Olight Marauder 2 Blue Flashlight Review
The Olight Marauder 2 Blue is an Osram flat white thrower, with secondary emitters (12) for flood. And both perform exceptionally! Read on!
Official Specs and Features
Here’s a link to the Olight Marauder 2 Blue product page.
Versions
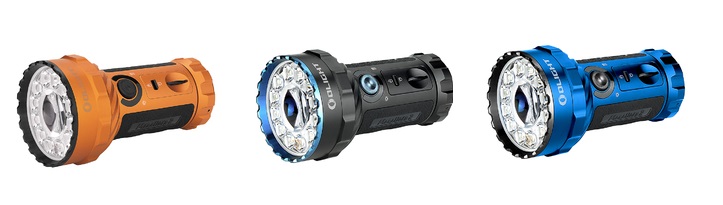
There’s really just one version of the Marauder 2, in the sense that all the body colors have the same emitters. There are three body colors, though – Blue (seen here), Black (still available), and Orange.
Each of those three is available in a different kit, with or without the wall wart.
Price
These were going for $349.95 when available, but the blue is sold out. It was also possible to purchase the light for less, without the power adapter. Around $30 less.
However, the Olight Marauder 2 in black is still available and is actually less expensive: $329.95. These are referral links. This helps Olight know to continue sending review lights to me!
Short Review
The best summary of this light is that this blue version was on loan from a friend, and I liked it enough to buy the orange version when it came out. Do I need to say more?
Long Review
The Big Table
| Olight Marauder 2 Blue | |
|---|---|
| Emitter: | Osram P9 (12) (Flood) |
| Price in USD at publication time: | $349.95 |
| Cell: | Internal (54Wh battery pack: 5000mAh @10.8V) |
| Level 7 Runtime Graph | Level 6 Runtime Graph |
| LVP? | Yes |
| Switch Type: | E-Switch |
| Quiescent Current (mA): | ? |
| On-Board Charging? | Yes |
| Charge Port Type: | USB-C |
| Power off Charge Port | All modes |
| Claimed Lumens (lm) | 14000 |
| Measured Lumens (at 30s) | 12419 (88.7% of claim)^ |
| Candela per Lumen | 4 |
| Claimed Throw (m) | – |
| Candela (Calculated) in cd (at 30s) | 2210lux @ 5.184m = 59391cd |
| Throw (Calculated) (m) | 487.4 |
| All my Olight reviews! | |
| Olight Marauder 2 Blue | |
|---|---|
| Emitter: | Osram KW CULPM1.TG 8R (Throw) |
| Price in USD at publication time: | $349.95 |
| Cell: | Internal (54Wh battery pack: 5000mAh @10.8V) |
| Level 7 Runtime Graph | Level 6 Runtime Graph |
| LVP? | Yes |
| Switch Type: | E-Switch |
| Quiescent Current (mA): | ? |
| On-Board Charging? | Yes |
| Charge Port Type: | USB-C |
| Power off Charge Port | All modes |
| Claimed Lumens (lm) | 850 |
| Measured Lumens (at 30s) | 873 (102.7% of claim)^ |
| Candela per Lumen | 192.2 |
| Claimed Throw (m) | 800 |
| Candela (Calculated) in cd (at 30s) | 5000lux @ 6.013m = 180781cd |
| Throw (Calculated) (m) | 850.4 (106.3% of claim)^ |
| All my Olight reviews! | |
^ Measurement disclaimer: Testing flashlights is my hobby. I use hobbyist-level equipment for testing, including some I made myself. Try not to get buried in the details of manufacturer specifications versus measurements recorded here; A certain amount of difference (say, 10 or 15%) is perfectly reasonable.
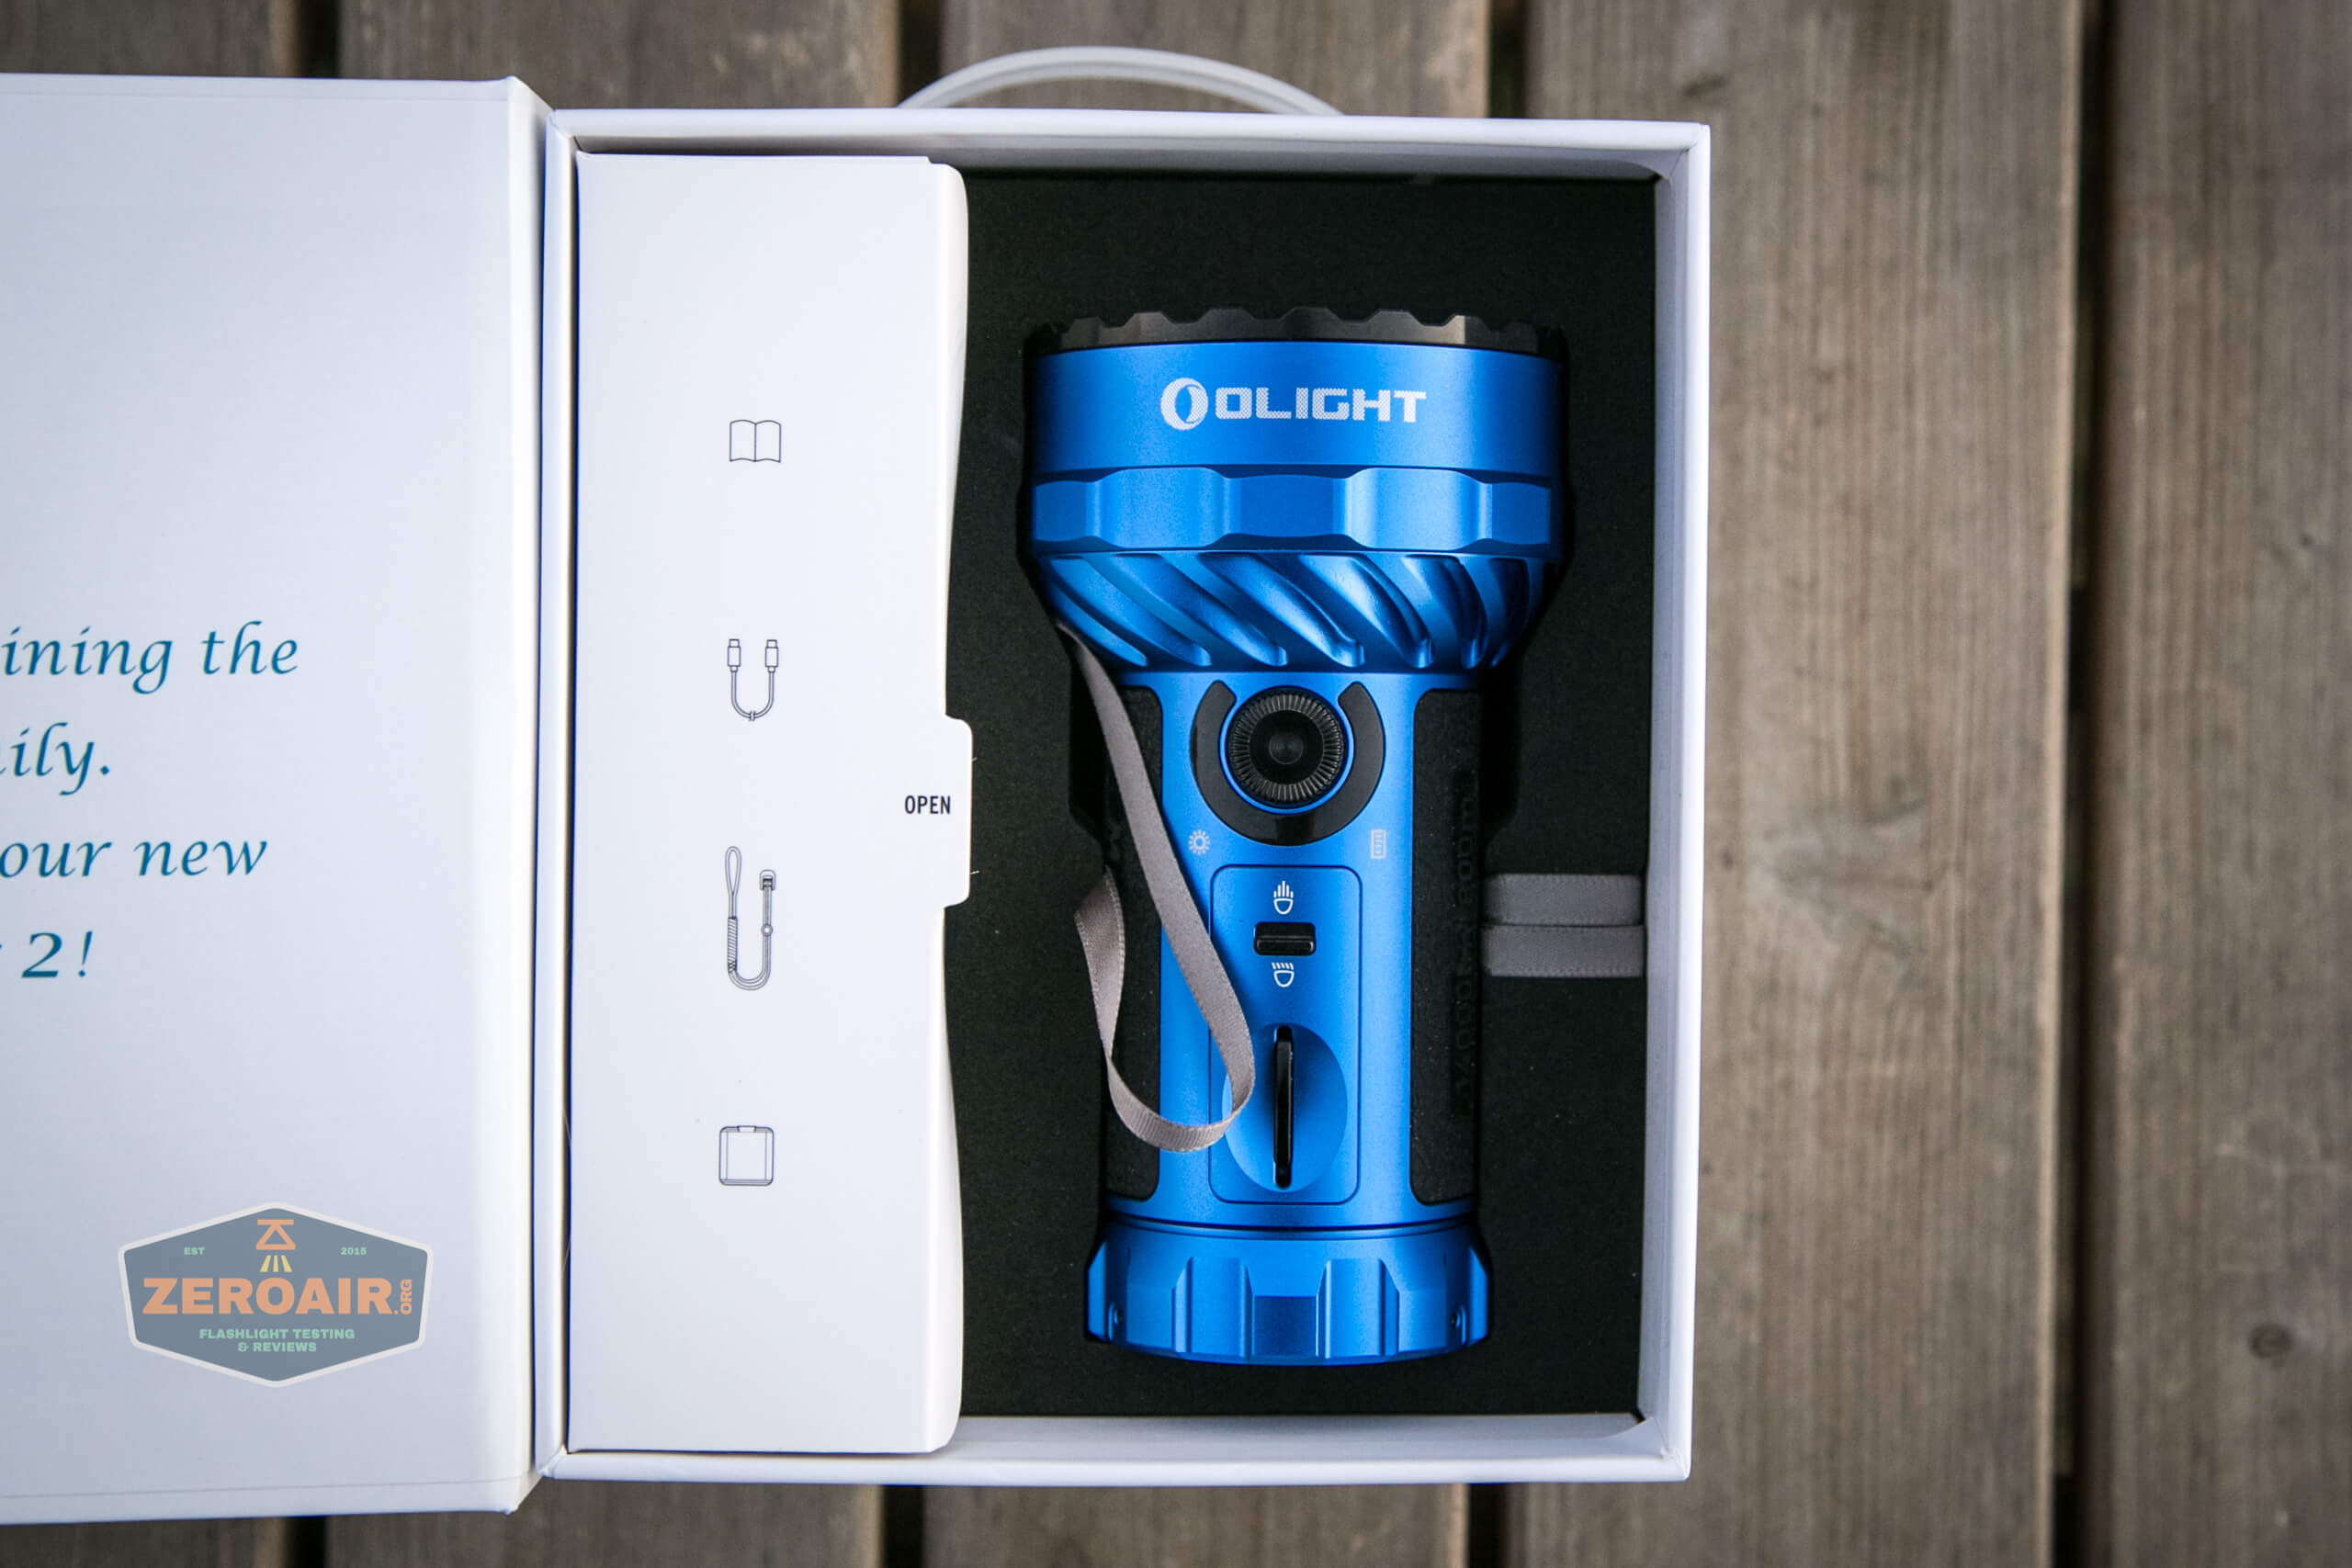
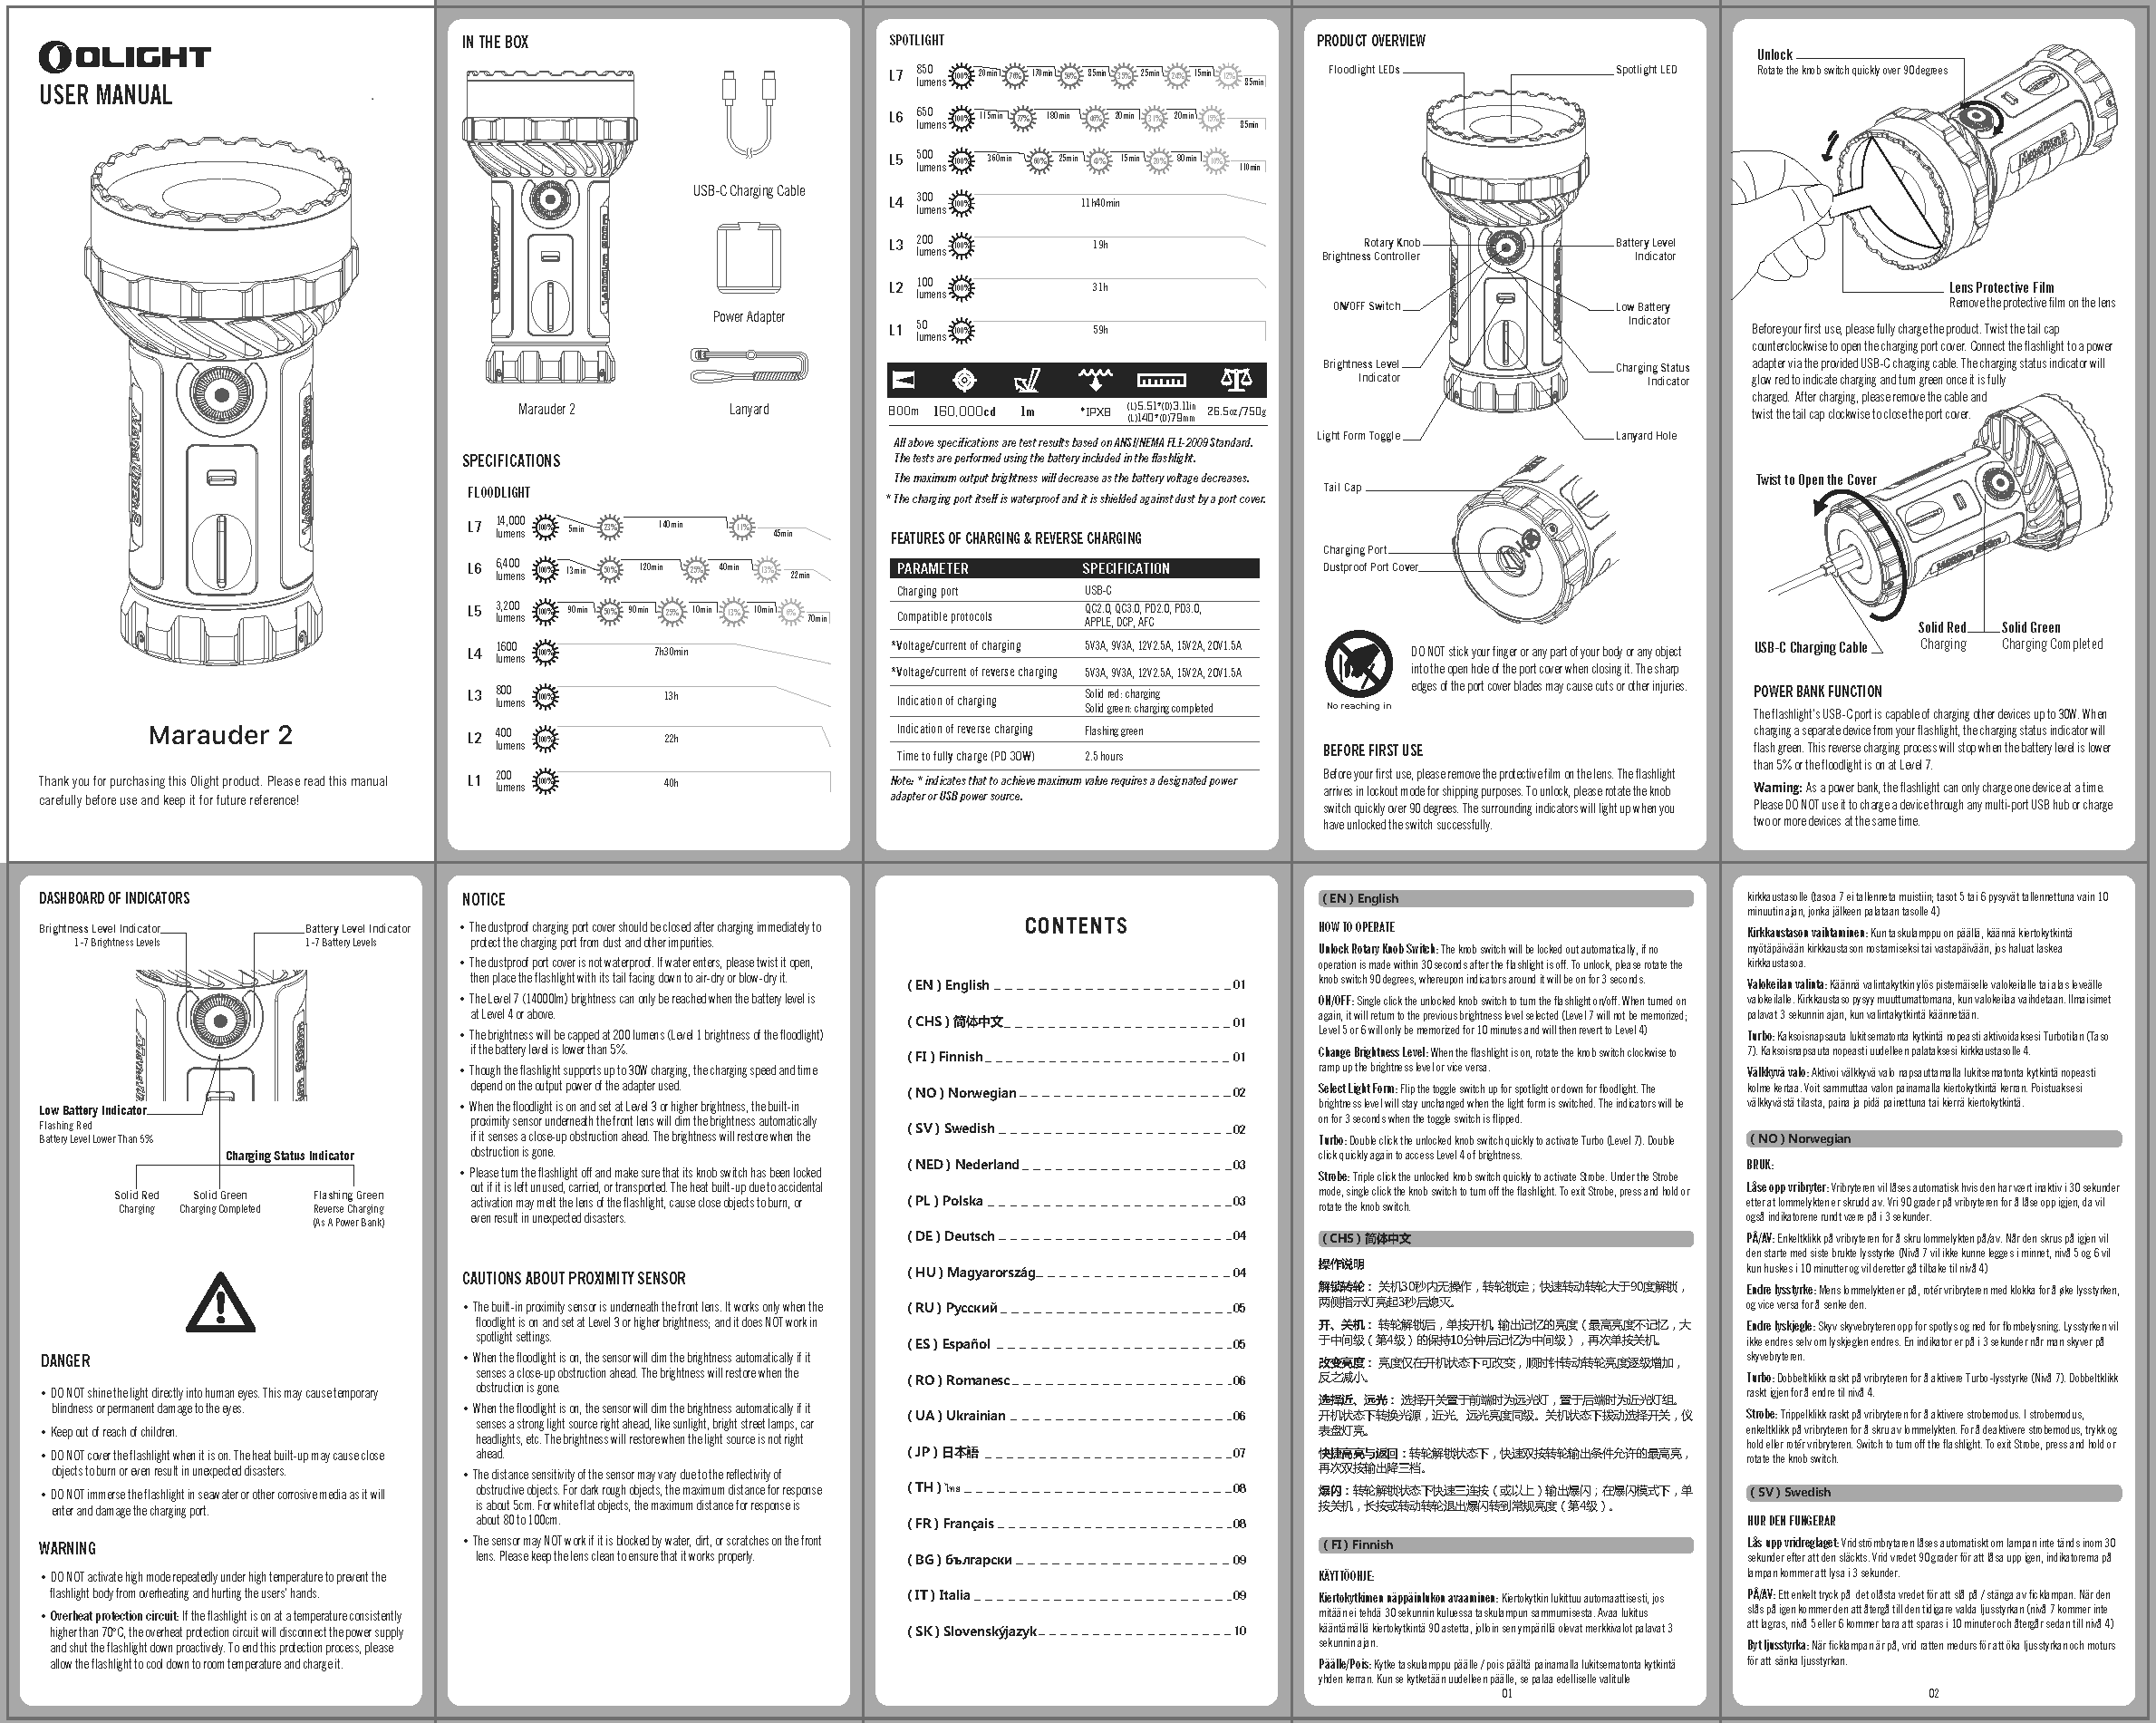
What’s Included
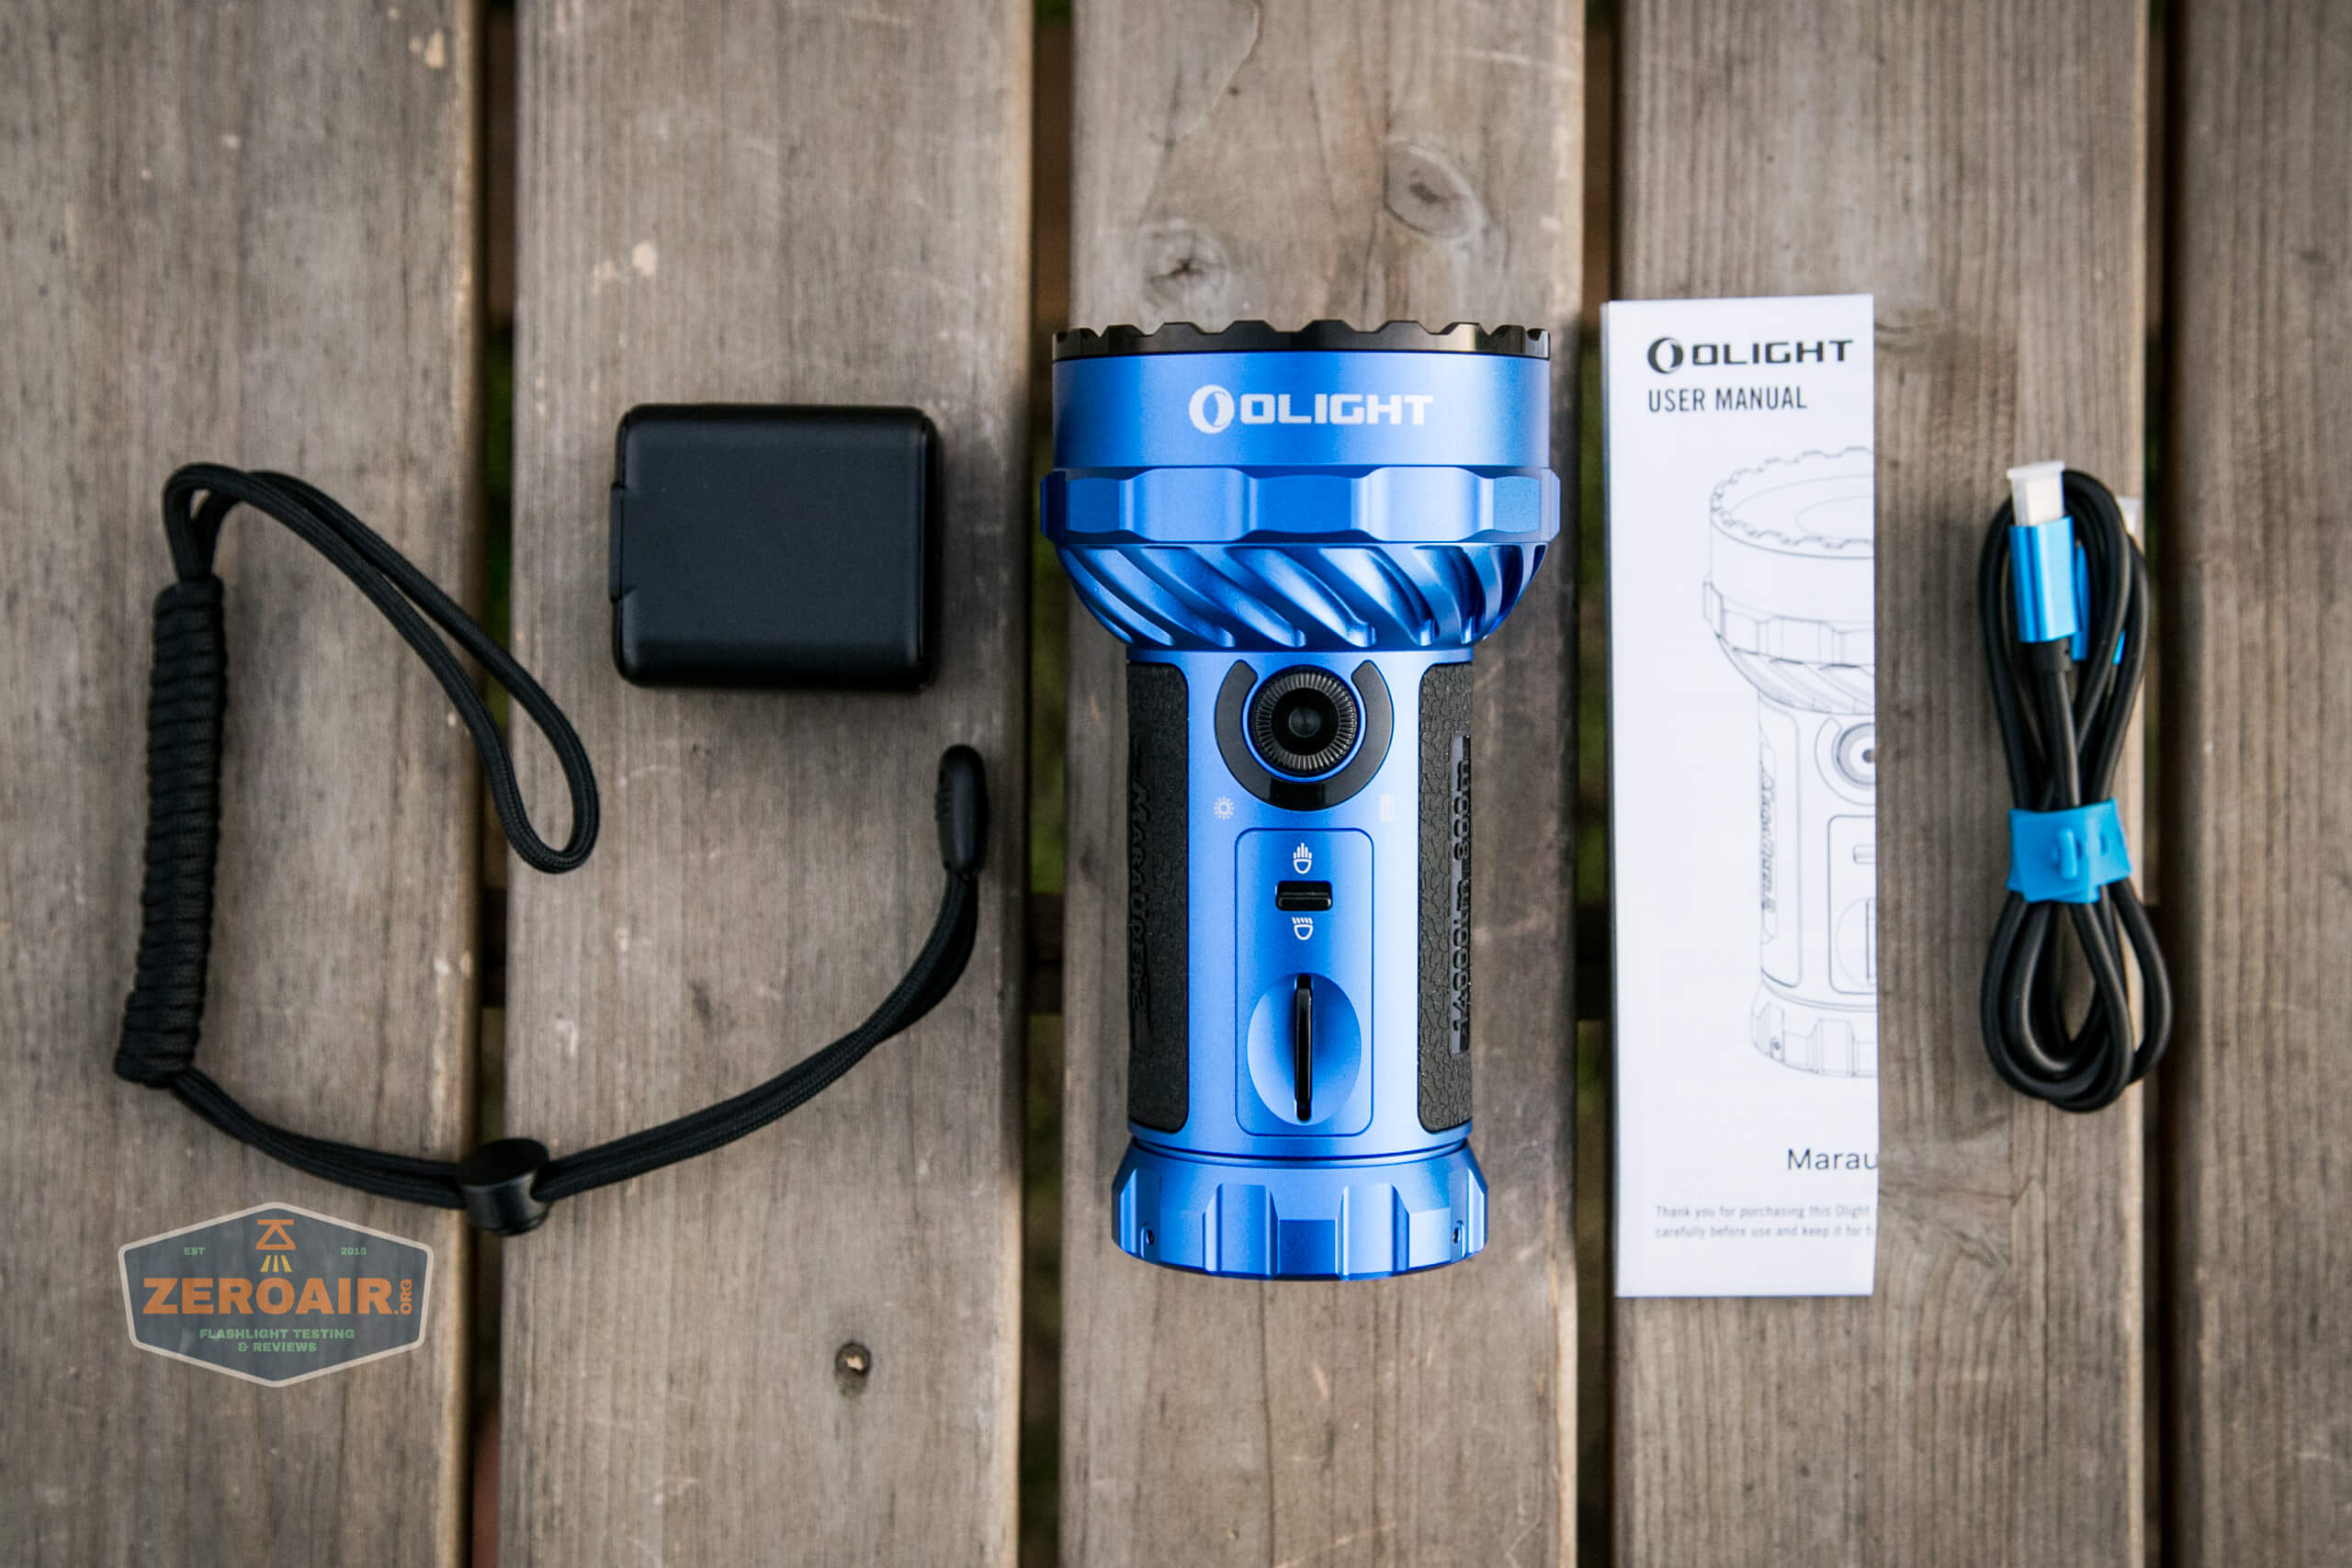
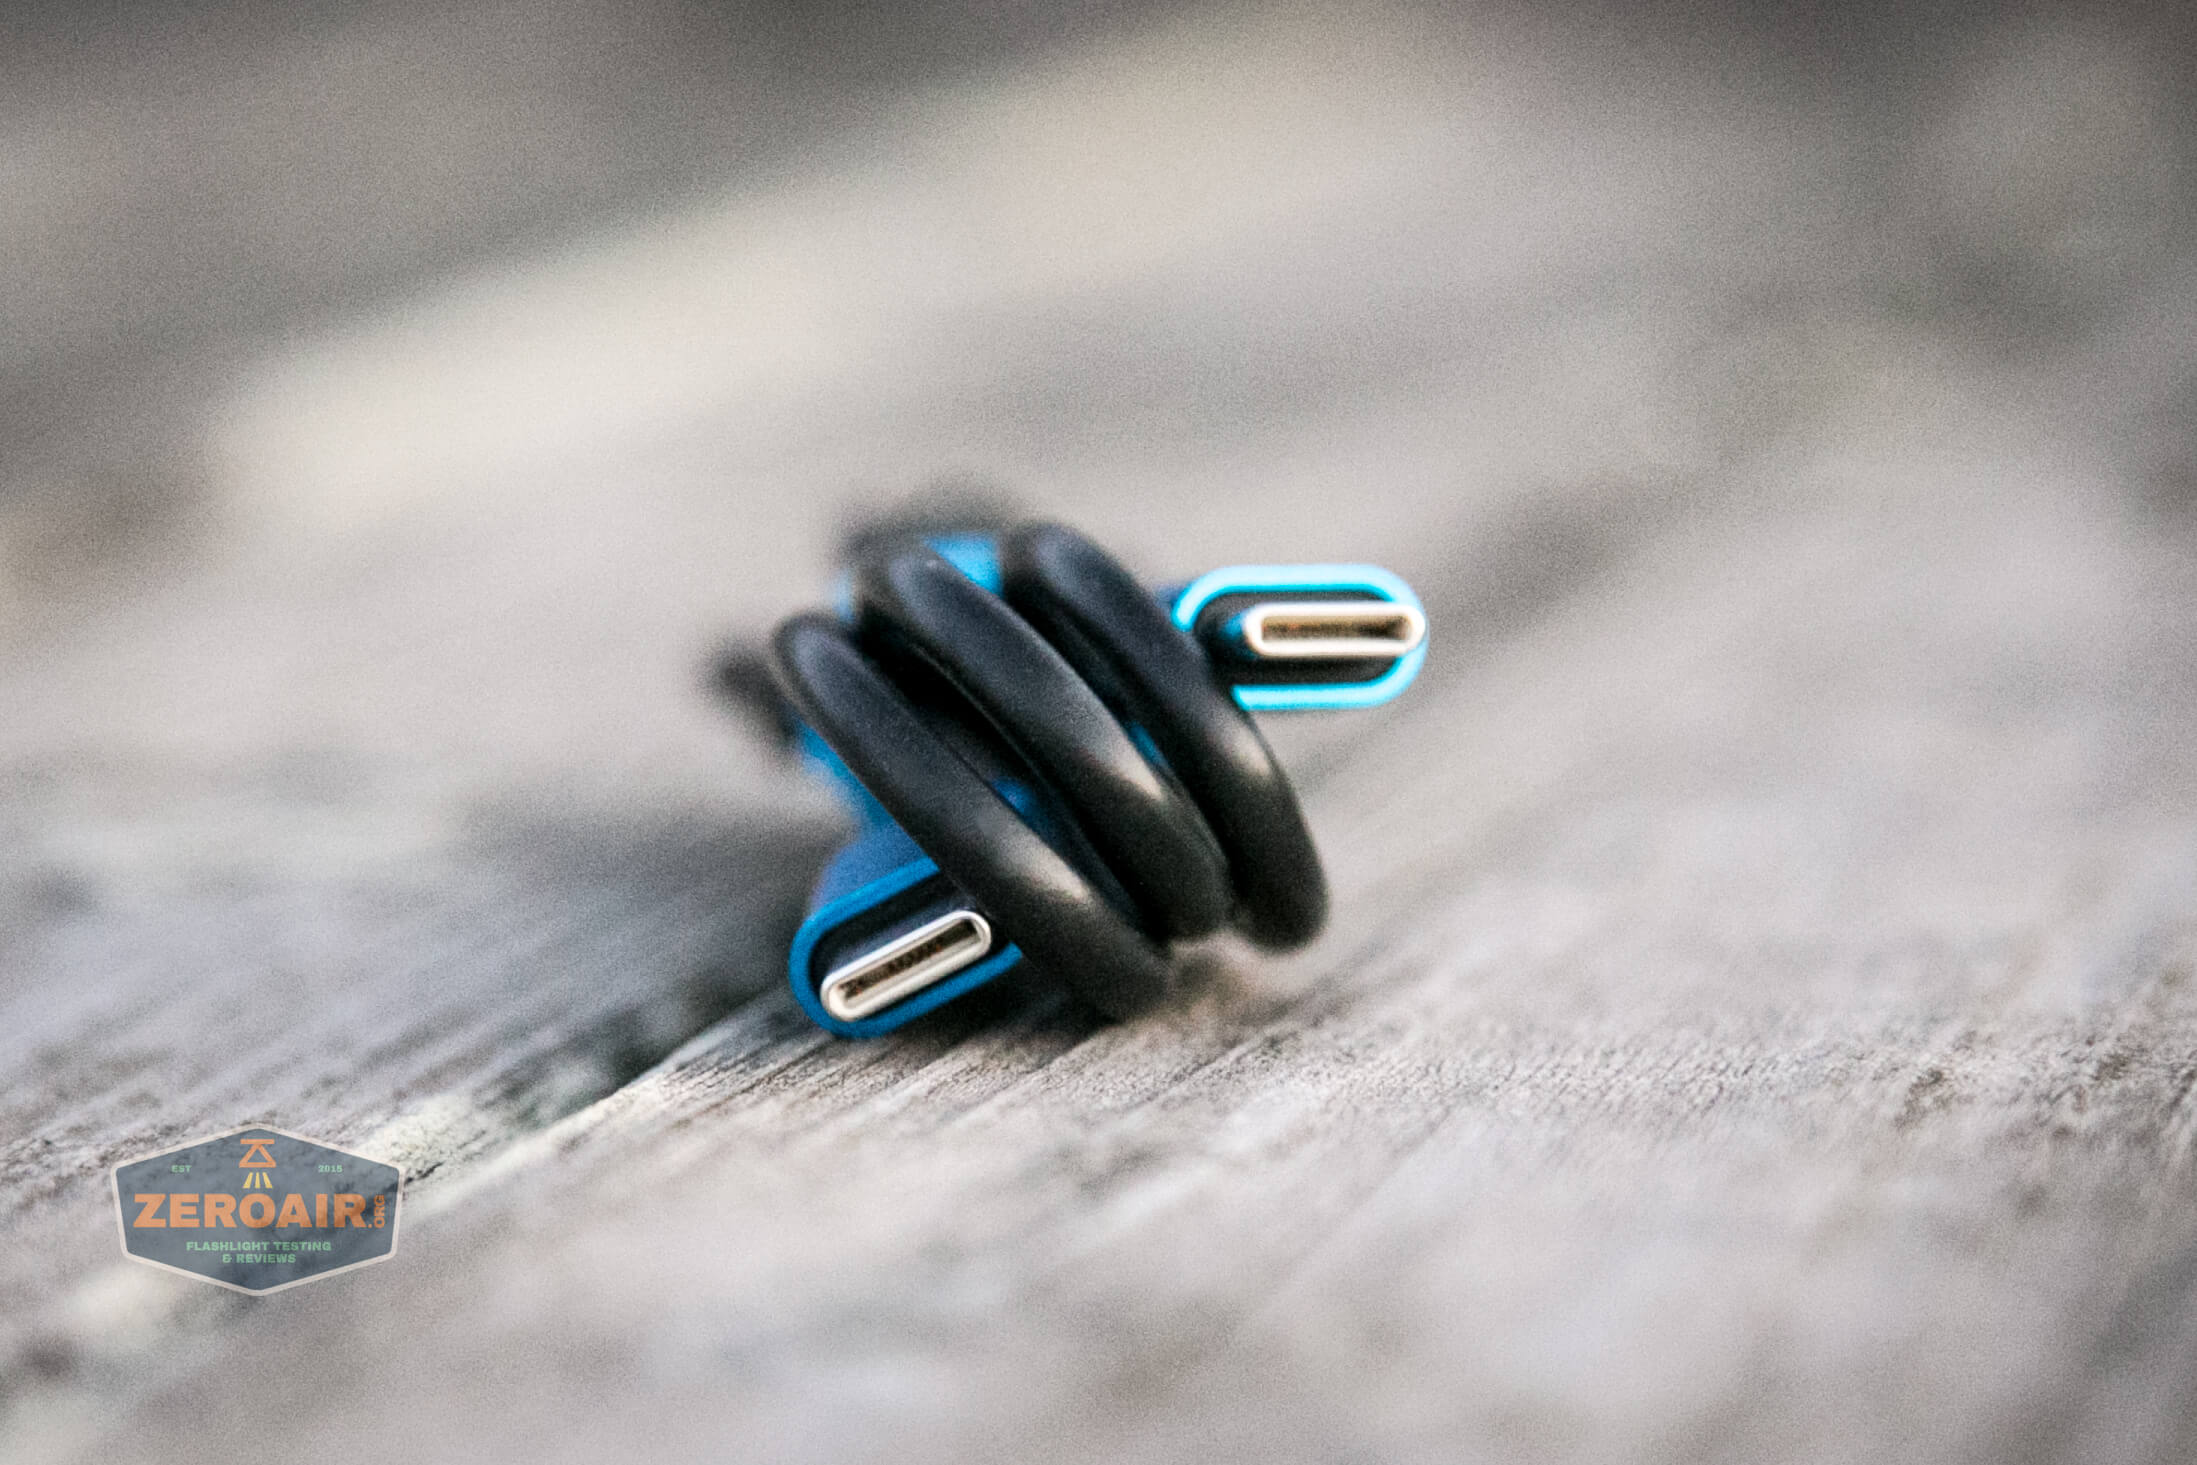
- Olight Marauder 2 Blue
- Charge cable (USB-C to USB-C)
- Lanyard
- Wall wart (30W)
- Manual
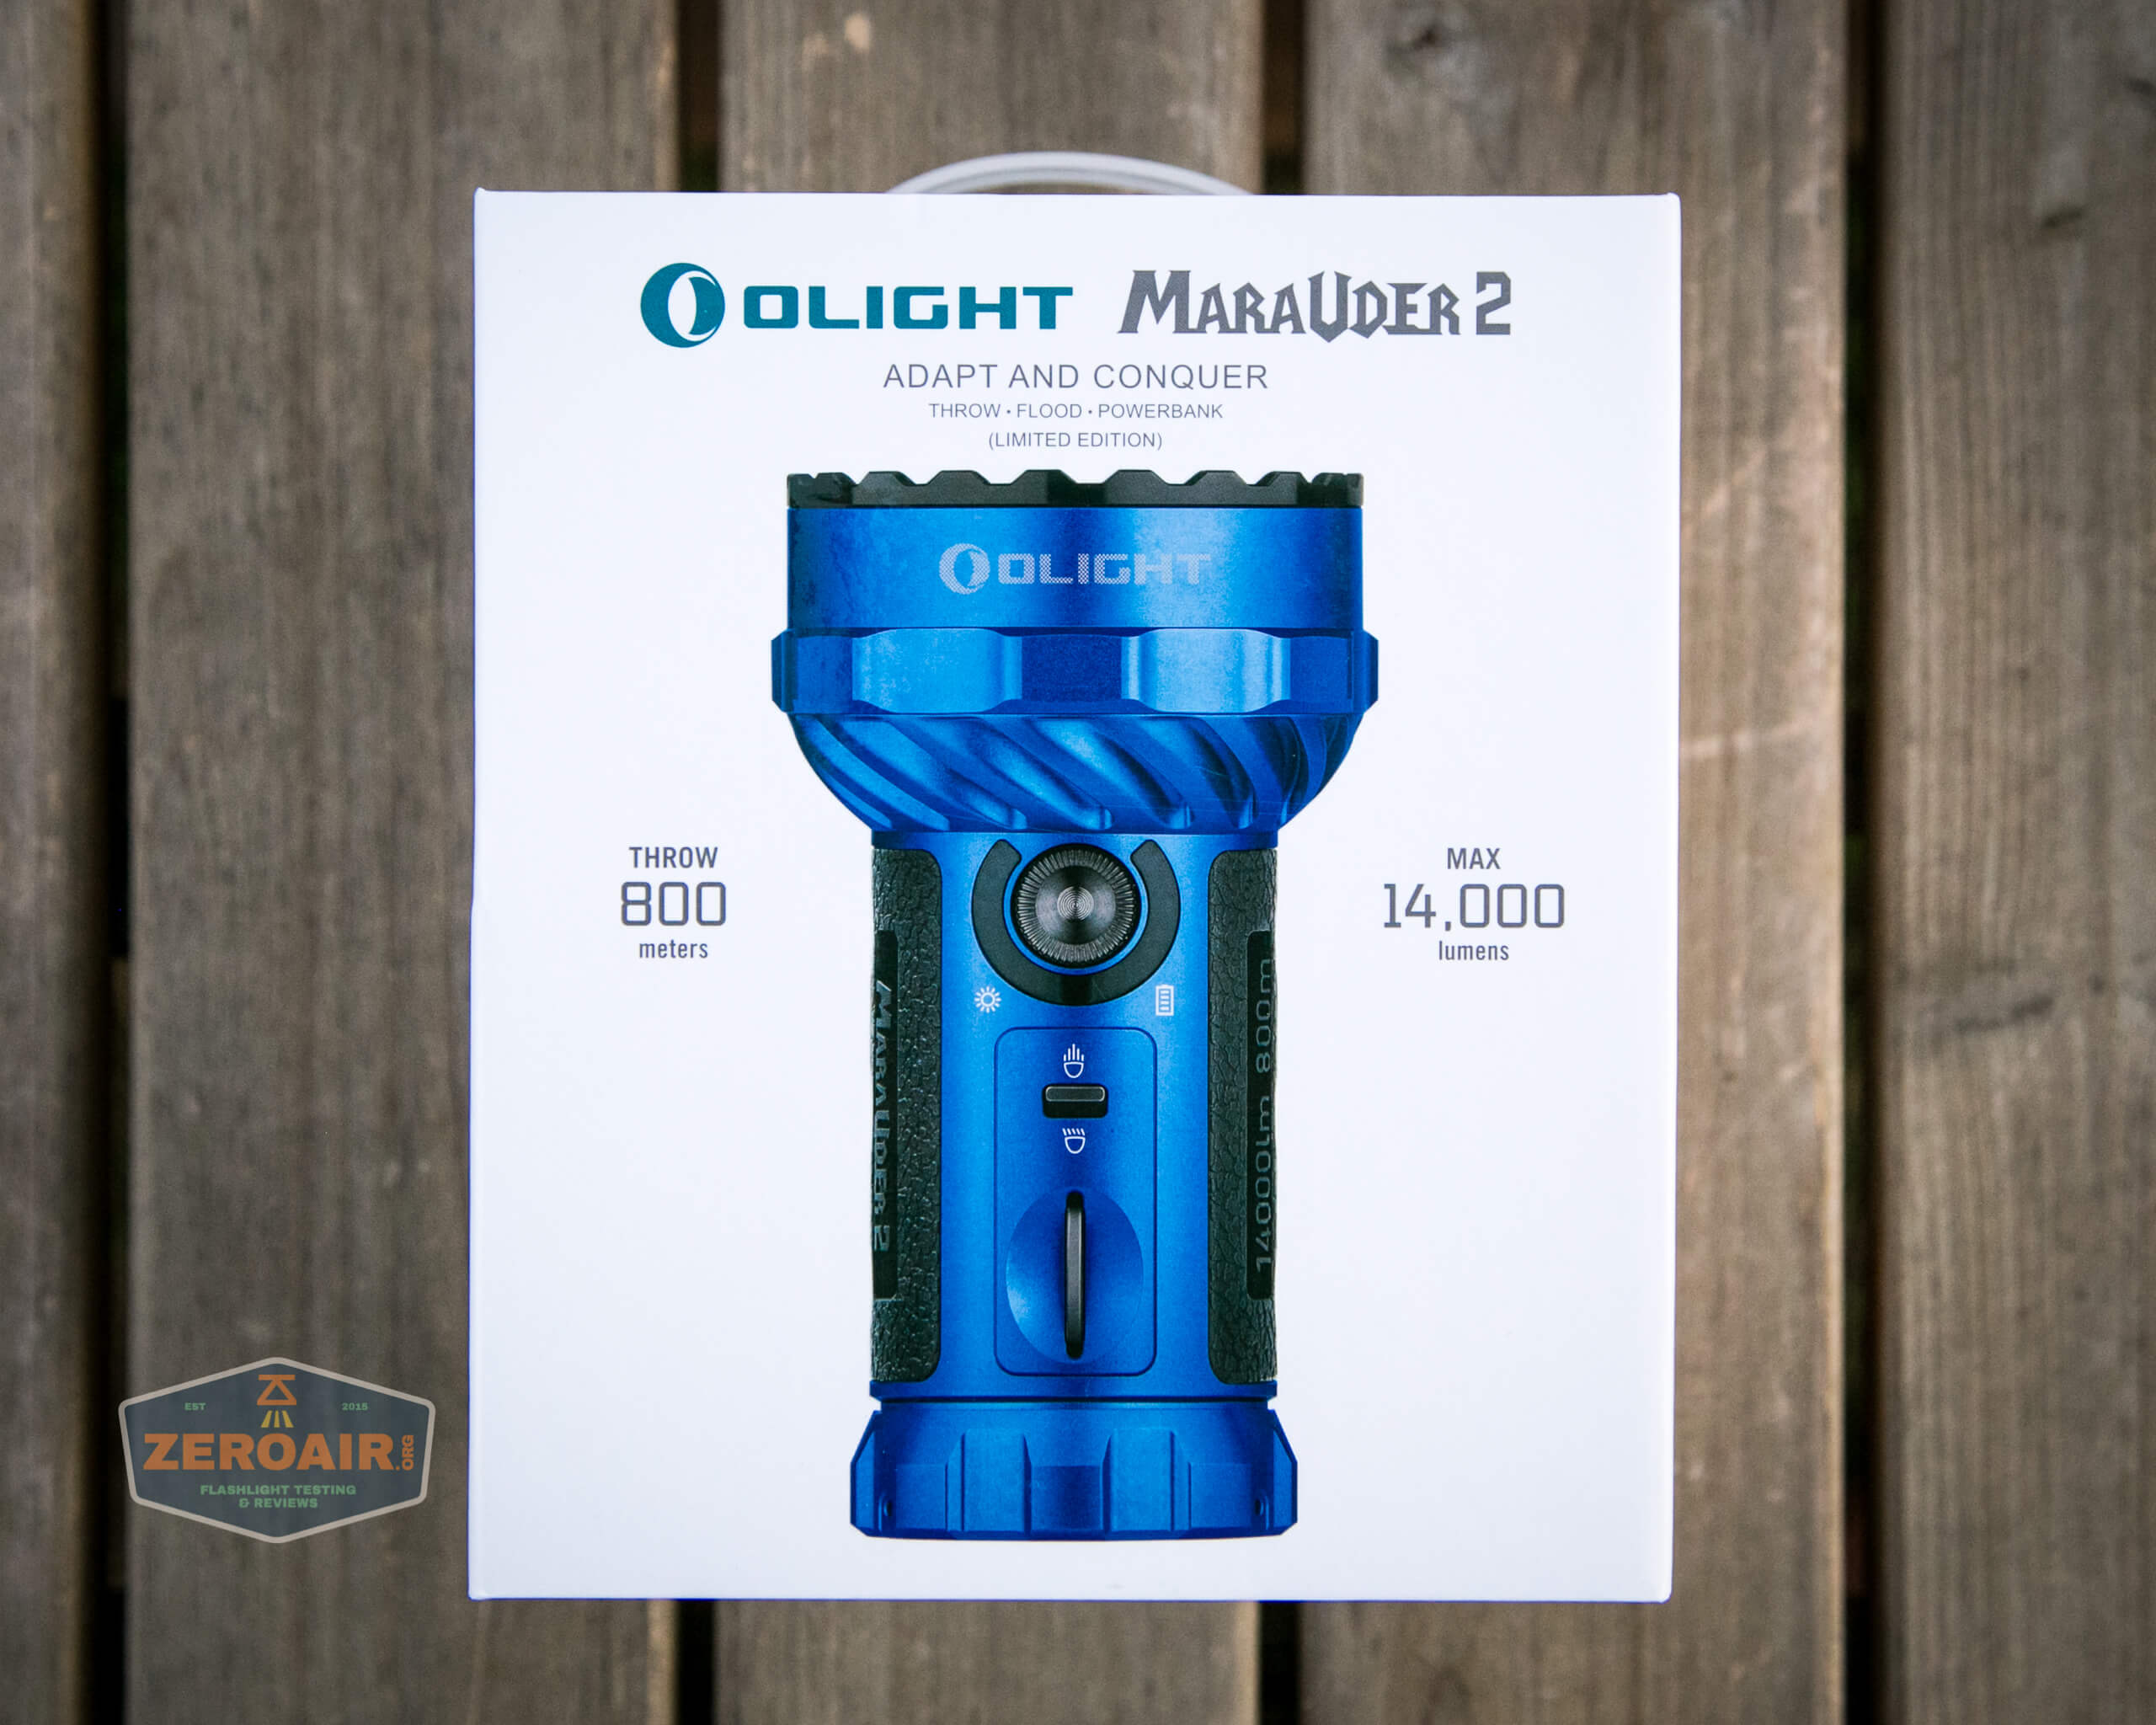
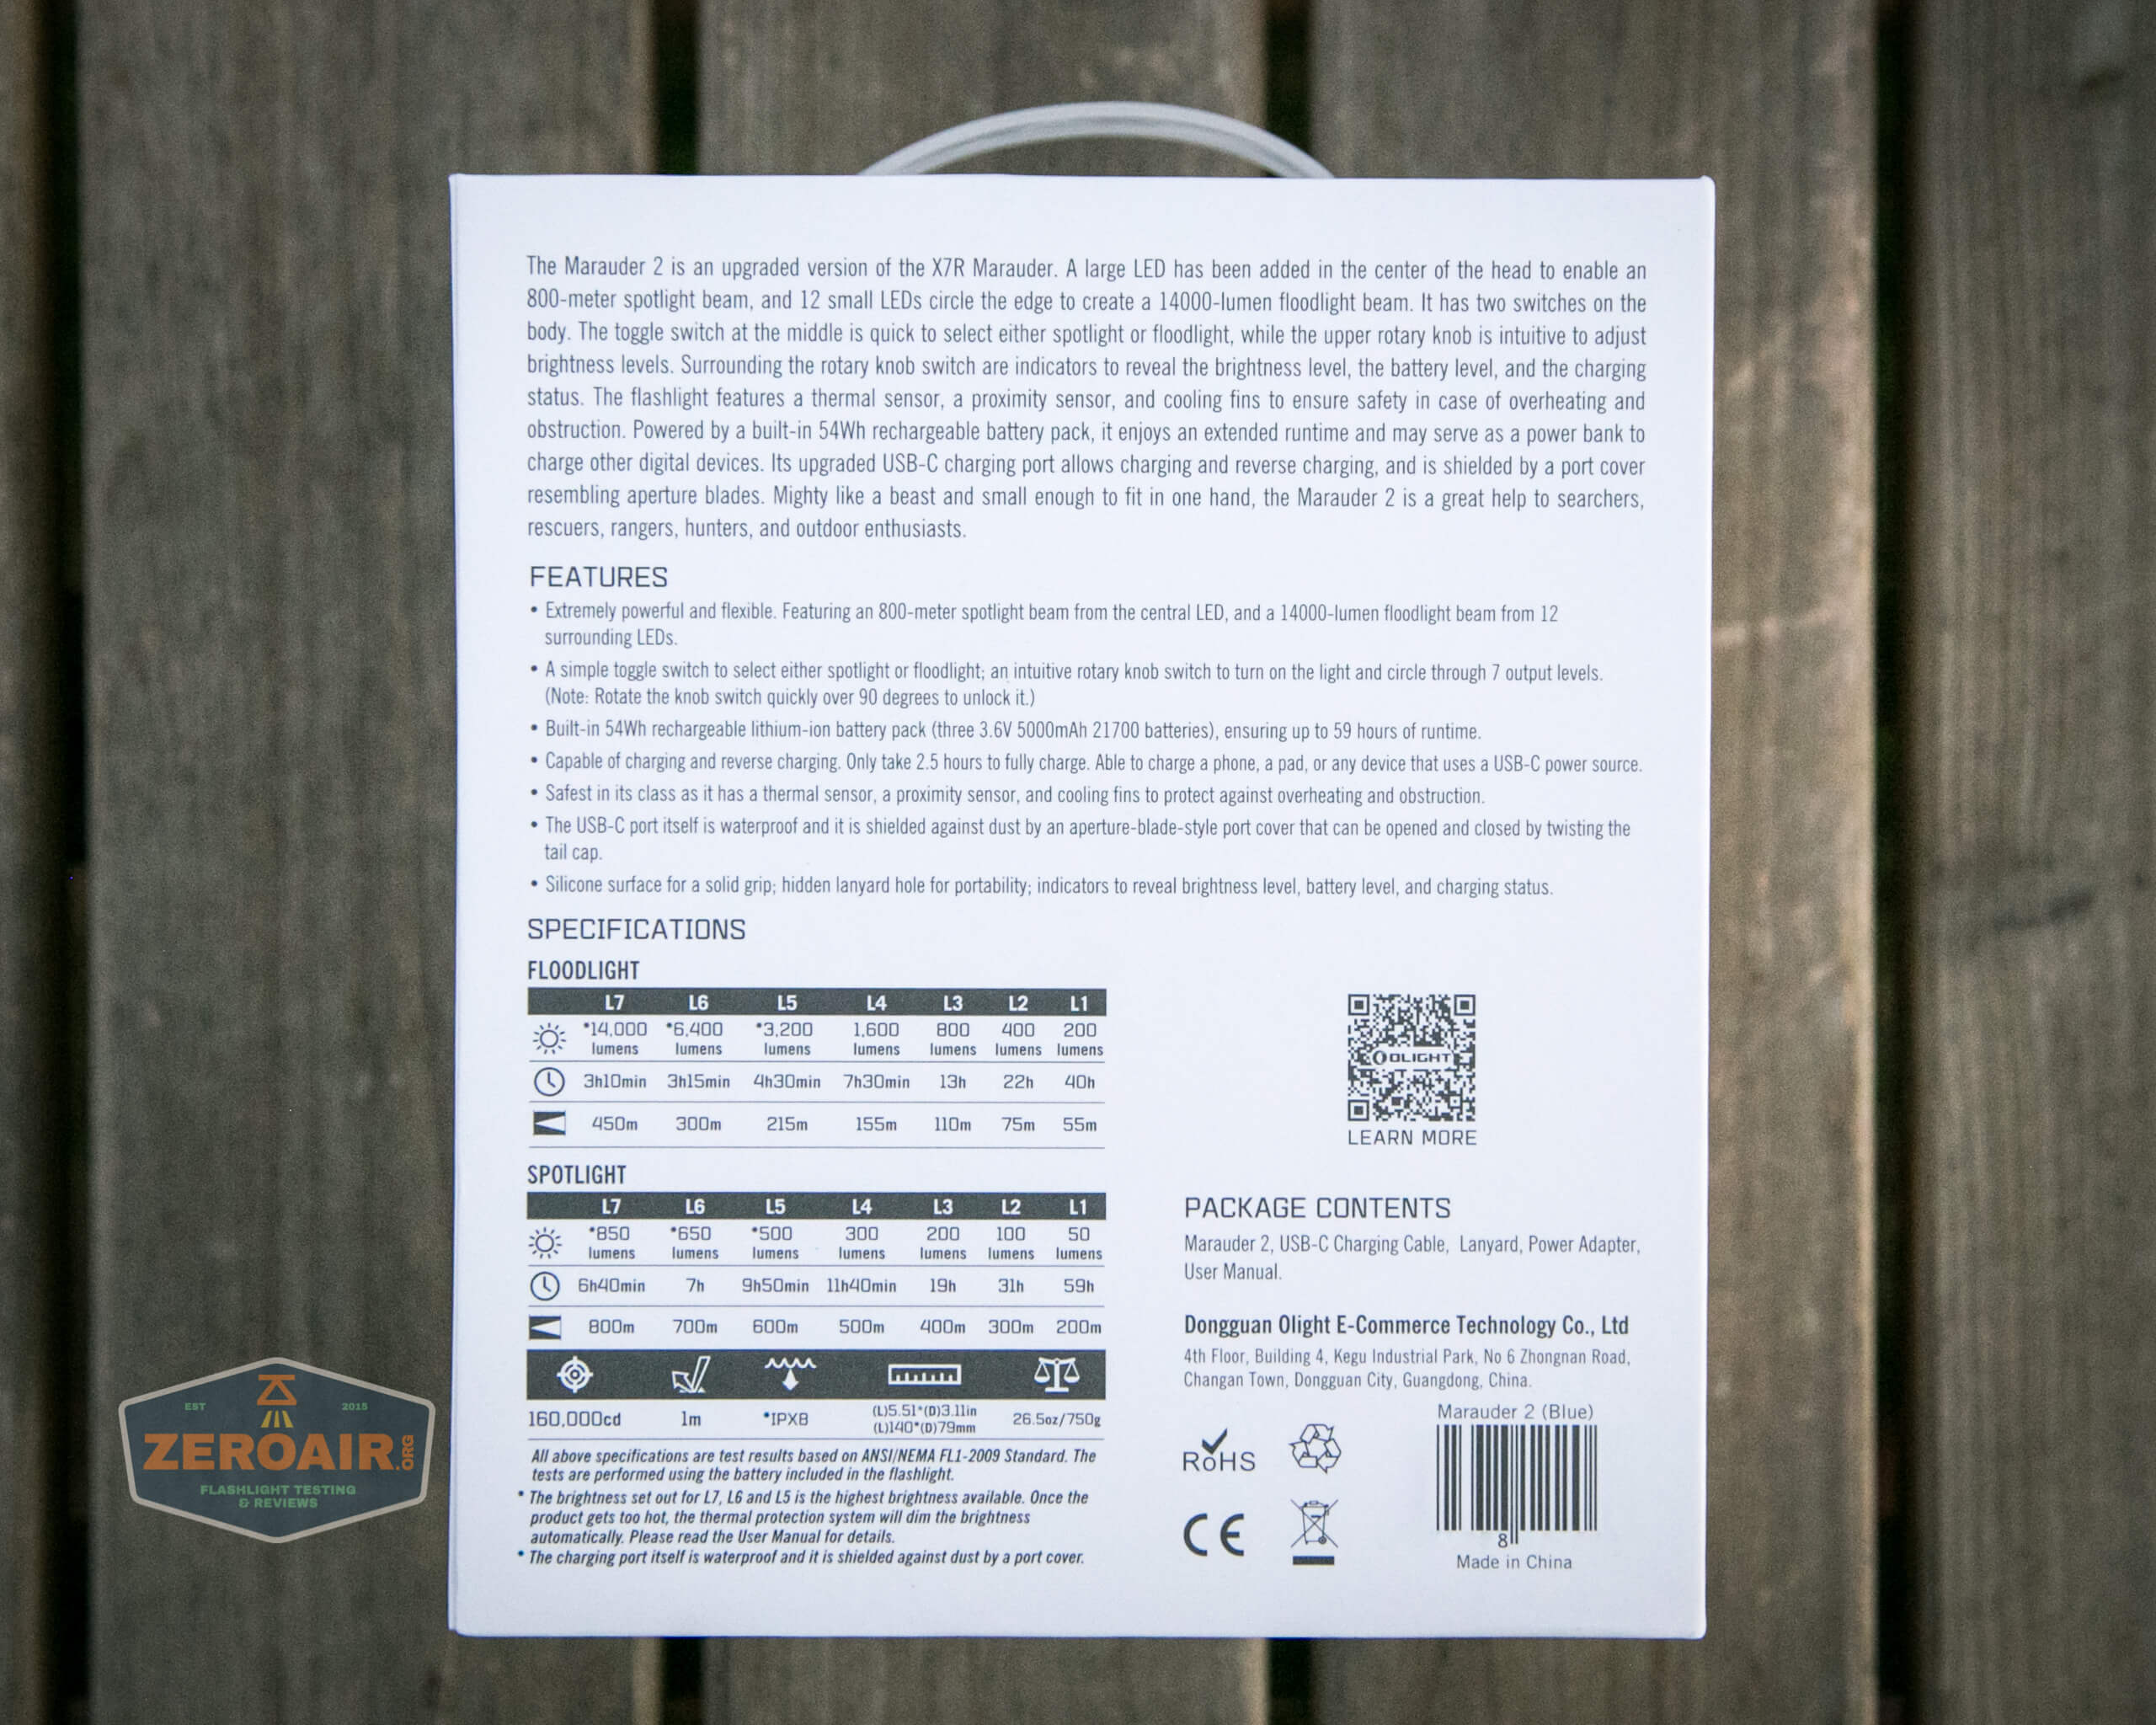
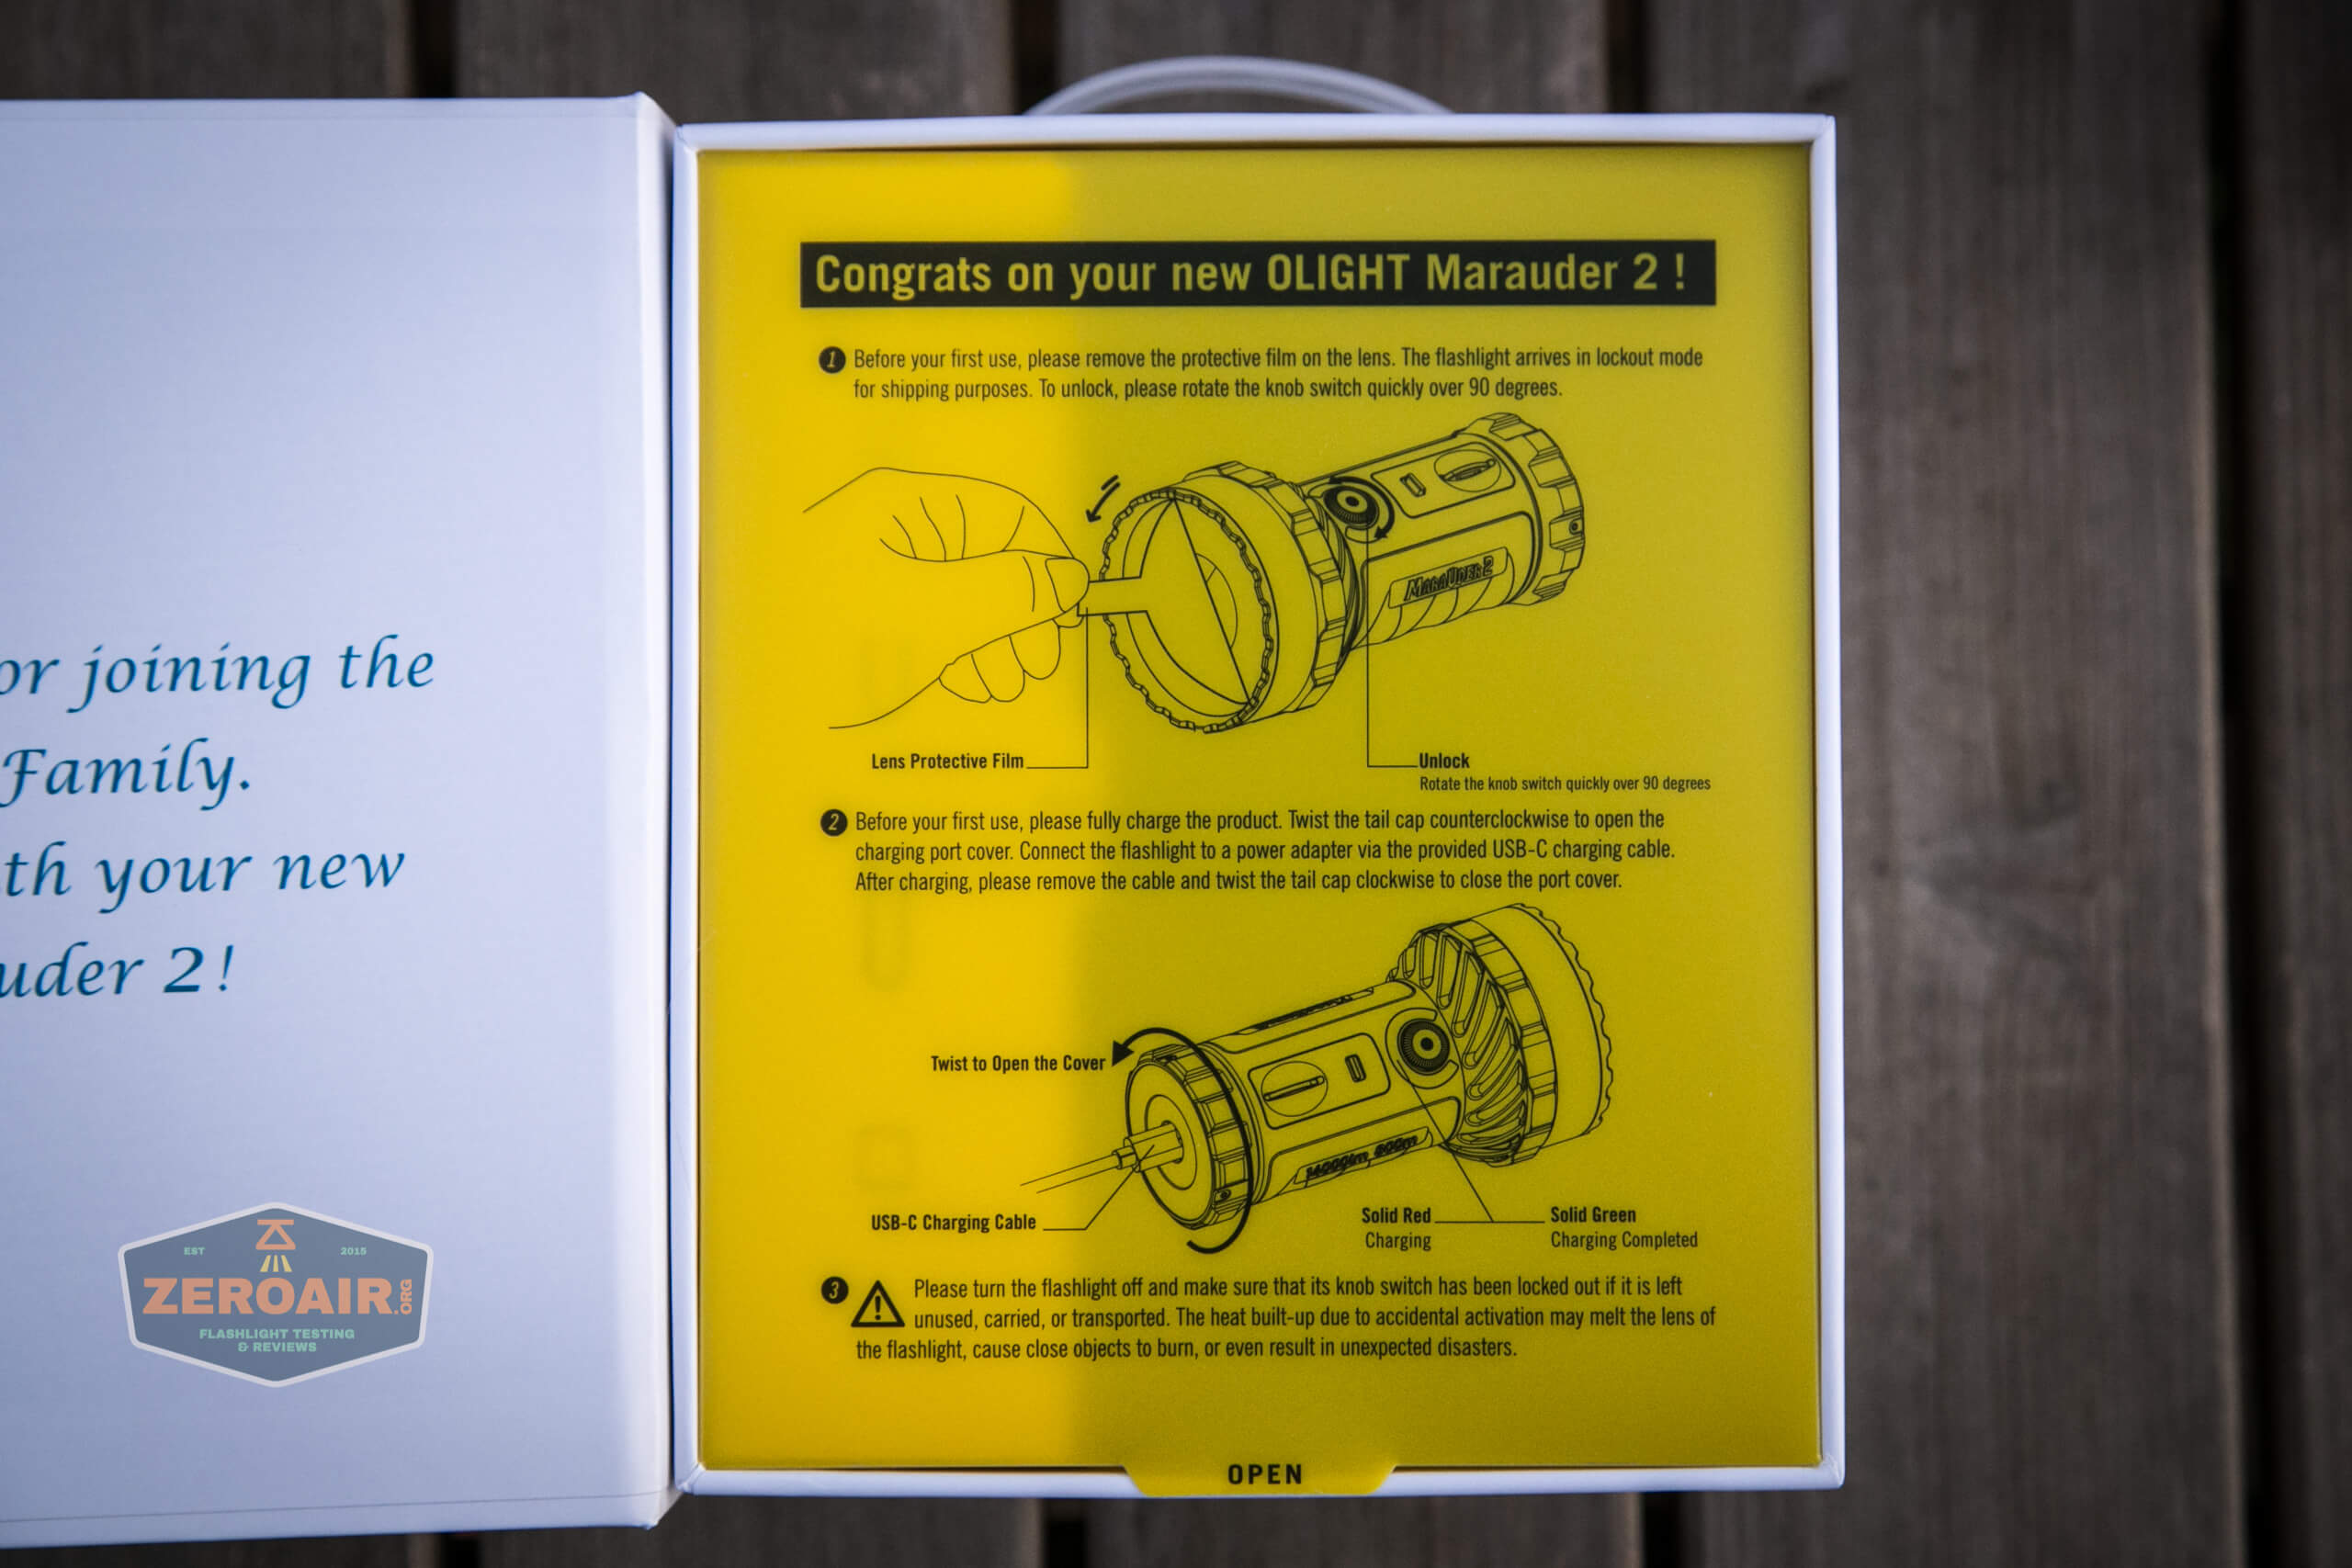
Package and Manual

Build Quality and Disassembly
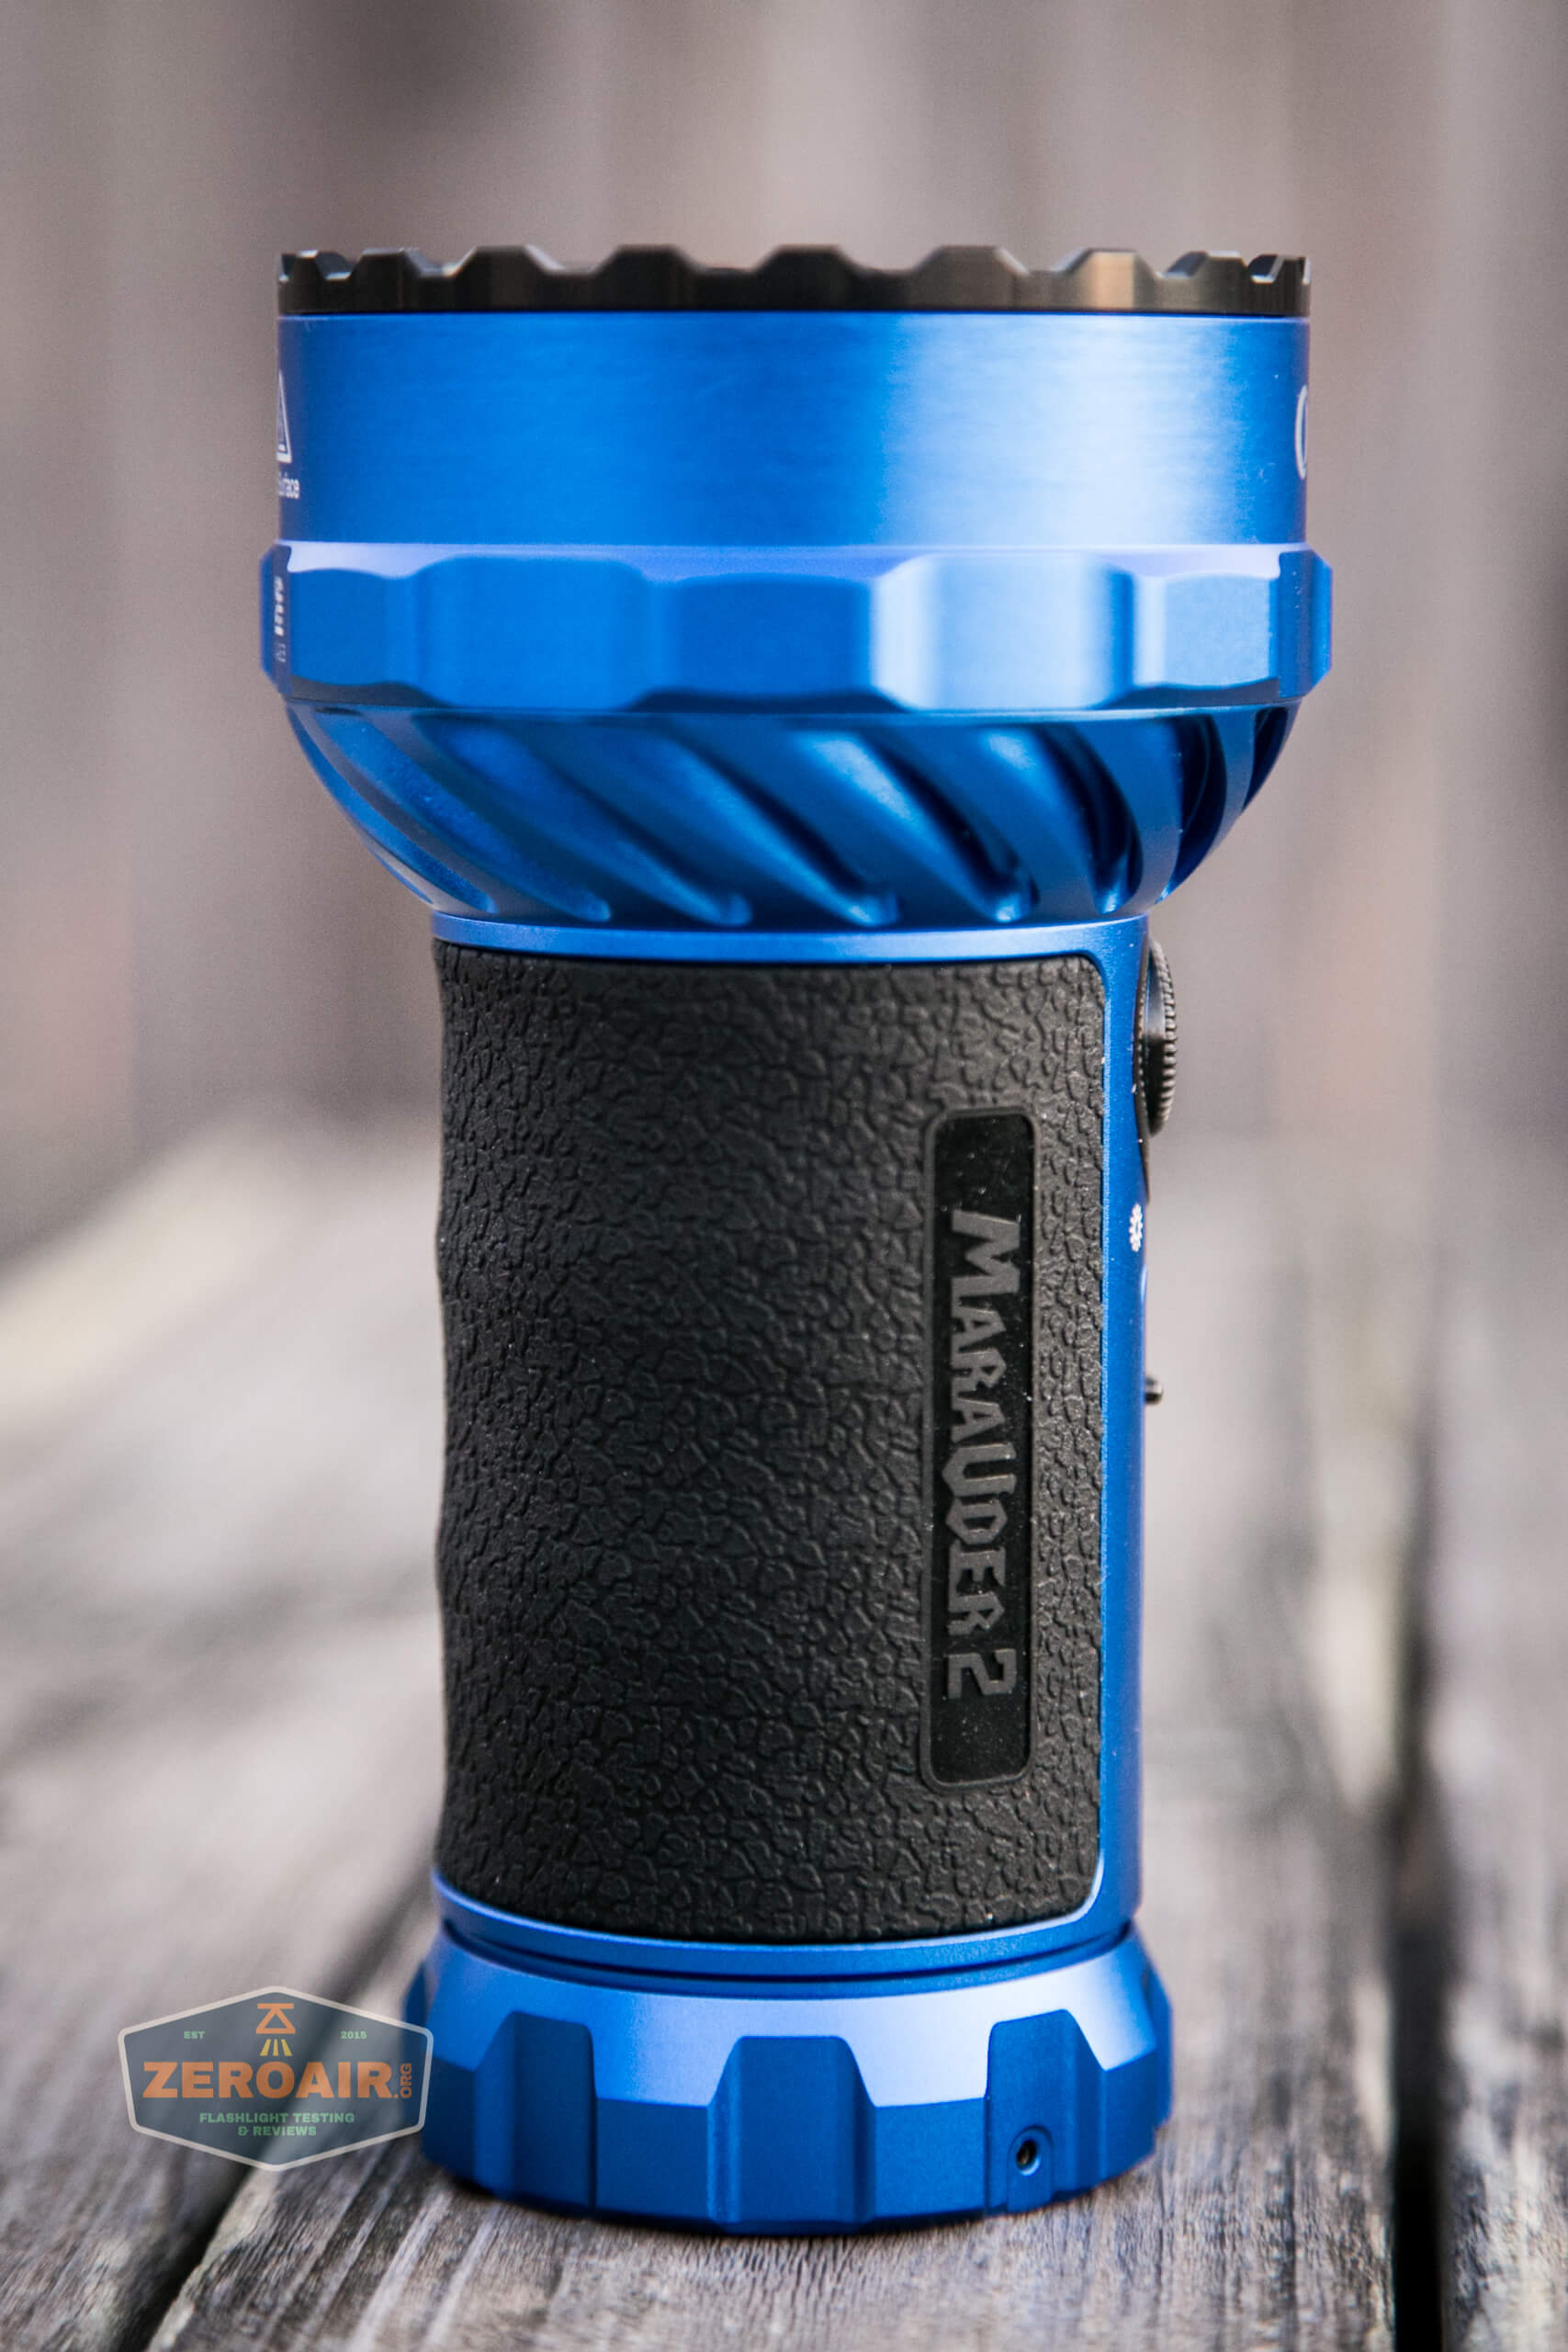
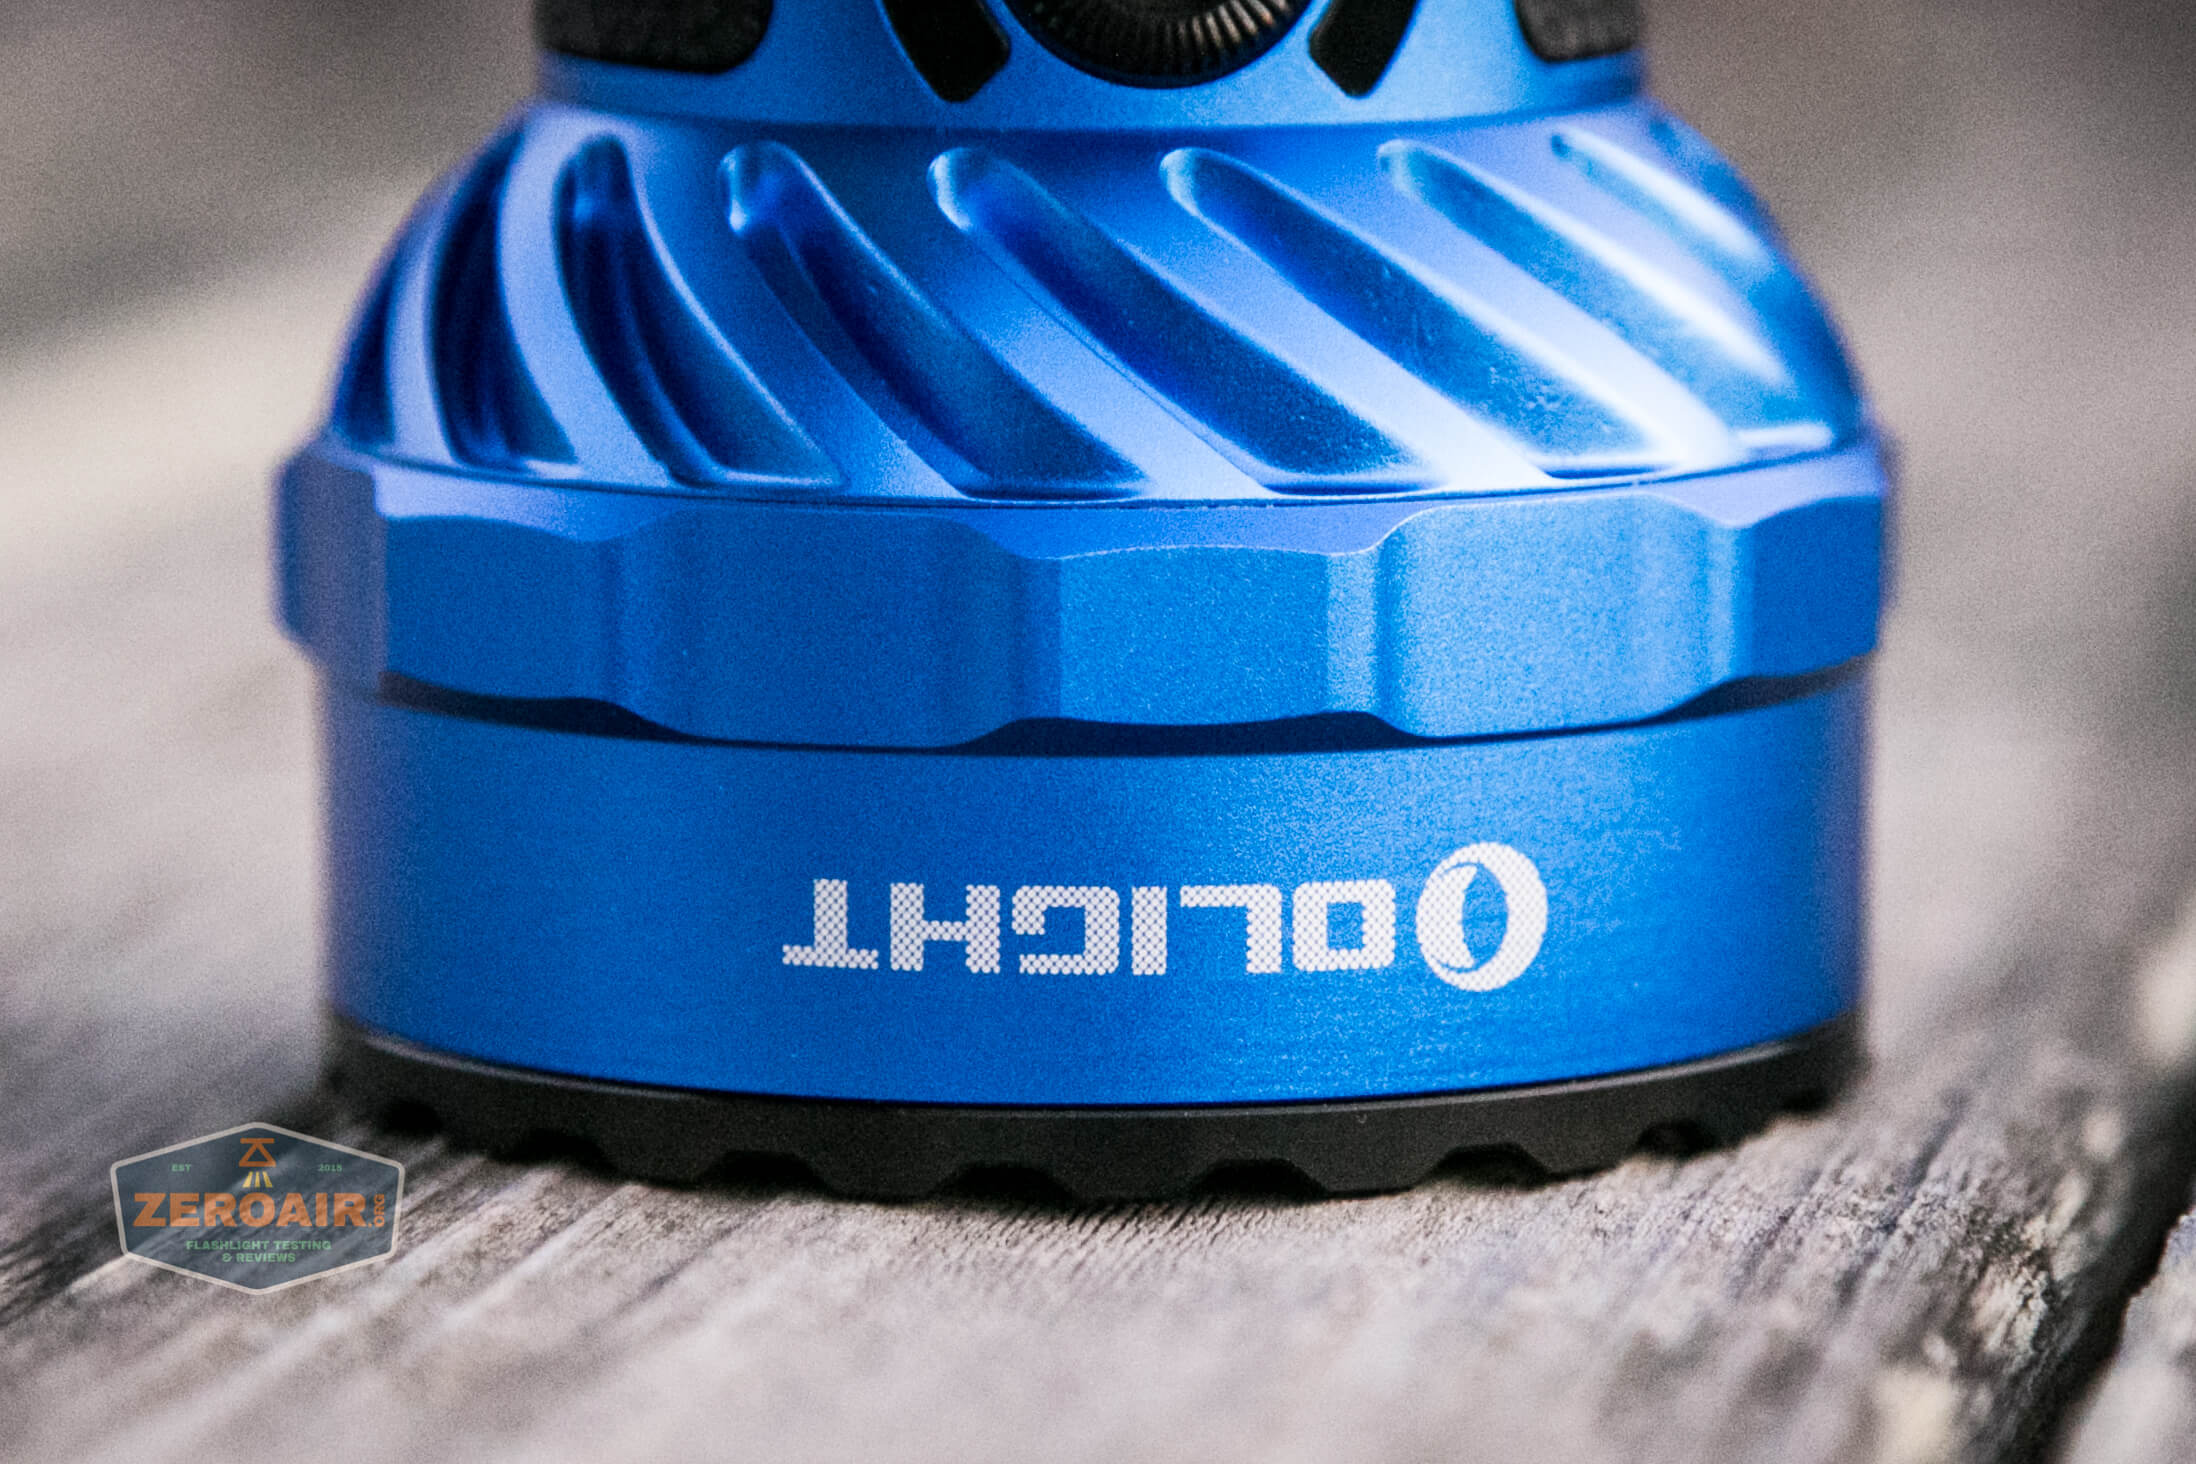
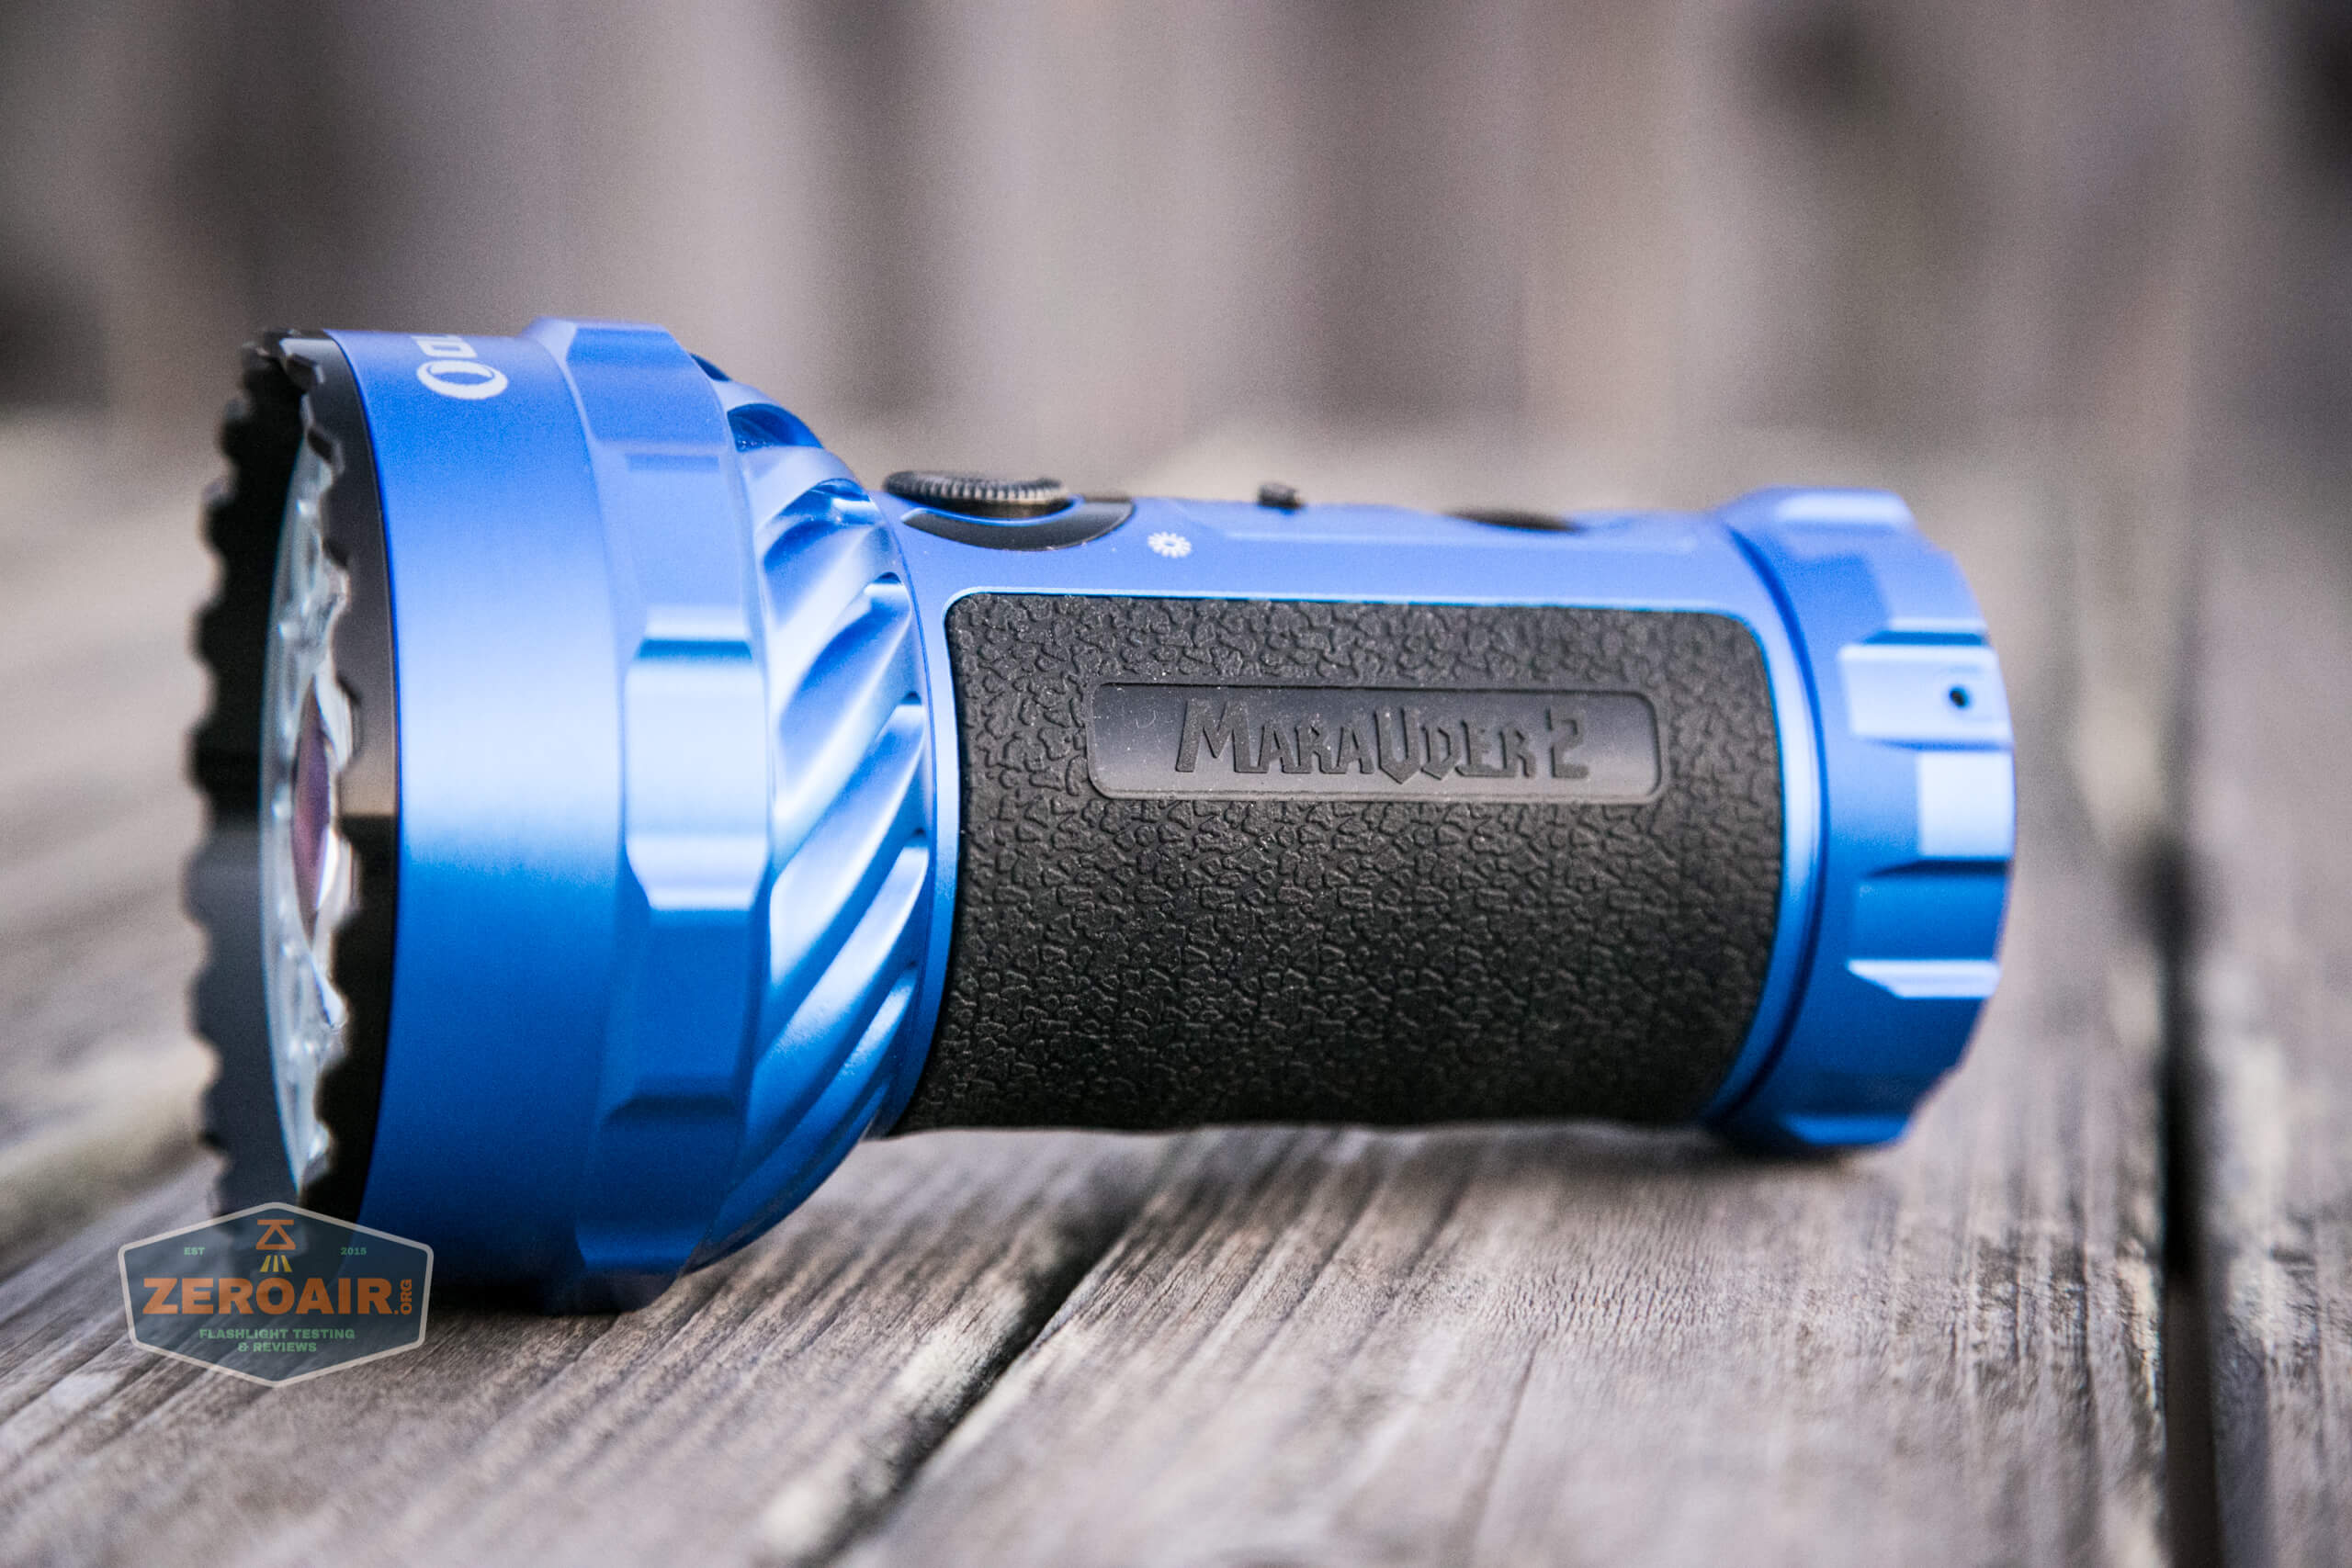
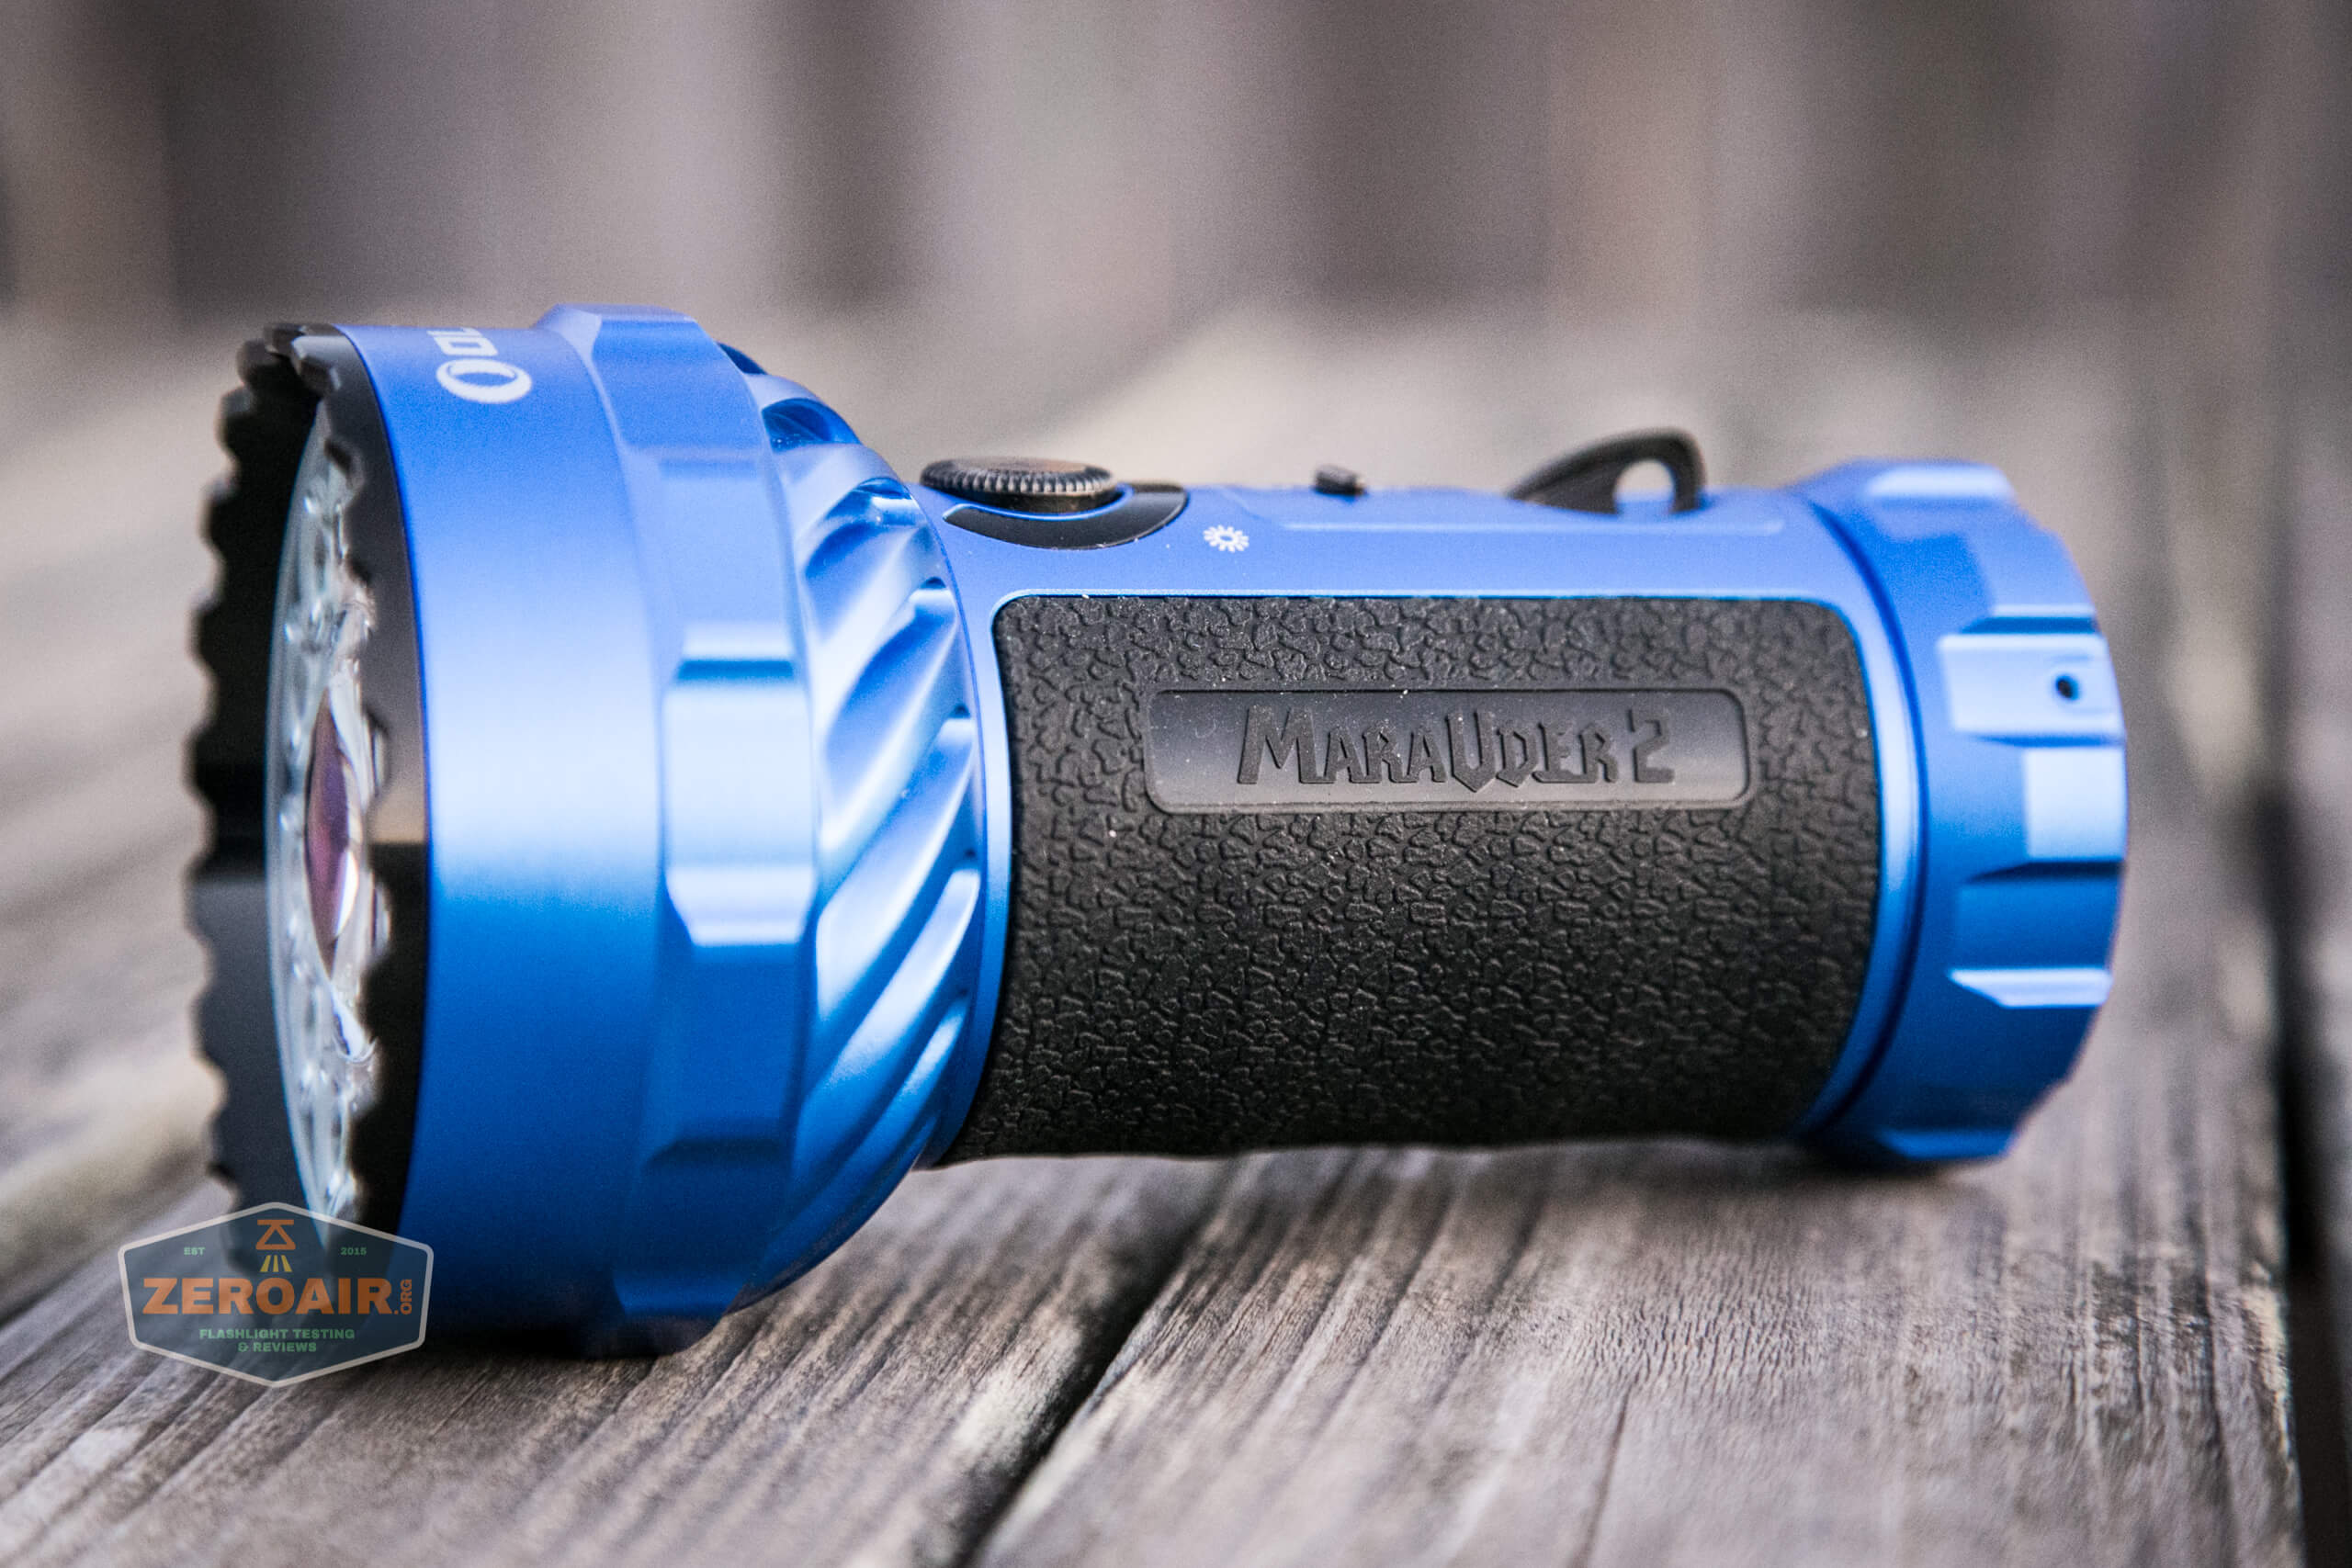
This light has a fantastic heft. The color is great and looks to be of high quality.
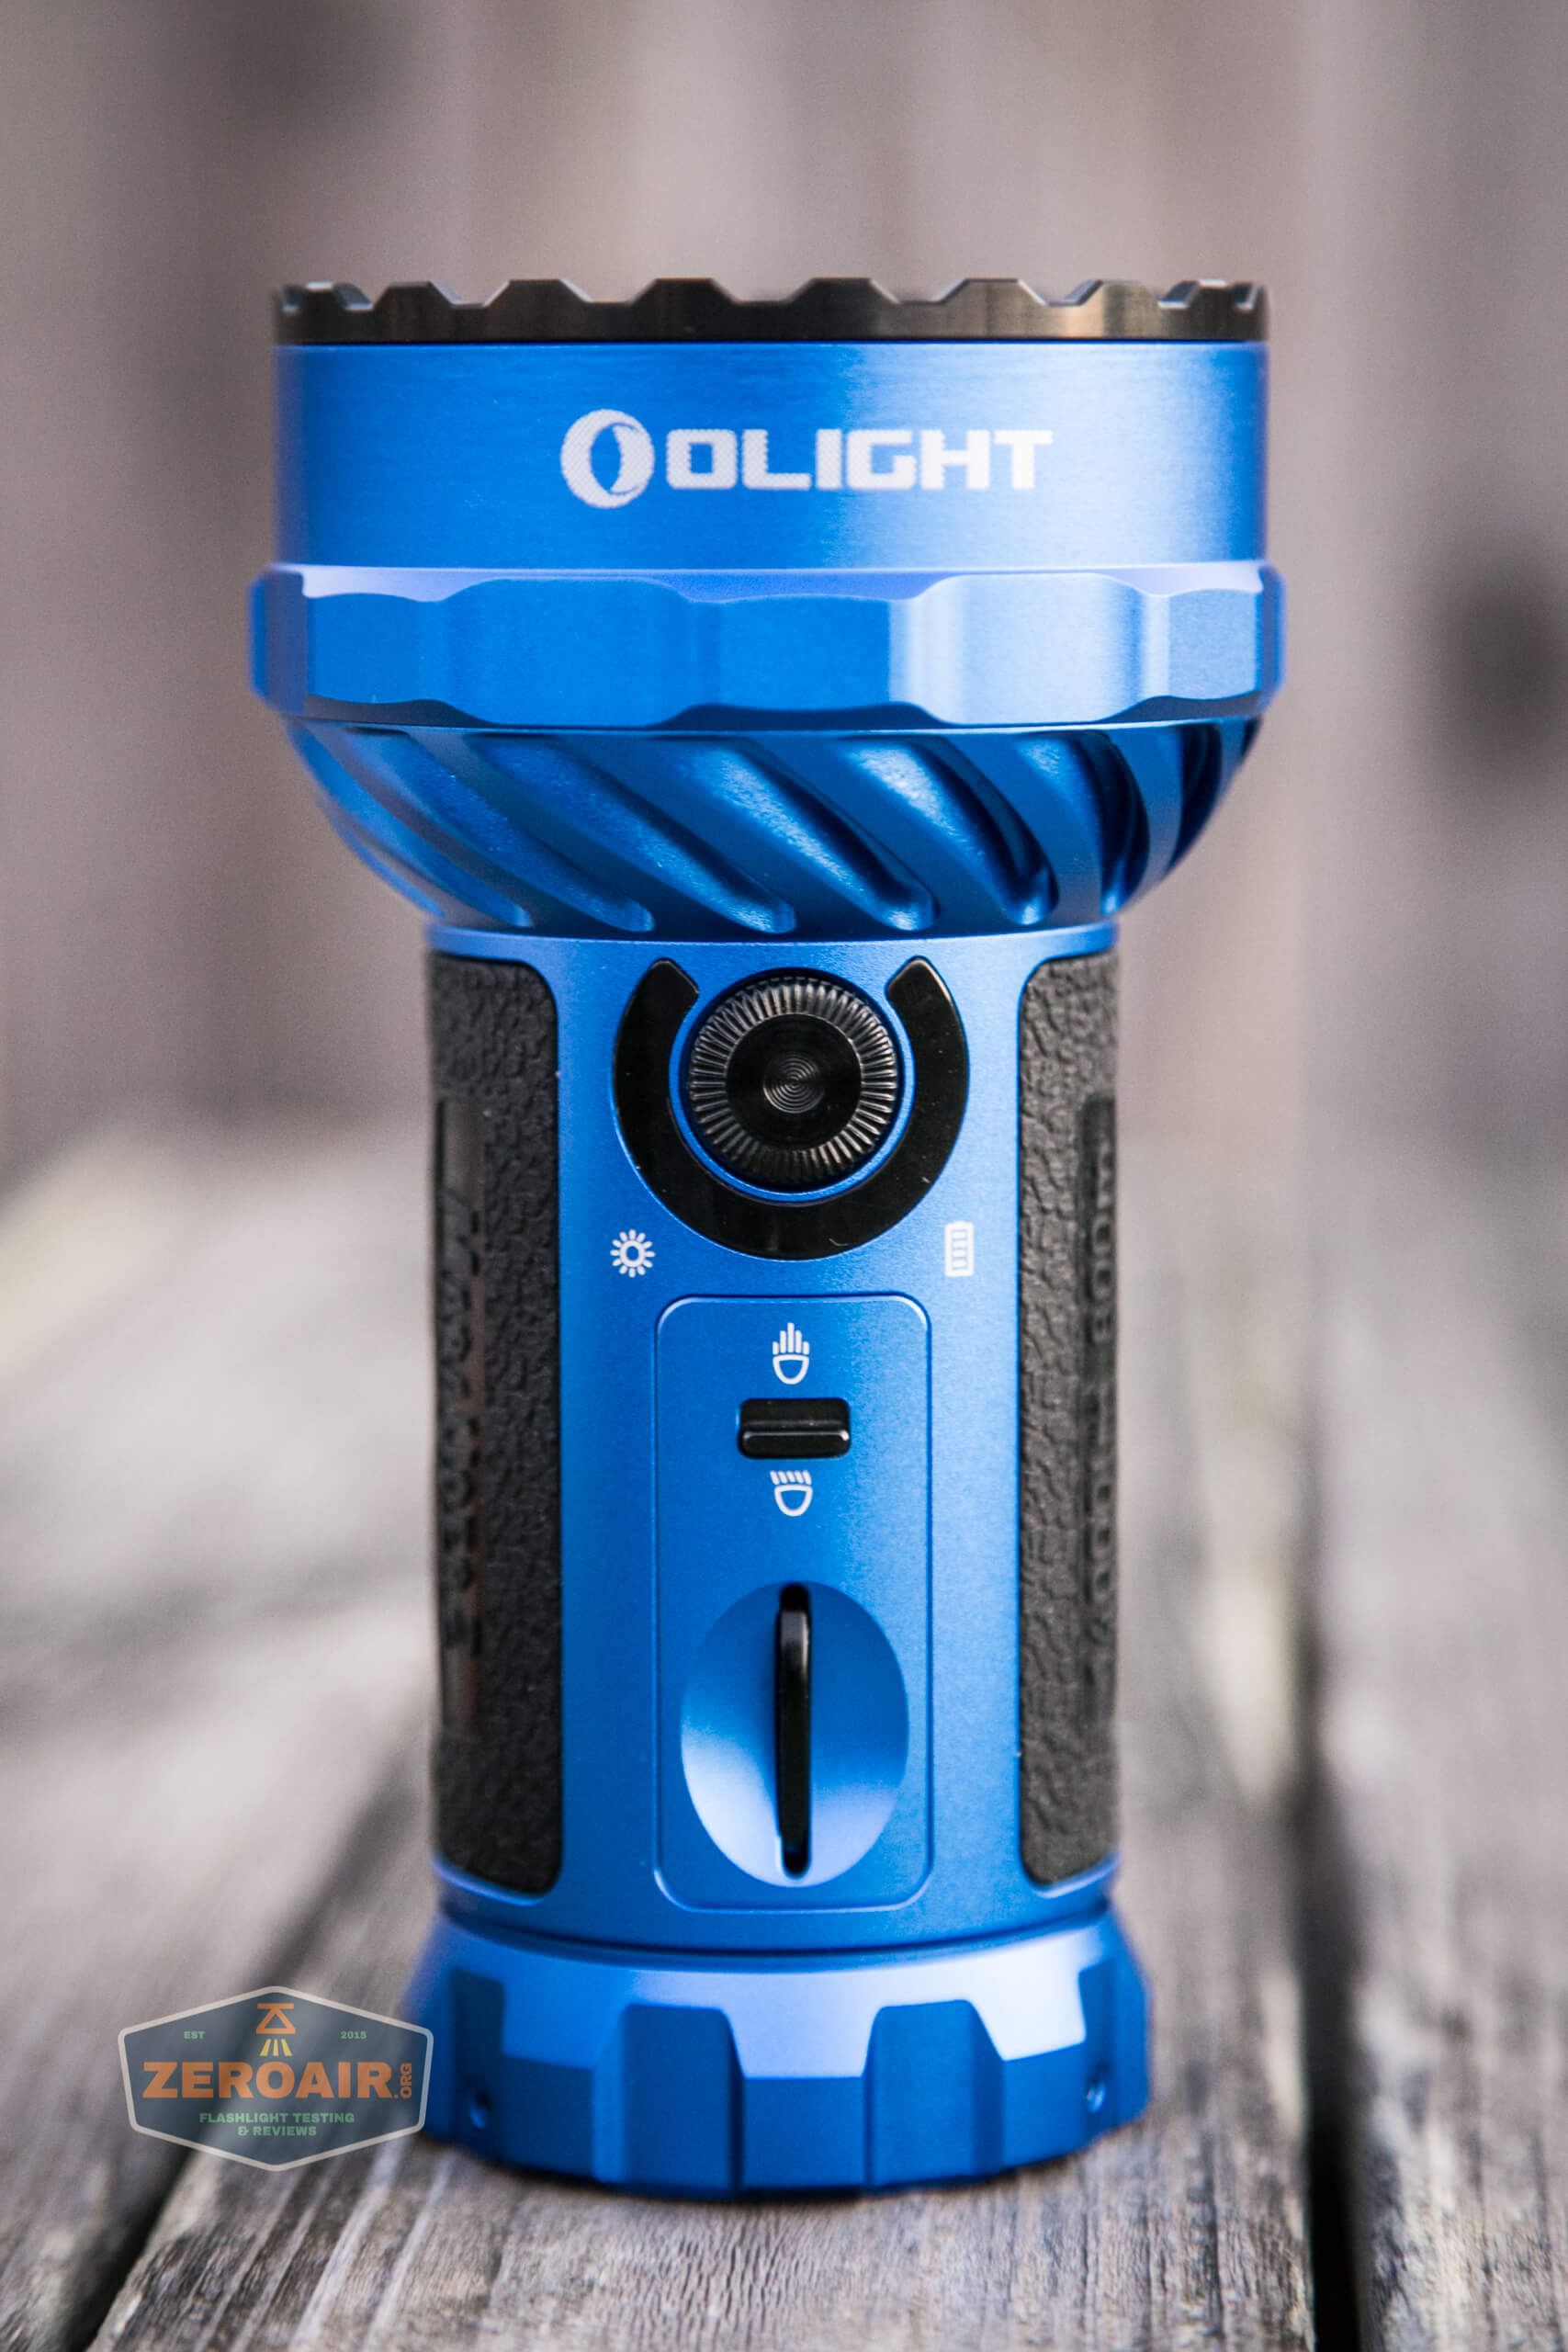
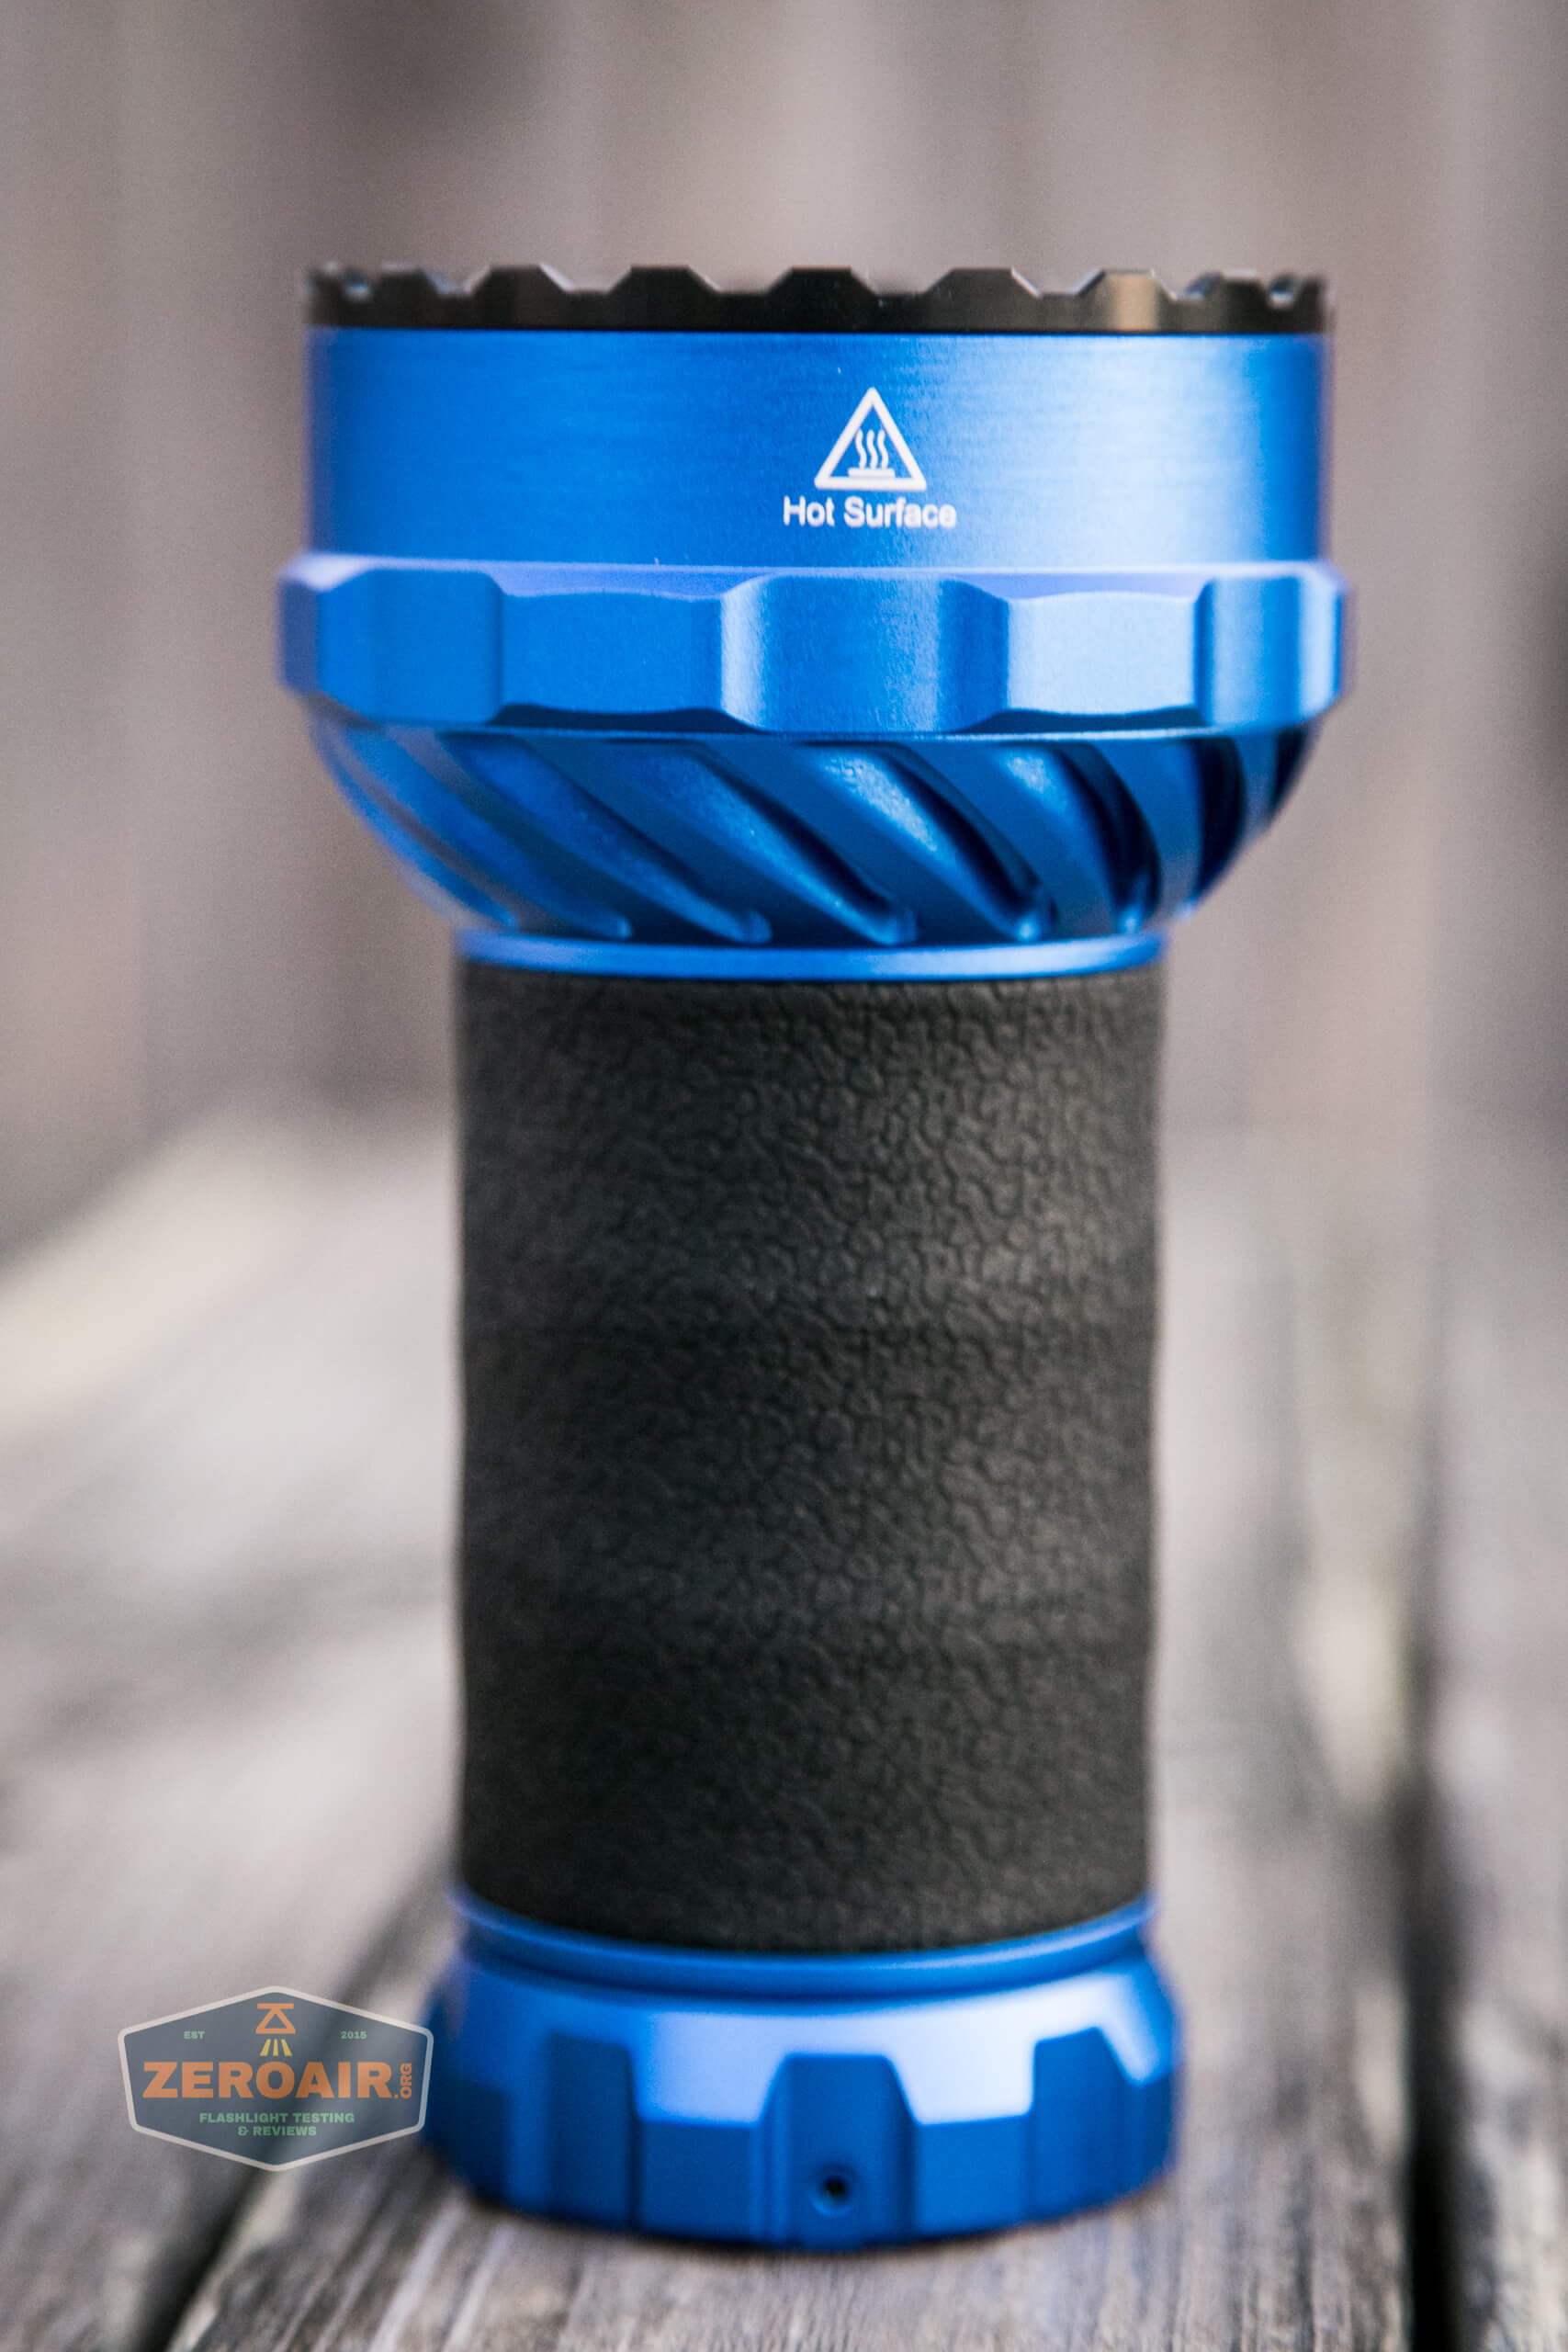
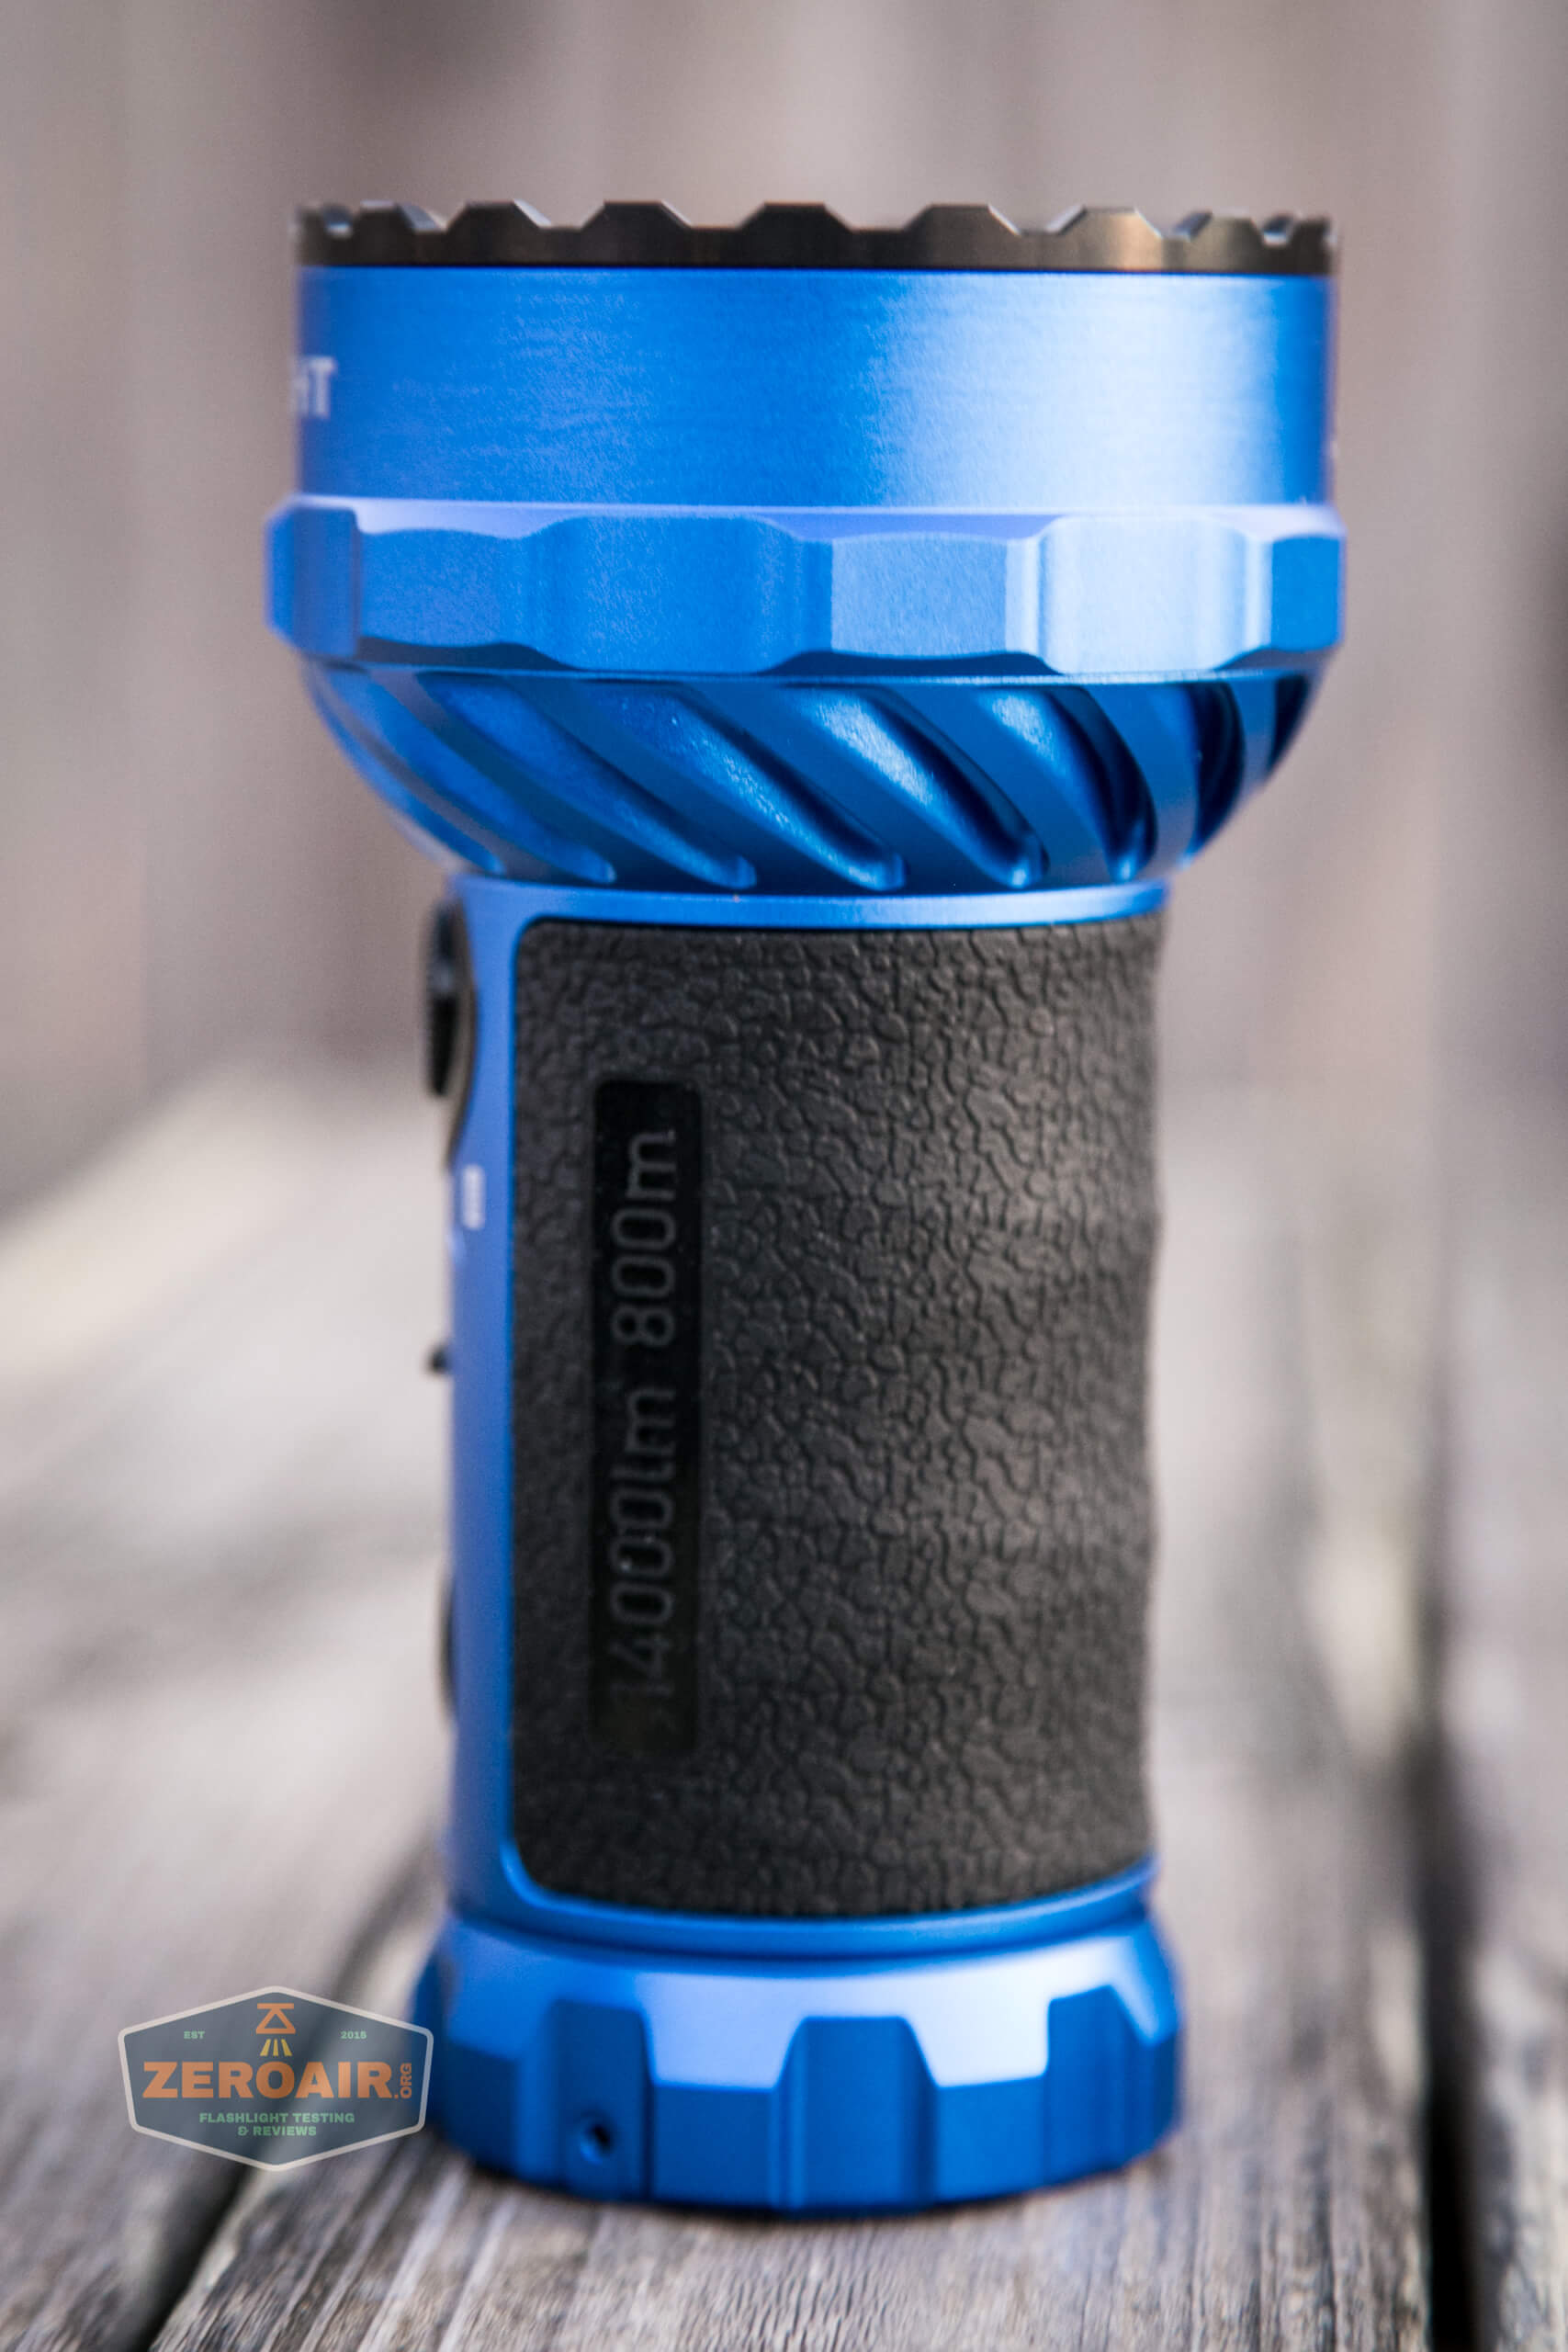
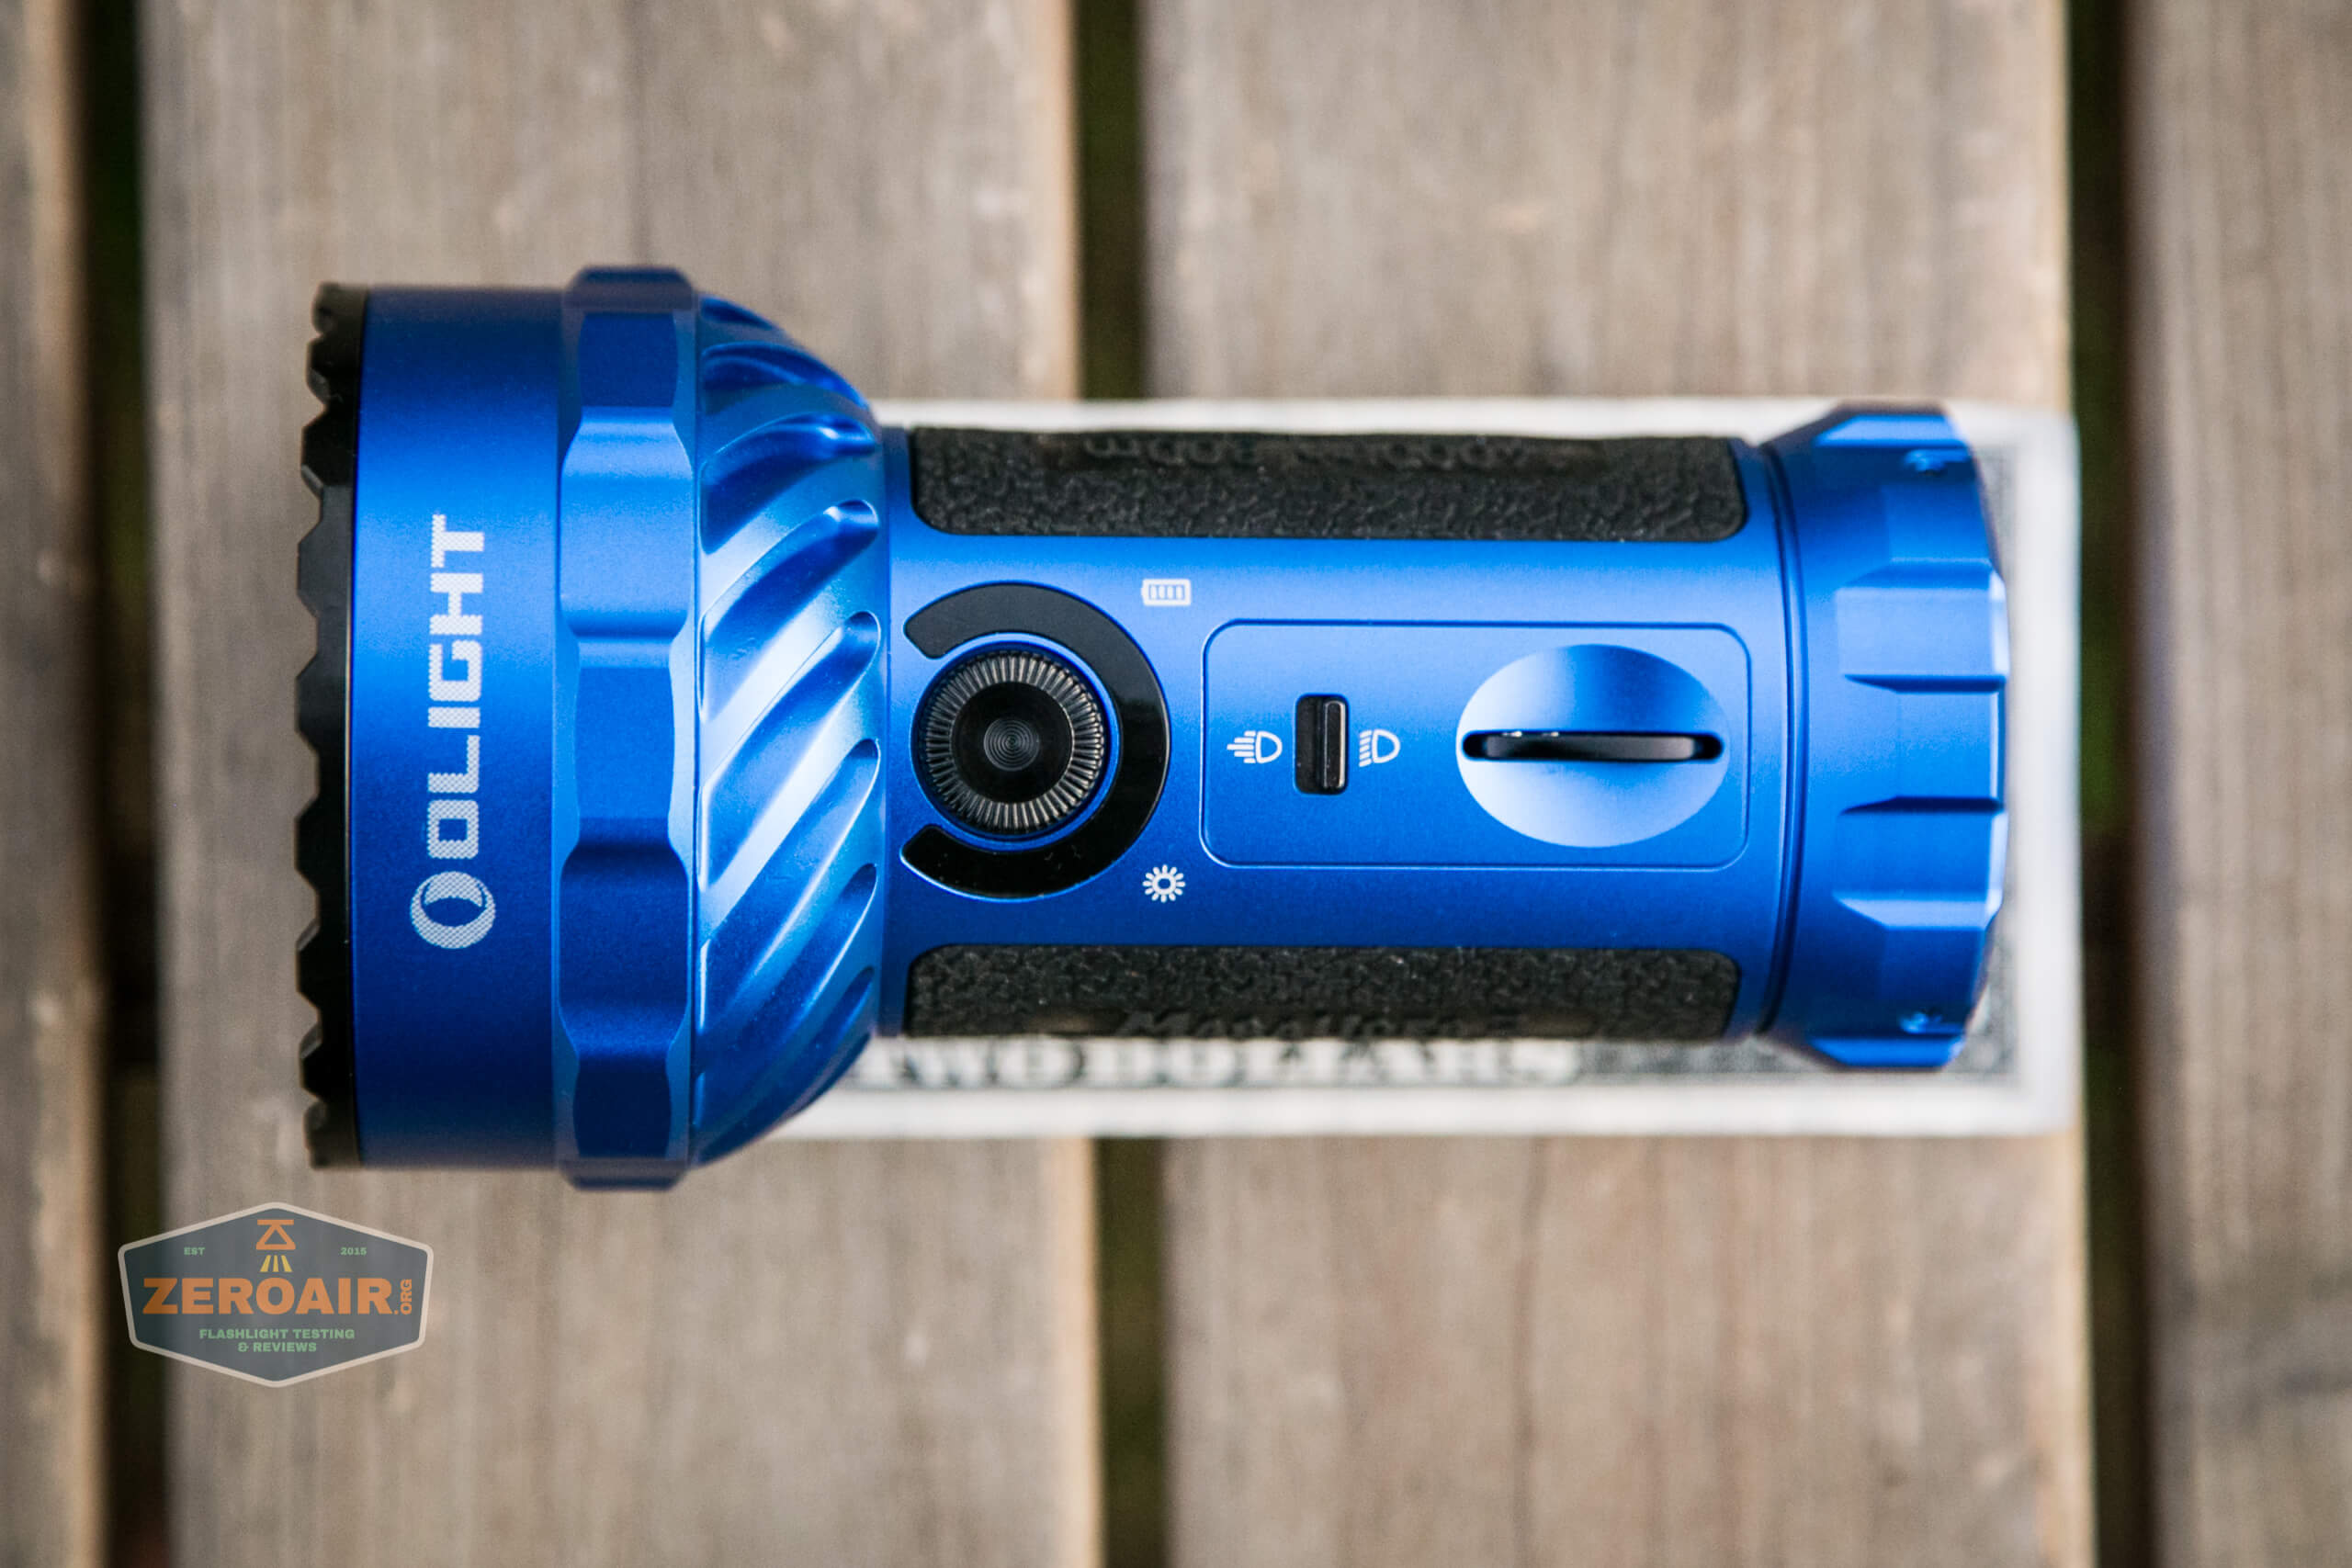
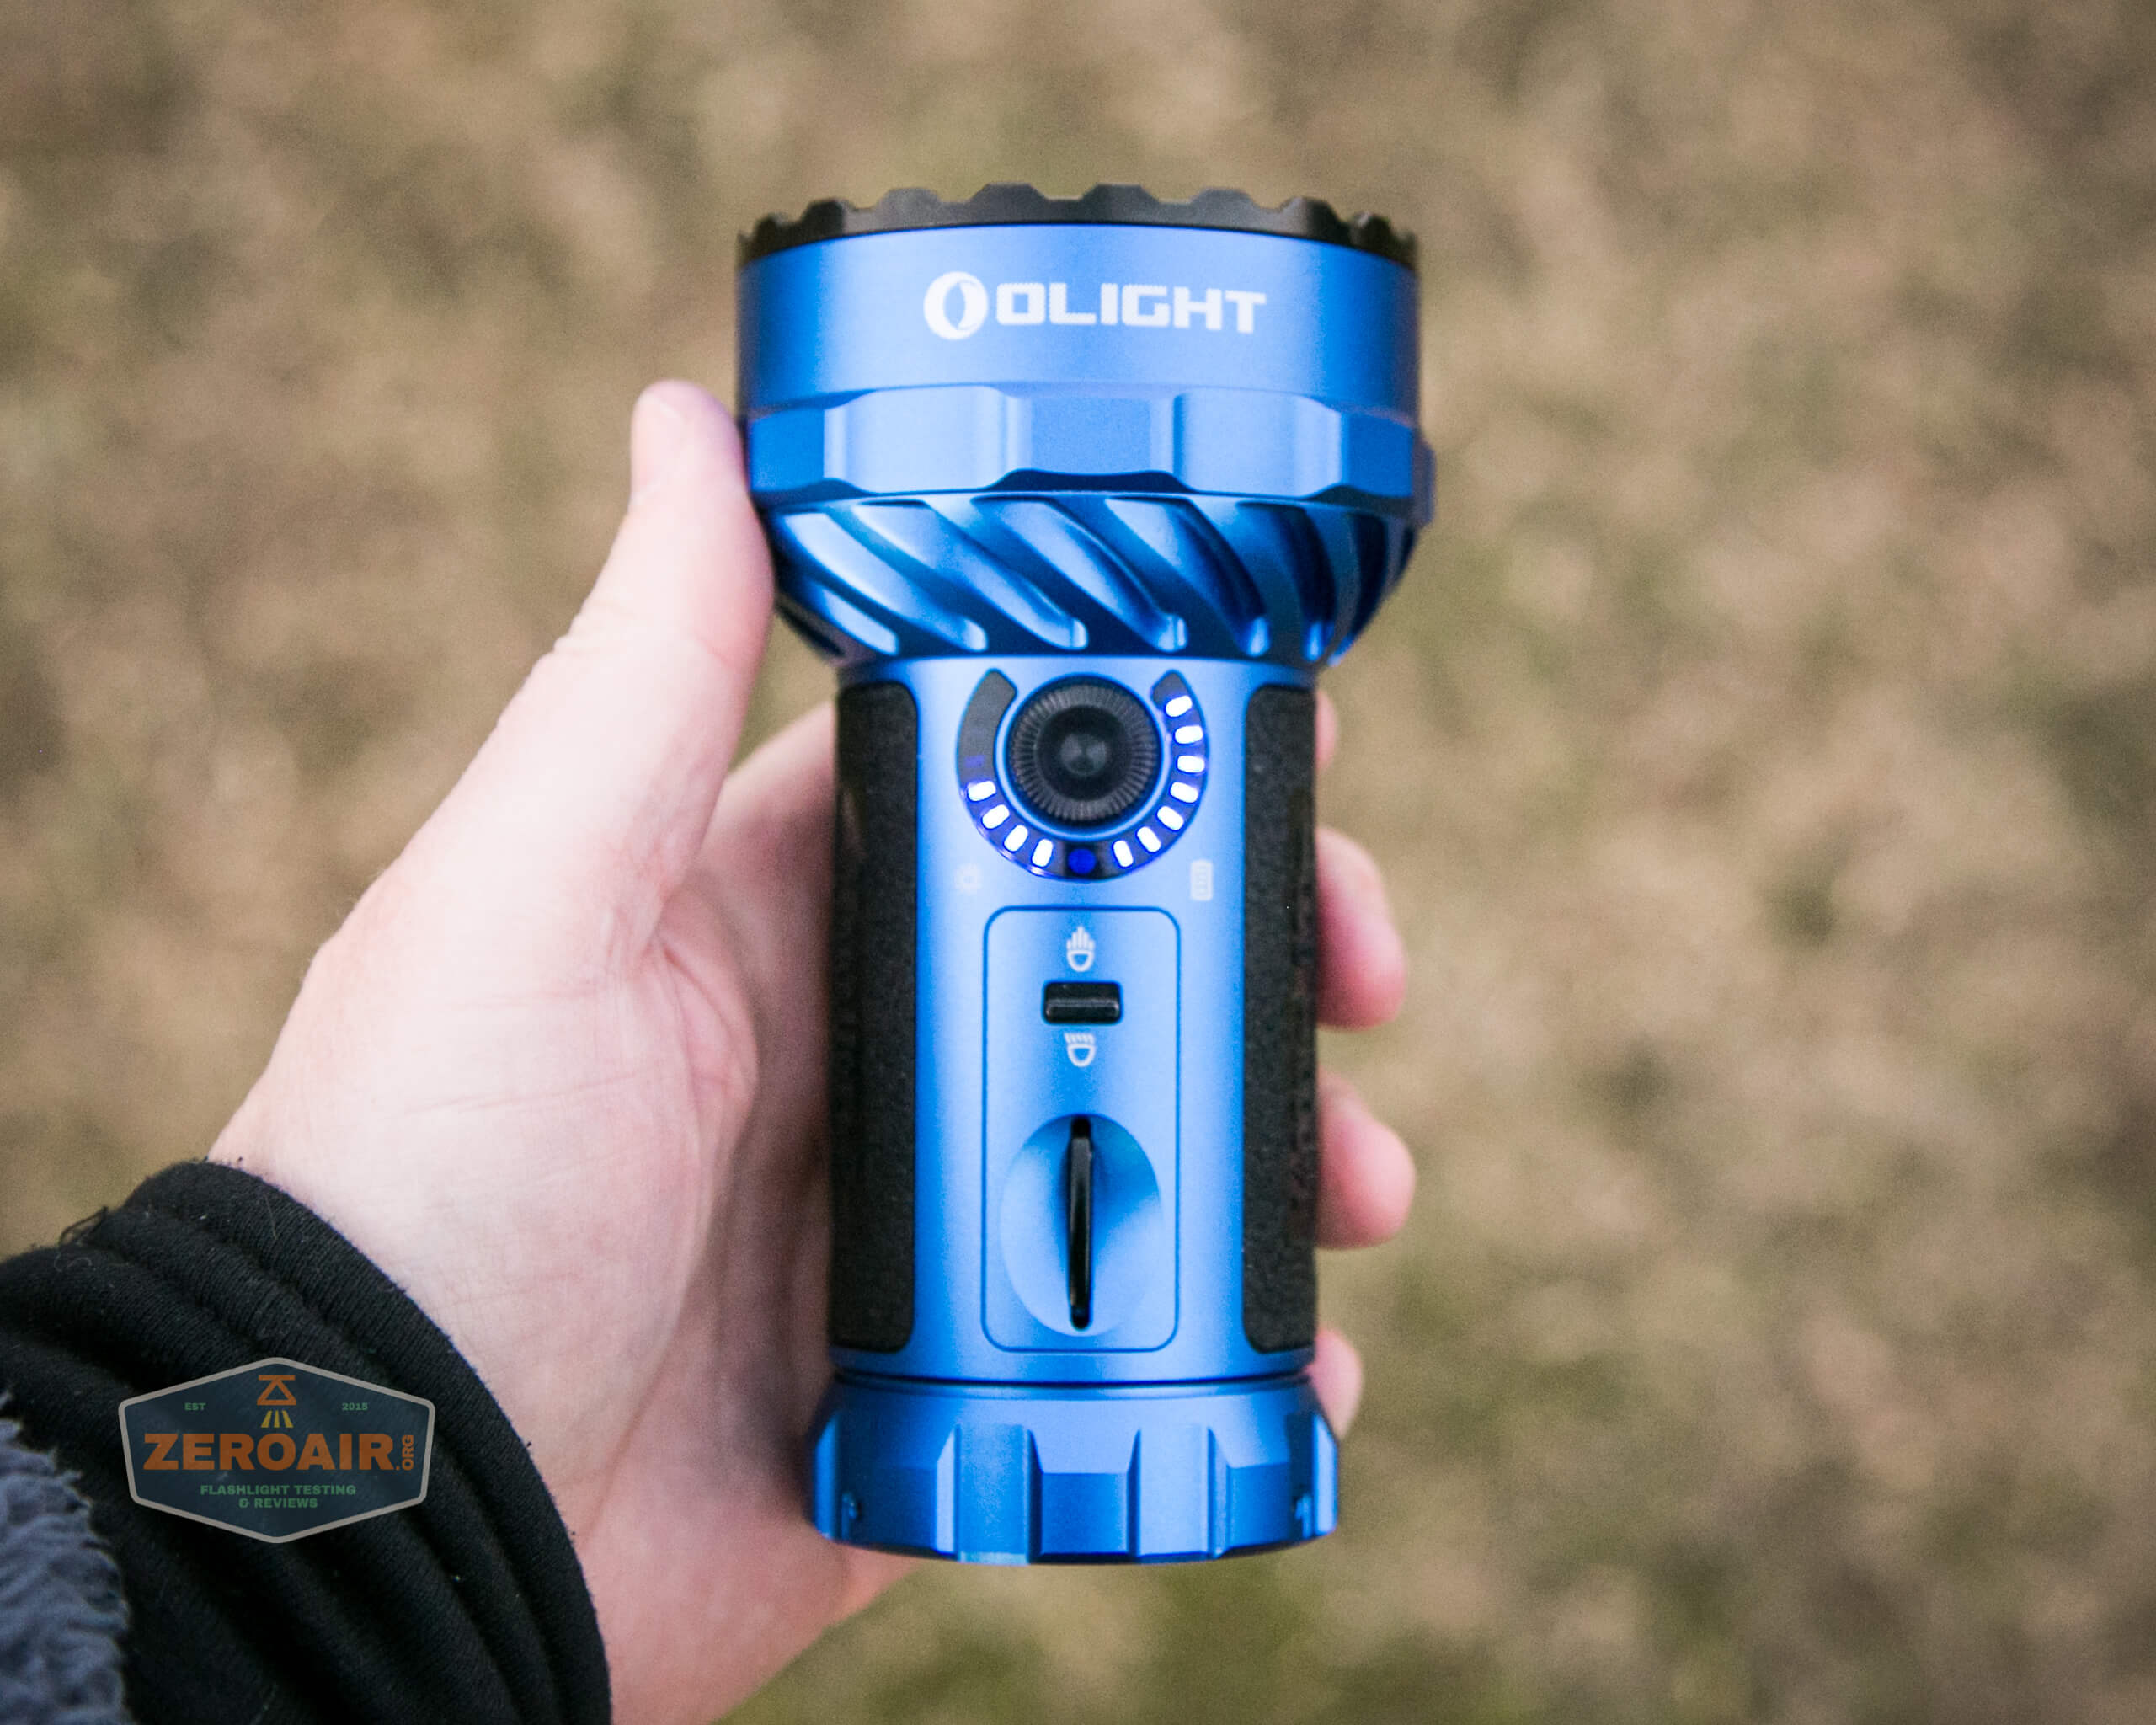
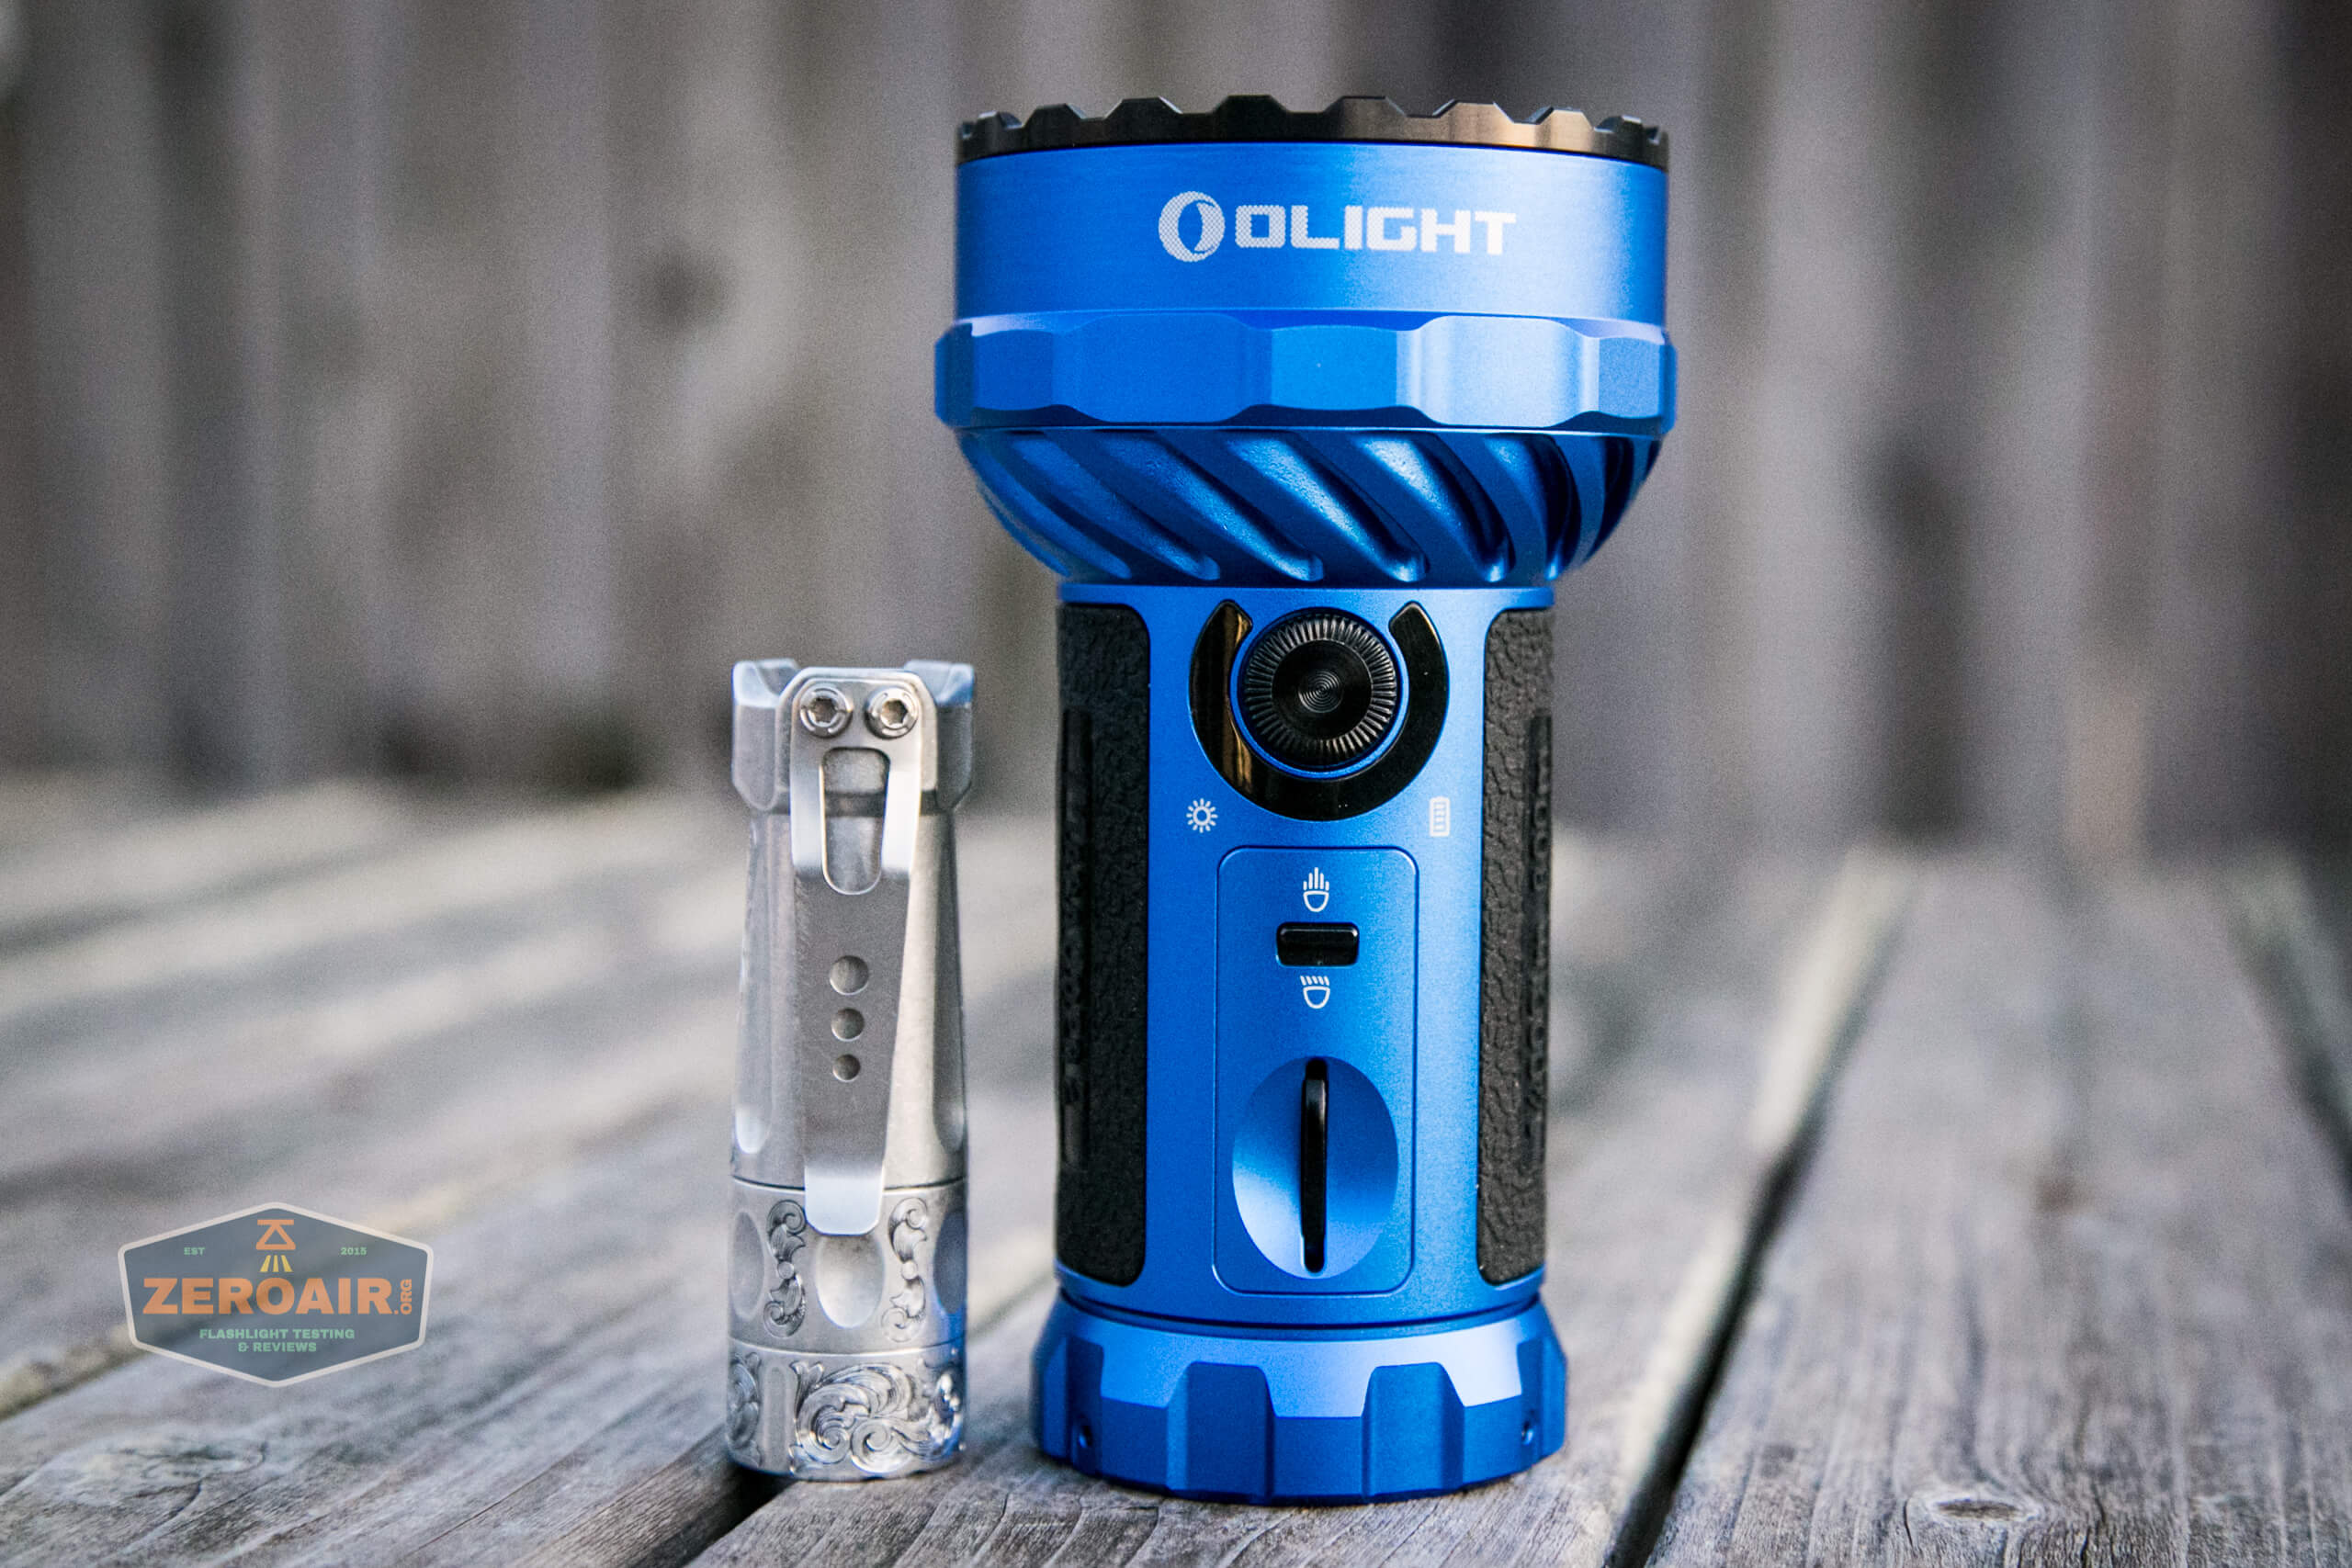
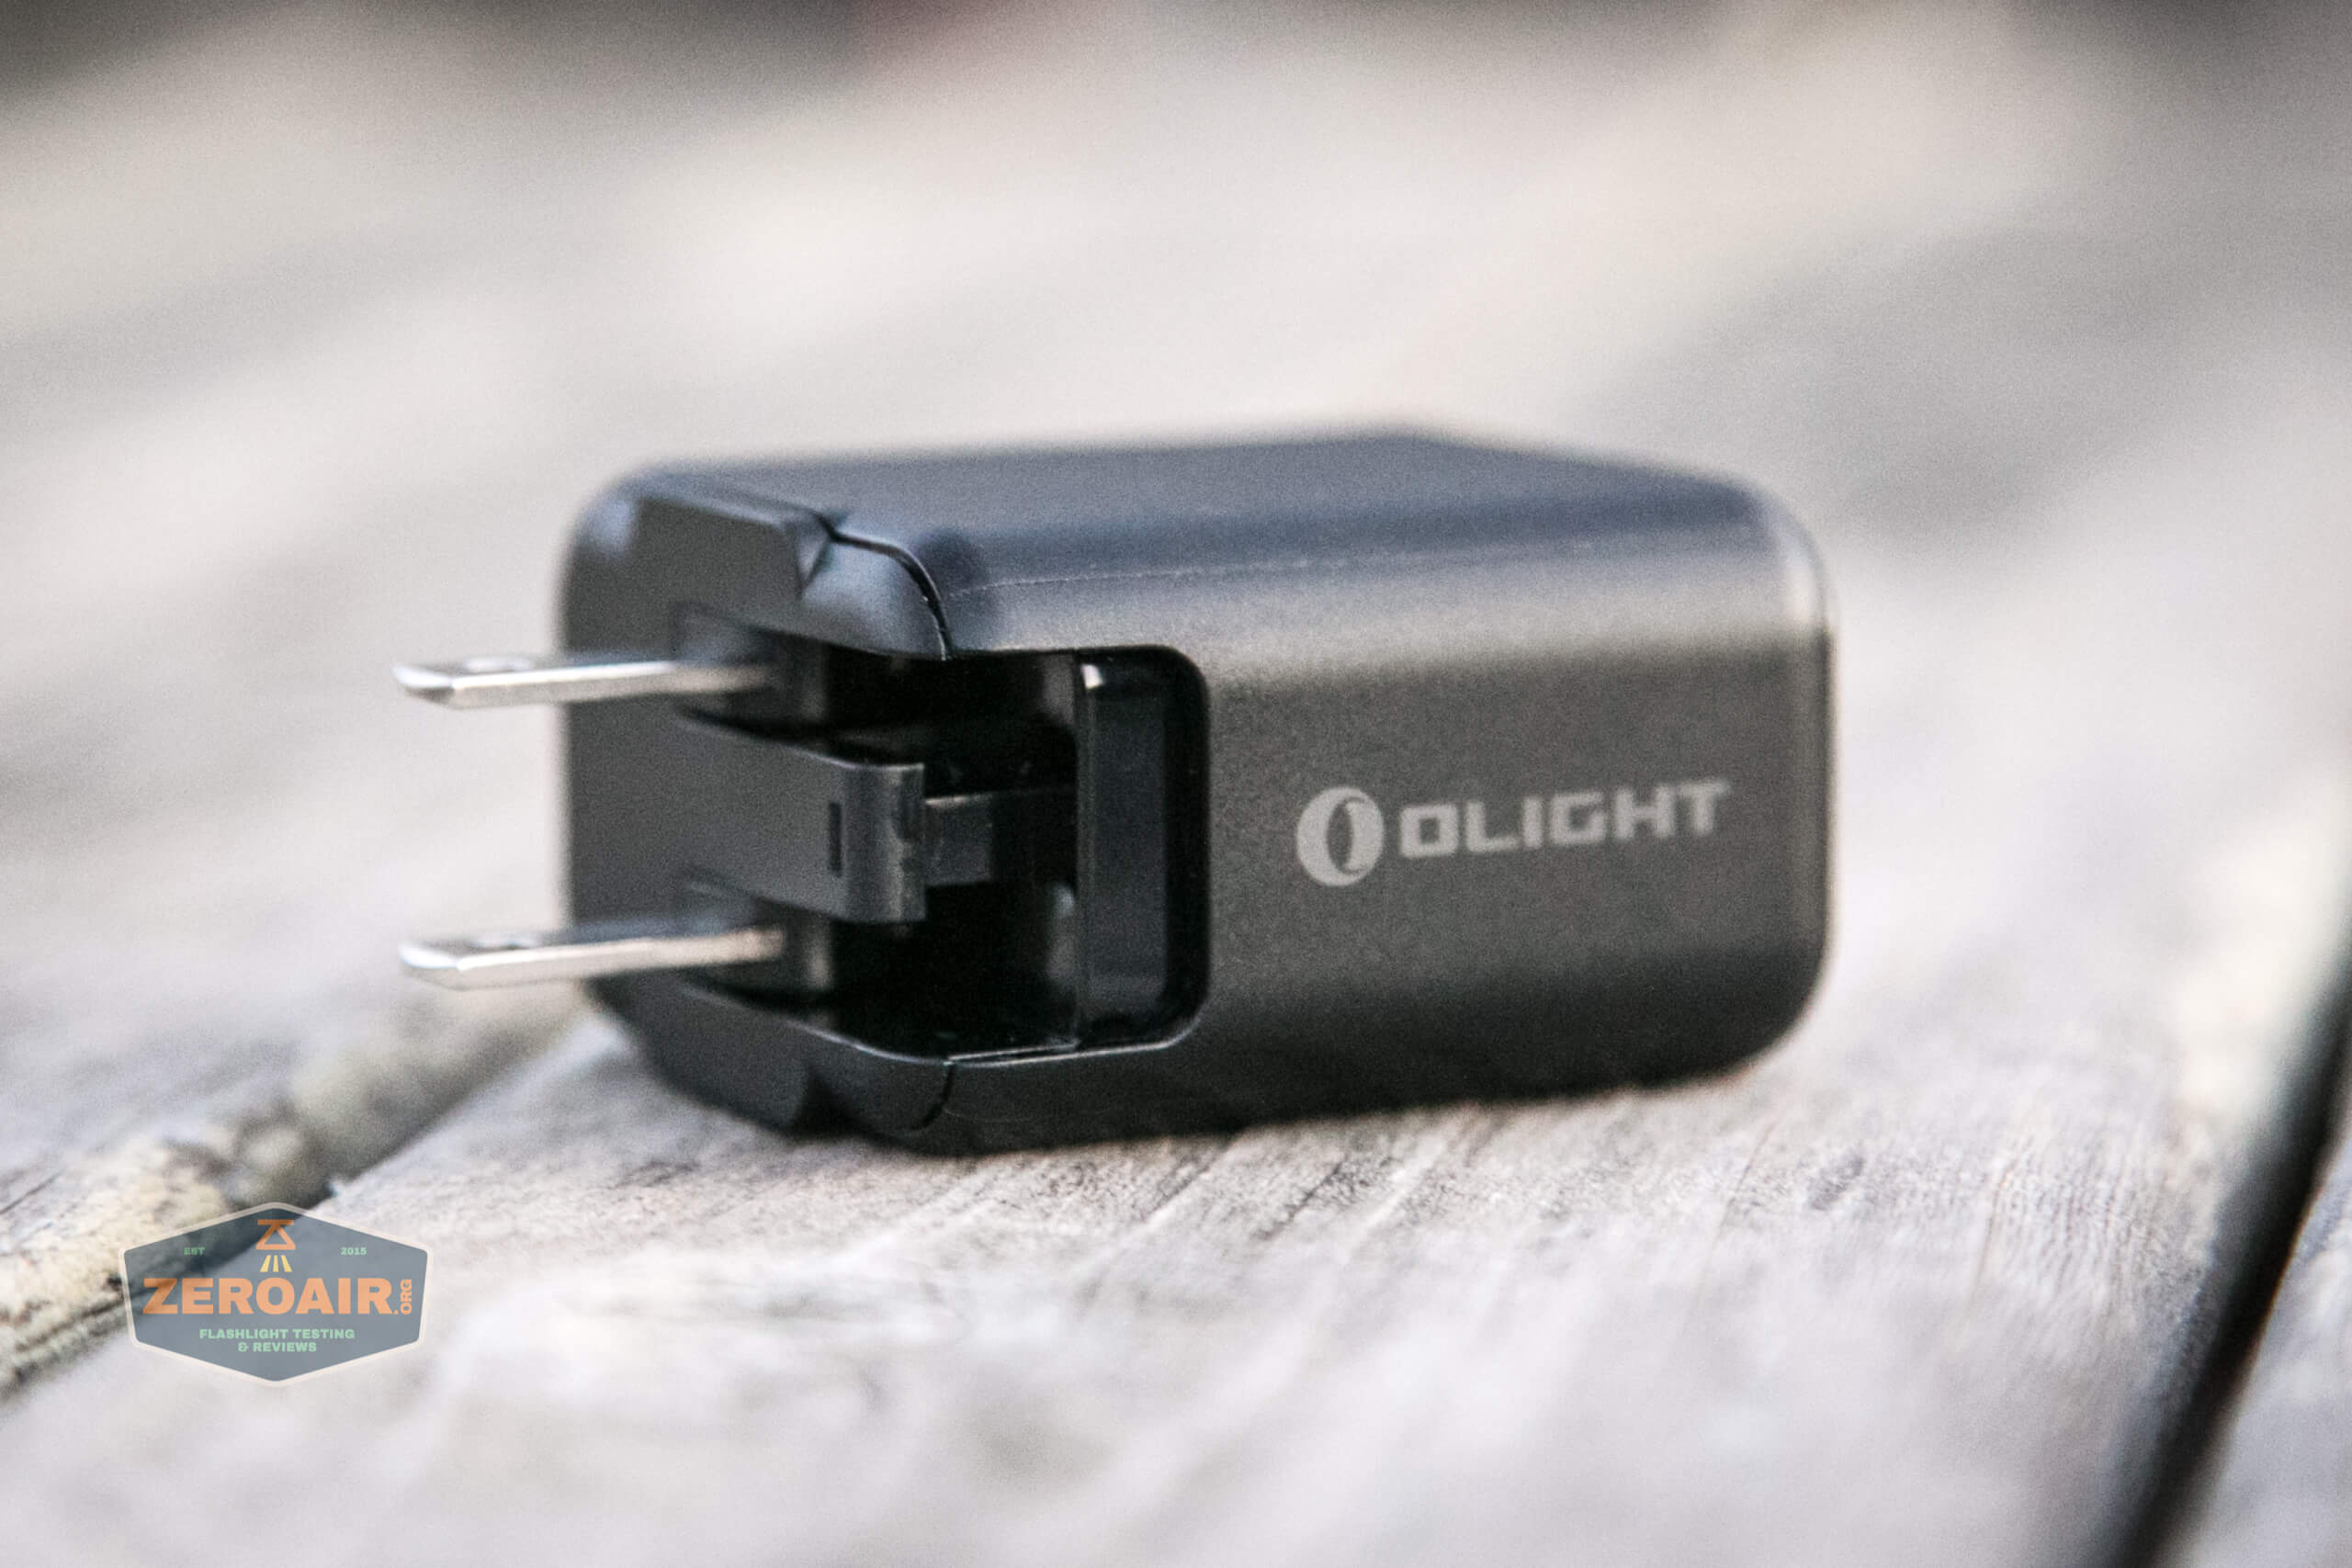
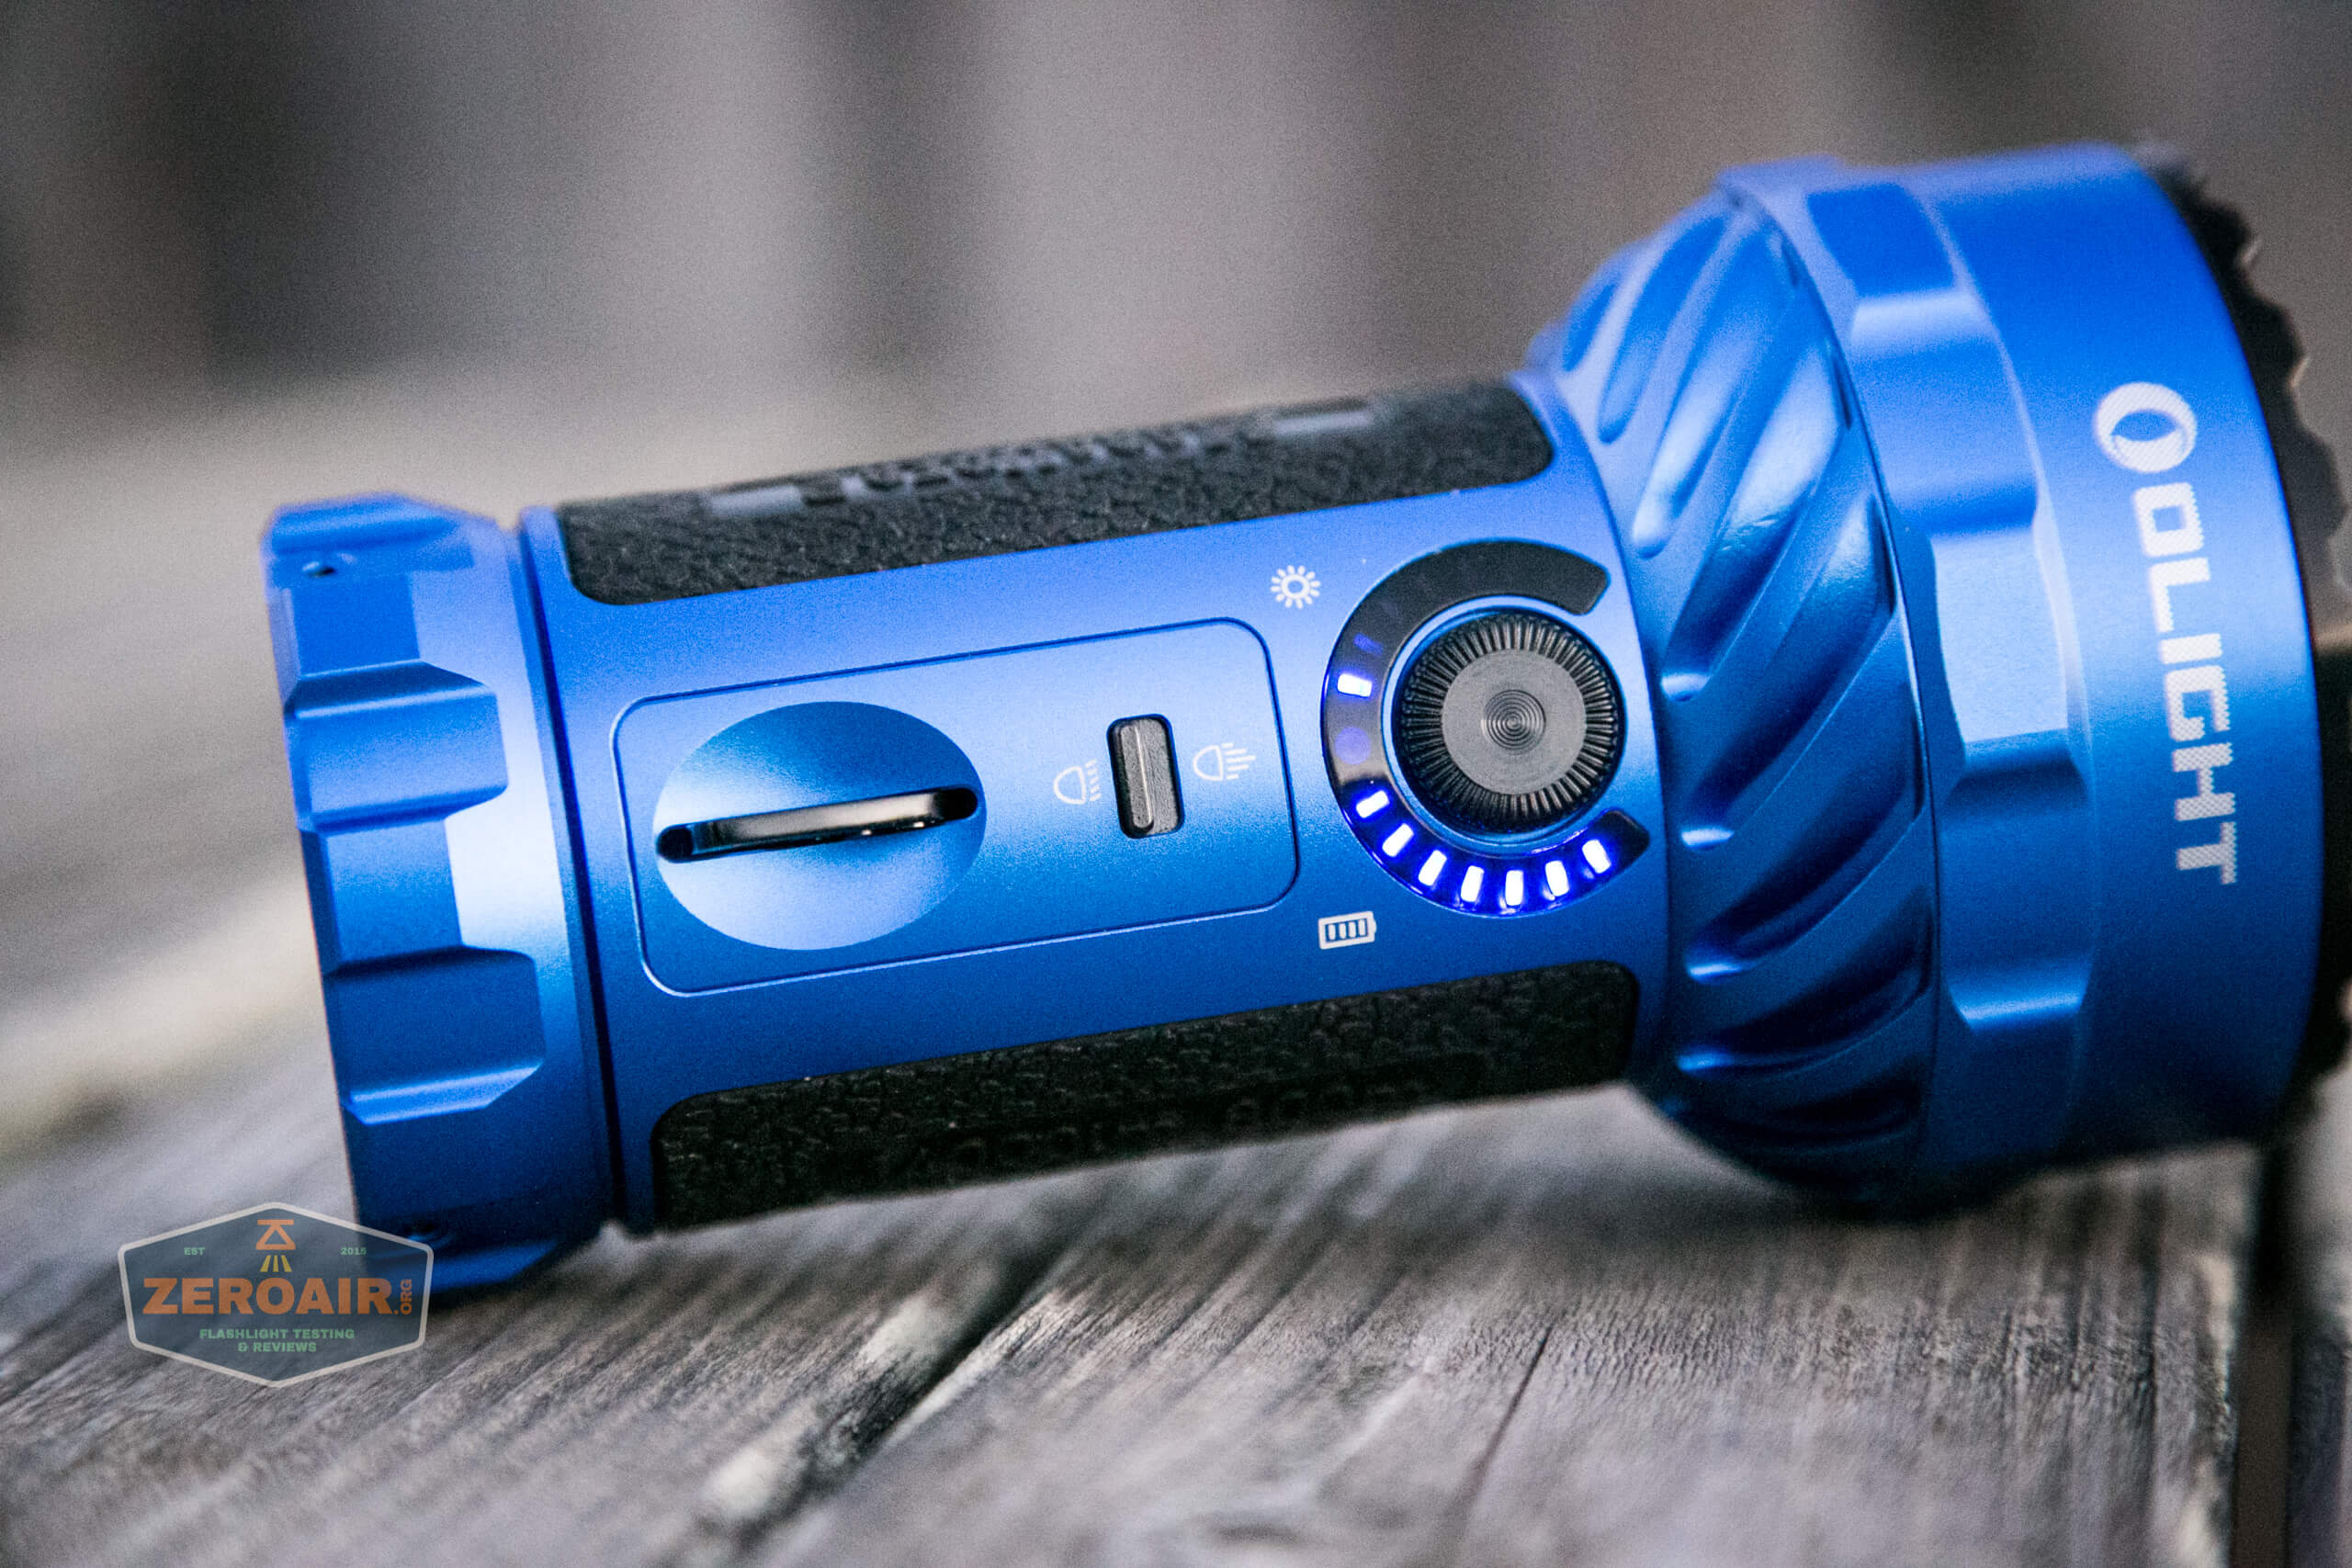
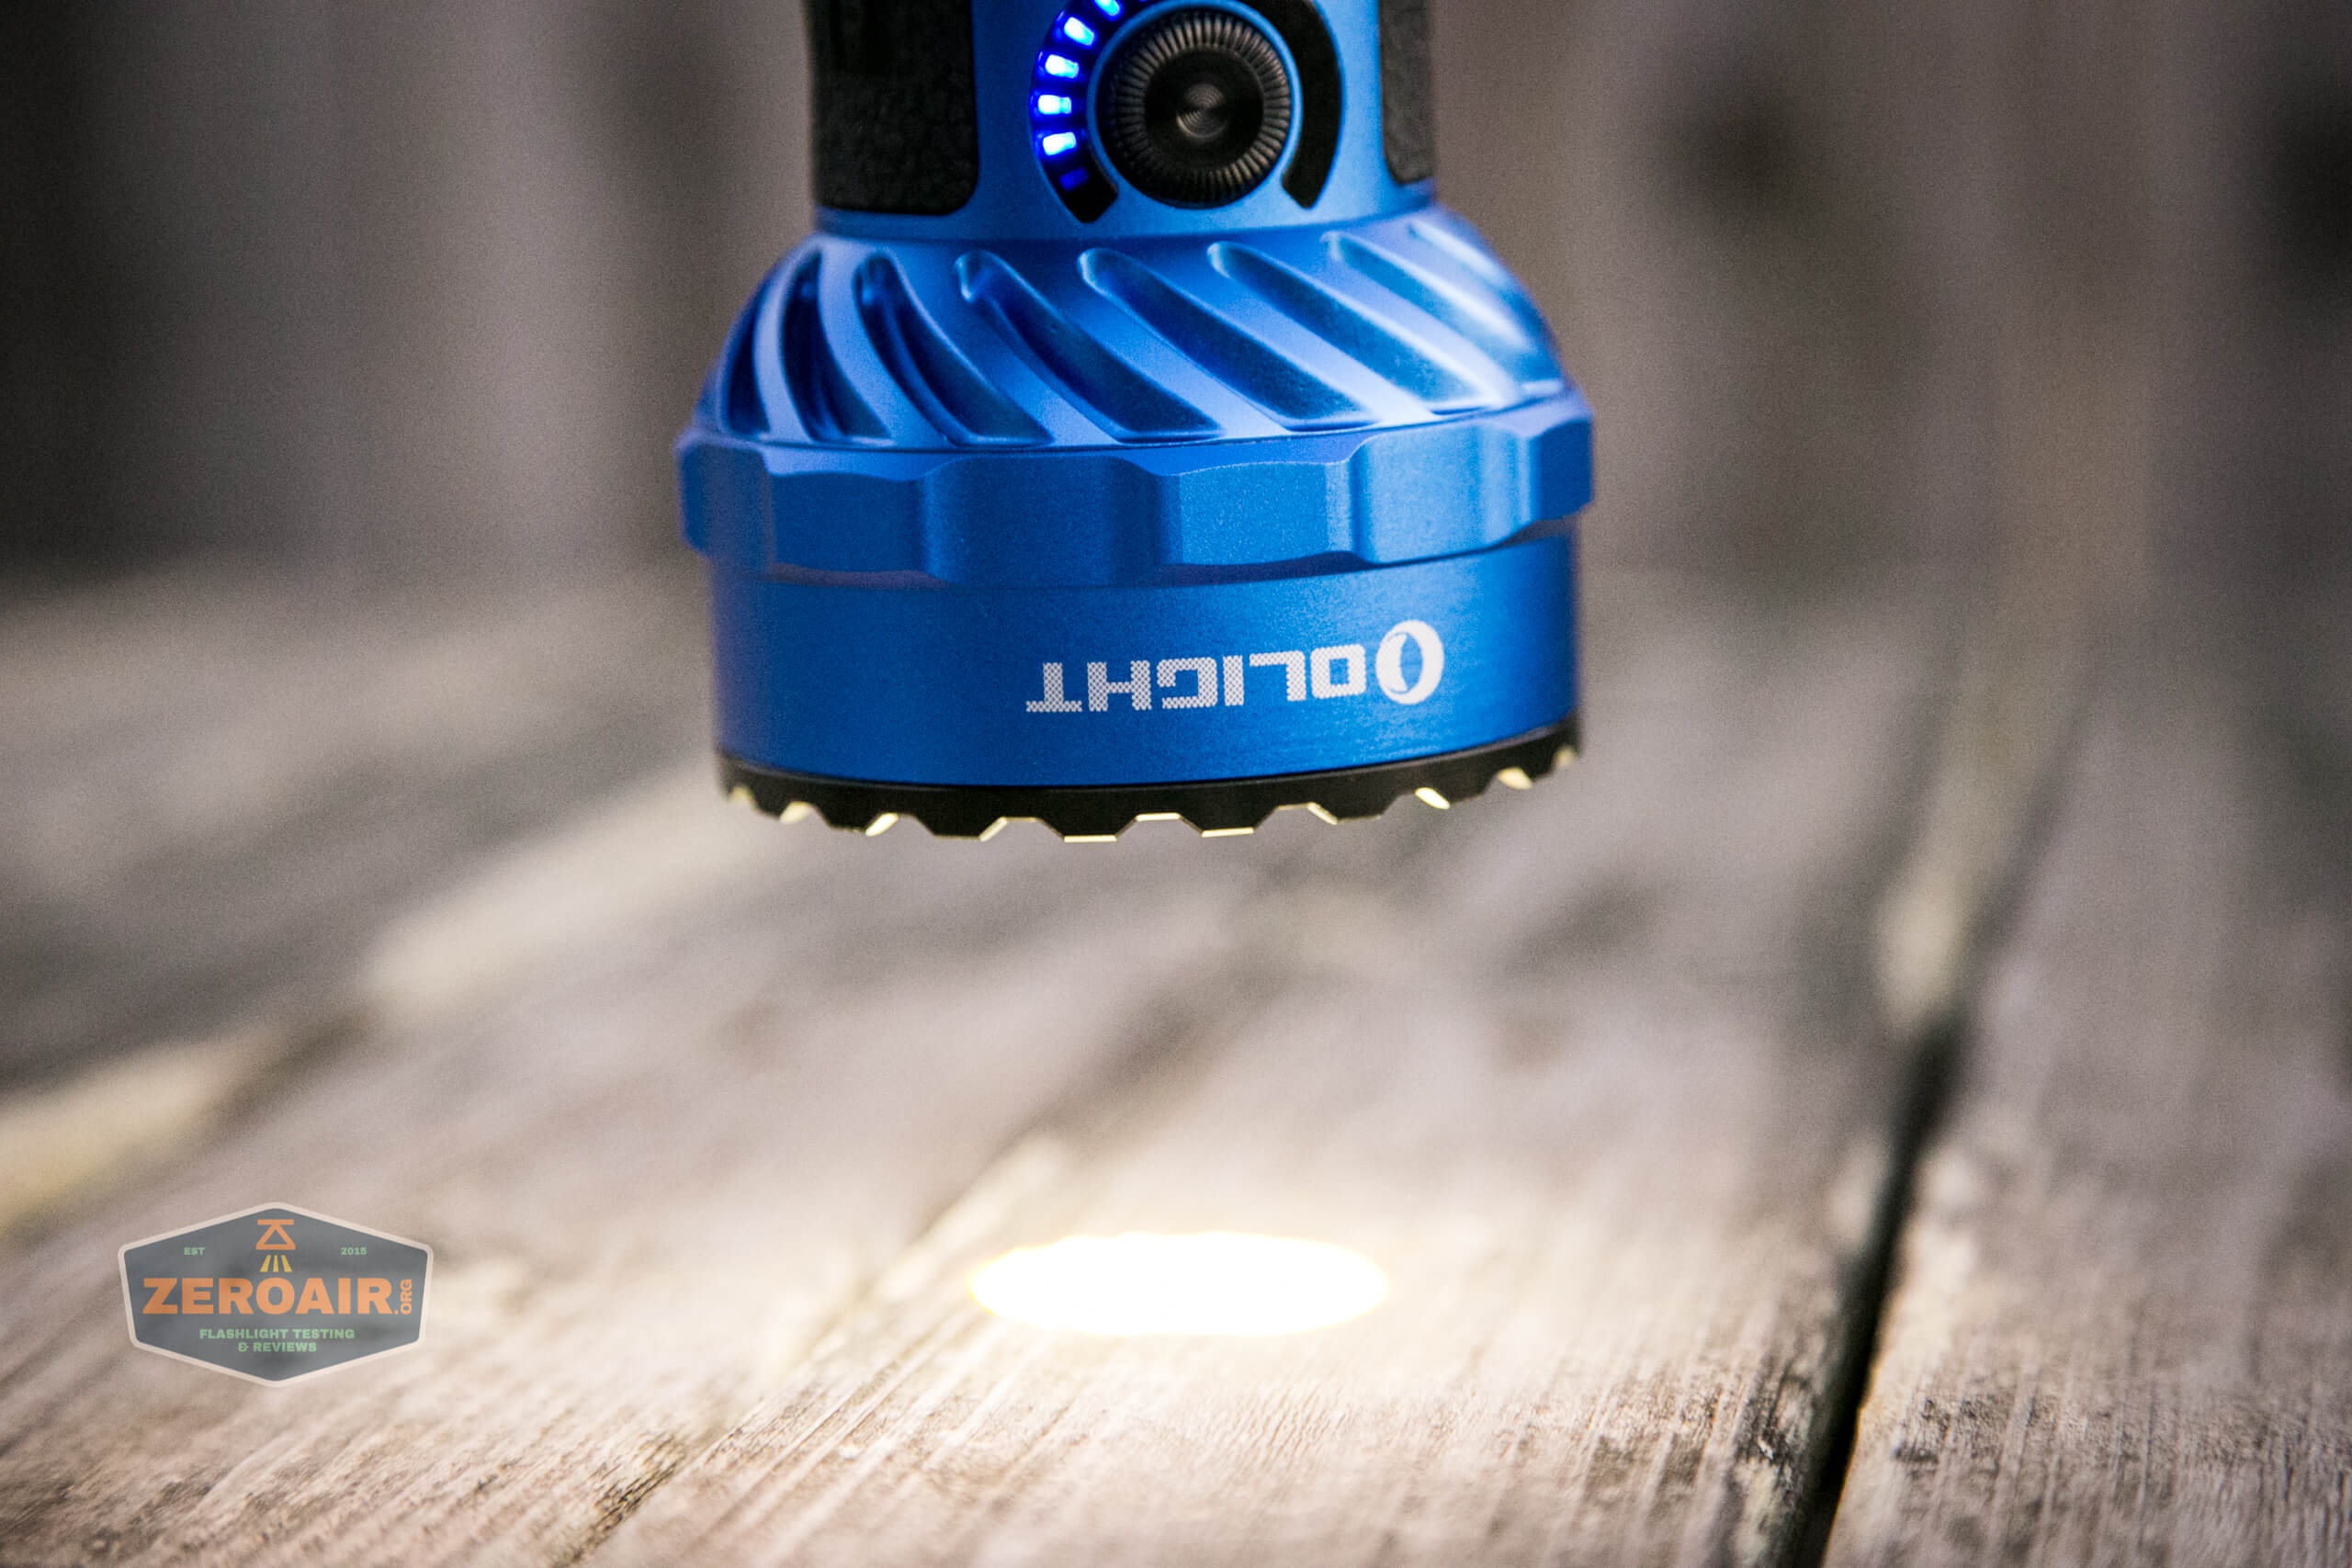
Atop the Olight Marauder 2 Blue is this strike bezel. The Blue version has a black bezel (and otherwise, black trim), as does the Orange. But the black has blue trim.
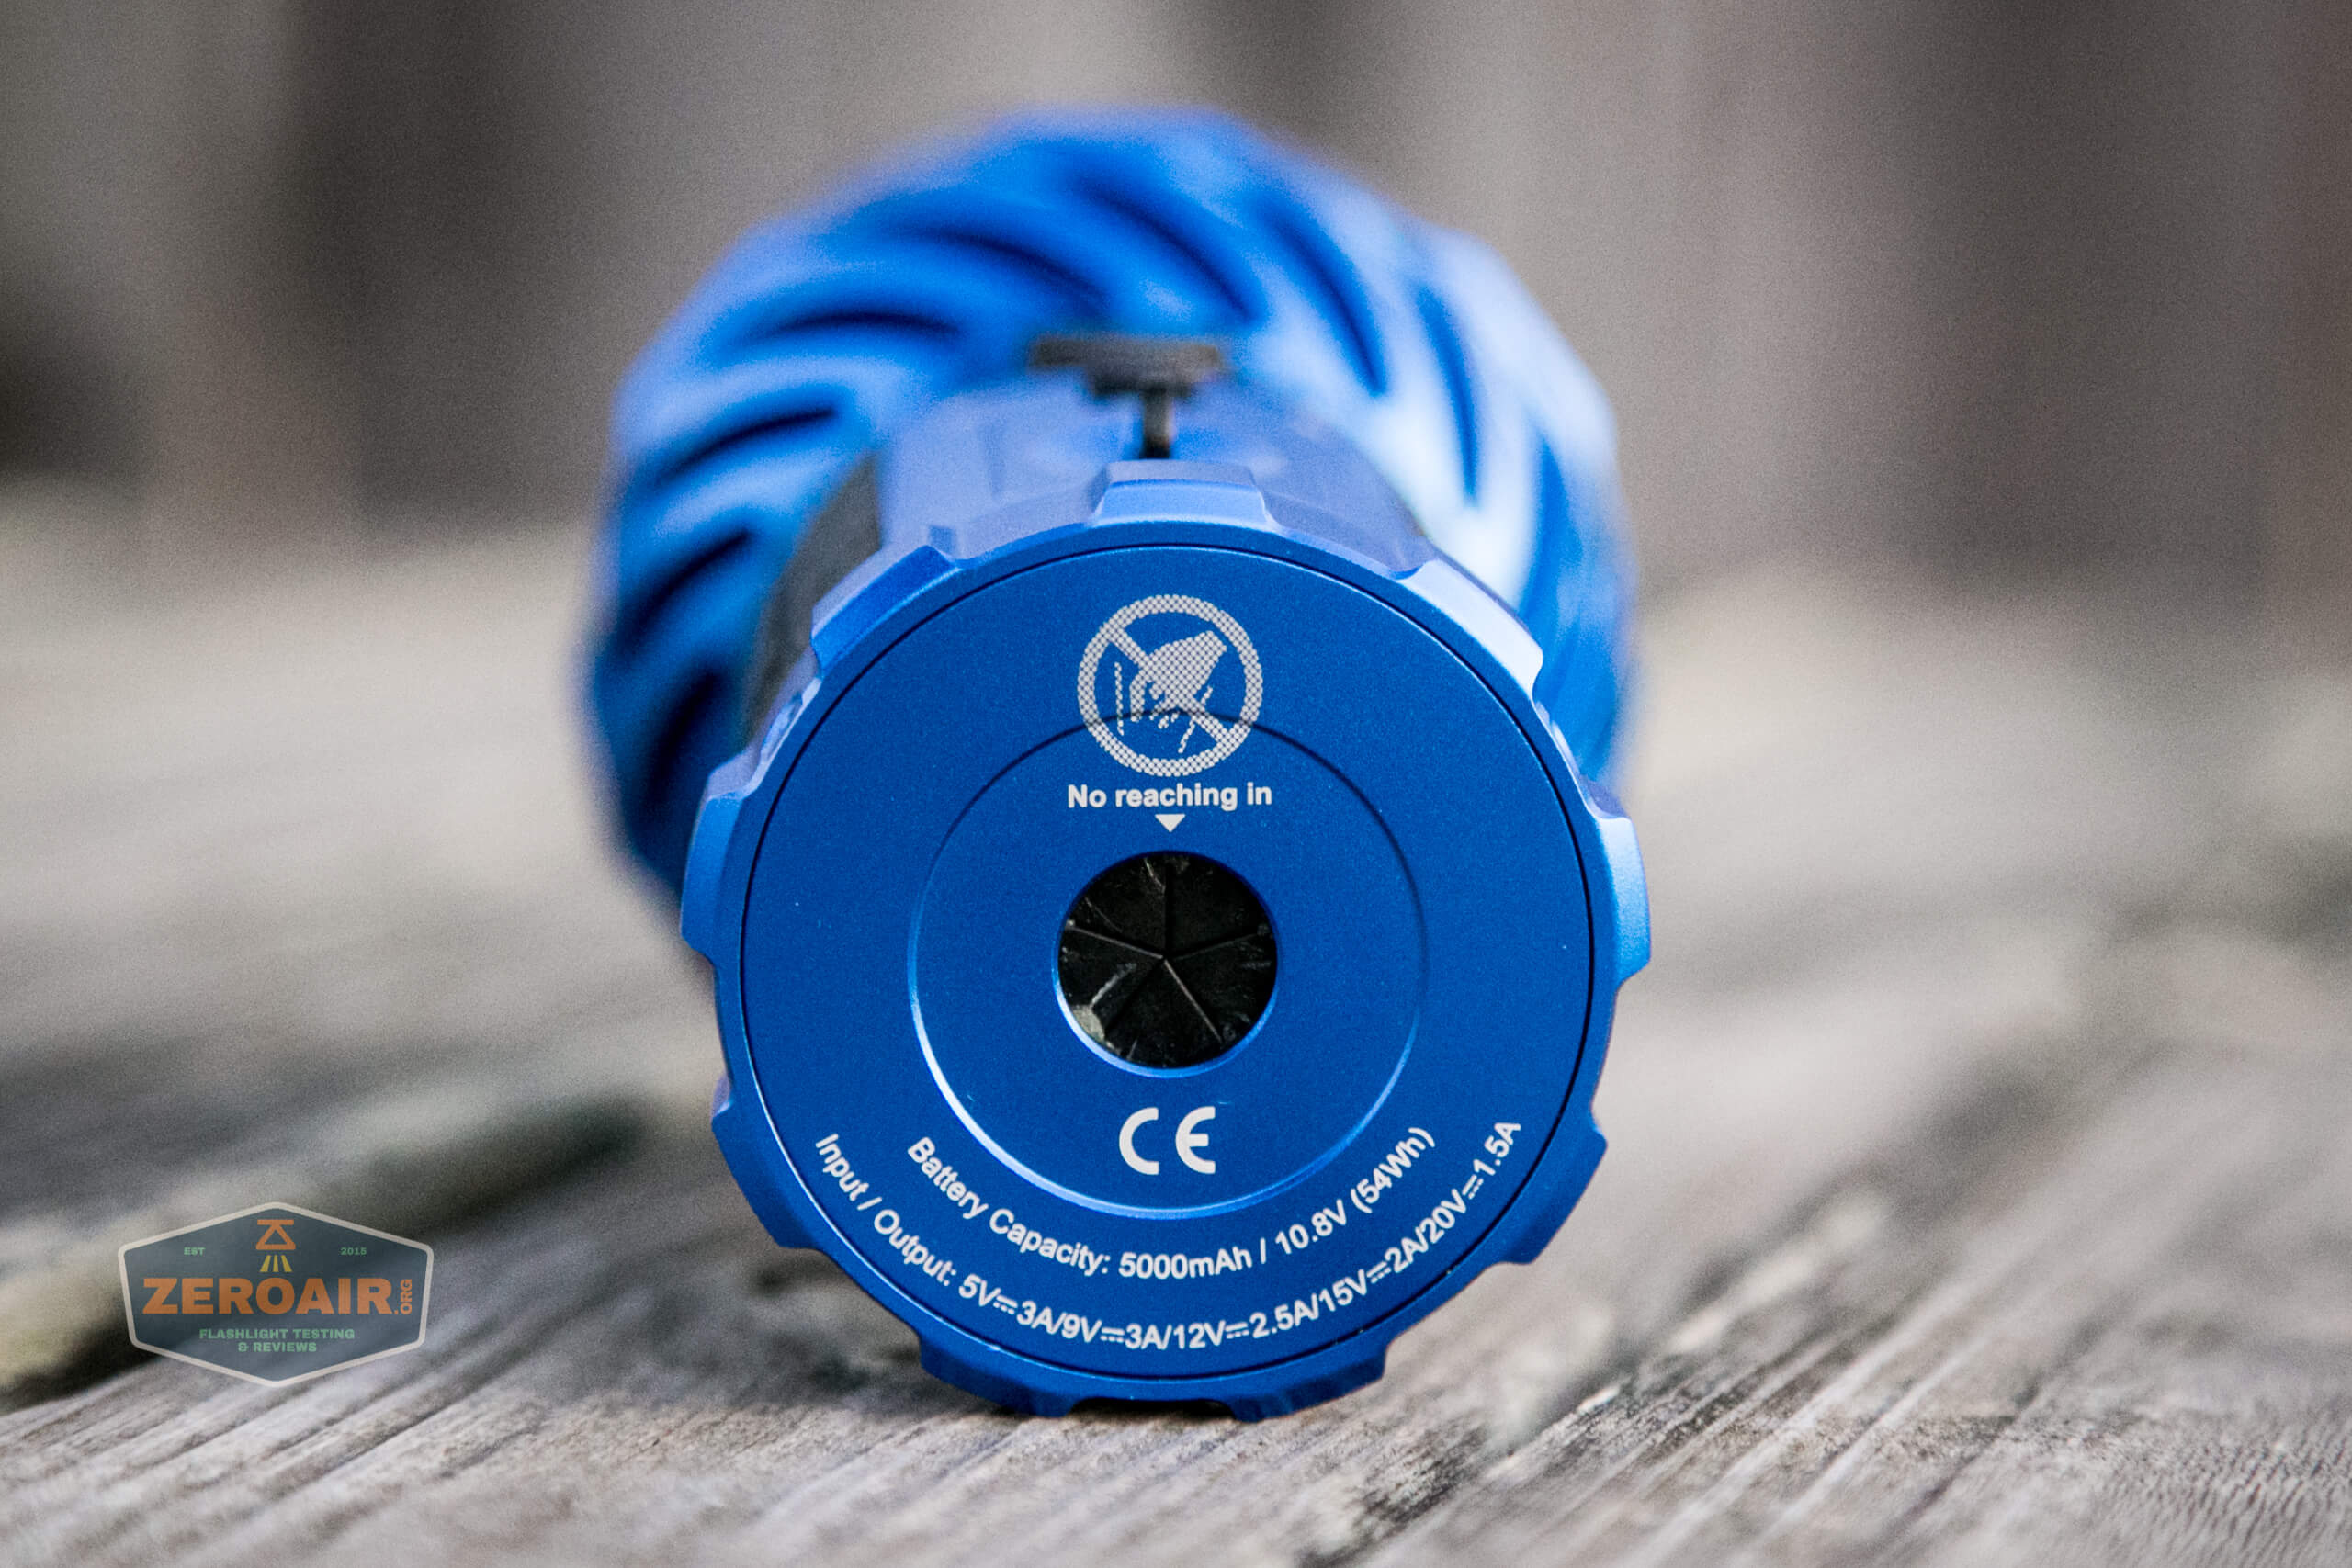
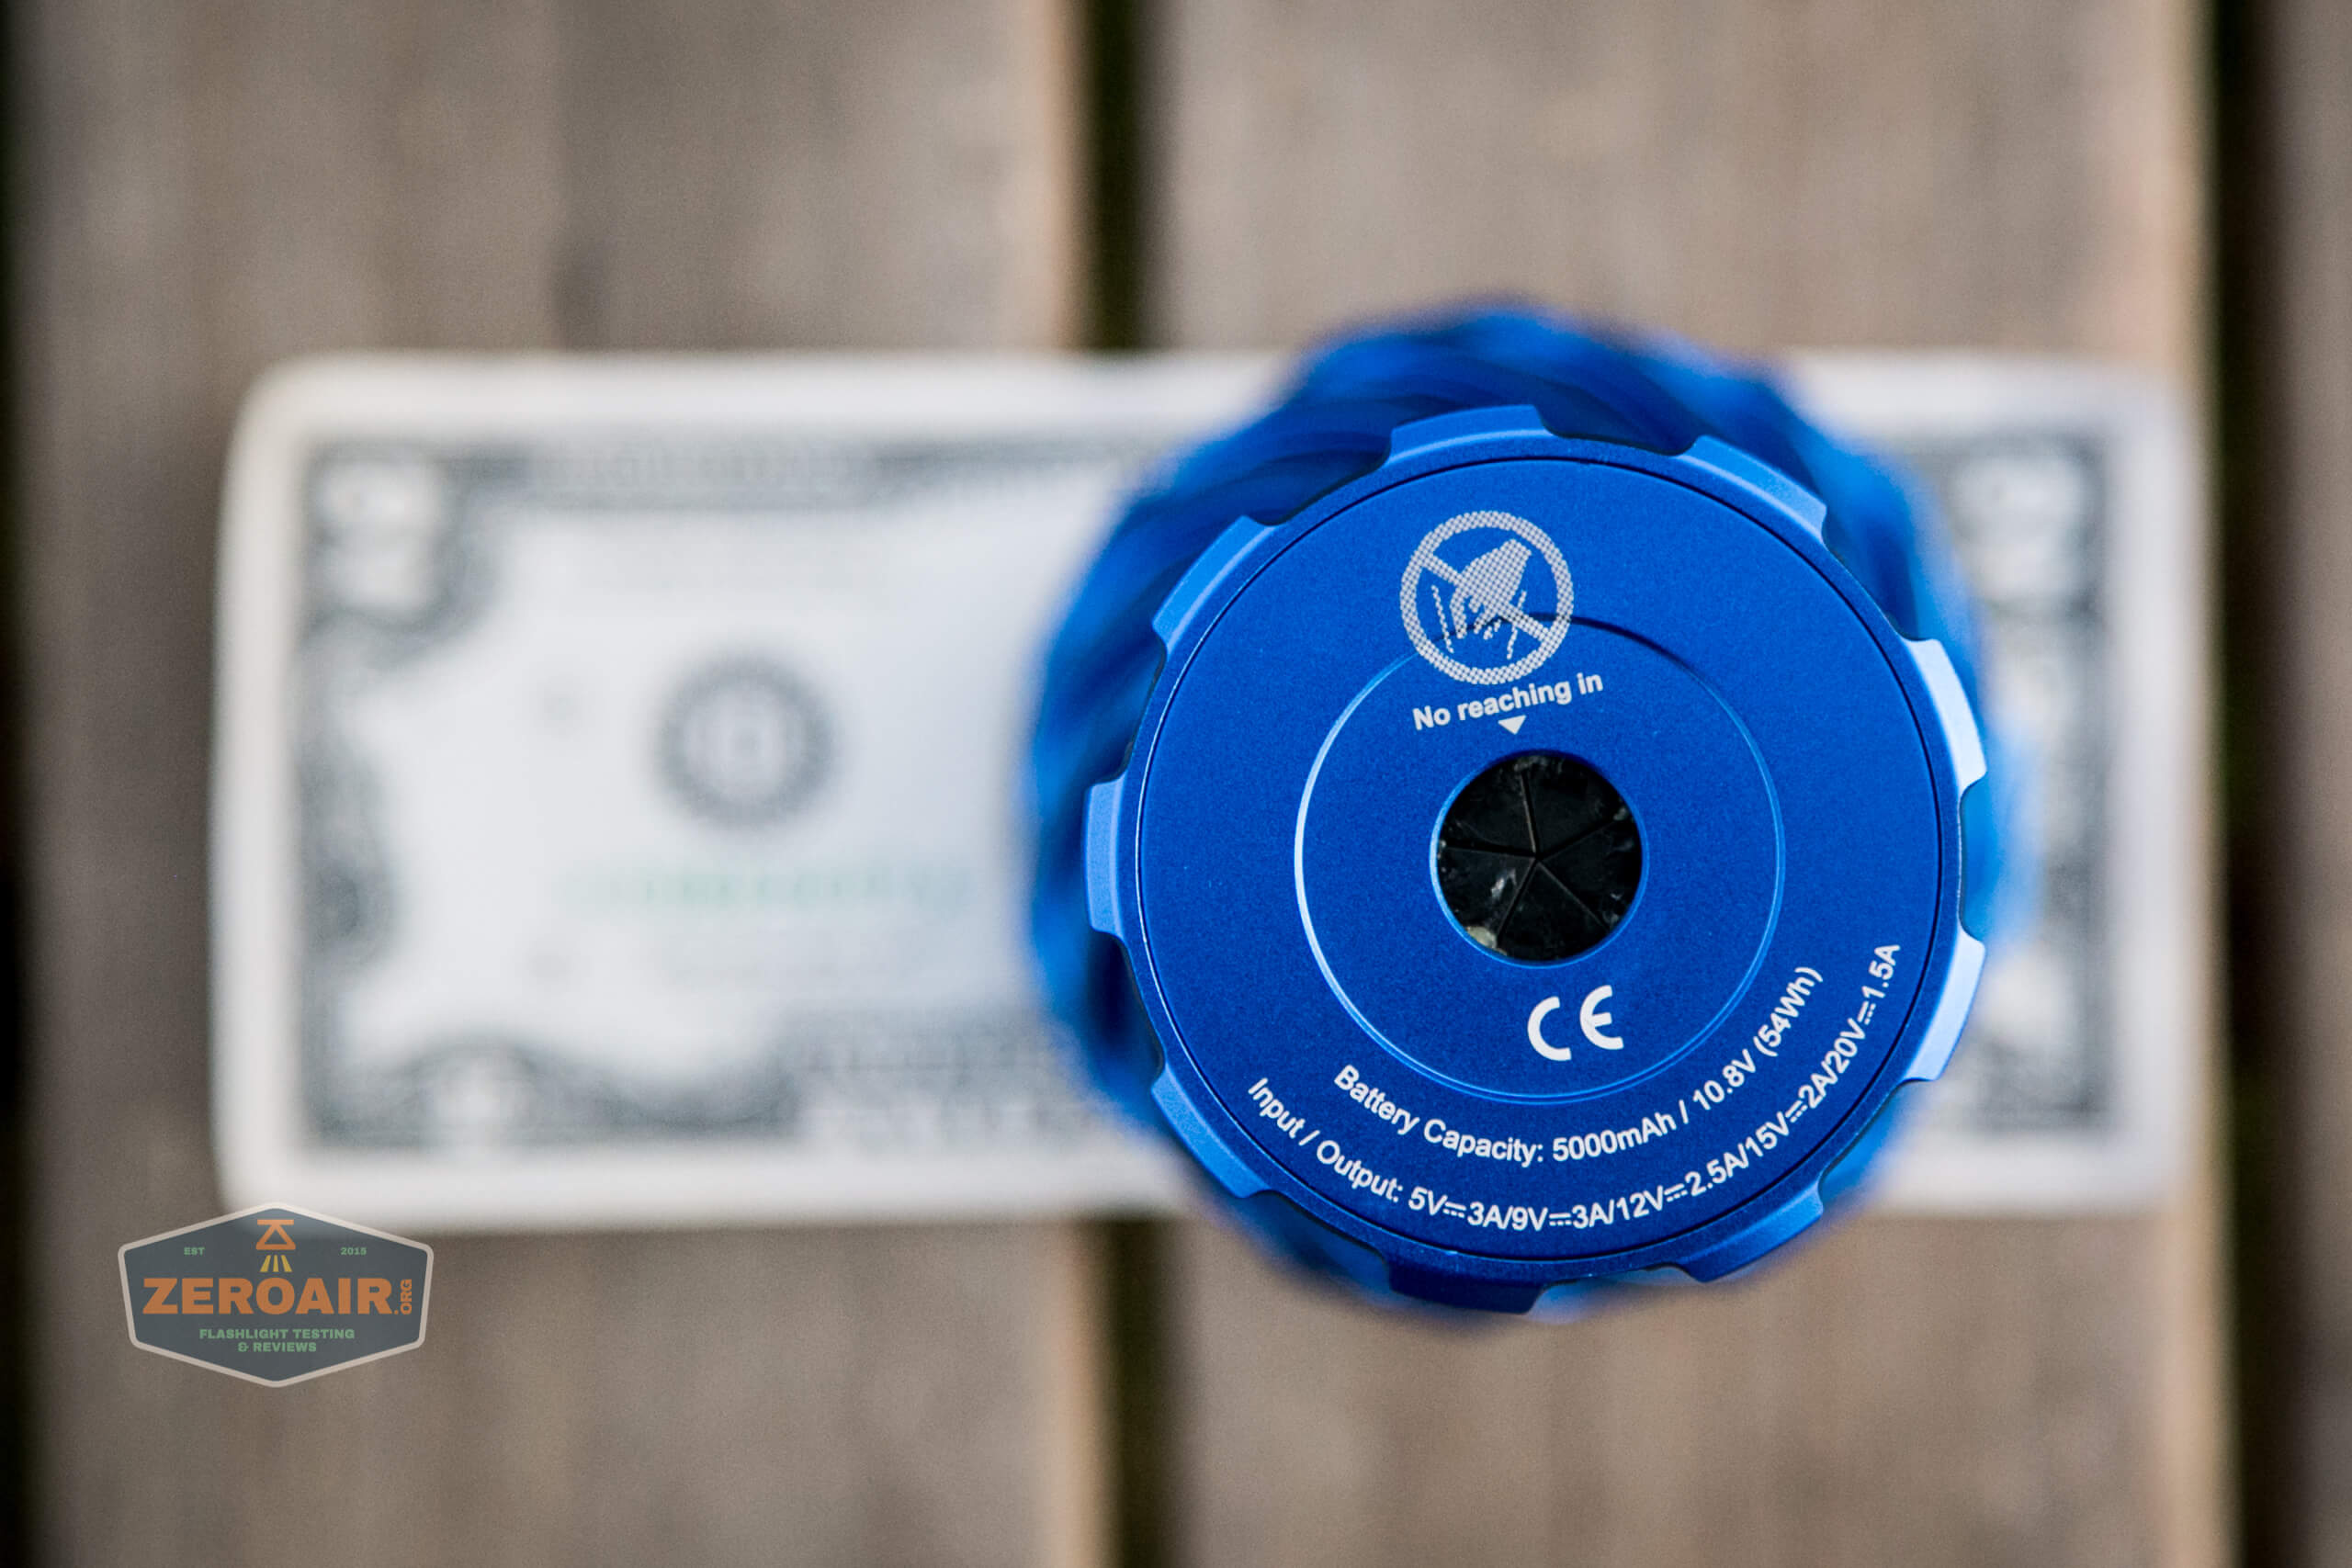
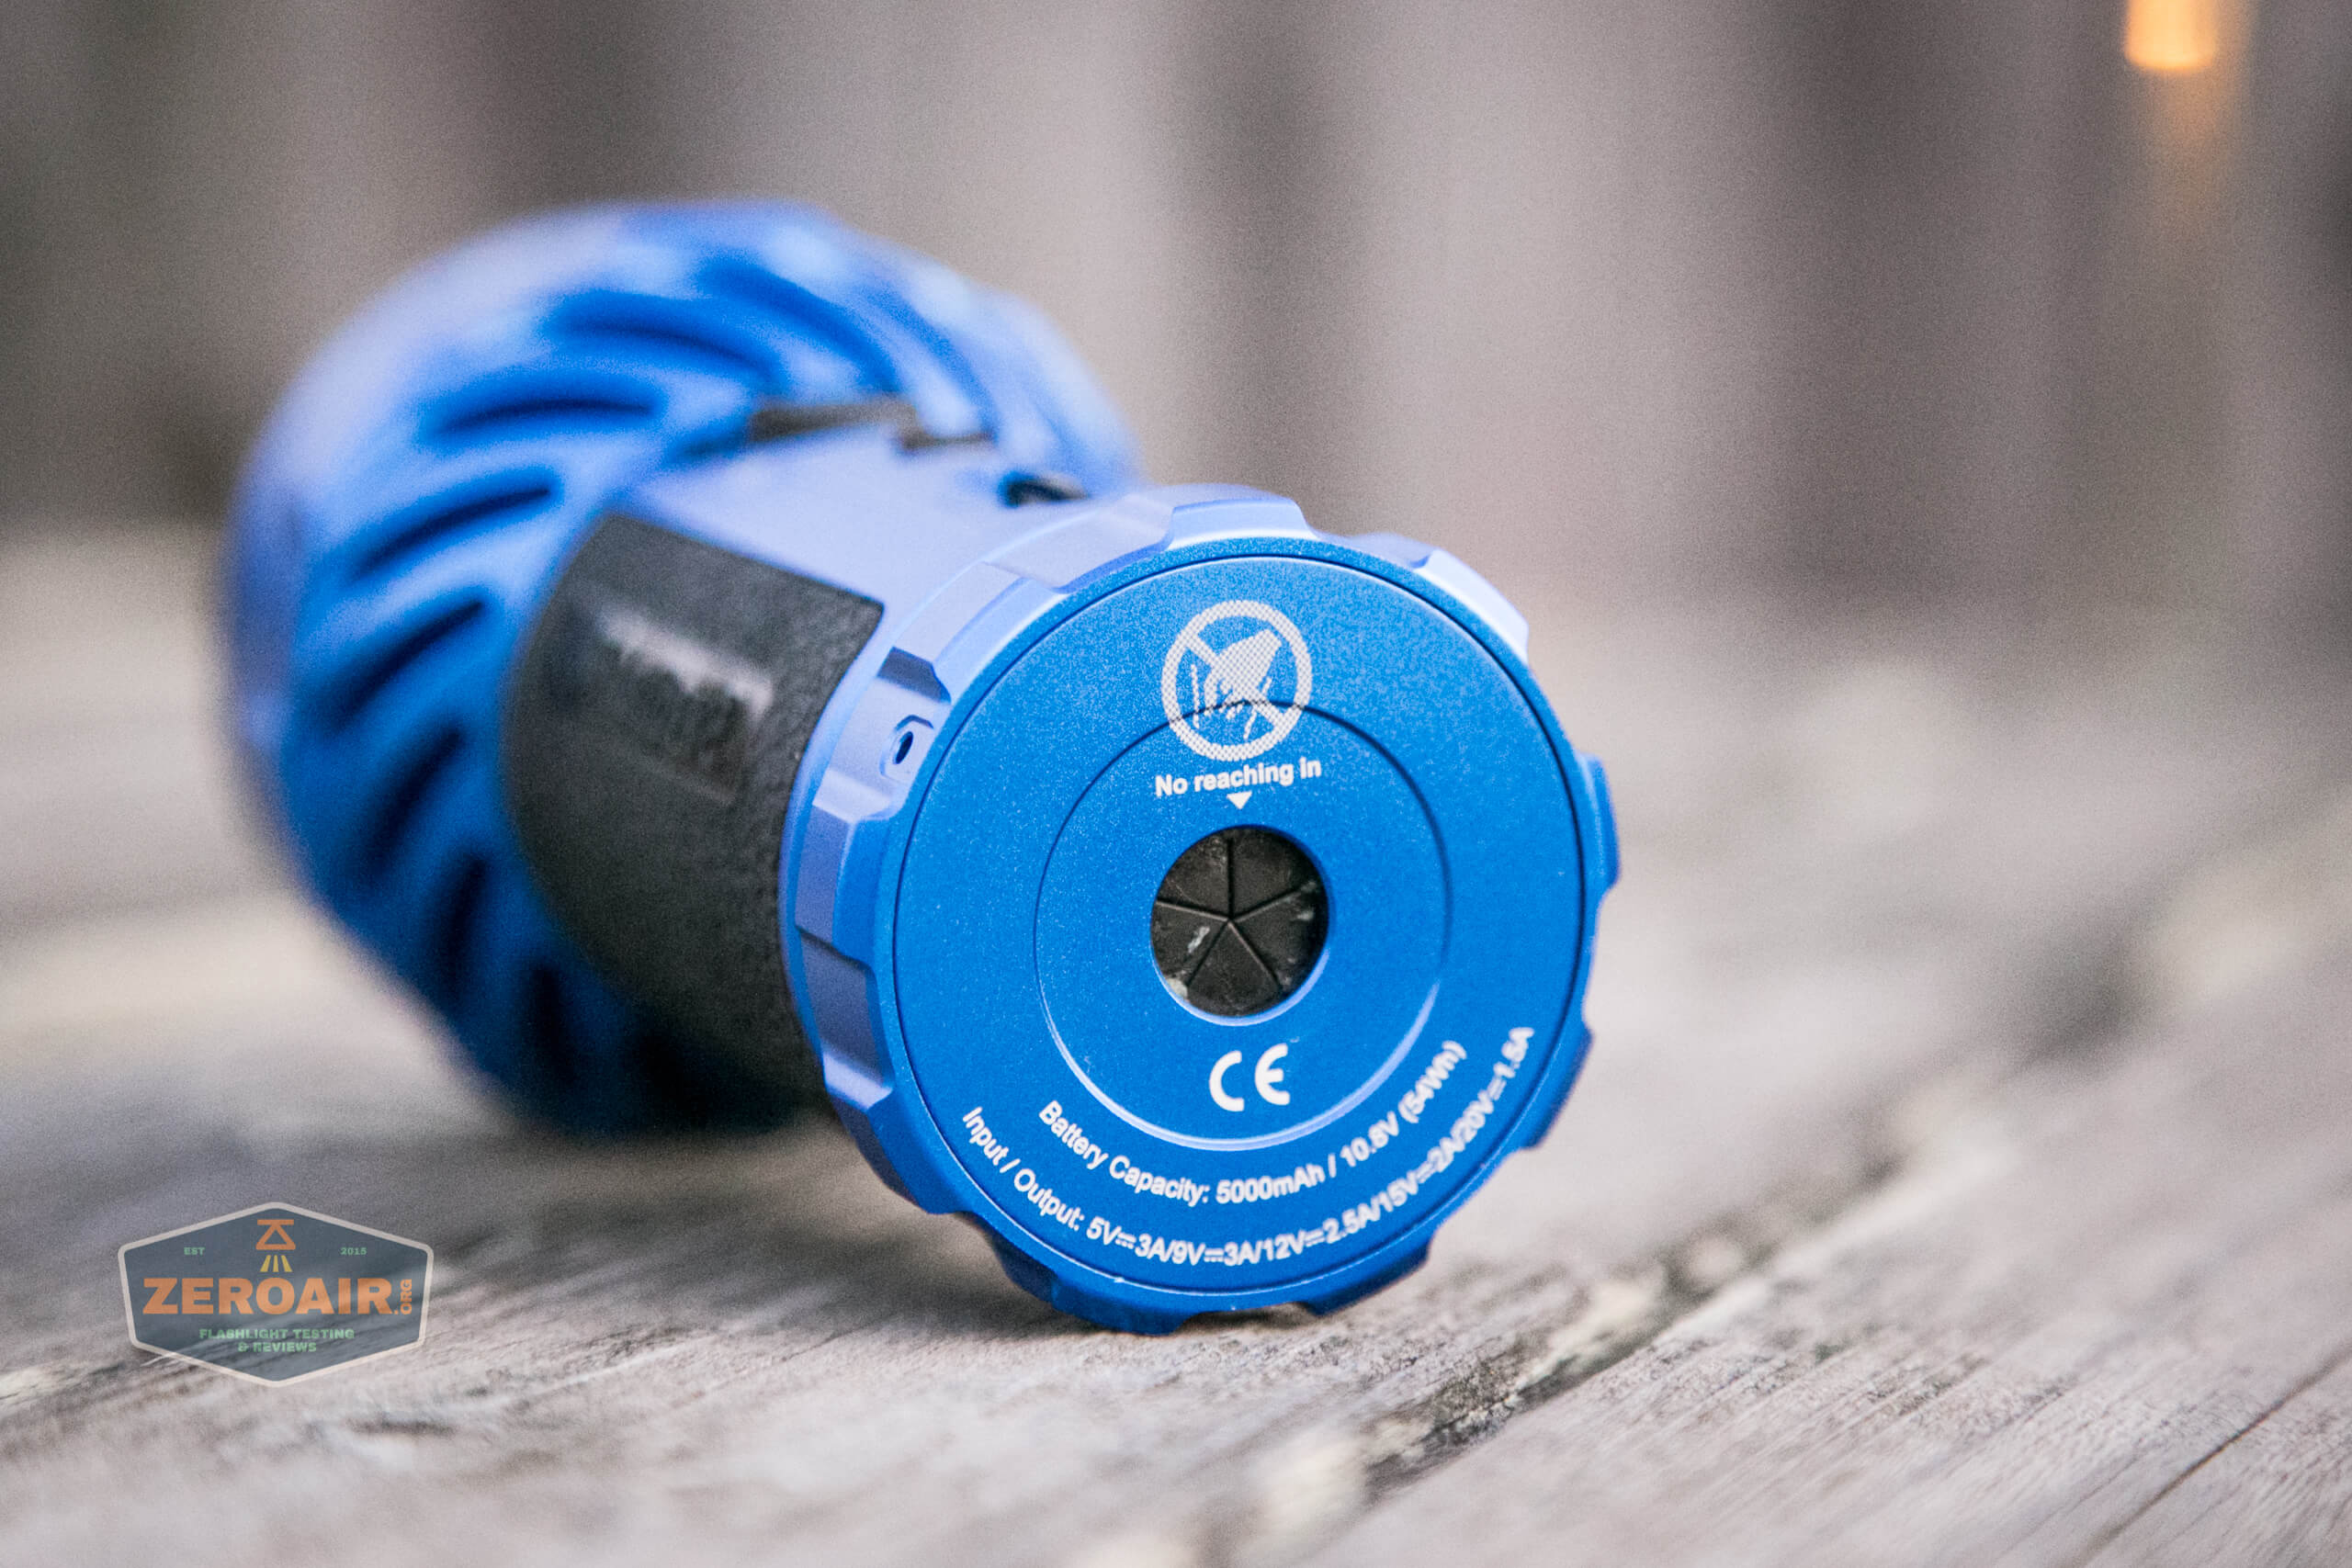
At the end of the Olight Marauder 2 Blue is all this printing, which details the battery that’s built in, and other aspects.
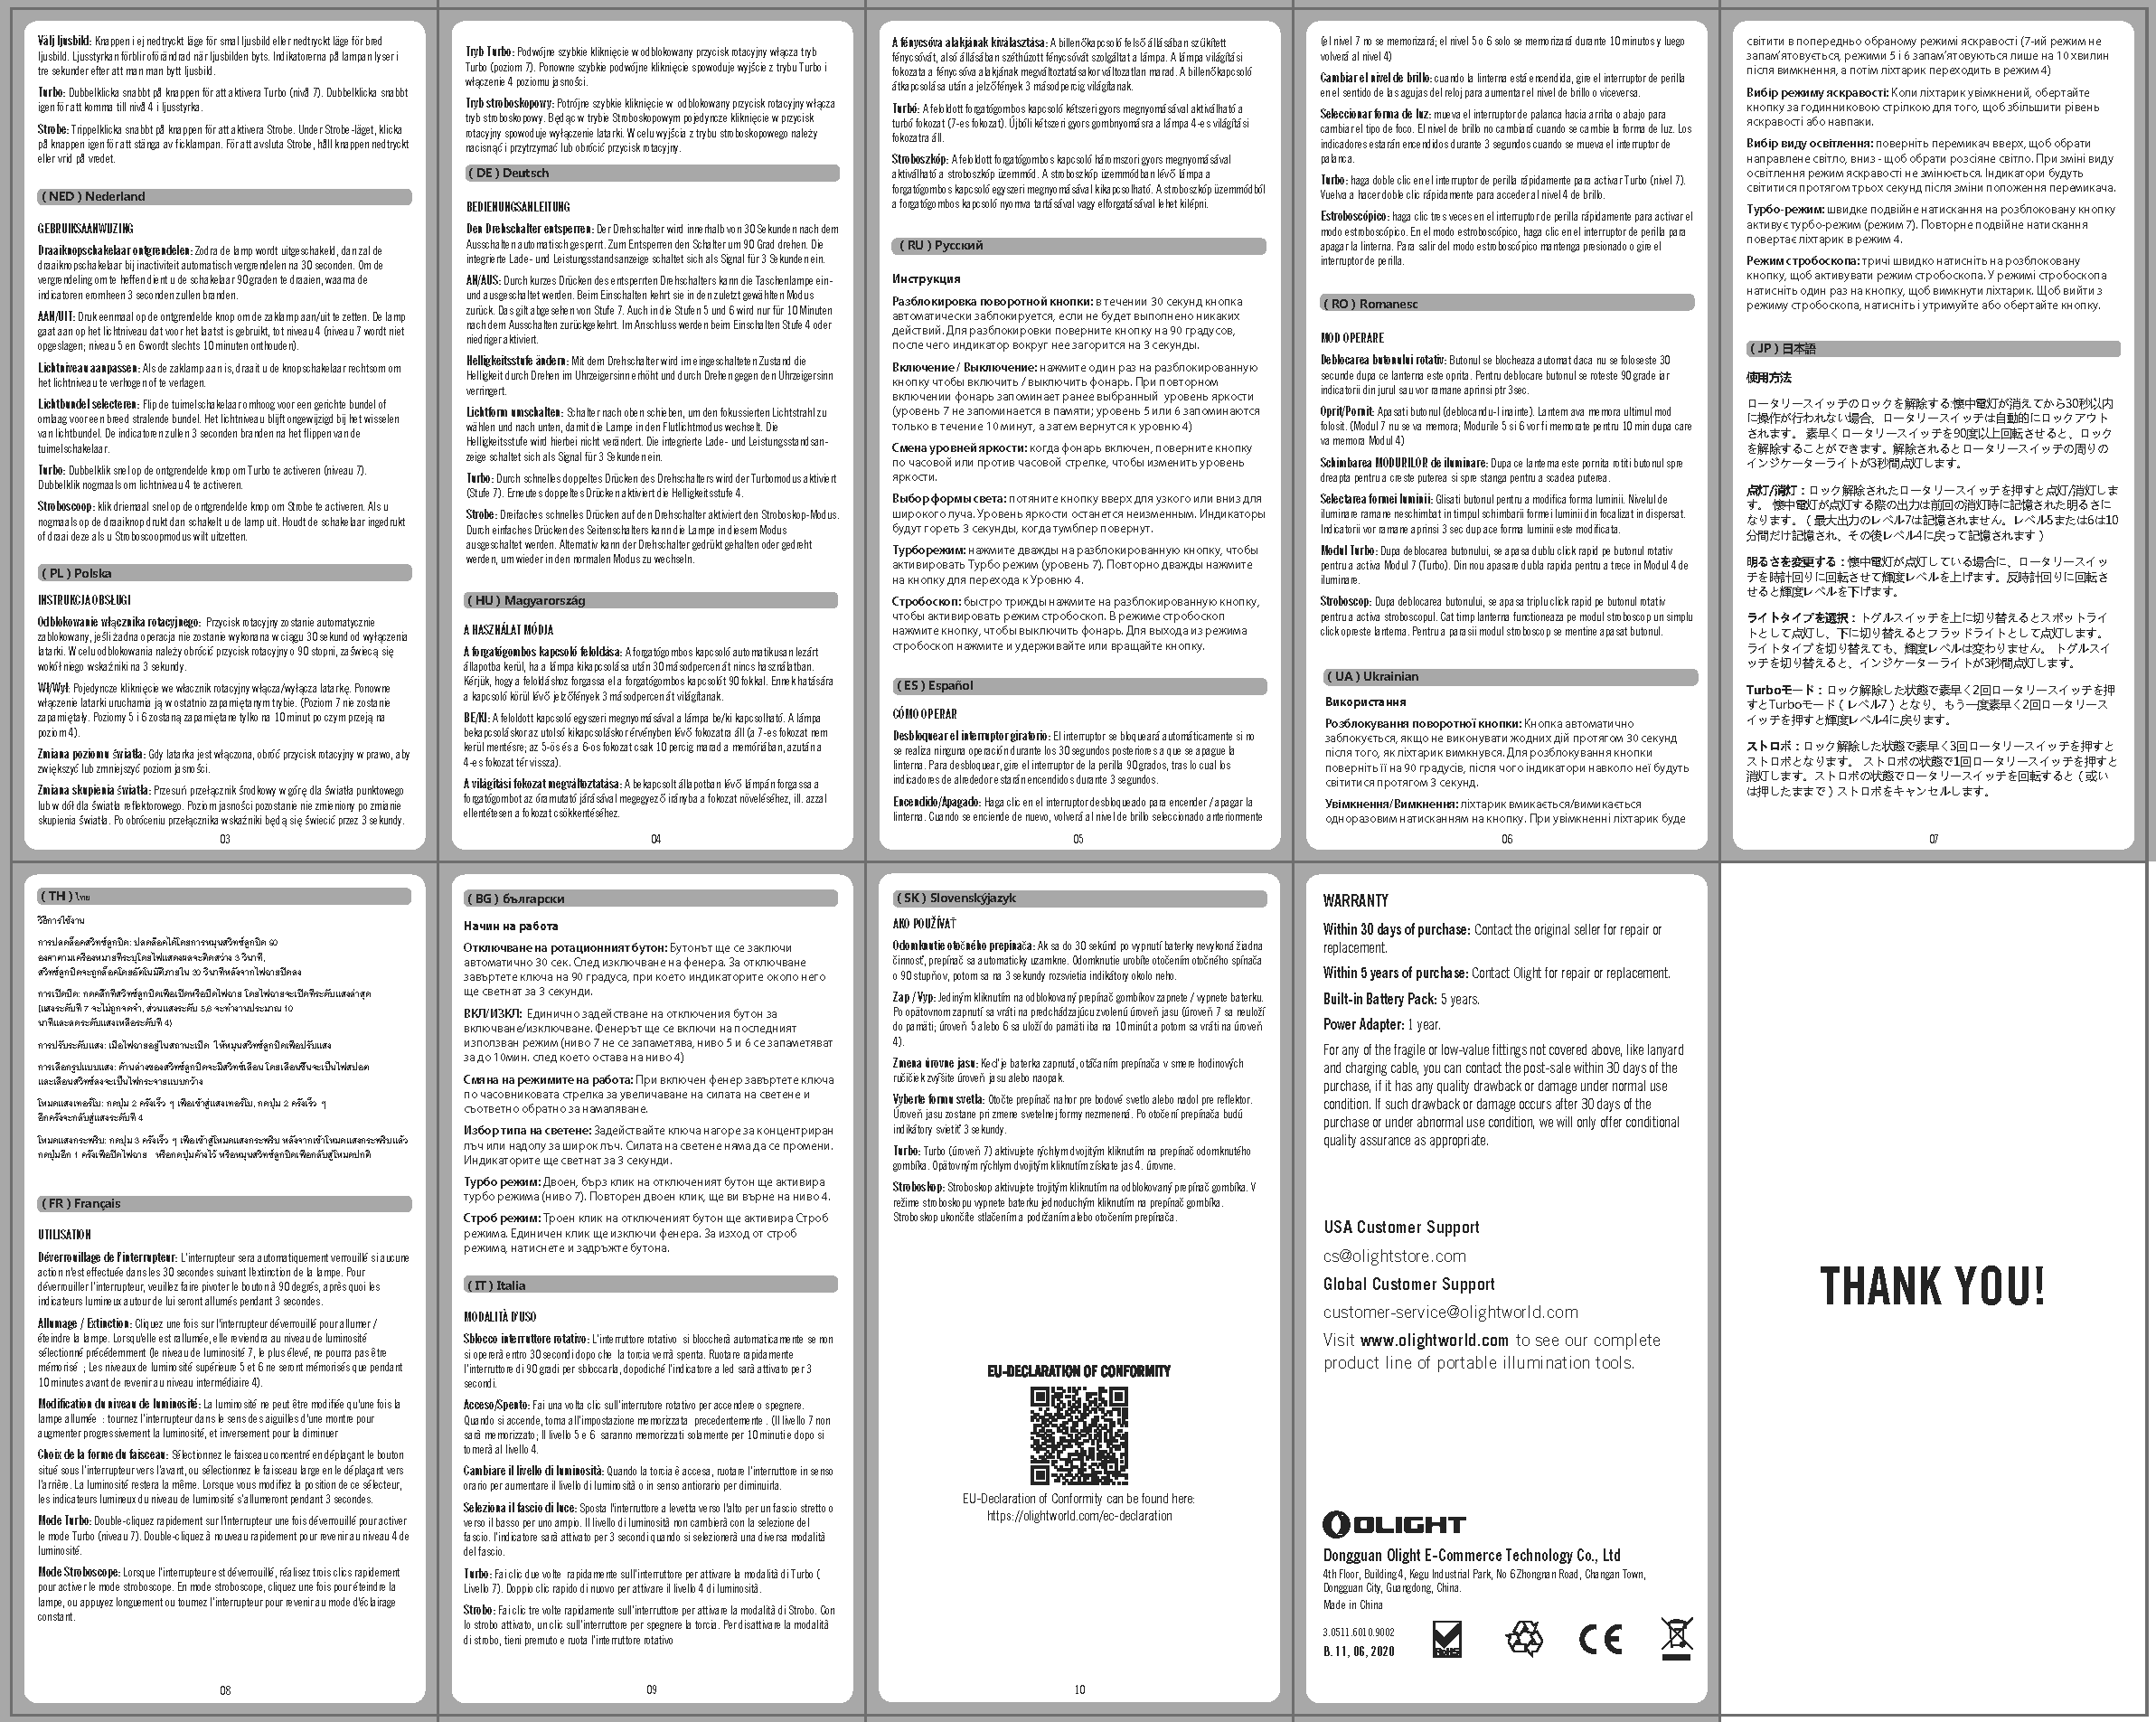
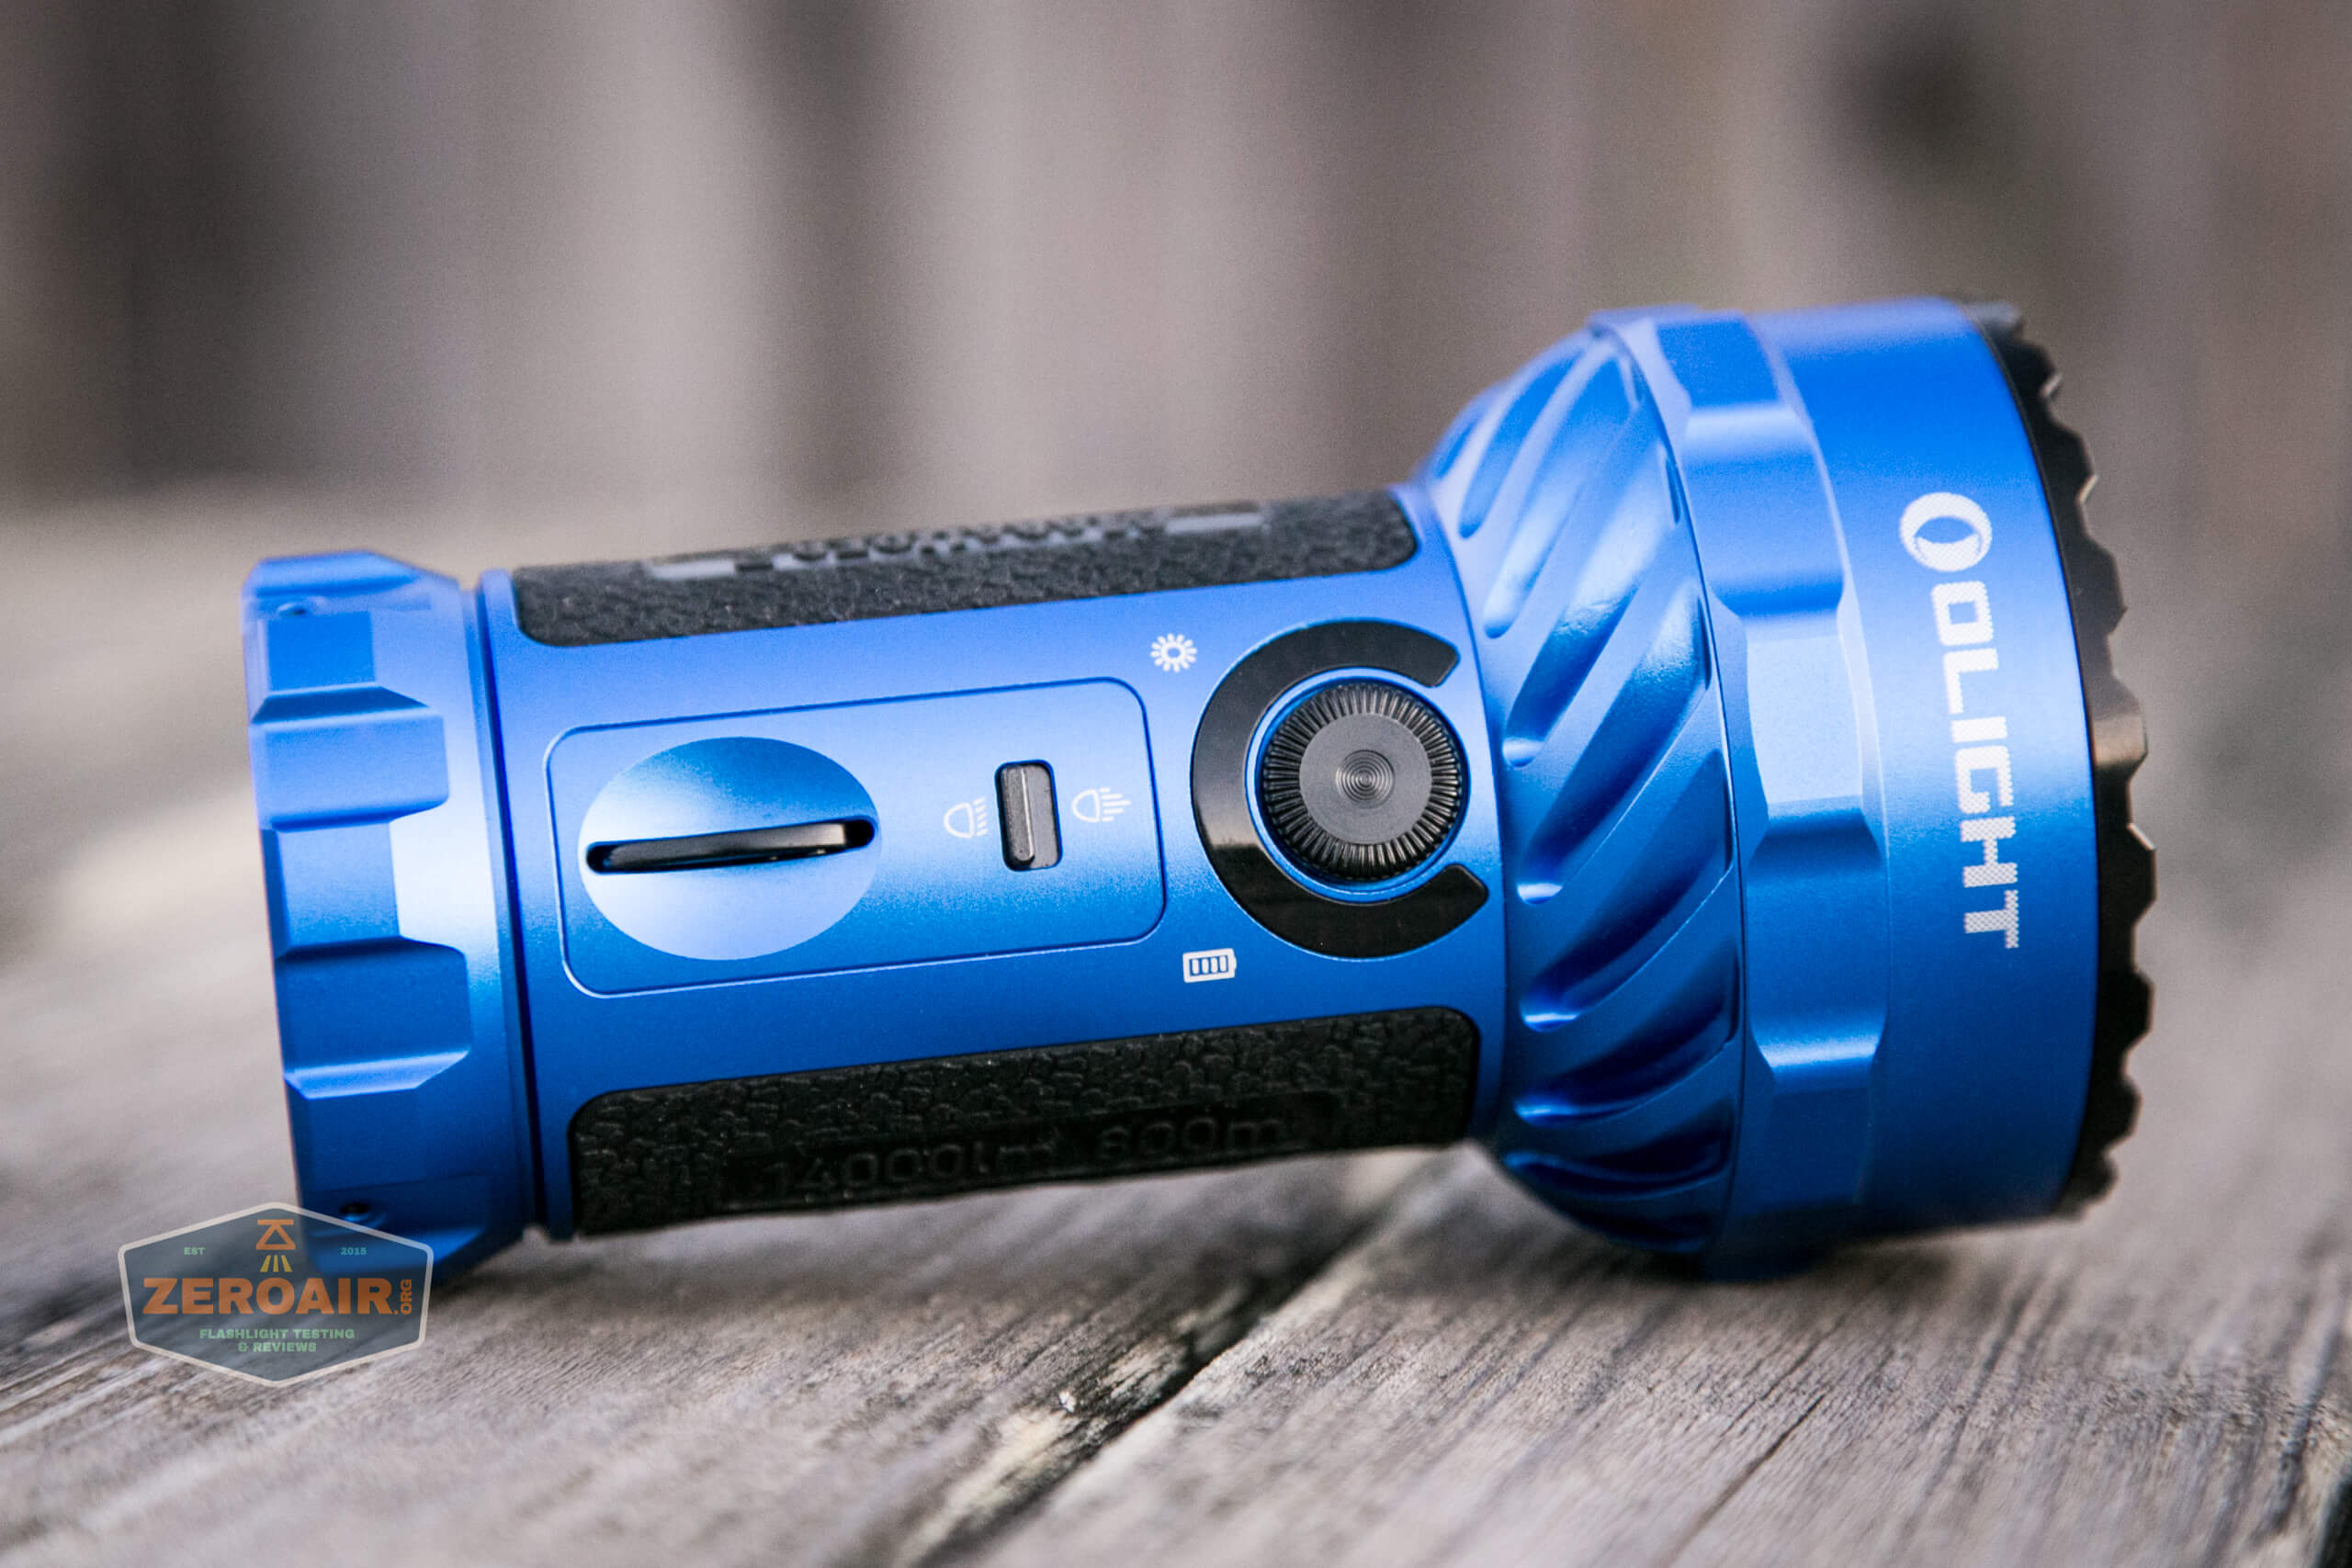
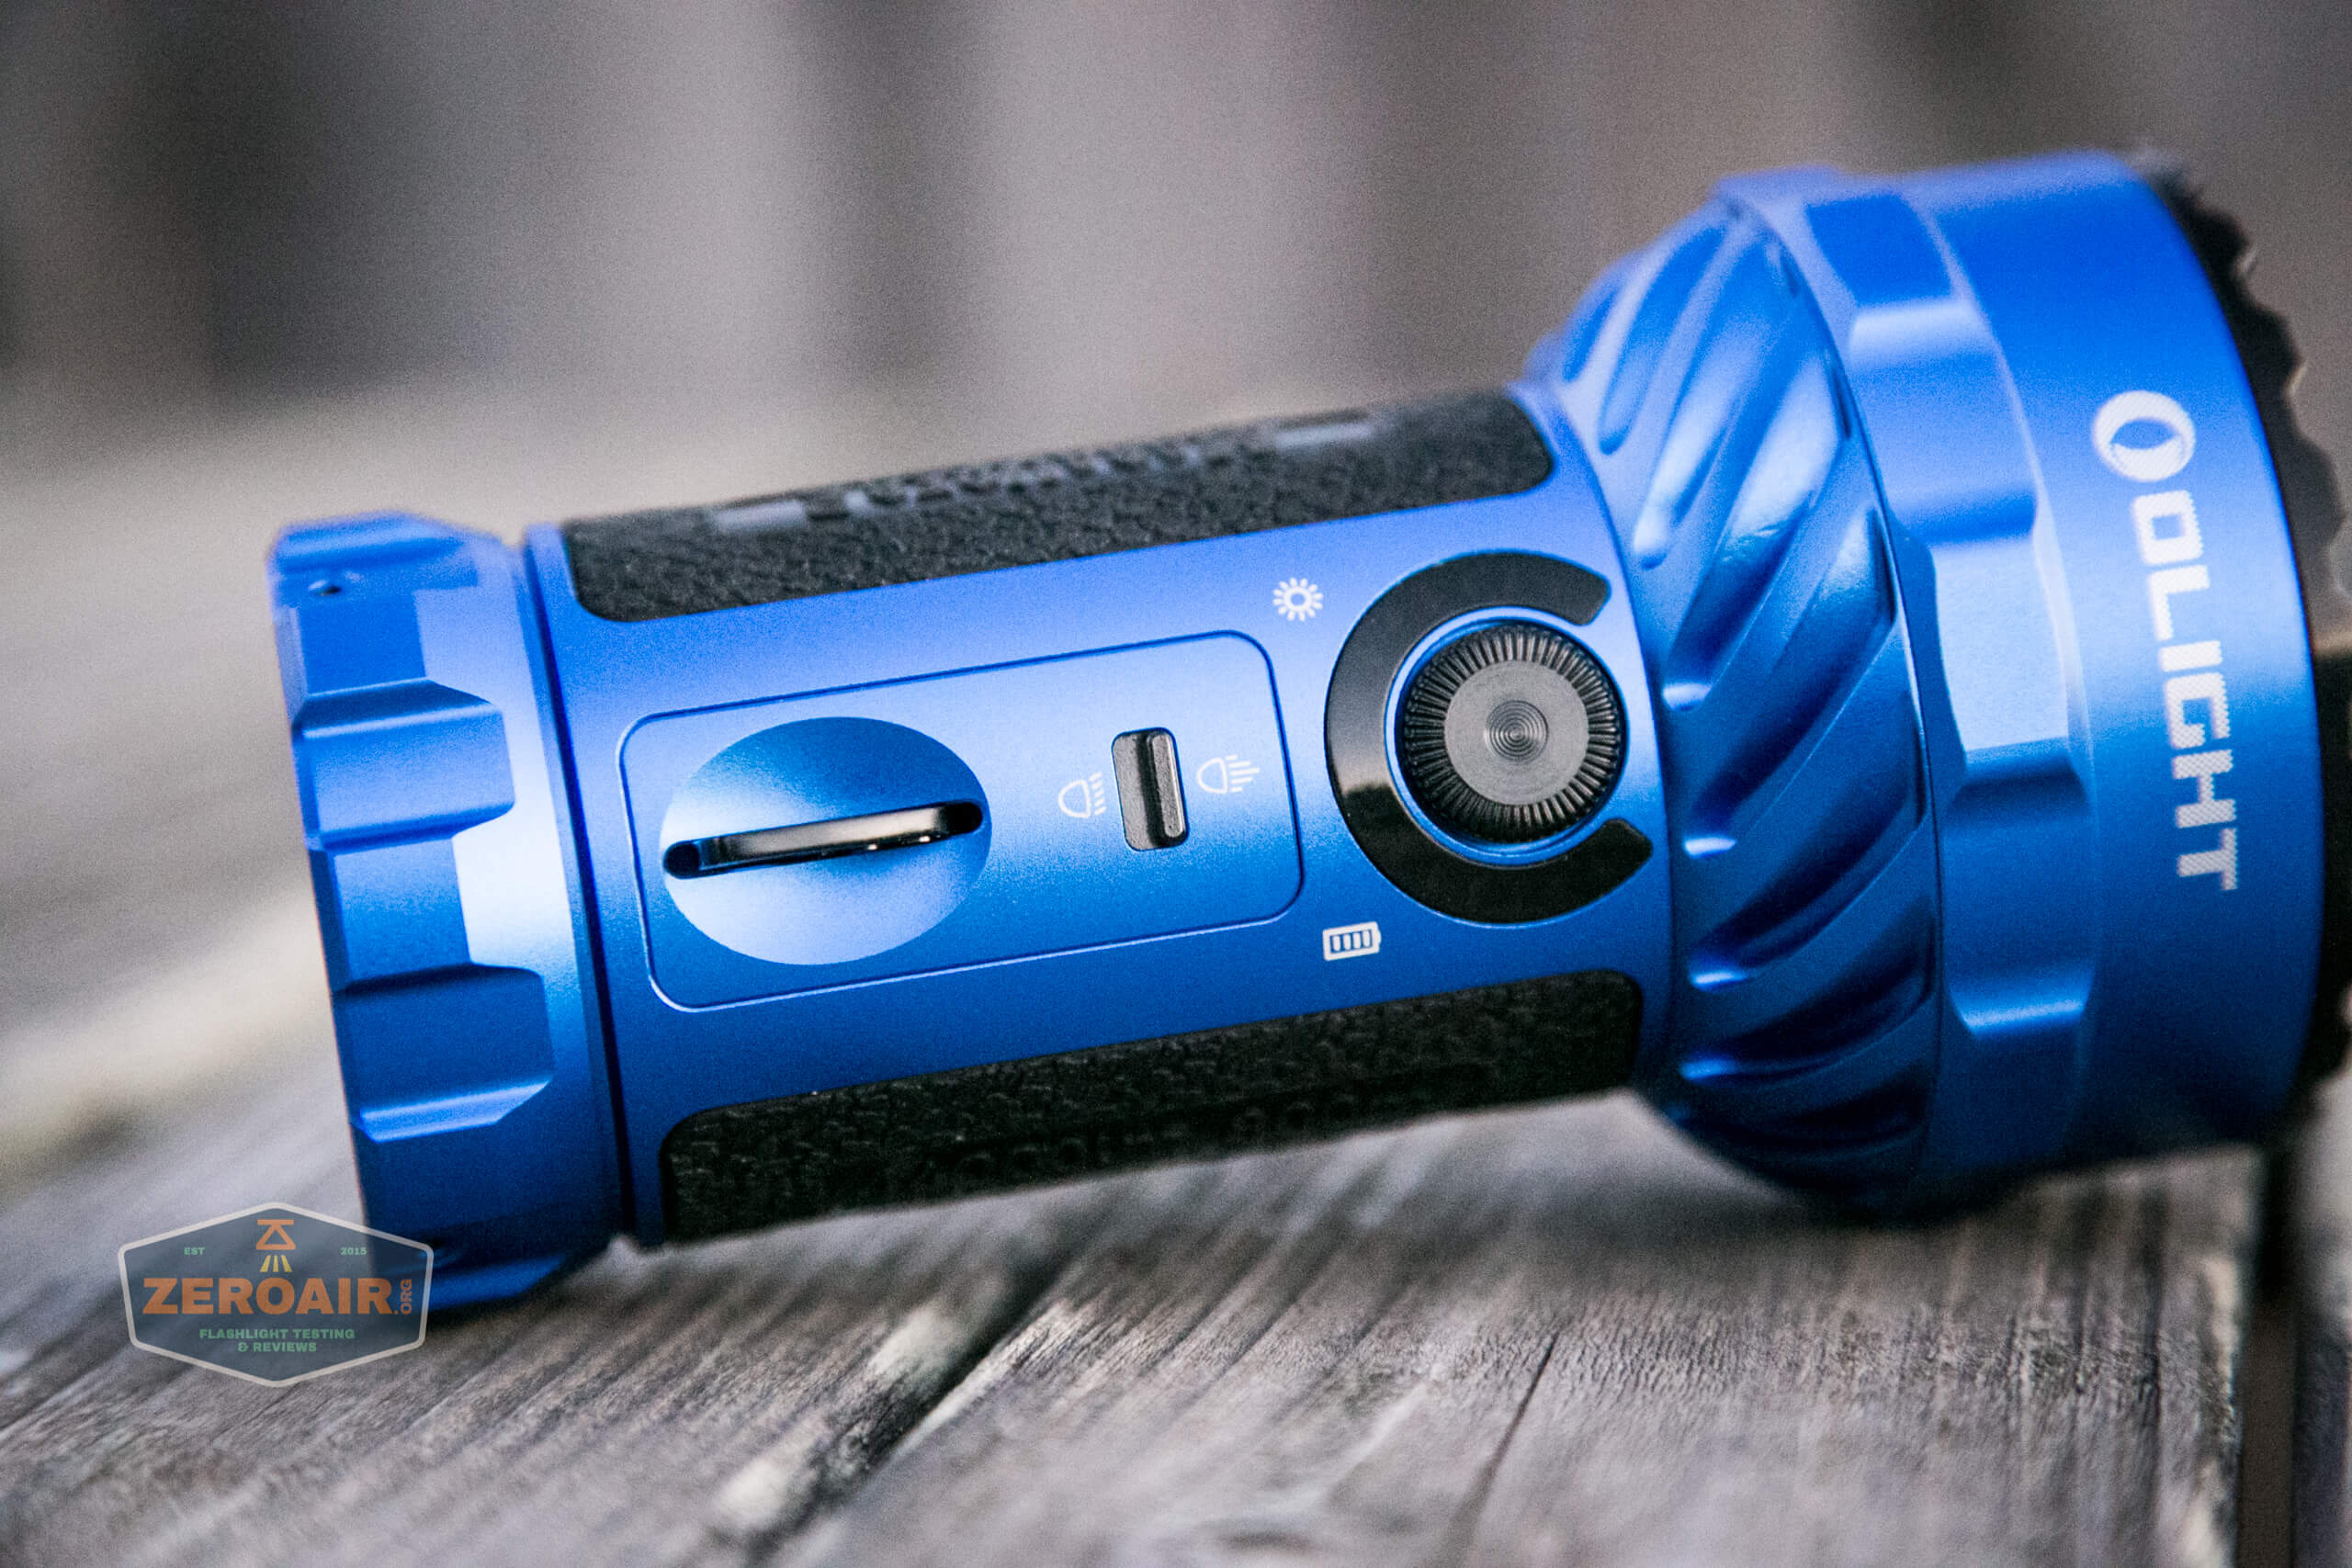
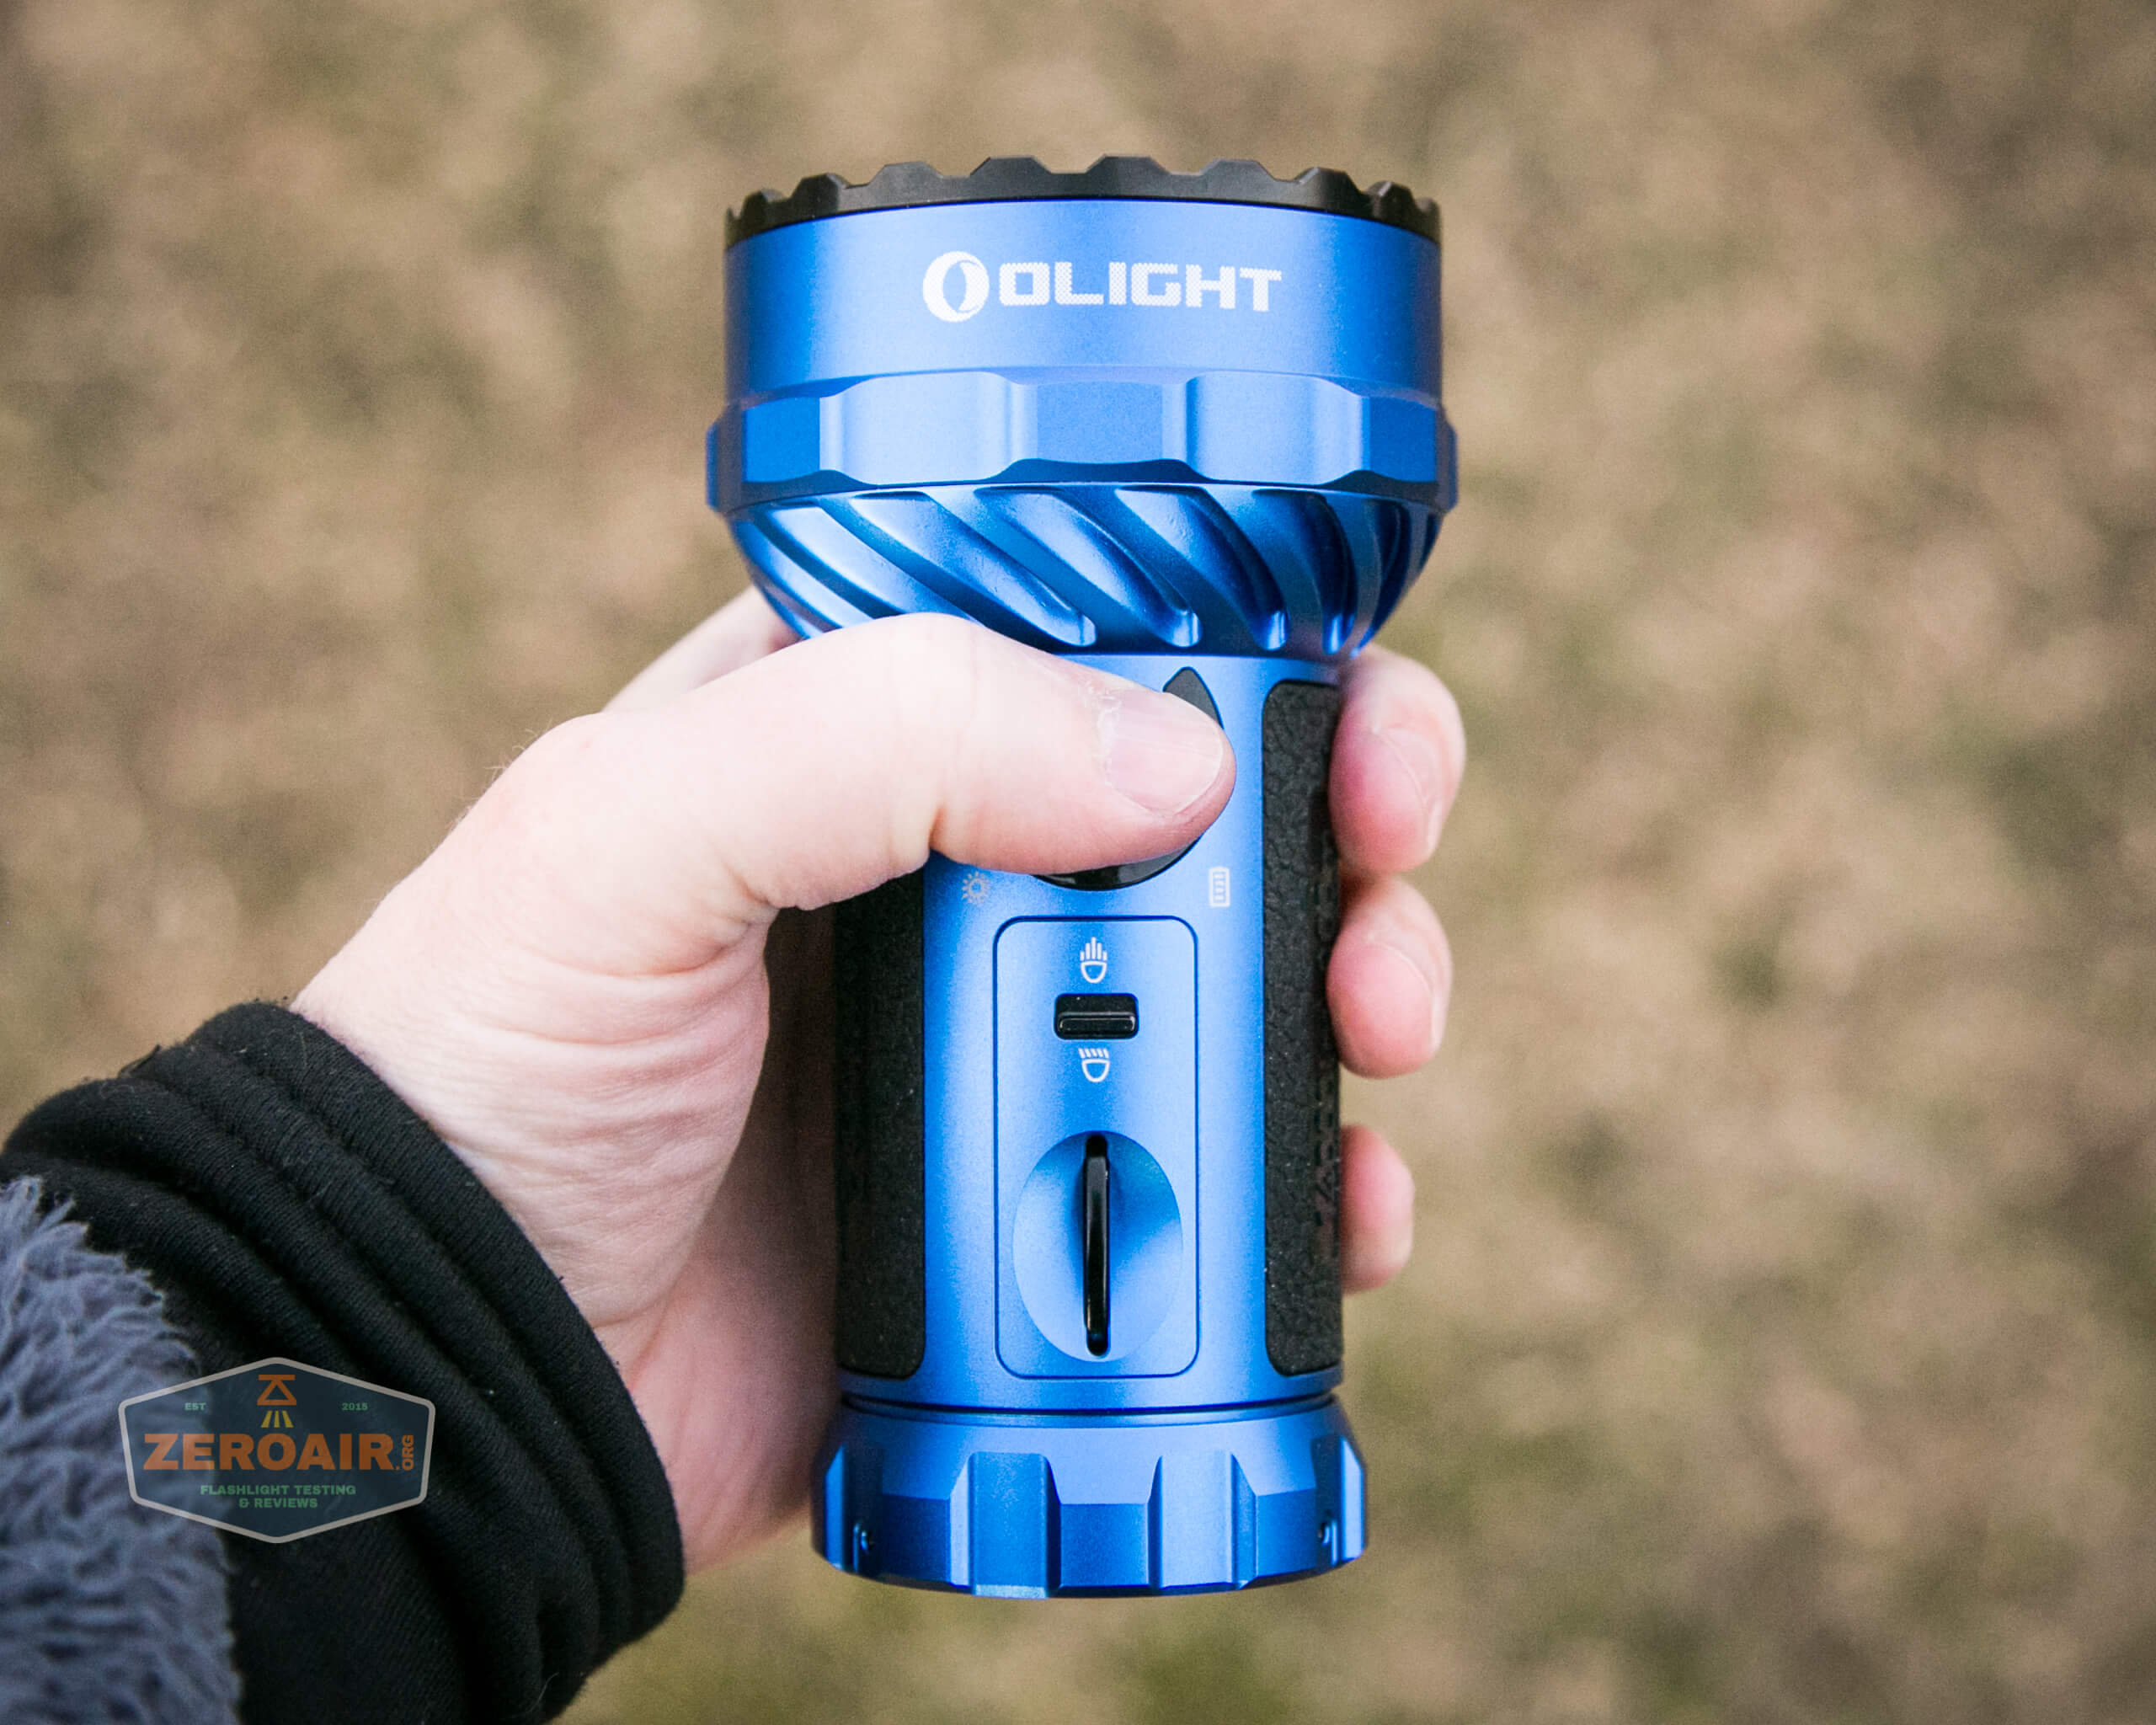
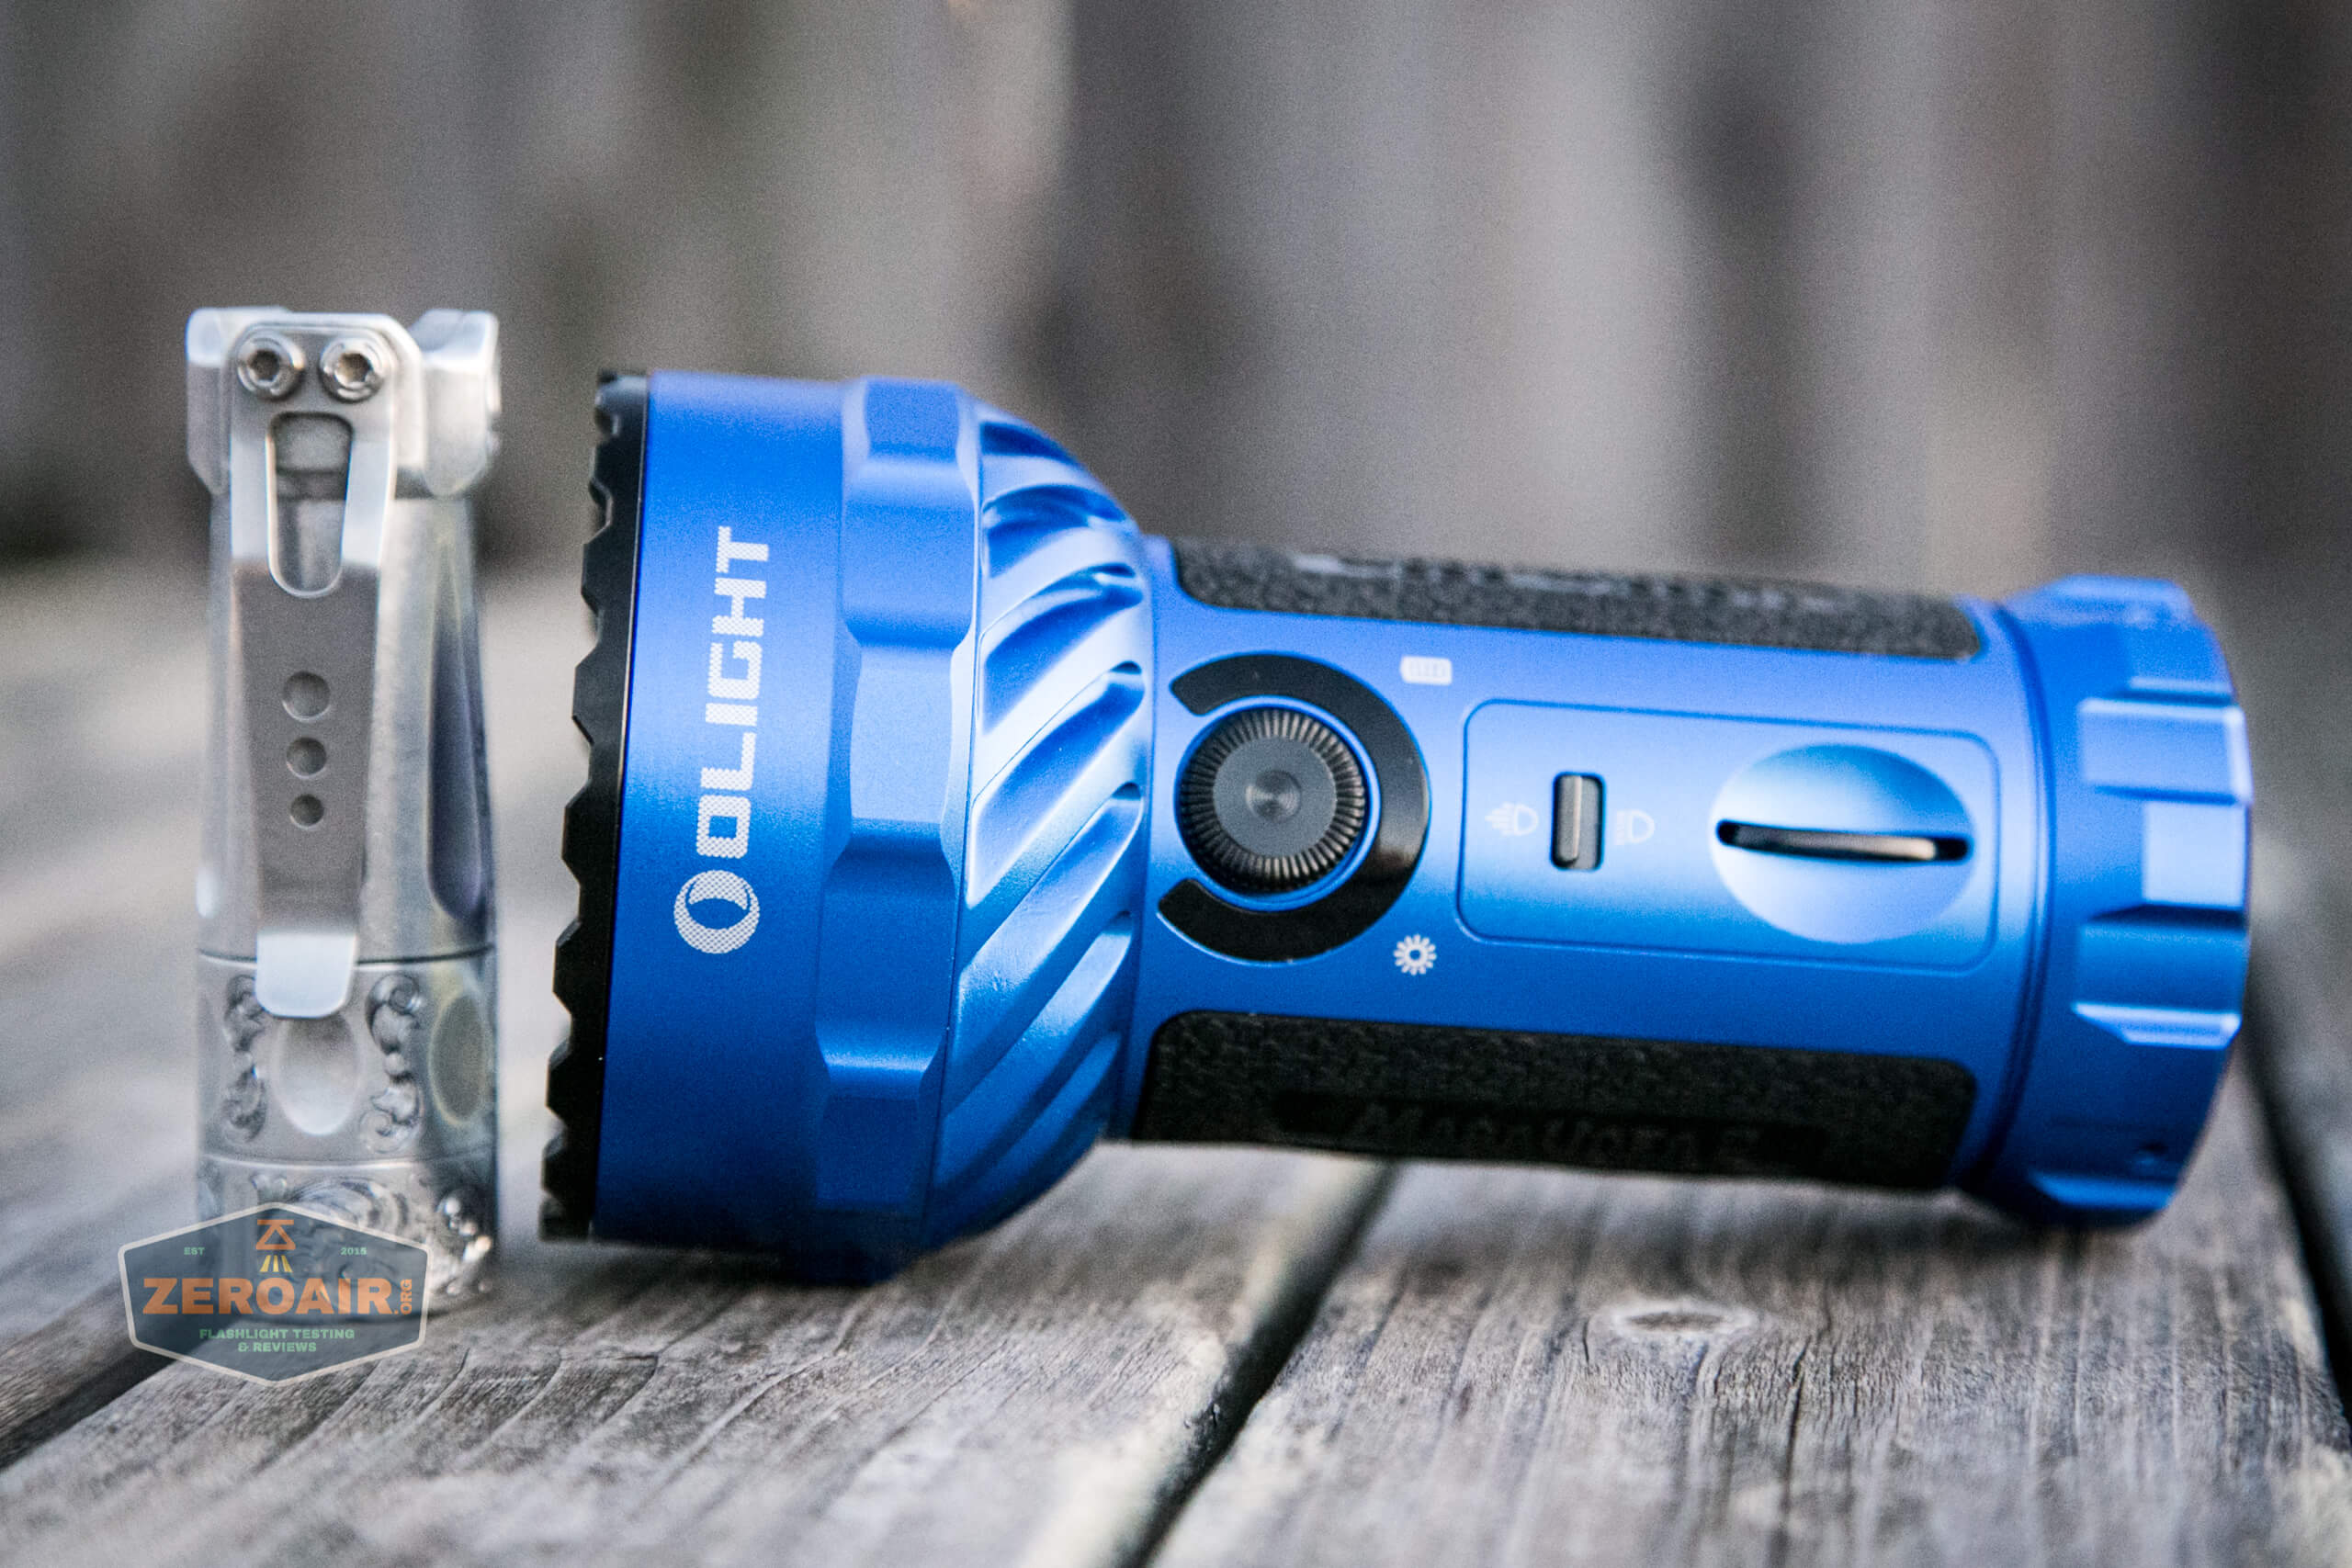
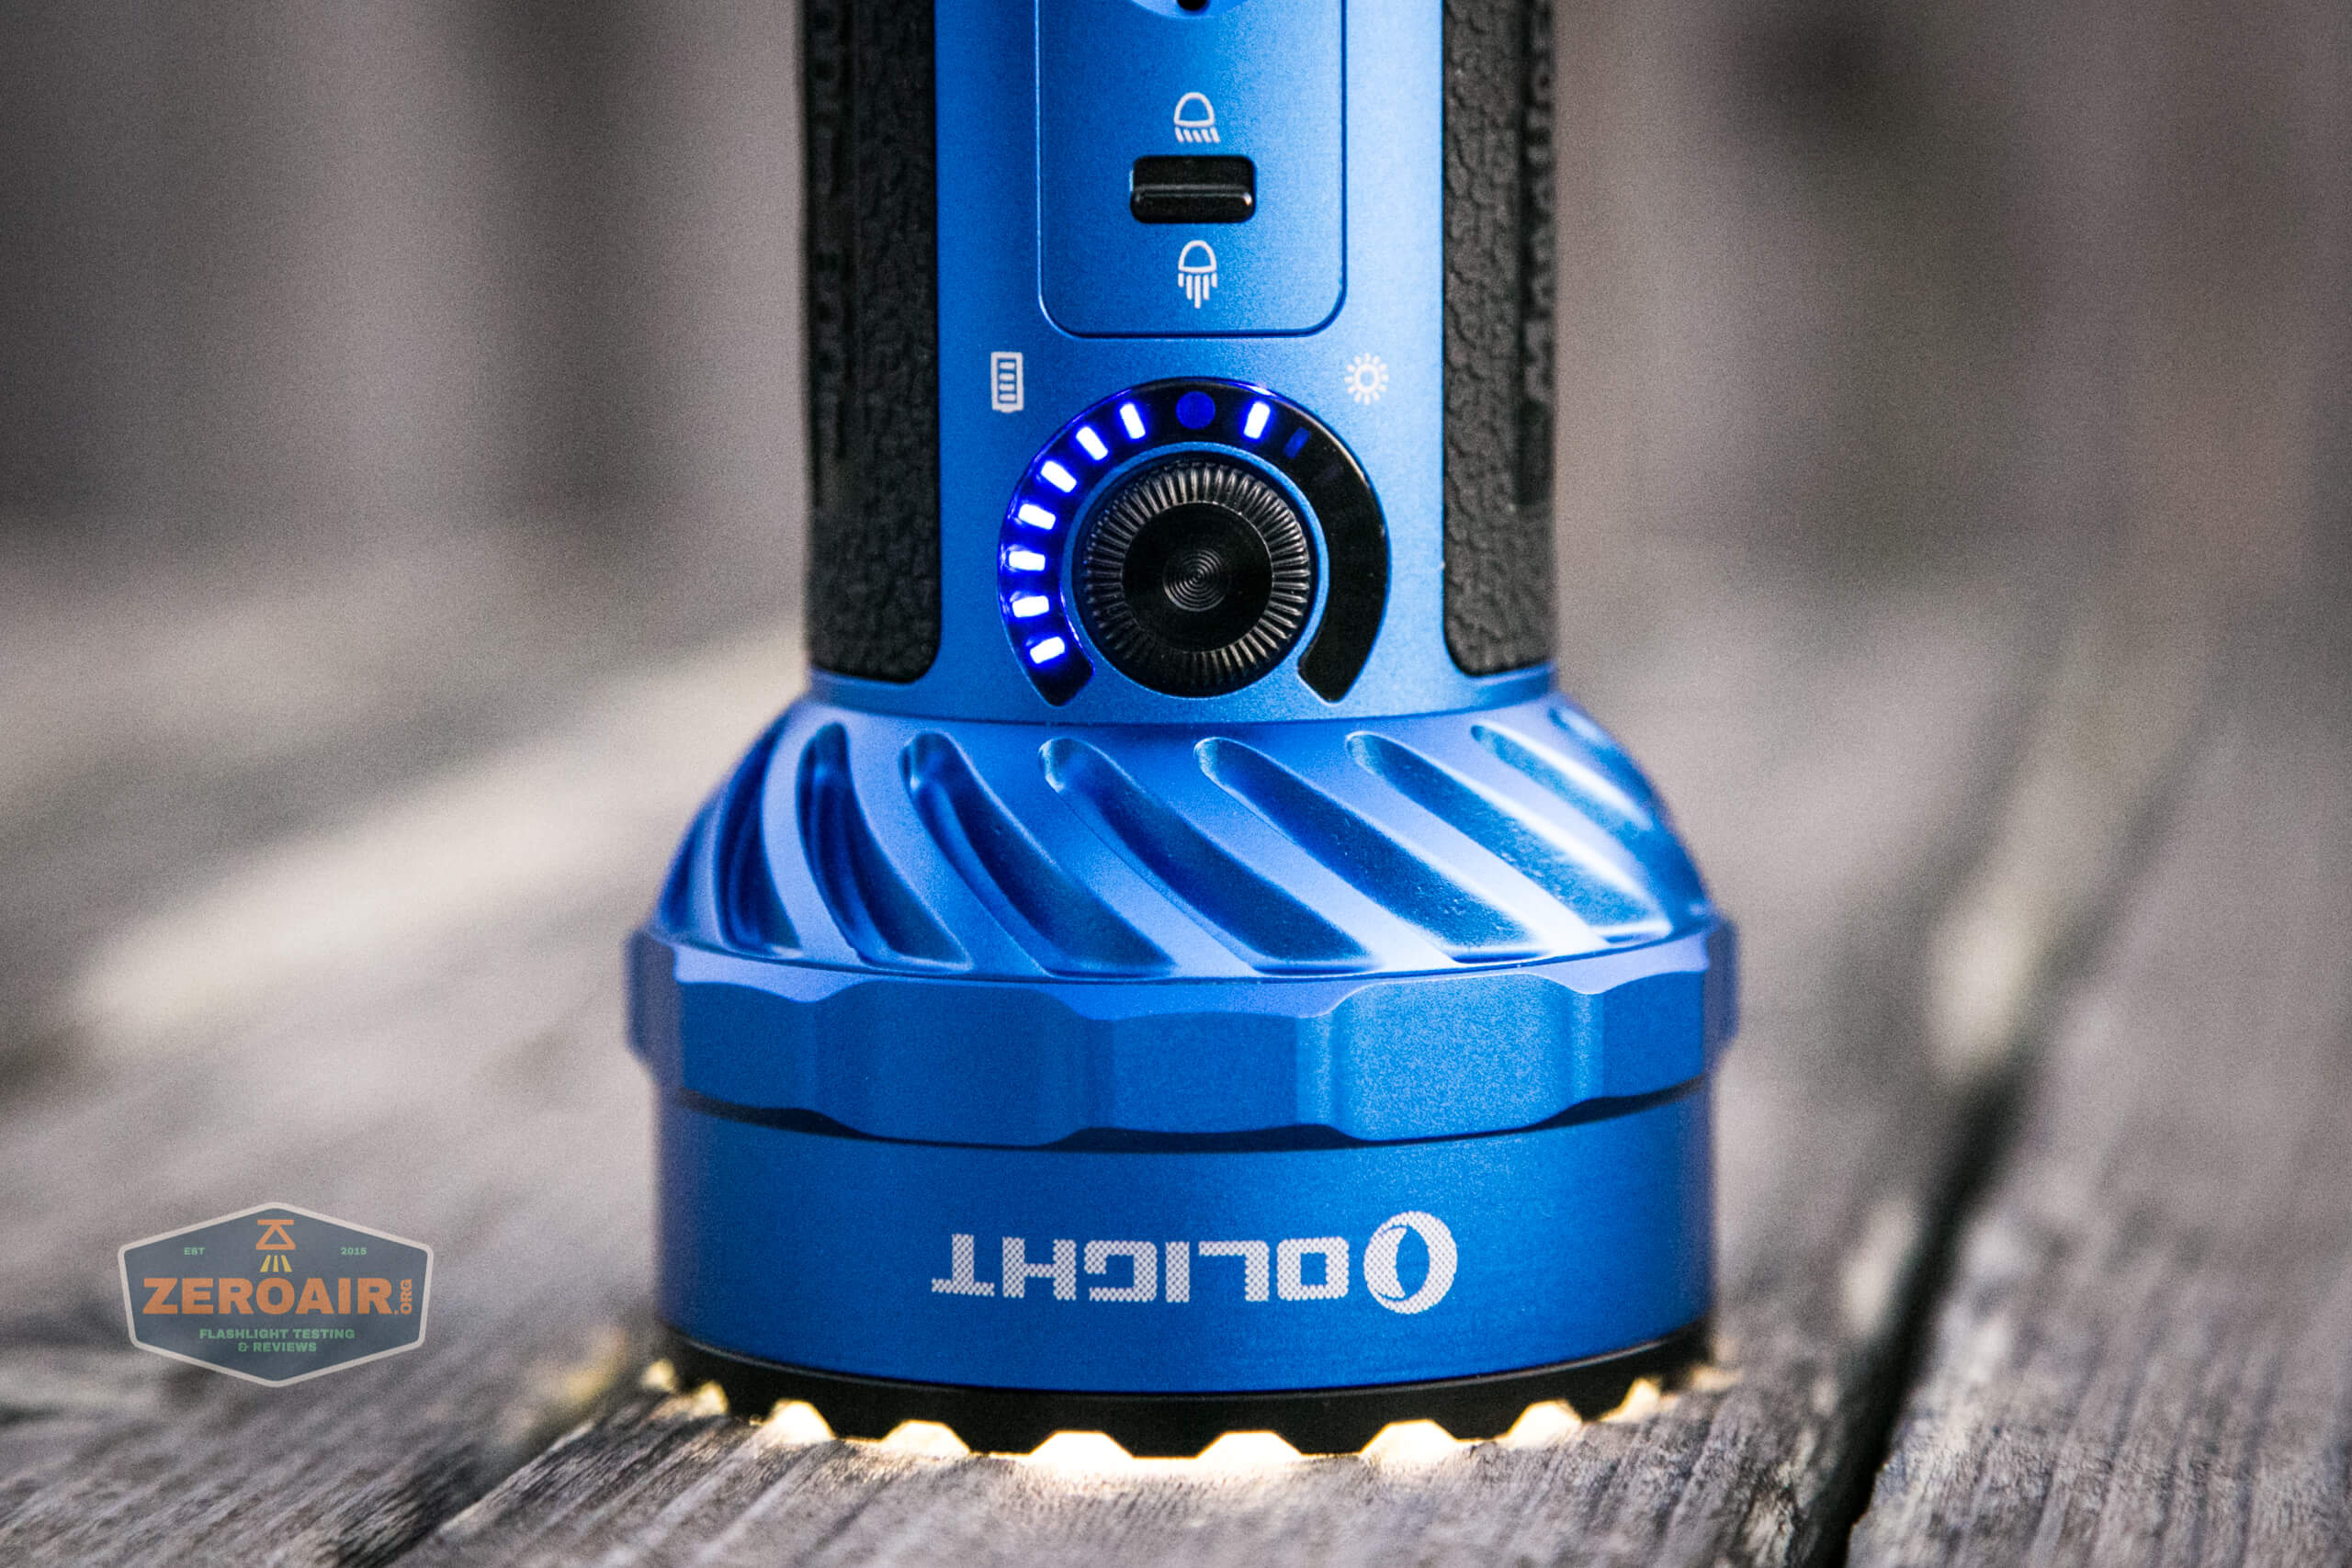
More about these switches later, but first, just check out the novelty. There’s a rotary switch for controlling the modes, and a flip switch that controls which emitters are on.
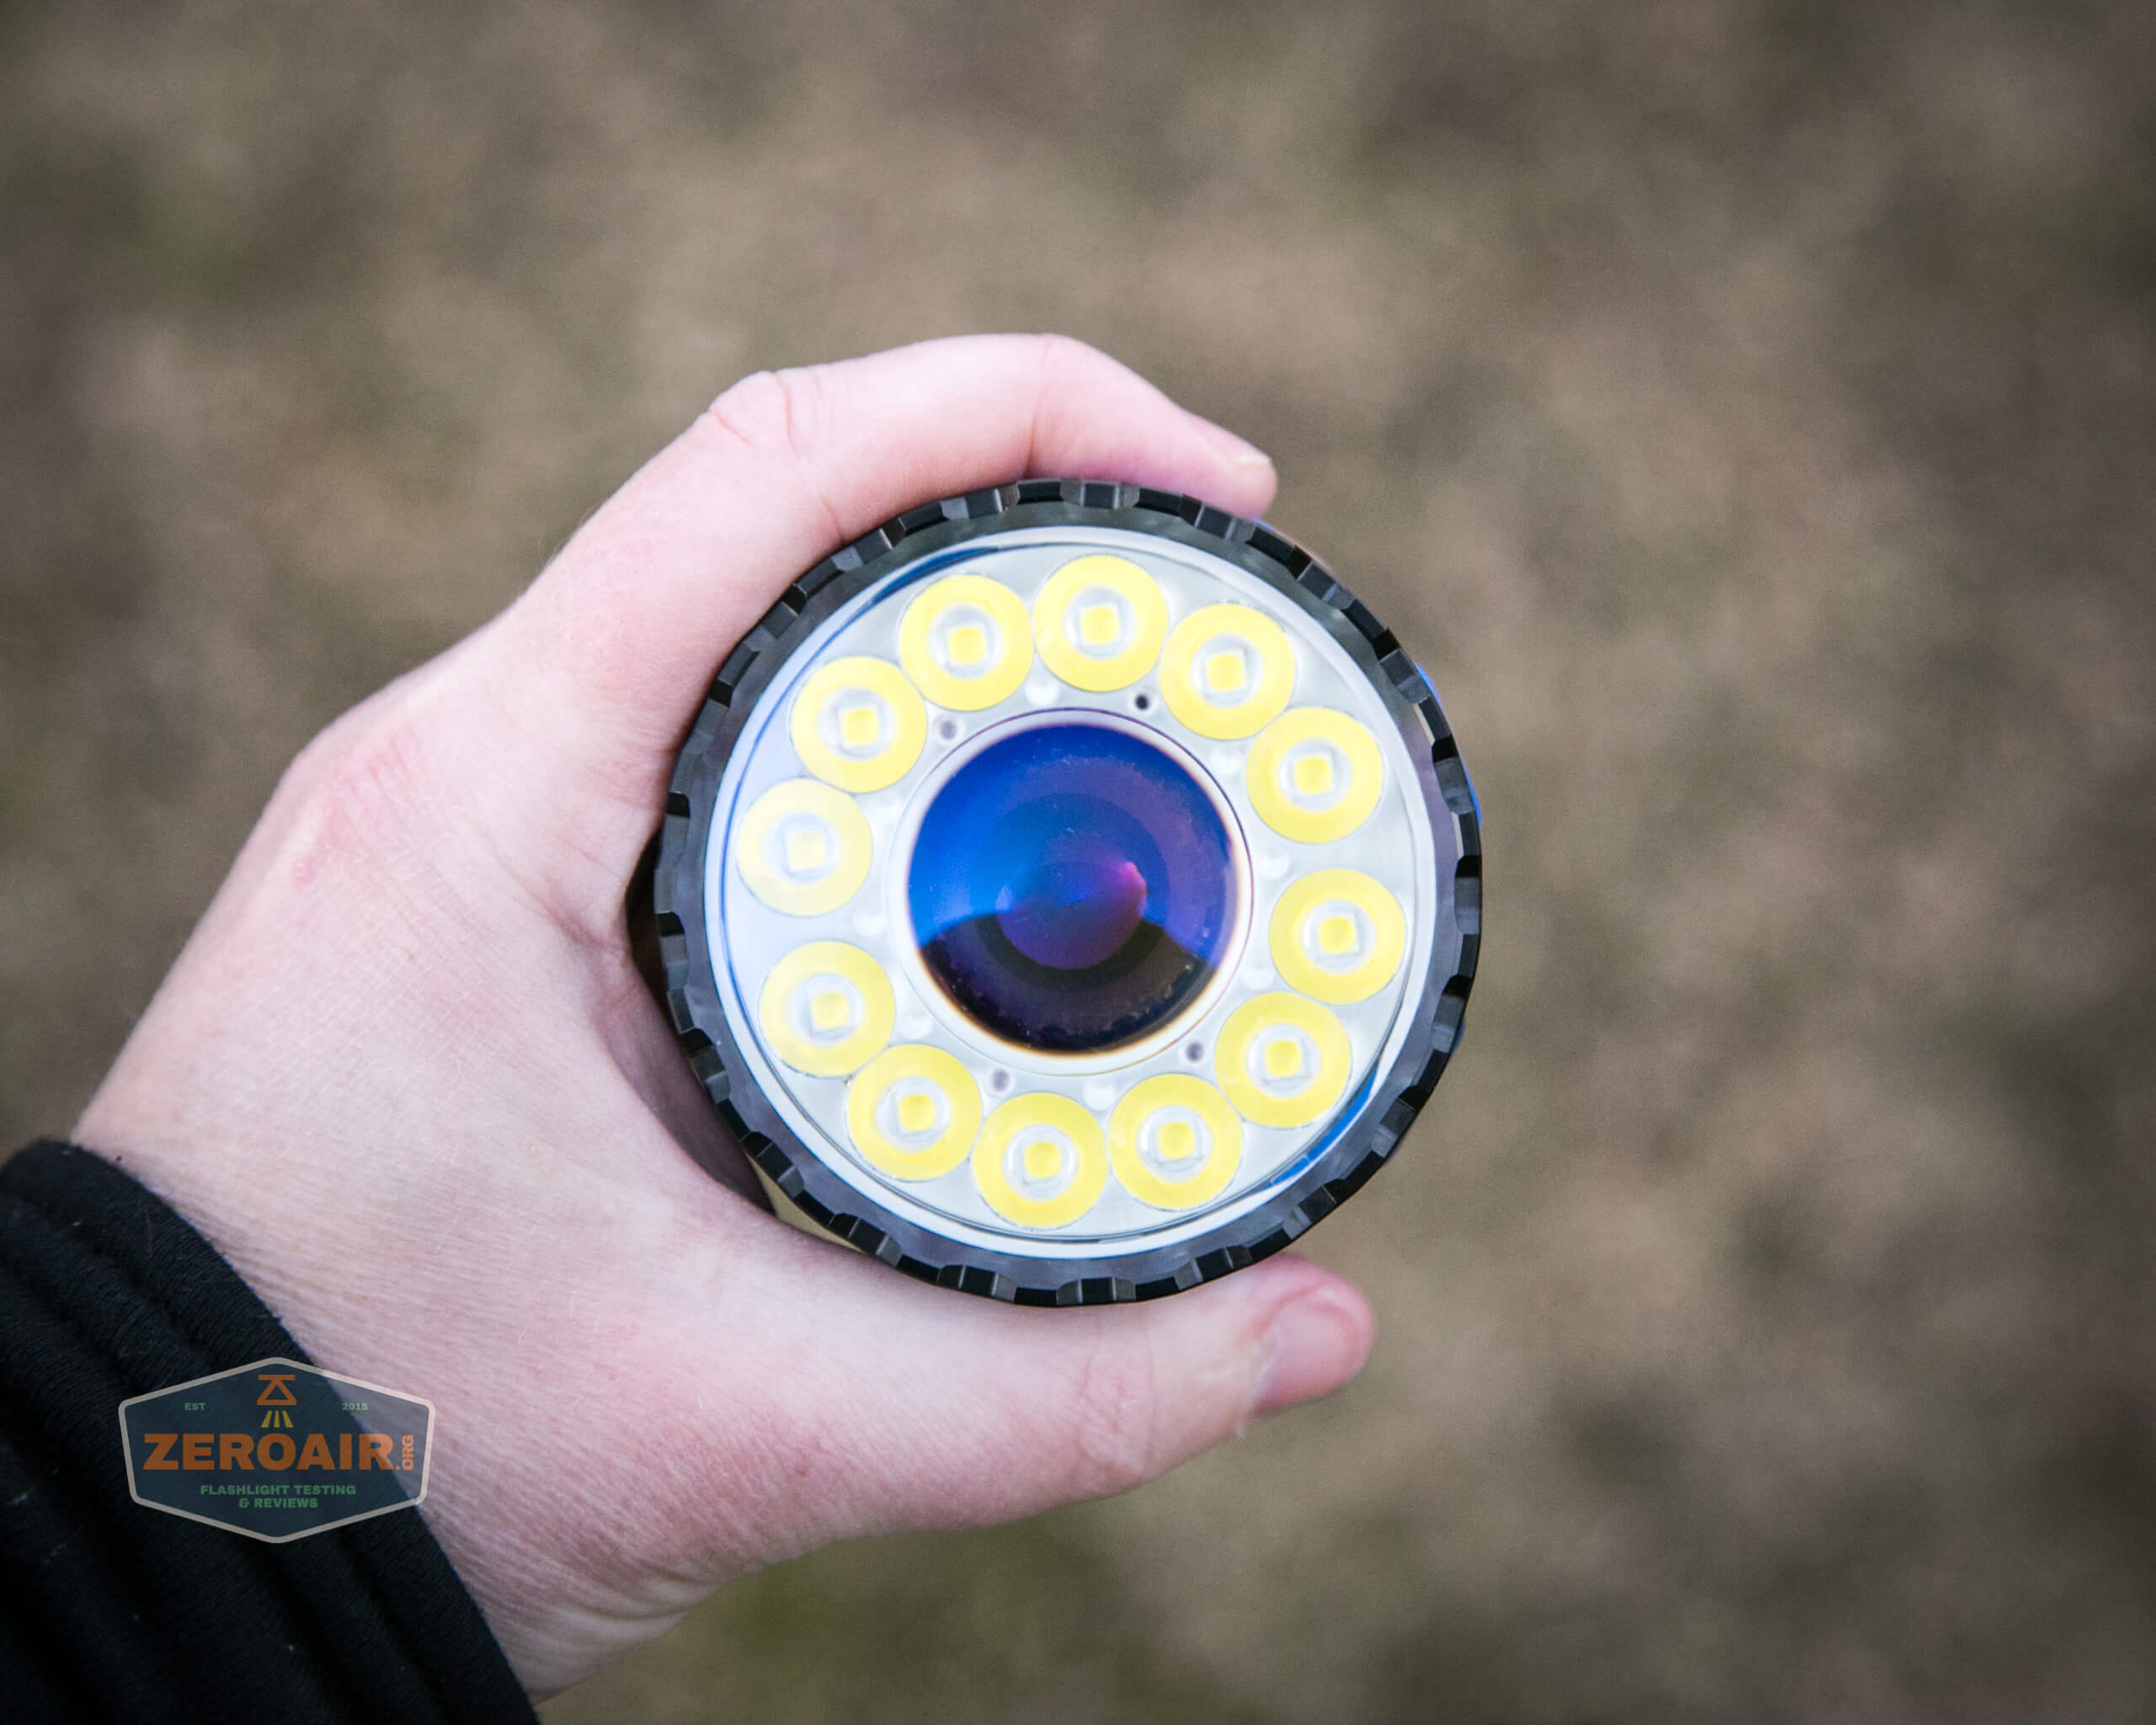
The lenses here are very … clear? Sharp? Neat? Unusual? There are all sorts of words you can use, but they’re cool, that’s for certain.
As this was a borrowed and not a review light, and since others have done it before anyway, I didn’t disassemble it at all. It’s possible, though.
Size and Comps
Weight (g / oz) 750g / 26.5oz
Length (mm / in) 140mm / 5.51in
Head Diameter (mm / in) 79mm / 3.11in
Body Diameter (mm / in) 53mm / 2.09in
If the flashlight will headstand, I’ll try to show it here. If the flashlight will tailstand, I usually show that here, too.
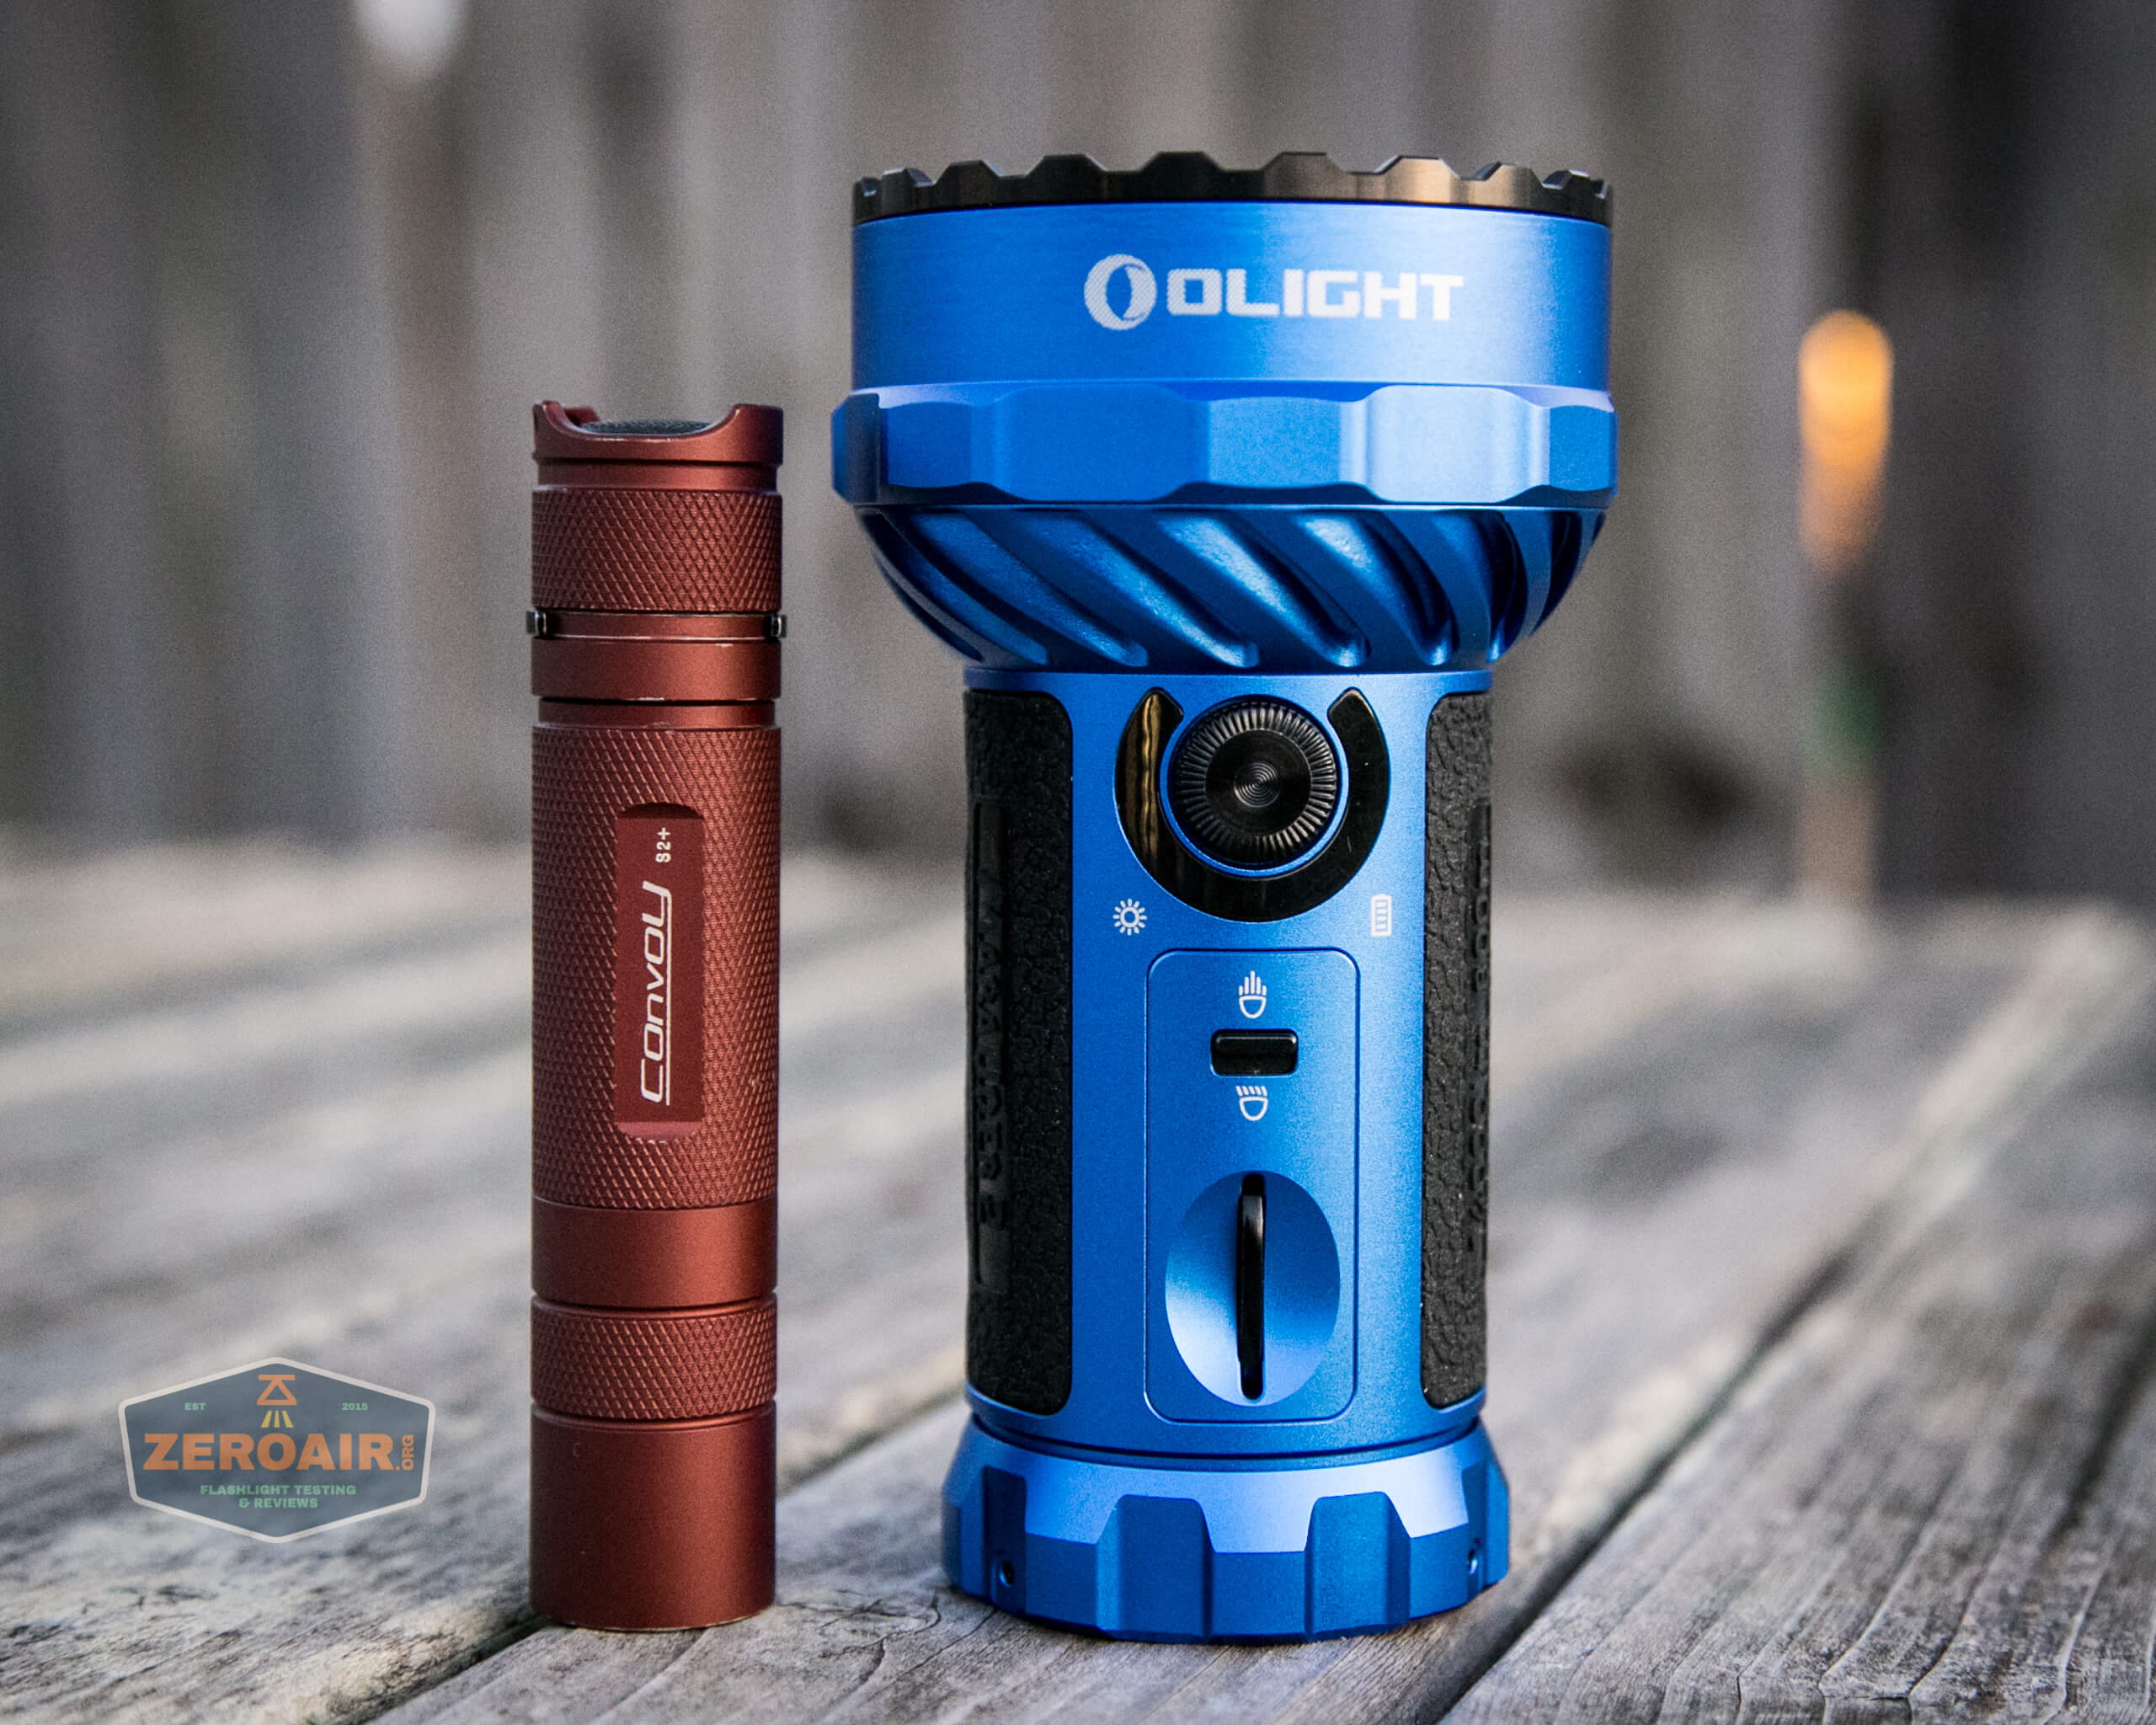
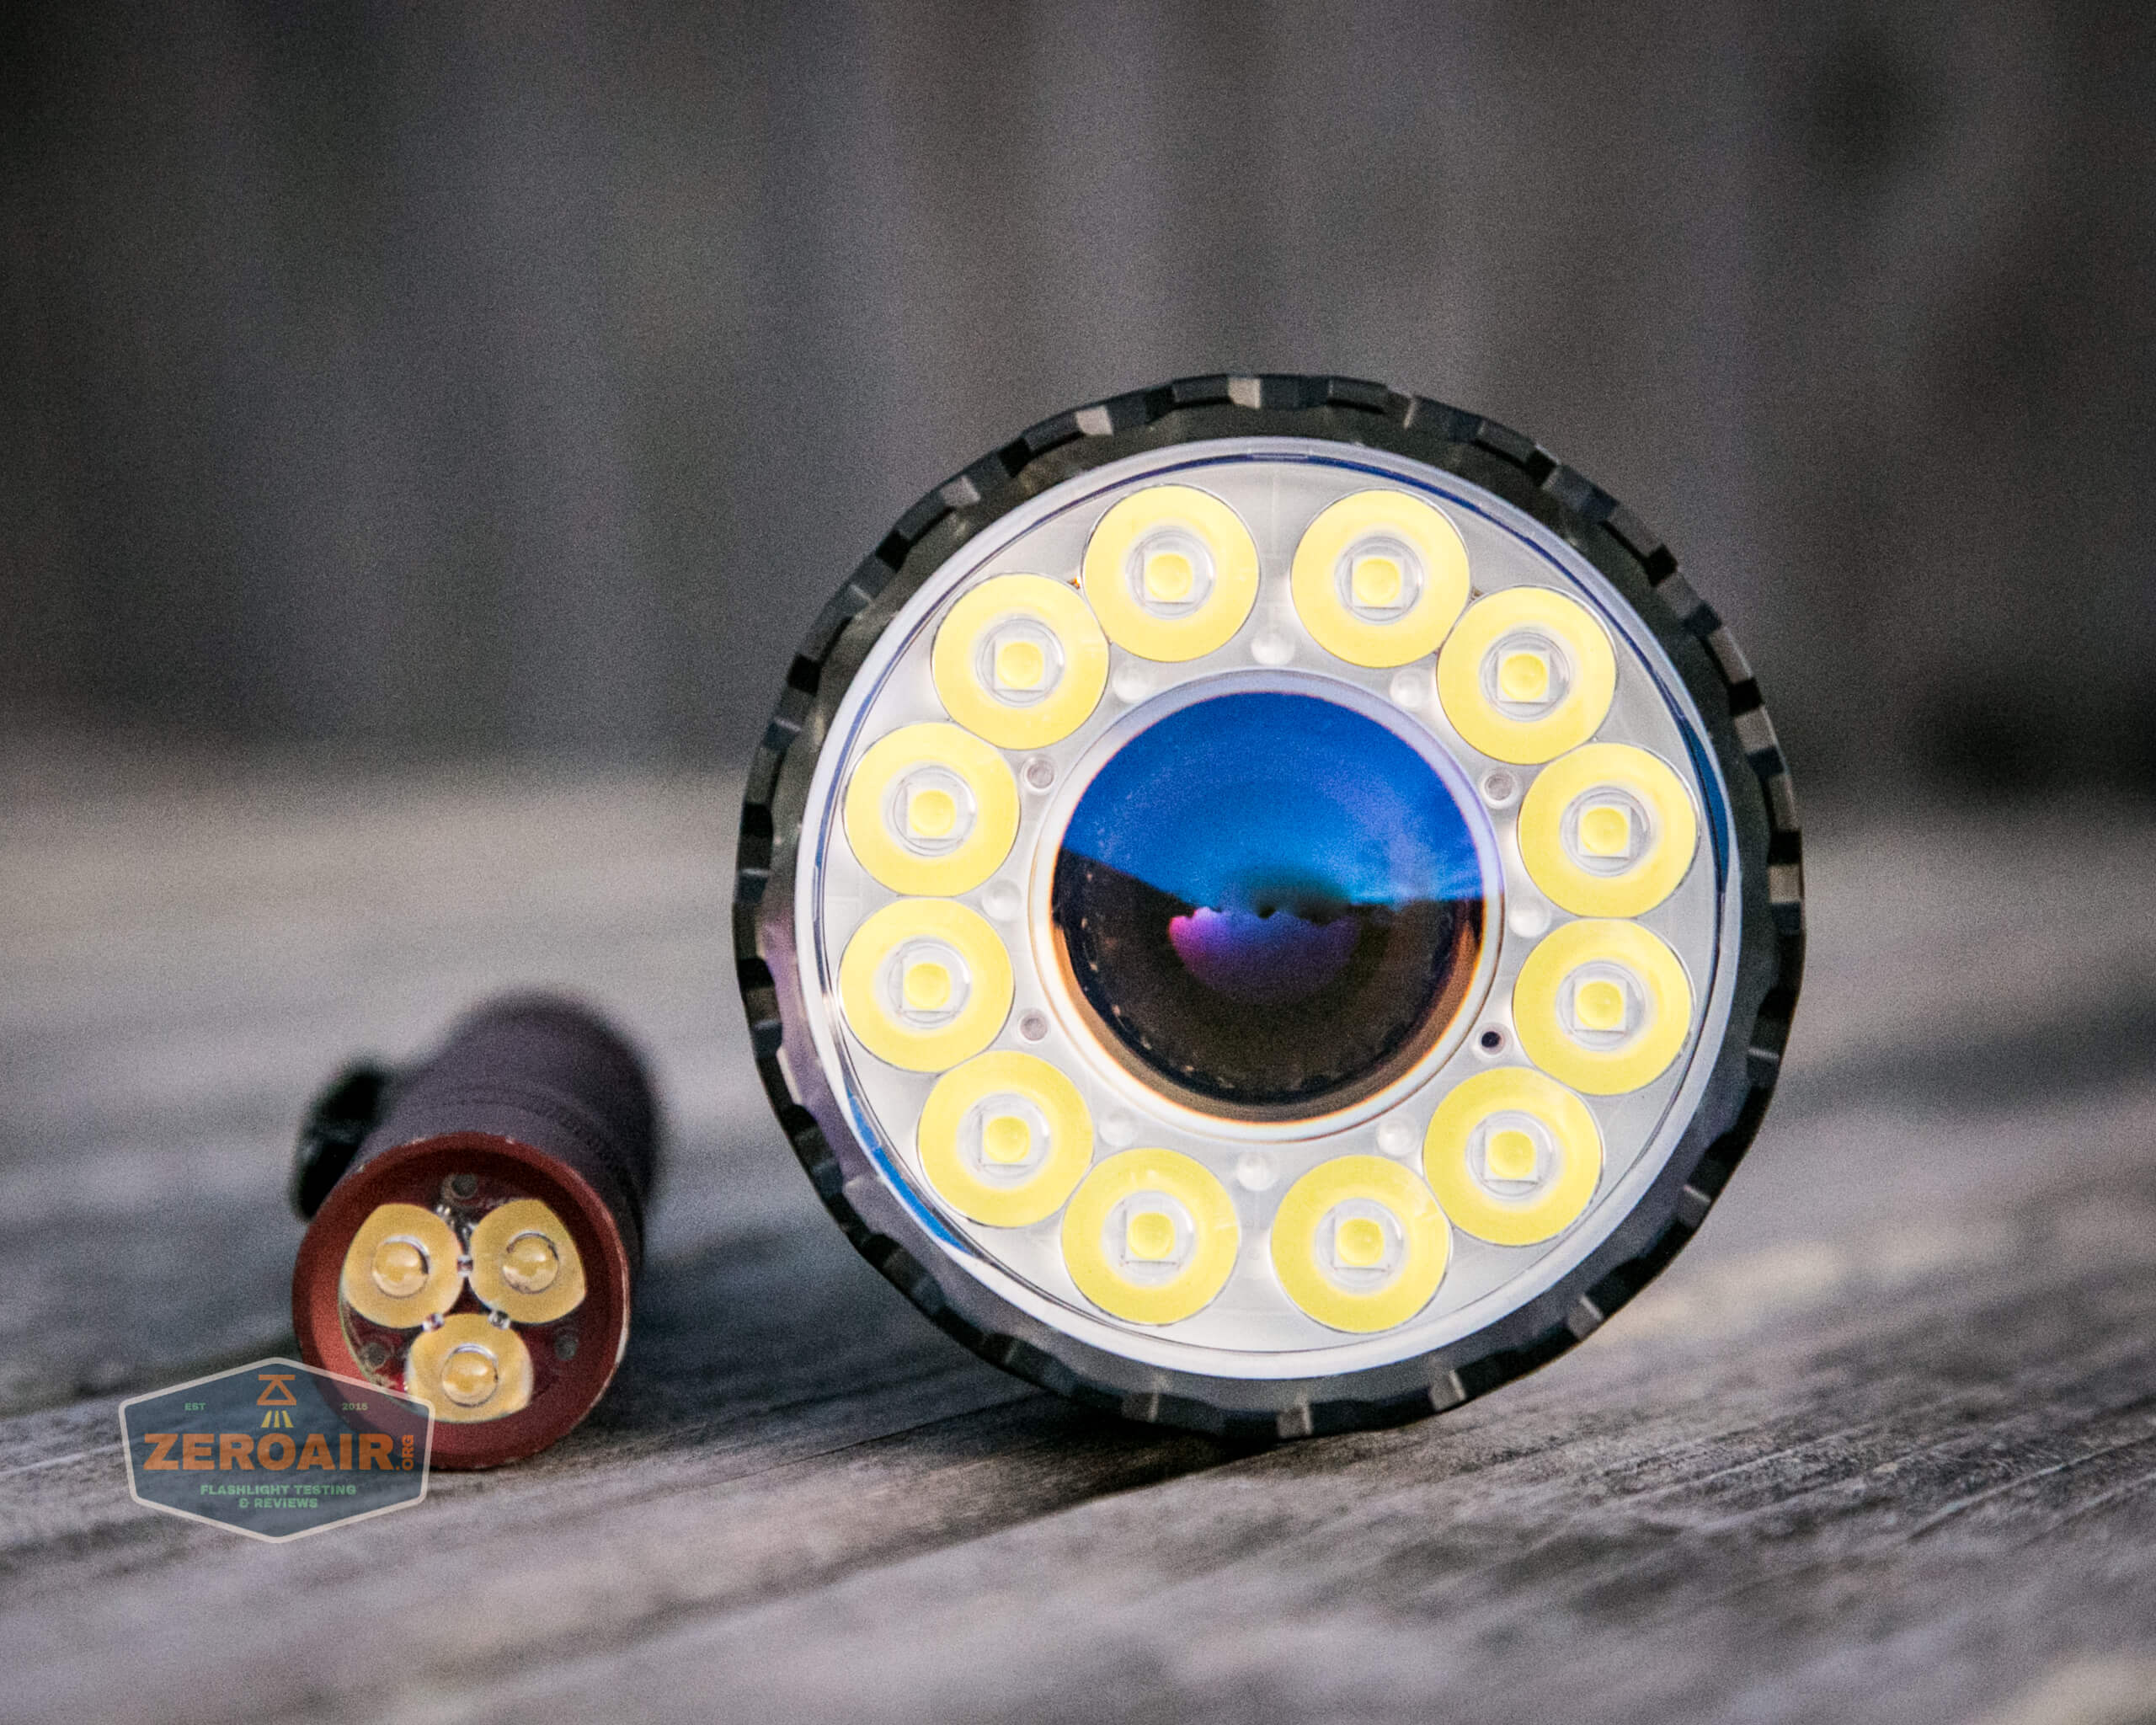
Here’s the test light with the venerable Convoy S2+. Mine is a custom “baked” edition Nichia 219b triple. A very nice 18650 light!
And here’s the light beside my custom-engraved TorchLAB BOSS 35, an 18350 light. I reviewed the aluminum version of that light in both 35 and 70 formats.
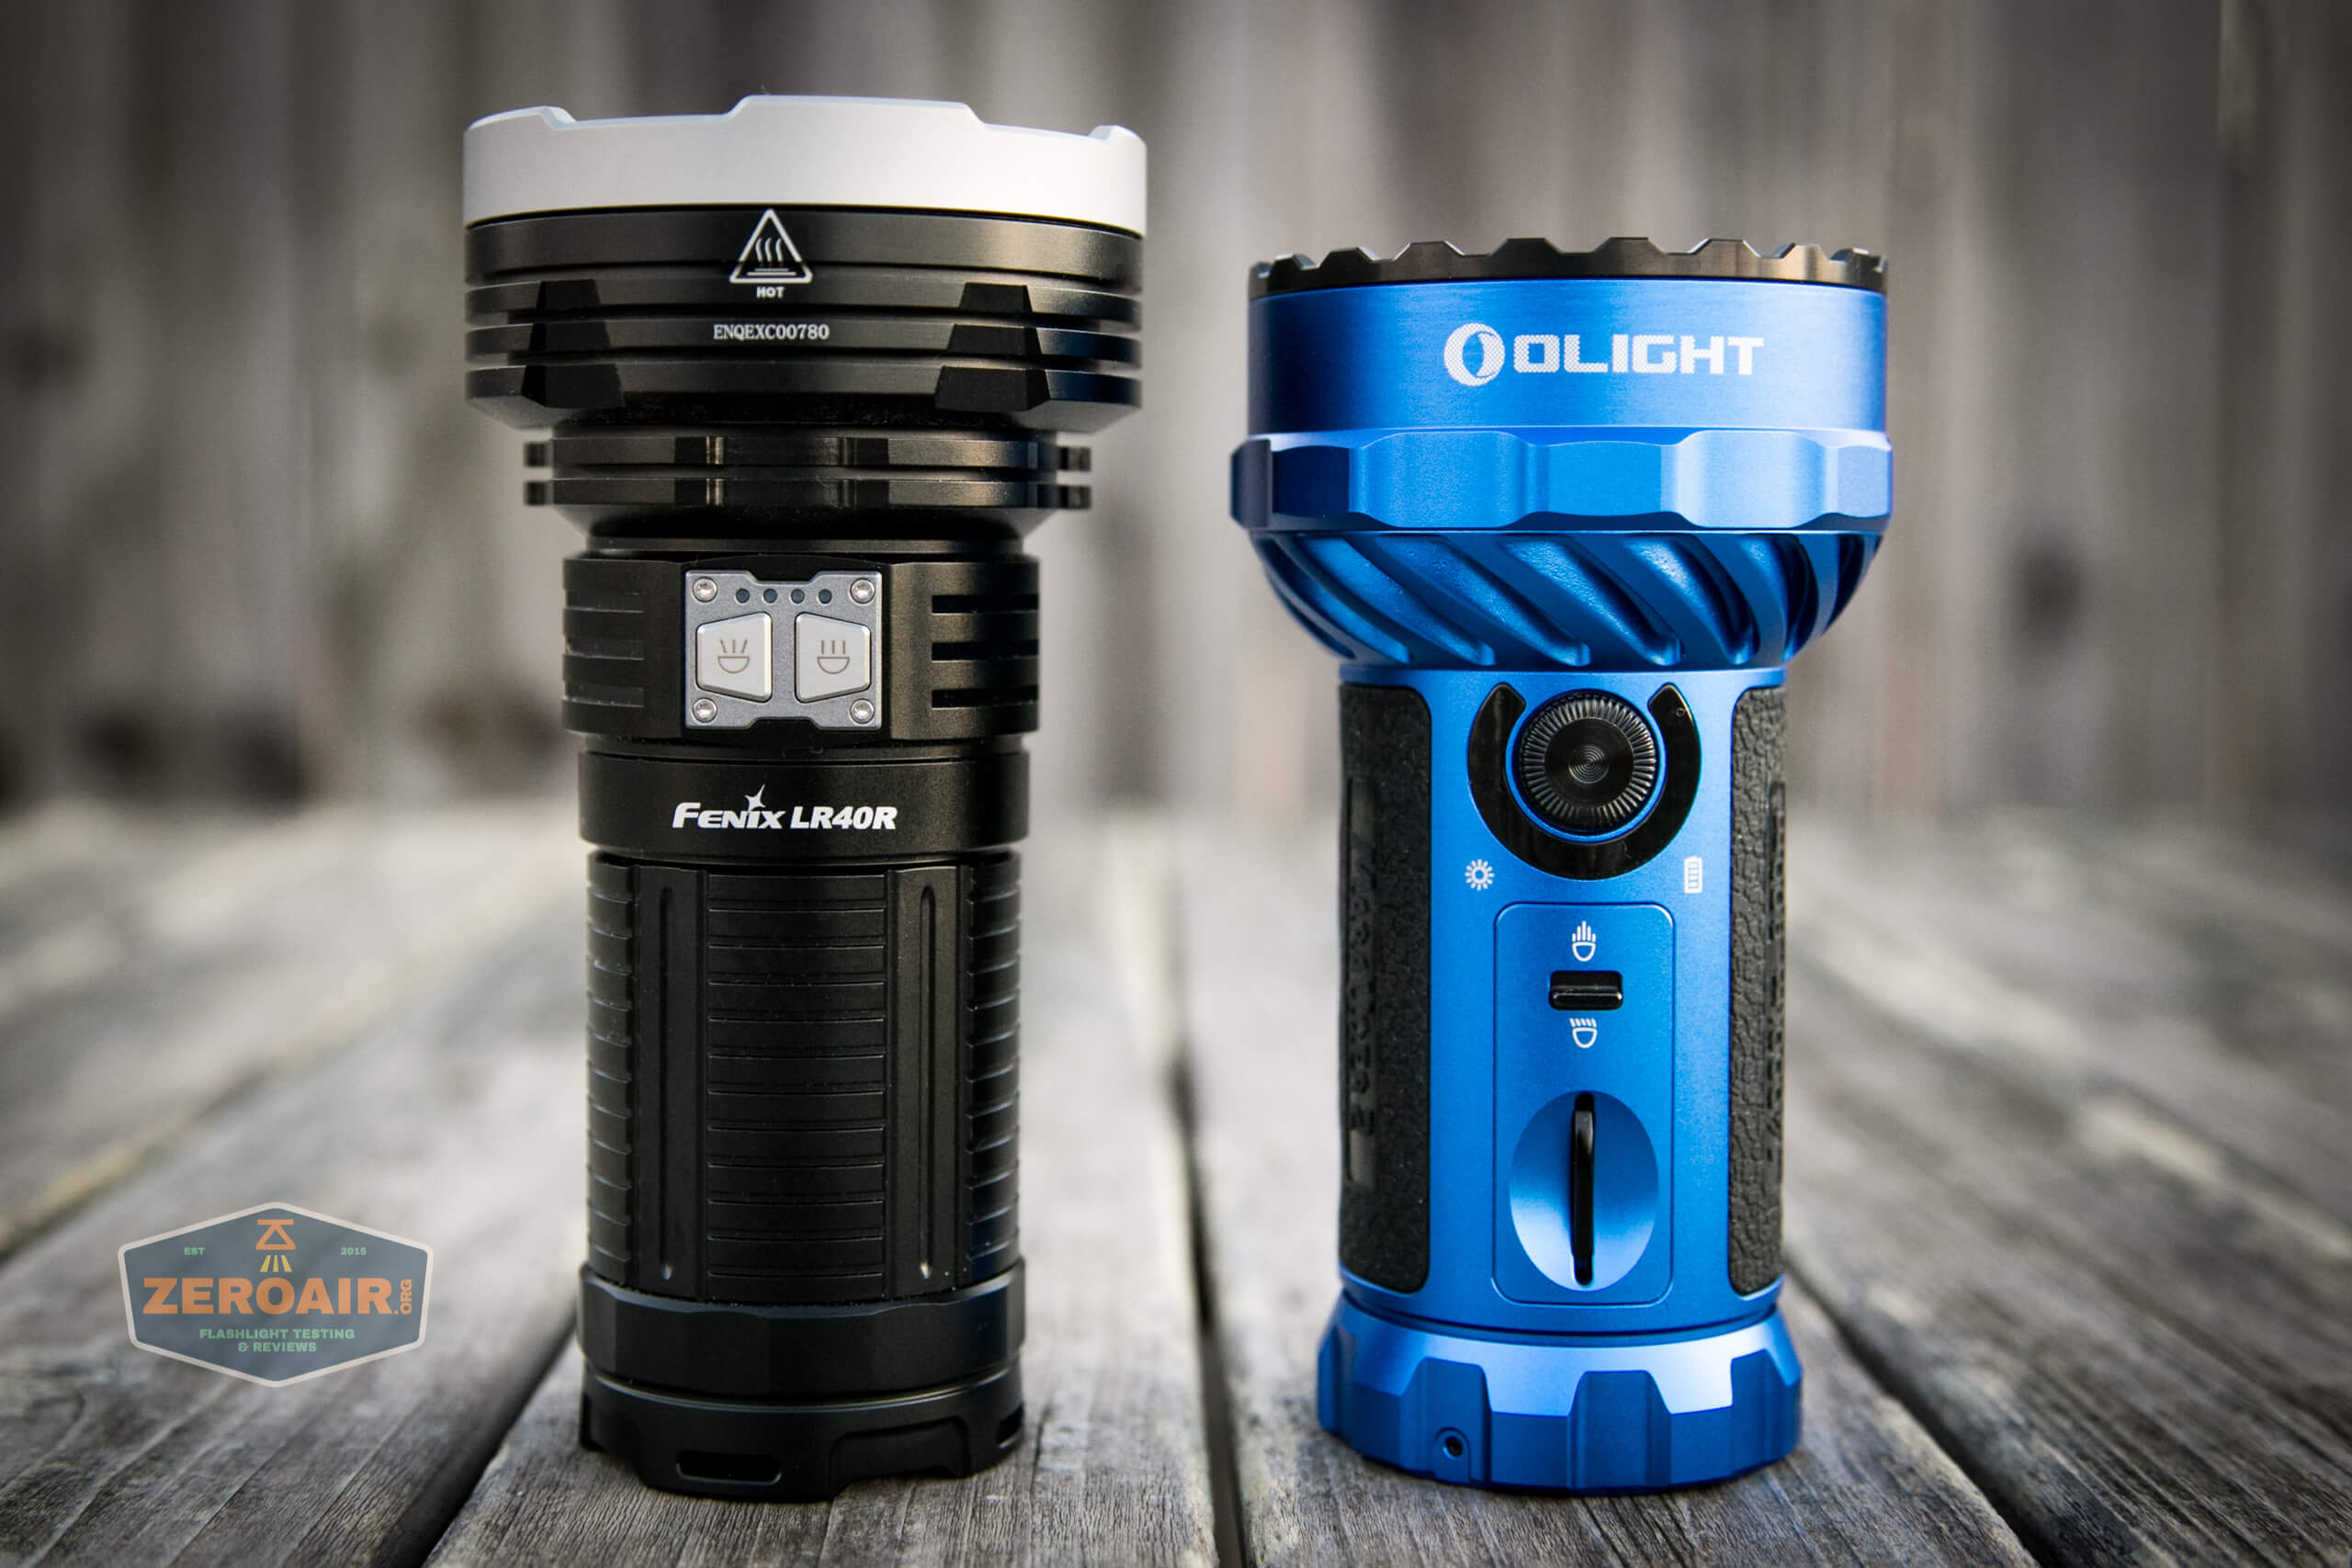
Here’s the Olight Marauder 2 Blue beside the Fenix LR40R, which I previously reviewed. These two are very solid competitors (and I’m glad to have both!)
Retention and Carry
Primarily, you’ll be carrying this light by means of the lanyard, which attaches to the “coin slot loop.”

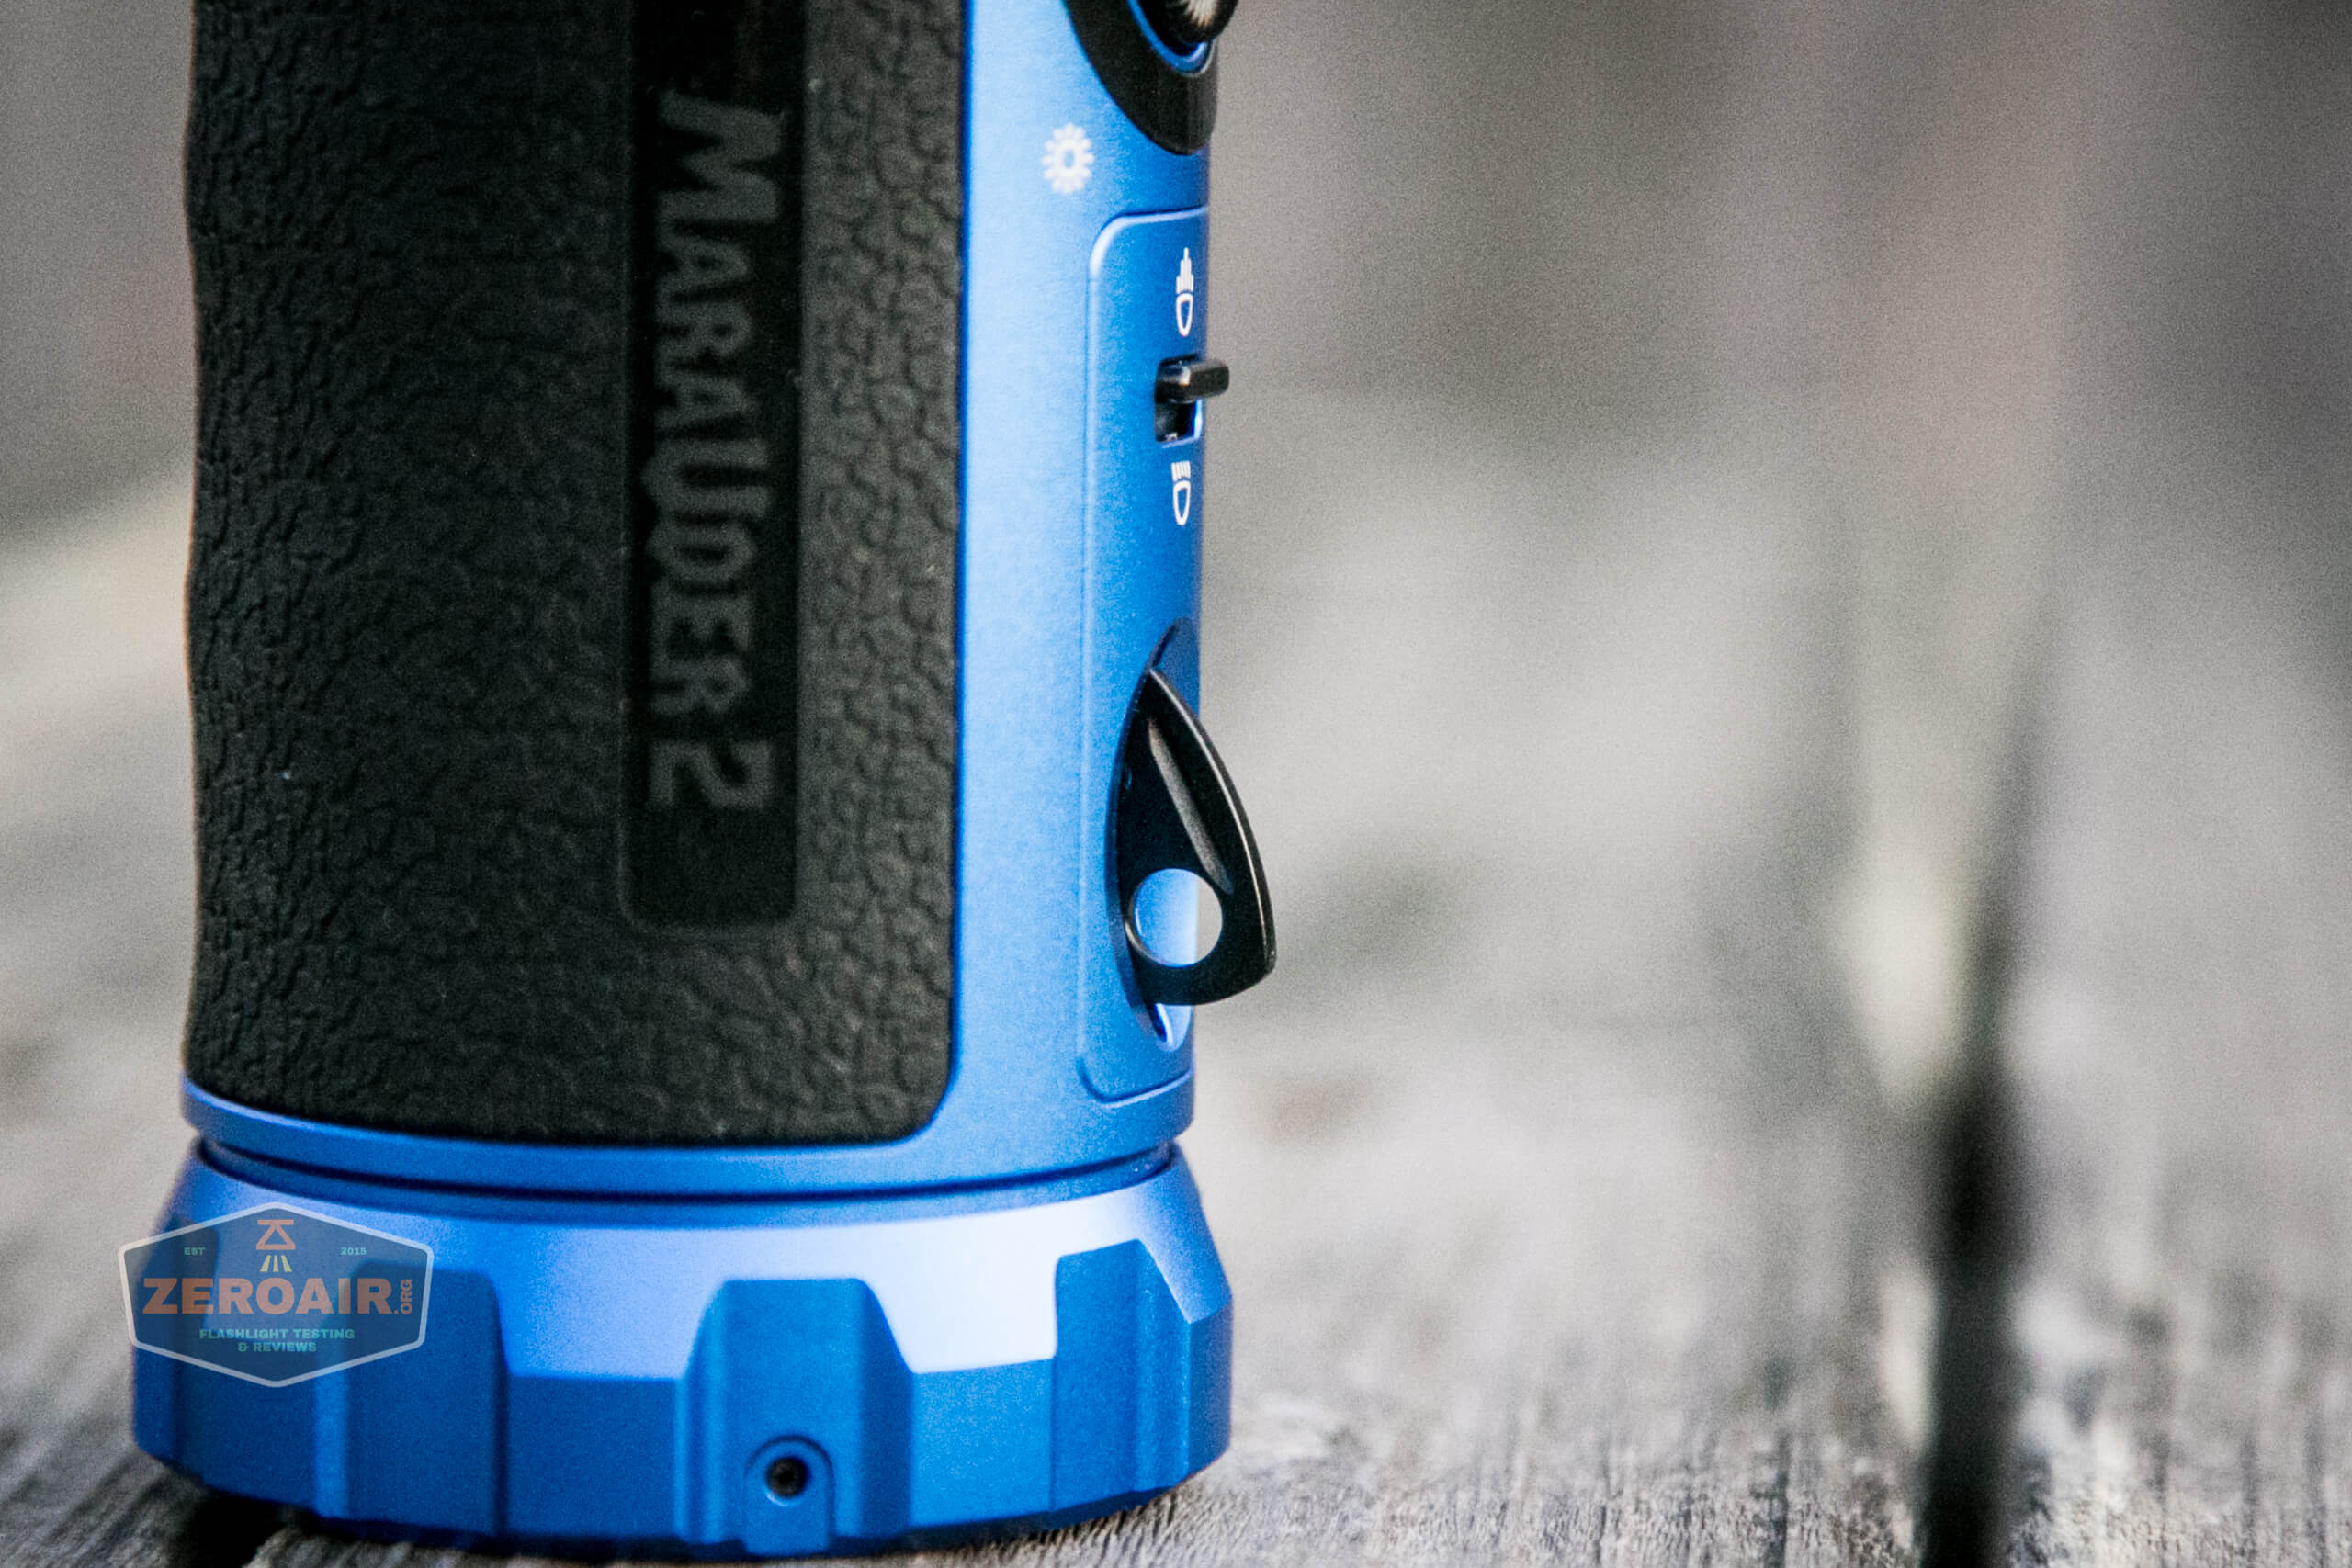
The little loop flips out of the body and has a little thumbnail nick to help with access.
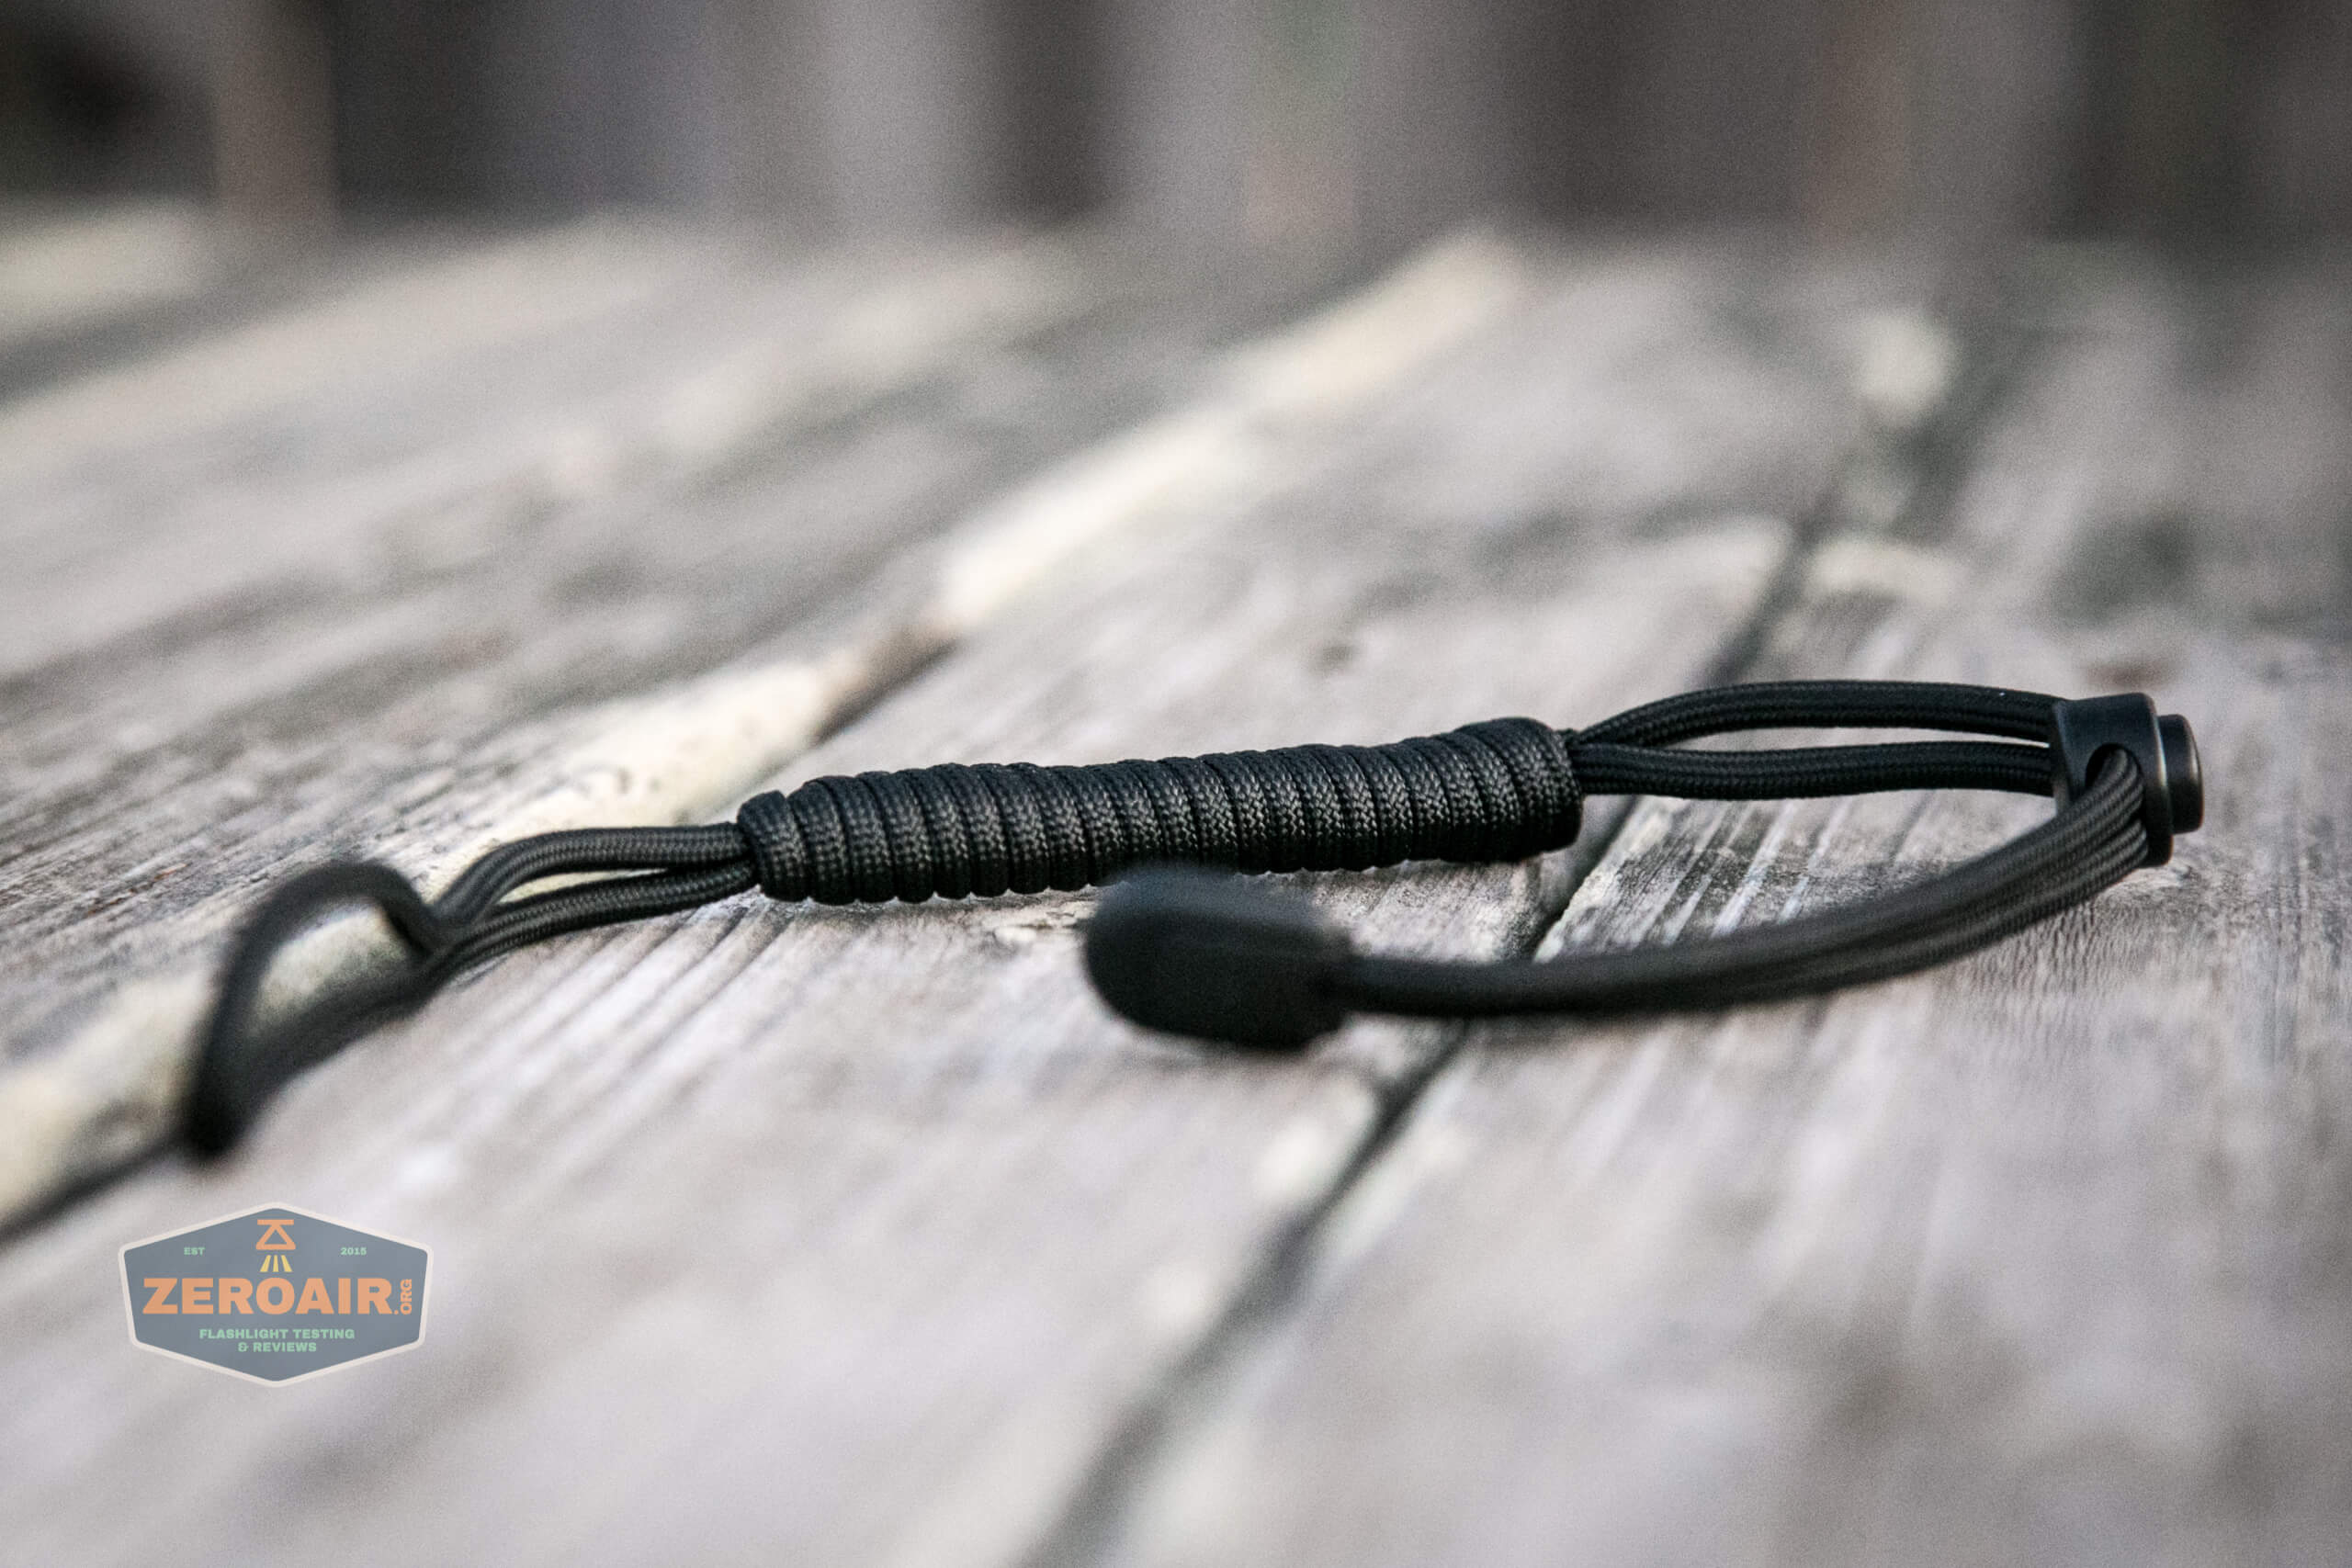
Here’s the included lanyard. It’s nice and can be very long if unraveled.
There are no other means intended for carrying the Olight Marauder 2 Blue. I will mention the grip along the body, however. This is a sticker-type grippy pad and does provide extra or substantial grip. It’s also a grime magnet.
Power and Runtime
Inside the Olight Marauder 2 Blue is a battery pack built of individual 21700 cells. There are three 21700 cells, and they’re in series (hence the “10.8V”). This is good for a number of reasons, but more on that below.
I didn’t take these cells out, but having seen them, I wouldn’t call this a “replaceable” setup. That is a definite downside.
Here are some runtime graphs. I tested a few of the Spot modes and a couple of the flood modes.
In this first graph (Spot Level 7), the temp sensor fell off the light at around 80 minutes, so disregard that section.
Output steps down a bunch on most modes, but 85 minutes or so at 800 lumens of 800m of throw is pretty great anyway.
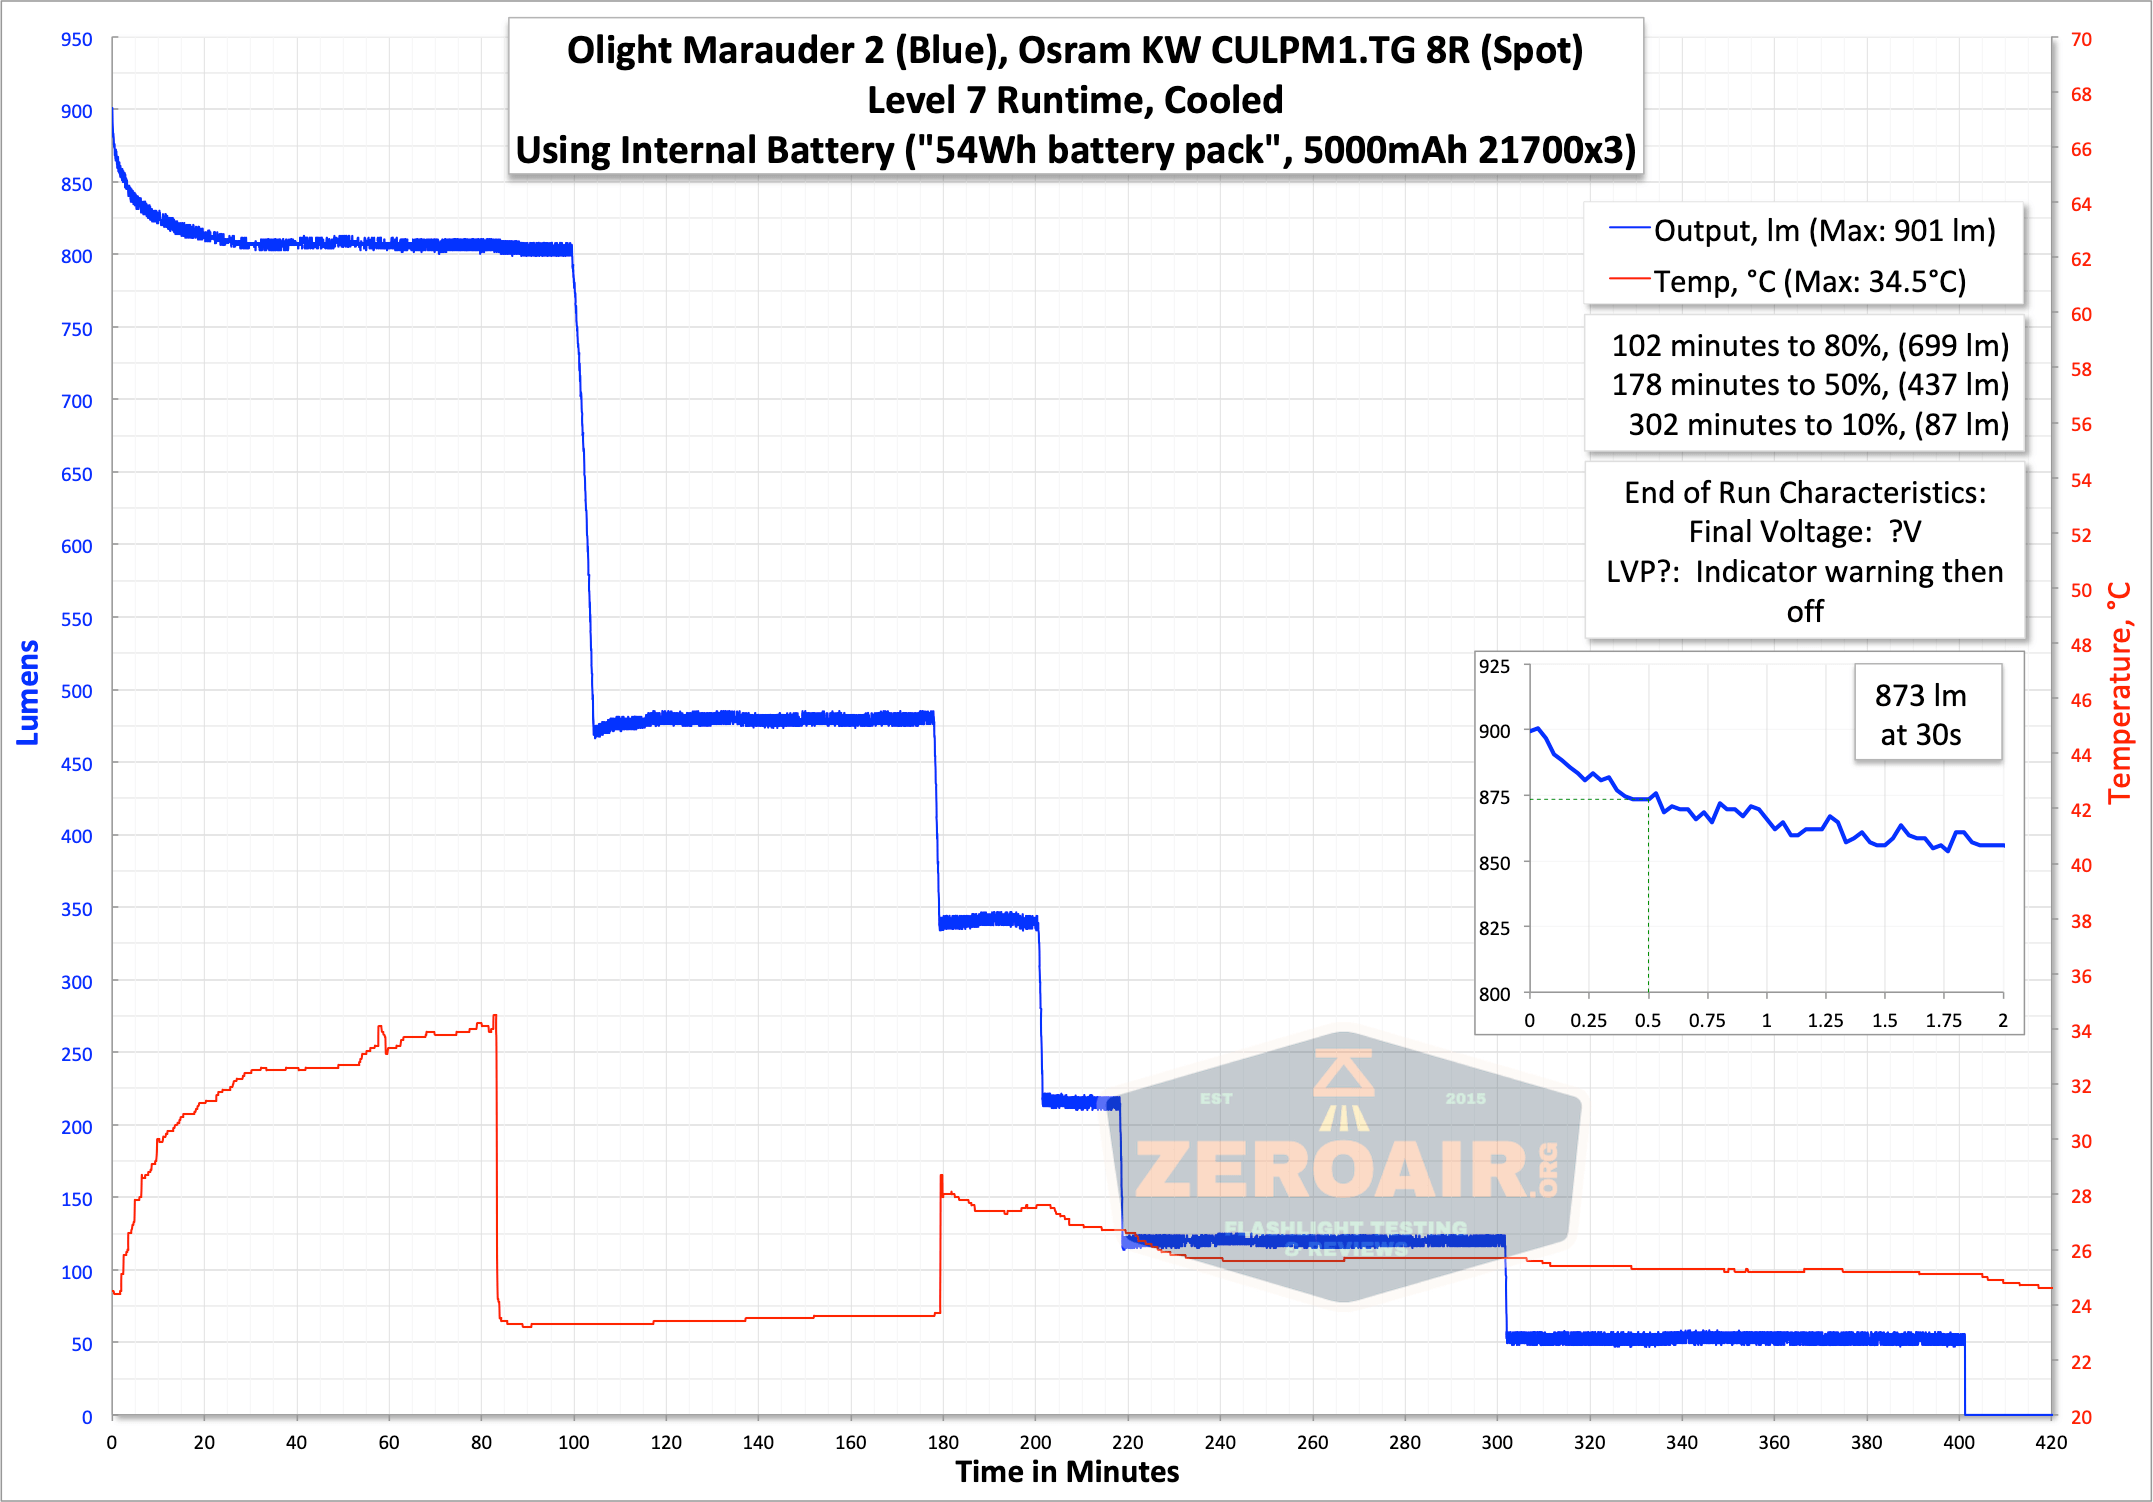
The modes are very flat throughout, which is great.
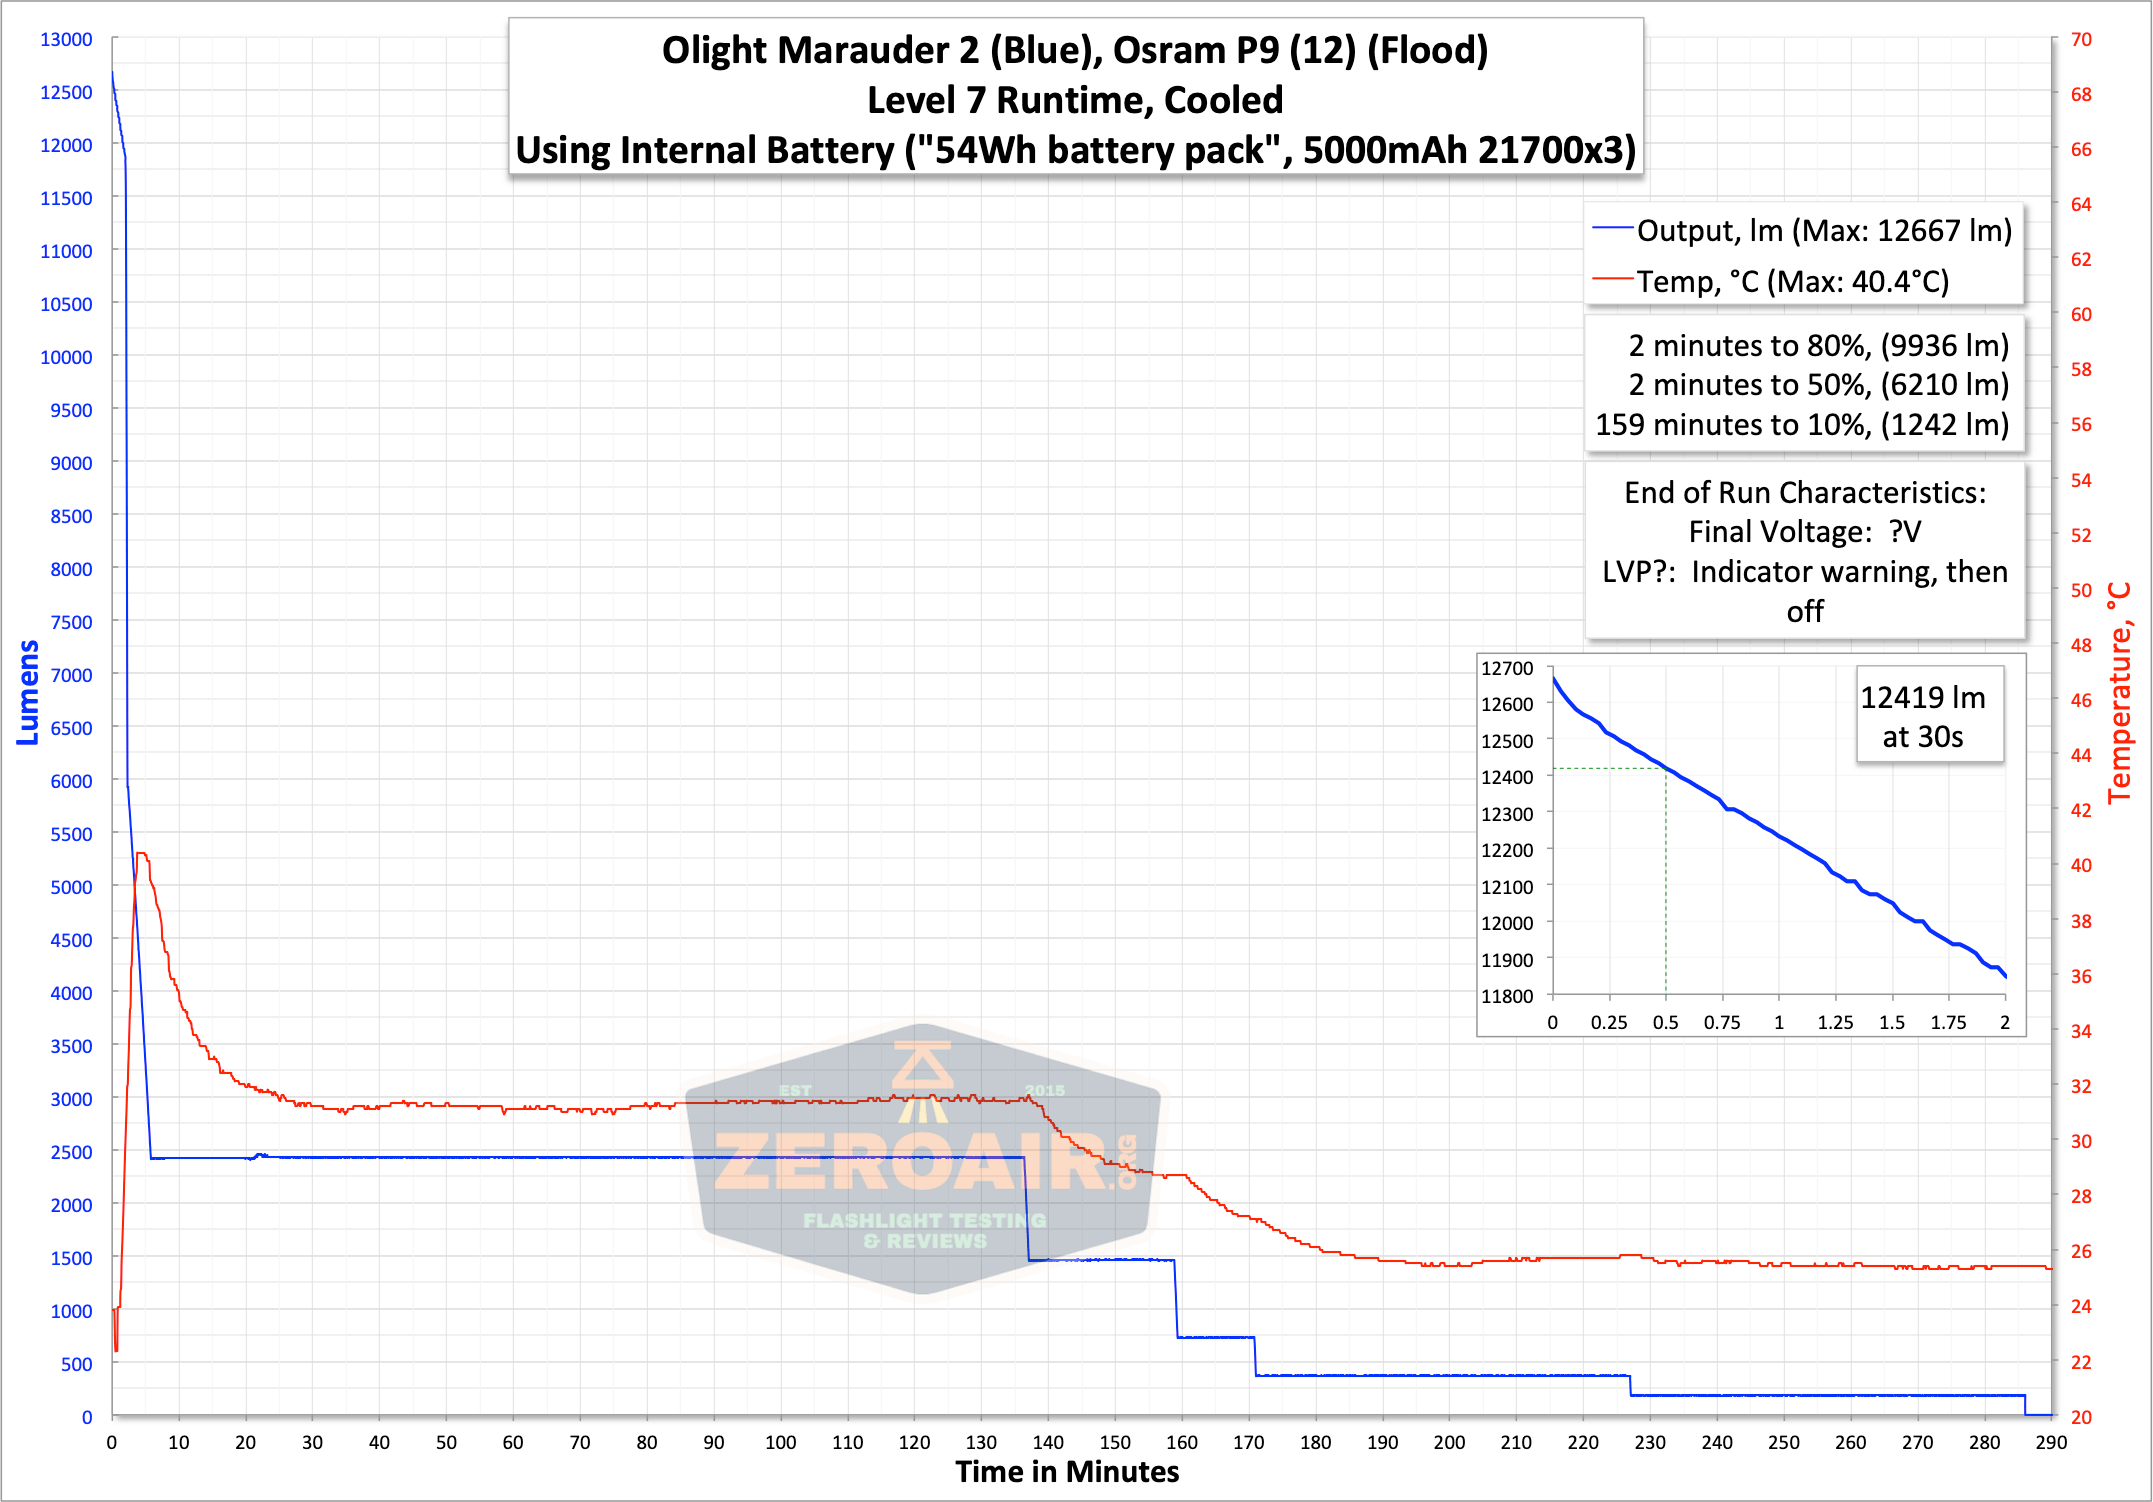
Here are a couple of the flood modes. Level 7 has a massive stepdown but is within 10% of the claim, which for me is close enough (by that I mean, I allow 10% or so because I’m an amateur).
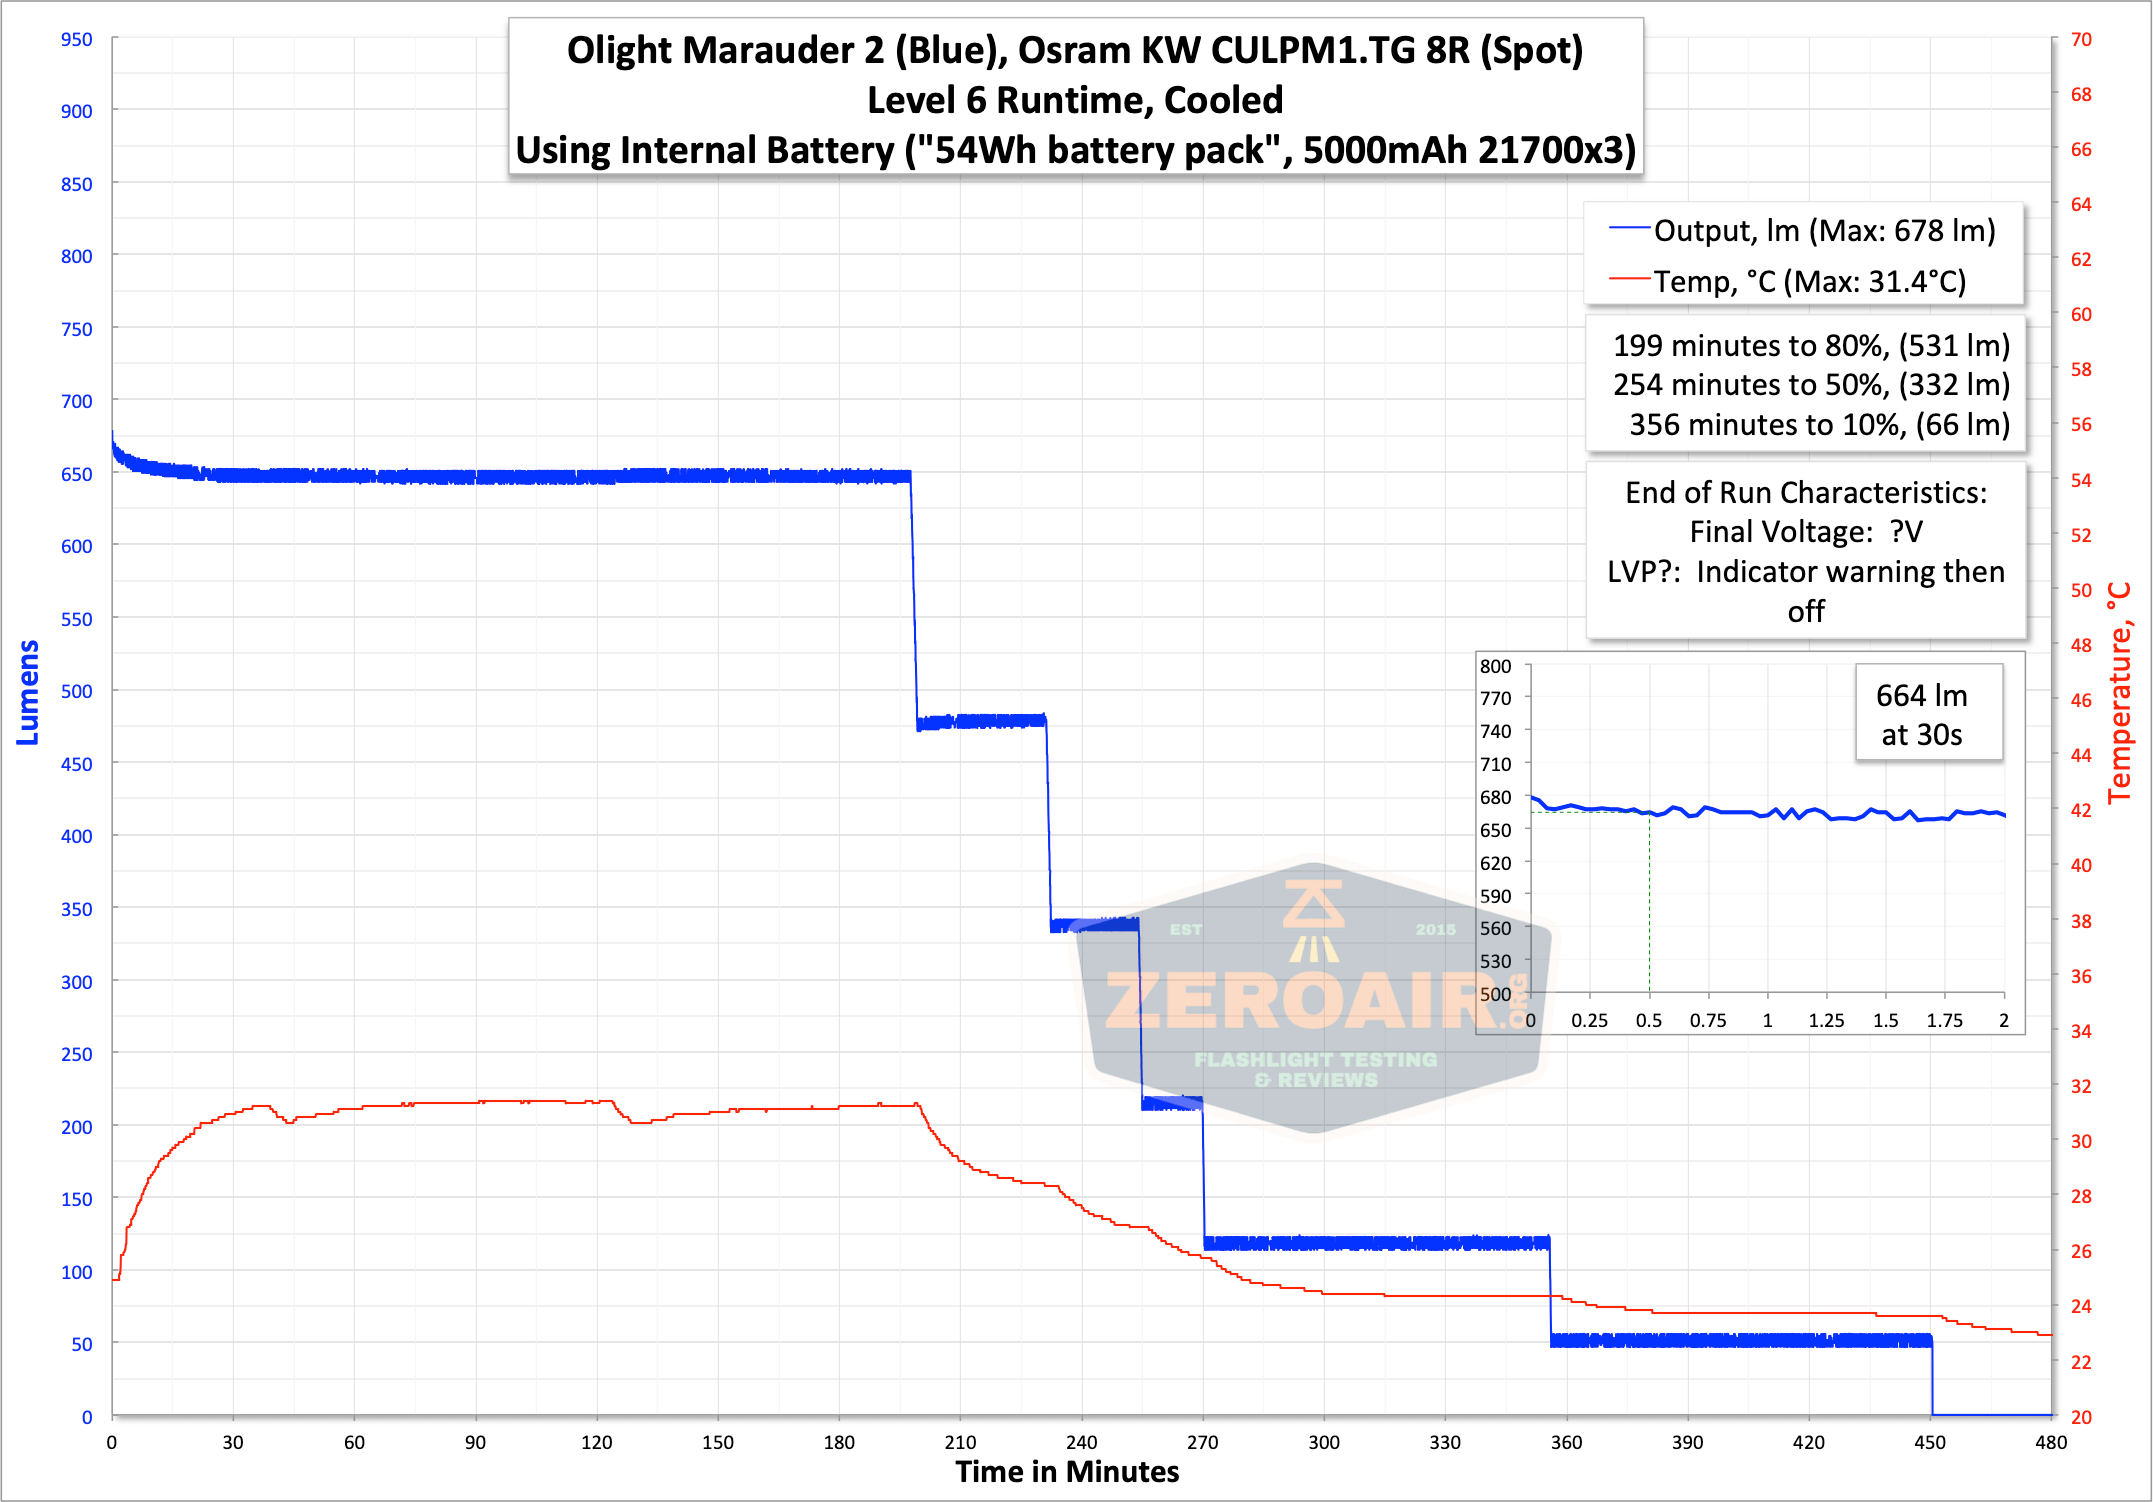
 On Level 6, you can see the temperature get quite warm until the stepdown.

Charging
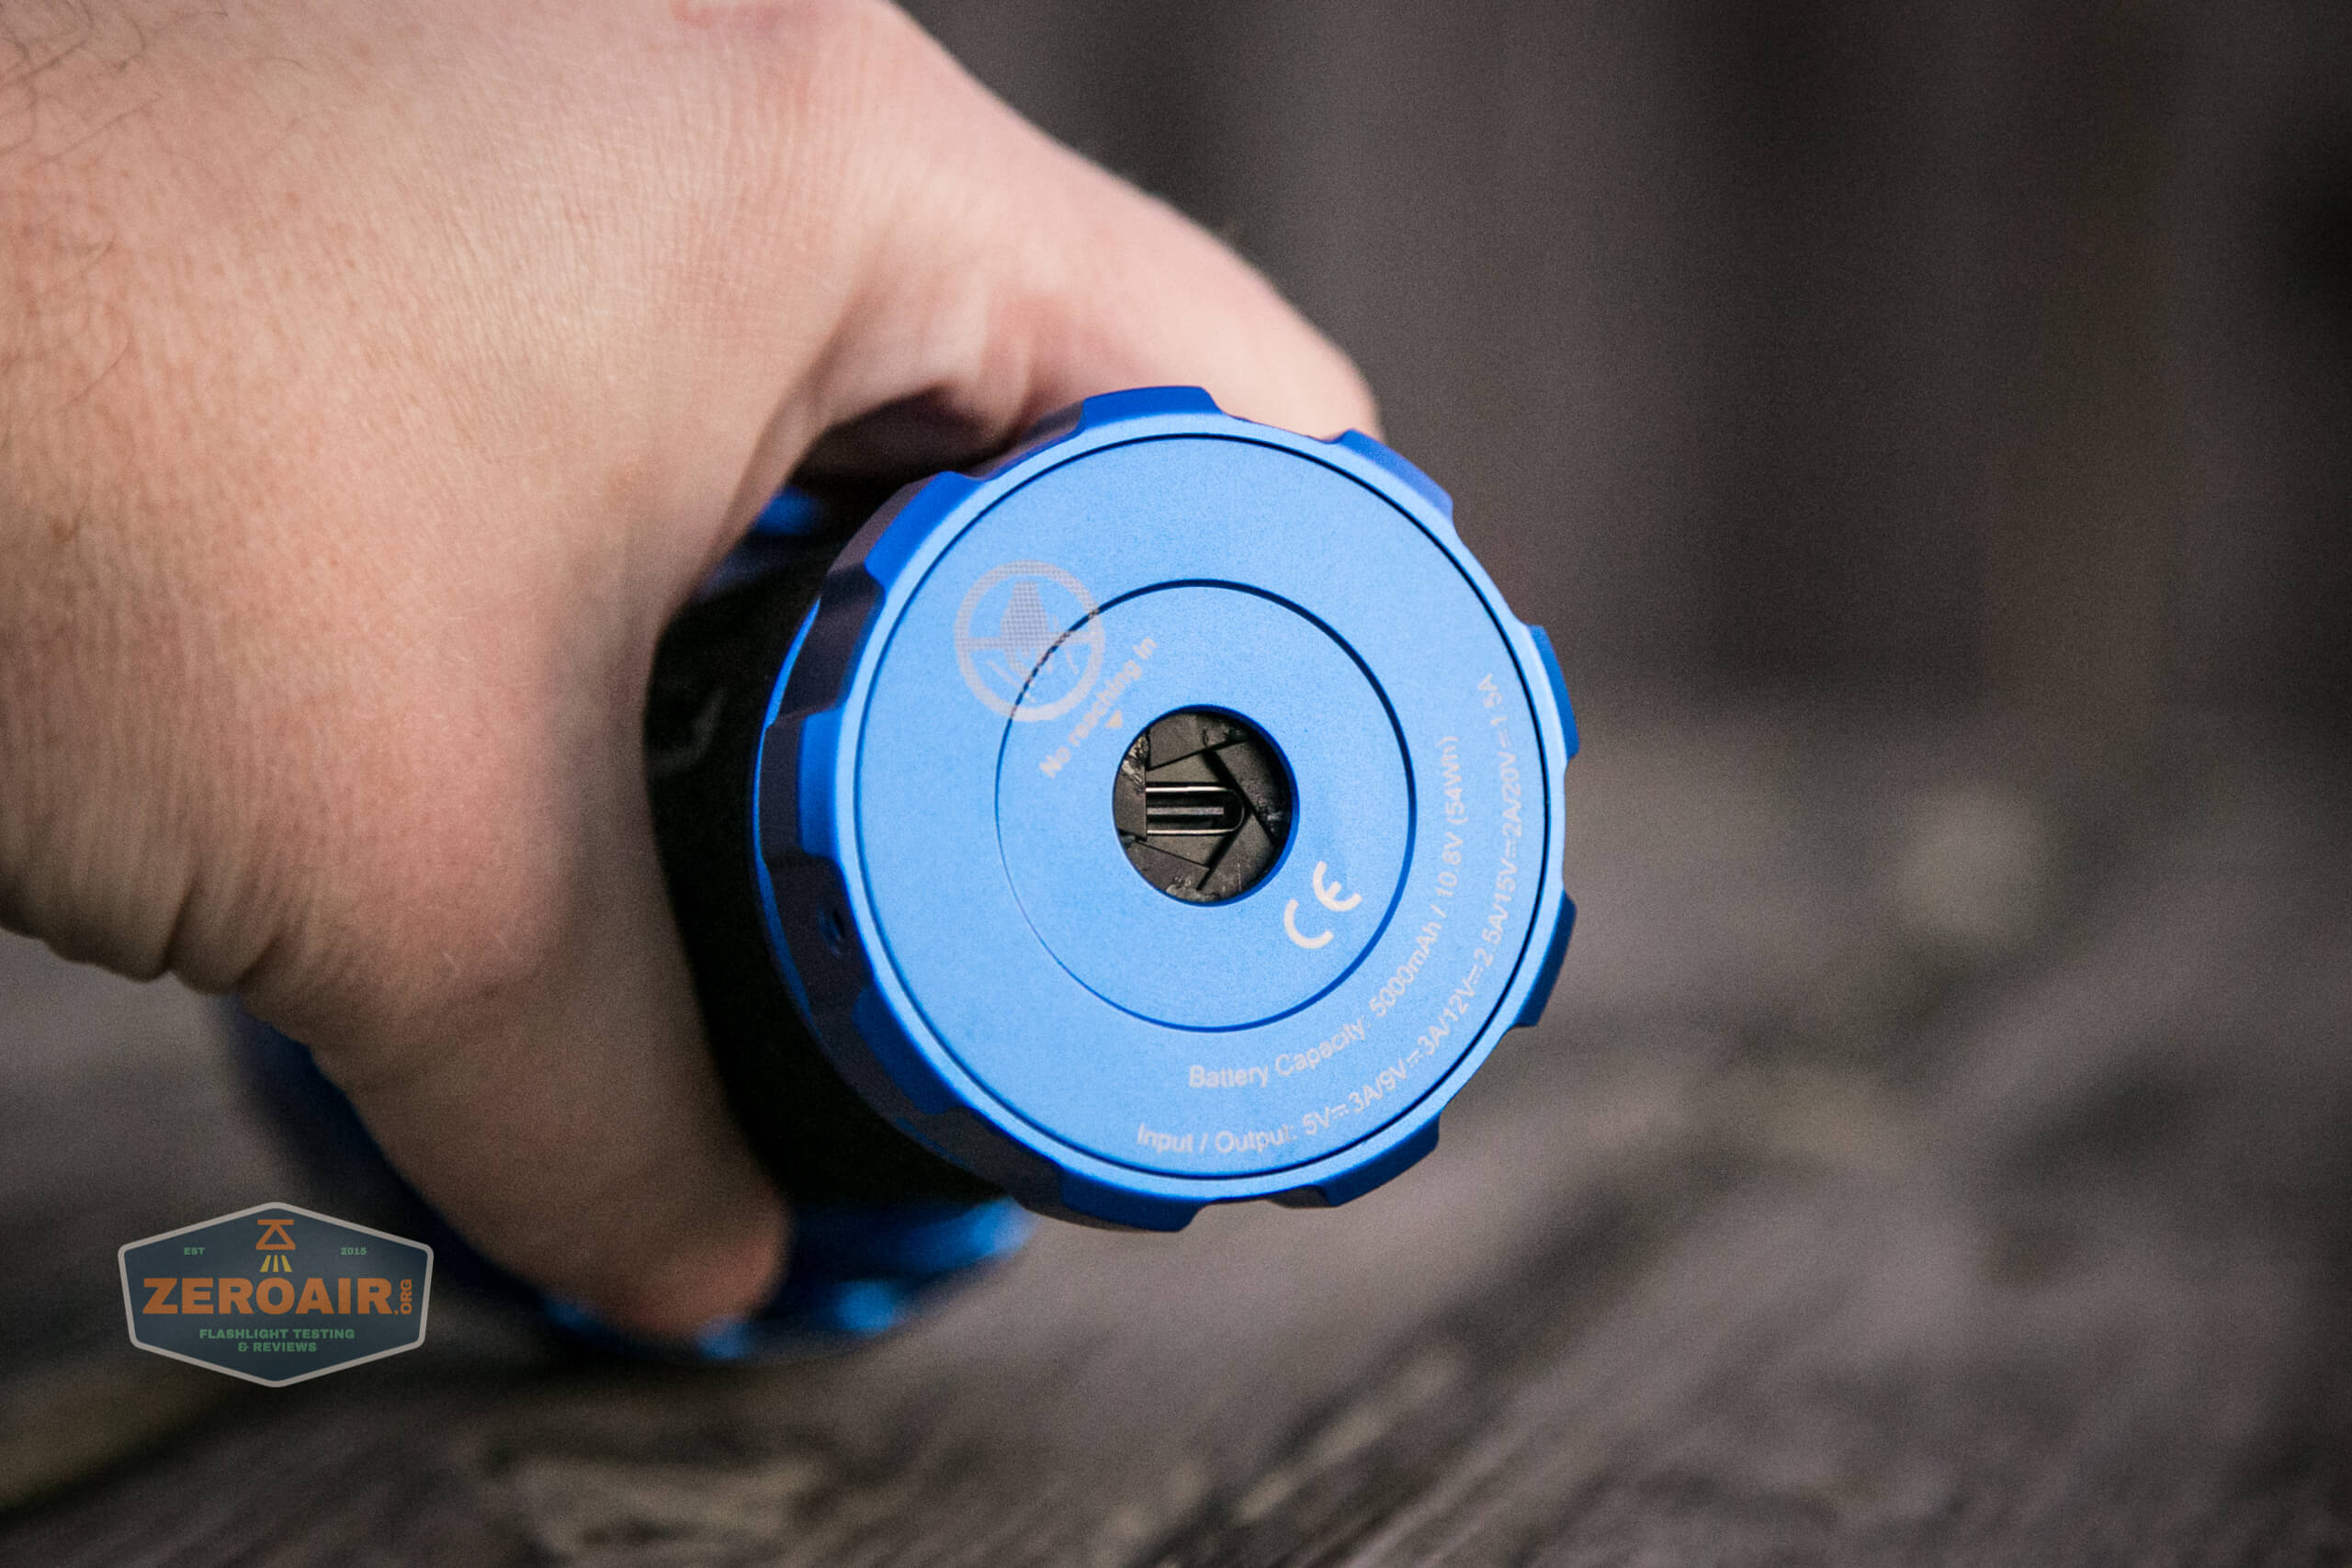
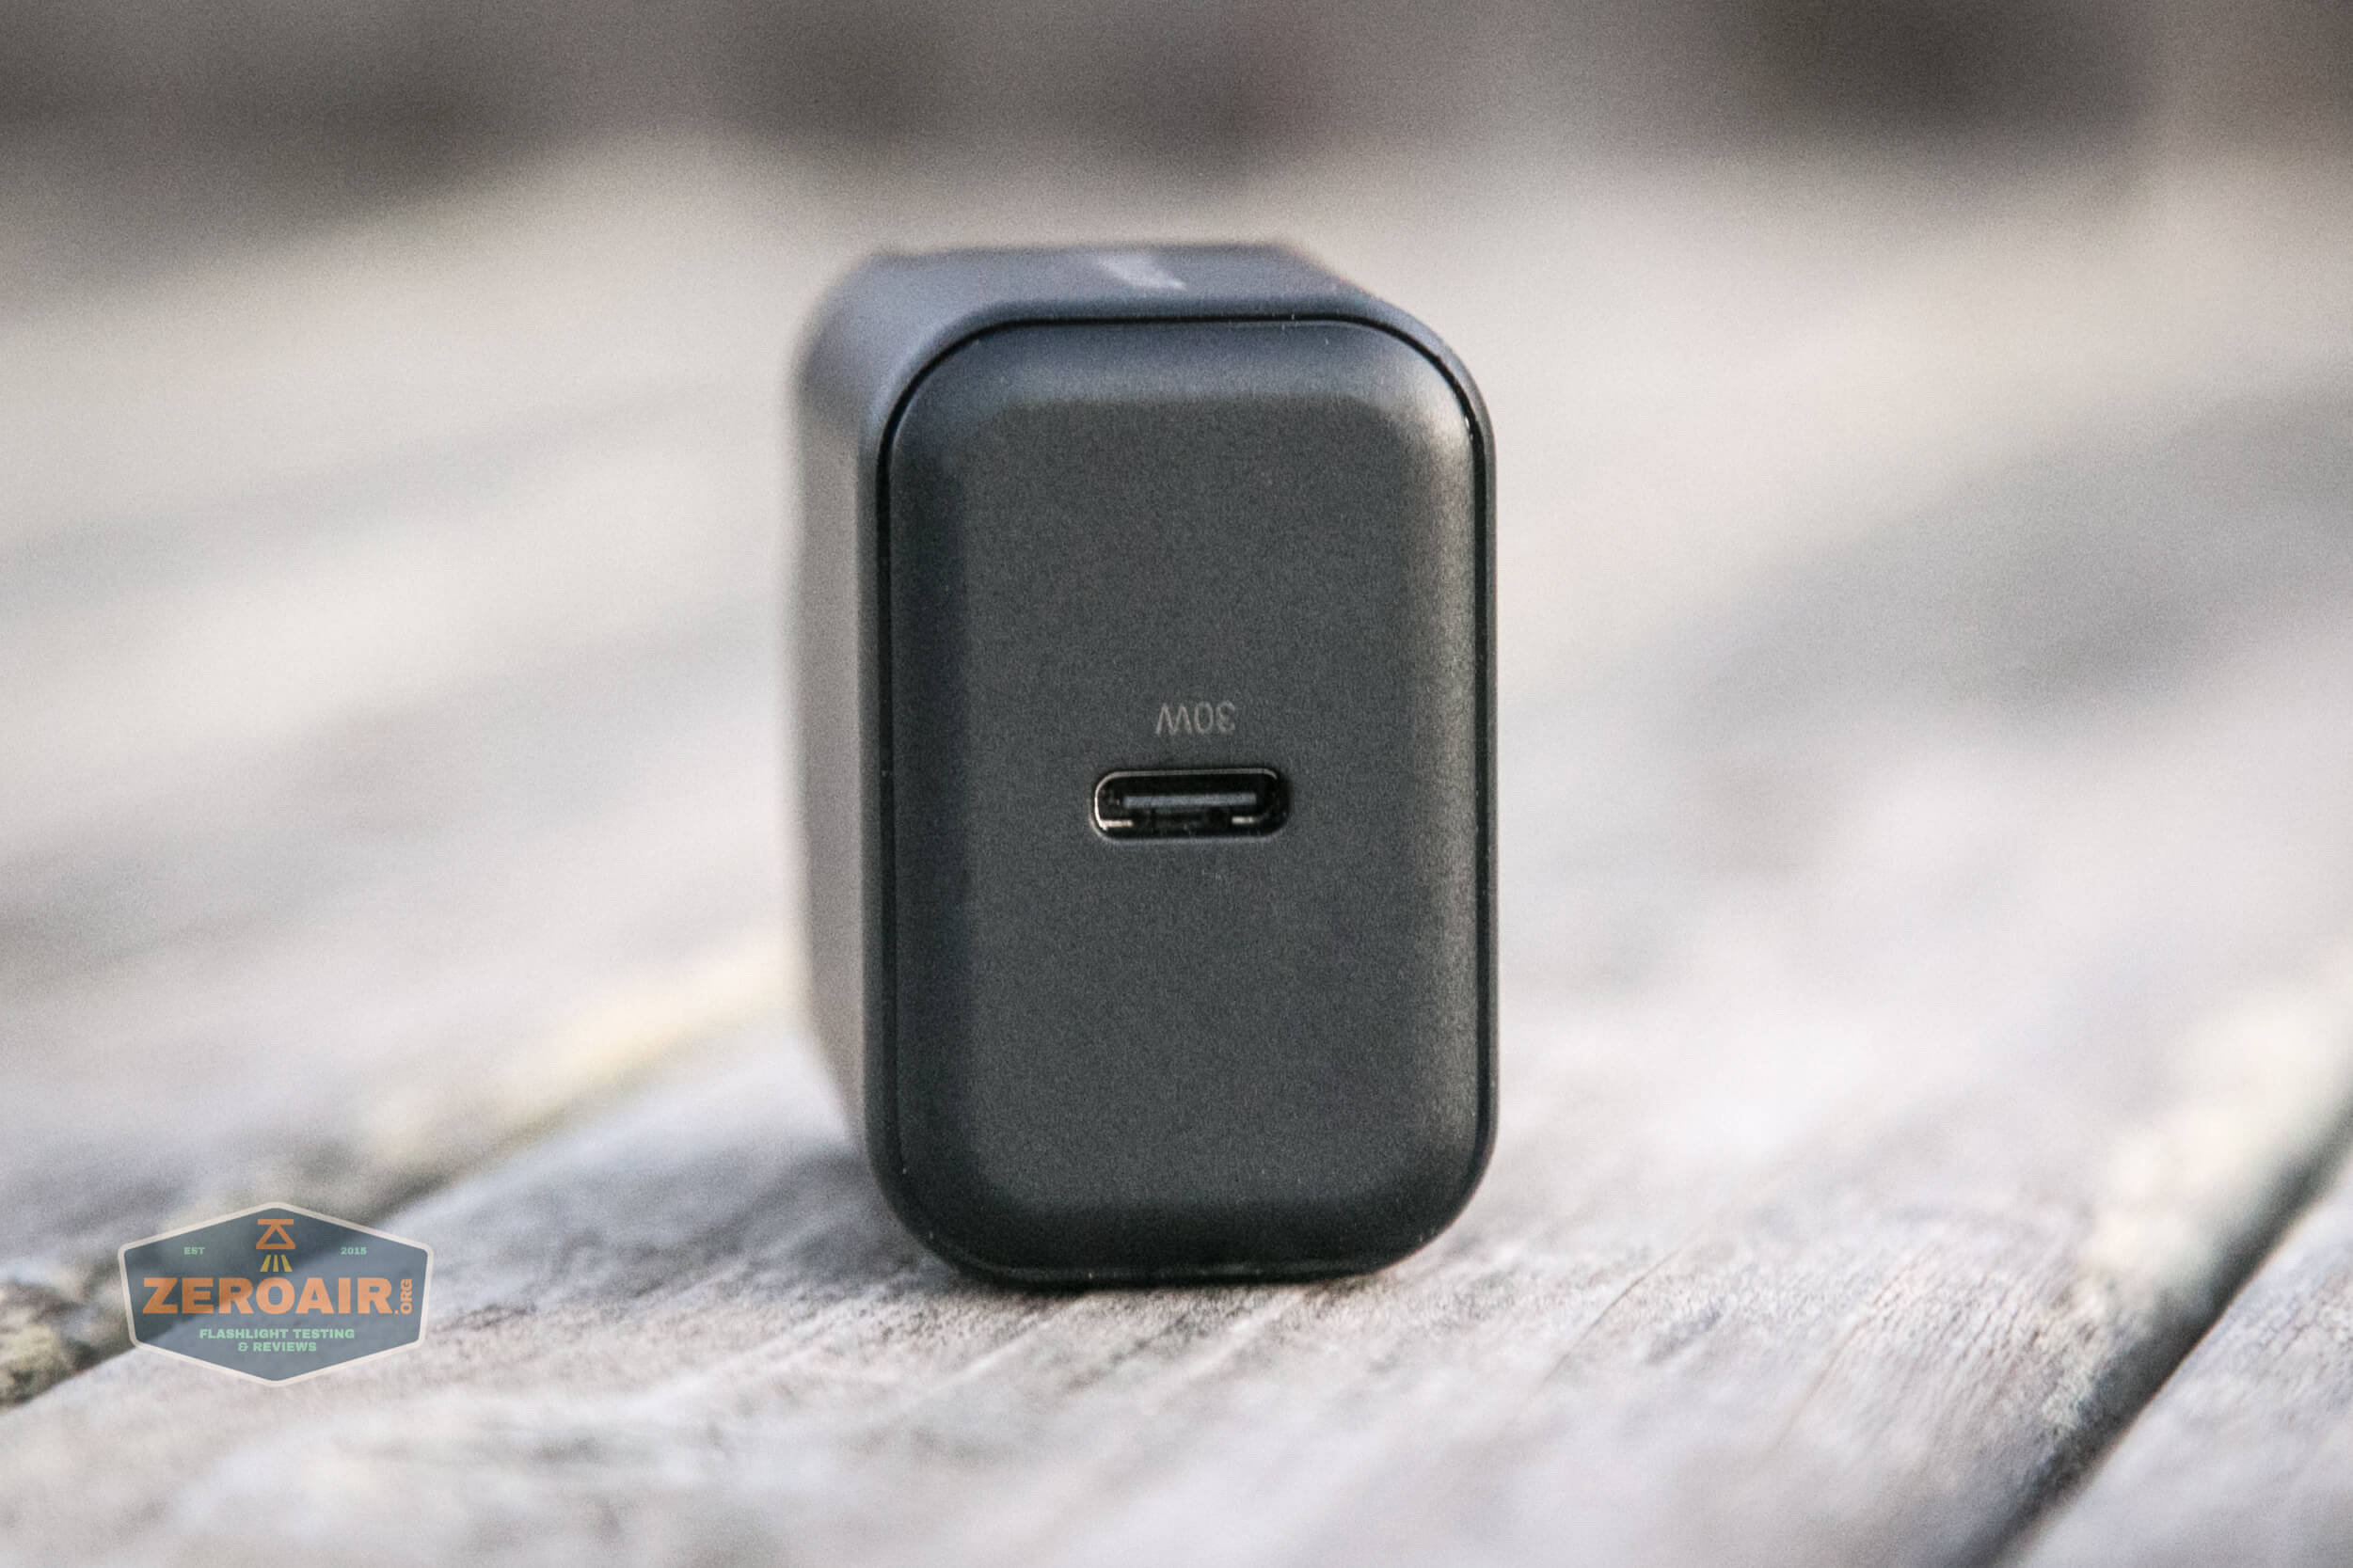
The Marauder 2 has onboard charging. This is a USB-C port in the tail and is accessible via twisting the tailcap.
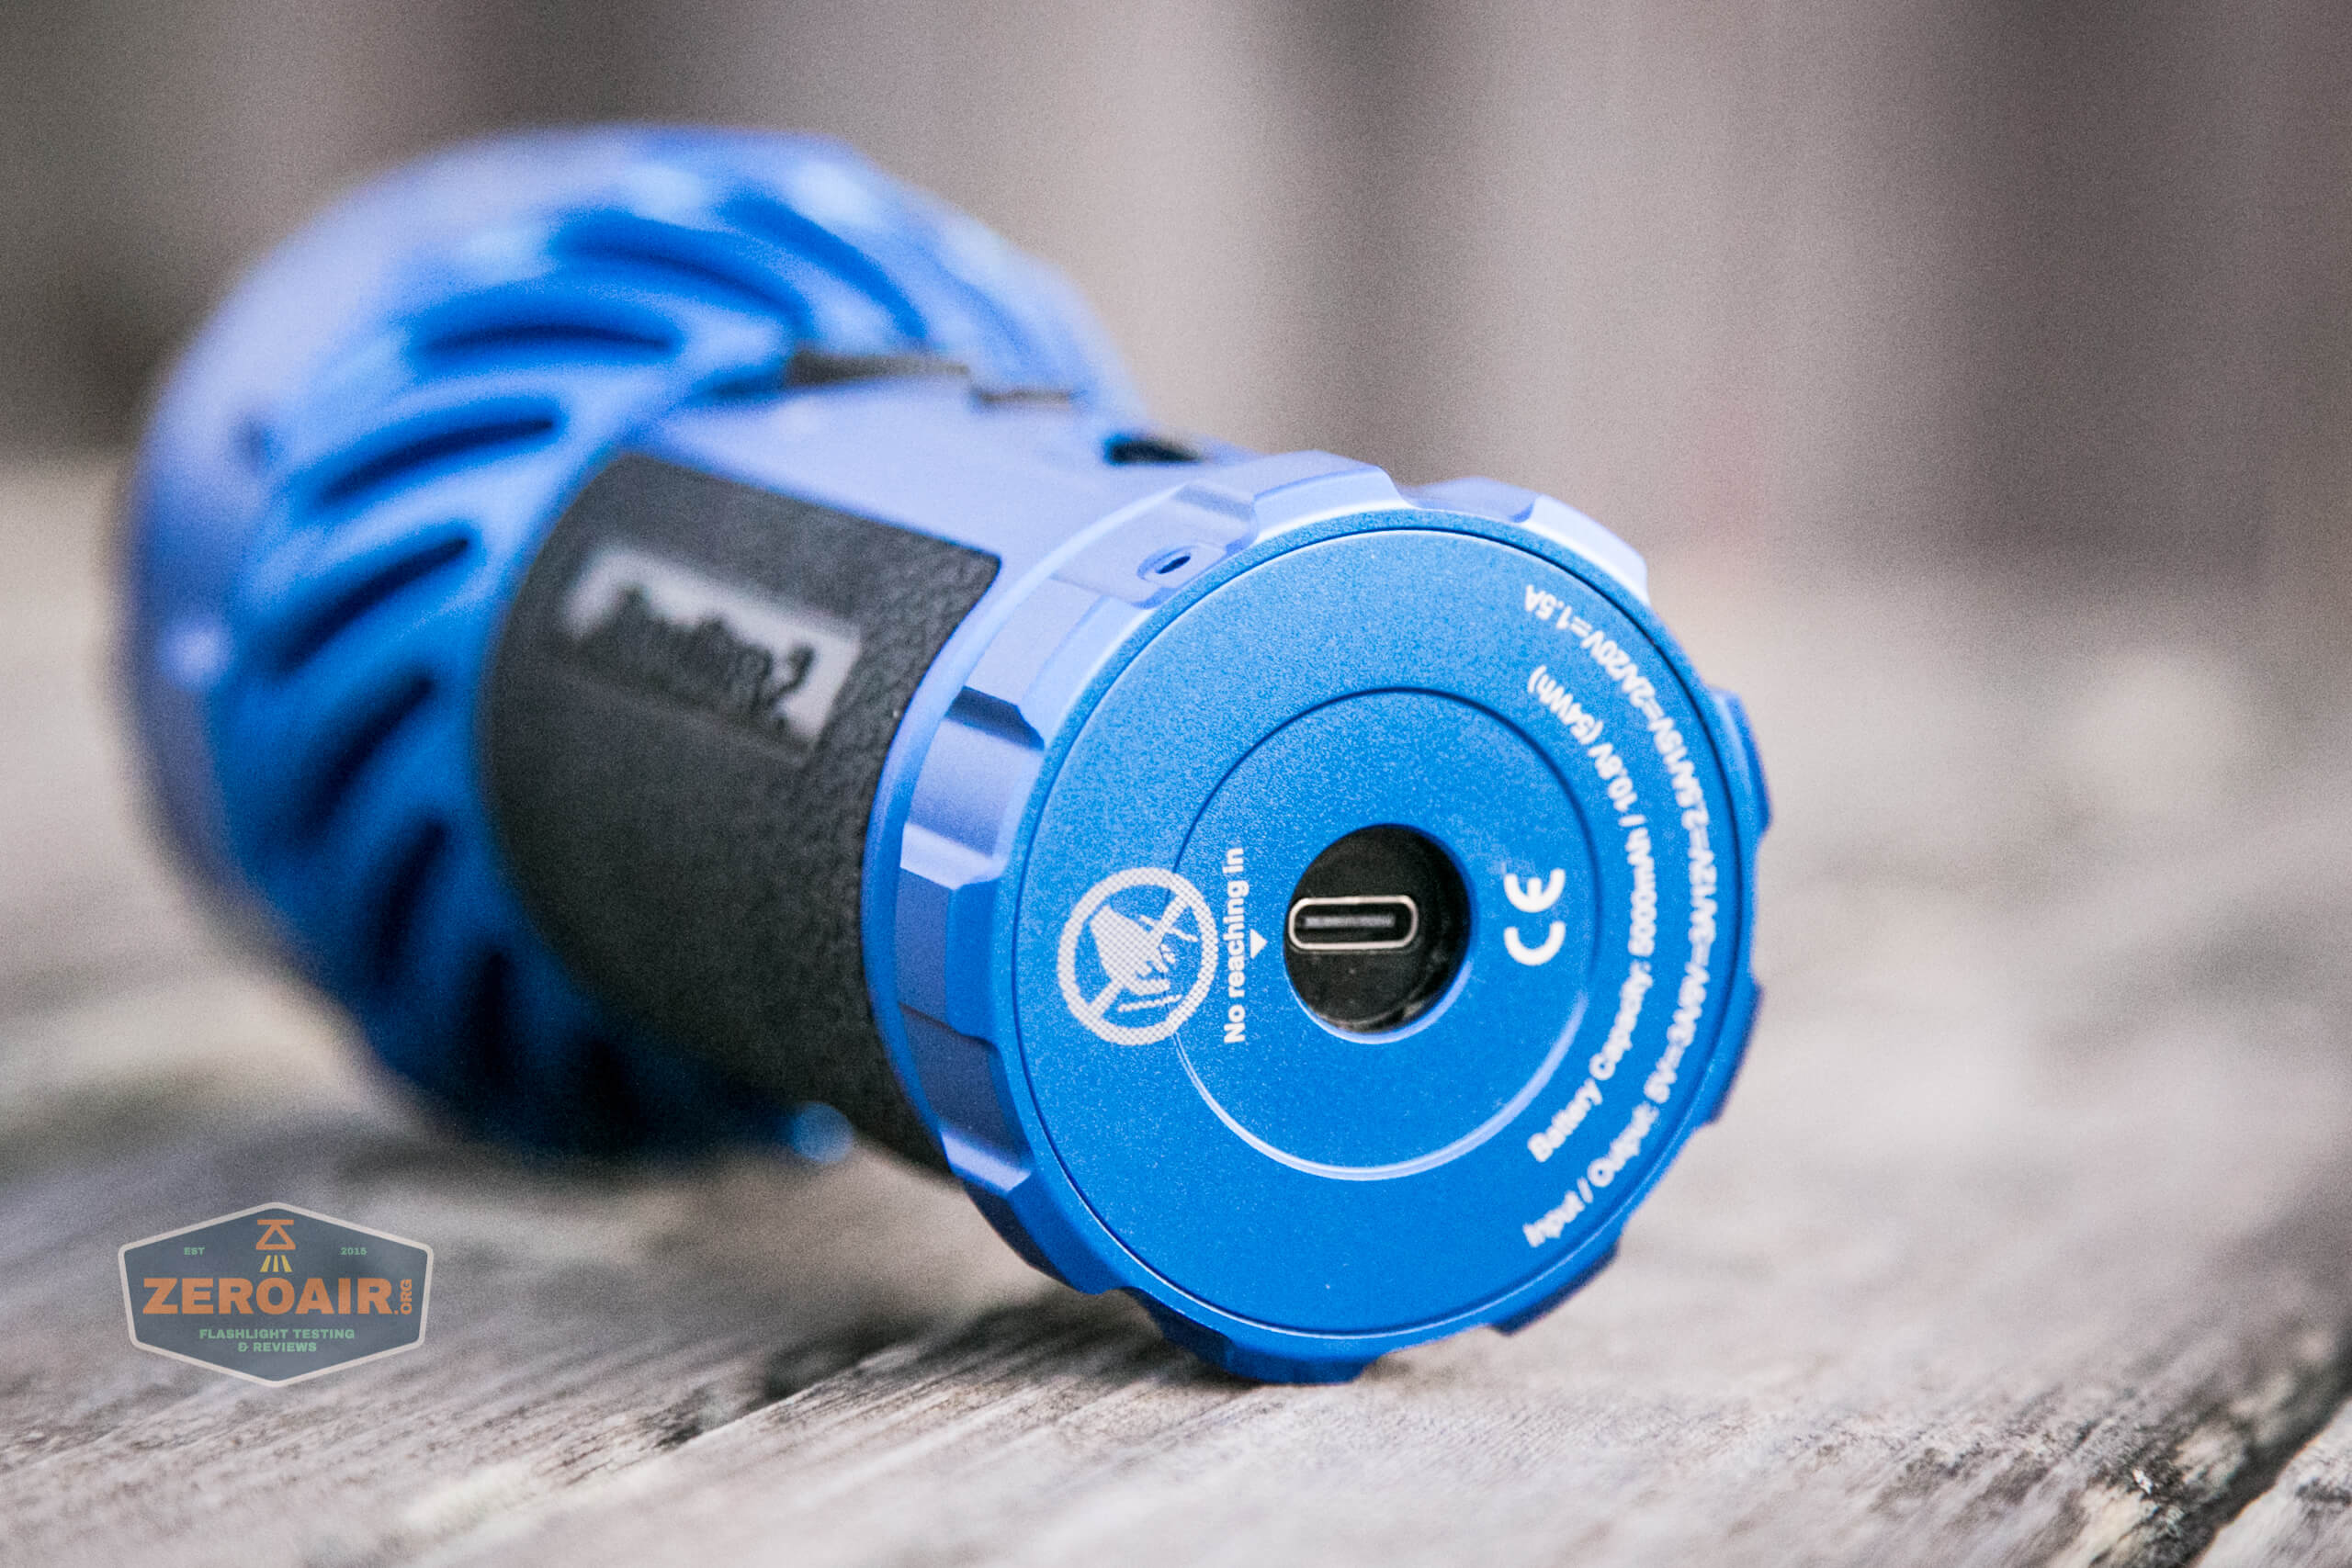
This is a neat mechanism, and the light has an IPX8 waterproof rating, so it must be a “good enough” seal.
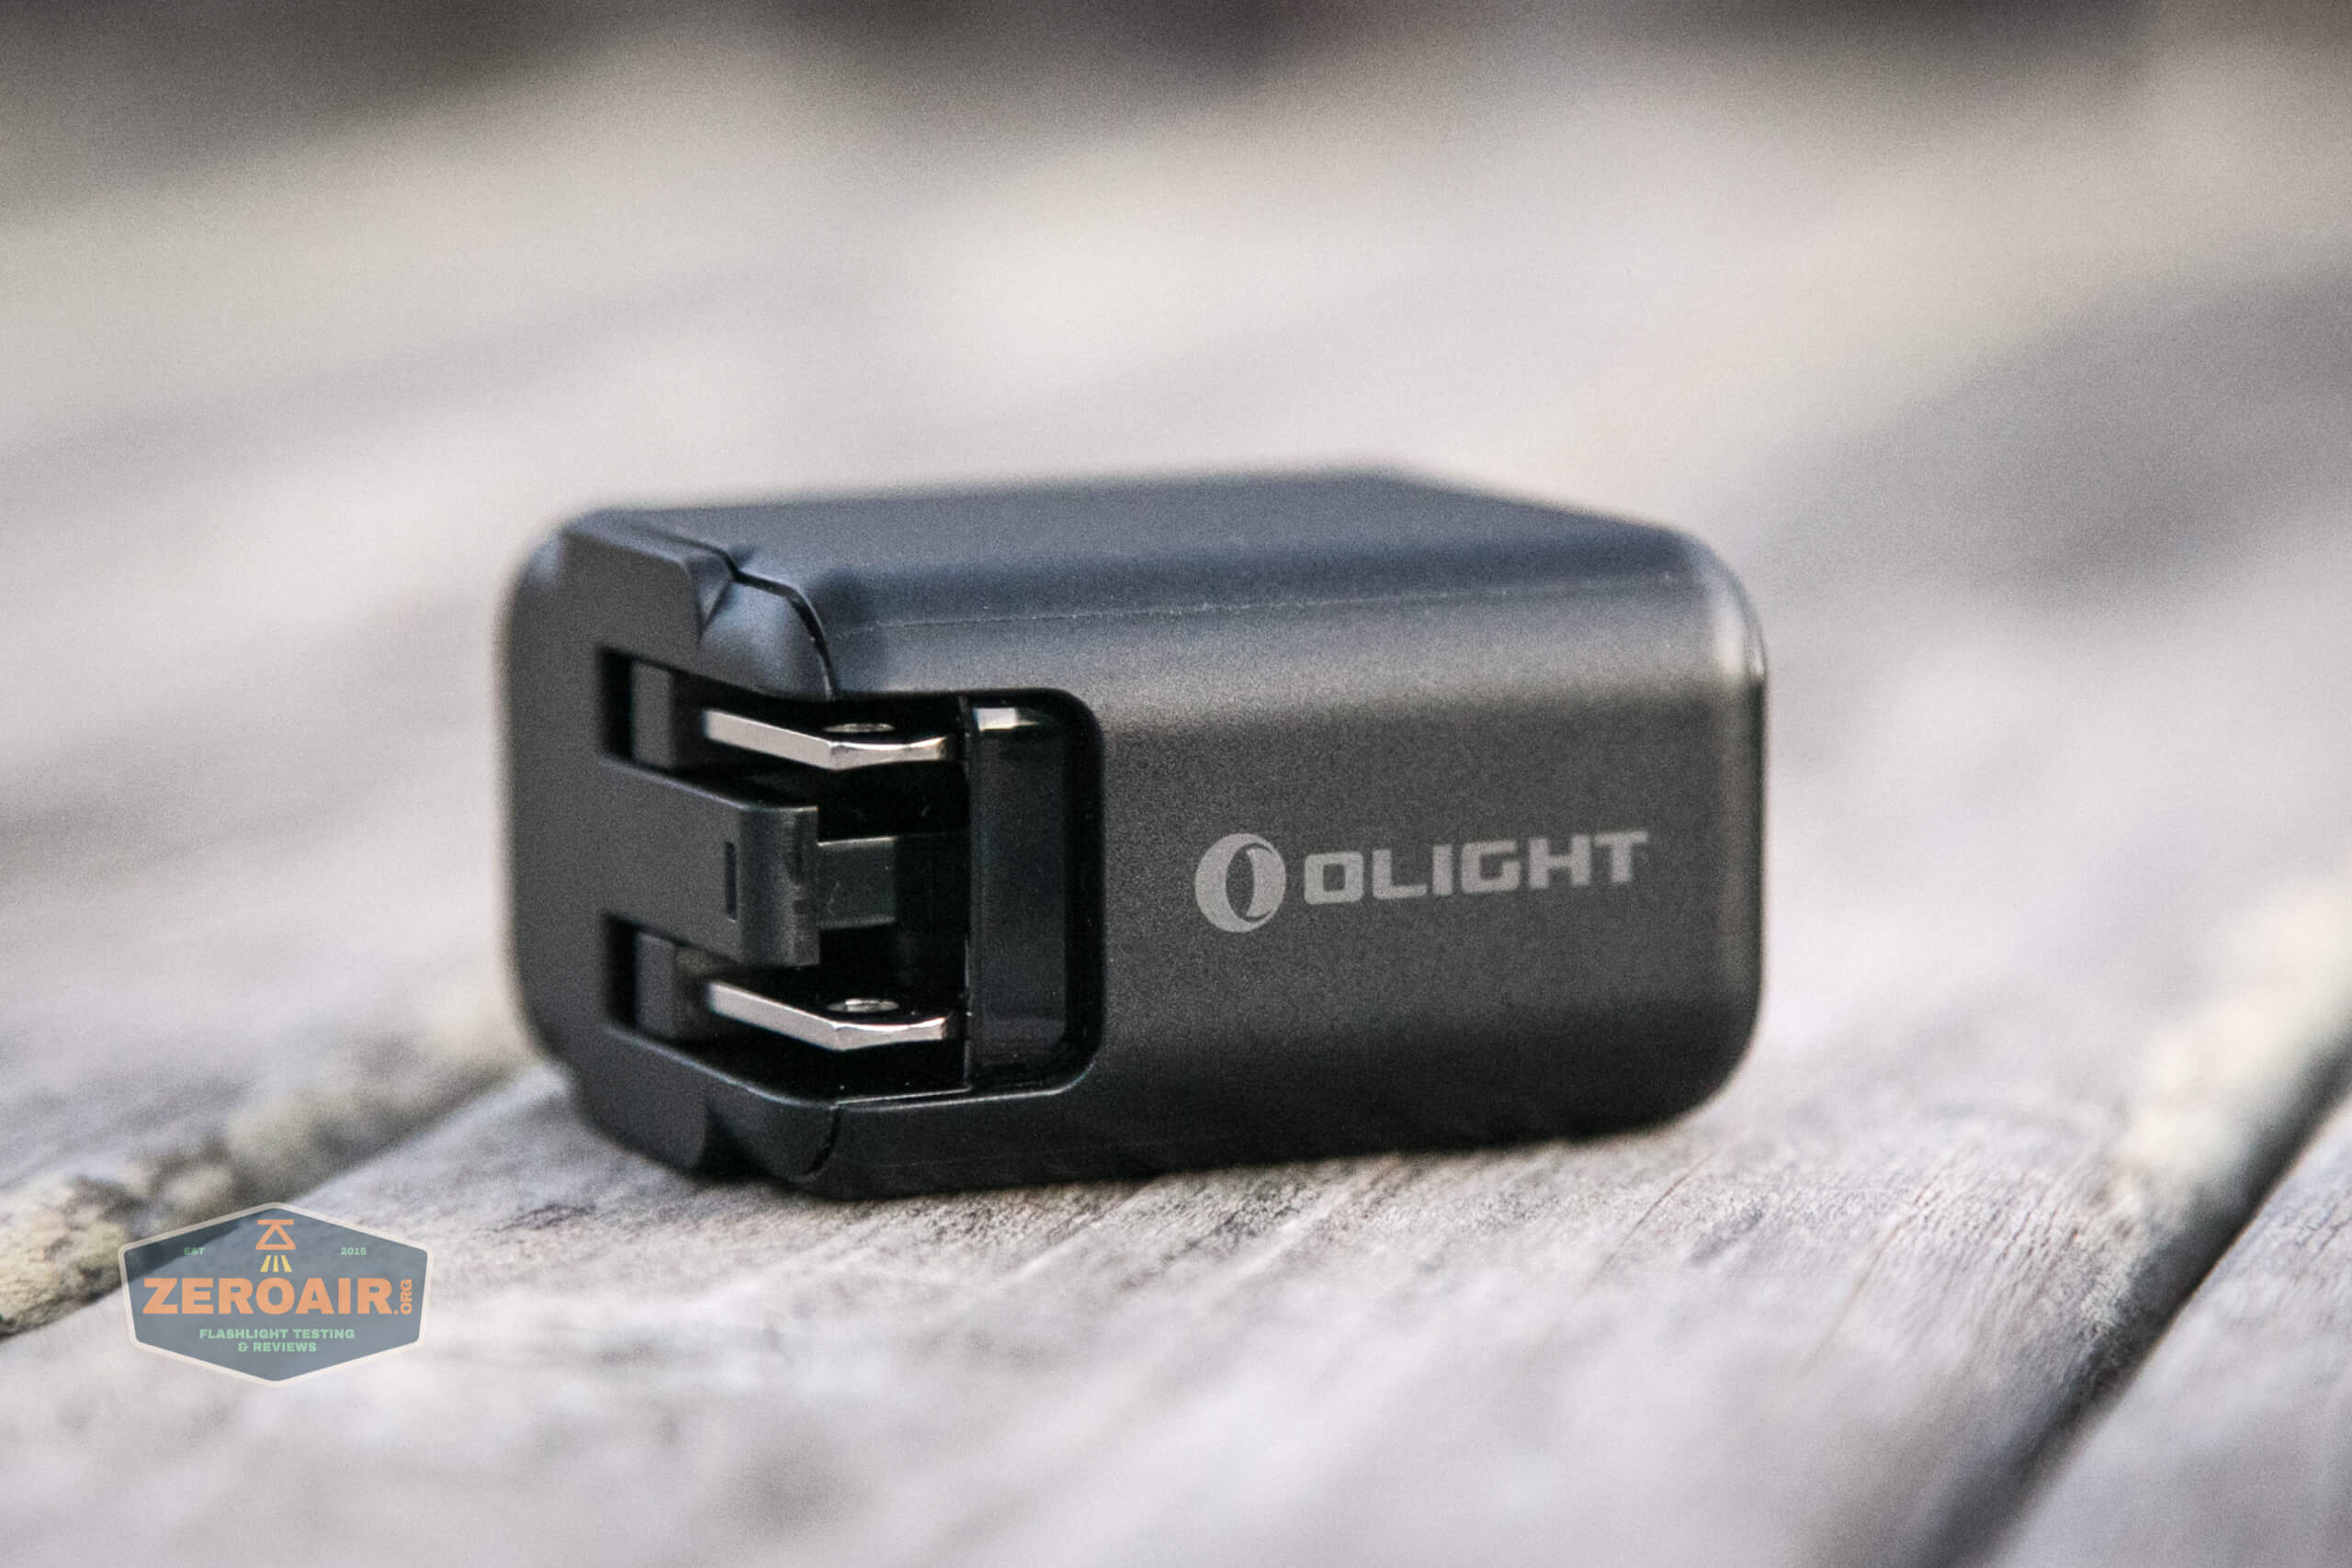
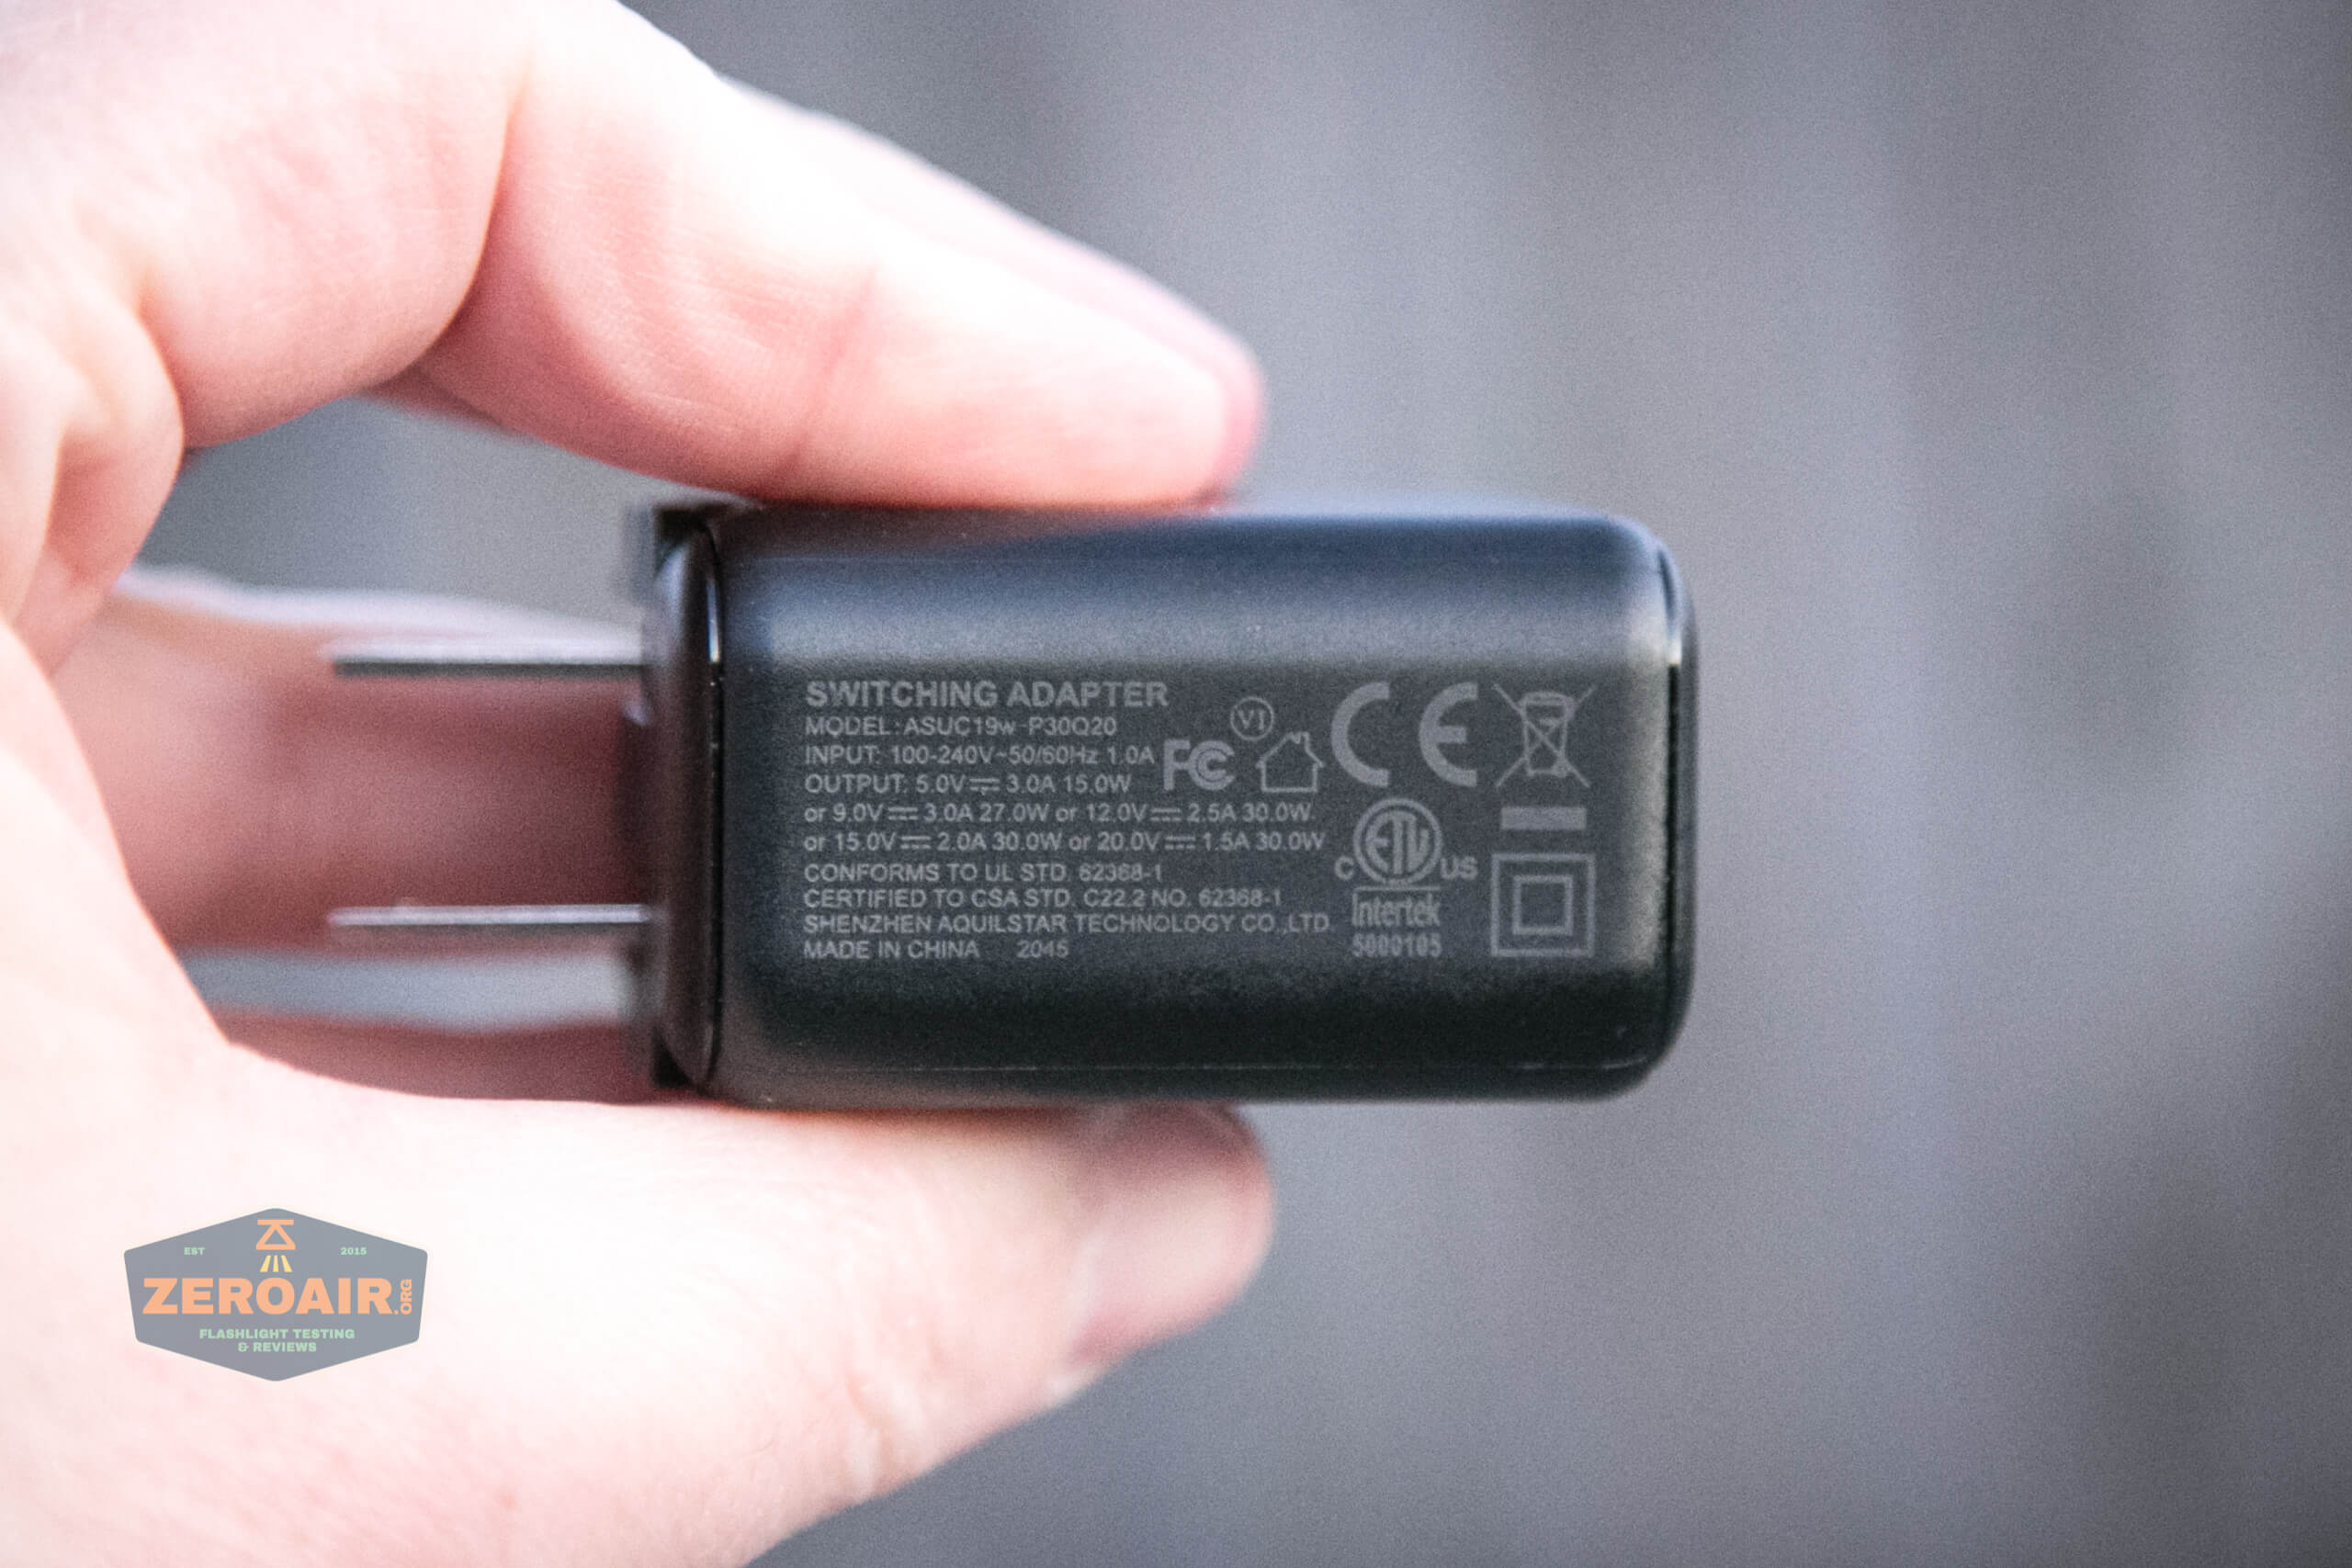
Included with the “bigger” package is this wall wart. It’s a 30W wall wart and has only one USB-C port.
This charger (or at least one like it) is positively recommended for the Olight Marauder 2. I can’t even say for certain that USB to USB-C will charge the light. I tried it, and it took ‘forever’ (and maybe didn’t complete, I don’t rightly recall).
Also, this charging is PD charging – it’ll charge at up to 20V. And with the included charger, it does charge at 20V.
As it states, it’s a 30W charger. So at 20V, that’s over 1A, and charging is amazingly quick!
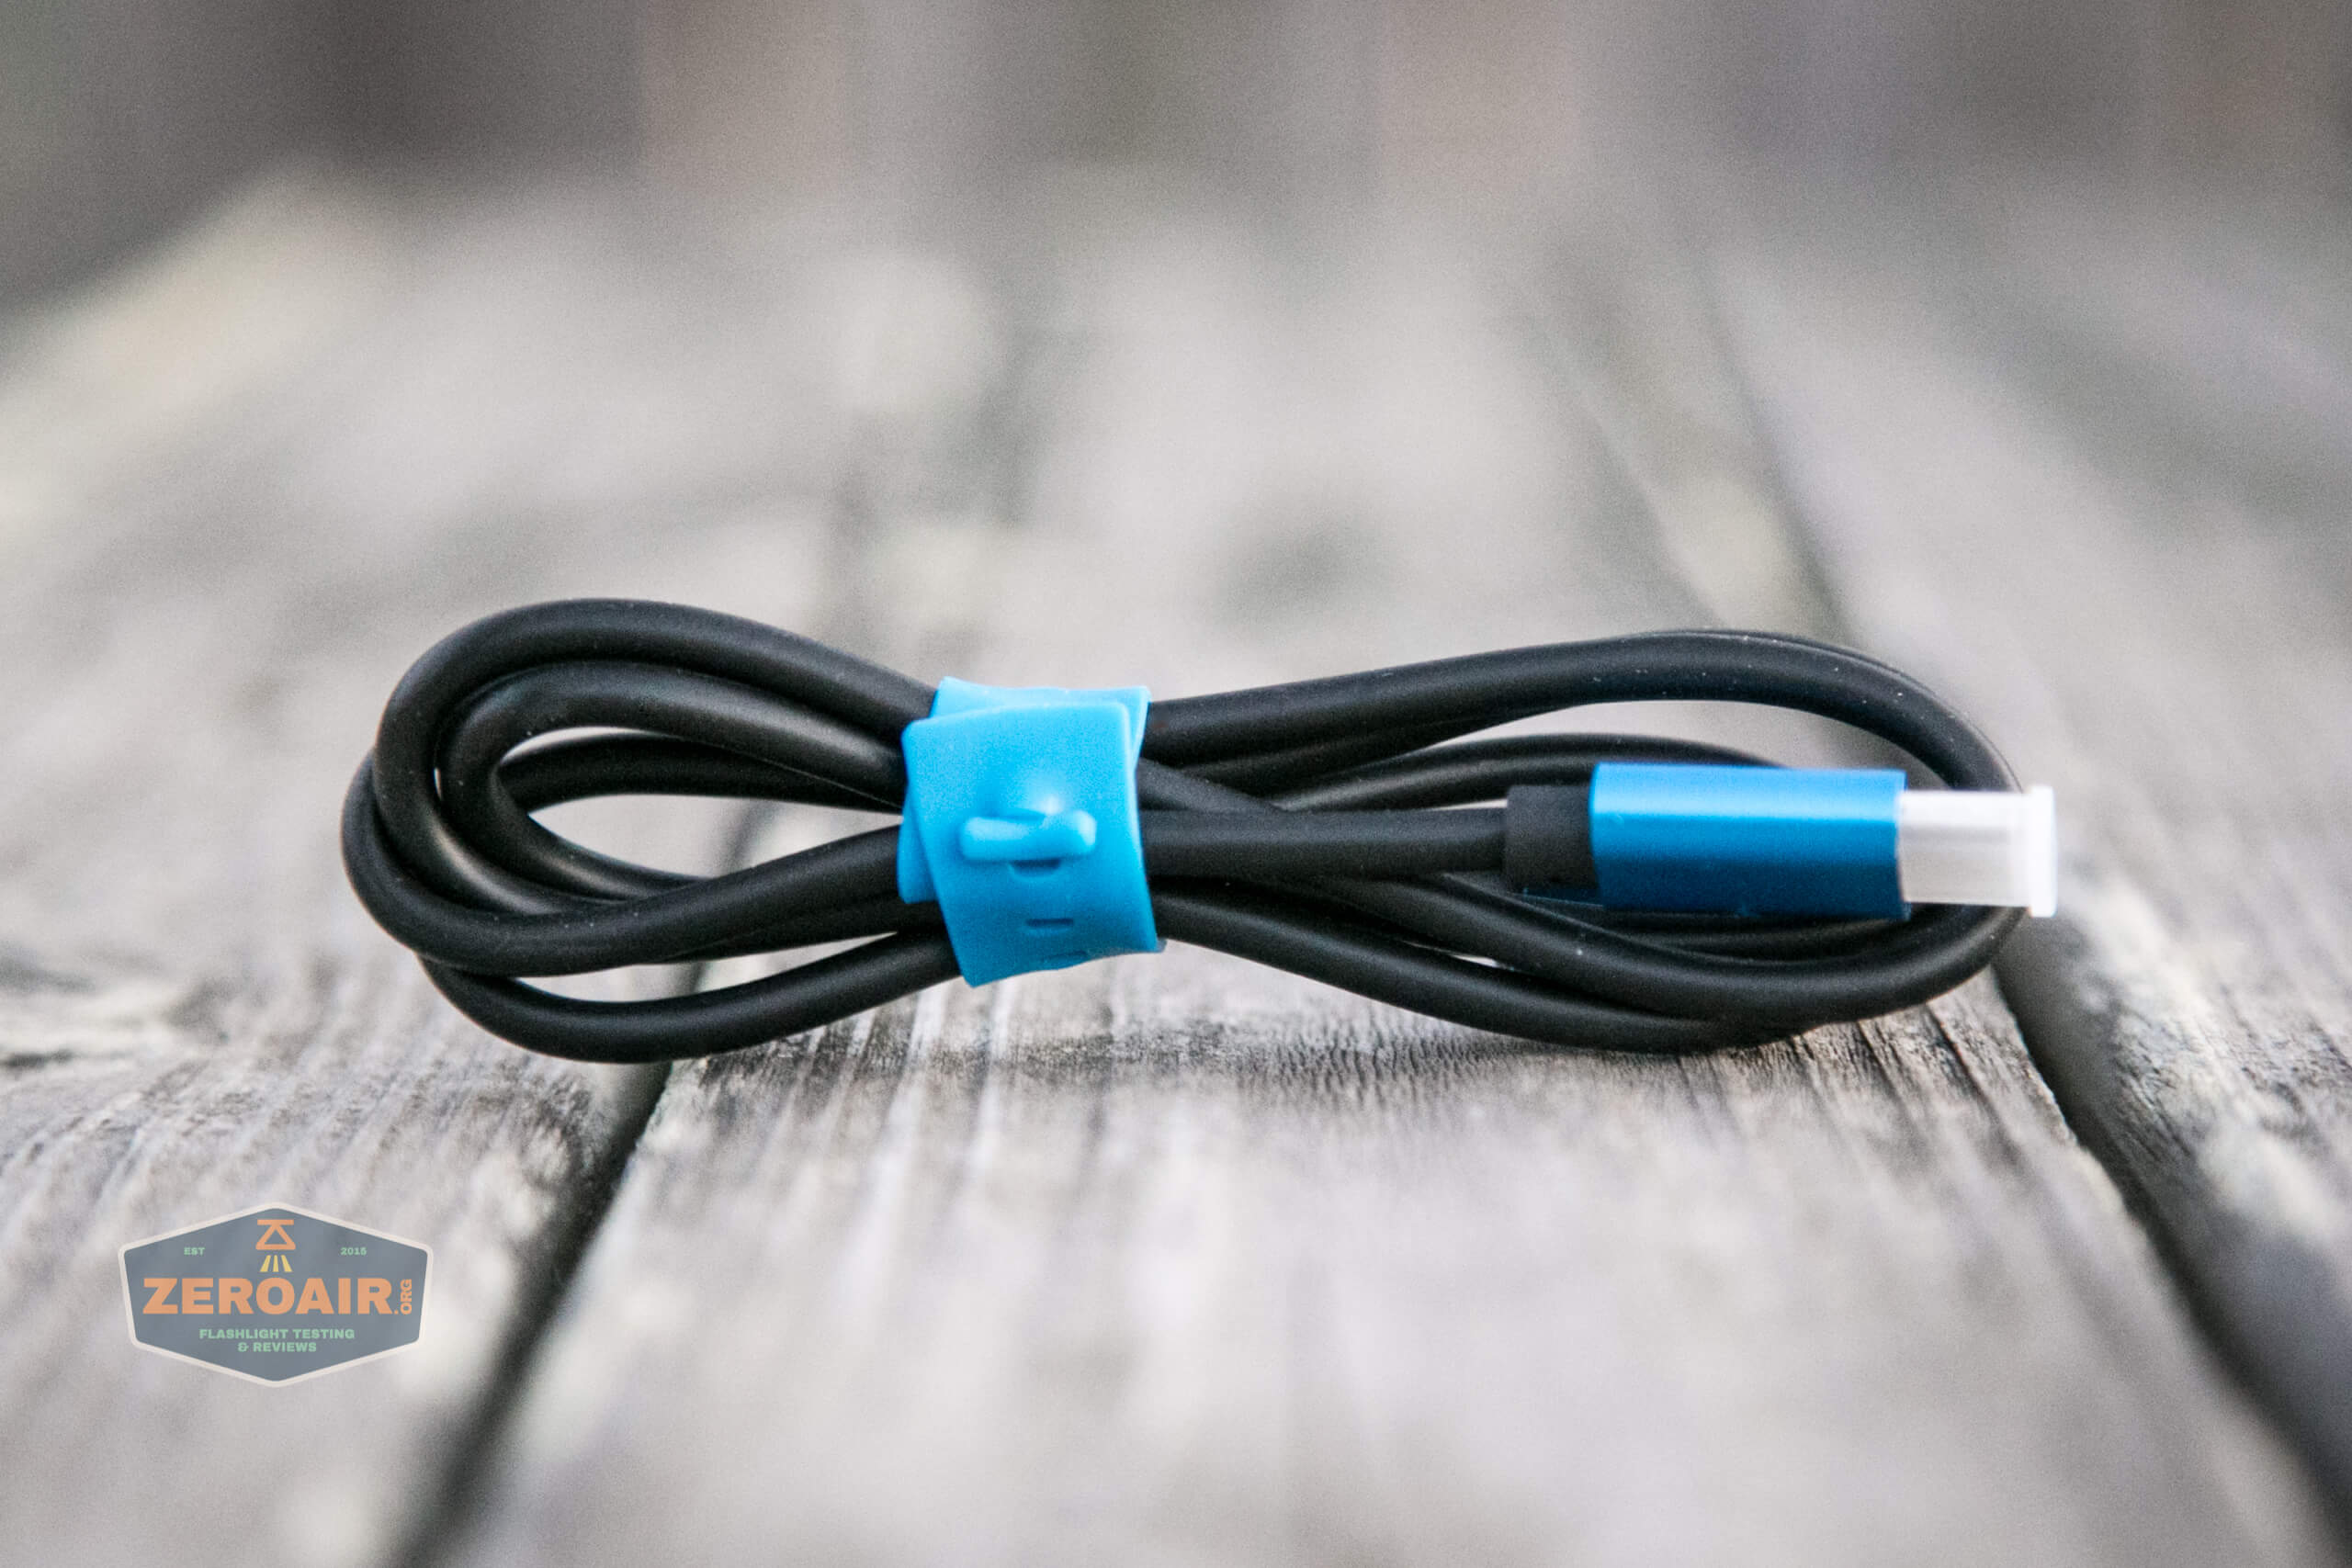
An appropriate charge cable is included – USB-C to USB-C.
Unfortunately for me and you all, I killed my USB-C logger and wasn’t able to record any charge cycles from this light. I did note it, as I said, at about 2.5 hours (which is just fantastic). It surprised me every time to note that it was already completely charged.
There’s a charge status indicator on the indicator around the rotary switch. Right in the center is a single dot (the rest are dashes). When solid red, the light is charging. When solid green, charging is complete. When flashing green, the charge port is being used as a powerbank.
That’s right! The Olight Marauder 2 Blue can be used as a powerbank, too! As with the charge logging, I wasn’t able to log the powerbank data.
Modes and Currents
Spot:
| Mode | Mode Claimed Output (lm) | Claimed Runtime | Measured Lumens | Tailcap Amps |
|---|---|---|---|---|
| Level 7 | 850/650/500/300/200/100 | 20m/170m/85m/25m/15m/85m | 873 | ? |
| Level 6 | 650/500/300/200/100 | 115m/180m/20m/20m/85m | 664 | ? |
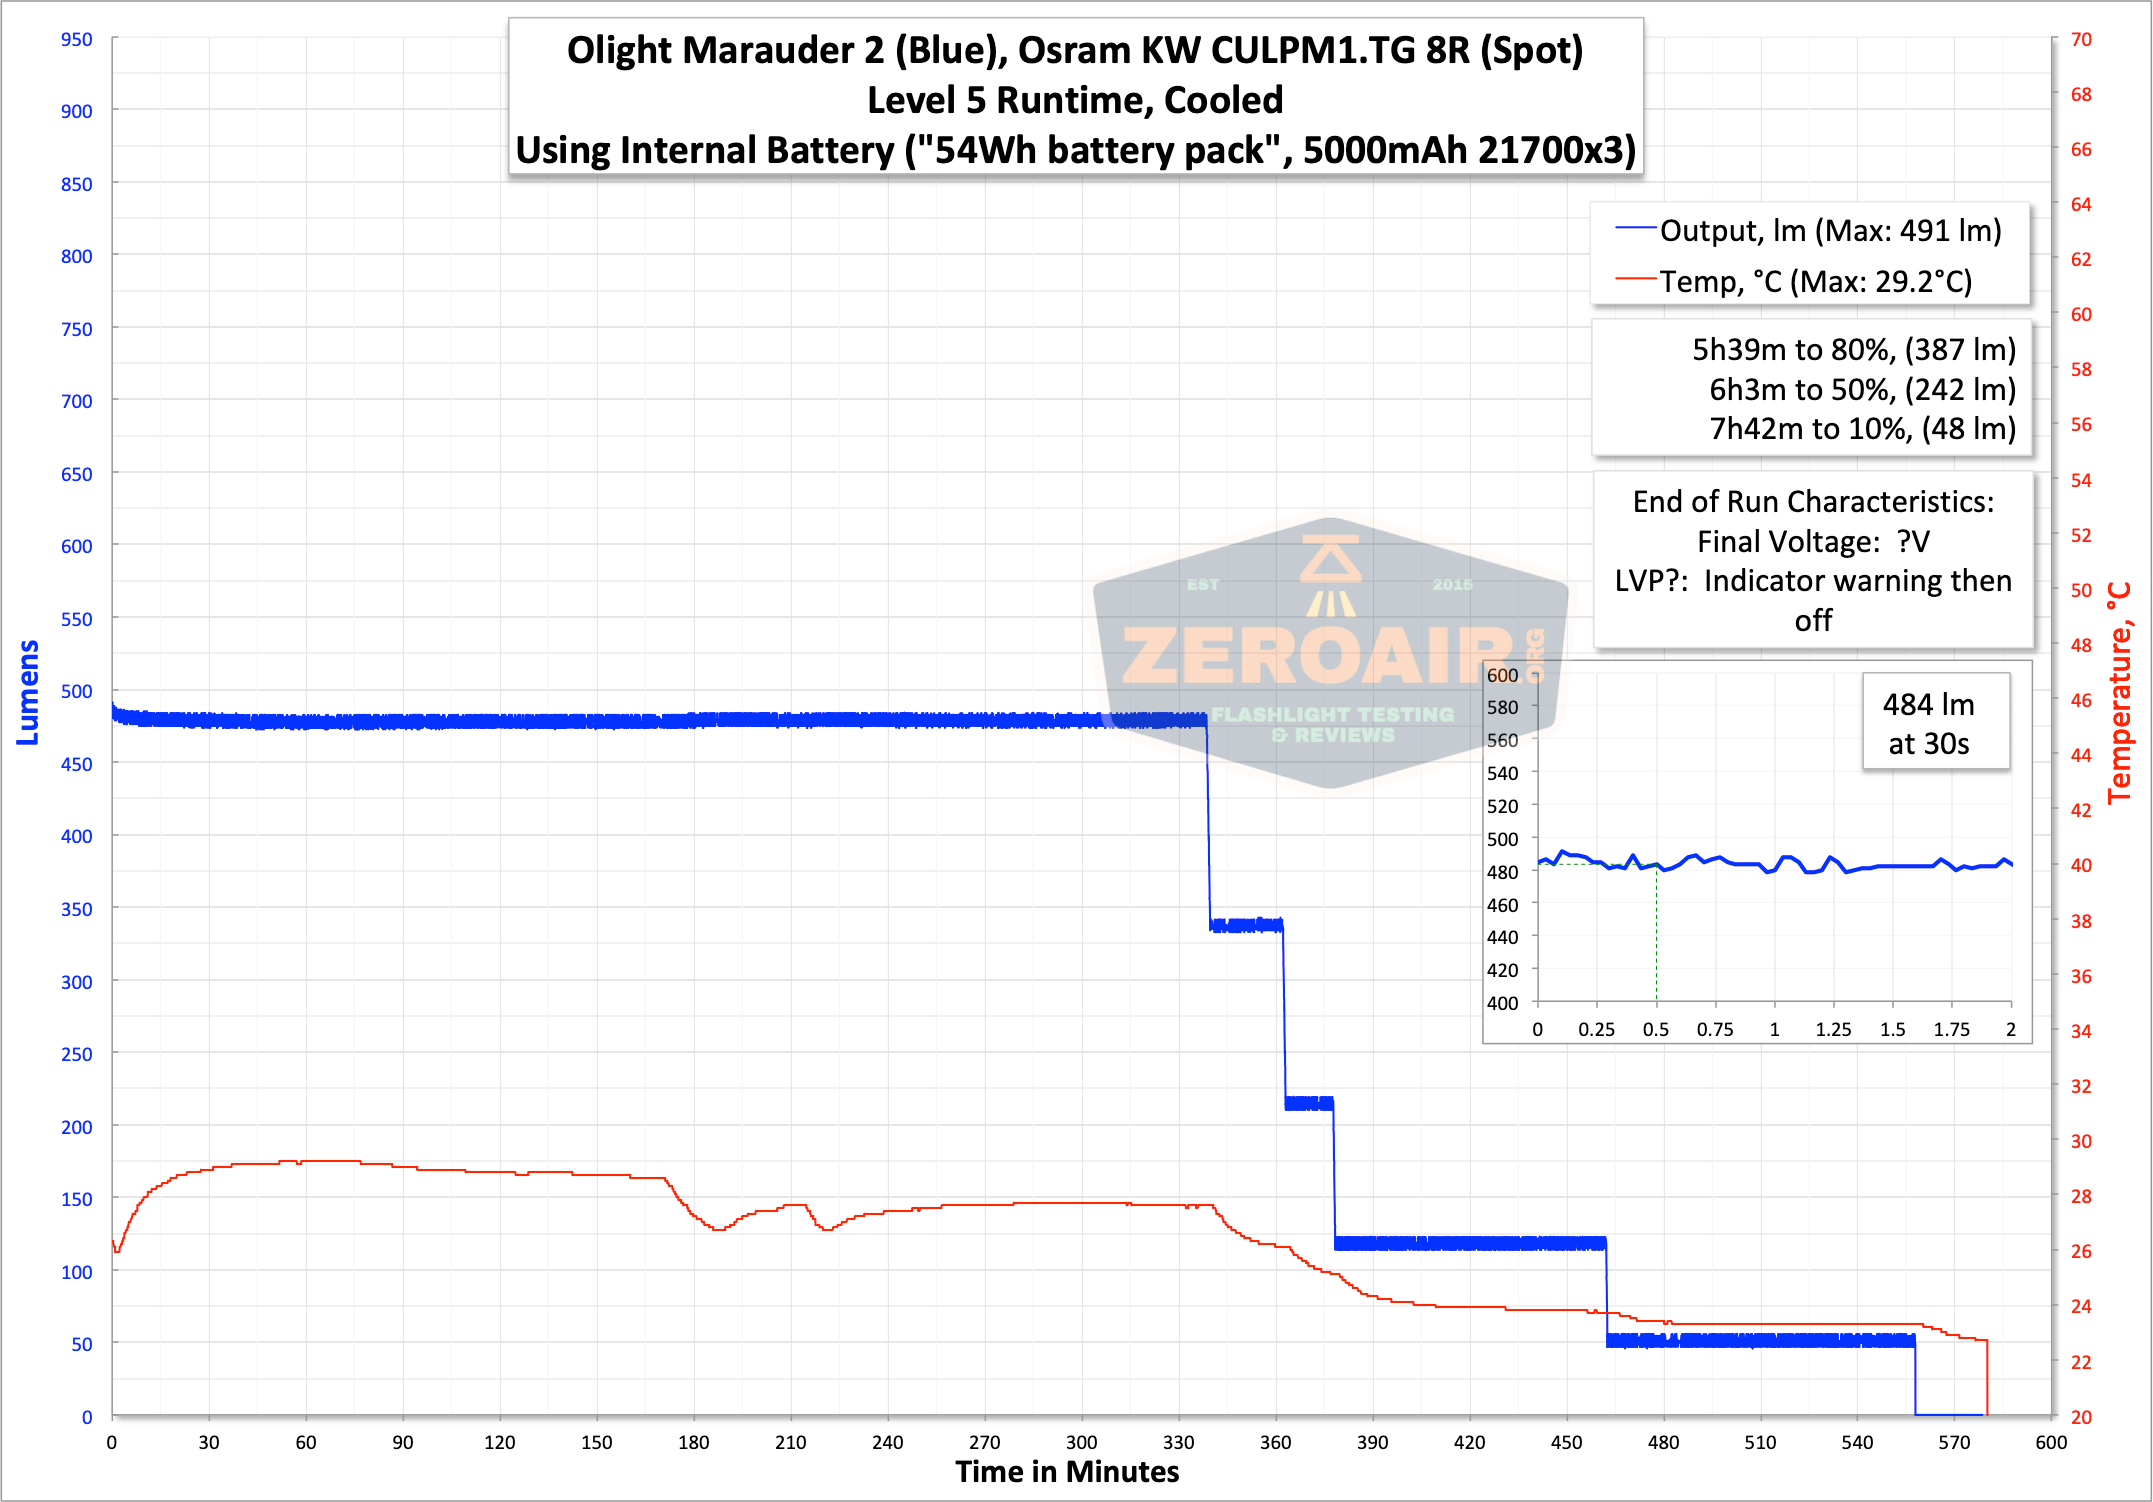
| Level 5 | 500/300/200/100/50 | 360m/25m/15m/80m/110m | 484 | ? |
| Level 4 | 300 | 700m | 346 | ? |
| Level 3 | 200 | 19h | 214 | ? |
| Level 2 | 100 | 31h | 118 | ? |
| Level 1 | 50 | 59h | 49 | ? |
Flood:
| Mode | Mode Claimed Output (lm) | Claimed Runtime | Measured Lumens | Tailcap Amps |
|---|---|---|---|---|
| Level 7 | 14000/3200/1600 | 5m/140m/45m | 12419 | ? |
| Level 6 | 6400/3200/1600/800 | 13m/120m/40m/22m | 5628 | ? |
| Level 5 | 3200/1600/800/400/200 | 90m/90m/10m/10m/70m | ? | |
| Level 4 | 1600 | 450m | 1455 | ? |
| Level 3 | 800 | 13h | 727 | ? |
| Level 2 | 400 | 22h | 365 | ? |
| Level 1 | 200 | 40h | 179 | ? |
Pulse Width Modulation
The spotlight (listed first) does not have any PWM at all.

The flood emitters have PWM on the lower four (maybe 5) modes.

Here you can see a “baseline” – a chart with almost no light hitting the sensor.
Then there’s the Ultrafire WF-602C flashlight, which has some of the worst PWM I’ve seen. It’s so bad that I used a post about it to explain PWM! Here are multiple timescales (10ms, 5ms, 2ms, 1ms, 0.5ms, 0.2ms) to make comparing this “worst” PWM light to the test light easier. That post also explains why I didn’t test the WF-602C at the usual 50us scale.
User Interface and Operation
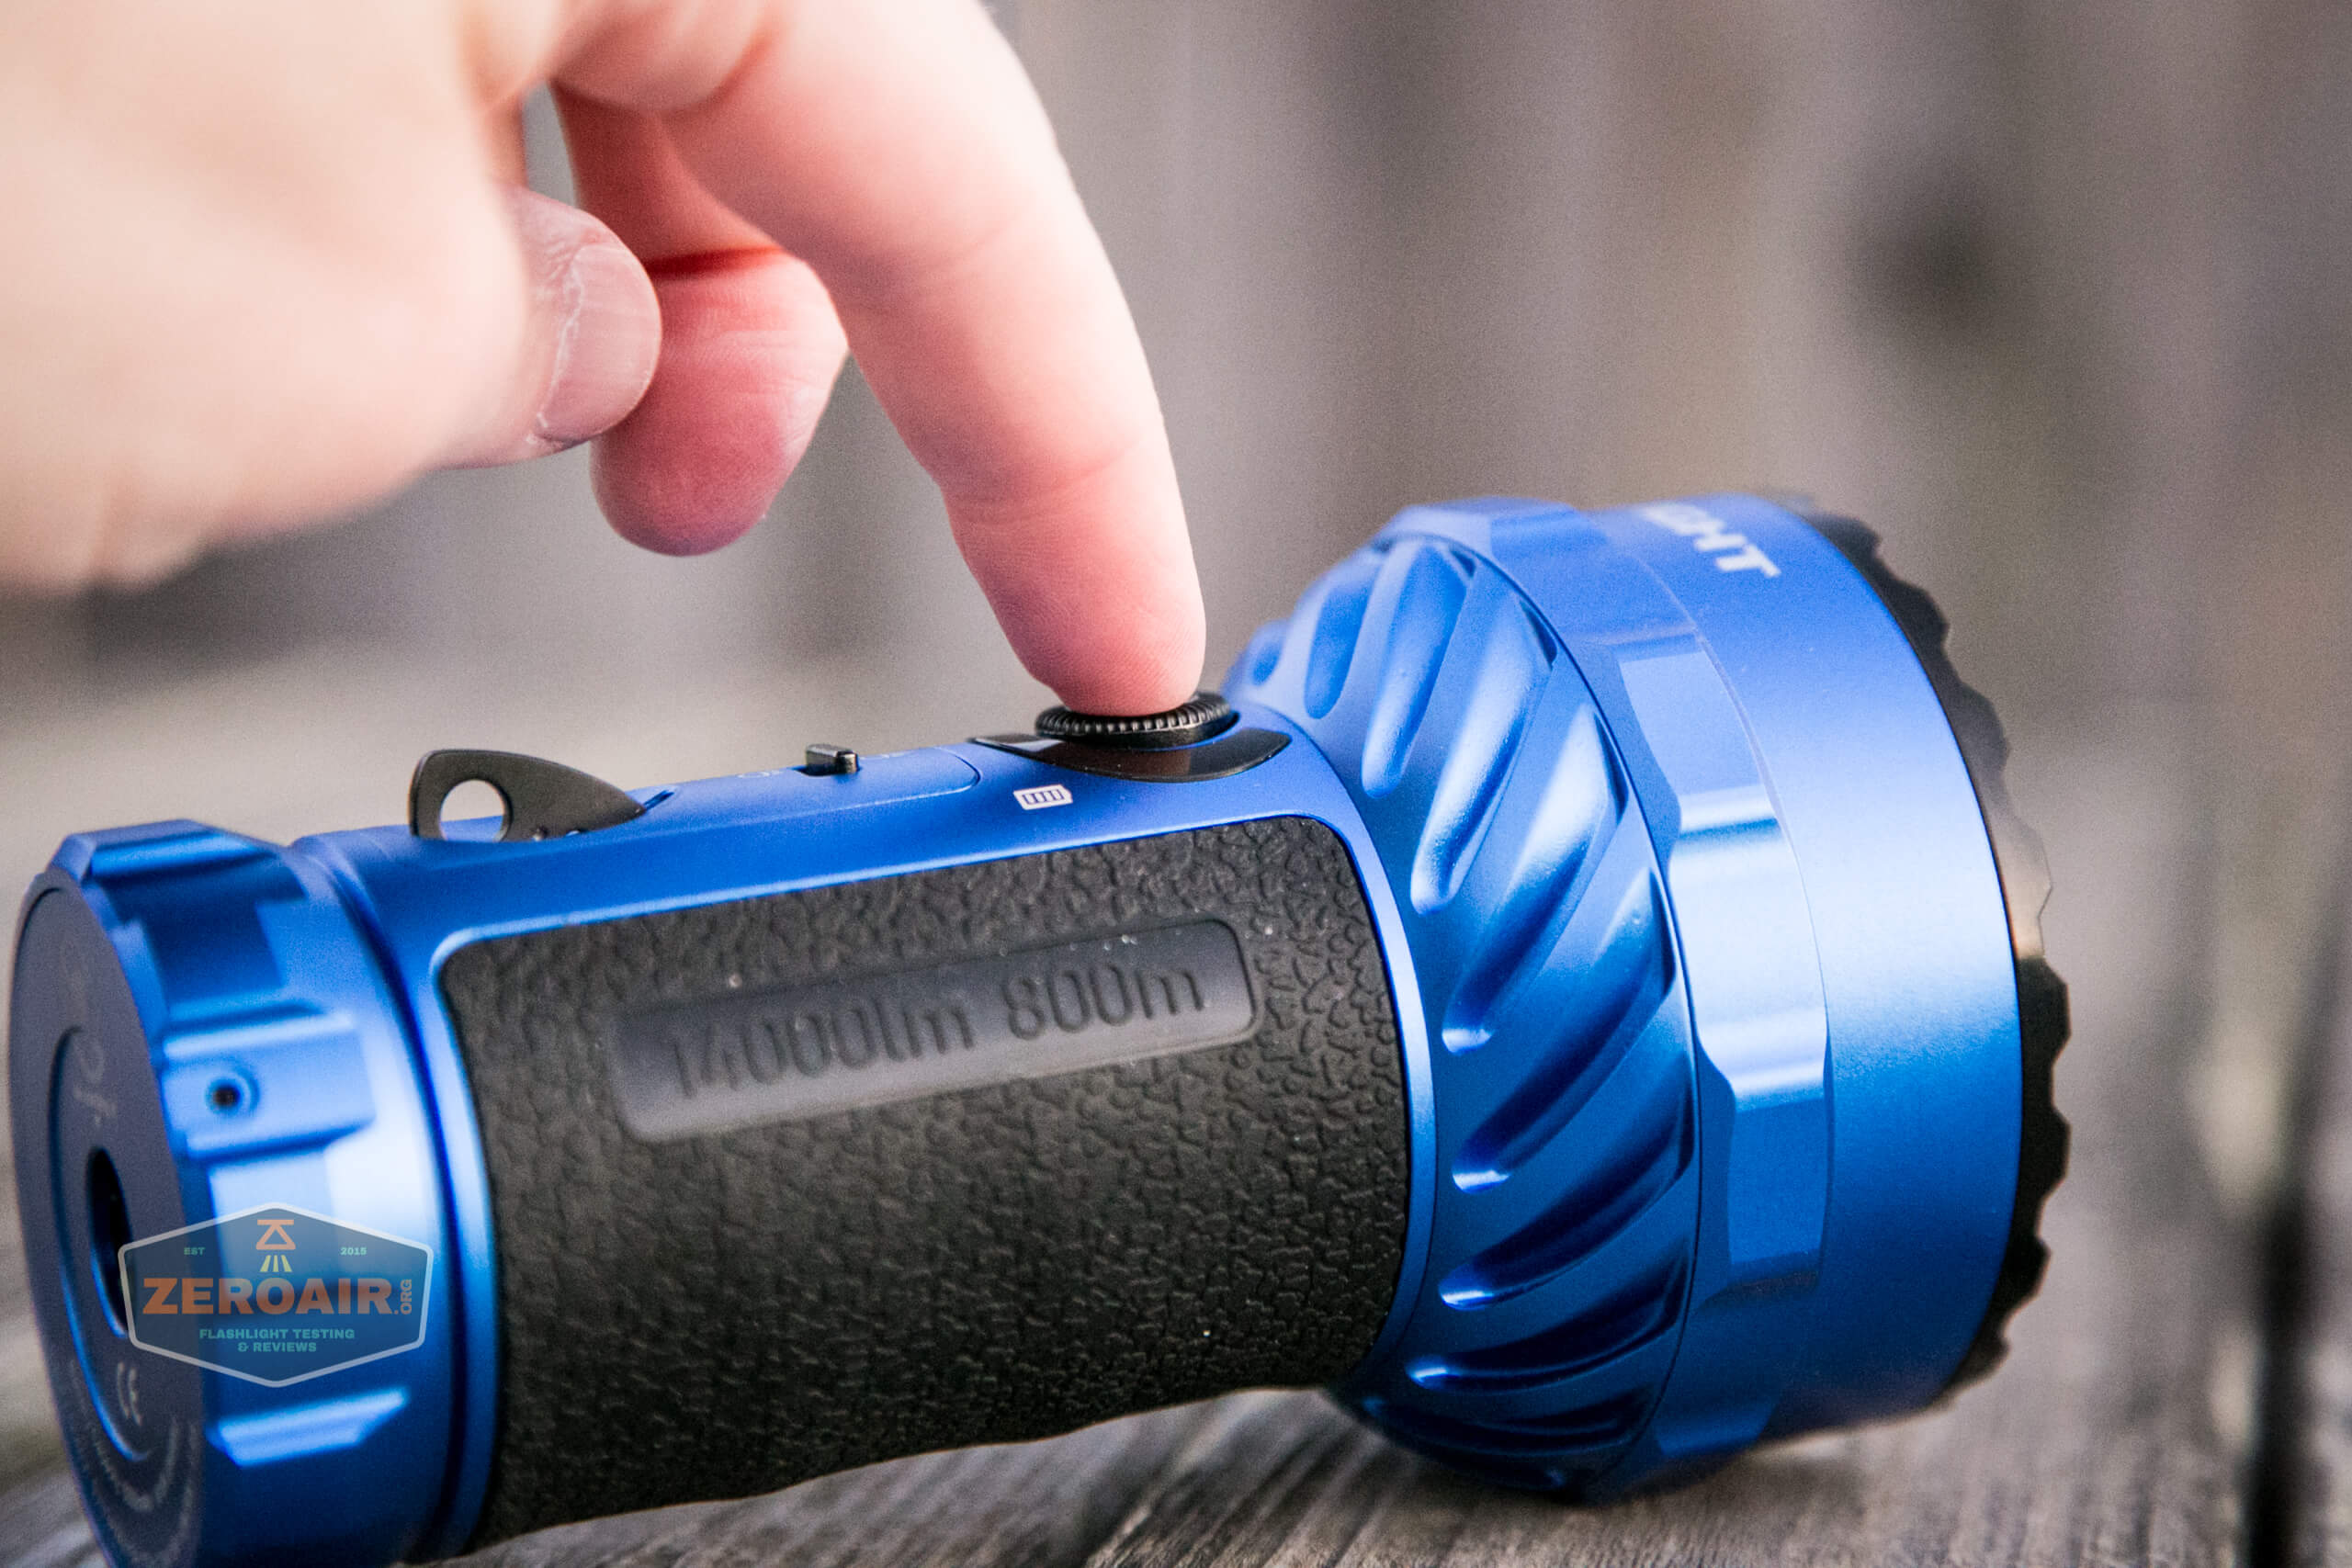
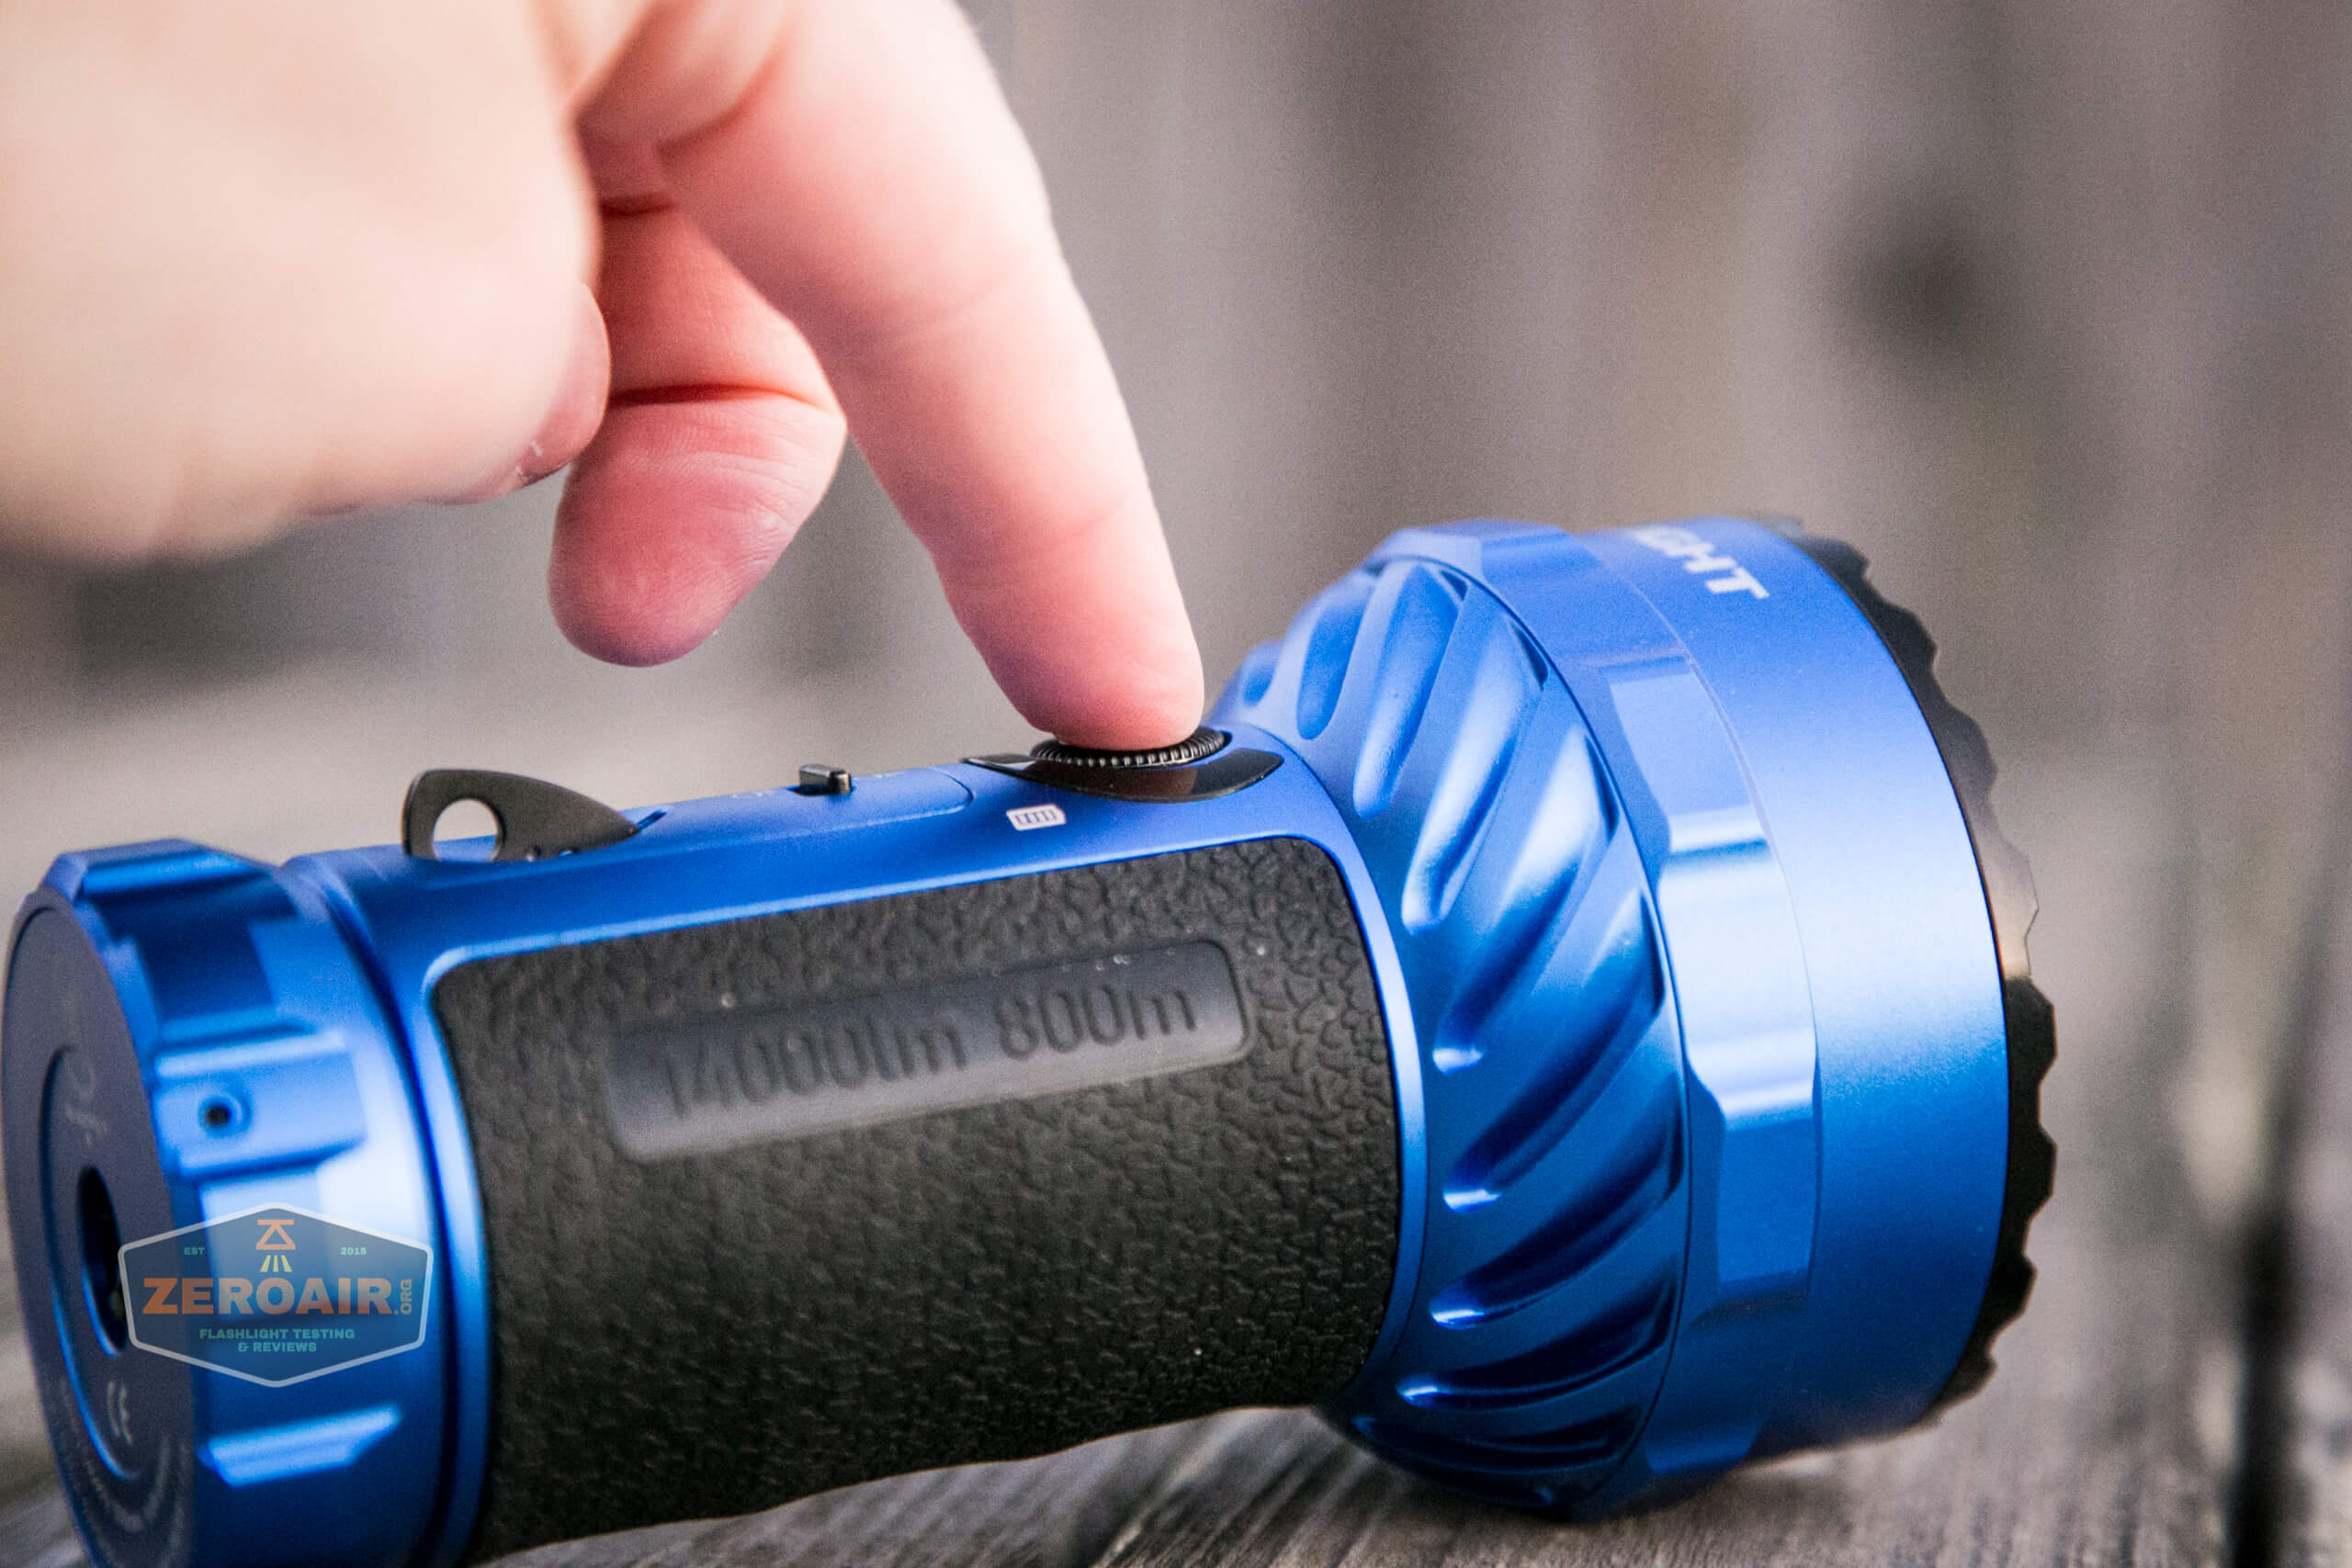
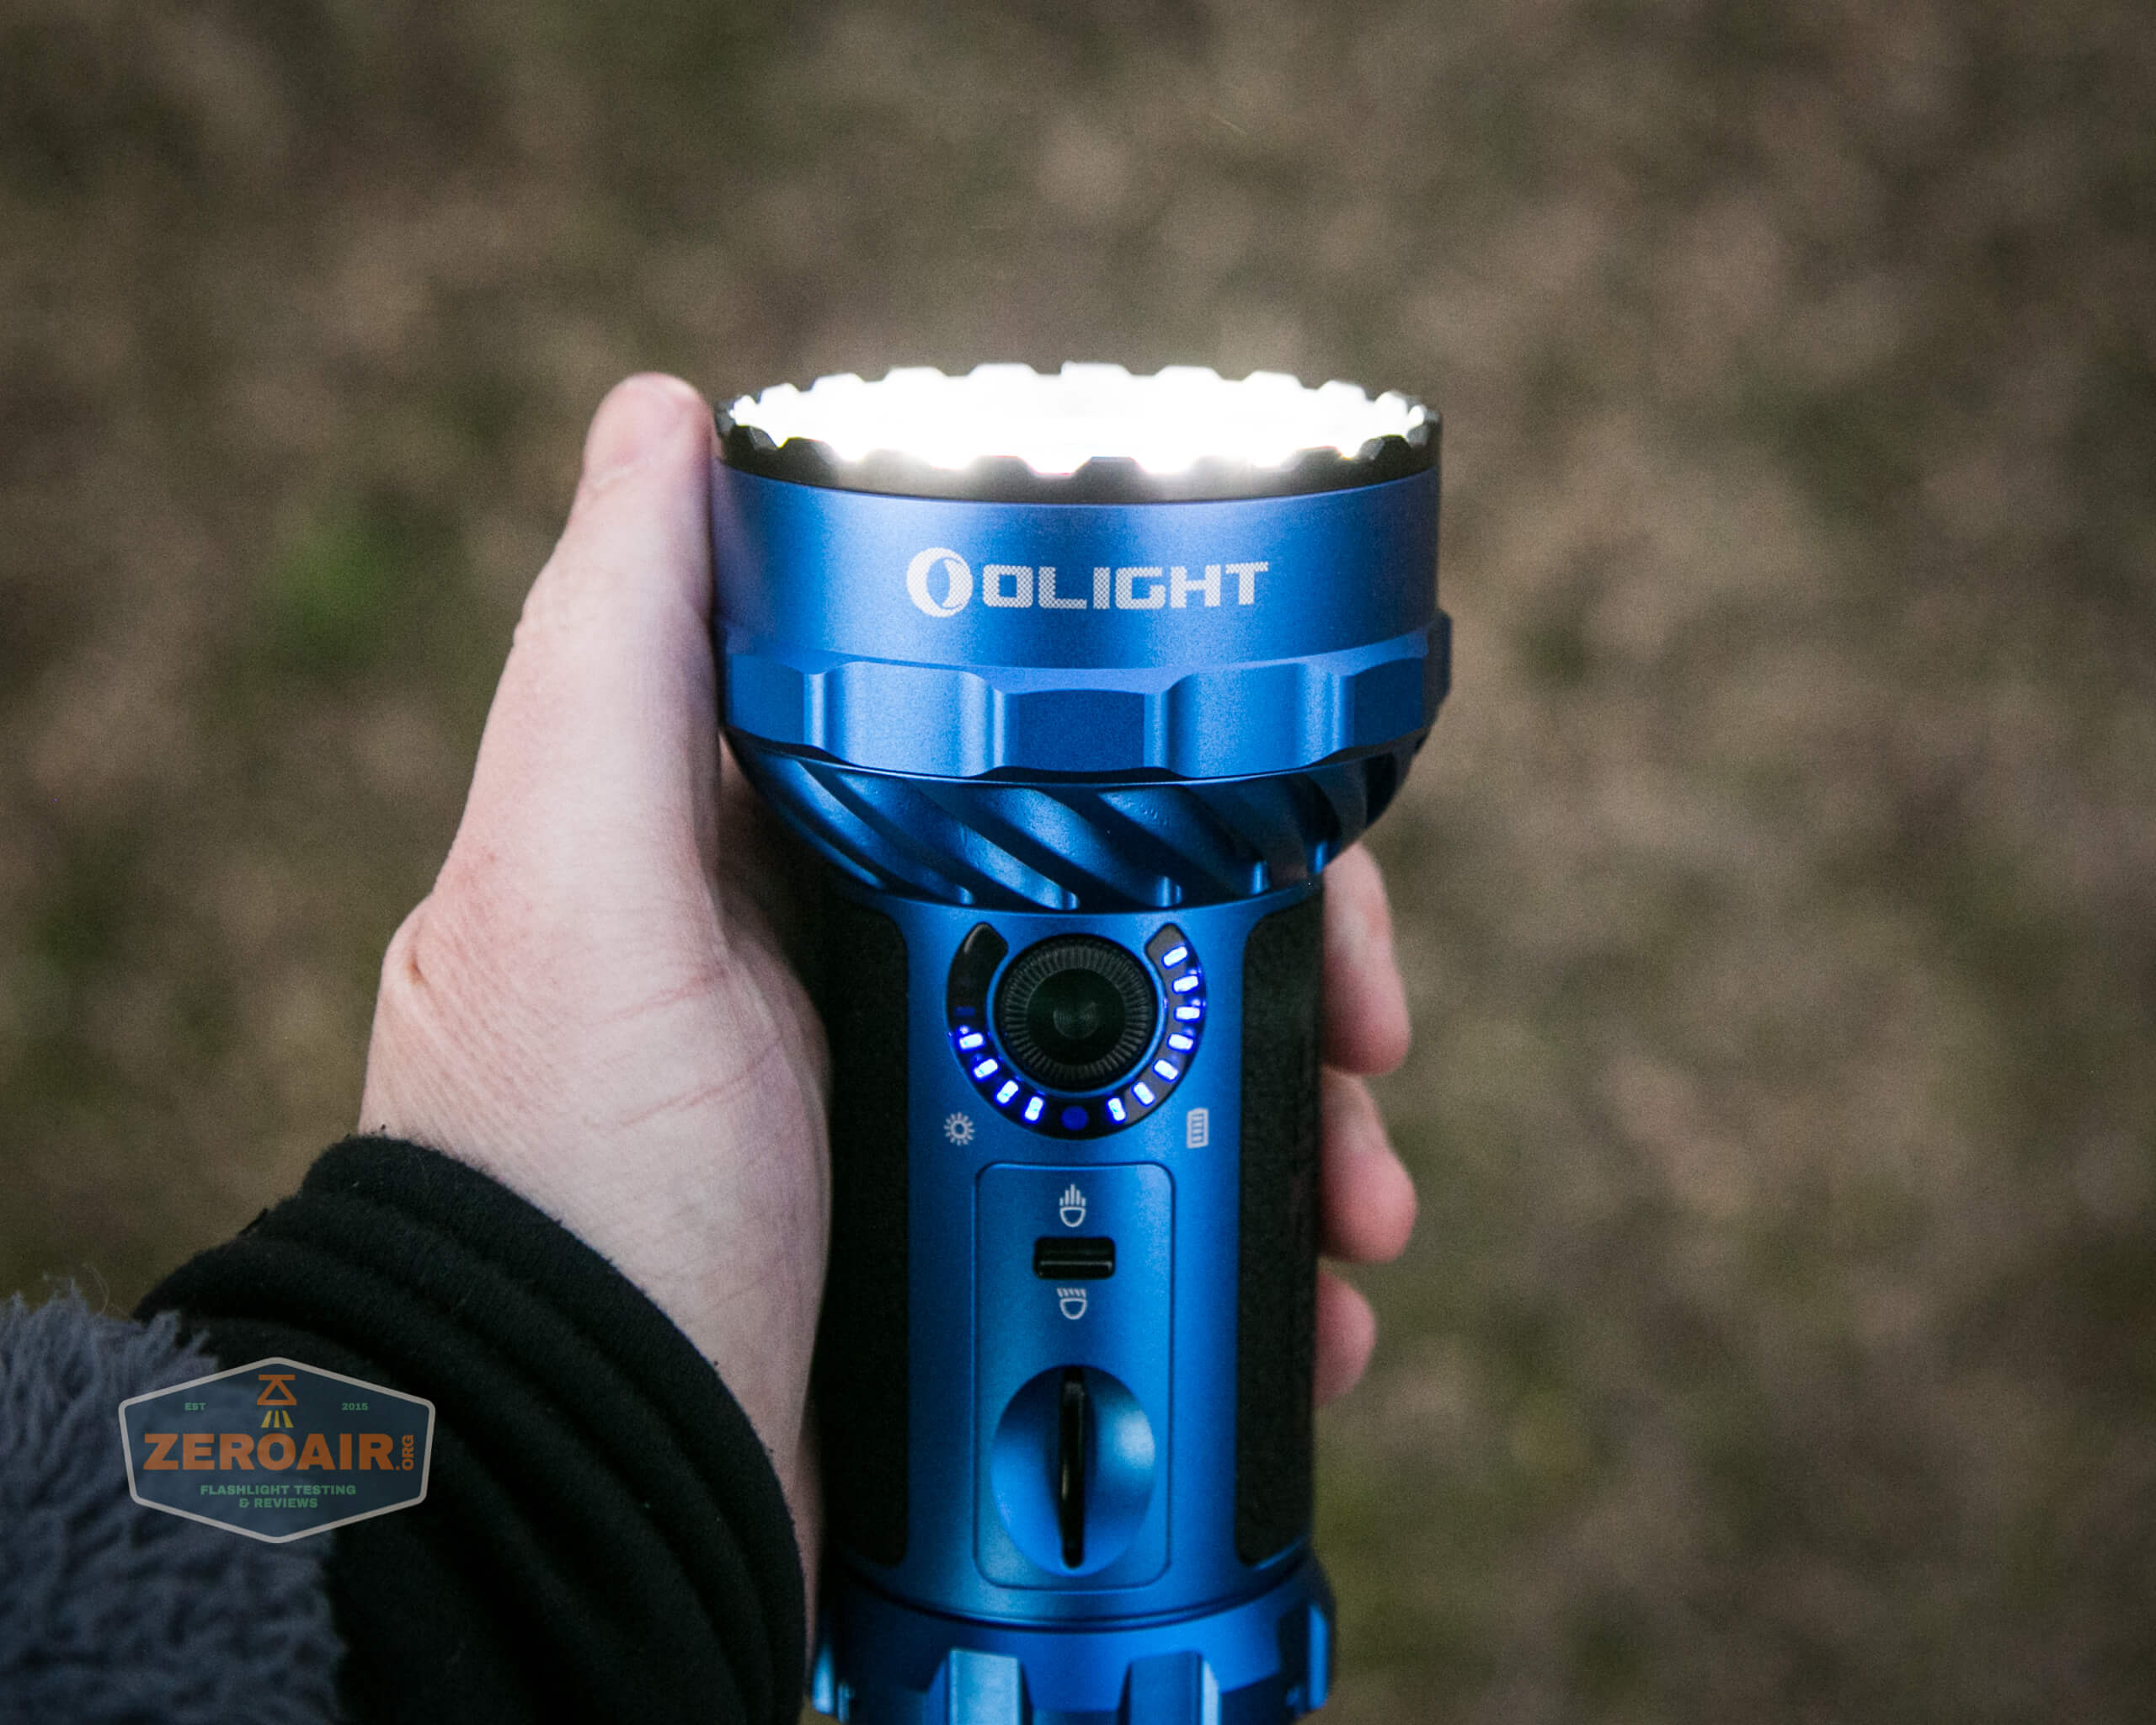
There are two switches on the Olight Marauder 2. First is this rotary switch.
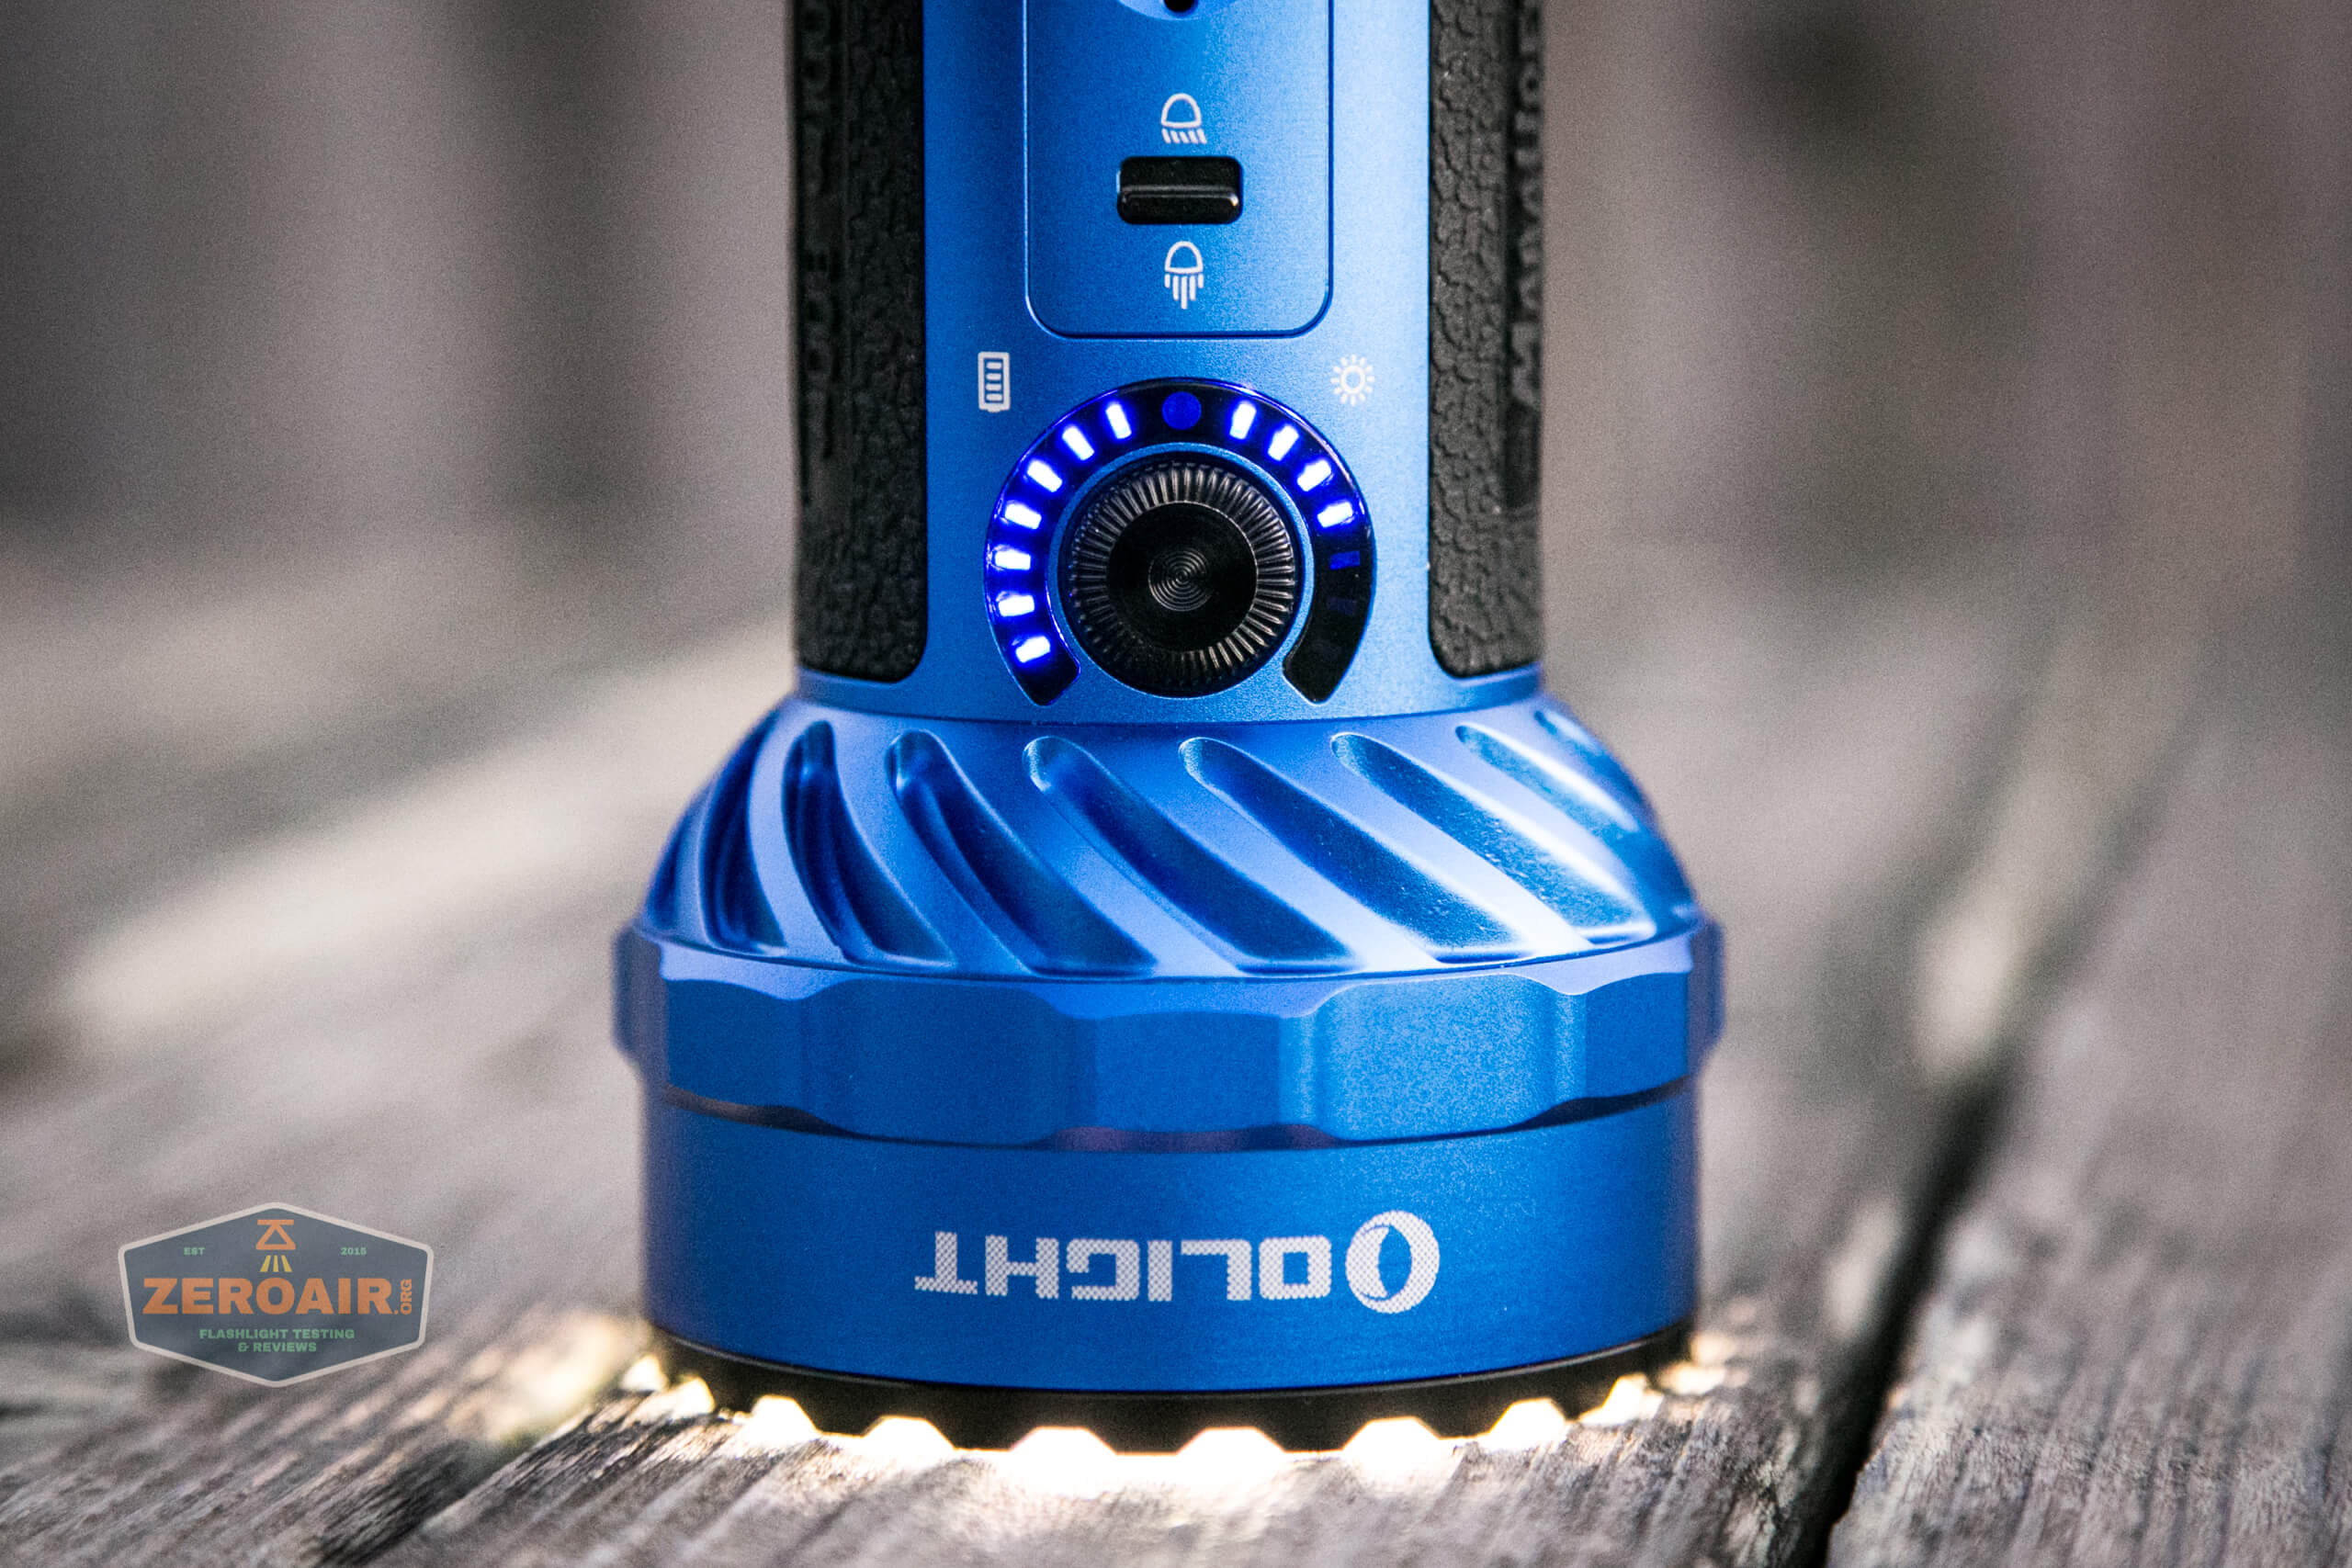
Not only does this switch serve as a dial, but it’s also clicky. There’s a fair bit of action on it, too. Travel is around 1.5-2mm.
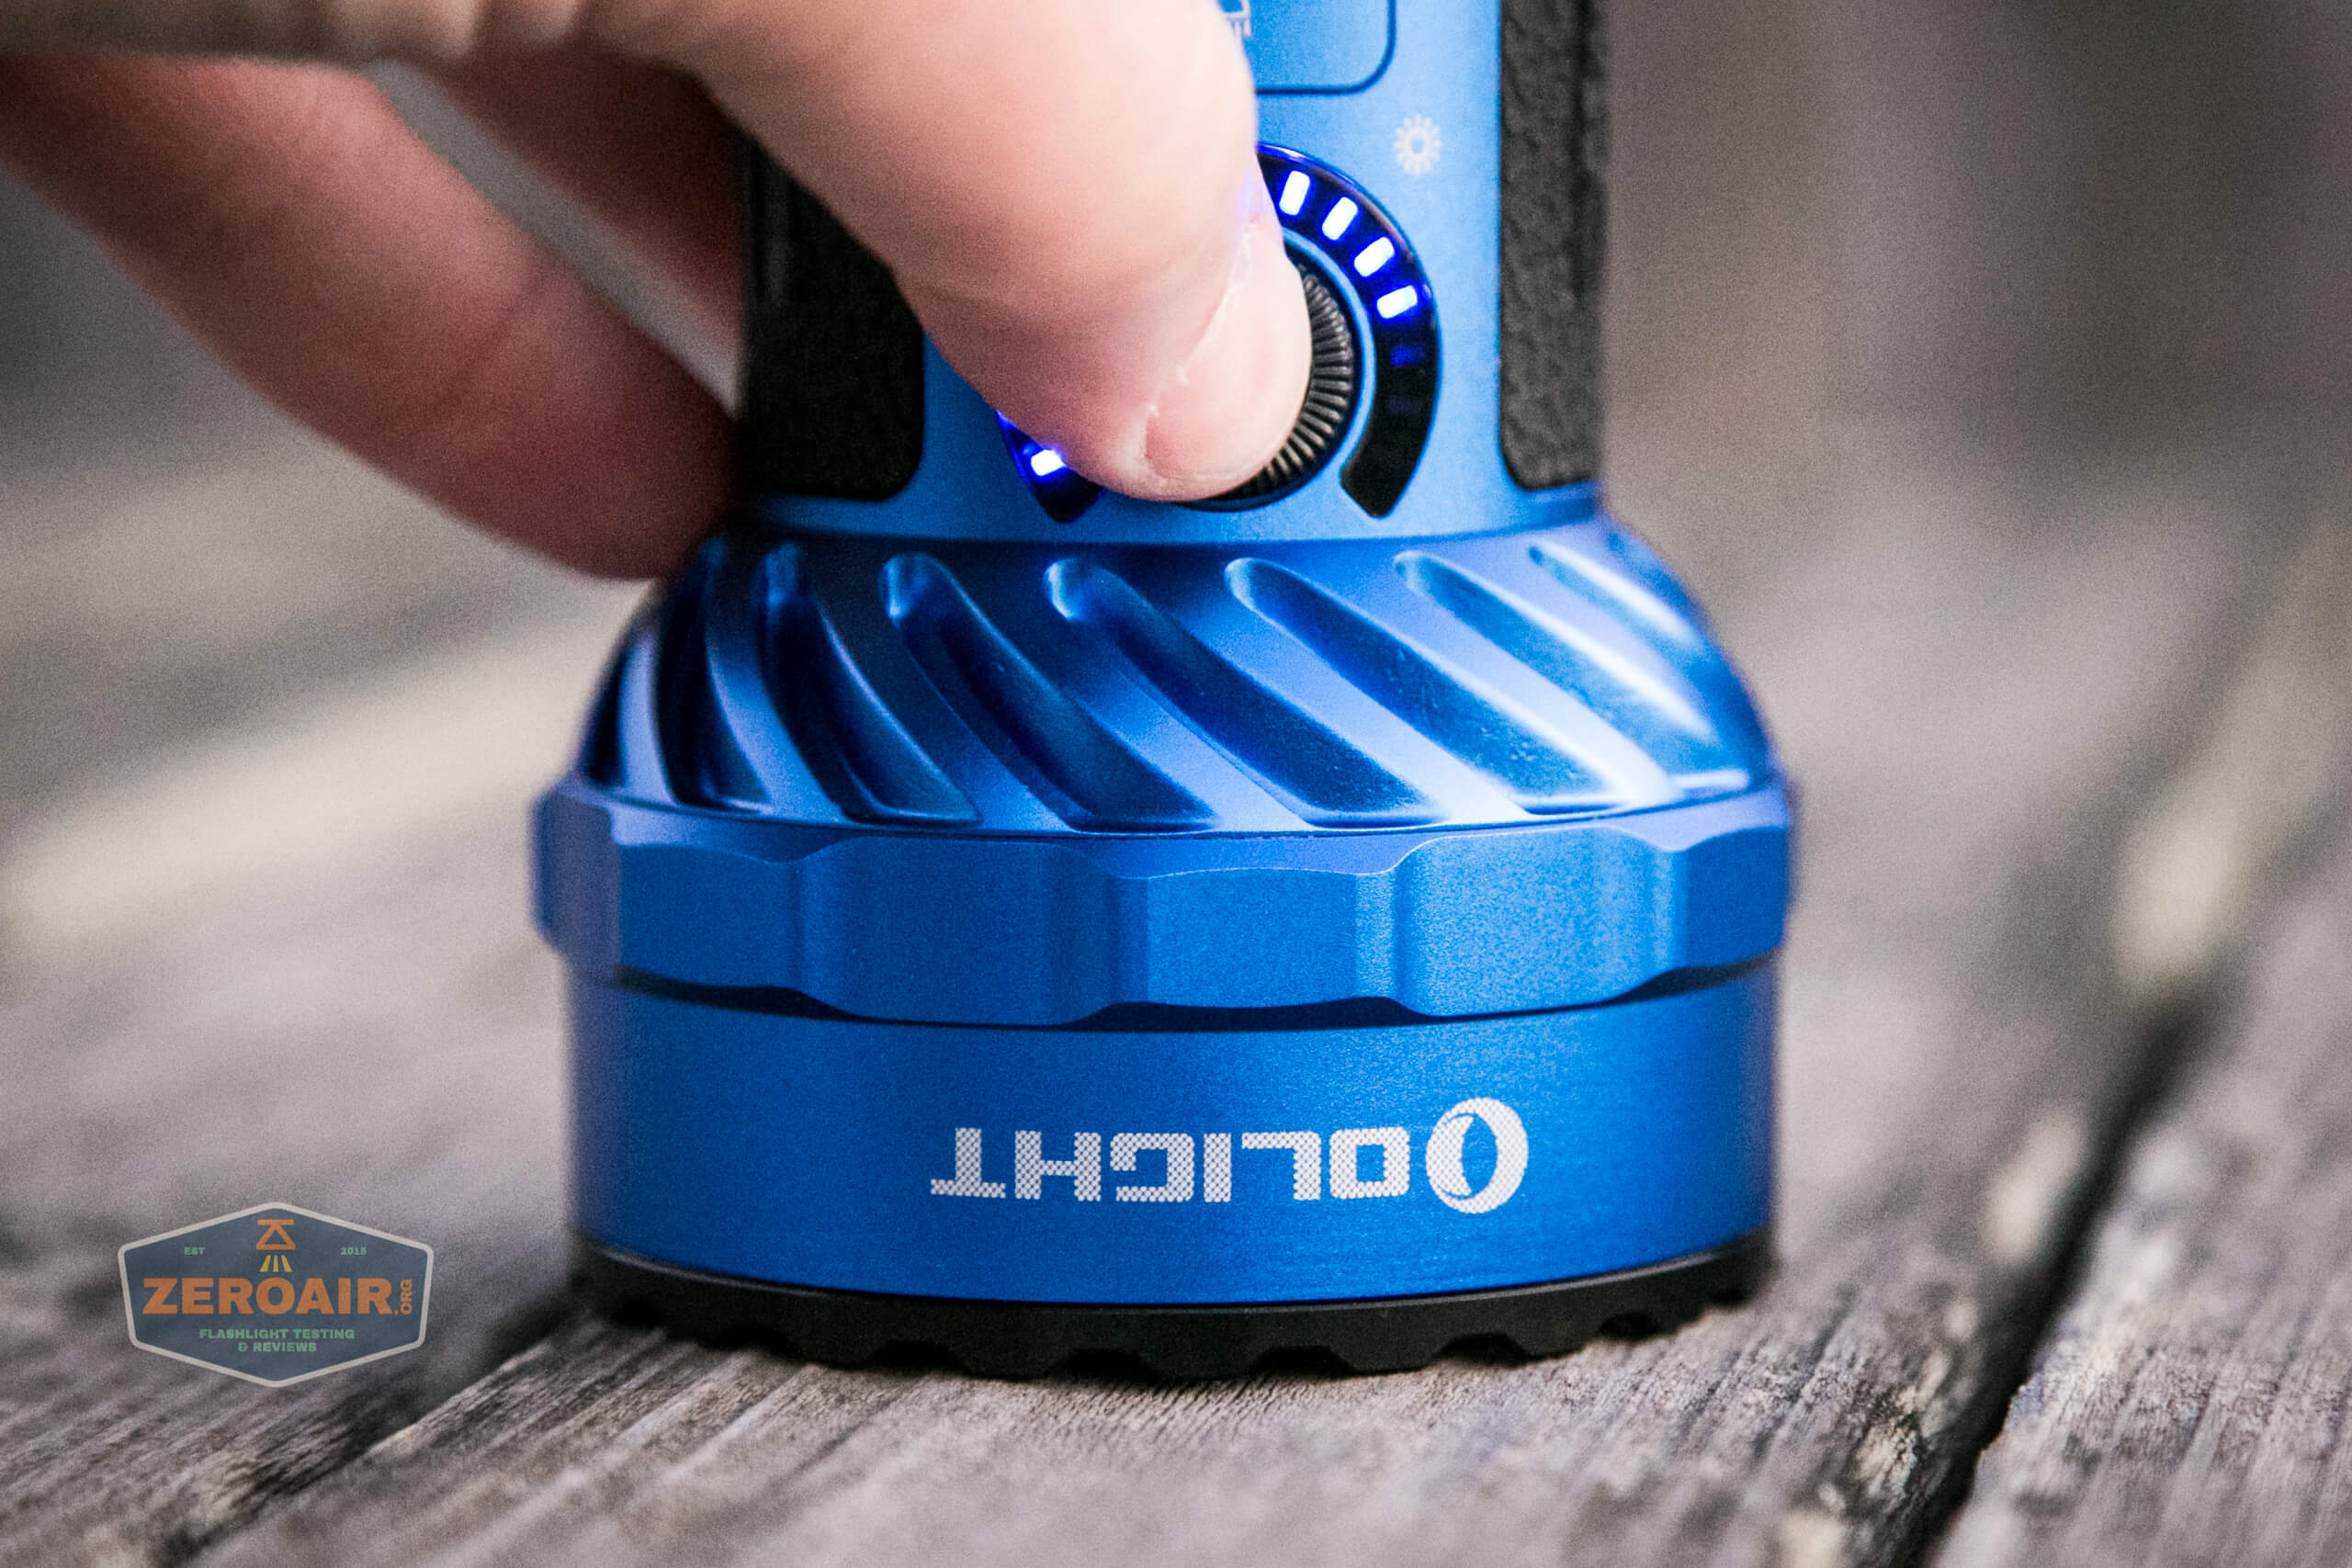
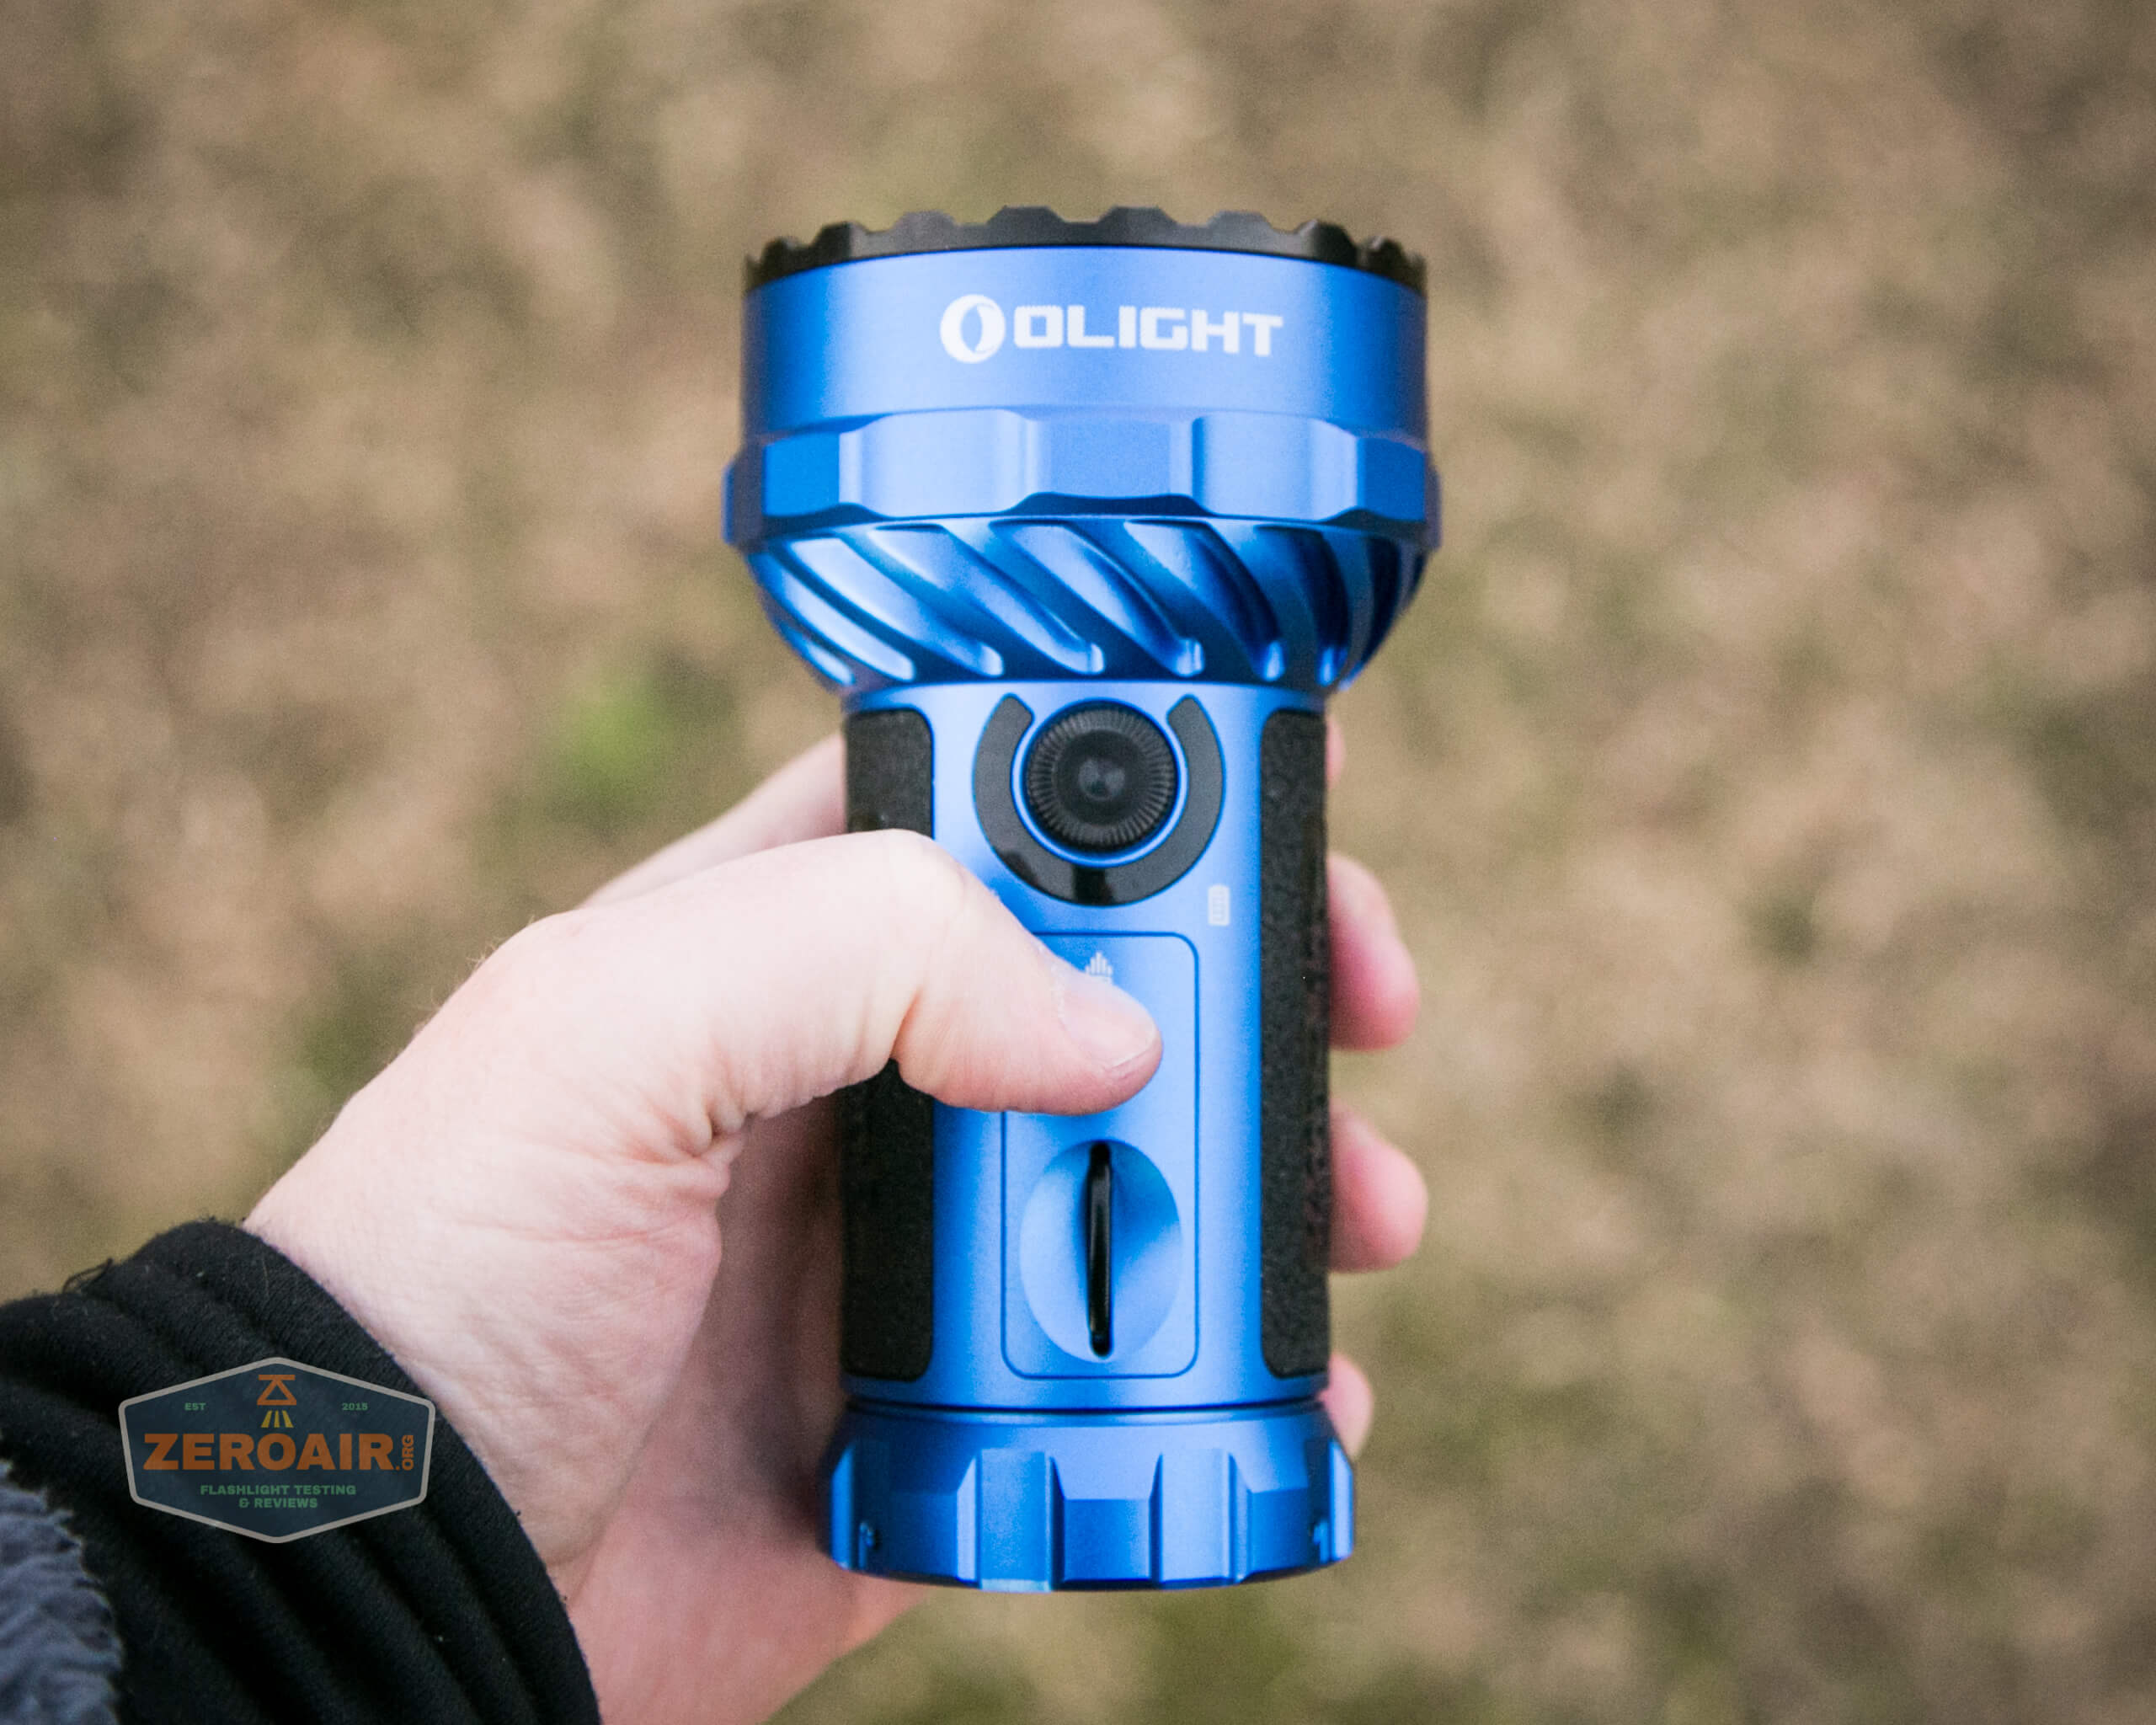
When actuated, the indicators light up as seen below. To the right side of the switch is the battery indicator. To the left is the mode. In the photo below, the battery is at level 7, and the output is at level 1.
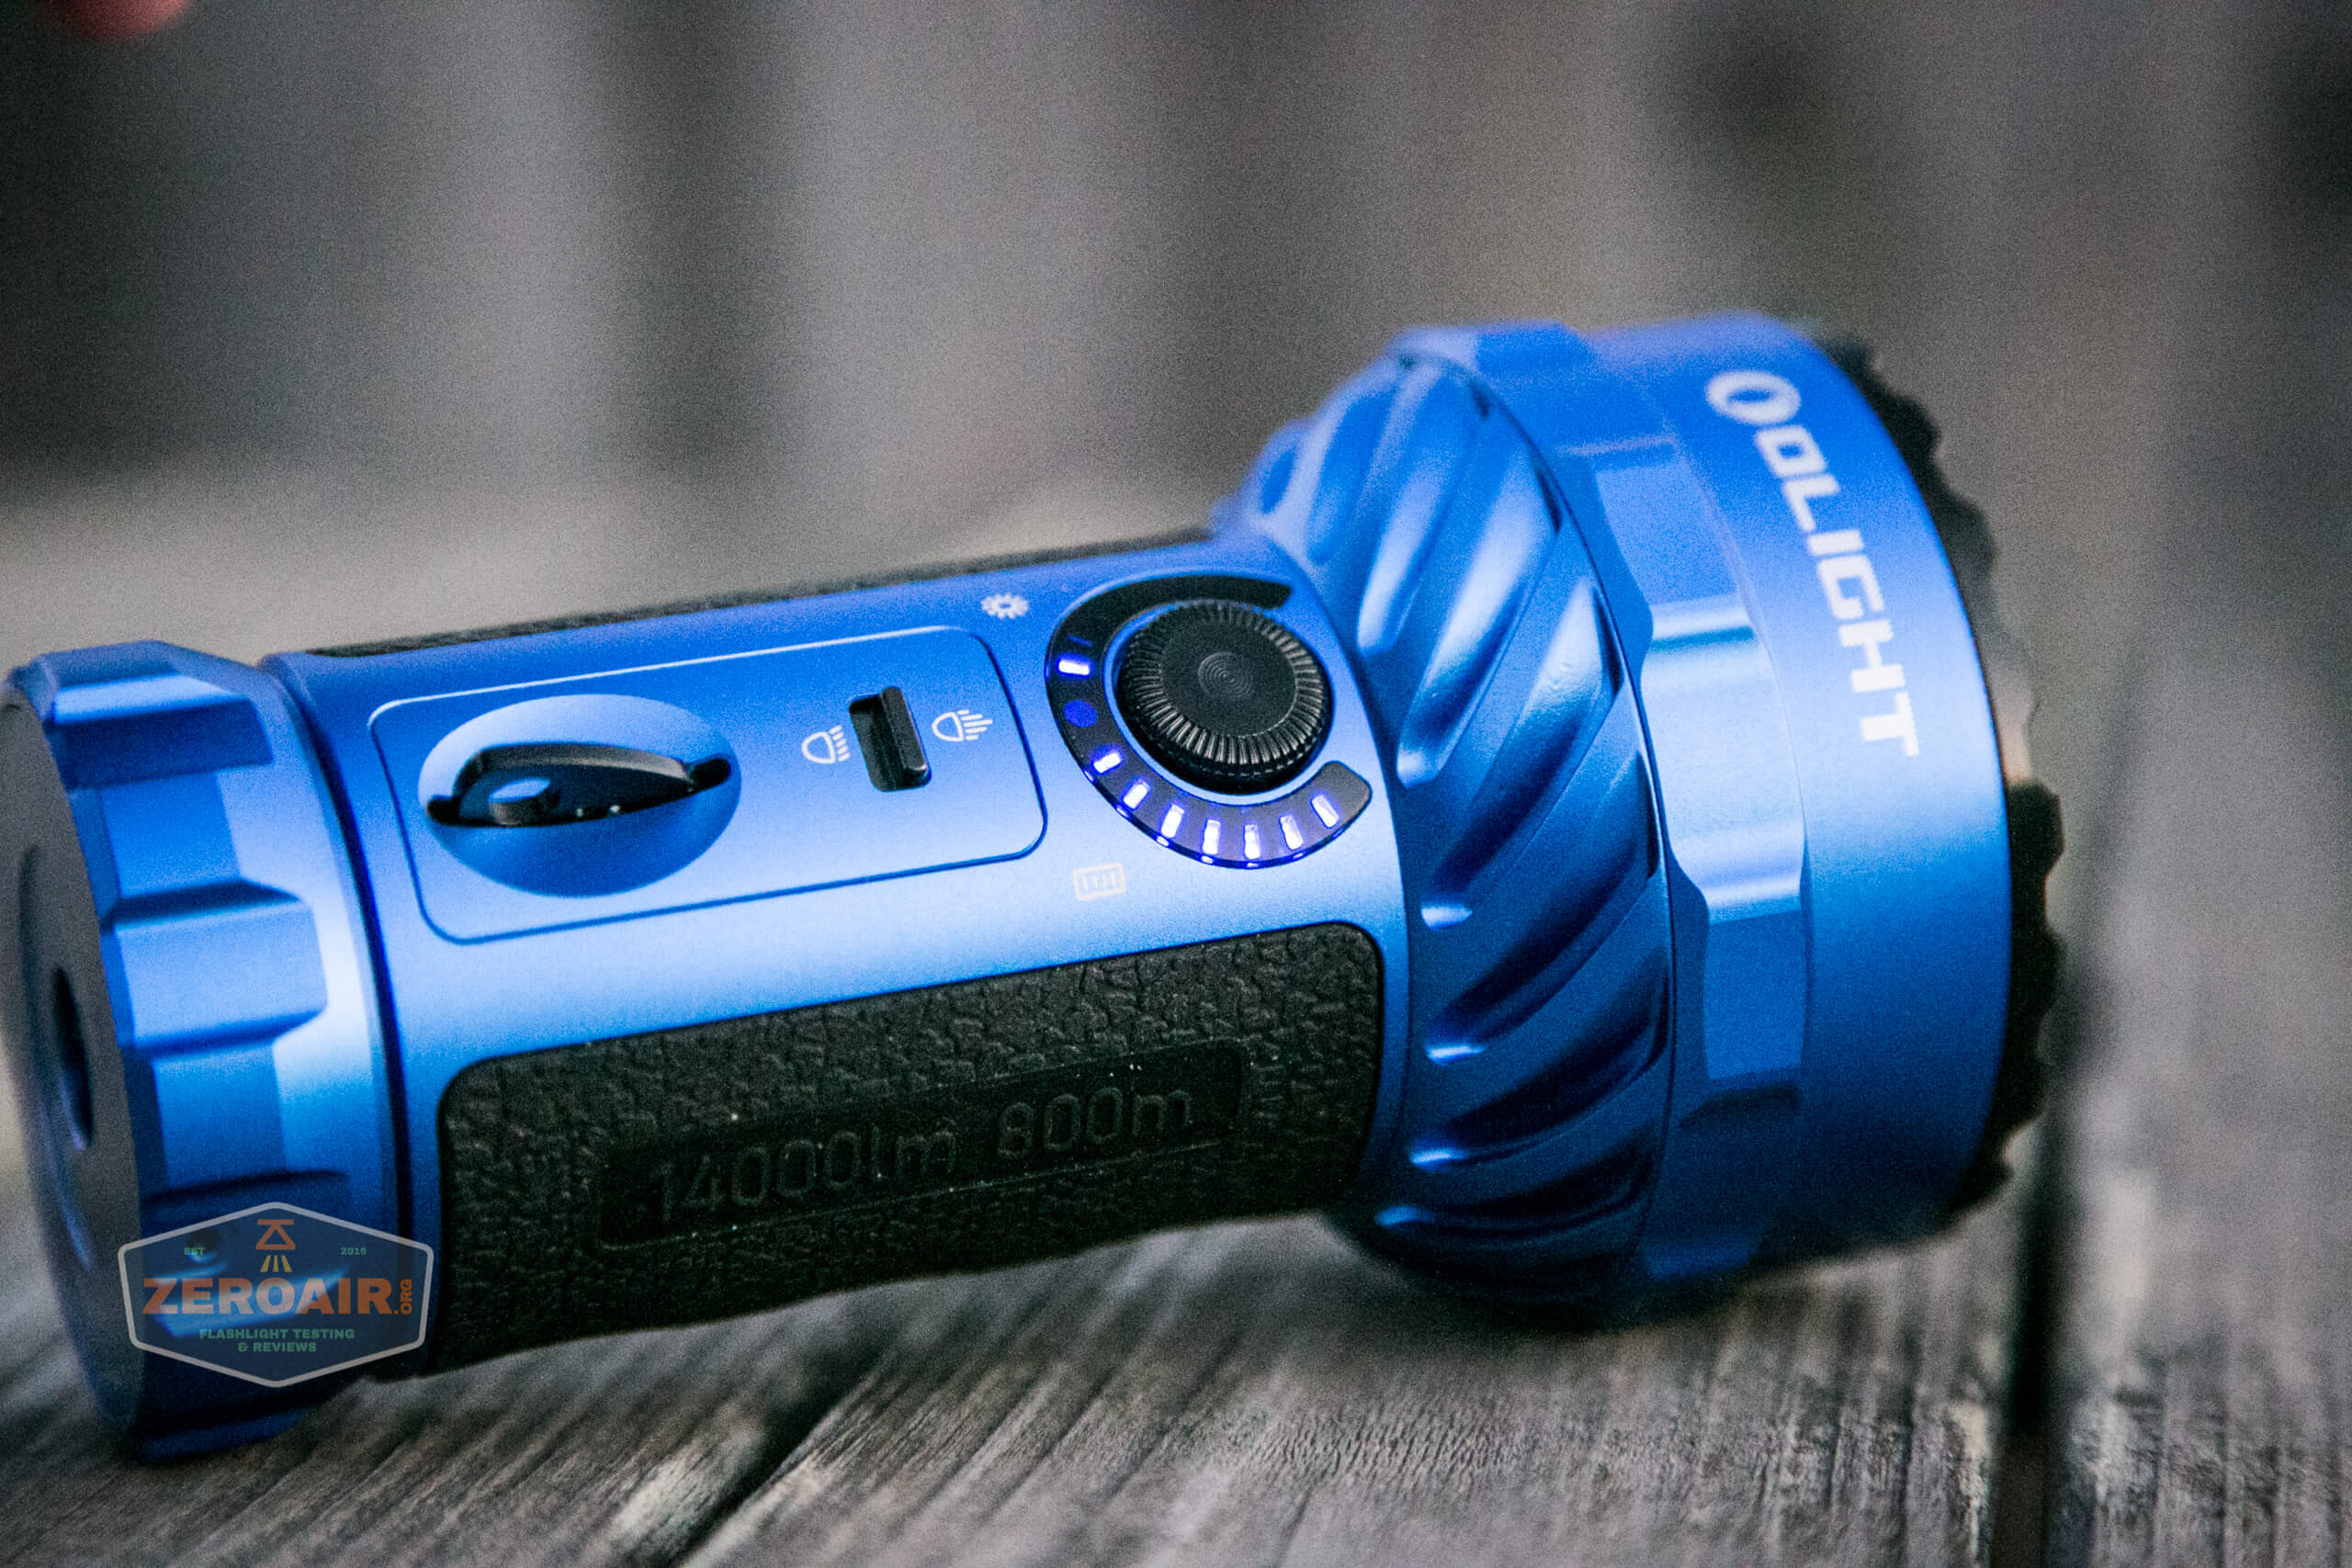
There’s a second switch, too. It’s this little toggle, which switches between flood and throw. The rotary doesn’t care which way the toggle is; the rotary user interface is the same. On the toggle, “up” or “forward” is the Spot emitter, and “down” or “back” is the flood.
Here’s a user interface table!
| State | Action | Result |
|---|---|---|
| Off | Click Rotary Switch | Battery indicator (if the light has been off >30s) |
| Off | Rotate Rotary Switch 90 degrees | Unlock |
| Unlocked | Click Rotary Switch | On in previously used level. (Level can not be changed while output is off.) |
| On | Rotate Switch Clockwise | Increase output level |
| On | Rotate Switch Counterclockwise | Decrease output level |
| On | Click Rotary Switch | Off |
| Any | Flip the Toggle Switch | Switch from Flood to Spot (also lights indicators around rotary switch |
| Unlocked | Double Click Rotary Switch | Level 7 (another double click accesses Level 4) |
| Unlocked | Triple Click Rotary Switch | Strobe |
| Off | Click Rotary Switch 15x | Iterate the proximity sensor |
LED and Beam
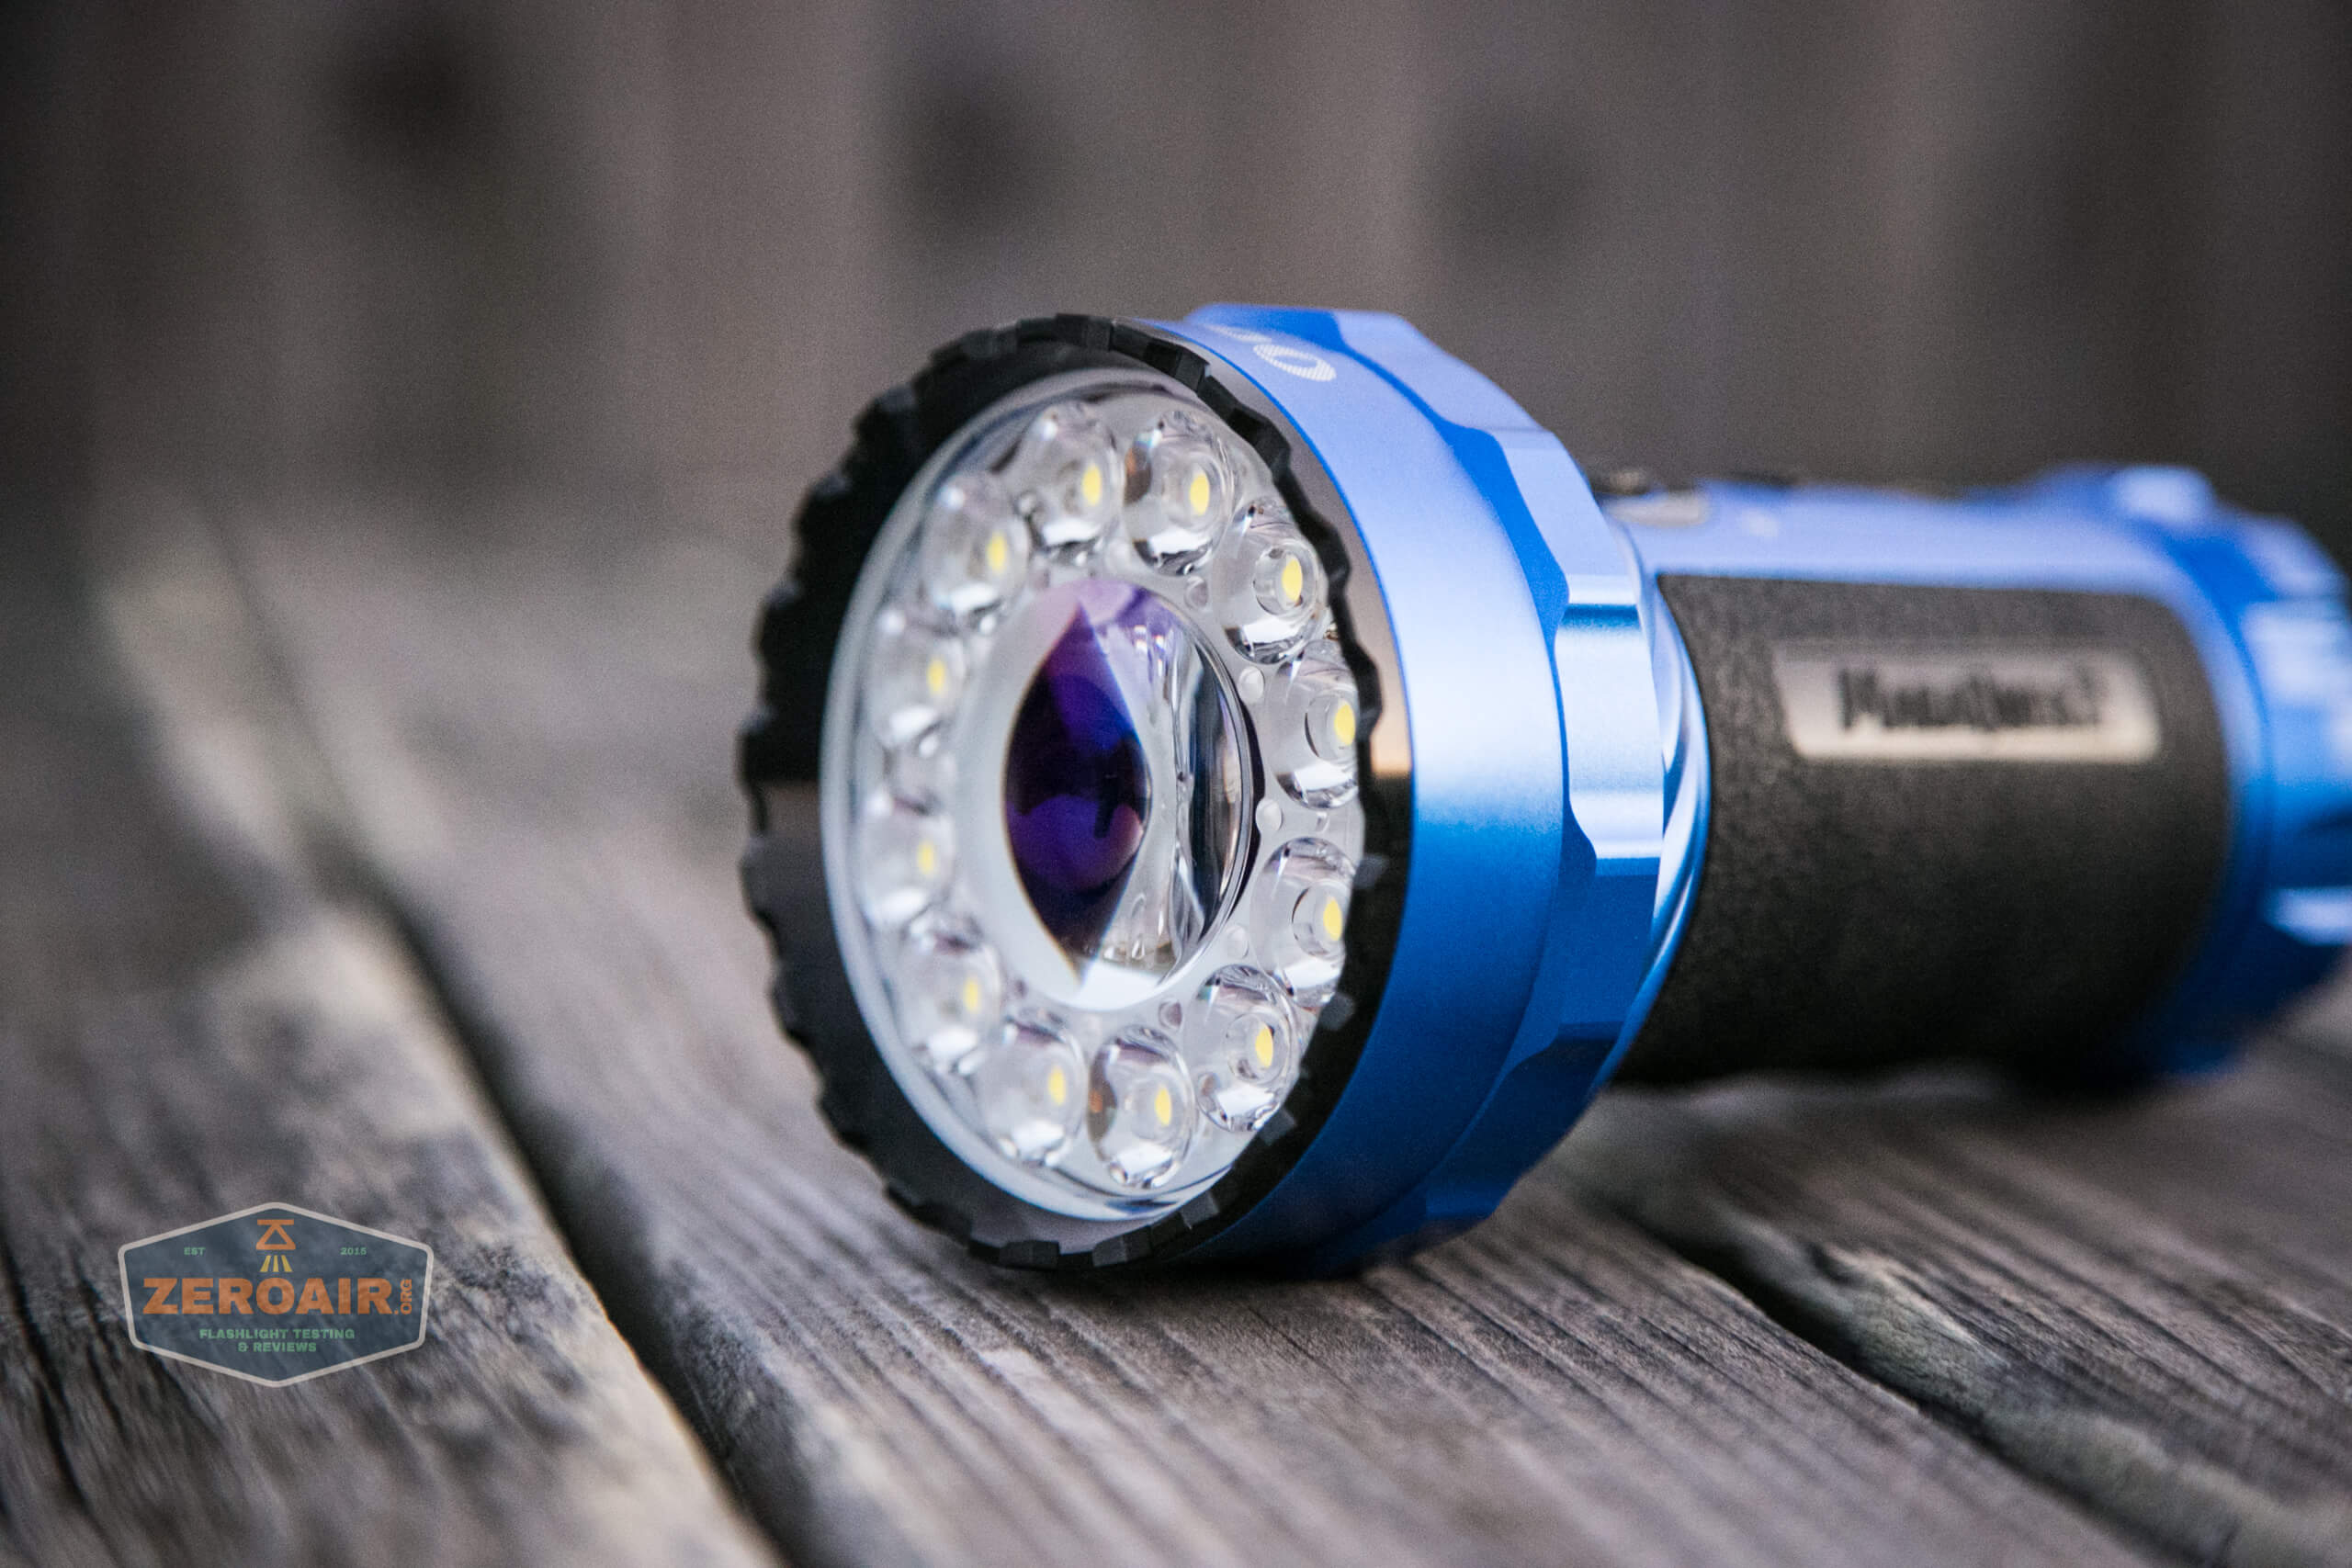
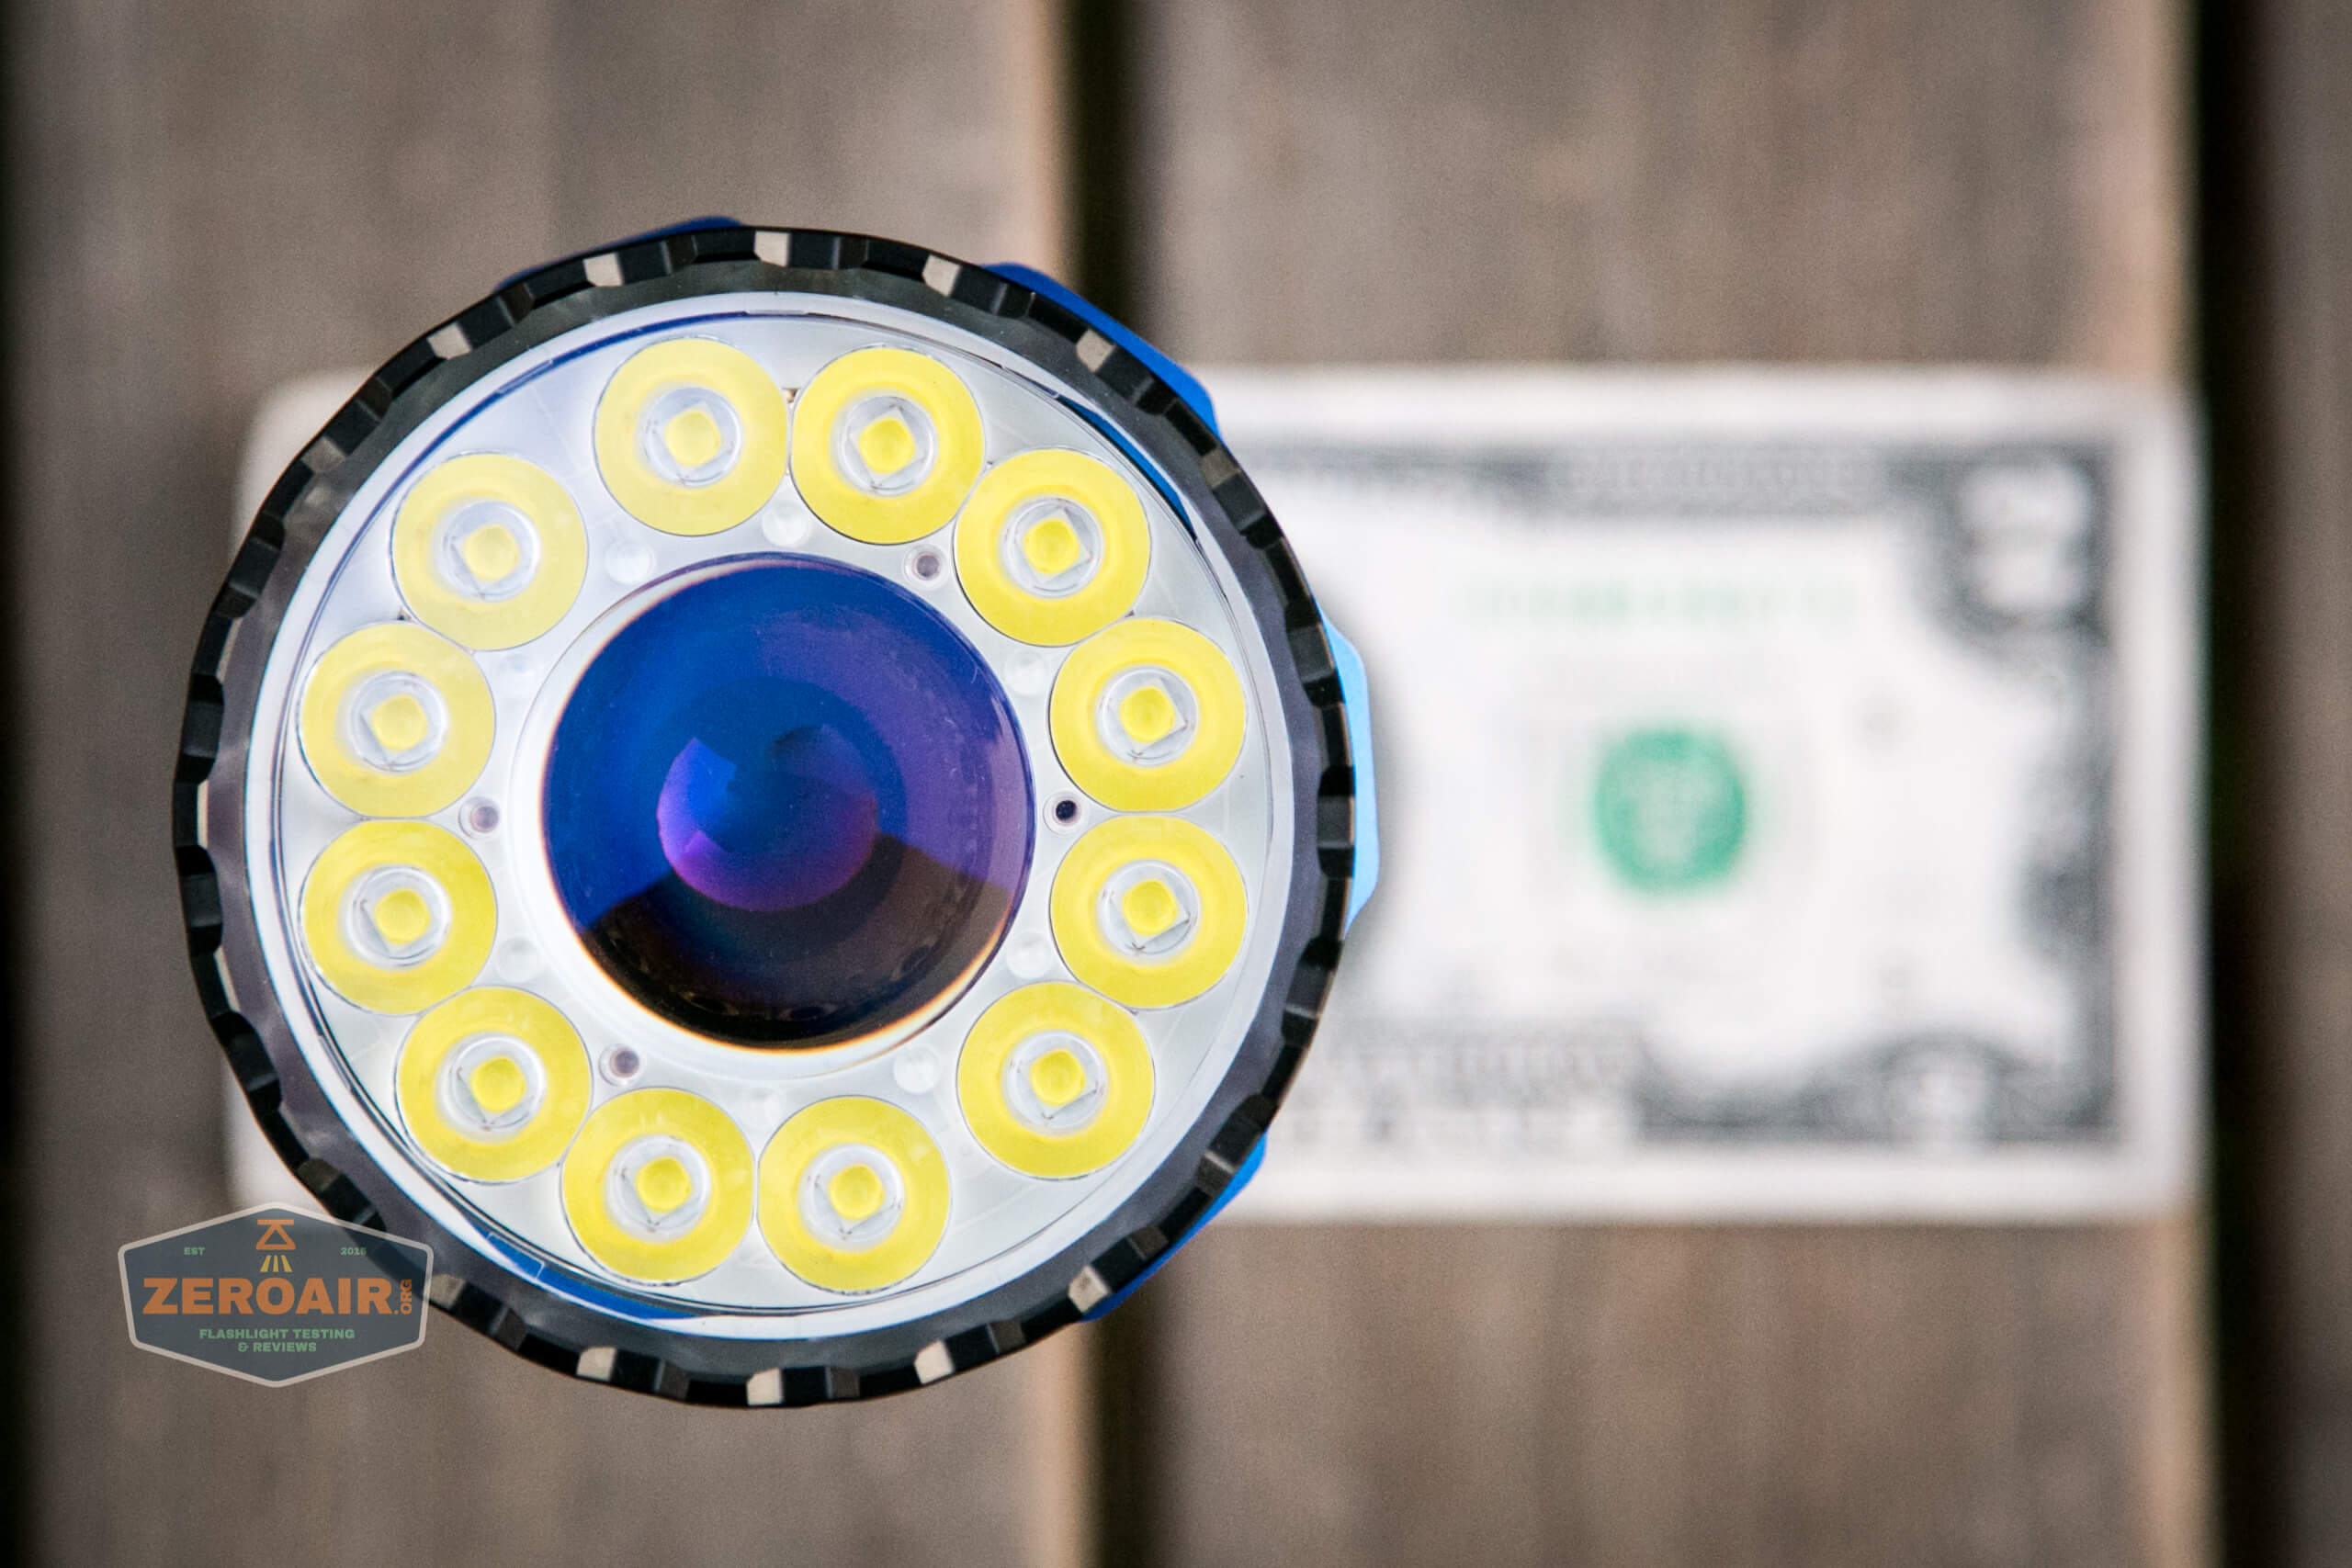
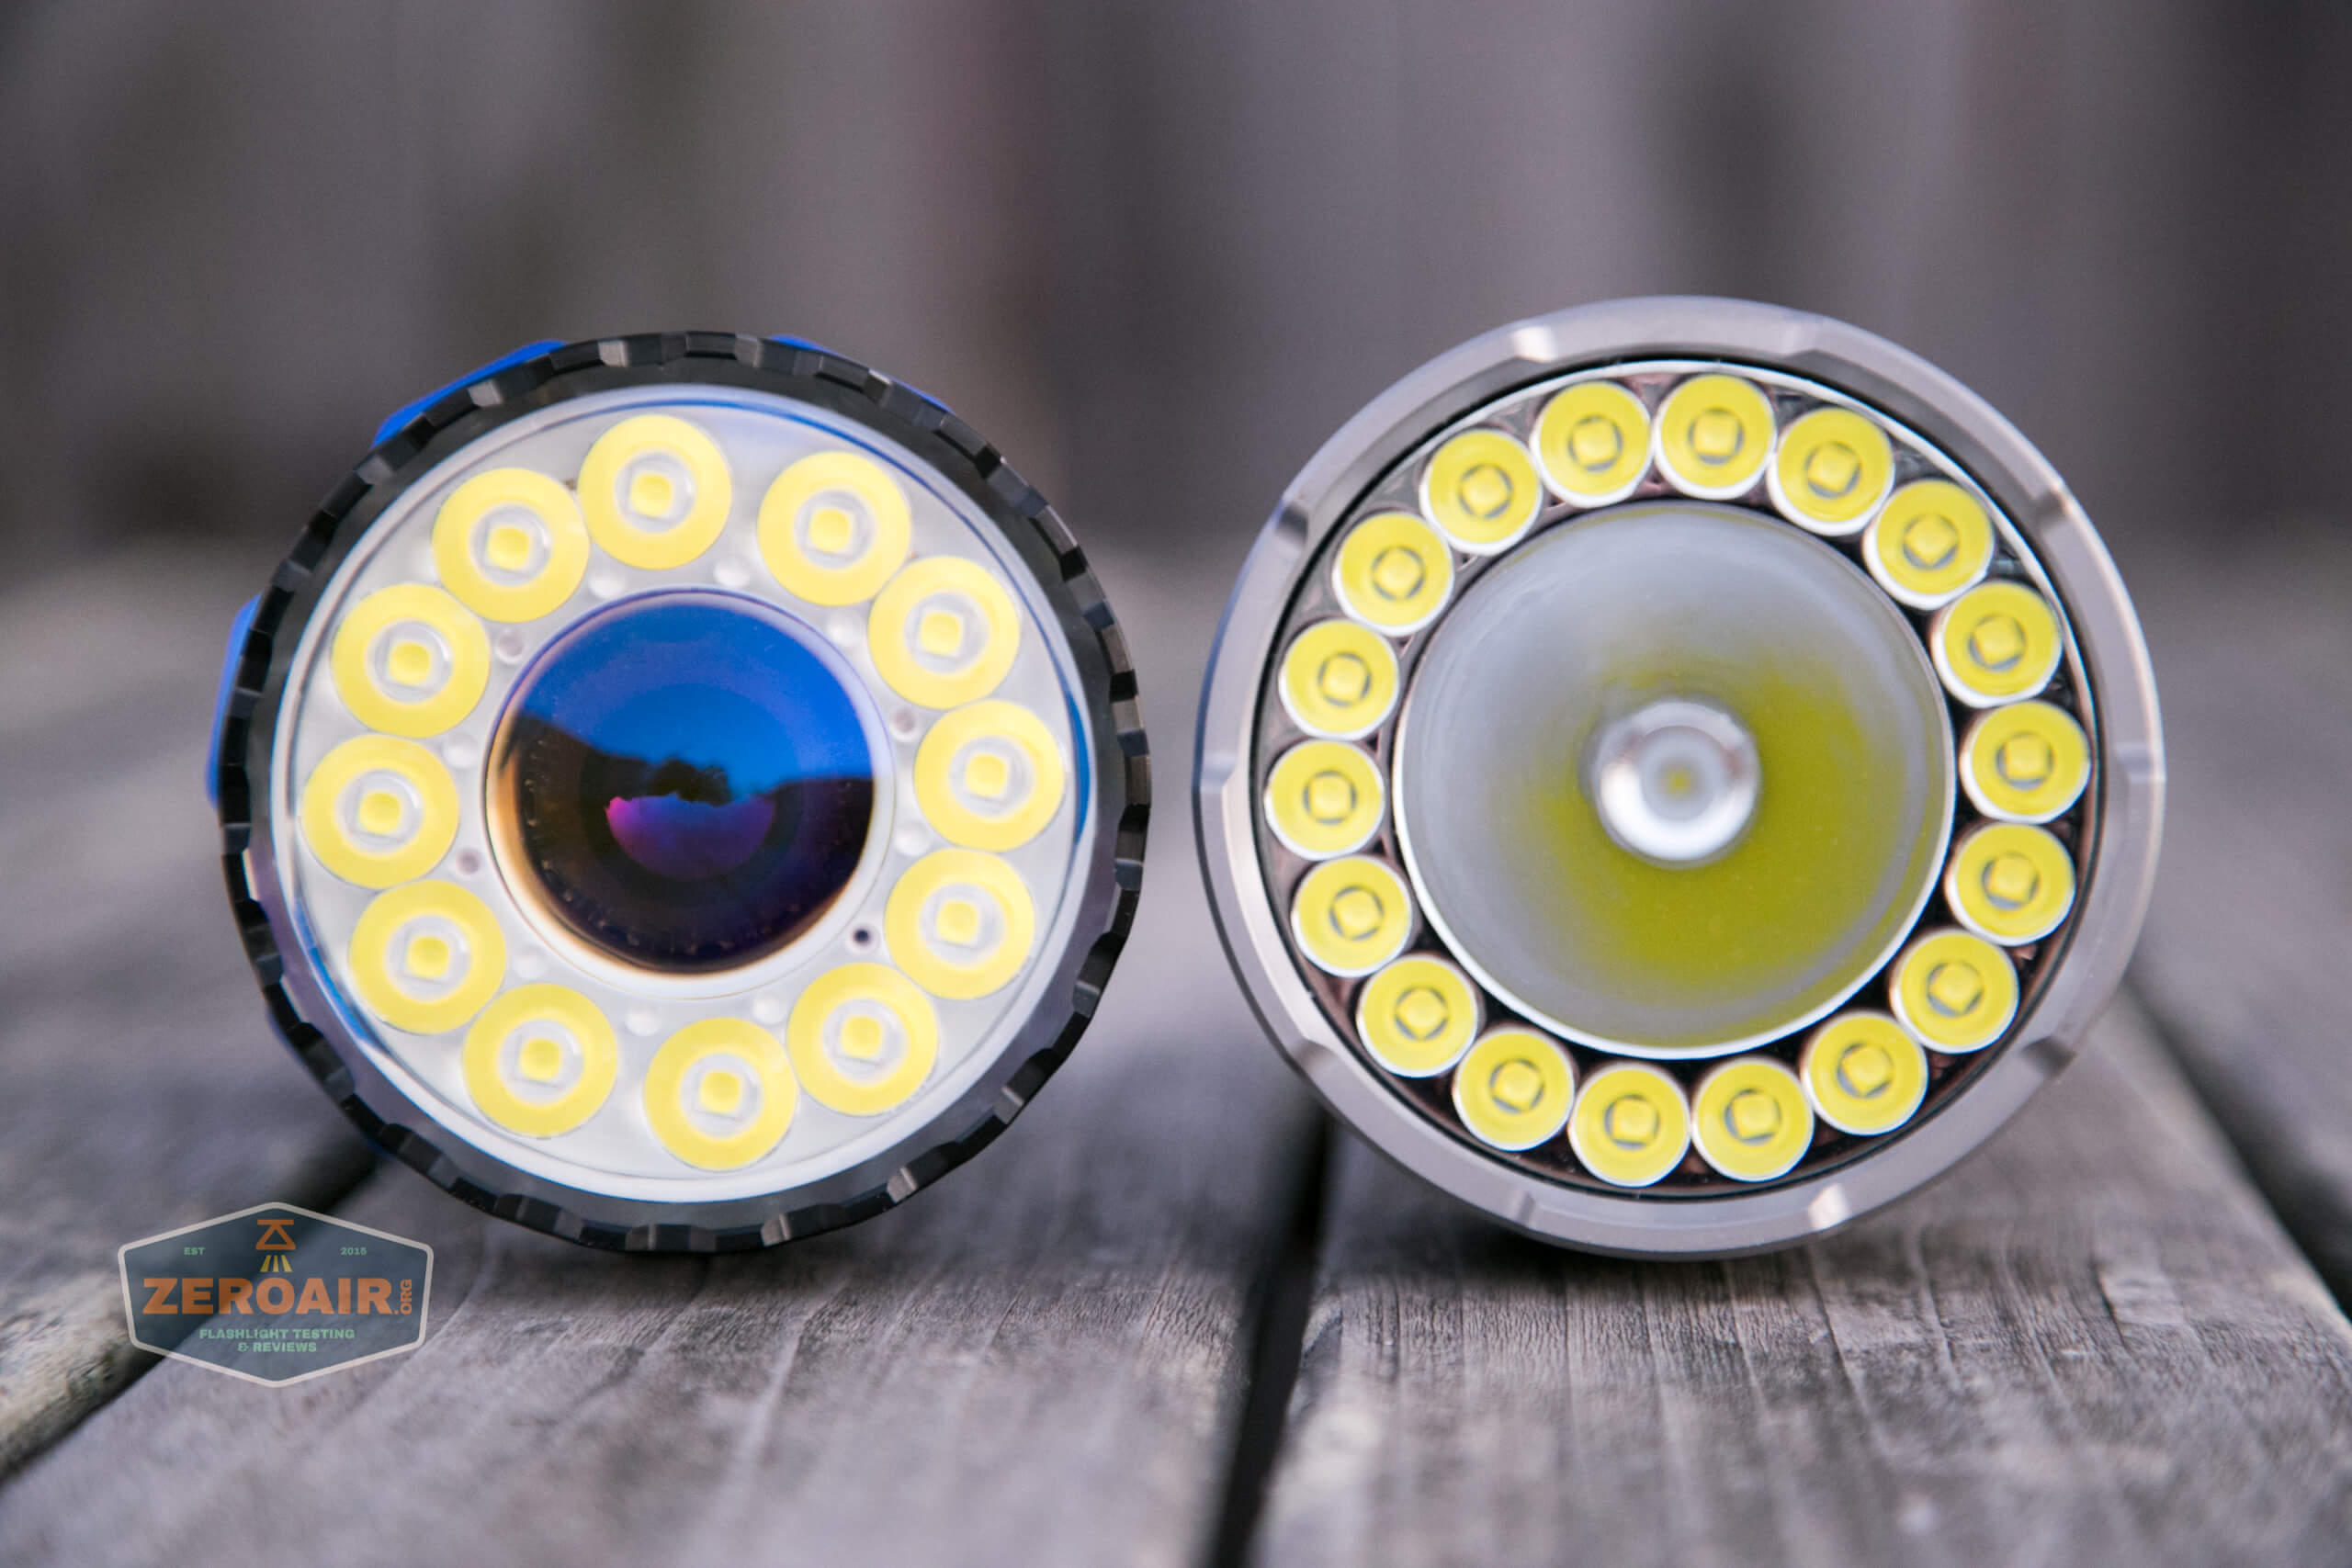
According to Olight, the throw emitter is an Osram KW CULPM1.TG 8R, and the flood emitters are Osram P9. The throw emitter is deep inside and projected by an actual projection lens.
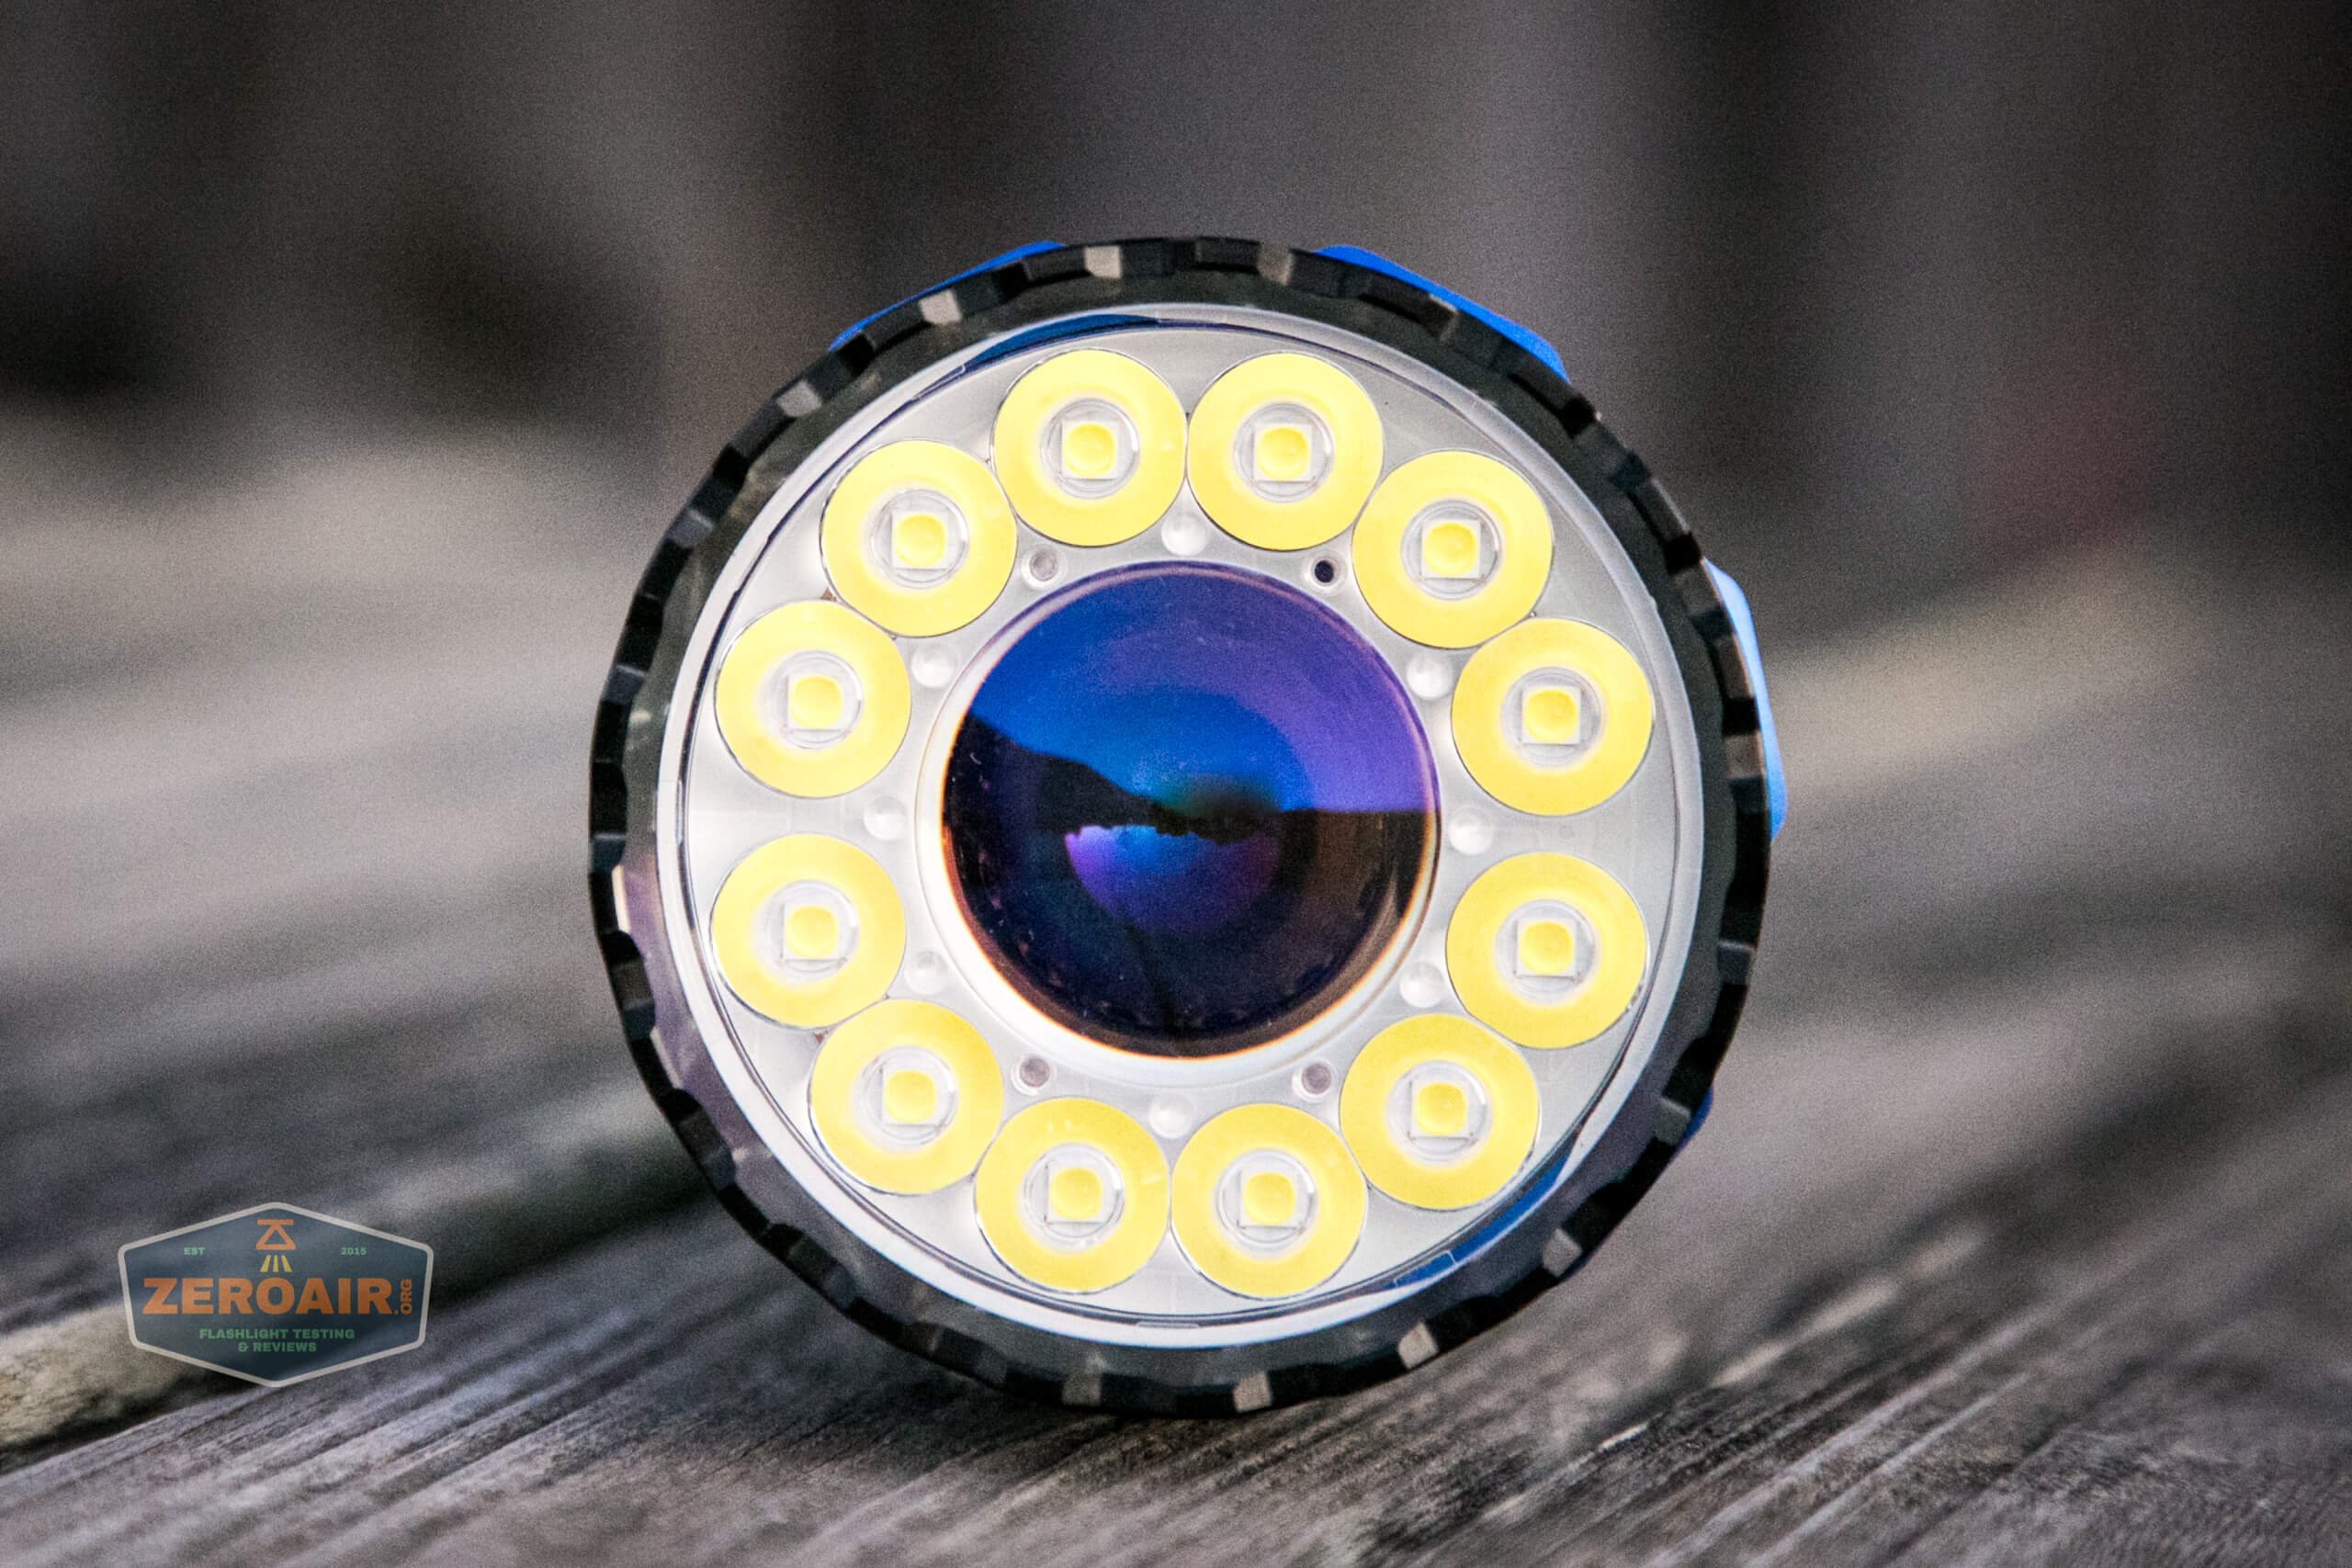
This setup is extremely efficient, causing a ton of throw out of the single emitter. While the projector lens does protrude (i.e., the front here is not “flat”), it doesn’t protrude past the bezel. So there’s no harm in placing the light face down on a surface.
Also, note in the image above, you can see the proximity sensor. It’s at around the 1 o’clock position in one of the optic legs. This sensor will step the light down any time there’s sufficient bounce from reflected light. This should prevent you from burning a hole in your [anything]. But it’s a massive hassle for runtime tests, I can tell you that. 😀 However, it can be turned off!
The flood emitters have their own little TIR-type lenses.
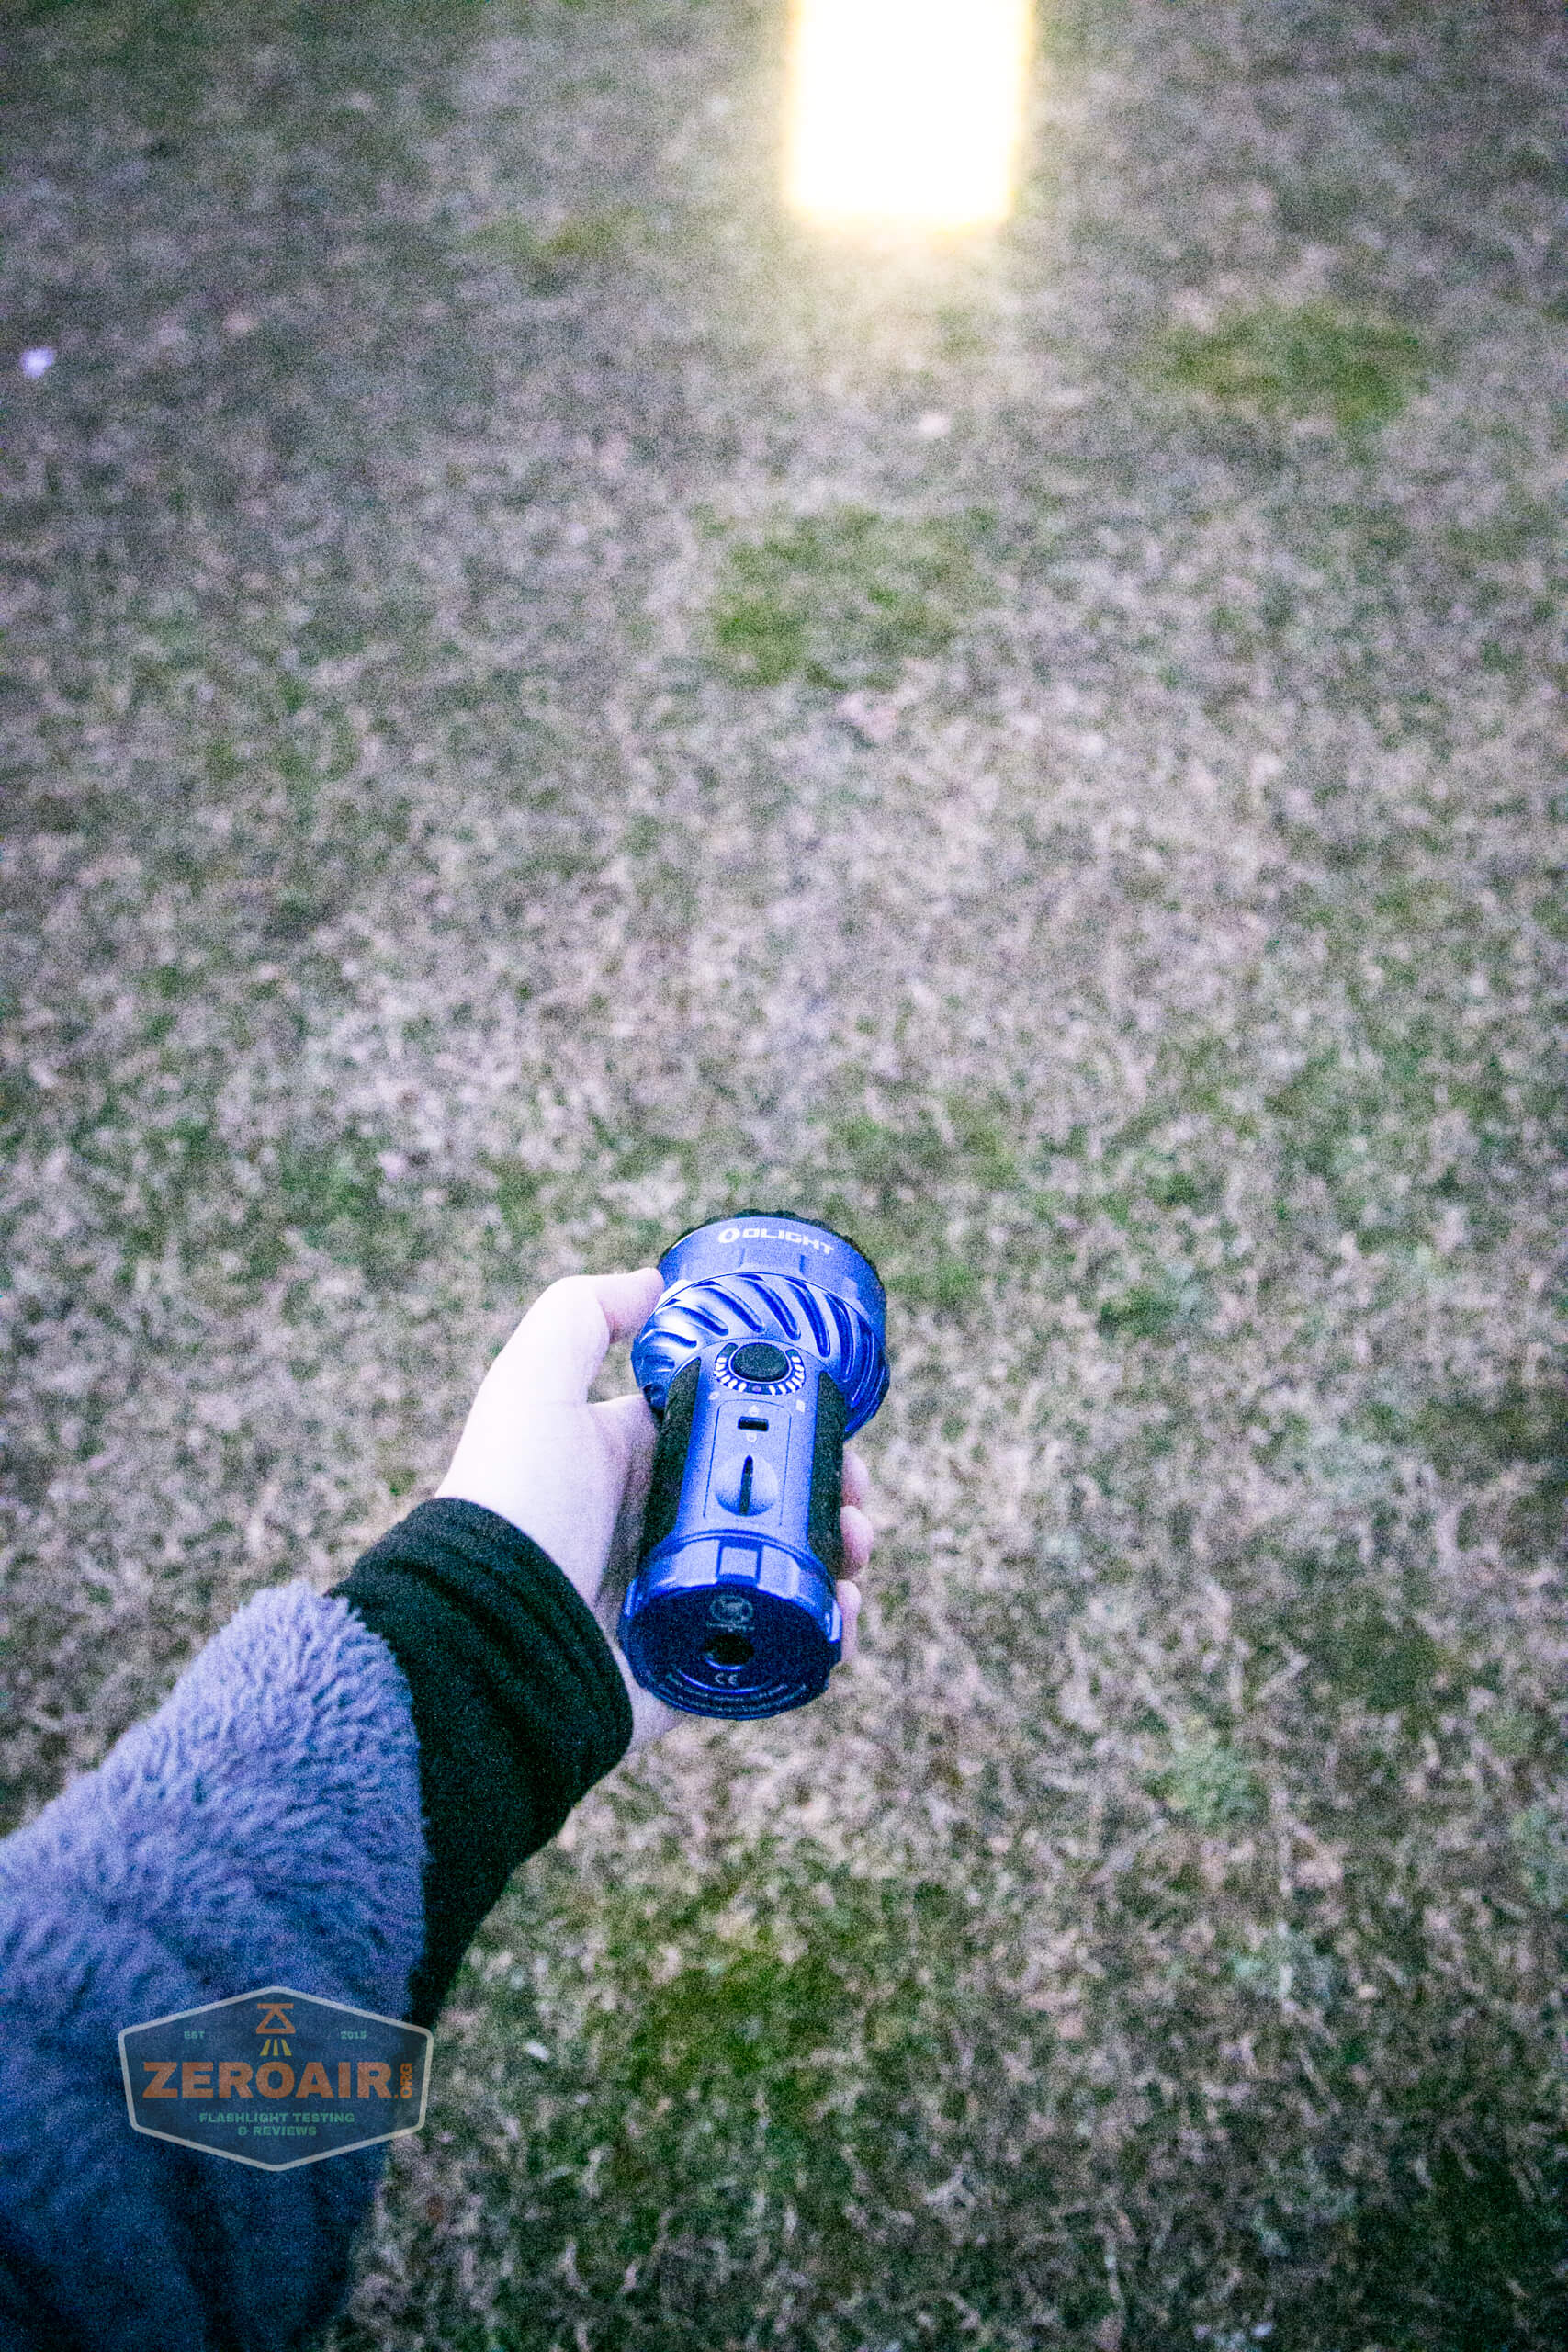
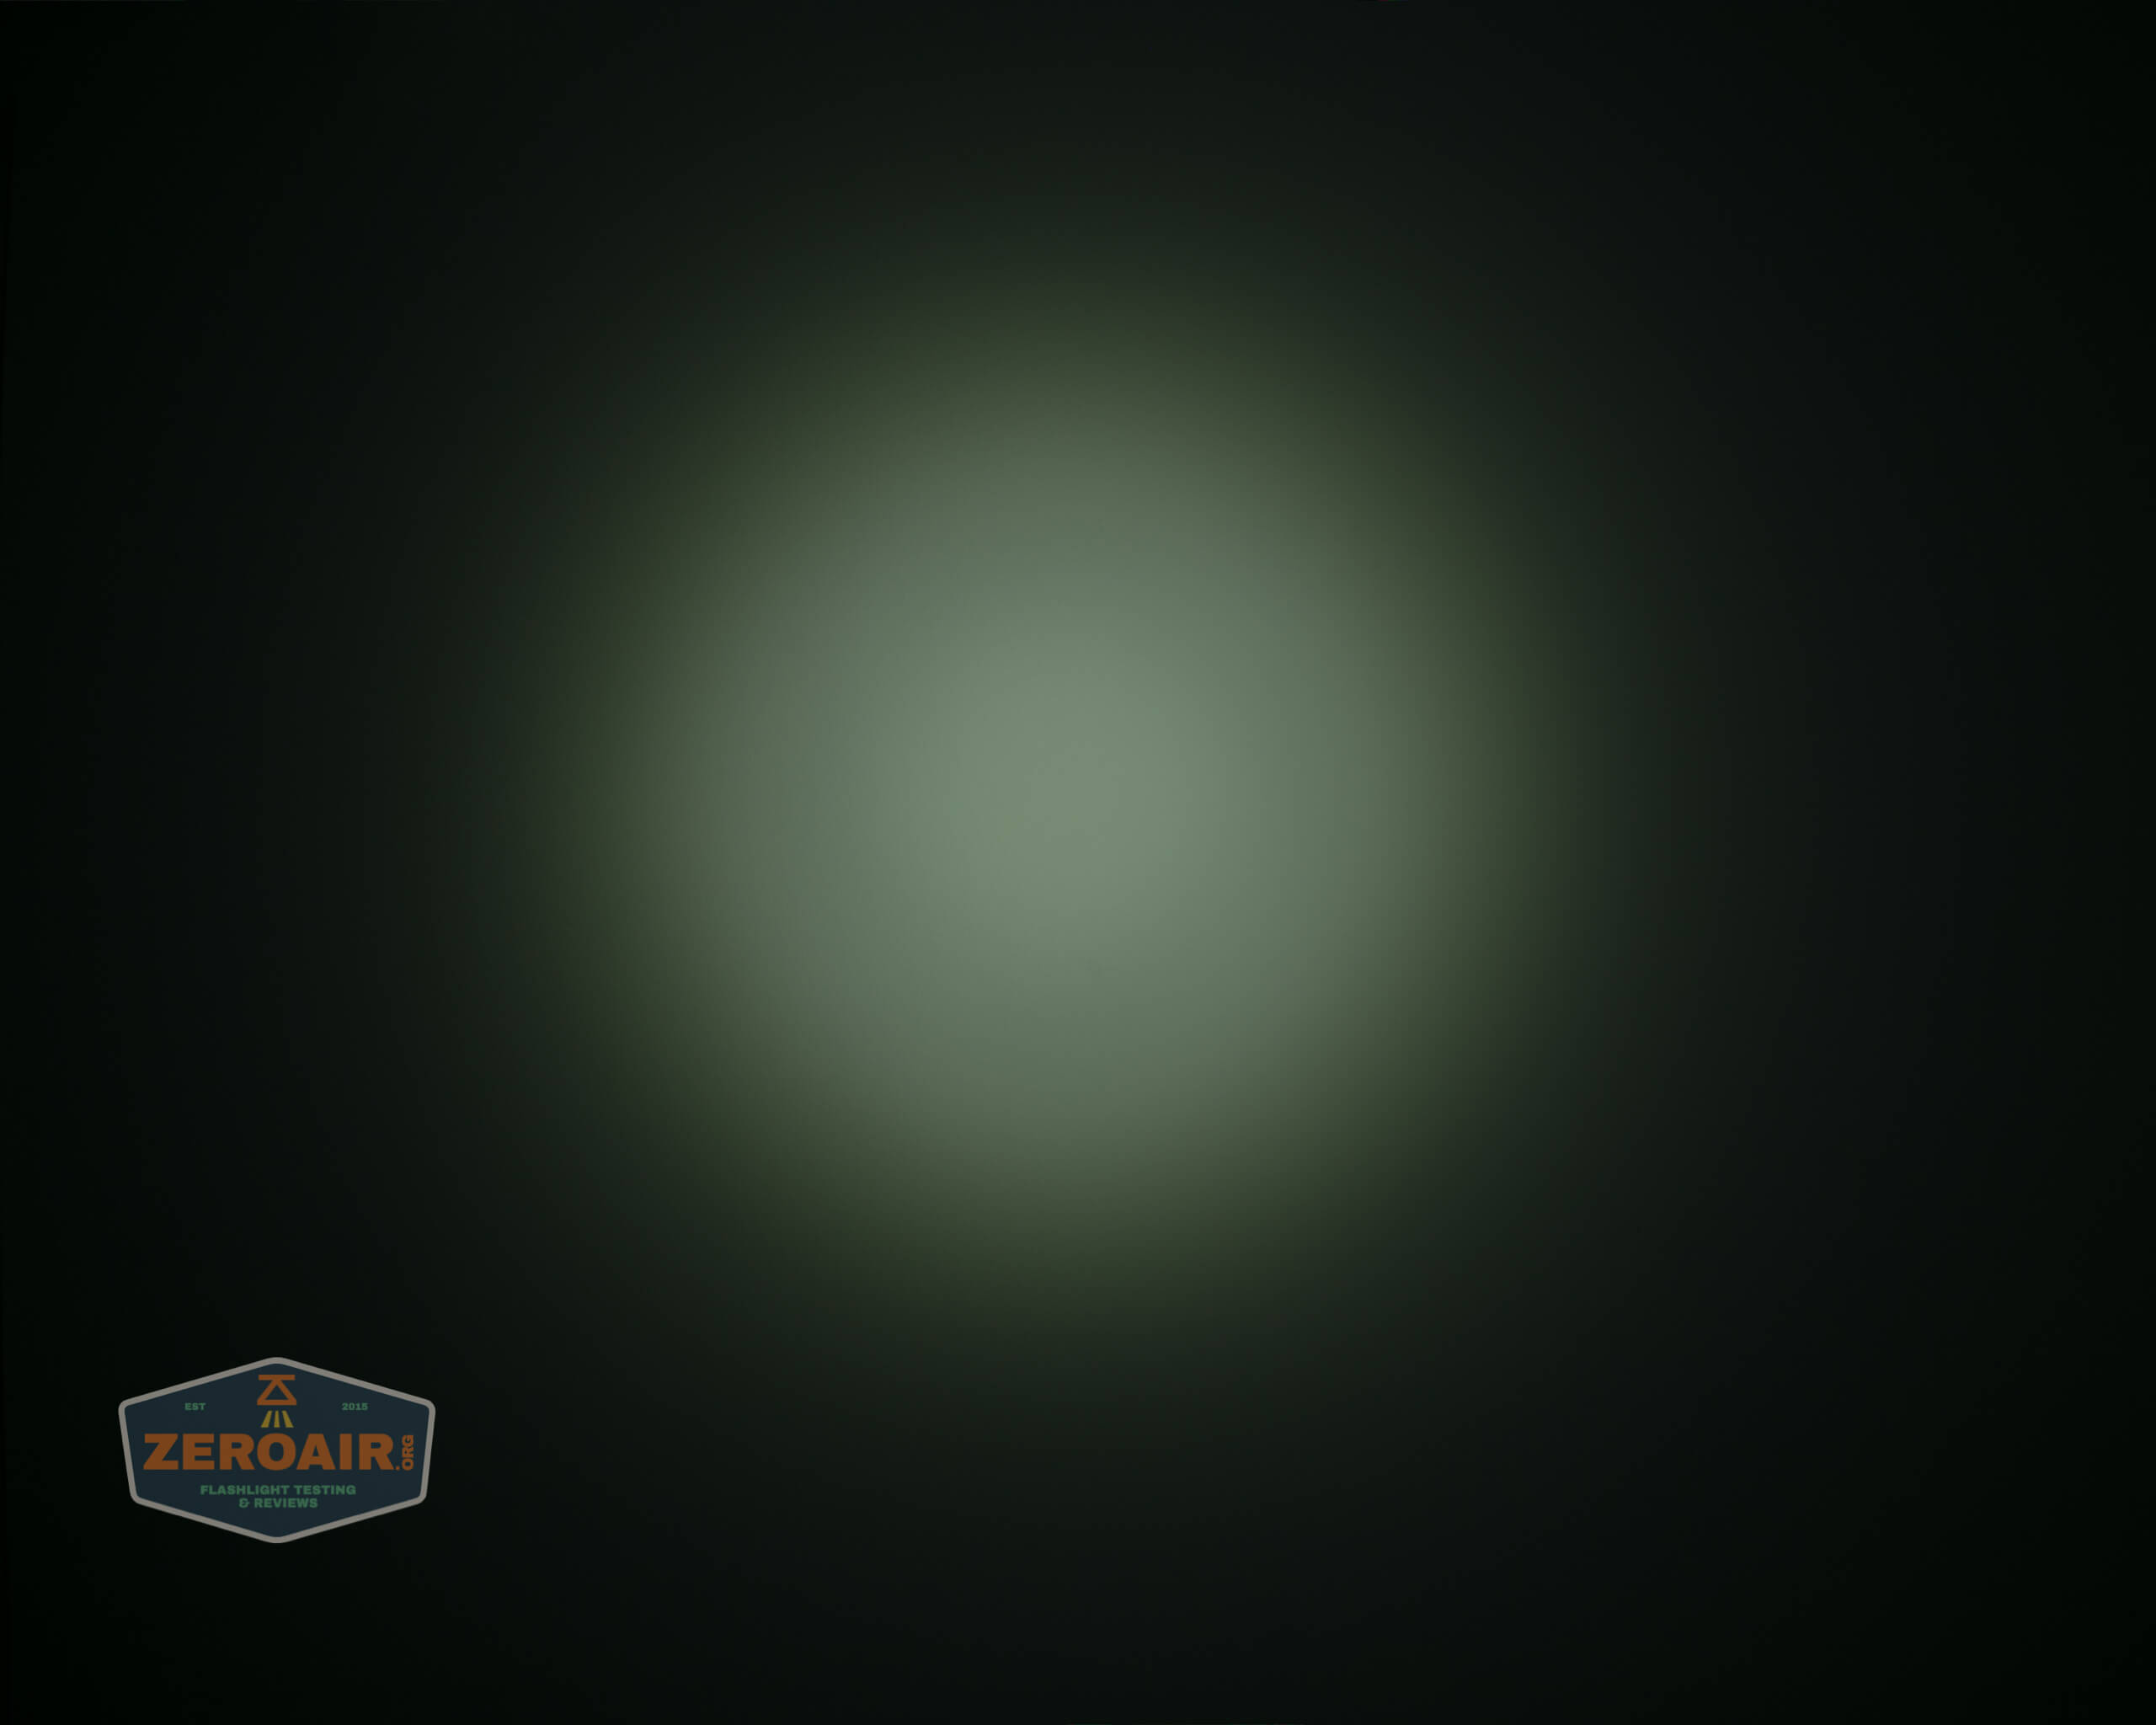
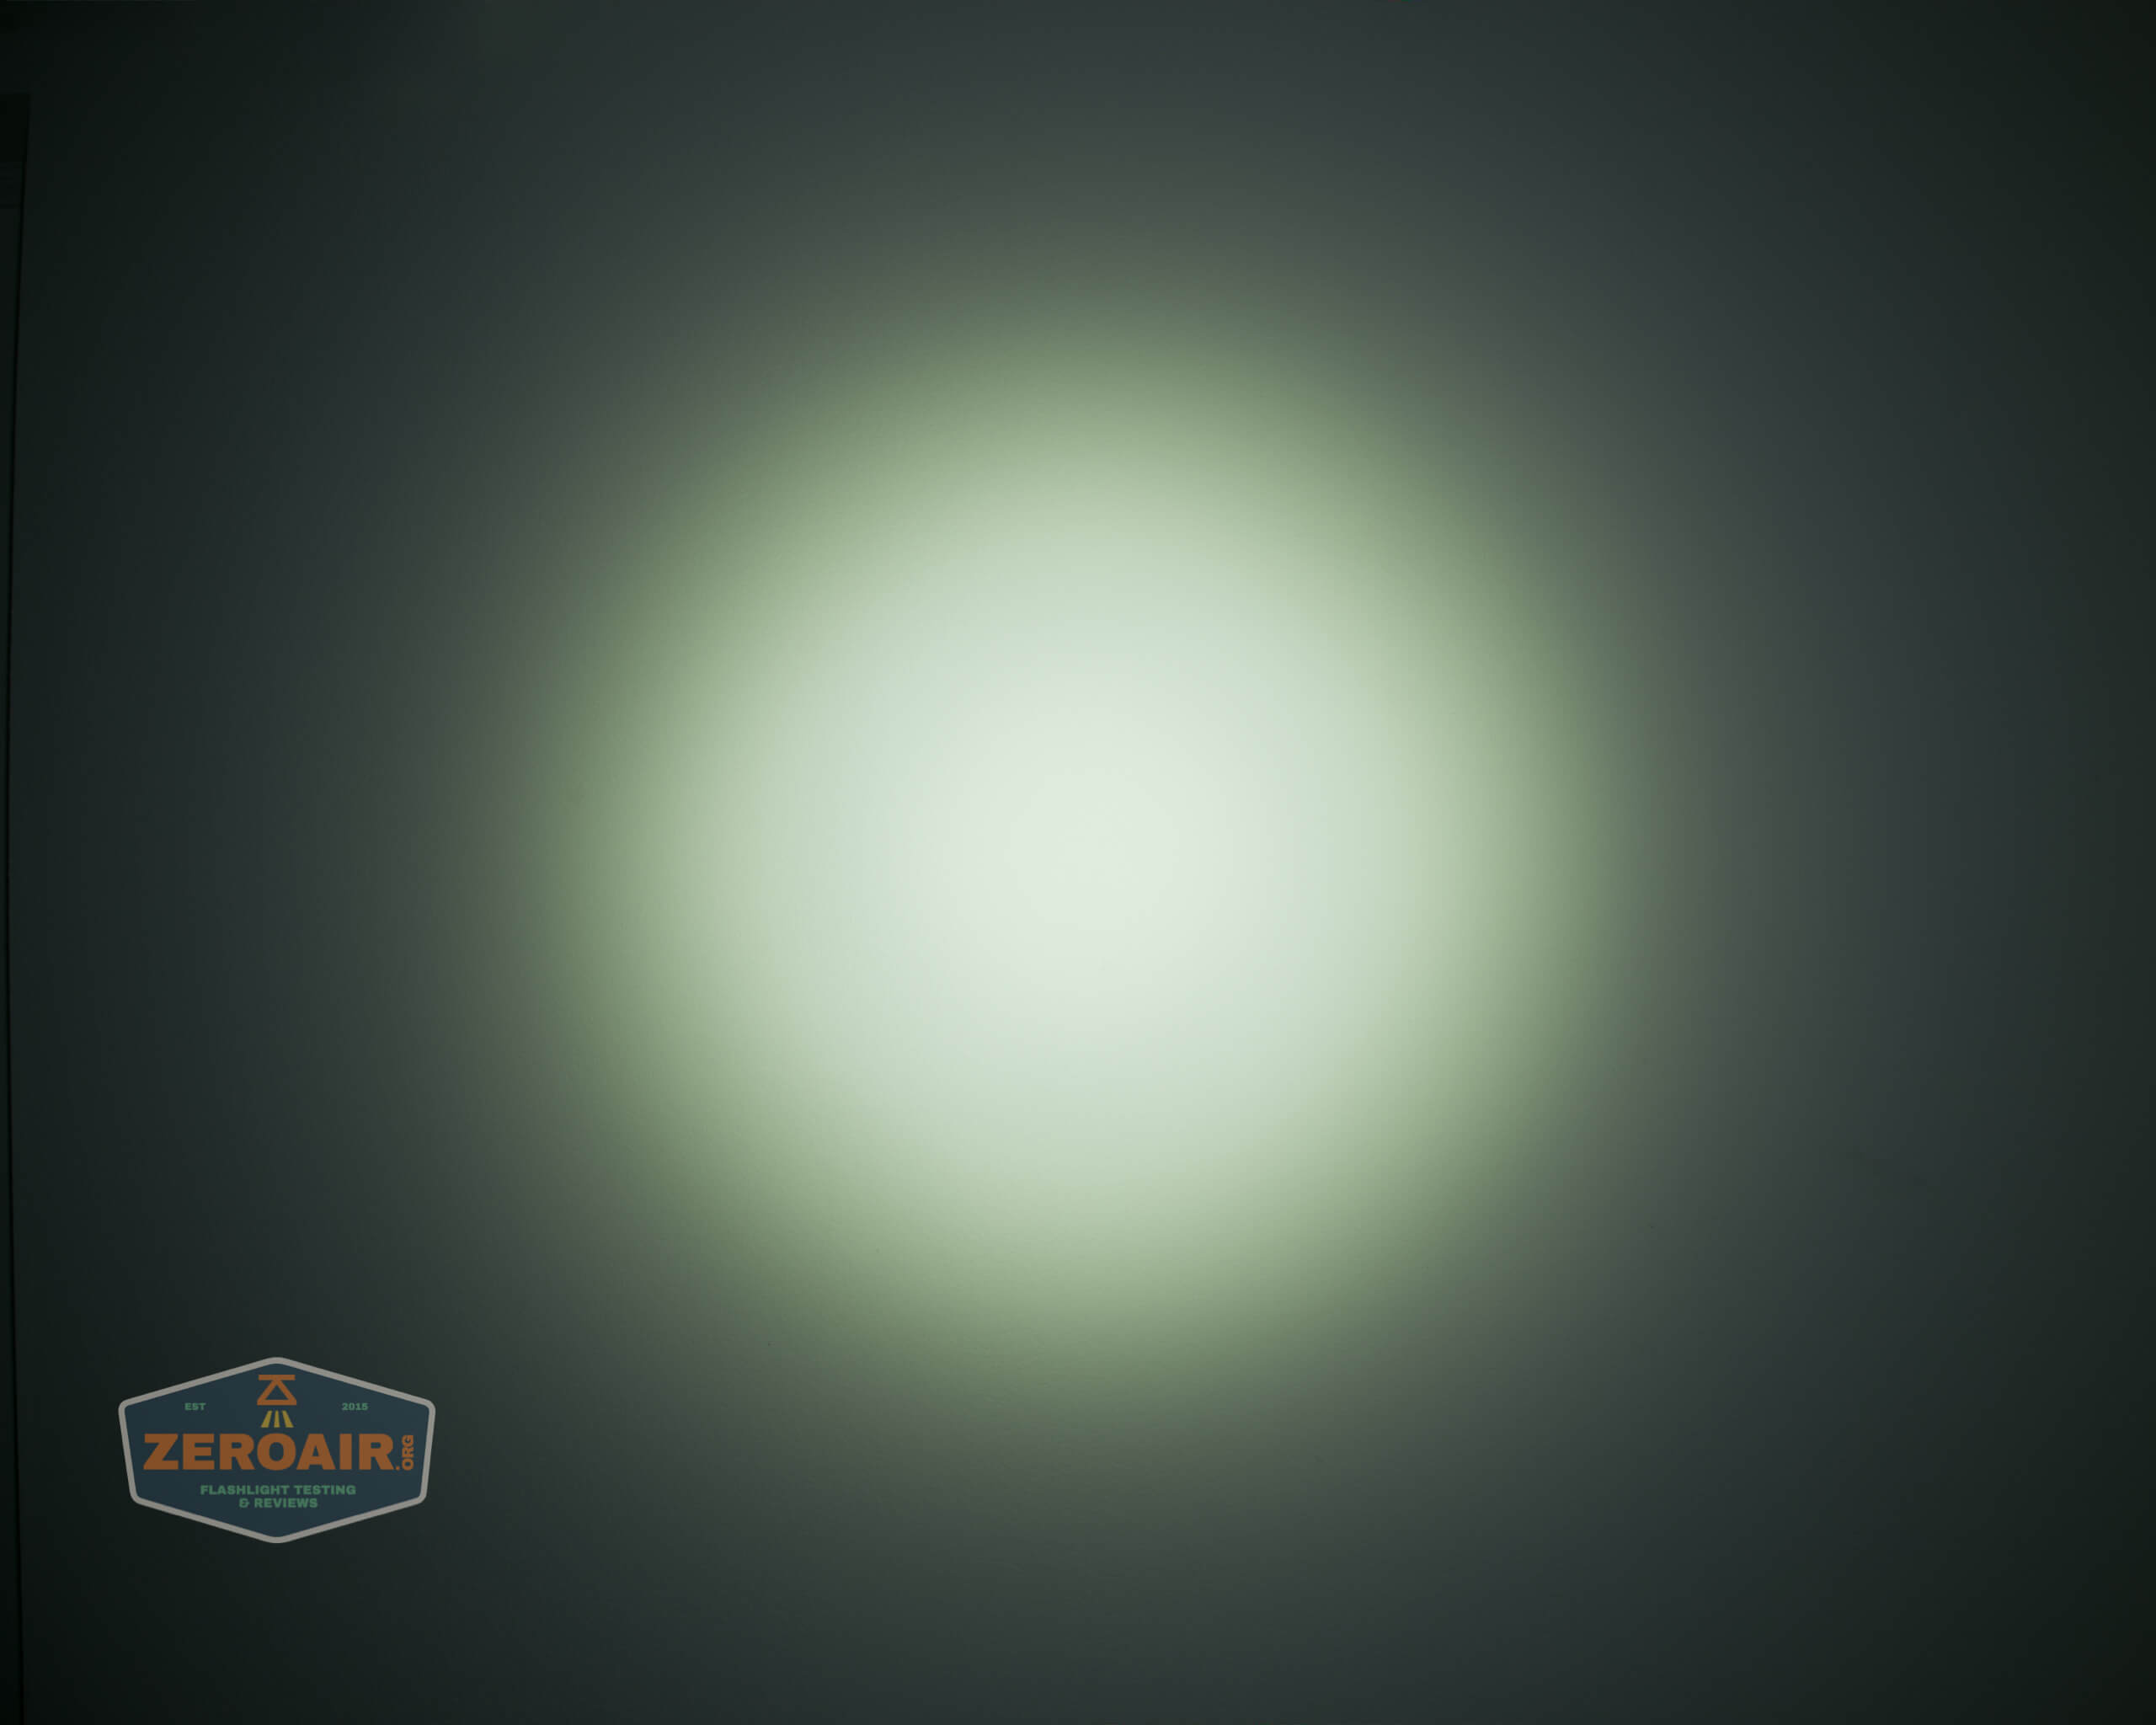
Below you can see the light in Spot setup (check the toggle), with a full battery, and on Level 4.
And below, with all the same things except now on Level 1.
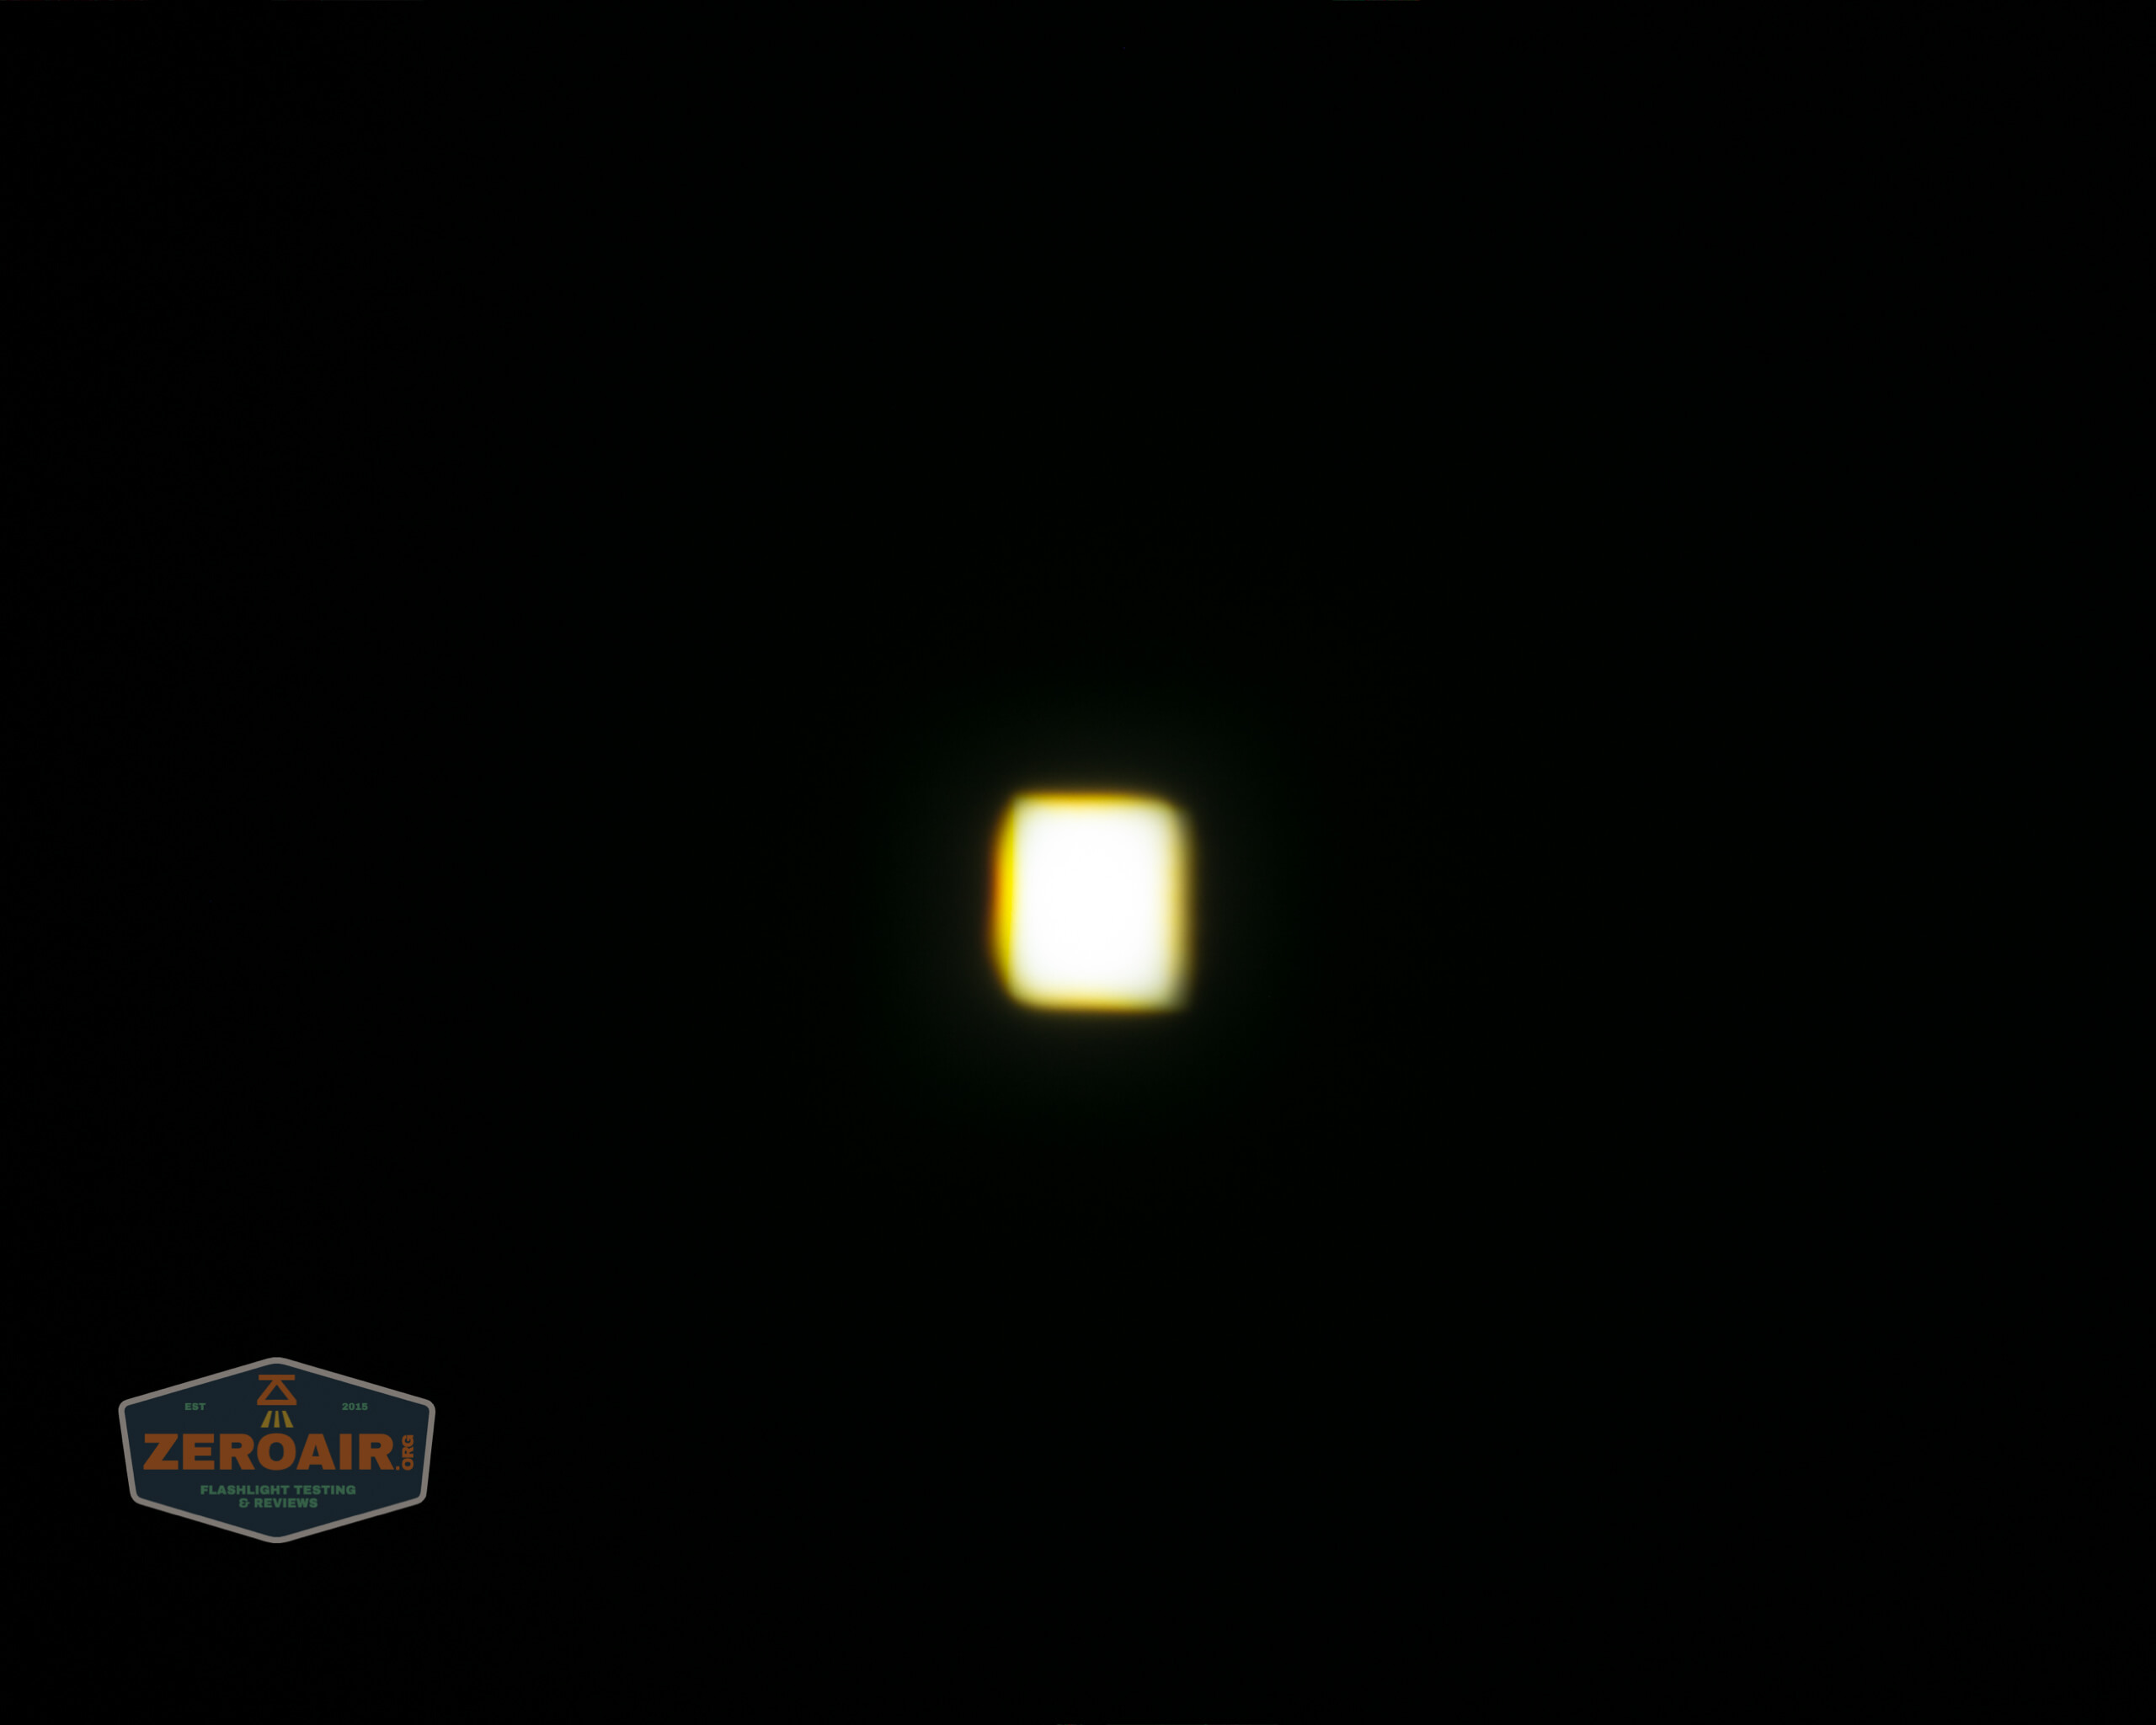
Up close, the spot emitter is pleasantly rounded. At any distance (say, 2 feet or more), however, the projection of the emitter turns square.
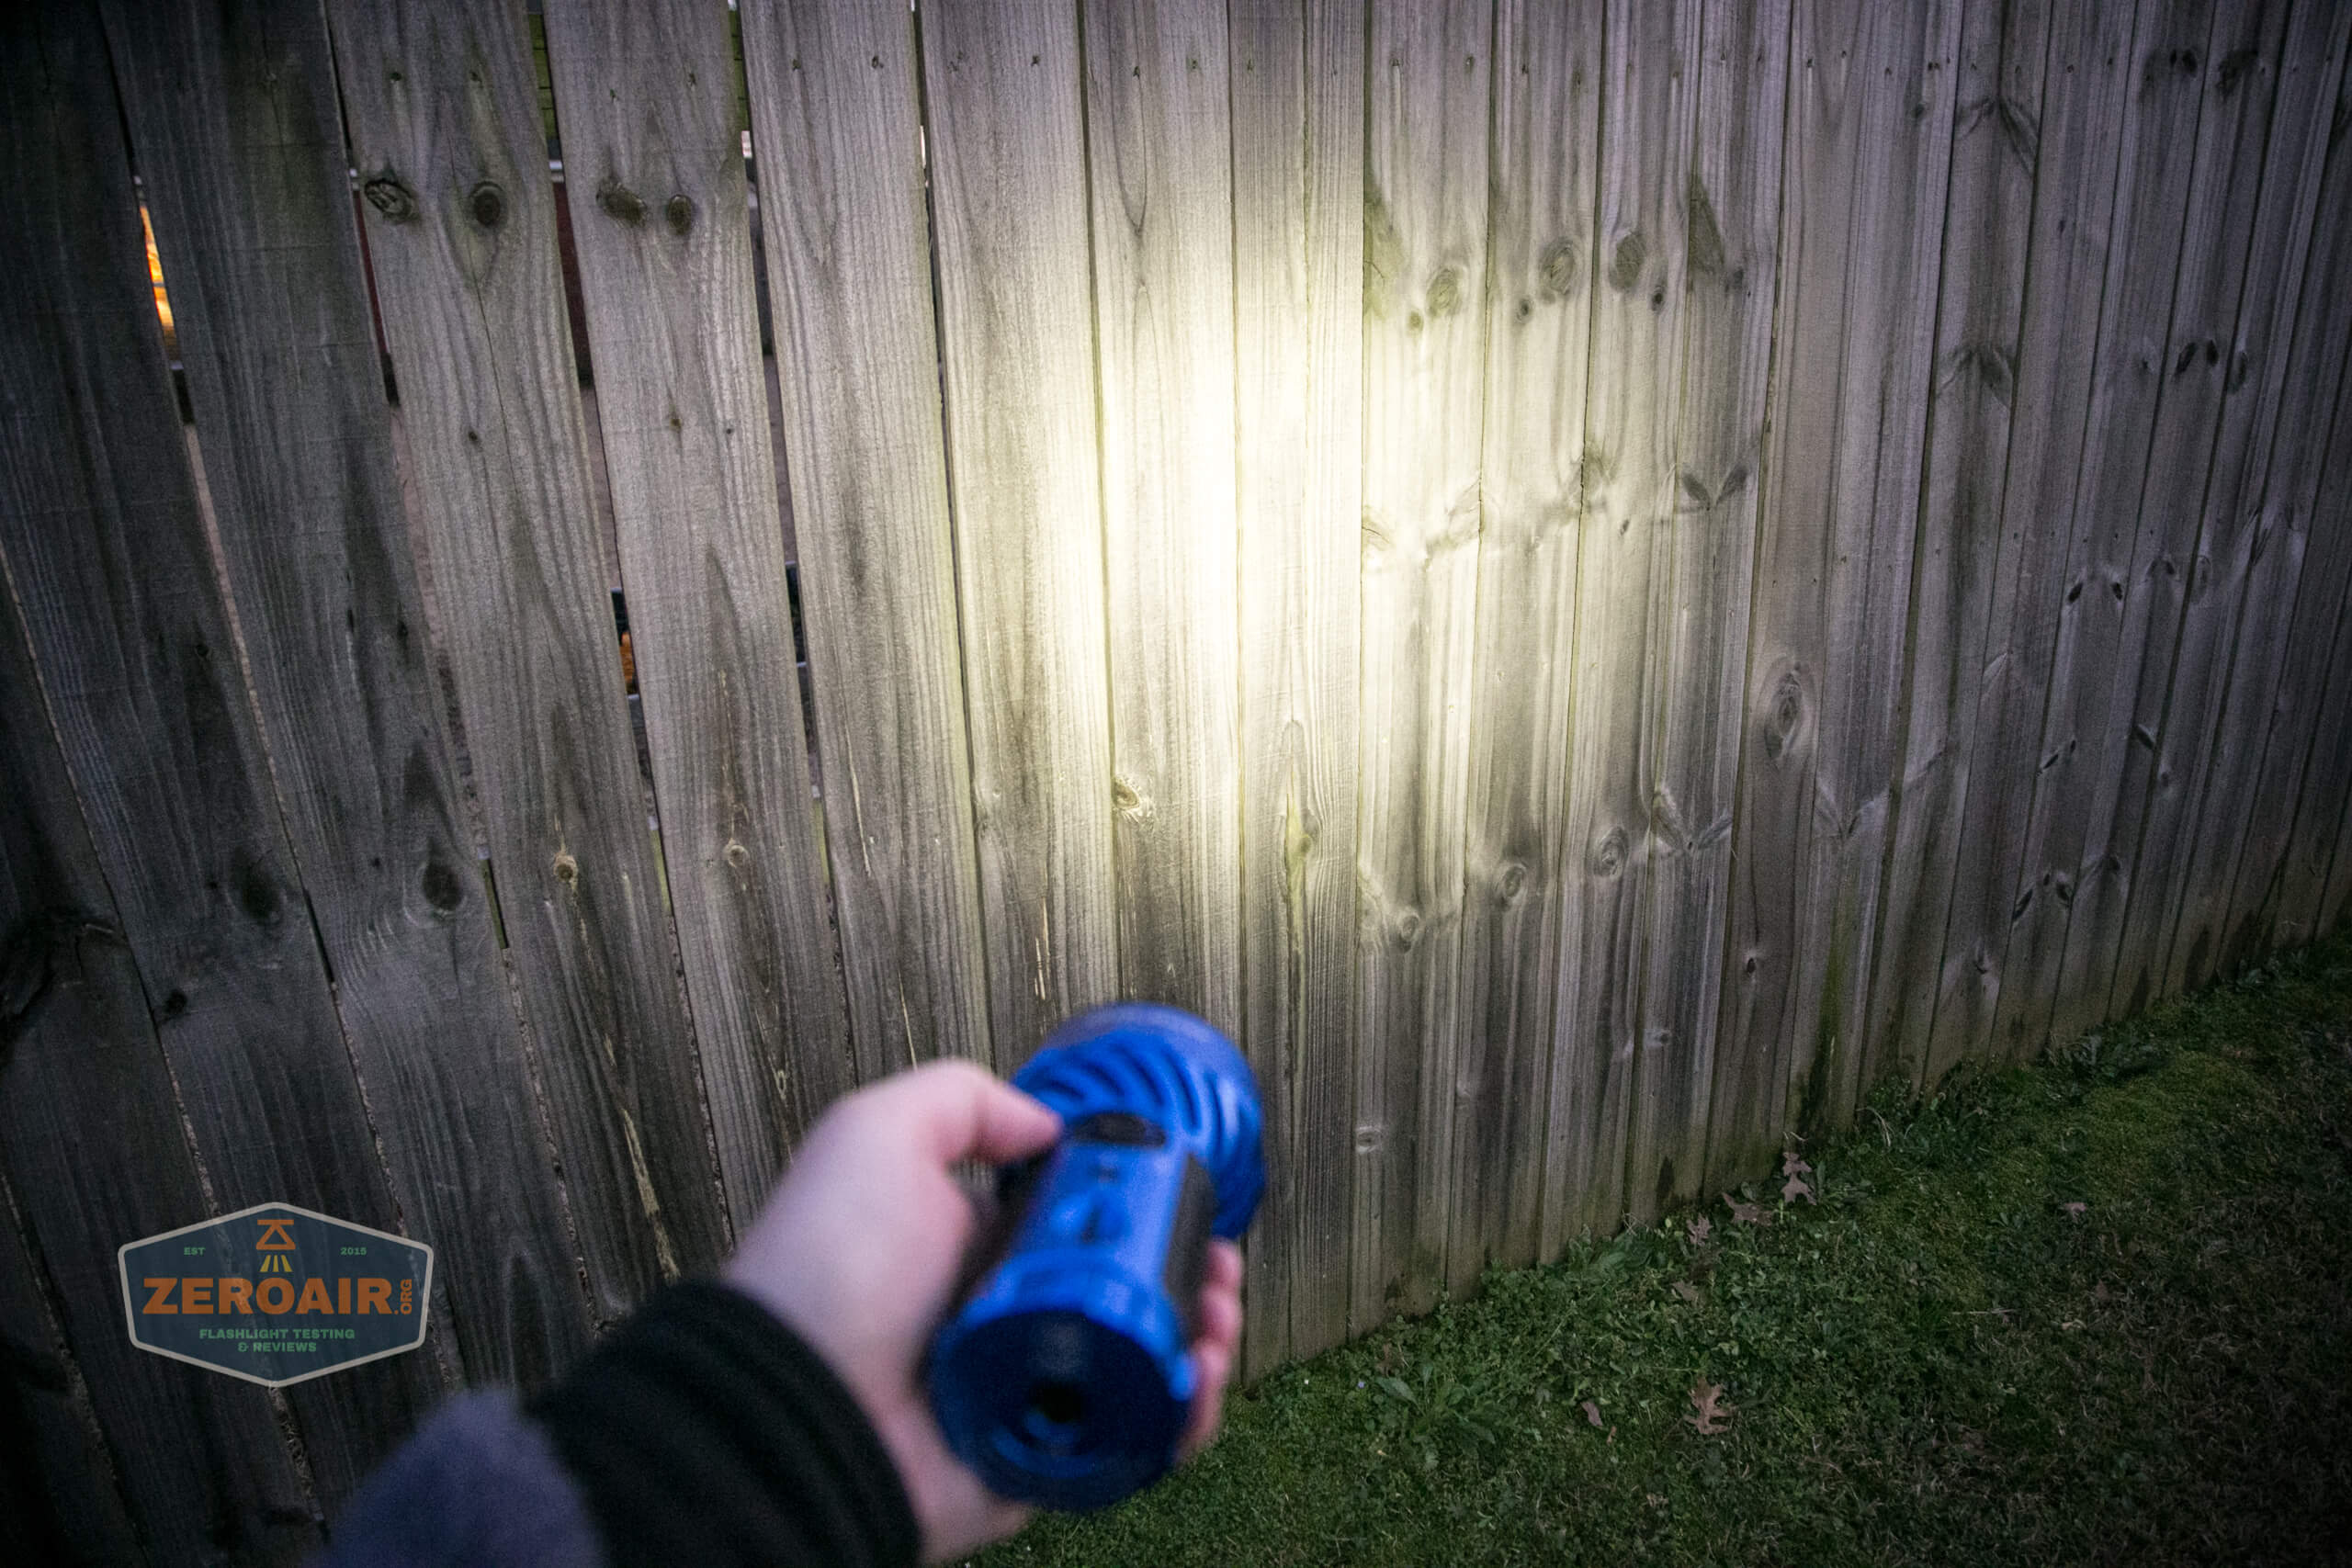
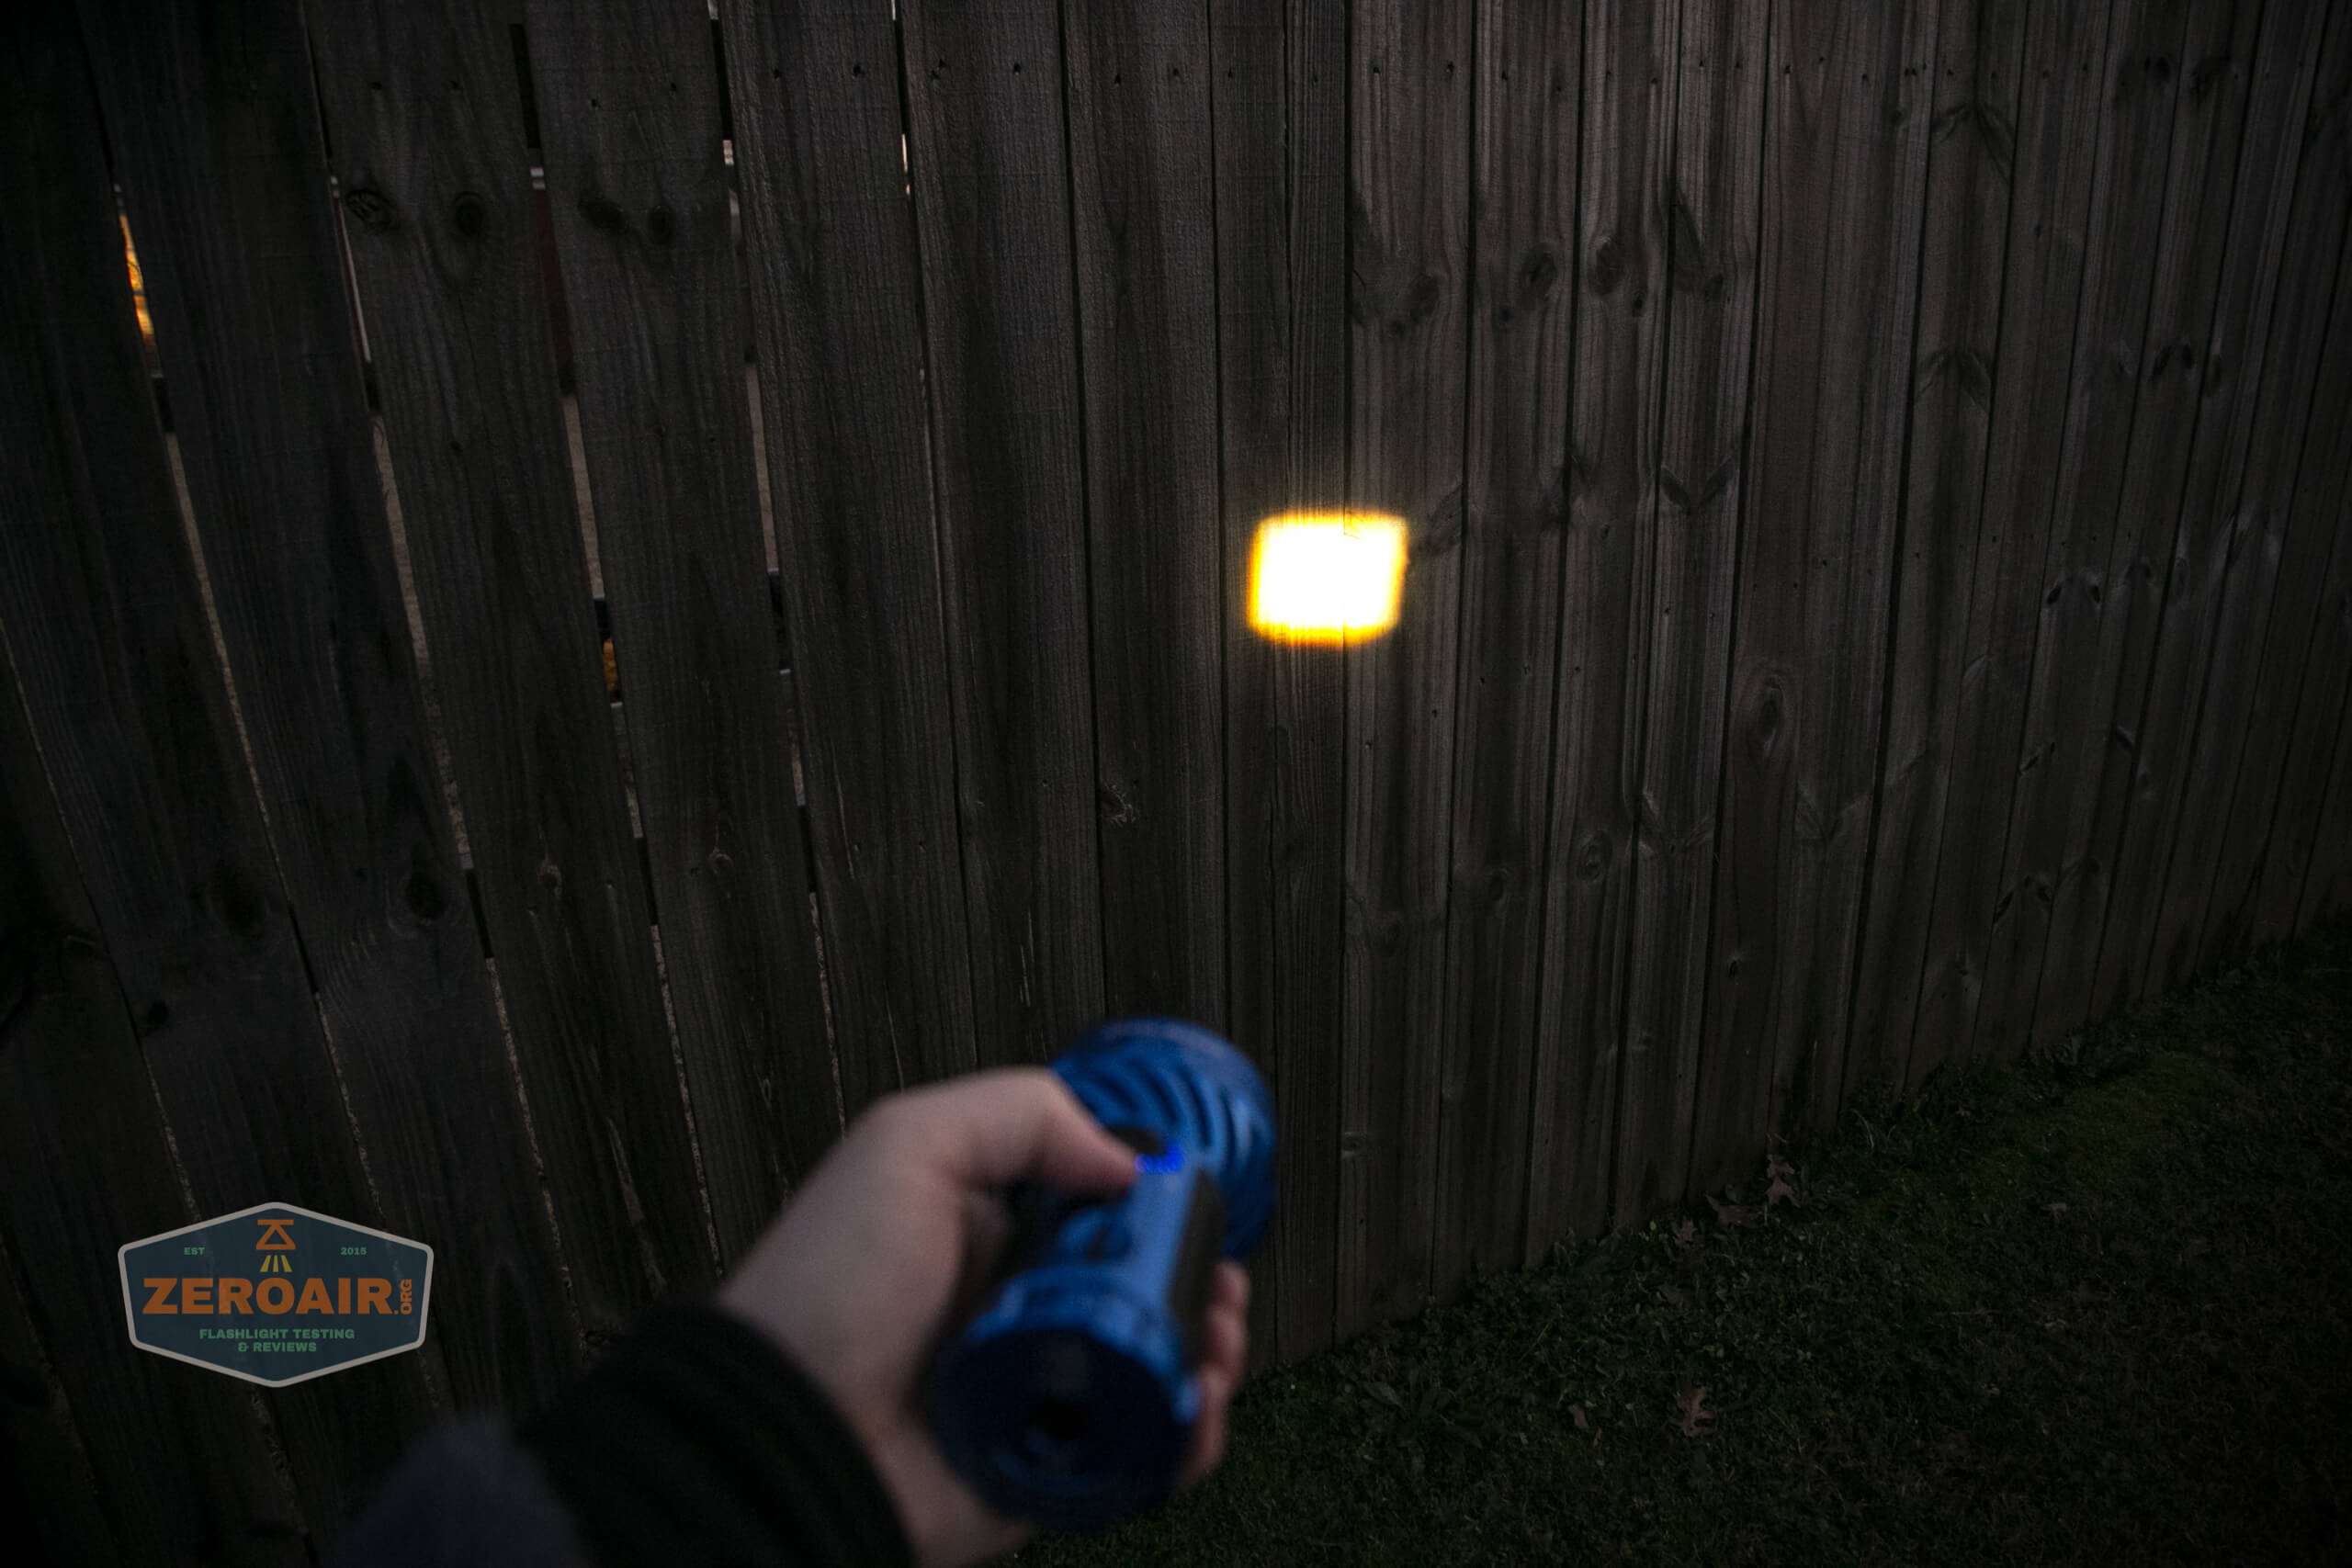
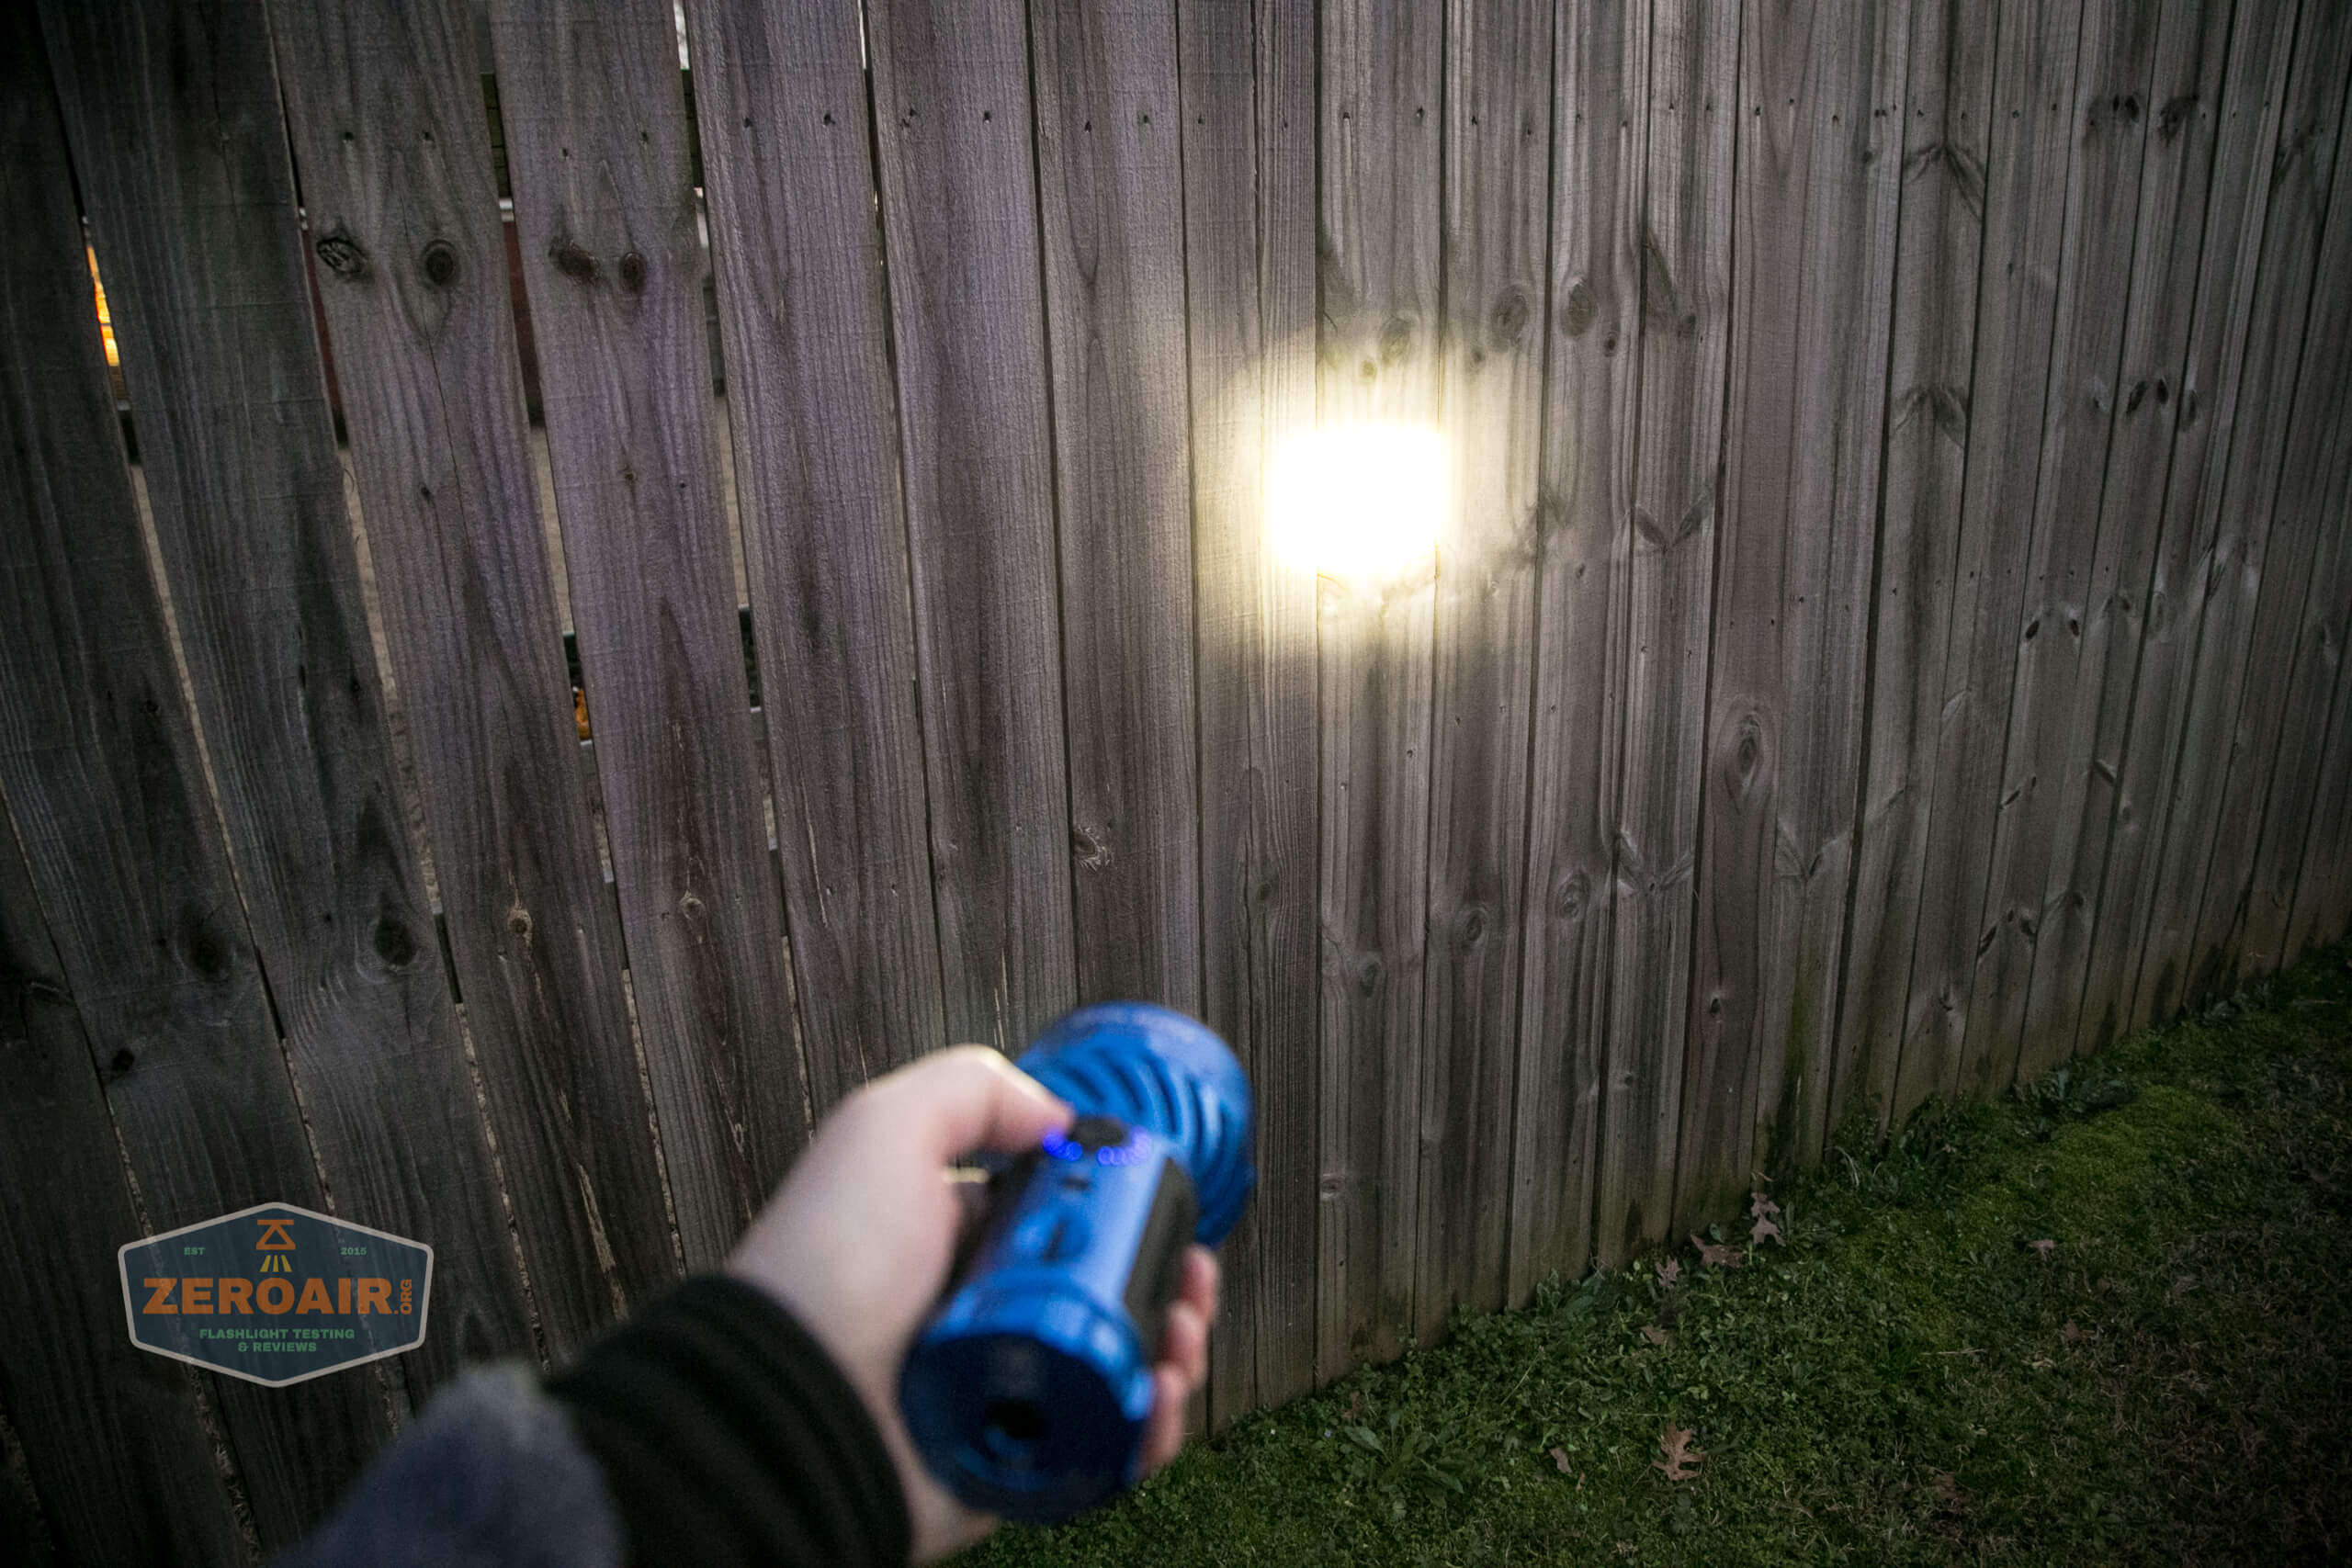

Some users will positively hate this square projection, and on some lights, it really is a downside. But while this is a very square output, it’s still quite neat. As long as you know what you’re getting, then this will be completely acceptable. It’s not really quite like the normal cheap zoomies, but I can’t put into words exactly why it’s different.
Also note that the light doesn’t fade from flood to throw – it’s either flood or throw, and there is no middle ground at all. Flood or throw. The outputs can not be used simultaneously. This is a difference from the Fenix LR40R, which can use both output types at the same time.

Beamshots
These beamshots always have the following settings: f8, ISO100, 0.3s shutter, and manual 5000K exposure. These photos are taken at floor level, and the beam hits the ceiling around 9 feet away.
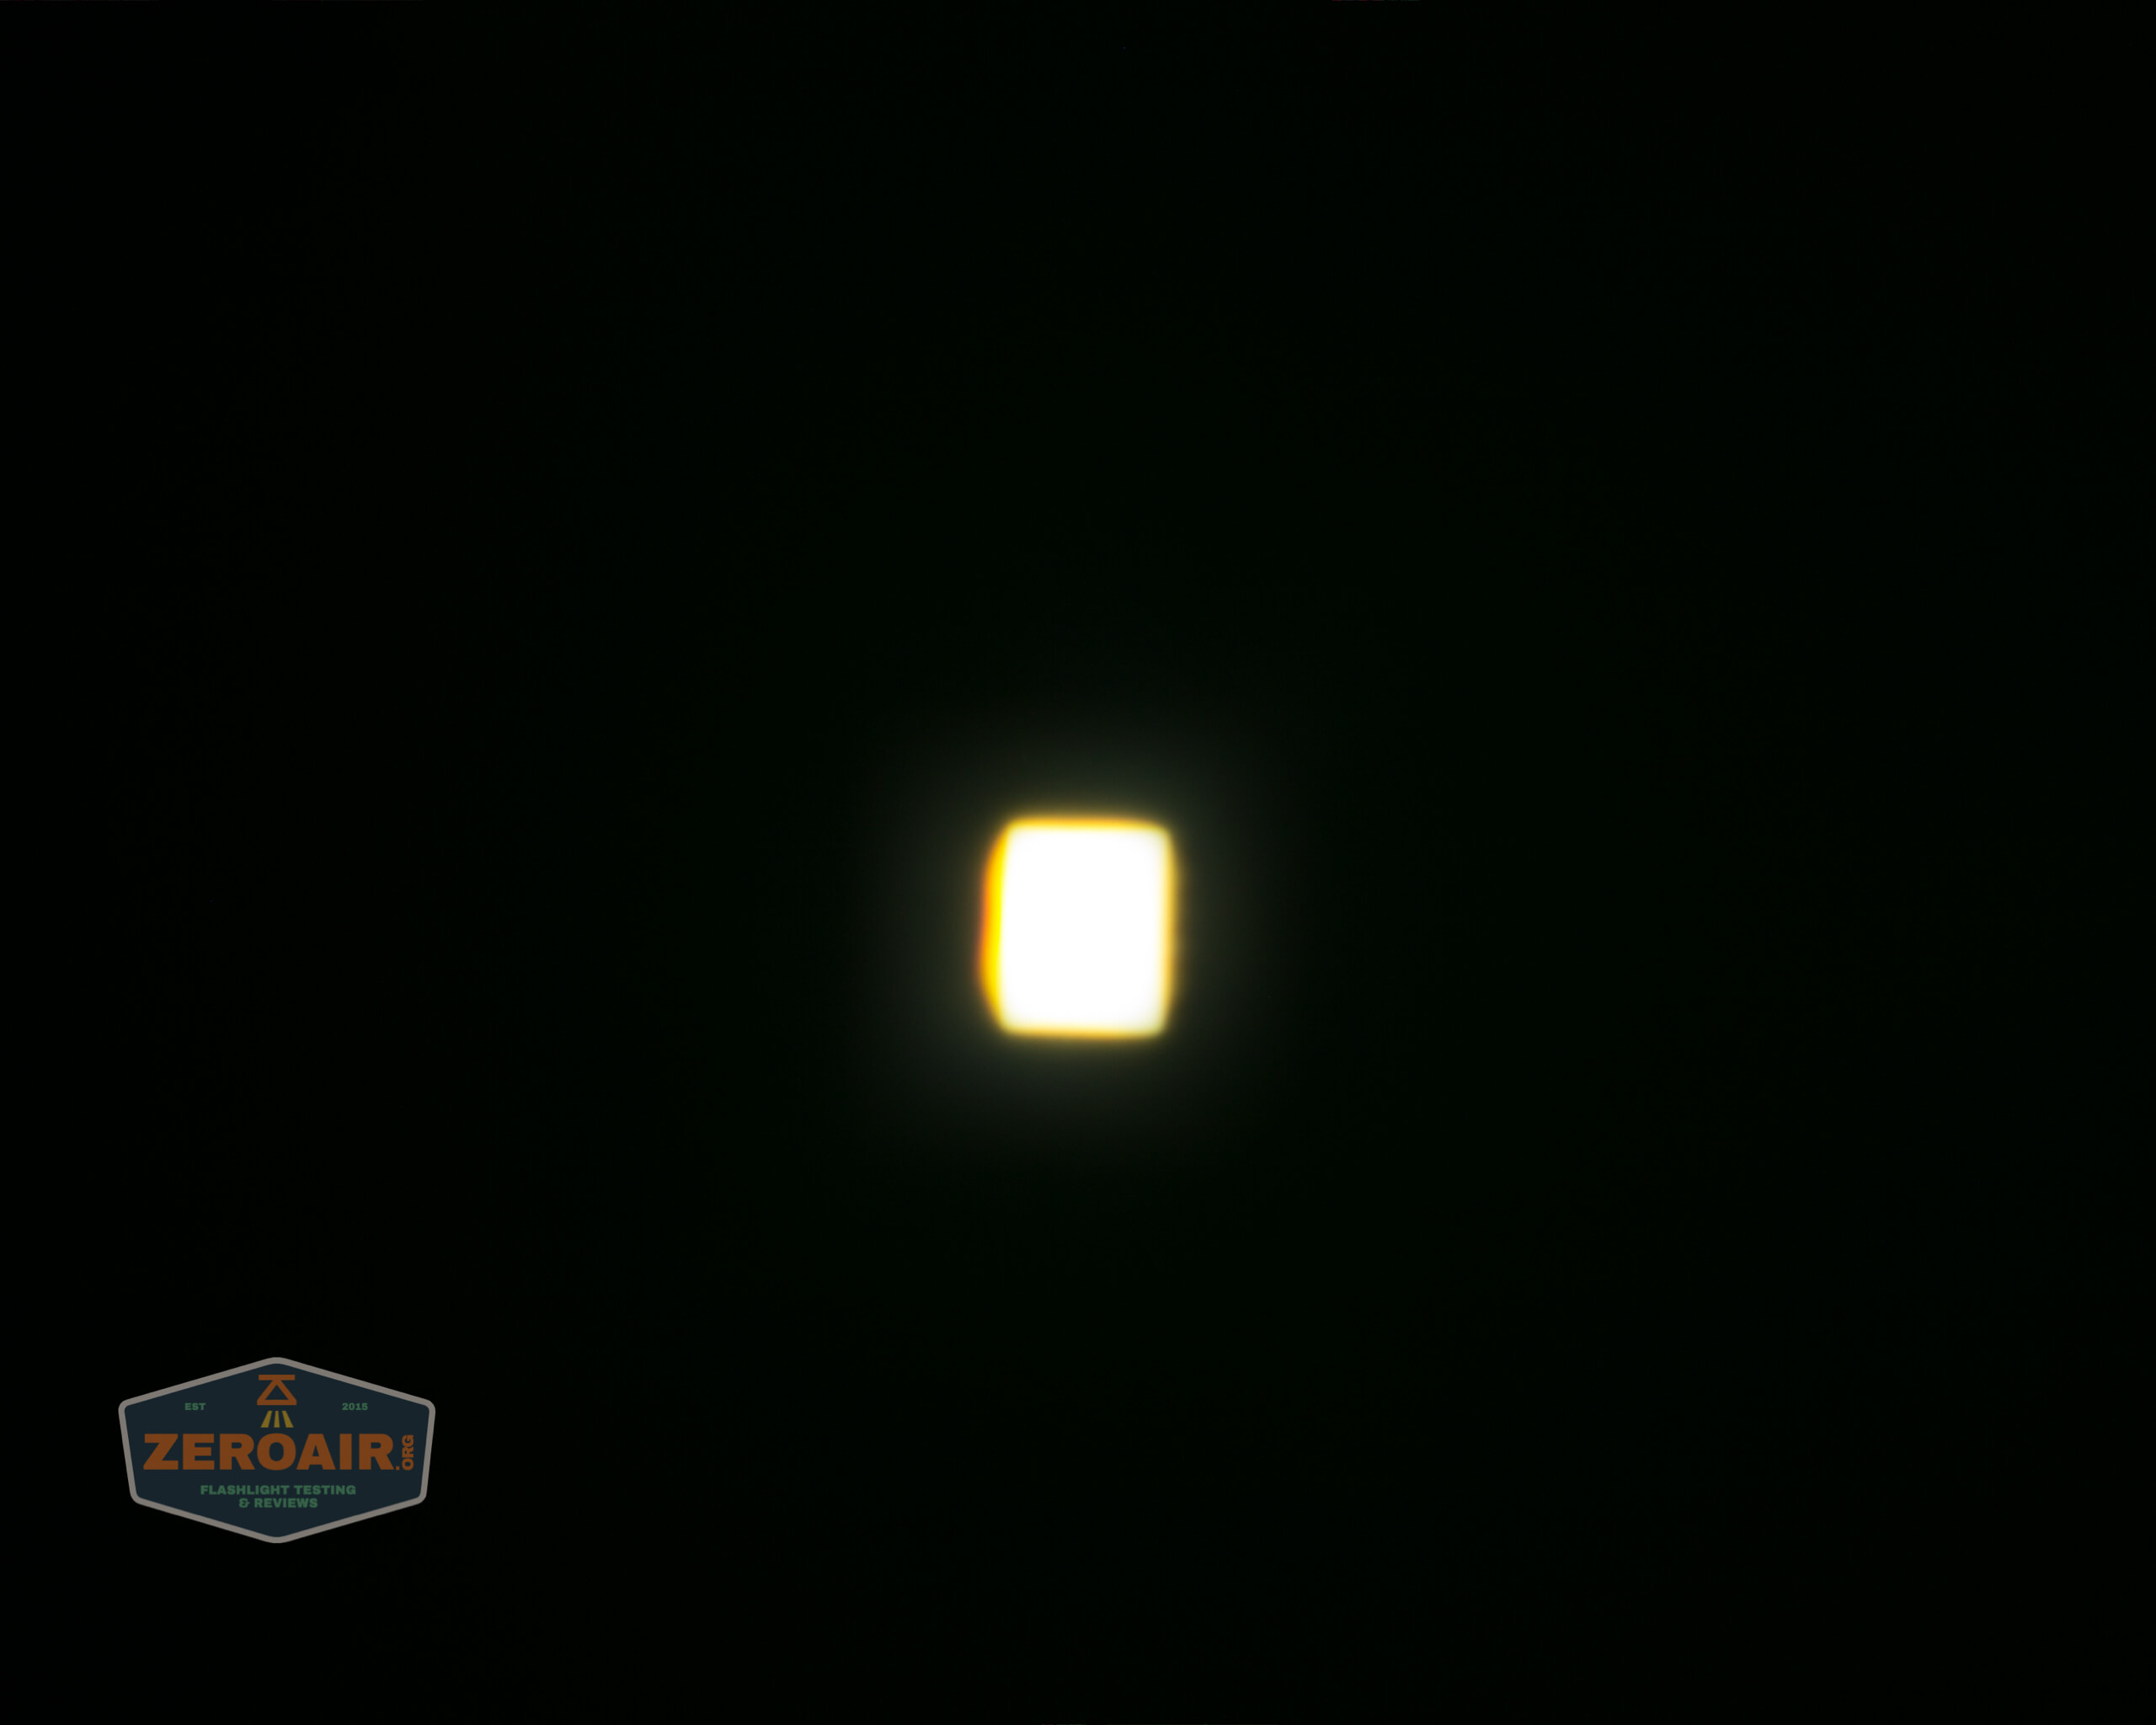


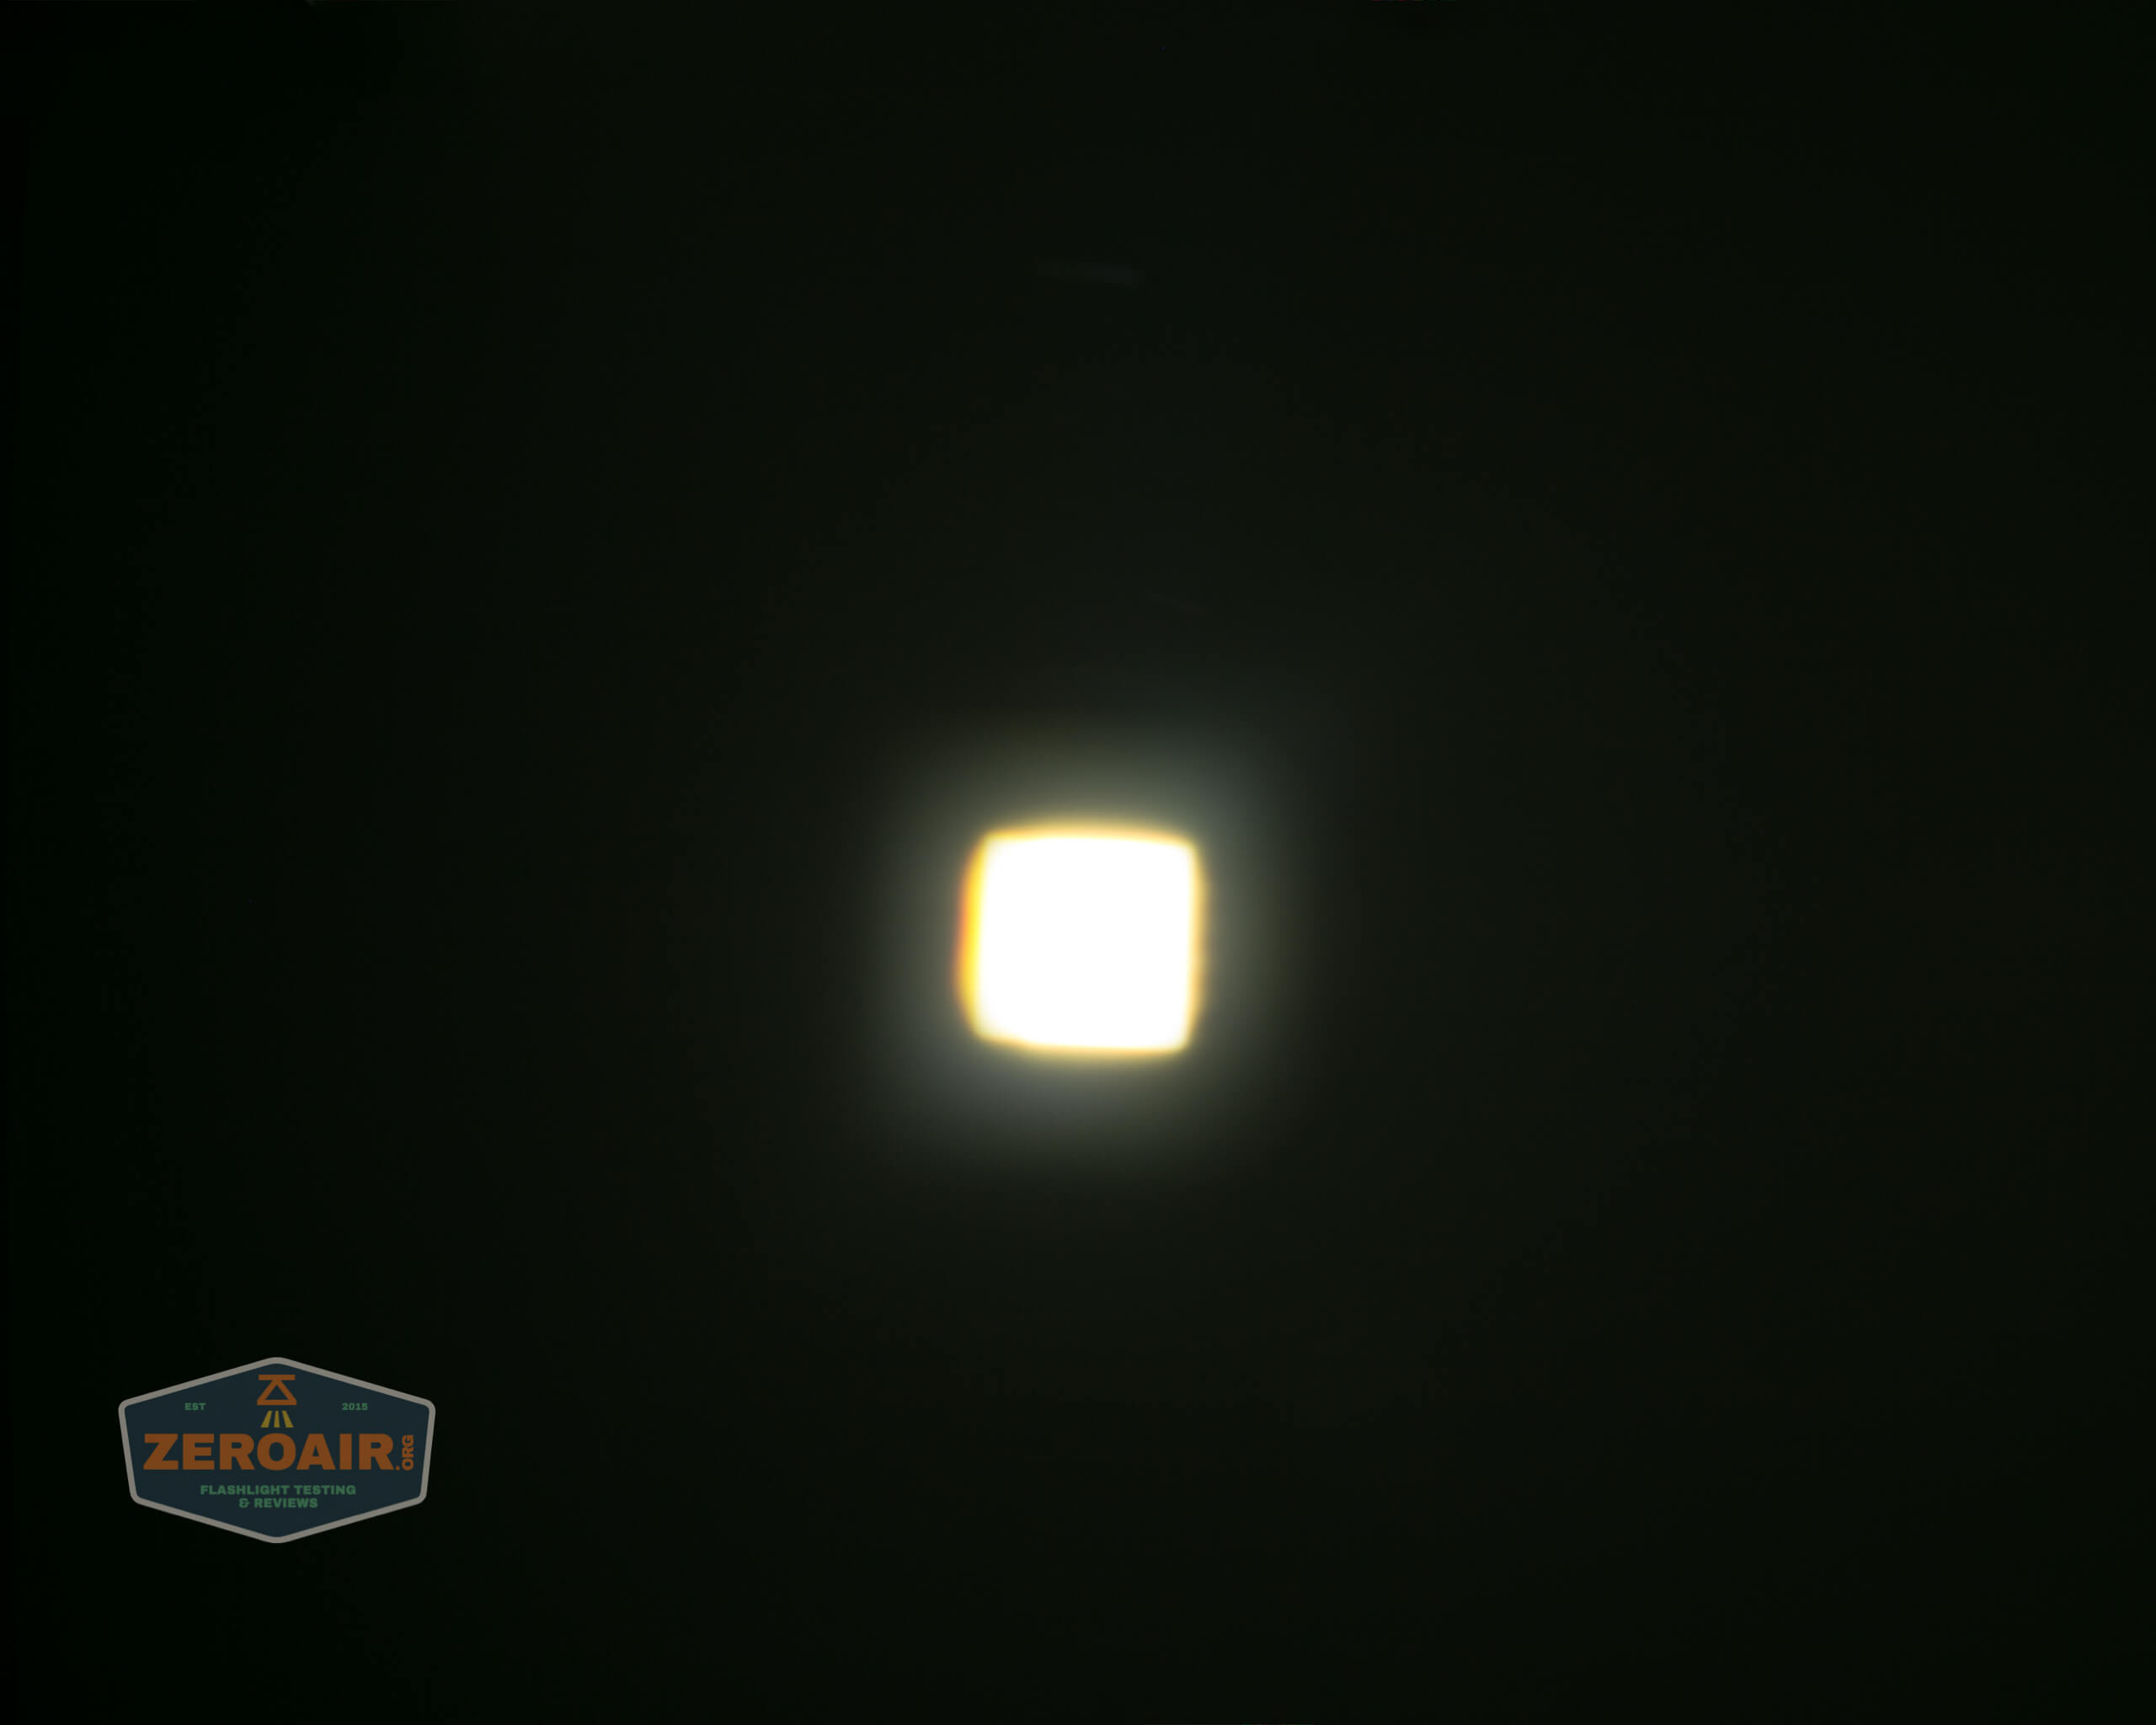
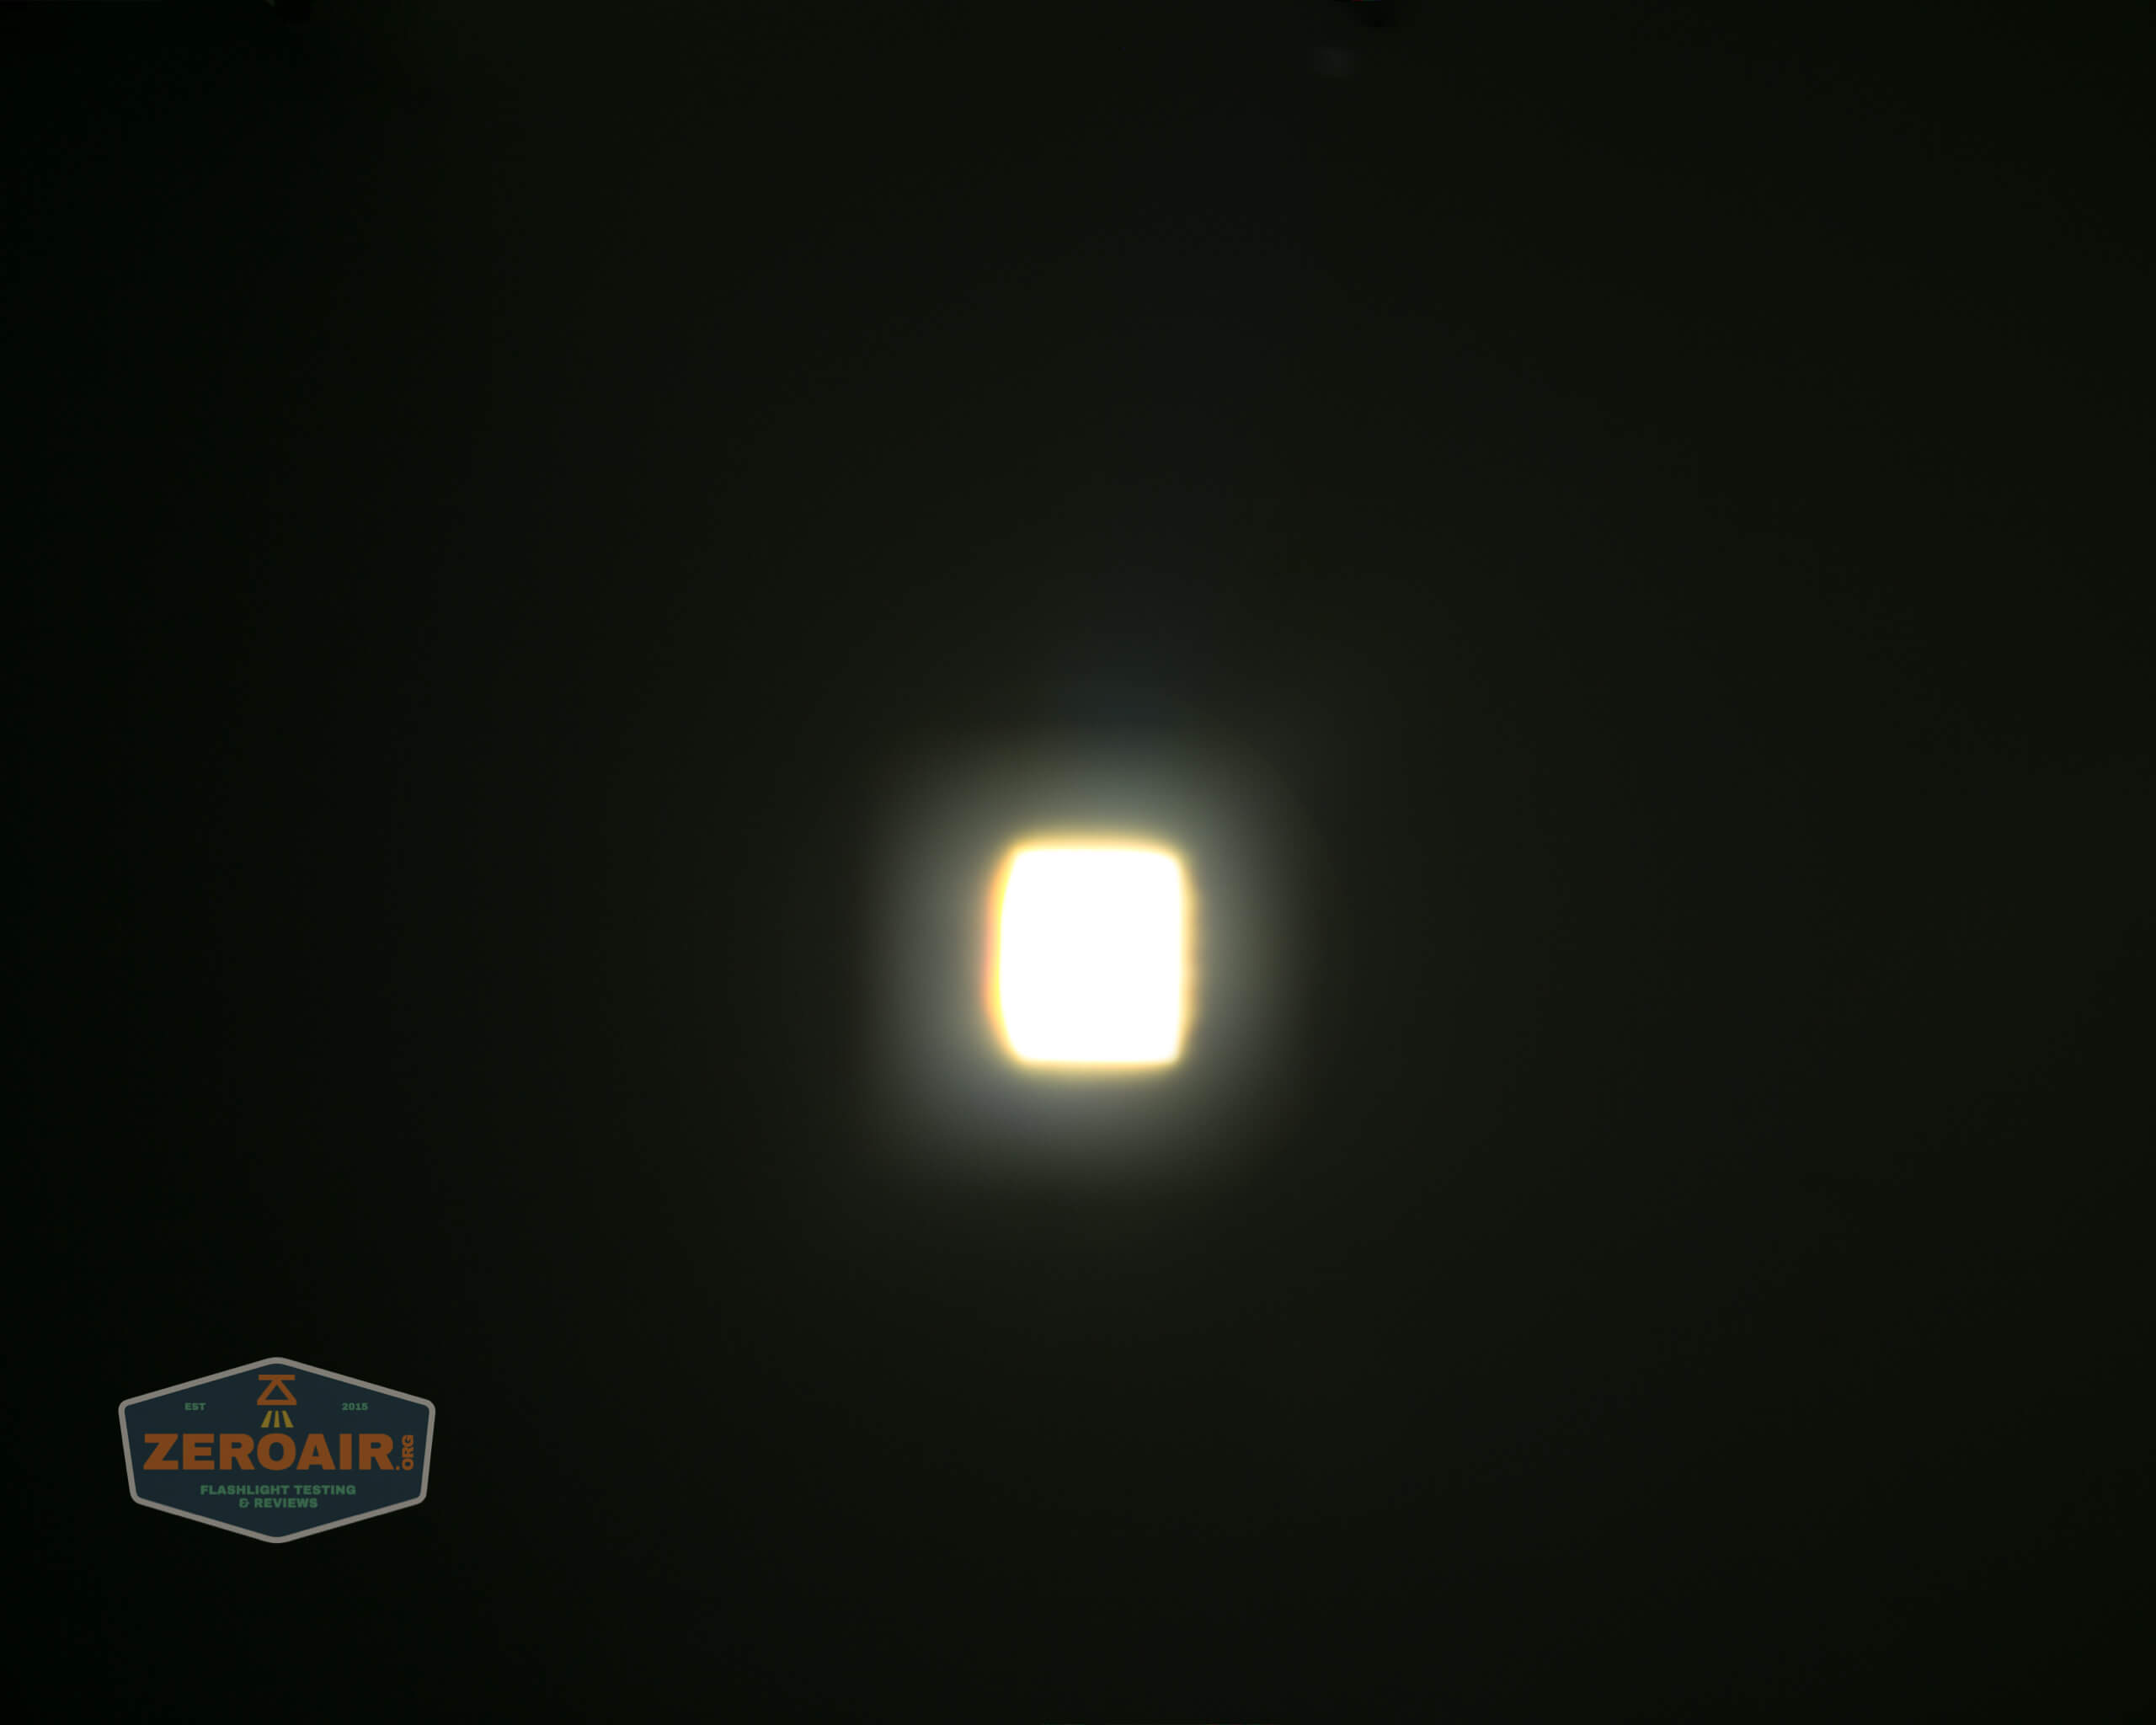
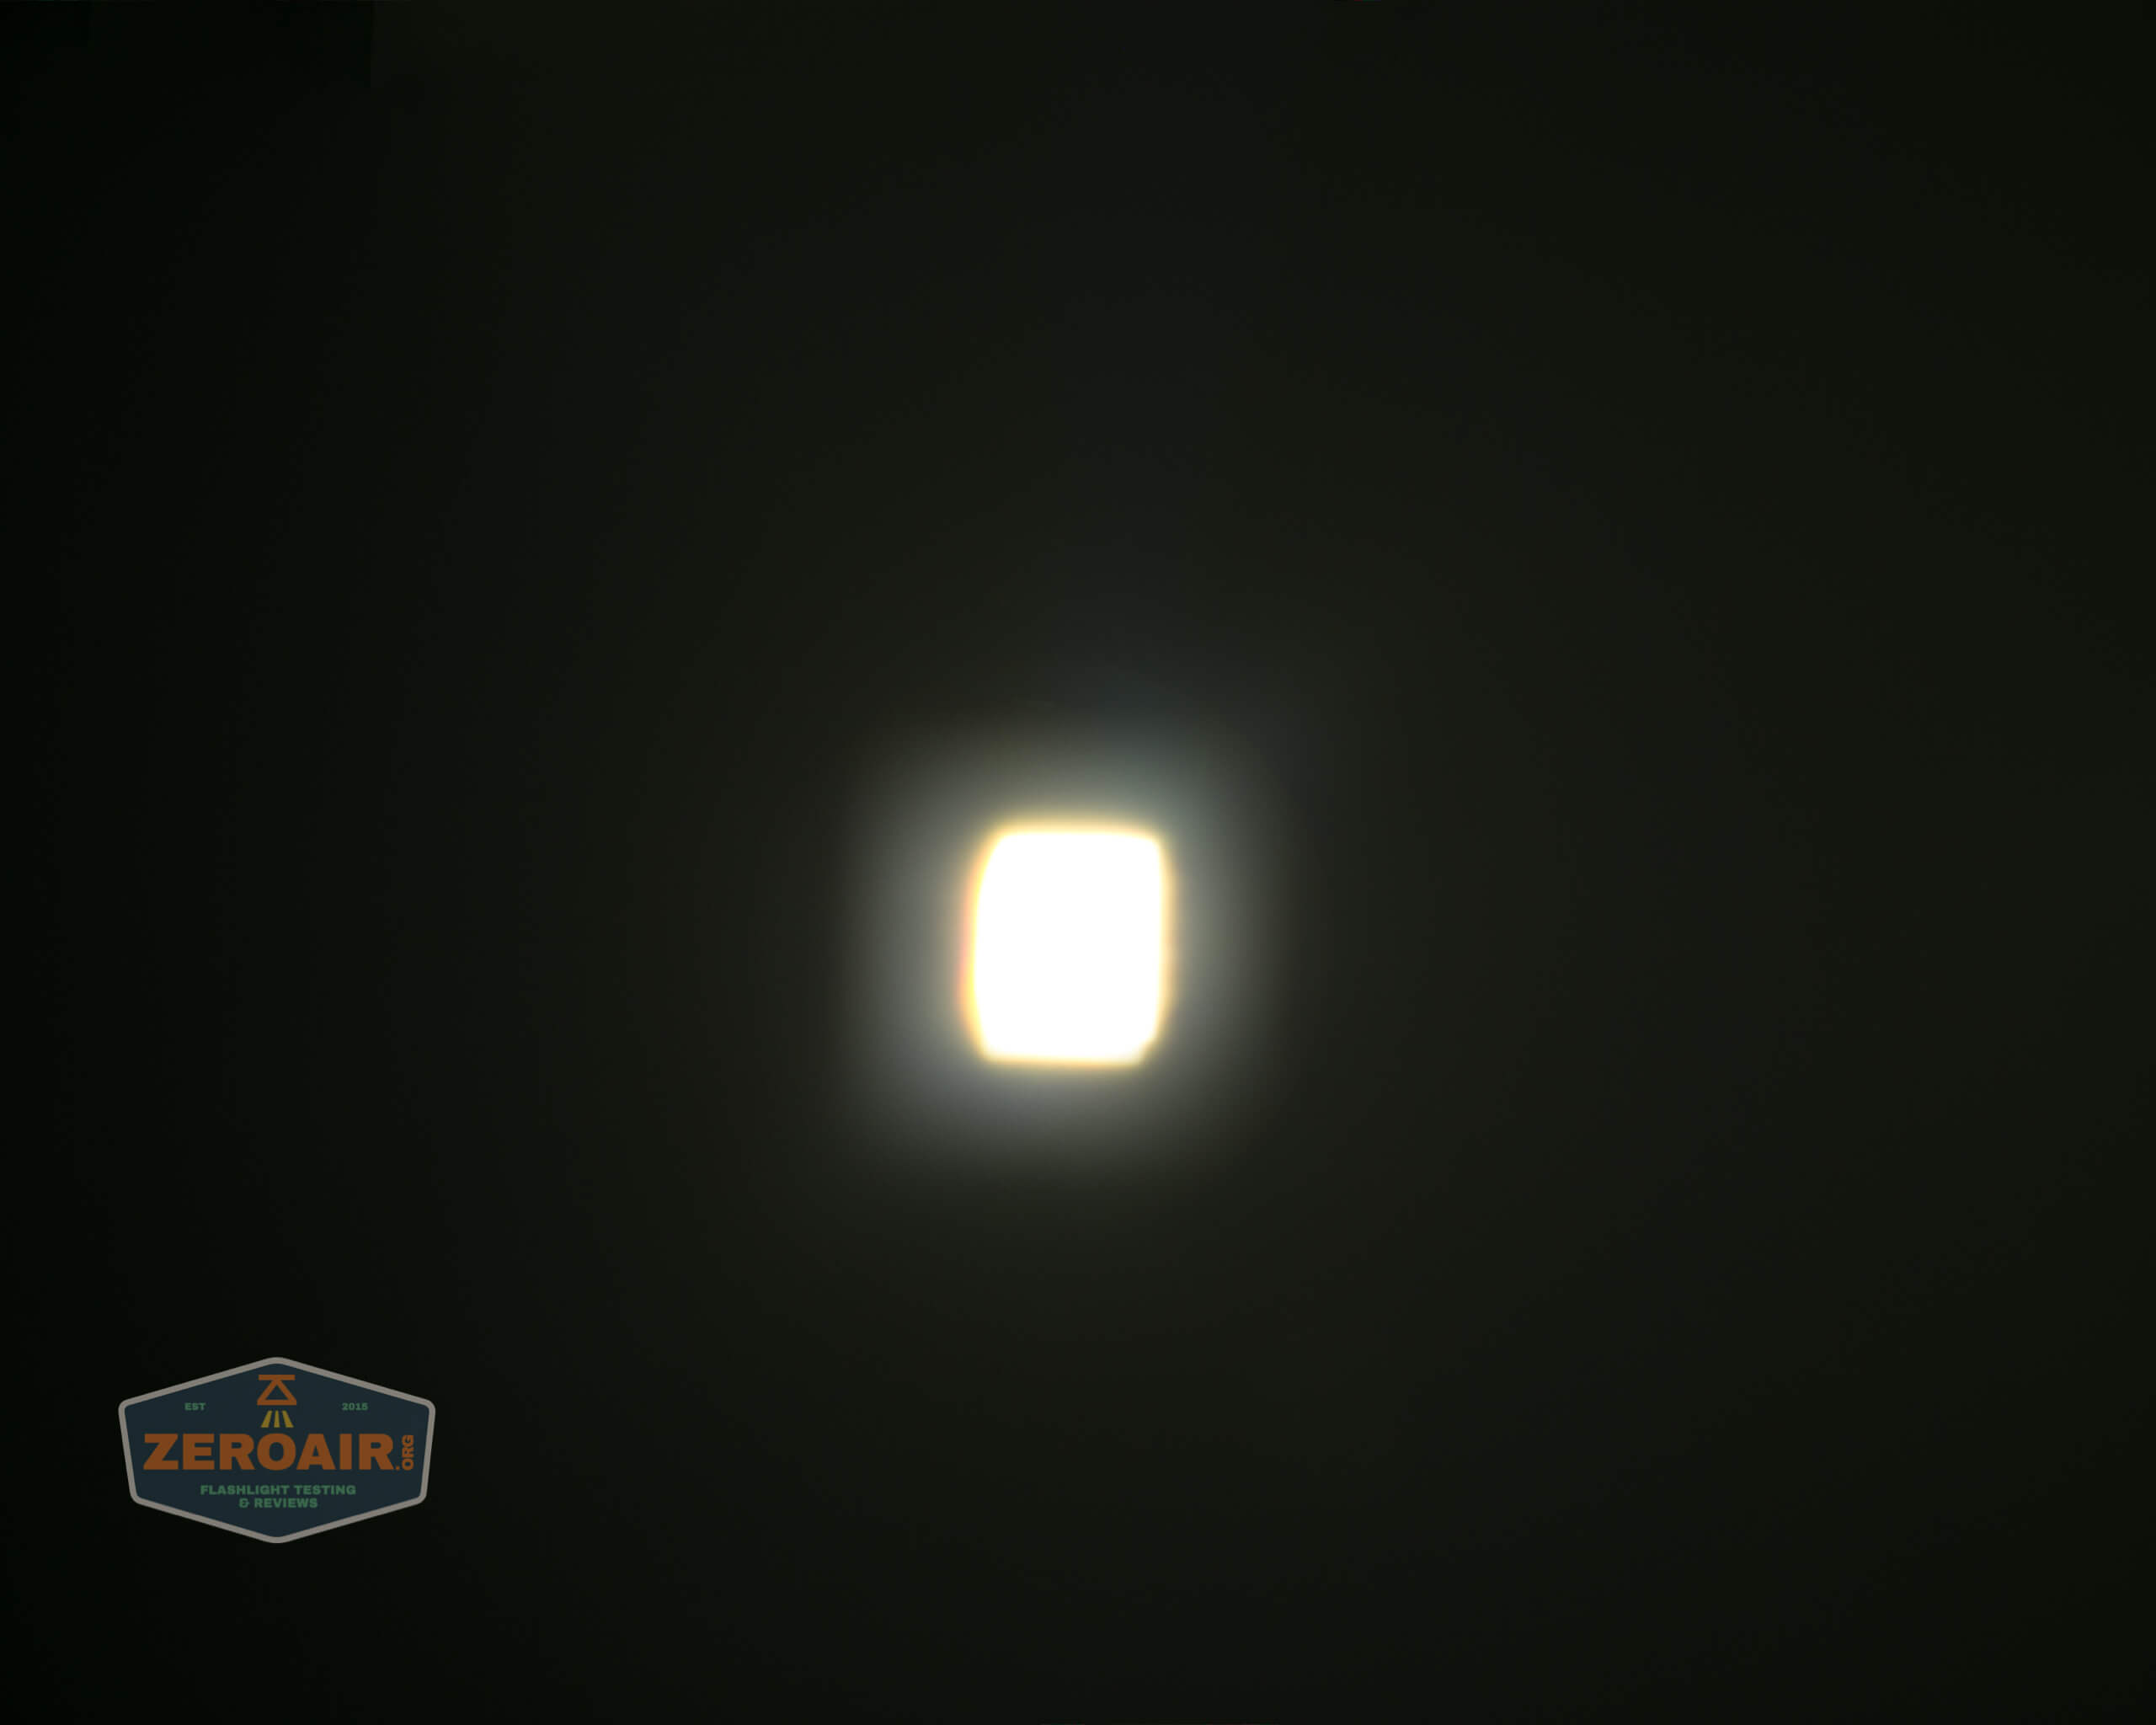


Tint vs BLF-348 (KillzoneFlashlights.com 219b version) (affiliate link)
I keep the test flashlight on the left and the BLF-348 reference flashlight on the right.
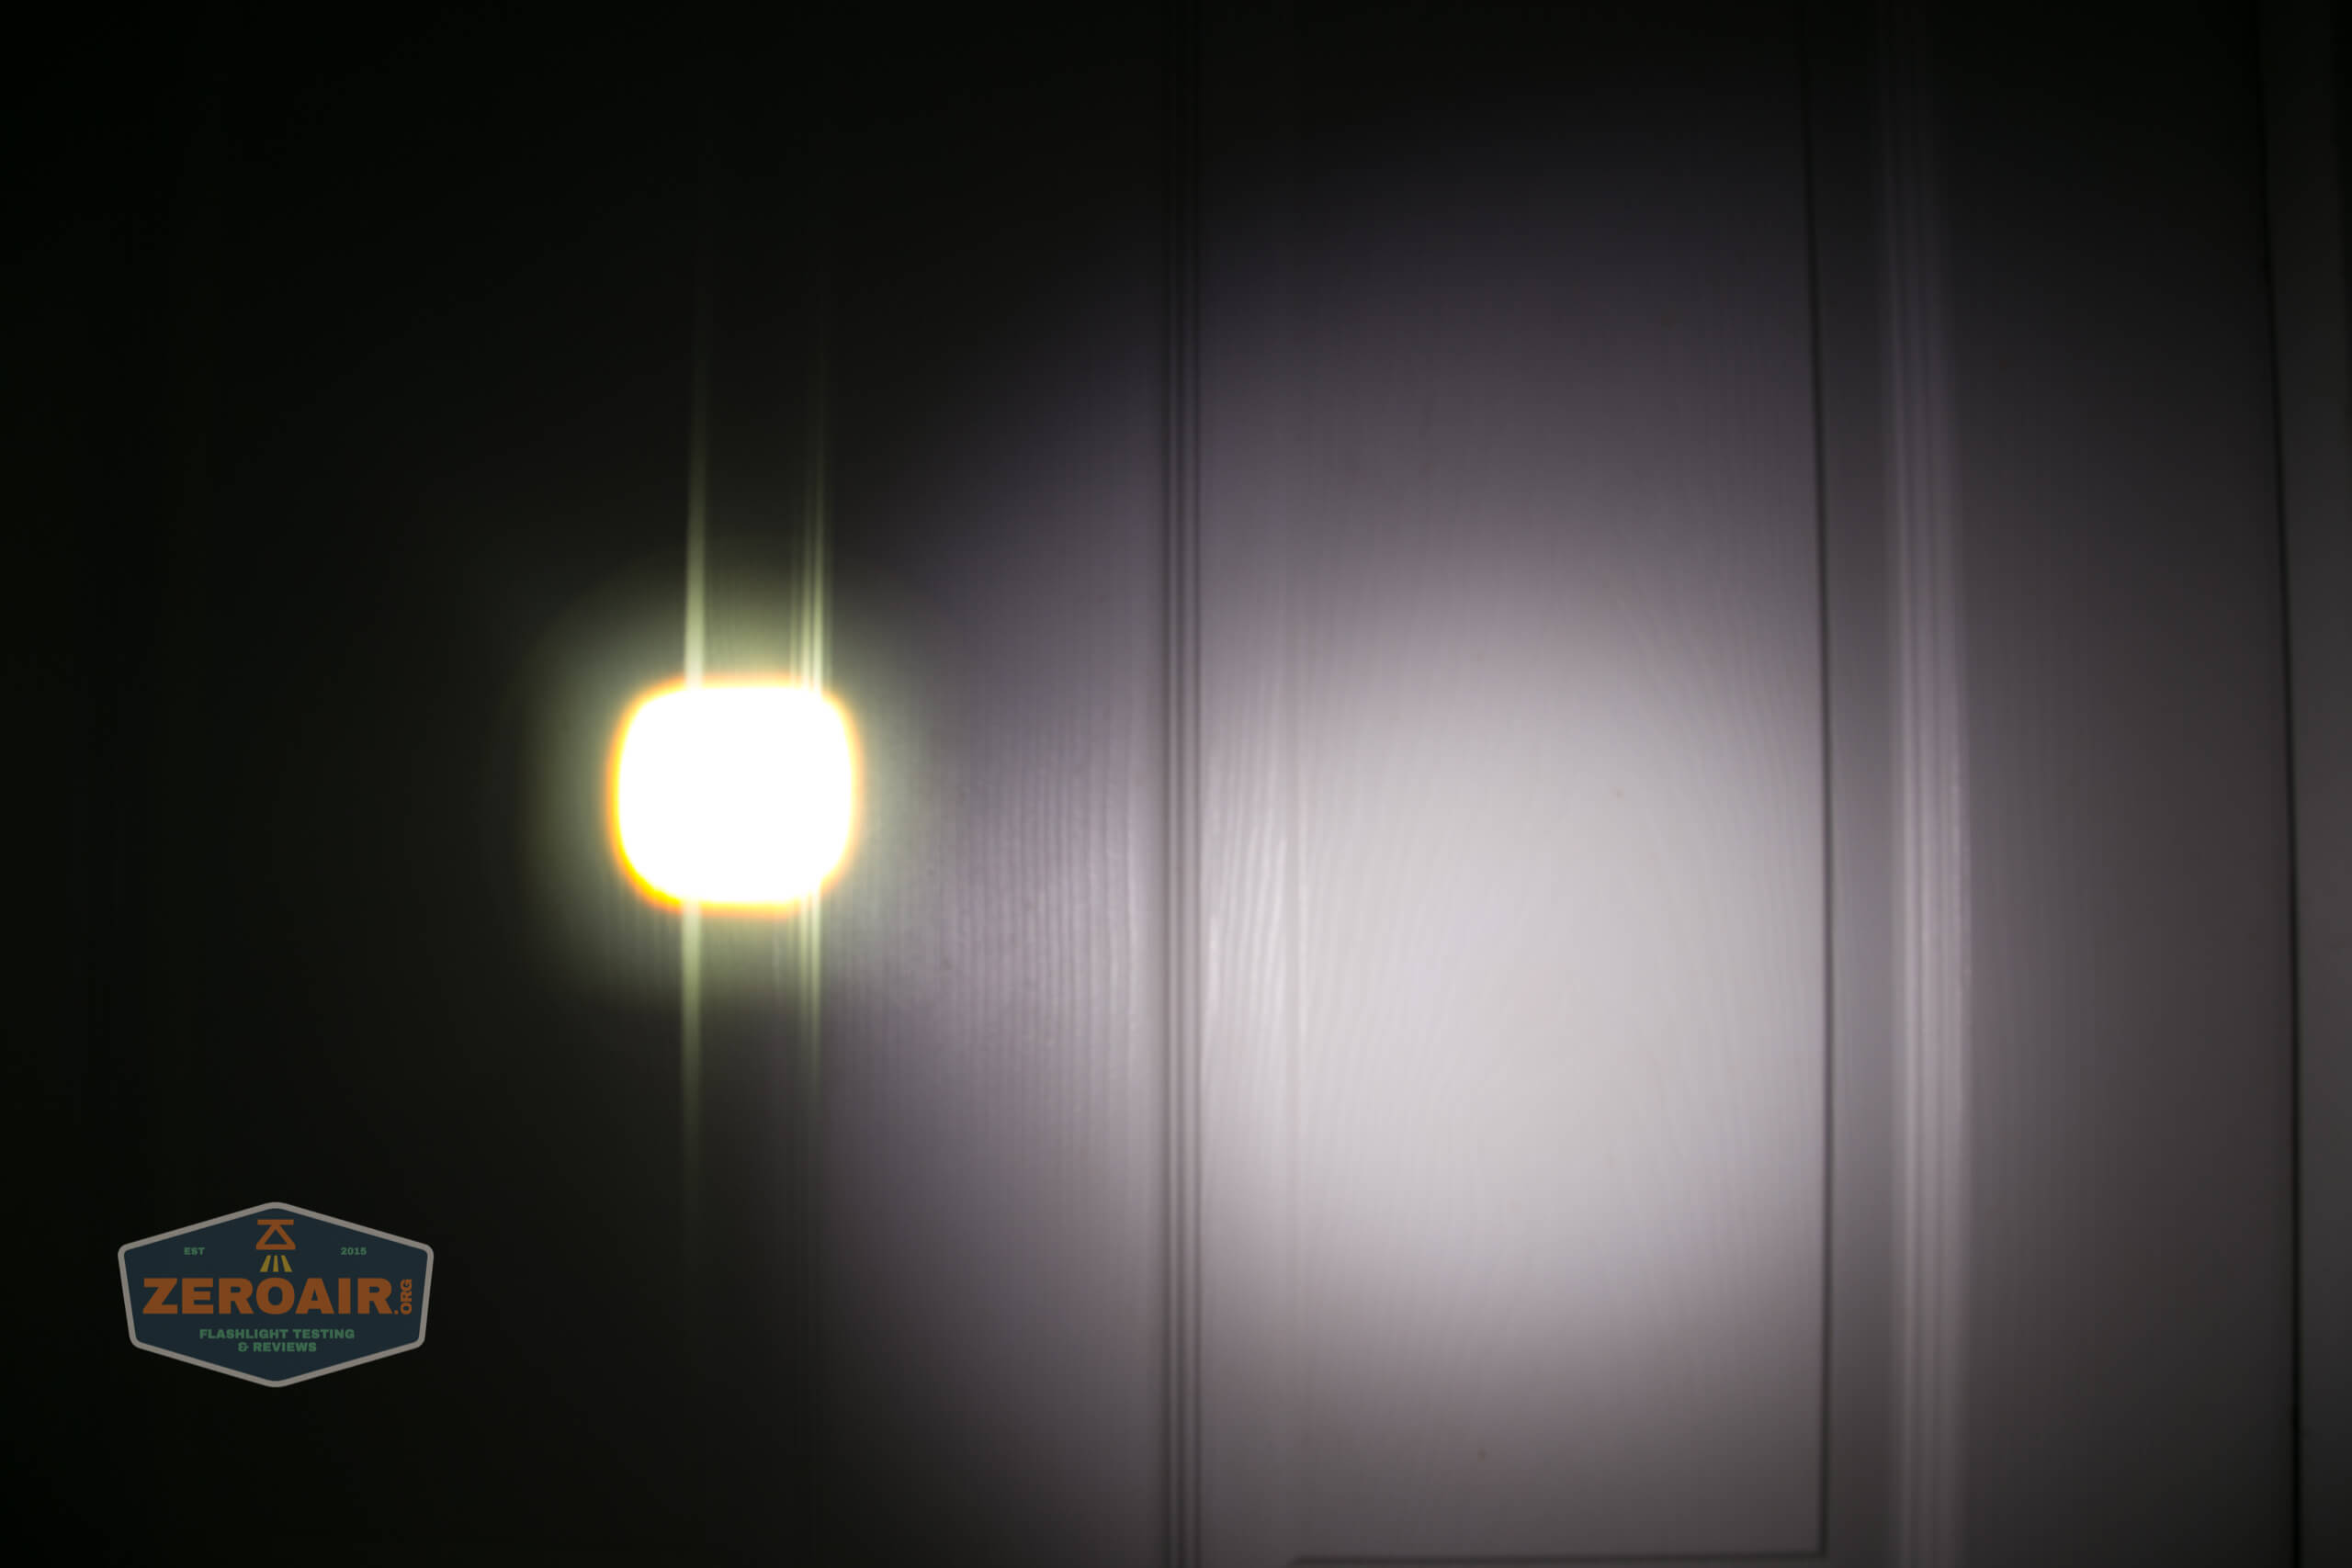
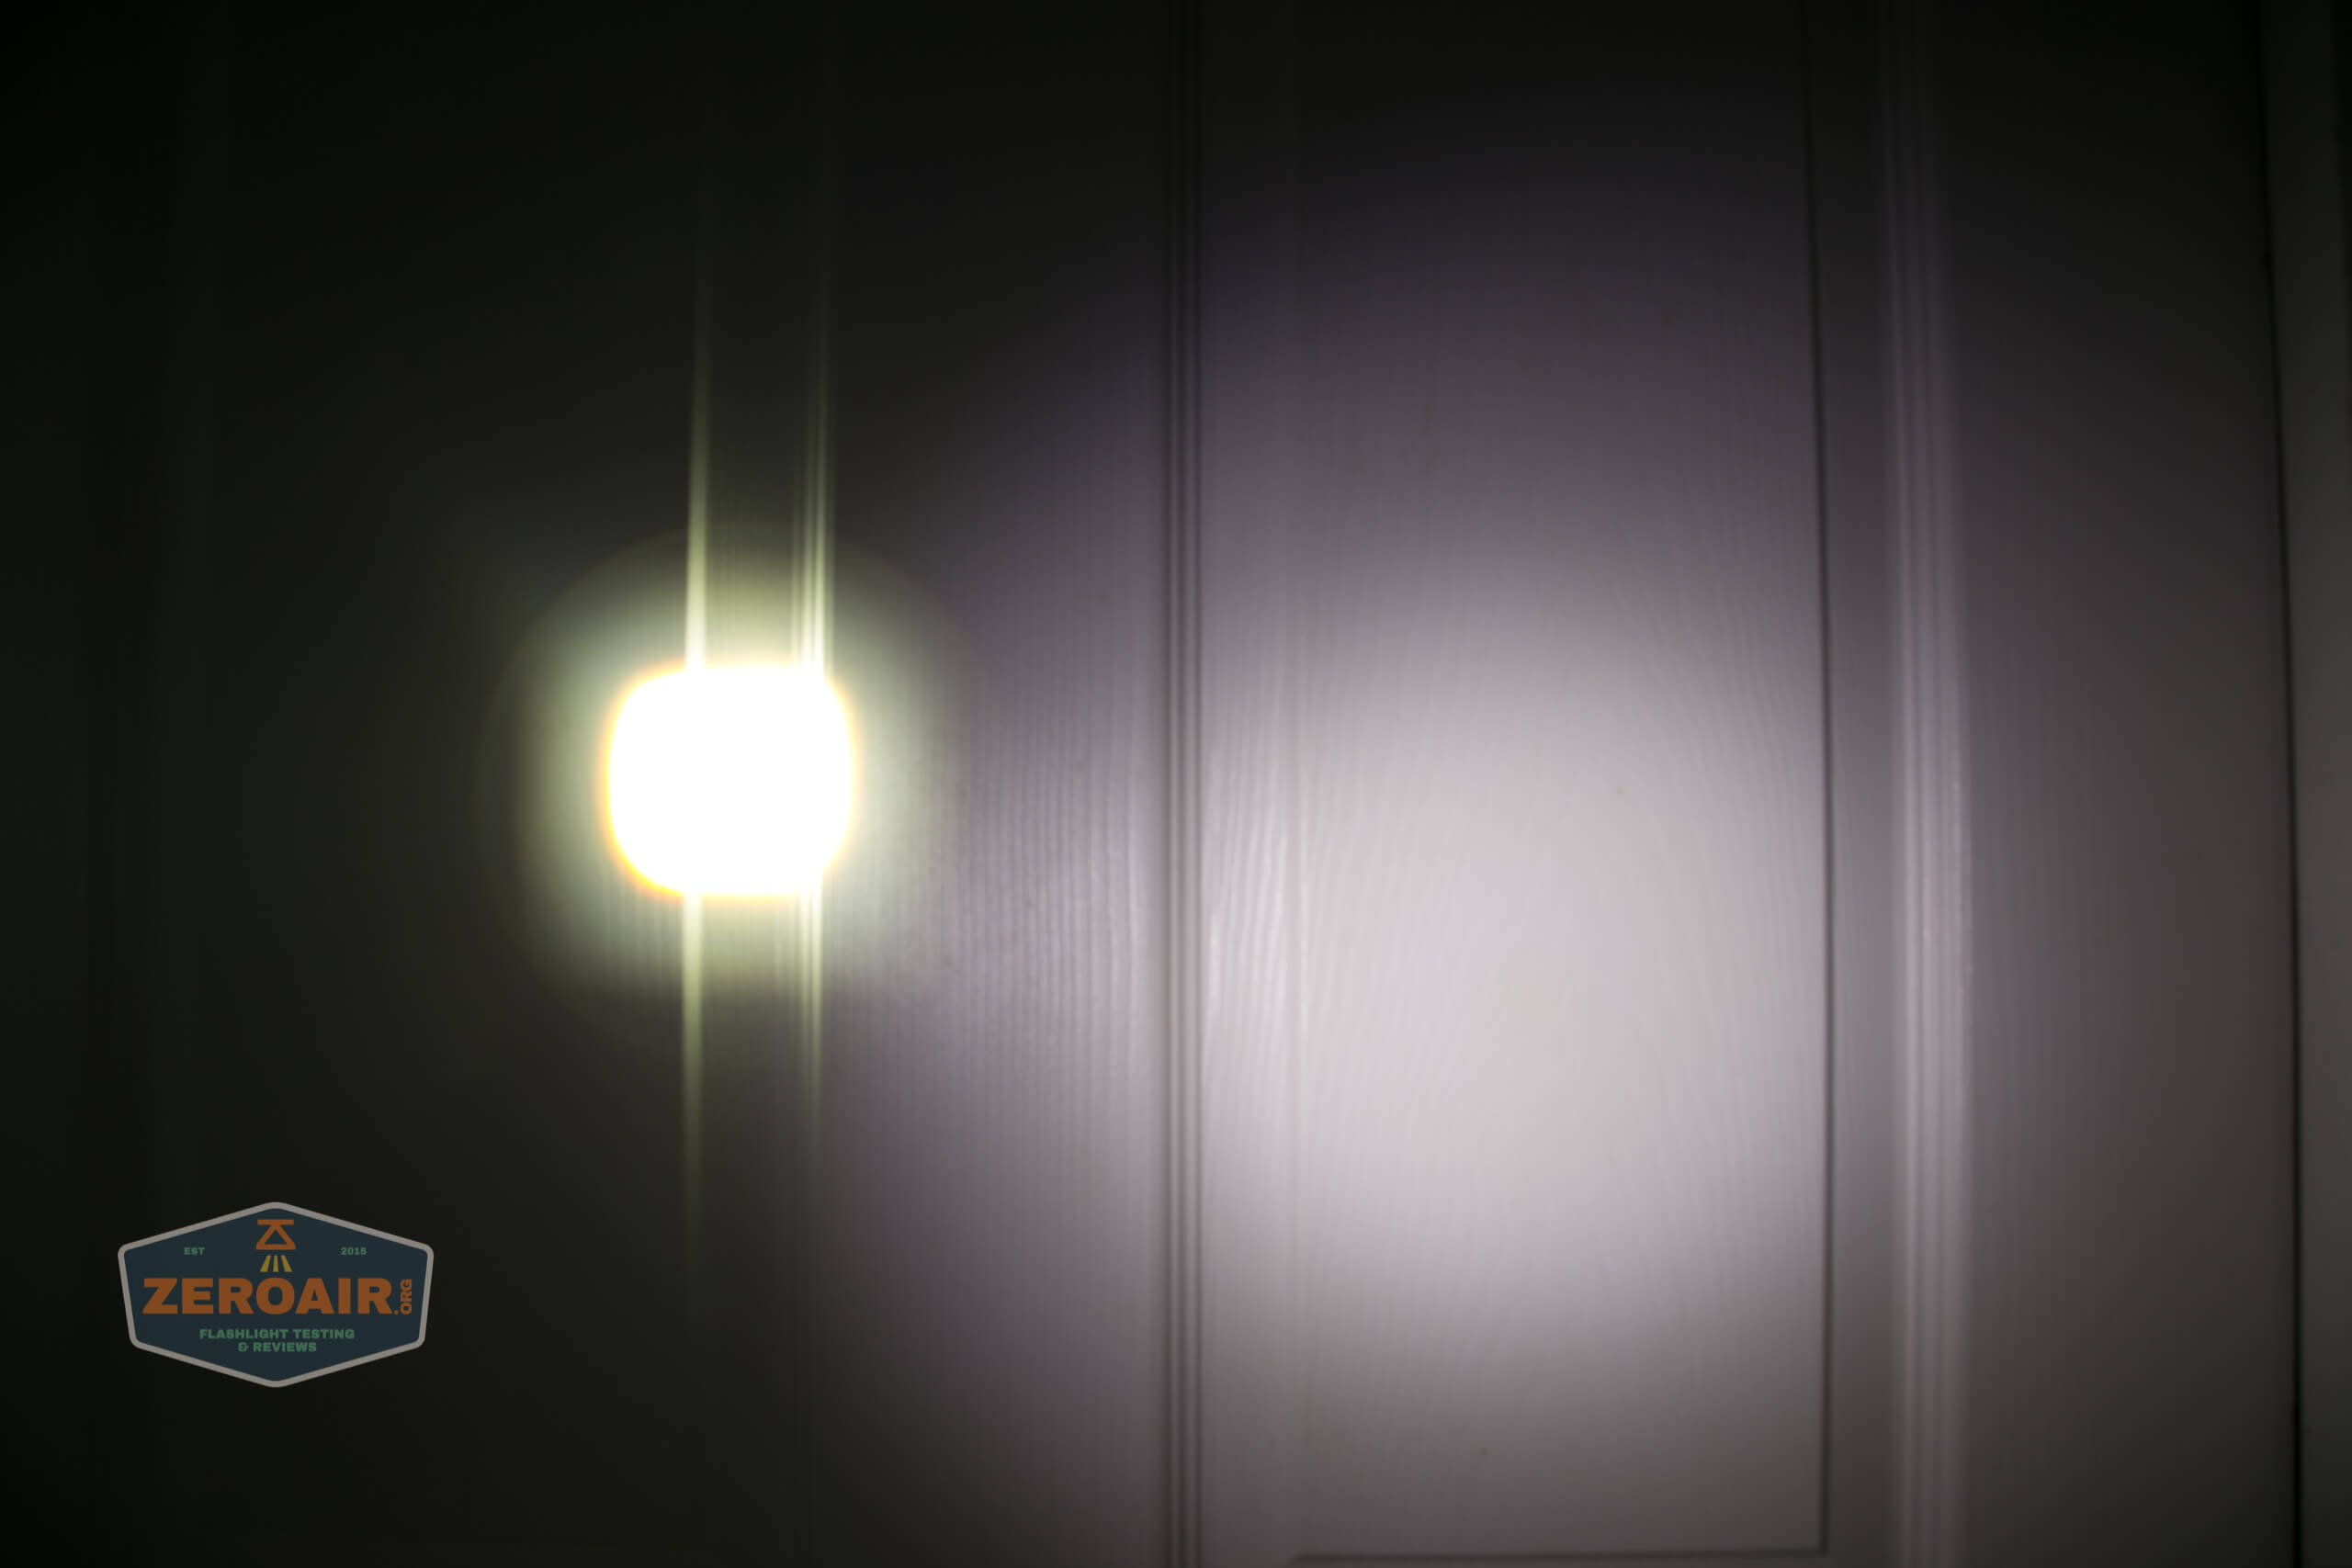
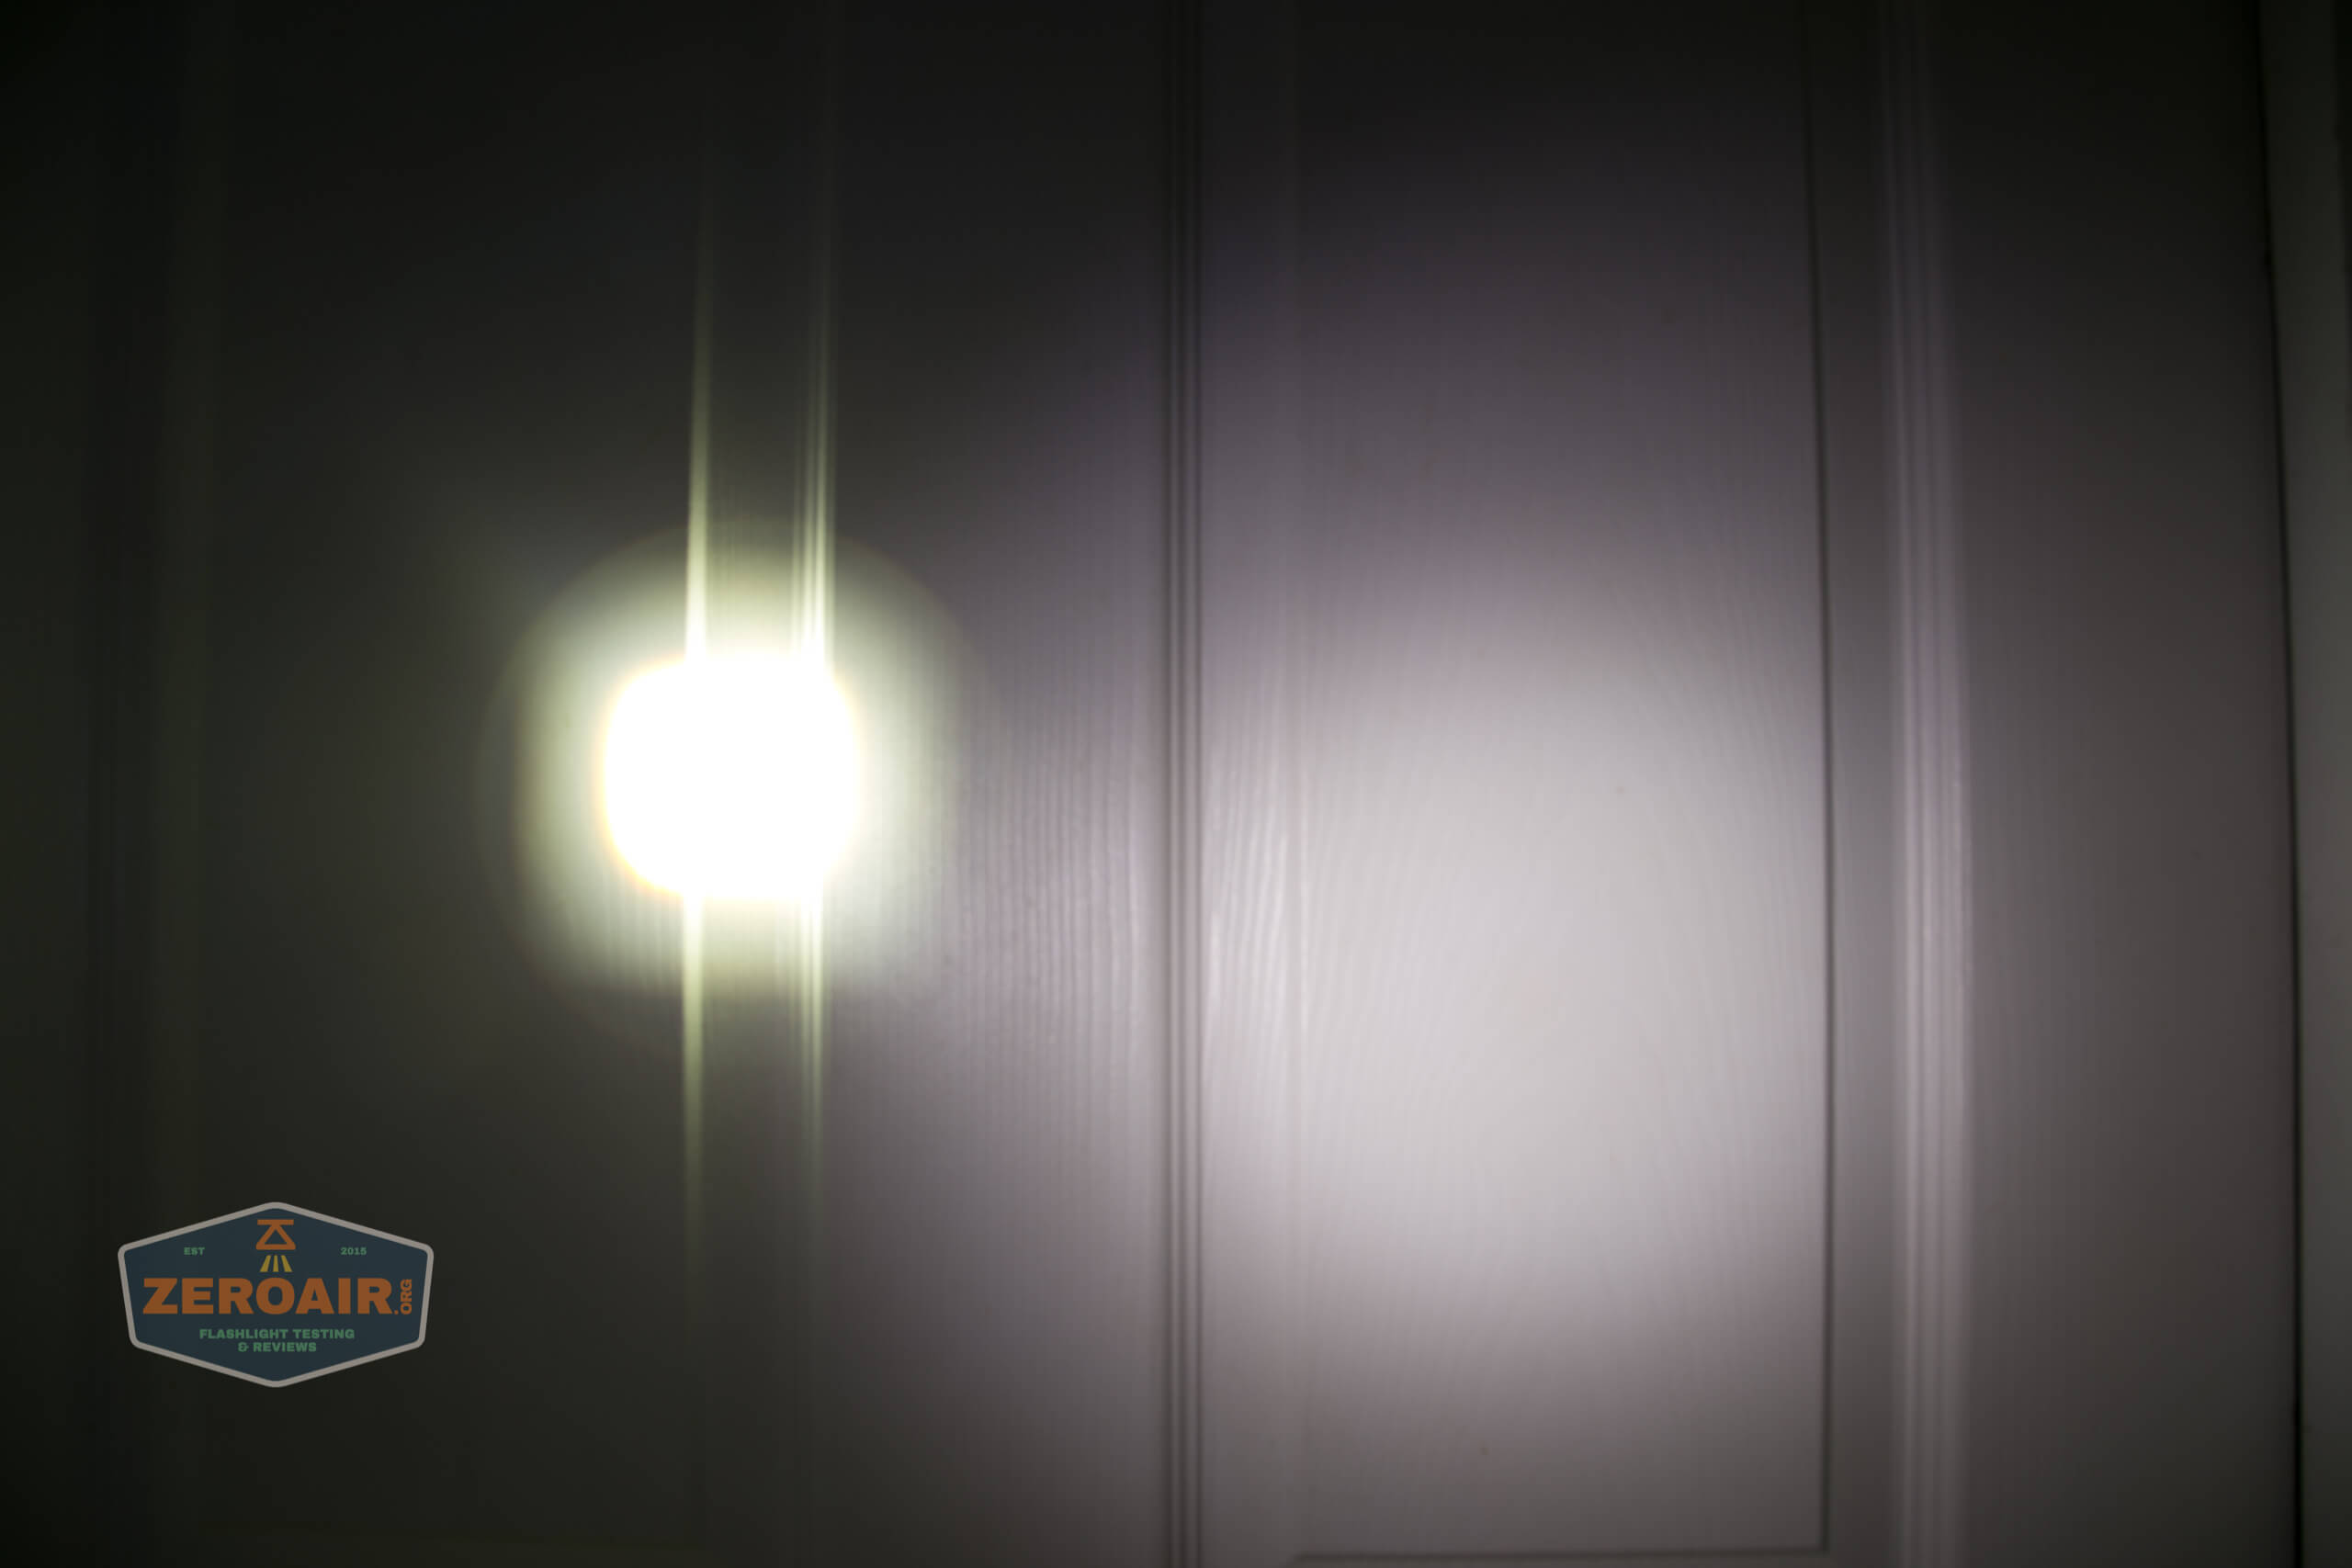
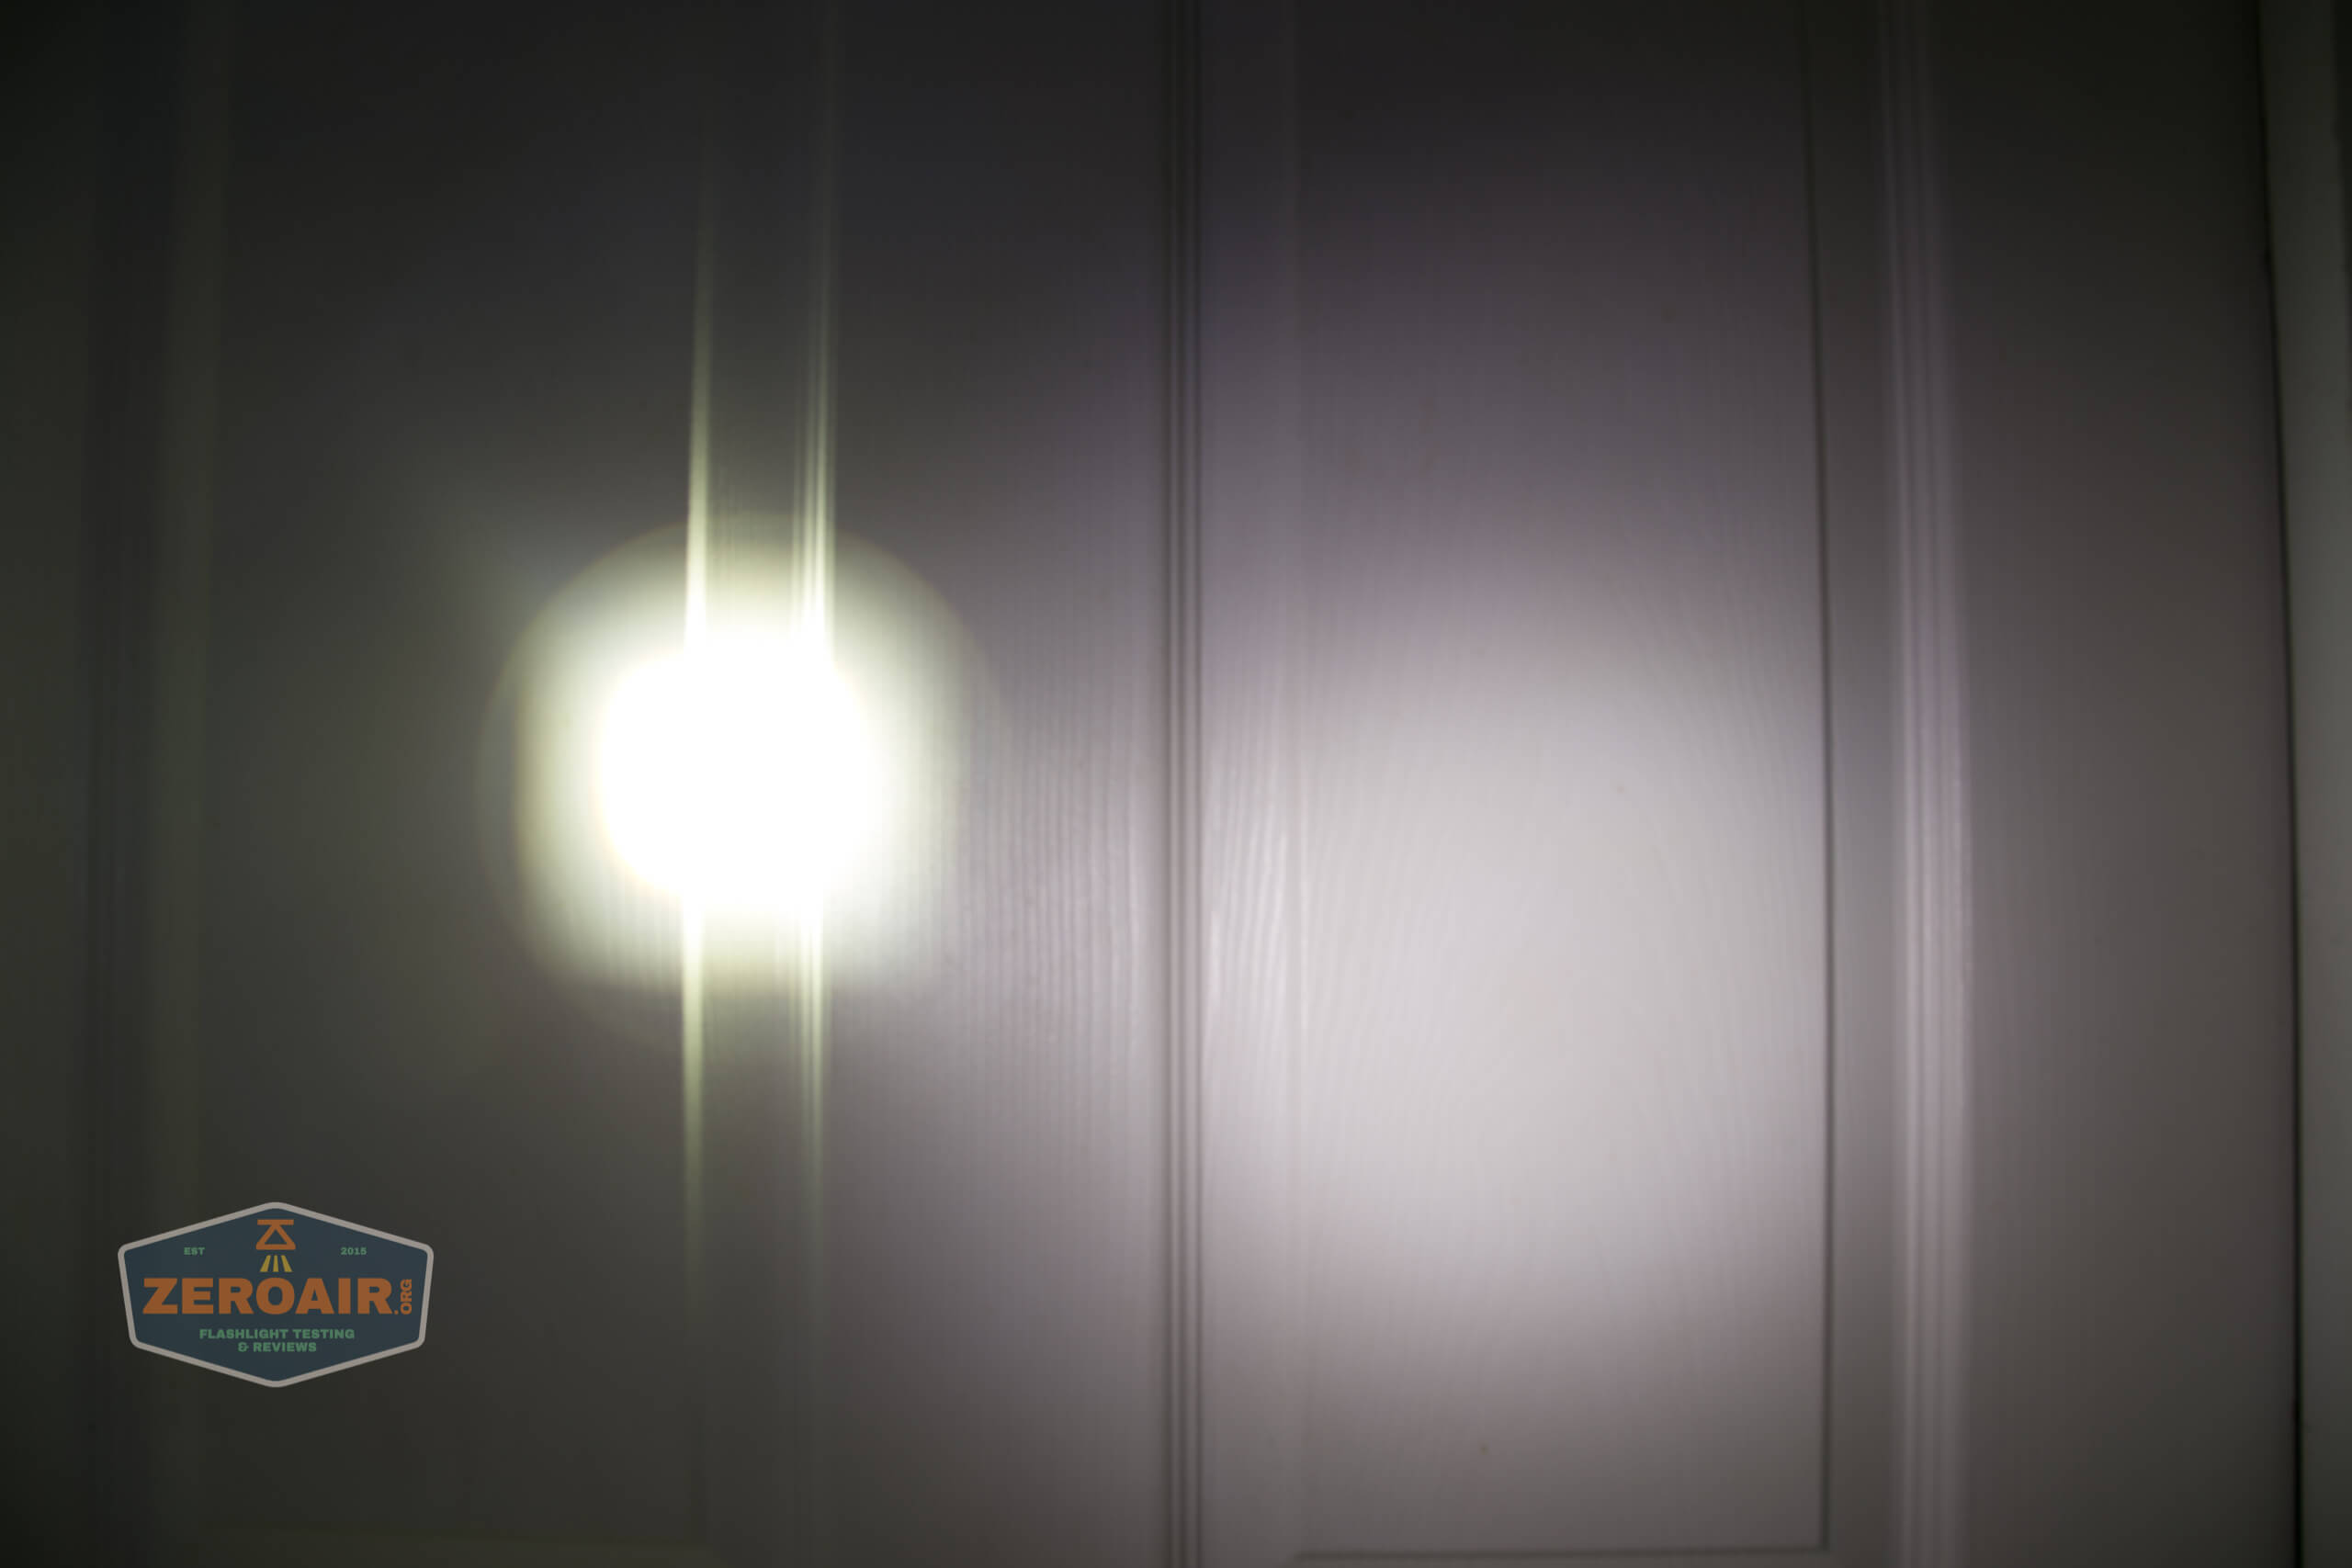
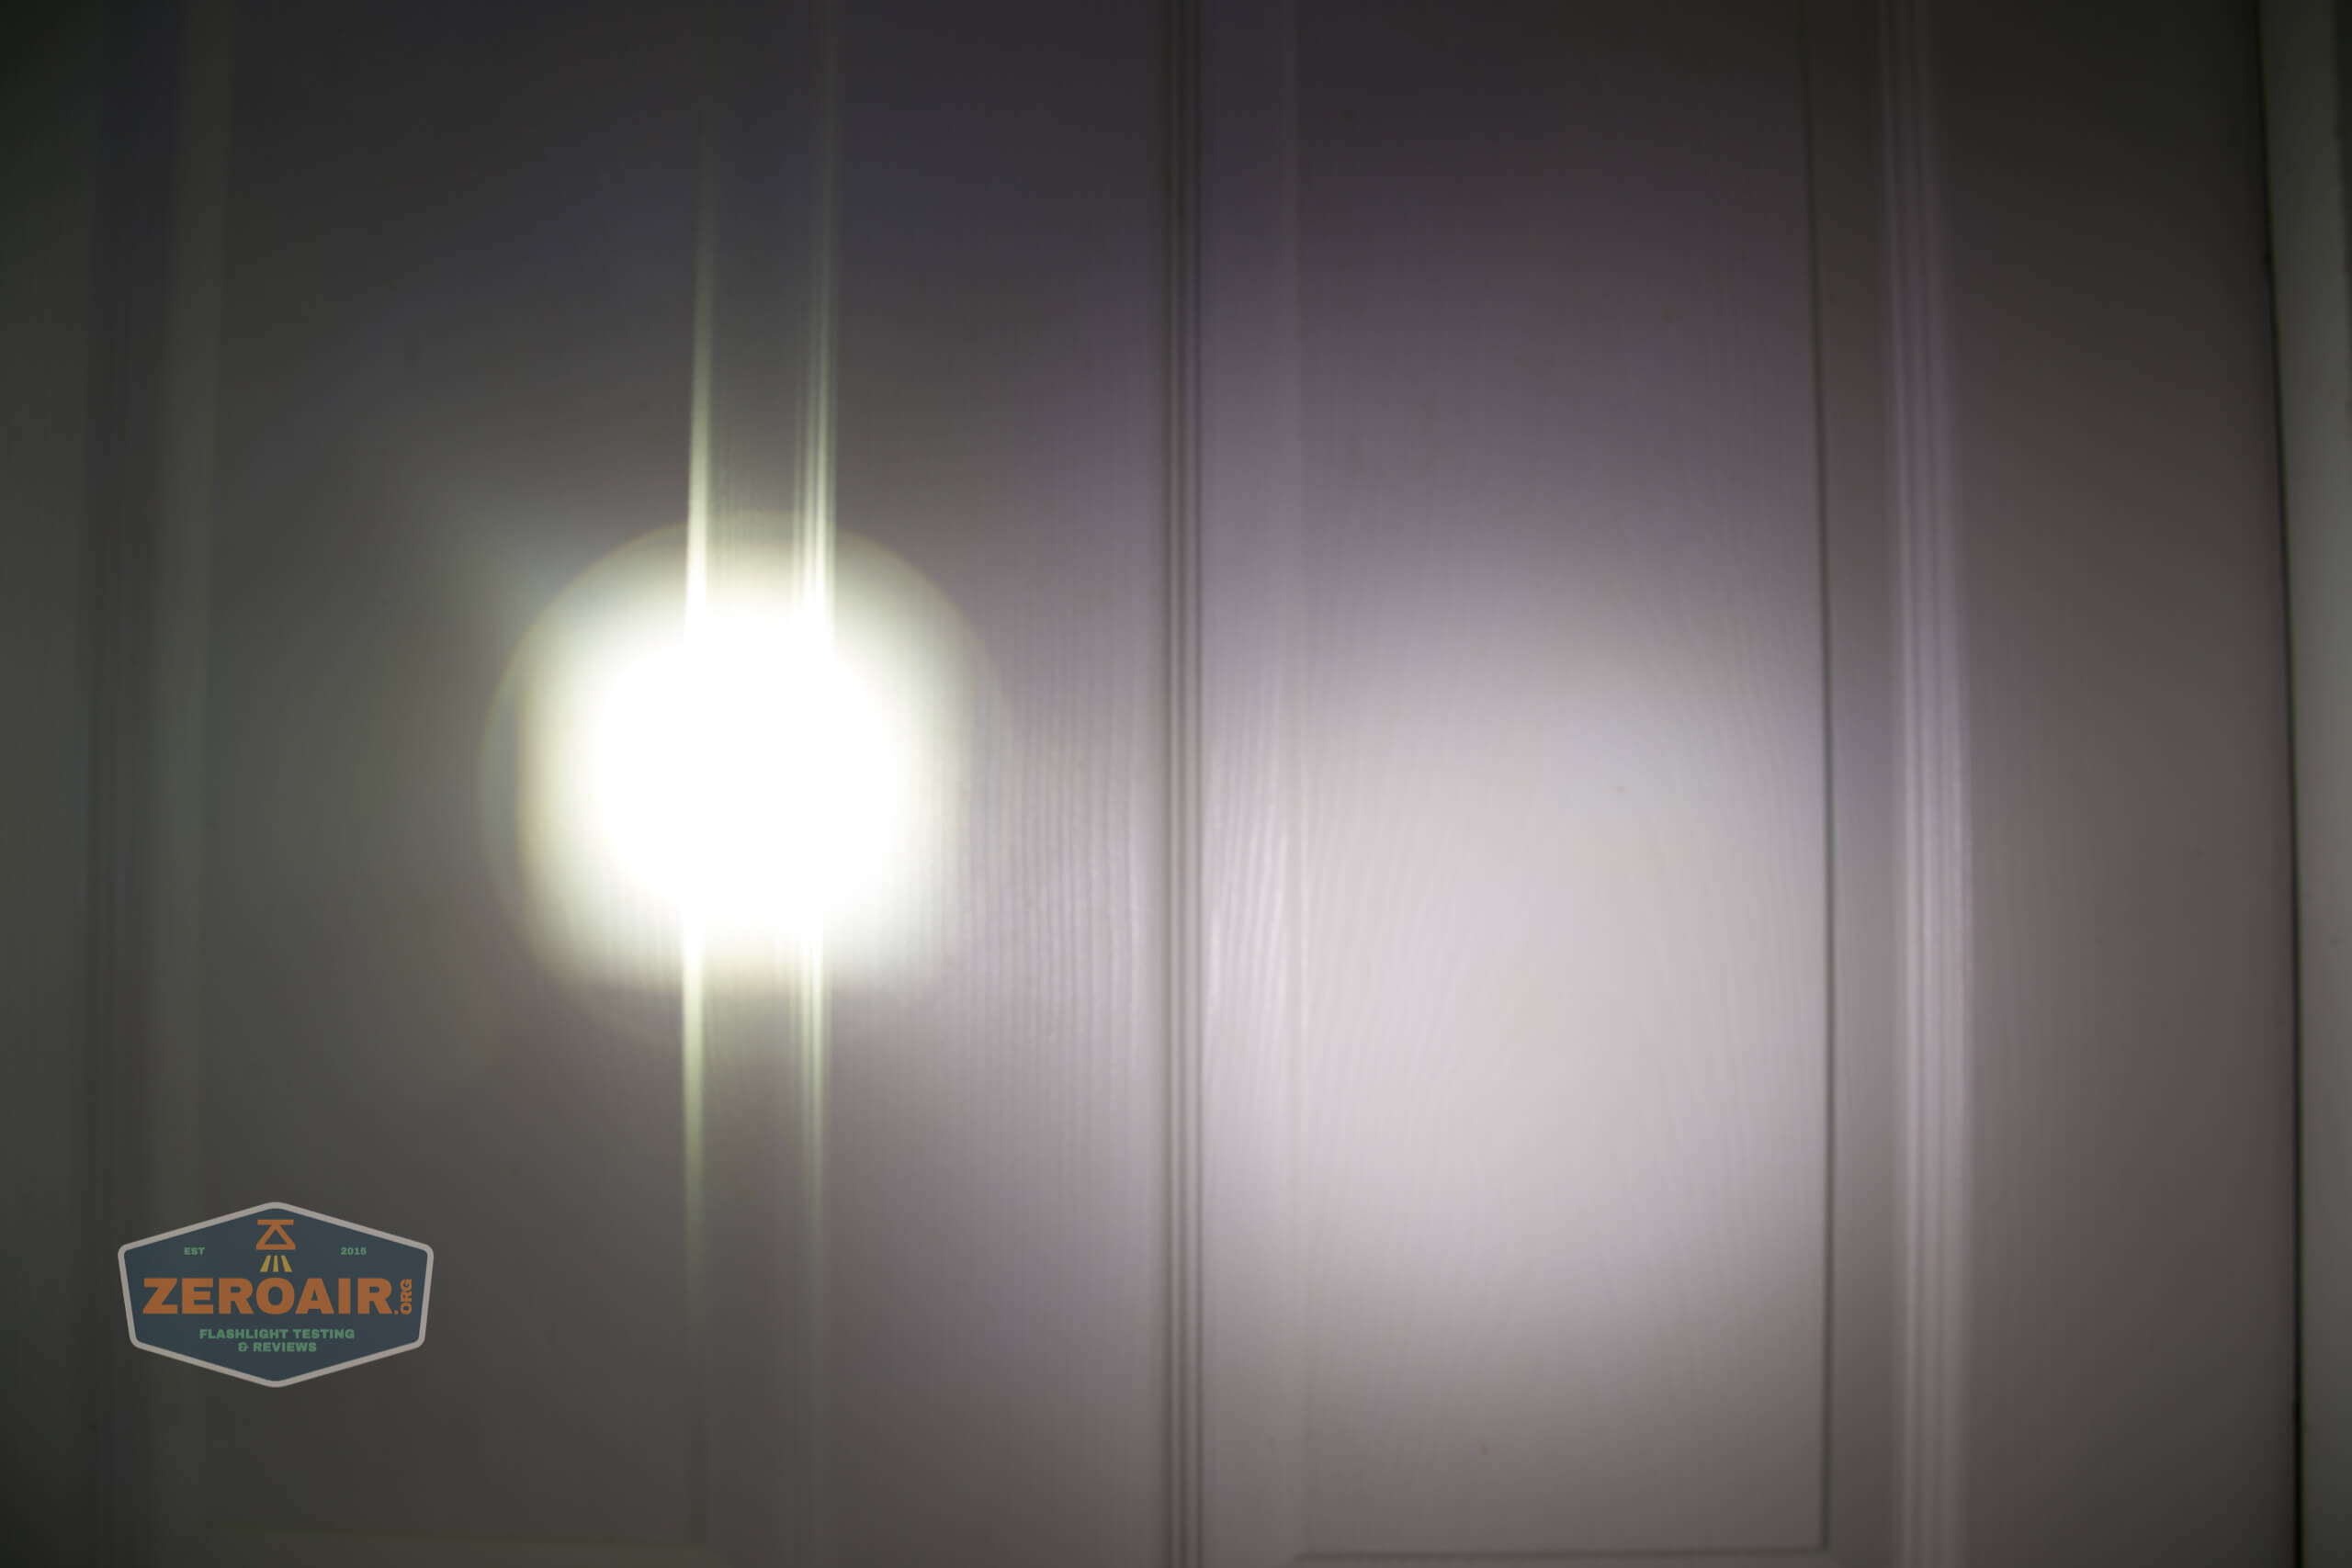
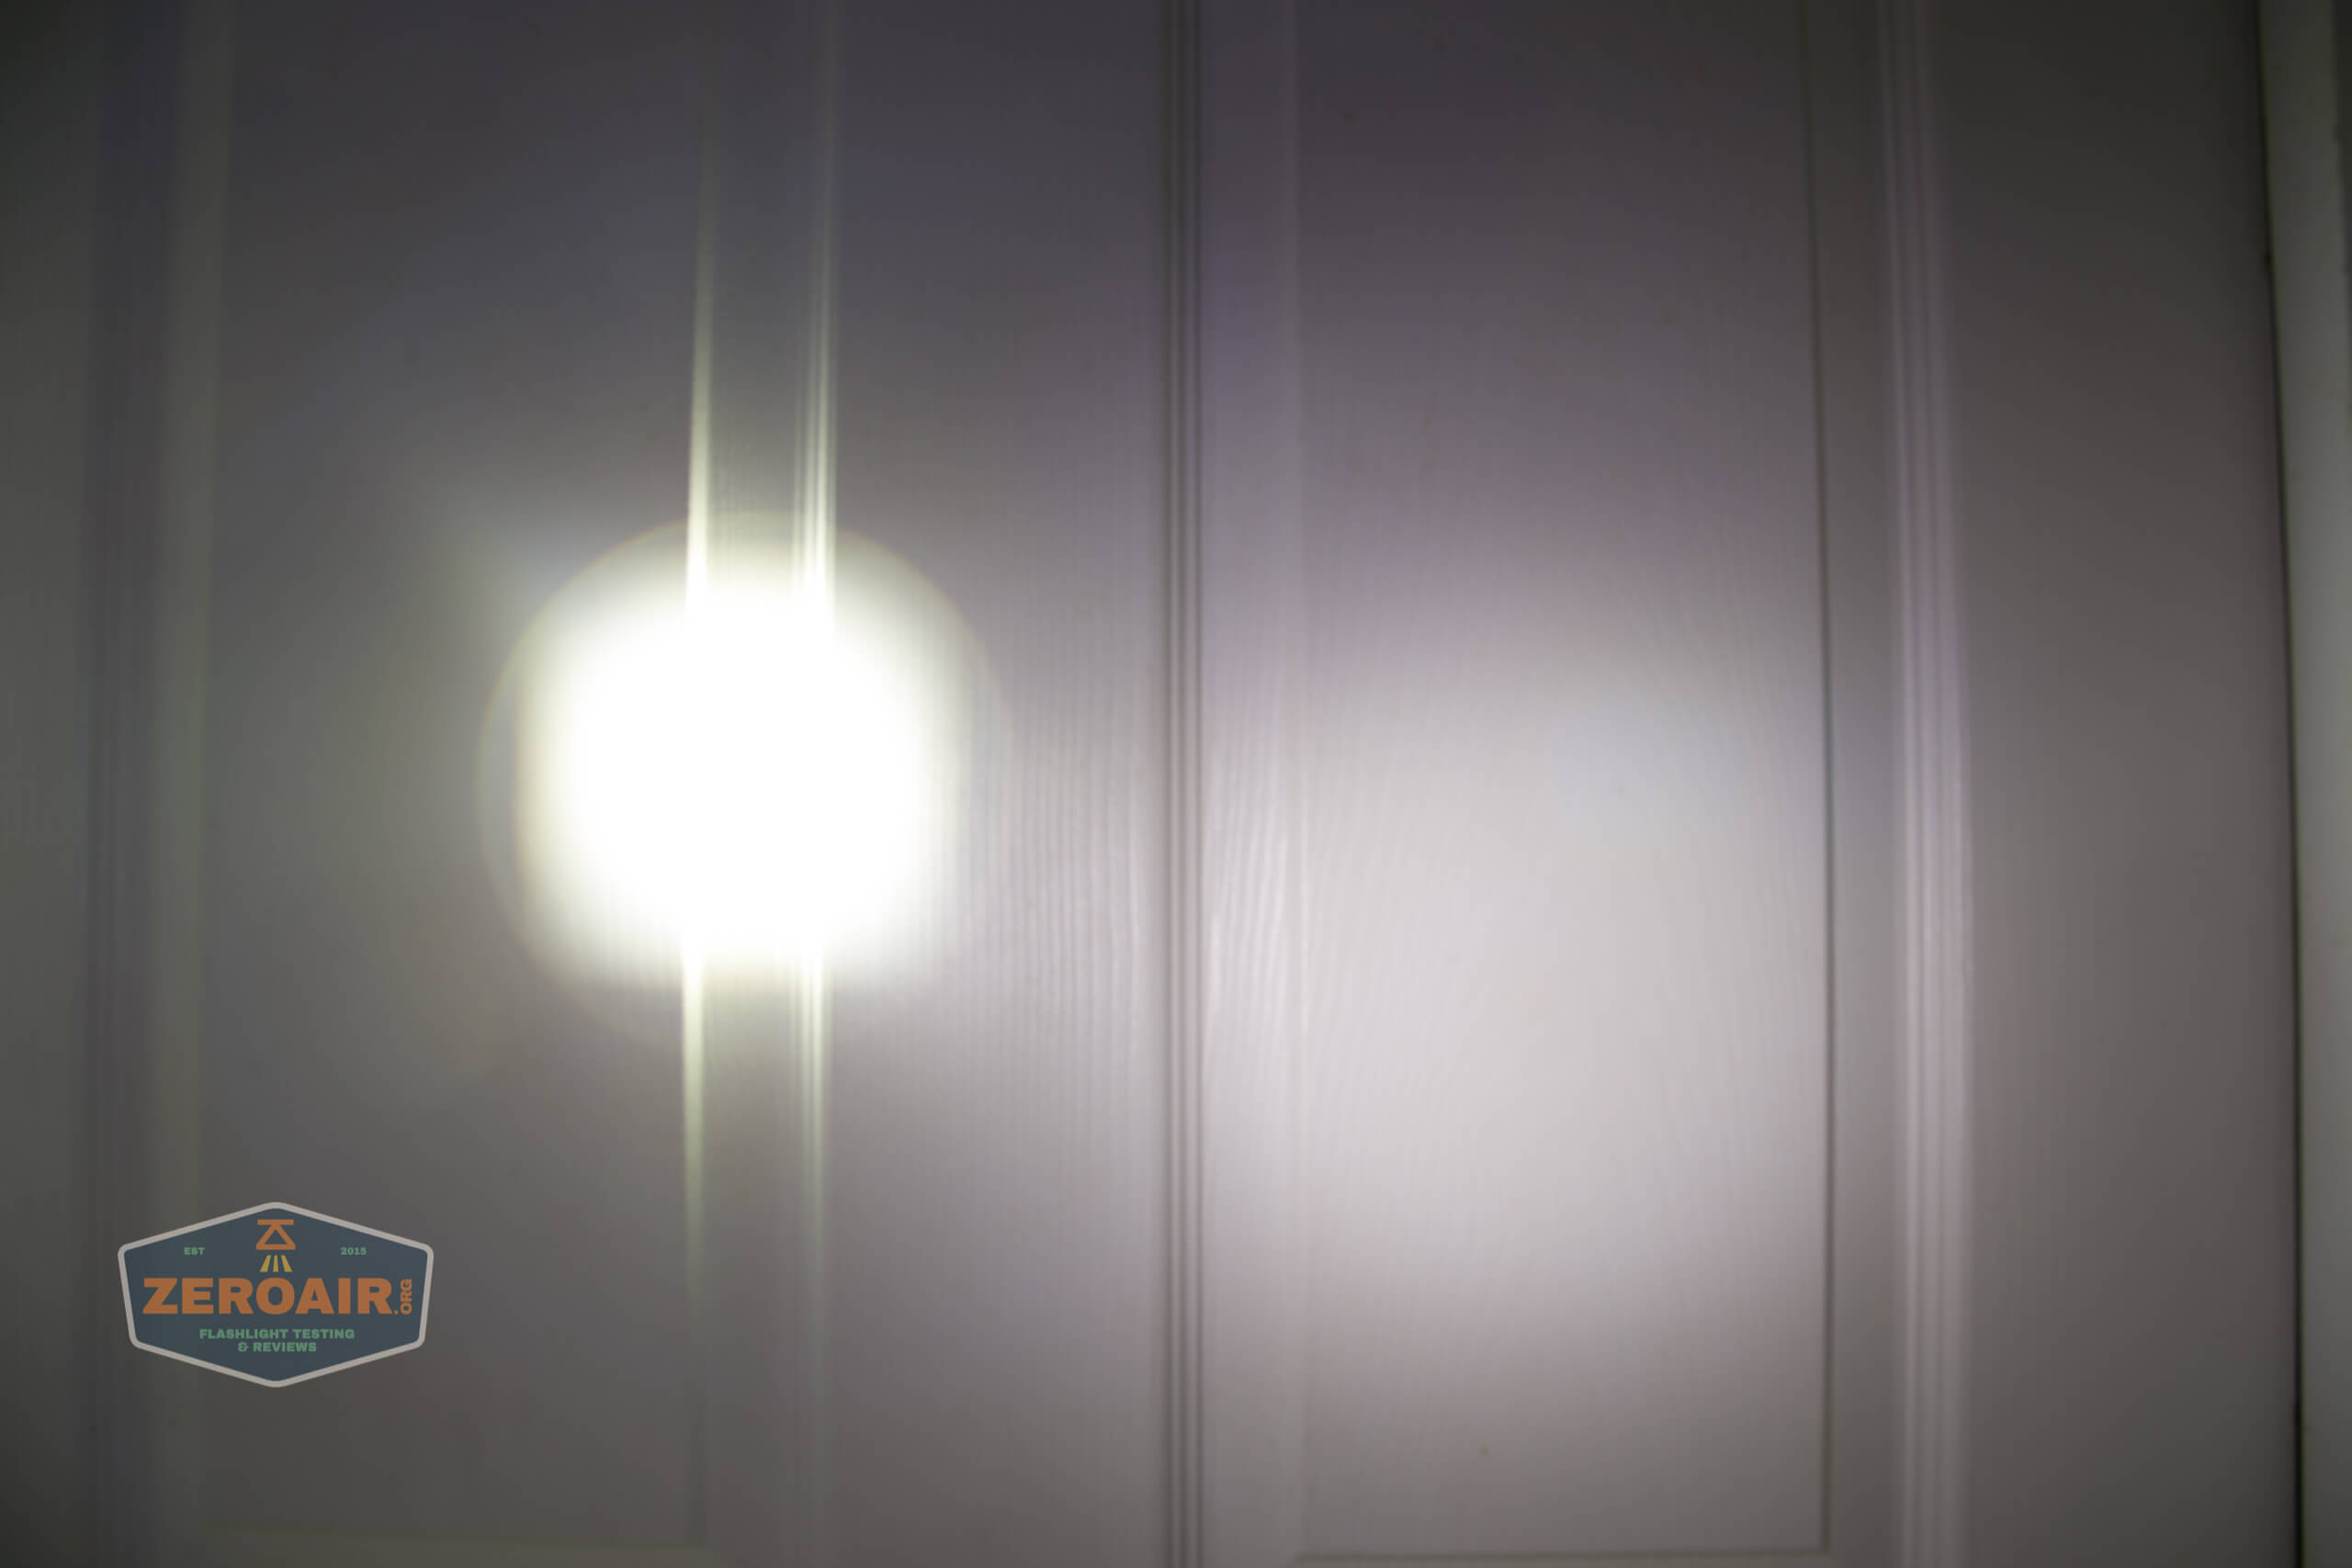
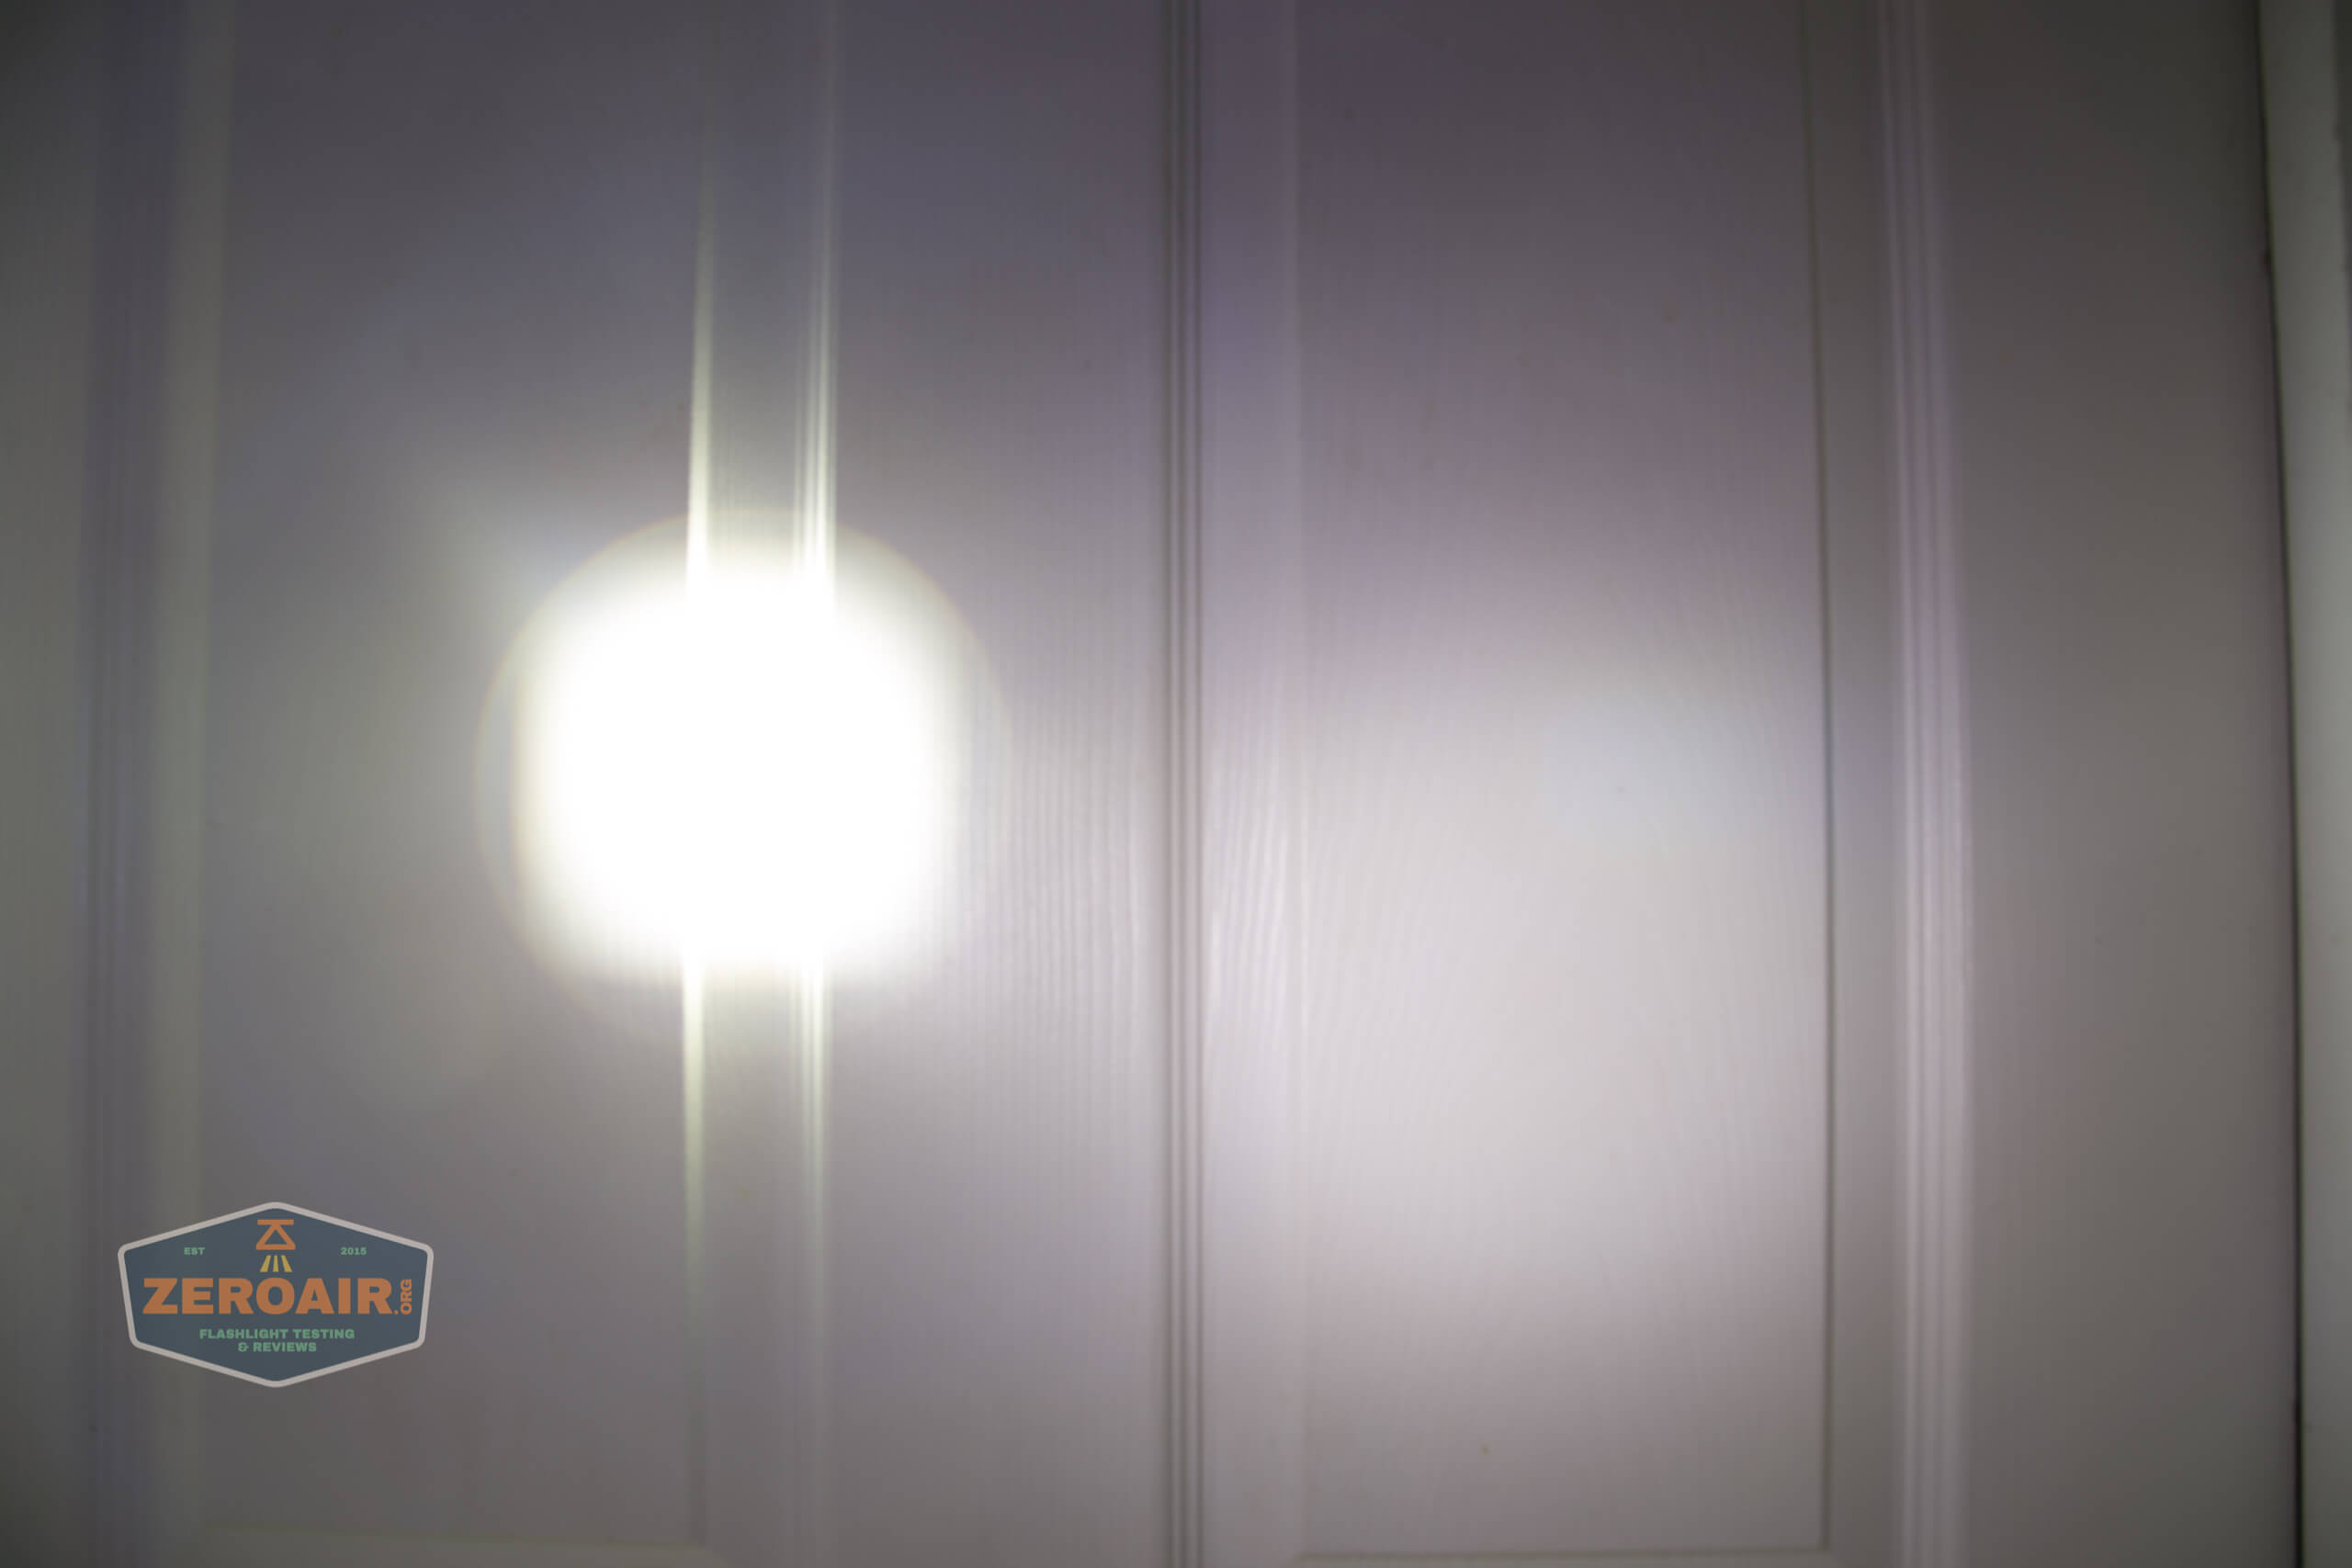
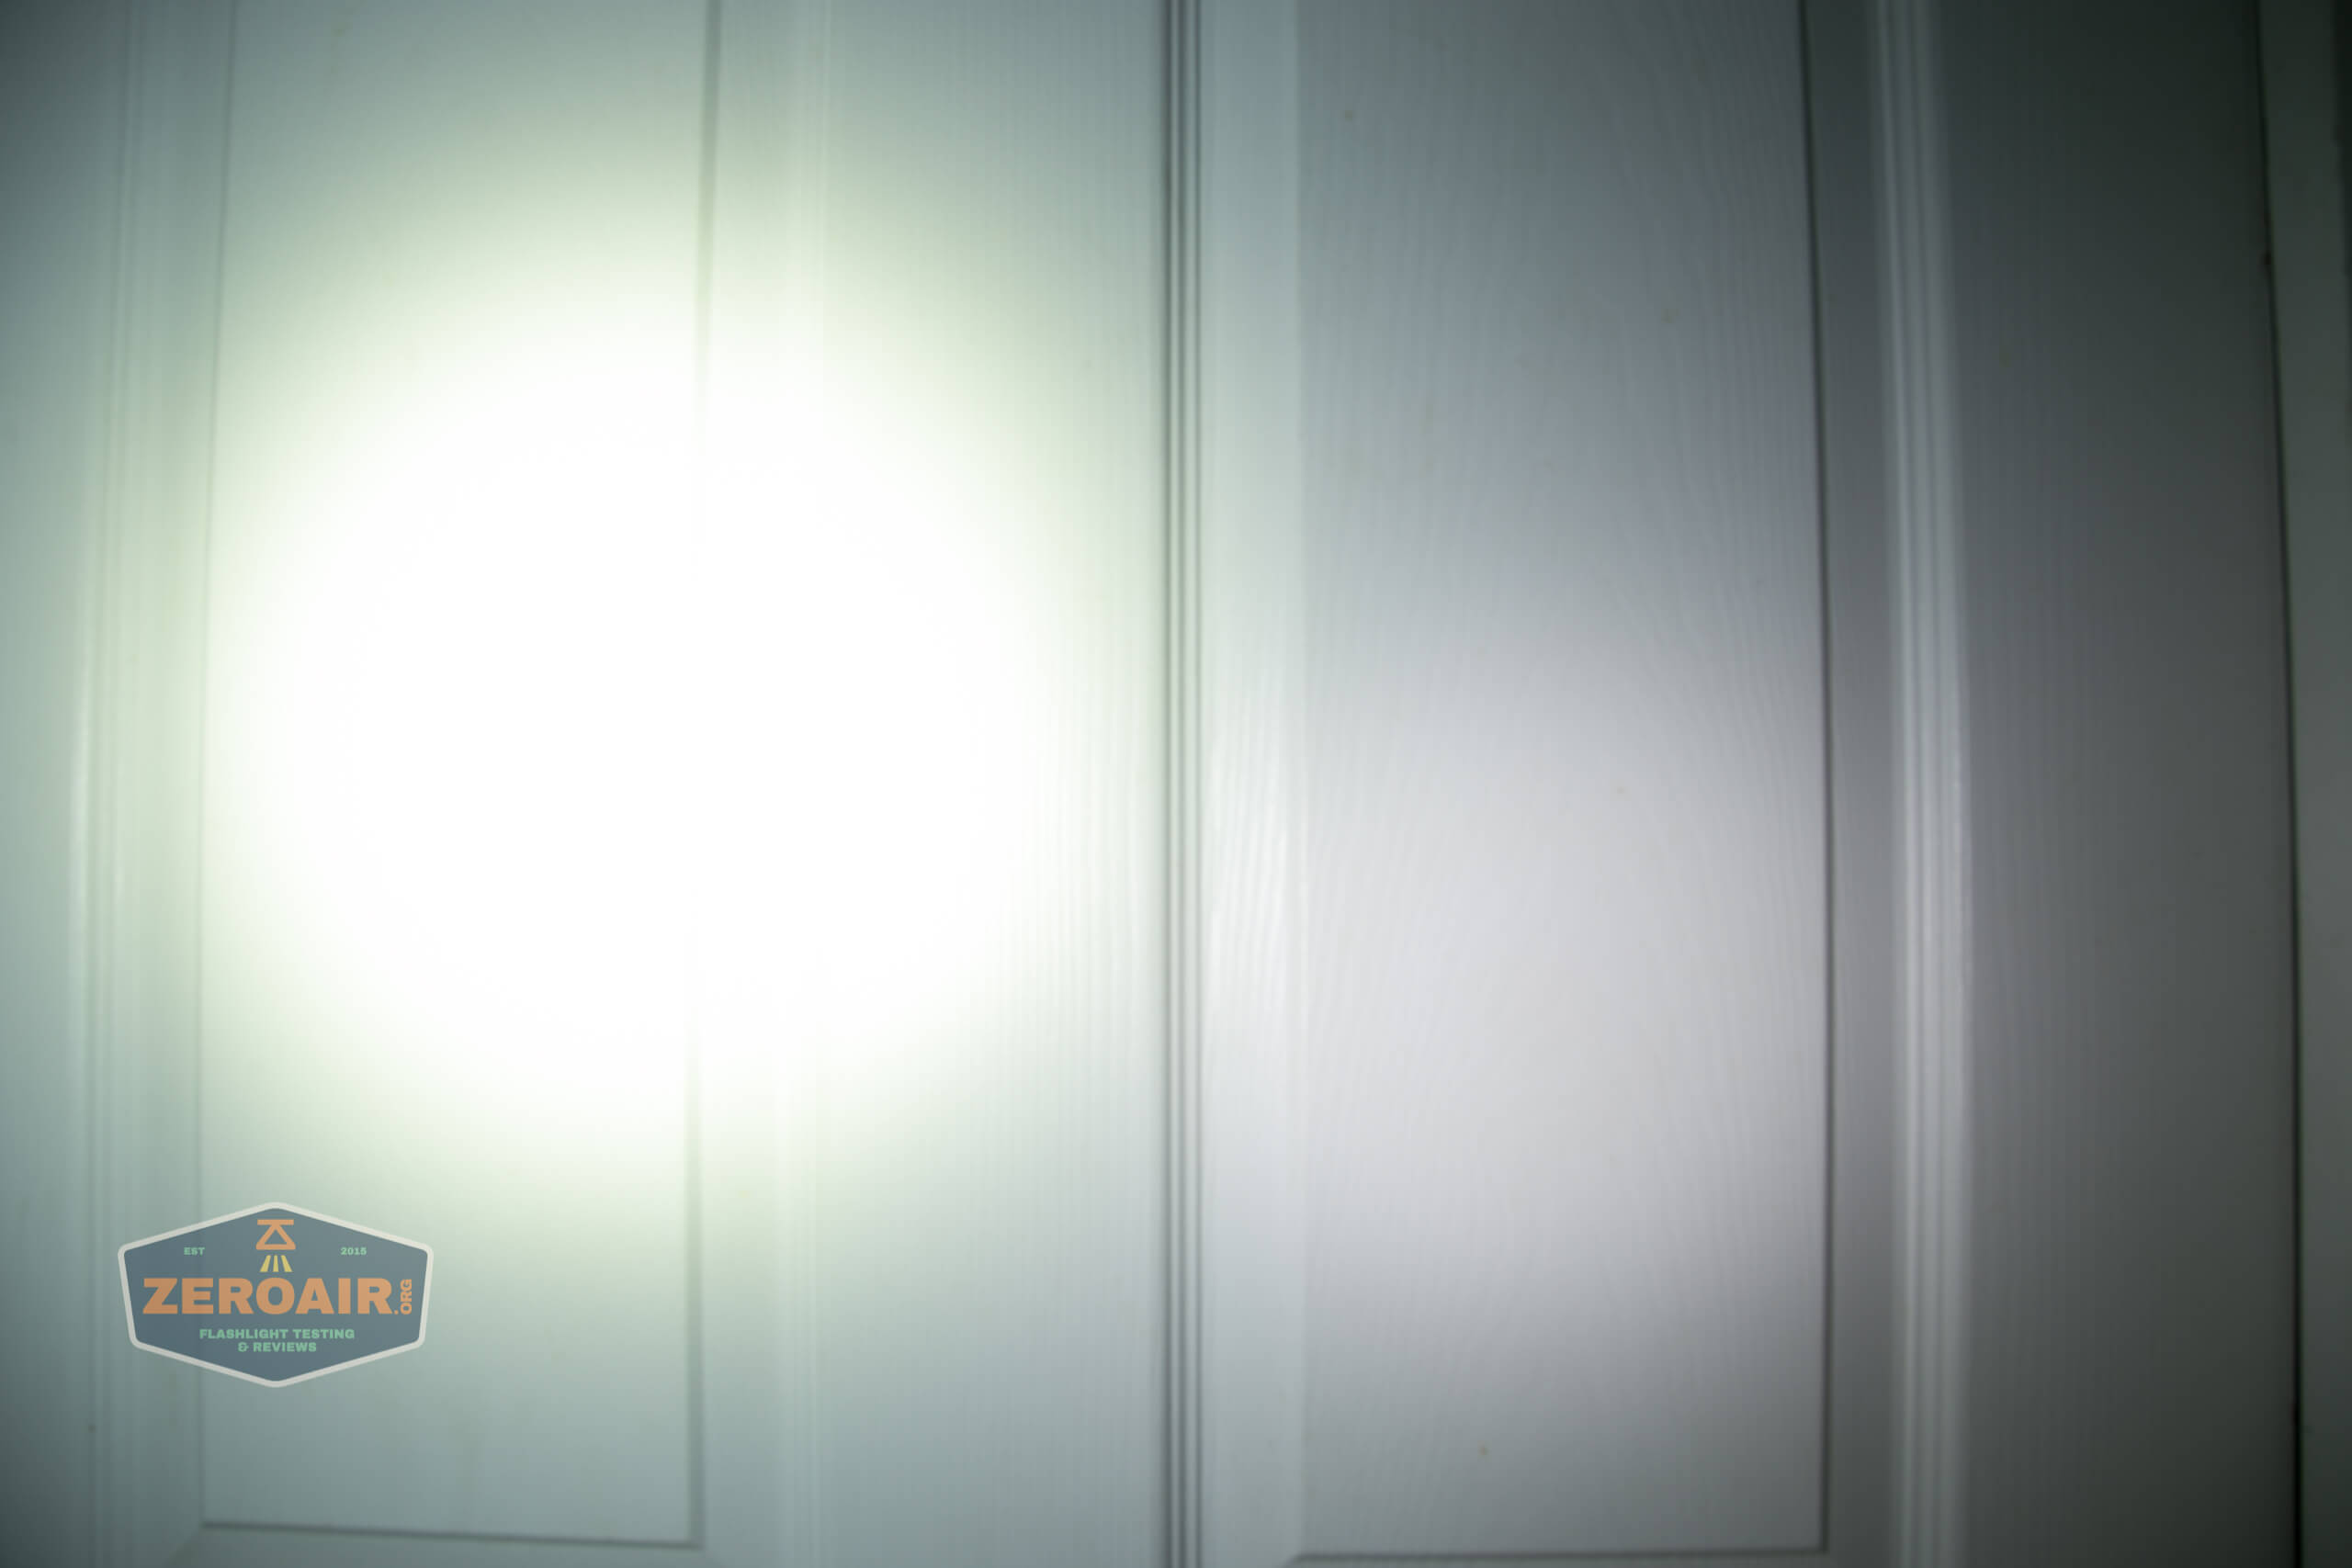
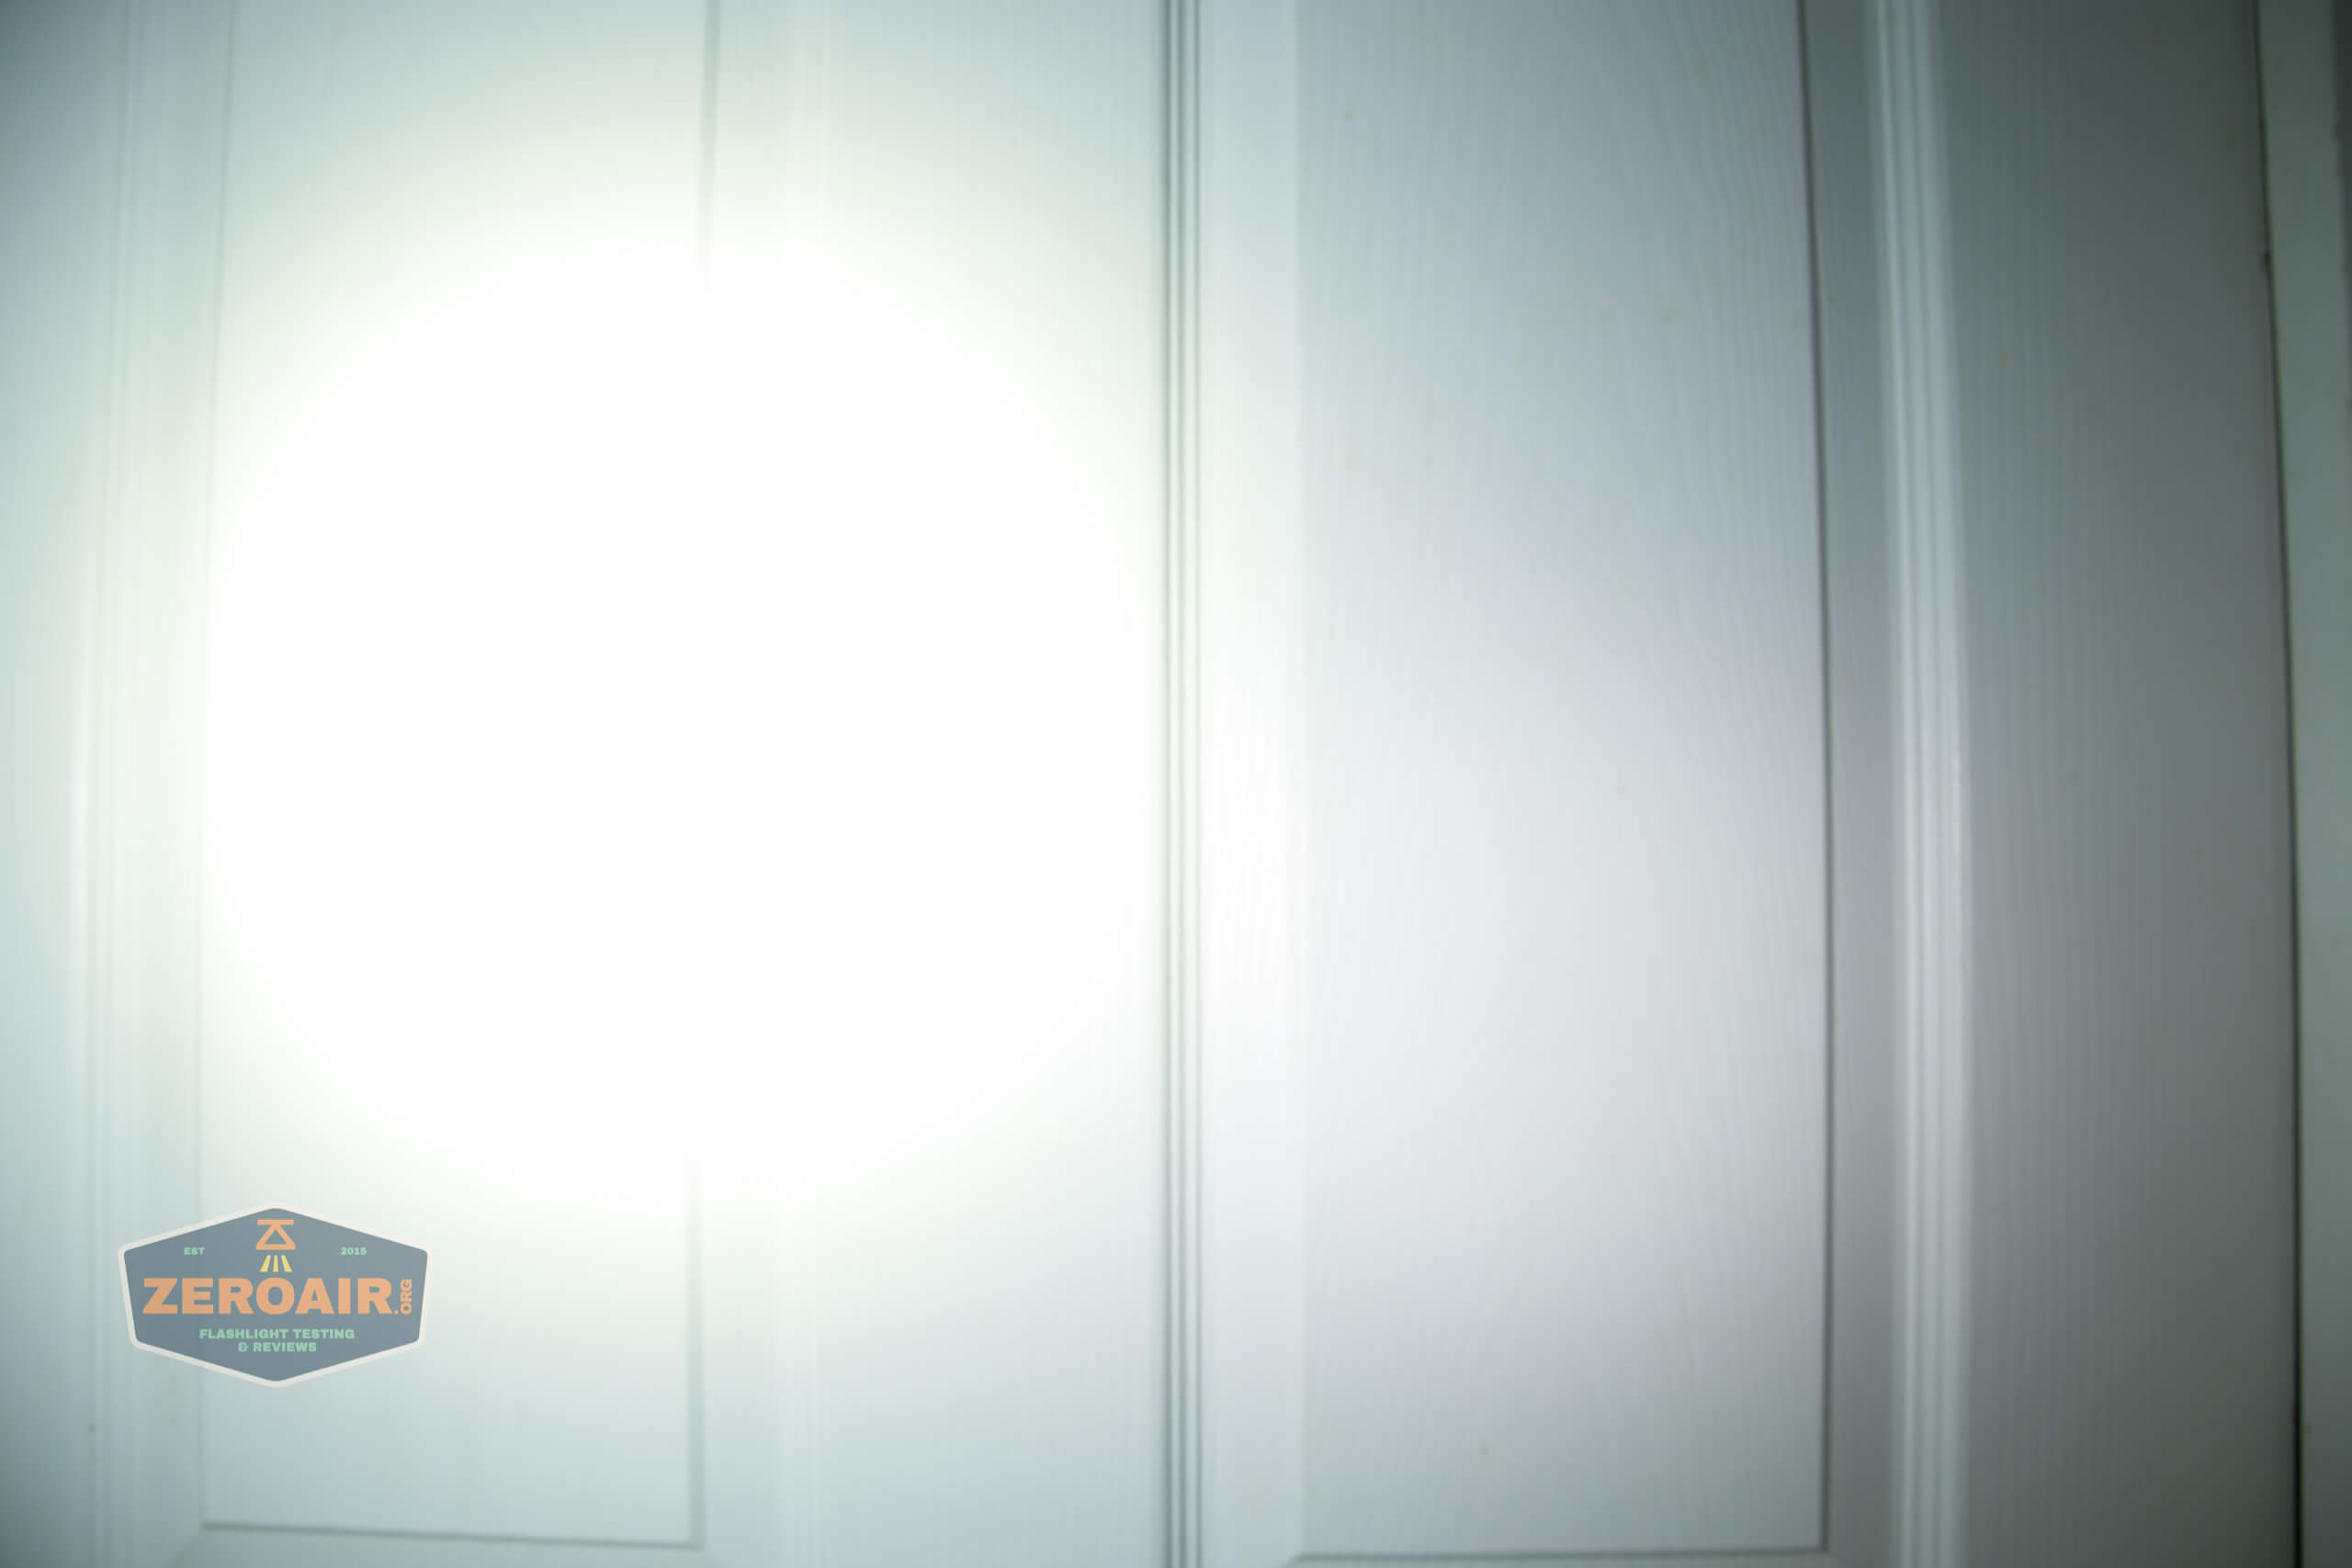


I compare everything to the KillzoneFlashlights.com 219b BLF-348 because it’s inexpensive and has the best tint!
Conclusion
What I like
- High-quality build
- Very fetching blue!
- USB-C charging at 20V
- Powerbank feature
- Massive throw!! And sustained, too.
- Output specifications are met
- Rotary dial is a nice interface for the 7 levels.
What I don’t like
- Cost
- Battery is not user serviceable
- Osram P9 emitters are cooler (and maybe greener) than I like
- Necessary lockout, without my choice
- The scheduled stepdowns are quite annoying on the higher modes.
- The rotating switch is not quite grippy enough for me to use one-handed.
Notes
- This light was loaned by a “friend from Ala-freaking-Bama” (his words) for review. I was not paid to write this review.
- This content originally appeared at zeroair.org. Please visit there for the best experience!
- Use my amazon.com referral link if you’re willing to help support making more reviews like this one
Discover more from ZeroAir Reviews
Subscribe to get the latest posts sent to your email.