Acebeam P15 EDC Tactical Flashlight Review
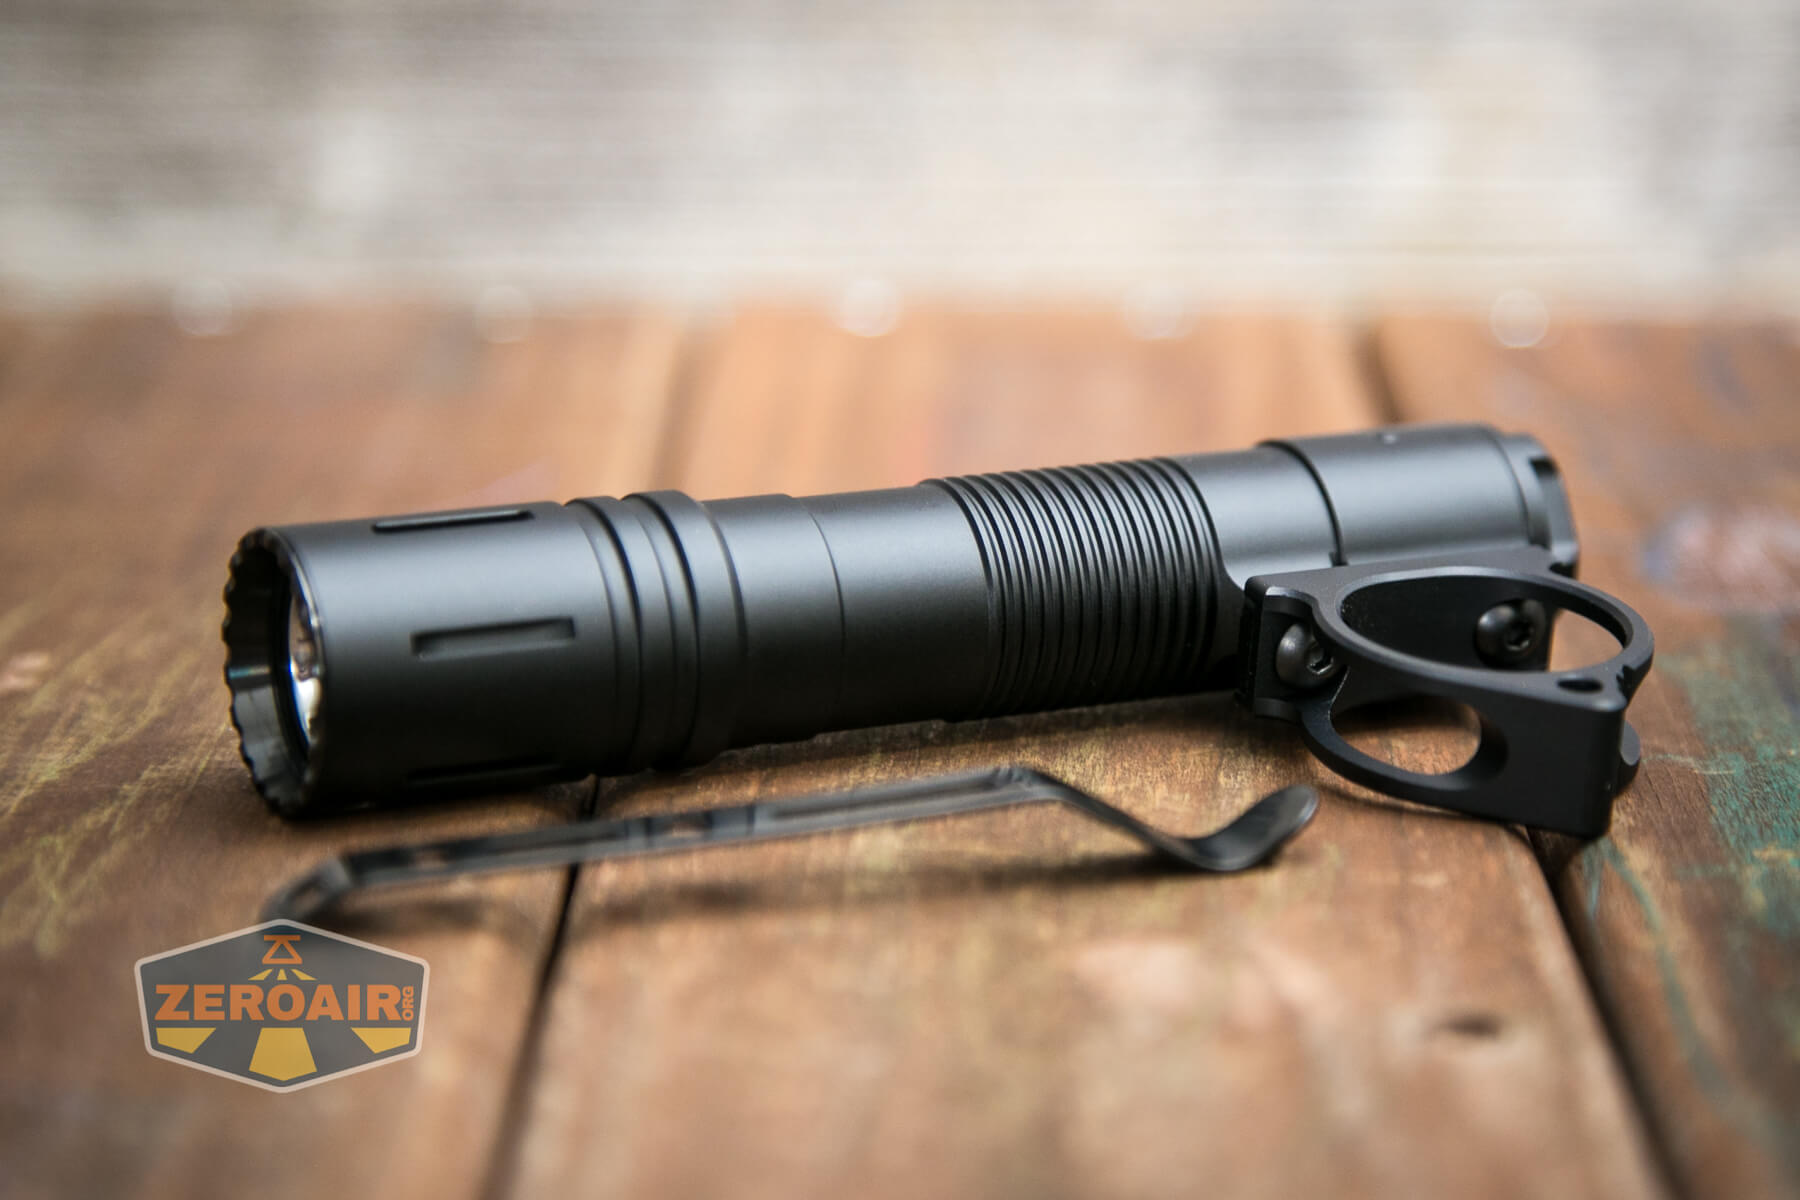
The Acebeam P15 EDC Tactical flashlight is suitable for EDC but also has great tactical applications. Read on about this weapon-mounted thrower!
Official Specs and Features
Here’s a referral link to the Acebeam P15 EDC Tactical flashlight product page.
Versions
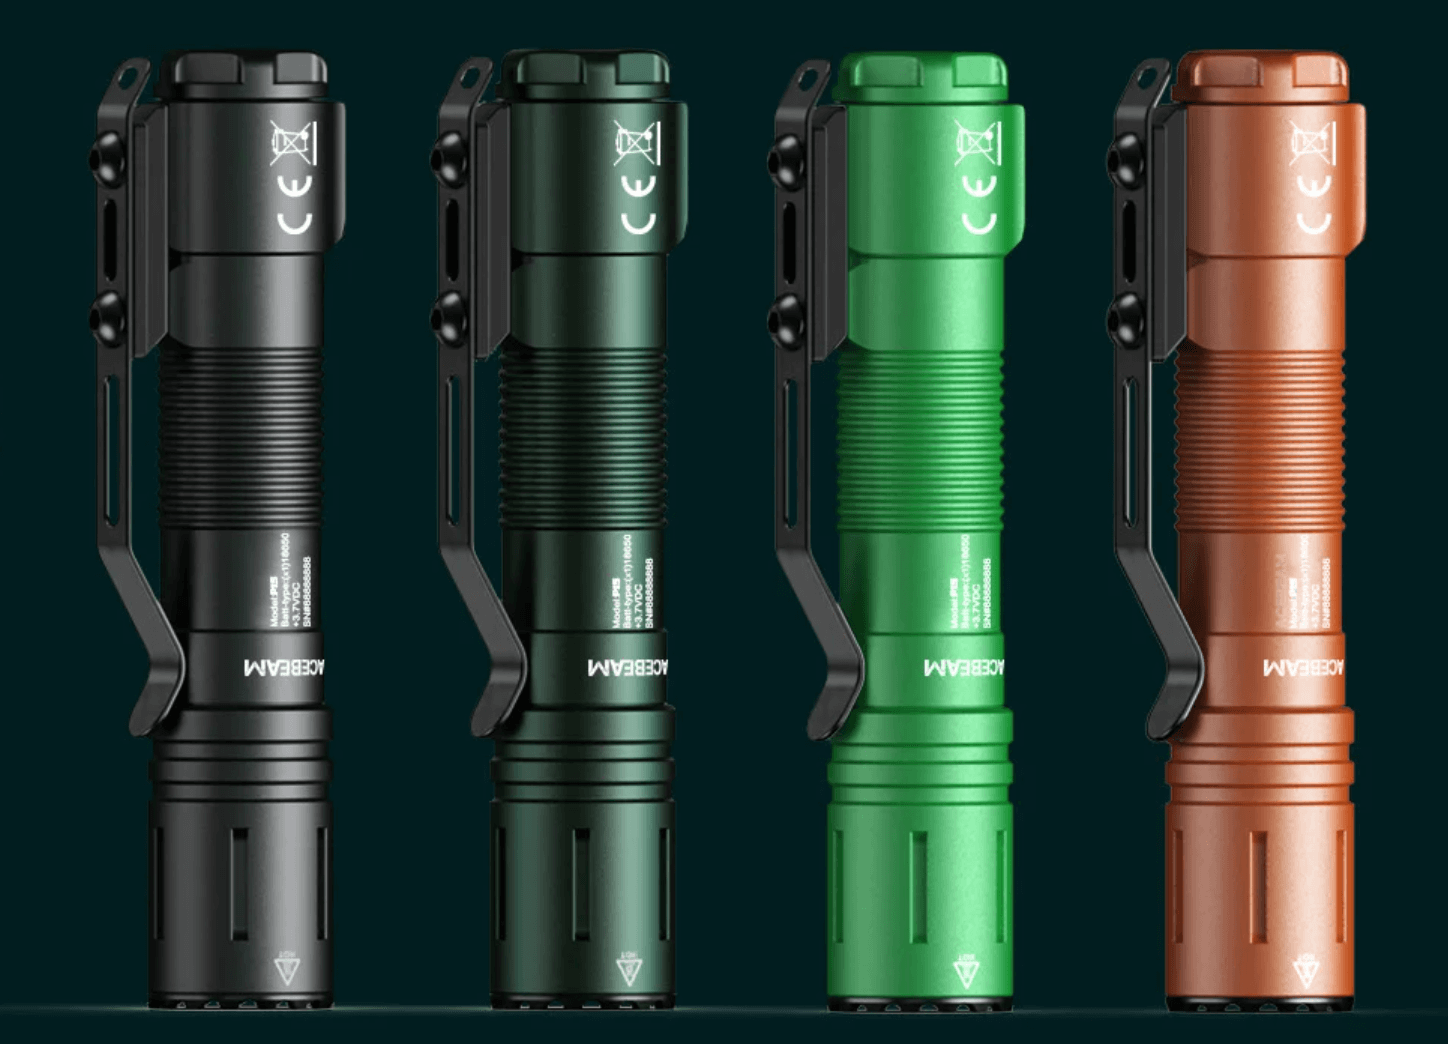
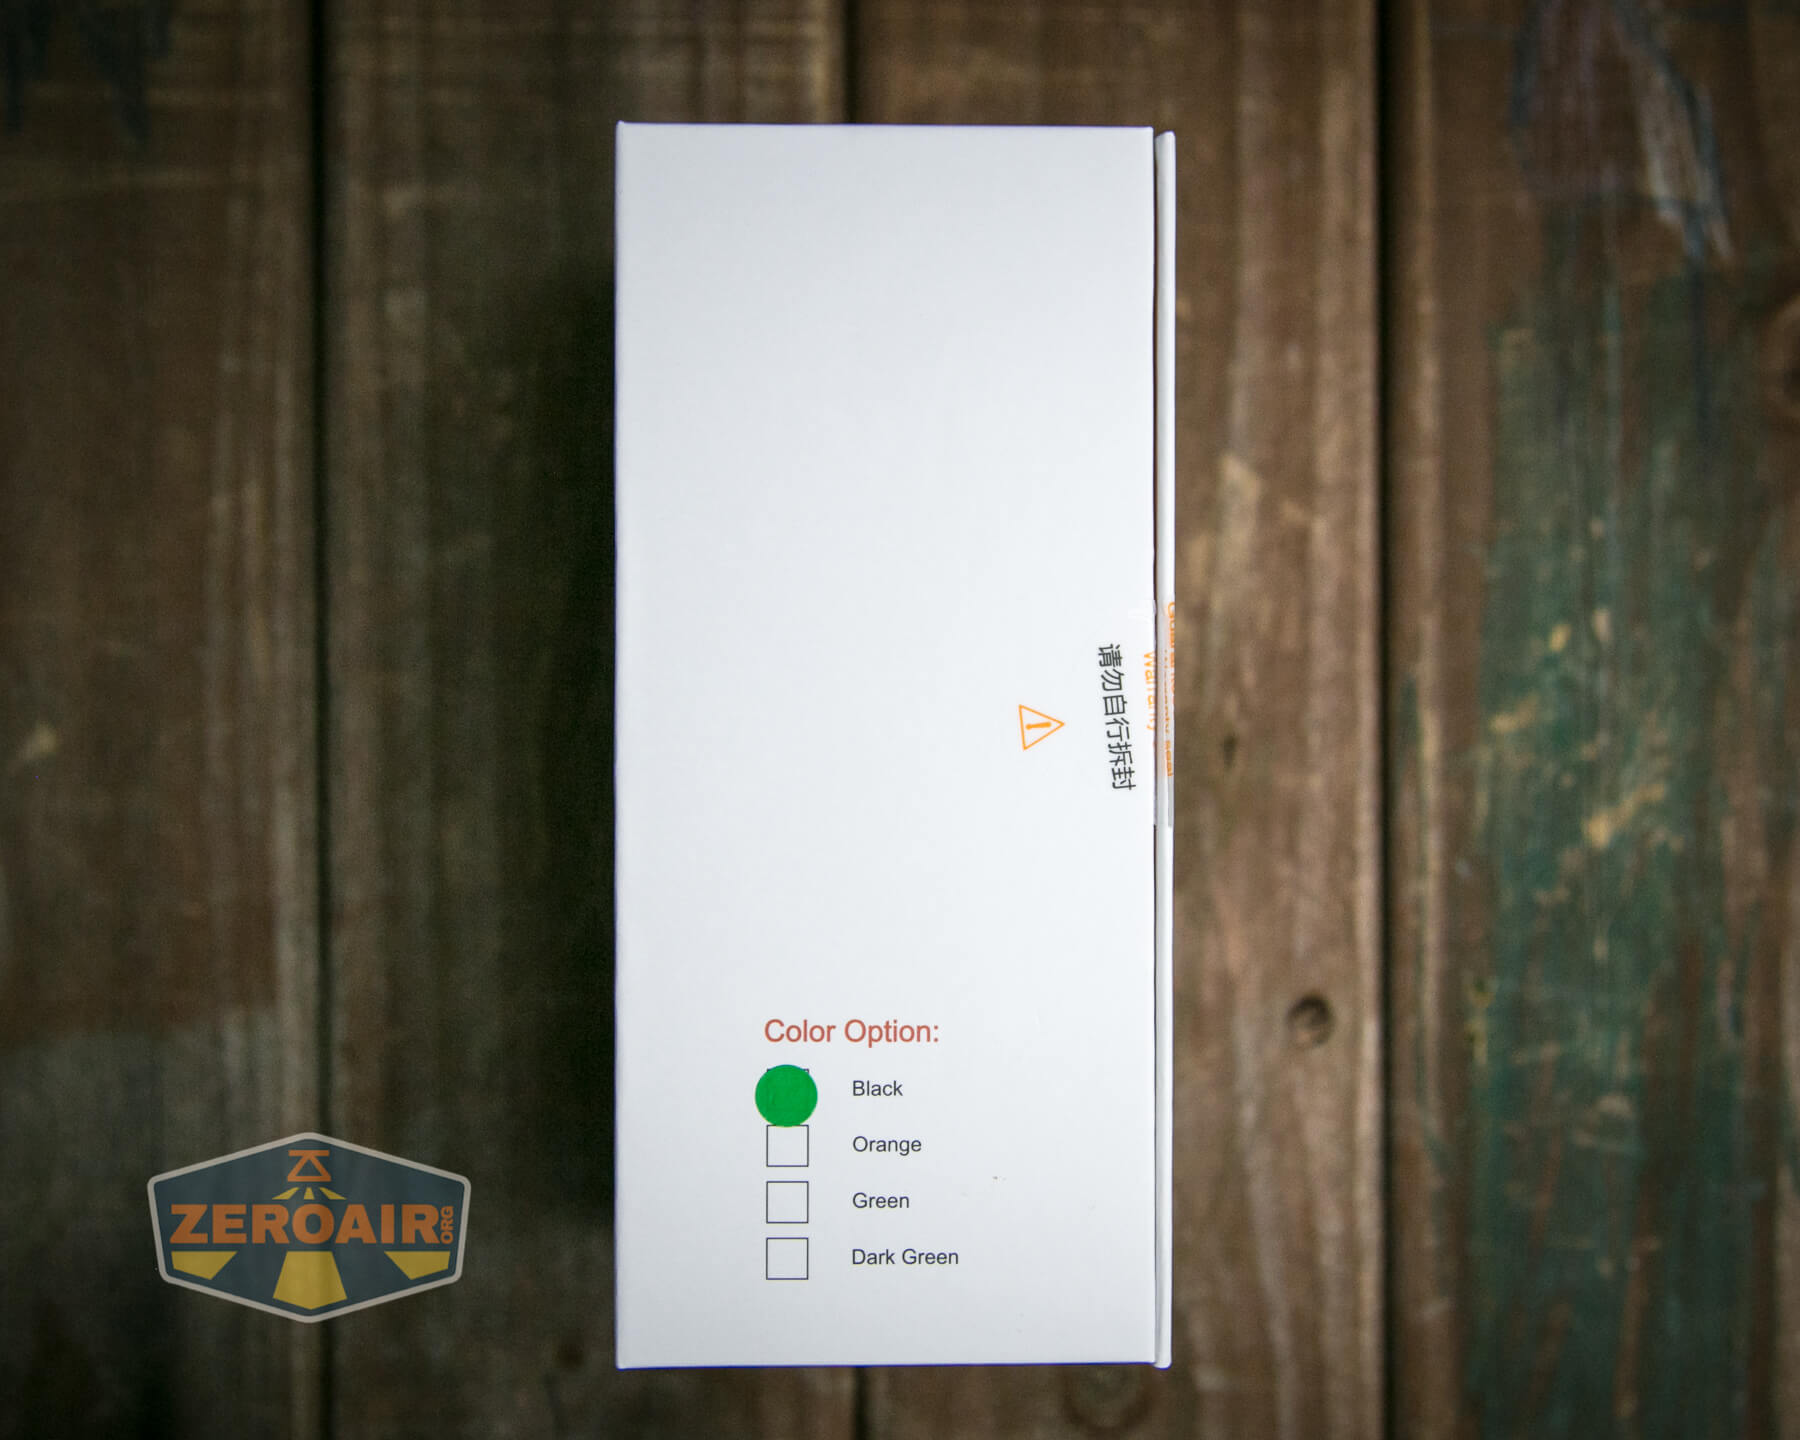
There are a bunch of versions of this light. Technically, it’s all one version, but a bunch of body colors. Two different kits are available, too.
Here are some of the colors. Black, Dark Green, Green, and Orange.
Acebeam also just released a few limited editions, as well. These are White, Light Gray, and Gray.
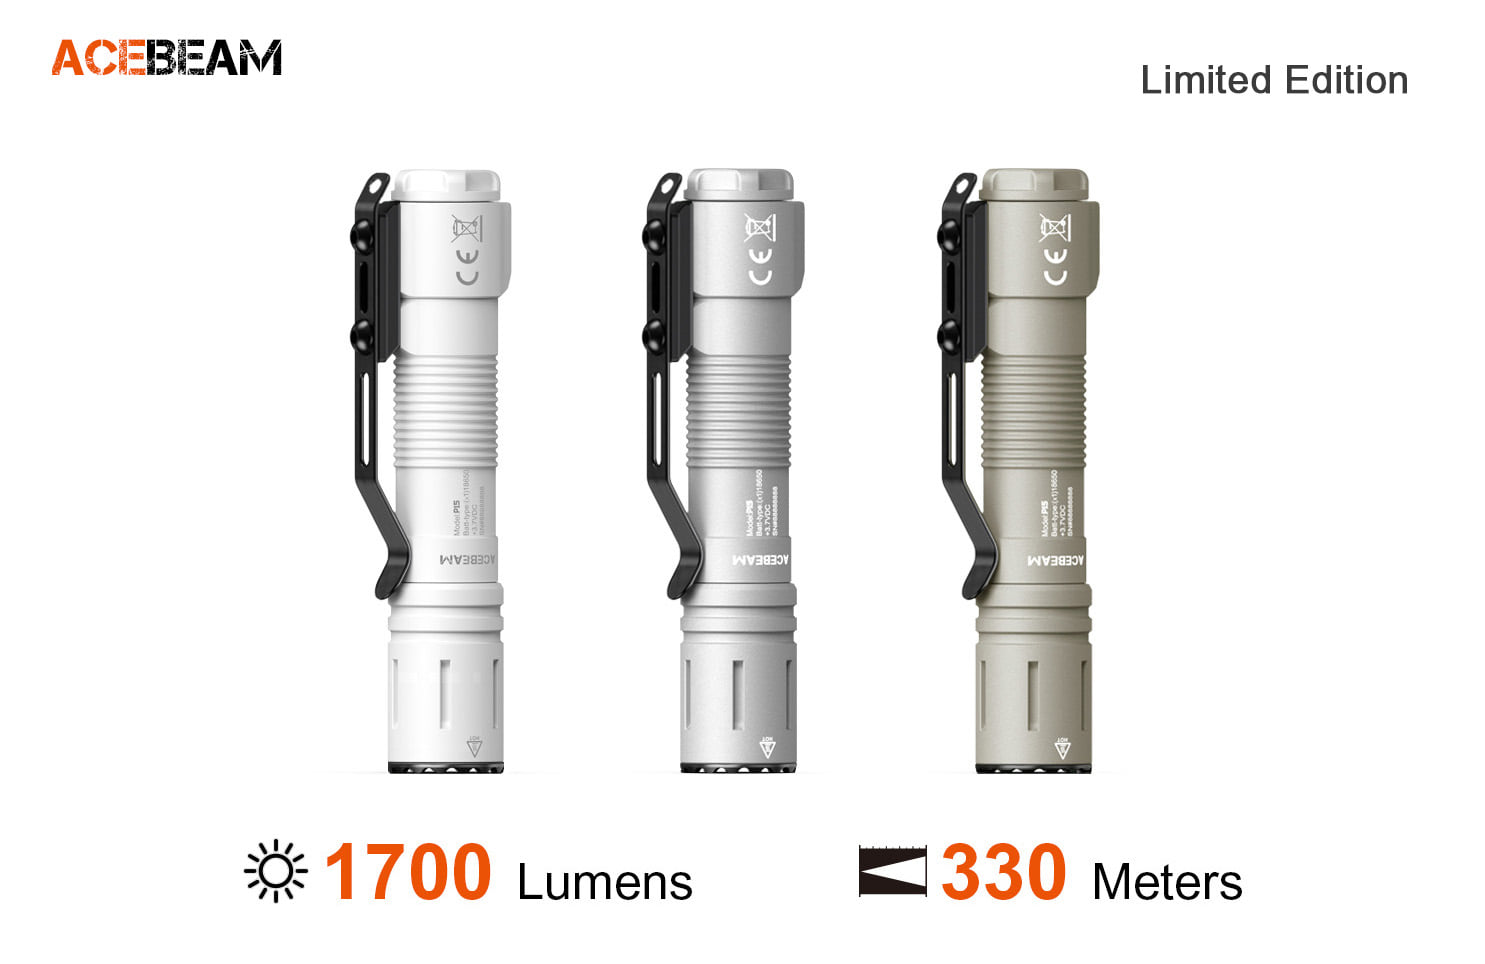
Functionally, these are all the same.
Price
These are all available at various kit levels, too. The full kit costs $162.50 and includes everything you see in this review. The base model comes in at $114.90, and I believe includes only the light, cell, charge cable, lanyard, and 1 wrench. The Acebeam P15 is available at killzoneflashlights.com!
Short Review
The full kit is quite compelling. All the attachment parts are included, as well as a remote switch with a mount. The output is great, and the user interface is great. Surprisingly, orange isn’t my favorite version of this light! I also really like the Stormtrooper white version. While the output is a little below specification, the performance is good. More importantly, the throw is better than specified, which is probably more important in a tactical flashlight.
Long Review
The Big Table
| Acebeam P15 EDC Tactical Light | |
|---|---|
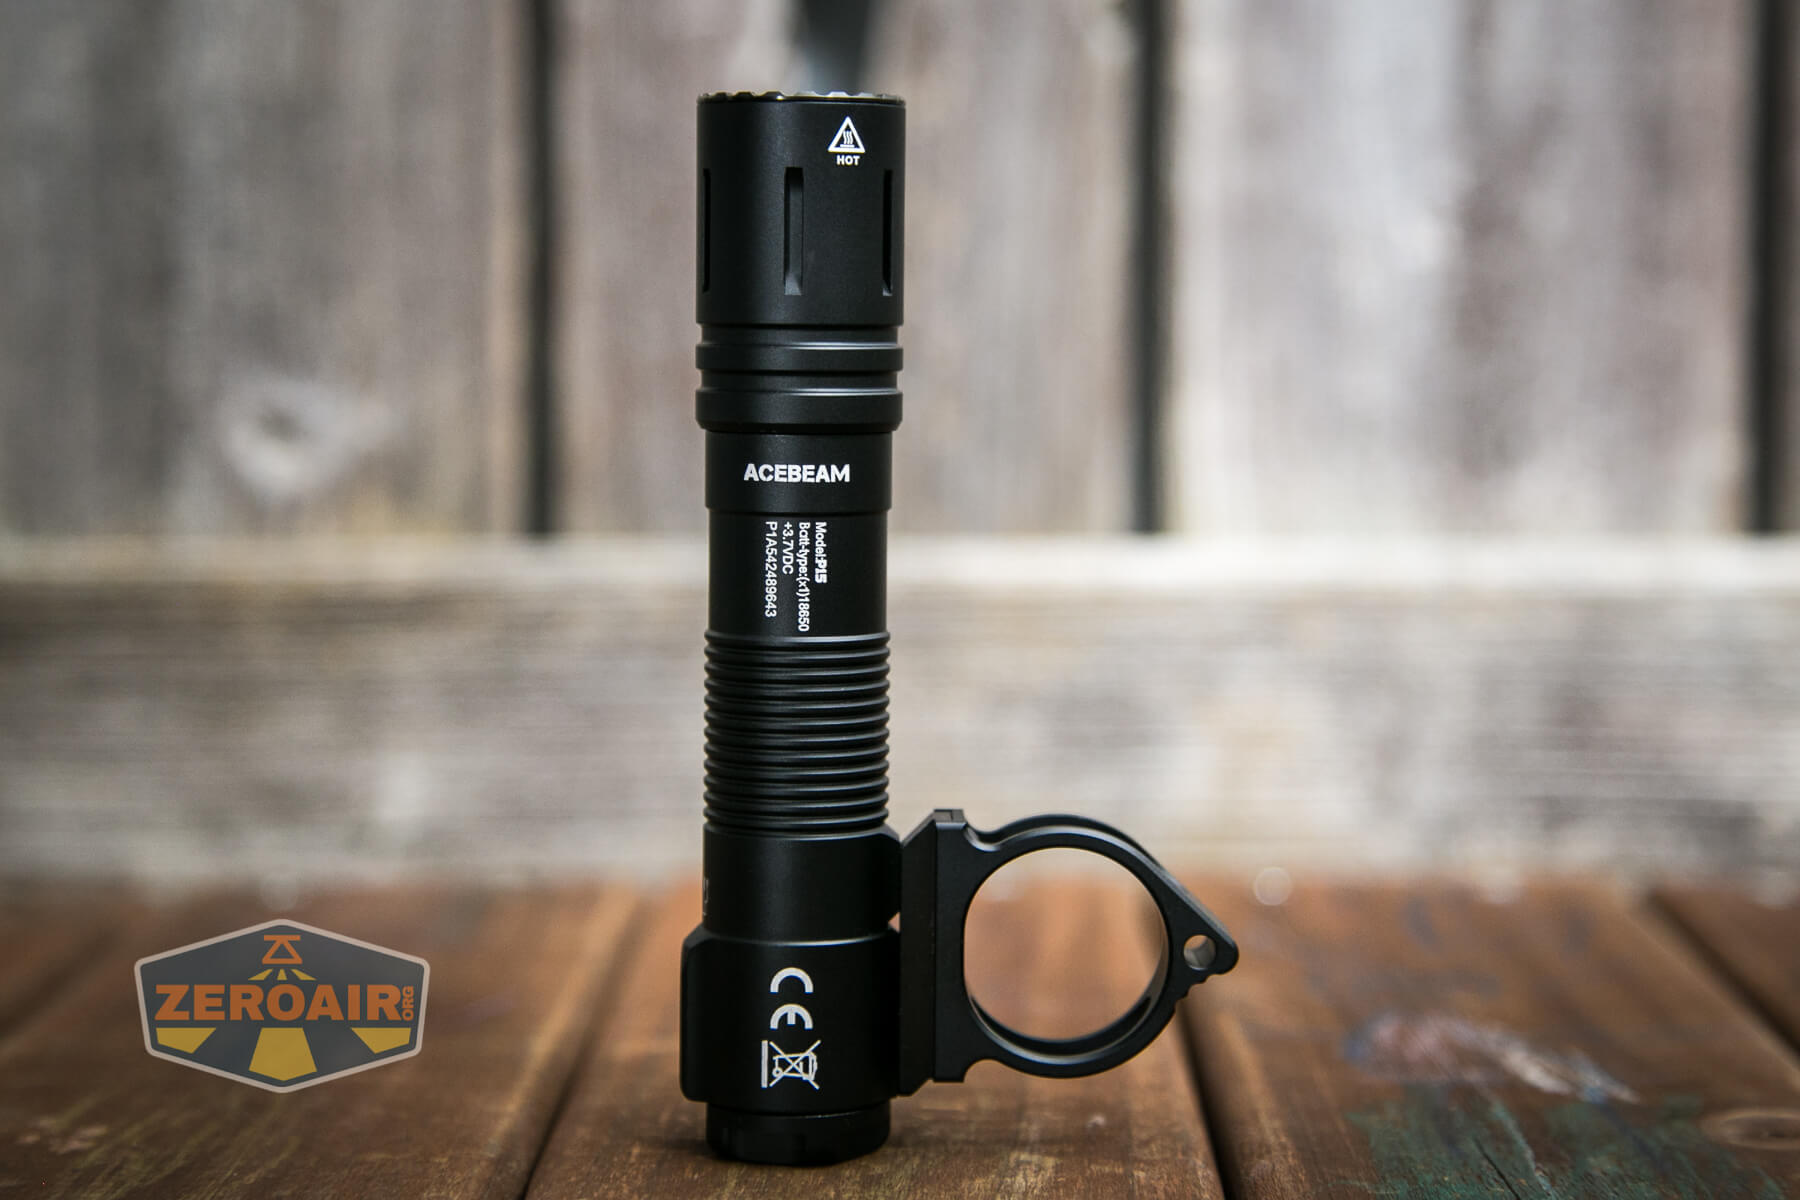
| Emitter: | Luminus SFT40 HI (6500K) |
| Price in USD at publication time: | $114.90 (referral link) |
| Cell: | 1×18650 |
| Turbo Runtime Graph | High Runtime Graph |
| LVP? | Questionable |
| Switch Type: | E-Switch |
| Quiescent Current (mA): | ? |
| On-Board Charging? | Yes |
| Charge Port Type: | |
| Charge Graph | |
| Power off Charge Port | No |
| Claimed Lumens (lm) | 1700 |
| Measured Lumens (at 30s) | 1465 (86.2% of claim)^ |
| Candela per Lumen | 19 |
| Claimed Throw (m) | 330 |
| Candela (Calculated) in cd (at 30s) | 1026lux @ 5.332m = 29169cd |
| Throw (Calculated) (m) | 341.6 (103.5% of claim)^ |
| Item provided for review by: | Acebeam |
| All my Acebeam reviews! | |
^ Measurement disclaimer: Testing flashlights is my hobby. I use hobbyist-level equipment for testing, including some I made myself. Try not to get buried in the details of manufacturer specifications versus measurements recorded here; A certain amount of difference (say, 10 or 15%) is perfectly reasonable.
What’s Included
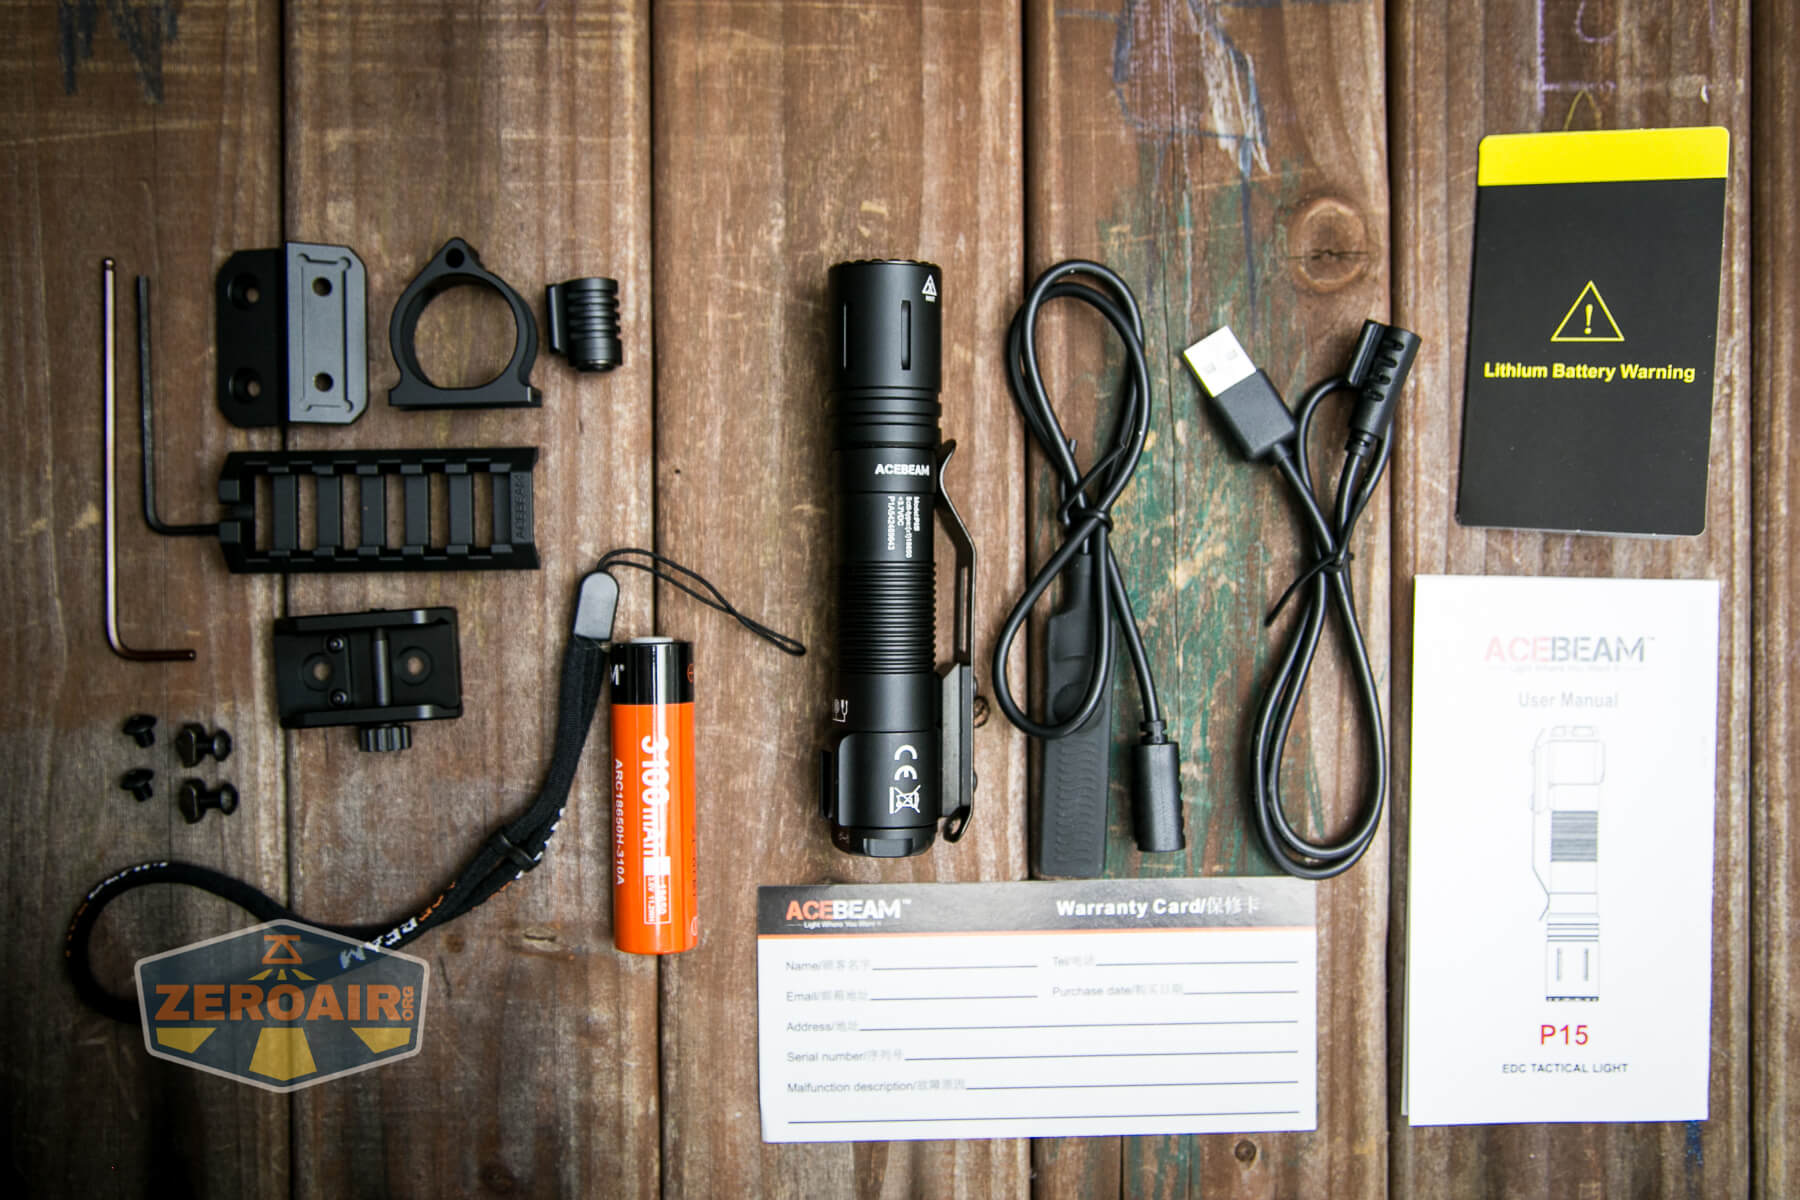
- Acebeam P15 EDC Tactical flashlight
- Remote Switch
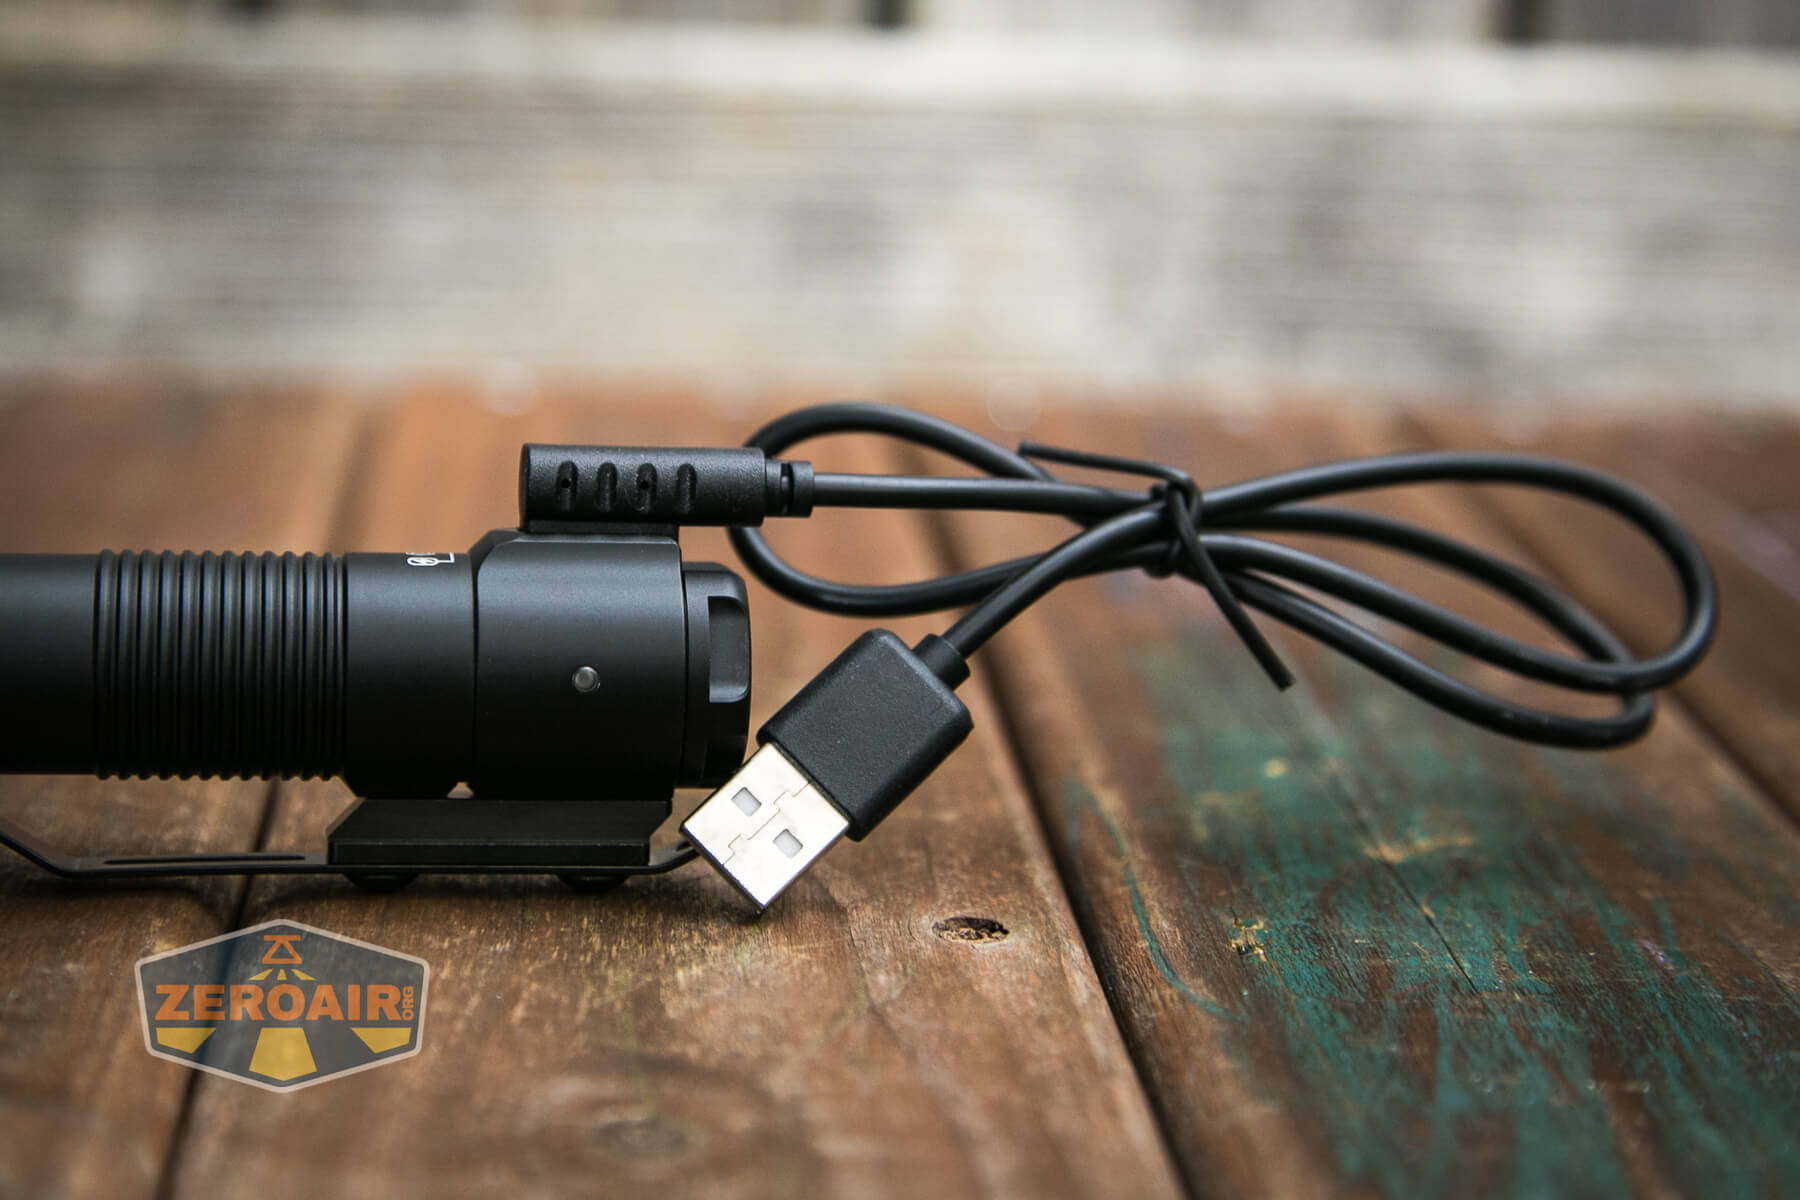
- Charge cable (USB to proprietary connection)
- Acebeam 18650 (customized, proprietary)
- Lanyard
- Tactical switch
- Tactical ring
- Picatinny rail mount for light
- Picatinny rail mount for remote switch
- Wrenches (2)
- Spare screws (2)
- MLOK screws (2)
- Manual etc
Package and Manual

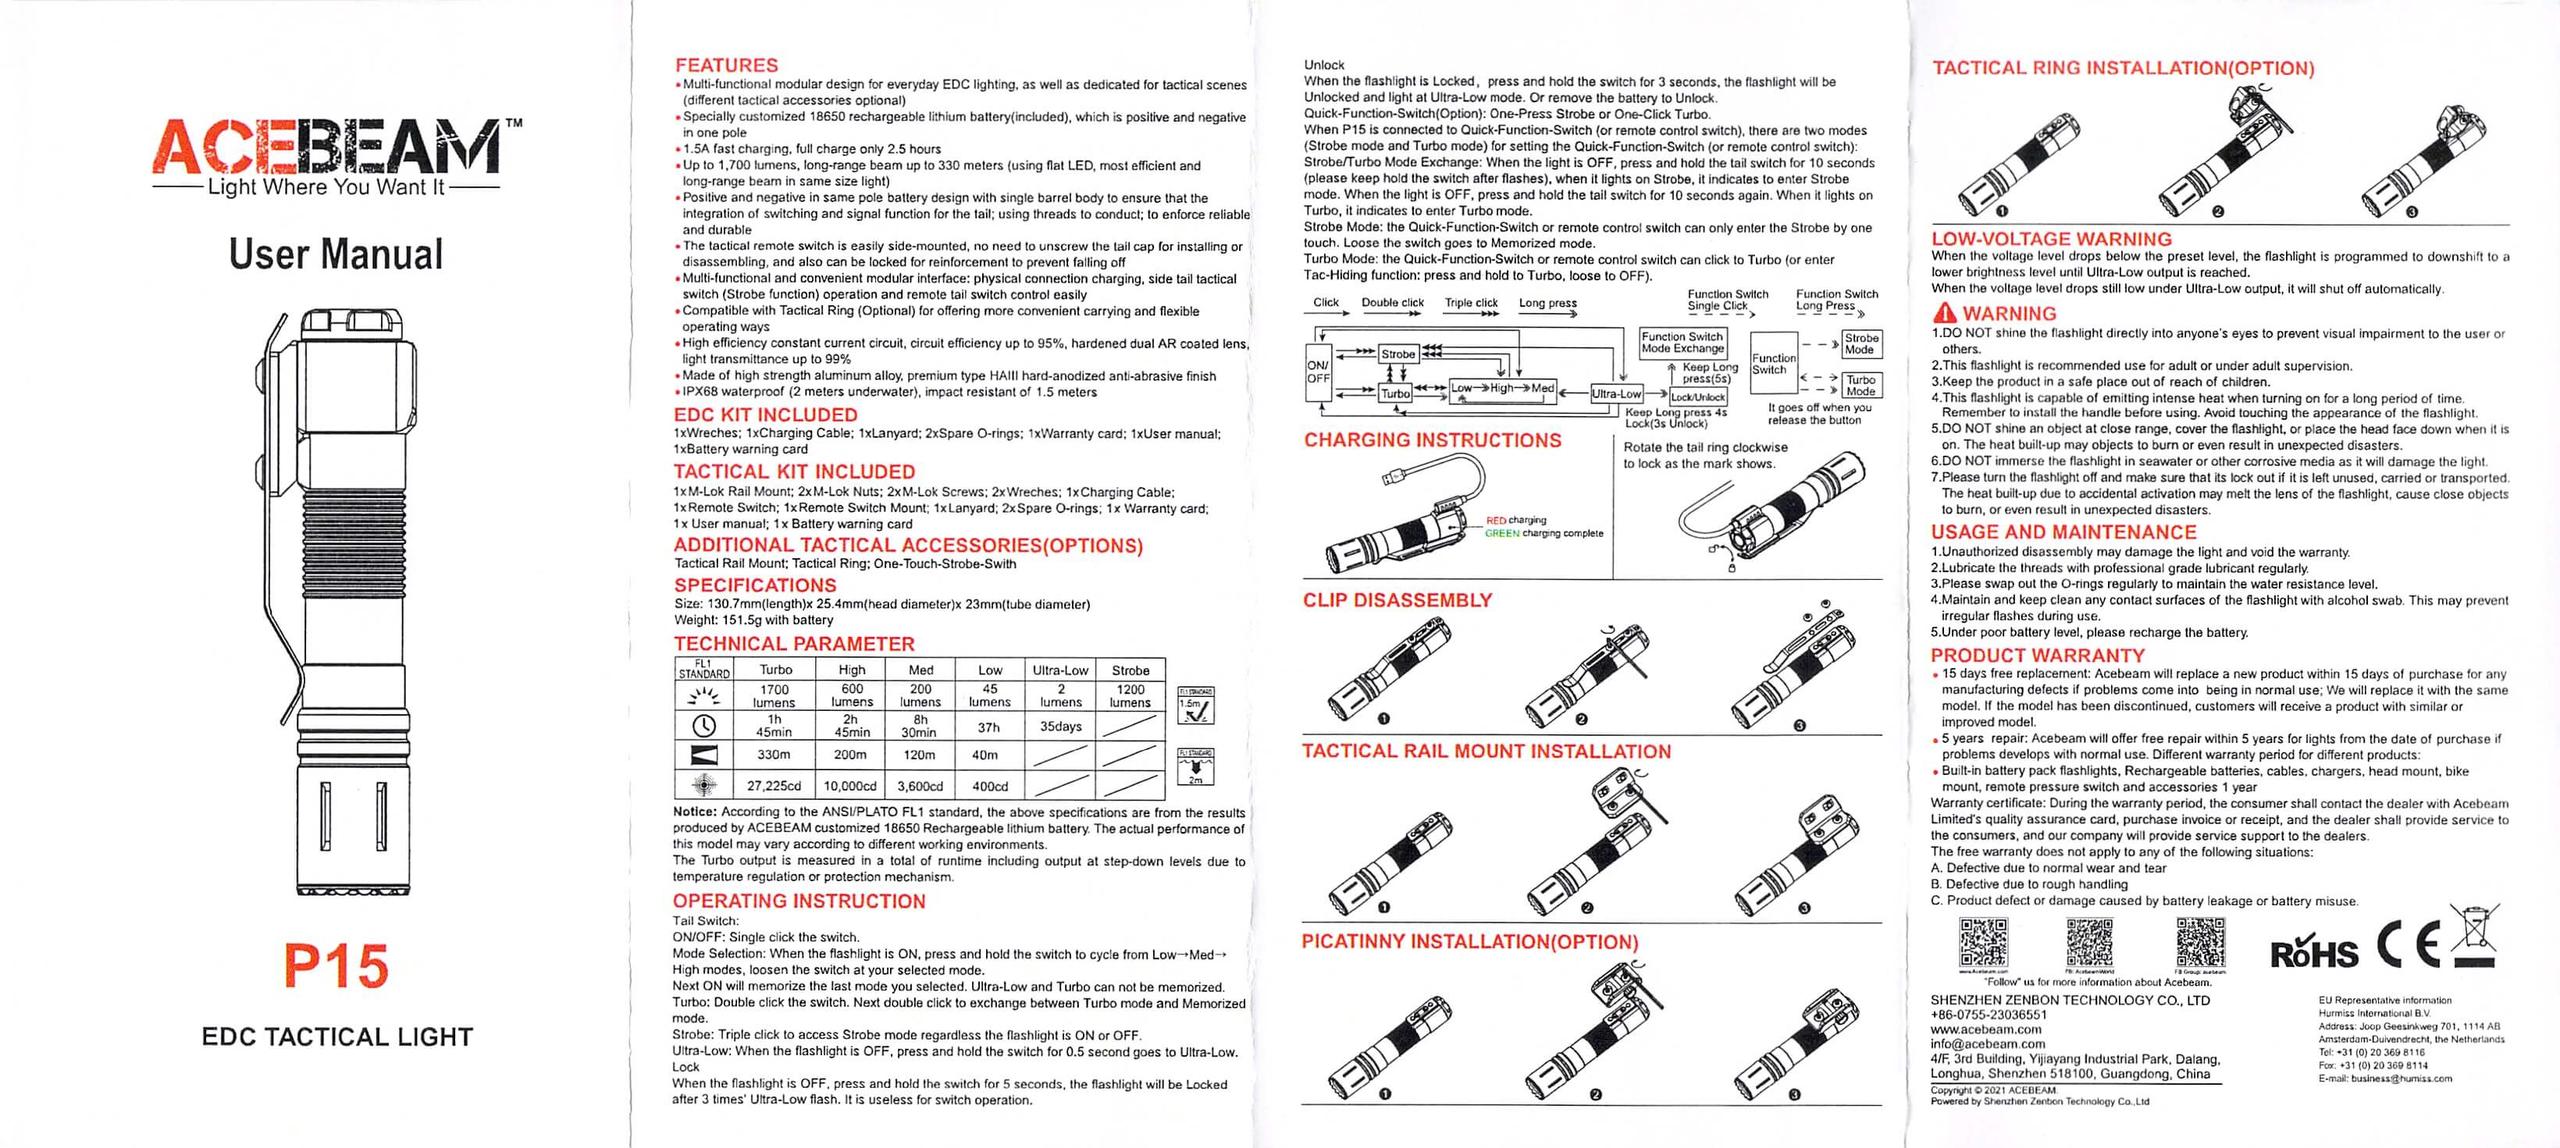
Build Quality and Disassembly
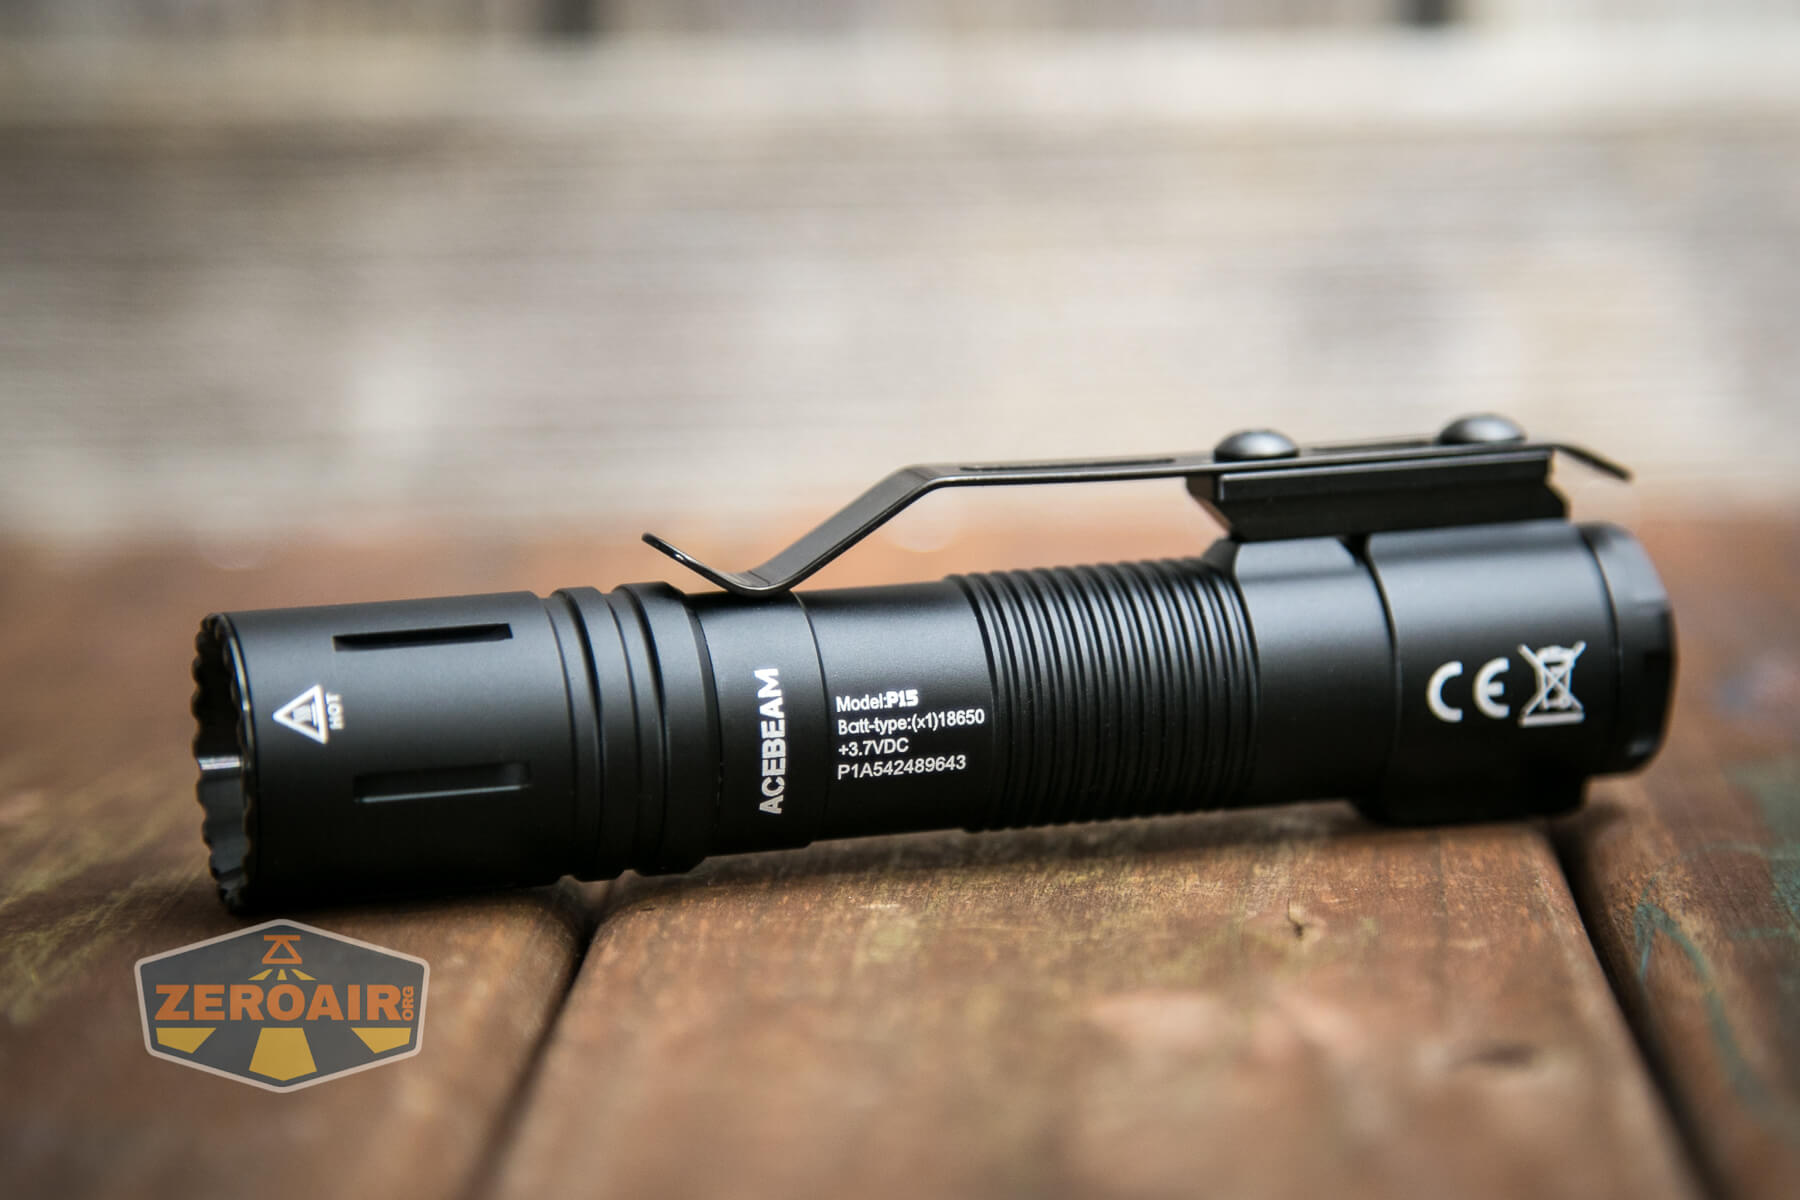
This is a solid light. It just feels like a high-quality device. After using it for a while, I can say that seems to be the case, too.
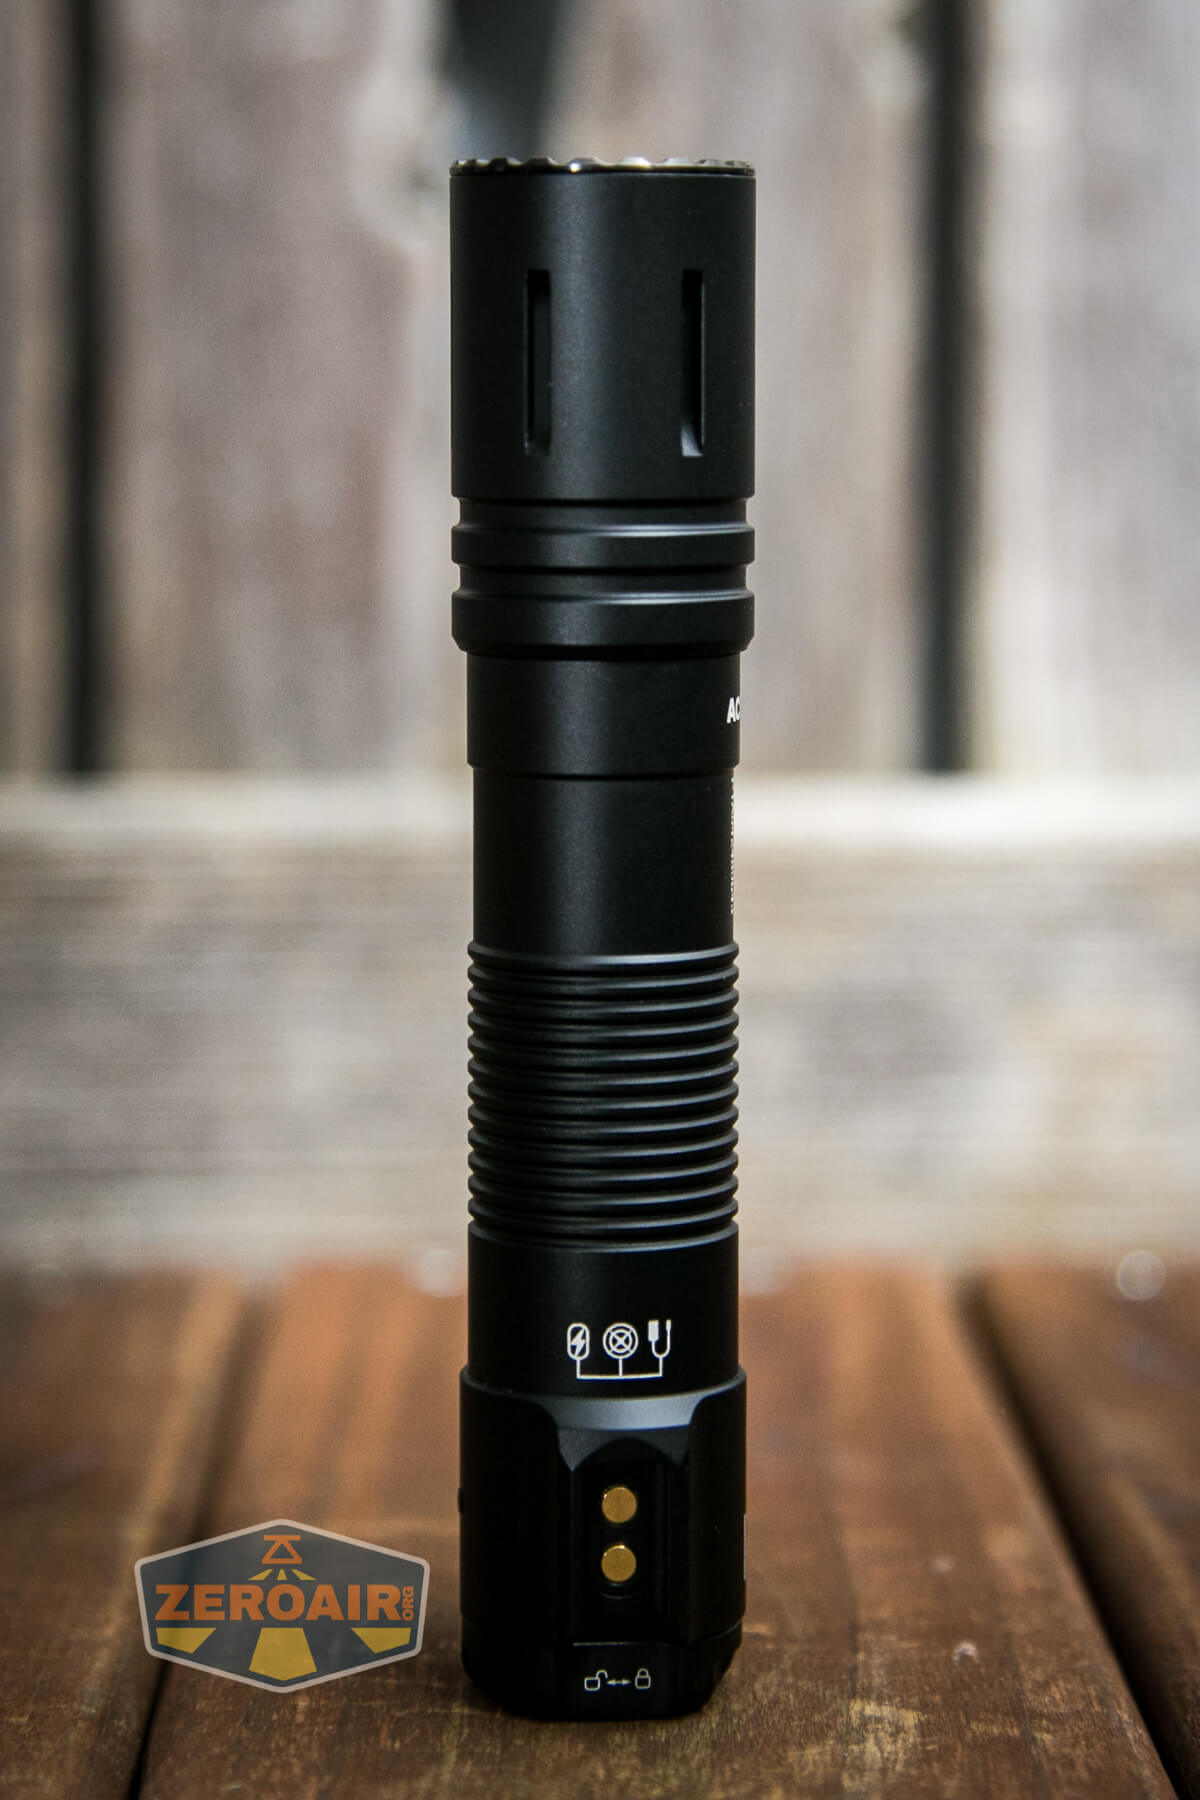

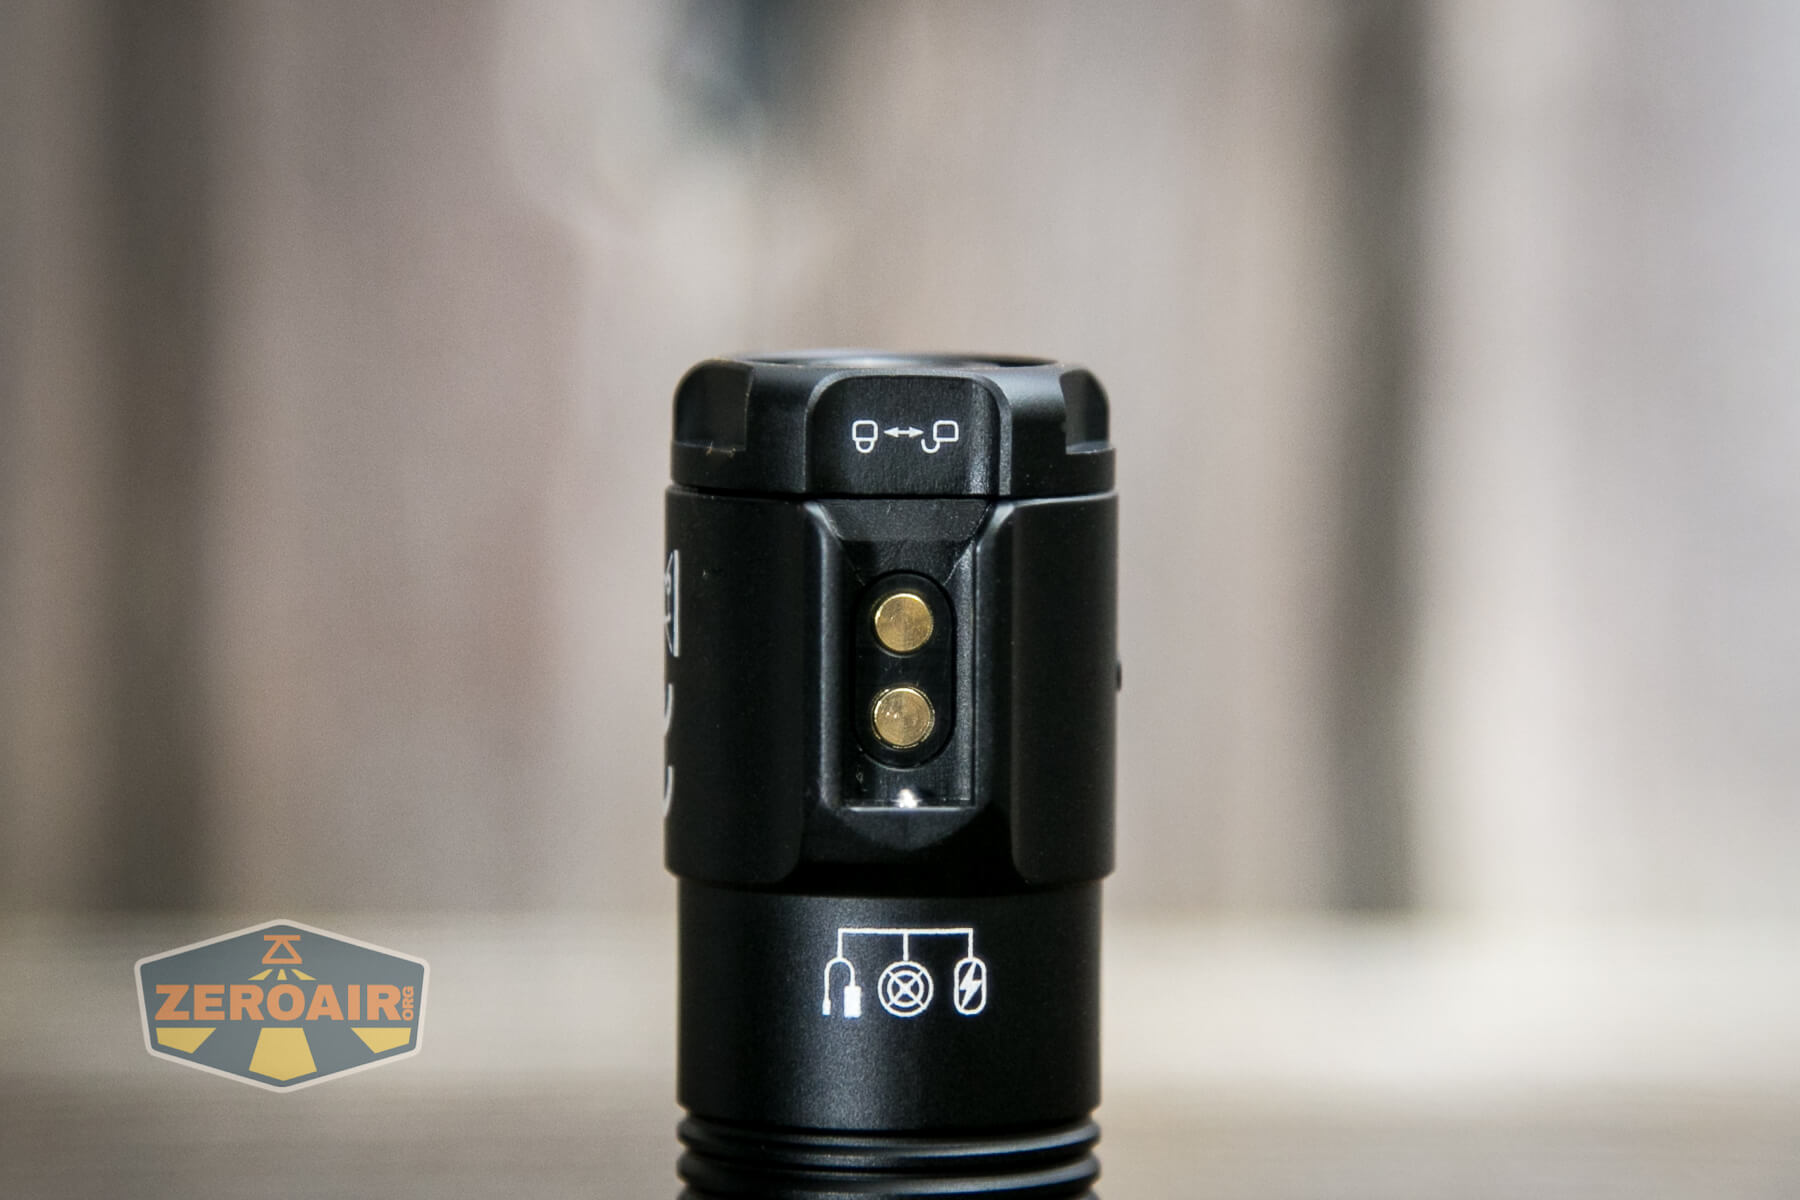
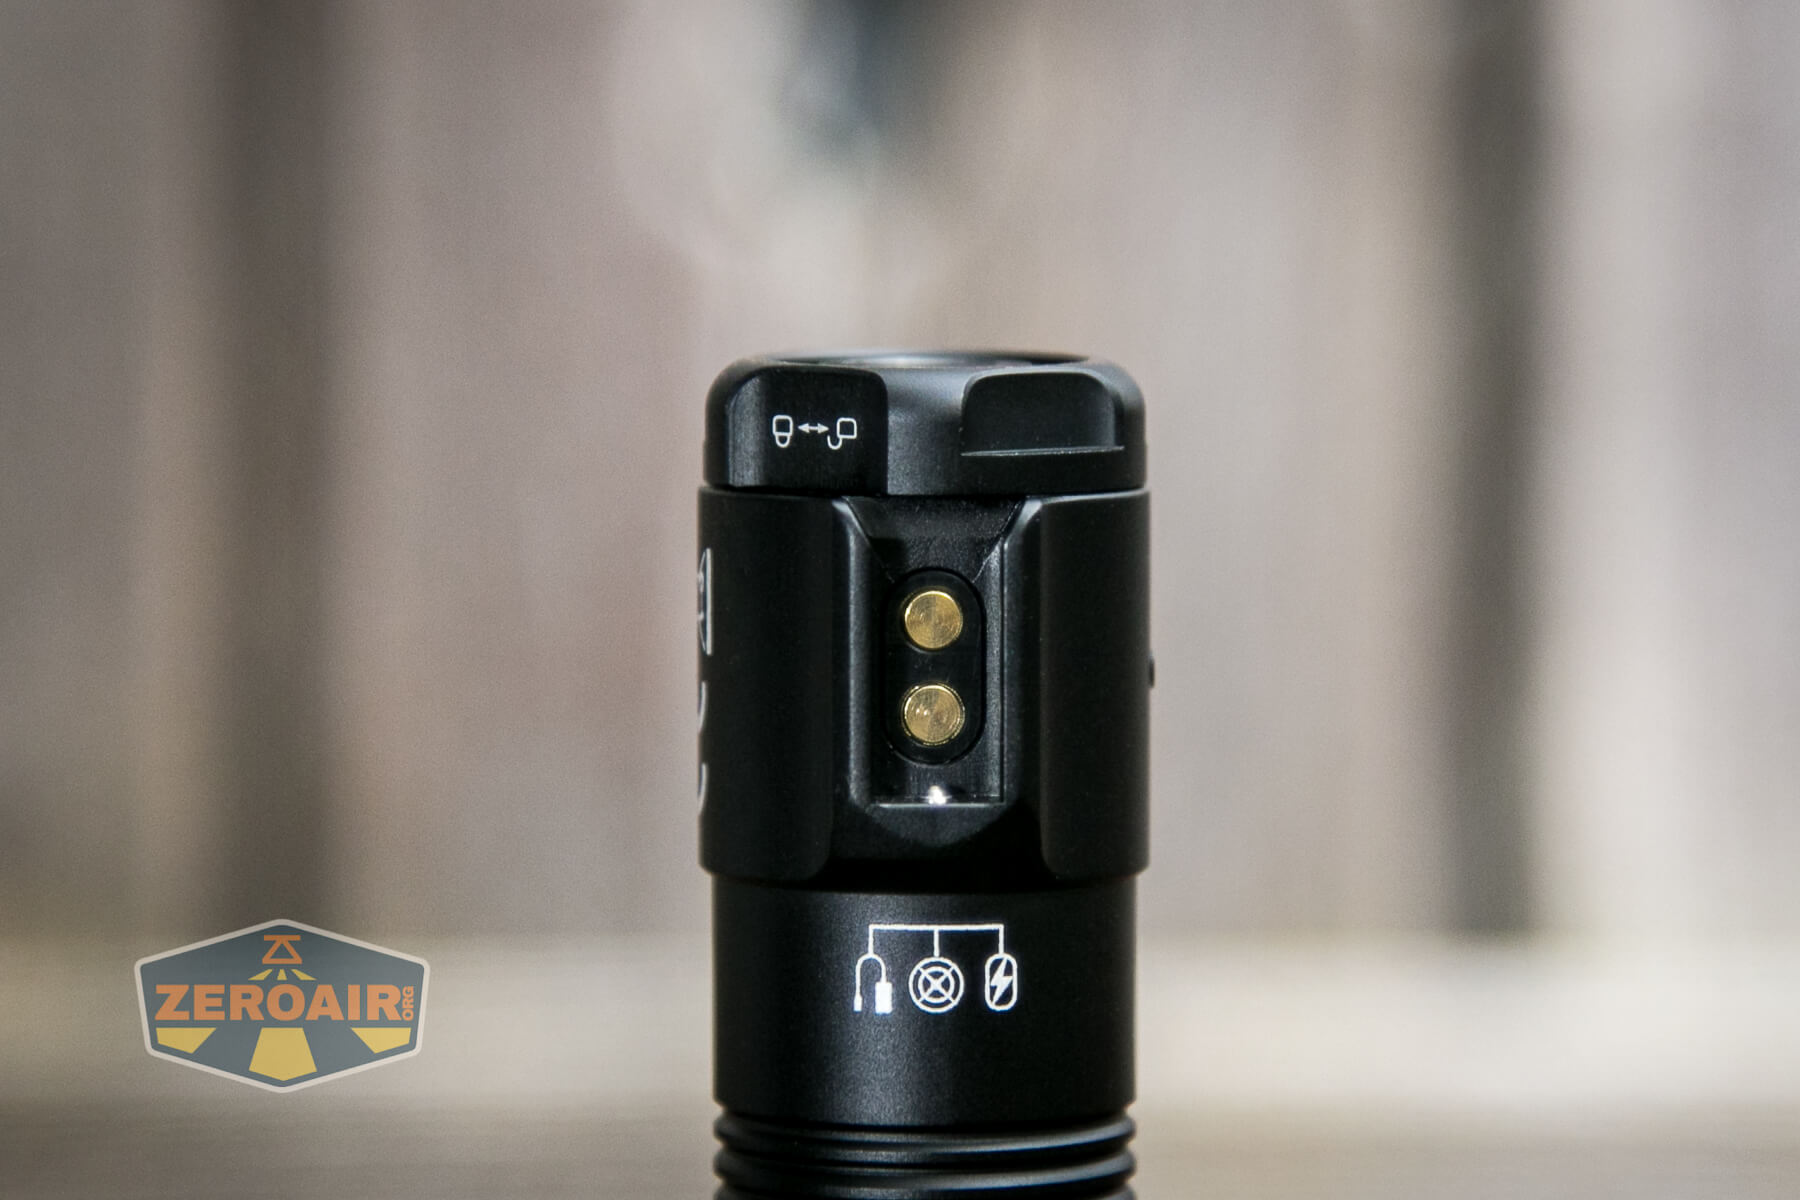
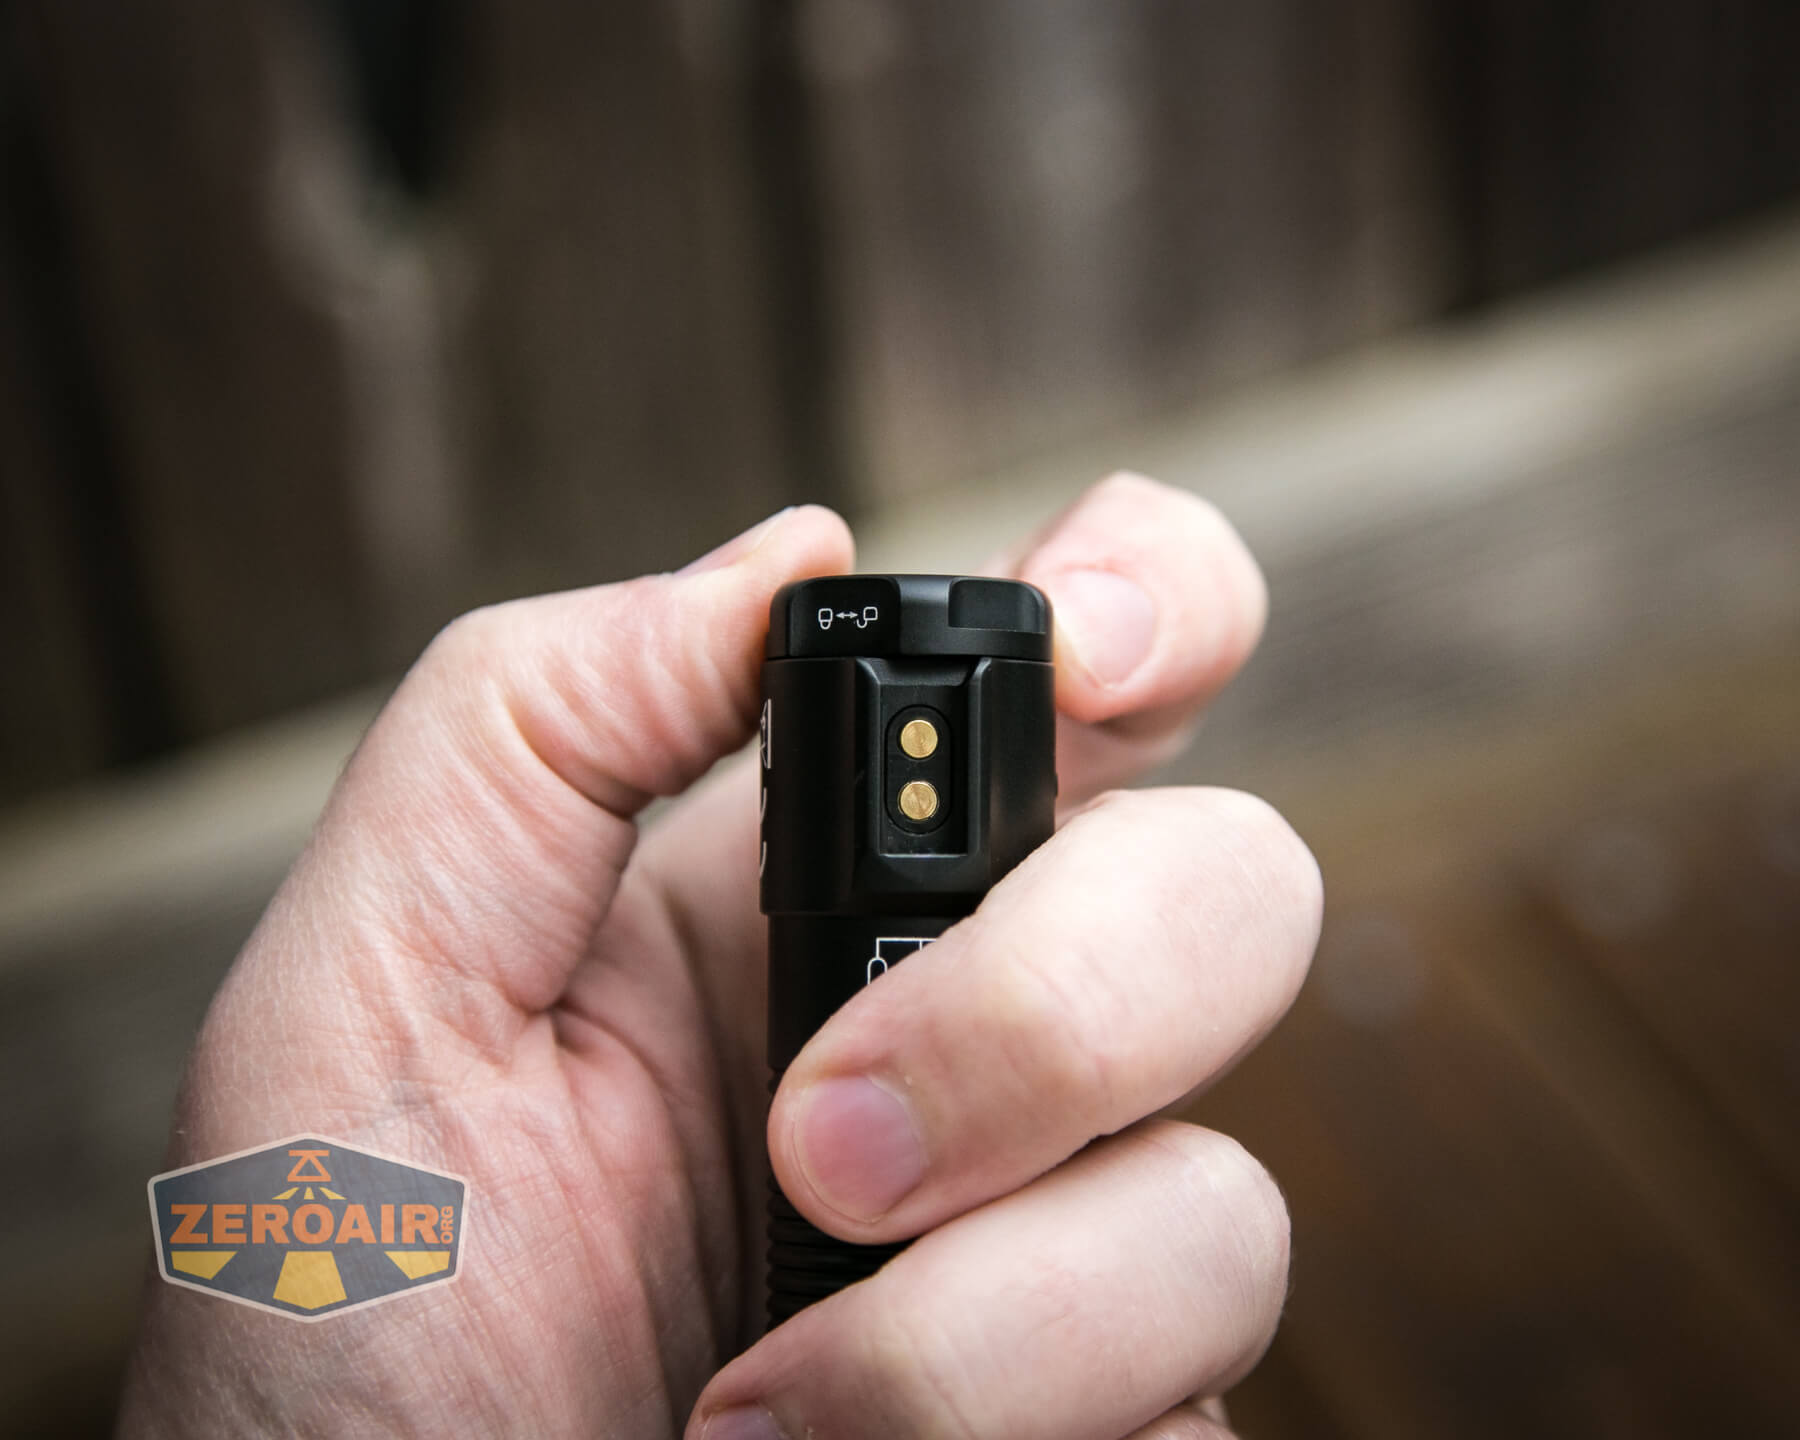
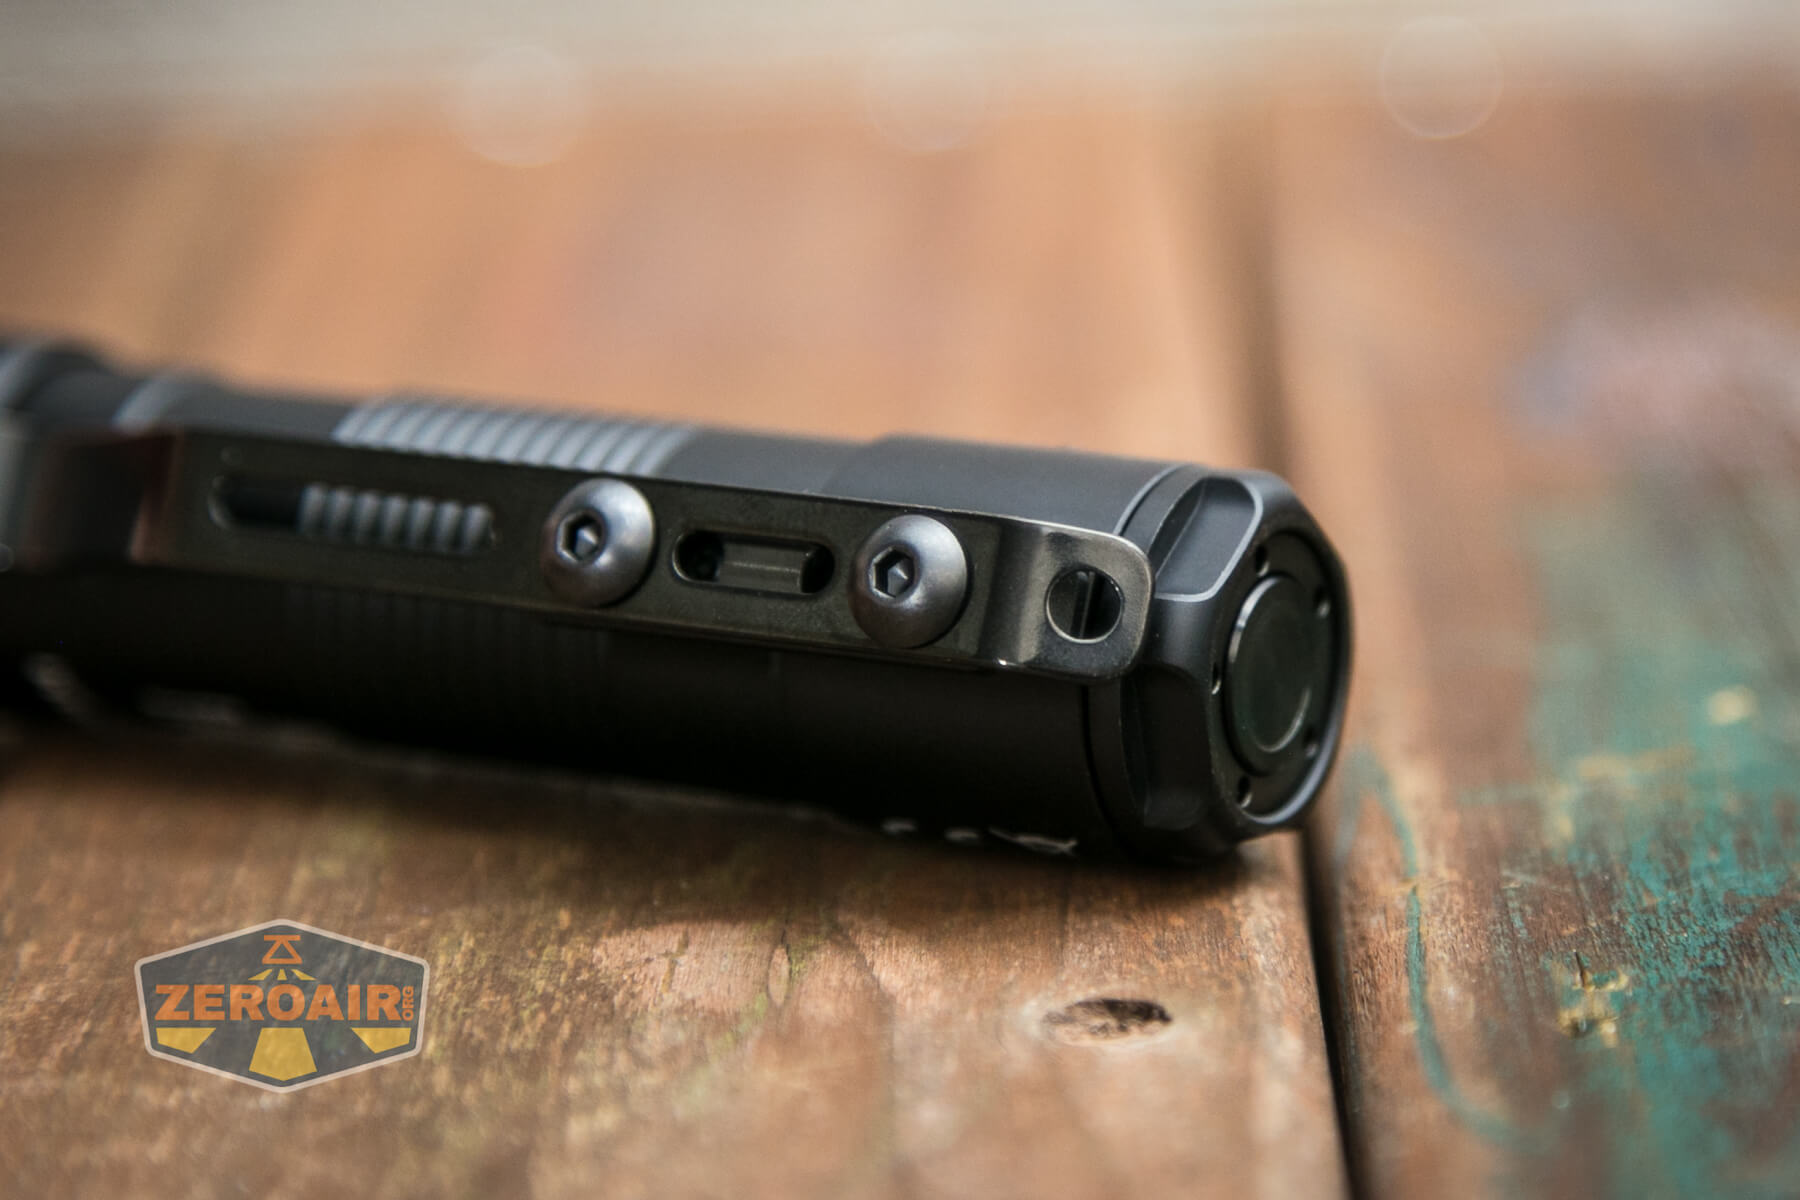
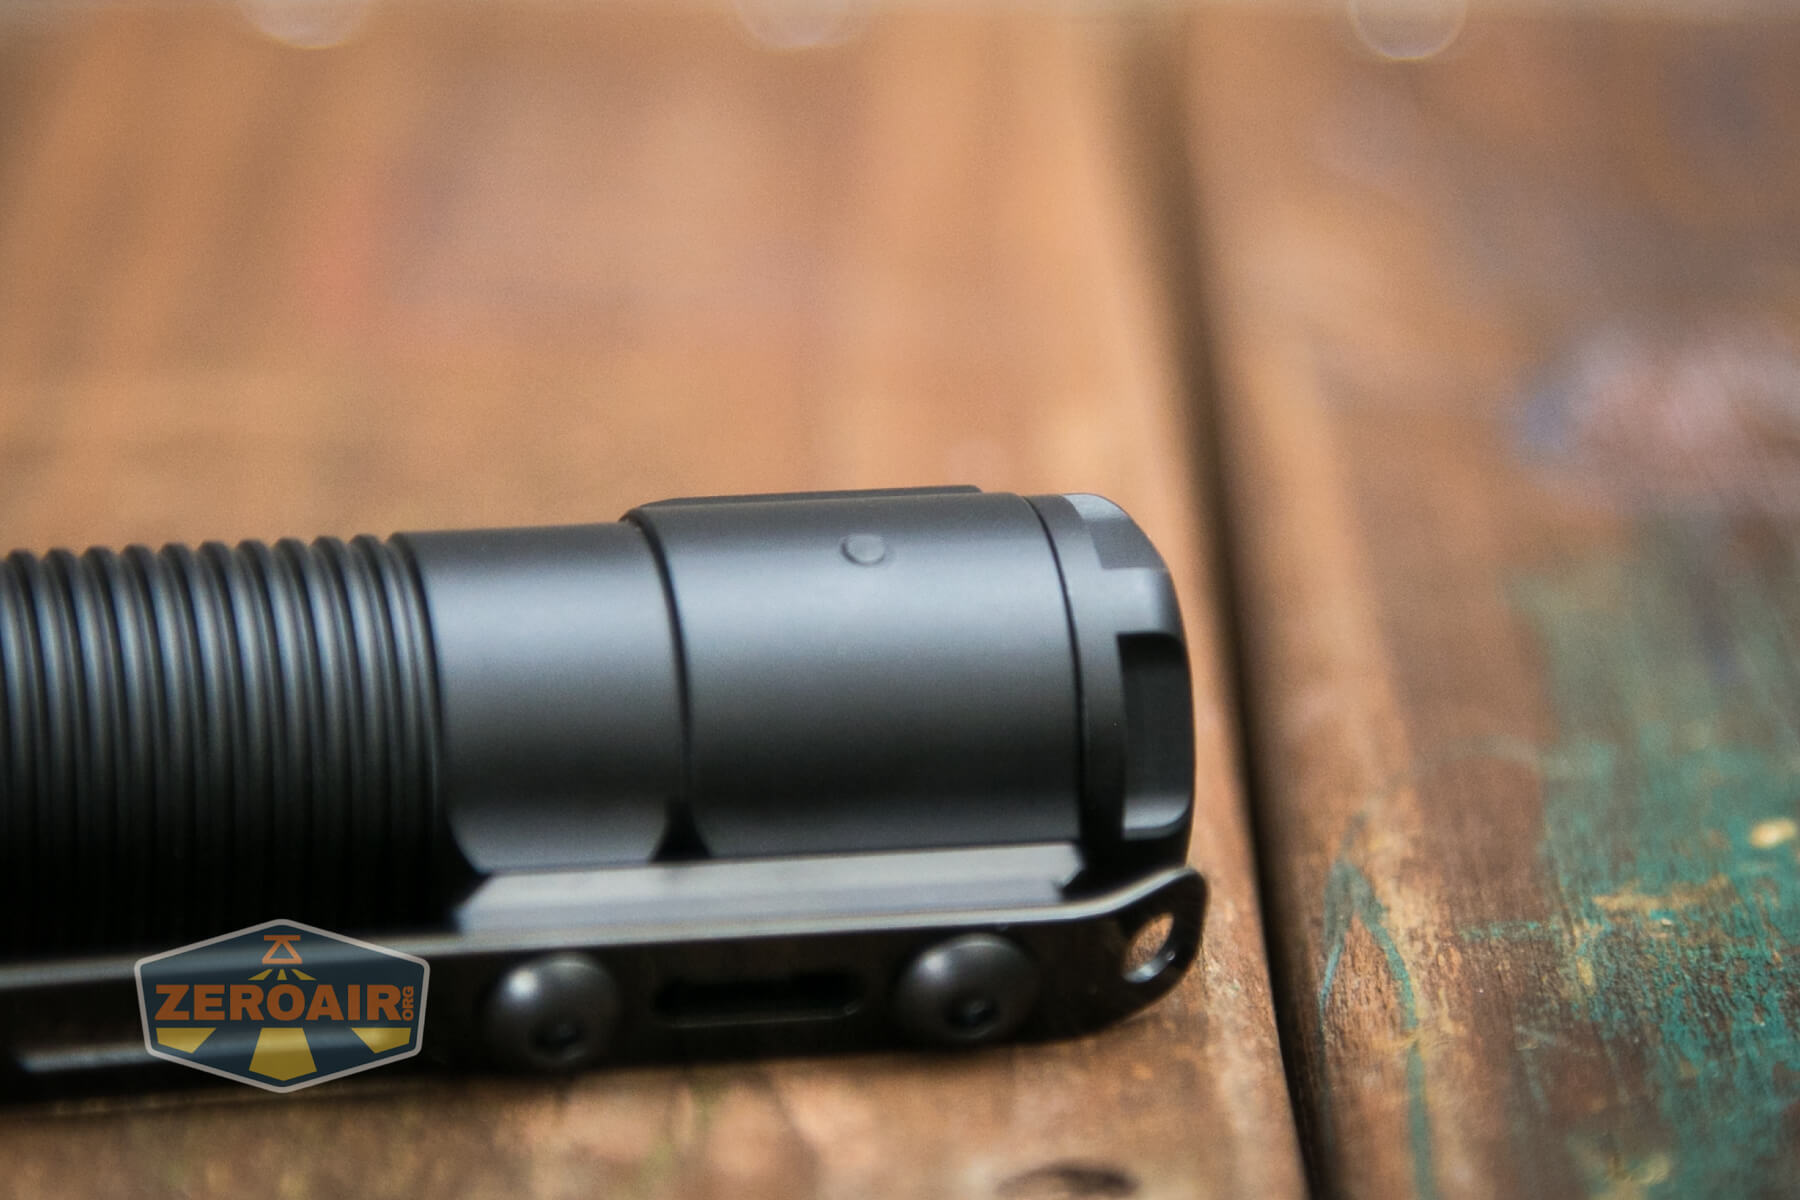
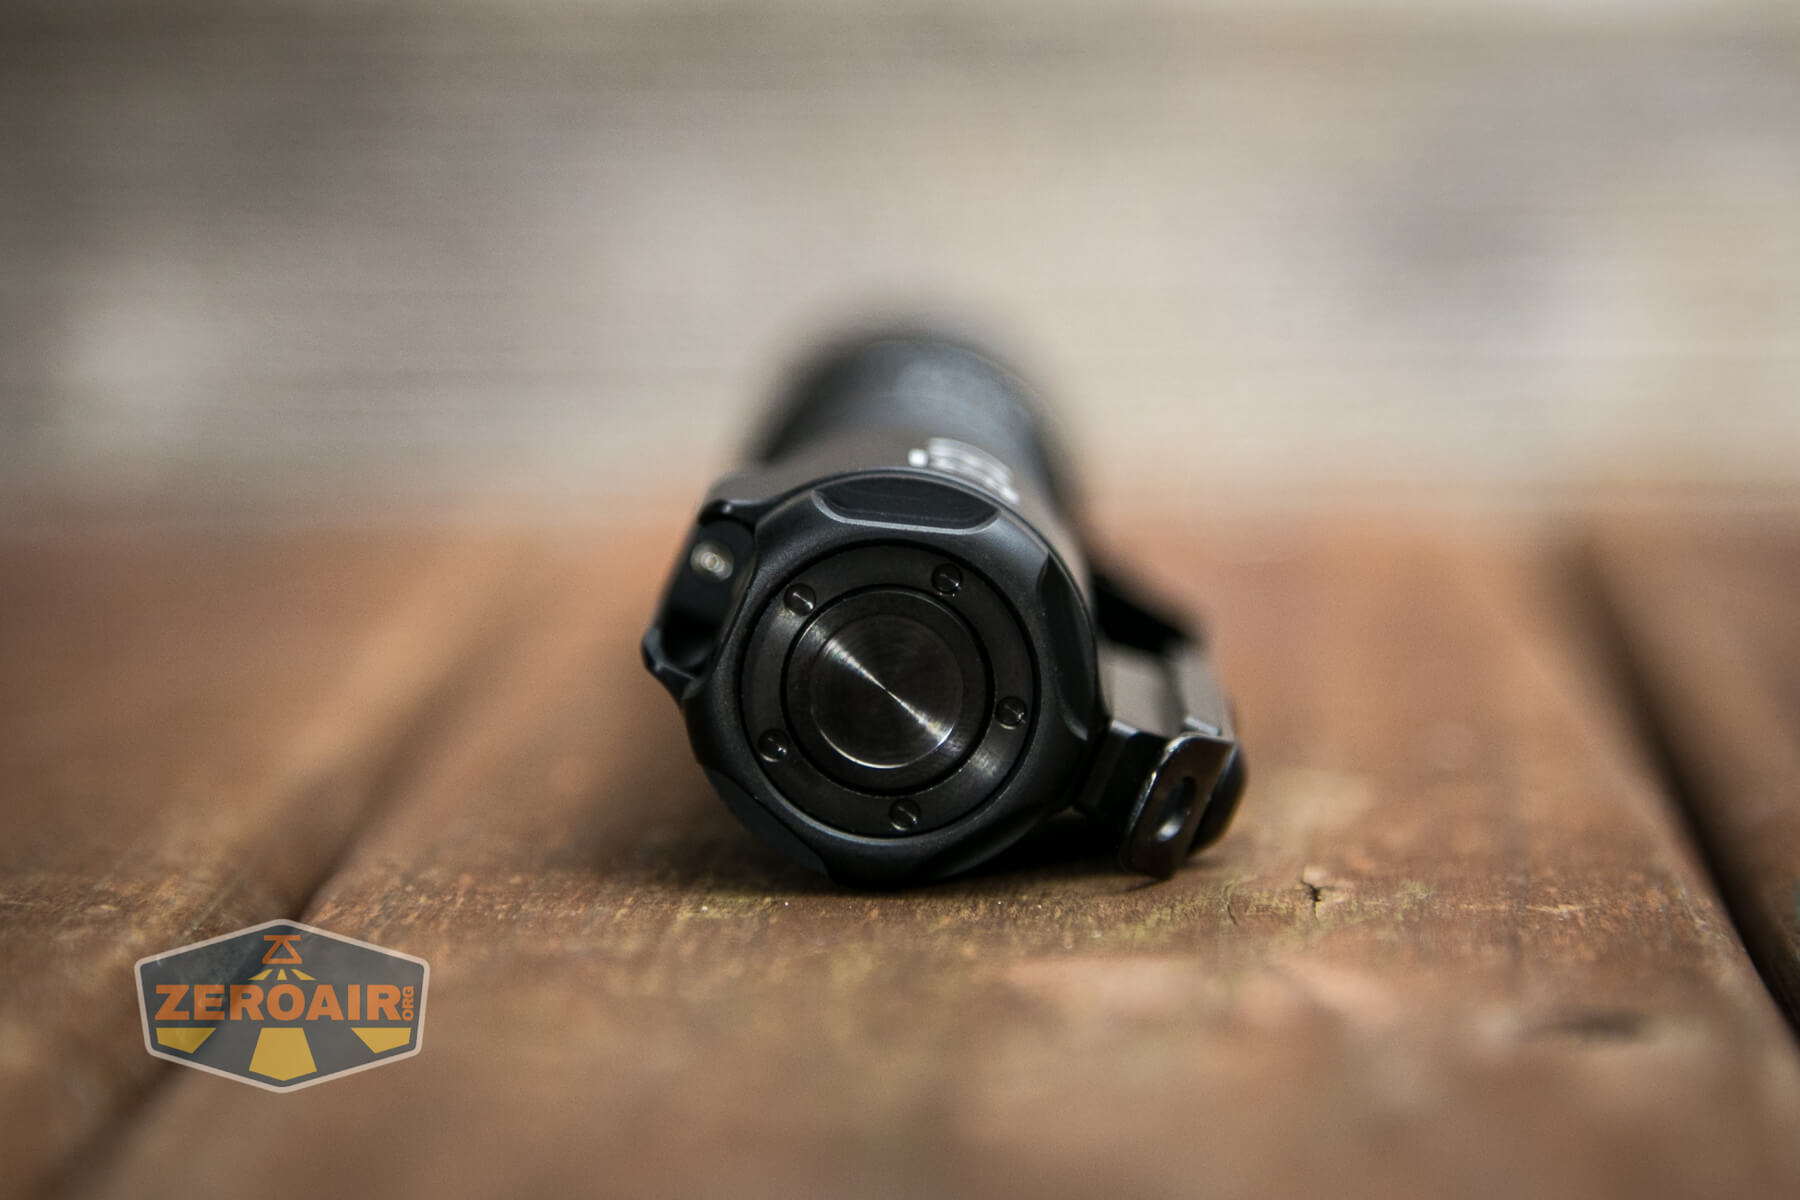
There’s an interesting feature that I don’t really know where to mention. So I’ll throw it right up here at the top of the review. On the tail of the Acebeam P15 EDC Tactical flashlight is a rotating dial that allows whatever is in this port to be locked in place. That’s less important for the charging cable, but it’s extremely important for something like the remote switch or the tactical switch. I doubt you’d want recoil to throw those out of the body… So this lock is important! And it works well.
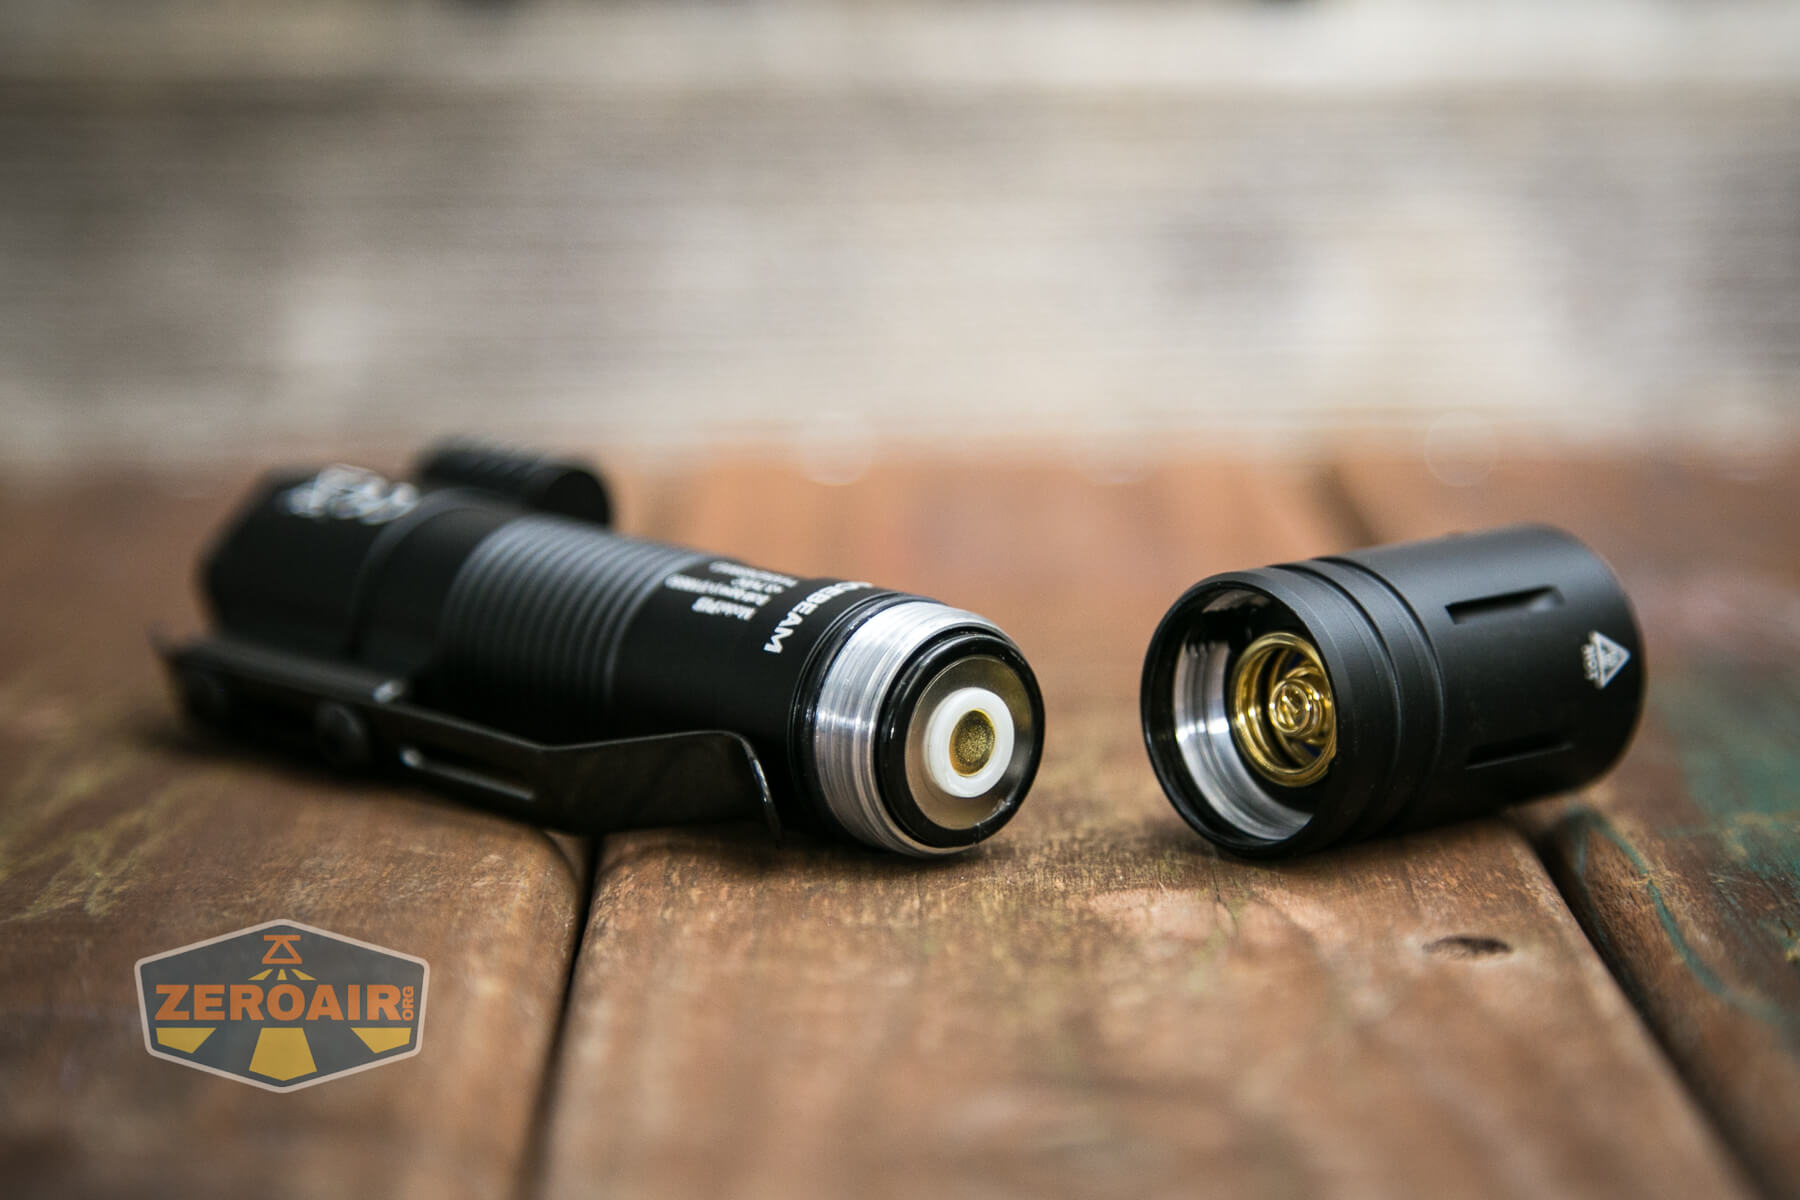
Only the head is removable. That’s how you’d swap the cell if you ever need to.
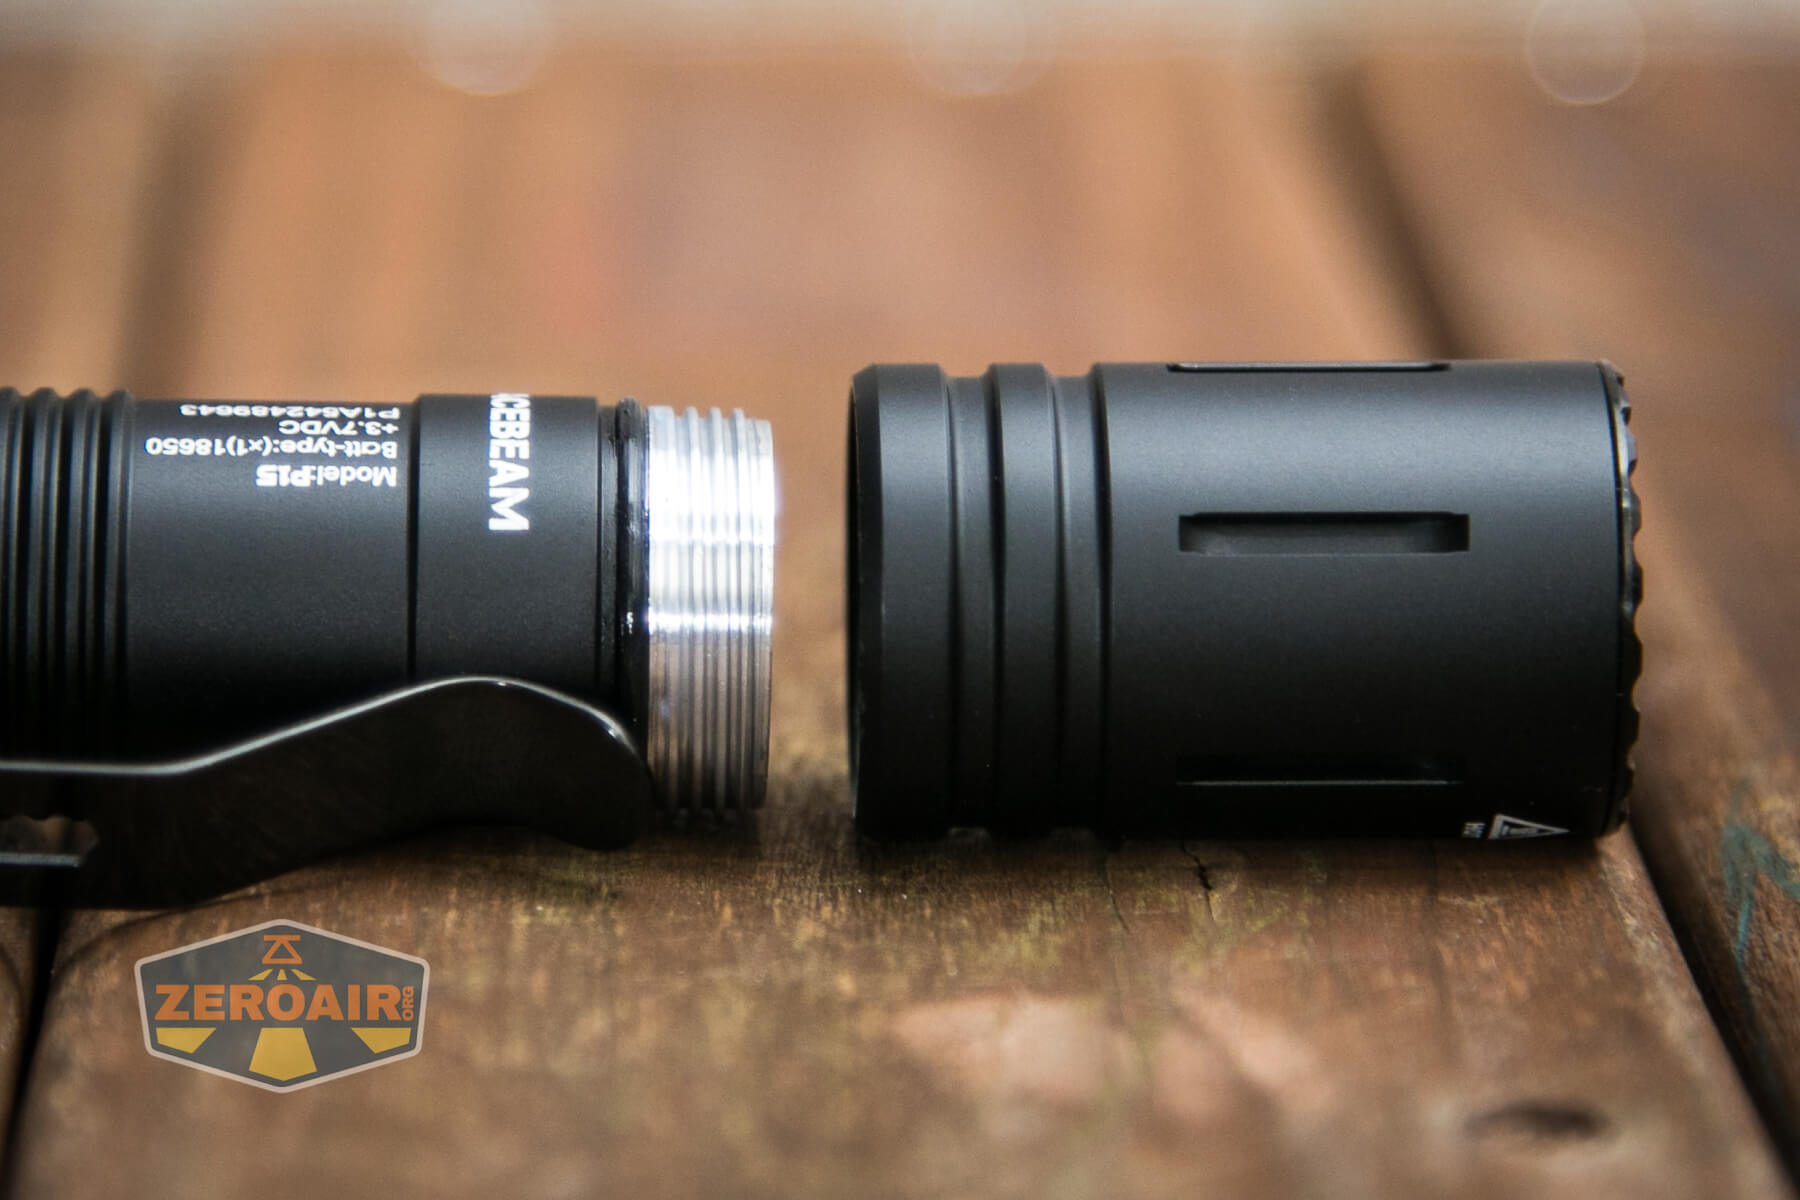
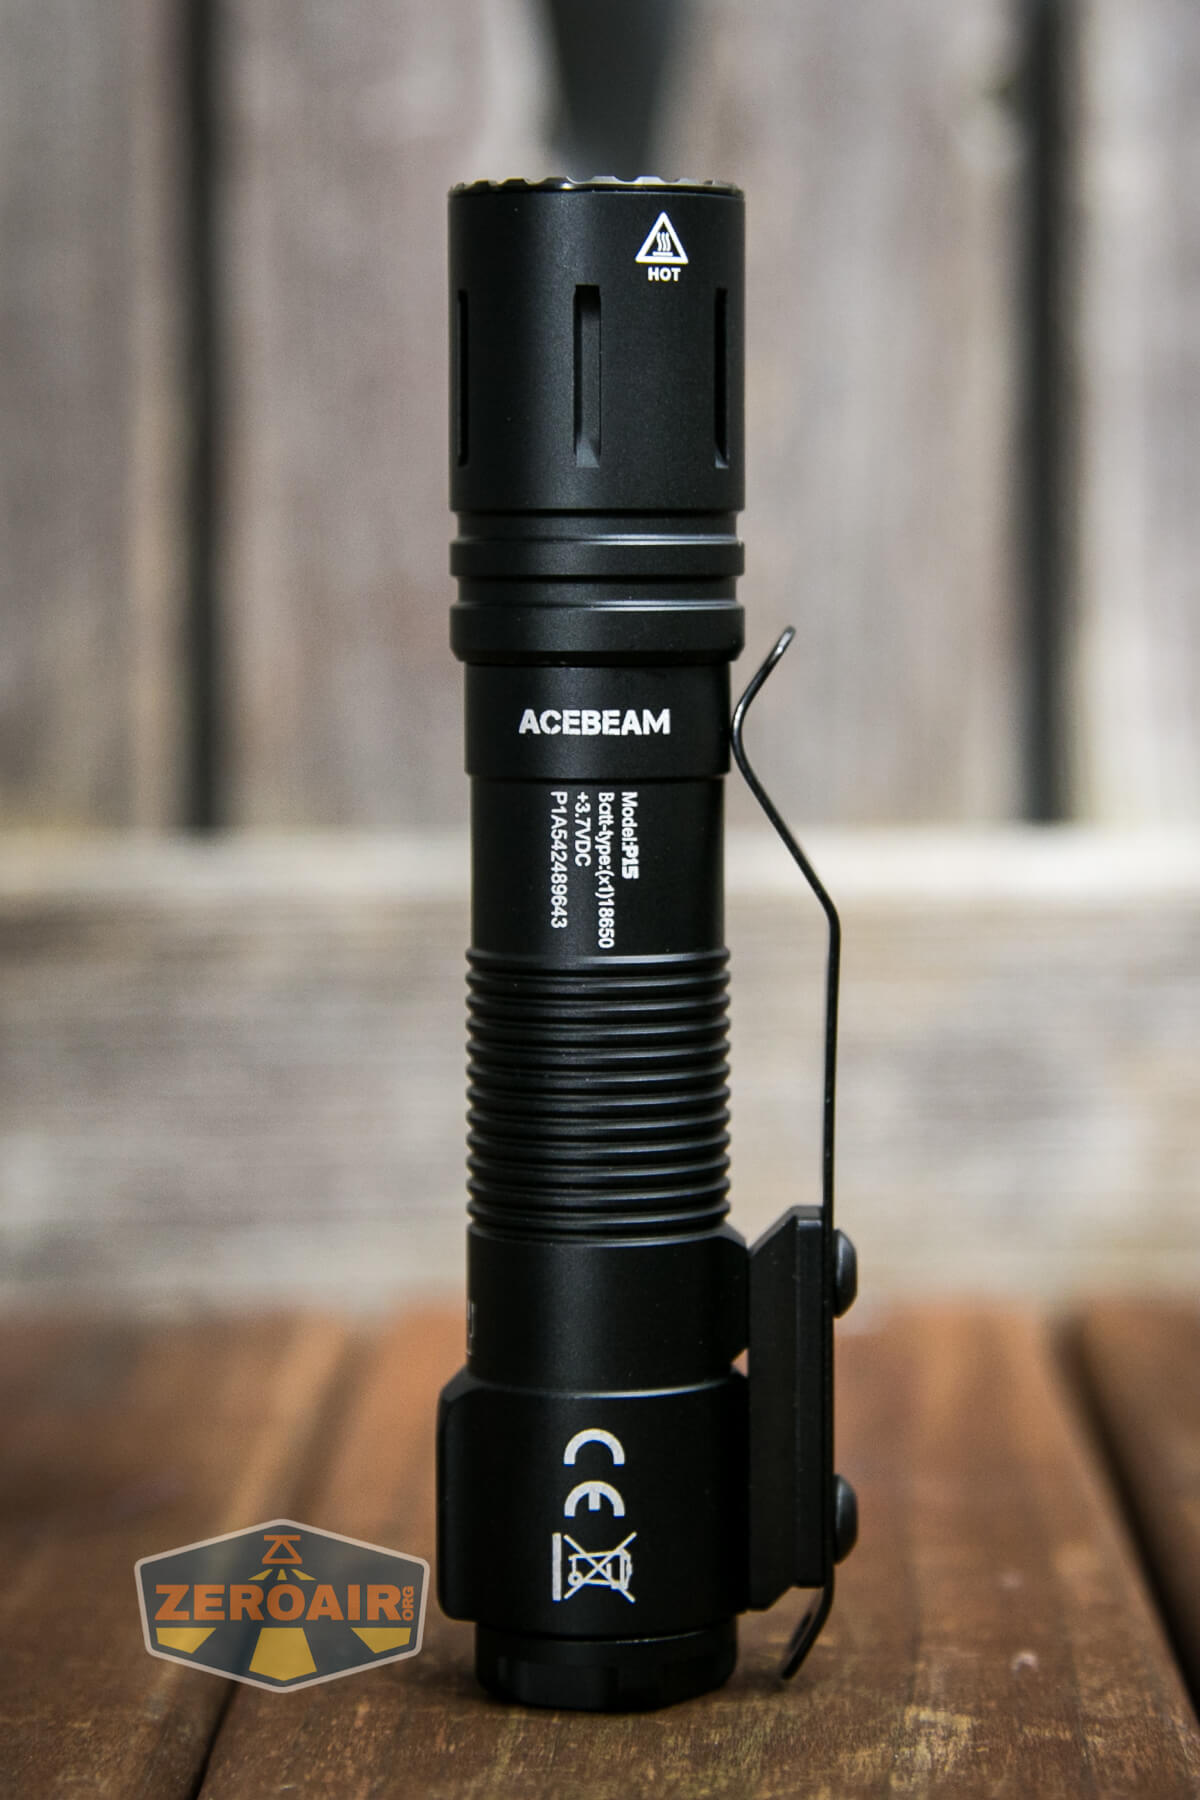
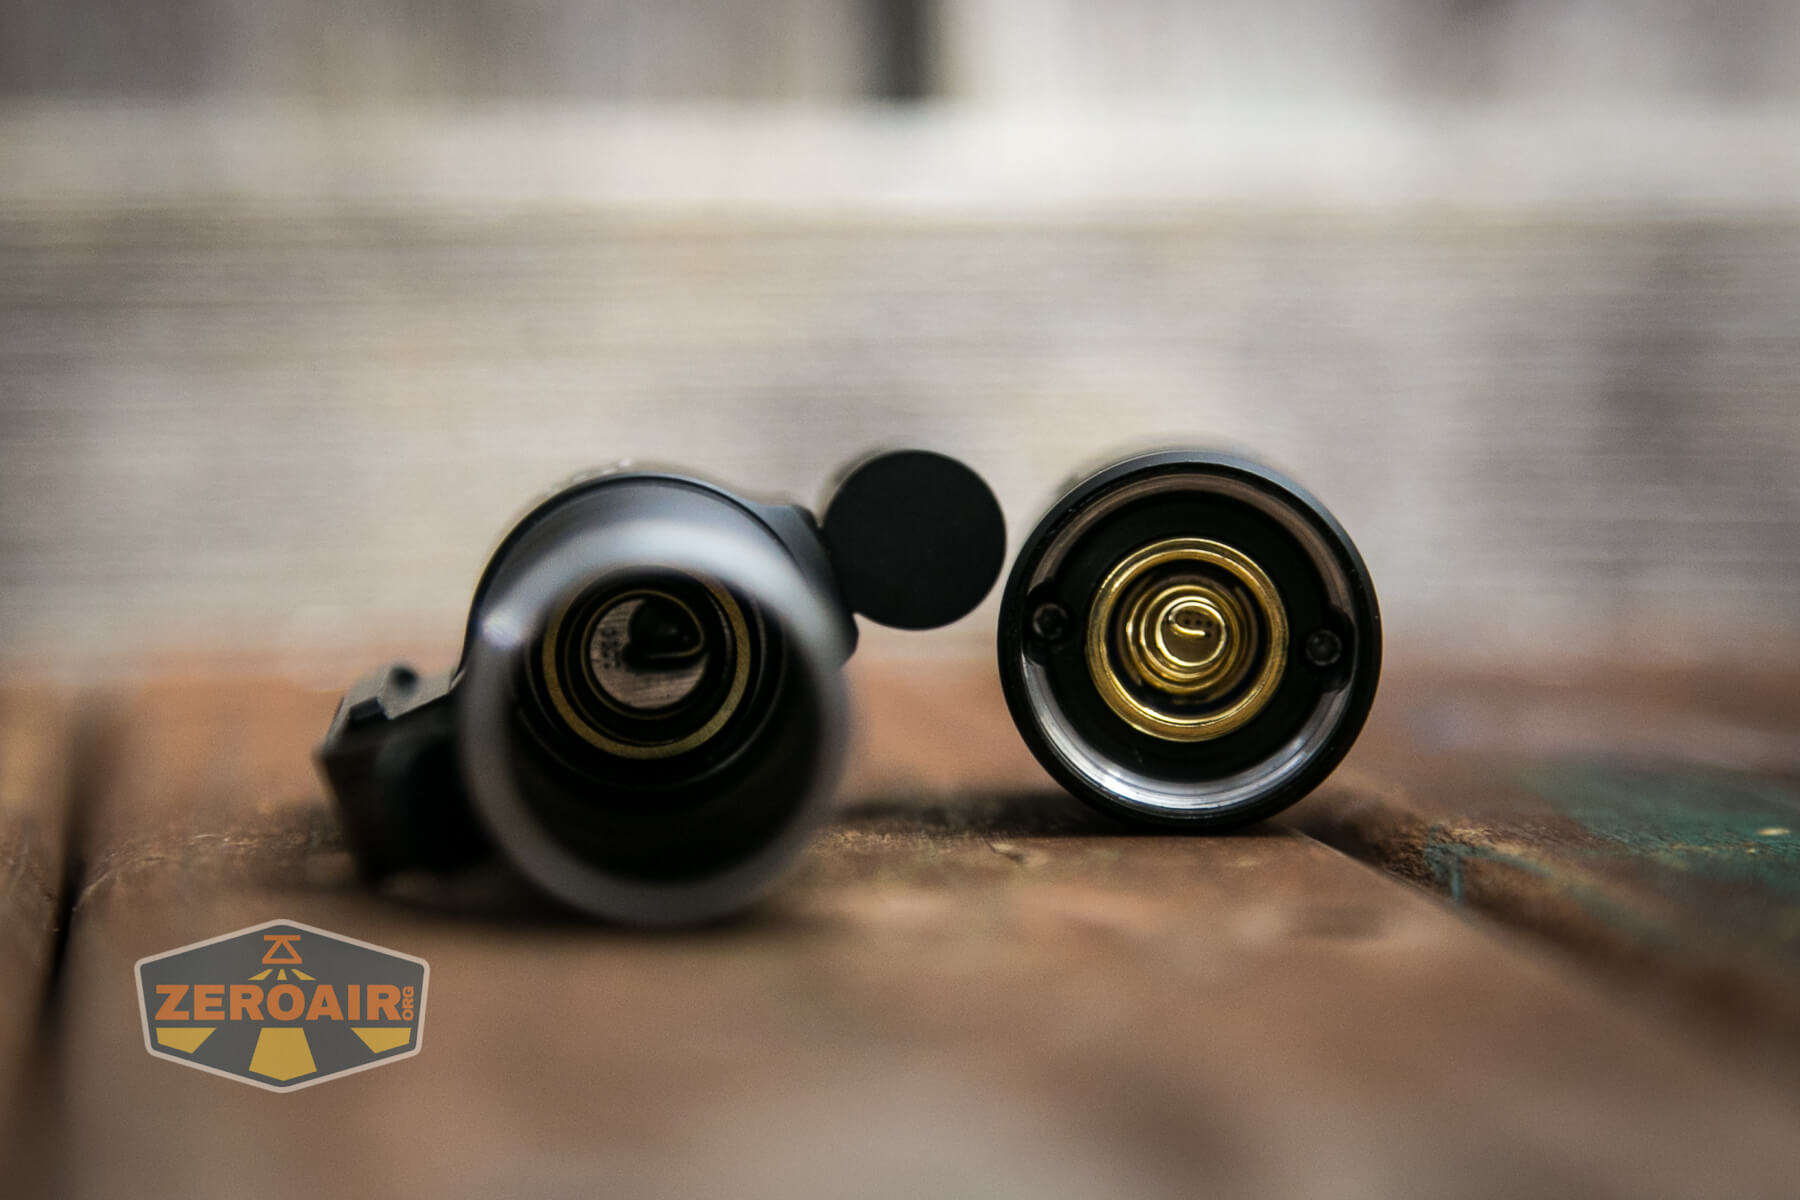
Acebeam has gone the way of Olight and Thrunite by having an 18650 with both positive and negative connections on the positive end. Below you can see why – the head has both connections. We’ll cover more about that later, but for now, just have a look at the contacts.
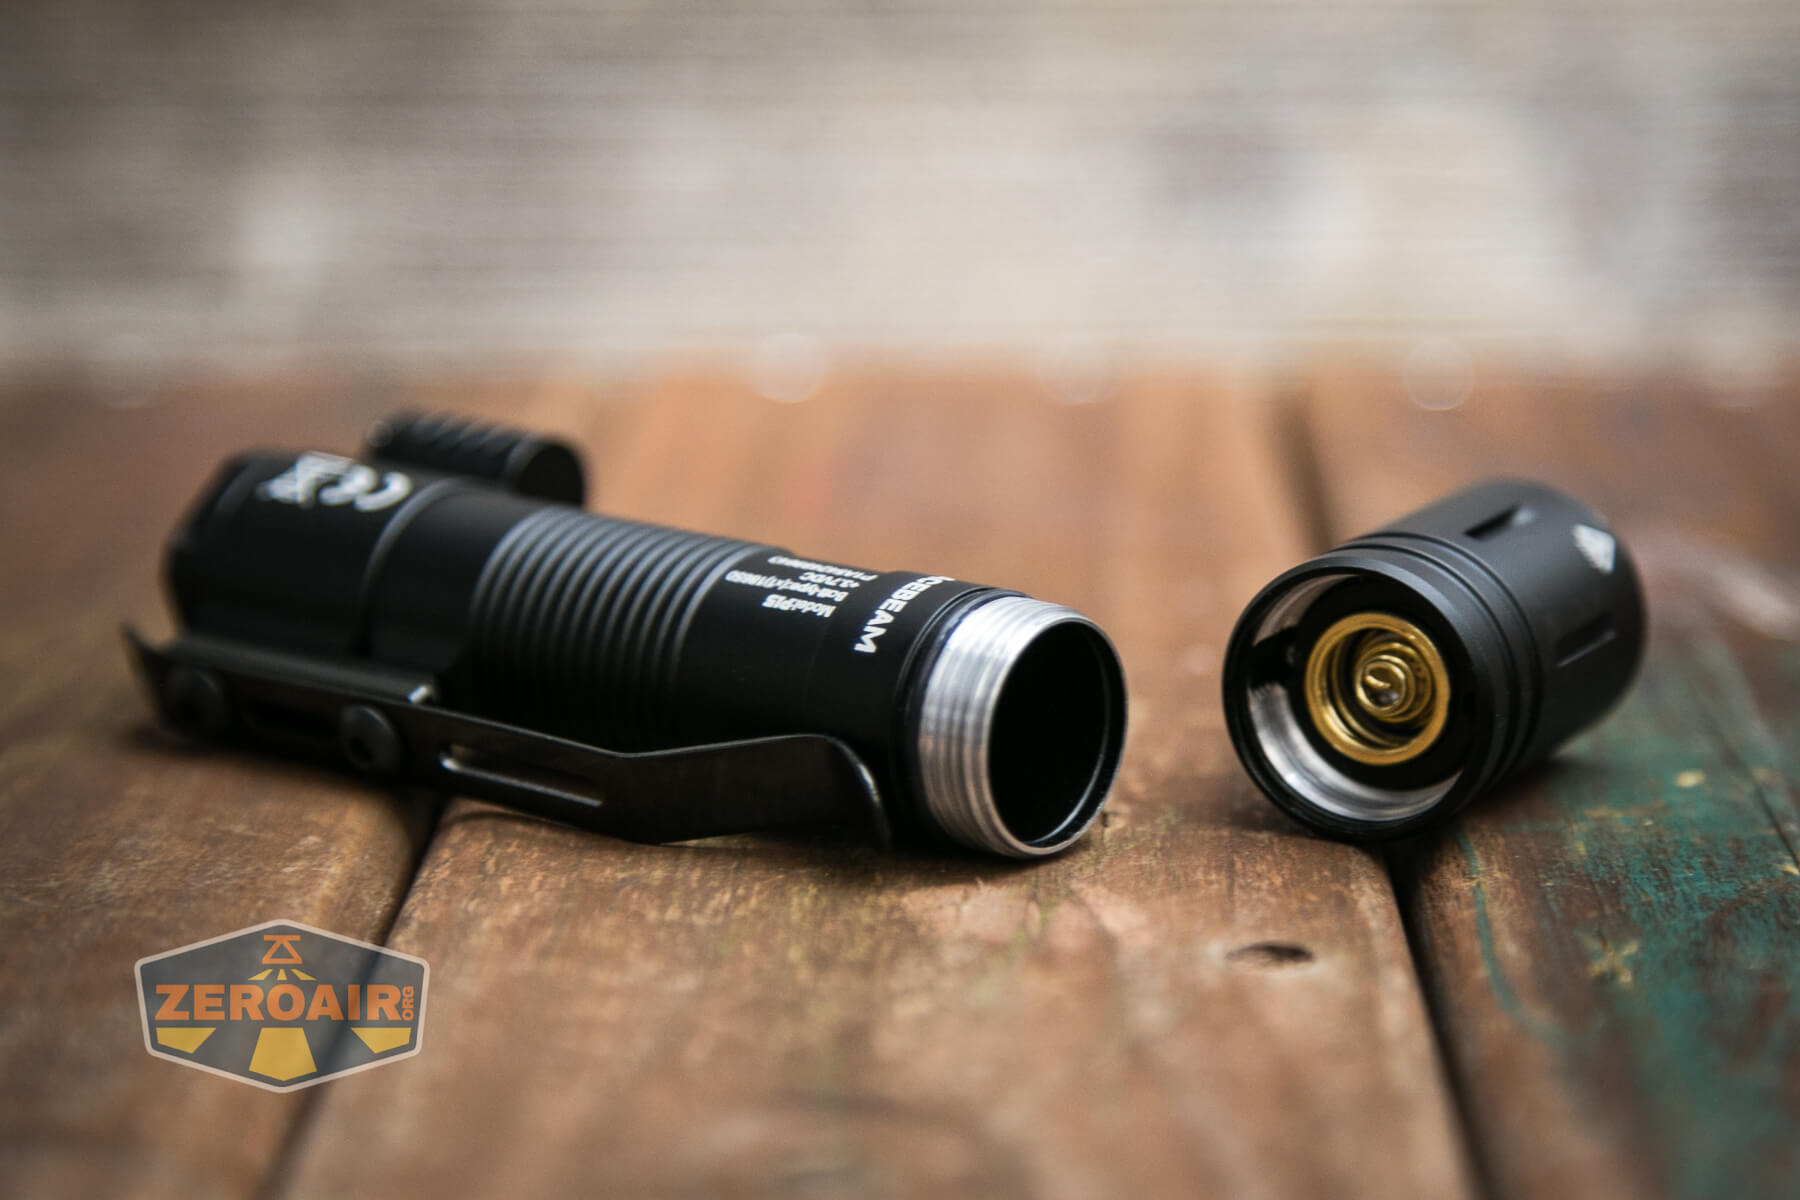
The tail has a spring as well. That tail spring is quite stiff, which is exactly what you’d want on a tactical light.
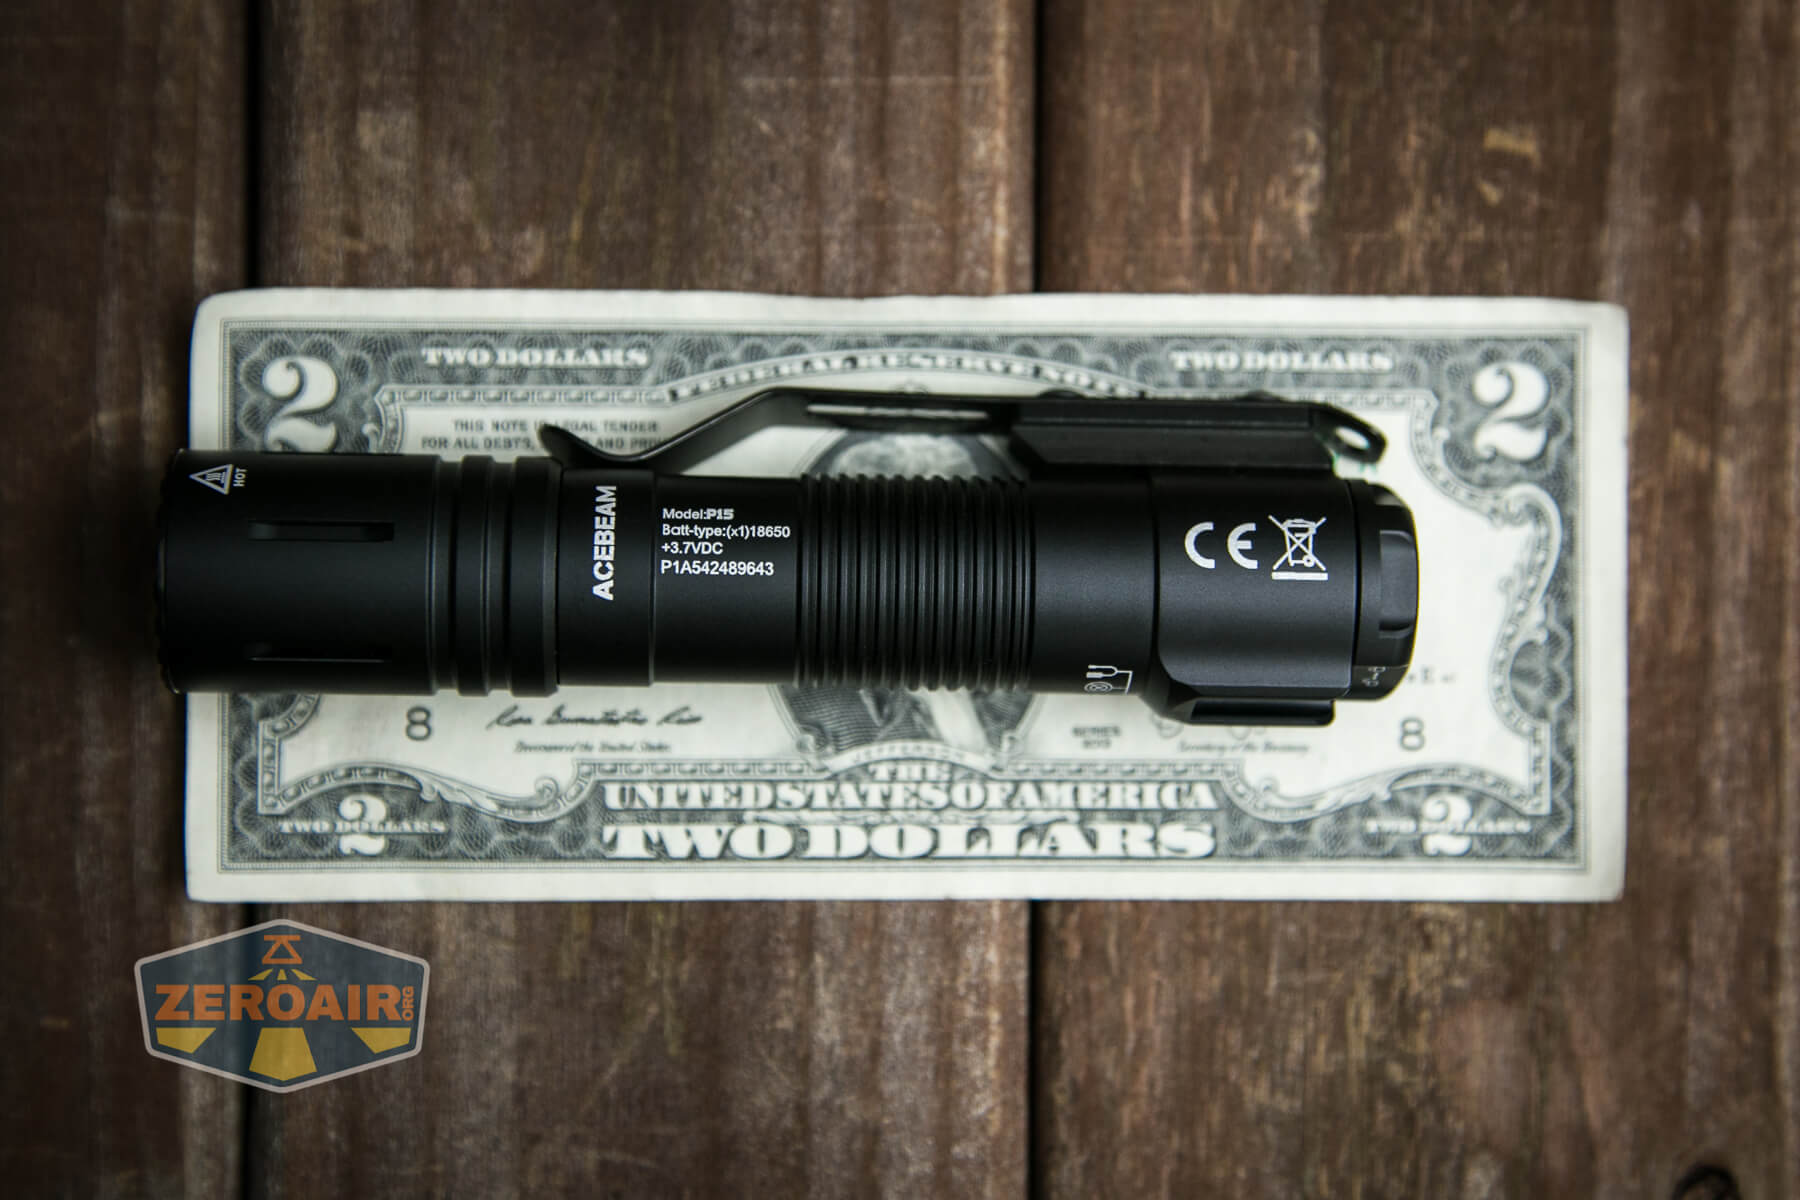
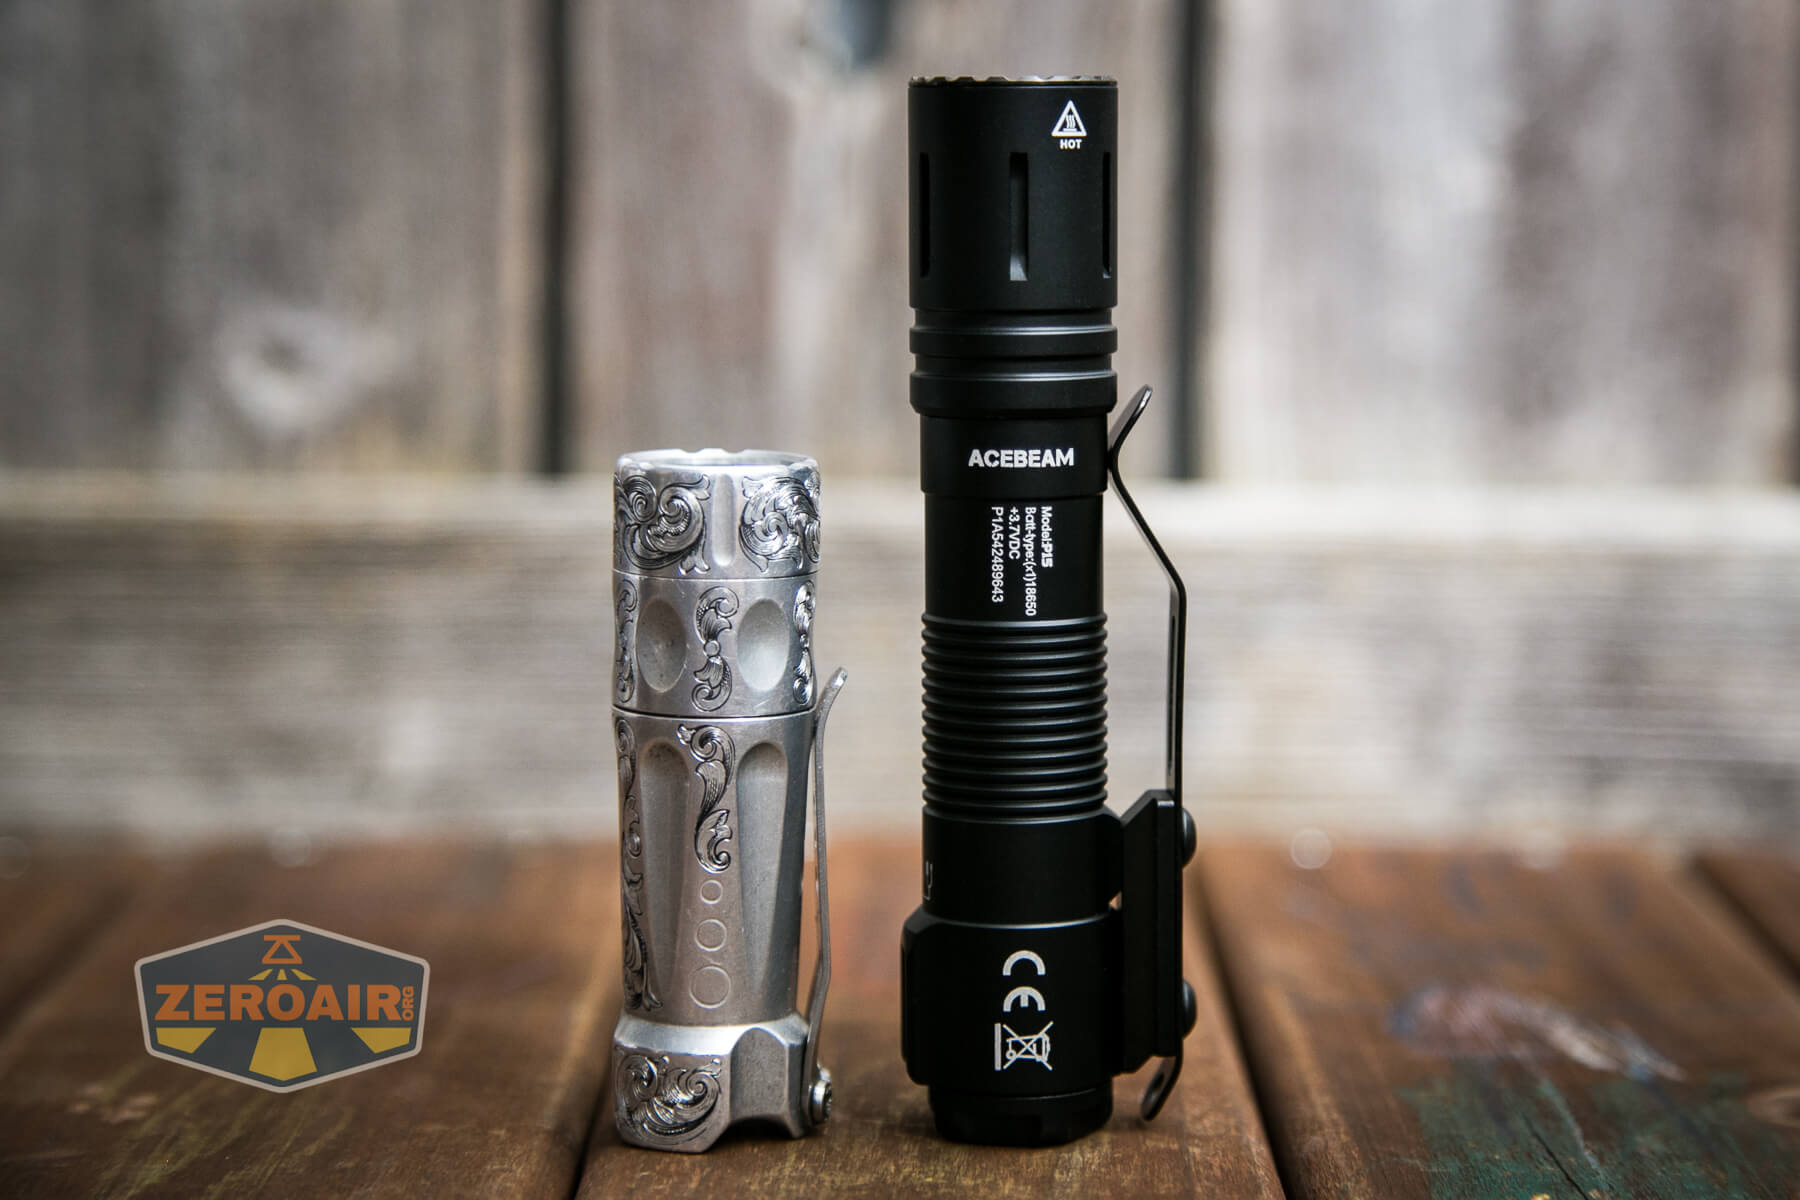
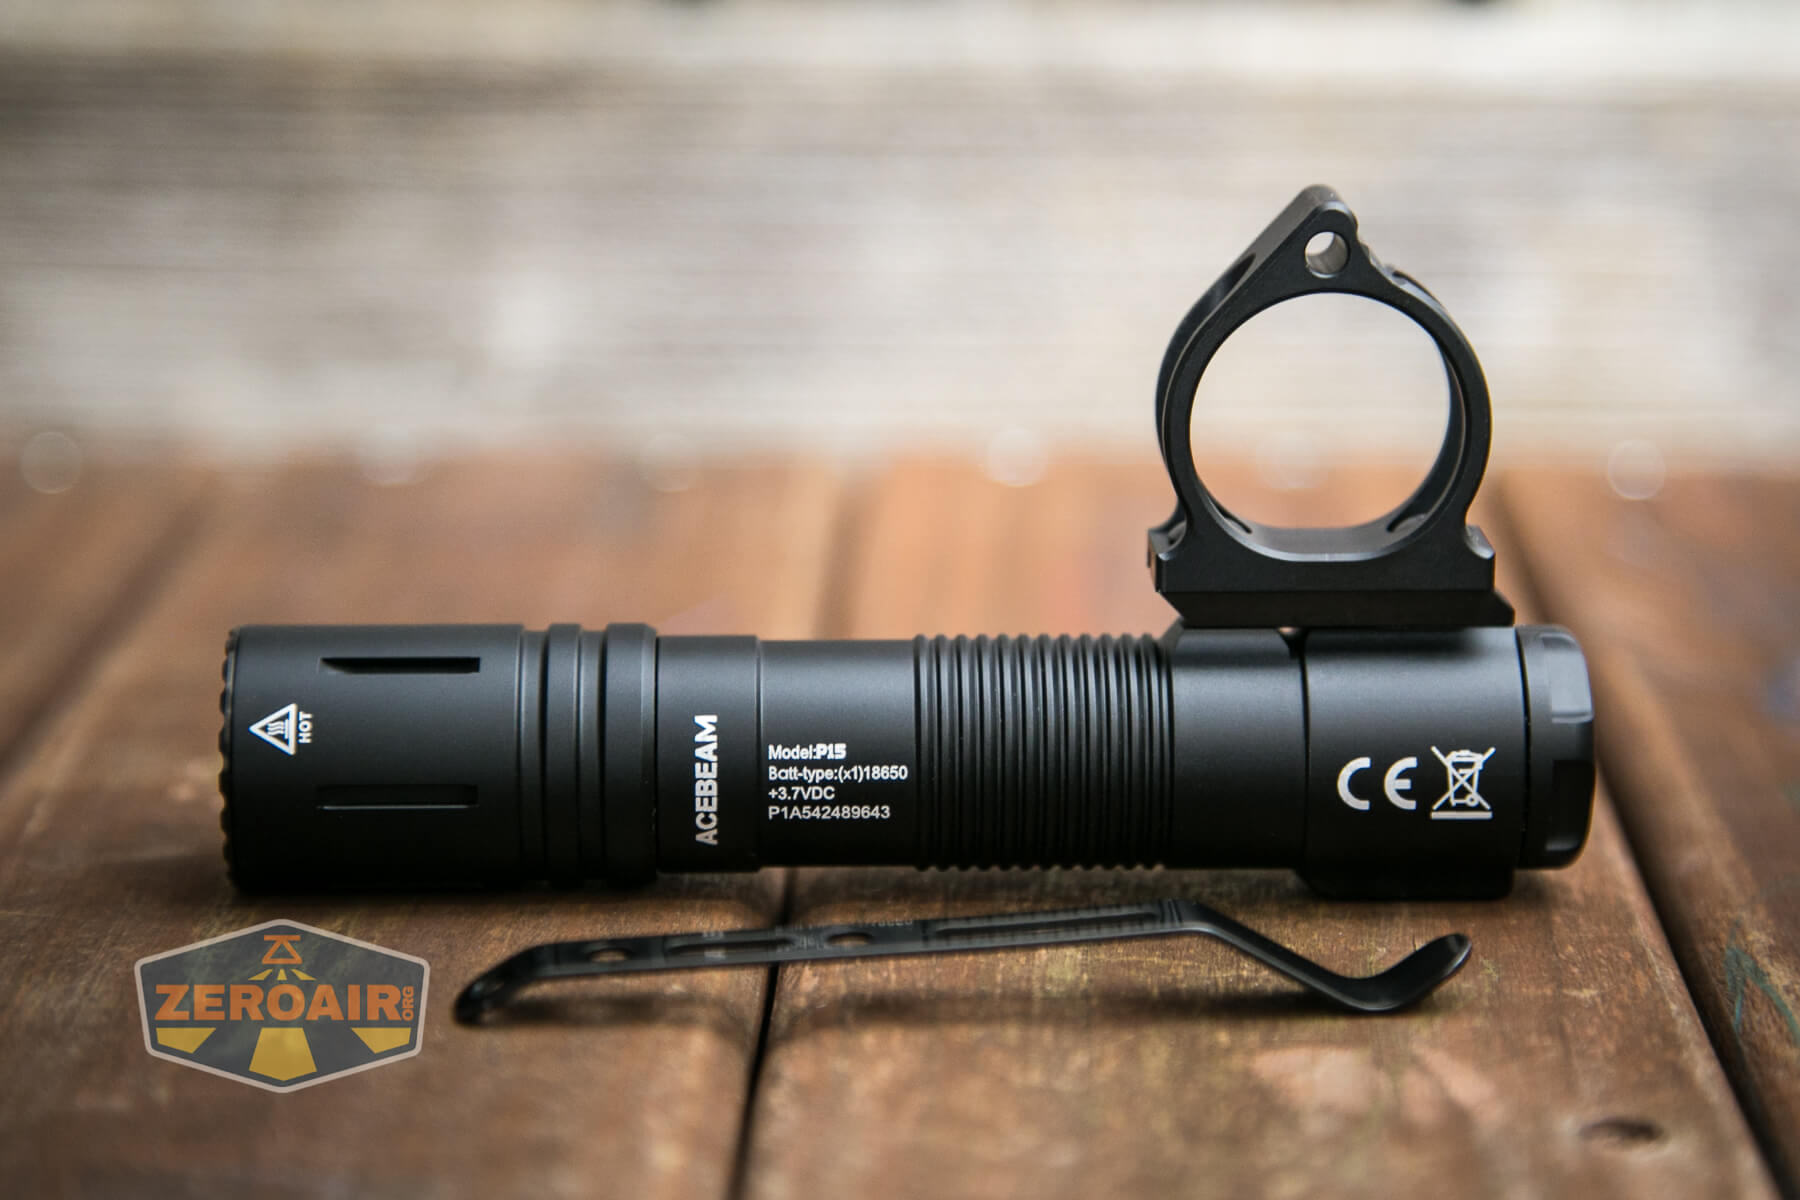
Size and Comps
Size: 130.7mm (Length) x 25.4mm (Head Diameter) x 23mm (Tube Diameter)
Weight: 98.8g(3.48oz.) w/o battery; 151.5g(5.34oz.) w/battery


If the flashlight will headstand, I’ll show it here (usually the third photo). If the flashlight will tailstand, I’ll show that here, too (usually the fourth photo).
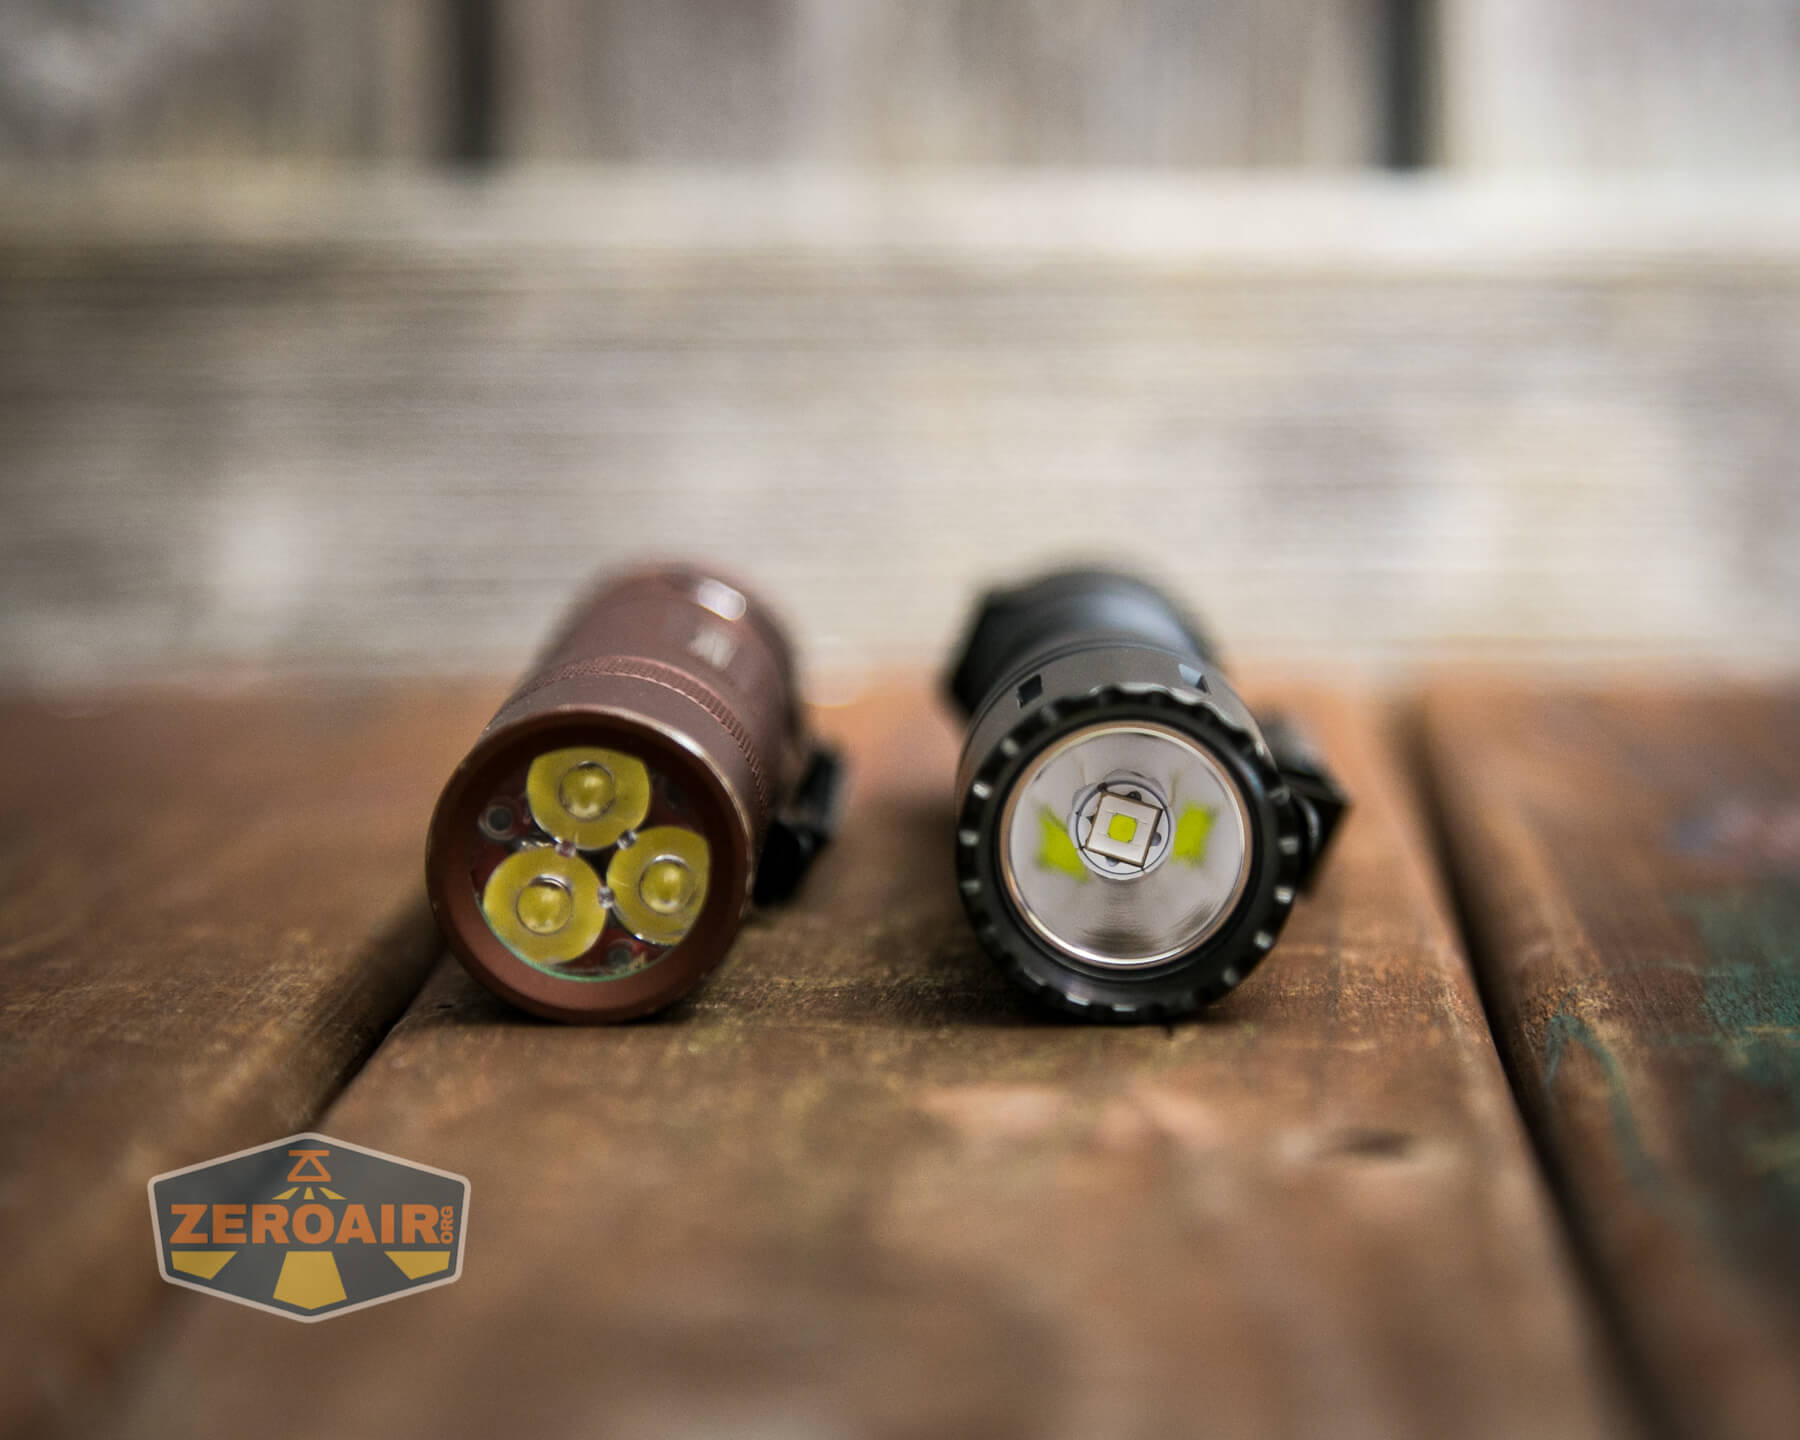
Here’s the test light with the venerable Convoy S2+. Mine is a custom “baked” edition Nichia 219b triple. A very nice 18650 light!

And here’s the light beside my custom-engraved TorchLAB BOSS 35, an 18350 light. I reviewed the aluminum version of that light in both 35 and 70 formats.
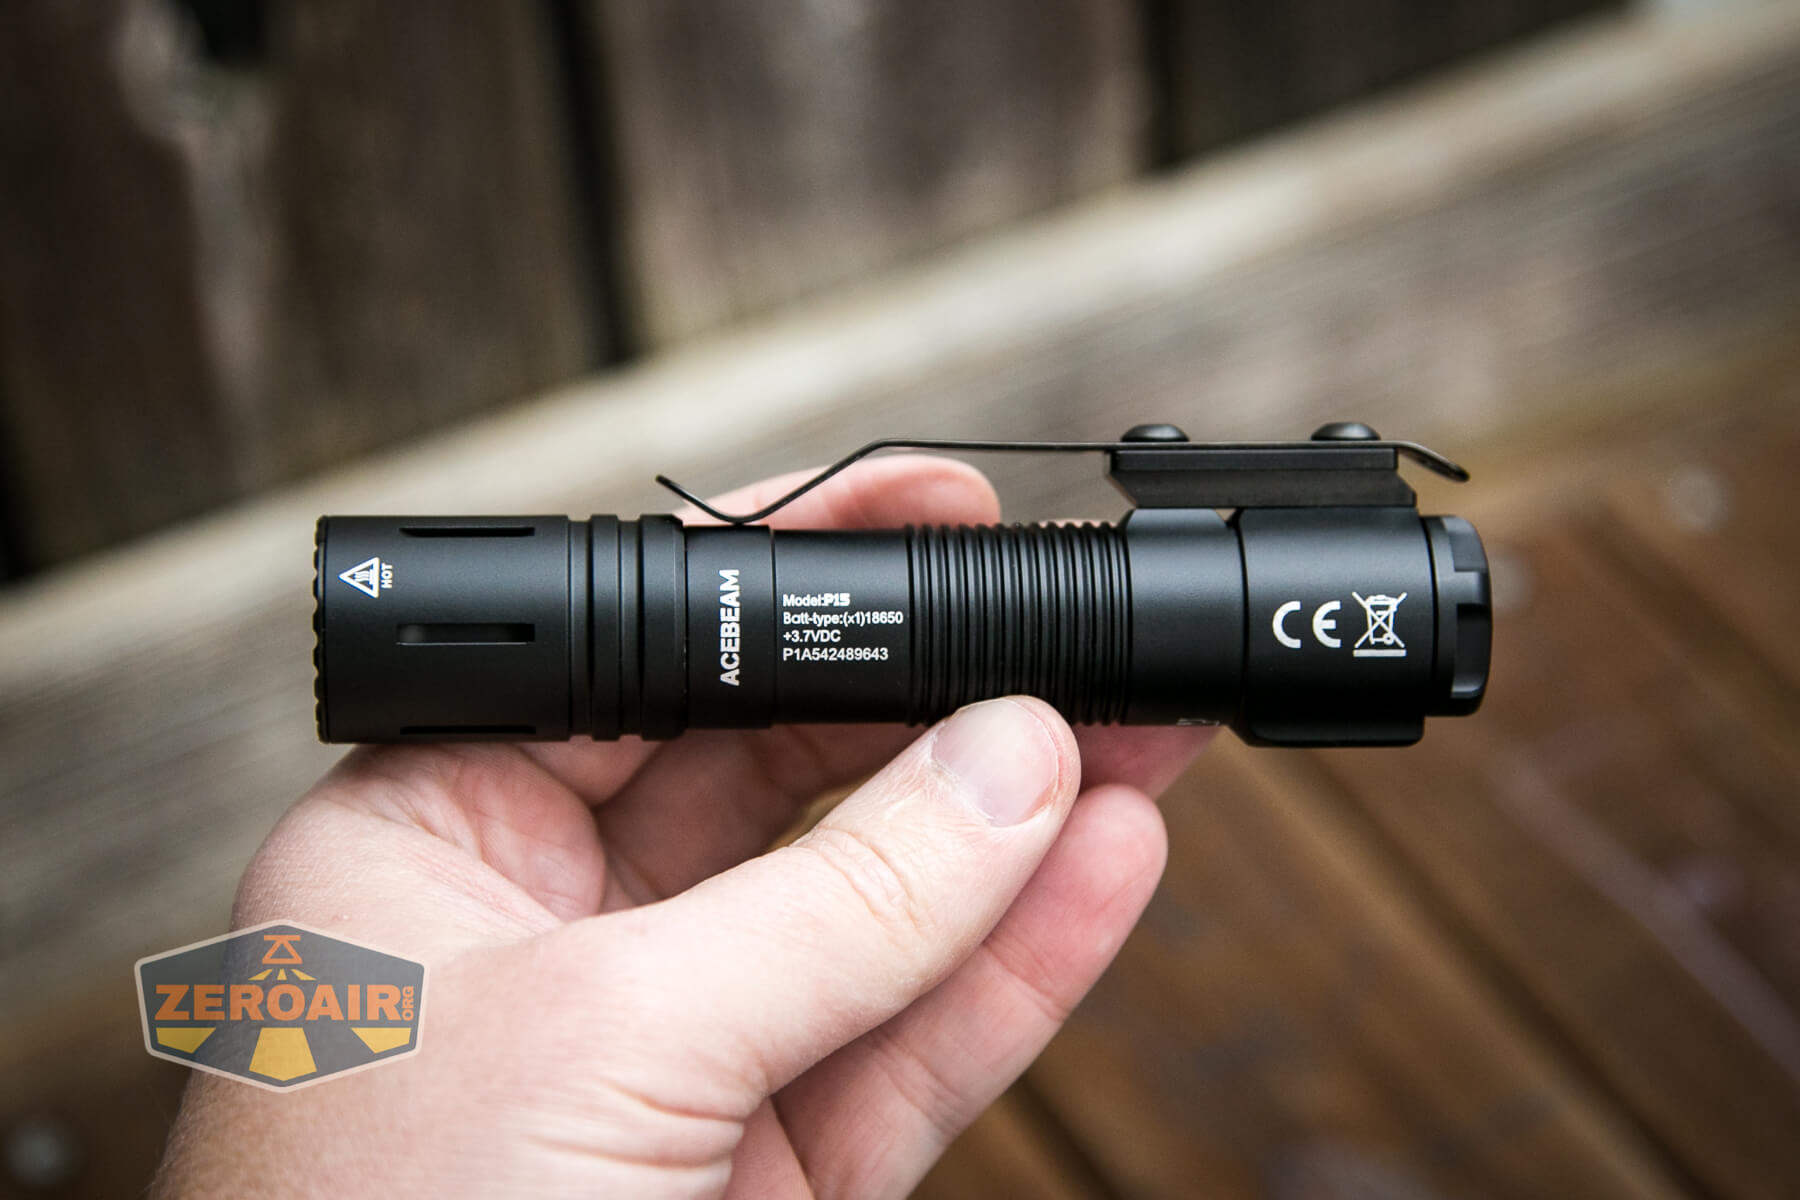
Retention and Carry
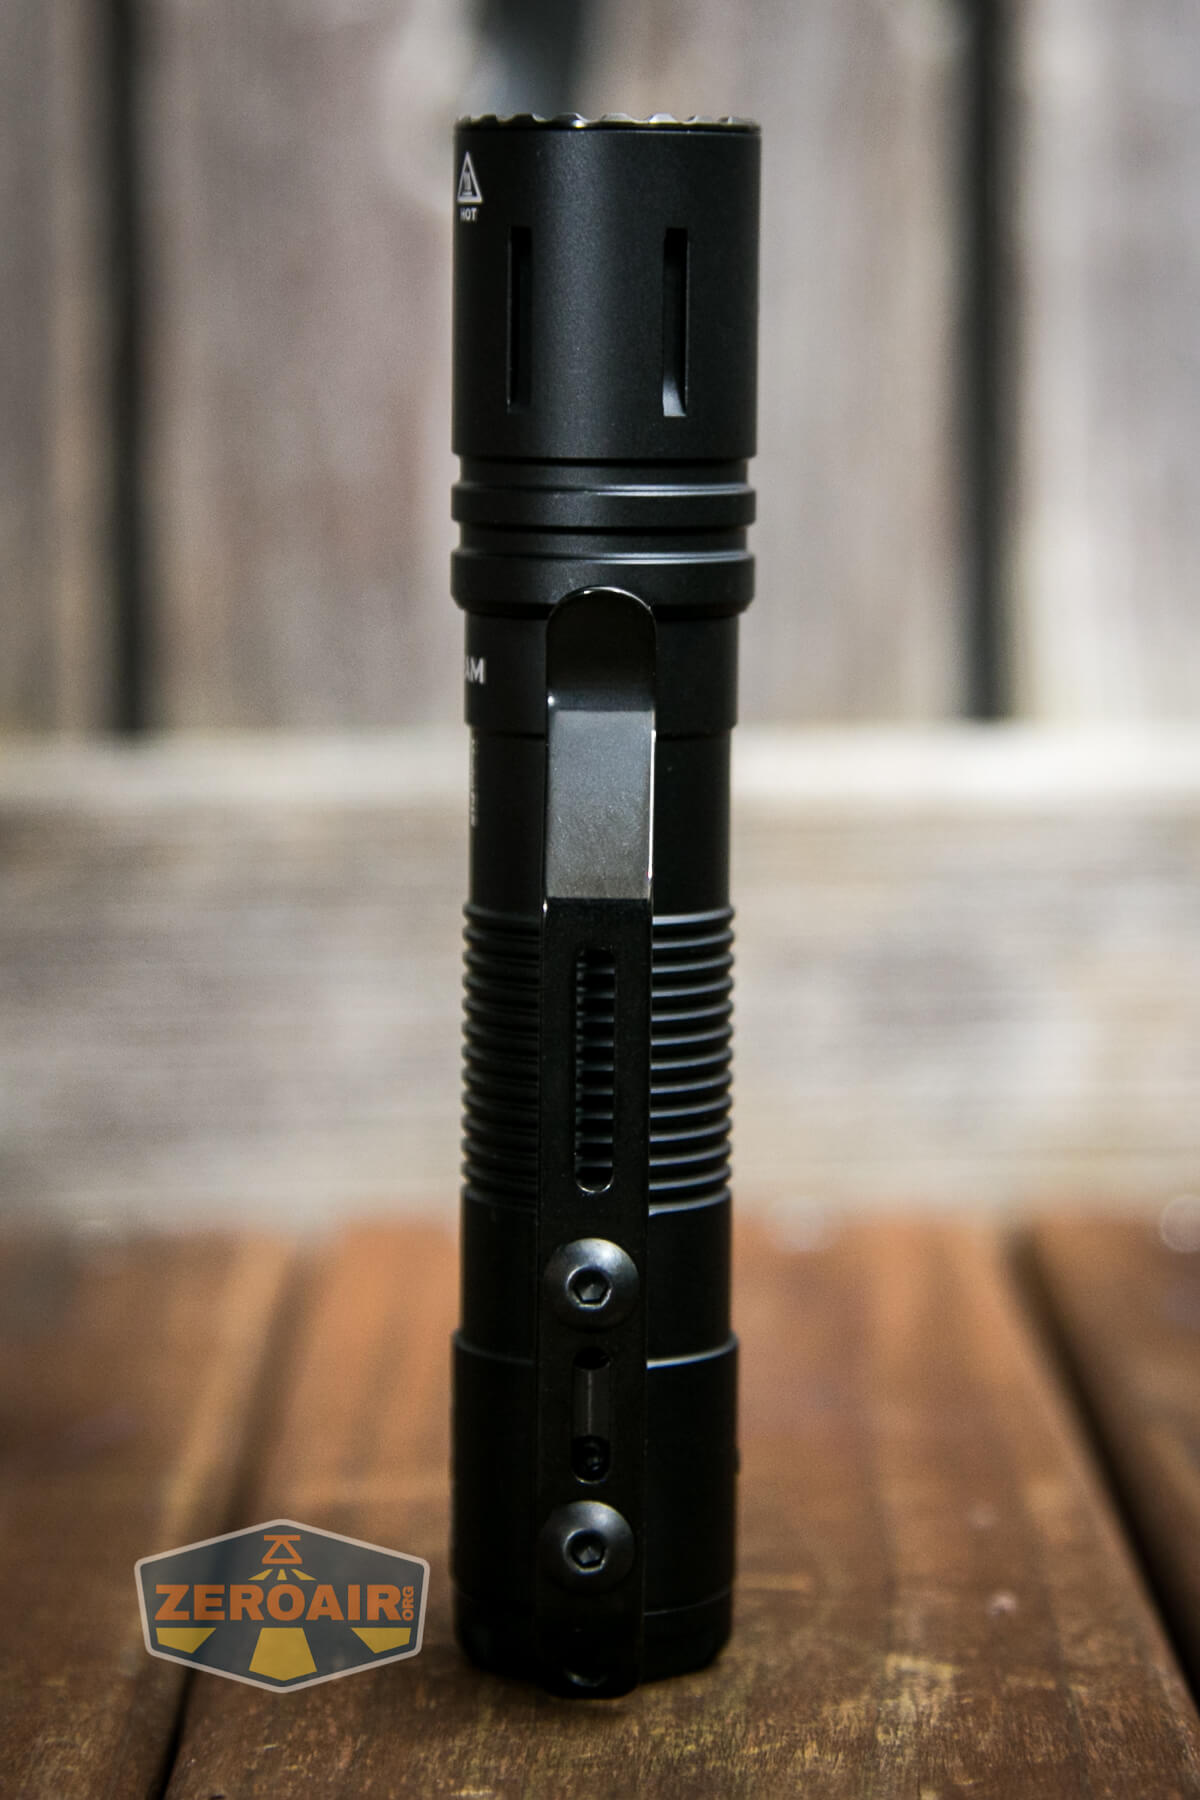
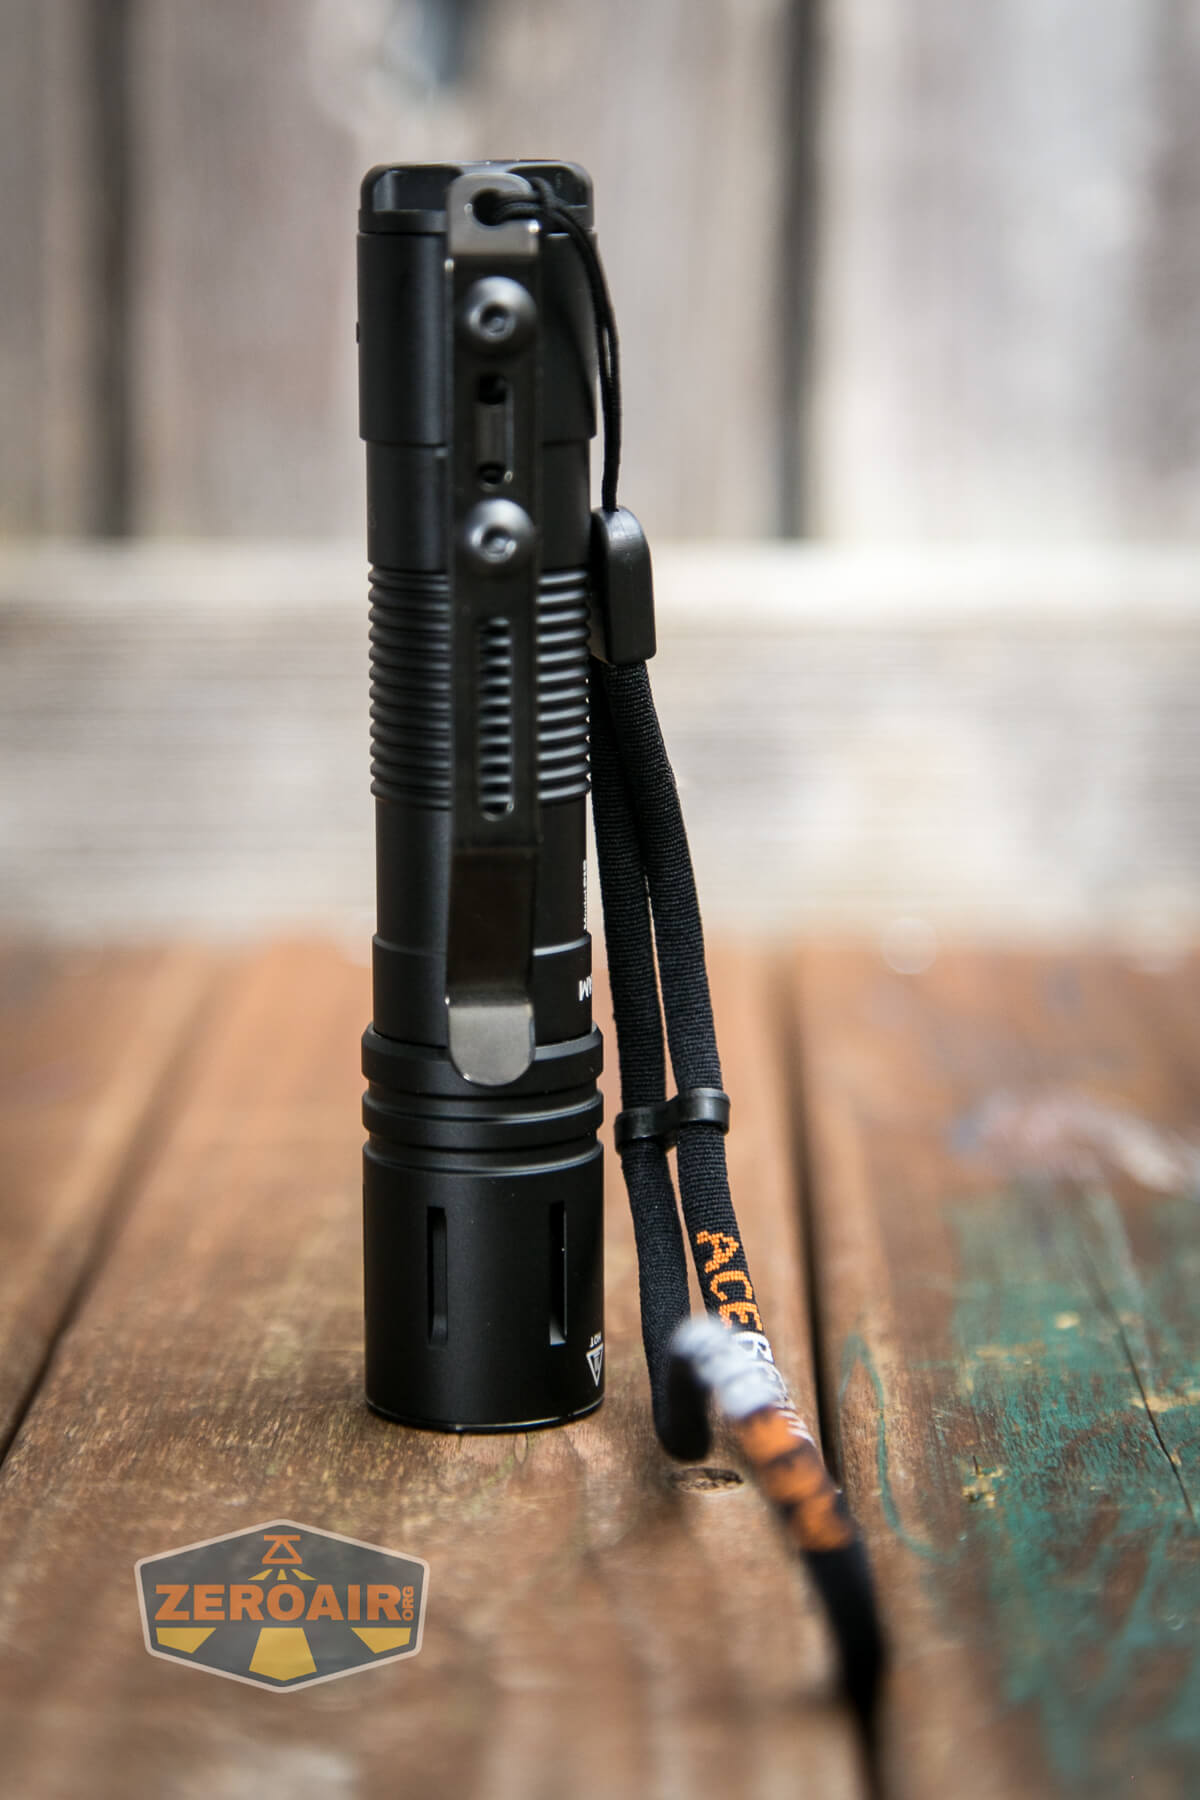
Whew, this could be a long section! First, let’s talk about the pocket clip. The pocket clip is what comes with all kit levels, and also what will ship already attached to the Acebeam P15 EDC Tactical flashlight.
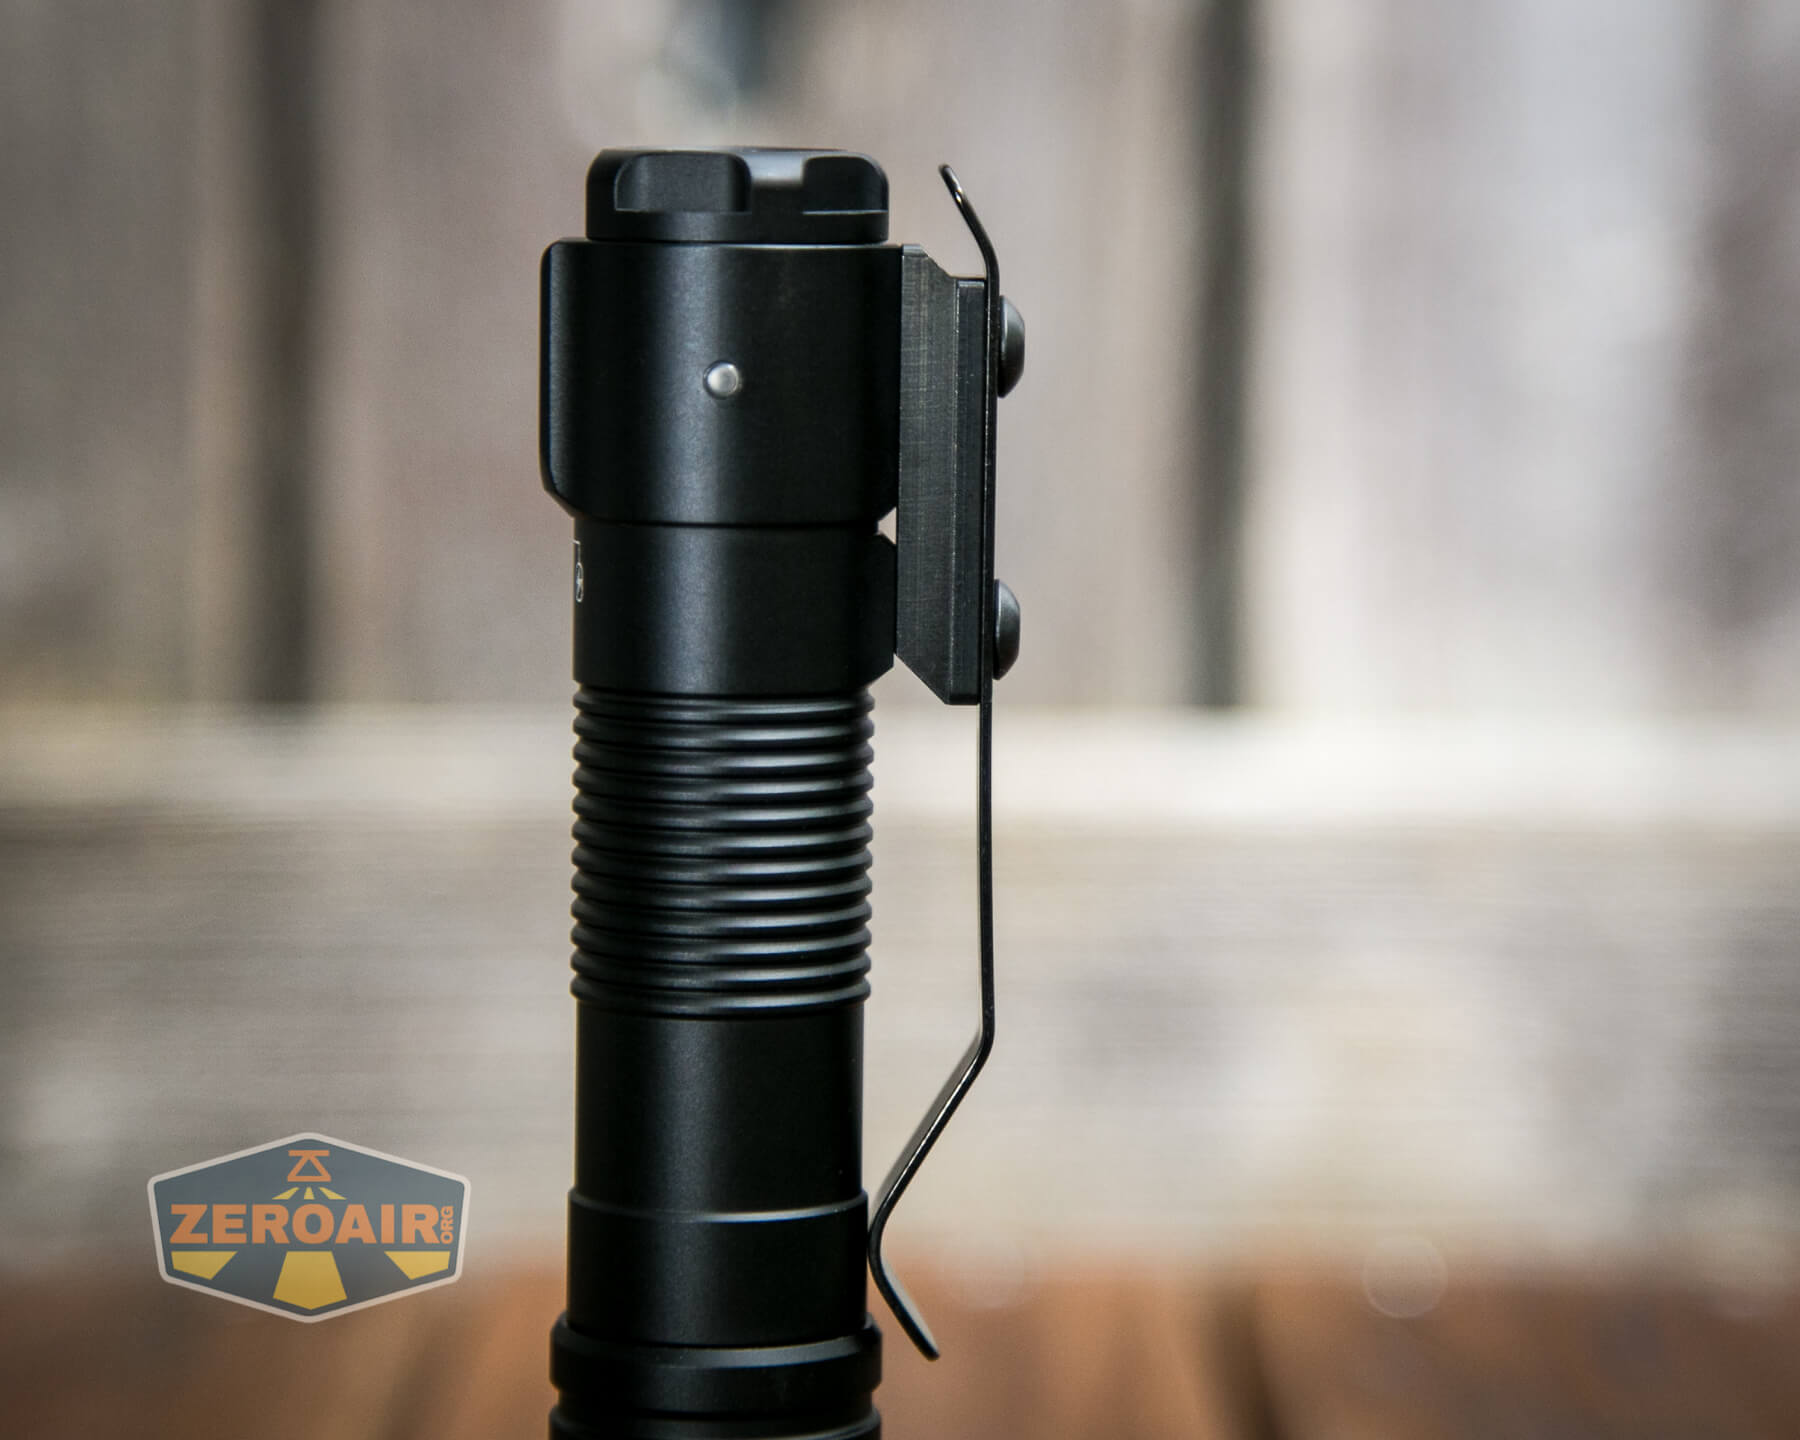
This is a fairly standard clip on the South end. On the North end, though, we see something that everyone asks about first. Why is the pocket clip attached this way? This clip attaches this way to facilitate all the other connection mechanisms that are intended for use with the Acebeam P15 EDC Tactical flashlight.
Despite looking a bit awkward, it’s actually a fairly elegant solution. As a pocket clip, being used to clip the P15 to pockets, it’s fine. The clip allows roughly 3/4 of the flashlight to be in a pocket, which is plenty for balance.
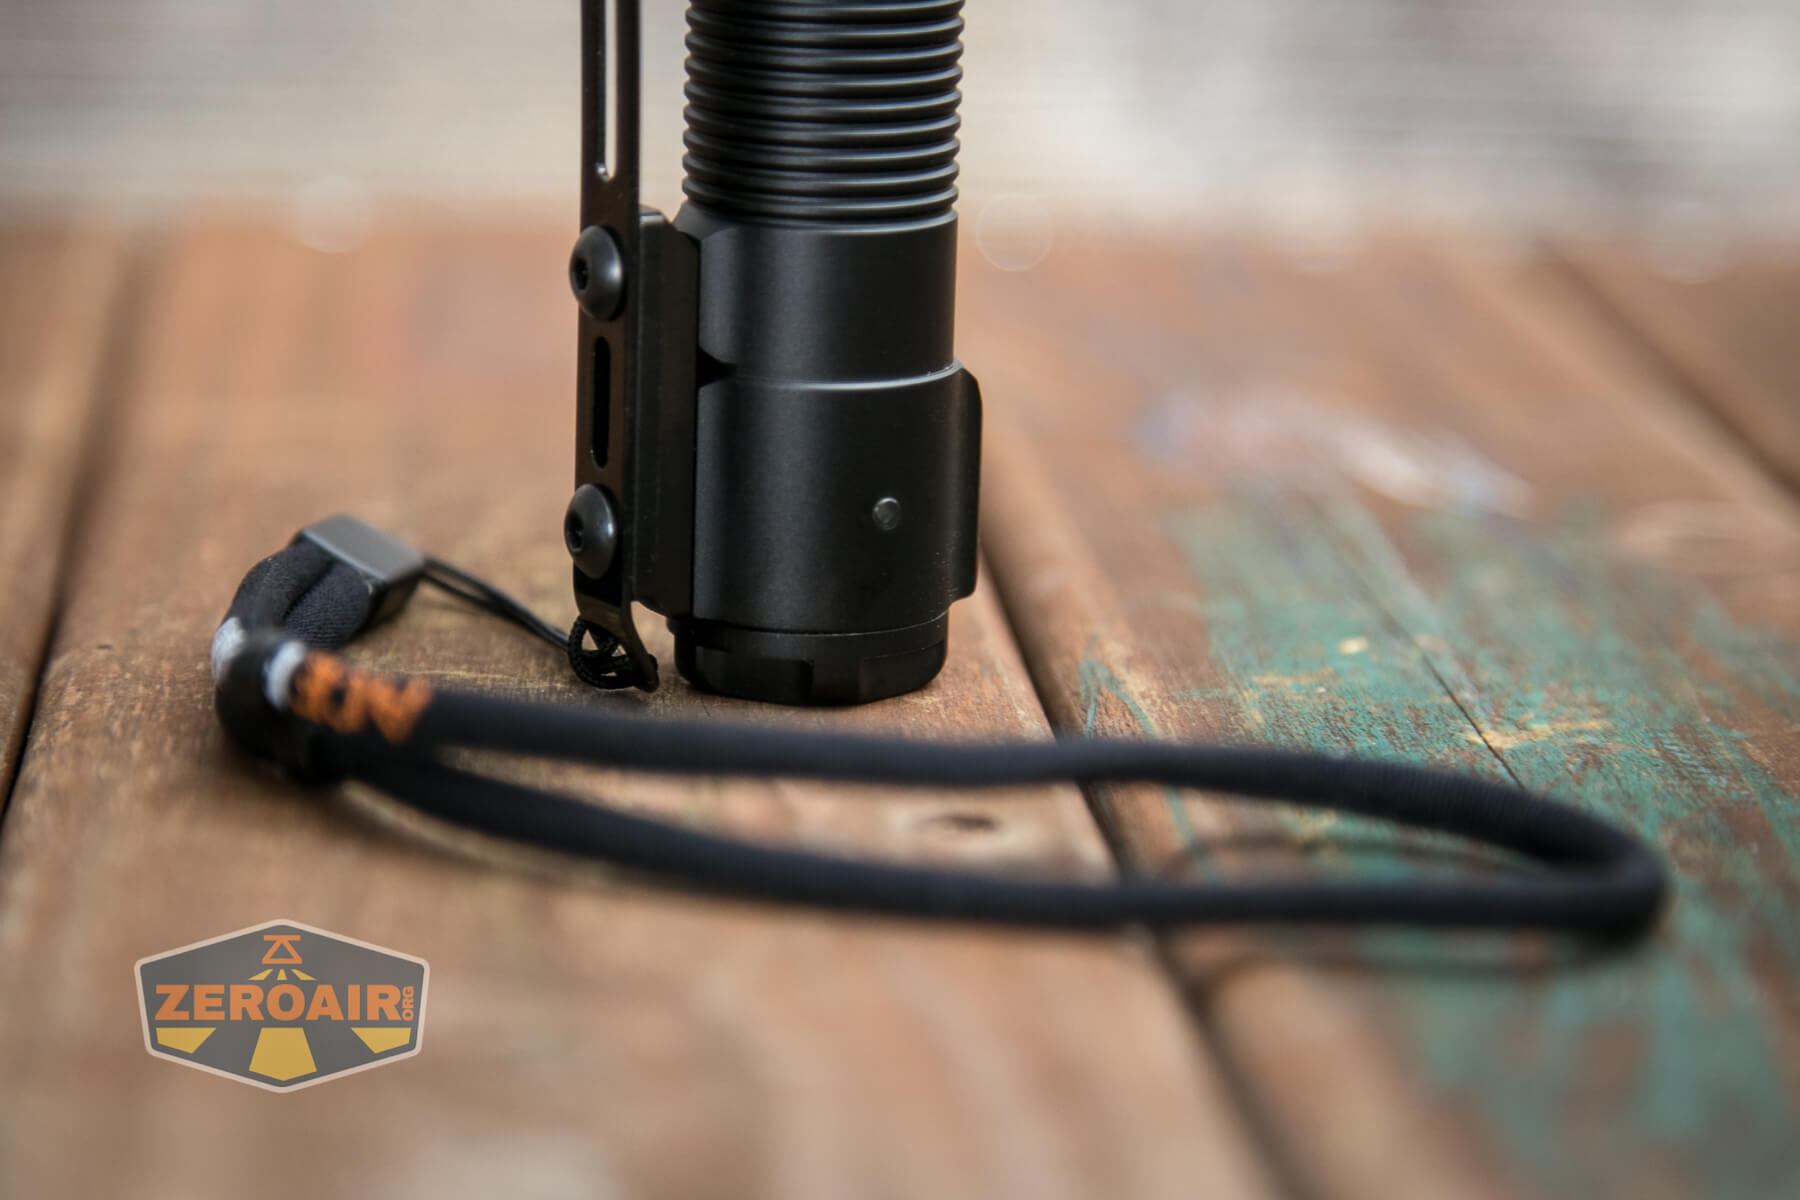
Multiple points on the pocket clip could also support lanyard attachment. Most logically is the hole in the bent section of the clip, though.
Here’s the lanyard attached in that way.
Also included is a tactical ring, which attaches to the same points as the pocket clip. These can’t be used at the same time.
I don’t actually know what to look for in a tactical ring, but this one is metal and is extremely secure on the flashlight.
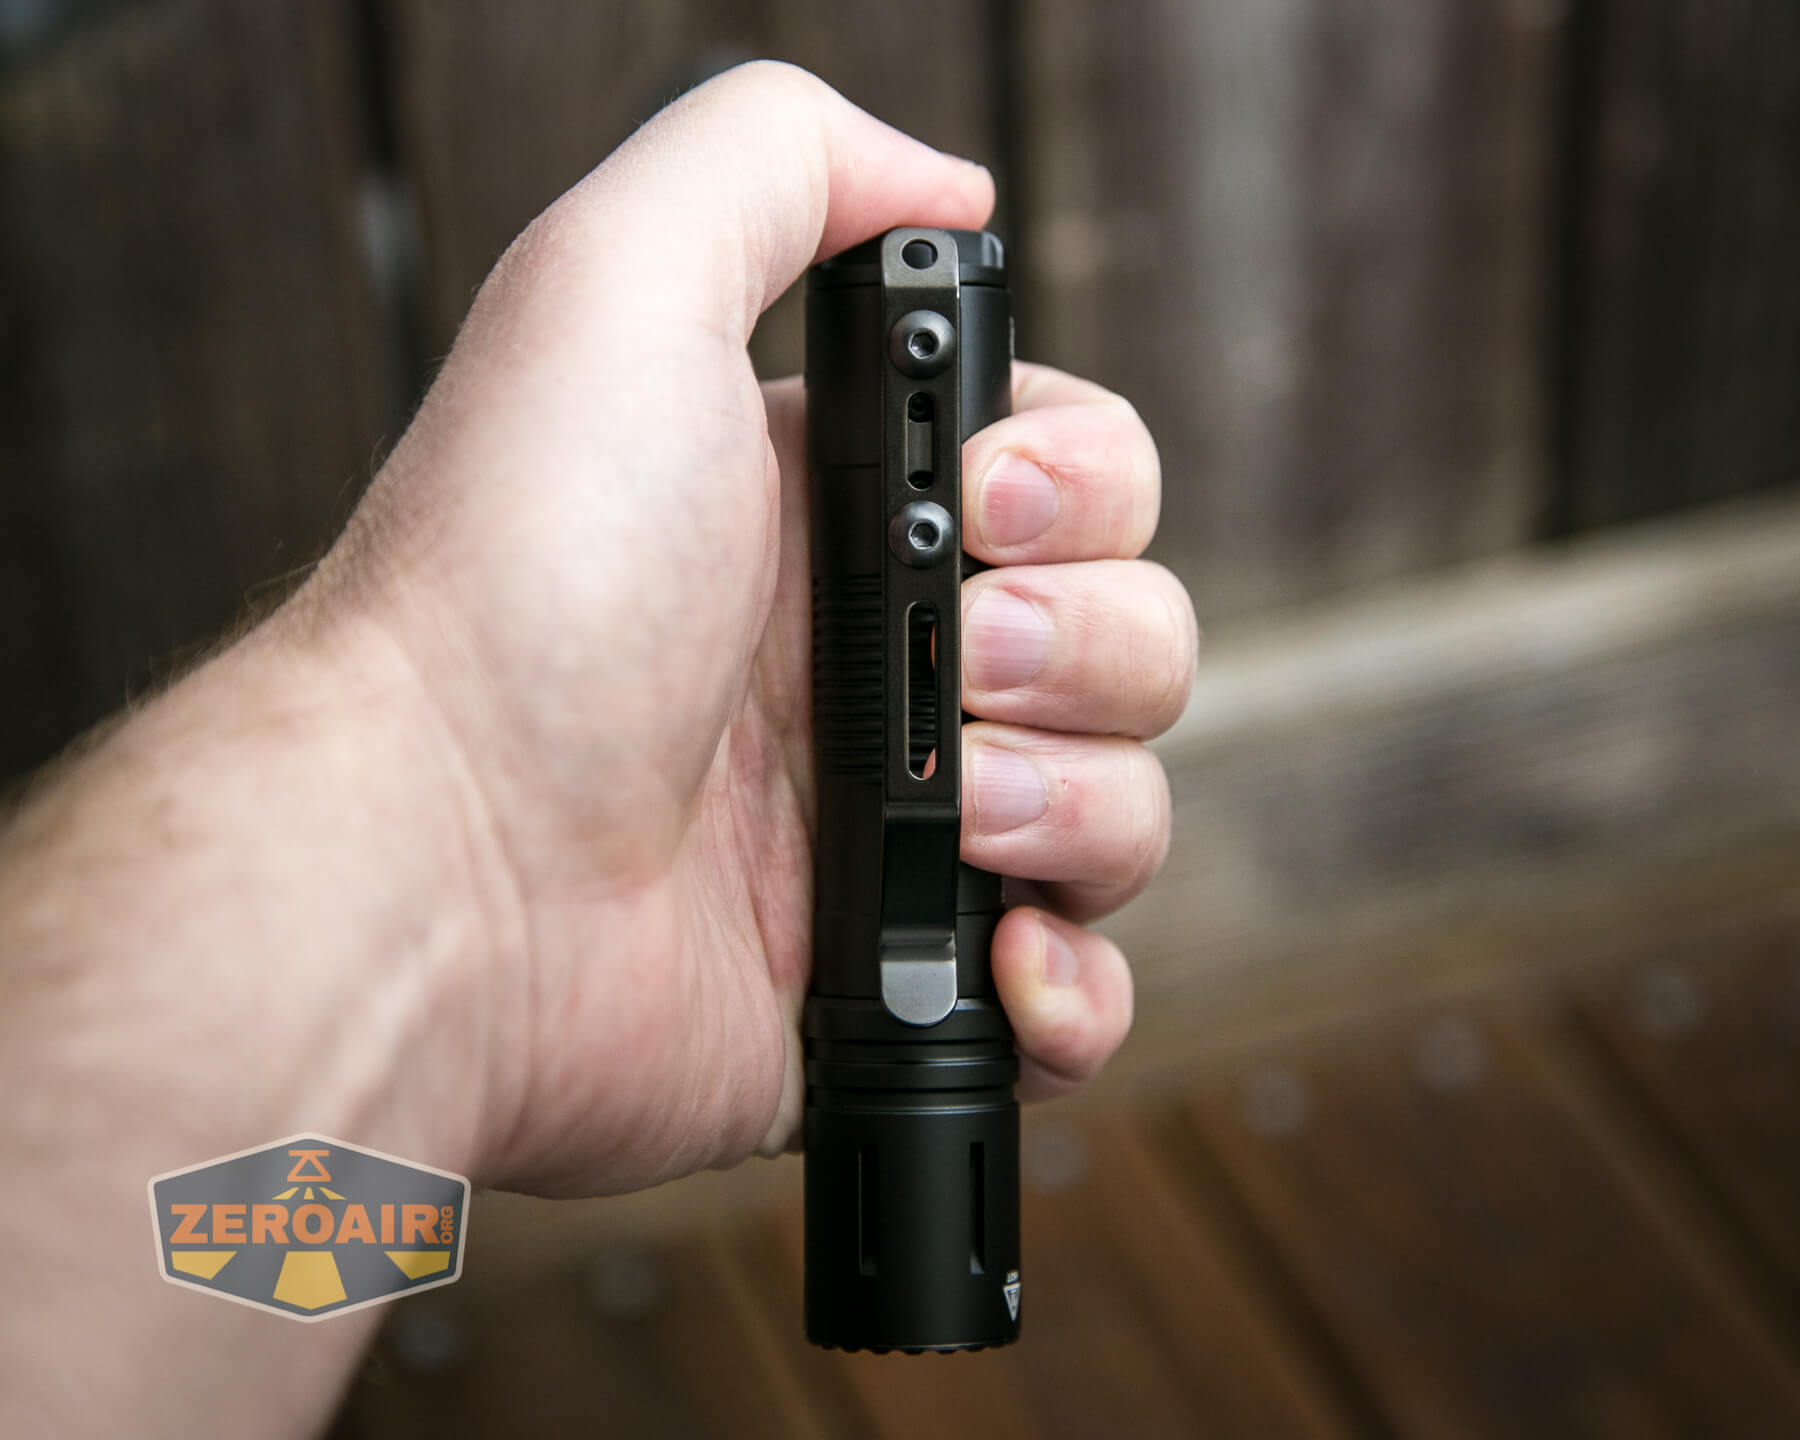
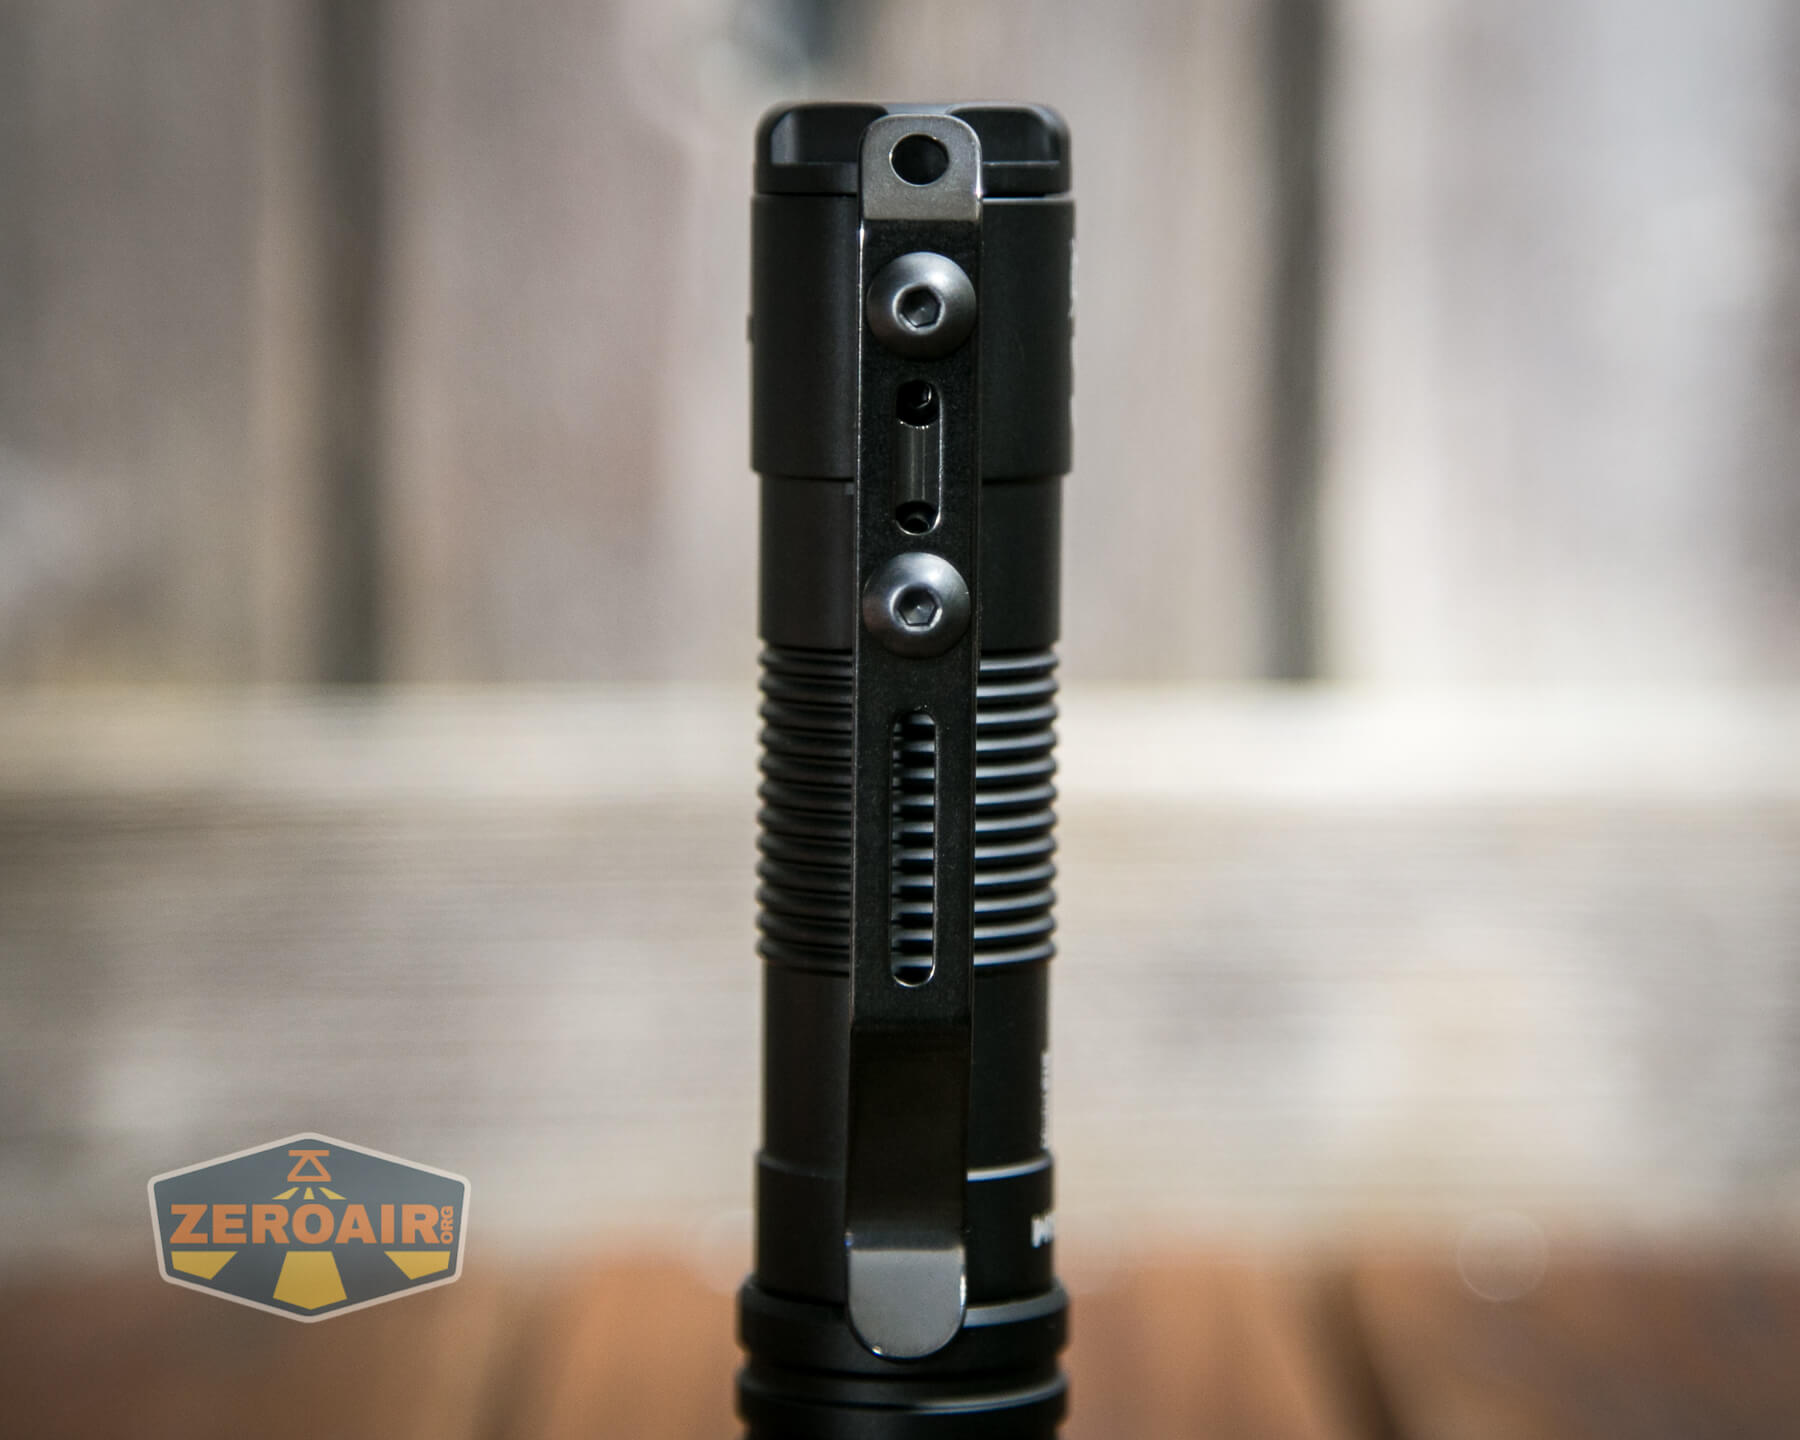
It’s possible to remove this attachment base, too. A Hex driver for those two inner screws is not included.
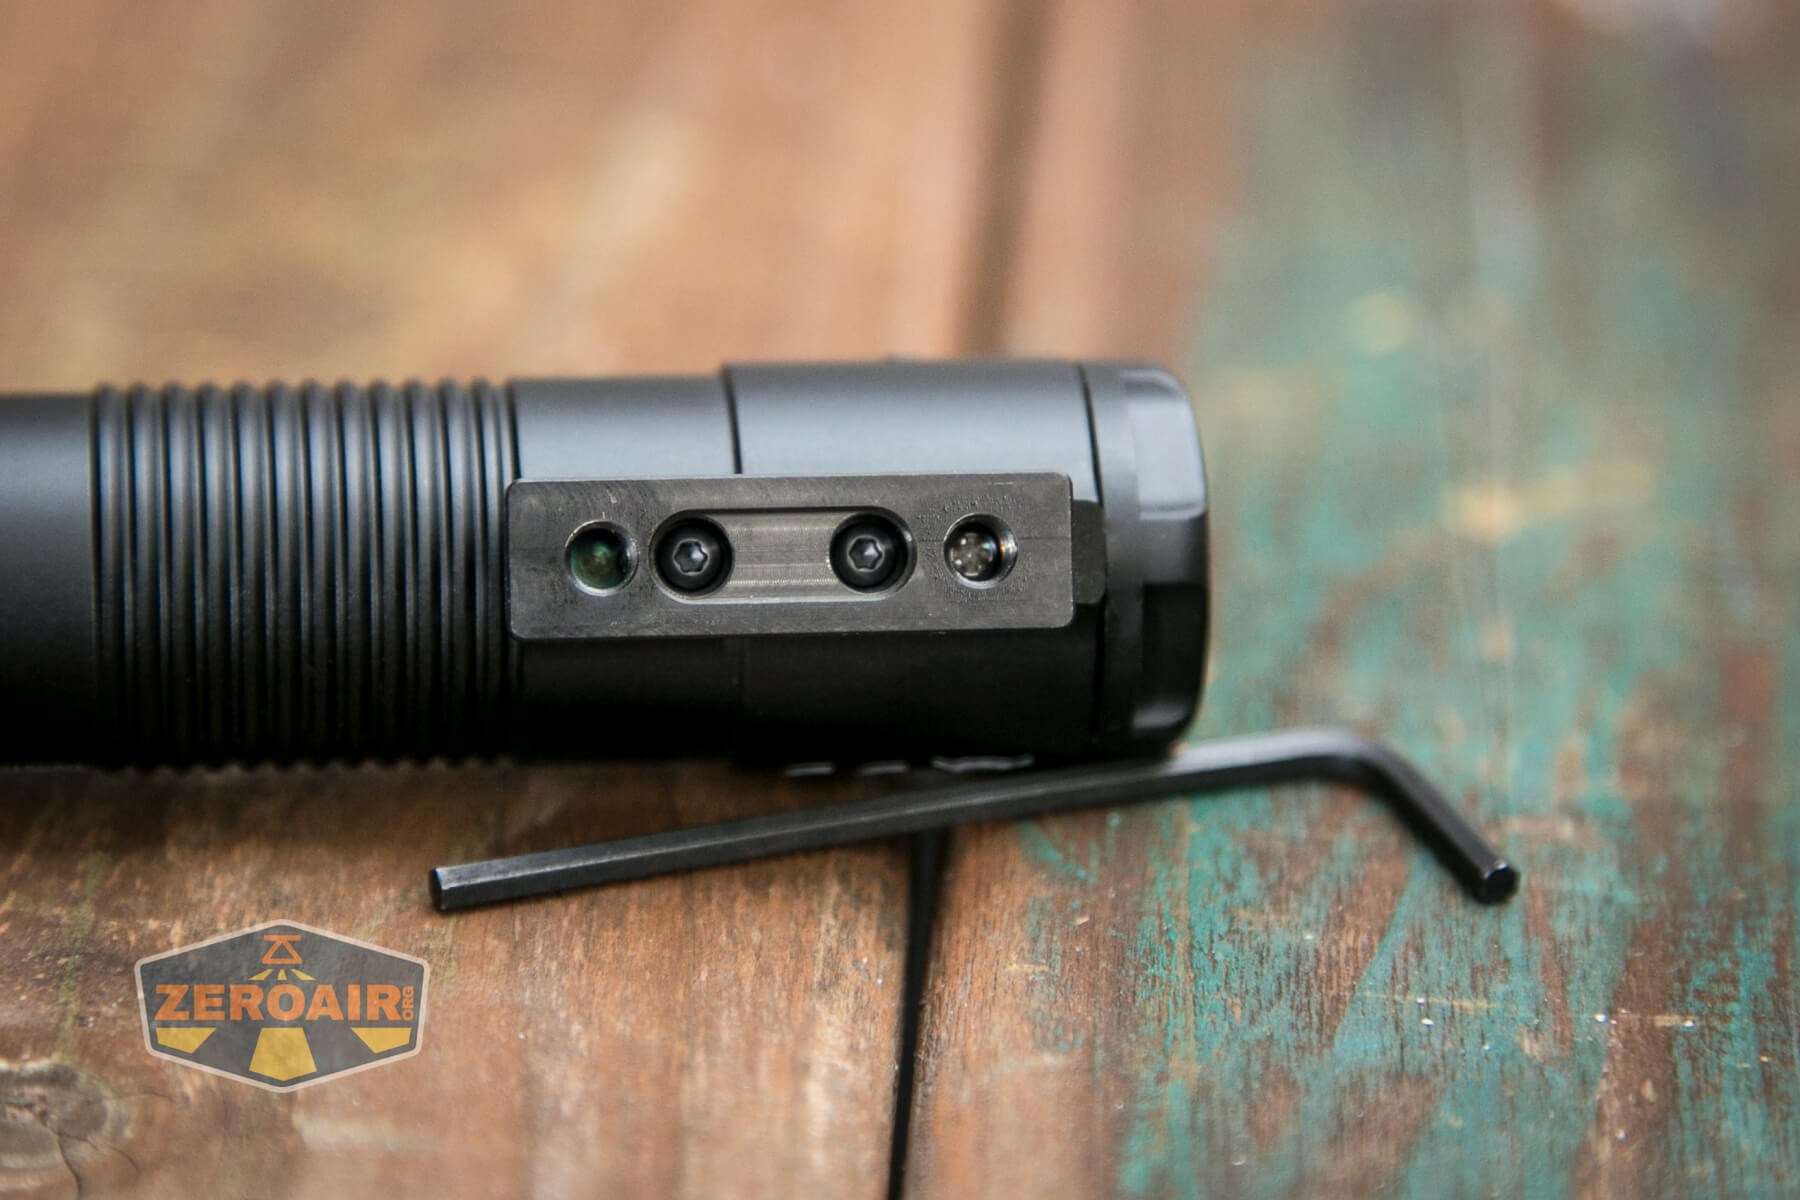
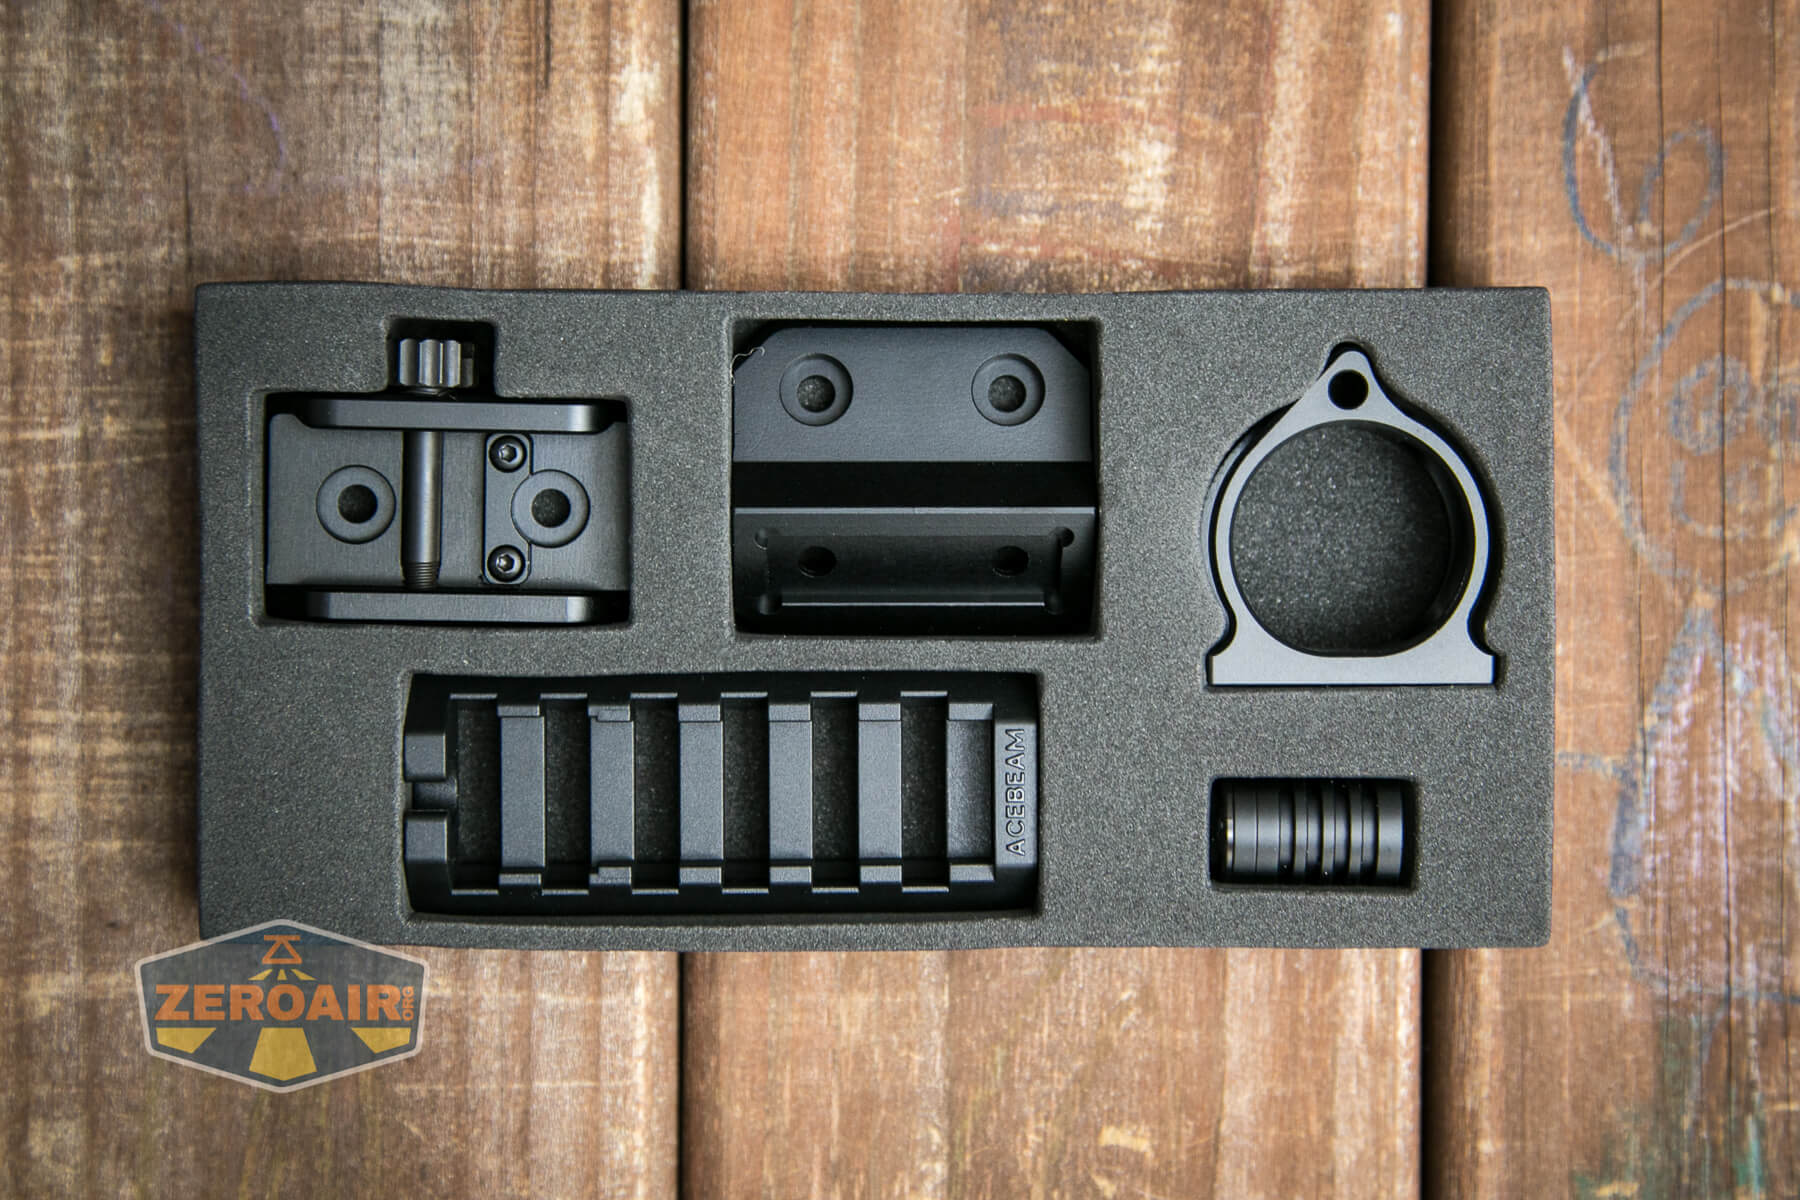
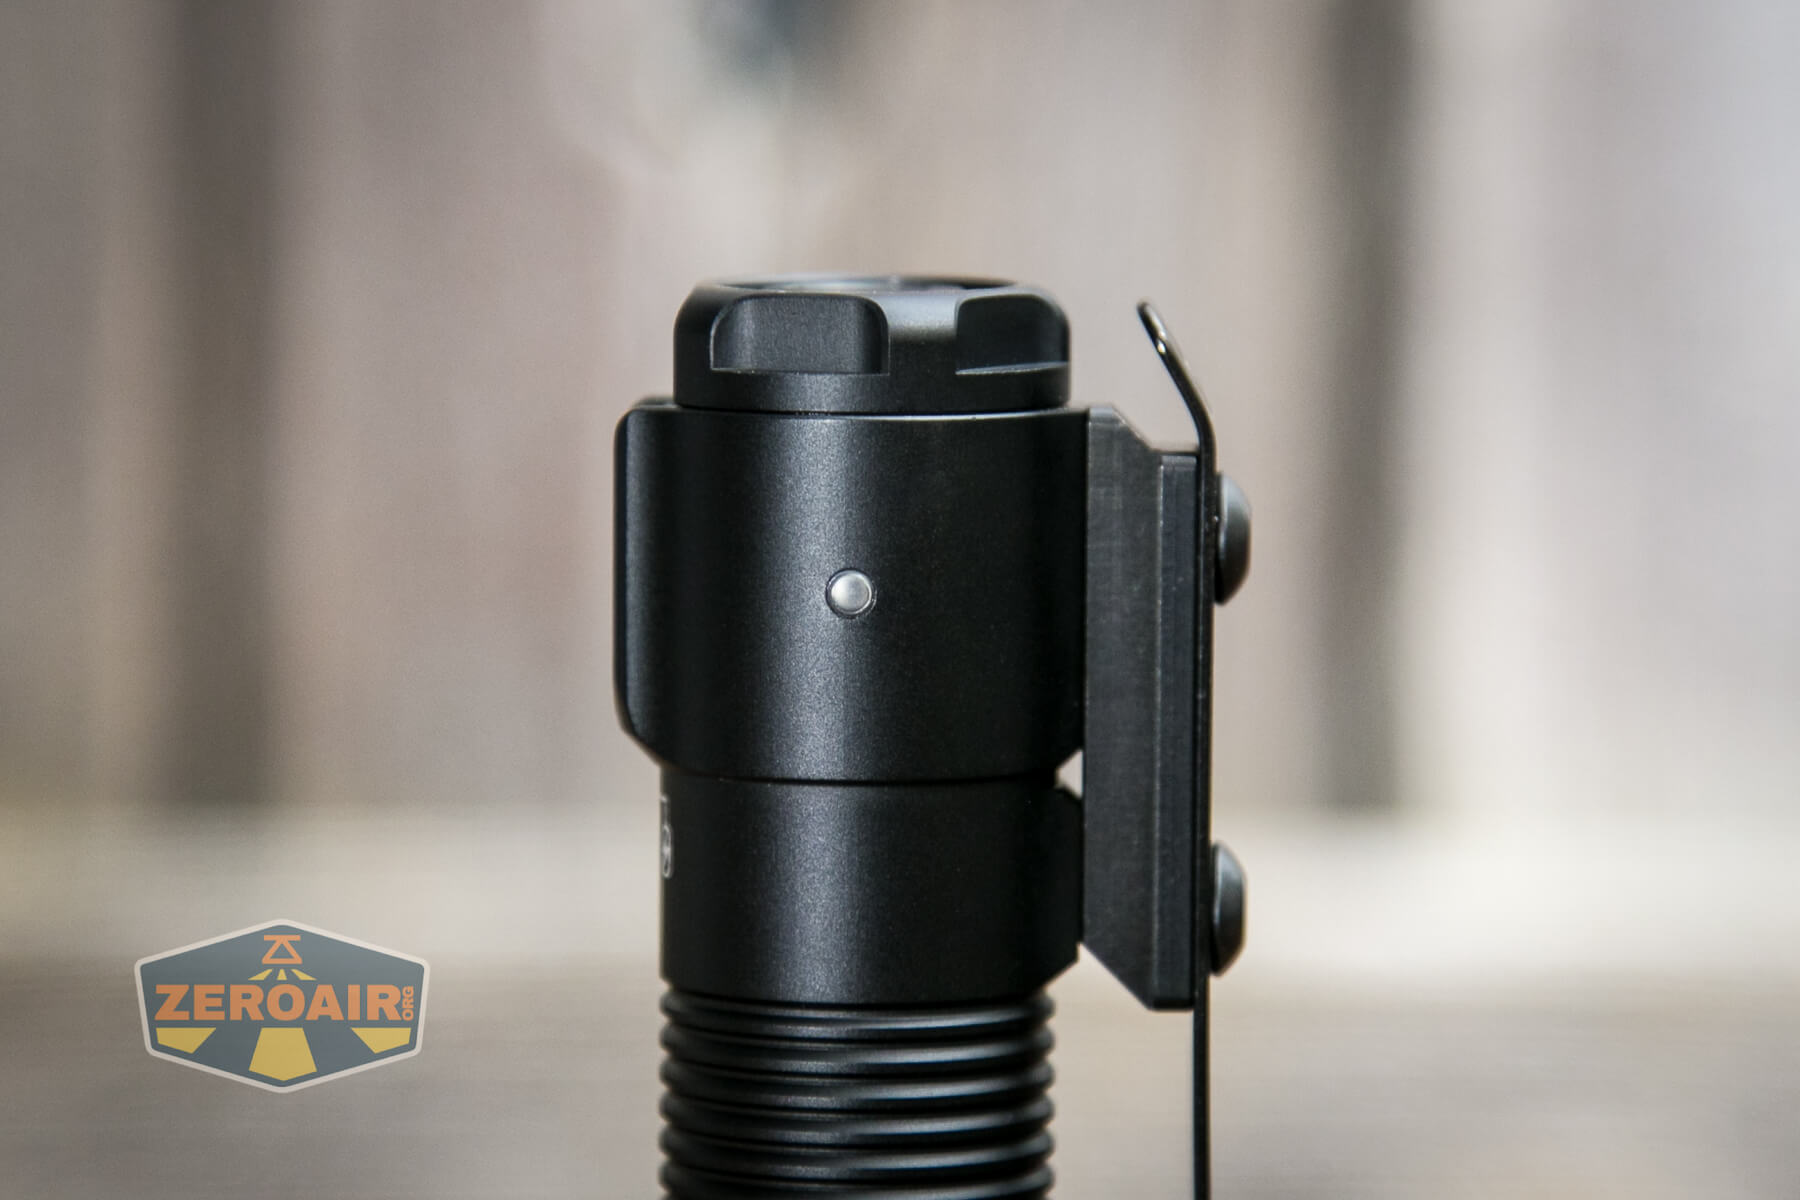
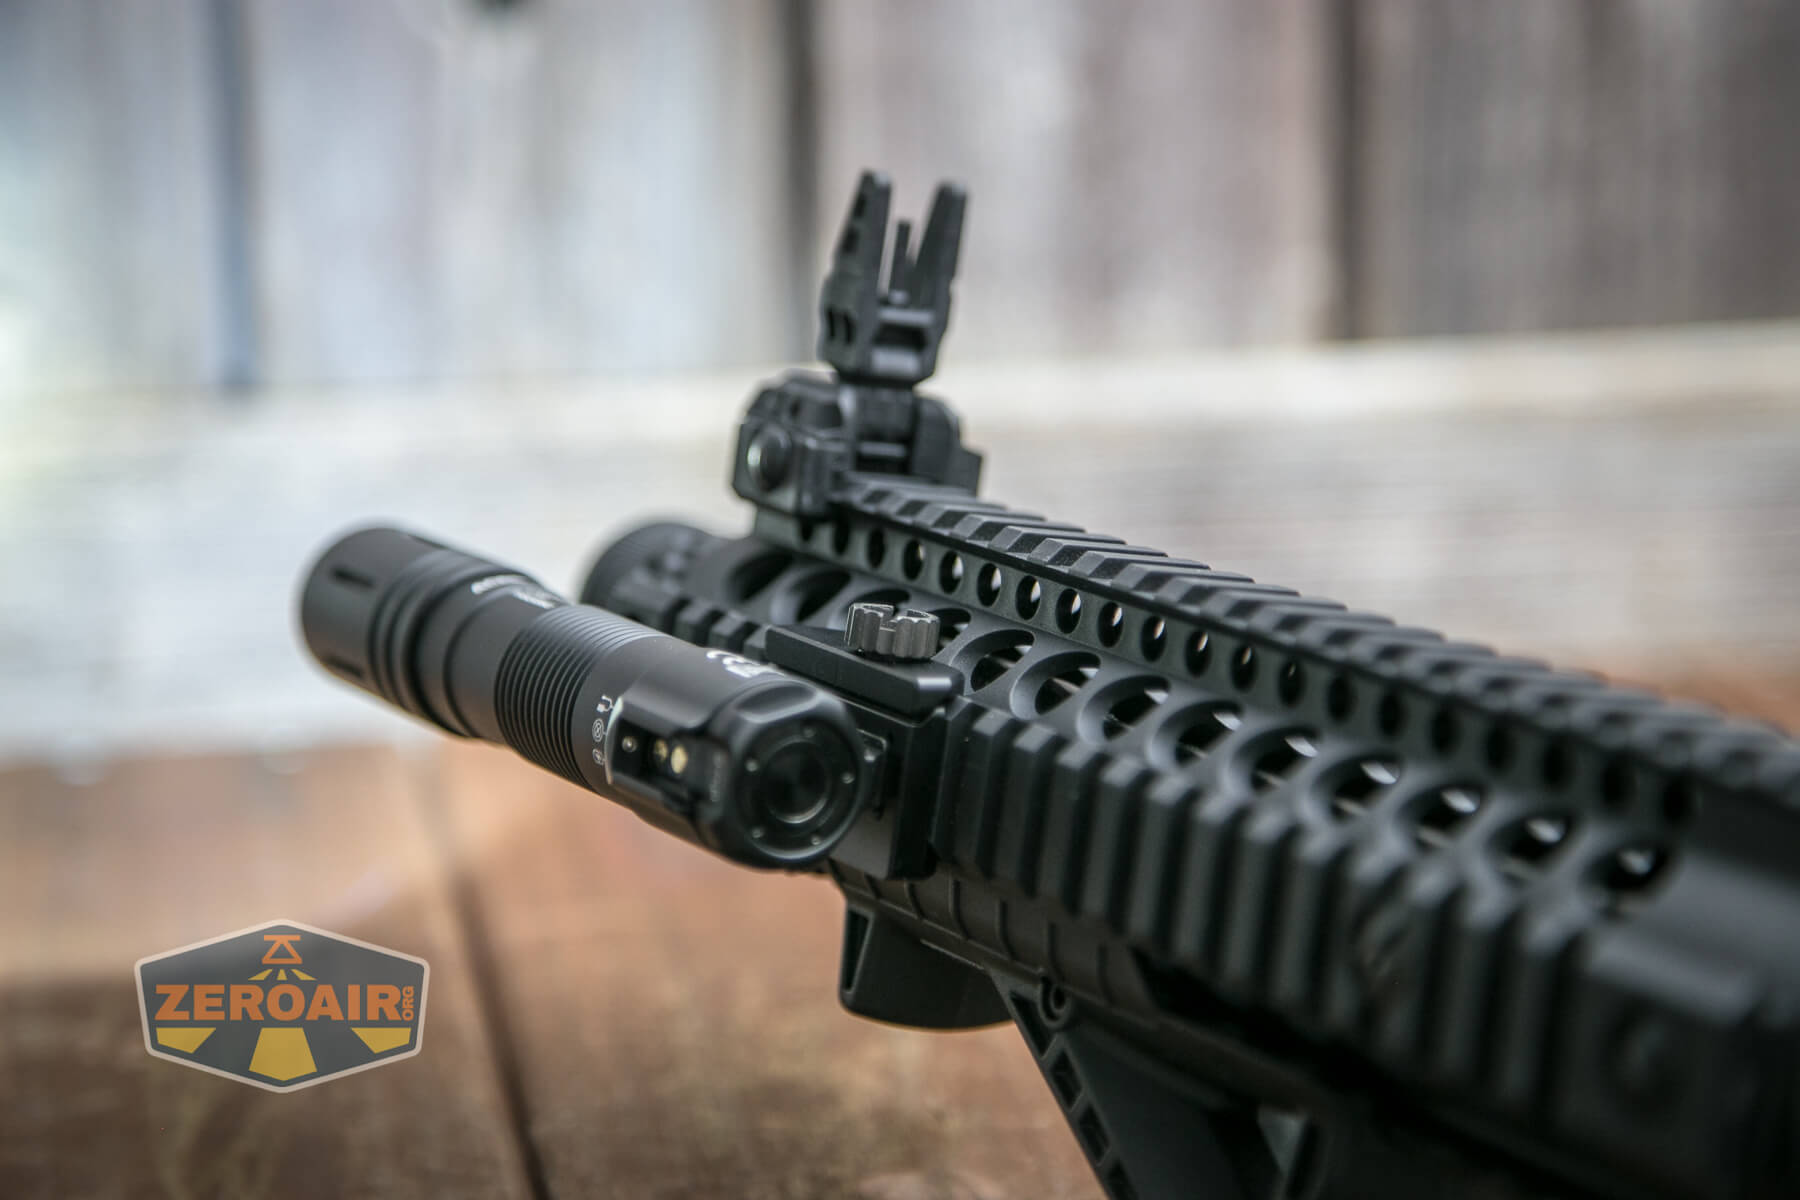
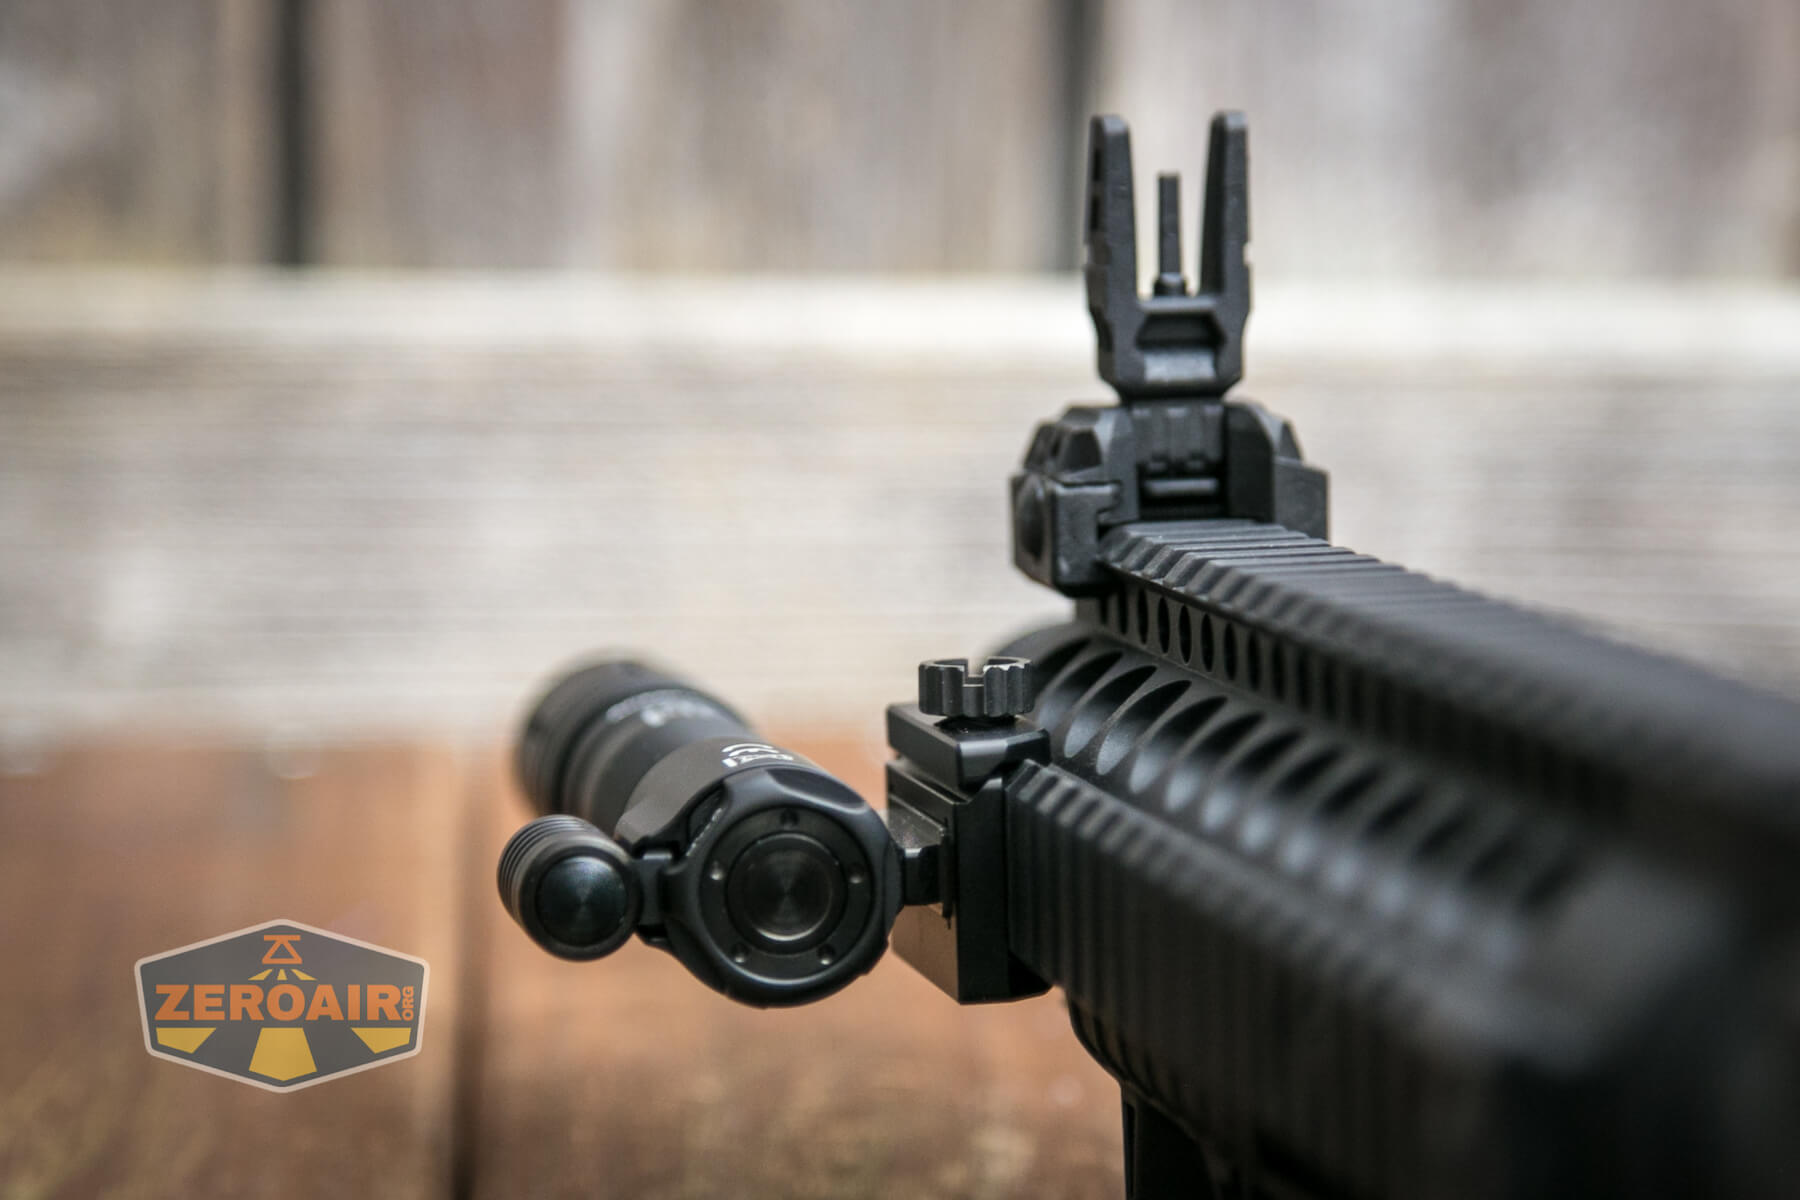
Here’s the Picatinny adapter.
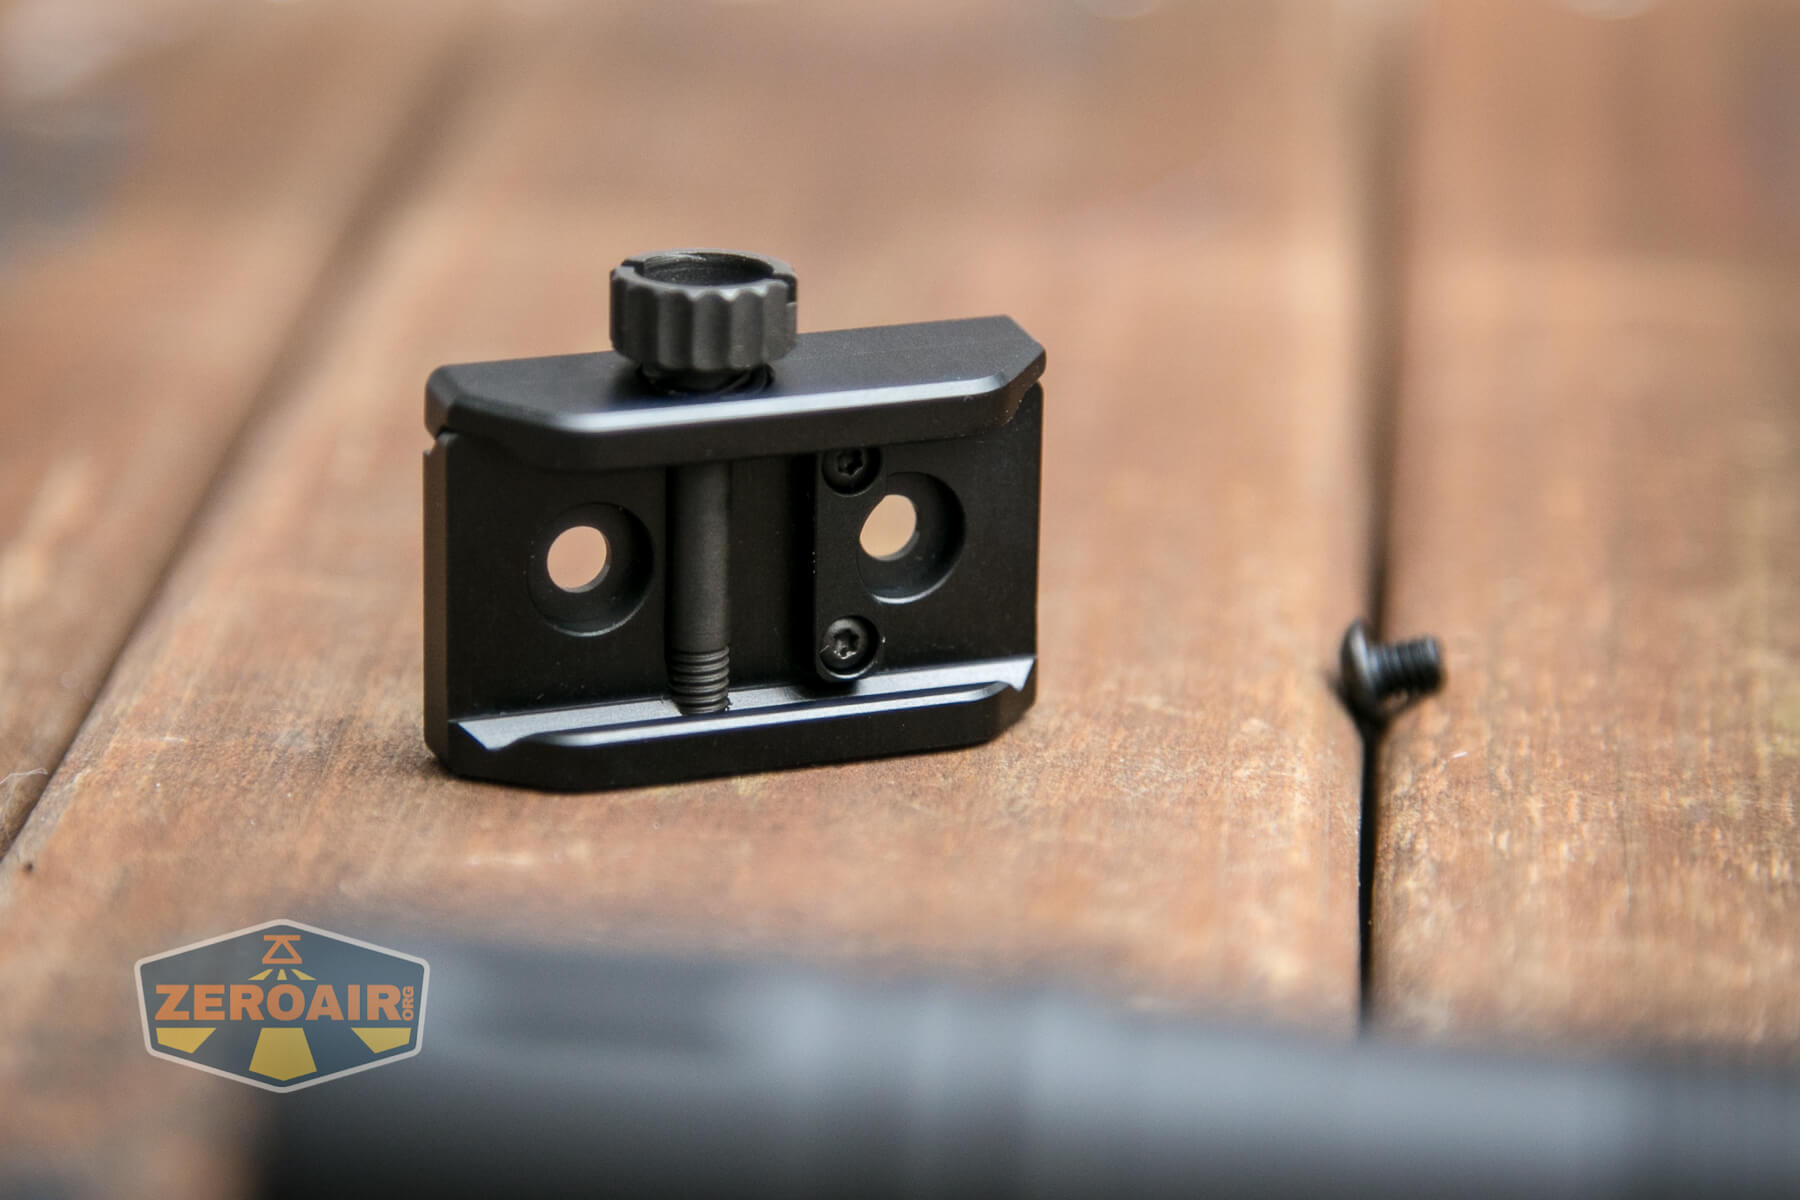
Just like the pocket clip and tactical grip ring, this Picatinny rail adapter fits into those two screw holes.

In the photos below, the thumbscrew is mounted down, but I think a more appropriate direction is to install it so the screw will be up.
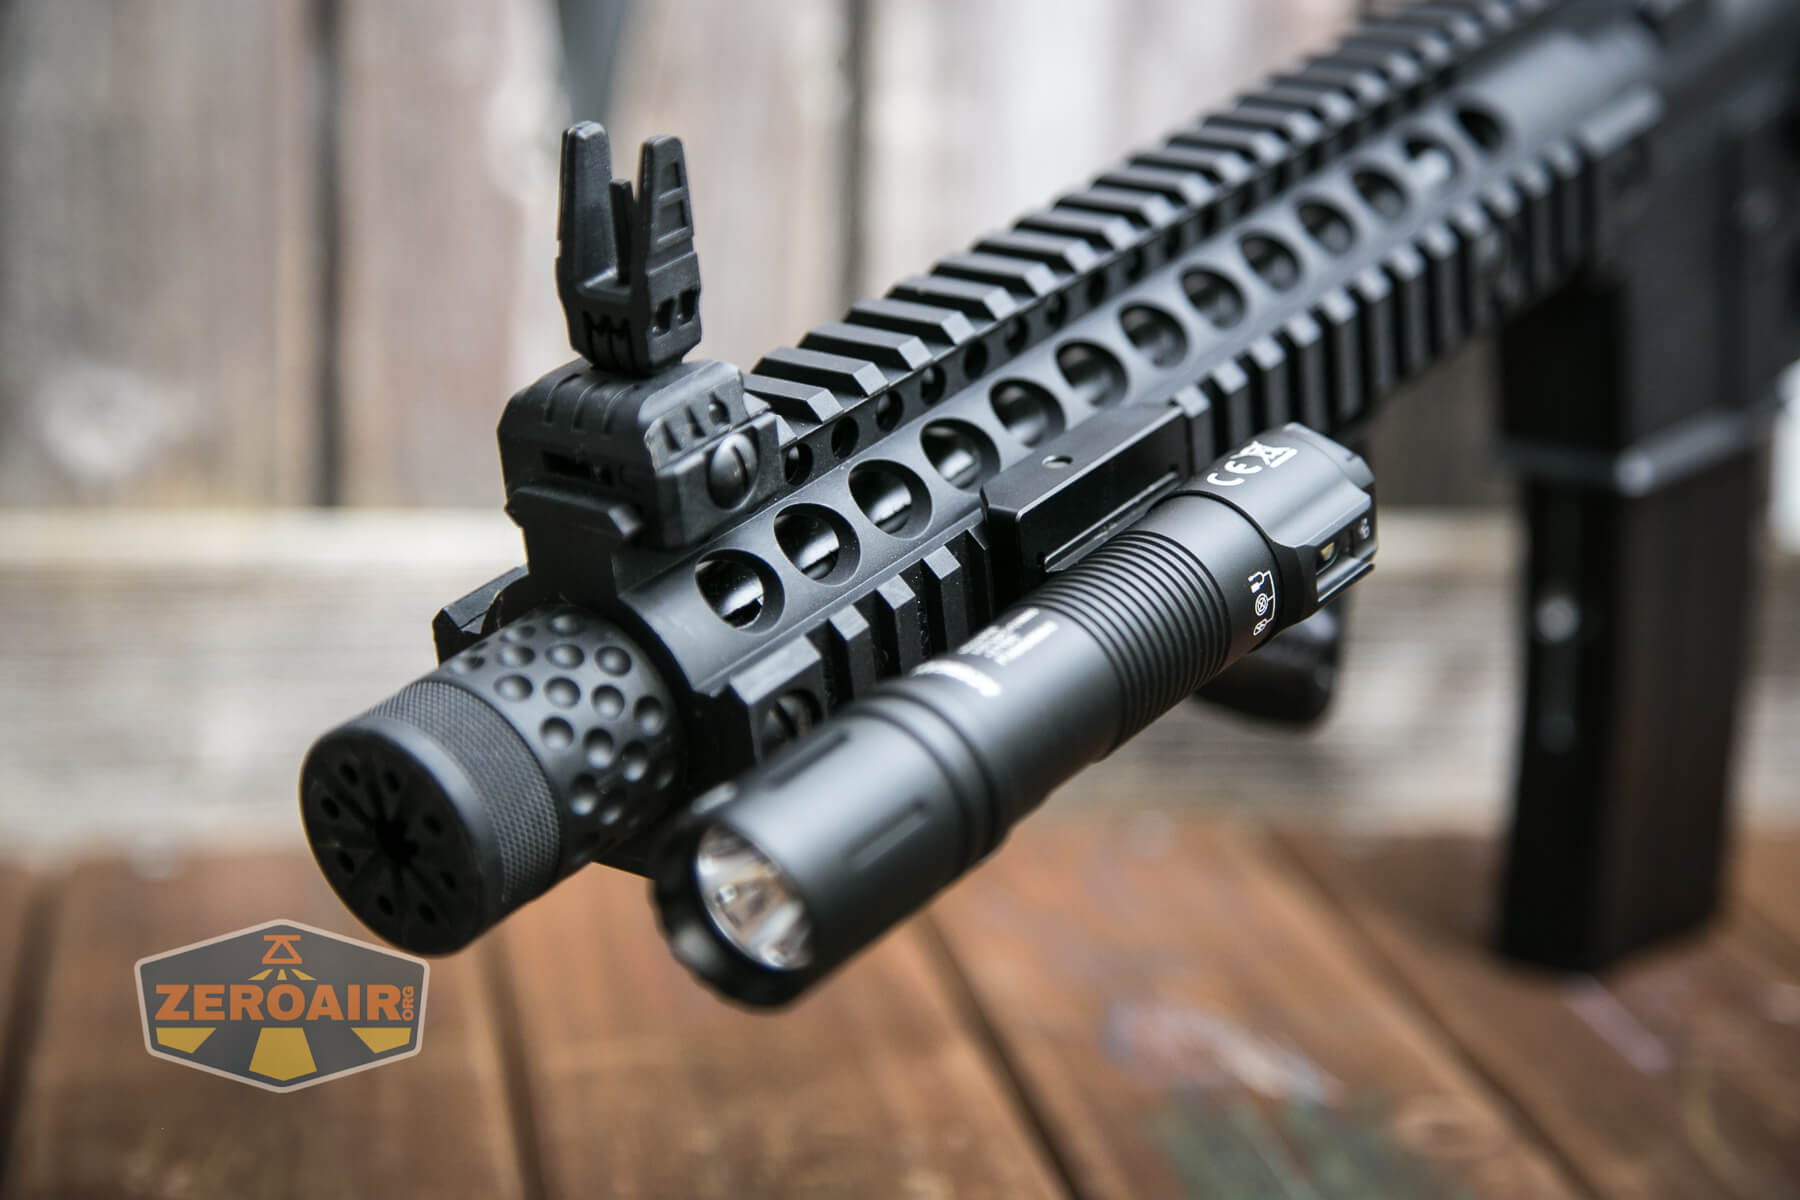
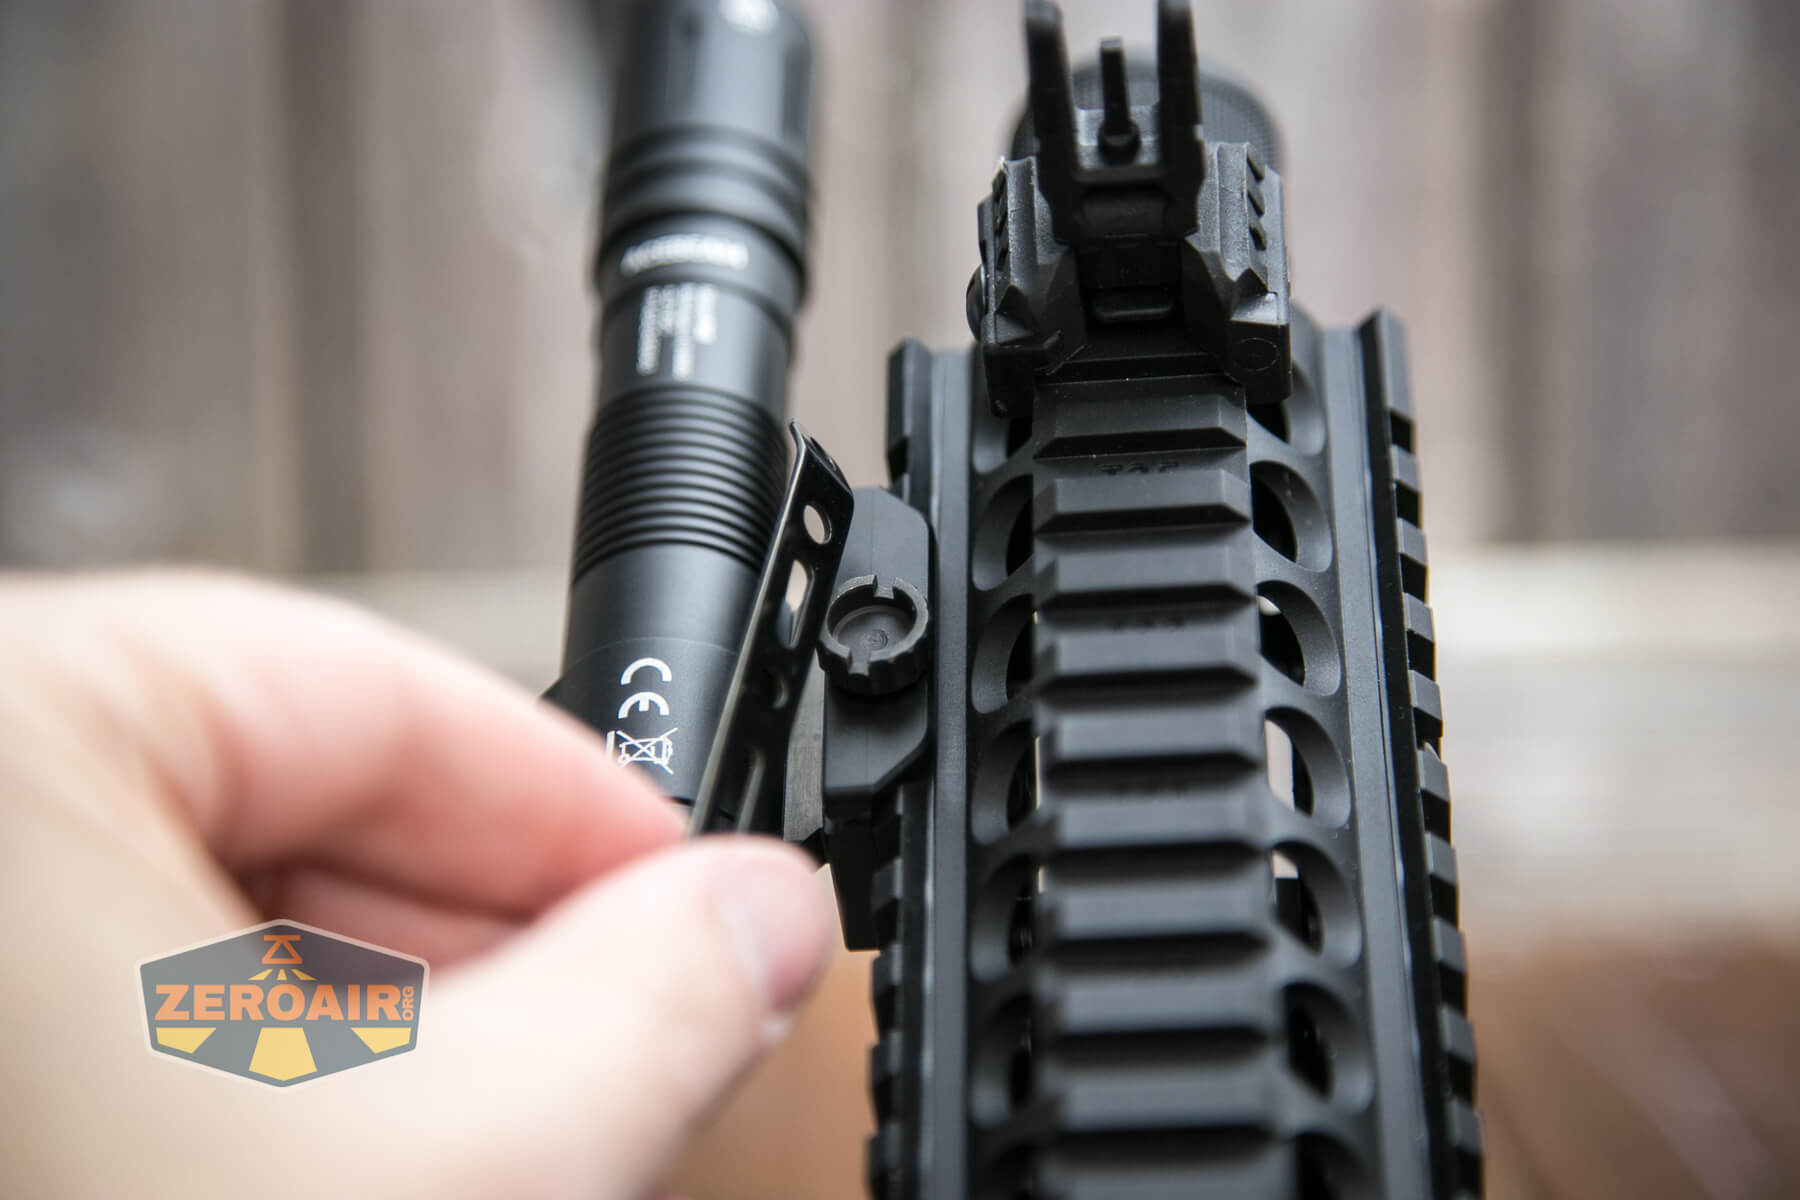
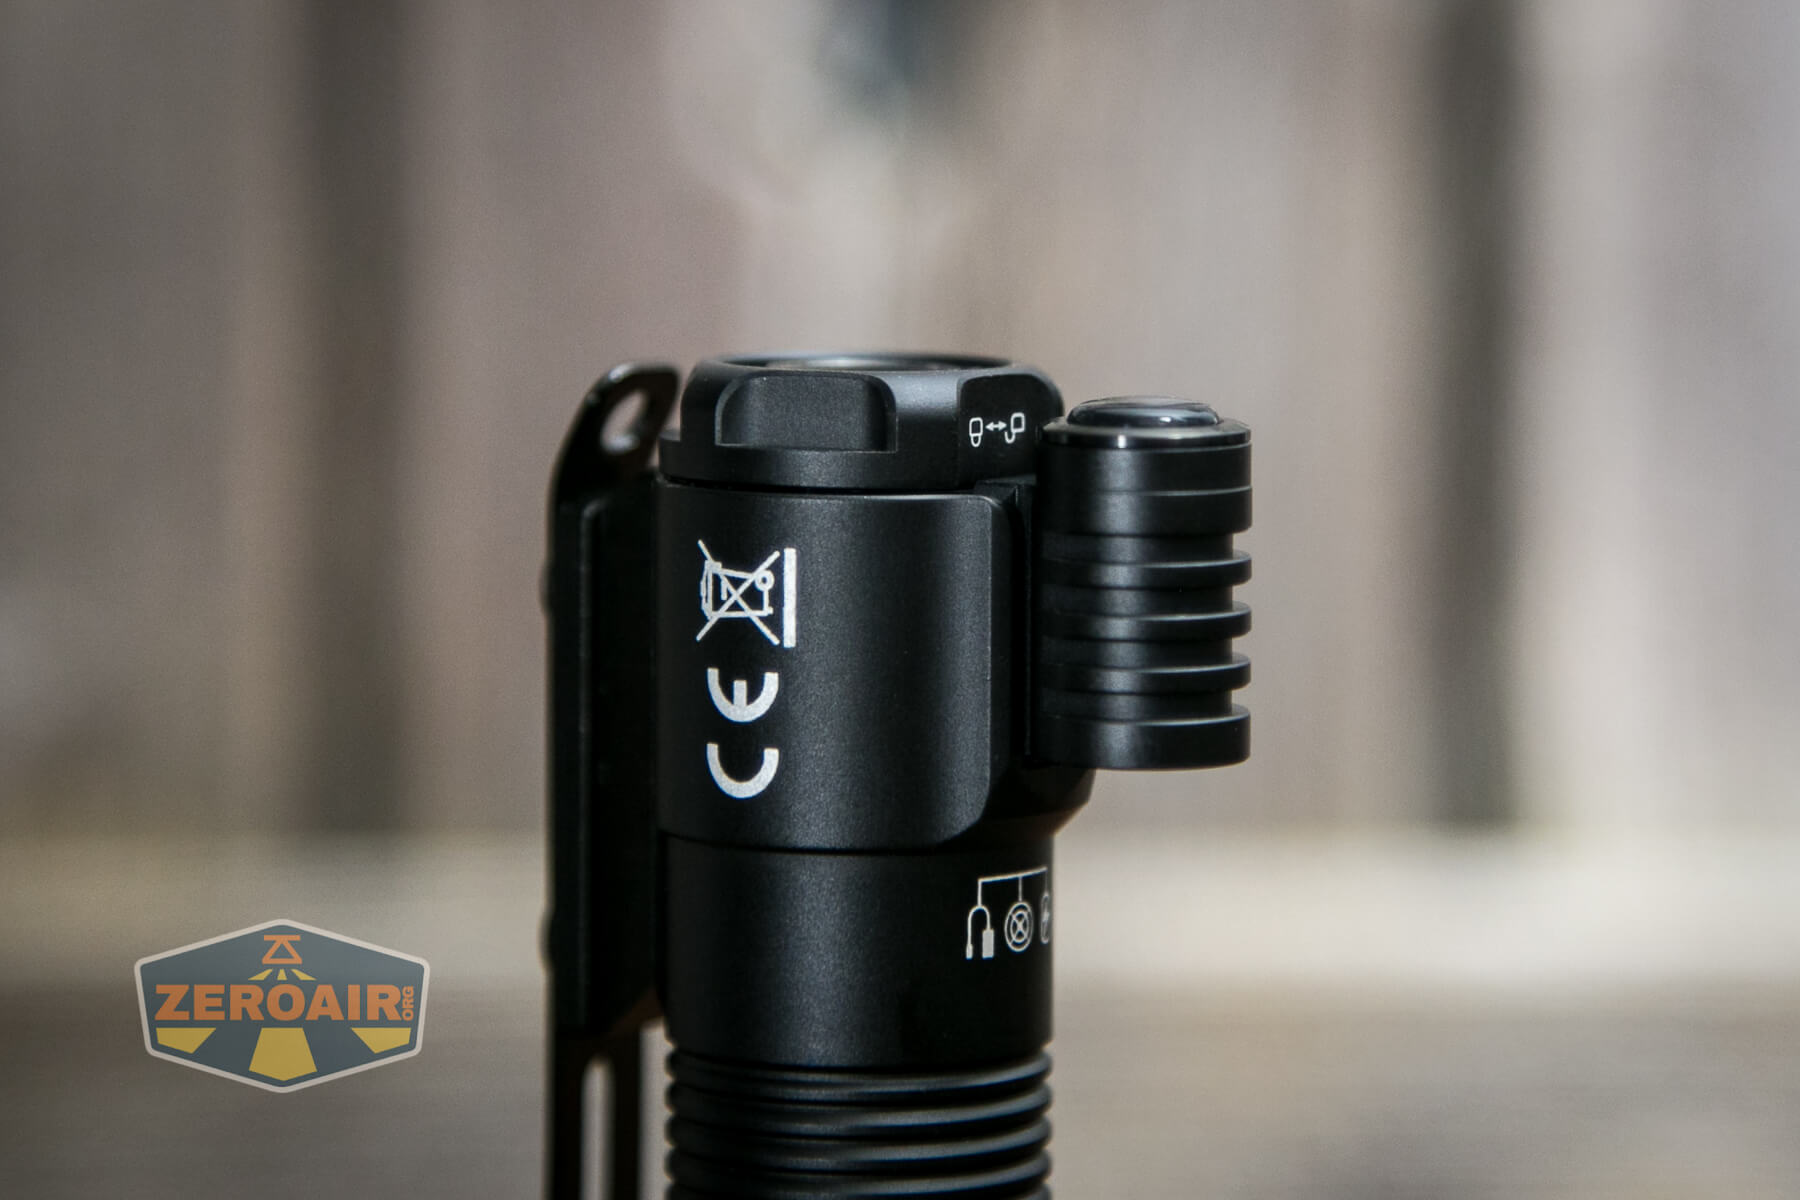
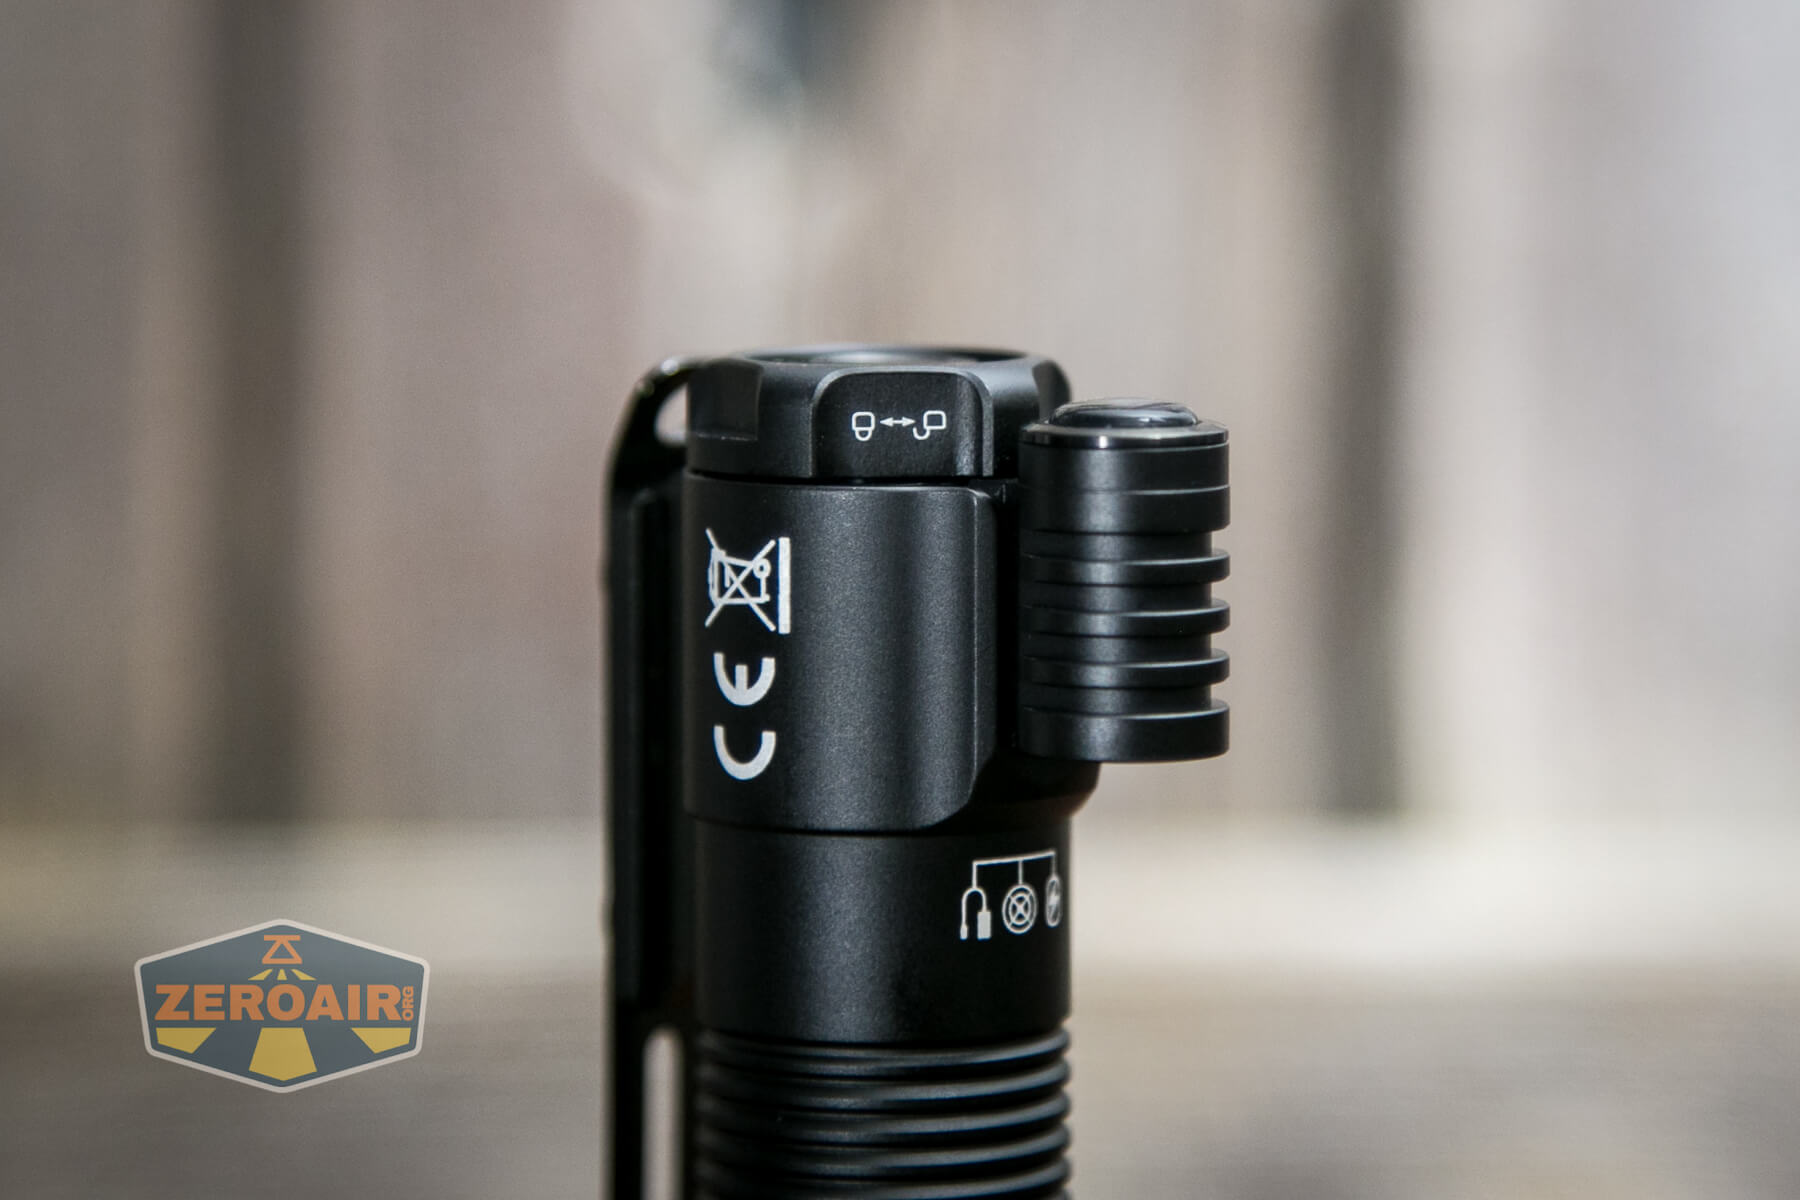
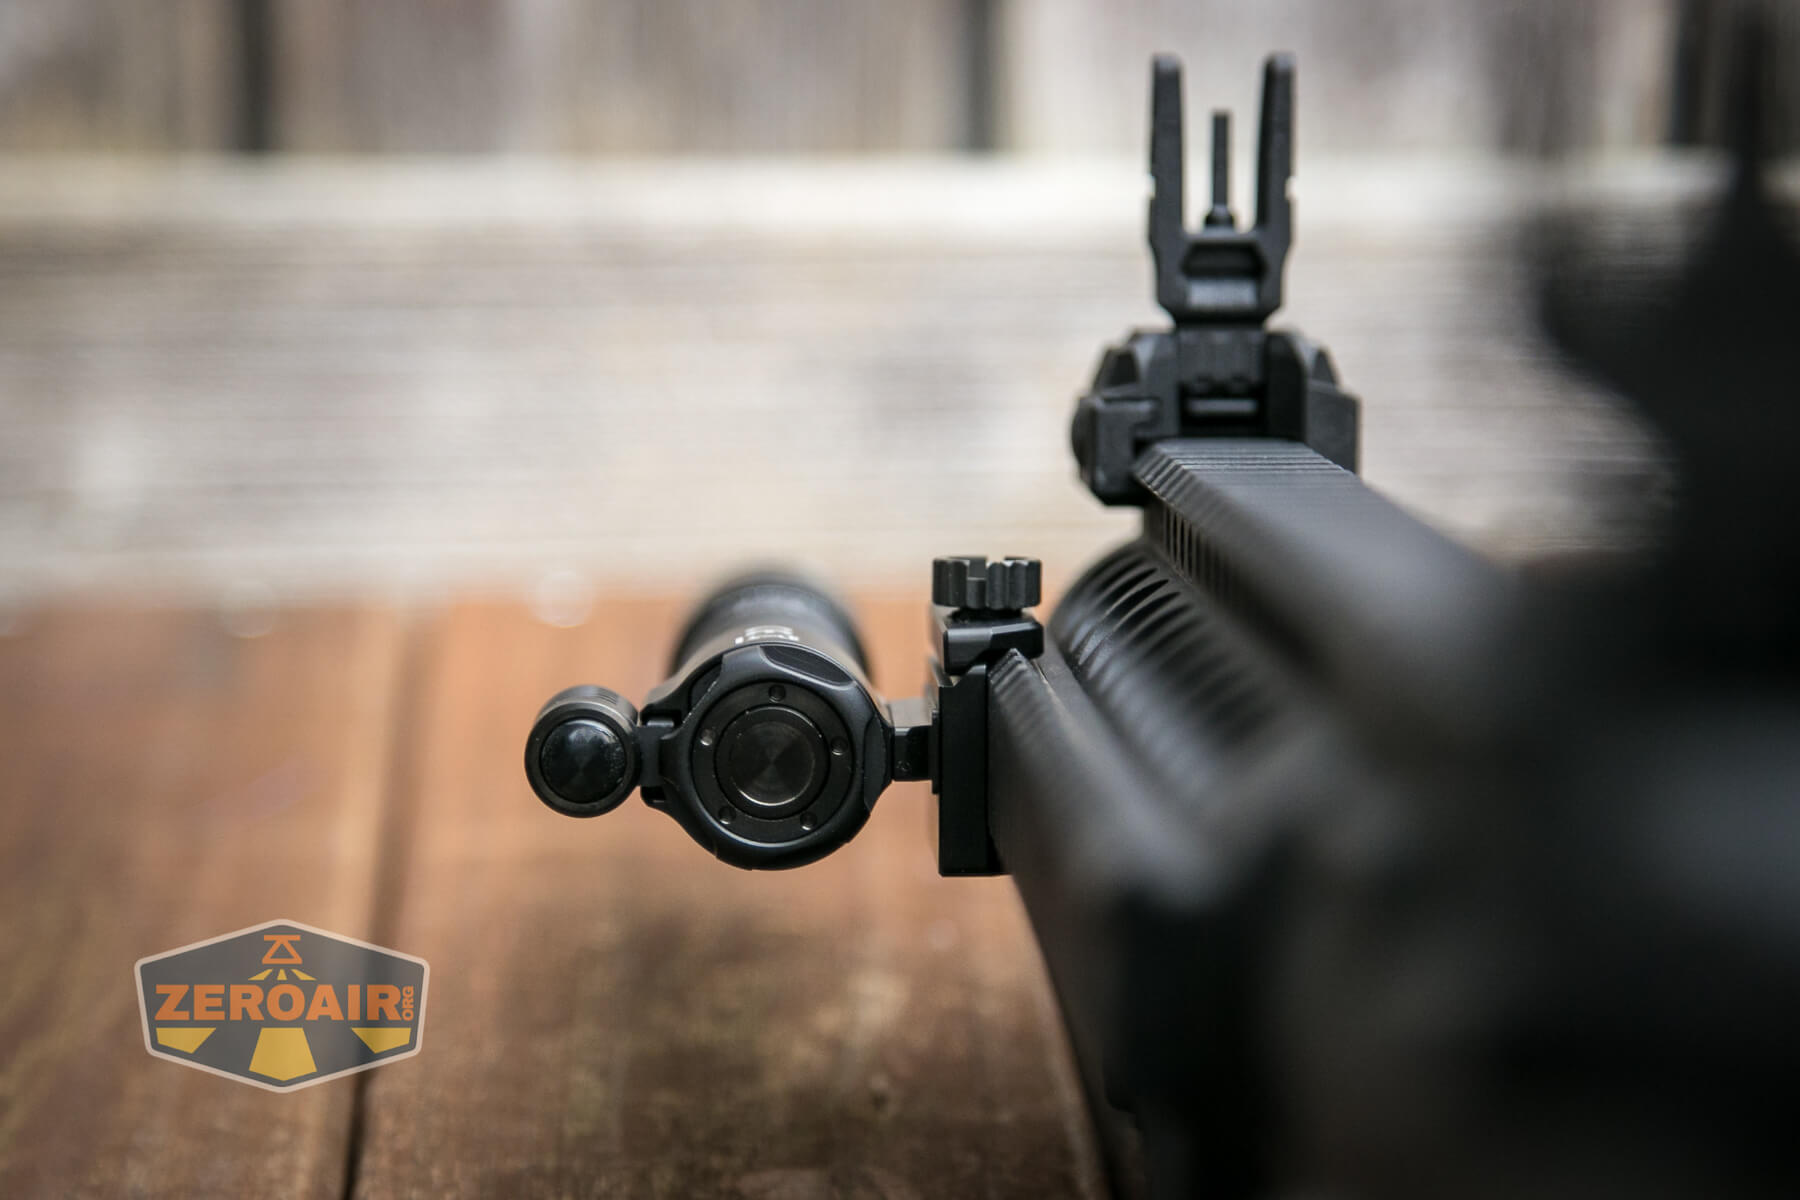
Importantly, with the light mounted to a weapon, the accessory port is still accessible. There’s a remote switch.
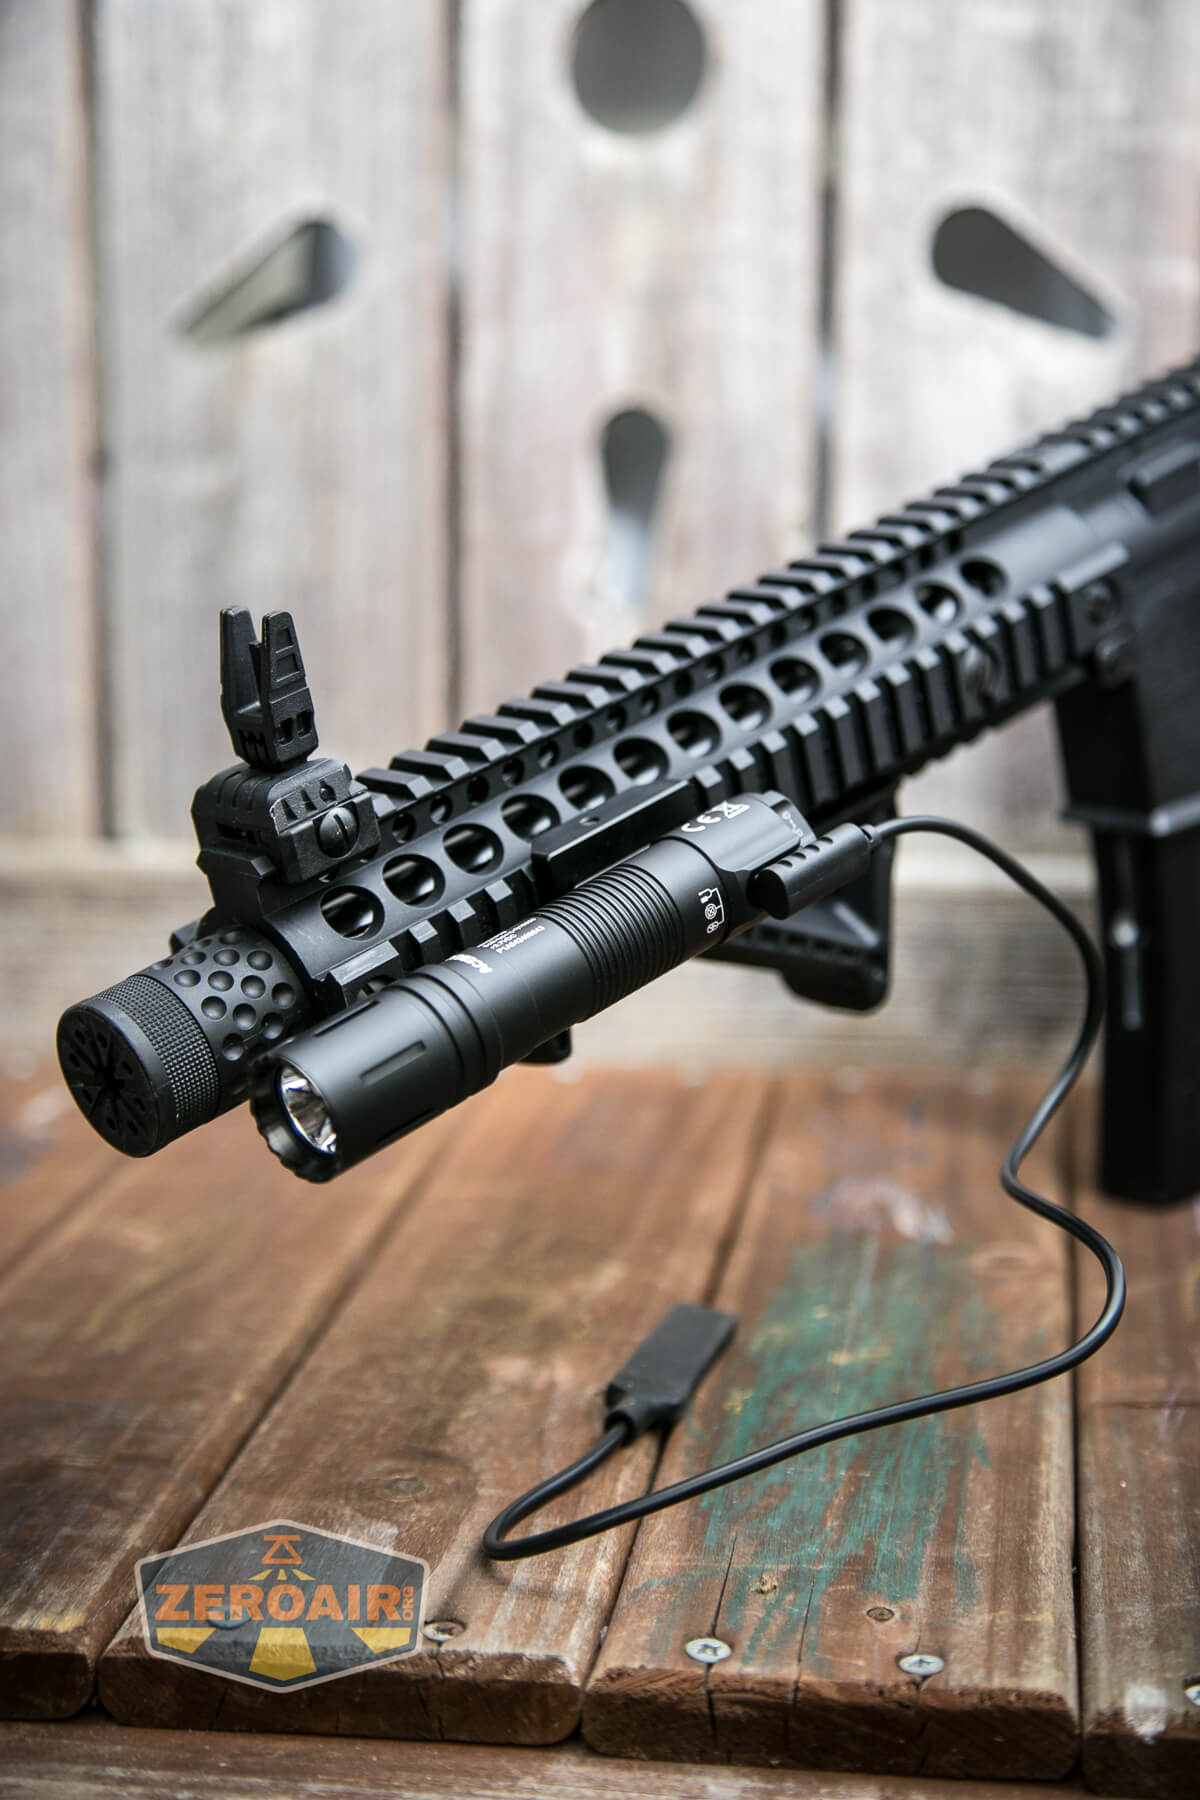
Acebeam even includes an attachment for the remote switch itself. I didn’t know what this was when doing photos, so I didn’t get any of it in action. But that remote switch (above) slips into this part (below), and the rails slip over the Picatinny rails of your weapon. This is a flexible (non-metal) adapter.
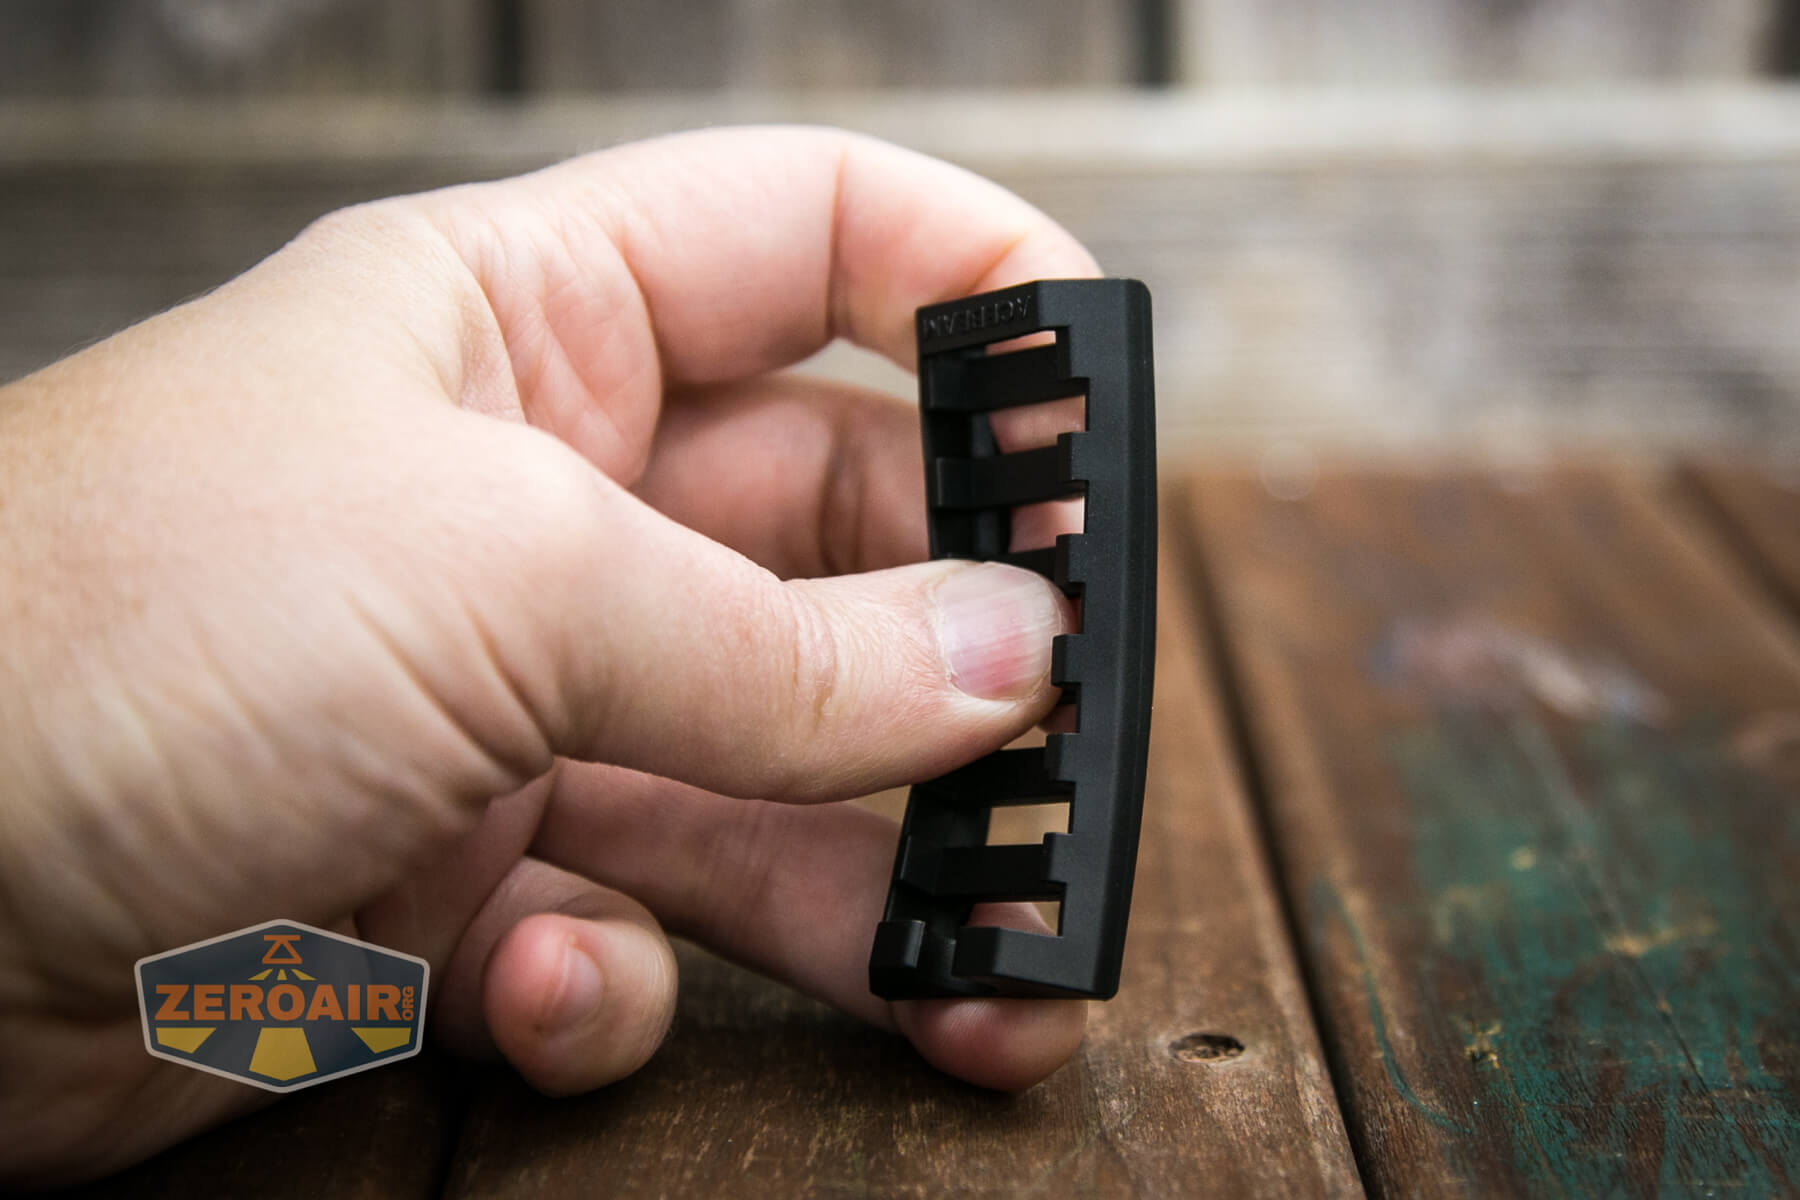
Again, I’d call that a fairly clever solution, and it allows you to put the remote switch where you really want it.
Below is a display of the charging cable attached.
One final point on attachment. While the pocket clip (when removed) isn’t perfect for this, it does work well for tightening this screw. Even a thick coin would work too – the gap there is very generous.

Power and Runtime
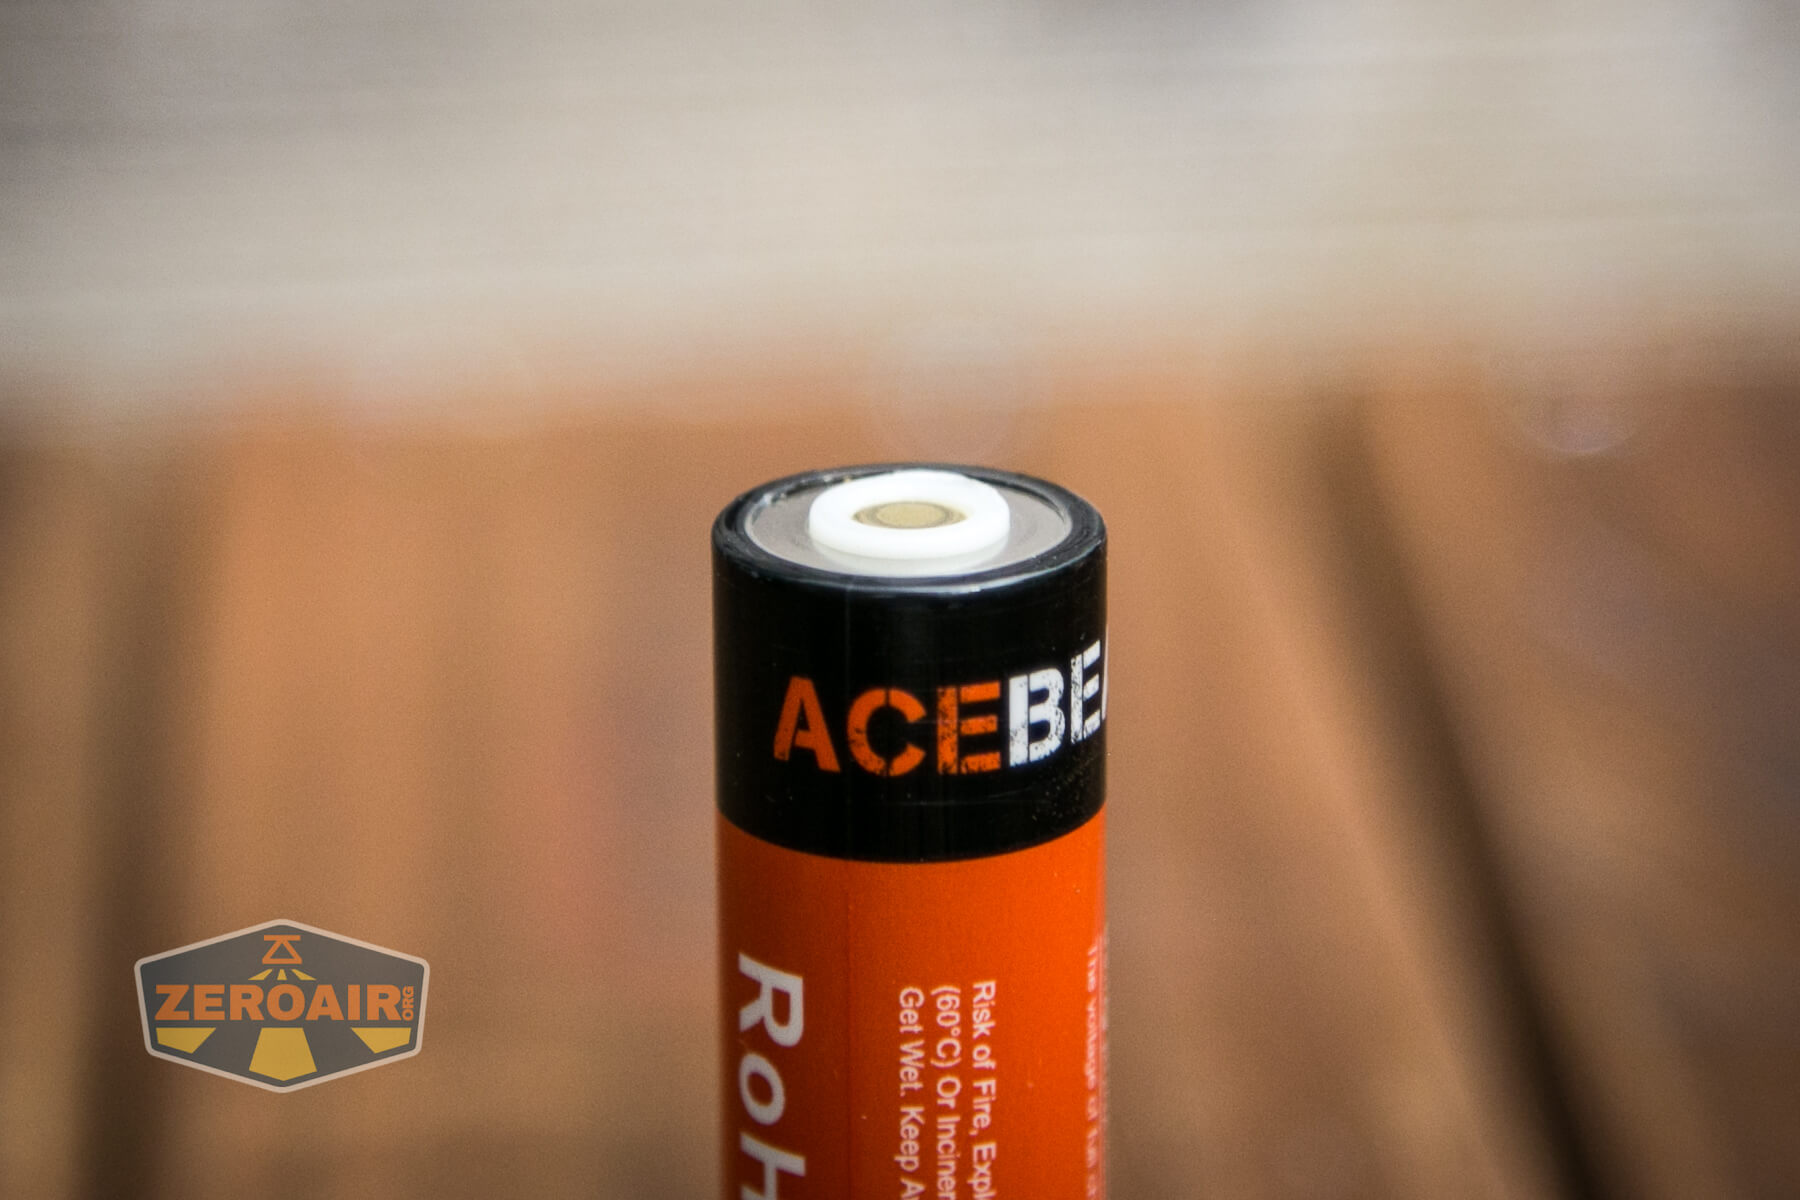
Acebeam includes with all kit levels the required cell for running the P15. It’s an 18650 cell, and has a capacity of 3100mAh.
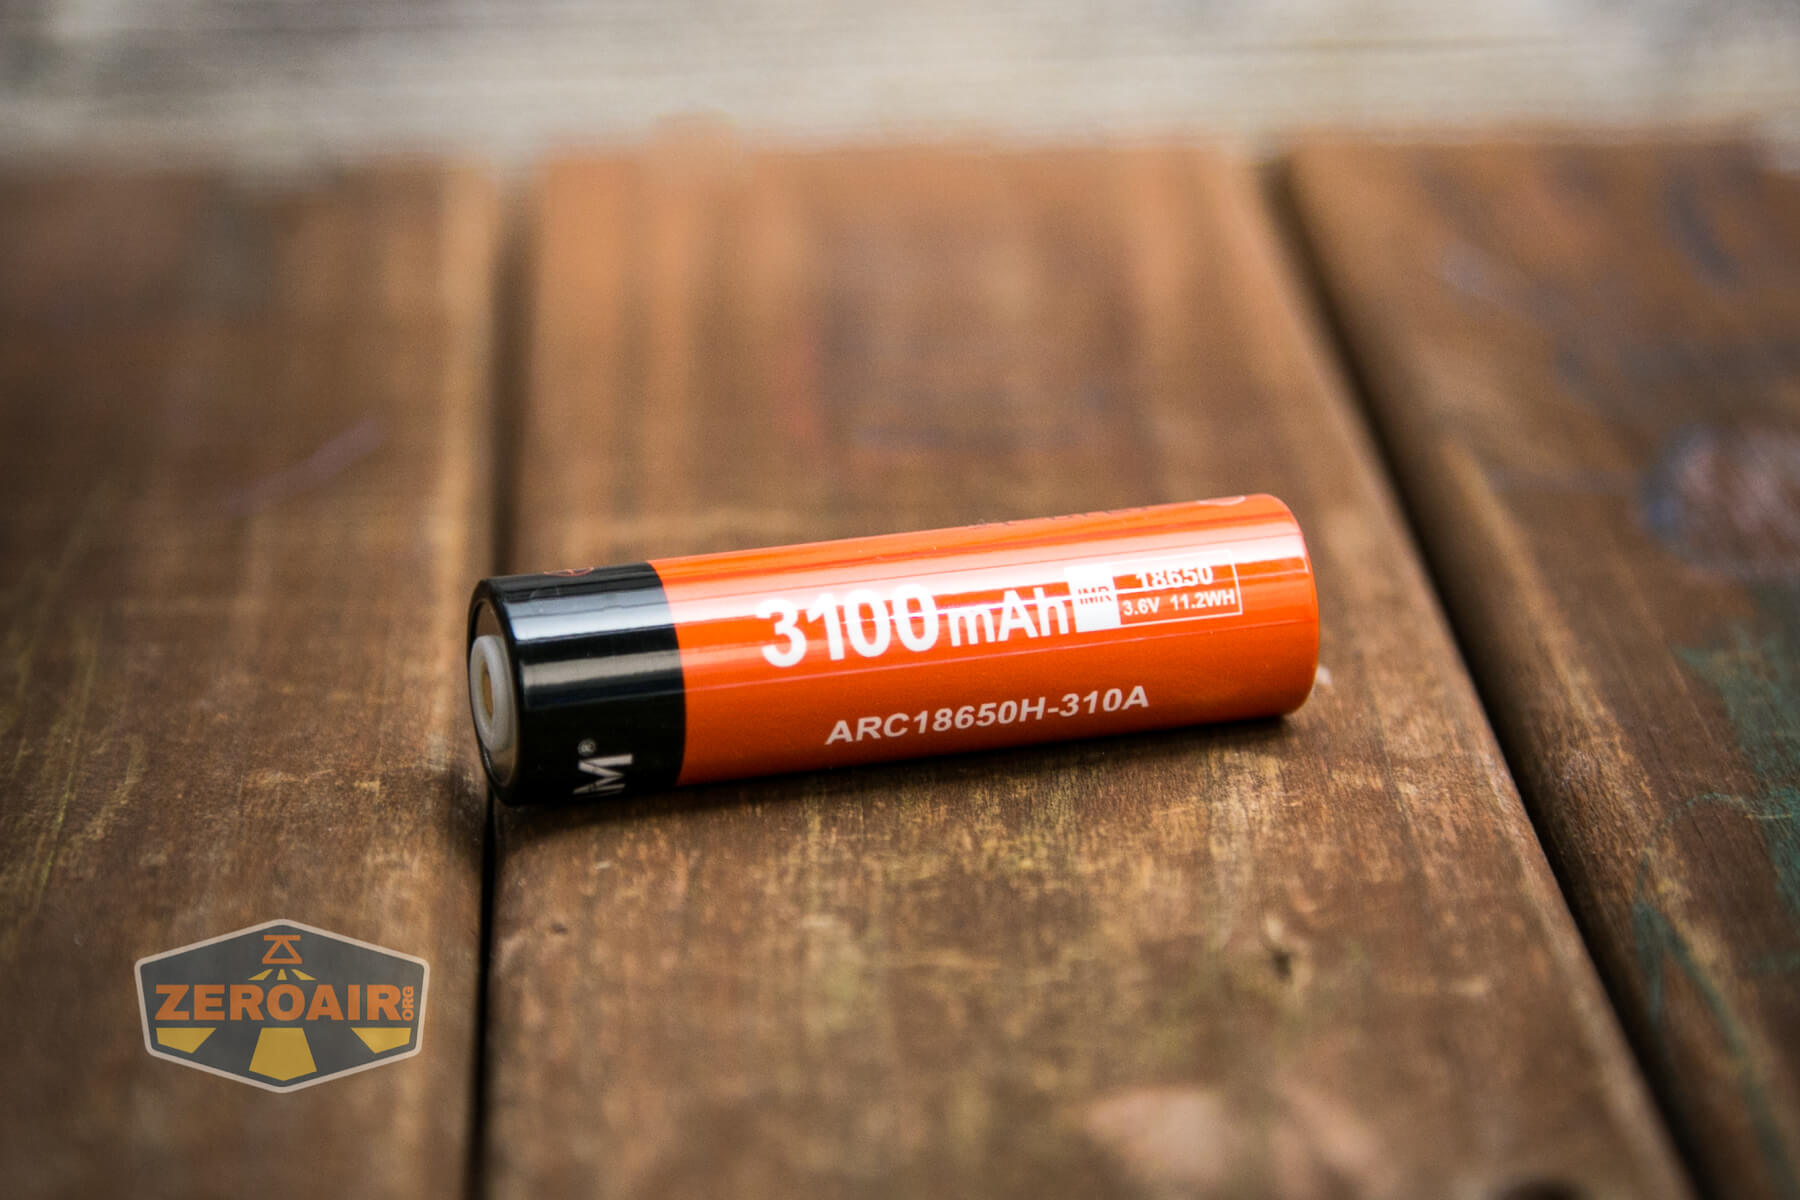
As you can see, this cell has both positive (center) and negative (ring) connections on the positive end.
That’s because of the connection points seen below – both positive and negative connections are seen on the head. I asked Acebeam specifically about this because cells like this are proprietary (typically) and often frowned upon by the community. The cell is made this way to allow the switch to be integrated into the tail. This prevents the need for an inner sleeve and improves the shock resistance of the light as a whole.
I personally understand the complaints, but I also personally have and have purchased plenty of lights with this cell setup, and it does not bother me. I am unlikely to swap other cells into this light, and with onboard charging, I’m fairly unlikely to even remove this cell from the light. So “whatever” – if it improves the reliability of the P15, then great!
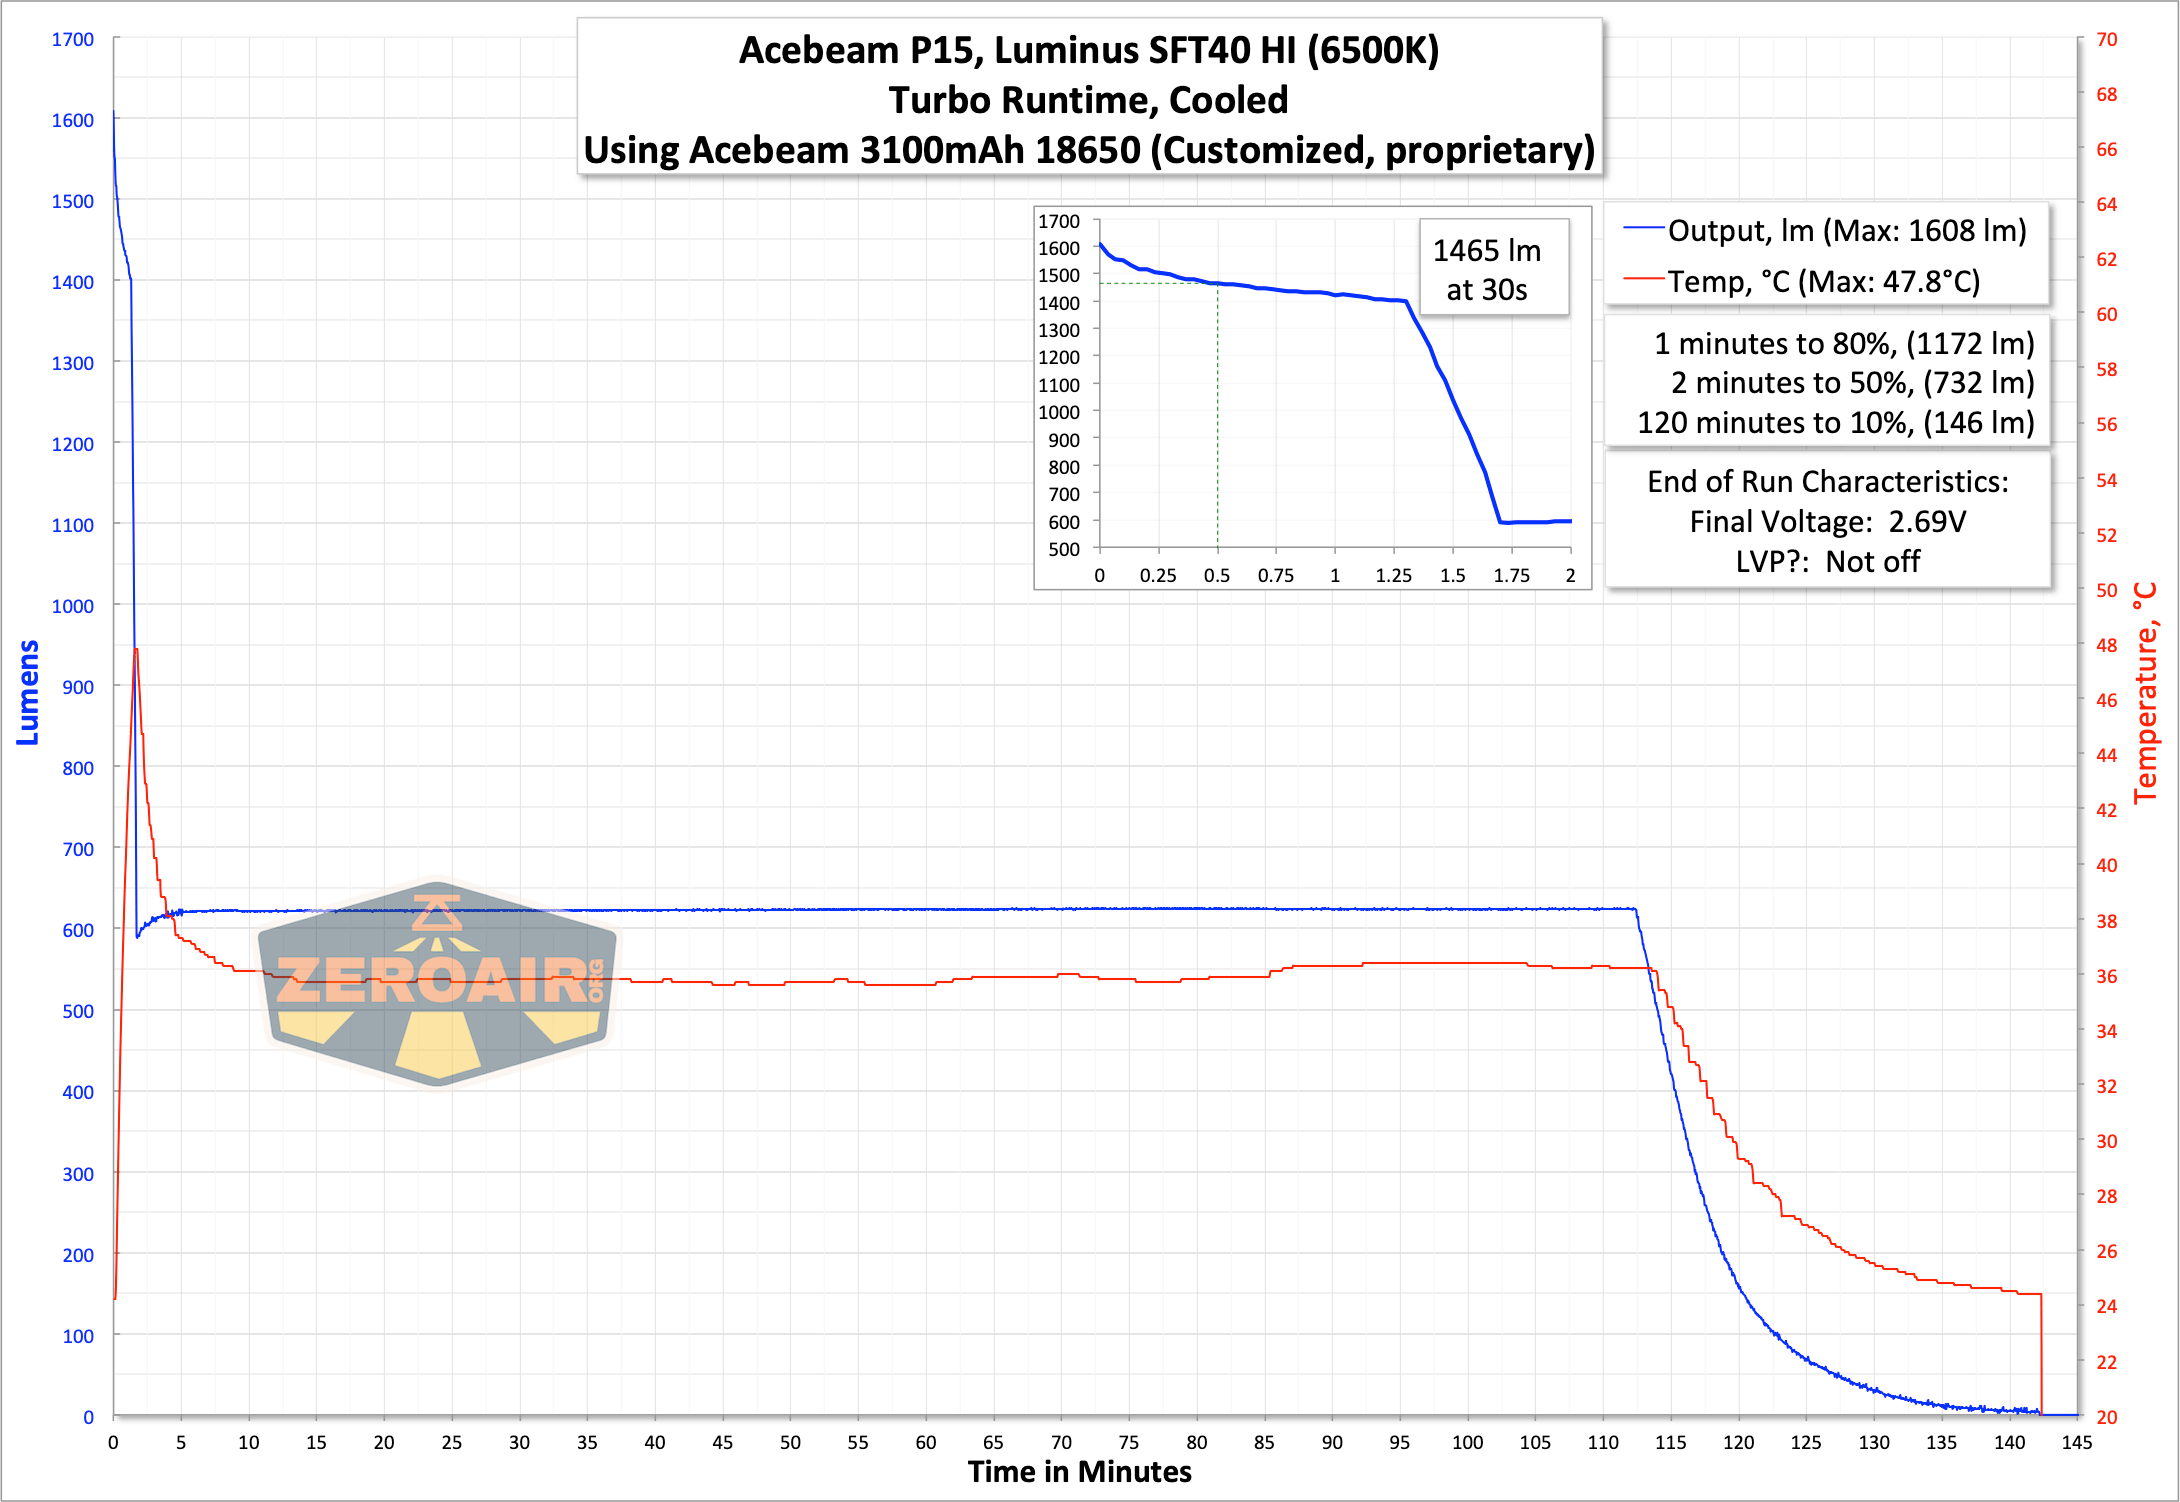
Here are a few runtime tests. Performance is good – we see a Turbo output nearly stable for 1.25m – that’s respectable. Then the stepdown to over 600 lumens has a nice flat output, too.
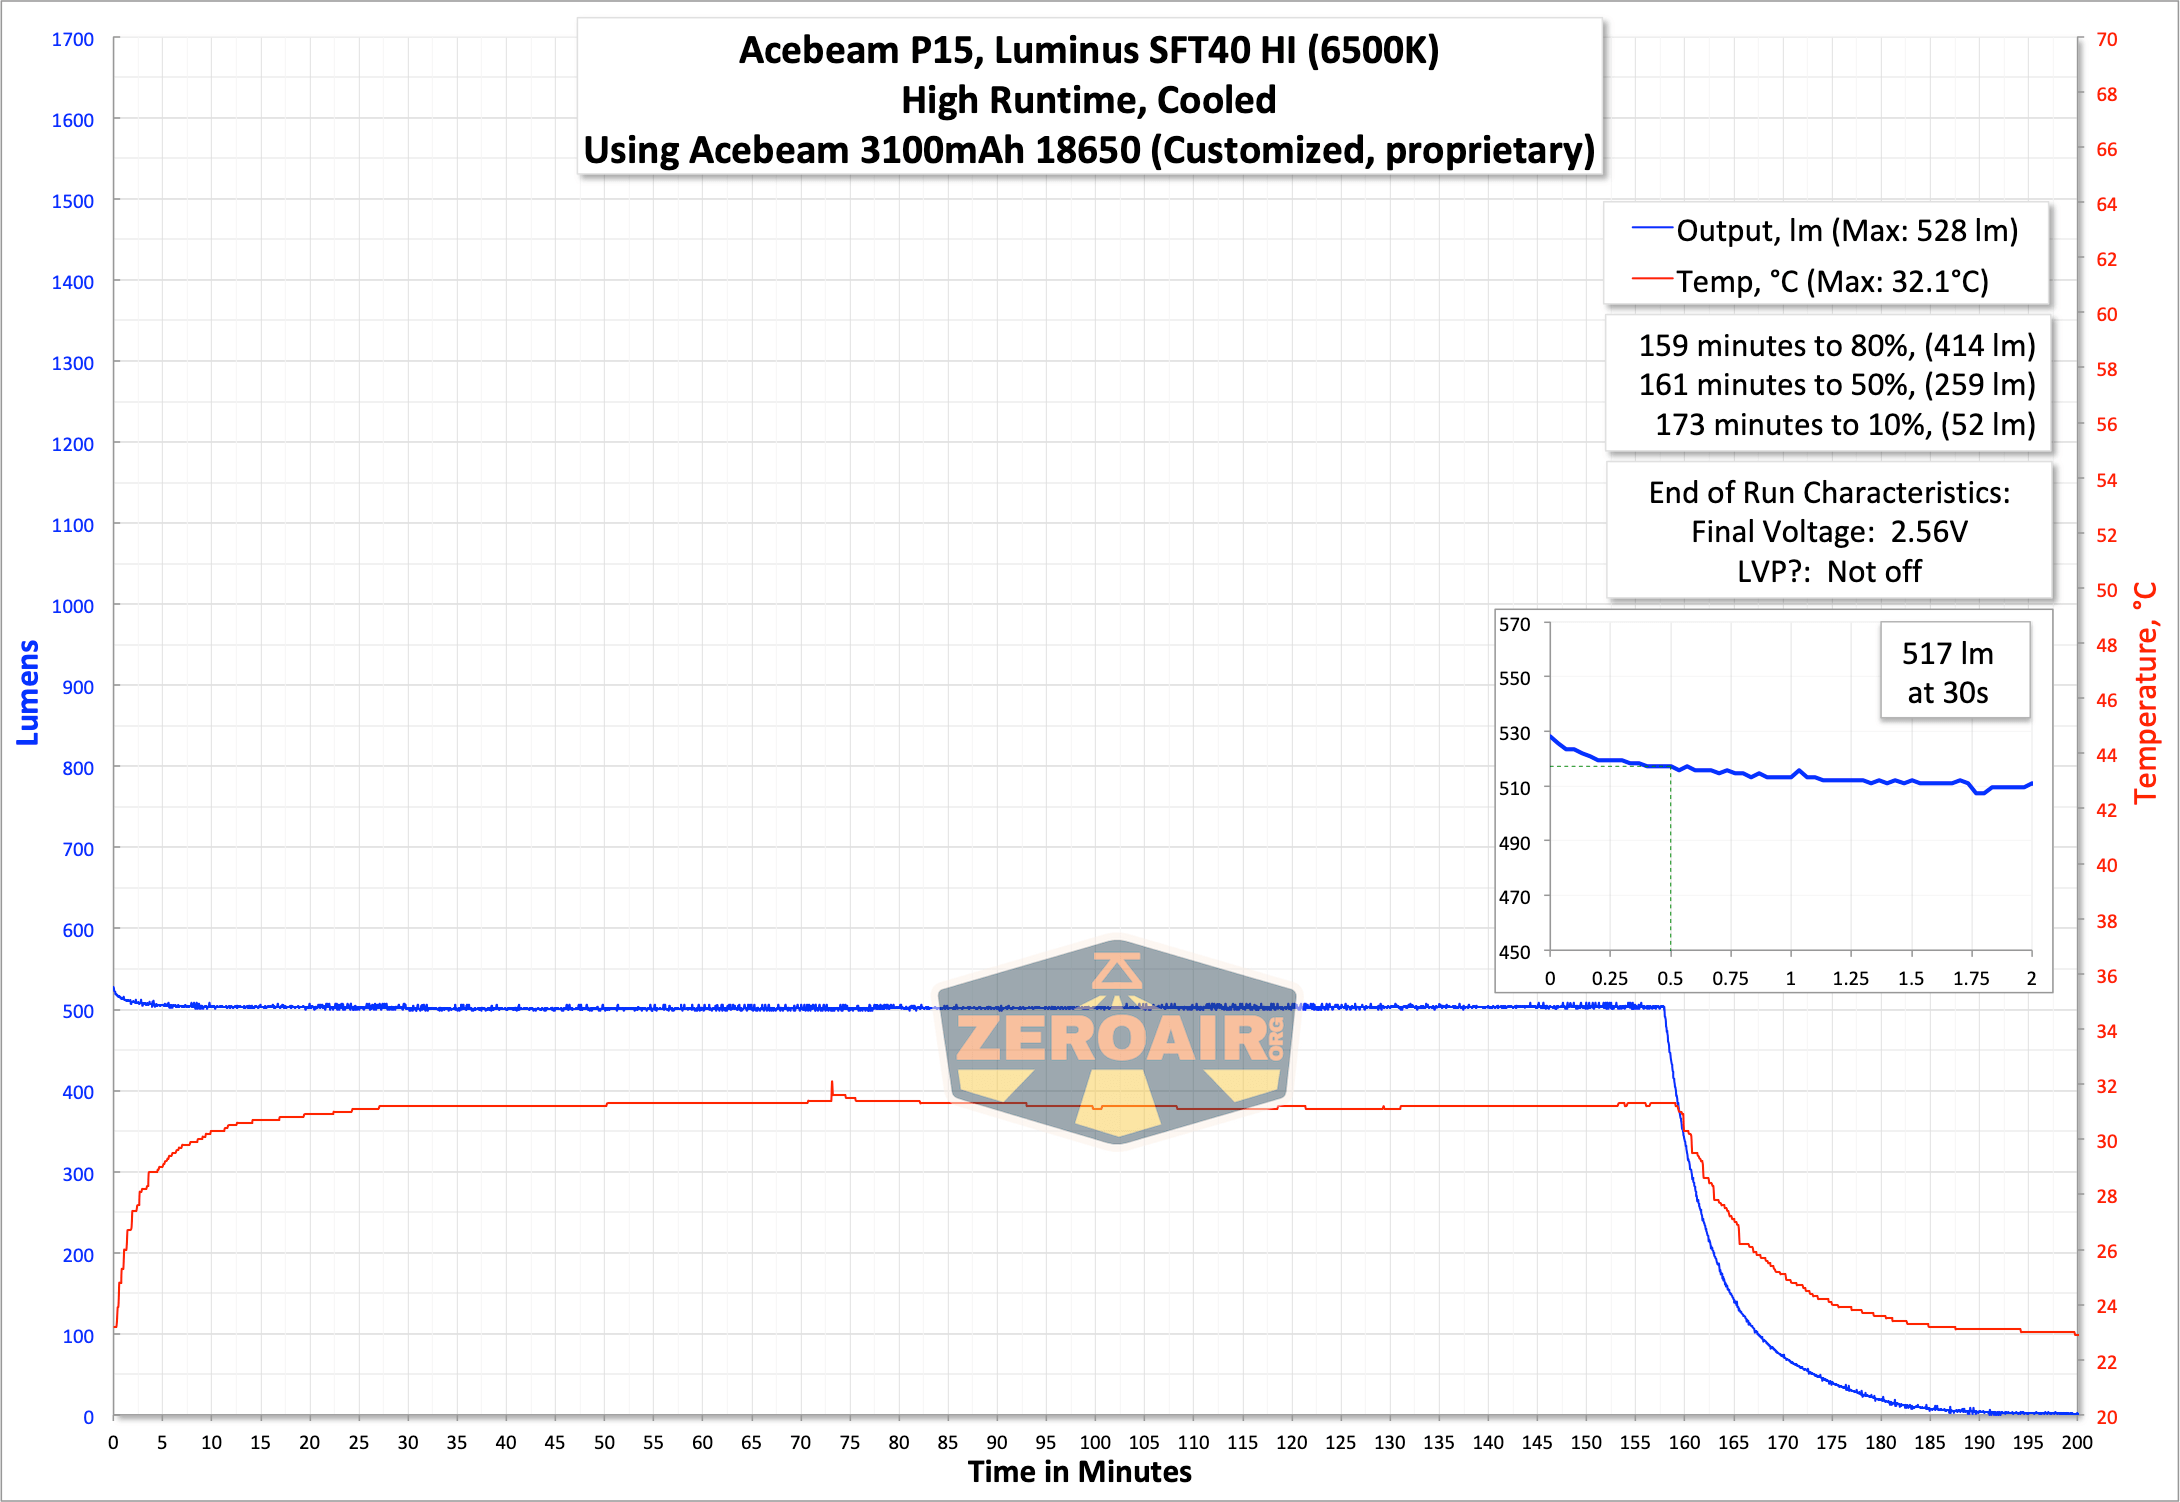
Here’s “High” – note that the output on high is lower than the output after the Turbo stepdown – i.e., Turbo does not step down to “high.” Output on High is exceptionally flat and lasts well over 2 hours at this level. Very solid output.
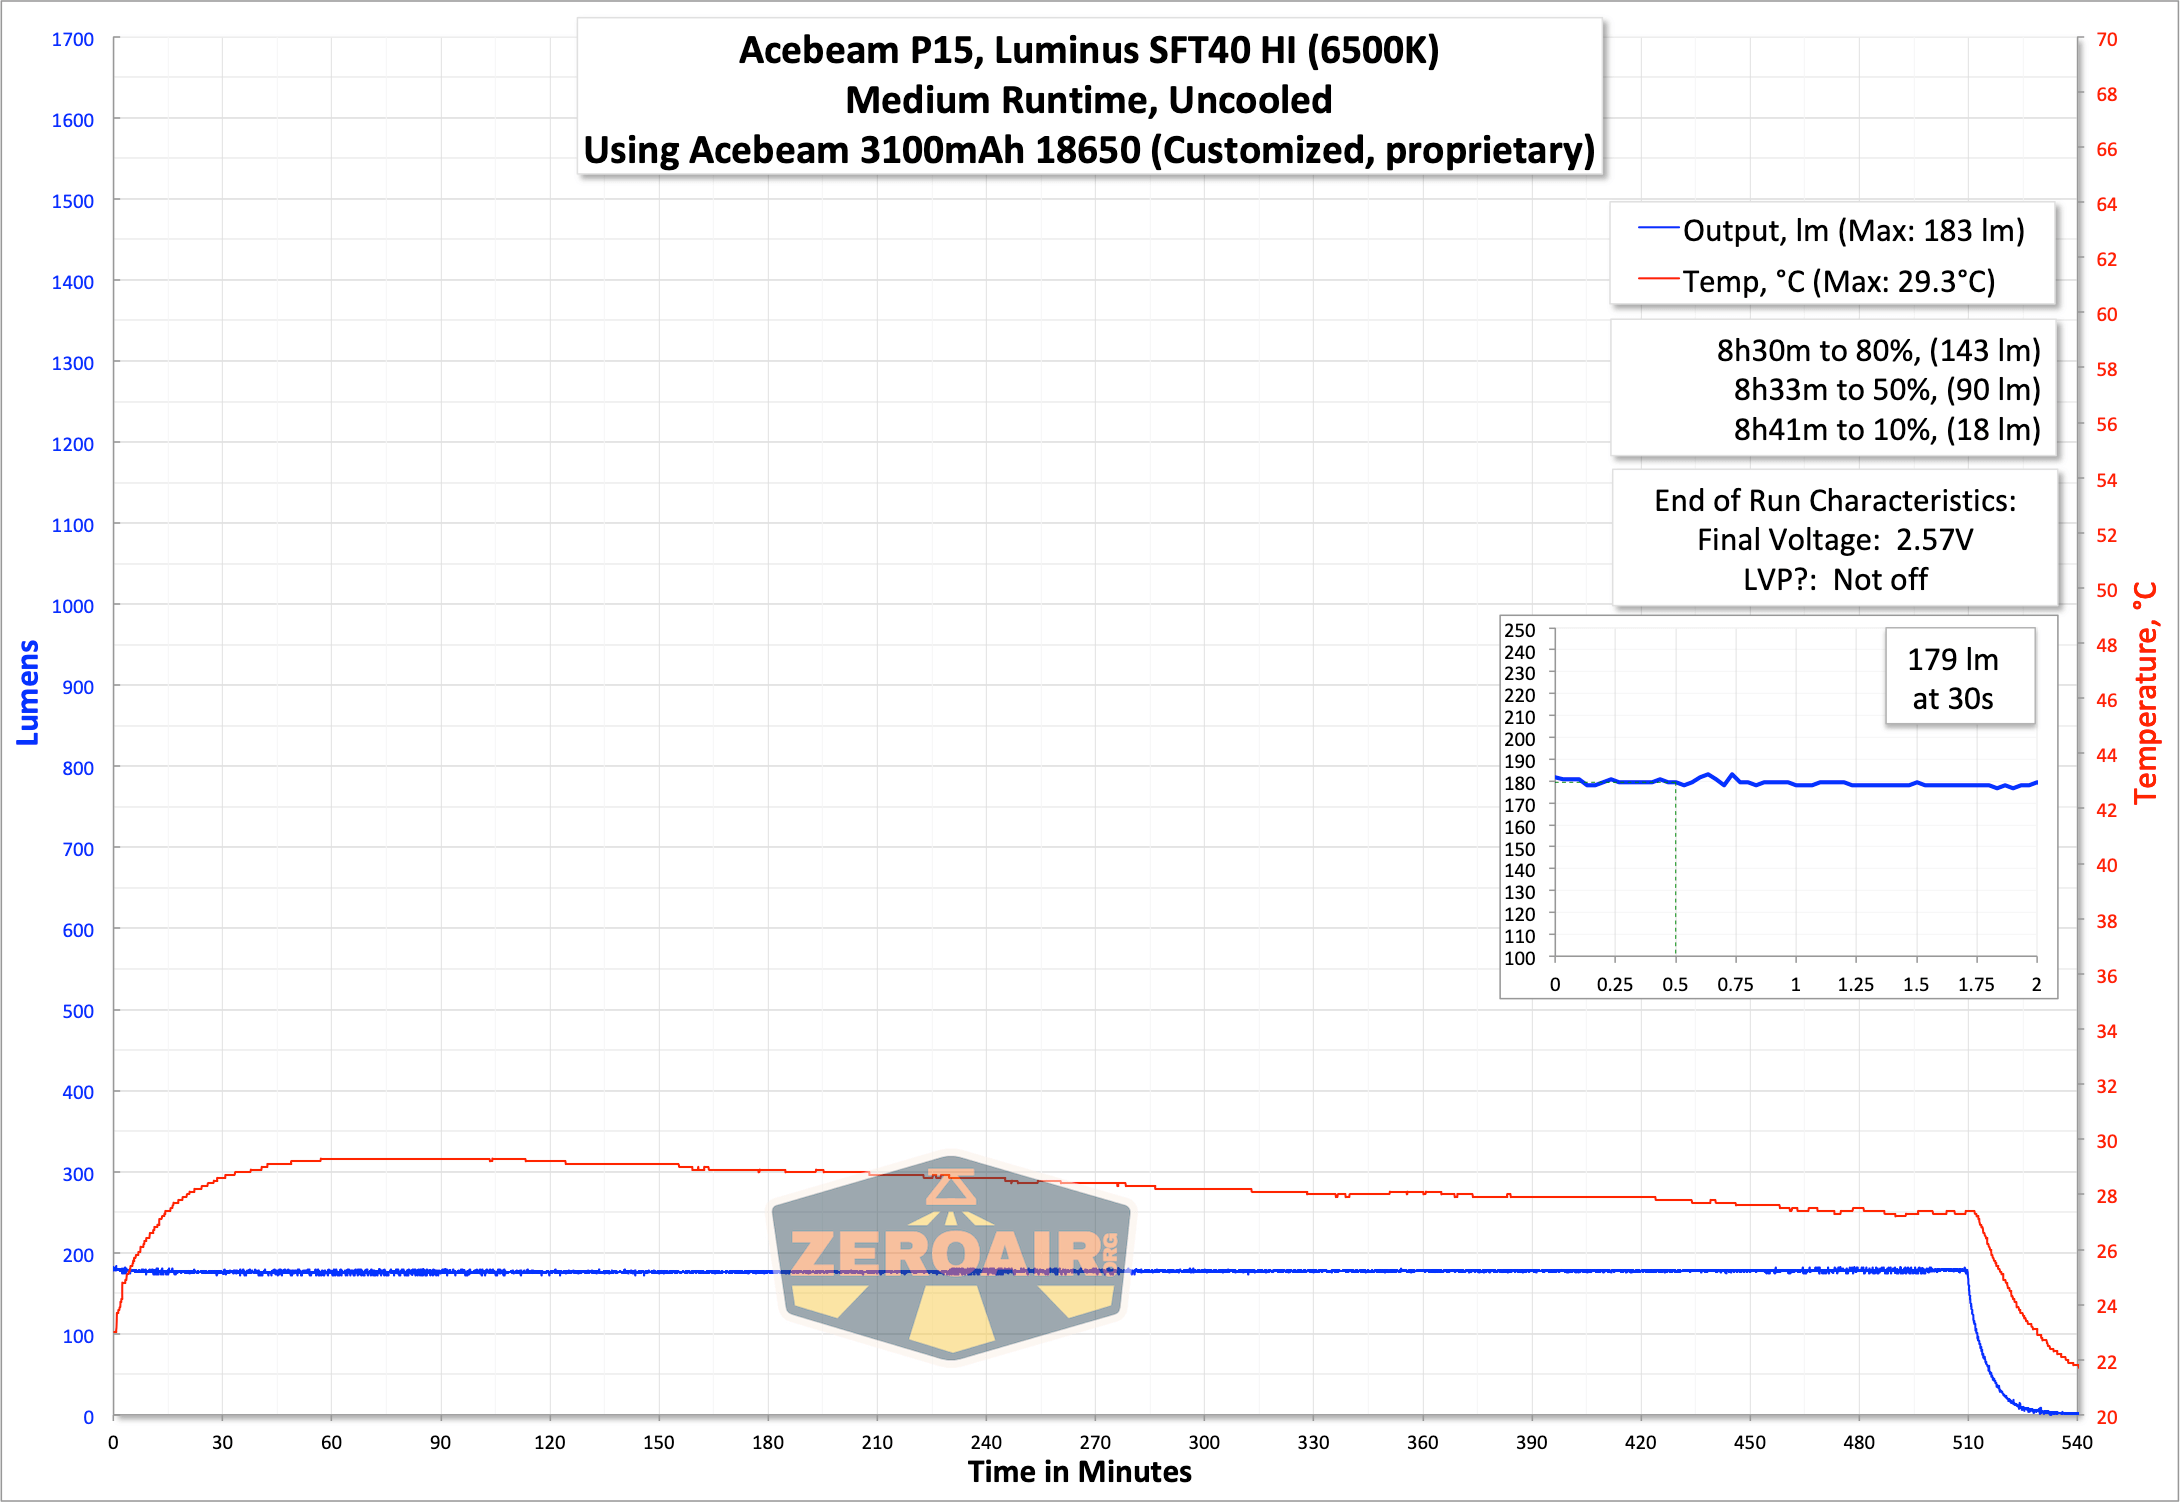
Same story with Medium – exceptionally flat output for the duration.
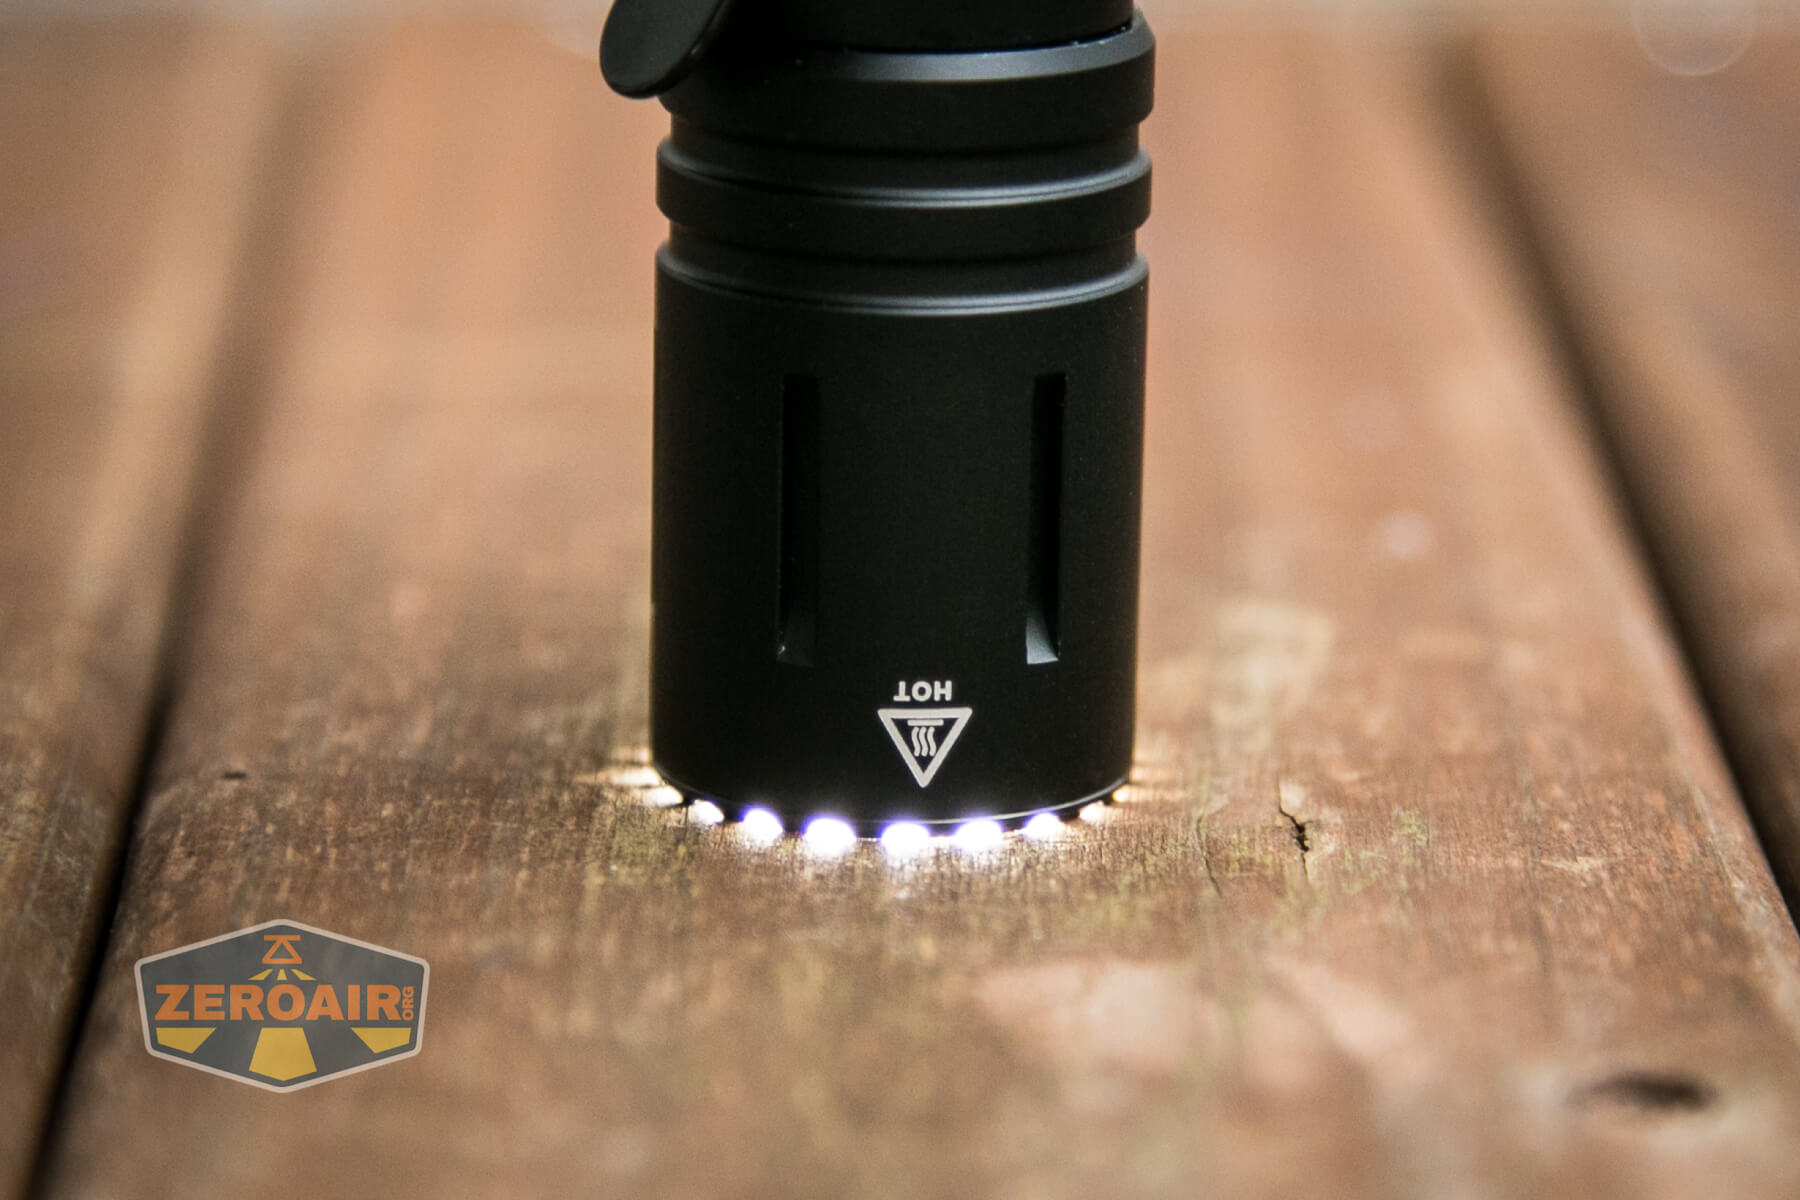
I didn’t observe the light shutting off once a lower voltage was reached by the cell. Typically, that’s what you’d want in a tactical light anyway, so no problems there. Surprisingly, the indicator LED on the side of the tail does not indicate the cell voltage during usage. I suppose that could be a tactical consideration, so I’ll give this one a pass too (but if your flashlight is on anyway, what would the voltage indicating LED being lit matter?)
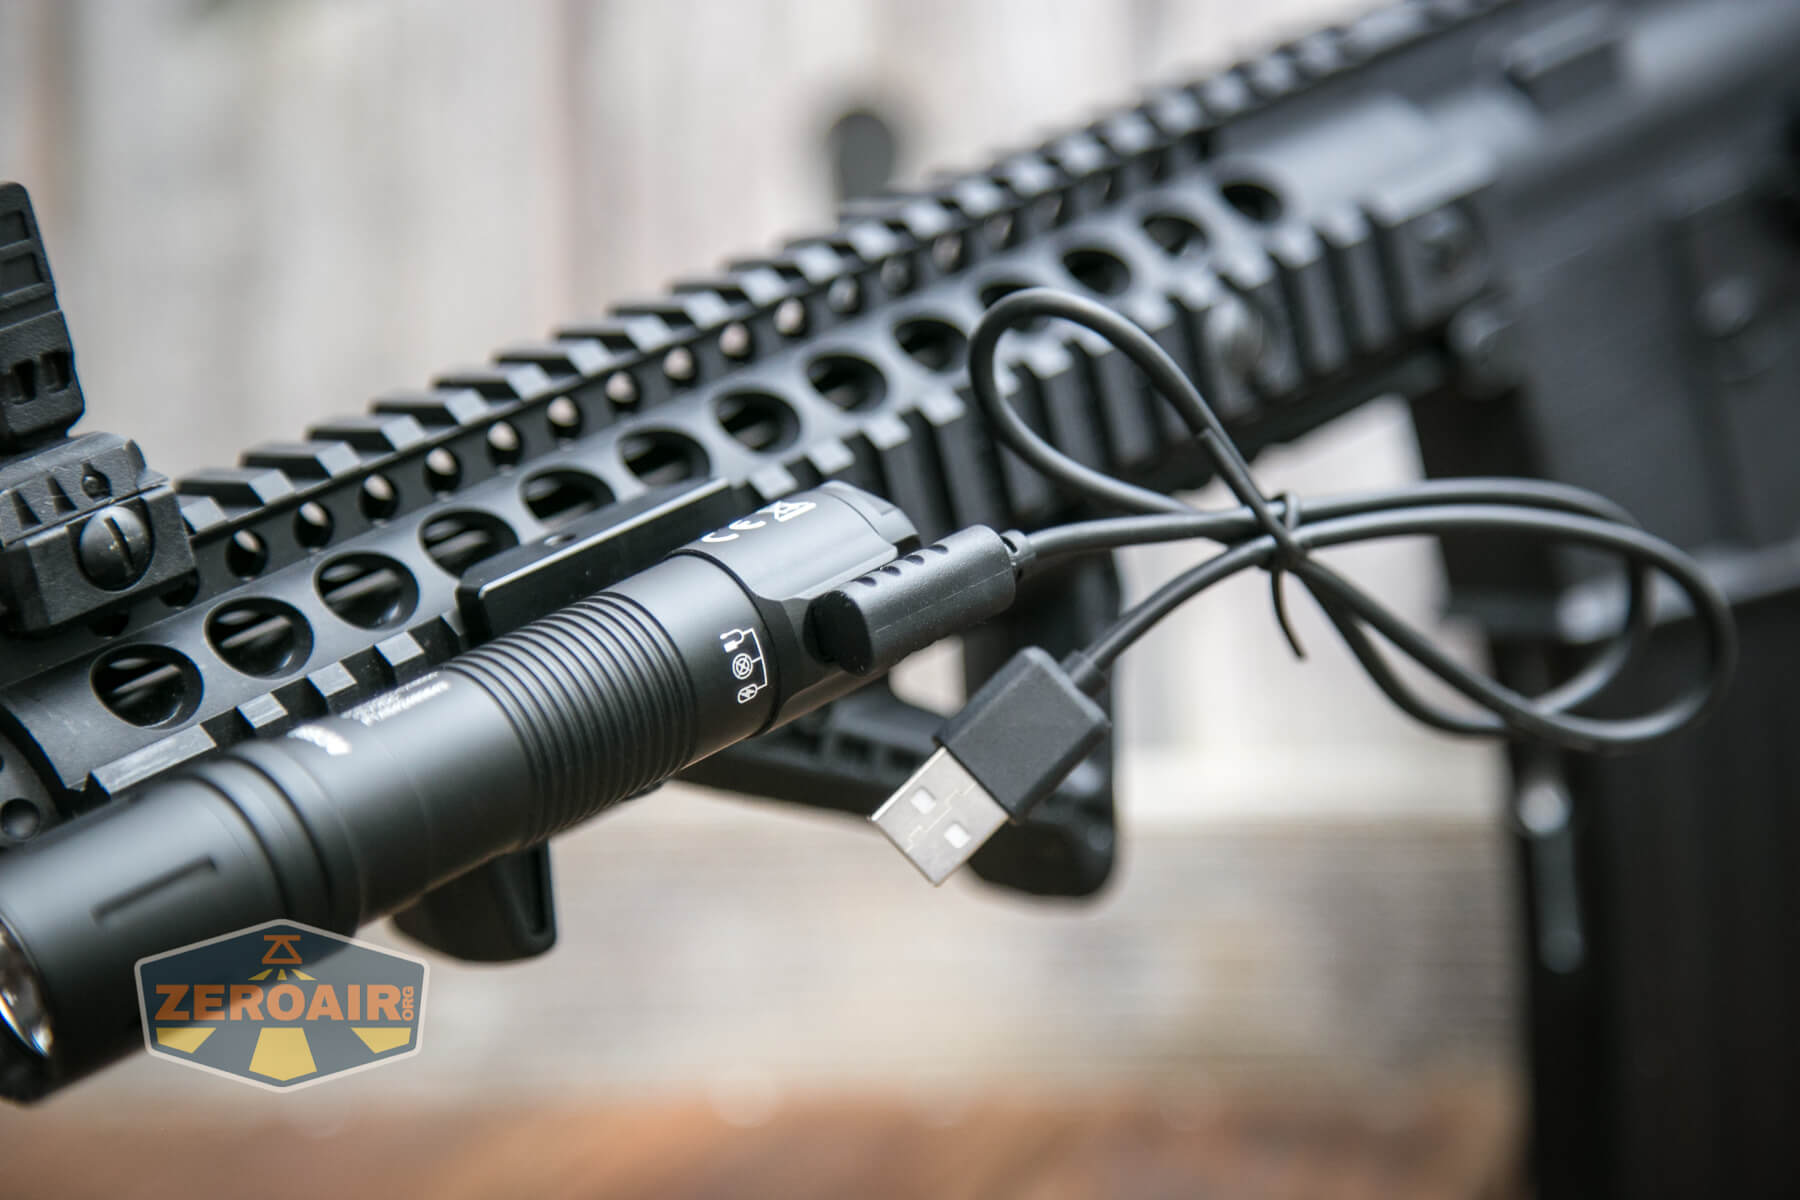
Charging
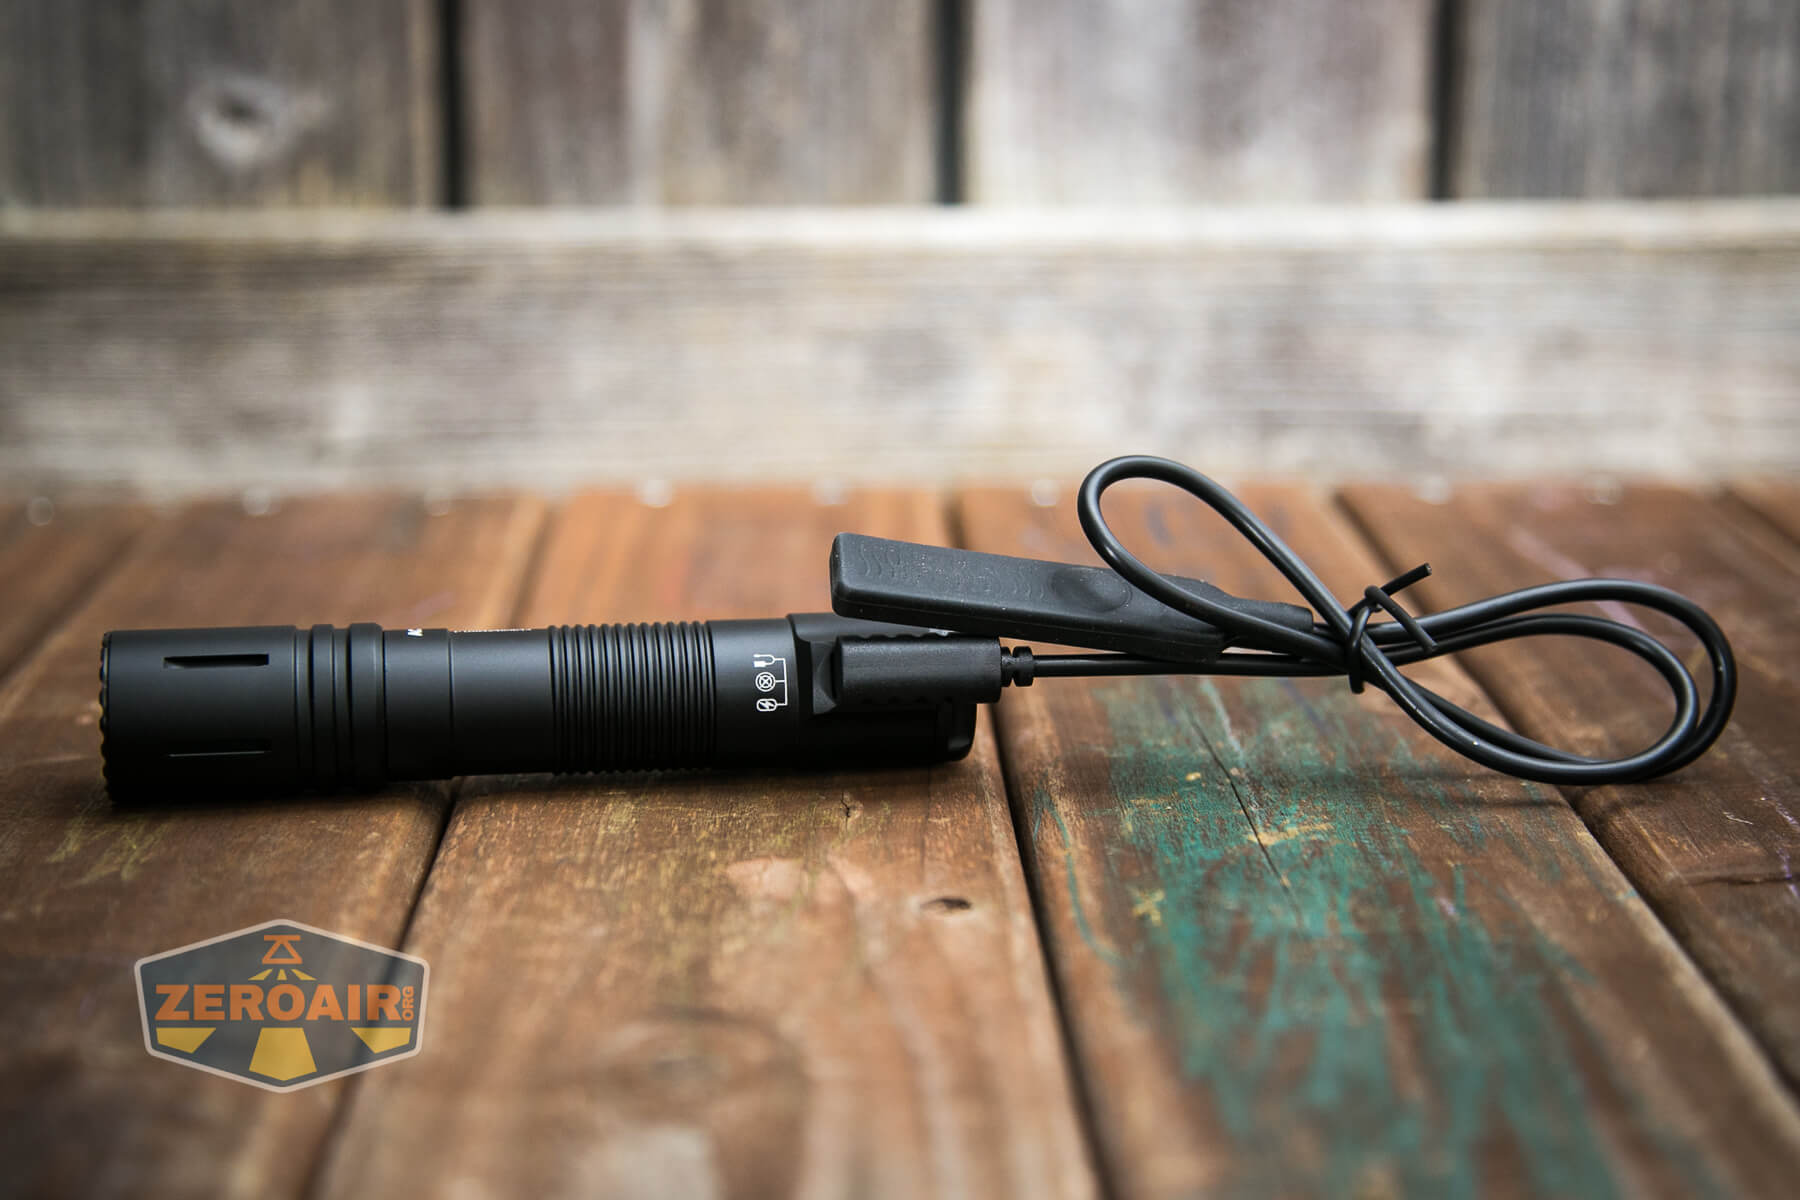
As stated above, the P15 has built-in charging. An appropriate cable is included – USB to proprietary “slip-in” connector.
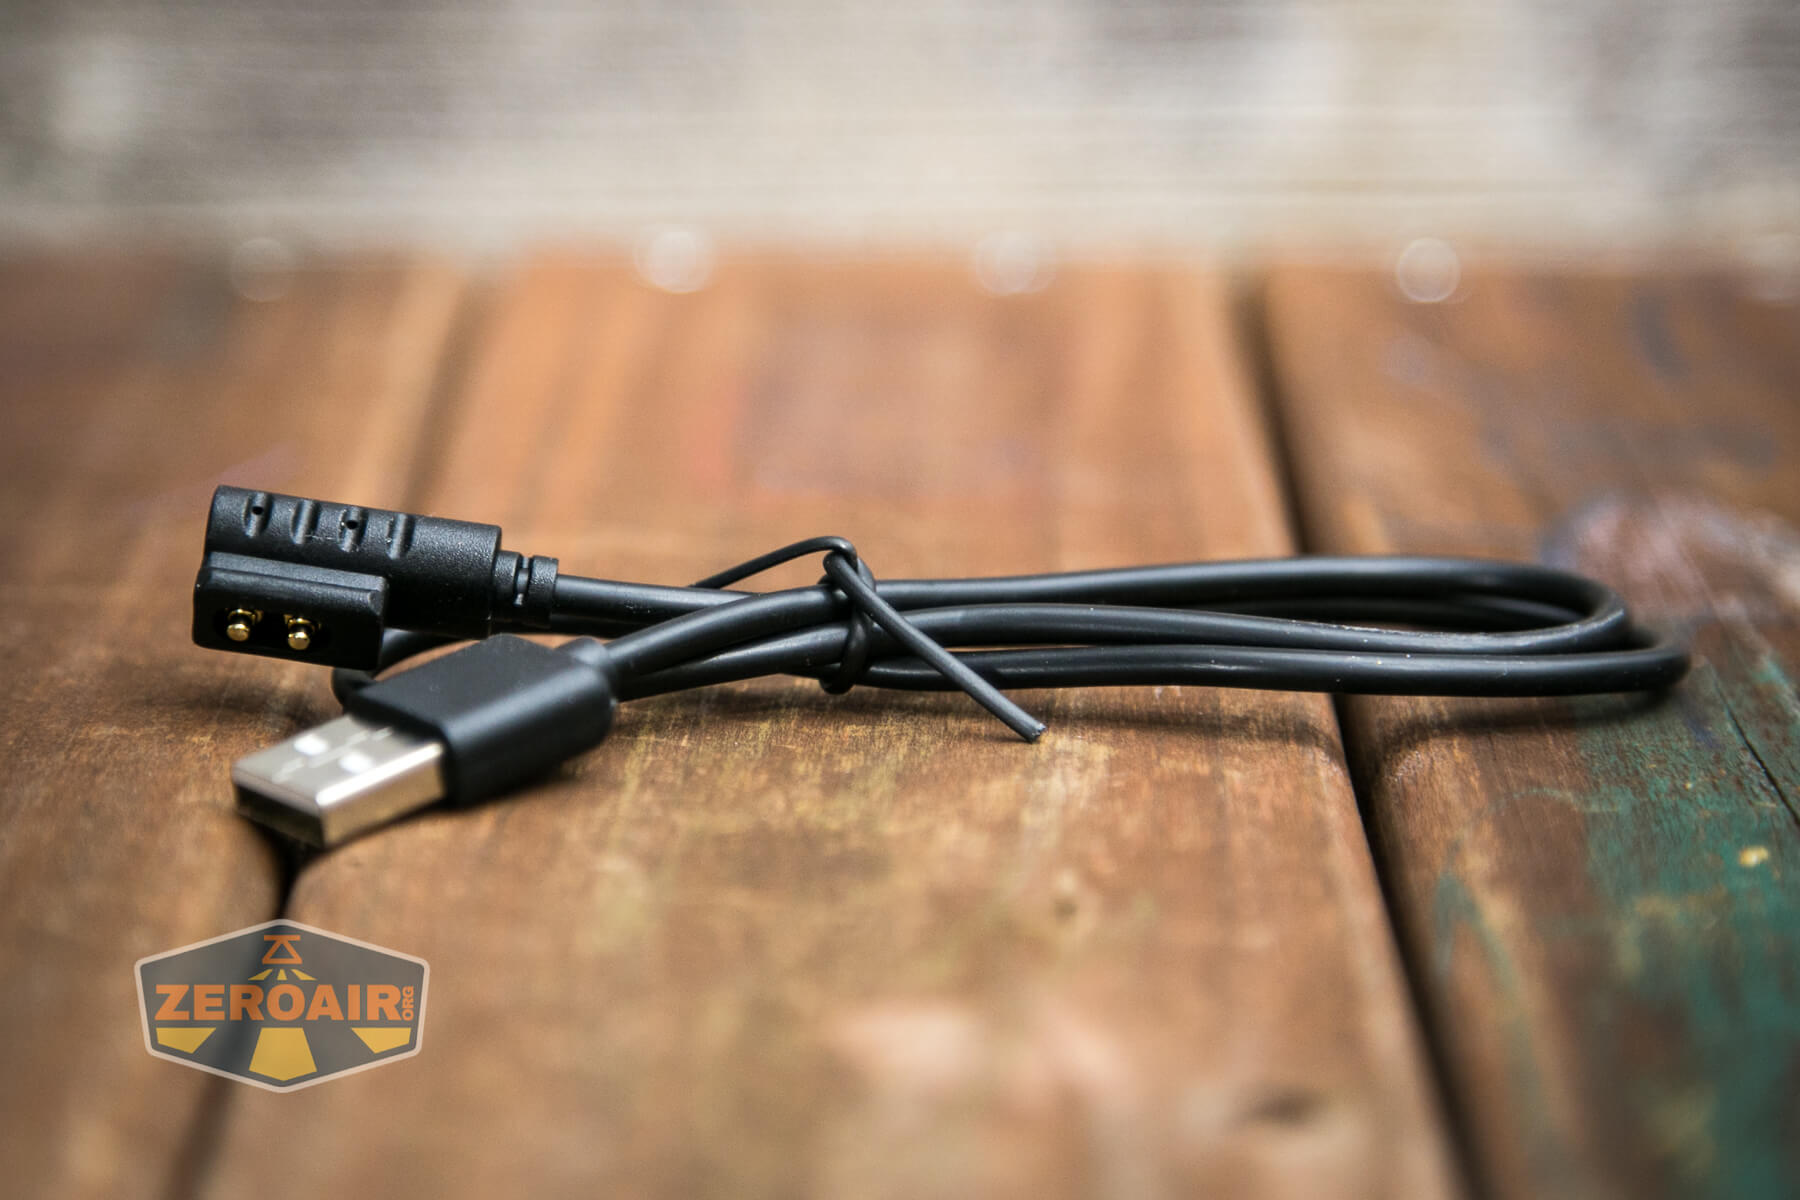
Only one connection is available on the P15 at any time, so if you’re charging the light, you can’t (for example) also have the remote switch attached. You must remove one to use another.
Only while charging can this indicating LED seen below activate.
It’s a subtle but useful notification. While charging, the indicator is red. When charging is complete, the LED switches to green.
Here are a couple (yes, two!) charge graphs. The charge cycle is extremely consistent.
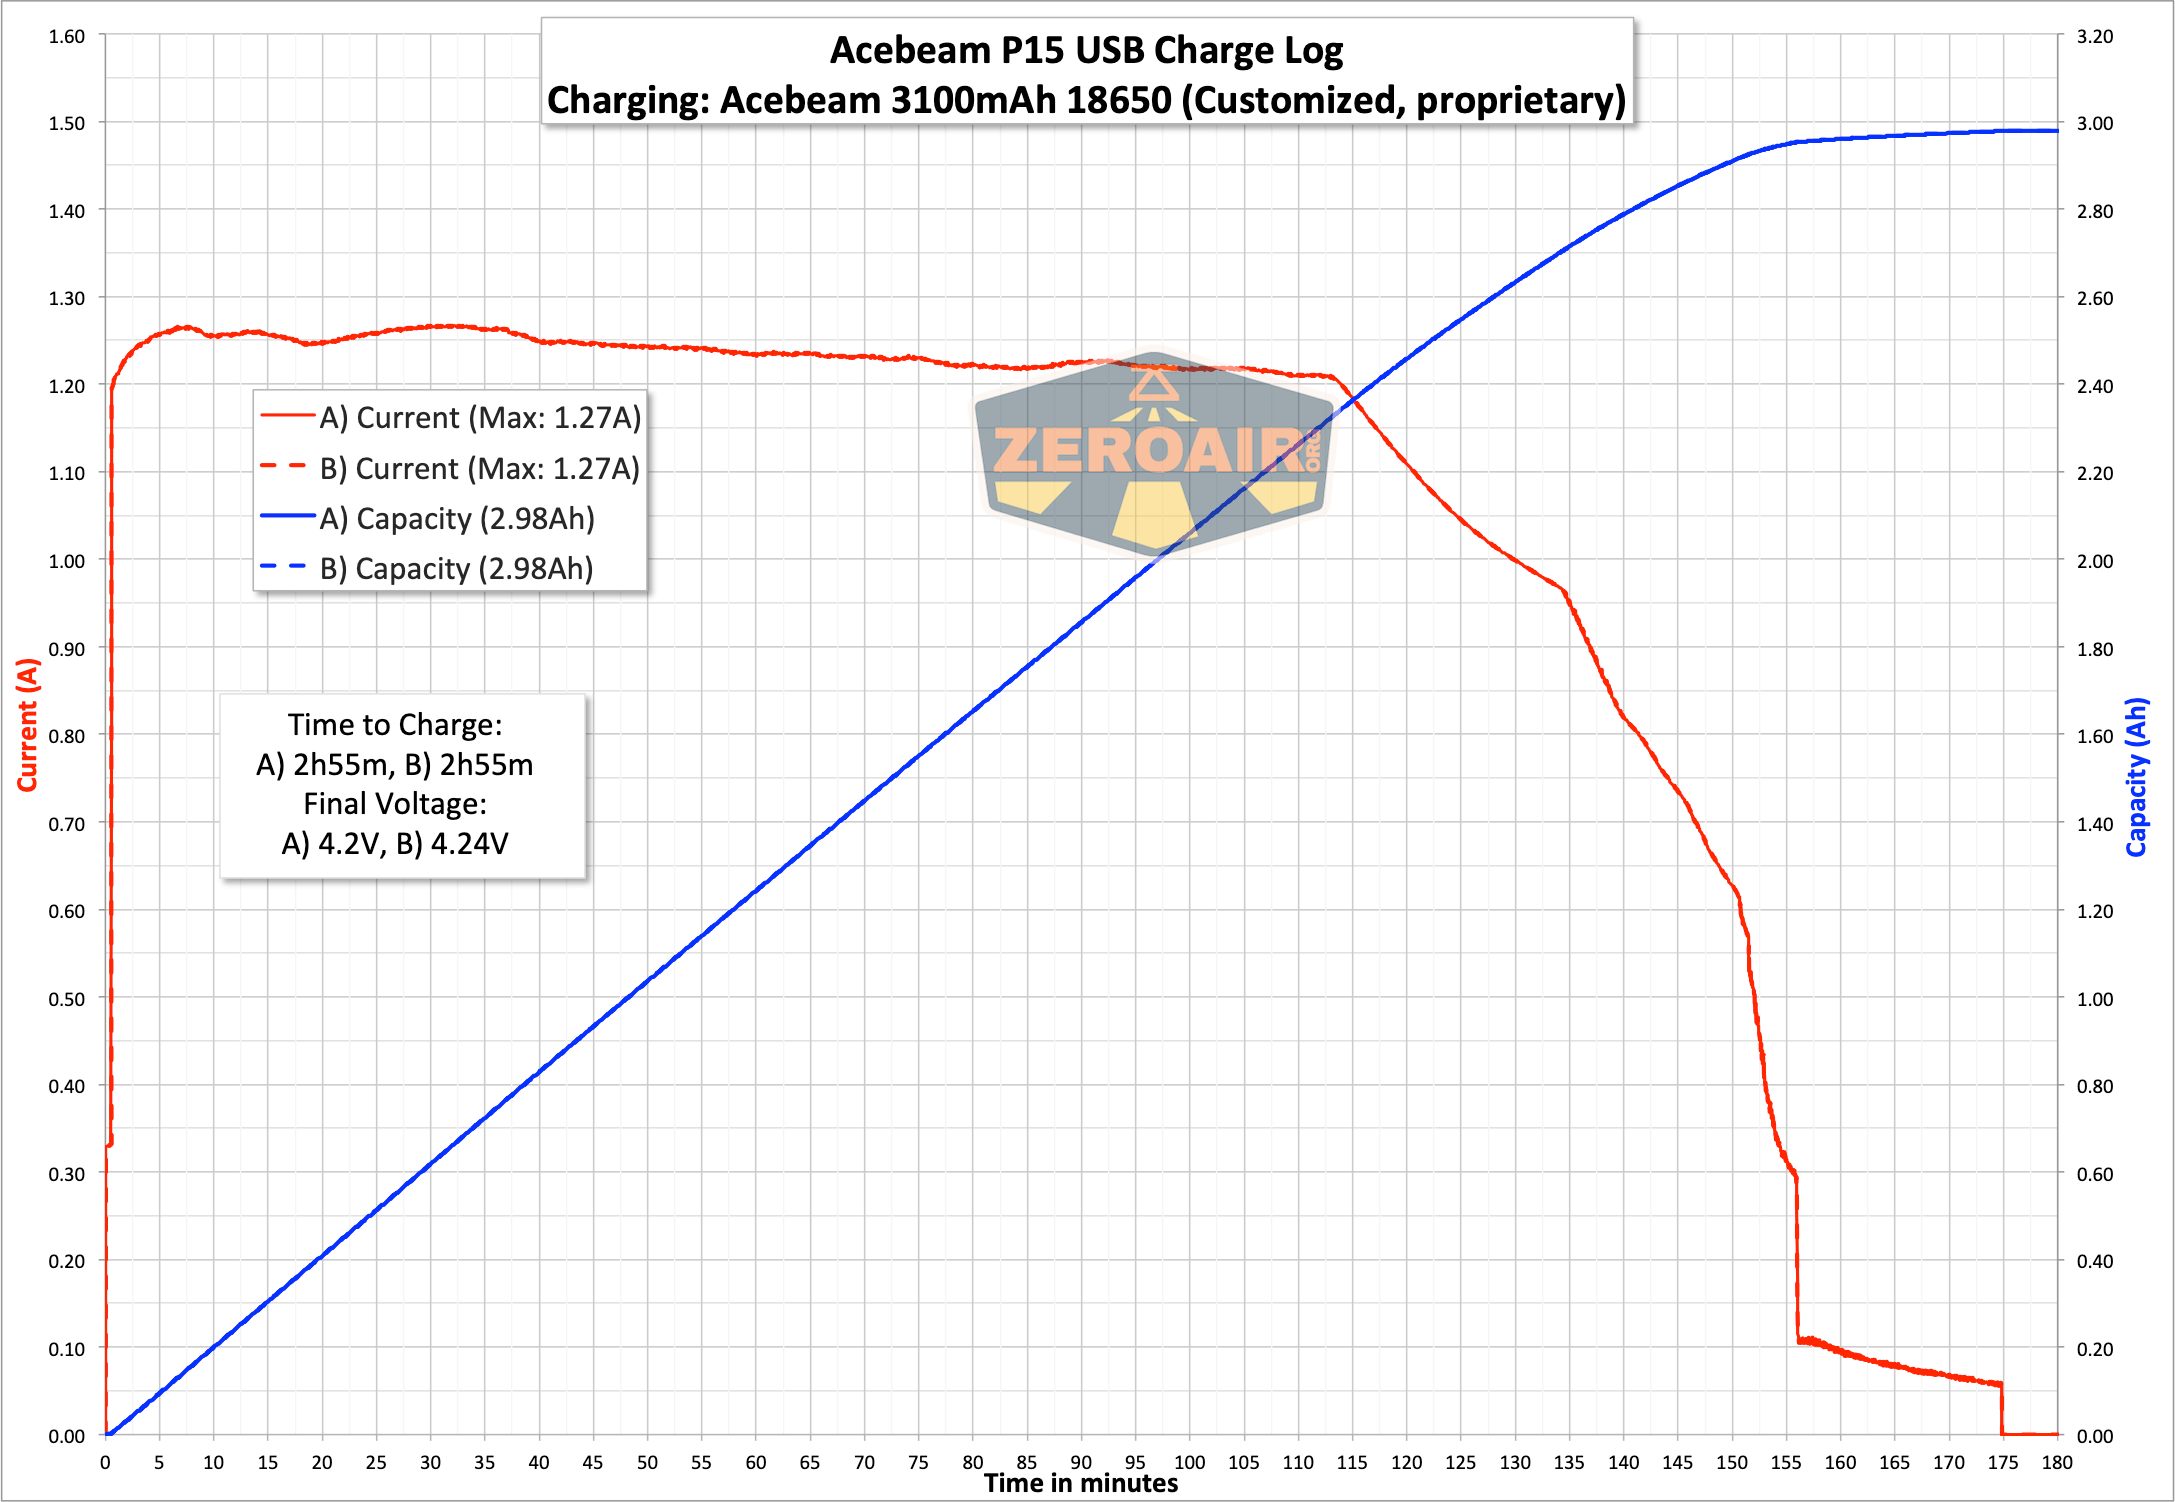
You’ll note in the data above that in one instance, this cell was charged to 4.24V. I mentioned this to Acebeam because normally I’d consider that overcharged. Acebeam said this cell is safe to charge to 4.35V, and that 4.24V is no problem. I do know more about it than this, but I will say that the 4.24V charge was an overnight charge. Maybe it’s best to just not leave the light on a charger for very long durations.
Modes and Currents
| Mode | Mode Claimed Output (lm) | Claimed Runtime | Measured Lumens | Tailcap Amps |
|---|---|---|---|---|
| Turbo | 1700 | 1h45m | 1465 | ? |
| High | 600 | 2h45m | 517 | ? |
| Med | 200 | 8h30m | 179 | ? |
| Low | 45 | 37h | 34.5 | ? |
| Ultra-Low | 2 | 35d | 0.4 | ? |
Pulse Width Modulation
I don’t see any PWM in any mode here. Looks good.
 Here you can see a “baseline” – a chart with almost no light hitting the sensor.
Then there’s the Ultrafire WF-602C flashlight, which has some of the worst PWM I’ve seen. It’s so bad that I used a post about it to explain PWM! Here are multiple timescales (10ms, 5ms, 2ms, 1ms, 0.5ms, 0.2ms) to make comparing this “worst” PWM light to the test light easier. That post also explains why I didn’t test the WF-602C at the usual 50us scale.
User Interface and Operation
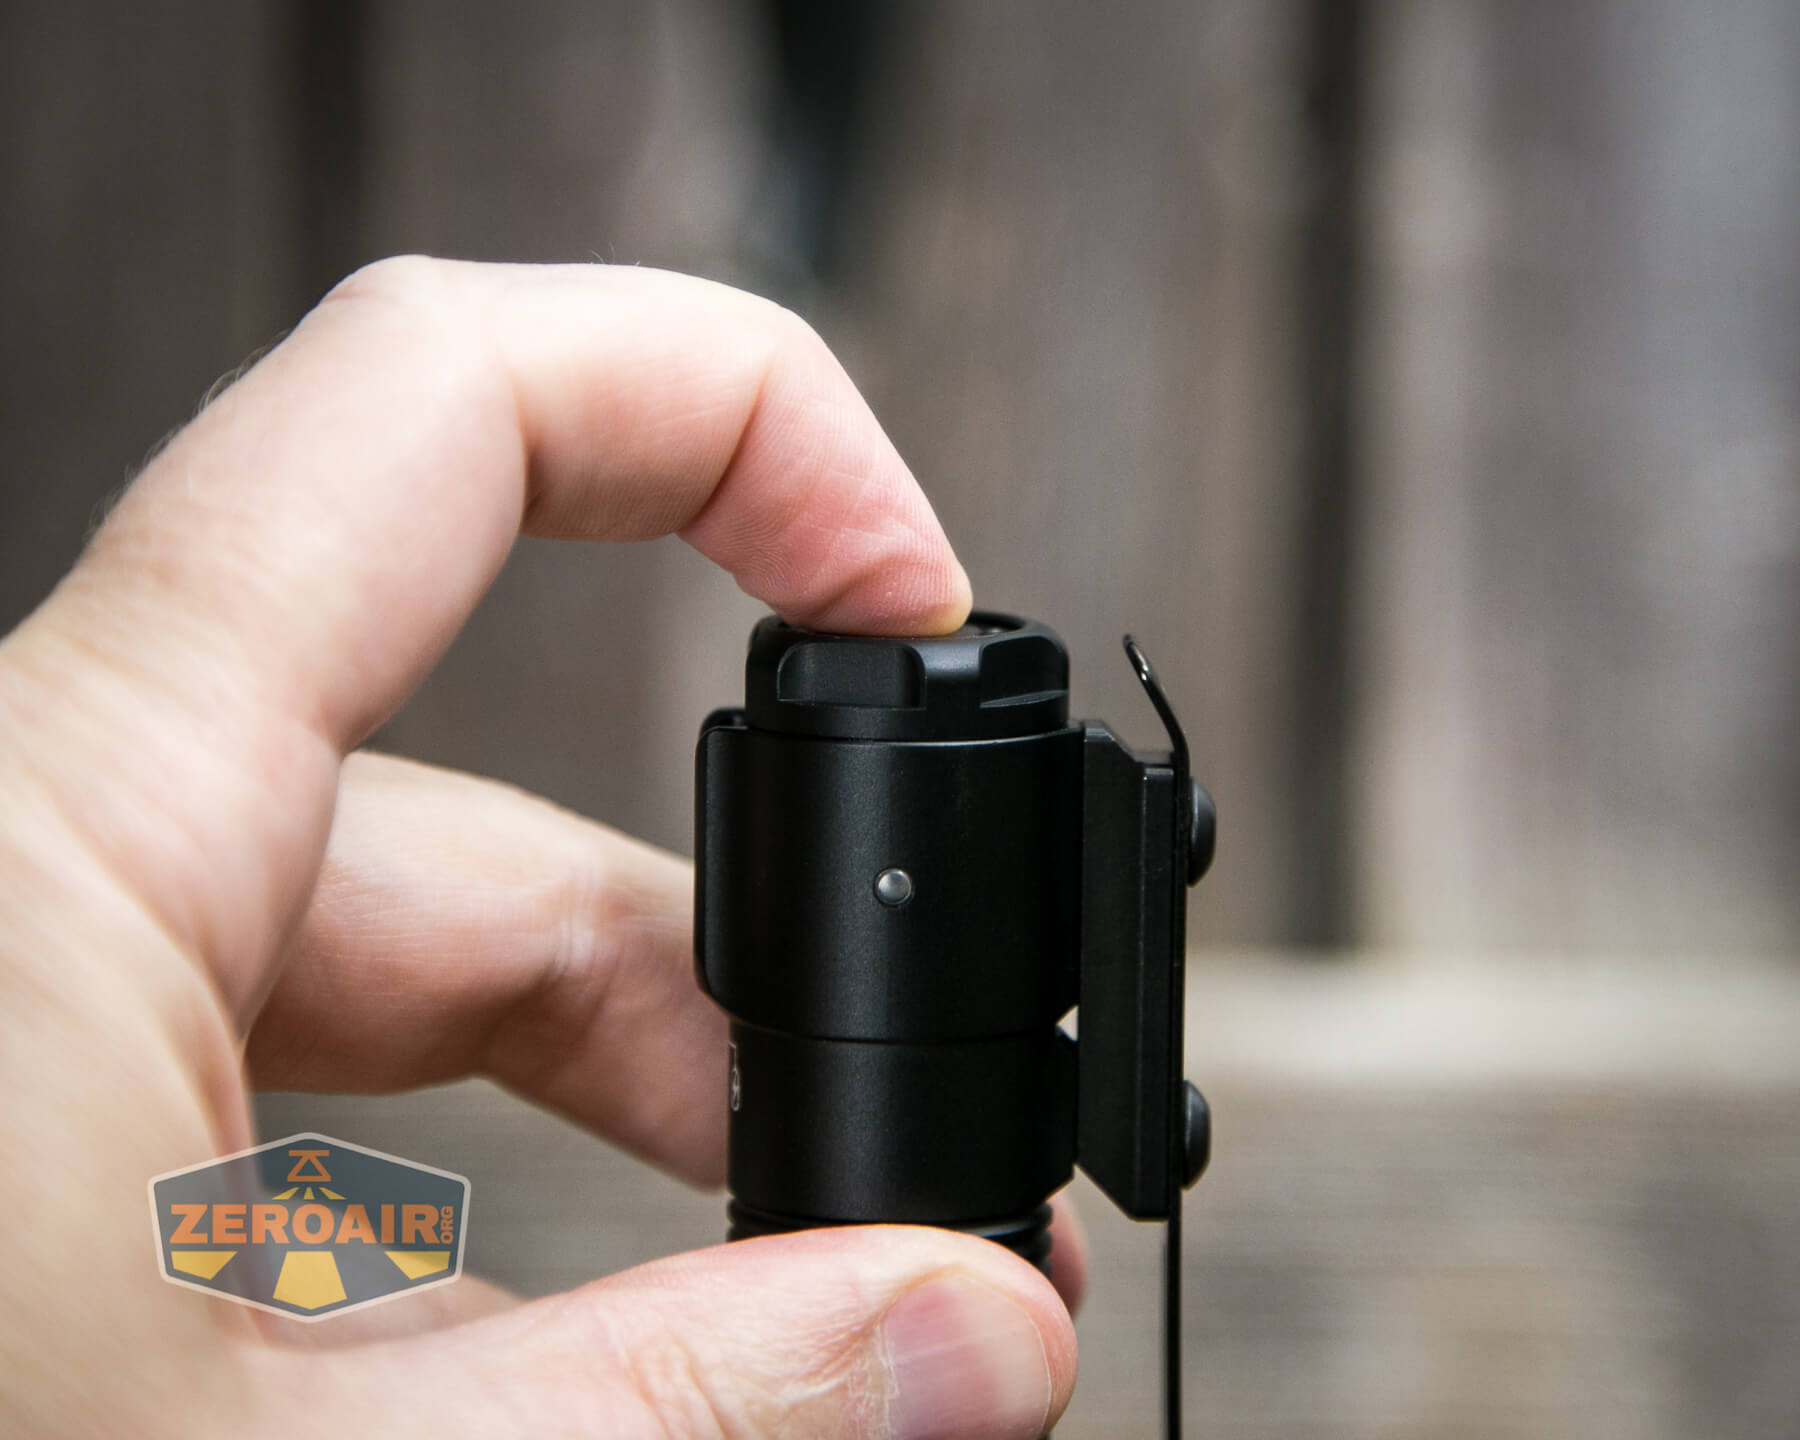
Let’s start the discussion on the user interface with what’s built into the Acebeam P15 EDC Tactical flashlight. It’s this tailswitch. This switch has a metal cover and is very nice.
The action on this switch is very low, and there’s a quiet but positive clicky sound and action from it.
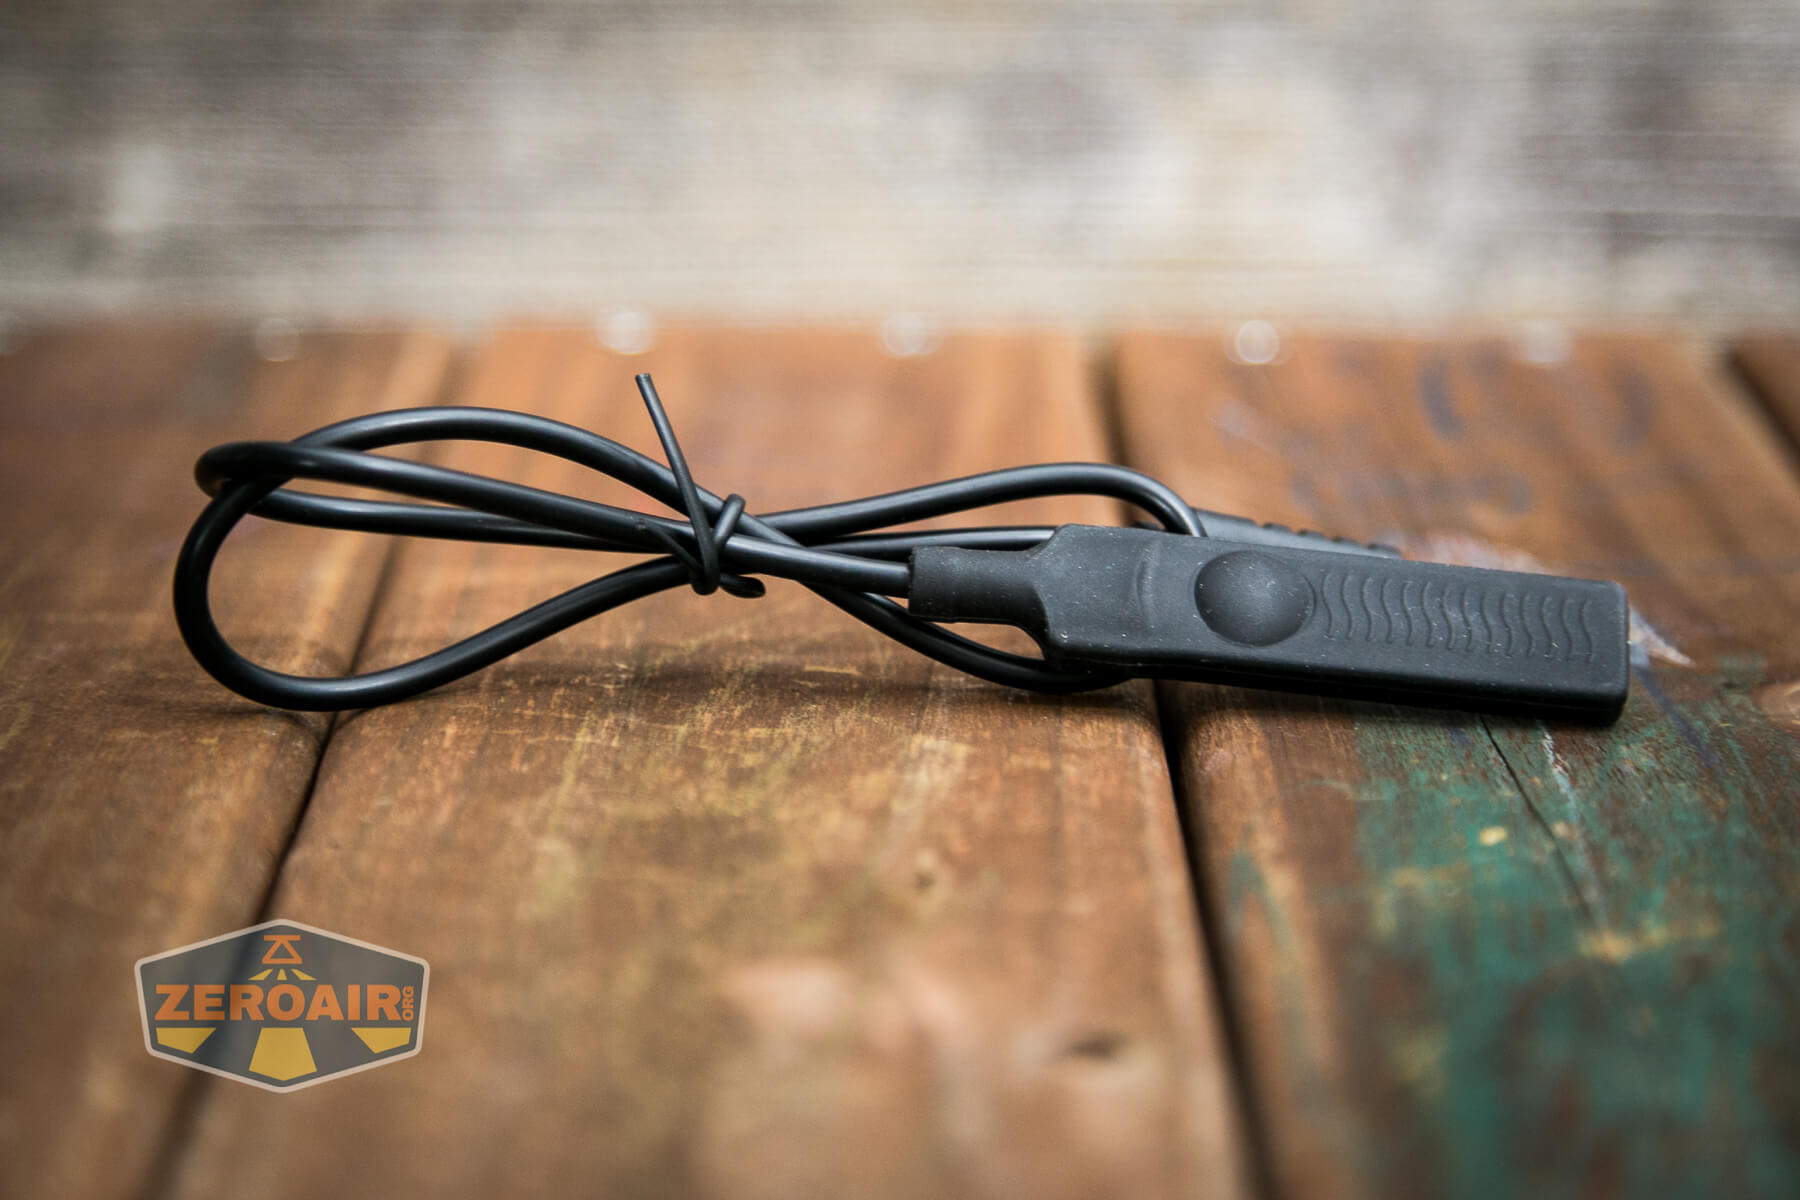
Next is this “Tactical Switch” – I believe Acebeam calls this the “One-Function-Switch.” This slips into the accessory port and has a similar feel to the tail switch, with the exception of it having a rubber cover. That makes it just a bit grippy, which is probably a good thing.
Technically, both of these accessory switches function exactly the same way. So either it’s right on the light (as seen directly below) or more remote (as seen later). But either way, they’re called the “One-Function-Switch” because that’s what they offer – essentially one function.

A reminder here that you’ll want to lock these attachments into place. Just turn the tailcap dial clockwise to lock.
Next up is the remote switch. It also attaches to the accessory port.
When the One-Function-Switch is attached, it’s quite proud of the light. Both switches (seen below) work in this setup.
Here’s a user interface table!
| State | Action | Result |
|---|---|---|
| Off | Click Tail Switch | On (mode Memory (Low, Medium, High only) |
| Off | Hold Tail Switch | Ultra-Low |
| Any | Double click Tail Switch | Turbo |
| Any | Triple-click Tail Switch | Strobe |
| On | Hold Tail Switch | Mode advance (LMH only) |
| Any | Click One-Function-Switch^ (a very quick click) | Turbo (If in Turbo Mode)
Or Momentary Strobe(if in Strobe Mode) |
| Any | Hold One-Function-Switch | Momentary Turbo (If in Turbo Mode) (Off upon release)
Momentary Strobe (if in Strobe Mode) (Previous mode upon release) |
| Turbo | Double Click Tail Switch | On (Mode Memory) |
| Turbo | Click One-Function-Switch | Off (If in Turbo Mode)
Previous Mode (If in Strobe Mode) |
| Off | Hold Tail Switch >5s | Lockout (after turning on in Ultra-Low) (3 flashes to indicate lockout) |
| Lockout | Hold Tail Switch ~3s | Unlock to Ultra-Low |
| Off with One-Function-Switch installed | Hold Tail Switch >10s | Iterate between Strobe Mode and Turbo Mode (pertains to what the One-Function-Switch does only)
Light will go to Ultra-Low, then lockout, then turn on in the active mode (Strobe Mode or Turbo Mode) to indicate |
| Strobe Mode | Click One-Function-Switch | Momentary Strobe. (Previous mode upon release) |
^ The “One-Function-Switch” is technically either switch that can be attached to the accessory port. That is the tiny one that occupies ONLY that space OR the remote switch that has the cable and can be mounted elsewhere on a weapon. These two switches operate the P15 in exactly the same way.
LED and Beam
Acebeam is using the Luminus SFT40 HI emitter on the P15.
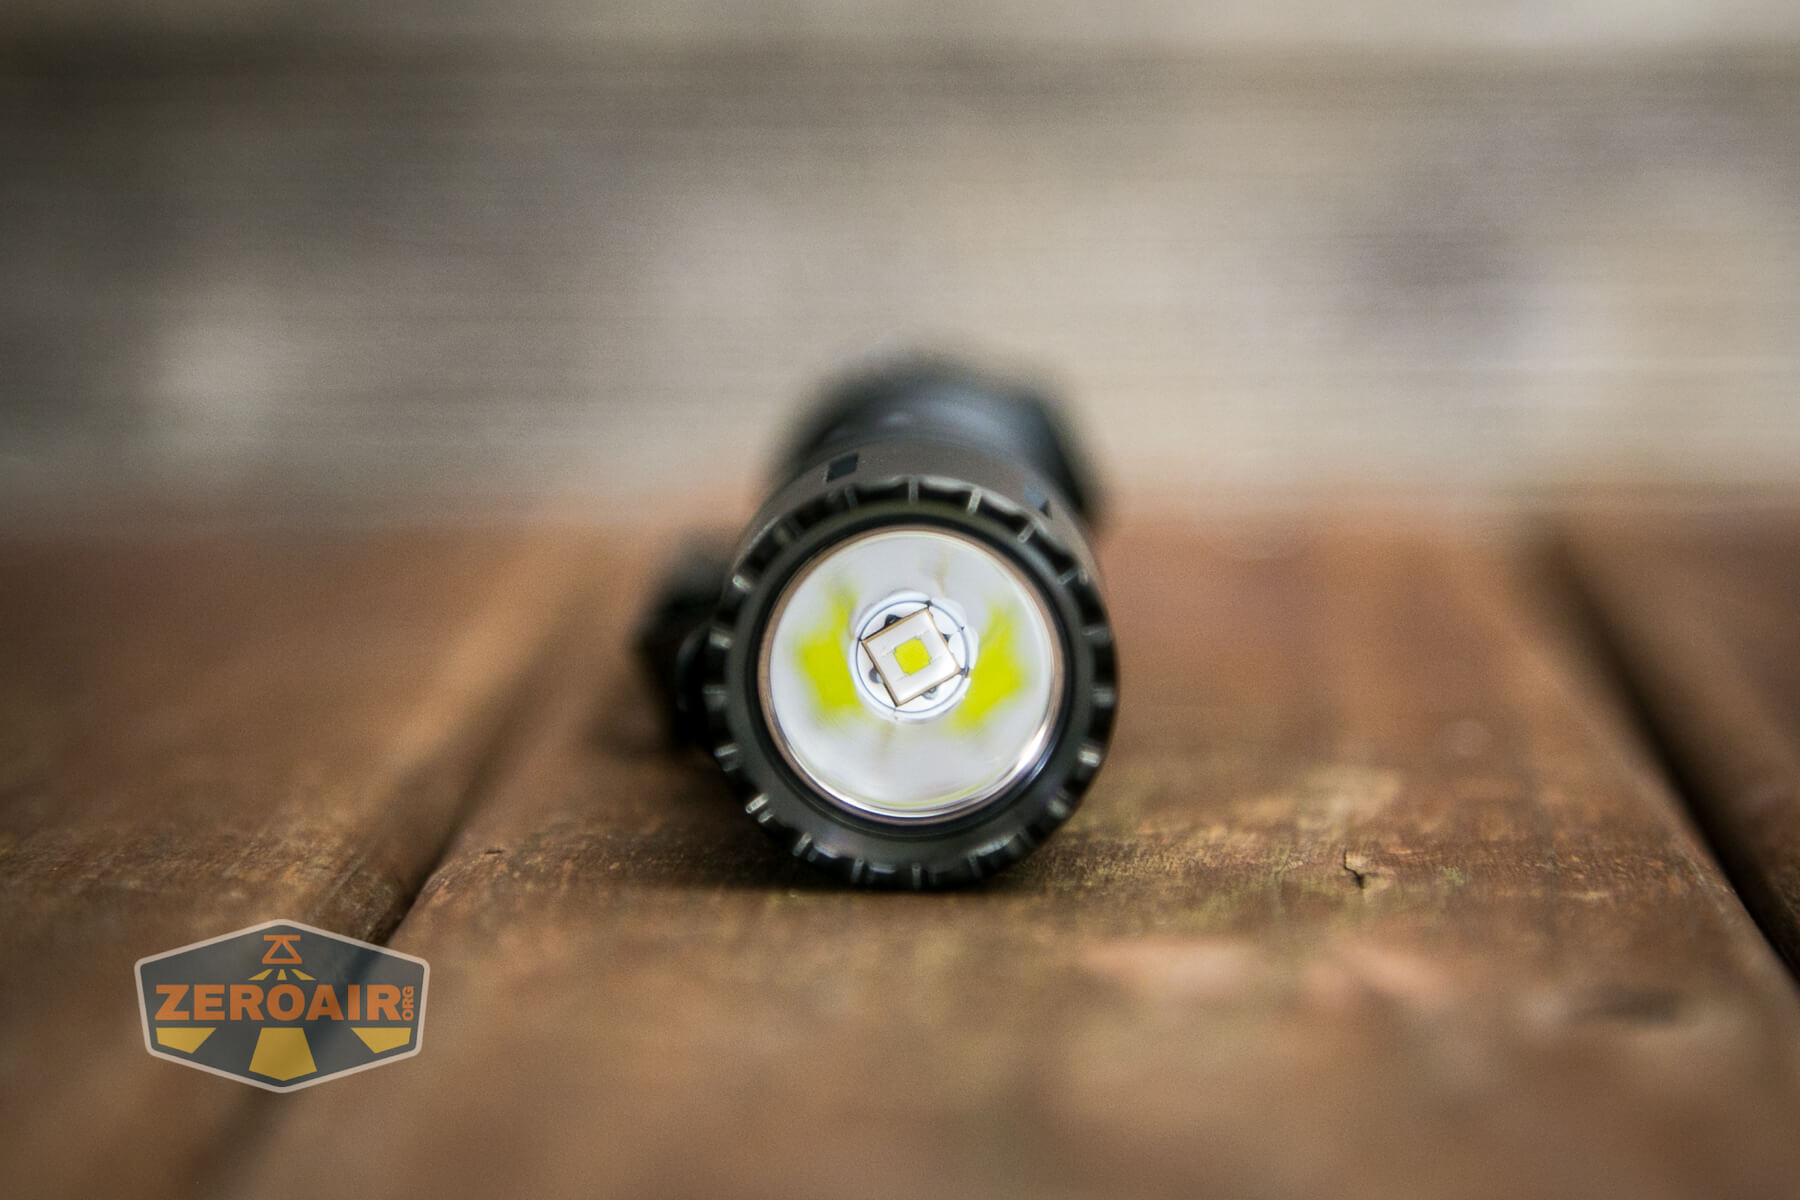
That is coupled with a smooth reflector and makes a great beam profile with a tight hotspot.
The bezel has teeth so that when the flashlight is headstanding, light will escape.
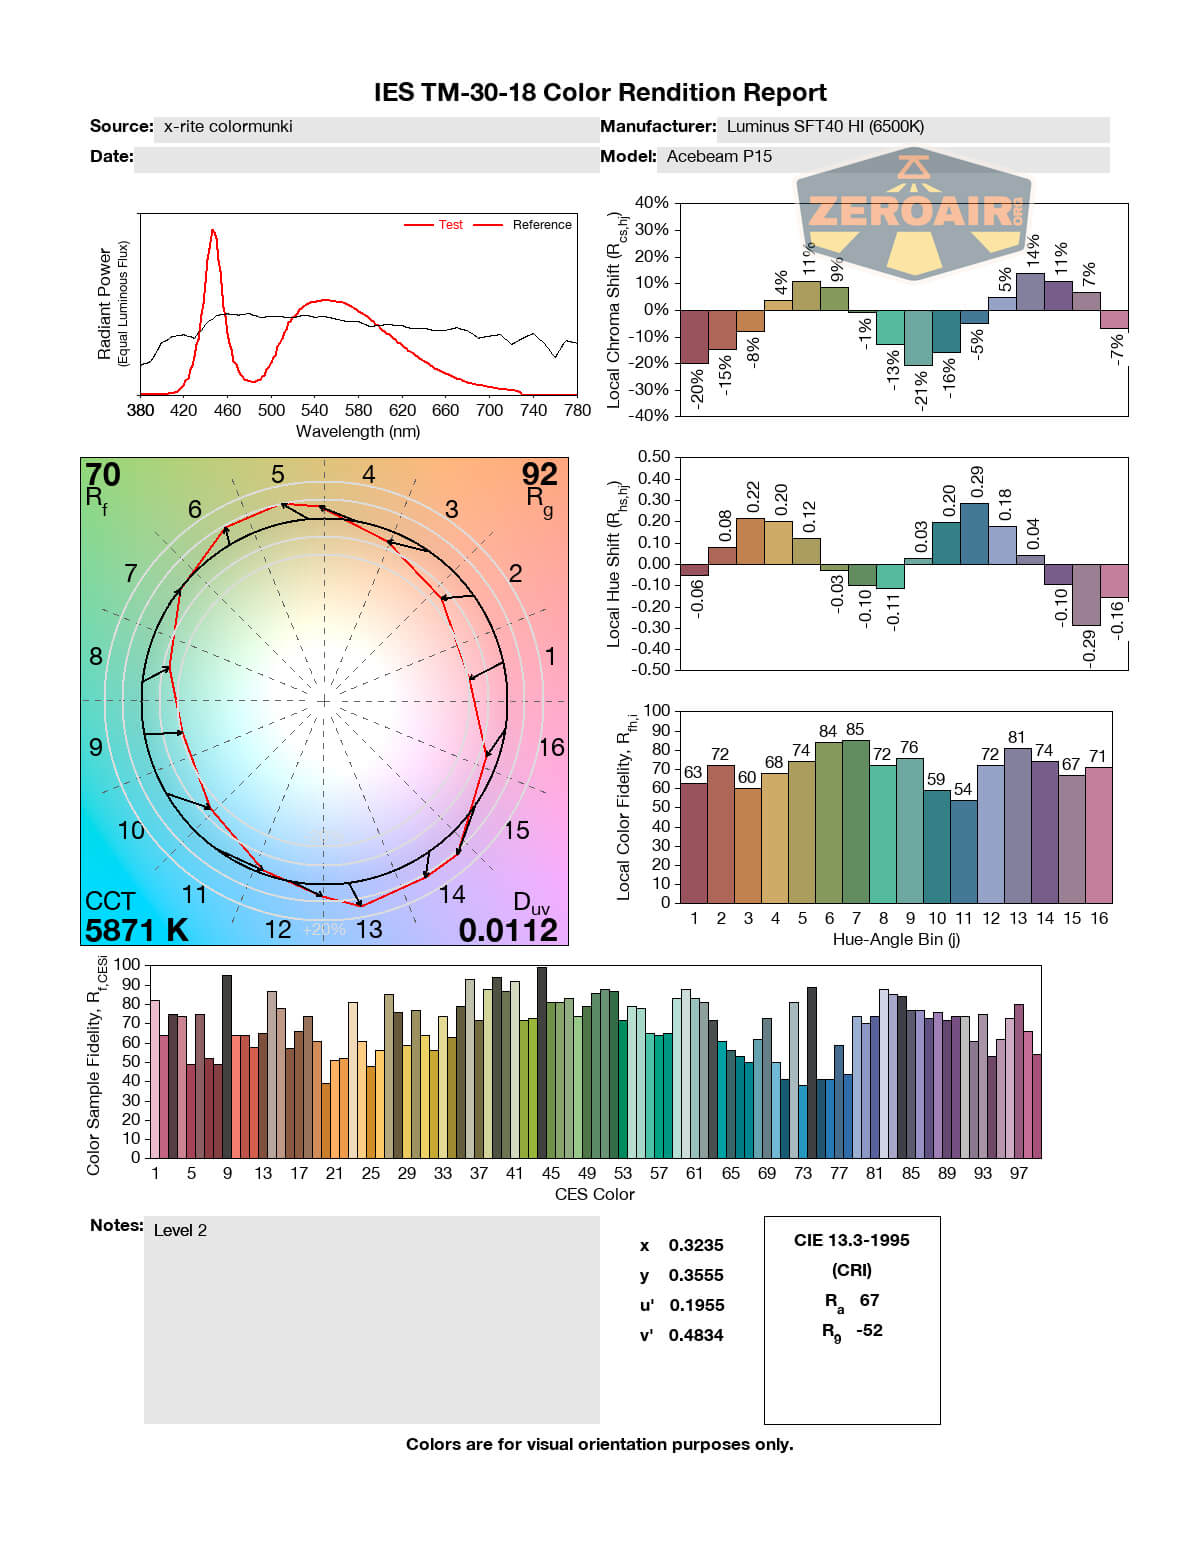
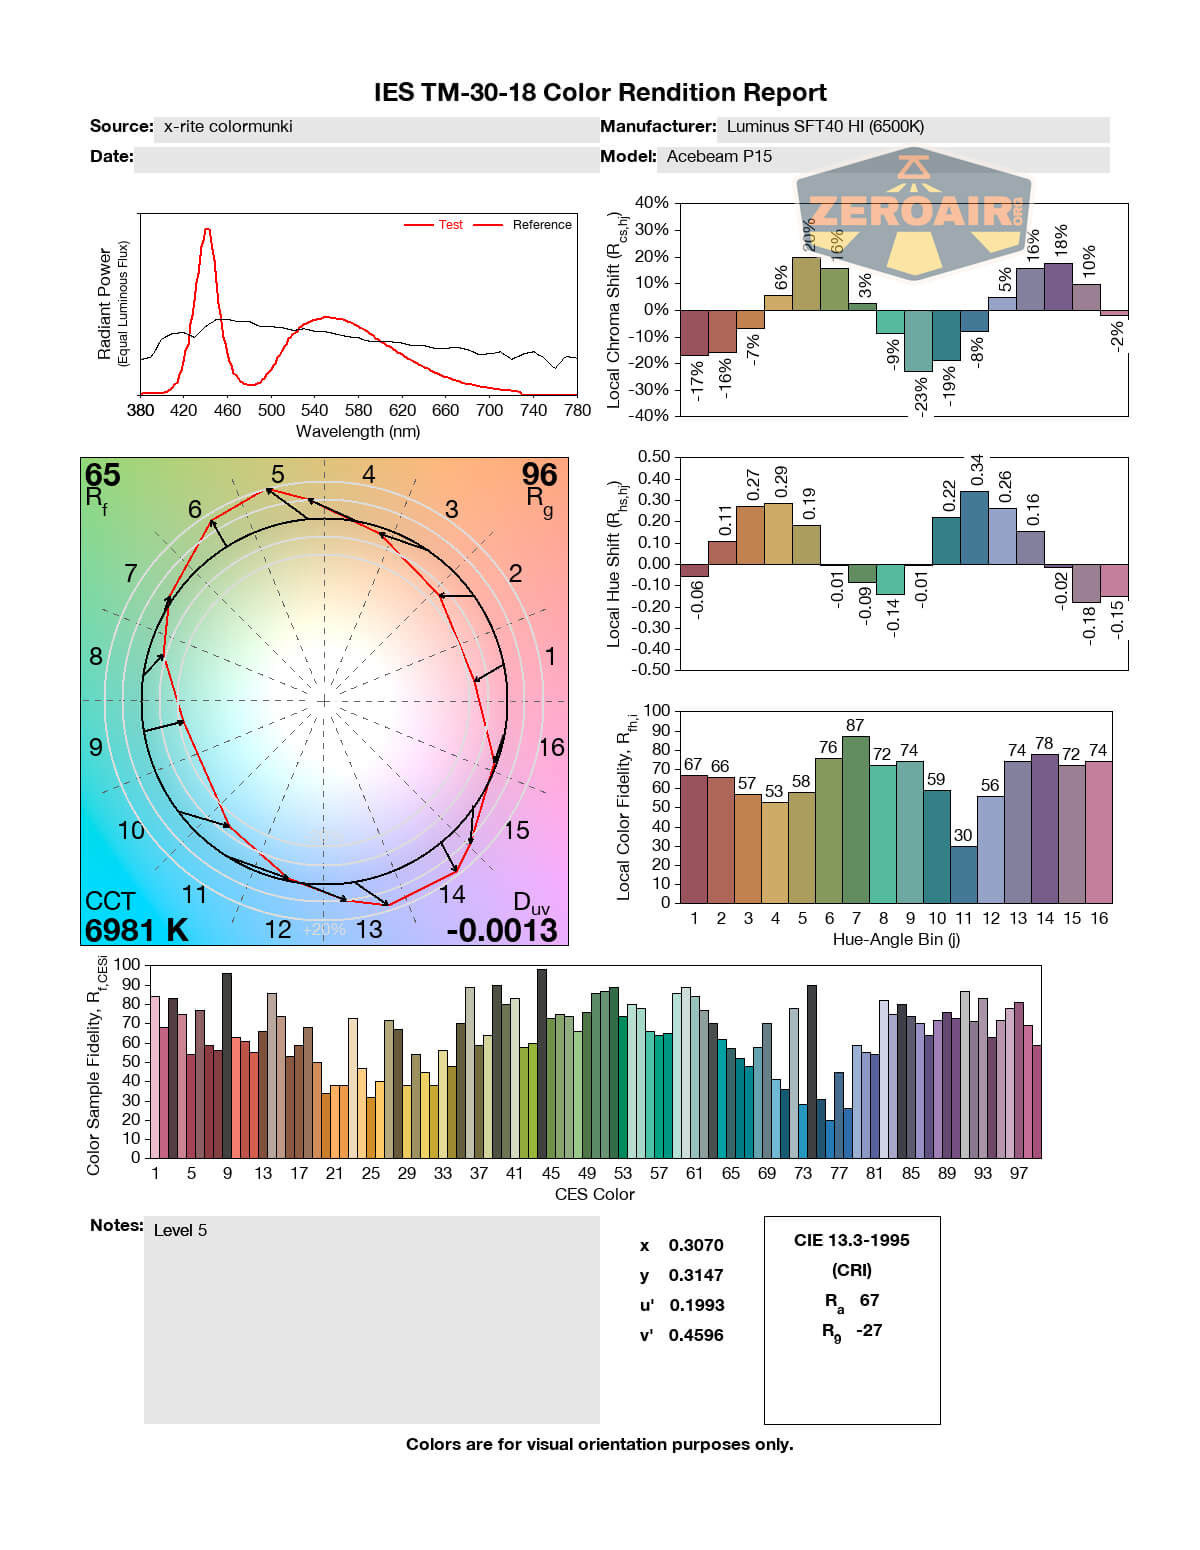
LED Color Report (CRI and CCT)
Despite not being able to test the current for each mode, we can guess based on these results below that the emitter is being driven fairly hard. That’s because as the output increases, the emitter goes from around 5500K to much cooler, at nearly 7000K. Still within the bounds of being called at “6500K” emitter, though.


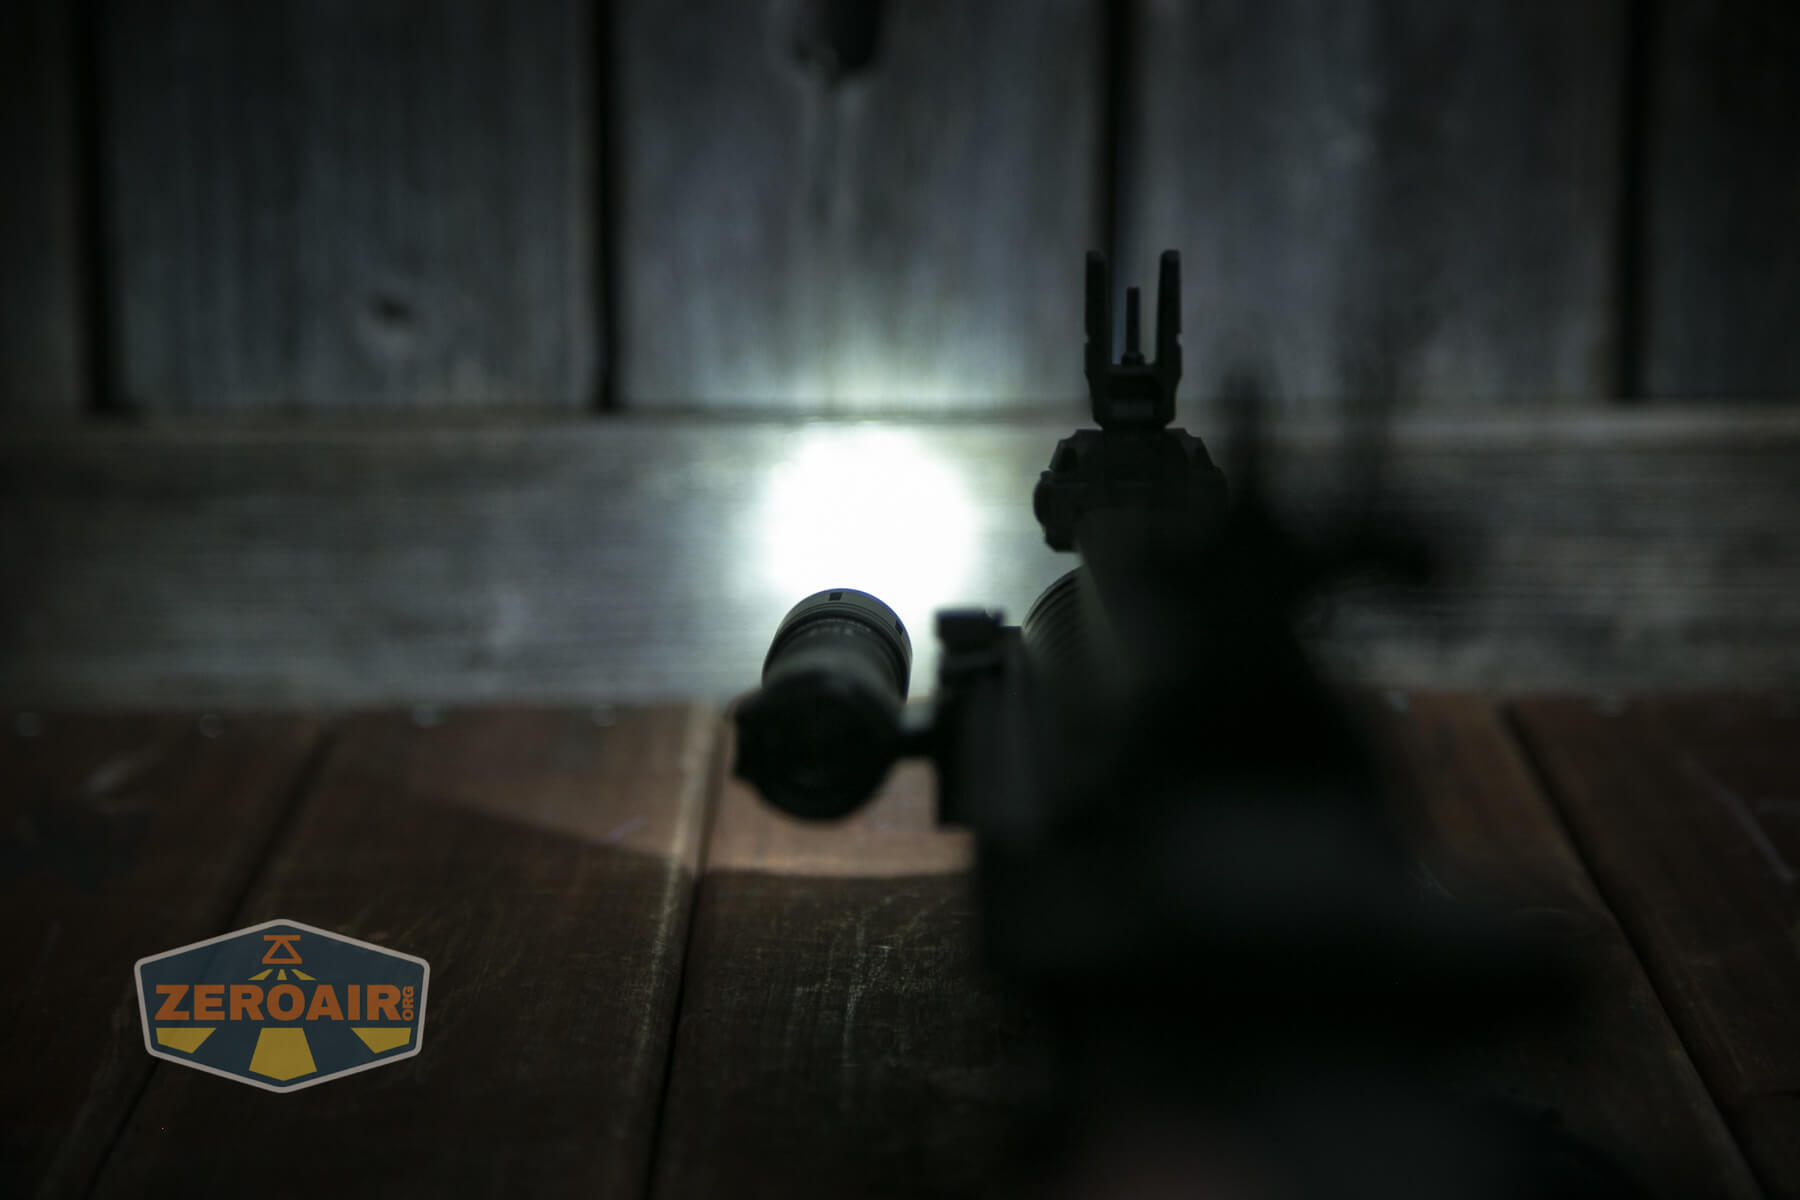
Beamshots
These beamshots always have the following settings: f8, ISO100, 0.3s shutter, and manual 5000K exposure. These photos are taken at floor level, and the beam hits the ceiling around 9 feet away.


Tint vs BLF-348 (KillzoneFlashlights.com 219b version) (affiliate link)
I keep the test flashlight on the left and the BLF-348 reference flashlight on the right.


I compare everything to the KillzoneFlashlights.com 219b BLF-348 because it’s inexpensive and has the best tint!
Conclusion
What I like
- Very robust package for mounting to many weapons
- Good tail switch
- Excellent beam profile
- Great throw out of a tube flashlight
- Multiple remote switch options
- Charging is fast and reliable
- Versatile user interface
What I don’t like
- 7000K on Turbo
- Proprietary cell
Notes
- This content originally appeared at zeroair.org. Please visit there for the best experience!
- Please use my Amazon.com referral link to help support zeroair.org!
- Please support me on Patreon! I deeply appreciate your support!
Discover more from ZeroAir Reviews
Subscribe to get the latest posts sent to your email.
That accessory / cable port being 180 degrees from the mount is absolutely unacceptable for any hard use cases. That will fail the first time it is smashed into something.