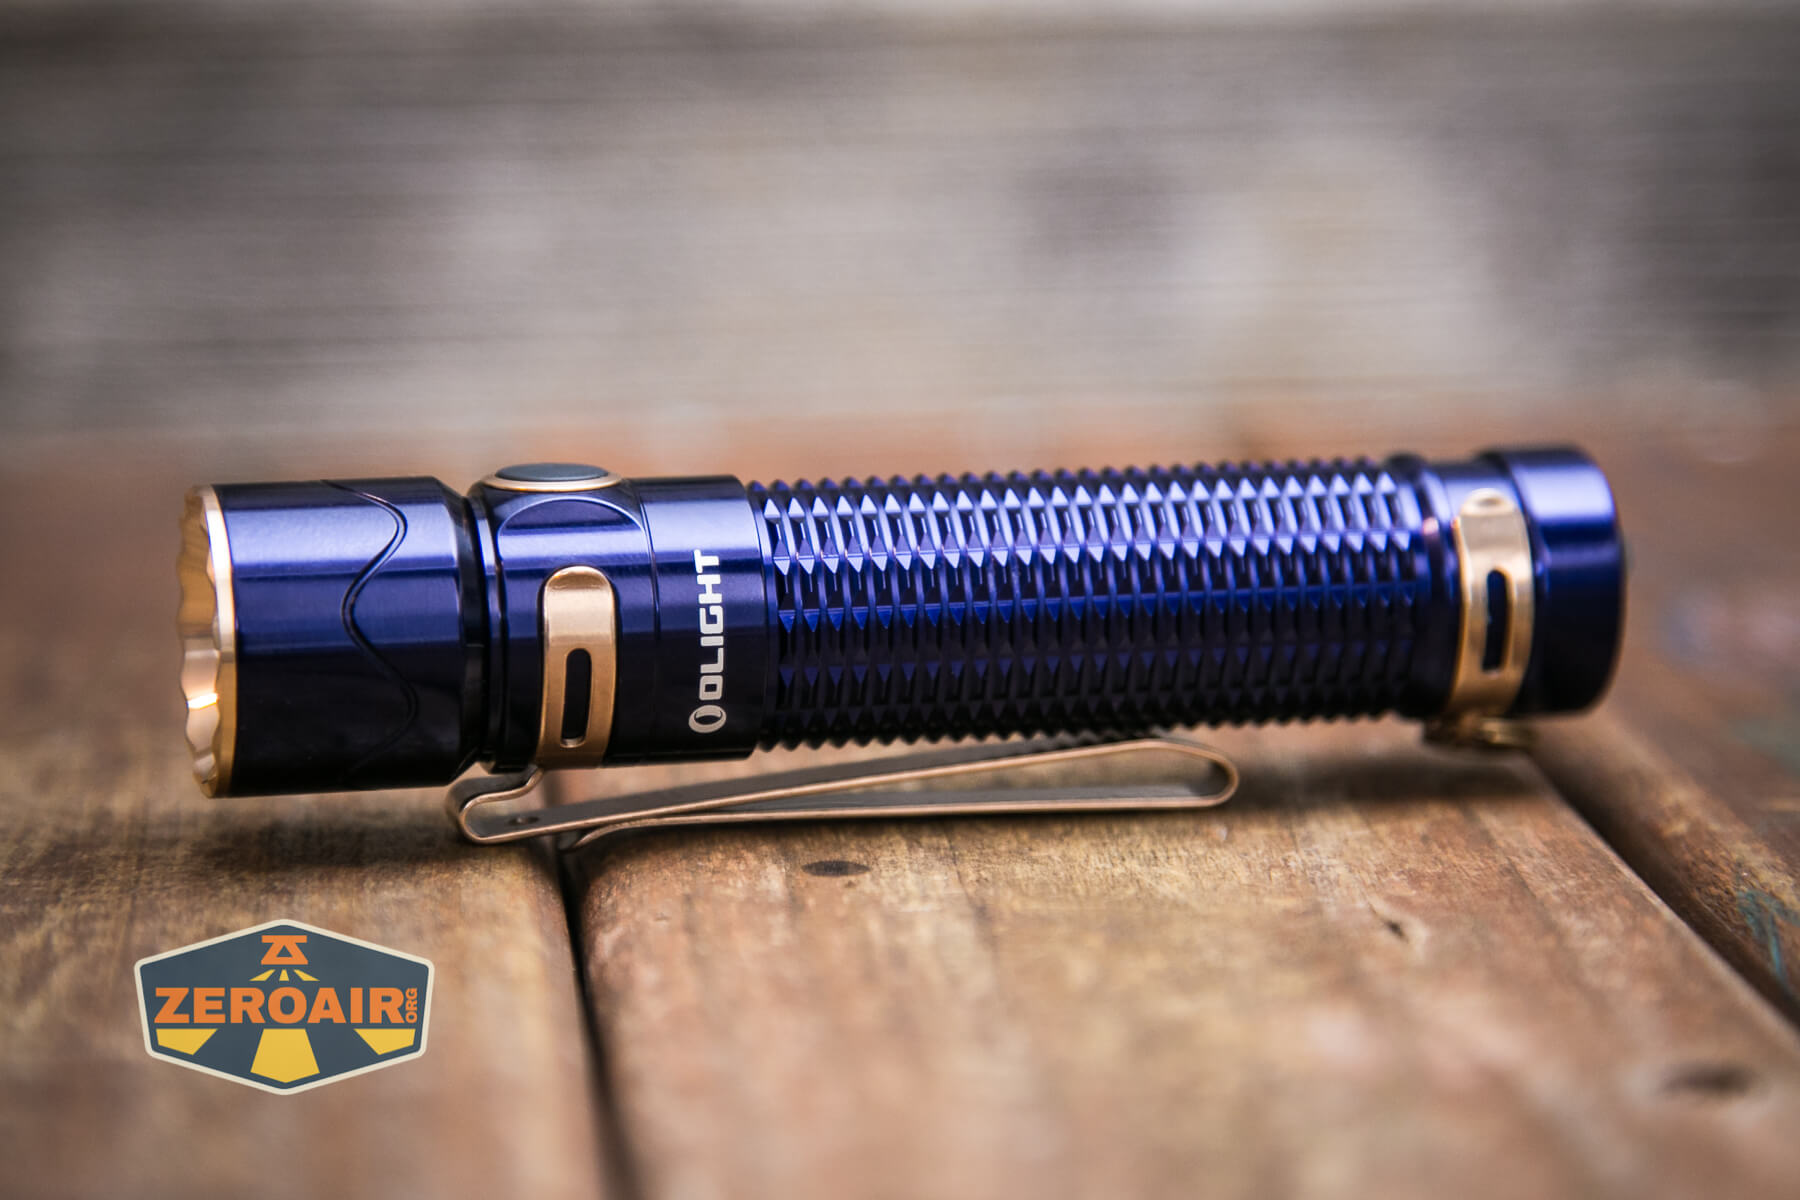
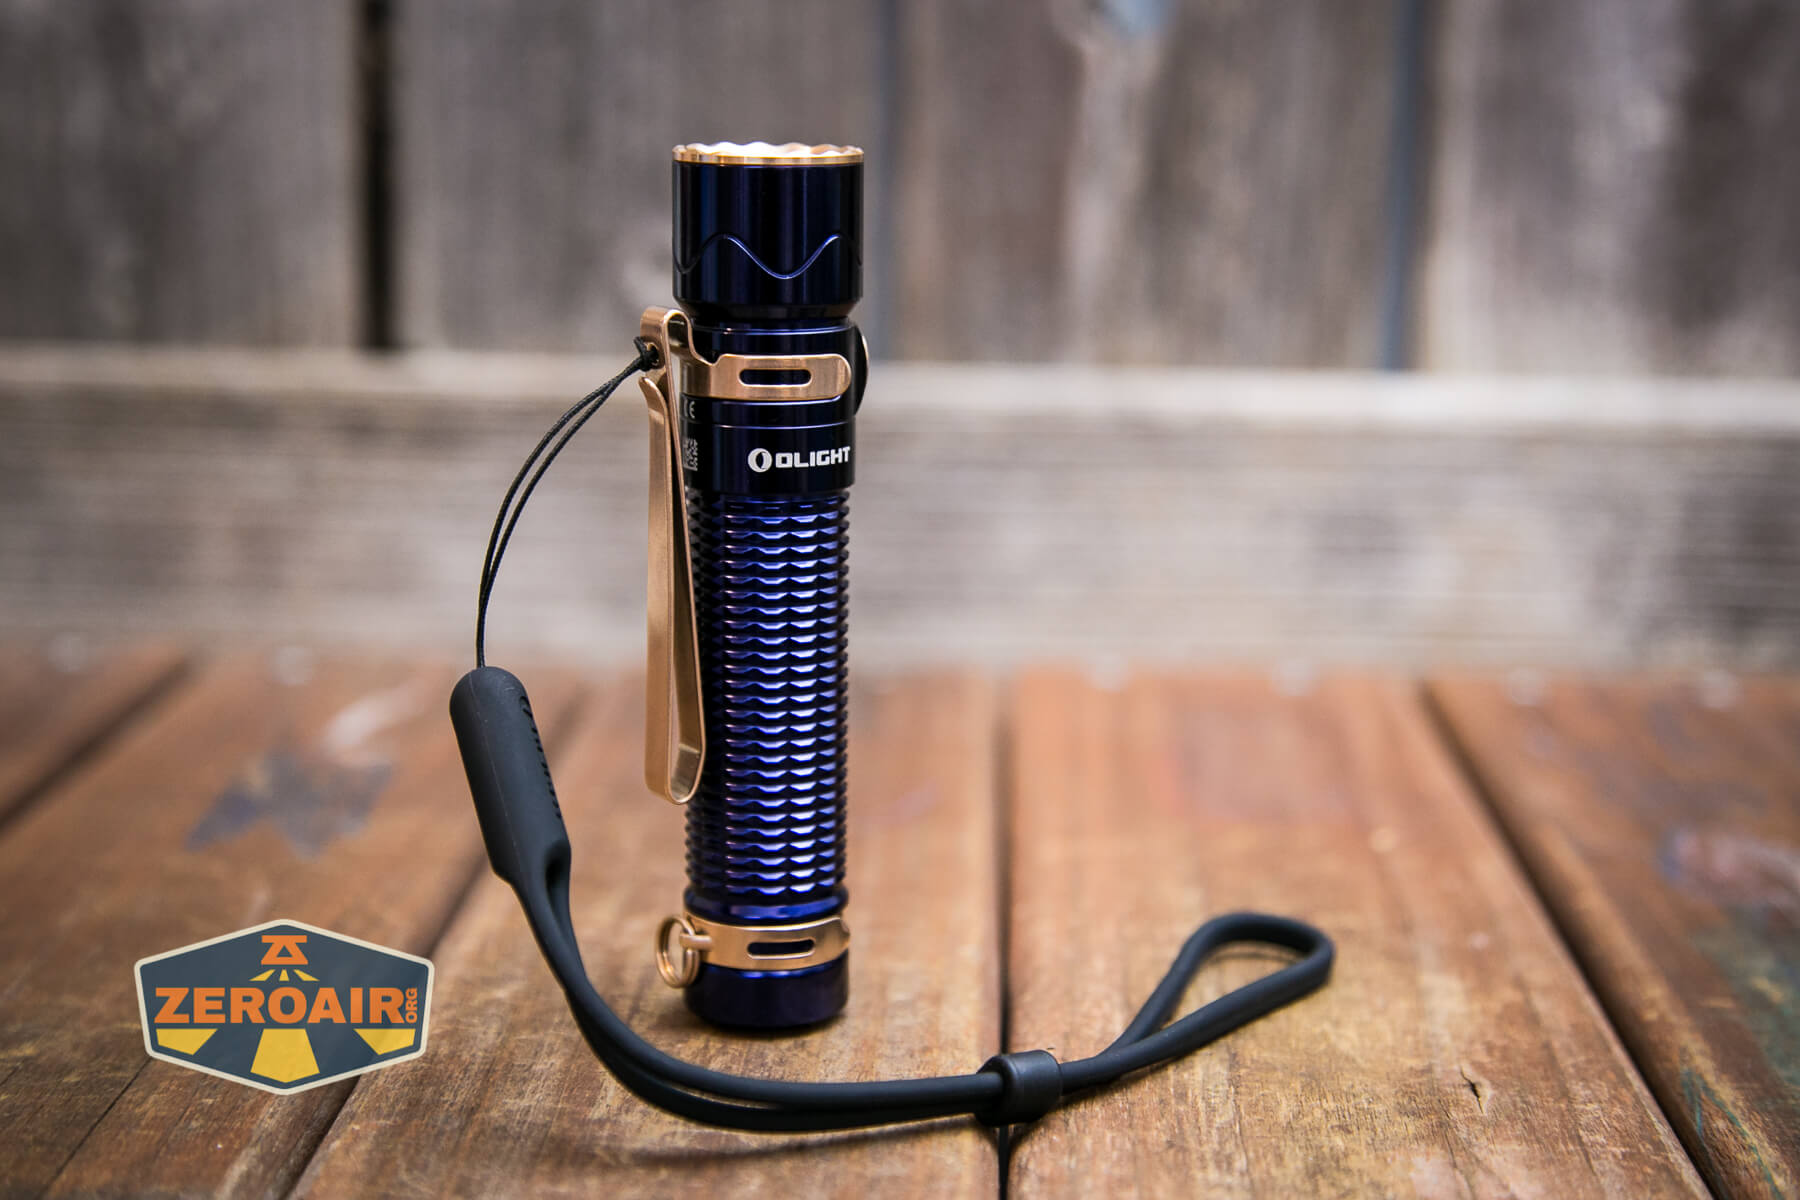
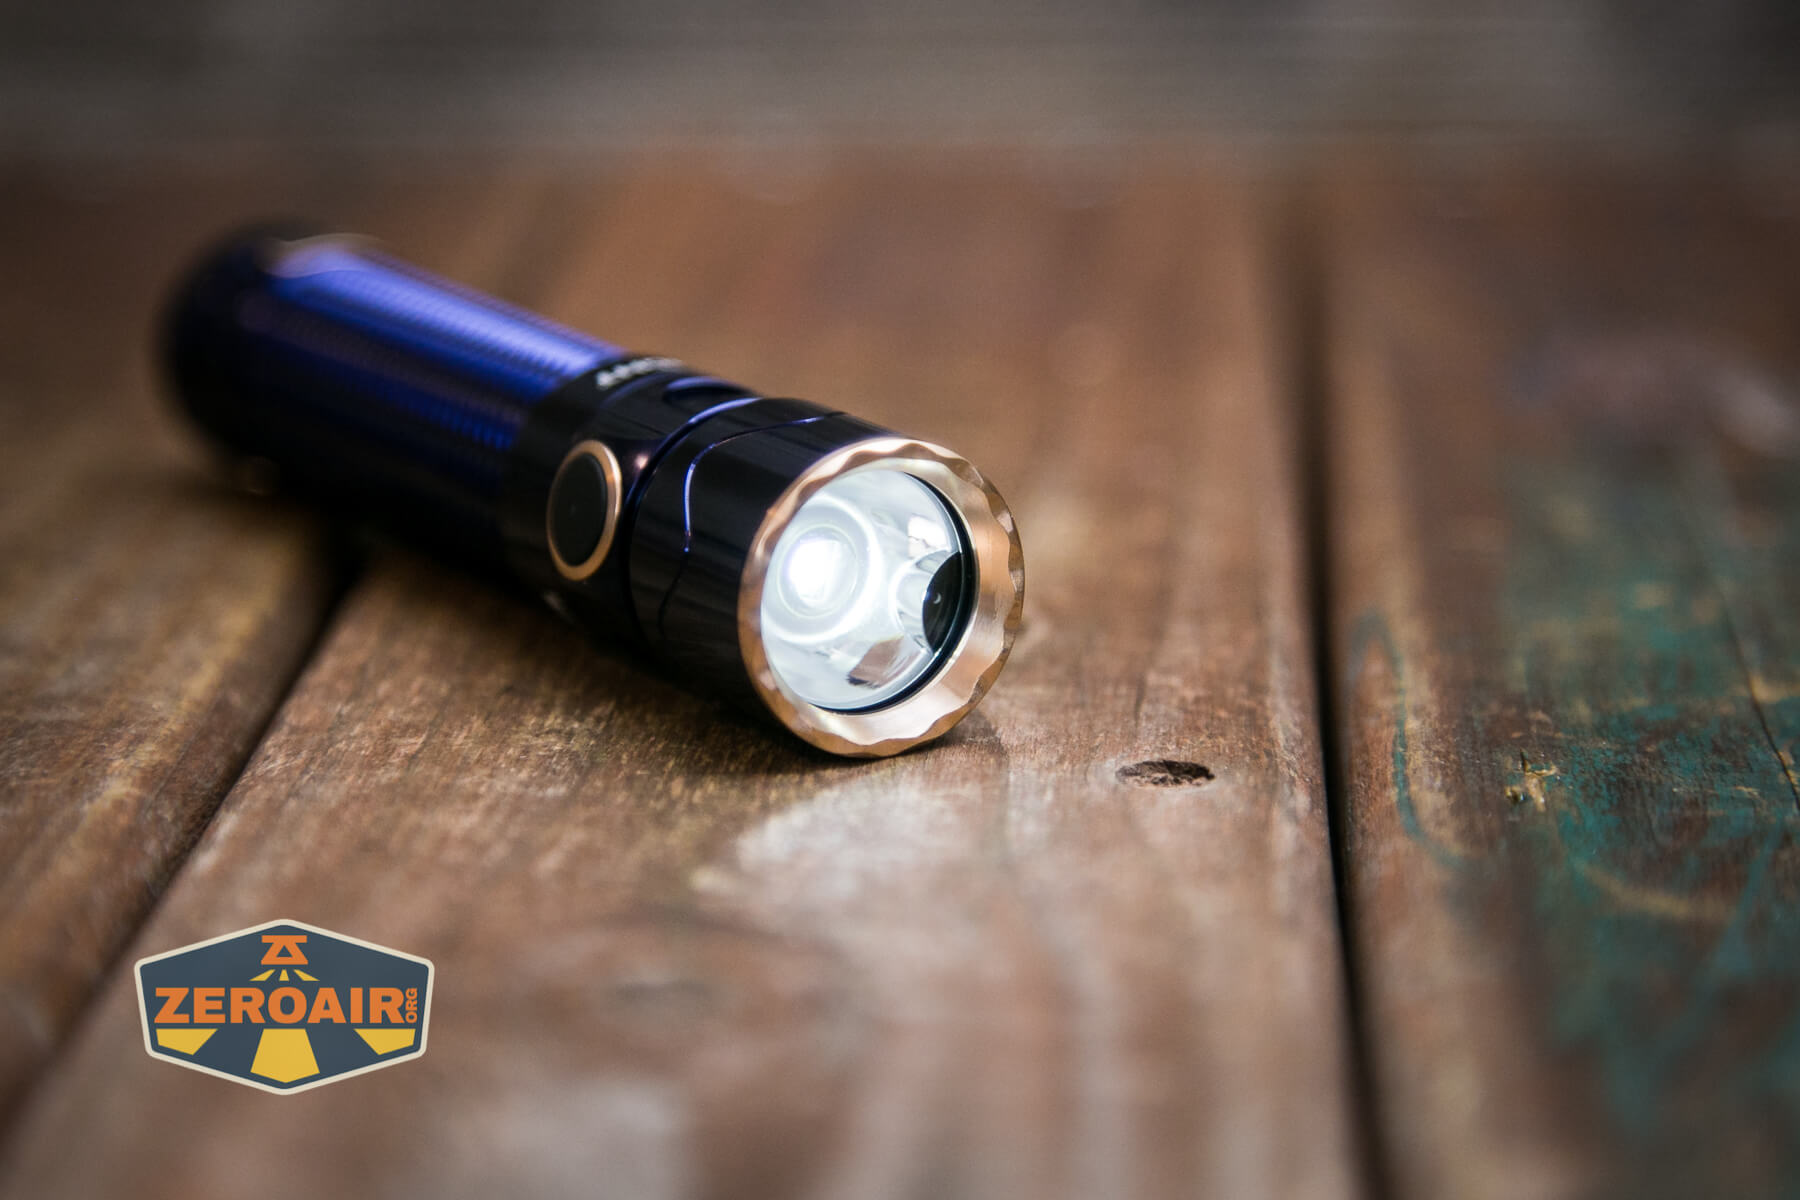
Olight Warrior Mini 2 Regal Blue Flashlight Review
The Olight Warrior Mini 2 Regal Blue is the newest Warrior Mini edition. It packs the punch the previous models had, but rocks a gorgeous blue body!
Official Specs and Features
Here’s a link to the Olight Warrior Mini 2 Regal Blue flashlight product page.
Versions
There are at least a few versions. There’s the black aluminum (which I reviewed previously). There’s also the “Mountain Sky” edition, which is a blue fade to gray. There’s a desert tan version. There are almost certainly other versions, too! These all have the same emitter.
Price
While the list price is around $95, during the Valentine’s Day sale, you can buy this light for $71.21. Here’s my ShareASale link for the Olight Warrior Mini 2 Regal Blue.
Short Review
I can safely report that the Regal Blue version is functionally no different than the other versions I previously reviewed. So pretty much everything I said about it is true here, too. In comparison to the original Warrior Mini, I should say I never really had any issues with it. I know a bunch of people might have gotten burned pockets and all that, but in all my use, I never faced this problem. That said, the Olight Warrior Mini 2 in aluminum is a nice light and a solid offering. Also pleasantly not too expensive!
Most importantly, this Regal Blue absolutely pops!!
Long Review
The Big Table
| Olight Warrior Mini 2 Regal Blue Flashlight | ||
|---|---|---|
| Emitter: | Luminus SST-40 ((Cool White)) | |
| Price in USD at publication time: | $71.21 during the sale (which ends today!) | |
| Cell: | 1×18650 | |
| Turbo Runtime Graph | ||
| LVP? | Yes | |
| Switch Type: | Both | |
| Quiescent Current (mA): | ? | |
| On-Board Charging? | Yes | |
| Charge Port Type: | Proprietary Magnetic | |
| Charge Graph | ||
| Power off Charge Port | with cell: all modes
without cell: no modes |
|
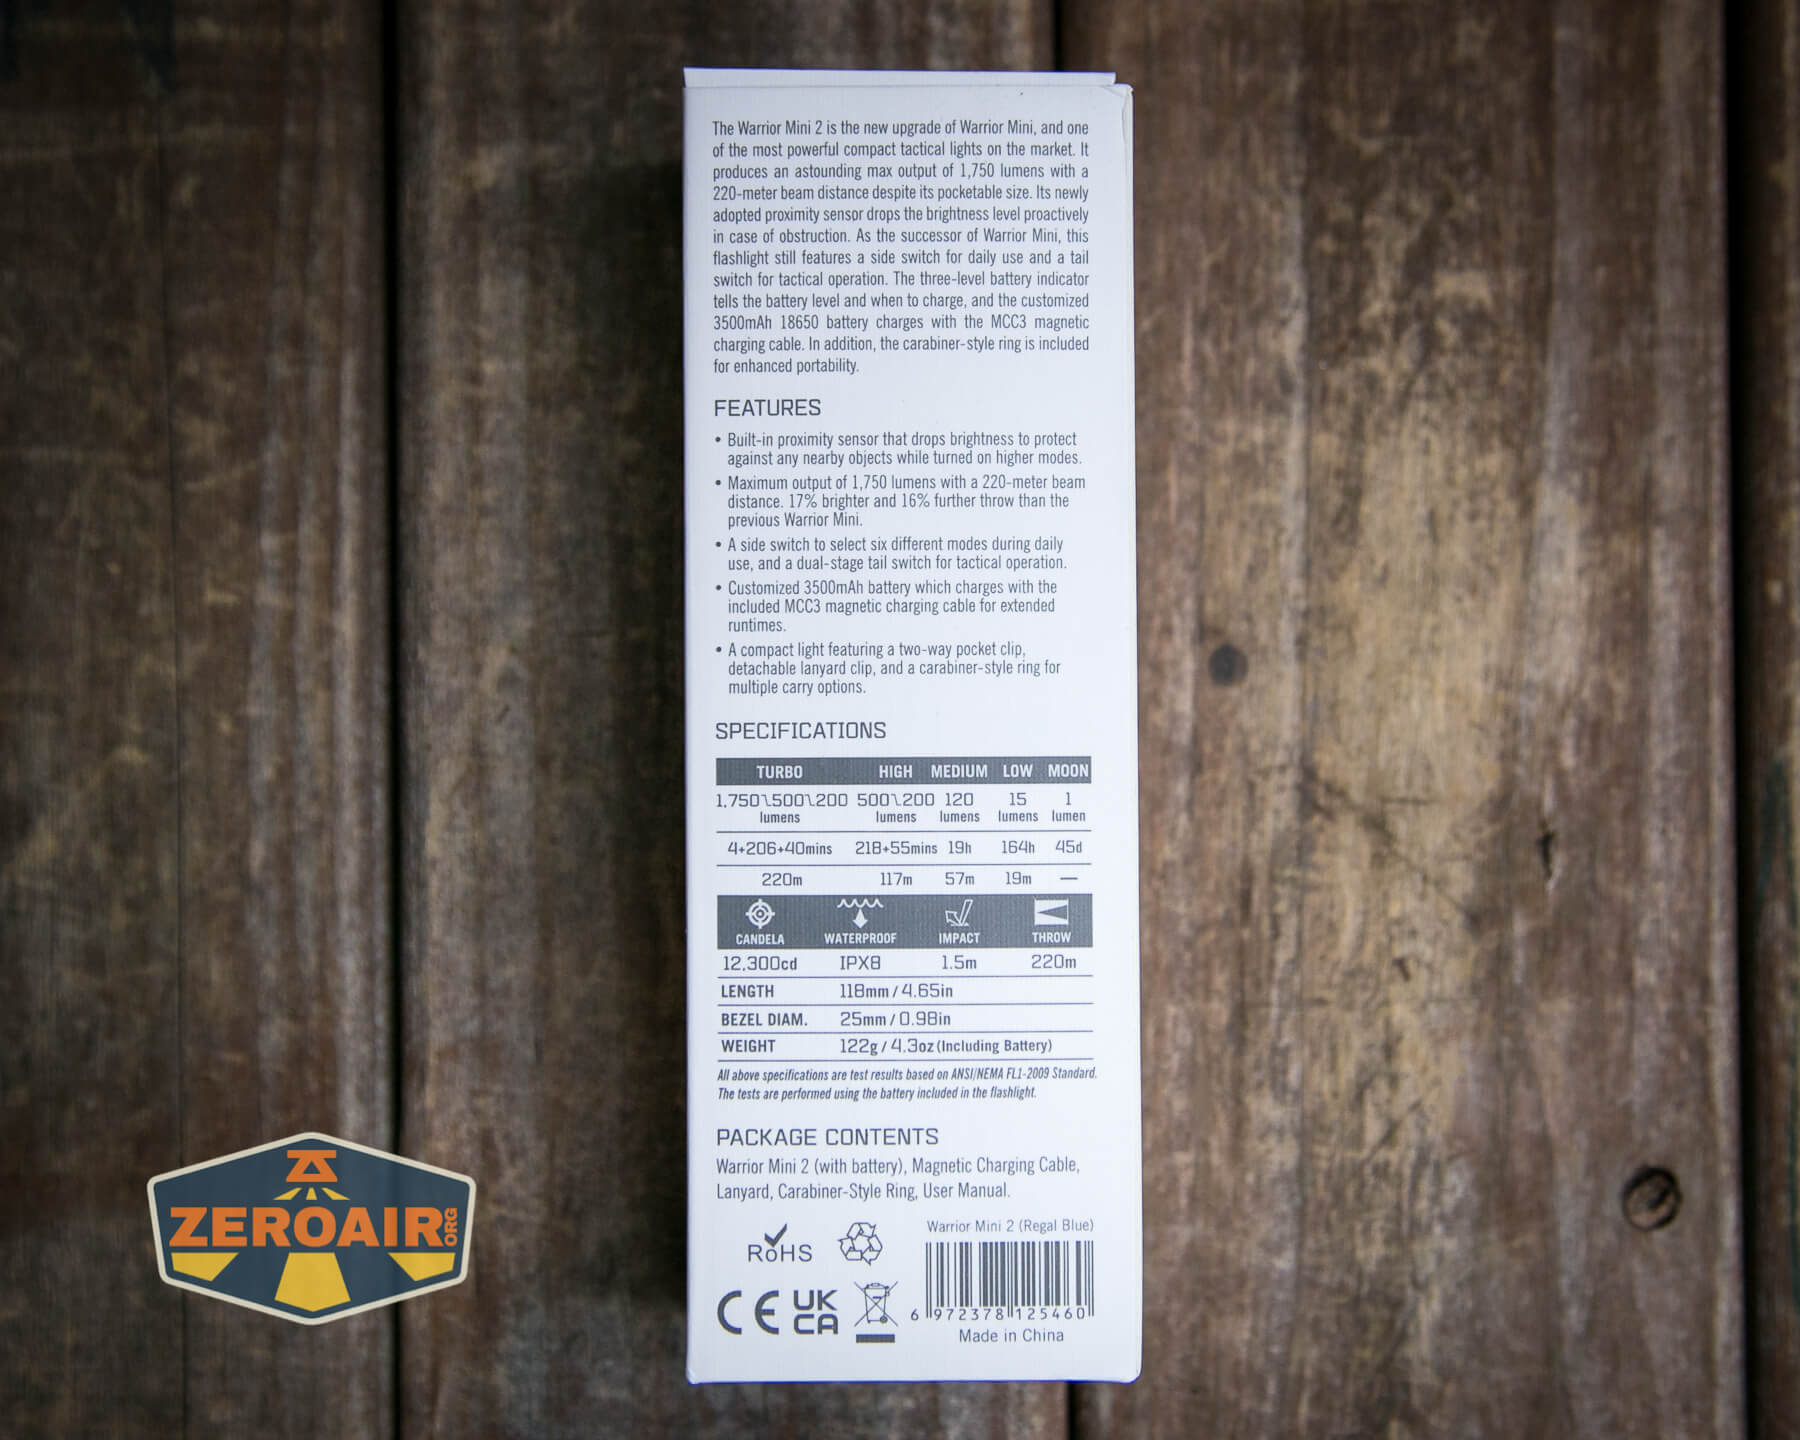
| Claimed Lumens (lm) | 1750 | |
| Measured Lumens (at 30s) | Unable to determine (because of proximity sensor!) | |
| Candela per Lumen | 7 | |
| Claimed Throw (m) | 220 | |
| Candela (Calculated) in cd (at 30s) | 622lux @ 4.677m = 13606cd | |
| Throw (Calculated) (m) | 233.3 (106% of claim)^ | |
| Claimed CCT | 6000-7000 | |
| Measured CCT Range (K) | 5500-6000 Kelvin | |
| Item provided for review by: | Olight | |
| All my Olight reviews! | ||
^ Measurement disclaimer: Testing flashlights is my hobby. I use hobbyist-level equipment for testing, including some I made myself. Try not to get buried in the details of manufacturer specifications versus measurements recorded here; A certain amount of difference (say, 10 or 15%) is perfectly reasonable.
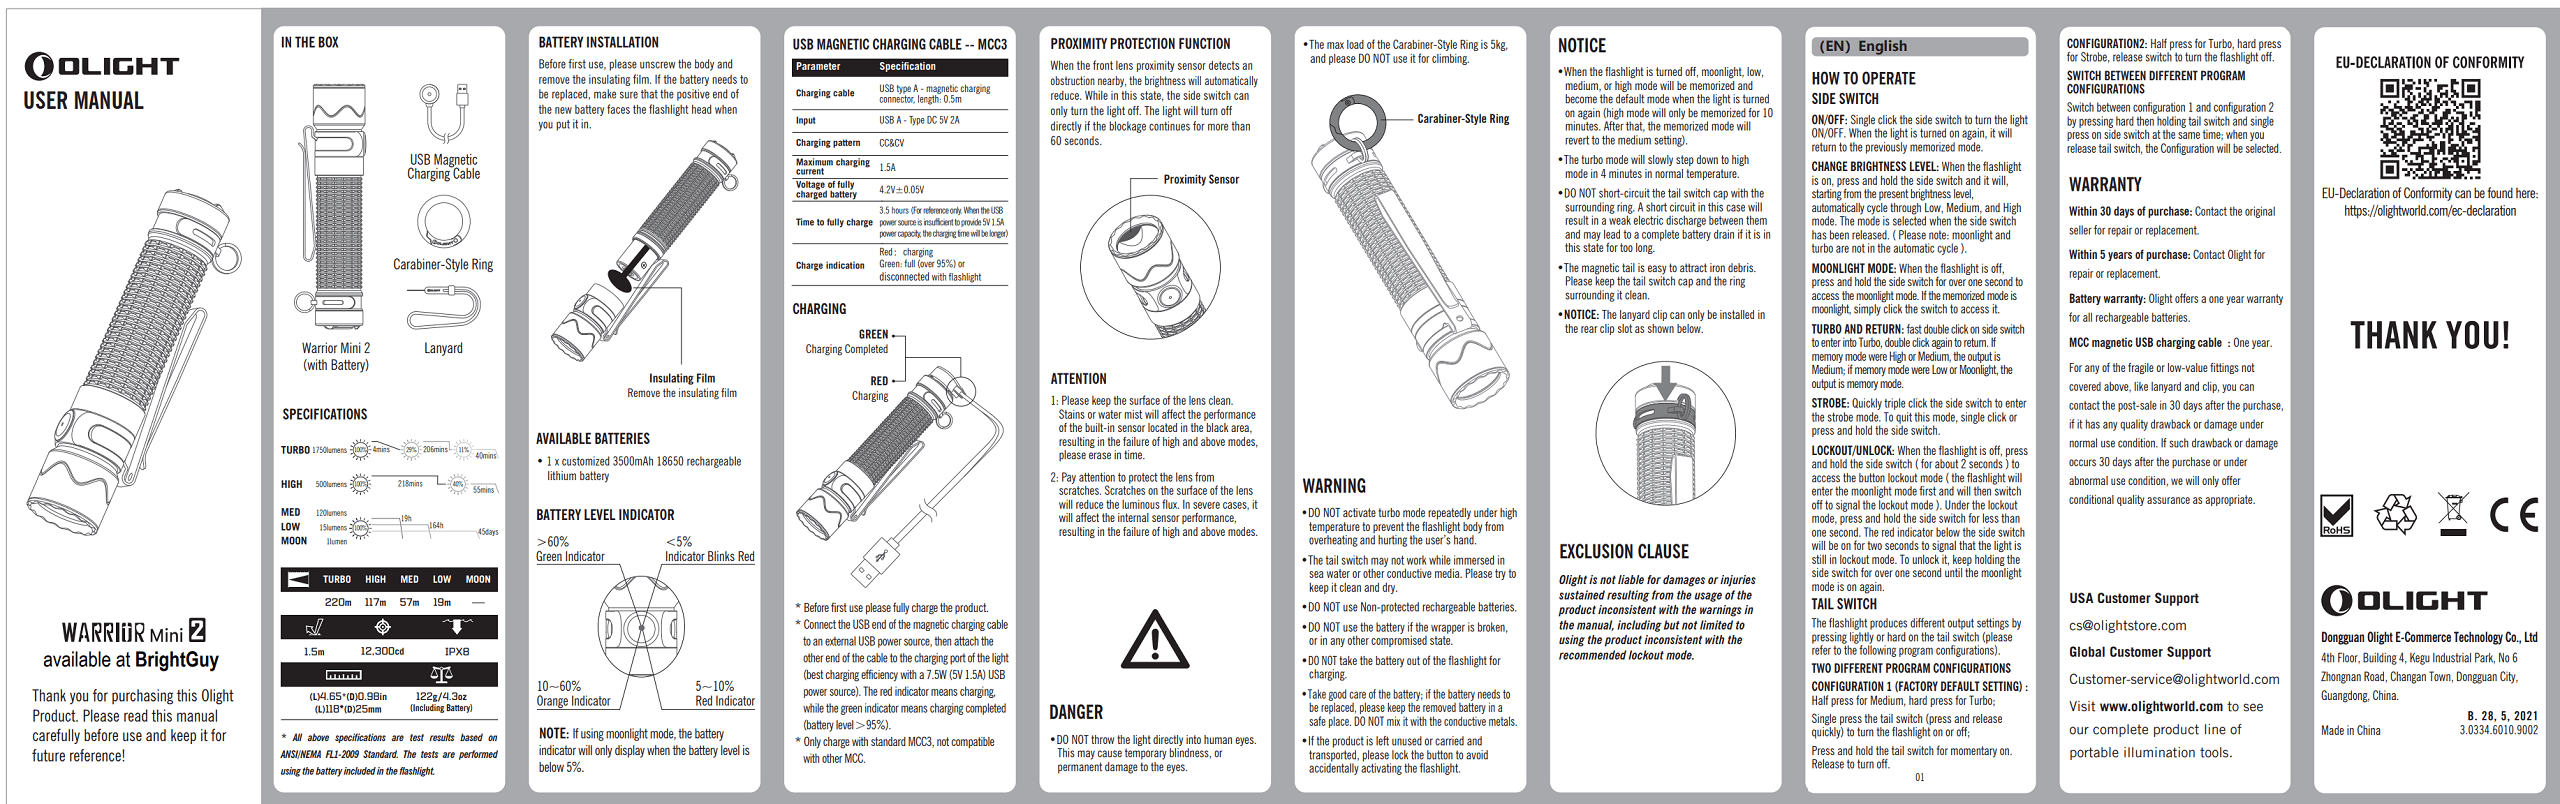
What’s Included
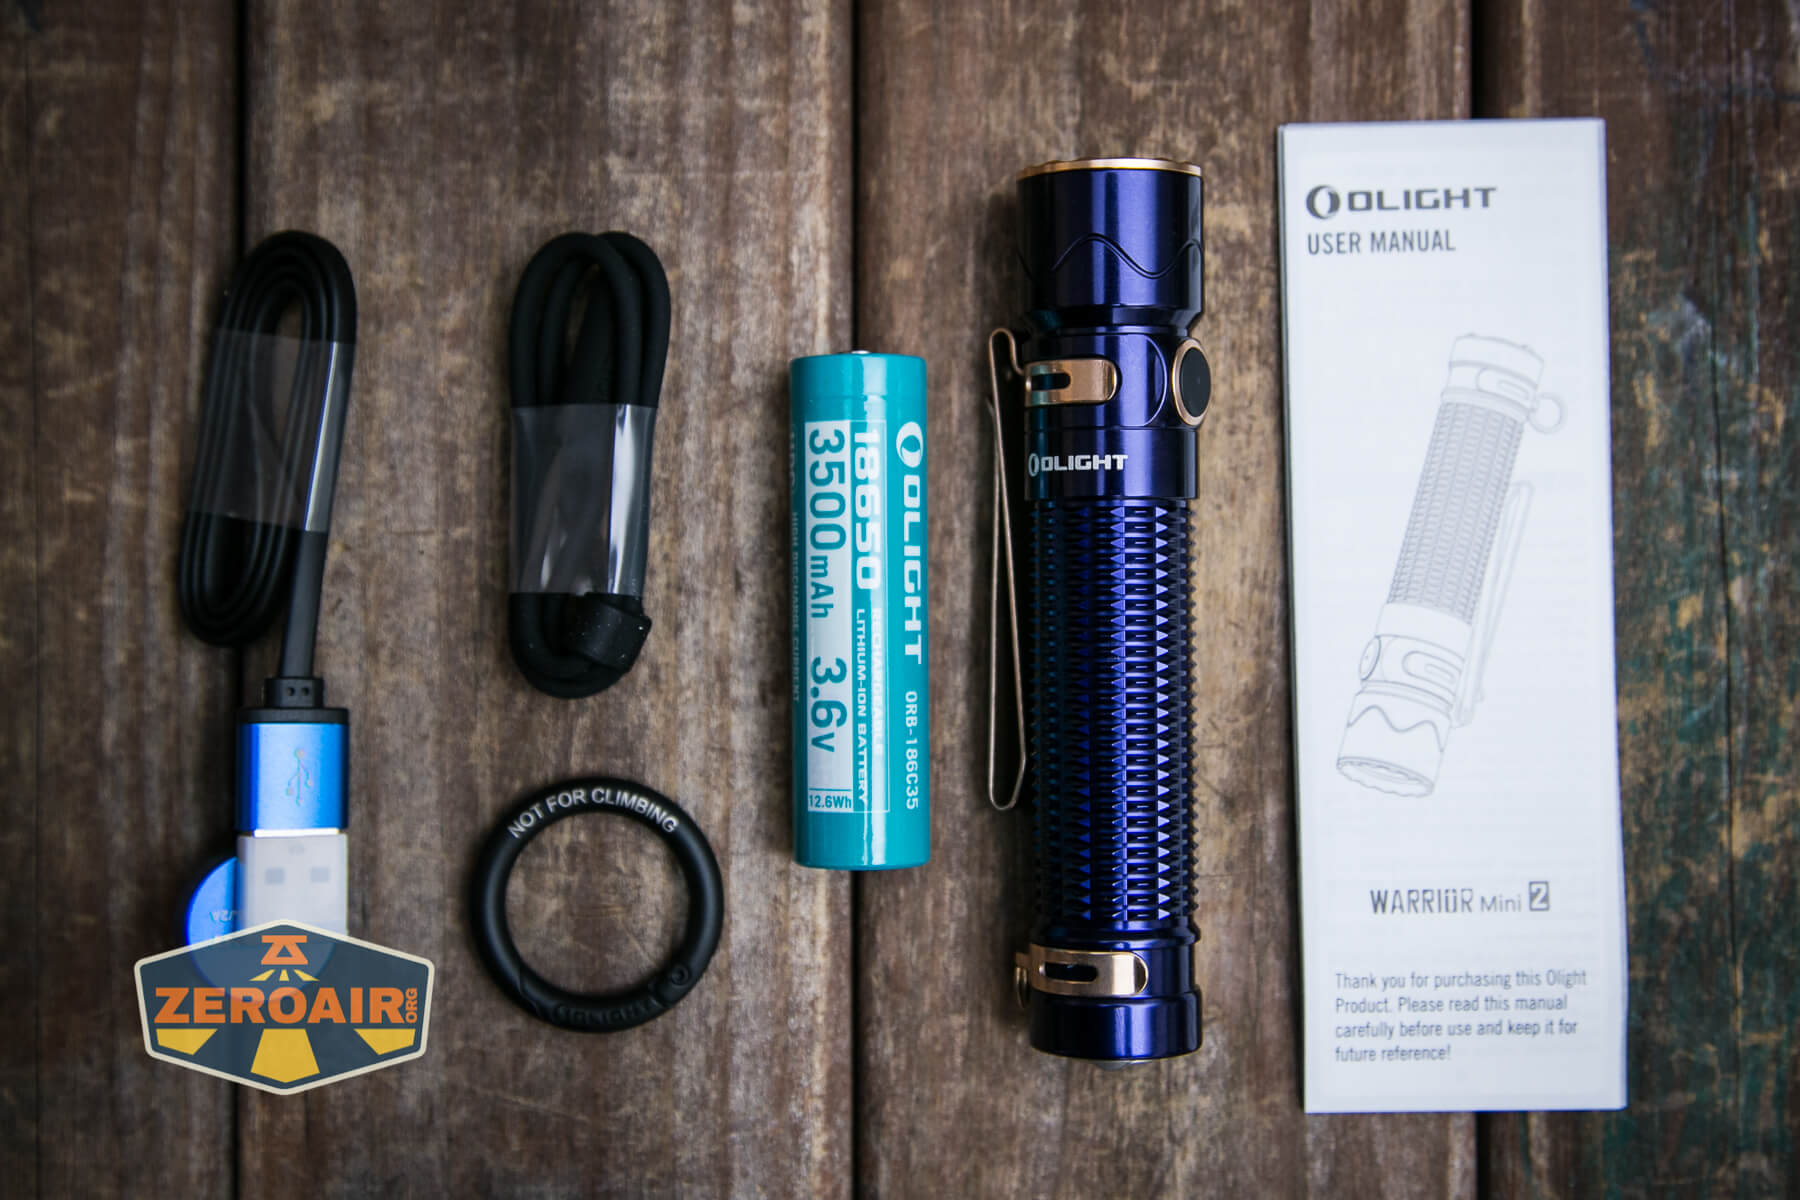
- Olight Warrior Mini 2 Regal Blue Flashlight
- Olight 3500mAh customized 18650
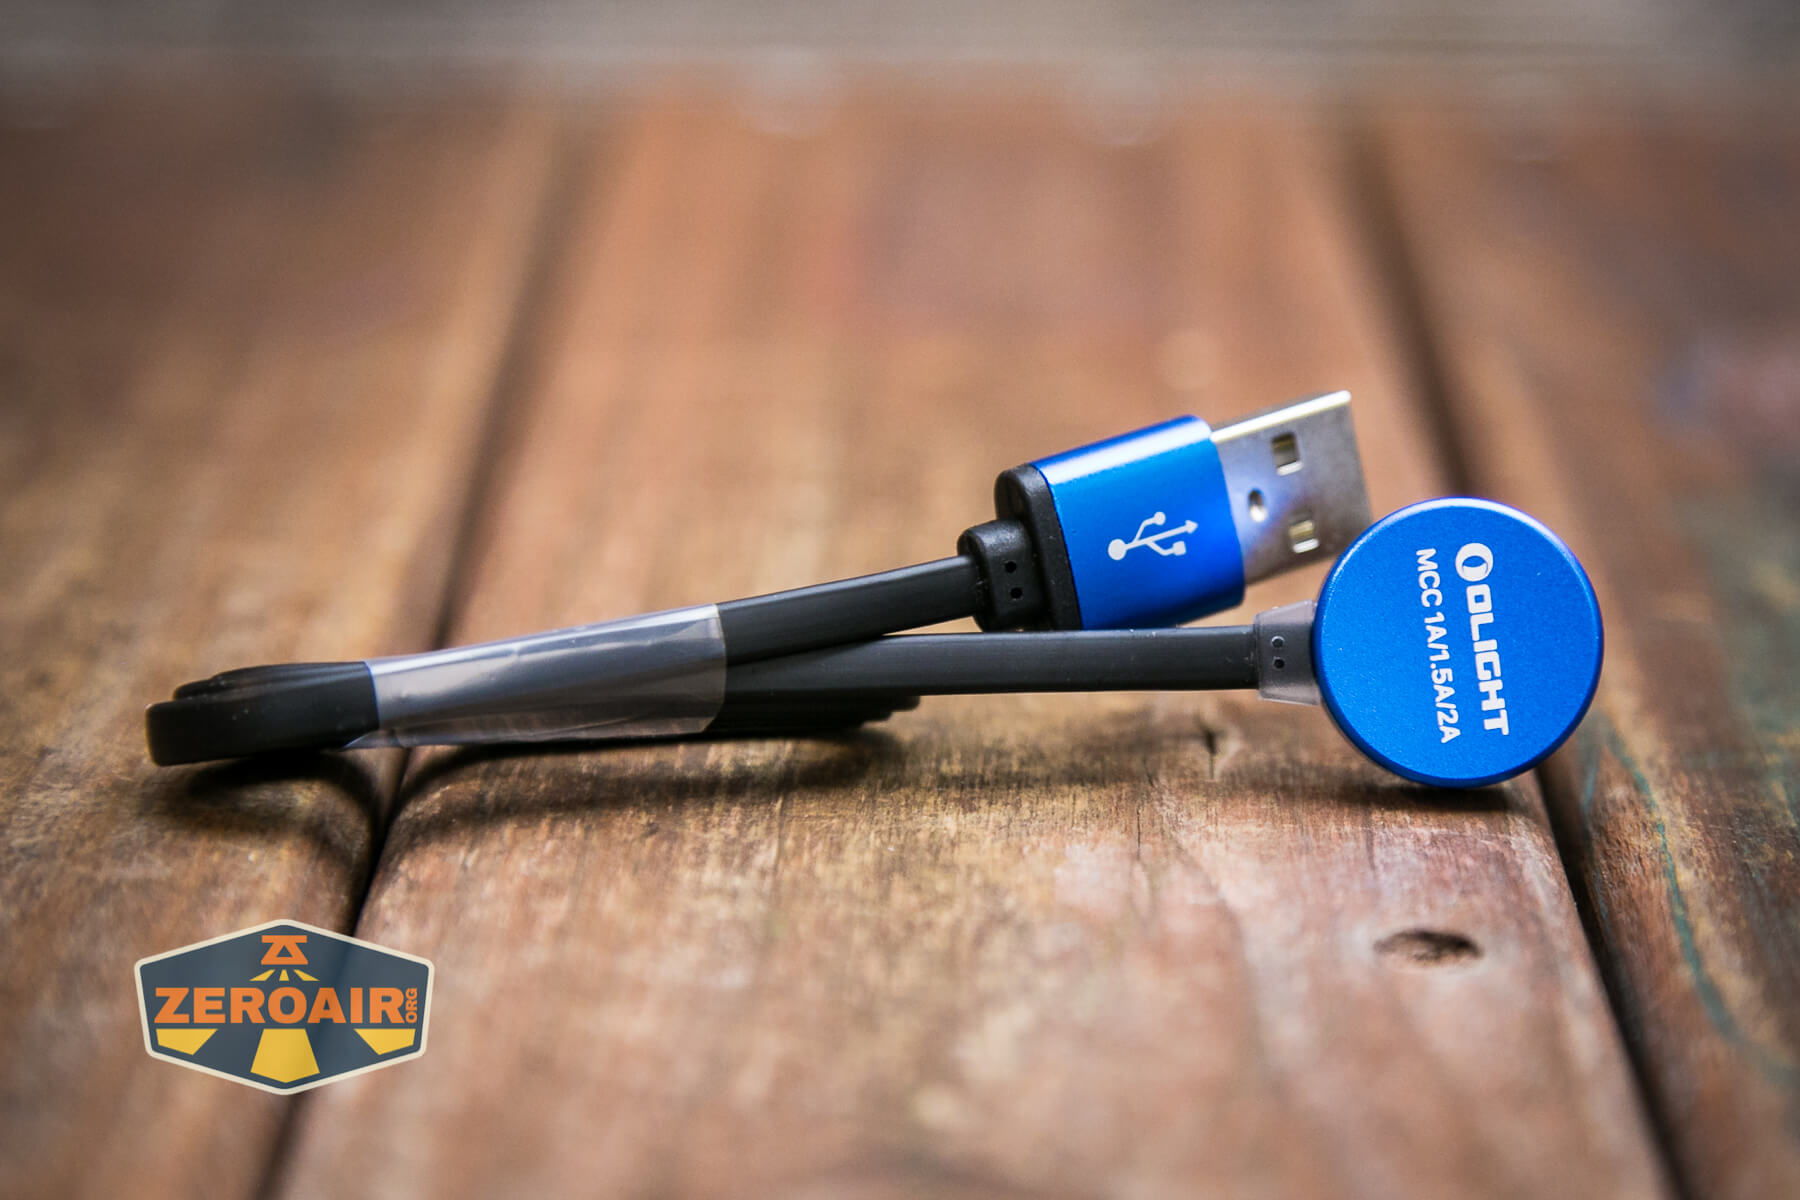
- Olight MCC 1A/1.5A/2A charger (USB to proprietary magnetic)
- Lanyard
- “Carabiner” ring
- Manual
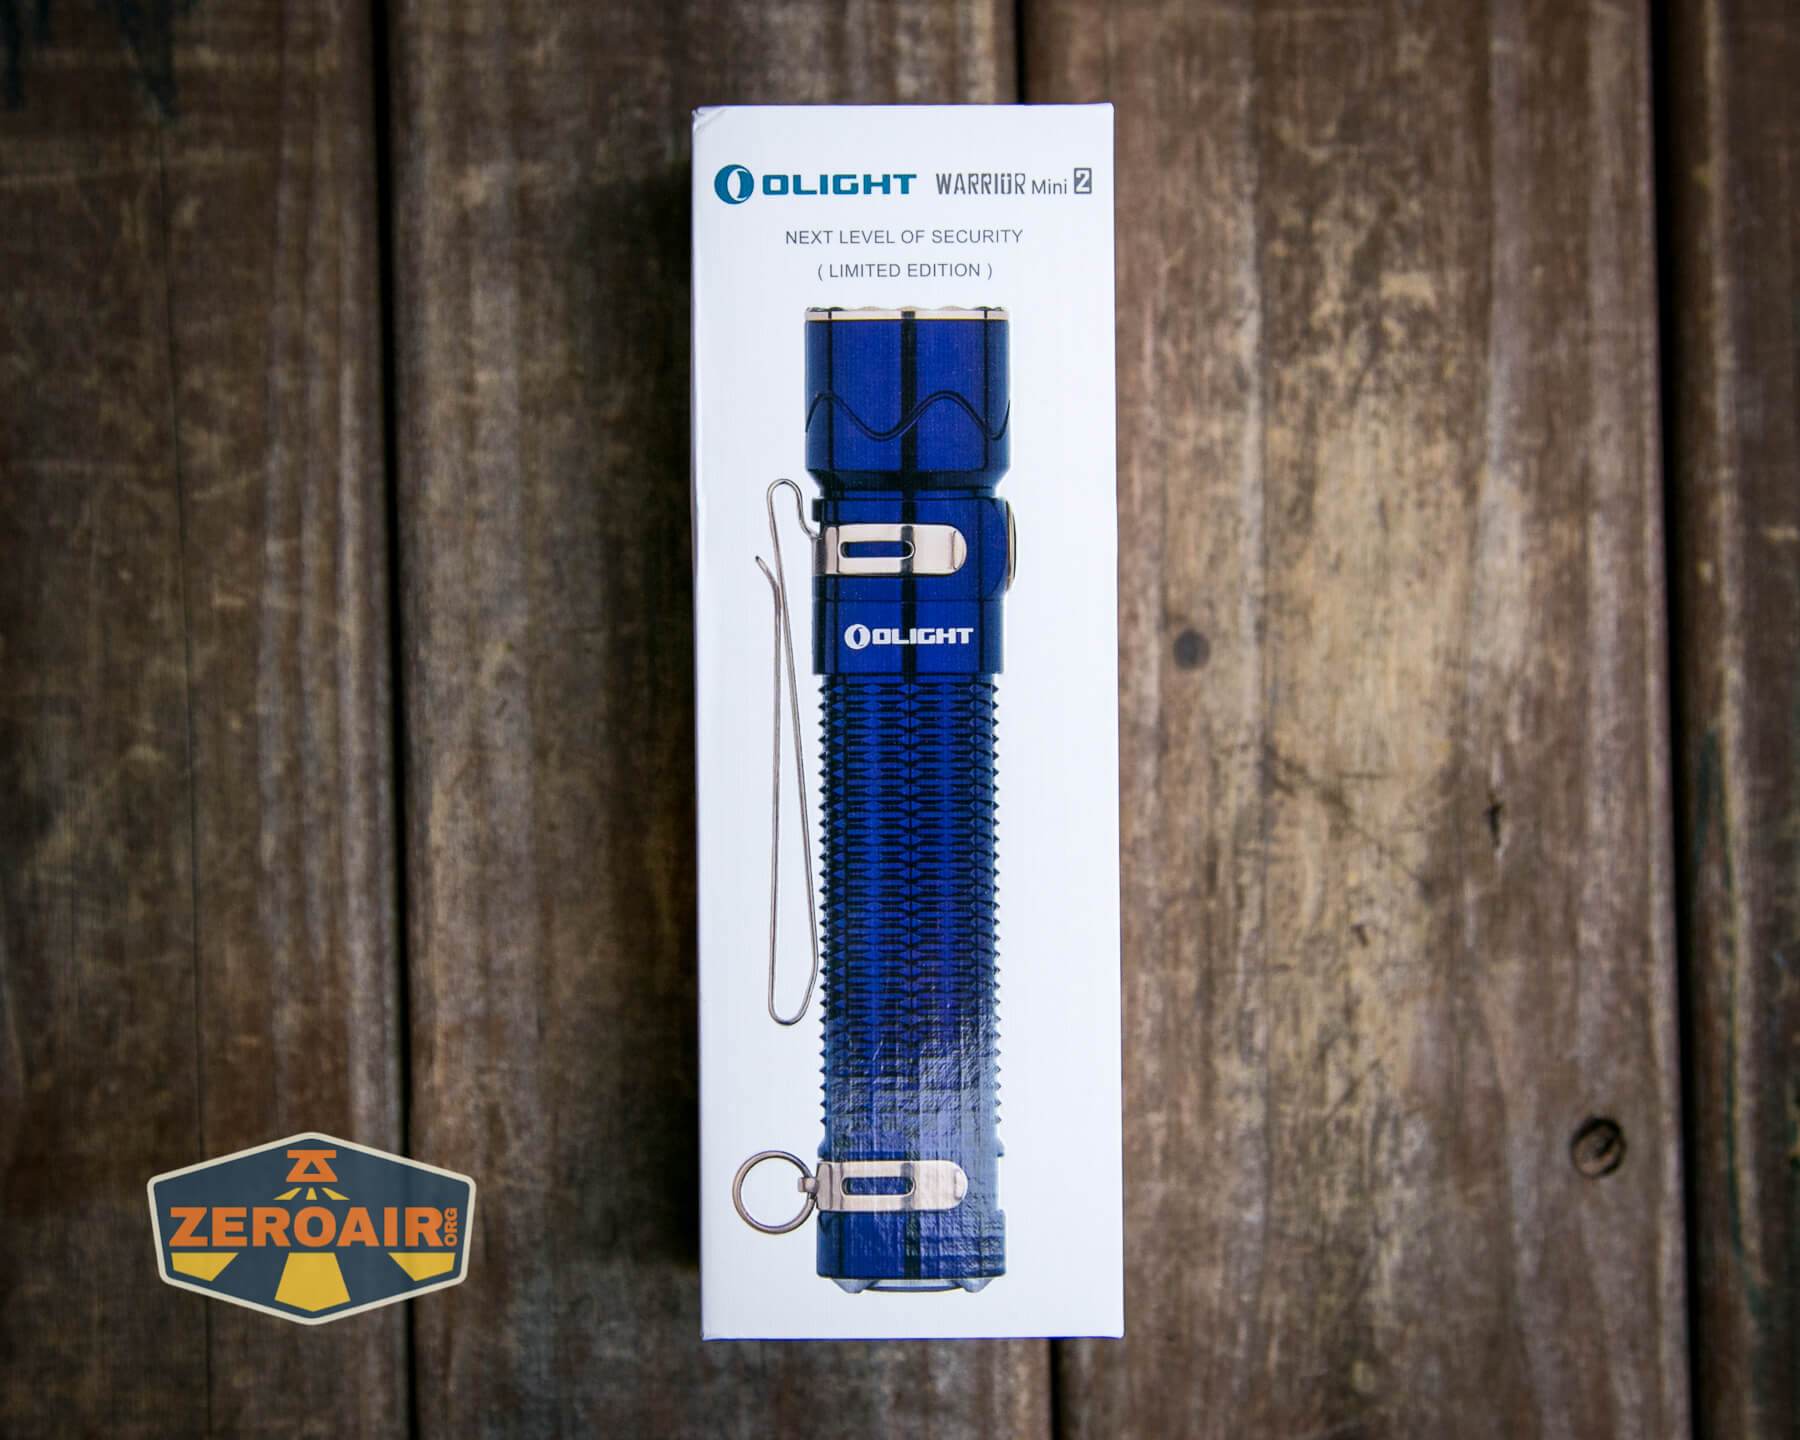
Package and Manual

Build Quality and Disassembly
There’s nothing at all to fault about the build quality of the Olight Warrior Mini 2 Regal Blue. It’s a robust light. There are a few enhancements over the original, which I’ll cover later.


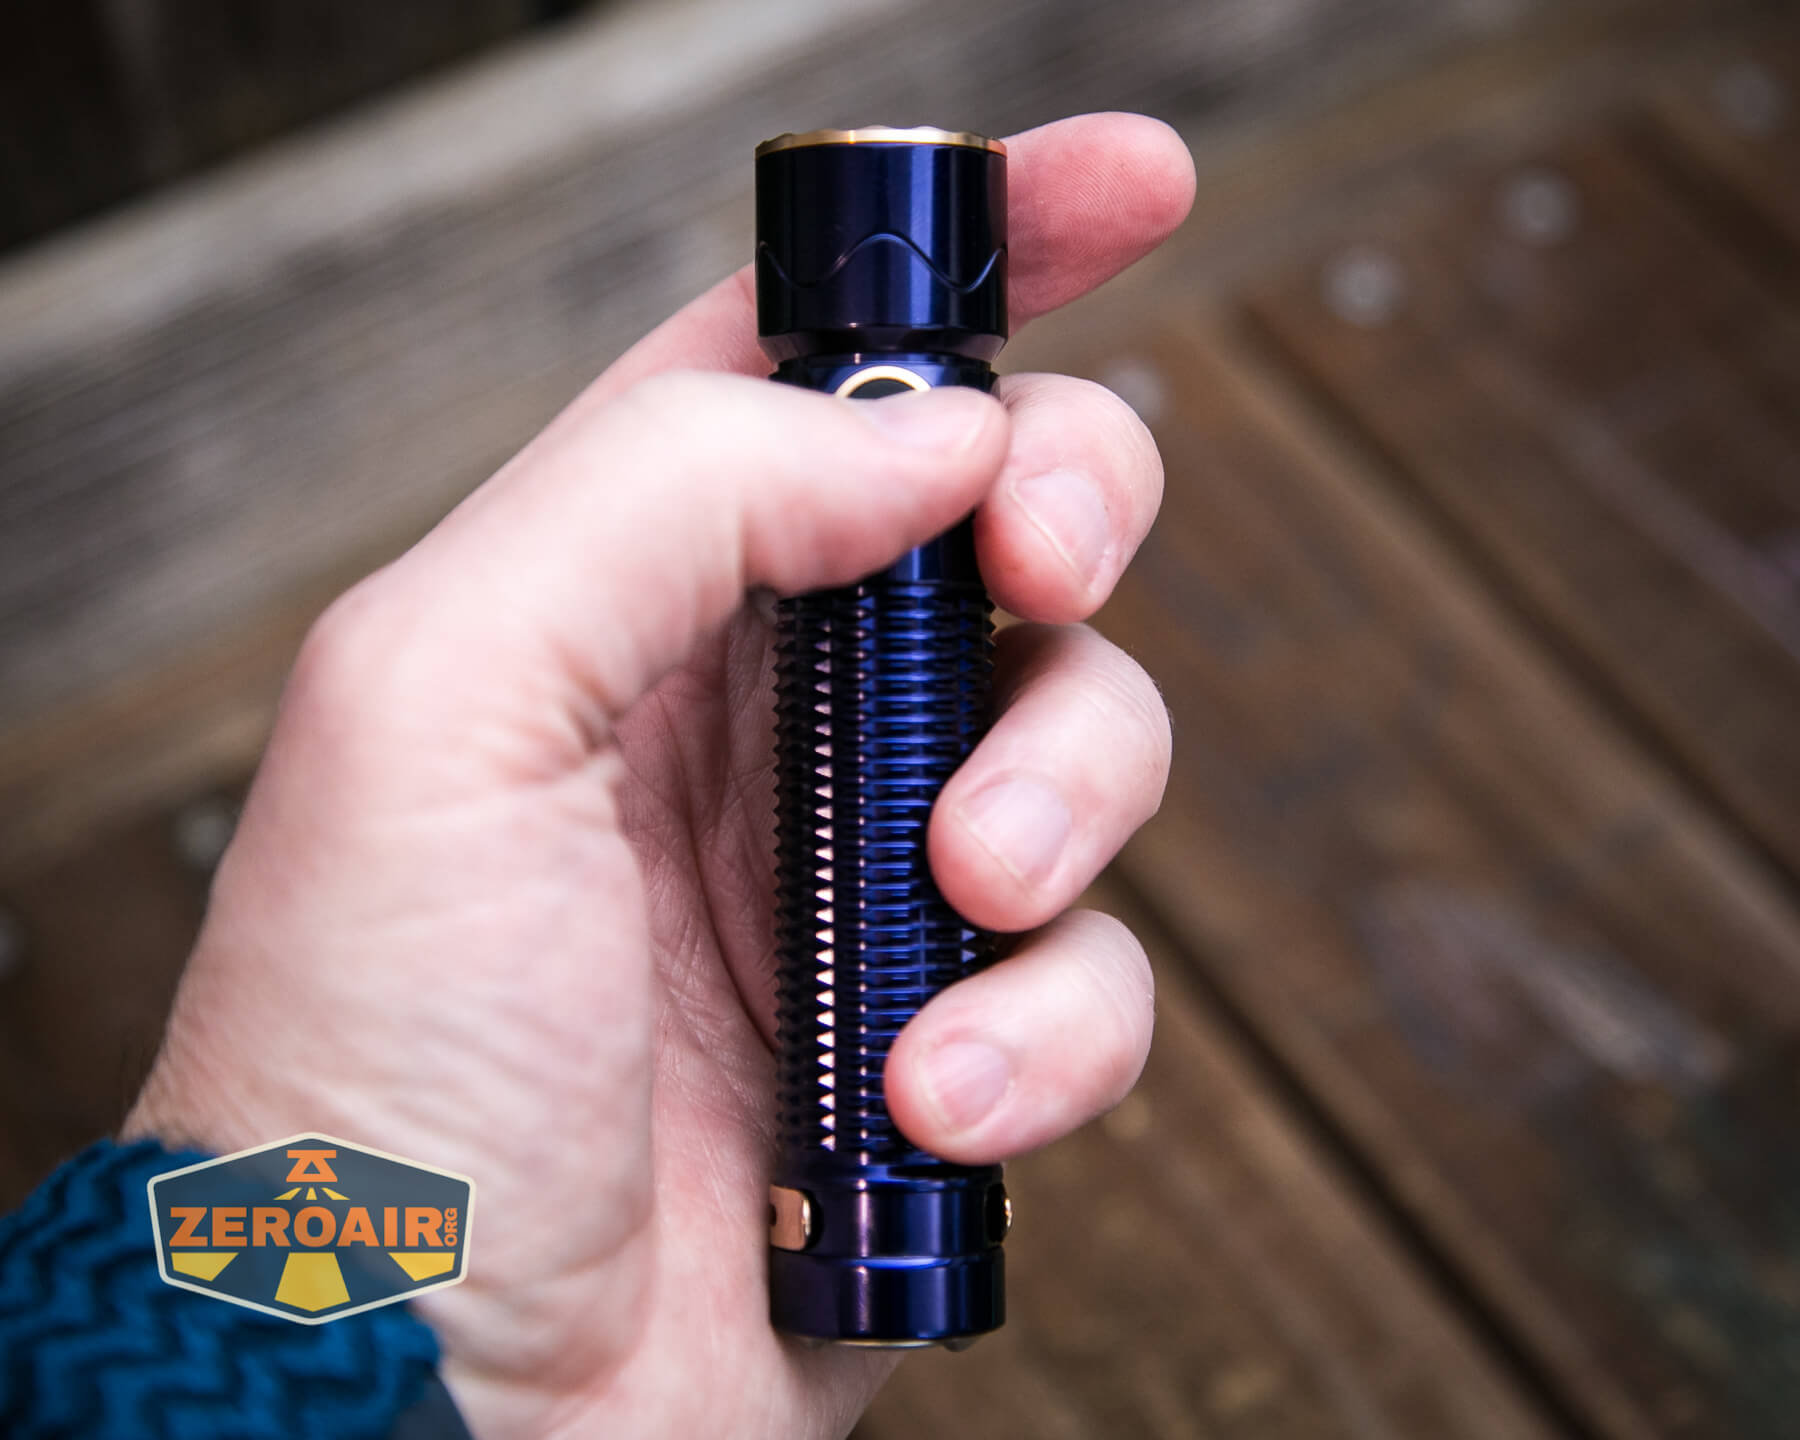
Notably, the grip pattern here is the same as before, and that’s fine. This pattern provides excellent grip.
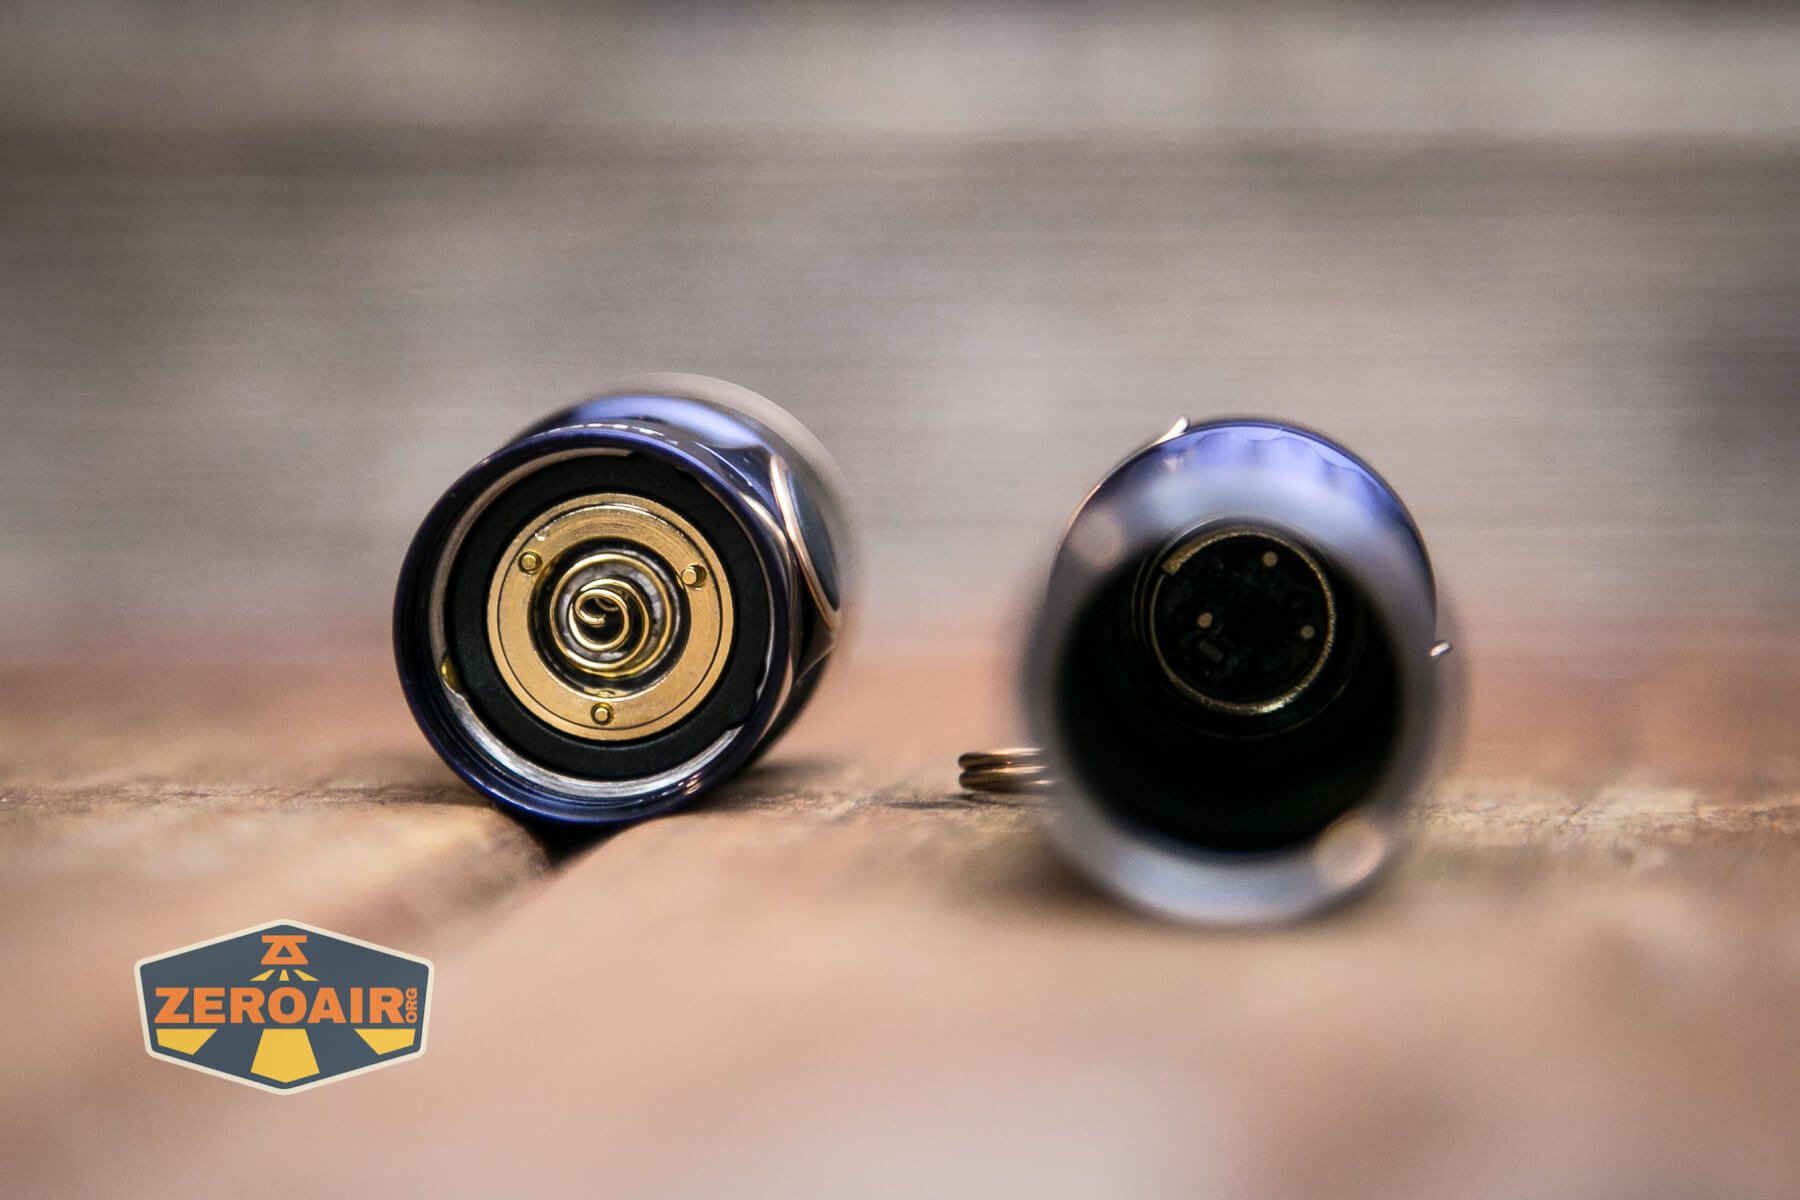
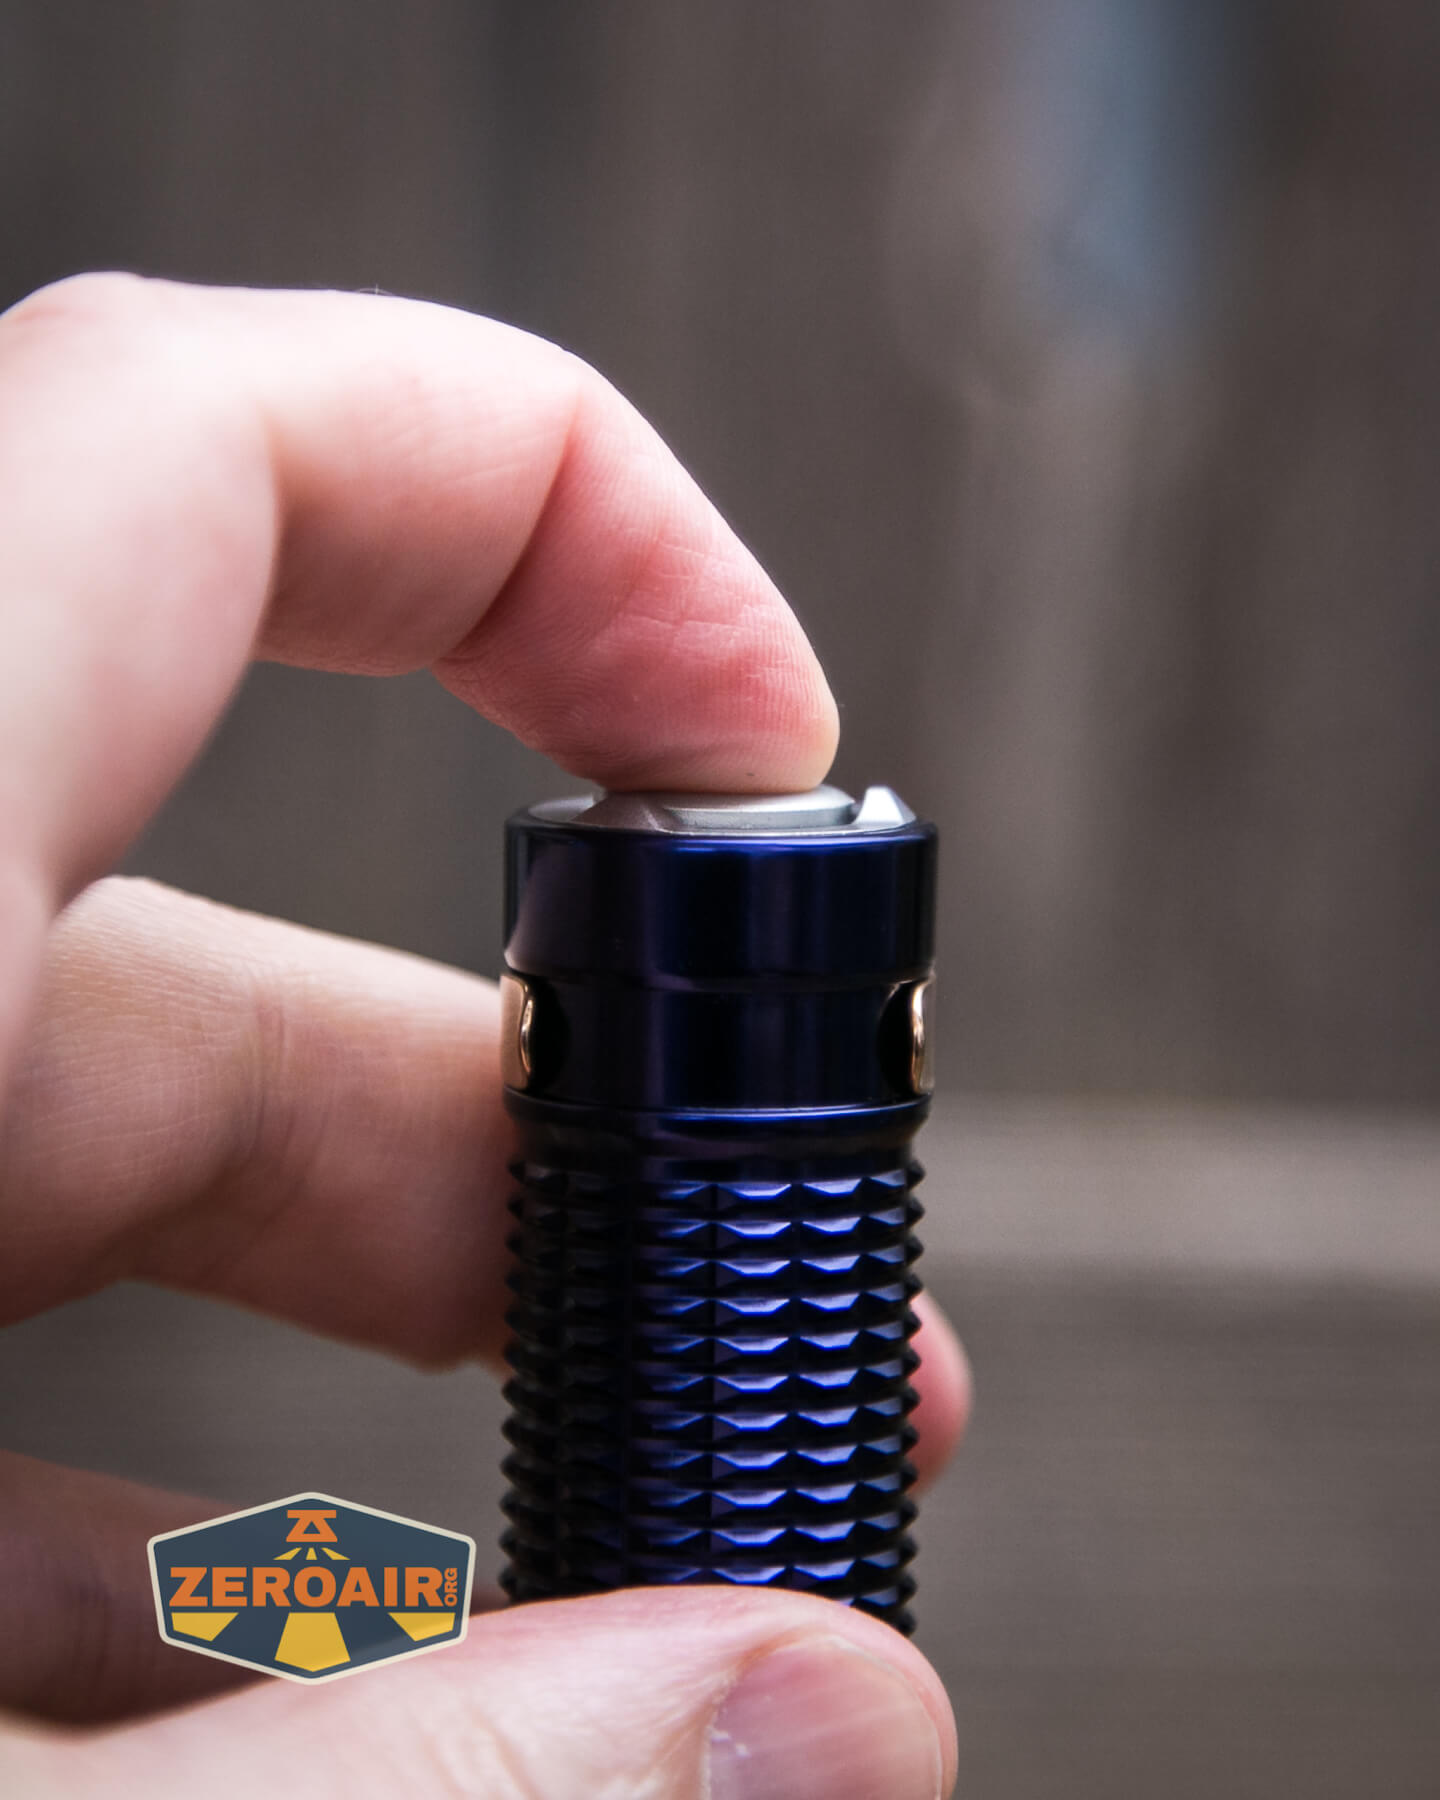
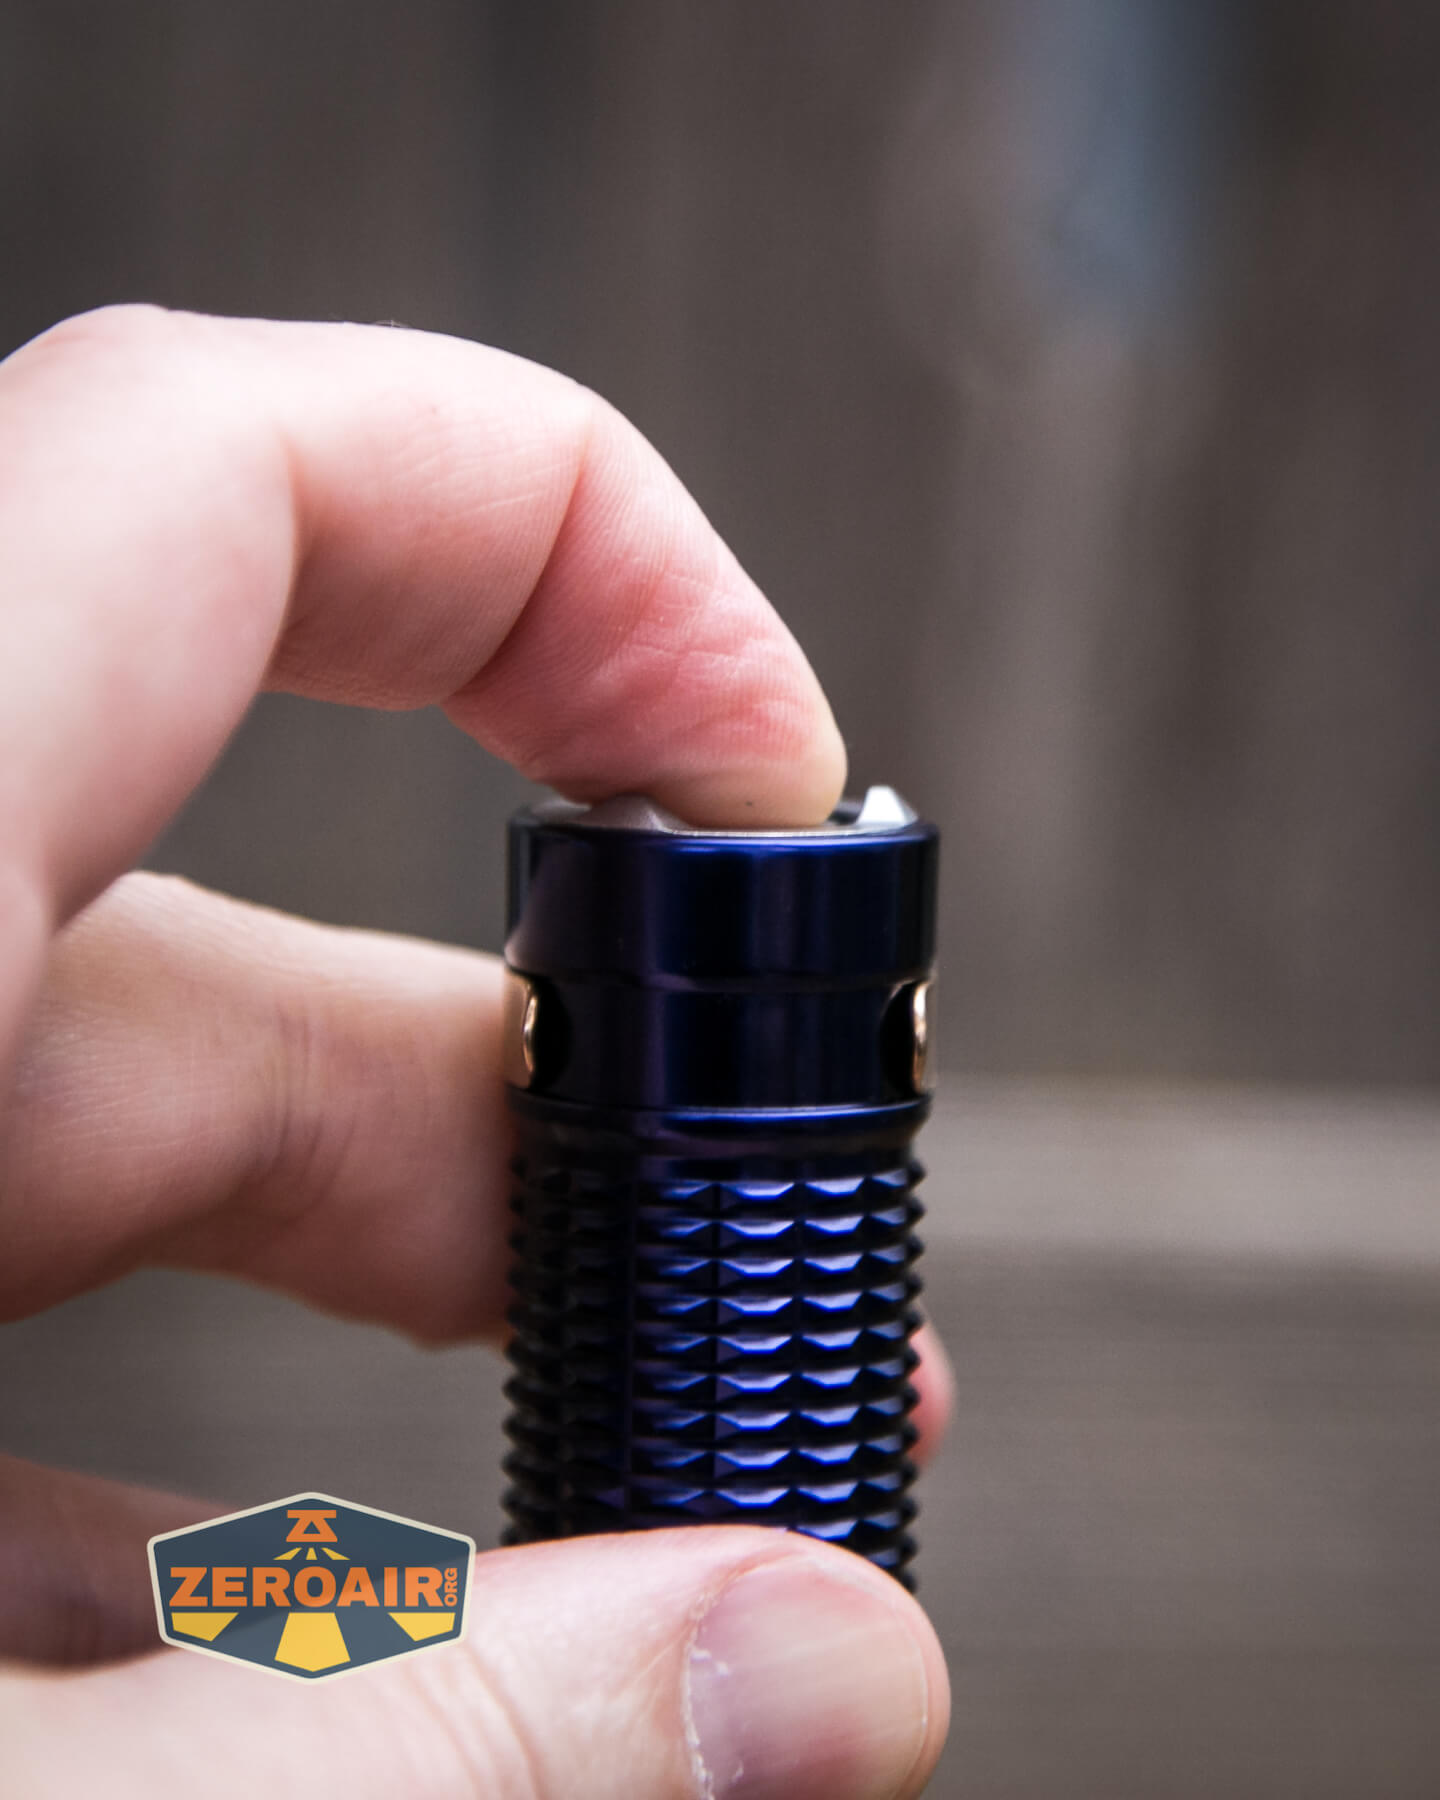
Only the head comes off the light. These threads are fairly short, square-cut, and anodized. However, since the cell is “this type of” proprietary, it’s not possible to lock the light out mechanically.
Both head and tail have a spring. The head end has both positive and negative contacts in the center. With the head unscrewed a little (which is normally the “mechanically locked out” position on most flashlights), the e-switch still functions!
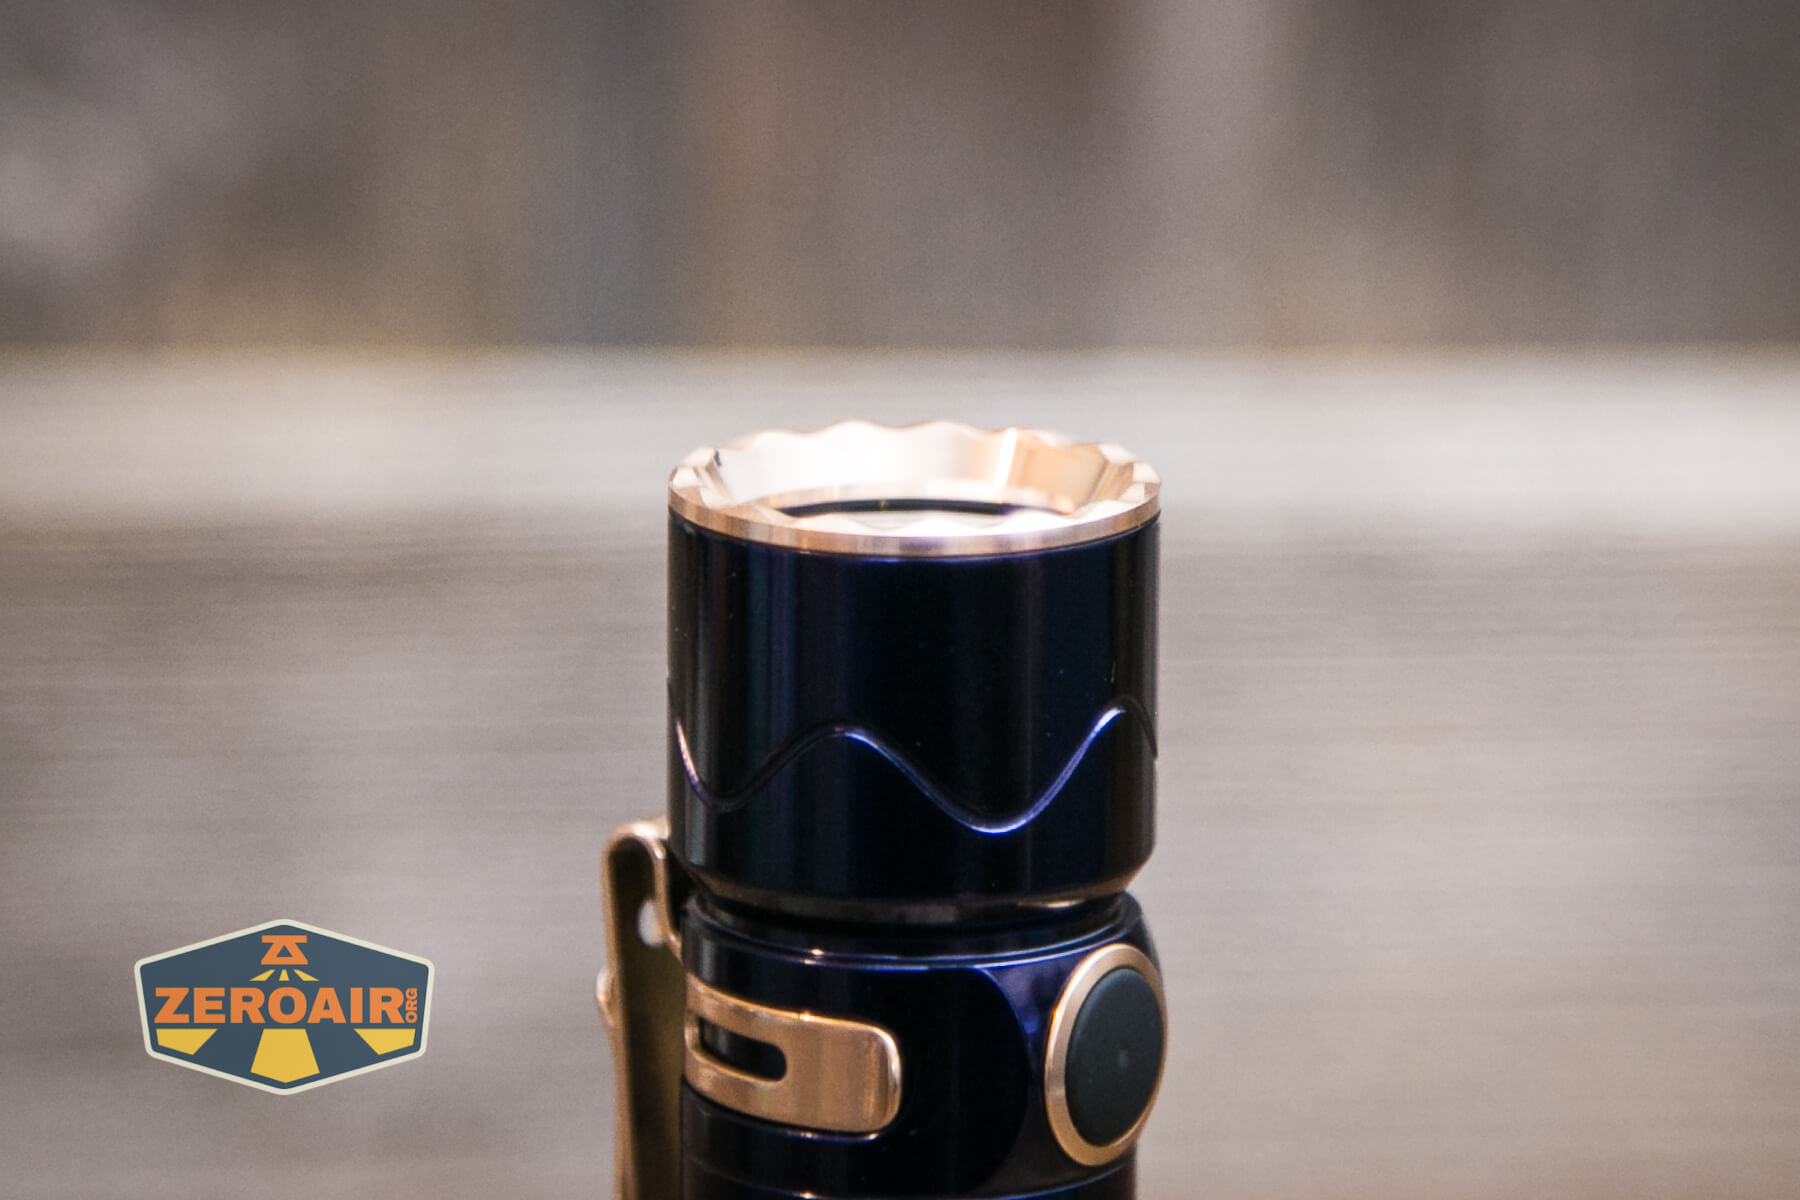
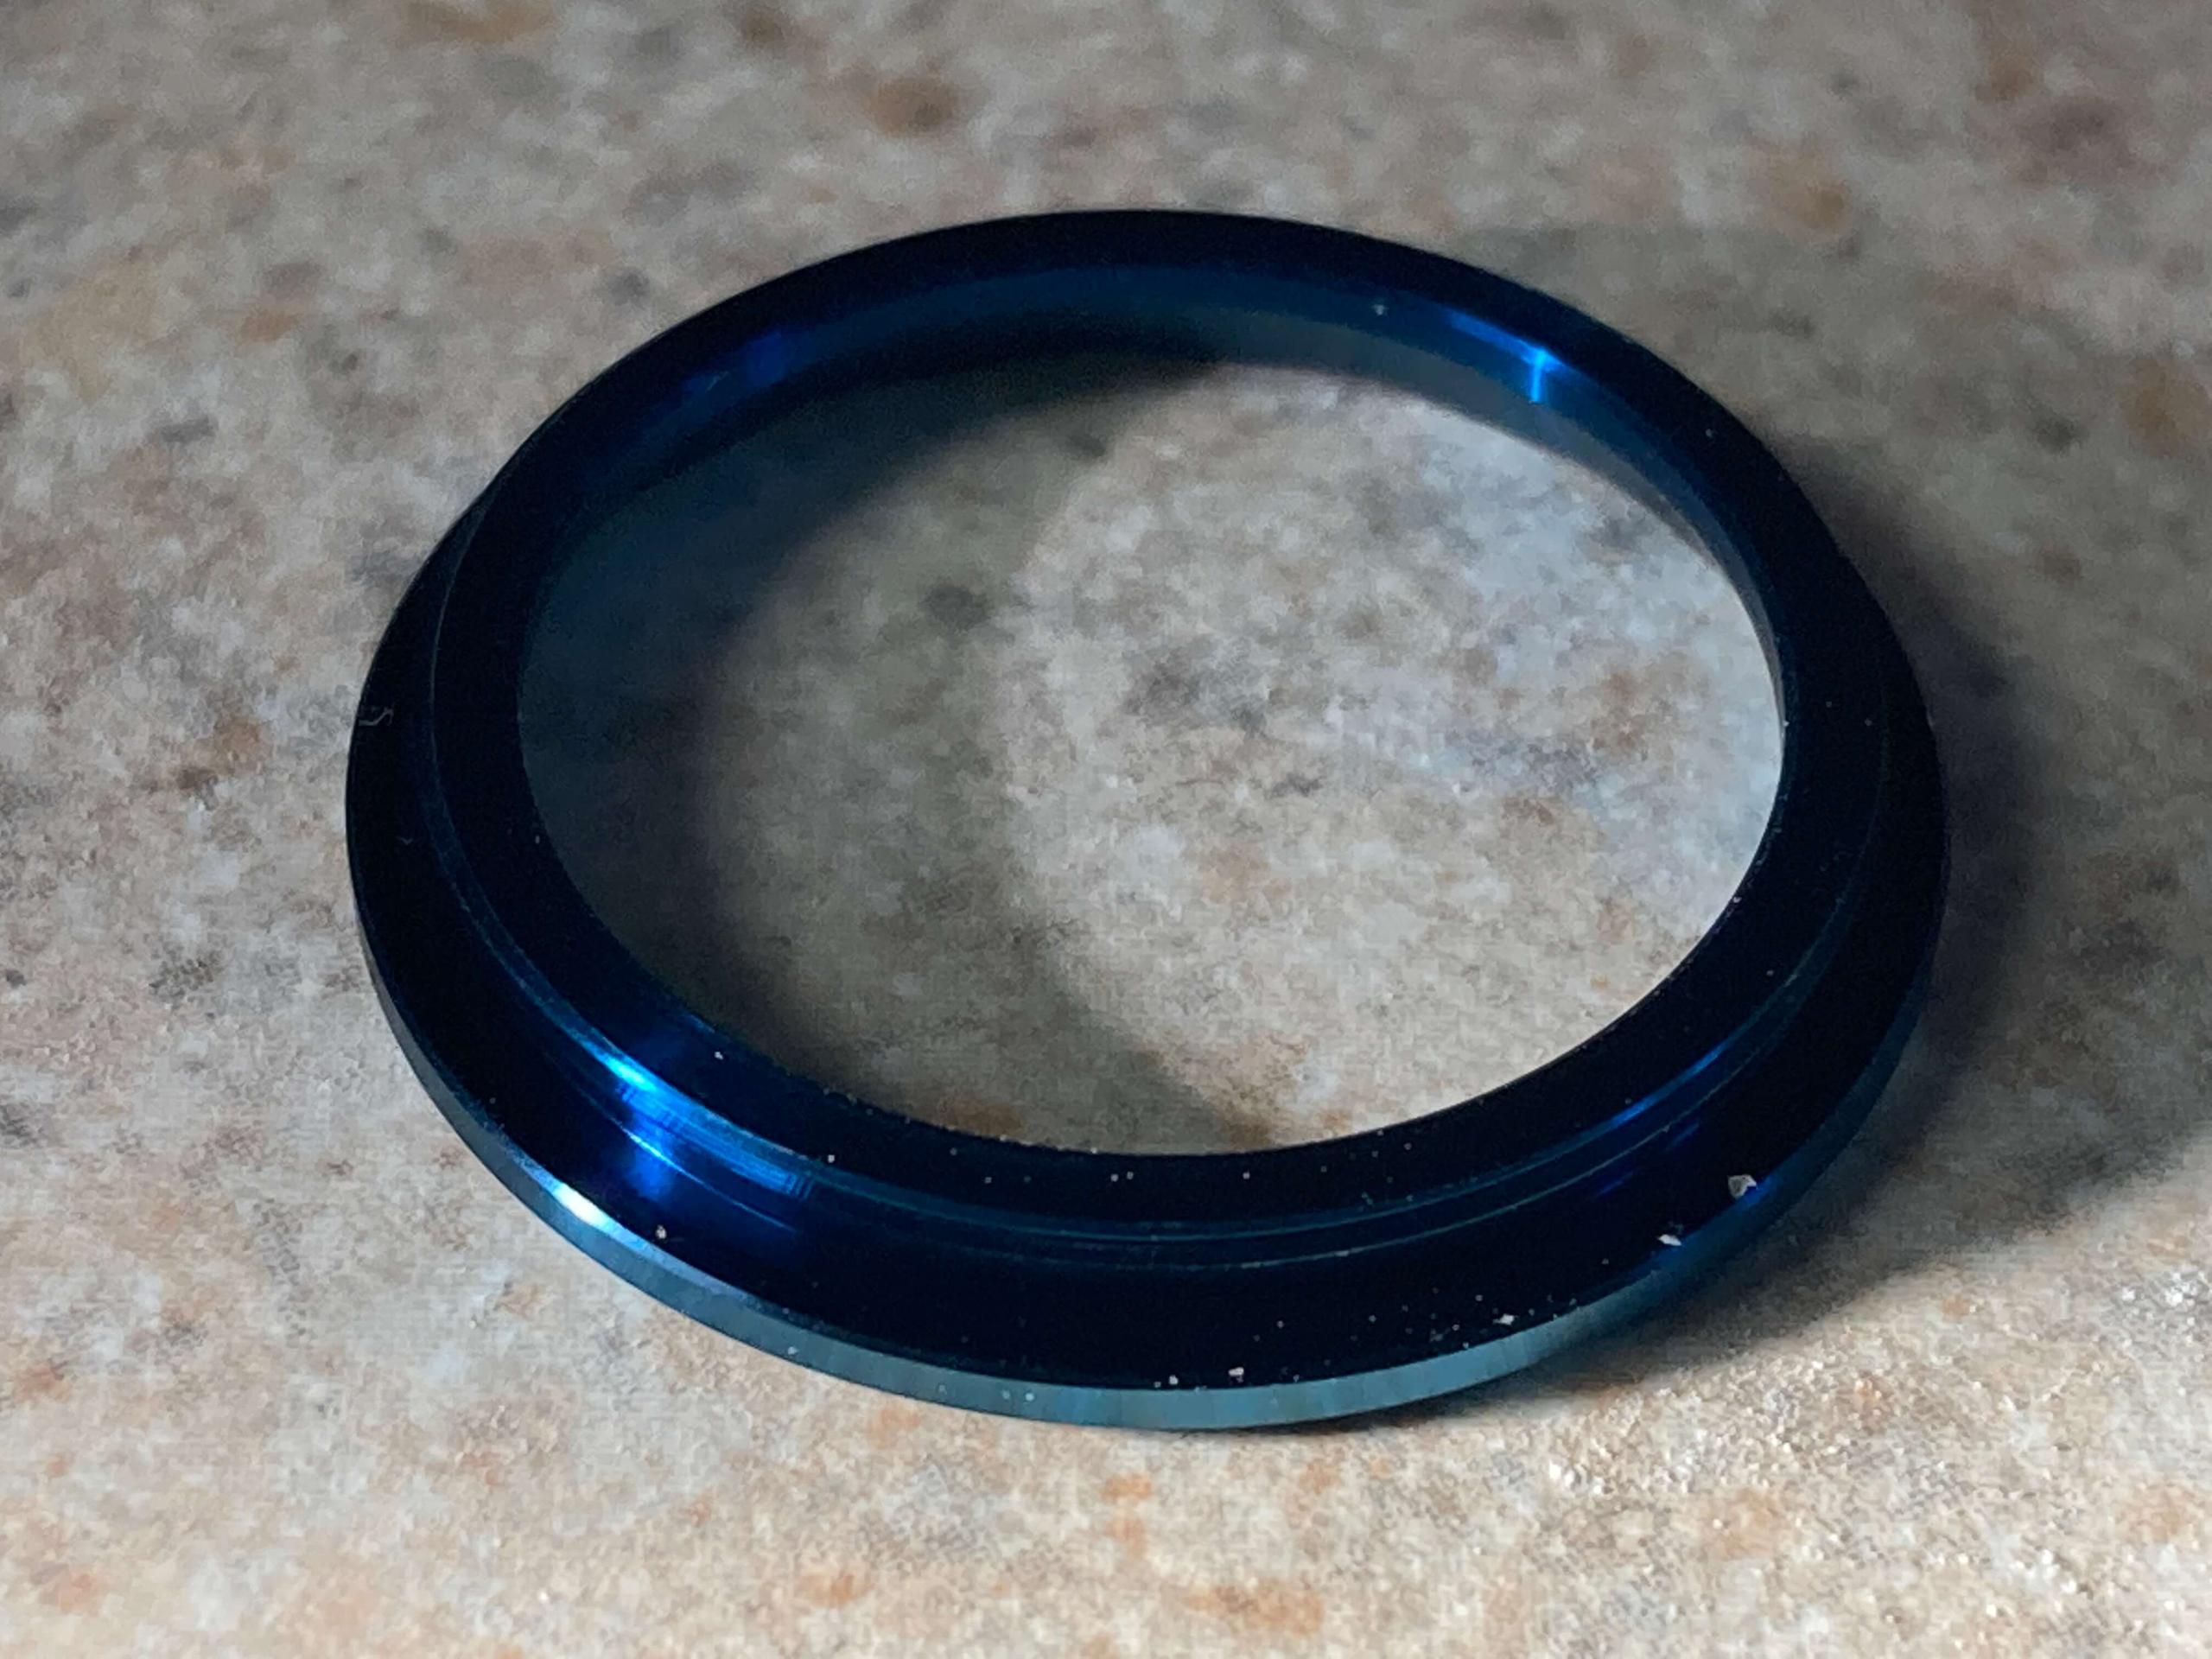
Here’s a bit of detail on what you’ll get when the bezel and optic are removed.
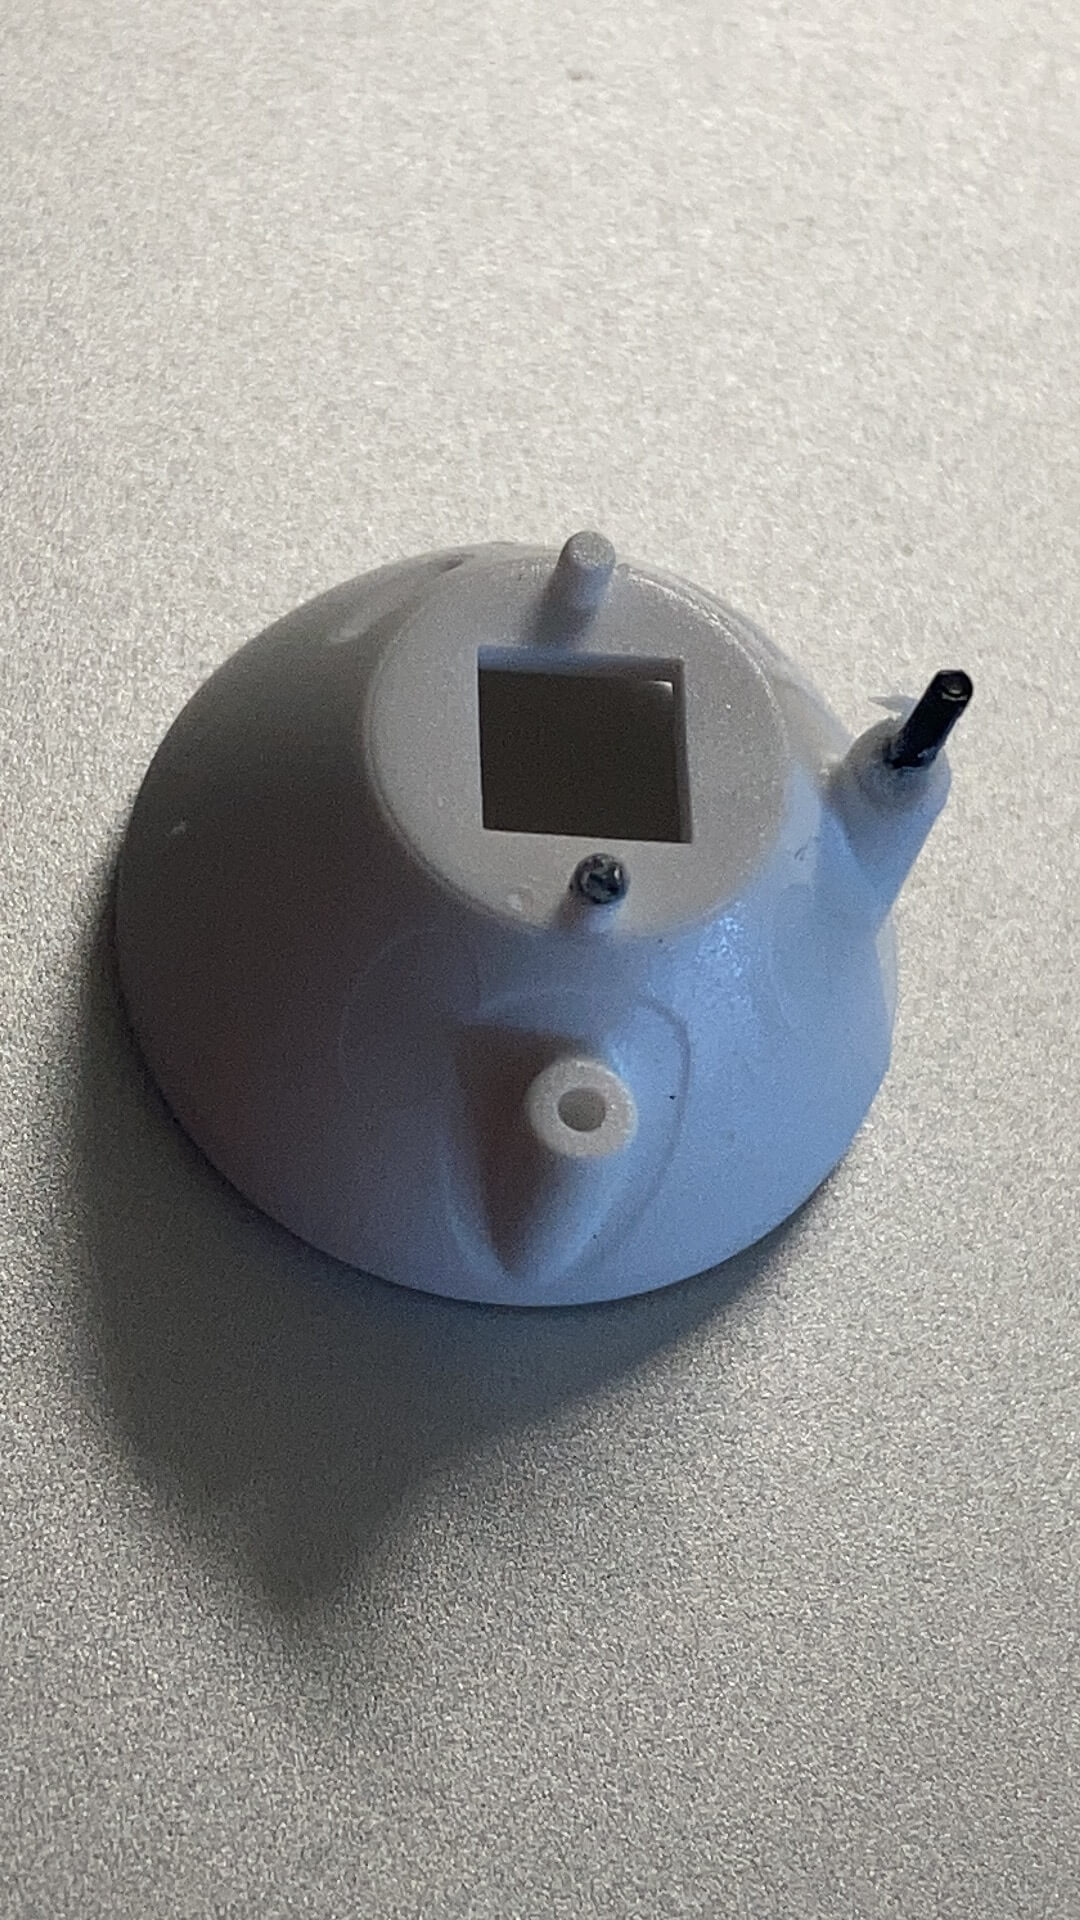
To the right (below), you can see the hole that goes through the shelf for the proximity sensor.
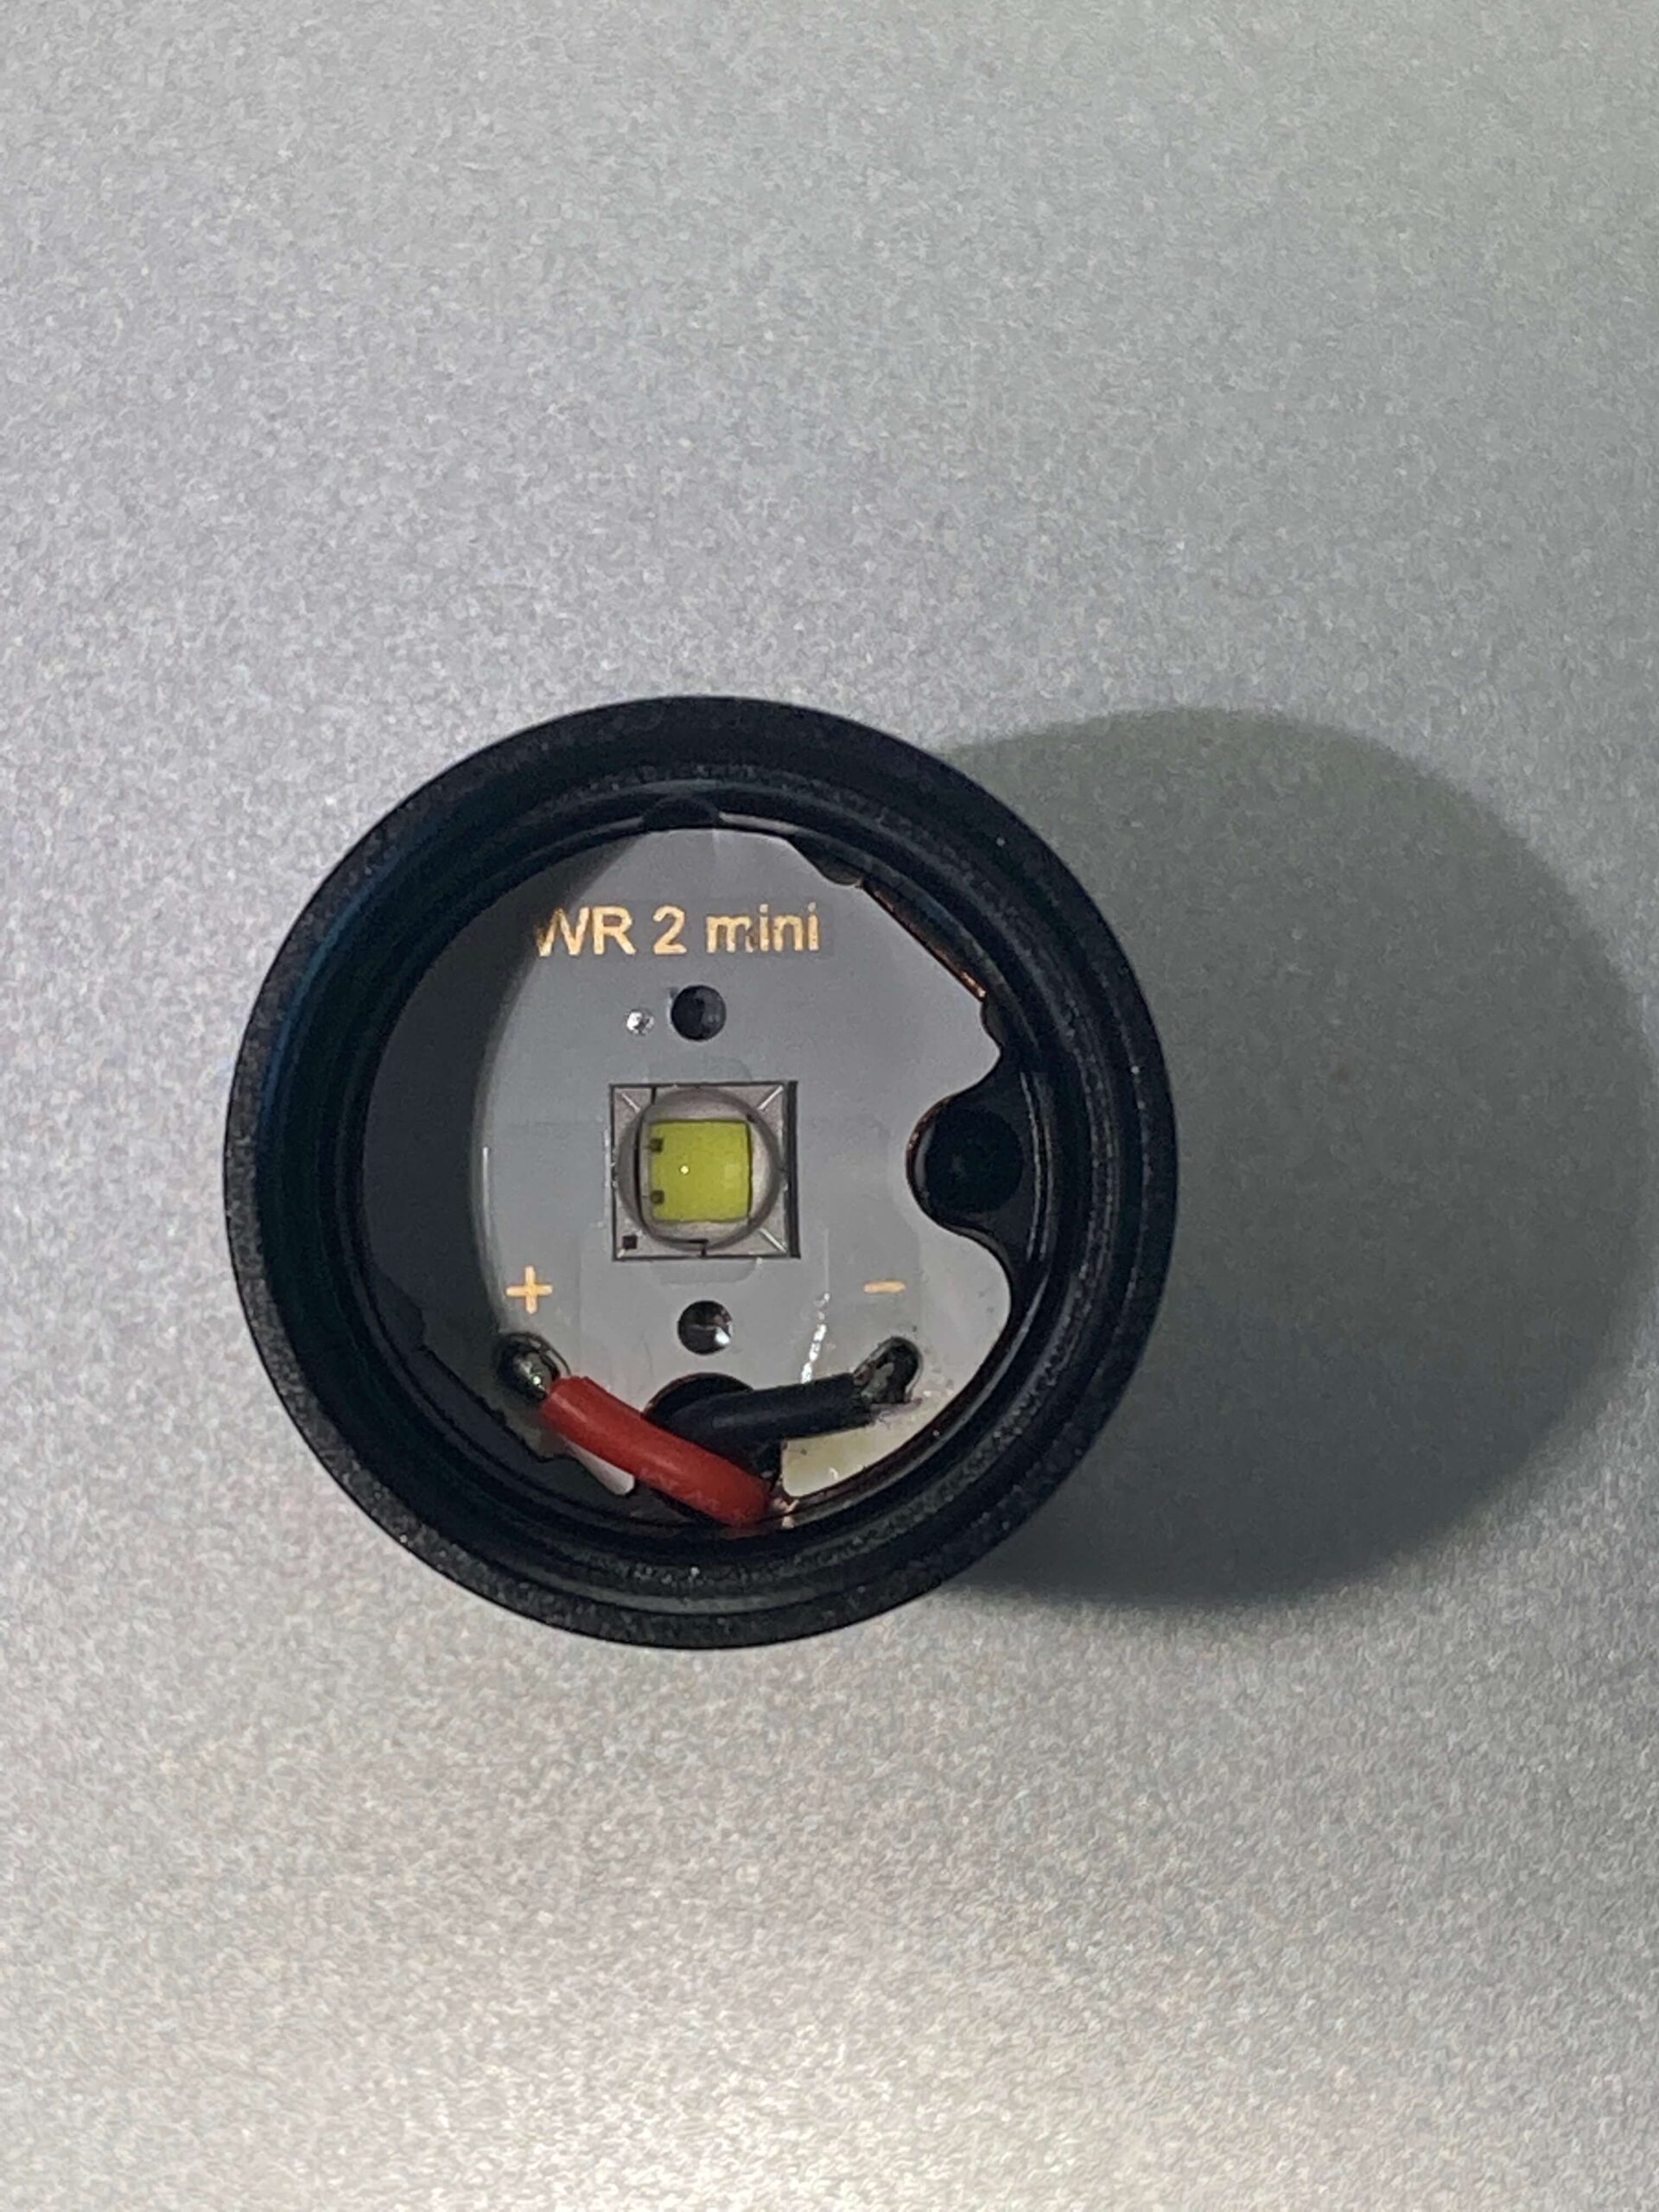
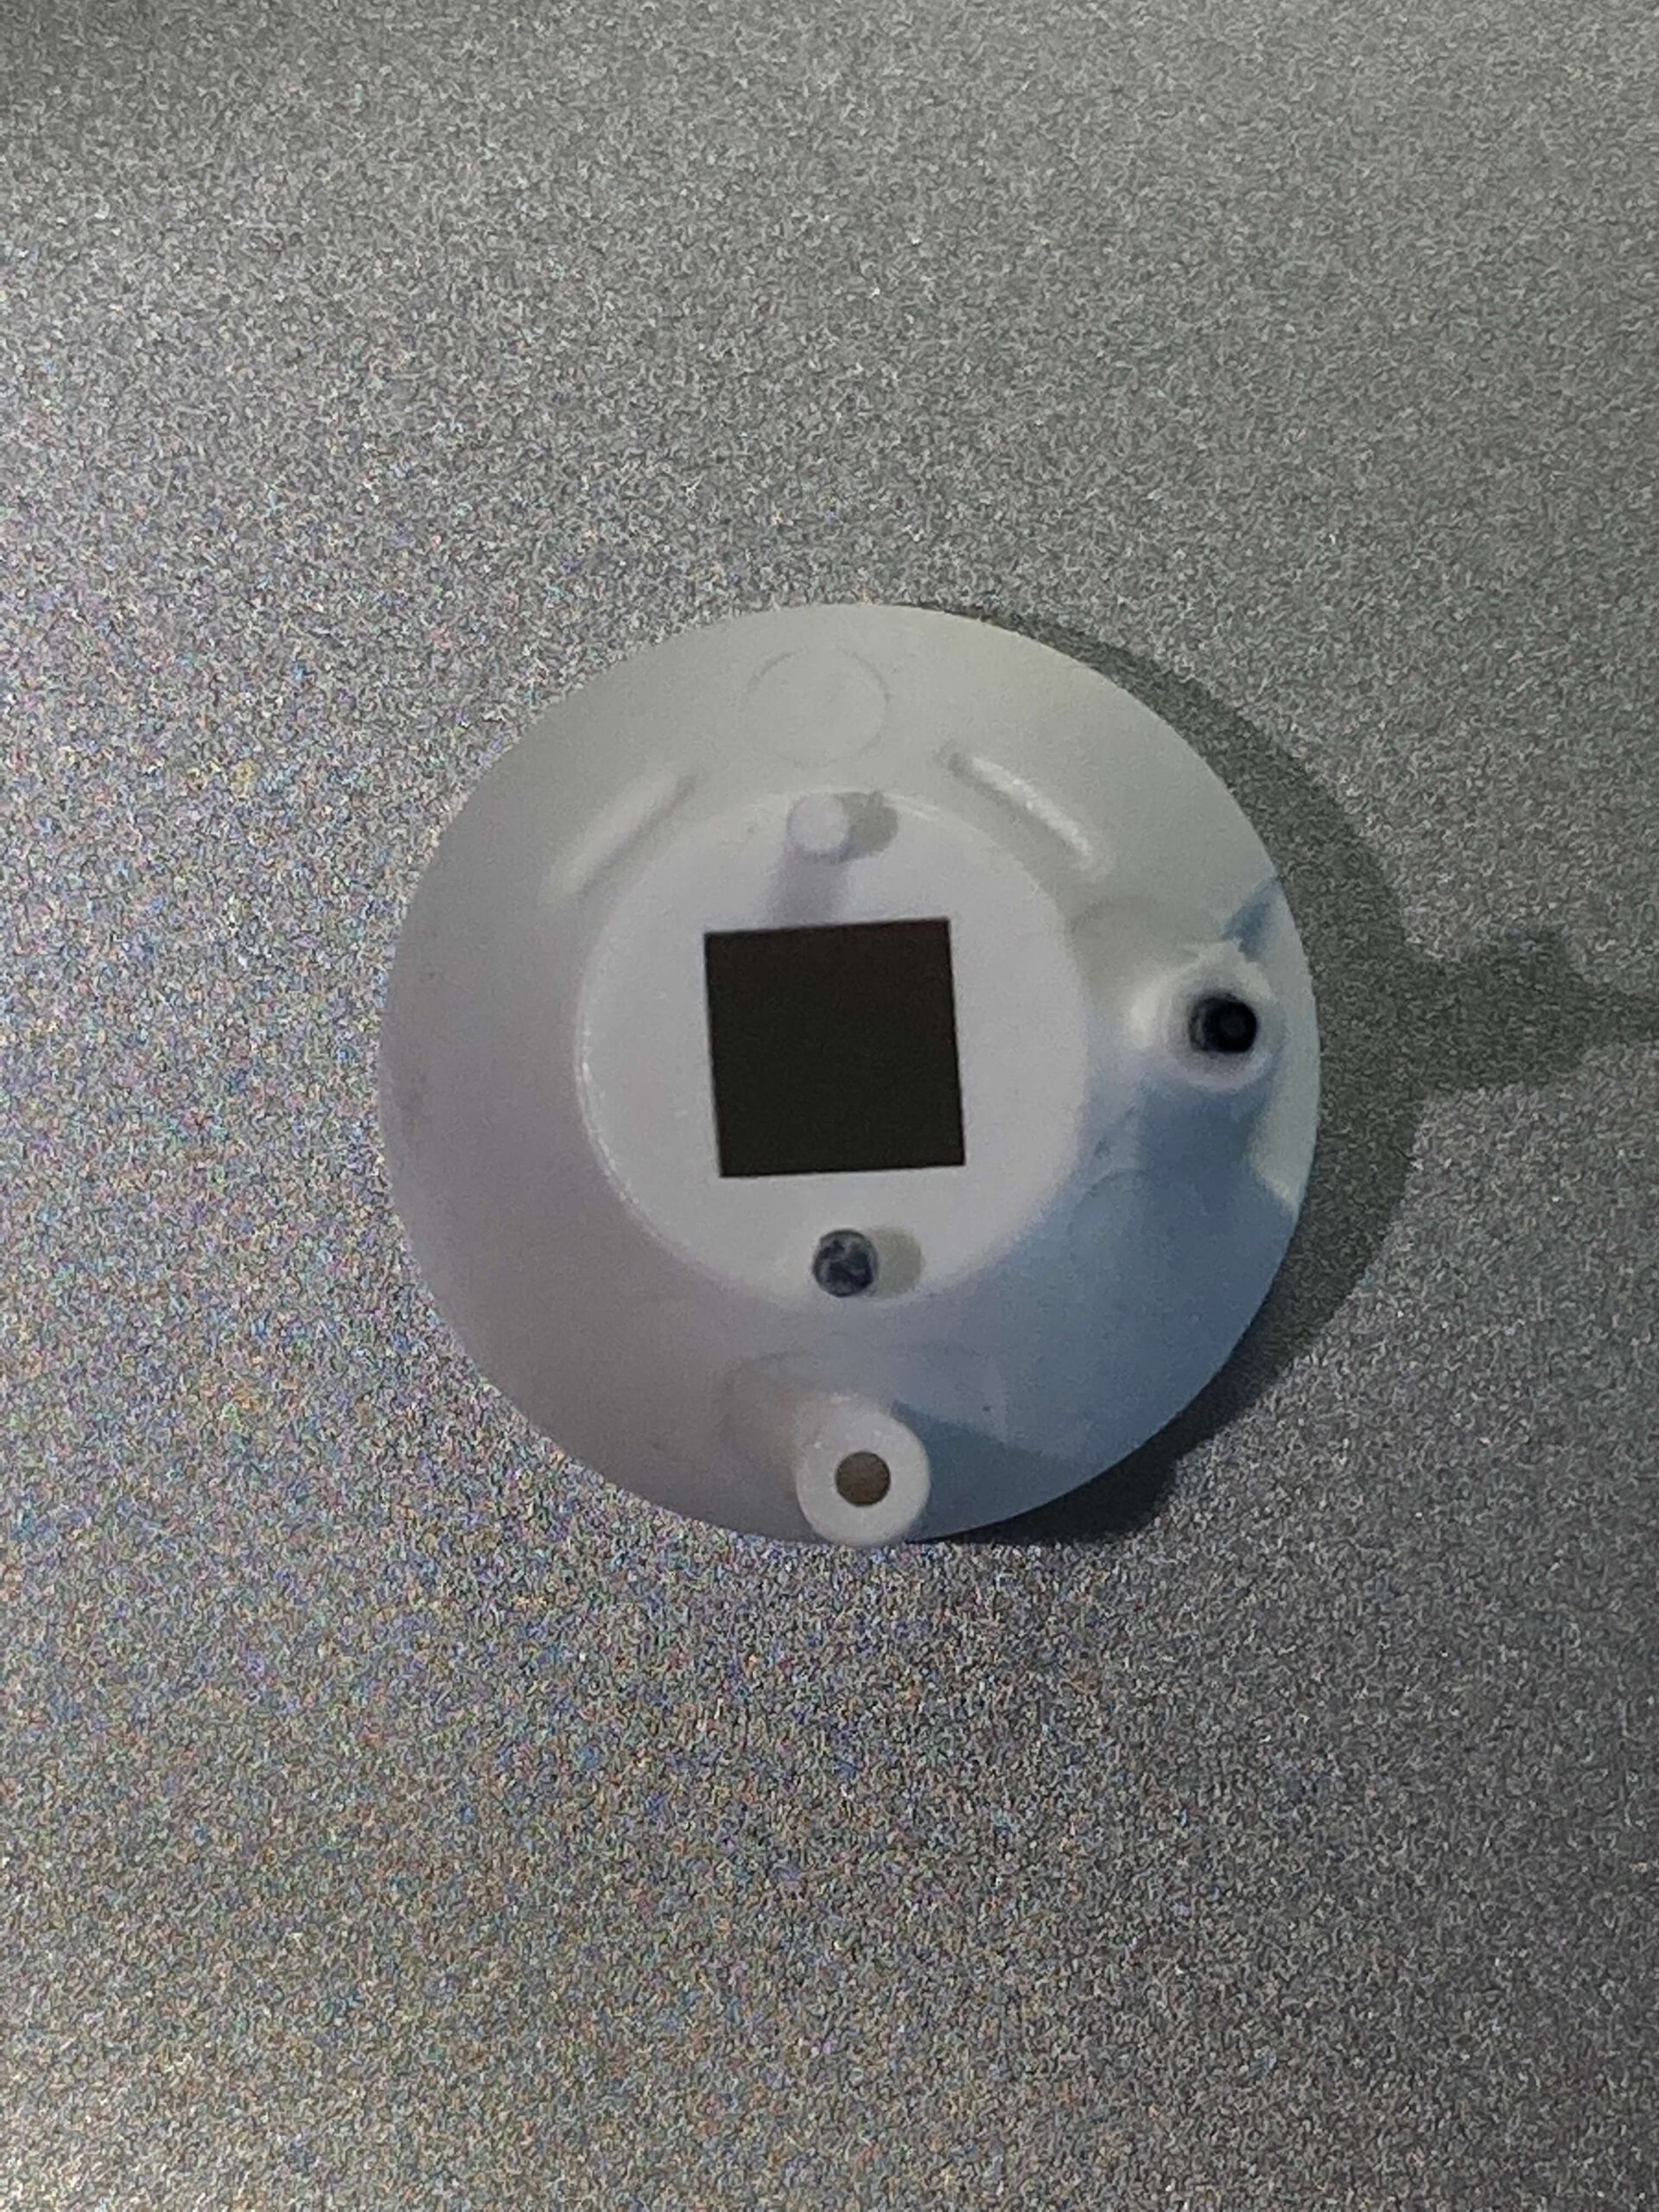
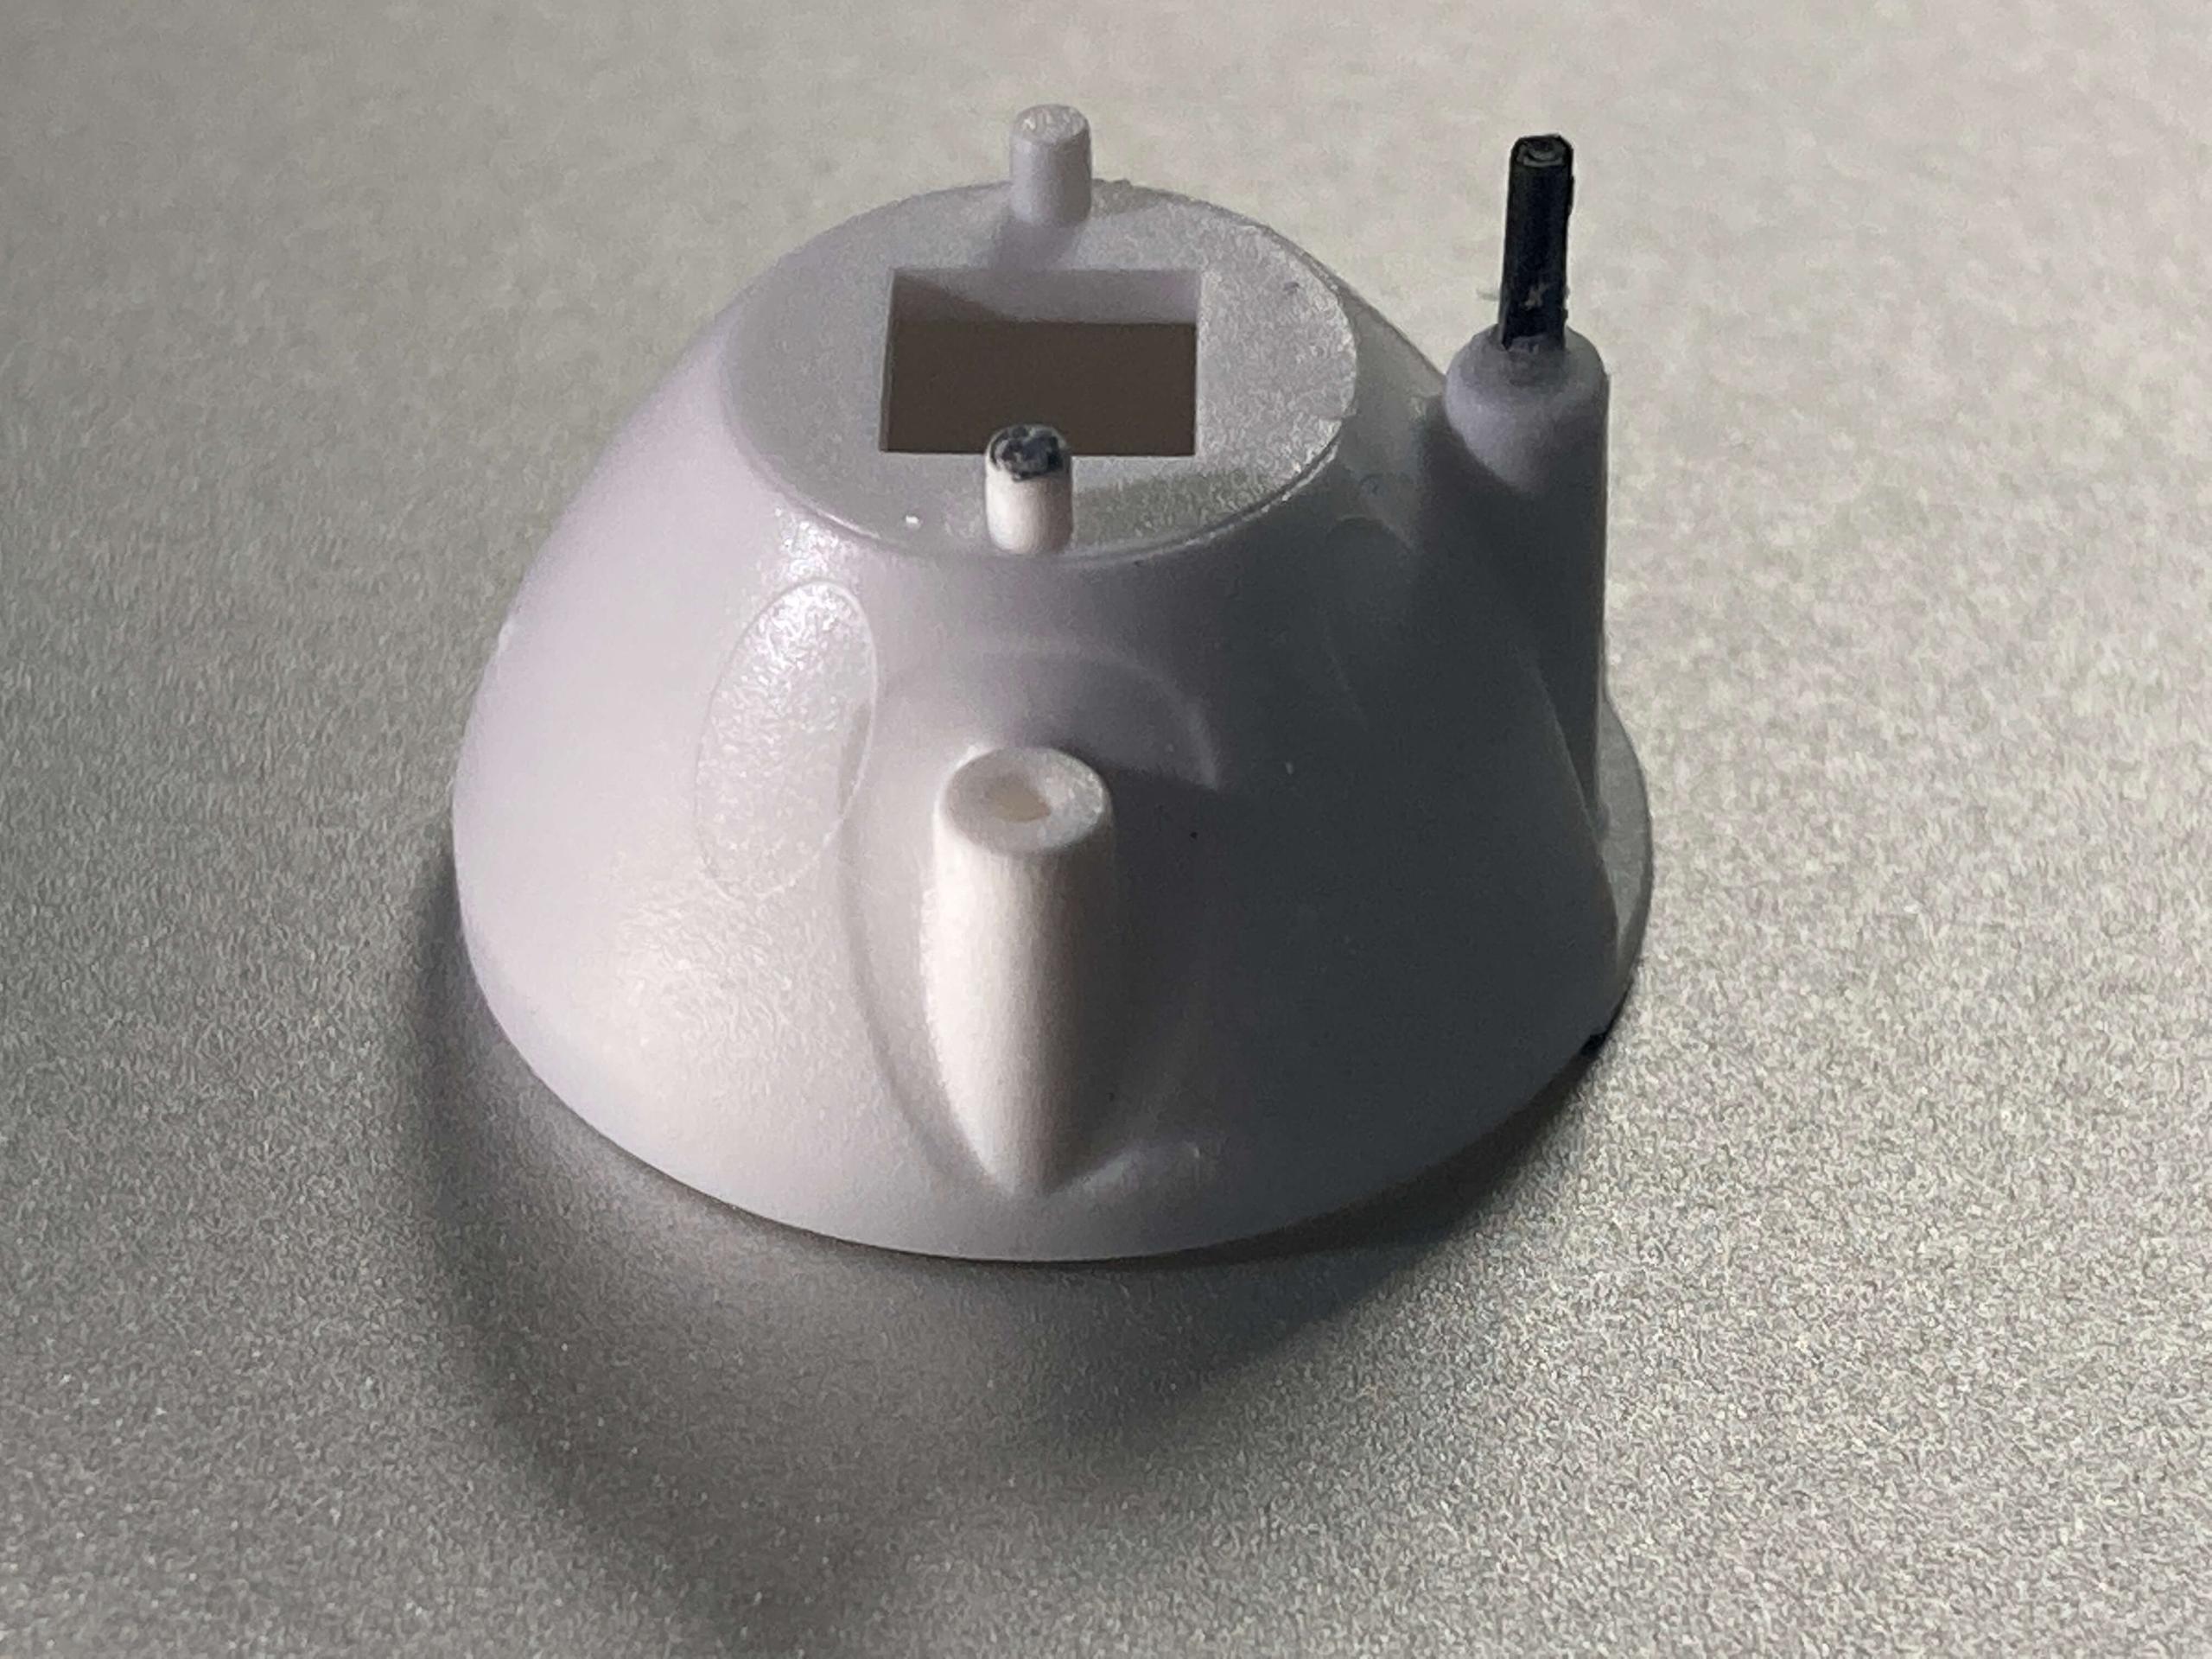
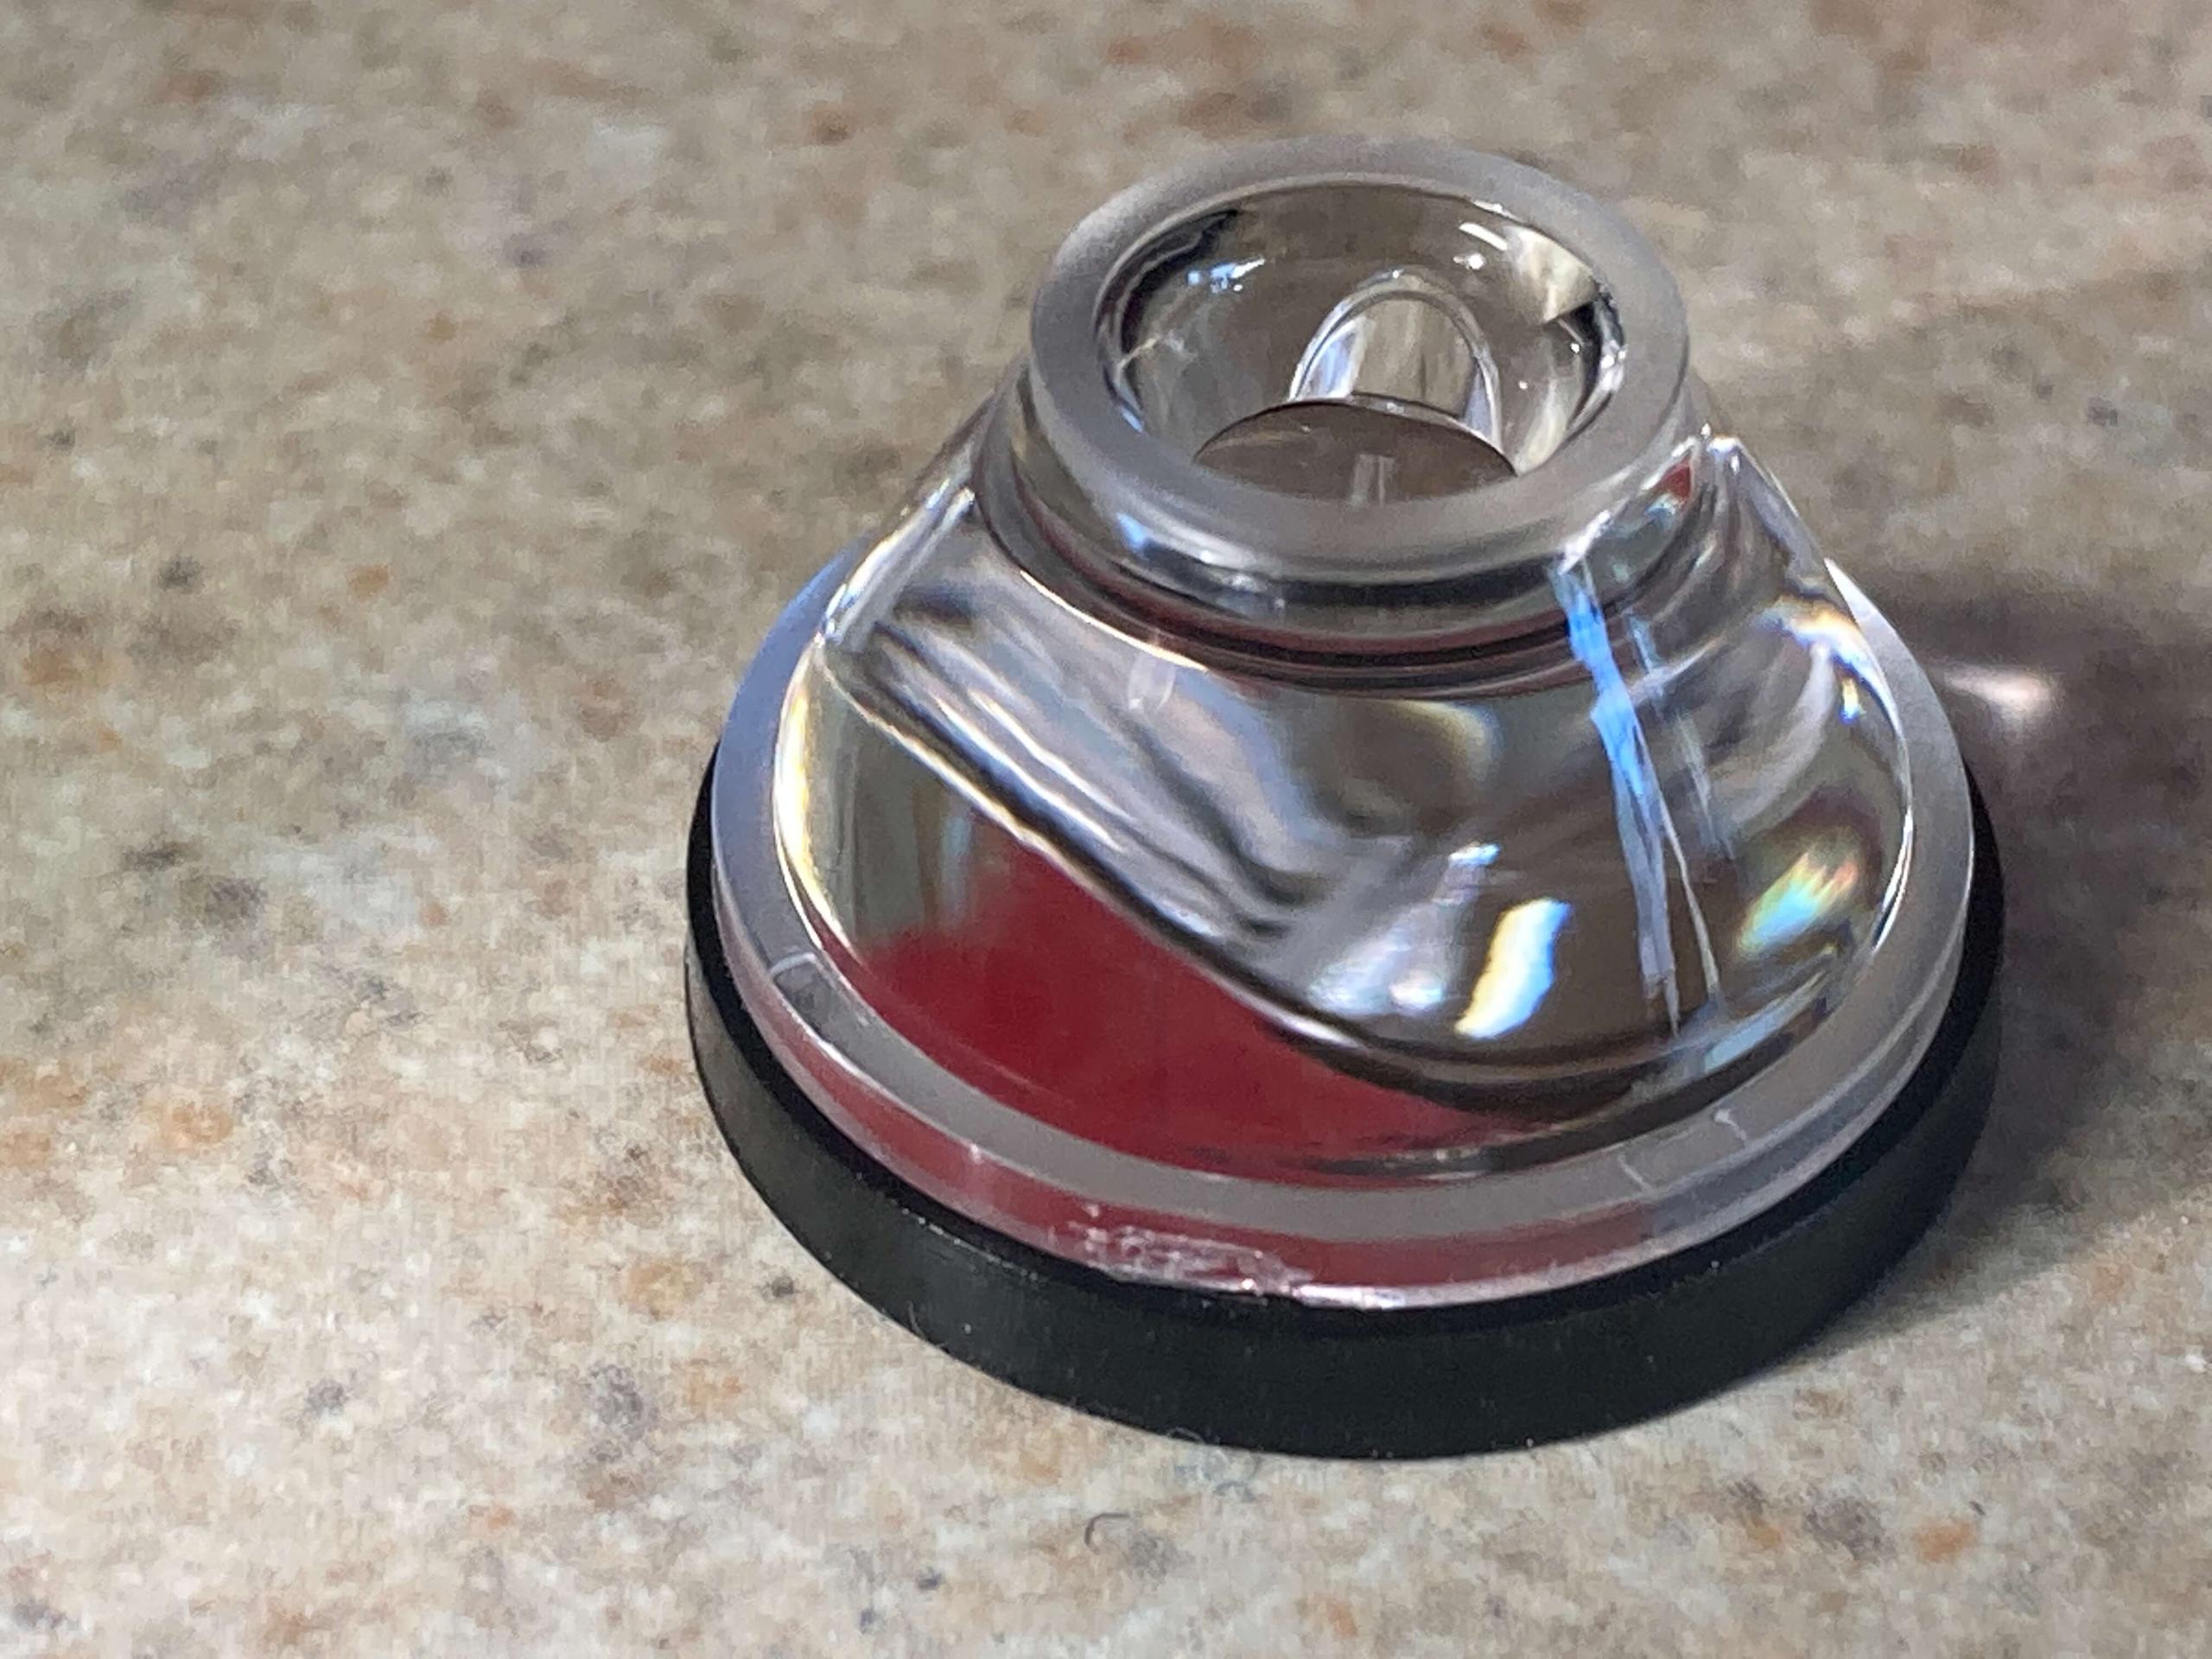
The photo below doesn’t show it, but you can see the optic. Also, you can see that (custom?) gasket. Between those two parts is a glass lens. This is an improvement over the original – you won’t have to worry about this being scratched anymore!
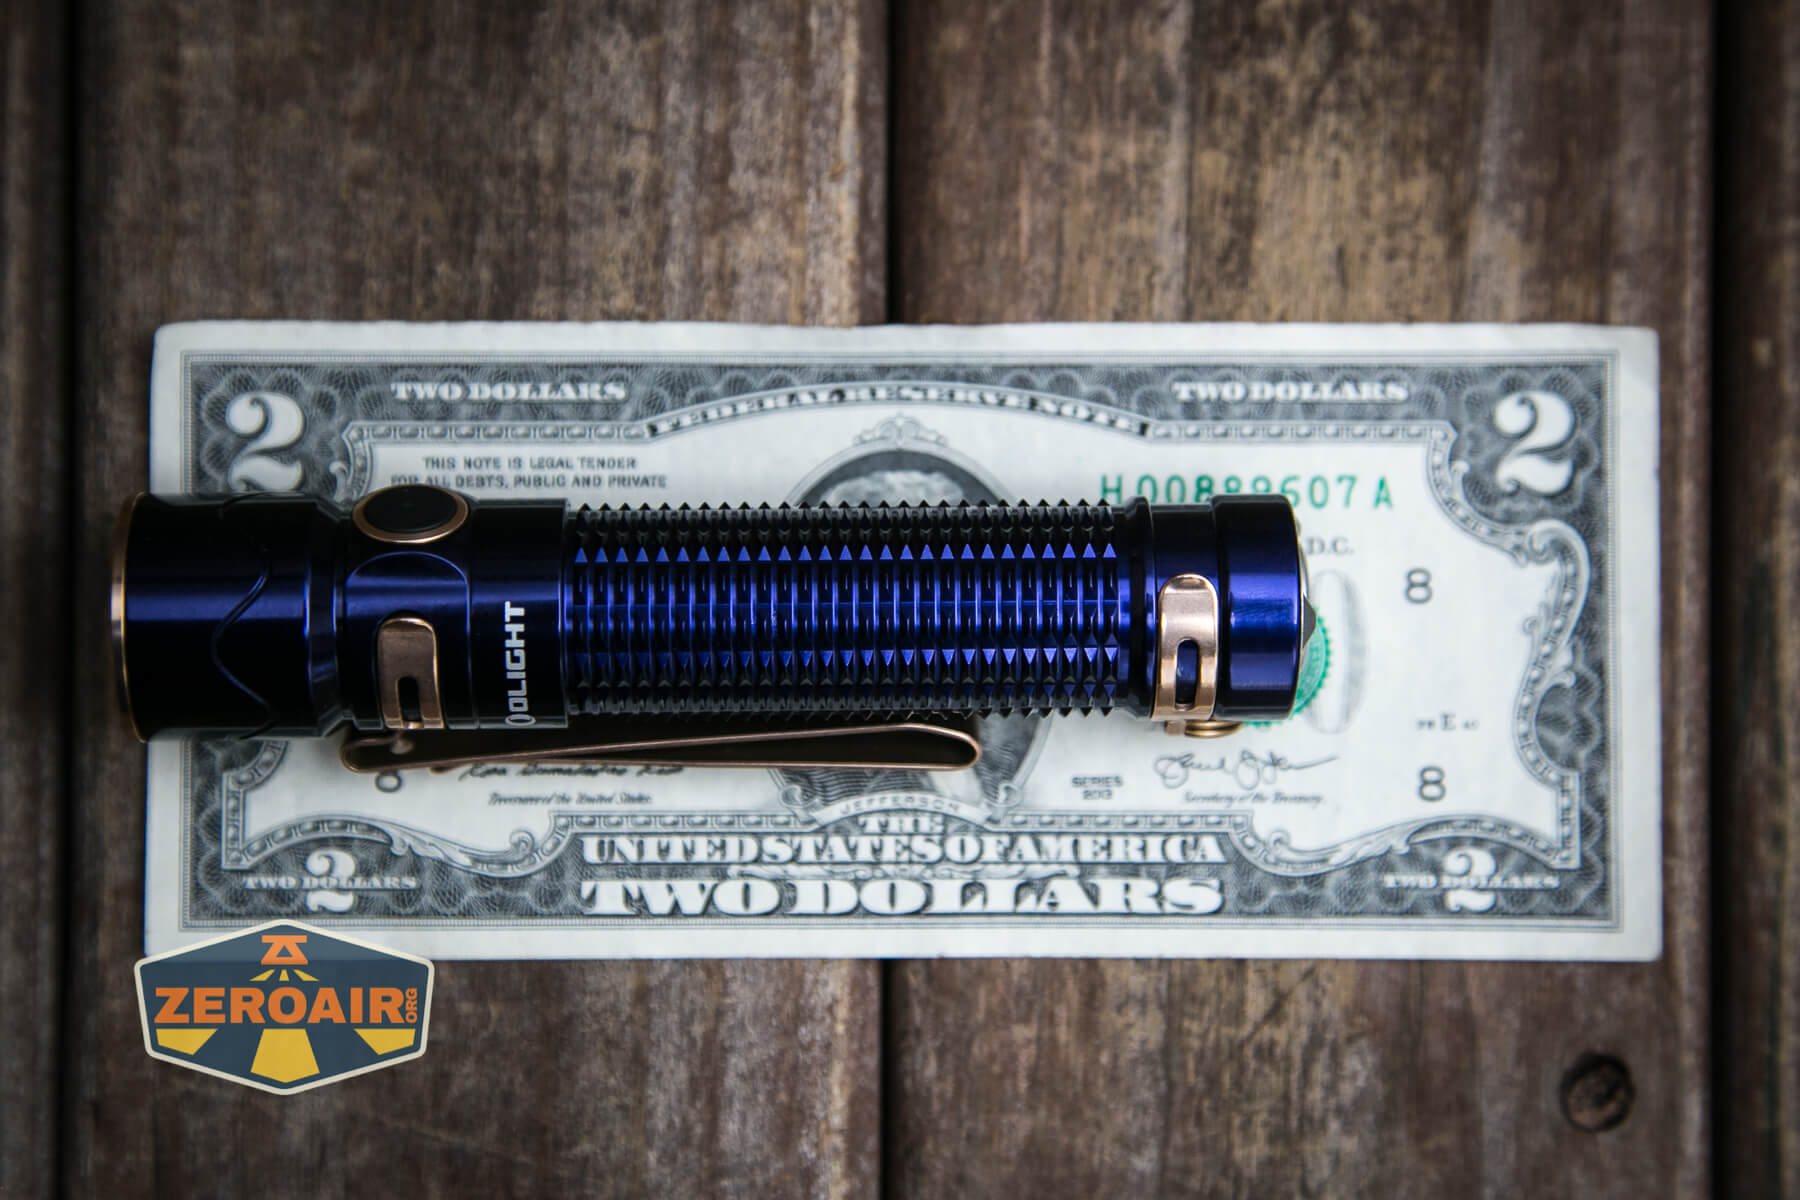
Size and Comps
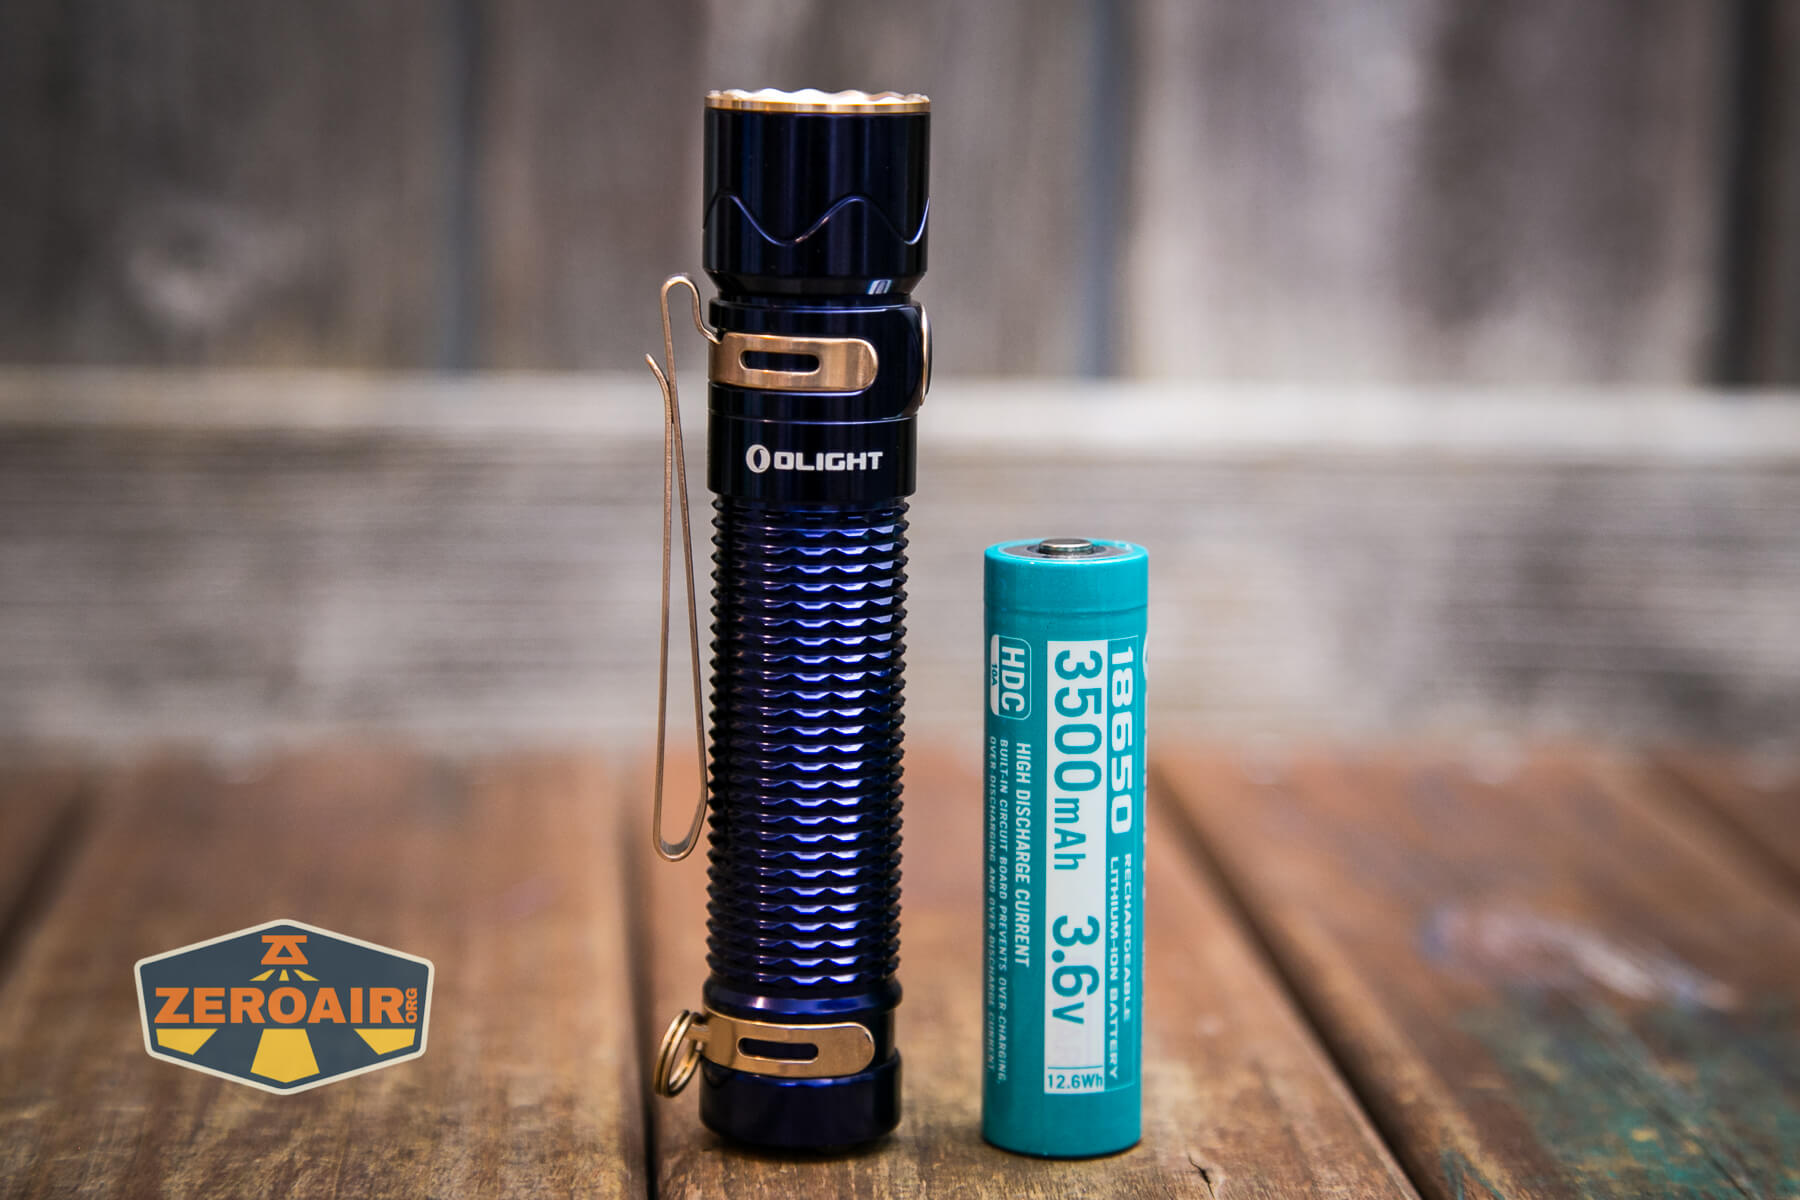
Length: 4.65in/118mm
Head Diameter: 0.98in/25mm
Body Diameter: 0.91in/23mm


If the flashlight will headstand, I’ll show it here (usually the third photo). If the flashlight will tailstand, I’ll show that here, too (usually the fourth photo).

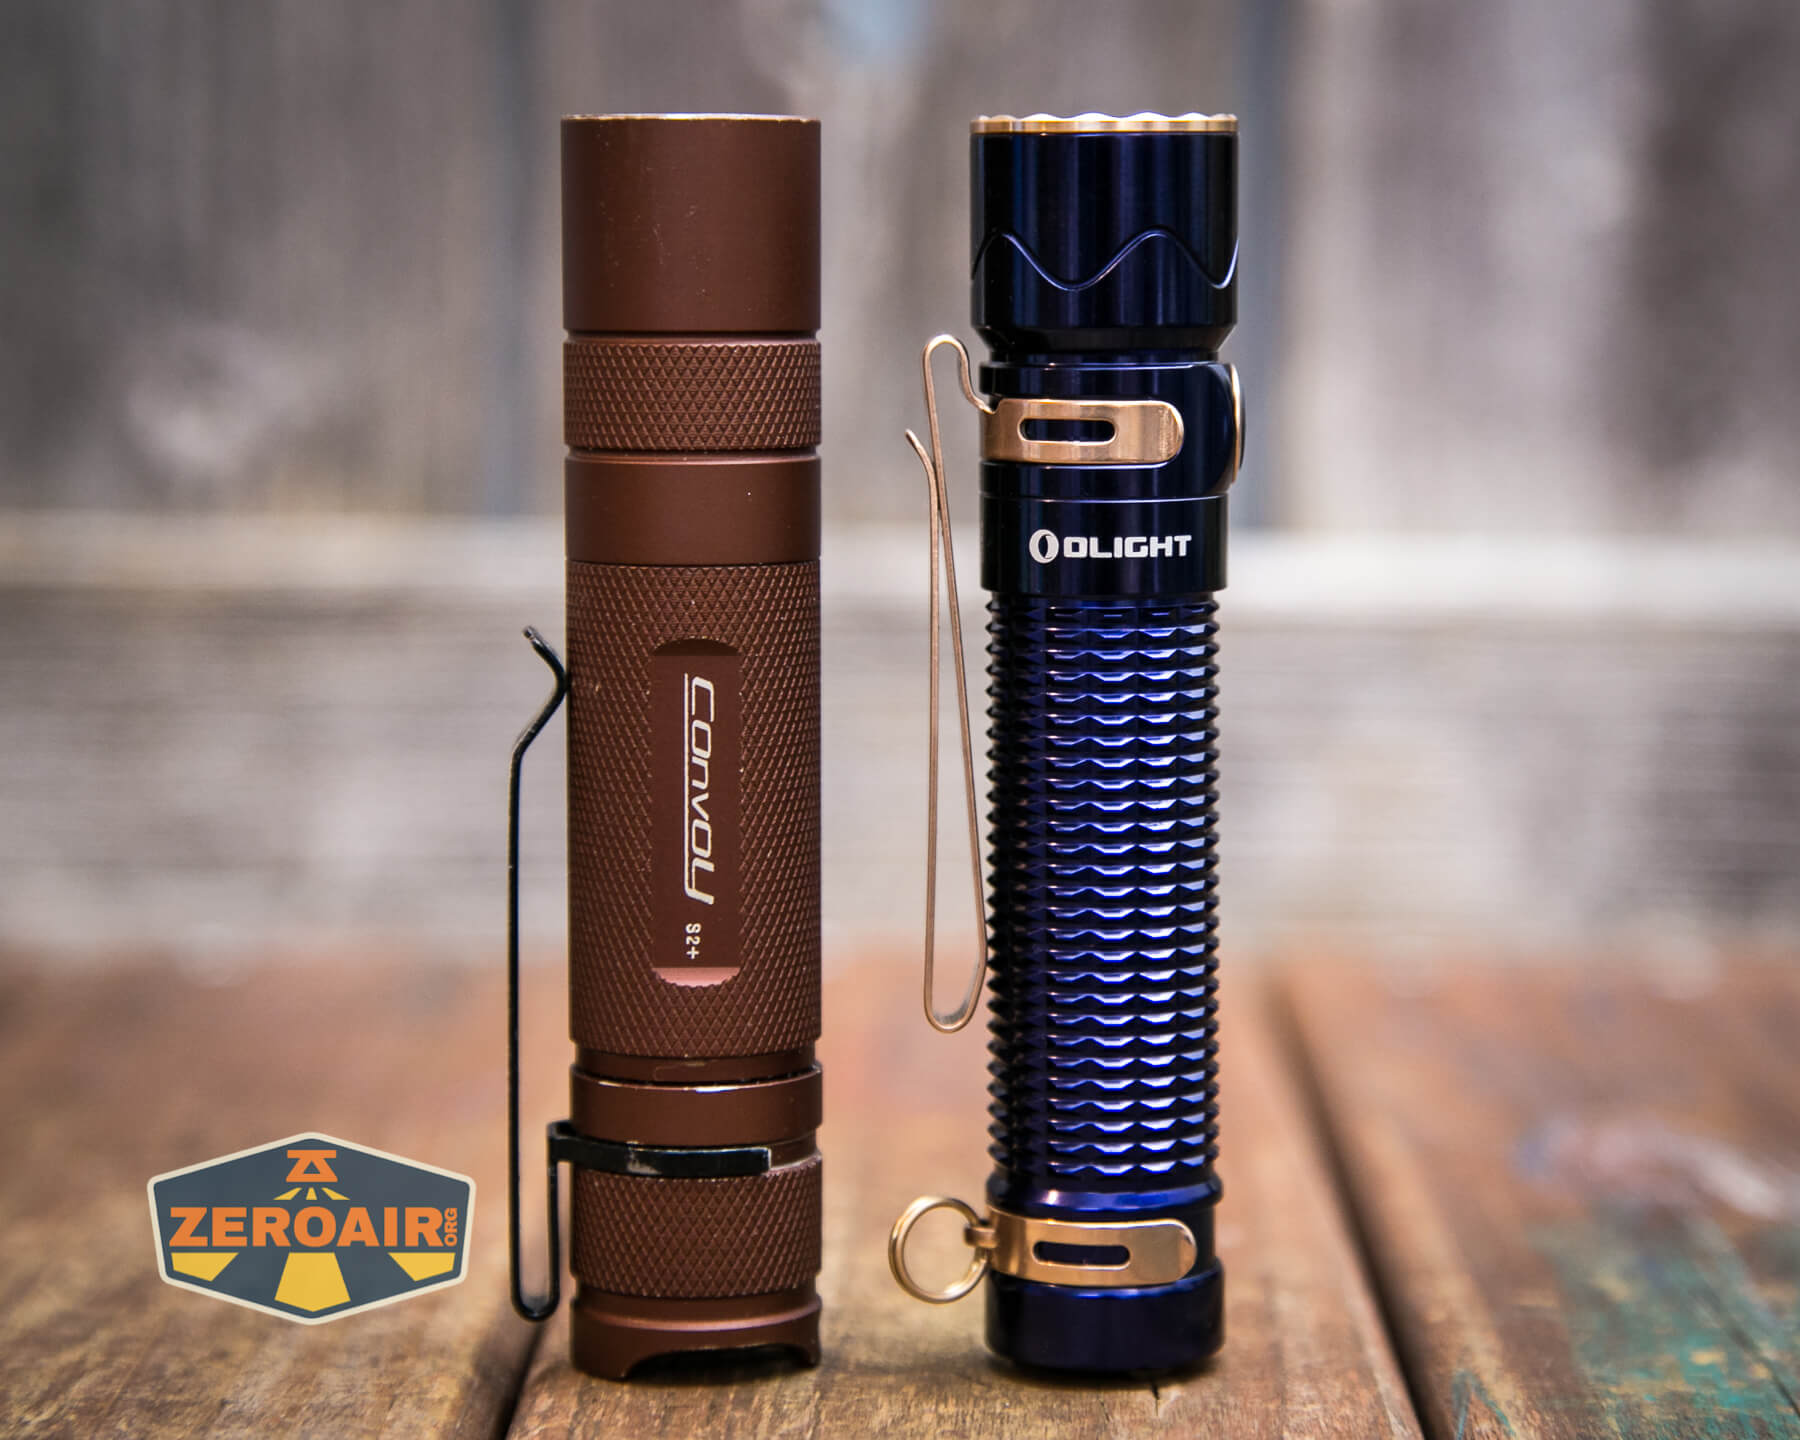
Here’s the test light with the venerable Convoy S2+. Mine is a custom “baked” edition Nichia 219b triple. A very nice 18650 light!

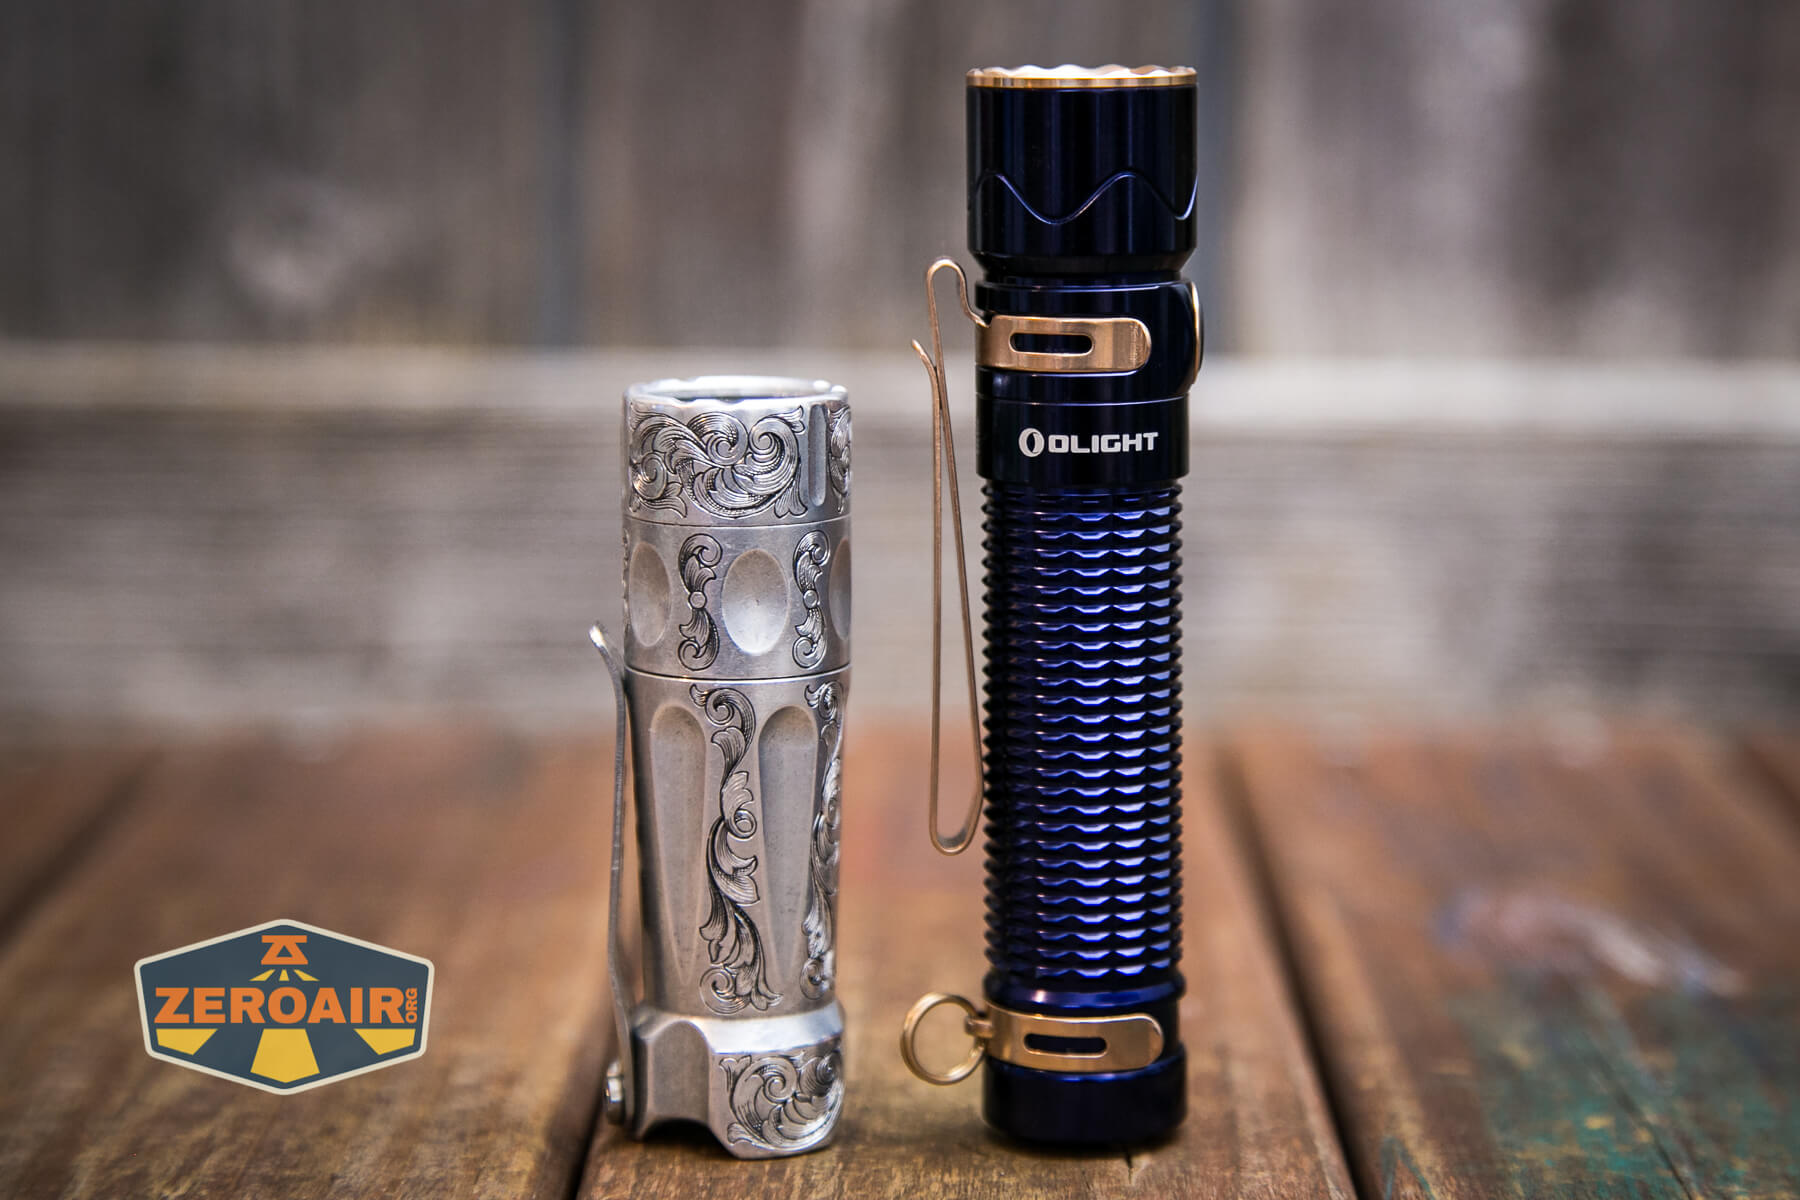
And here’s the light beside my custom-engraved TorchLAB BOSS 35, an 18350 light. I reviewed the aluminum version of that light in both 35 and 70 formats.
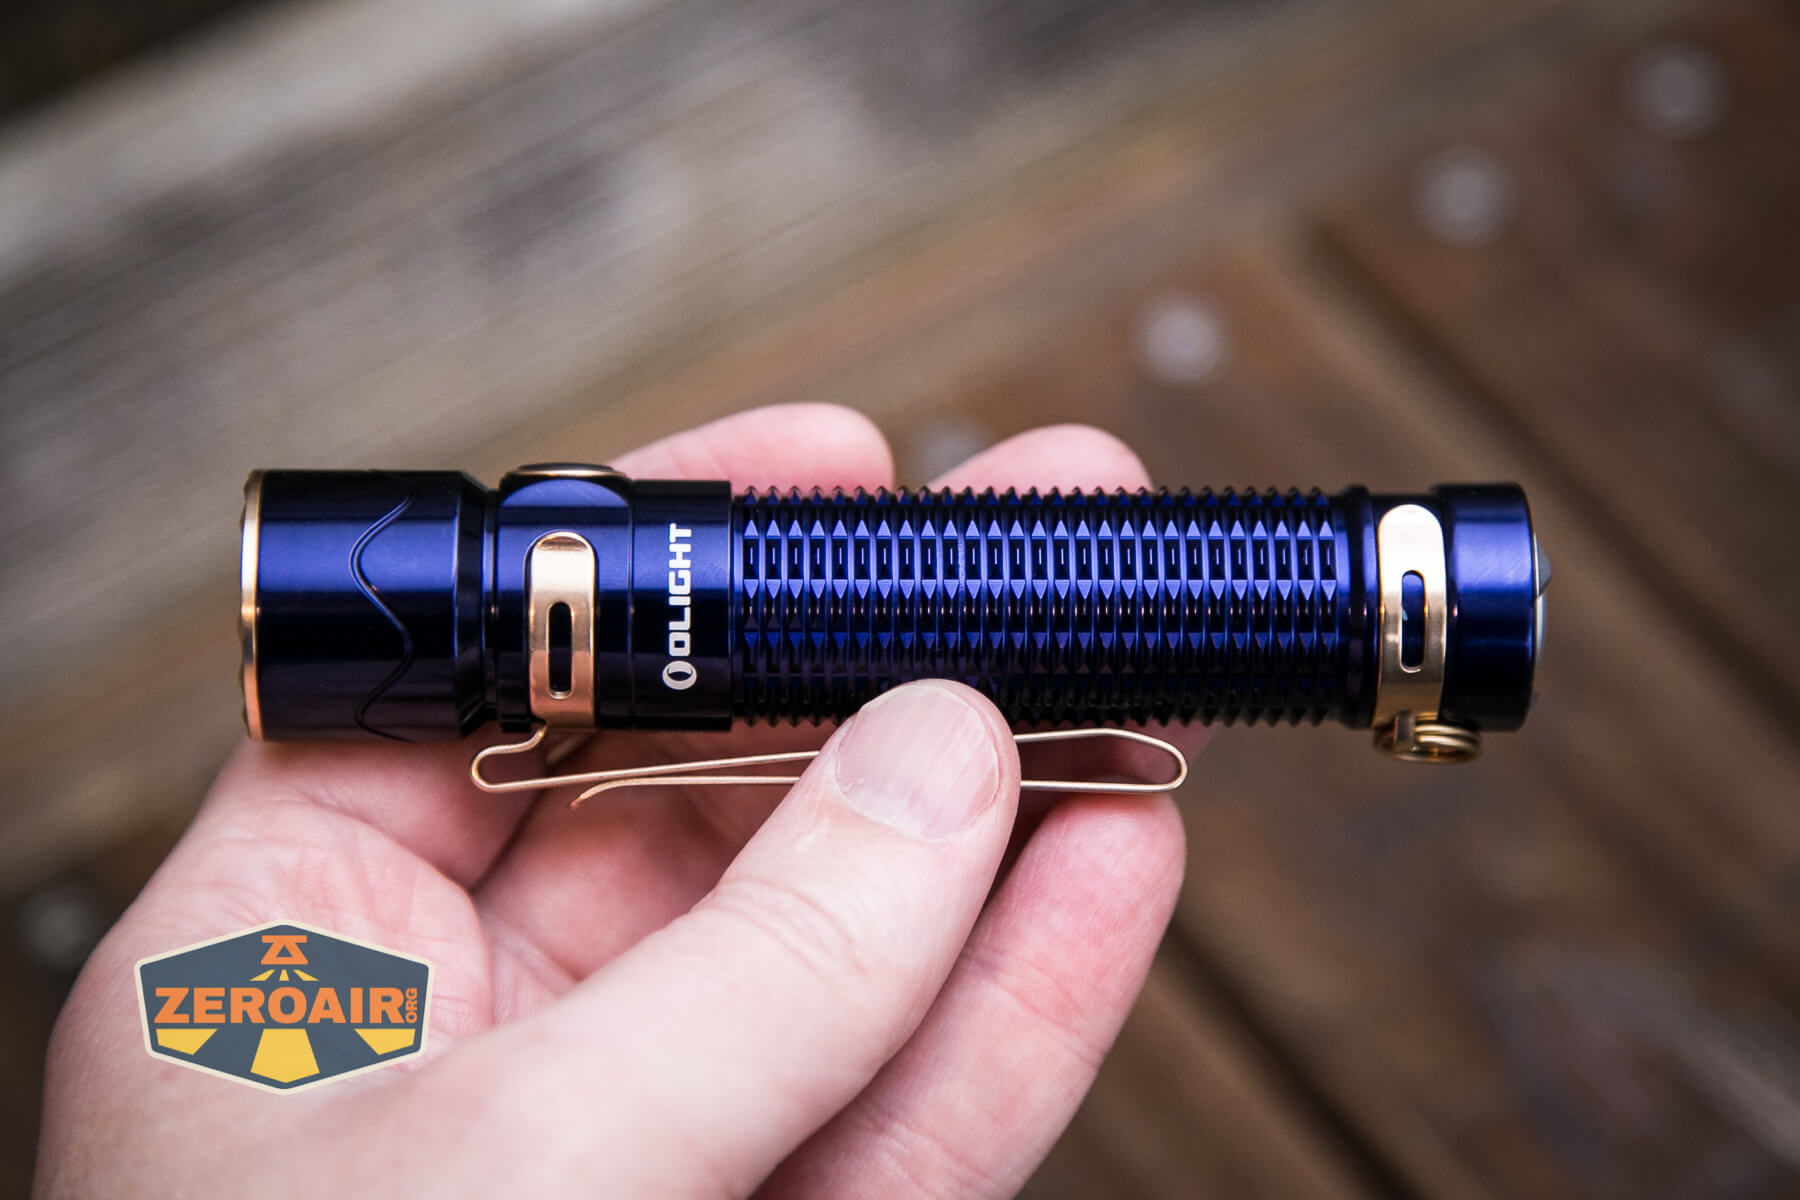
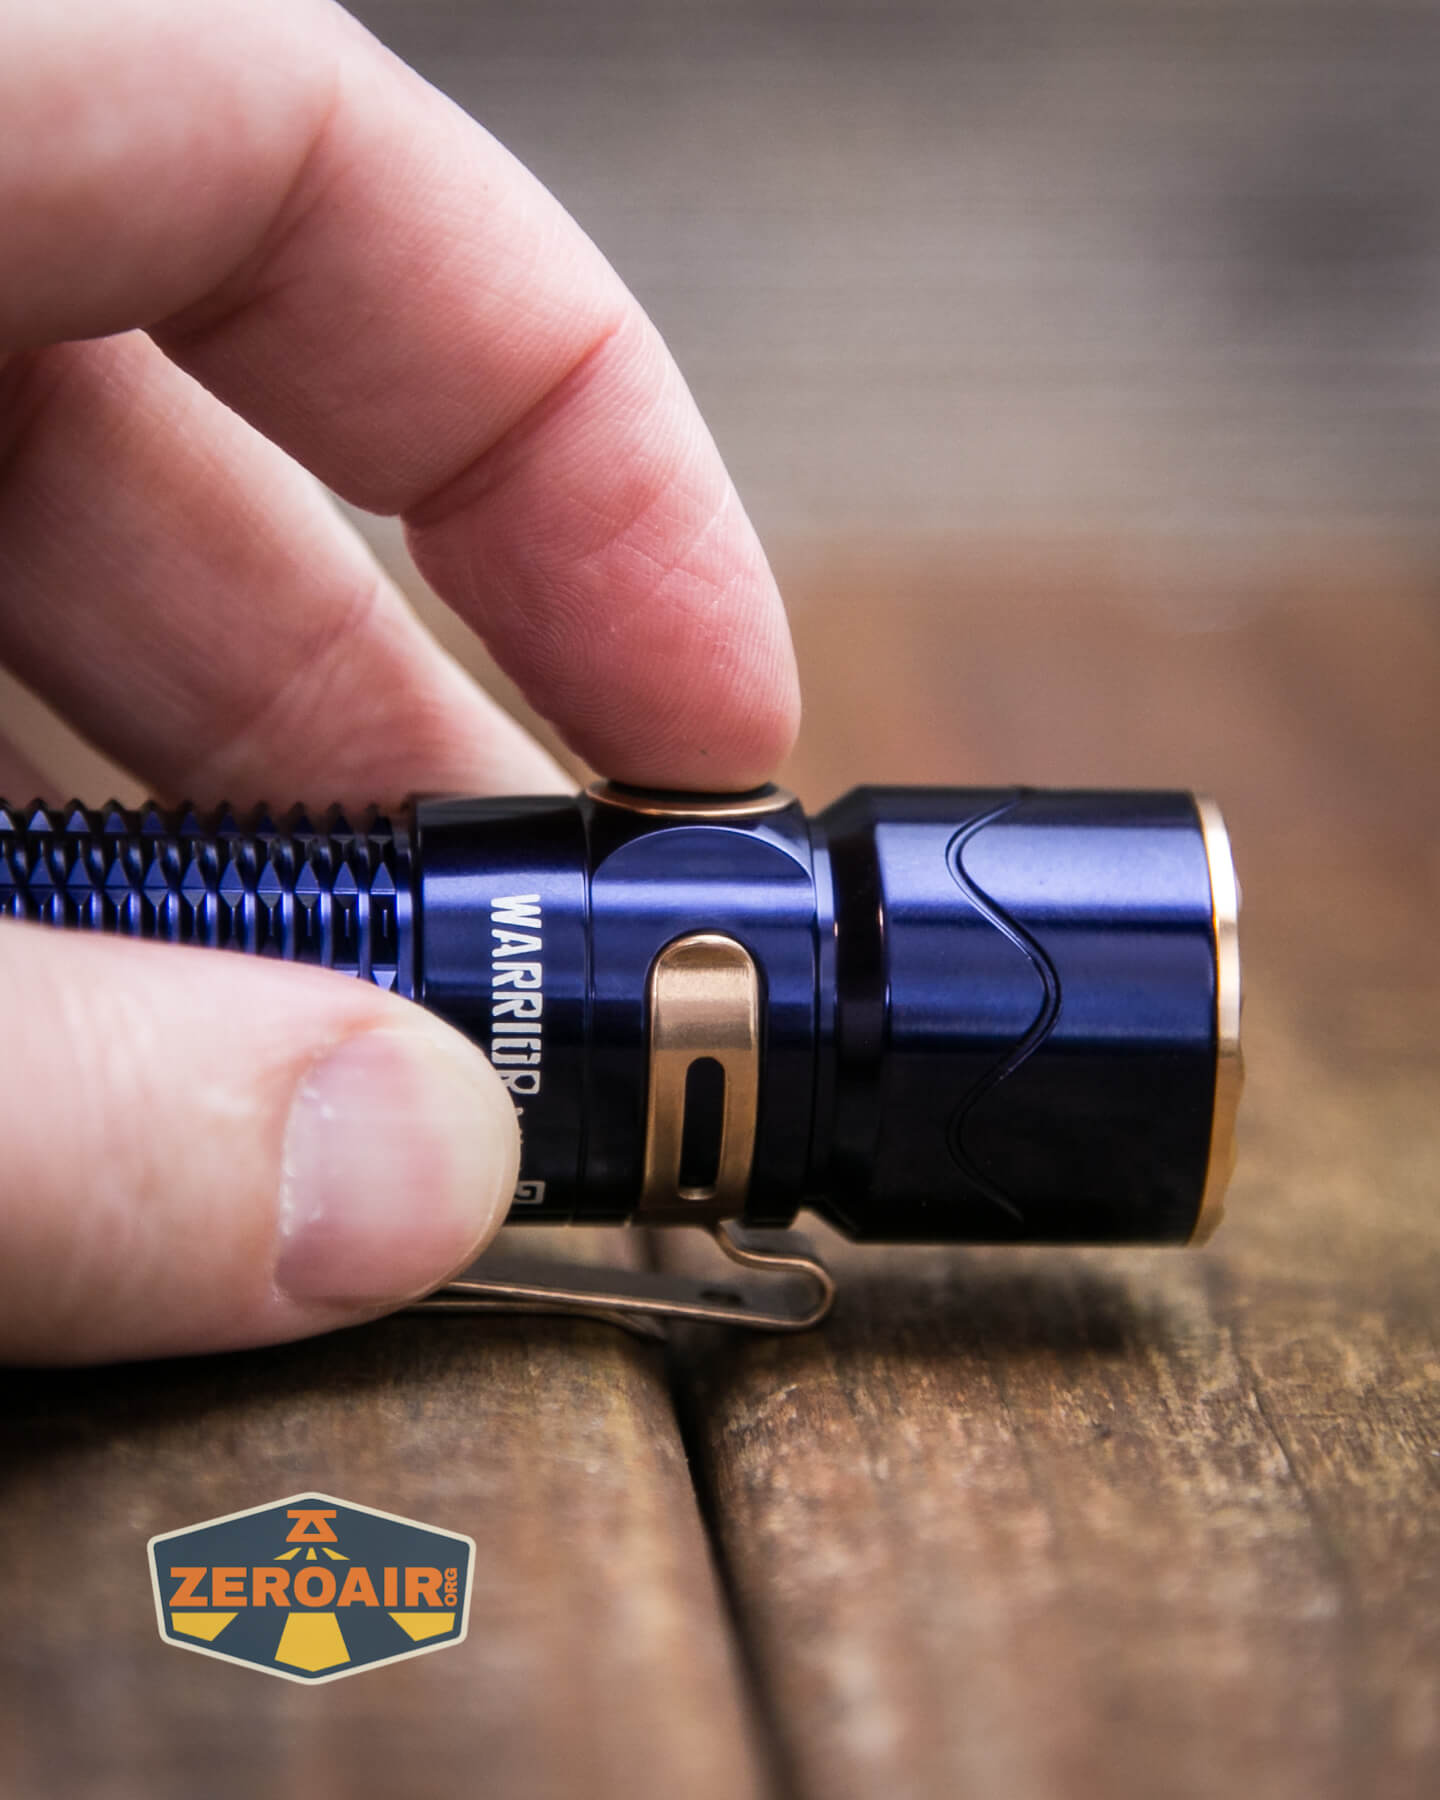
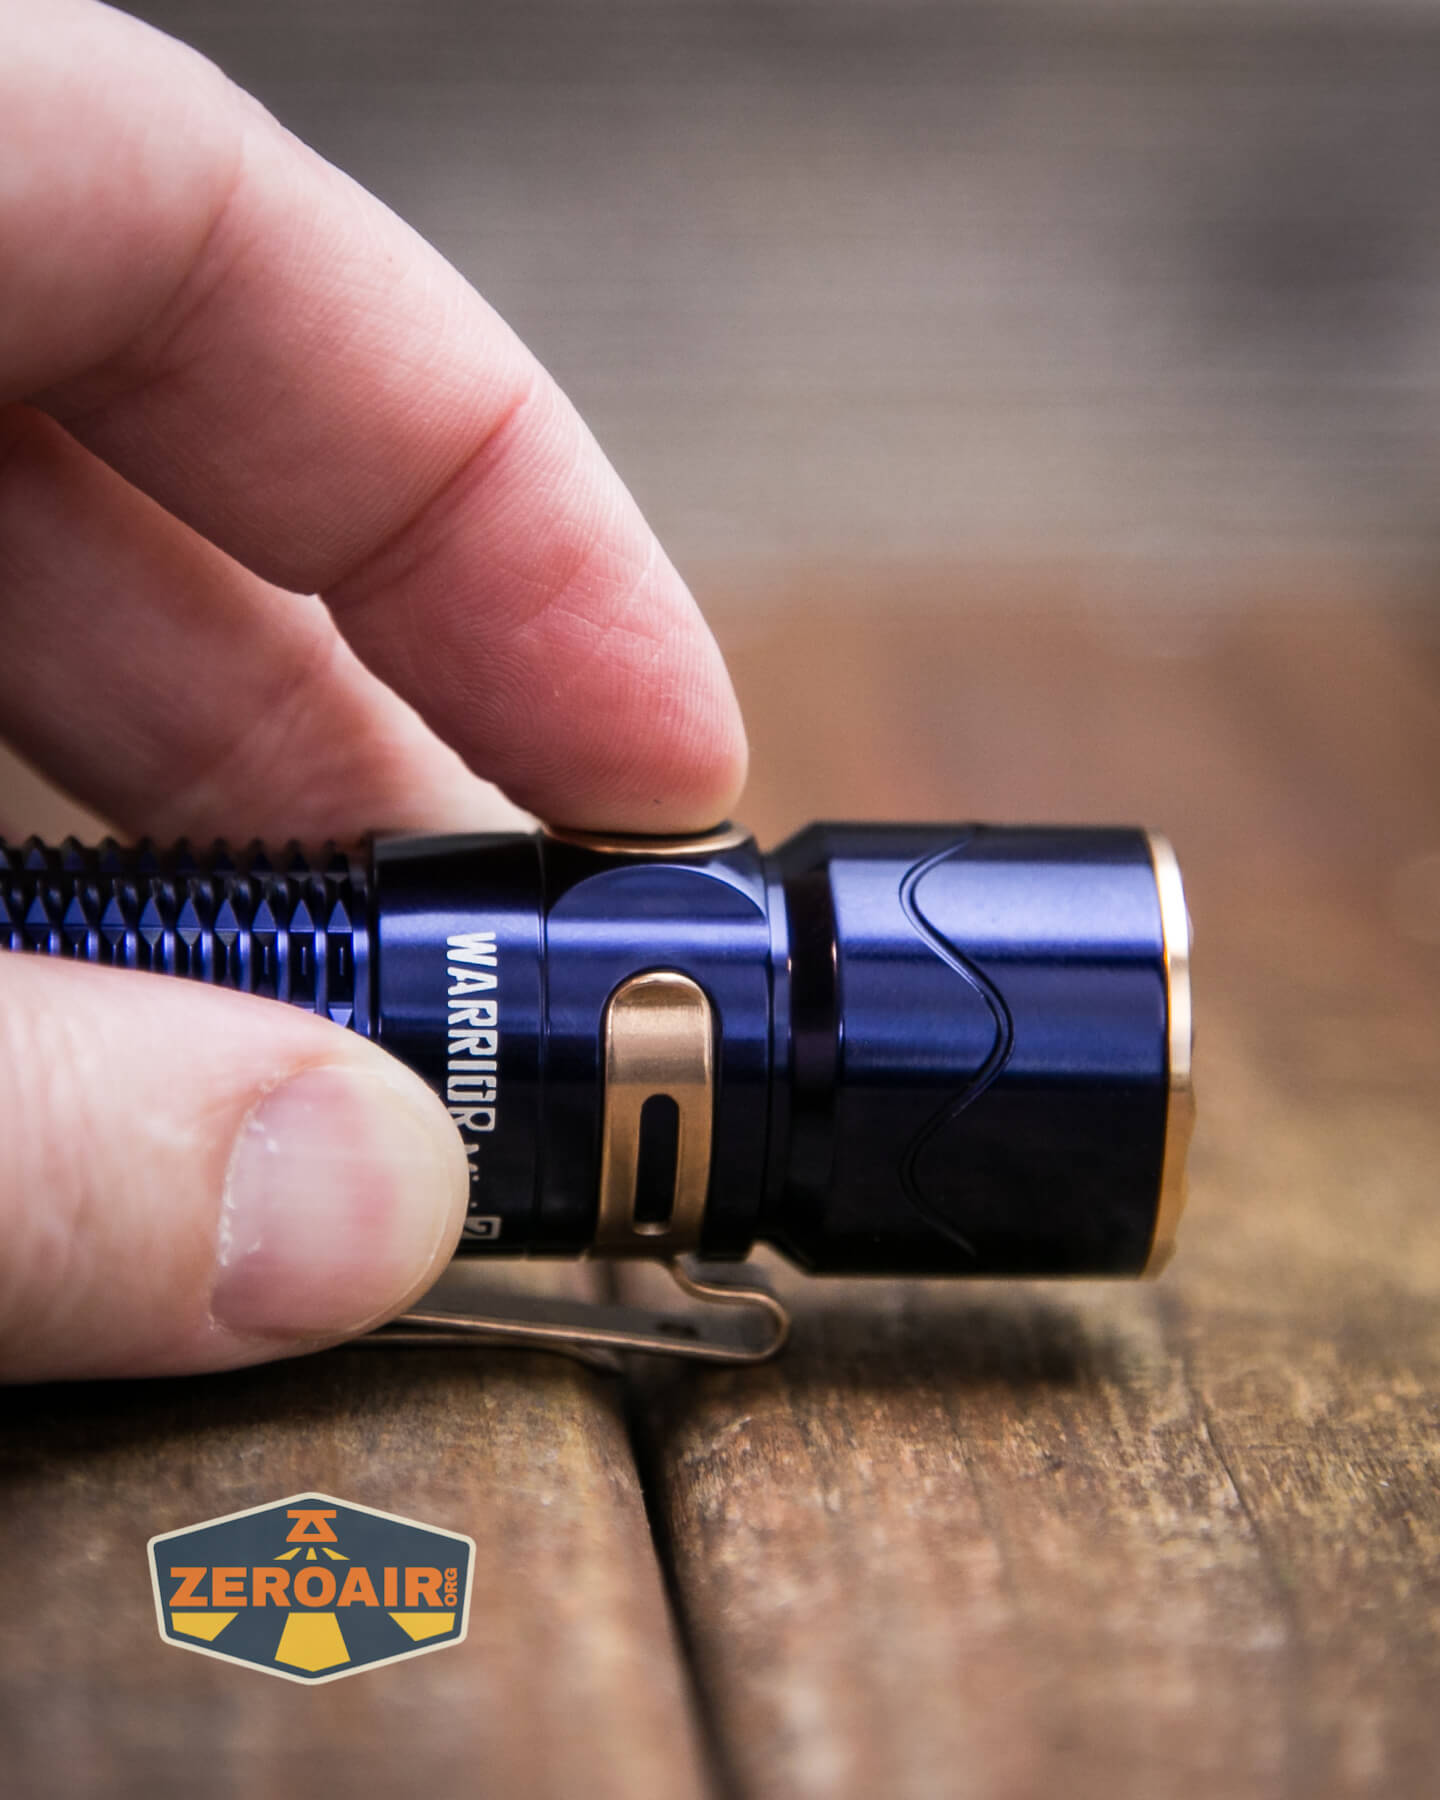
Retention and Carry
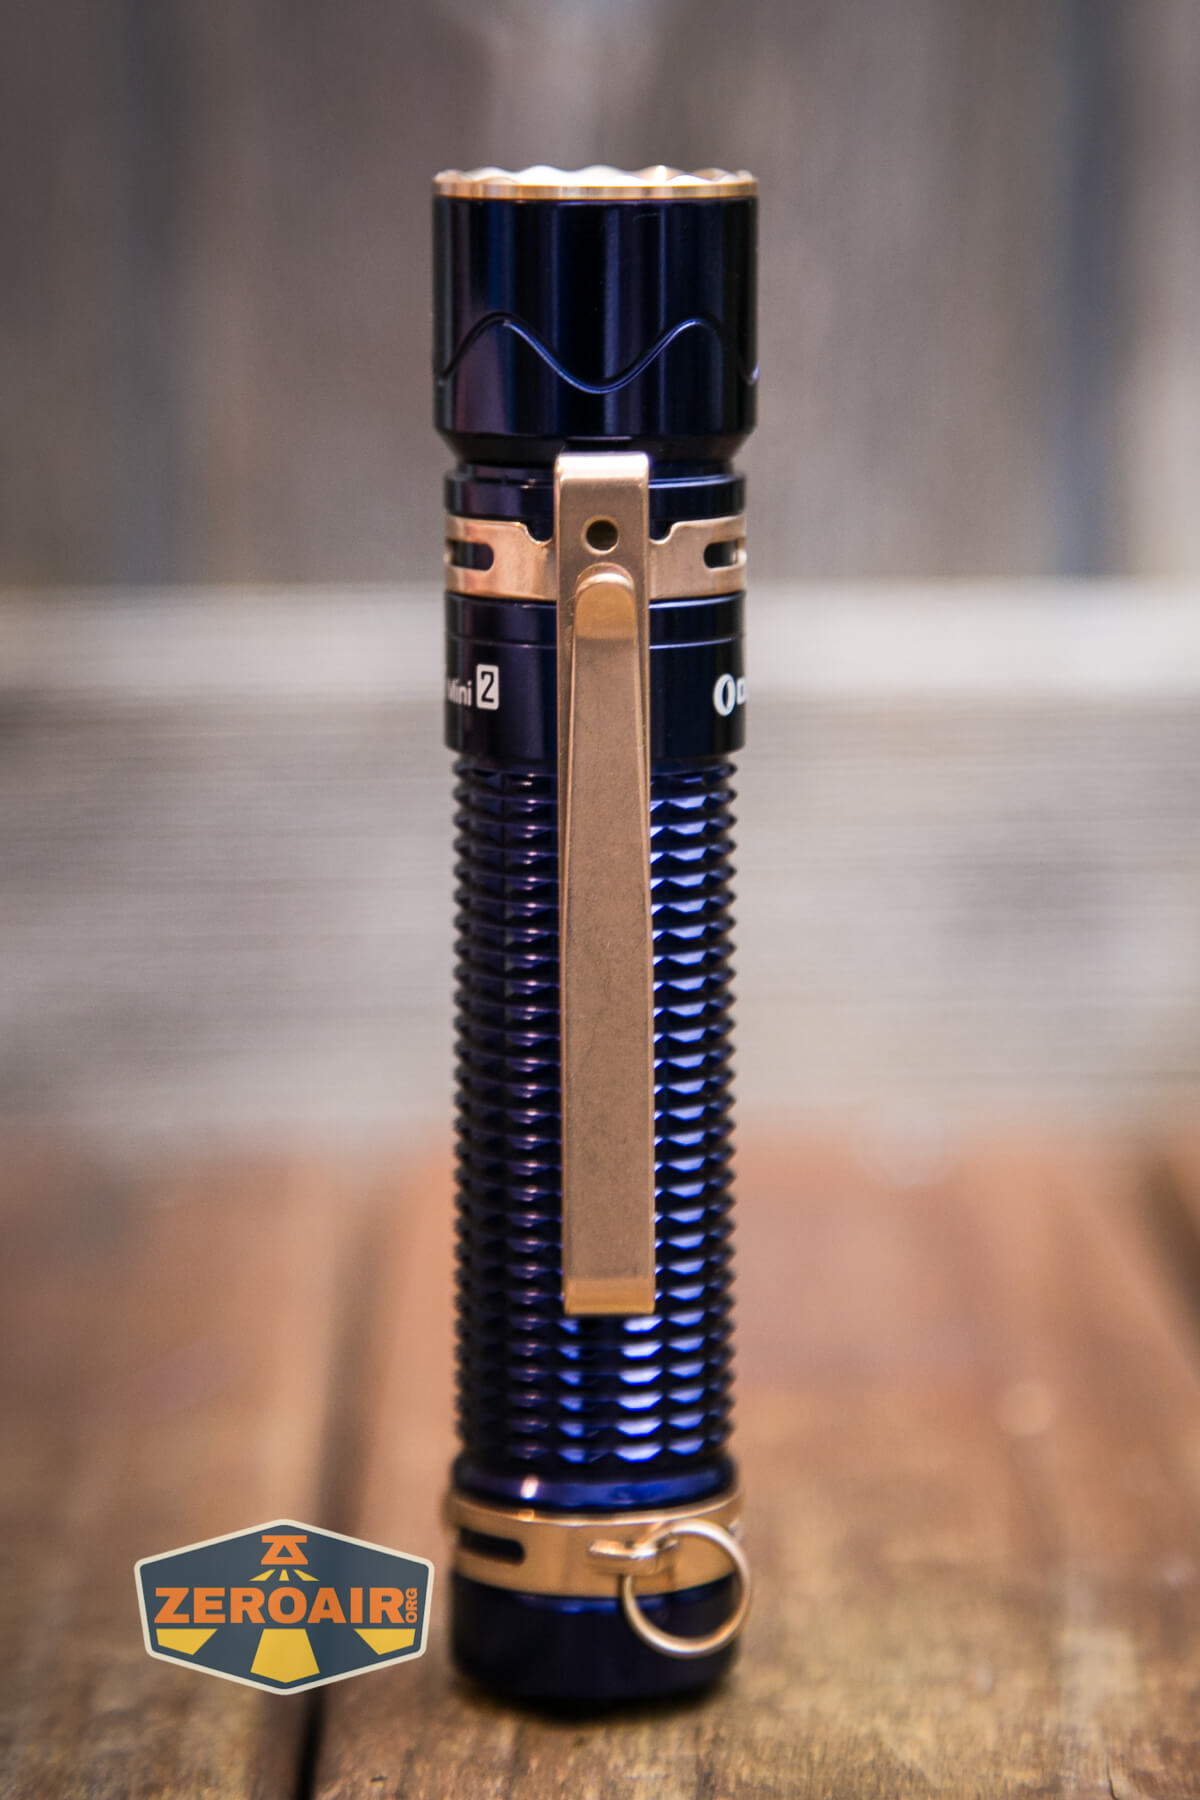
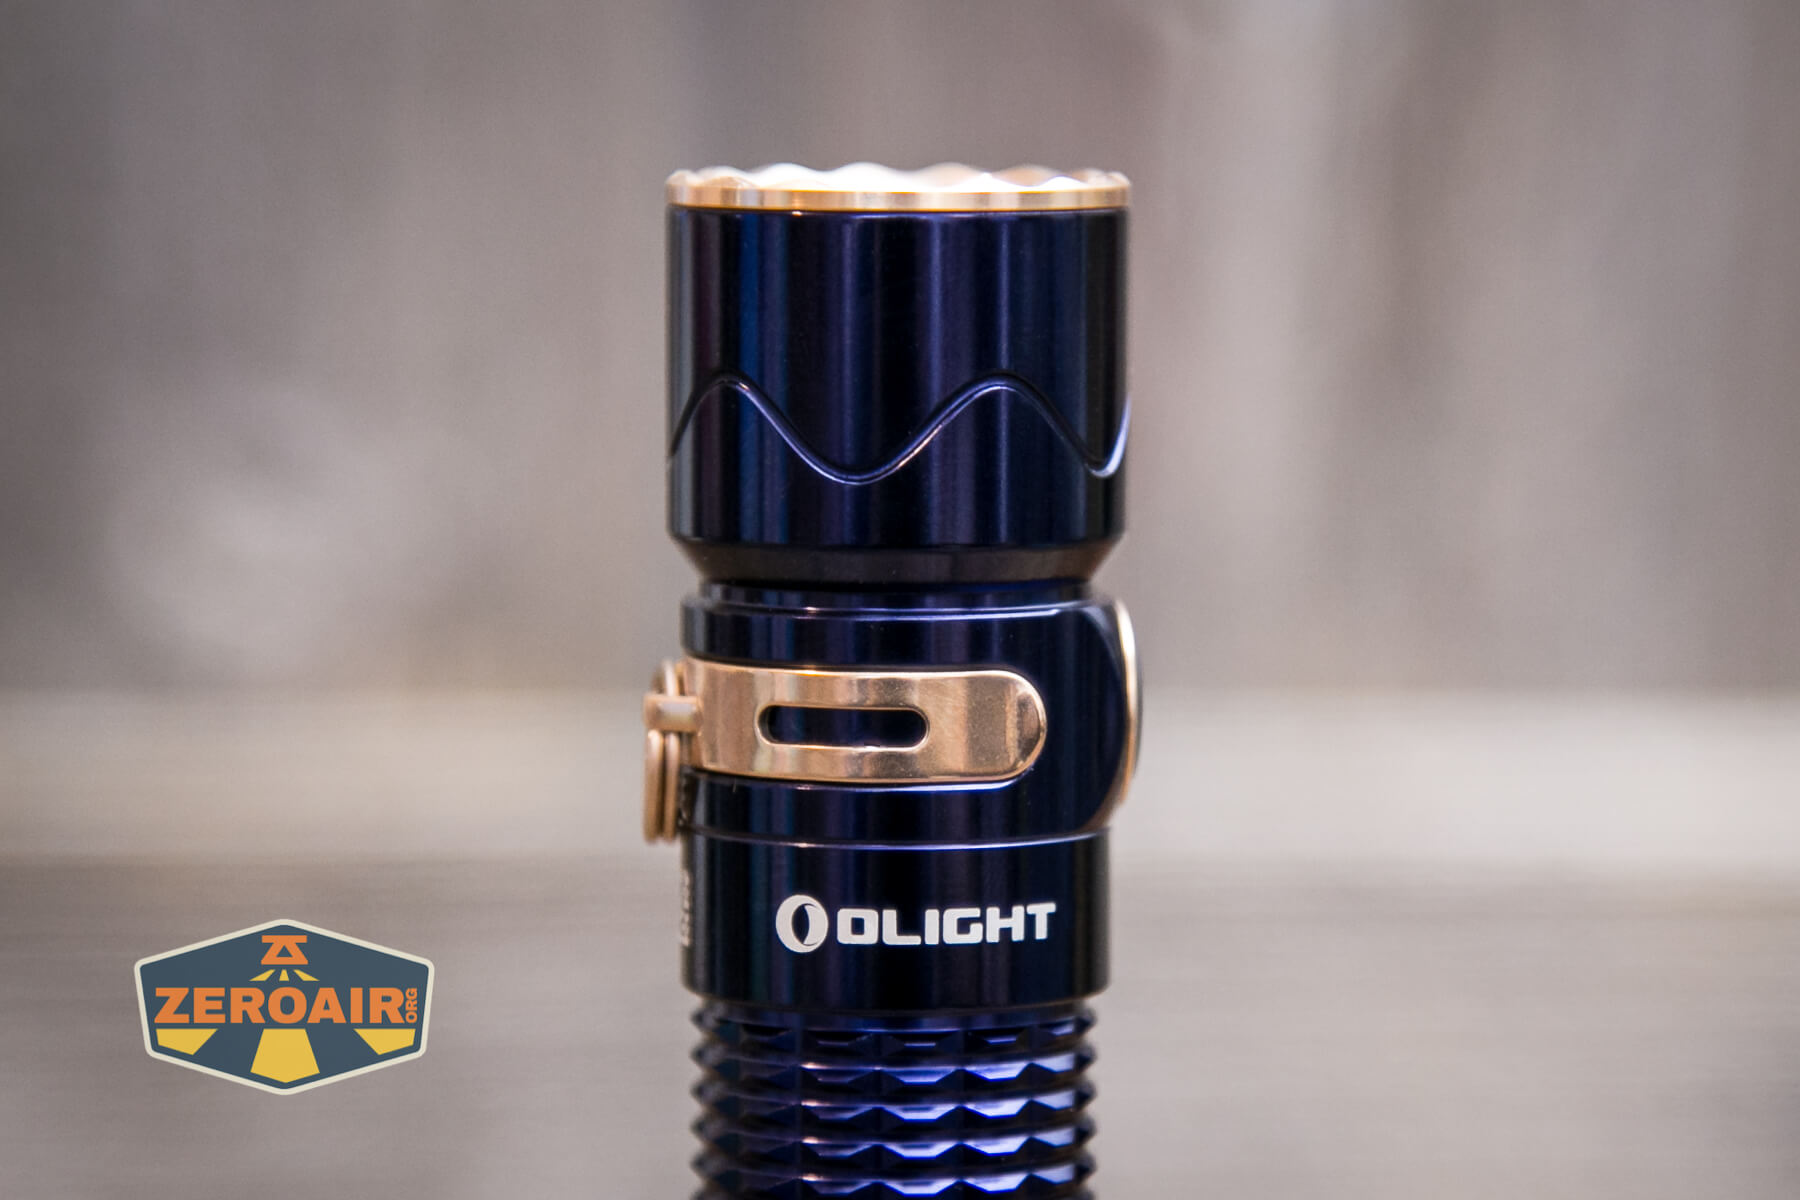
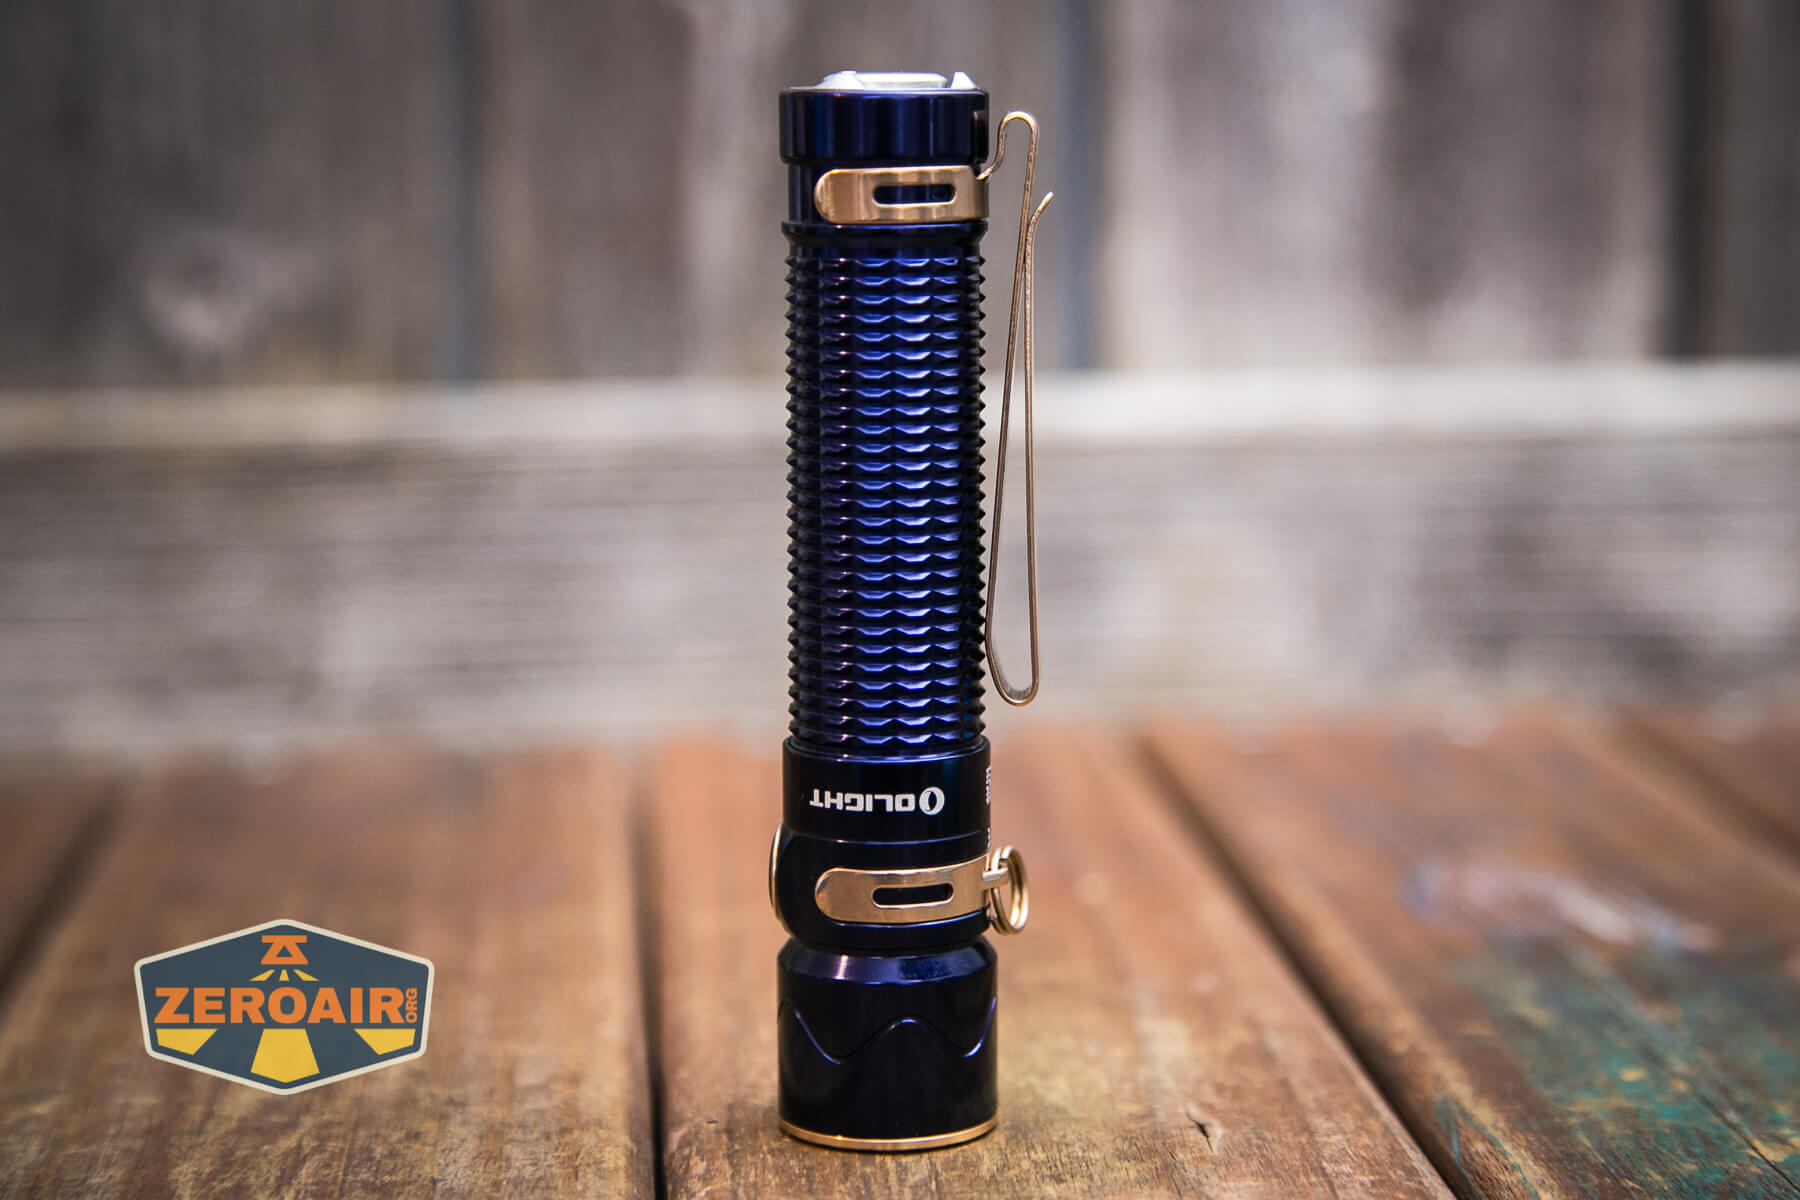
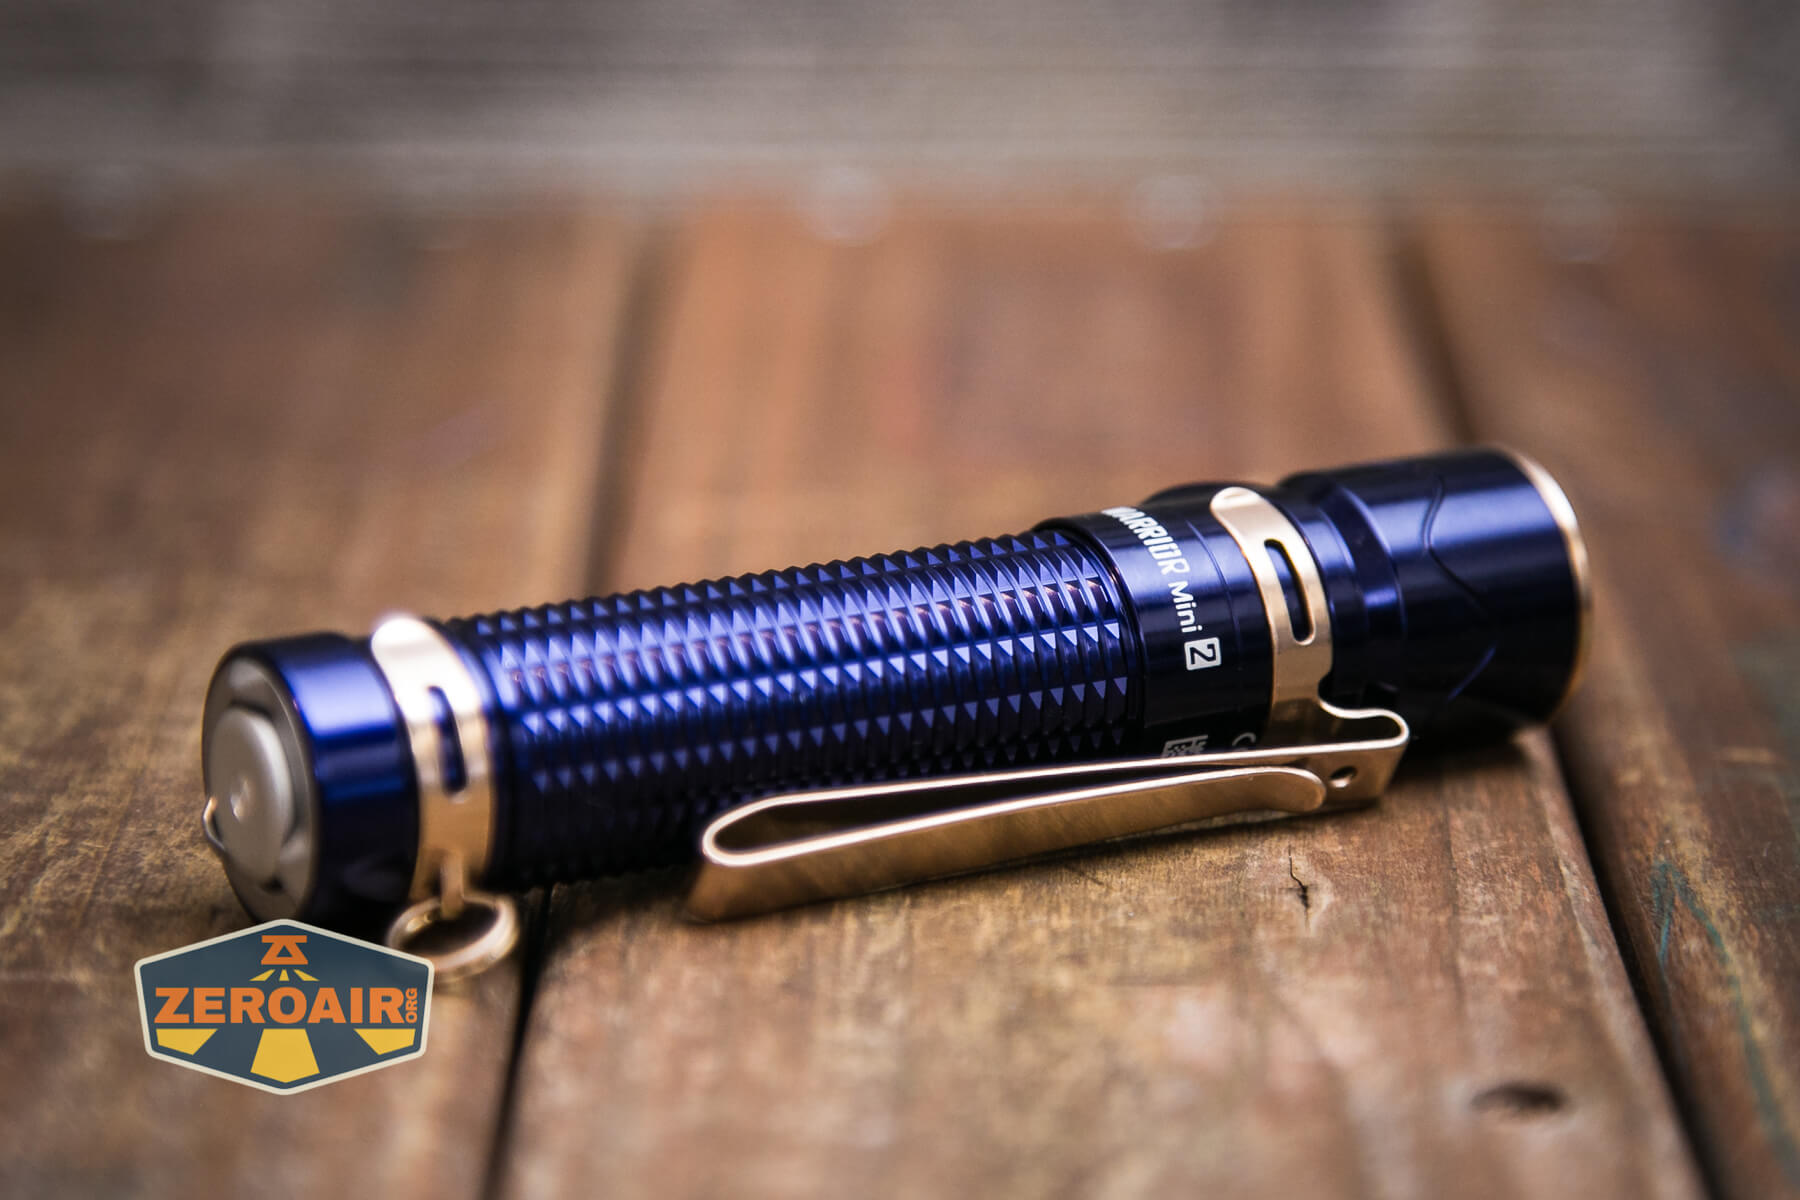
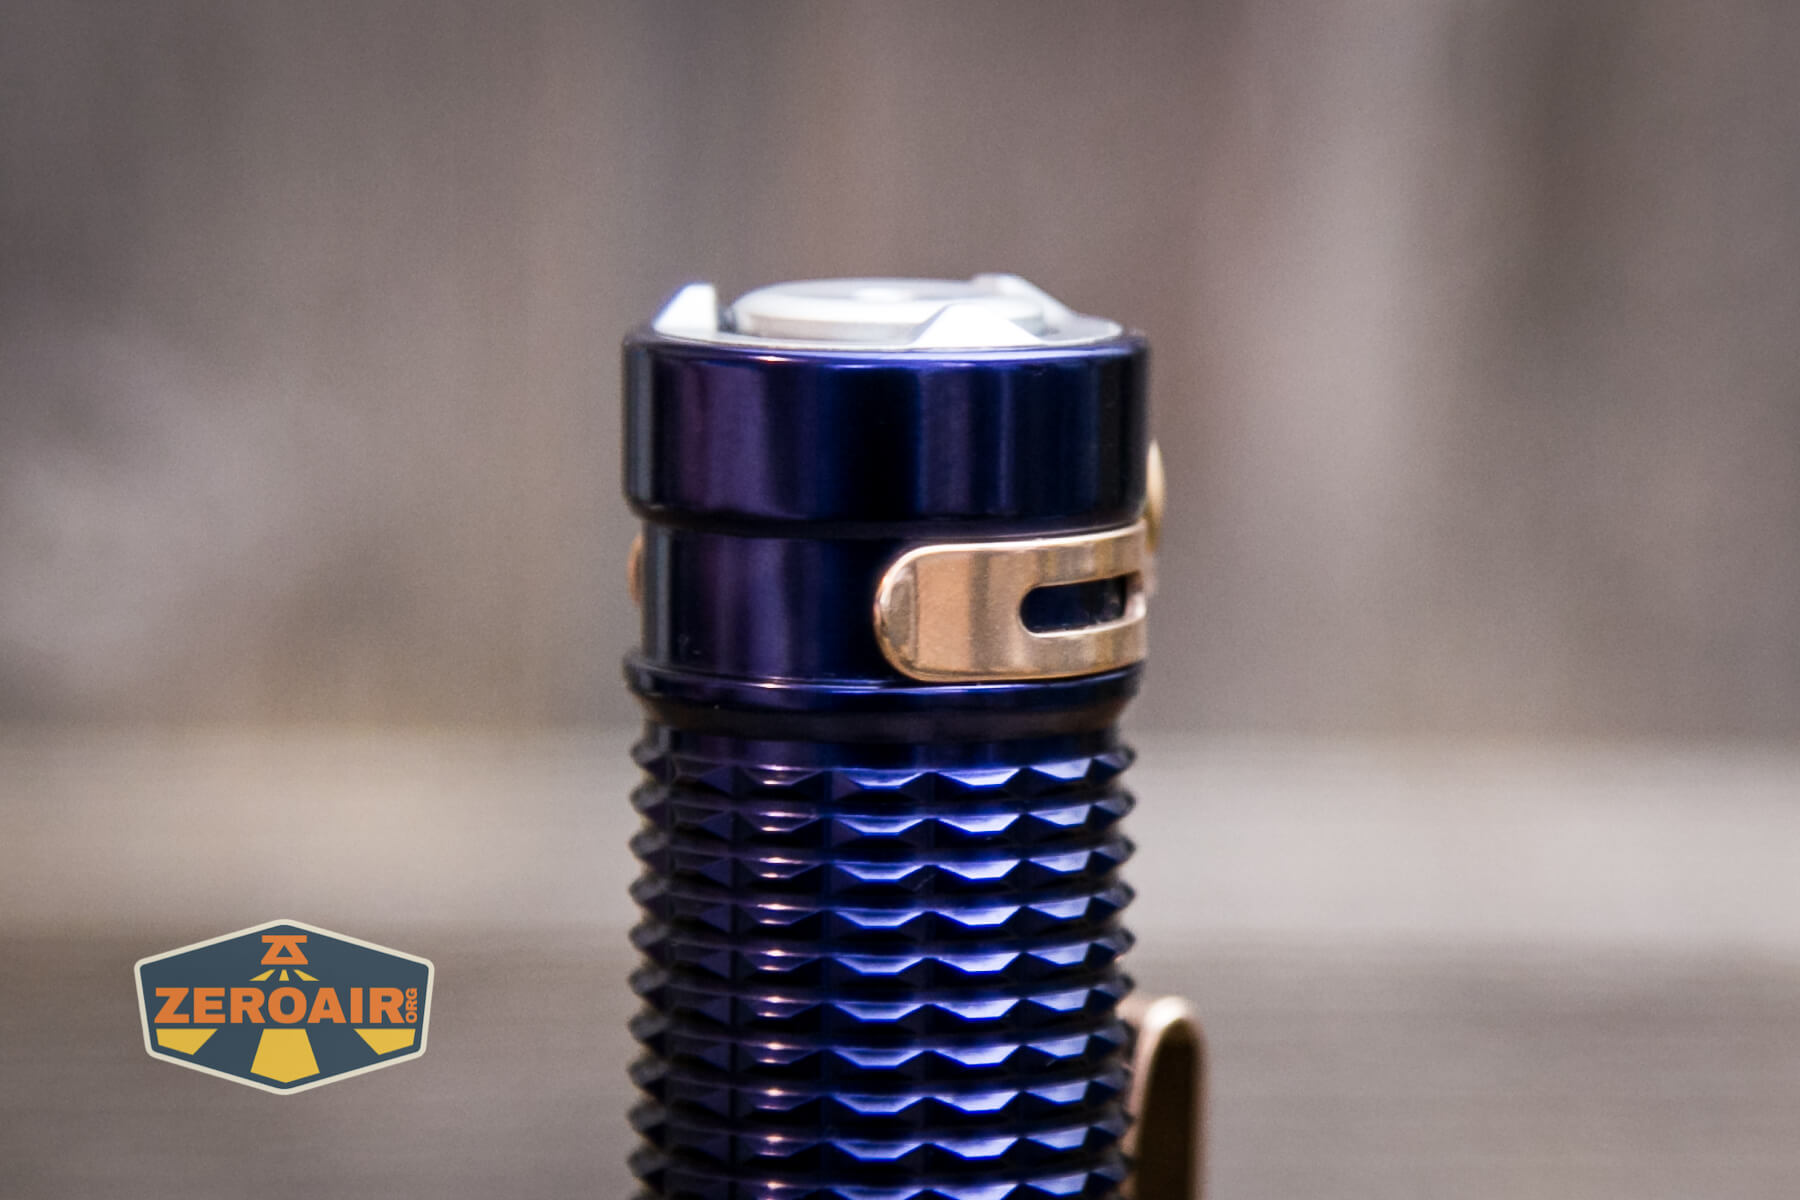
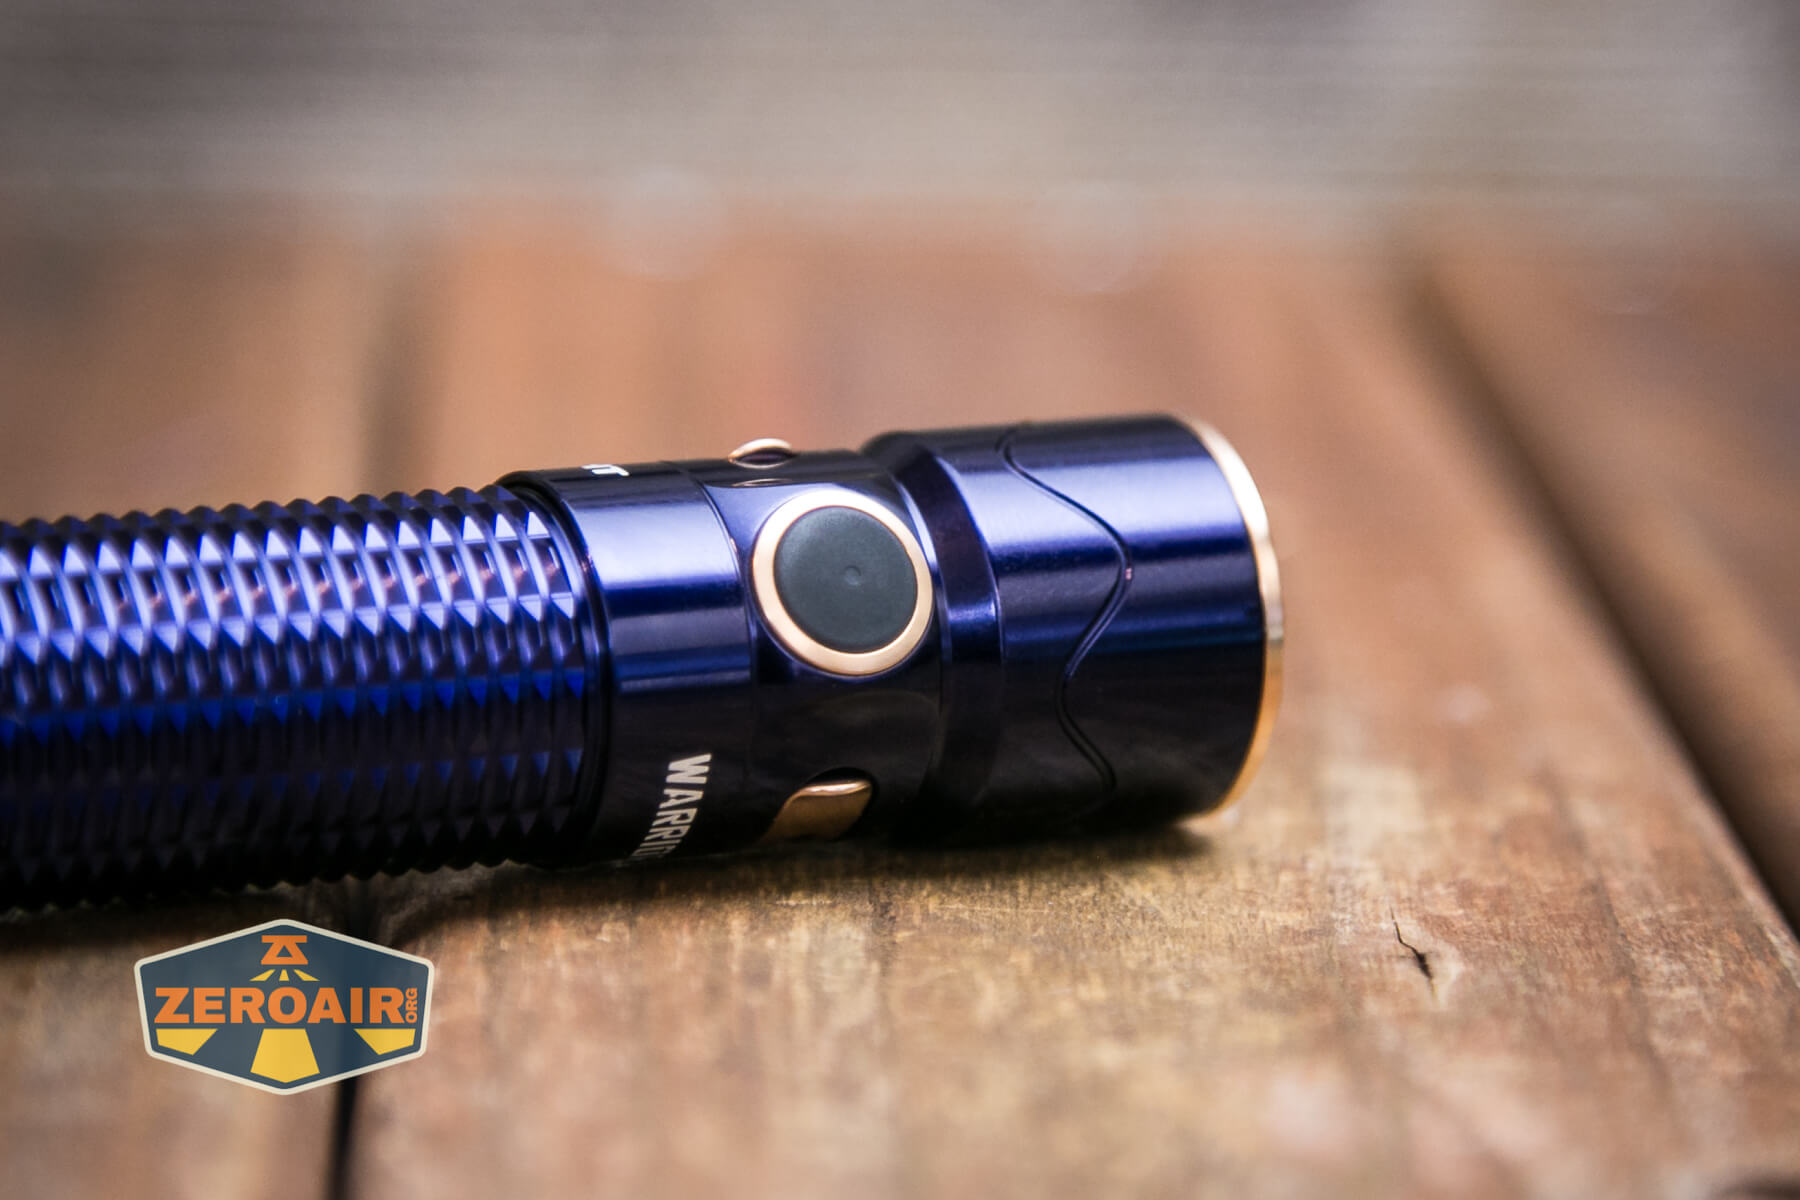
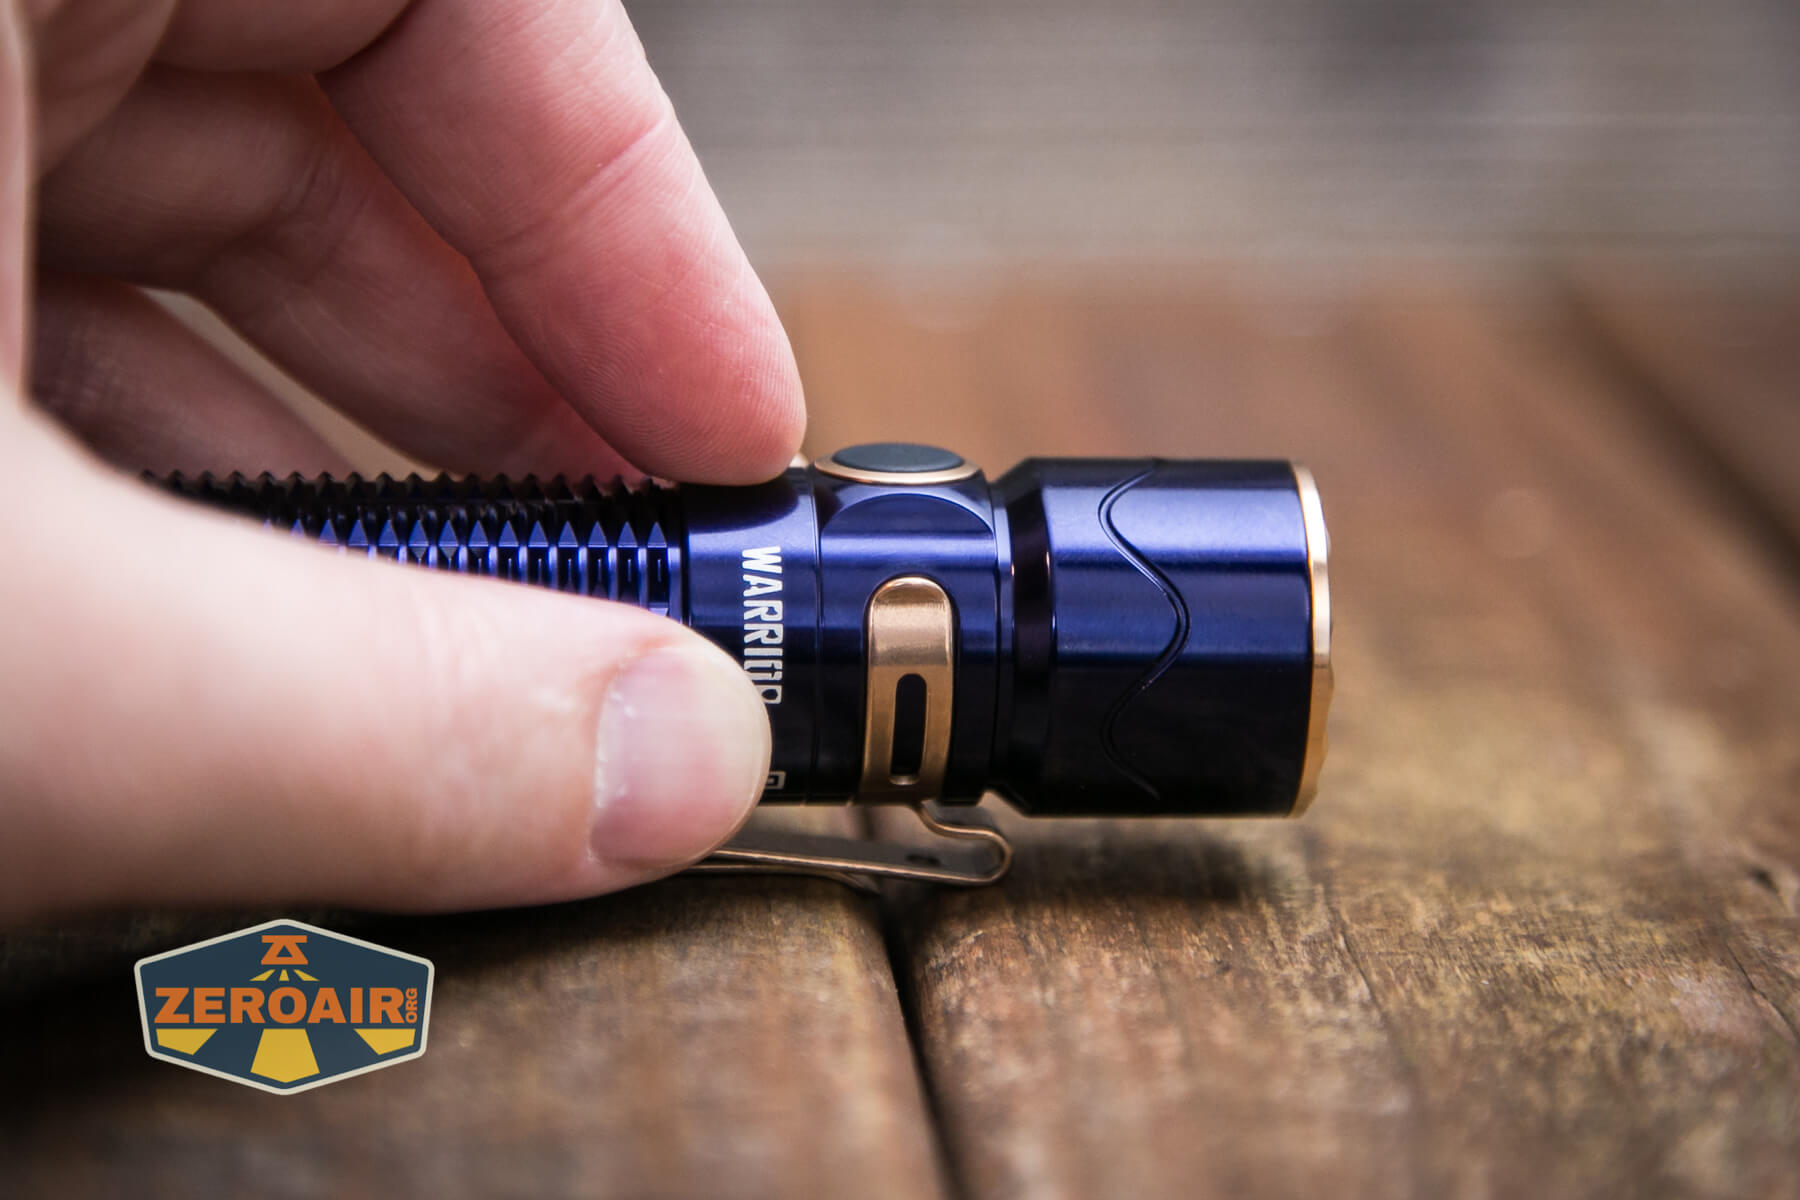
A pocket clip is included and attached from the factory. This is a “two-way” clip and has seen some improvements over previous-generation Olight two-way clips.
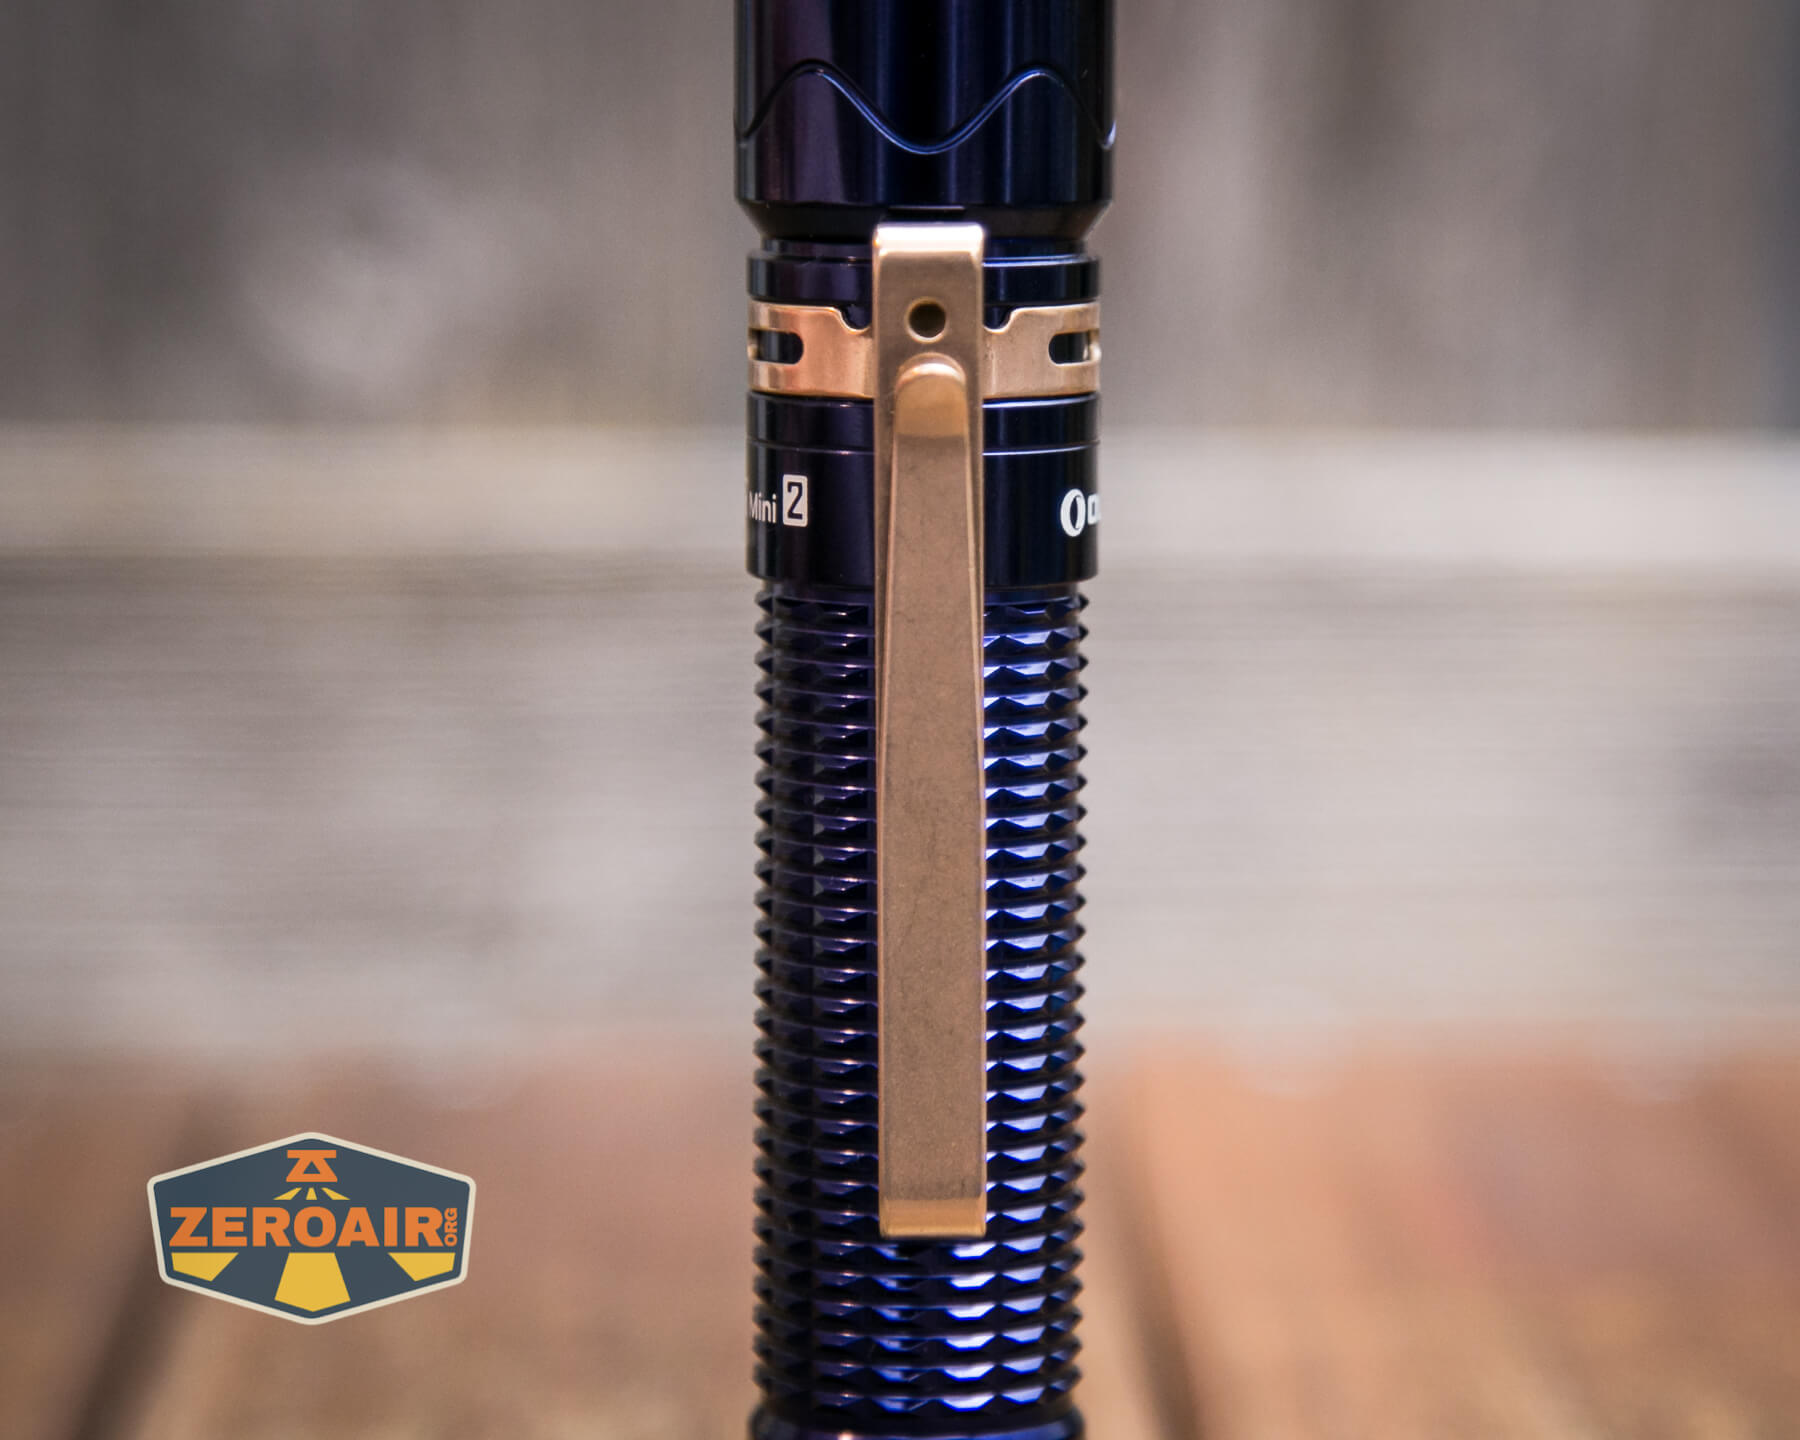
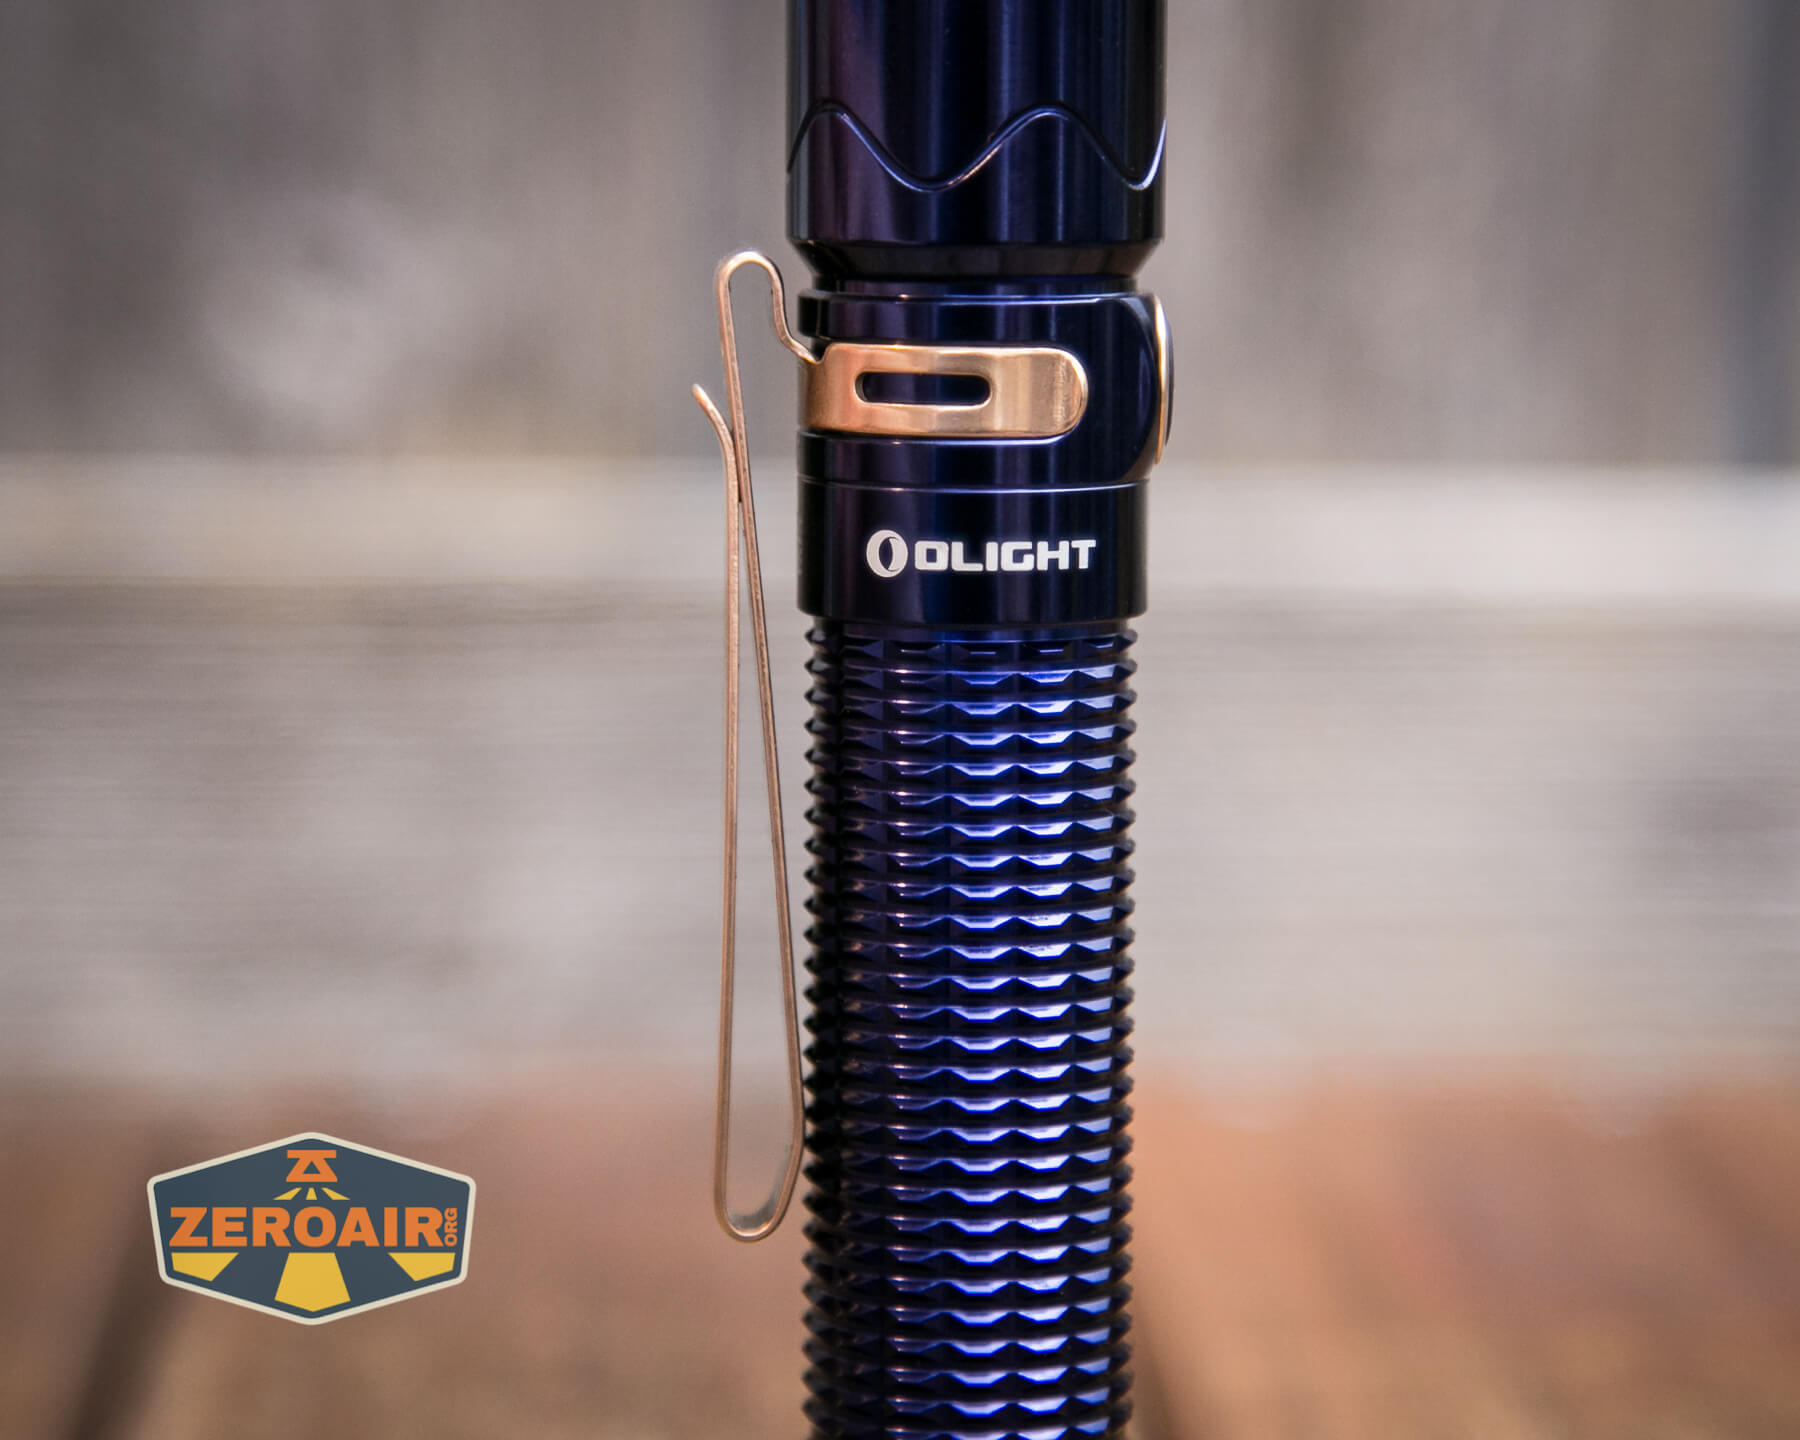
First, it’s much longer. Second and most importantly, the clip now has a slot on the tail end too, which allows bezel-down carry (without using the “second-way” aspect of the clip, which is terrible on all two-way clips). The new clip has a bigger mouth too, so getting it into pockets will be easier.

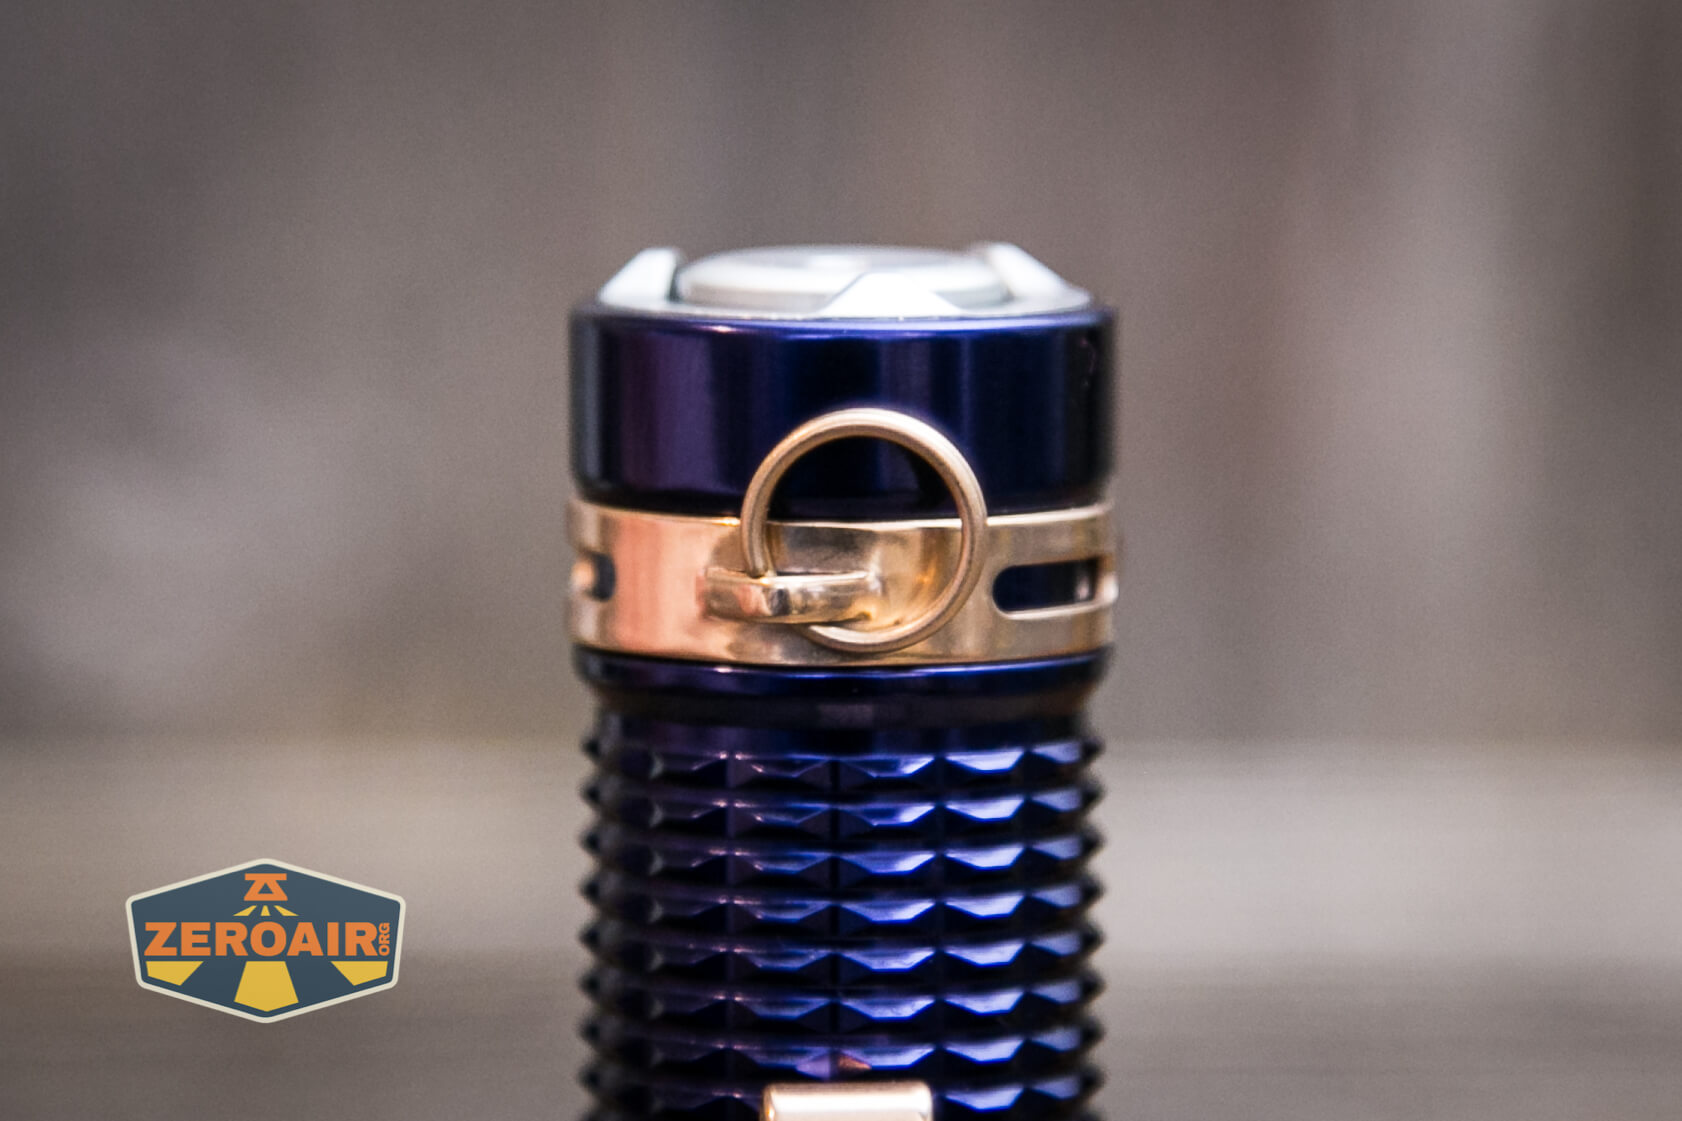
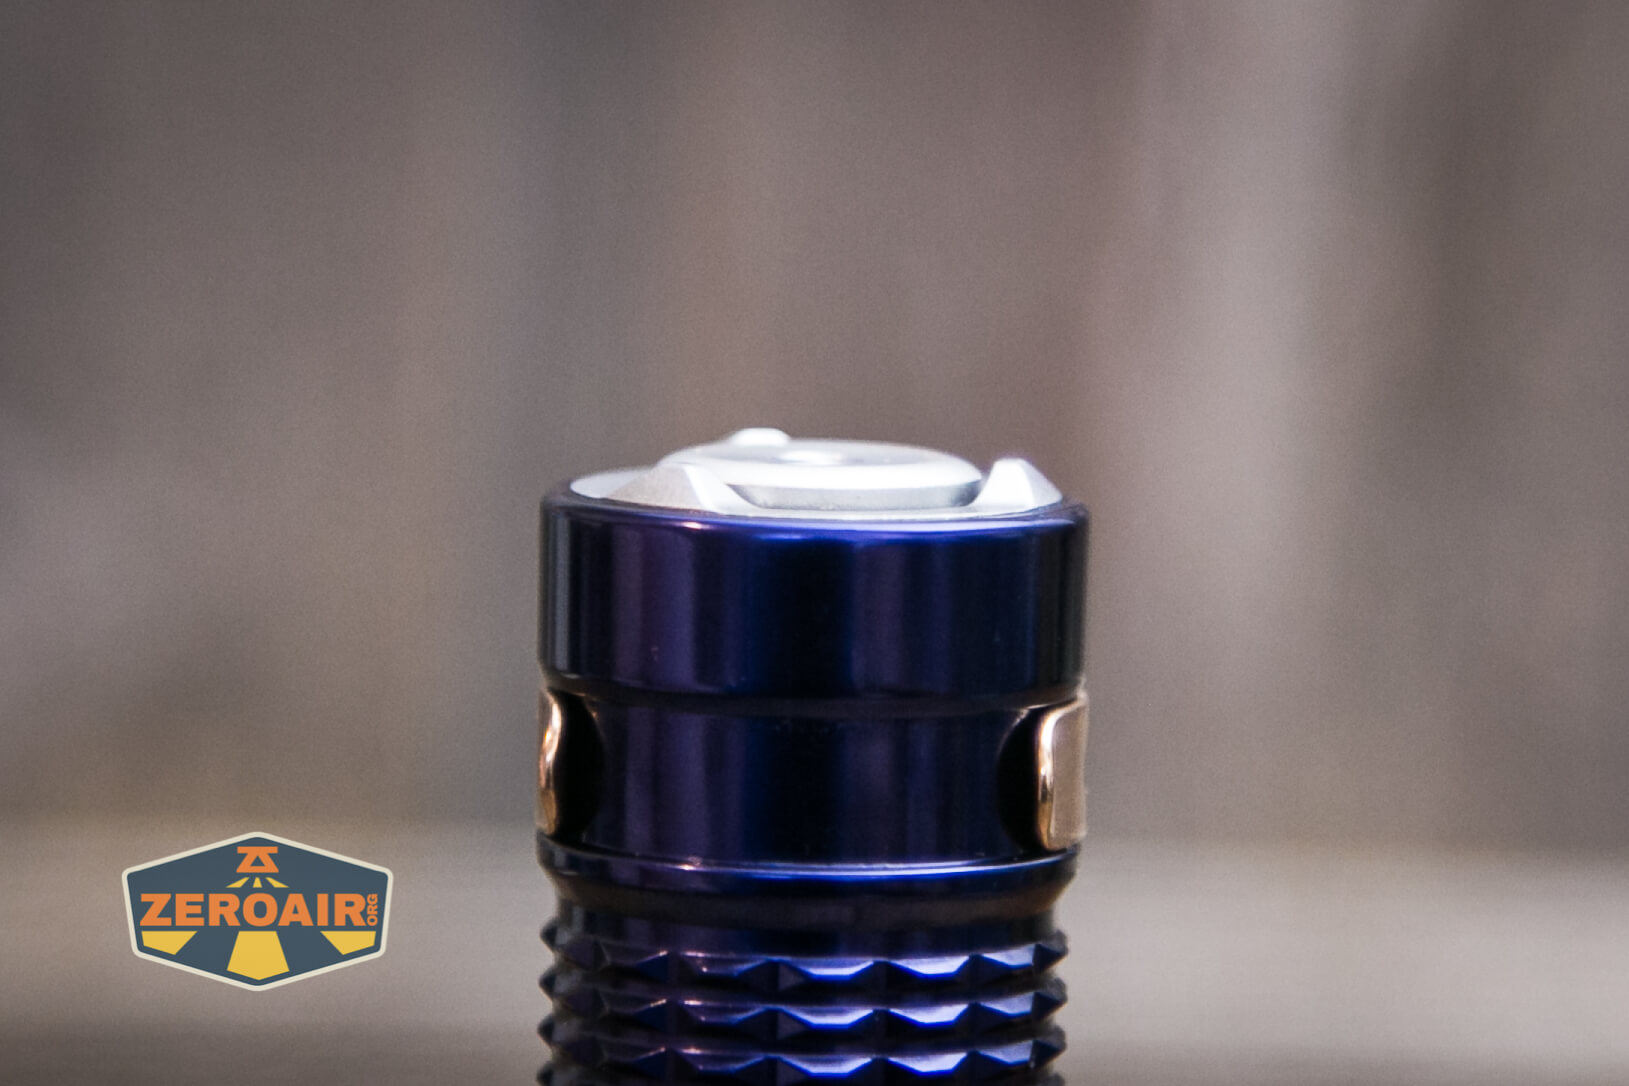
Secondly, there’s now a groove on the tail end of the light which accommodates the pocket clip. You can see there’s also a keyring attached. This is reversible with the clip – it’ll fit on the head end too. It’s not possible to put both on the same end, though.
One more thing about the clip before I move on. I hated how the clip ground over the body when removing the head for cell swaps on the Warrior Mini. Since the clip wasn’t reversible, there was no option – either just remove the clip entirely or deal with the scrape. On the new version, just throw the clip on the tail, and you won’t have this grinding problem anyway! Also, this allows bezel-down carry. You don’t carry bezel-up like a monster, do you?


Also included is this carabiner-type ring, which seems intended to fit through the tiny split ring.
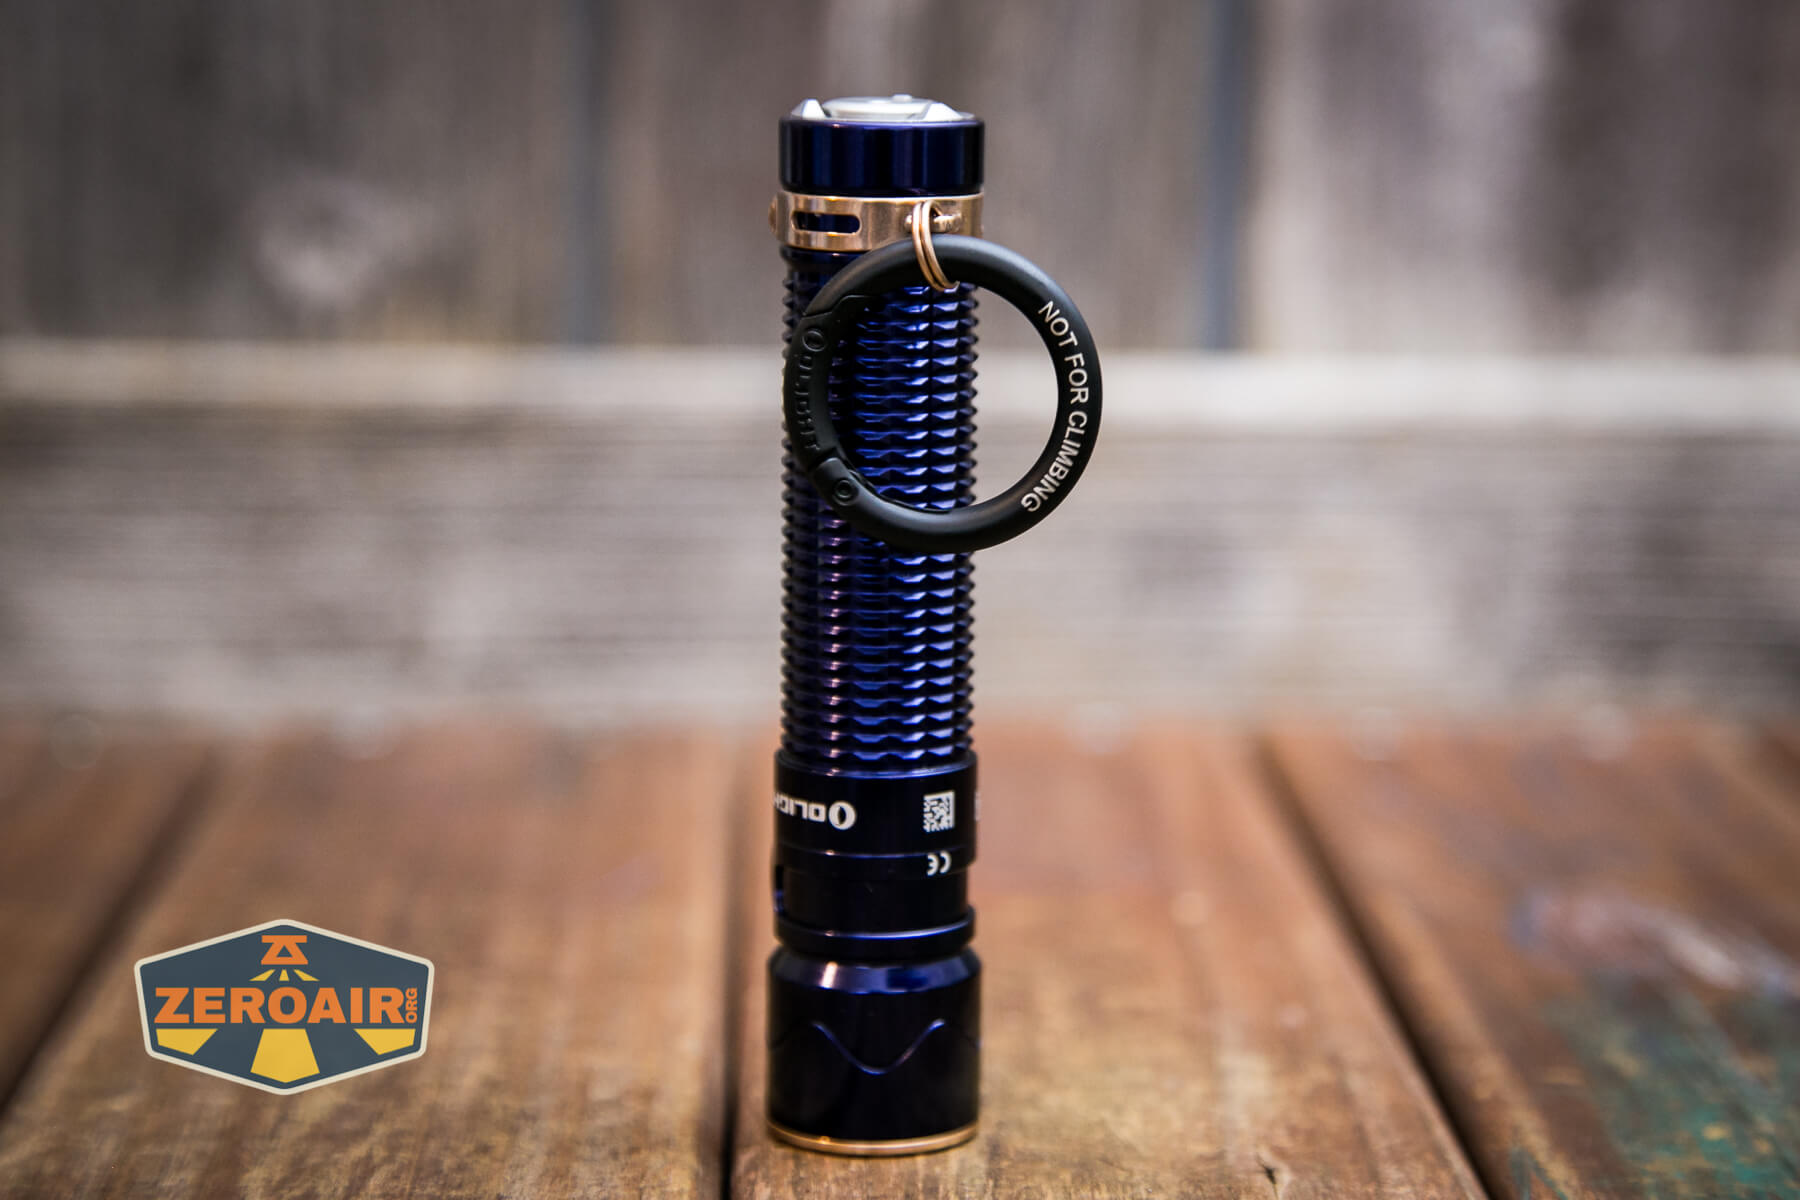
One great thing about this version, specifically vs at least one of the other versions of the Warrior Mini 2, is that the half-moon keychain clip fits perfectly in the pocket clip area. There were some versions of the Warrior Mini 2 (specifically the Mountain Sky) where this half-moon didn’t fully seat in the head area. I can happily report that’s not a problem here.
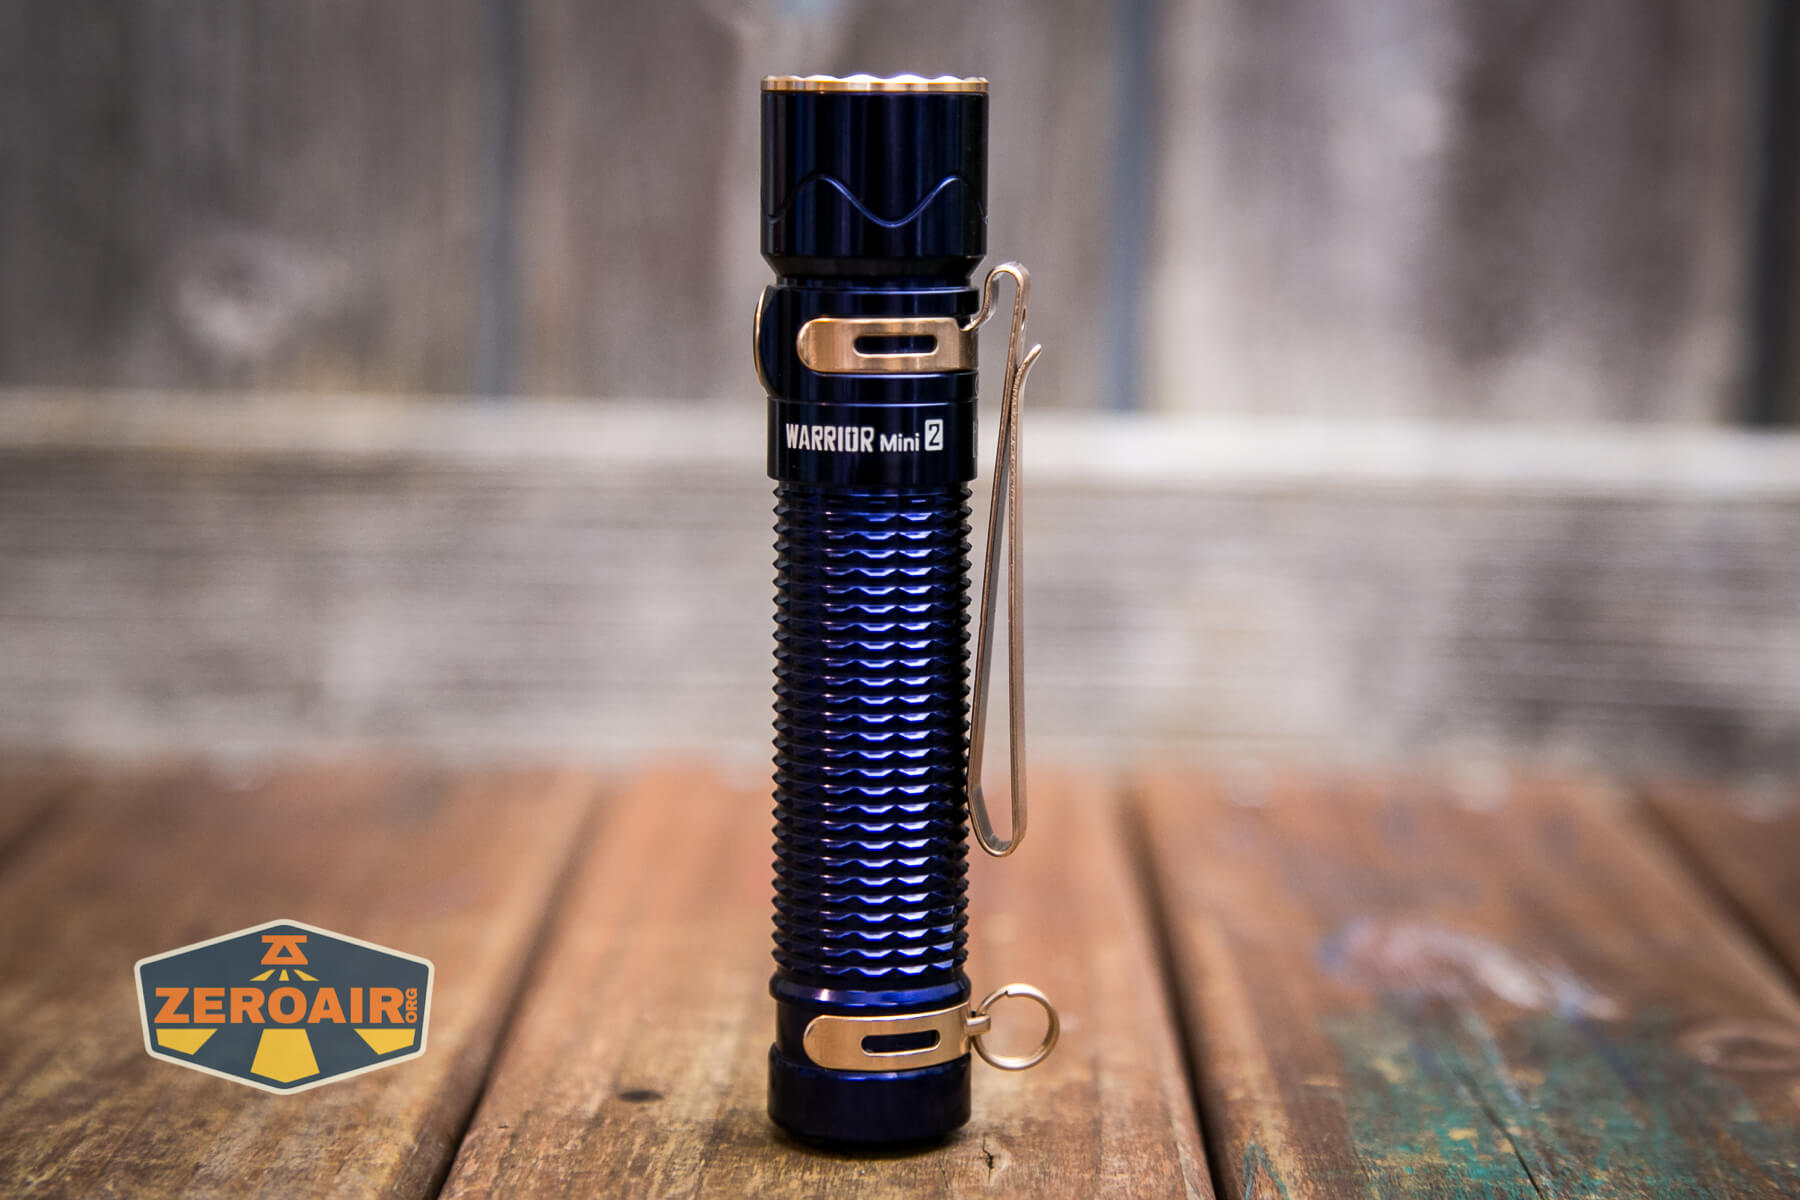
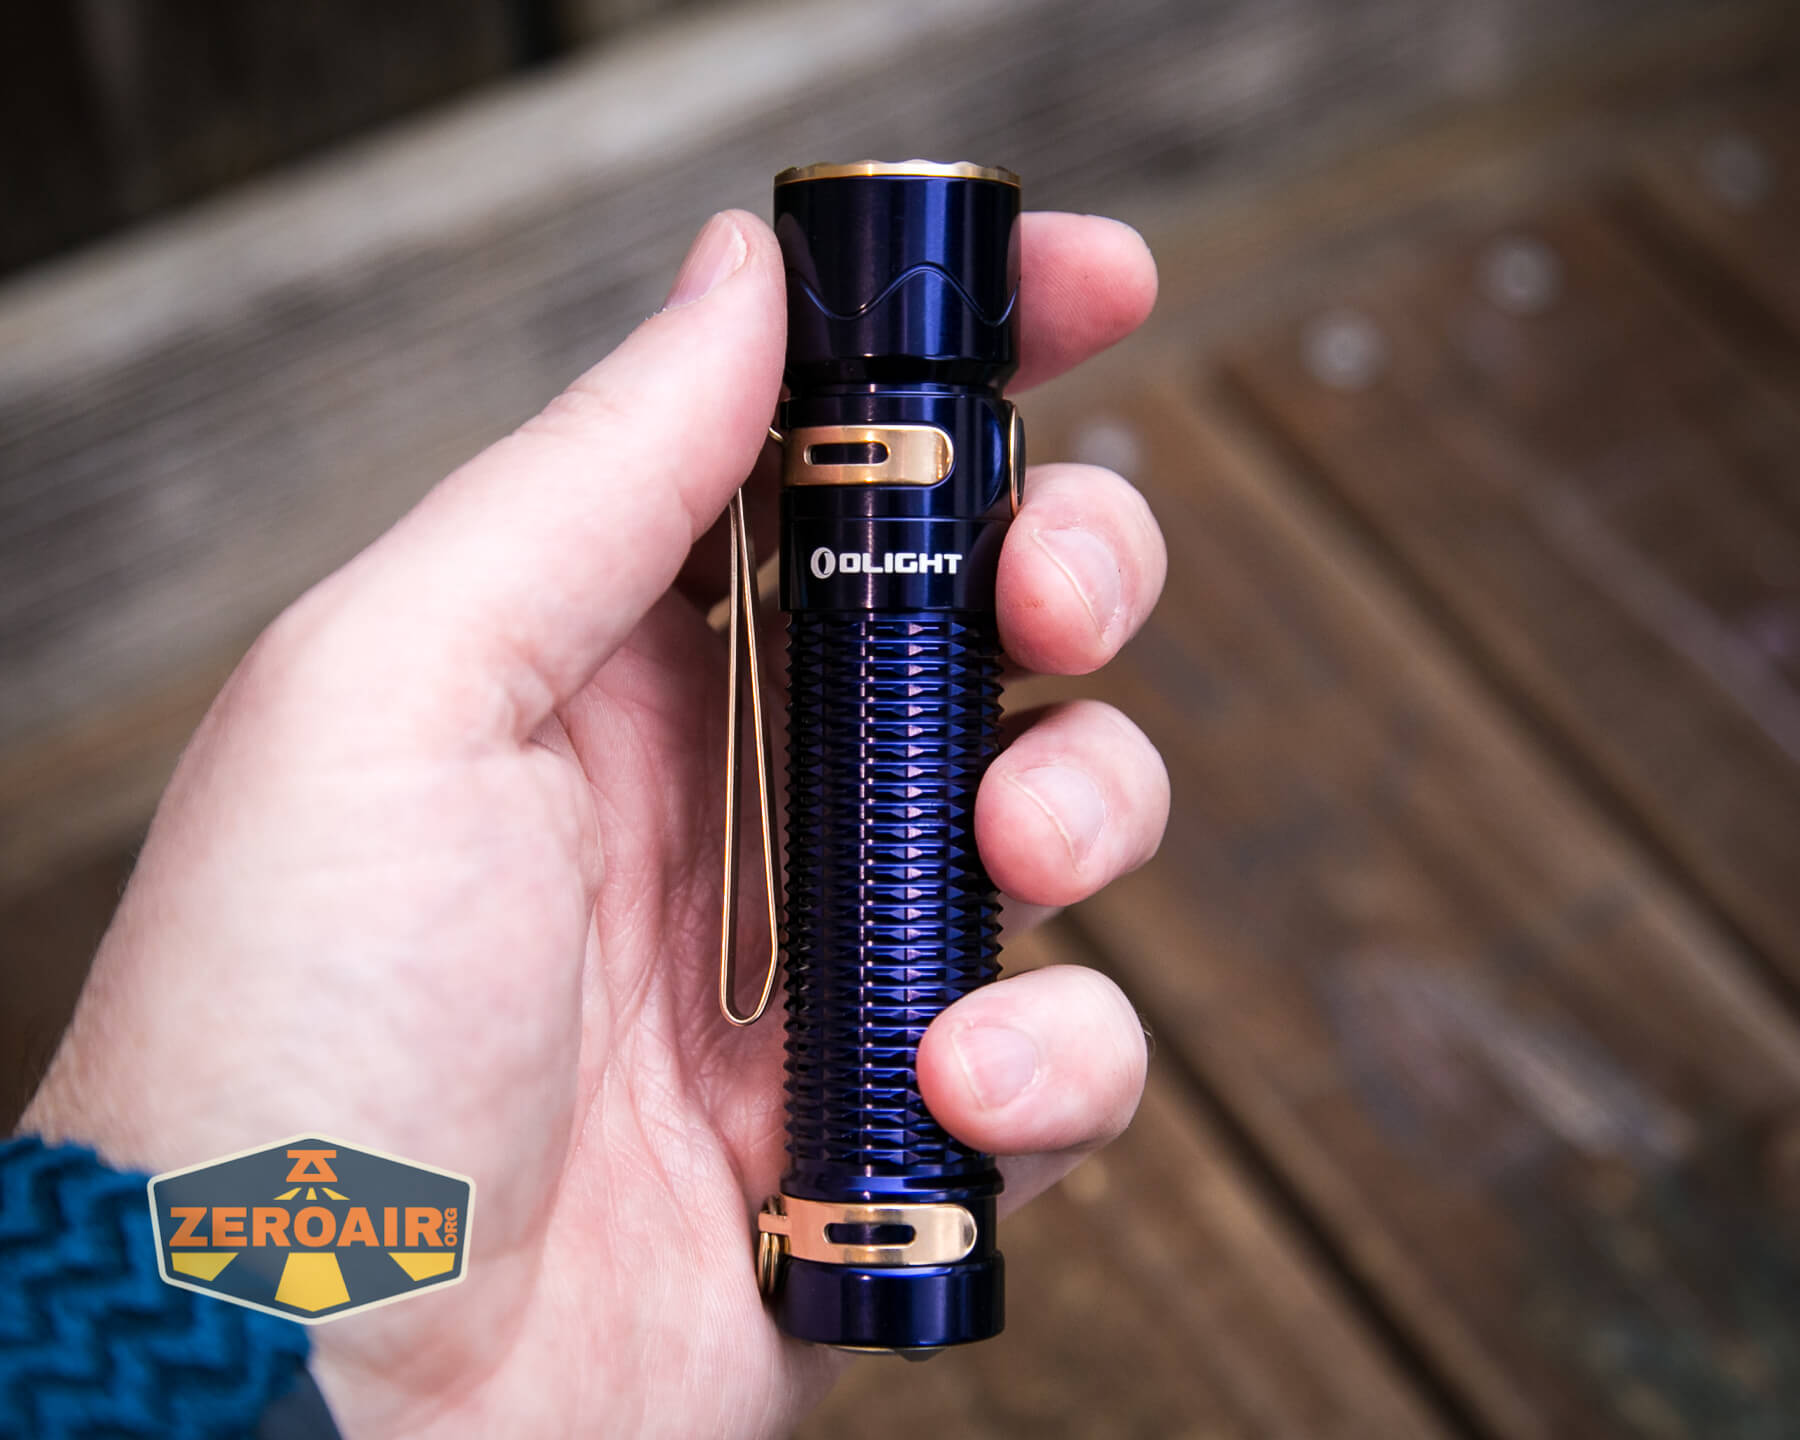
Finally, there’s a lanyard included. This lanyard can attach to the pocket clip or the split ring mentioned above. It’s an unusual lanyard because it feels fully silicone. That’s neat.
Power and Runtime
The Olight Warrior Mini 2 Regal Blue is powered by a custom single lithium-ion cell. The appropriate cell is included – a customized 3500mAh 18650.
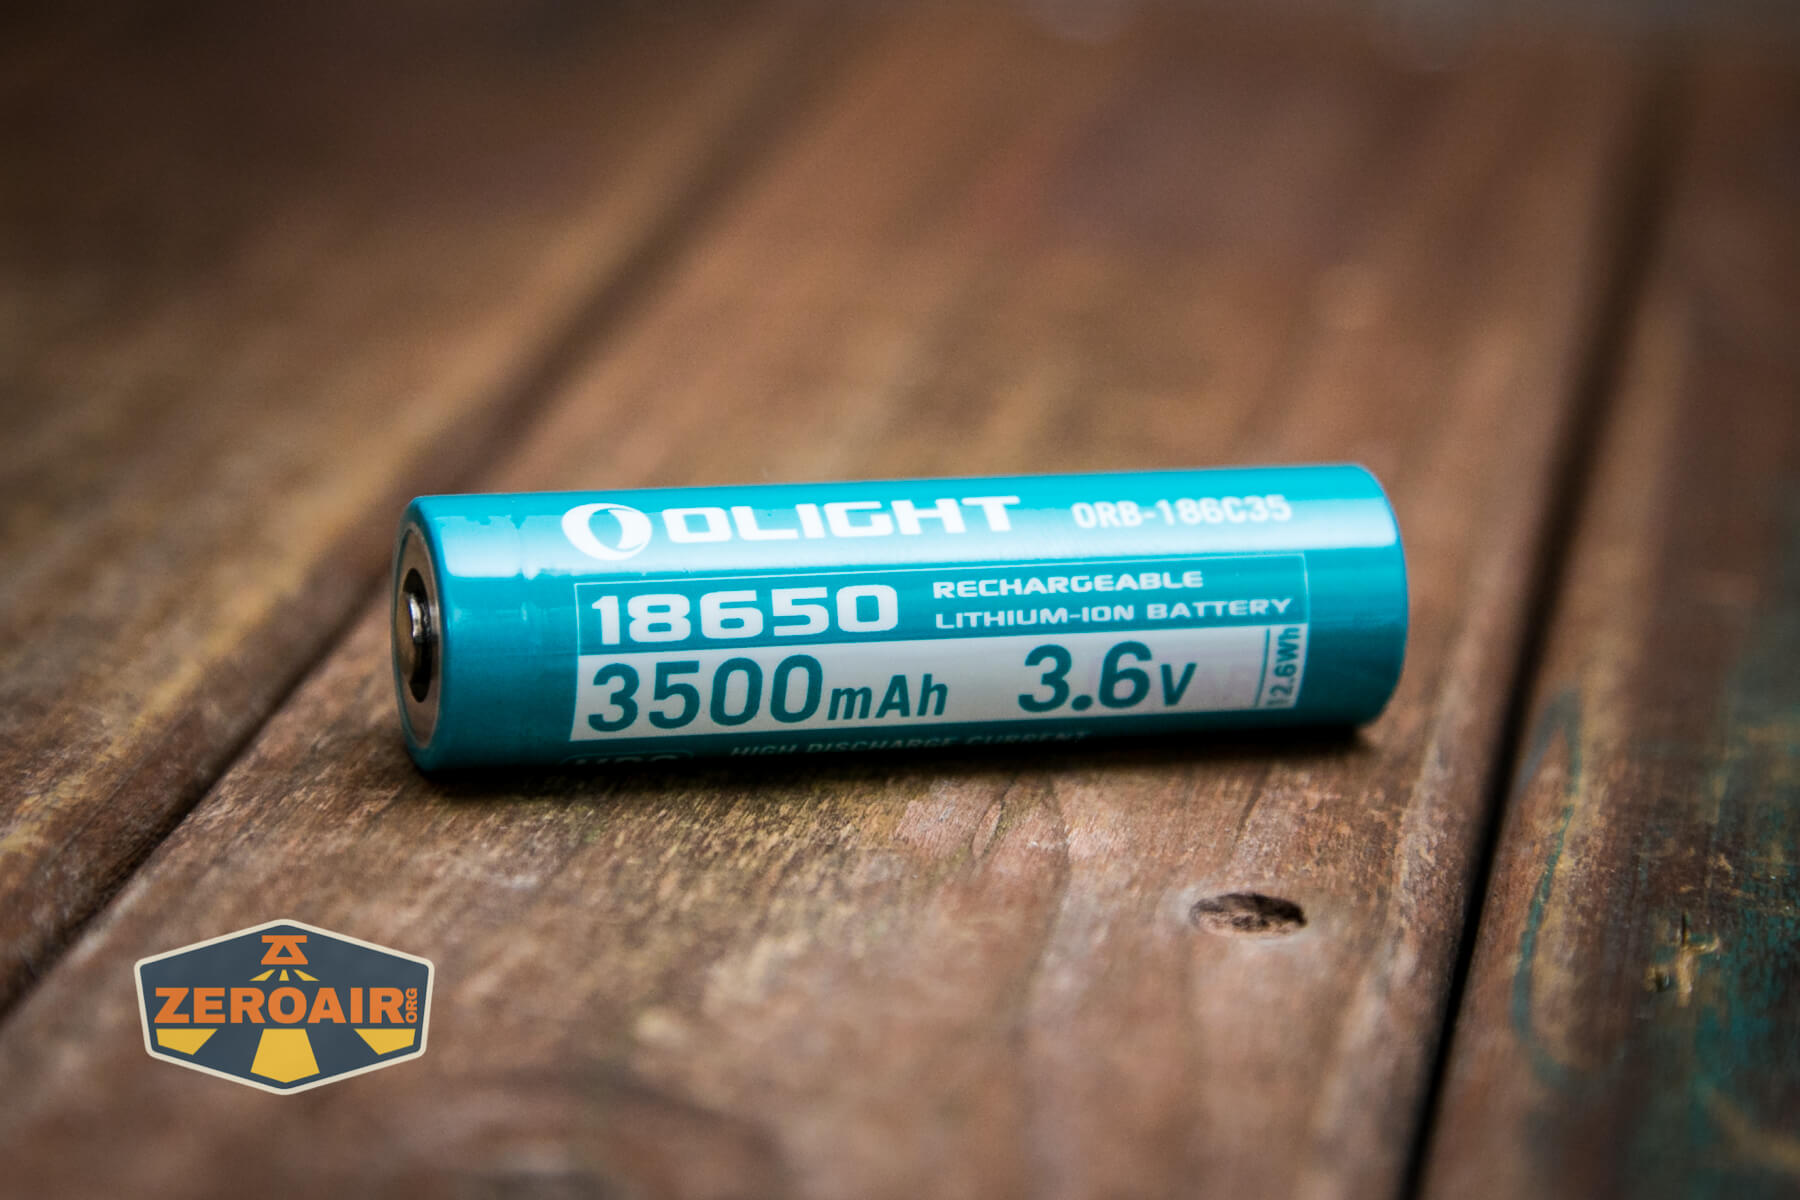

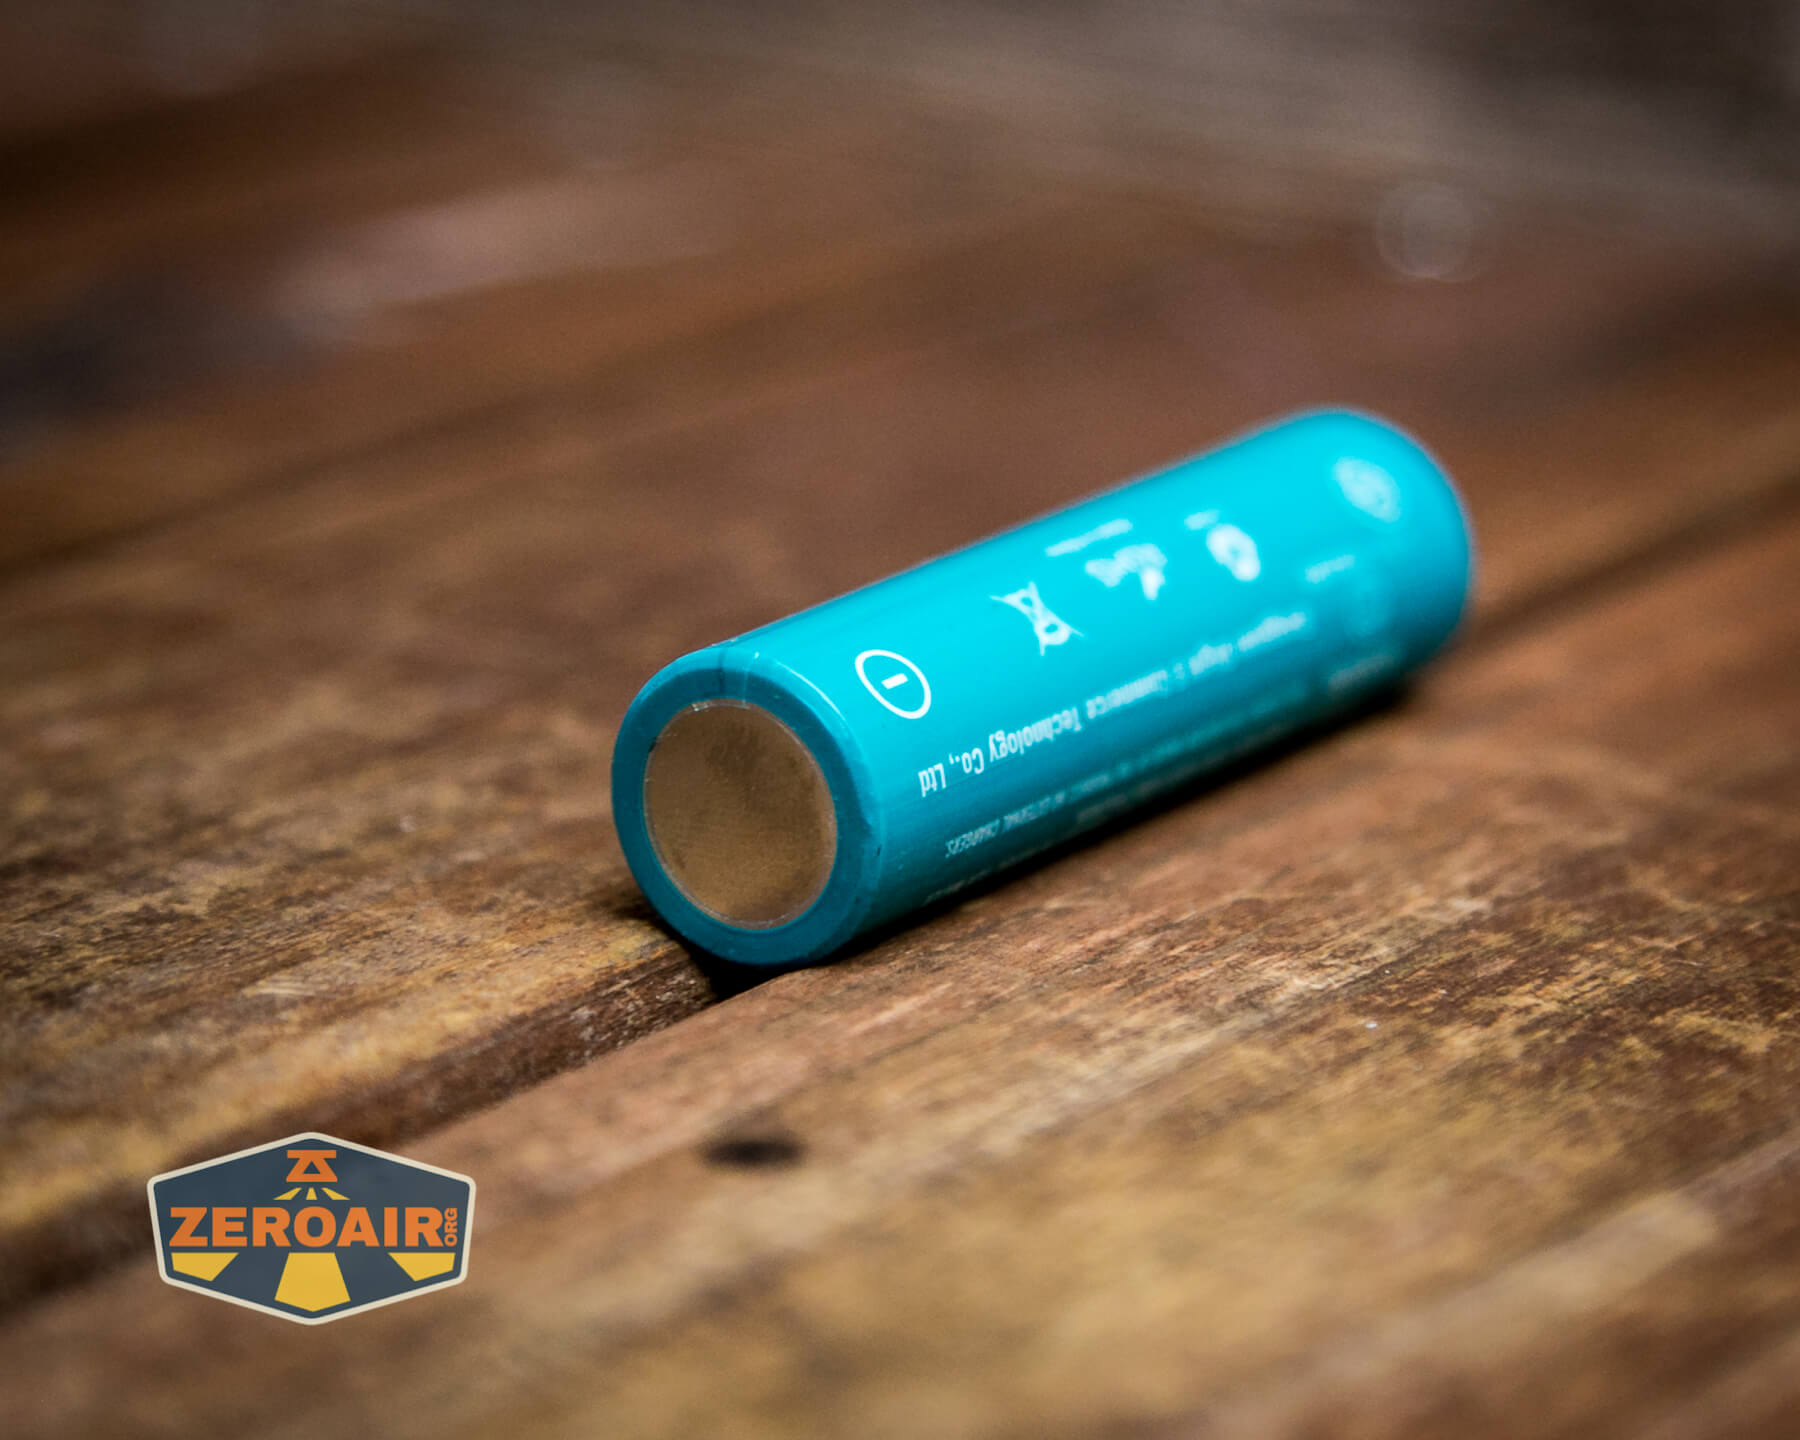
The “custom” part is seen below – both positive and negative terminals are exposed on the positive end. One great aspect that was retained from the previous Warrior Mini (and a massive improvement over previous iterations of this type of cell) is that the positive terminal is not recessed. This means the cell can charge in a bay-style charger! Unfortunately, that’s where the good news ends: This customized type cell is required for operating the Warrior Mini 2. This is still a step forward, though.
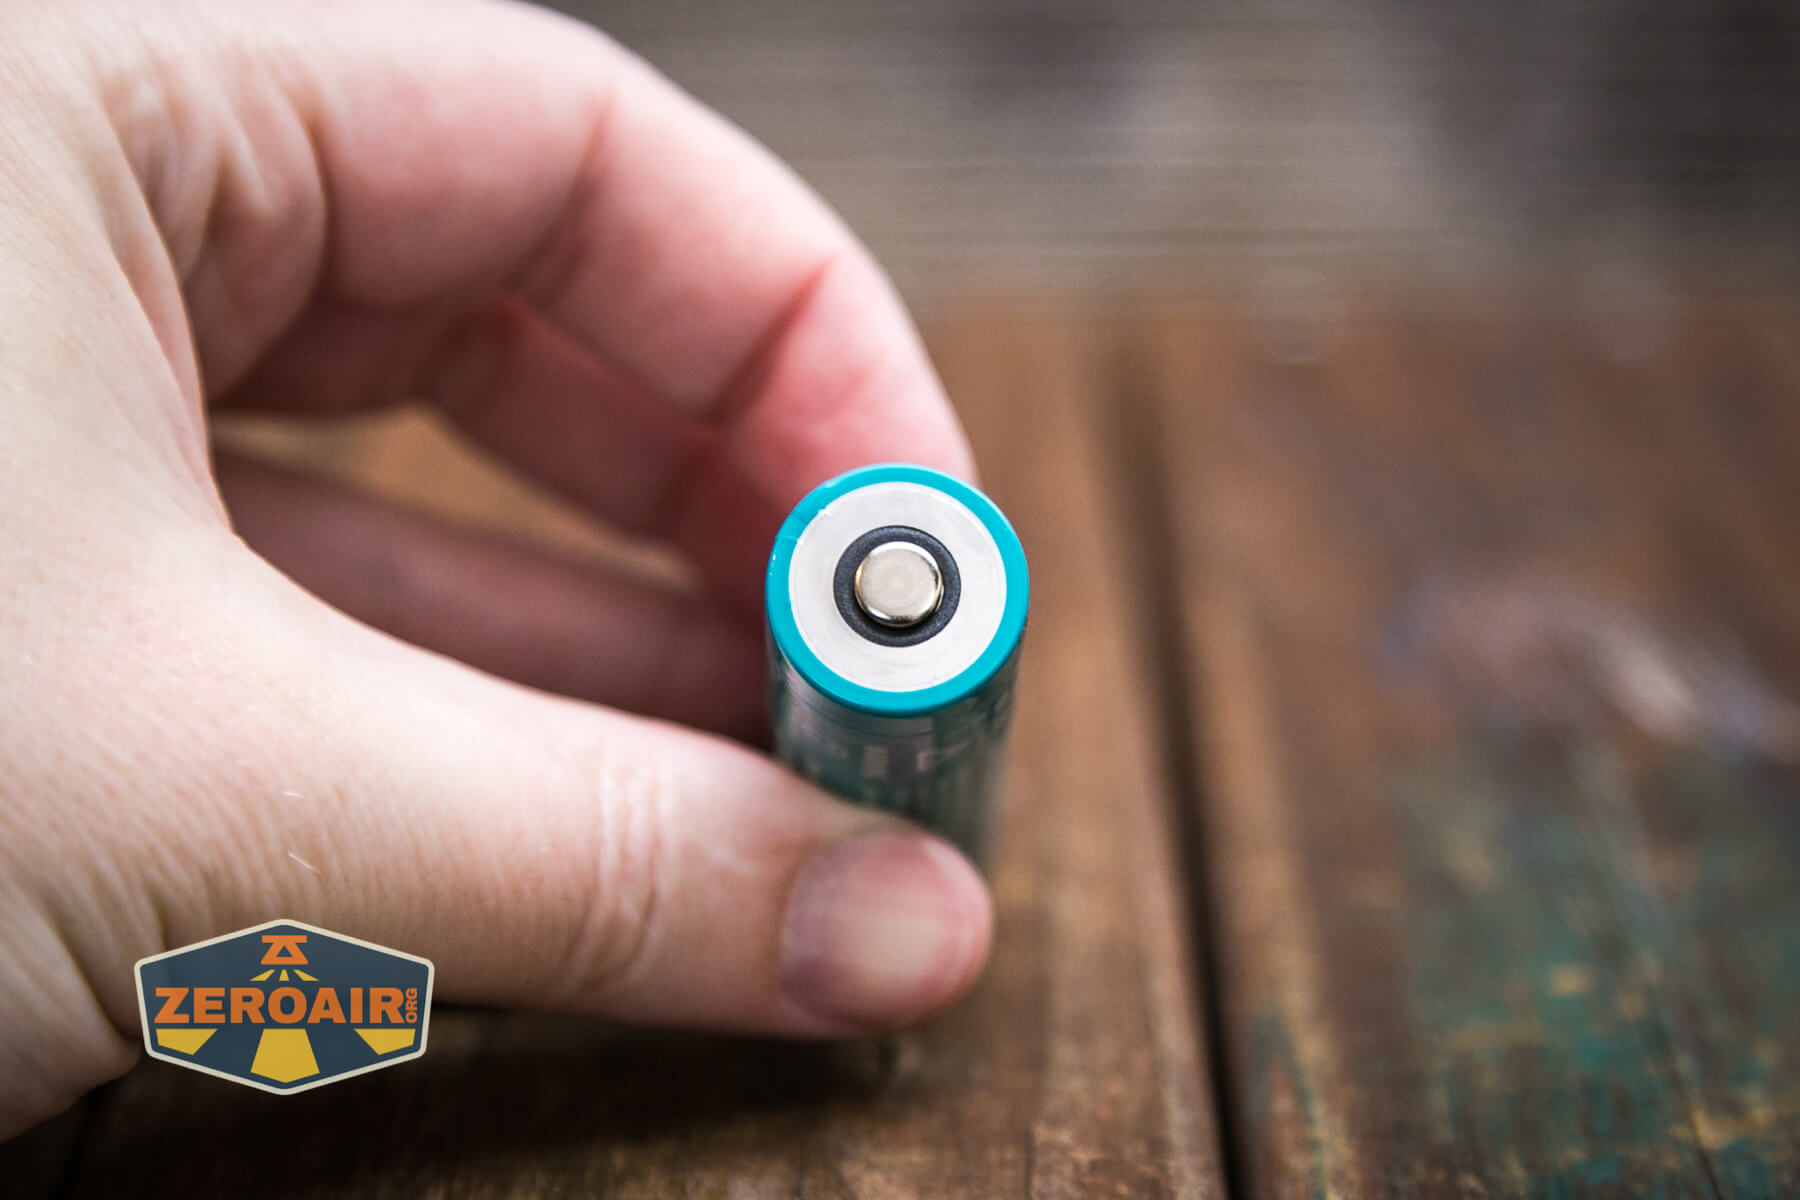
And the cell goes into the light in the “normal” way – positive terminal toward the head. (This is in contrast to some of the other similar Olights, like the S1R Baton II, a light that otherwise looks incredibly similar to the Warrior Mini).

Here is one runtime. Runtimes on these lights are difficult because of the nearly impossible-to-disable proximity sensor. Note that the proximity sensor is an improvement over the previous generation because of the pants-on-fire situations that were happening to some users. Again, I didn’t experience this, but I get it – it happens. This should be a good answer to that problem, and I doubt you’ll have hot pants again with a Warrior Mini 2.
Output steps down from an initial ~1800 lumens to over 1700 for the first >1m. Once the light steps down, the output is incredibly flat for hours. Then there’s another stepdown, which lasts for under an hour, and then the light begins to decline in output. The switch warns the user of low voltage along the way. First green, then orange, then solid red, then flashing red. The light does shut off (which is a difference from previous iterations of the Warrior Mini 2 that I’ve had).
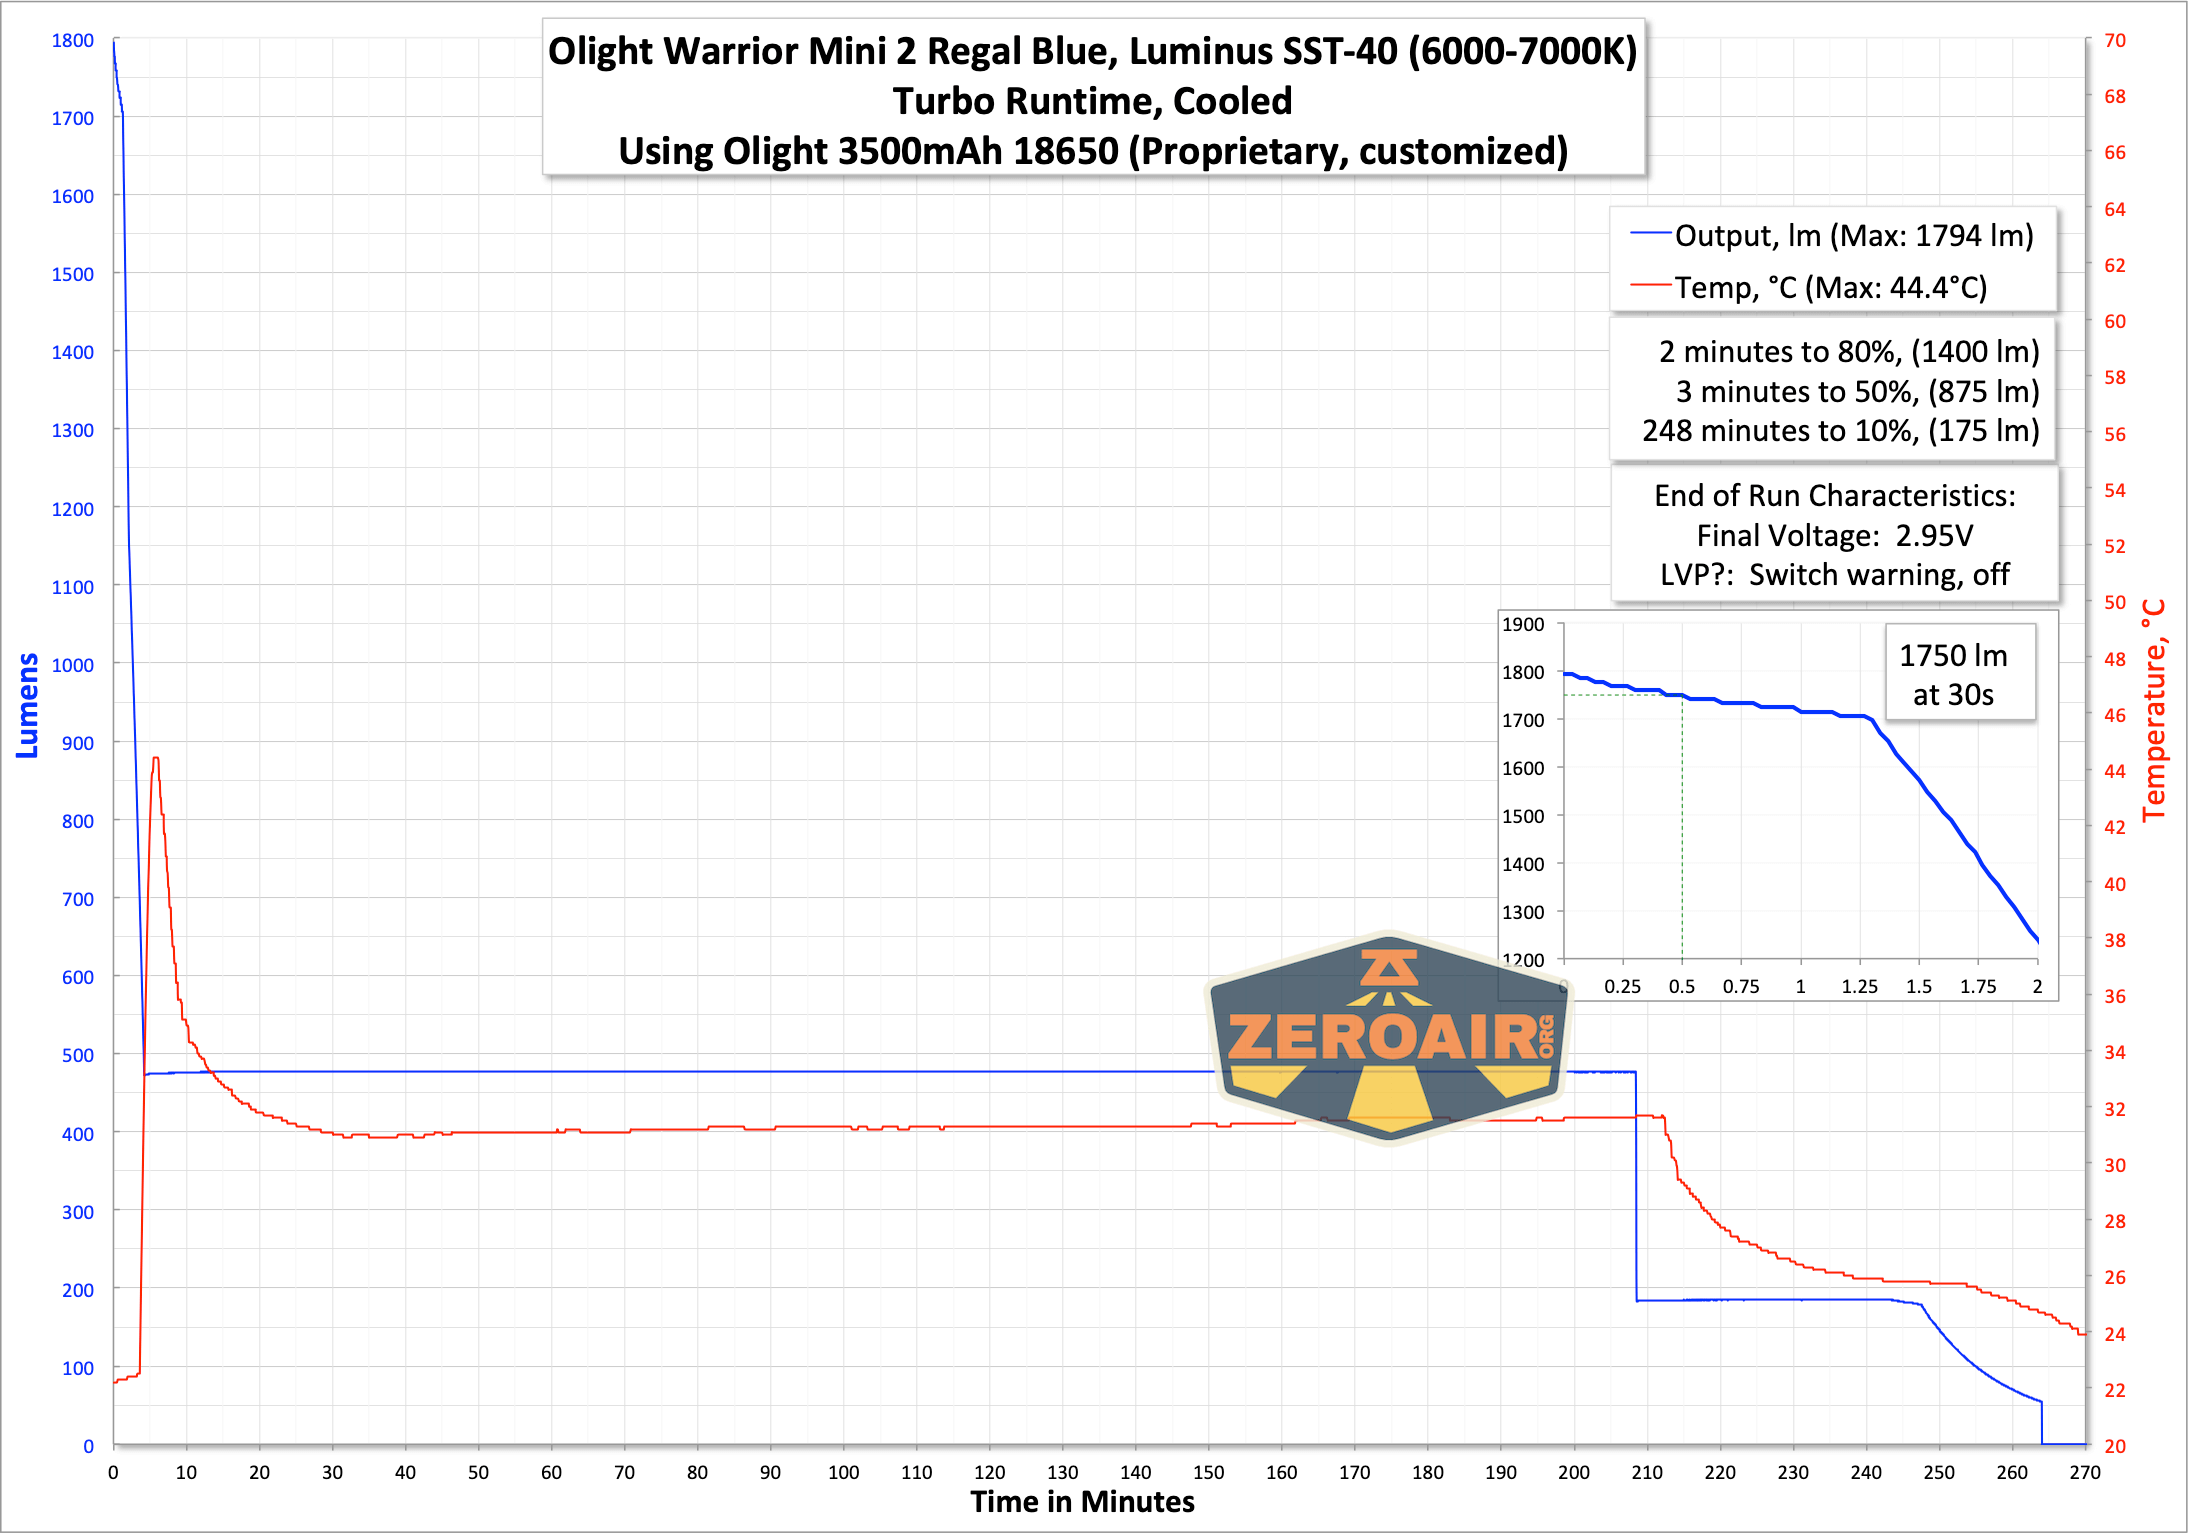
Again, remarkably well-regulated output for the duration of the runtime.
Regarding the proximity sensor – The mode that’s stepped down to (around 200 lumens) is interestingly not a mode that’s otherwise available – you can’t hit this 200-lumen mode any way except the proximity sensor action.
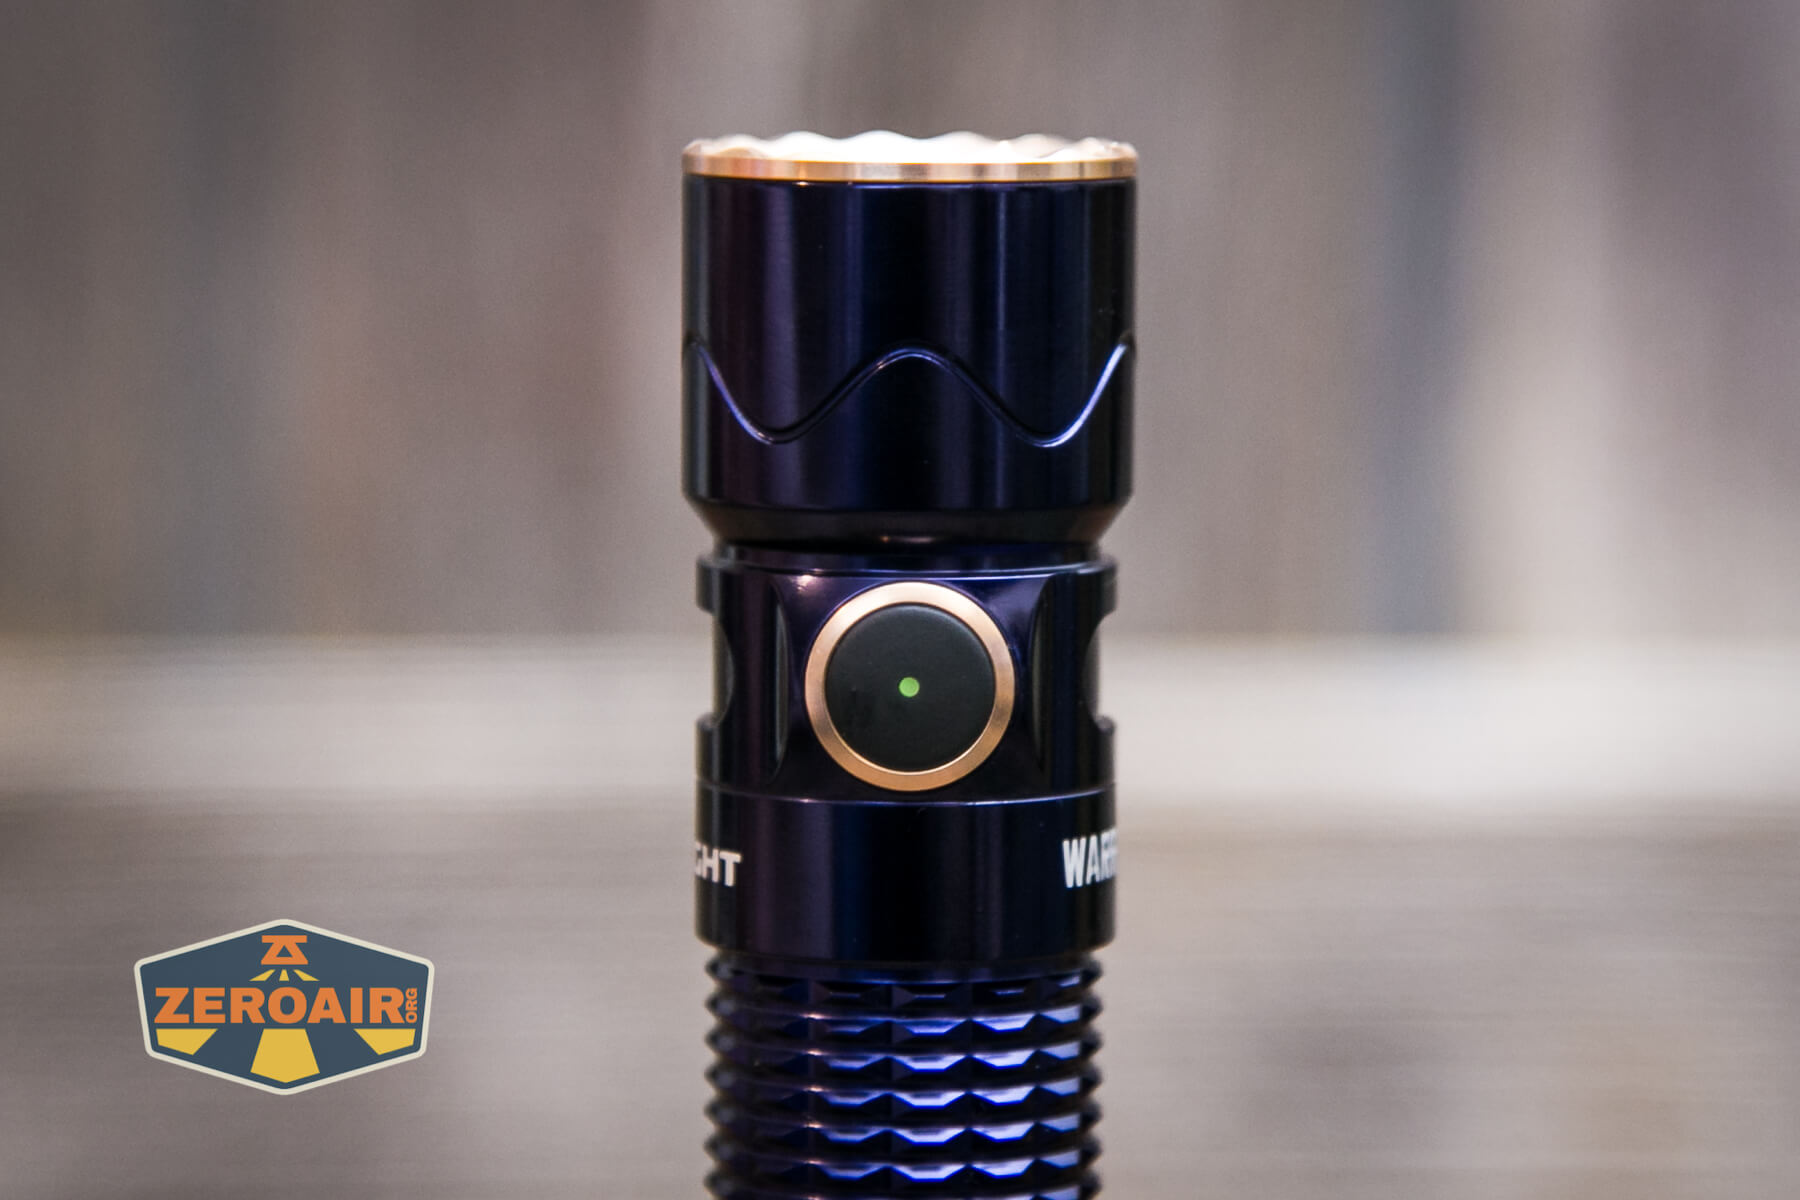
The indicating e-switch does display the charge level while the light is on, too. Except in moonlight, that is, where the power indicator is not enabled. Here’s what the colors mean:
Green: >60% power
Orange: 10-60% power
Red: 5-10% power
Red blinking: <5% power
Charging
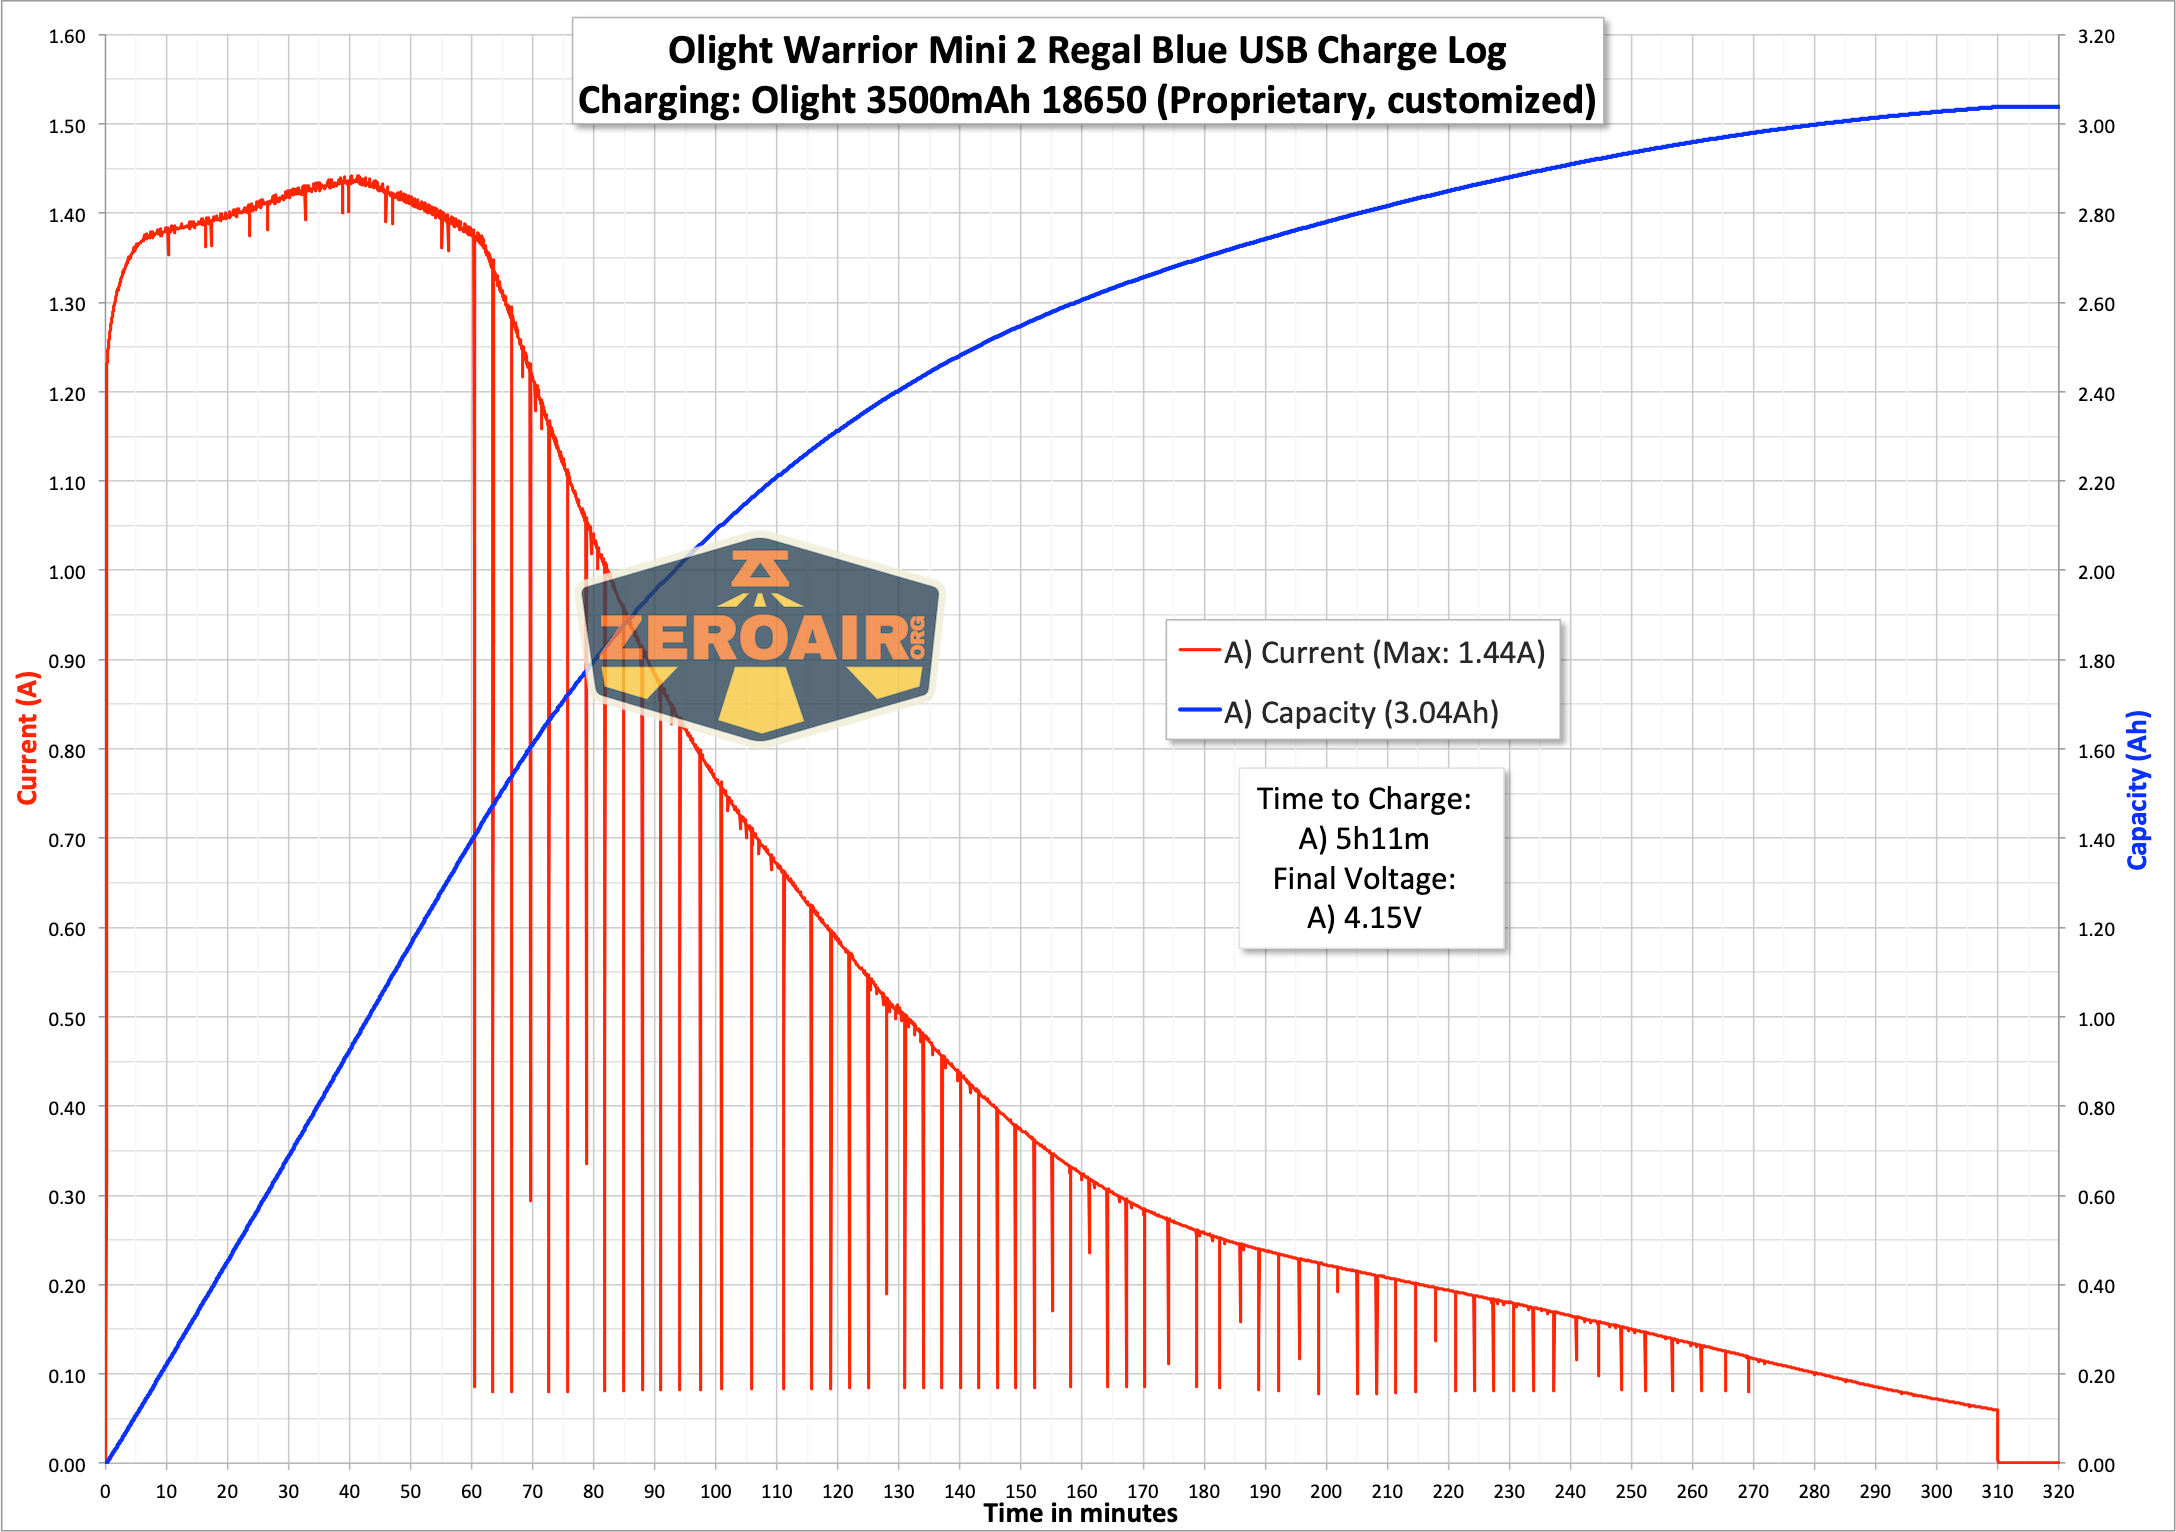
There’s also onboard charging, by way of a magnetic charge base and a magnetic charge connector in the tail (both parts are magnetic!). The charging base is the common Olight MCC, which can charge at 1A, 1.5A, or 2A. As I said above, this cell can be charged in a regular bay charger too!

Charging proceeds at well over 1A, and the 3500mAh cell is charged in around 4 hours. The charging base is red when charging, and green when not being used or the cell is “completely charged.” I noted in charge testing that the indicator on the charger would turn green before the trickle CV phase had stopped putting power into the cell.
Modes and Currents
| Mode | Mode Claimed Output (lm) | Claimed Runtime | Measured Lumens | Tailcap Amps |
|---|---|---|---|---|
| Turbo | 1750/500/200 | 4m/206m/40m | 1750 | 4.56 |
| High | 500/200 | 218m/55m | 0.75 | |
| [mode for stepdown only] | 200 | – | 297 | 0.42 |
| Medium | 120 | 19h | 115 | 0.15 |
| Low | 15 | 164h | 11 | 0.01 |
| Moon | 1 | 45d | 0 |
Pulse Width Modulation
Nothing really to mention here. None of the modes seem to be using PWM. That wave graph on the second-to-lowest mode is fun, though.
 Here you can see a “baseline” – a chart with almost no light hitting the sensor.
Then there’s the Ultrafire WF-602C flashlight, which has some of the worst PWM I’ve seen. It’s so bad that I used a post about it to explain PWM! Here are multiple timescales (10ms, 5ms, 2ms, 1ms, 0.5ms, 0.2ms) to make comparing this “worst” PWM light to the test light easier. That post also explains why I didn’t test the WF-602C at the usual 50us scale.
User Interface and Operation
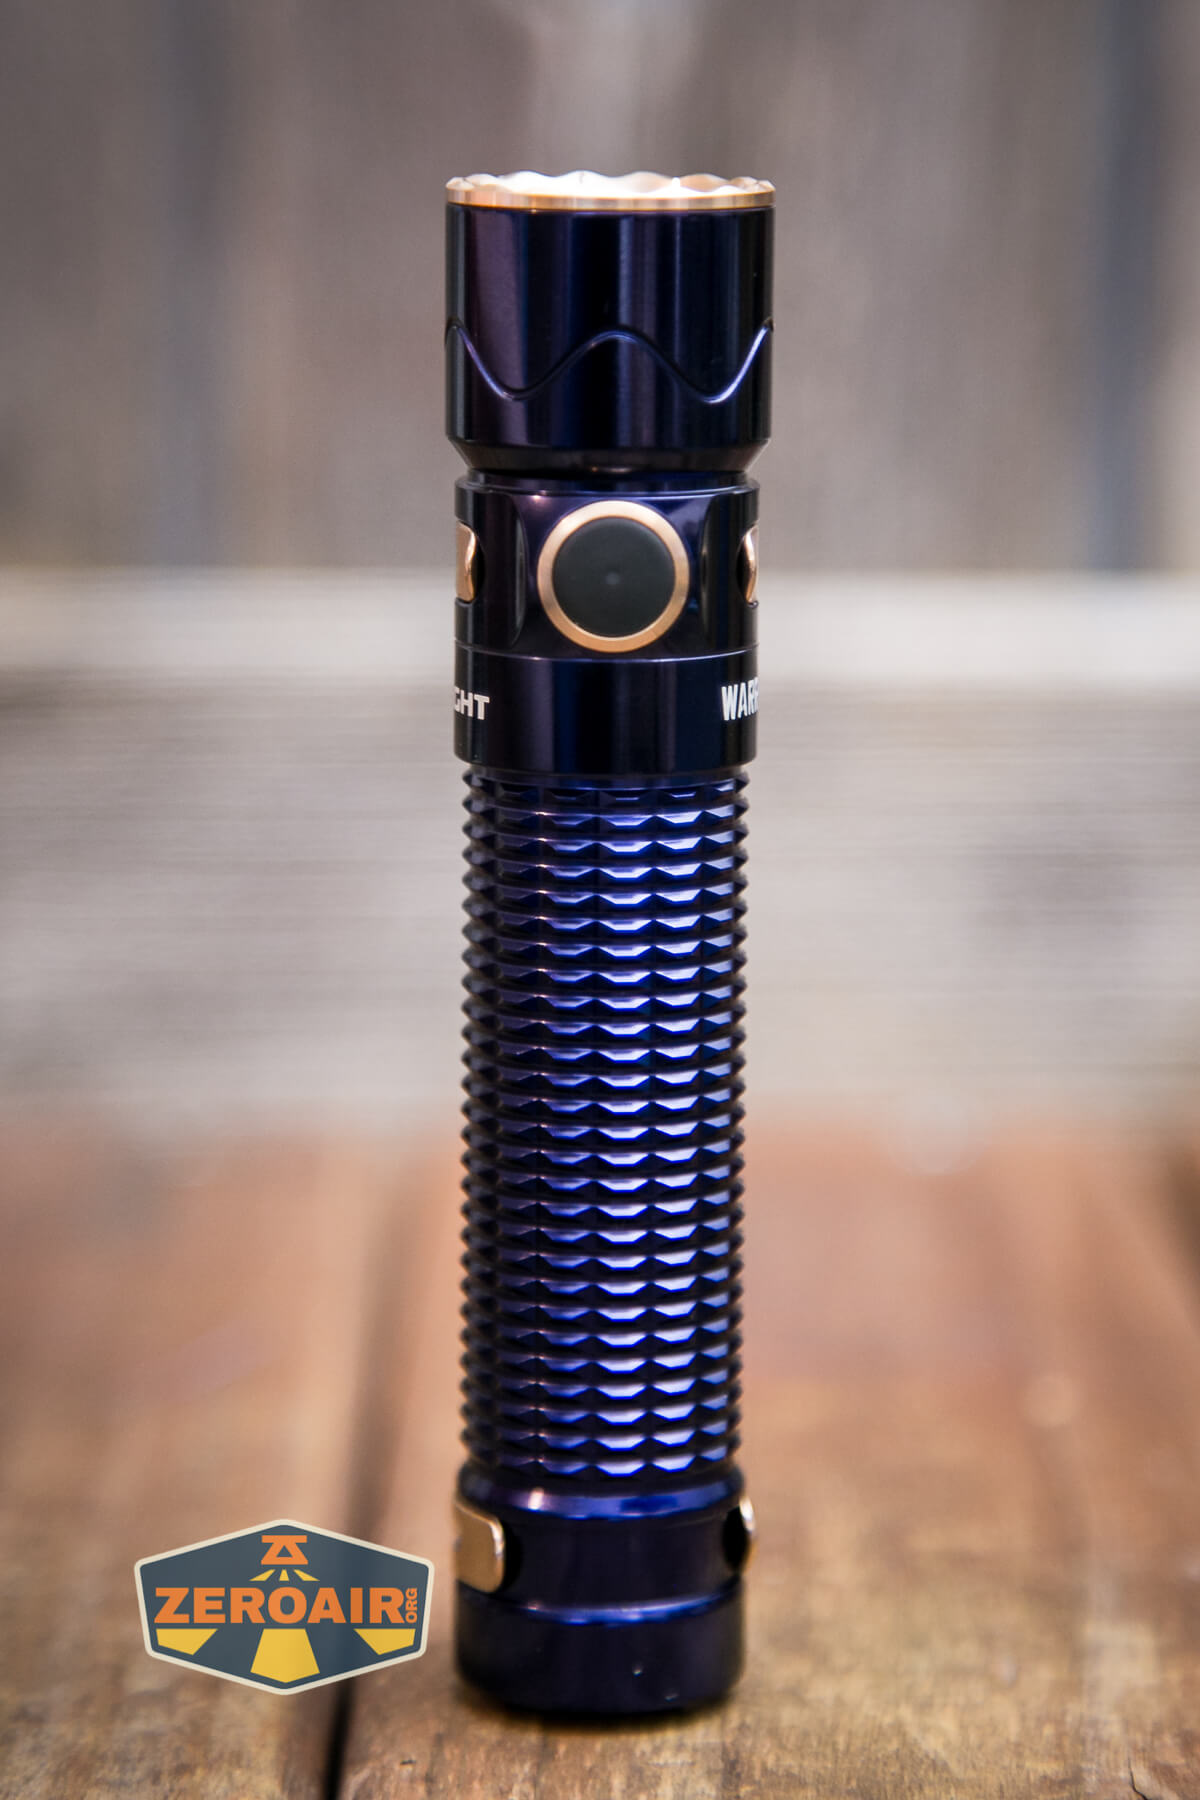
There are two switches on the Olight Warrior Mini 2 in aluminum. First is the metal tail switch, which is also used in charging.

This two-stage switch is quite nice to use!
Next is the indicating side e-switch.
Here’s a user interface table! This is the same user interface as is on the M2R Warrior Pro.
| State | Action | Result |
|---|---|---|
| Off | Click Side Switch (SS) | On (Mode Memory) |
| Off | Hold SS | Moon |
| Off | Double Click SS | Turbo |
| Any (Except when the proximity sensor is being “tripped”) | Triple Click SS | Strobe |
| On | Click SS | Off |
| On (Except when the proximity sensor is being “tripped”) | Hold SS | Mode Advance (L>M>H) (Moon and Turbo are excluded from the cycle) |
| Turbo | Double Click SS | Return to previous mode (If previous was “High,” returns to Med) |
| Off | Long Hold SS | Lockout (Technically “Moon then lockout”) |
| Lockout | Click SS | Switch indicating lockout (red for 2s) |
| Lockout | Hold SS | Unlock to Moonlight |
| Any | Hold (“half-press”) Tail Switch (TS) | Med (in Config 1, default)
Turbo (in Config 2) |
| Any | Click TS | Turbo (in Config 1)
Strobe (in Config 2) |
| Off | Hold TS, Click SS | Switch between Config 1 and 2 (there is no confirmation except the modes seen per Config) |
LED and Beam
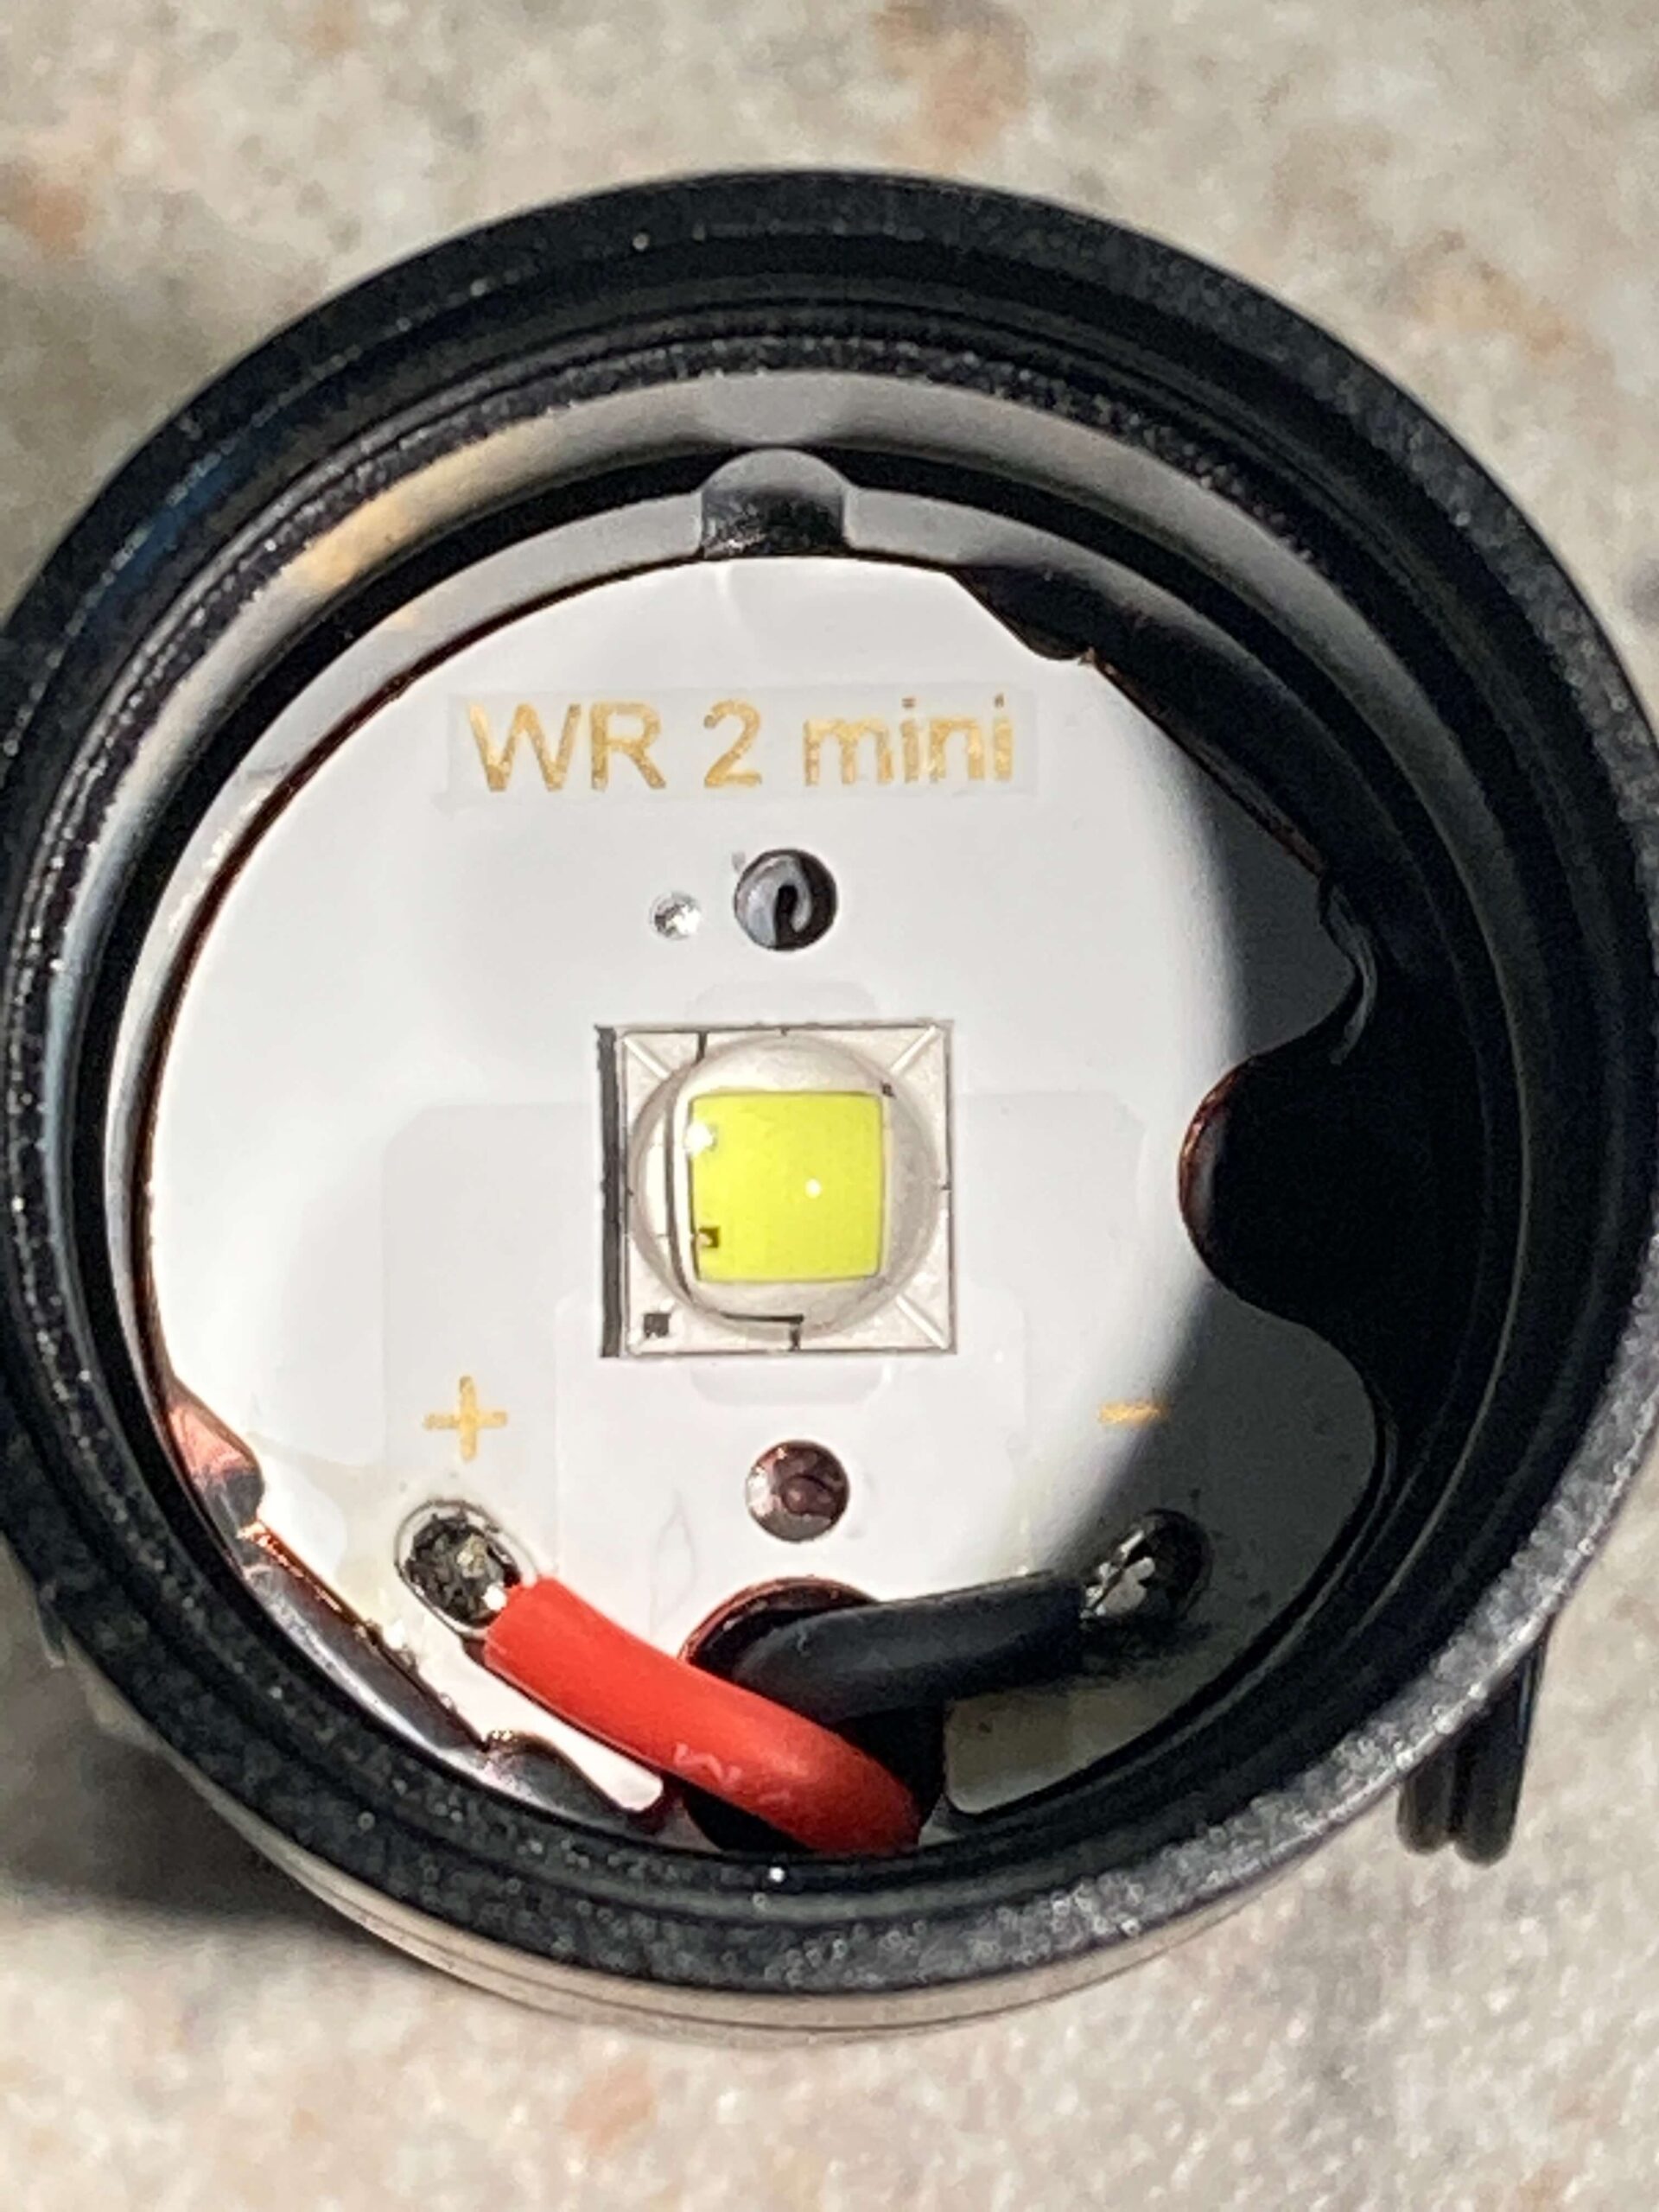
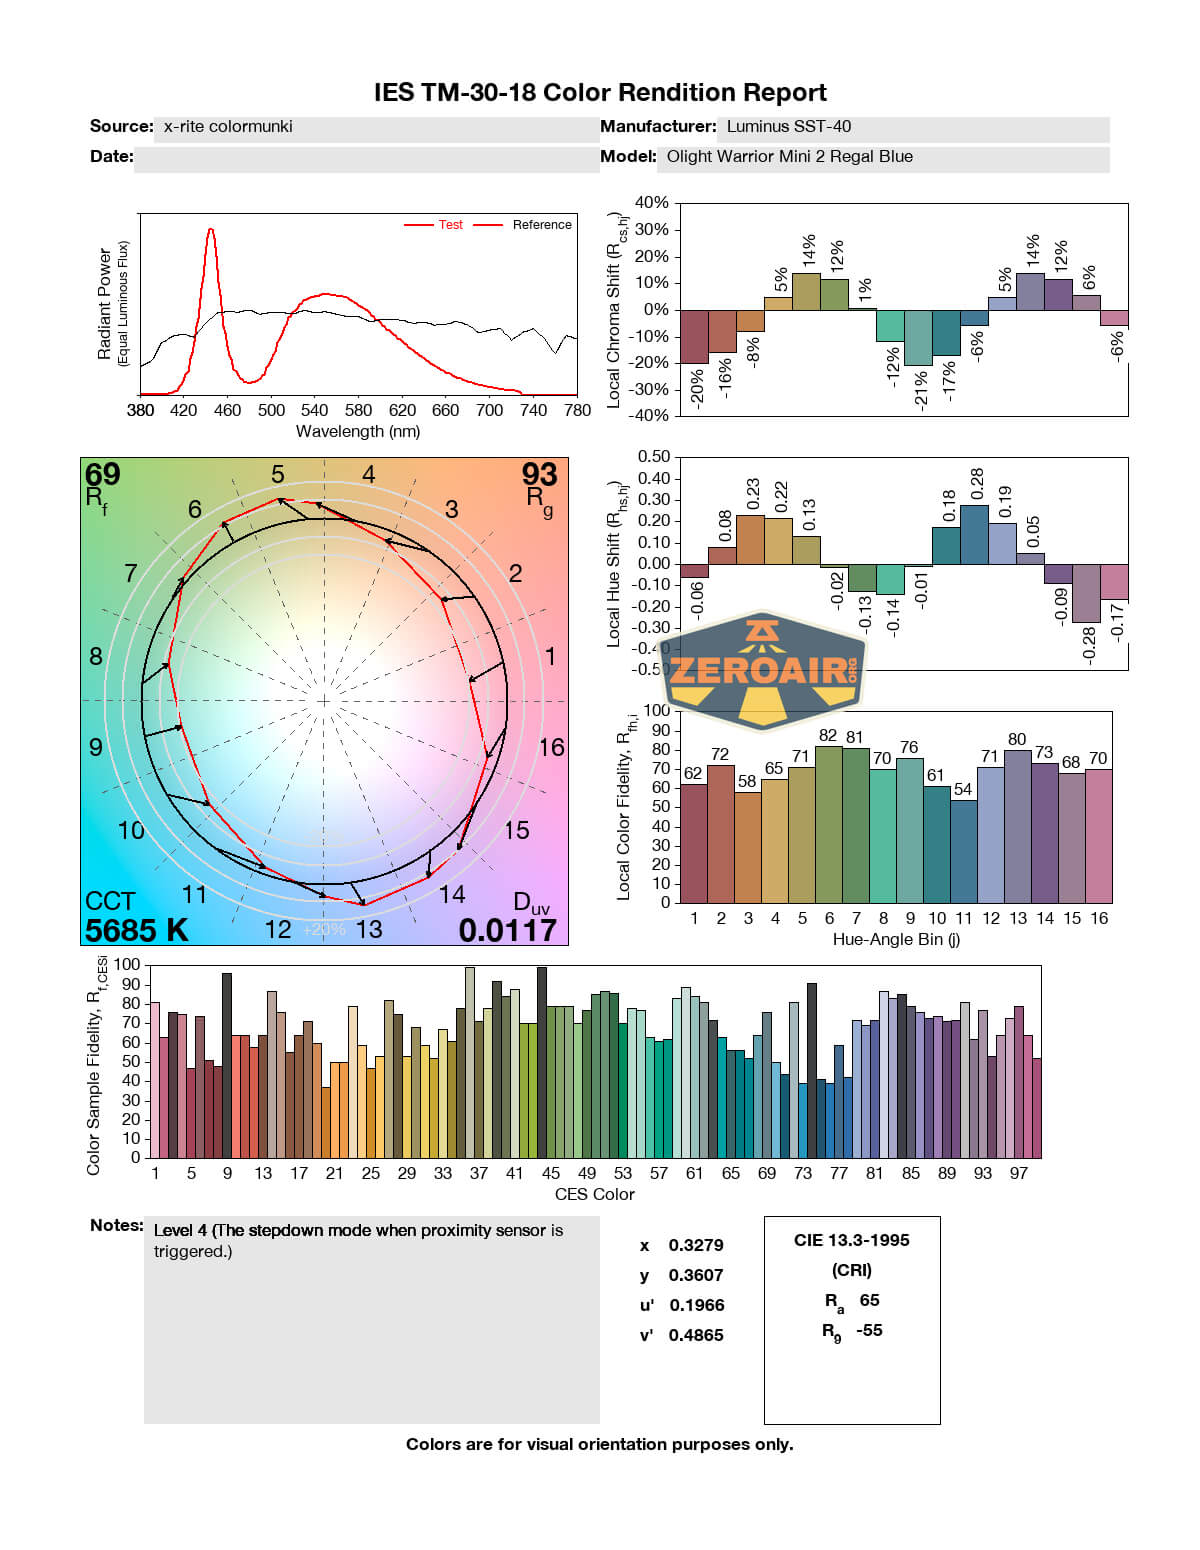
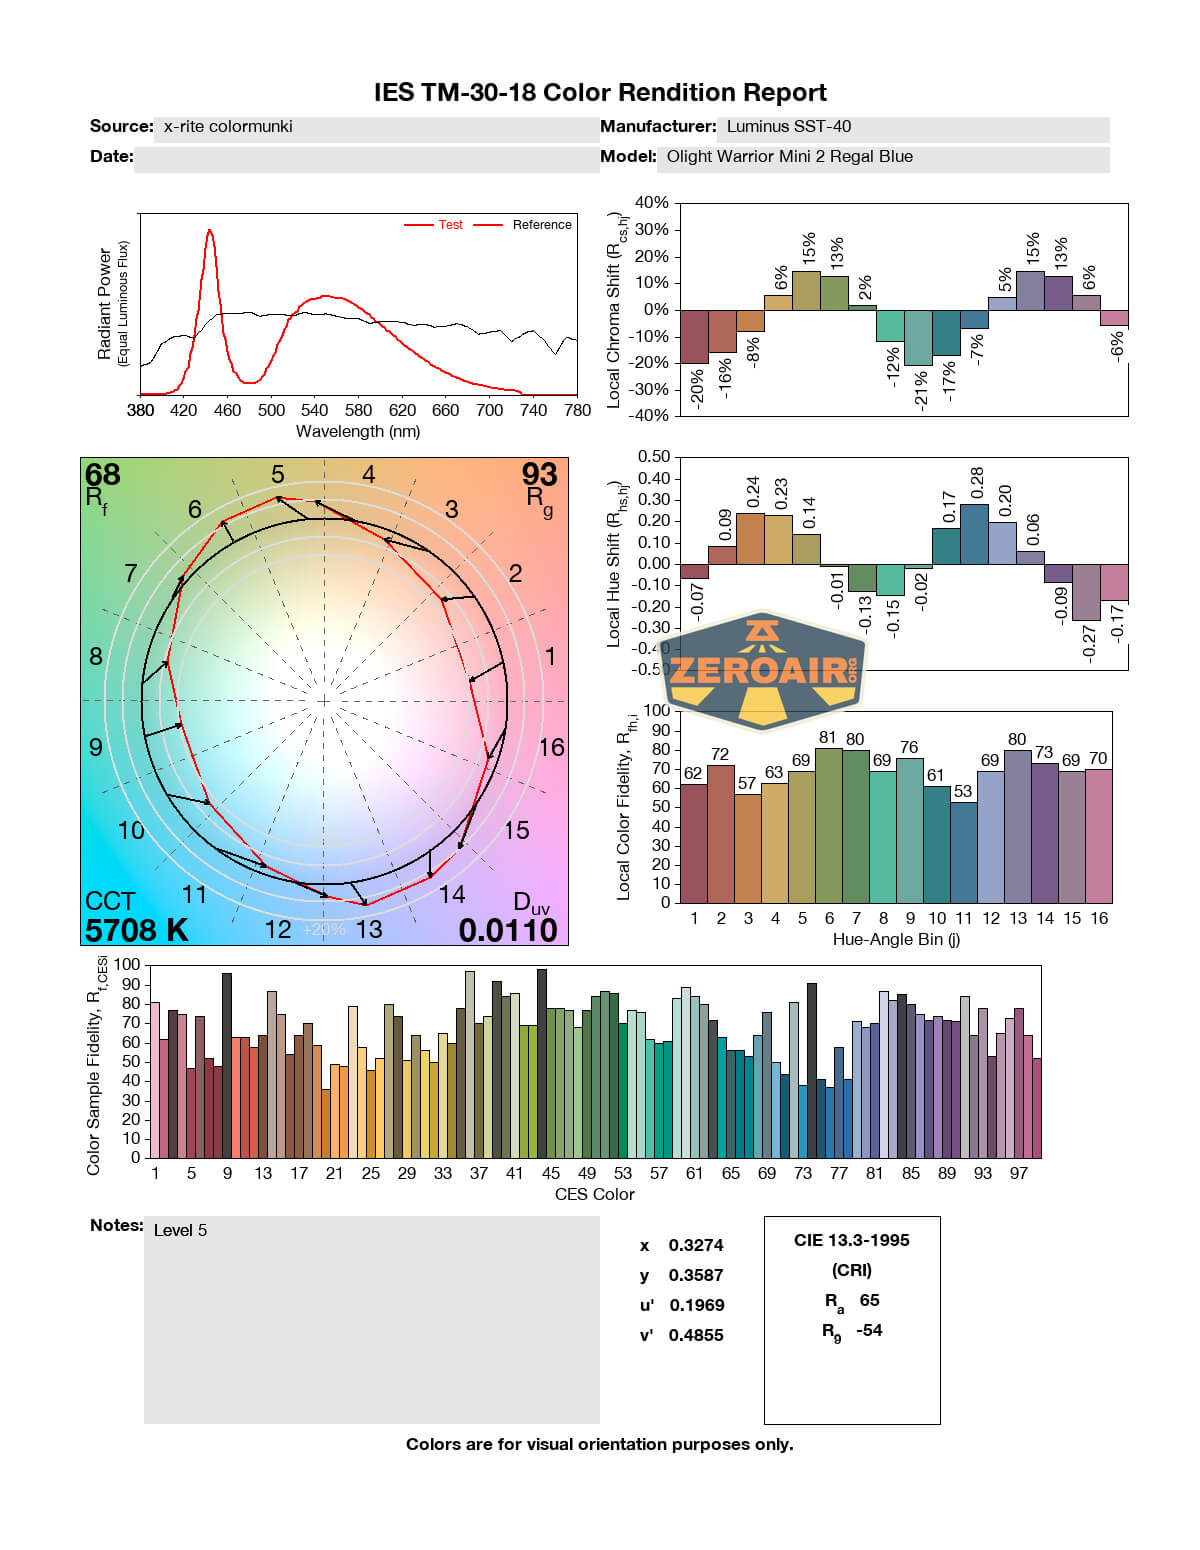
The emitter of choice for this light is a Luminus SST40. The temperature is Cool White, at 6000K-7000K. This emitter is under a TIR, and there is a glass over the TIR. That glass is an update from the original! And an improvement.
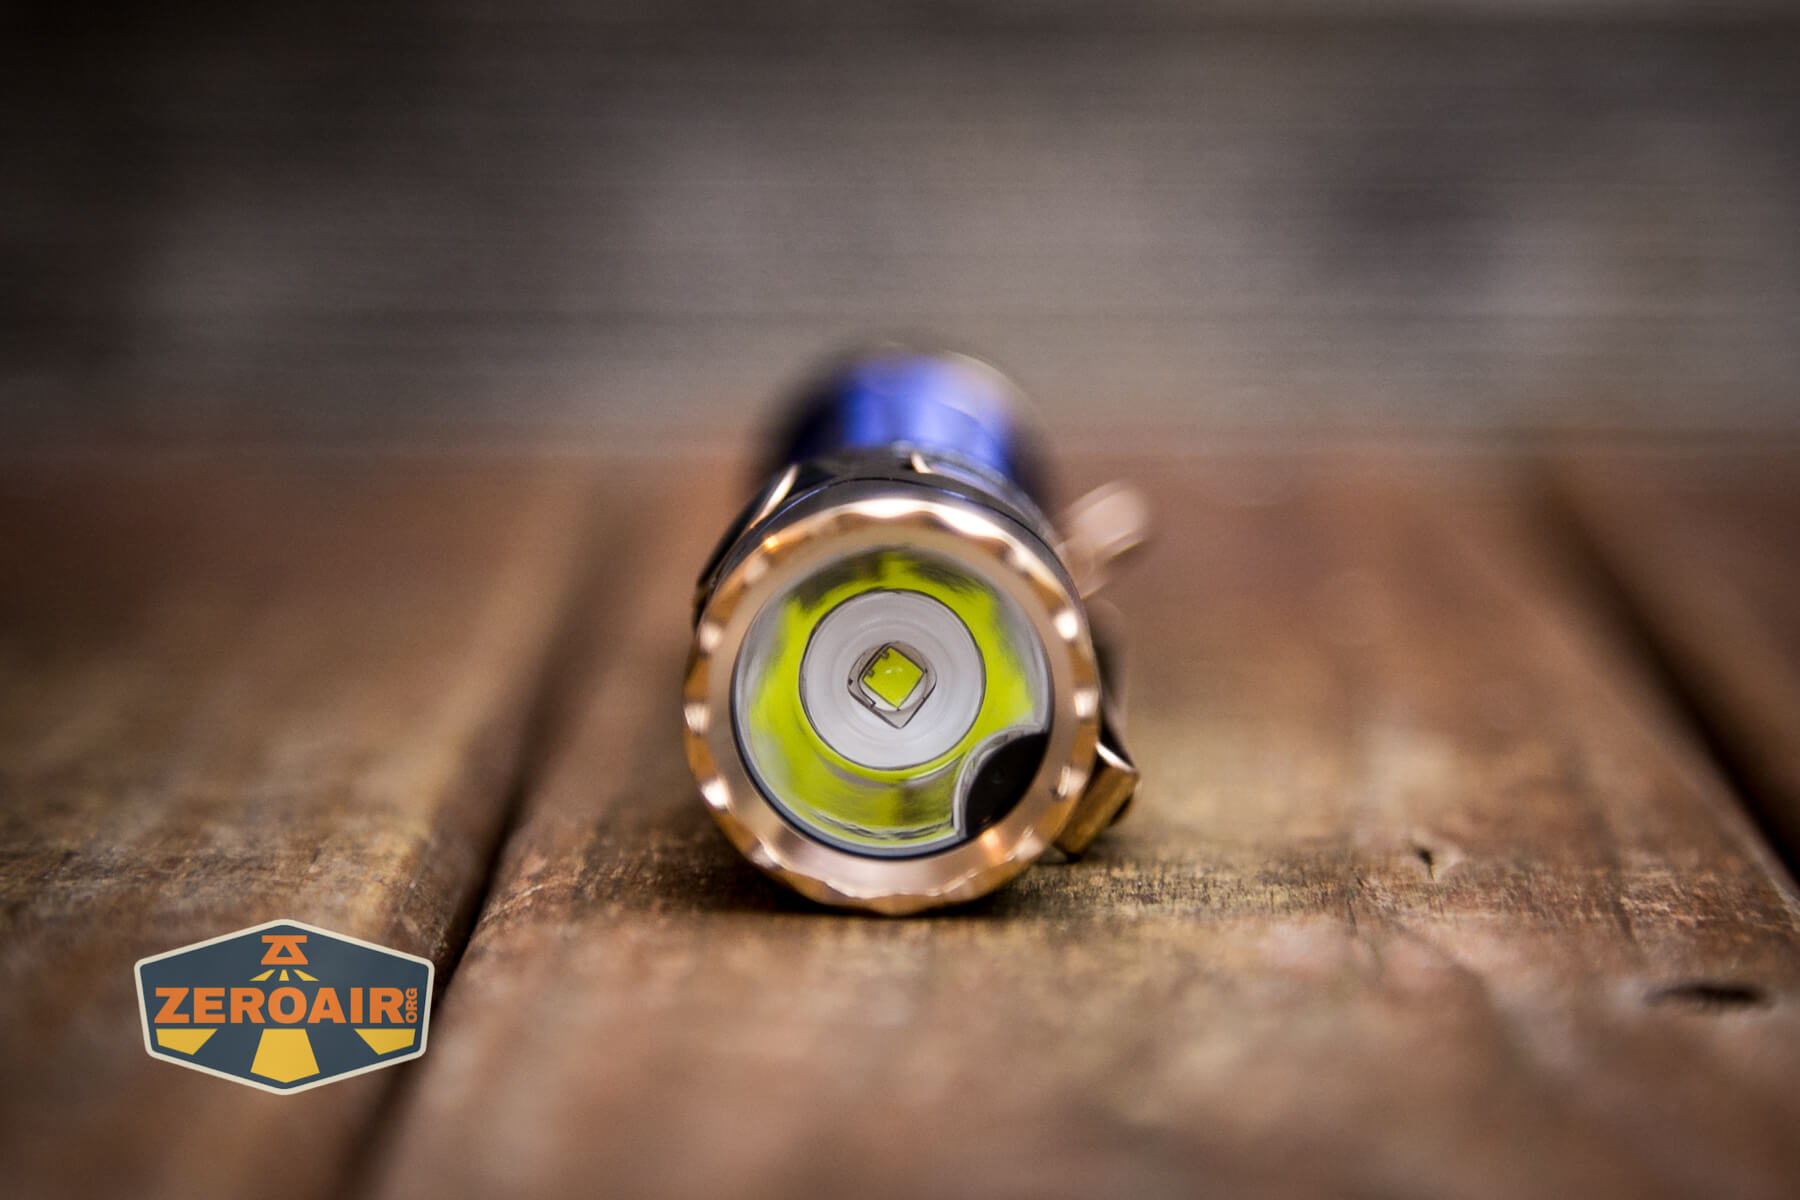
I can say excitedly that this bezel will unscrew with no fuss at all. At that point, the optic can be tapped right out. Then the cup that holds the proximity sensor can be tapped right out, too. And only two wires are holding the MCPCB… So if you have a favorite emitter with the SST-40 footprint (XM-L2, I think?) then you should be good to go with this light. Emitter swapping will provide no hurdles at all. You might need to modify the optic a bit, though.
Also, the proximity sensor isn’t as easy to disable here as on other lights (like the Freyr). It seems to actually be under the shelf. It does seem like simply covering the sensor will disable it (but I have a few tests to do yet). If this is the case, then it should be even easier to do internally by plugging that hole in the shelf… And in that case, it’d be nice to have a replacement TIR that doesn’t have the cutout for this sensor.
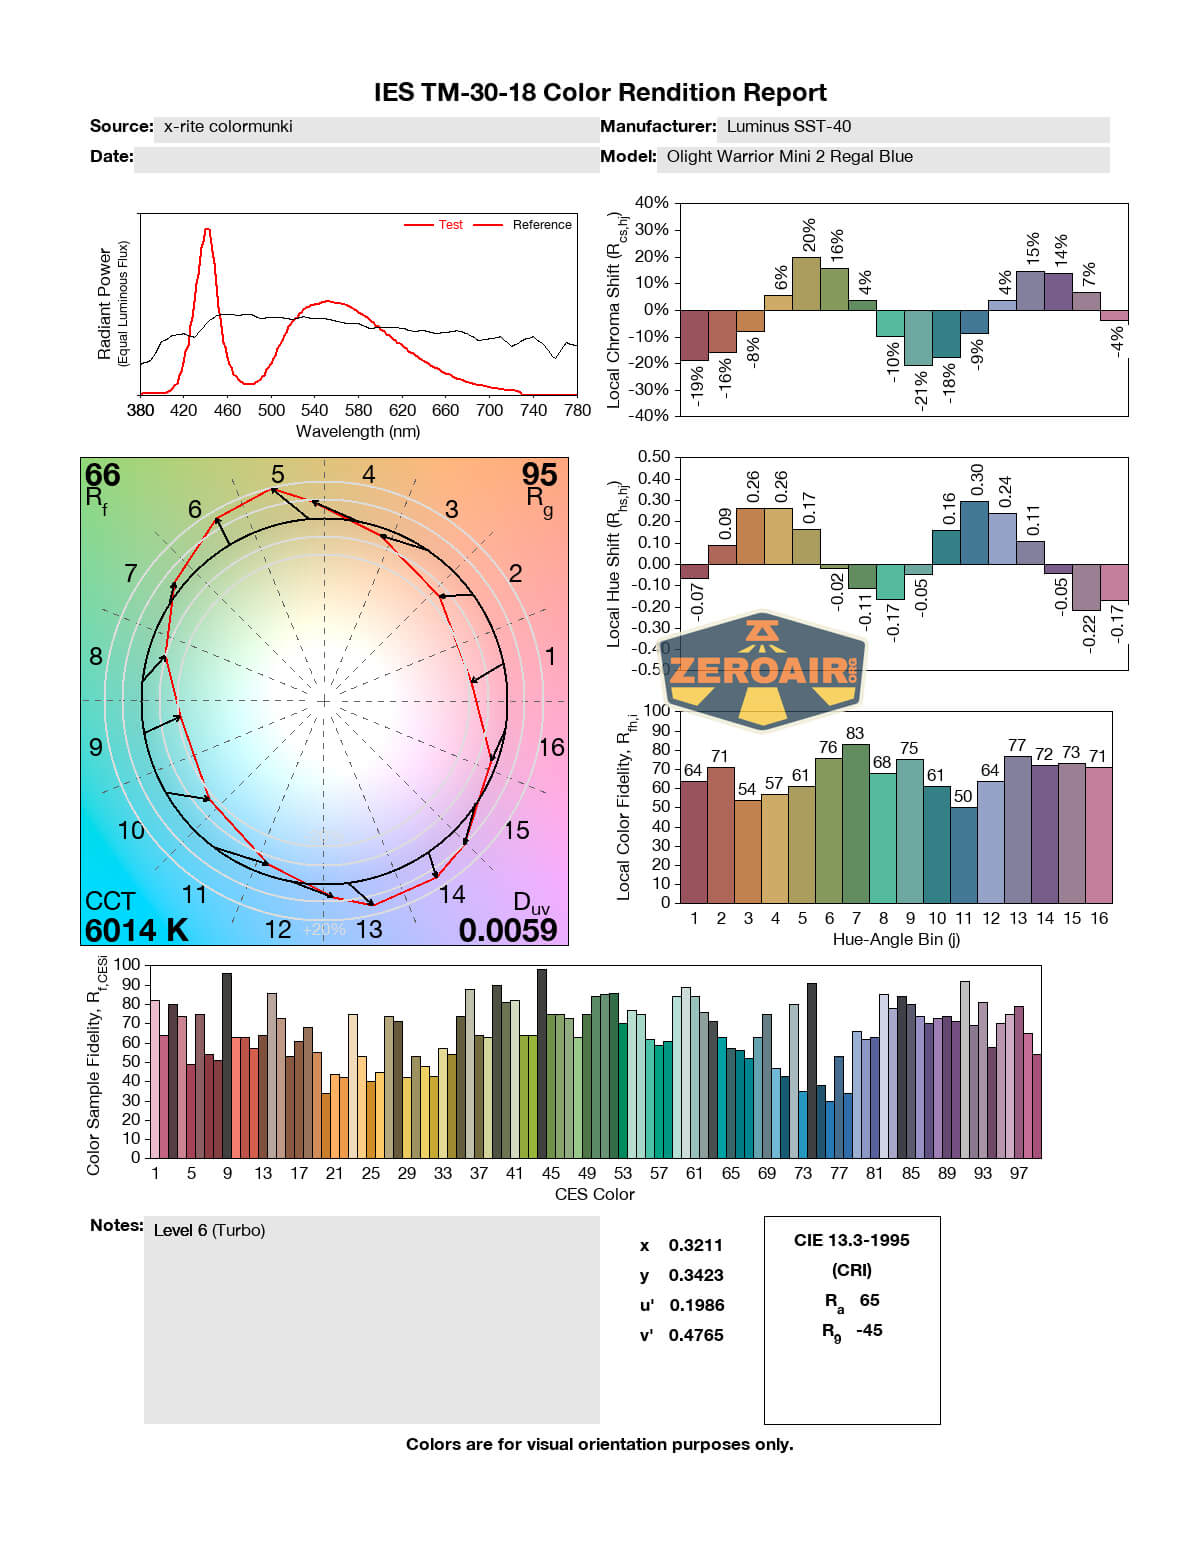
LED Color Report (CRI and CCT)
You know, despite whatever the claim by Olight is on the CCT of this Luminus SST-40, it’s really not that cool. It stays under 6000K for all but the highest output level. Now, it does have a fair bit of “positive dUV” to it – that means it can appear greenish. The CRI is fairly low, too, at around 66.


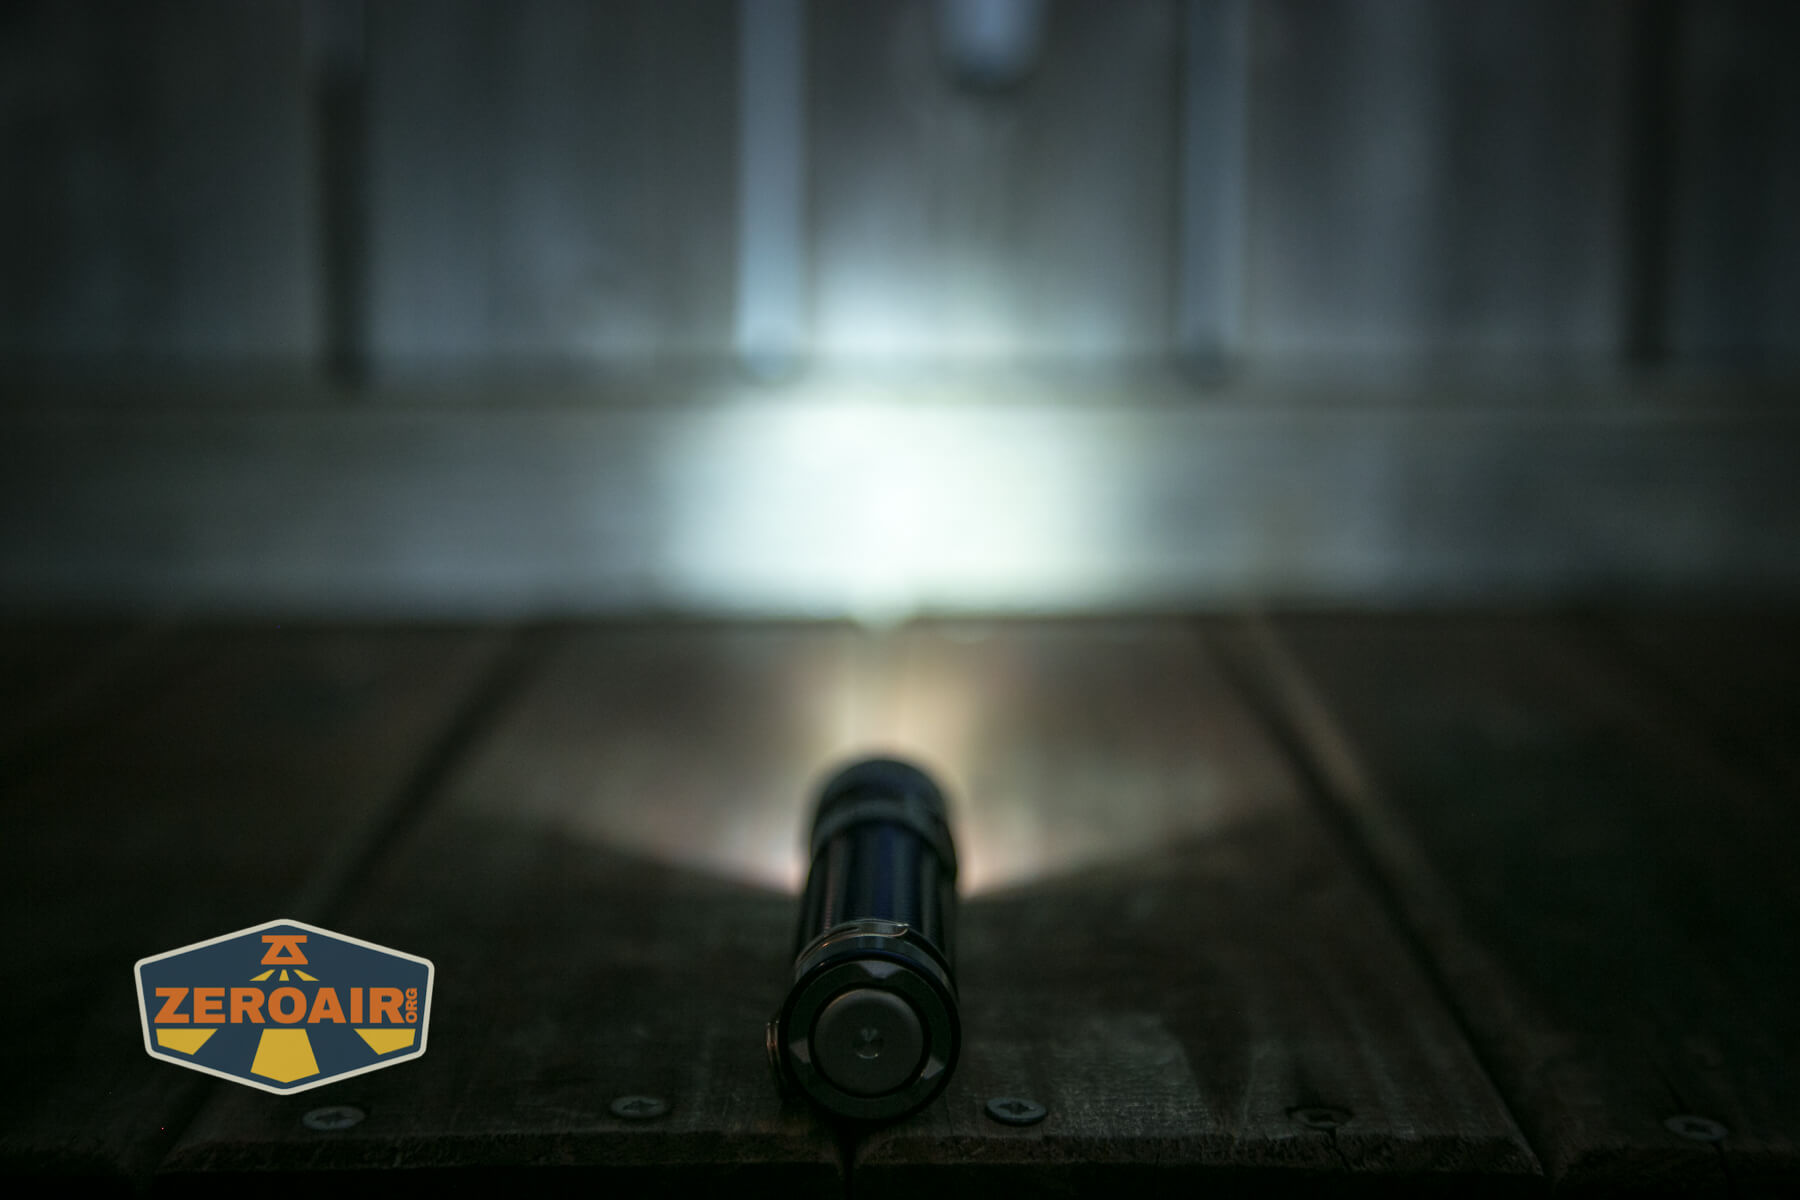
Beamshots
These beamshots always have the following settings: f8, ISO100, 0.3s shutter, and manual 5000K exposure. These photos are taken at floor level, and the beam hits the ceiling around 9 feet away.


Tint vs BLF-348 (KillzoneFlashlights.com 219b version) (affiliate link)
I keep the test flashlight on the left and the BLF-348 reference flashlight on the right.
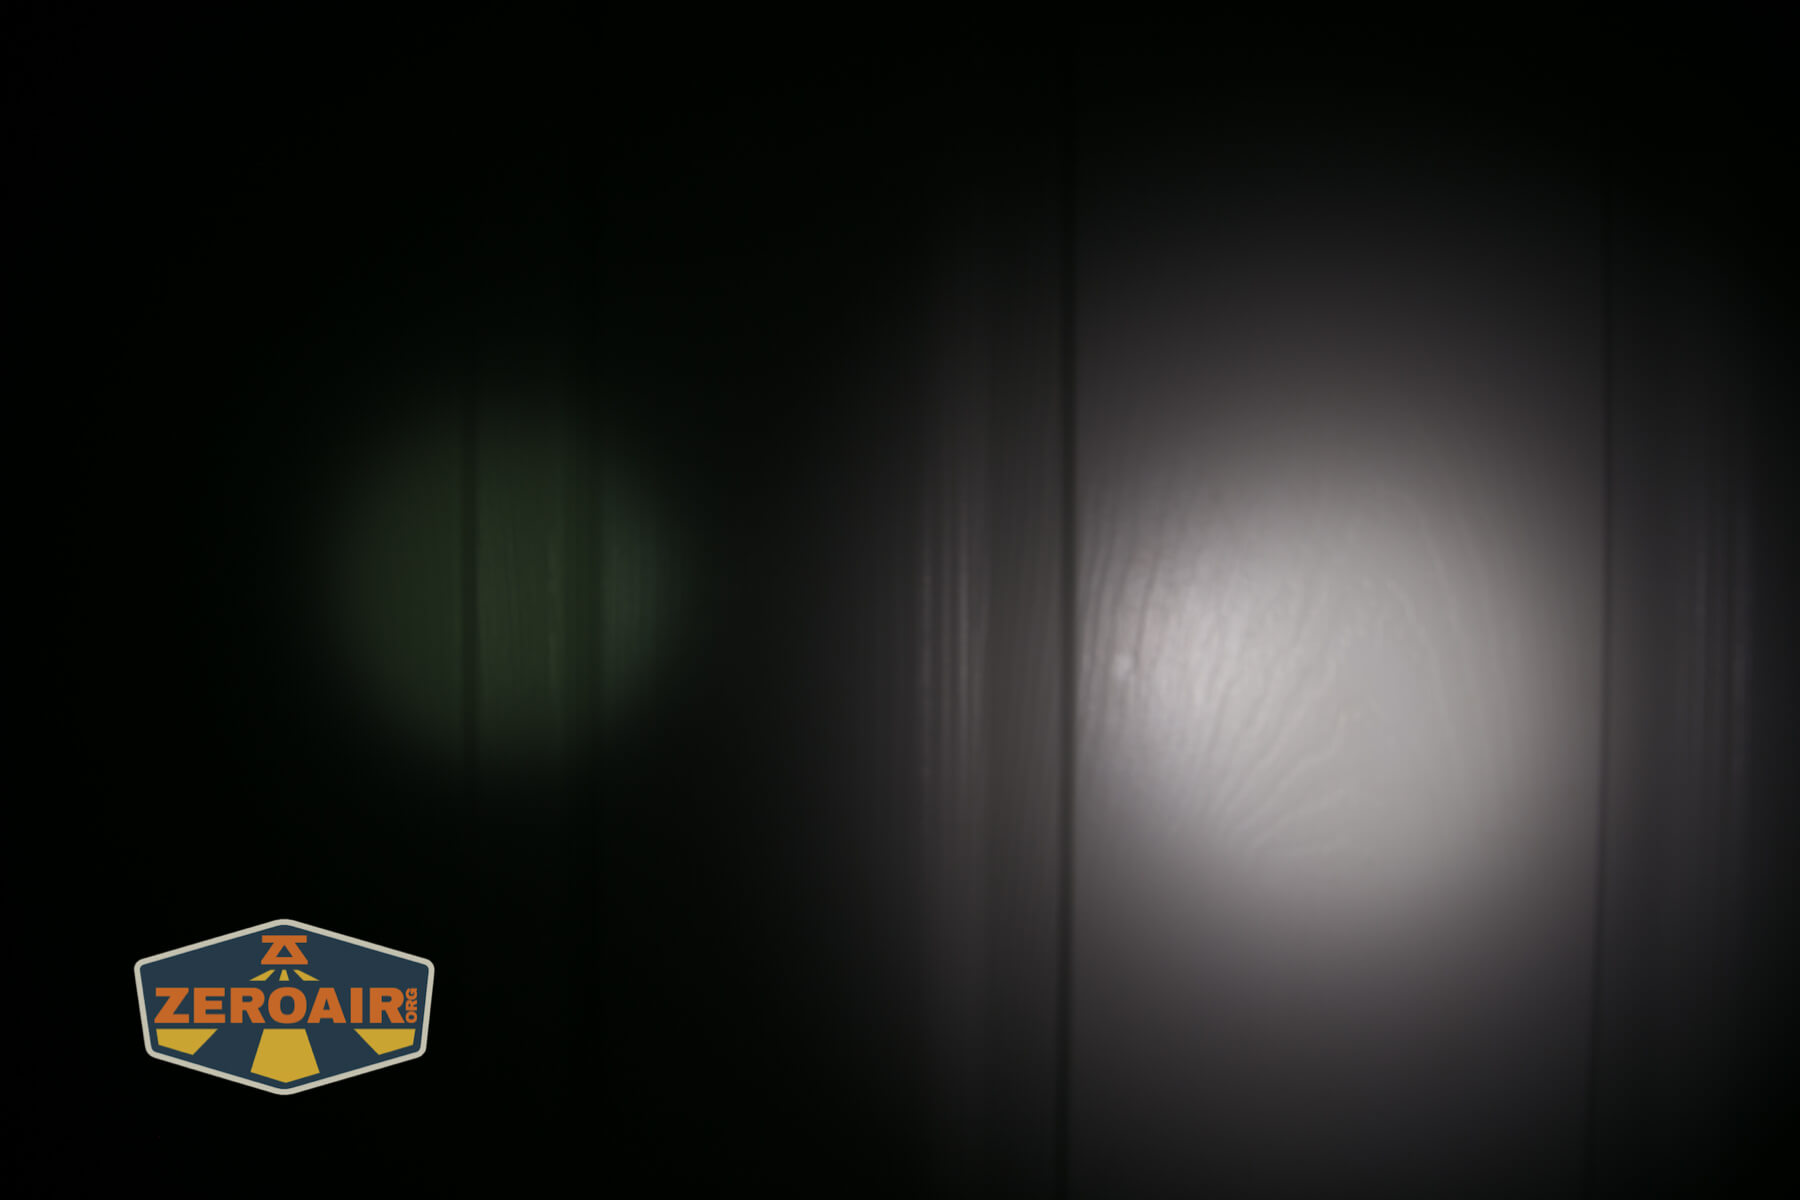
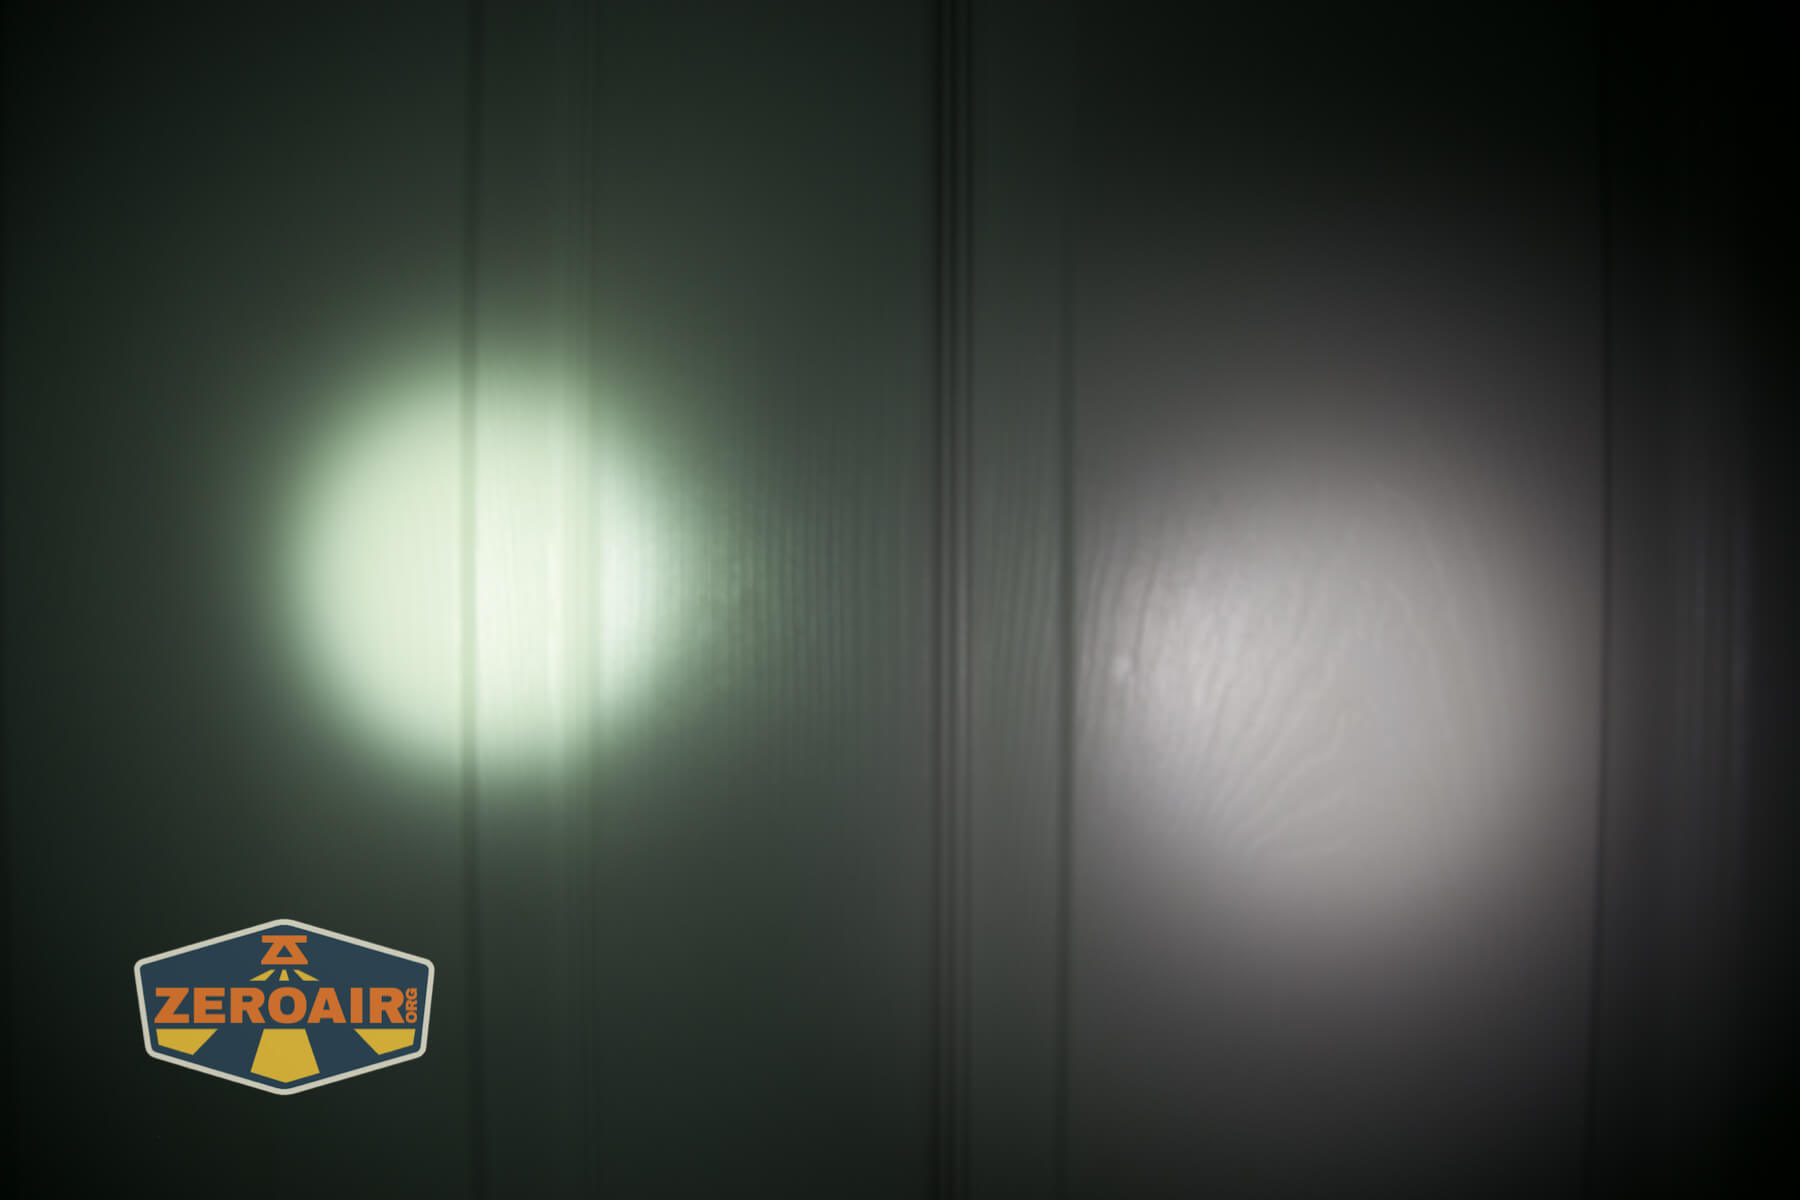
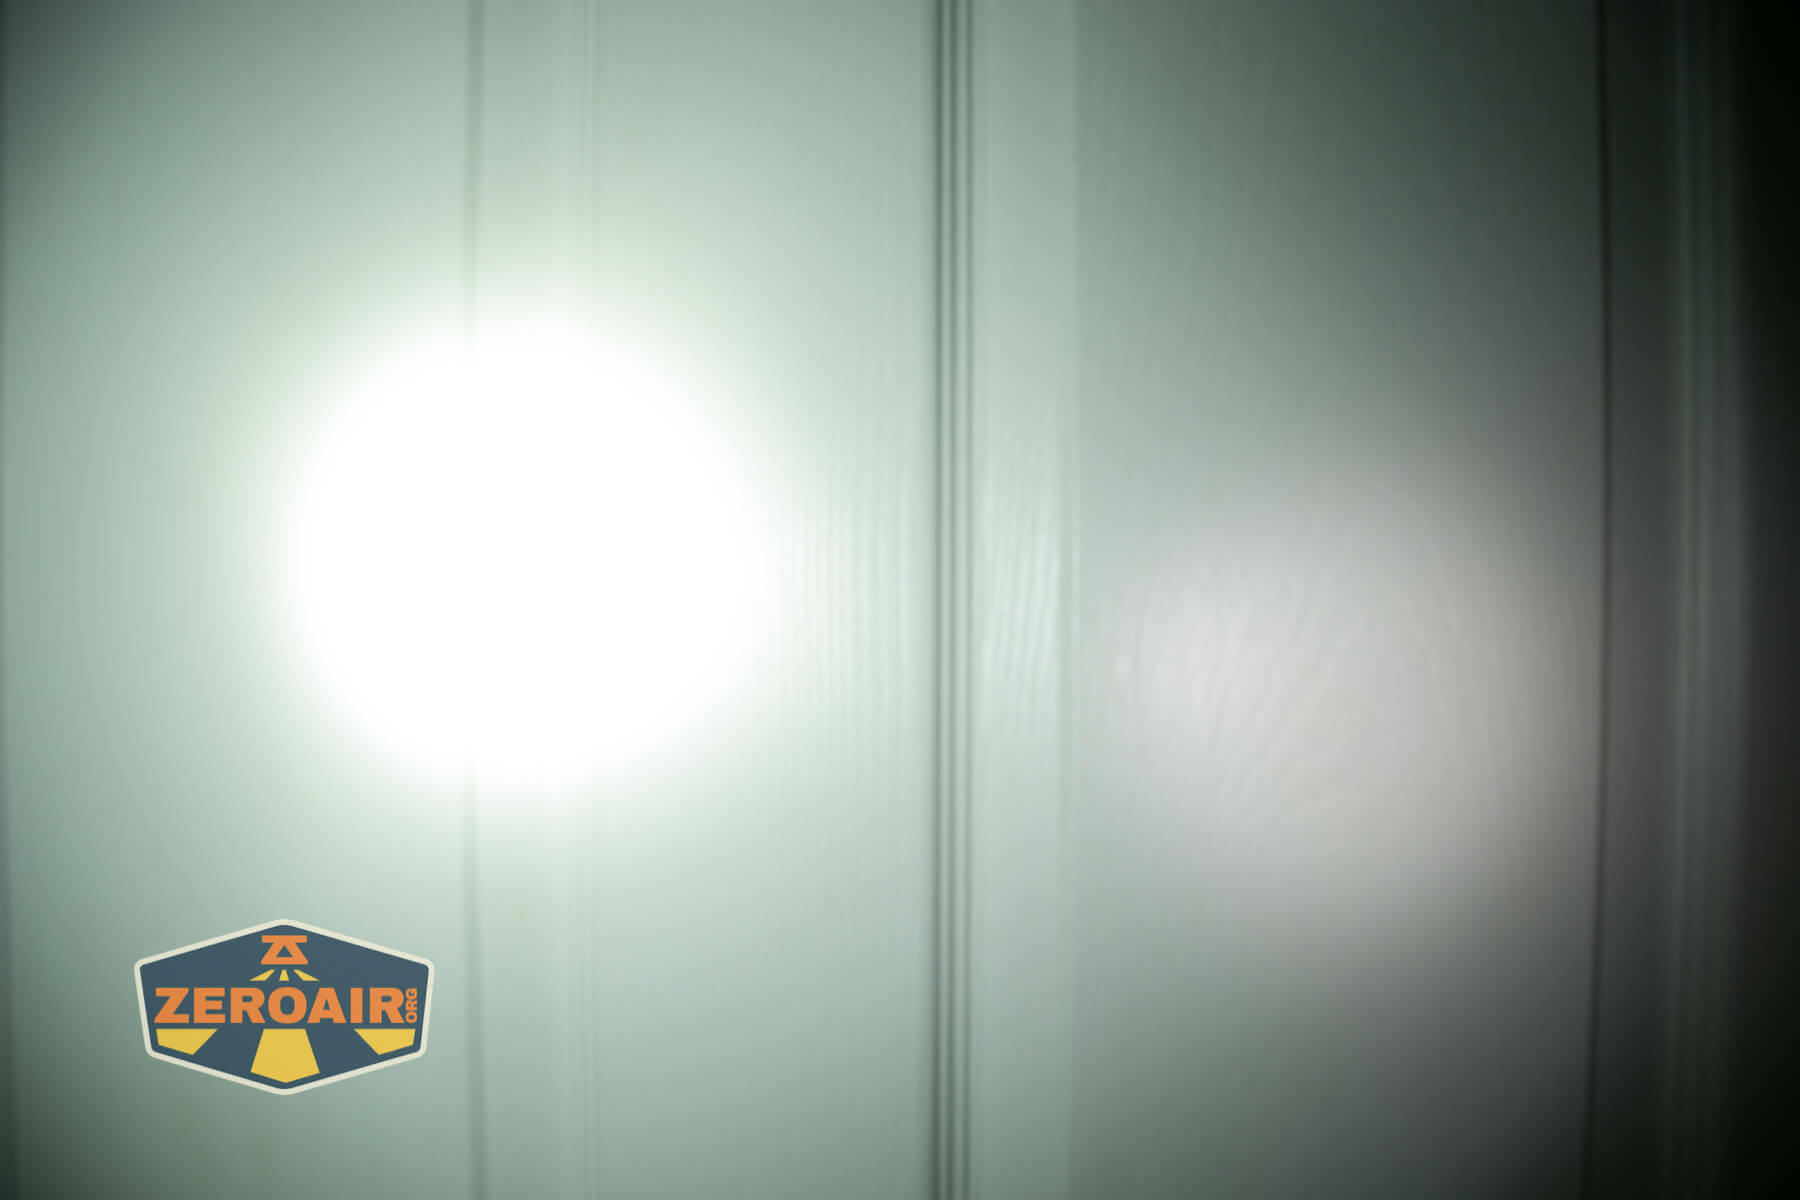


I compare everything to the KillzoneFlashlights.com 219b BLF-348 because it’s inexpensive and has the best tint!
Conclusion
What I like
- Complete package
- Good user interface
- Very good beam profile
- Hits claims for output and throw
- New and improved clip over version 1
- Clip fits on both ends now
- Cell can be charged in bay charger
What I don’t like
- Cool white emitter
- Proprietary cell
- Proximity sensor
Notes
- This content originally appeared at zeroair.org. Please visit there for the best experience!
- Please use my Amazon.com referral link to help support zeroair.org!
- Please support me on Patreon! I deeply appreciate your support!
Discover more from ZeroAir Reviews
Subscribe to get the latest posts sent to your email.