Wurkkos TS10 Brass Flashlight Review
The Wurkkos TS10 Brass flashlight is available, and I love it! This triple-emitter, 14500-cell flashlight packs a punch and runs on Andúril2!! Read on
Official Specs and Features
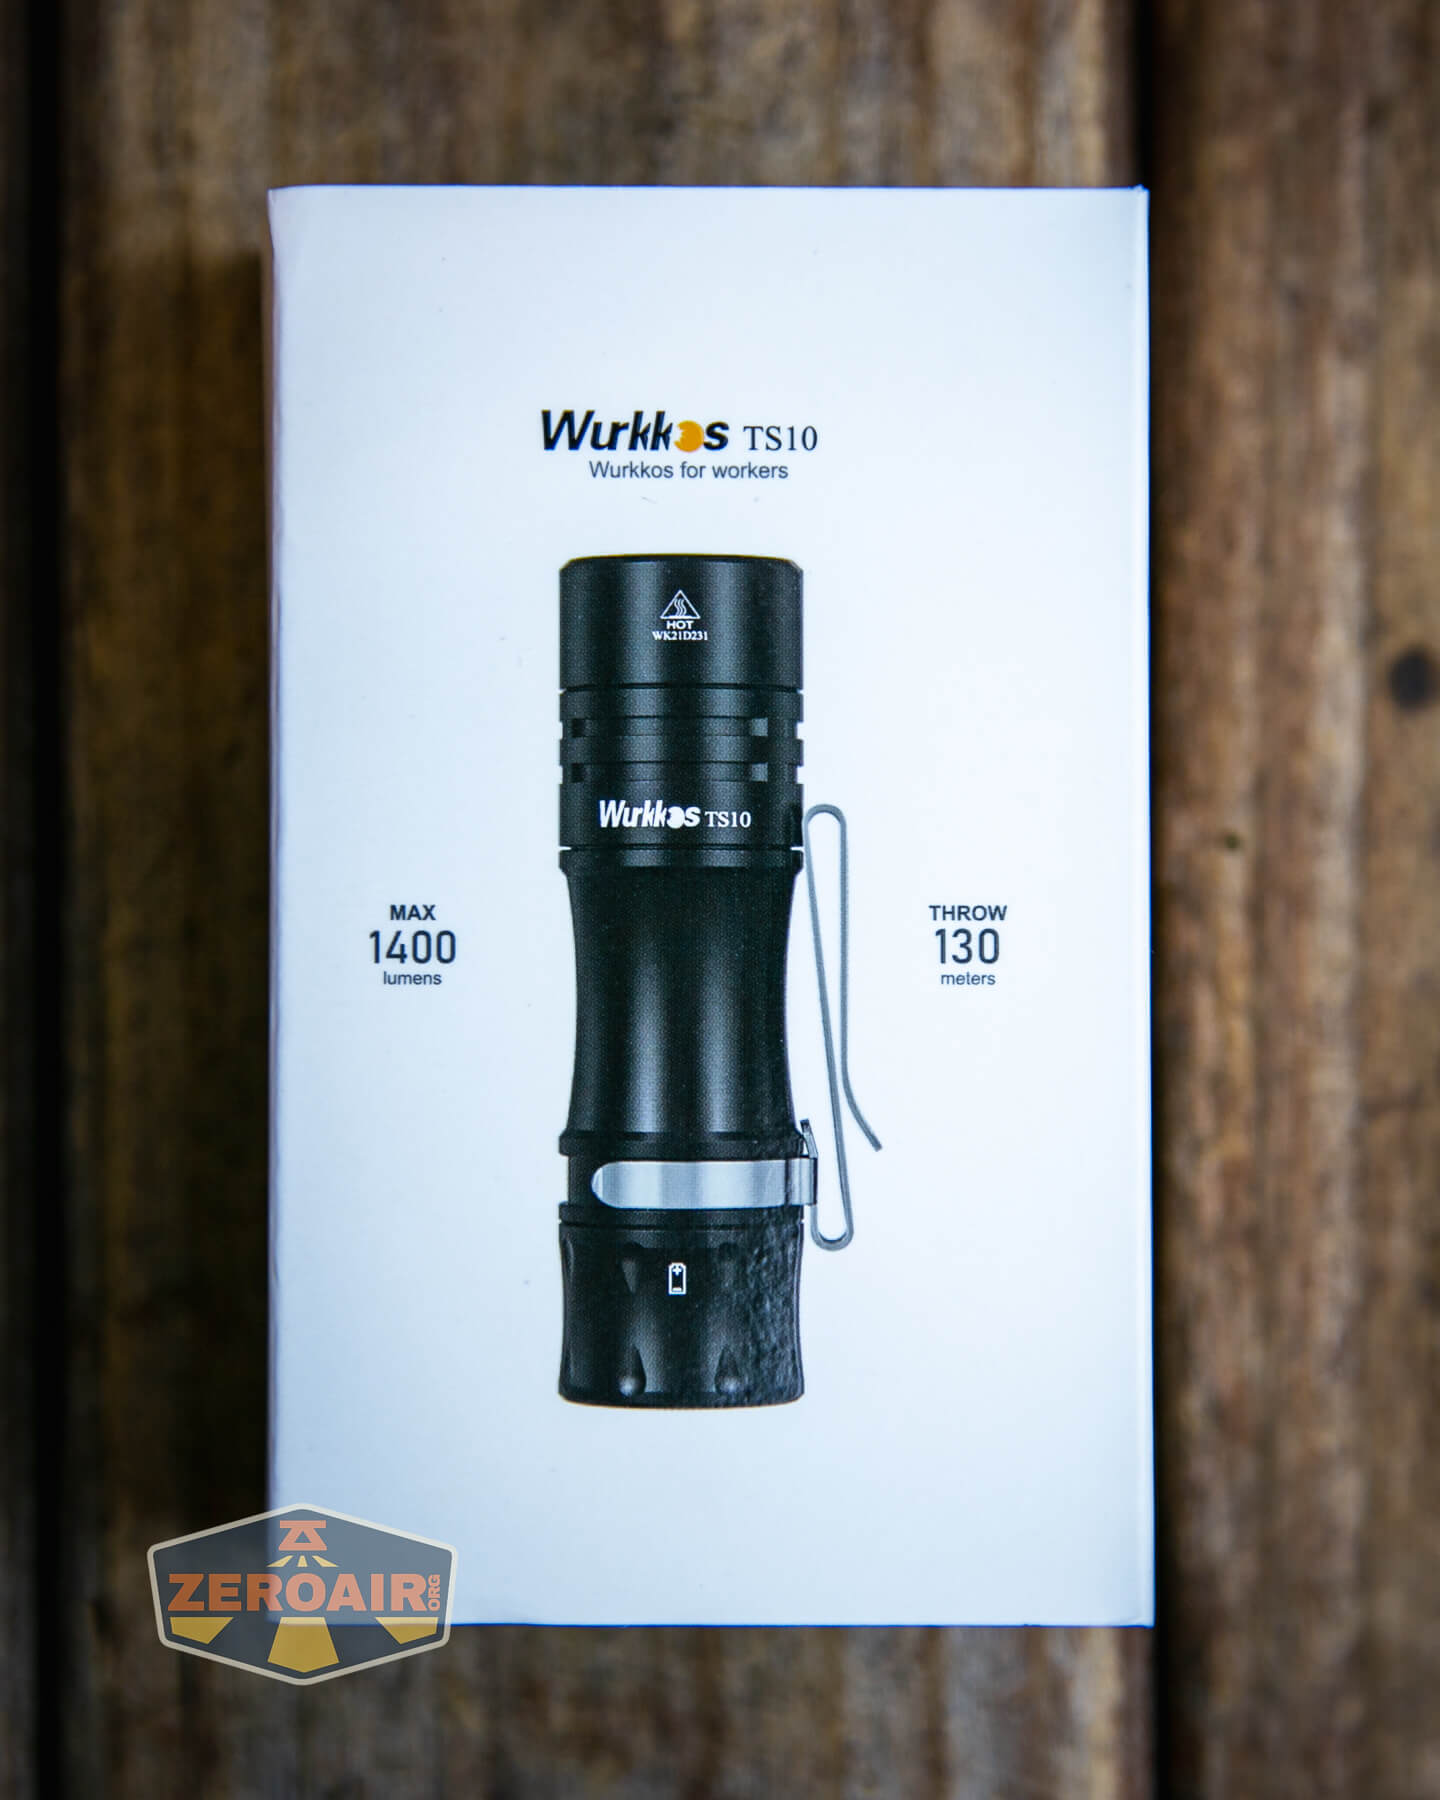
Here’s a link to the Wurkkos TS10 brass flashlight product page.
Versions
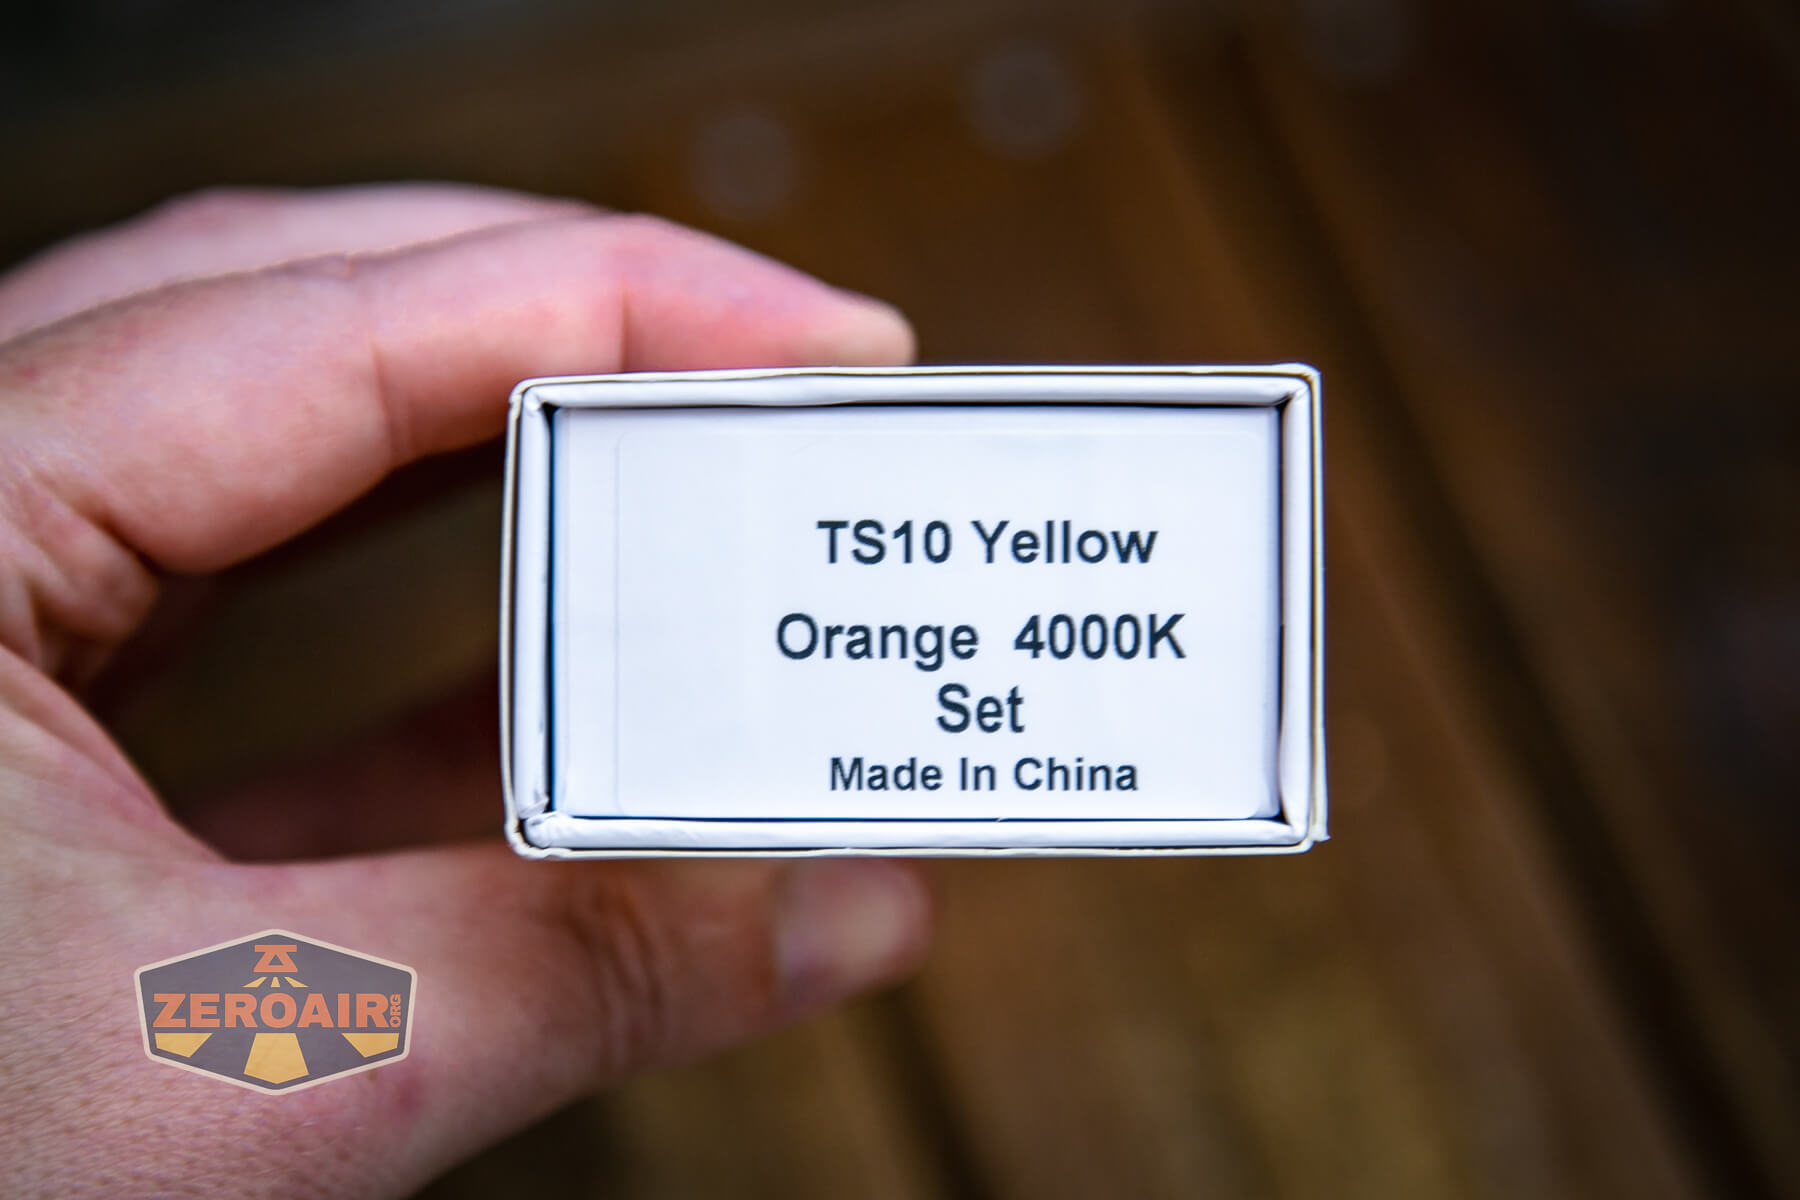
There are many versions of the TS10, namely in aluminum. In this brass option, there are secondary color options: red, ice blue, and orange (seen here). The light can be purchased with or without a 14500 cell, too.
Price
The Wurkkos TS10 brass flashlight alone sells for $27.99 (which is a 15% off price). For $2 more, you can get the 14500 cell included – I wholeheartedly recommend that. In fact, grab a few extra cells if you can. Buy your Wurkkos TS10 brass flashlight here at wurkkos.com!
Short Review
As with the TS10 (aluminum), I think the TS10 Brass is a toy. It’s a fun toy, and inexpensive, so I still think you should buy one. But the rate at which the secondary emitters drain these small cells means the battery won’t last too long even when the light is off. Anyway, I do think you need one (or more). I also think Wurkkos is making some of the best value lights available today, and this TS10 is right up there at the top of that list. These CSP LEDs are surprisingly good. Andúril2 is very good. All in all, this is just a great value light (or toy, you decide).
Long Review
The Big Table
| Wurkkos TS10 Brass Flashlight | |
|---|---|
| Emitter: | CSP LED (4000K) |
| Price in USD at publication time: | $26.99 |
| Cell: | 1×14500 |
| Runtime Graphs | |
| LVP? | Yes |
| Switch Type: | E-Switch |
| Quiescent Current (mA): | ? |
| On-Board Charging? | No |
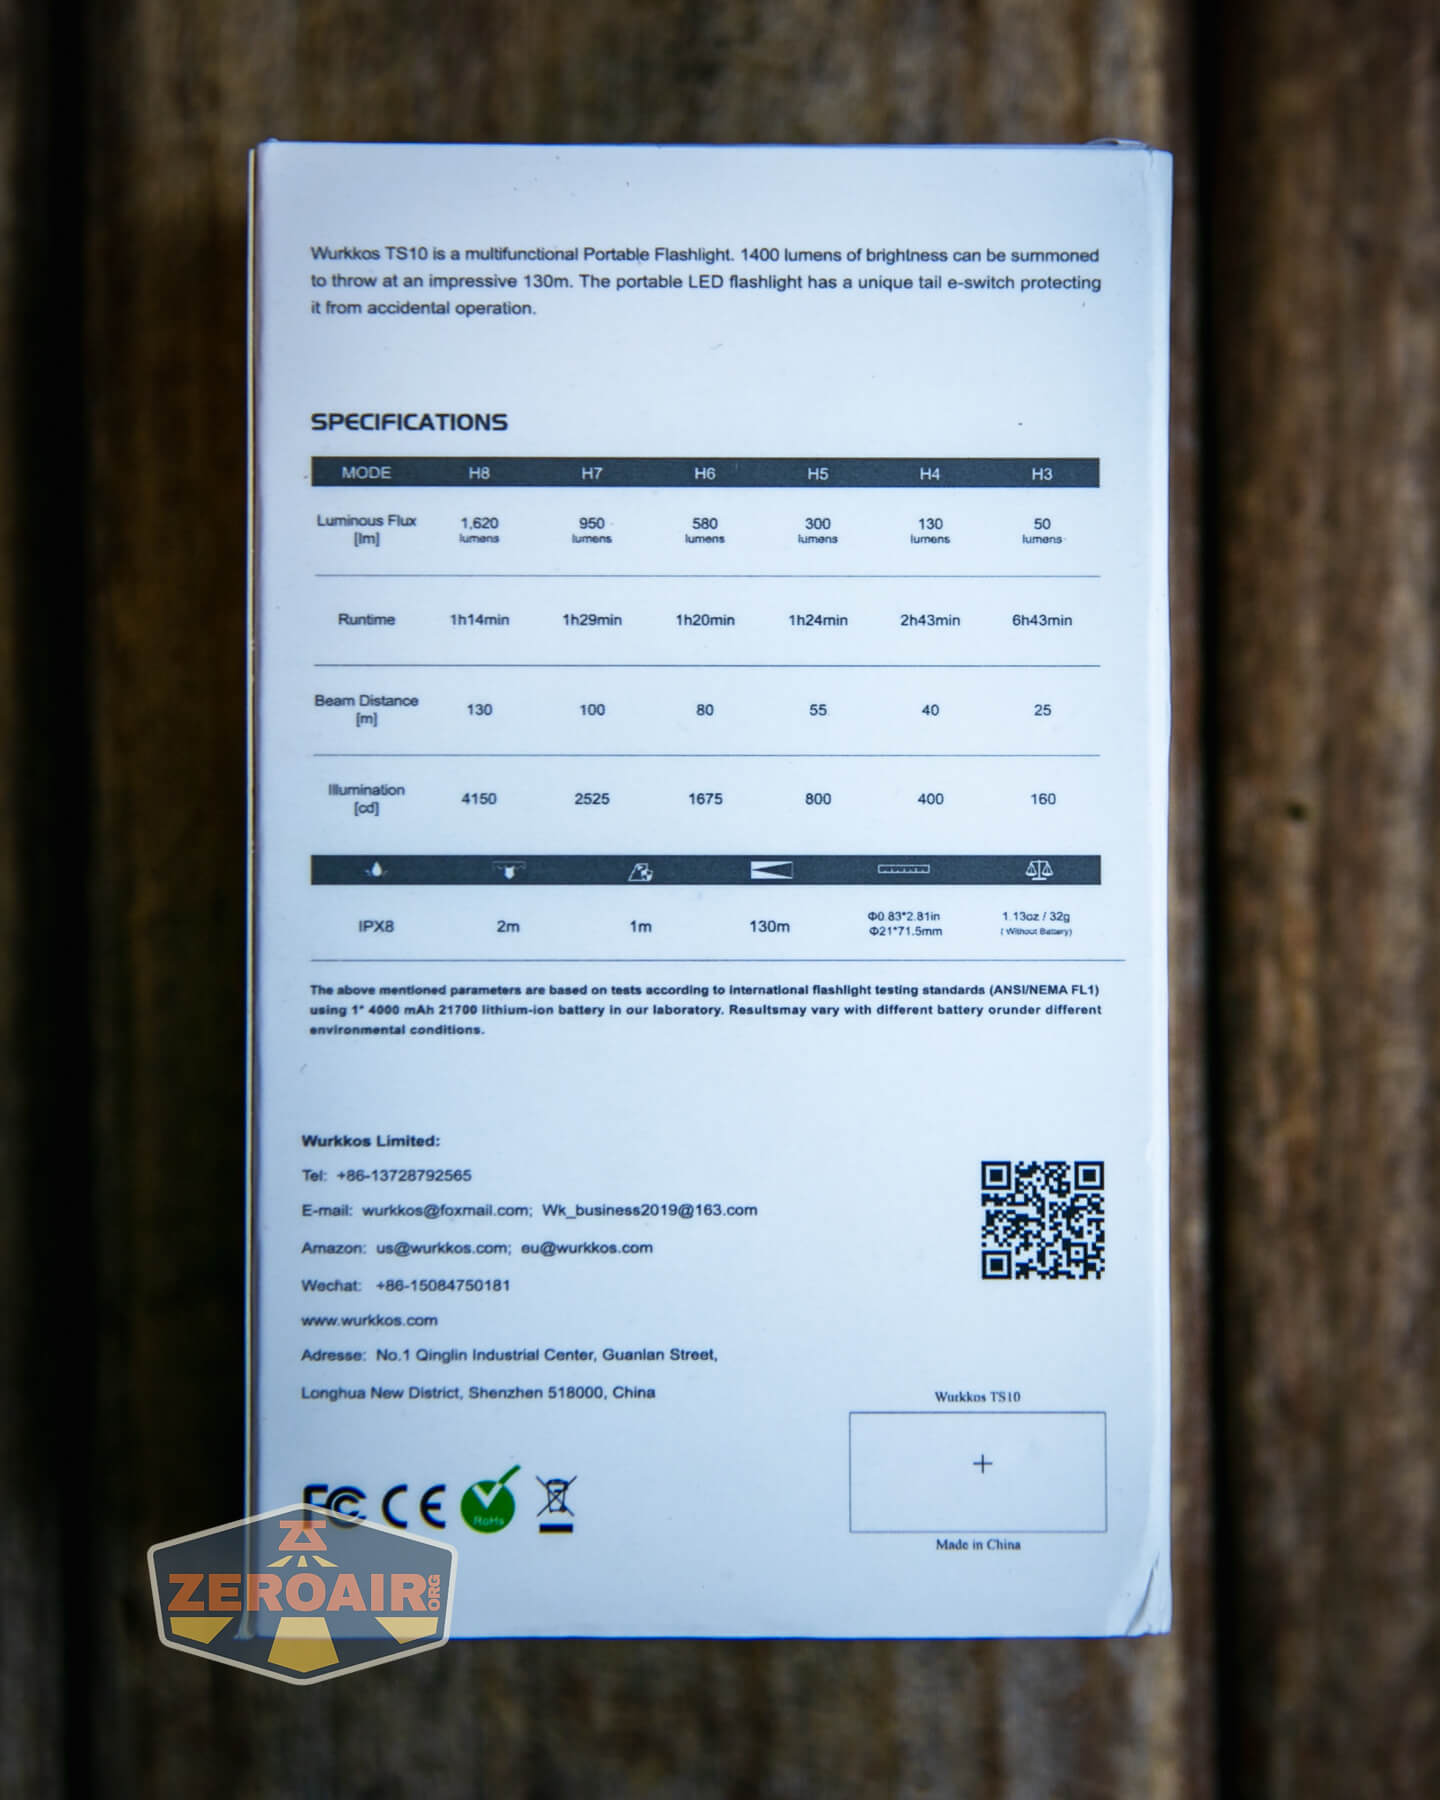
| Claimed Lumens (lm) | 1400 |
| Measured Lumens (at 30s) | 1142 (81.6% of claim)^ |
| Candela per Lumen | 5 |
| Claimed Throw (m) | 129 |
| Candela (Calculated) in cd (at 30s) | 43lux @ 4.212m = 763cd |
| Throw (Calculated) (m) | 55.2 (42.8% of claim)^ |
| Claimed CCT | 4000 |
| Measured CCT Range (K) | 3800-4300 Kelvin |
| Item provided for review by: | Wurkkos |
| All my Wurkkos reviews! | |
^ Measurement disclaimer: Testing flashlights is my hobby. I use hobbyist-level equipment for testing, including some I made myself. Try not to get buried in the details of manufacturer specifications versus measurements recorded here; A certain amount of difference (say, 10 or 15%) is perfectly reasonable.
What’s Included
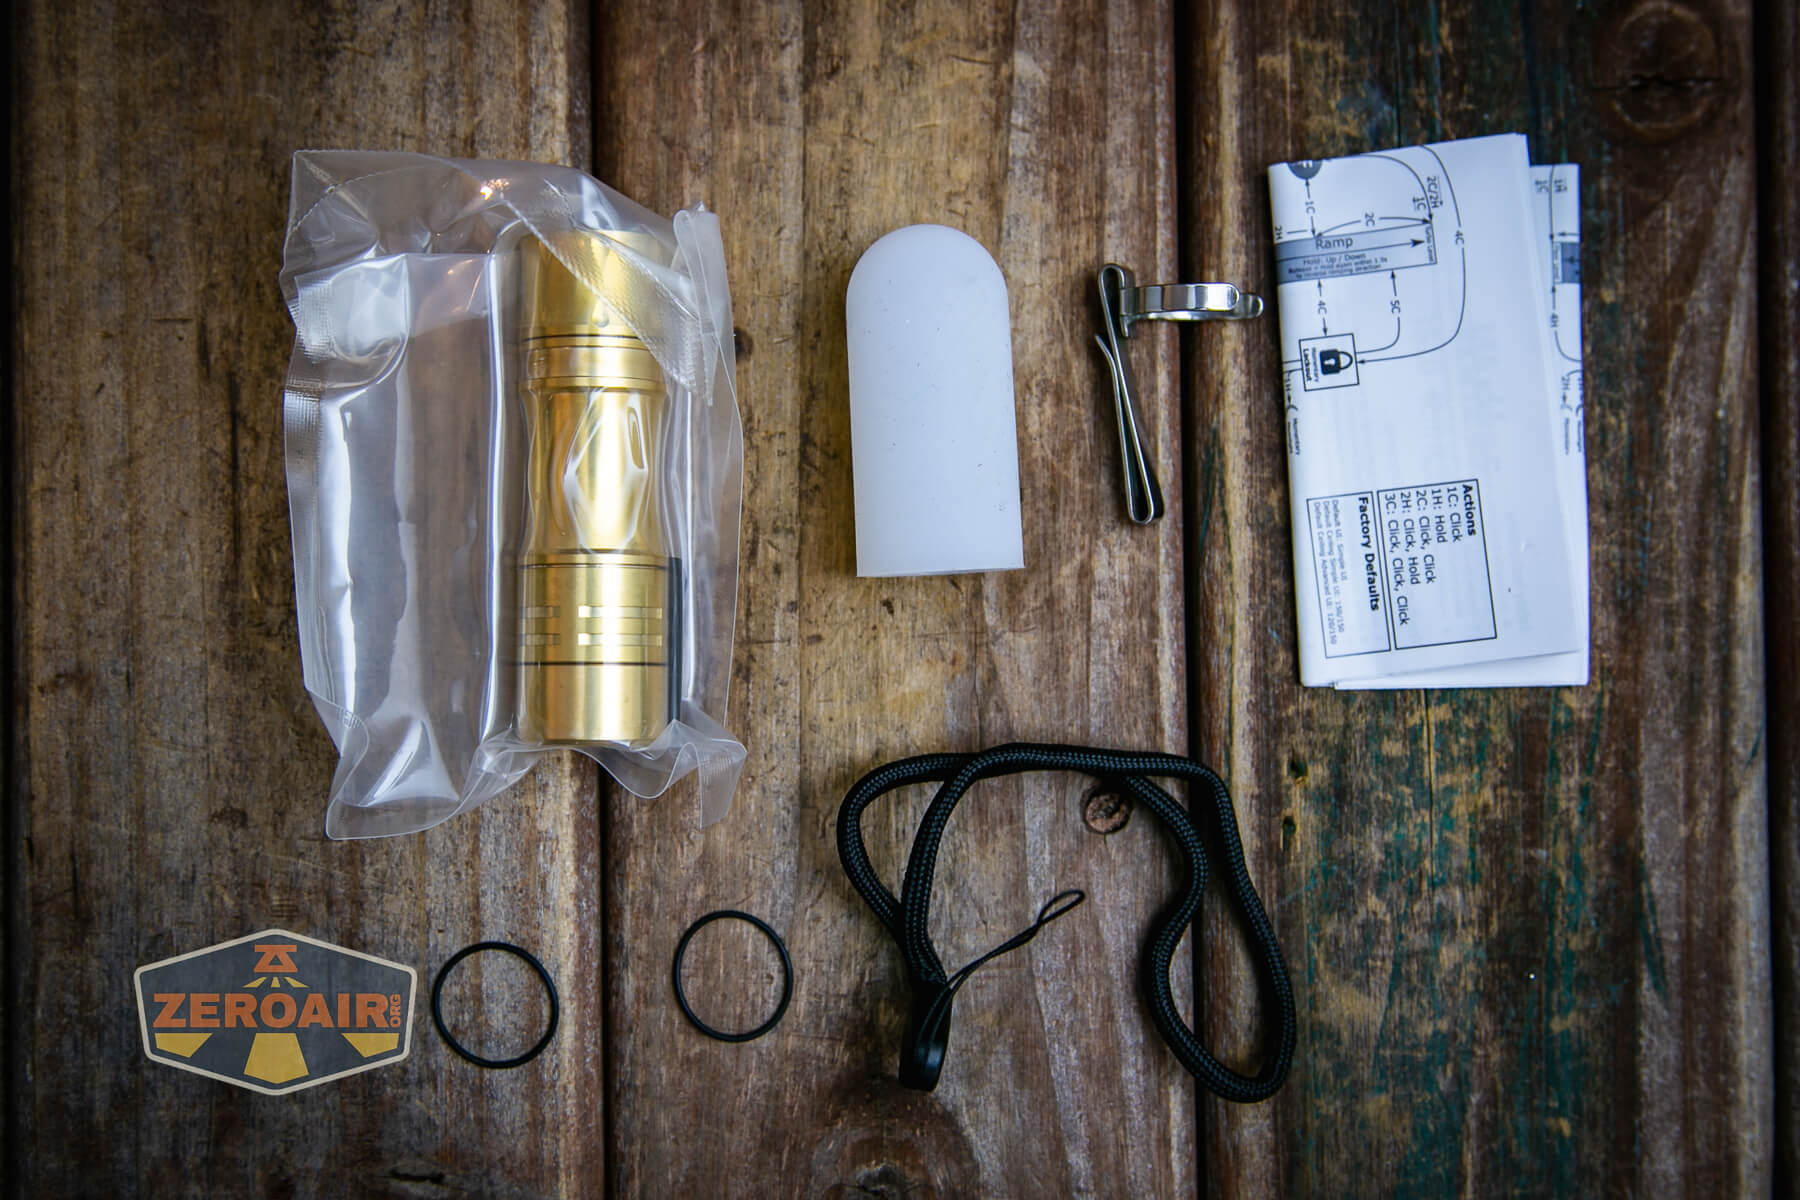
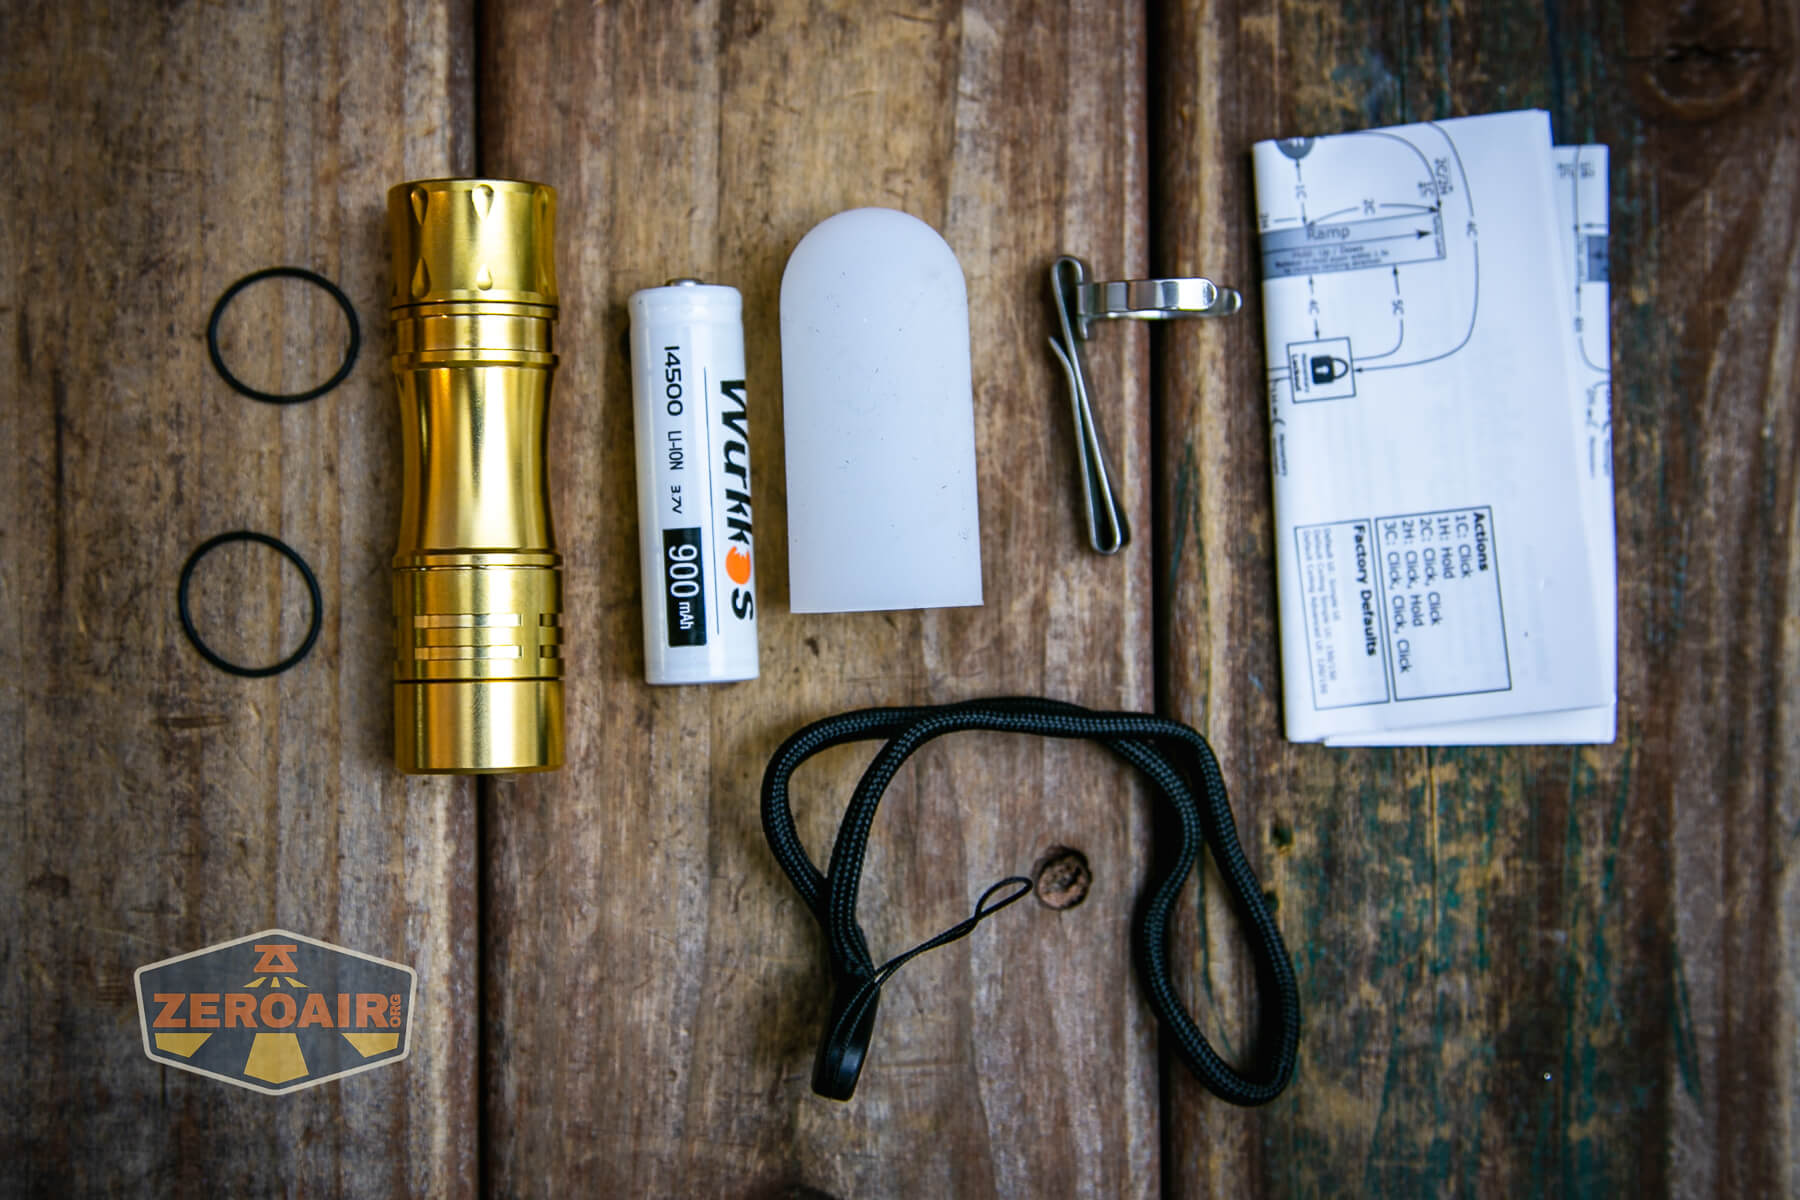
- Wurkkos TS10 brass flashlight (sealed)
- Wurkkos 900mAh 14500 (optional)
- Pocket clip
- Lanyard
- Soft silicone diffuser
- Spare o-rings (2)
- Manual etc
Package and Manual
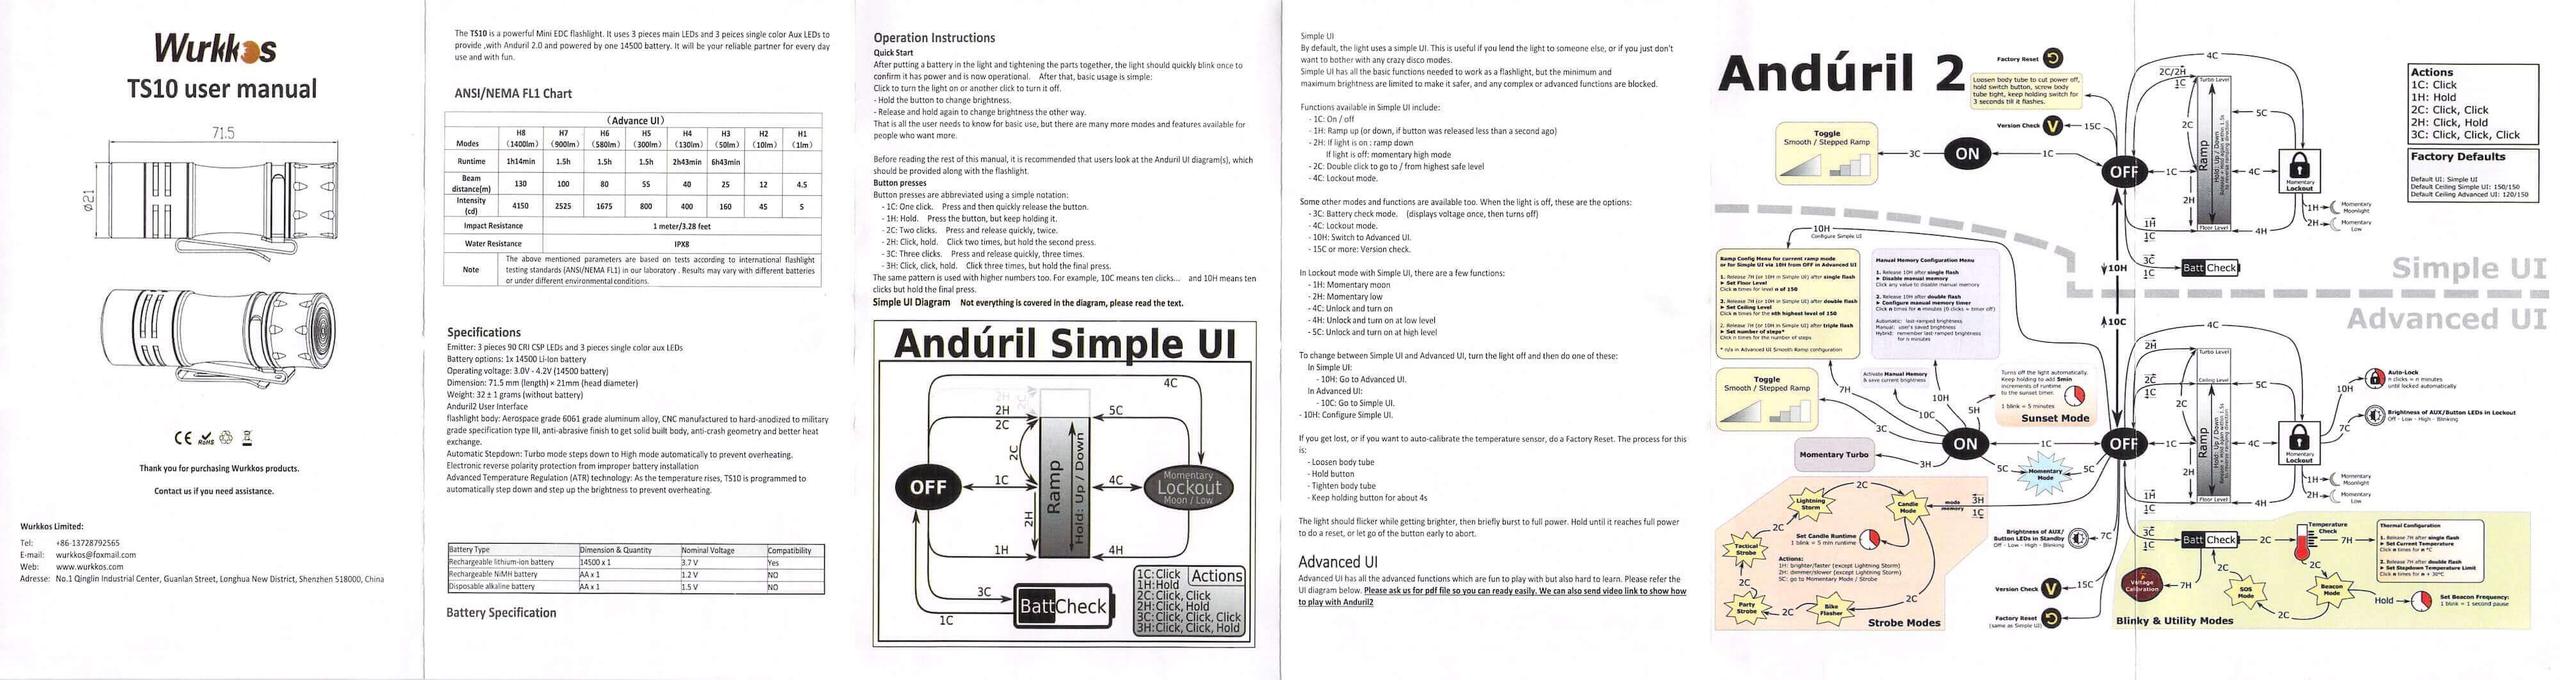
Unlike the Andúril2 light I just reviewed (the Lumintop FW1AA), the Wurkkos TS10 flashlight appears to use standard Andúril2.
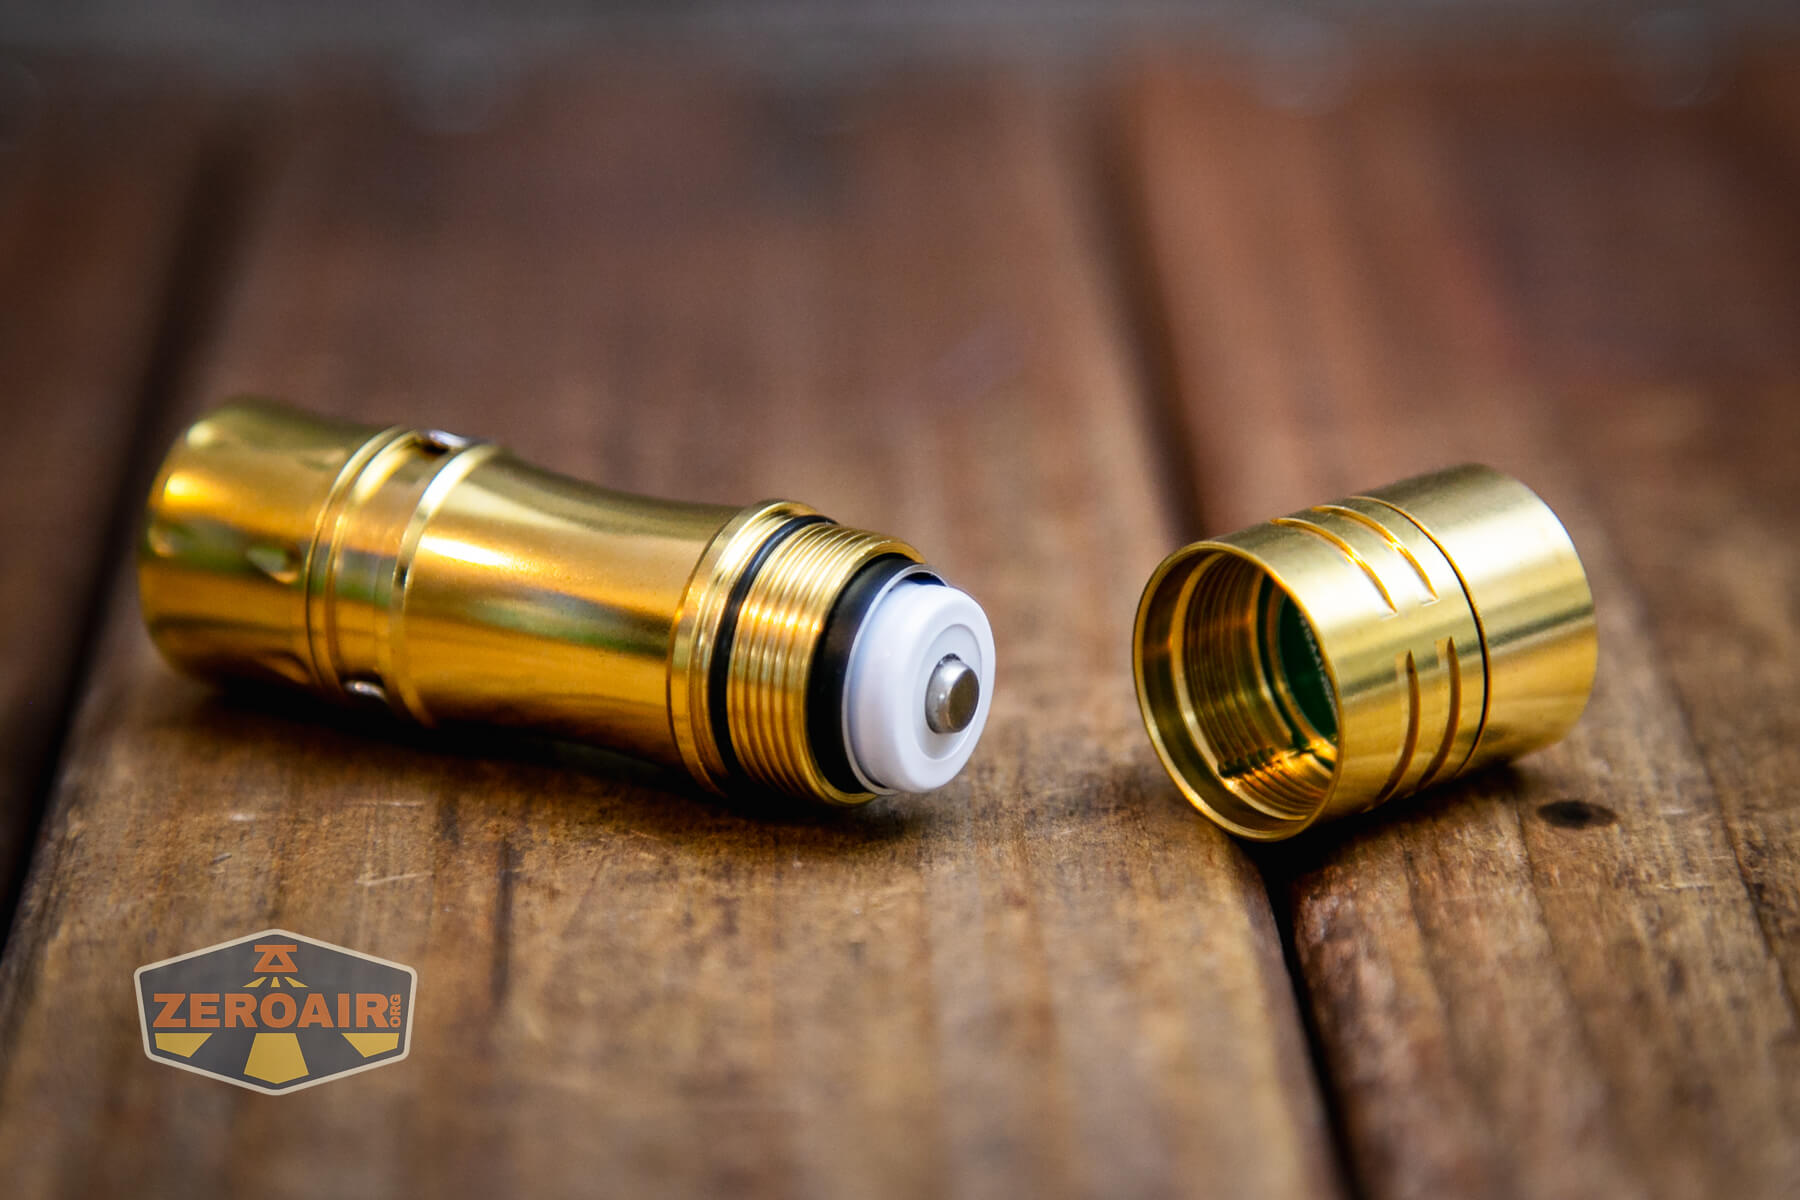
Build Quality and Disassembly
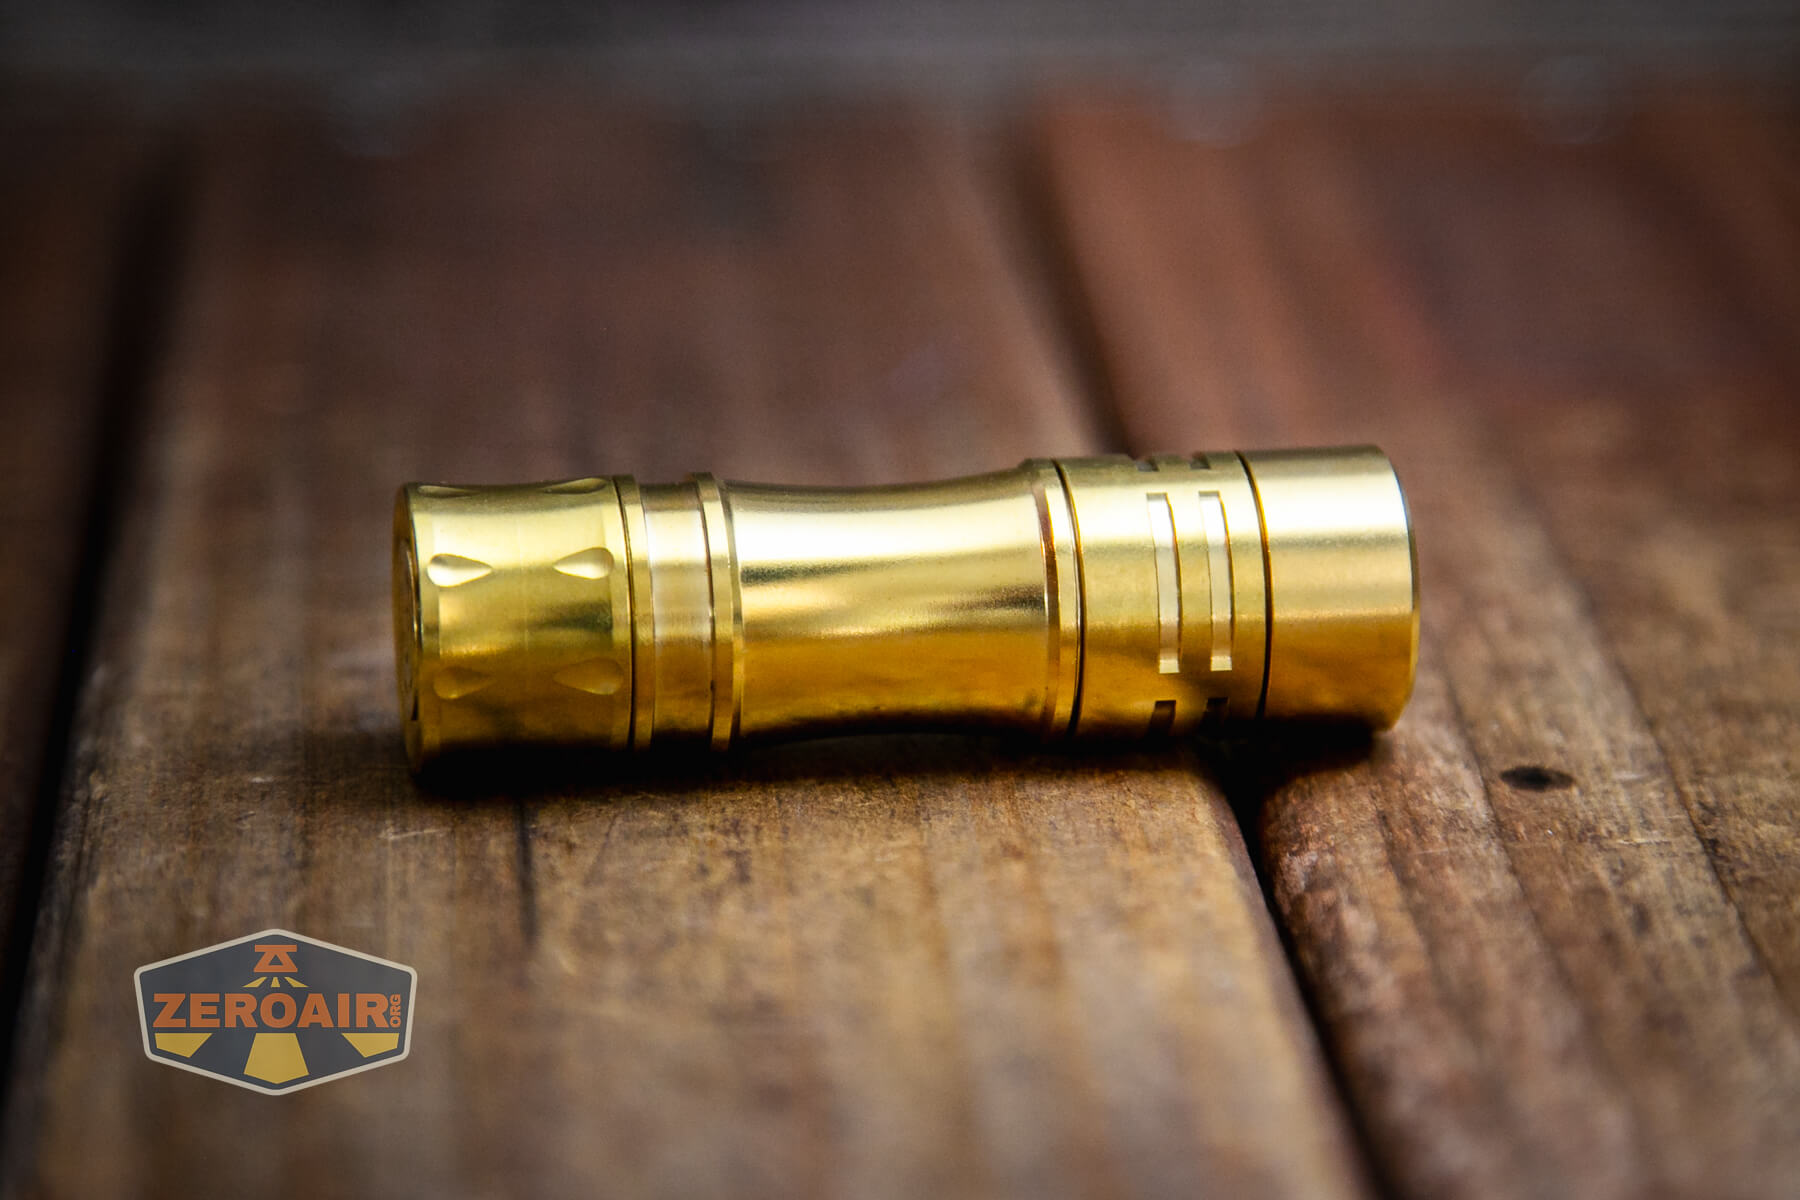
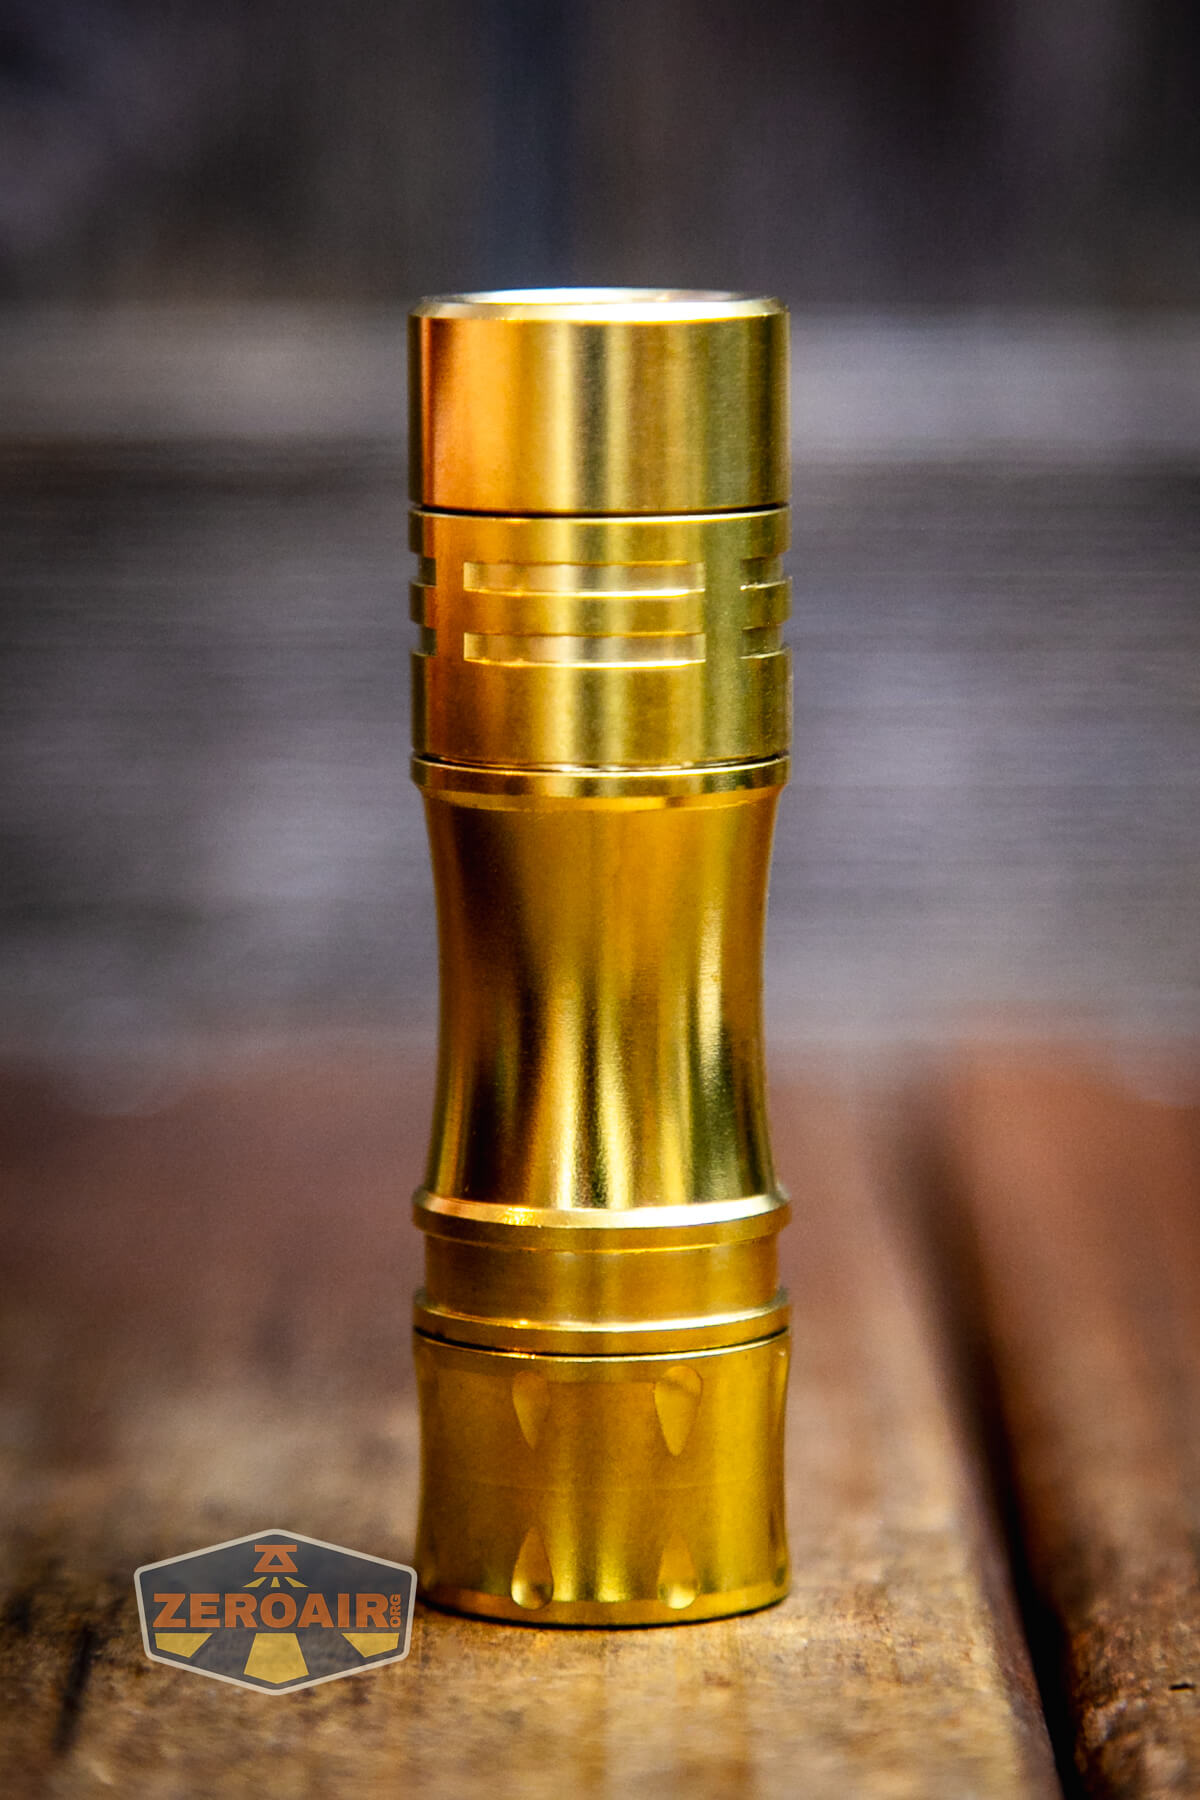
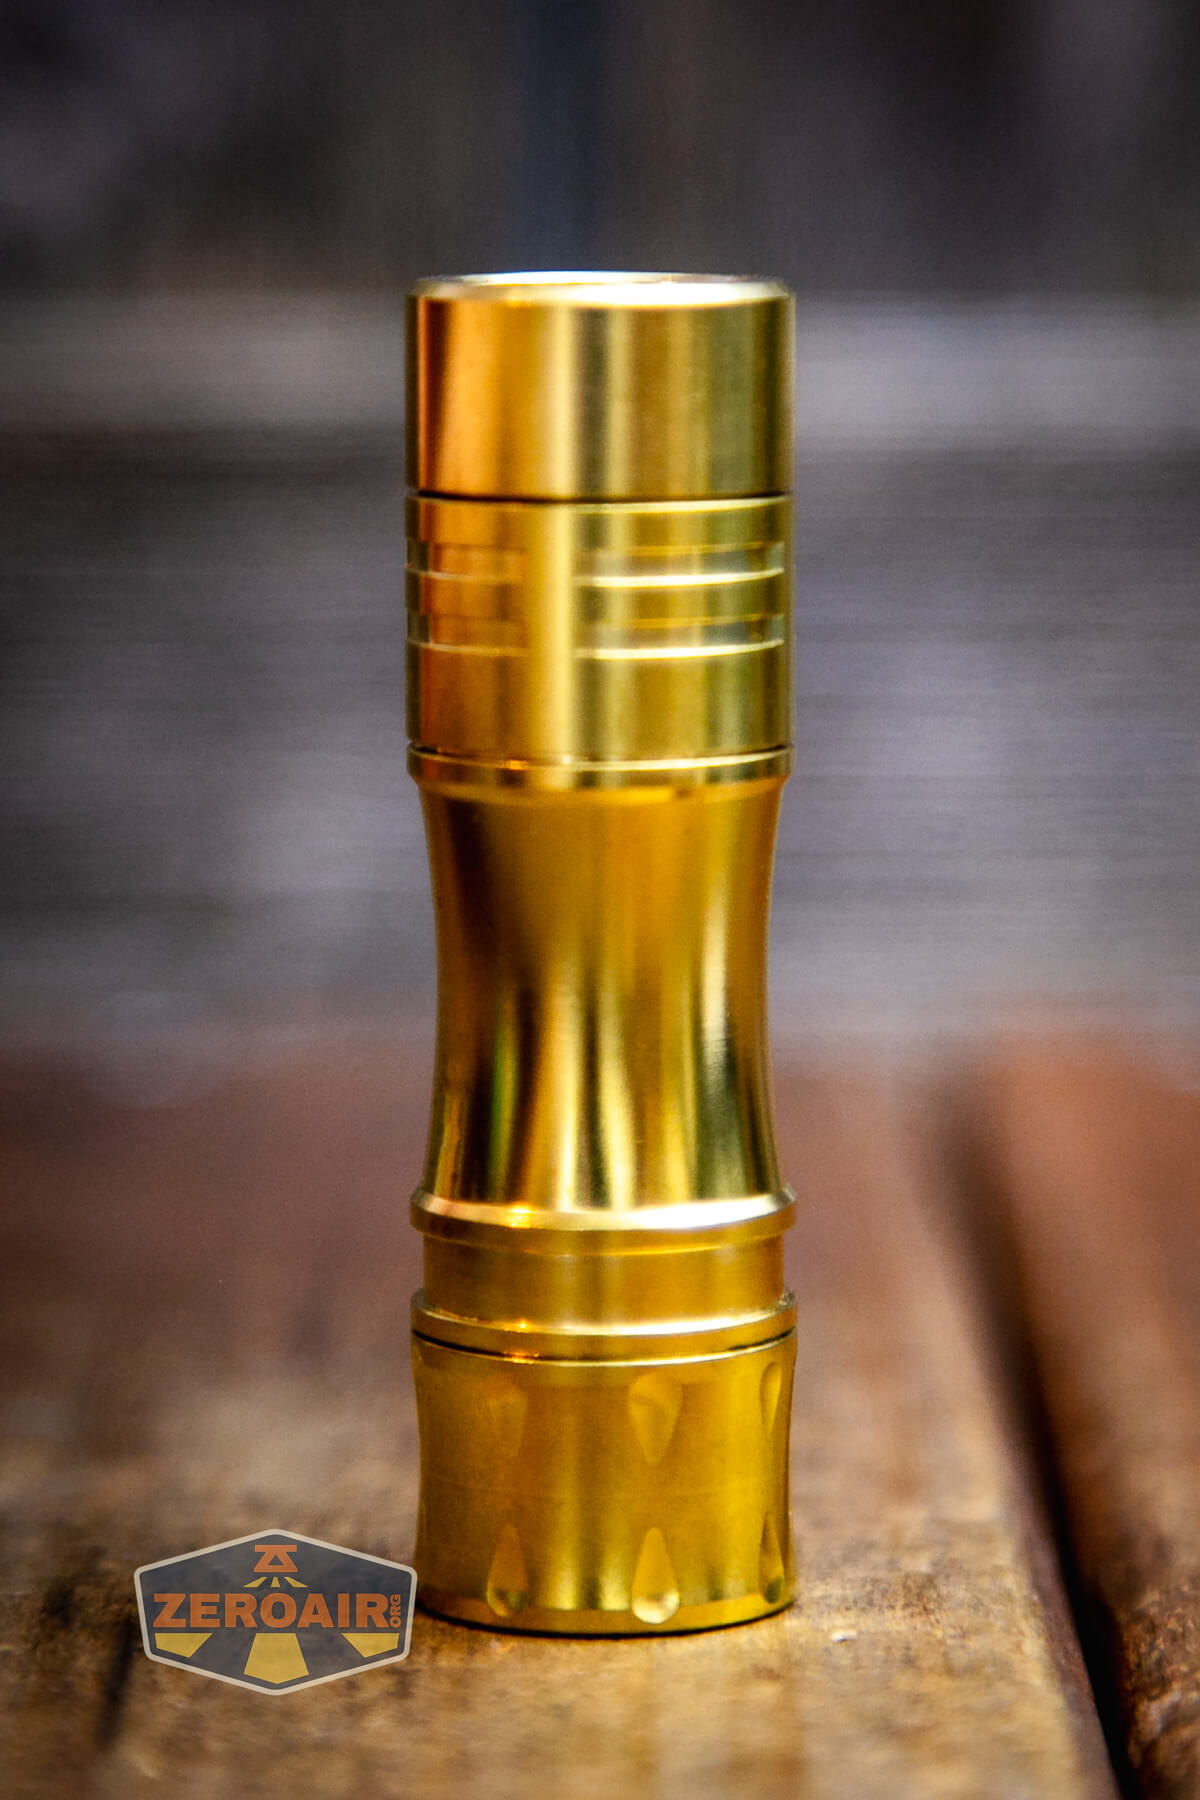
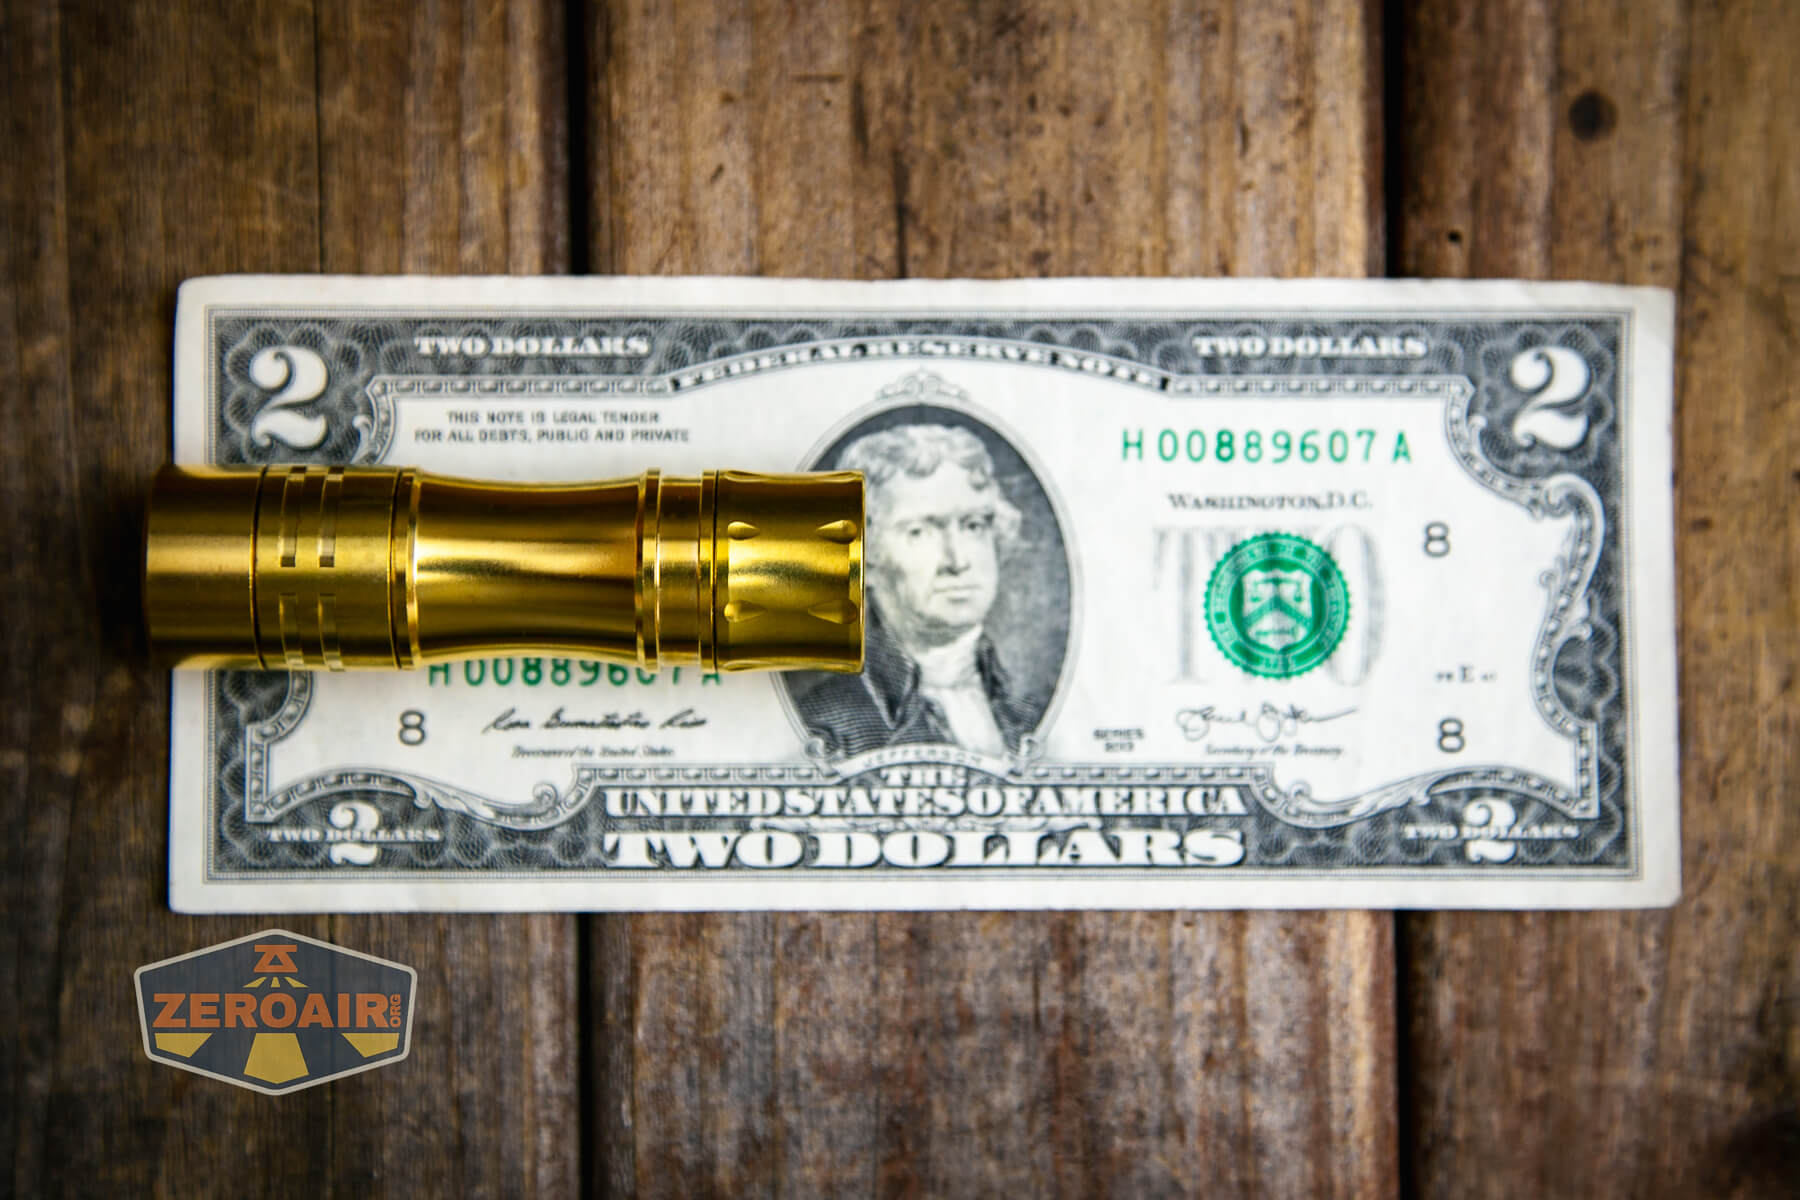
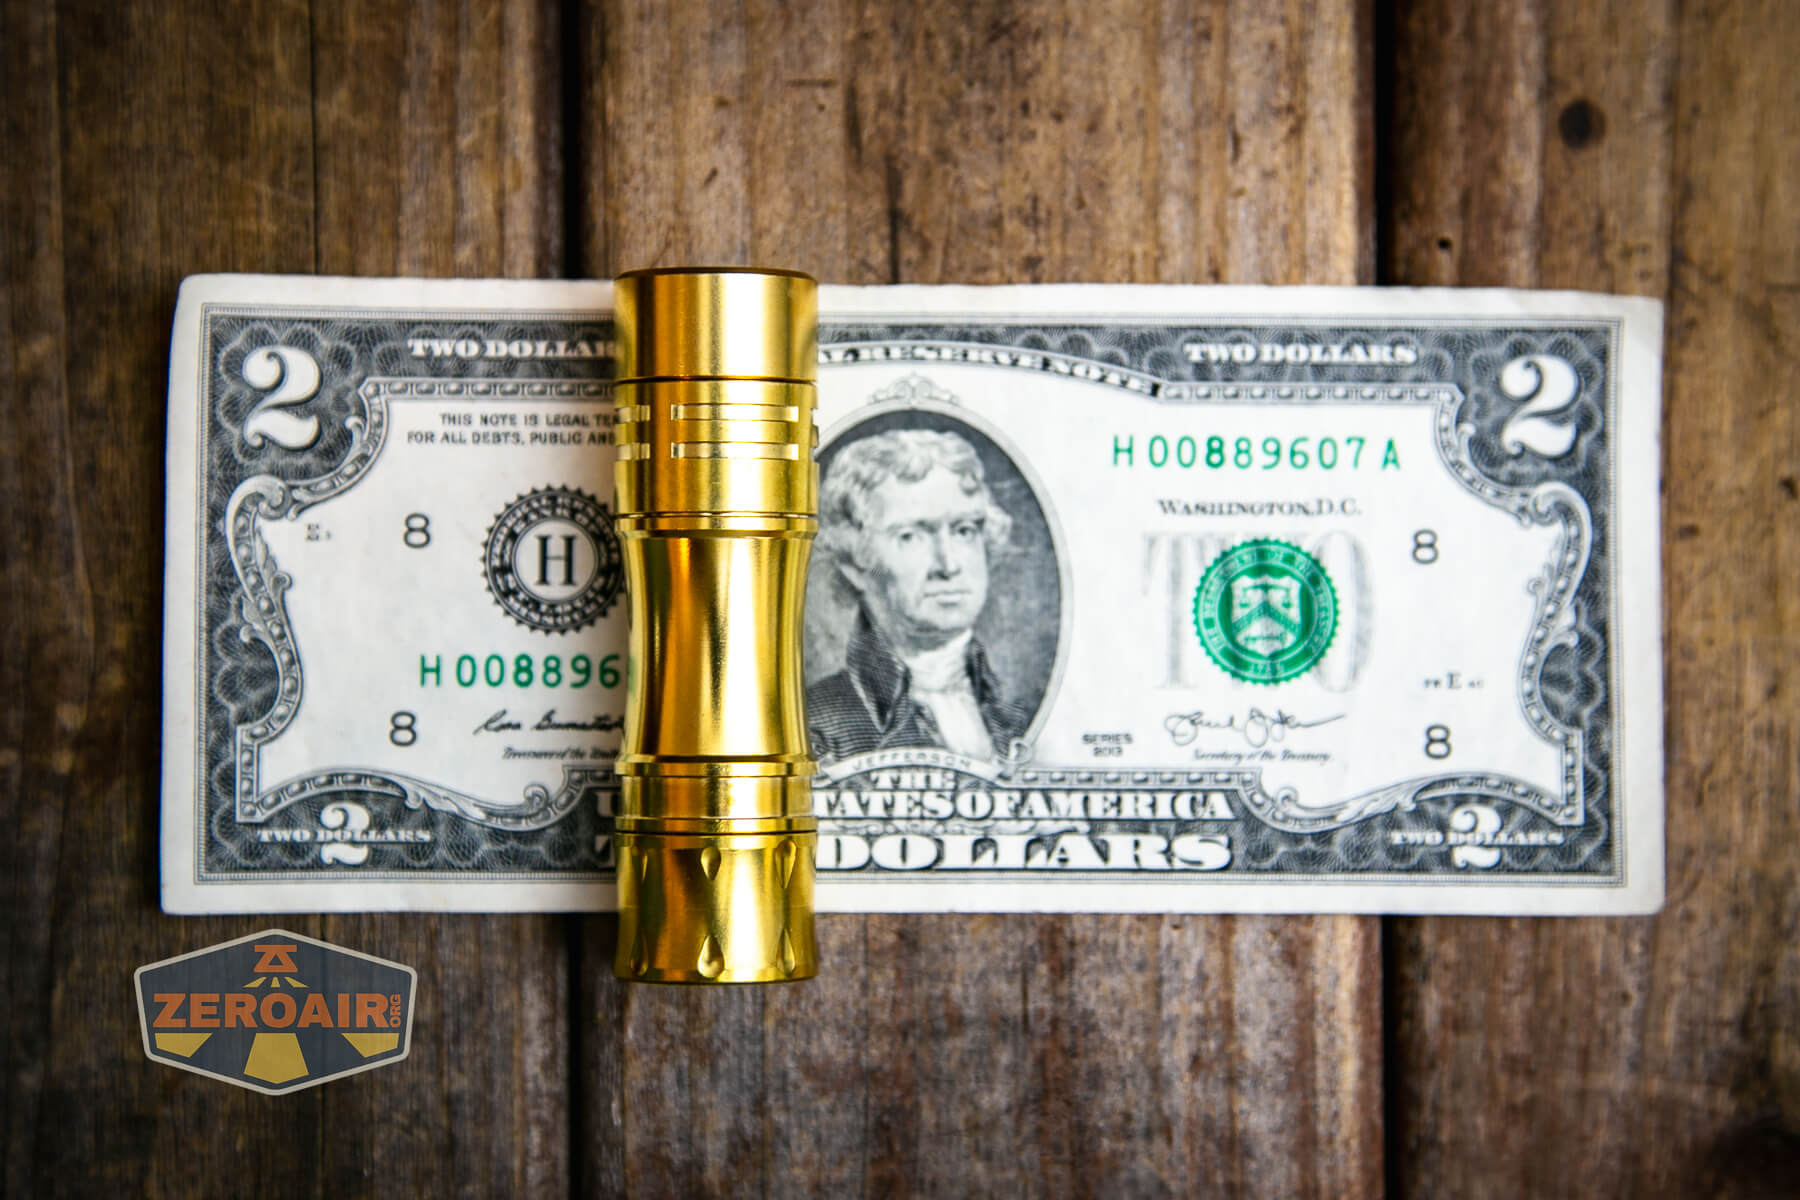
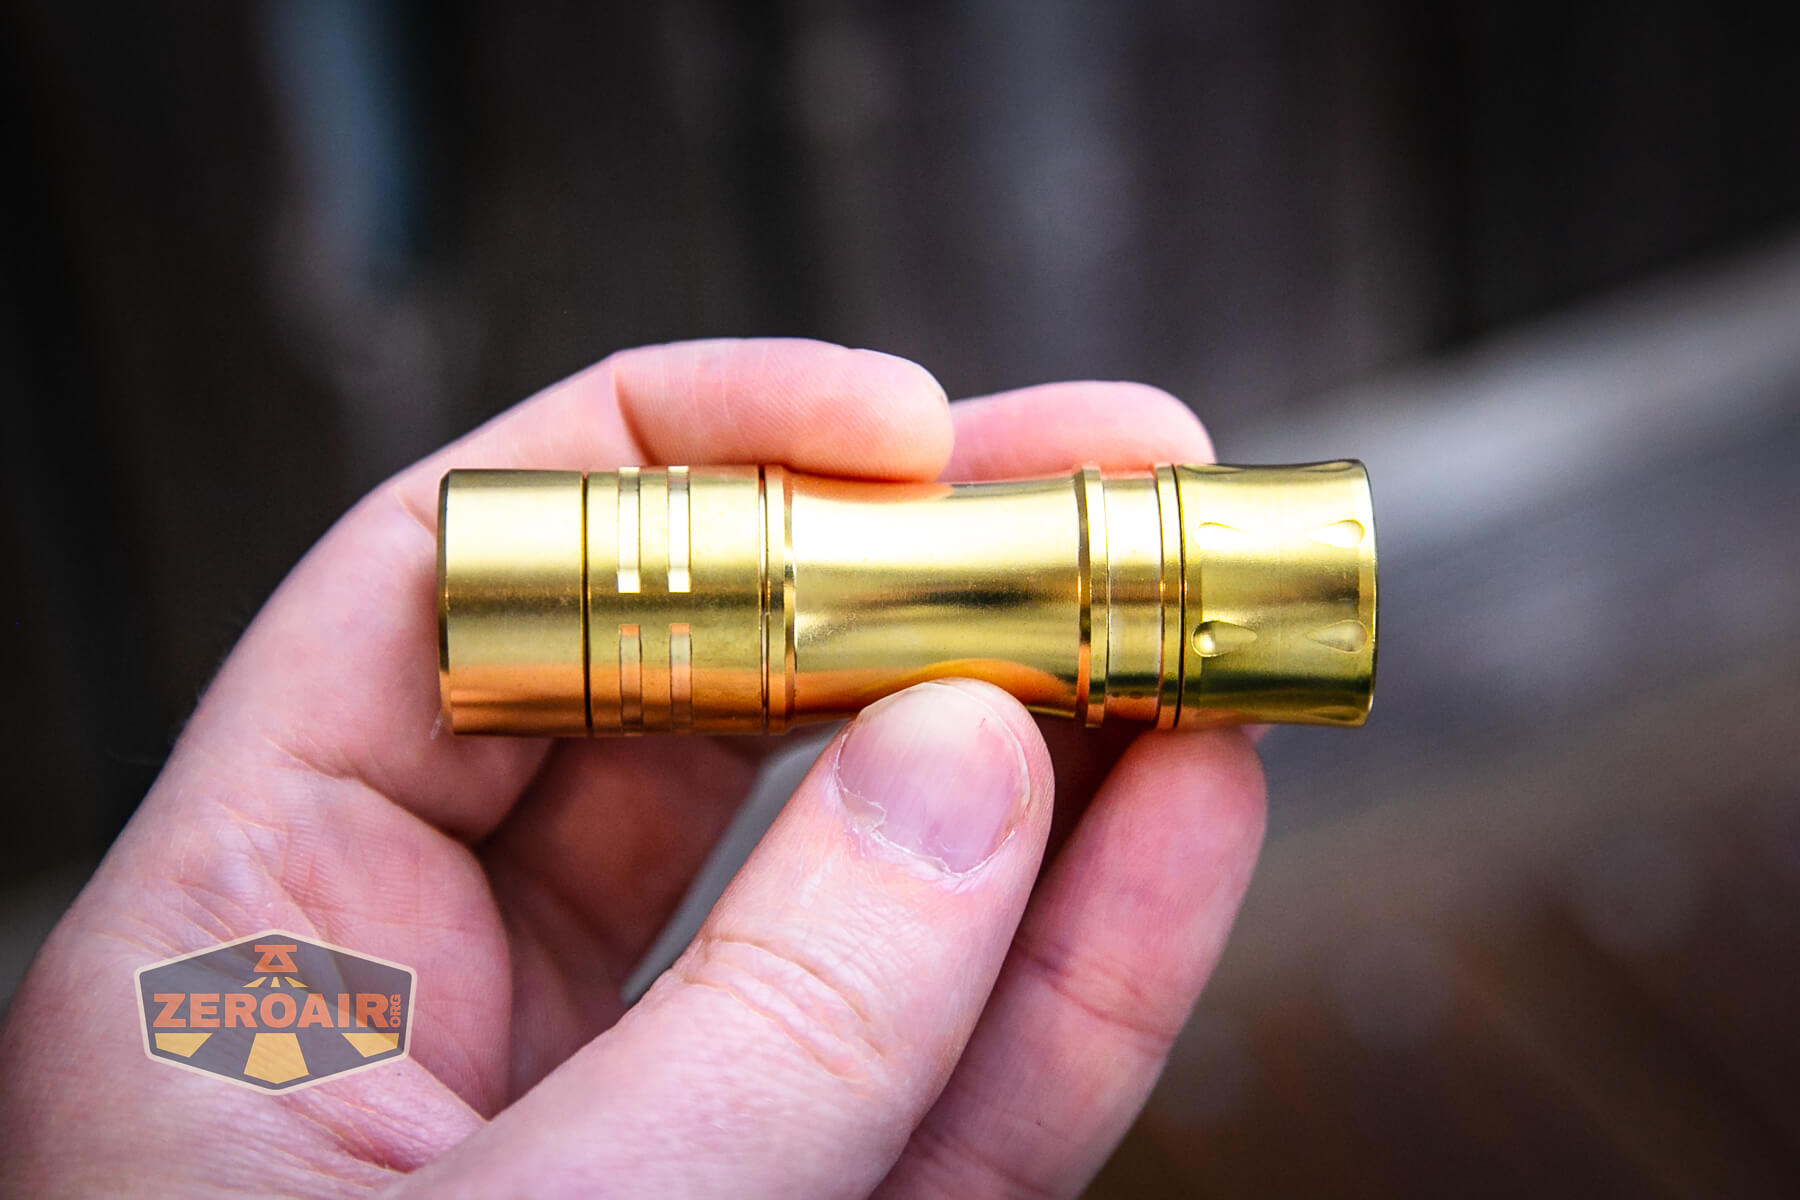
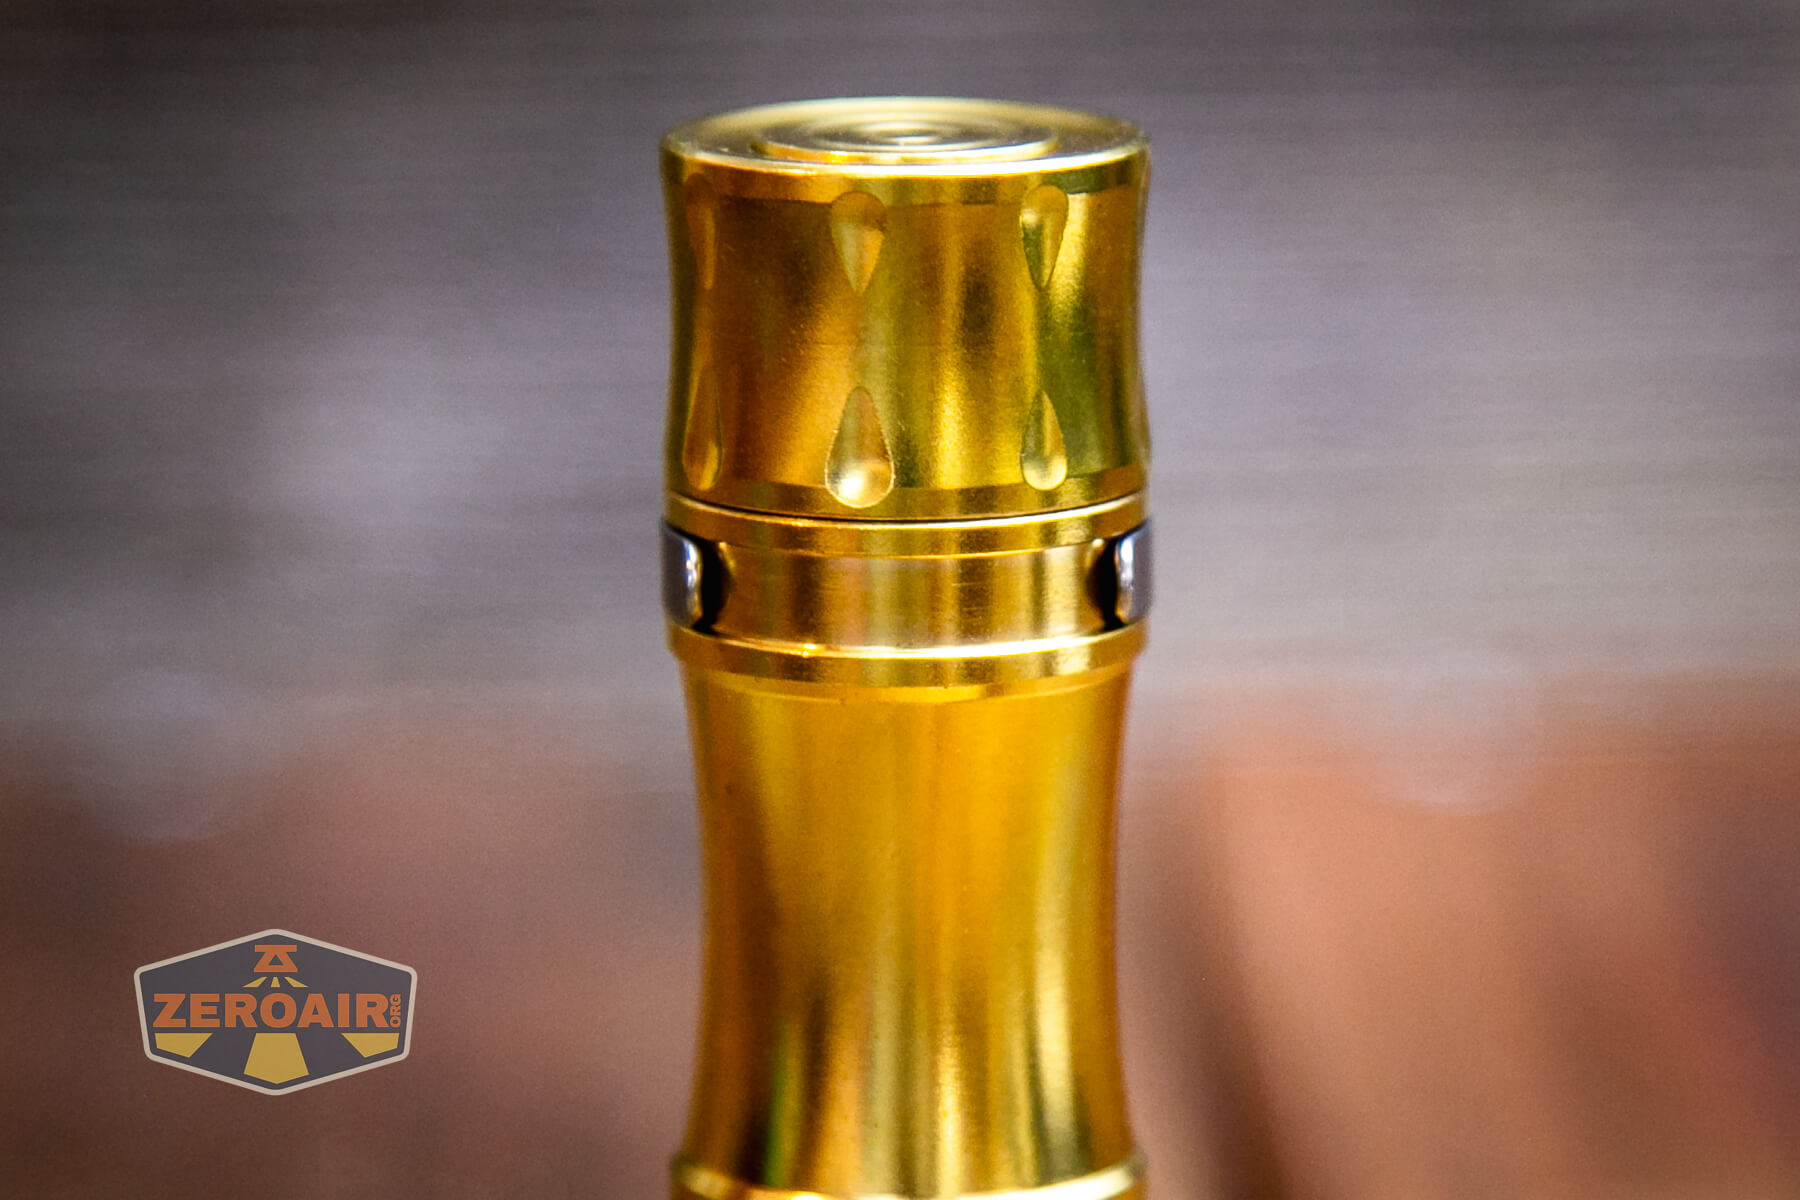
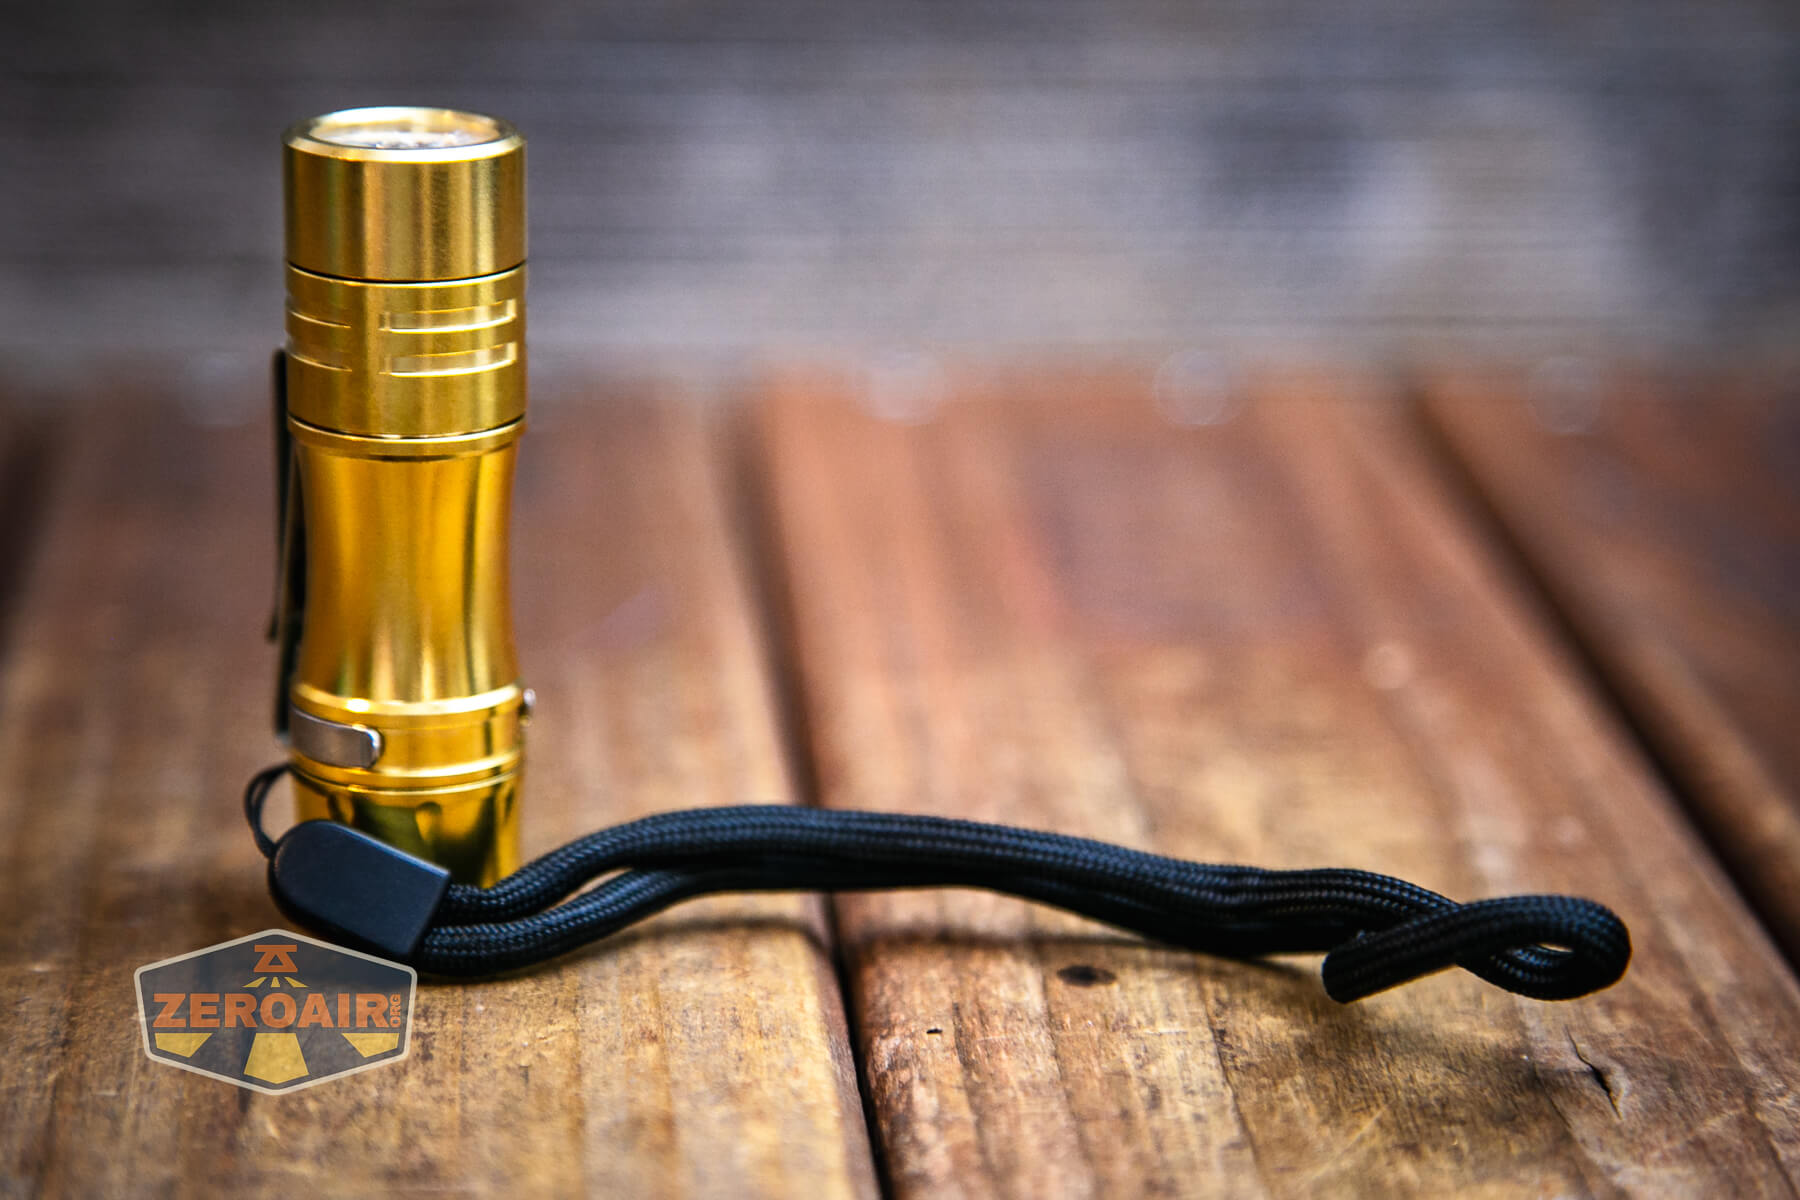
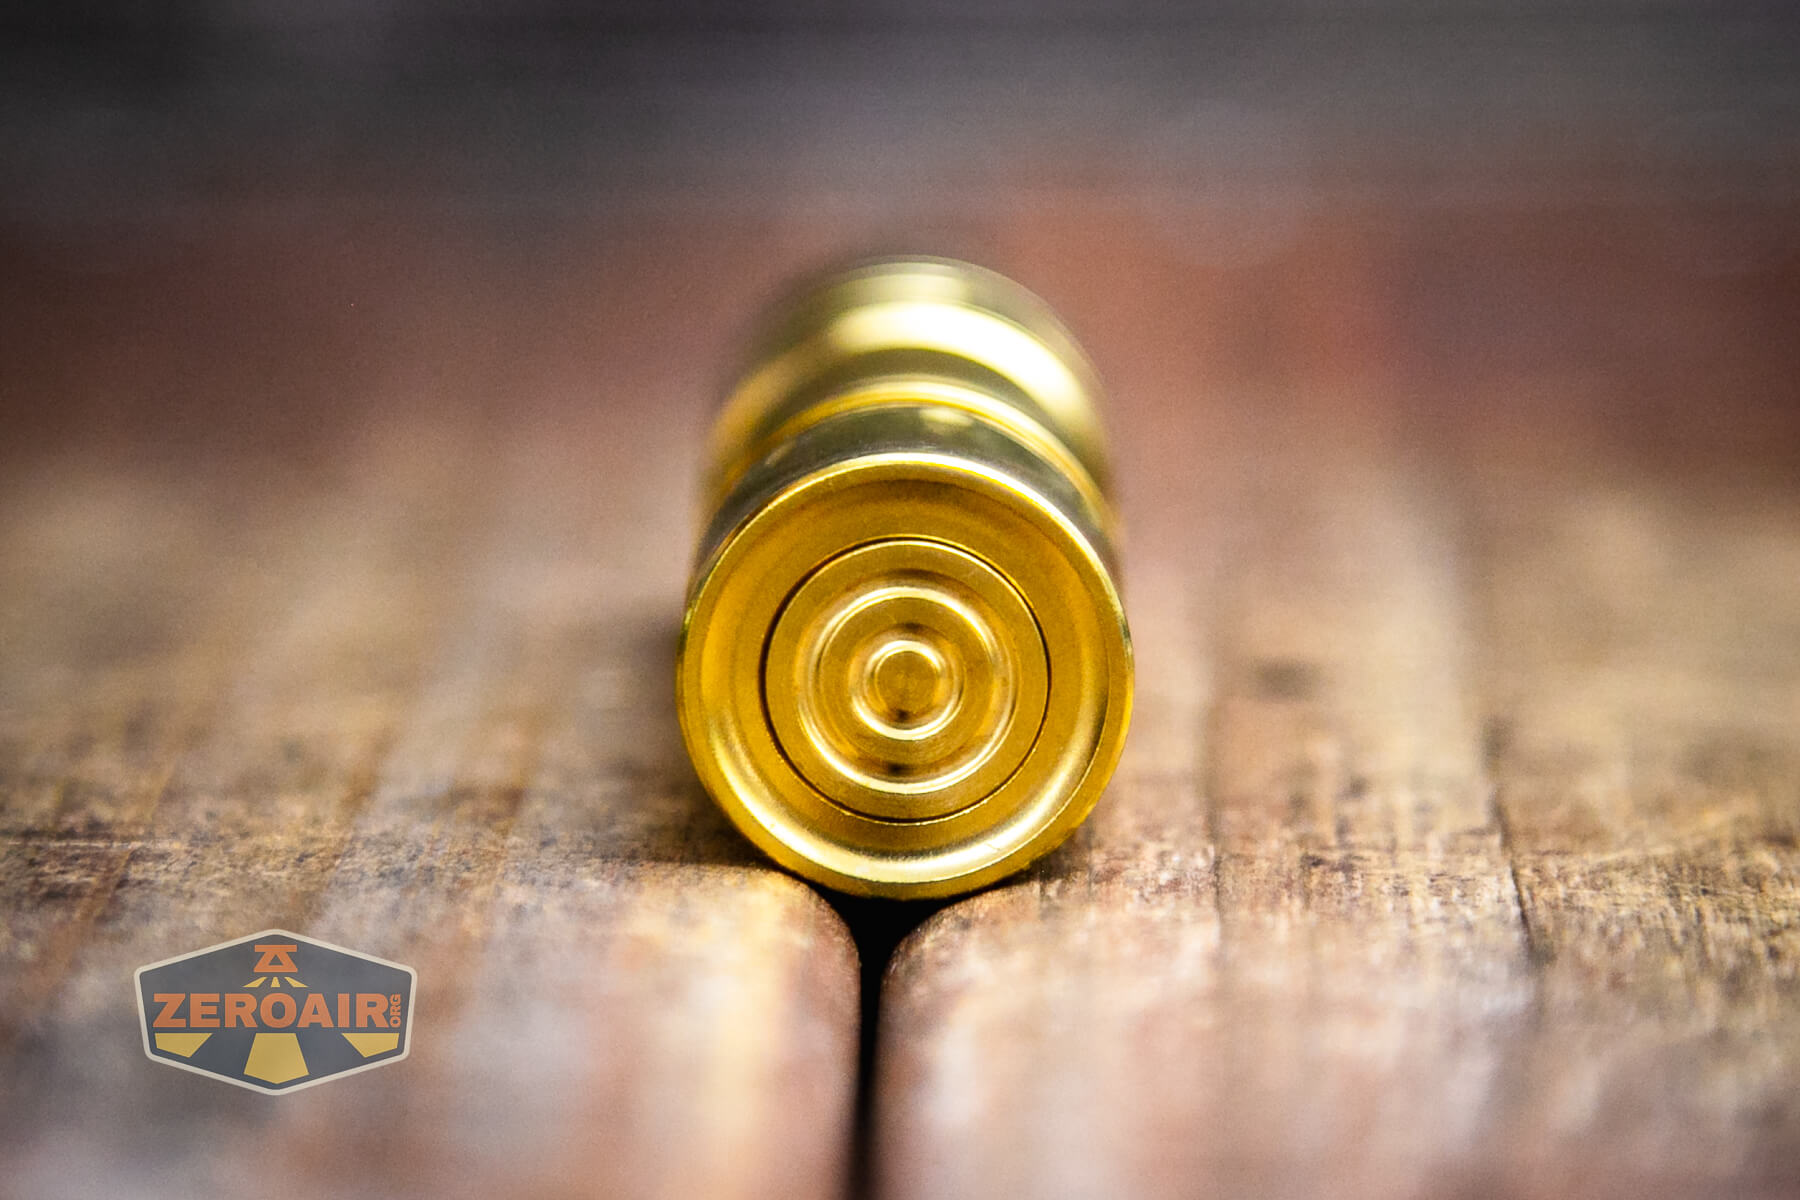
A solid brass flashlight for $27! This is a nice quality light!


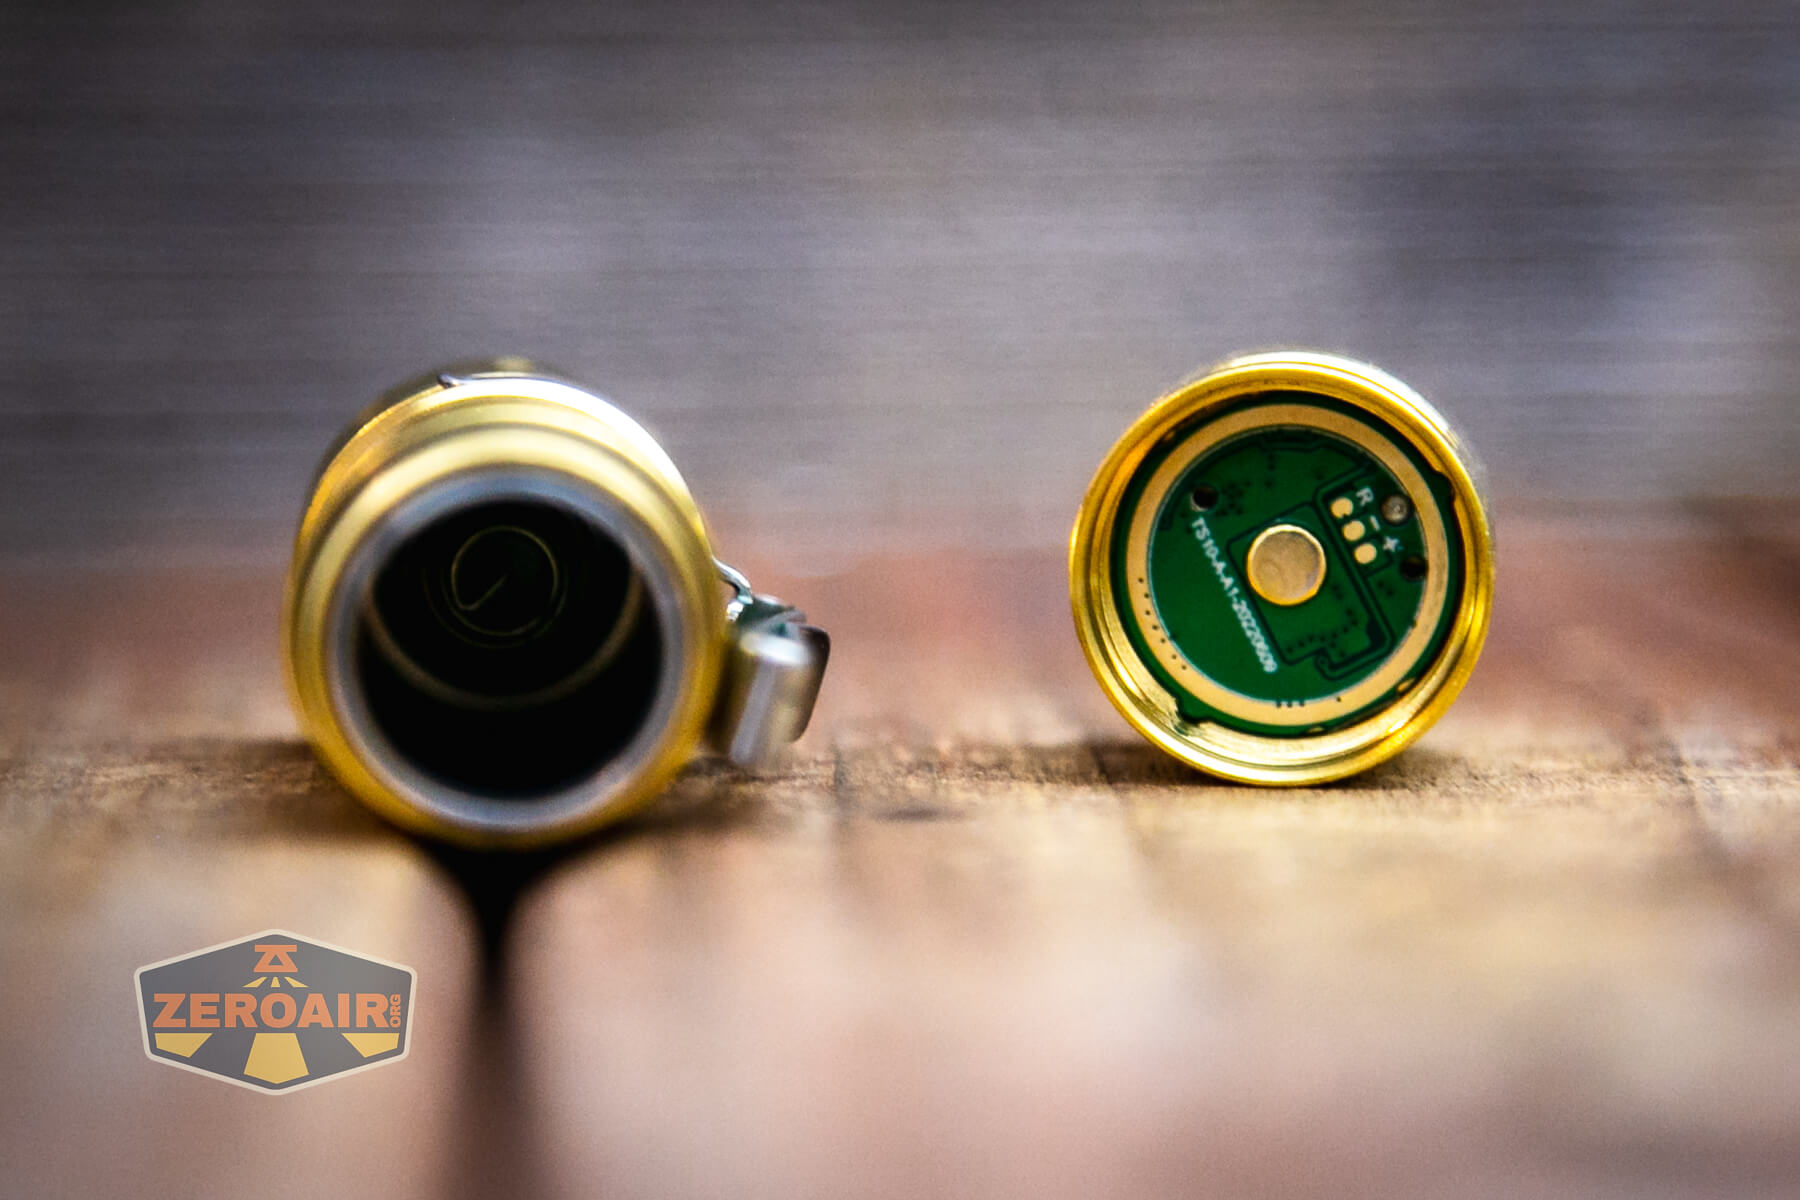
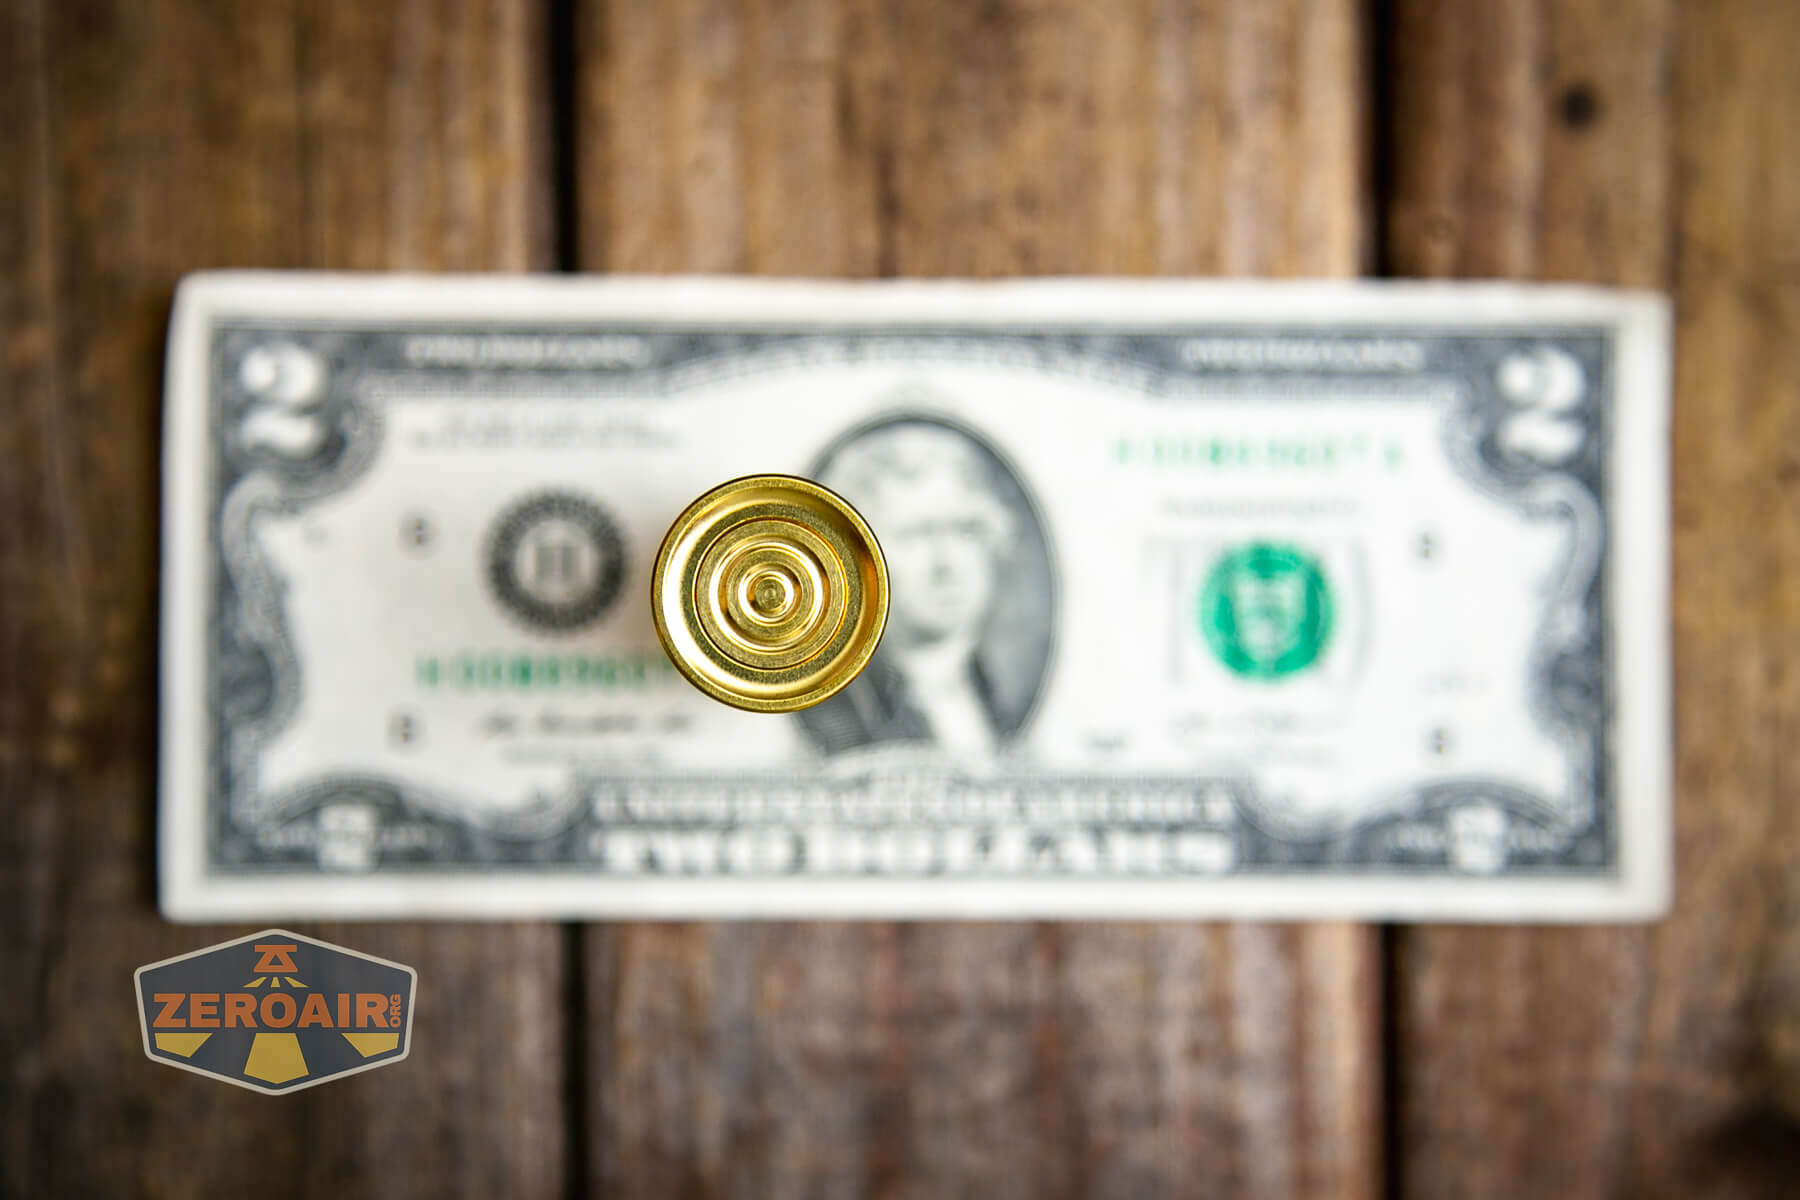
Since the TS10 uses a tail e-switch, there’s an inner sleeve on the cell tube. That can be seen below (the black bit). The threads are unanodized and square-cut, but fairly small.
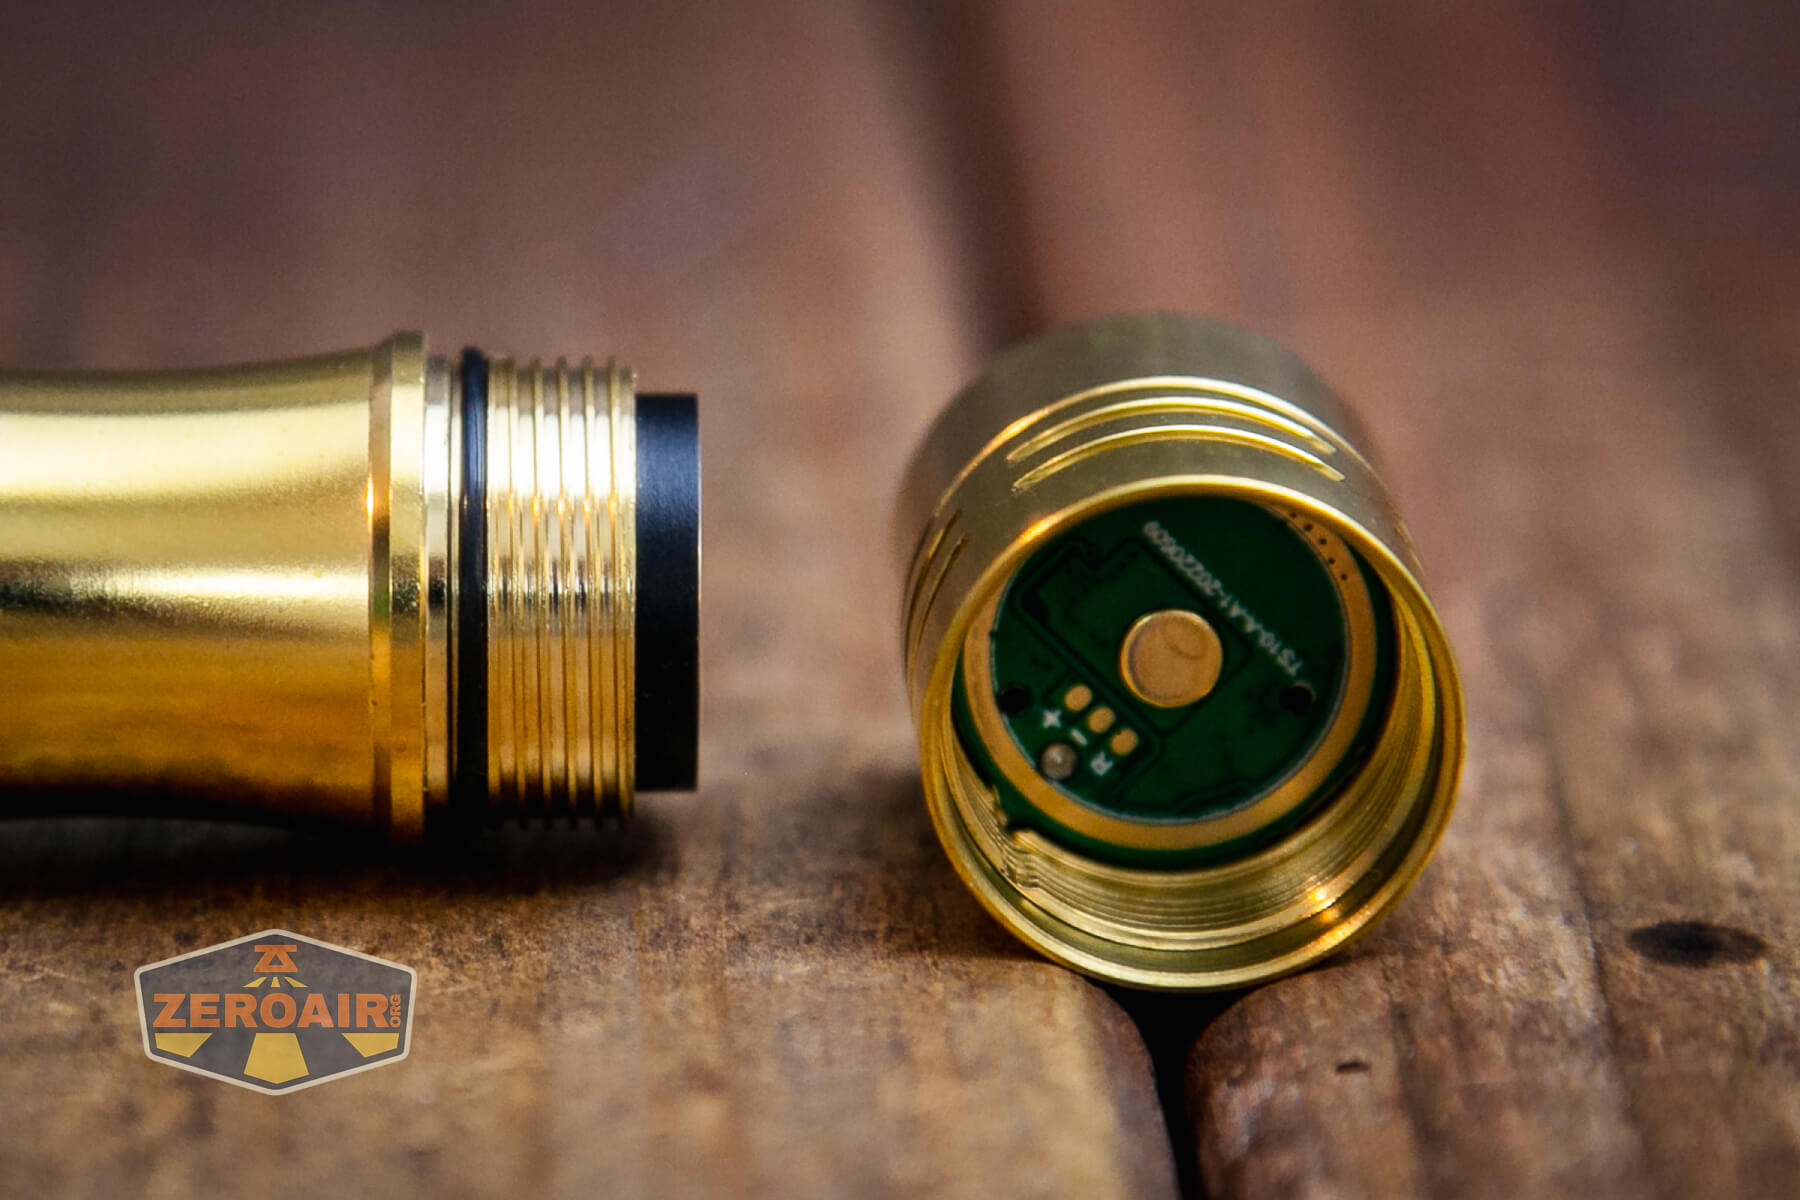
Only the tail end has a spring; the head has only a button.
I can’t really say enough about the brass used in this light. There’s a very pleasant, solid bare metal on solid bare metal connection between the head and body when putting the parts together, and I love it!
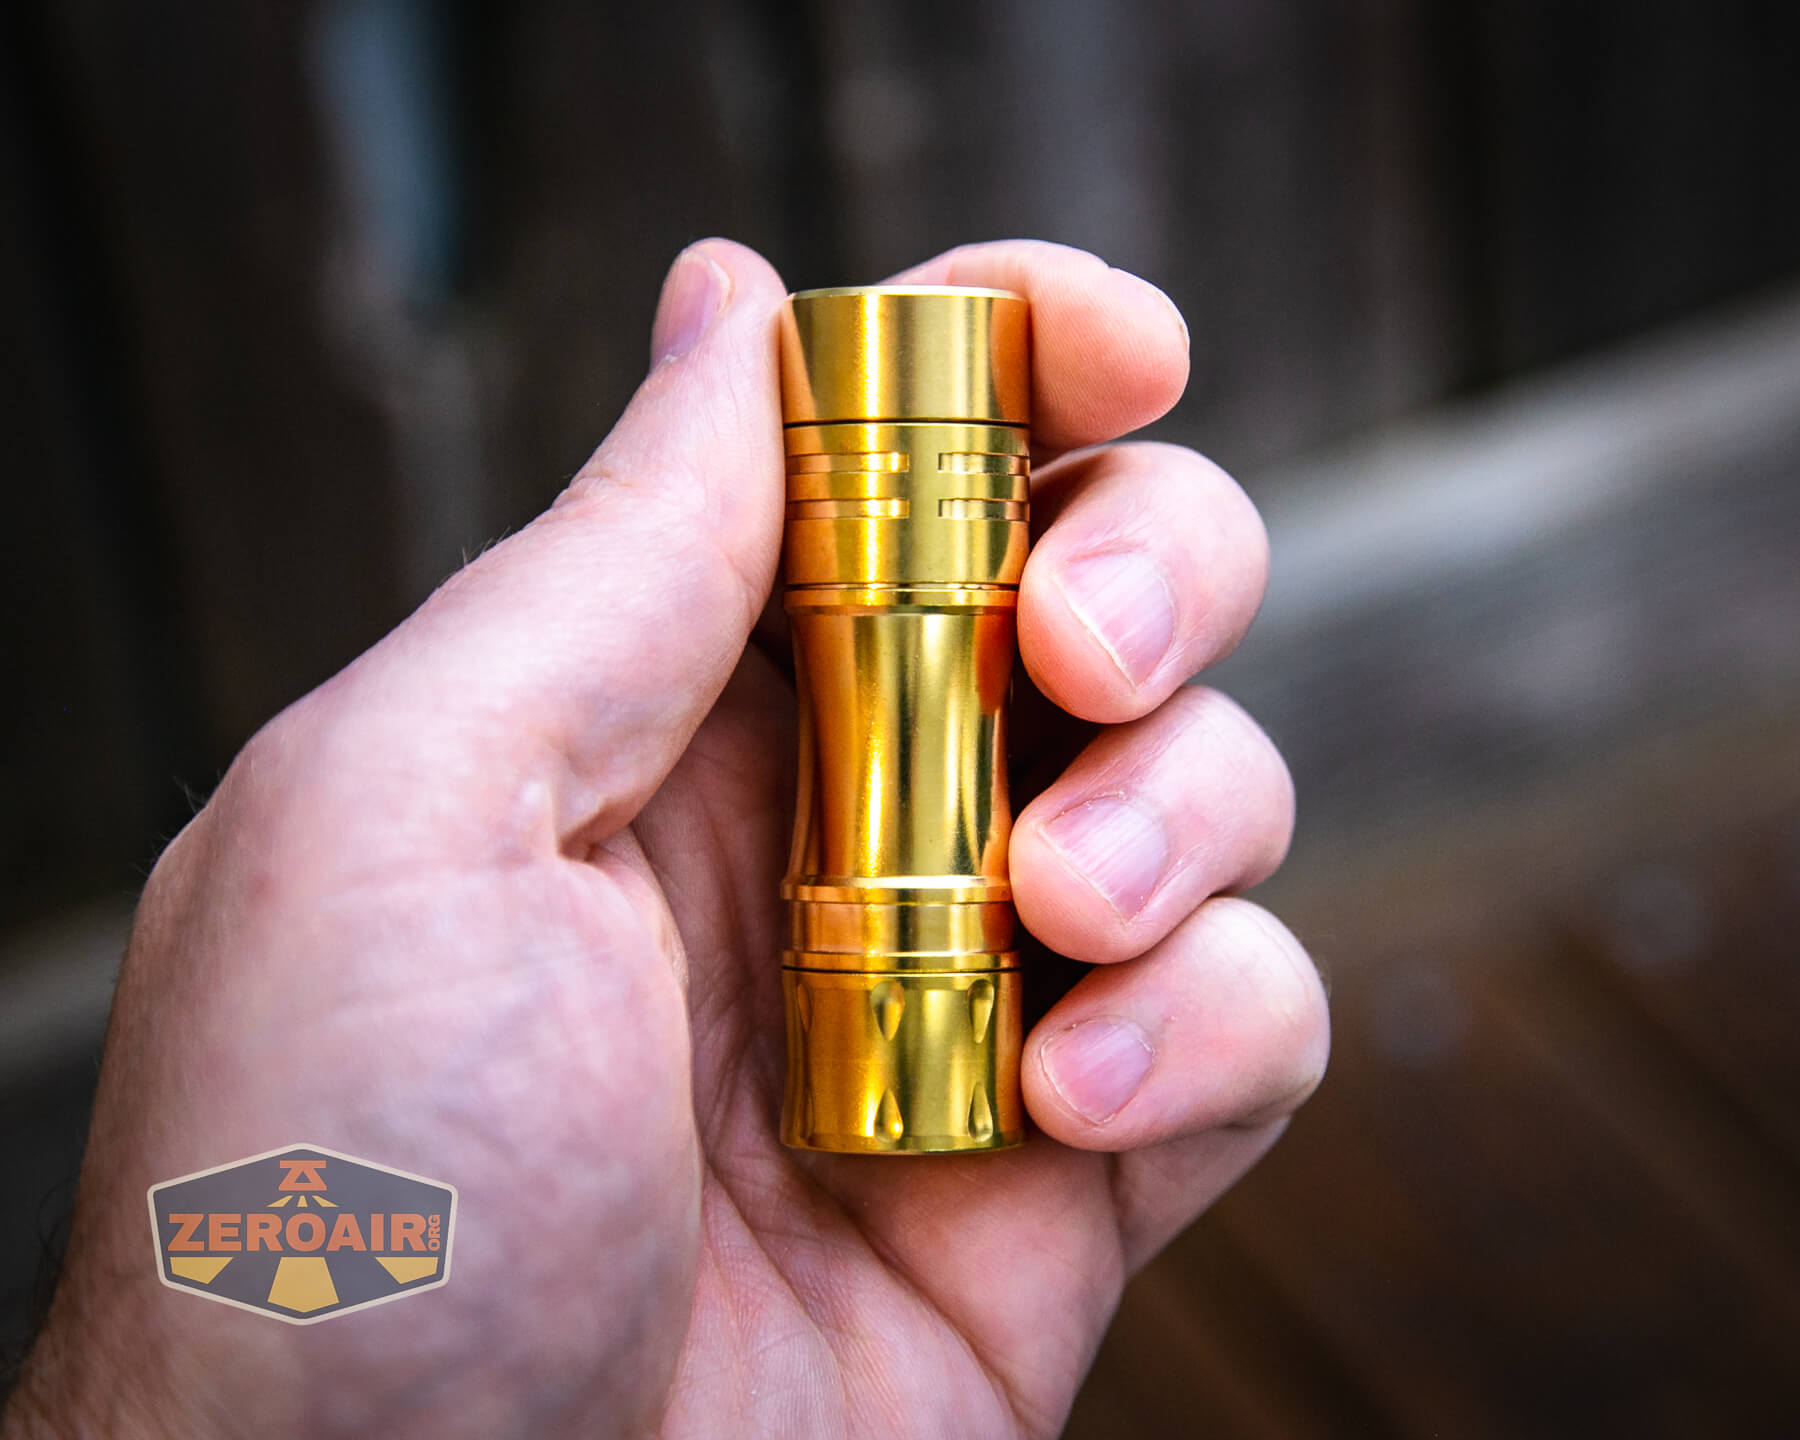
Size and Comps
Dimension: 71.5 mm (length) × 21mm (head diameter)
Weight: 32 ± 1 grams (without battery) (that’s the same weight Wurkkos lists for aluminum, but in reality, this one is much heavier.)
I measure the brass at 73.3g, and the cell adds another 19.2g.
If the flashlight will headstand, I’ll try to show it here. If the flashlight will tailstand, I usually show that here, too.

Here’s the test light with the venerable Convoy S2+. Mine is a custom “baked” edition Nichia 219b triple. A very nice 18650 light!
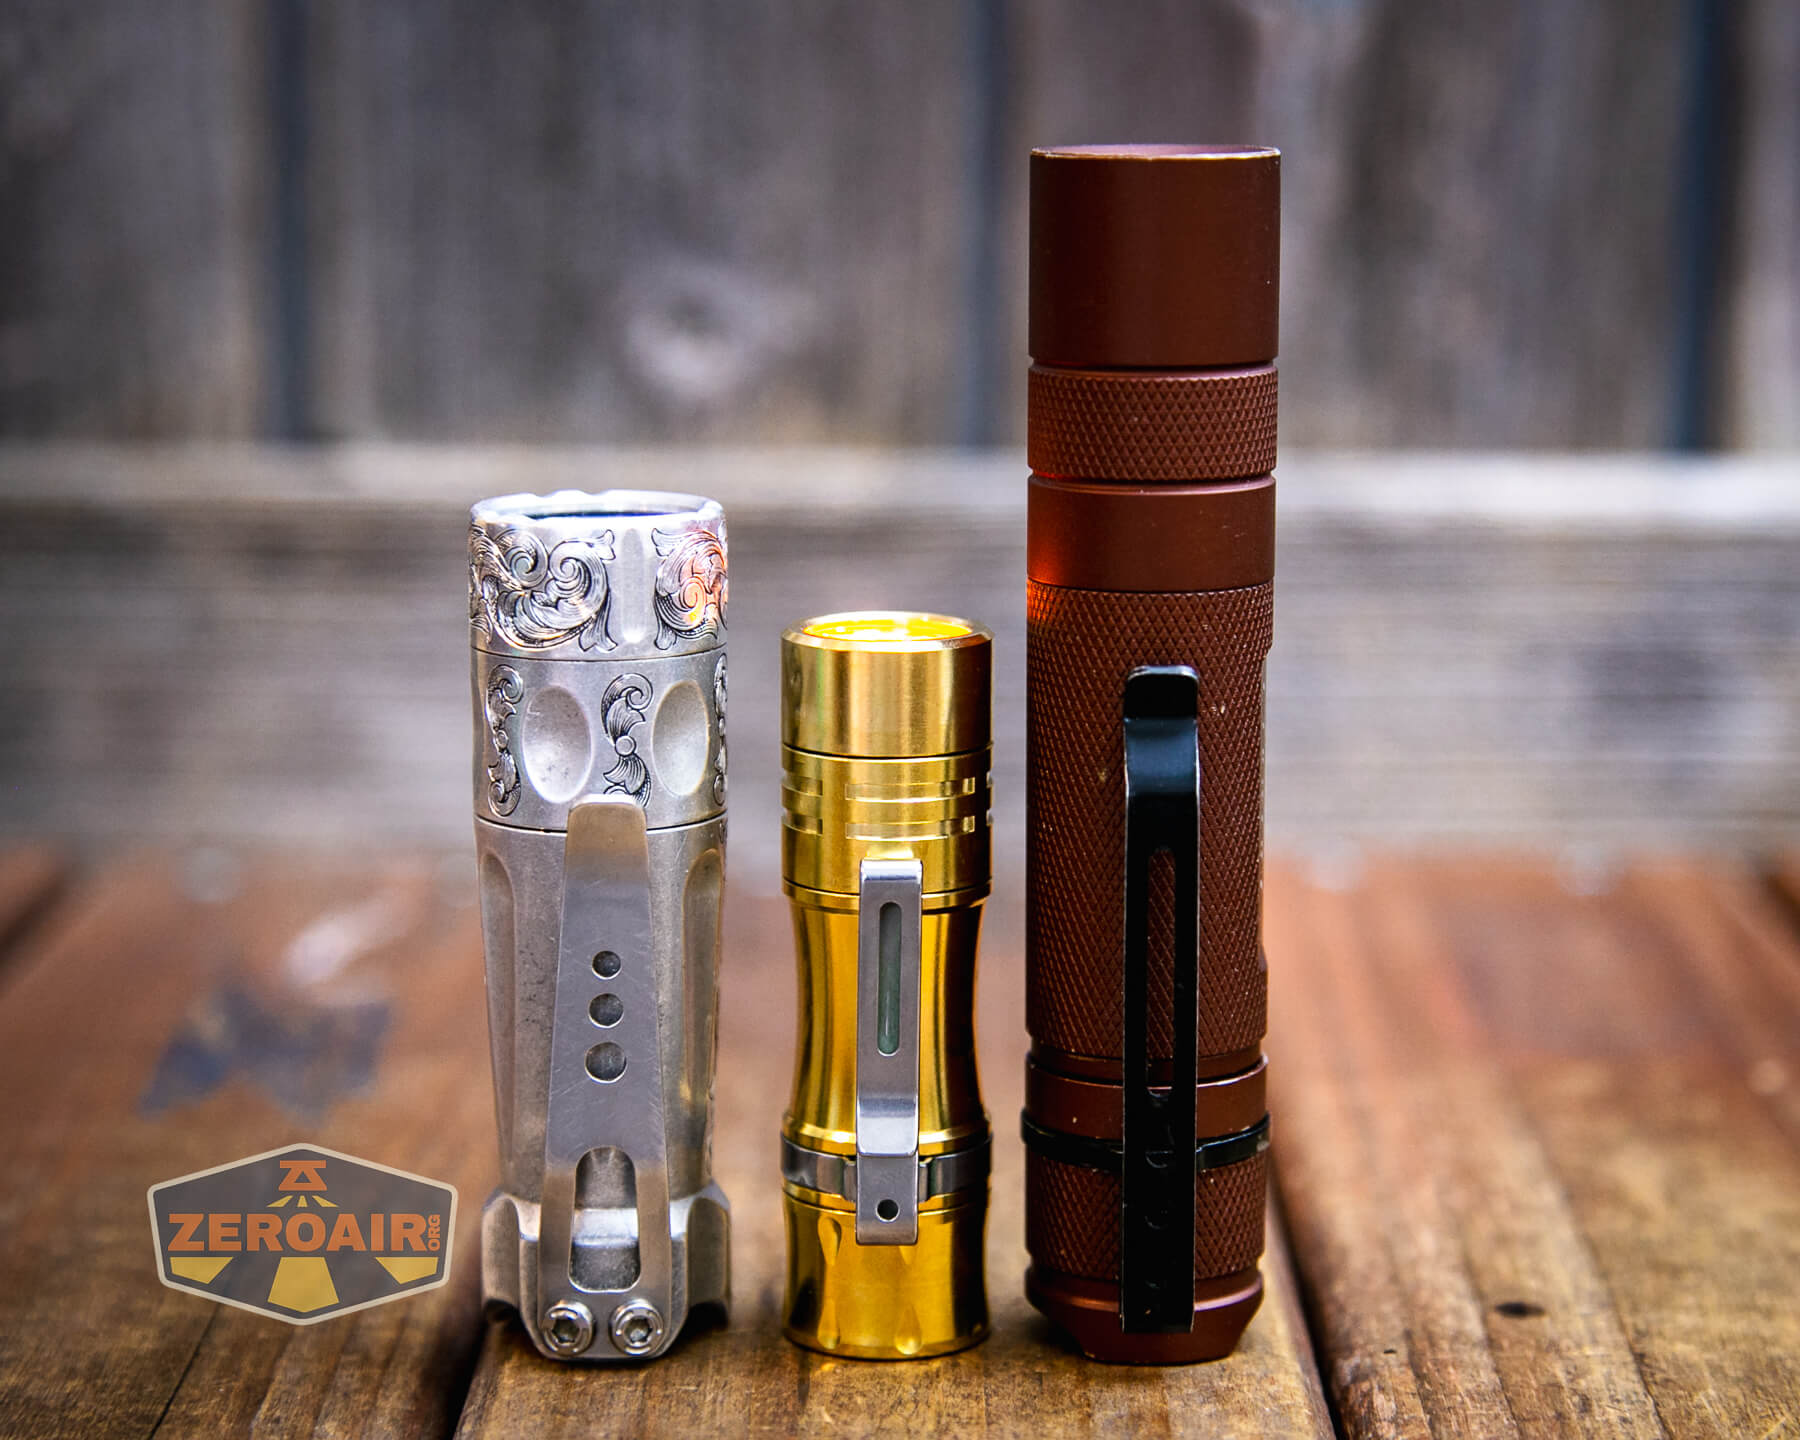
Also above is the light beside my custom-engraved TorchLAB BOSS 35, an 18350 light. I reviewed the aluminum version of that light in both 35 and 70 formats.
Retention and Carry
The Wurkkos TS10 brass flashlight uses a two-way pocket clip. This clip has a couple of options for lanyard attachment, including a hole in the shoulder and a long slit down the side.

It’s a friction-fit clip (unlike what’s used on the FWAA, which is a collar-style clip.)


The lanyard attaches only in these holes – there is no lanyard hole in the body.
Power and Runtime
The Wurkkos TS10 brass flashlight is powered by a single lithium-ion cell. The size is 14500. I found that both my button top and flat tops worked fine, but I really only had the gold Vapcell you see below in flat/button formats. So really the same cell. This light does not support 1.5V cells!
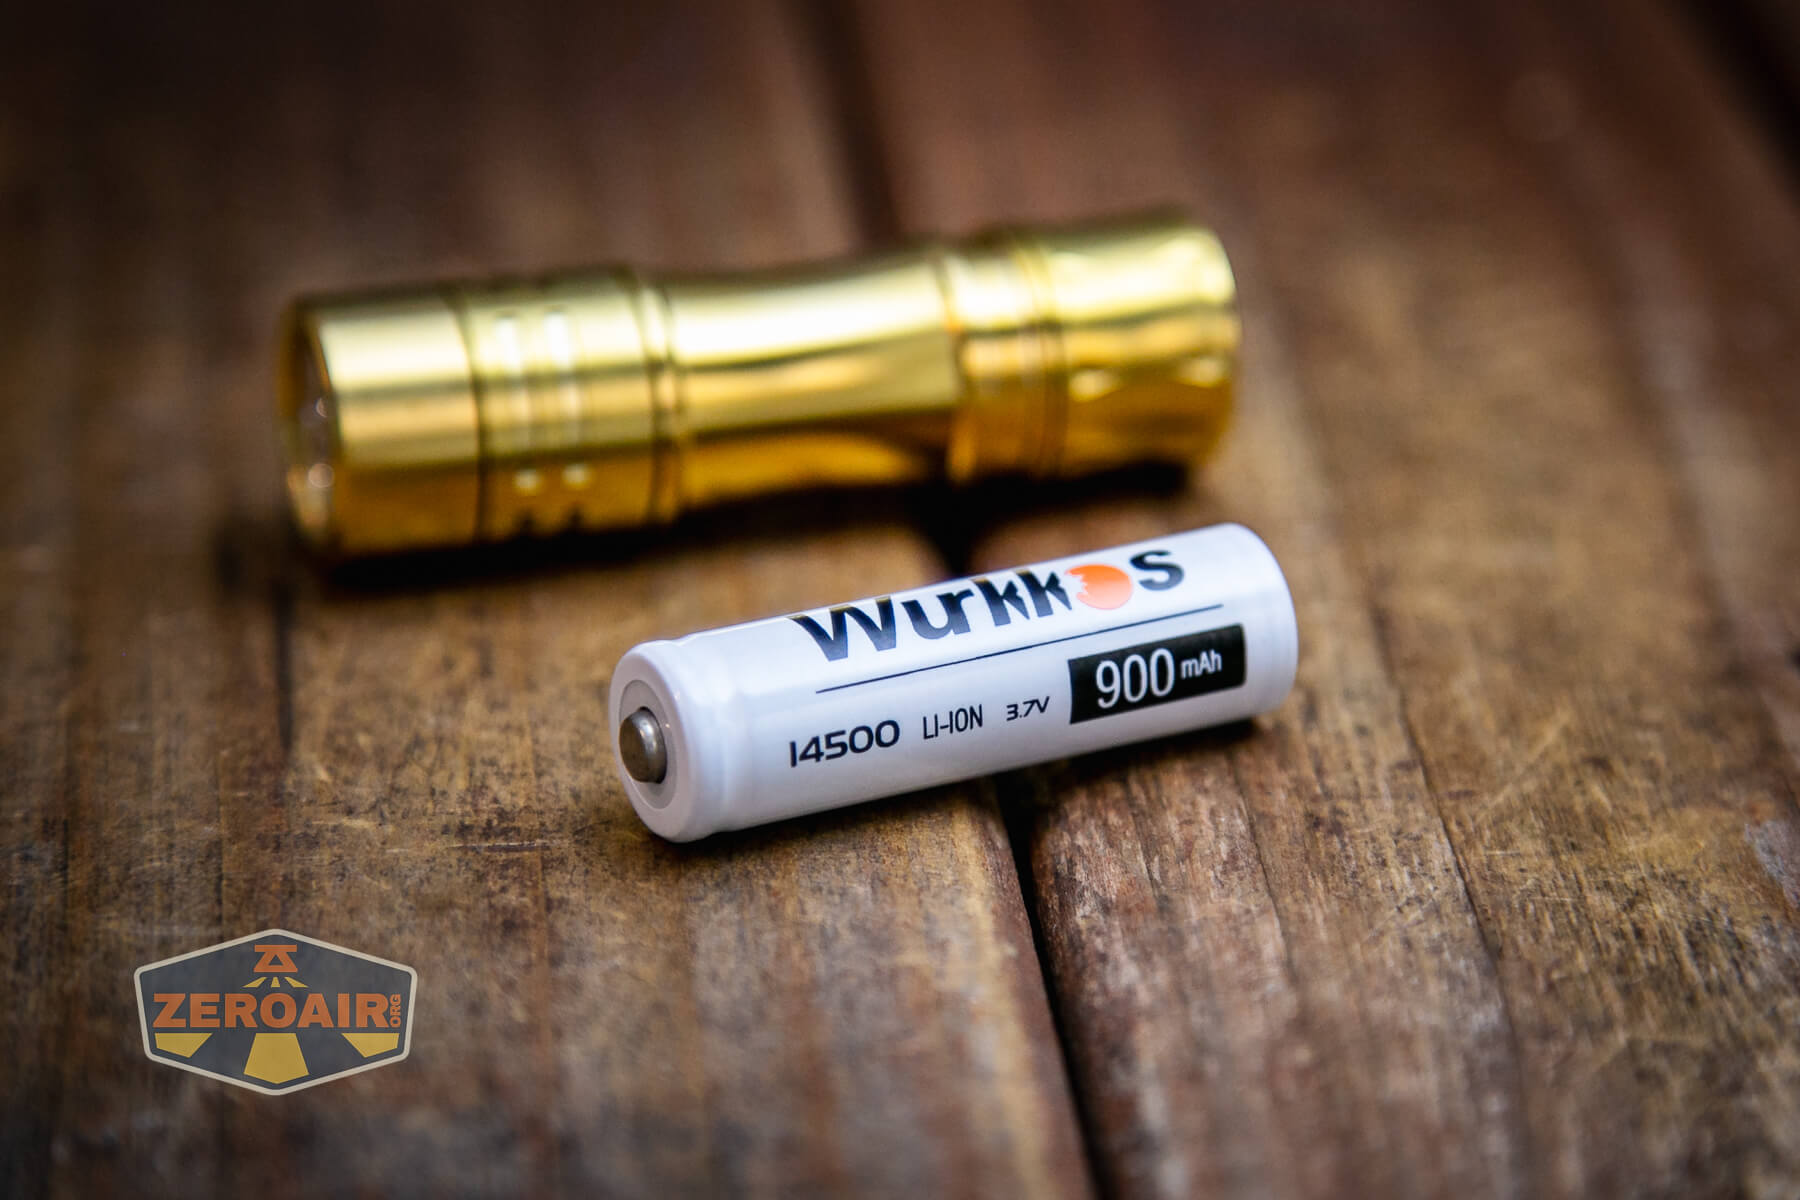
Put the cell in the normal way, positive toward the head. Also, you should only remove the head – don’t try to swap the cell through the tail end. That is not the way.
Here are a number of runtimes. The output is really fantastic, briefly. Over 1000 lumens for around a minute is pretty crazy for such a tiny light. That’s going to make a lot of heat, so it’s unreasonable to think that it’d last for too long. I did calibrate the thermal settings before this test.
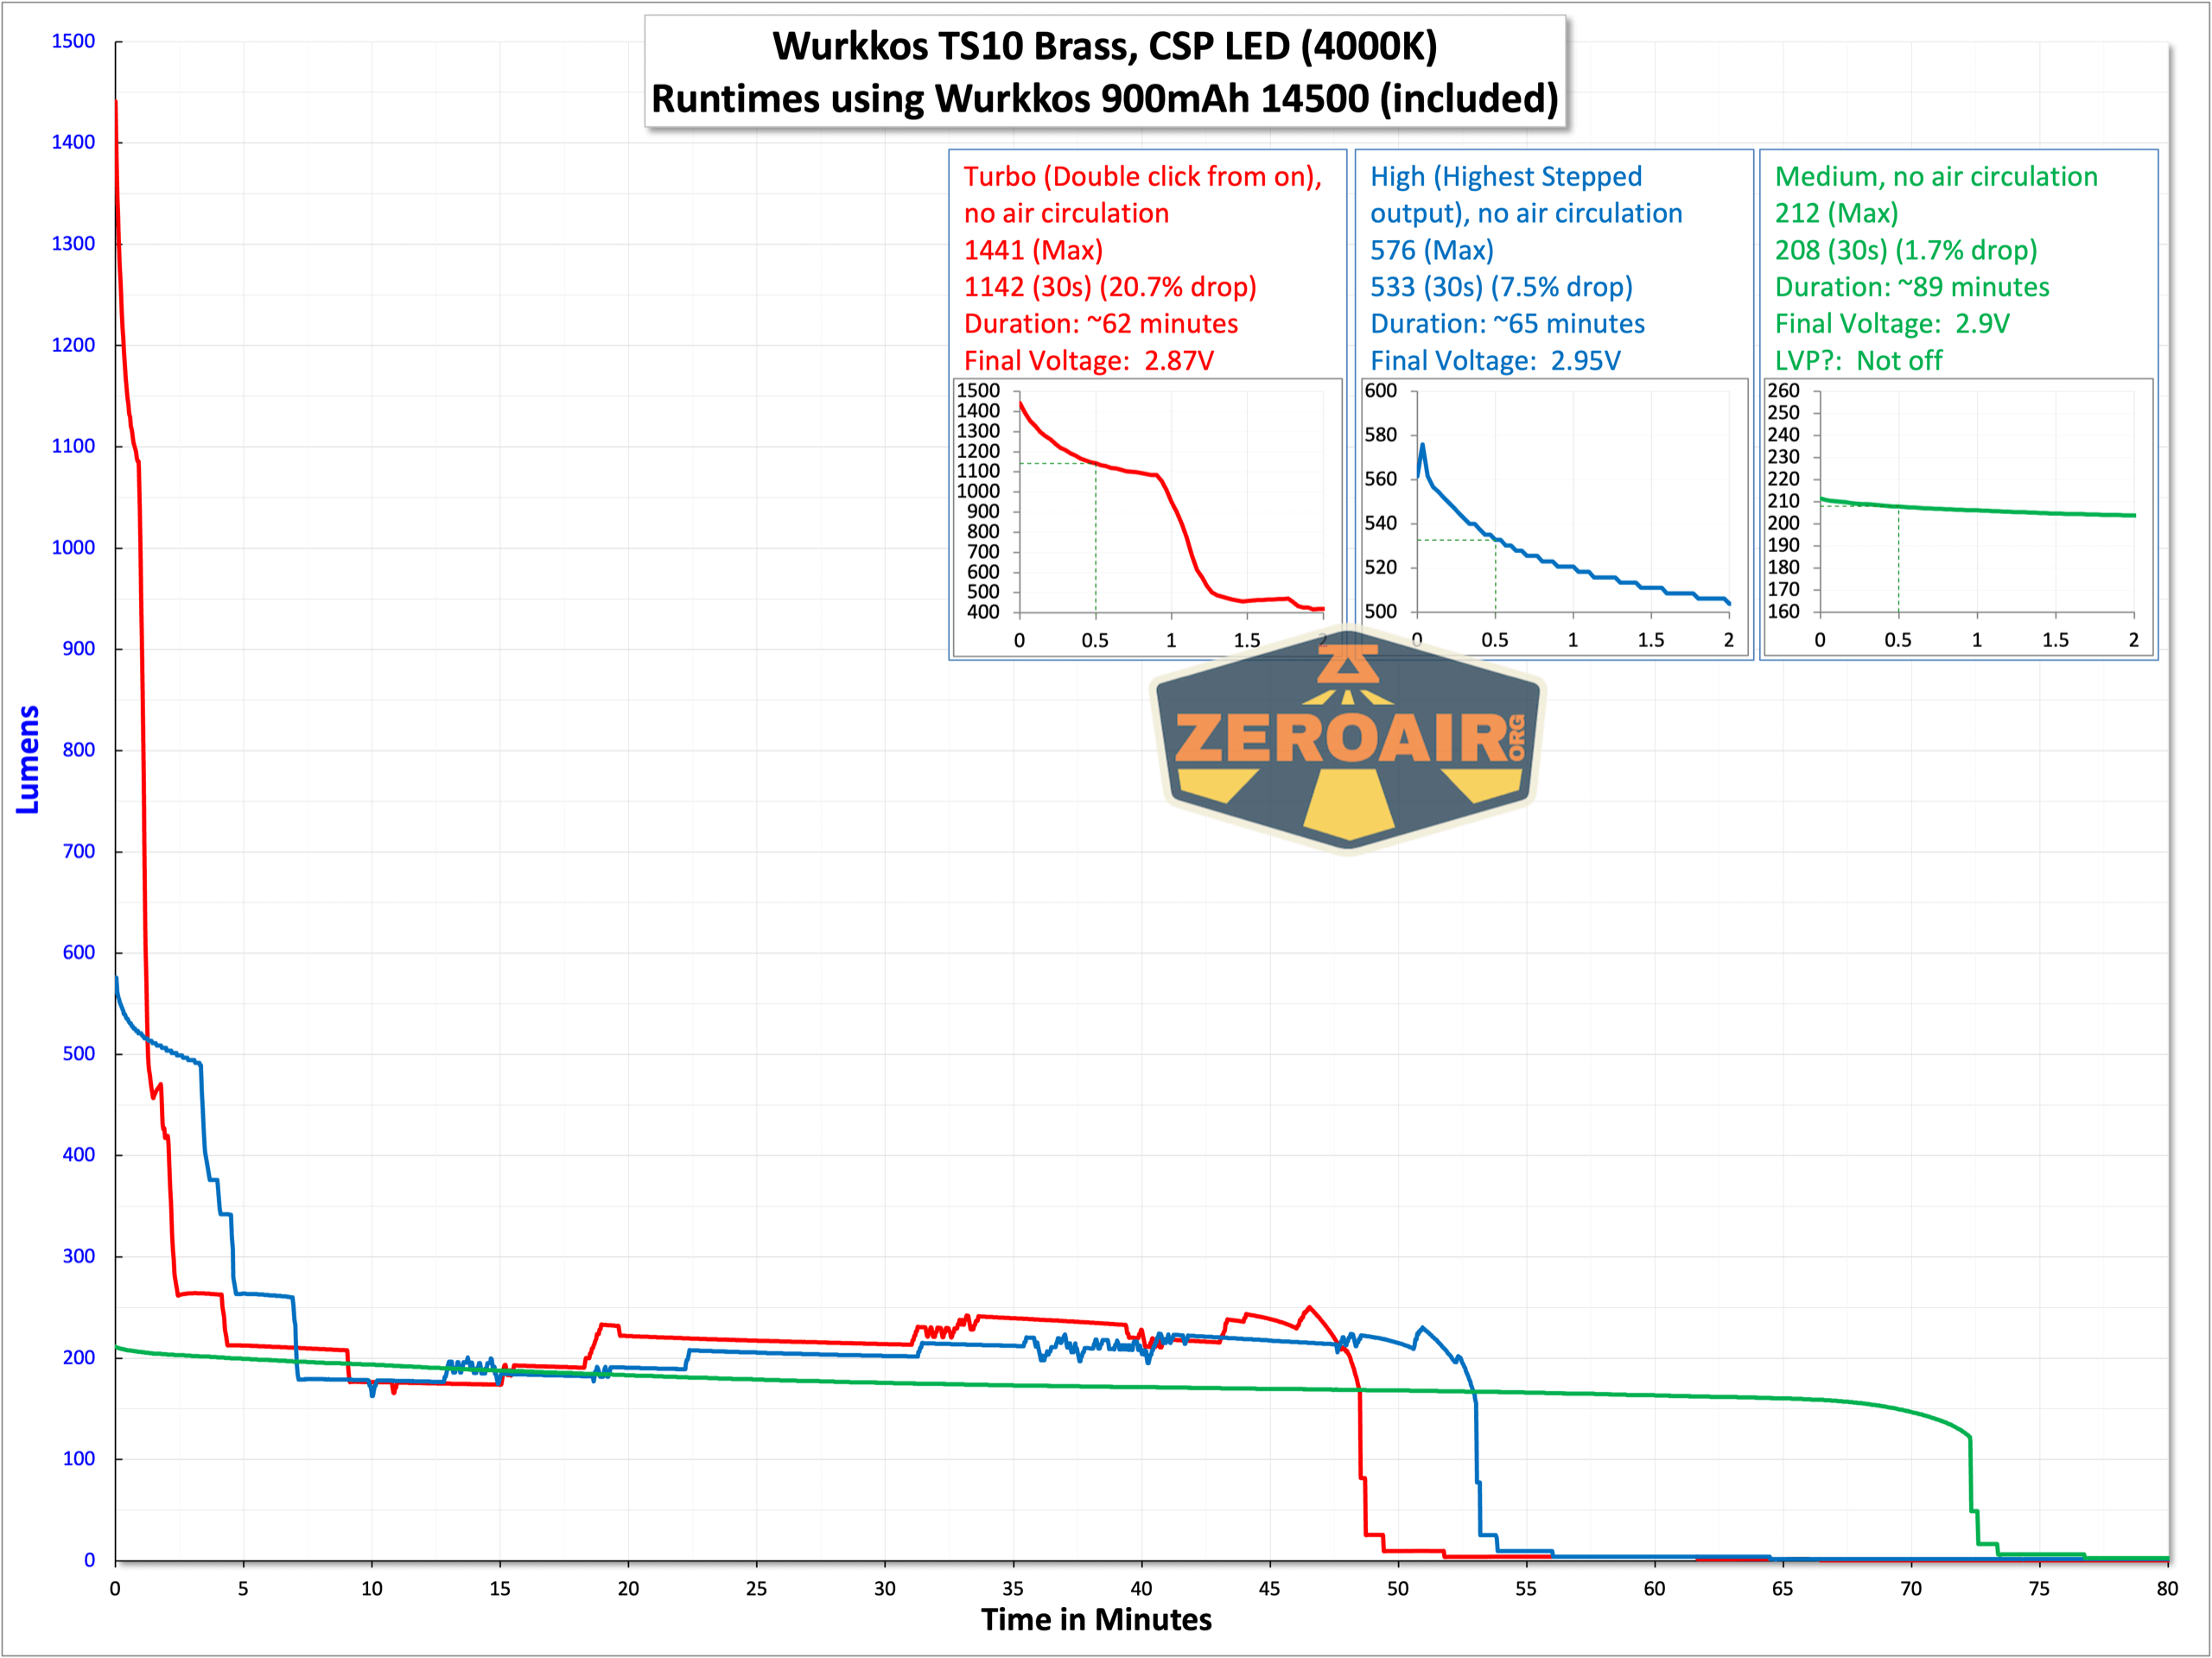
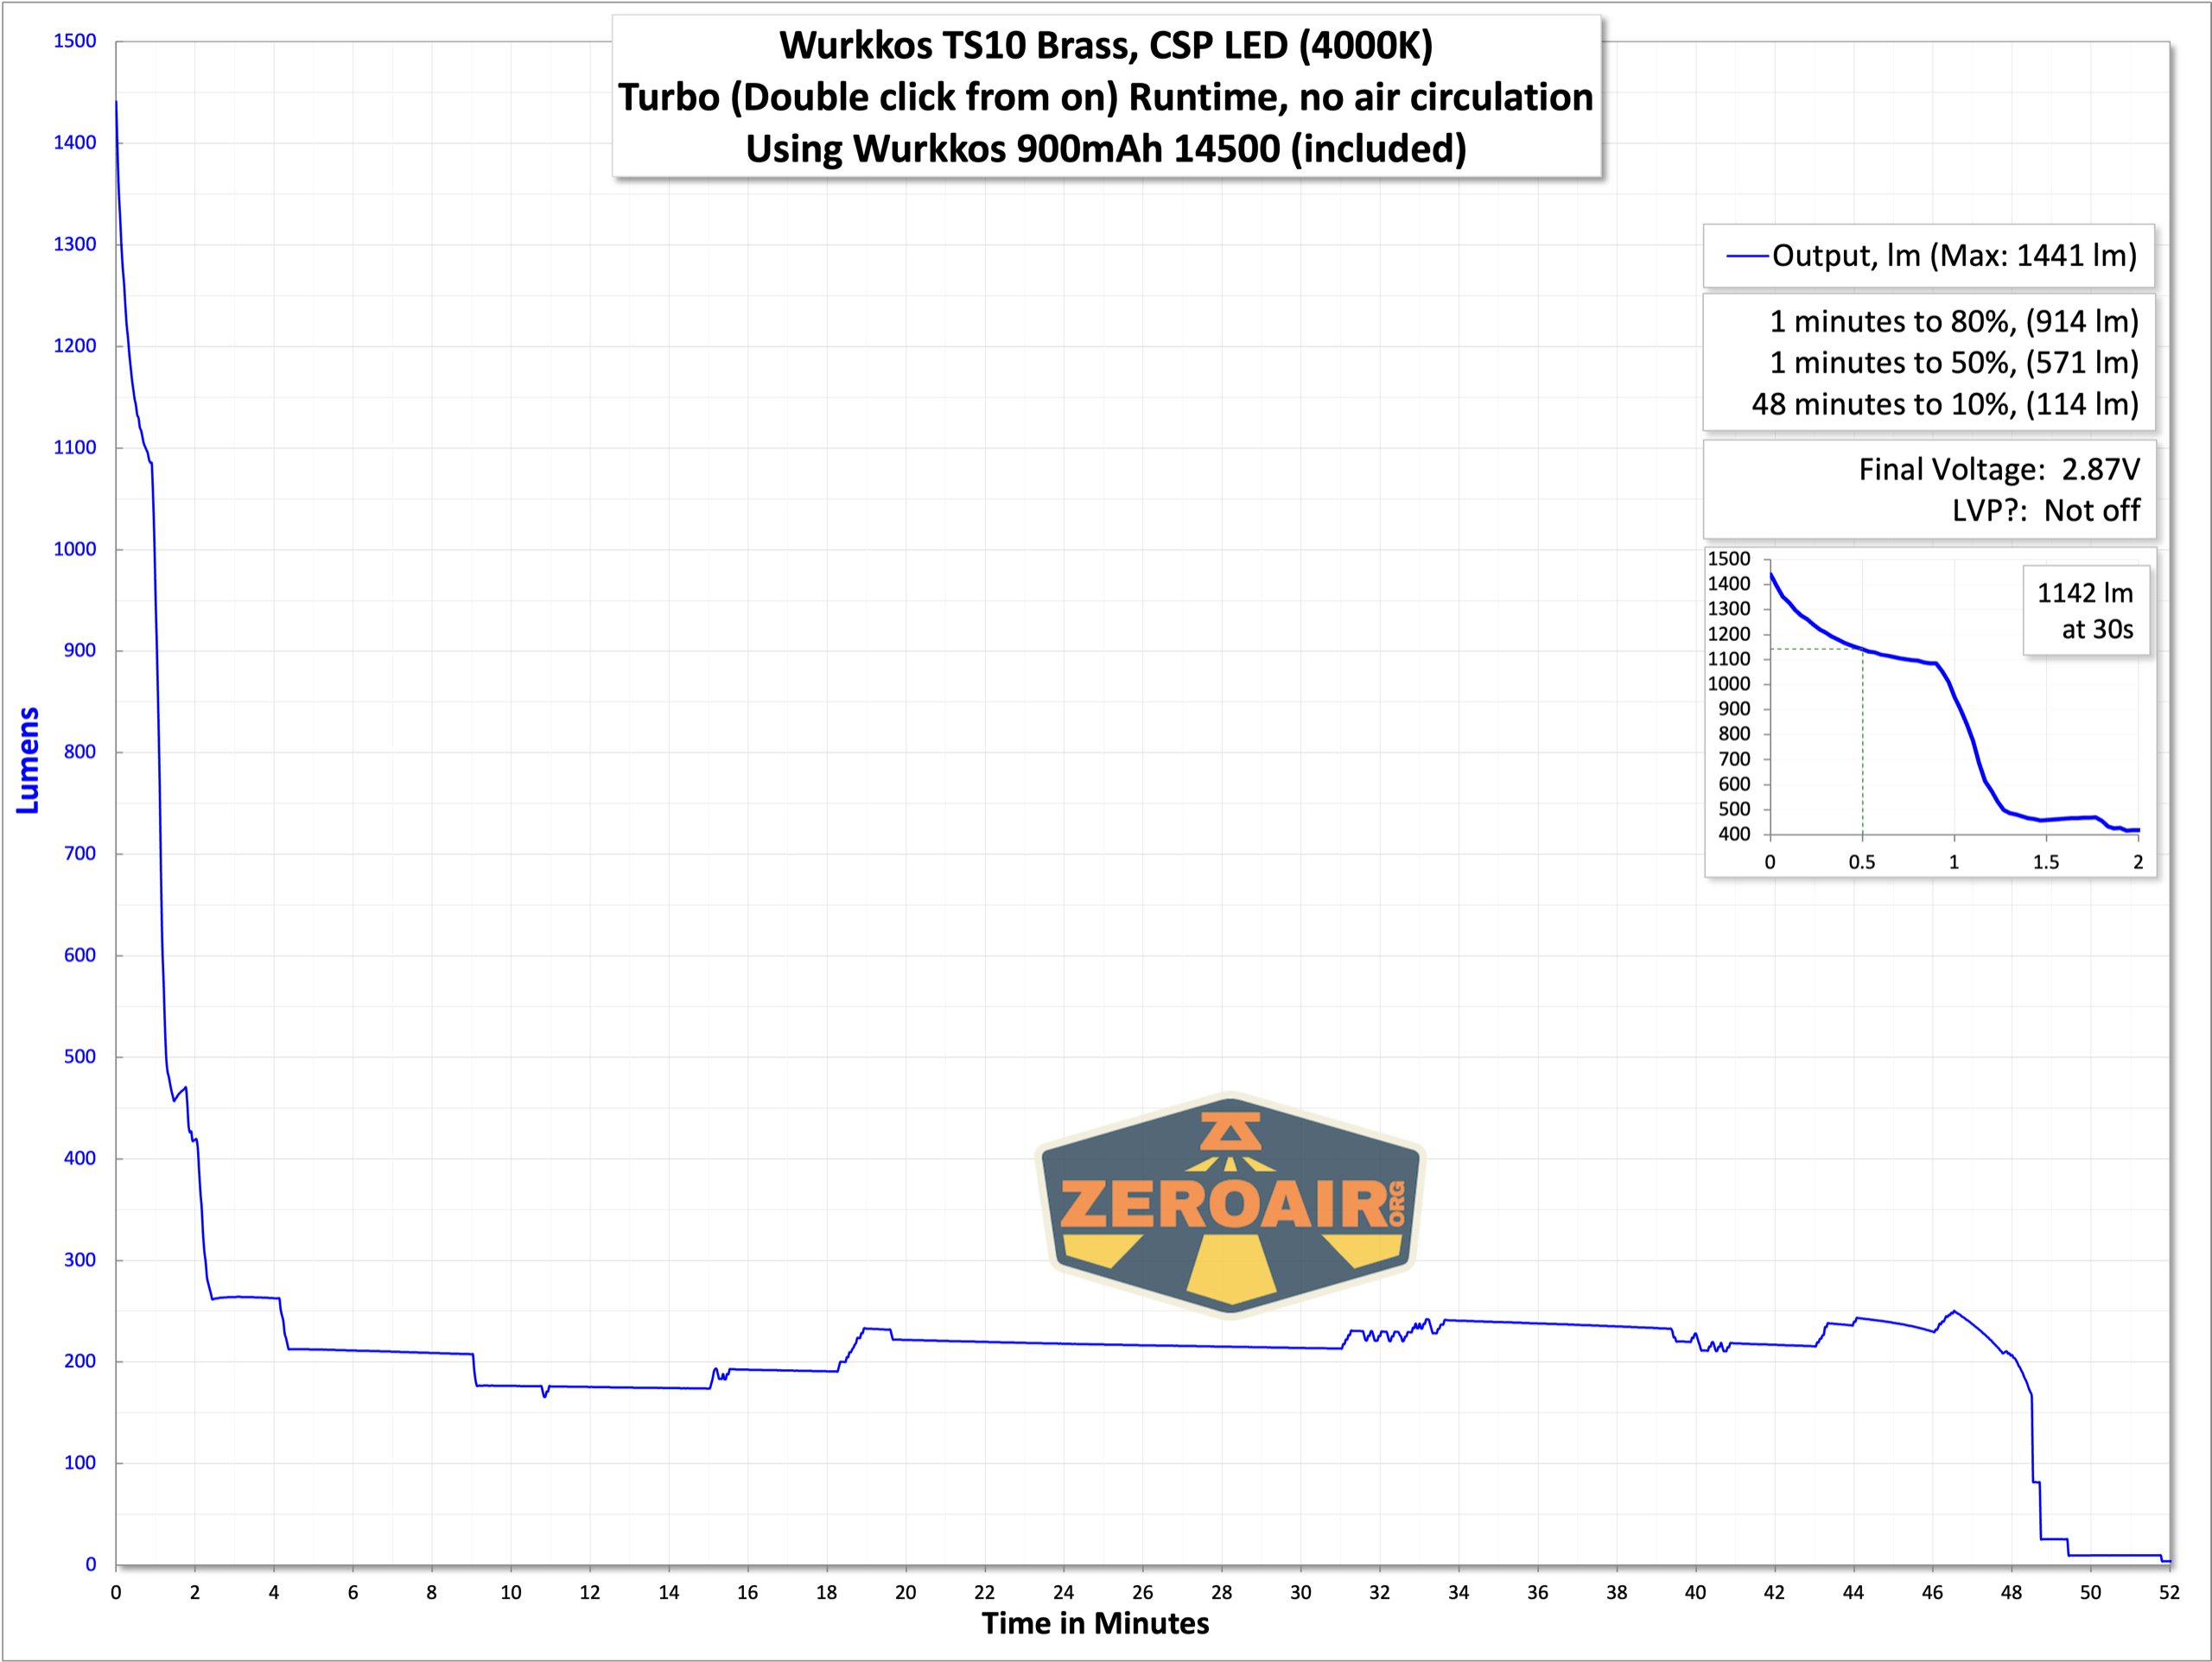
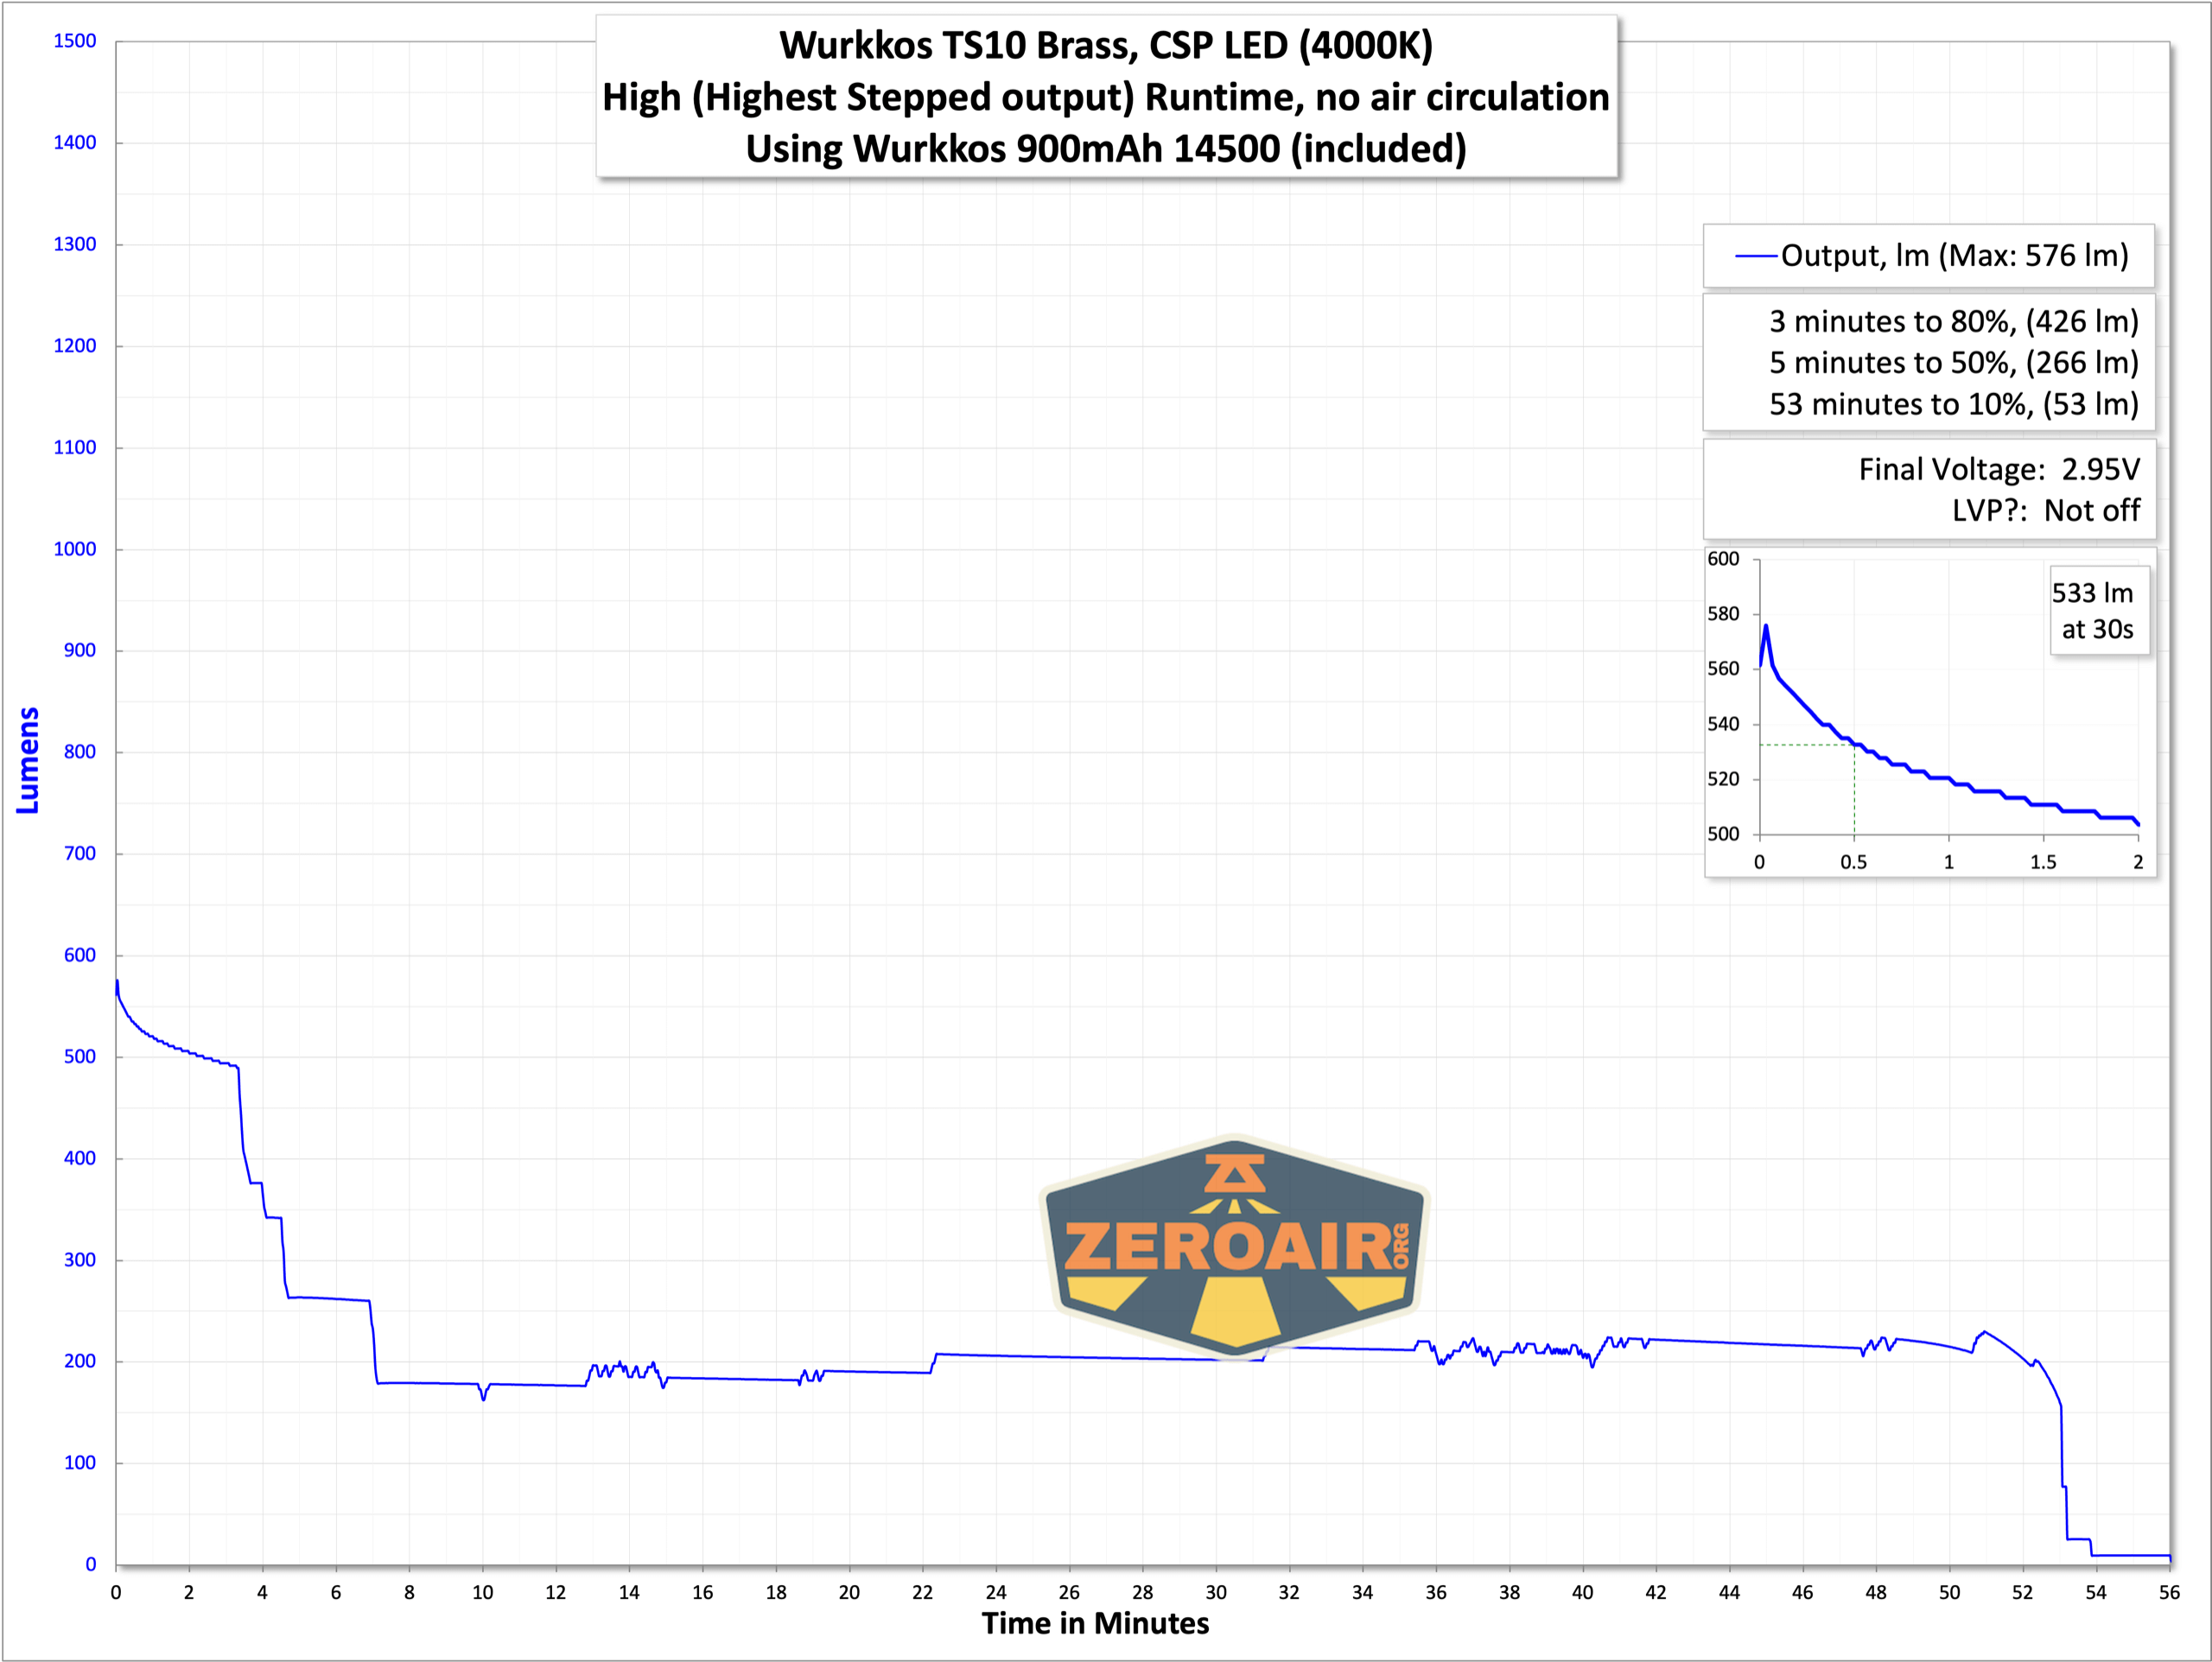
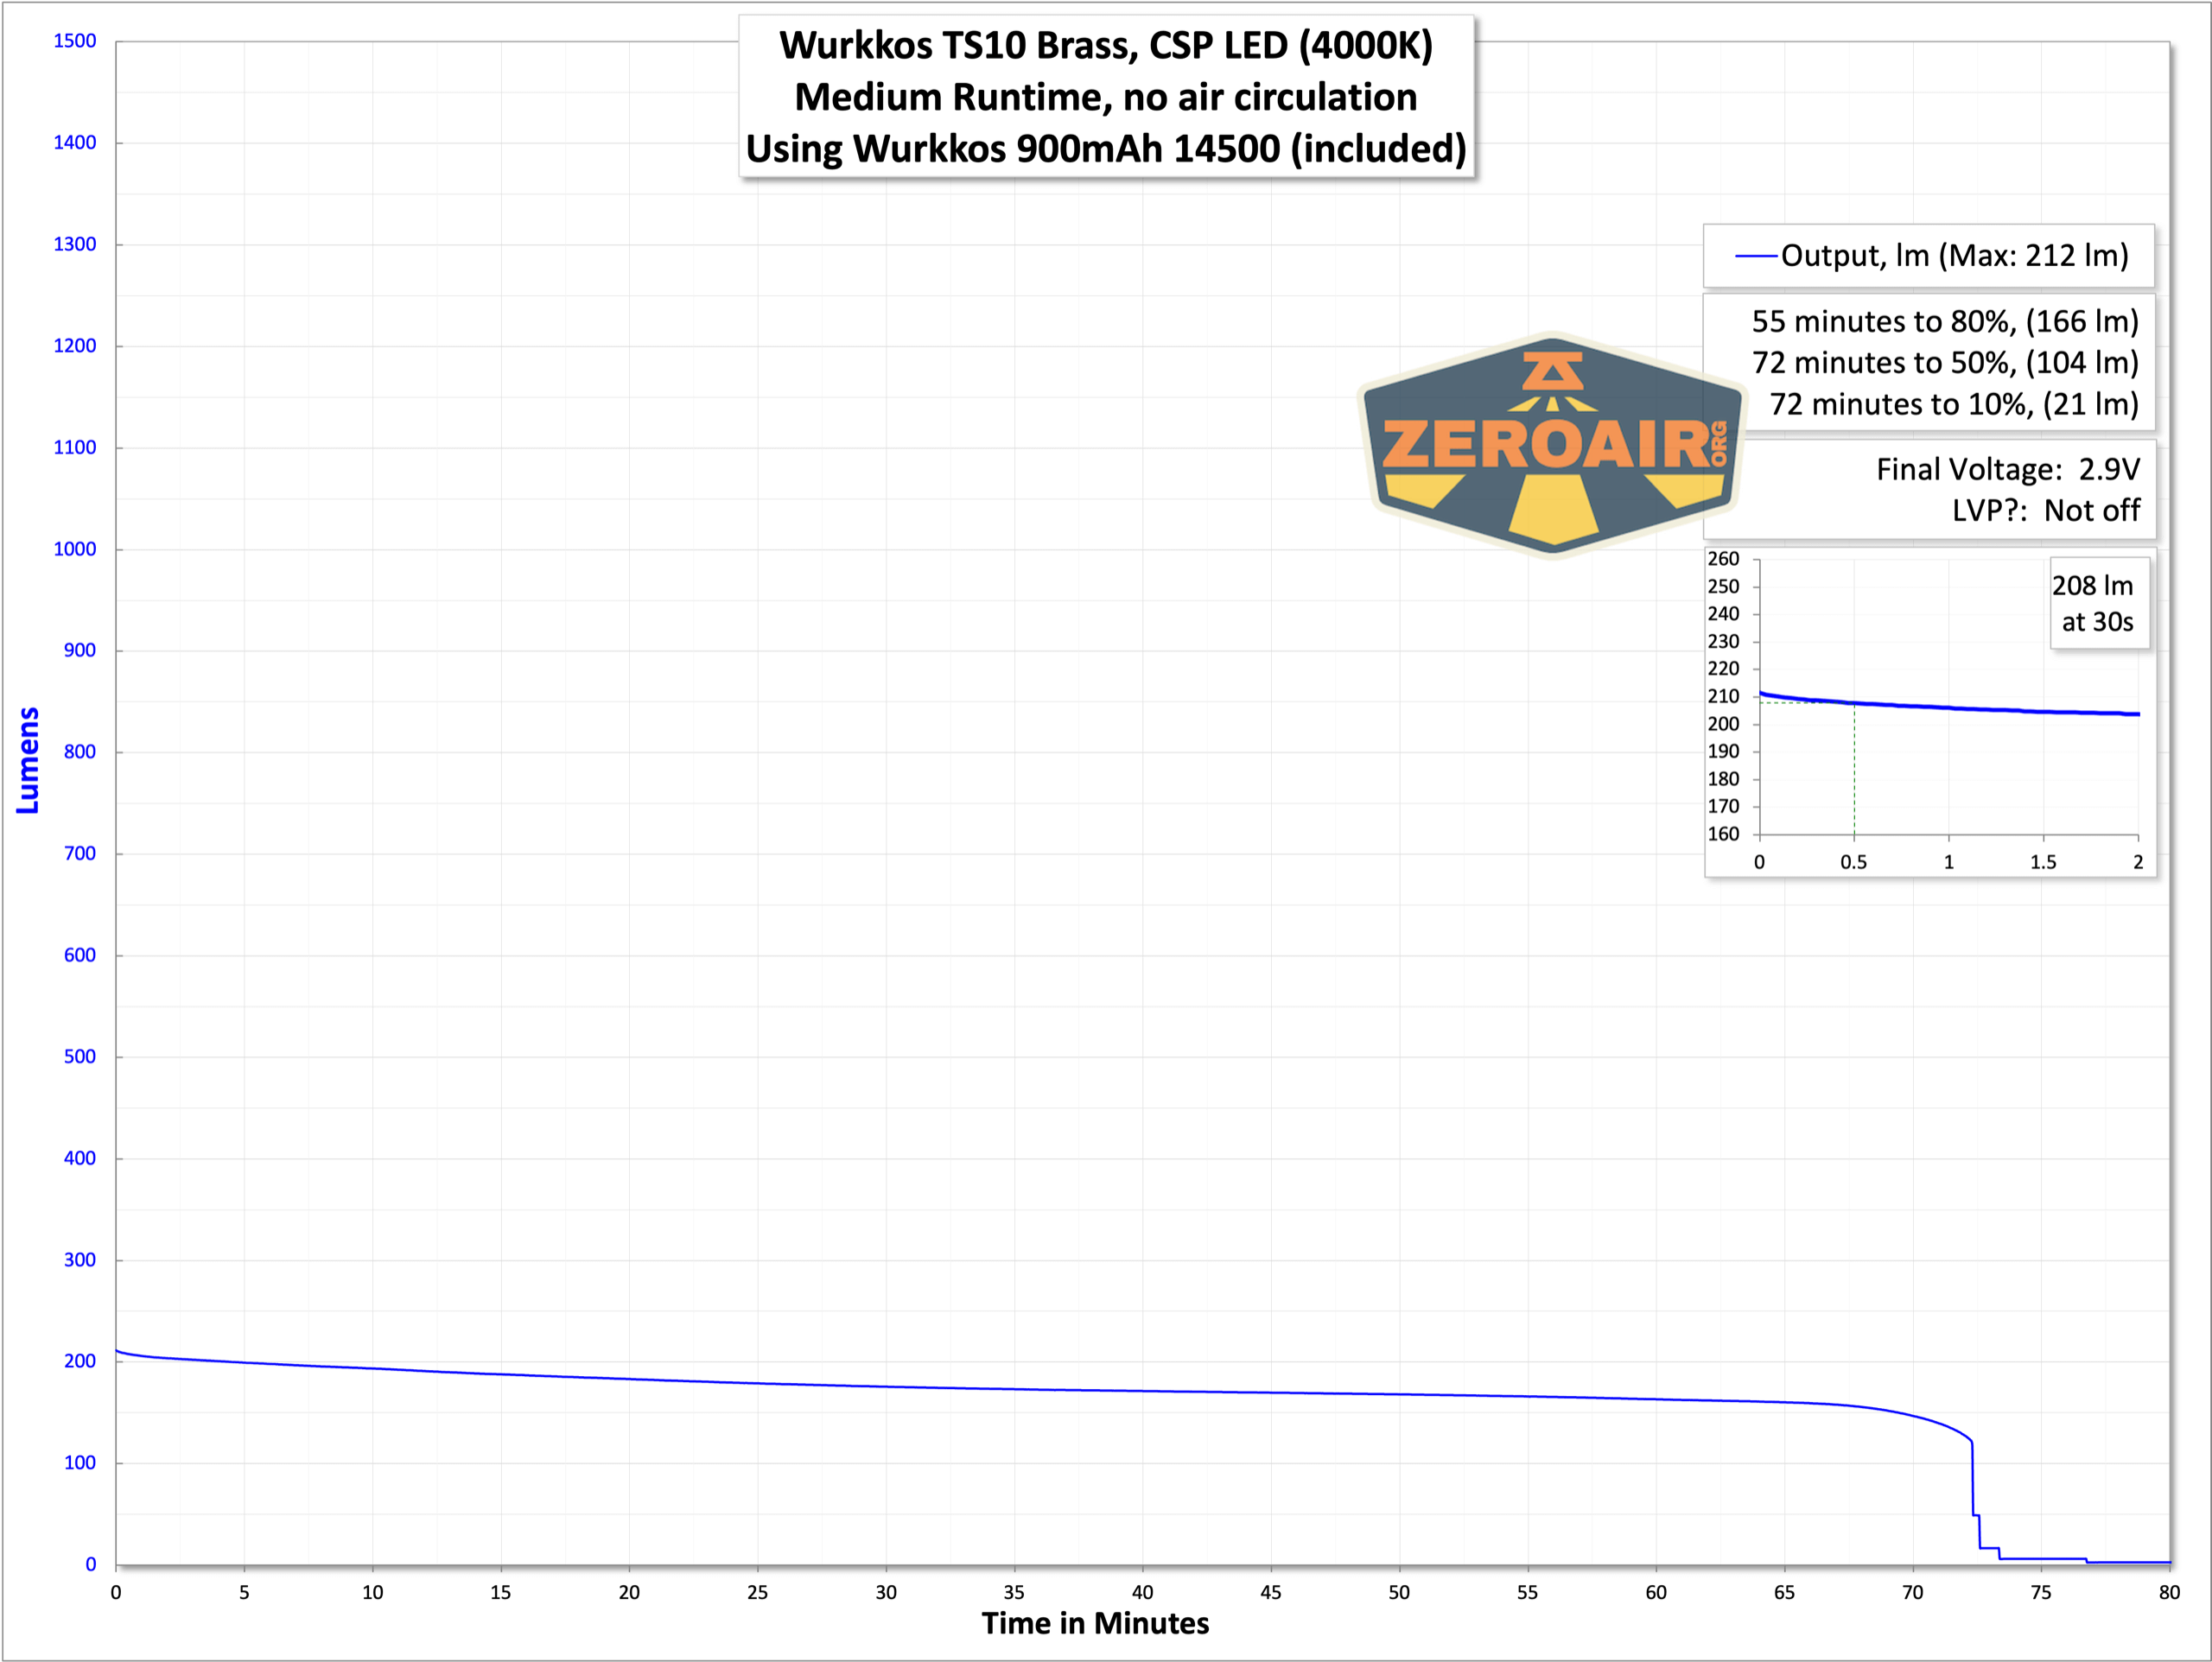
With regard to low voltage protection, the light seems to step down to a very low level. This is a typical Andúril characteristic.
Modes and Currents
| Mode | Mode Claimed Output (lm) | Claimed Runtime | Measured Lumens |
|---|---|---|---|
| Turbo (Double click from on state) | 1400 | 1h14m | 1441 (0s)
1142 (30s) |
| Highest stepped | 900 | 1h29m | 533 |
| 7 | 580 | 1h20m | 208 |
| 6 | 300 | 1h24m | 76 |
| 5 | 130 | 2h43m | 30 |
| 4 | 50 | 6h43m | 10 |
| 3 | 10 | – | 2.5 |
| 2 (Lowest stepped output) | 1 | – | 0.30 |
| 1 (Lowest ramping output) | – | – | ~ (negligible) |
Pulse Width Modulation
I’ve done mostly the same thing here that I do with other Andúril lights – the lowest mode (far left) is the lowest of ramping. Because that’s much lower than the lowest stepped mode (annoying!). Then, from the second photo to the far right is each of the stepped modes (with the far right being the “double click to turbo” mode). All modes except the highest have PWM (again, not a surprise for Andúril, and doesn’t look to have been sped up for Andúril2.

Here you can see a “baseline” – a chart with almost no light hitting the sensor.
Then there’s the Ultrafire WF-602C flashlight, which has some of the worst PWM I’ve seen. It’s so bad that I used a post about it to explain PWM! Here are multiple timescales (10ms, 5ms, 2ms, 1ms, 0.5ms, 0.2ms) to make comparing this “worst” PWM light to the test light easier. That post also explains why I didn’t test the WF-602C at the usual 50us scale.
User Interface and Operation
There’s a single switch for interacting with the Wurkkos TS10 brass flashlight. It’s an e-switch with a big button.
This button has a nice texture and a great action.
Andúril2 is great, and I think it’s an improvement over the first iteration(s). There are some things some users might not love about it, but I think overall it’s much more approachable. I will note, though, that the nomenclature might be a bit confusing – the light (all lights with Andúril2) ships in Simple UI. This is not Muggle Mode. You may think “well, duh,” and by now you’ve already seen the blistering runtime on turbo of Simple, so you get it. But just be aware, don’t hand this light to the uninitiated, thinking they won’t set their hand on fire while using Simple UI. Here is where I’d tell you how to switch to Muggle mode. There is no muggle mode.
Here’s a user interface table! This table is directly from ToyKeeper’s Andúril2 manual, which you can view here:
http://toykeeper.net/torches/fsm/anduril2/anduril-manual.txt
I am putting this in a table here with ToyKeeper’s permission. Thanks, TK! This is so much better than me writing it because it’s more reliable, and I completely trust its accuracy (at least, if I can paste it accurately). I’m breaking it up a little differently than ToyKeeper did, though I certainly understand why it was done her way originally.
First, the table for Either User Interface. These actions work whether you’re in Simple or Advanced UI.
| State | Action | Result |
|---|---|---|
| Off | 1C | On (ramp mode, memorized level) |
| Off | 1H | On (ramp mode, floor level) |
| Off | 2C | On (ramp mode, ceiling level) |
| Off | 3C | Battcheck mode |
| Off | 4C | Lockout mode |
| Off | 13H | Factory reset (on some lights) |
| Off | 15+C | Version check |
| Ramp | 1C | Off |
| Ramp | 1H | Ramp (up, with reversing) |
| Ramp | 2H | Ramp (down) |
| Ramp | 3H | Tint ramping (on some lights) |
| Ramp | 3H | Momentary turbo (on lights without tint ramping) |
| Ramp | 4C | Lockout mode |
| Lockout | 1C/1H | Momentary moon (lowest floor) |
| Lockout | 2C/2H | Momentary moon (highest floor, or manual mem level) |
| Lockout | 4C | On (ramp mode, memorized level) |
| Lockout | 4H | On (ramp mode, floor level) |
| Lockout | 5C | On (ramp mode, ceiling level) |
| Batt check | 1C | Off |
A table for only Simple User Interface:
| State | Action | Result |
|---|---|---|
| Off | 2H | On (momentary ceiling level) |
| Off | 10H | Disable Simple UI |
| Ramp | 2C | Go to/from ceiling |
A table for only Advanced (aka “Full”) User Interface:
| State | Action | Result |
|---|---|---|
| Off | 2H | On (momentary turbo) |
| Off | 3H | Strobe mode (whichever was used last) |
| Off | 5C | Momentary mode |
| Off | 7C | Aux LEDs: Next pattern |
| Off | 7H | Aux LEDs: Next color |
| Off | 10C | Enable Simple UI |
| Off | 10H | Simple user interface ramp config menu (1: floor, 2: ceiling, [3: steps]) |
| Ramp | 2C | Go to/from ceiling (or turbo if at ceil already) |
| Ramp | 3C | Change ramp style (smooth / stepped) |
| Ramp | 5C | Momentary mode |
| Ramp | 5H | Sunset timer on, and add 5 minutes |
| Ramp | 7H | Ramp config menu (1: floor, 2: ceiling, [3: steps]) |
| Ramp | 10C | Turn on manual memory and save current brightness |
| Ramp | 10H | Manual memory config menu (1: off, 2: set timeout) |
| Lockout | 7C | Aux LEDs: Next pattern |
| Lockout | 7H | Aux LEDs: Next color |
| Lockout | 10H | Auto-lock config menu (1: set timeout) |
| Strobe (any) | 1C | Off |
| Strobe (any) | 2C | Next strobe mode |
| Strobe (any) | 3H | Tint ramping (on some lights) |
| Strobe (any) | 5C | Momentary mode (using current strobe) |
| Candle | 1H/2H | Brighter / dimmer |
| Candle | 5H | Sunset timer on, add 5 minutes |
| Party strobe | 1H/2H | Faster / slower |
| Tactical strobe | 1H/2H | Faster / slower |
| Biking | 1H/2H | Brighter / dimmer |
| Lightning | 1H | Interrupt current flash or start new one |
| Batt check | 2C | Next blinky mode (Temp check, Beacon, SOS) |
| Batt check | 7H | Voltage config menu |
| Temp check | 1C | Off |
| Temp check | 2C | Next blinky mode (Beacon, SOS, Batt check) |
| Temp check | 7H | Thermal config menu |
| Beacon | 1C | Off |
| Beacon | 1H | Configure beacon timing |
| Beacon | 2C | Next blinky mode (SOS, Batt check, Temp check) |
| SOS | 1C | Off |
| SOS | 2C | Next blinky mode (Batt check, Temp check, Beacon) |
| Momentary | Any | On (until button is released) |
| Momentary | Disconnect power | Exit Momentary mode |
| Config menus | Hold | Skip current item with no changes |
| Config menus | Release | Configure current item |
| Number entry | Click | Add 1 to value for current item |
LED and Beam
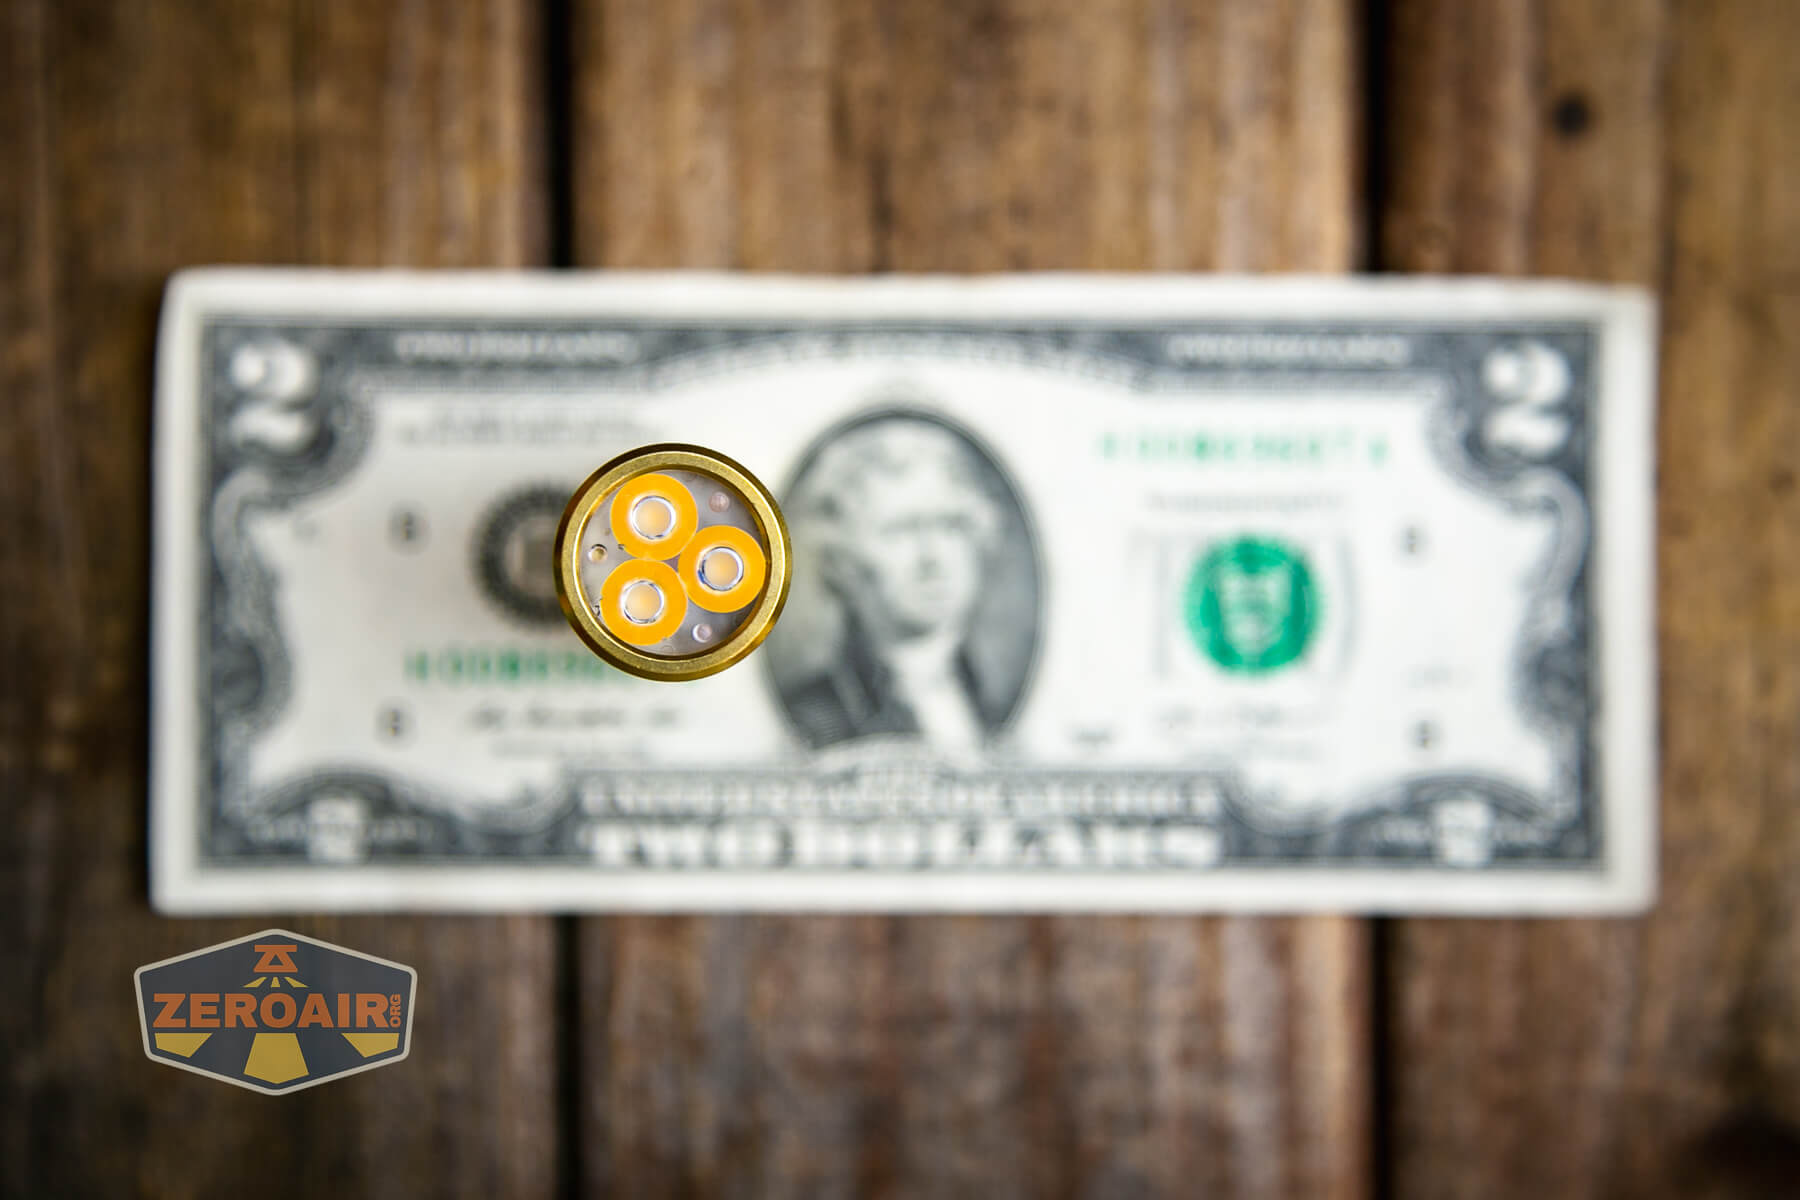
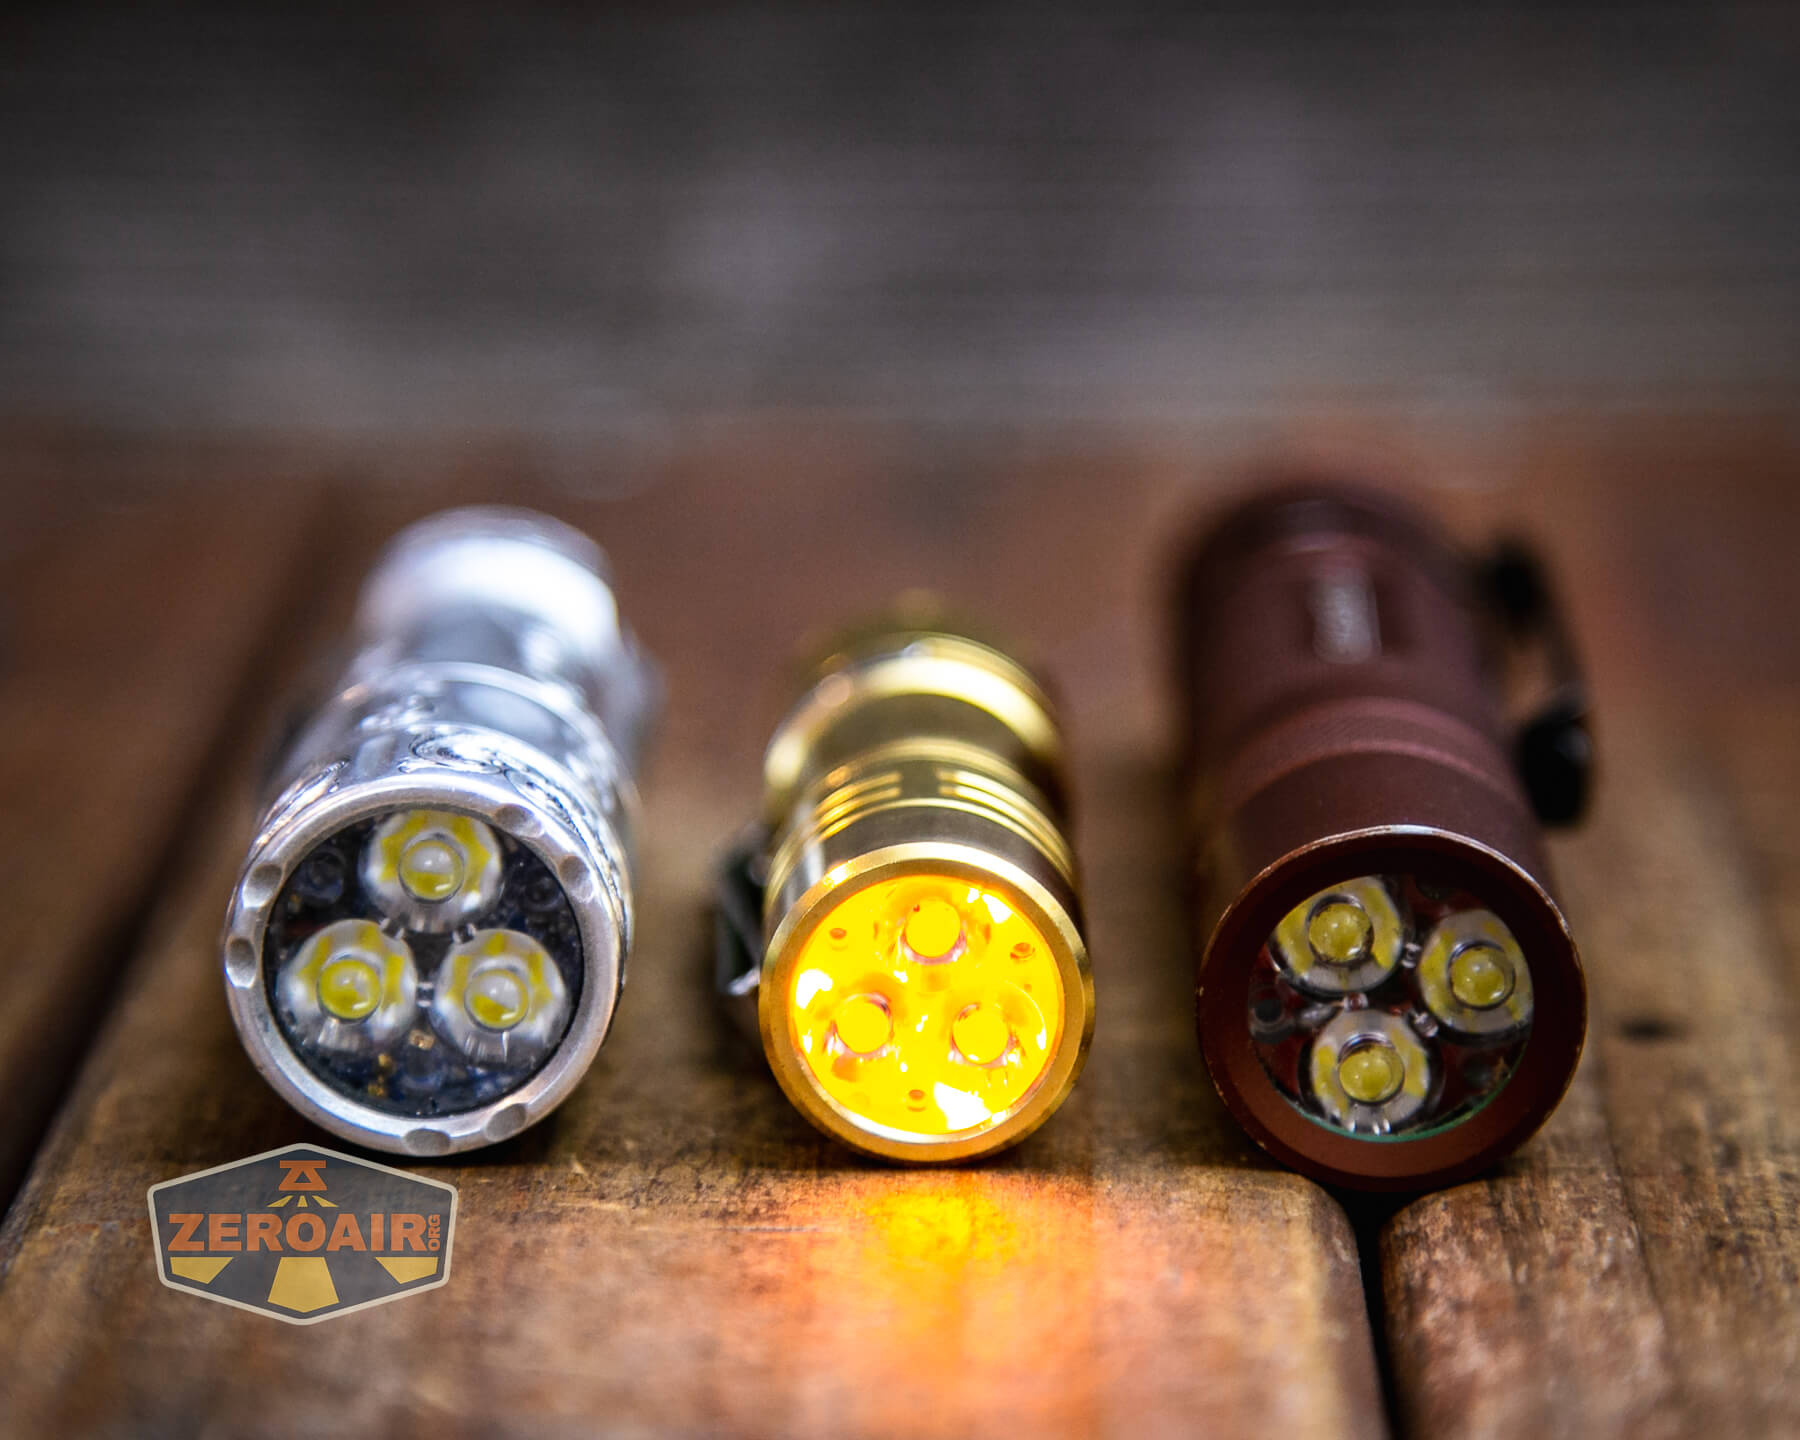
This is a triple-emitter light – there are three emitters. They are “CSP LED” emitters and are rated at 4000K.
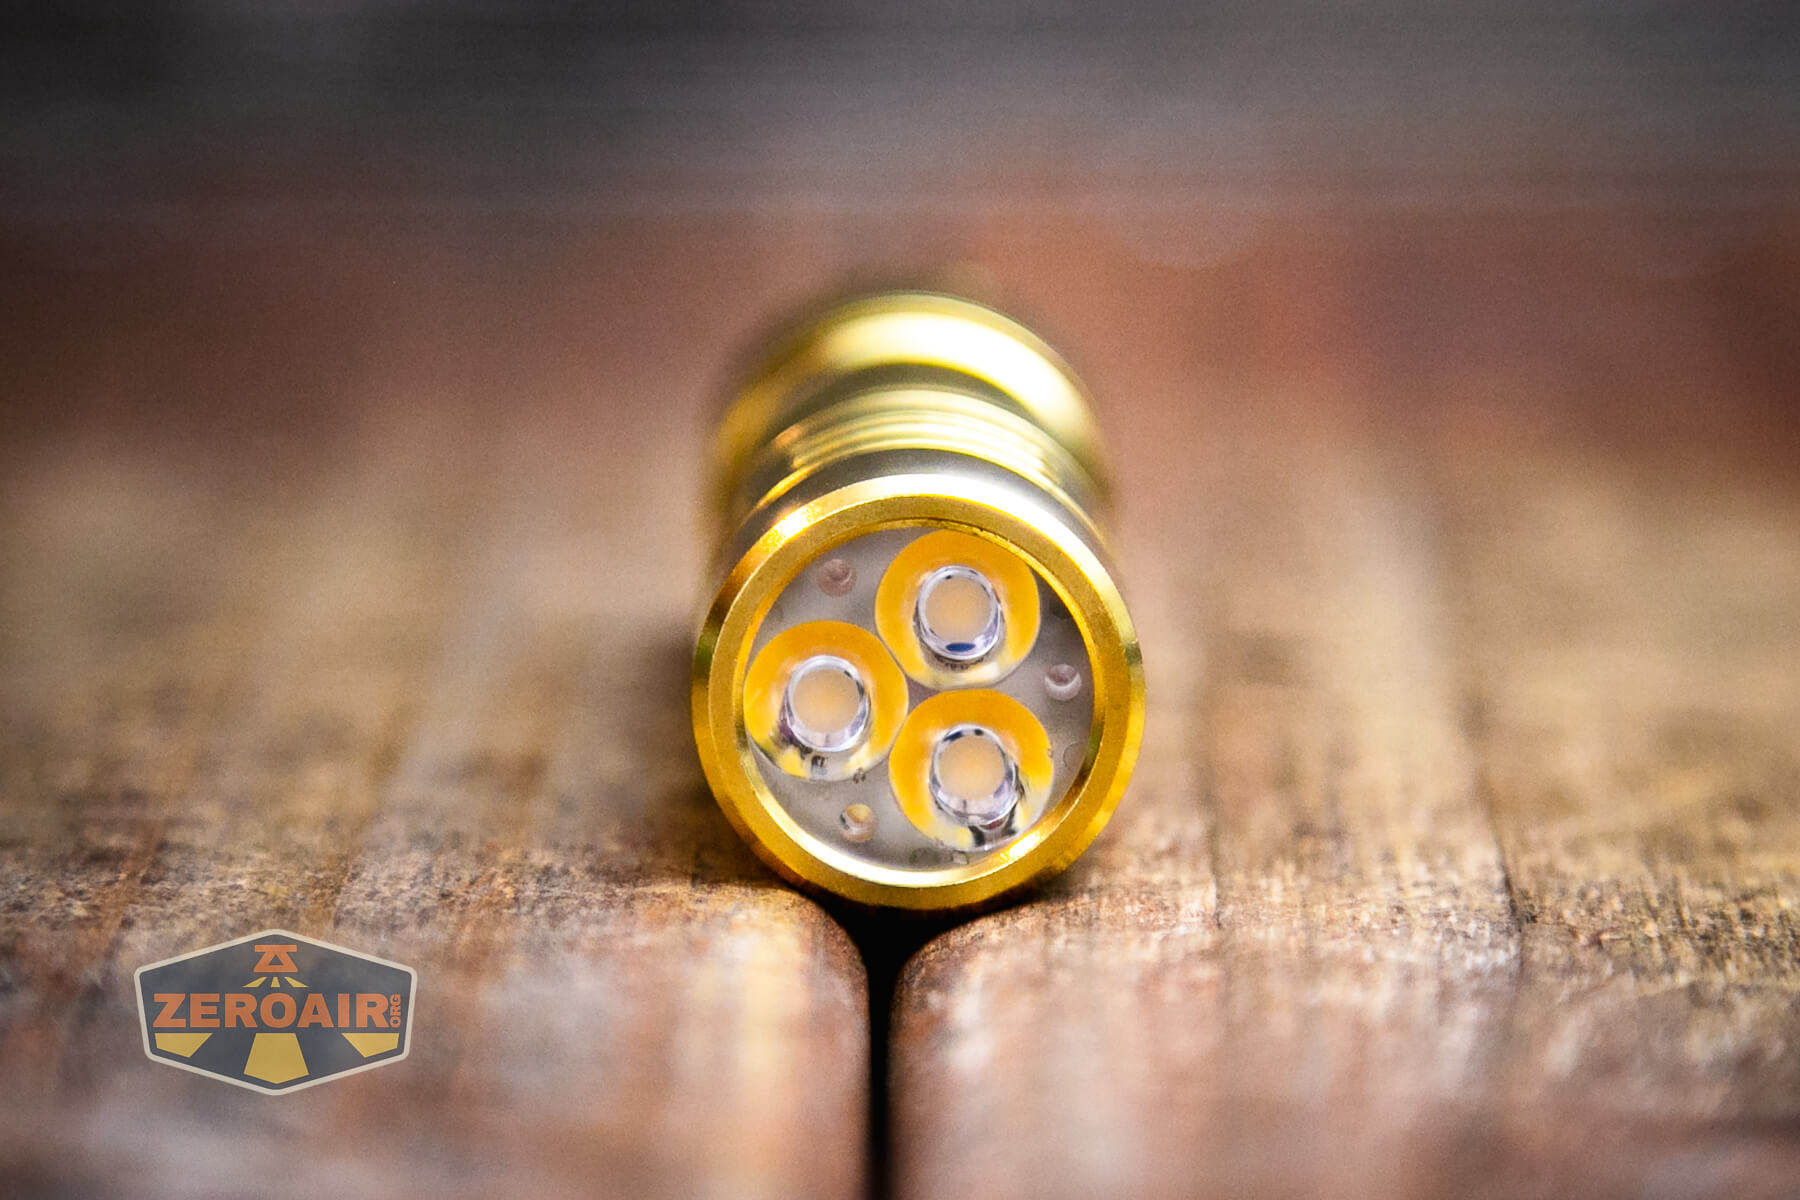
They are really fantastic emitters.
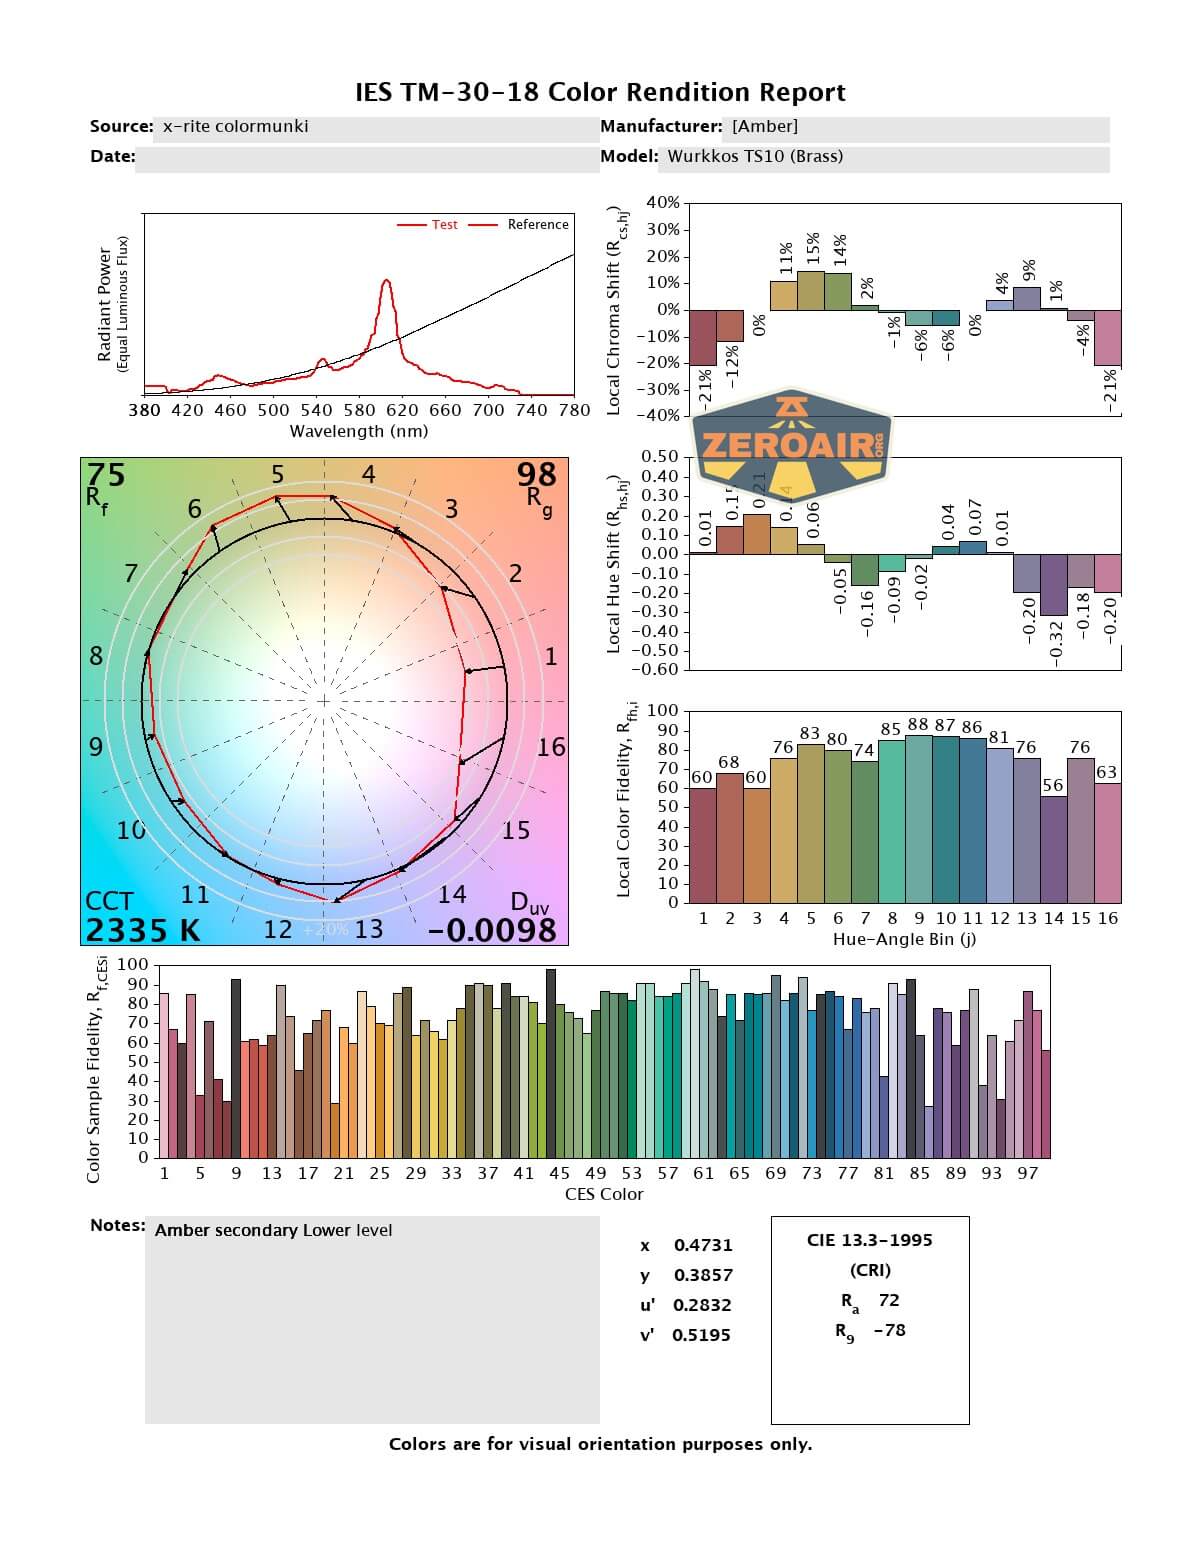
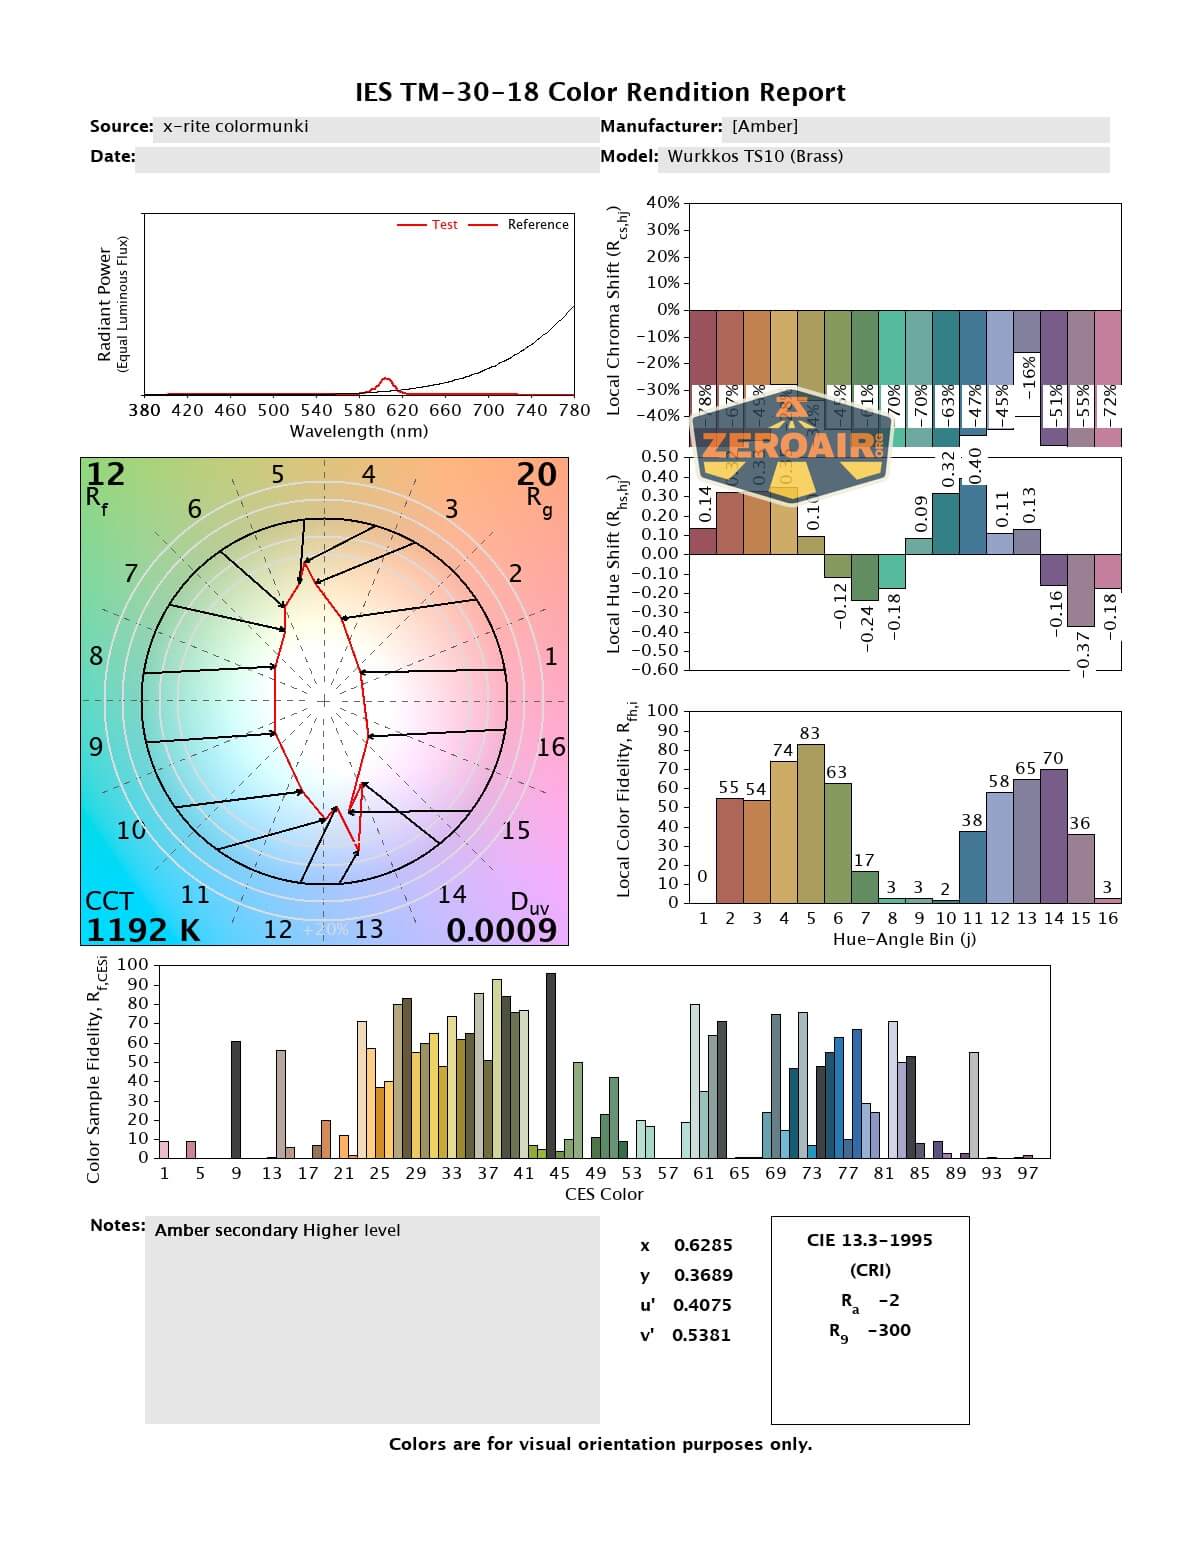
My brass TS10 has orange (or “amber”) secondary emitters. Per the settings on Anduril, you can have a couple of brightness levels as well as “lightning” and “off.” Below, the amber secondary emitters are set on the highest steady level. Warning – this setting will fully drain the battery in a few days. And I mean fully drain the battery. Down well past the levels that are considered “safe to recharge from.” So be very careful!
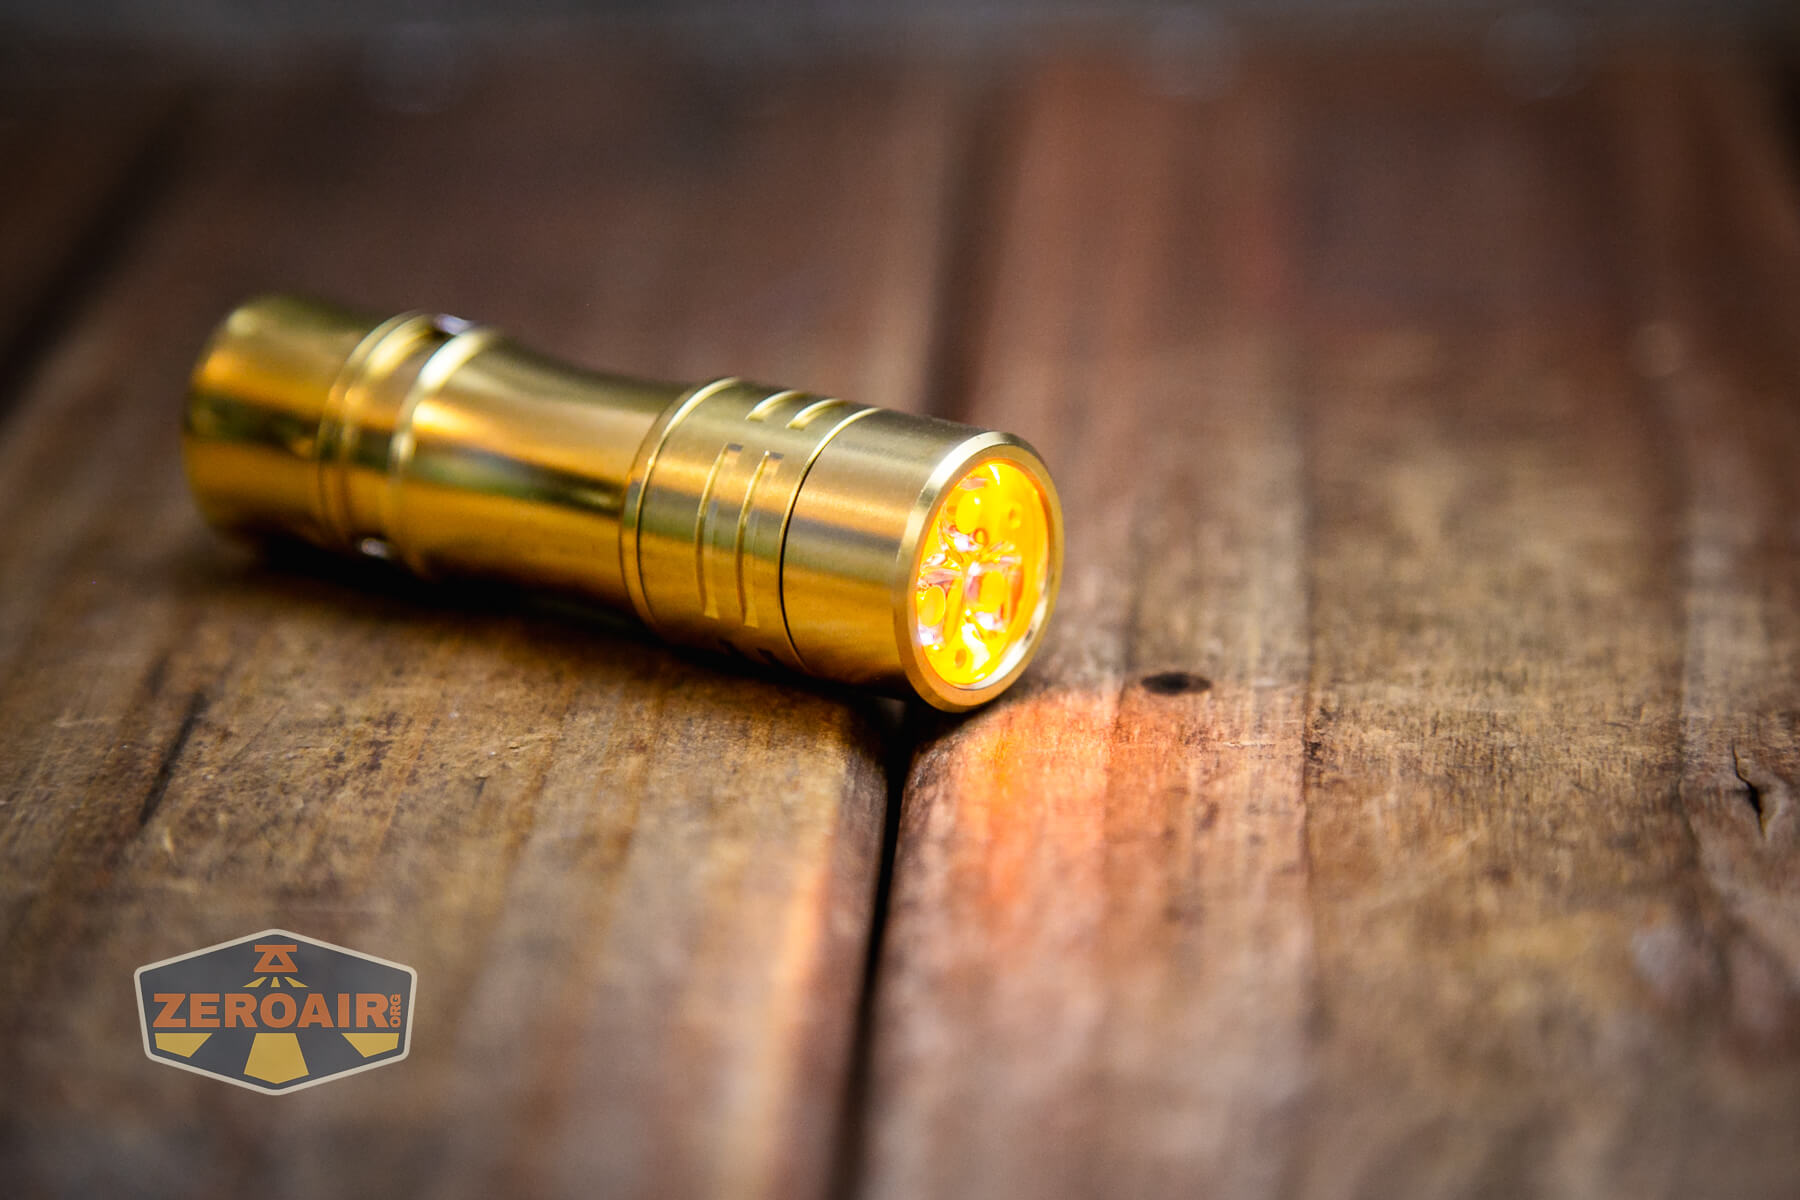
Wurkkos includes with the brass TS10 a diffuser that they did not include with the aluminum versions. It’s nice. It’s fine.

Here’s the diffuser being used with secondary emitters set to high.

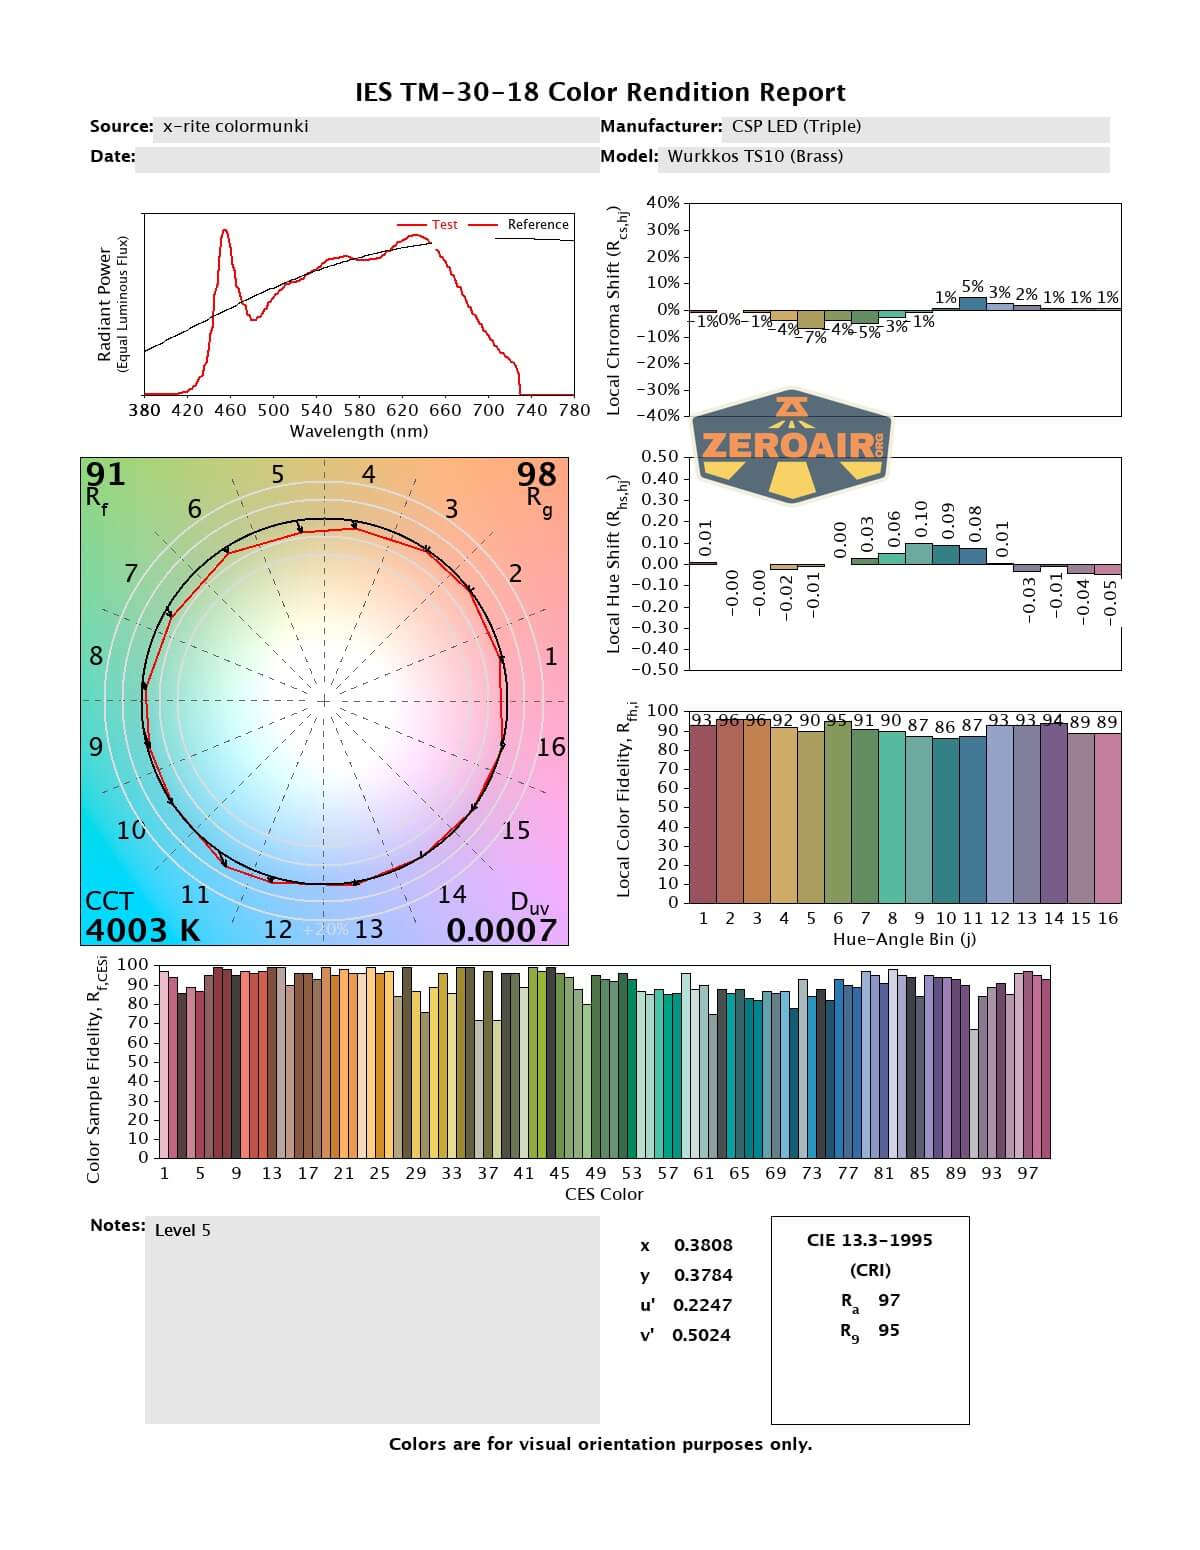
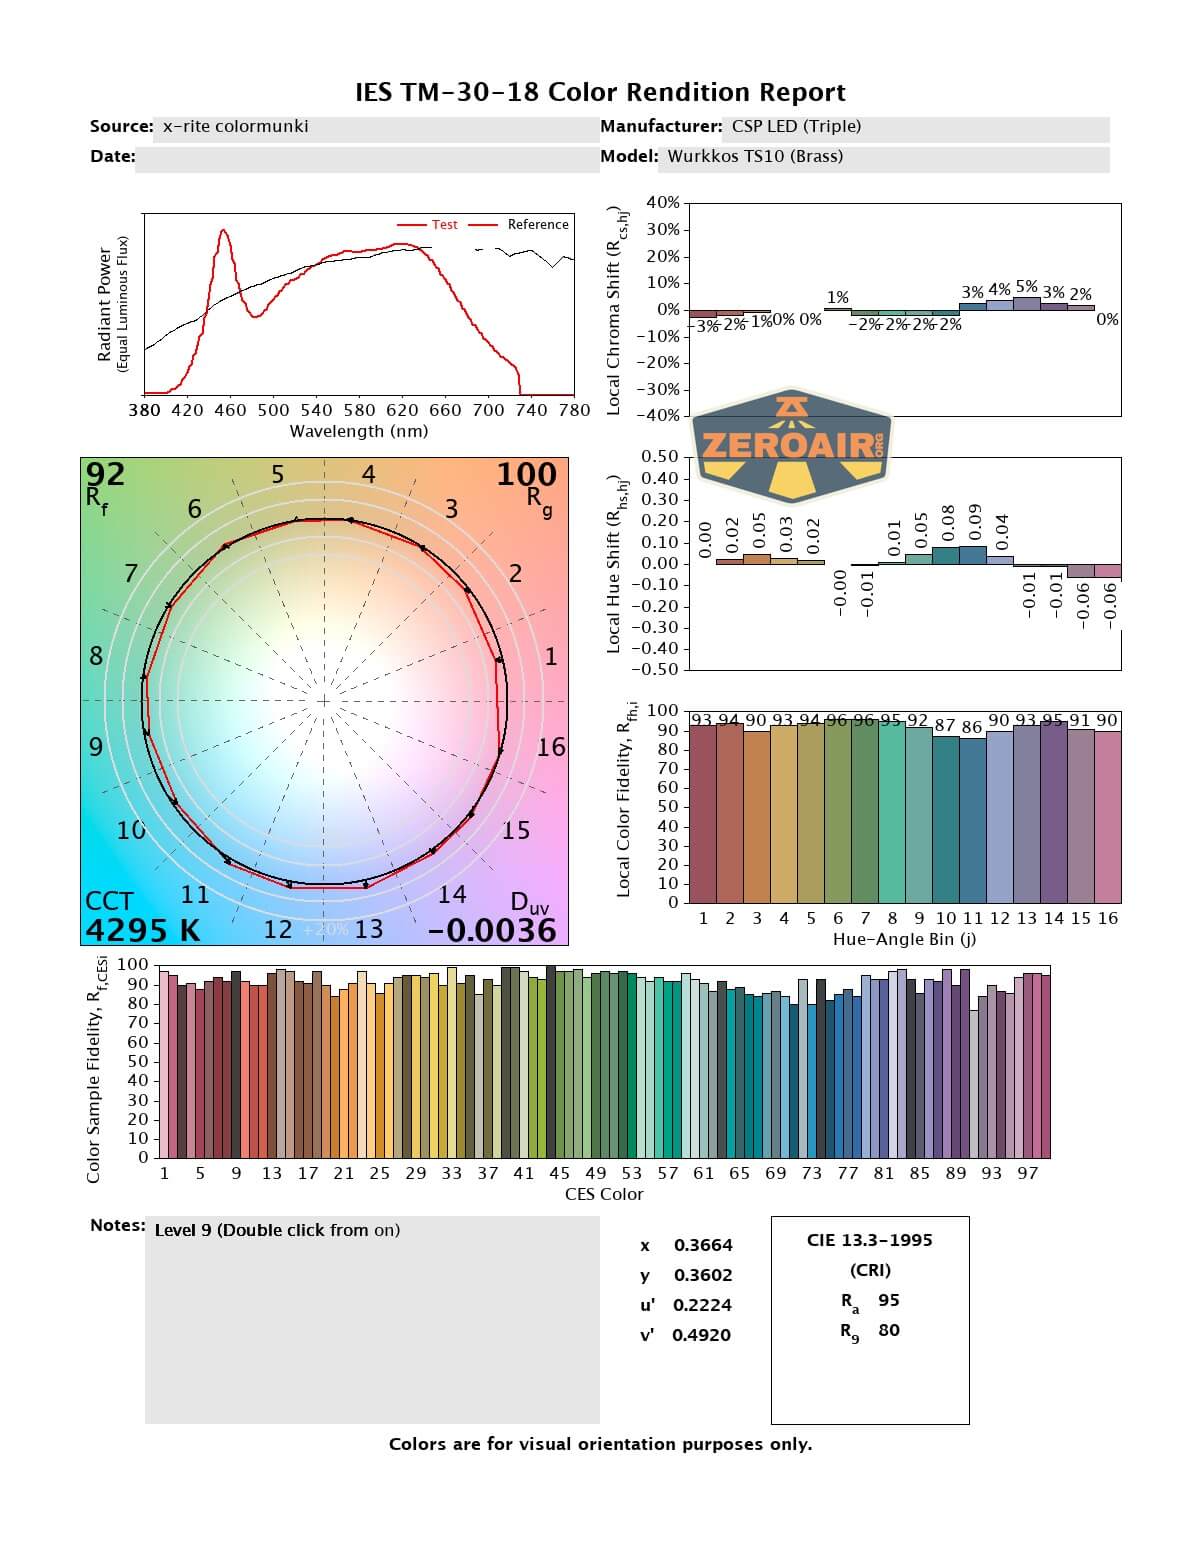
LED Color Report (CRI and CCT)
Rated at 4000K, the output is in that range for sure. From the lower output (at left) of 3500K to the highest output at around 4200K, 4000K is a good rating and reasonable. I’m also pleased to say that these CSP emitters are very high CRI! Also shown below are the two steady amber output levels.


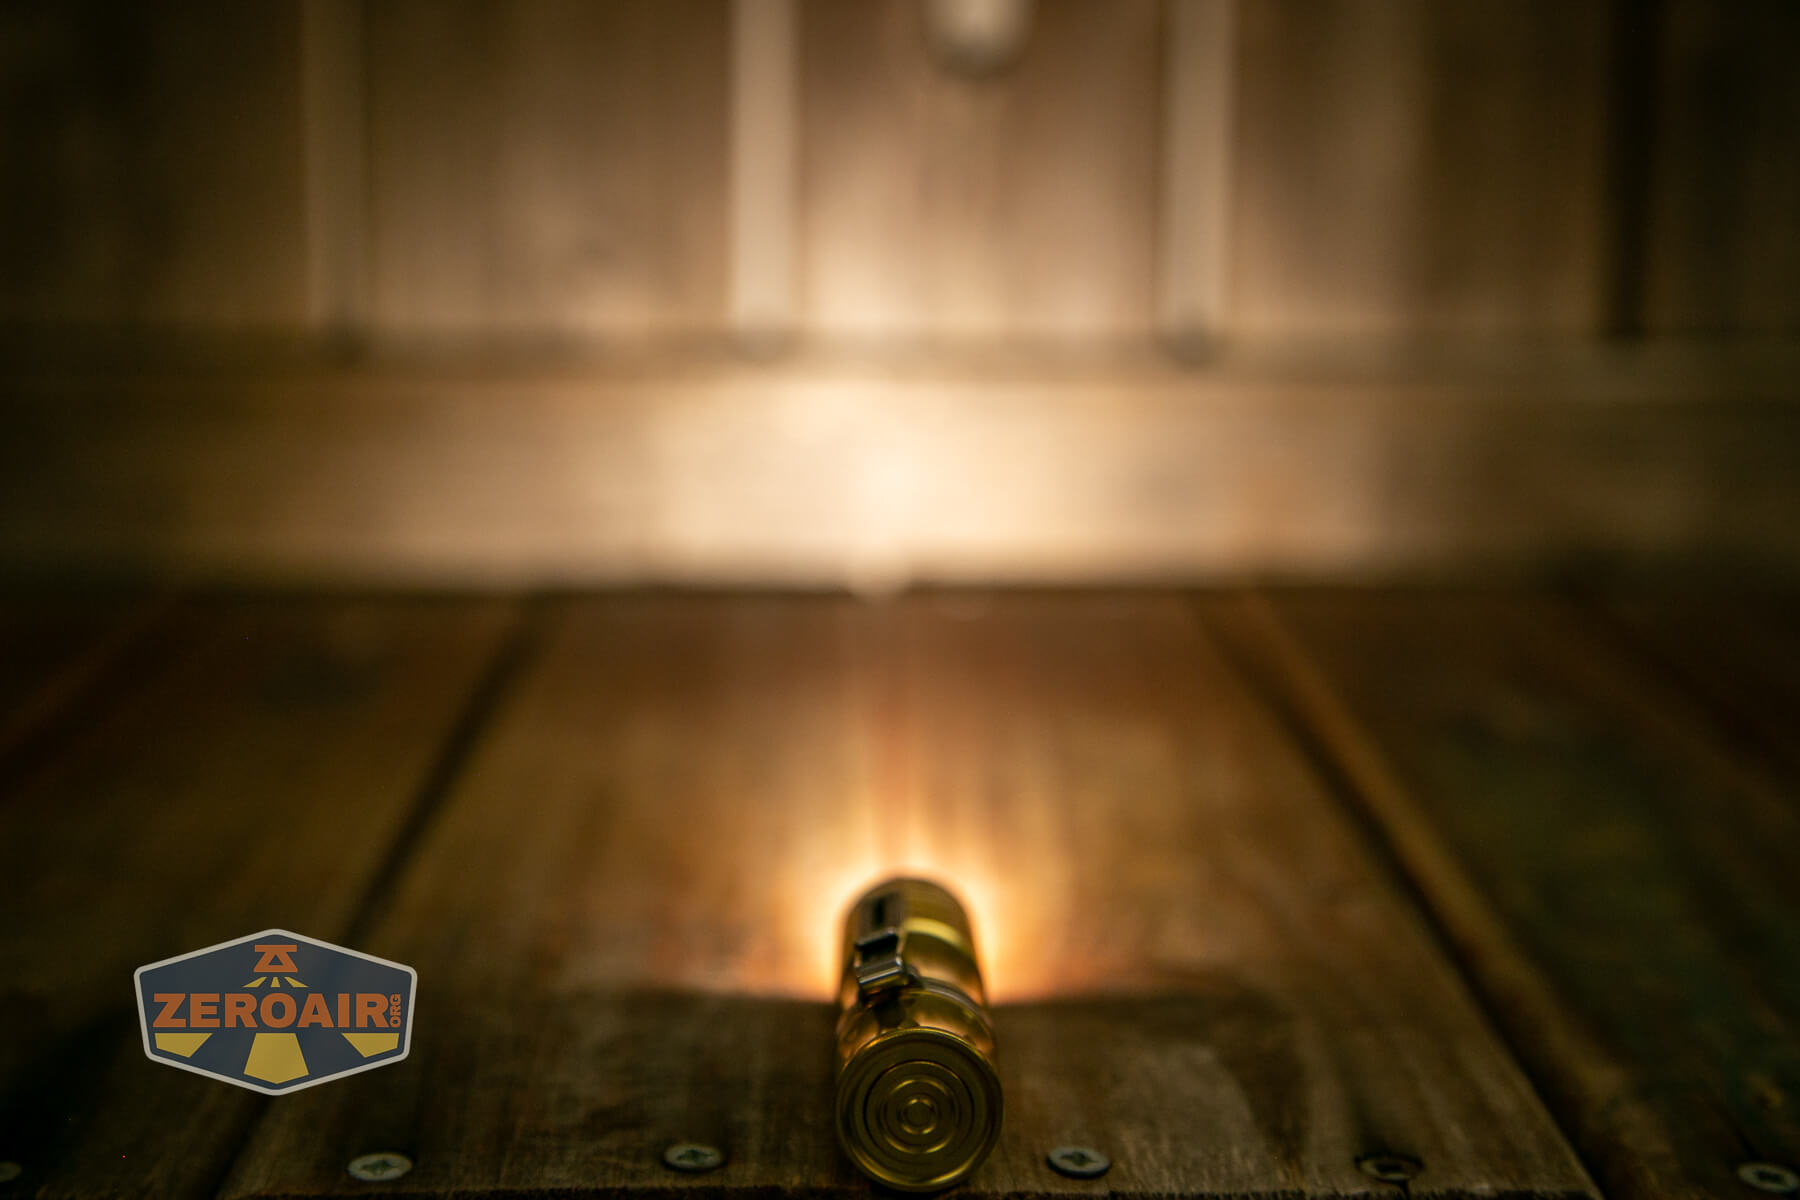
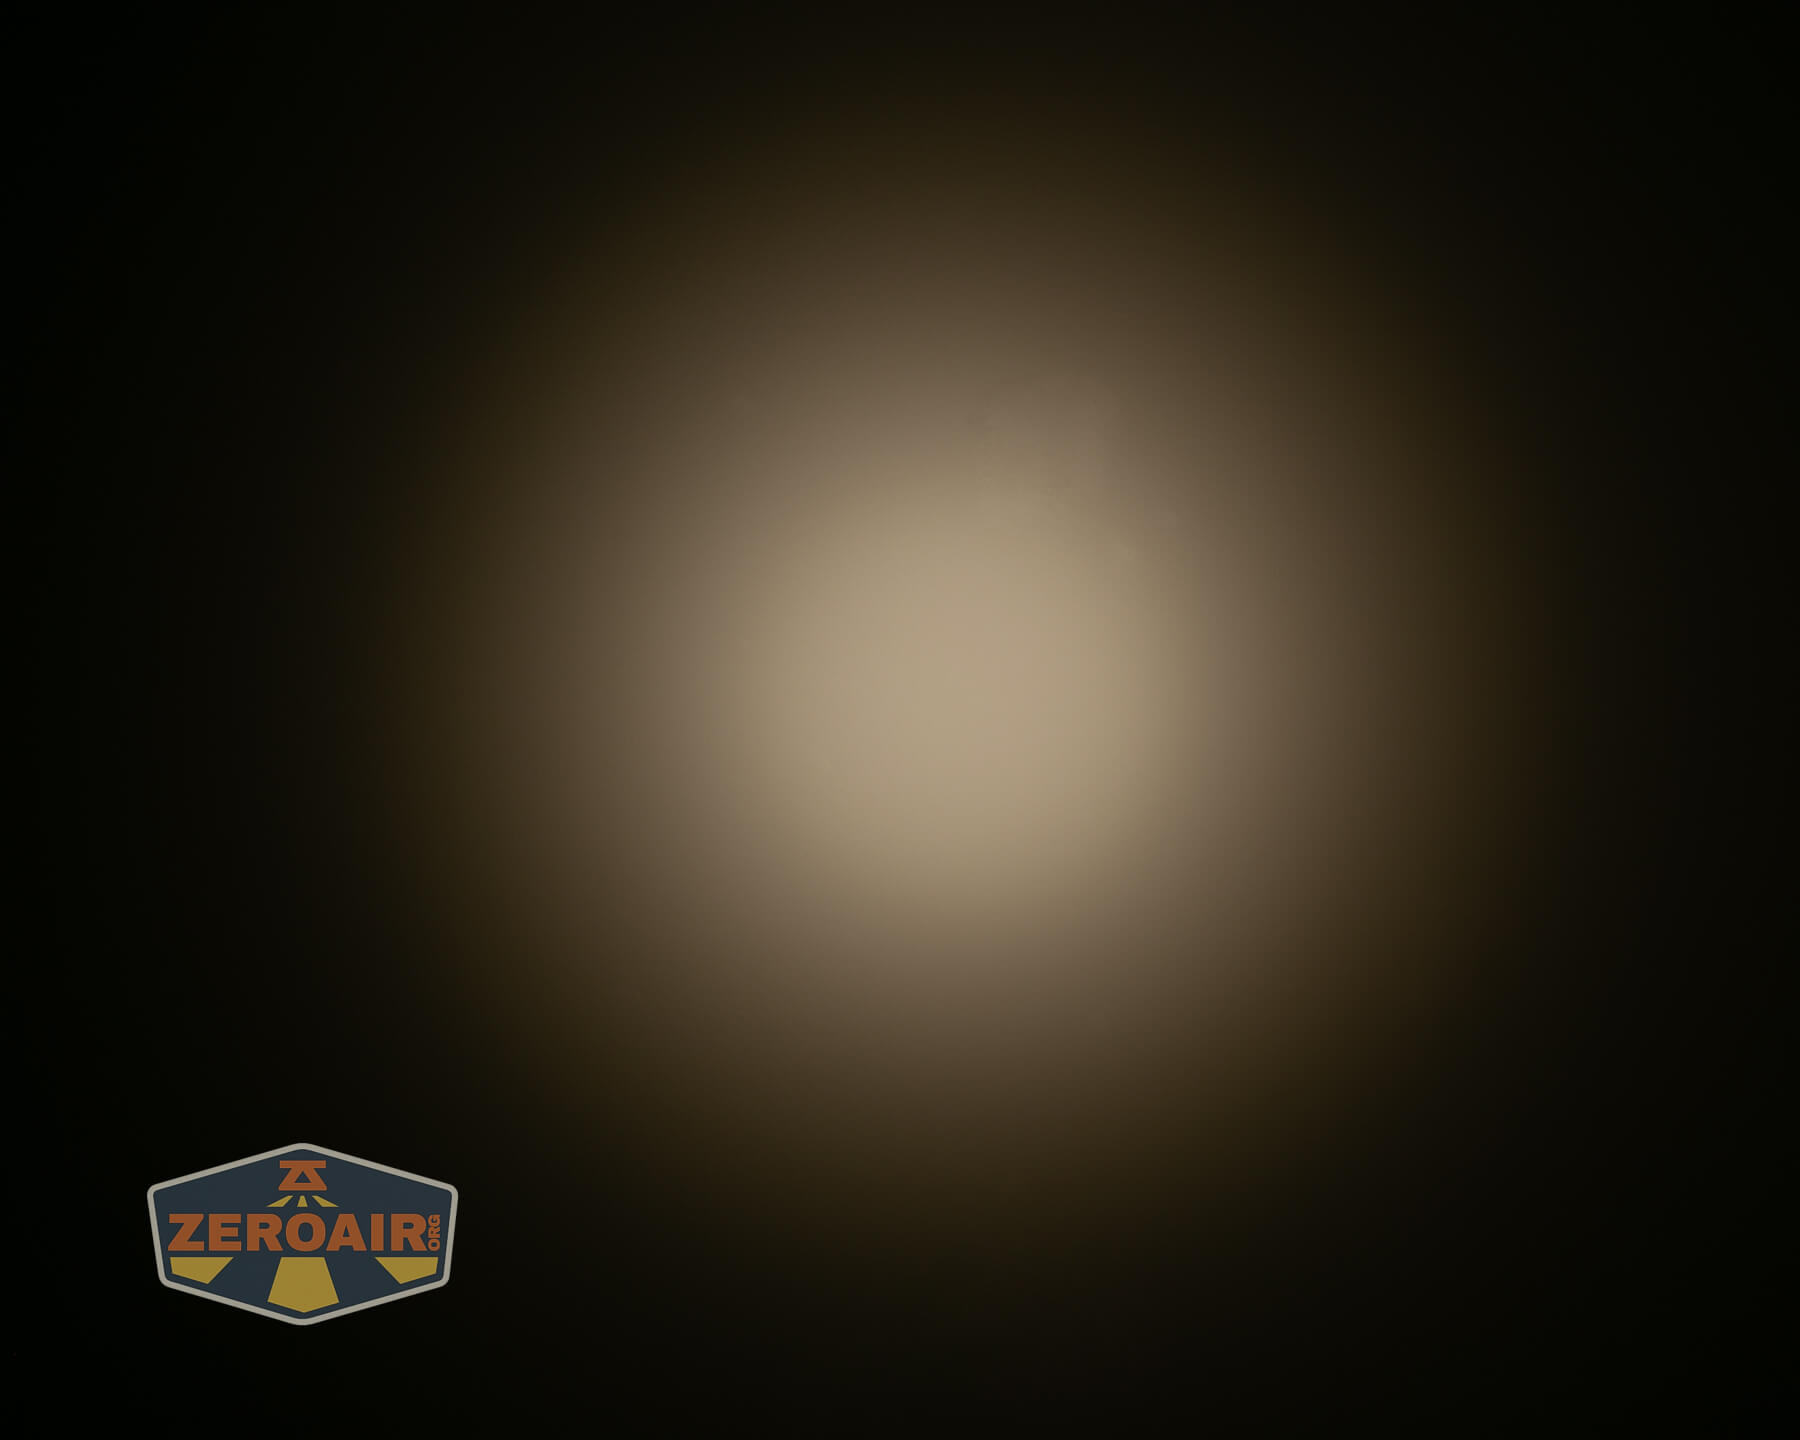
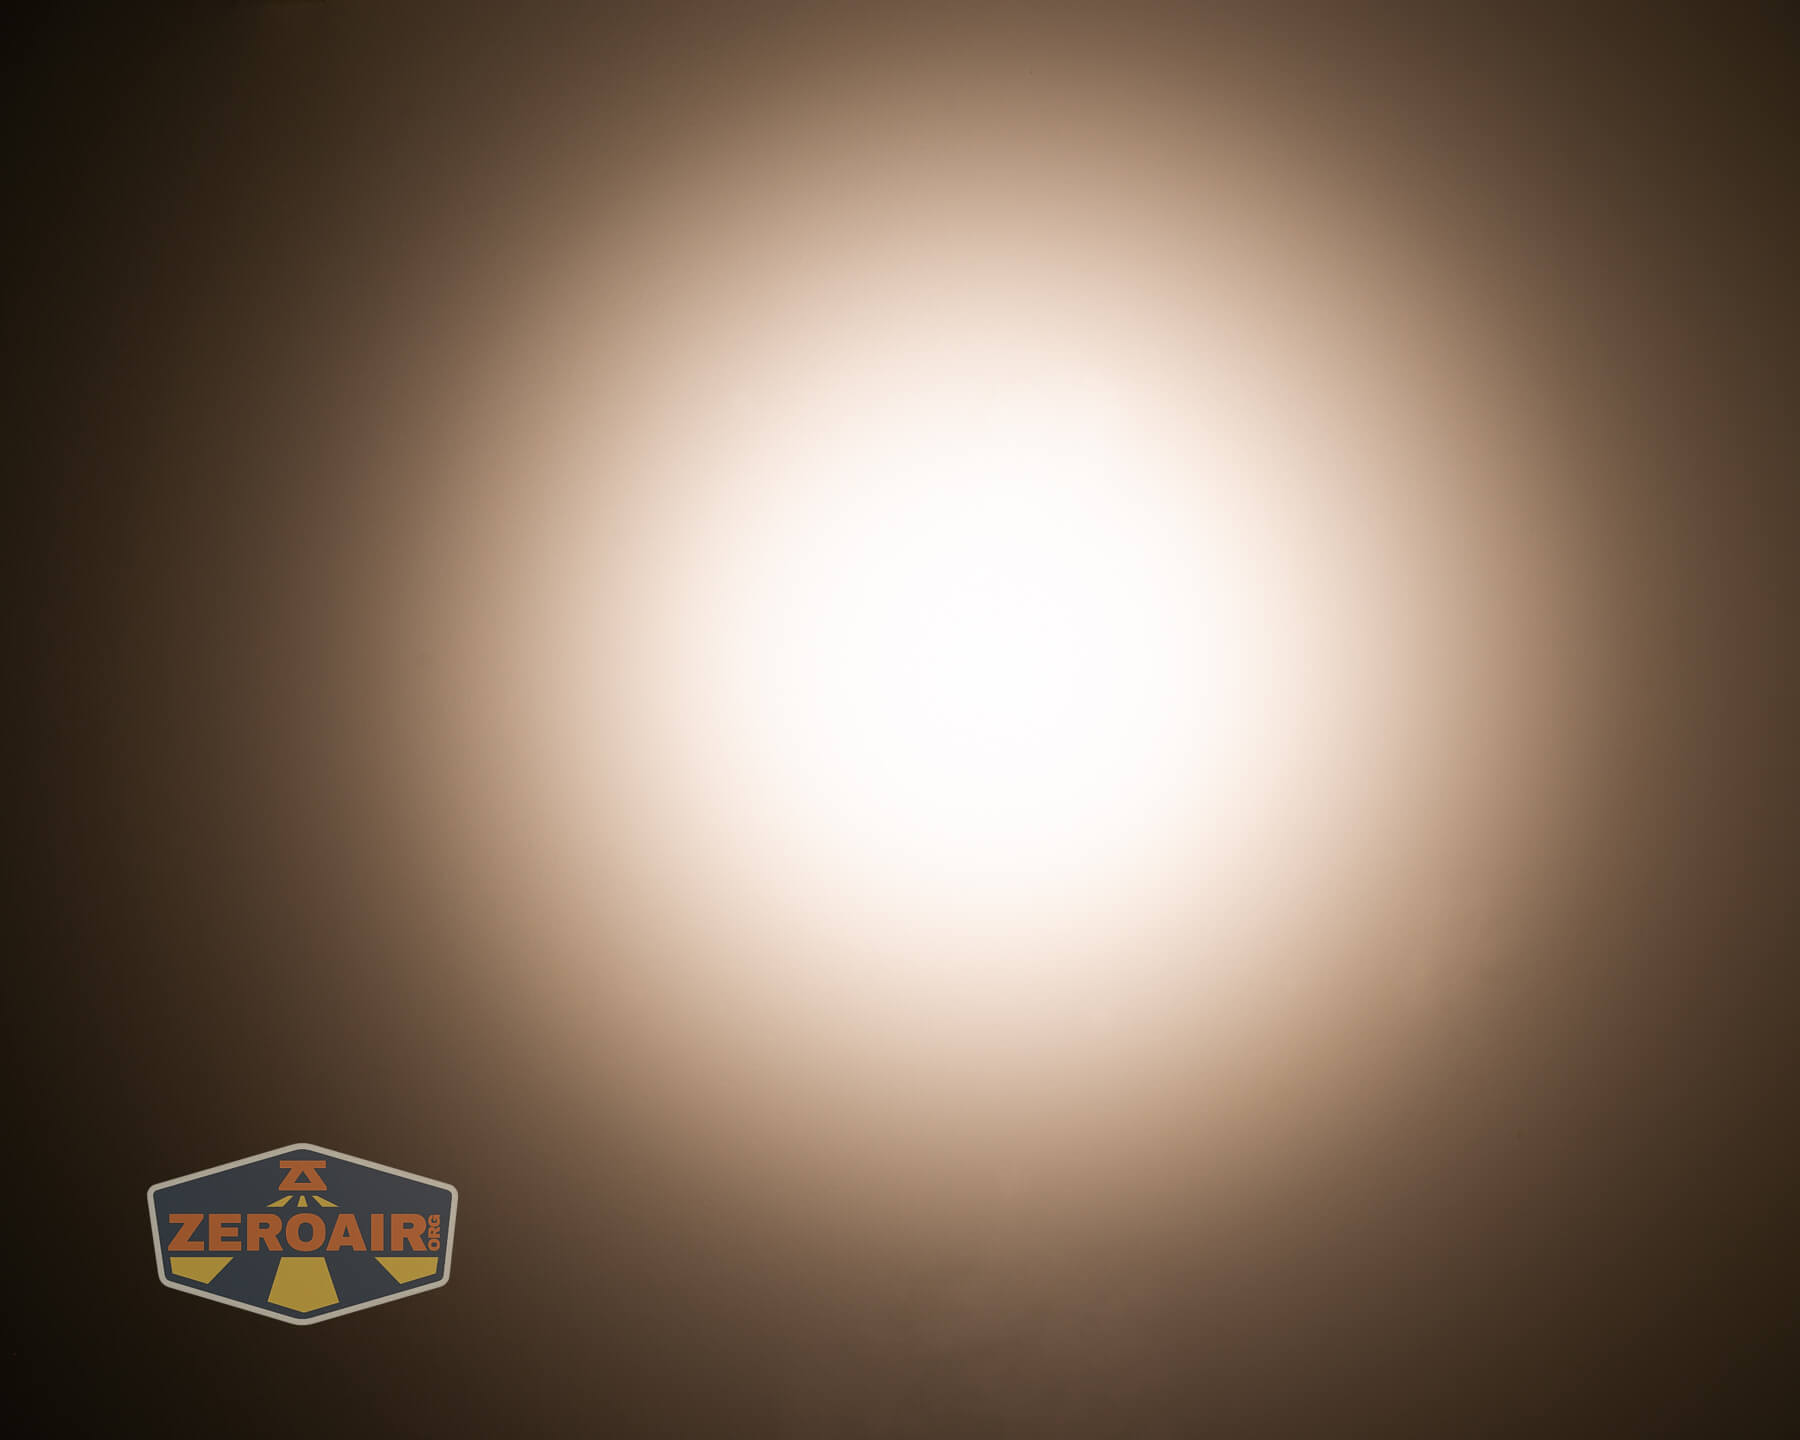
Beamshots
These beamshots always have the following settings: f8, ISO100, 0.3s shutter, and manual 5000K exposure. These photos are taken at floor level, and the beam hits the ceiling around 9 feet away.


Tint vs BLF-348 (KillzoneFlashlights.com 219b version) (affiliate link)
I keep the test flashlight on the left and the BLF-348 reference flashlight on the right.
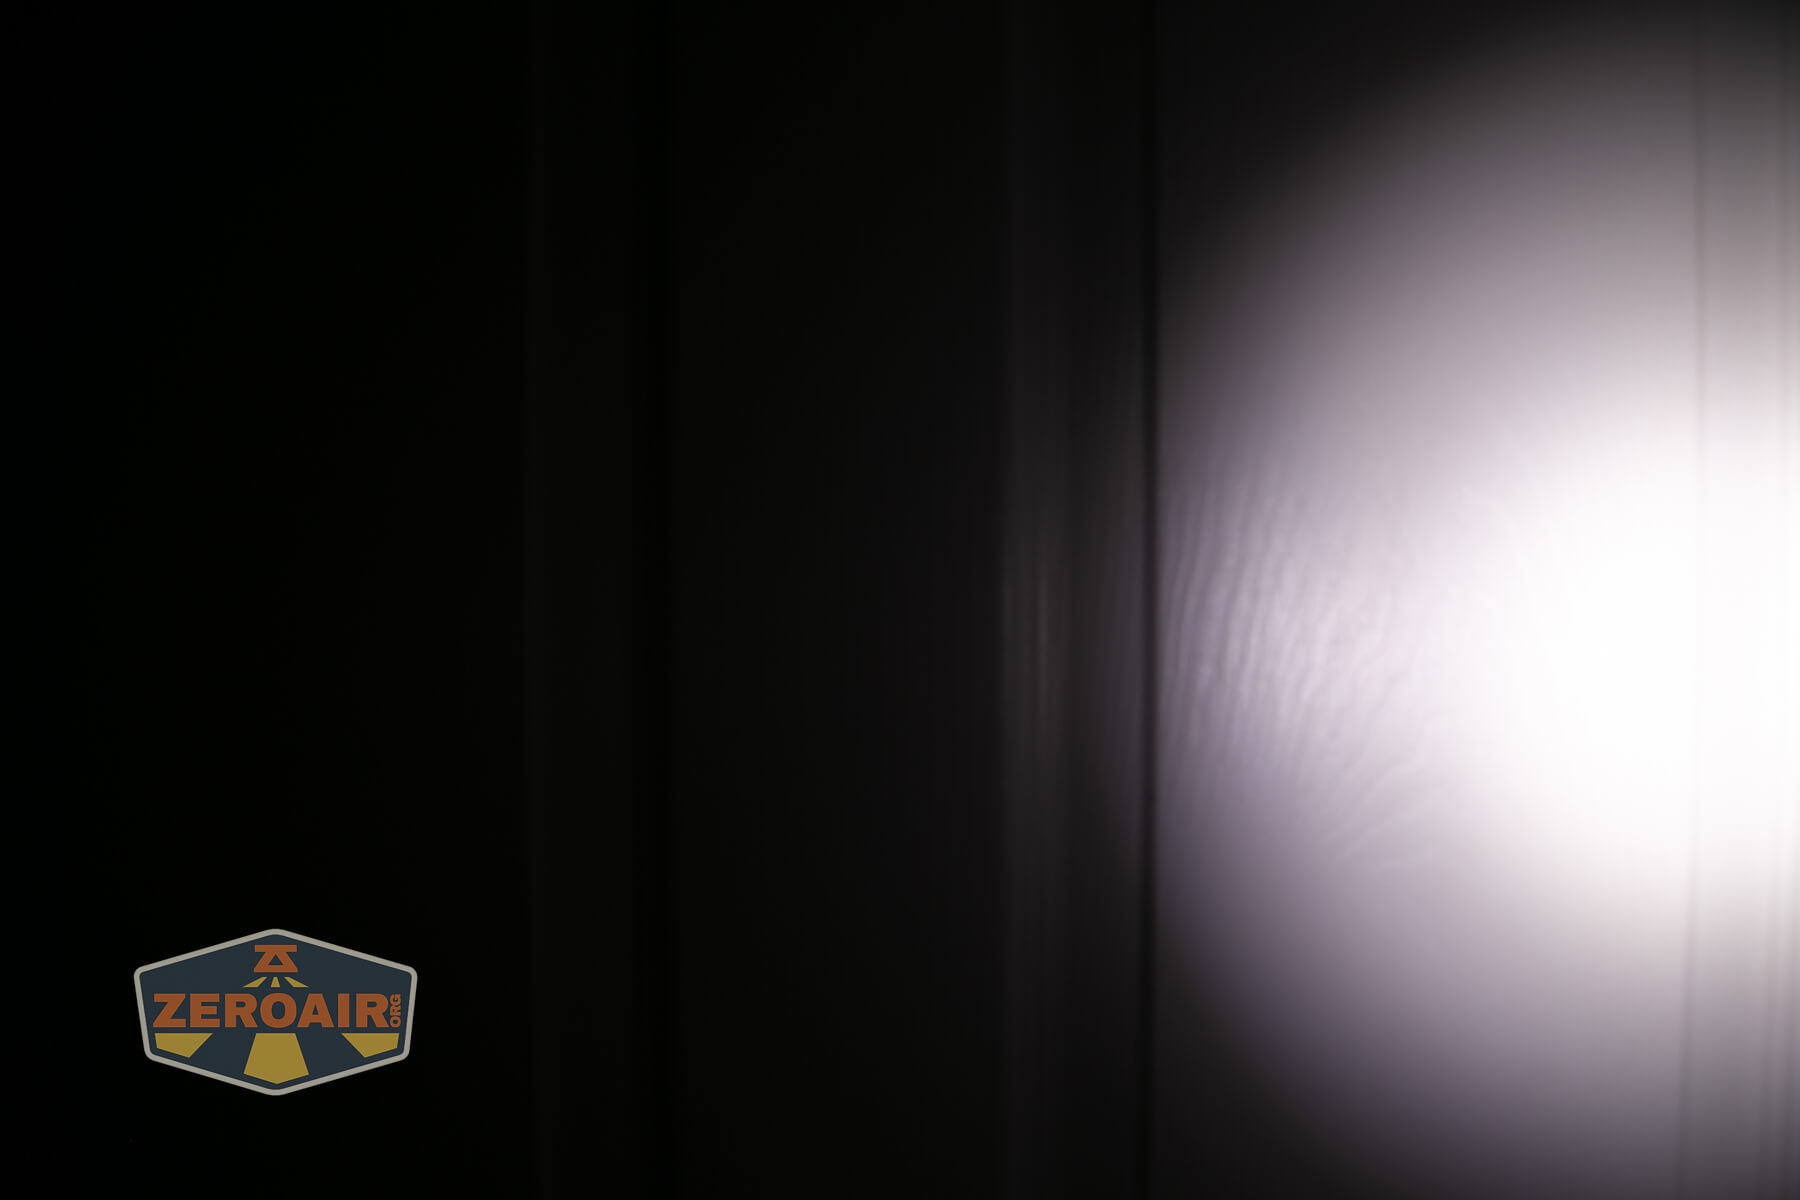
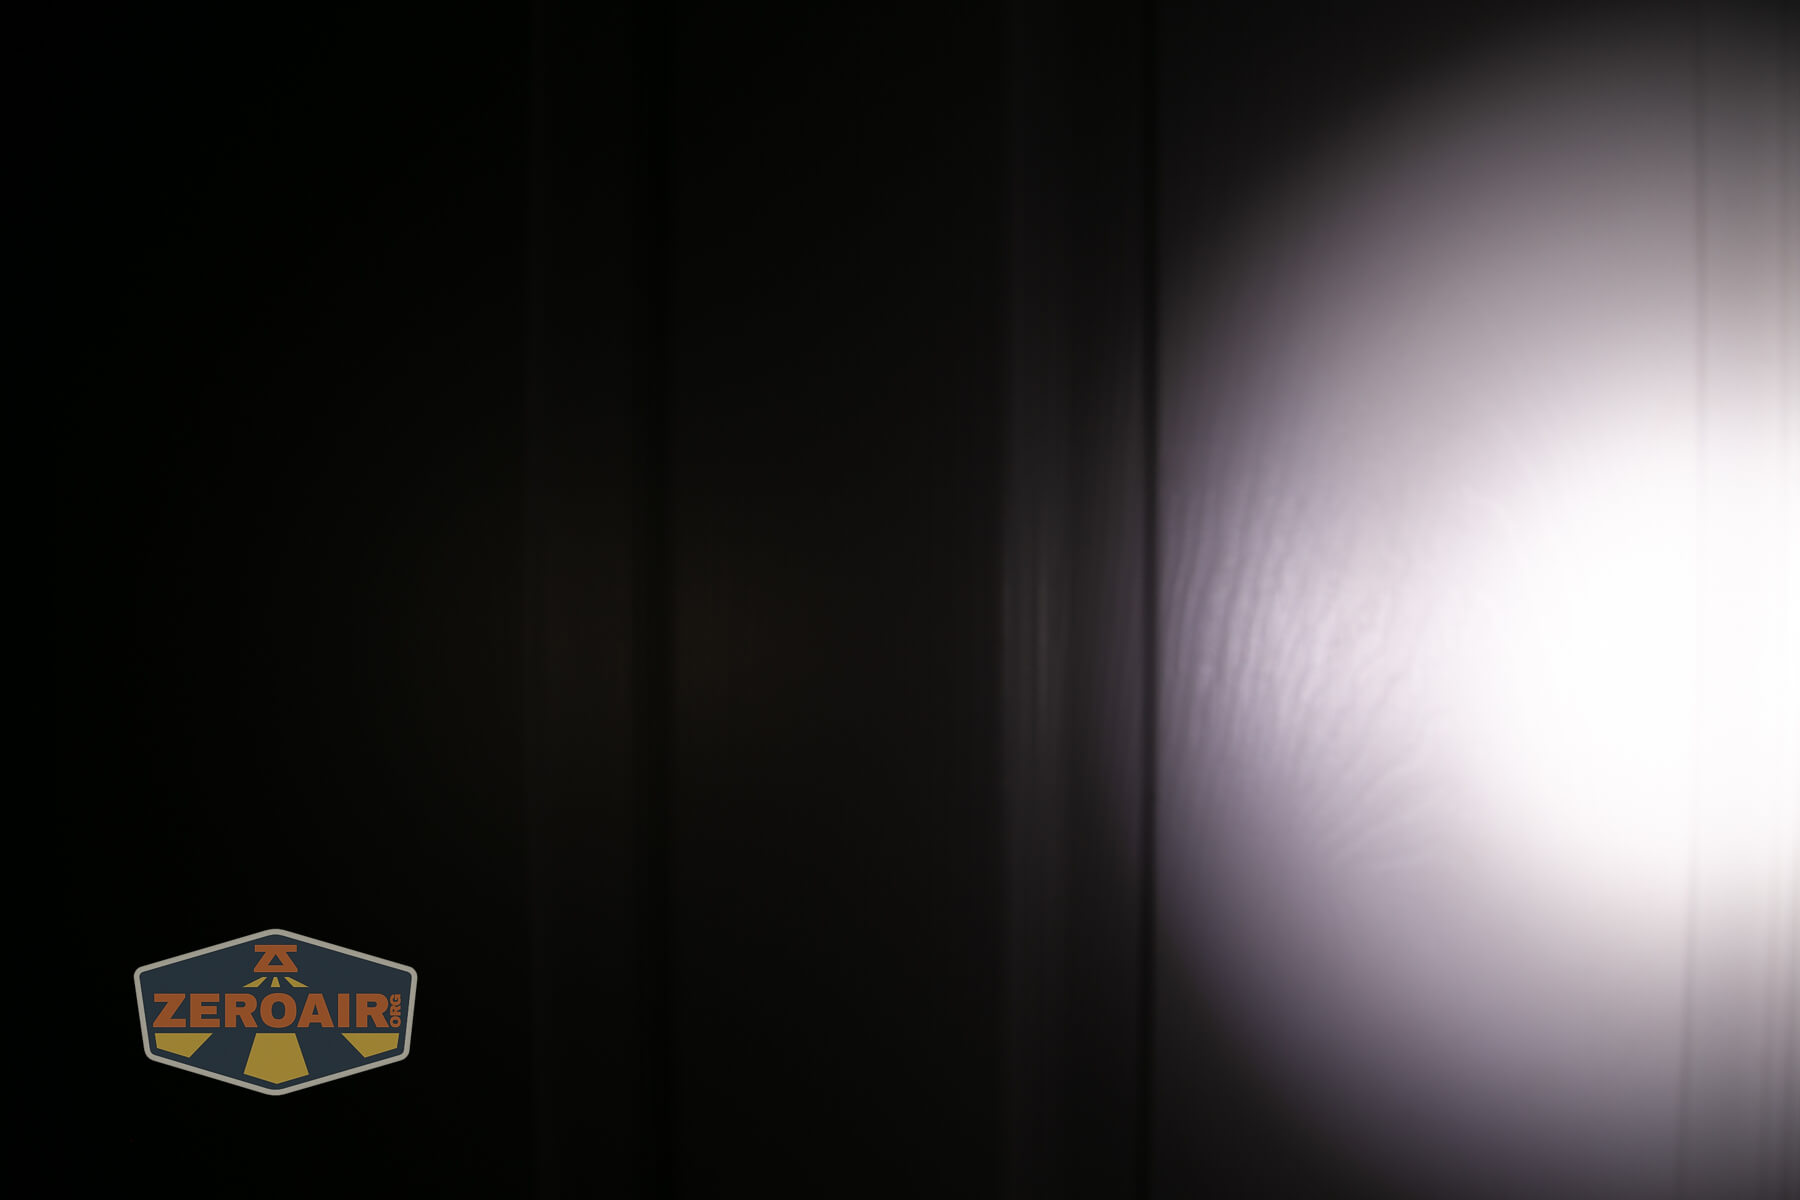
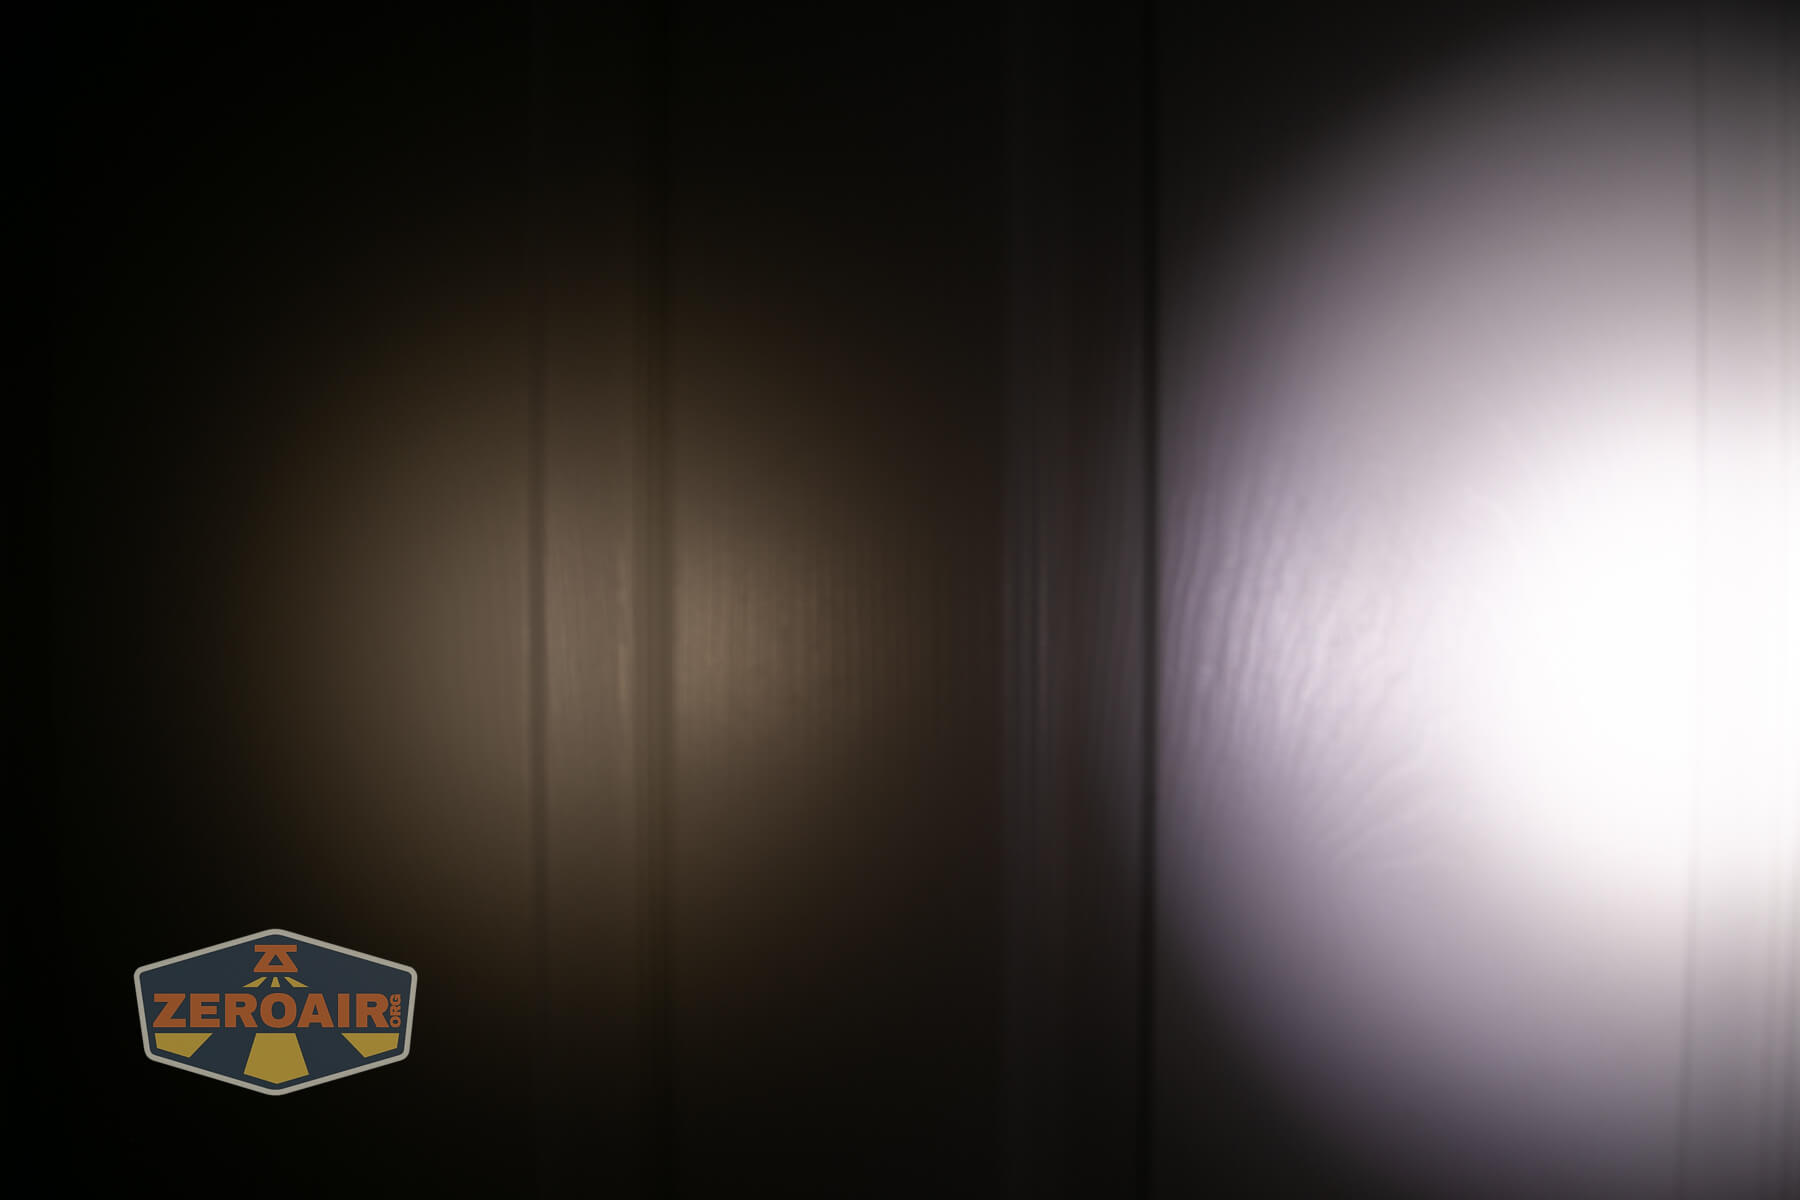
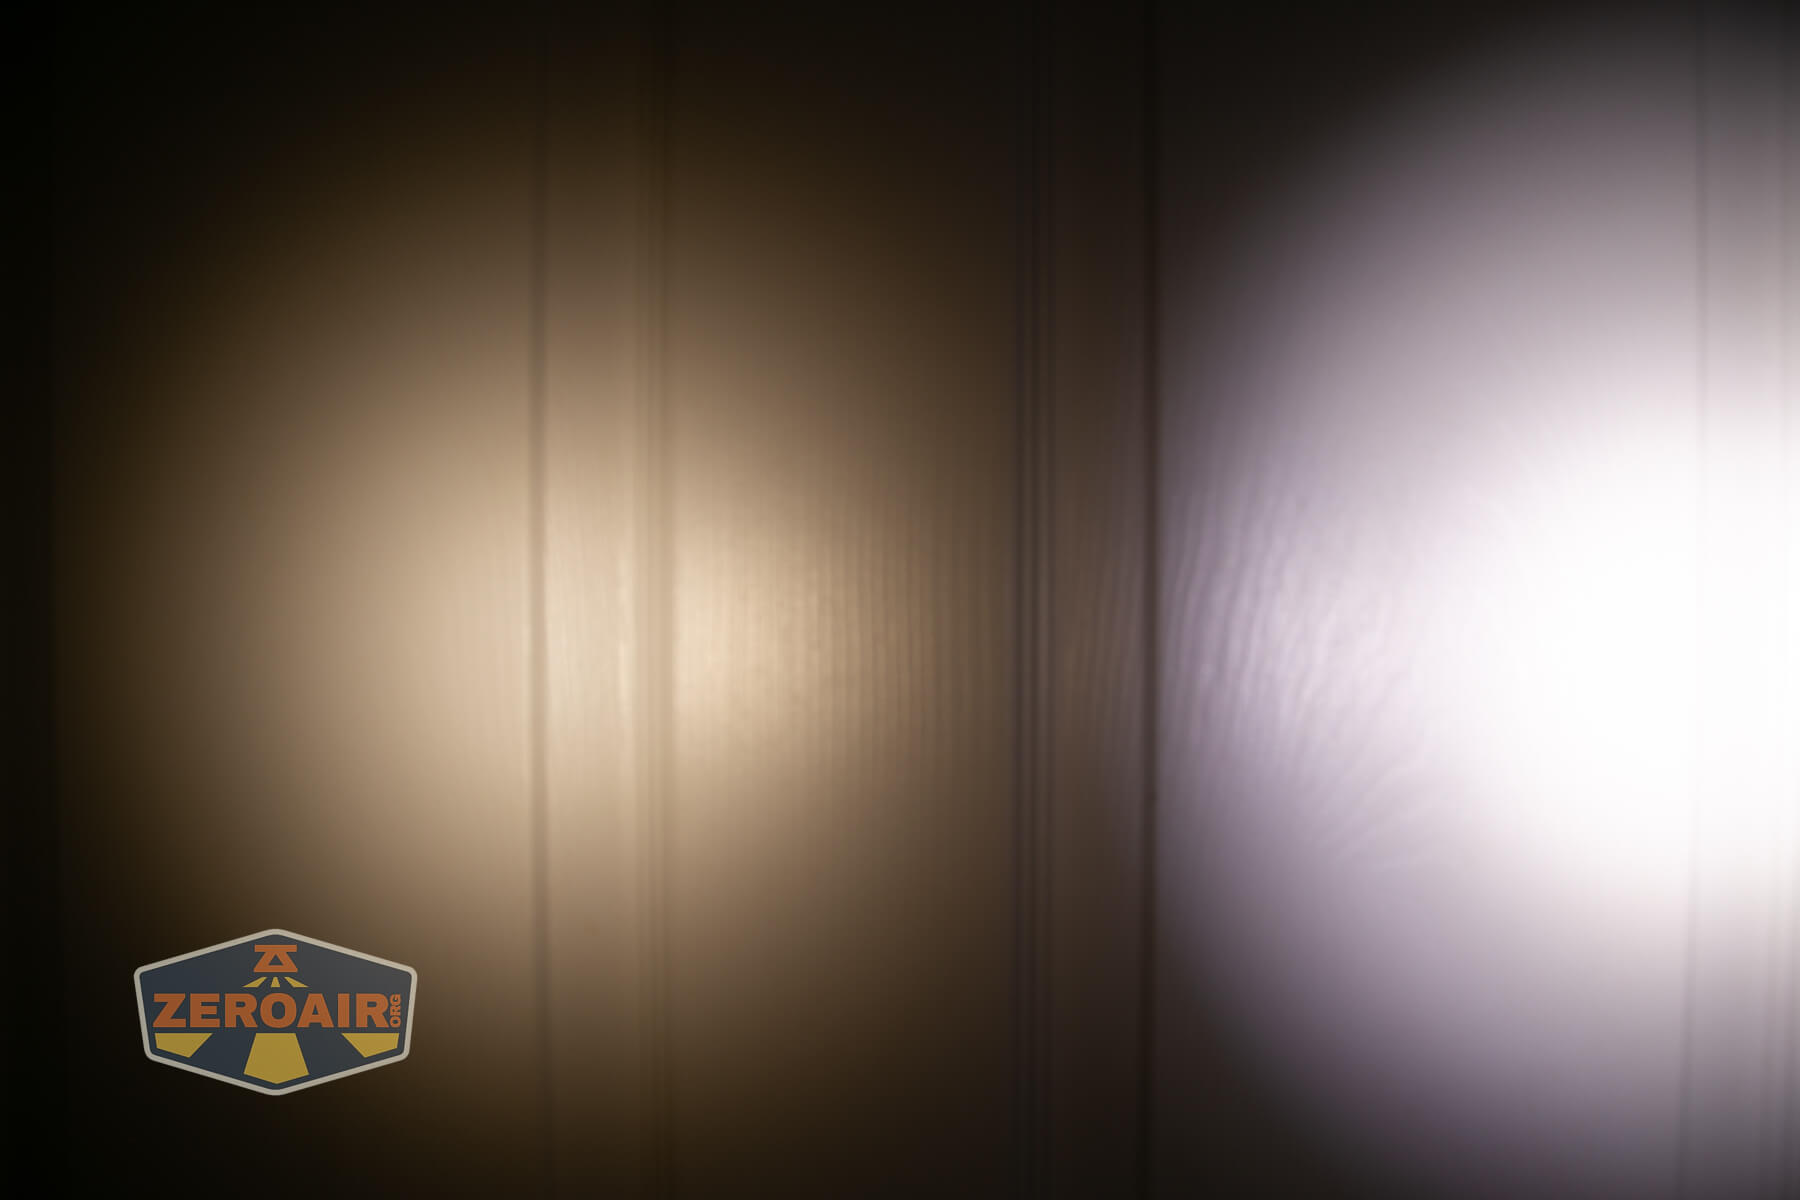
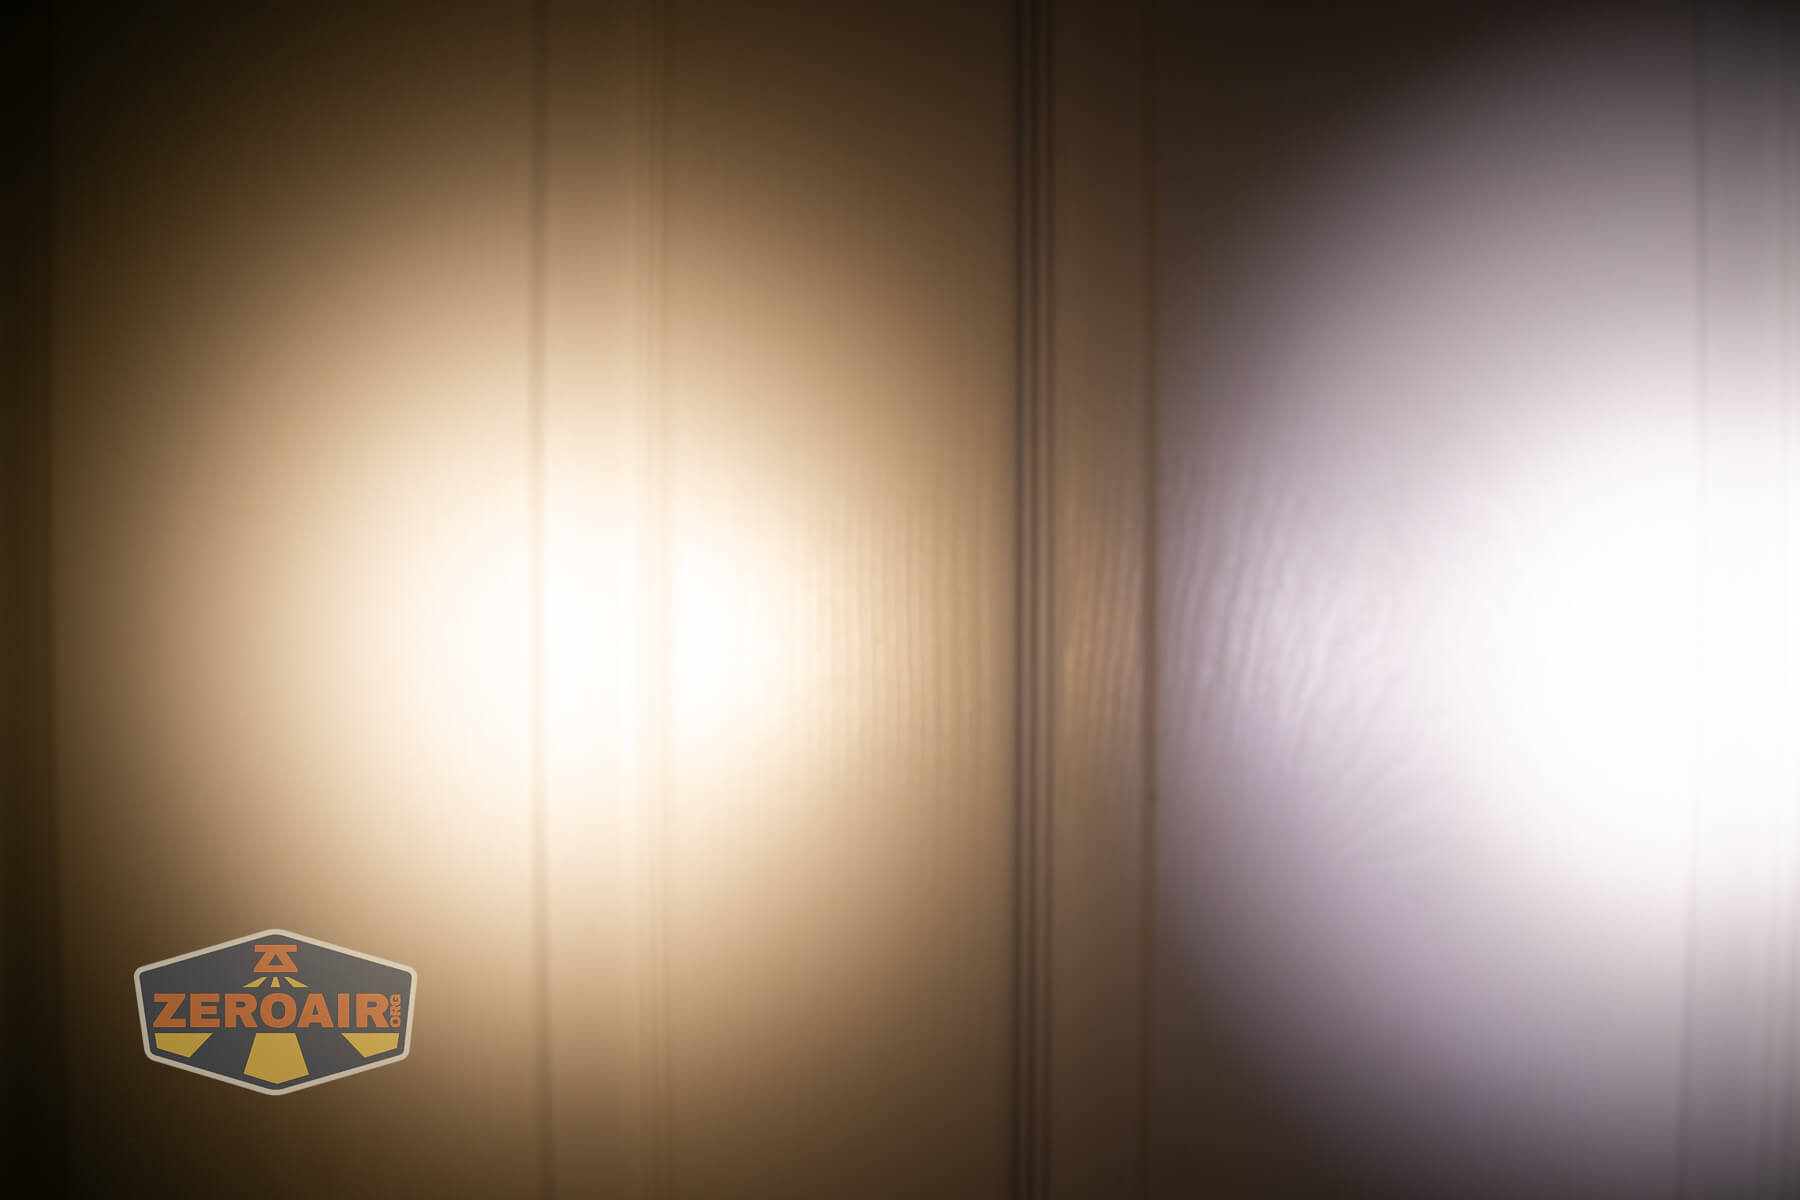
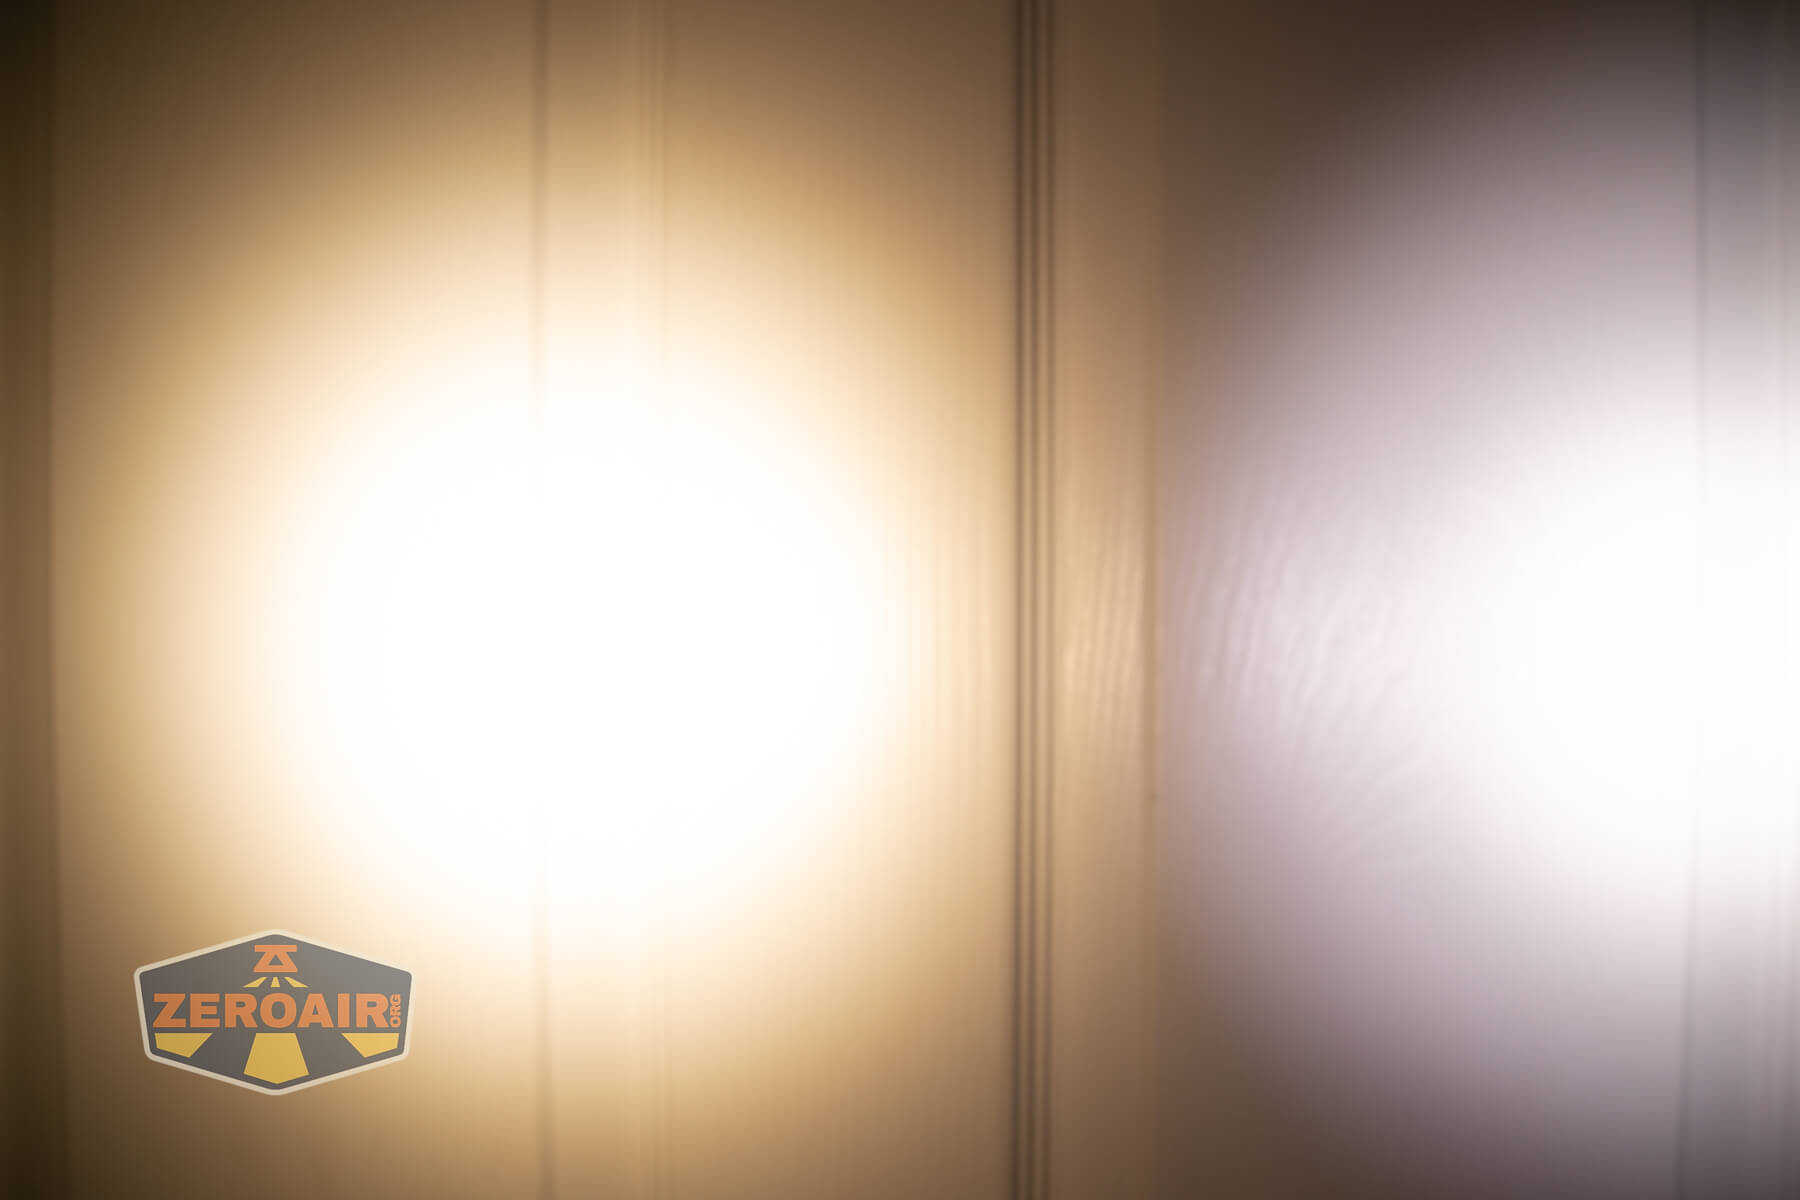


I compare everything to the KillzoneFlashlights.com 219b BLF-348 because it’s inexpensive and has the best tint!
Conclusion
What I like
- Low cost brass light
- No excessive branding (in fact, no branding at all)
- Great build quality
- CSP emitters are both 4000K and very high CRI
- Uses Andúril2
What I don’t like
- Secondary emitters drain the 14500 quickly when set to high
- Doesn’t support AA (1.5V) cells
Notes
- This content originally appeared at zeroair.org. Please visit there for the best experience!
- Please use my Amazon.com referral link to help support zeroair.org!
- Please support me on Patreon! I deeply appreciate your support!
Discover more from ZeroAir Reviews
Subscribe to get the latest posts sent to your email.
Regarding the modes and current table, SammysHP helped to make the ramp more linear and the moon mode dimmer. https://budgetlightforum.com/comment/1881531#comment-1881531
So the new firmware has different values in the ramp, which normally don’t get transferred to the manual. It is normal that your measured mode values are way off. 🙂
Thank you for the niche review, I am still waiting for mine.