Nextorch P10 Right Angle Flashlight Review
The Nextorch P10 Right Angle flashlight has three emitters: white, red, and blue. It runs on a single 18650 and has two switches. Read on!
Official Specs and Features
Here’s a link to the Nextorch P10 right-angle flashlight product page.
Versions
Only one version is available.
Price
MSRP for the Nextorch P10 right-angle flashlight looks to be $65.
I also have a referral coupon for Nextorch.com that’ll give you 10% off! The code is “ZEROAIR“.
Short Review
The Nextorch P10 is a solidly-built right-angle flashlight, and the addition of red and blue emitters is an interesting (and fun) combination. I wish they both had steady modes instead of being blinky-only, though. Output from the main (white) emitter is good, but again, I do wish for more than three modes.
Long Review
The Big Table
| Nextorch P10 right-angle flashlight | |
|---|---|
| Emitter: | Unstated emitter |
| Price in USD at publication time: | $65.00 |
| Cell: | 1×18650 |
| Runtime Graphs | |
| LVP? | Yes |
| Switch Type: | Both |
| Quiescent Current (mA): | – |
| On-Board Charging? | Yes |
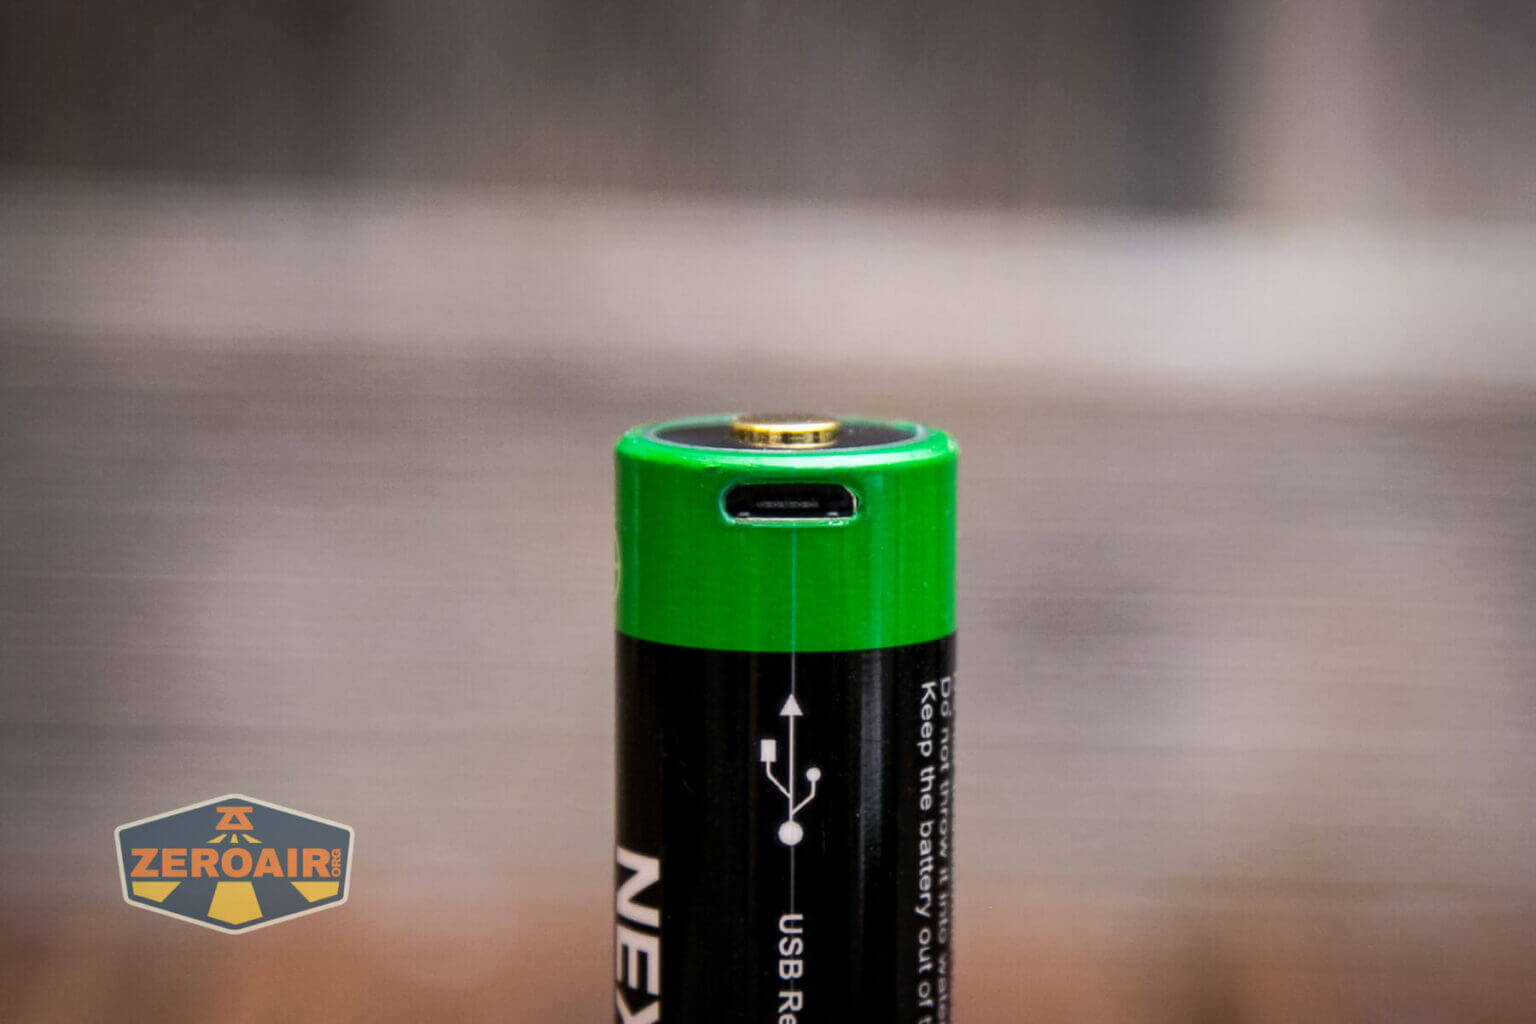
| Charge Port Type: | micro-USB (on cell) |
| Charge Graph | |
| Power off Charge Port | – |
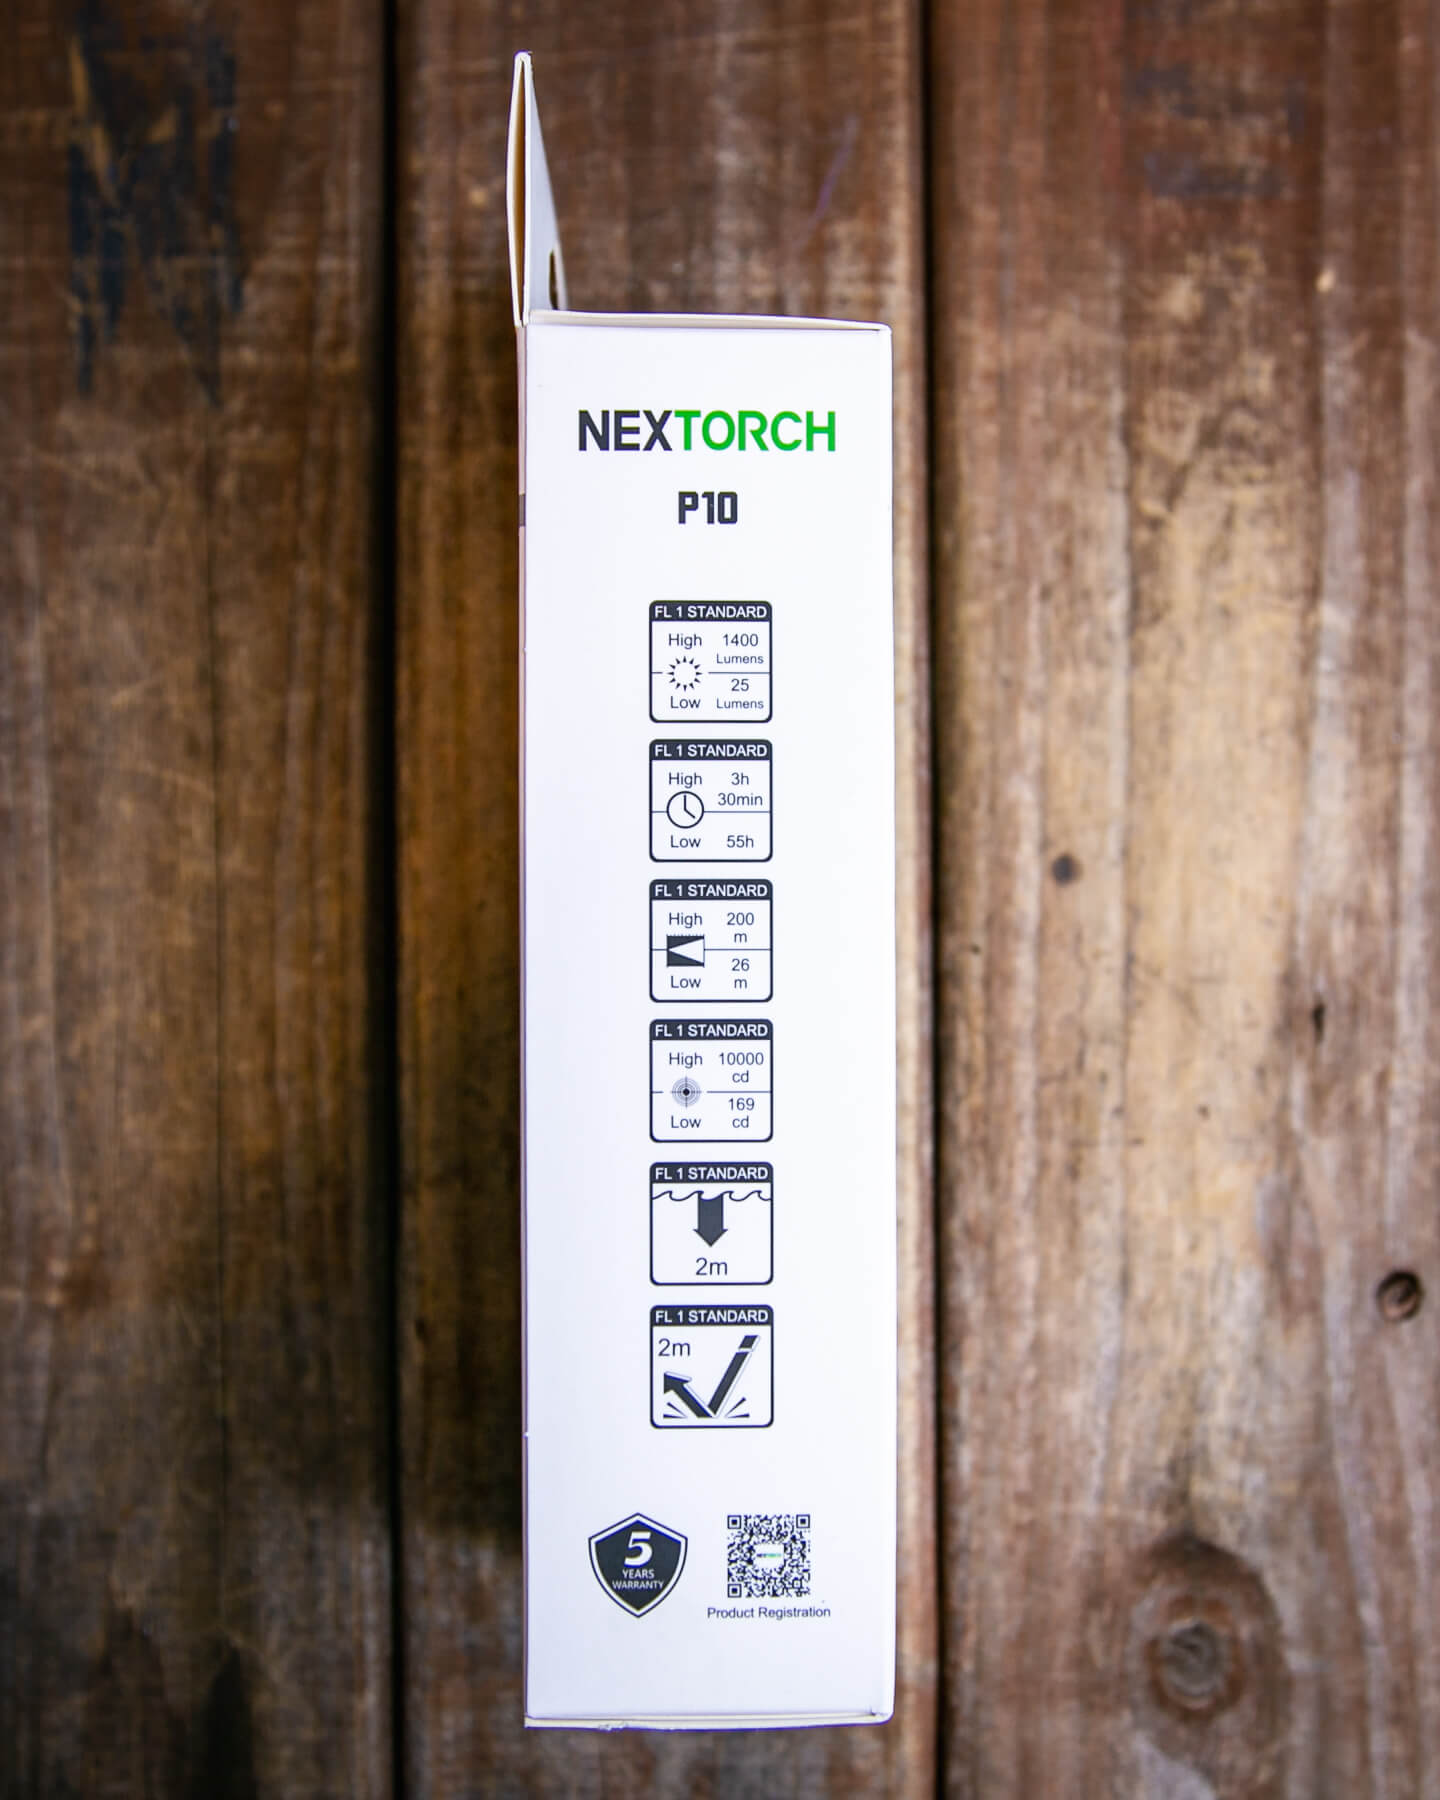
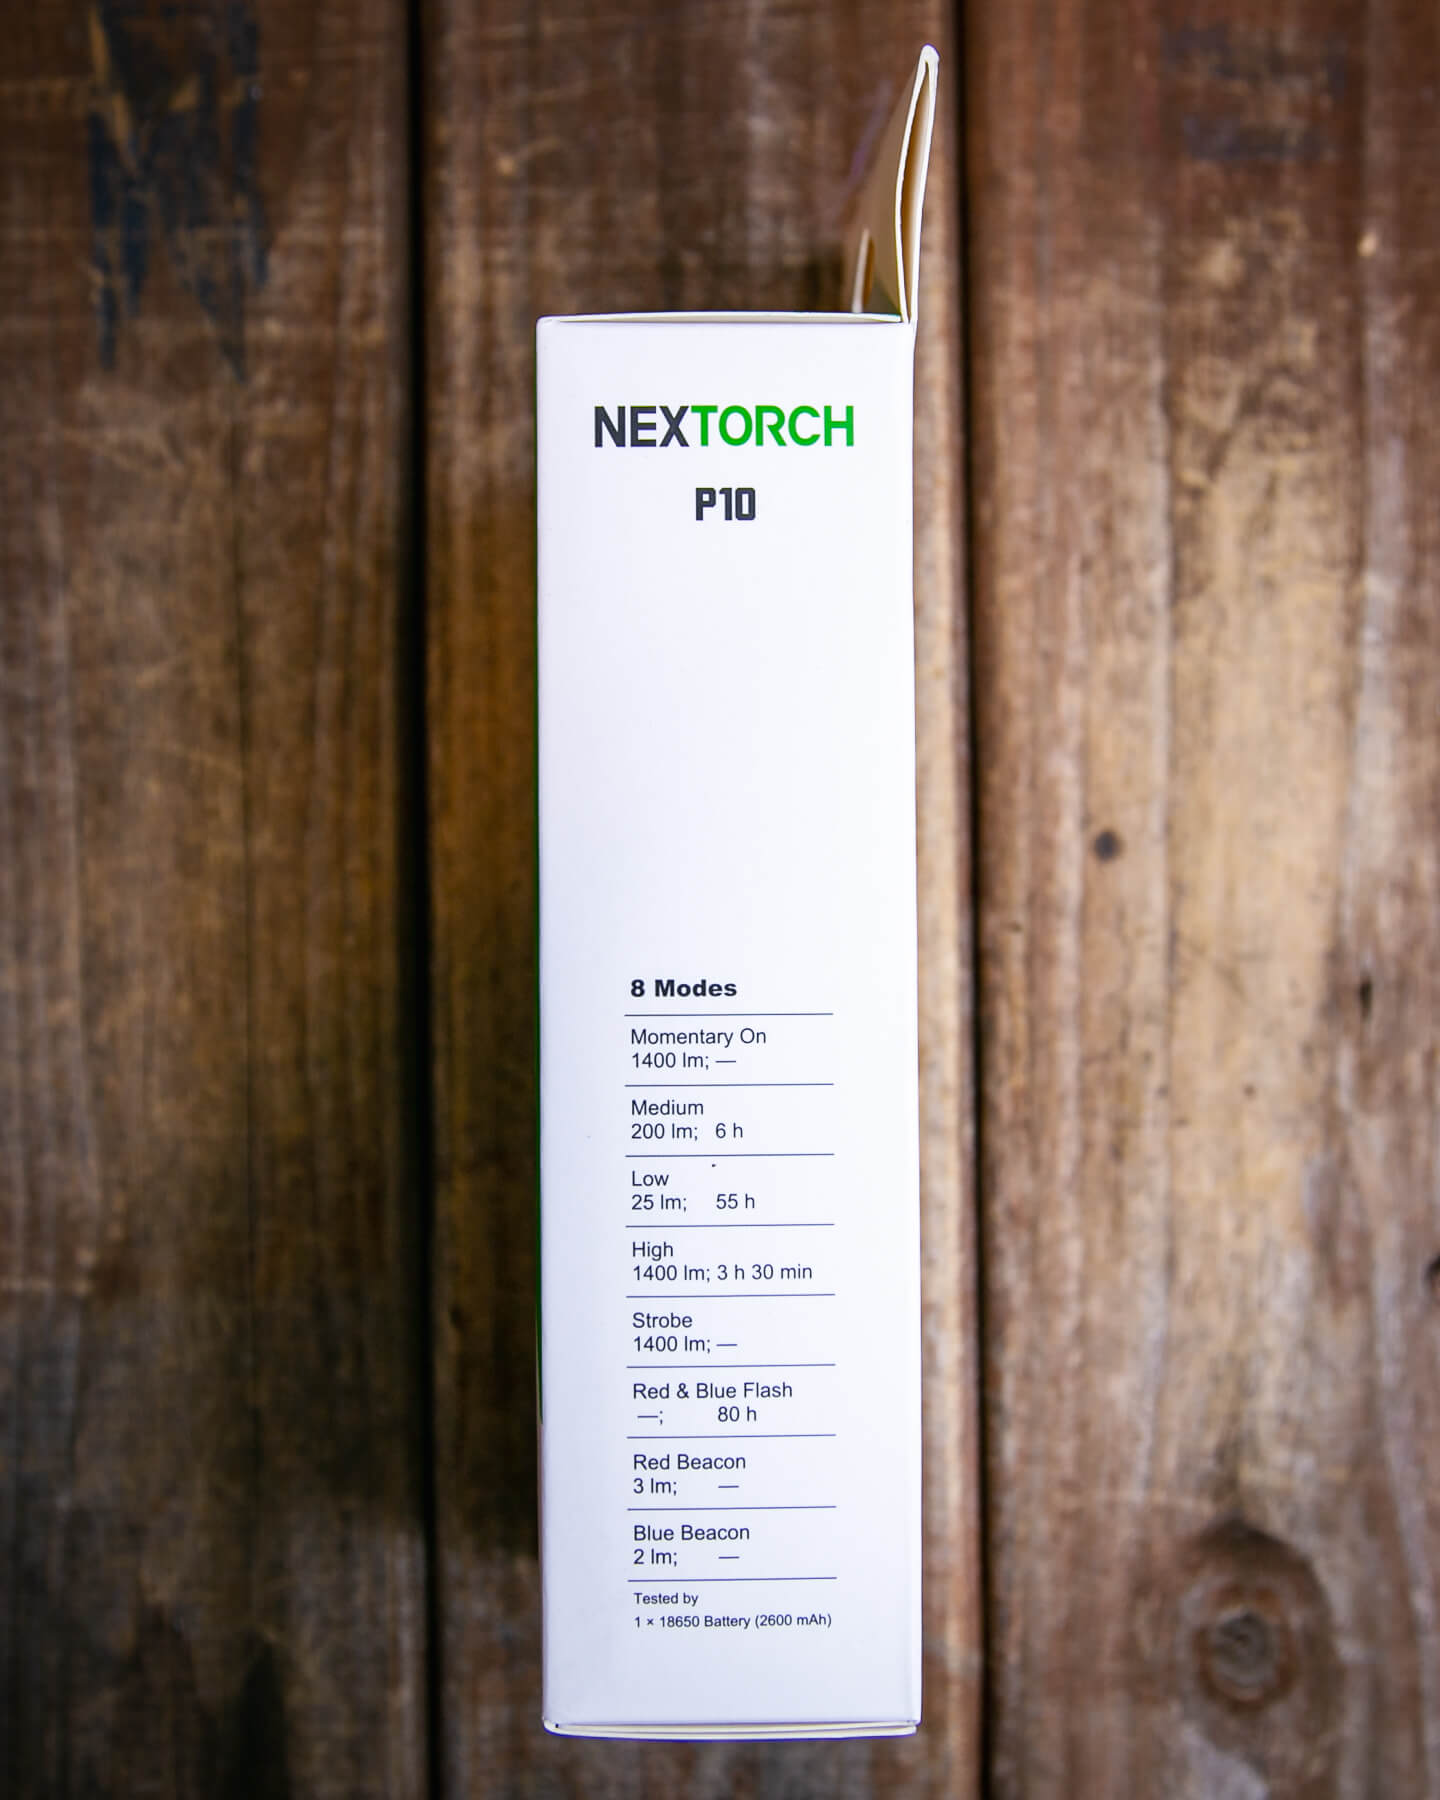
| Claimed Lumens (lm) | 1400 |
| Measured Lumens (at 30s) | 1481 (105.8% of claim)^ |
| Candela per Lumen | 7.5 |
| Claimed Throw (m) | 200 |
| Candela (Calculated) in cd (at 30s) | 447lux @ 5.446m = 13258cd |
| Throw (Calculated) (m) | 230.3 (115.2% of claim)^ |
| Claimed CCT | – |
| Measured CCT Range (K) | 6200-6400 Kelvin |
| Item provided for review by: | Nextorch |
| All my Nextorch reviews! | |
^ Measurement disclaimer: Testing flashlights is my hobby. I use hobbyist-level equipment for testing, including some I made myself. Try not to get buried in the details of manufacturer specifications versus measurements recorded here; A certain amount of difference (say, 10 or 15%) is perfectly reasonable.
What’s Included
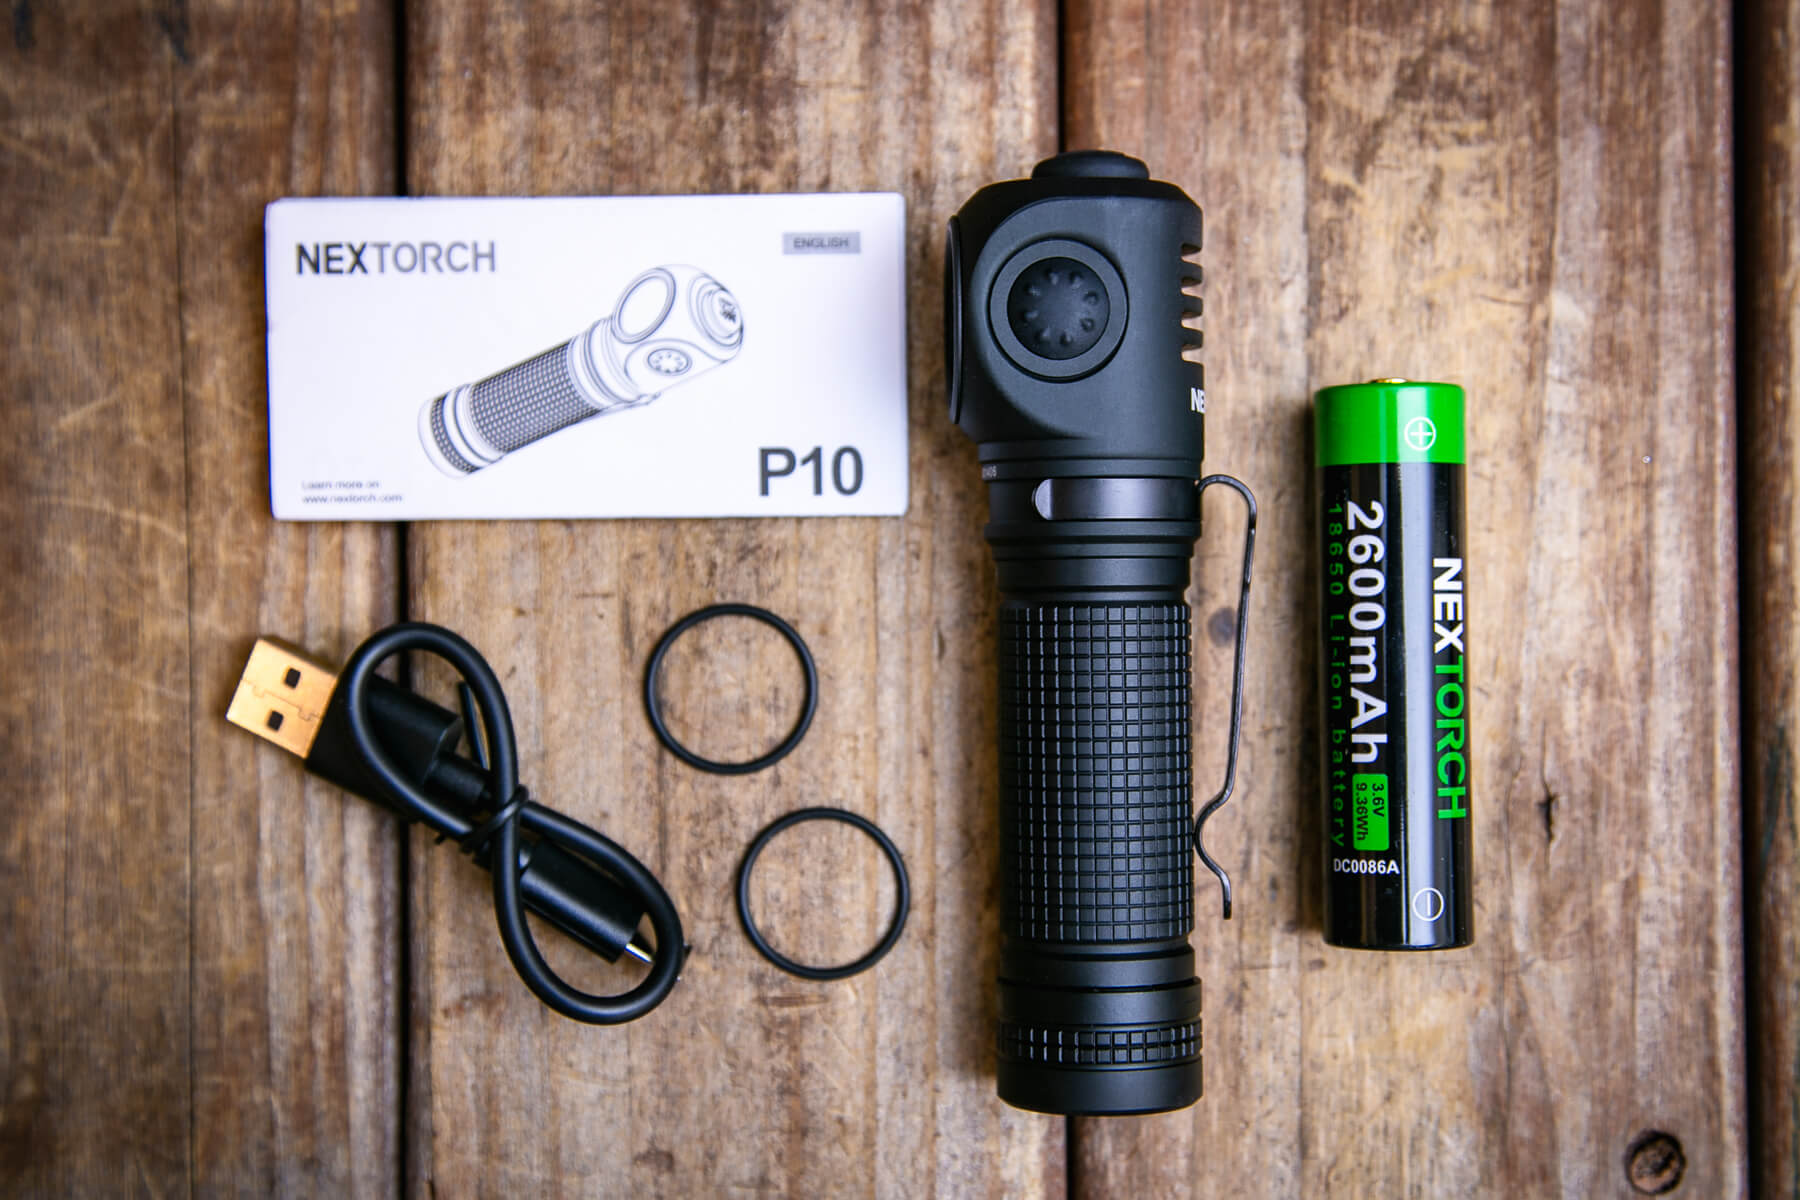
- Nextorch P10 right-angle flashlight
- Nextorch 2600mAh 18650
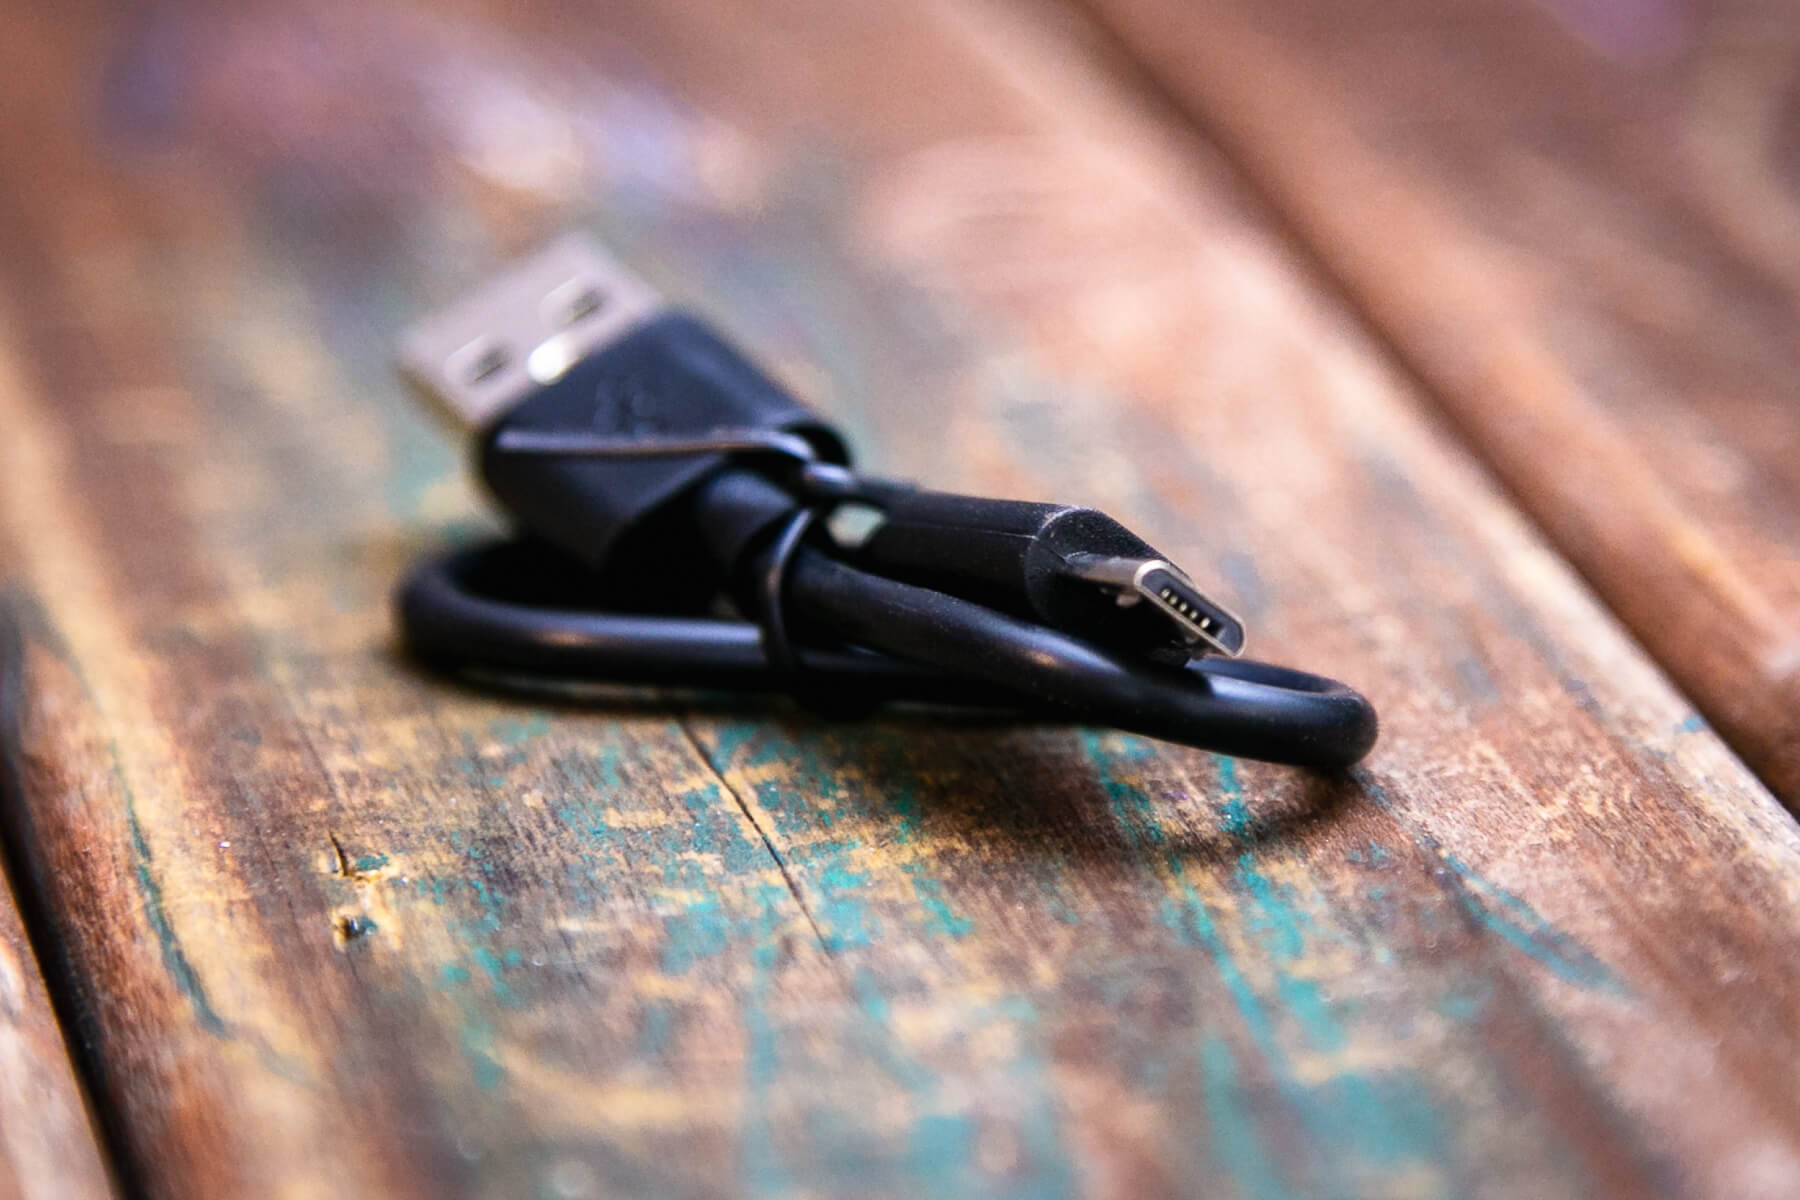
- Charging cable (USB to micro-USB)
- Spare o-rings (2)
- Manual
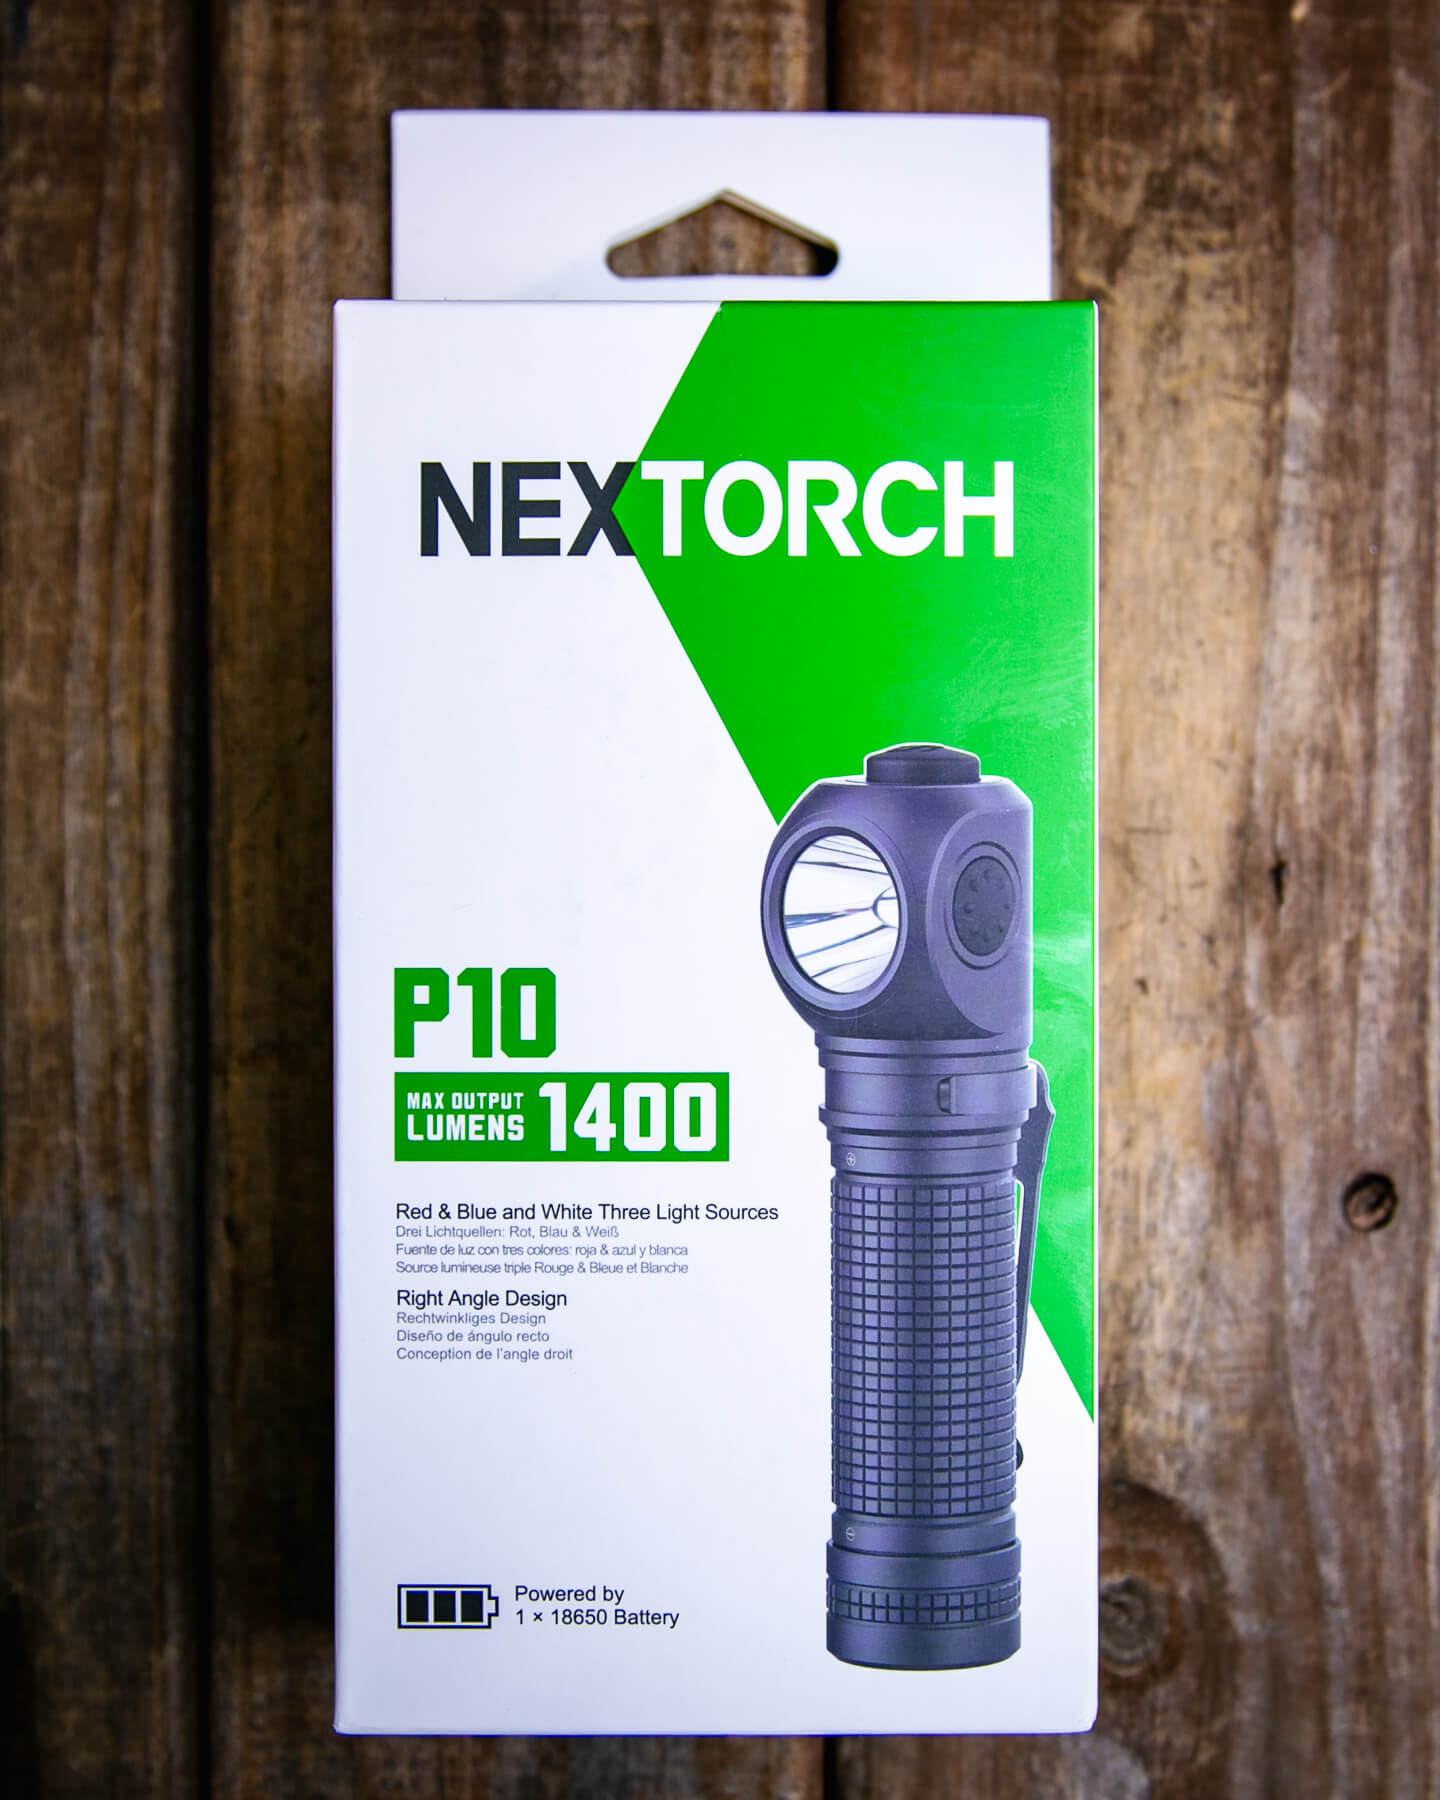
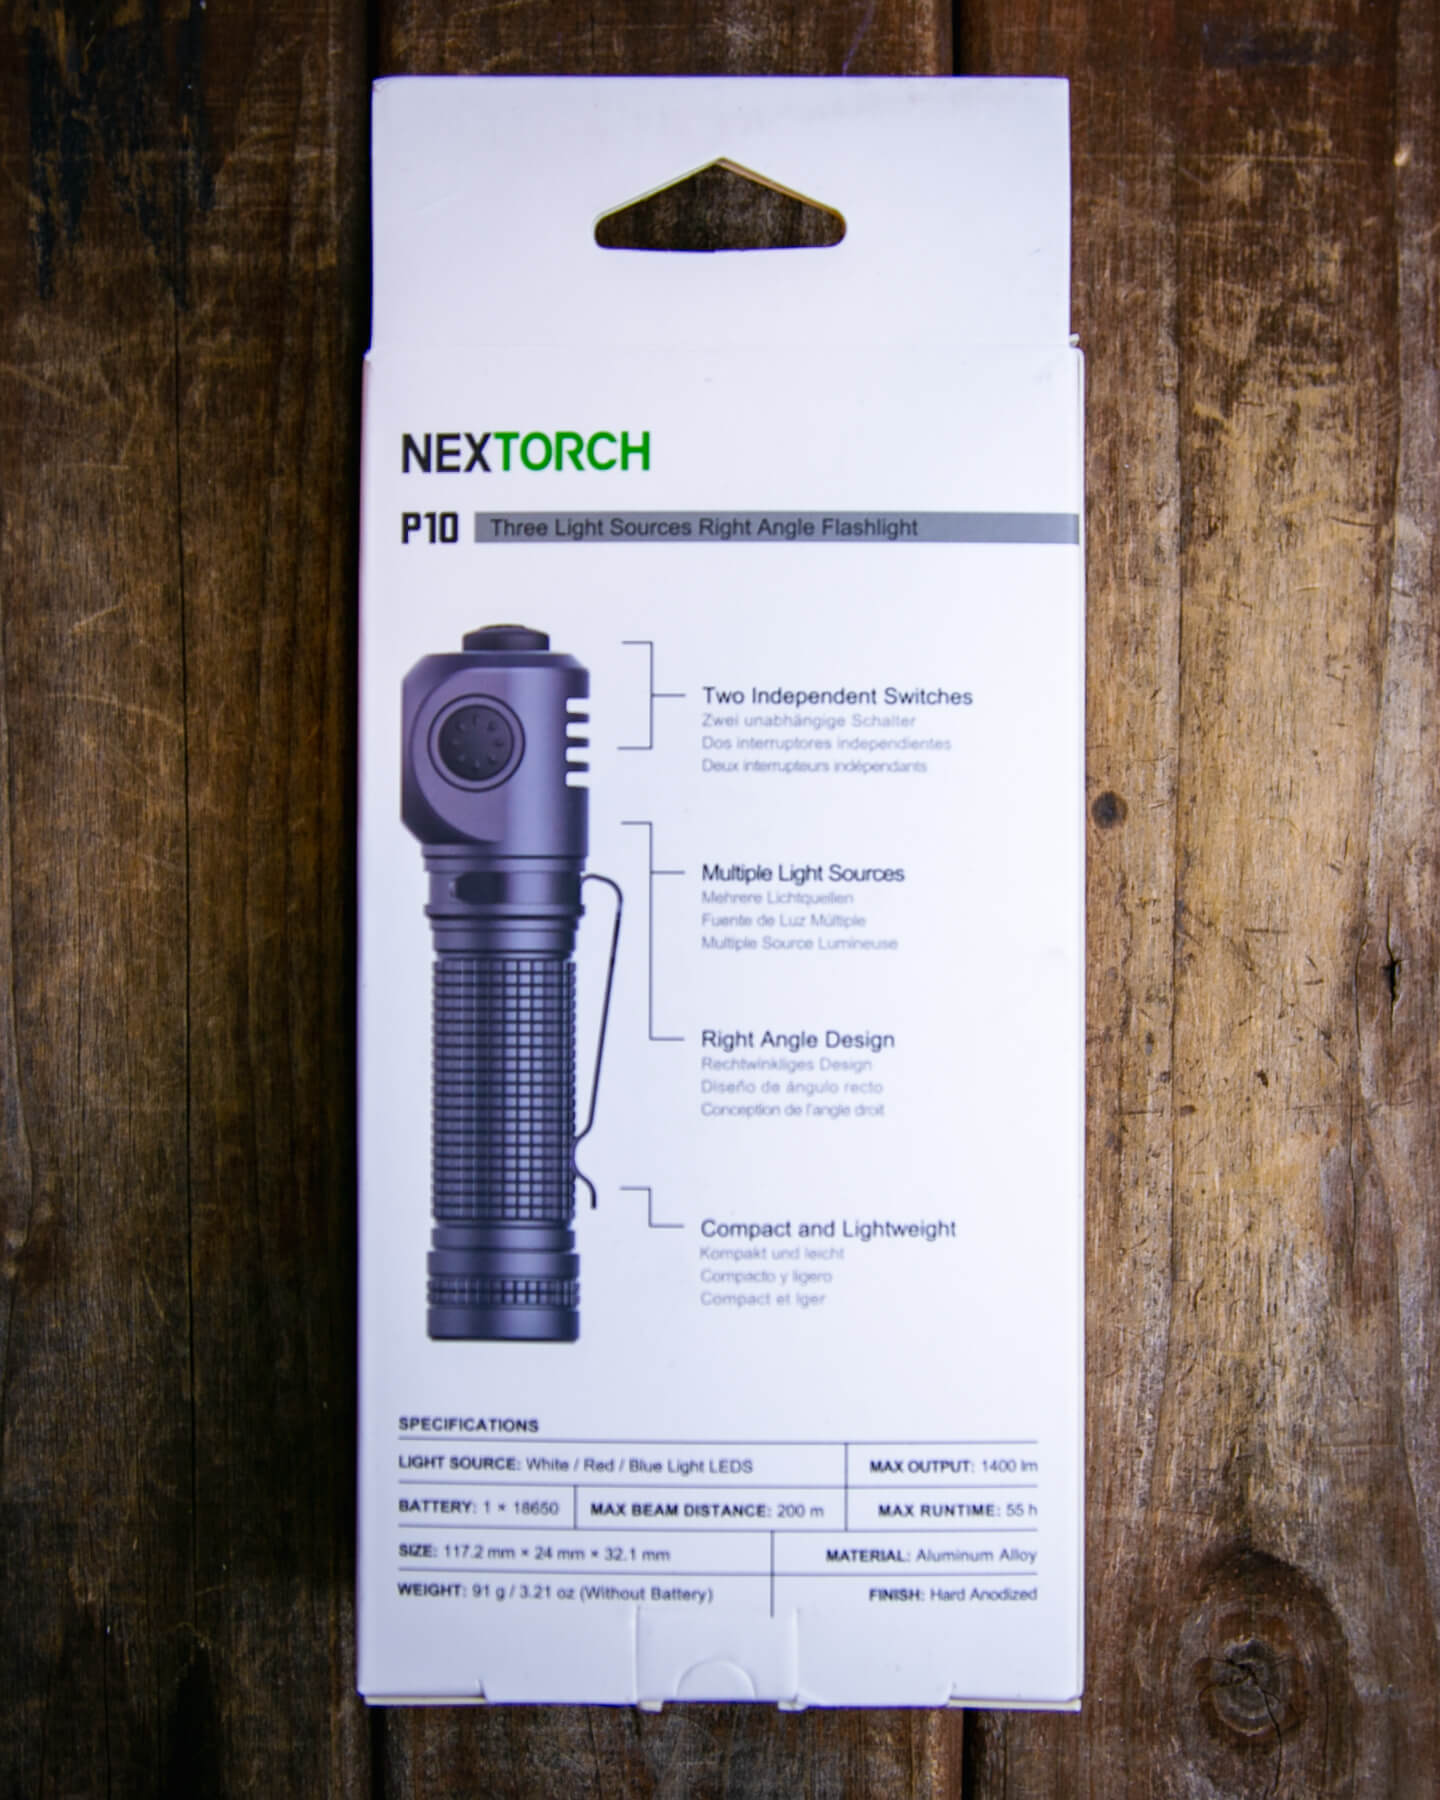
Package and Manual
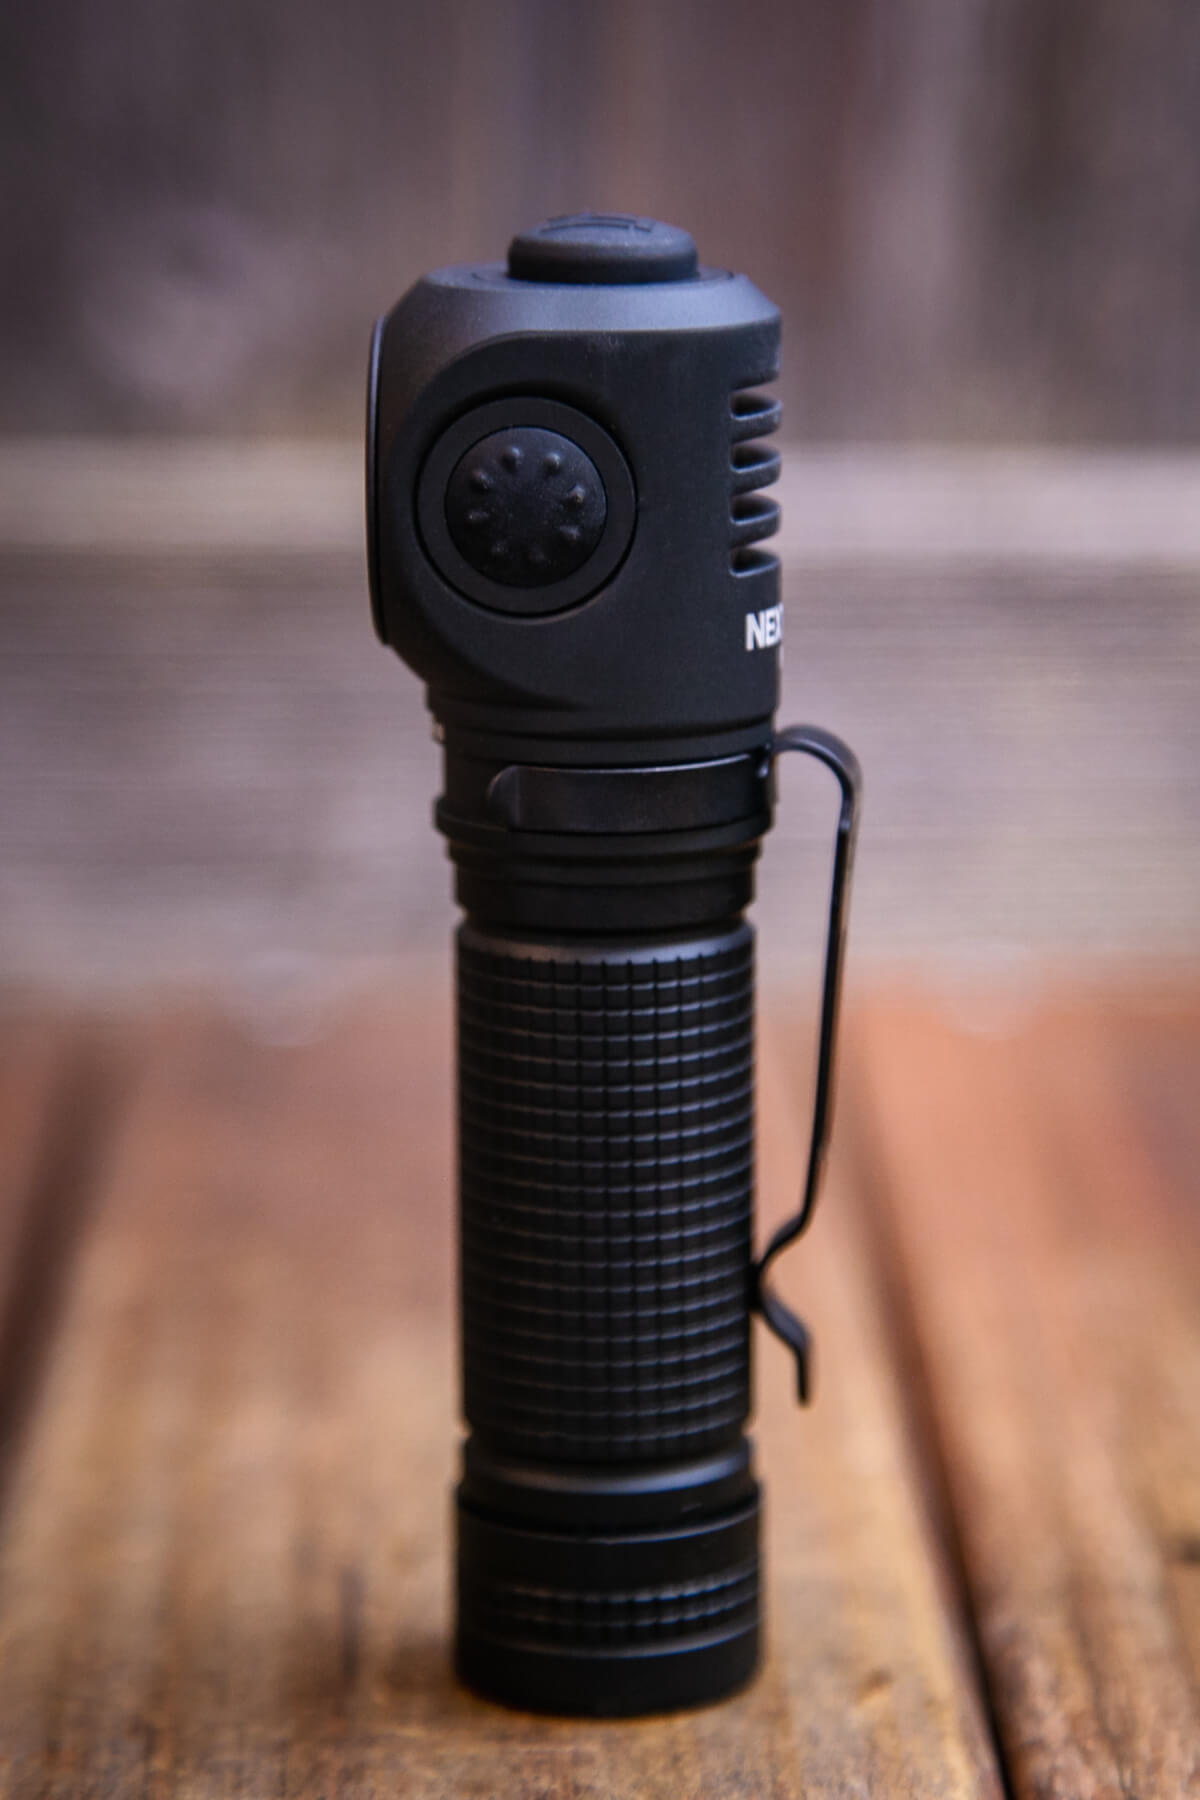
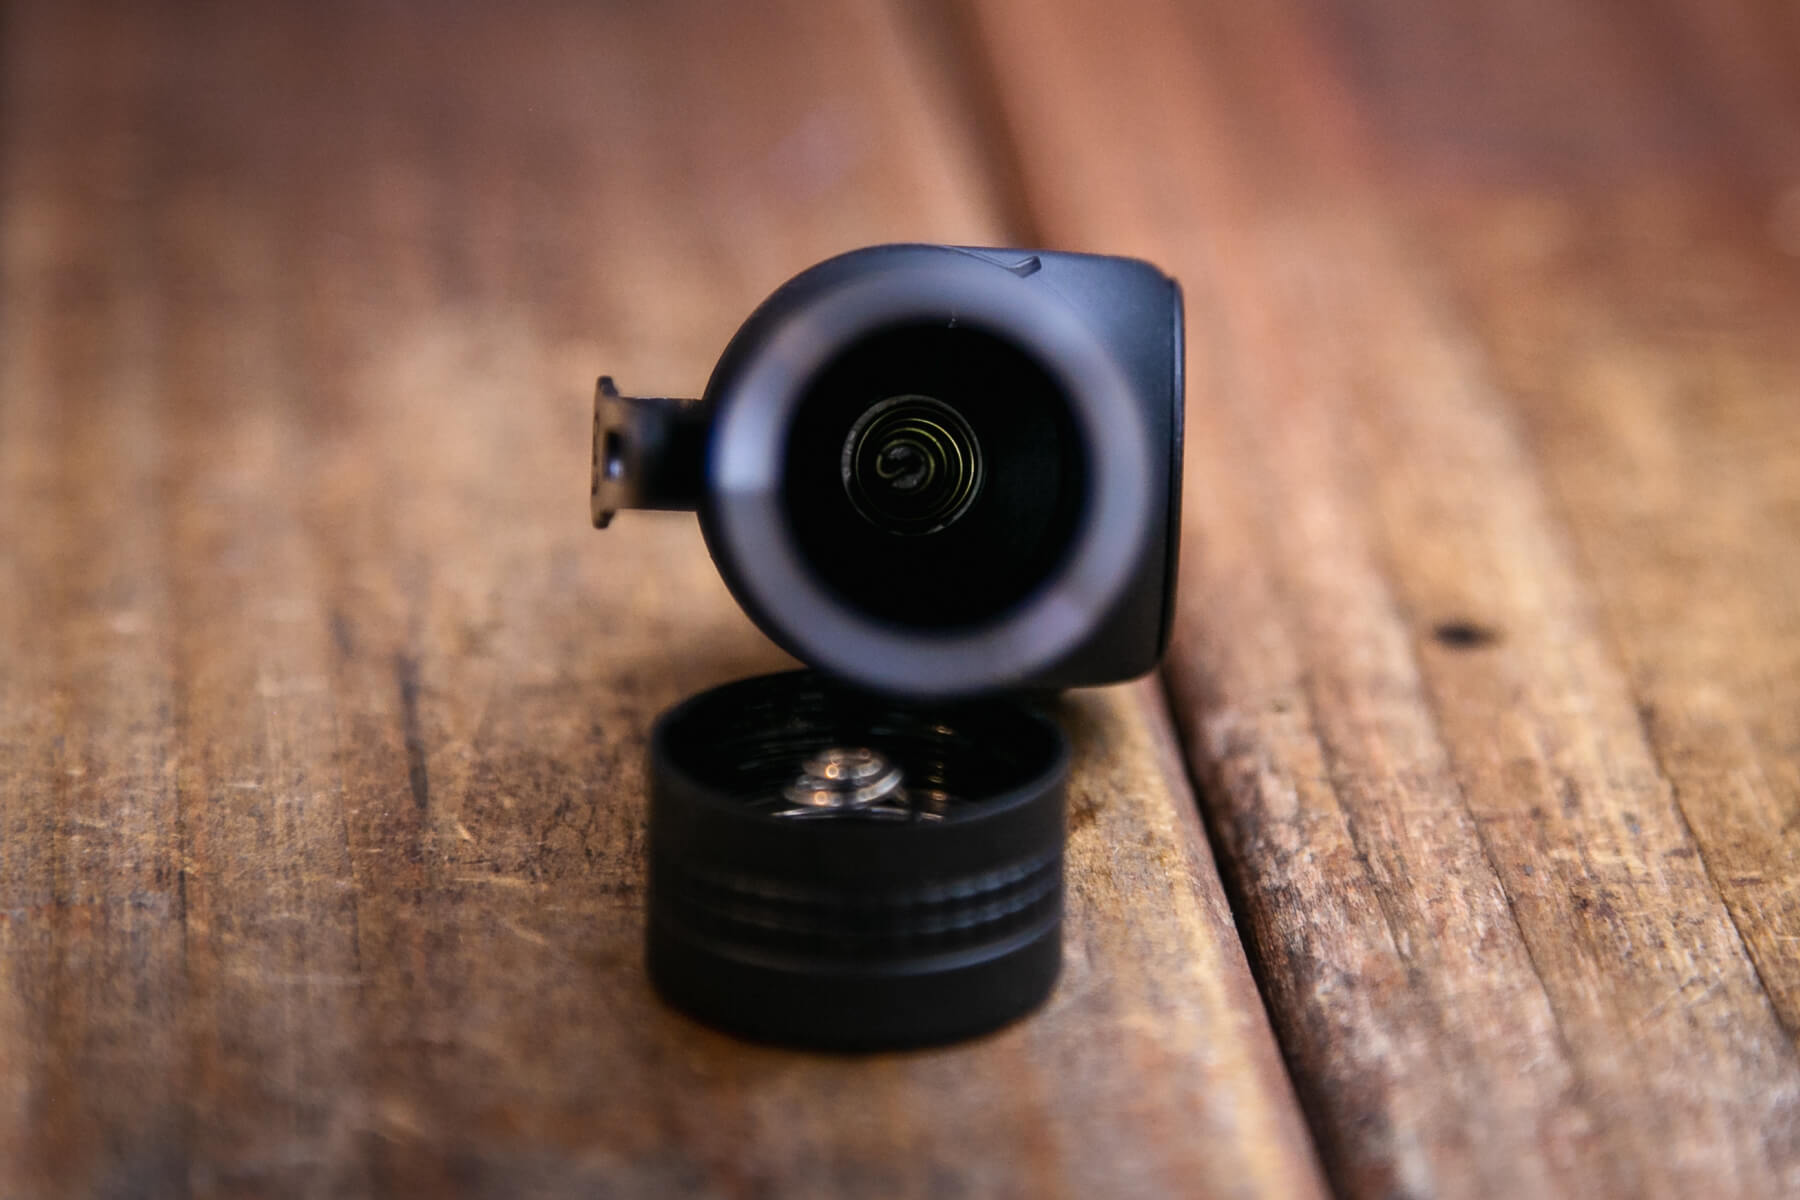
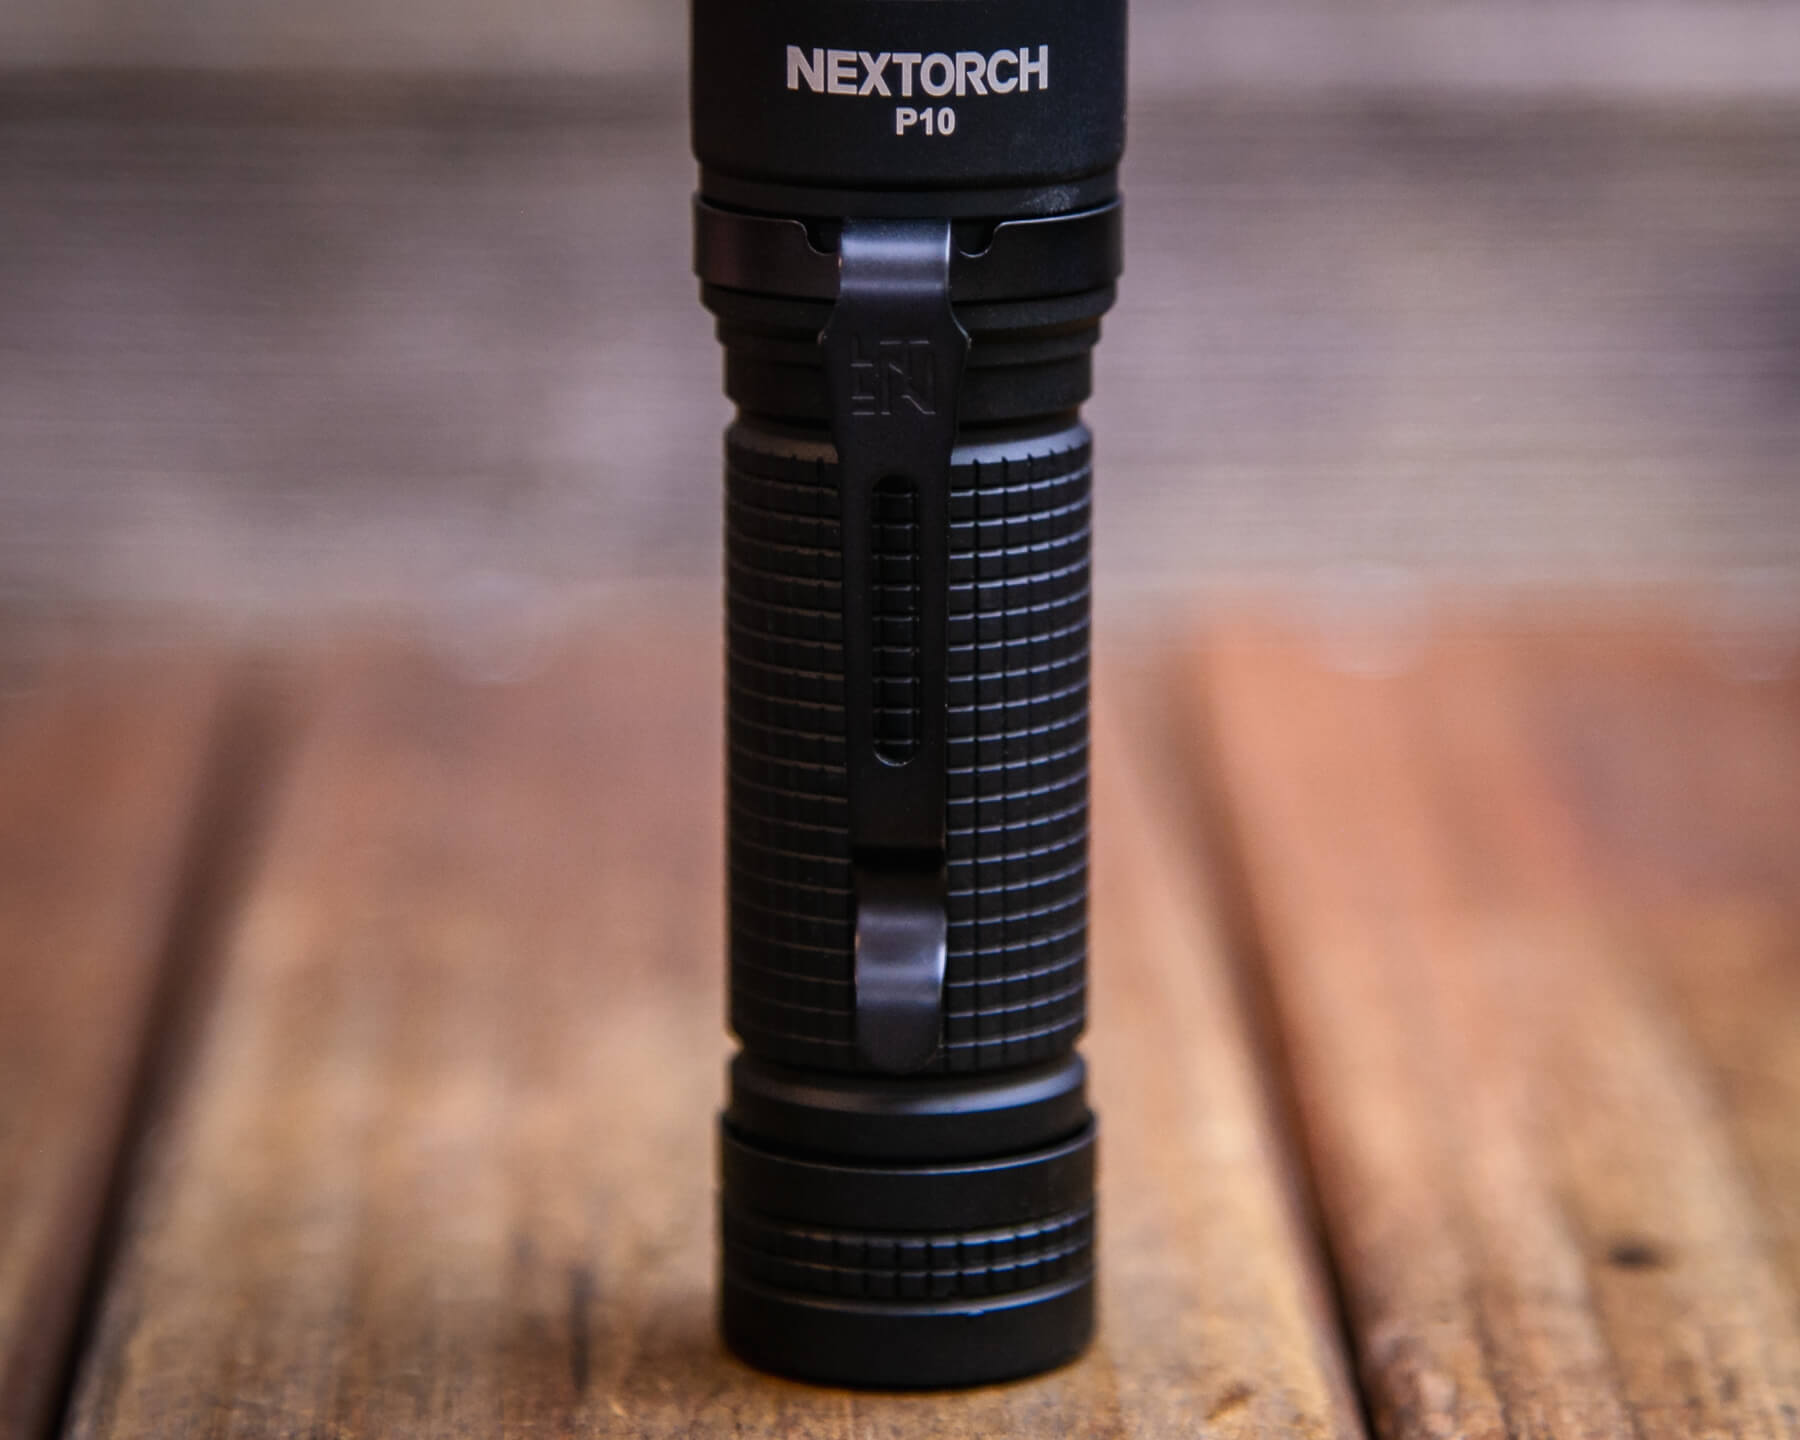
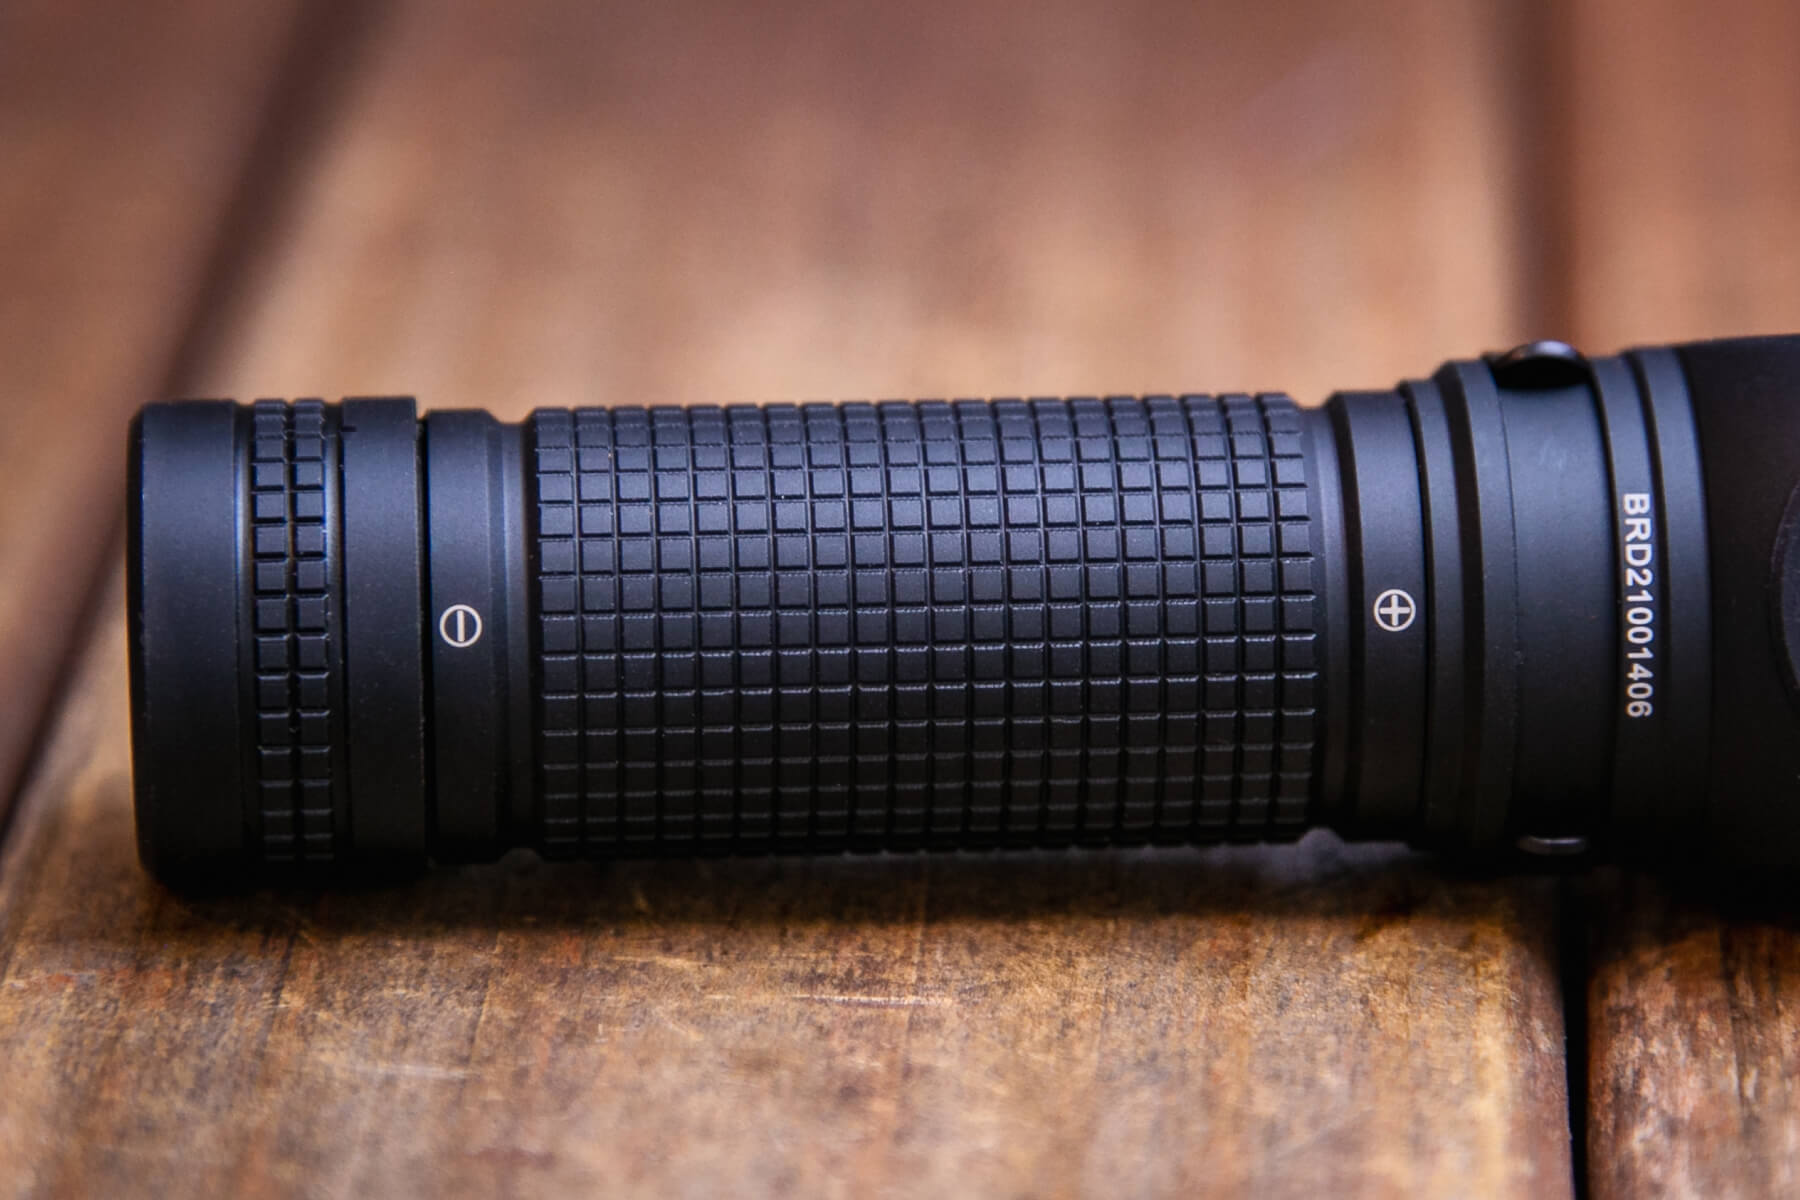
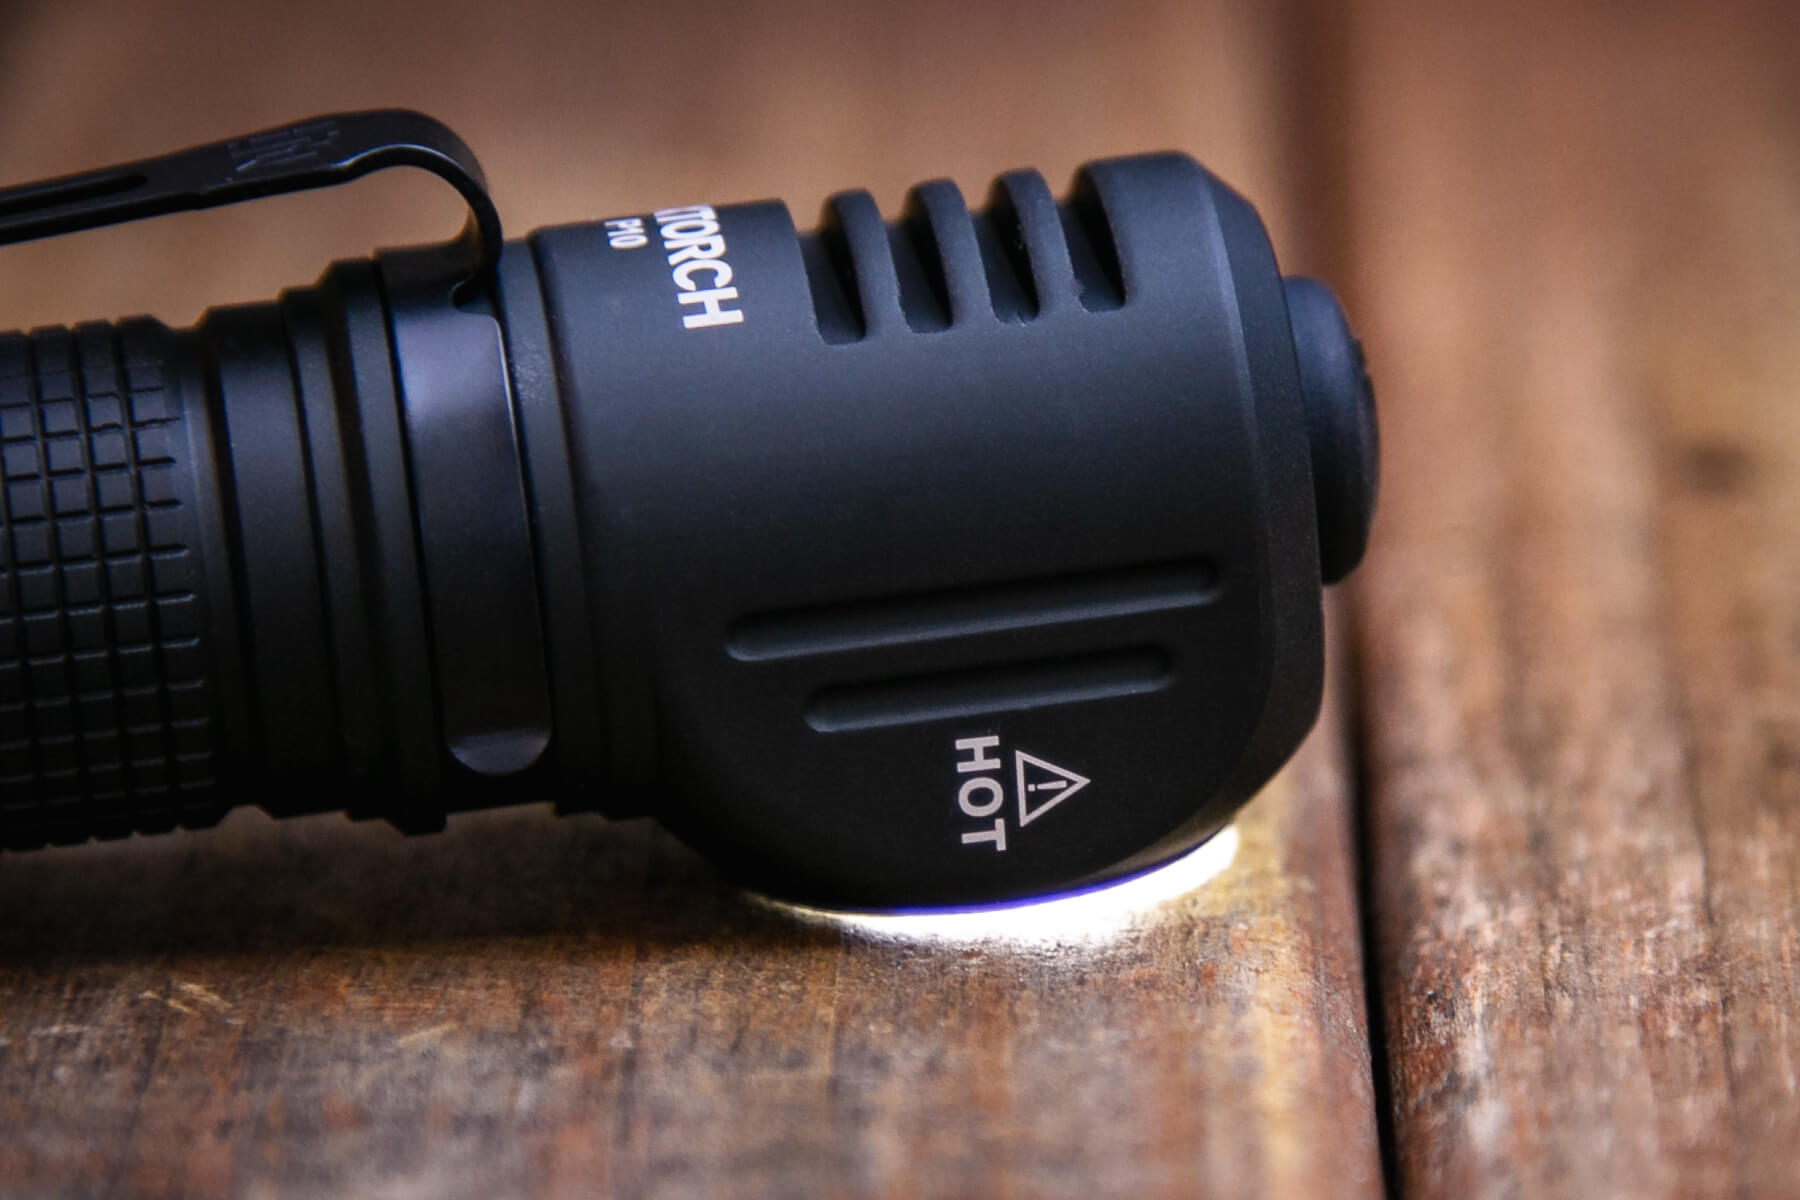
Build Quality and Disassembly
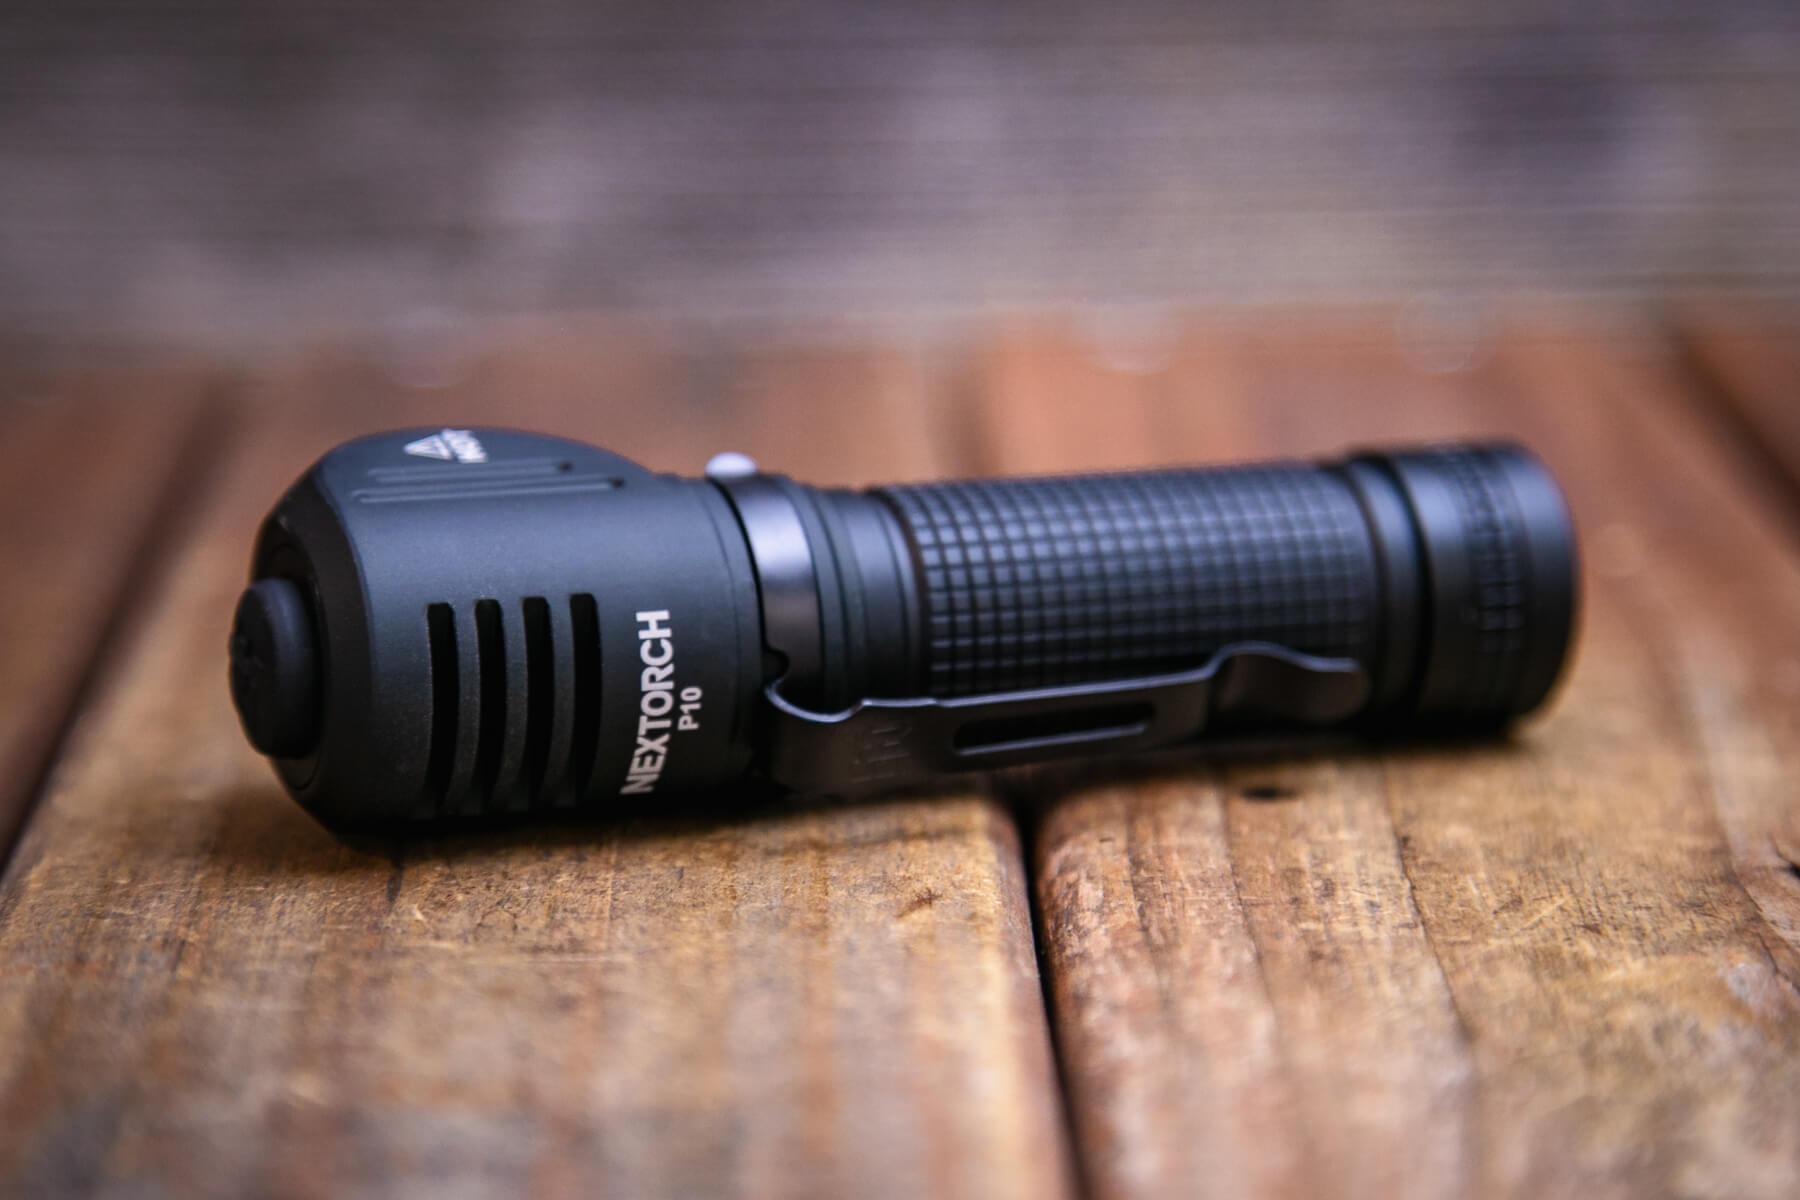
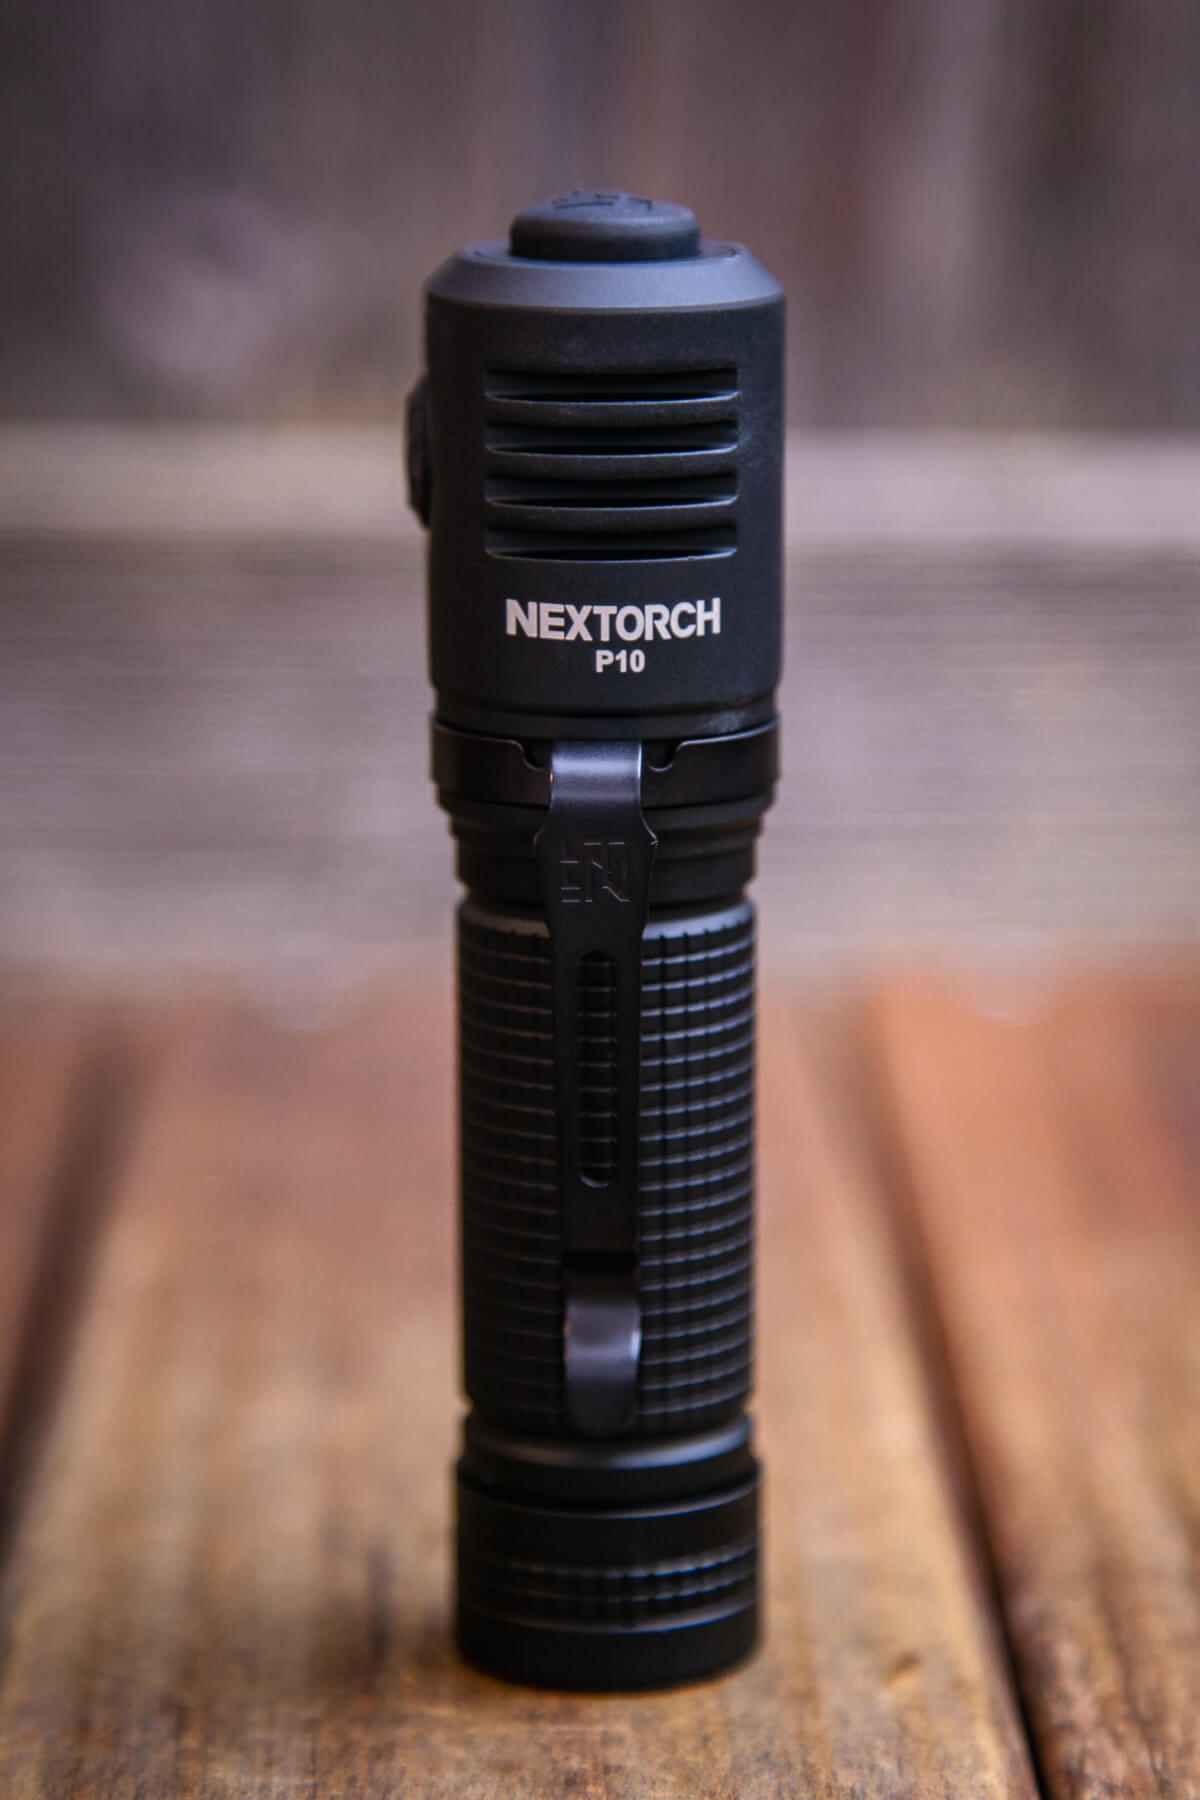
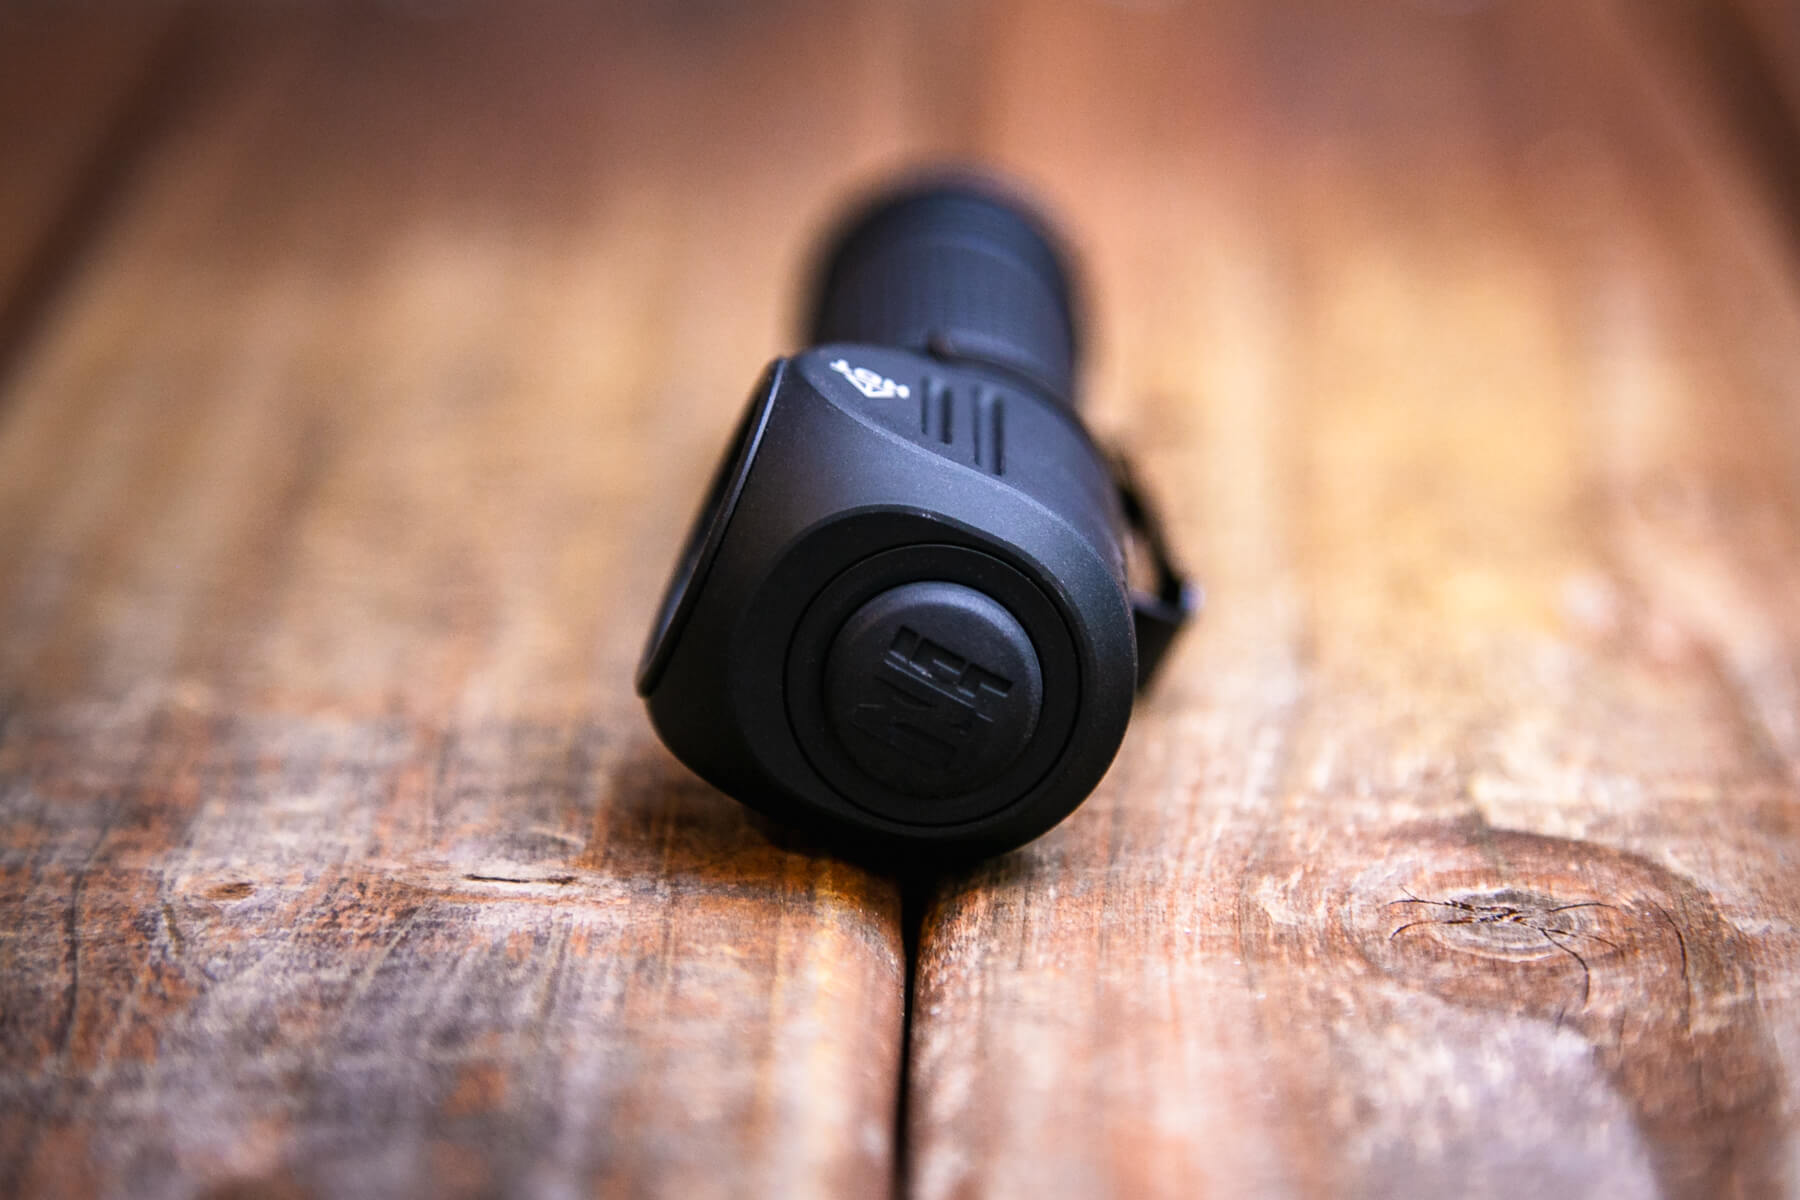
It’s not a headlamp! The P10 is solidly a “right-angle” flashlight, and no means of using it as a headlamp are included. That’s fine: right-angle lights are awesome!
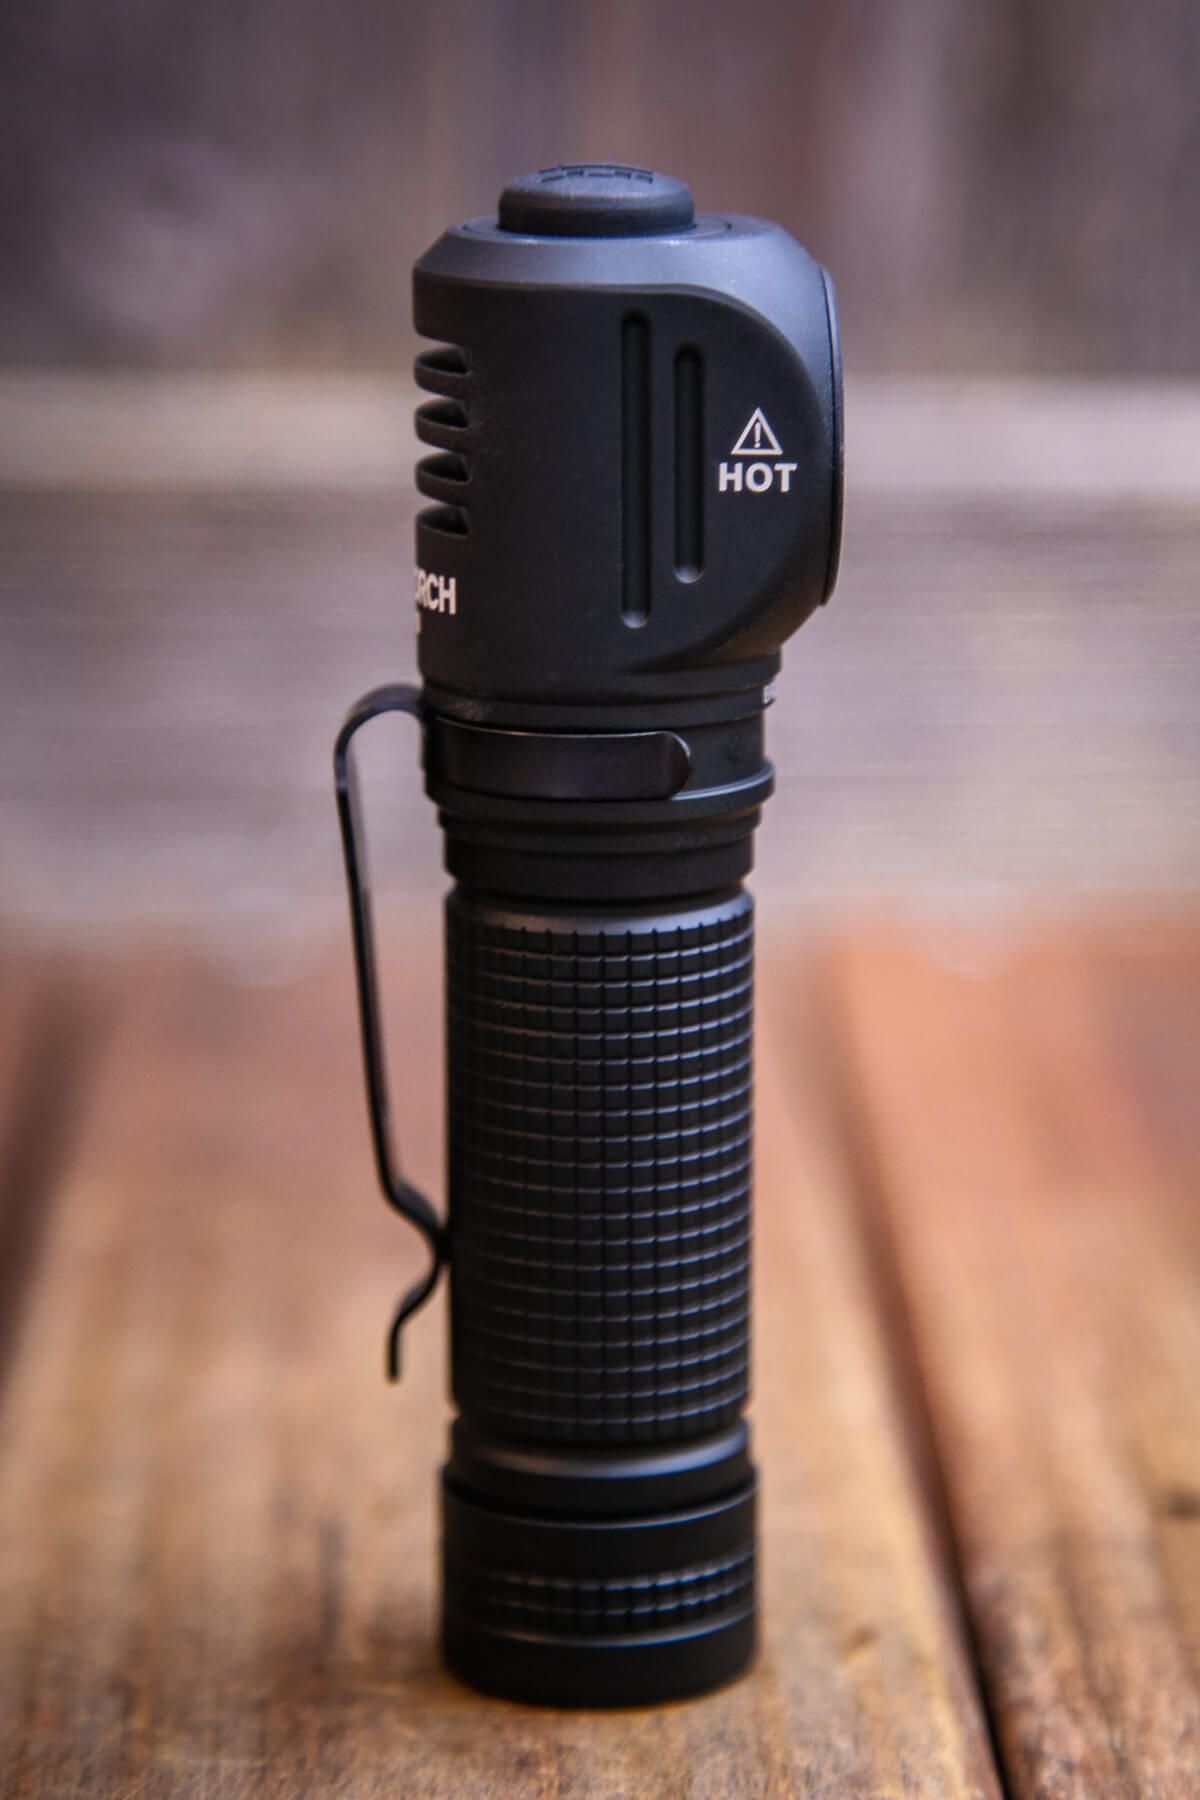
The back of the head here offers some cooling fins.
The tailcap has a nice, thick spring.
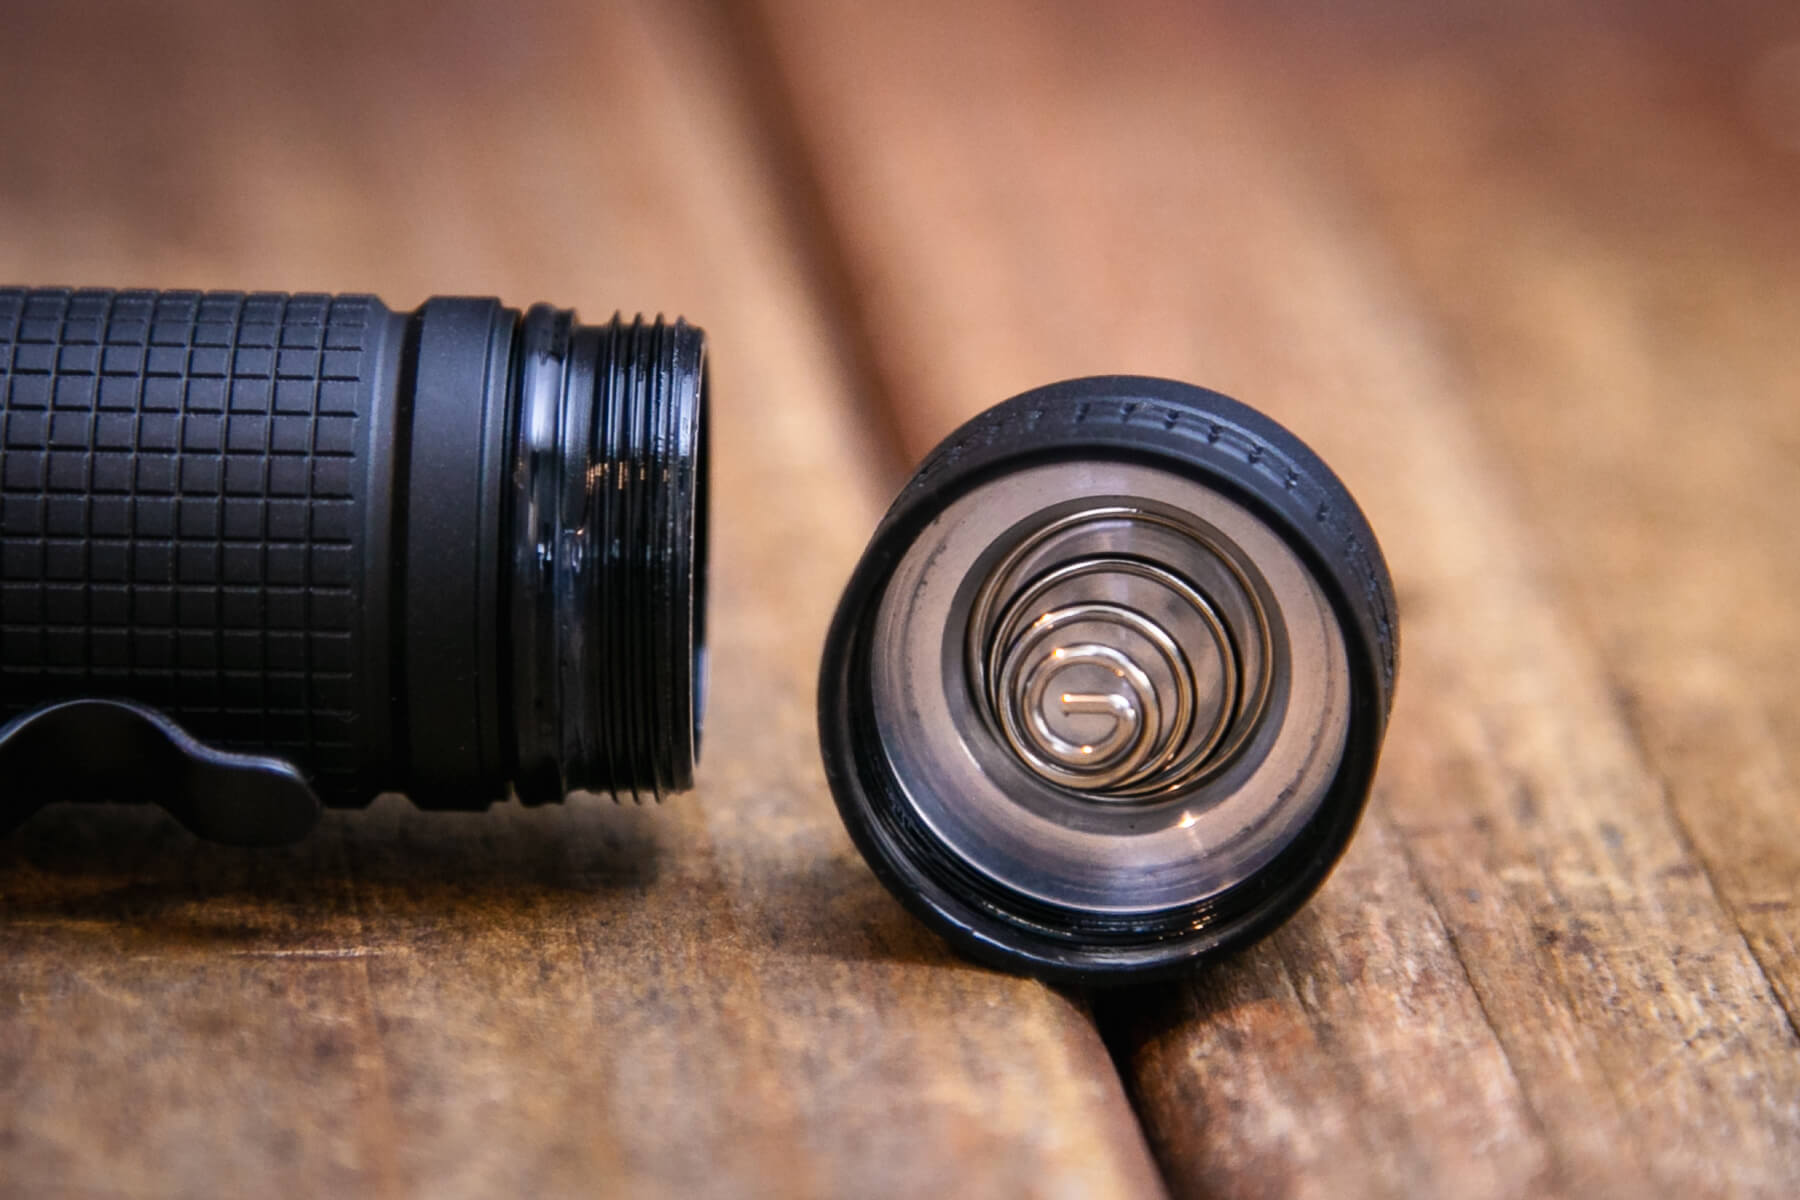
Inside the cell tube, you can see that the head has a spring, too.
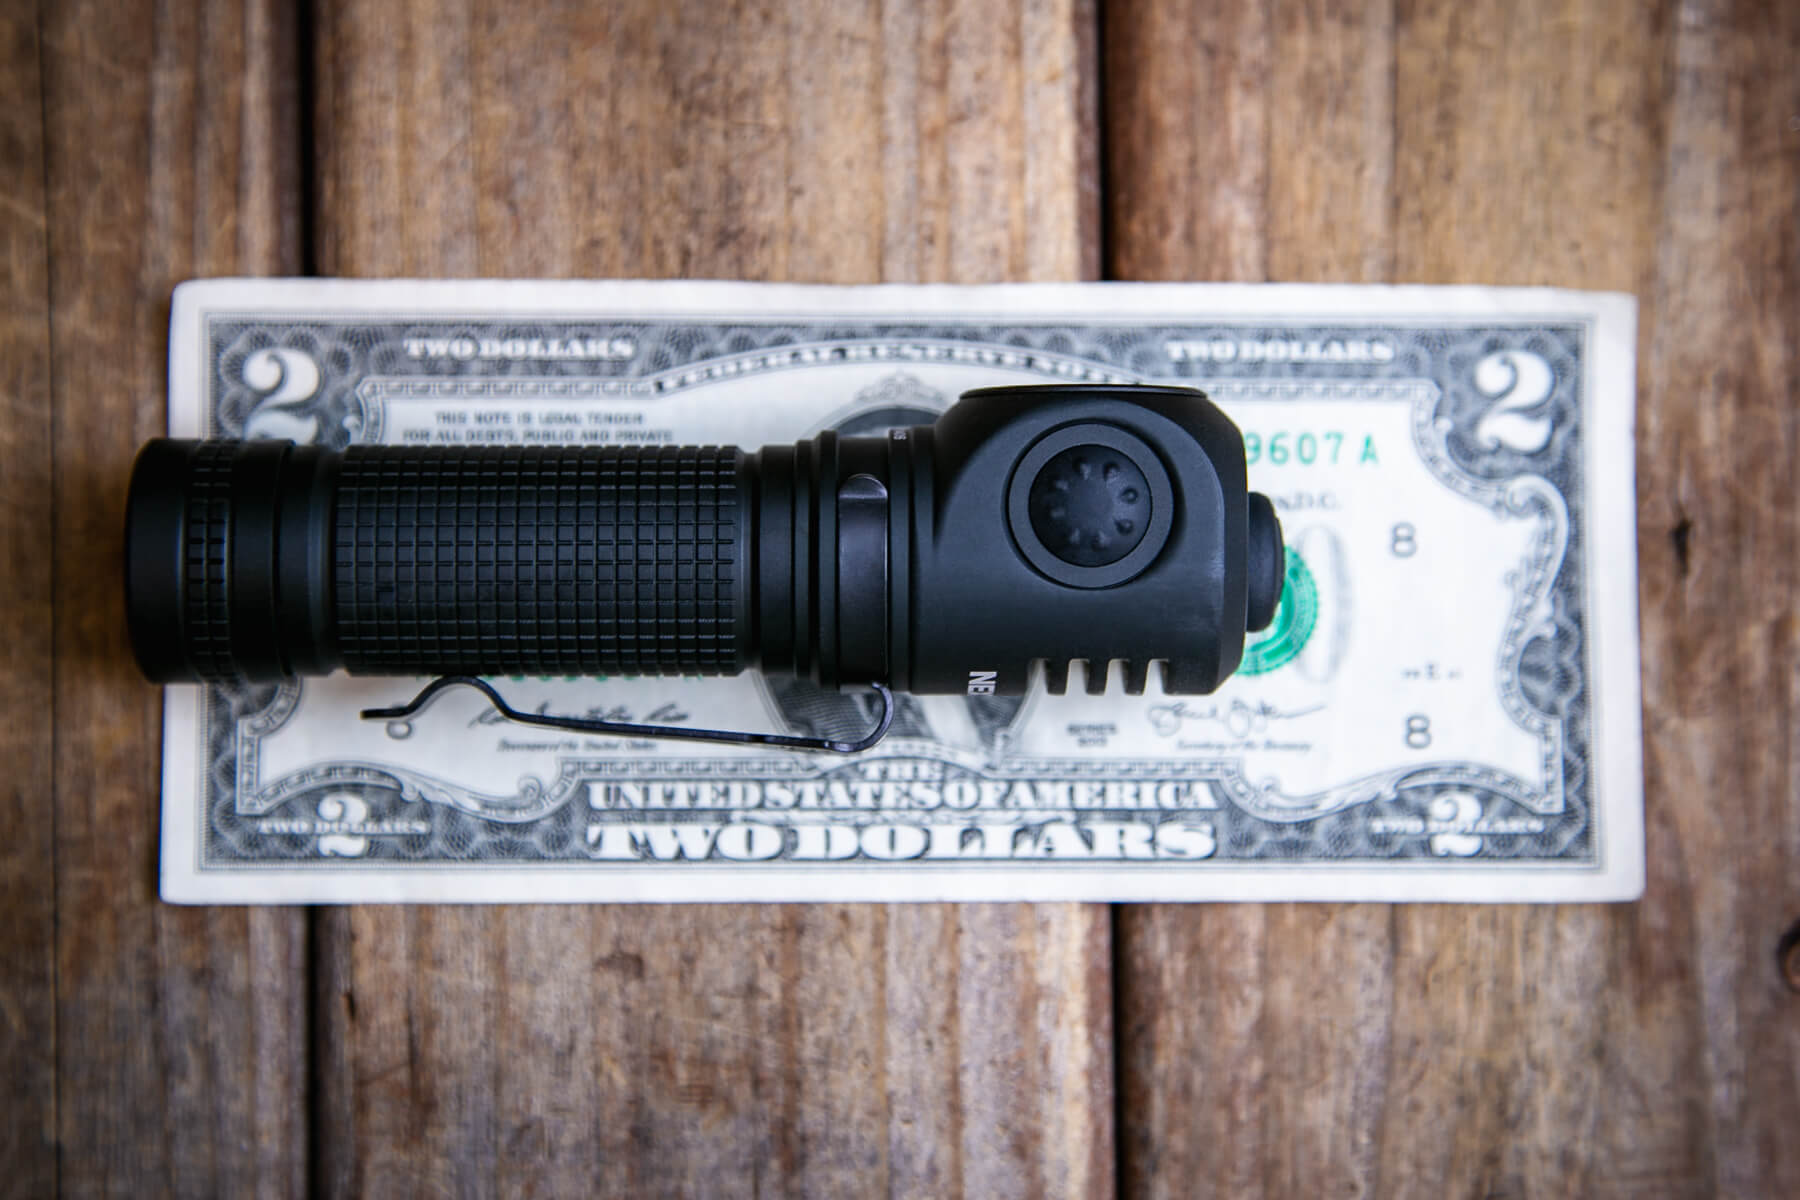
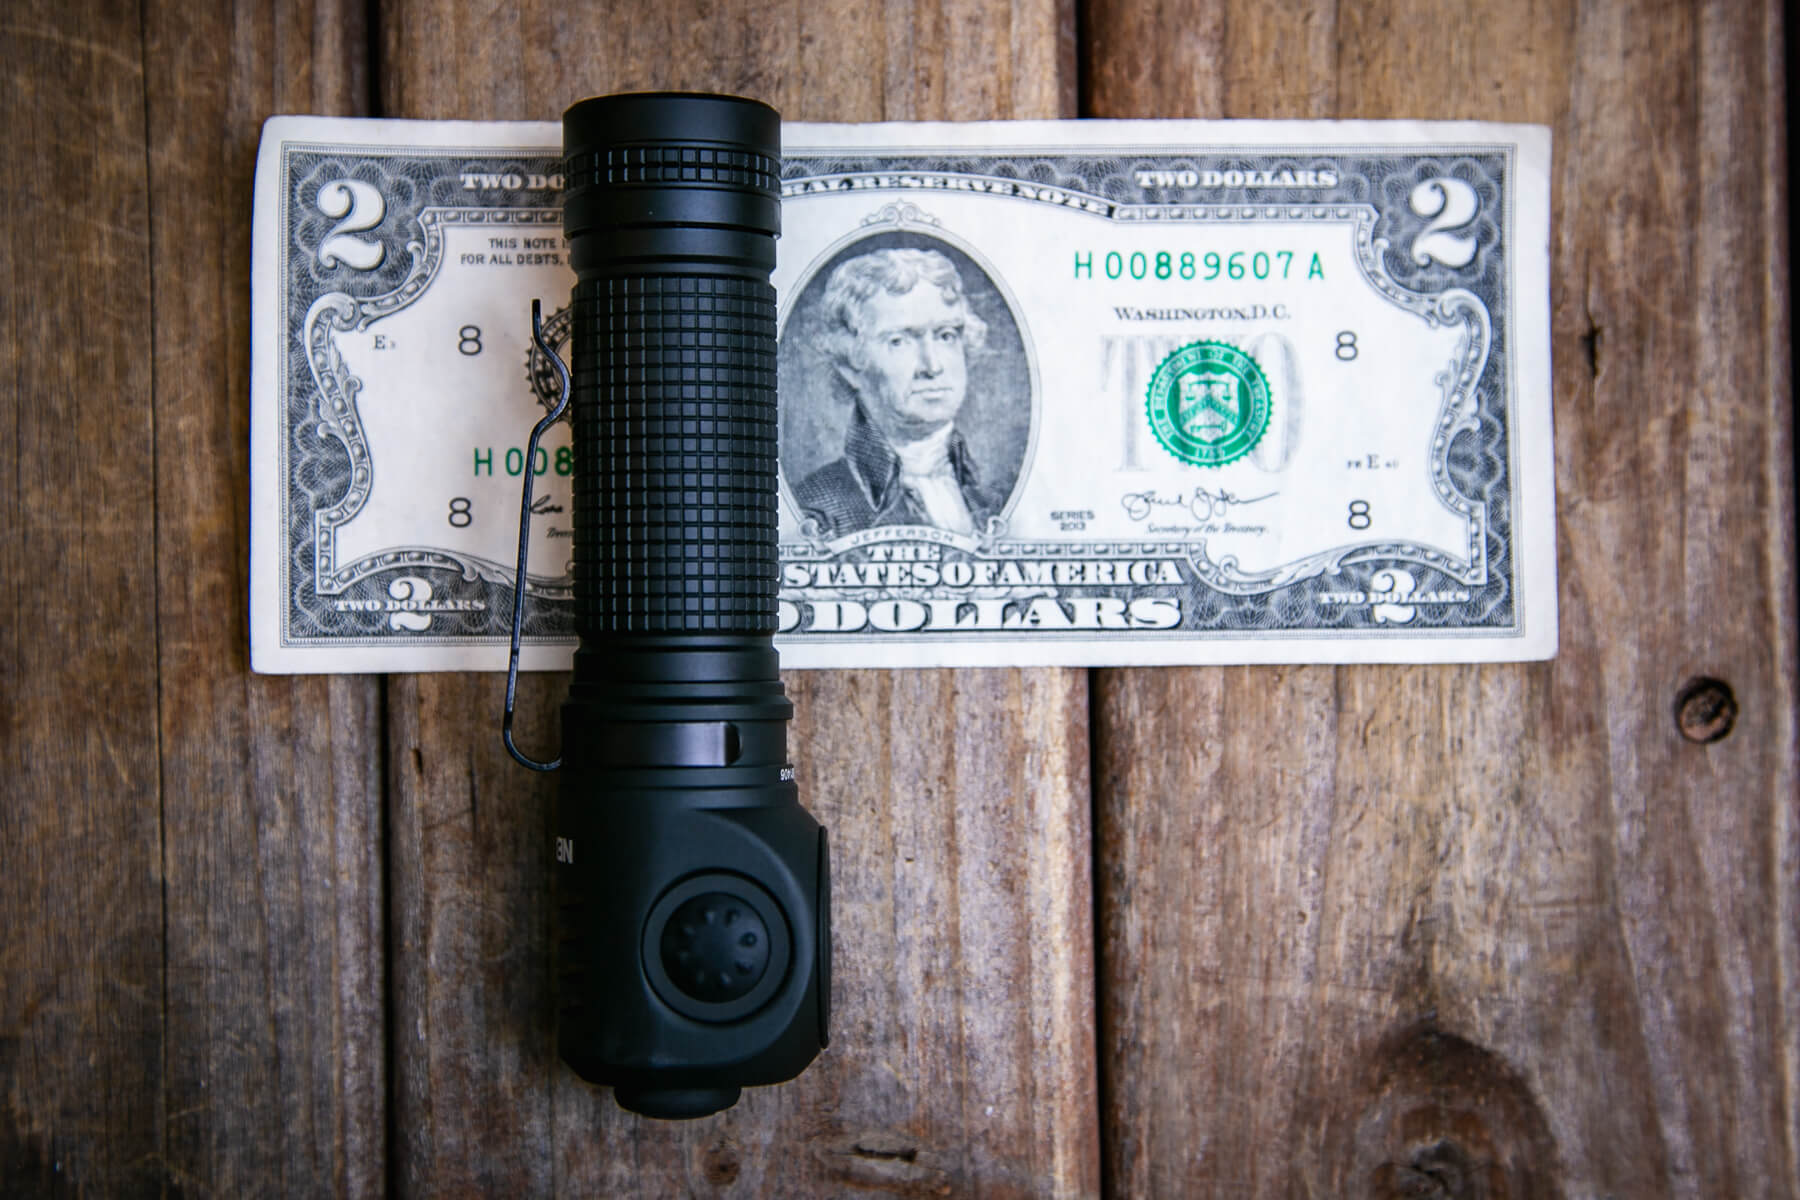
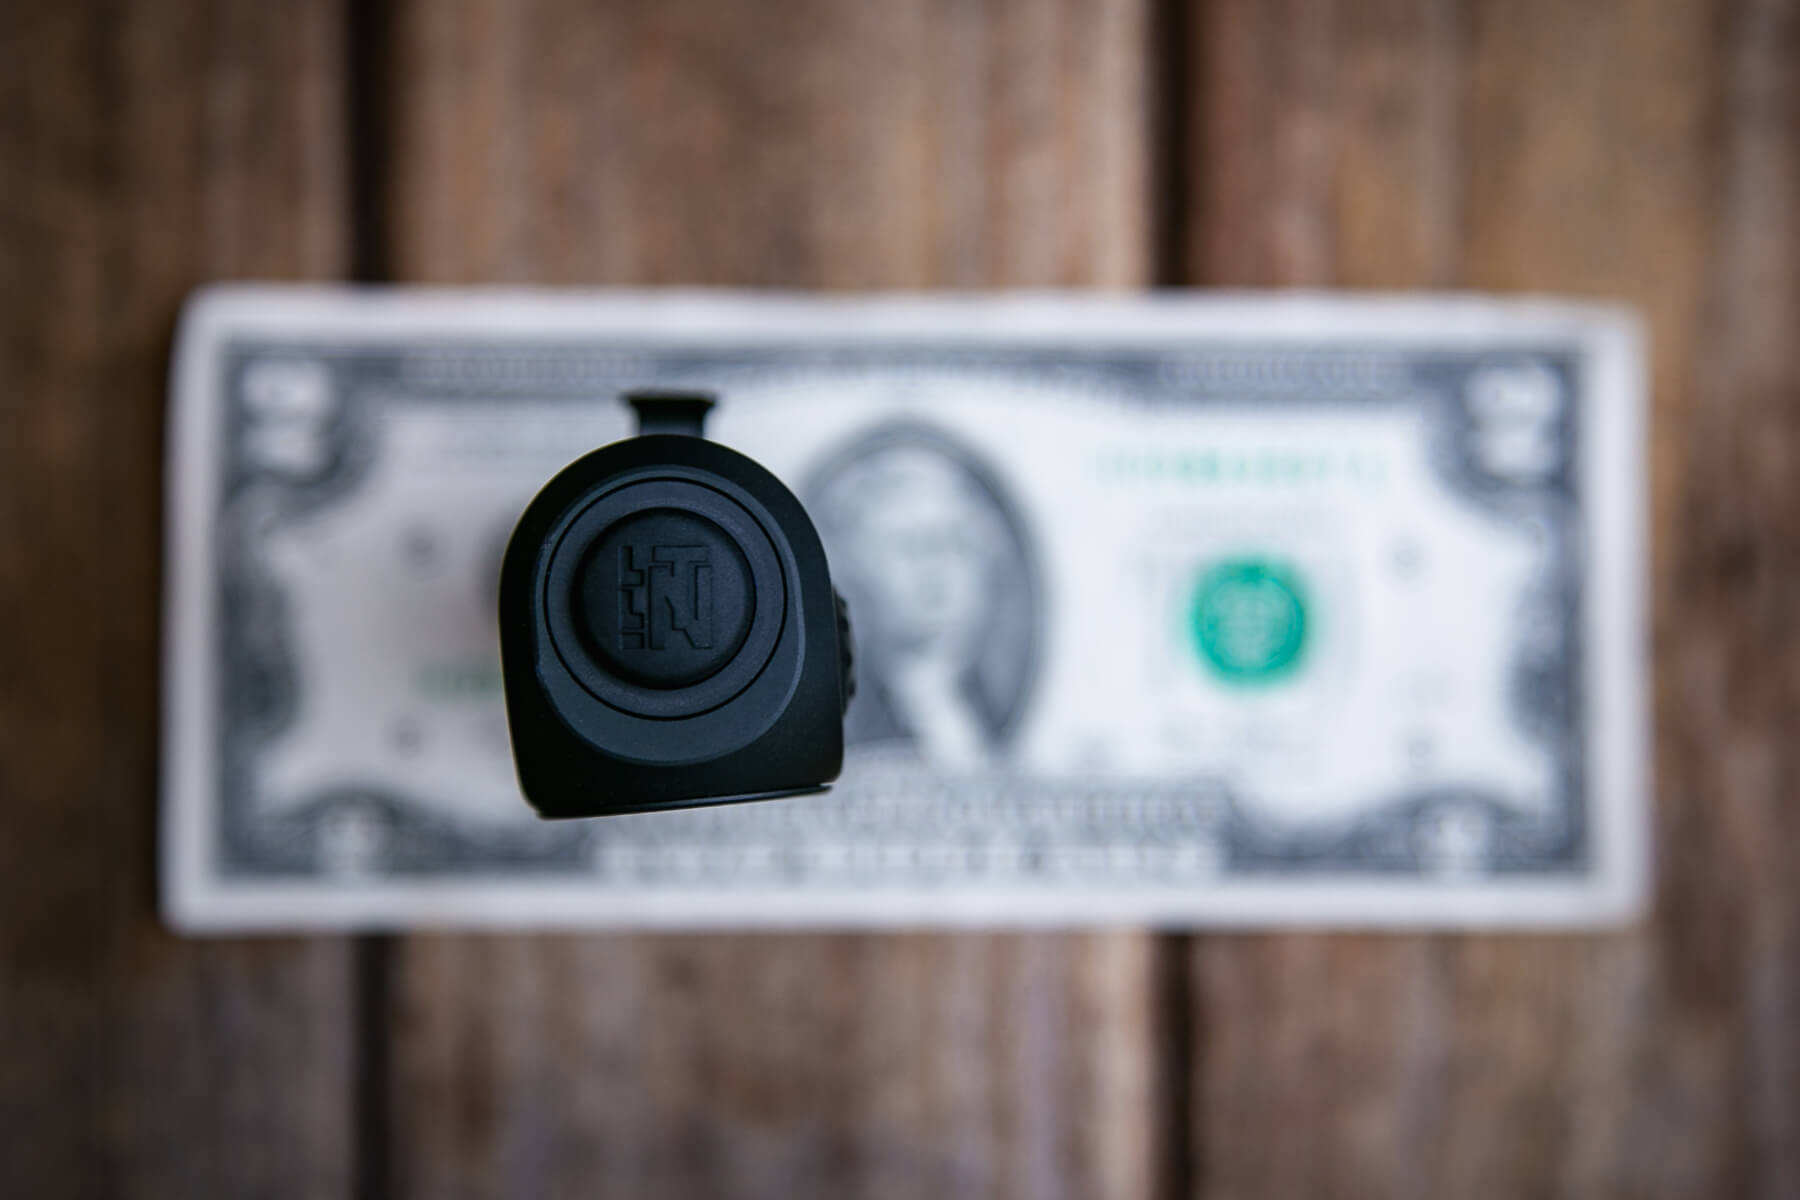
Size and Comps
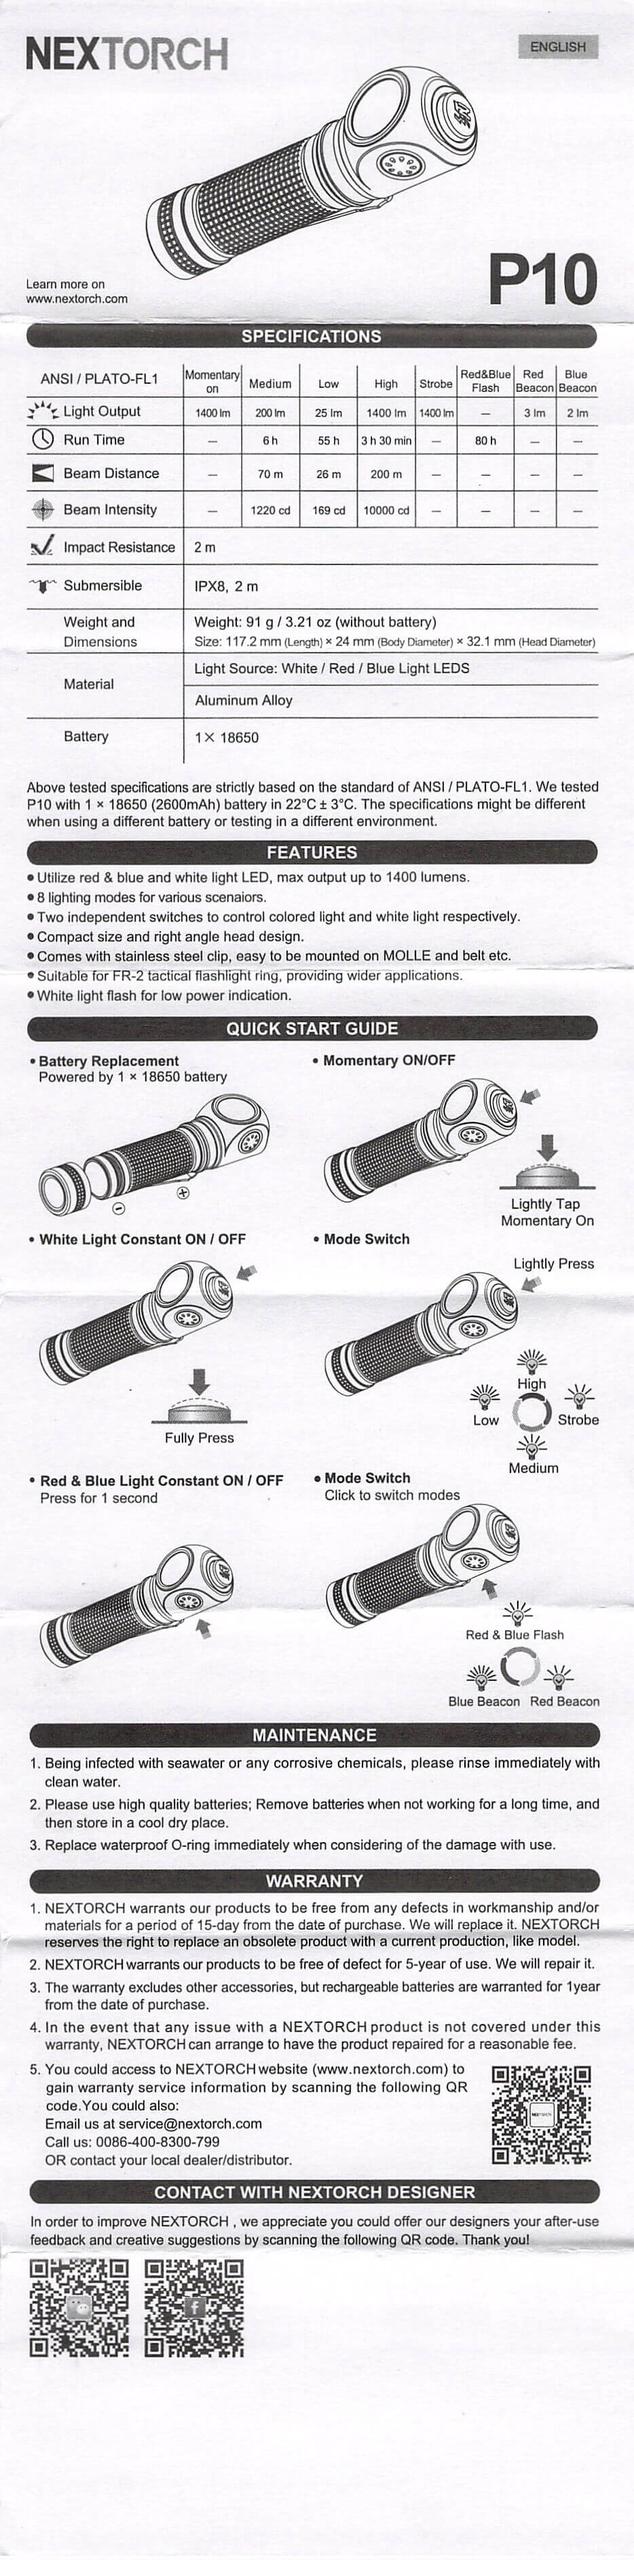
117.2mm x 24mm x 32.1mm, and 91g without the battery.
If the flashlight will headstand, I’ll show it here (usually the third photo). If the flashlight will tailstand, I’ll also show that (usually in the fourth photo).

Here’s the test light with the venerable Convoy S2+. Mine is a custom “baked” edition Nichia 219b triple. A very nice 18650 light!
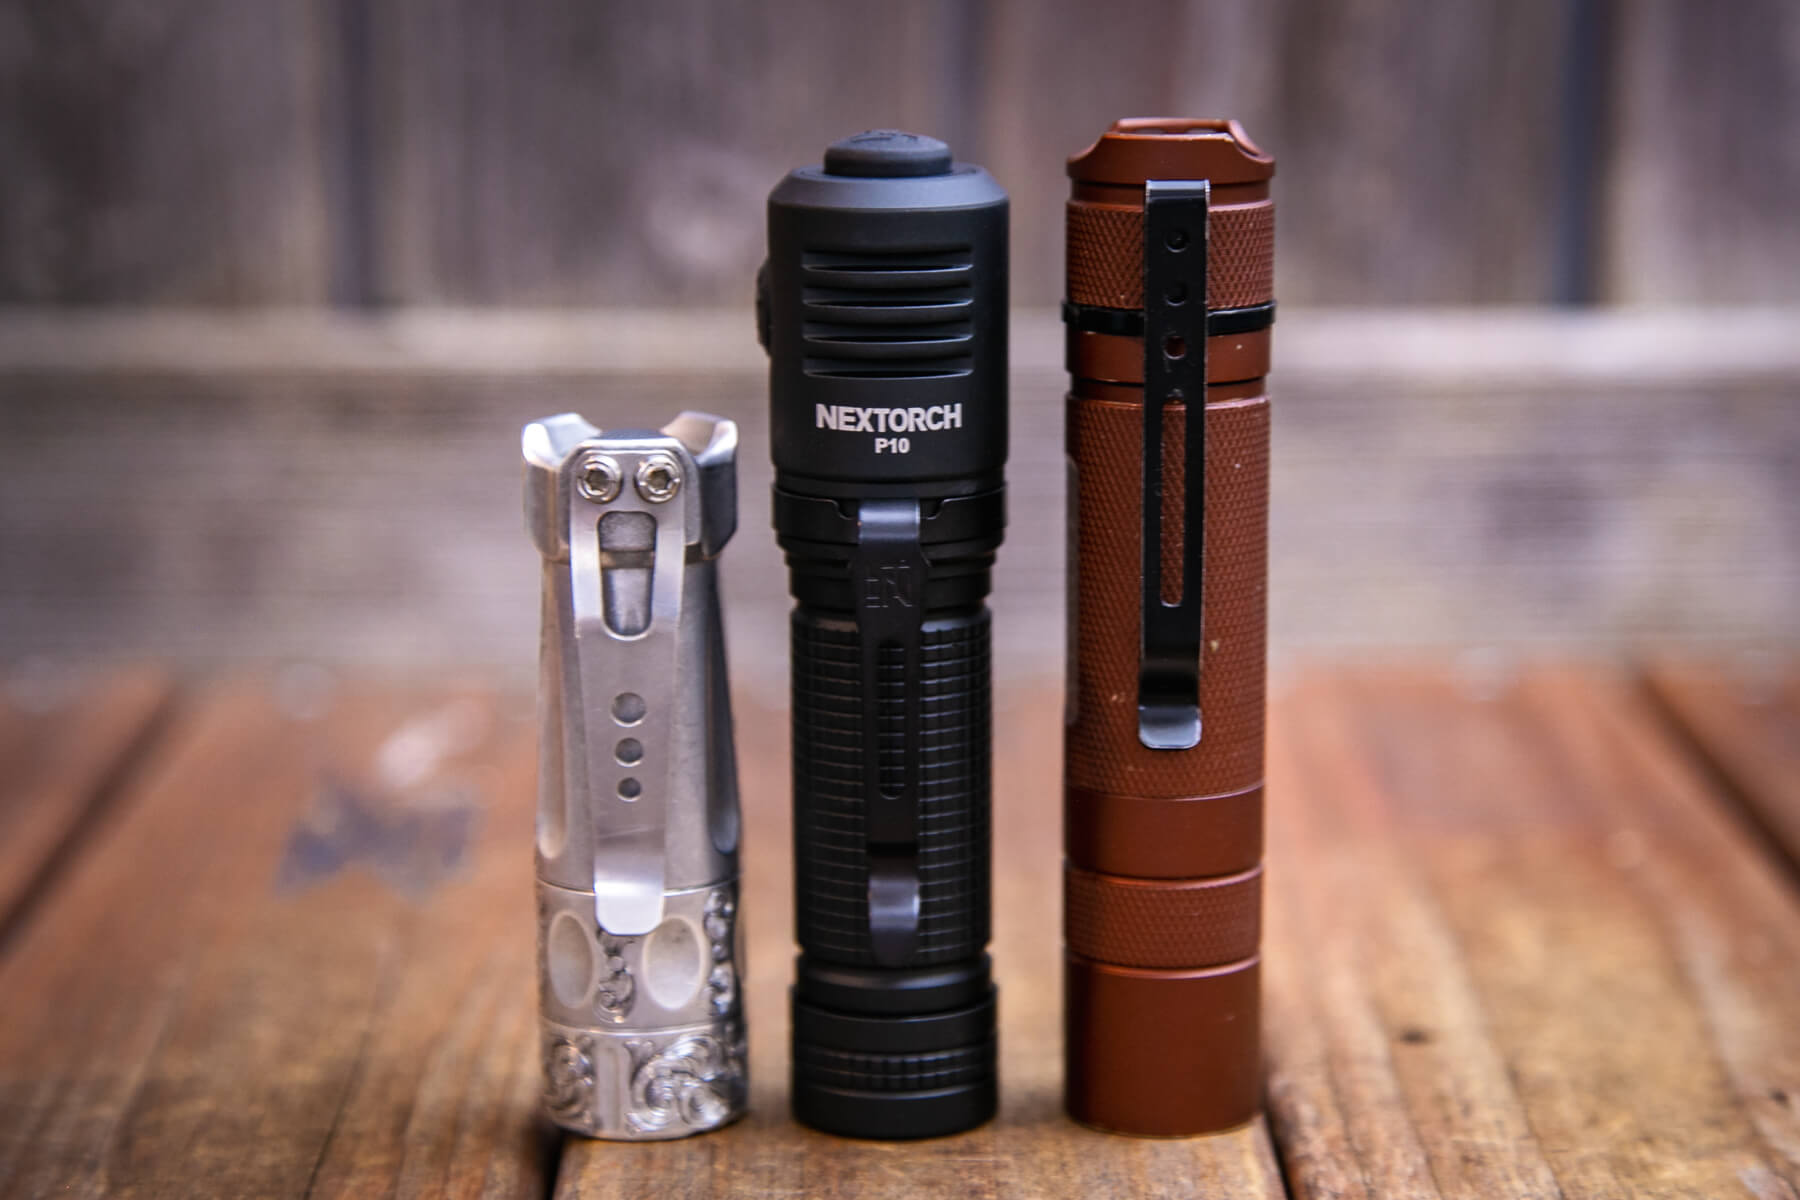
Also above is the light beside my custom-engraved TorchLAB BOSS 35, an 18350 light. I reviewed the aluminum version of that light in both 35 and 70 formats.
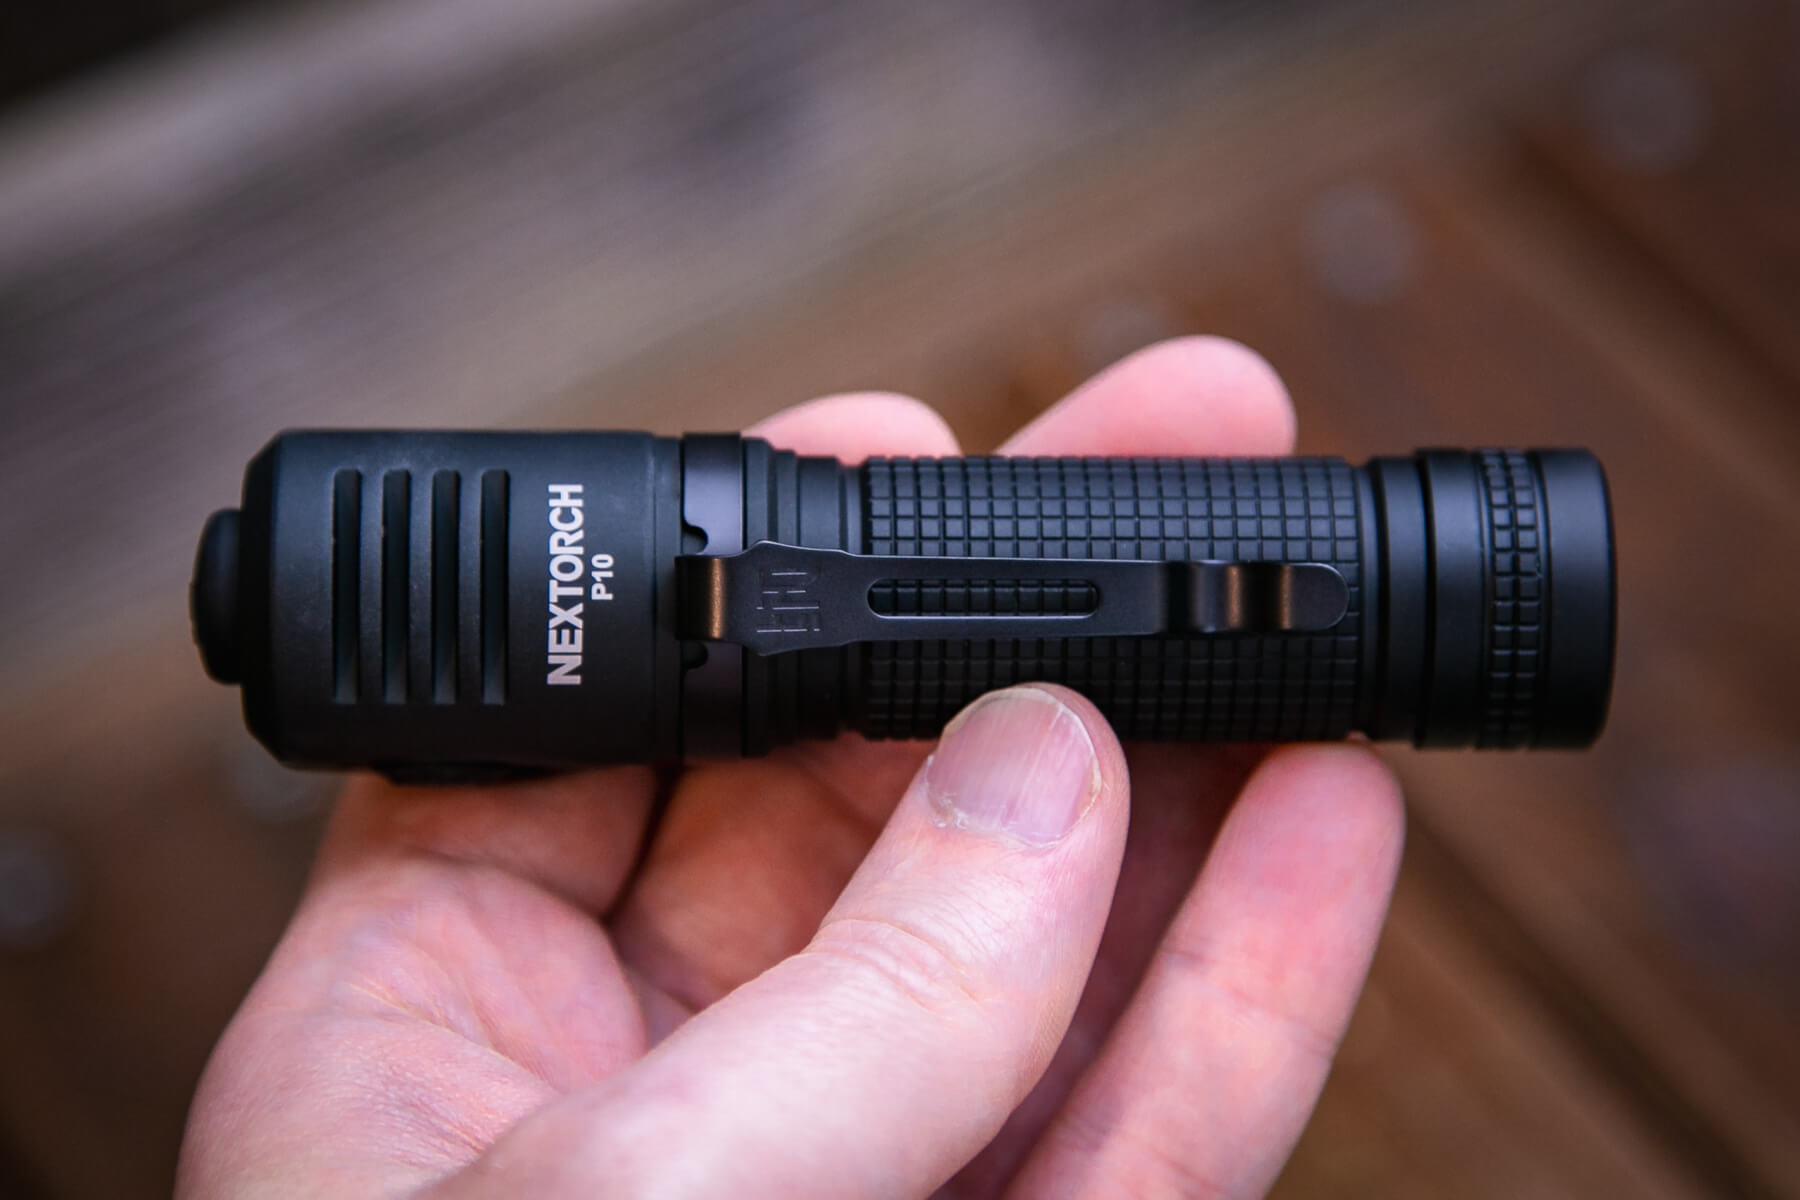
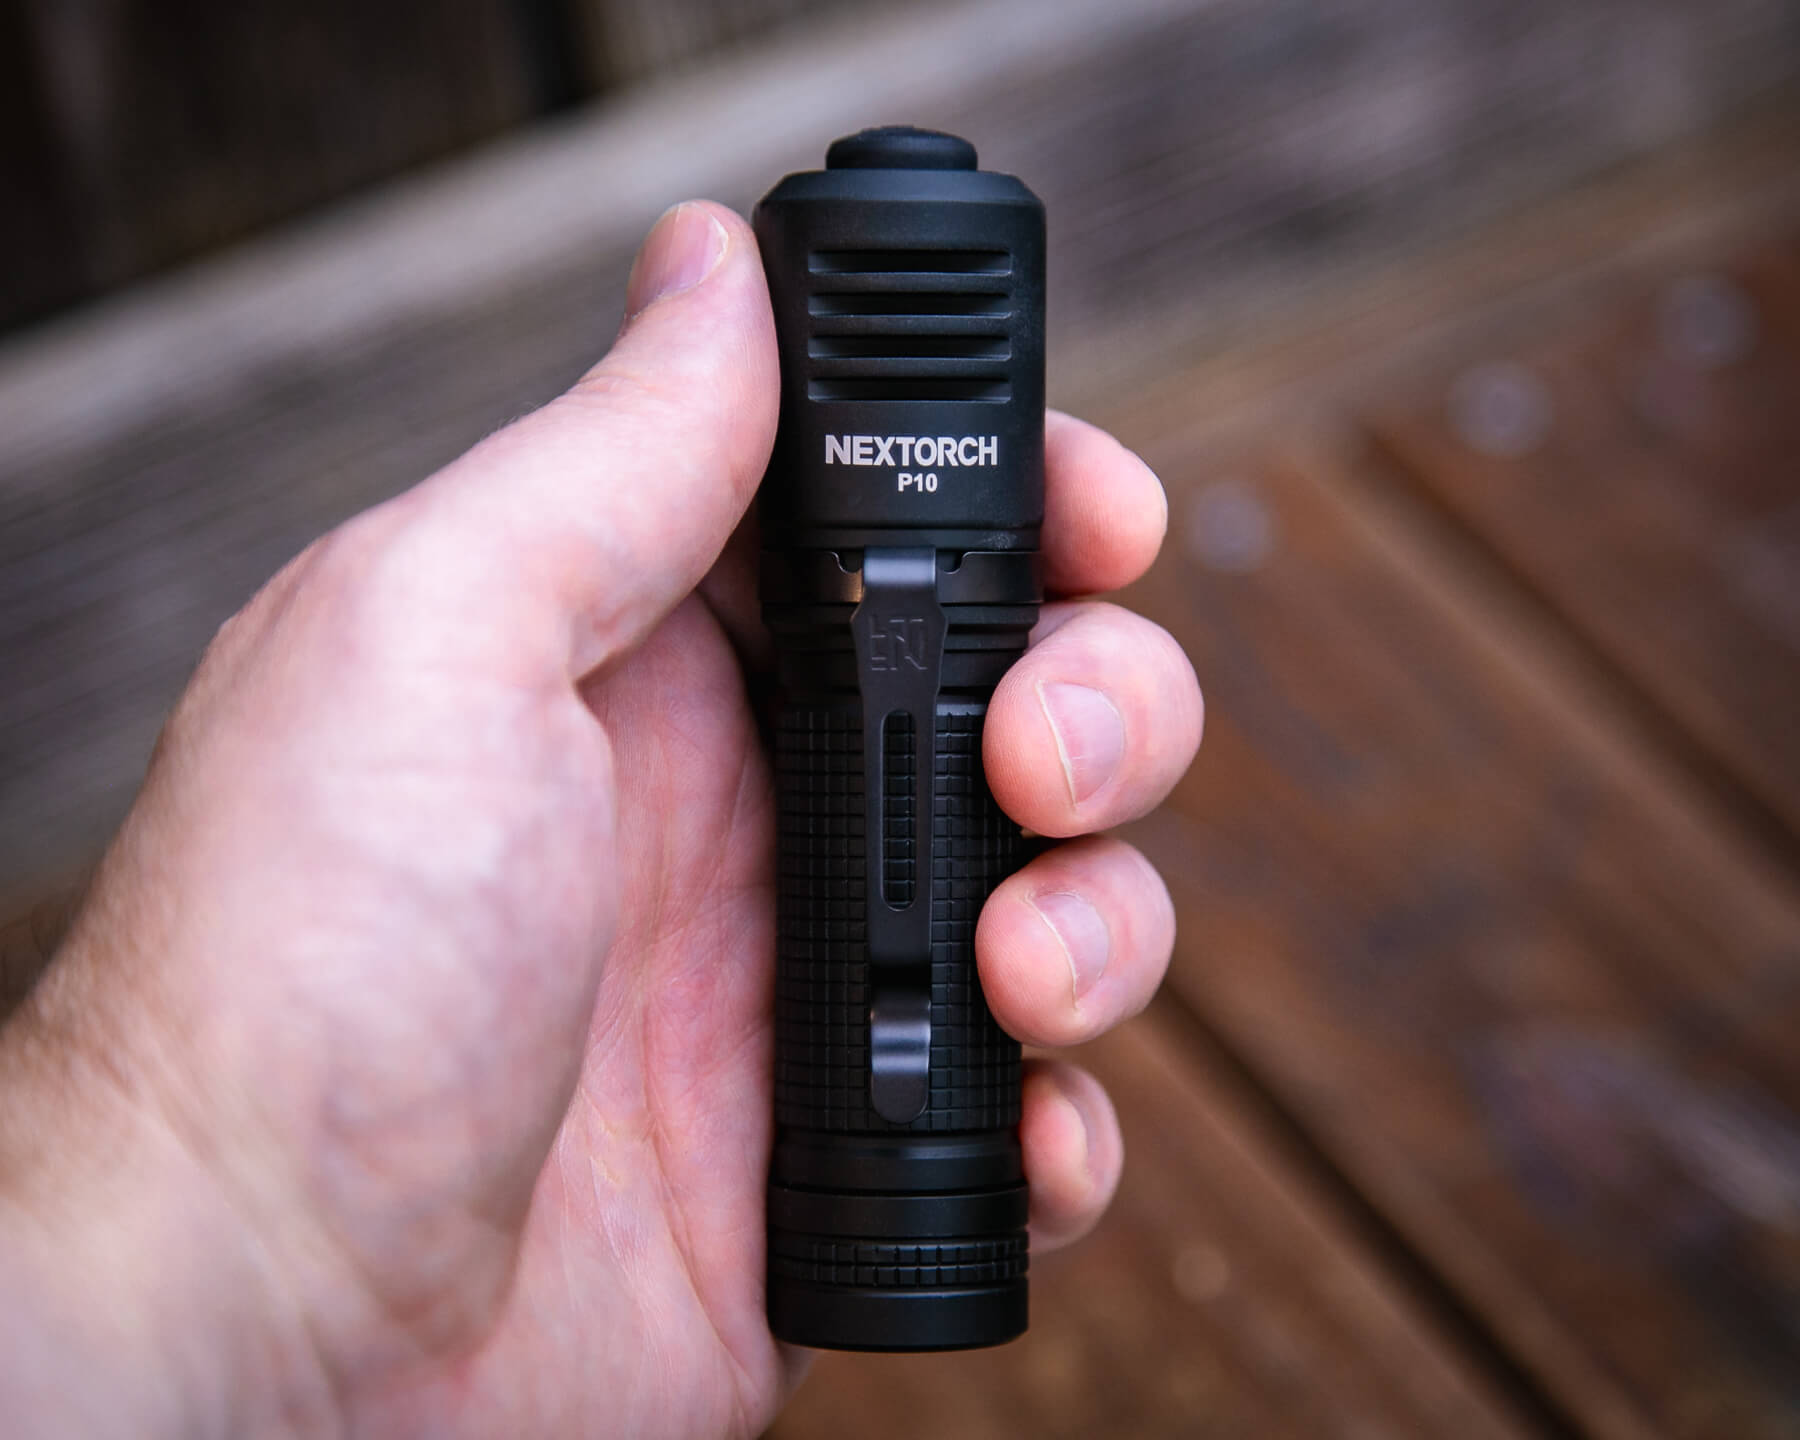
Retention and Carry
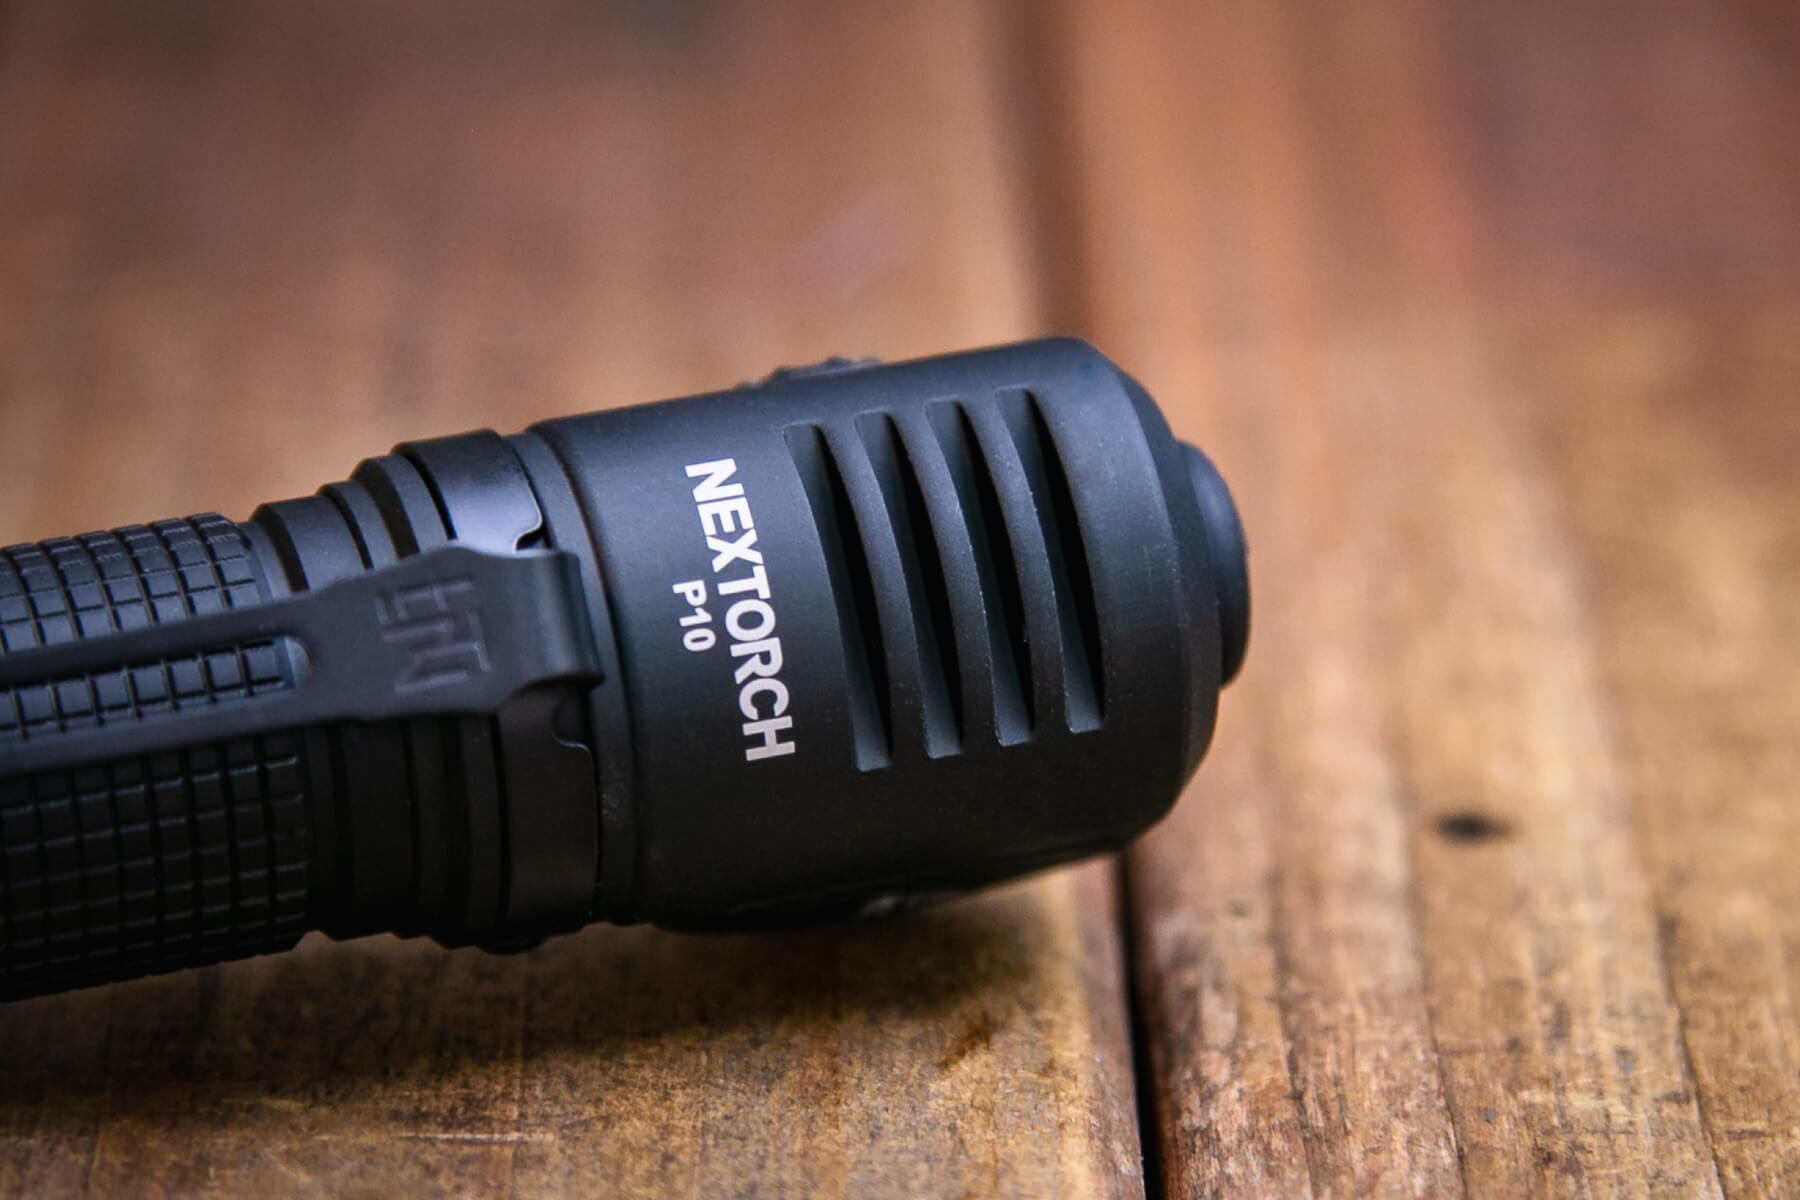
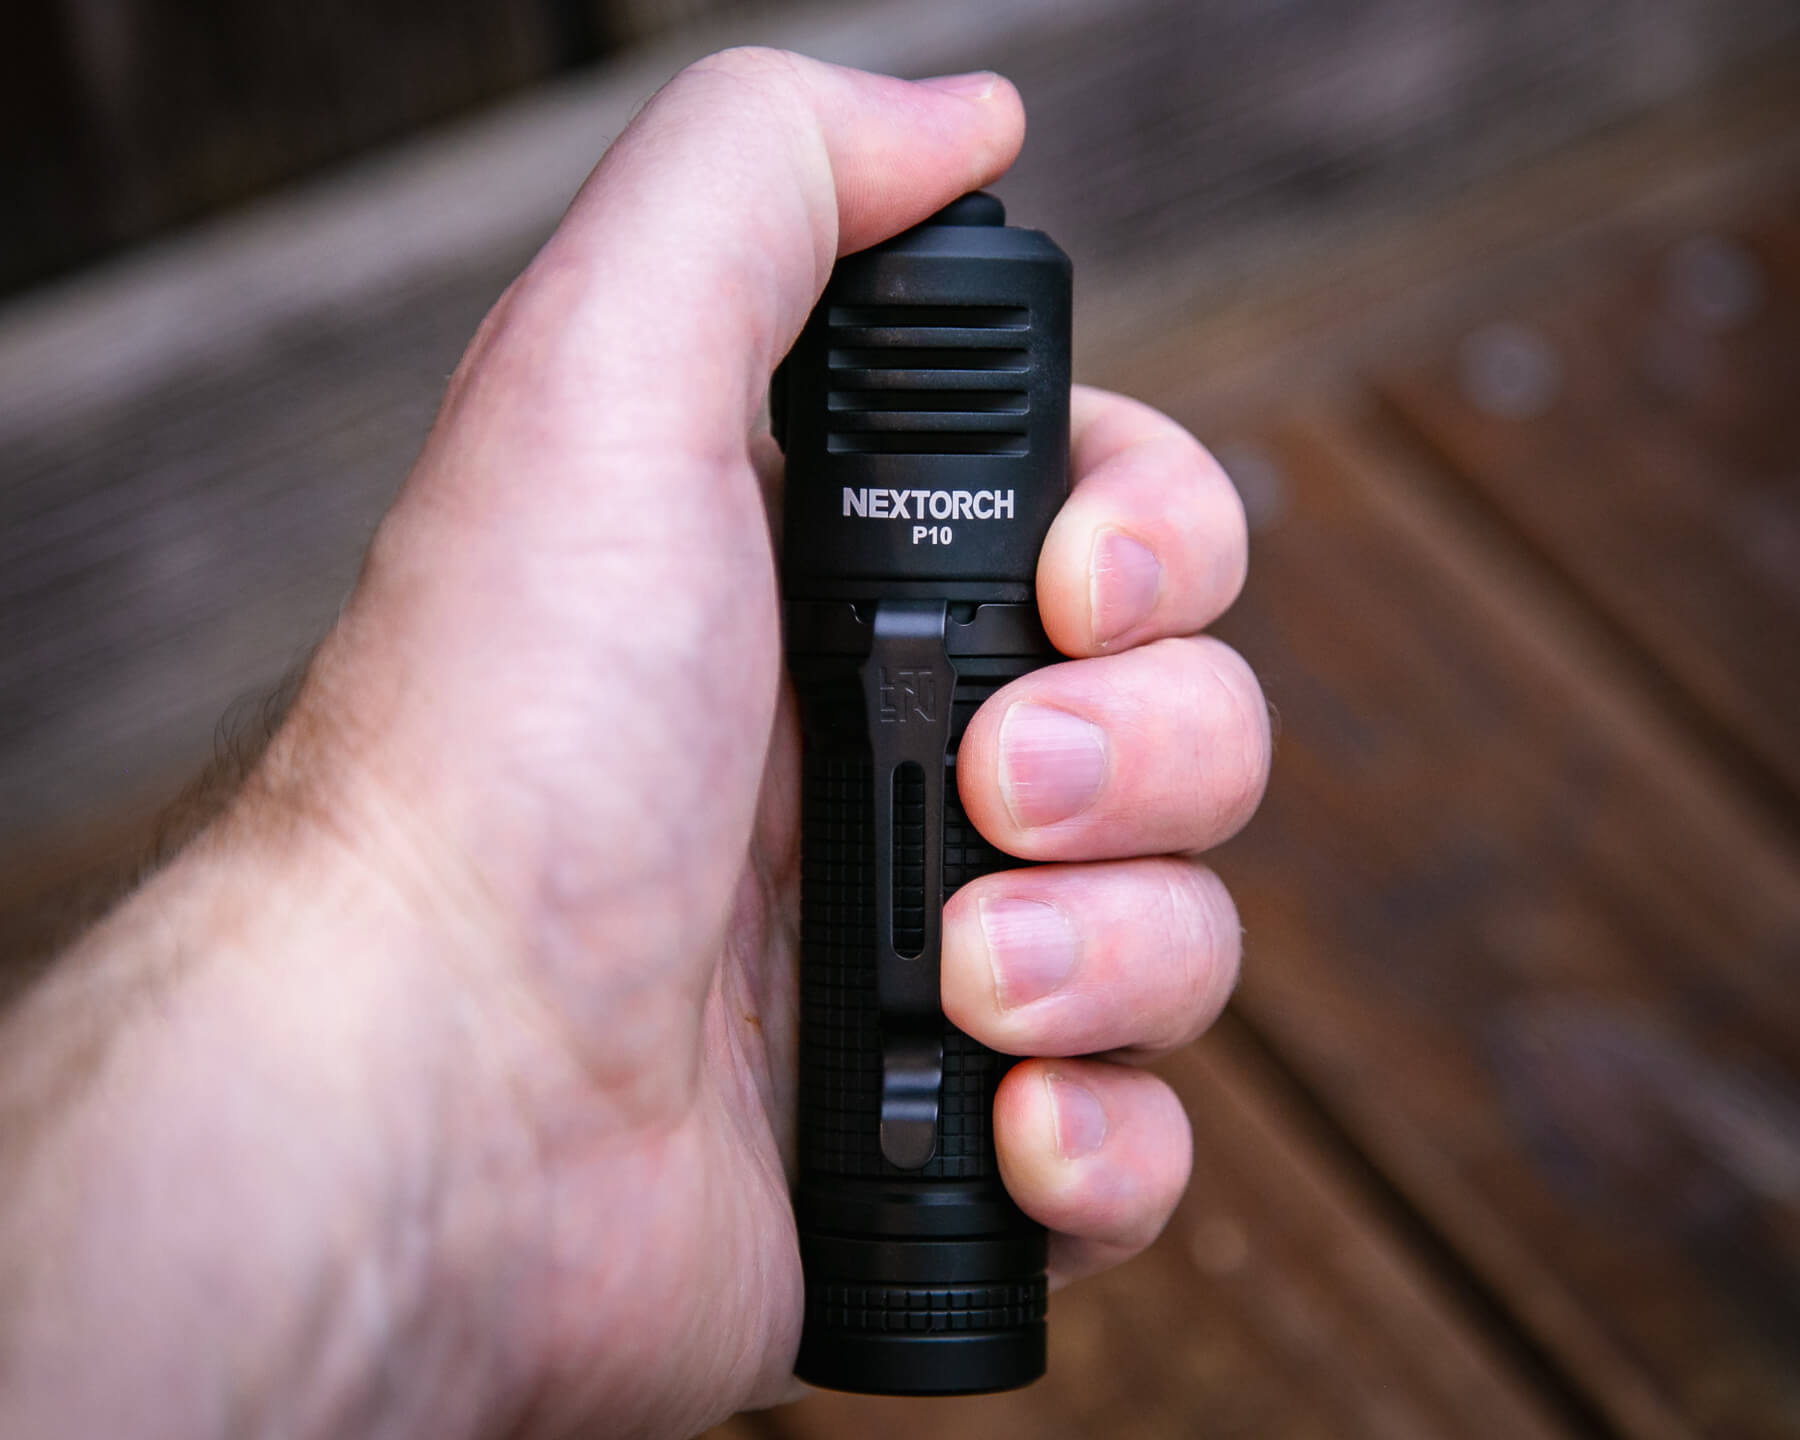
Again, the Nextorch P10 is a right-angle flashlight, not a headlamp. So don’t expect any headband or the like. What you do get is a nice, thick friction-fit pocket clip.
The clip attaches only on the head end. There’s no “deep carry” or reversible carry, but as it is, the light can stick out of your pocket and still be used, if that’s your jam.
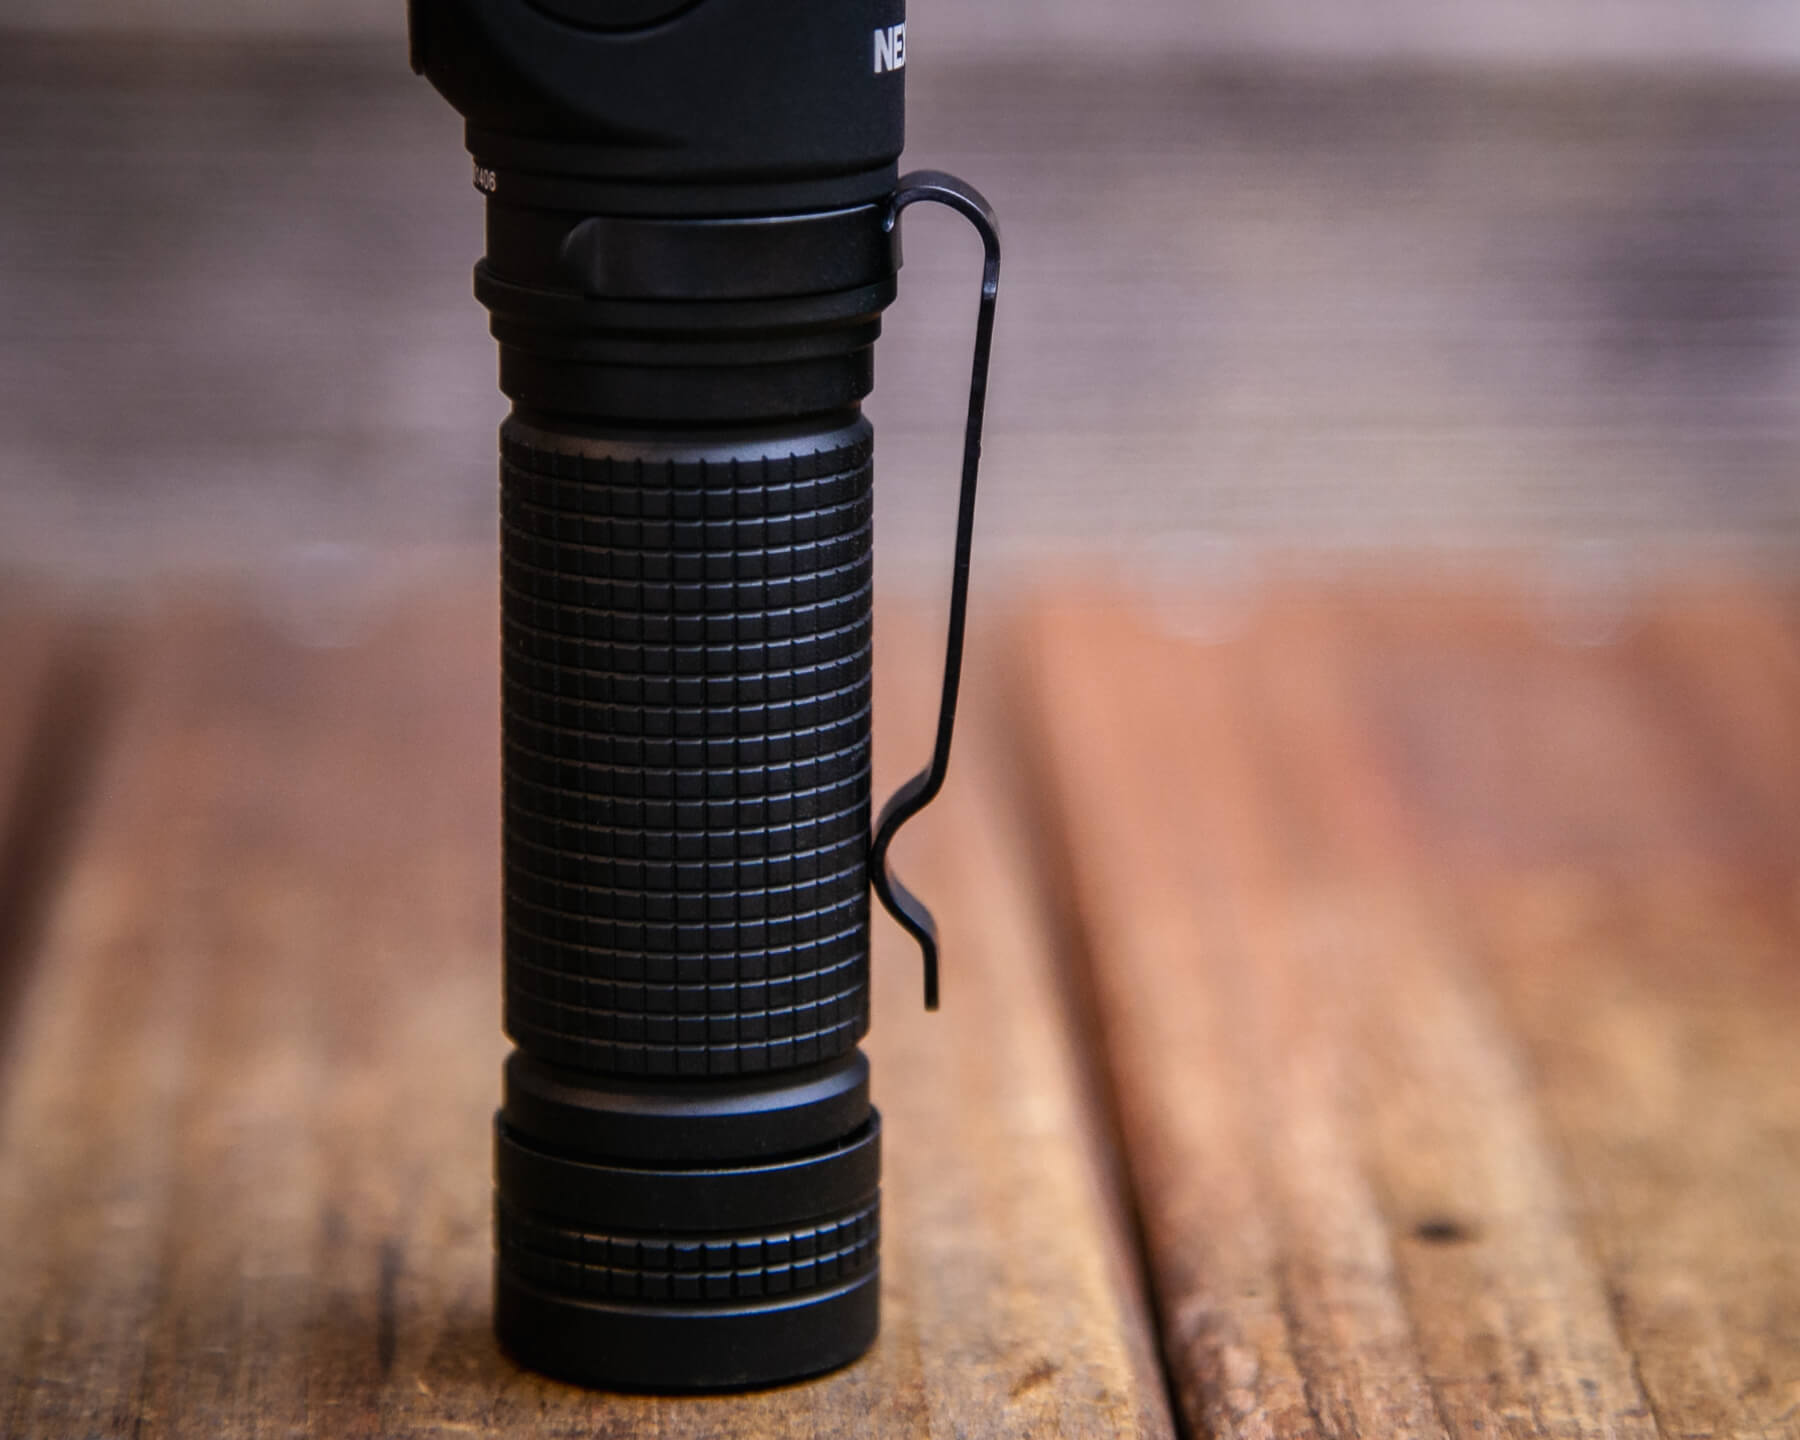
There is no magnet or anything else for carrying the P10.
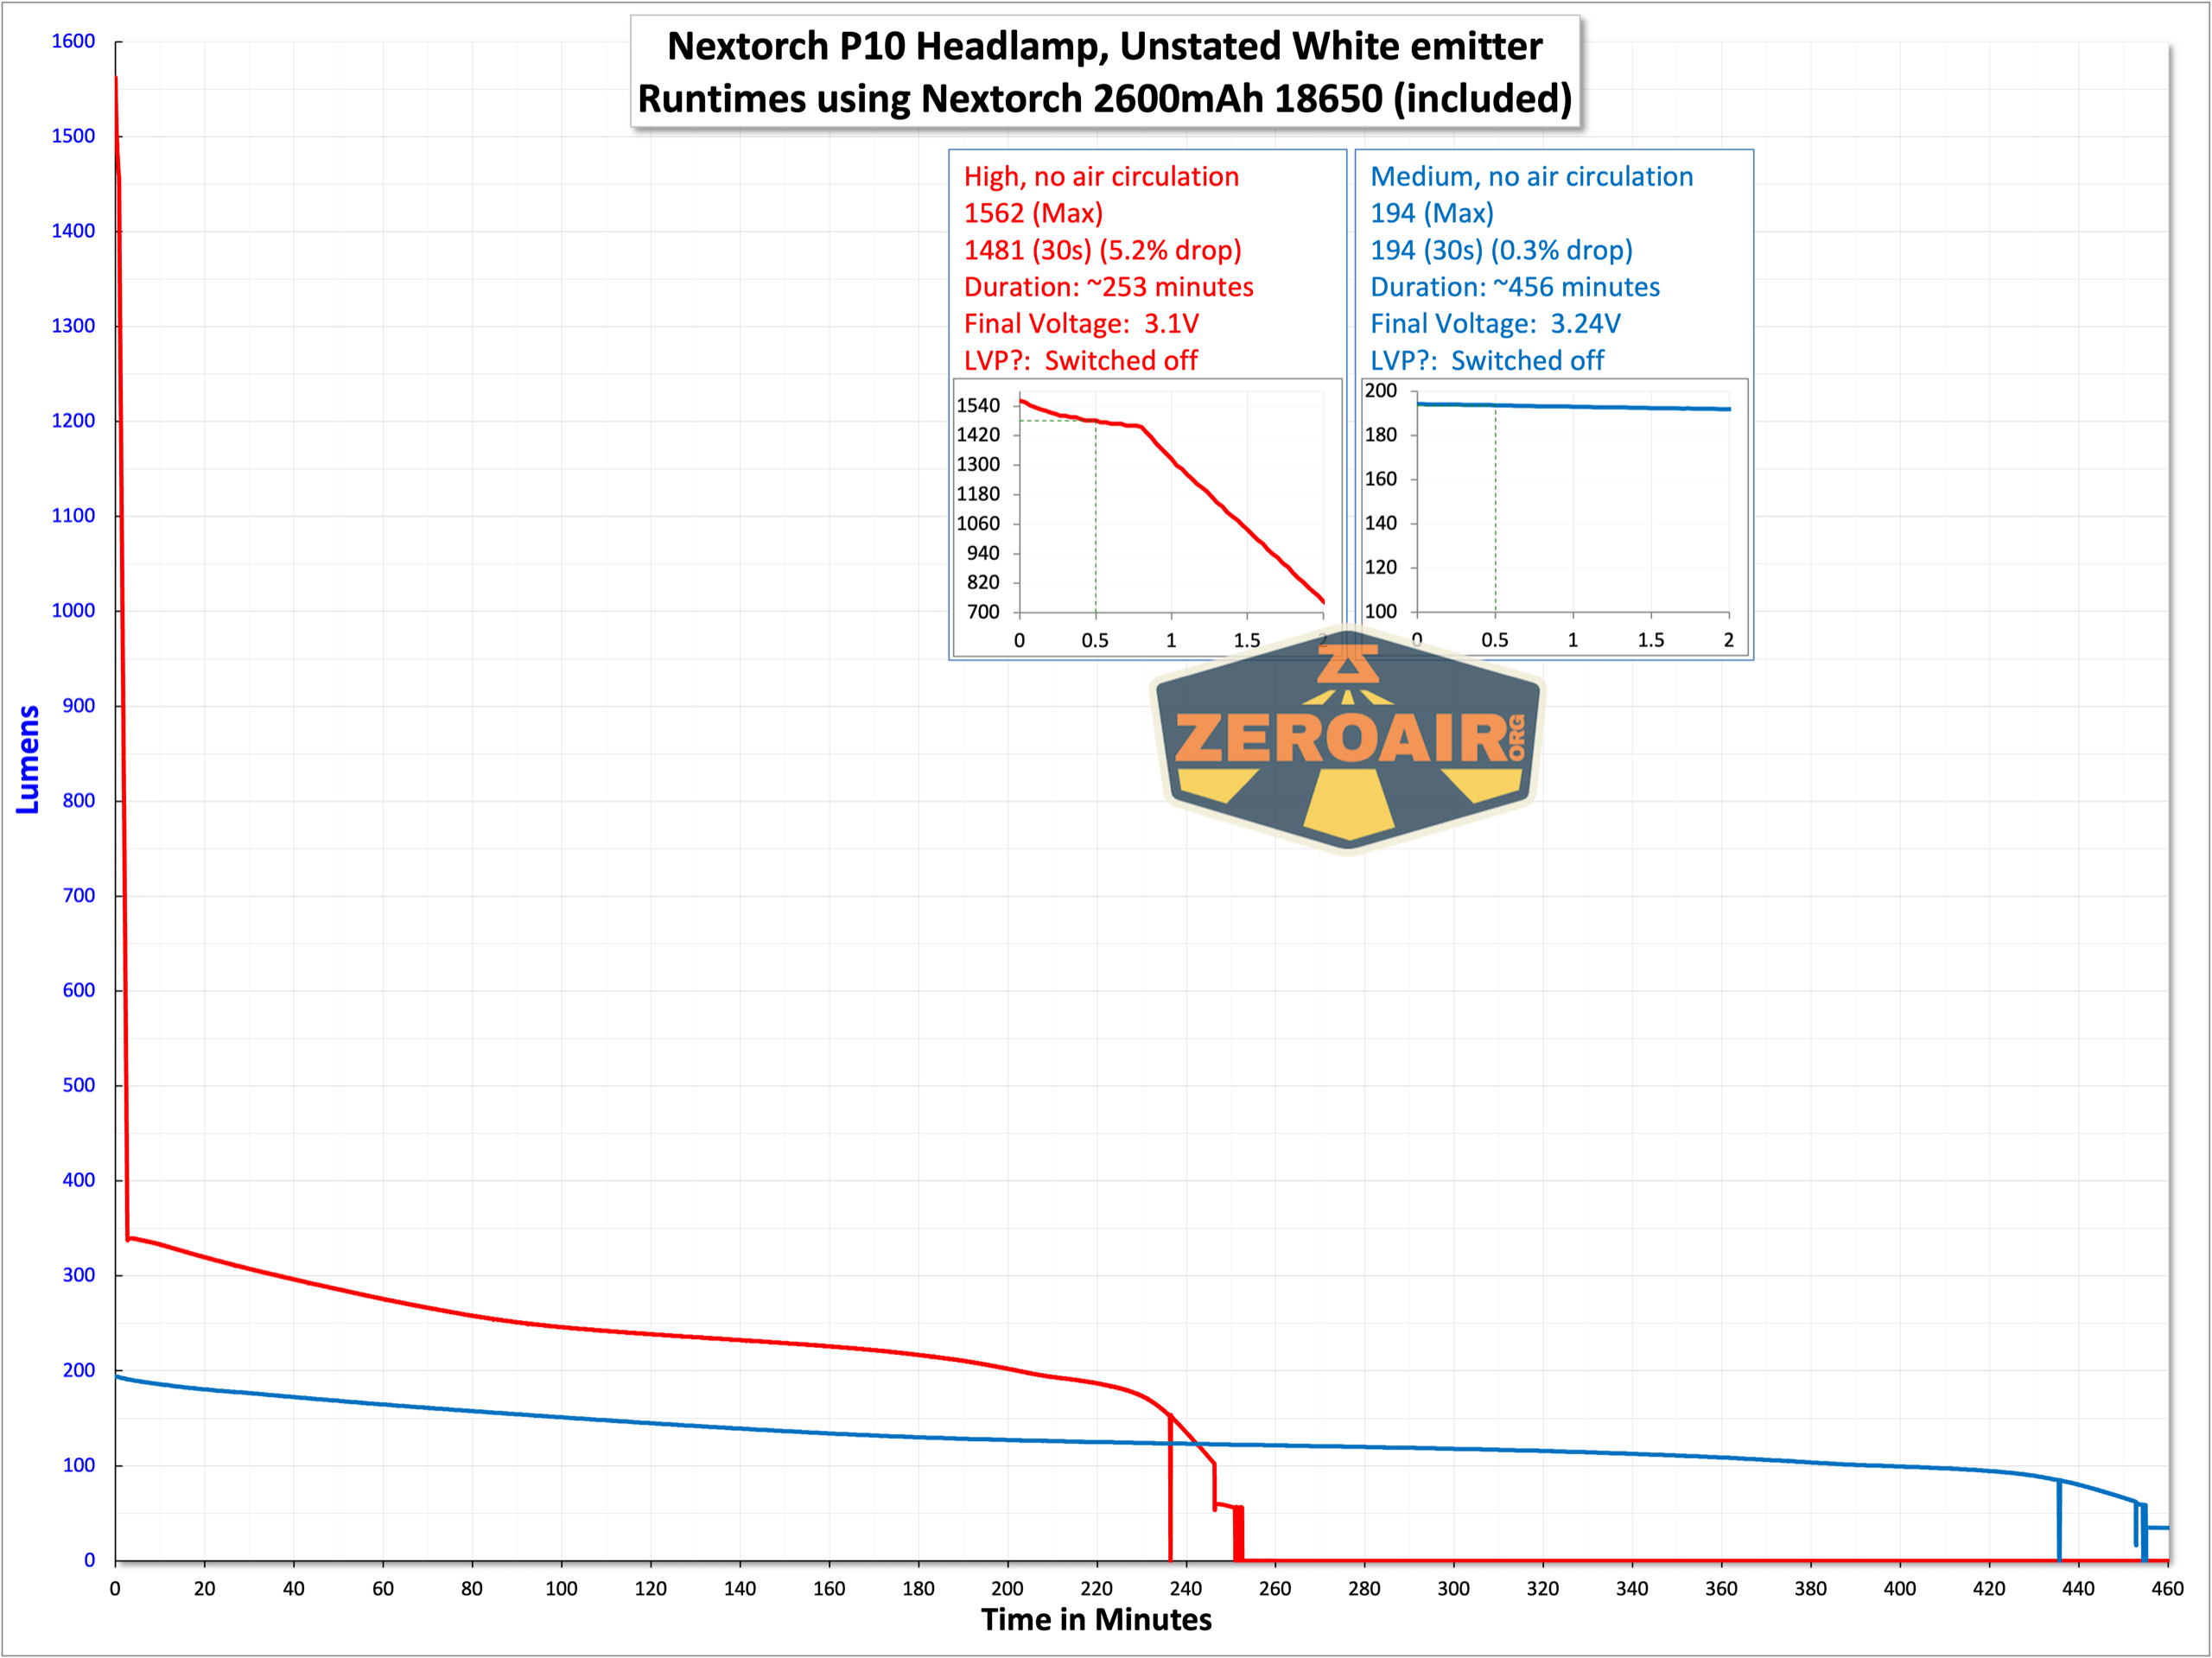
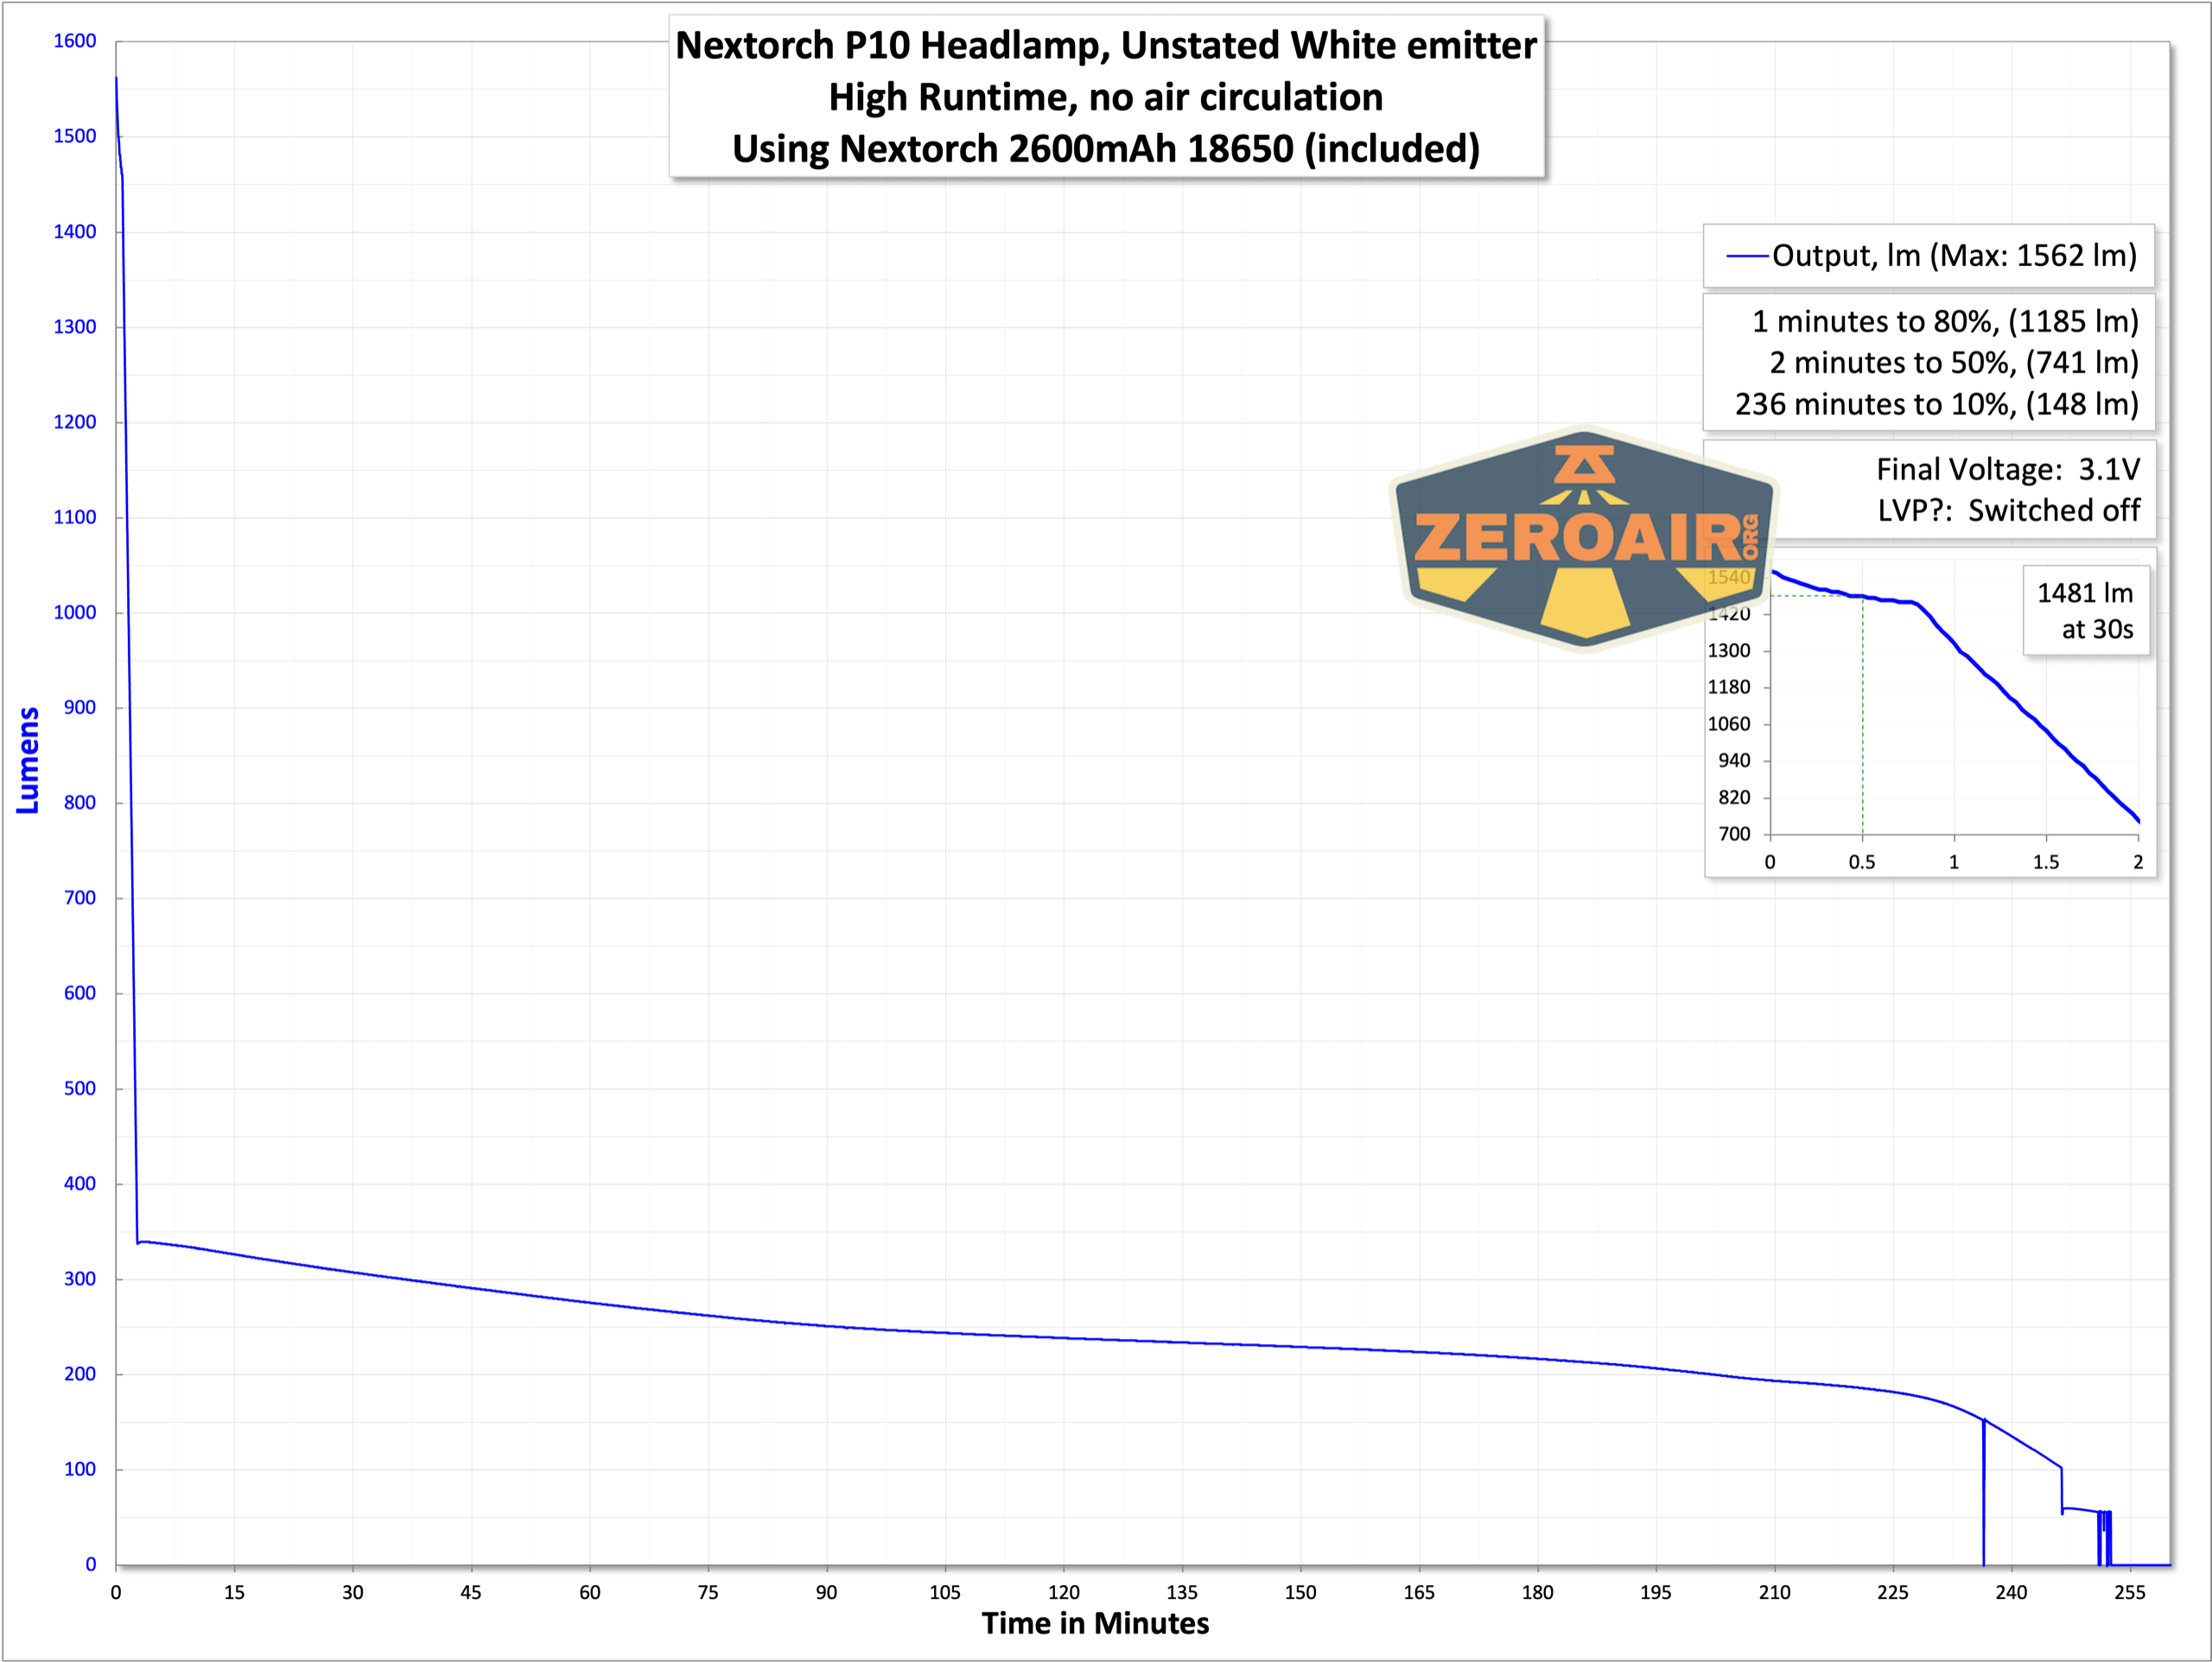
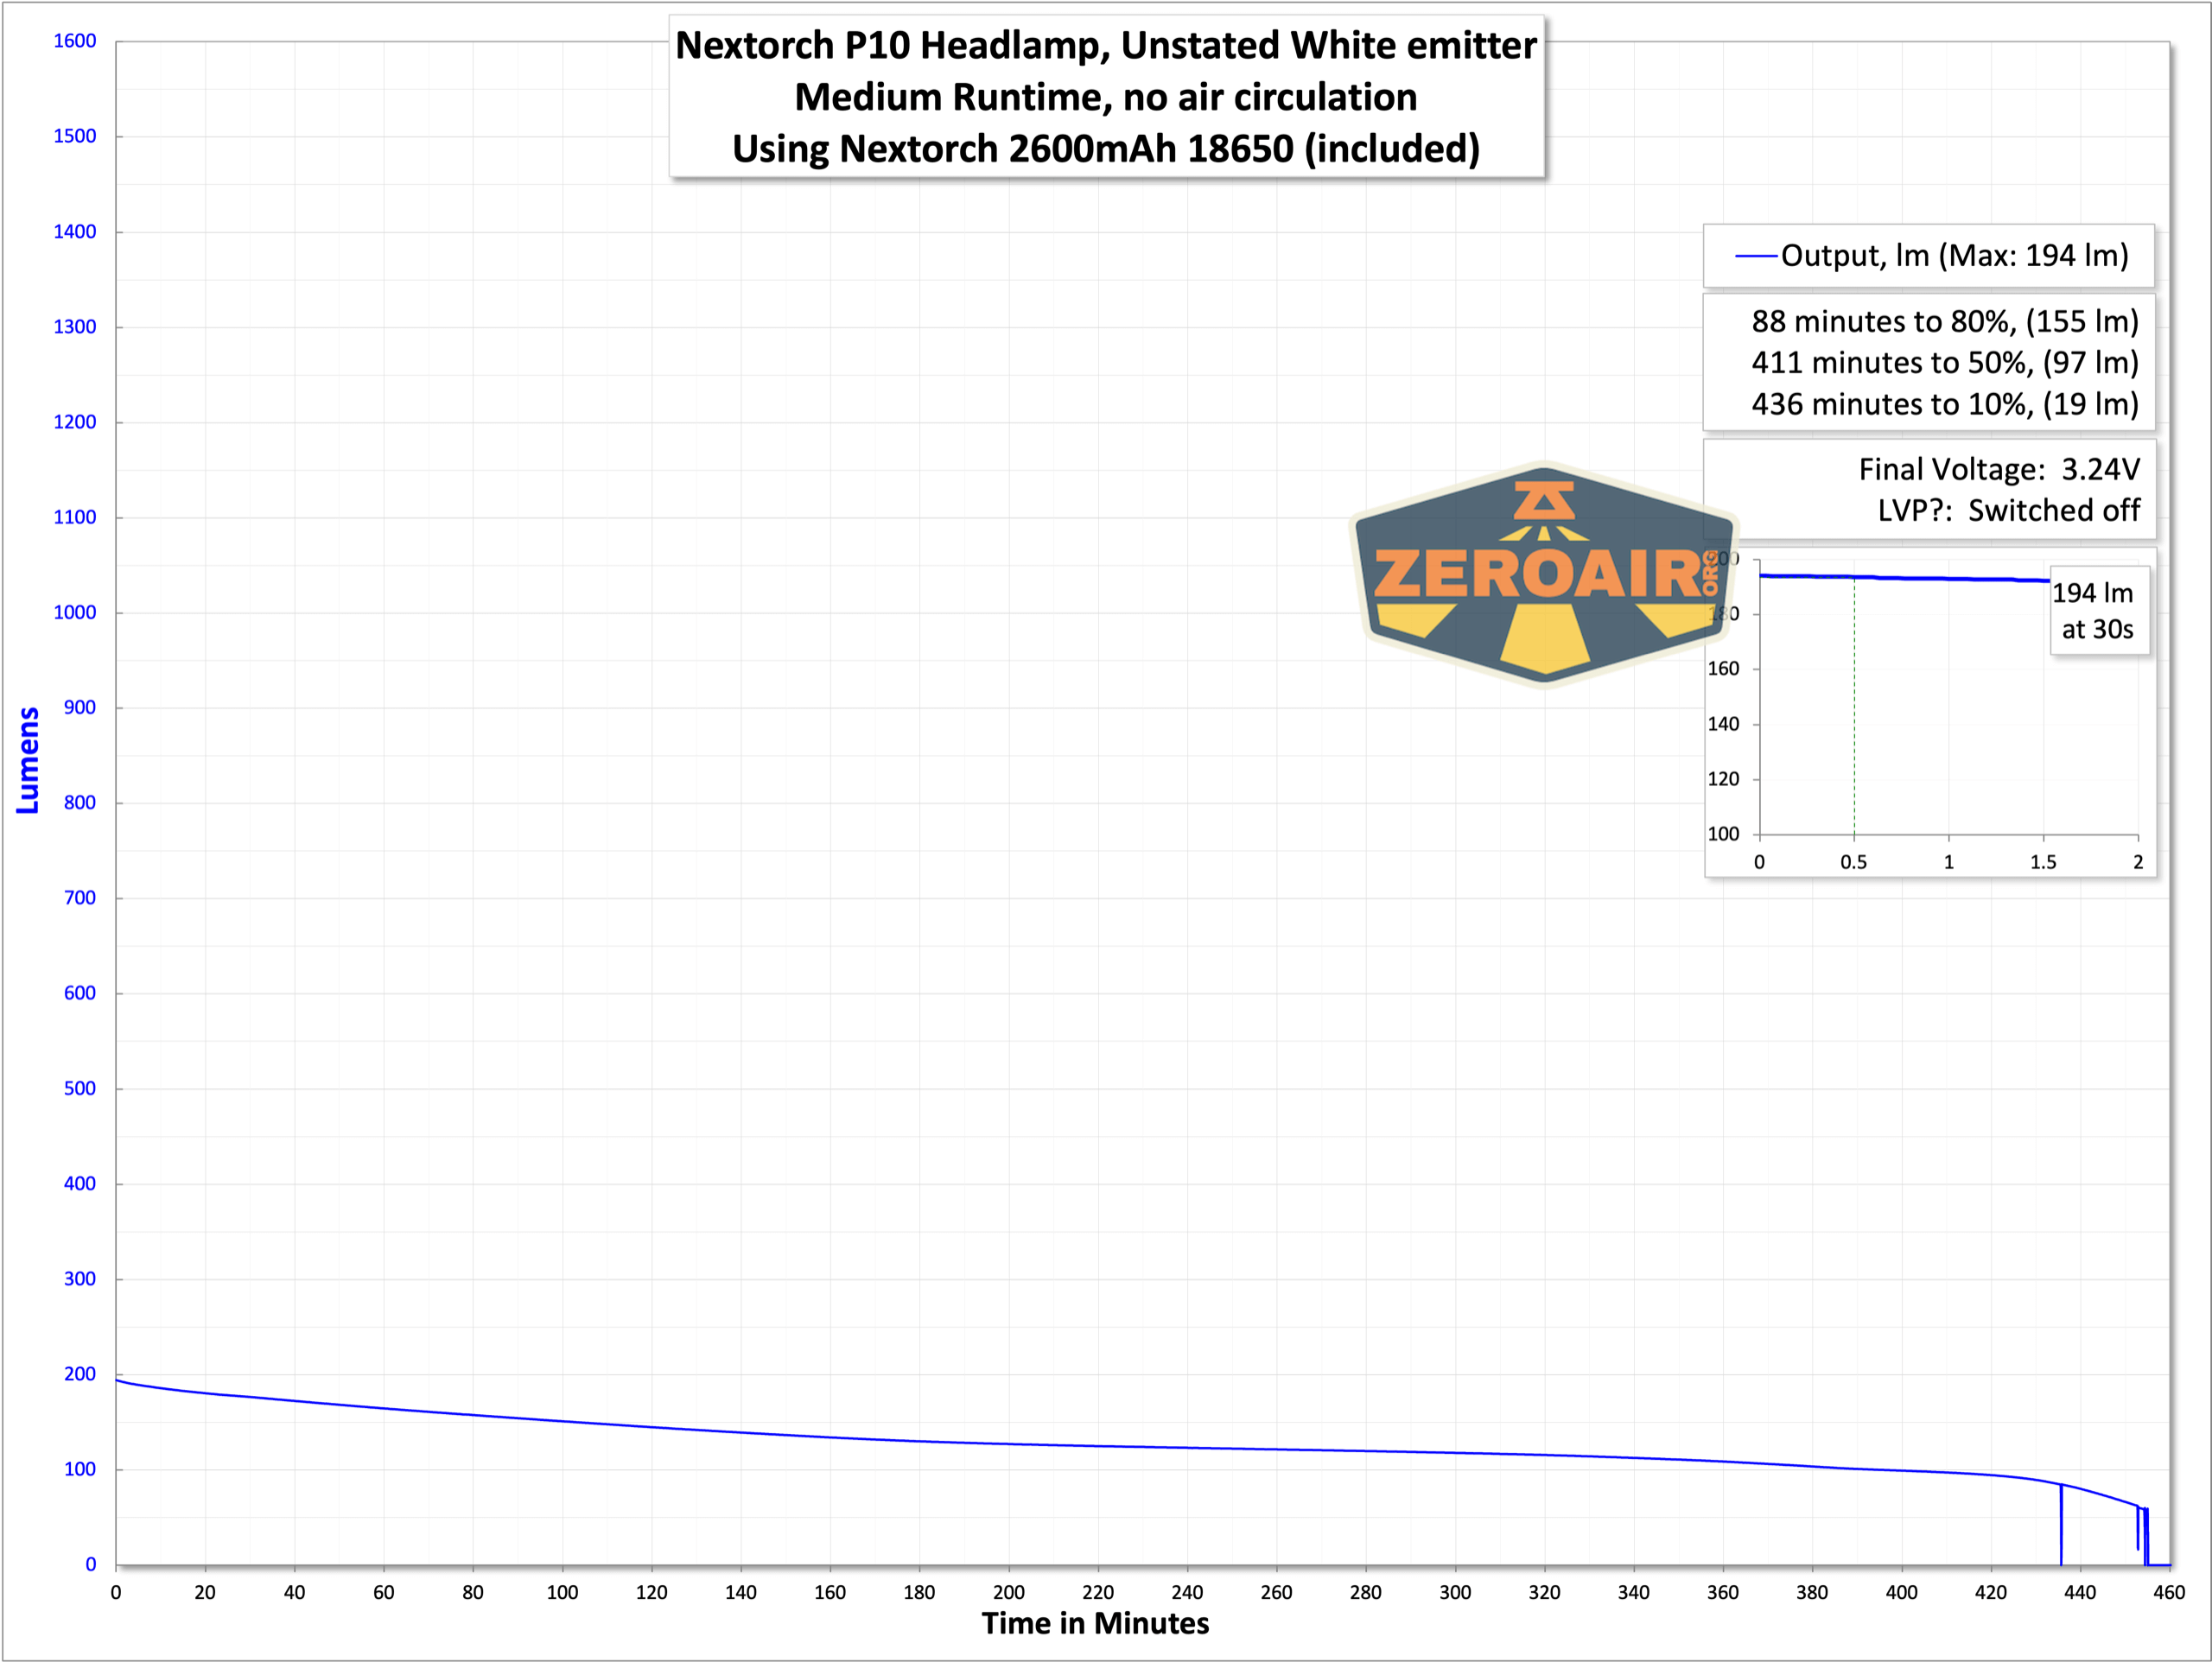
Power and Runtime
Nextorch includes a cell with the P10 right-angle flashlight. The cell is a standard button top 18650, with a capacity of 2600mAh.
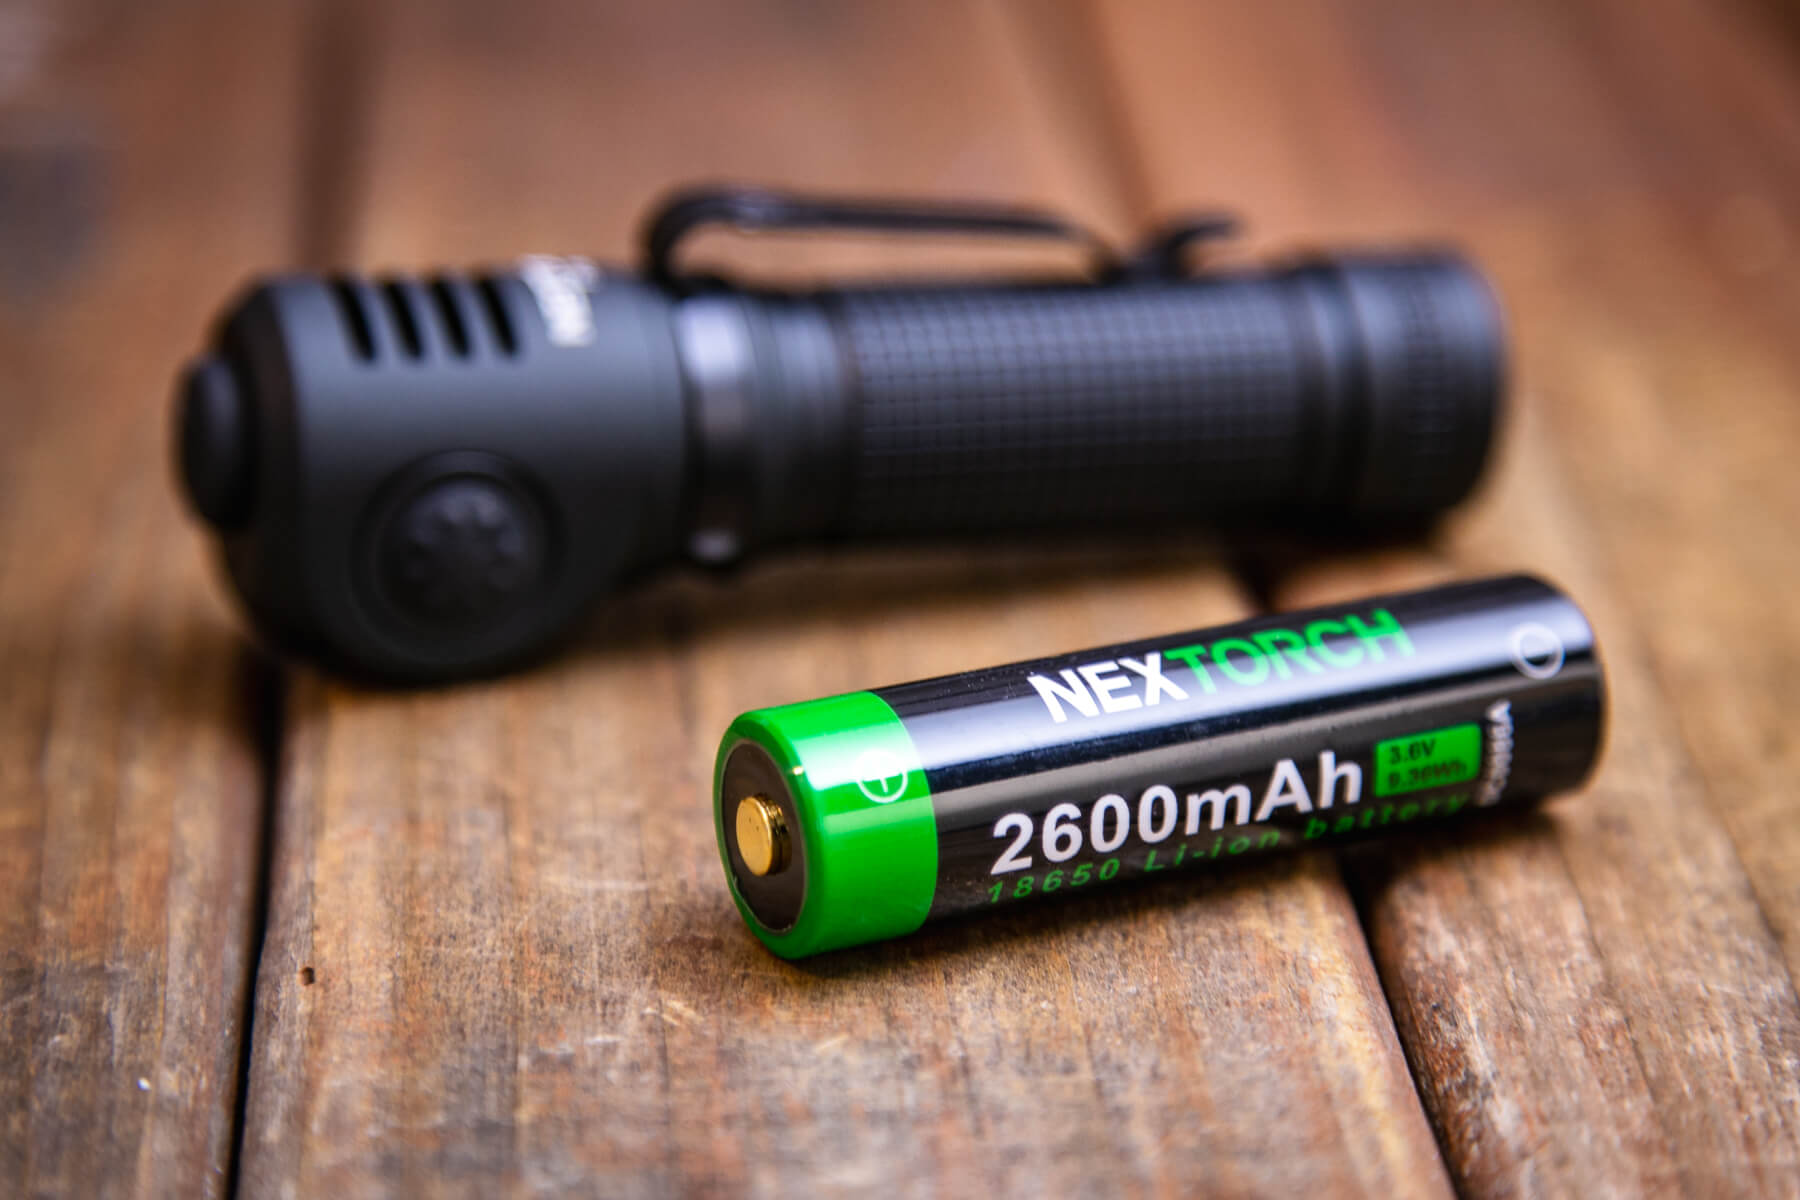
The cell is installed into the P10 in the usual way – positive end (button) toward the head.
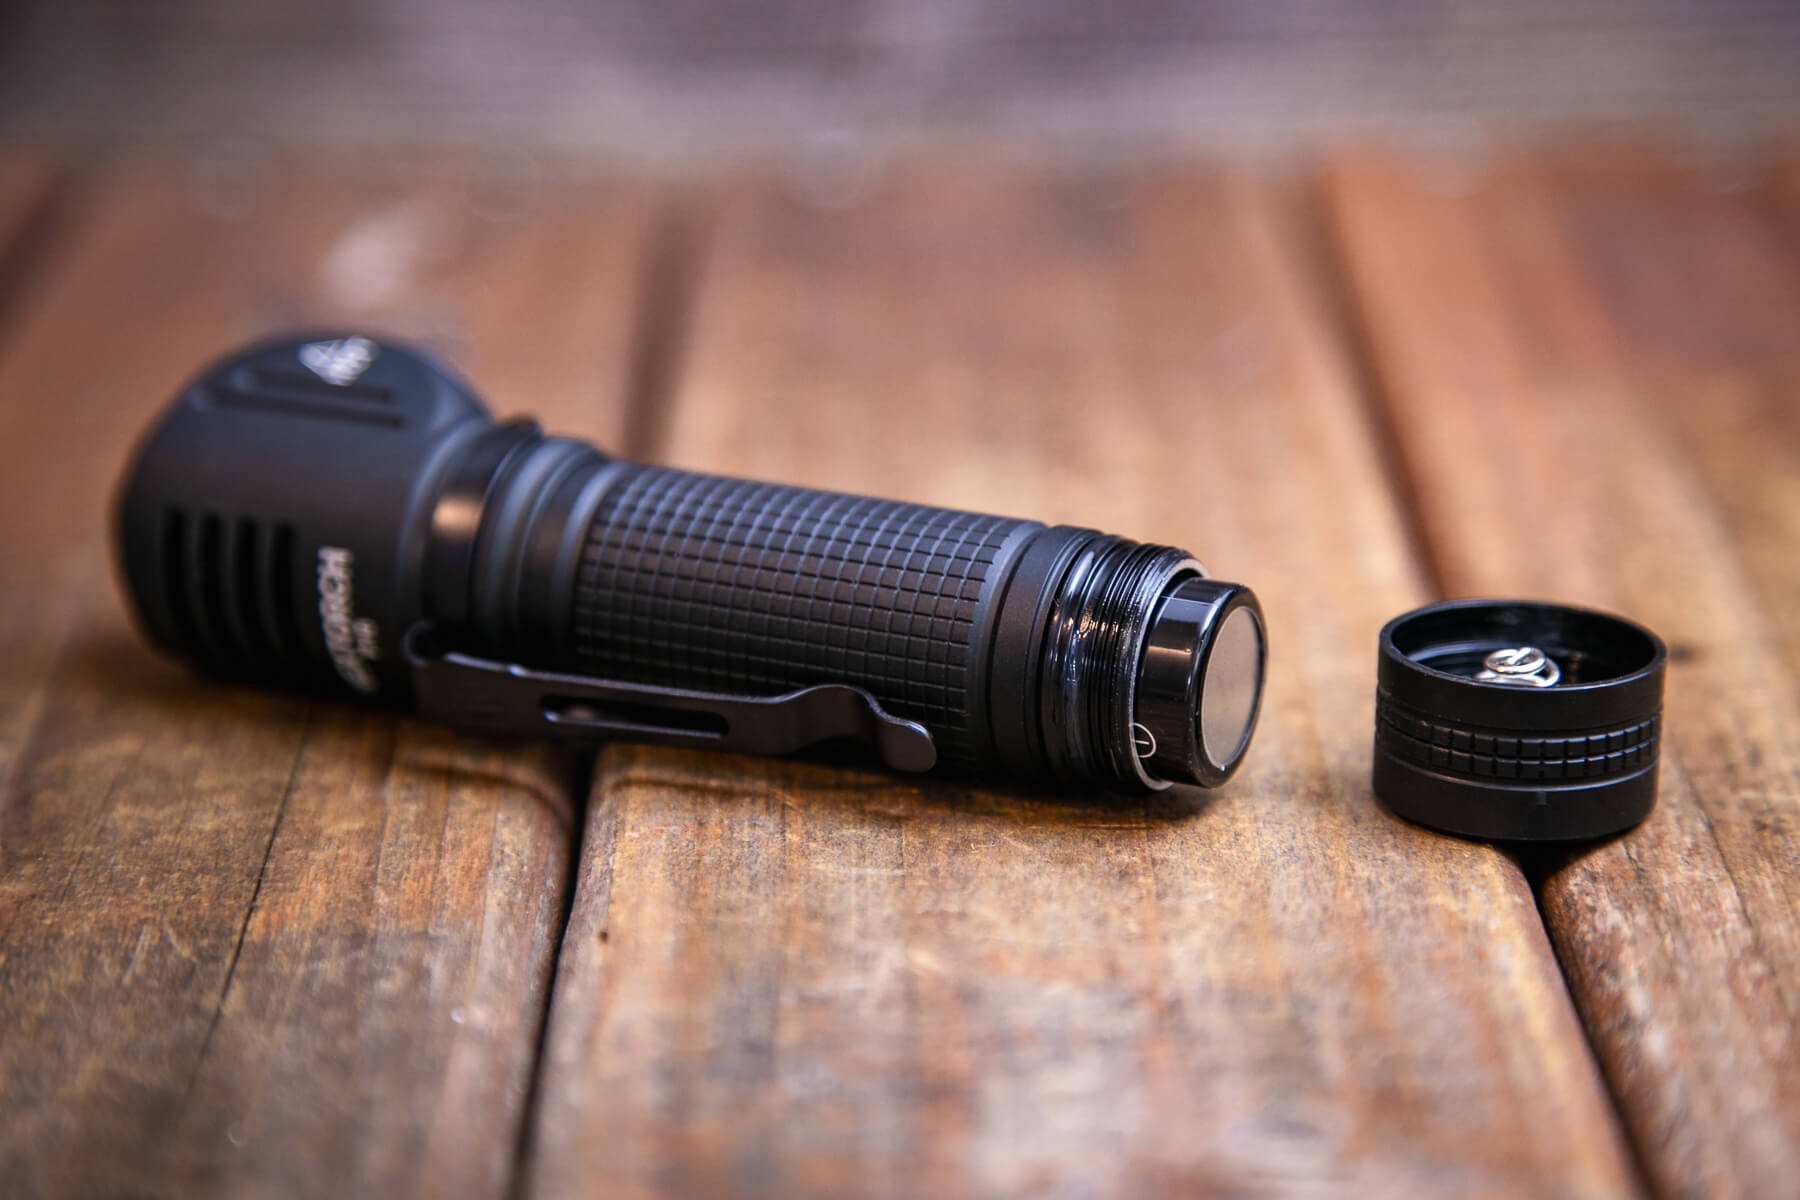
In case you forget that the cell tube is also marked with little positive/negative icons.
Below are a couple of runtime tests. Output is quite great for a minute or so in the highest mode (“High”), but steps down dramatically.
Charging
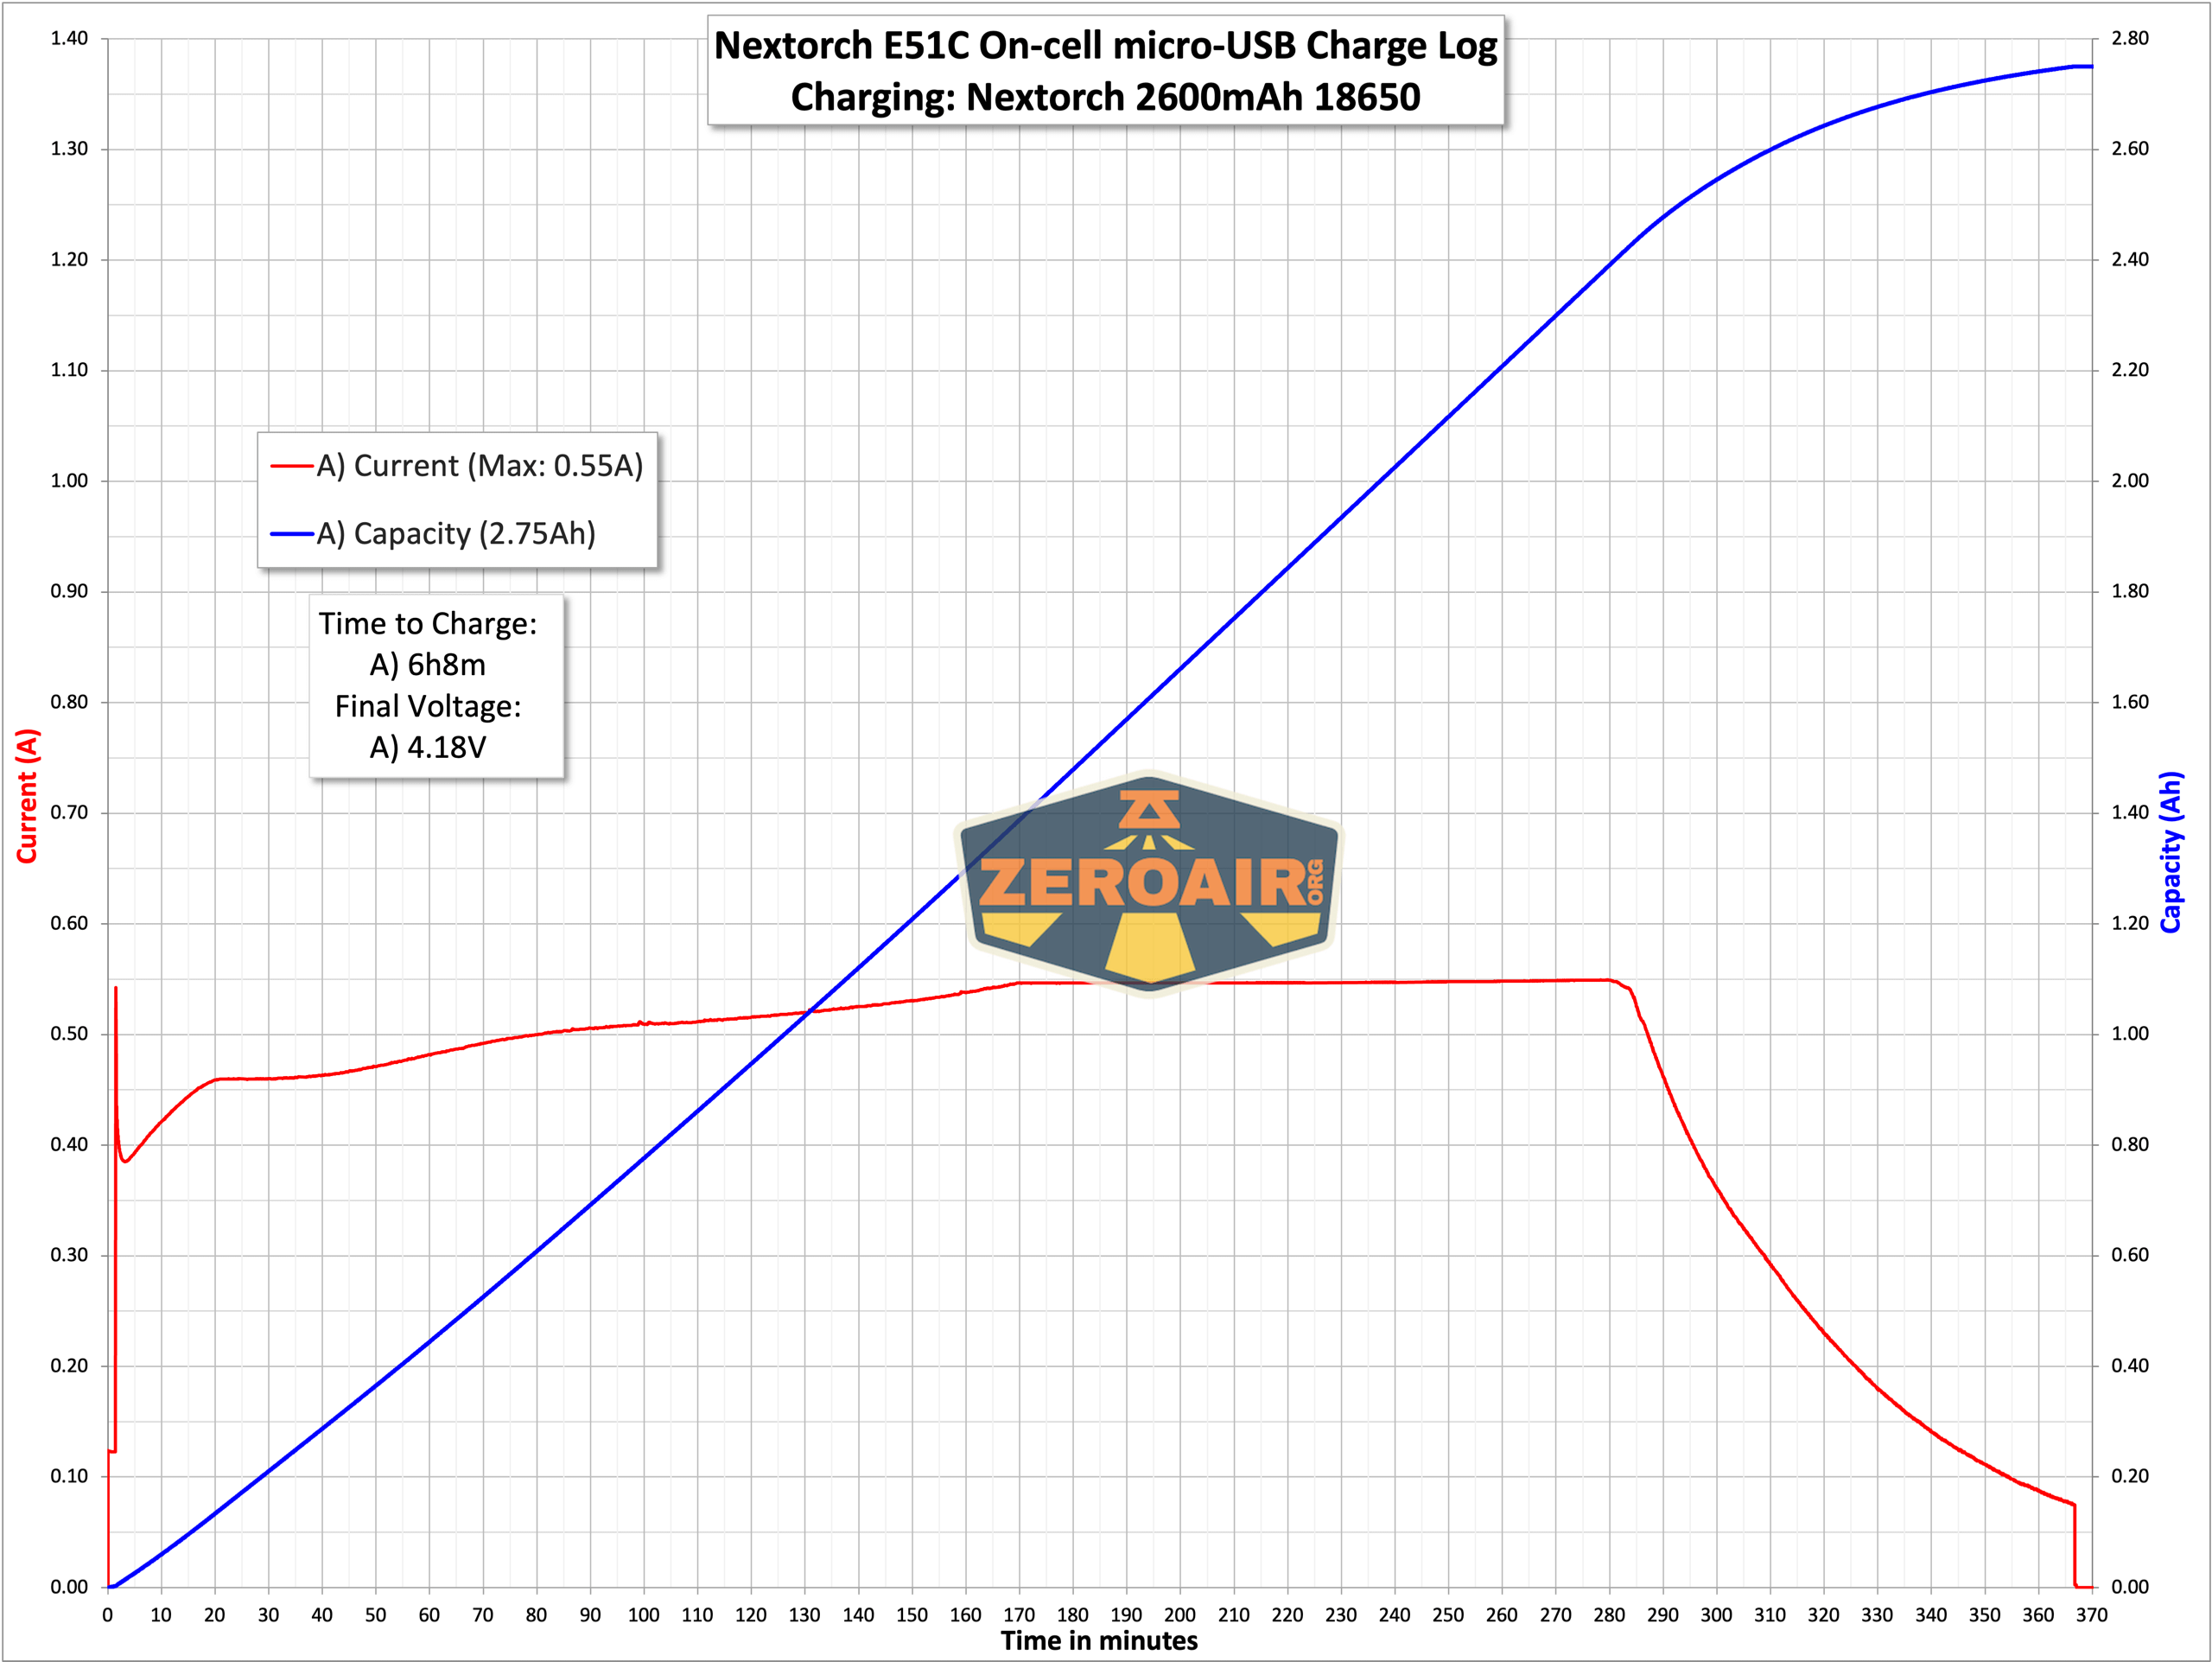
I said above that this is a “normal” 18650 and that’s true – it’s a standard button top. However, it does offer onboard charging. That’s by way of a micro-USB port in the positive end. I did run a test charging via that micro-USB, which you can see below.
Nextorch includes a short USB to micro-USB cable.
Here’s the micro-USB charging on the cell. It’s very slow.
Modes and Currents
| Mode | Mode Claimed Output (lm) | Claimed Runtime | Measured Lumens | Tailcap Amps |
|---|---|---|---|---|
| High | 1400 | 3h30m | 1481 | 5.35 |
| Medium | 200 | 6h | 194 | 0.40 |
| Low | 25 | 5h | 24 | 0.06 |
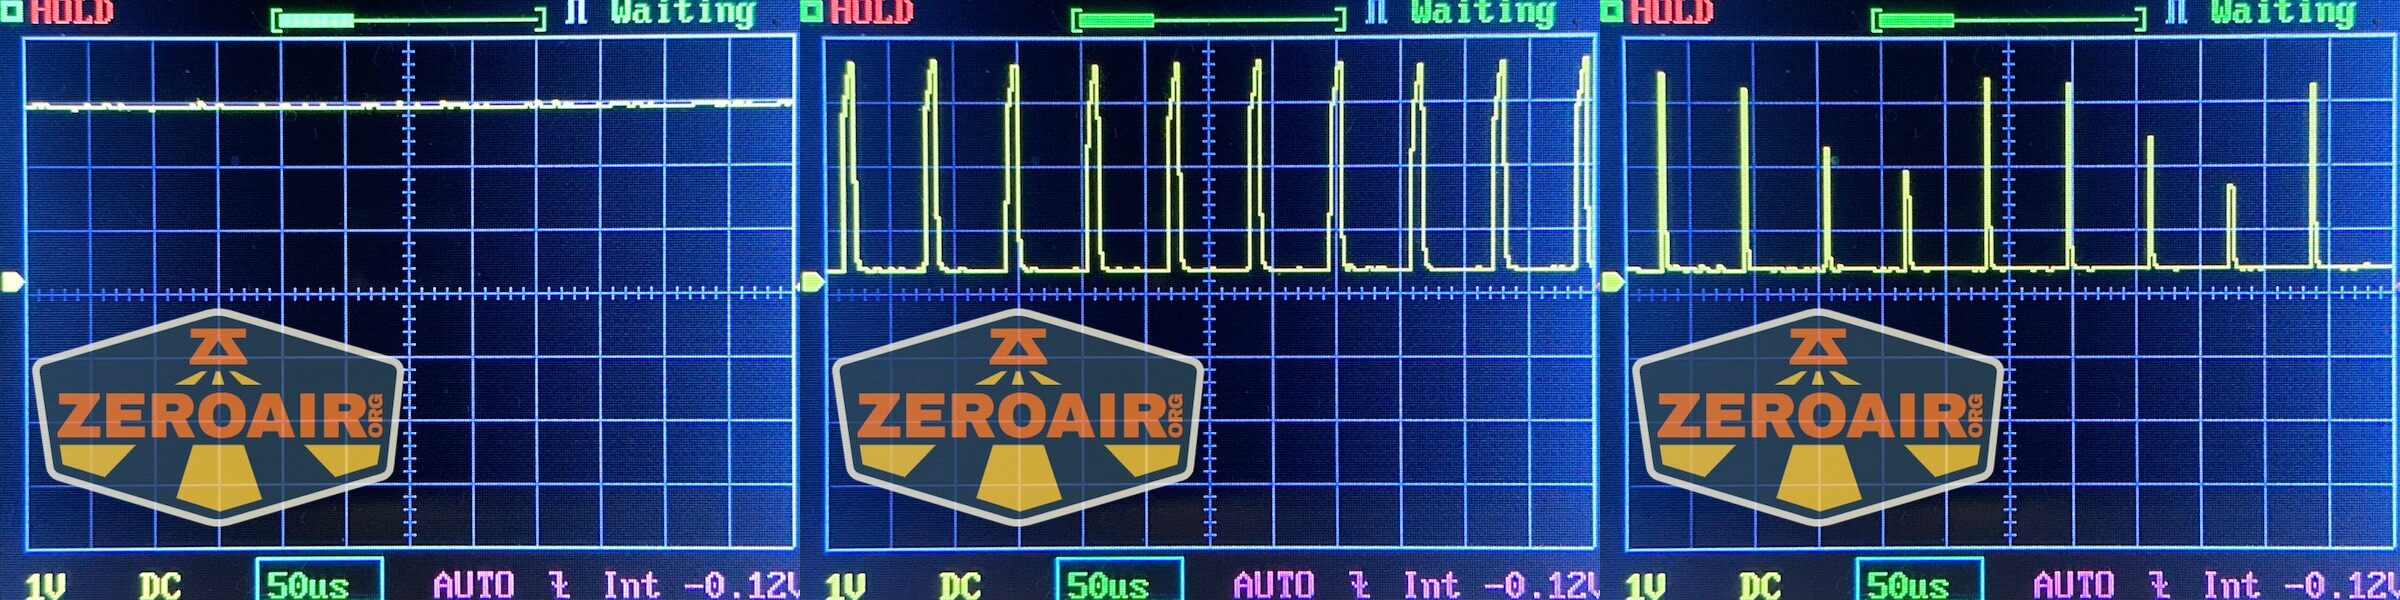
Pulse Width Modulation
Below, High is first and doesn’t use PWM. The lower two modes do.
Here you can see a “baseline” – a chart with almost no light hitting the sensor. Then there’s the Ultrafire WF-602C flashlight, which has some of the worst PWM I’ve seen. It’s so bad that I used a post about it to explain PWM! Here are multiple timescales (10ms, 5ms, 2ms, 1ms, 0.5ms, 0.2ms) to make comparing this “worst” PWM light to the test light easier. That post also explains why I didn’t test the WF-602C at the usual 50us scale.
User Interface and Operation
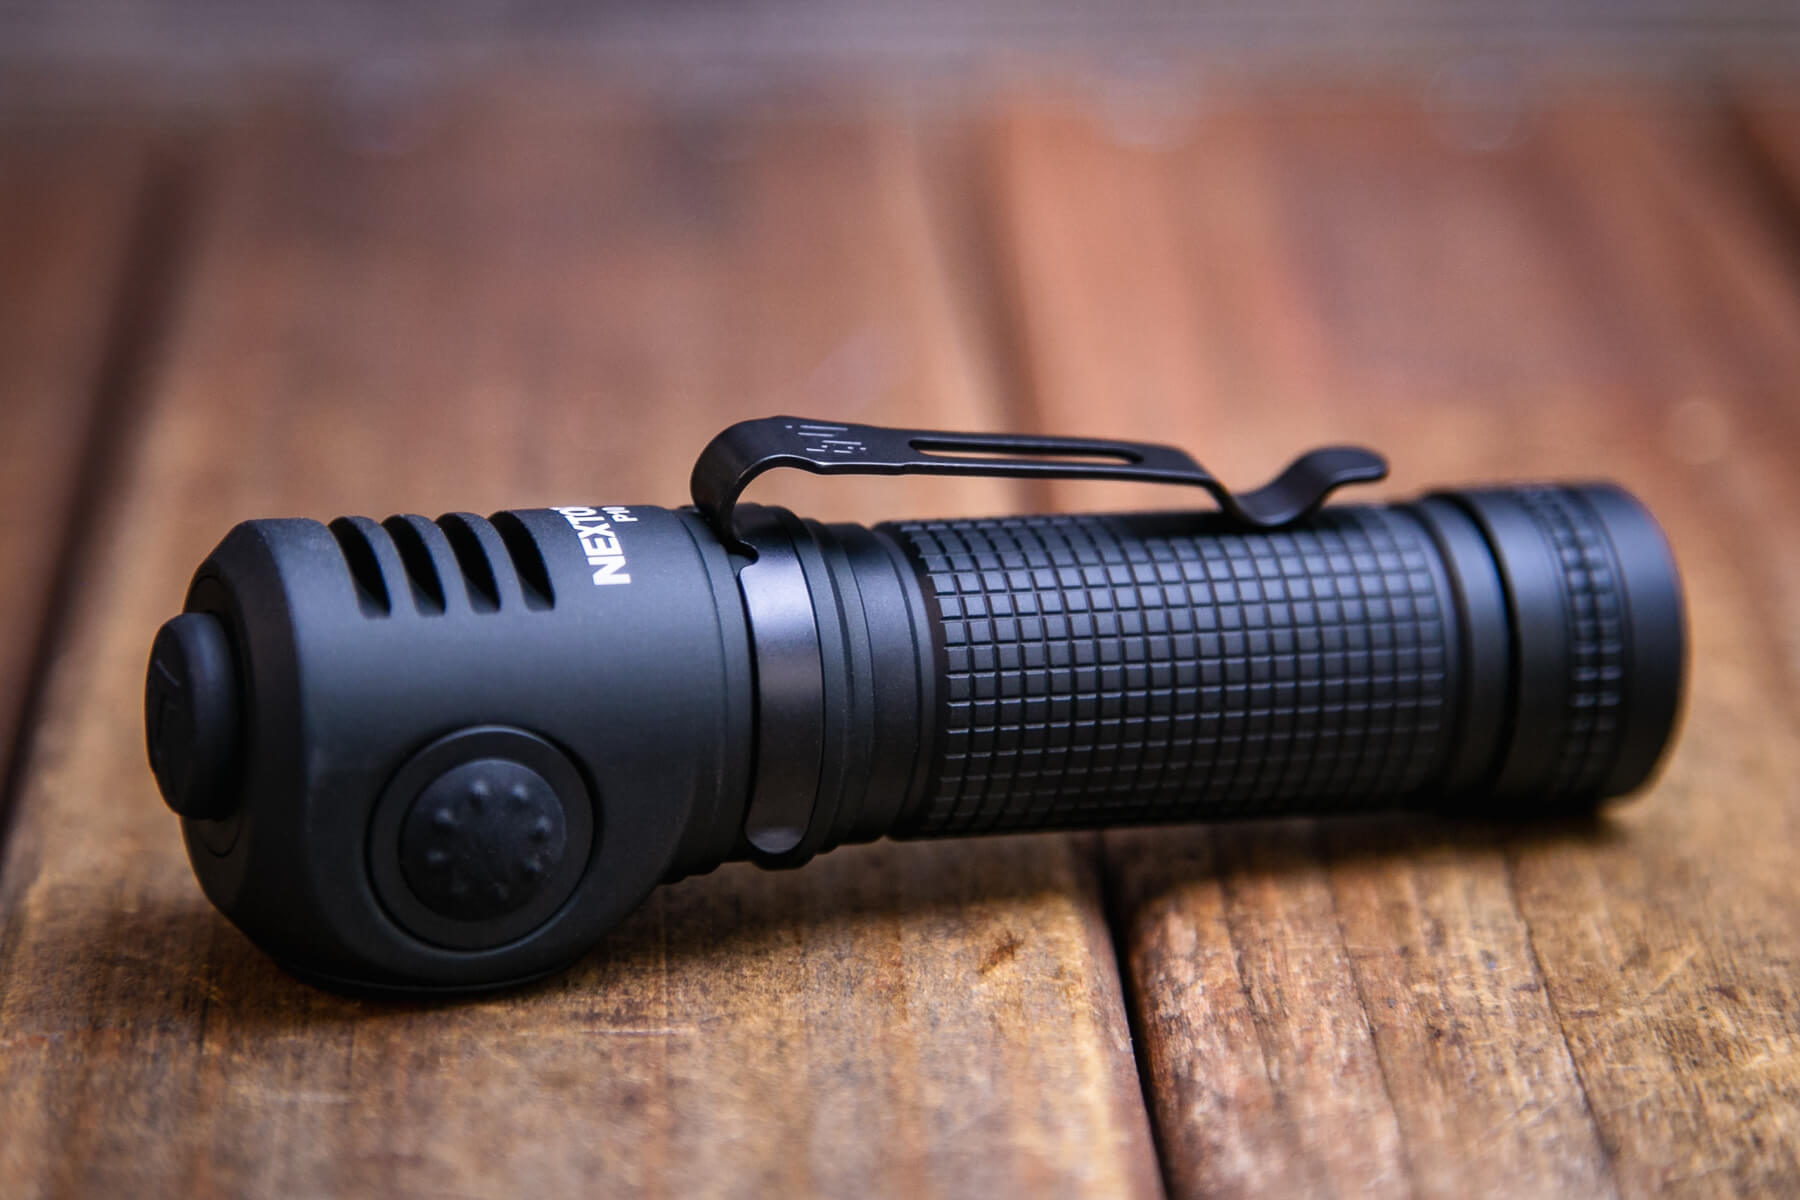
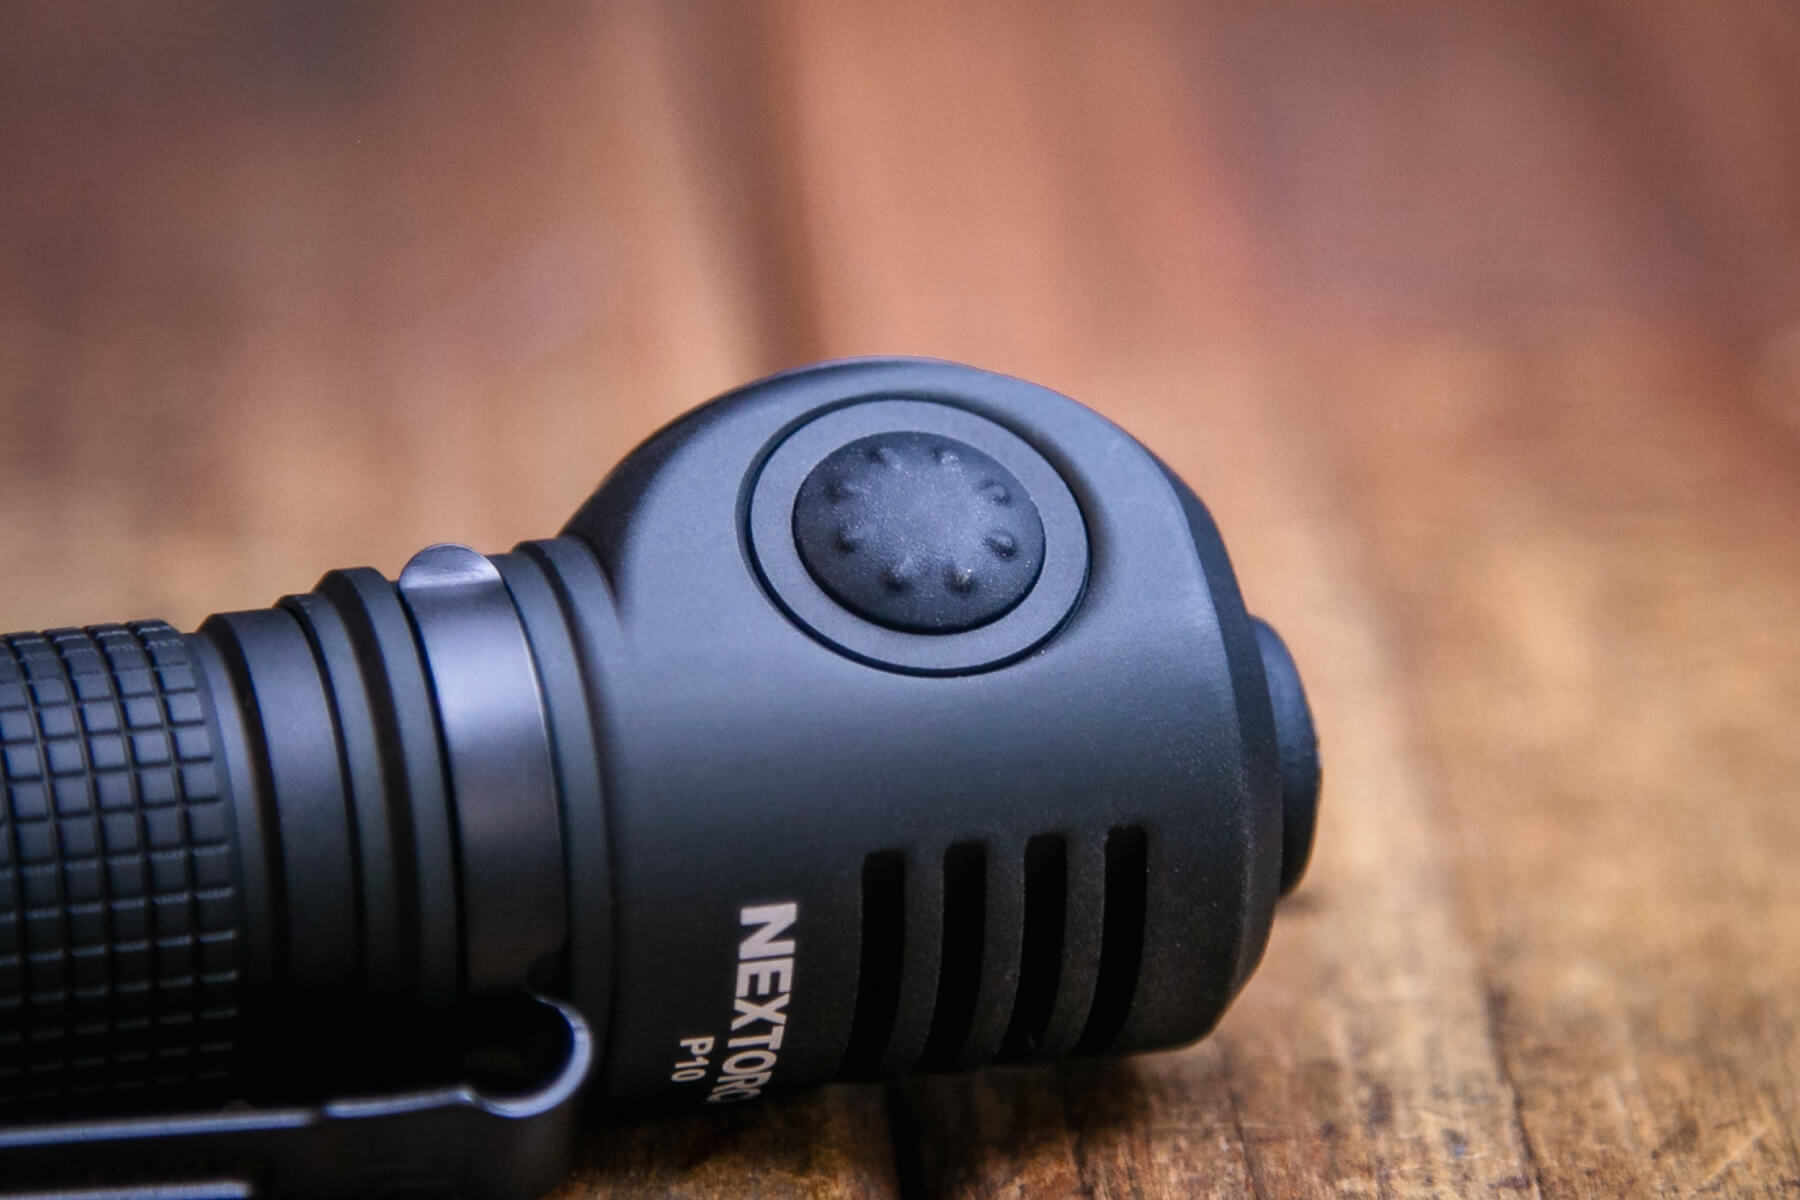
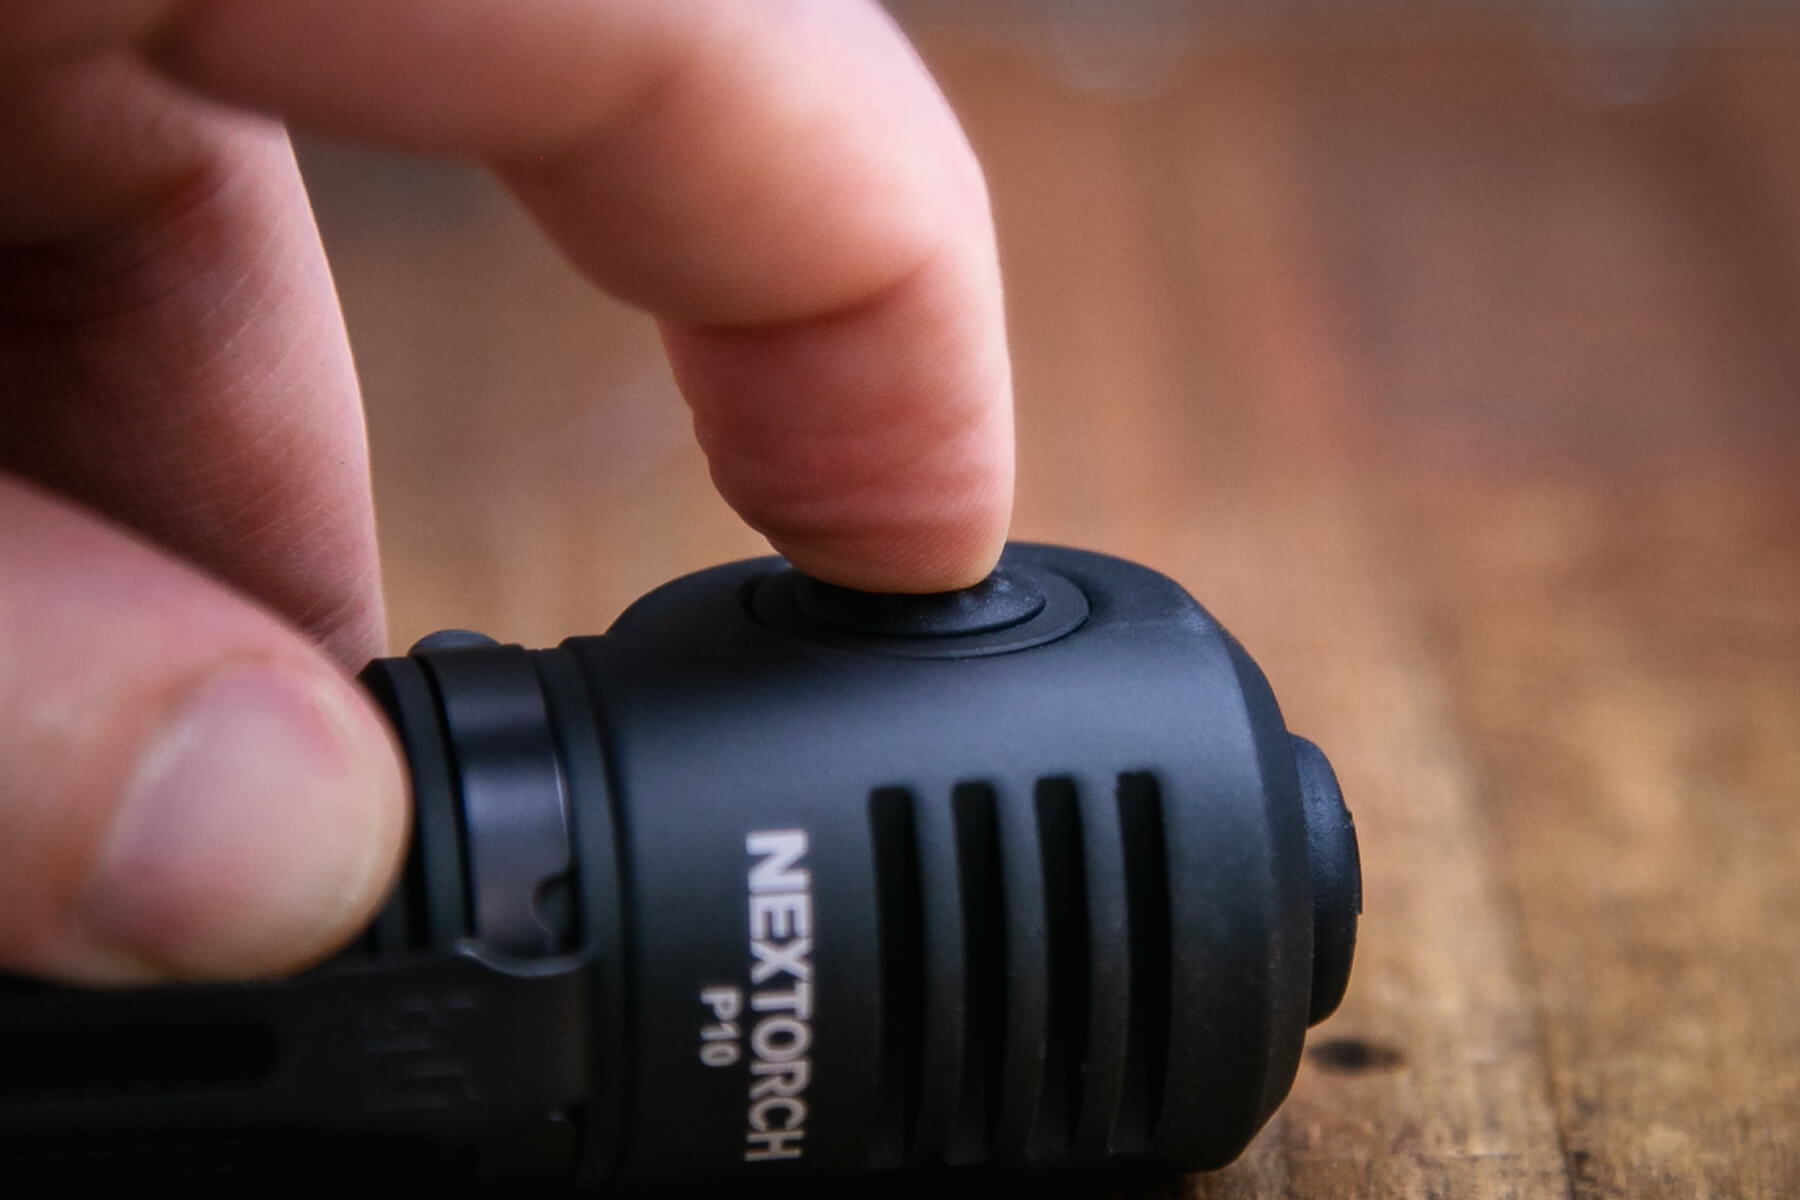
First, let’s talk about the switch right at the top end of the P10. It seems like a mechanical switch (it feels like one, anyway). But it’s very likely a “disguised” e-switch.
I say that because it has characteristics of both forward and reverse clicky switches – it’s possible to tap for momentary activation, but also change modes while the light is on.
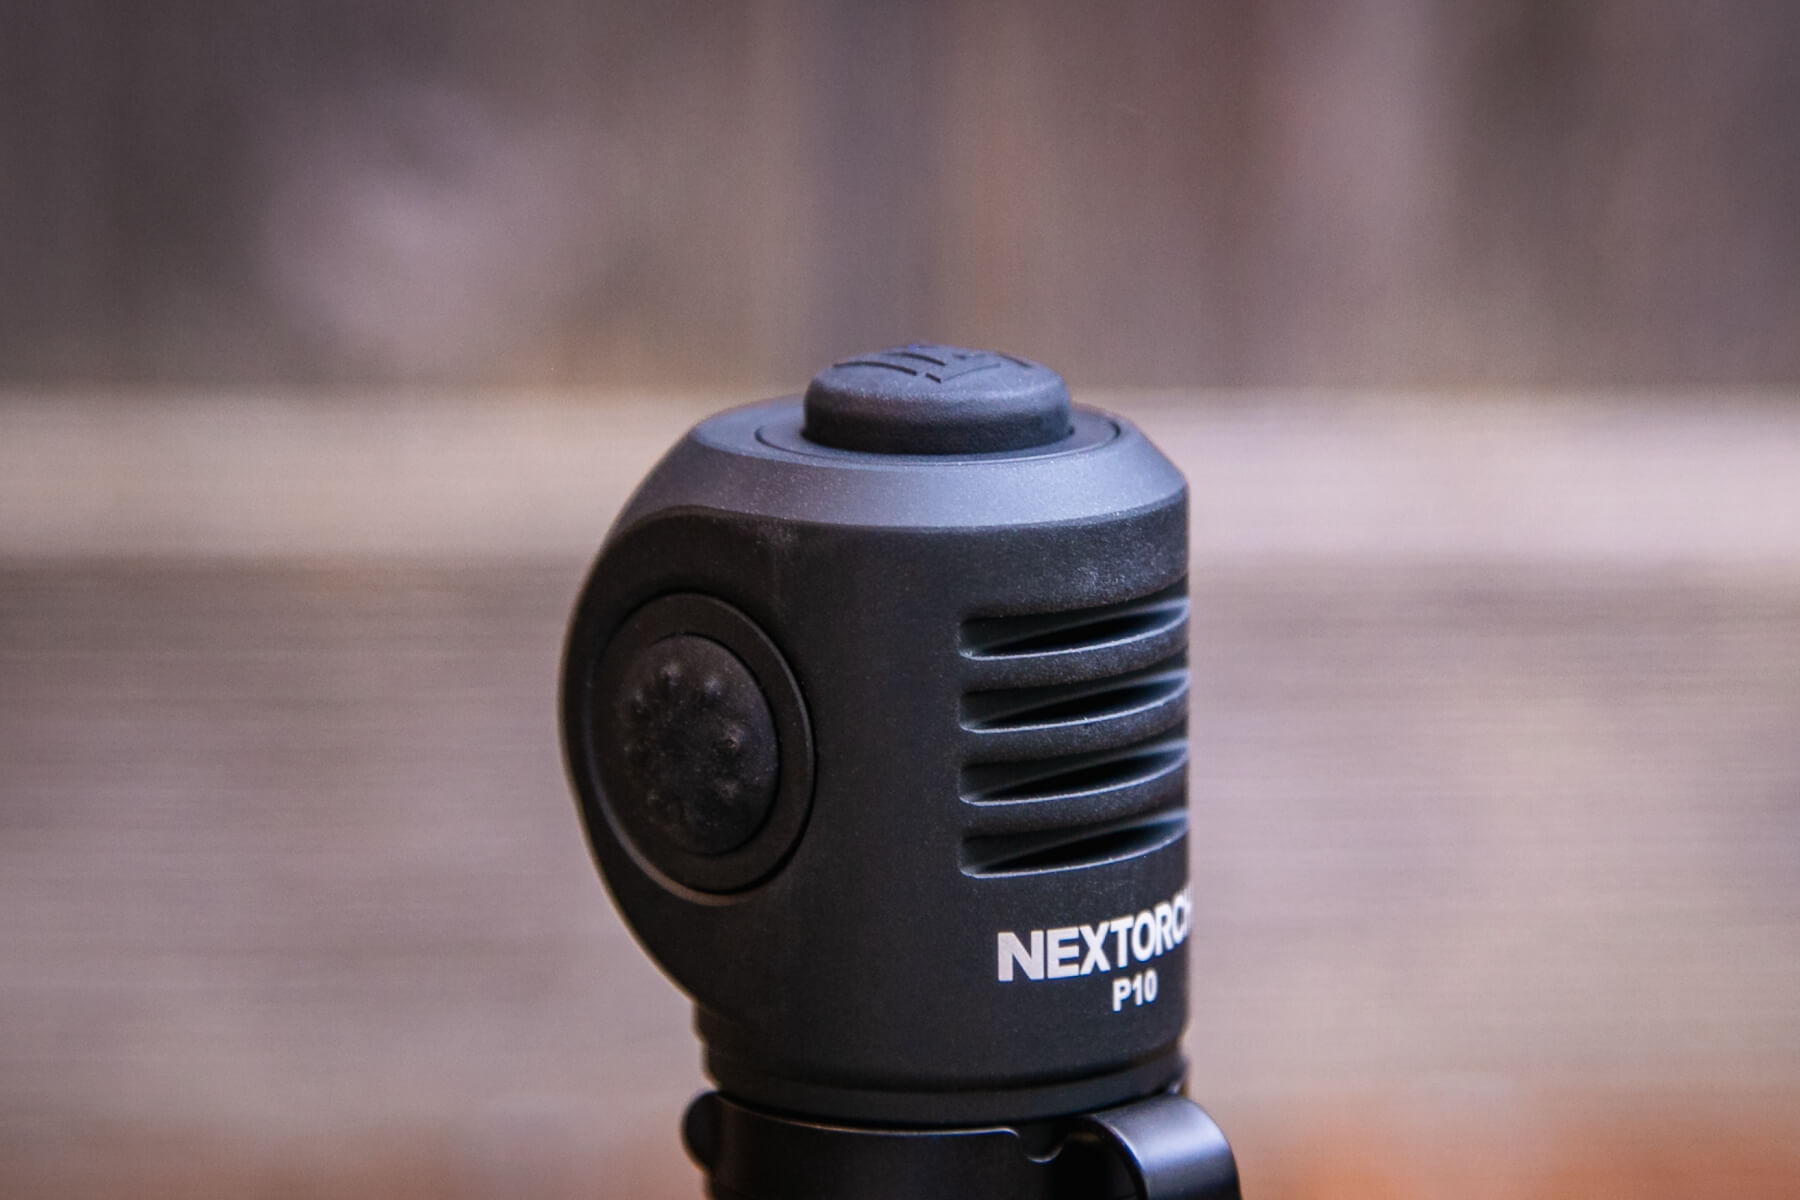
The action is quite deep, too. This switch controls only the white LED.

The other switch is on the side of the head and is most certainly an e-switch. Since this e-switch will work regardless of the state of the head switch, I hypothesize that both are actually e-switches (otherwise, I’m unsure how the side e-switch could receive power with the main switch off).
Here’s a user interface table!
| State | Action | Result |
|---|---|---|
| Off | Click Top Switch | On (White) |
| Off | Tap Top Switch | Momentary White |
| Off | Repeated taps on Top Switch | Mode advance (HML)^ |
| On (White) | Click Top Switch | Off |
| Off | Hold Side Switch | On (Red/blue modes) |
| Red/blue modes On | Click Side Switch | Mode advance (Red Beacon/ Blue Beacon/Red and blue flash) |
| Red/blue modes on | Hold Side Switch | Red/blue off^^ |
^ After one time through the modes of HML, the next mode after High will be Strobe. That’s right, strobe is in the main group (sort of.)
^^ It’s also possible to enter red/blue from a “white on” state. In that case, holding the side switch for “off” of red/blue will turn the light to the previous white state.
The manual states (or “seems to state”) that the secondary emitters (red/blue) can be on in a steady state, but I couldn’t activate them. I could only get the blinky modes out of red and blue.
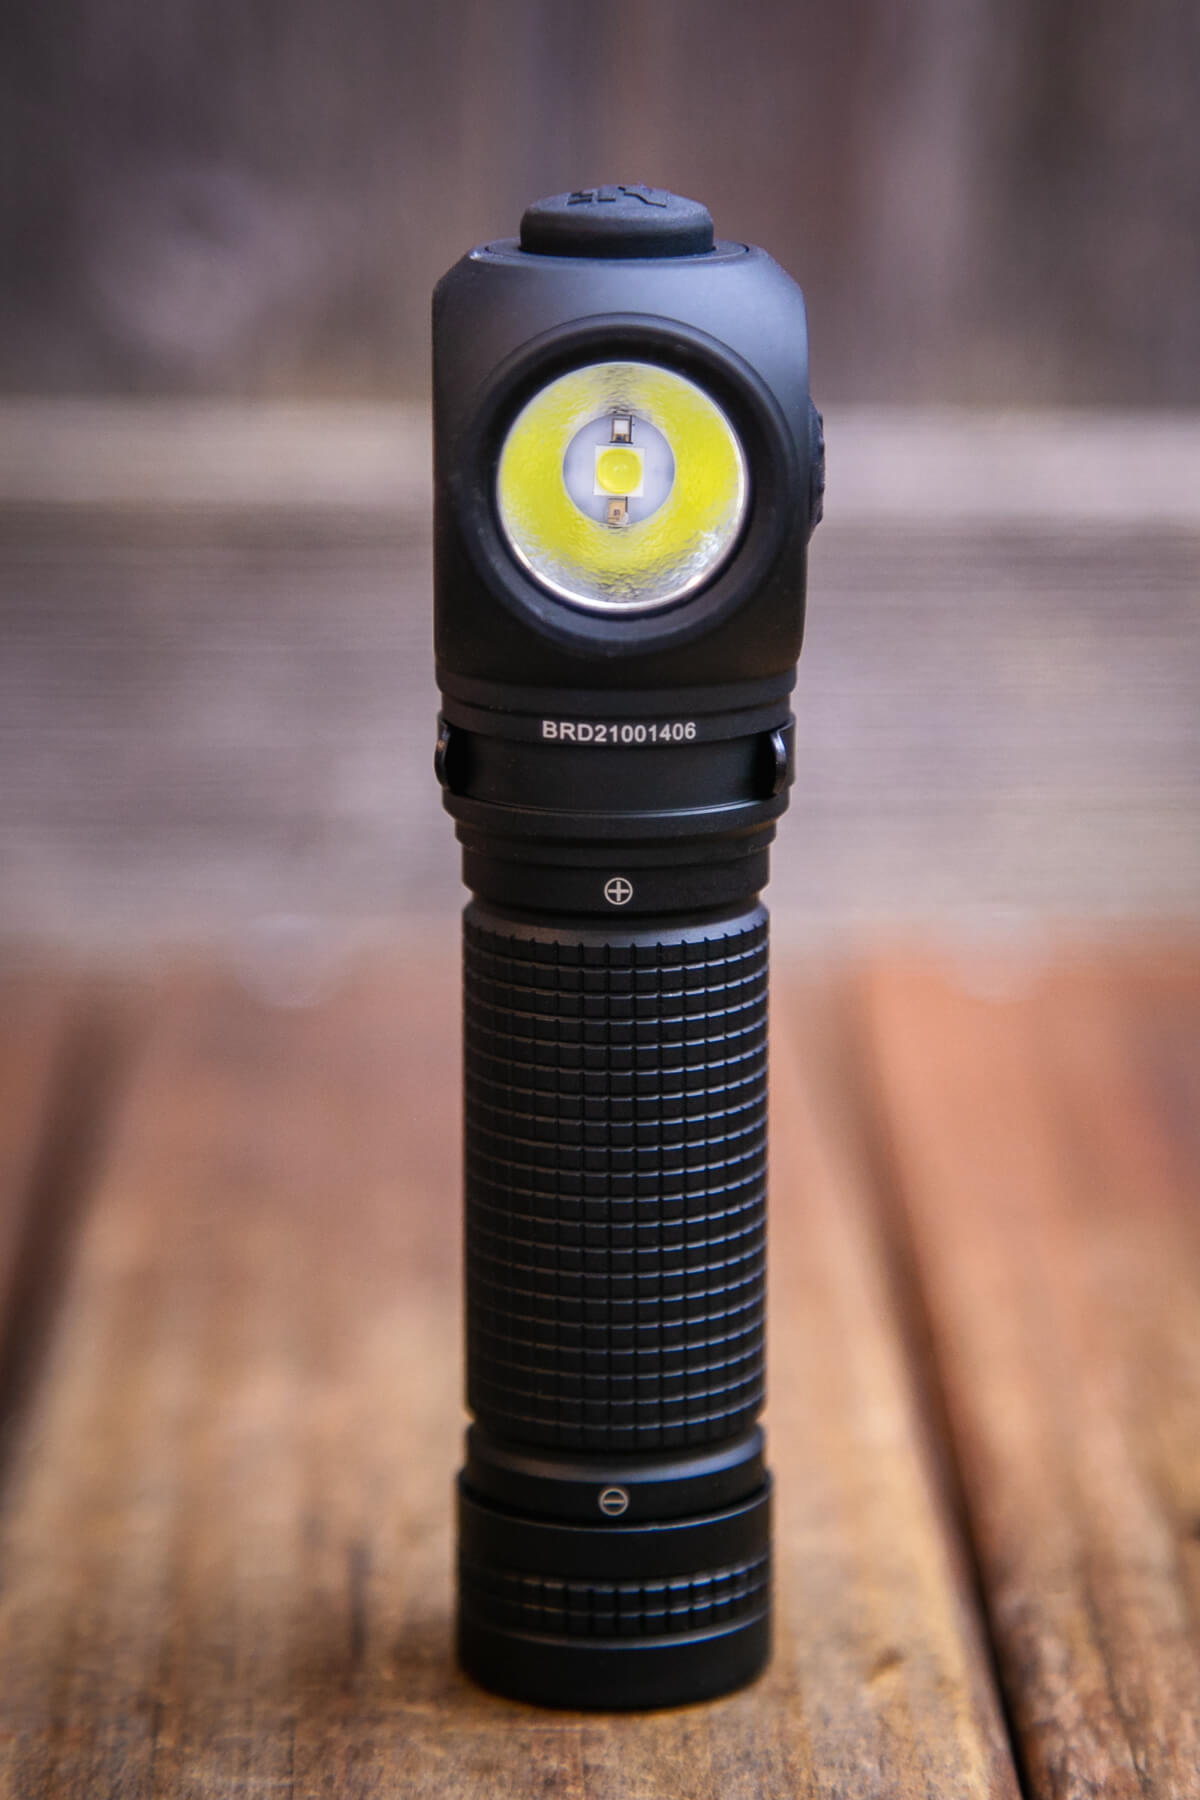
LED and Beam
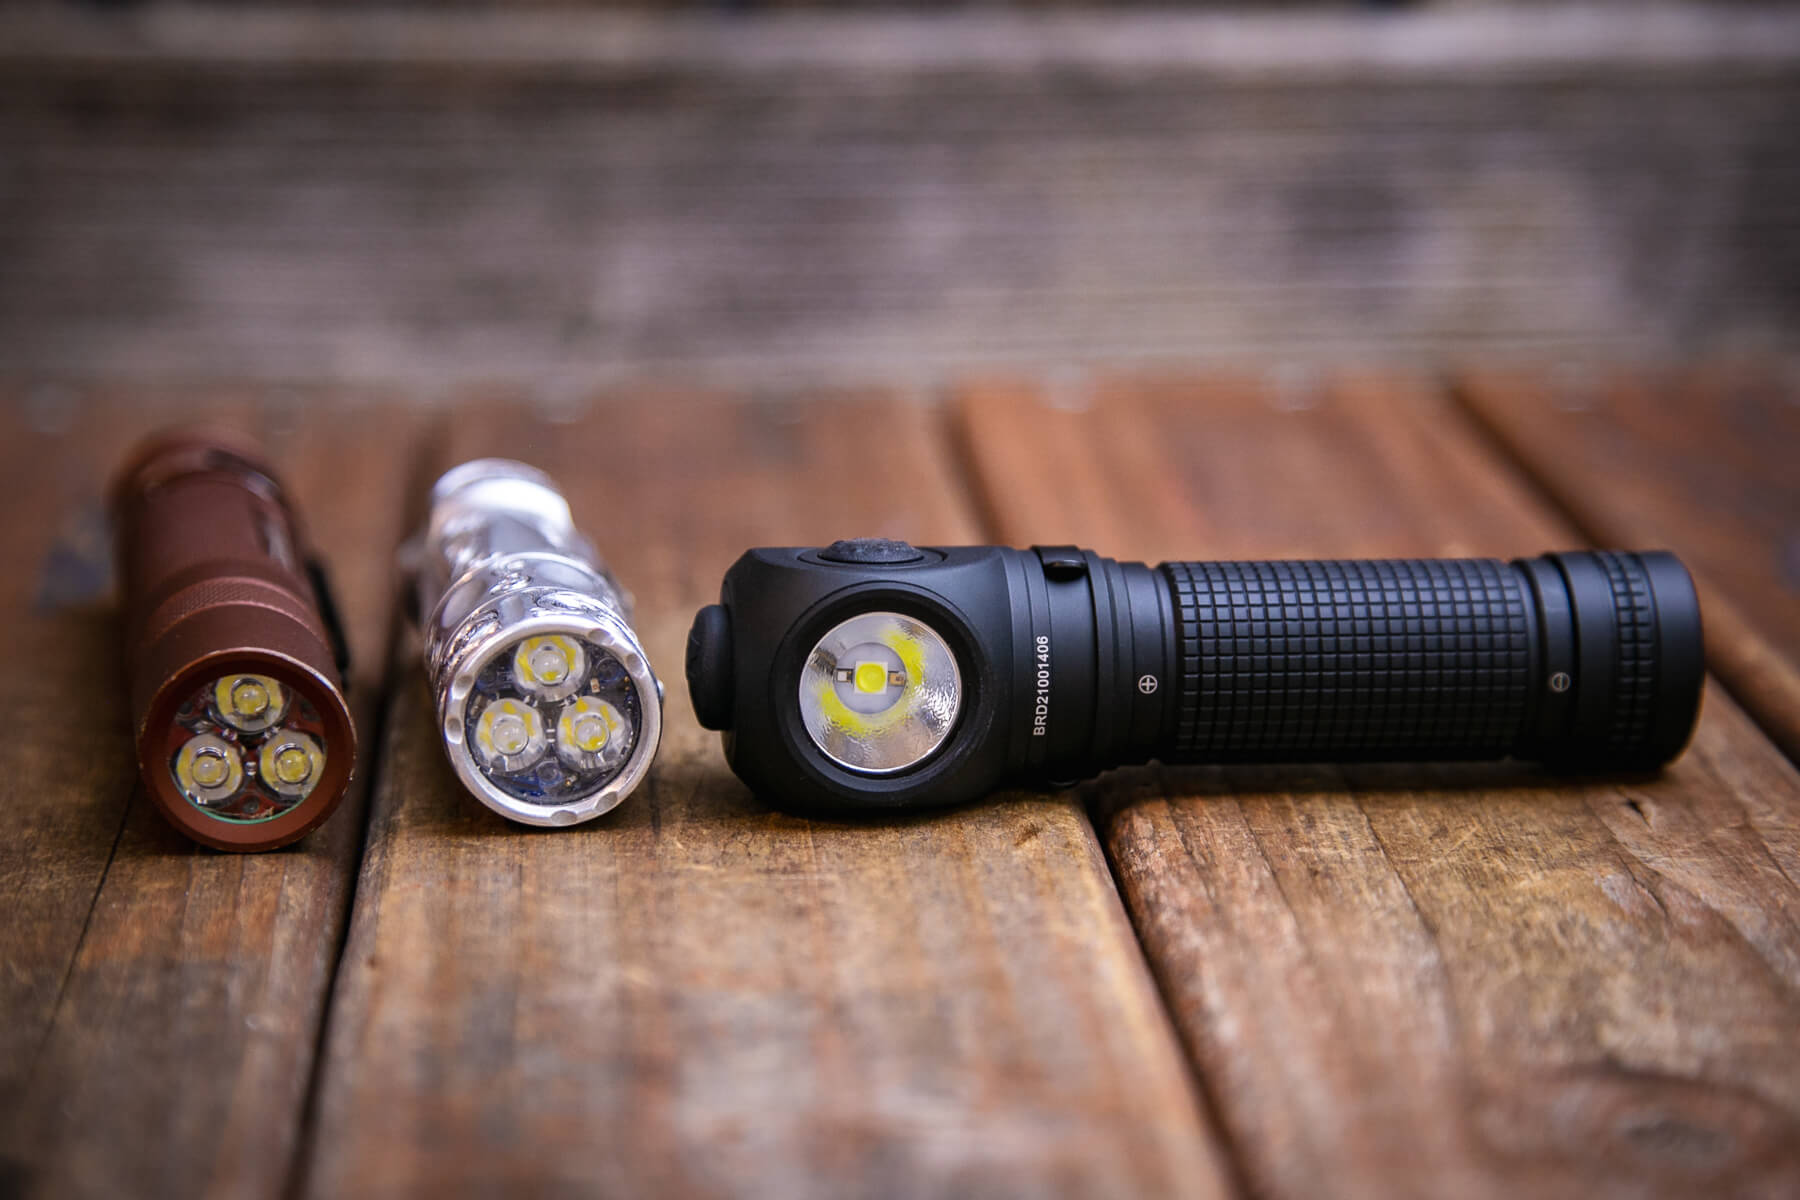
As far as I can see, Nextorch does not state what emitter is used in the P10. Below you can see the setup – white in the middle with red and blue surrounding the white emitter.
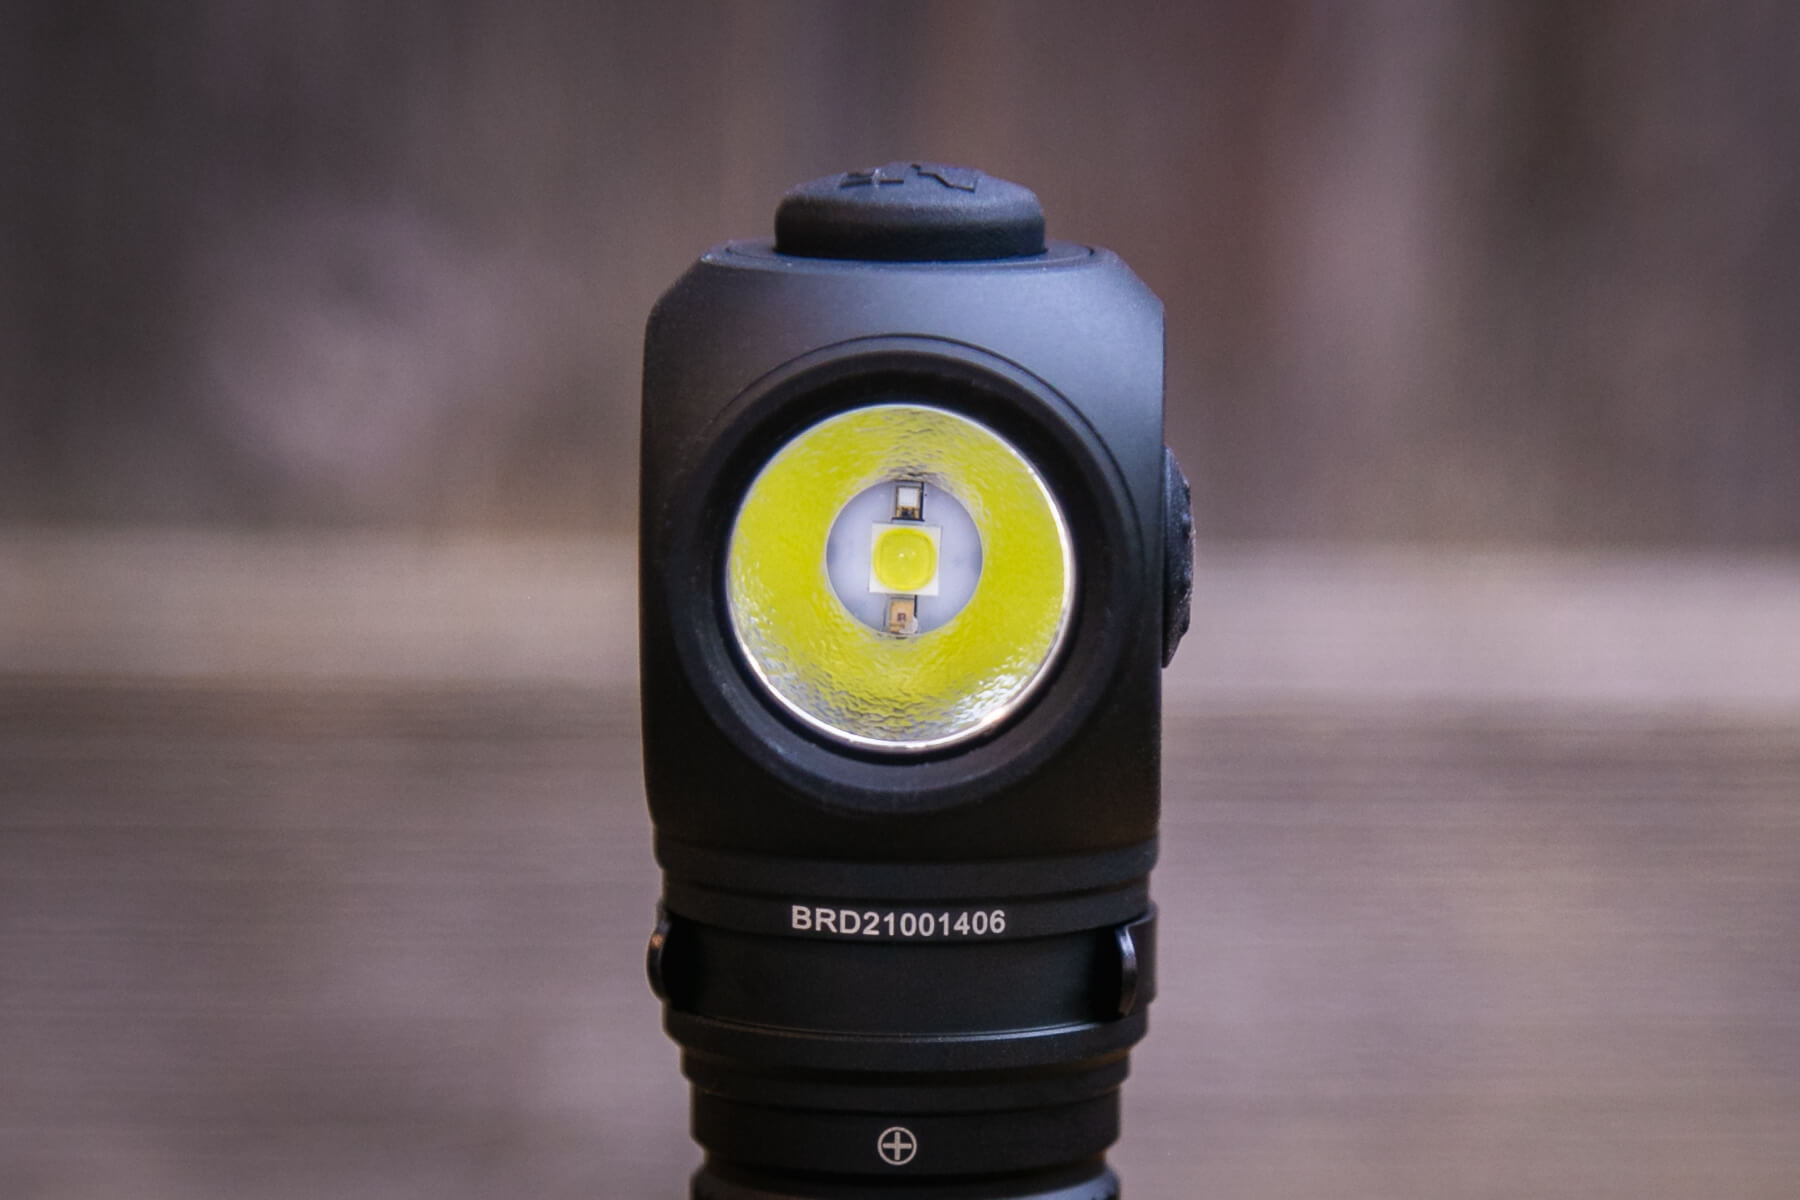
Again, I couldn’t get the red and blue emitters to enter a steady state, so I don’t have any photos or testing of those emitters.
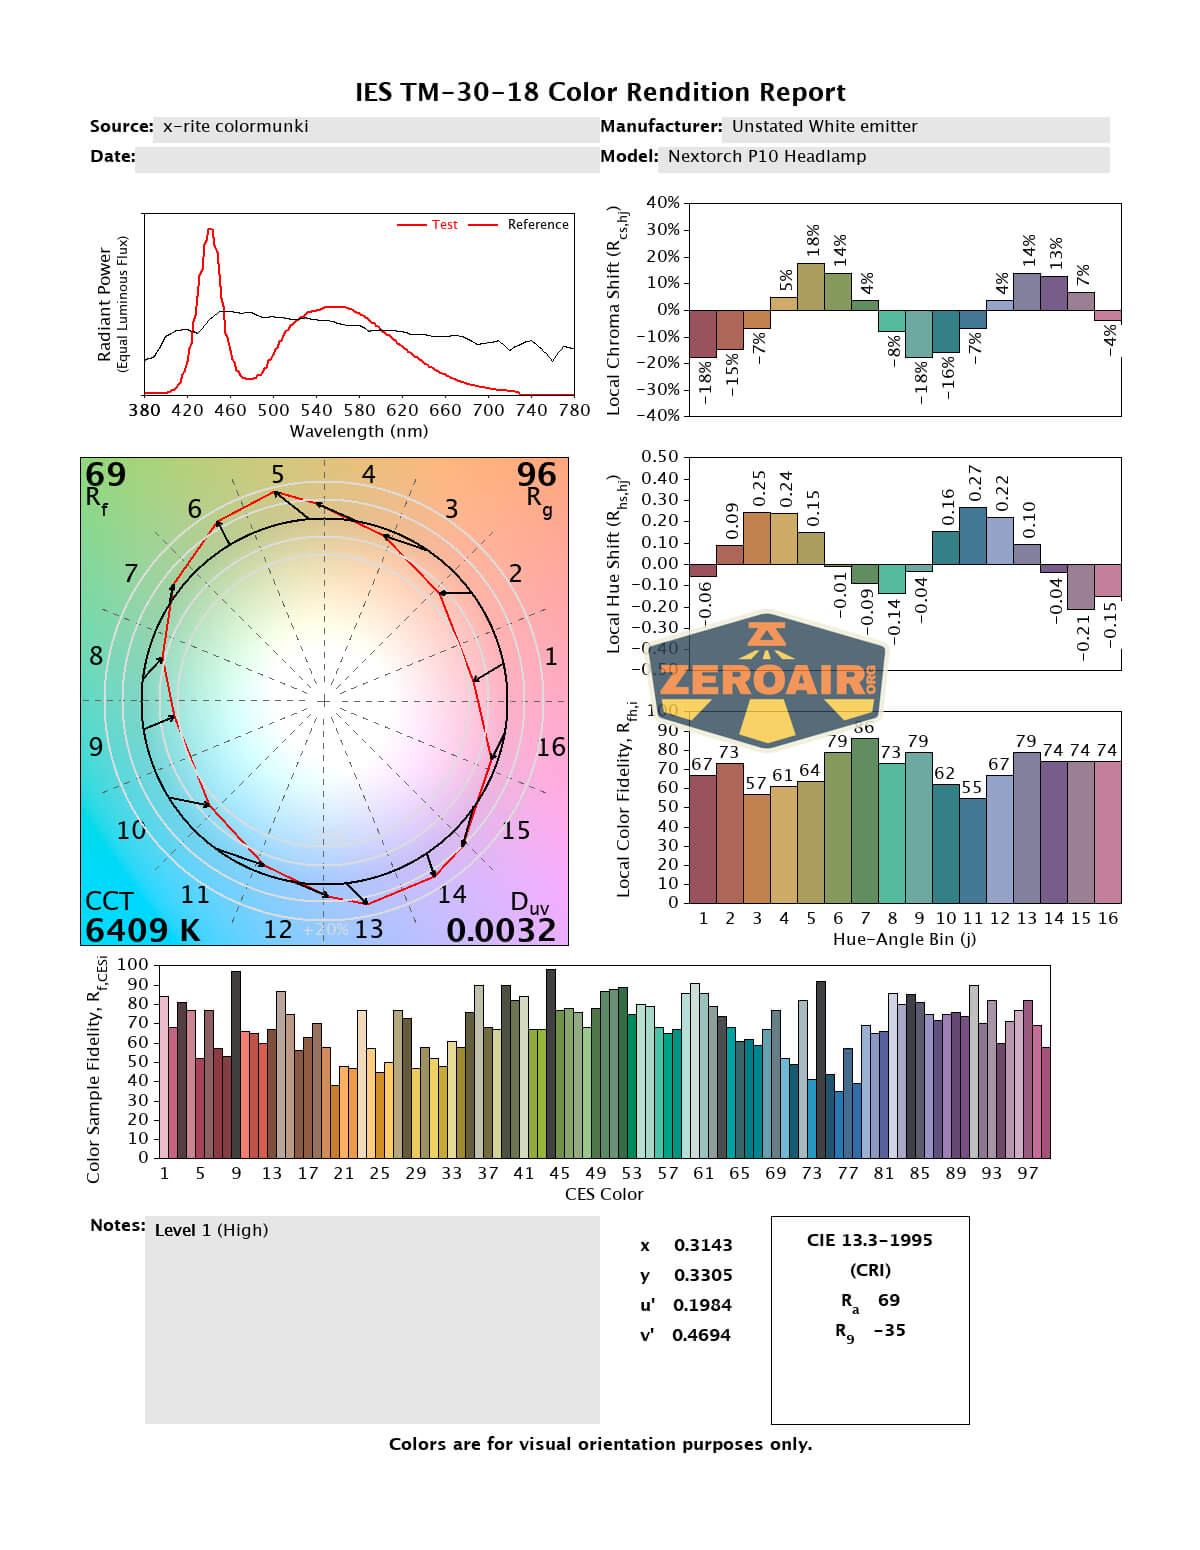
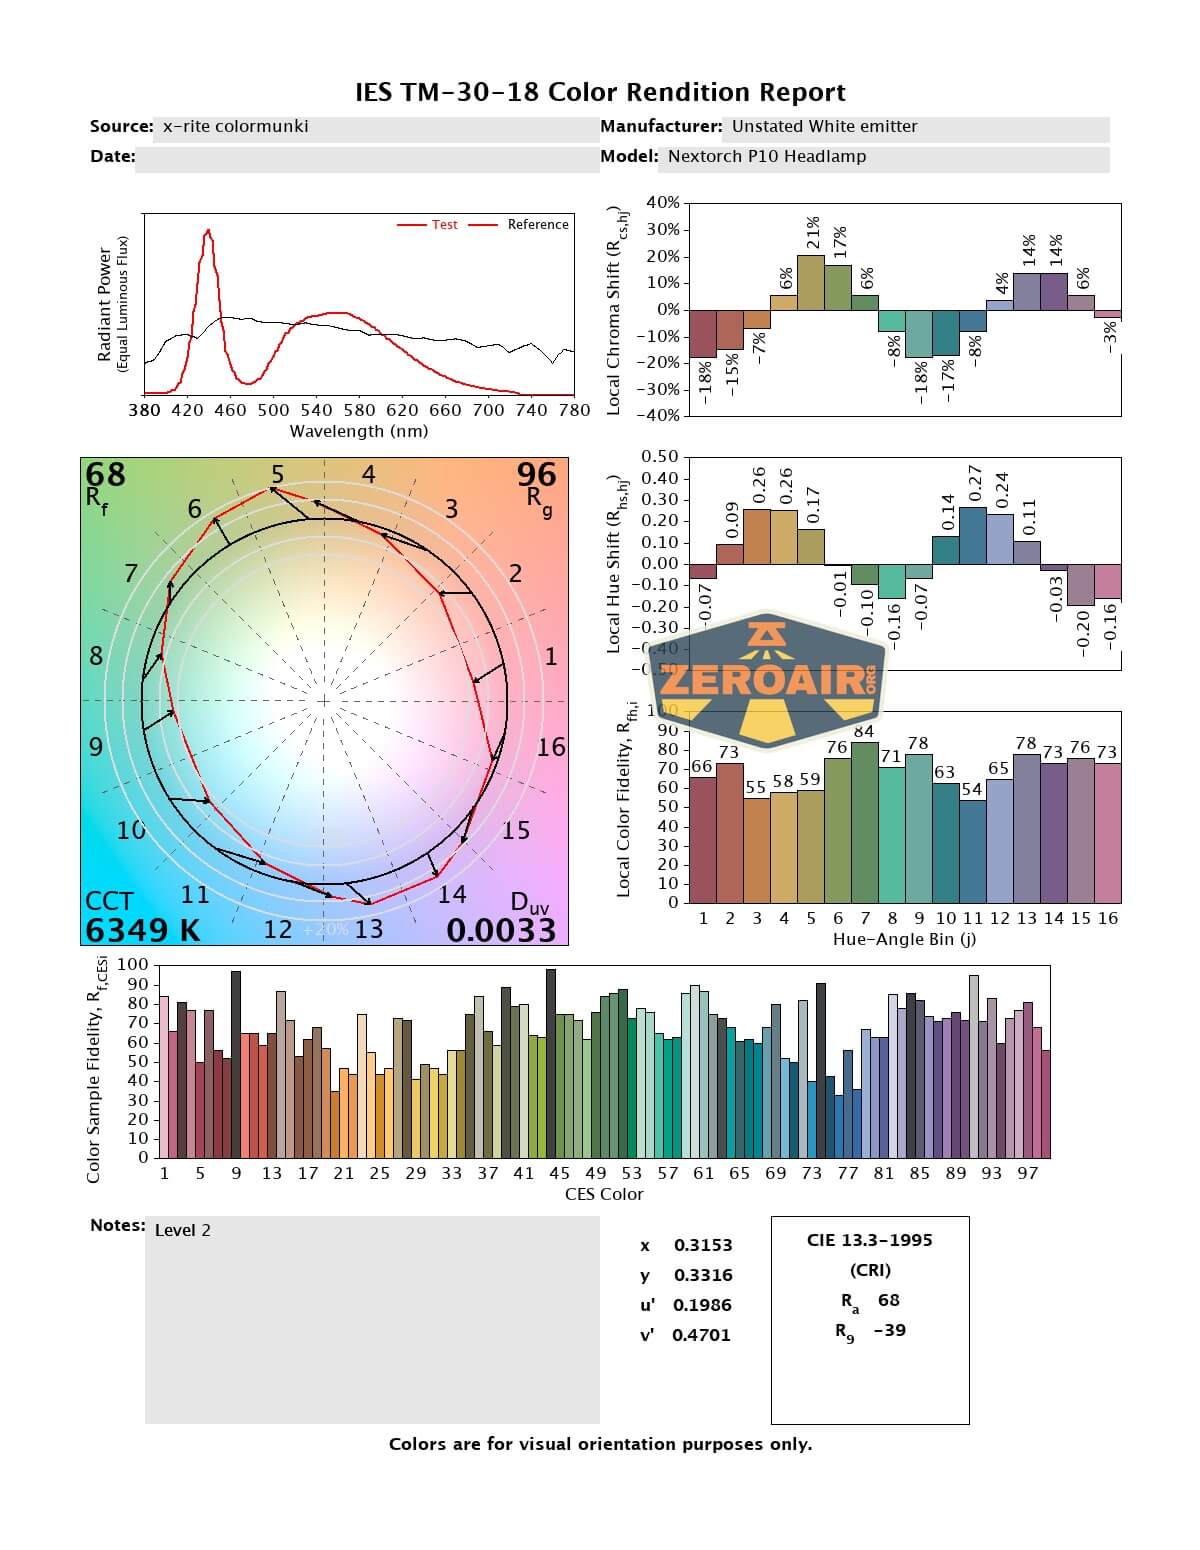
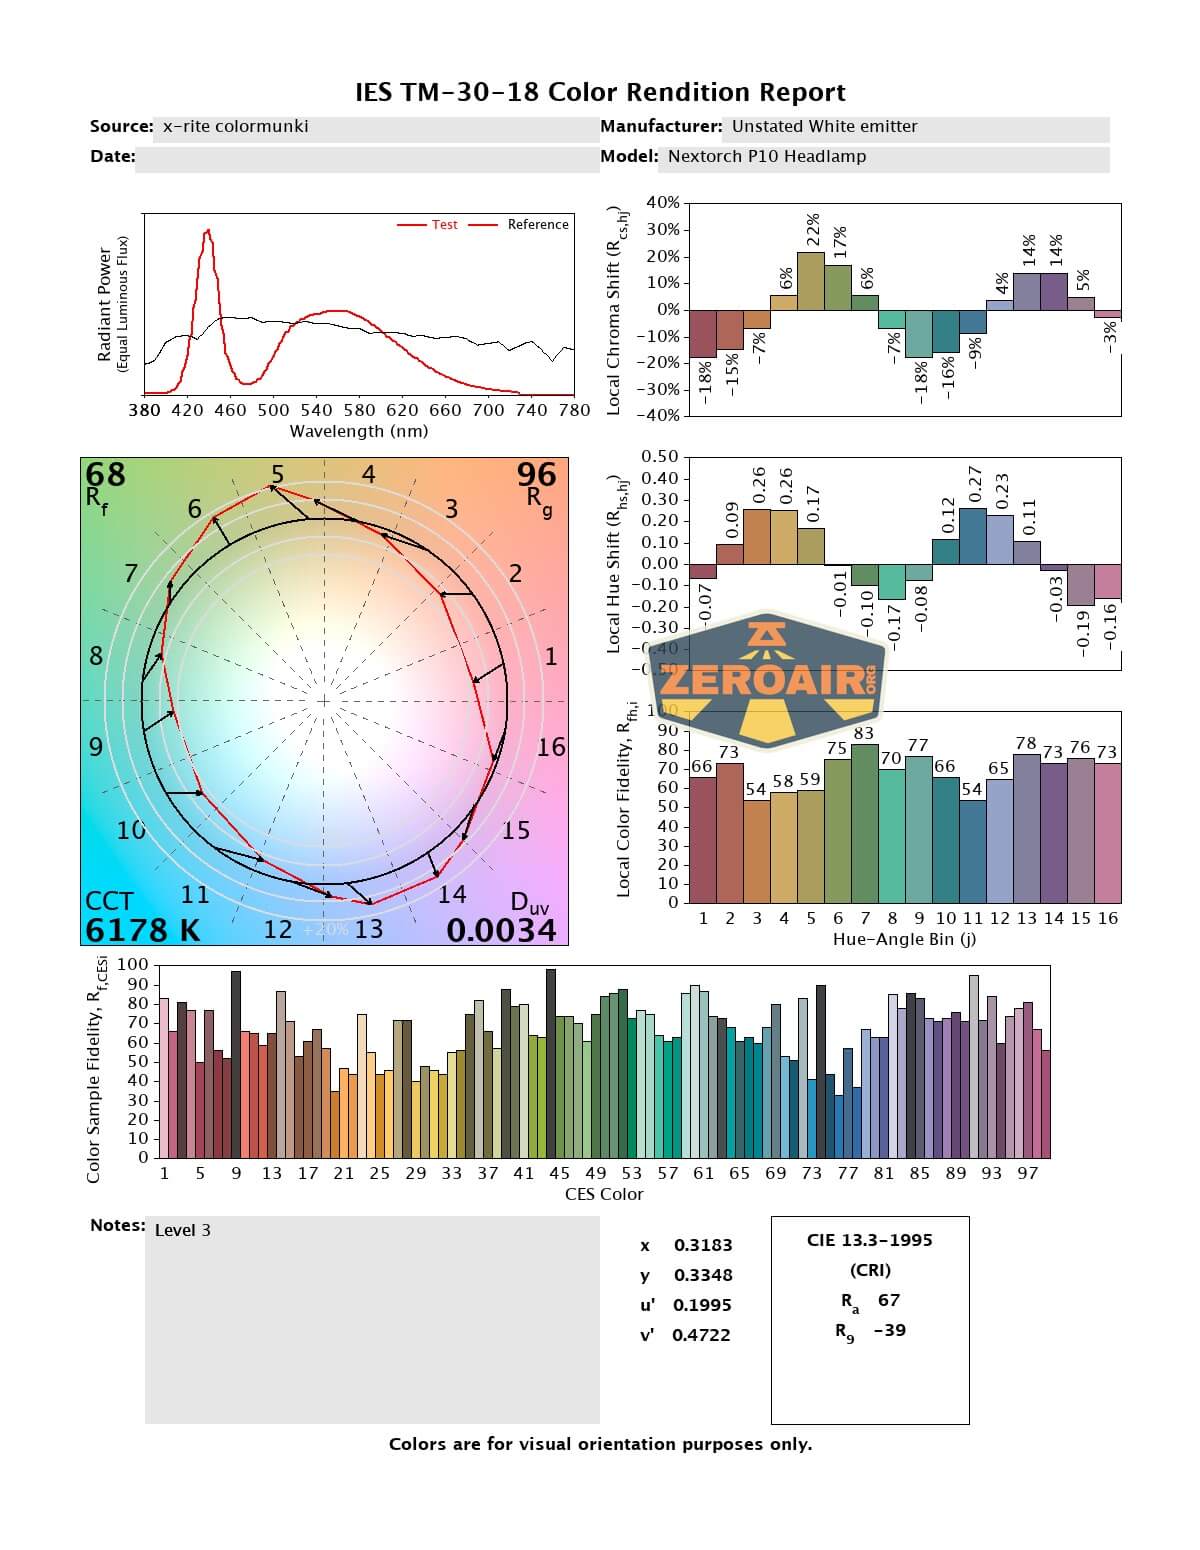
LED Color Report (CRI and CCT)
As above, the order here is high to low. CRI is low at under 70, and CCT ranges from 6200K to 6400K, which is cool white.
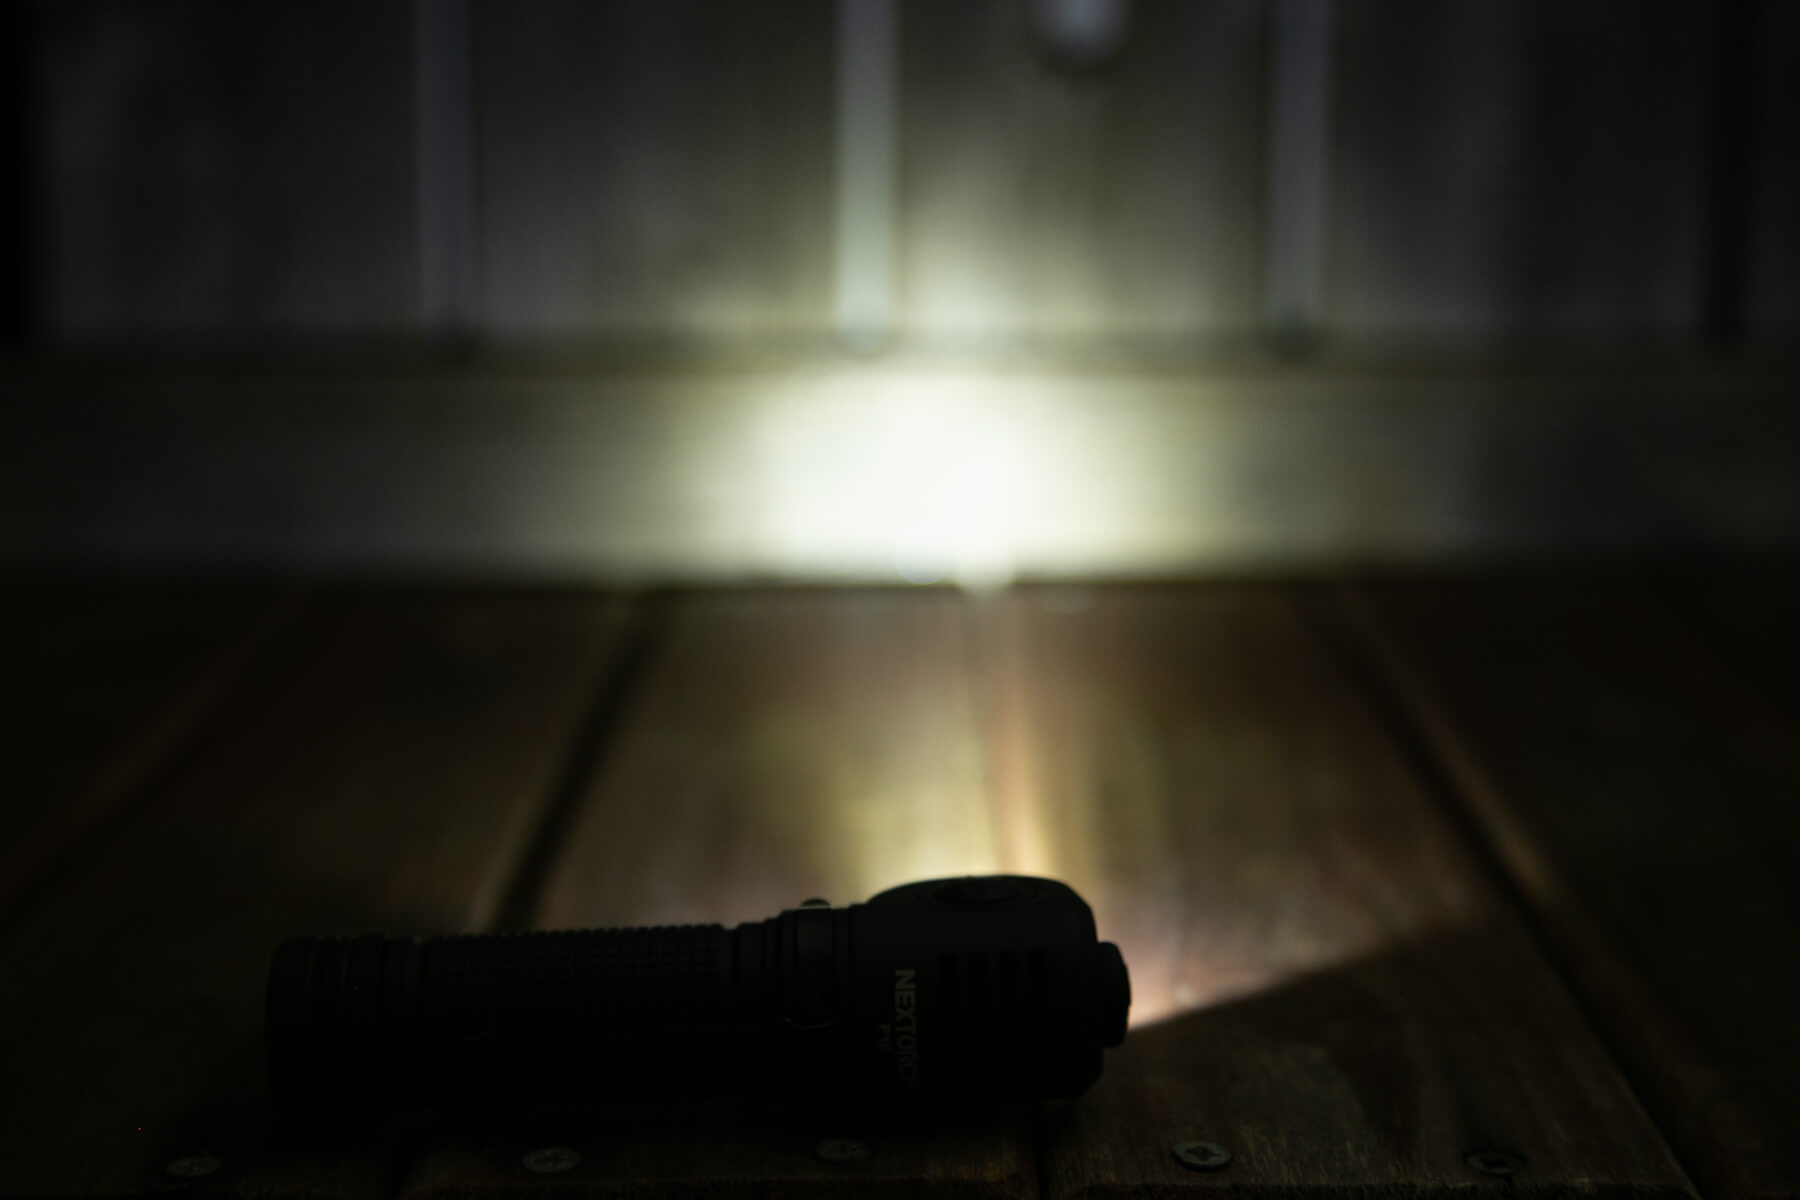
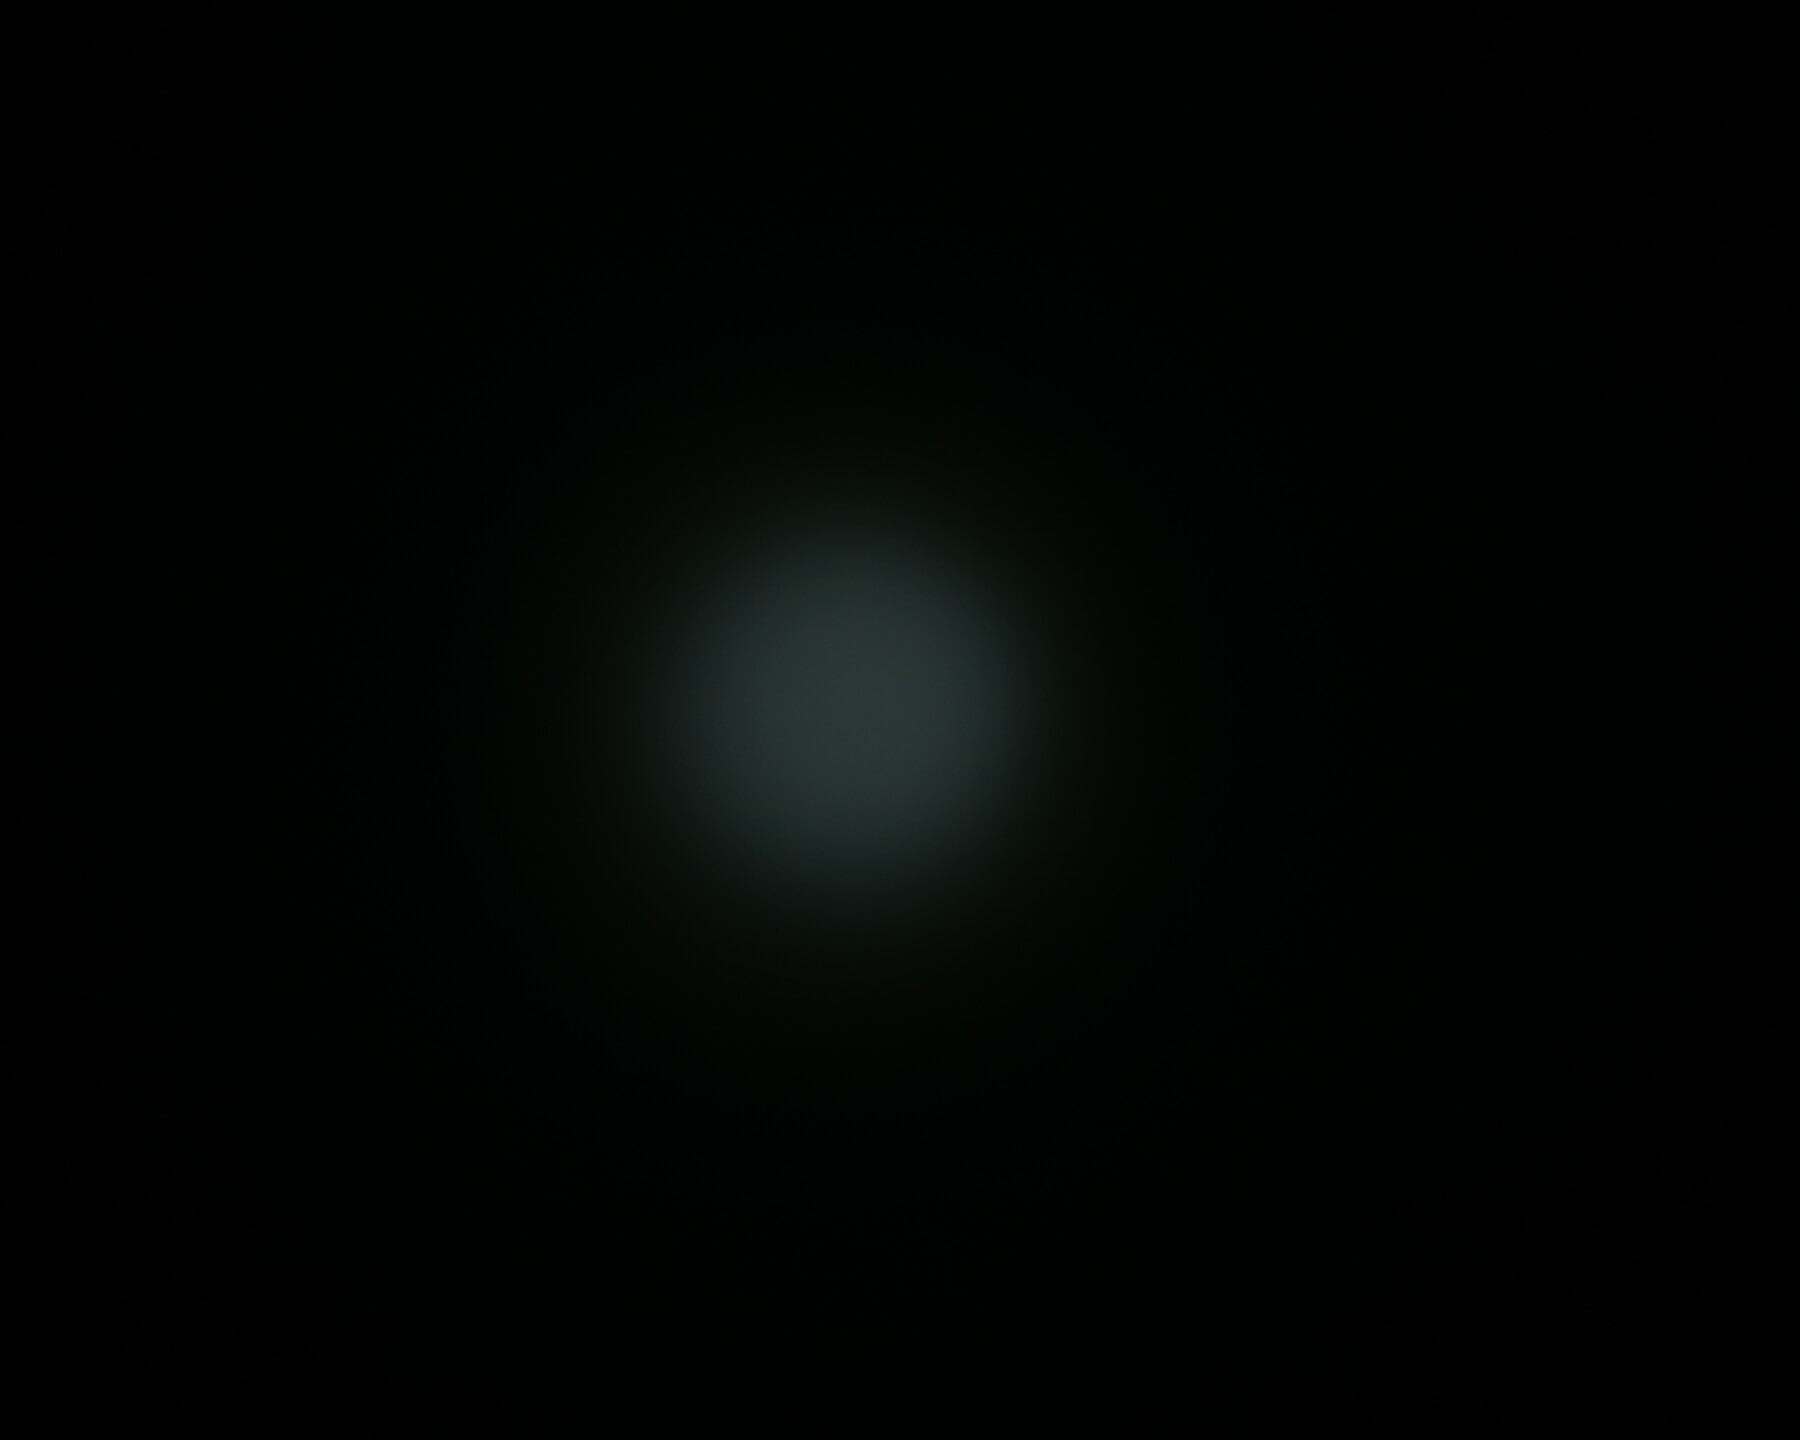
Beamshots
These beamshots always have the following settings: f8, ISO100, 0.3s shutter, and manual 5000K exposure. These photos are taken at floor level, and the beam hits the ceiling around 9 feet away.


Tint vs BLF-348 (KillzoneFlashlights.com 219b version) (affiliate link)
I keep the test flashlight on the left and the BLF-348 reference flashlight on the right.

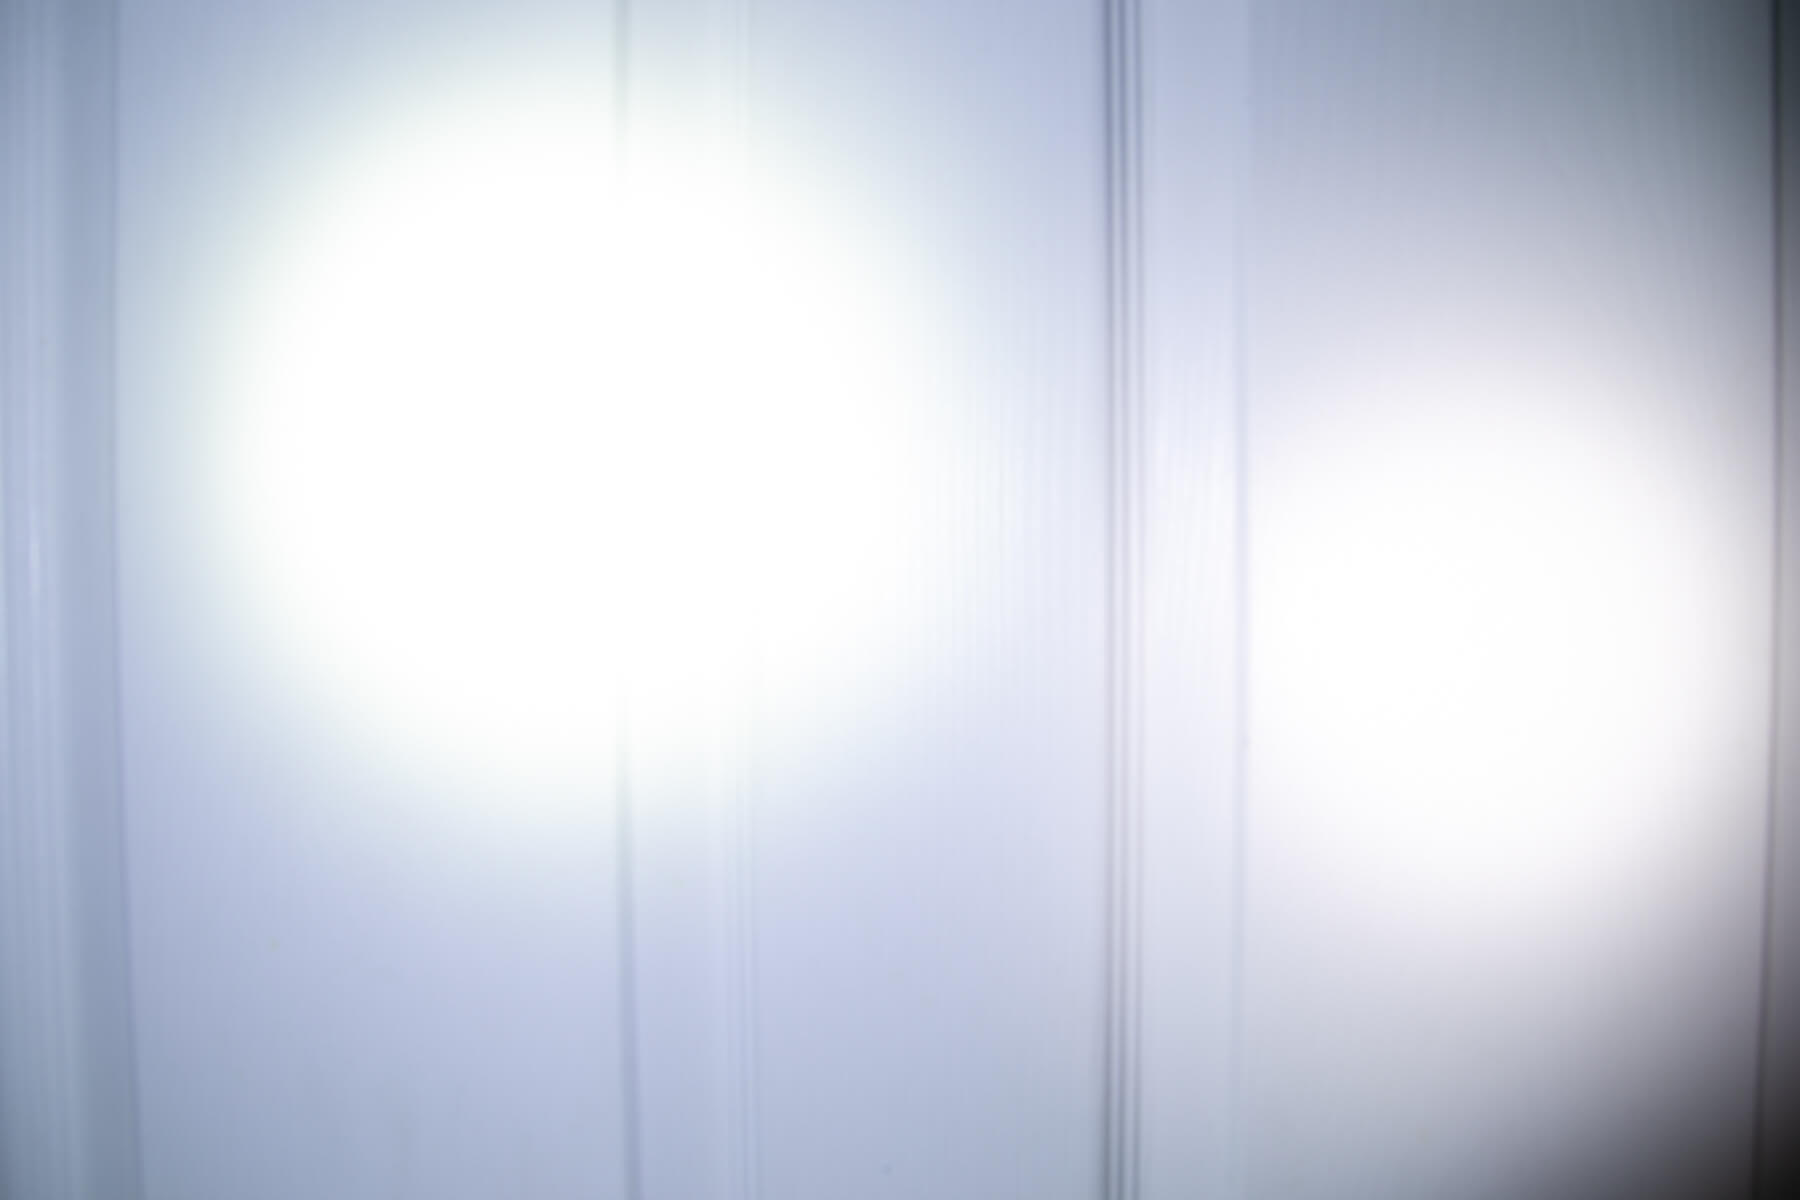
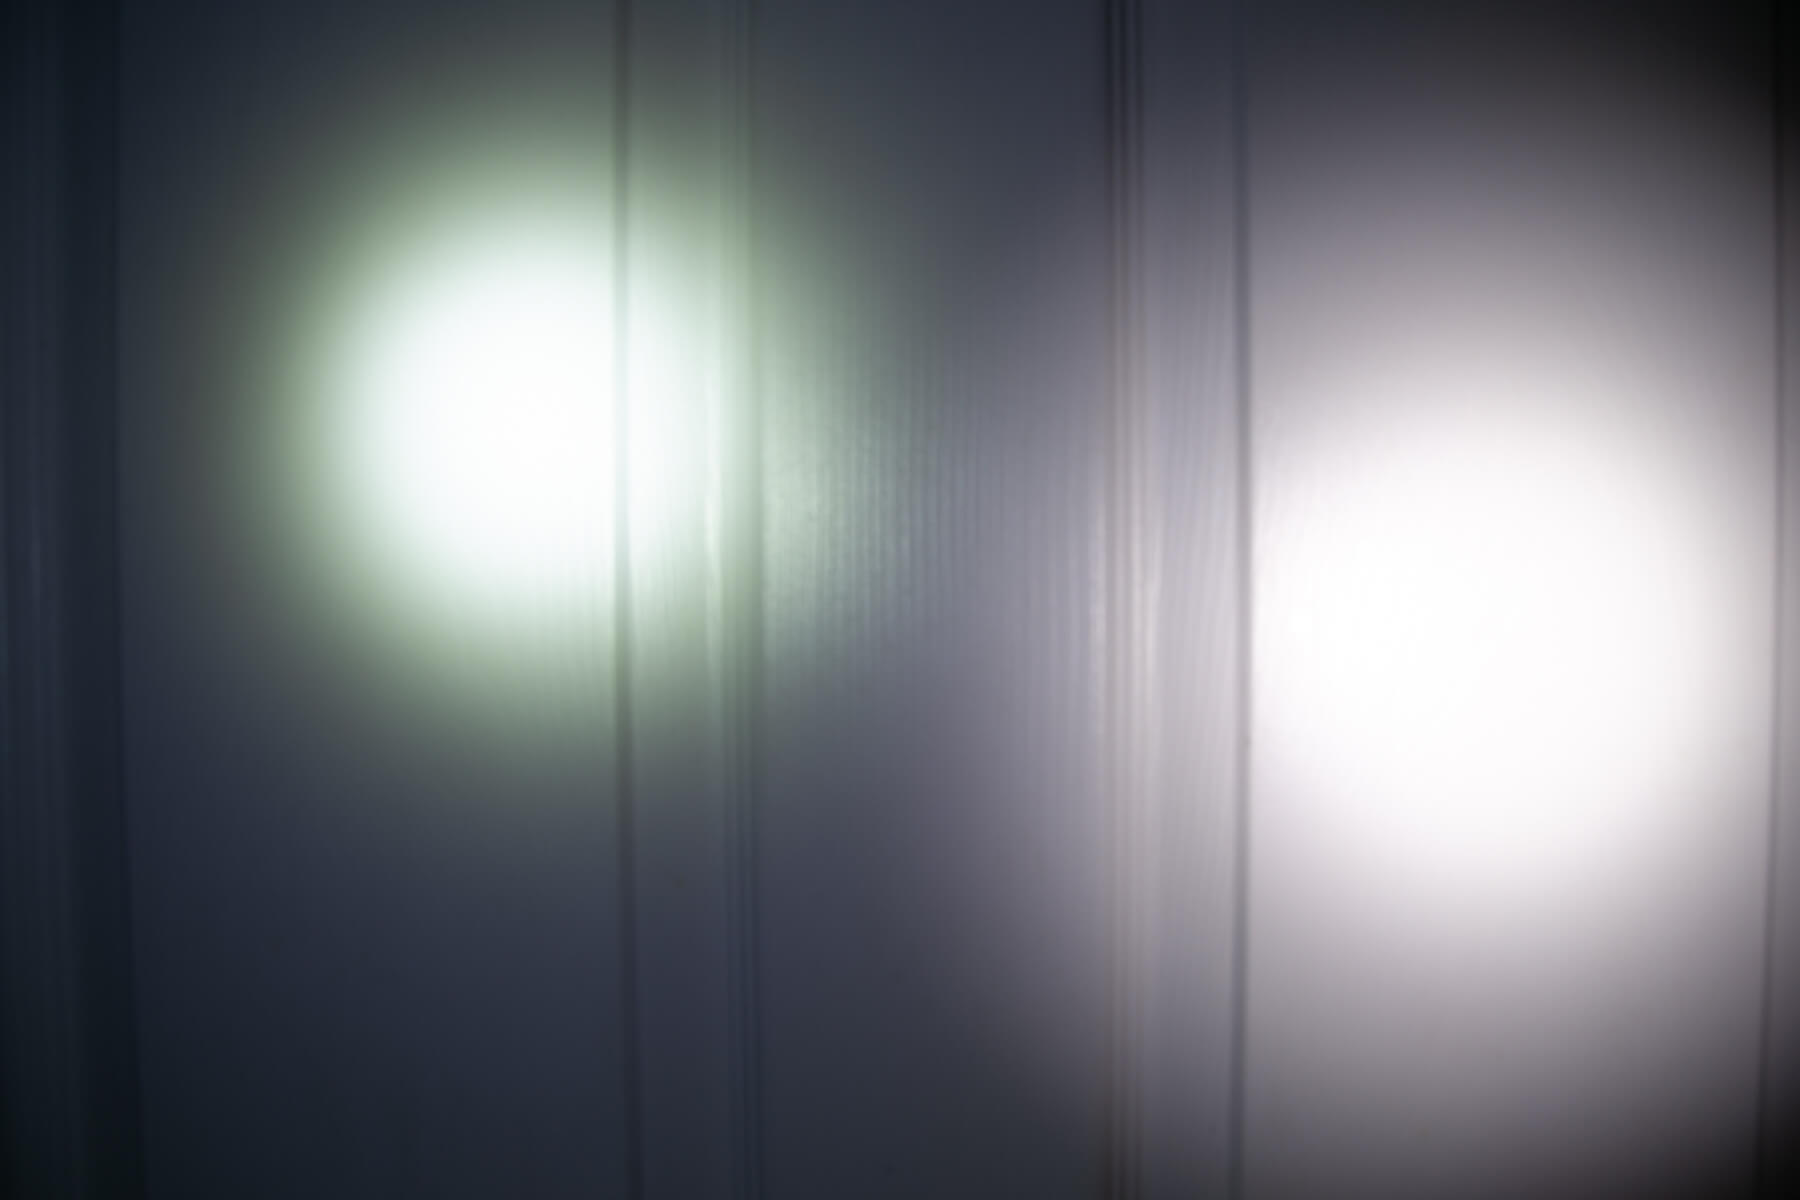
I compare everything to the KillzoneFlashlights.com 219b BLF-348 because it’s inexpensive and has the best tint!
Conclusion
What I like
- Good build quality
- Dual switch interface
- Great output on High (briefly)
- It’s a dedicated right-angle light (and not a headlamp at all)
What I don’t like
- Switch for white emitter is too sensitive on first pass – High always ends up on medium, and you have to cycle through the modes to get to high.
- Red and blue are blinky only! (no steady states)
- Minor complaint is micro-USB on the cell (and not USB-C). (But I use bay-style chargers anyway, sooo)
- It’s a dedicated right-angle light (and not a headlamp at all)
Notes
- This content originally appeared at zeroair.org. Please visit there for the best experience!
- Please use my Amazon.com referral link to help support zeroair.org!
- Please support me on Patreon! I deeply appreciate your support!
Discover more from ZeroAir Reviews
Subscribe to get the latest posts sent to your email.