Manker MC01 Flashlight Review
The Manker MC01 flashlight is an interesting little light with a built-in 18650, simple user interface, and USB-C charging! Read on for more!
Official Specs and Features
Here’s a link to the Manker MC01 flashlight product page.
Versions
I think there’s just one body available of the MC01, but it’s available with either neutral white emitter (seen here) or cool white. More on this later, but note that the neutral white is much more of a warm white!
Price
Flashlightgo.com has the Manker MC01 flashlight for $24.99 right now.
Short Review
I didn’t initially know that the MC01 has a built-in battery. That’s a downside but I’d realy say that’s one of the few downsides. Despite that built-in cell, I actually really like this light! I could handle a lower low, but I can live with every other concession it makes. And the price is low!
Long Review
The Big Table
| Manker MC01 Flashlight | |
|---|---|
| Emitter: | Samsung LH351d (Neutral White – 4000K, 90CRI) |
| Price in USD at publication time: | $24.99 at flashlightgo.com |
| Cell: | 1×18650 |
| Runtime Graphs | |
| LVP? | ? |
| Switch Type: | E-Switch |
| Quiescent Current (mA): | ? |
| On-Board Charging? | Yes |
| Charge Port Type: | USB-C |
| Charge Graph | |
| Power off Charge Port | All modes |
| Claimed Lumens (lm) | 1030 |
| Measured Lumens (at 30s) | 496 (48.2% of claim)^ |
| Candela per Lumen | 5.4 |
| Claimed Throw (m) | 120 |
| Candela (Calculated) in cd (at 30s) | 135lux @ 5.003m = 3379cd |
| Throw (Calculated) (m) | 116.3 (96.9% of claim)^ |
| Claimed CCT | 4000K |
| Measured CCT Range (K) | 3900 Kelvin |
| Item provided for review by: | flashlightgo.com |
| All my Manker reviews! | |
^ Measurement disclaimer: Testing flashlights is my hobby. I use hobbyist-level equipment for testing, including some I made myself. Try not to get buried in the details of manufacturer specifications versus measurements recorded here; A certain amount of difference (say, 10 or 15%) is perfectly reasonable.
What’s Included

- Manker MC01 flashlight
- Charging cable (USB to USB-C)
- Lanyard
- Manual
Package and Manual


Build Quality and Disassembly

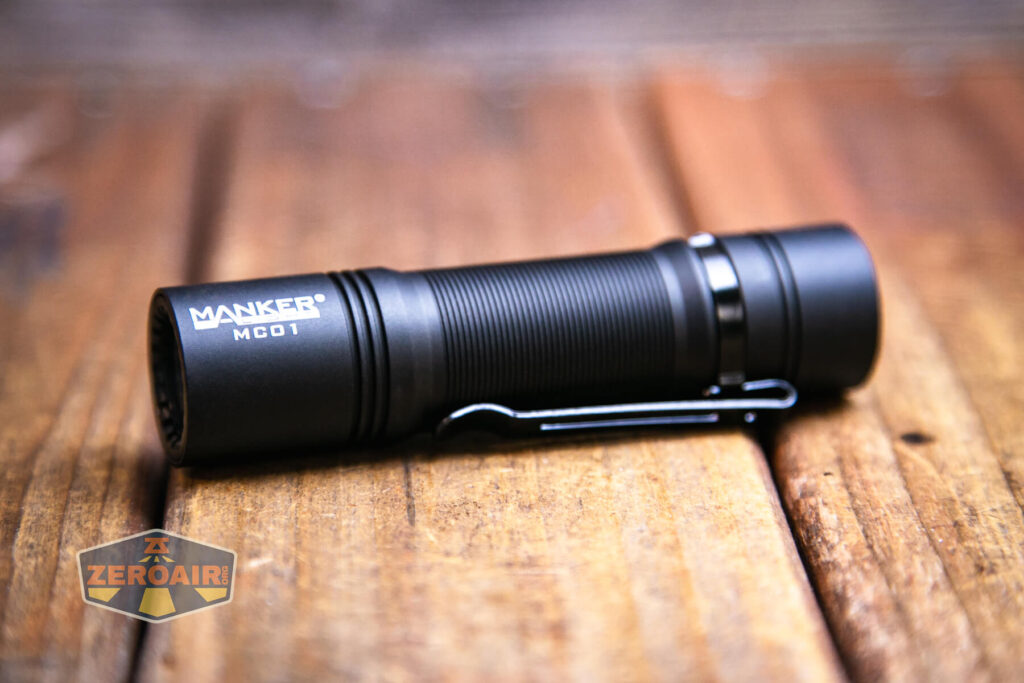
The Manker MC01 is a very nicely built, simple flashlight. Despite looking quite traditional, it’s different in that the cell is built-in and not (really) user-serviceable. That makes it a good and safe option for those users who might otherwise not be comfortable with lithium-ion cells, though.


As the light is sealed, there’s no disassembly to show. If you were inclined to tear the light down, I think you’d have to go in from the front by removing the TIR!
Size and Comps
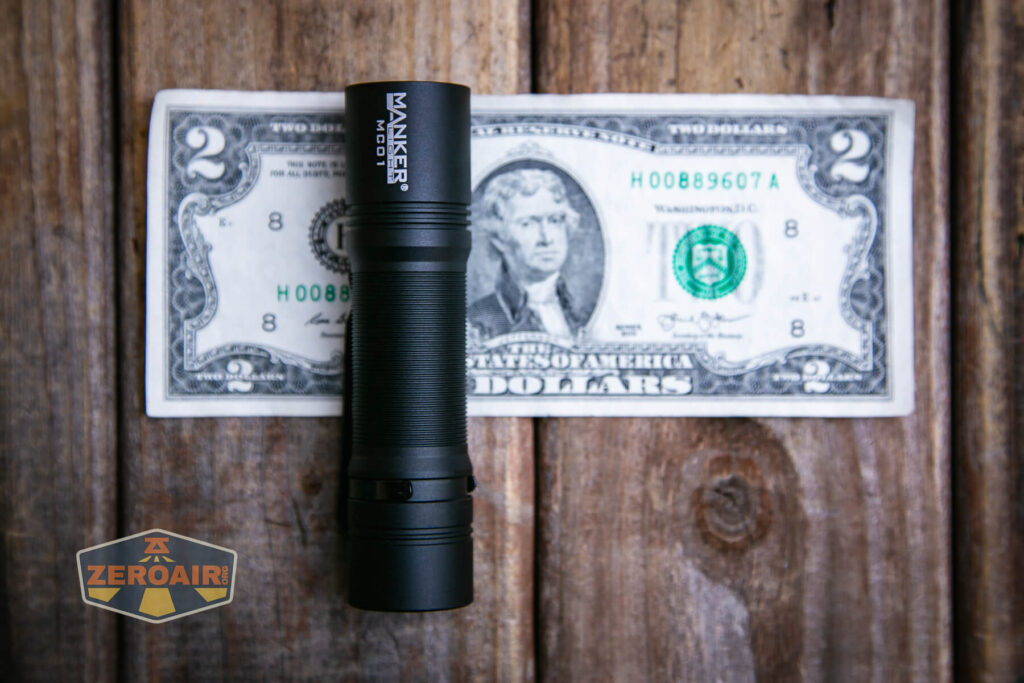
4.03″ / 102.3mm (length) x 0.98″ / 25mm (head of diameter)
3.31oz / 93.8gram (built-in battery)


If the flashlight will headstand, I’ll show it here (usually the third photo). If the flashlight will tailstand, I’ll also show that (usually in the fourth photo).


Here’s the test light with the venerable Convoy S2+. Mine is a custom “baked” edition Nichia 219b triple. A very nice 18650 light!


Also above is the light beside my custom-engraved TorchLAB BOSS 35, an 18350 light. I reviewed the aluminum version of that light in both 35 and 70 formats.
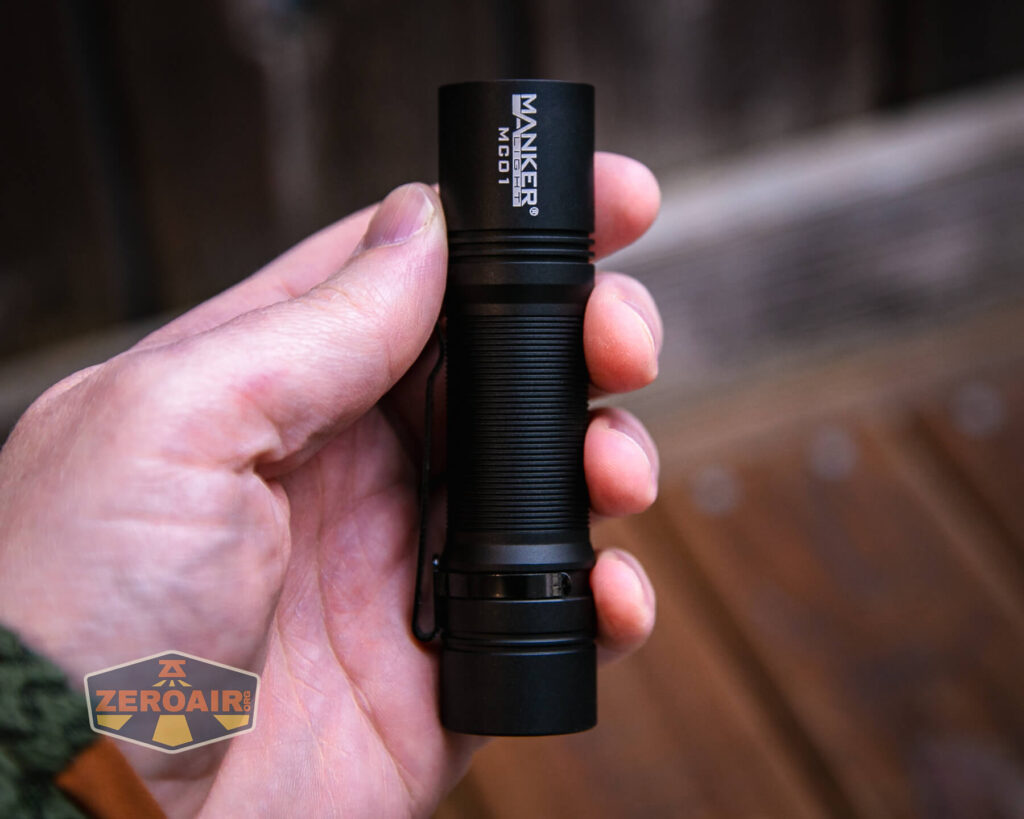
Just so that I’m sure to say it somewhere – the Manker MC01 is a great sized EDC flashlight. It’s in the realm of some Zebralight 18650 lights, and that’s saying something!
Retention and Carry
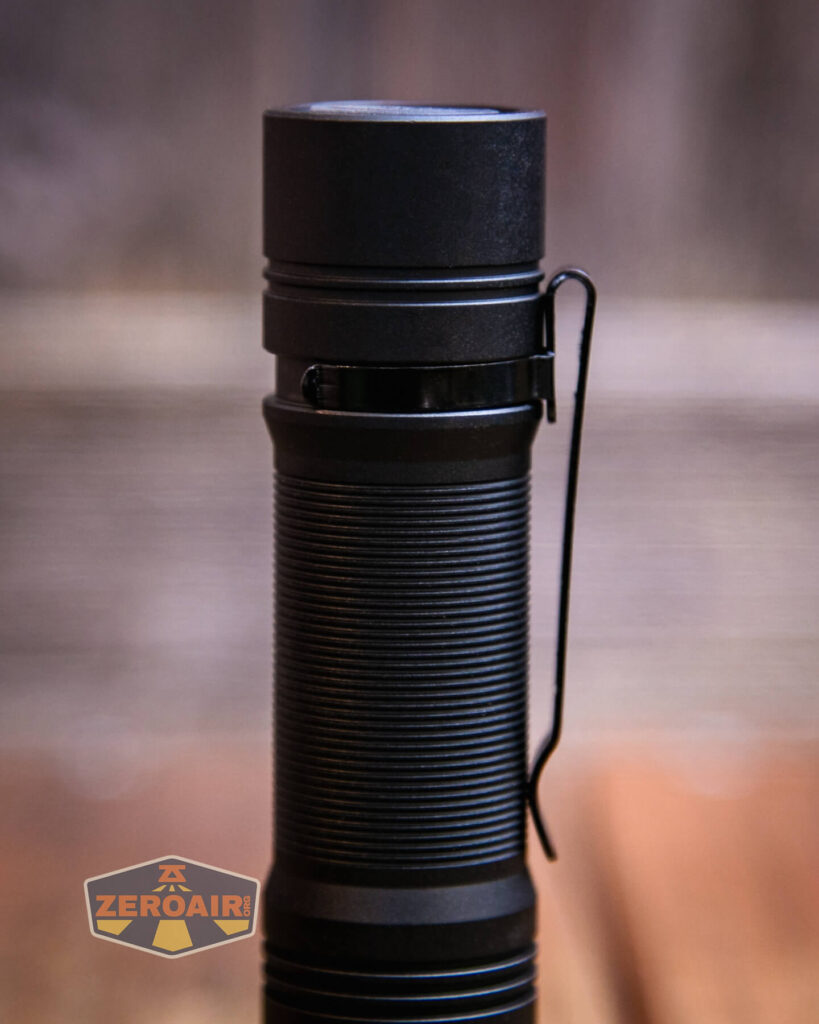
A pocket clip ships attached to the MC01. It’s a friction-fit clip though, so can be removed.

The clip is what I call a “standard Lumintop” clip.

Clip hug!

The included lanyard can only attach to the pocket clip. That’s ok, but not just the most secure spot, as the pocket clip is a friction-fit clip.
Power and Runtime
The Manker MC01 flashlight is powered by a built-in lithium-ion battery. This cell is not replaceable for the average user. Because of all that, I don’t have any photos of the cell (or even inside the light, for that matter.)
I would imagine the specification of output claim is made for the cool white version, and this “neutral white” (more of a warm white) is much lower. This is to be expected. That it’s this much lower only supports that the output is warmer than “neutral.”


The charging area has an indicating LED, but that doesn’t seem to indicate the charge state when the light is on.
Charging
Along with the built-in 18650 cell comes built-in charging. On the Manker MC01, this is by way of a USB-C charging port in the tail. In fact, the charging port cover is quite like the e-switch – the differ in profile (with the e-switch having a very slight dome – higher than the charge port cover).


I found the charging port cover to be difficult, and always required a tool to get under the flap.

An appropriate cable is included – USB to USB-C.


C to C charging works fine, too. It is ever so slightly quicker.

While charging, a red indicating LED under the e-switch cover is lit. When charging is complete, a green LED is illuminated.
Modes and Currents
| Mode | Mode Claimed Output (lm) | Claimed Runtime | Measured Lumens |
|---|---|---|---|
| Turbo | 1030 | 2h30m | 496 |
| High | 600 | 2h40m | 305 |
| Middle | 300 | 5h | 167 |
| Low | 60 | 29h | 31 |
Pulse Width Modulation
Every mode uses PWM. It’s fast PWM though, so nothing to really worry about.


Here you can see a “baseline” – a chart with almost no light hitting the sensor.
Then there’s the Ultrafire WF-602C flashlight, which has some of the worst PWM I’ve seen. It’s so bad that I used a post about it to explain PWM! Here are multiple timescales (10ms, 5ms, 2ms, 1ms, 0.5ms, 0.2ms) to make comparing this “worst” PWM light to the test light easier. That post also explains why I didn’t test the WF-602C at the usual 50us scale.
User Interface and Operation
As stated above, on the tail is an e-switch. This switch shares space on the tailcap with the charging port. The two are very similar, except that the e-switch has a slight dome.


It’s possible to differentiate the two by feel, despite their similarity.

Here’s a user interface table!
| State | Action | Result |
|---|---|---|
| Off | Hold | Low |
| Off | Click | On (Mode memory of Low/Middle/High) |
| Any | Double Click | Turbo |
| On | Hold | Mode advance (LMHML)^ |
| On | Click | Off |
| Turbo | Double Click | General Modes (Low/Middle/High) |
| Any | Triple Click | Special Modes (Strobe/Beacon/SOS) |
| Special Modes | Triple Click | General Modes (Low/Middle/High) |
^ When holding the switch to advance modes, the output ascends through three modes, then descends through the modes. The MC01 will continue this cycle up and down.
LED and Beam
In the Manker MC01 is a Samsung LH351d emitter. My review copy is the “neutral white” version (cool white is also available). This emitter is coupled with a dimpled TIR optic and gives a fairly diffuse beam pattern.


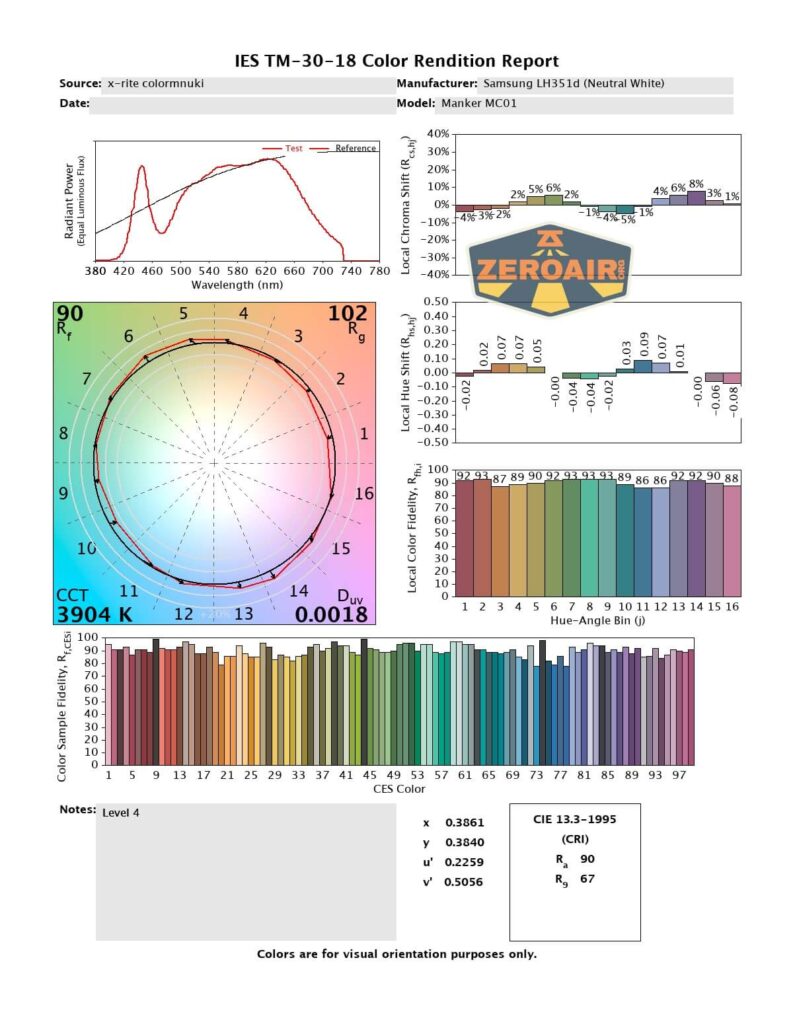
LED Color Report (CRI and CCT)
As you can see from the photos above, this is a warm emitter! I read the output at a CCT of around 3900K, and that’s steady for all four modes. CRI is also high, at around 90. The CCT claim is 4000K, so I’d say Manker did it about right with this one.


Beamshots
These beamshots always have the following settings: f8, ISO100, 0.3s shutter, and manual 5000K exposure. These photos are taken at floor level, and the beam hits the ceiling around 9 feet away.


Tint vs BLF-348 (KillzoneFlashlights.com 219b version) (affiliate link)
I keep the test flashlight on the left and the BLF-348 reference flashlight on the right.


I compare everything to the KillzoneFlashlights.com 219b BLF-348 because it’s inexpensive and has the best tint!
Conclusion
What I like
- Nice CCT (neutral or warm, the “4000K” is nice)
- High CRI
- Simple user interface
- Great size for edc
What I don’t like
- Built-in batter is not user-serviceable
- Low of “60” lumens is much too high
- Charge port cover is fiddly
Notes
- This content originally appeared at zeroair.org. Please visit there for the best experience!
- Please use my Amazon.com referral link to help support zeroair.org!
- Please support me on Patreon! I deeply appreciate your support!
Discover more from ZeroAir Reviews
Subscribe to get the latest posts sent to your email.