How I…. Test a Charger (charging a cell)
Here’s how I test a charger! Really it’s just one way I do the testing – there are many ways to do the same procedure. Read on for more!
Caveats
There is certainly more than one way to do this. There are probably more accurate ways to do this, too. In this post, I’m simply telling you how I do it. My primary goal is (as you will see) to get the best data I can obtain, with the tools I have. You may not already have these tools; if you’re planning to buy, there may be better tools for the price.
The Parts
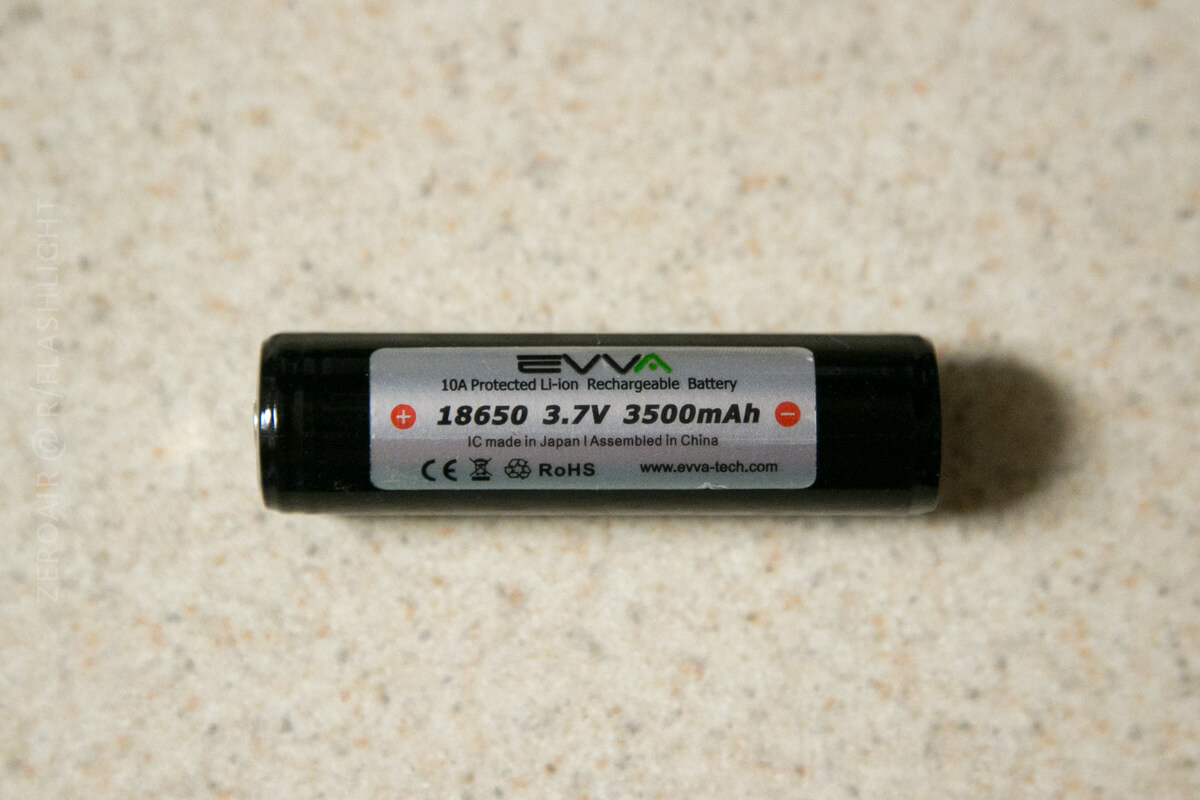
First, you’ll need a cell for testing. I typically use an 18650; here is an example of an 18650. I don’t always use a protected cell, but it’s not a bad idea.
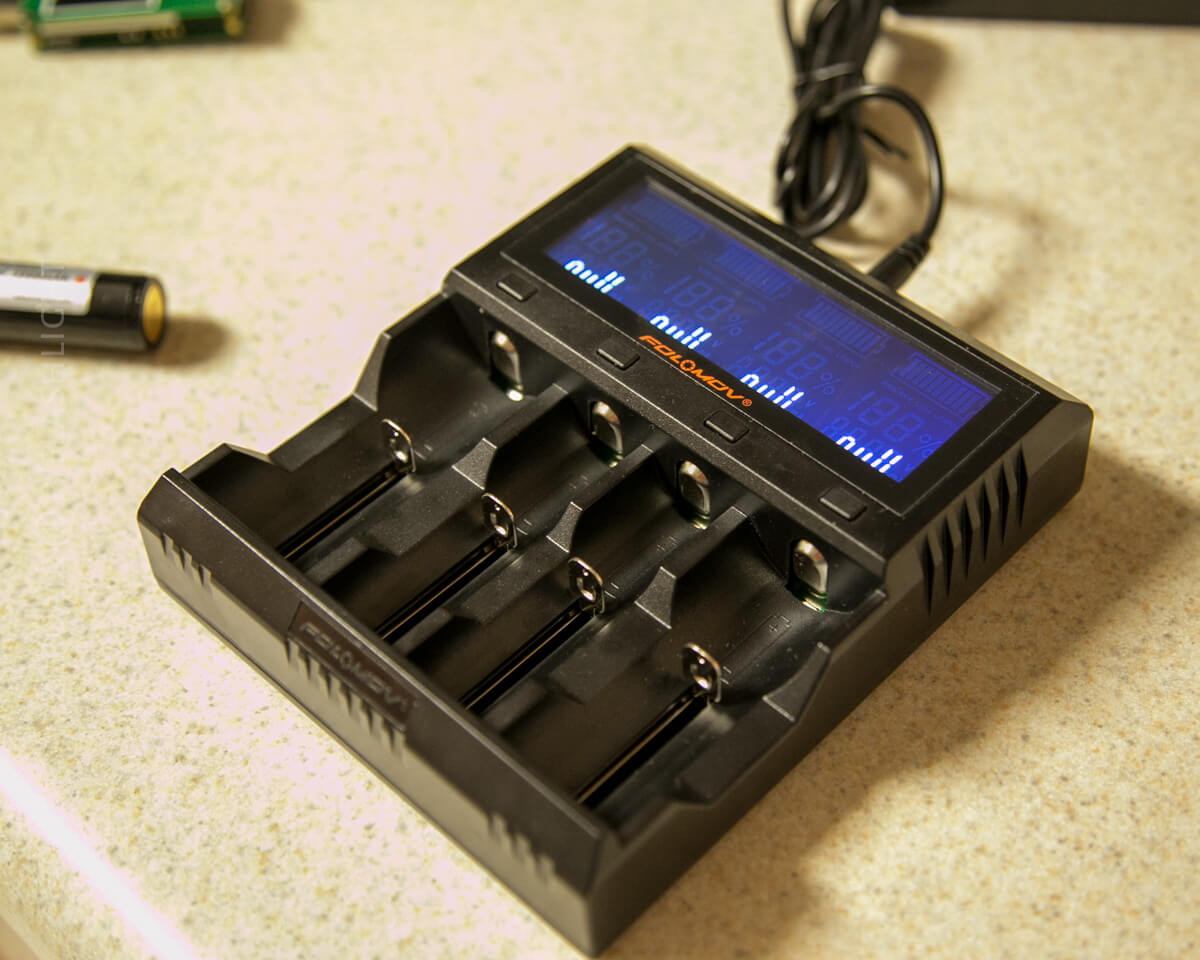
You’ll need to have the charger that you plan to test. Here I’m testing the charge rate of the Folomov A4. That is, I’m testing at what rate the cell voltage increases (not actually testing the rate that current is being put into the cell, though I believe it’s possible with this setup).
And next is possibly the most important part of the equation is the YZXStudio ZY1270. This is a neat little device that has a male USB, two female USBs, and one micro USB. That said, this device is positively not intended for this application. But like I said, my goal is to use things I have. I have this device.
Also importantly, this device has Bluetooth. It’ll transmit raw data to a Bluetooth emulator of your choice. Here’s the model on banggood, though I got mine on eBay from the actual maker of the devices. I don’t think he has one available right now, however.
The new version utilizes more of the screen and has newer firmware than mine. These things are absolutely fantastic, and was one of the best purchase I’ve made in a long time!

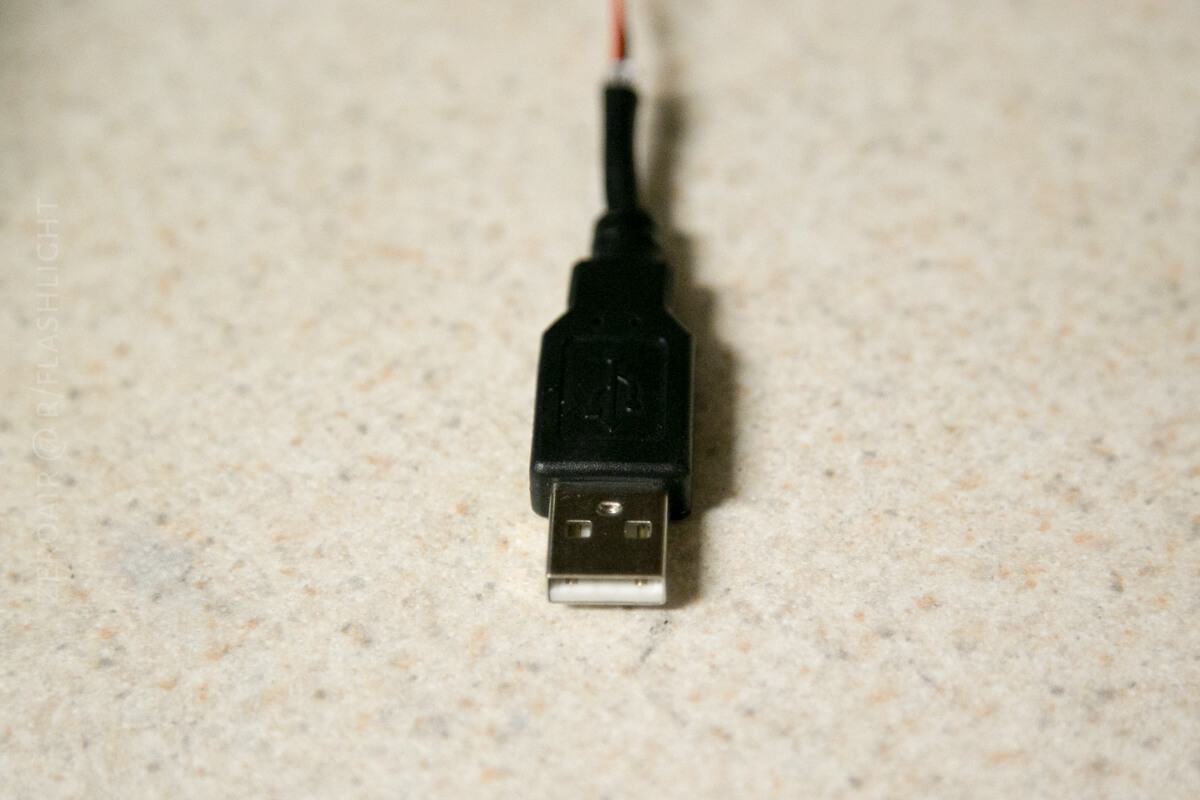
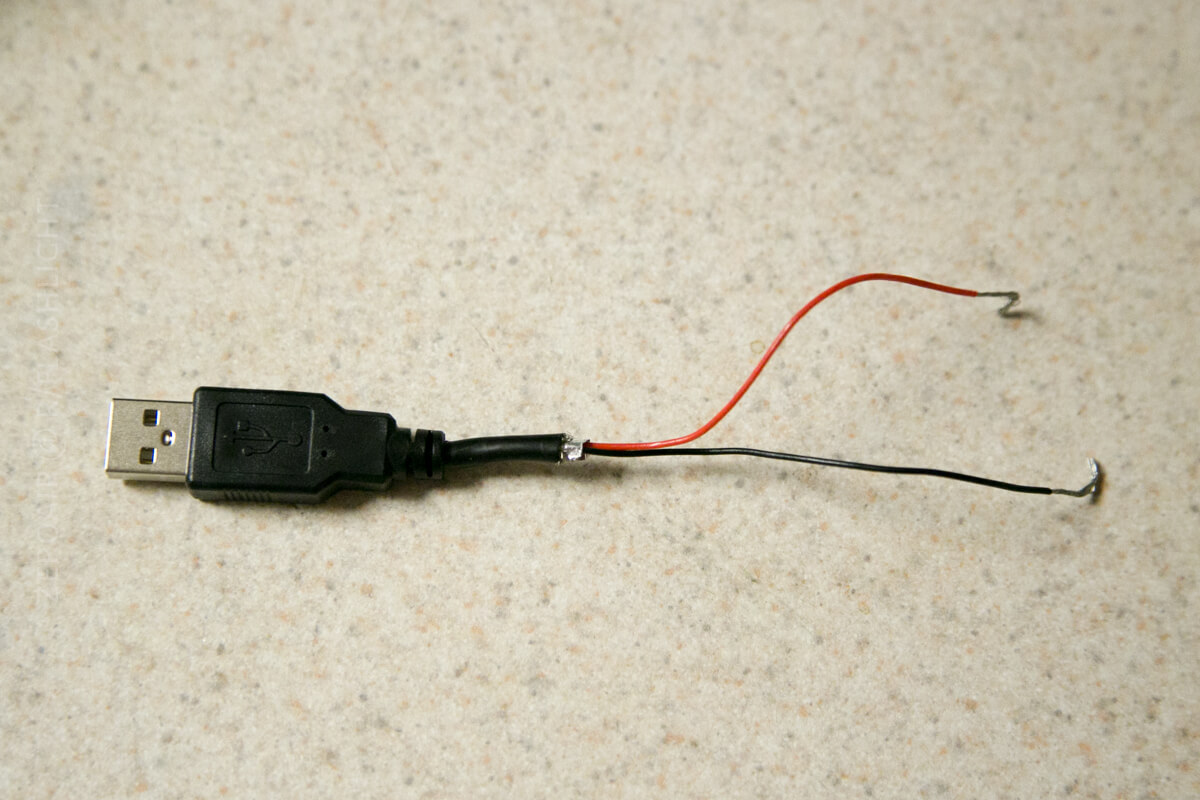
You’ll need a male USB.
But you’ll need to murder it. Here I’ve lopped it off, stripped the wires, and kept only the power wires, red and black. The green and white aren’t important to us, because they’re connected to the data pins. As you can see, I’ve stripped the terminals to bare wire.
How it all works
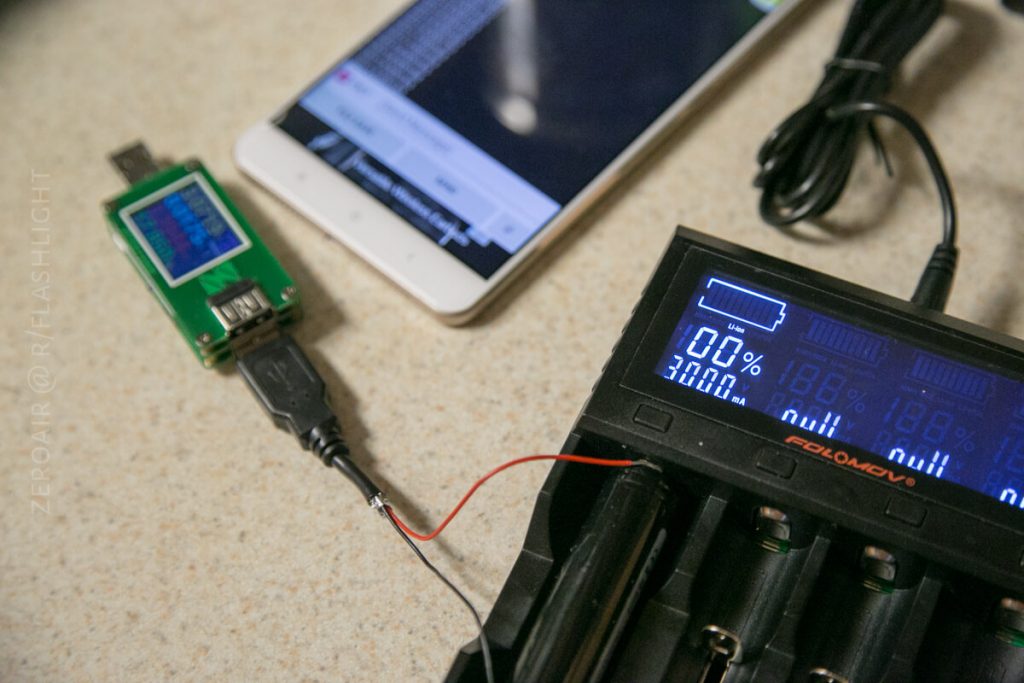
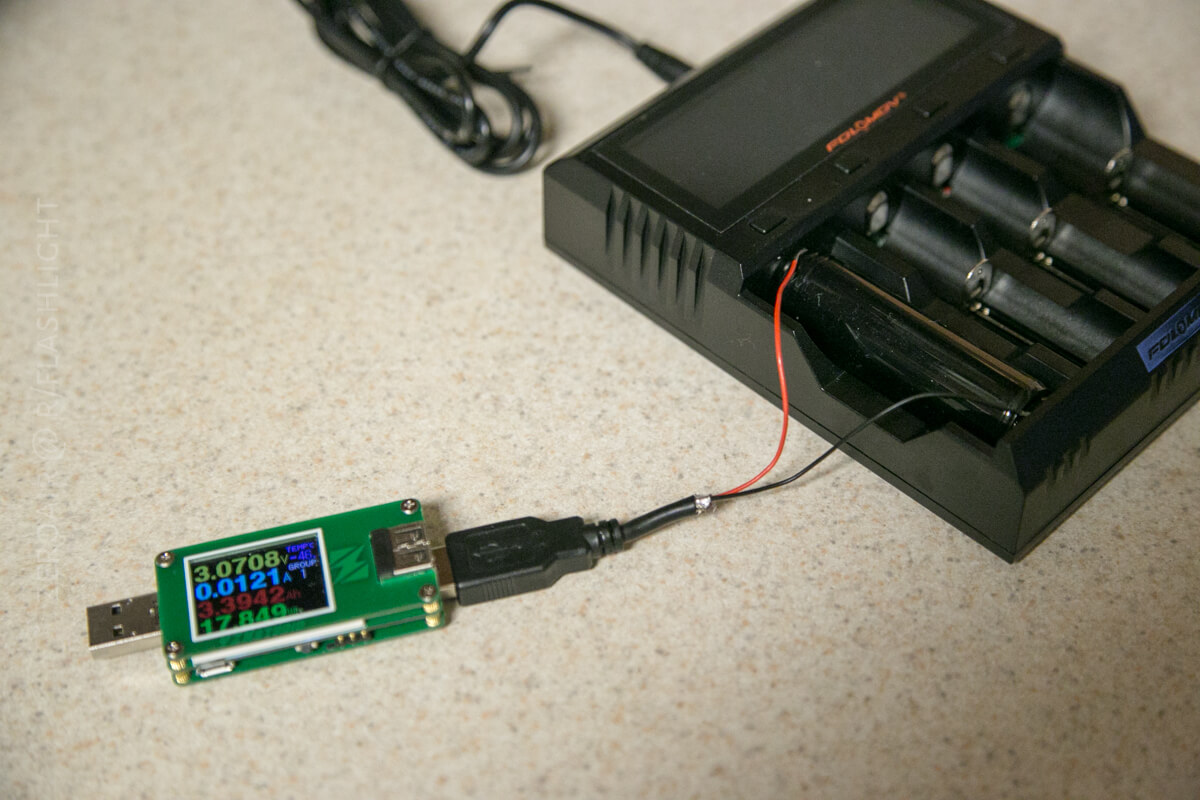
Below you can see the actual setup. The male USB goes into the ZY1270. The bare USB terminals go to the charger with the battery in place. This is a little finicky, but it will work.
The ZY1270 must have >3V to operate. The male USB connected to the battery can’t provide that voltage unless the cell is at 3V or higher. This is why I don’t test Eneloops with this method. Eneloops are nominally 1.2V, which isn’t enough to even turn on the ZY1270.
The ZY1270 is really not meant to be used in this manner, and I won’t say I recommend you do it. I have done it without issue for a good while, and have been satisfied with the results. Typically this device would be used in the opposite direction. That is, it is plugged into a power source and a device to be charged is plugged into the female USB of the 1270. In that instance, the 1270 is essentially a logging multimeter.

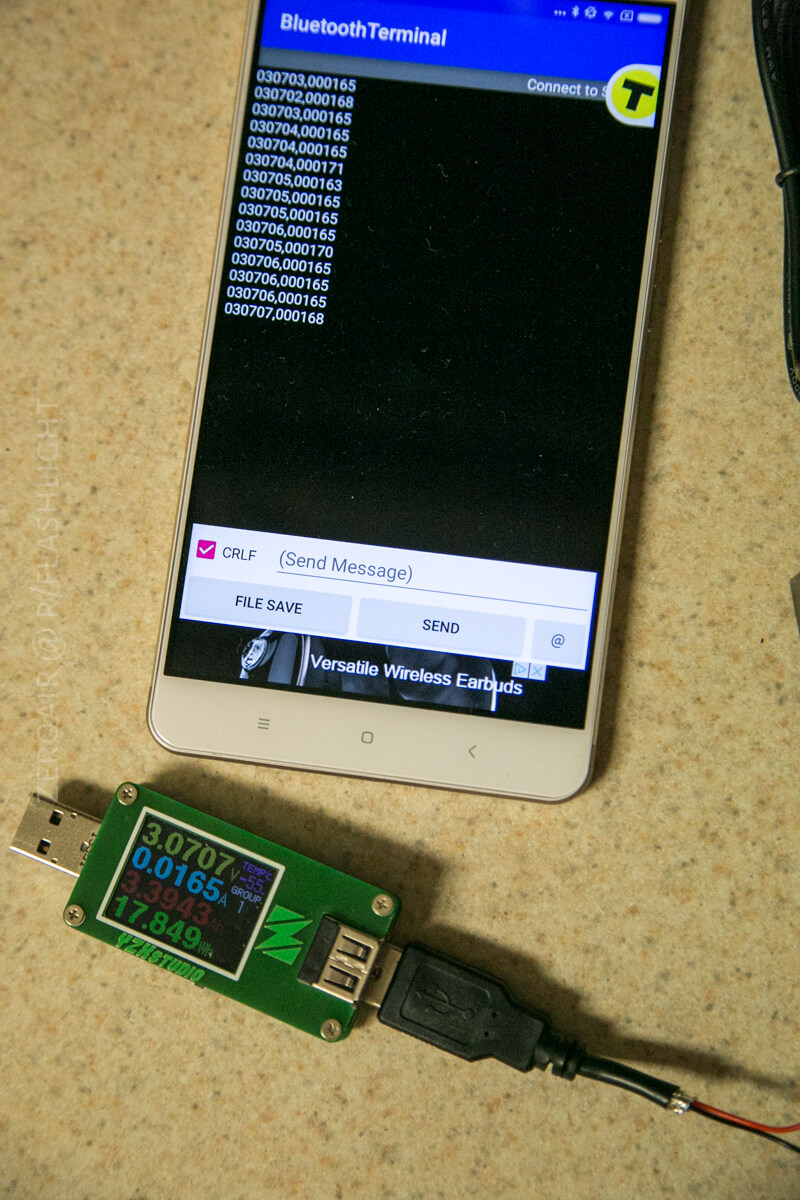
Then I use a Bluetooth Terminal app (I think I use one called BlueTerm2, but you should just try them until you find one you like, and that works.) Connect the app to your ZY1270, and the data will start pouring in. Once per second.
The ZY1270 does have to be powered from the cell. That will have to be accounted for in the calculations. And if a charger doesn’t provide a trickle charge, then the display will drain the cell after charging is complete.
Here are the parts!

Conclusion
Hope that sheds some light on how I test a charger. What I’m really testing is the charge profile of the charger. I’d like to modify this setup to be able to test current as well. It’s something I’ve worked on and may revisit. For now, my test of current is simply noting how much faster one current is than the other, through the tests I make on cell voltage.
Hope you have found this useful!
Notes
- Most of the parts used in and for this post were purchased by me. Some secondary parts were provided for review, and have been reviewed elsewhere on this website.
- This content originally appeared at zeroair.org. Please visit there for the best experience!
- For flashlight-related patches, stickers, and gear, head over to PhotonPhreaks.com!
- Use my amazon.com referral link if you’re willing to help support making more reviews like this one!
- Please support me on Patreon! I deeply appreciate your support!
Pingback: ISDT C4 NiMH/Li-Ion Charger Review - ZeroAir Reviews