Xiaomi Yuemi MK01B Mechanical Keyboard Review
The Xiaomi Yuemi MK01b is a high-quality mechanical keyboard, offering Cherry blue clicky switches! This is a “tenkeyless” size board.
Official Specs and Features
Here’s a link to the Xiaomi Yuemi MK01B Mechanical Keyboard product page. There doesn’t seem to be a listing for this keyboard on the official site yet, so I’m linking GearBest, which is from where I got this board.
Versions
There is a black and a white version, with each having blue or red Cherry MX switches (or it’s possible that red switches are only available on the whiteboard, and blue switches only available on blackboard – I’m still unclear on this.)
Price
This board started north of $100, but it looks like it’s settling around $89.99.
Short Review
I love this board. The size, the shape, the weight. I love the layout. I love the metal case. I’m not a fan of blue clicky, but that could be remedied with the white/red board. This is a wonderful keyboard.
Long Review
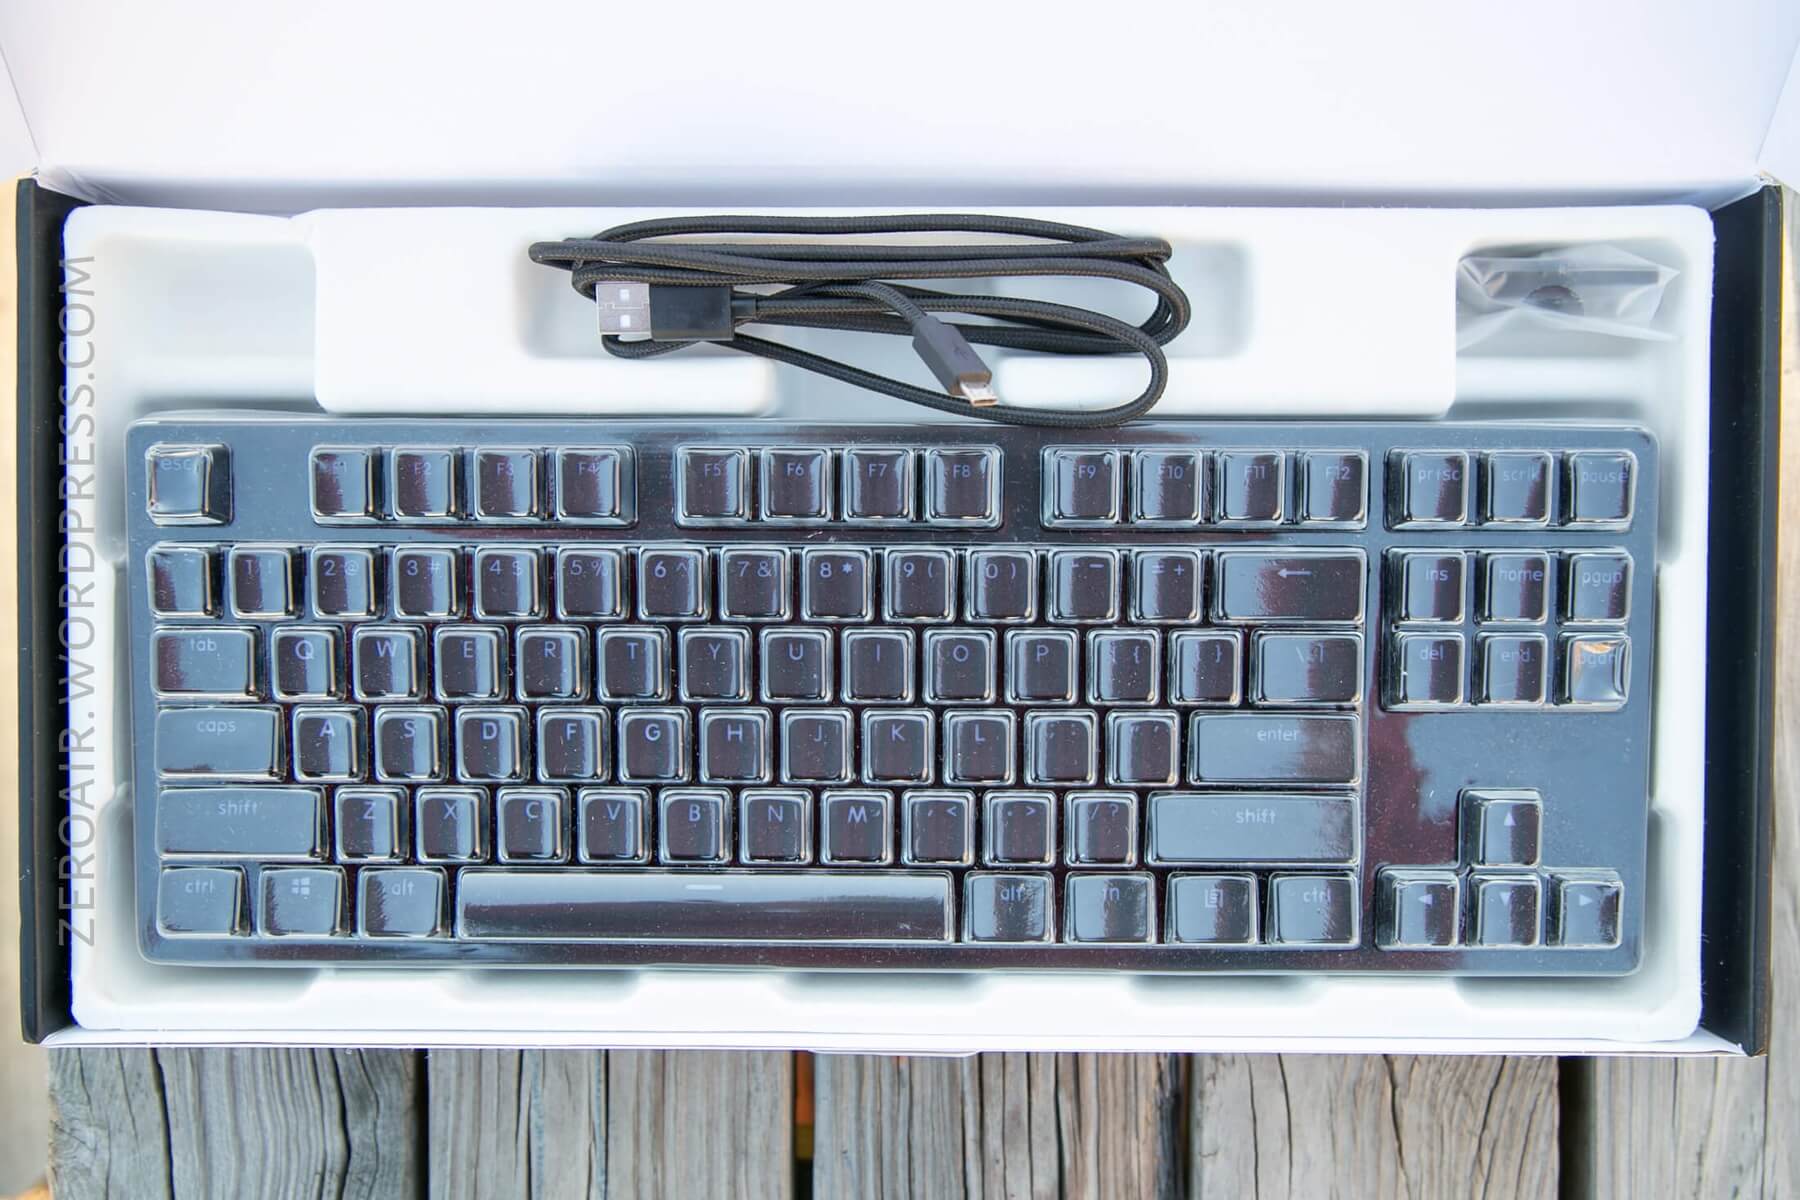
What’s Included
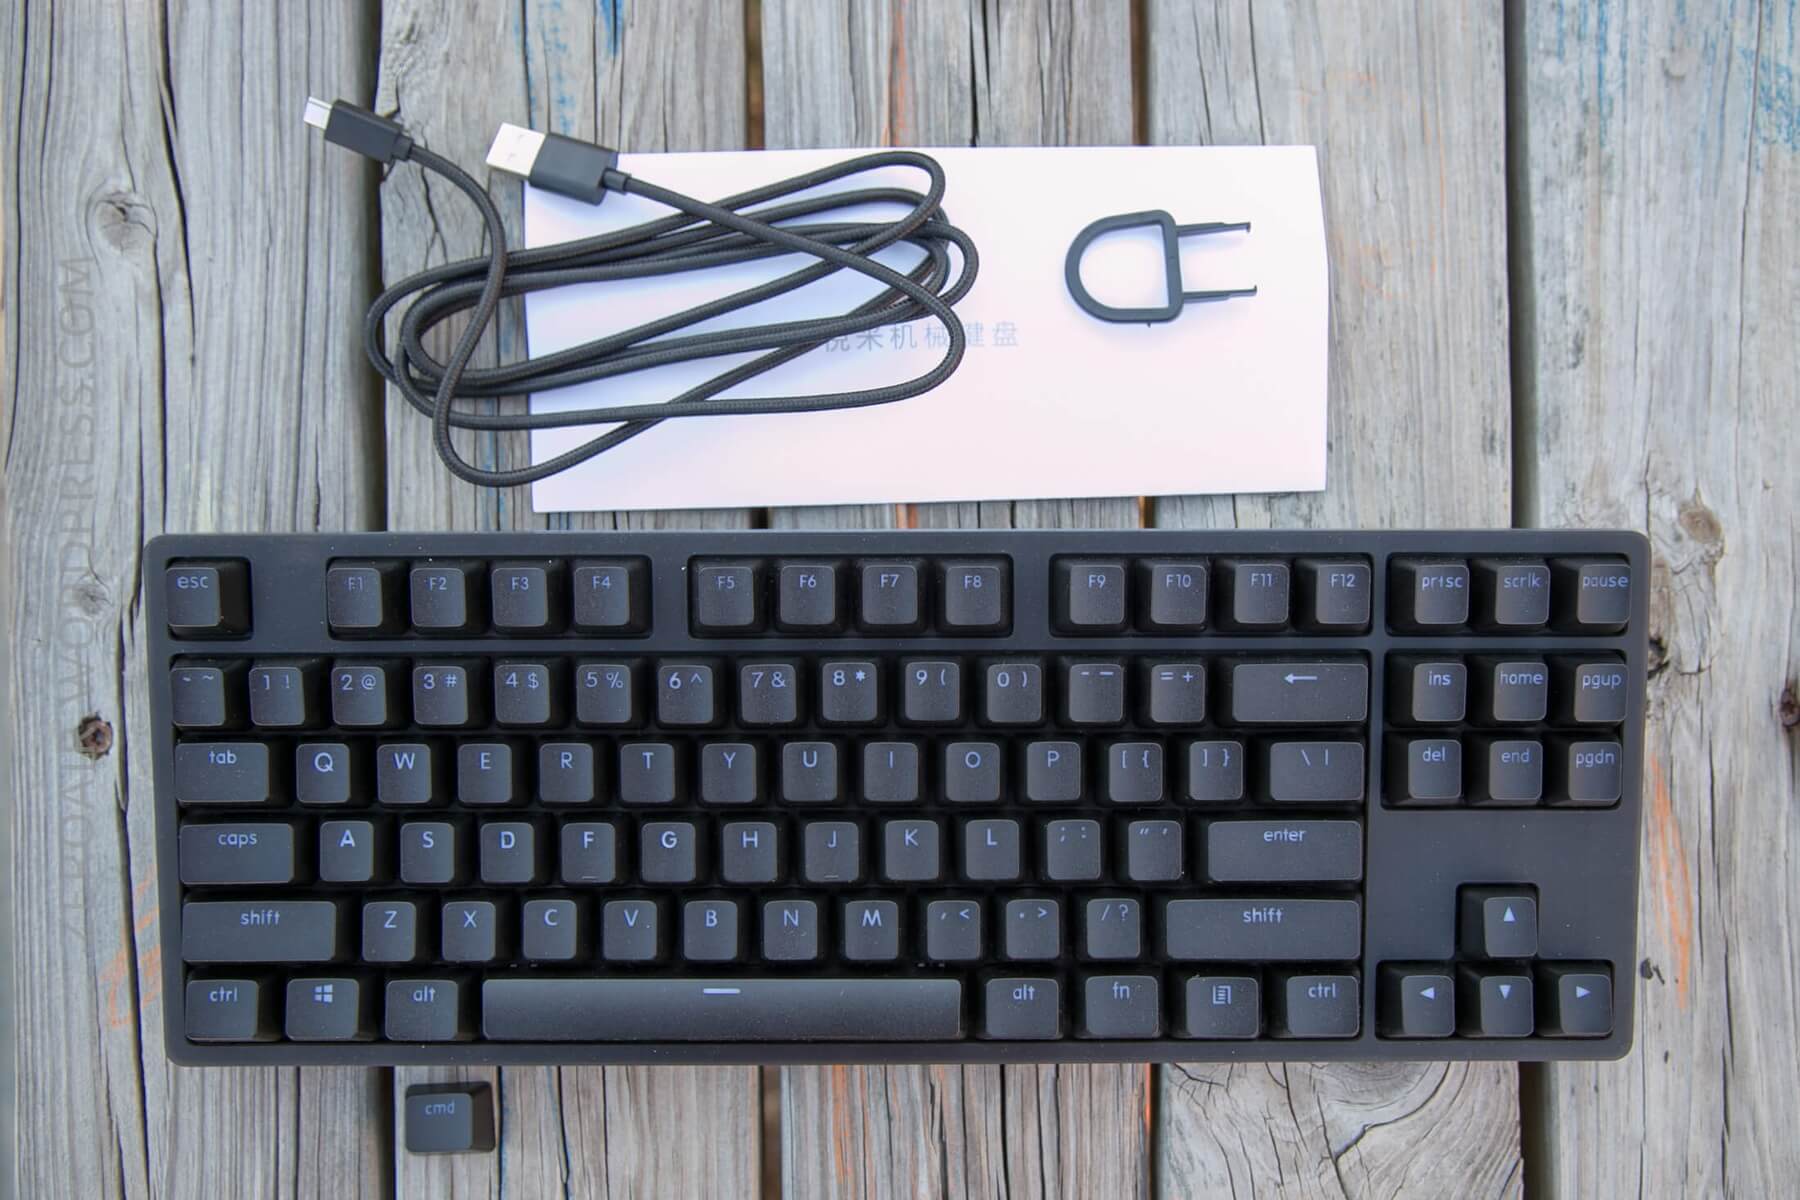
- Xiaomi Yuemi MK01B
- Braided Micro-USB to USB cable
- Key puller
- Manual (of which no part is in English)
Package and Manual
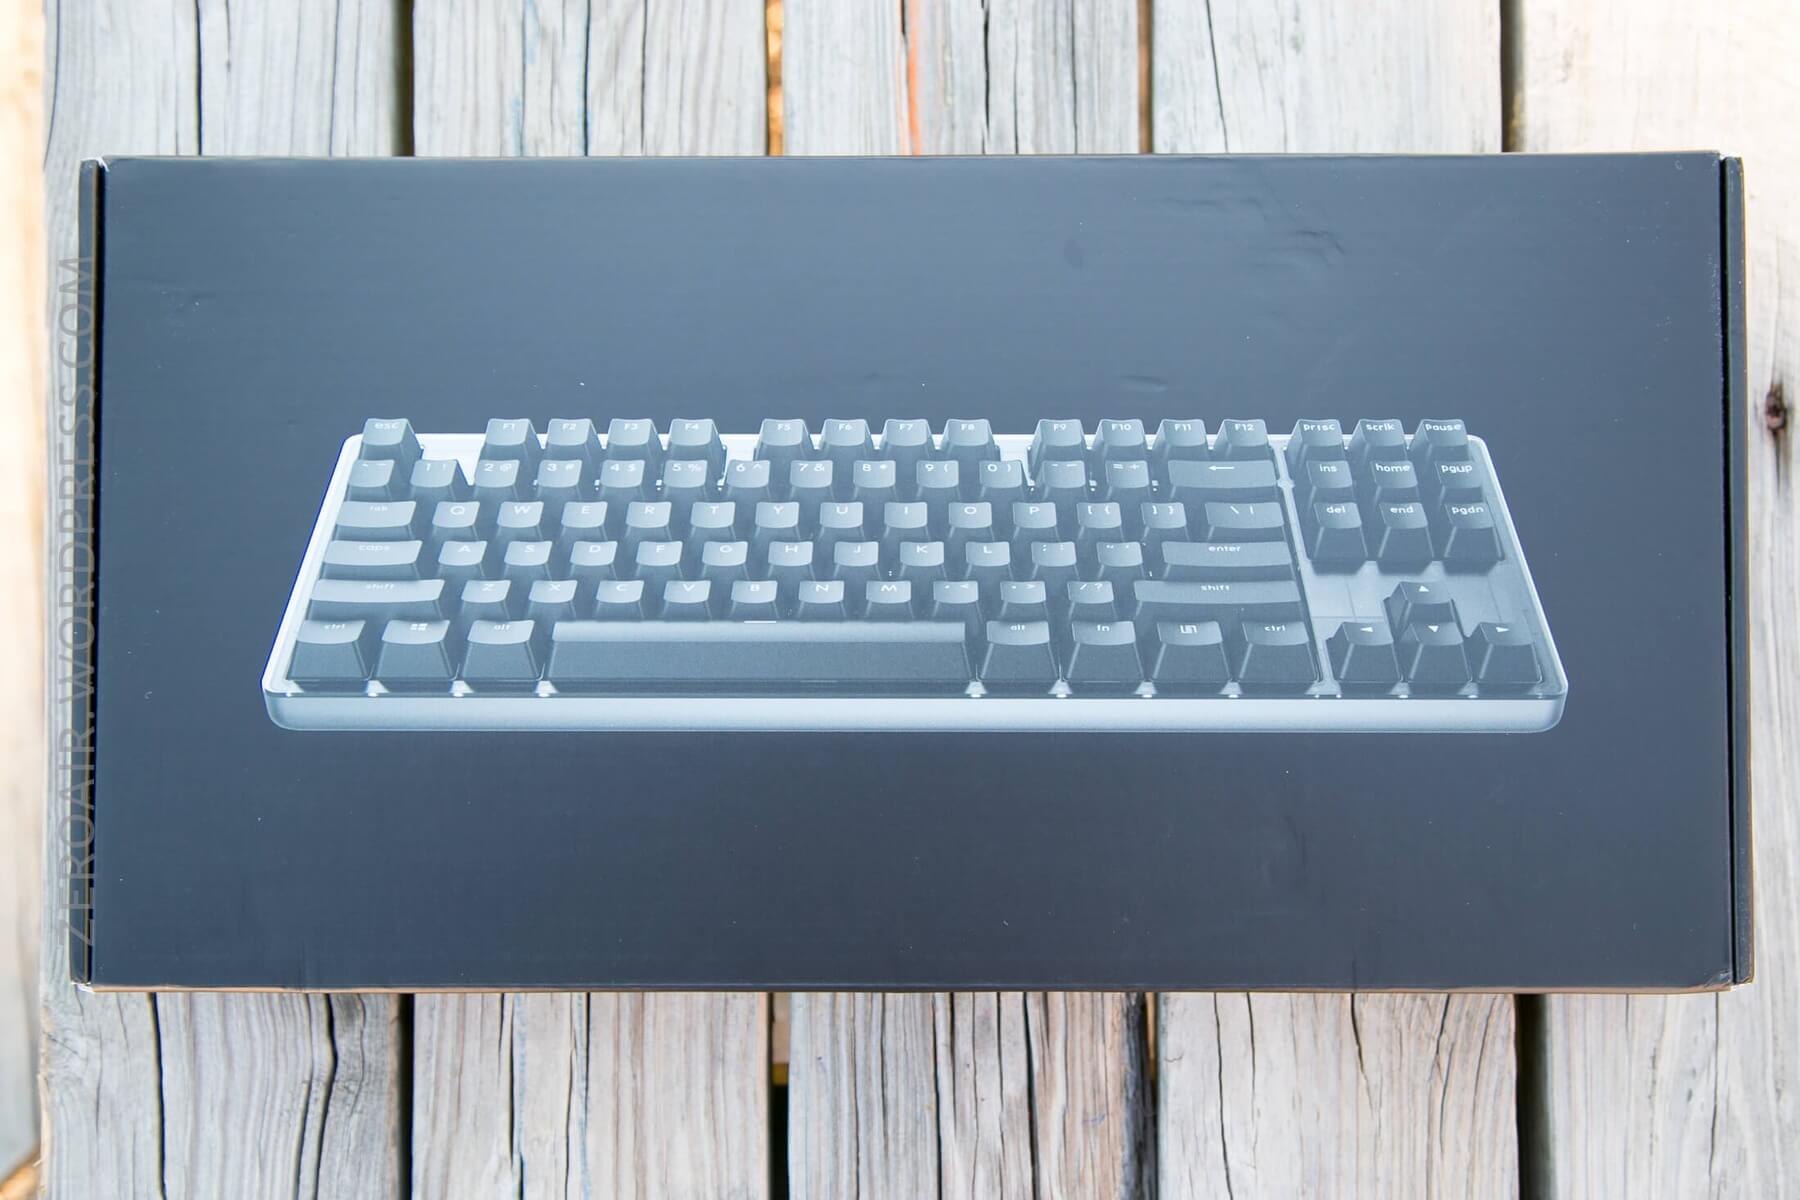
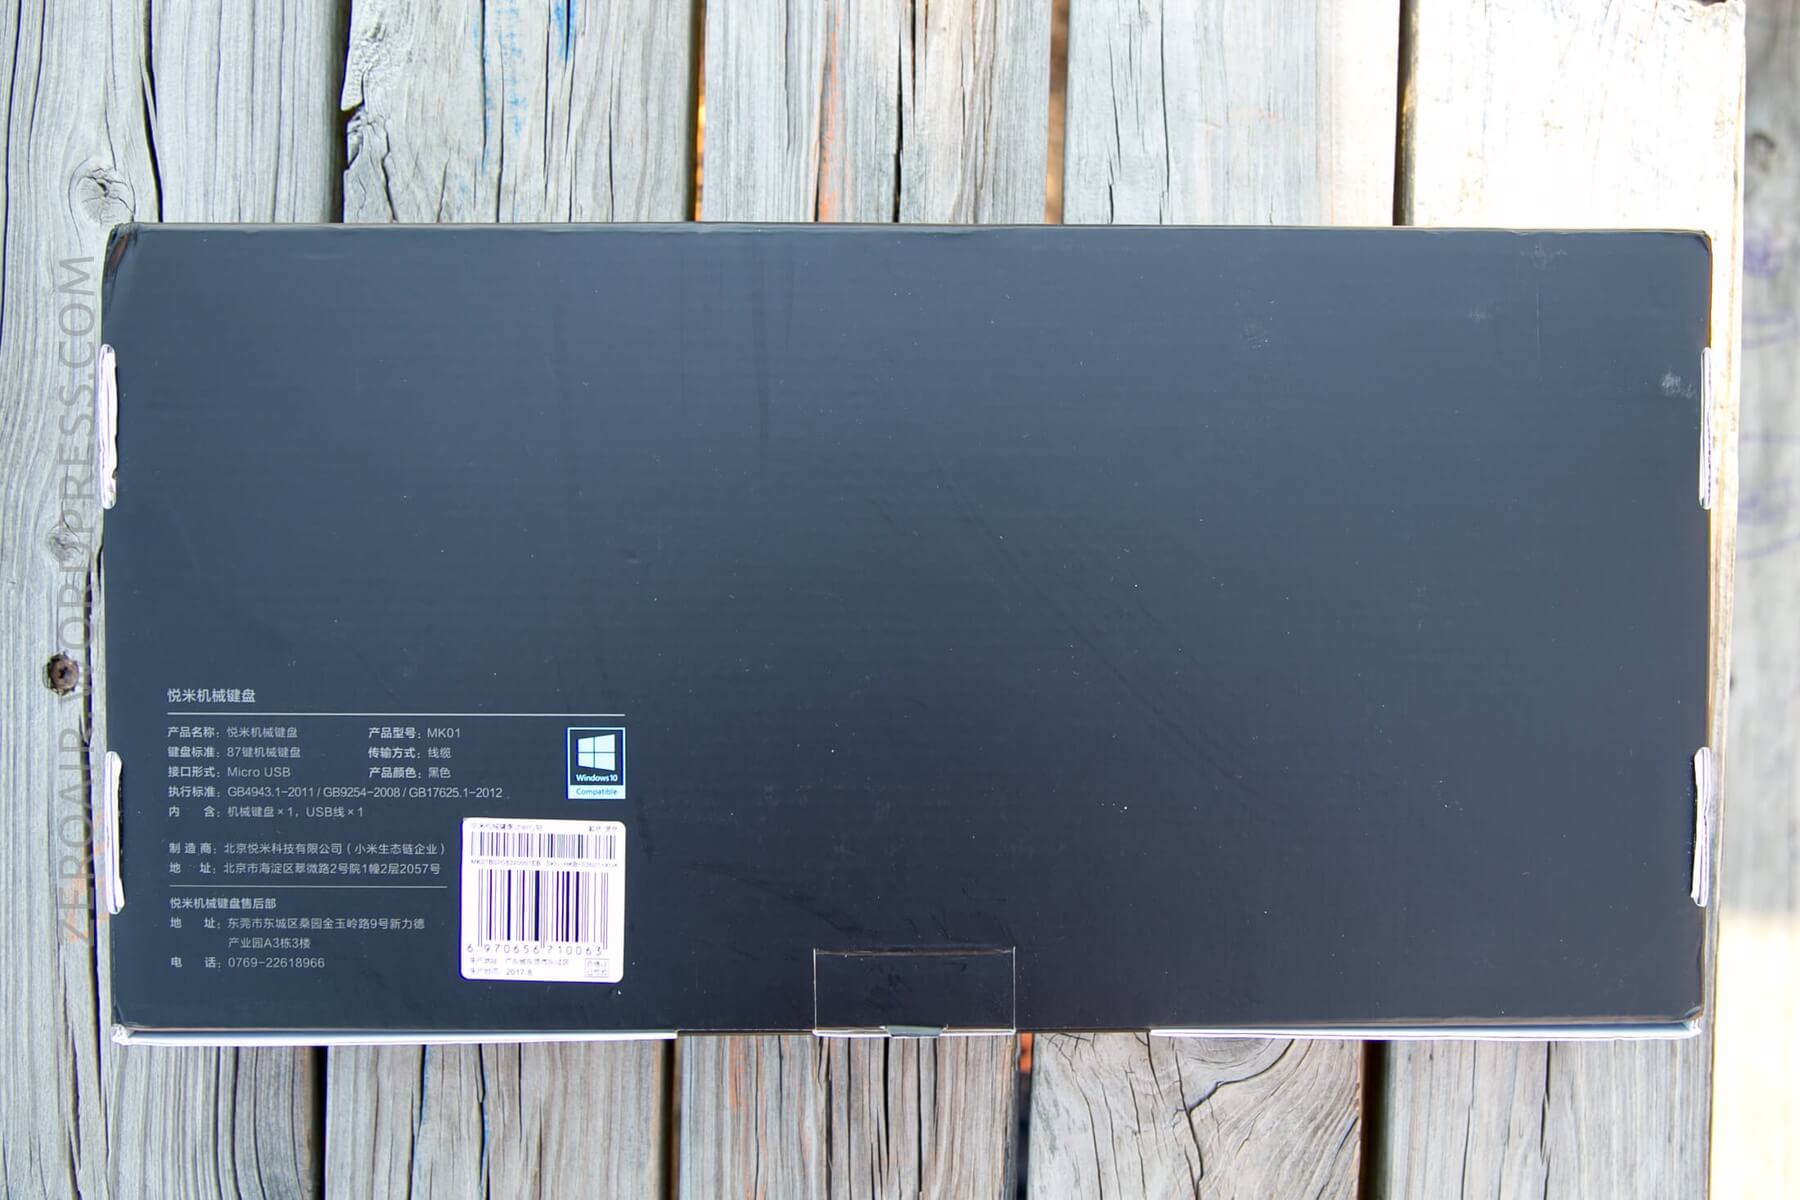
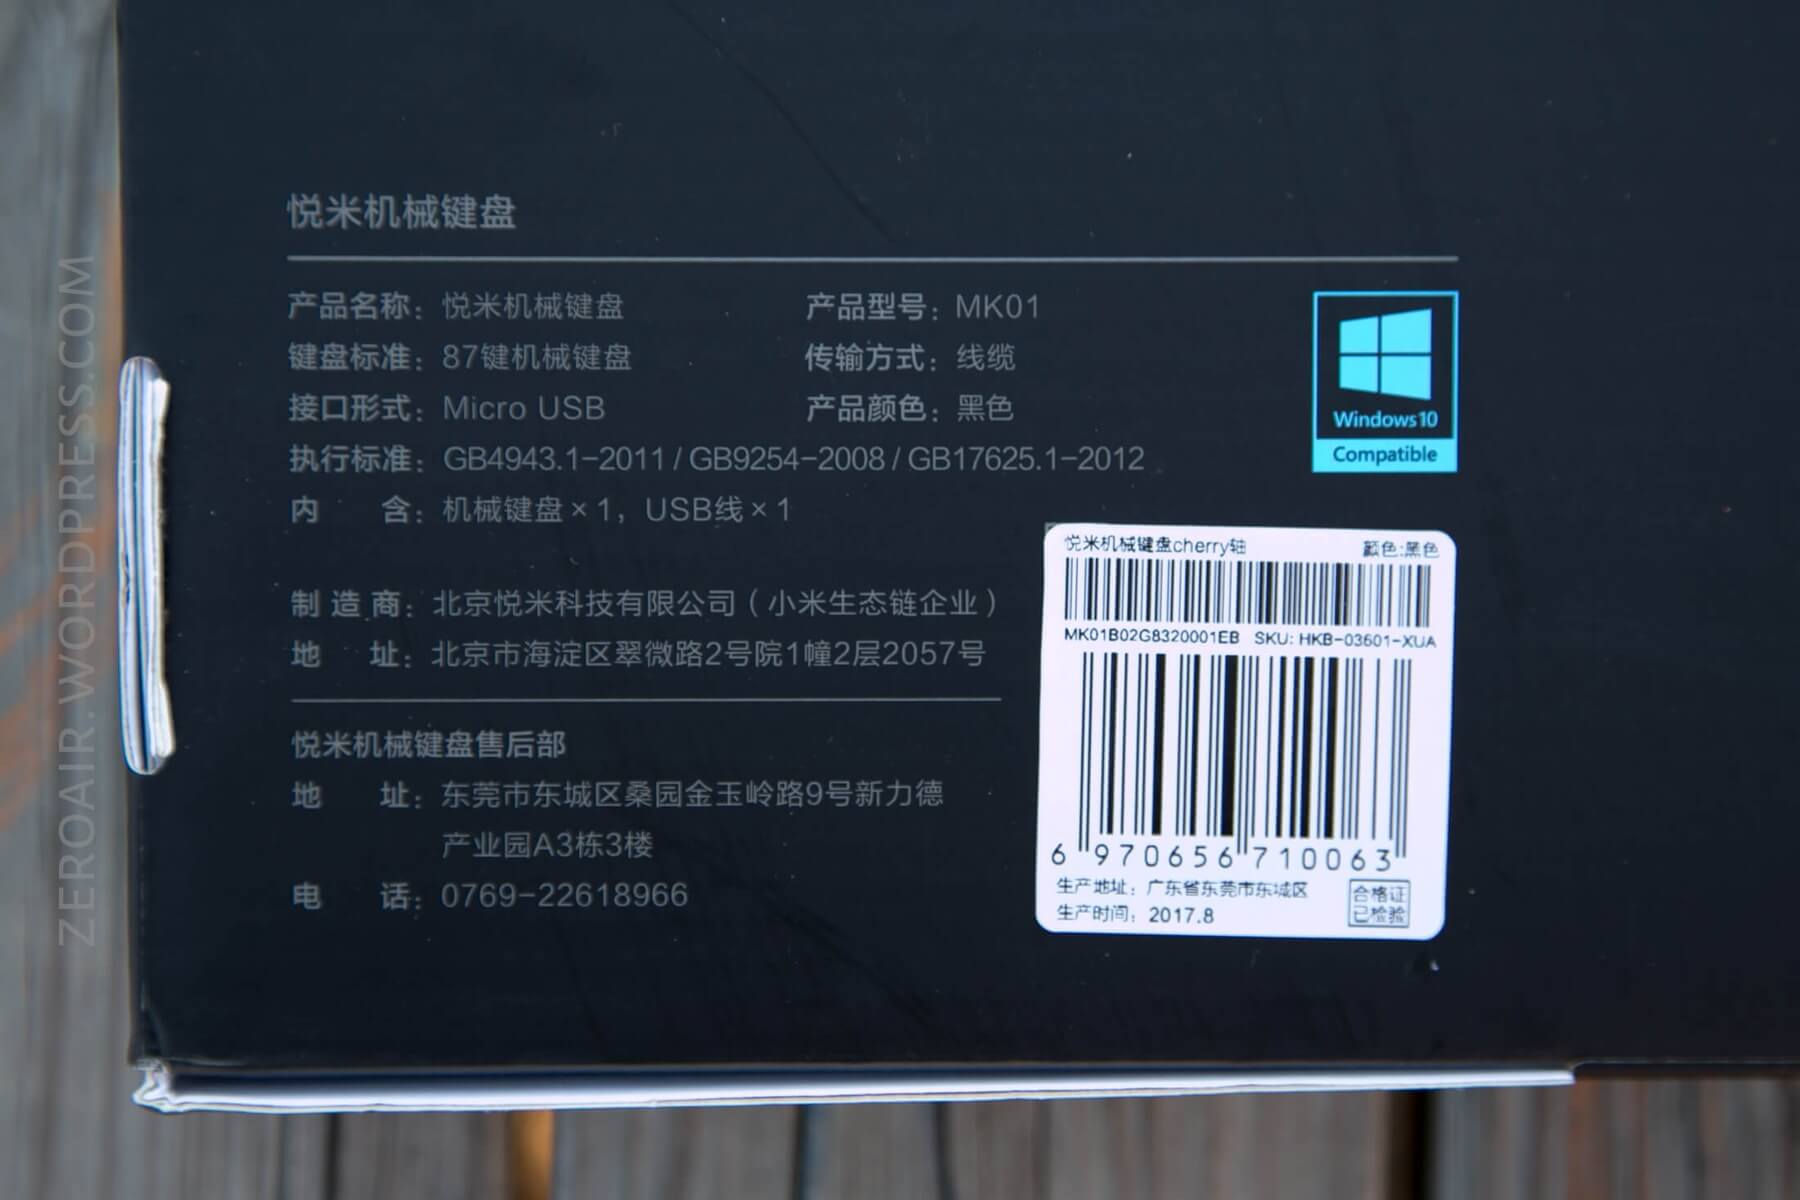
The package is a typical keyboard box. A printed black corrugated box with a photo of the keyboard. On the back are some specs and just general information.
On the inside, the keyboard lives in an egg-crate style holder, with a plastic cover over the keys. This cover could be used on the desk, too, to protect the board from dust when not in use. This is a [possibly unintended but] very nice inclusion.
Unfortunately, the manual leaves a lot to be desired. That said, there’s really not much that needs to be covered in the manual, as this board is very straightforward.
Size
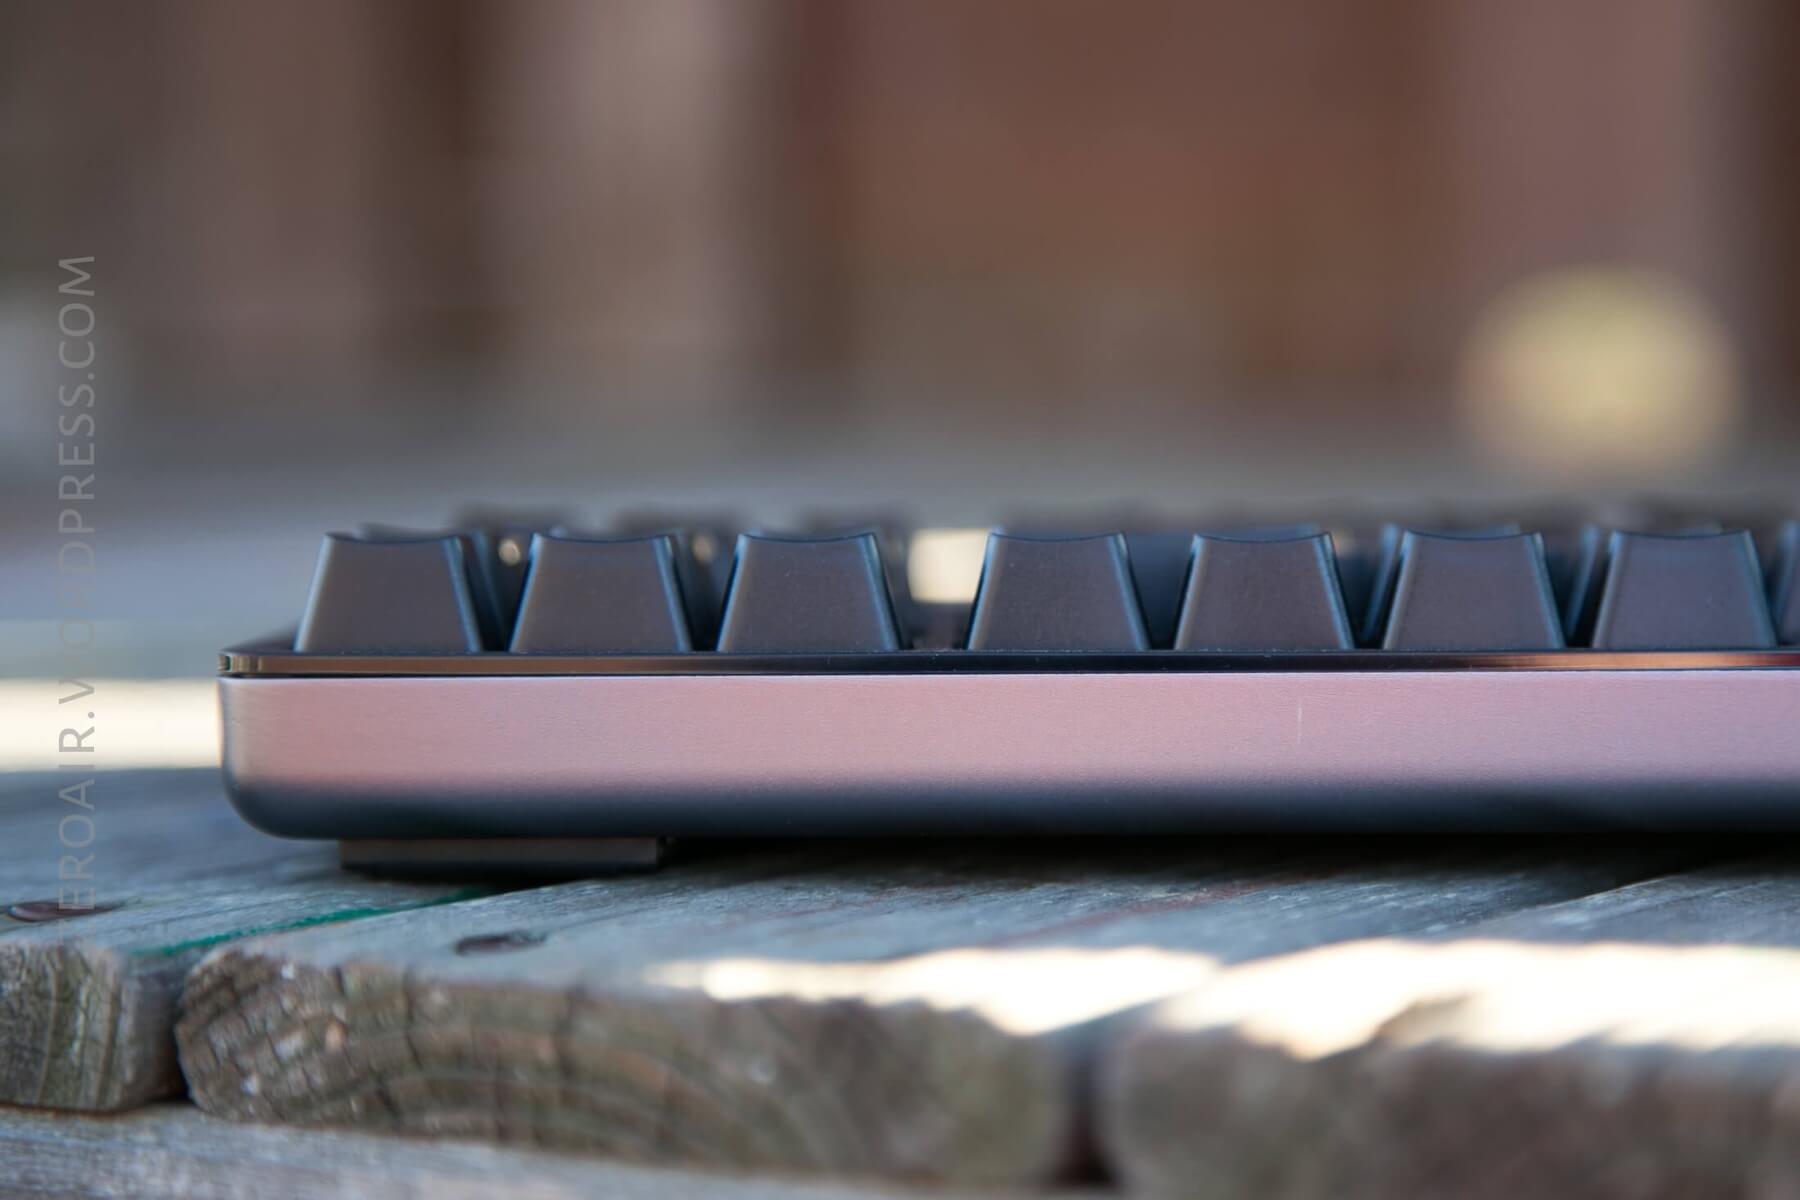
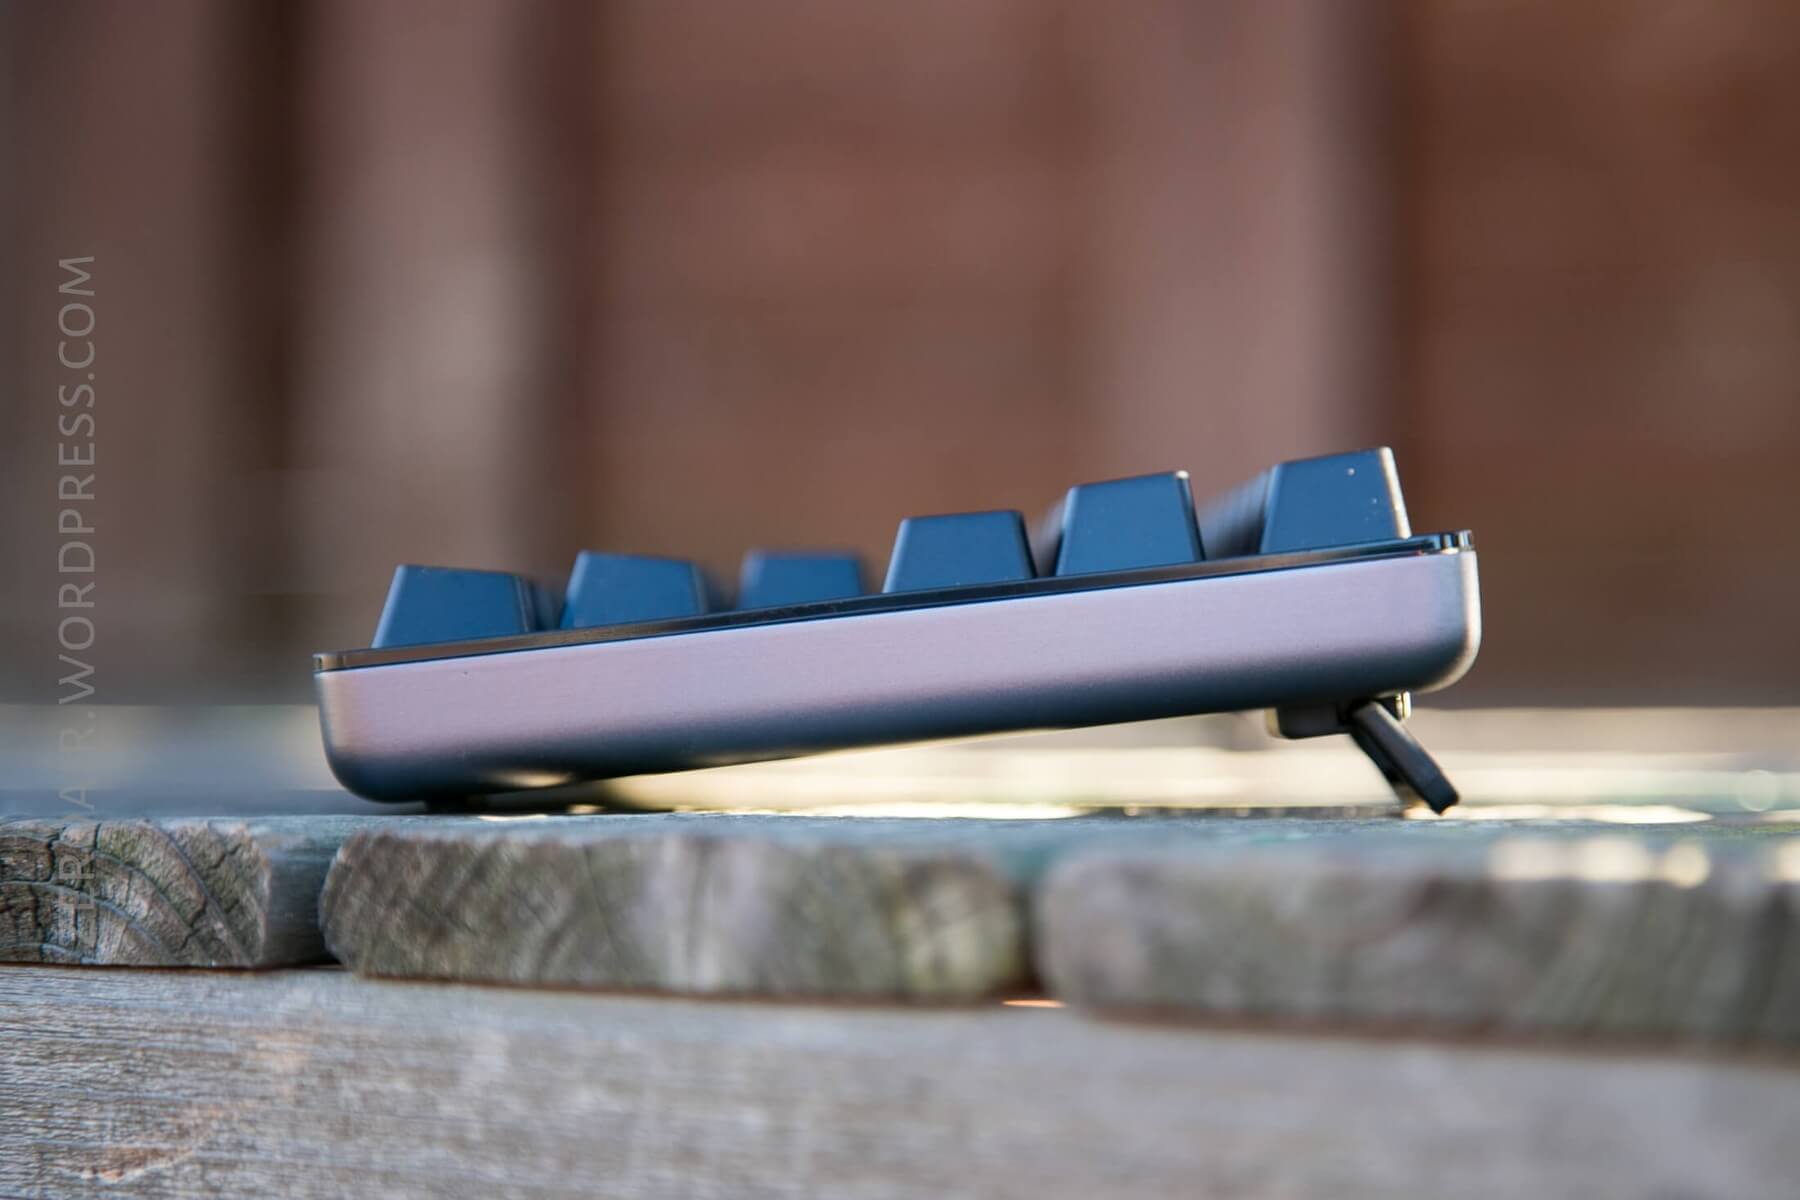
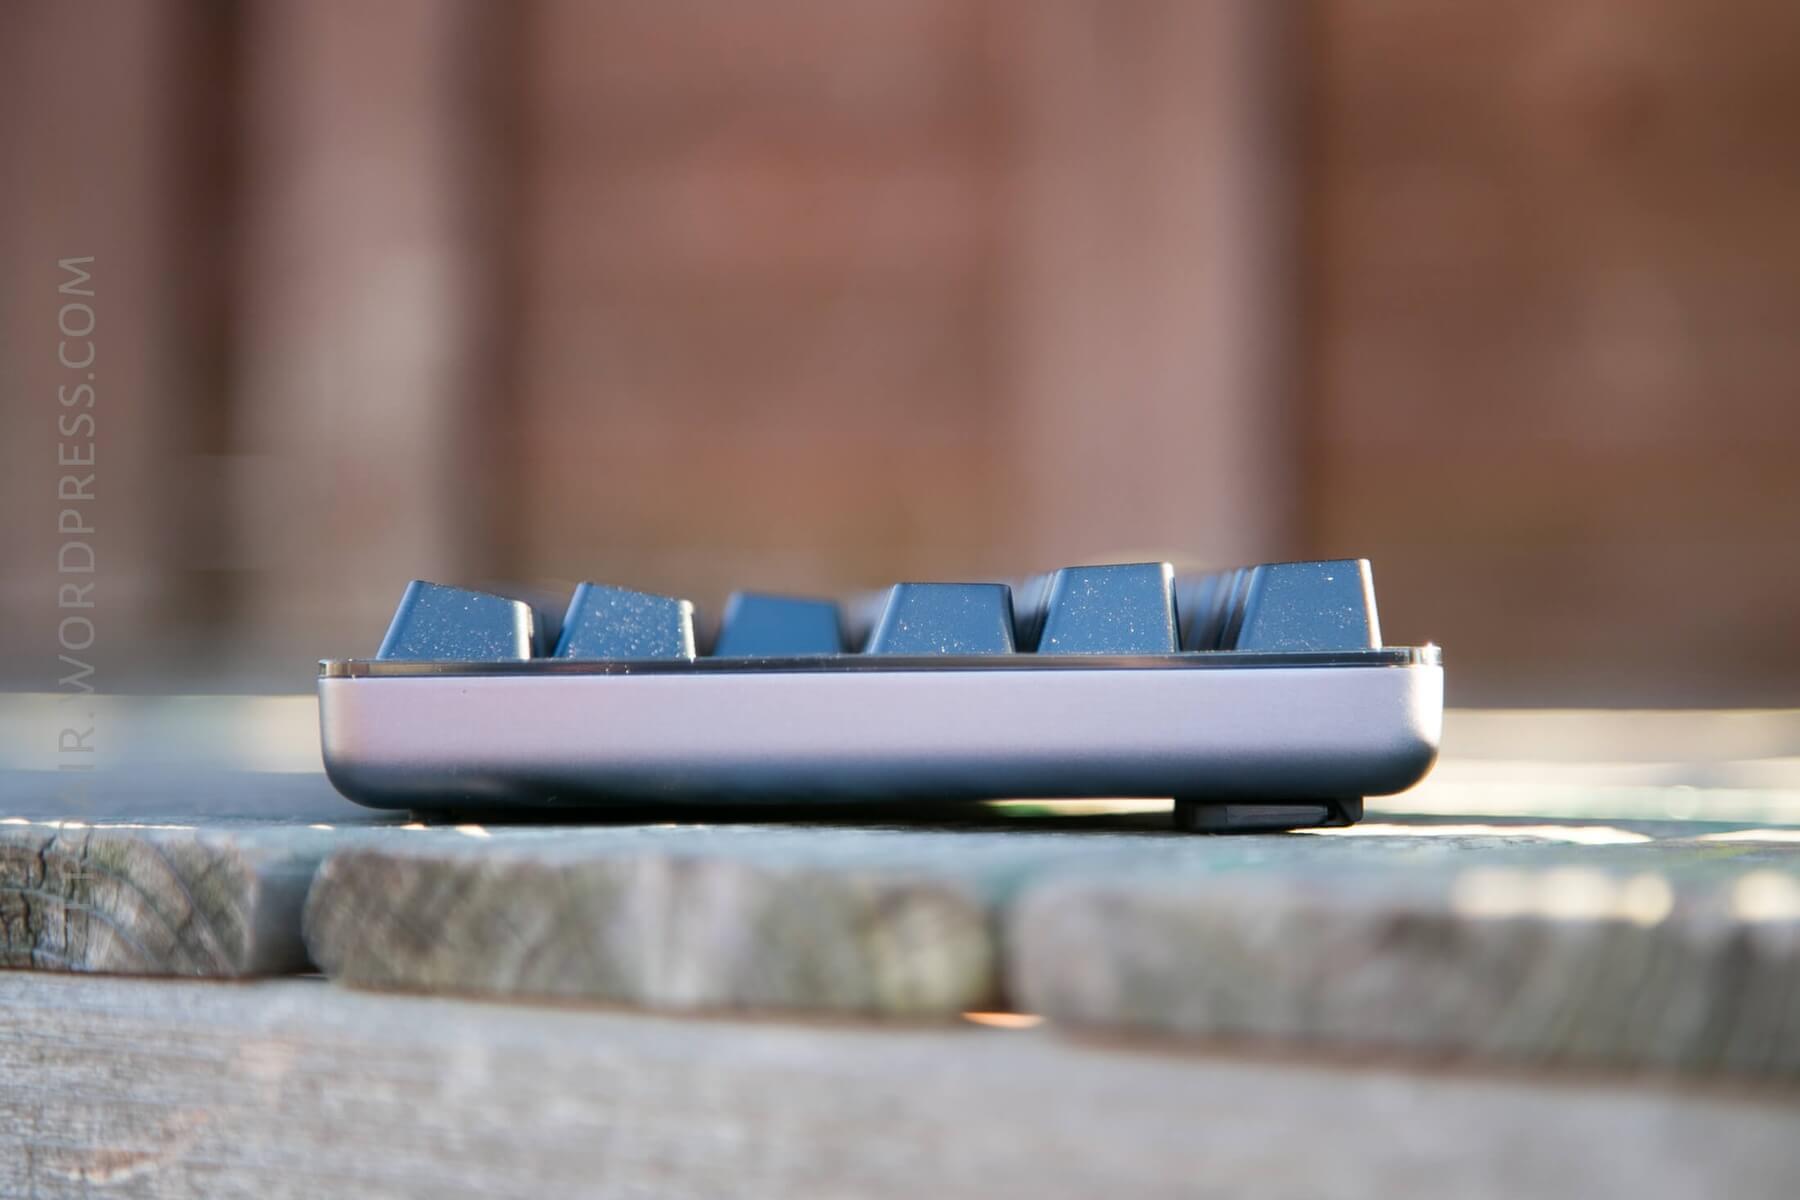
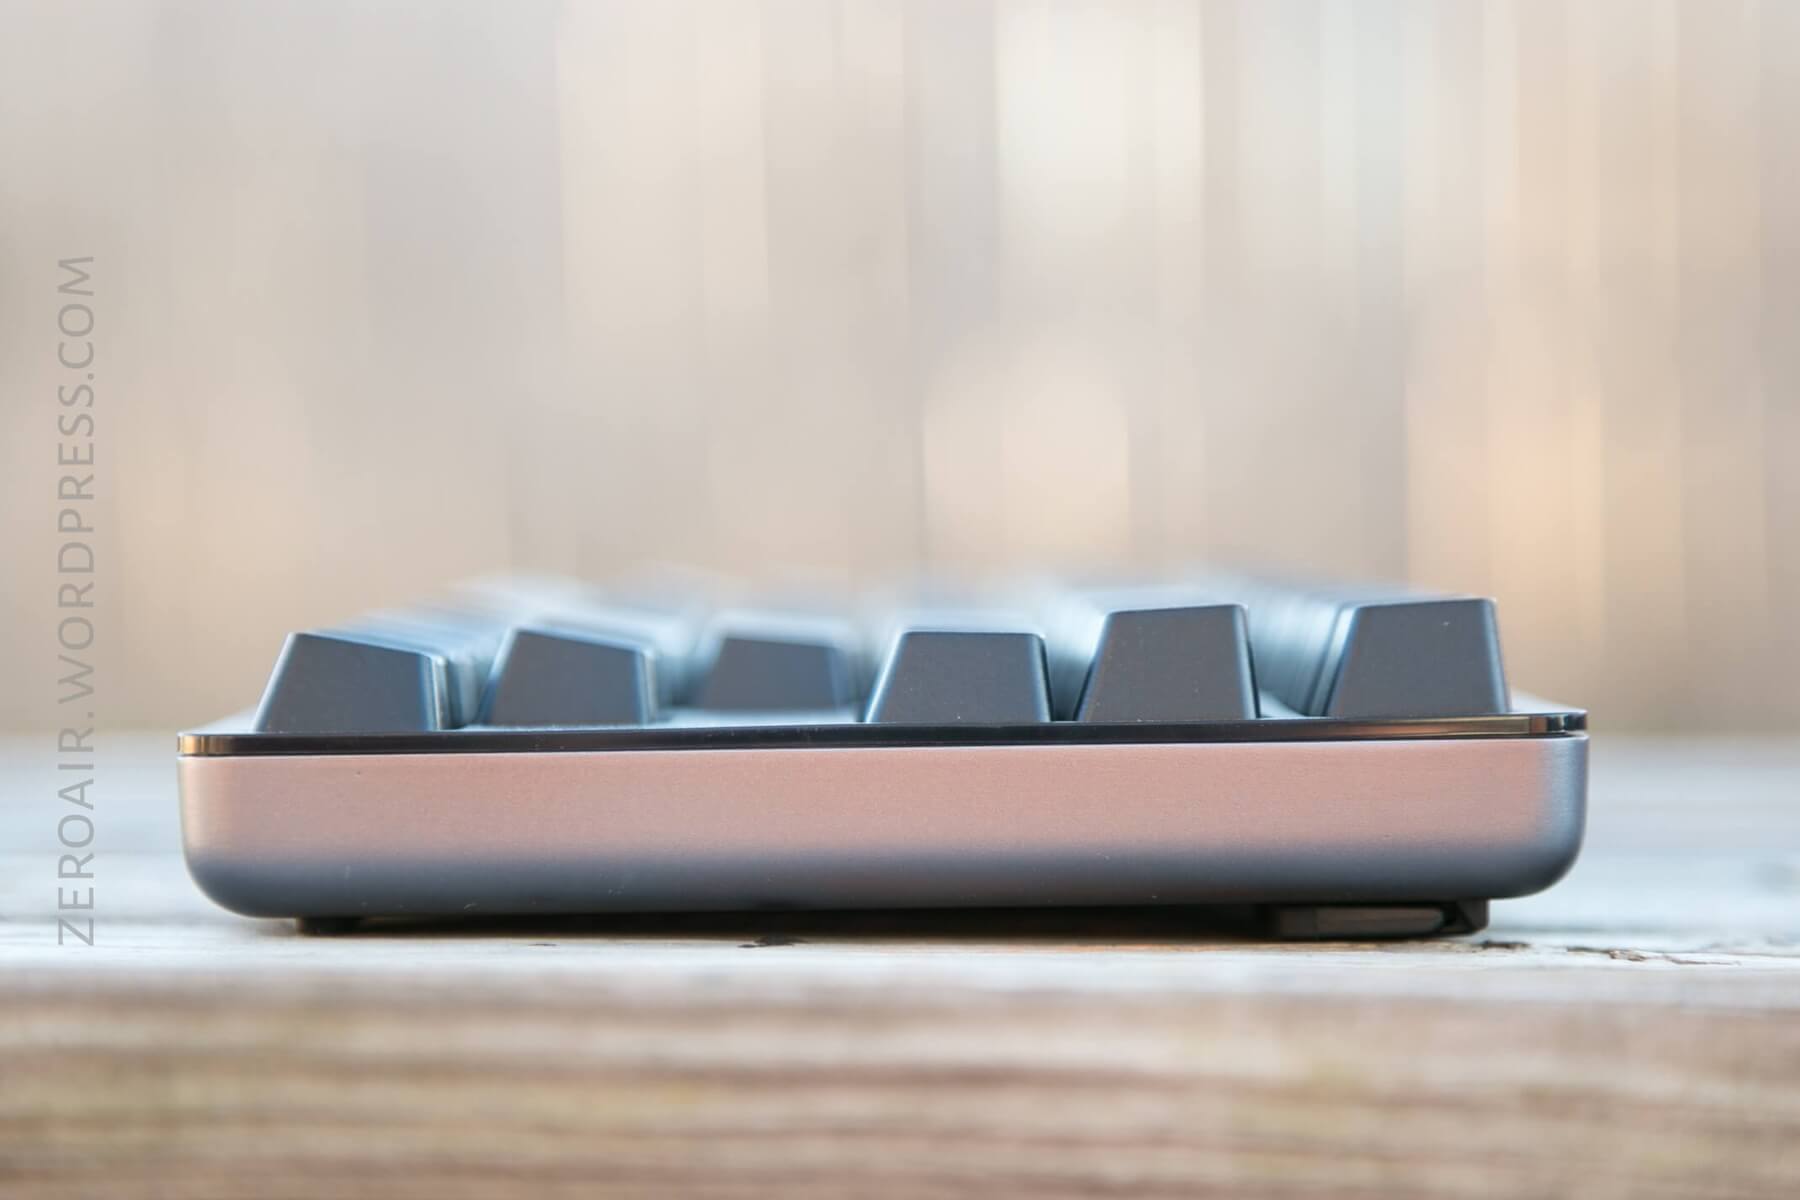
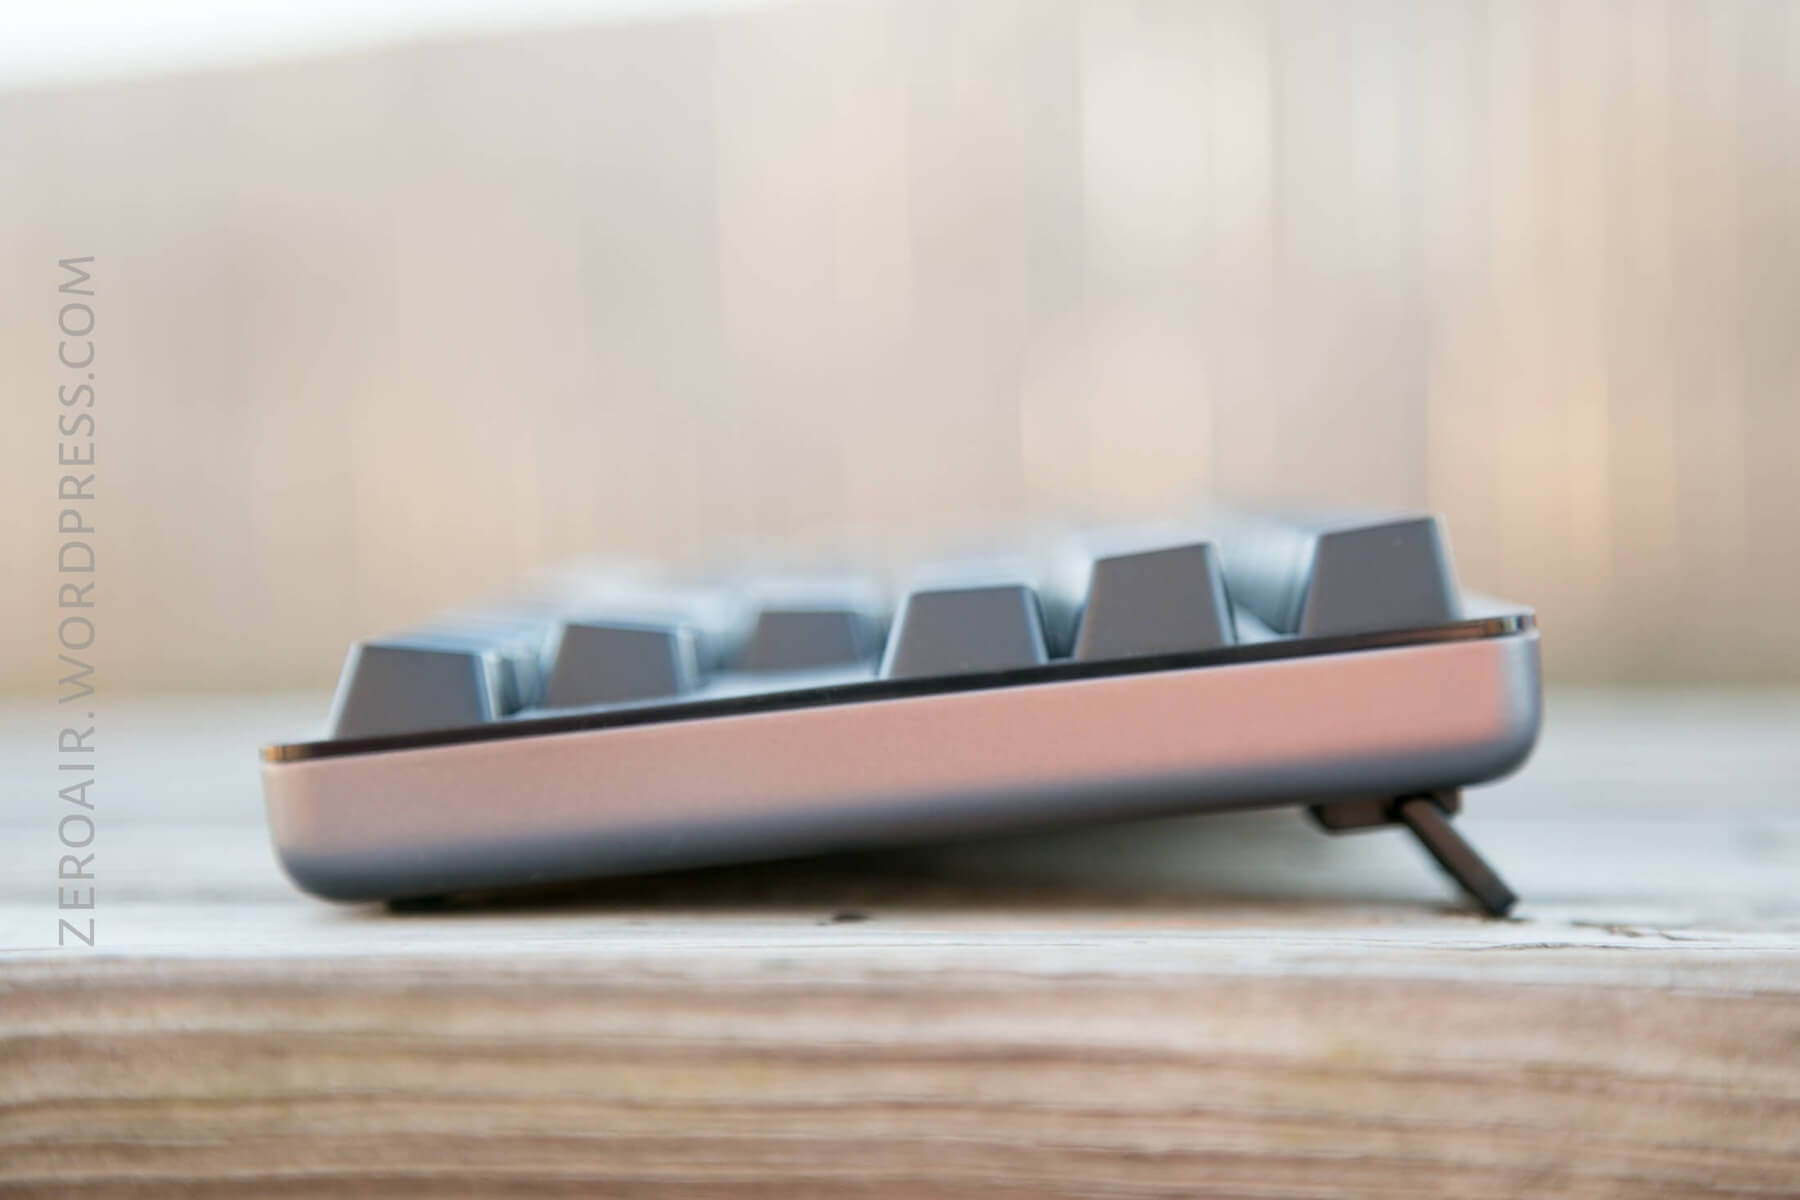
Officially 35.80 x 12.80 x 3.16 cm, and 0.94kg. This is a fairly slim (not much bezel) keyboard, with quite a bit of heft.
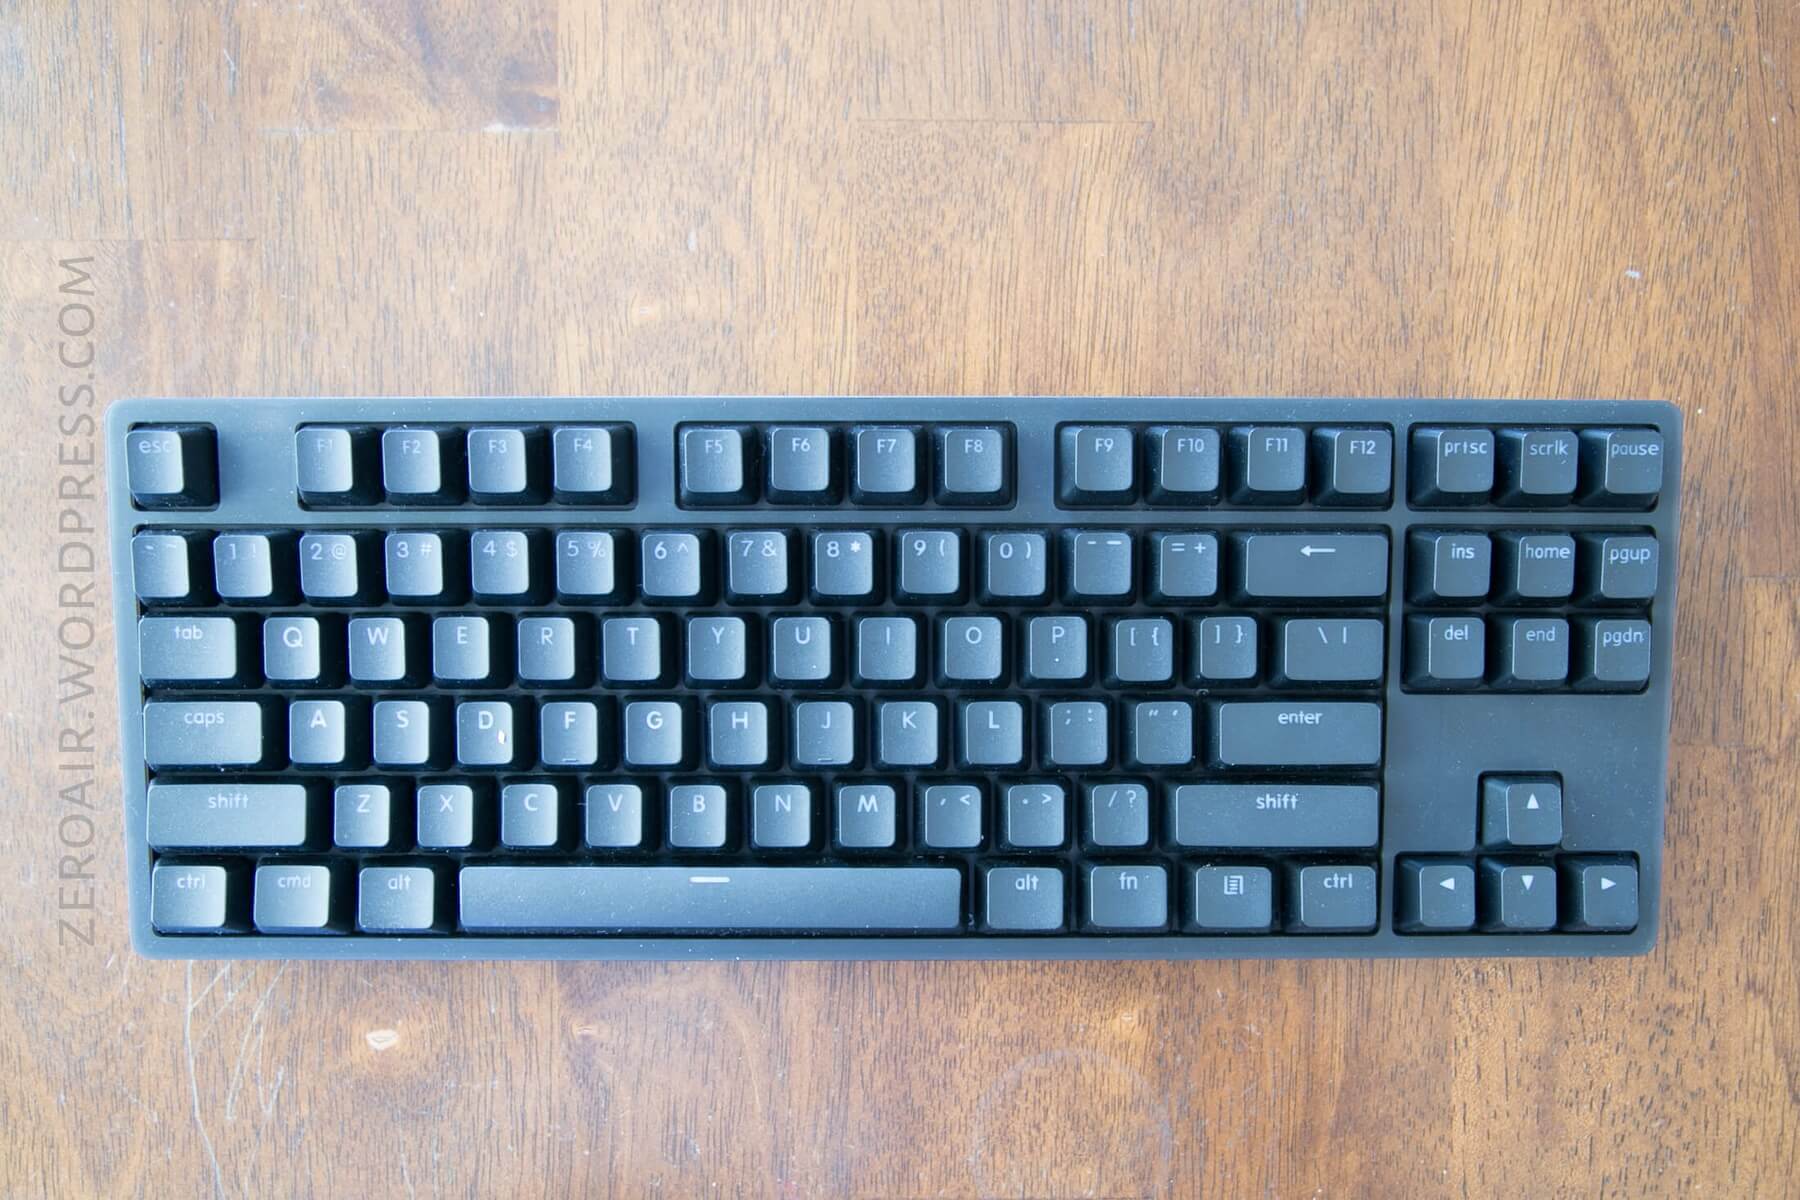
This is a Tenkeyless (or “87 key”) board.

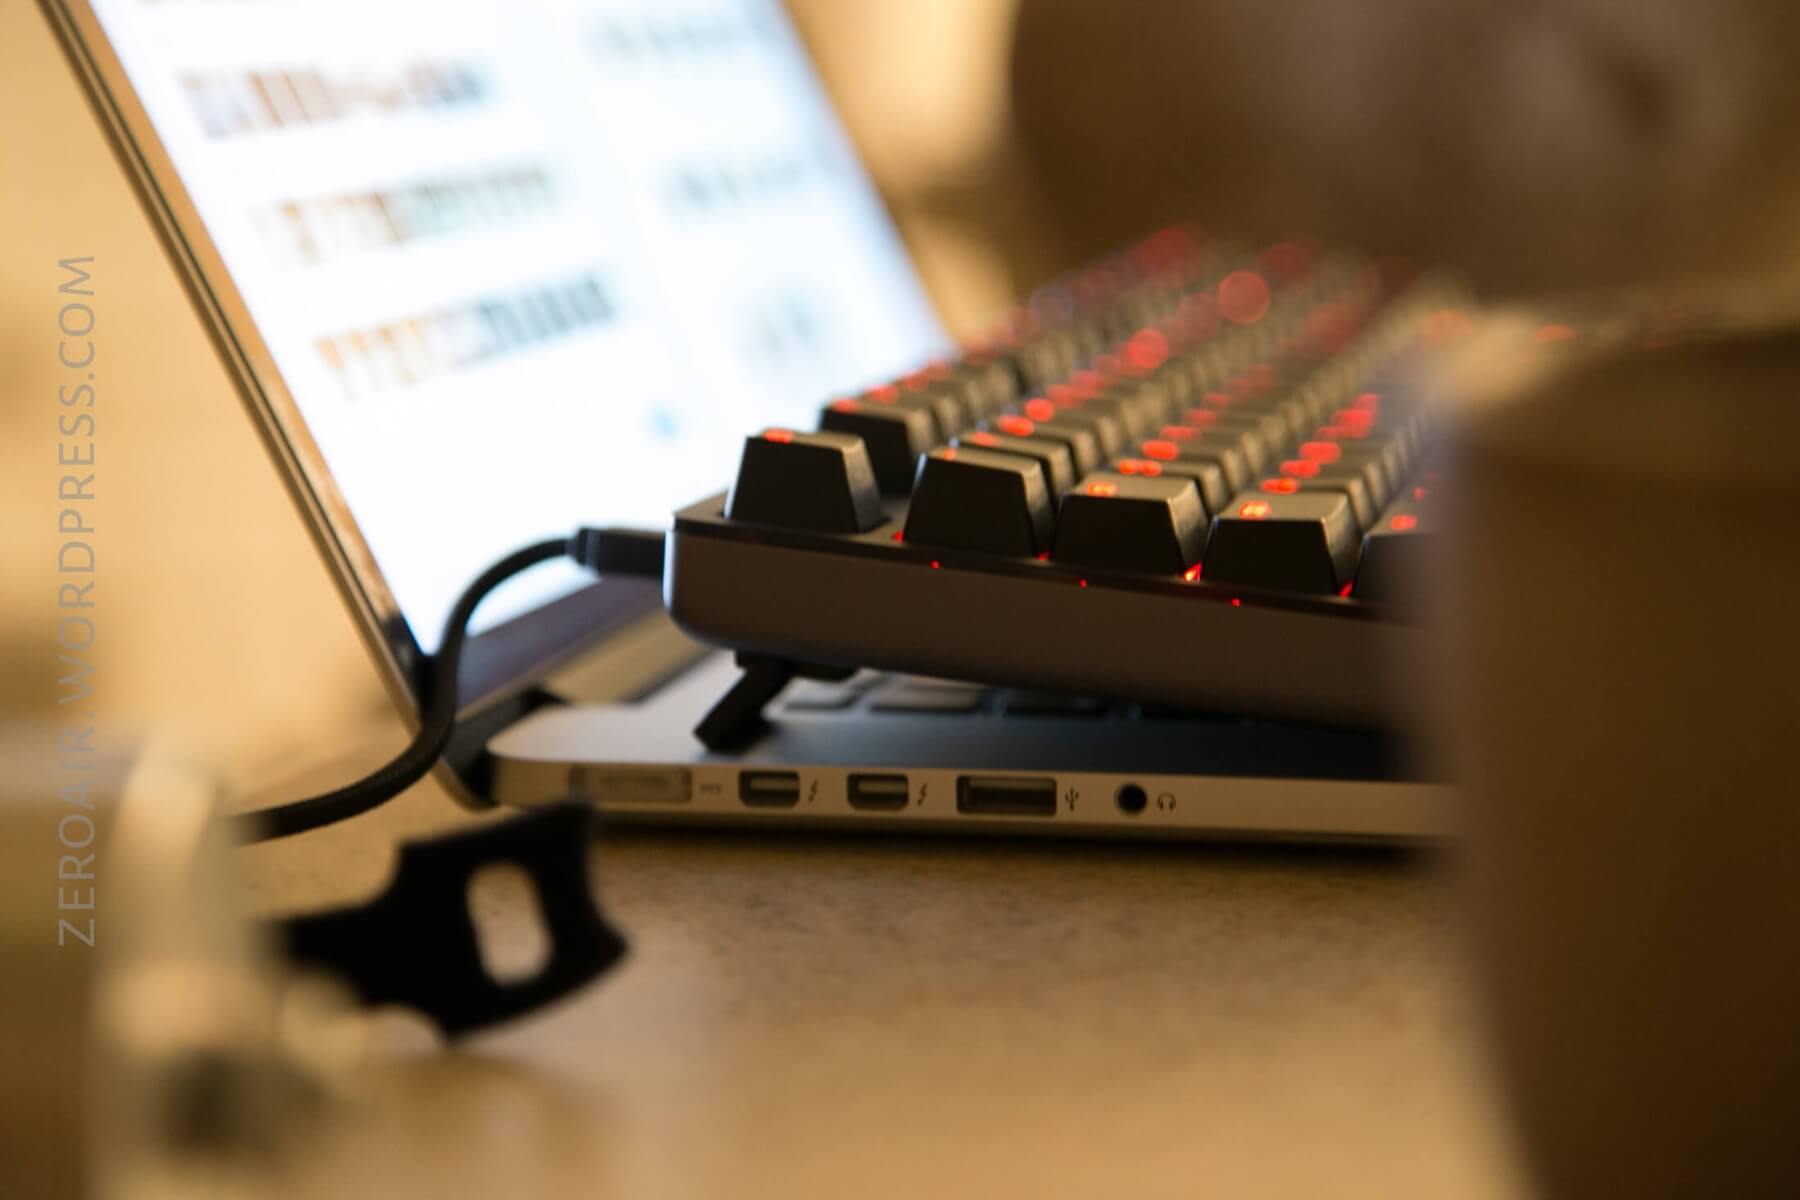
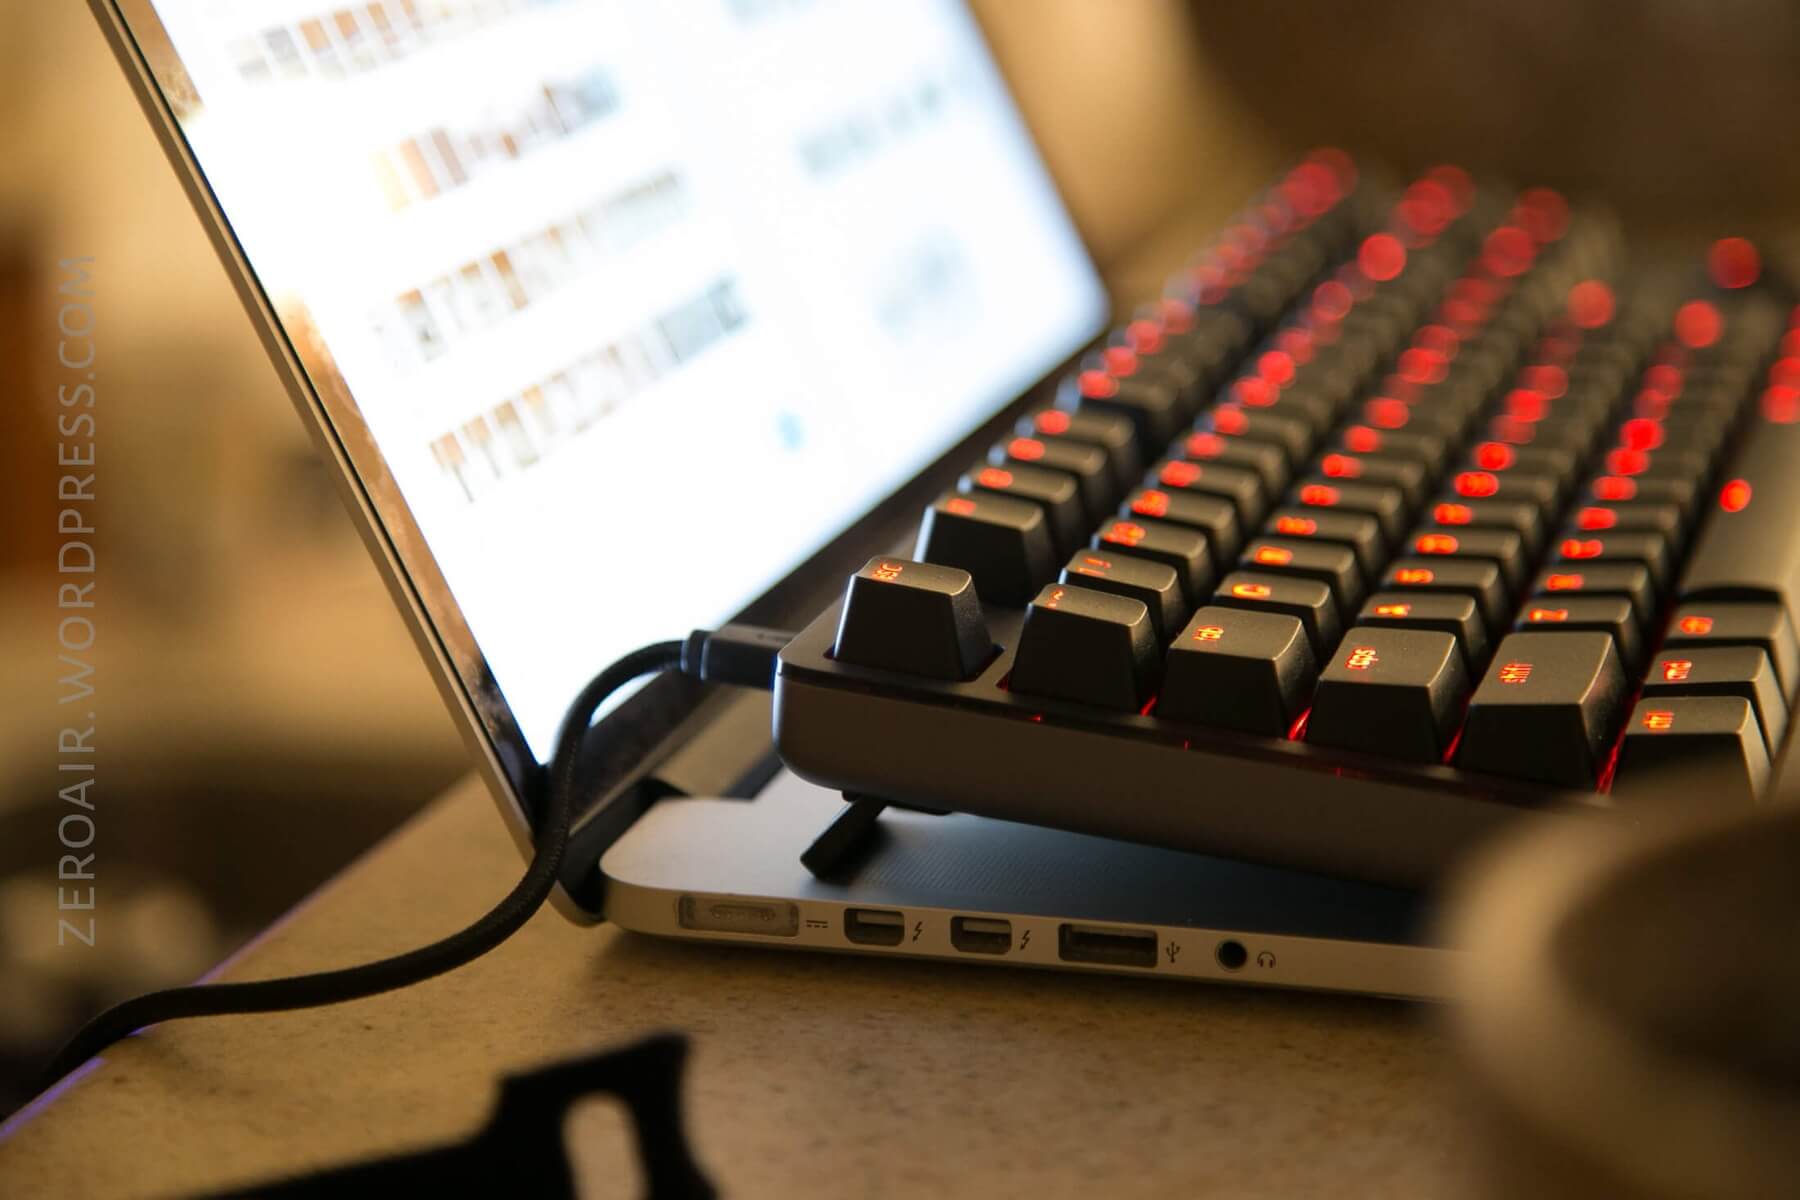
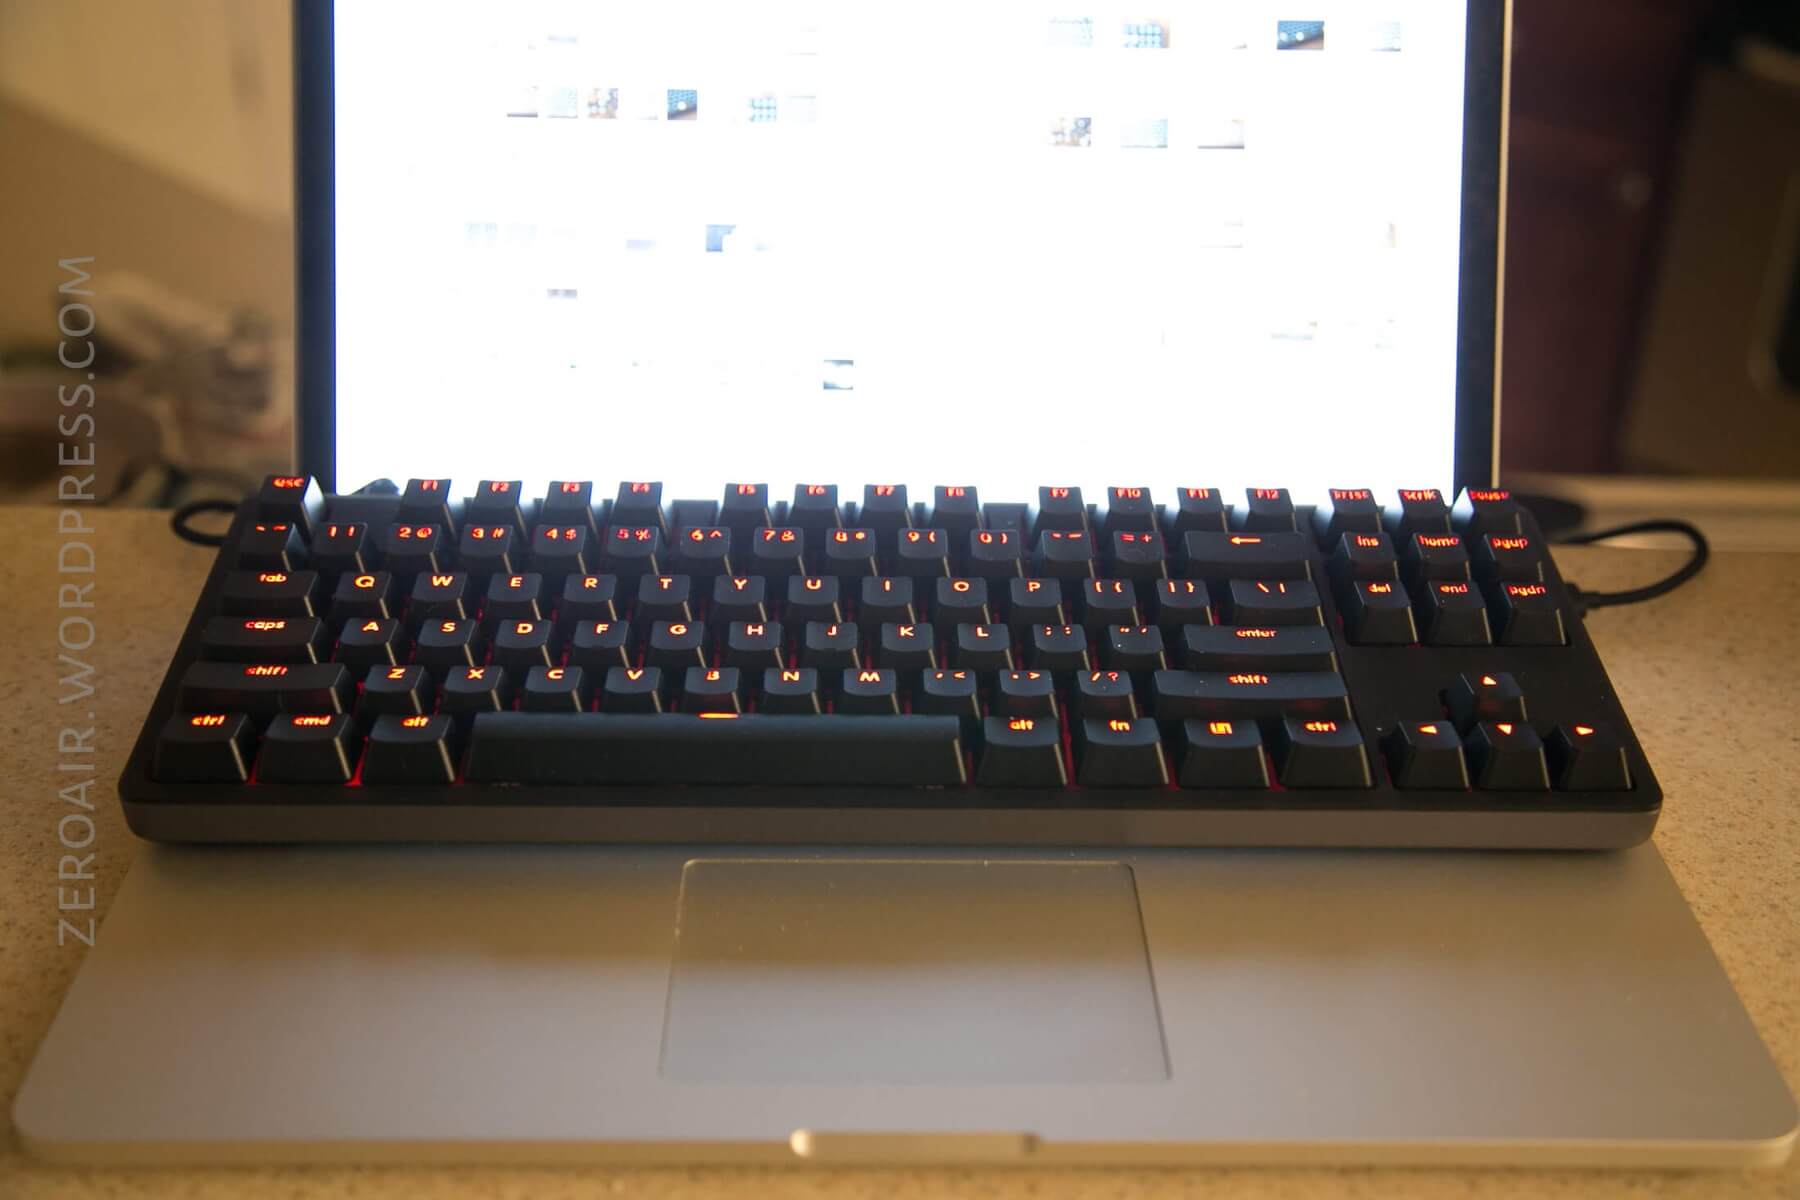
One thing I particularly liked about this board is how well it fits on a 15″ MacBook. The cable does exit straight out the back, so the board can’t push all the way against the screen. But with an angle adapter for the micro-USB, this would work very well to cover the keyboard on a laptop!
Build Quality and Disassembly
This board is impeccably built. That’s evident right when it’s first handled. There’s just a weight to it….
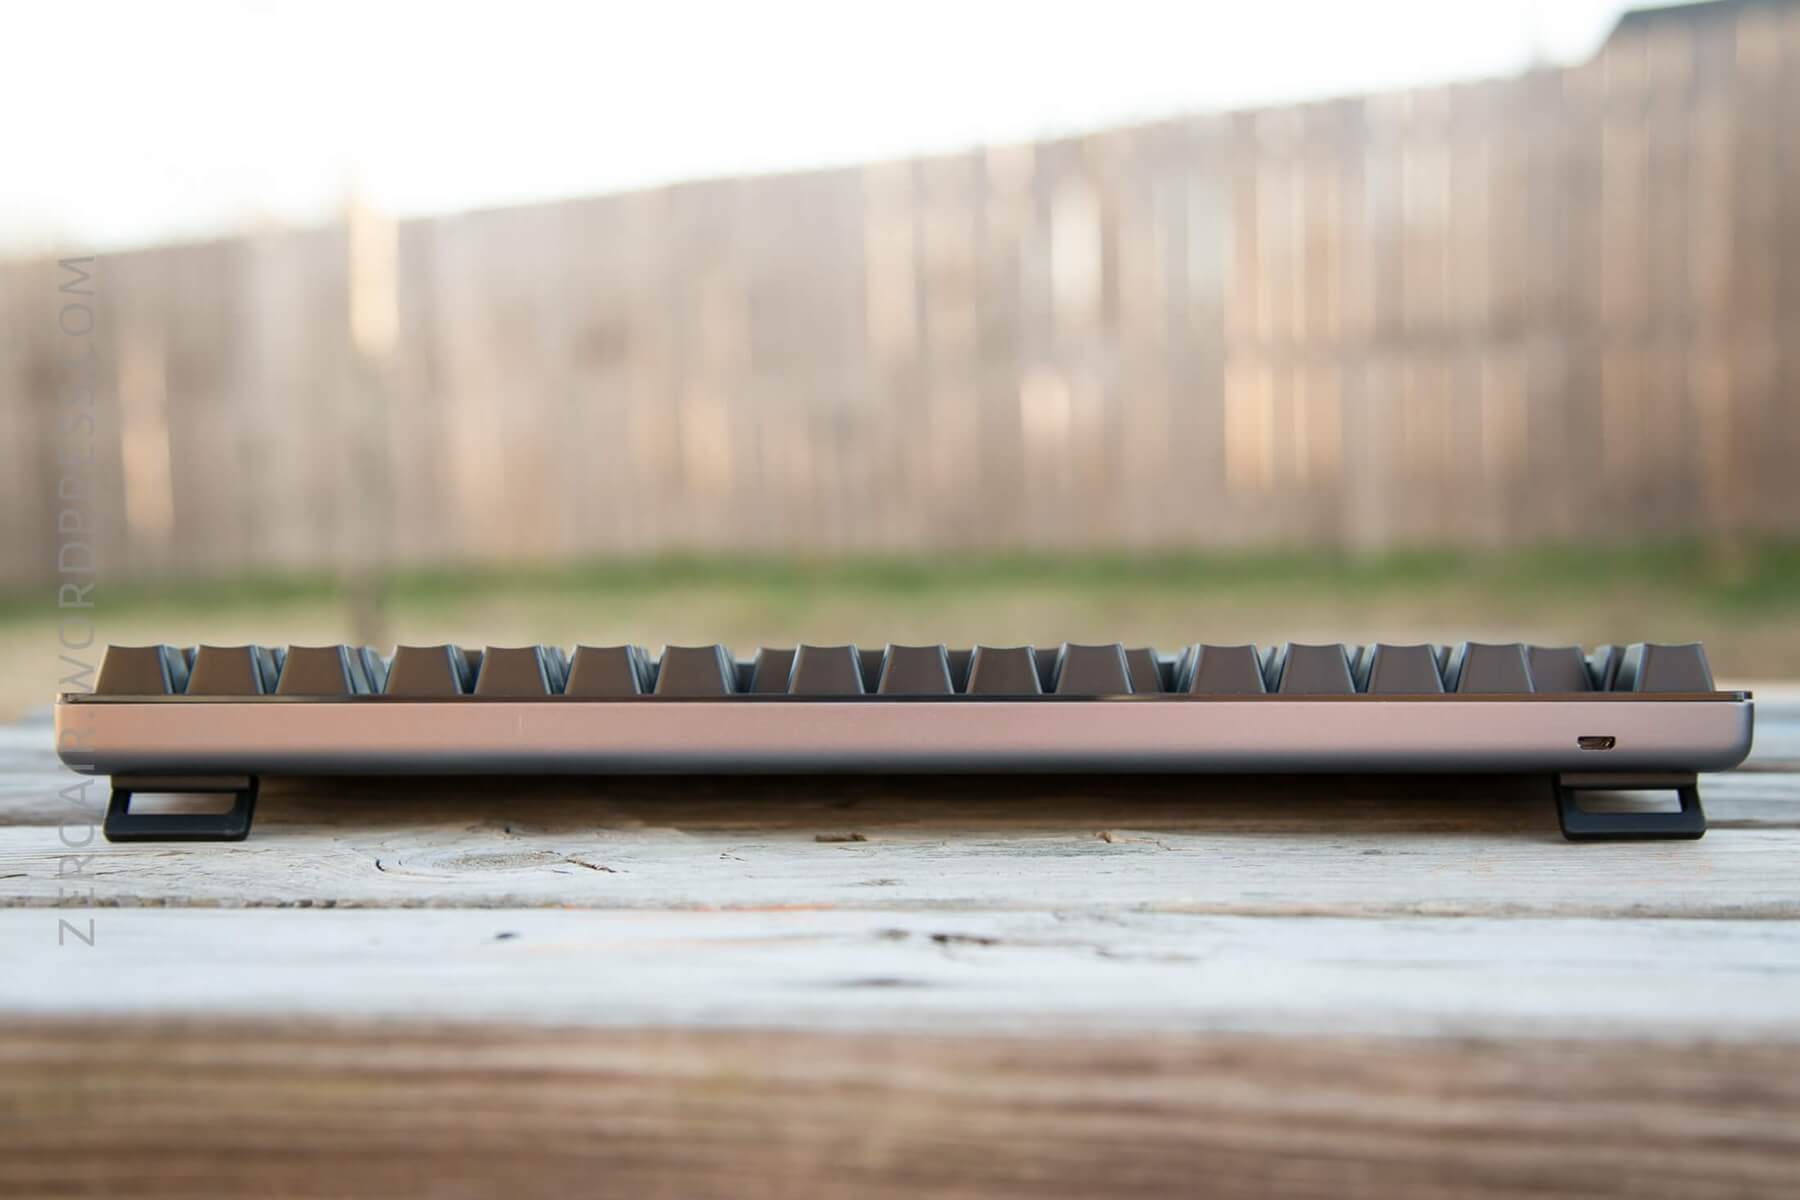
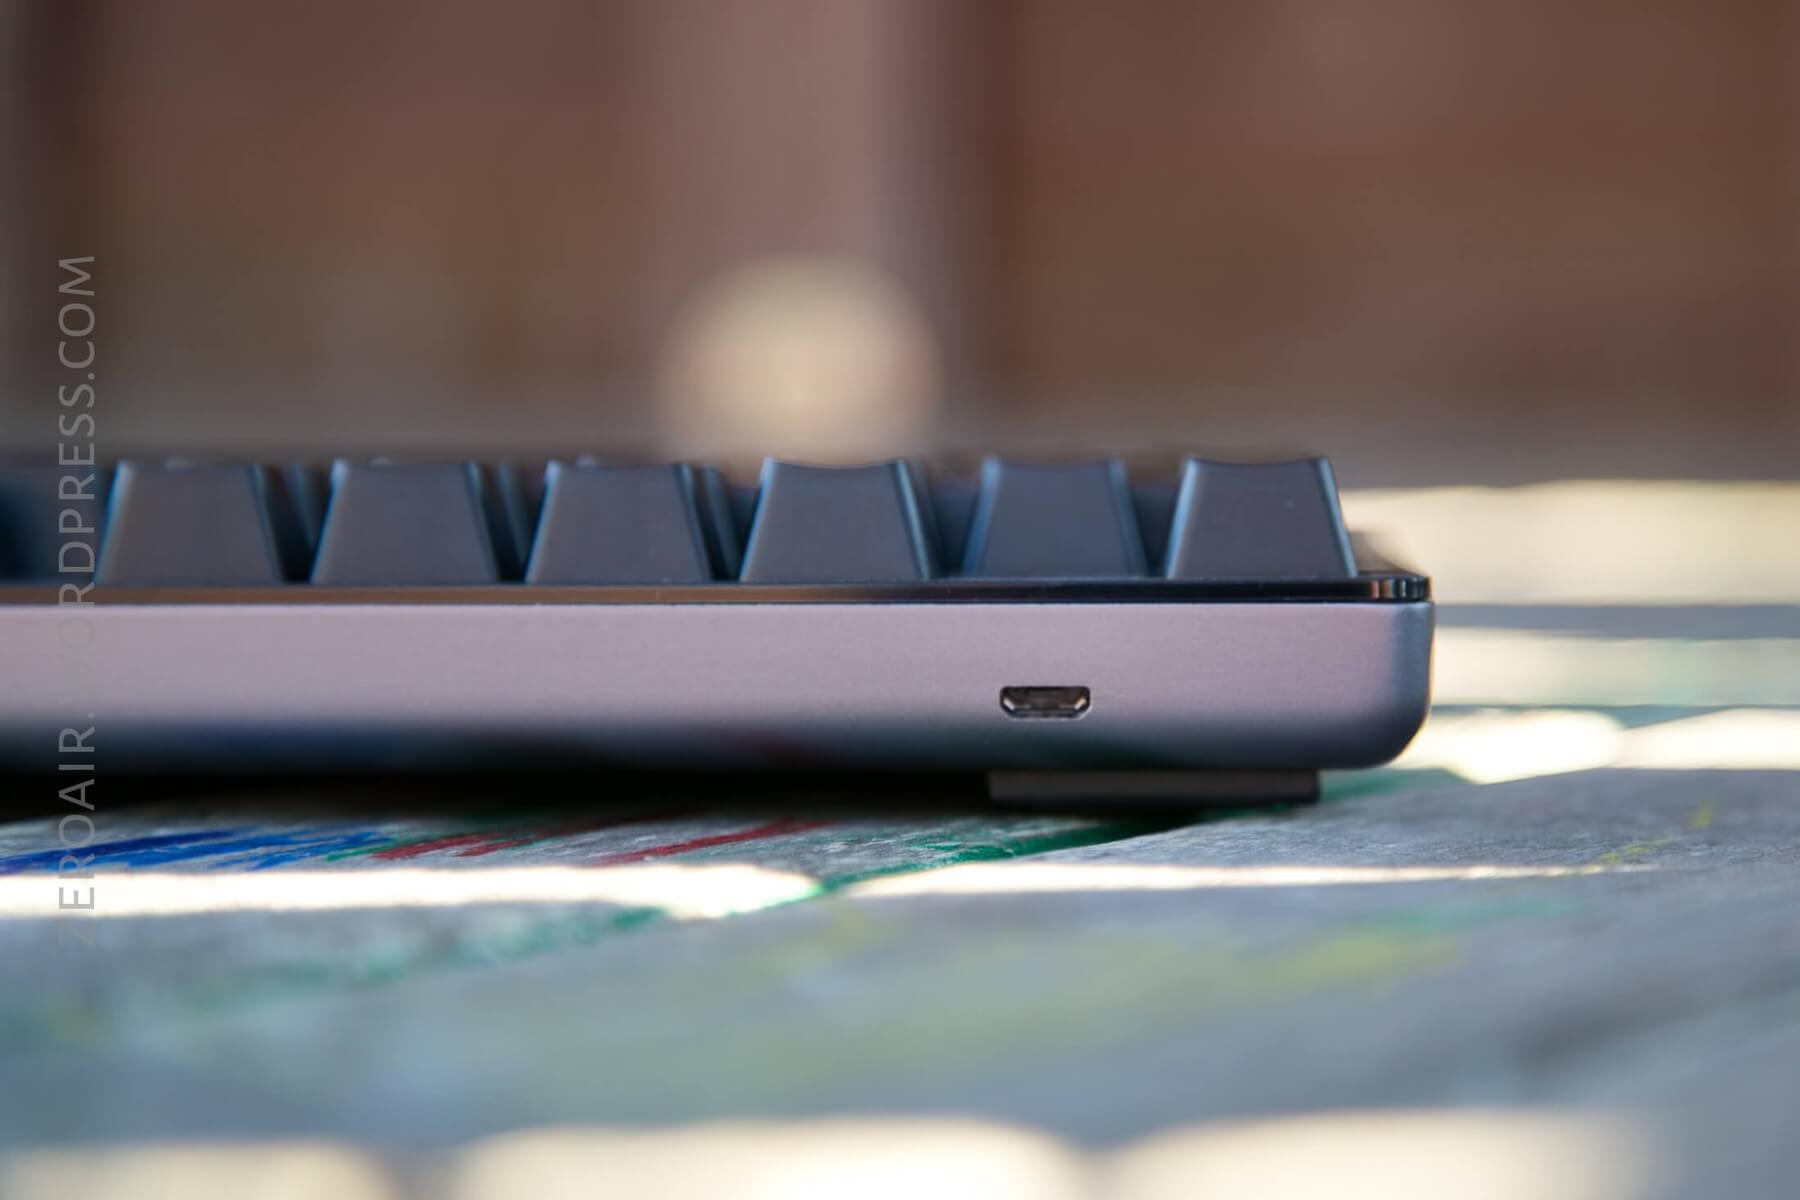
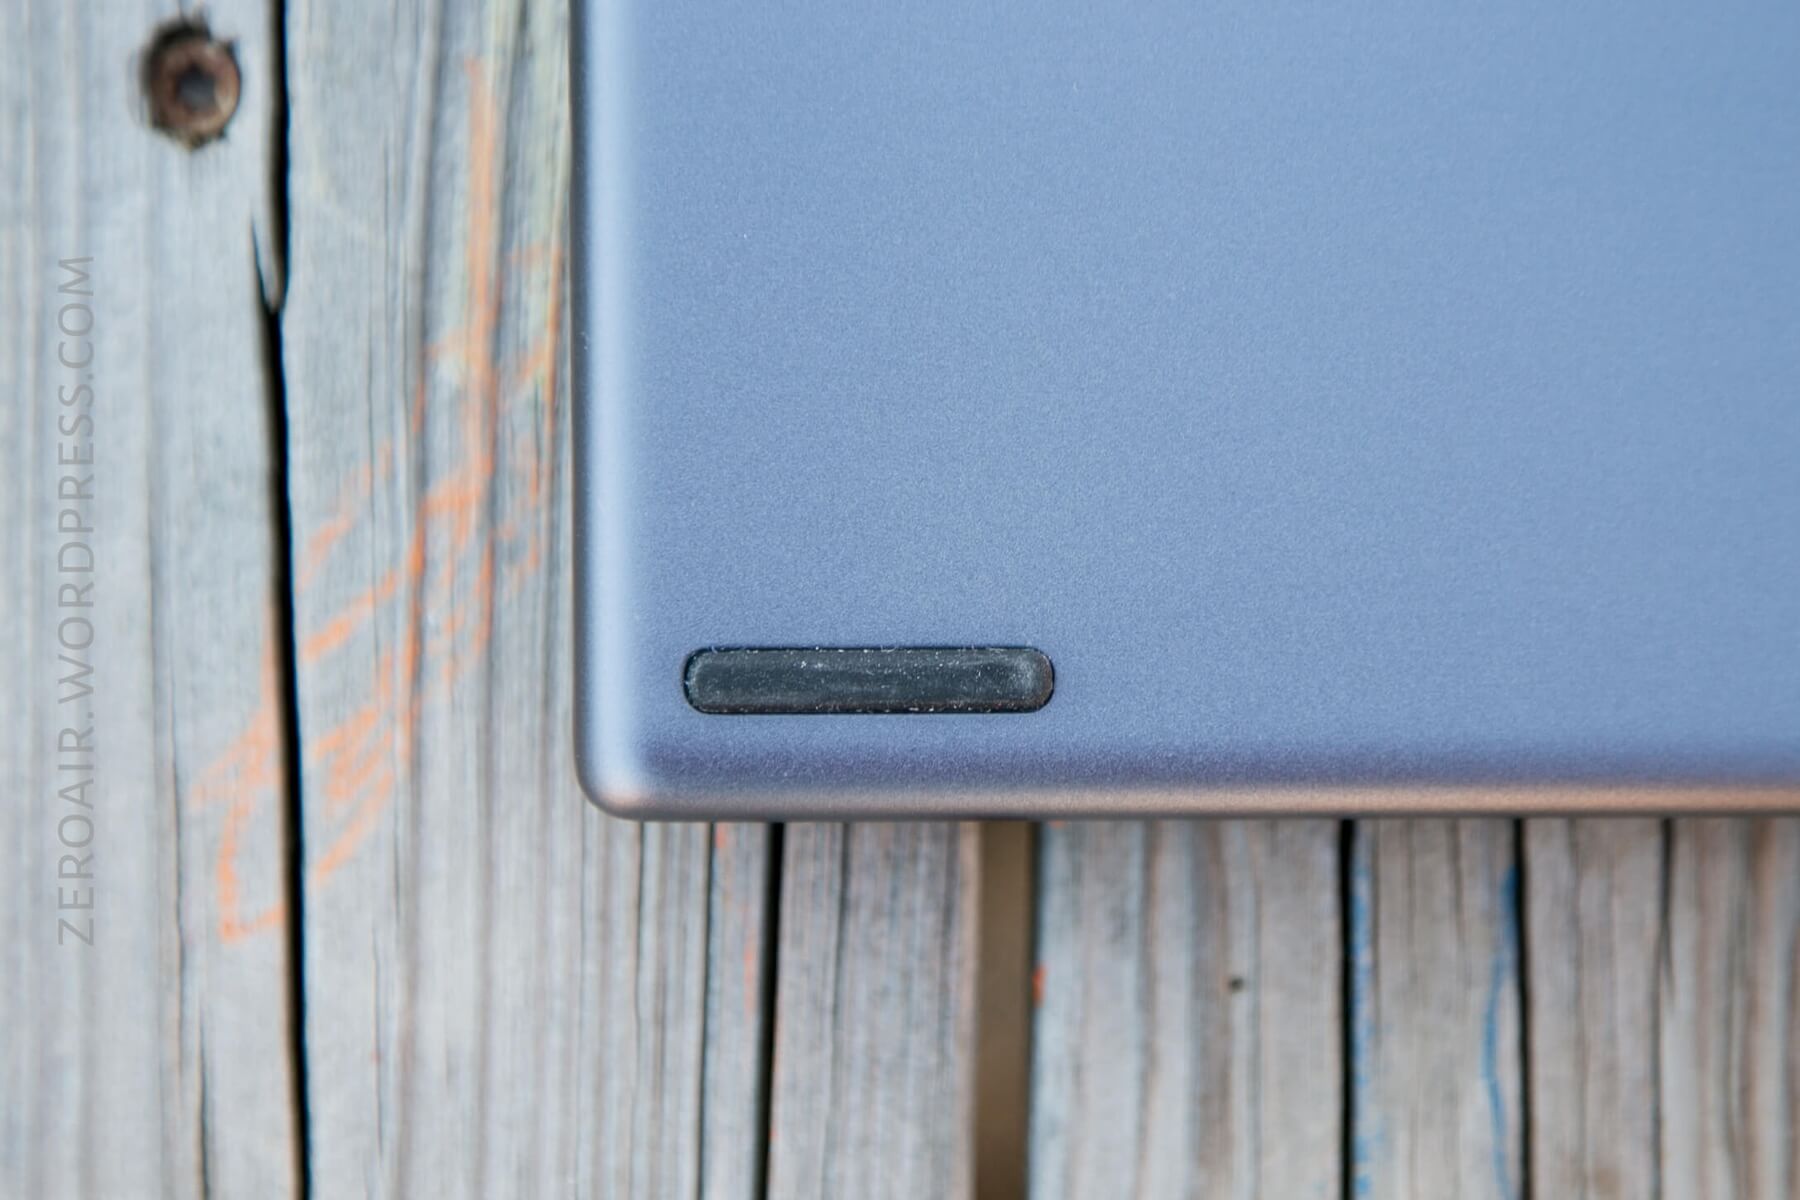
Have a look at the micro-USB connection – nothing extra, nothing too fancy, just a perfectly aligned, through-case micro-USB port.
The feet are also nothing extravagant. They serve their purpose and have rubber feet that will keep the board from sliding around.
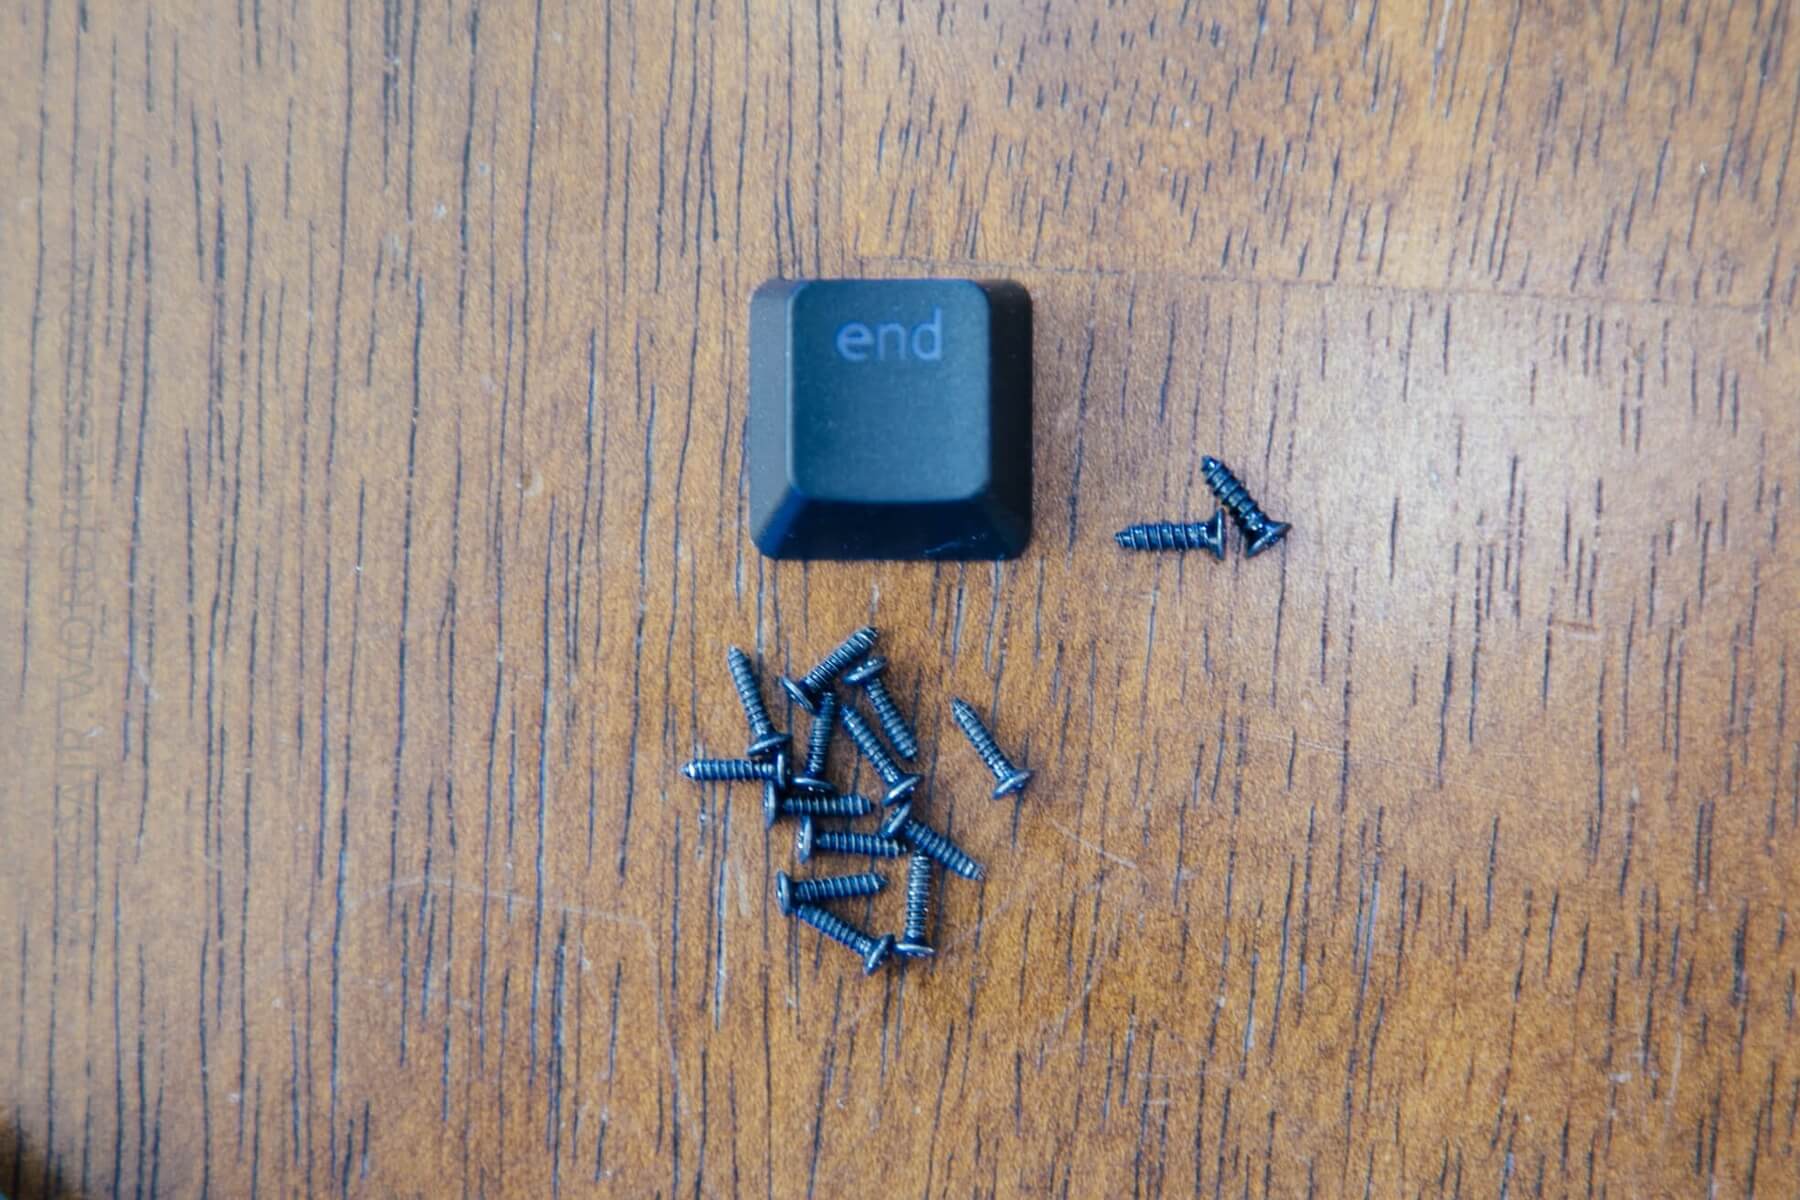
I was surprised that the board is held together by this bunch of screws. Basically, self-tapping screws (ie, not machine screws). This is one of my two (albeit very minor) complaints about this board. Proper machine screws with a hex head (instead of Torx, like these are) would look nicer. (That said, the screws really aren’t seen in normal use anyway – they’re hidden under keycaps or feet, etc.)
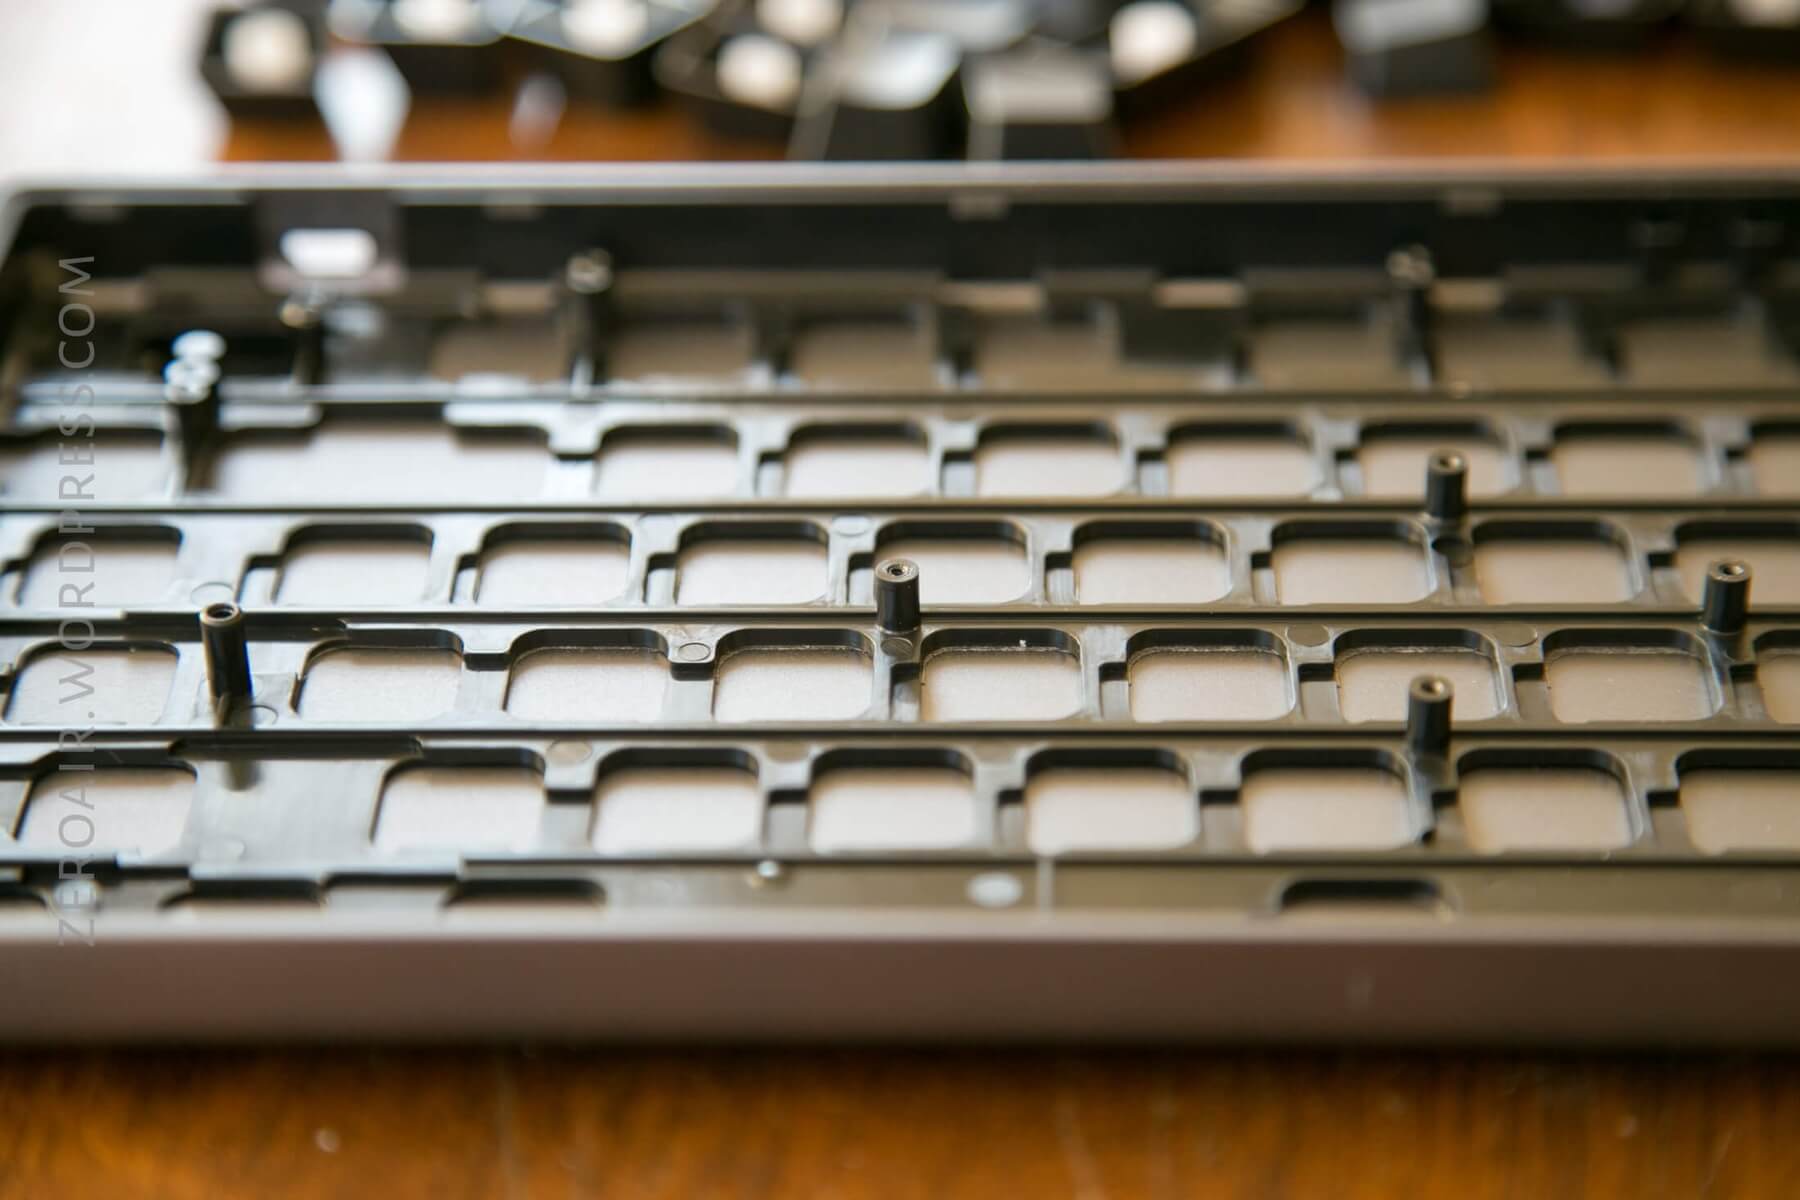
I’ll disassemble this board more fully below, but here are a few other shots. You can see below that there are posts for alignment (those aren’t screw holes).
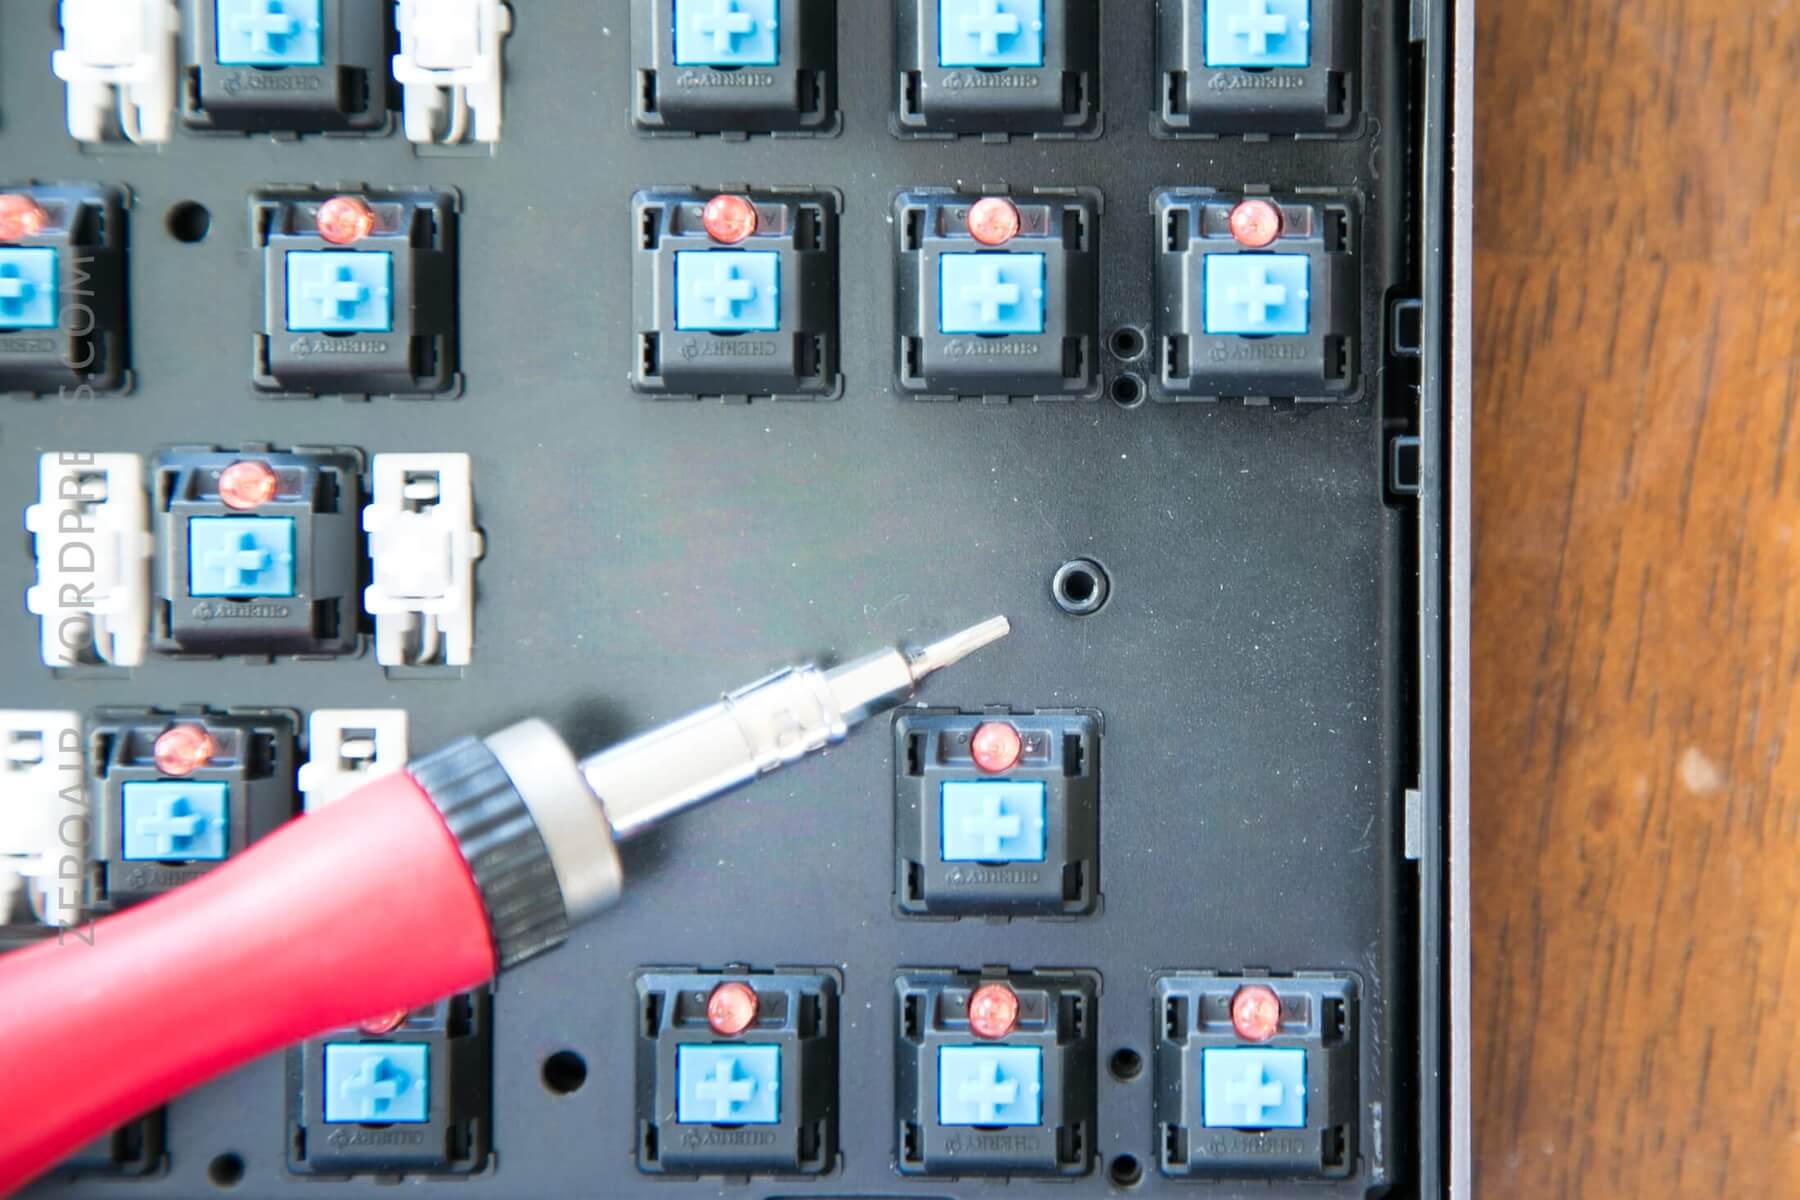
The summary of the build quality of this case is that it is absolutely superb. The case is secure (even stiff?) and there’s not one sign of poor build quality or even manufacturing error at all, anywhere on this board.
Case
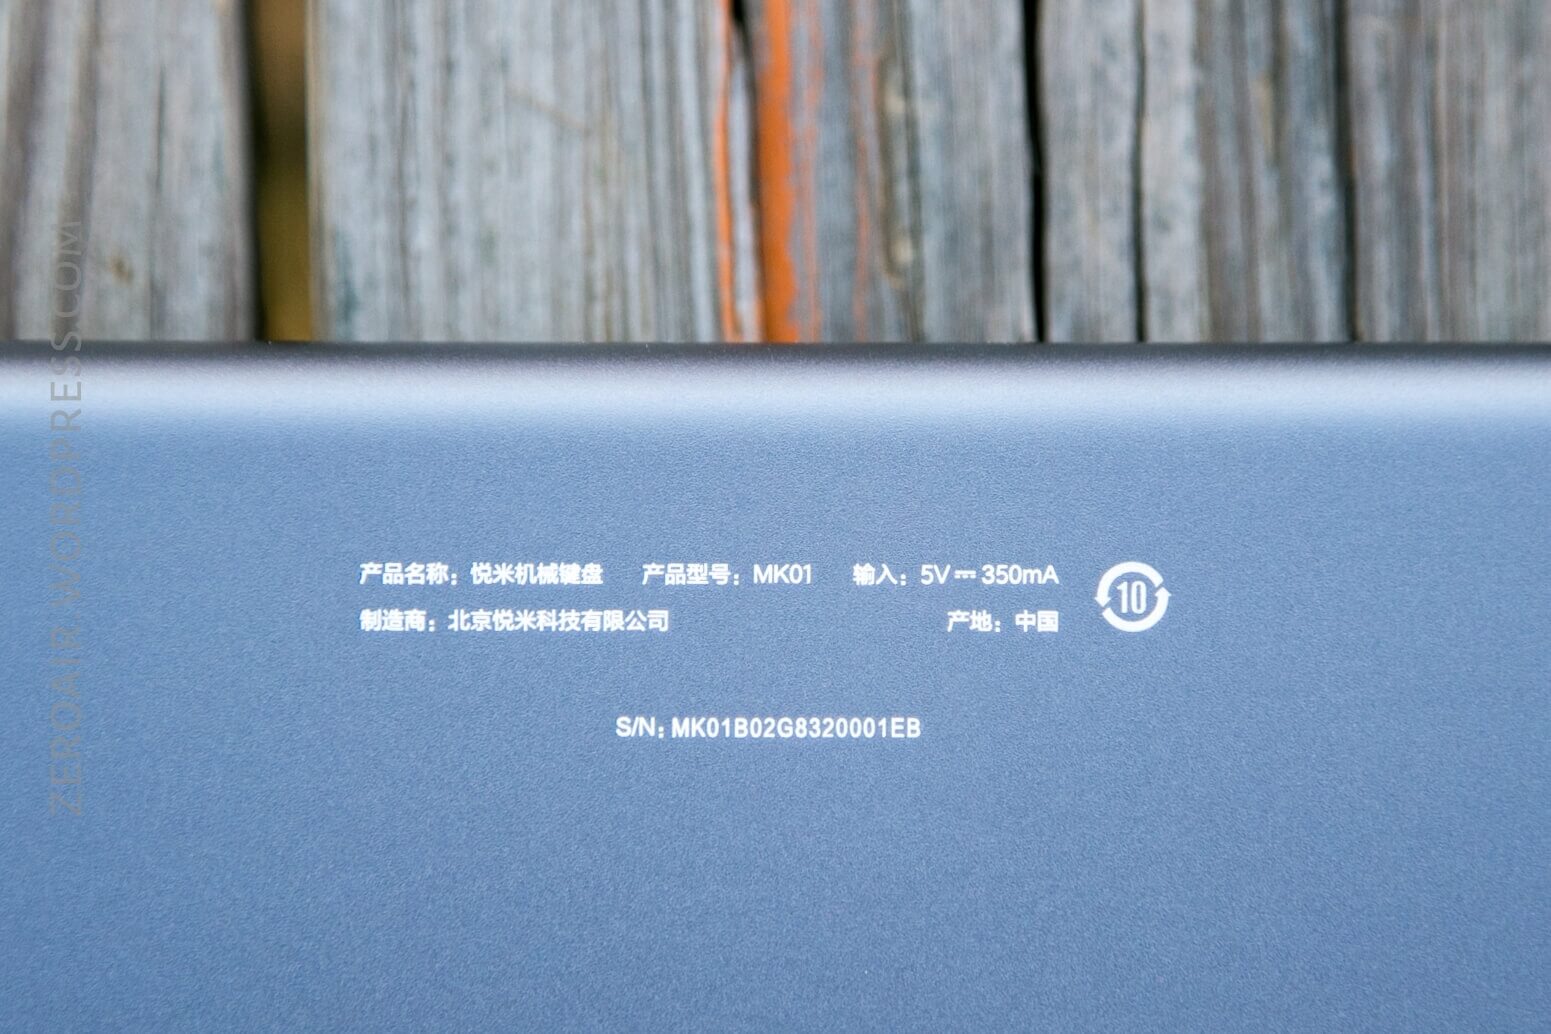
The plate is metal. I failed to test if it was magnetic (I don’t think it’s steel), but it has a weight to it that makes me wonder. The product description indicates that it’s Aluminum (“aluminum alloy” to be exact).
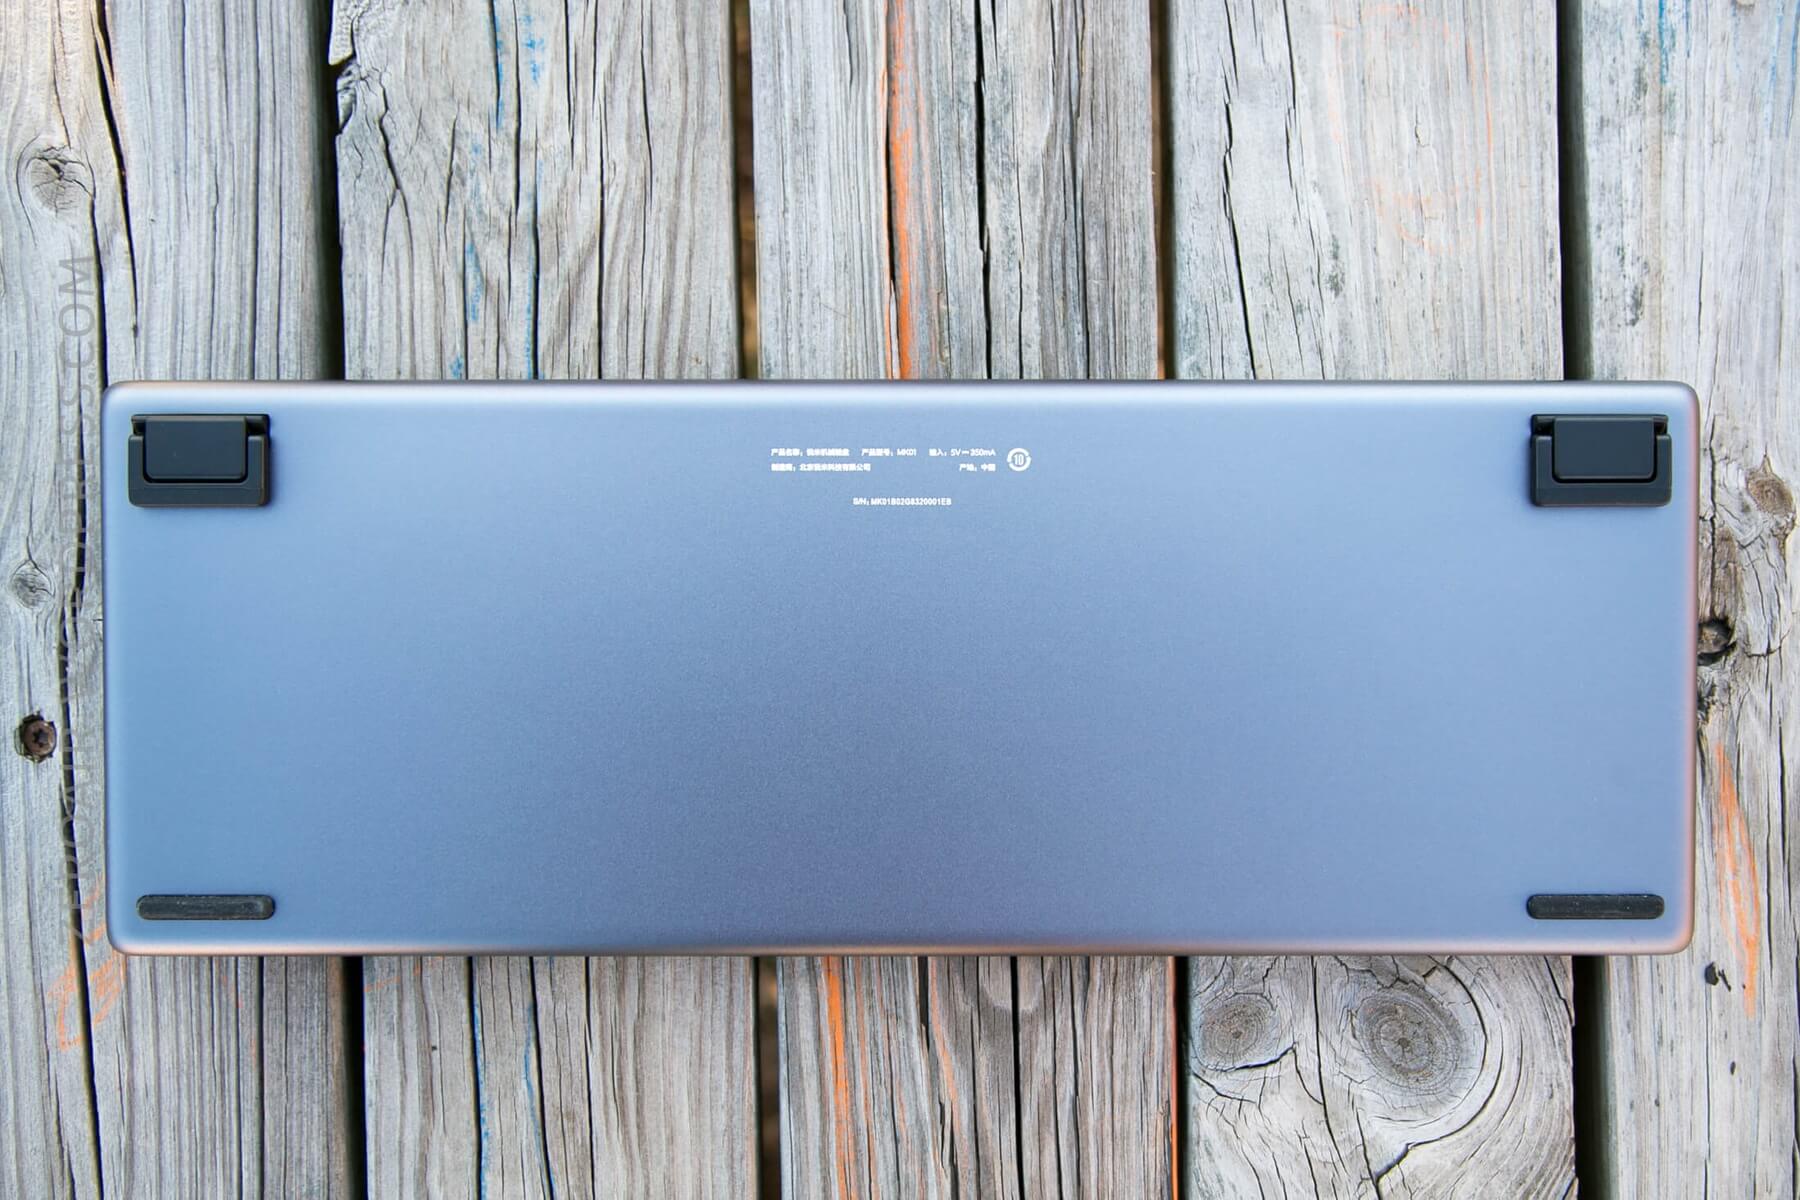
The case is very simple but practically perfect. The feet are rubber-coated and non-slip. The bottom is almost unmarred by anything, too. Little printing, not many accouterments.
Such attention to detail is that the screw holes on the bottom of this keyboard are covered by the feet. Just a minor, but very nice, little touch.

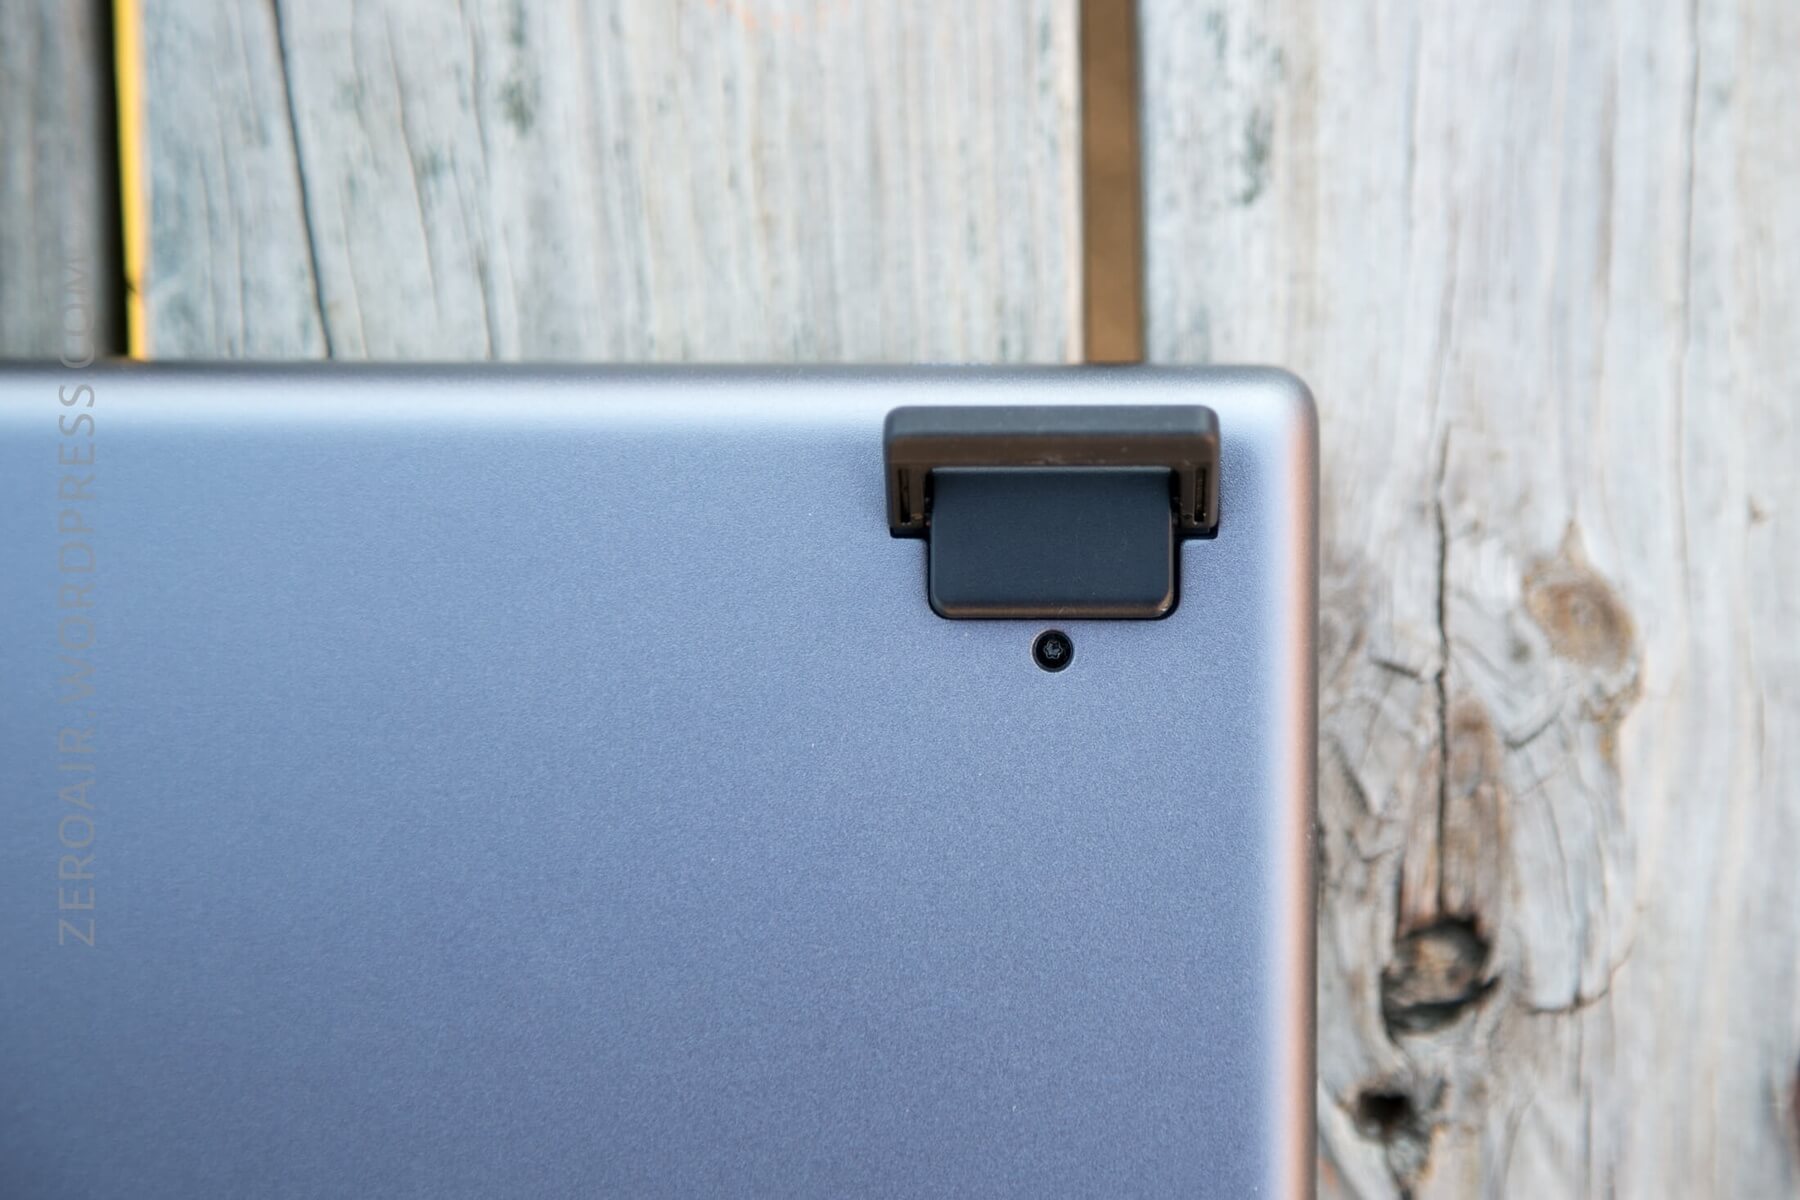
Below, see the case with the feet extended and not extended.
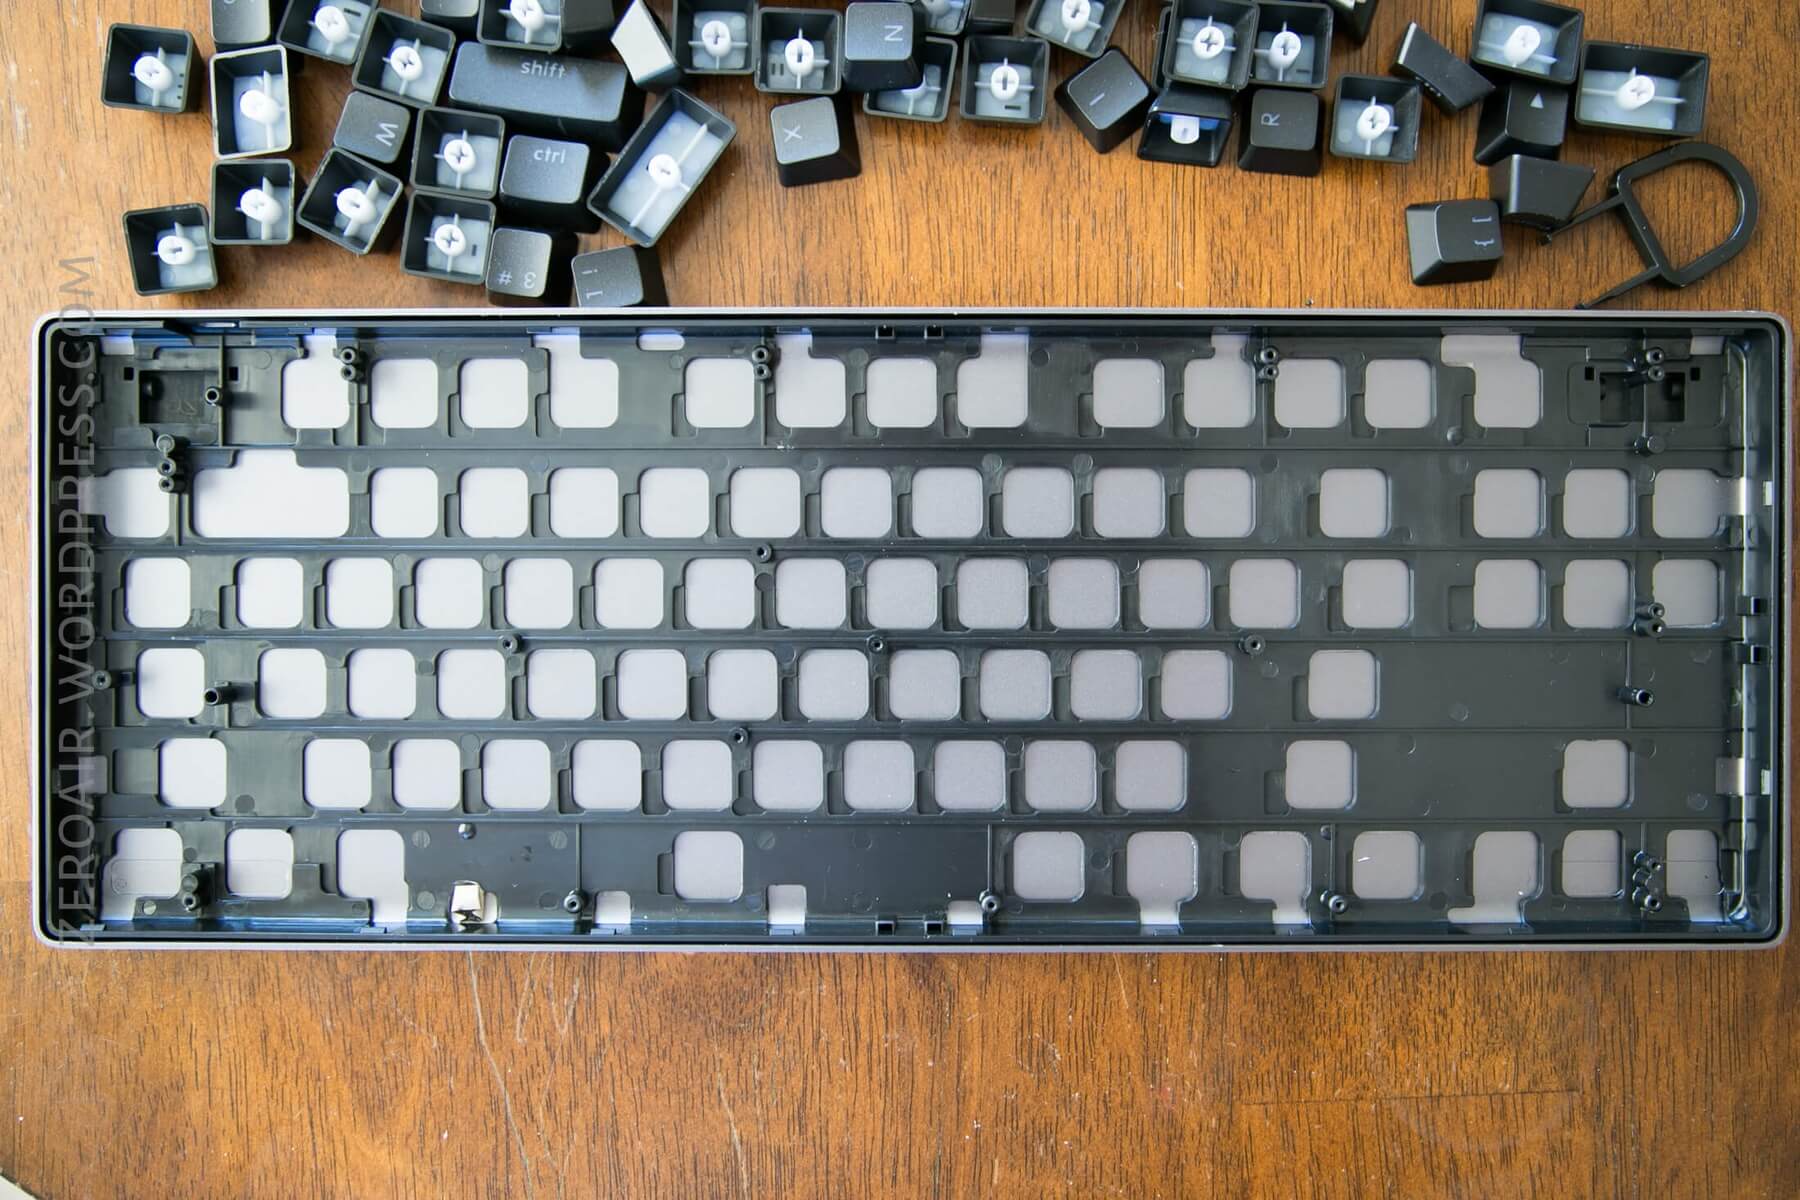
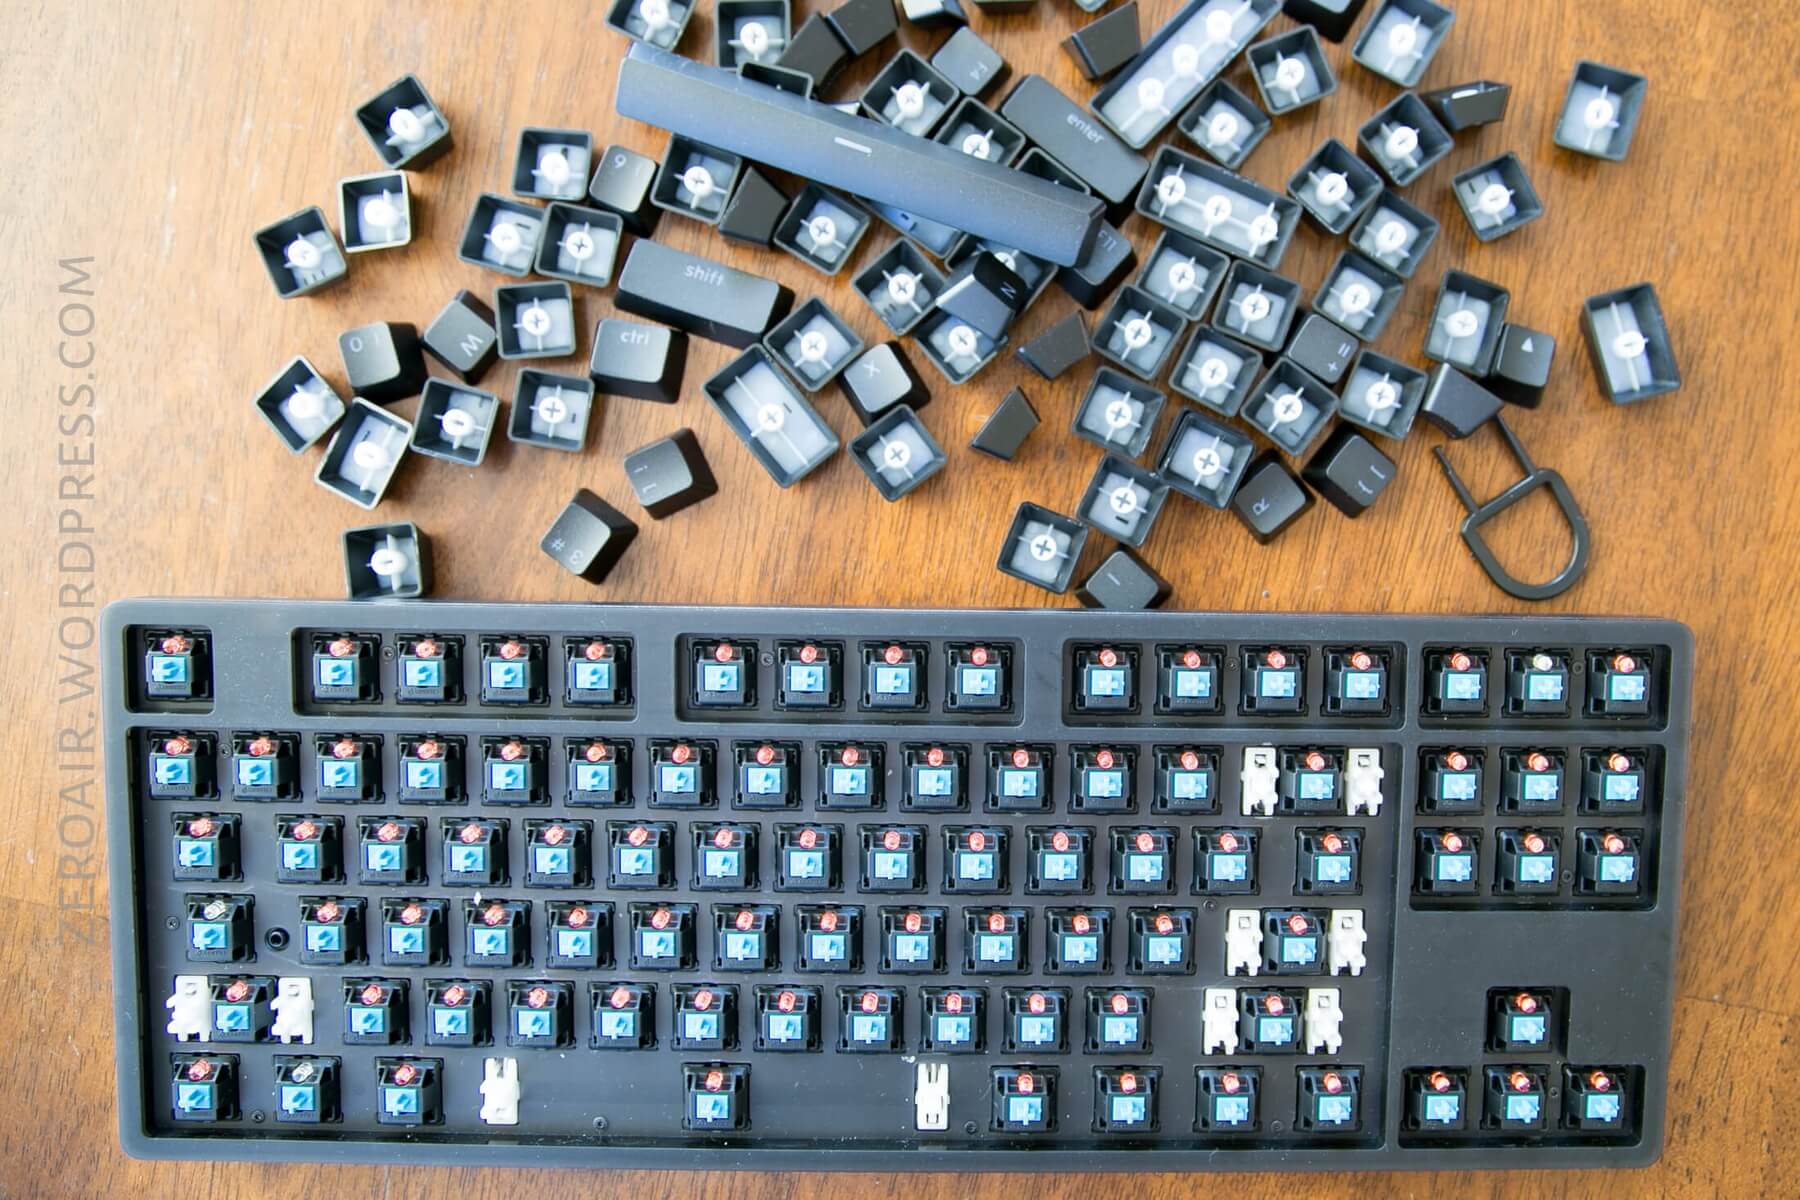
The plate cover is just plastic. The plate cover snaps into the case and makes things very snug.
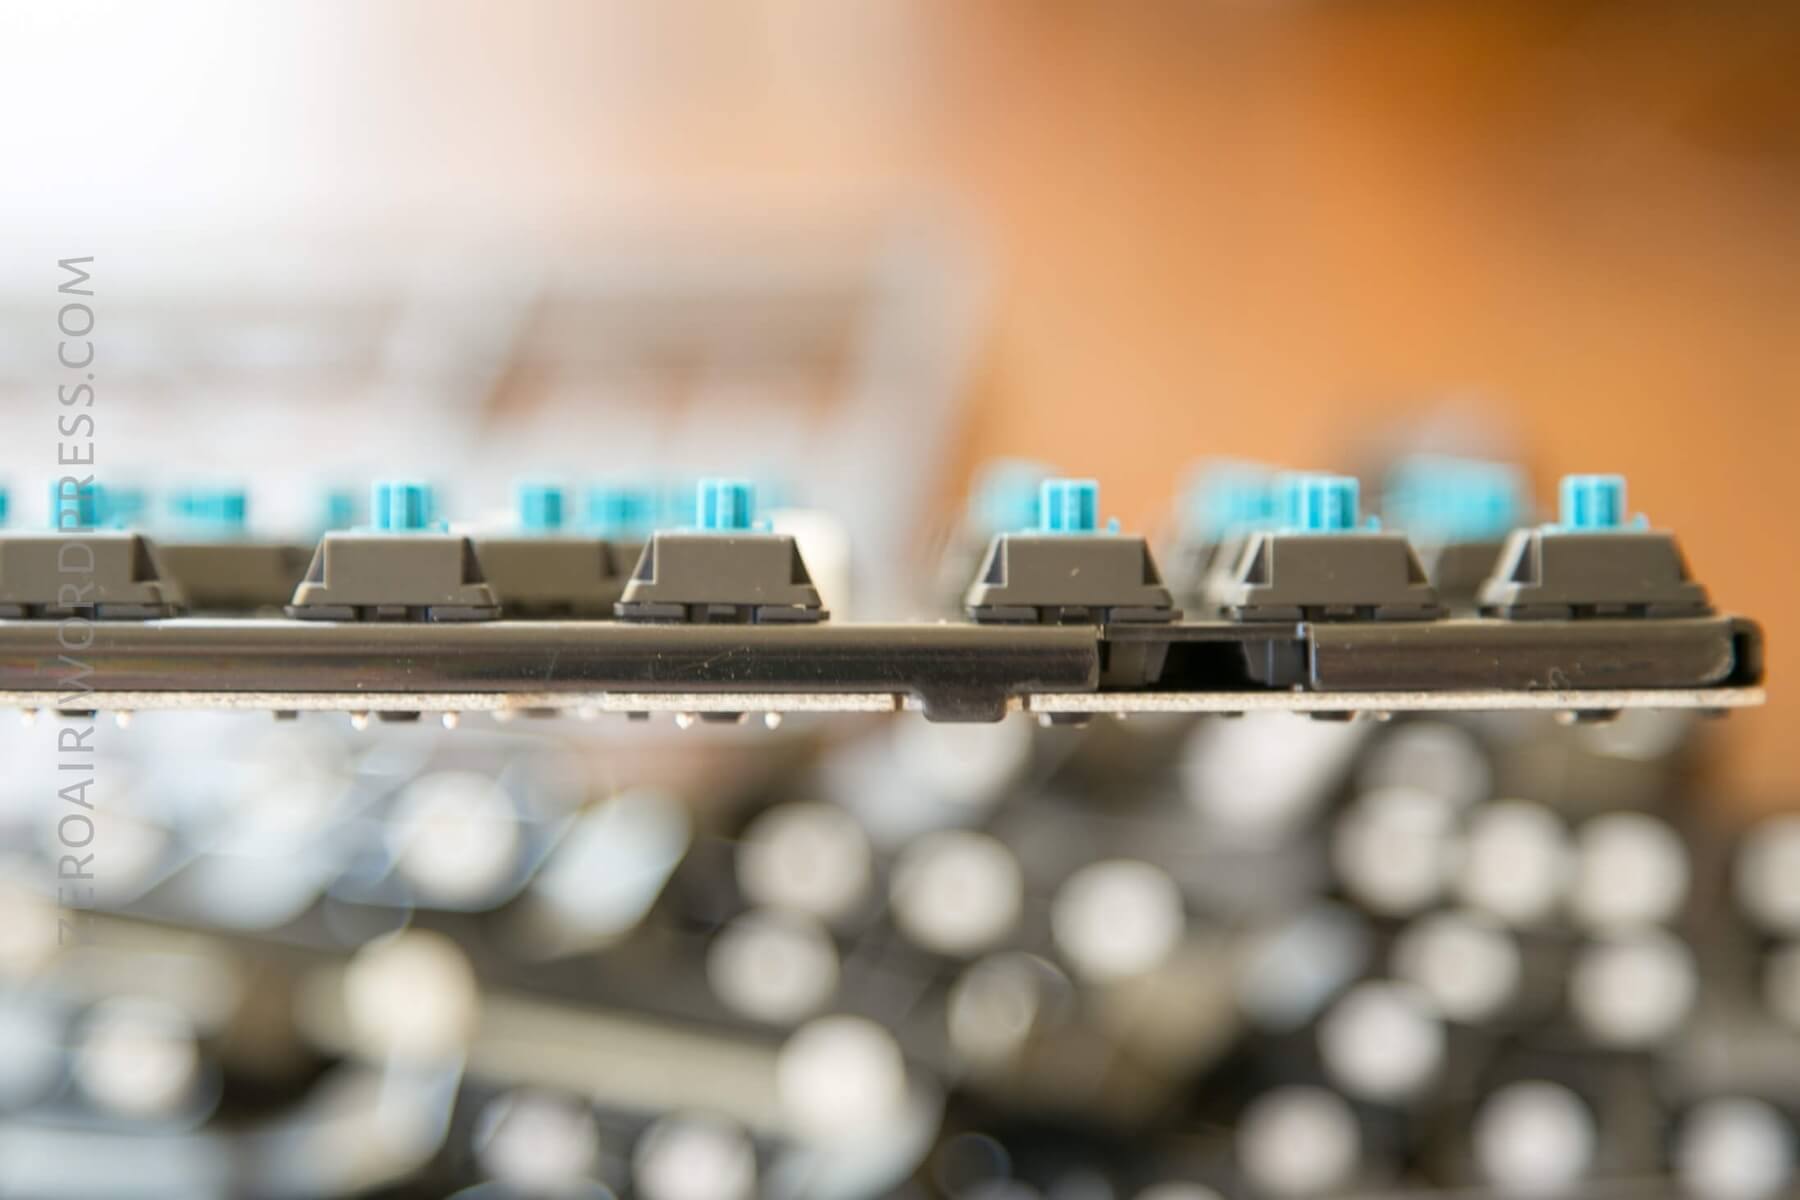
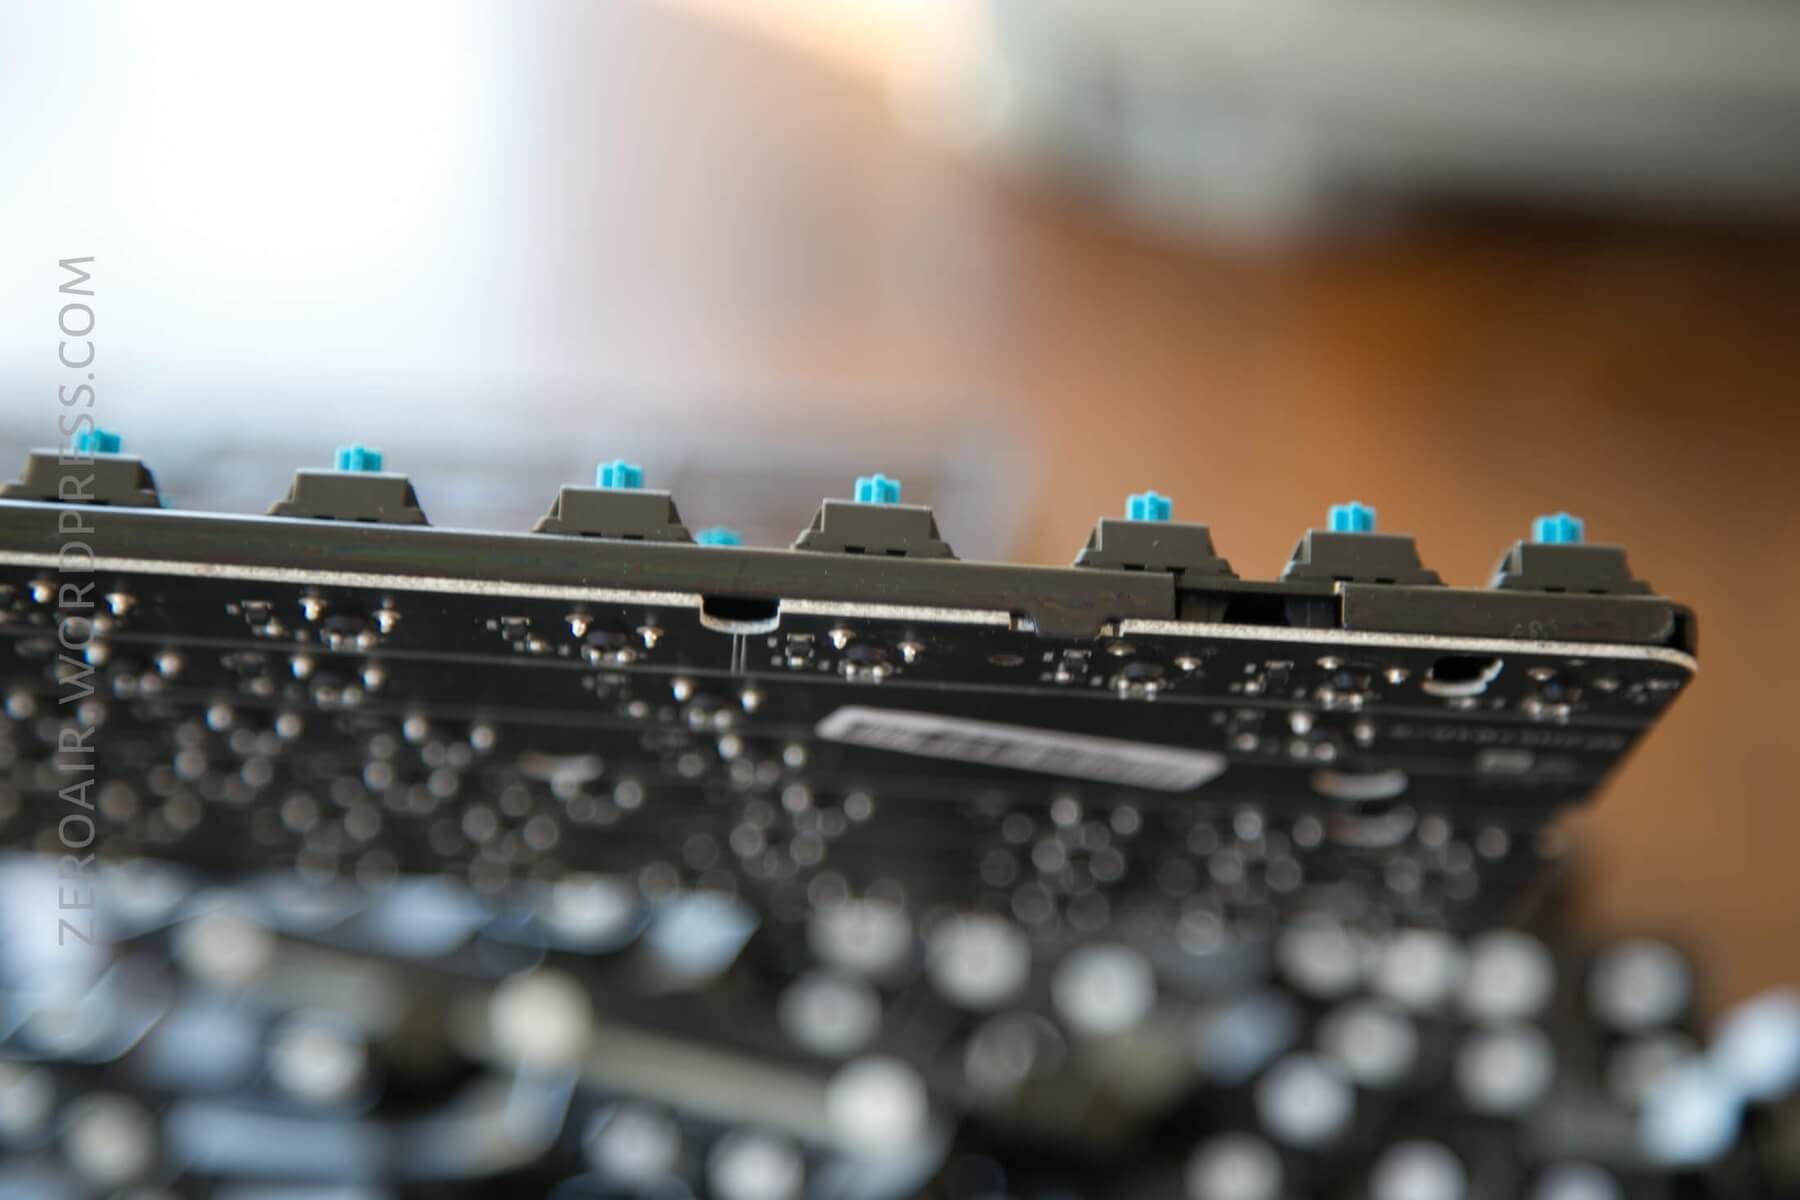
The parts that are visible from the top are nice and thick and look great. Between the keys, it’s very thin; if you disassemble this board when pulling this plate off, be careful! Or you’ll break it.
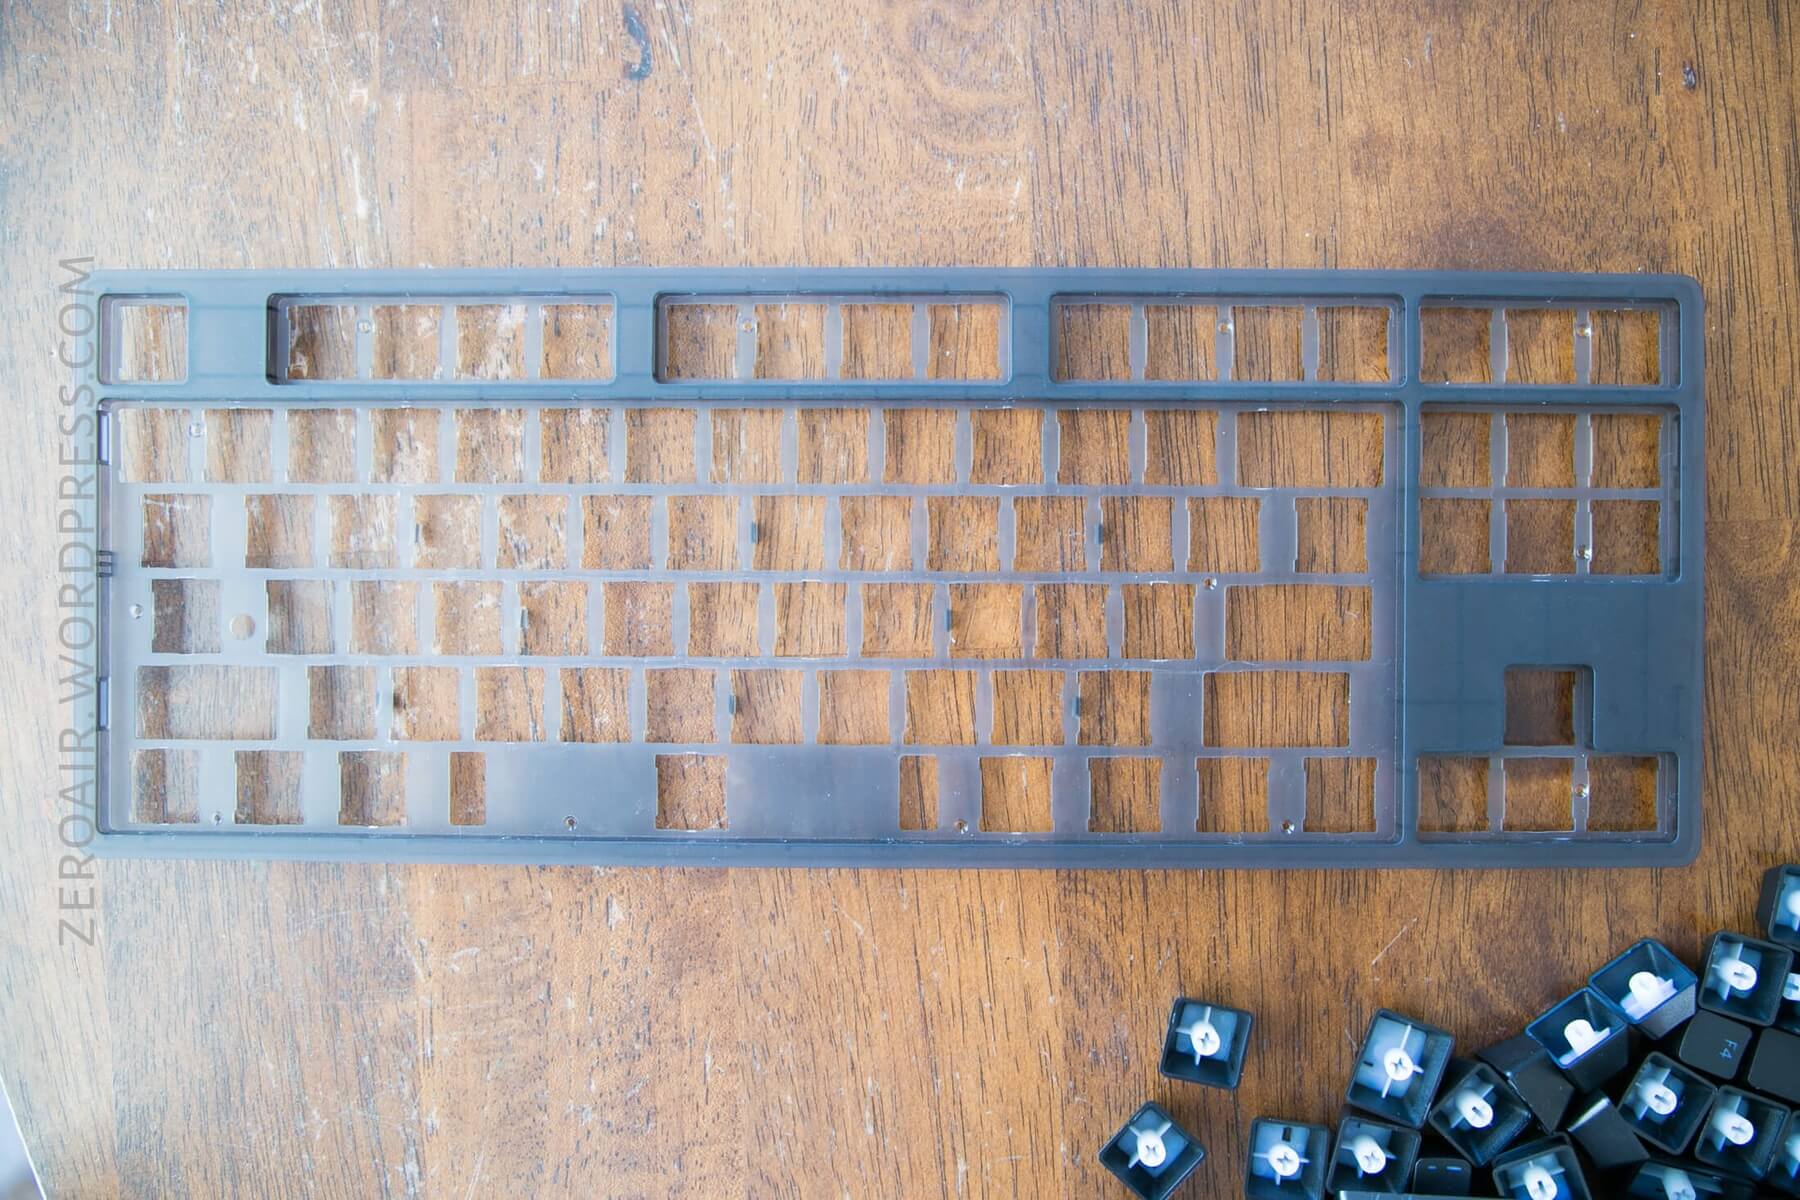
The plate (above) snaps into the case (below) and is also screwed down by the (many) Torx screws seen above.
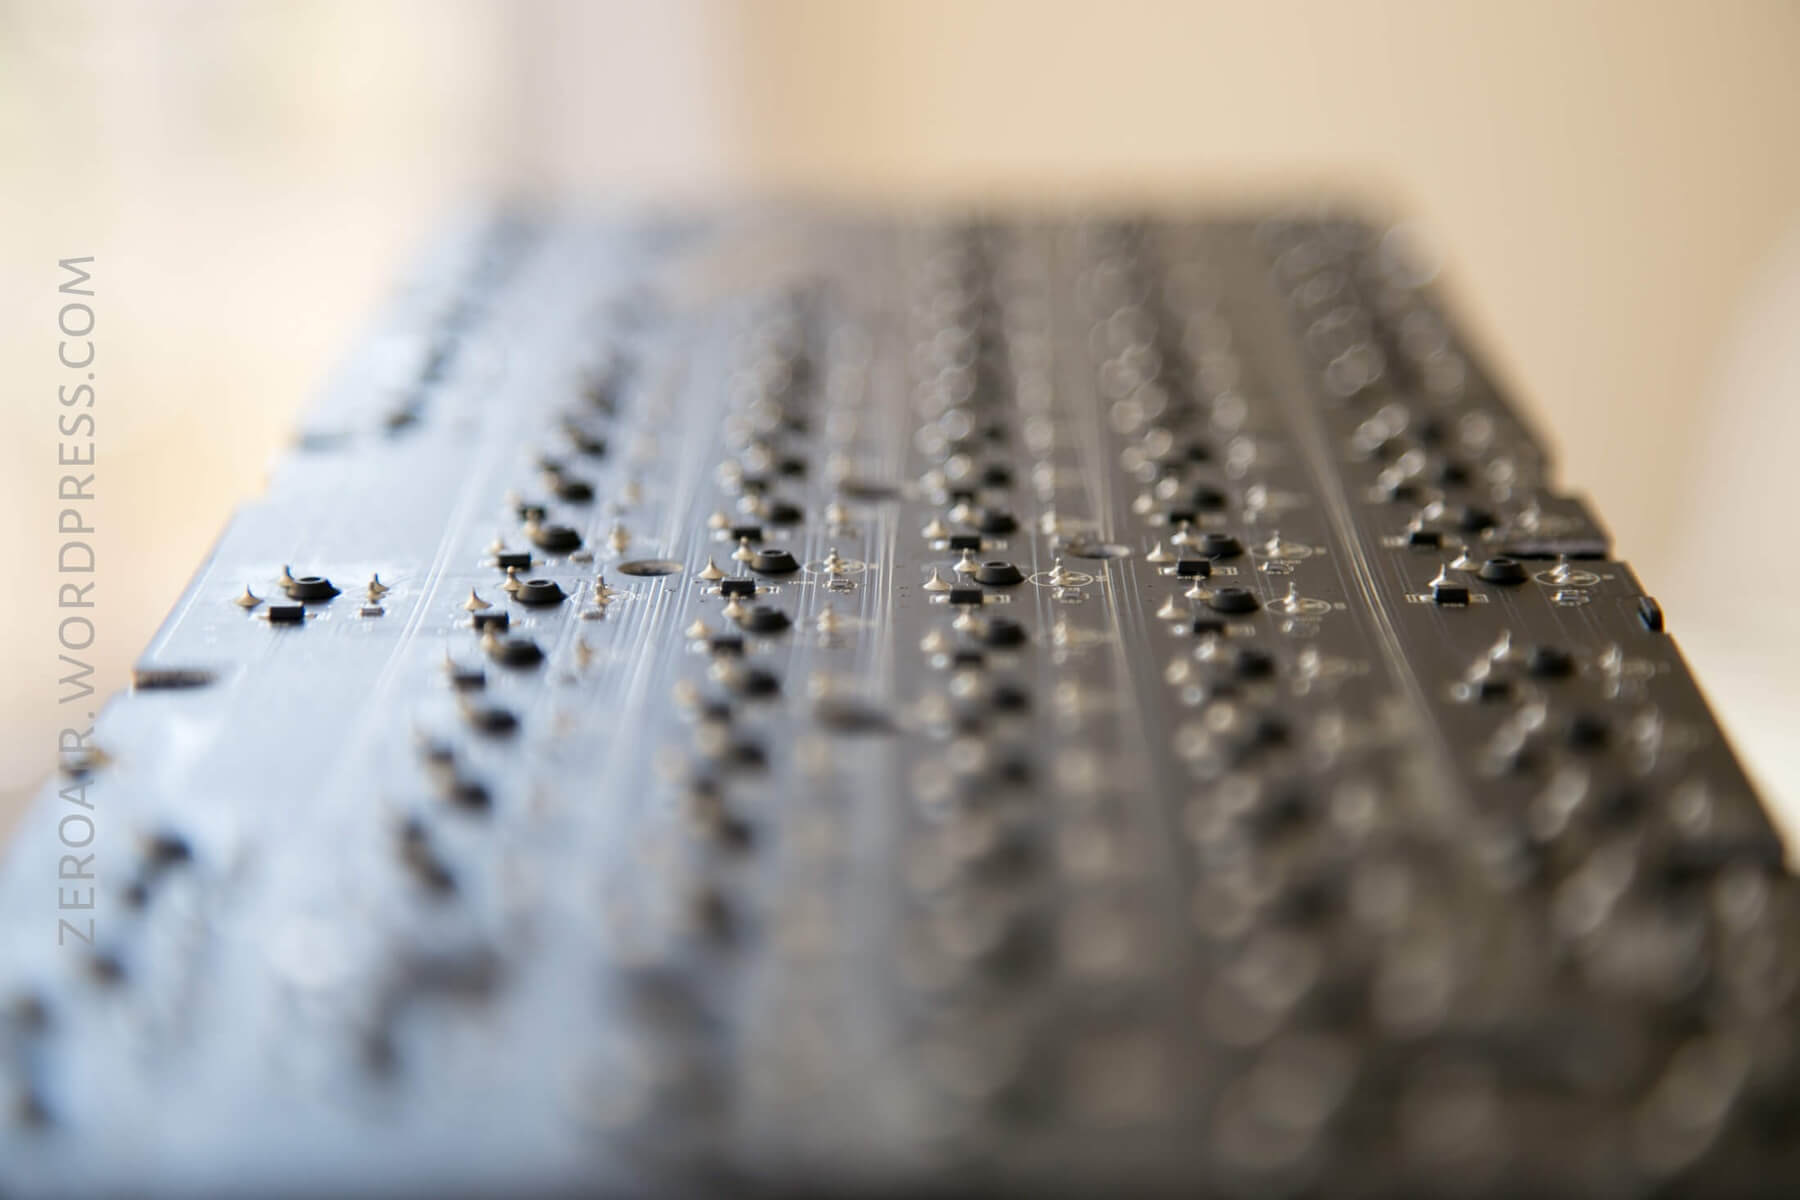
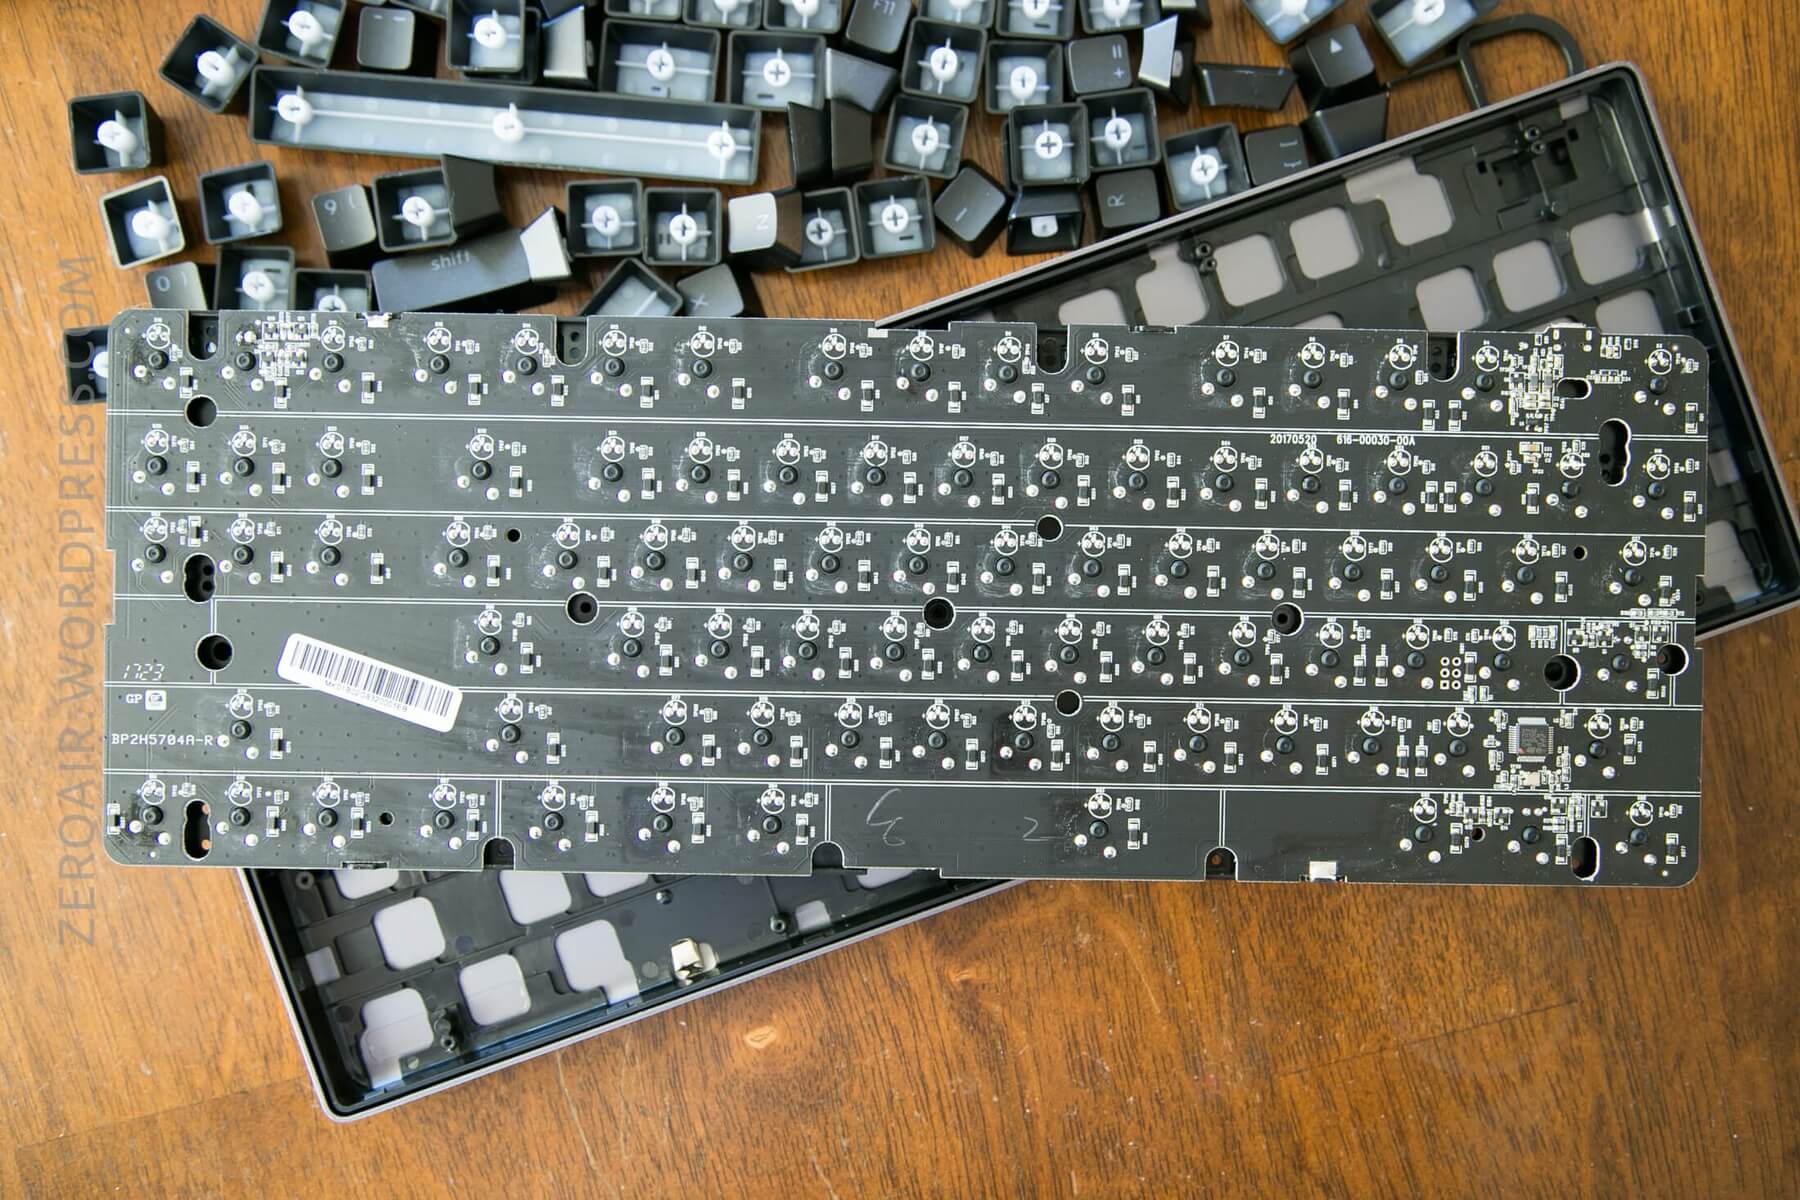
PCB / Controller
The PCB is sandwiched between the plastic plate seen above and the plastic insert that resides in the metal case. This is the nicest PCB I’ve seen in my limited experience tearing down keyboards.

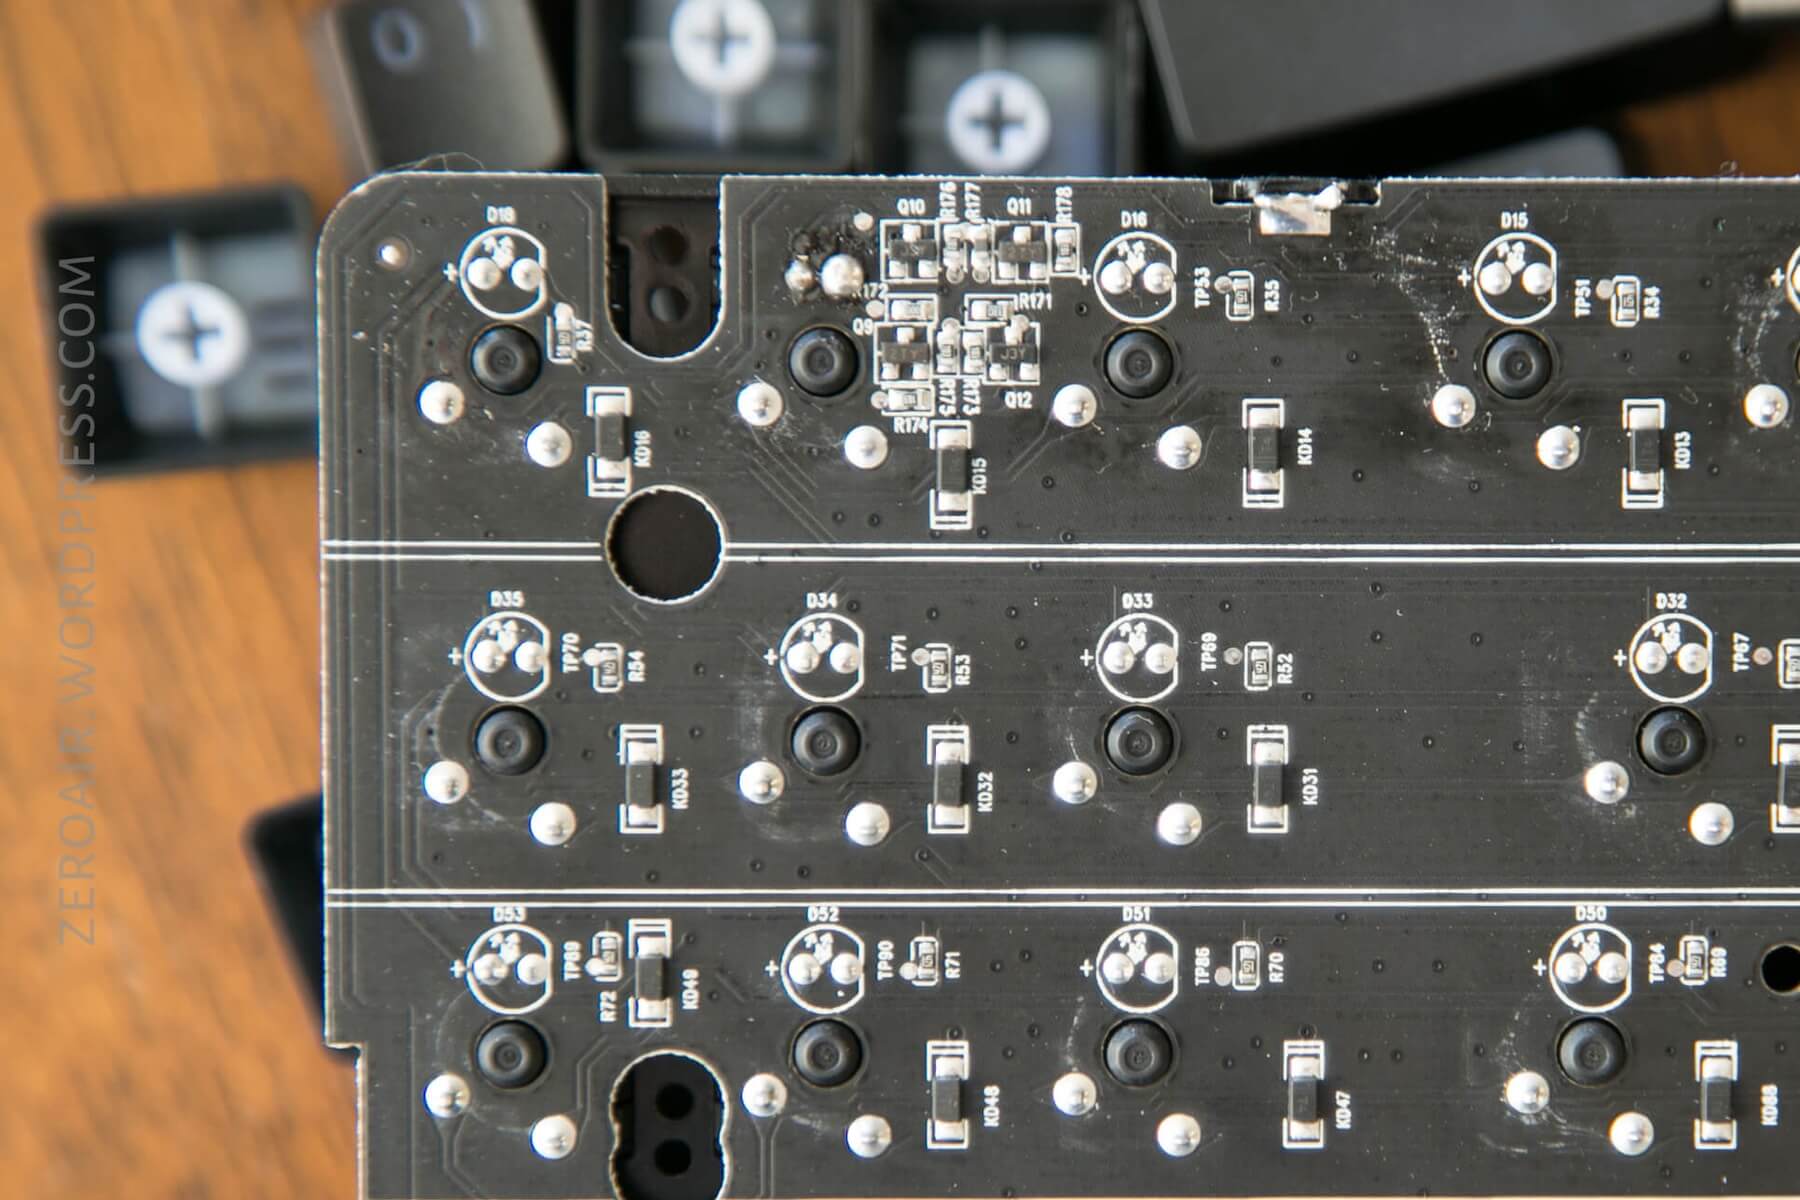
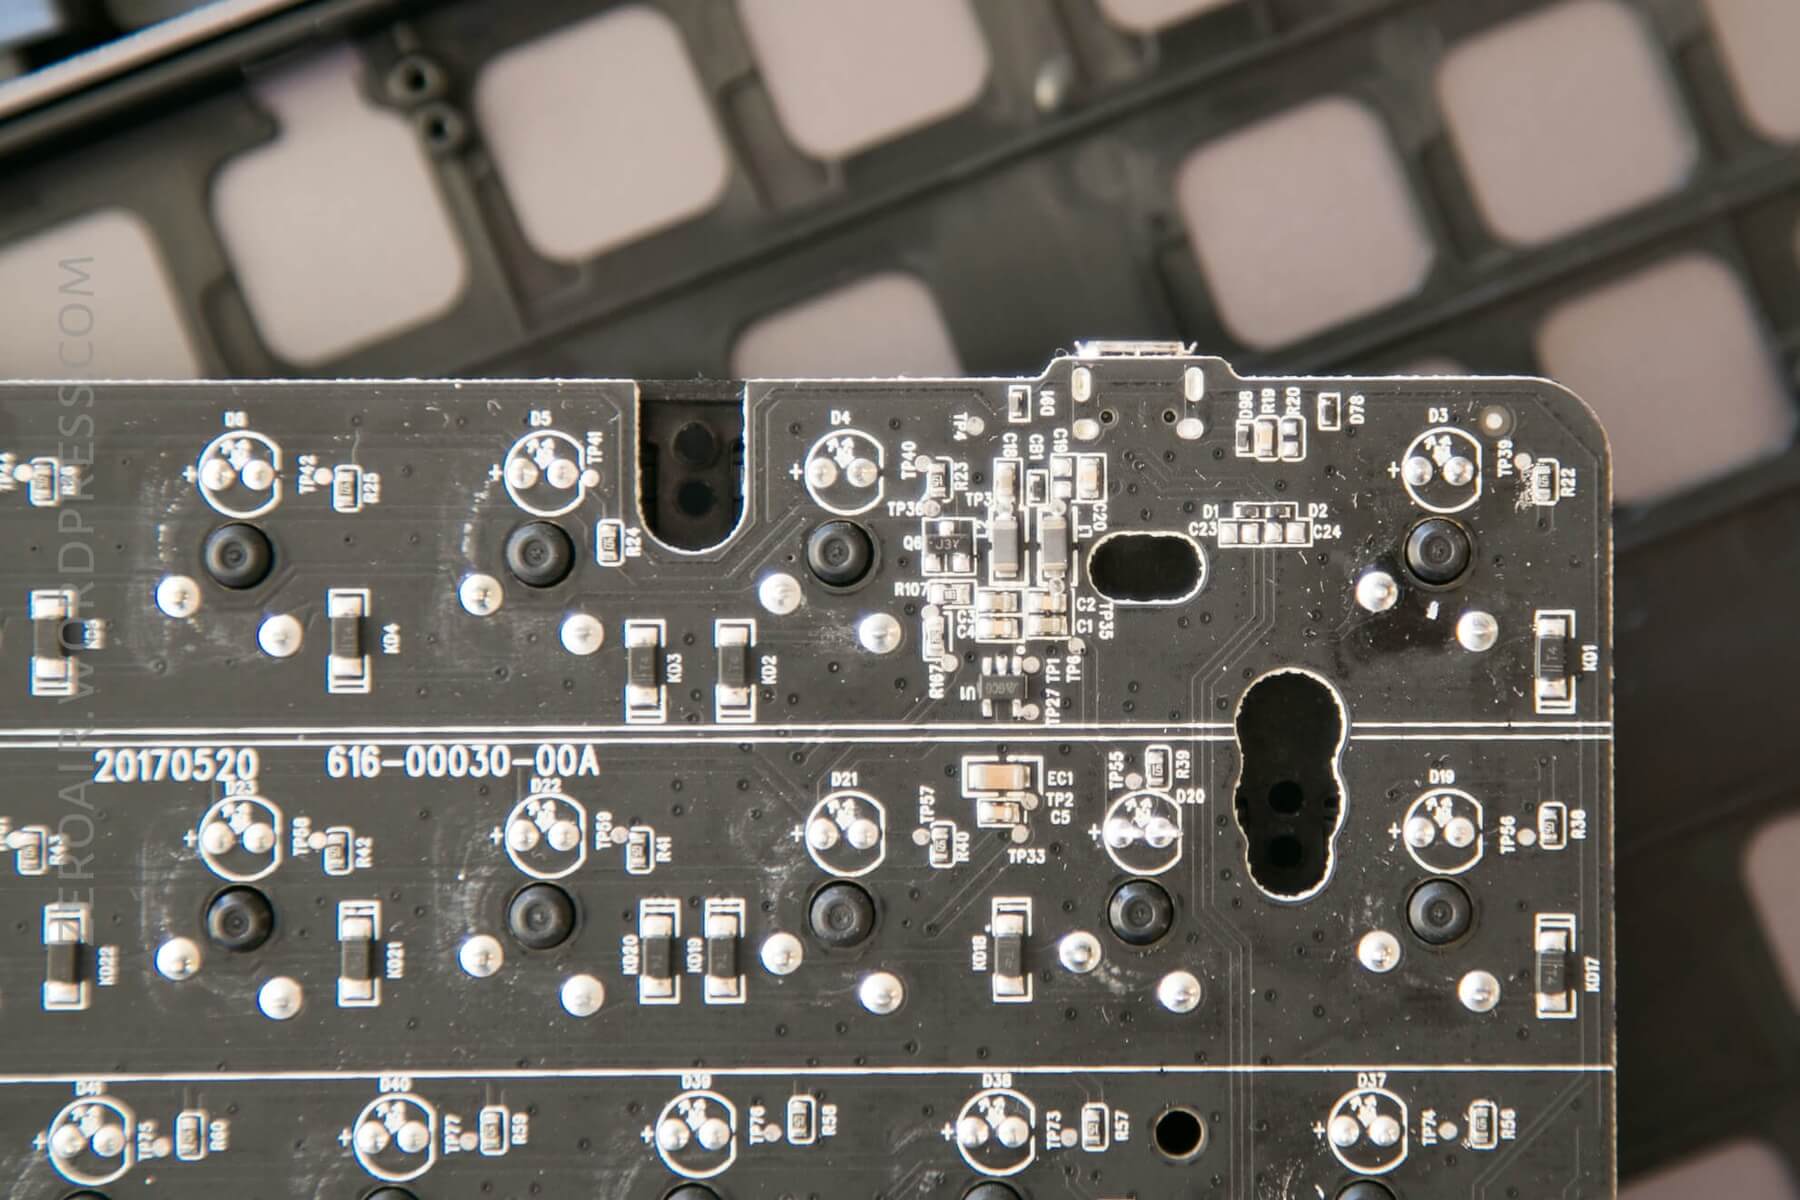
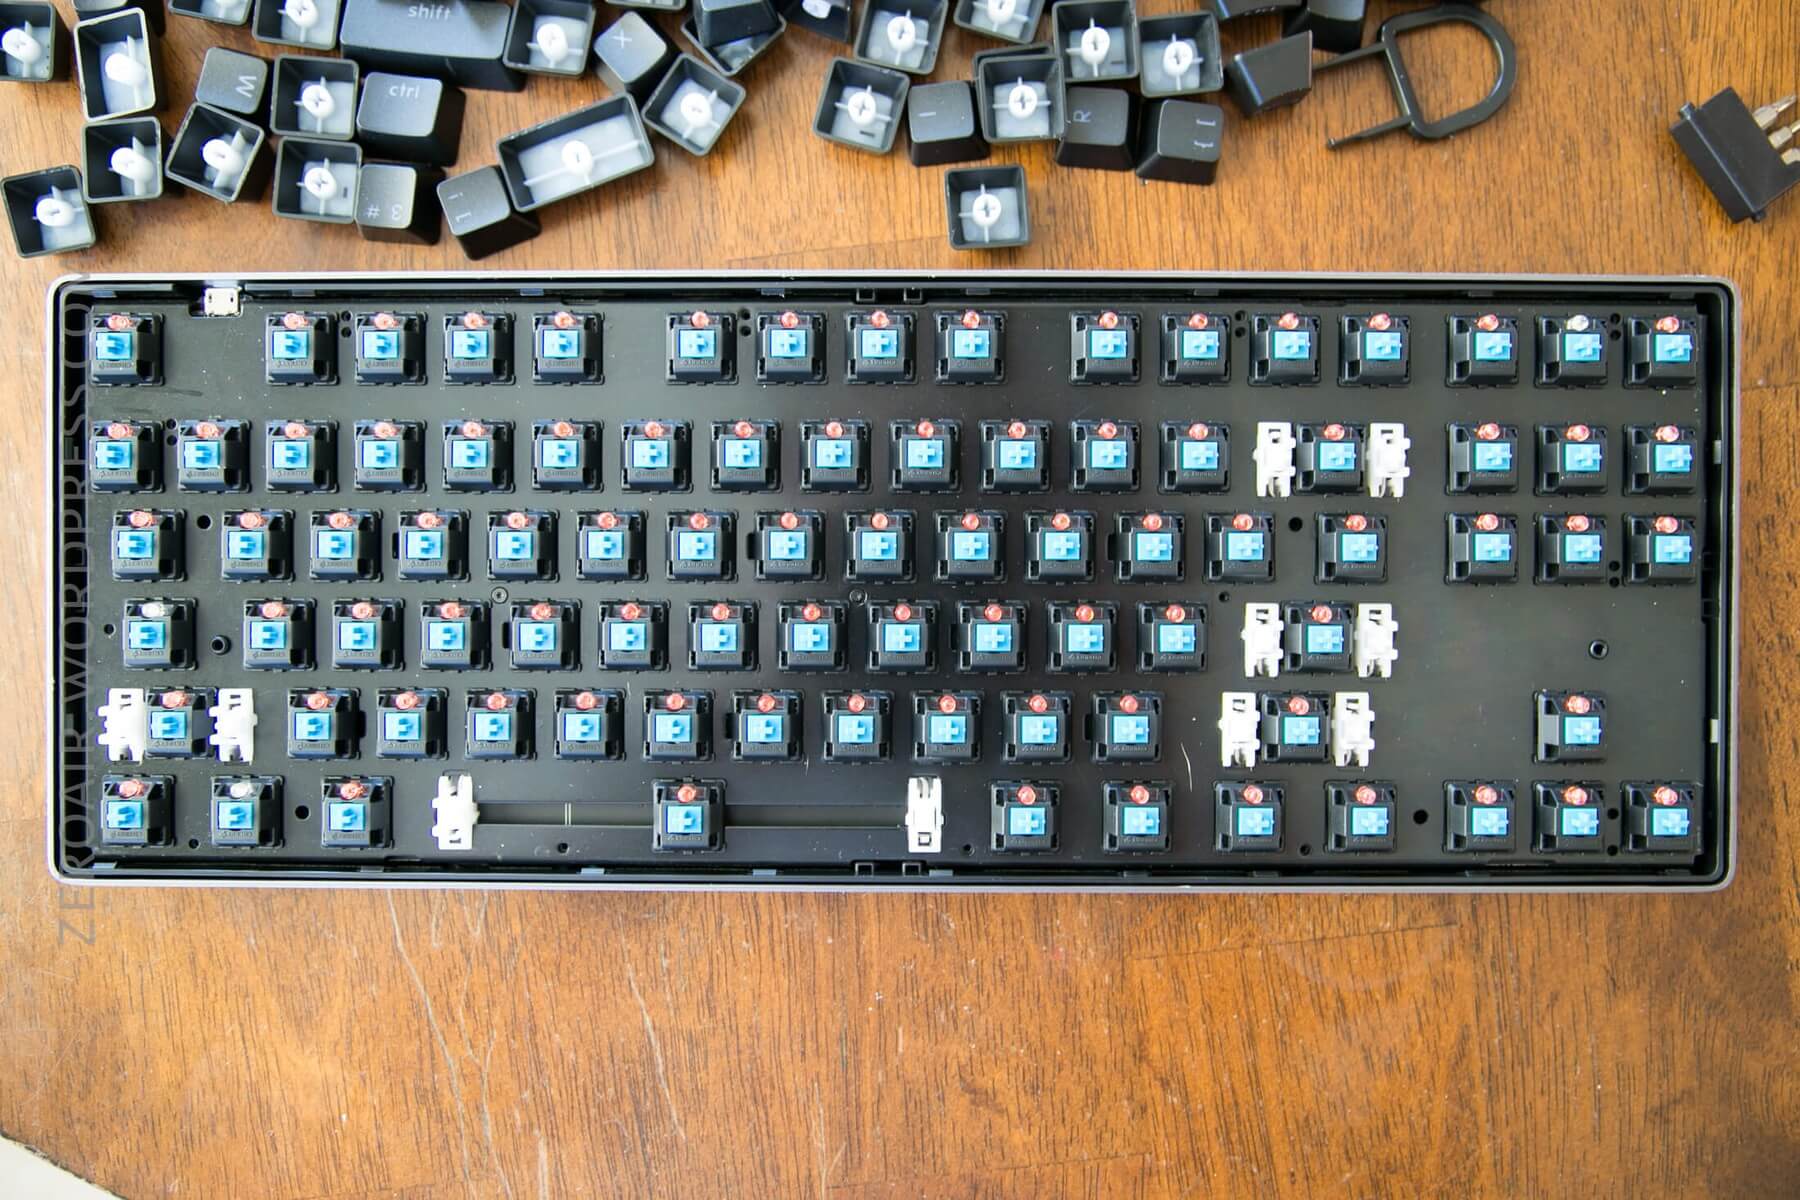
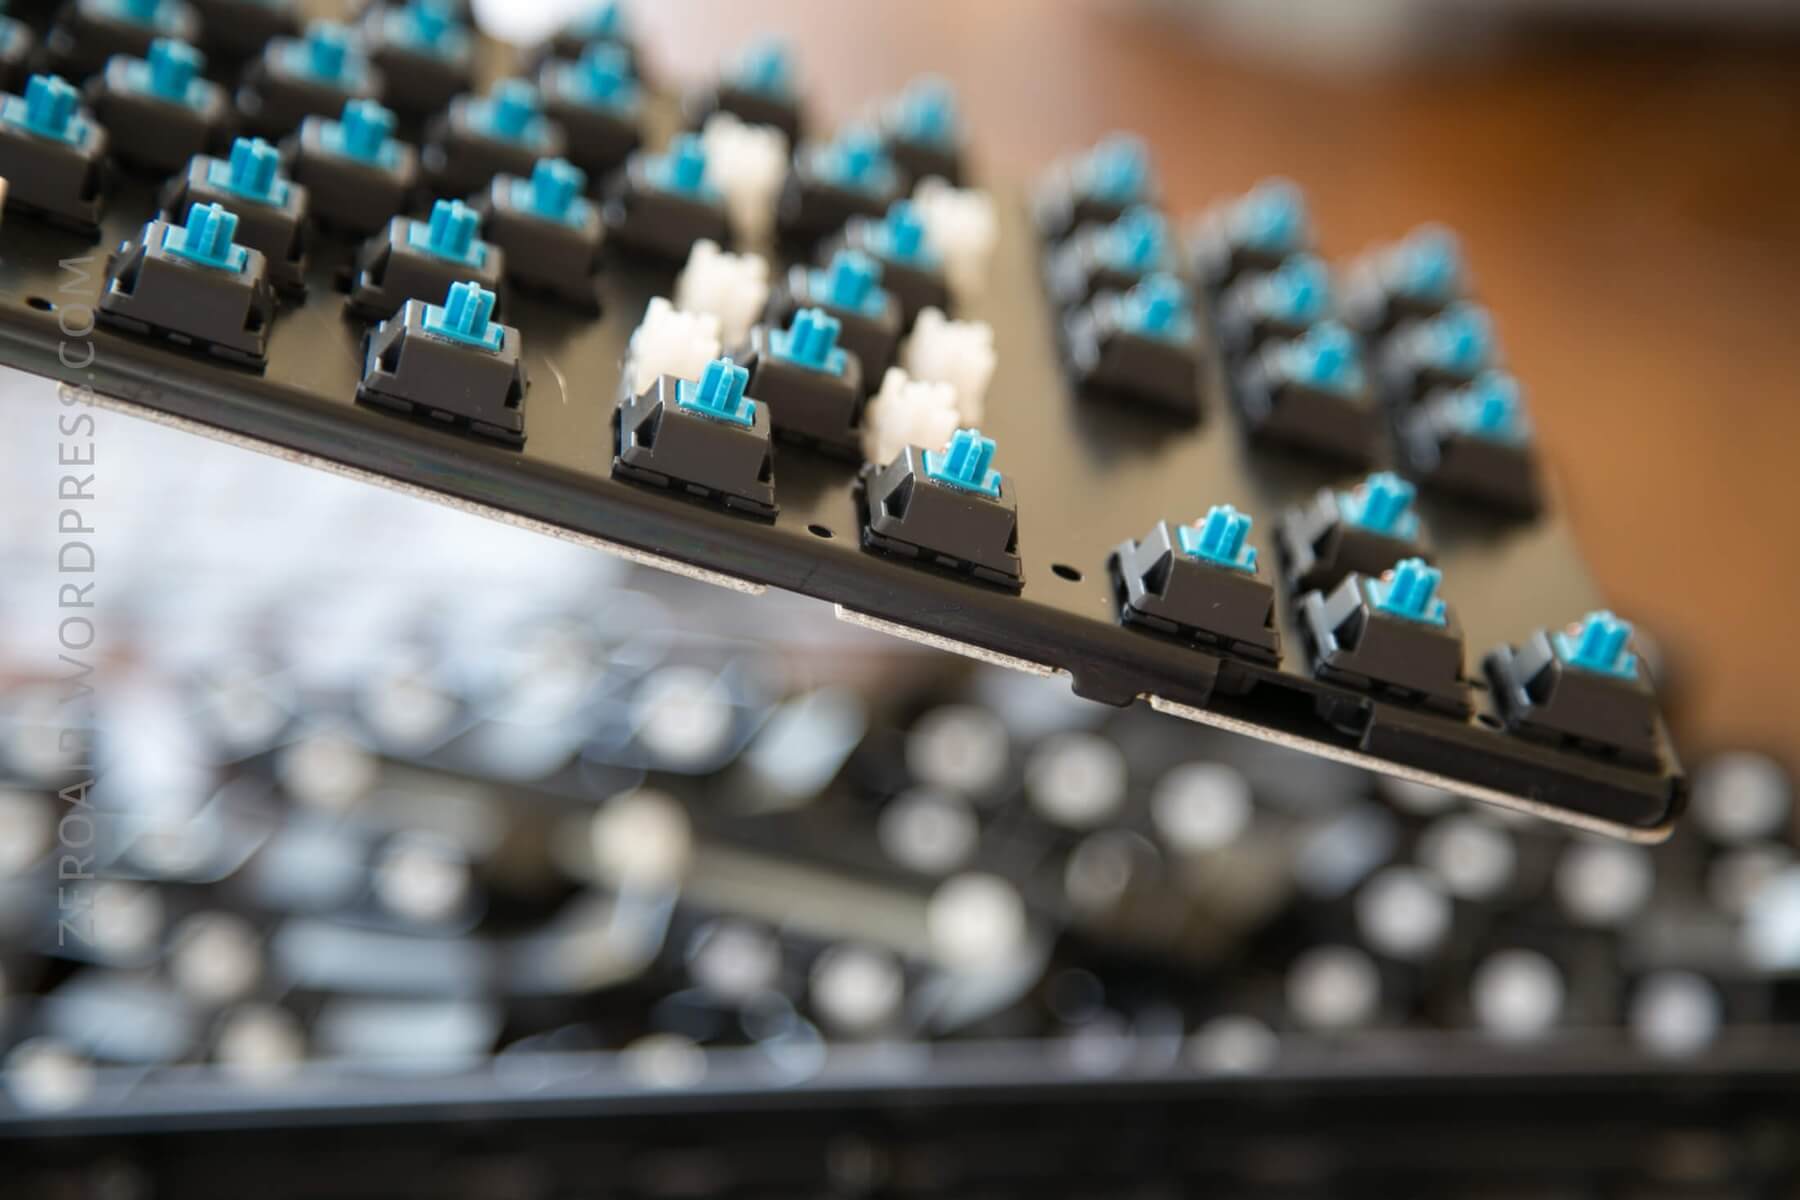
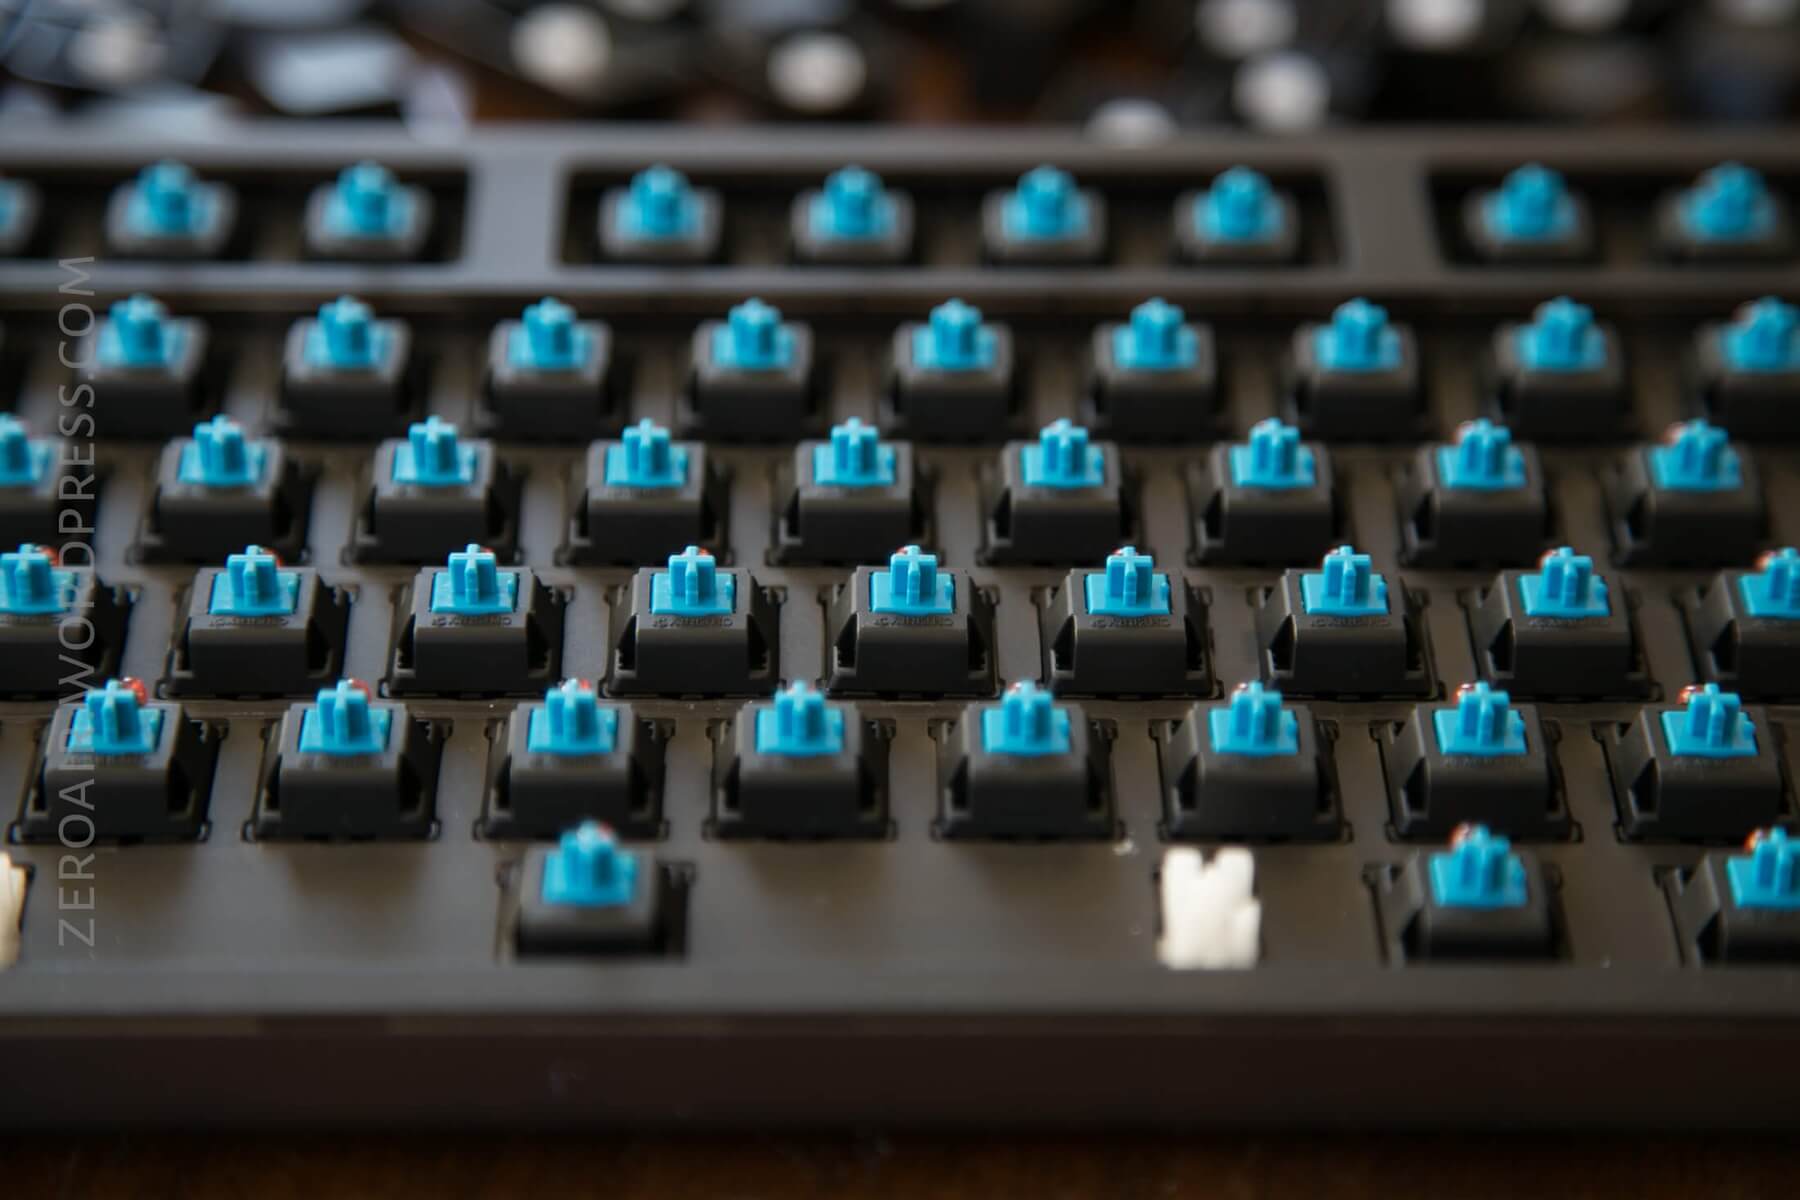
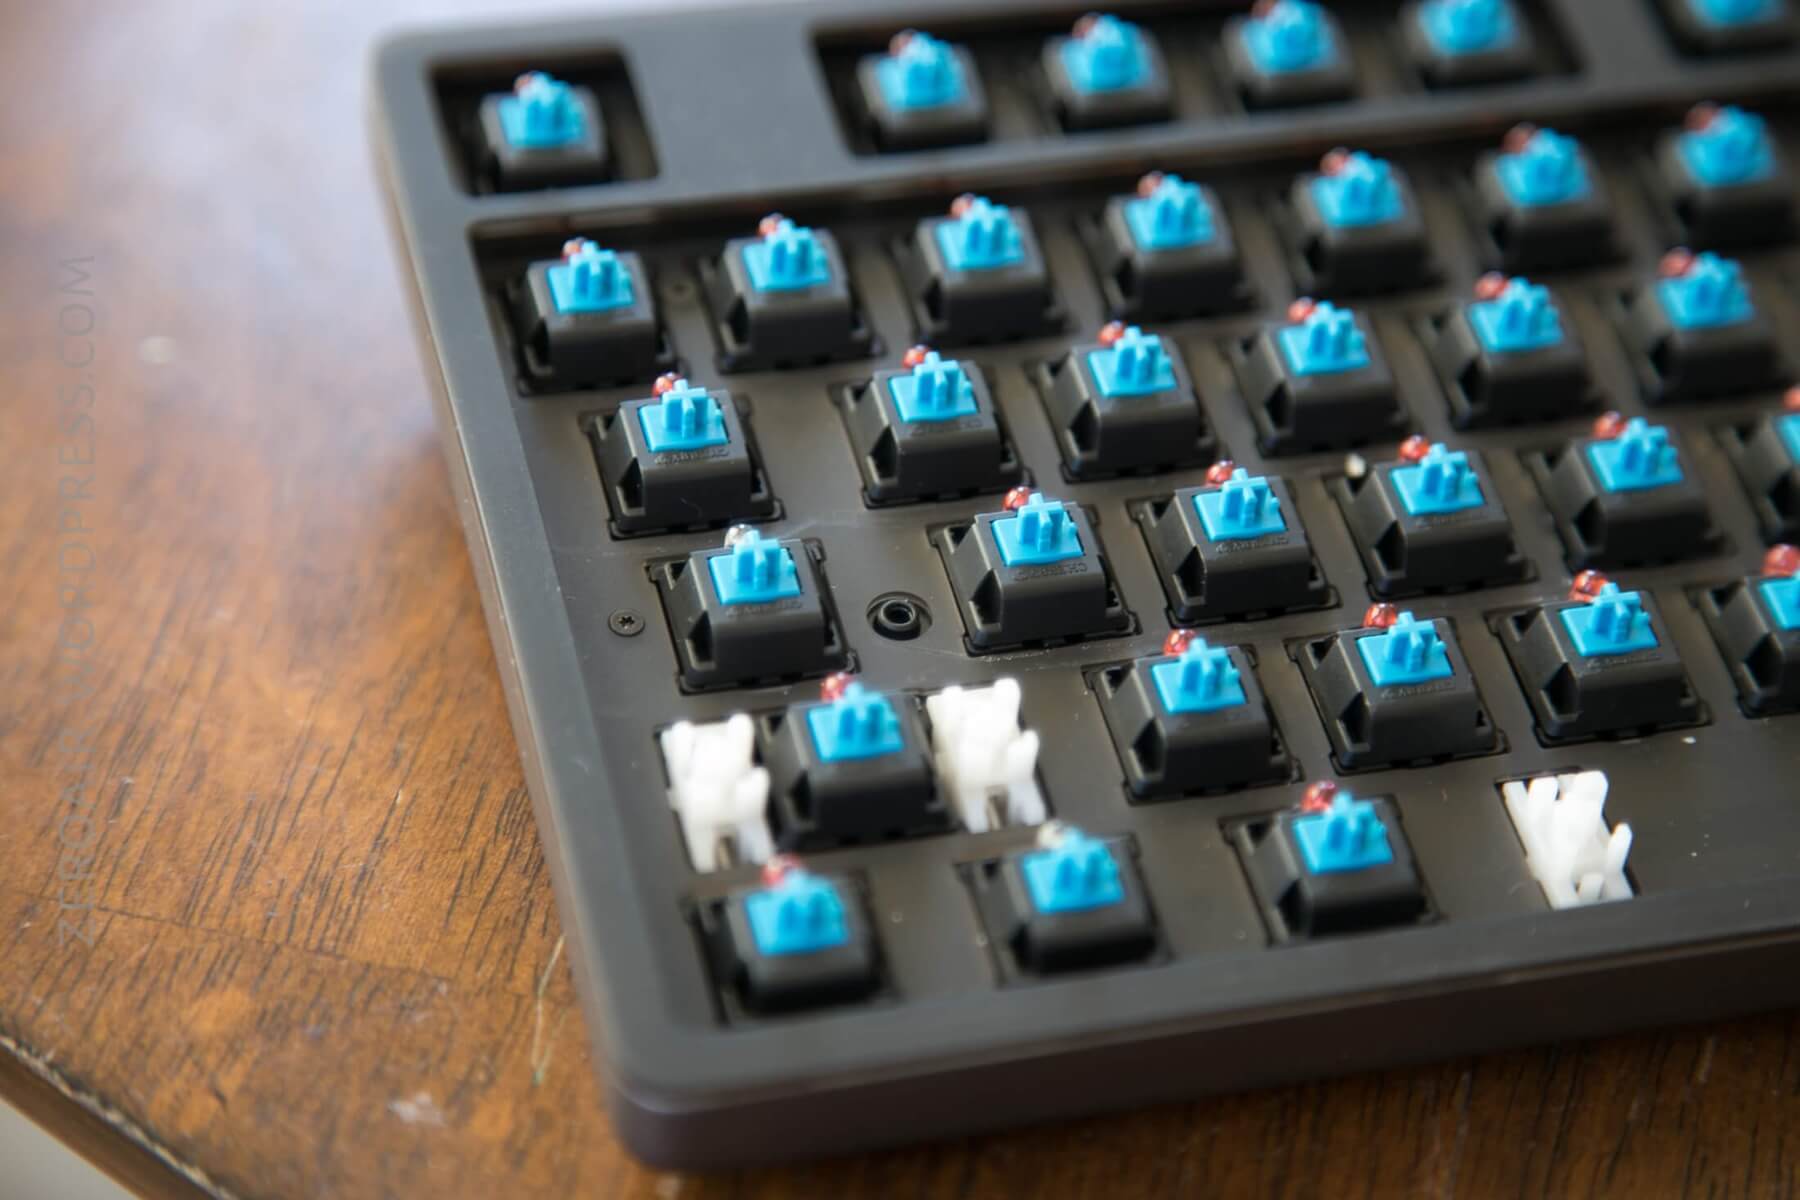
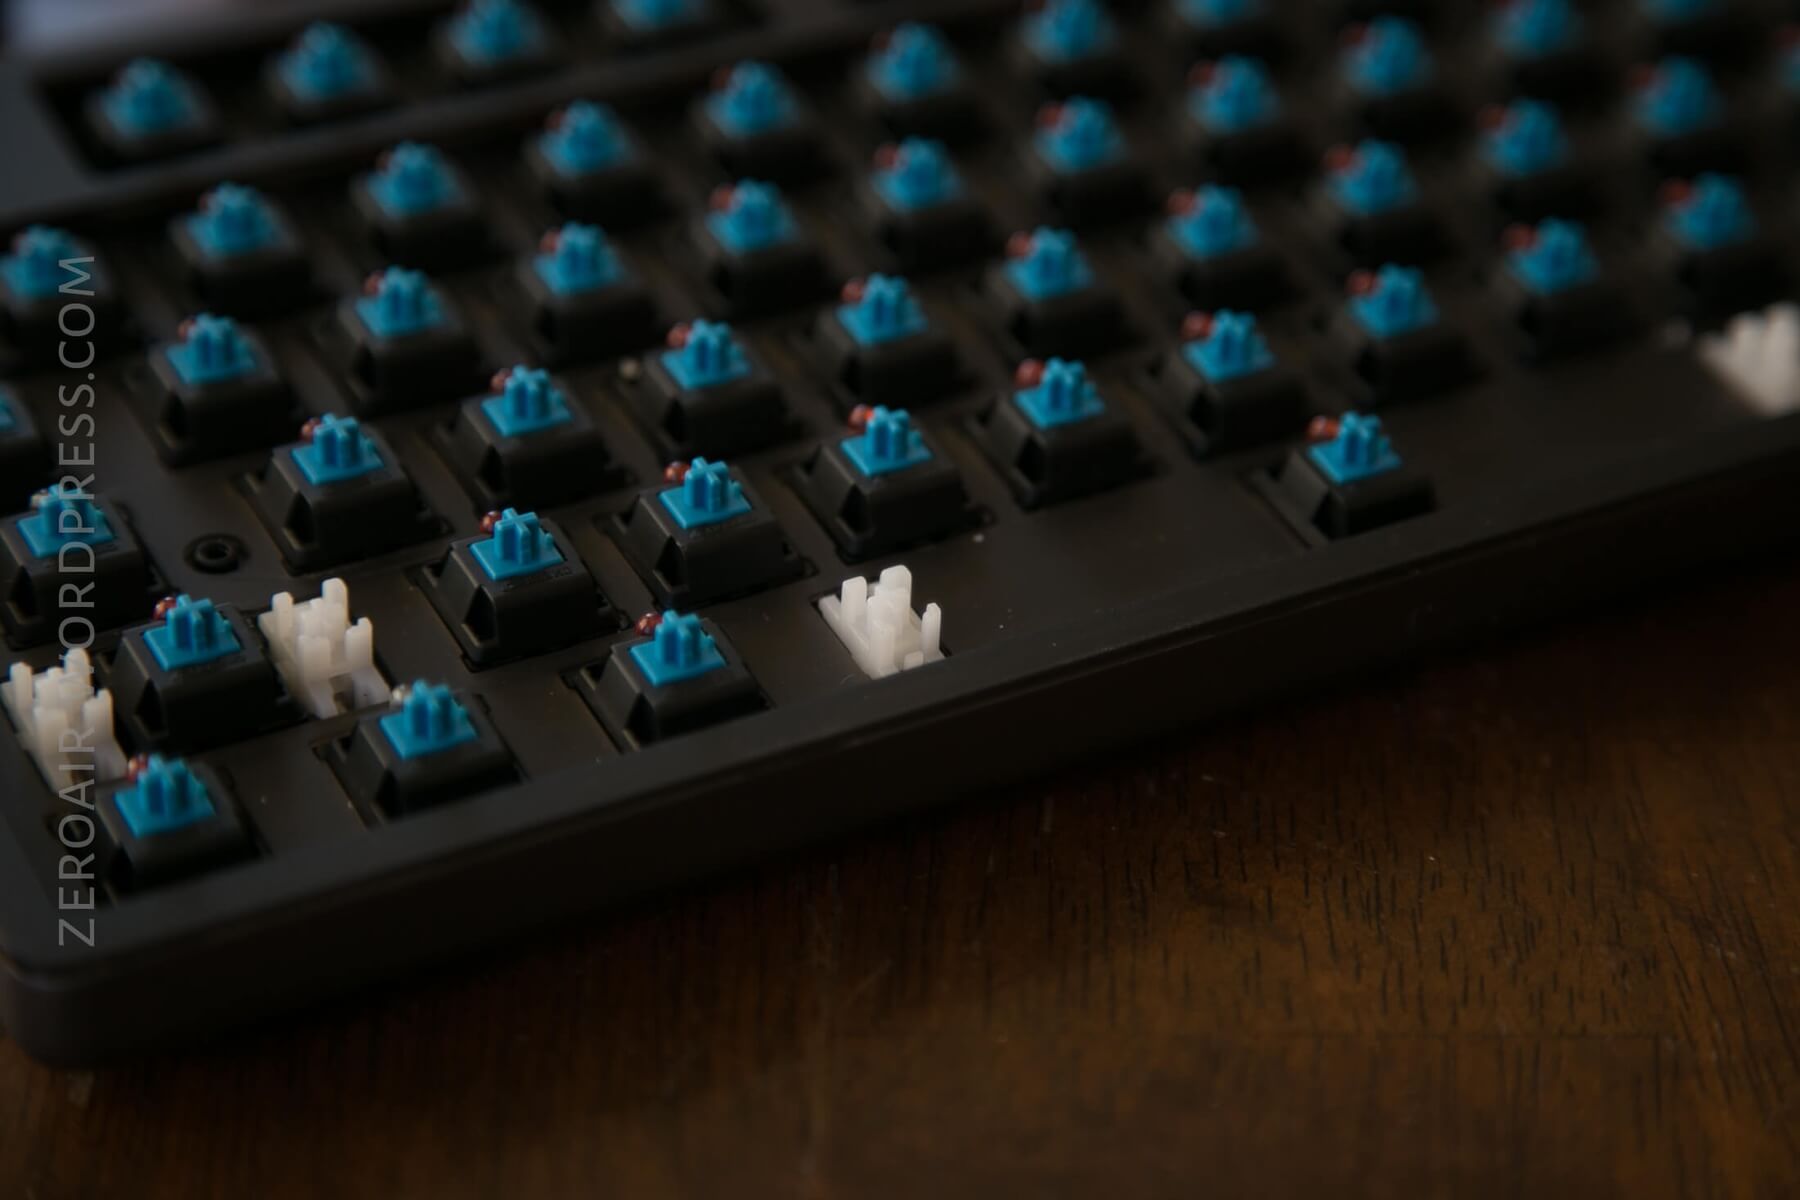
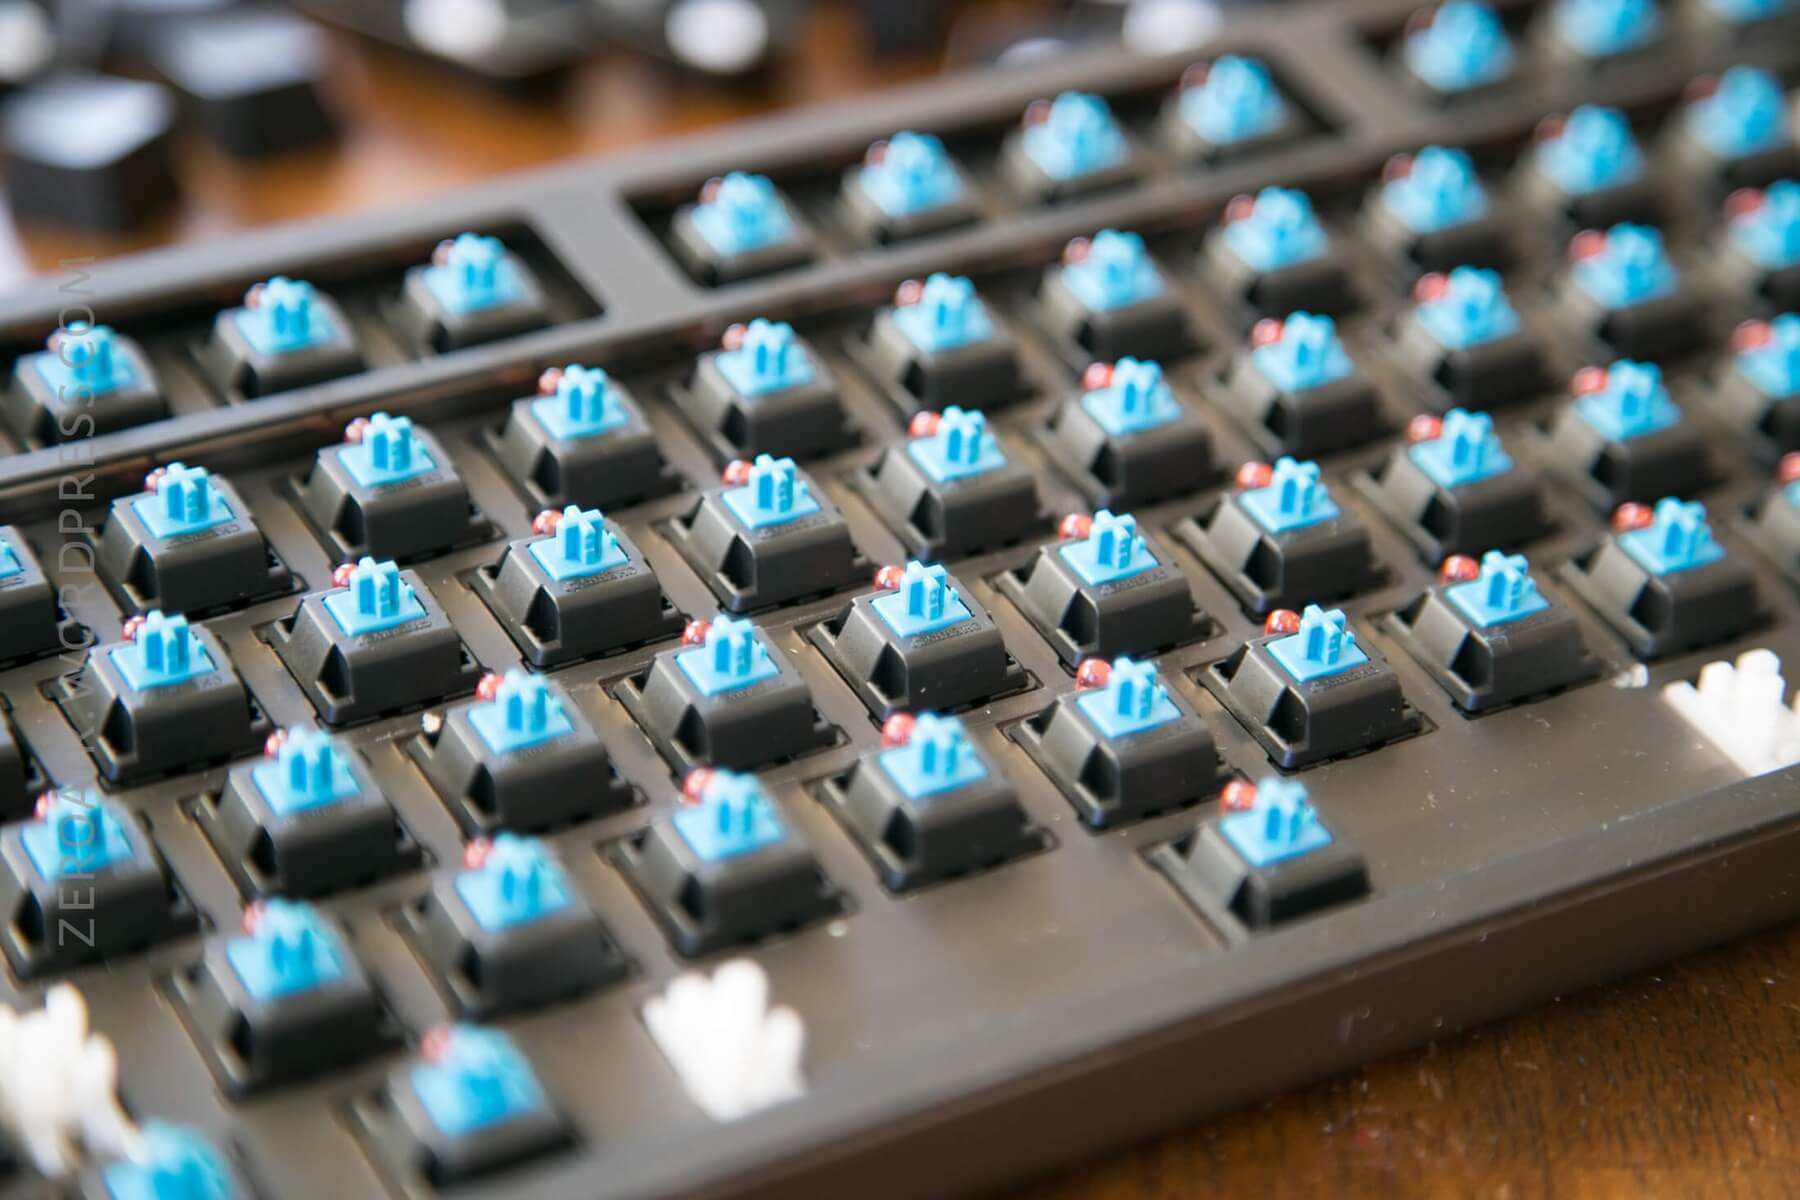
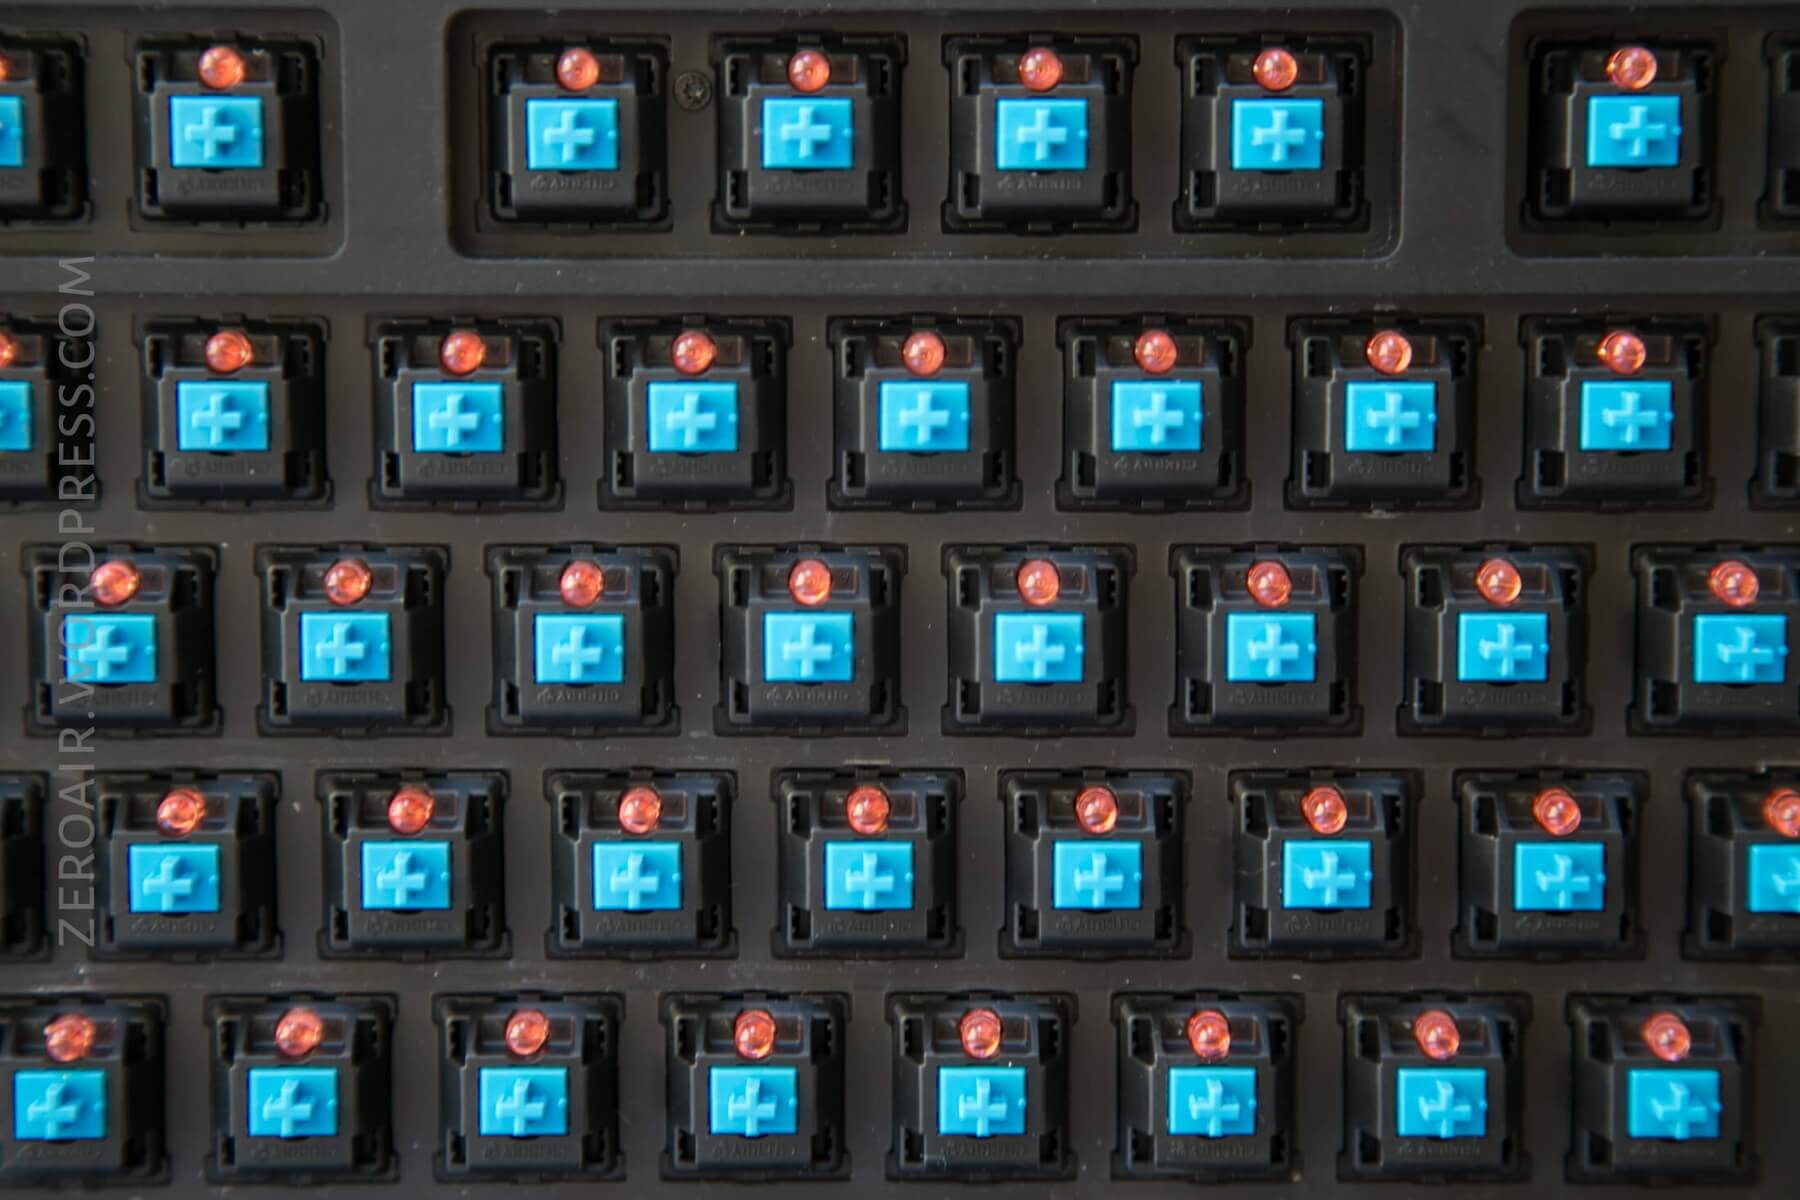
The switches are plate mounted on a steel plate, which has bent edges. This helps with spacing and probably alignment during manufacturing. And this plate is likely what adds a big chunk of the weight felt from this board.
Layout and Keycaps
Again, this is a Tenkeyless board. Tenkeyless (TKL) happens to be my layout of choice. Numpad? Who needs that!! Arrows, on the other hand, I can’t live without those.
And this MK01B is a fine example of TKL. The spacing is all exactly standard, and the bezel is very slim. There’s not much extra space – it’s a small footprint.
With TKL, you retain the function row, and there’s normal spacing to that, too. I’ve had other boards where the FN row was too close to the num row, and that’s cumbersome (even if the board can be smaller).
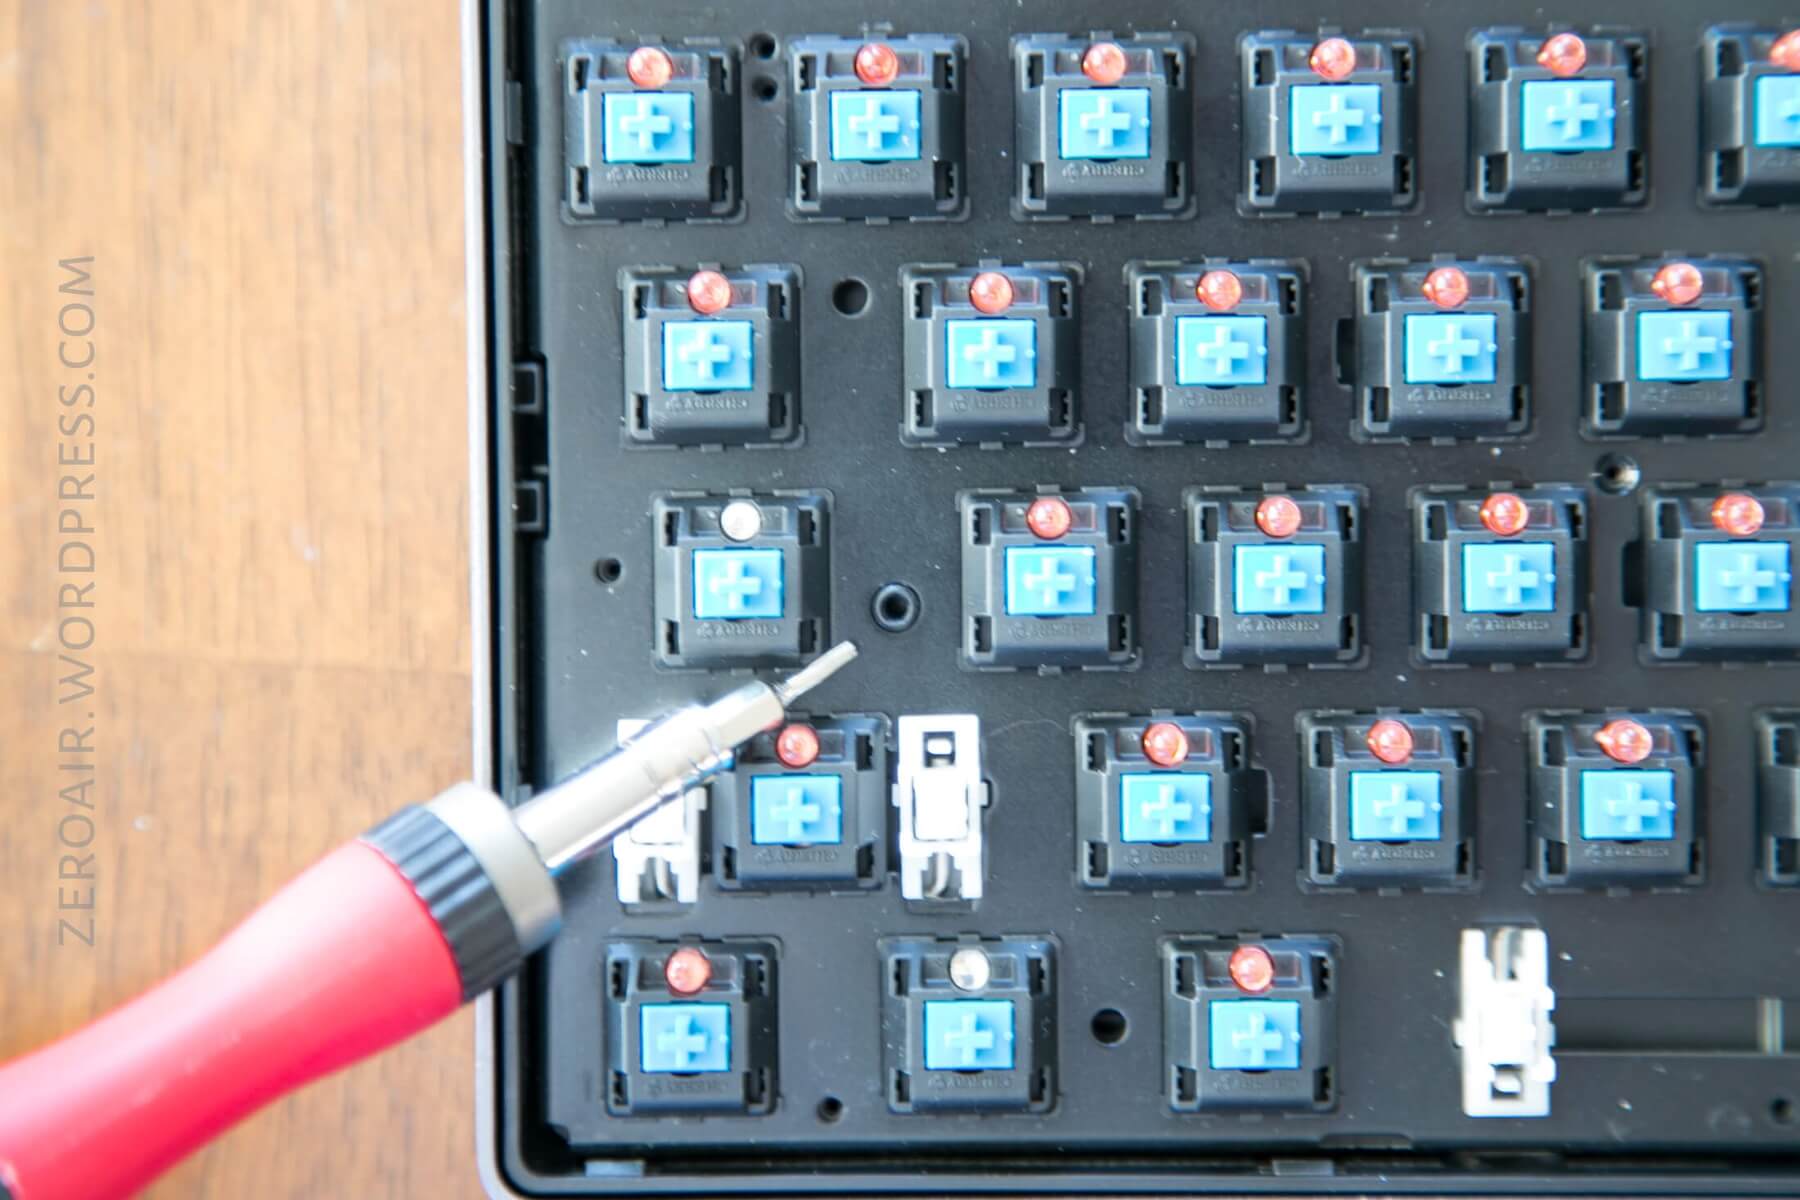
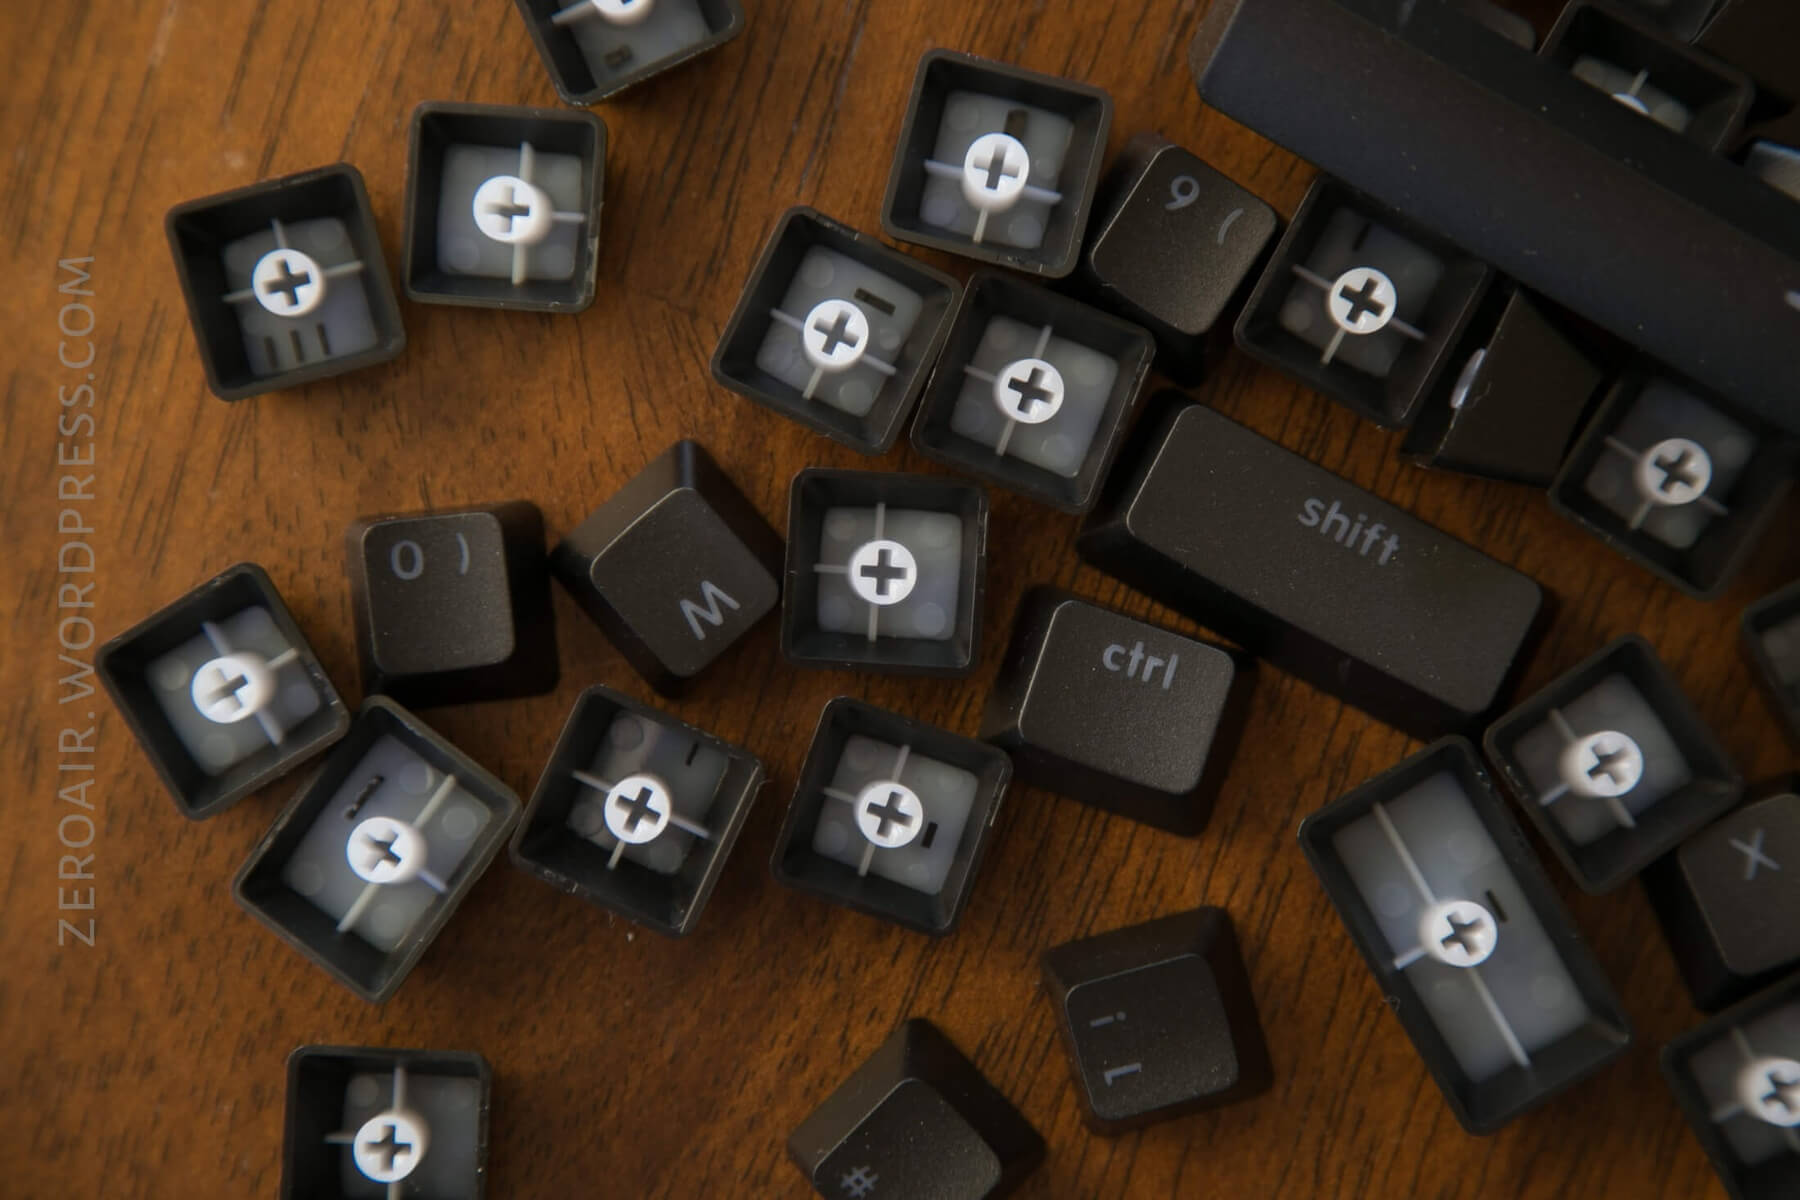
The switches are double-shot; primarily black, but with an opaque white for the stem and lettering. This mostly worked, but when considering the LEDs underneath (as you’ll see later), not all of every key’s lettering lights completely.
Life ain’t nothing but Switches and money
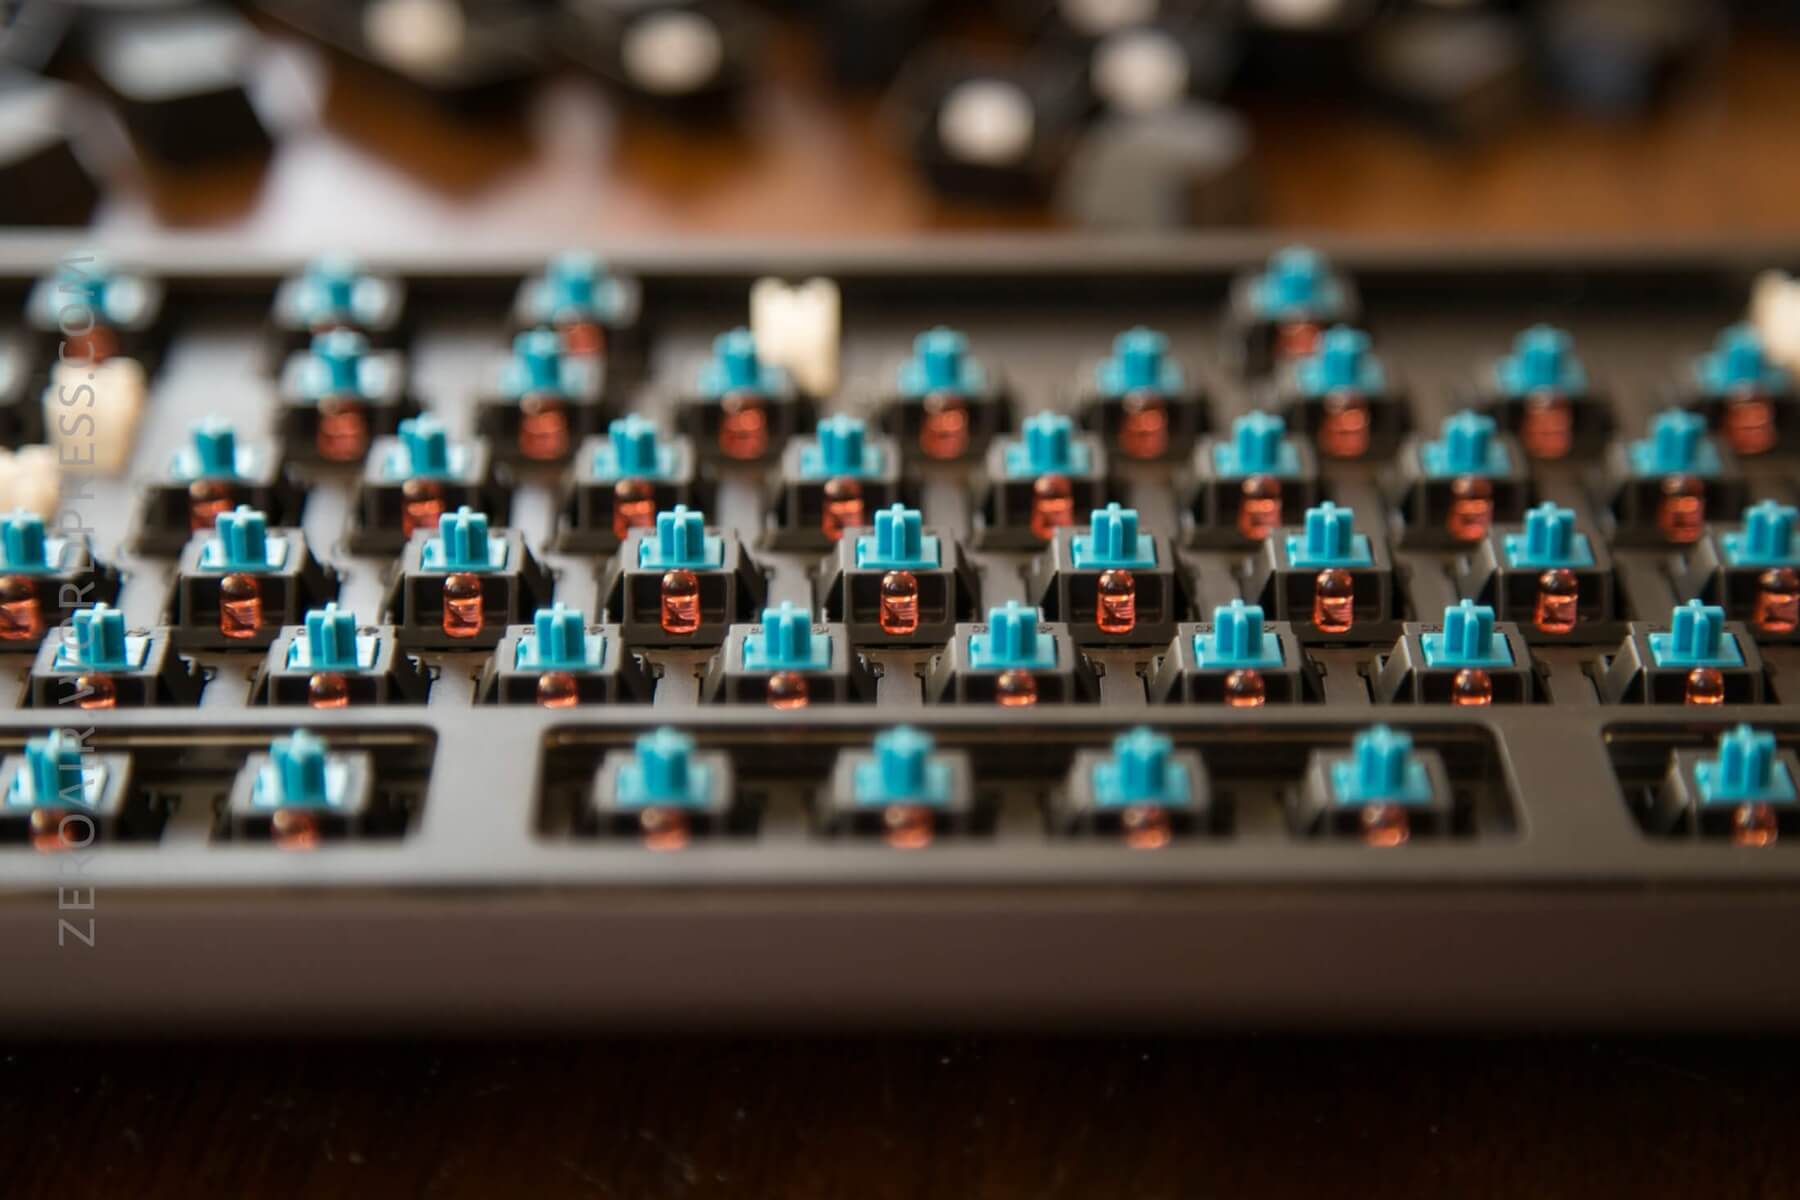
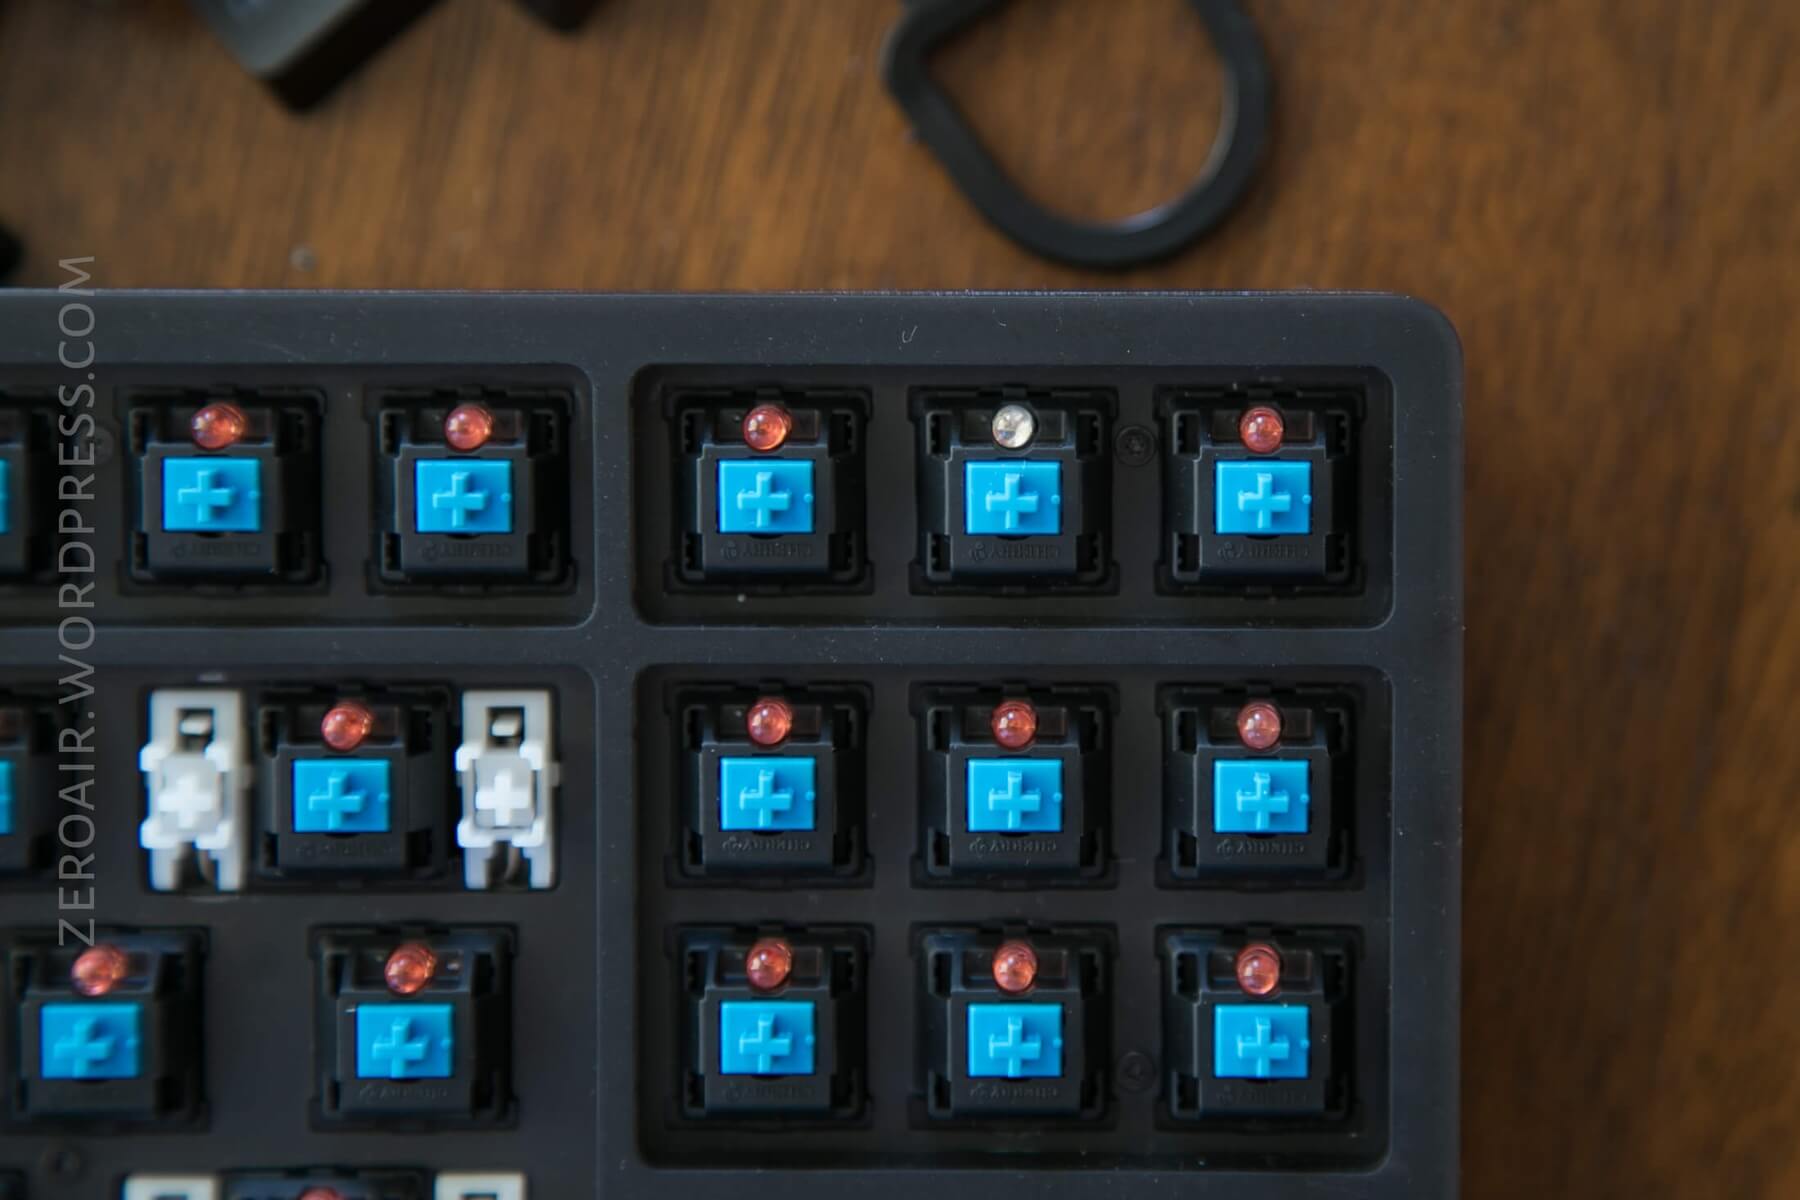
Xiaomi uses genuine Cherry MX switches here – in my case Cherry Blue.

The LEDs are north-facing to line up more properly with the keycap lettering. Every key has a round red LED except for two keys: the Windows (or CMD) key, bottom left, and the Home key, top right. These are red and blue (or white, not really sure).
Here’s a small sample of the keyboard sound when typing connected to (and resting on) a MacBook Pro.
Connectivity
The only means of connecting this board is through the micro-USB to USB cable. When connected to a Macbook, there will likely be a pop-up, and you may have to type a couple of keys. This is to let your Mac know what type of keyboard it is. After I did this, the keyboard worked flawlessly.
User Interface and Operation
There are no drivers or anything to install with this keyboard, so the interface is simply the switches. The Fn key (lower right) is used to modify the keyboard’s backlight, but other than that, there’s not much interaction with the board except for actual use.
Programmability
As far as I can tell, there are no programming options for this board. Maybe once Xiaomi gets this board on their site, there will be a more in-depth English manual that will shed some light, but for now, accept no programming.
RGB
In this case, there isn’t RGB, but simply a single emitter color. On this black board, the LED color is red (with the two blues mentioned above). The intensity can be adjusted to 6 different output levels, including off, by pressing the FN key and up or down arrows.
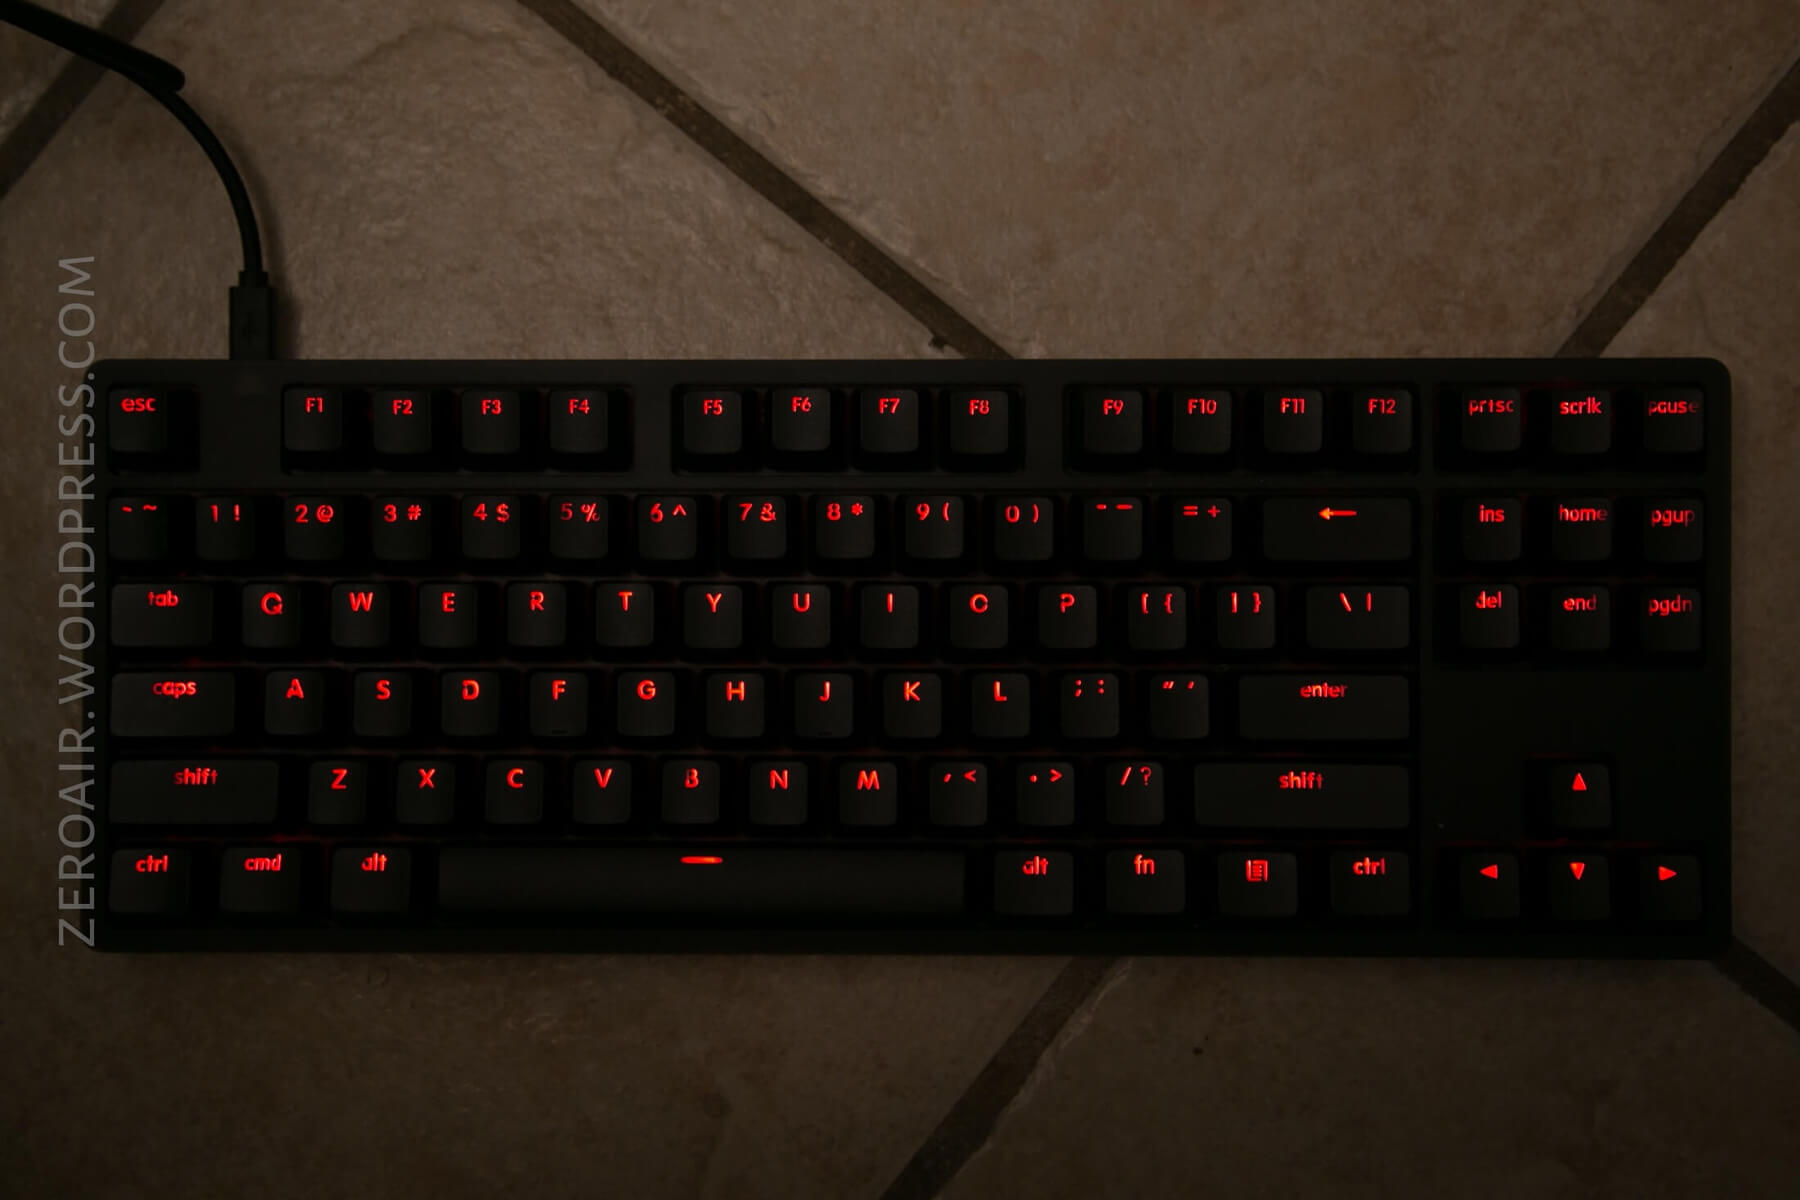
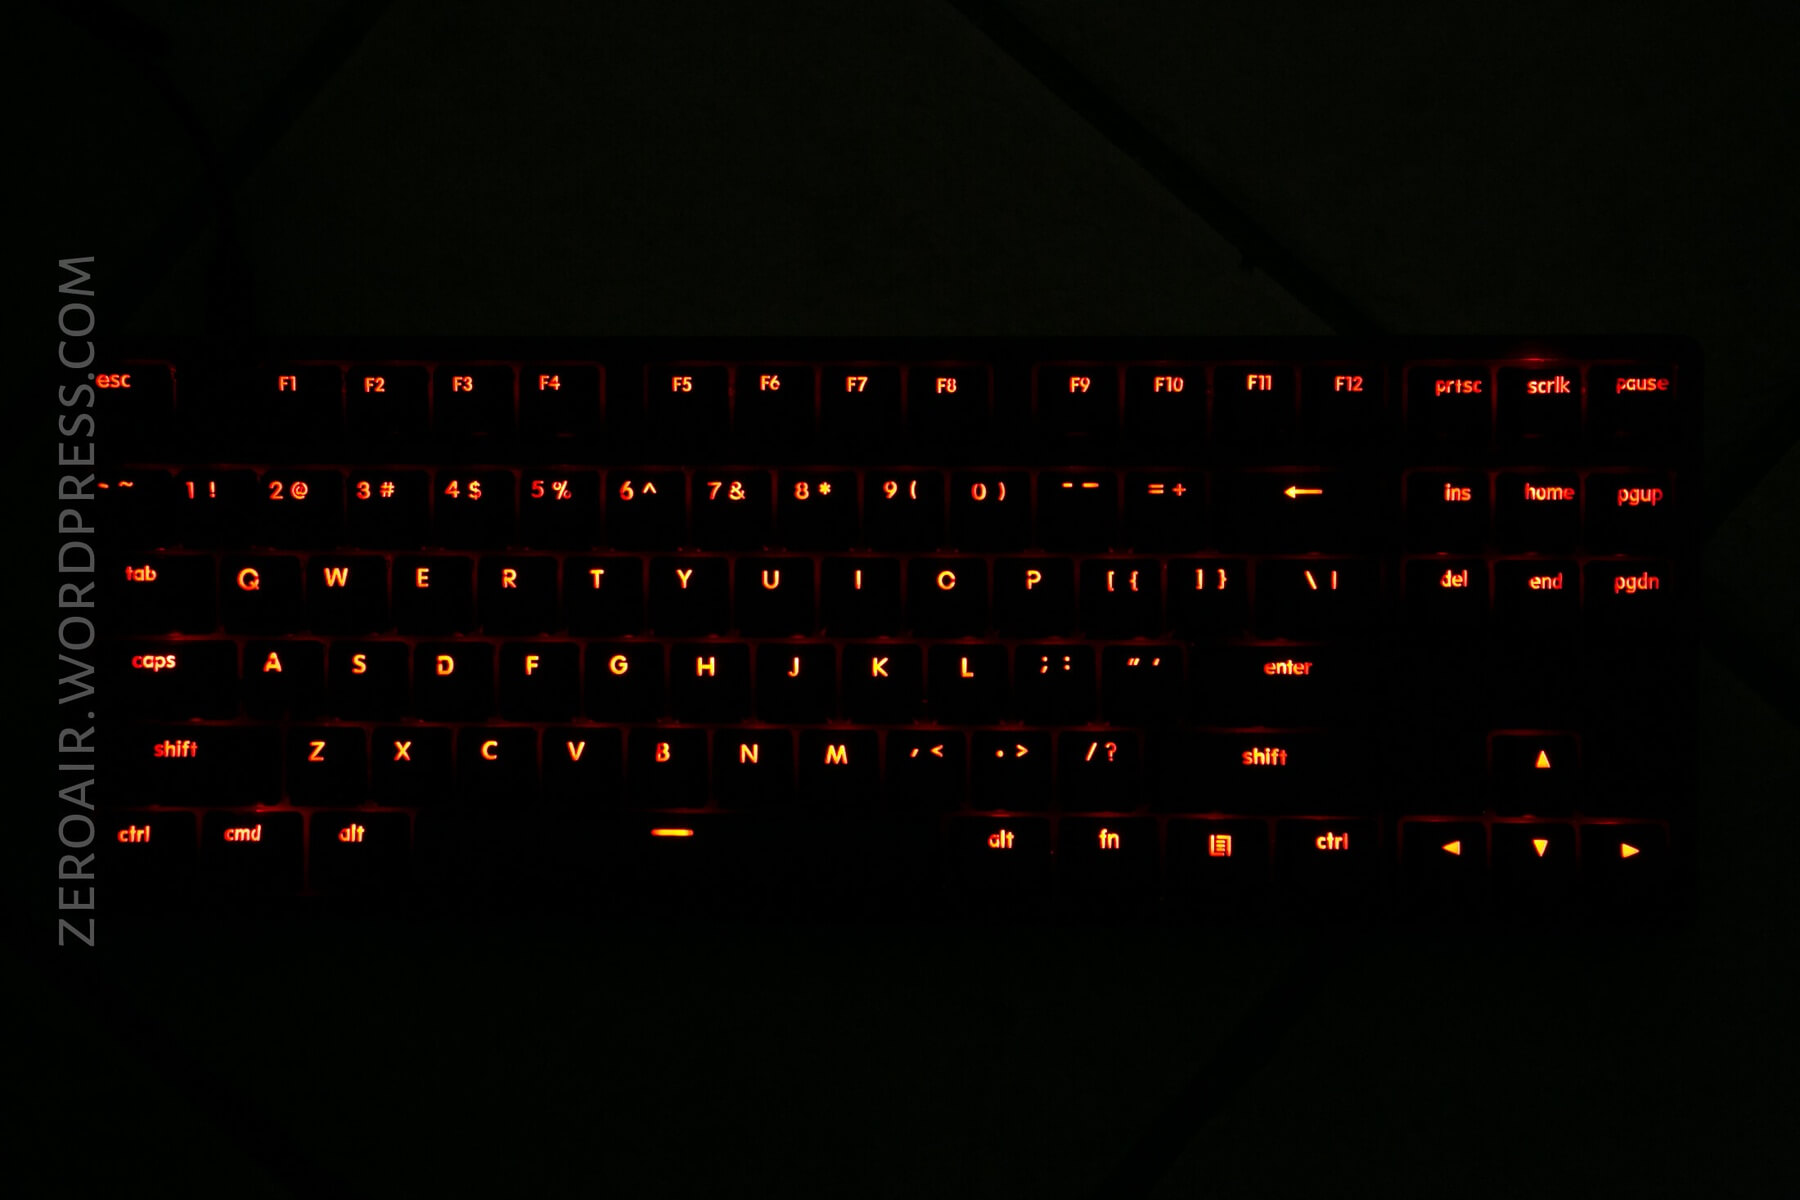
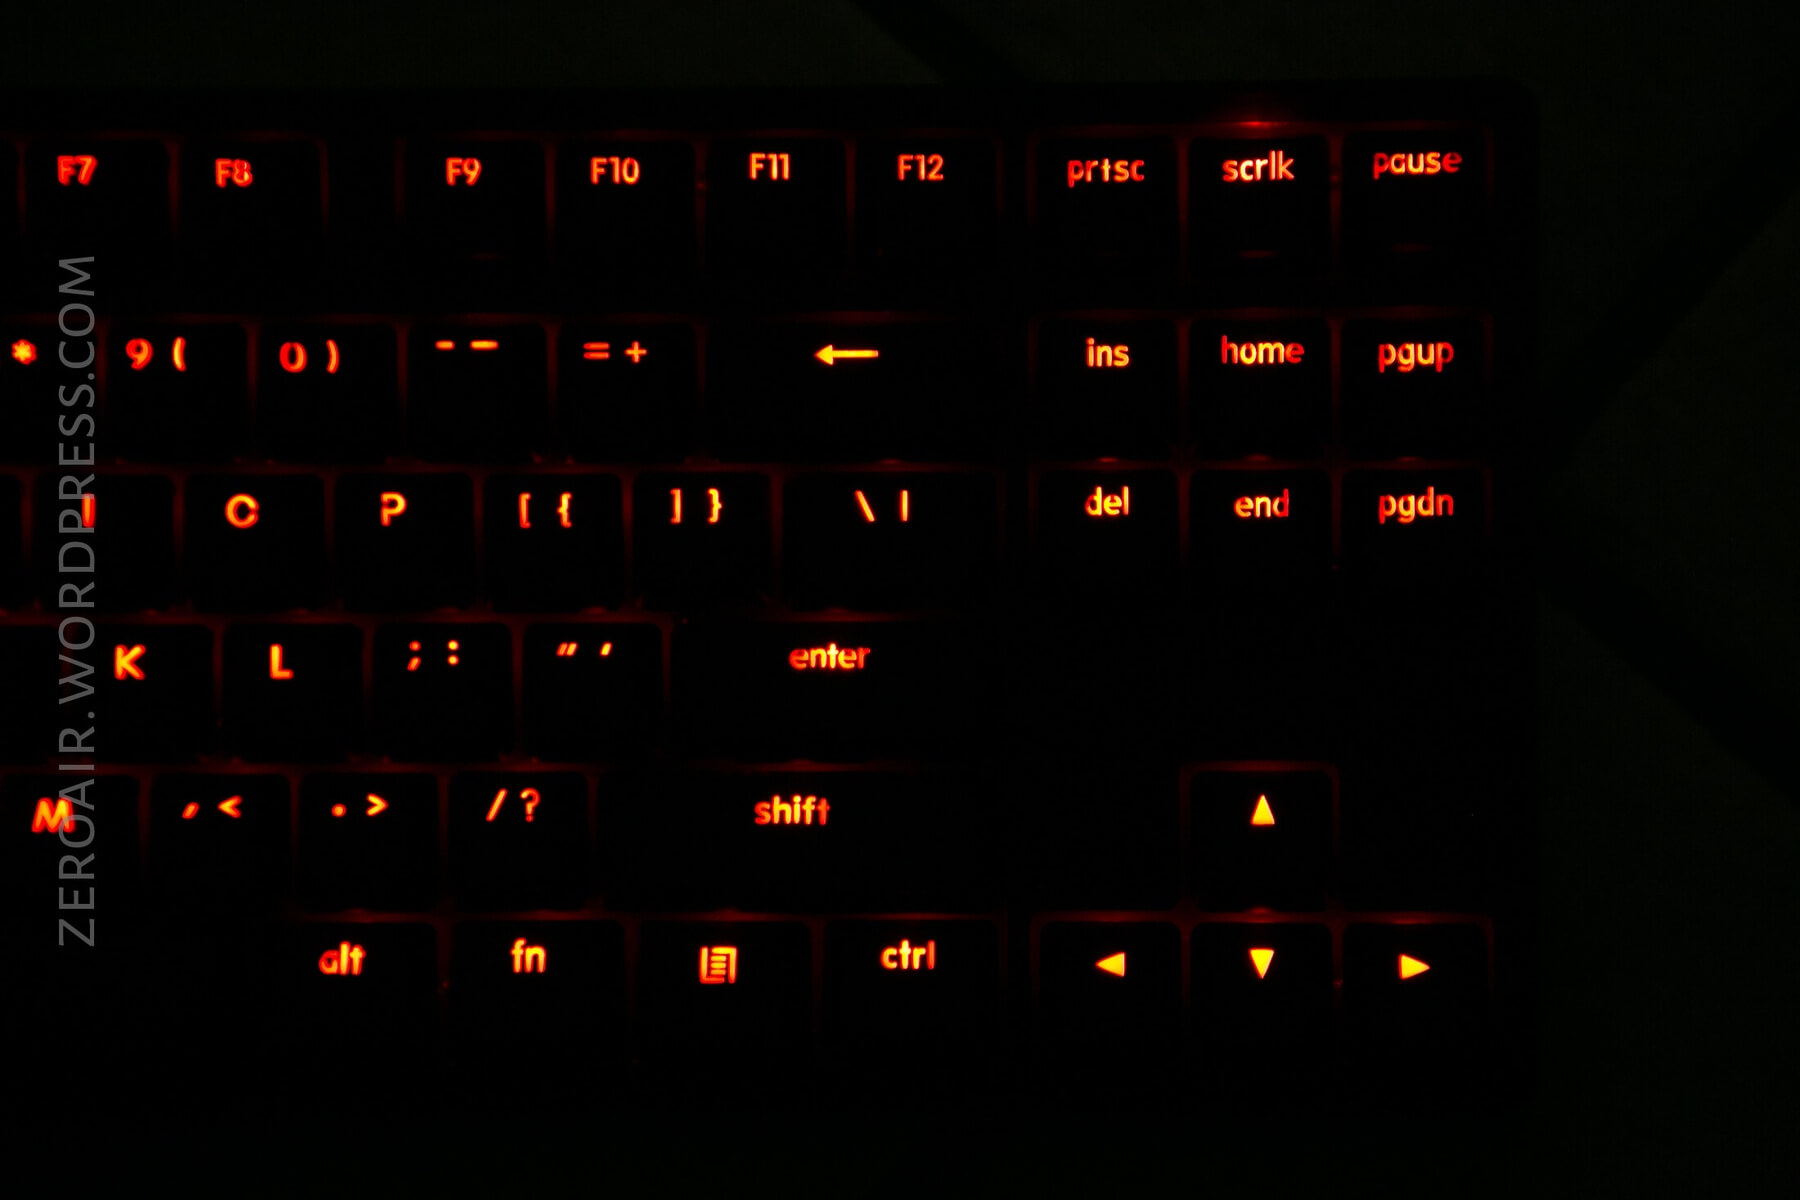
The color is actually quite good. Since it’s a single color led, it’s easy for the keyboard to do it well, with no PWM or flickering issues whatsoever. Also worth mentioning is that the two non-base-red LEDs do match the base-red LEDs when they’re on.
Conclusion
What I like
- Build quality is absolutely superb.
- Single color LED, with no modes (I like the simplicity)
- Size is great for use with a MacBook 15.”
- The weight keeps the keyboard placed on a surface very stably
- Real Cherry Switches, at a reasonable cost.
What I don’t like
- Wish an angle micro-USB was included
- Better yet, I wish the micro-USB port exited out the side
Parting Shot
Notes
- This keyboard was provided by GearBest for review. I was not paid to write this review.
- This content originally appeared at zeroair.org. Please visit there for the best experience!
- Use my amazon.com referral link if you’re willing to help support making more reviews like this one!
- Please support me on Patreon! I deeply appreciate your support!
Discover more from ZeroAir Reviews
Subscribe to get the latest posts sent to your email.
Pingback: Xiaomi Flashlight/Powerbank Review – ZeroAir Reviews
Pingback: Xiaomi Flashlight/Powerbank Review - ZeroAir Reviews