

Emisar DT8 Flashlight Review
The Emisar DT8 flashlight offers many emitter choices, Anduril 2, and follows the tradition of popular “Hank lights.” This one even has constant current!
Official Specs and Features
Here’s a link to the Emisar DT8 product page.
Emisar DT8 Versions
There are three body colors available – Black, Dark Grey (seen here), and Cyan. There are a bunch of emitter options, and I think they vary from time to time. Right now, what’s available is the following:

That’s a bunch of choices. And to be honest, one of the things that make “Hank Lights” so popular is that if it will physically work in the light, Hank will be willing to do it by special request. You want to mix 2850K XP-L HI and 5000K XP-L HI, or whatever? Hank will do it.
Price
As configured here (Dark Grey, Raised ring, Warm white switch, Nichia E21A 2700K, pocket clip), this light costs $91.02. You should definitely add a shorty tube for 18350 ($4.50) and probably the 18500 tube too just for fun ($4.50).
Short Review
Well, it’s as fun as you thought it would be. If you don’t already have a light with Anduril 2, and aren’t planning to buy a Lumintop FWAA (which ships with A2), then buy this one. This is a remarkably fun light, and the different head shape makes the light stand out. Functionally it’s no different than other “normal” lights, though, which is good.
Long Review of the Emisar DT8
The Big Table
| Emisar DT8 Flashlight | |
|---|---|
| Emitter: | Nichia E21a (2700K) |
| Price in USD at publication time: | $91.02 as seen in this review. Buy here. |
| Cell: | 1×18650 |
| Turbo (Double click from on) Runtime Graph | High Runtime Graph |
| LVP? | Yes |
| Switch Type: | E-Switch |
| Quiescent Current (mA): | 0.07 (secondary off) |
| On-Board Charging? | No |
| Claimed Lumens (lm) | 1800 |
| Measured Lumens (at 30s) | 935 (51.9% of claim)^ |
| Candela per Lumen | 2.4 |
| Claimed Throw (m) | – |
| Candela (Calculated) in cd (at 30s) | 300lux @ 3.138m = 2954cd |
| Throw (Calculated) (m) | 108.7 |
| All my Emisar reviews! | |
^ Measurement disclaimer: Testing flashlights is my hobby. I use hobbyist-level equipment for testing, including some I made myself. Try not to get buried in the details of manufacturer specifications versus measurements recorded here; A certain amount of difference (say, 10 or 15%) is perfectly reasonable.
What’s Included

My light is a loaner, from a consumer (ie not a store) so I don’t have a real “what’s included” – I didn’t get the retail package. But what you get from intl-outdoor.com depends mostly on what you purchase exactly – most additional items are an additional cost.
Build Quality and Disassembly

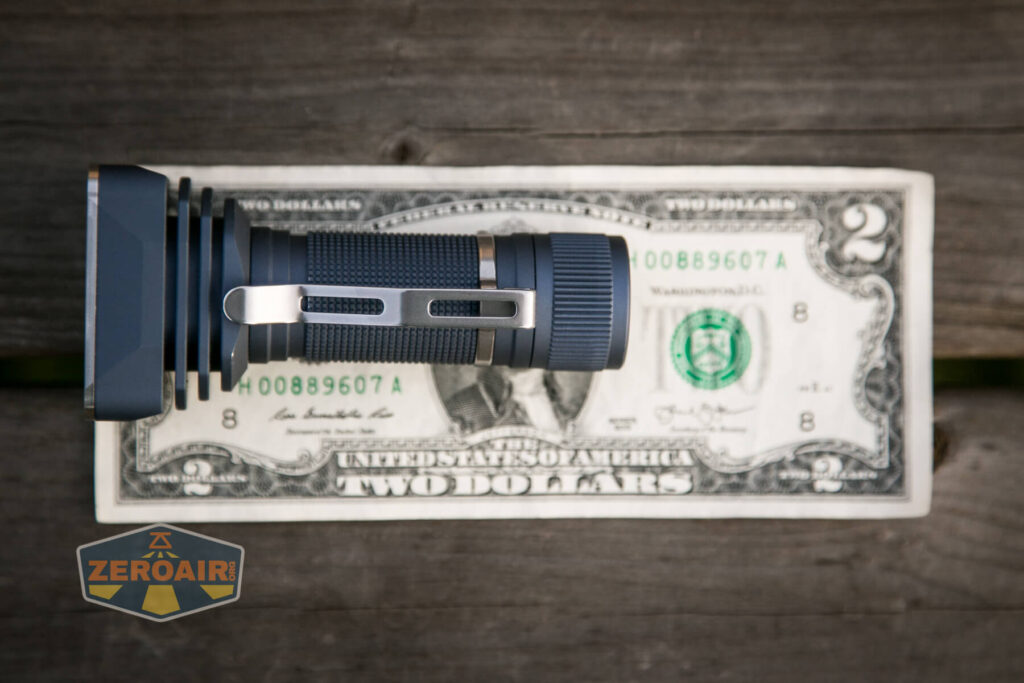
Alright, check out the shape on the Emisar DT8. How interesting…. it’s like a big head flashlight with both sides of the head chopped off and squared…. very nice.
As far as anti-roll features go, this light is probably the best. Regarding build quality, I’d call it “commensurate with the price.” At ninety-ish dollars, this light is “ninety-ish dollars well built.” There are really no shortfalls with it.


Again mine is a used loaner, so there are some bits of wear on it.


The anodizing on the Emsiar DT8 (and other Emisar lights, really) is a sort of matte finish – not quite like (or “as bad as”) Armytek lights, but approaching that feel. The anodizing itself does add a bit of grip, I think.
The tailcap has reeding, which aids in tailcap removal for cell swaps.

On the cell tube is square-cut knurling, which also aids in grip.

Here on the head, you can see these deep cooling fins. They’re deep and thick and really provide a great cooling surface.

But of course, since the light has a rectangular head, the cooling fins don’t go all the way around the head.

Threads on the tail end of the light are long, anodized, and square-cut. They’re minimally lubed, and smooth enough. Since they’re anodized, a very small amount of loosening the tailcap will mechanically lock out the Emisar DT8.

The cell tube is completely removable. That makes sense since a 18350 and 18500 tube are also offered.

The head end has similar threads as the tail, but much much shorter. The threads are the same, but due to the difference in length, the cell tube is not really reversible. (It’ll fit, but too much of the threads will be exposed and that’d be a silly way to run the light.)

Both head and tail have a beefy spring.

Also, note that the head has programming pins (that’s two lights in a row reviewed which have those pins!
One more thing about this driver – just like my brass D4V2 (which was also E21A, but 4500K), the PCB components on the spring side seen below indicate that this version (specifically the E21A emitter version) of the DT8 has a linear driver. The linear driver limits the current, which keeps these Nichia E21A’s from going up in a puff of magic smoke from an unregulated FET output (like the non-linear driver DT8’s will have). In this case, the current is limited to 9A (per the intl-outdoor.com product page, if I’m reading it right, and I may not be). Let’s just quote the page, shall we?
• 9A constant current + FET (non FET for the E21A version)

The tailcap shows the only bit of branding on the whole light.

Size and Comp
Dimensions:
97mm (length 18650)
27×45.8mm (head)
24mm (body)
67mm (length 18350)
Weight: 100g


If the flashlight will headstand, I’ll show try to it here. If the flashlight will tailstand, I usually show that here, too.


Here’s the test light with the venerable Convoy S2+. Mine is a custom “baked” edition Nichia 219b triple. A very nice 18650 light!


And here’s the light beside my custom-engraved TorchLAB BOSS 35, an 18350 light. I reviewed the aluminum version of that light in both 35 and 70 formats.

This was just a joke photo I posted on reddit. Just something fun – not a working light (which you probably know if you absorbed the cell tube above having male threads on both end).

Retention and Carry
My light has an optional pocket clip. This is a friction fit clip made of stainless steel.


The clip can fit on the head or tail end of the light, and is comfortable in either position.

There are no other options for carry of the Emisar DT8. There’s no pouch or lanyard. A magnet tailcap is available, but I’d be surprised if the magnet was strong enough. But it’s an option!
Power and Runtime
The Emisar DT8runs on lithium-ion cells. The default is a single 18650. I tested with a flat top unprotected cell. While other cells will work in the light, even the unprotected cell is a snug fit. These springs are quite stiff, and there’s not excessive room in the cell tube.

Also available are 18350 and 18500 cell tubes. You should buy both, because why not. At least by the 18350!
I’ve performed runtime tests on the three highest modes. The product page claims that the E21A version of the Emisar DT8 produces 1800 lumens, but that’s almost certainly not for the 2700K version. Remember, there’s a 5000K version of this emitter offered, and likely the 1800 lumen claim is for that emitter.
Either way, you’re probably not buying a 2700K light for maximum lumens.


Sustained >600 lumens on the third-highest mode is quite nice. The light never shuts off in my tests, but Anduril states low voltage protection and I don’t really doubt it.
Modes and Currents
| Mode | Mode Claimed Output (lm) | Claimed Runtime | Measured Lumens (18650) | Tailcap Amps |
|---|---|---|---|---|
| Turbo | 1800 | – | 935 | 8.00 |
| 7 (Stepped) | – | – | 870 | 5.56 |
| 6 (Stepped) | – | – | 602 | 3.65 |
| 5 (Stepped) | – | – | 385 | 2.23 |
| 4 (Stepped) | – | – | 214 | 1.24 |
| 3 (Stepped) | – | – | 103 | 0.58 |
| 2 (Stepped) | – | – | 37 | 218mA |
| 1 (Stepped) | – | – | 5.1 | 35mA |
| 0 (Ramping) | – | – | 1.1 | 10mA |
Pulse Width Modulation
First is the lowest mode on the ramping part of the user interface. Then are the eight stepped modes. This is an interesting thing….. All my other Andúril lights specifically have PWM. This DT8 does not have PWM. That’s because this E21A DT8 (just like the E21A D4V2) gets fitted with the linear driver mentioned above, and a linear driver means there is no PWM! Other DT8 lights (that don’t have E21A emitters) will have the default Anduril driver, which does have PWM.


Here you can see a “baseline” – a chart with almost no light hitting the sensor.
Then there’s the Ultrafire WF-602C flashlight, which has some of the worst PWM I’ve seen. It’s so bad that I used a post about it to explain PWM! Here are multiple timescales (10ms, 5ms, 2ms, 1ms, 0.5ms, 0.2ms) to make comparing this “worst” PWM light to the test light easier. That post also explains why I didn’t test the WF-602C at the usual 50us scale.
User Interface and Operation
There’s one switch on the Emisar DT8. It’s a side e-switch, with four white indicating LEDs. It’s quiet but very clicky, and the rubber cover is nice and grippy. This one has the “Warm White” backlighting, but Cool White and other colors are also available.
This light ships with Andúril2 by ToyKeeper. Andúril is a fantastic UI, and extremely versatile!


This is my first experience with the raised ring around the switch. I can probably see why you’d want it, but I prefer the shorter ring.


There’s a user on budgetlightforum who has made an incredible user interface graphic for Anduril2. Here’s a link to that thread. It’s quite good, and has helped me quite a bit.
Here’s a user interface table! This table is directly from ToyKeeper’s Andúril2 manual, which you can view here:
http://toykeeper.net/torches/fsm/anduril2/anduril-manual.txt
I am putting this in a table here with ToyKeeper’s permission. Thanks TK! This is so much better than me writing it, because it’s more reliable, and I completely trust it’s accuracy (at least, if I can paste accurately). I’m breaking it up a little differently than ToyKeeper did, though I certainly understand why it was done her way originally.
First, the table for Either User Interface. These actions work whether you’re in Simple or Advanced UI.
| State | Action | Result |
|---|---|---|
| Off | 1C | On (ramp mode, memorized level) |
| Off | 1H | On (ramp mode, floor level) |
| Off | 2C | On (ramp mode, ceiling level) |
| Off | 3C | Battcheck mode |
| Off | 4C | Lockout mode |
| Off | 13H | Factory reset (on some lights) |
| Off | 15+C | Version check (202019270312 on this light) |
| Ramp | 1C | Off |
| Ramp | 1H | Ramp (up, with reversing) |
| Ramp | 2H | Ramp (down) |
| Ramp | 3H | Tint ramping (on some lights) |
| Ramp | 3H | Momentary turbo (on lights without tint ramping) |
| Ramp | 4C | Lockout mode |
| Lockout | 1C/1H | Momentary moon (lowest floor) |
| Lockout | 2C/2H | Momentary moon (highest floor, or manual mem level) |
| Lockout | 4C | On (ramp mode, memorized level) |
| Lockout | 4H | On (ramp mode, floor level) |
| Lockout | 5C | On (ramp mode, ceiling level) |
| Batt check | 1C | Off |
A table for only Simple User Interface:
| State | Action | Result |
|---|---|---|
| Off | 2H | On (momentary ceiling level) |
| Off | 10H | Disable Simple UI |
| Ramp | 2C | Go to/from ceiling |
A table for only Advanced (aka “Full”) User Interface:
| State | Action | Result |
|---|---|---|
| Off | 2H | On (momentary turbo) |
| Off | 3H | Strobe mode (whichever was used last) |
| Off | 5C | Momentary mode |
| Off | 7C | Aux LEDs: Next pattern |
| Off | 7H | Aux LEDs: Next color |
| Off | 10C | Enable Simple UI |
| Off | 10H | Simple user interface ramp config menu (1: floor, 2: ceiling, [3: steps]) |
| Ramp | 2C | Go to/from ceiling (or turbo if at ceil already) |
| Ramp | 3C | Change ramp style (smooth/stepped) |
| Ramp | 5C | Momentary mode |
| Ramp | 5H | Sunset timer on, and add 5 minutes |
| Ramp | 7H | Ramp config menu (1: floor, 2: ceiling, [3: steps]) |
| Ramp | 10C | Turn on manual memory and save current brightness |
| Ramp | 10H | Manual memory config menu (1: off, 2: set timeout) |
| Lockout | 7C | Aux LEDs: Next pattern |
| Lockout | 7H | Aux LEDs: Next color |
| Lockout | 10H | Auto-lock config menu (1: set timeout) |
| Strobe (any) | 1C | Off |
| Strobe (any) | 2C | Next strobe mode |
| Strobe (any) | 3H | Tint ramping (on some lights) |
| Strobe (any) | 5C | Momentary mode (using current strobe) |
| Candle | 1H/2H | Brighter / dimmer |
| Candle | 5H | Sunset timer on, add 5 minutes |
| Party strobe | 1H/2H | Faster / slower |
| Tactical strobe | 1H/2H | Faster / slower |
| Biking | 1H/2H | Brighter / dimmer |
| Lightning | 1H | Interrupt current flash or start new one |
| Batt check | 2C | Next blinky mode (Temp check, Beacon, SOS) |
| Batt check | 7H | Voltage config menu |
| Temp check | 1C | Off |
| Temp check | 2C | Next blinky mode (Beacon, SOS, Batt check) |
| Temp check | 7H | Thermal config menu |
| Beacon | 1C | Off |
| Beacon | 1H | Configure beacon timing |
| Beacon | 2C | Next blinky mode (SOS, Batt check, Temp check) |
| SOS | 1C | Off |
| SOS | 2C | Next blinky mode (Batt check, Temp check, Beacon) |
| Momentary | Any | On (until button is released) |
| Momentary | Disconnect power | Exit Momentary mode |
| Config menus | Hold | Skip current item with no changes |
| Config menus | Release | Configure current item |
| Number entry | Click | Add 1 to value for current item |
To be completely honest, I’m not entirely sure yet what’s the best way to tell if you’re in Simple user interface or Advanced UI. Based on what I see here and with the light in hand, I think the fewest-clicks way will be 3 clicks from on (technically “Ramp” in the table, but I think “On” is accurate.) This action – 3C from Ramp – in Advanced user interface will iterate smooth or stepped. In Simple UI, this action will do nothing. There are other ways, though. For example, double-clicking from the top of the ramp will either do nothing or go to Turbo. If it does nothing, then you’re in Simple. If it goes to 11, then you’re in Advanced.
If you’re like me, you’re always learning new things about Andúril…. in this case I learned (or remembered? idk…) that the secondary emitters can be different in lockout and not lockout!! Quite a neat feature.
LED and Beam
The emitters in this Emisar DT8 are Nichia E21A at a temperature of 2700K. There are two sets of four of them, making this a “double quad.” It’s also possible to even mix emitters, for example, 3500K and 2700K, which could add to the rosy tint. So if rosy tint is something you desire, consider asking for a temperature mix!
The 2700K E21A has a profile of R9080, which is a very nice combo. The E21A is also very high CRI! (>98 CRI, I think).

The optic is a Carclo optic. I’m not sure if it’s been modified, or Carclo has some square quad optics…. so I’m not sure about replacing these. This Nichia version uses a frosted optic, while all the others use clear. The clear likely have better throw.


I didn’t remove the stainless bezel – just 12 Philips screws to do so – because this isn’t my light. Even if I could get it back together properly, there’s that chance….

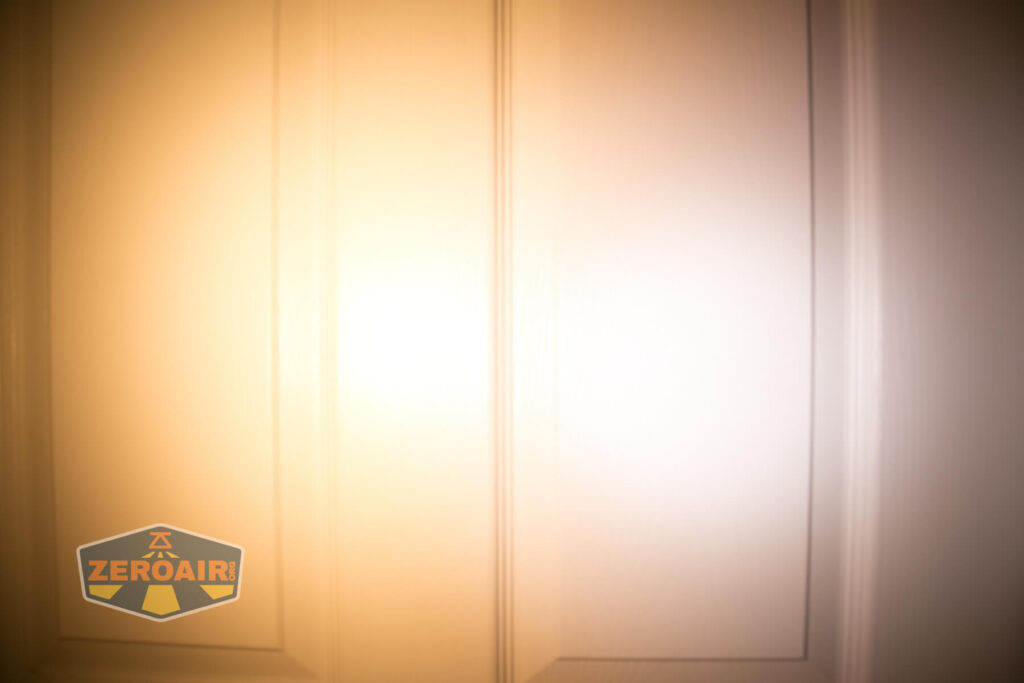
Very floody!

A row of these could make great faux stadium lights. Maybe for a Lego stadium. 😀

These beamshots always have the following settings: f8, ISO100, 0.3s shutter, and manual 5000K exposure.
I normally test only in stepped mode. However, the ramped output offers a much lower low, so the first mode below is actually the lowest of the ramped. Then the next 7 modes are the stepped options, and the rightmost is the [double click to] Turbo. Same below with the 219b comparison.


Tint vs BLF-348 (KillzoneFlashlights.com 219b version) (affiliate link)
I keep the test flashlight on the left and the BLF-348 reference flashlight on the right.


I compare everything to the KillzoneFlashlights.com 219b BLF-348 because it’s inexpensive and has the best tint!
Conclusion
What I like
- Interesting design
- A double quad? Very fun!
- Anduril2 is a great improvement, and very nice
- No PWM!!
- High output in great temp (2700K) and high CRI
- Versatile secondary emitters
- Lit switch
- There is now a Nichia 219b option!!
What I don’t like
- Anduril can be confusing, quite honestly.
Notes
- This light was provided by barry_baltimore for review. I was not paid to write this review. This light is a loaner!
- This content originally appeared at zeroair.org. Please visit there for the best experience!
- Please use my Amazon.com referral link to help support zeroair.org!
- Please support me on Patreon! I deeply appreciate your support!
That runtime! 🙁
Man this really makes the Zebralights look good. What horrible efficiency and output. So many emitters, such disappointing performance.
These particular LEDs are not efficient, just like every LED with high CRI (>95).Hank offers this light with many different LEDs, you should be looking for the SST20 and XPL-Hi variants above 4000K that emit major lumens.
I think that all current Hank lights use linear + FET driver. On some lights FET it’s disabled through software. That means no PWM but no so good efficiency when compared with a buck driver. You can see that output increases when battery discharge, due to less heat.
I have a D4v2 with 3500k E21As, I’m disappointed that the efficiency isn’t higher with double the LEDs. After looking into the GT-FC40 LED I’ve realised how inefficient high CRI LEDs are in general. Even if they can still briefly output a lot of Lumens on a turbo mode. My MF01 Mini has 7xSST-20s and I wonder if it’s any more efficient than my FW3A with 3xSST-20s.
The Emisar DT8 has a constant current driver up to 9Amps and a linear driver beyond that, hence no PWM at lower levels. The D4v2 on the other hand has FET+1, so it’s not an Anduril thing.
Pingback: New Flashlights: Phreaky Briefing Issue 44 – PhotonPhreaks