
Superfire M12 Flashlight Review
The Superfire M12 is a rechargeable flashlight that runs four 18650 cells, has USB-C charging, and an indicating e-switch. Read on for more!
This post was sponsored by the manufacturer.
Official Specs and Features
Here’s a link to the Superfire M12 rechargeable flashlight product page.
Versions
There appears to be just one version of the M12.
Price
As pictured in this review, the Superfire M12 rechargeable flashlight is $56.99.
Short Review
I can really say that I was impressed by the output from the M12. Sometimes on brands that are somewhat unfamiliar, a claim of 10,000 lumens is just laughable. In this case, while the M12 isn’t hitting 10,000 lumens, it’s pretty close! Cells being built into a light is never my favorite feature, but that does probably allow for the high output. I don’t love the user interface. All in all, there is room for improvement, but the M12 is a good starting point!
Long Review
The Big Table
| Superfire M12 Rechargeable Flashlight | |
|---|---|
| Emitter: | “SH-S14” (Four emitters) |
| Price in USD at publication time: | $56.99 |
| Cell: | Internal |
| Runtime Graphs | |
| LVP? | ? |
| Switch Type: | E-Switch |
| Quiescent Current (mA): | ? |
| On-Board Charging? | Yes |
| Charge Port Type: | USB-C |
| Charge Graph | |
| Power off Charge Port | No |
| Claimed Lumens (lm) | 10000 |
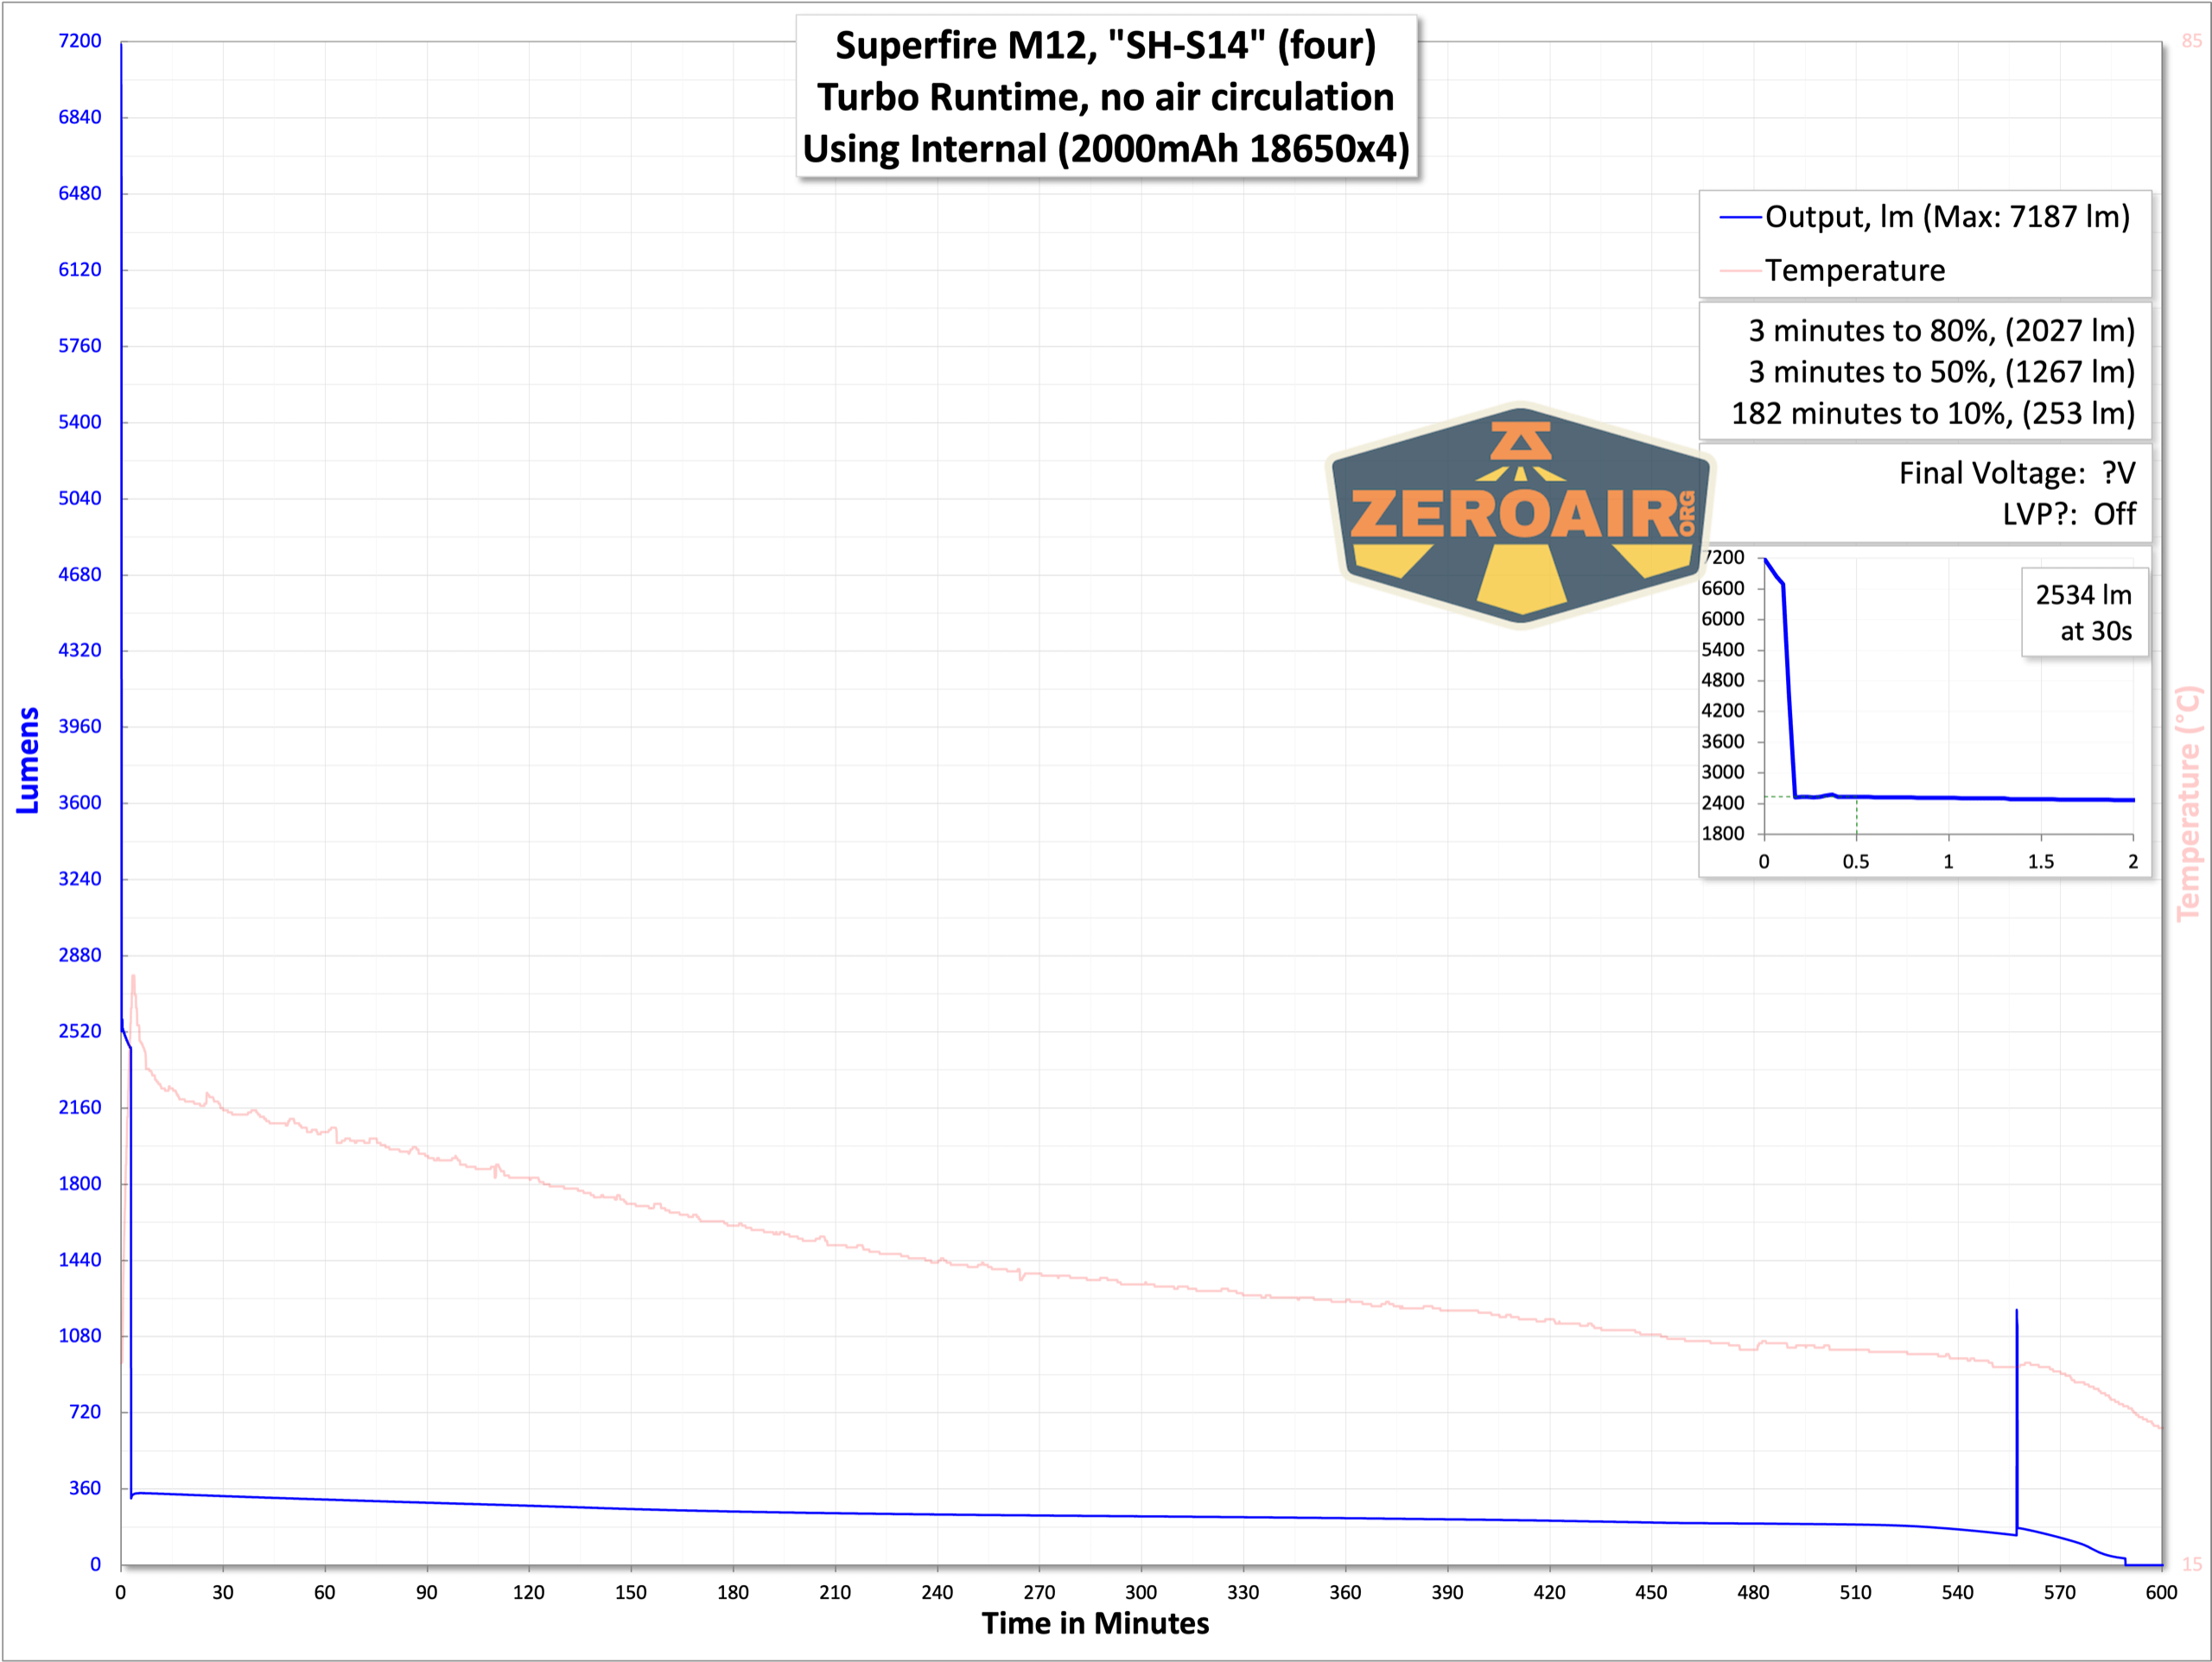
| Measured Lumens (at 30s) | 2534 (25.3% of claim)^ |
| Candela per Lumen | 7 |
| Claimed Throw (m) | 380 |
| Candela (Calculated) in cd (at 30s) | 765lux @ 5.215m = 20805cd |
| Throw (Calculated) (m) | 288.5 (75.9% of claim)^ |
| Claimed CCT | – |
| Measured CCT Range (K) | 6800-7300 Kelvin |
| Item provided for review by: | Superfire |
| All my Superfire reviews! | |
^ Measurement disclaimer: Testing flashlights is my hobby. I use hobbyist-level equipment for testing, including some I made myself. Try not to get buried in the details of manufacturer specifications versus measurements recorded here; A certain amount of difference (say, 10 or 15%) is perfectly reasonable.
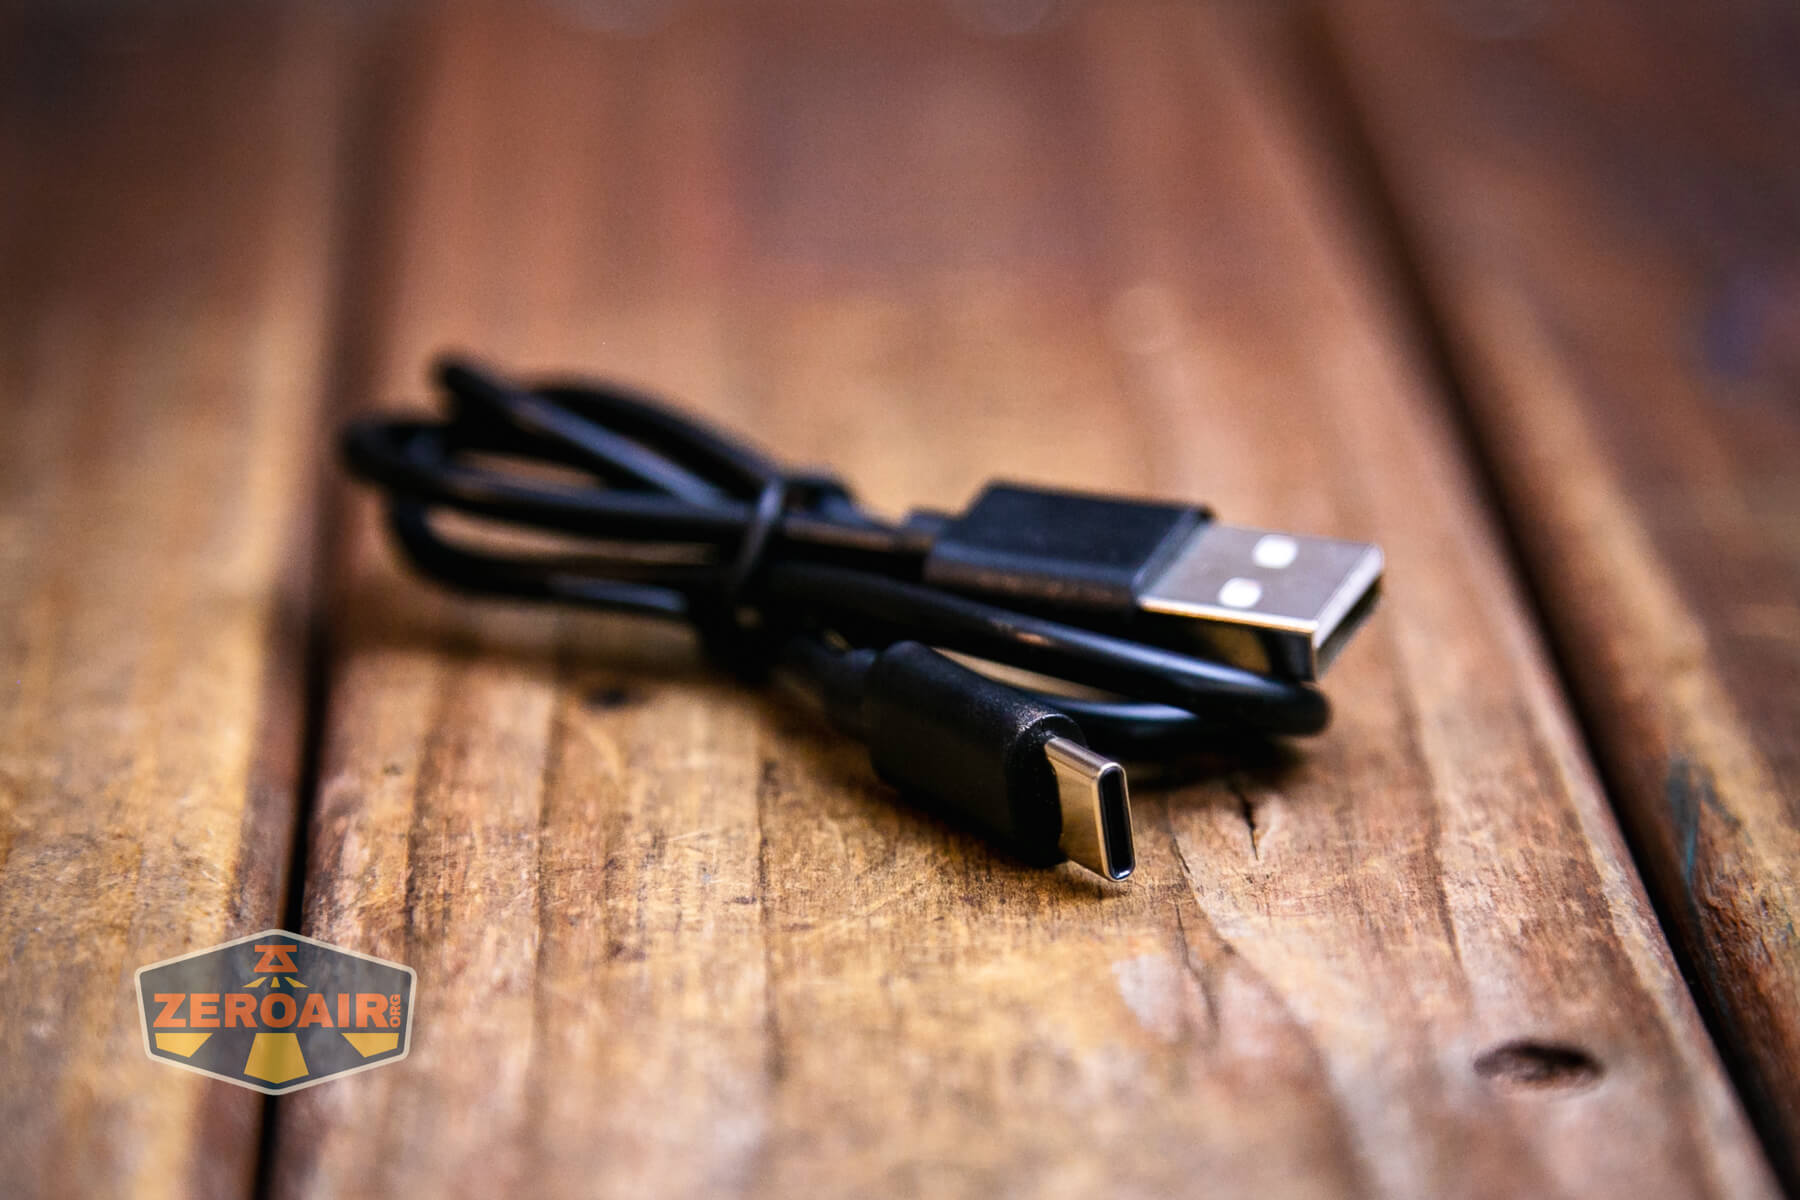
What’s Included
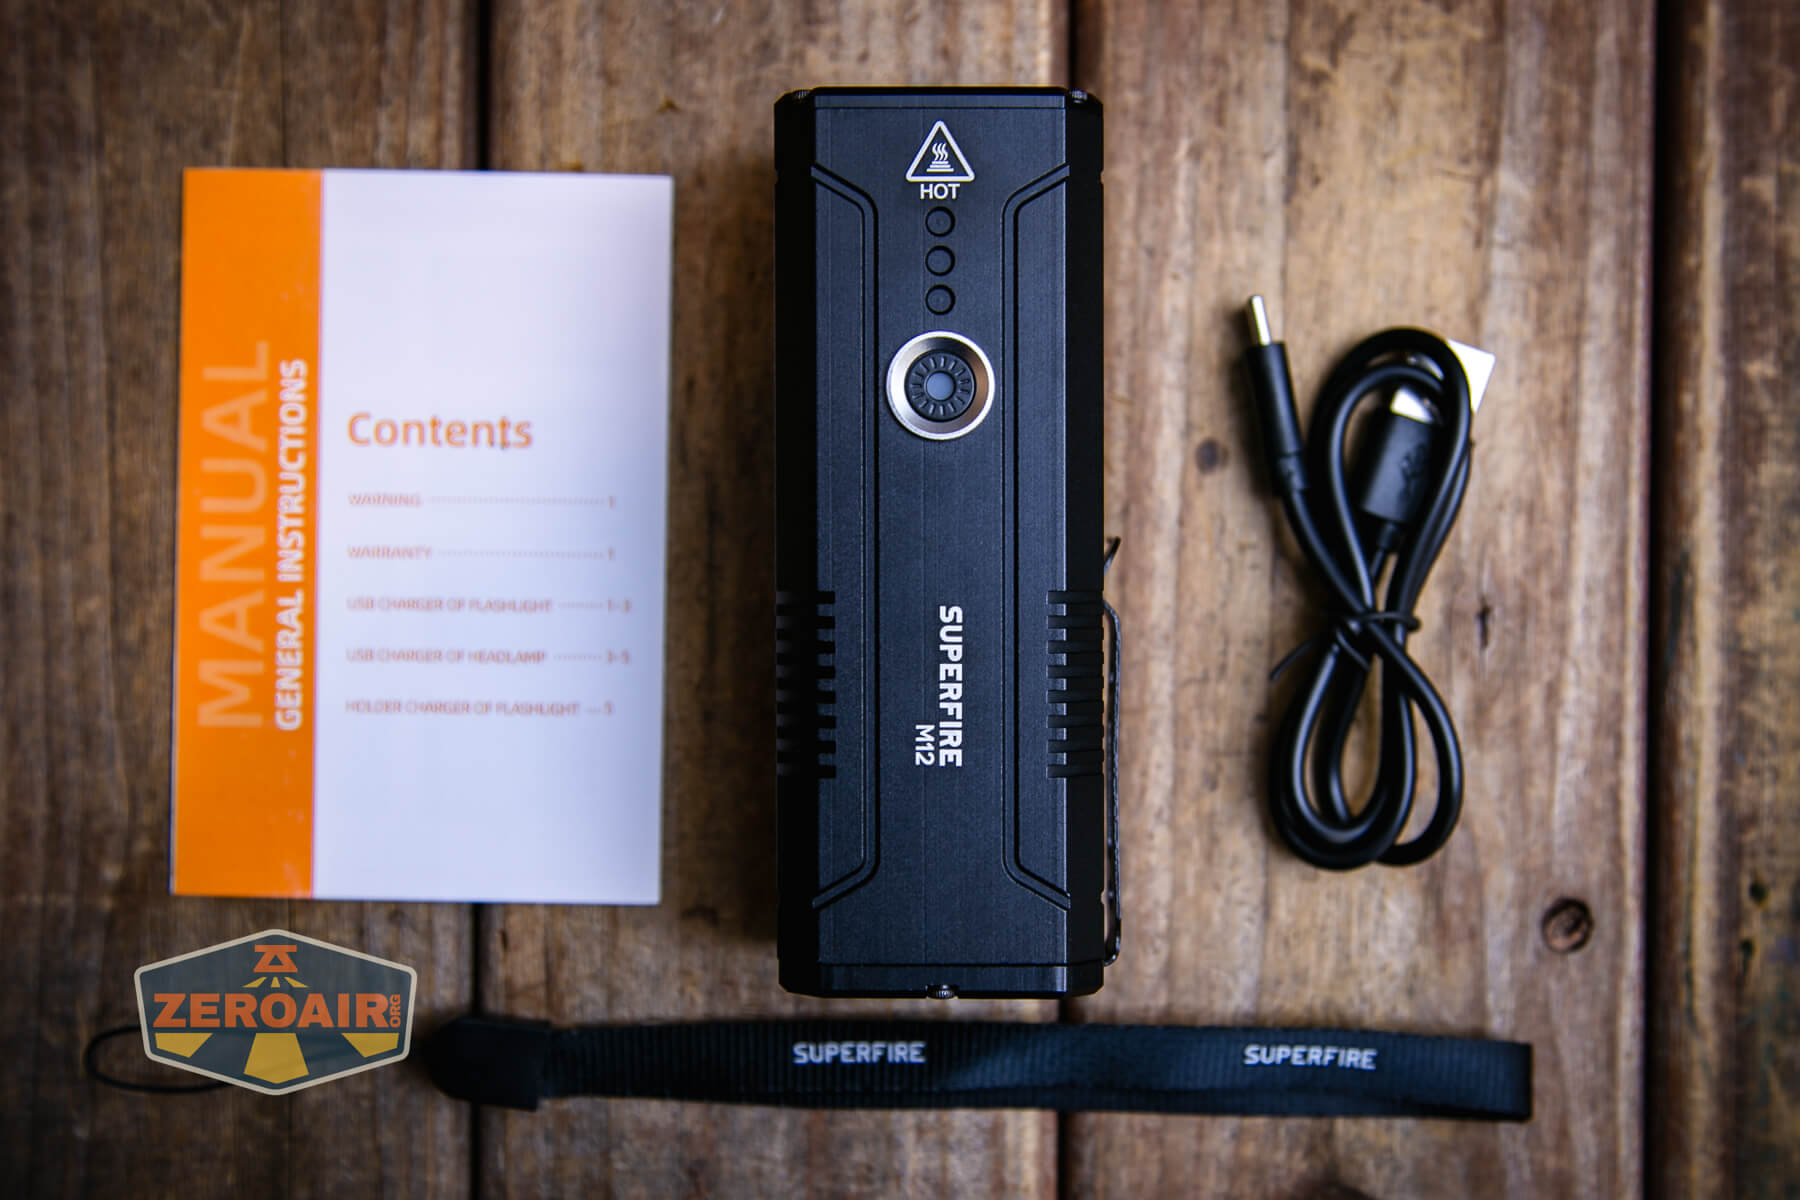
- Superfire M12 rechargeable flashlight
- Charging cable (USB to USB-C)
- Lanyard
- Manual
Package and Manual
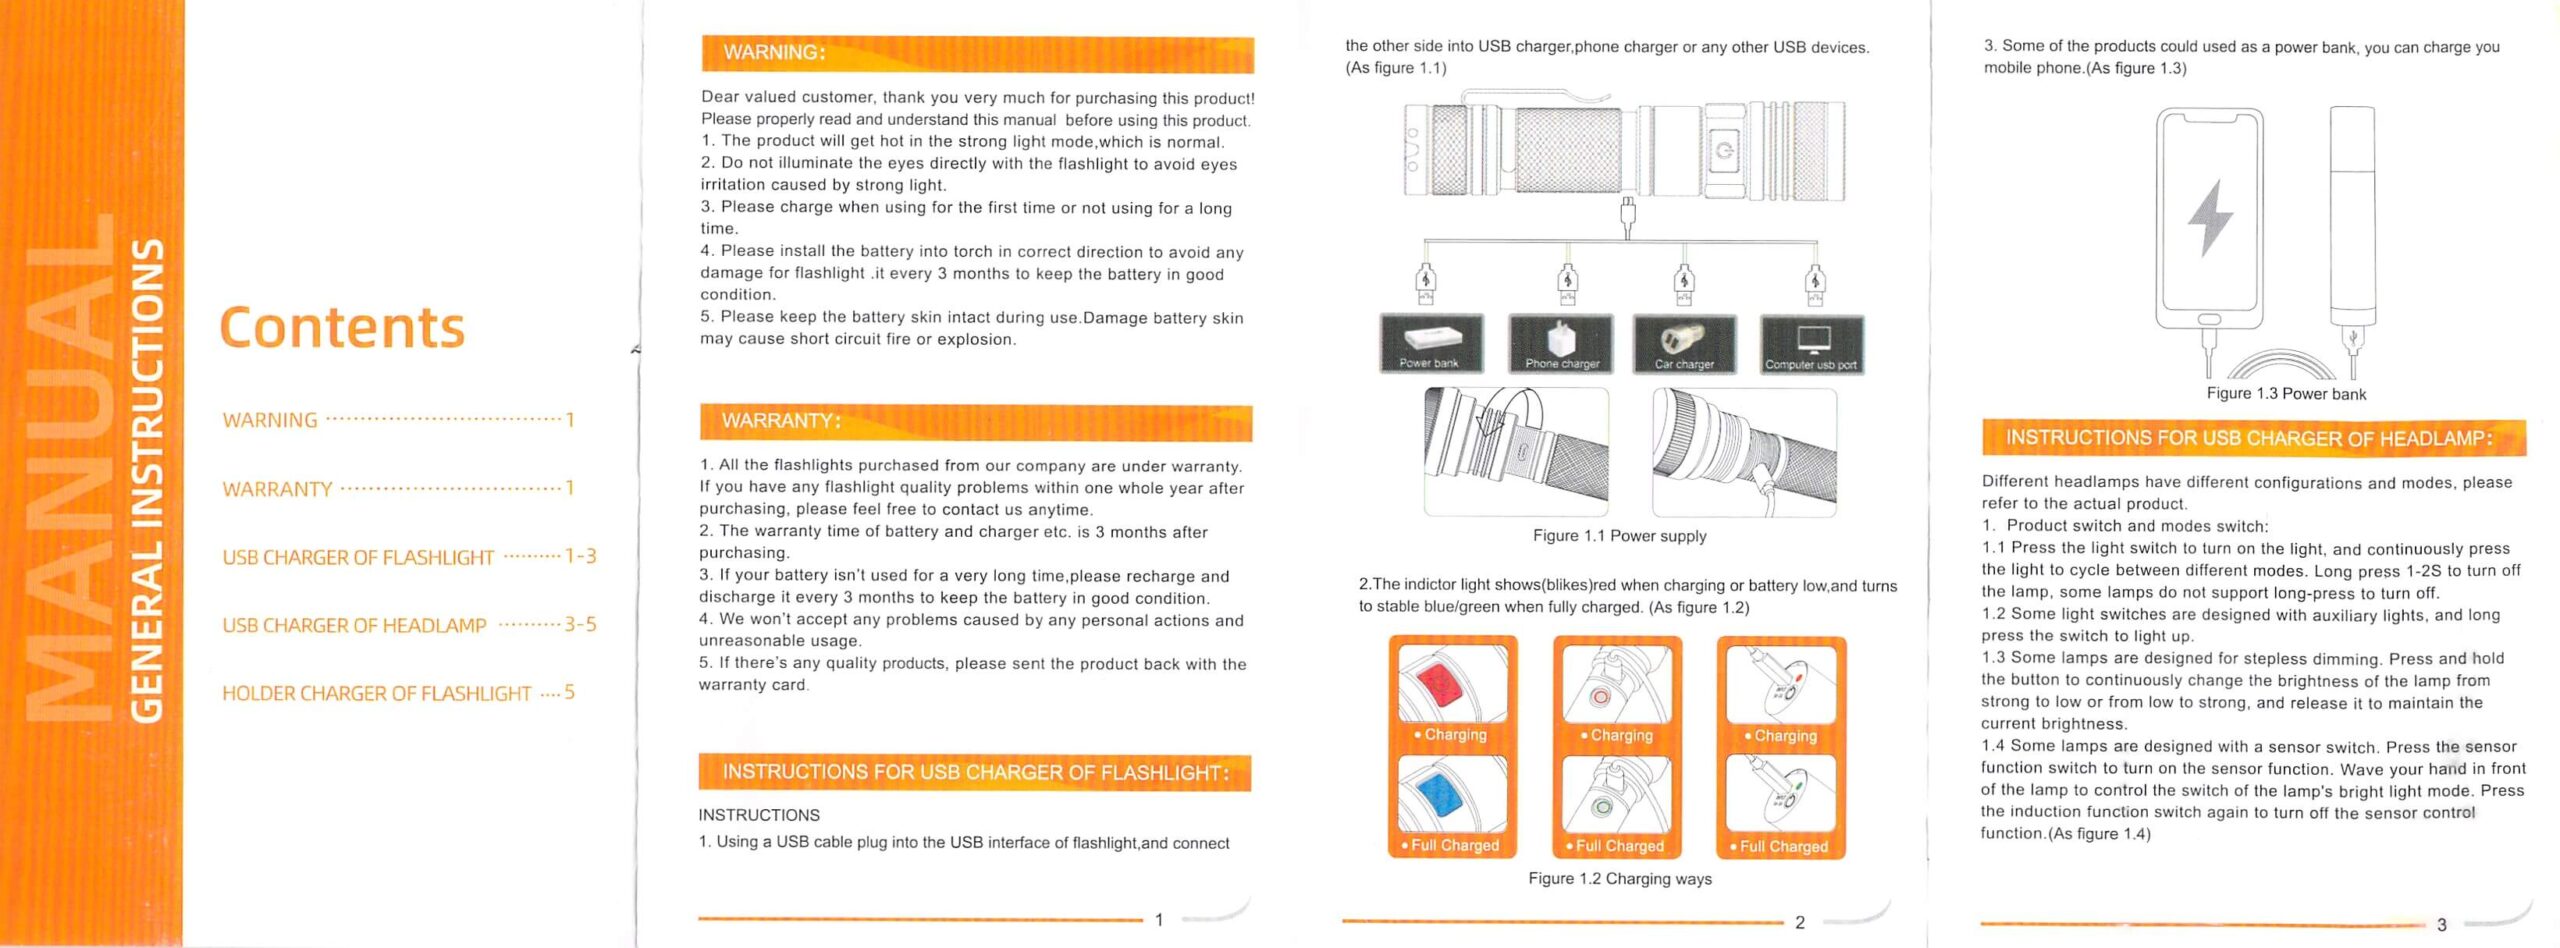
Unfortunately what you see below is the actual manual that ships with the M12. It’s scarcely about the M12, and more generically about all the lights that Superfire makes.
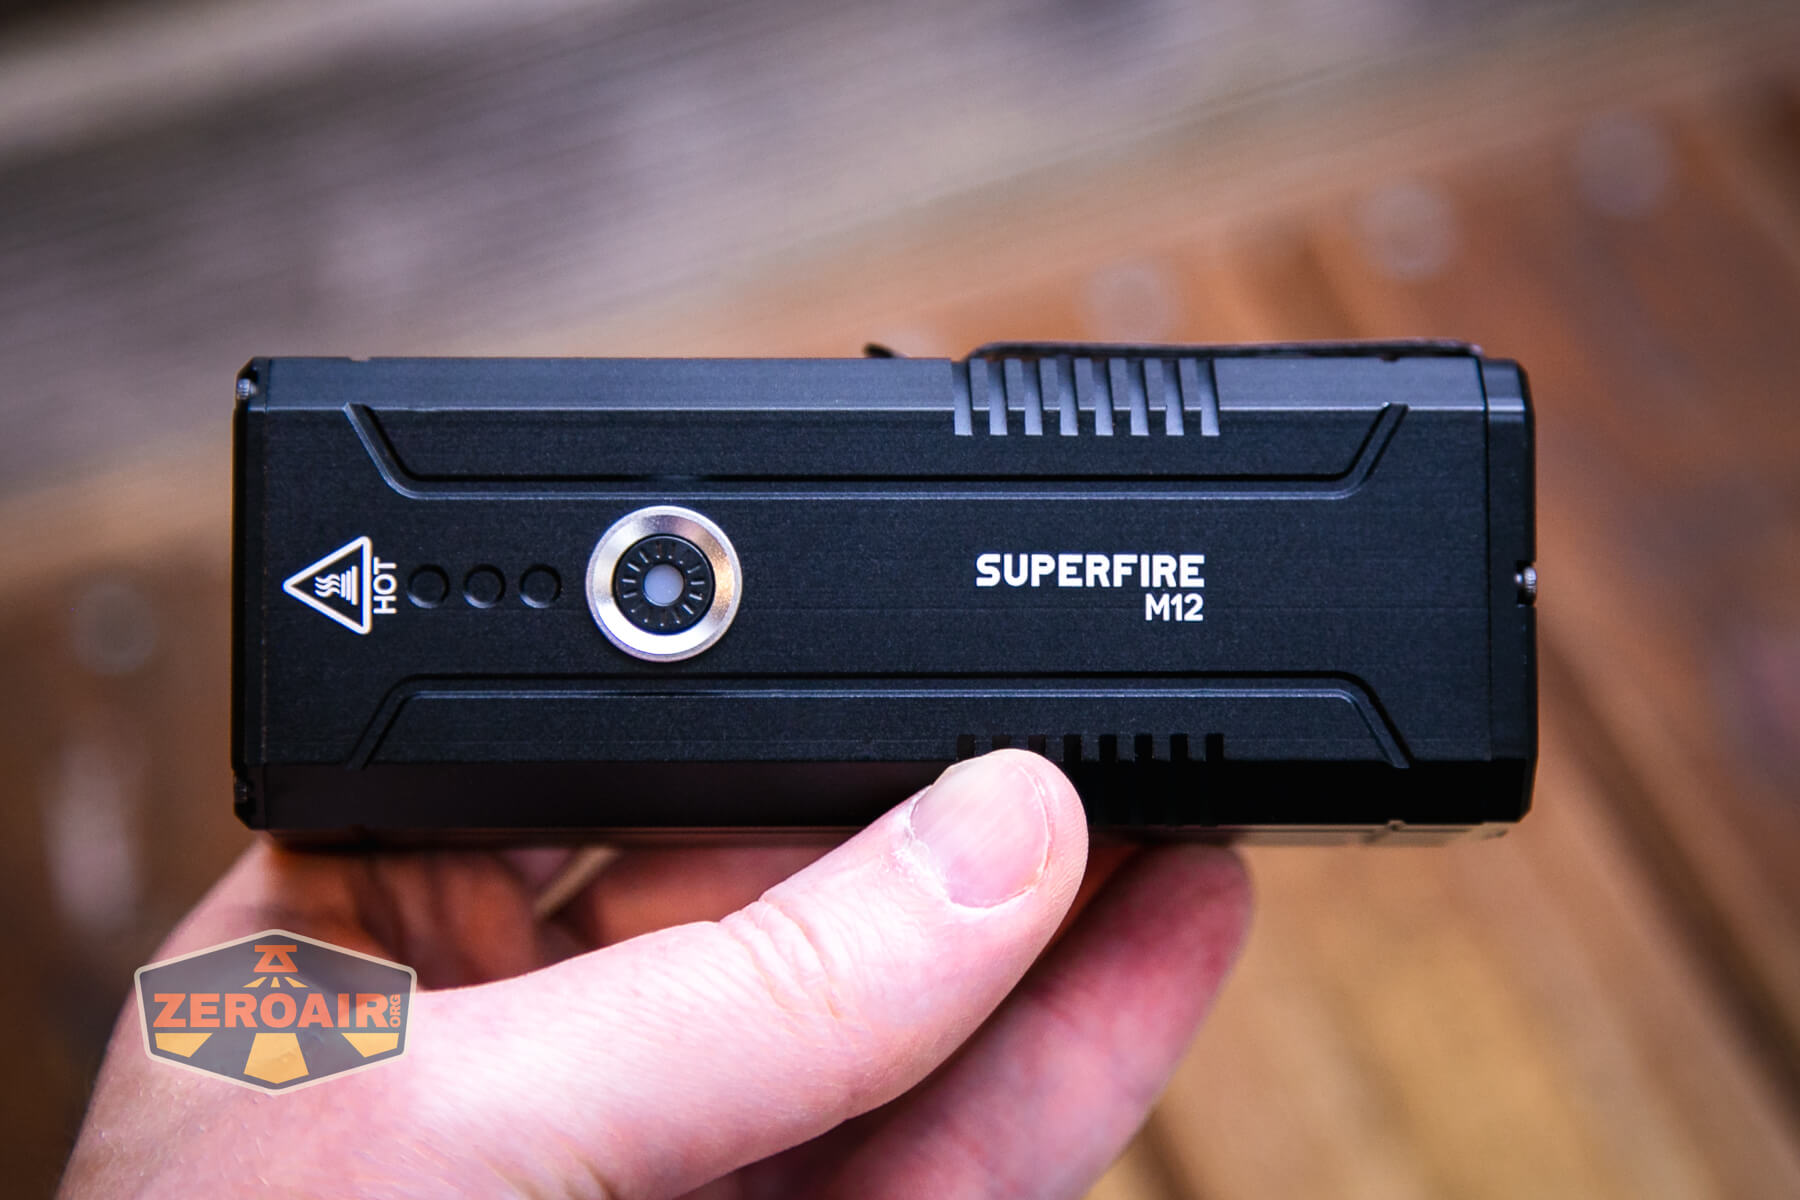
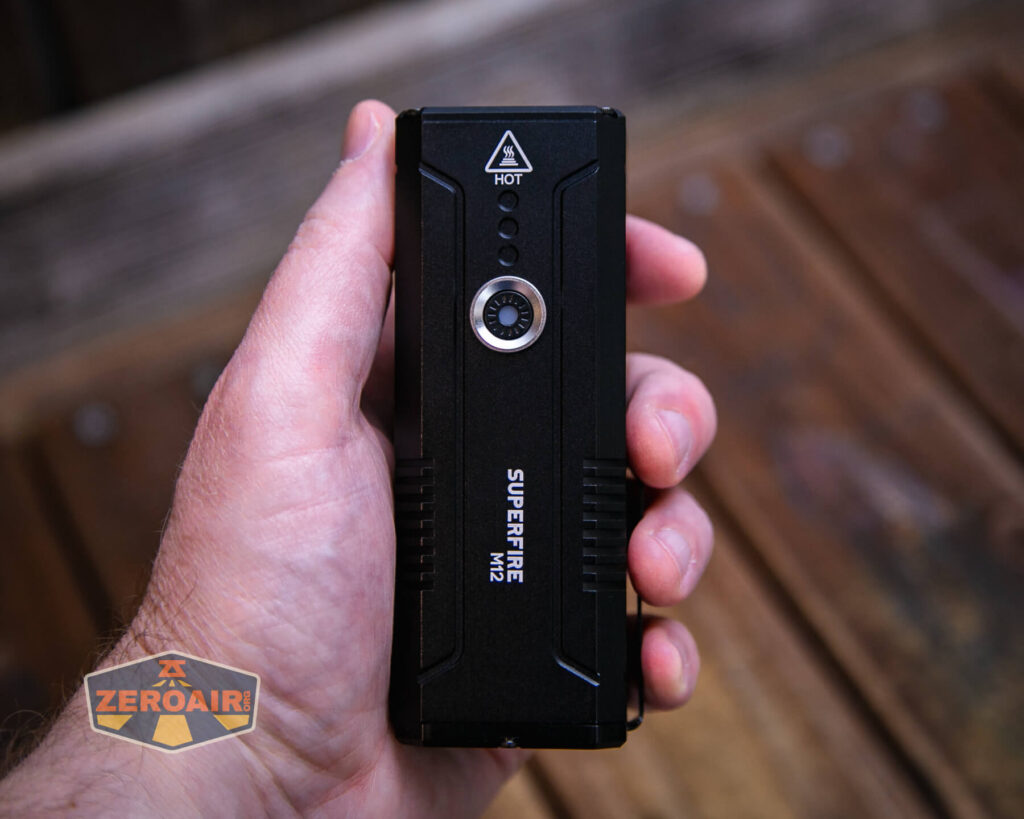
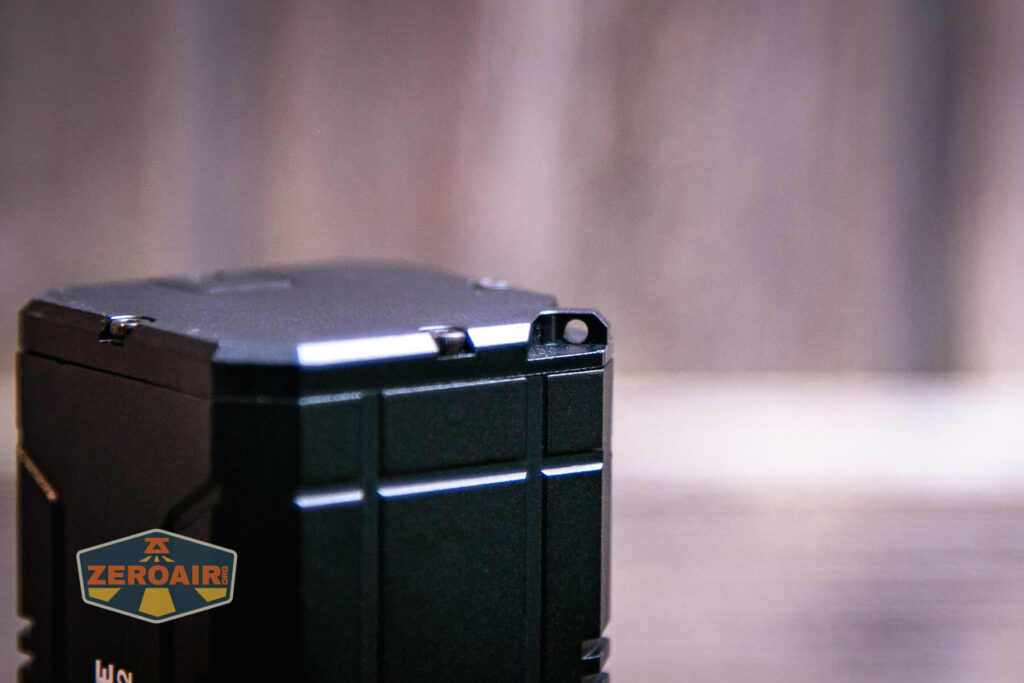
Build Quality and Disassembly
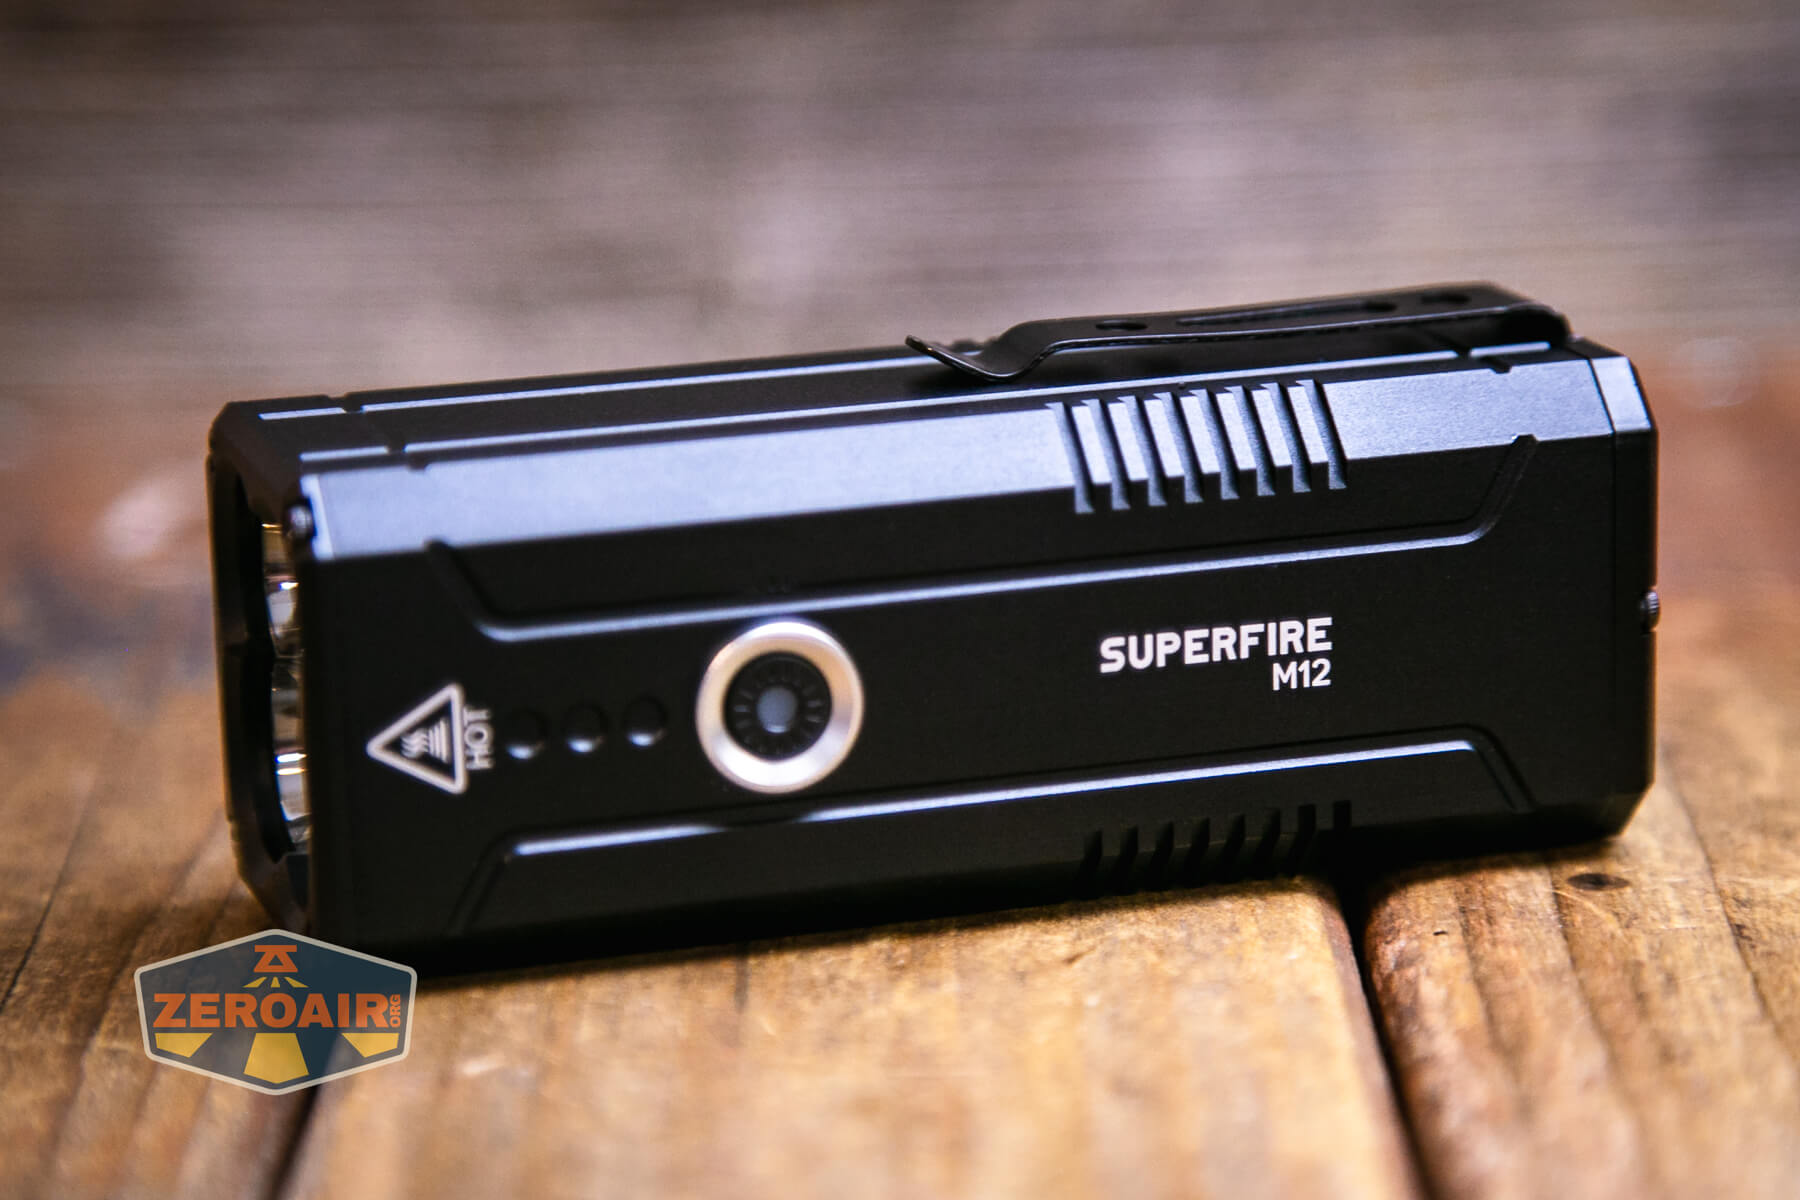
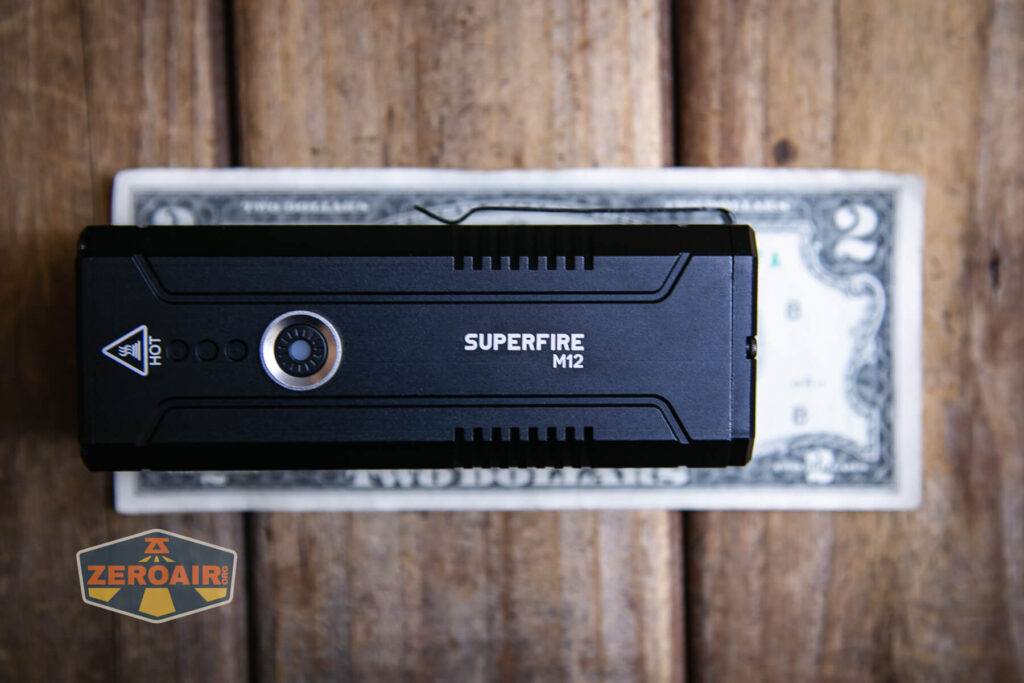
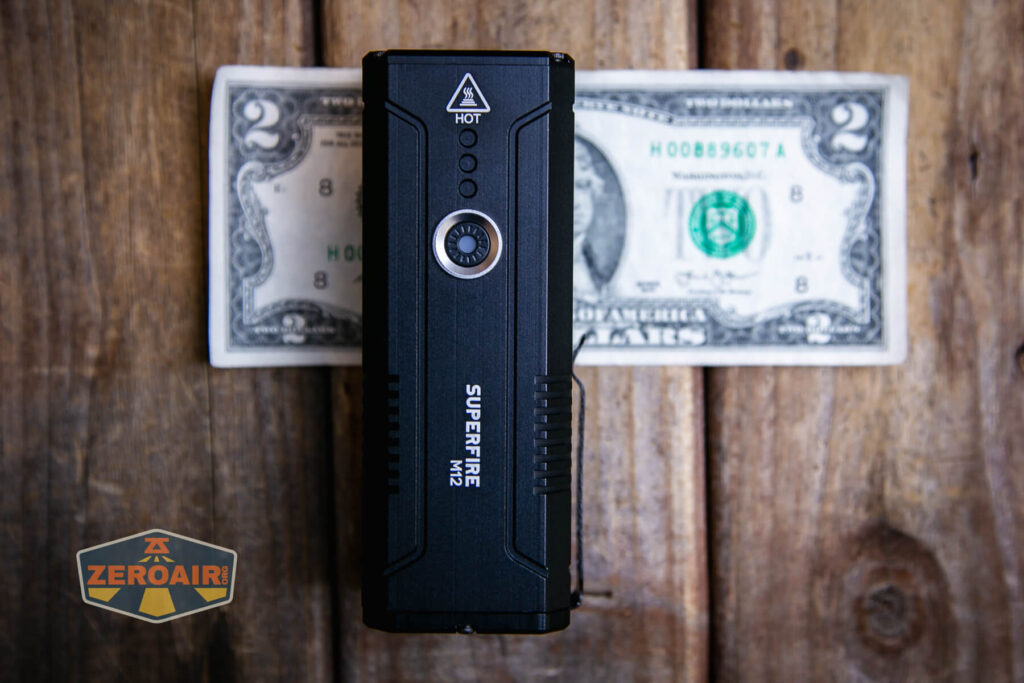
The build quality here isn’t too bad. I like odd things (shoutout to myself!) and so I appreciate the unusual shape (for flashlights) the M12 offers. It’s very anti-roll!
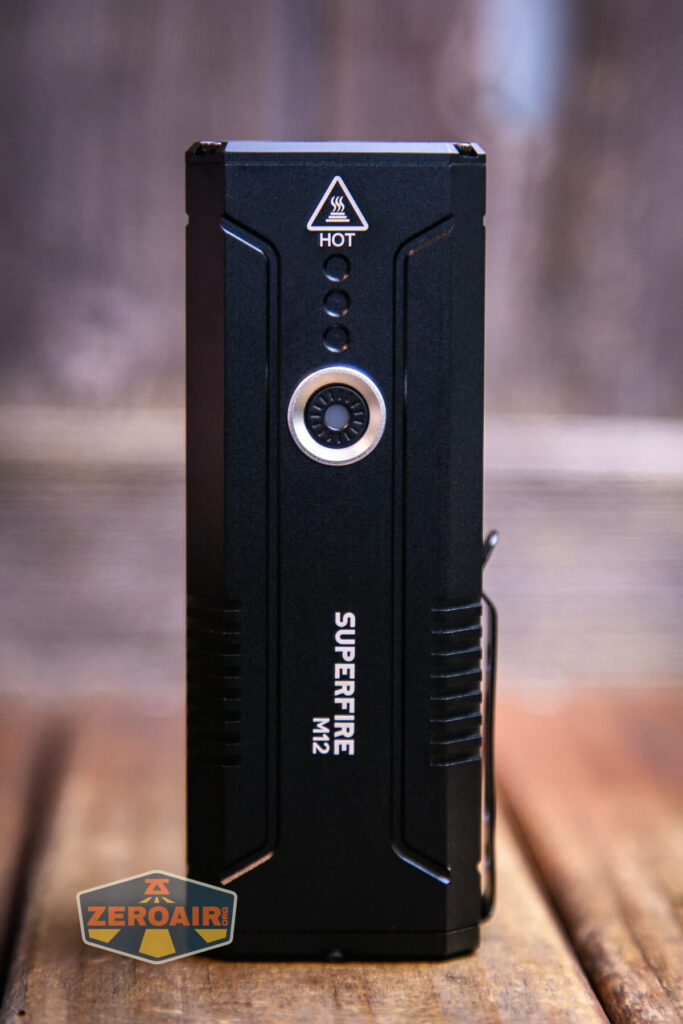
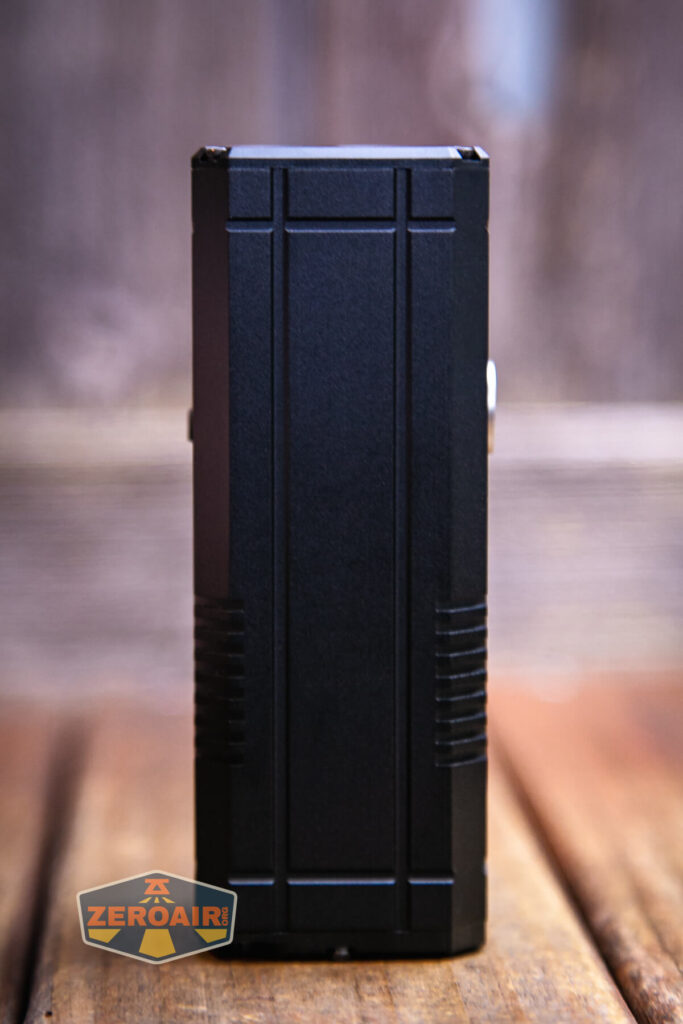
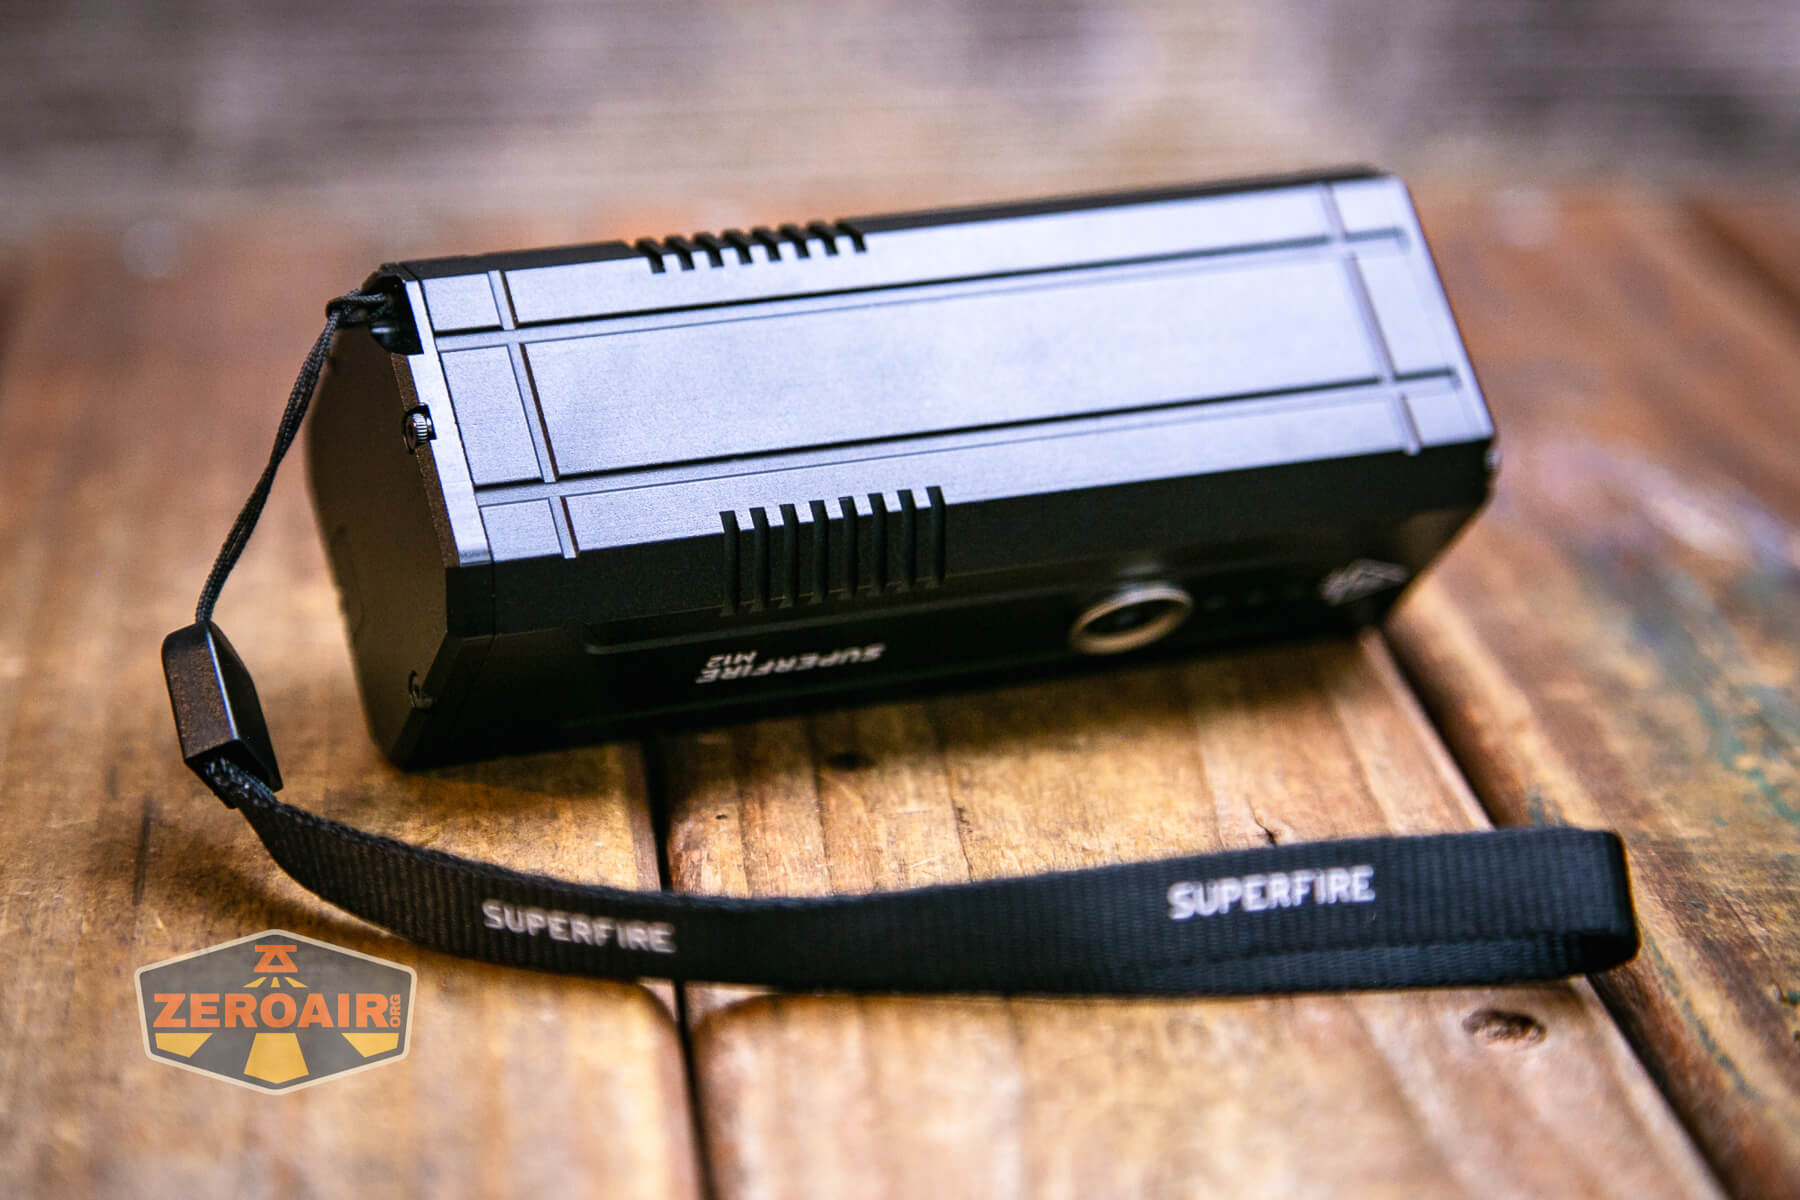
The body lacks much grip. There is no knurling, and the body has “flat faces,” so using the included lanyard is probably a good choice.
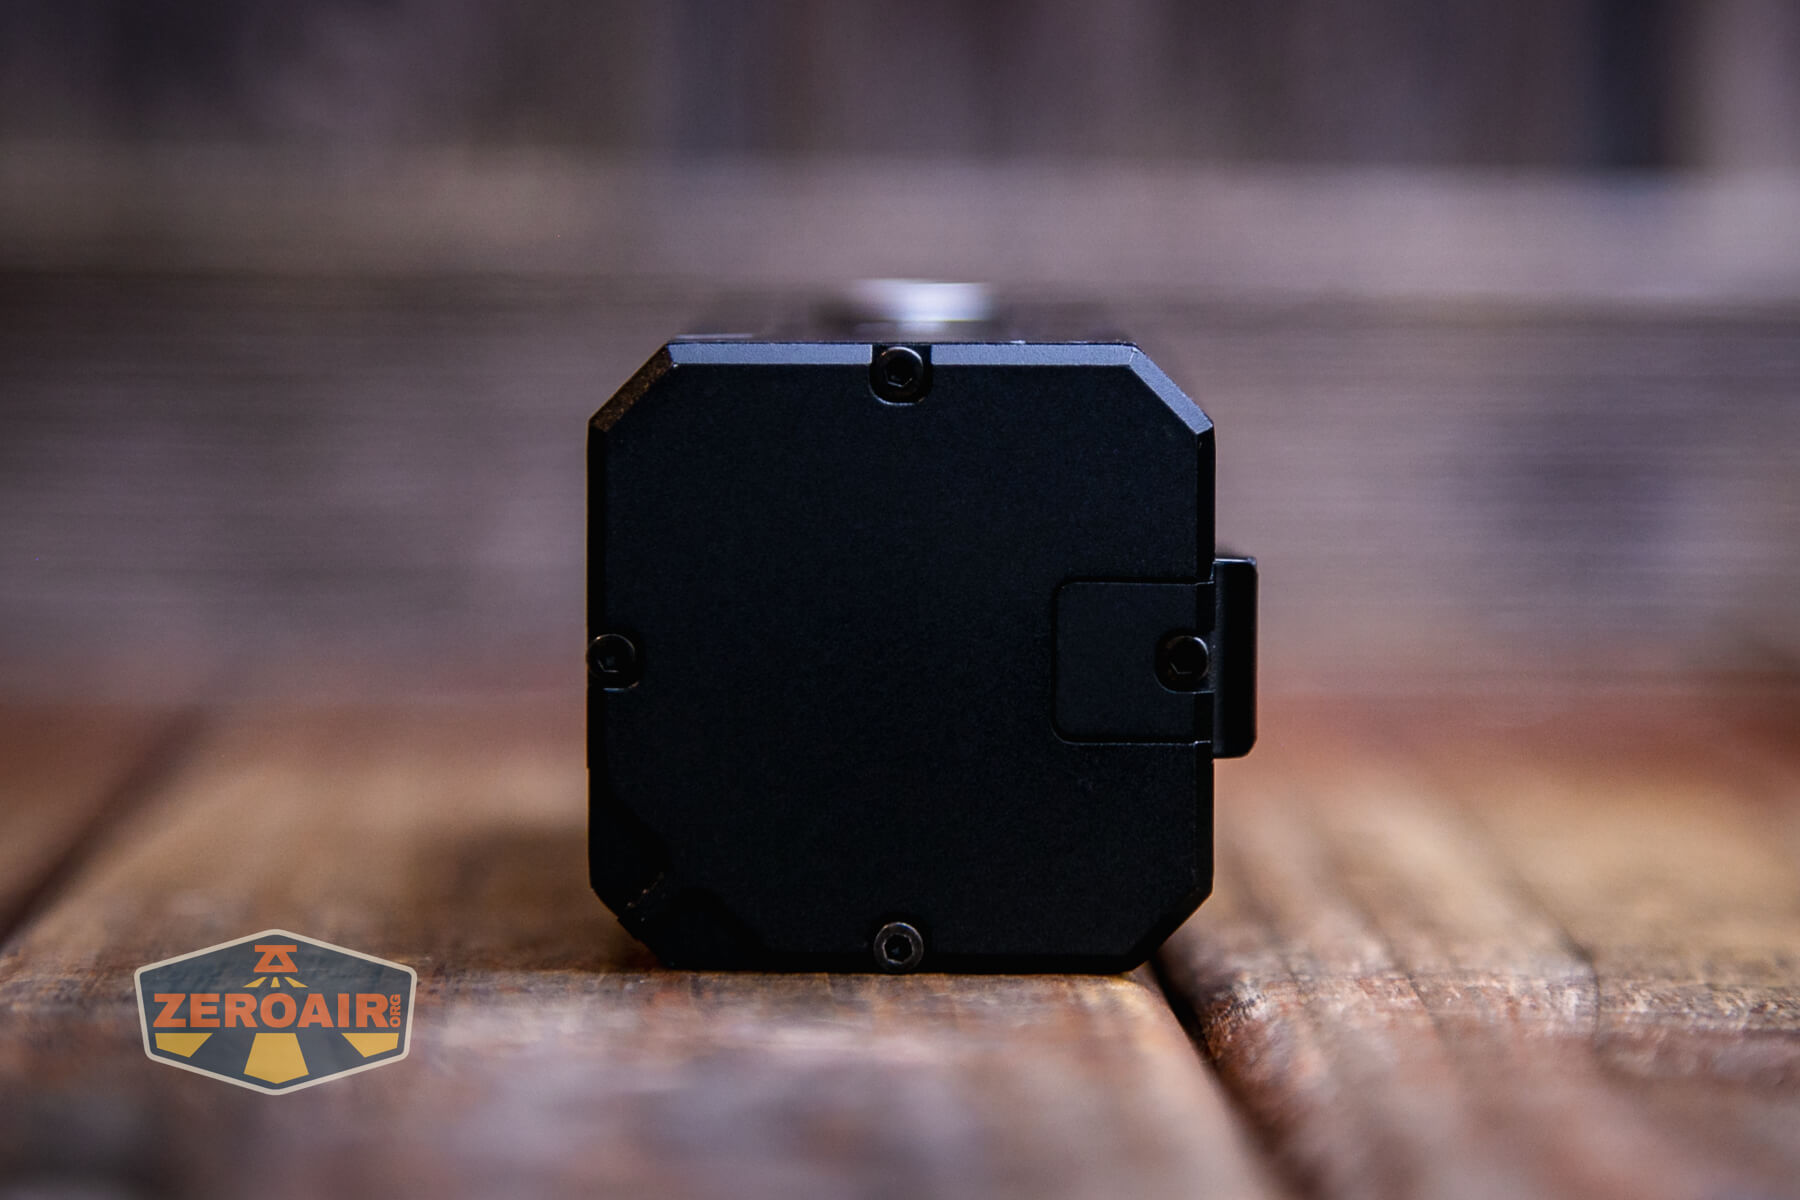
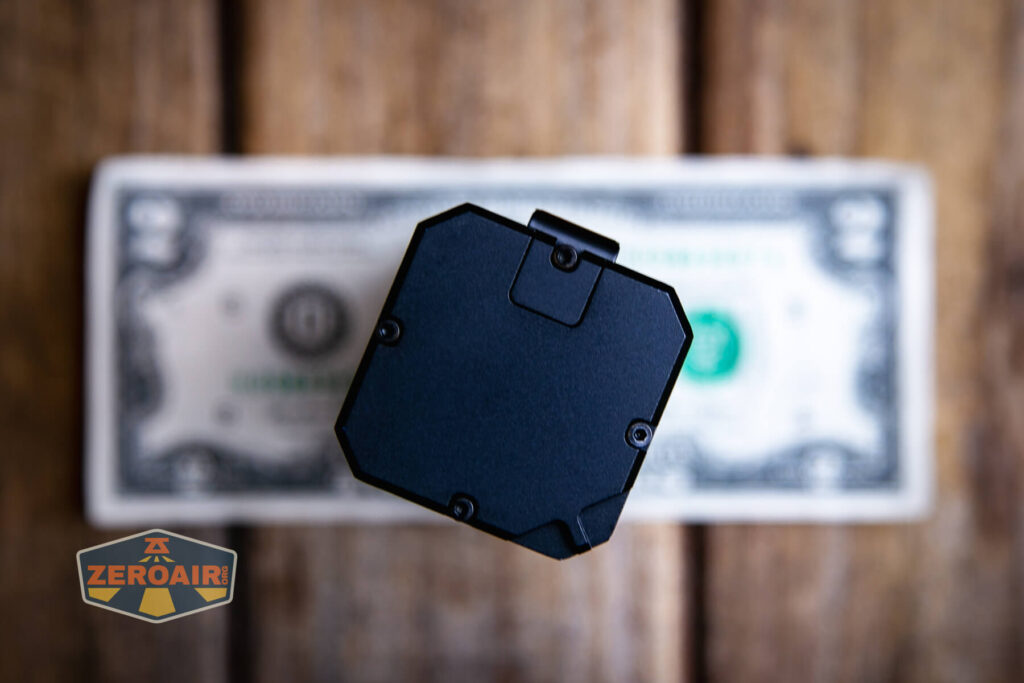
The tailcap is flat, too, with no magnets or anything. This does, of course, mean that the M12 will tailstand easily!
Size and Comps
- Weight: about 410g
- Product Size: 118 x 46 x 43mm
If the flashlight will headstand, I’ll show it here (usually the third photo). If the flashlight will tailstand, I’ll also show that (usually in the fourth photo).
Here’s the test light with the venerable Convoy S2+. Mine’s a custom “baked” edition Nichia 219b triple. A very nice 18650 light.
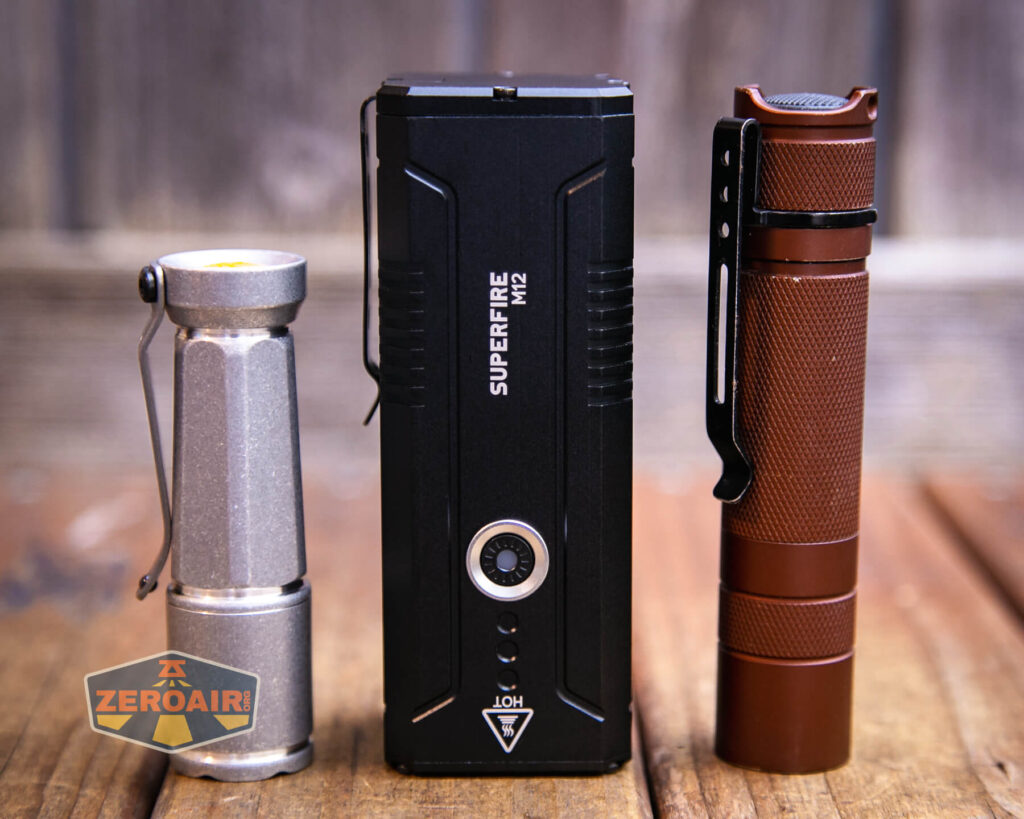
Also above on the left is a new feature light!! Laulima Metal Craft sent this Todai in tumbled aluminum for some size comparison photos like the ones above. Laulima has a bunch of incredible items. I’ve tested one (the Laulima Metal Craft Hoku) (the official site for Hoku is here) that was a Friend Fund Friday review. I was impressed enough by that Hoku that I bought a Laulima Metal Craft Diamond Slim (also in tumbled aluminum) (review is upcoming!) These lights by Laulima have impeccable build quality and not only that, they’re quite configurable. There are some (great, actually) default configurations, but Joshua Dawson (of Laulima Metal Craft) is open to ideas and emitter options and the like. I haven’t reviewed this Todai, but I have to say, it feels absolutely fantastic and I love it thus far. (Notably, I love how warm and eggy those emitters look through the TIR.)
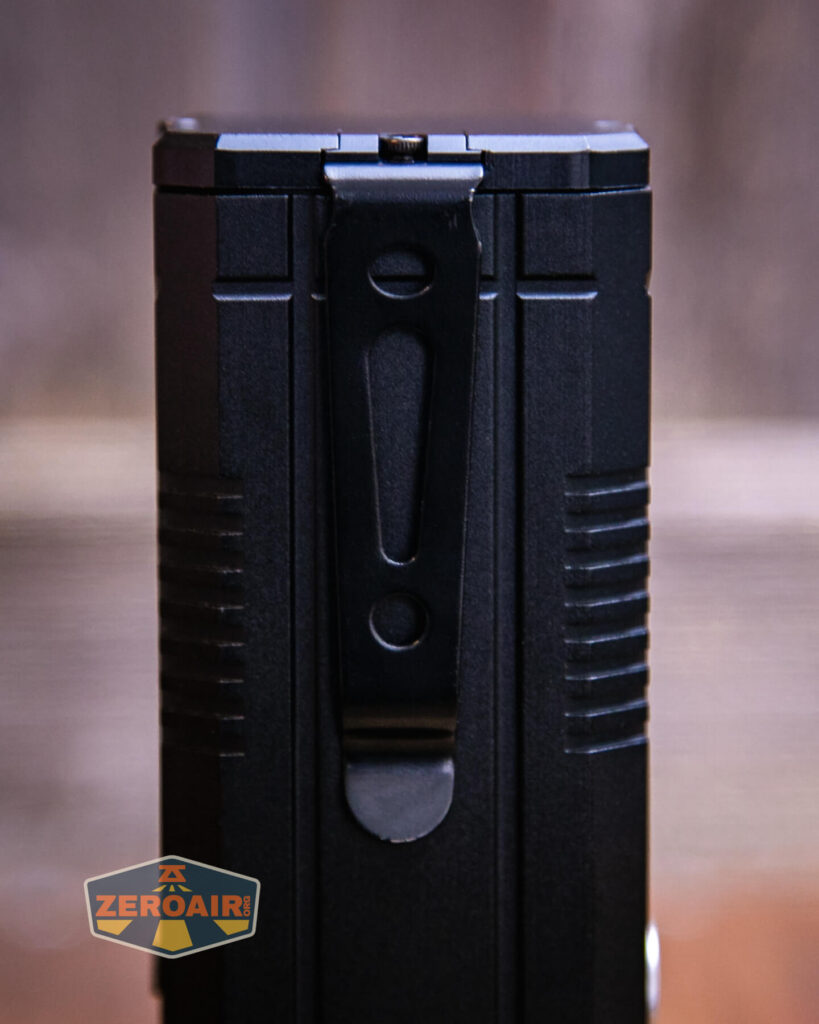
Retention and Carry
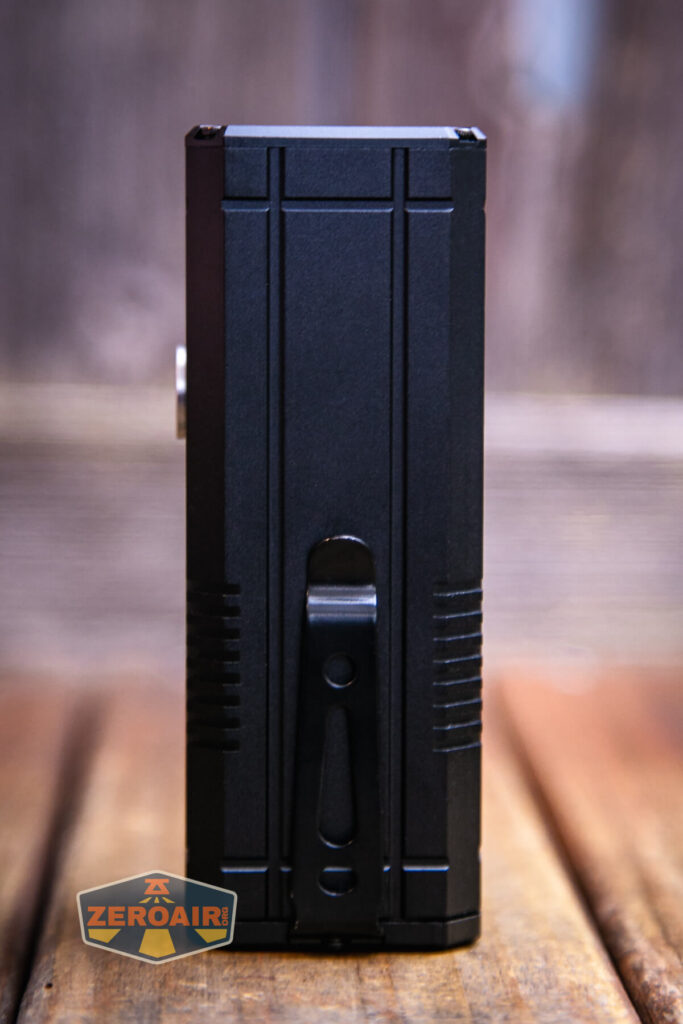
This pocket clip, which is attached from the factor, attaches in an interesting way. It’s captured in the tailcap with a single screw.

Because the clip is captured in this way, it’d be reasonable to use any of those three holes for attaching the lanyard, too. Because of the thickness (or “thinness”) of the clip, though, the hole in the tailcap is definitely the best place for a lanyard.
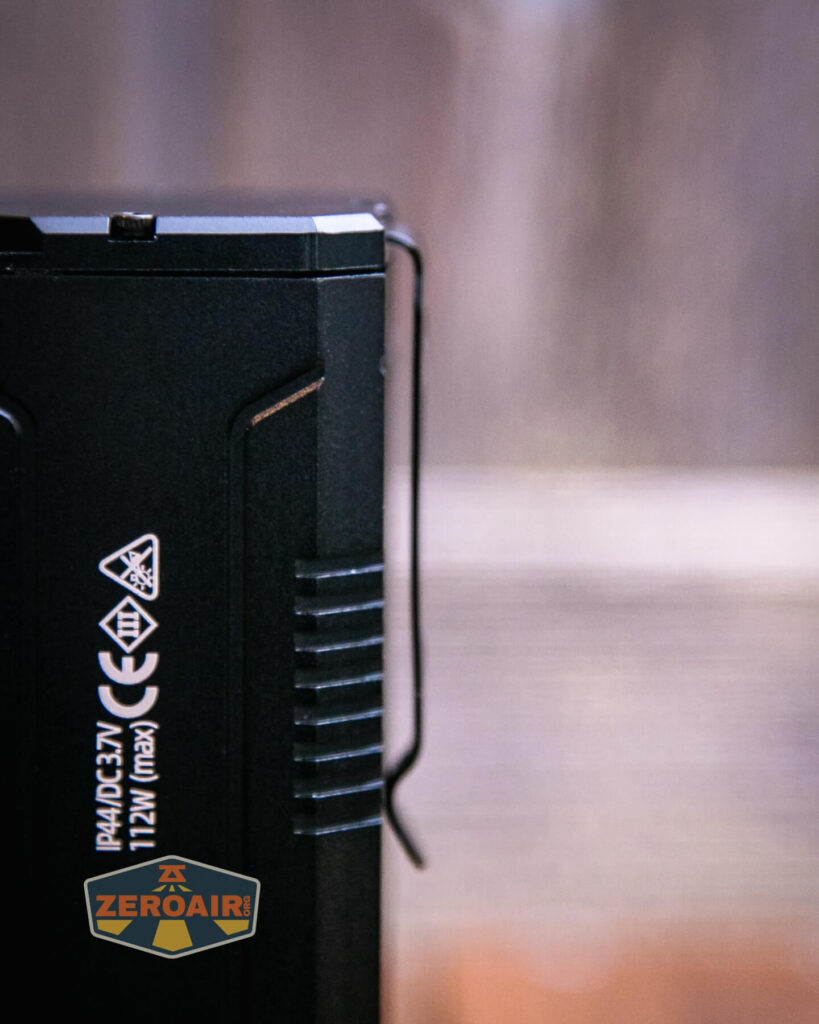

Here’s the hole in the tailcap for the lanyard.

And here’s that lanyard attached. It’s a very simple affair.
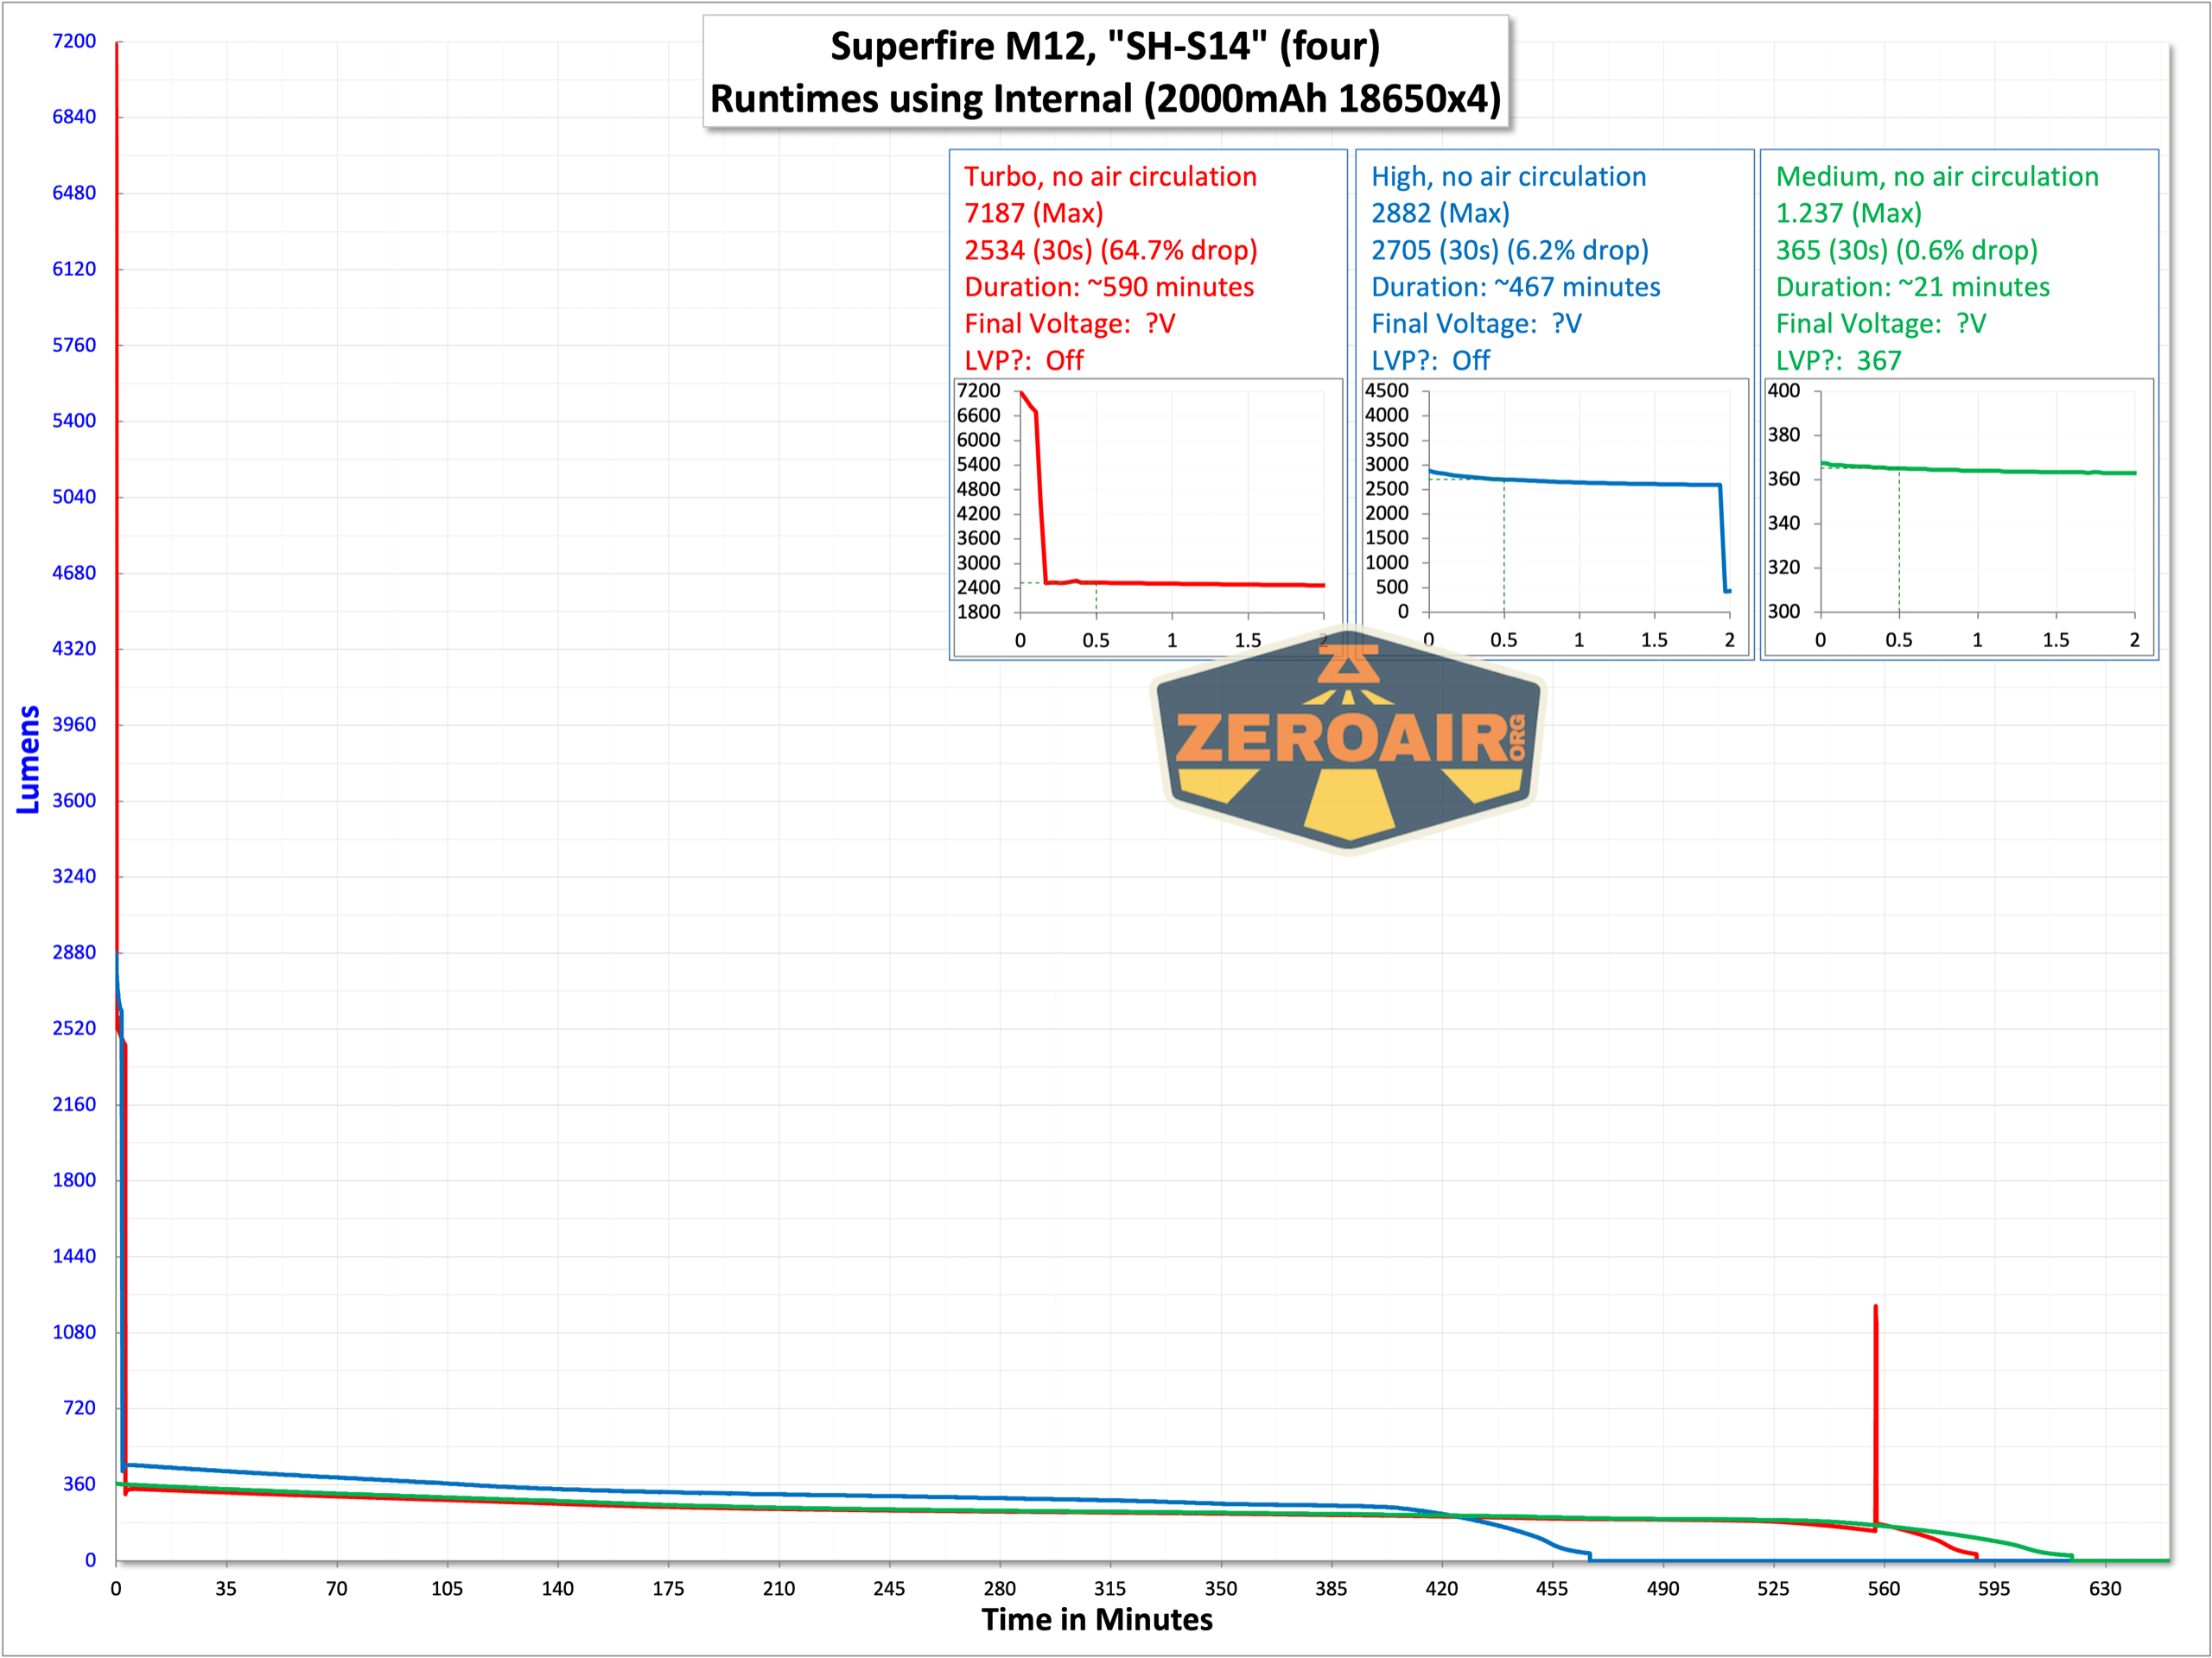
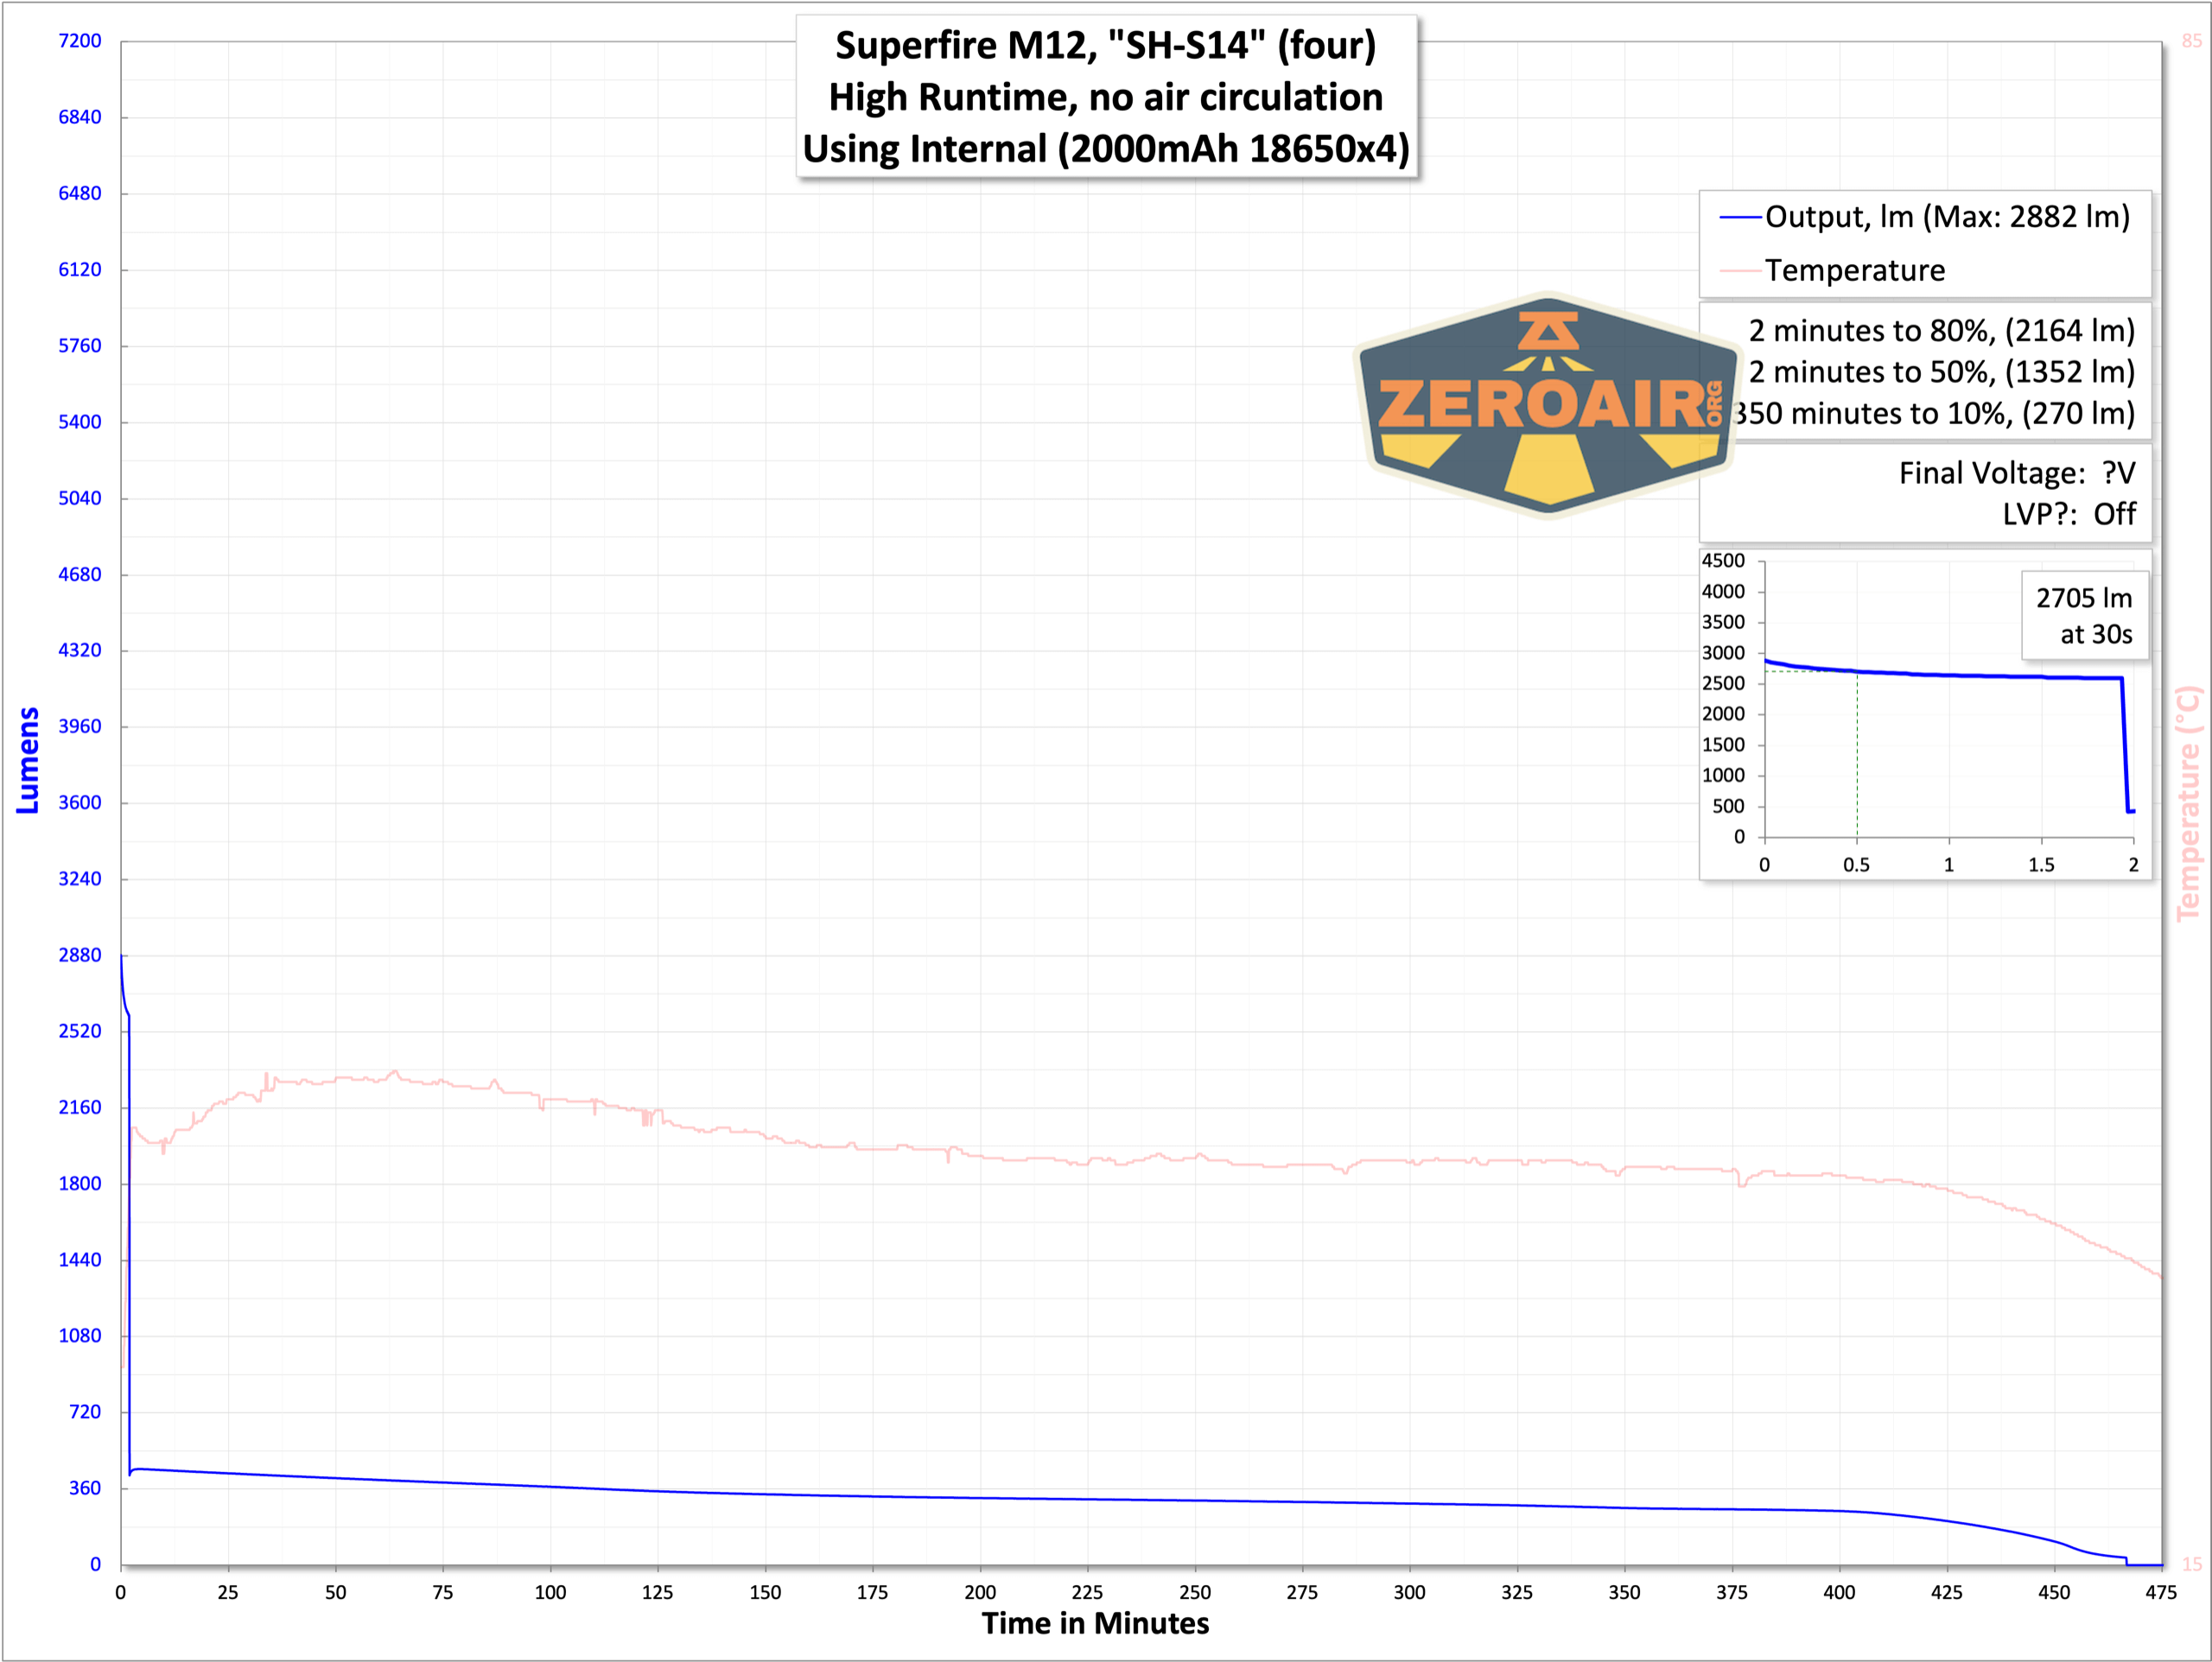
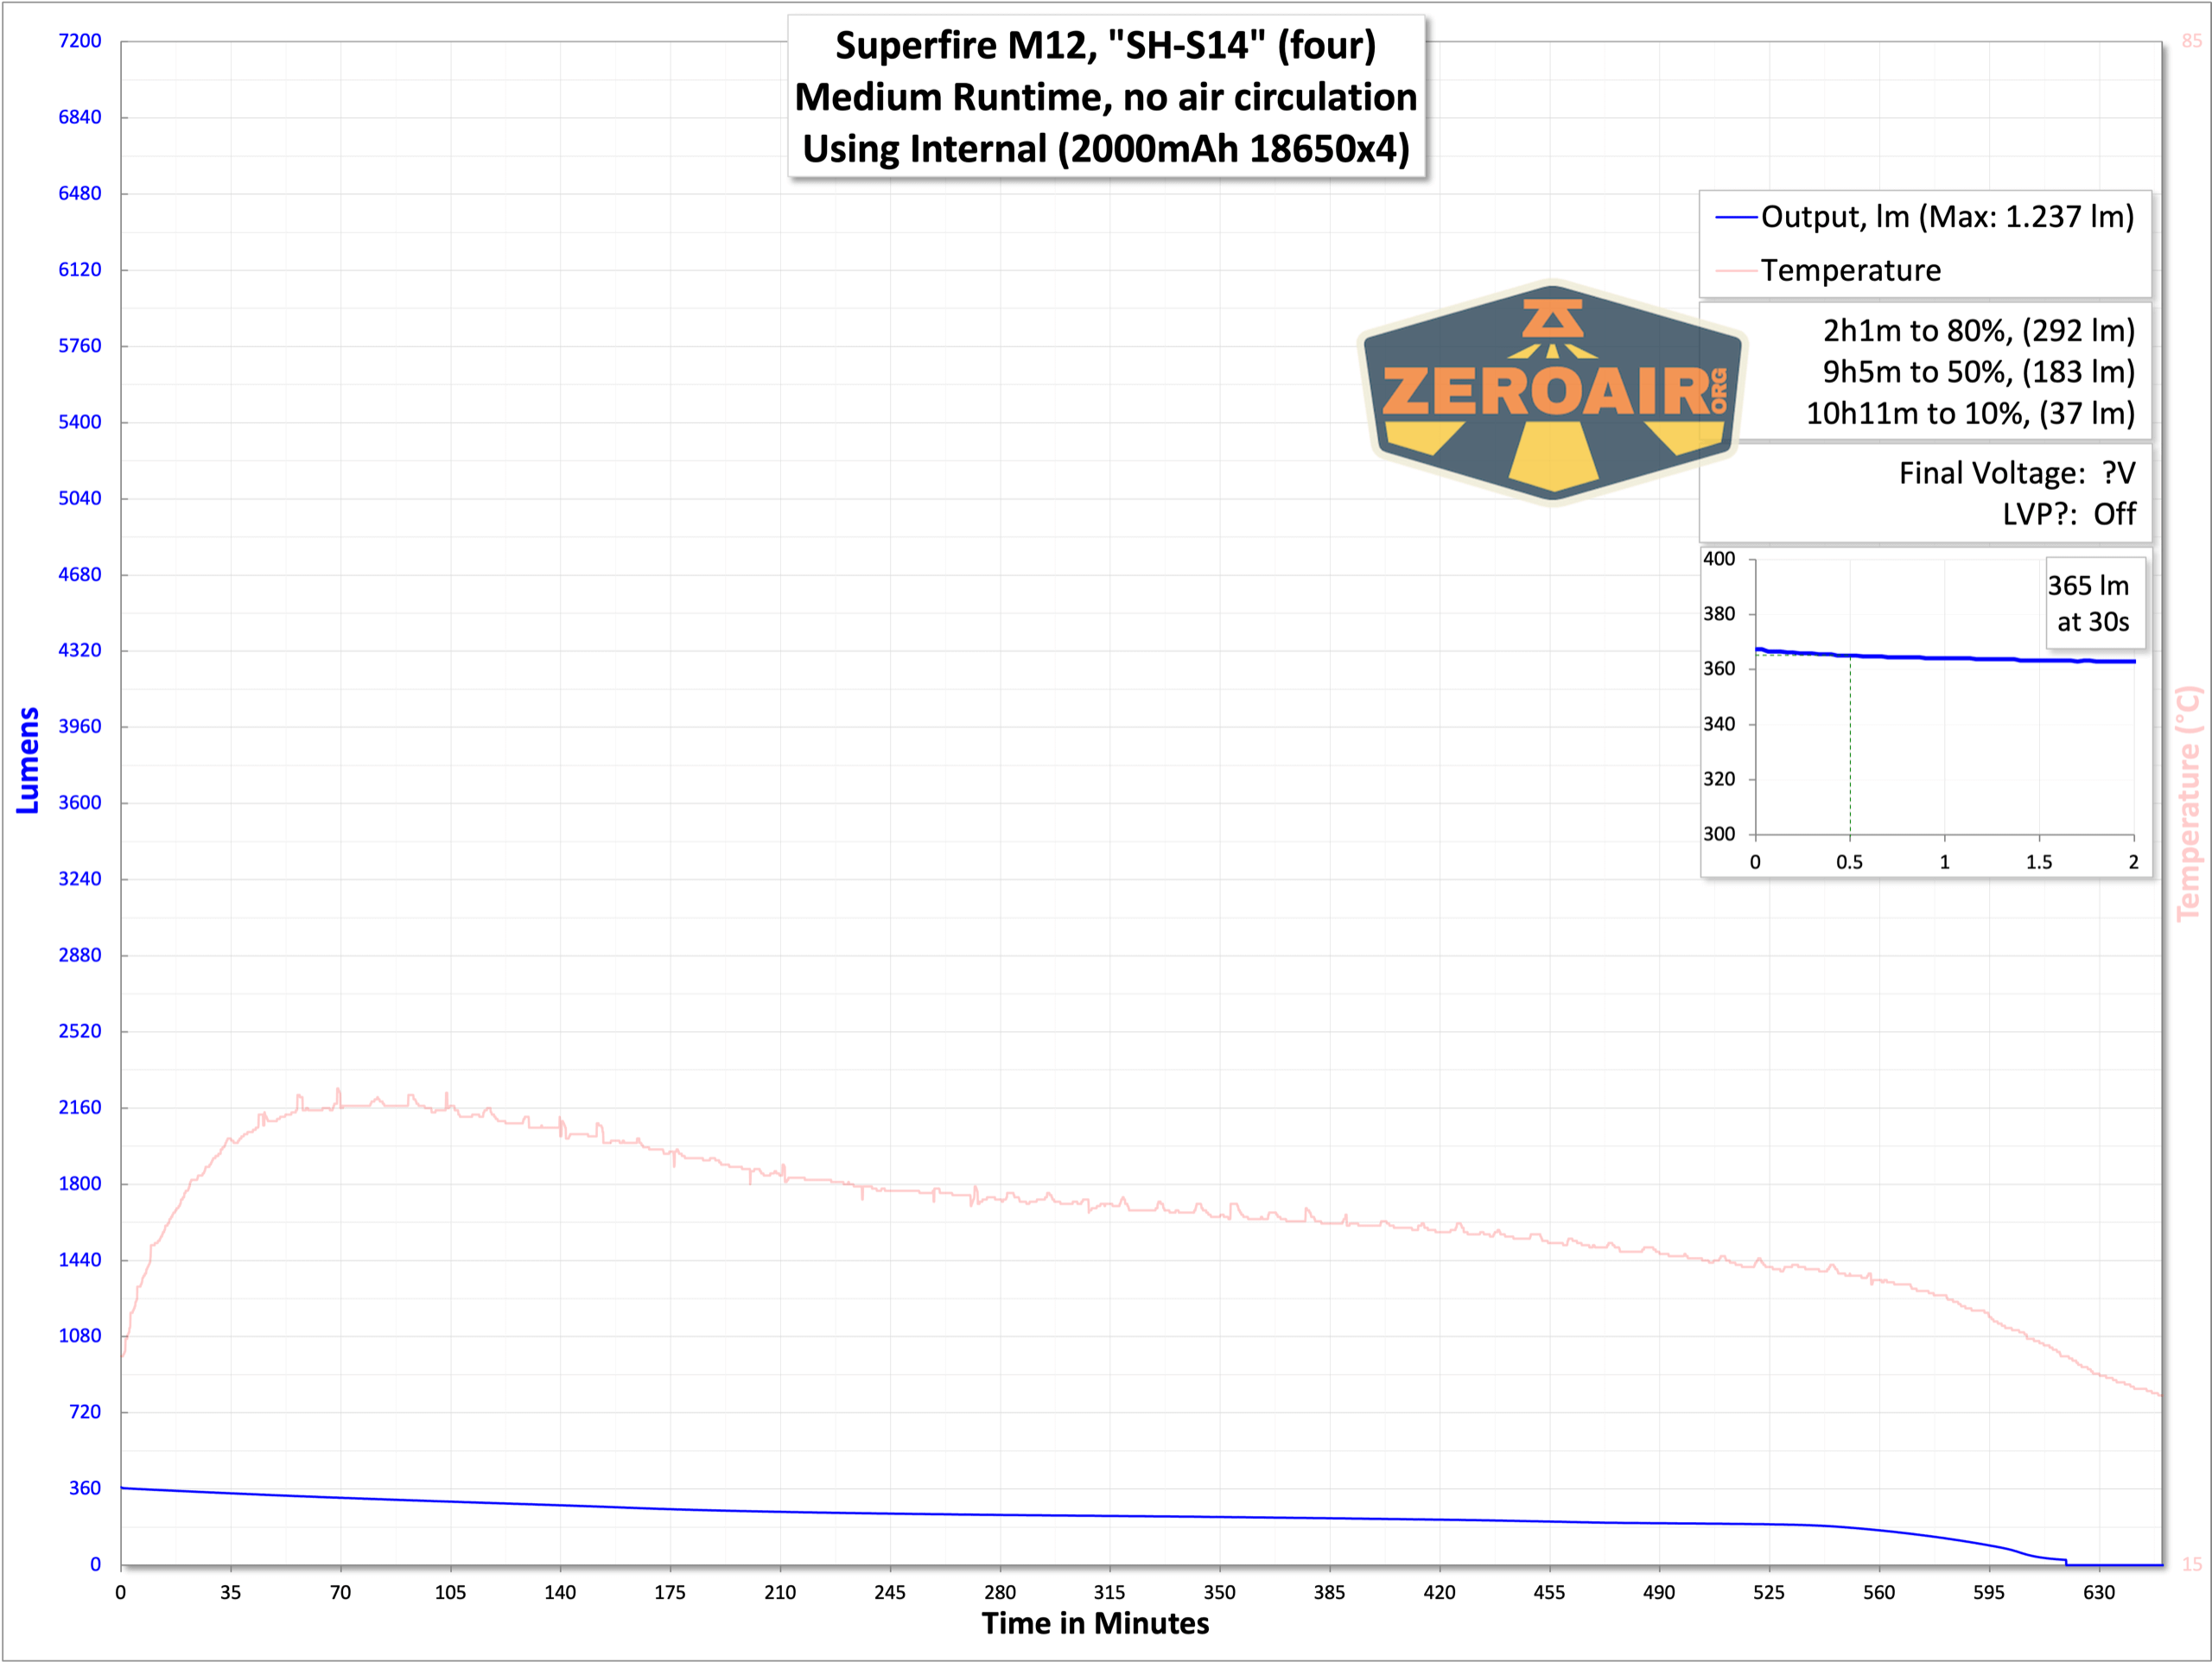
Power and Runtime
While Superfire states that the M12 runs four 18650 cells (which are 2000mAh), those cells are built into the M12, and are not really replaceable.
I did not disassemble the light to check the configuration of the cells.
Below are three runtime tests.
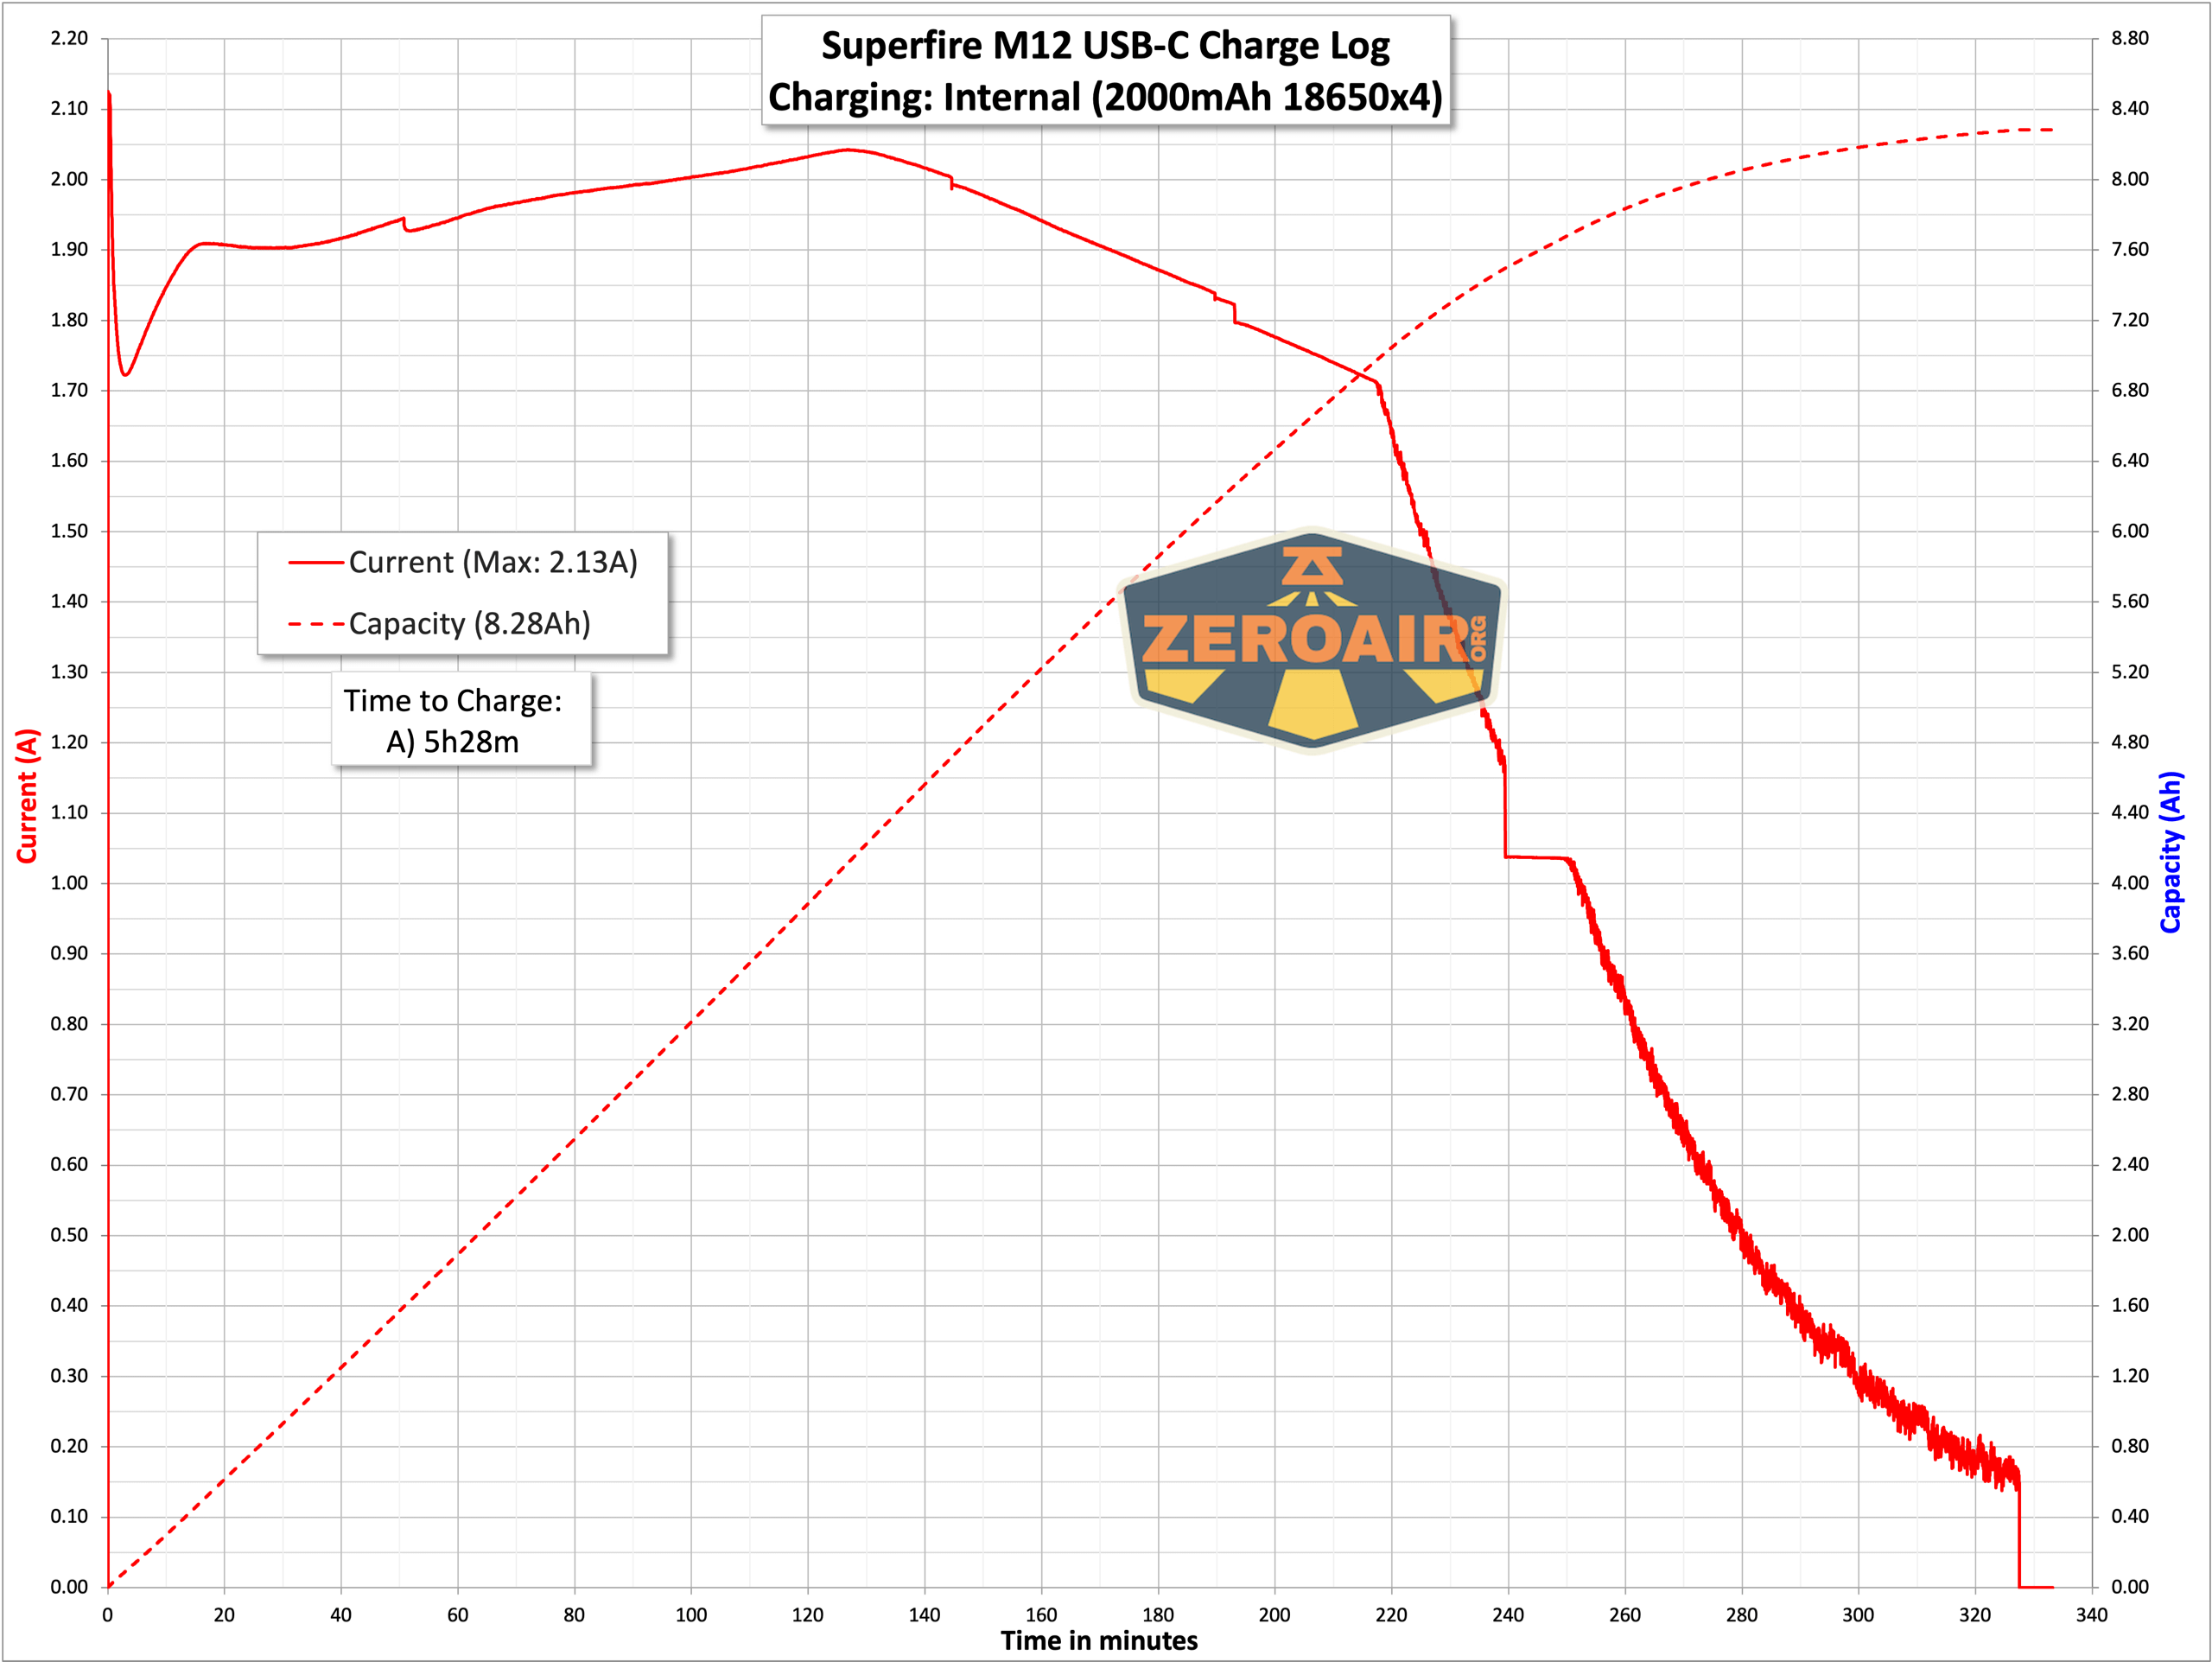
Charging
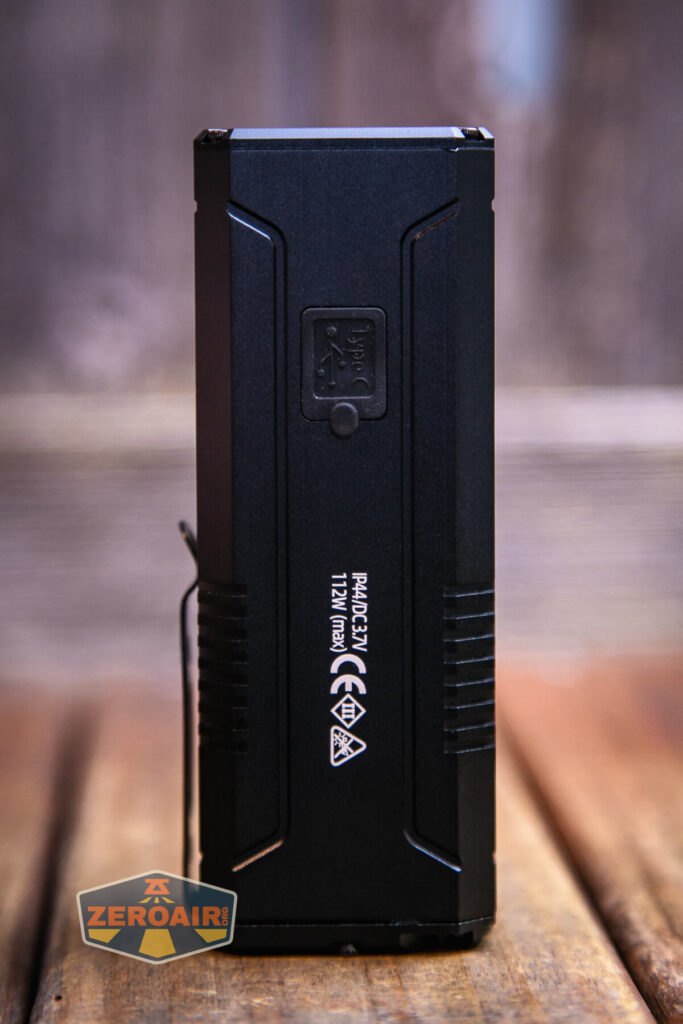
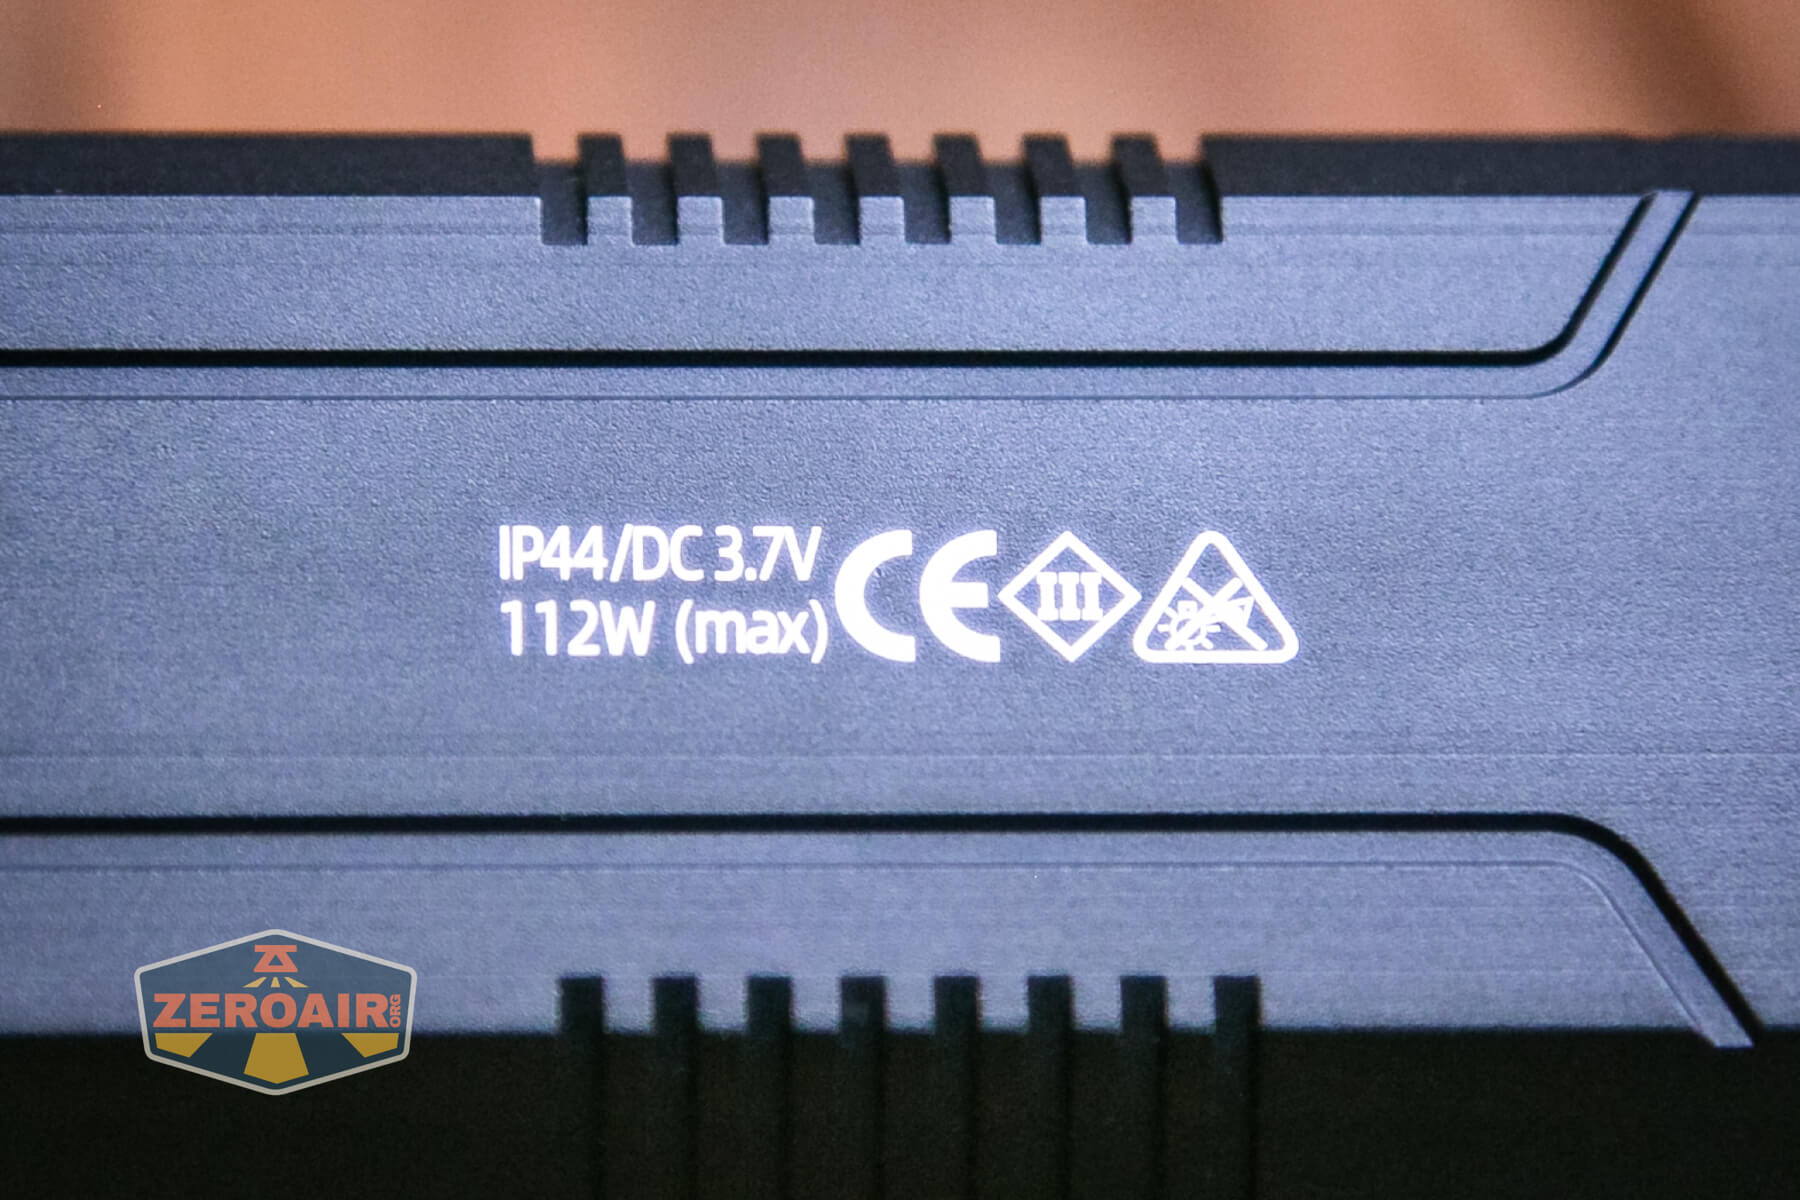
The Superfire M12 is in fact a rechargeable flashlight. The charging feature is by way of a USB-C charging port.
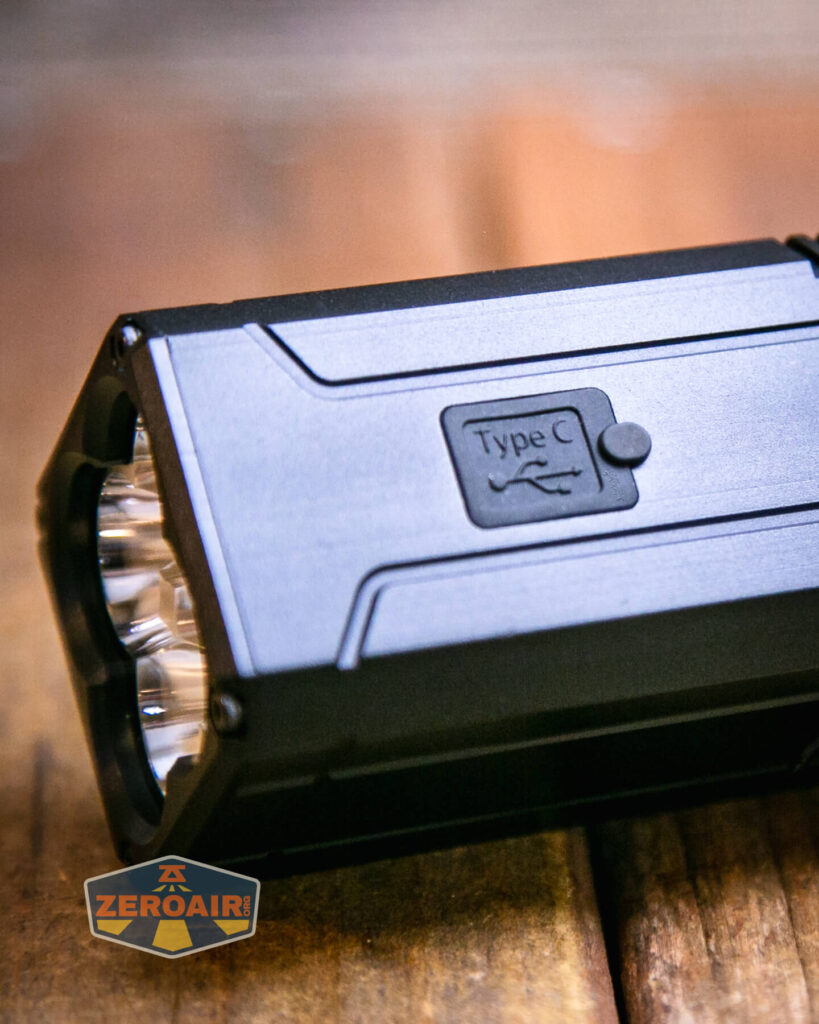

An appropriate cable is included – USB to USB-C.
Here are a couple of charge graphs. Both USB to C and C to C were tested and performed nicely.
Powerbank
The USB-C port of the Superfire M12 rechargeable flashlight can also output power, so this big light with four 18650 cells can be used as a powerbank, too!
I wasn’t able to test that feature. Despite having a number of testing methods and devices, I couldn’t get the powerbank to output any power. I really believe that’s a failing in my equipment though, and the M12 probably can sufficiently charge devices such as mobile phones.
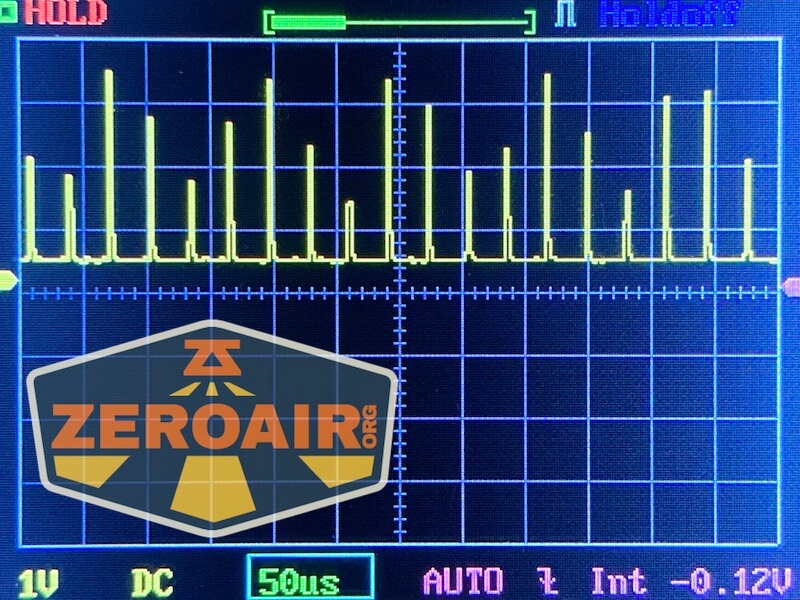
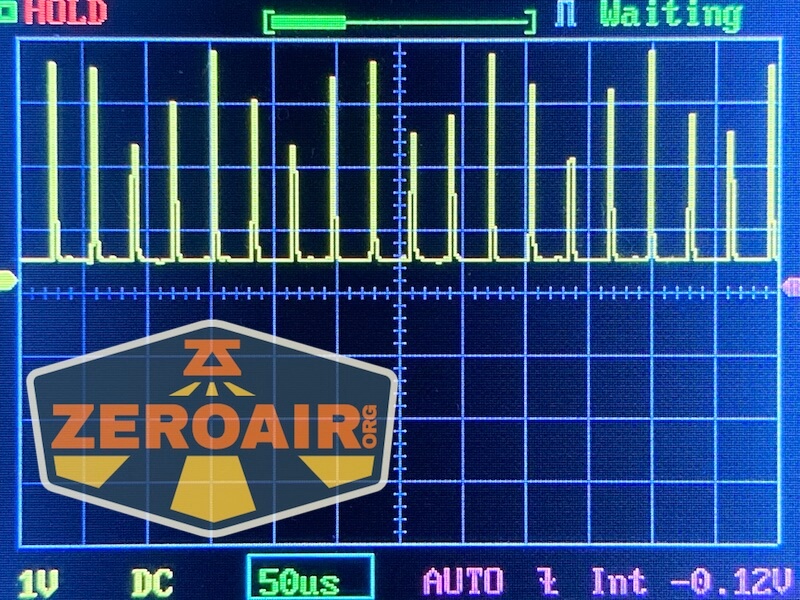
Pulse Width Modulation
The lower three modes use PWM but it’s quick and should not be a problem for most users.
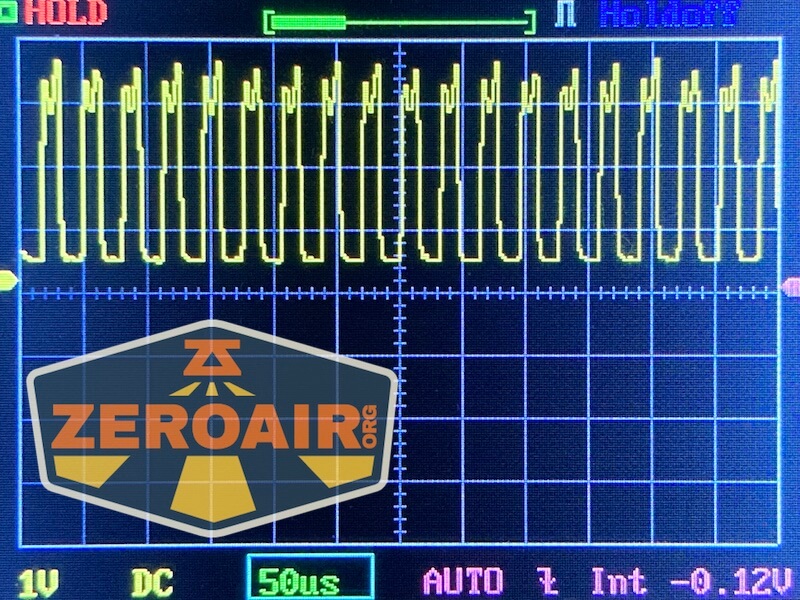
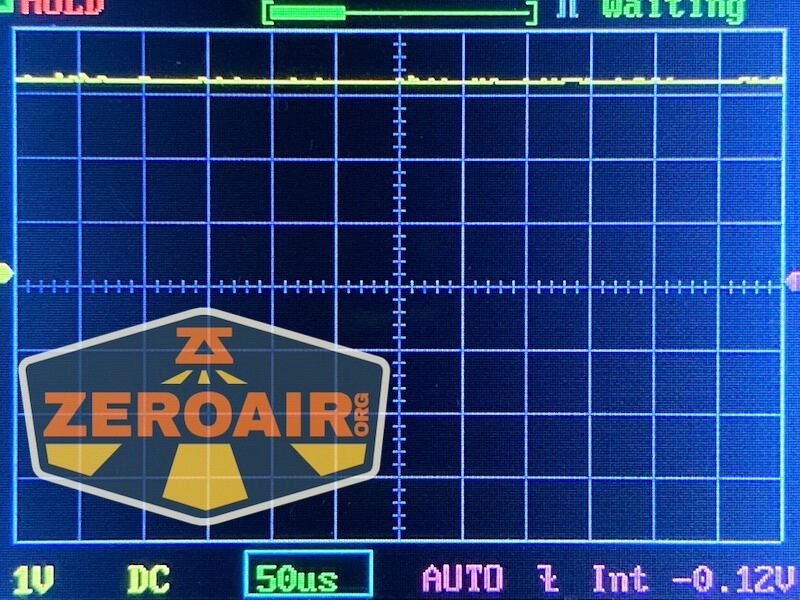
Here you can see a “baseline” – a chart with almost no light hitting the sensor.
Then there’s the Ultrafire WF-602C flashlight, which has some of the worst PWM I’ve seen. It’s so bad that I used a post about it to explain PWM! Here are multiple timescales (10ms, 5ms, 2ms, 1ms, 0.5ms, 0.2ms) to make comparing this “worst” PWM light to the test light easier. That post also explains why I didn’t test the WF-602C at the usual 50us scale.
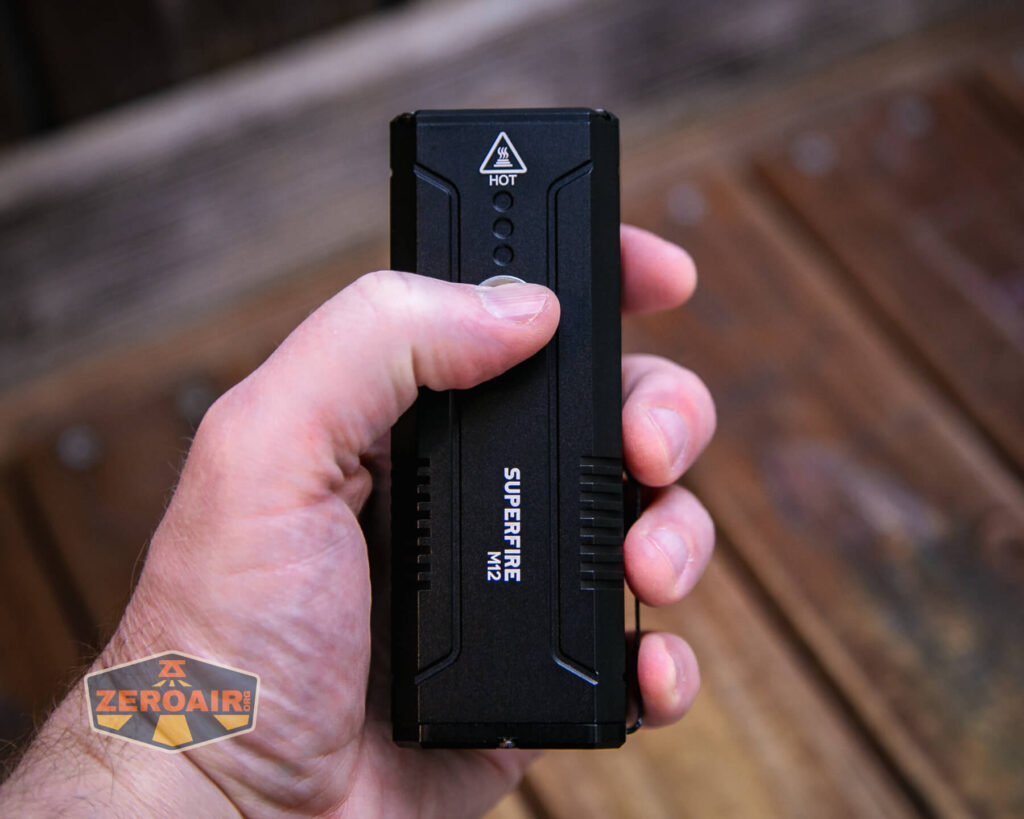
User Interface and Operation
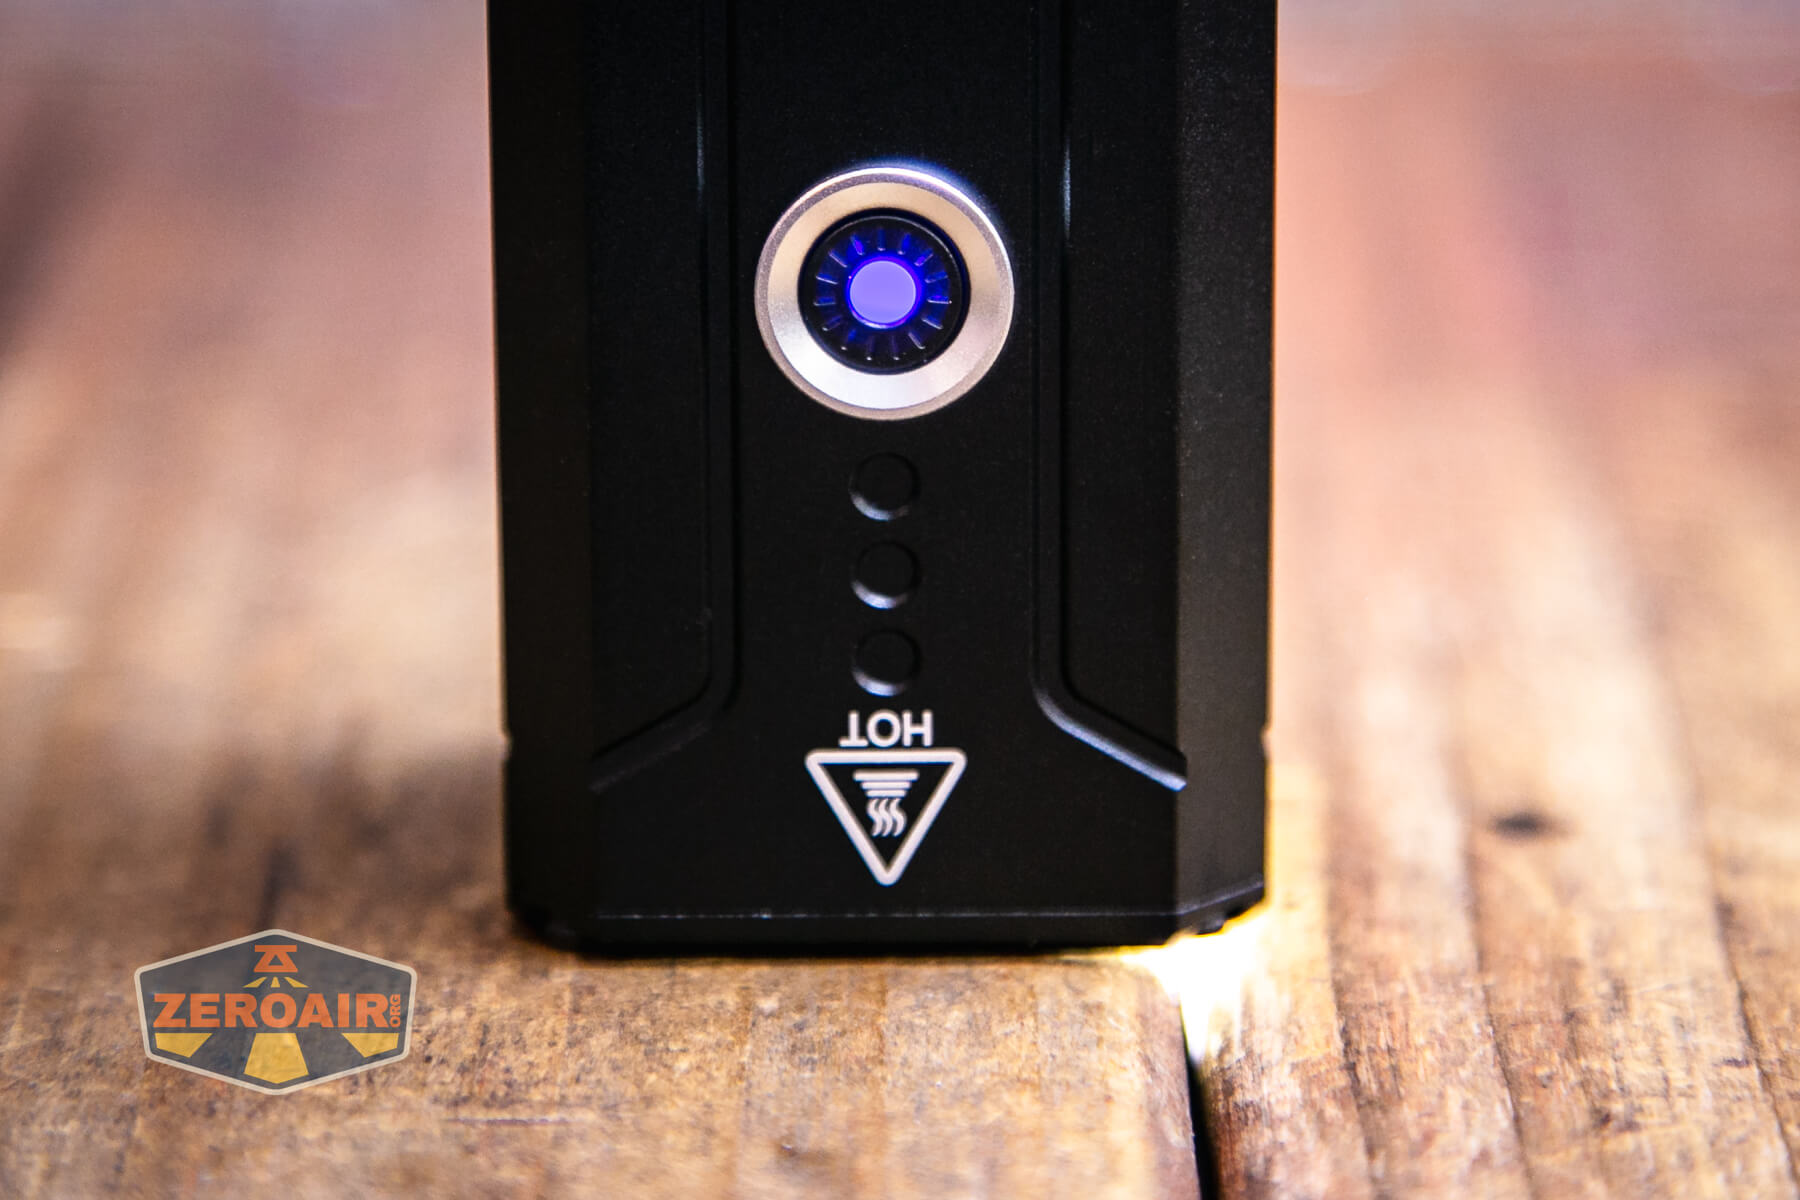
A single e-switch is used to control the Superfire M12. The switch has an indicating function, too. Below you can see the switch indicating red – that means the battery is low.
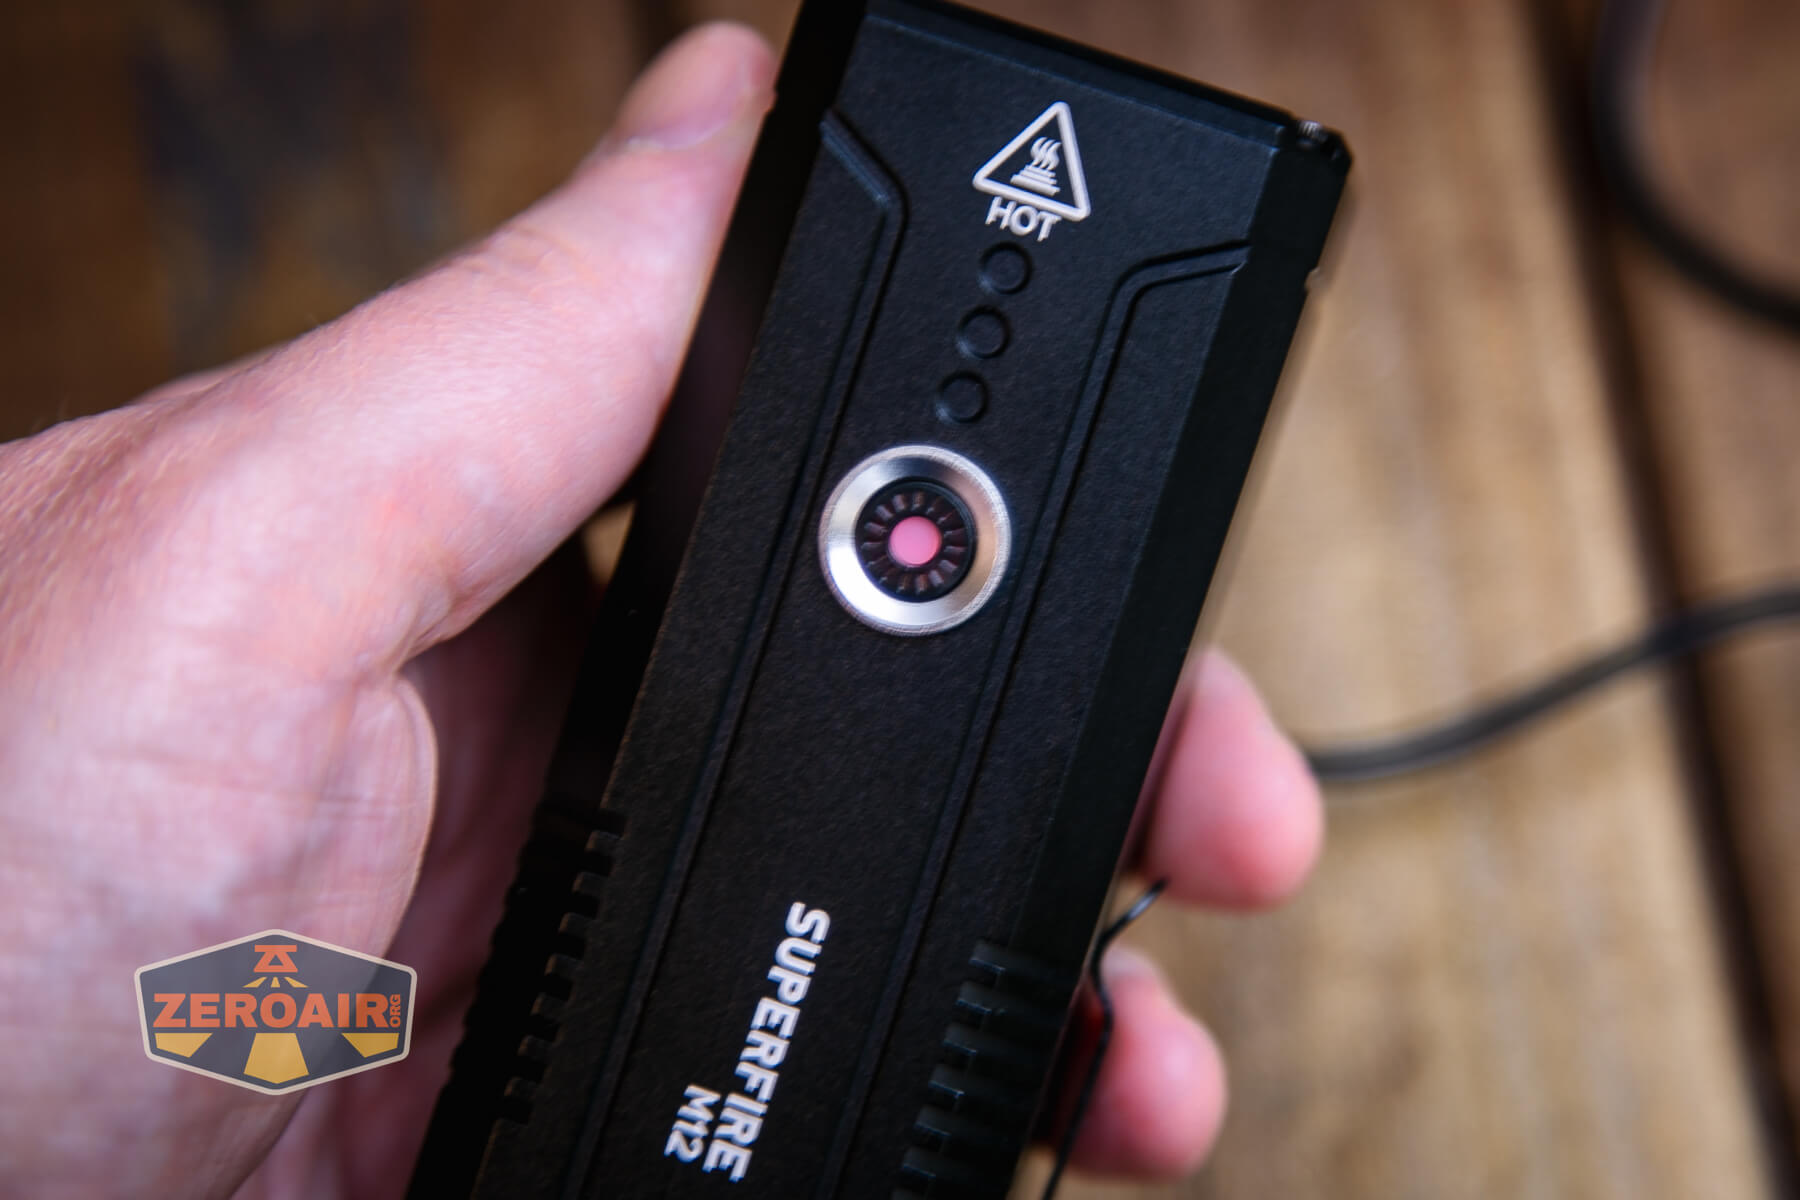
And below the switch is lit in blue.
Here’s a user interface table!
| State | Action | Result |
|---|---|---|
| Off | Hold (at least 2 seconds!!) | On |
| On | Click | Mode advance: Low > Medium > High > Strobe > SOS Turbo is not in the main group! It’s accessed only by double-clicking! |
| On | Double Click | Turbo |
| Turbo | Click | Previous mode |
| On | Hold | Off |
| Off | Click (any number of clicks!) | No action |
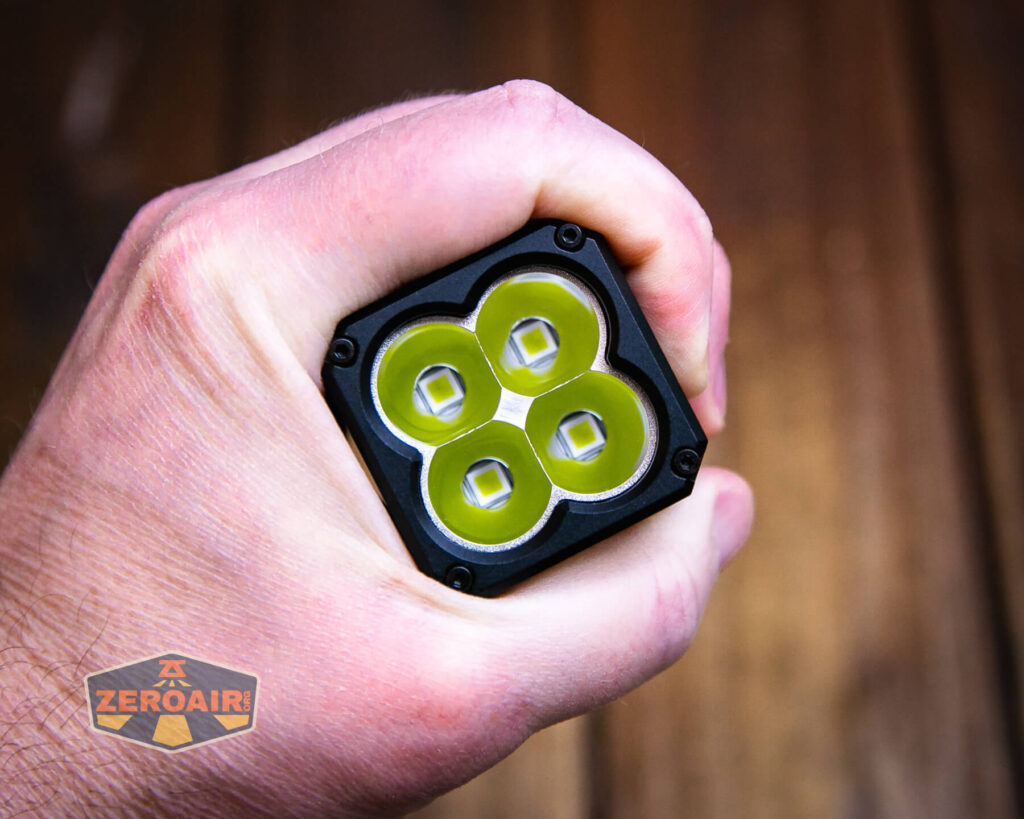
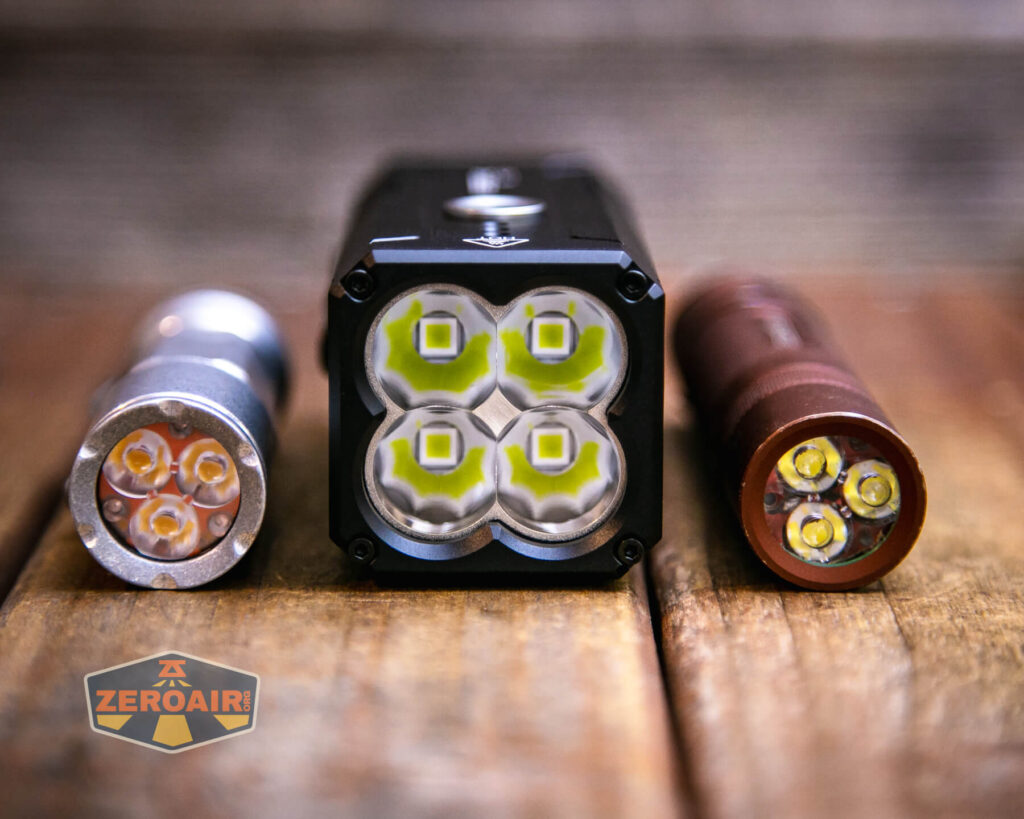
LED and Beam
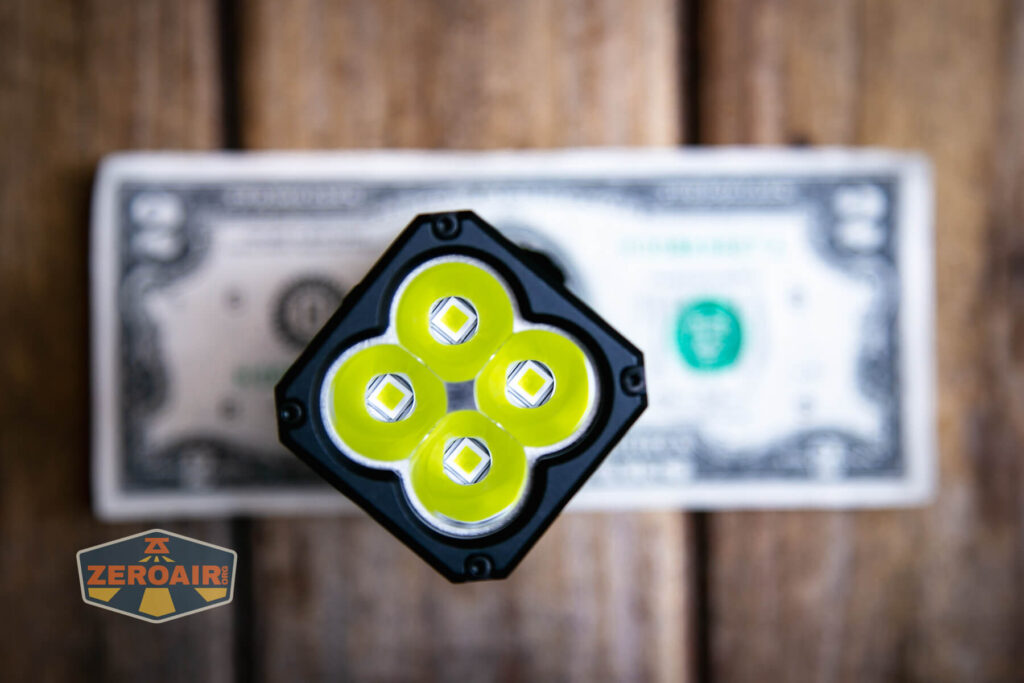
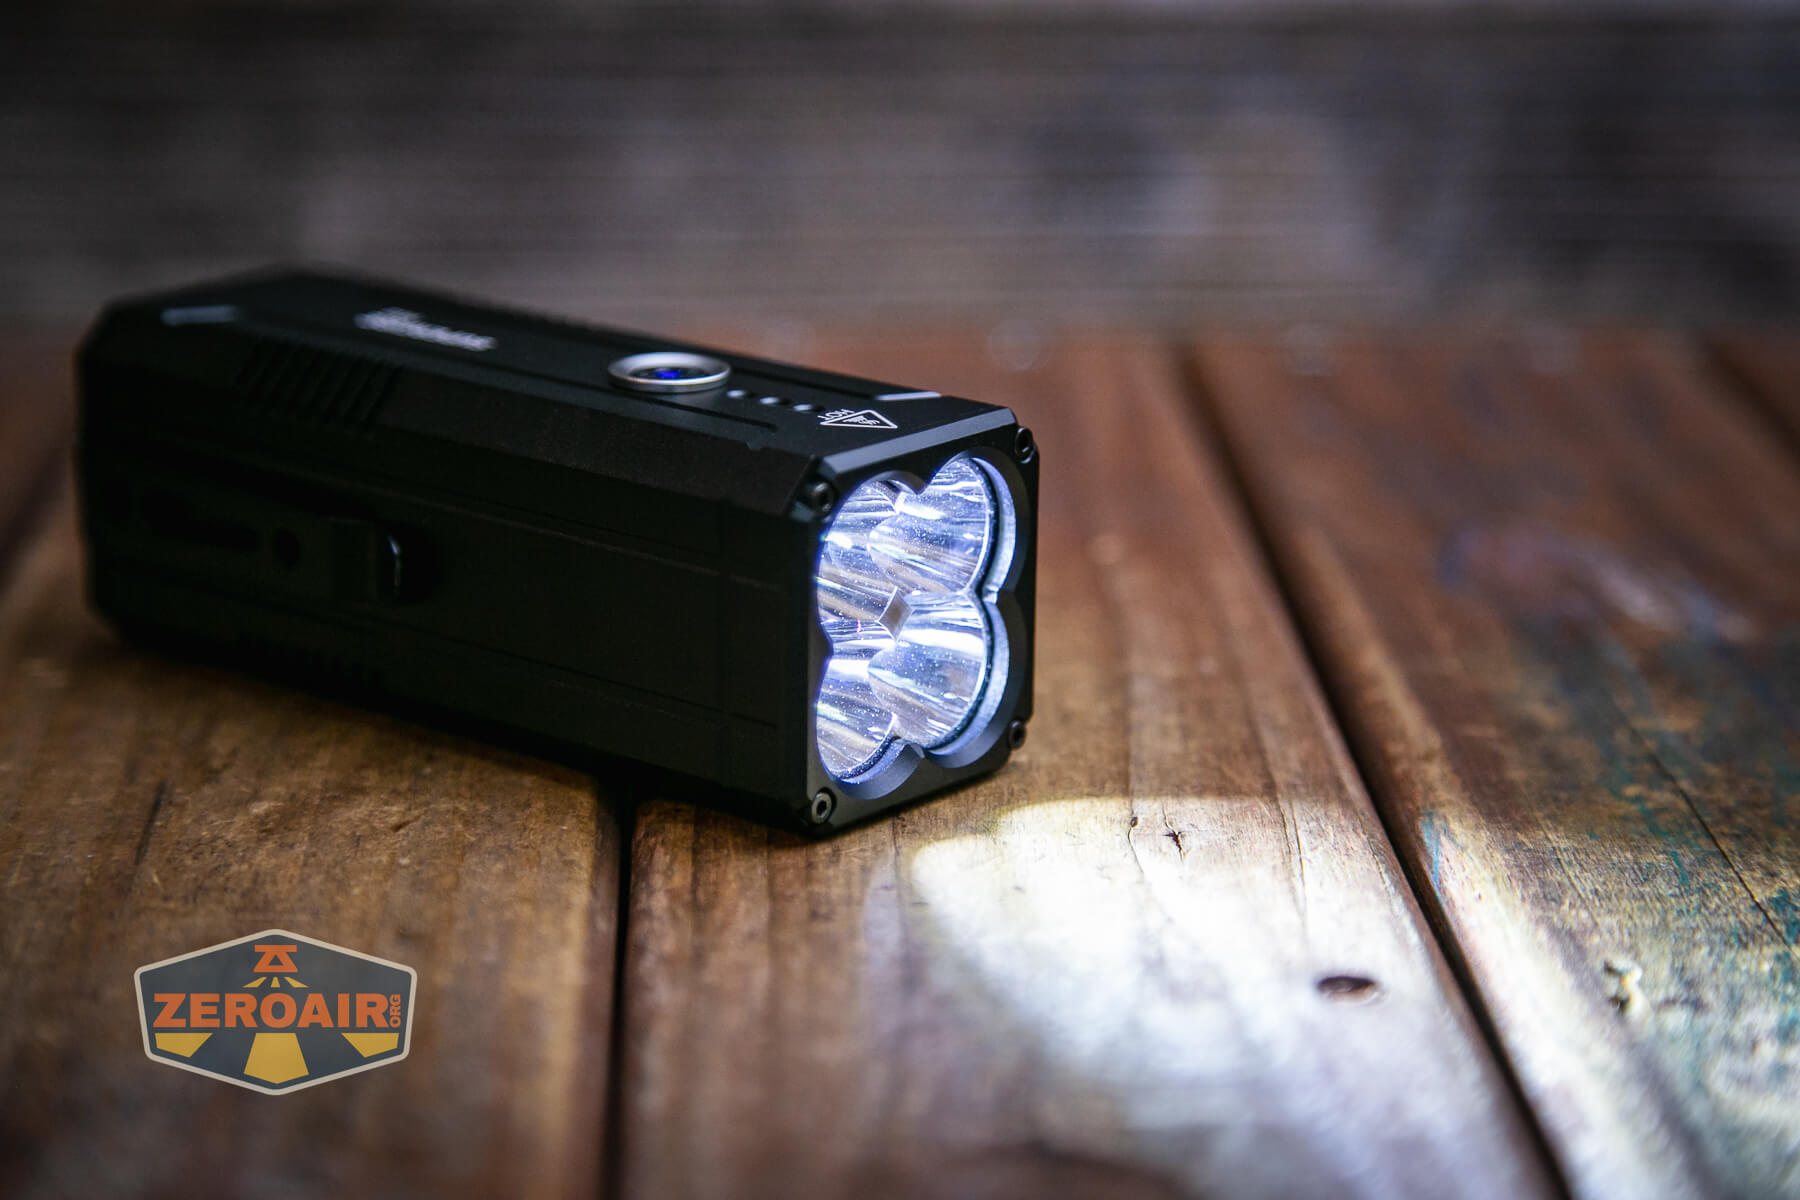
Superfire calls these four emitters “SH-S14.” I have no idea what that is but you can see the emitters below. They’re domeless, which gives great throw.
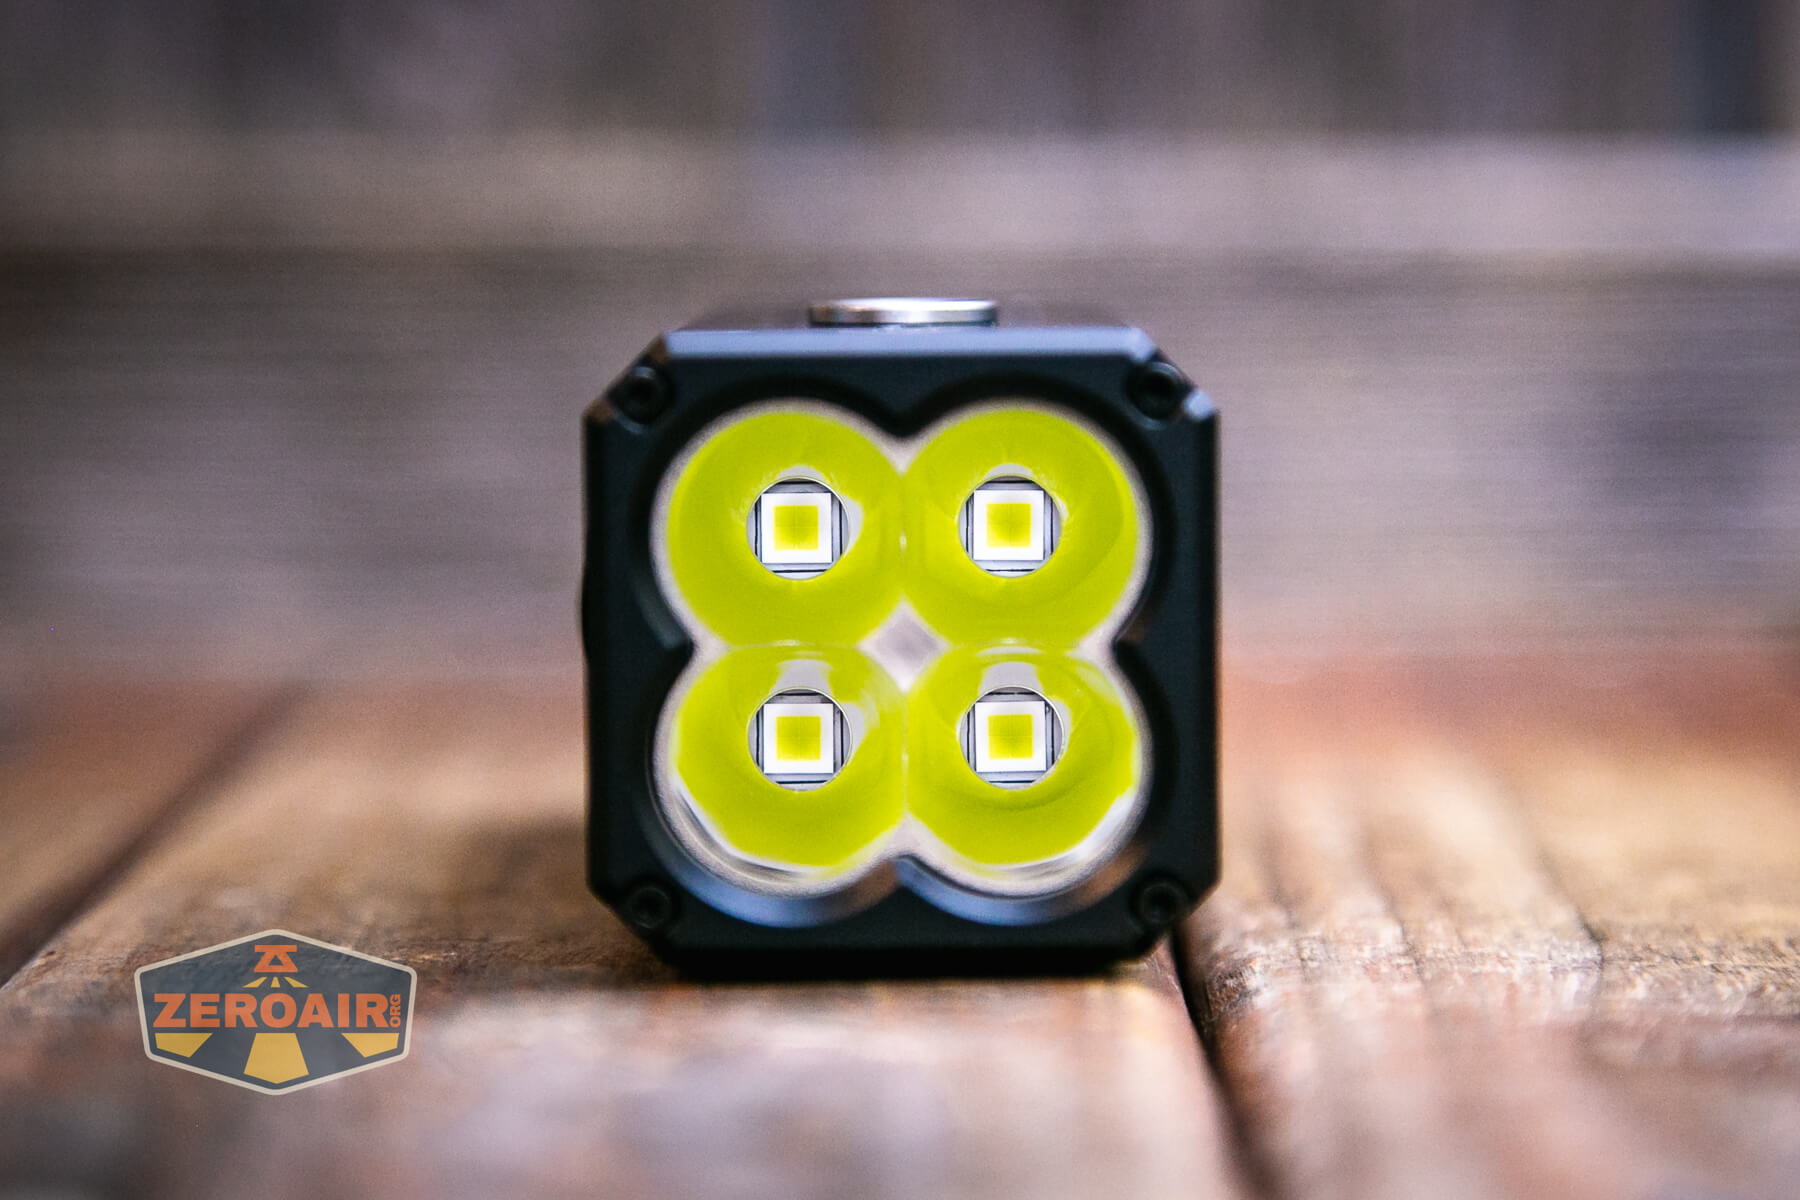
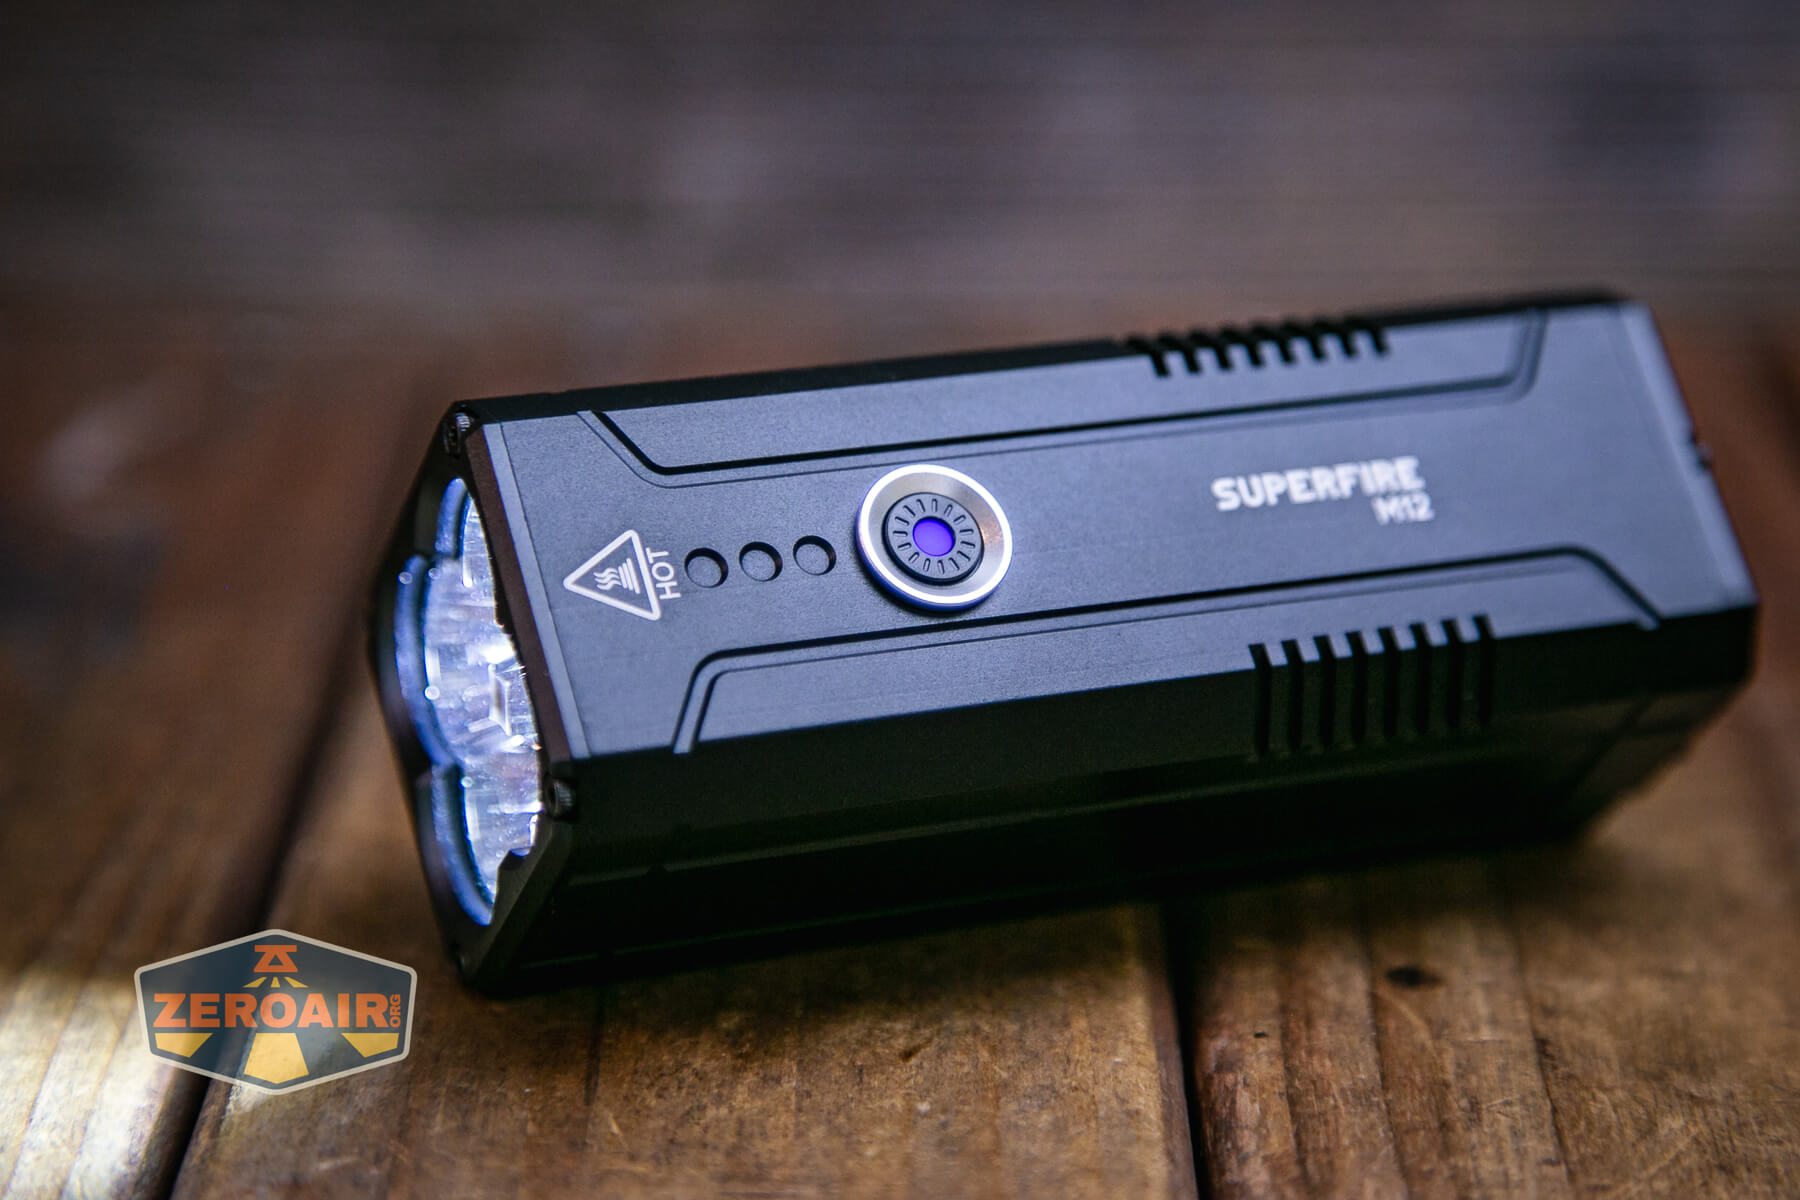
Each of those emitters has its own reflector.
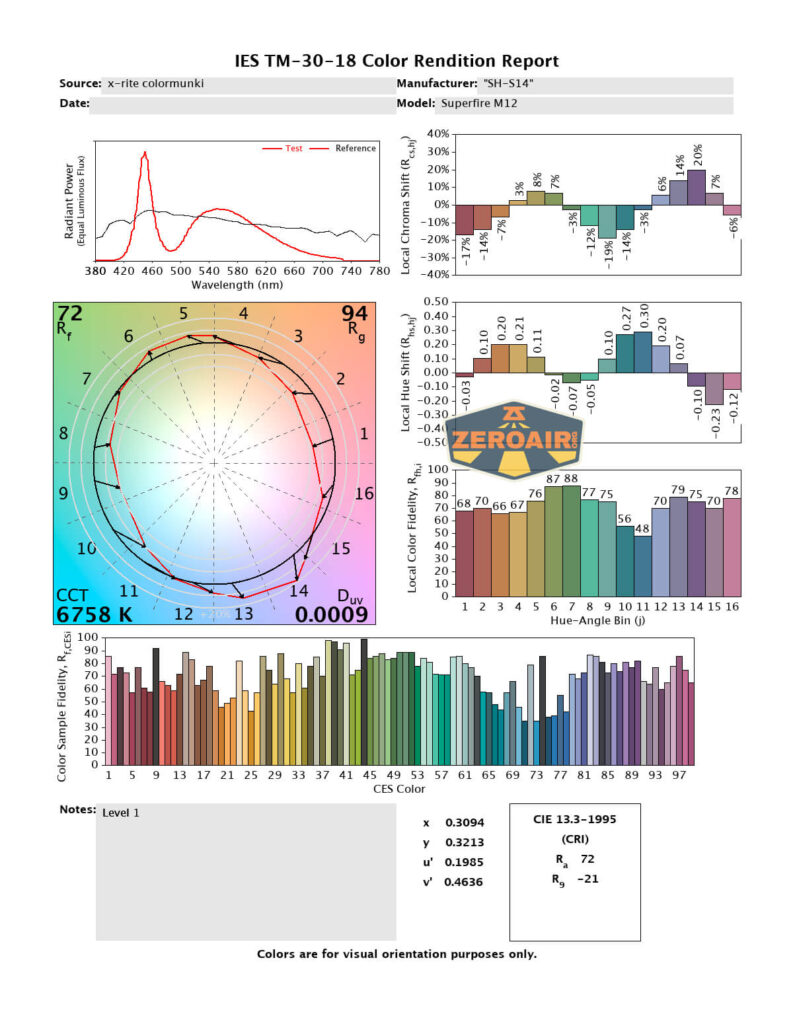
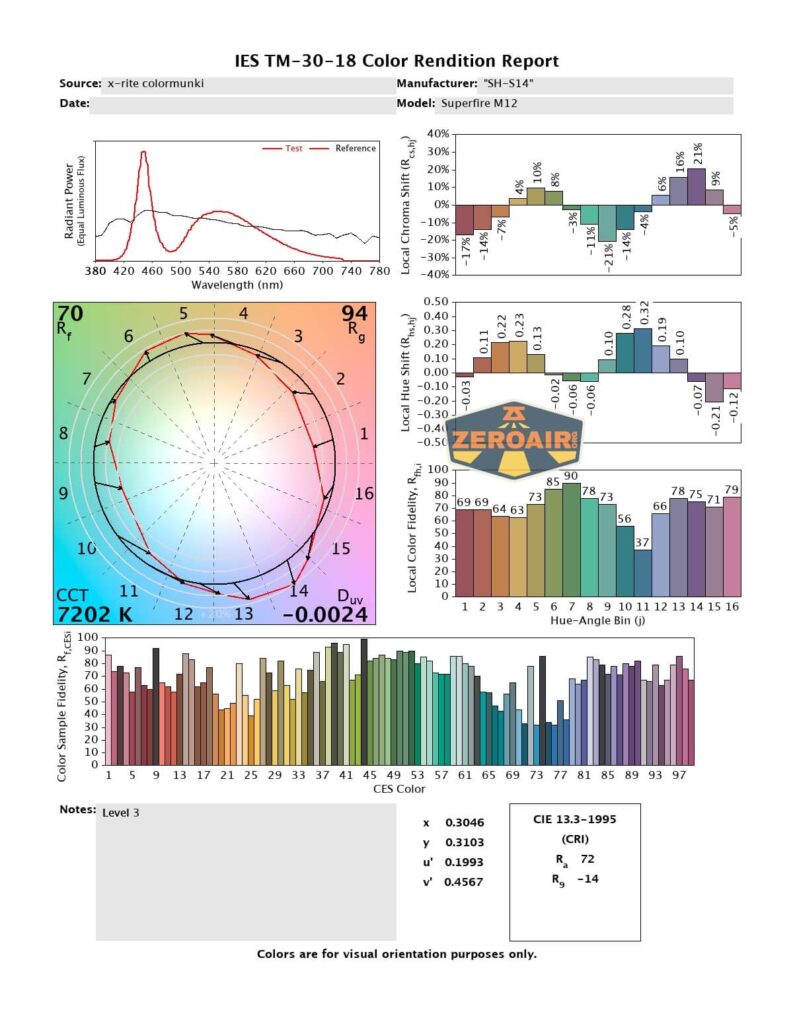
LED Color Report (CRI and CCT)
There’s not too much to say here, and nothing really surprising. This emitter I am unfamiliar with is cool white (ranging from 6700K to 7300K). Honestly for how hard the light gets driven at the highest level, 7300K is not all that “bad” (or “cold white”). CRI is unsurprisingly low, at around 72.


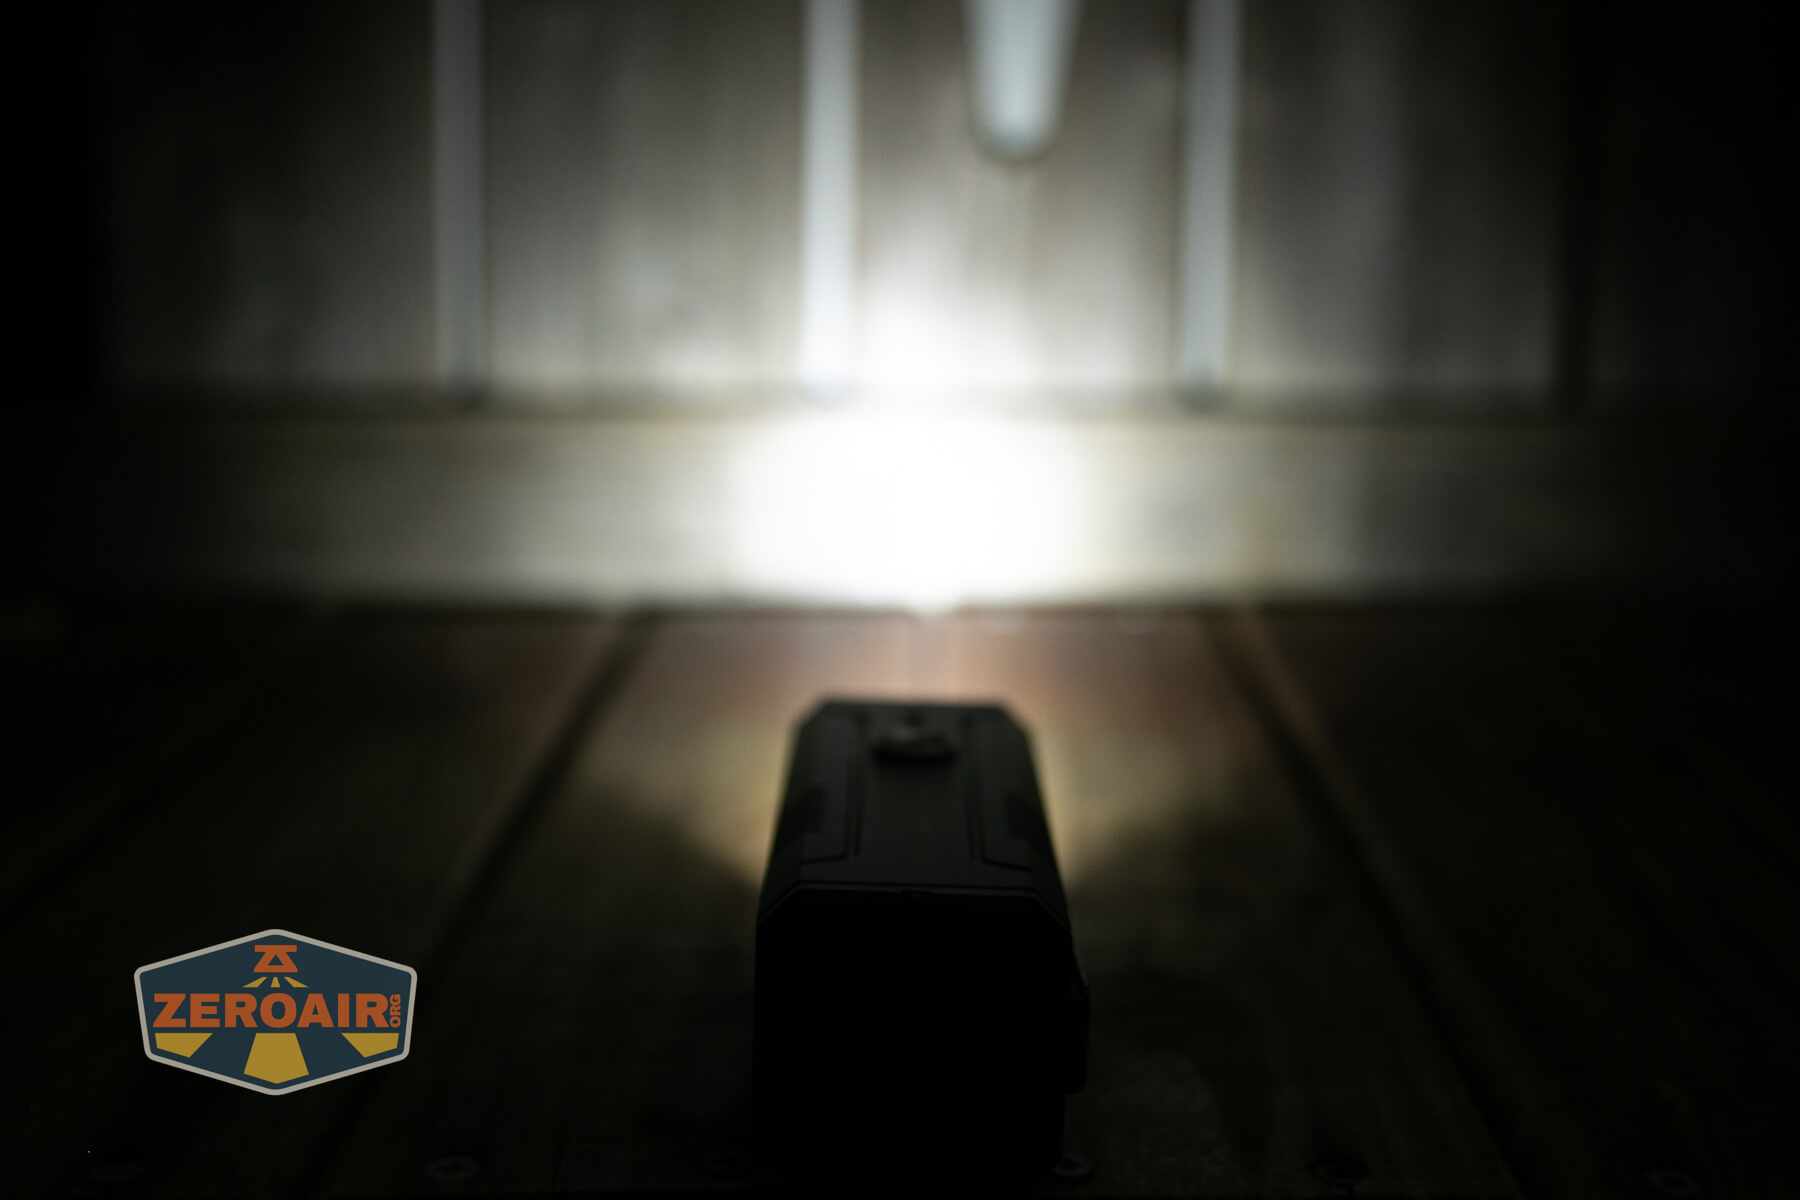
Beamshots
These beamshots always have the following settings: f8, ISO100, 0.3s shutter, and manual 5000K exposure. These photos are taken at floor level, and the beam hits the ceiling around 9 feet away.
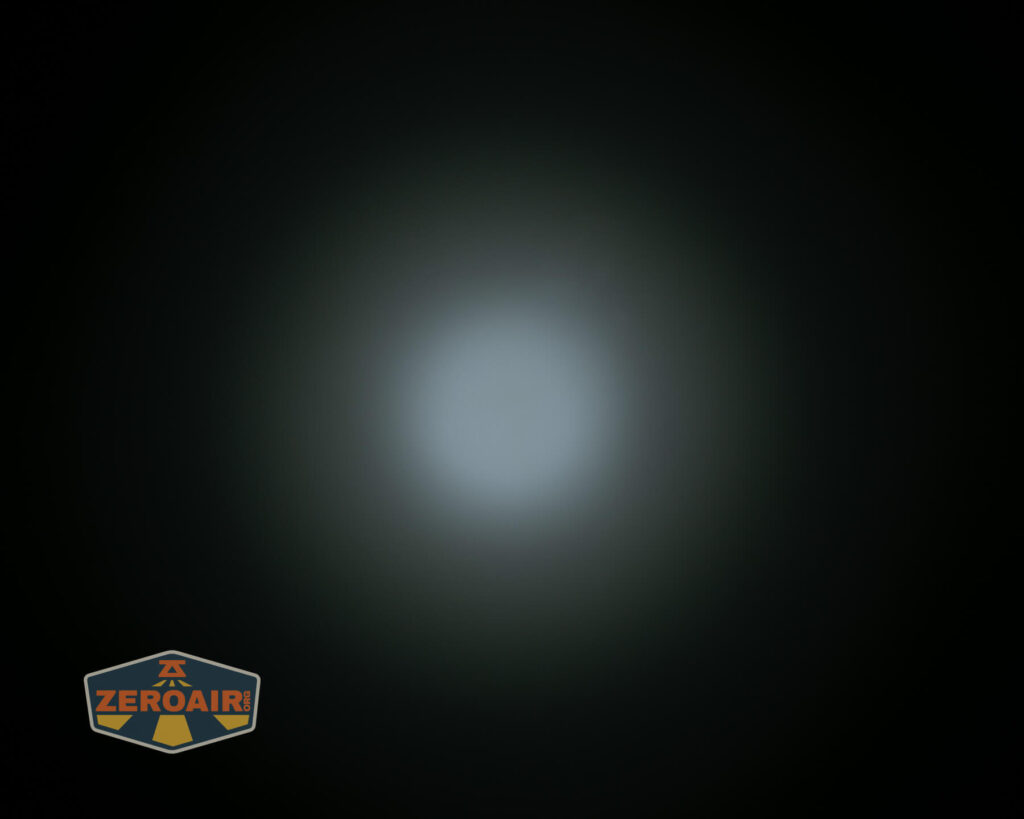

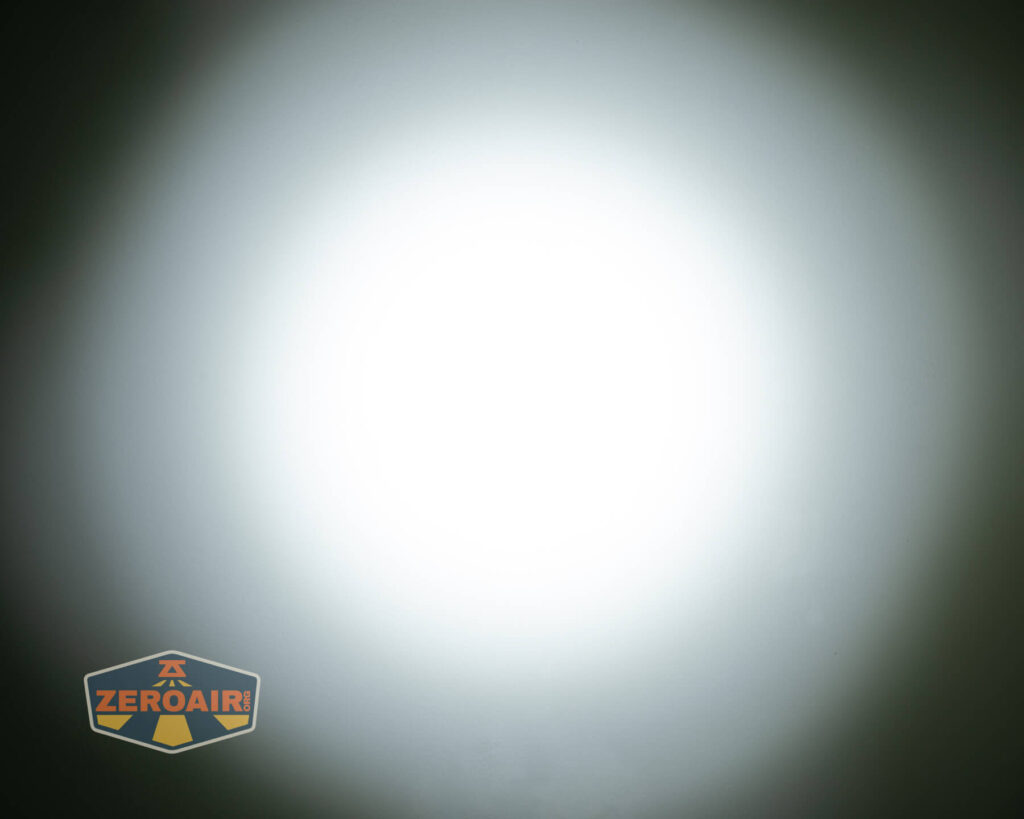
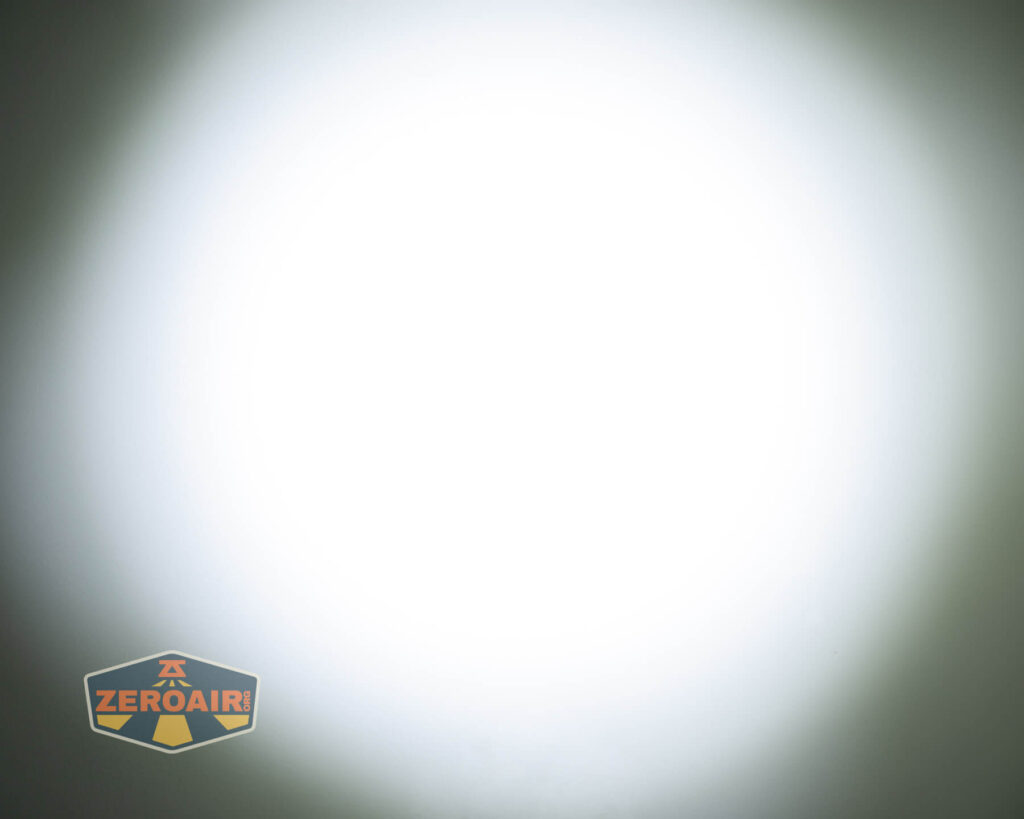
Tint vs BLF-348 (KillzoneFlashlights.com 219b version) (affiliate link)
I keep the test flashlight on the left and the BLF-348 reference flashlight on the right.
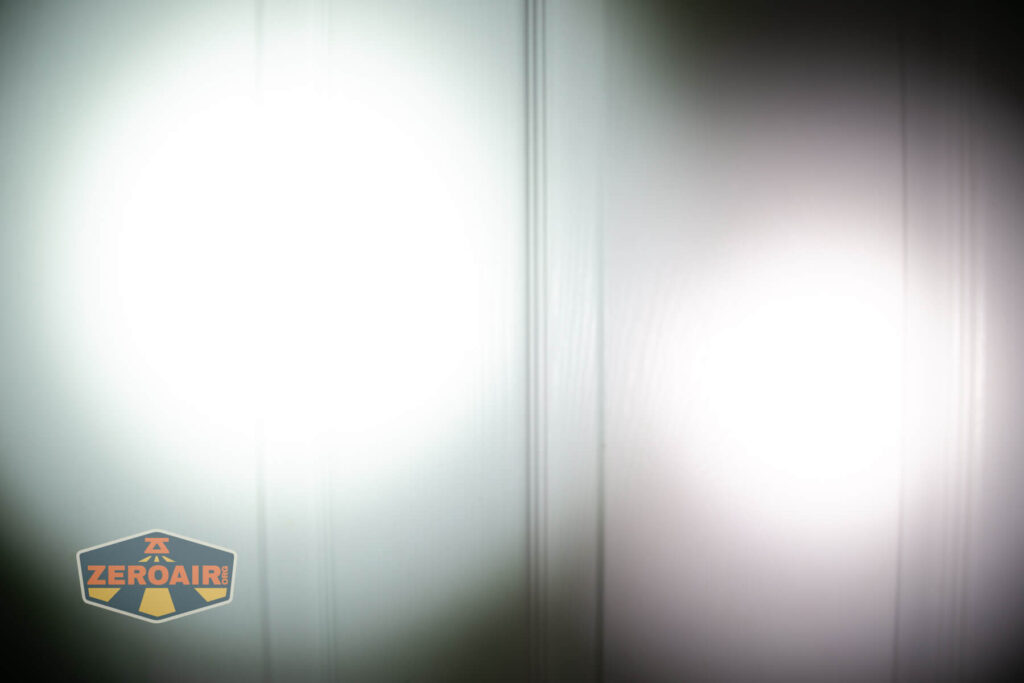
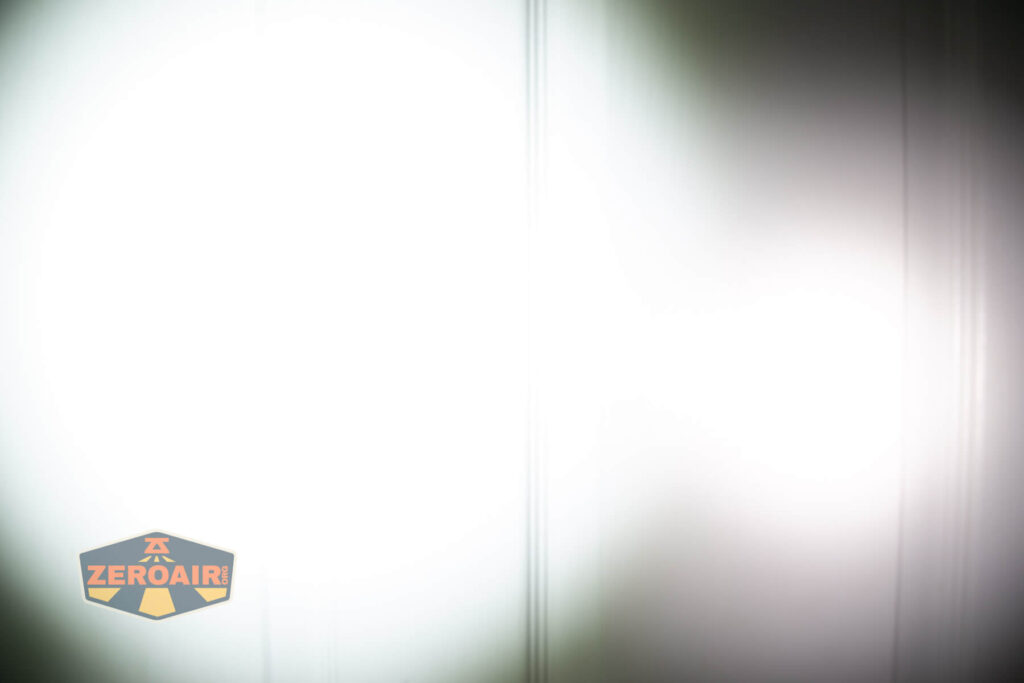


I compare everything to the KillzoneFlashlights.com 219b BLF-348 because it’s inexpensive and has the best tint!
Conclusion
What I like
- Brief but very high output
- Turbo is tucked away behind a double click
- Good build quality
- USB-C charging works nicely (USB-A does too)
- Indicating e-switch
What I don’t like
- Cool to cold white emitters
- Weird user interface that requires a too-long hold to turn on and has strobes in the main group.
- Turbo is tucked away behind a double click
- Cells are inaccessible
- Both turbo and high drop down too quickly
I guess the reason I see turbo being a double-click-only mode being good and bad is that really I want four steady modes in the main group (nearly always. always always.). But I also like that since actual Turbo is so brief (like 15 seconds or something), I don’t really need to see that in the main group. So I can go either way.
Notes
- This content originally appeared at zeroair.org. Please visit there for the best experience!
- For flashlight-related patches, stickers, and gear, head over to PhotonPhreaks.com!
- Please use my Amazon.com referral link to help support zeroair.org!
- Please support me on Patreon! I deeply appreciate your support!