BLF GT Giggles Flashlight Review
The BLF GT Giggles Flashlight hit the market hard. One of the first big consumer flashlights that has massive throw. Read on!
Official Specs and Features
Here’s a link to the BLF GT Giggles Flashlight product page. Also highly relevant is the original thread on budgetlightforum, as a starting point.
Versions
Originally there was just one version, as far as I recall. Then there are some iterative versions of the BLF GT as a host – the BLF GT70, for example. Same body, but the emitter is changed to a Cree XHP70.2.
Price
I was in the original group buy and got this light at a ridiculous price (maybe in the $115 range). The second wave went for something like $155 in the group buy. Then the price was somewhere north of $200, and that’s right around what I’d expect you to find these at now.
Edit! It was brought to my attention that the BLF GT is still available at BangGood!! The price is $268, and it’s available in CW and NW! That link is an affiliate link – I hope you’ll click it and go check out the light, even if you don’t end up purchasing. (I’m liking where to buy even though I bought this item myself!)
Short Review
The moniker “Giggles” is entirely appropriate for this light. It’s absolutely fun to play around with, and I can’t seem to sell it because it’s just so fun. It meets its specifications, and is easily one of the 3 most fun lights I have.
Long Review
The Big Table
| BLF GT | |
|---|---|
| Emitter: | Cree XHP35 HI (NW 4000K) |
| Price in USD at publication time: | – |
| Cell: | 18650×4 |
| Turbo Runtime | – |
| LVP? | Yes |
| Switch Type: | E-Switch |
| Quiescent Current (A): | ? |
| On-Board Charging? | No |
| Claimed Lumens (lm) | 2000 |
| Measured Lumens (at 30s) | 1594 (79.7% of claim)^ |
| Claimed Throw (m) | 2000 |
| Candela (Calculated) in cd (at 30s) | 9500lux @ 10.451m = 1037622cd |
| Throw (Calculated) (m) | 2037.3 (101.9% of claim)^ |
| All my BLF reviews! | |
^ Measurement disclaimer: Testing flashlights is my hobby. I use hobbyist-level equipment for testing, including some I made myself. Try not to get buried in the details of manufacturer specifications versus measurements recorded here; A certain amount of difference (say, 10 or 15%) is perfectly reasonable.
What’s Included
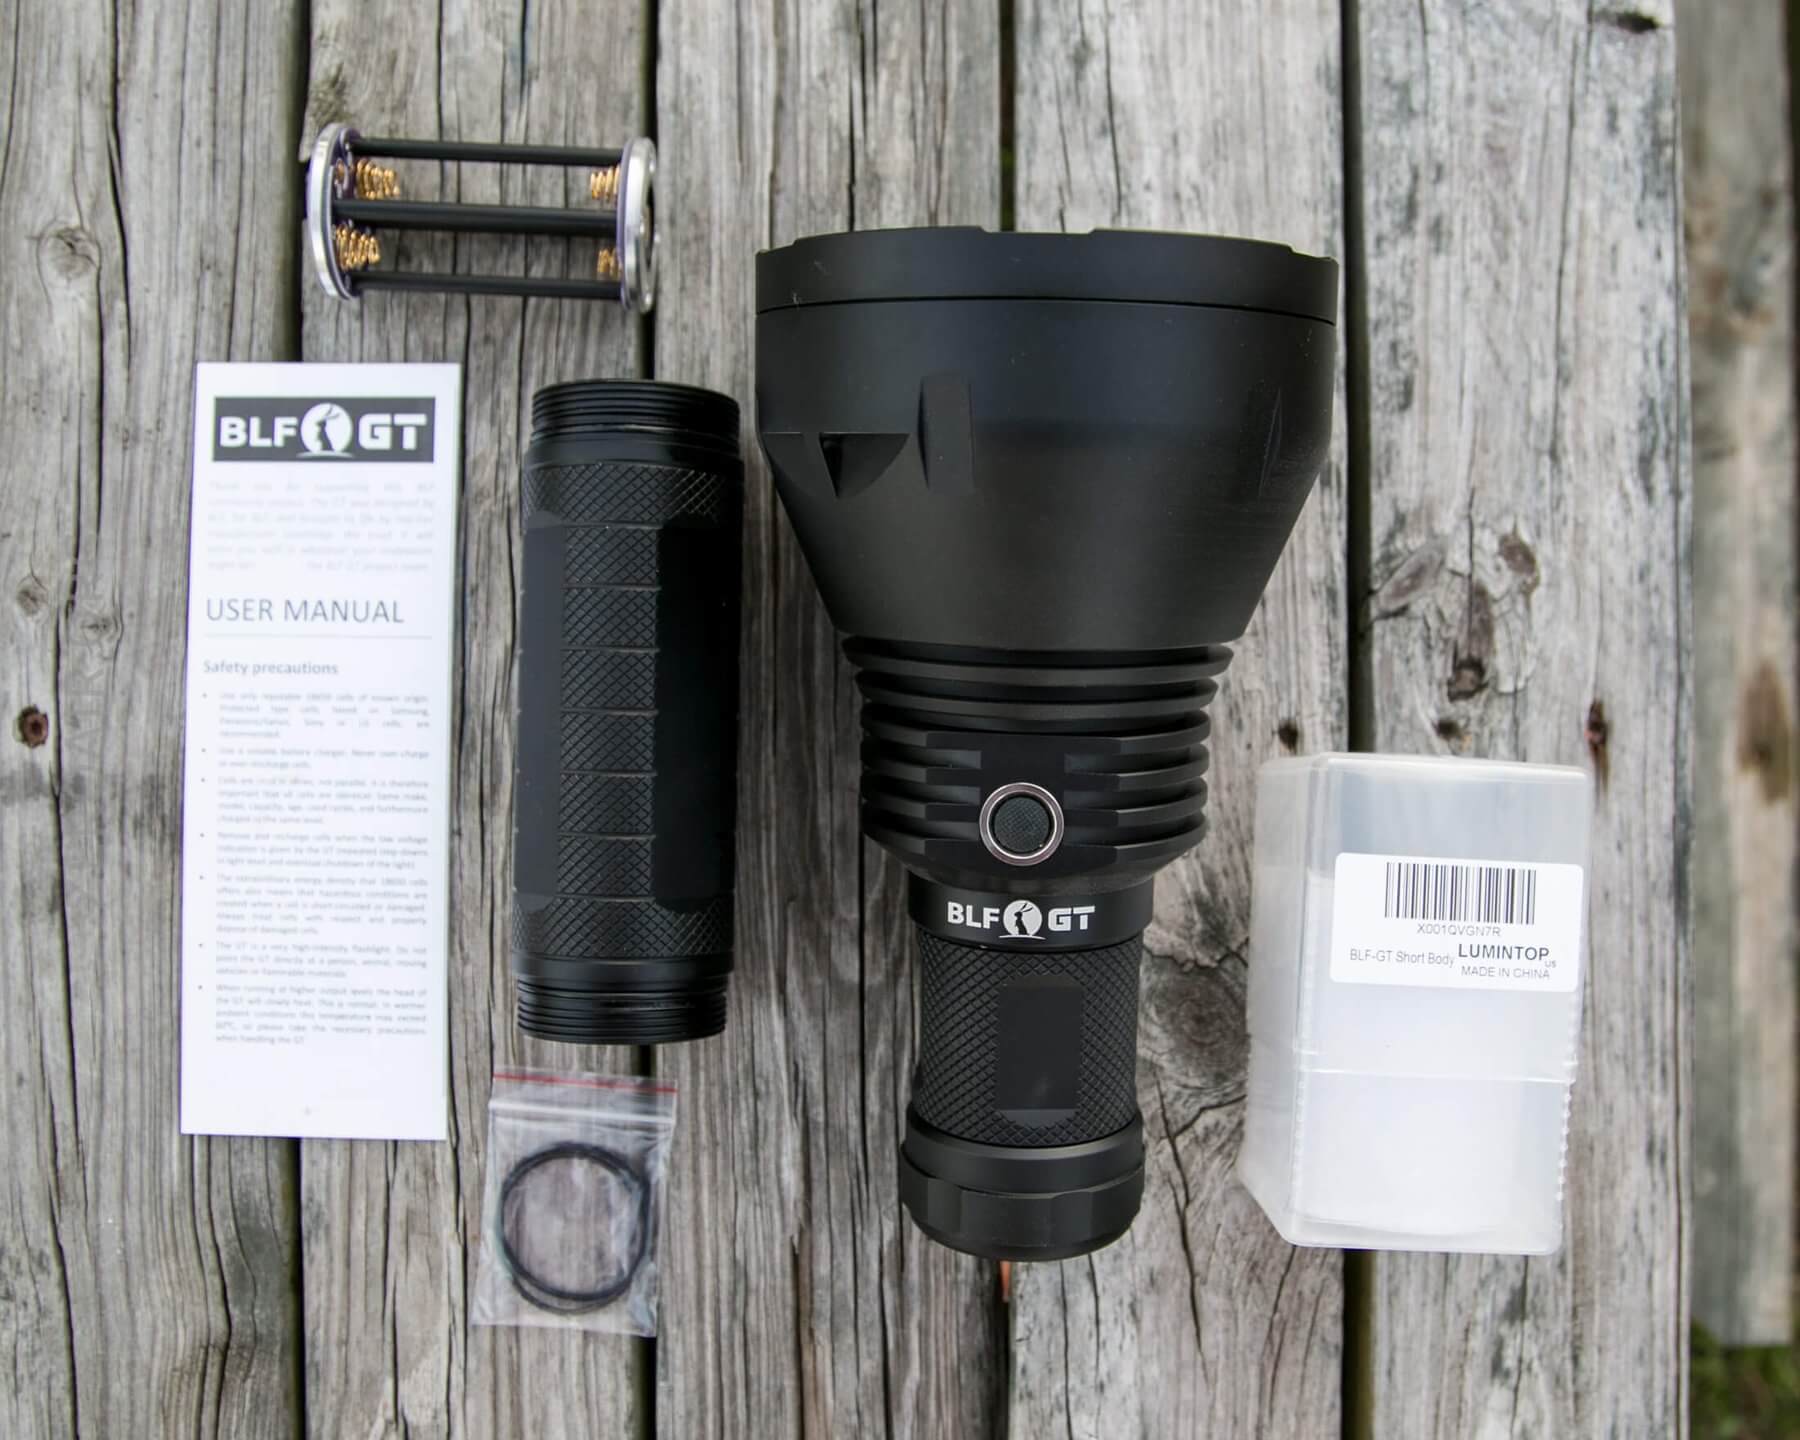
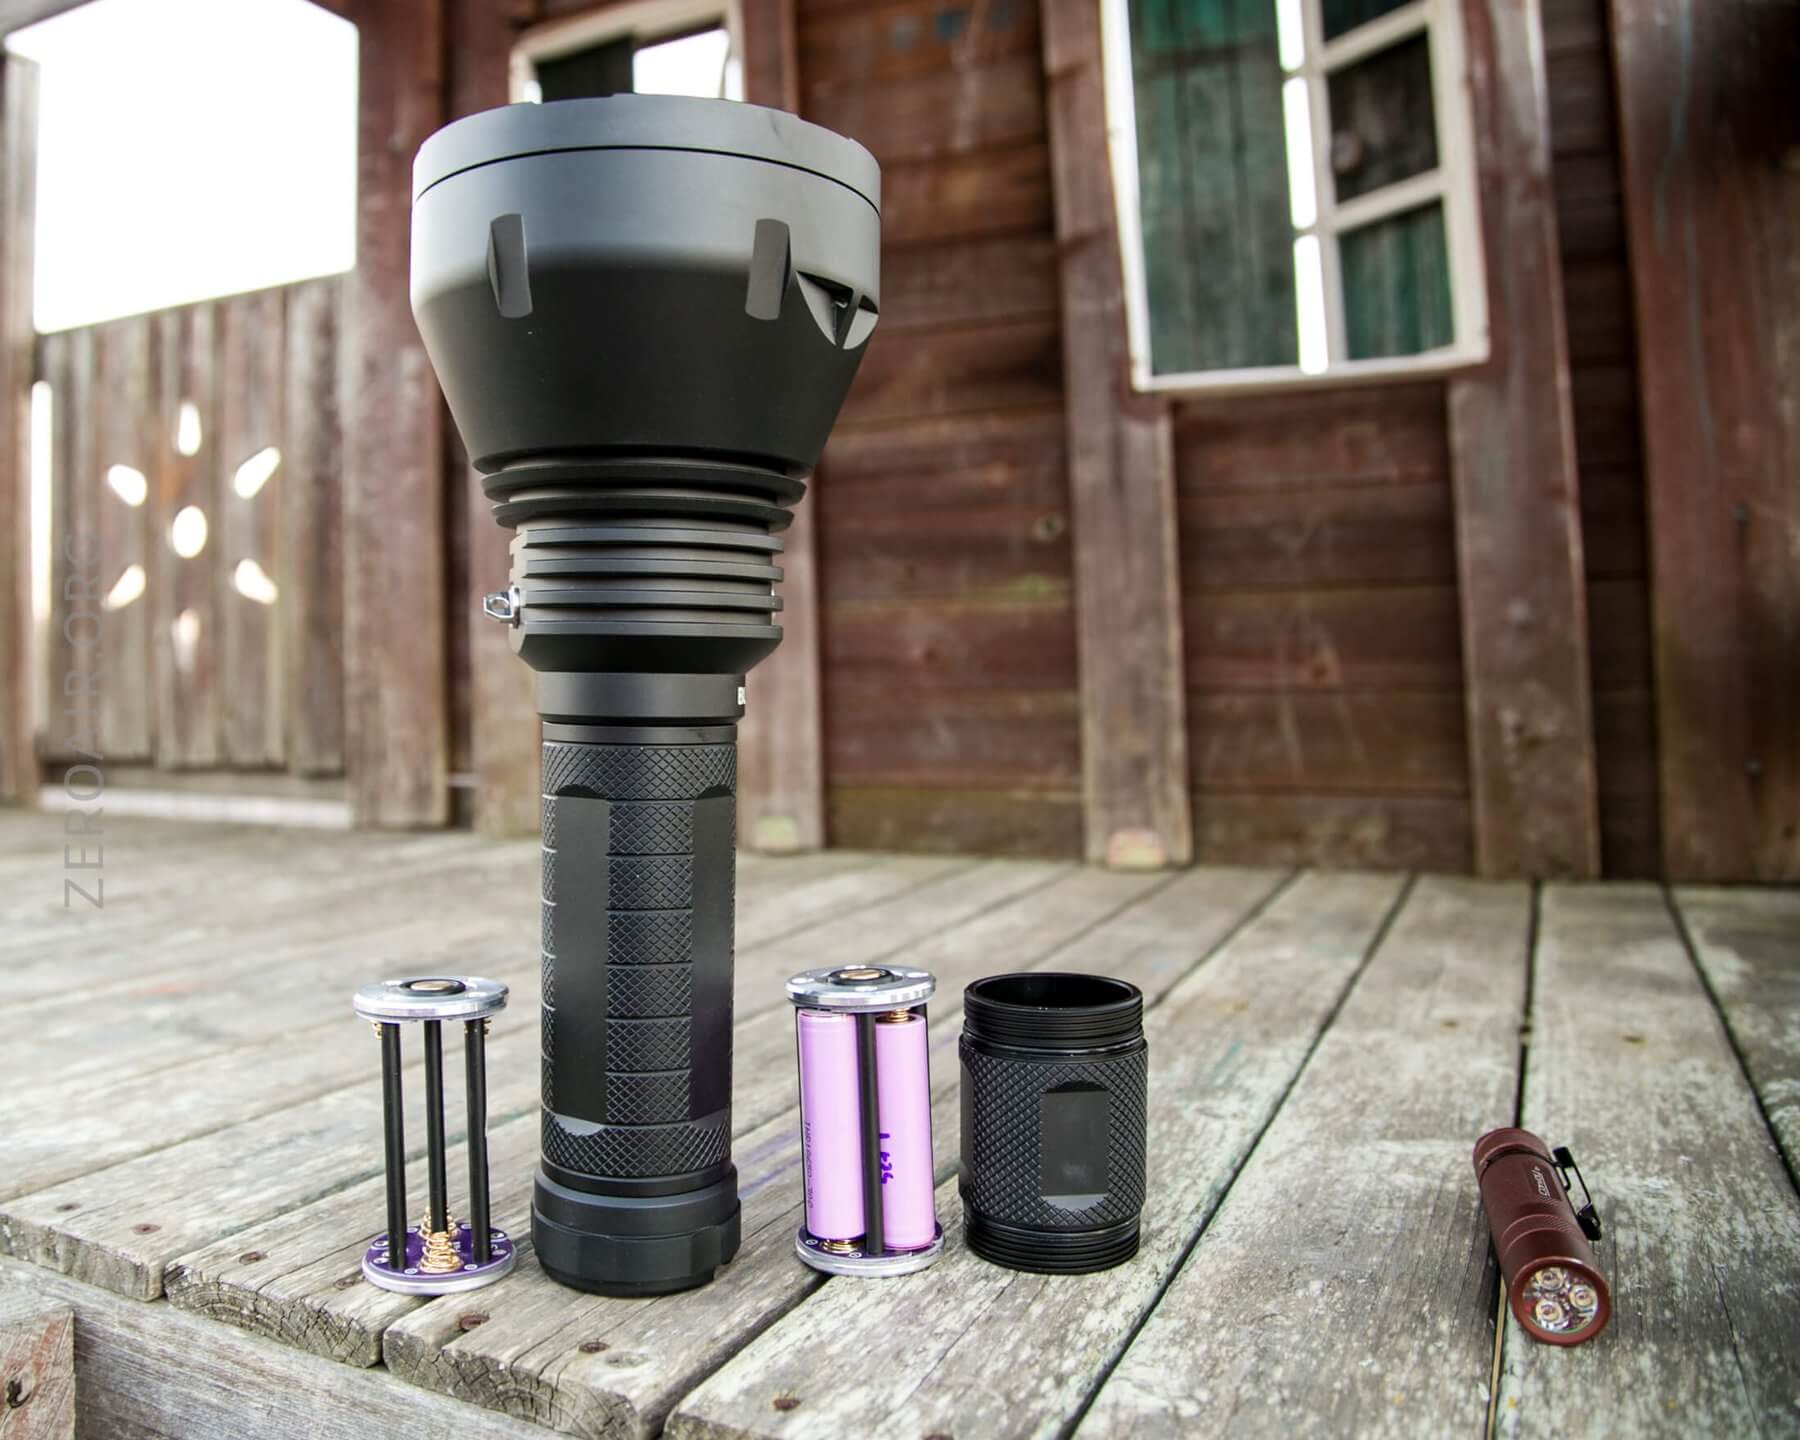
- BLF GT Flashlight with 8×18650 body tube
- Spare o-rings (2)
- Manual
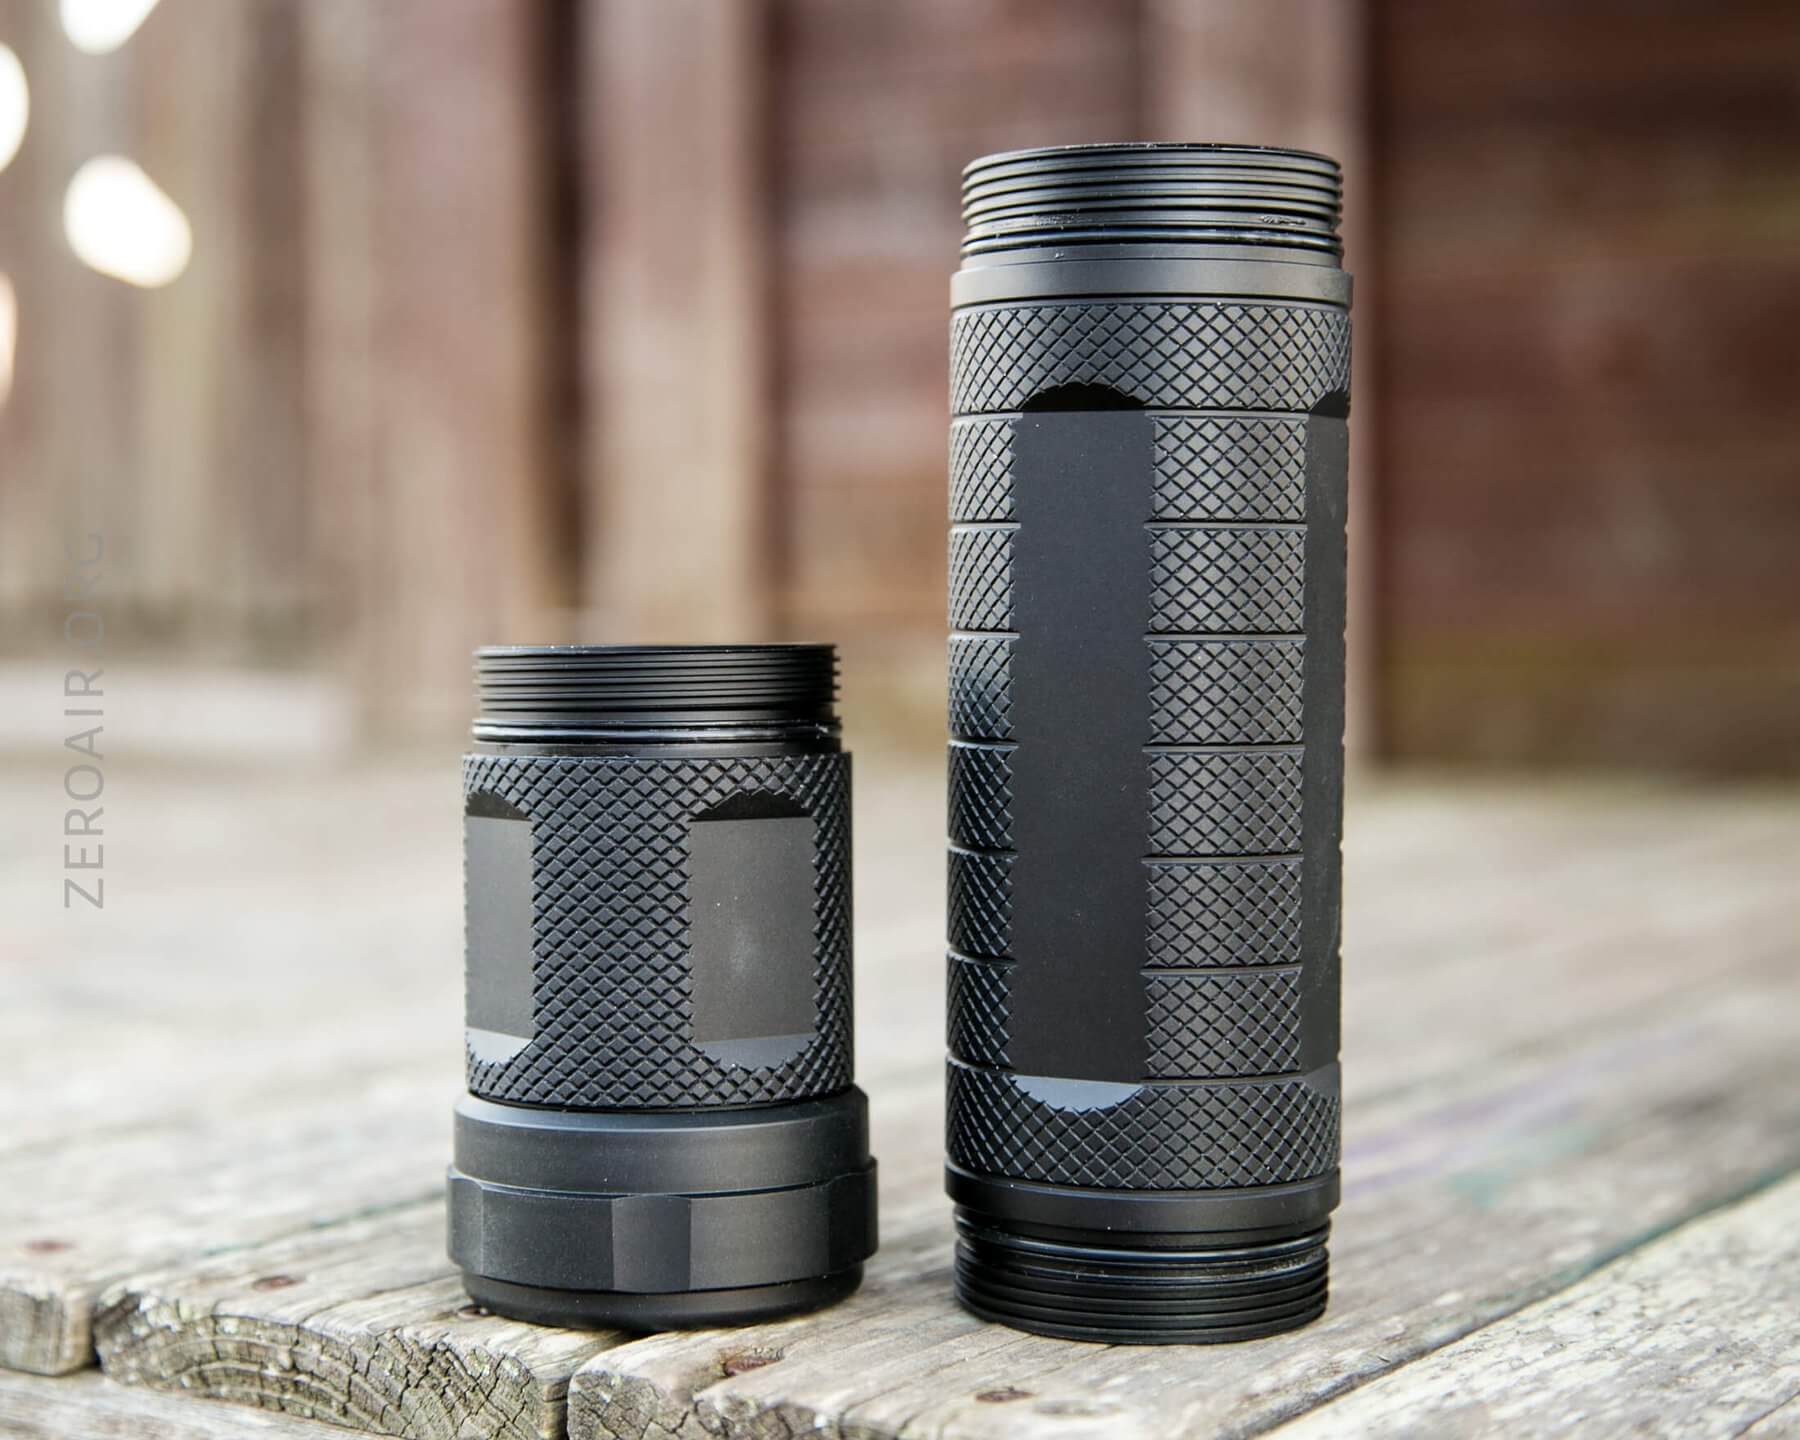
I separately purchased the shorty tube (4×18650). I think it was $15 or so.
Package and Manual
The BLF GT ships in a massive cardboard box. Inside is a bunch of foam, which securely holds the light.
The manual is good, and the user interface is well described.
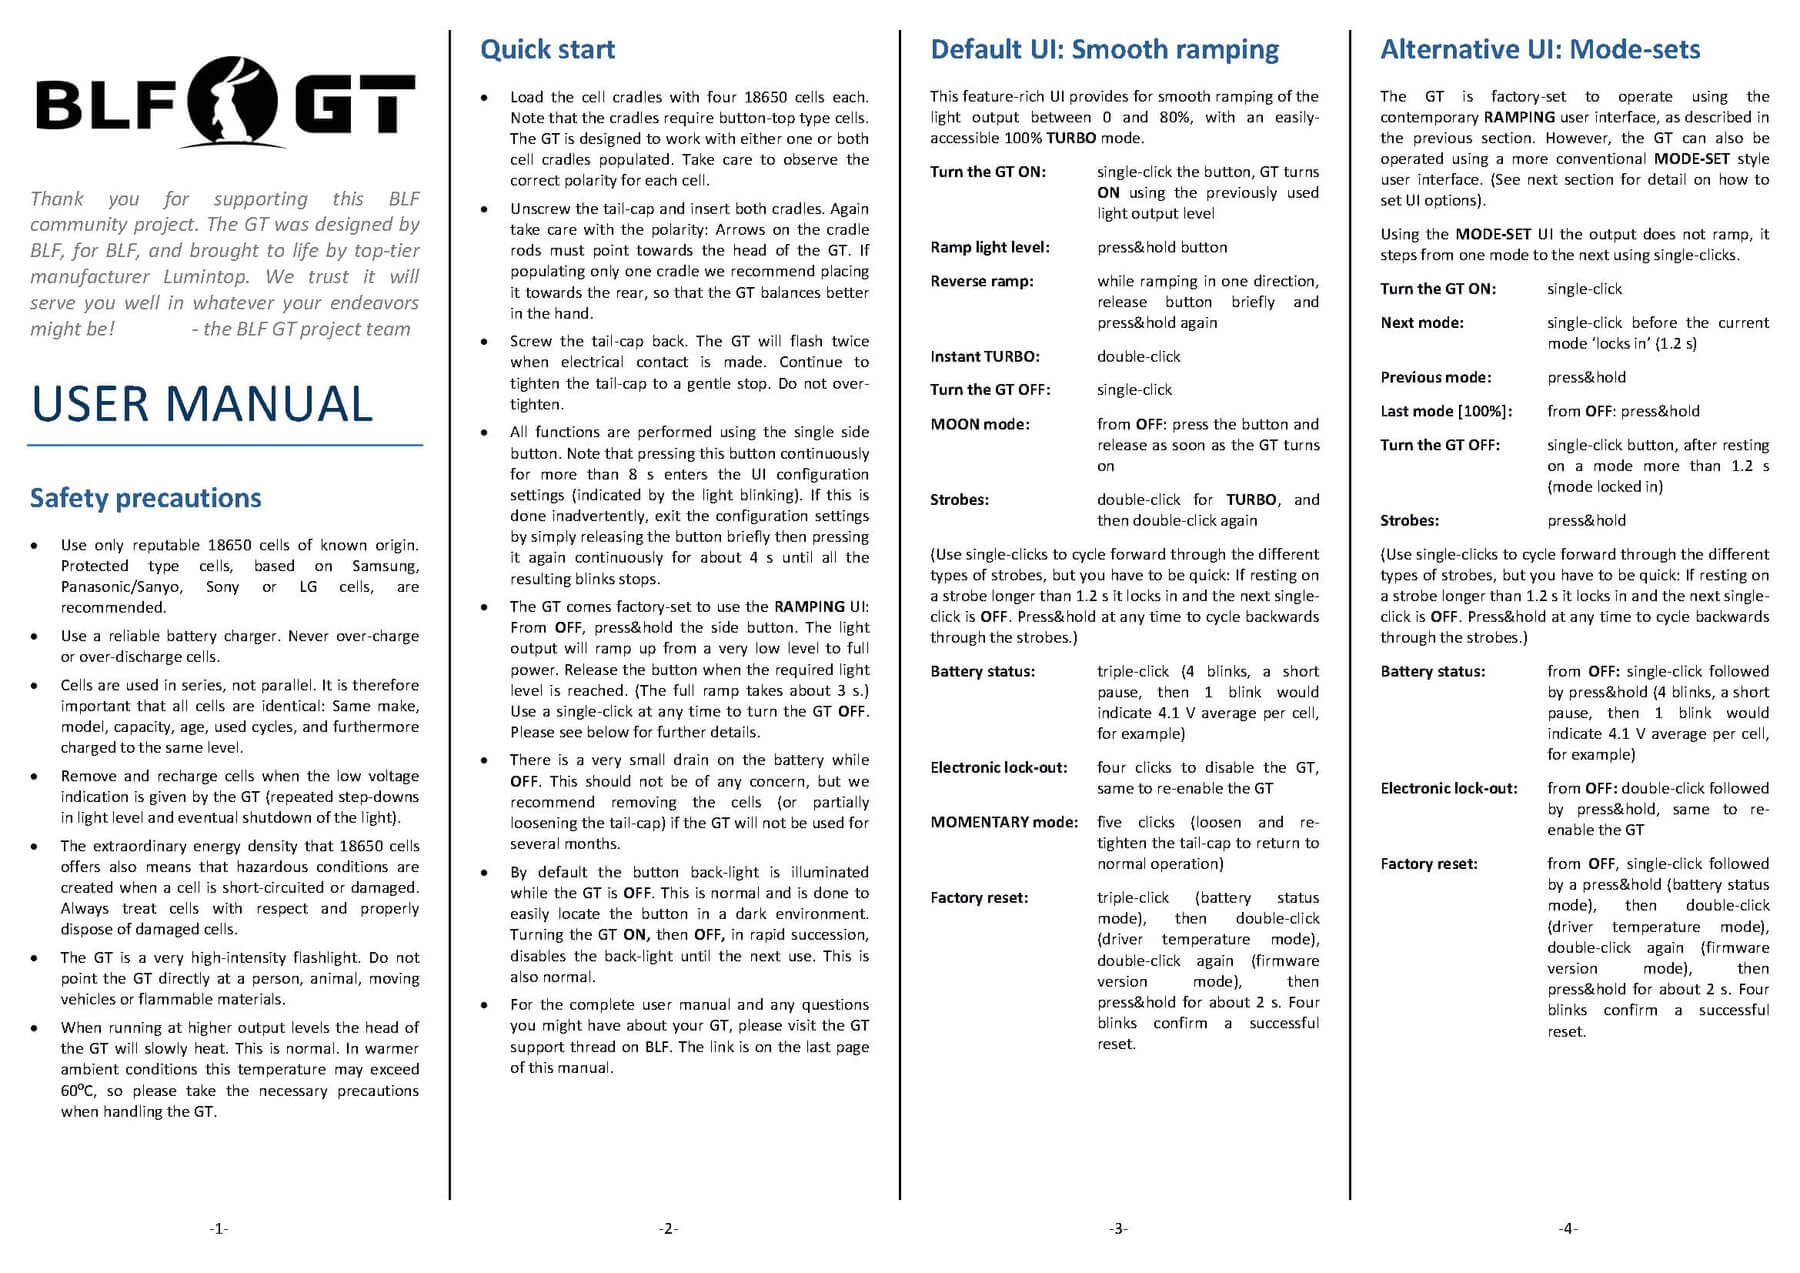
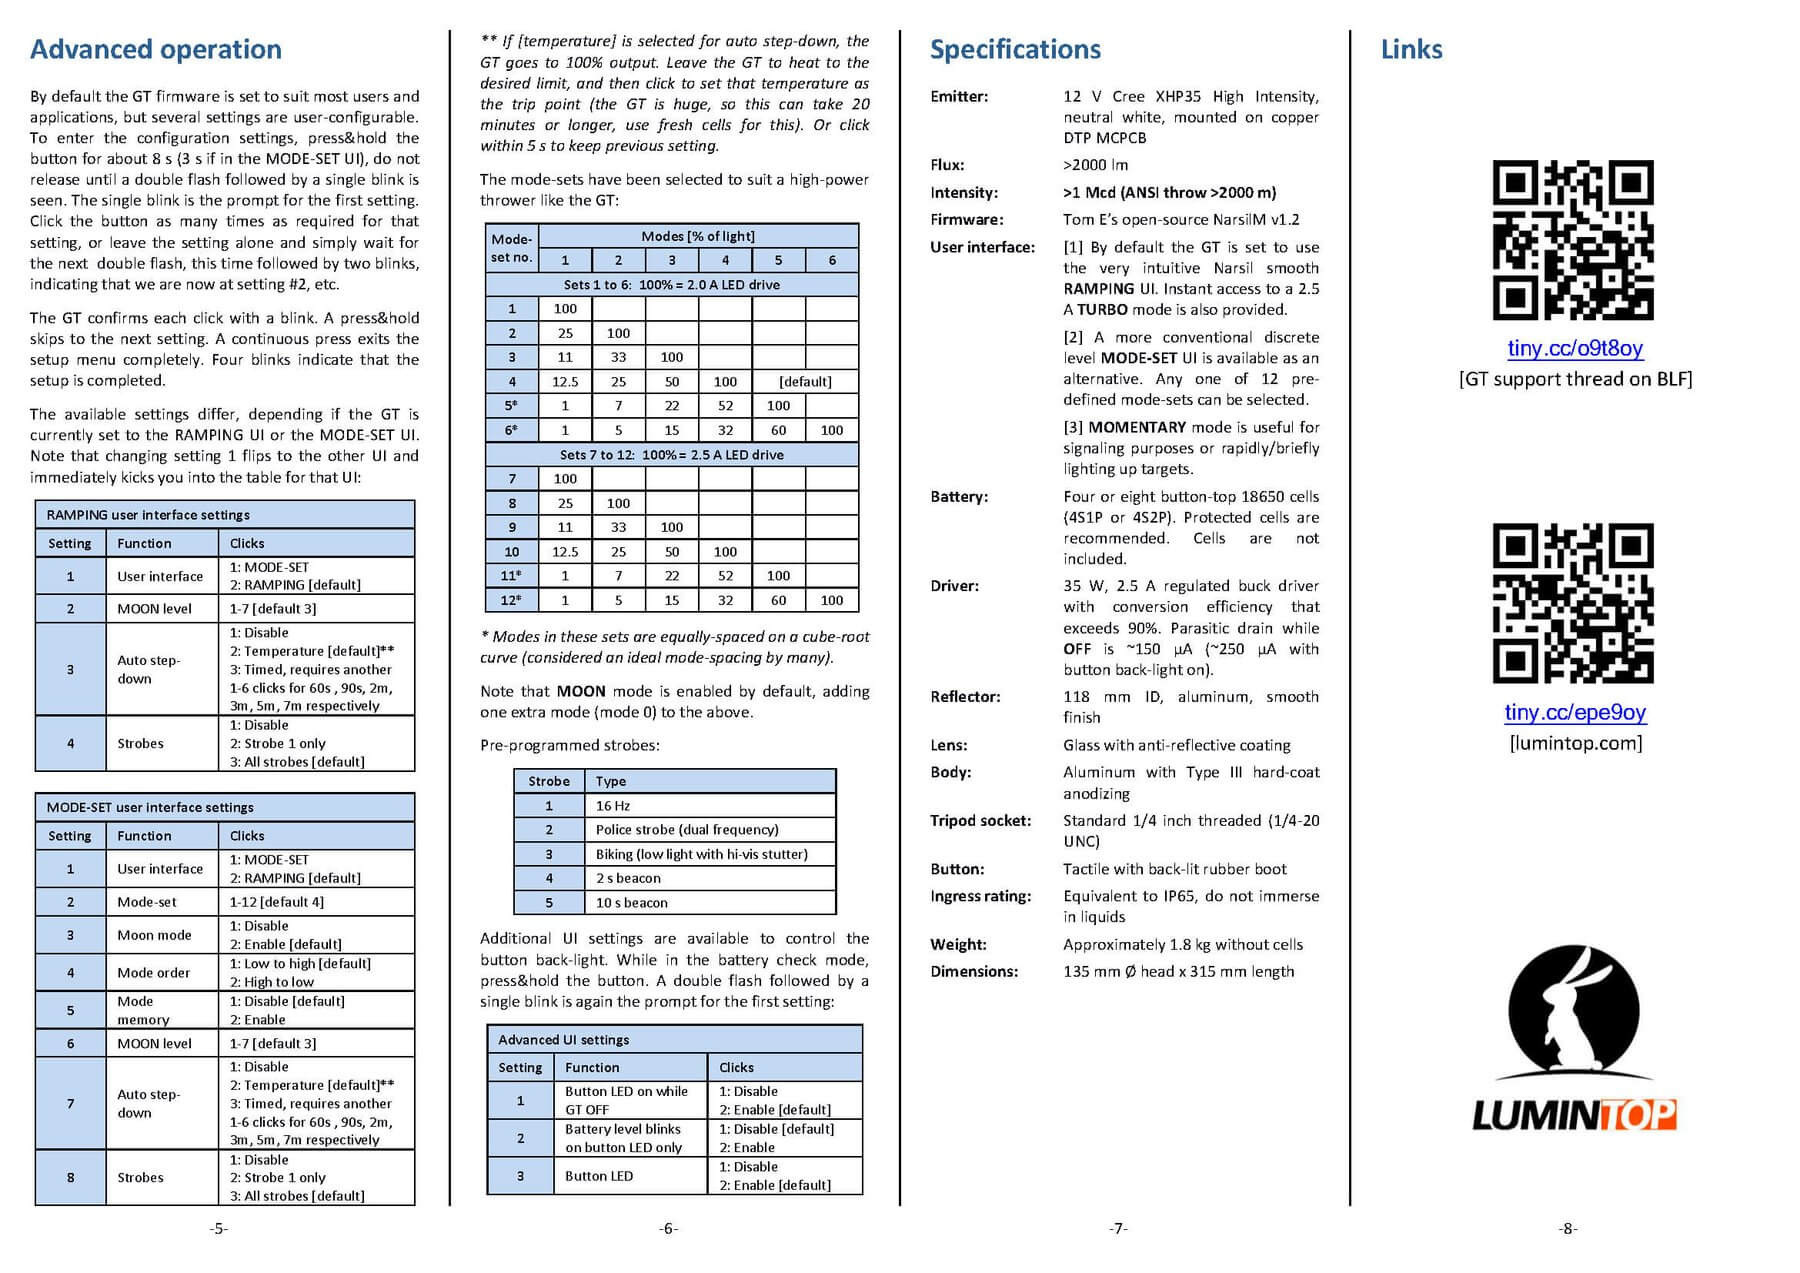
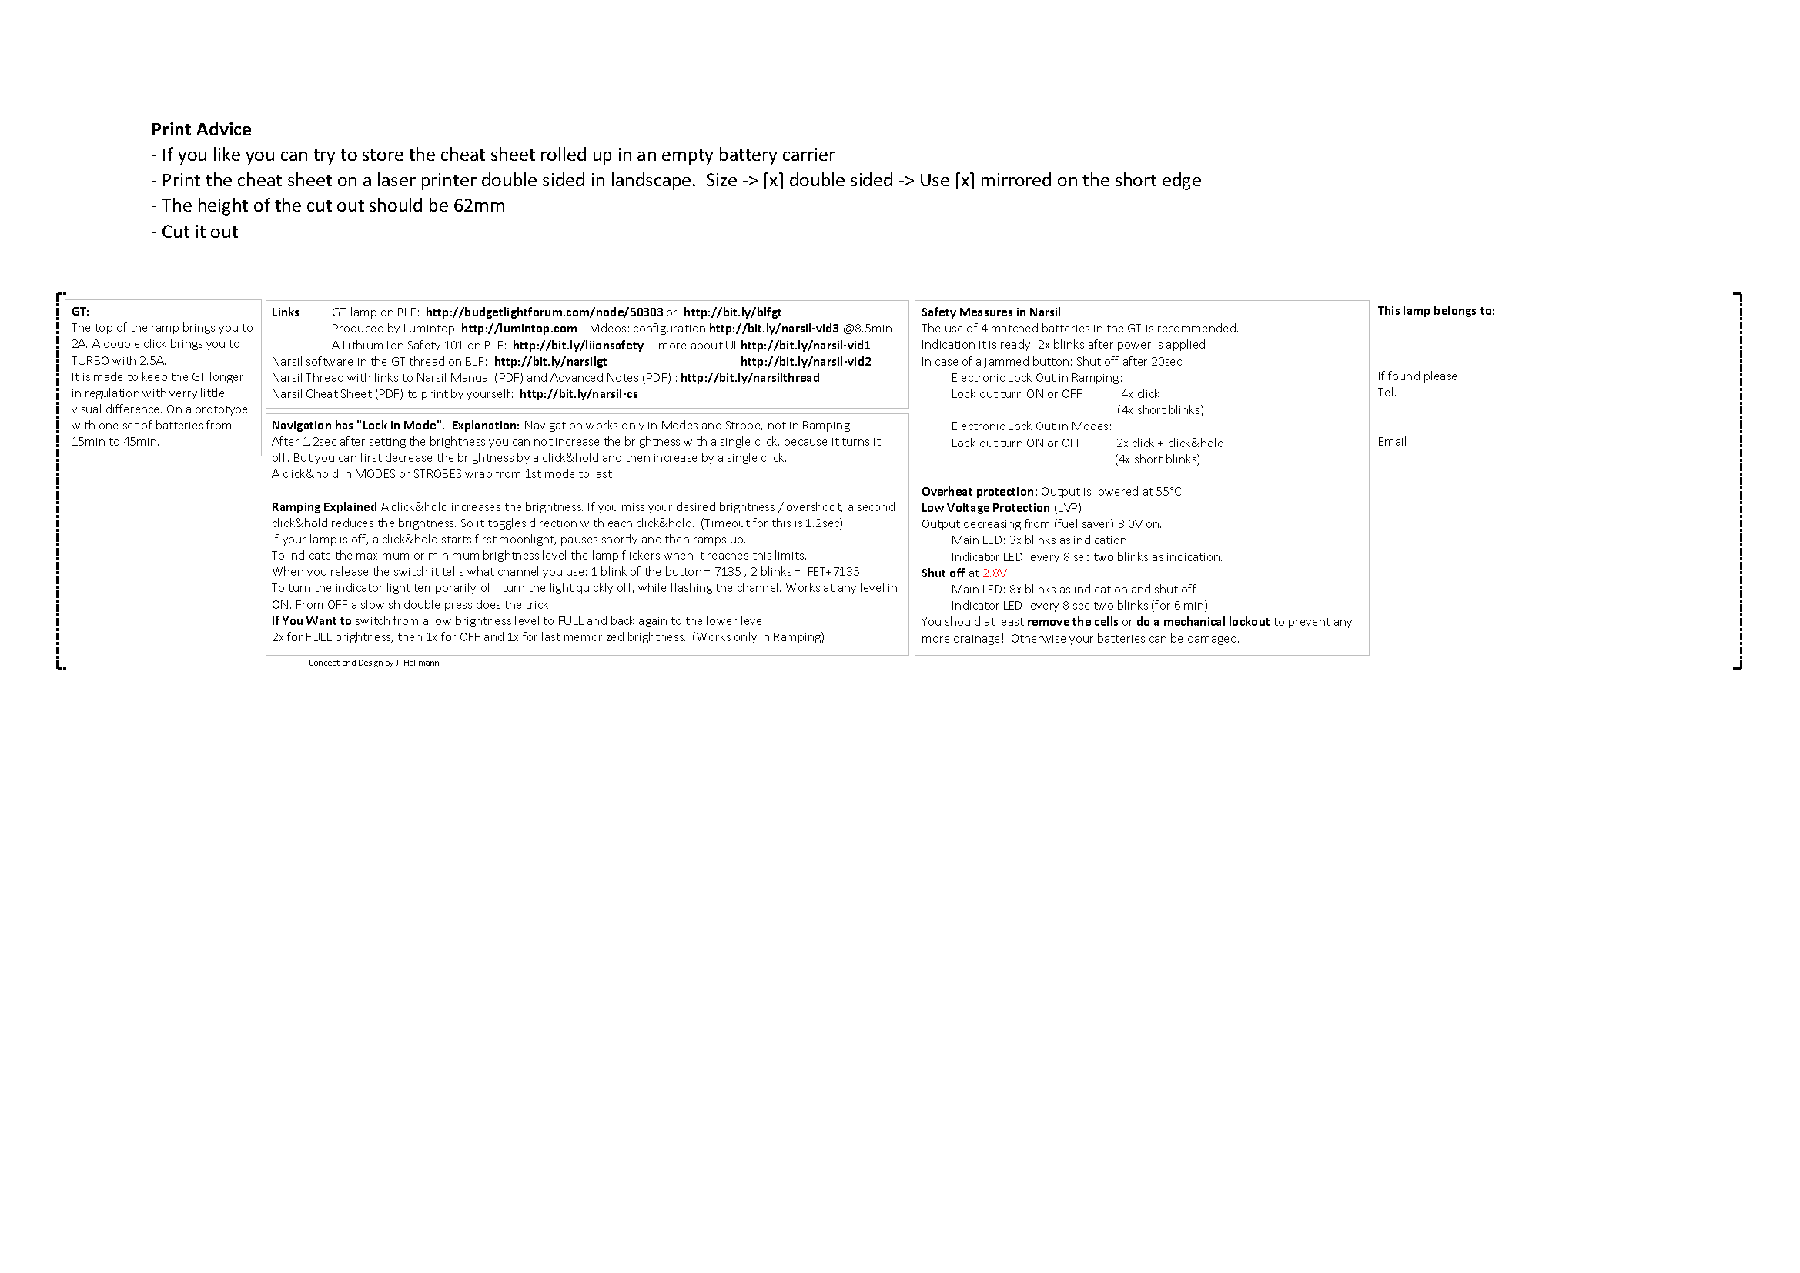
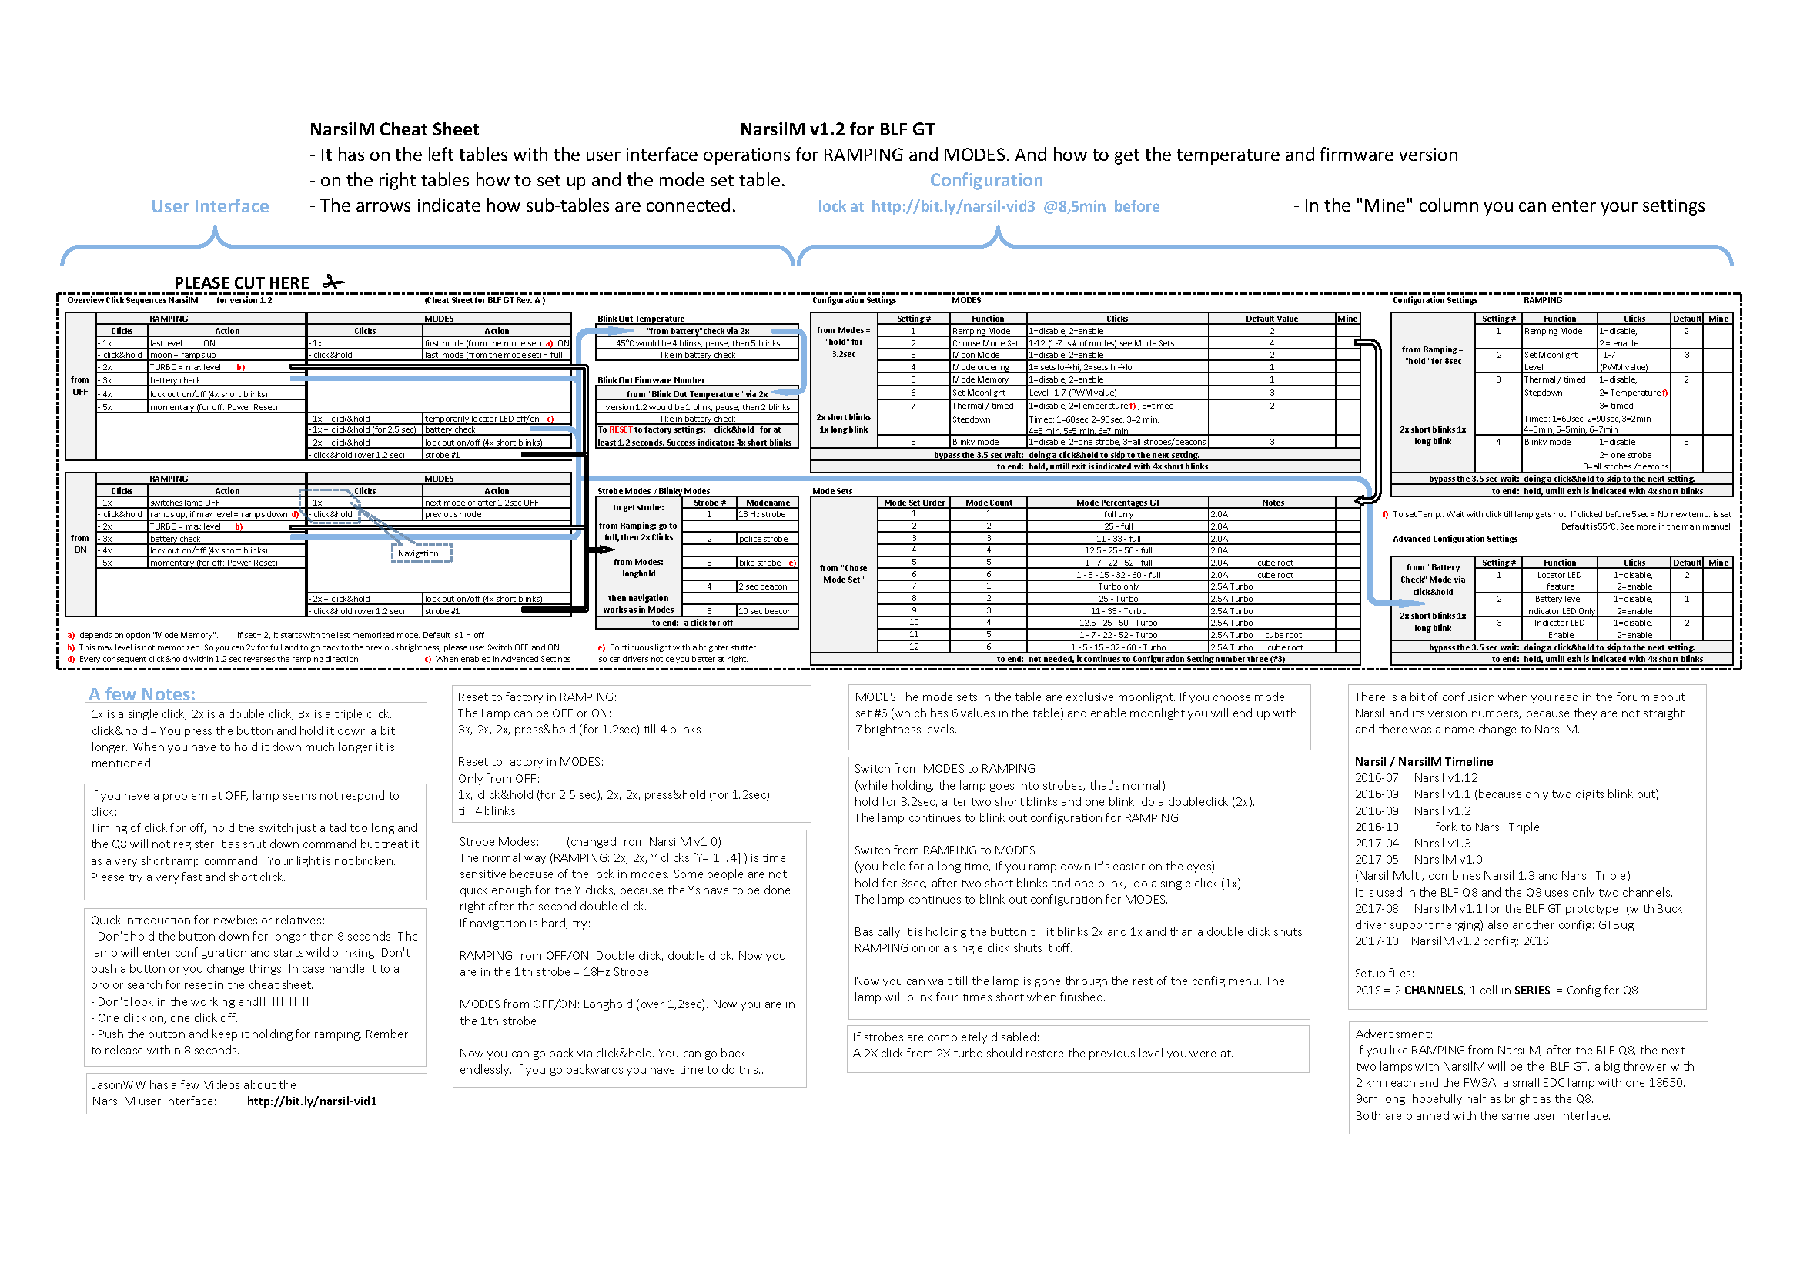
Below is a ‘cheat sheet’ for the UI, made by a user (joechina) on budgetlightforum.
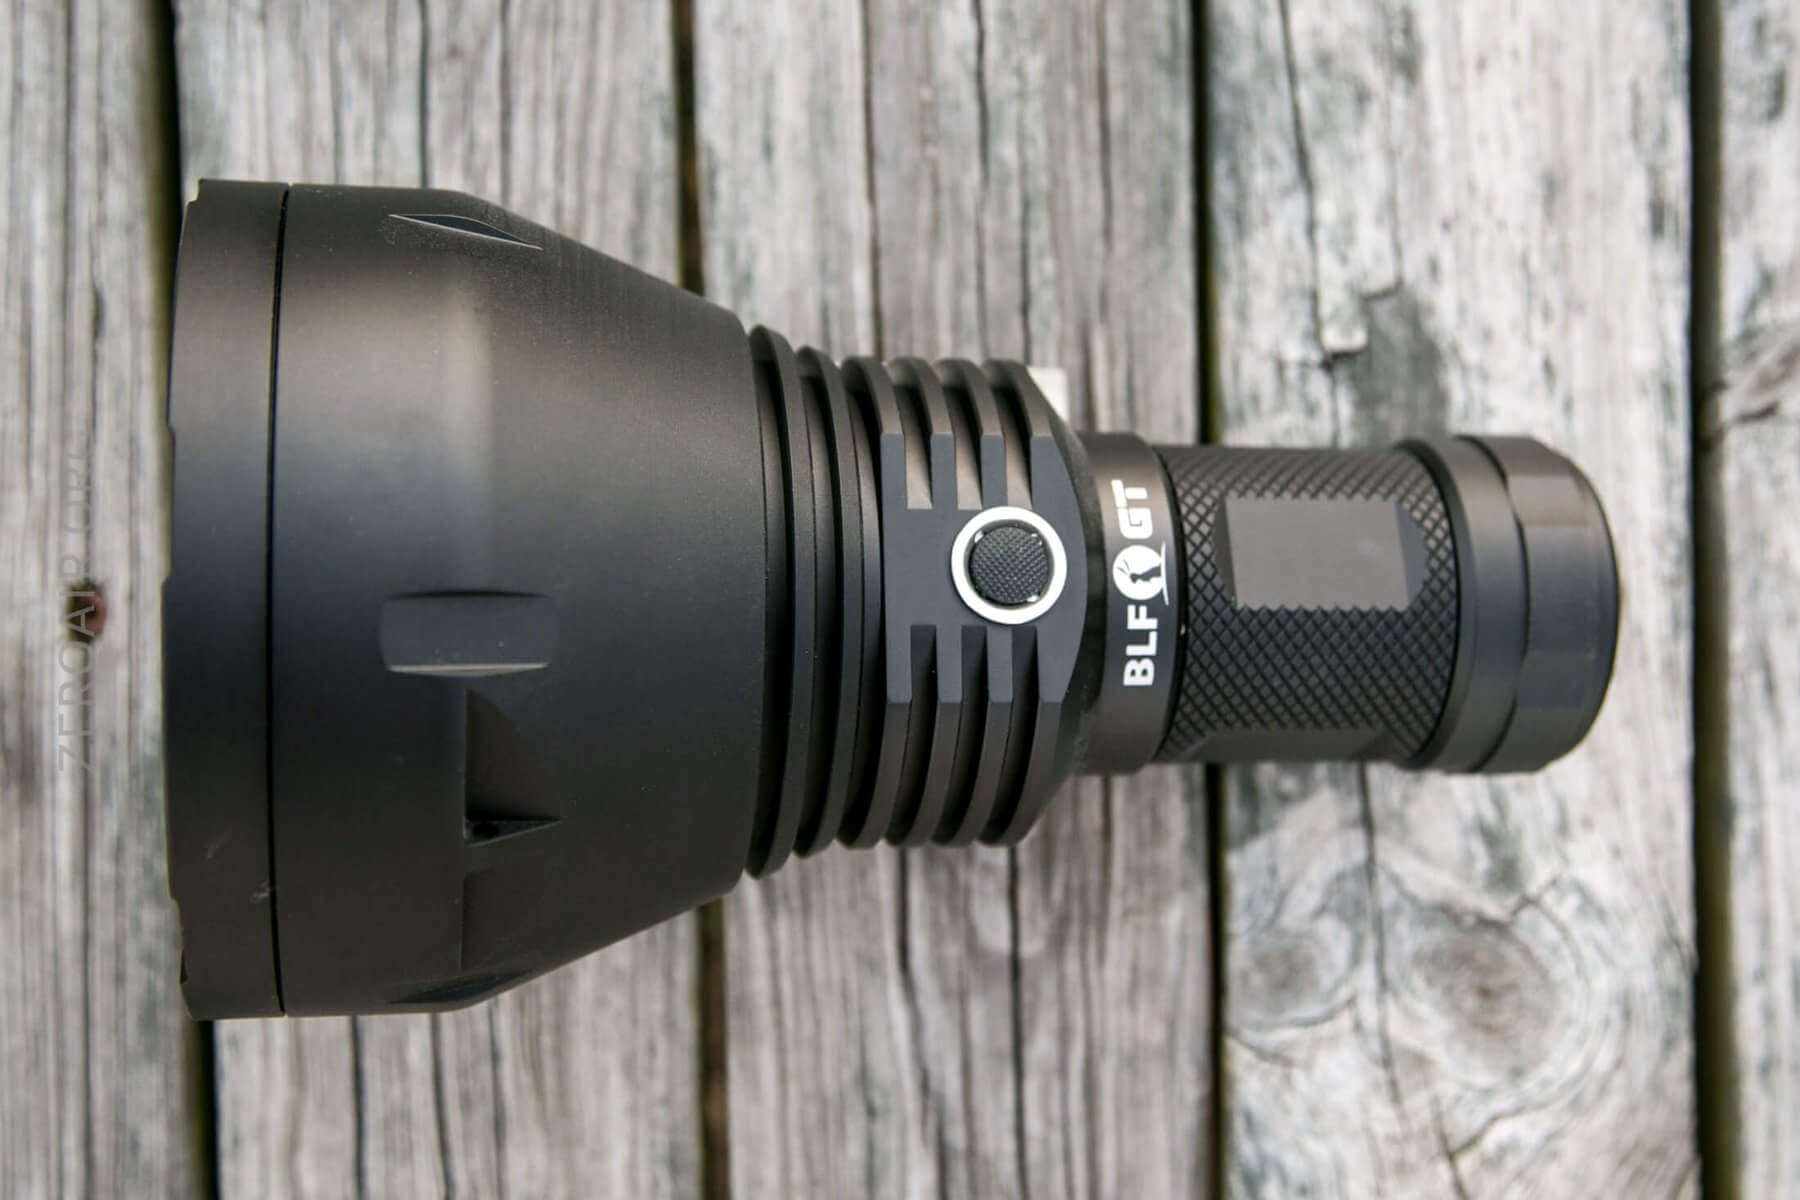
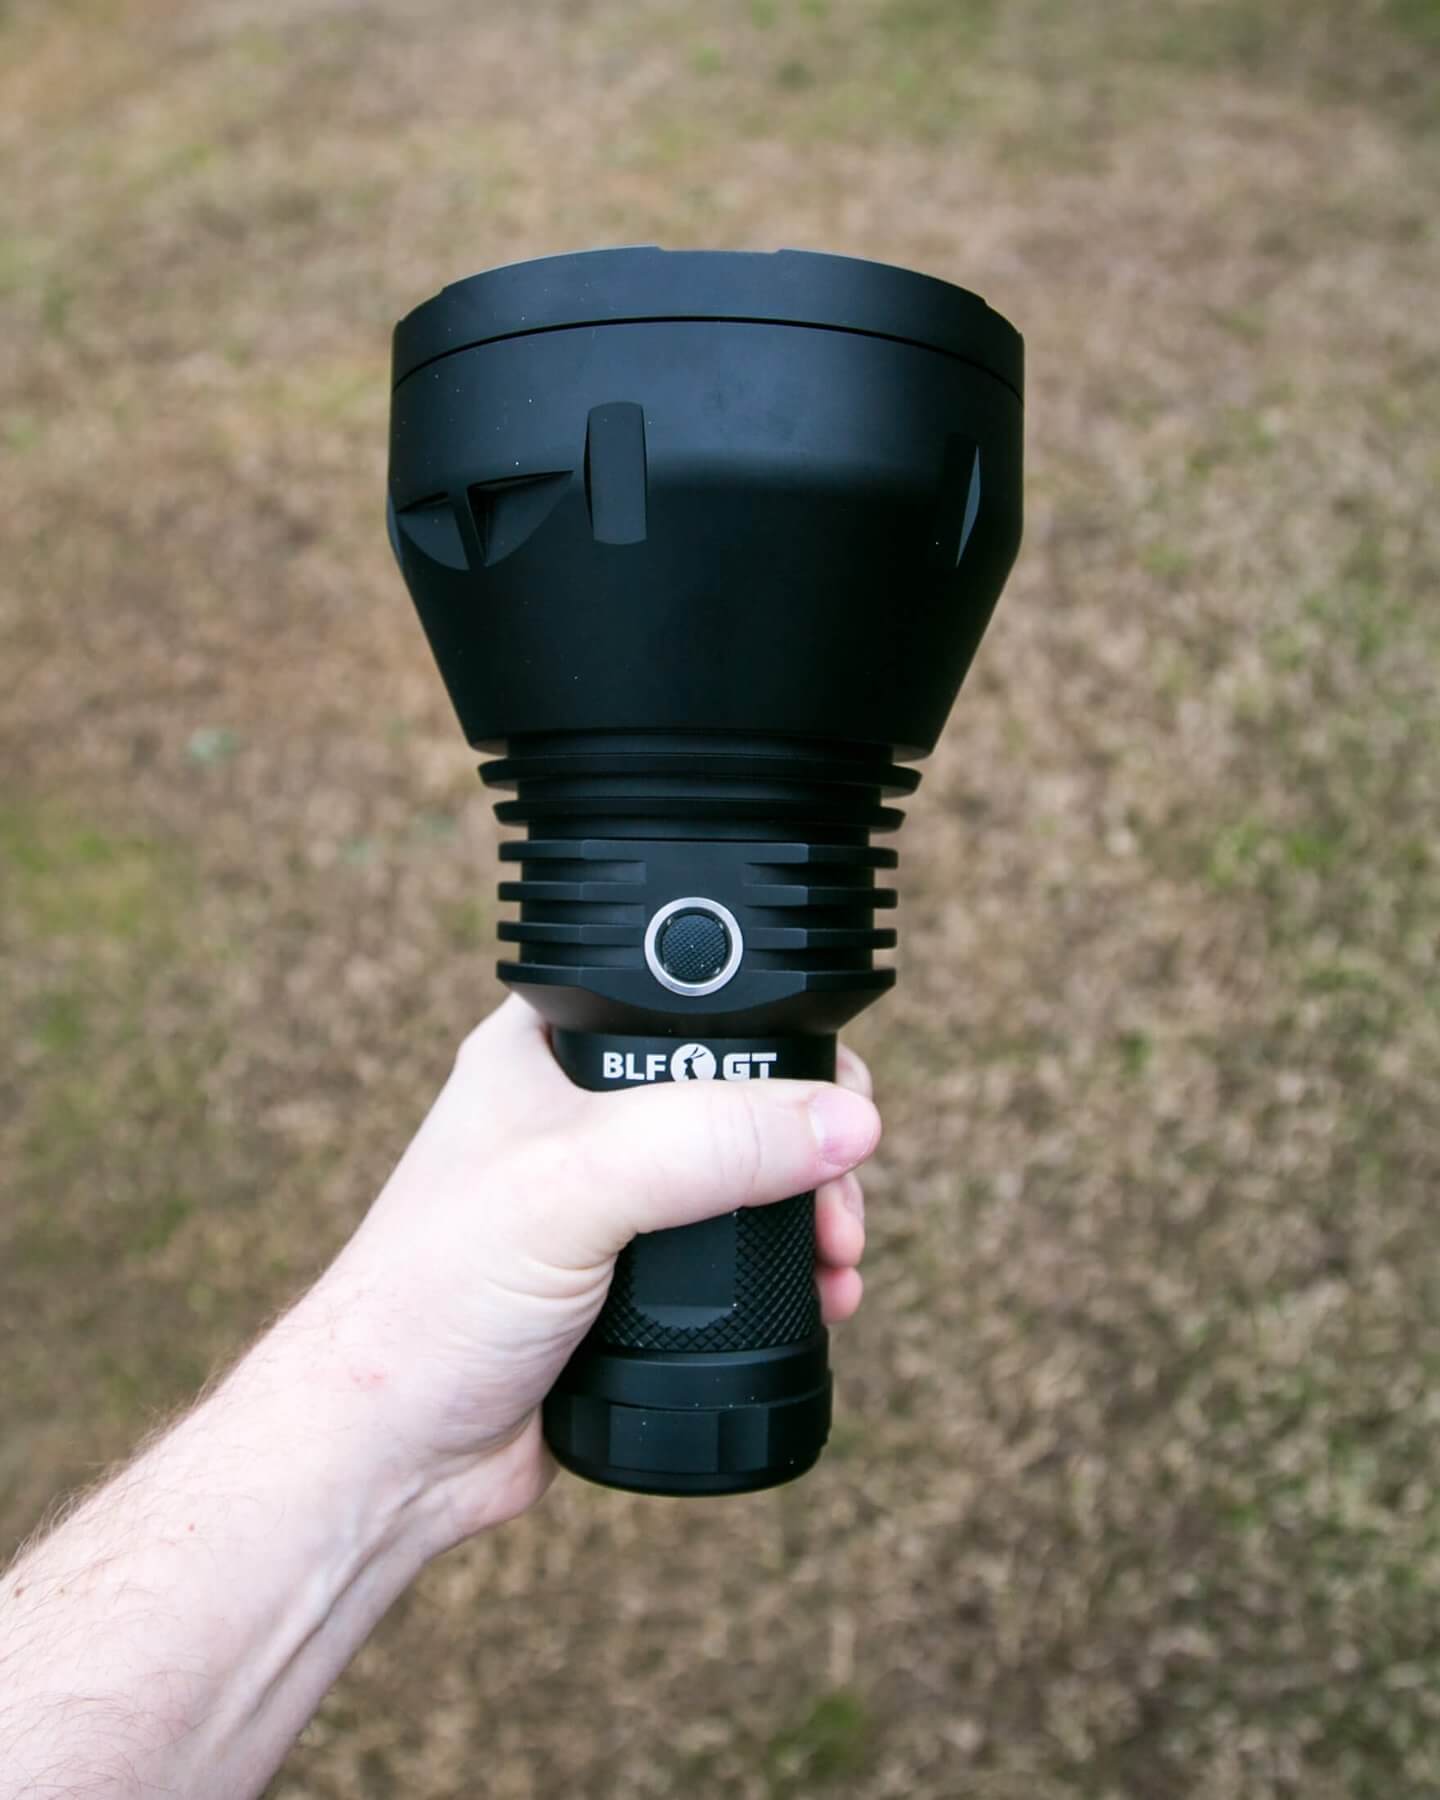
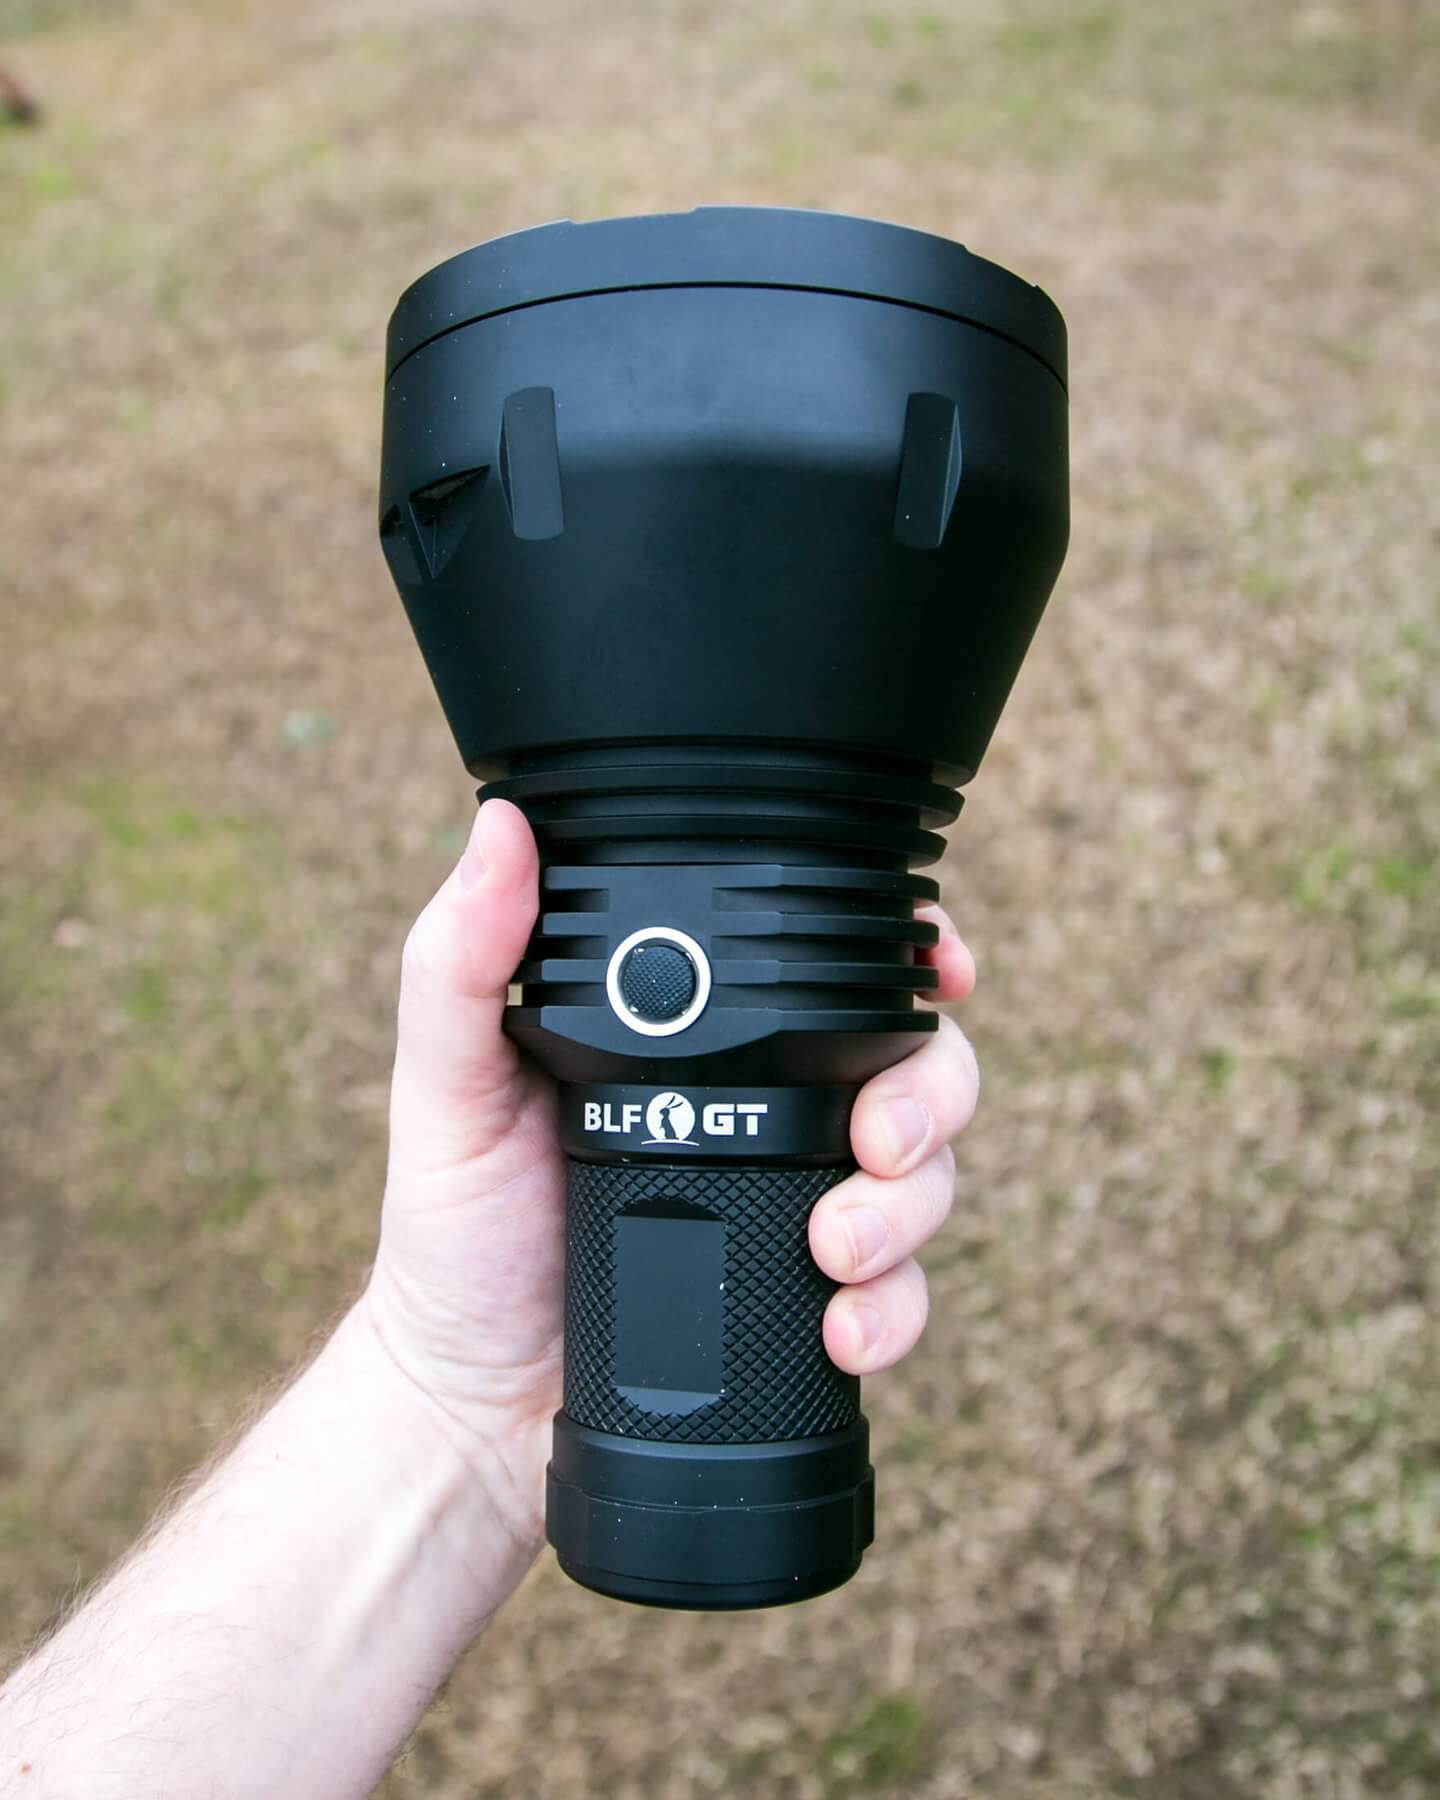
Build Quality and Disassembly
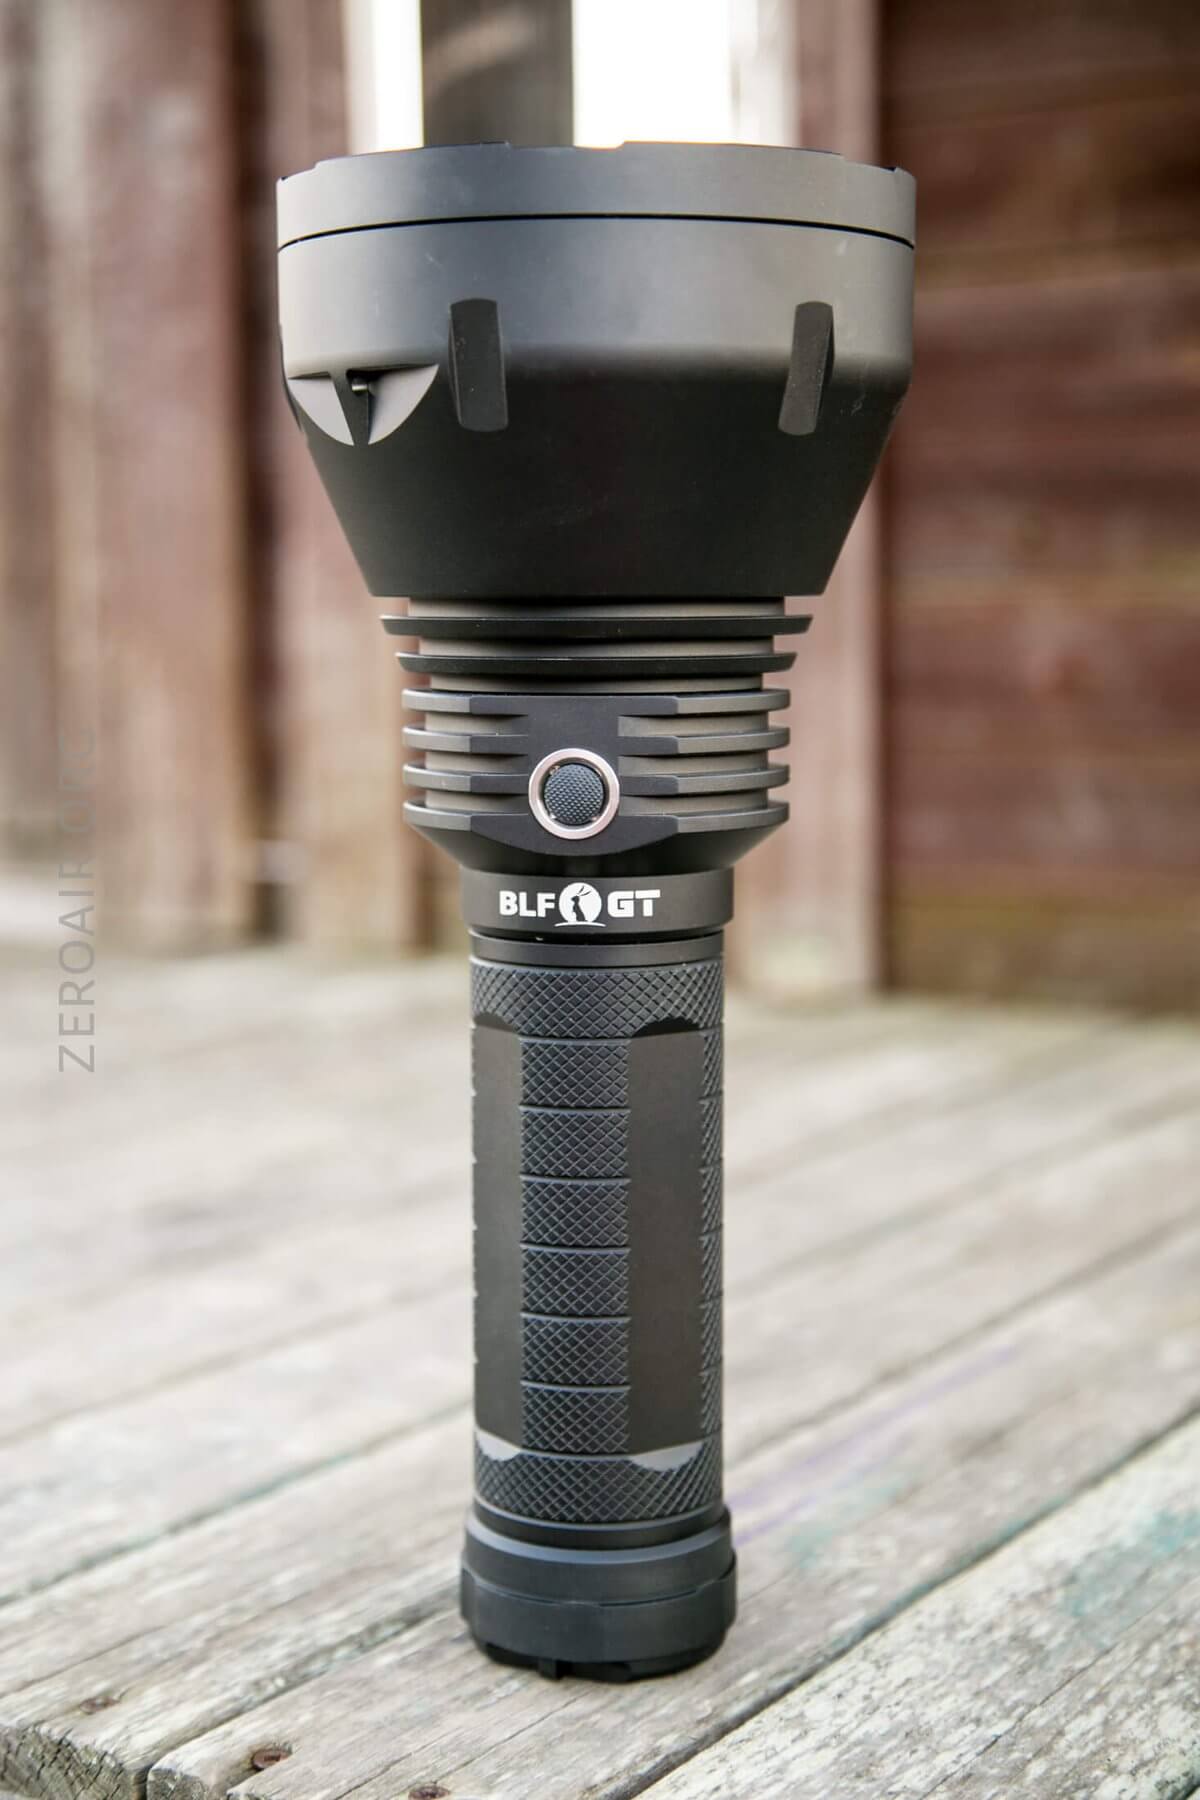
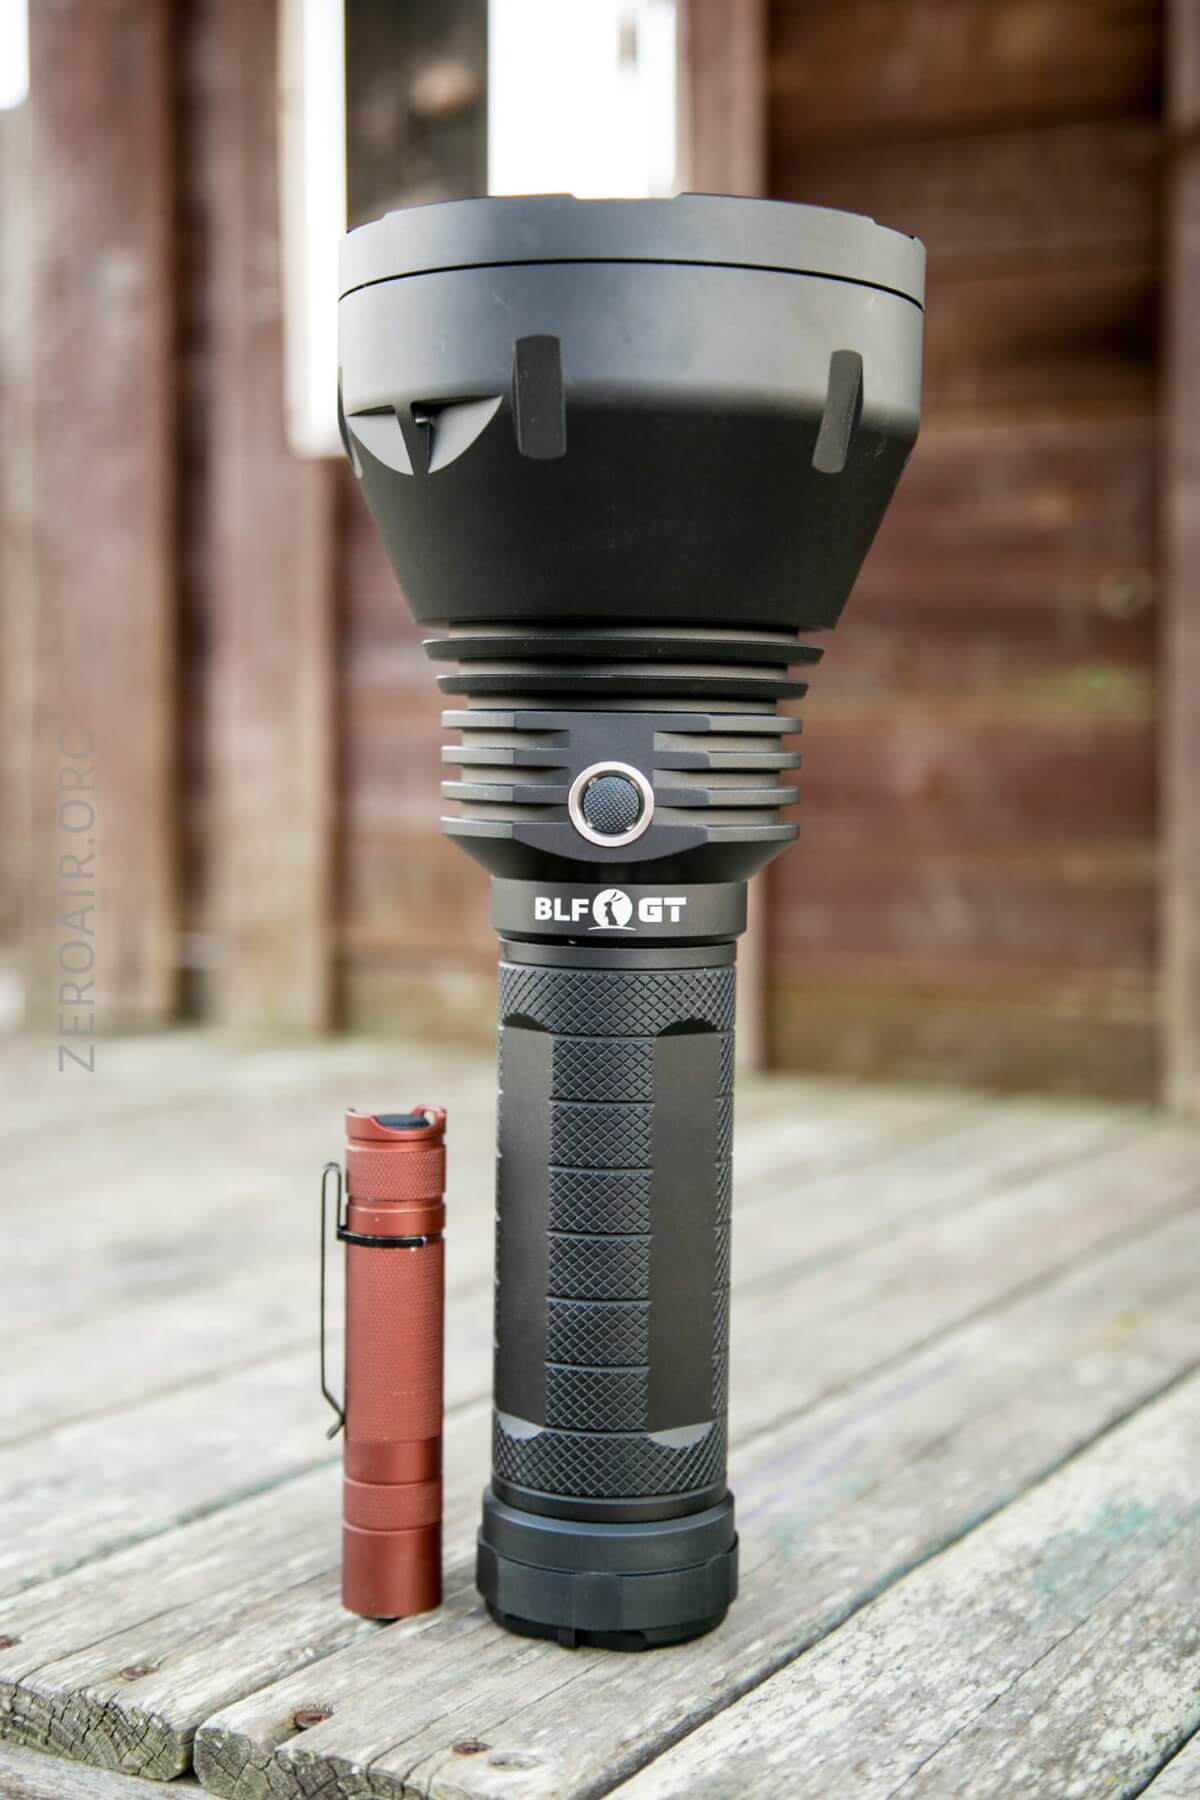
The GT is very well built. Above is the 8×18650 format, which I practically never use. In fact, that long tube stays stored away in the box. Below is the format I usually keep the light, with 4×18650 ready to go.


It’s a big light and so that means a big lens, so you wouldn’t want to be careless with that, but still, the light seems quite robust.
Below is a shot with the long tube installed, and the shorty beside. (Some users have doubled the 8×18650 format, and there was even a 4×18350 format rumored, too!!). But these are the only two production formats.
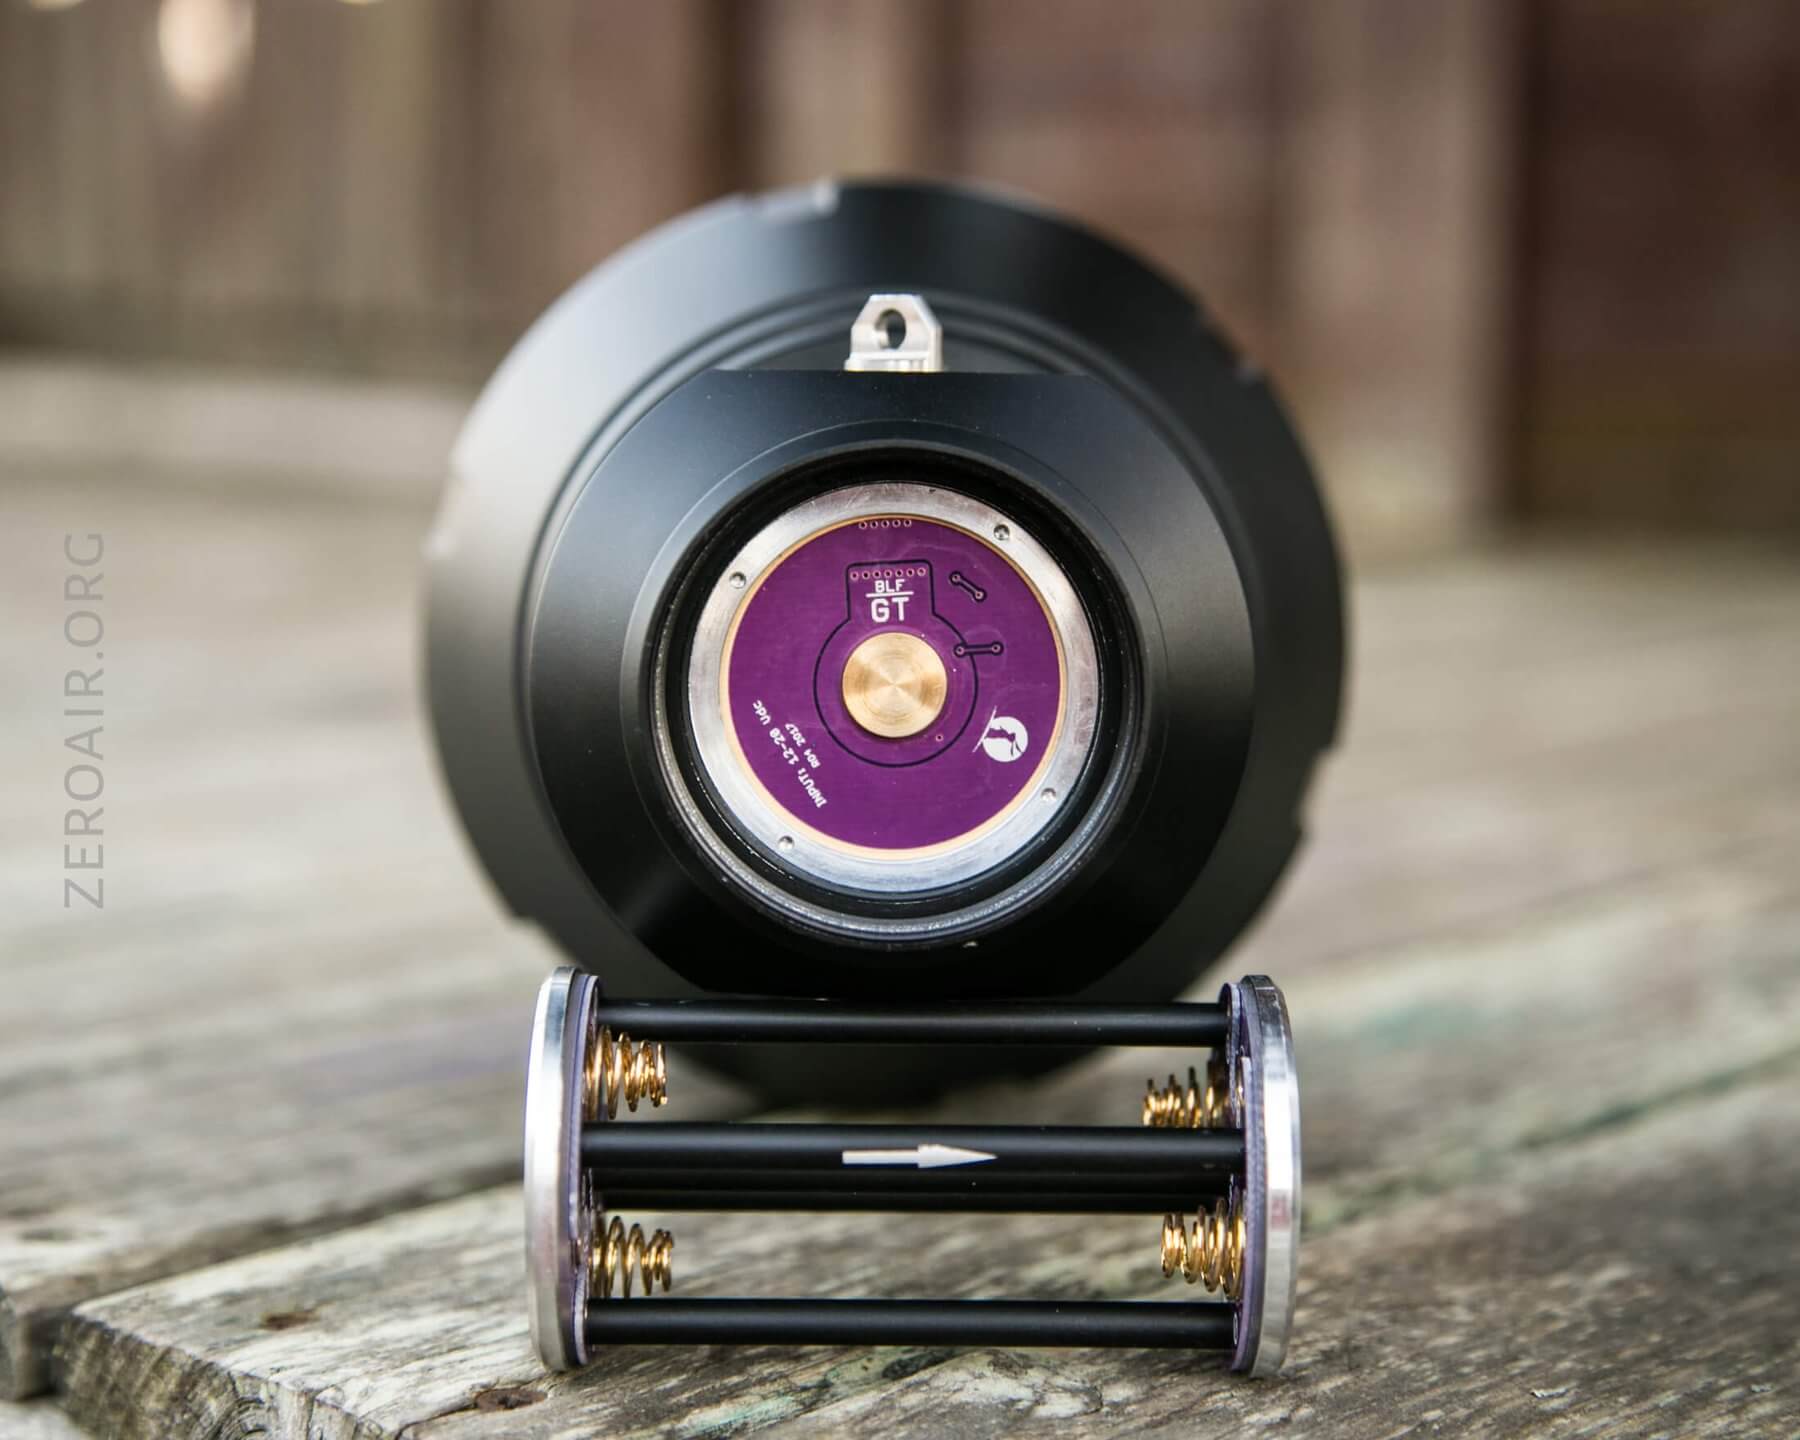
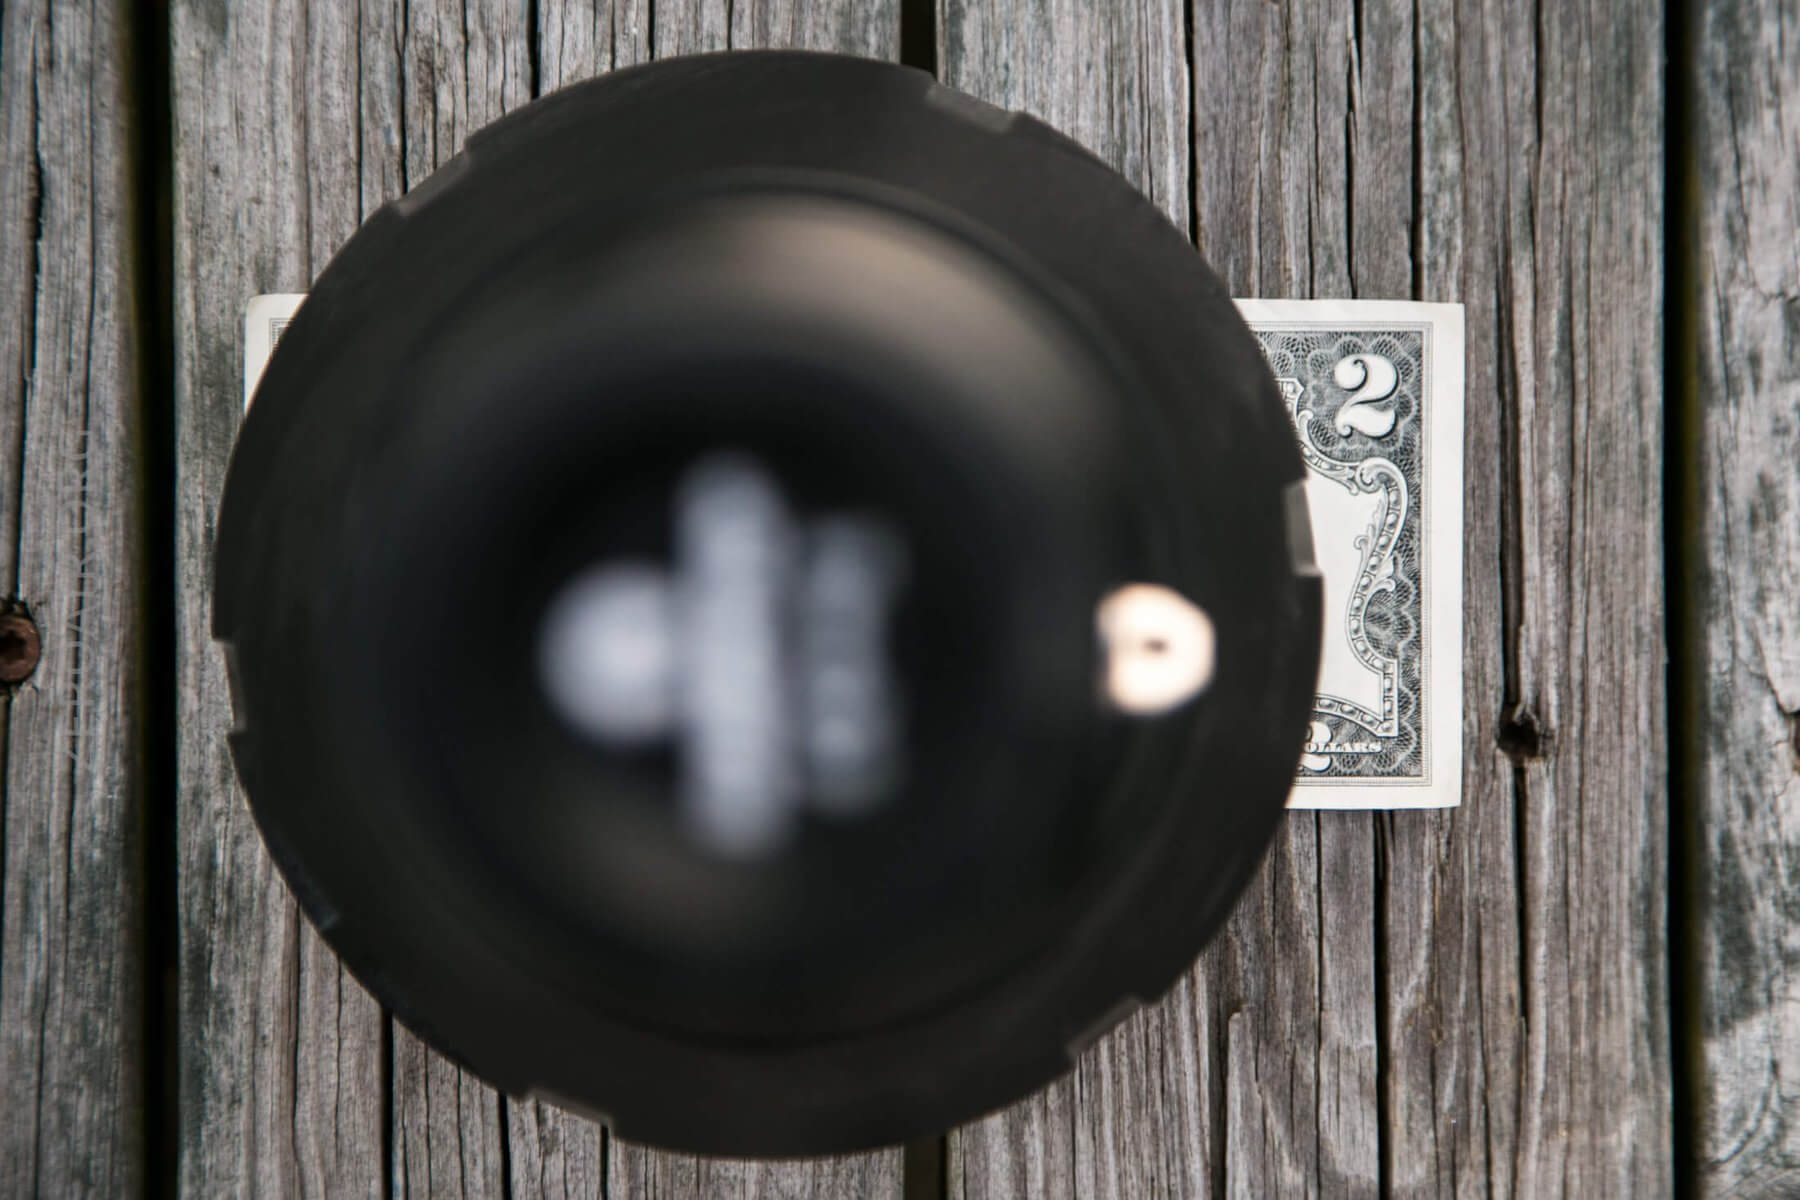
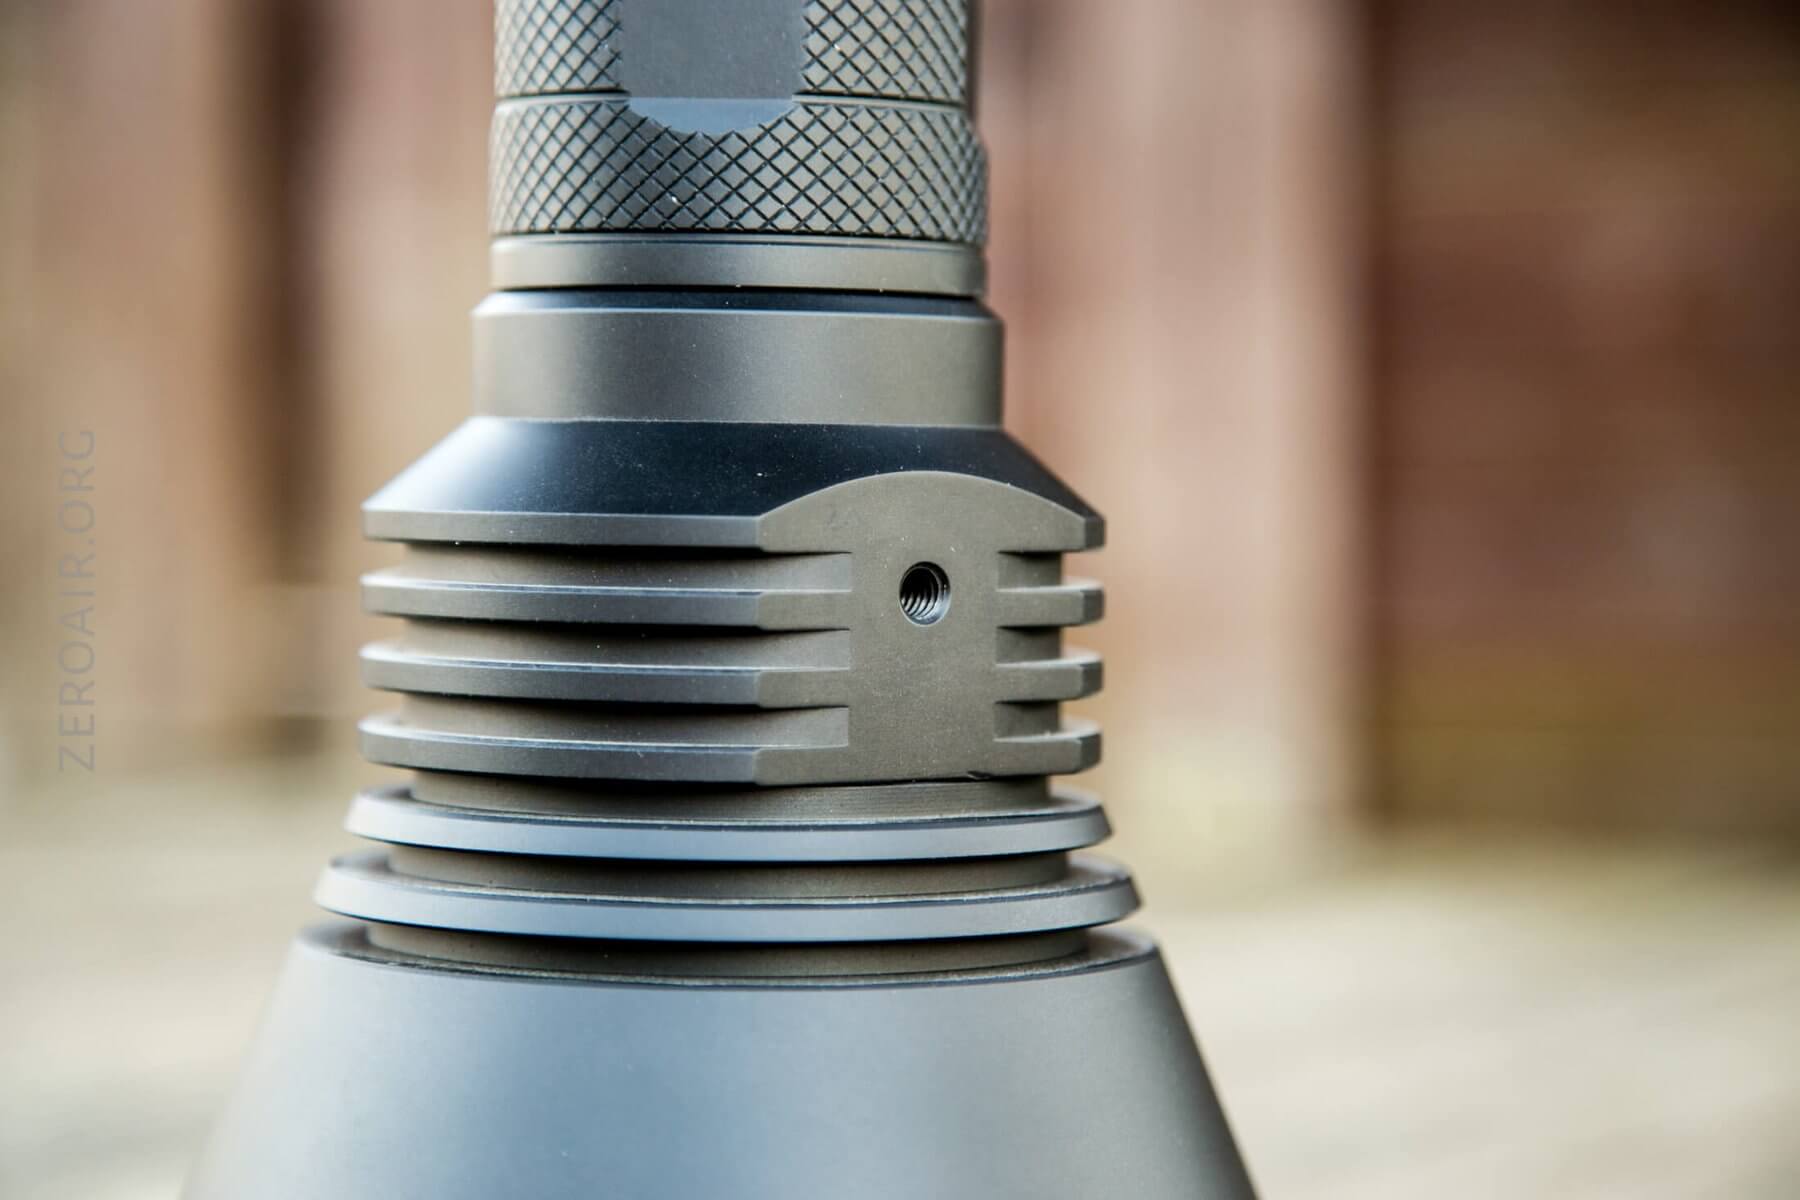
The head end of the light has a big brass button for contact with the cell holder. The cell holder is directional, as is indicated by the arrow seen below.
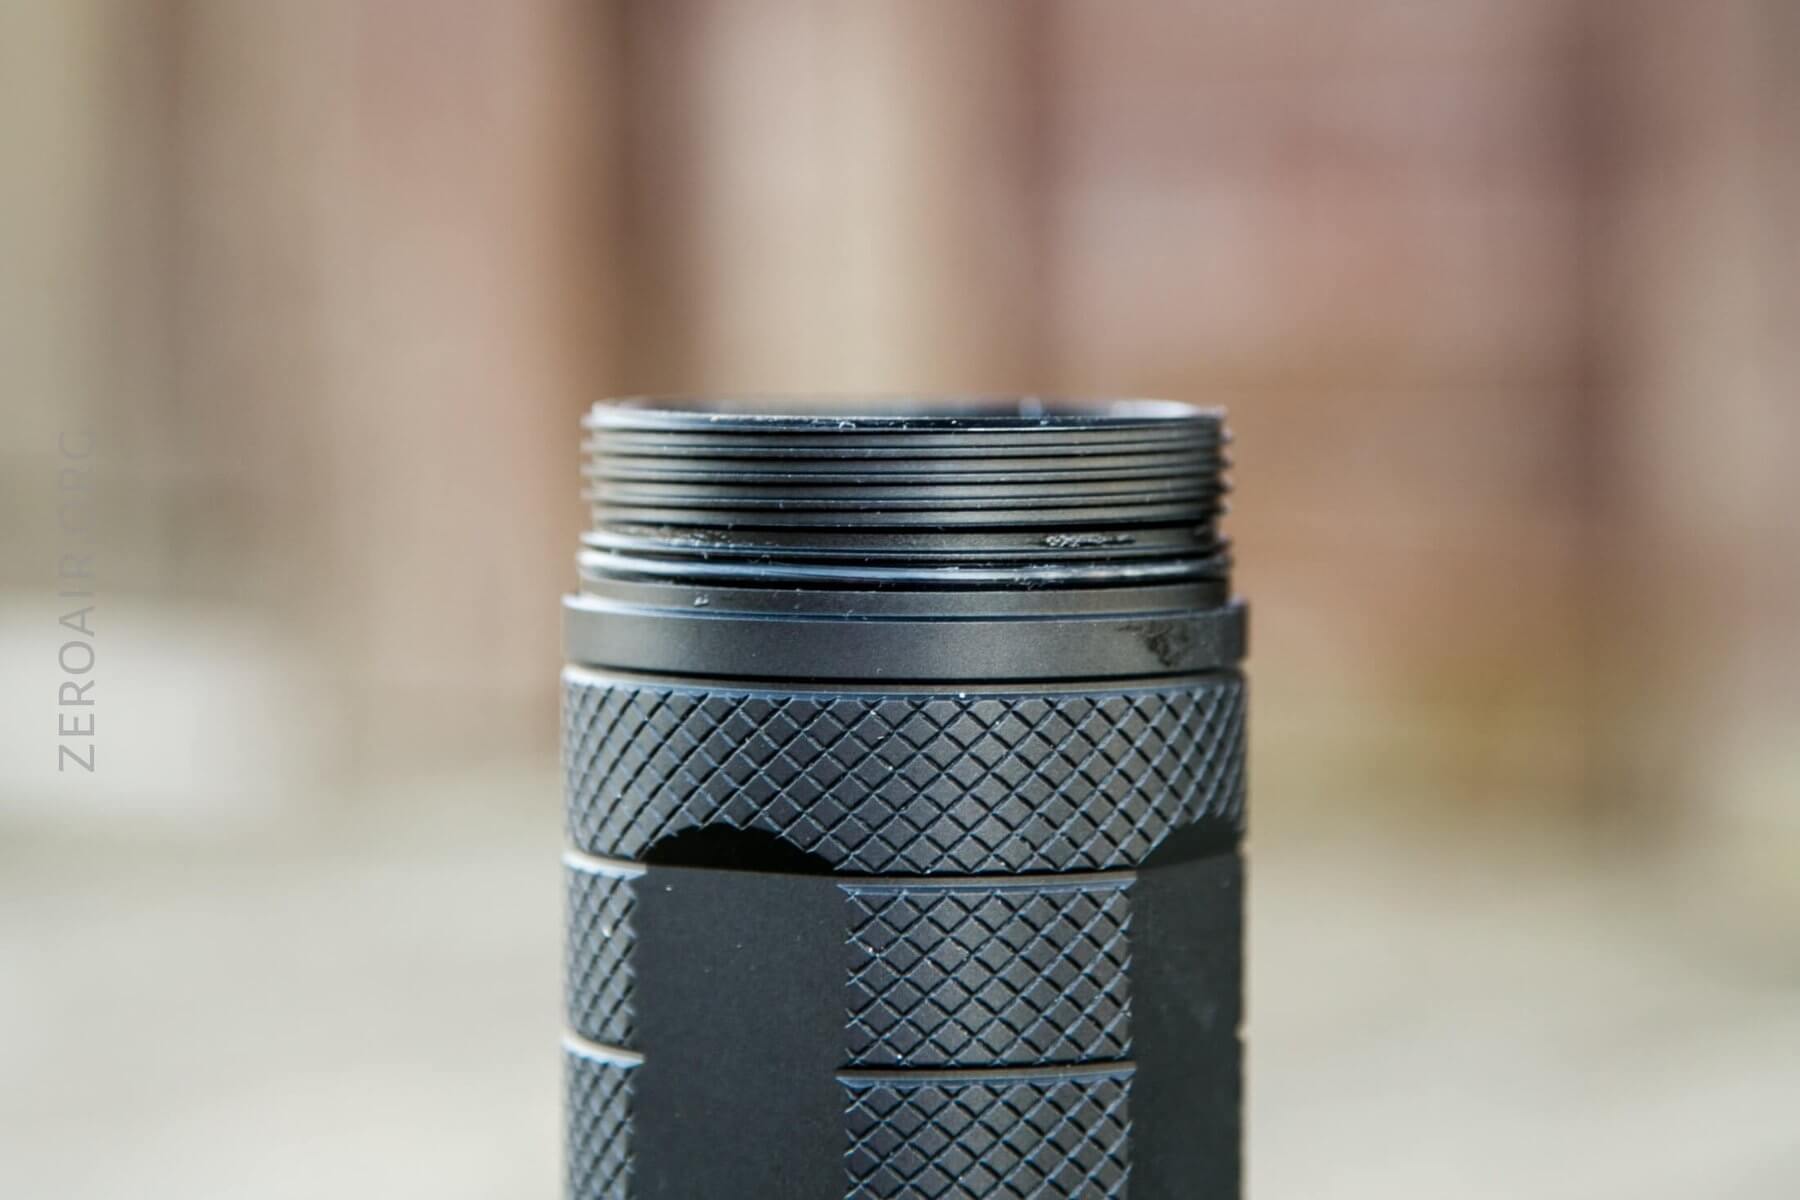
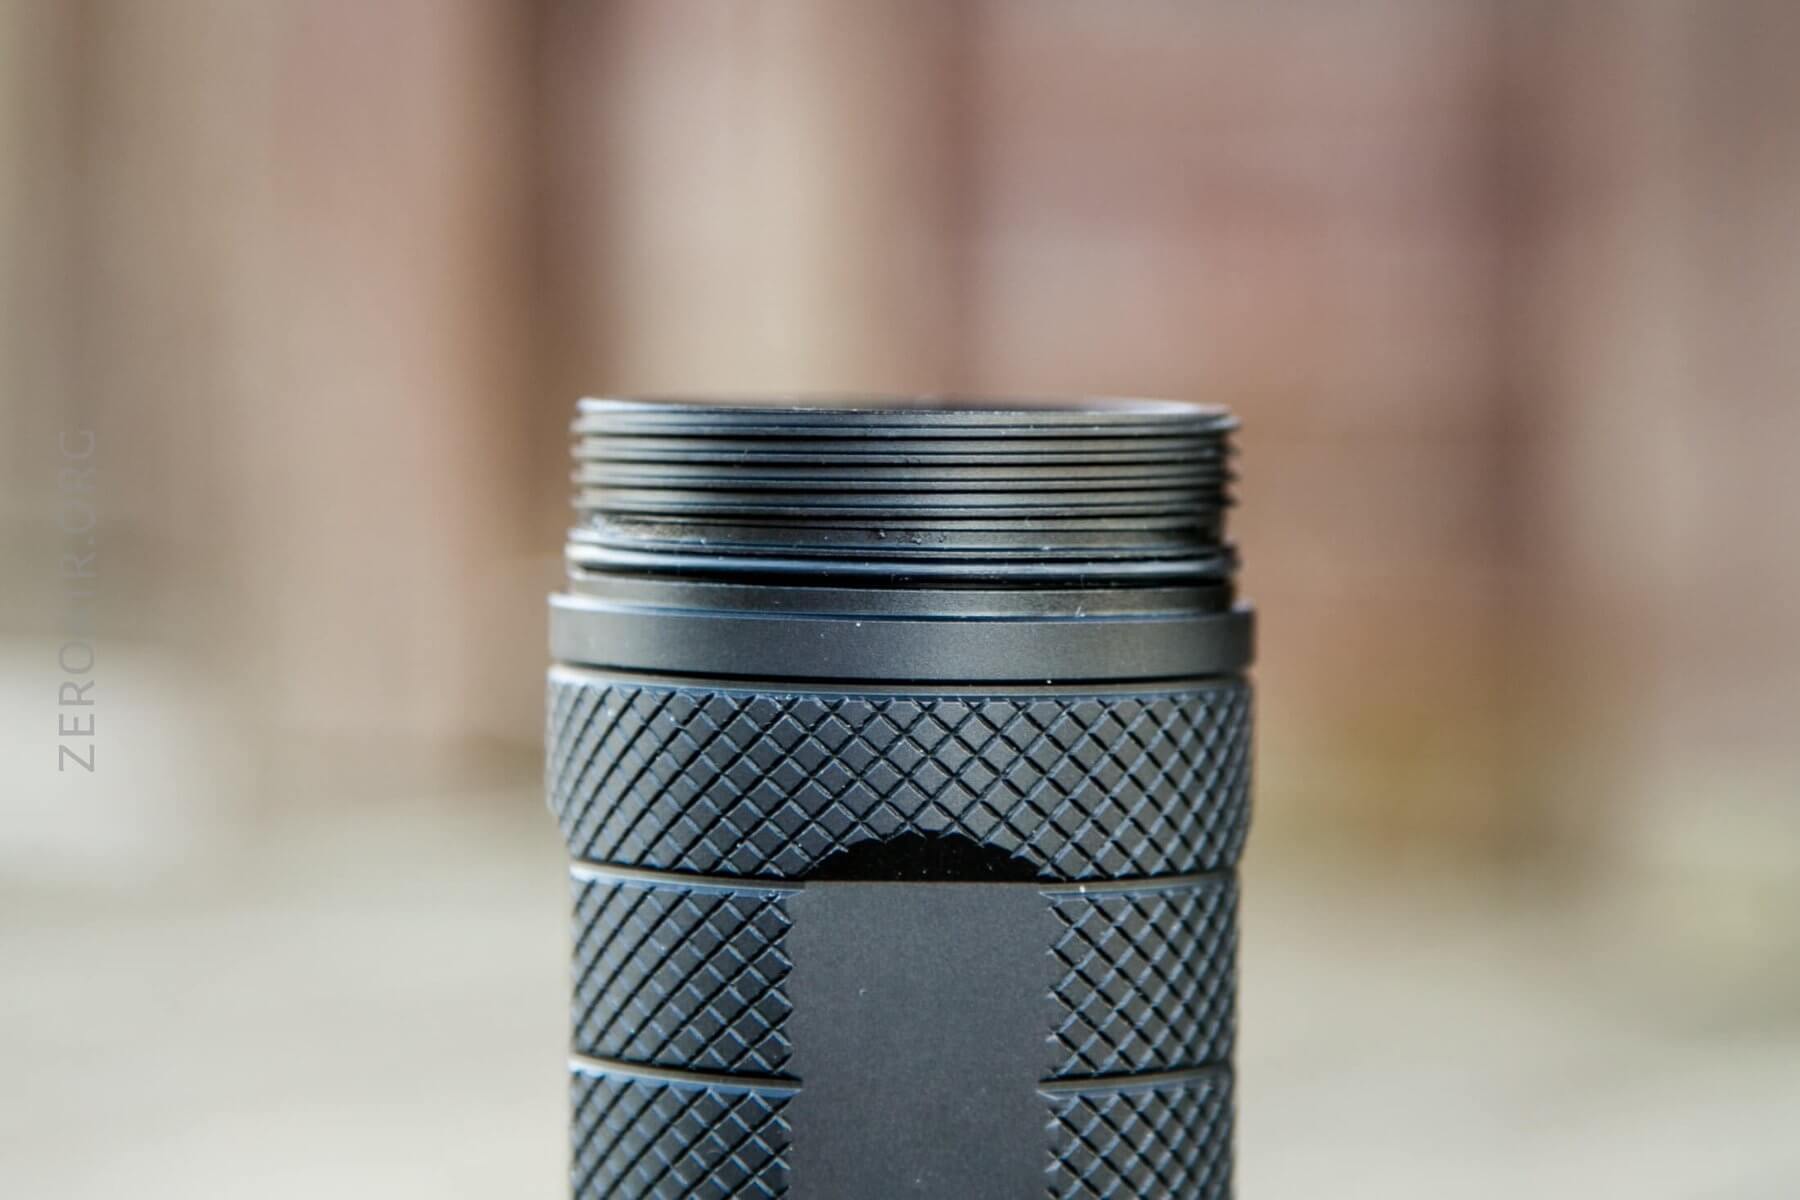
Threads on the cell tubes are anodized and square-cut, and smooth. There’s no sense of binding, and there’s no lube, either.
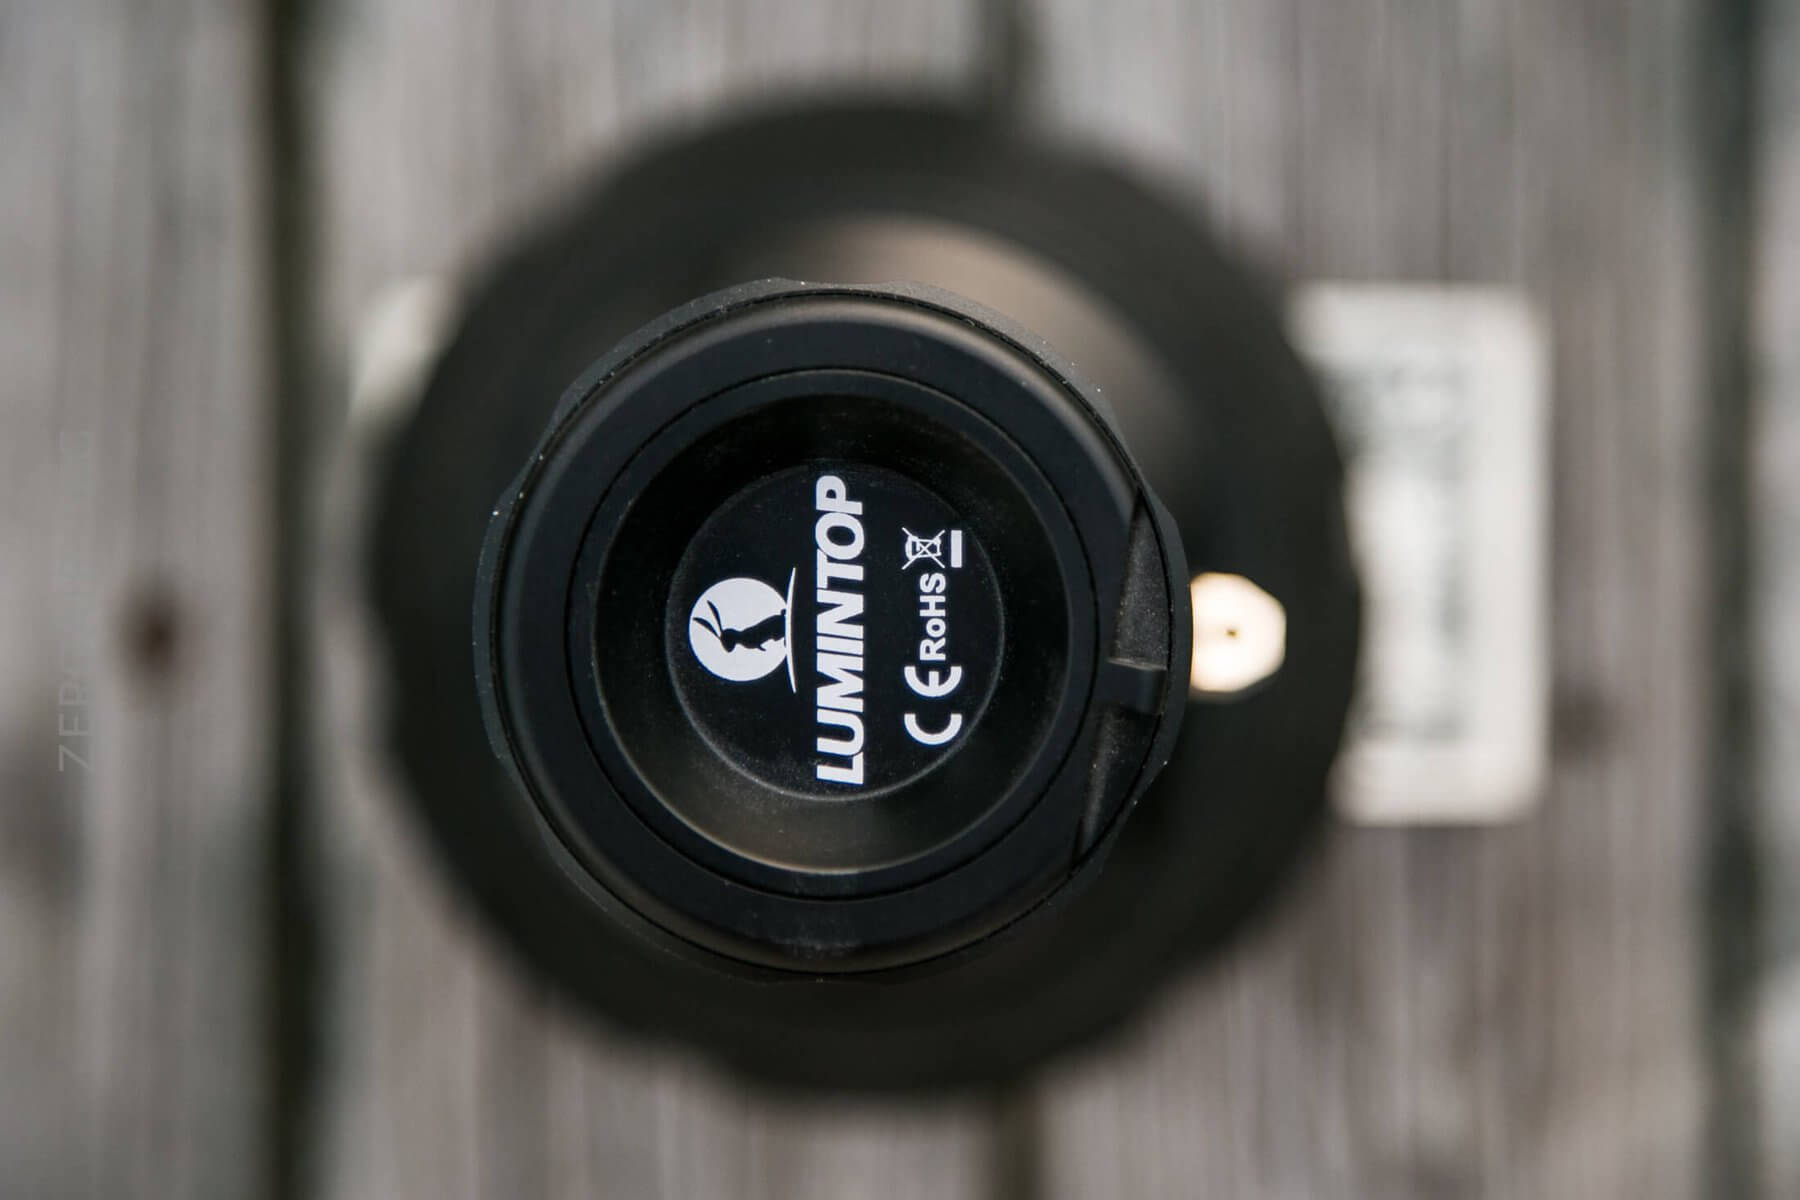
The tailcap is just a dummy tailcap – no electronics here. There is a bit of Lumintop branding, though, and a QR code.

The tailcap also has an important strap connection point.

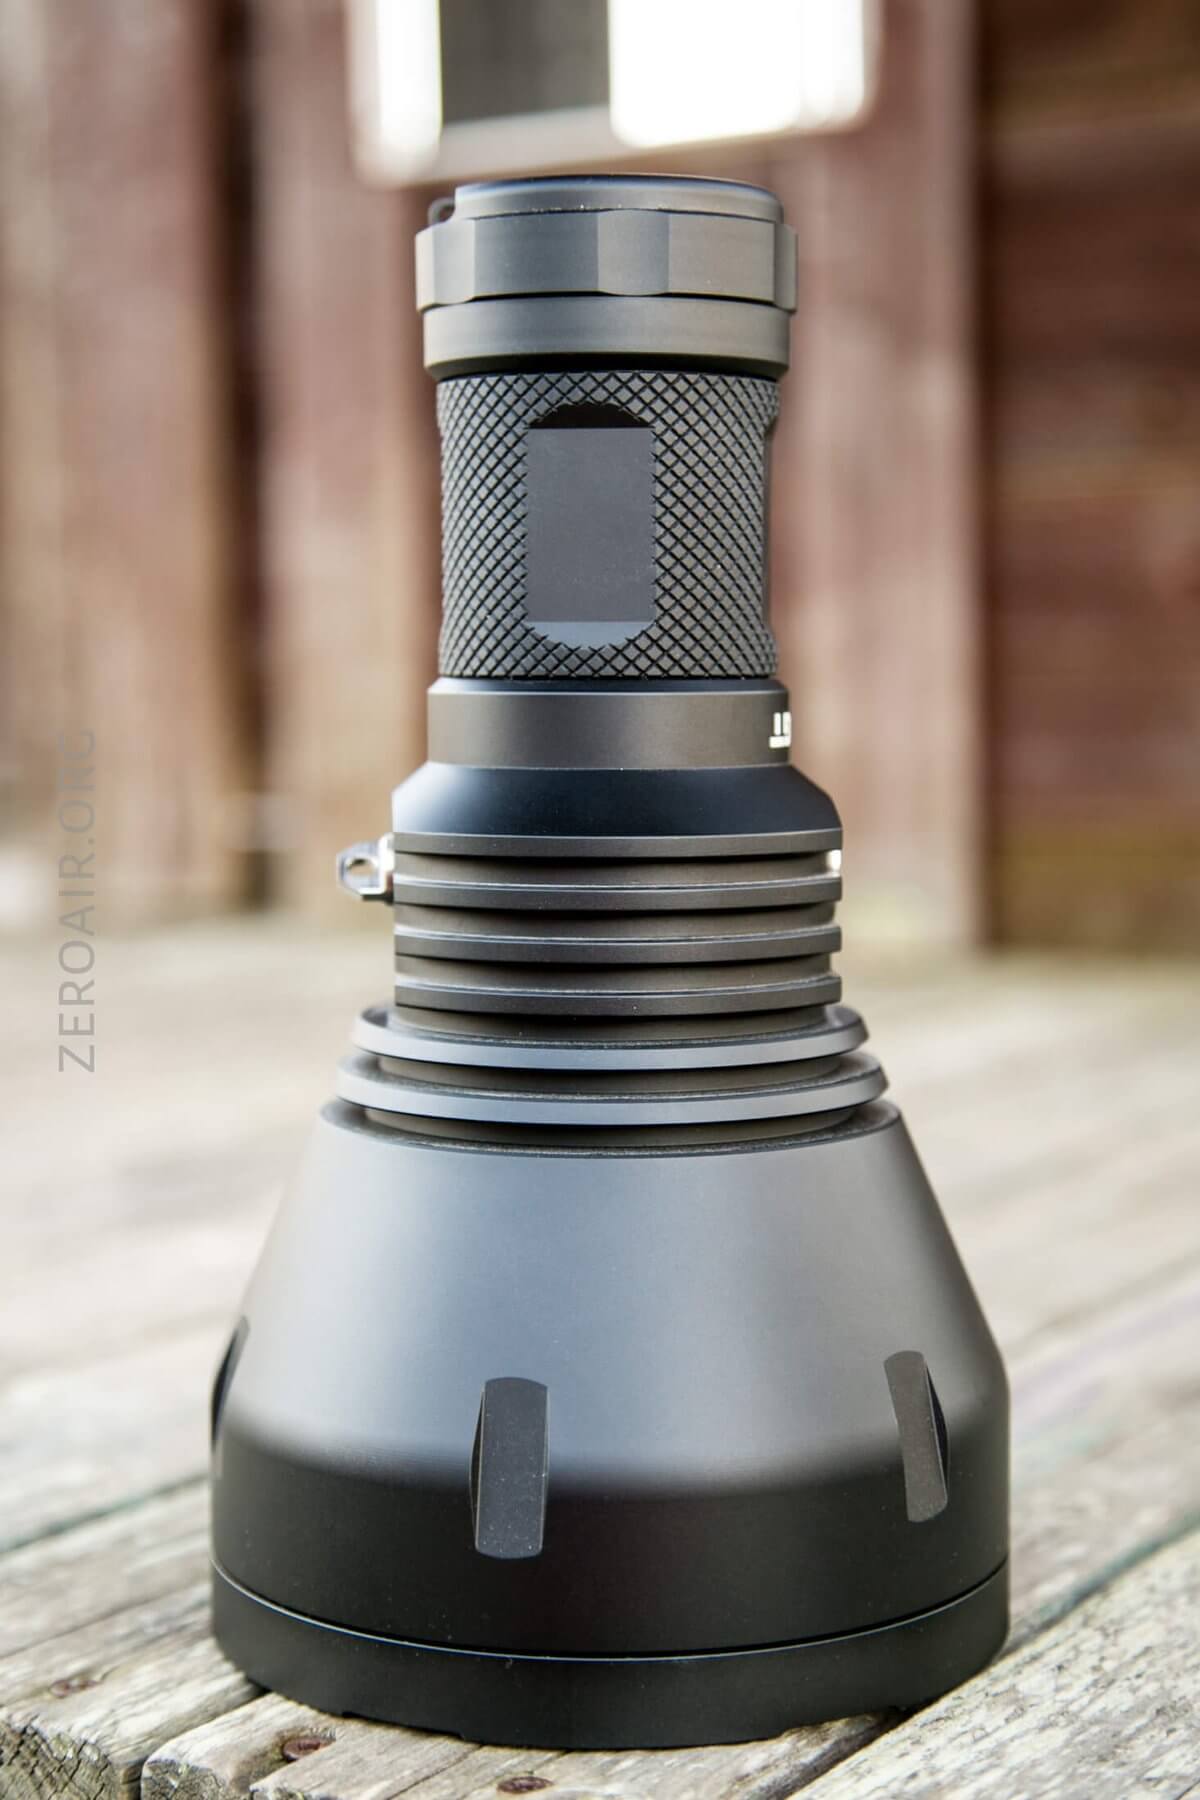
The body of the light has large thick fins.
And the outside of the bezel has a little bit of design, too.
Size and Comps
The dimensions for the long version are as follows:
Length: 315mm
Head Diameter: 135mm
Weight: 1.8kg without cells
The 4×18350 version is shorter by around 70mm.

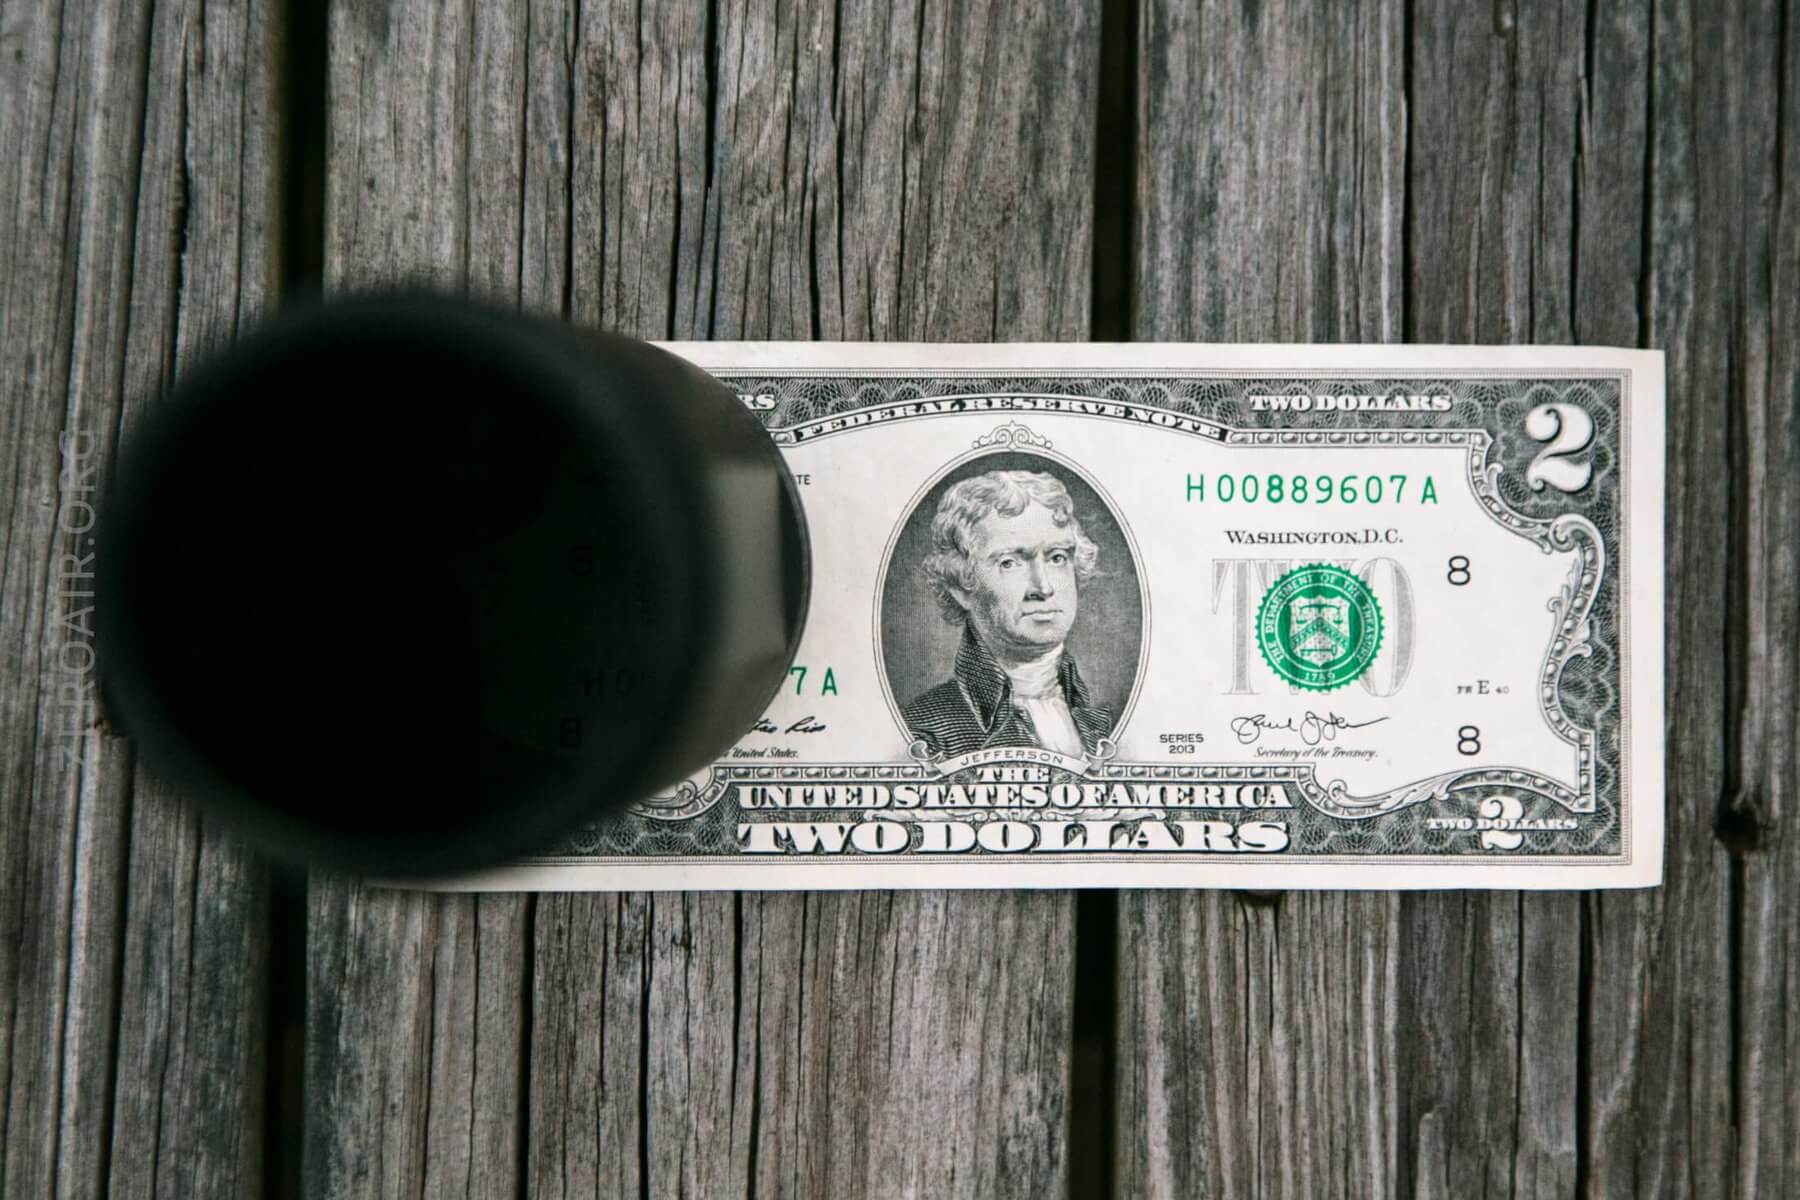
As you can see above, the long cell tube by itself practically covers my usual scale marker!
Here’s the test light with the venerable Convoy S2+. Mine’s a custom “baked” edition Nichia 219b triple. A very nice 18650 light.
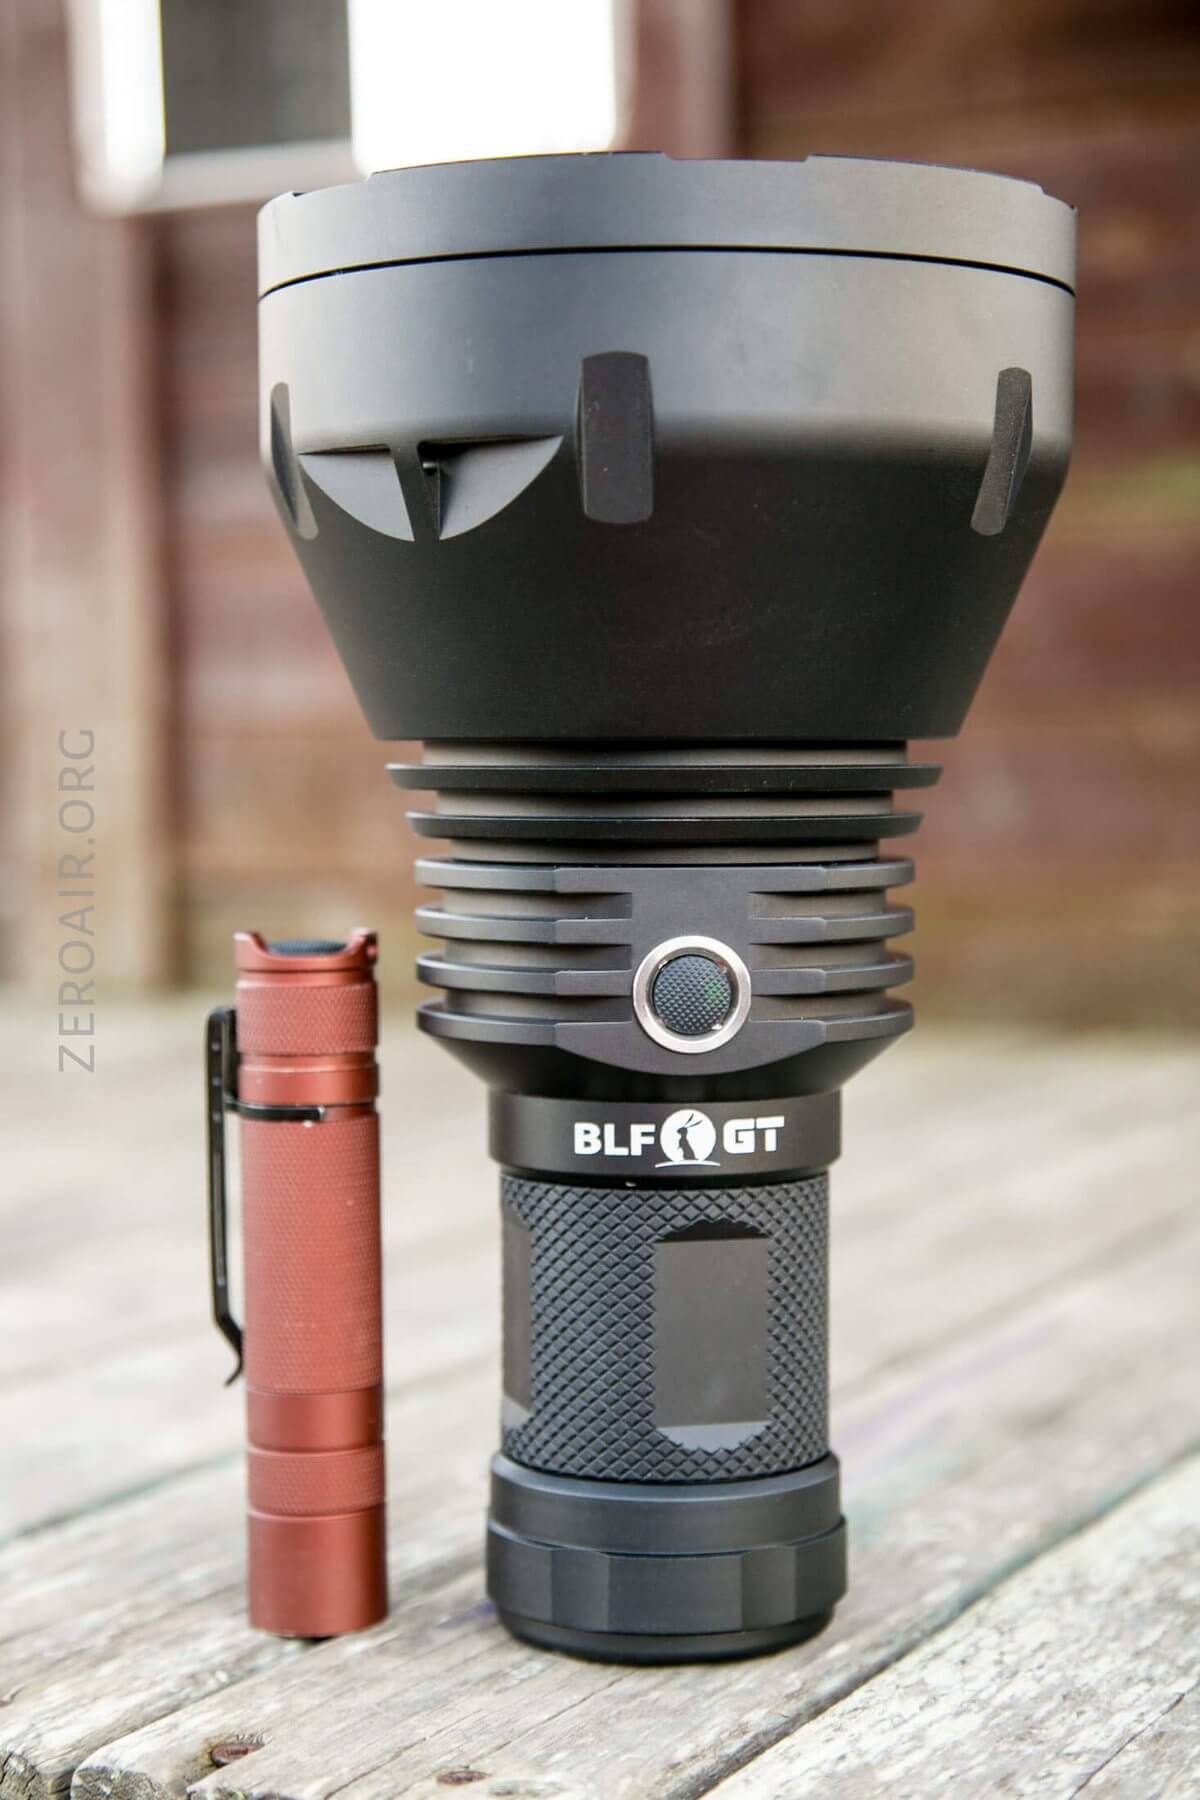
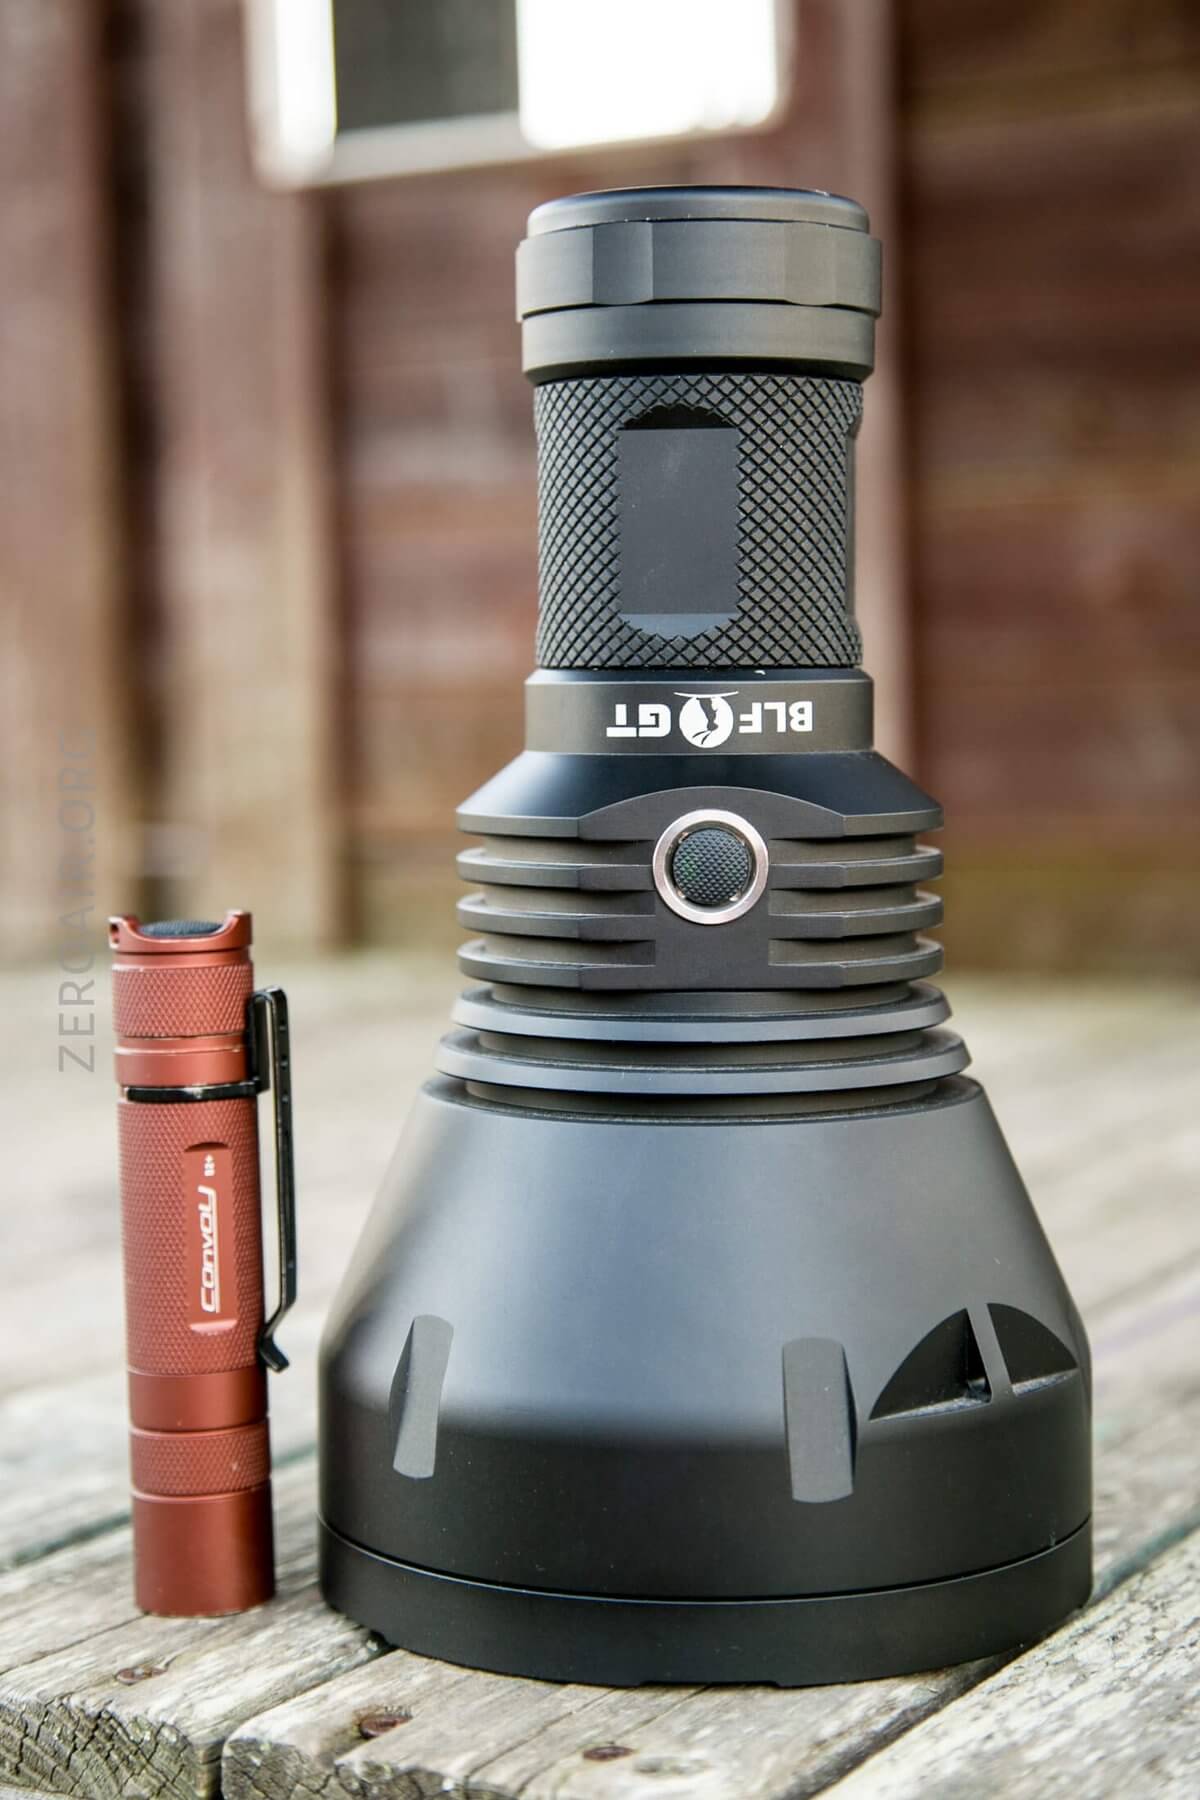
Besides the Convoy S2+, the only real meaningful scale is to see that the bezel is taller in diameter than the Convoy is in length. This really is a big light!
And here’s the long body beside the S2+.
Retention and Carry
There are some optional accessories for the BLF GT. A bag, a bezel cover, etc. But included with the light is really… nothing much. The metal threaded shoulder strap connector seen below is included, but no shoulder strap is.
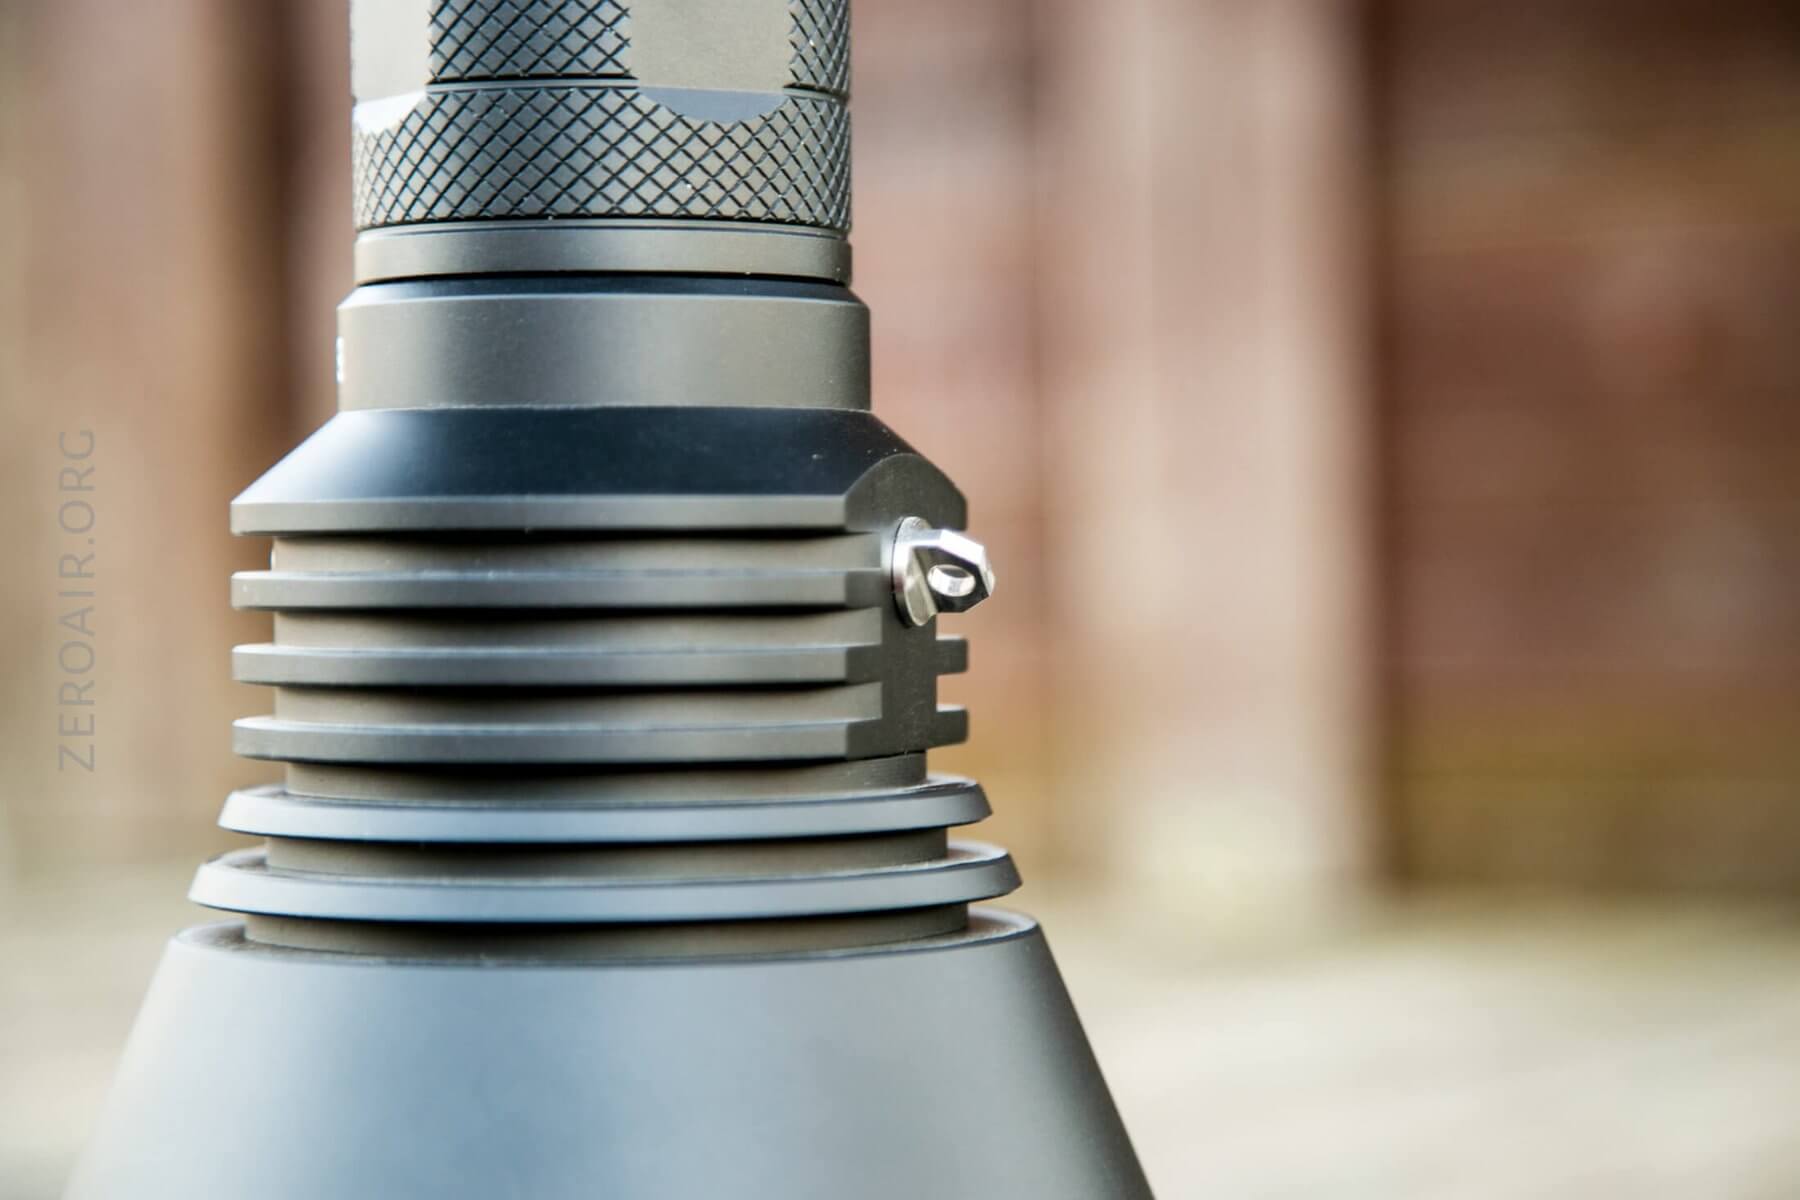
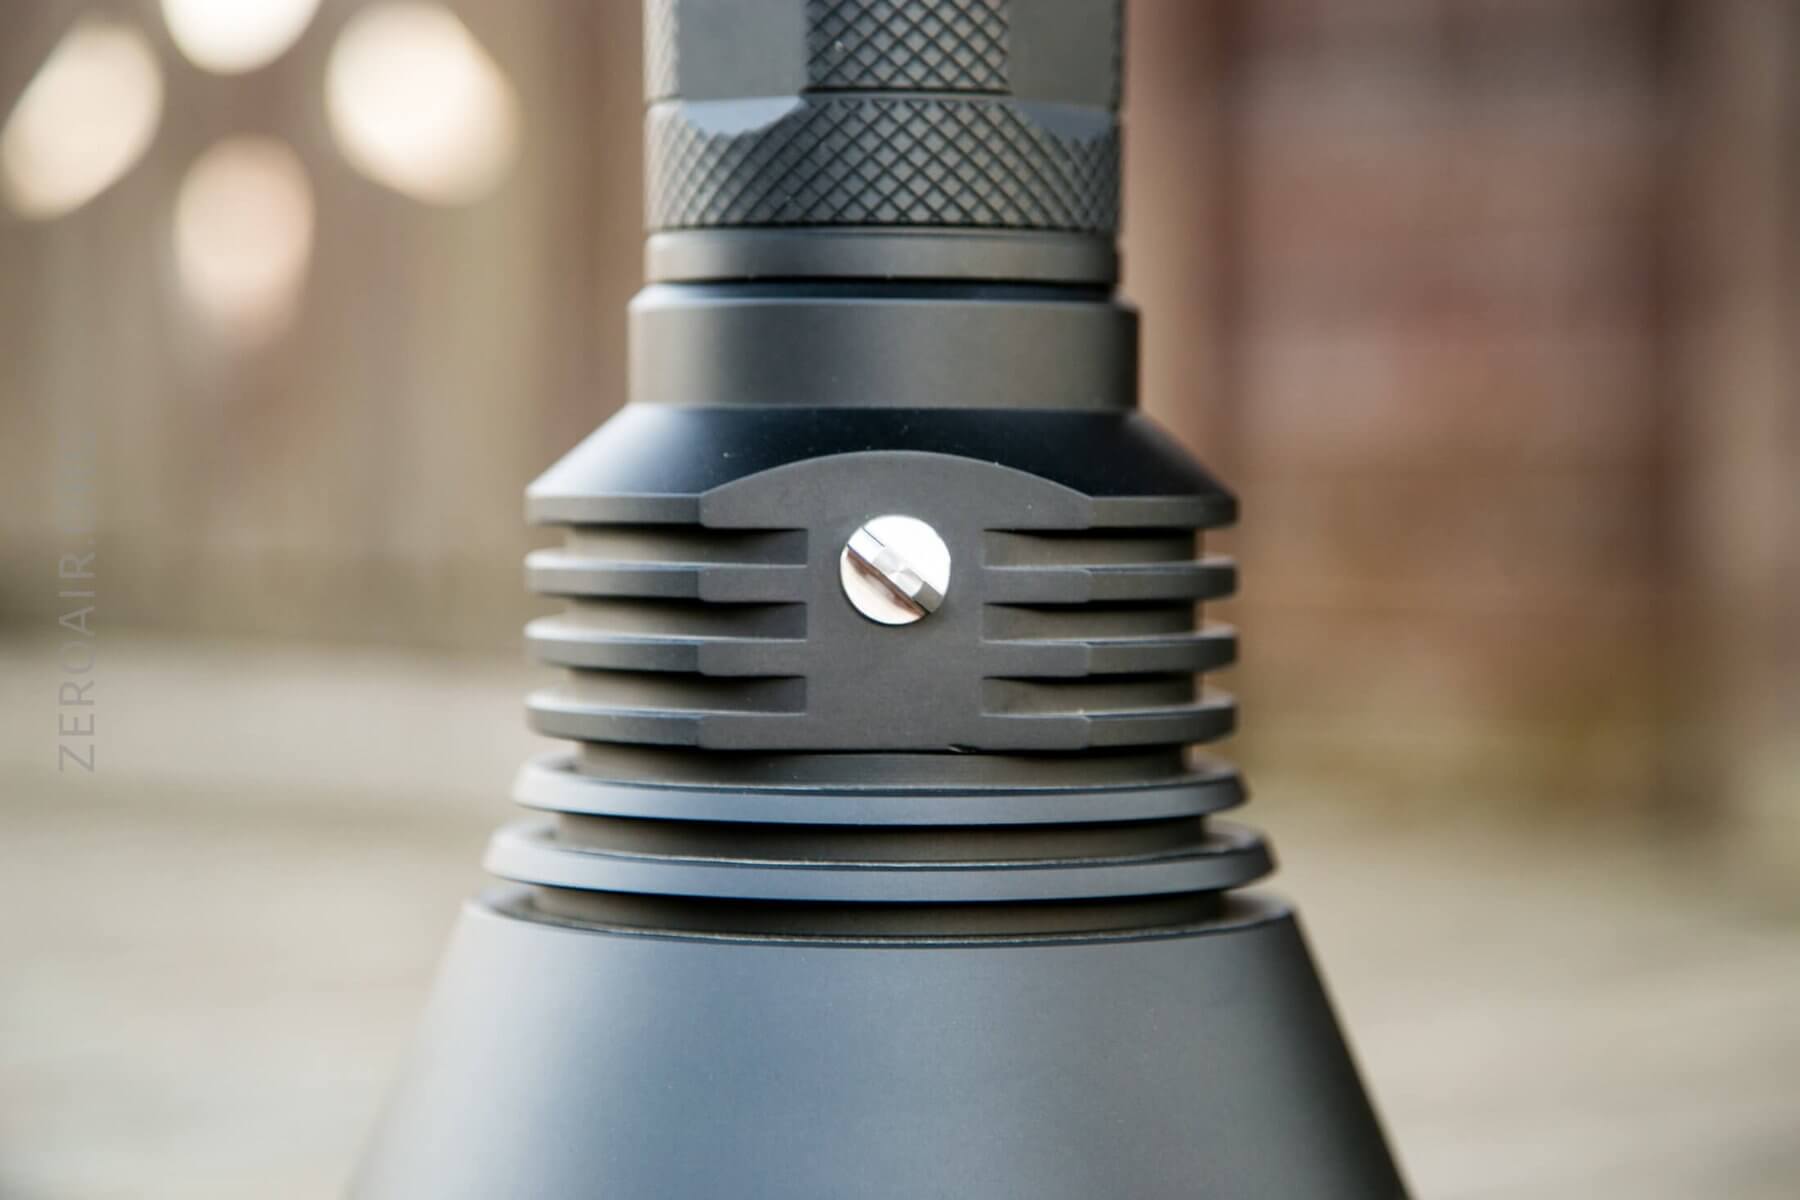
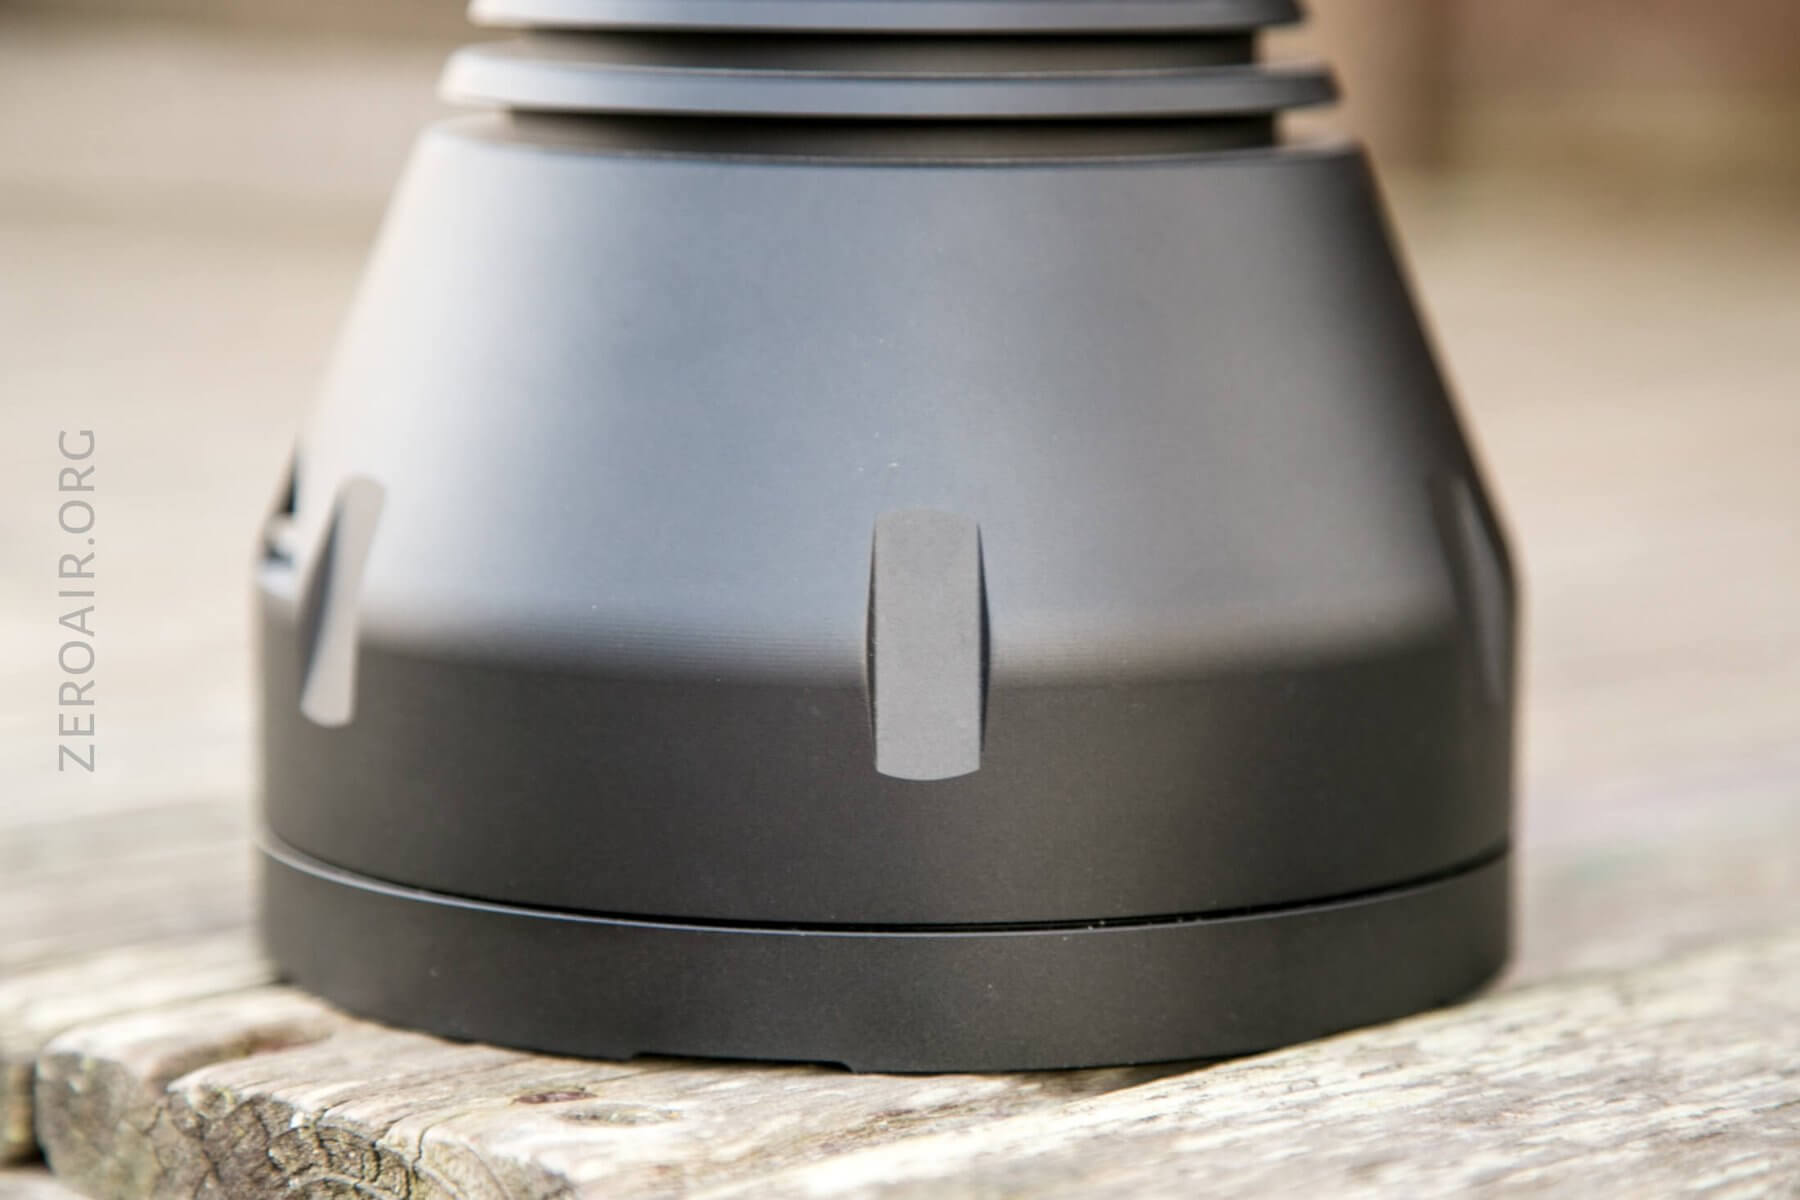
That little stainless bit unscrews to reveal a tripod mount, which is in a nicely balanced spot.
Another option for the shoulders trap is the connection point on the widest part of the light.
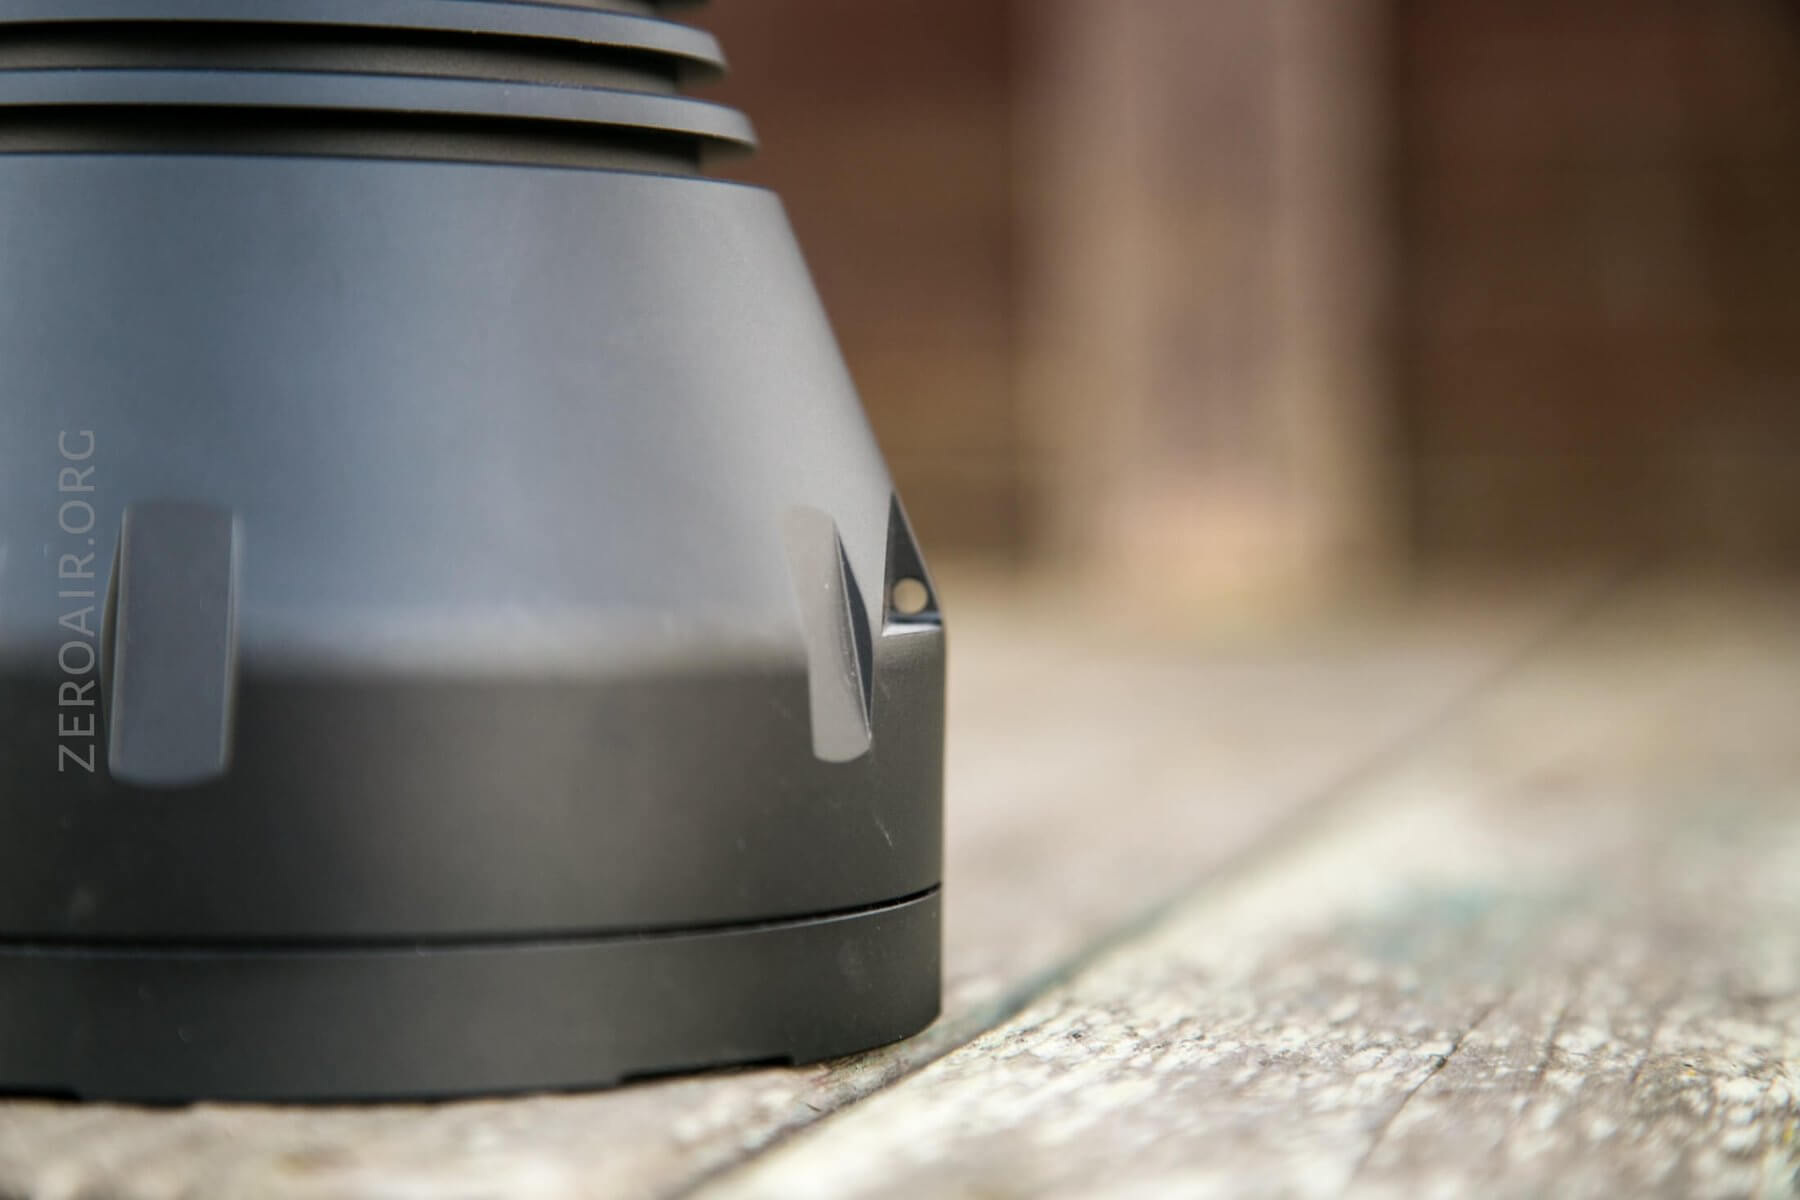
Either of those would use the hole in the tailcap as the counterpoint. All these holes are adequately large, and could probably connect many generic shoulder straps.
Power and Runtime
I tested this light only with the 4×18650 power option. There are a few reasons for that, but the most important among them is that the performance (output, throw) is unchanged between the options. The only difference is the runtime. But with a little math, it’s not hard to extrapolate what will happen with twice the number of cells.
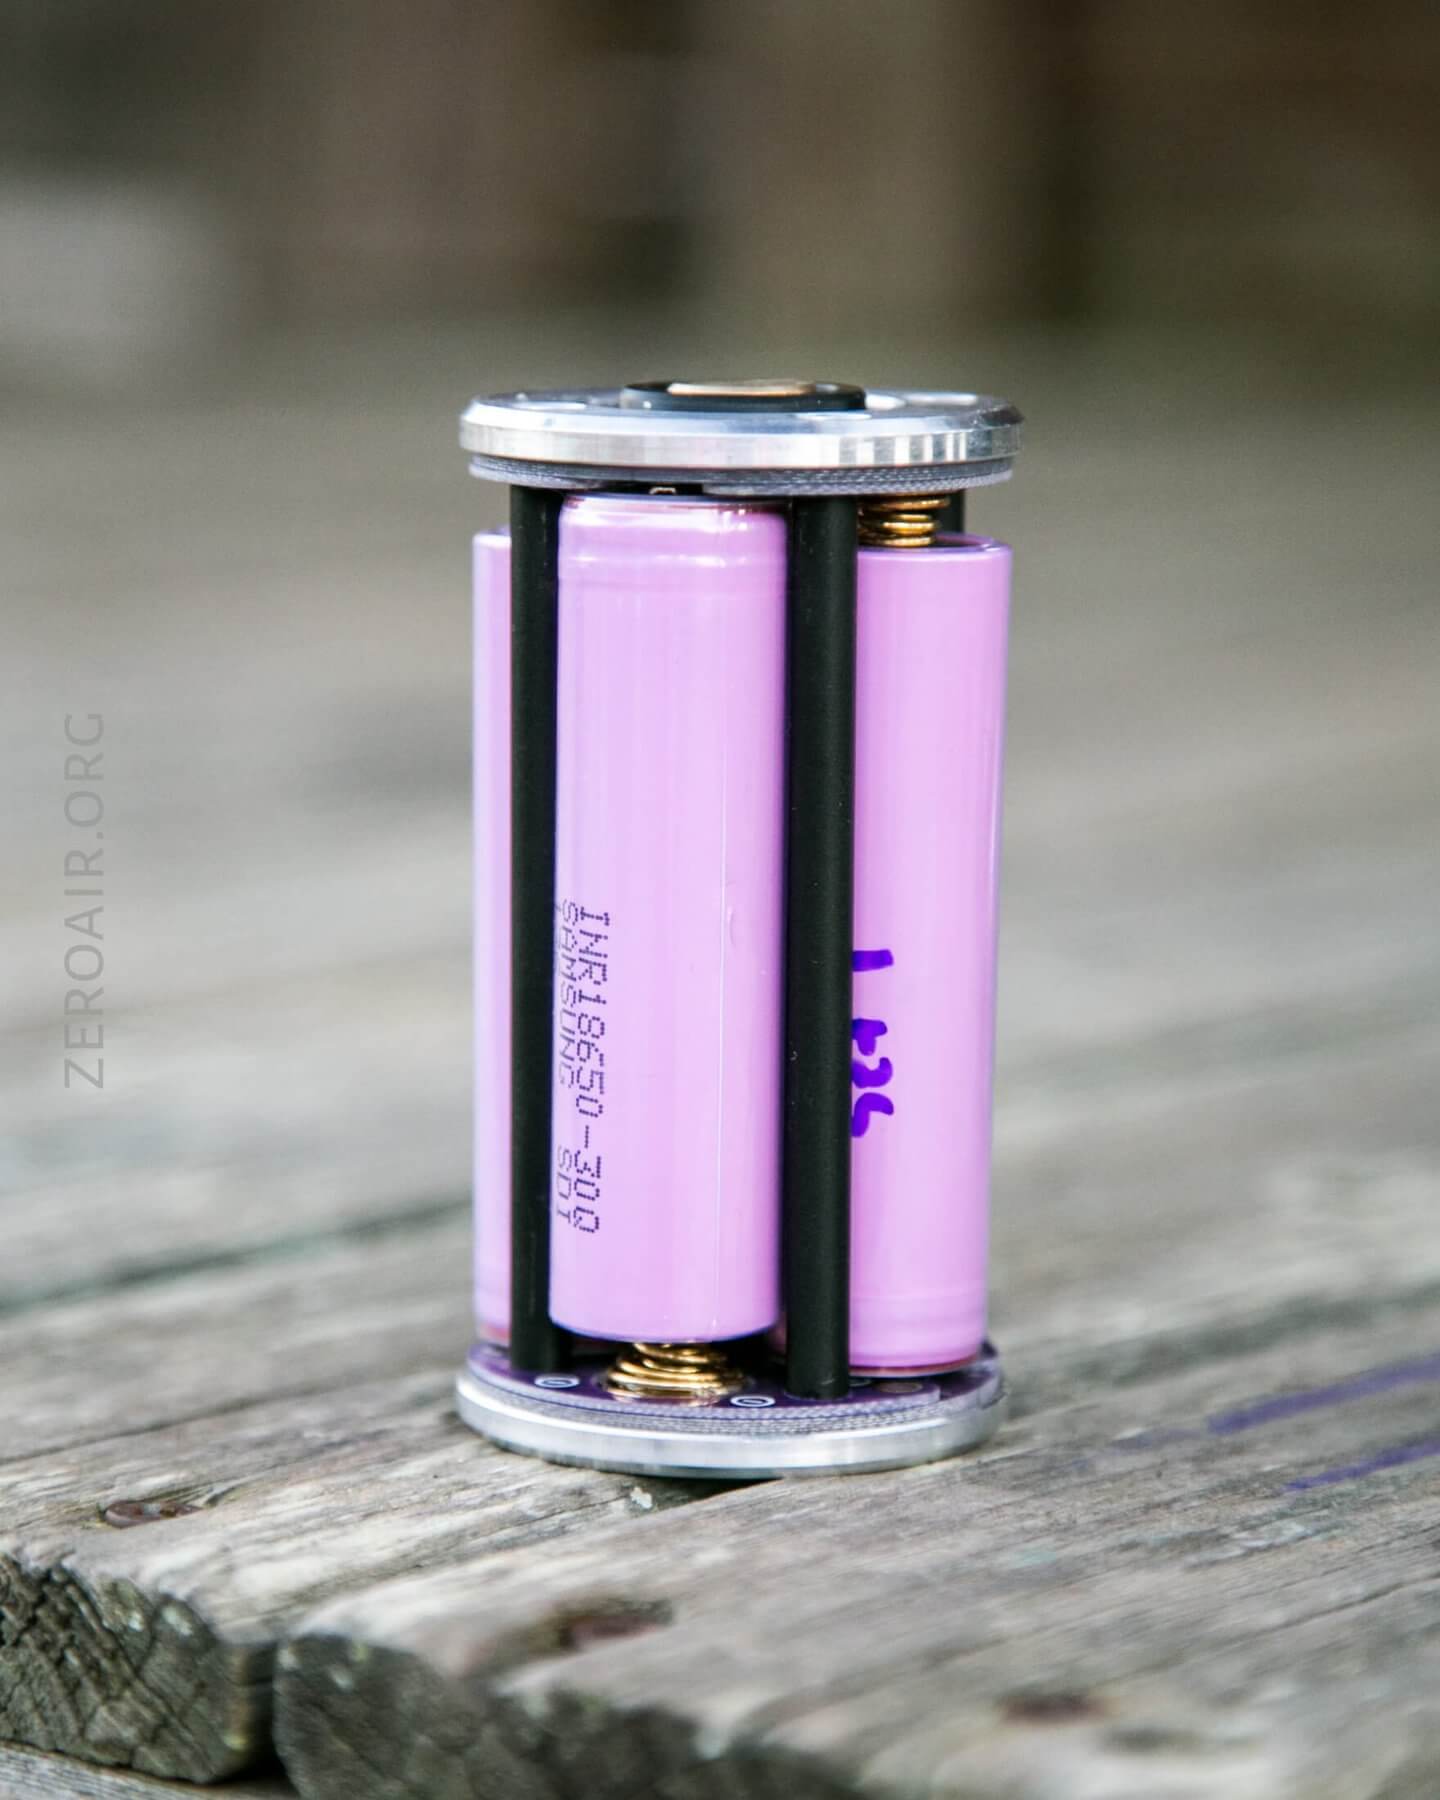
I used Samsung 30q cells (real ones, not fake ones), though it’s overkill for this light – the GT doesn’t need extremely high drain cells. (In fact, the cells that were options for the original group buy were Samsung 35Es, a high-capacity, lower-drain cell.)
The cells go in opposite orientation to the cell beside. (pretty much the usual way). The spring always connects to the negative end of the cell.
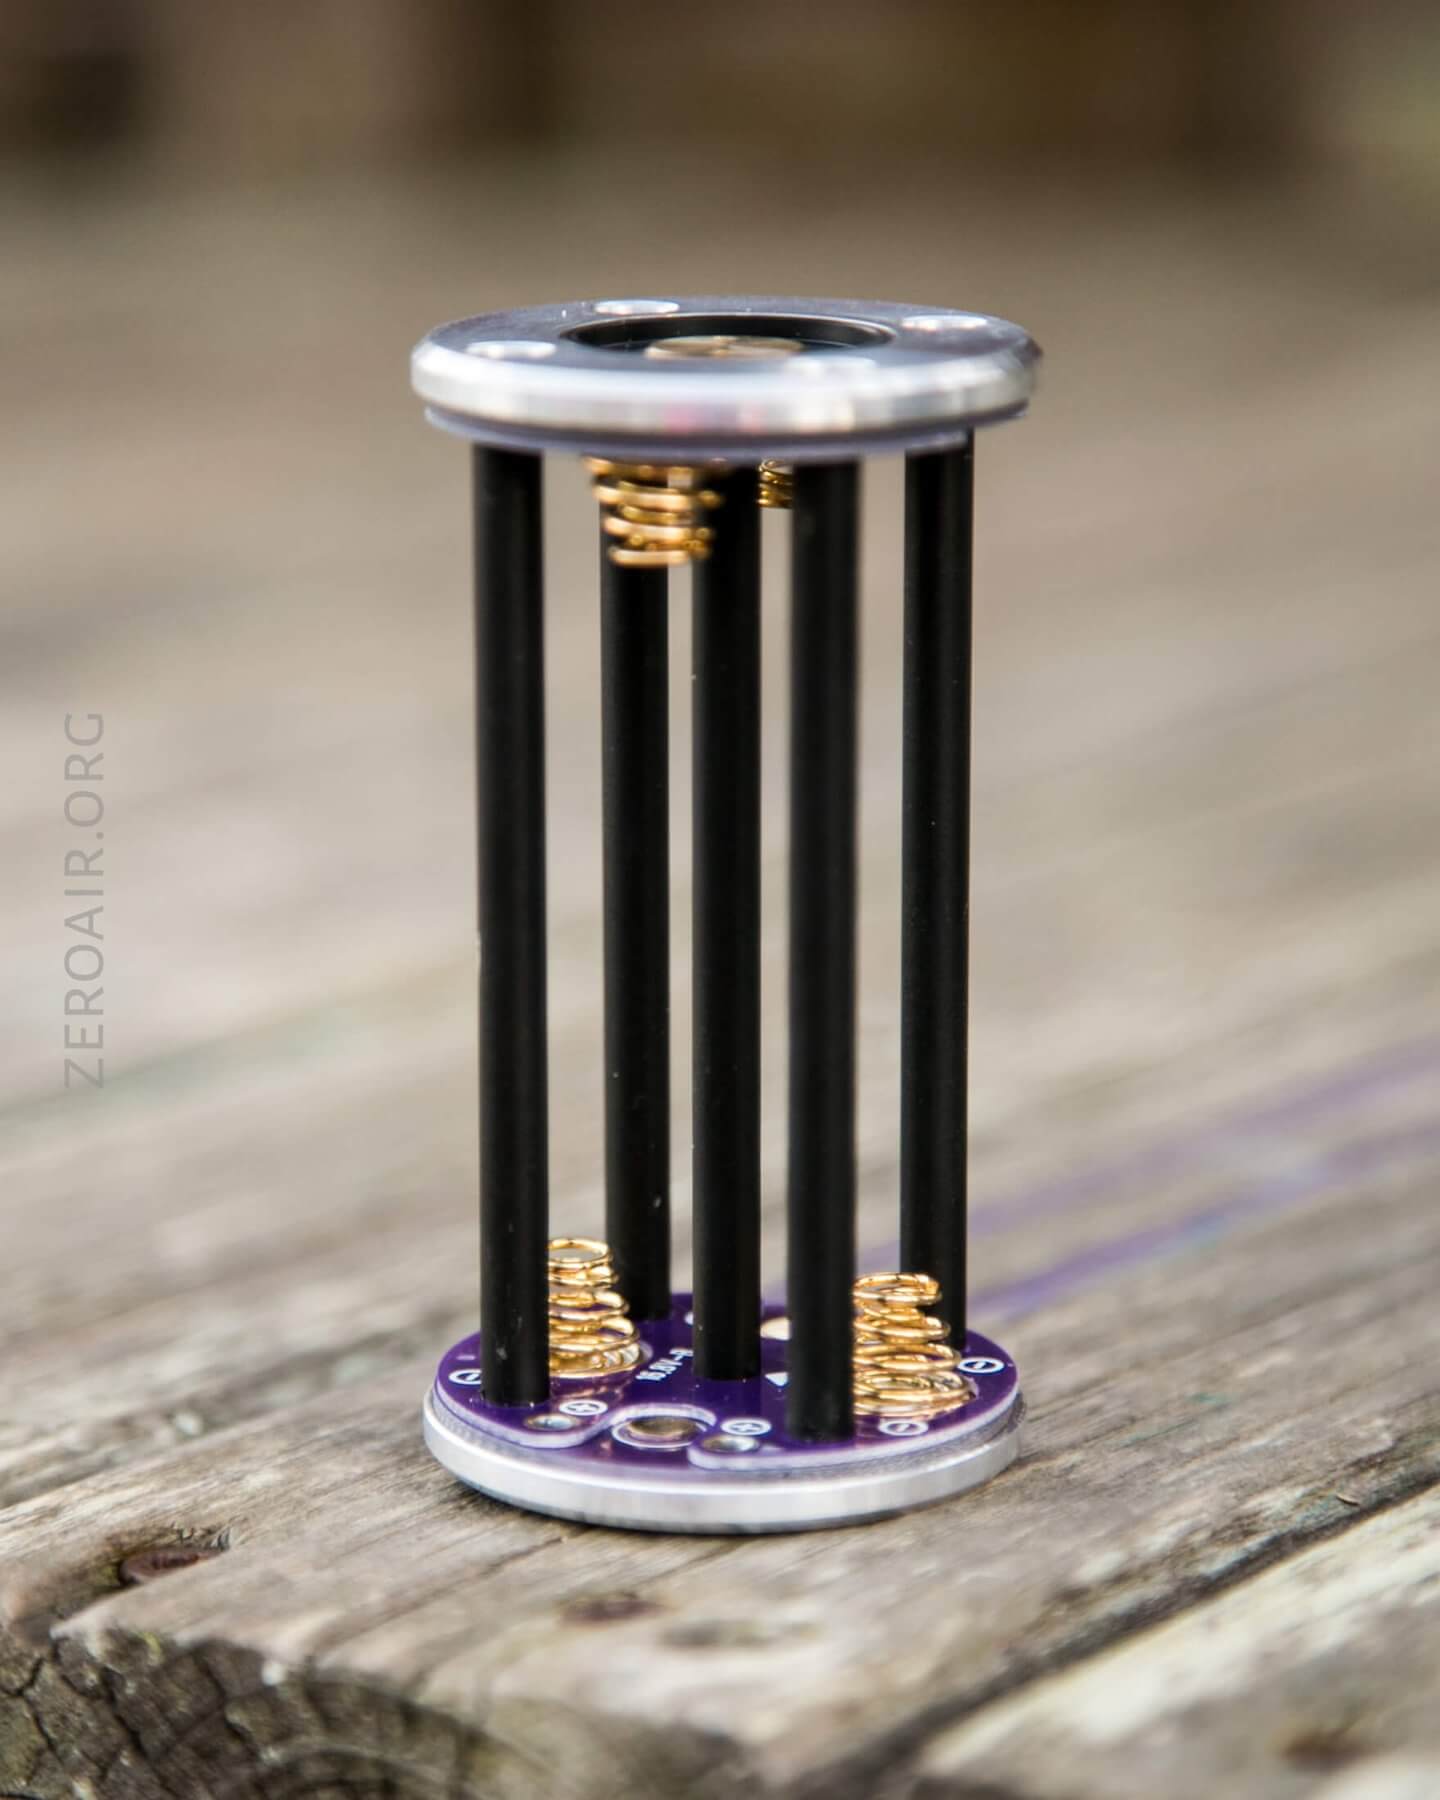
The cell holder is directional. The arrow should go toward the head of the light. The terminals are the same on both ends (confirmed) – positive is the brass center button, and negative is the aluminum outer part. It’s directional like I suspected so that the cell holders fit together well. If you don’t have them right, they won’t work.
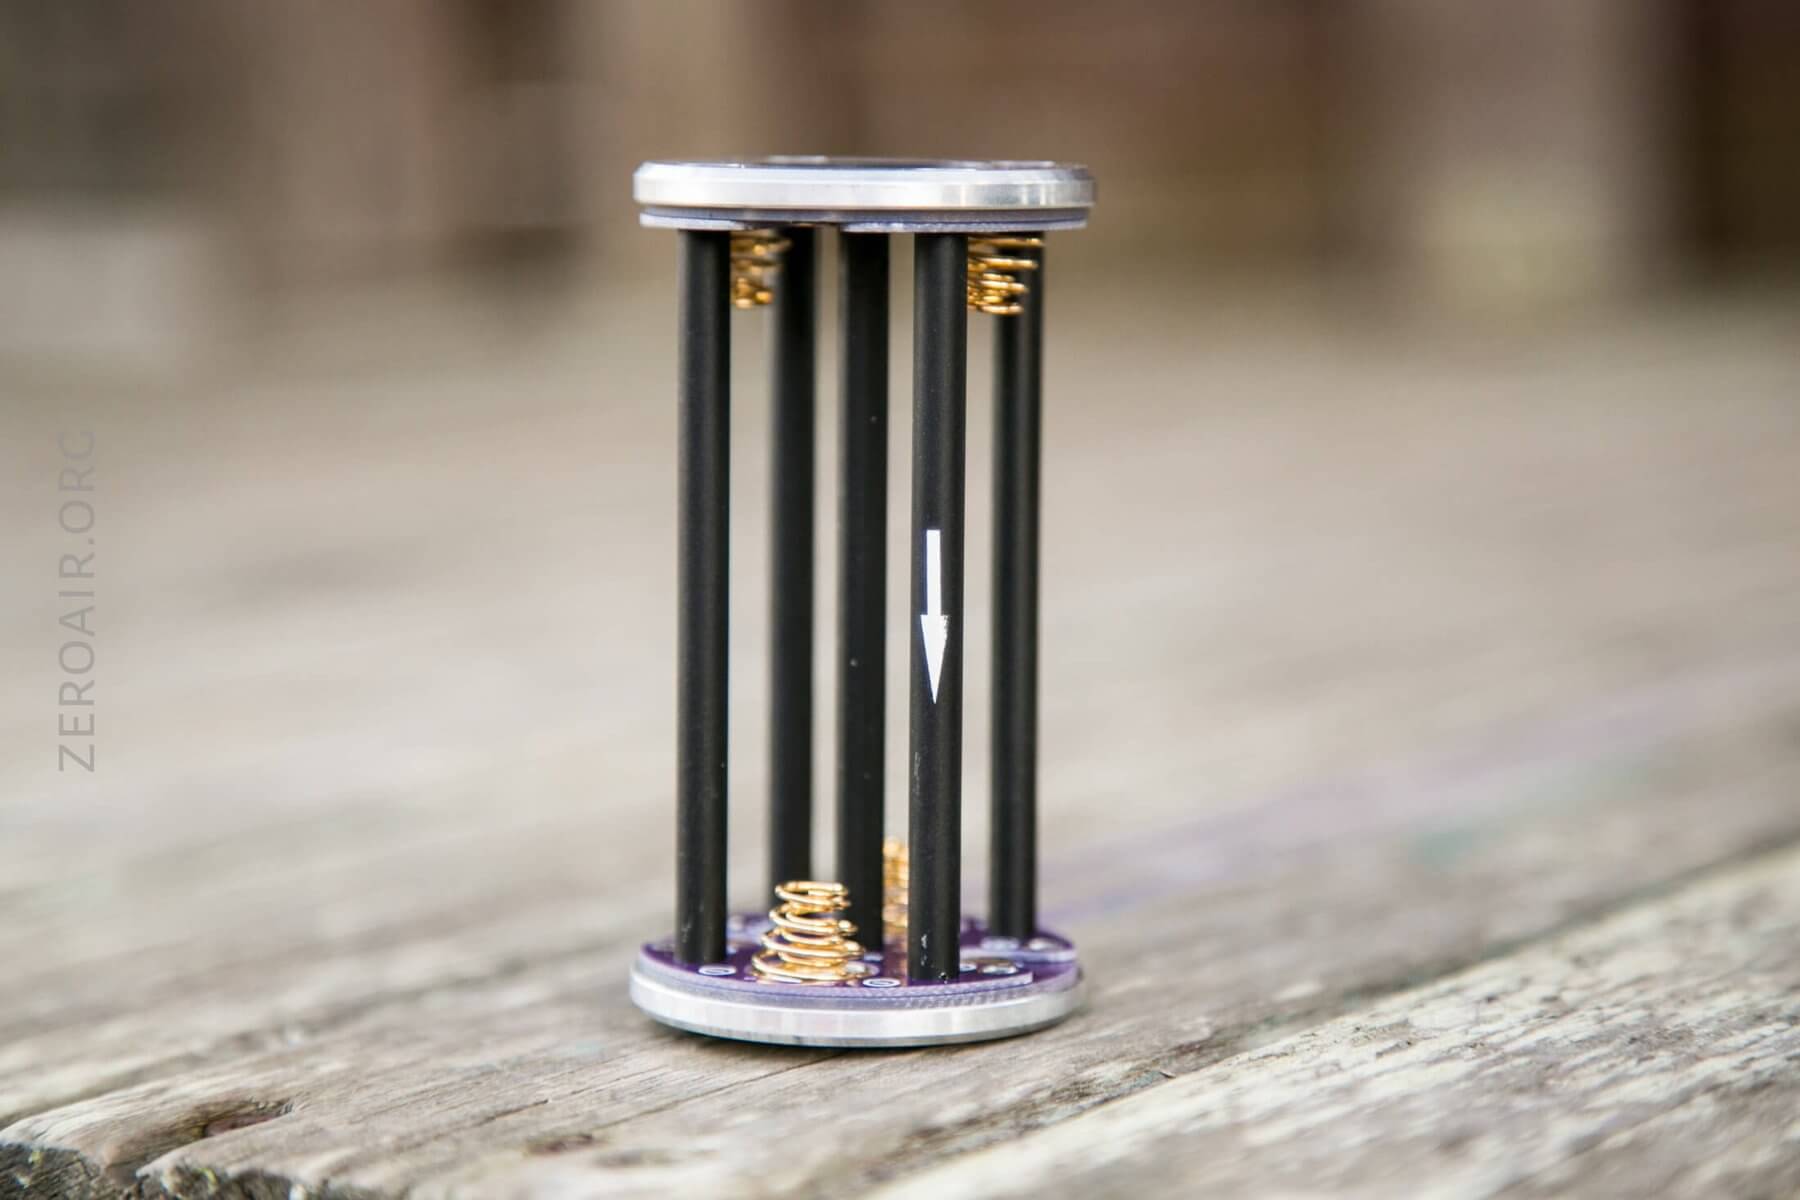
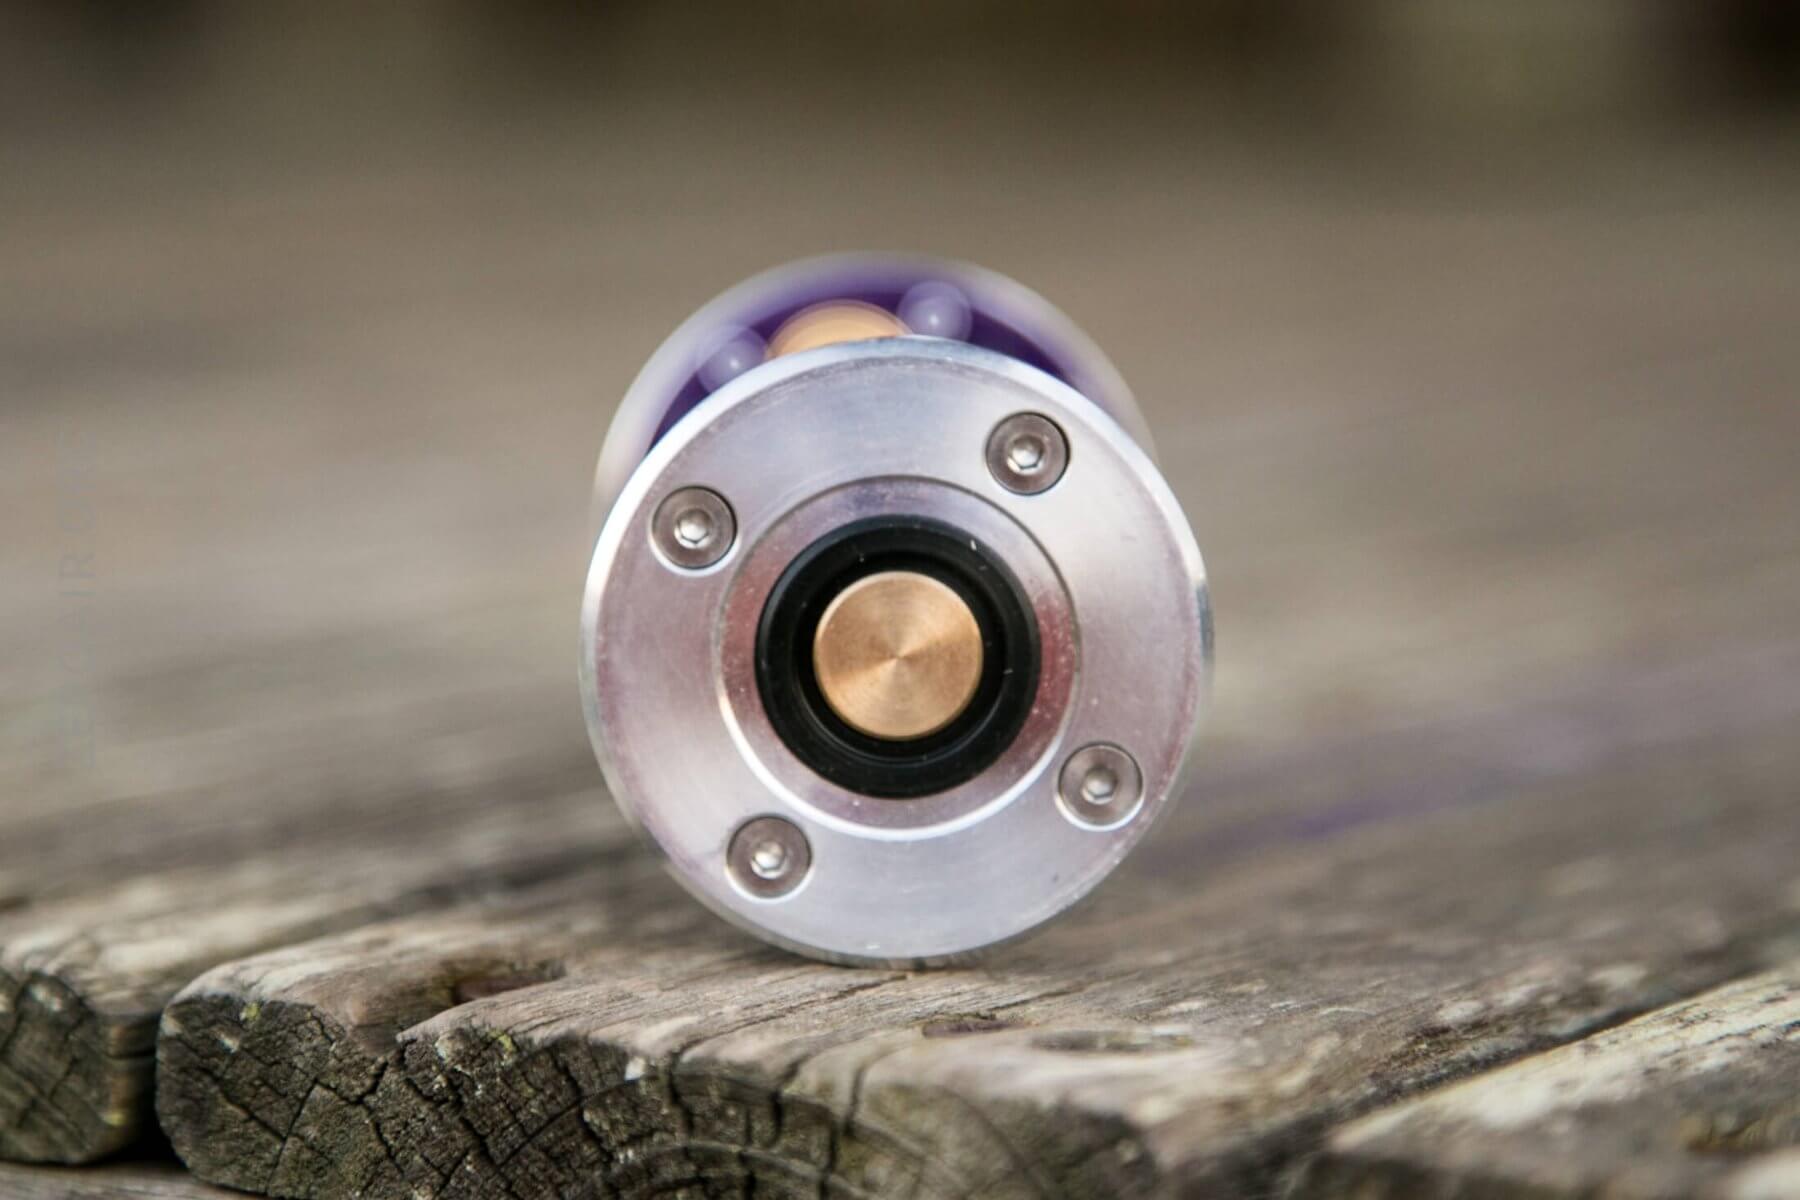
The ends are aluminum, with a center springy brass button.
I can’t say exactly why this cell holder is directional, but most likely it’s so the 2-up versions play well together. I’ll have to put my DMM on there to confirm if there’s any difference in polarity. But I’m fairly sure there isn’t.
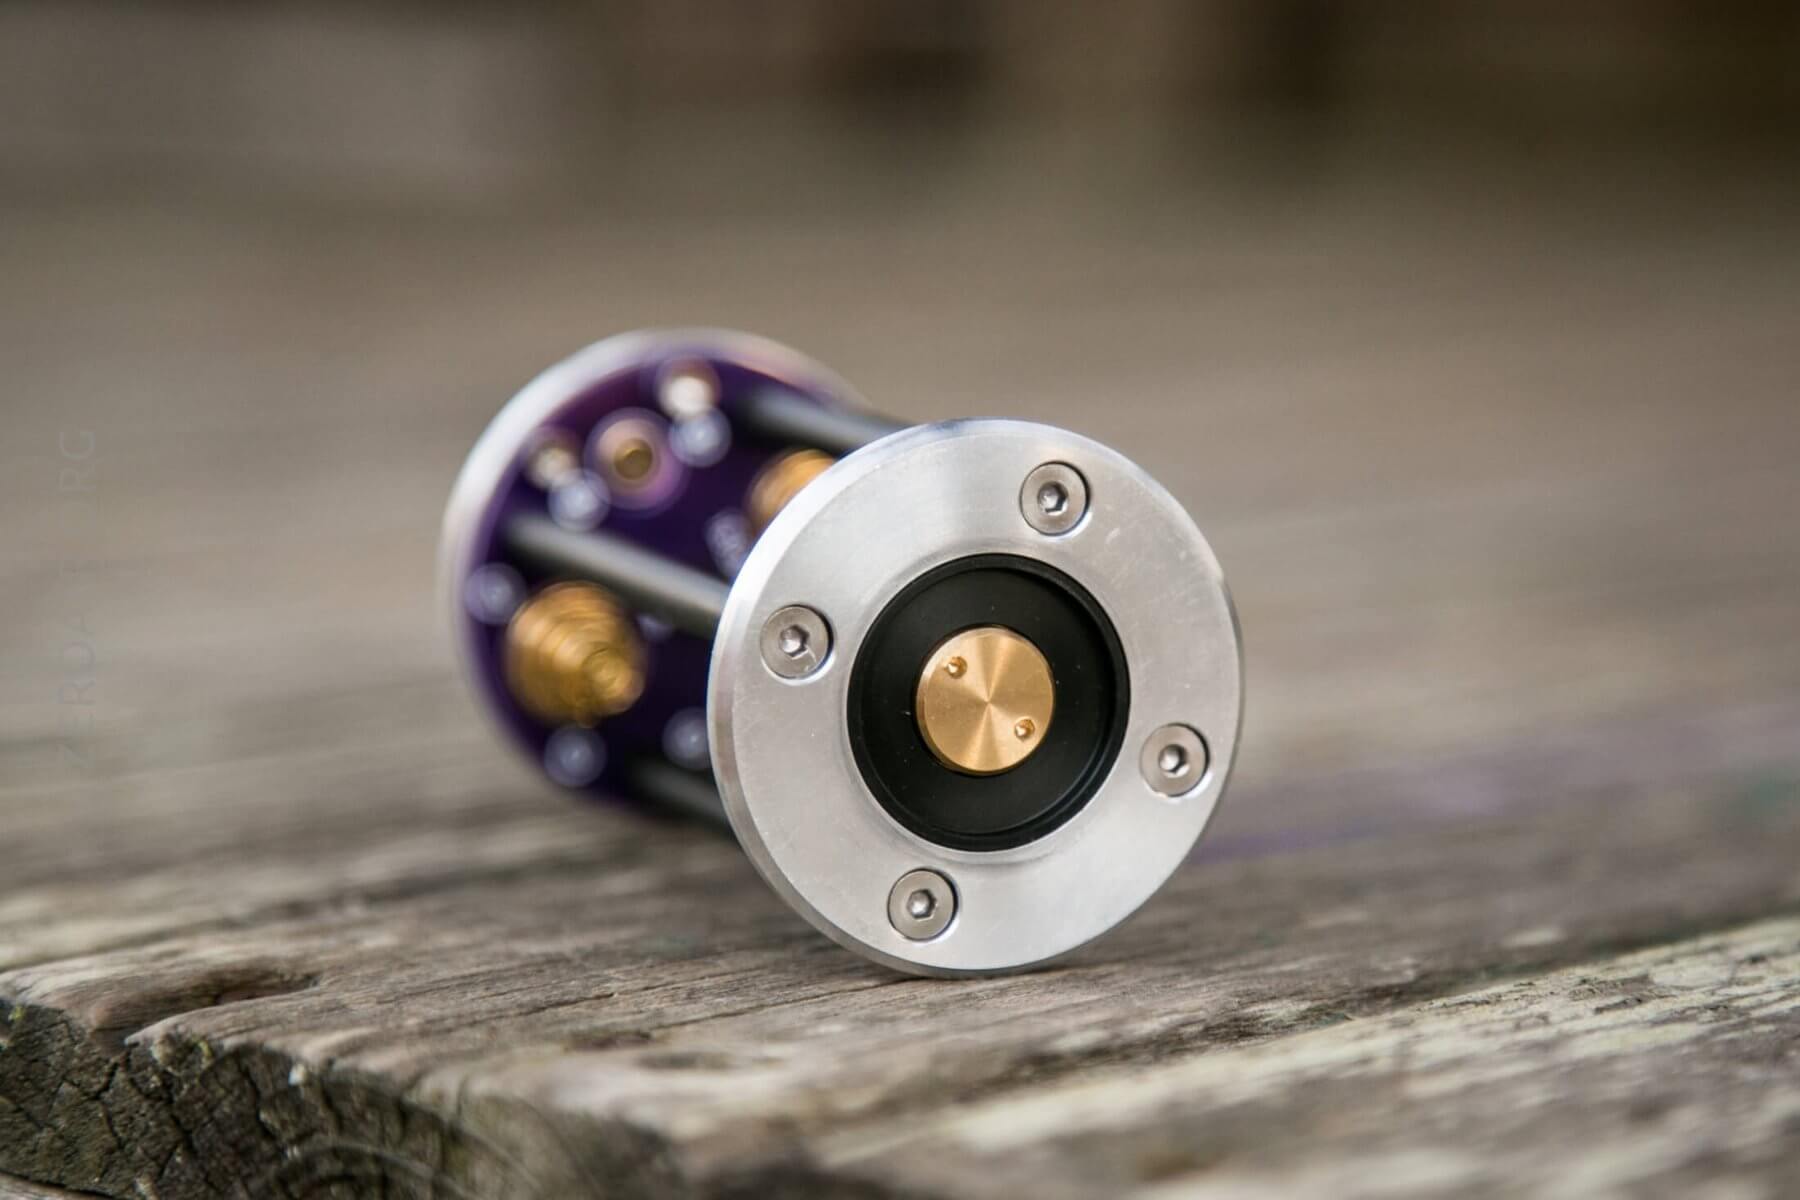
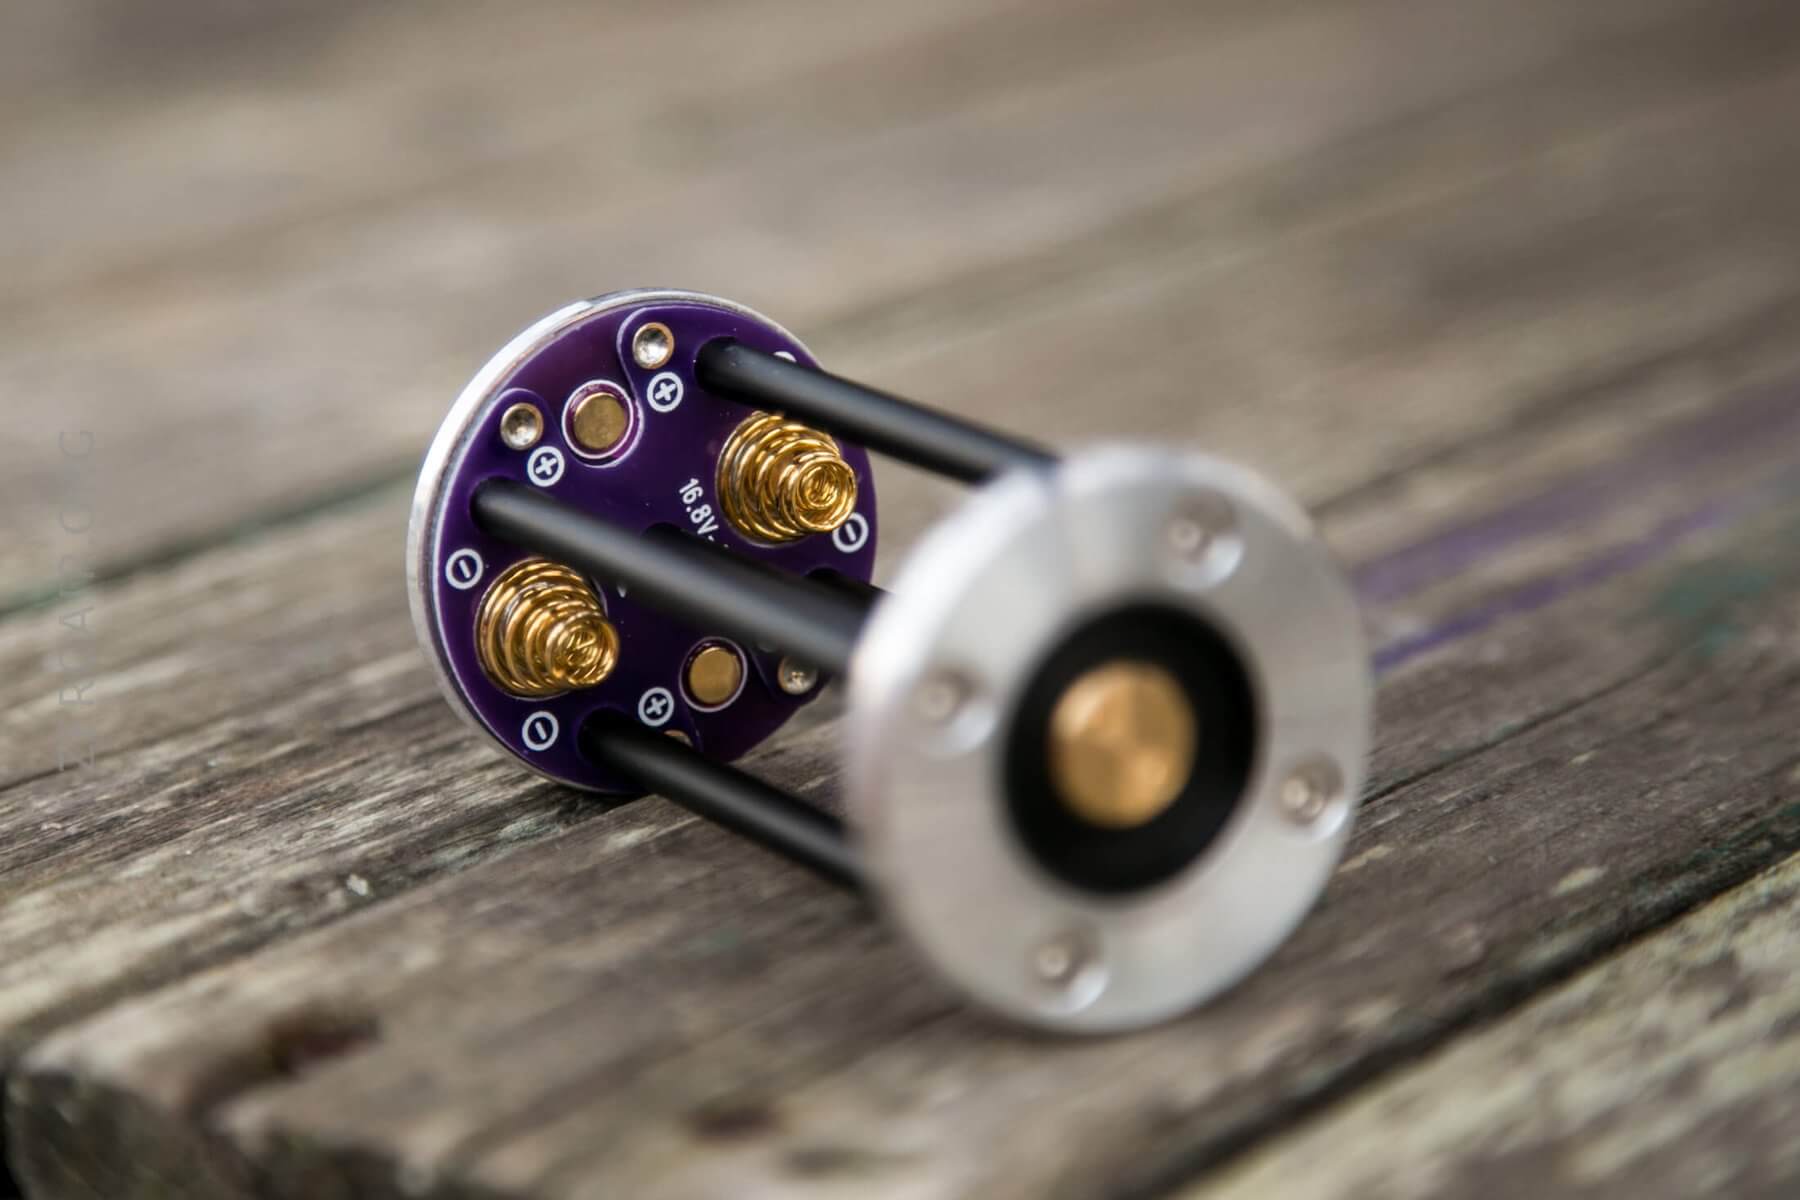
Also, note that this cell holder isn’t like many (most?)…. the voltage here is over 16V. That means the cells aren’t in any parallel configuration – it’s a 4S configuration. That makes sense since the emitter is a “12V” emitter – a typical forward voltage of 11.3V. The power being at 16V means the driver only has to step the voltage down.
Here’s a runtime on Turbo. Since the user interface is ramping, I didn’t test any other mode.
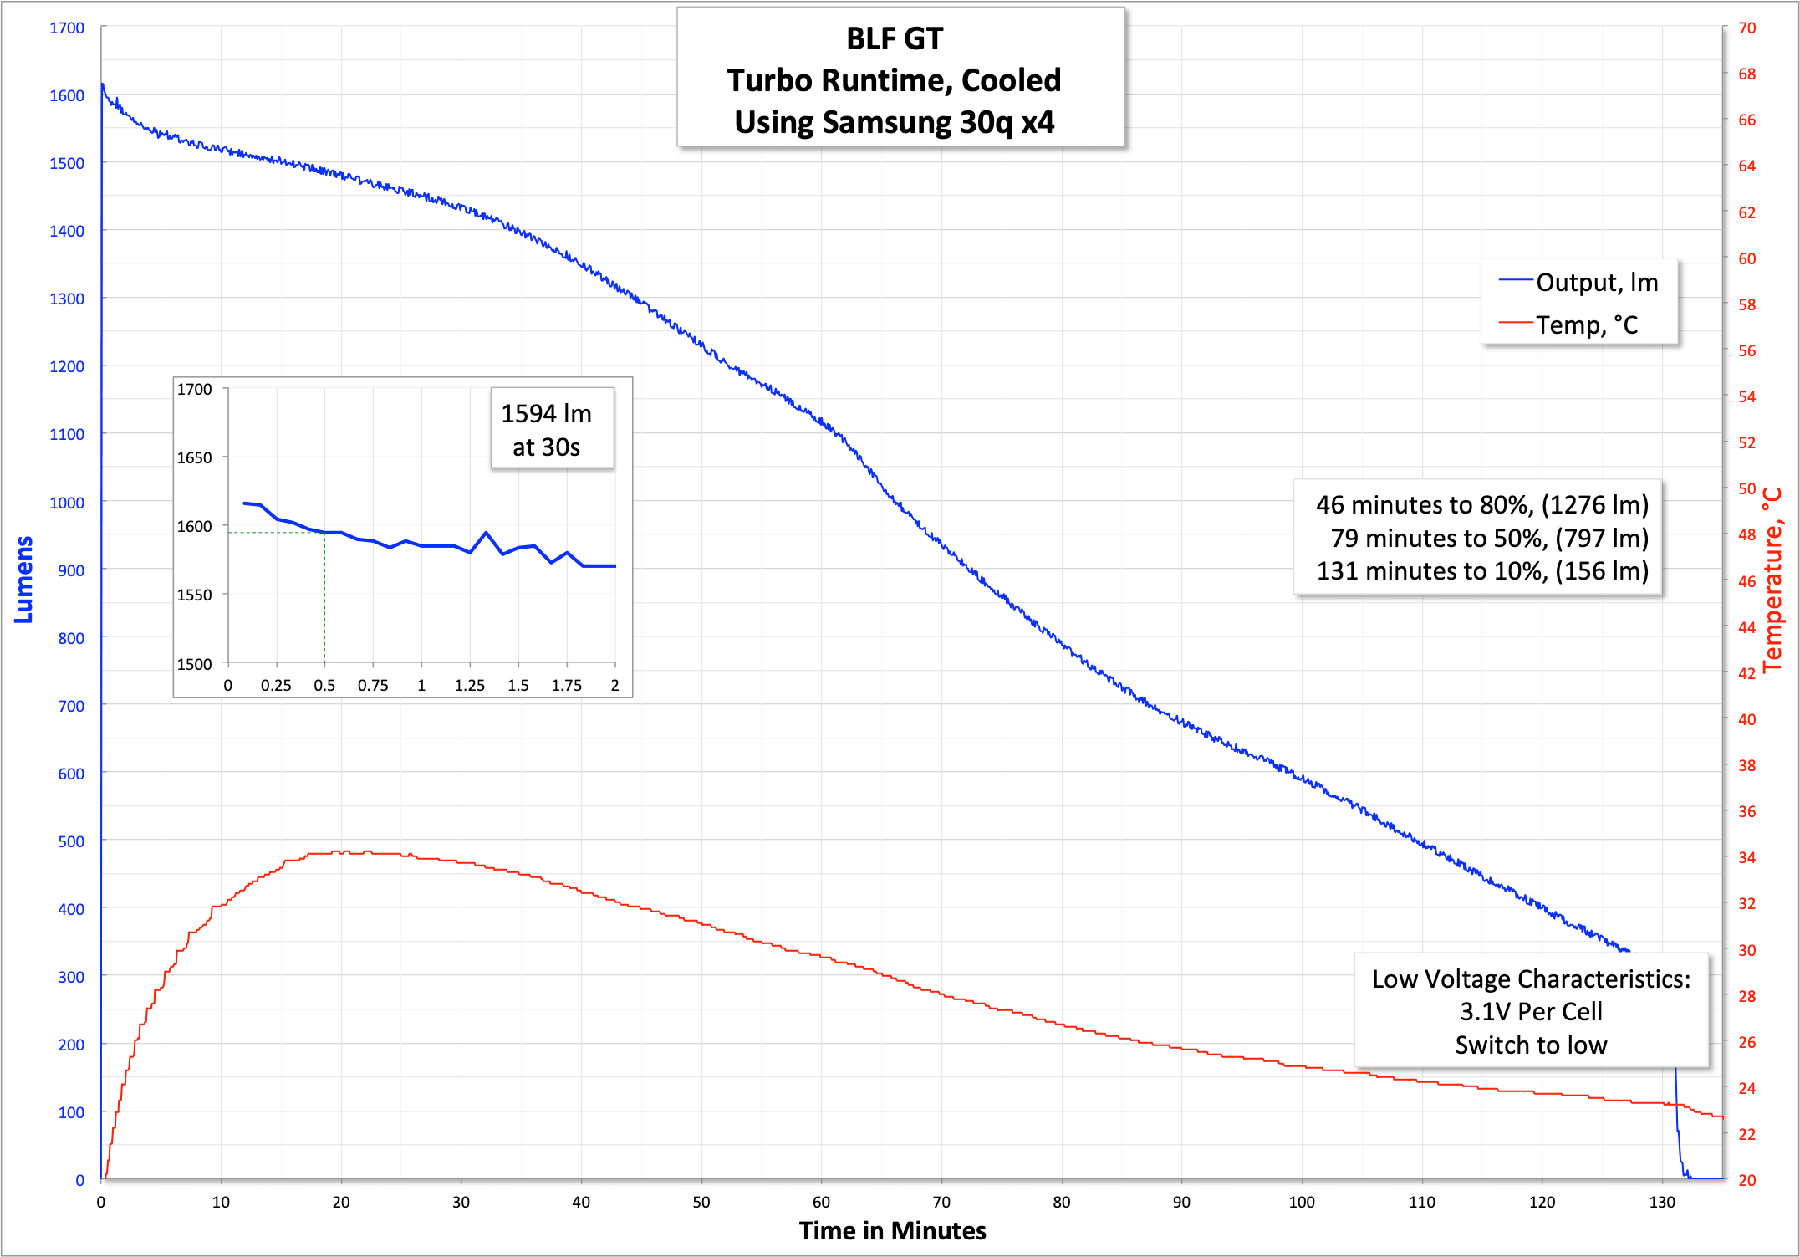
My bench power setup doesn’t pump out 16V at over 1A, so I can’t test how many amps the light draws on turbo. It’s over 1A, though, so 16W at least.
Pulse Width Modulation
Here you can see a “baseline” – a chart with almost no light hitting the sensor.
Then there’s the Ultrafire WF-602C flashlight, which has some of the worst PWM I’ve seen. It’s so bad that I used a post about it to explain PWM! Here are multiple timescales (10ms, 5ms, 2ms, 1ms, 0.5ms, 0.2ms) to make comparing this “worst” PWM light to the test light easier. That post also explains why I didn’t test the WF-602C at the usual 50us scale.
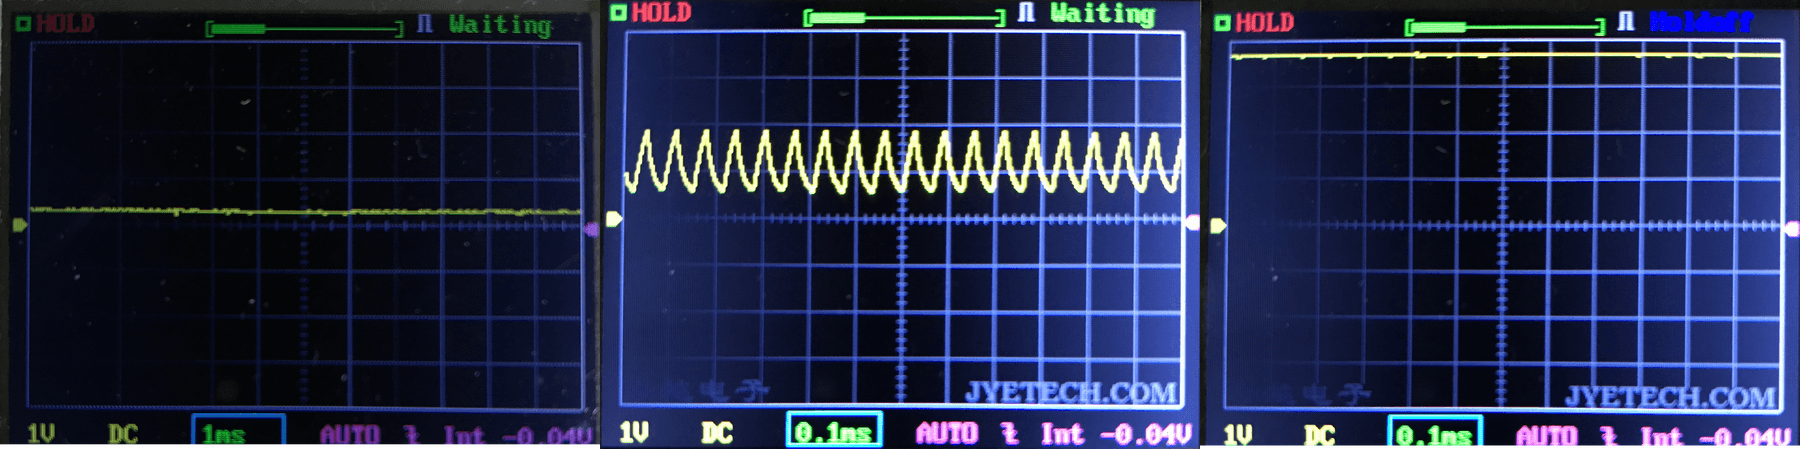
Nothing to report as far as PWM goes. Yes, there’s a bit of sawtooth there, but that’s nothing to be concerned about at all.
User Interface and Operation
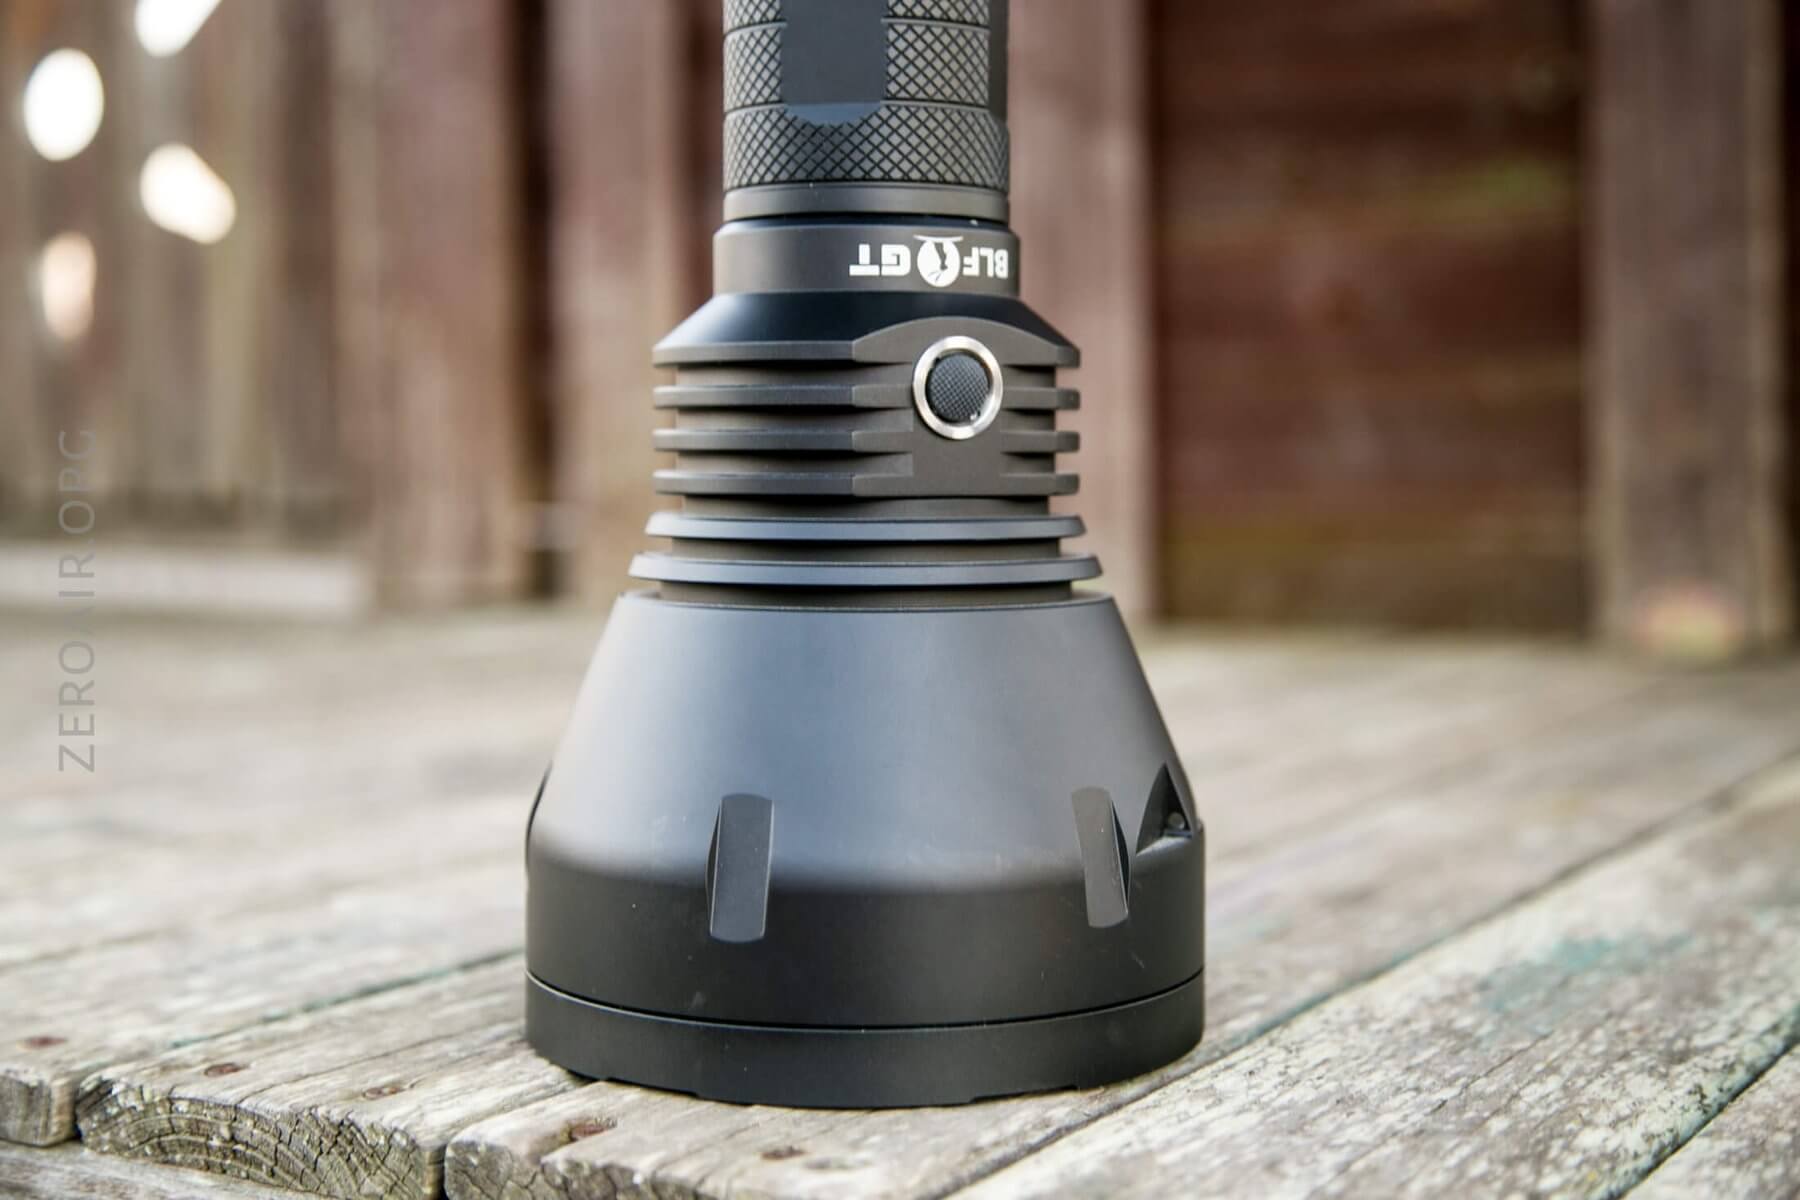
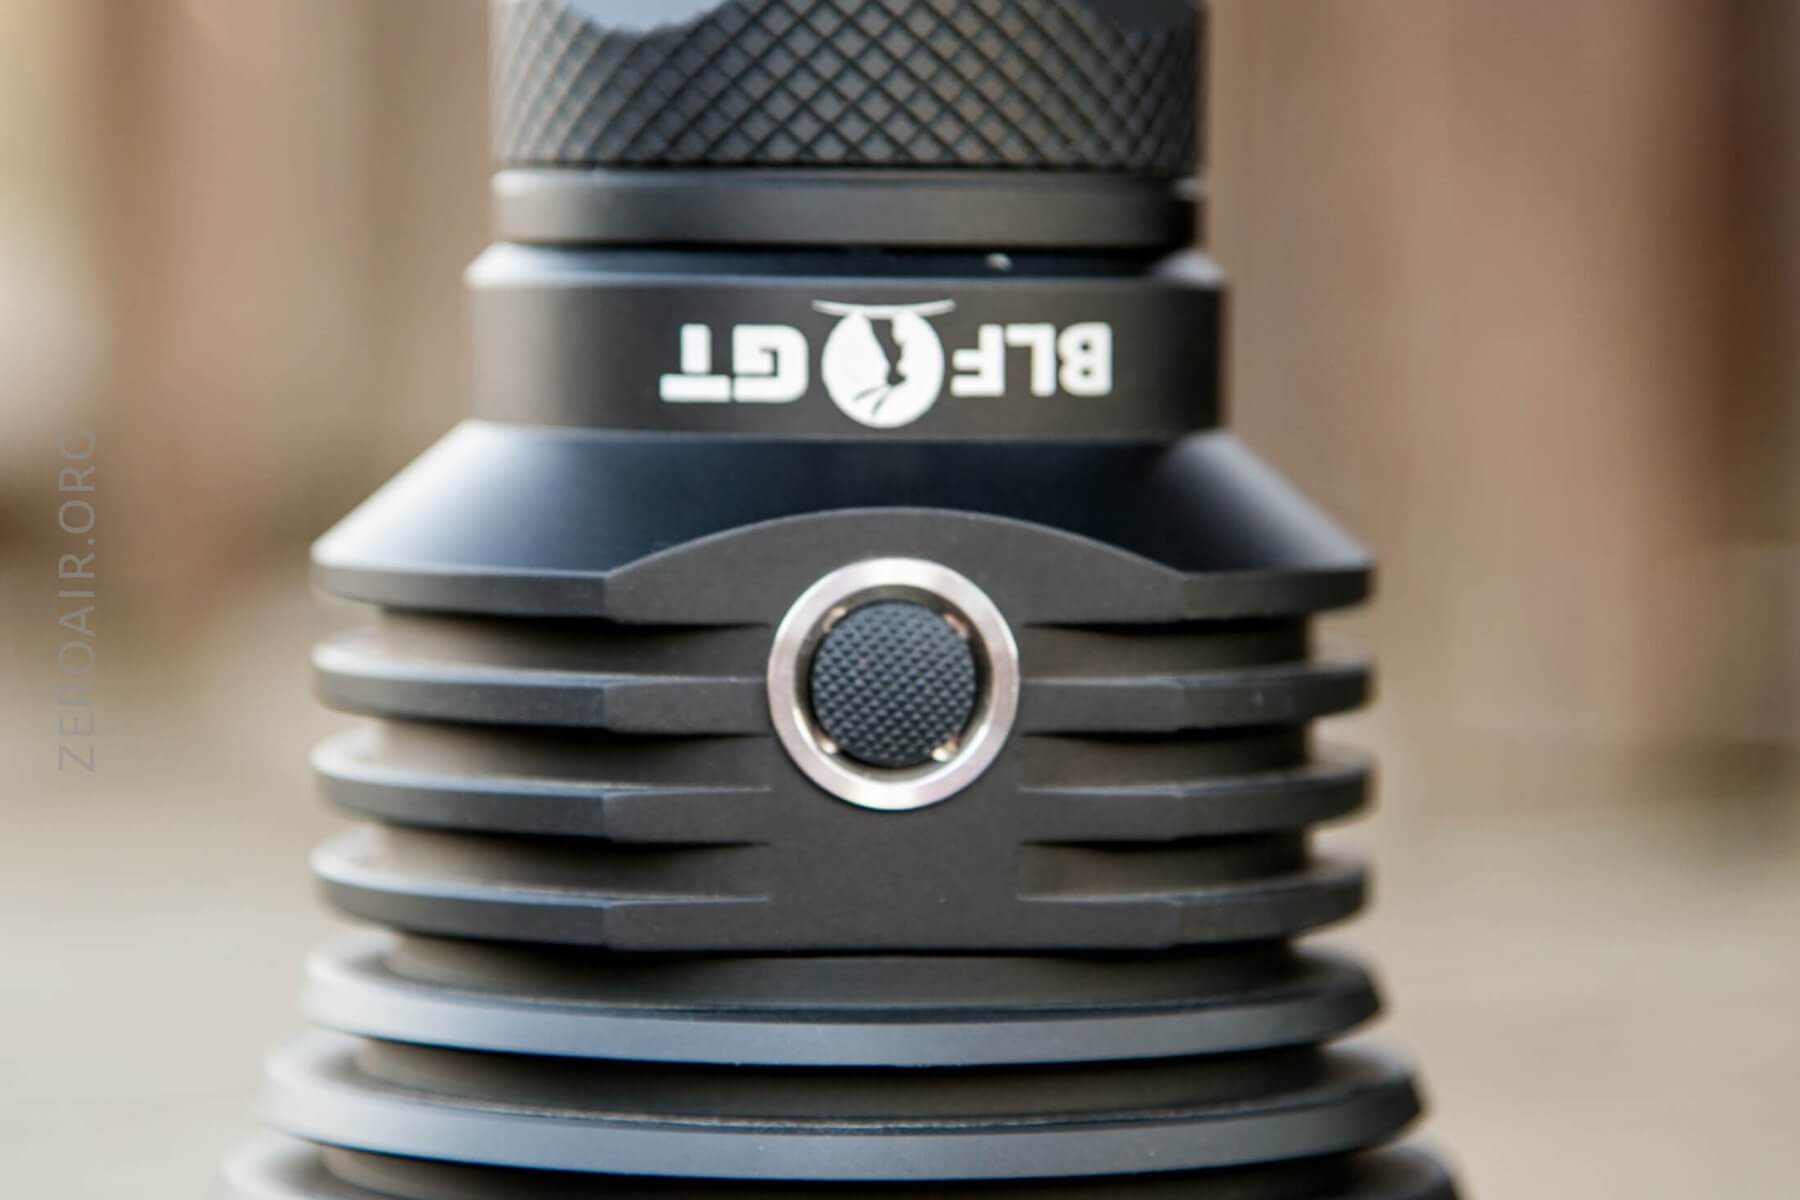
There’s a single switch on the GT. It’s a side, e-switch, and has an indicating emitter under it. The indicator is green. The button has some crosshatching, which allows a nice grip.
The user interface itself is a version of Narsil, by Tom E. The version my light shows is Narsil 1.3. (Check this by clicking 3x, then 2x, then 2x, and the version will be blinked. 1 blink, pause 3 blinks.)
There are two groups. One group has ramping, one group has discrete modes. It’s possible to switch between ramping and discrete easily. The default is ramping, and to switch to modes, first turn the light on, then hold the switch for 3.2s. It’ll blink twice, pause, and blink once. At that point, click once. This disables ramping. Once this is done, put the light down so you don’t change other settings (which is very easy to do.) There are other things you could do to expedite termination of programming, but just skip it, and wait.
Narsil is wonderful firmware. It’s extremely versatile, and possible to change many (most? all?) of the settings about the light. I’ll try to put together a video showing programming because that’s the easiest way to grasp how to do it.
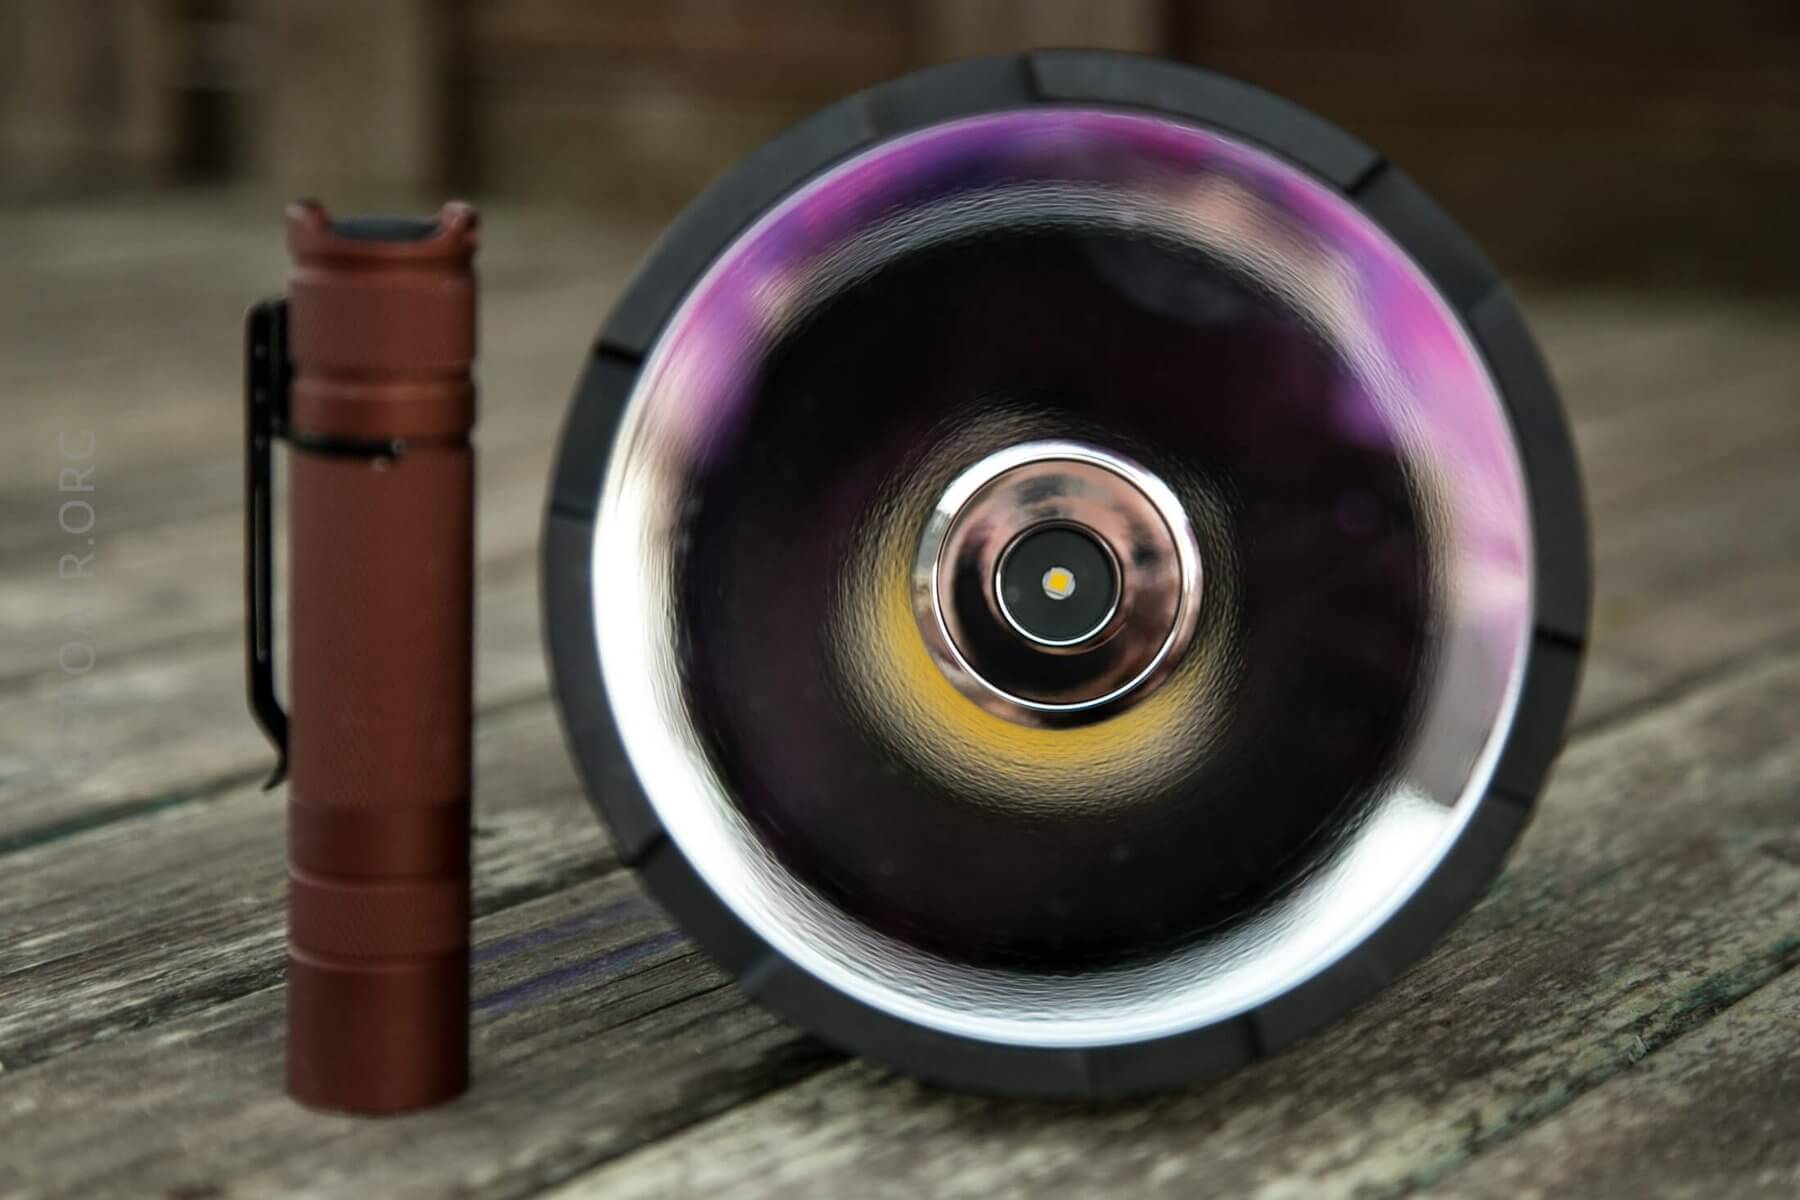
LED and Beam
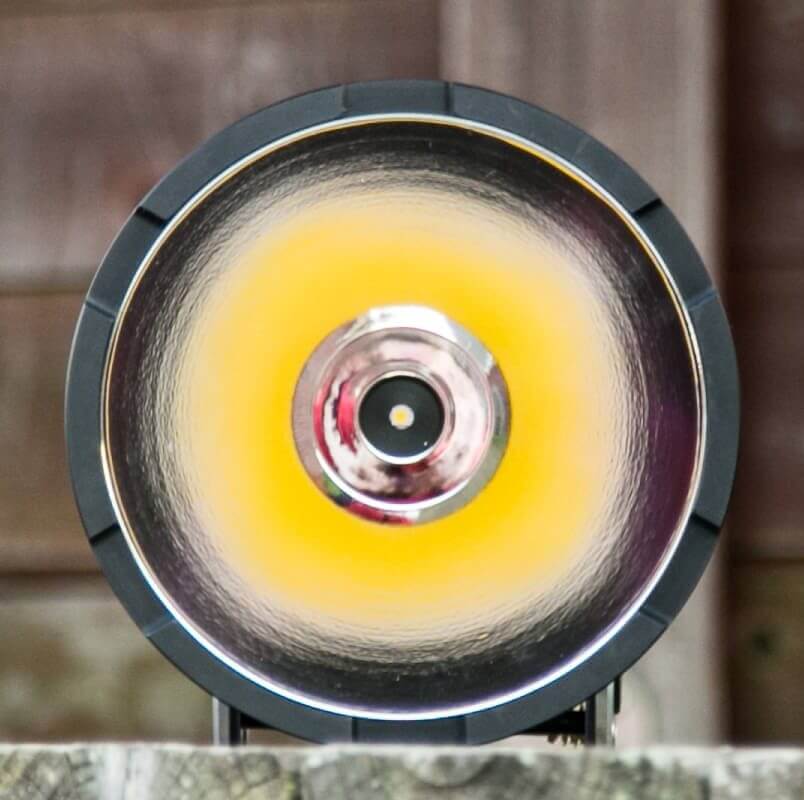
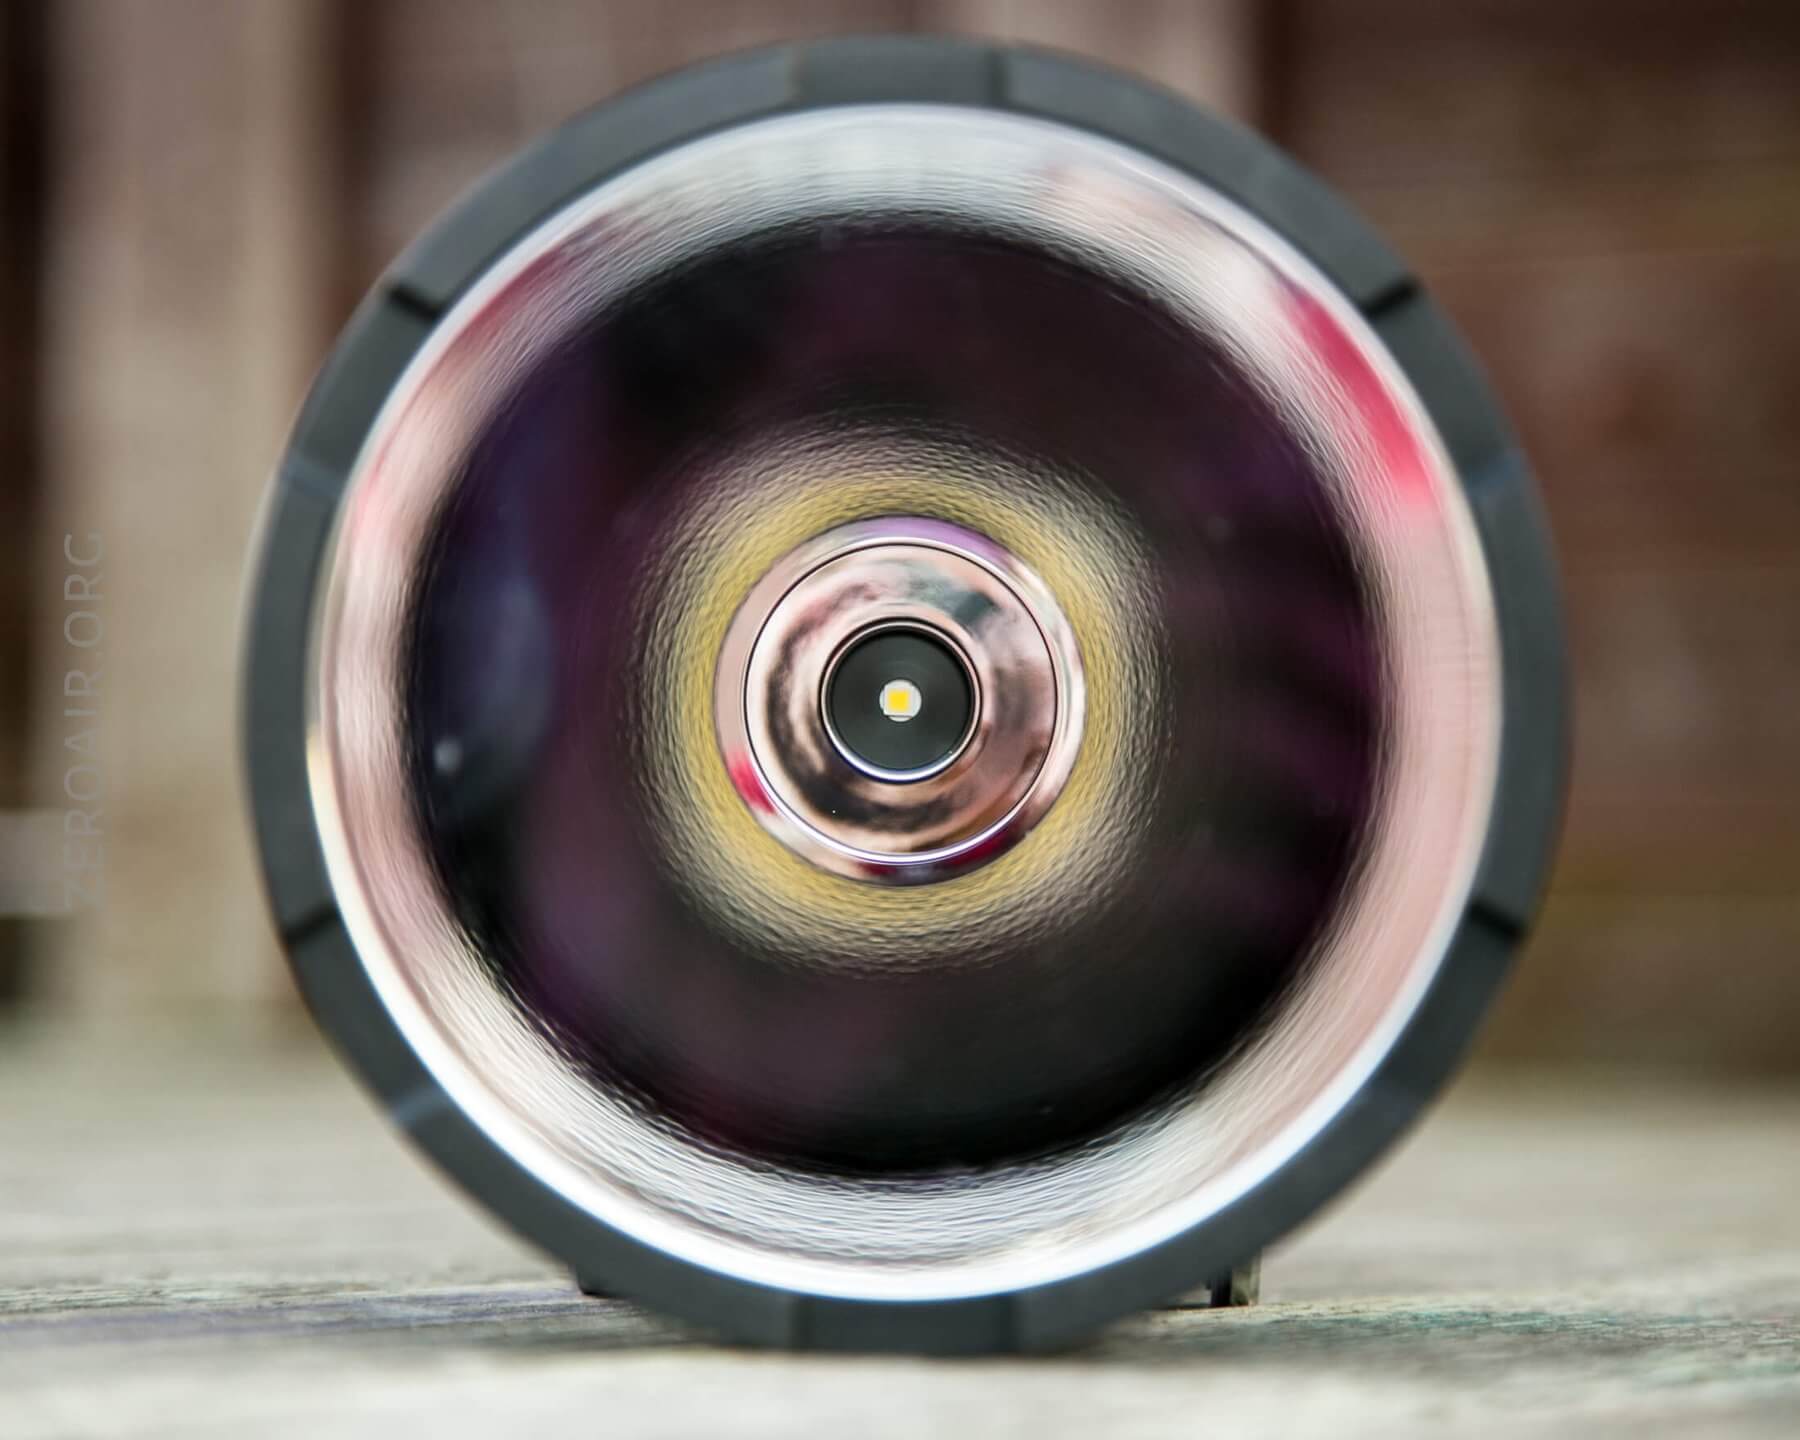
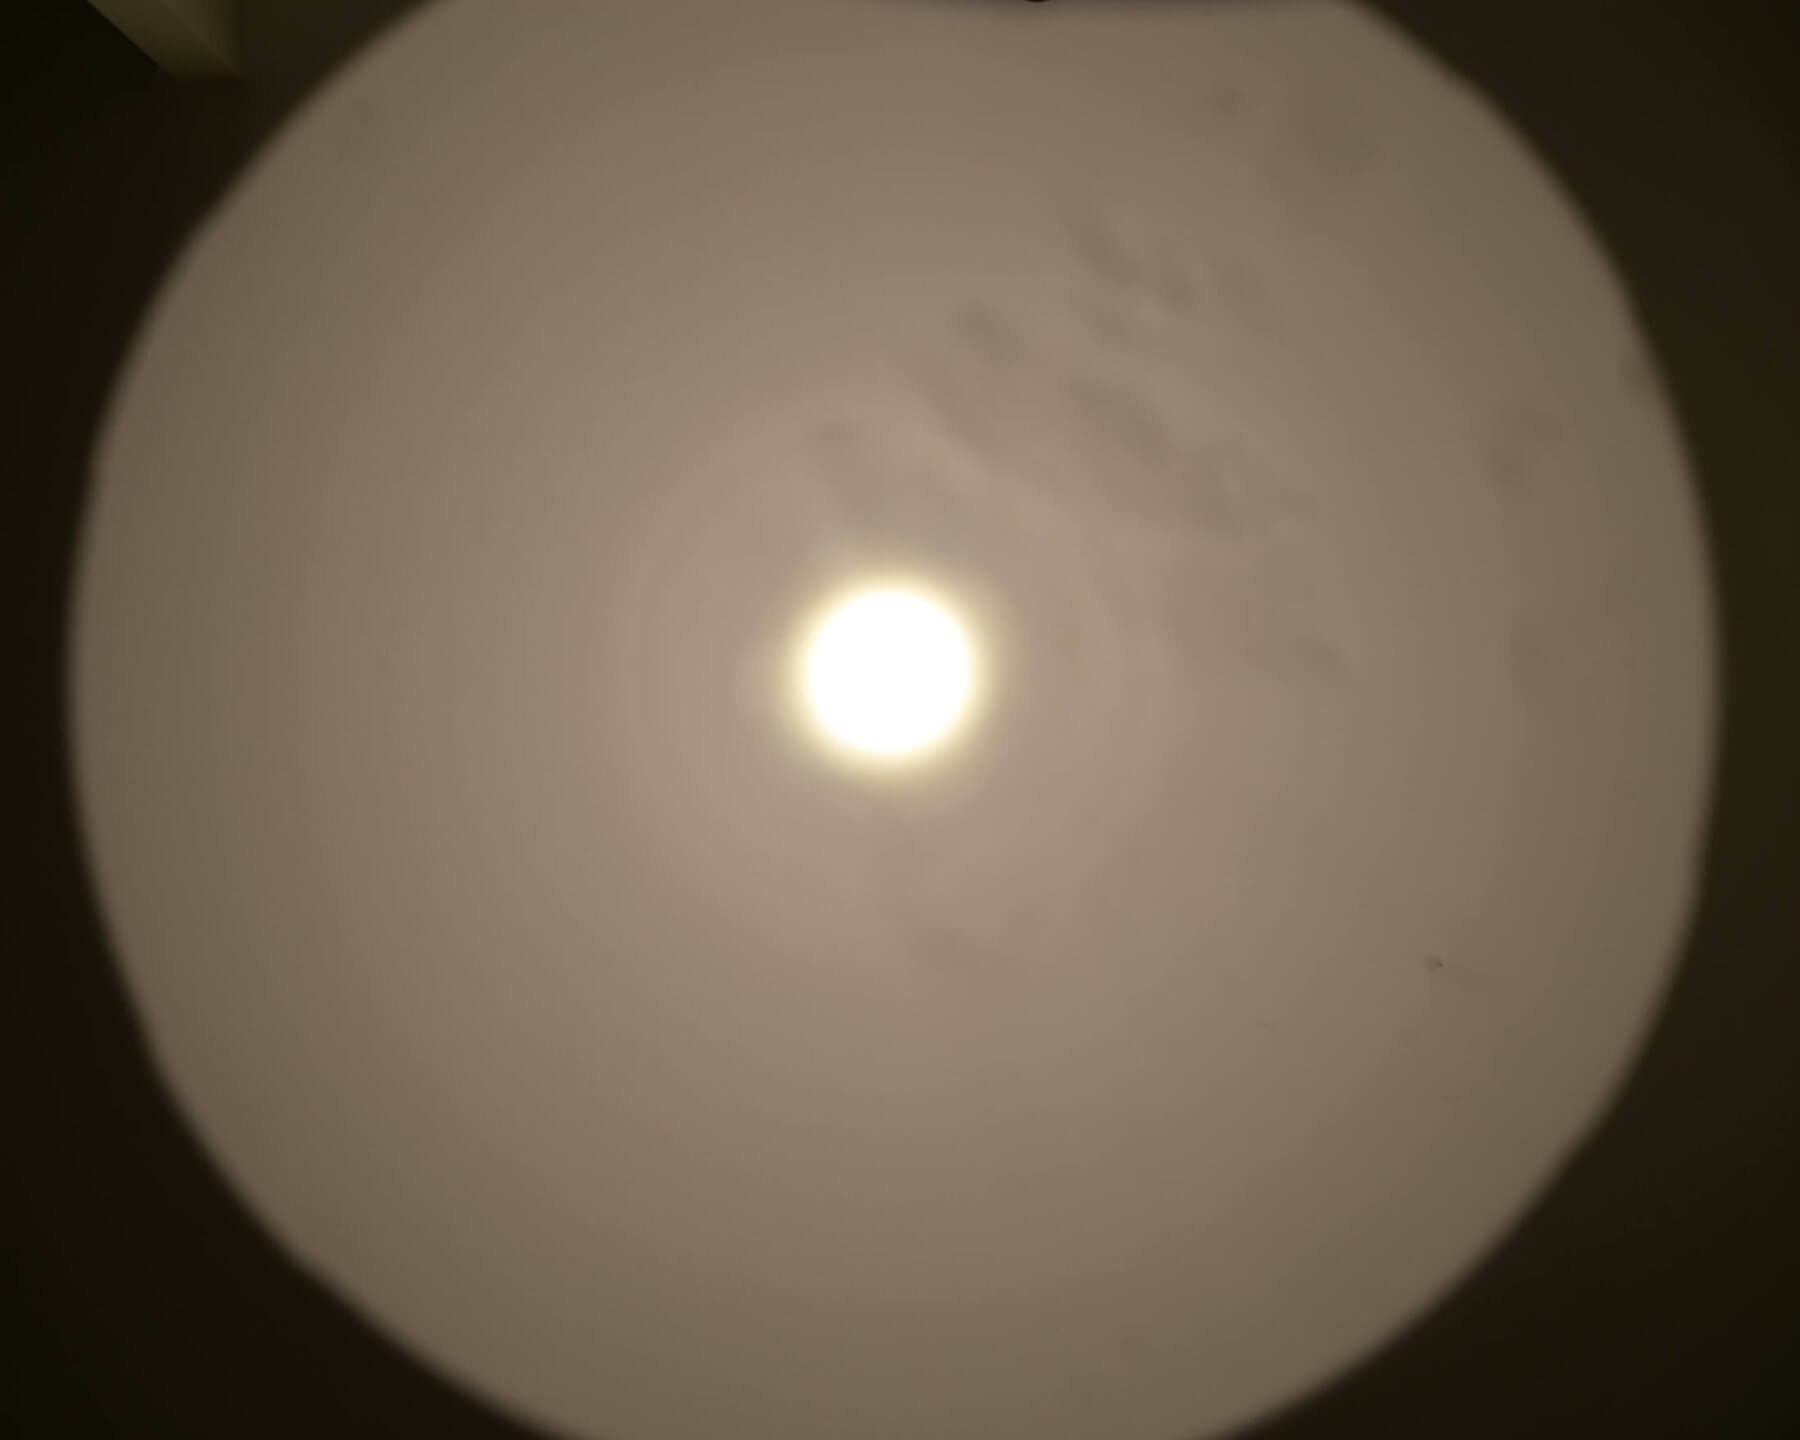
The emitter sitting deep within this big ol smooth reflector is a Cree XHP35 HI. That’s the thrower of choice in my opinion and a wonderful choice for this light. It’s even neutral white, which proves that this is a community-driven light. (If it was manufacturer only, it’d certainly be CW, so they could pump out just a few more lumens, and a few more meters). The reflector is smooth with whatever it is the photo shows off below. Not really even enough to call it orange peel, but there’s a bit of wave going on, anyway.
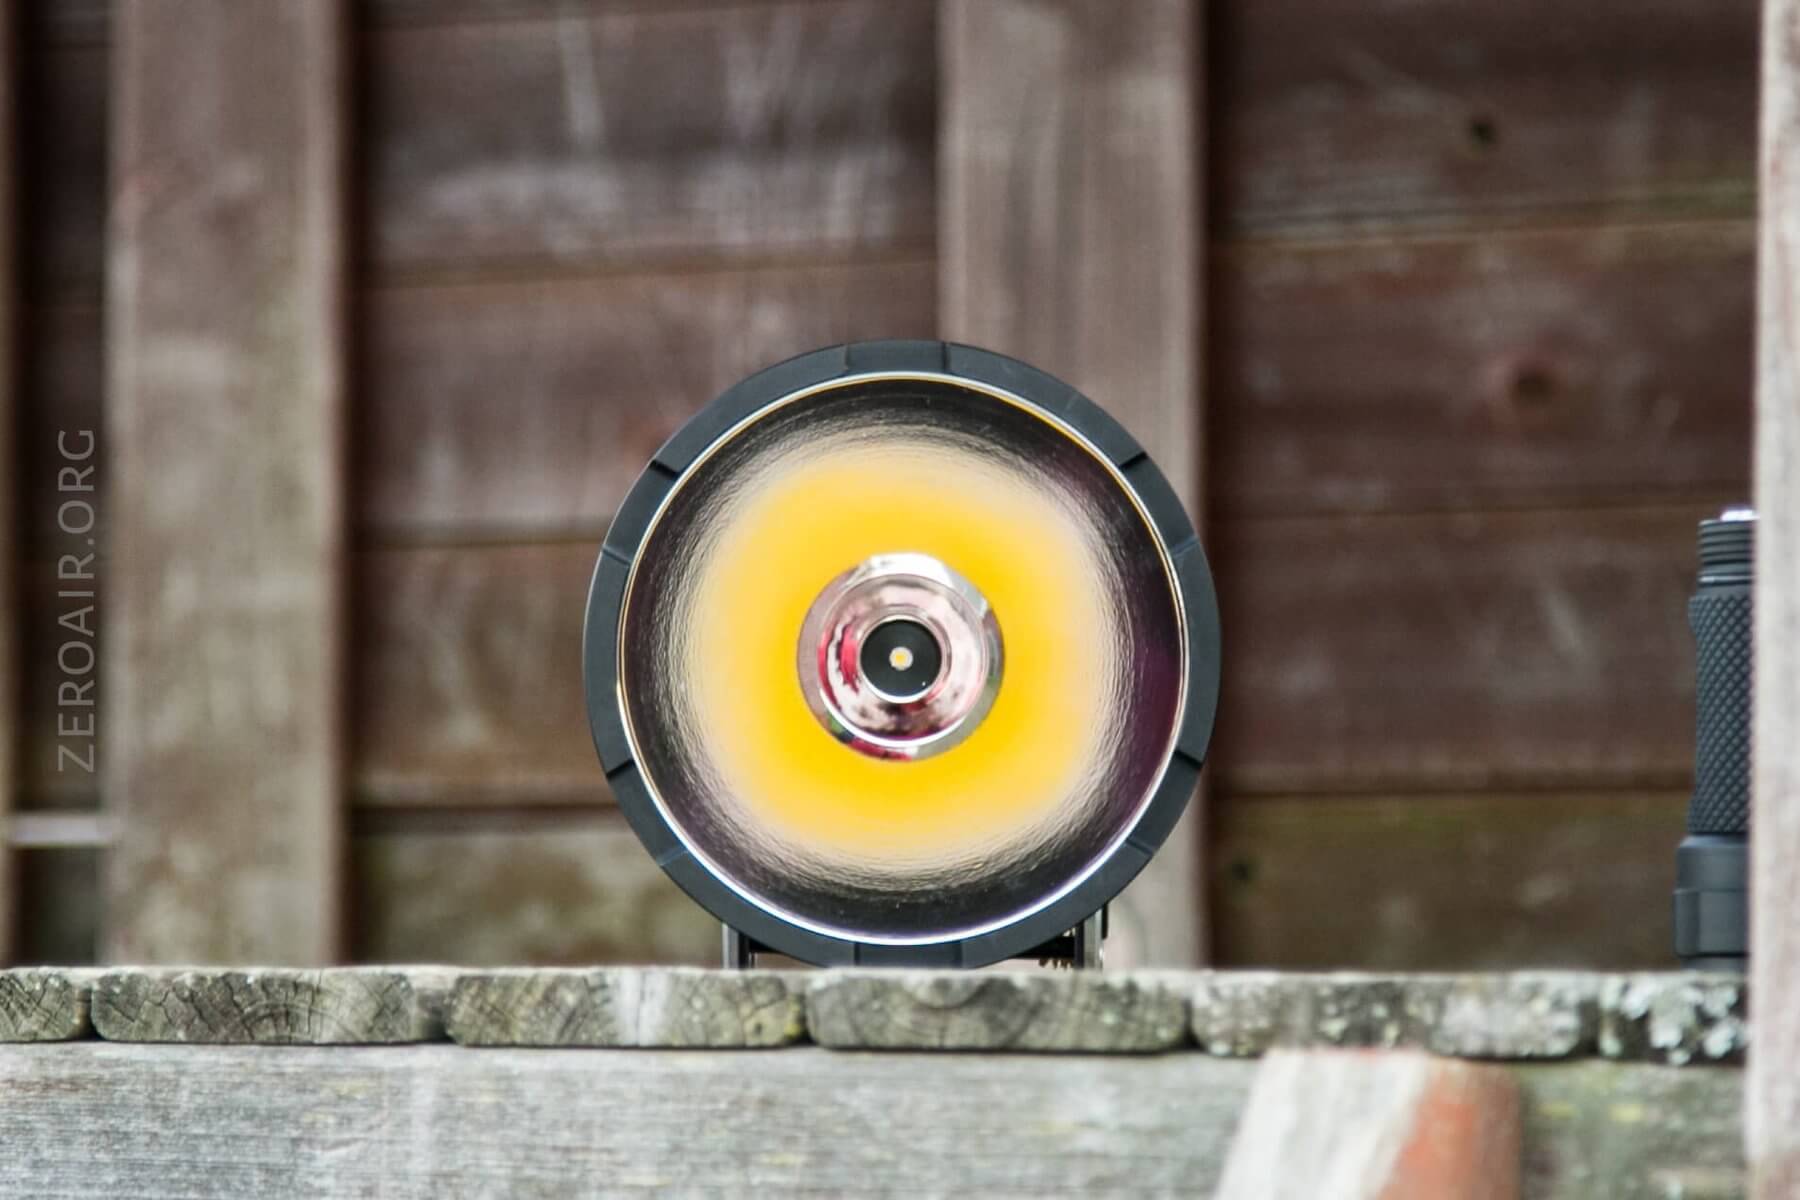
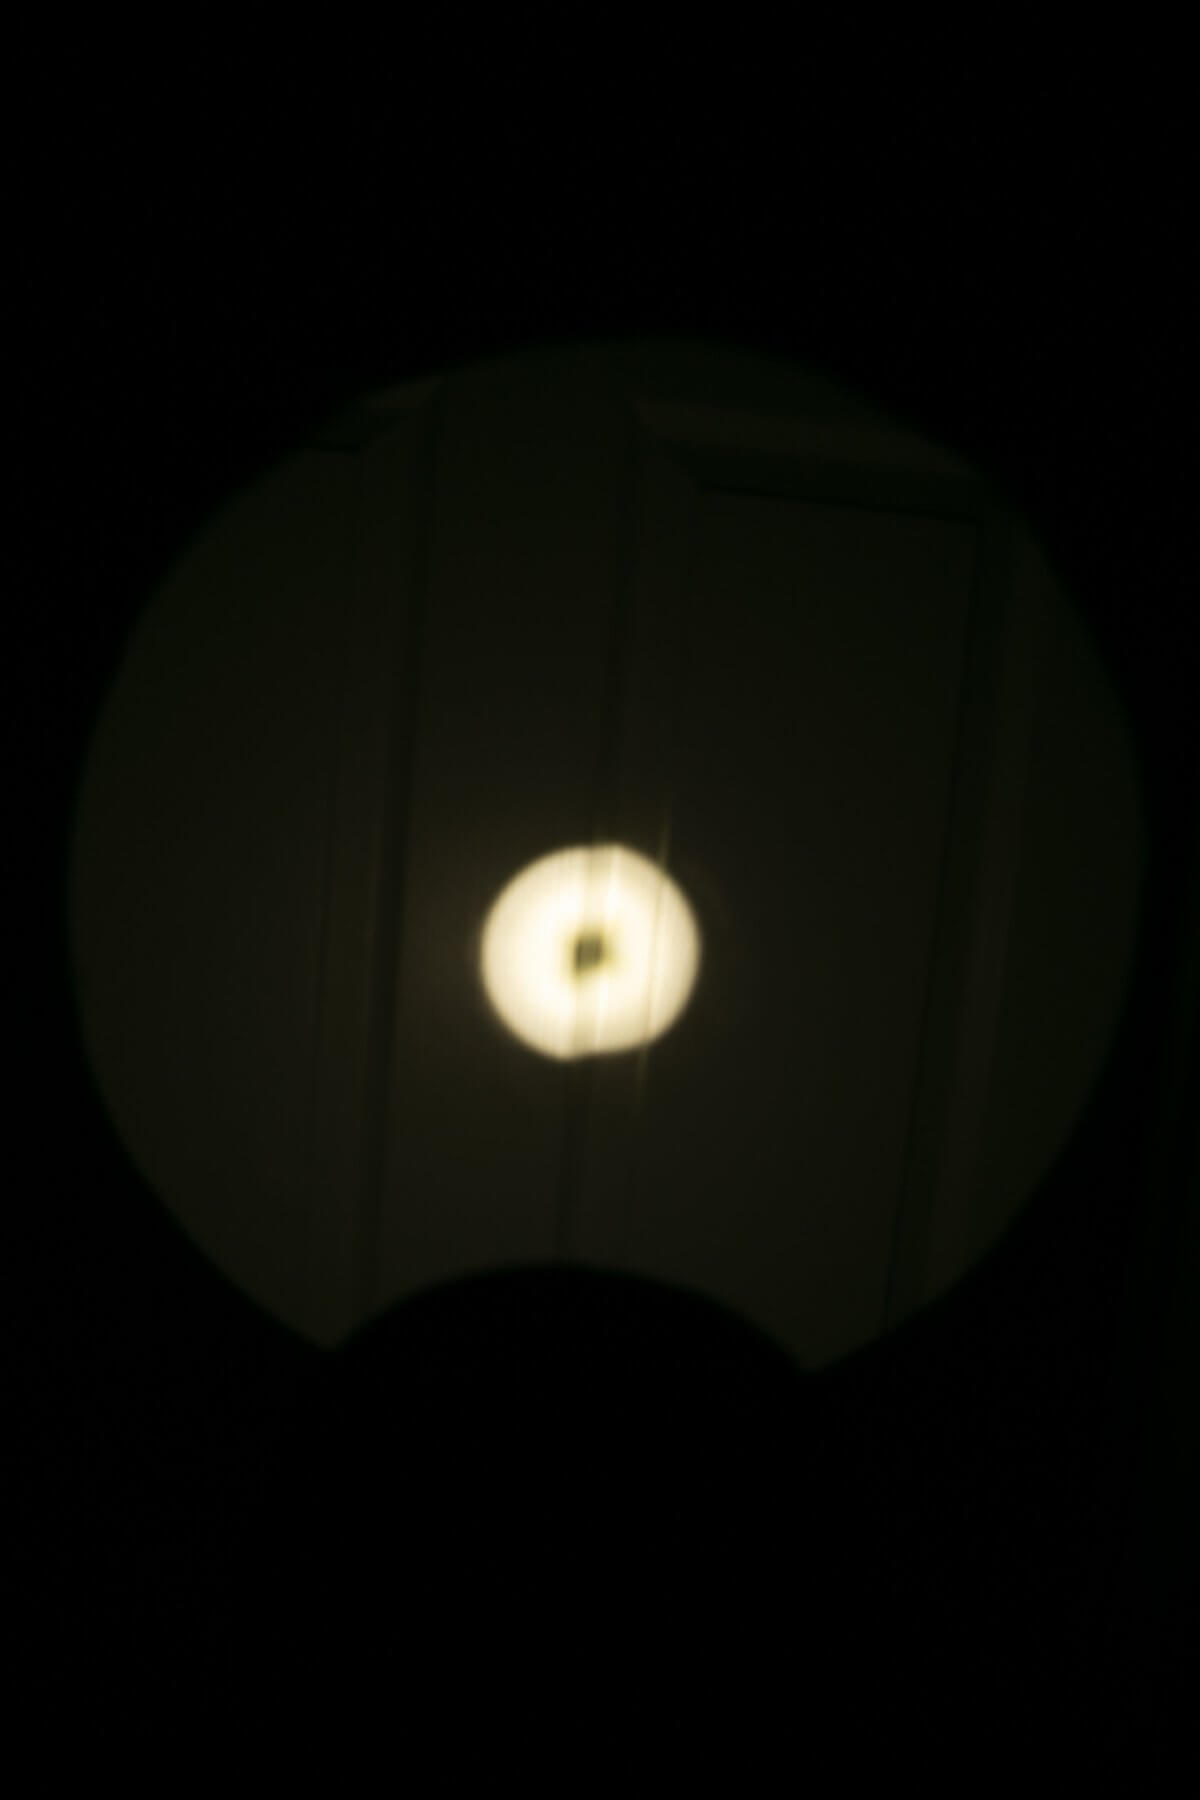
These beamshots always have the following settings: f8, ISO100, 0.3s shutter, and manual 5000K exposure. These photos are taken at floor level, and the beam hits the ceiling around 9 feet away.
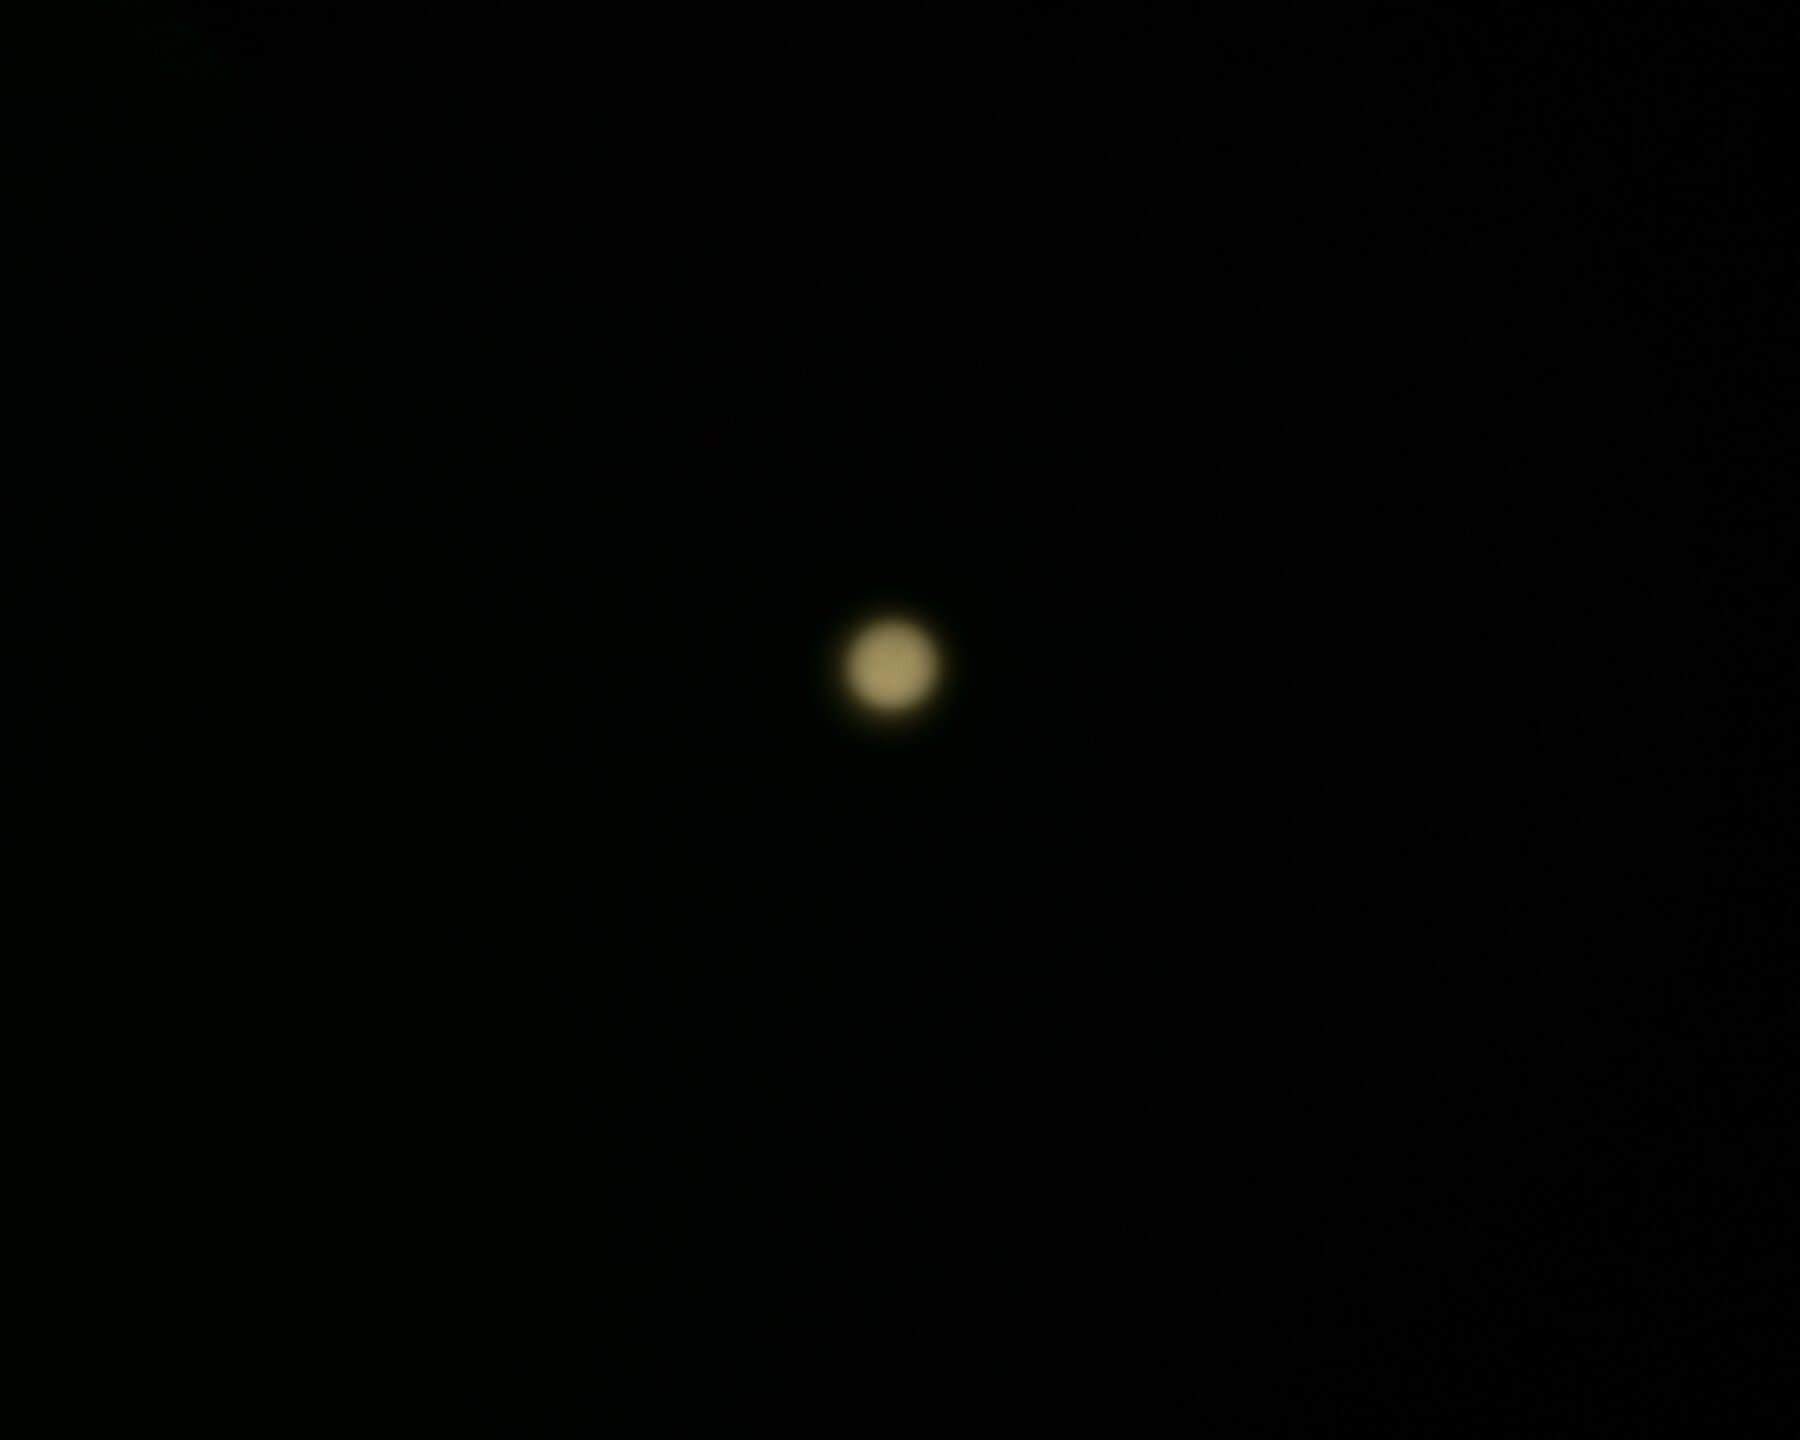
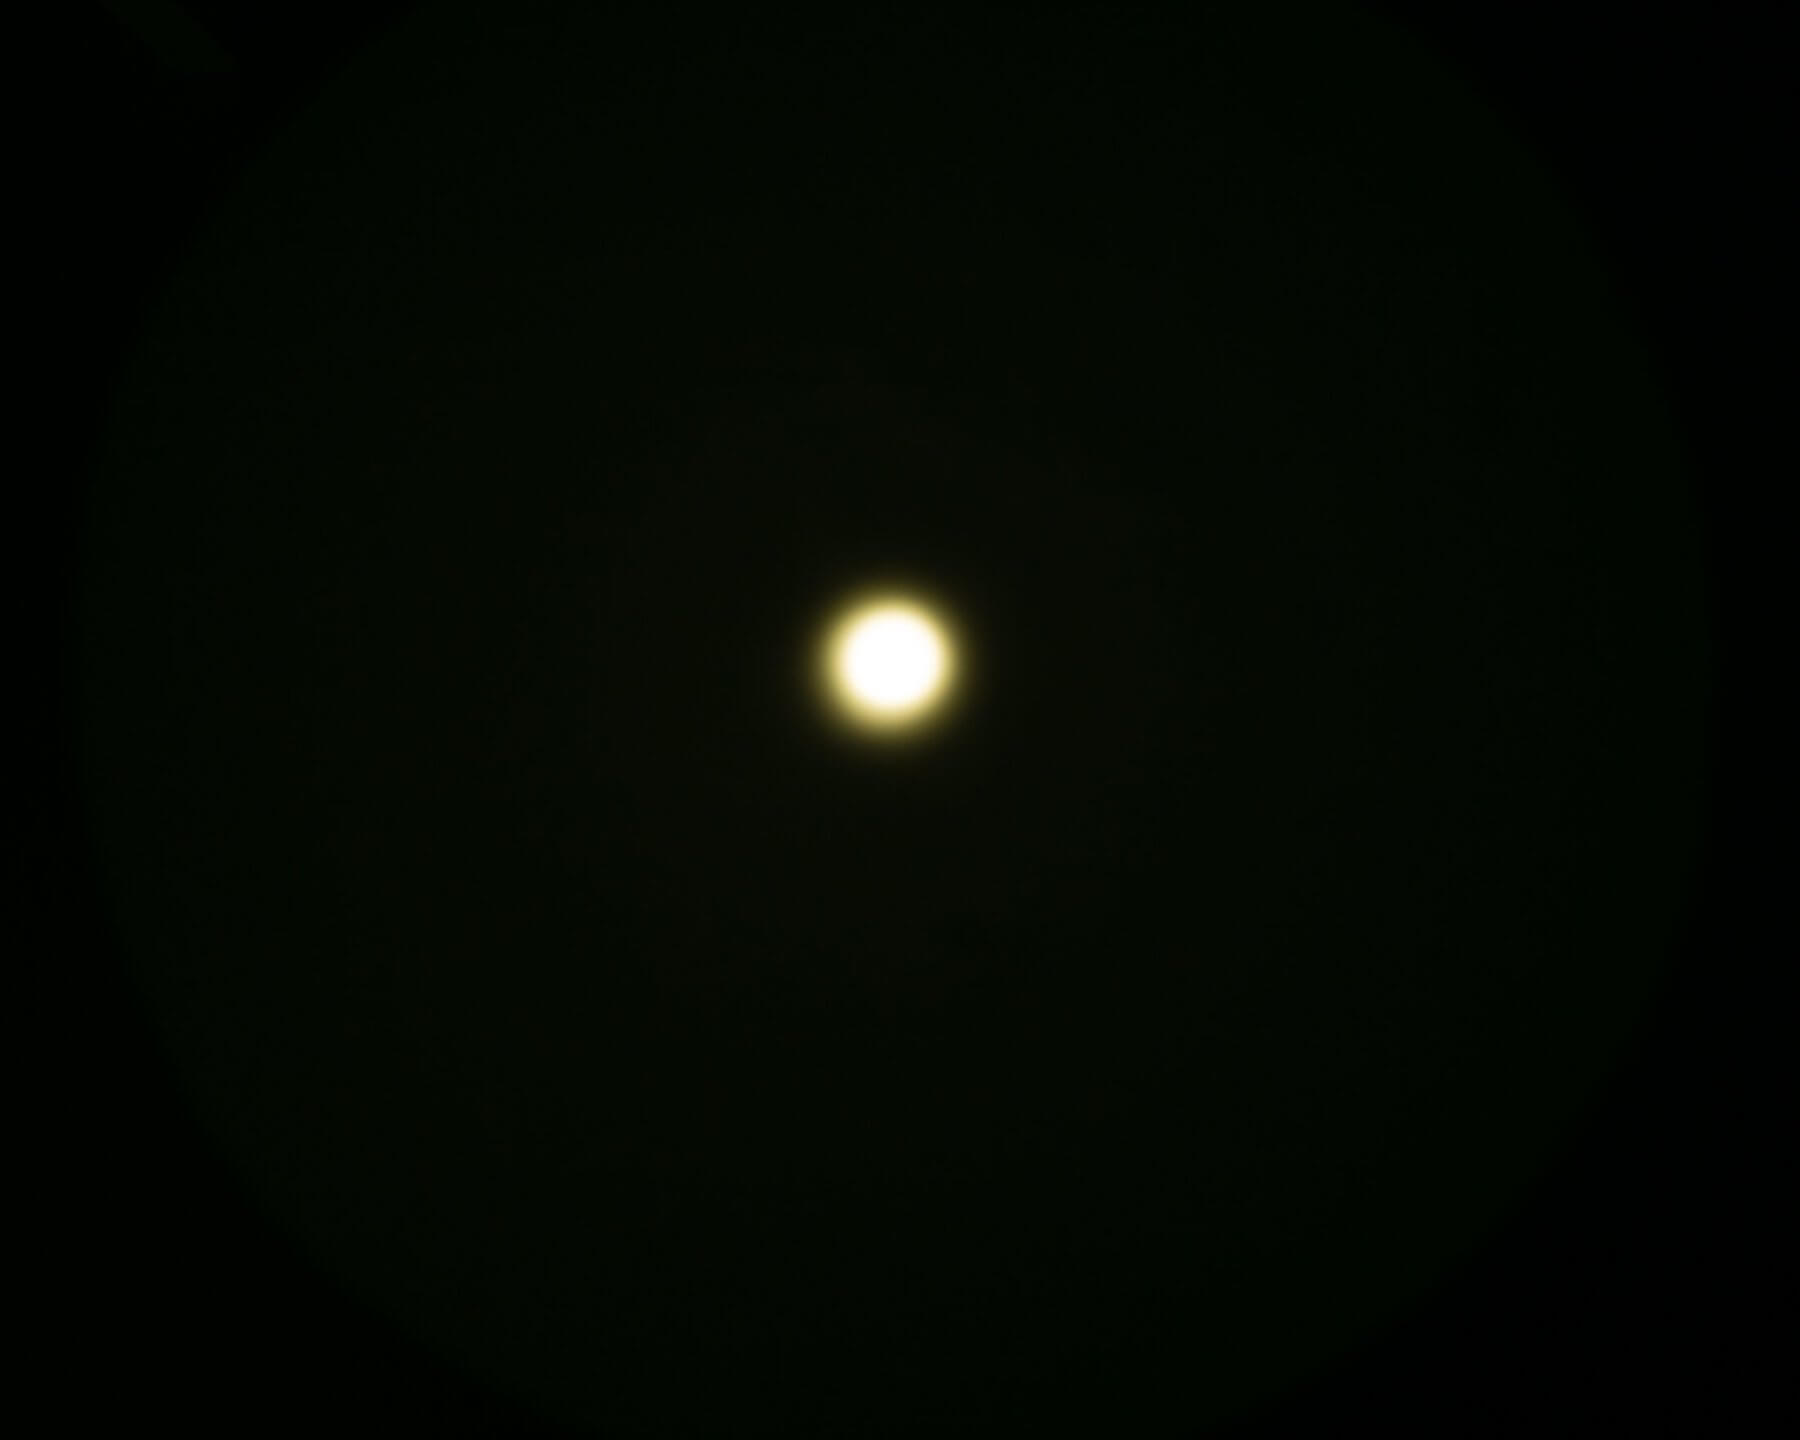
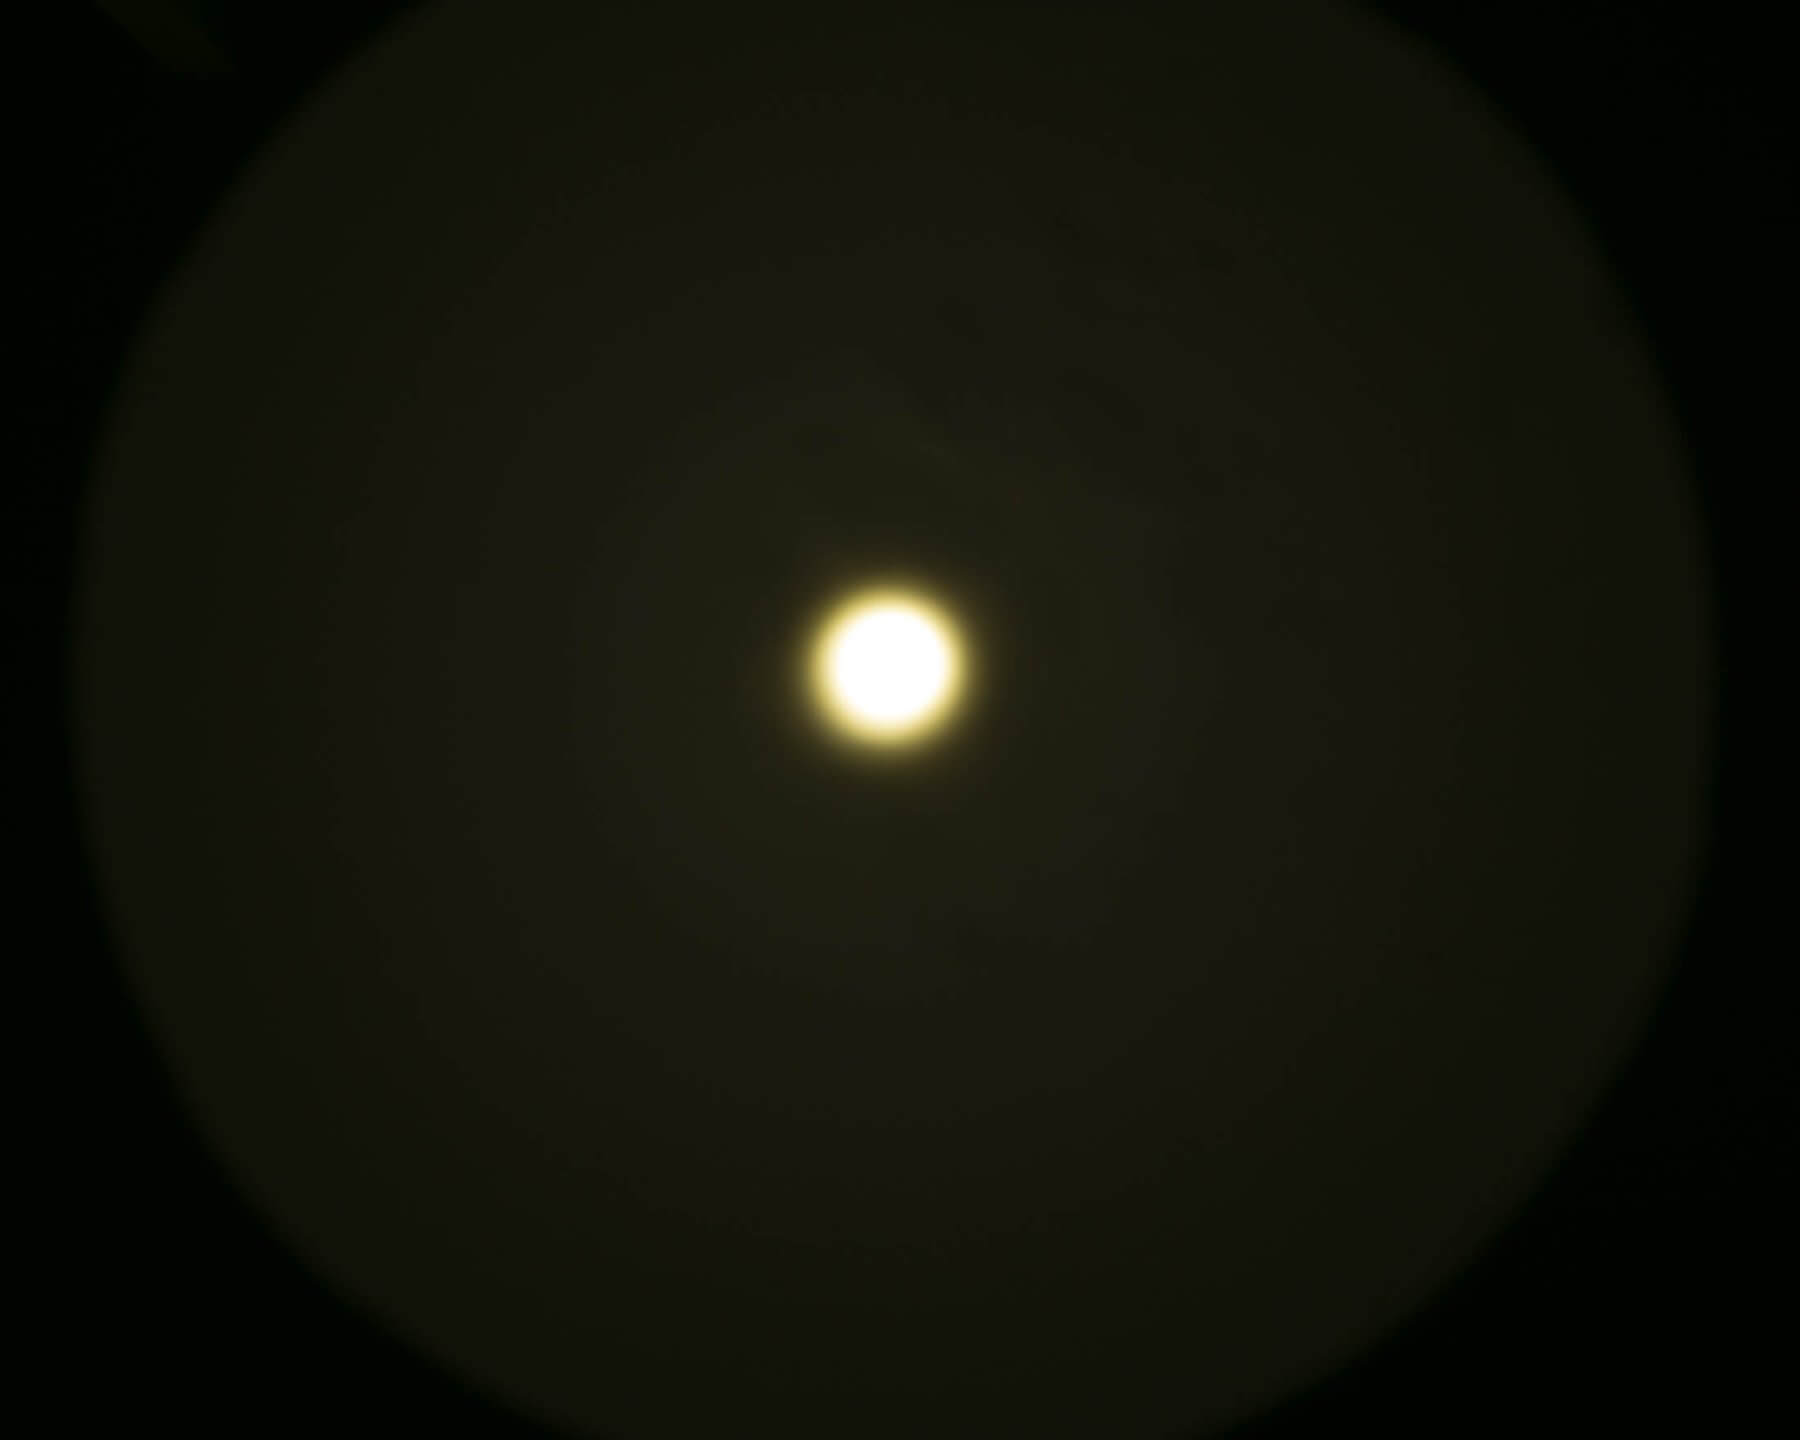
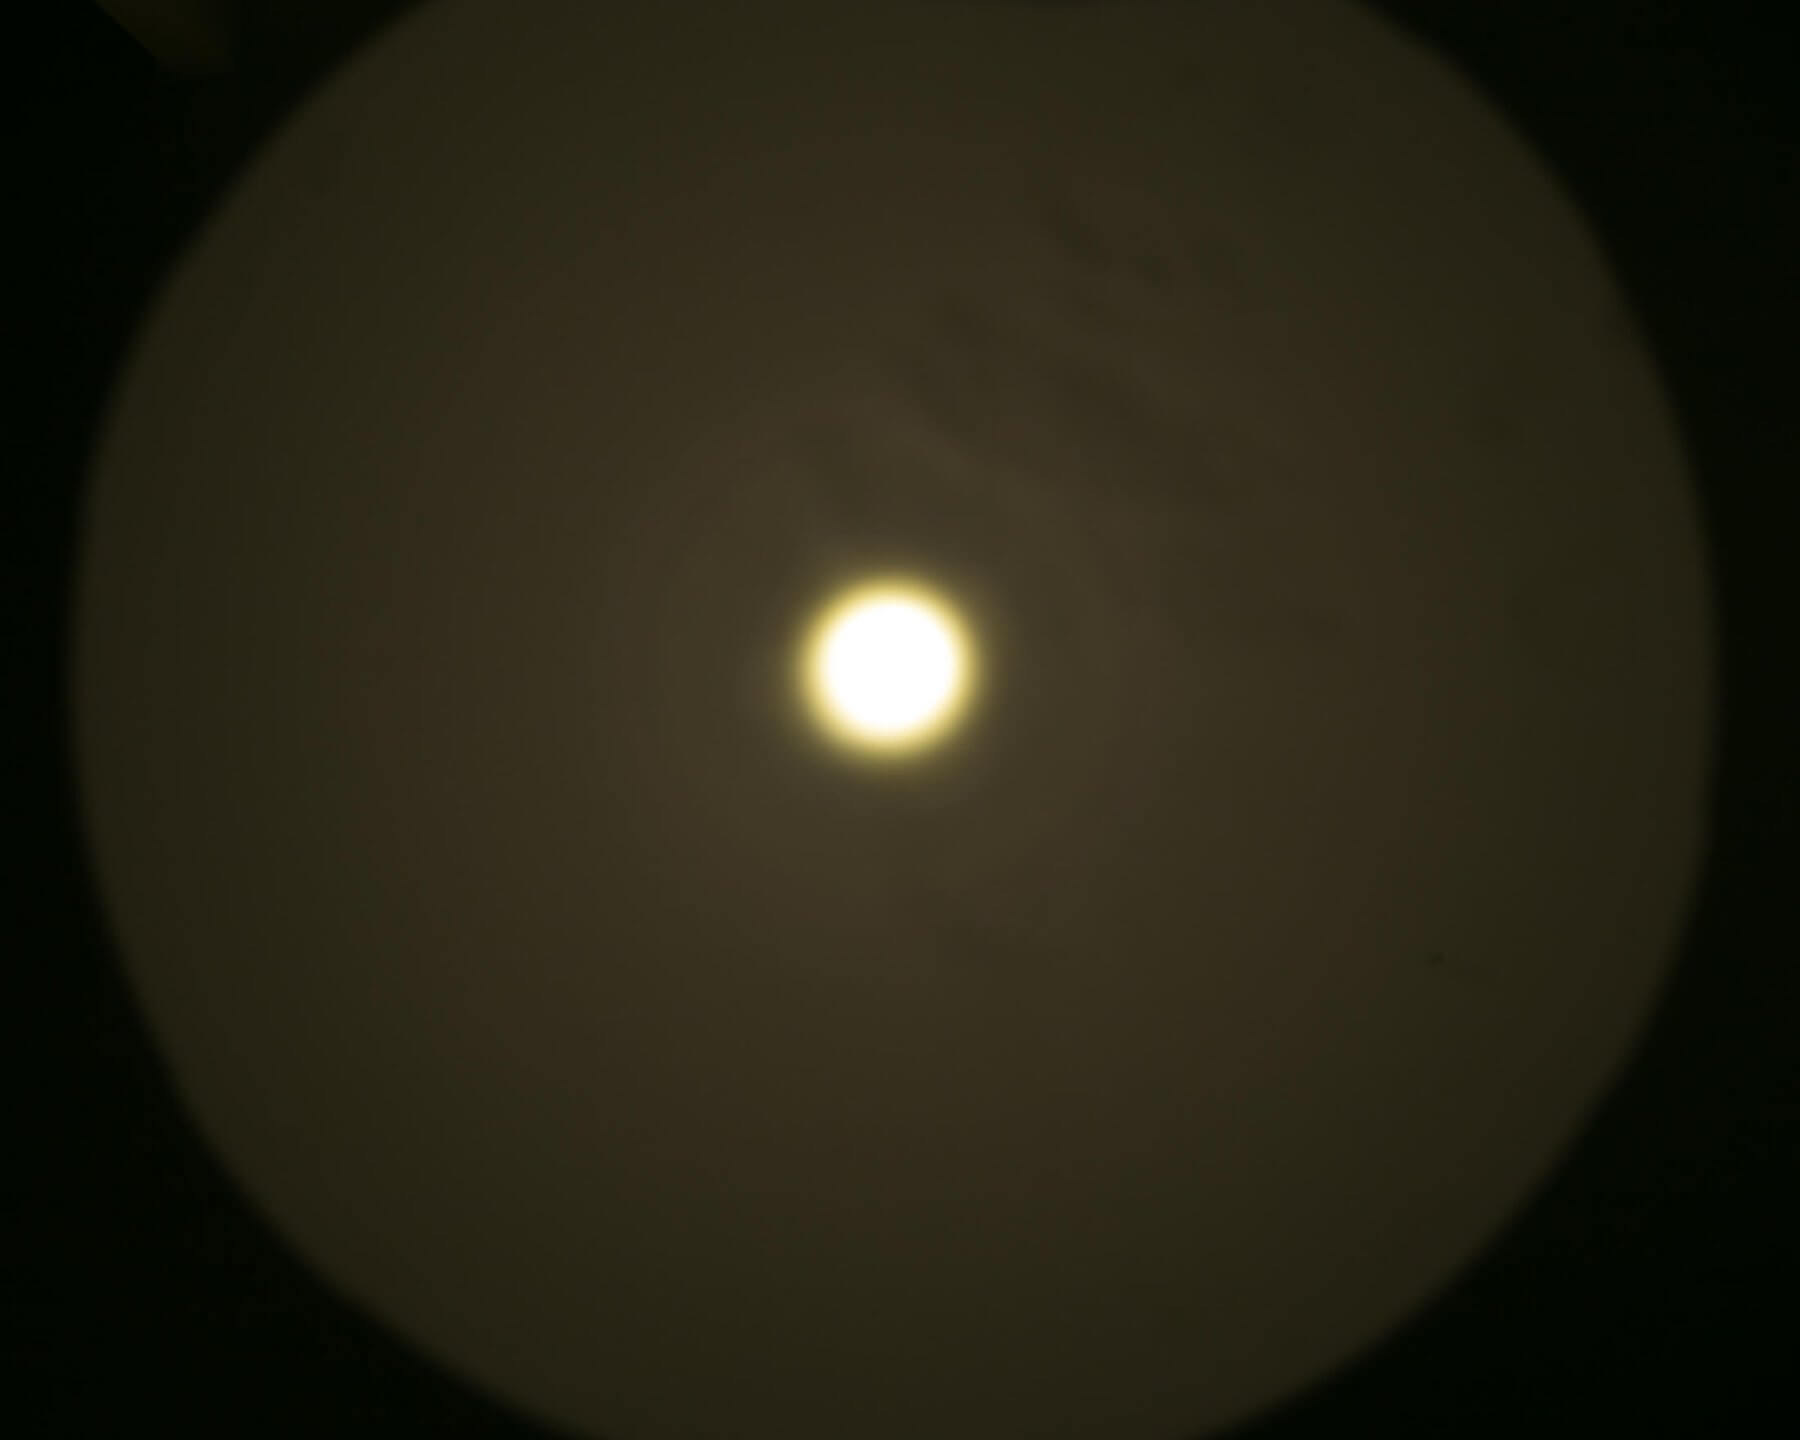
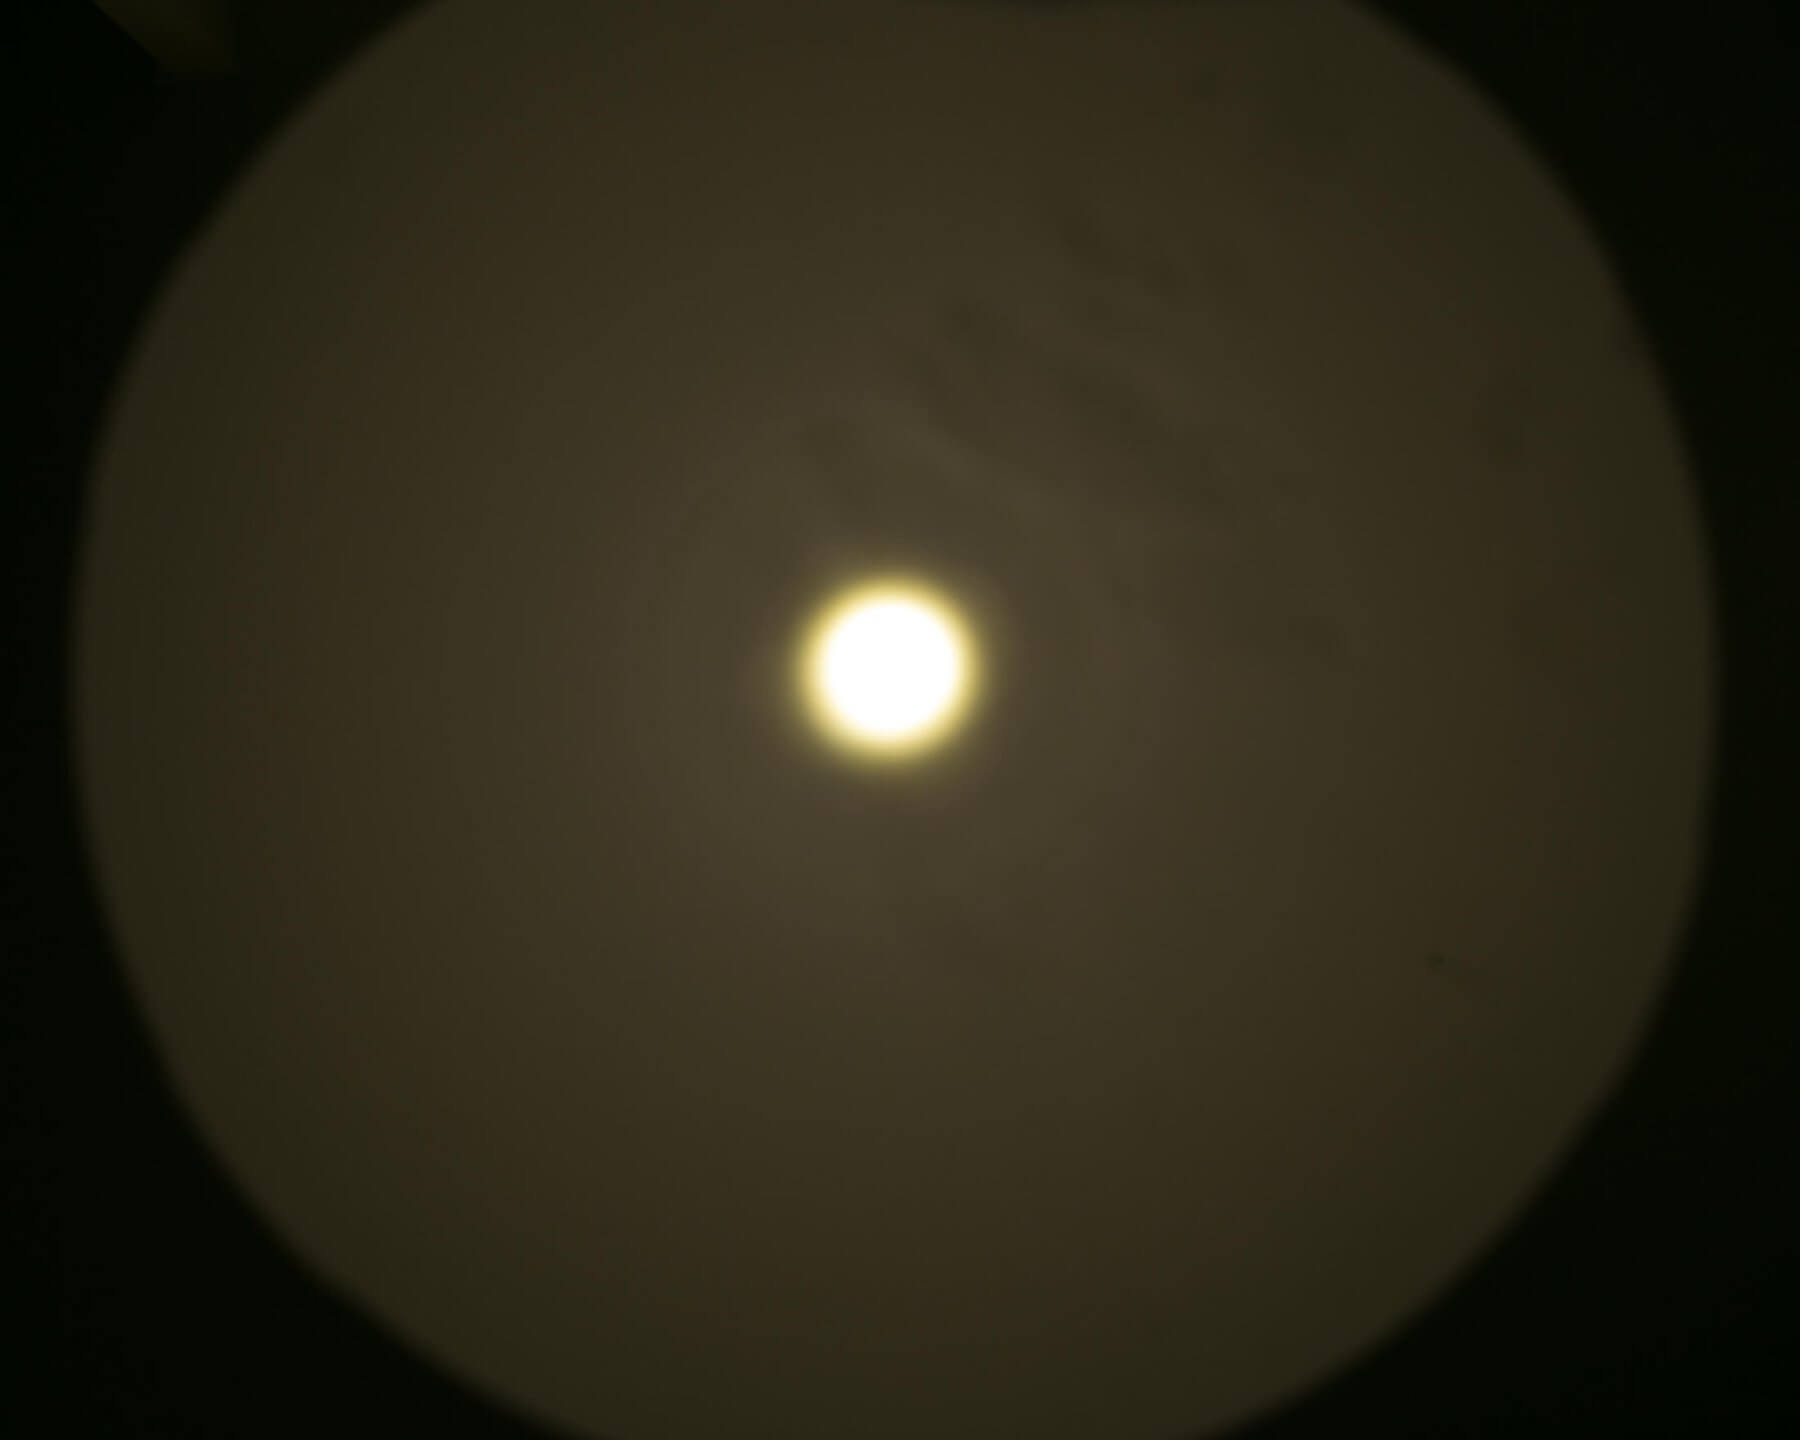

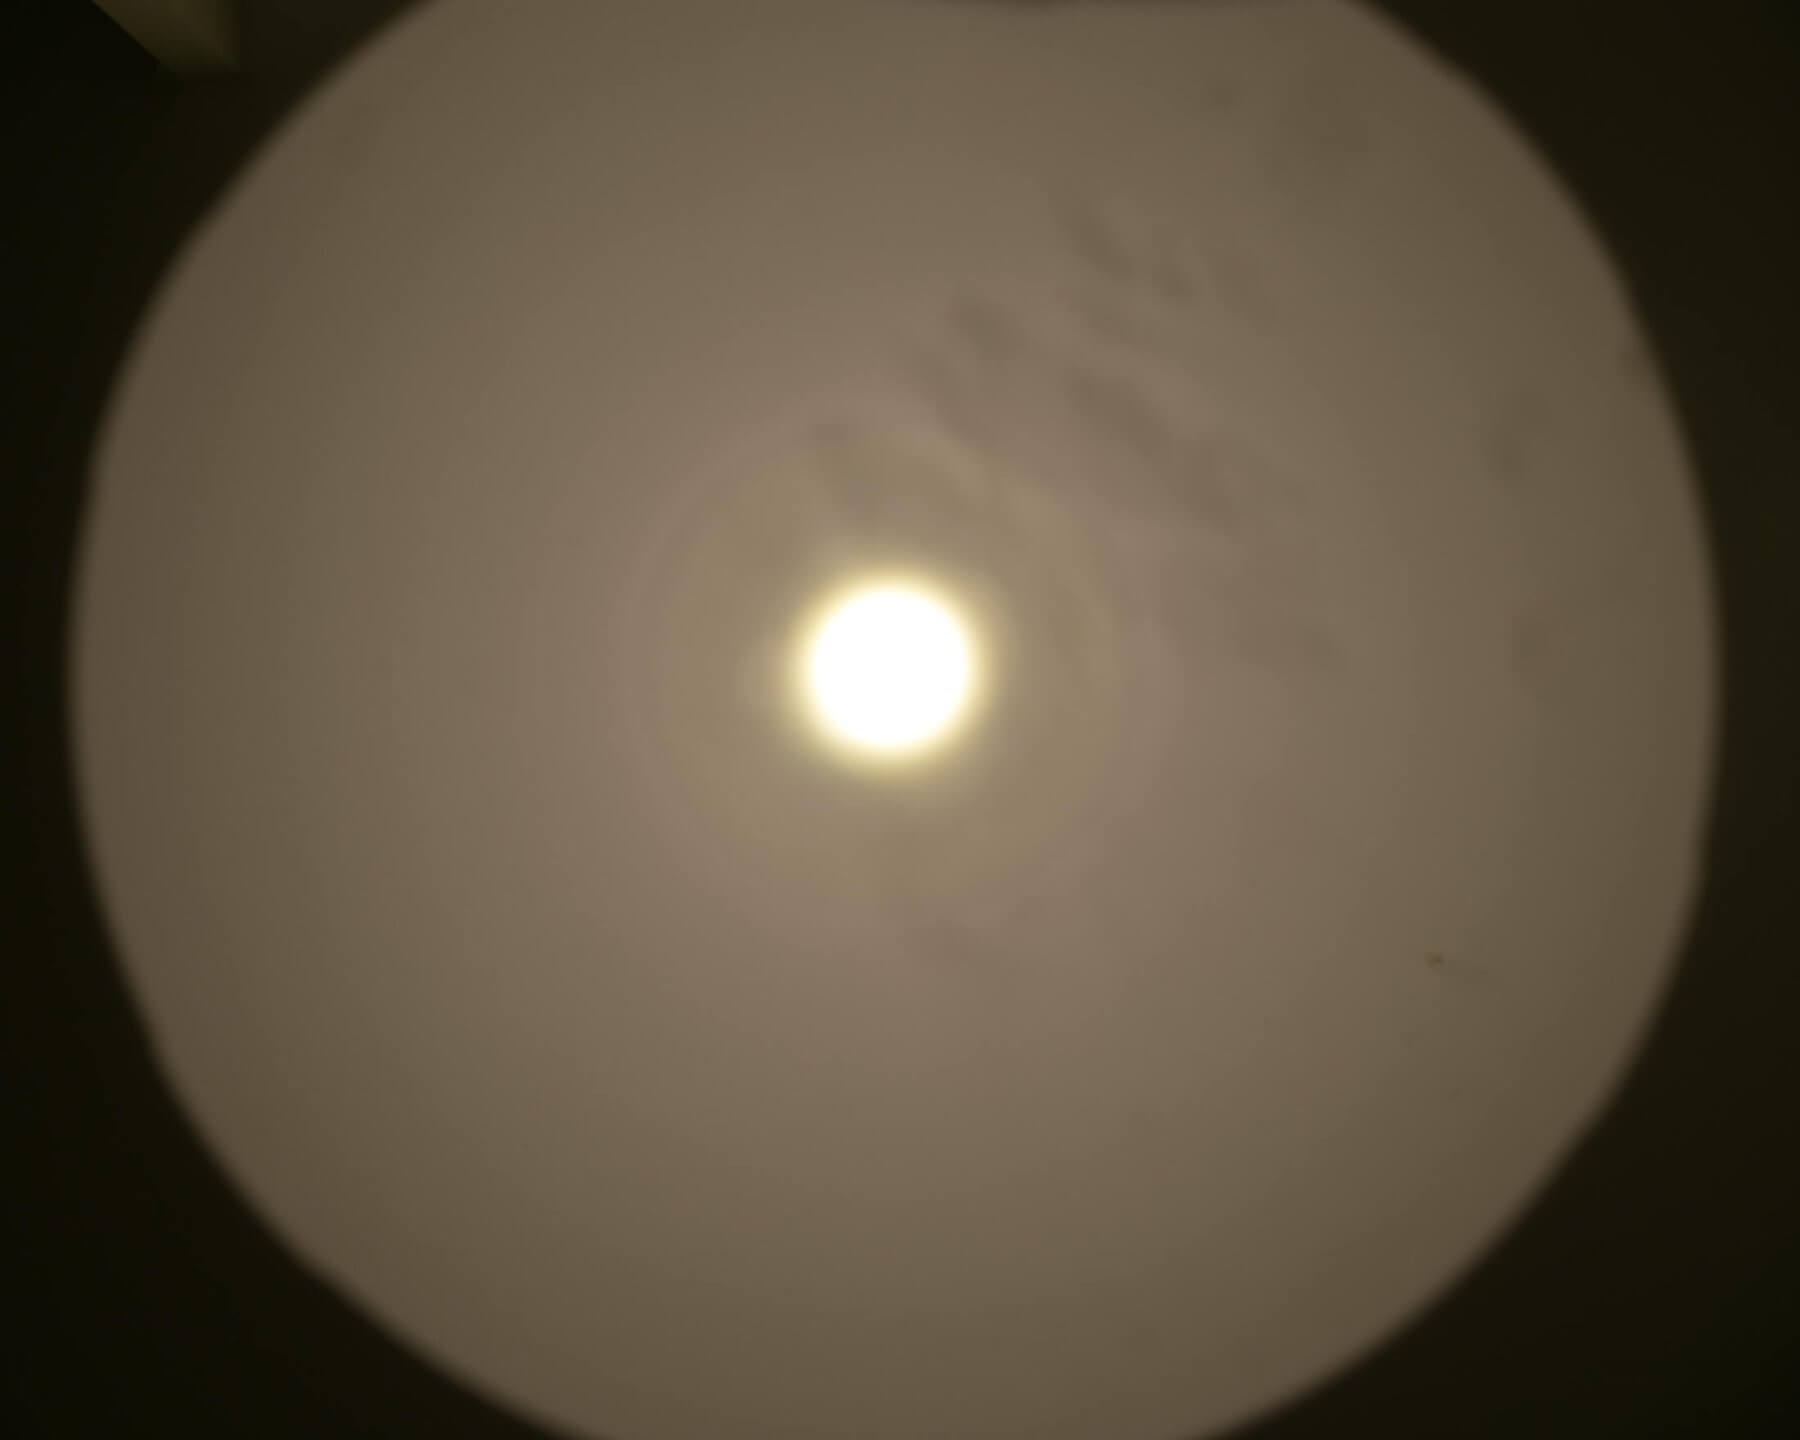
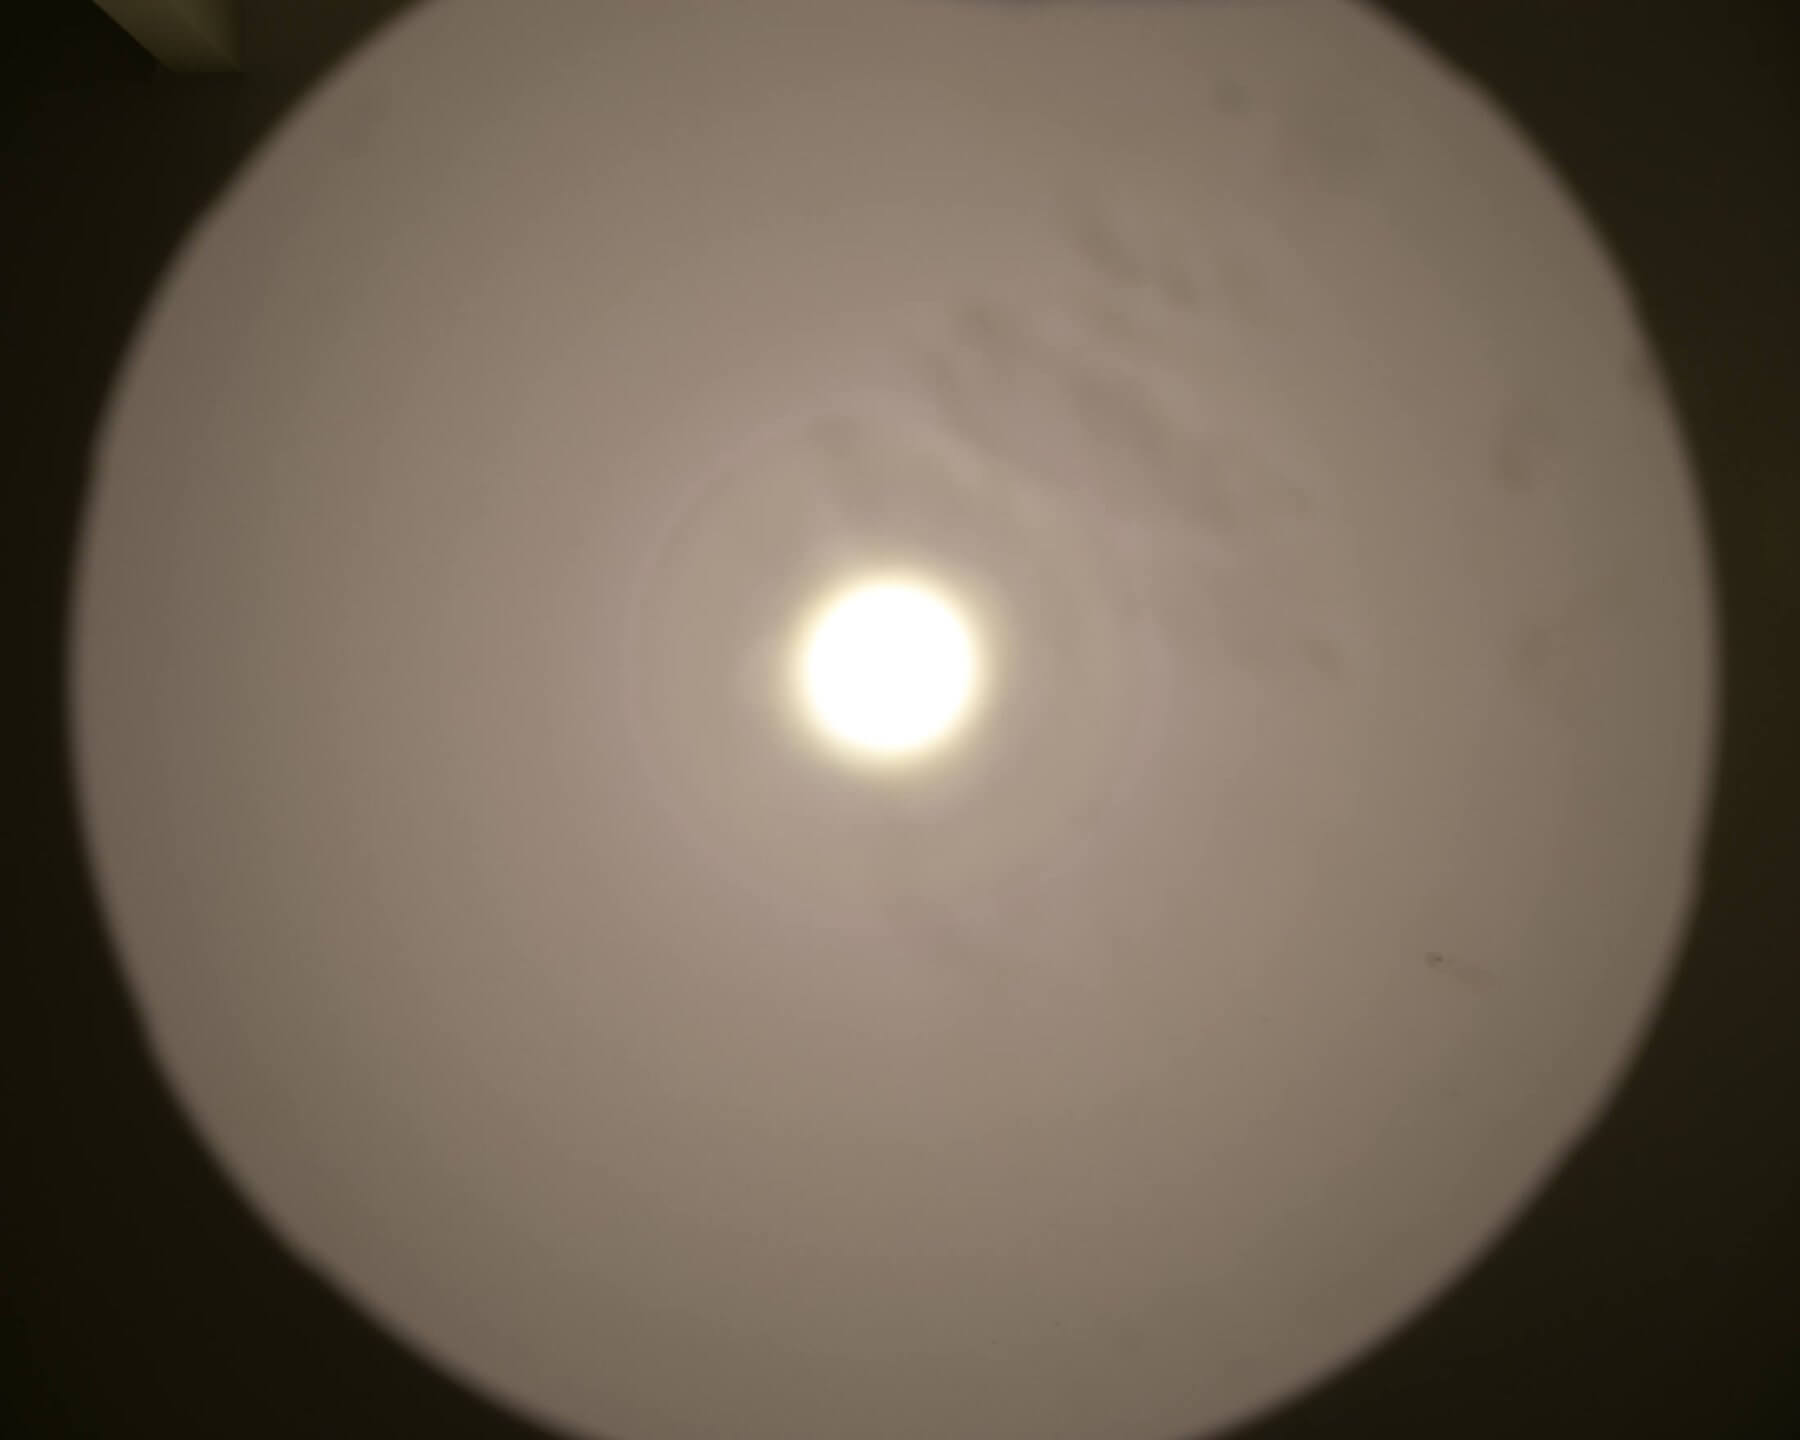
Tint vs BLF-348 (KillzoneFlashlights.com 219b version) (affiliate link)
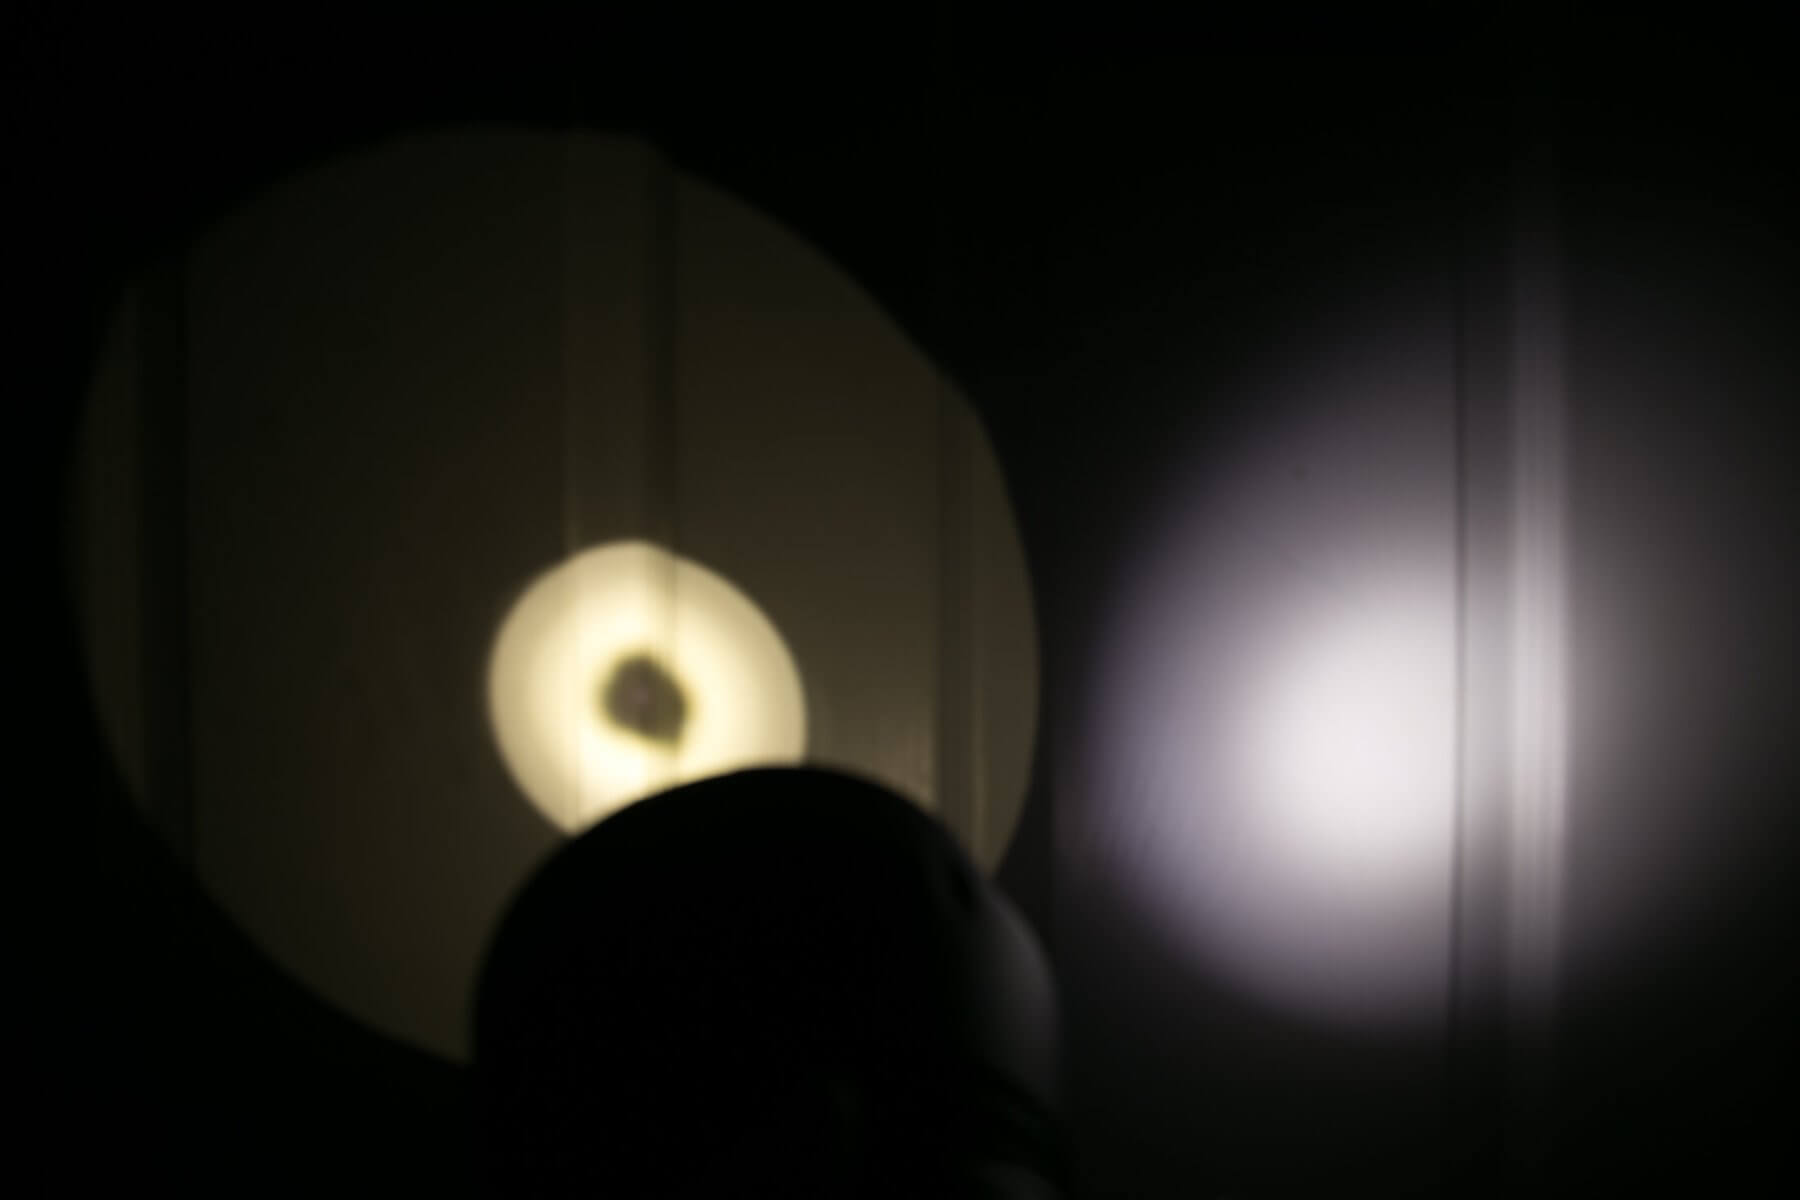
I compare everything to the Killzone 219b BLF-348 because it’s inexpensive and has the best tint!
Random Comparisons and Competitive Options
Literally, nothing compares to this light. Nothing reasonable anyway, unless your budget includes lighthouses.
But really, other top production throwers like the Thrunite TN42 are decent competitors. You lose a little bit of throw, but you have a light that’s much more easily stored than this behemoth. Because make no mistake, the BLF GT is a big light.
I can say that I really like the TN42 in comparison, too. I still have both but really only want to keep one. It’s been hard to make the decision between them. If the GT was the same size as the TN42, then there would be no question at all.
Conclusion
What I like
- Hits throw number
- Close enough on lumen numbers (since I can’t measure it so well)
- Really gives you the Giggles
What I don’t like
- Size is really a downside. The GT is unwieldy
- Availability? I don’t know where you could actually buy this light right now
Notes
- This light was provided by me for review. I bought this light with my own money. I was not paid to write this review.
- This content originally appeared at zeroair.org. Please visit there for the best experience!
- Use my amazon.com referral link if you’re willing to help support making more reviews like this one!
- Please support me on Patreon! I deeply appreciate your support!
Pingback: Lumintop GT Micro Flashlight Review – ZeroAir Reviews
Thanks!! Very helpful. great review compared to others ive read!!
Pingback: Weltool W4 “Dragon in Clouds” LEP Flashlight Review – ZeroAir Reviews
Can this 8×18650 tube fit in a BLF Q8? I know the voltage will be higher, but will the tube screw in and make contact on a Q8?
No and it’s not even close. The GT has a much larger diameter and seems beefier.