JETBeam Jet-II Pro Flashlight Review
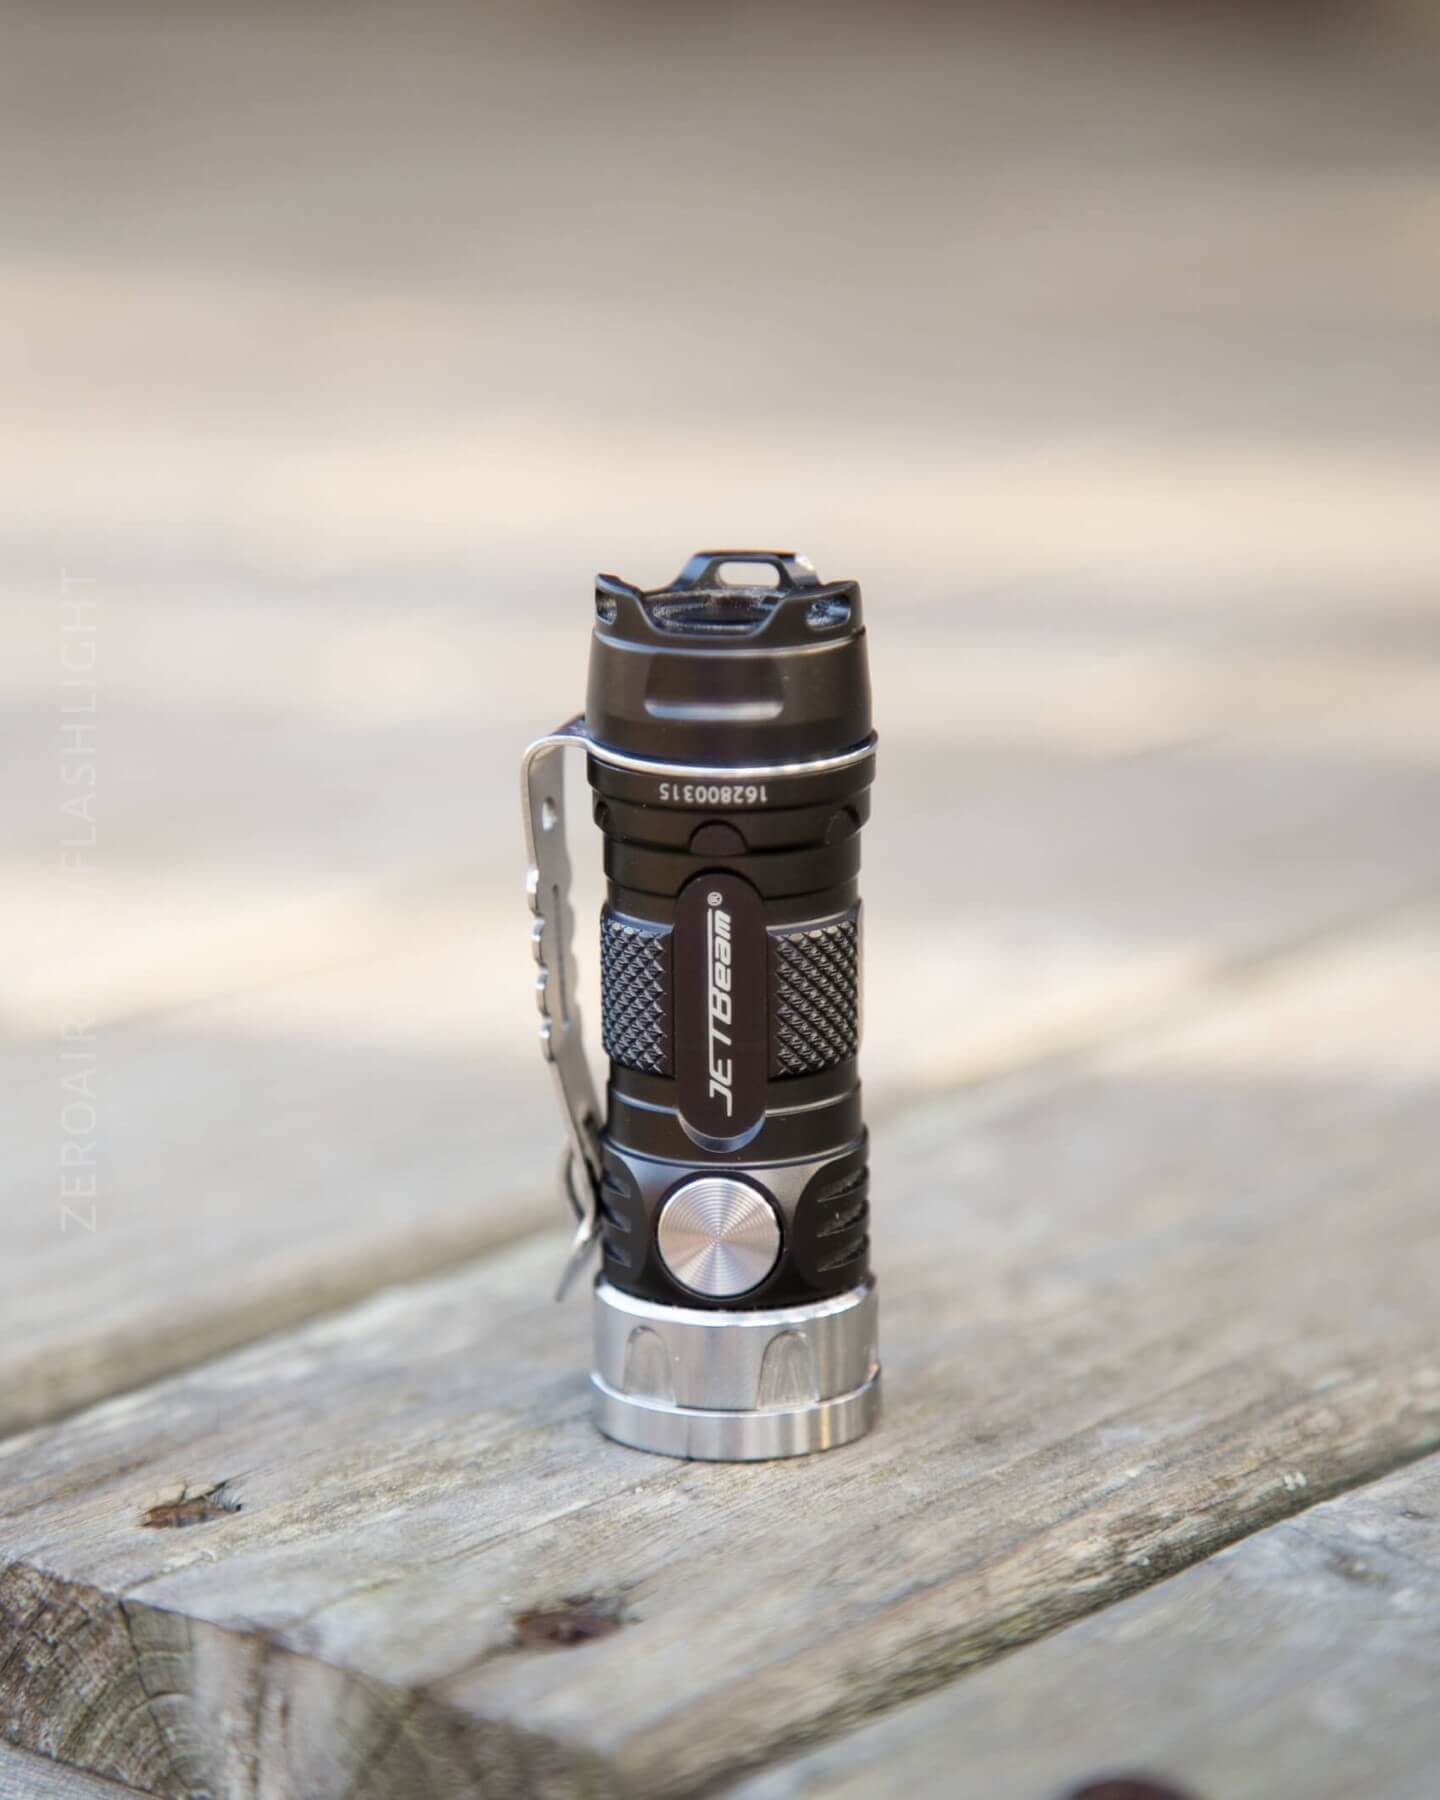
The JETBeam Jet-II Pro flashlight offers an interesting design, using a single 16340 cell and a Cree XP-L HI emitter. Read on for more photos!
Official Specs
Main Features:
- CNC-machined aluminum alloy construction, compact and convenient
- Cree XP-L HI LED with max output of 510 Lumens
- 4 brightness levels for different situations and runtime demands
- Instant access to High, Ultra Low, and Strobe modes
- Convenient, smart, and timing mode
- Lock-out function to prevent accidental activation
- Reversible stainless steel ring for either normal protection or self-defense
- High efficiency alloy reflector optimized to achieve perfect throw and flood
- IPX-8 waterproof standard suitable for use in various environments
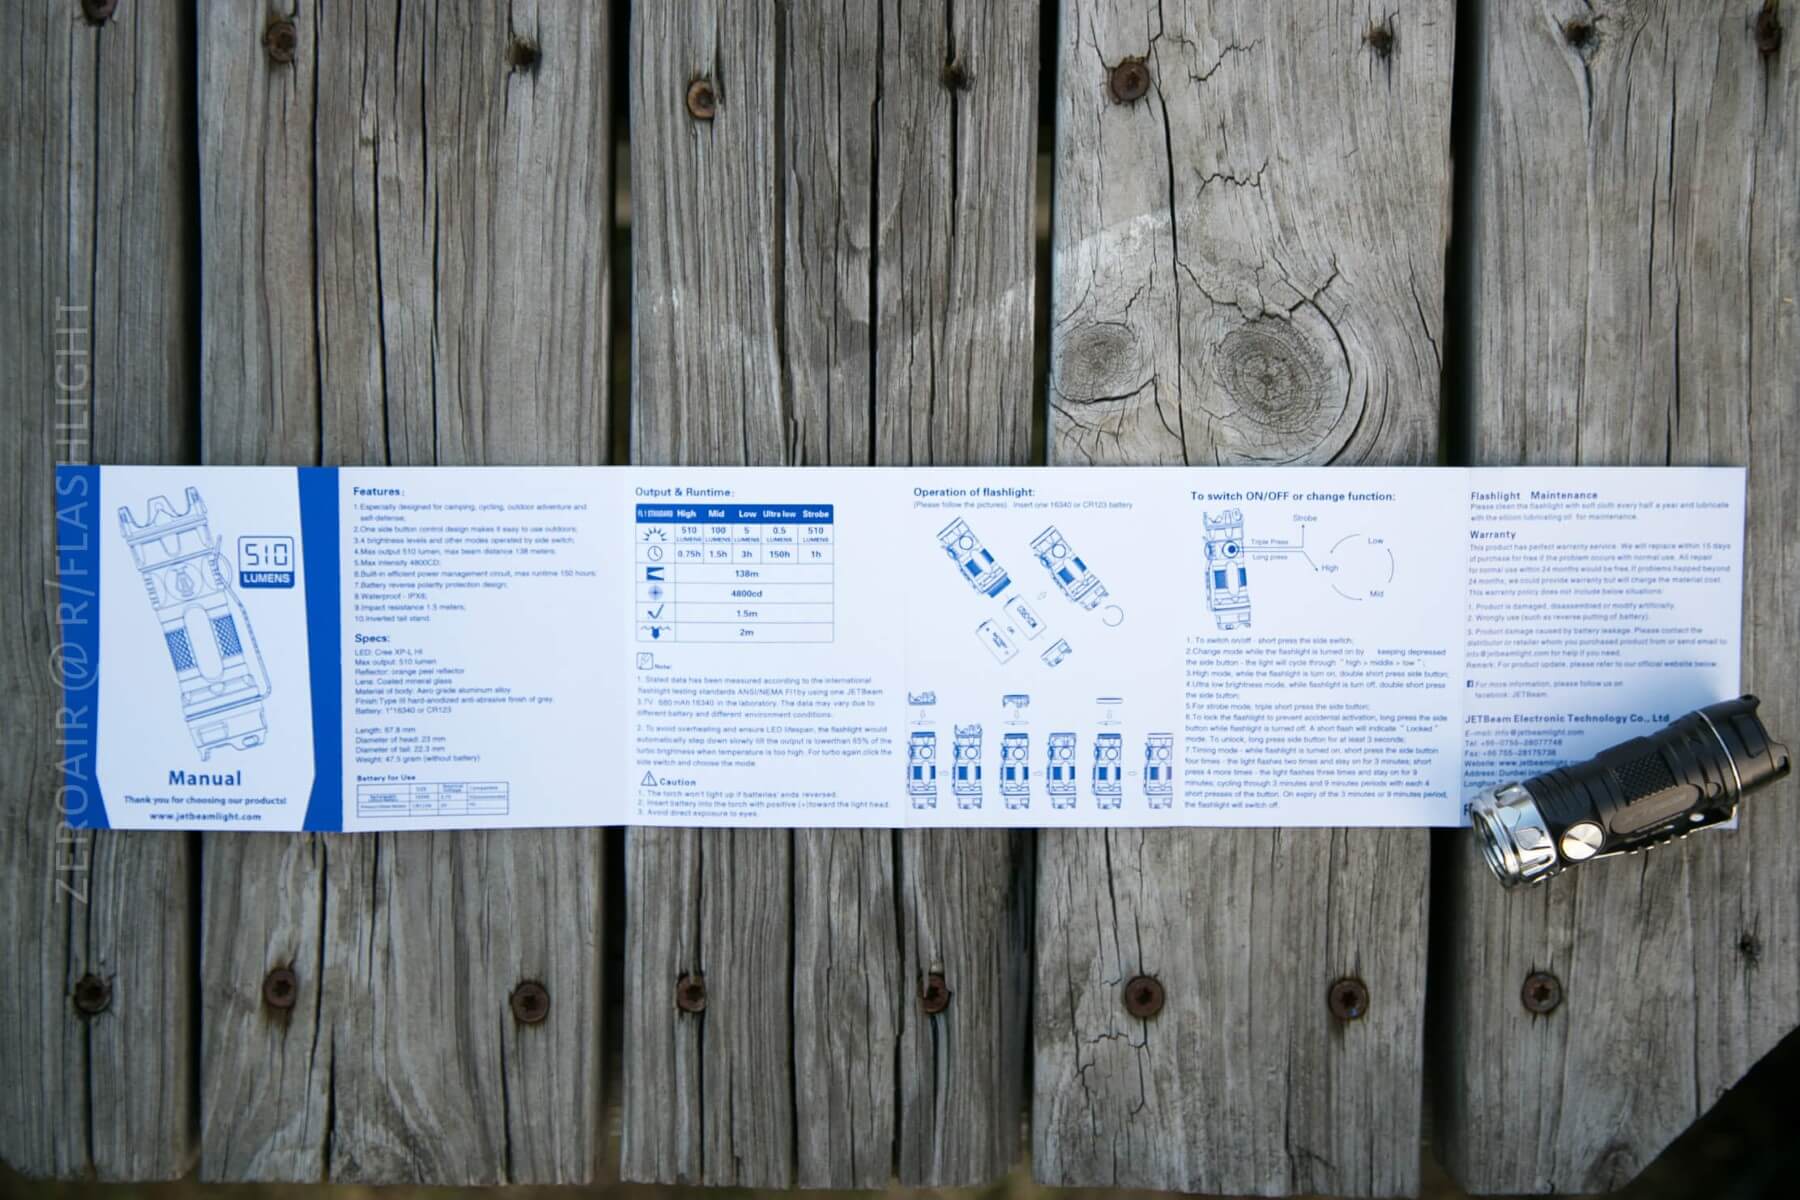
Output & Runtime
| Mode | Output (lm) | Runtime (h) |
|---|---|---|
| High | 510 | 0.75 |
| Mid | 100 | 1.5 |
| Low | 5 | 3 |
| Ultra Low | 0.5 | 150 |
| Strobe | 510 | 1 |
Versions
There are quite a few versions of this light, but they all have XPL-HI and are essentially the same light in varying bodies.
There is an aluminum version (as you see here) and three titanium versions – a titanium gray, a purple-green, and a green-yellow version. The user interface is the same on all models. I’ll have a titanium version for a photo session soon, so look for that.
Short Review
I’ve said it over and over locally and on the internet: I feel like I like this light way more than I “should.” It looks like it’d be kitschy or a “flashy” design, but it’s truly a functional masterpiece, and I’ve absolutely loved it.
Long Review
What’s Included
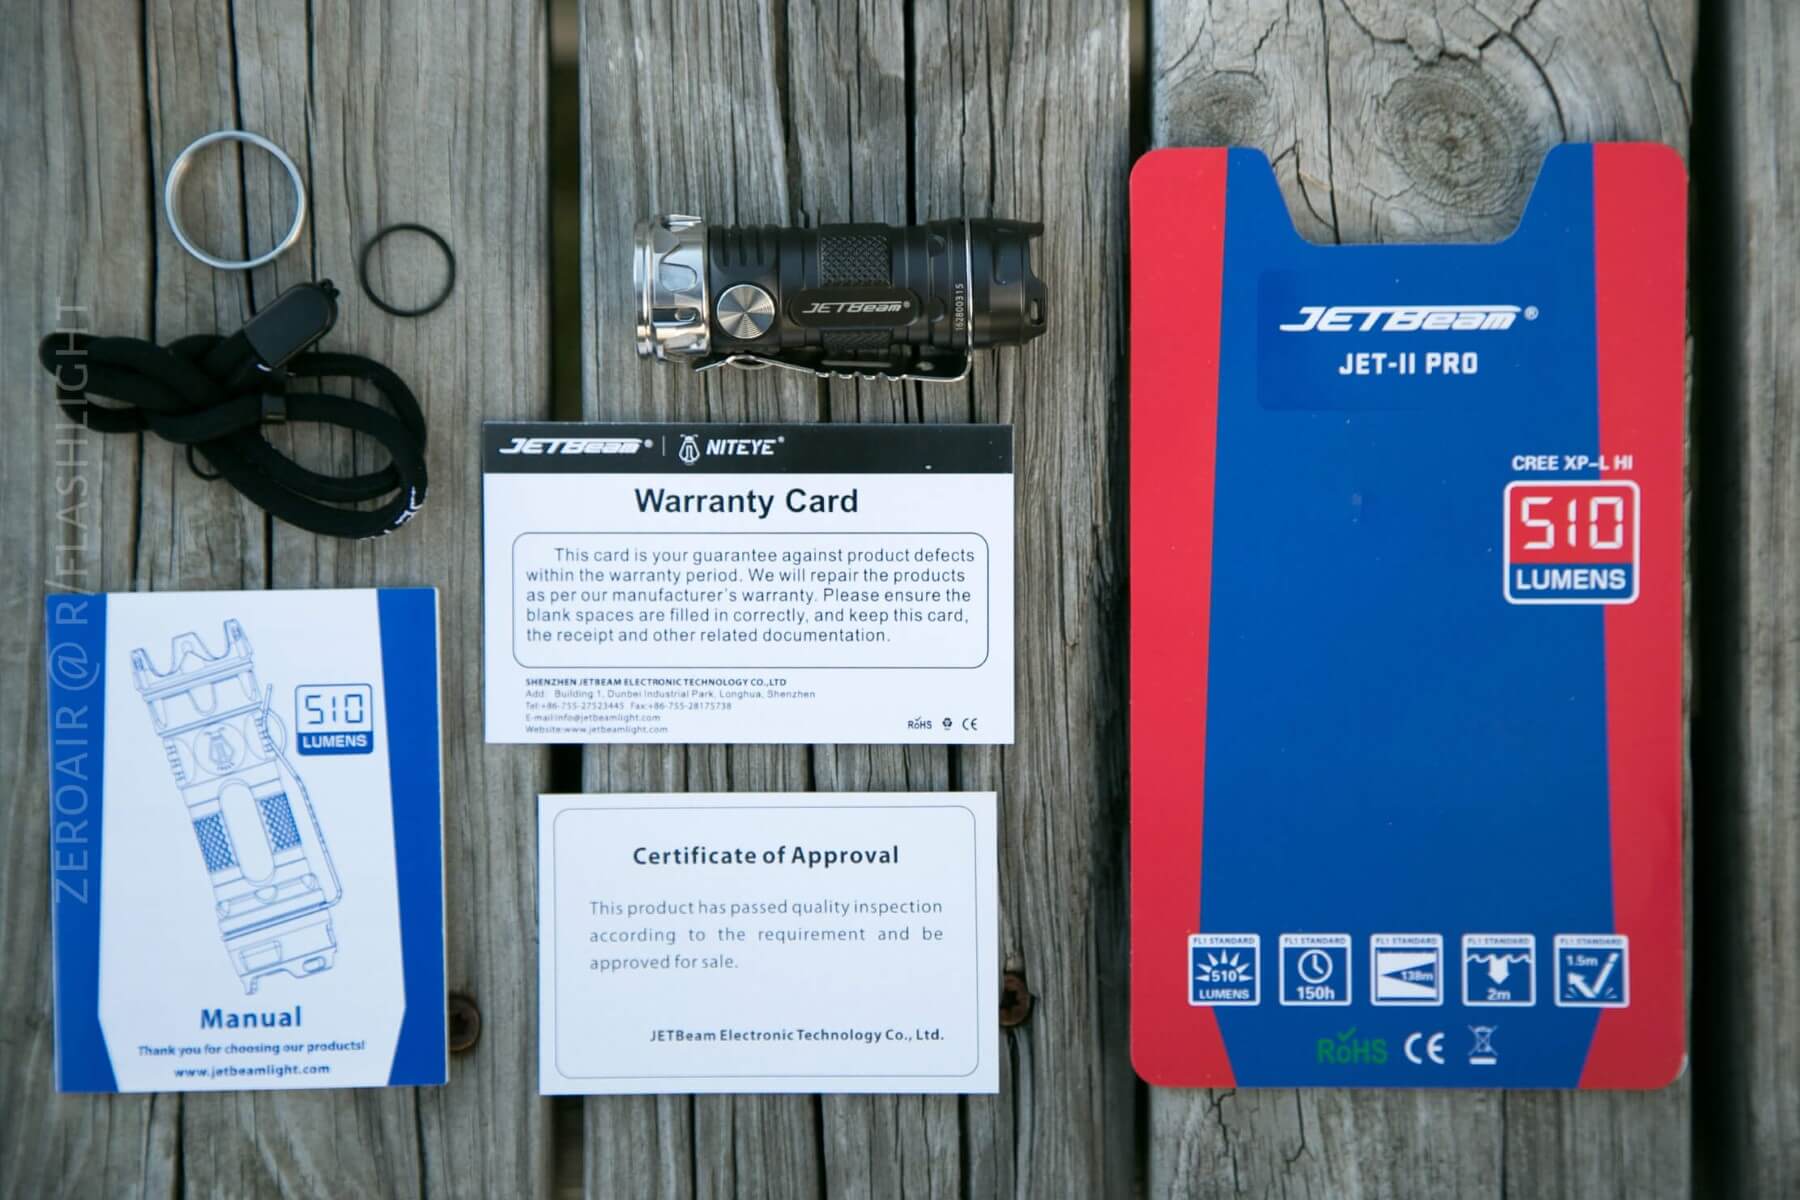
- JETBeam Jet-II Pro
- Alternate (non-strike) bezel
- Manual/Warranty/CoA card
- Lanyard
- Spare O-ring
Package and Manual
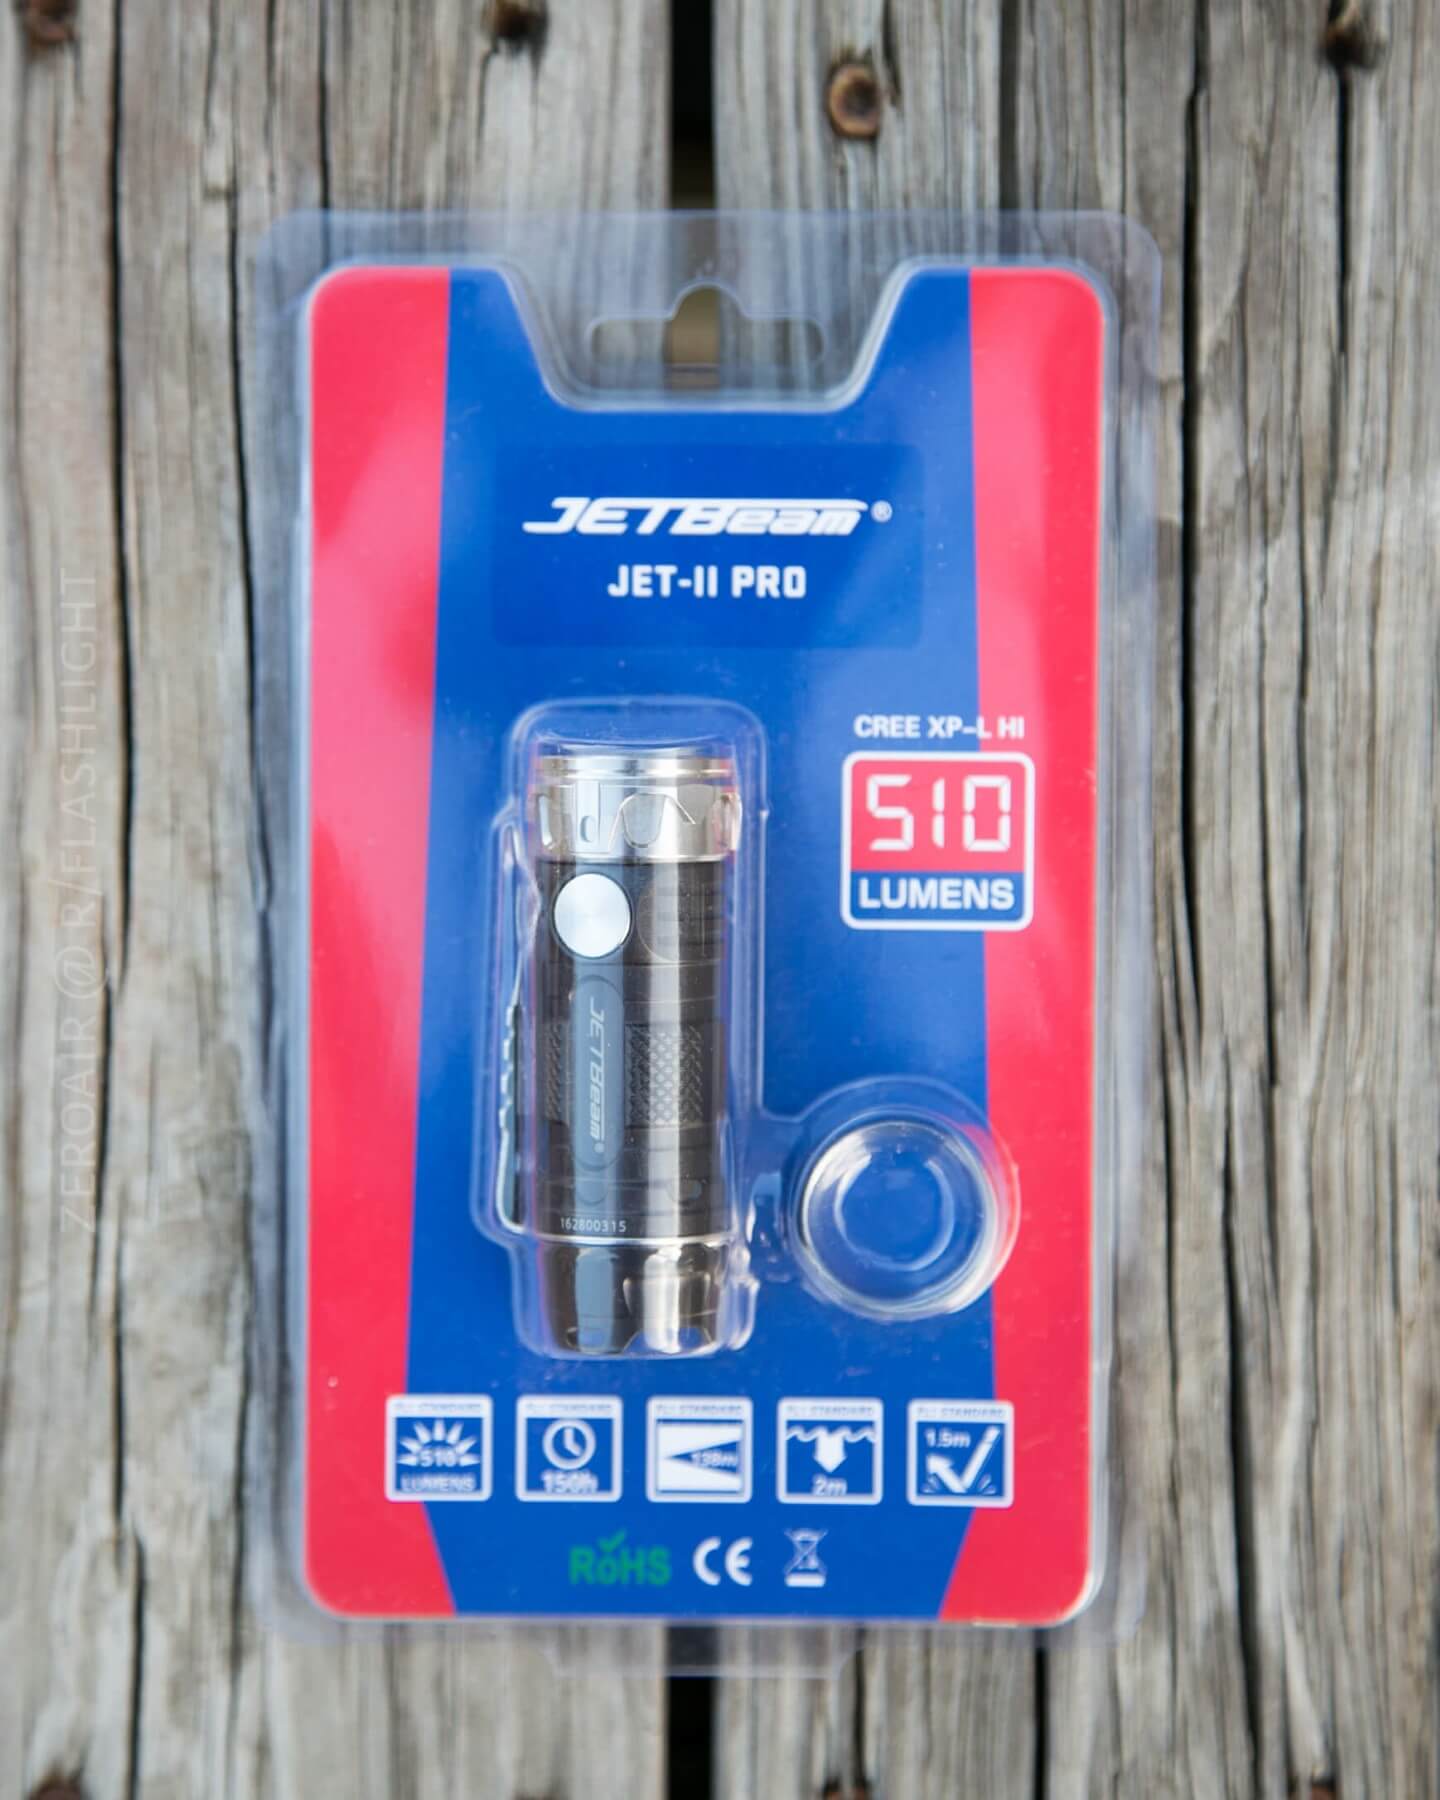
Just like the other JETBeam I reviewed a while back, this light is in an easy-open blister package, great for a hanging store display. It’s nice and easy to open, but largely not recyclable, which is unfortunate. The package shows off the goods, though, so you can see what you’re getting! The back is fairly nondescript.

The manual is also typical of JETBeam. A long page with all the info in English on one side, and non-English on the other. It’s fairly descriptive and well written. Warranty card too.
Build Quality, Durability, and Disassembly
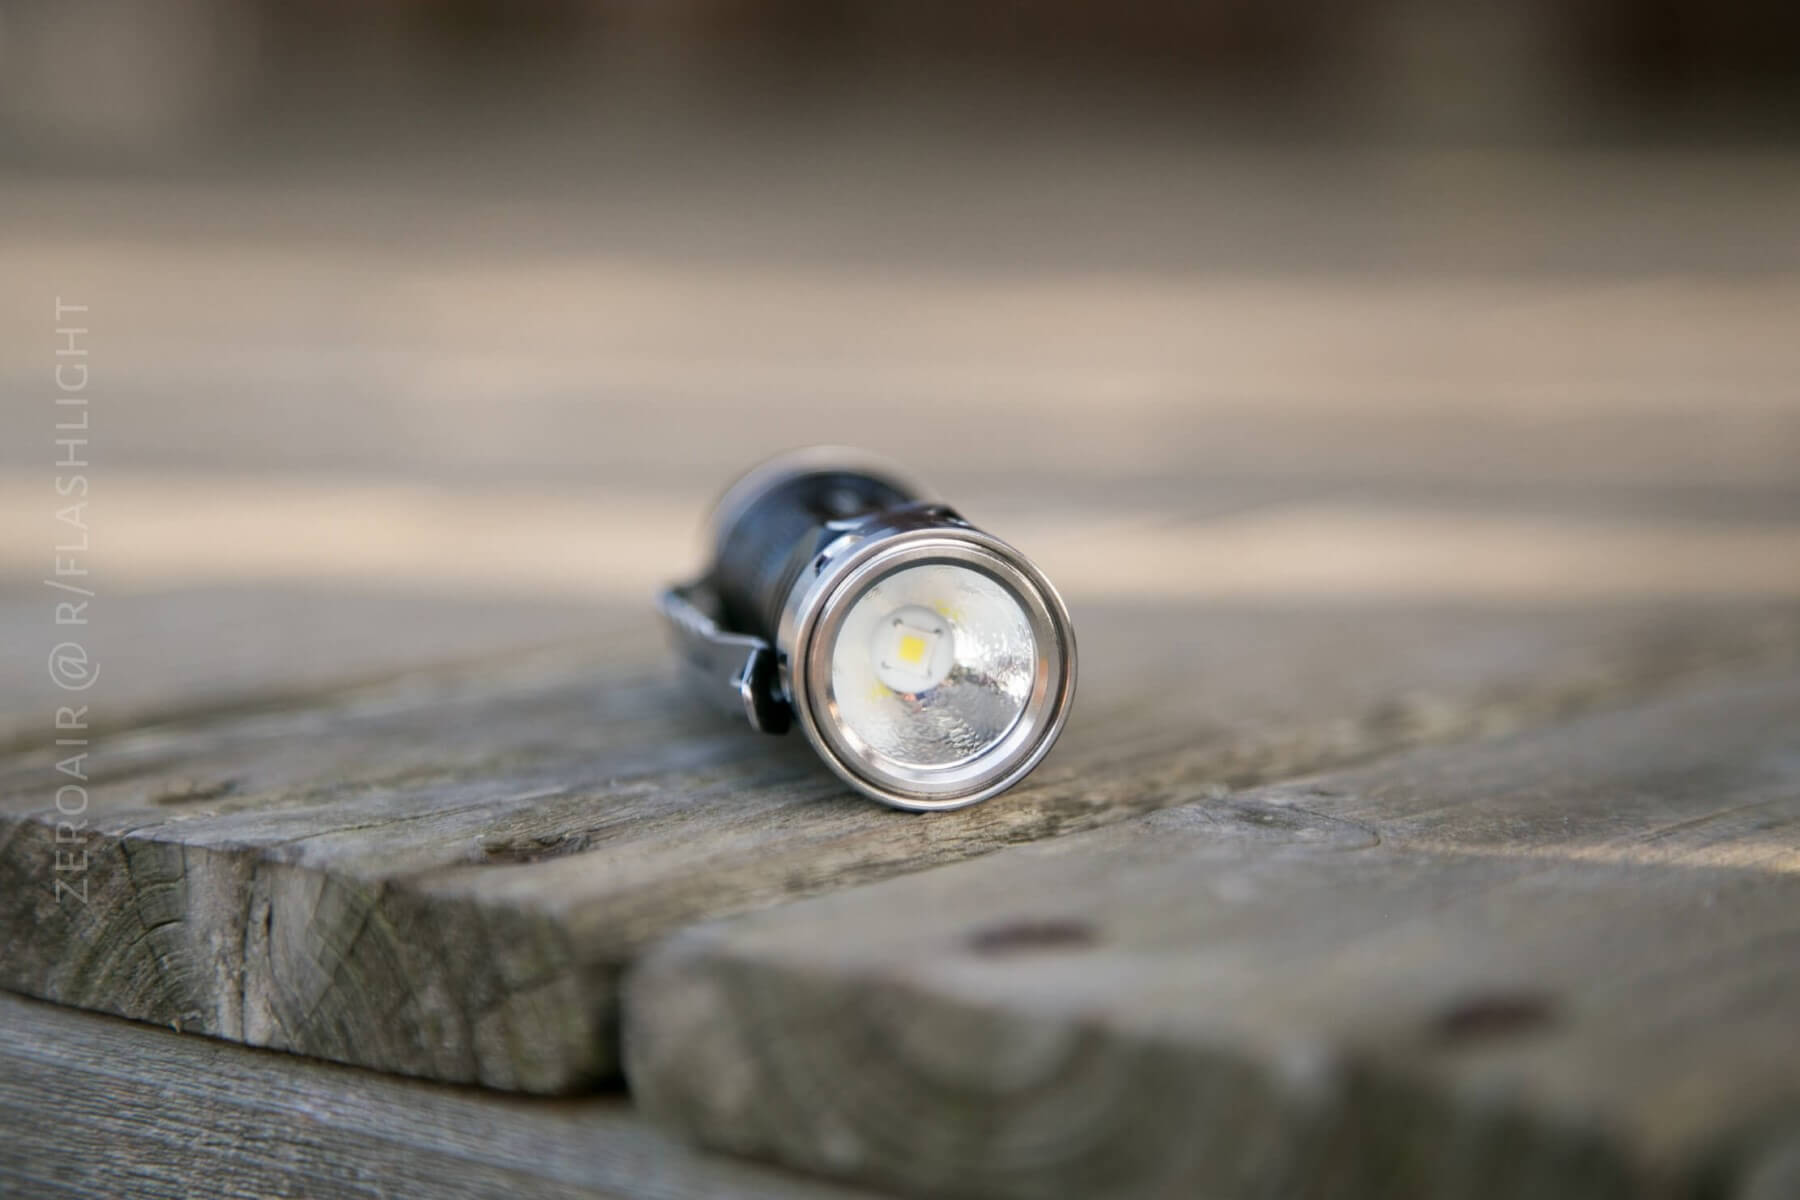
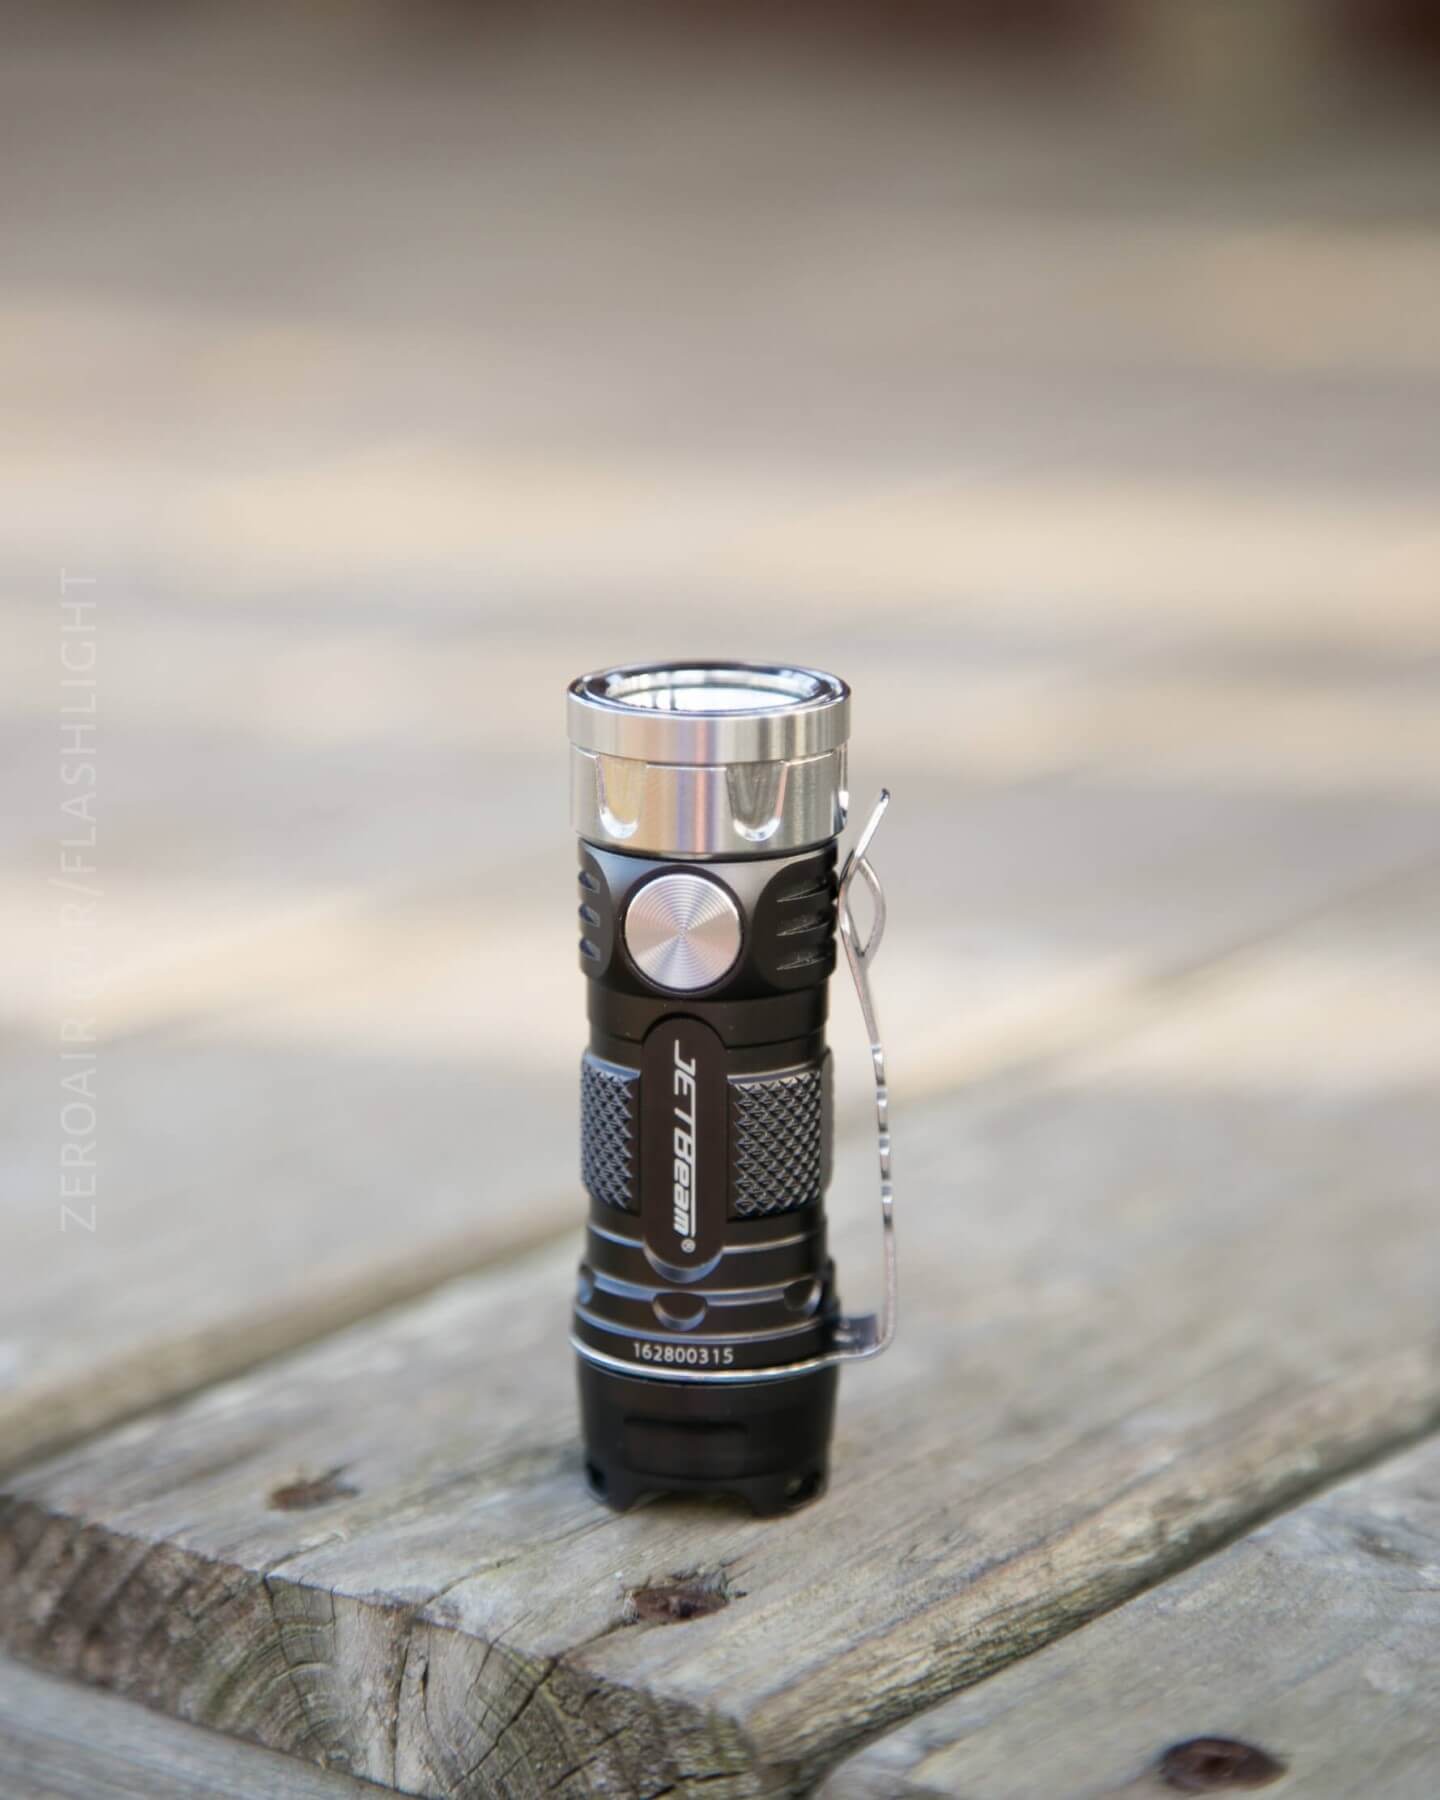
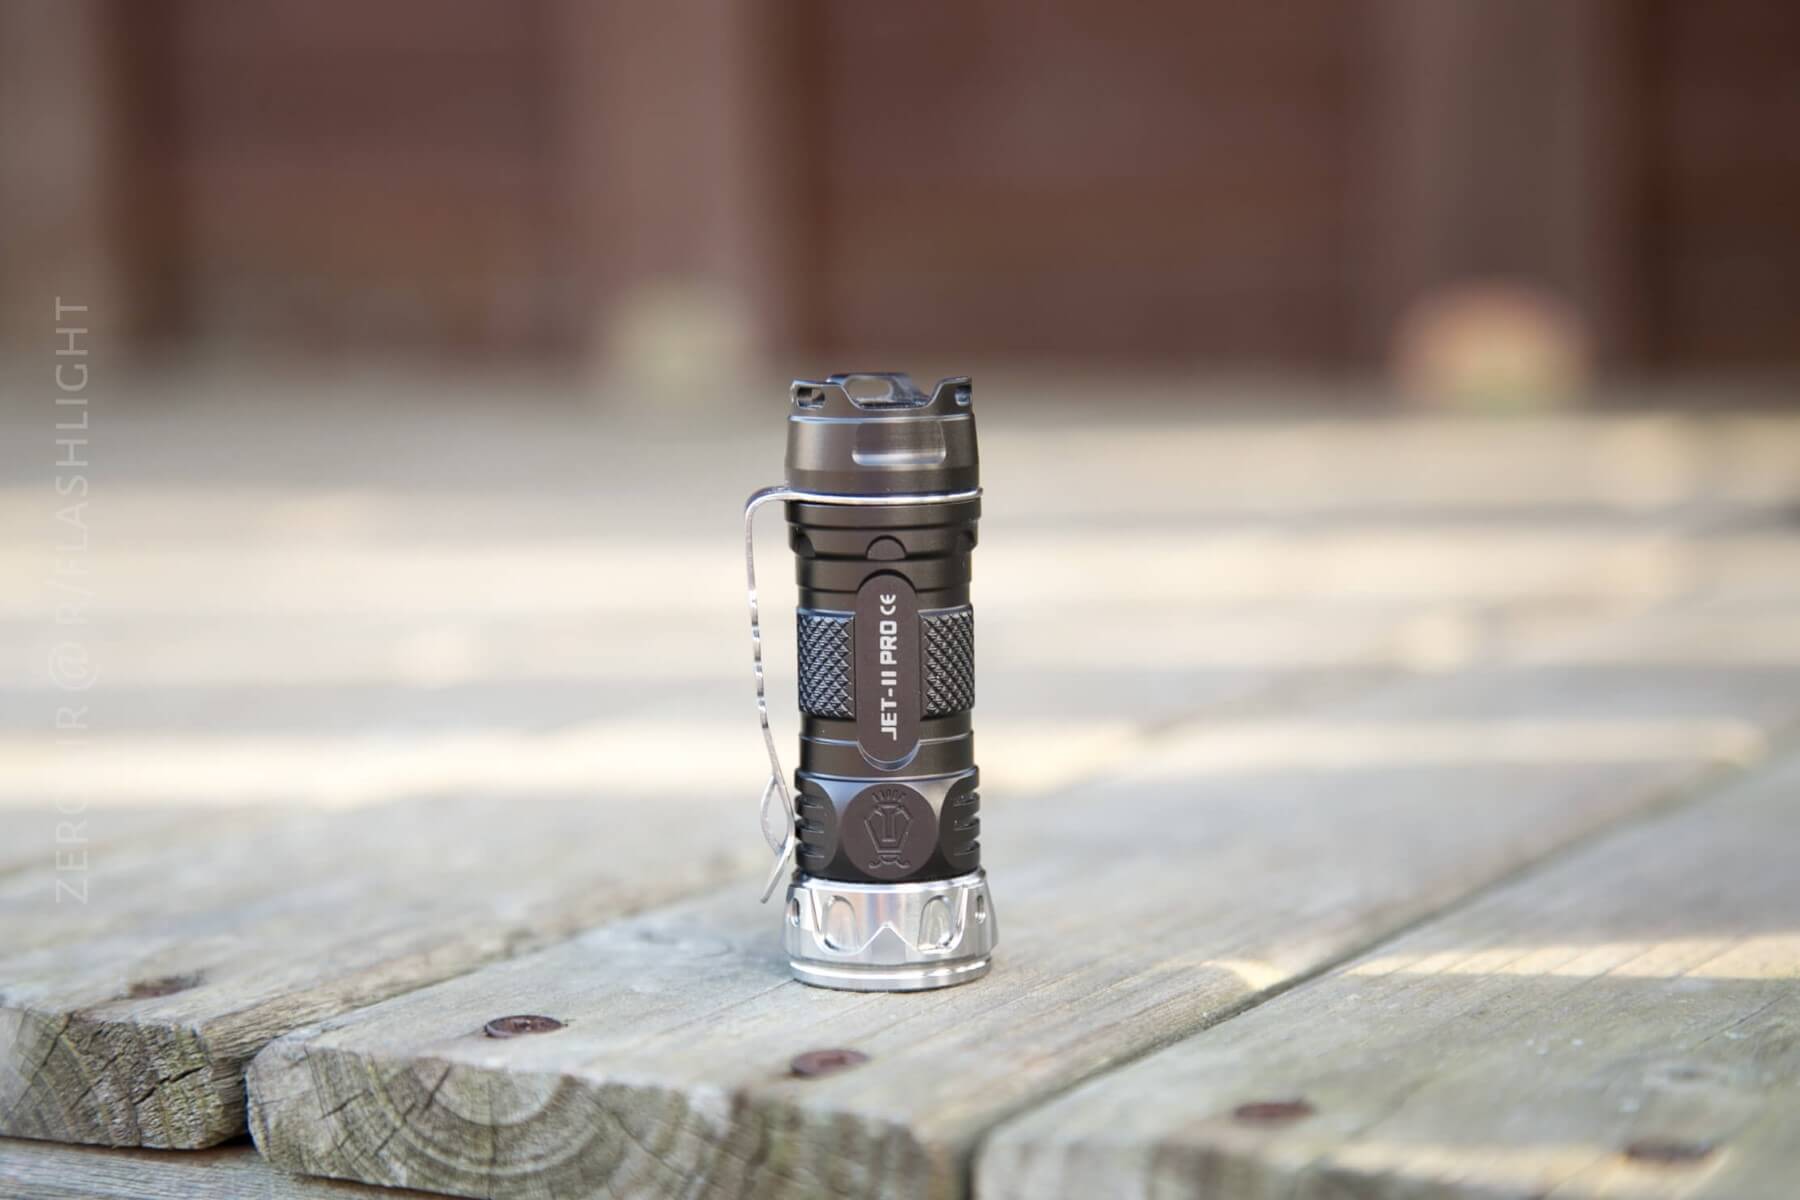
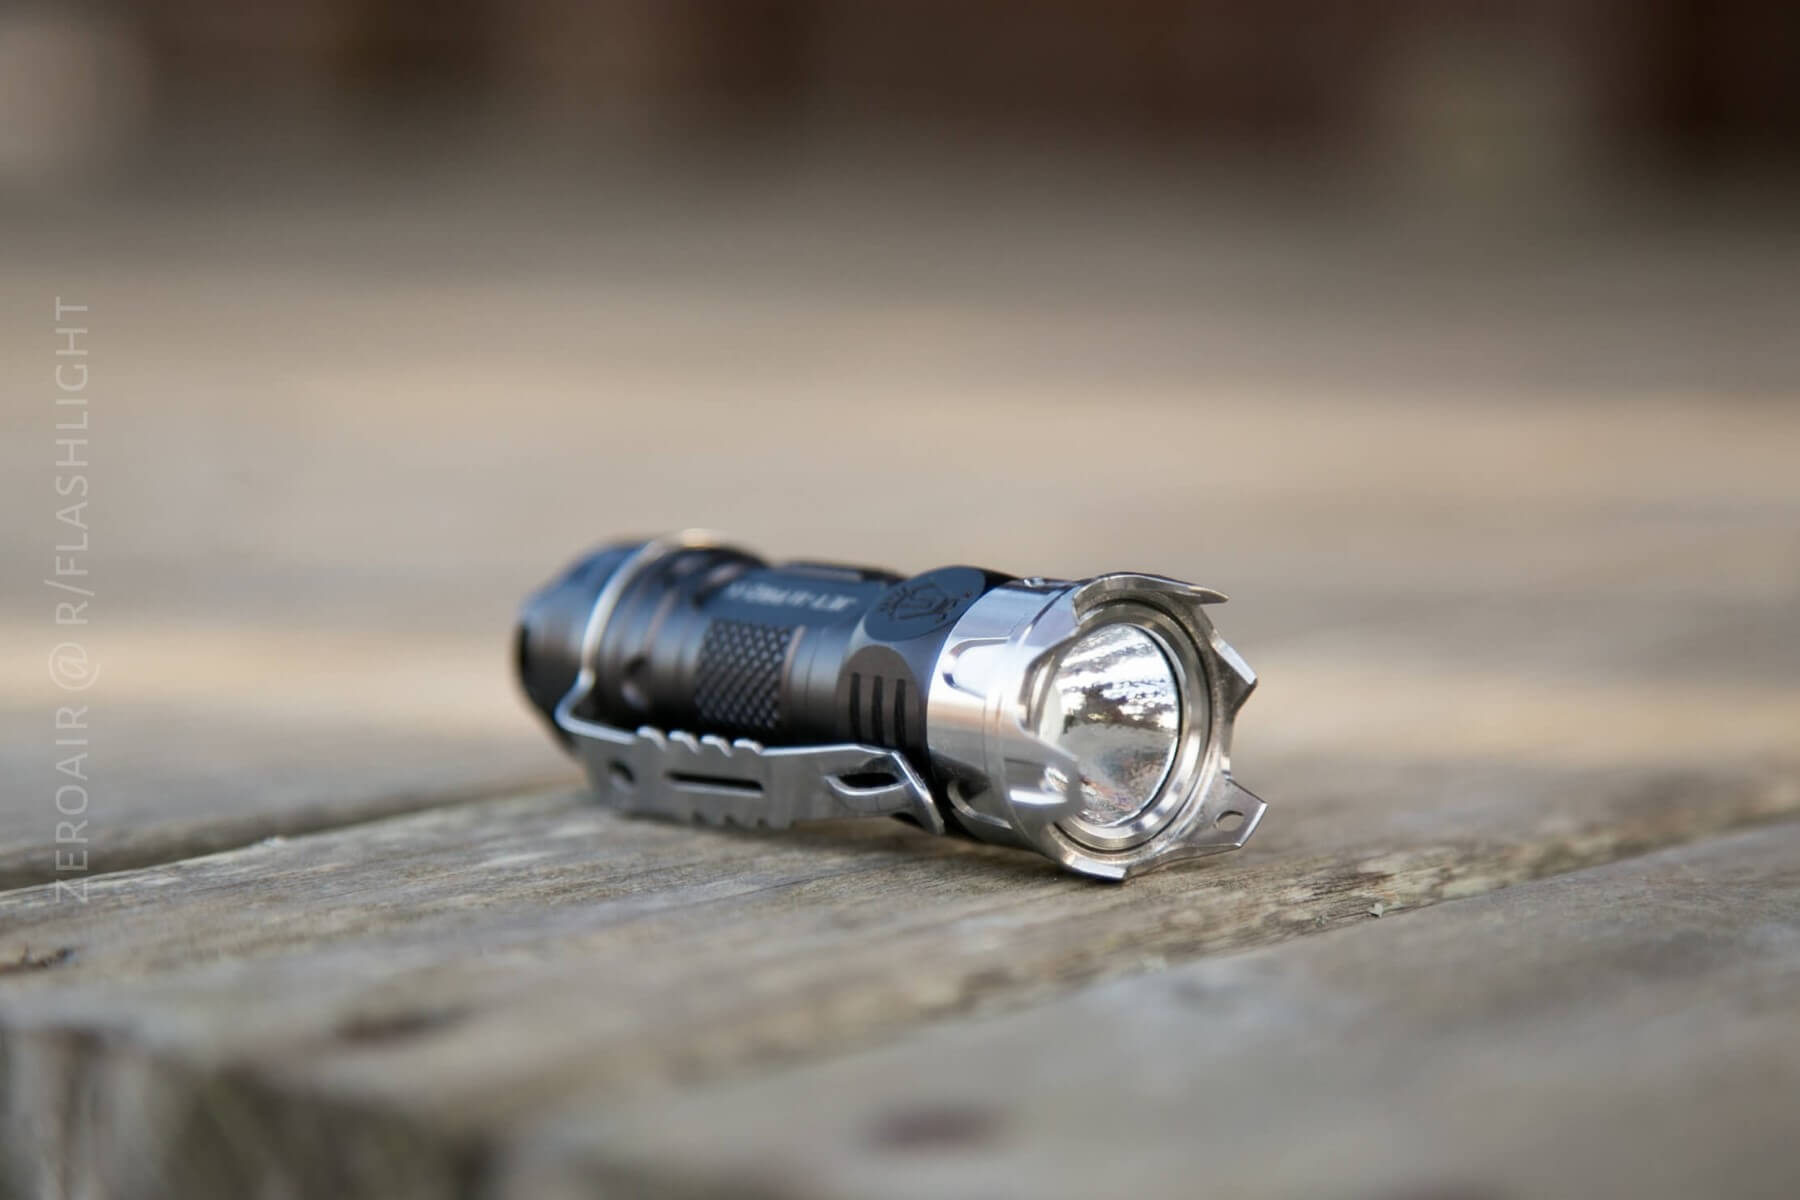
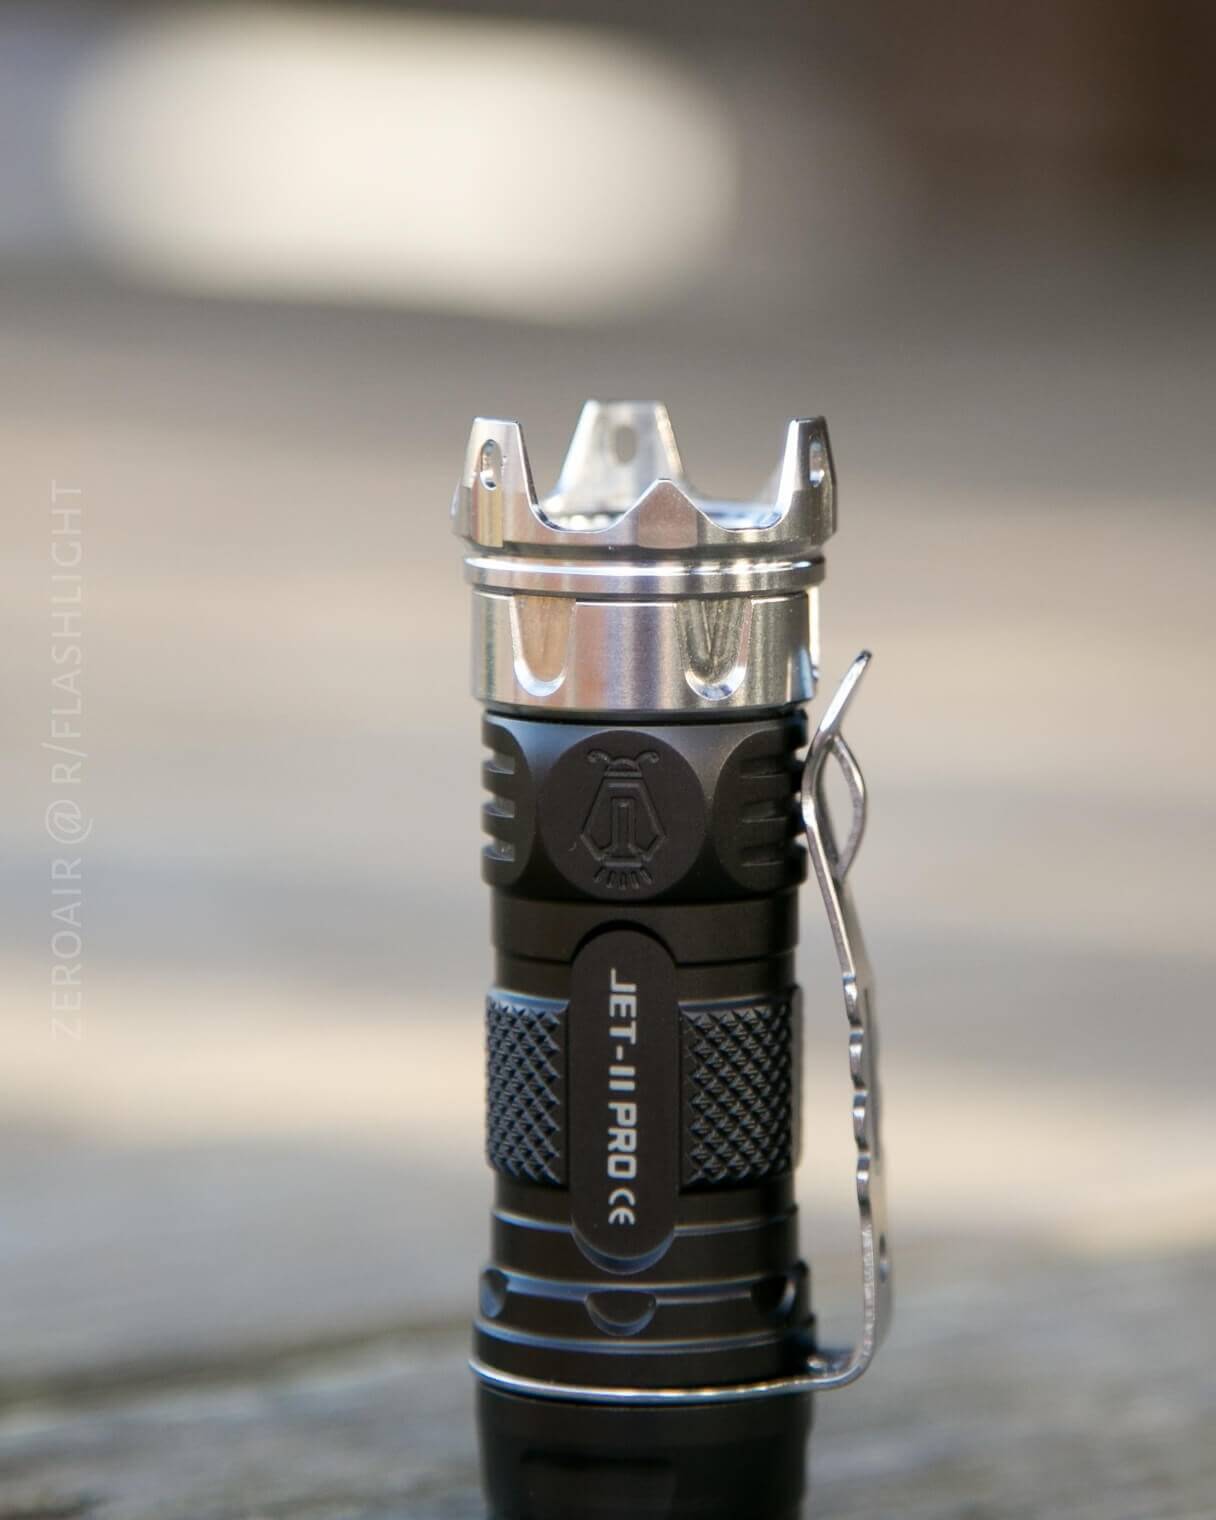
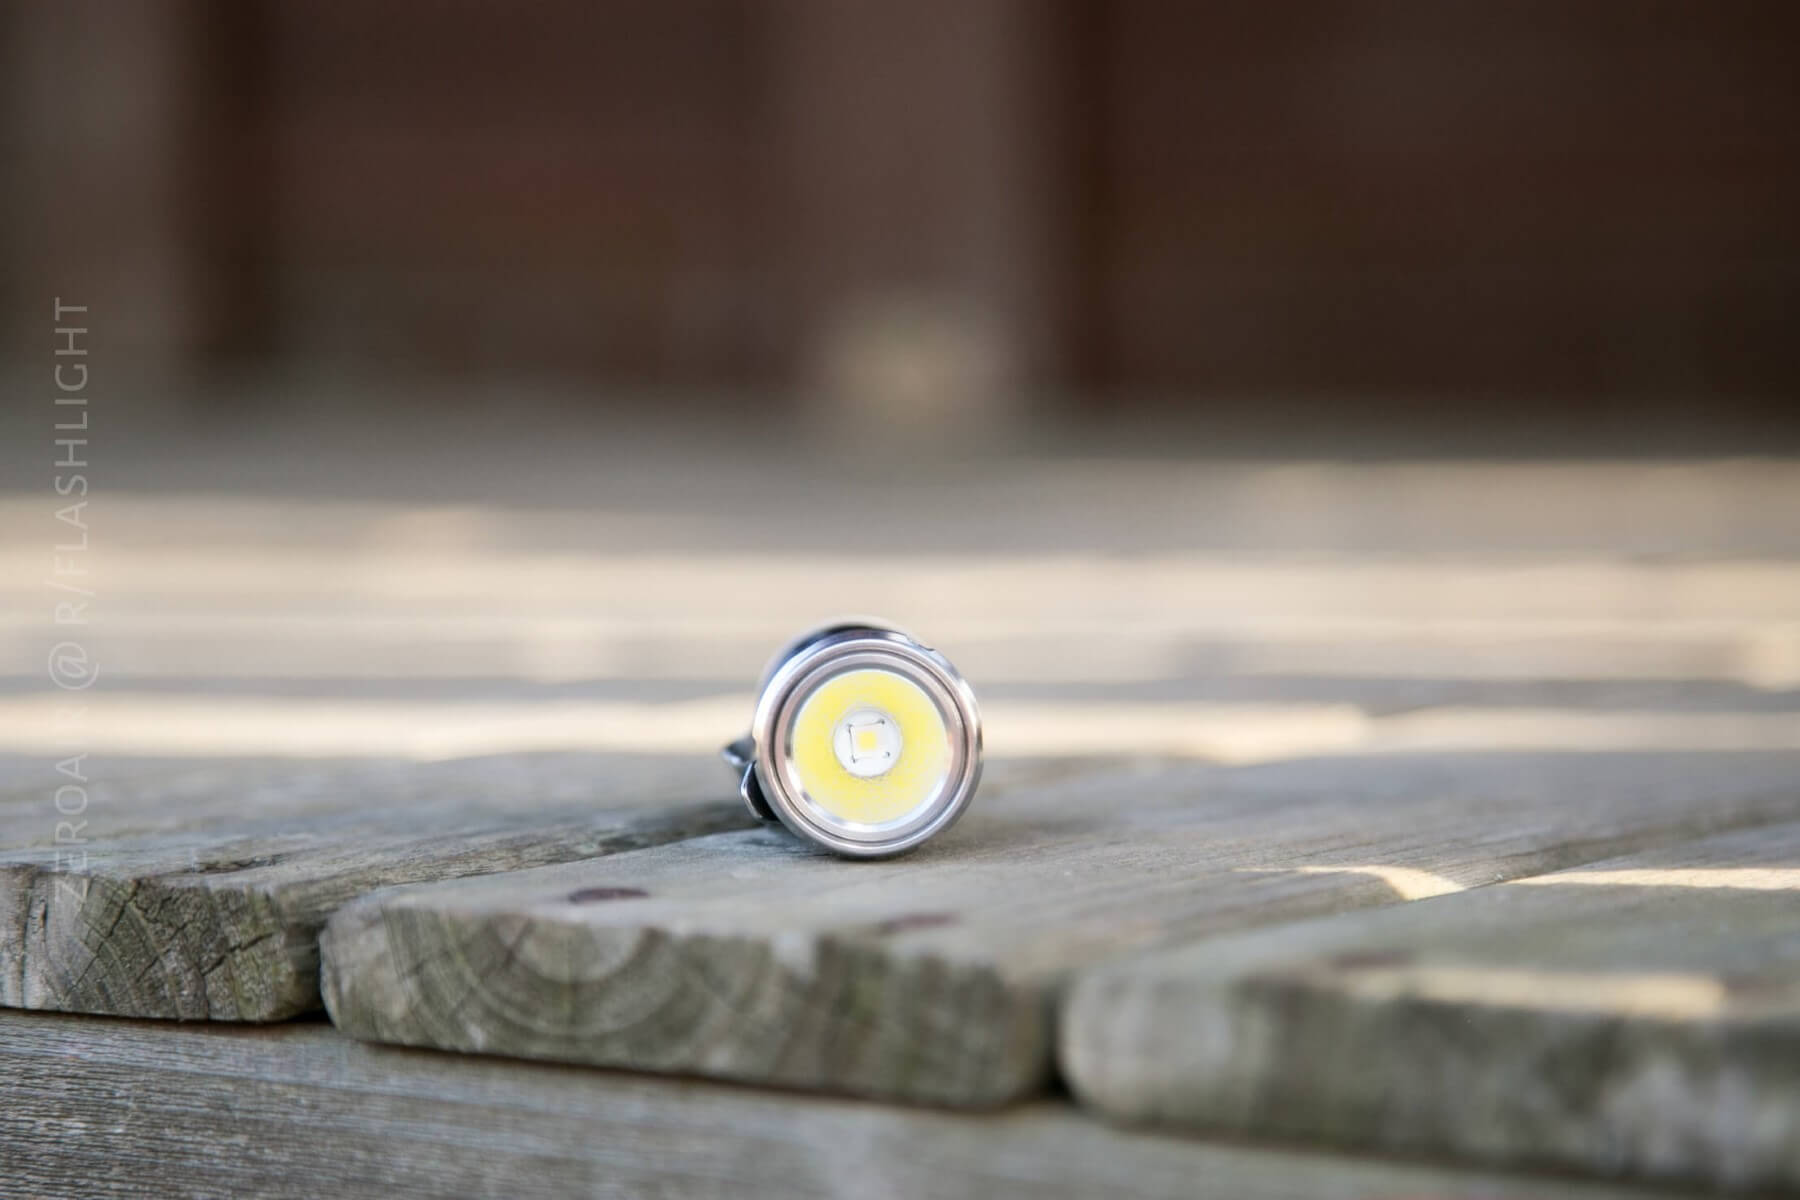
This little JetBEAM is impeccably built. Everything is smooth, the threads are anodized, well-lubed, and square, and feel firm (ie, quality). The bezel – both strike and smooth – is stainless, and the part they screw on to is stainless as well. So the threads there are even better than elsewhere! They’re so smooth that I often play with this light just by screwing/unscrewing the bezel. It’s so smooth it can almost be spun snug with one quick flick. This aggressive ‘spike bezel’ can be flipped around to a smooth side. Here’s a head-on view of the spike bezel with the flat side forward.
Also provided is a separate, completely smooth screw-on bezel.
And honestly, you could probably run this thing with no extra bezel at all if you wanted.

The tailcap has a nice thick spring, but there’s no magnet under there.
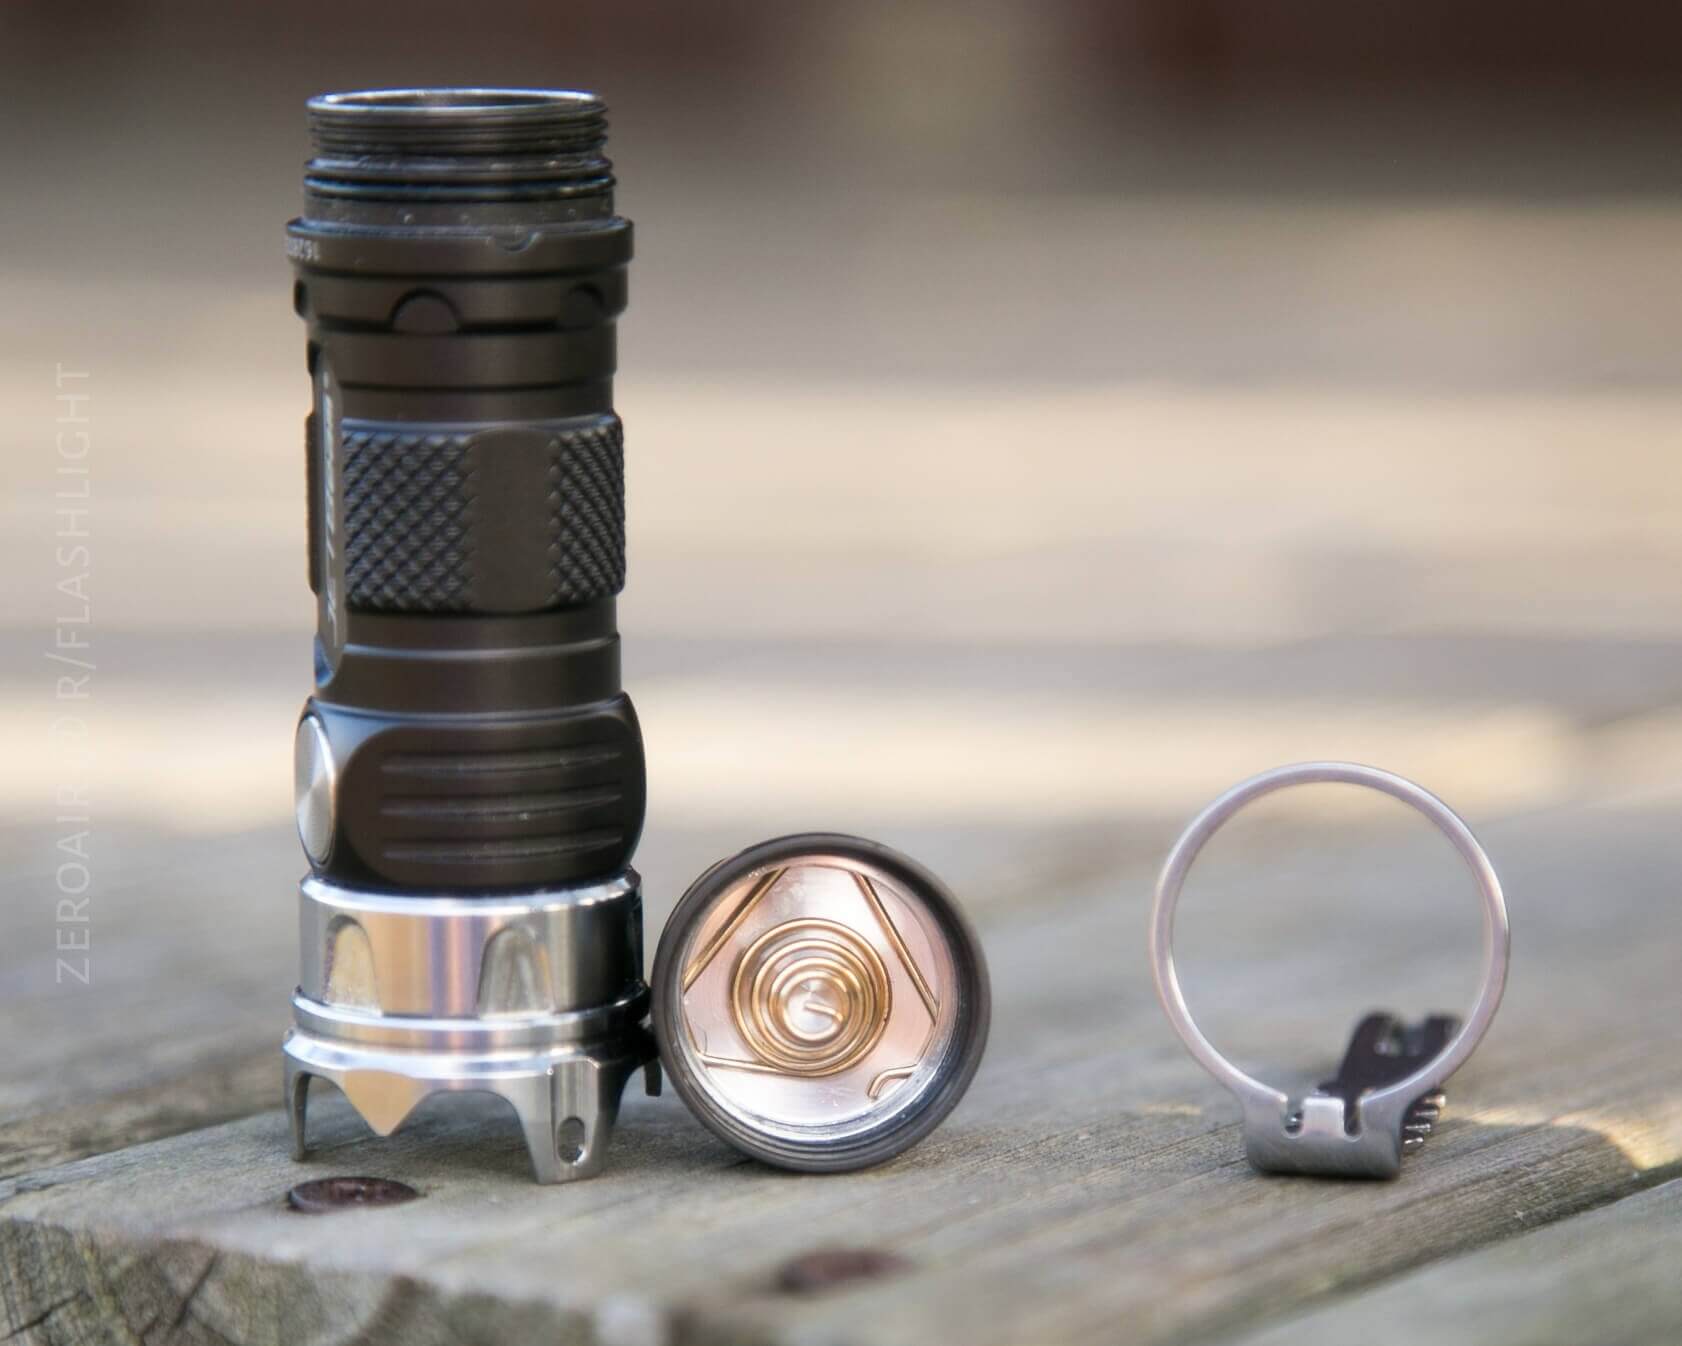
The driver side of the light has a brass button for great electrical contact.
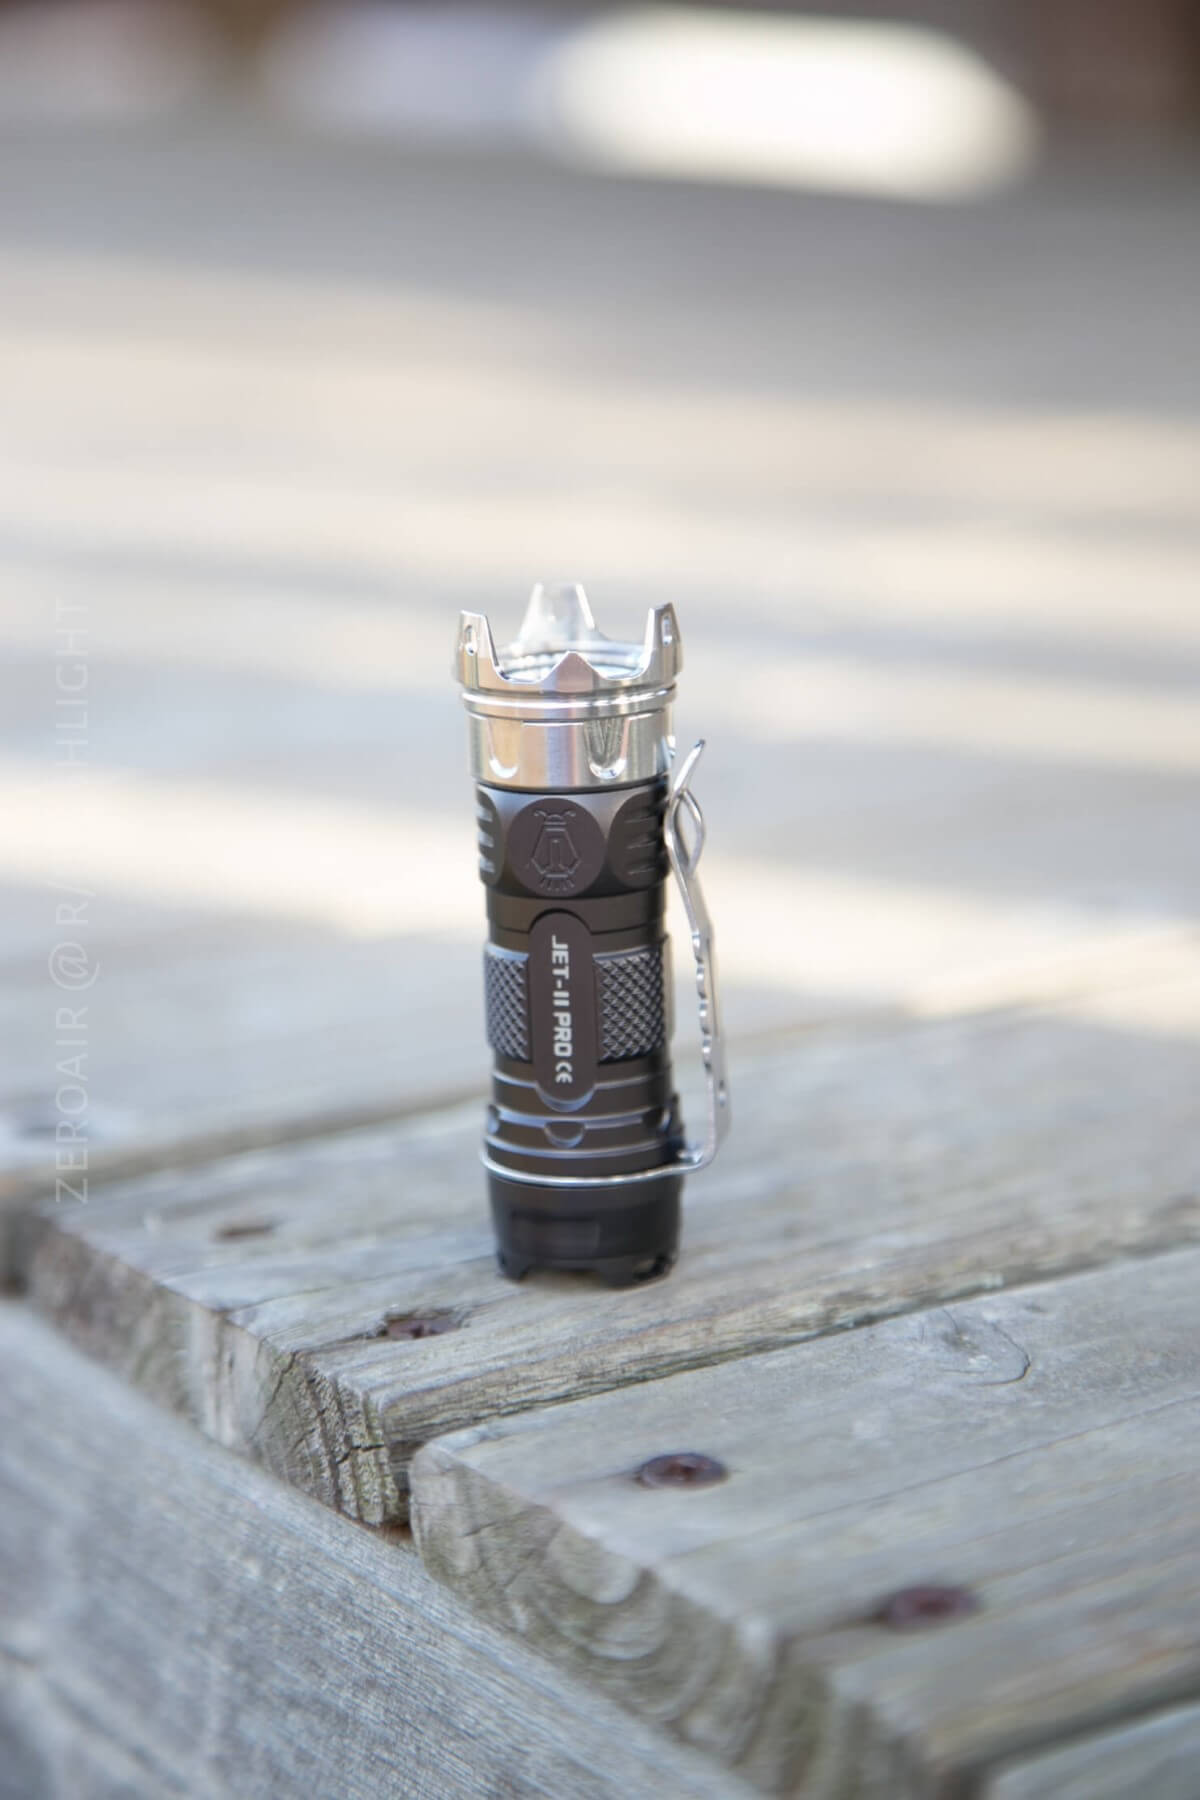
This strike bezel is quite aggressive, though.
Mmm quite.
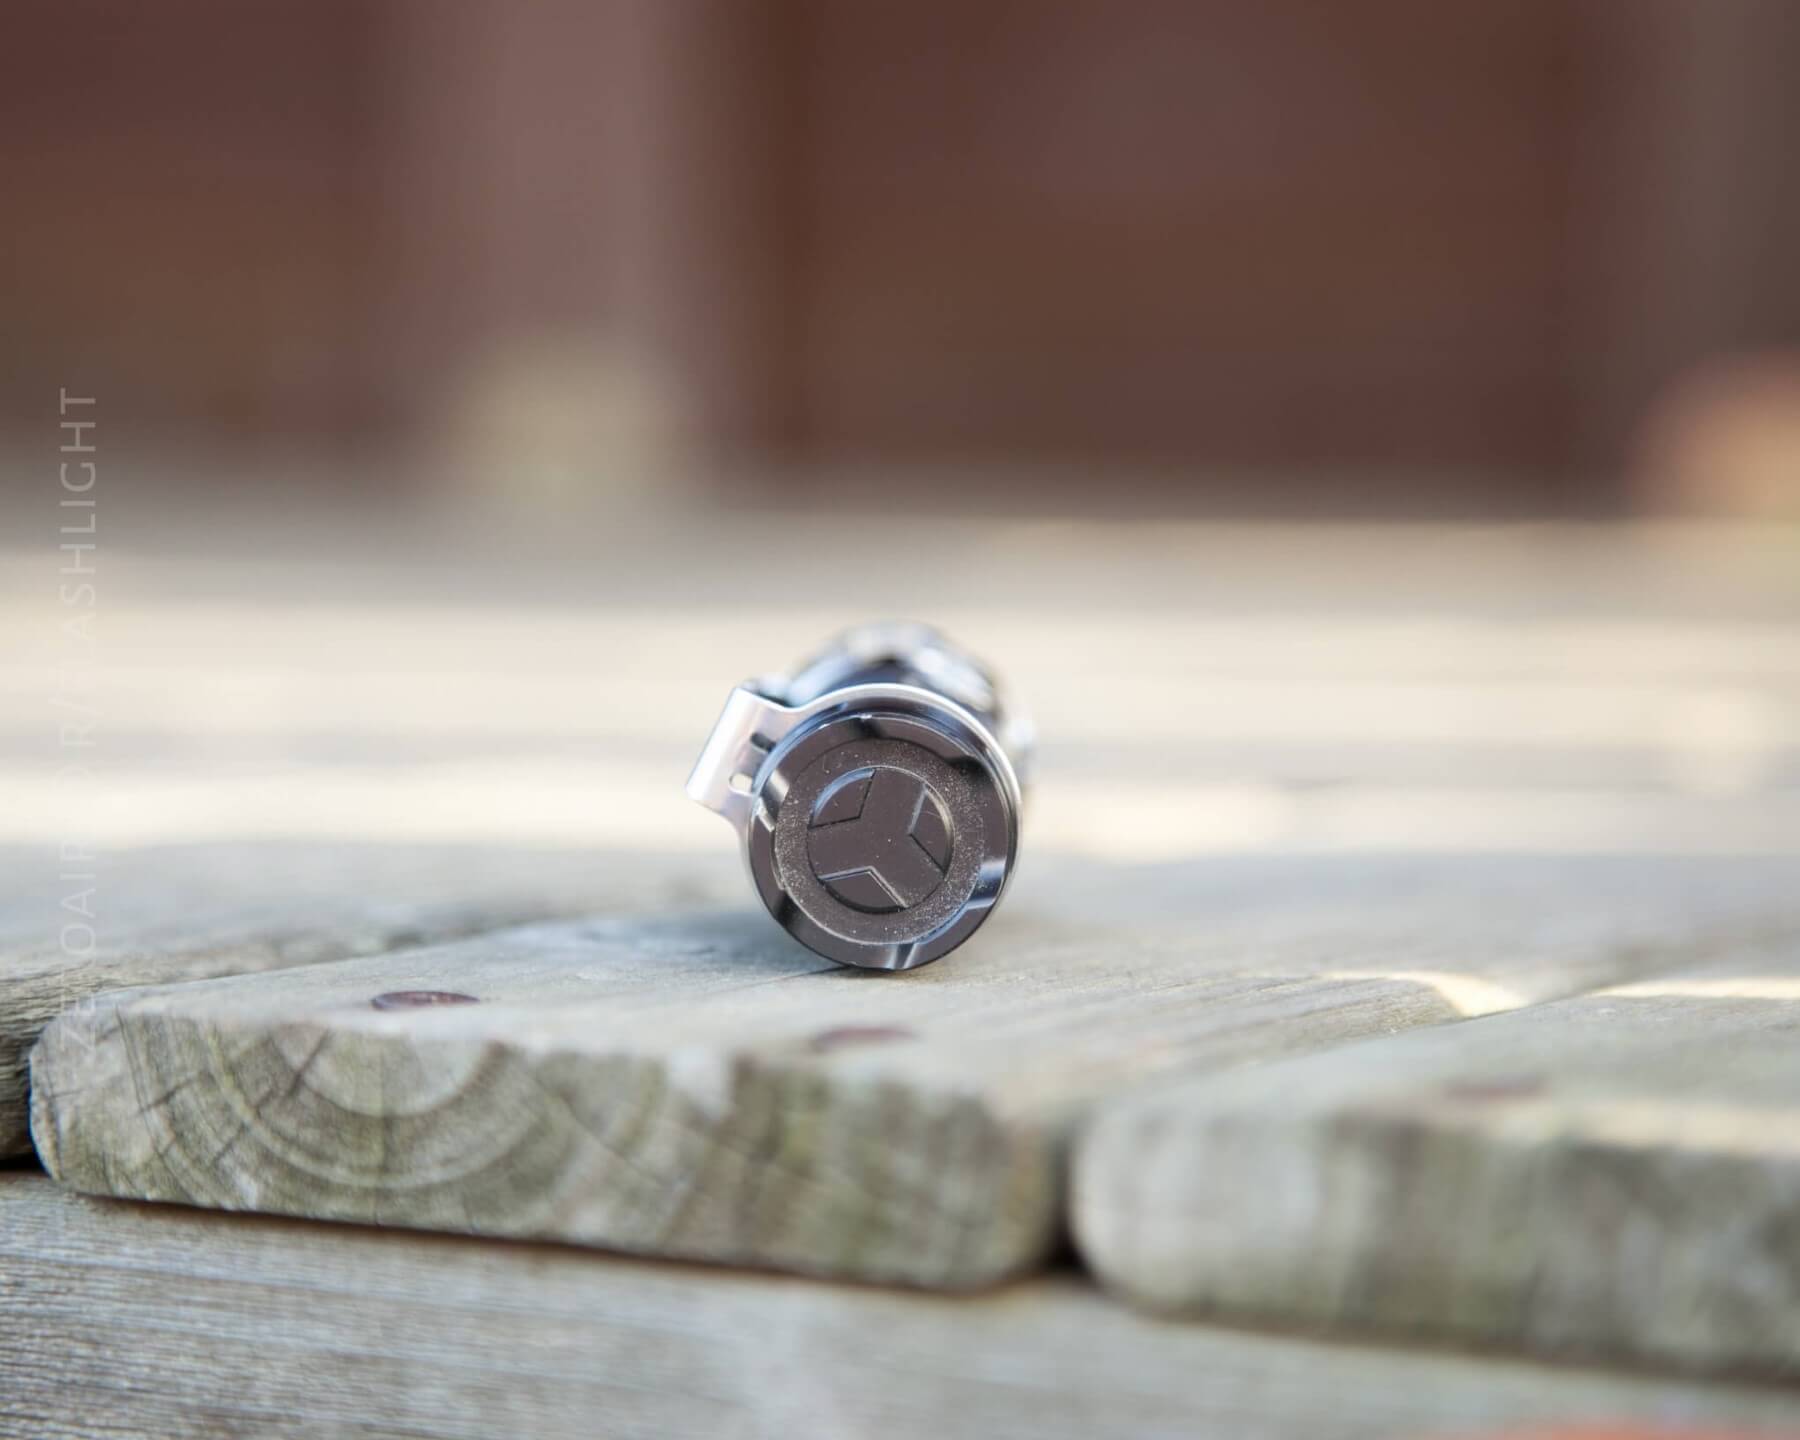
A neat little bonus is the three slots in the tailcap made for [lanyard attachment or] tritium vials! I think it’s the 6mm variety that’ll fit here.
Otherwise, the tailcap is tailcappy.
The Jet-II Pro is also quite durable – I’ve carried this light for about a month now, and it still looks and works great.
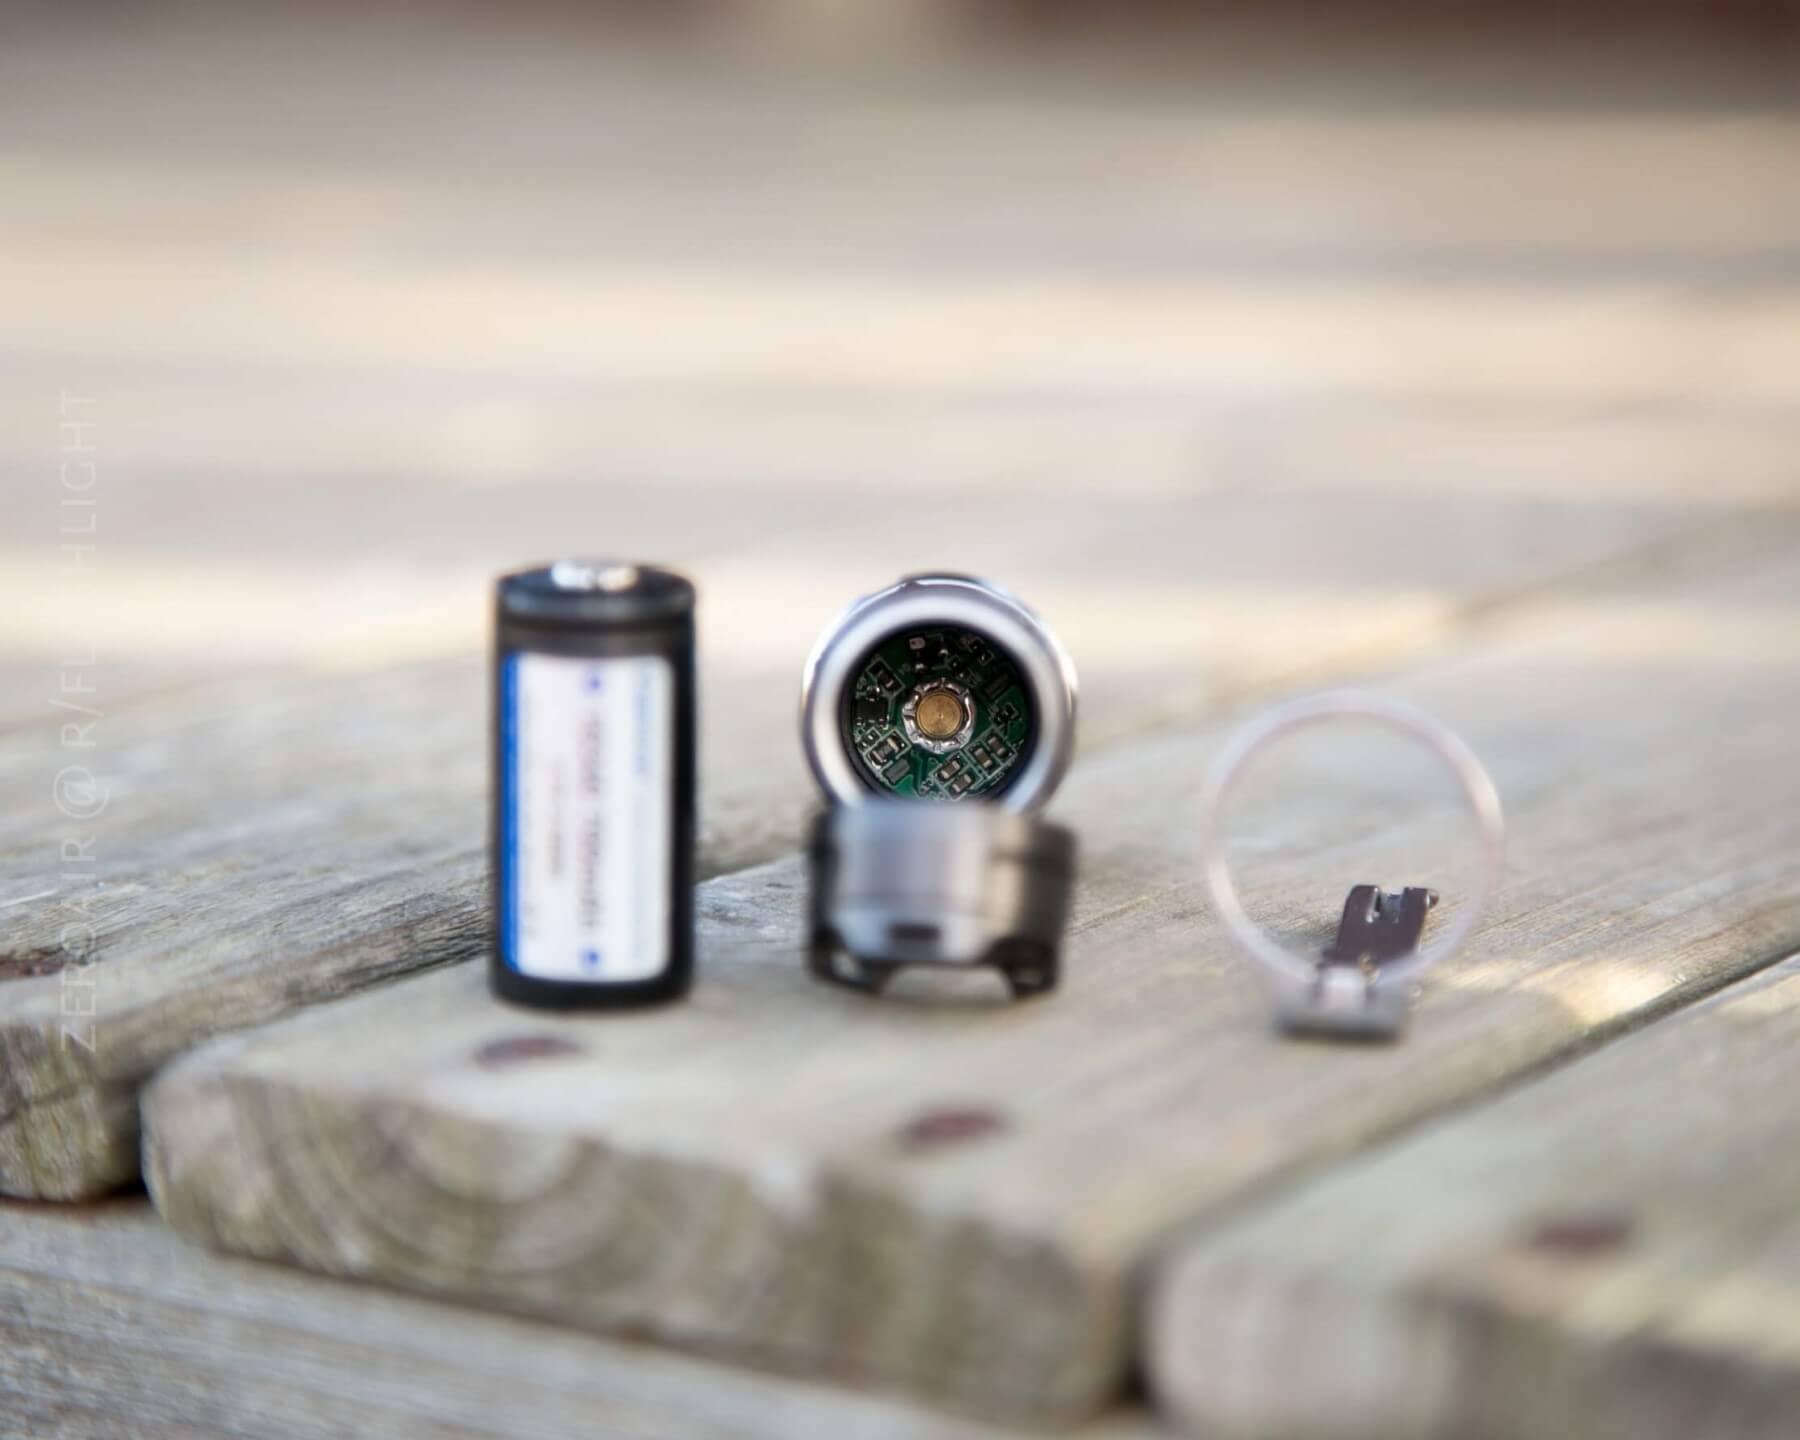
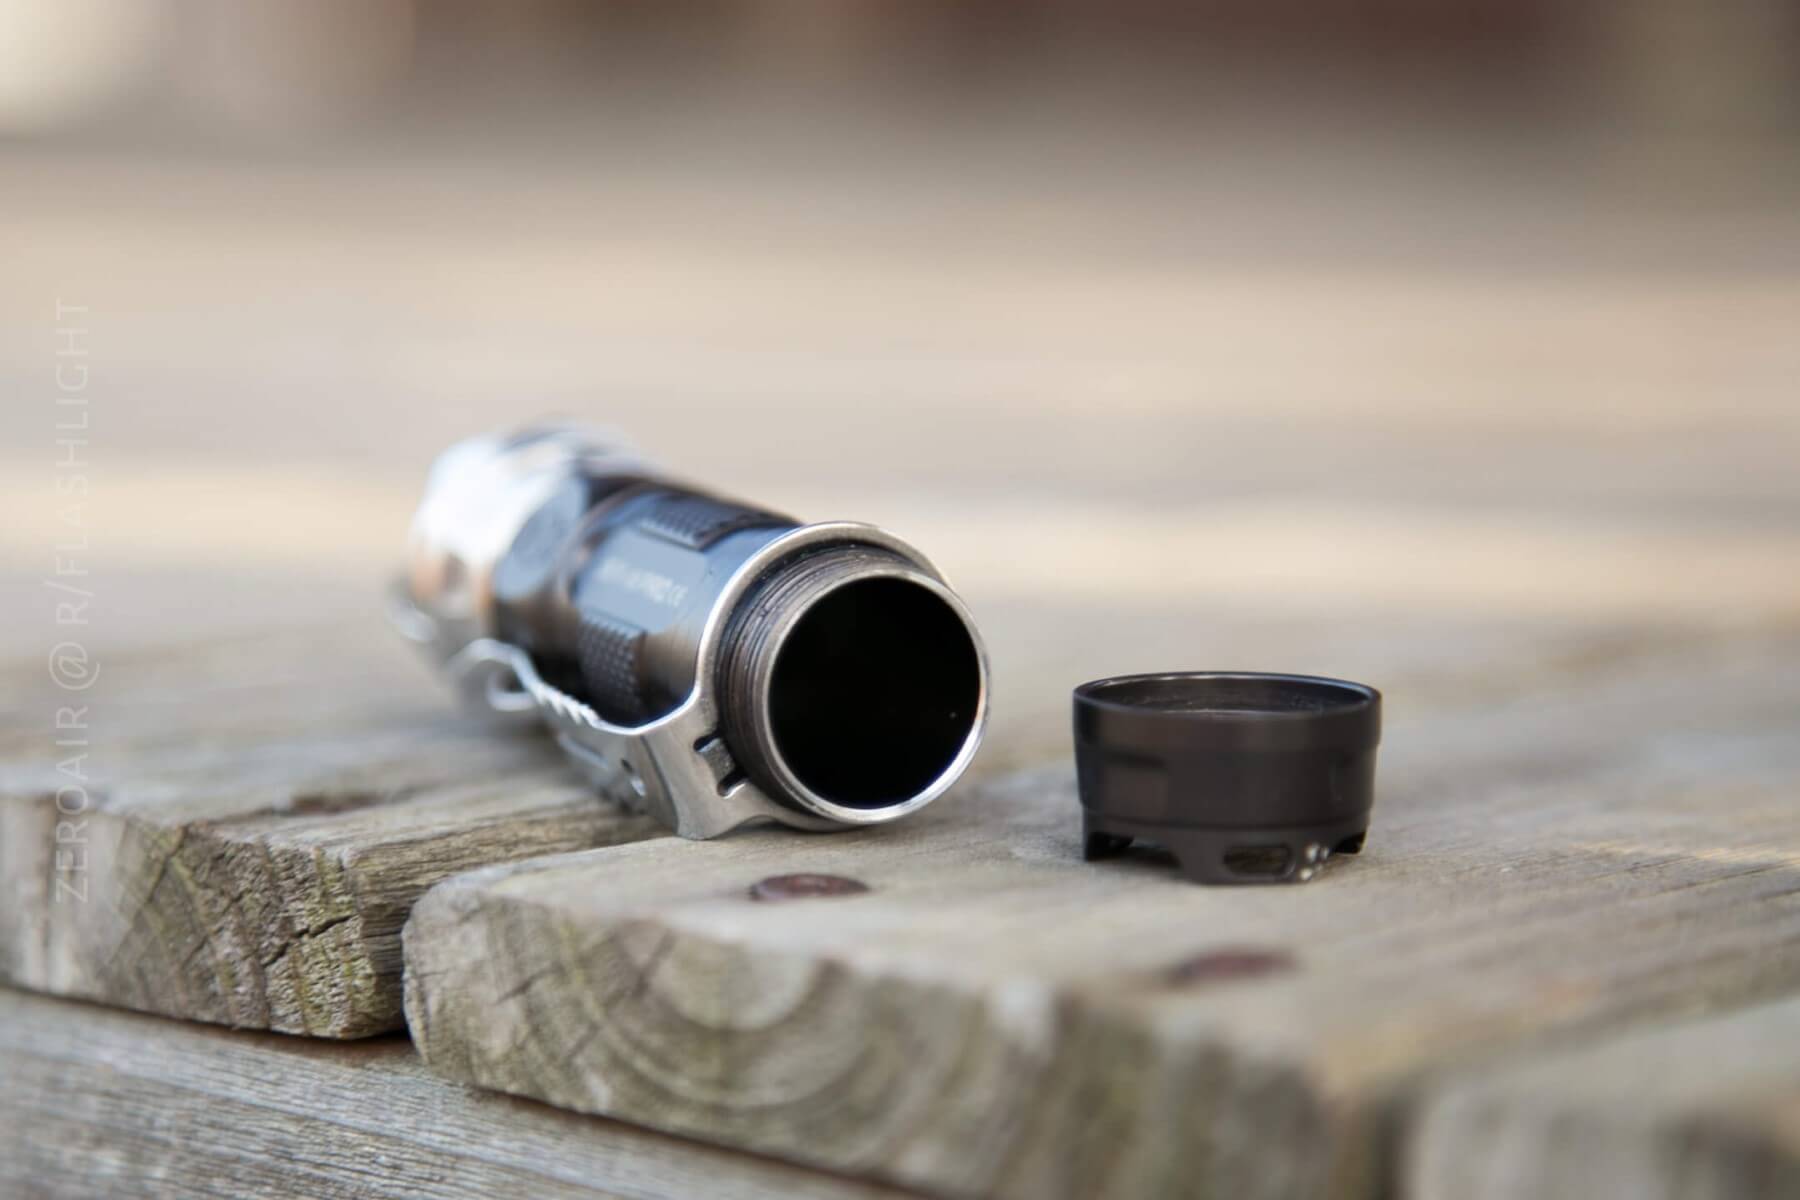
Surprisingly, the head comes right off, too. Possibly that’s unsurprising? Anyway, I was surprised. Of course, it’s a different metal, and a slightly different size (head is bigger), but still, they fit so snugly. But the head unscrews, and has an o-ring or two in there to seal everything properly. So the emitter is accessible, but even so, the side switch would have to be dealt with to get the MCPCB out for an emitter swap.
Size
The Jet-II Pro is a single CR123A or 16340, so as expected, it’s a small light. It’s by no means the smallest 16340 light on the market. It’s not even as small as the Olight S1 (but smaller than the Manker E14), which has been out-smalled by the Olight S1 Mini!
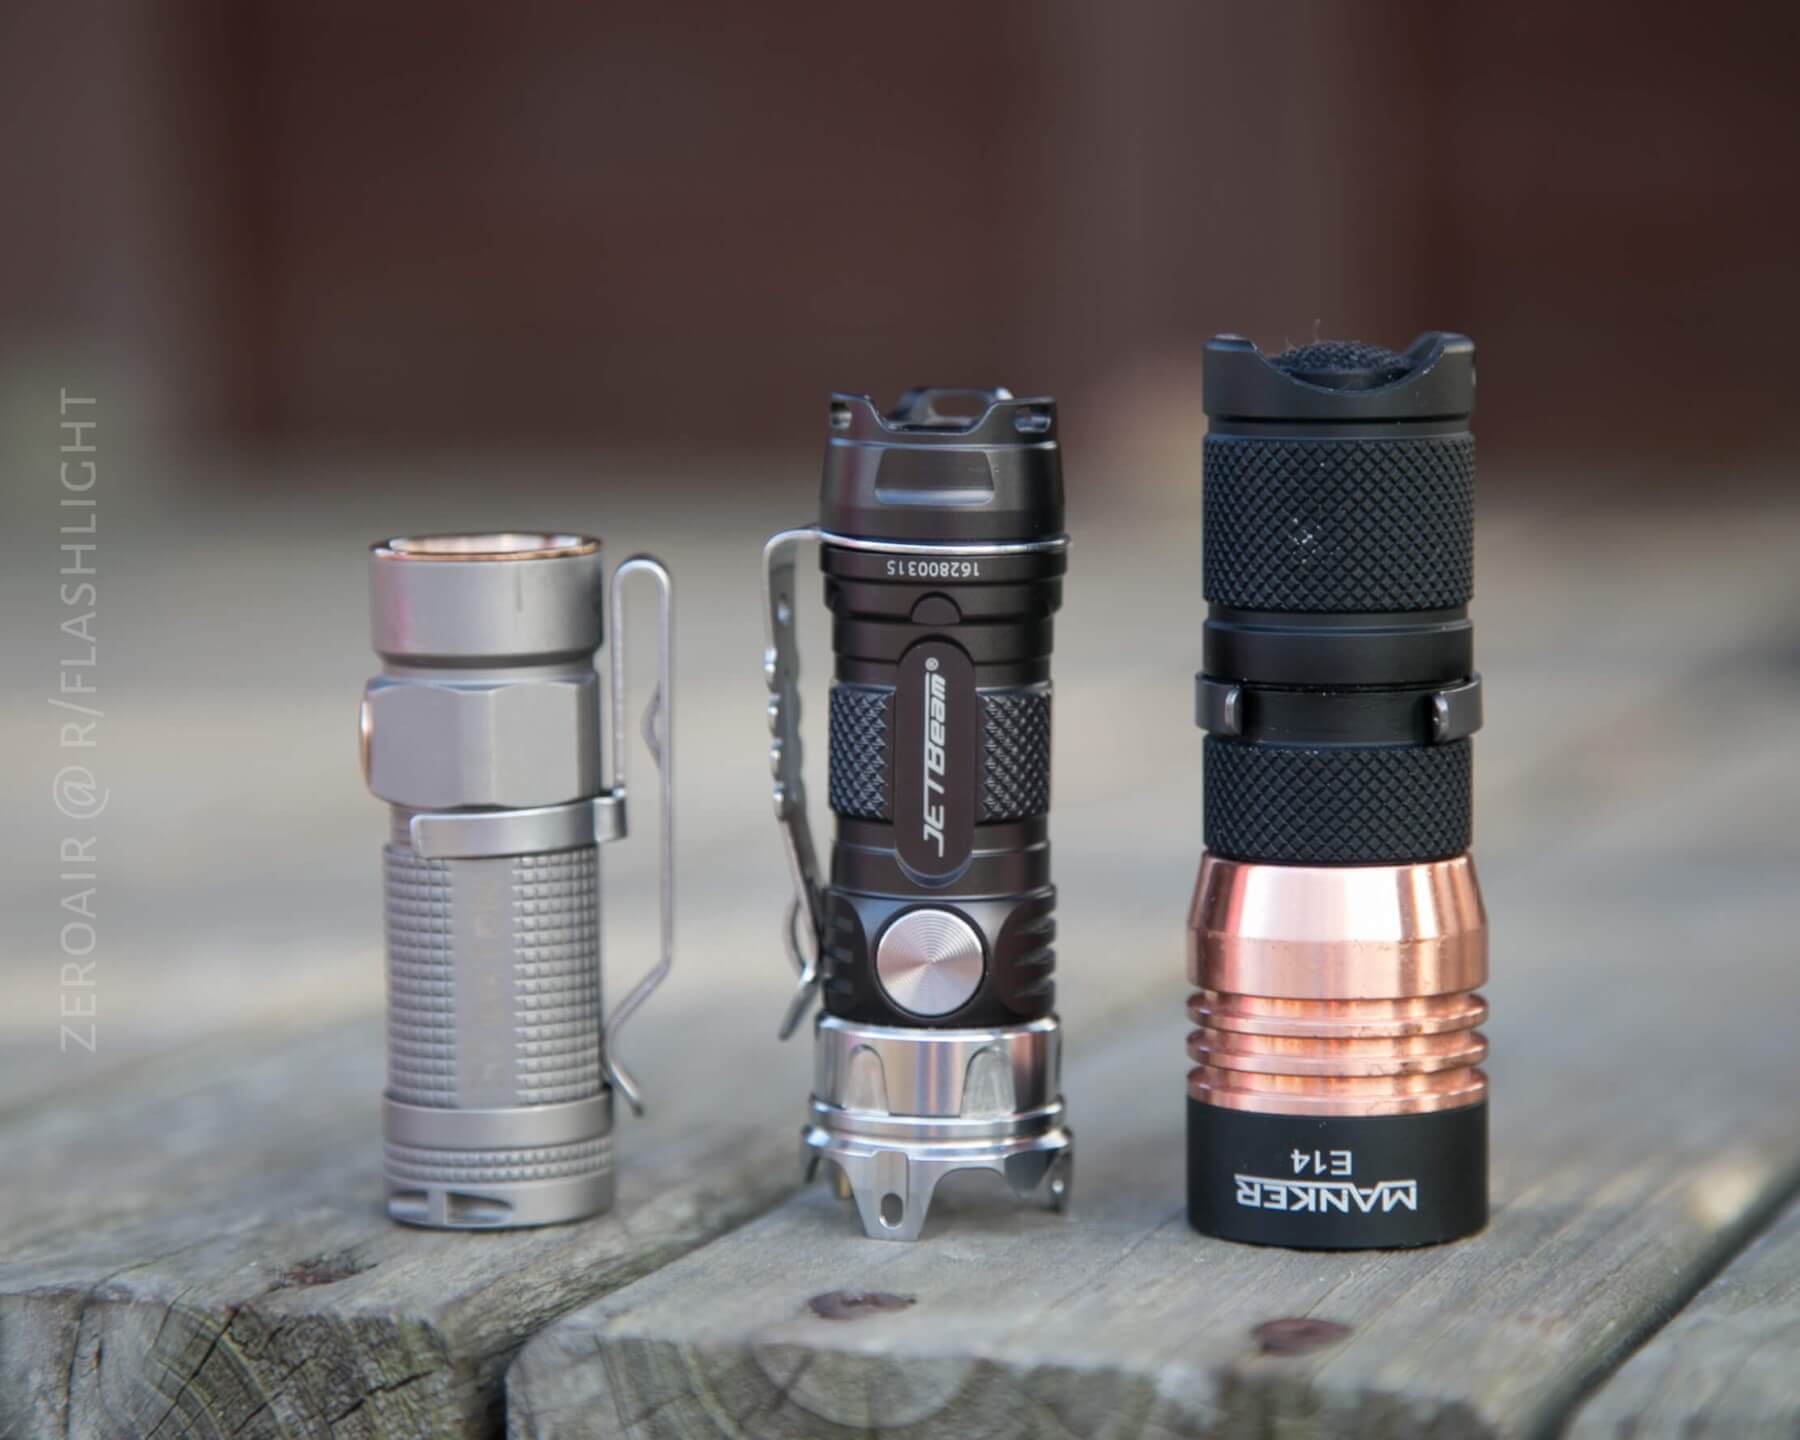
Having said that, it’s a fantastic carry size, and practically disappears clipped to my pocket. In fact, I’ve carried other review lights at the same time as this one because this Jet-II Pro is small enough to not interfere. Olight S1, Jet-II Pro, Manker E14.
Retention
The options are clip or lanyard.
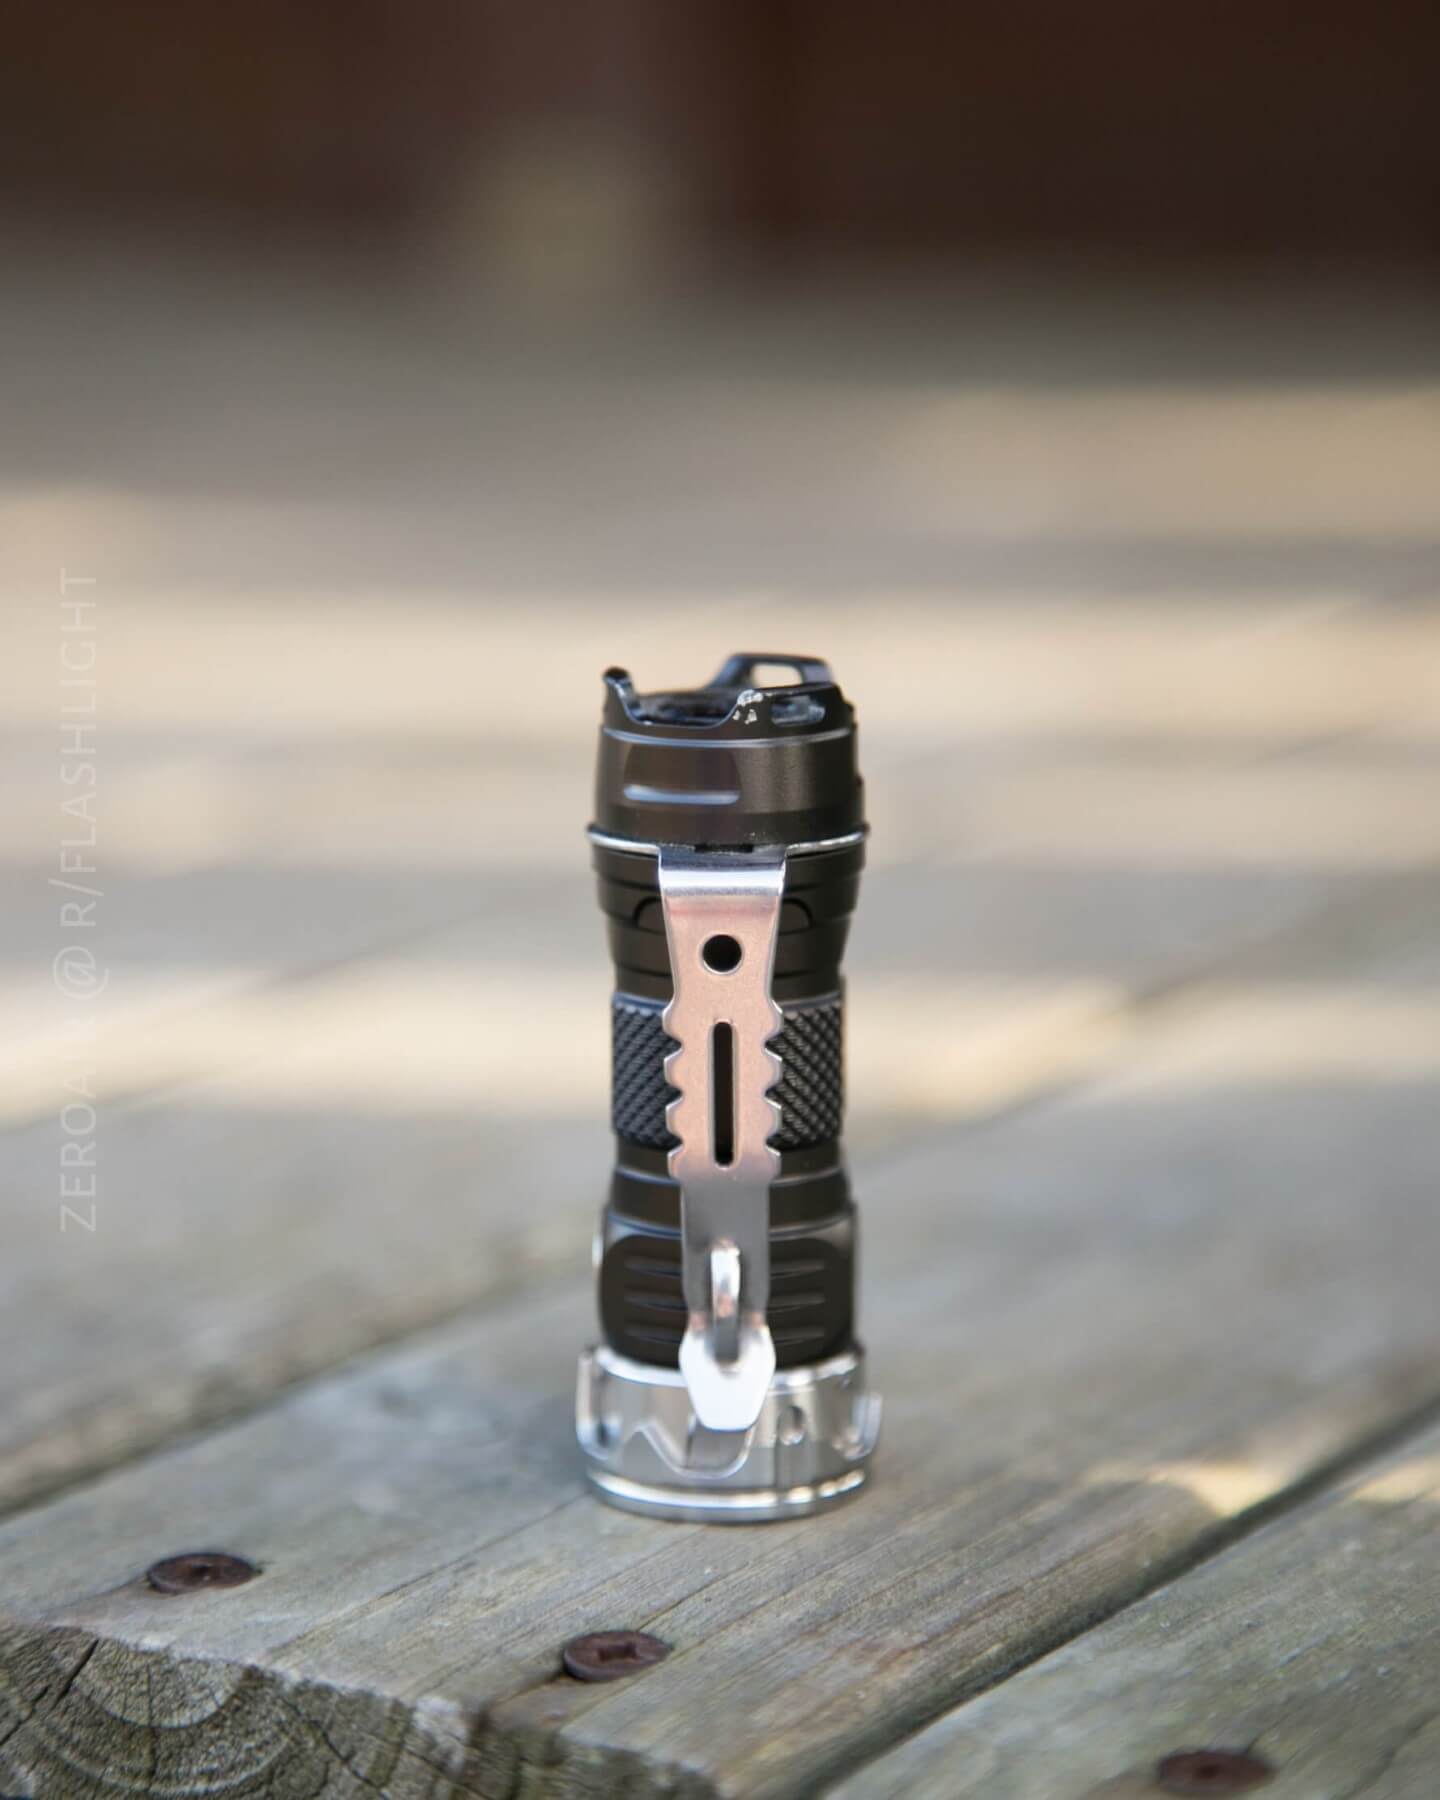
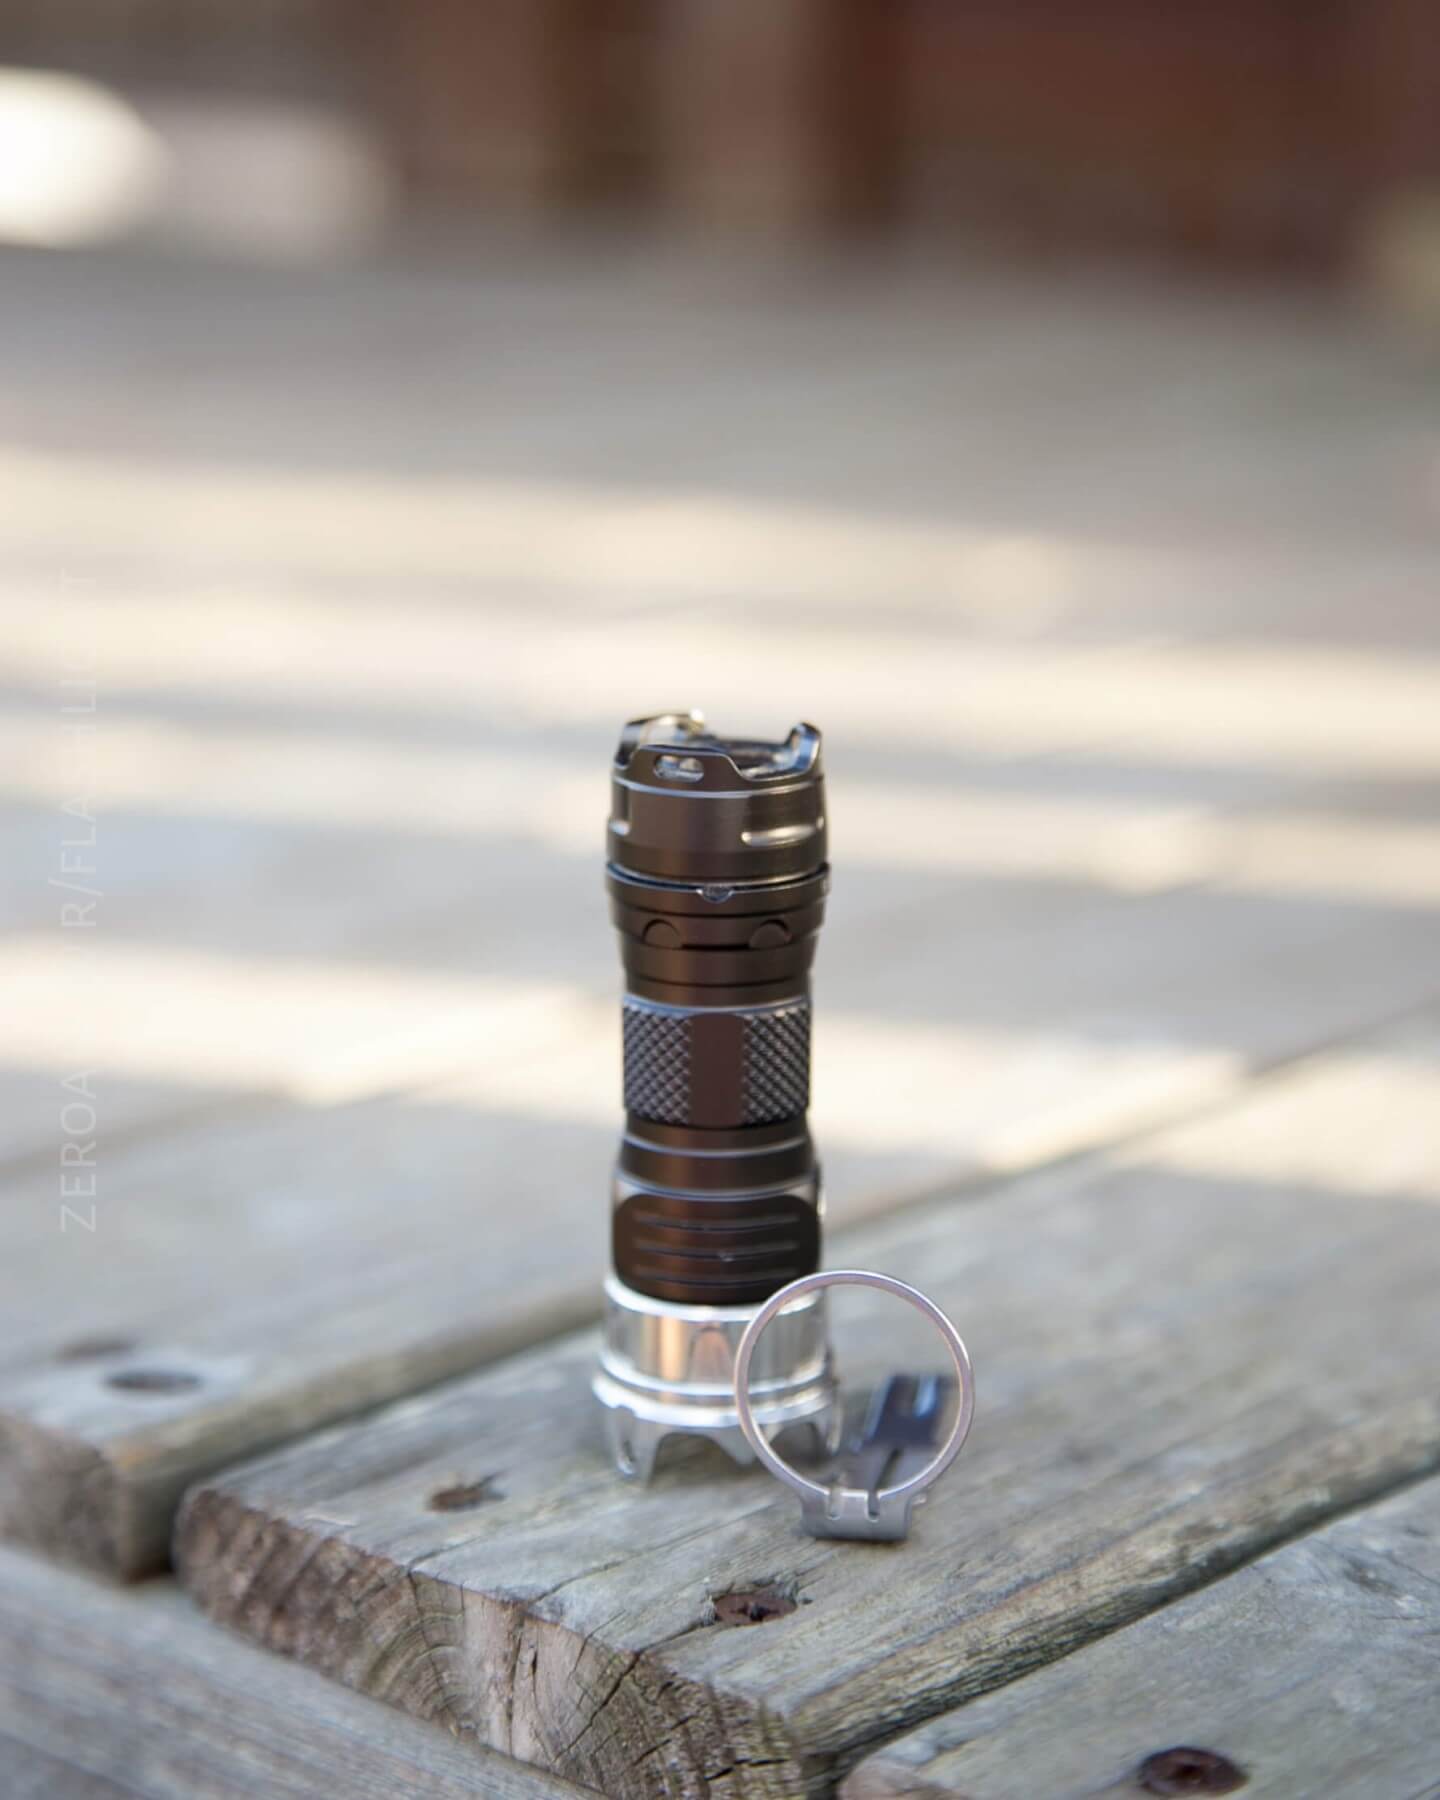
The lanyard attaches to holes in the tailcap. But even if you chose to use the lanyard, you’d probably want to leave the clip attached: The clip connects as a ring that is put on before the tailcap.
Here’s a cap-off look.
Without the clip installed, there’s a gap that seems a little too large for me – maybe it’s environment-sealed, maybe it isn’t…. The clip is a nice size and shape, and is different from all those ‘standard’ clips on so many lights now.

On the body side of that tailcap/body connection is a tiny notch on both sides of the light, into which the clip slots.
If you don’t install the clip the right way, the tailcap will not screw down completely. At first, I found this frustrating and fiddly, but I quickly got used to it. This also means that you’re screwing the tailcap against a bit of tension in the clip. I could never get a great purchase on the tailcap, and I wish it had a bit of knurling on the other side. That would help this whole clip setup tremendously.
There are no other retention options, and the clip is not reversible.
One thing I did like about the clip fitting in two ways is that it became a great beacon for me to know where the switch is. If I grab the light and the clip is here in my hands, there are only two places the switch can be. And the clip is 90 degrees from either of them. I really liked that aspect of the clip’s specificity!
Power and Runtime
A single cell powers this light, and that can be a CR123a or a 16340. I used a 16340 from Keeppower – the 700mAh protected button top. That’s what all the runtime tests below are run with.
Here’s the runtime graph:
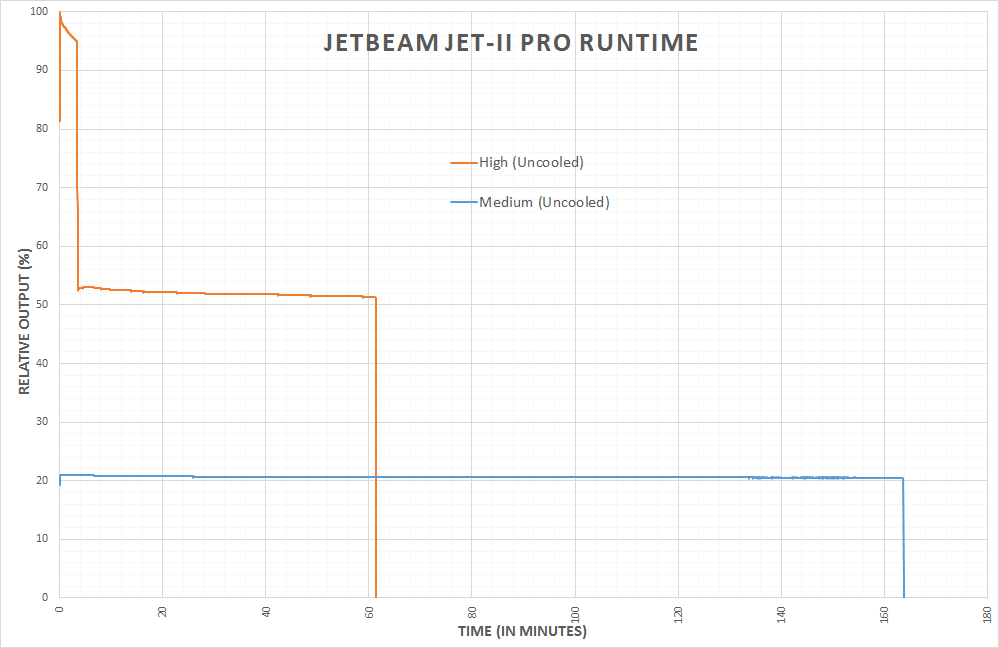
I did all of these tests with a 700mAh Keeppower protected button top 16340.
I found these termination voltages: 3.4V, 3.3V. I read reports that this light either doesn’t have protection or has protection that cuts off very low, but 3.4V seems plenty high for me.
User Interface and Operation
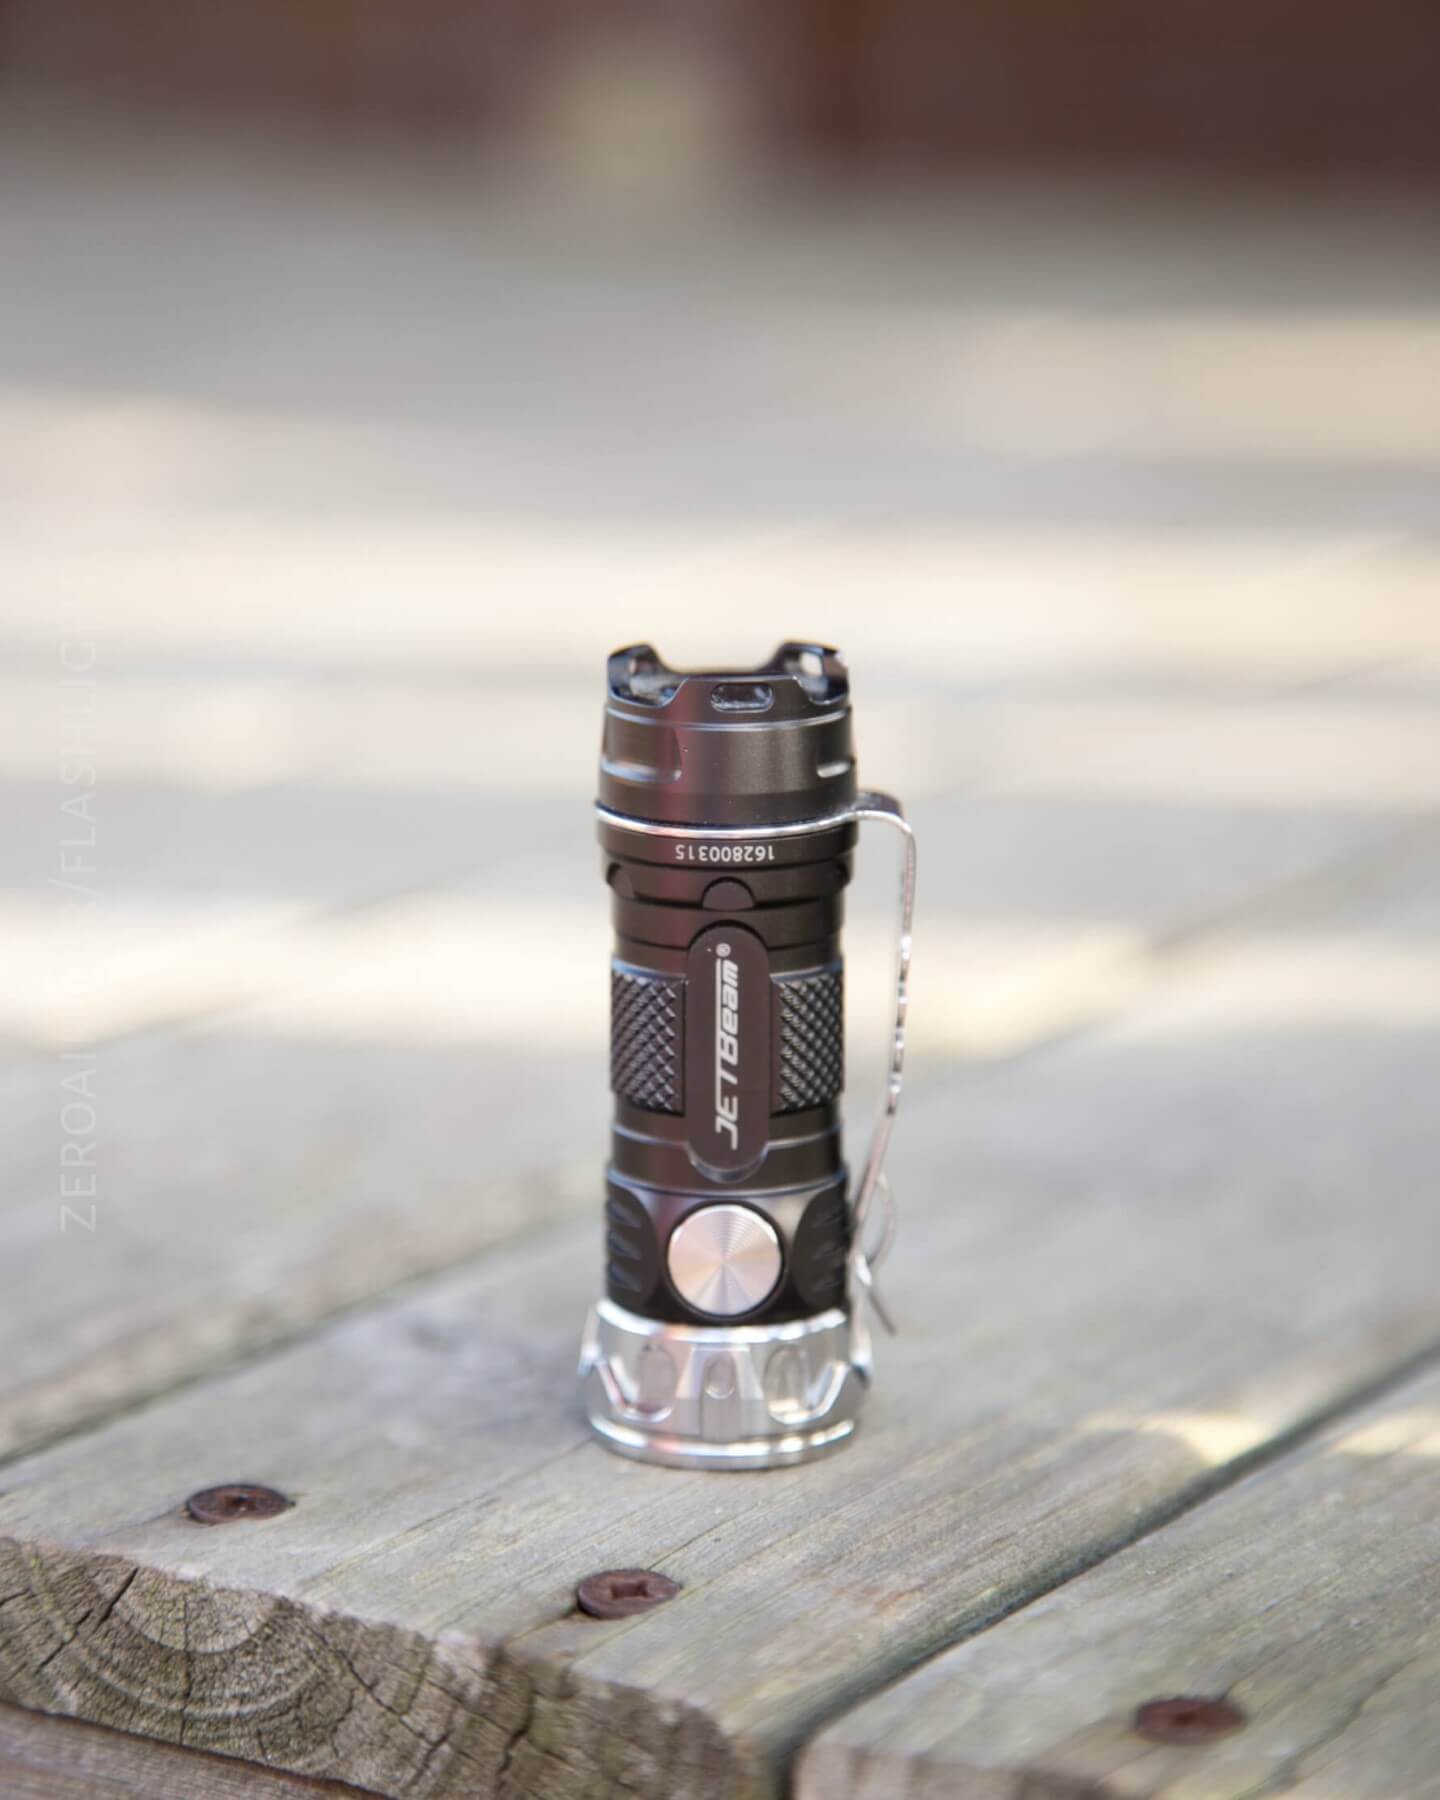
There’s a single metal side switch on this tiny light.
I like all that… that’s basically my ideal switch. The metal switch is even, flat, and textured (concentric rings), which makes it easily identifiable vs the similarly-shaped circle on the opposite side. They’re different enough that I rarely, if ever, get them confused.
This single switch packs a ridiculously complex punch and impressed me in a way that only one other light has.
As far as operating the light goes, the very first thing that must be mentioned is that it seems to me, upon inserting a cell, the light enters lockout mode. So you essentially have to initialize the light upon placing a cell inside. This is no big deal, but I don’t love that aspect. I’d also like to know what the design logic was behind that.
User interface Table
| State | Action | Result |
|---|---|---|
| Off | Click | On |
| Off | Double Click | Moonlight |
| Off | Triple Click | Strobe |
| Off | Hold^ | Lockout |
| On | Click | Off |
| On | Double Click | High |
| On | Hold | Mode cycle^^ |
| On | Click 4x | 3-minute timer |
| 3-minute timer | Click 4x | 9-minute timer |
| Lockout | Hold | Unlocked |
| Lockout | Double Click | Moonlight^^^ |
| Lockout | Triple Click | Strobe^^^ |
^ Hold until the light flashes to indicate lockout
^^ Modes cycle H>M>L
^^^ That’s right, these modes work while the light is locked out!!!
LED and Beam
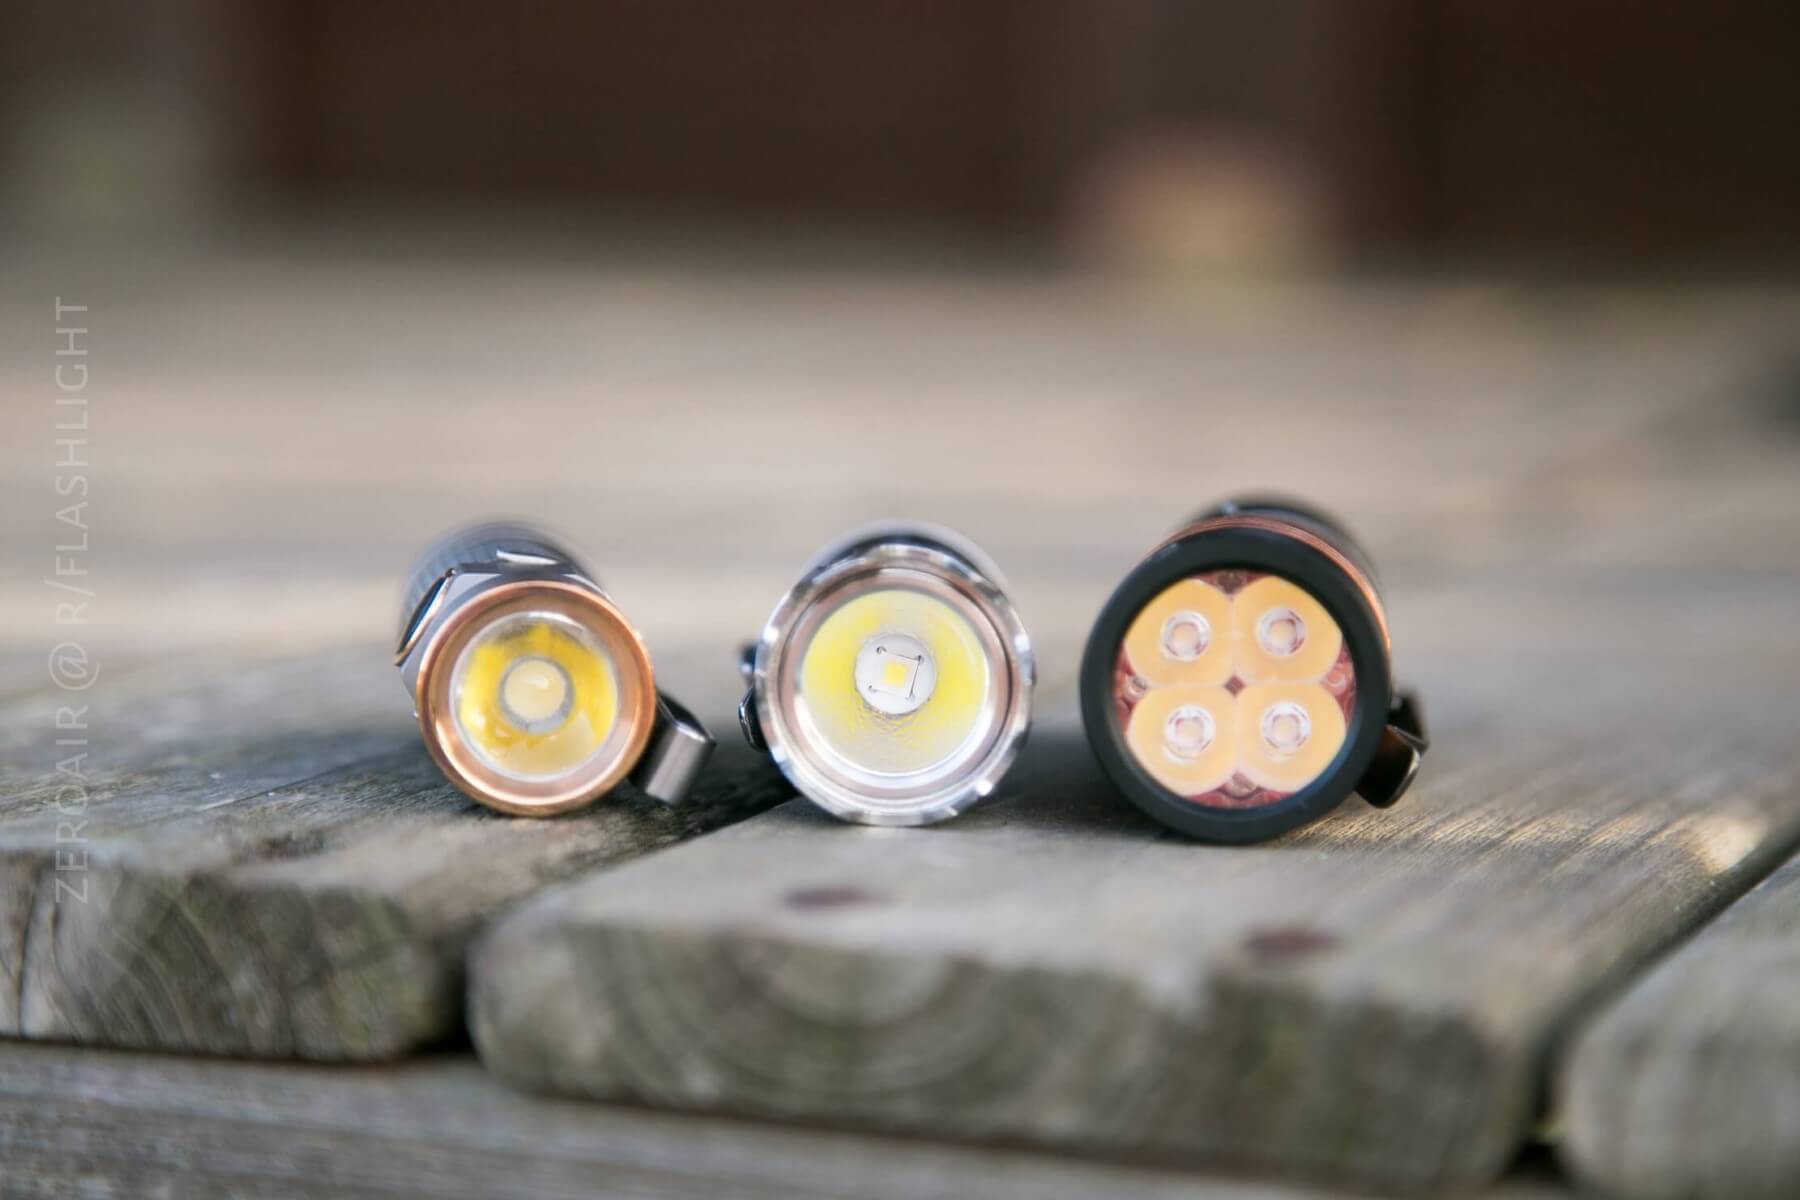
This small light utilizes a Cree XPL-HI.
I wasn’t able to find the tint info for this XPL-HI, but it’s a fine one. Of course, that means it’s dedomed, and of course, dedomed emitters typically mean more throw. I doubt anyone would buy this as a thrower, but it does its role well. The reflector is lightly textured, leading to a smooth beam profile. It’s also more intense than I really expected a light this size to be.
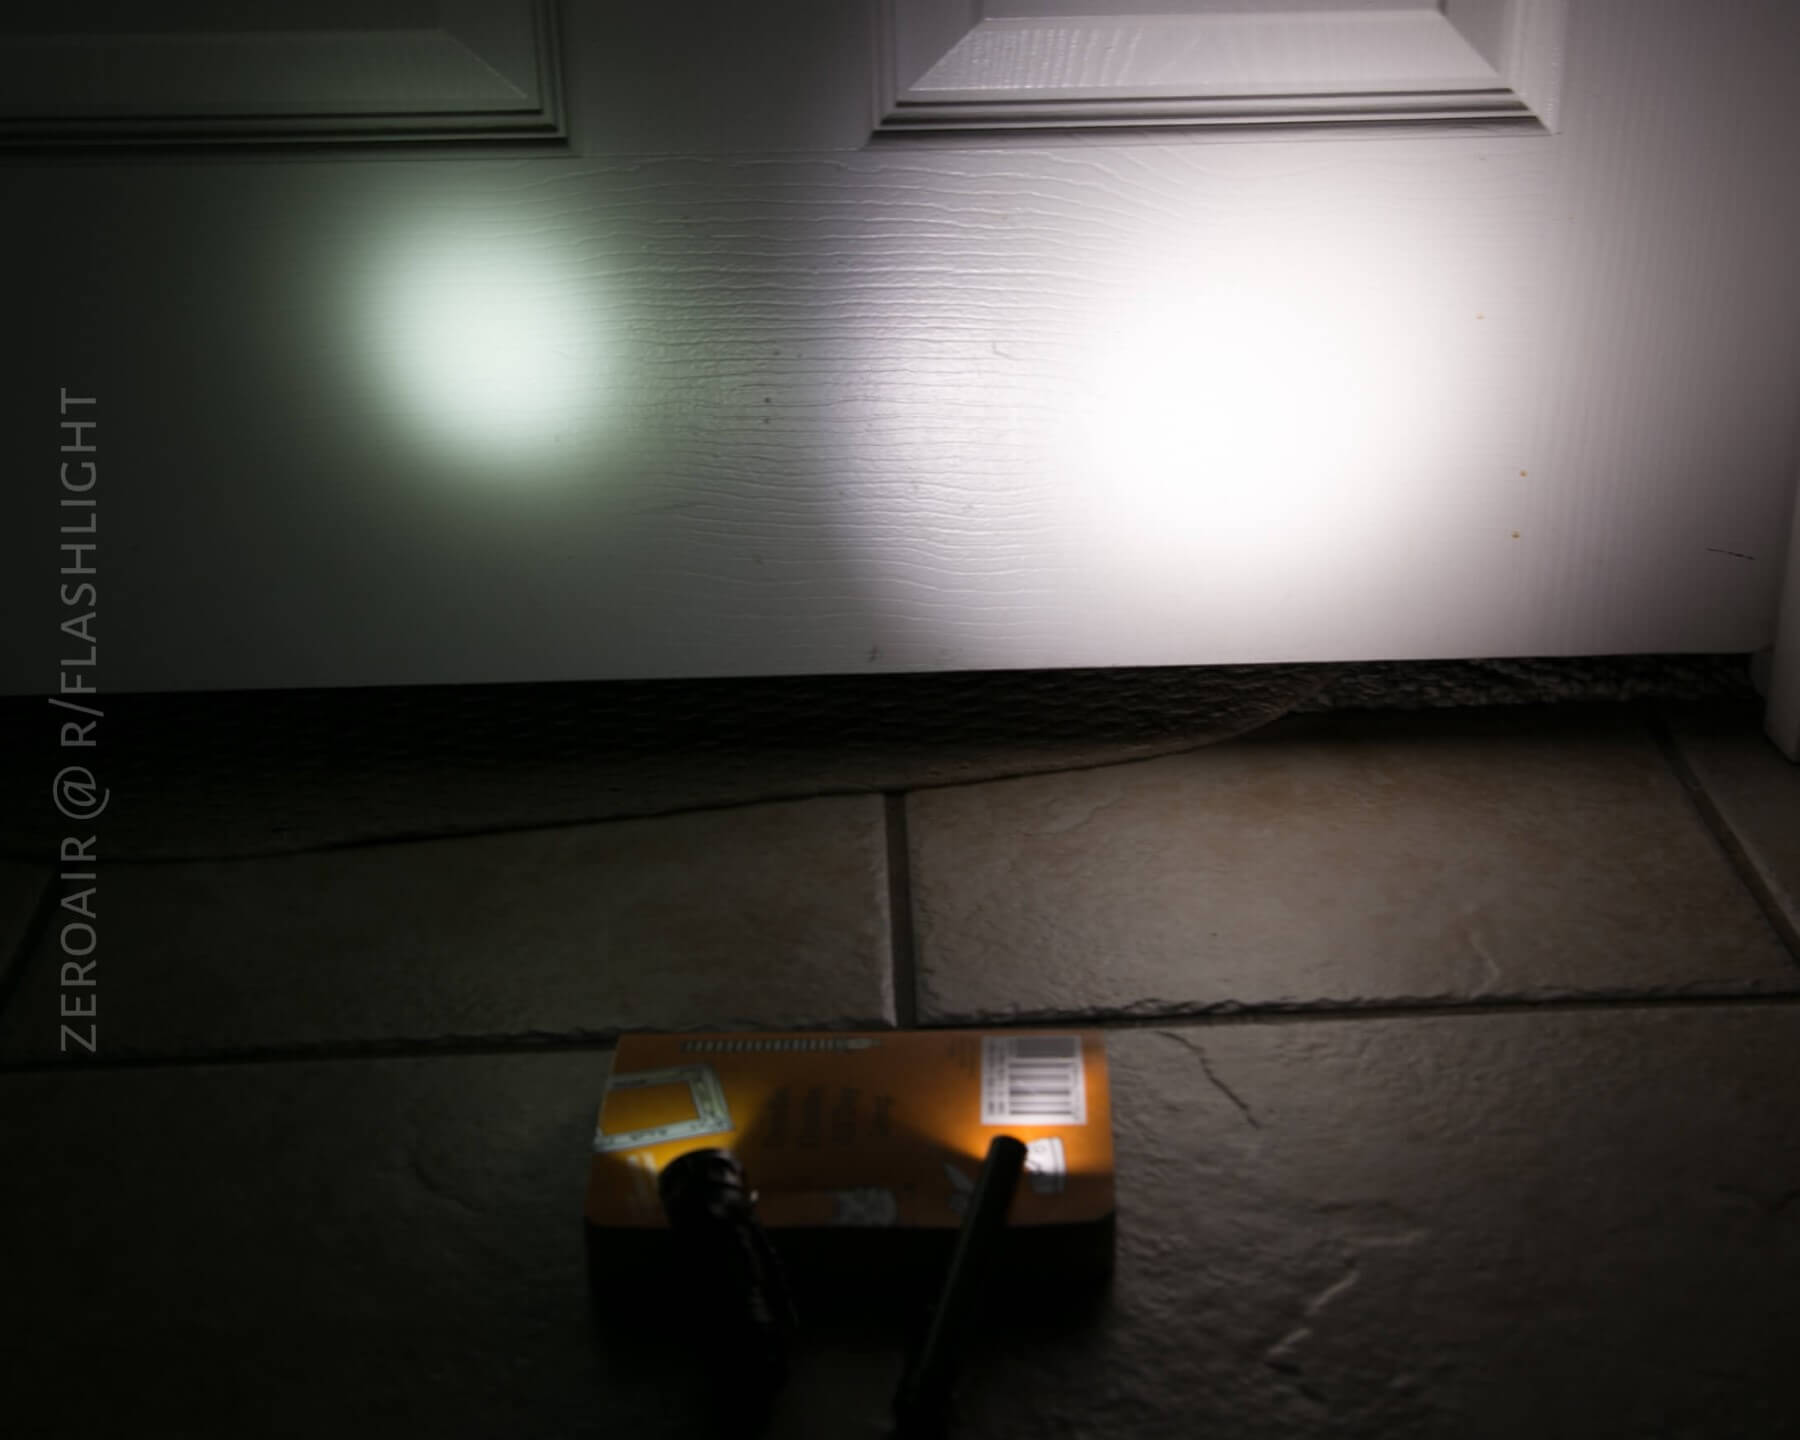
Beamshots
These beamshots always have the following settings: f8, ISO100, 0.3s shutter, and manual 5000K exposure. These photos are taken at floor level, and the beam hits the ceiling around 9 feet away.
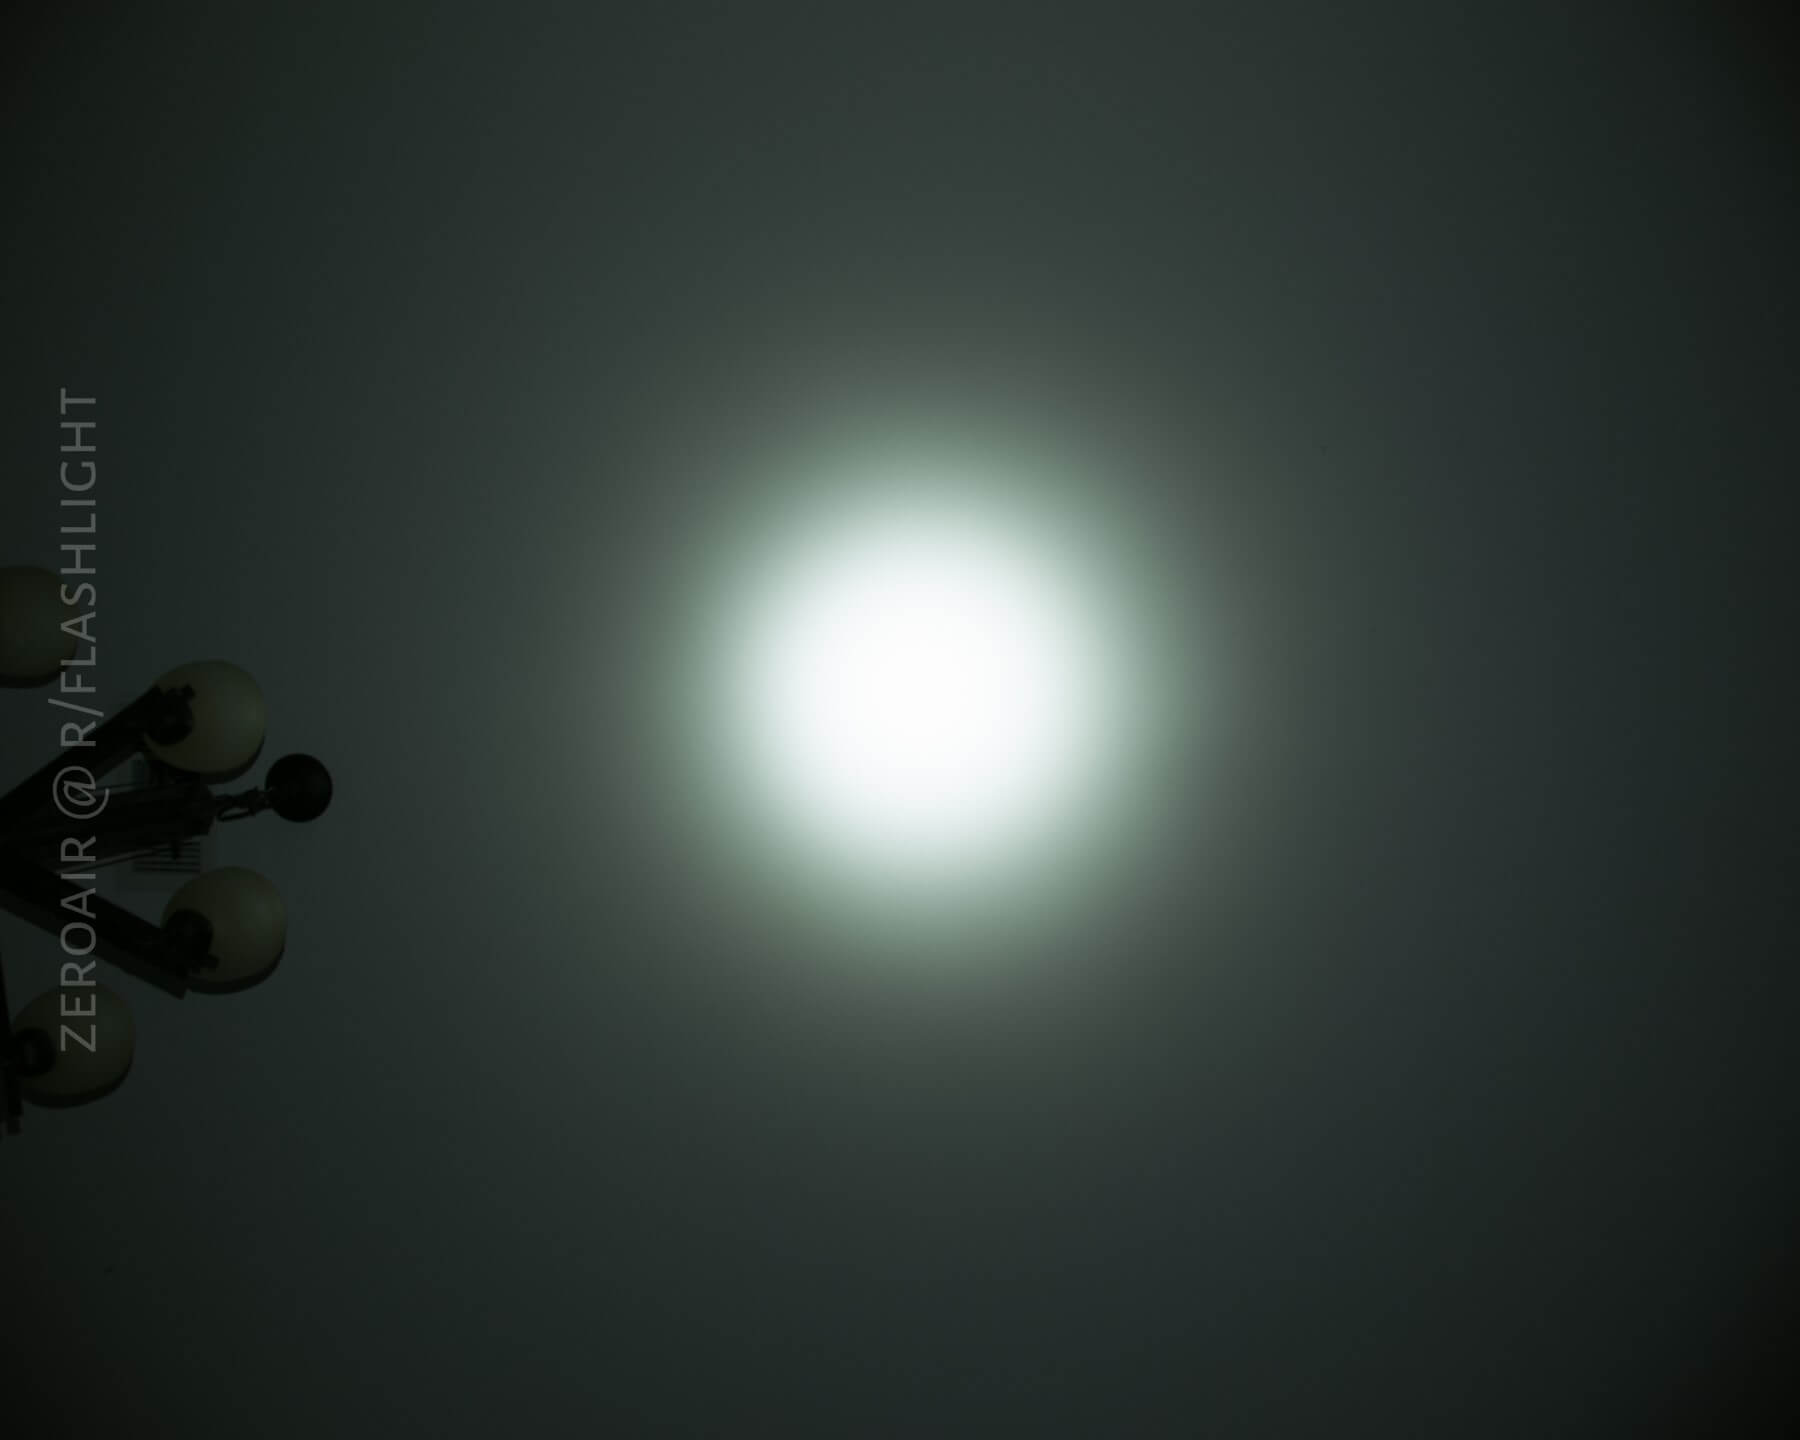
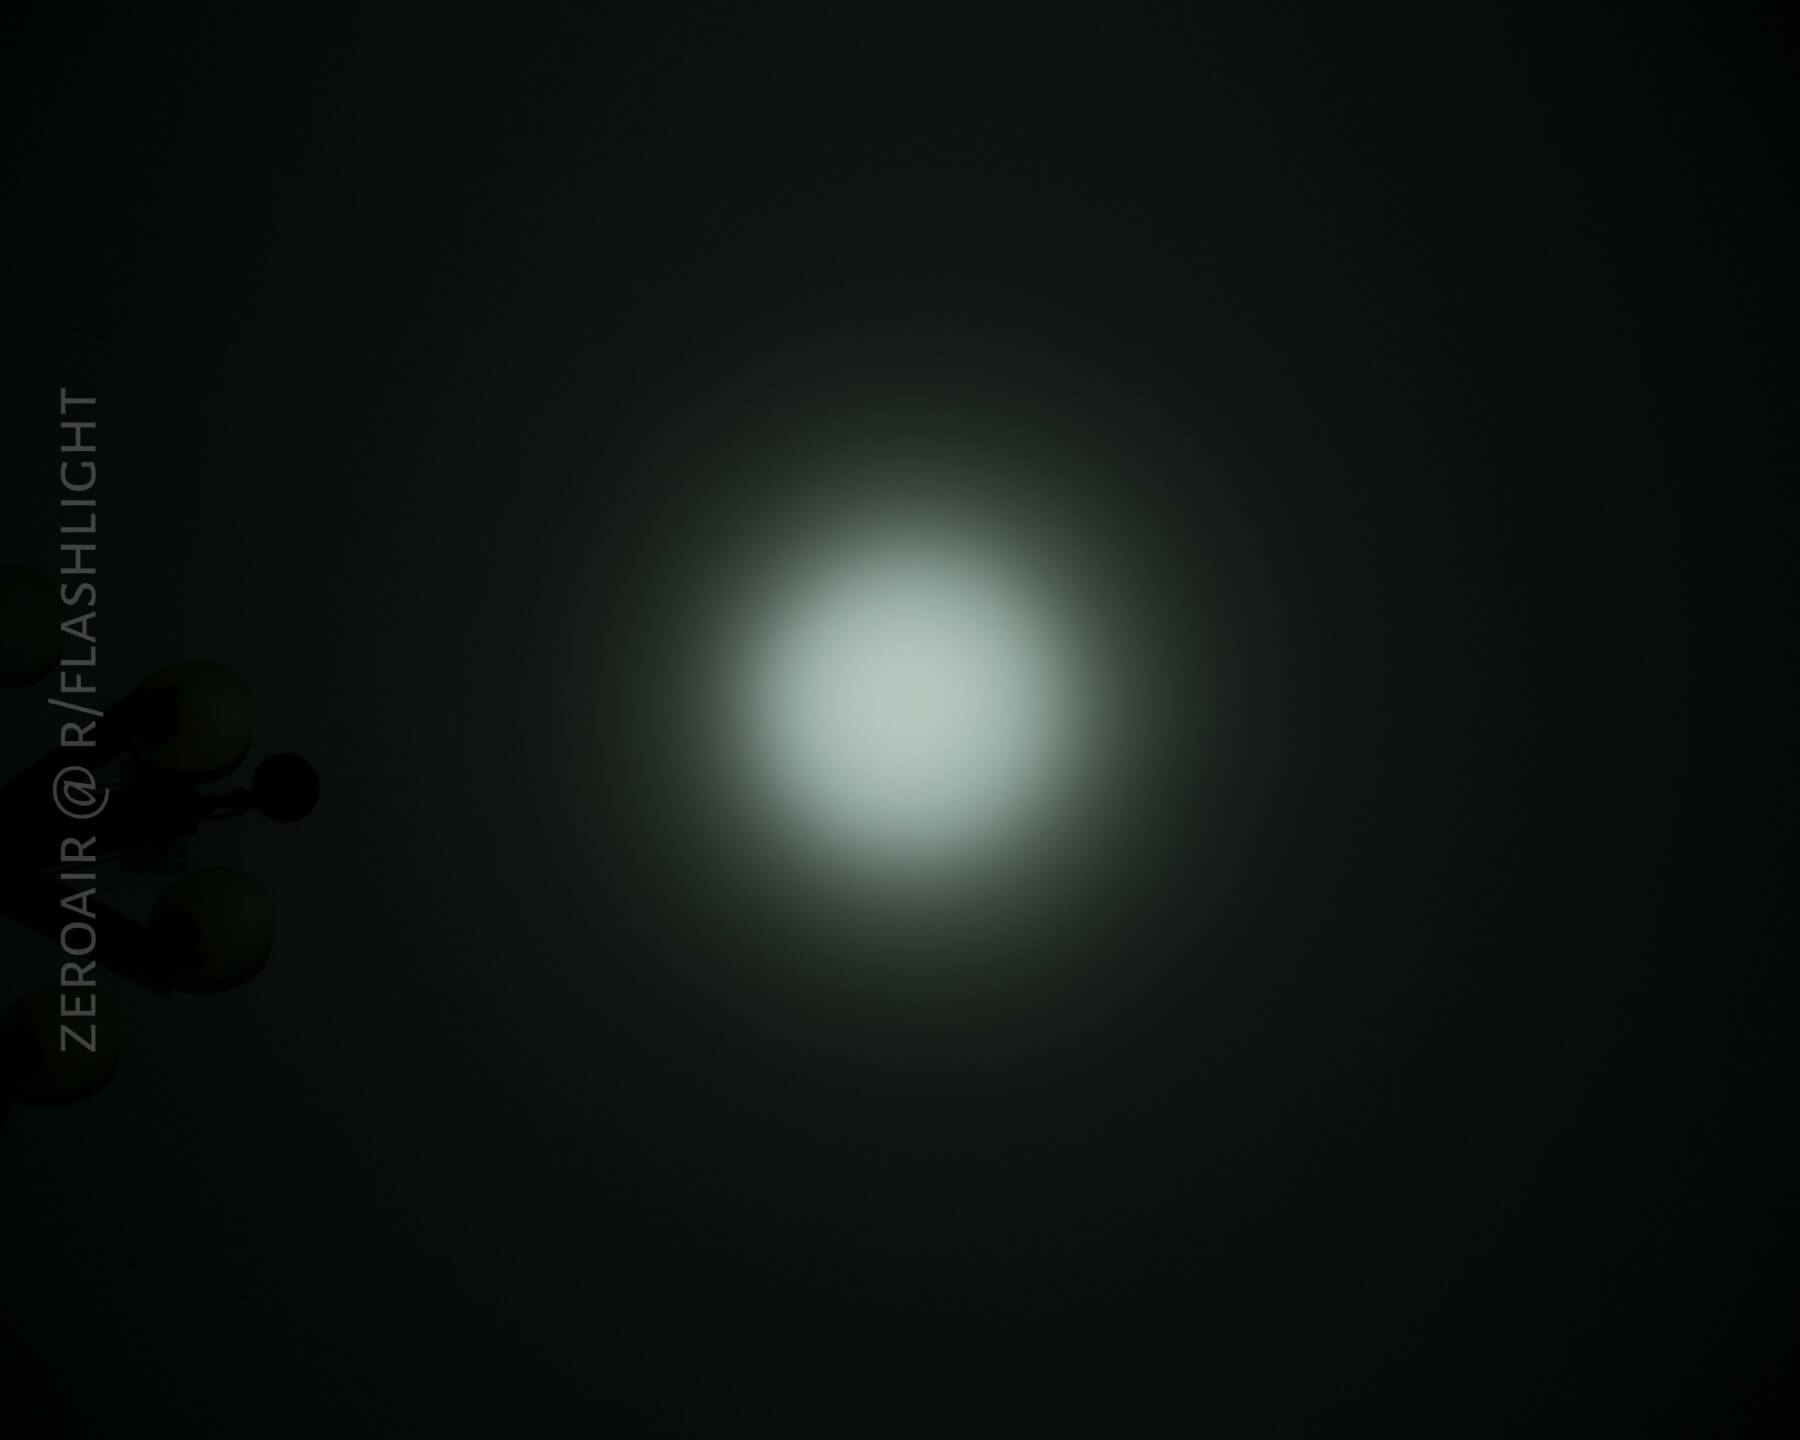

Tint vs BLF-348 (KillzoneFlashlights.com 219b version) (affiliate link)
I keep the test flashlight on the left and the BLF-348 reference flashlight on the right.
I always compare every beam to my venerable BLF-348. Here again is that comparison, but the camera doesn’t capture that right… the JetBEAM is nowhere near that green. It’s a nicely colored tint. (The JETBeam is on Low in this photo.)
Random Comparisons and Competitive Options
There are two similar lights, and they both differ from the Jet-II Pro in that they offer onboard charging. The Klarus RS16 has charging and a magnet, but is much bigger and more expensive (and also ugly!). The Fenix RC09Ti is a small light with XPL HI, which also has onboard charging. A very nice-looking light, and the Ti is cheaper than the Jet-II Pro Ti. I would prefer the size of the JETBeam; however, the Fenix is fairly longer. Of course, there’s the “Mk” version of this light as well – a twisty CR123A light. I have that one and will be giving it a look before too long.
Conclusion
What I like
- Moonlight and strobe work in lockout
- Tritium slots!
- Stainless Bezel (three options are included!)
- Great clicky metal button
- Size is good
- Two timers
What I don’t like
- The clip has two orientations, and that makes the tailcap hard to tighten
- Mode memory
- No magnet (but the trit slots kind of preclude a magnet anyway)
Final Thoughts
I absolutely love this light. I don’t even know when I’ve been this excited about a light. I love carrying it, and I love using it. If you’re interested in checking it out, head over to Going Gear and see it there. Check out the cool package deals.
Parting Shot
Honestly, things got kinda Kooky during this photoshoot.

Notes
- This light was provided by Going Gear for review. I was not paid to write this review.
- This content originally appeared at zeroair.org. Please visit there for the best experience!
- Use my Amazon.com referral link if you’re willing to help support making more reviews like this one!
- Please support me on Patreon! I deeply appreciate your support!
Pingback: Addendum to my Review of the JETBeam Jet-II Pro, here are pics of the purple titanium version. – ZeroAir Reviews