
Olight i1R 2 Pro Keychain Flashlight Review
The Olight i1R 2 Pro Keychain Flashlight is available in Stars and Stripes! It has USB-C charging and a twisty interface. Read on for more!
Official Specs and Features
Here’s a ShareASale link to the Olight i1R 2 Pro Keychain flashlight product page.
Versions
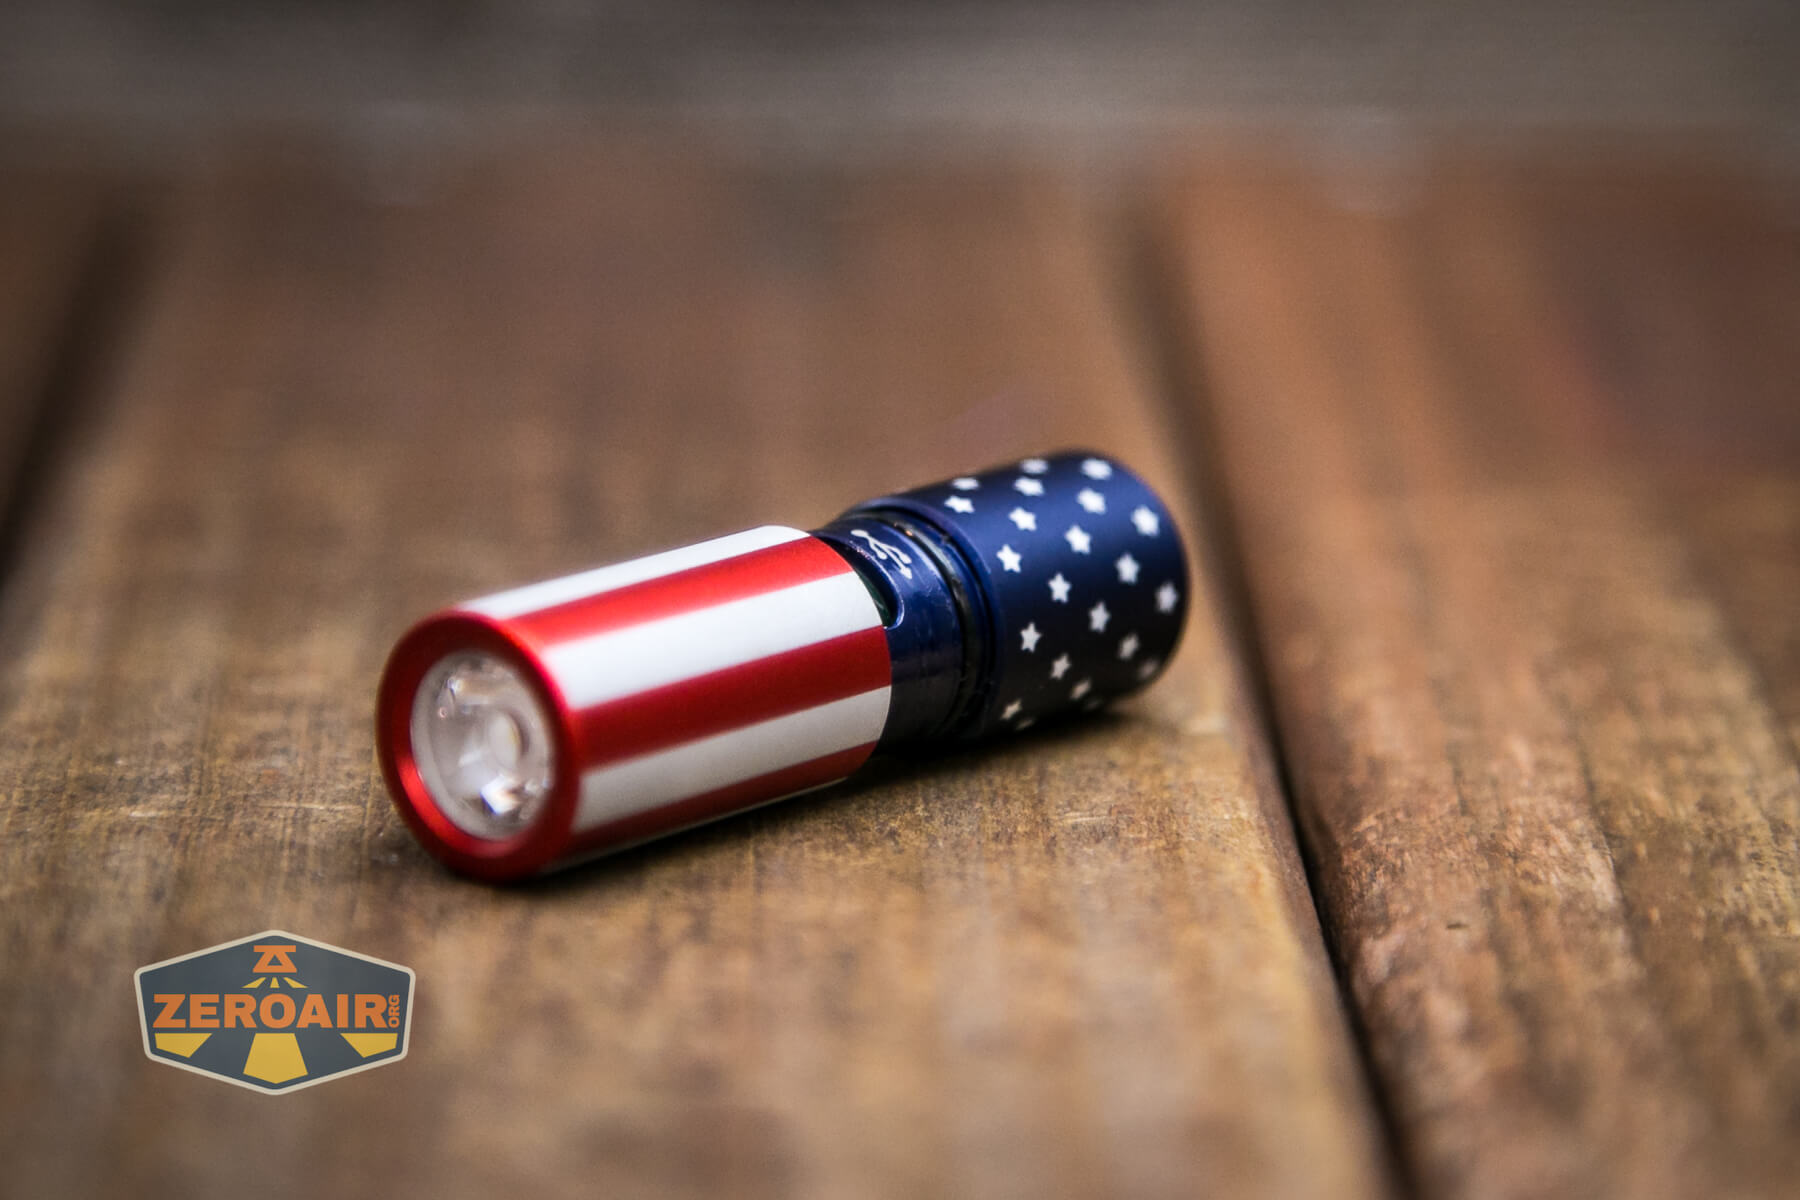
It looks like this Stars and Stripes version makes three total editions of the i1R 2 Pro flashlight by Olight. There’s also black and orange! Their body has a bit more texture milled into the sides, as well as a different color. I think internally they are the same, though.
Price
Cleverly, the sale price is $19.76! That probably represents America’s 200th birthday year.
Short Review
Surprisingly, I’ve never had an i1R 2 Pro before – I can’t recall even having an i1R 2 (the “not Pro” version). I have reviewed the iXV Ti, though and was quite fond of it. This light is very similar! I like it – I like the Stars and Stripes design; I find it to be very nicely done.
Long Review
The Big Table
| Olight i1R 2 Pro Keychain Flashlight | |
|---|---|
| Emitter: | CSP LED (-) |
| Price in USD at publication time: | $19.76 |
| Cell: | Internal |
| High (Cooled) Runtime Graph | High (Uncooled) Runtime Graph |
| LVP? | ? |
| Switch Type: | Twisty |
| On-Board Charging? | Yes |
| Charge Port Type: | USB-C |
| Charge Graph | |
| Power off Charge Port | No |
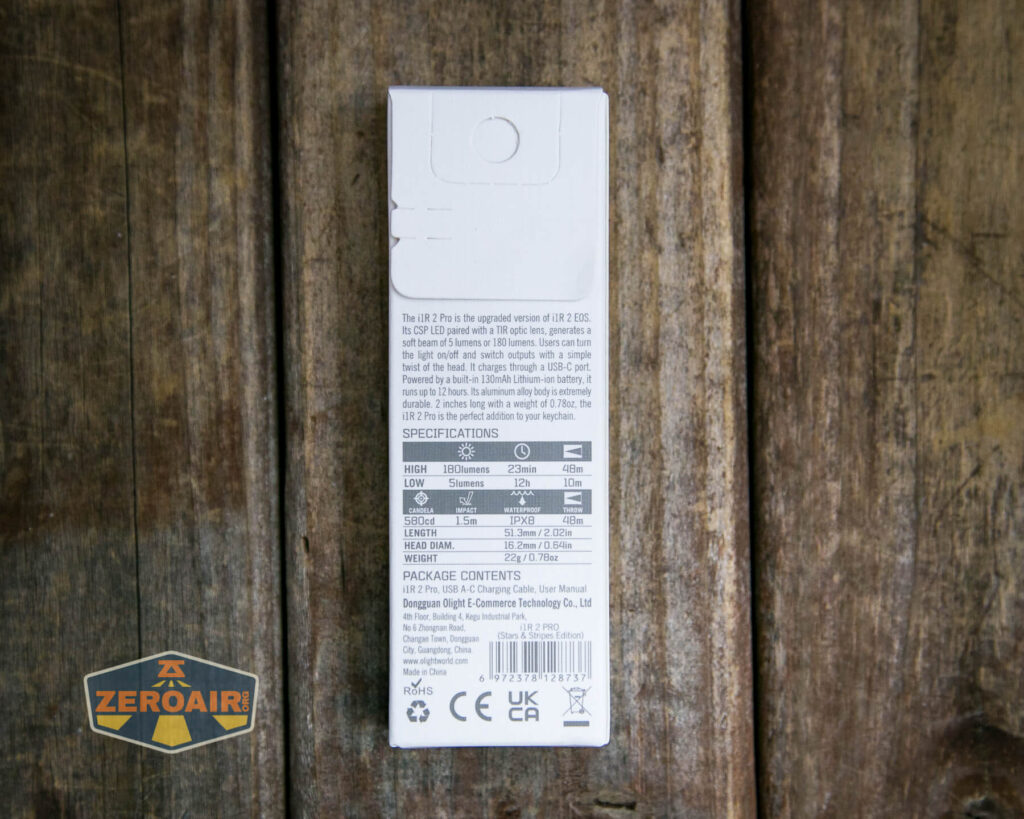
| Claimed Lumens (lm) | 180 |
| Measured Lumens (at 30s) | 211 (117.2% of claim)^ |
| Candela per Lumen | 4.5 |
| Claimed Throw (m) | 48 |
| Candela (Calculated) in cd (at 30s) | 76lux @ 3.182m = 770cd |
| Throw (Calculated) (m) | 55.5 (115.6% of claim)^ |
| Claimed CCT | – |
| Measured CCT Range (K) | 4800-5100 Kelvin |
| Item provided for review by: | Olight |
| All my Olight reviews! | |
^ Measurement disclaimer: Testing flashlights is my hobby. I use hobbyist-level equipment for testing, including some I made myself. Try not to get buried in the details of manufacturer specifications versus measurements recorded here; A certain amount of difference (say, 10 or 15%) is perfectly reasonable.
What’s Included
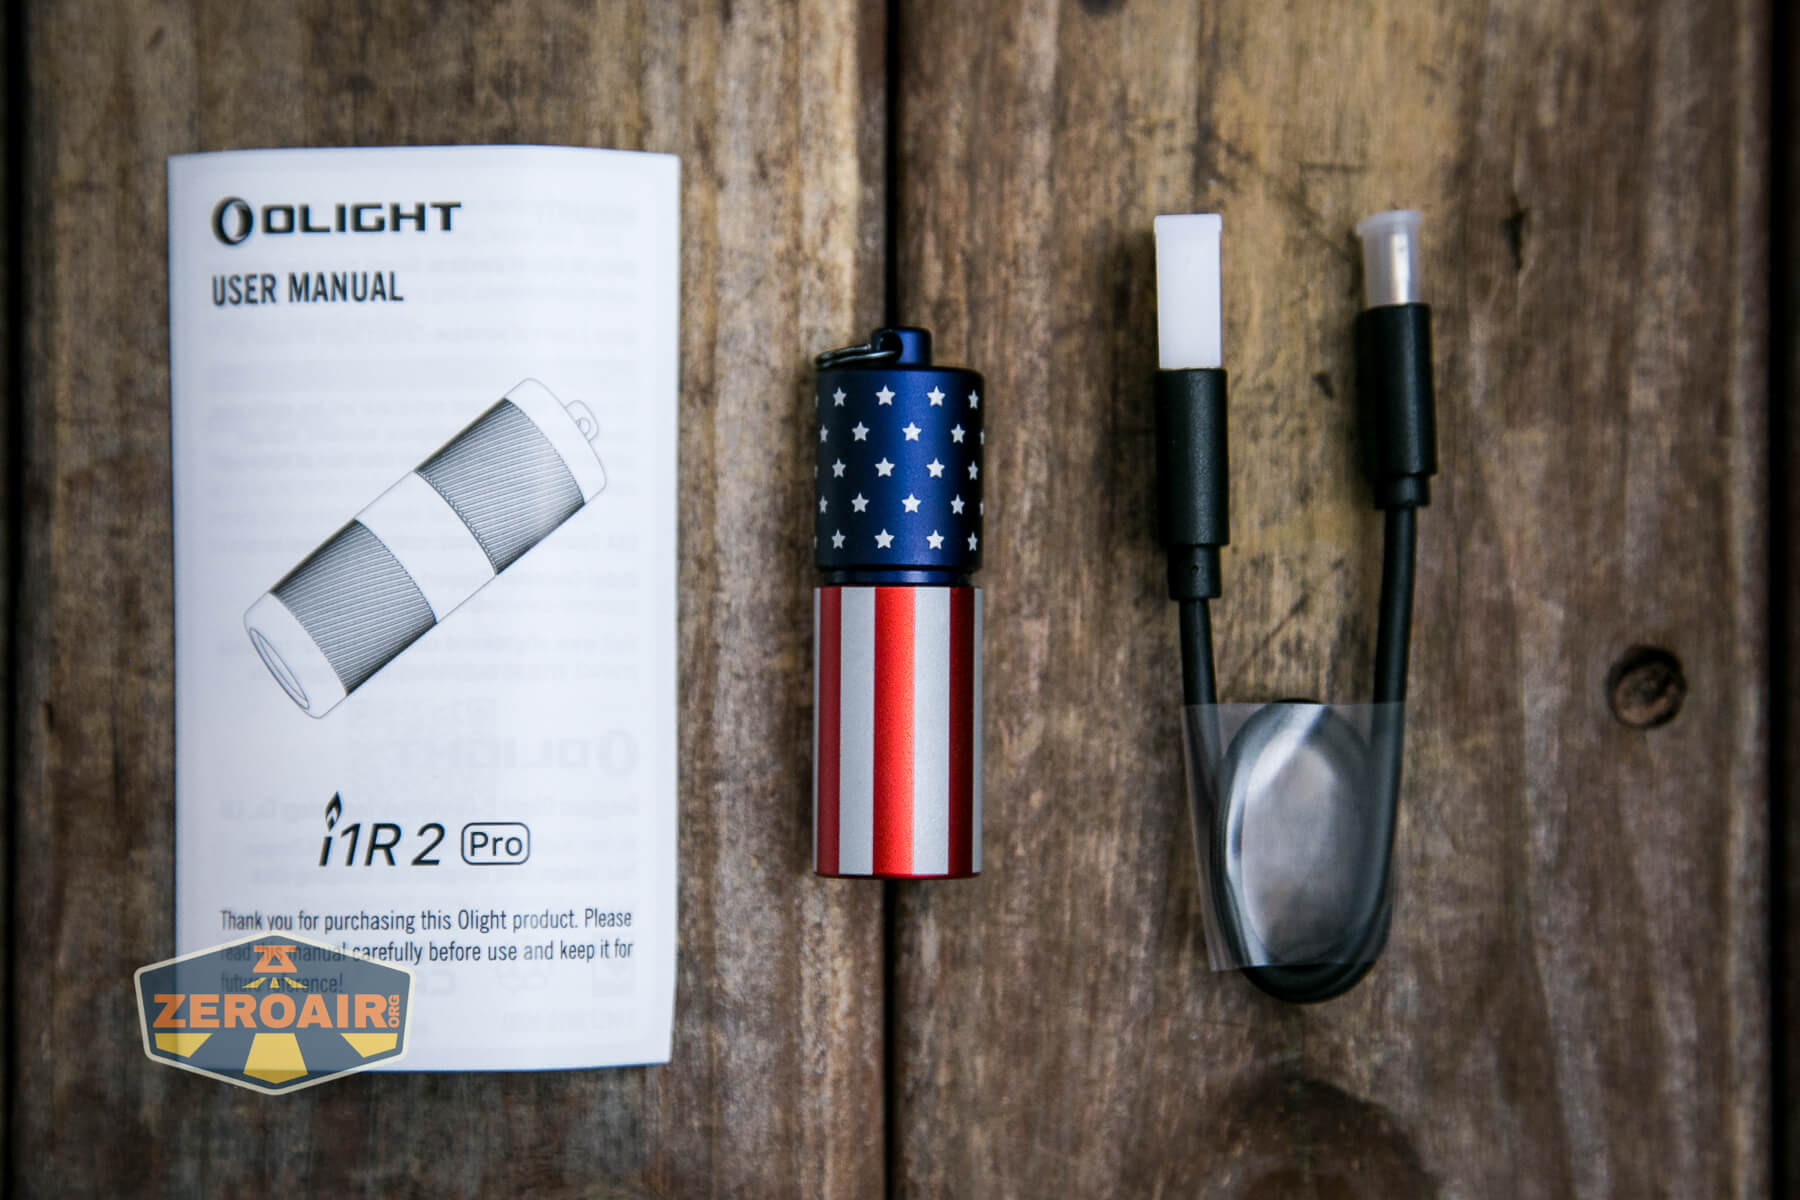
- Olight i1R 2 Pro keychain flashlight
- Charging cable (USB to USB-C)
- Manual
Package and Manual


Build Quality and Disassembly

This is a fairly simple light, I’d say. Maybe that’s because it’s just a two-mode twisty. But actually, it offers USB-C charging, so it’s not that simple internally. The build quality seems great, with a design choice here or there that is a bit annoying.


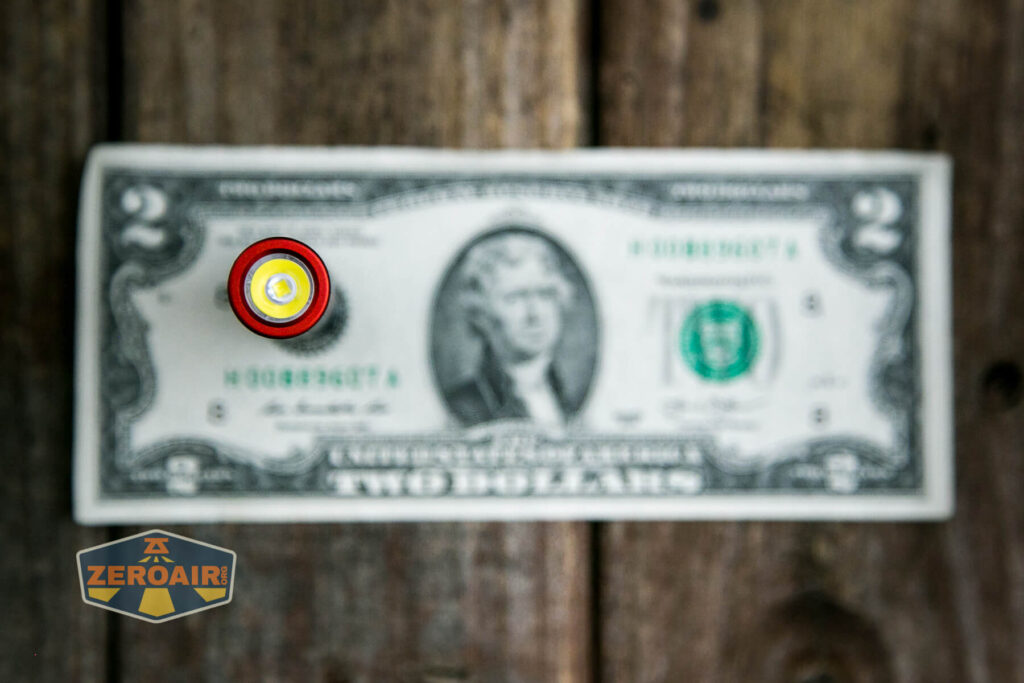
I love the Stars and Stripes look – did I say that already? Yes, this is a light made in China. No need to get all bent out of shape about it. It’s still a nice-looking light.
The tailcap has a spot for a split ring to be attached. This bump-out does not come off.

Between the head and tail (which don’t really come apart completely) is an o-ring.
Size and Comps
Length: 2.02 in/51.3 mm
Body Diameter: 0.64 in/16.2 mm
WEIGHT
0.78oz/22g (Including Battery)

If the flashlight will headstand, I’ll show it here (usually the third photo). If the flashlight will tailstand, I’ll show that here, too (usually the fourth photo).


Here’s the test light with the venerable Convoy S2+. Mine is a custom “baked” edition Nichia 219b triple. A very nice 18650 light!


And here’s the light beside my custom-engraved TorchLAB BOSS 35, an 18350 light. I reviewed the aluminum version of that light in both 35 and 70 formats.

Here’s the Olight i1R2 Pro keychain flashlight with the iXV Ti I mentioned above.

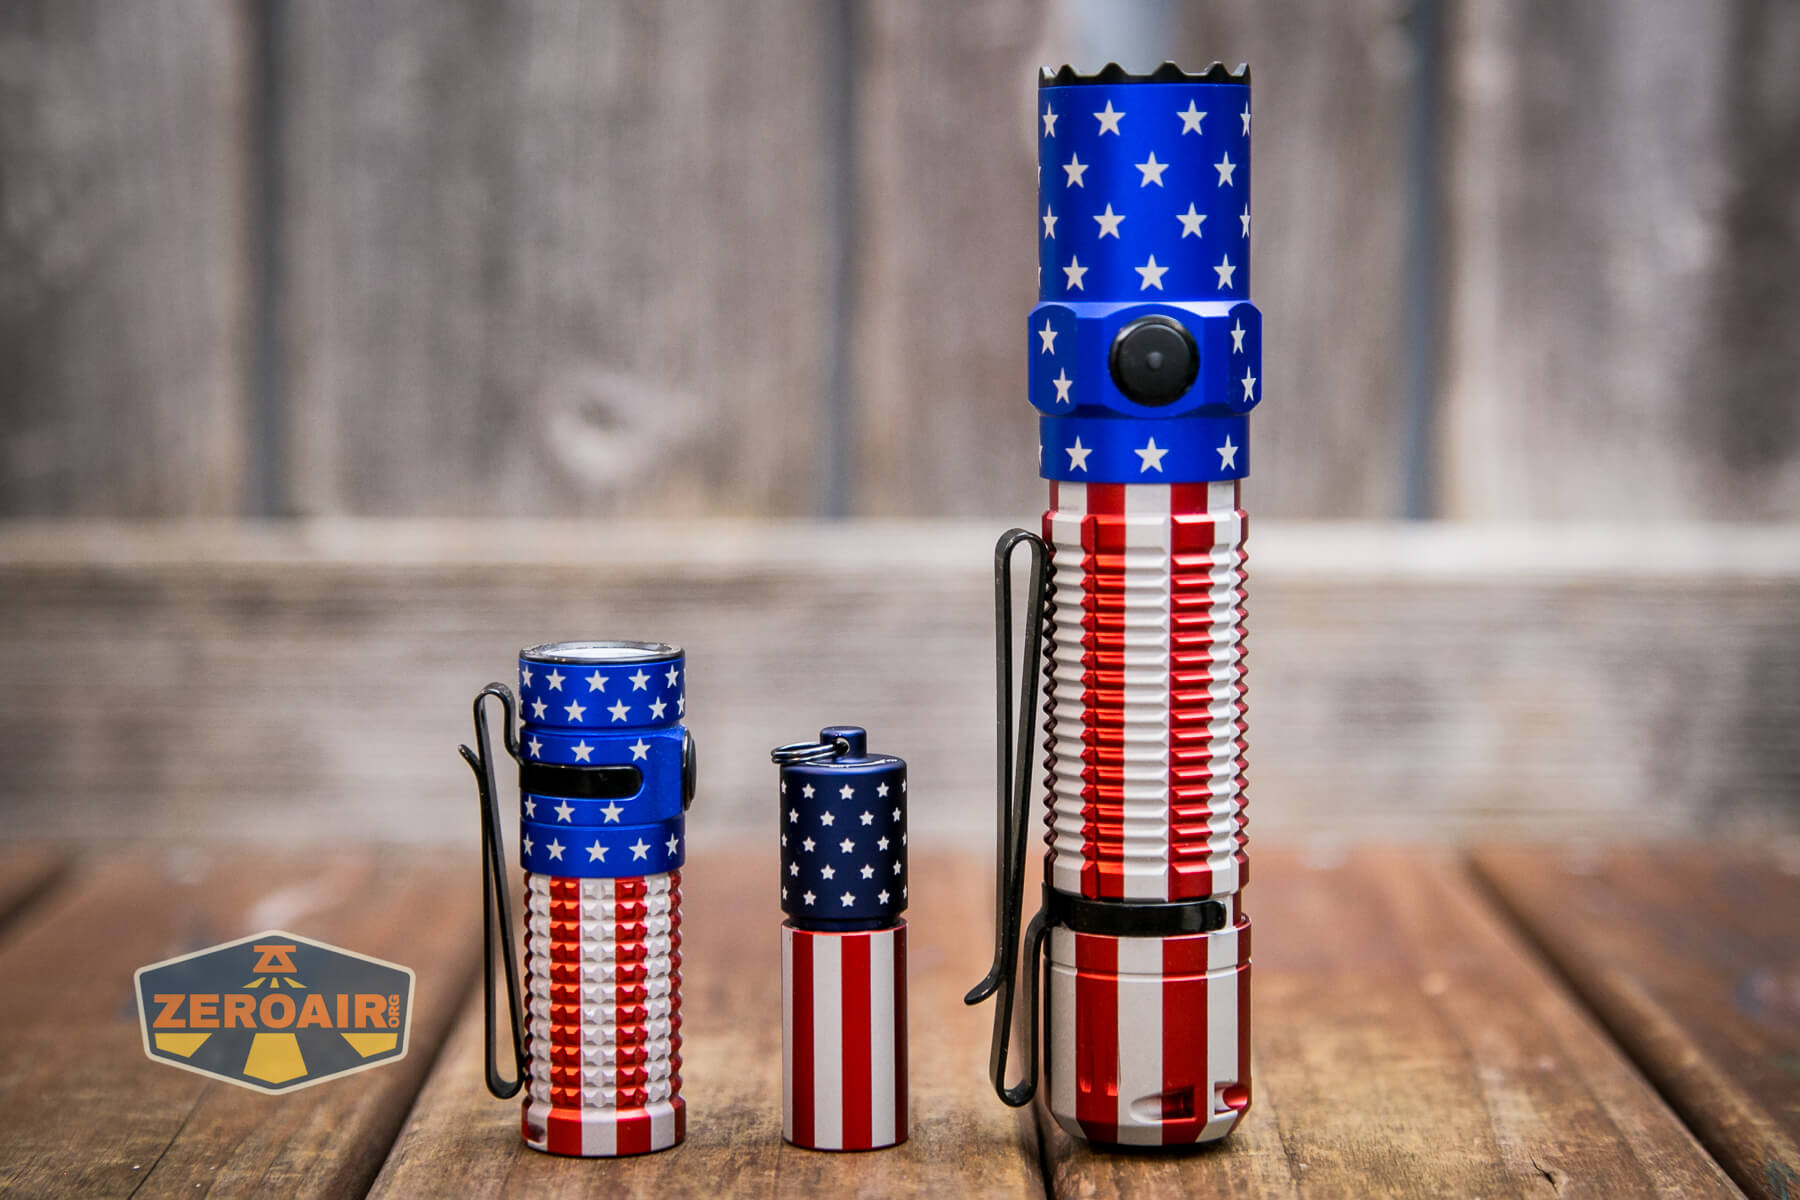
And here’s the Olight i1R2 Pro keychain flashlight with my other two Patriot editions! Note that the blue on this new one is slightly darker than on the other two seen here. (Not a trick of lighting – it’s actually darker.)
Retention and Carry
The only means for carrying the Olight i1R2 Pro keychain flashlight is this split ring on the tail end. The part where the split ring attaches is not removable – even if you remove the split ring, that little knob will still be there.
The split ring is tiny but perfectly sufficient for attaching the Olight i1R2 Pro keychain flashlight to a keychain!
Just like on the Surefire Titan Plus, I’d rather this little knob be gone. It’s probably possible to permanently grind that off!
Power and Runtime
The cell that powers the Olight i1R2 Pro is built-in. It’s a 130mAh 10220 cell. As far as I can tell, there’s no way to access it or change it. Thus, when the battery reaches end-of-life, the light essentially does too.
Here are runtimes for both modes, High and Low. In fact, two test of High – one cooled and one uncooled.


Charging
On-board charging on the i1R 2 Pro comes thanks to a built-in USB-C charging port. To access this port, loosen the head completely. The head is captured – it will not fall off and get lost. However, it’s captured to exactly the point you can see below – the USB-C port is “fully exposed” here.

That level of exposure is not quite enough for me. Yes, the charging cables I used work fine, but they’re a bit hard to get into the port.
Near the charging port is this charging indicator. When the i1R 2 Pro is charging, this indicator is red. When charging is complete, this indicator turns blue.

An appropriate cable is included: USB to USB-C.

Here are a few charging cycles.


Modes and Currents
| Mode | Mode Claimed Output (lm) | Claimed Runtime | Measured Lumens | Tailcap Amps |
|---|---|---|---|---|
| High | 180 | 23m | 211 | – |
| Low | 5 | 12h | 9 | – |
Pulse Width Modulation
Neither mode uses PWM.


Here you can see a “baseline” – a chart with almost no light hitting the sensor.
Then there’s the Ultrafire WF-602C flashlight, which has some of the worst PWM I’ve seen. It’s so bad that I used a post about it to explain PWM! Here are multiple timescales (10ms, 5ms, 2ms, 1ms, 0.5ms, 0.2ms) to make comparing this “worst” PWM light to the test light easier. That post also explains why I didn’t test the WF-602C at the usual 50us scale.
User Interface and Operation
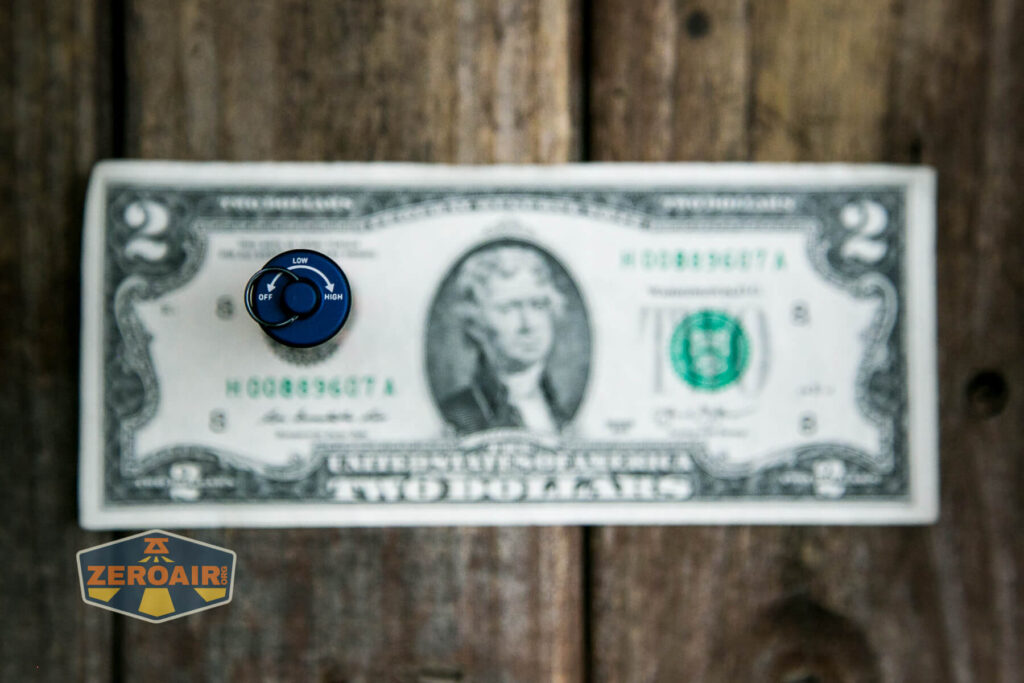
The Olight i1R2 Pro keychain flashlight is a twisty. There are markings on the tailcap to help a user know what to do, but of course, it’s very simple.
The markings are very easy to read.

Below you can see the gap in a state of “just” for each mode. Left is “just off” – the biggest gap. Middle is “just Low” – the mediumest gap. And the rightmost photo is when the light is in High, which is the smallest gap.


Here’s a user interface table!
| State | Action | Result |
|---|---|---|
| Off | Tighten head | Low |
| Low | Tighten head | High |
| High | Loosen head | Low |
| Low | Loosen head | Off |
LED and Beam
Olight surprisingly does state what emitter is used in the Olight i1R2 Pro keychain flashlight, though I am completely unfamiliar with it. They say it’s a “CSP LED.” Anyway, we can see the tests below and know what we need to know.

The “CSP” emitter is paired with a TIR optic.


LED Color Report (CRI and CCT)
Olight went with this new/unknown LED, but it’s nice to note that the CCT is around 5100K. That’s great! Perfectly acceptably great. Thank you Olight! The downside is that the CRI is not great, but still above what I typically just straight out call “low CRI.” This one clocks in around 75 CRI, which is probably “low to middle” CRI.


Beamshots
These beamshots always have the following settings: f8, ISO100, 0.3s shutter, and manual 5000K exposure. These photos are taken at floor level, and the beam hits the ceiling around 9 feet away.


Tint vs BLF-348 (KillzoneFlashlights.com 219b version) (affiliate link)
I keep the test flashlight on the left and the BLF-348 reference flashlight on the right.


I compare everything to the KillzoneFlashlights.com 219b BLF-348 because it’s inexpensive and has the best tint!
Conclusion
What I like
- Nice titanium construction
- Very simple user interface
- 5100K output!
- Great beam profile
What I don’t like
- Low to medium CRI
- Battery is completely inaccessible
Notes
- This content originally appeared at zeroair.org. Please visit there for the best experience!
- Please use my Amazon.com referral link to help support zeroair.org!
- Please support me on Patreon! I deeply appreciate your support!