
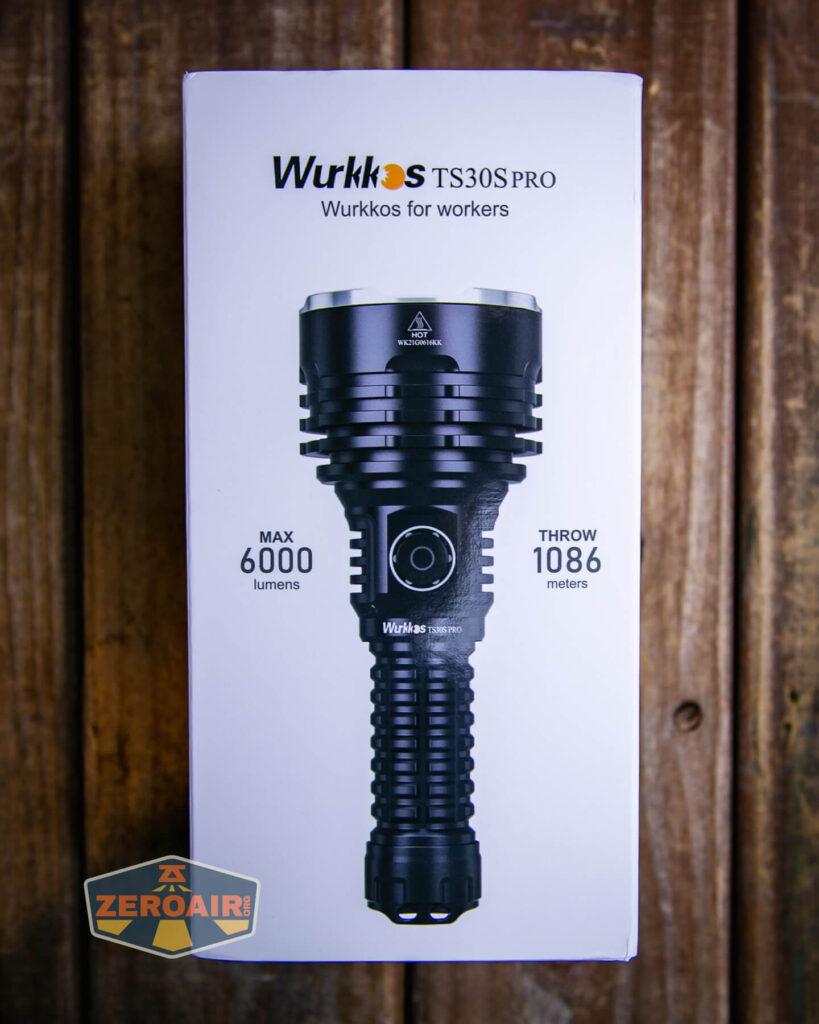
Wurkkos TS30S Pro Powerbank Flashlight Review
Wurkkos updated the TS30S – the TS30S Pro flashlight features Andúril with a Luminus SBT90.2 emitter, higher output, and a powerbank feature!
Official Specs and Features
Here’s a link to the Wurkkos TS30S Pro powerbank flashlight product page.
Versions
Of the Wurkkos TS30S Pro powerbank flashlight specifically, there are just two versions: with cell and without. Of course, there are previous iterations of this light, too. The Wurkkos TS30S has been covered here
before.
Price
Without the 21700, the Wurkkos TS30S Pro powerbank flashlight comes in at $76.99. The 21700 cell seen in this review adds only a few dollars, so the package makes great sense.
Short Review
I liked the previous iteration of the TS30S and the Pro version is even Pro-er. It’s a great light, with great throw and output. The Pro version claims higher output and better throw, and all in all is a great package.
Long Review
The Big Table
| Wurkkos TS30S Pro powerbank flashlight | |
|---|---|
| Emitter: | Luminus SBT90.2 |
| Price in USD at publication time: | $76.99 |
| Cell: | 1×21700 |
| Runtime Graphs | |
| LVP? | Yes |
| Switch Type: | E-Switch |
| Quiescent Current (mA): | ? |
| On-Board Charging? | Yes |
| Charge Port Type: | USB-C |
| Charge Graph | |
| Power off Charge Port | with cell: all modes without cell or tailcap: all but highest few modes |
| Claimed Lumens (lm) | 6000 |
| Measured Lumens (at 30s) | 3855 (64.3% of claim)^ |
| Candela per Lumen | 67.8 |
| Claimed Throw (m) | 1086 |
| Candela (Calculated) in cd (at 30s) | 5320lux @ 7.144m = 271515cd |
| Throw (Calculated) (m) | 1042.1 (96% of claim)^ |
| Claimed CCT | 5700 |
| Measured CCT Range (K) |
4300-6100 Kelvin |
| Item provided for review by: | Wurkkos |
| All my Wurkkos reviews! | |
^ Measurement disclaimer: Testing flashlights is my hobby. I use hobbyist-level equipment for testing, including some I made myself. Try not to get buried in the details of manufacturer specifications versus measurements recorded here; A certain amount of difference (say, 10 or 15%) is perfectly reasonable.
What’s Included

- Wurkkos TS30S Pro powerbank flashlight
- Wurkkos 5000mAh 21700 cell
- Spare o-rings (2)
- Lanyard
- Charge cable
(USB to USB-C) - Manual, etc.
Package and Manual


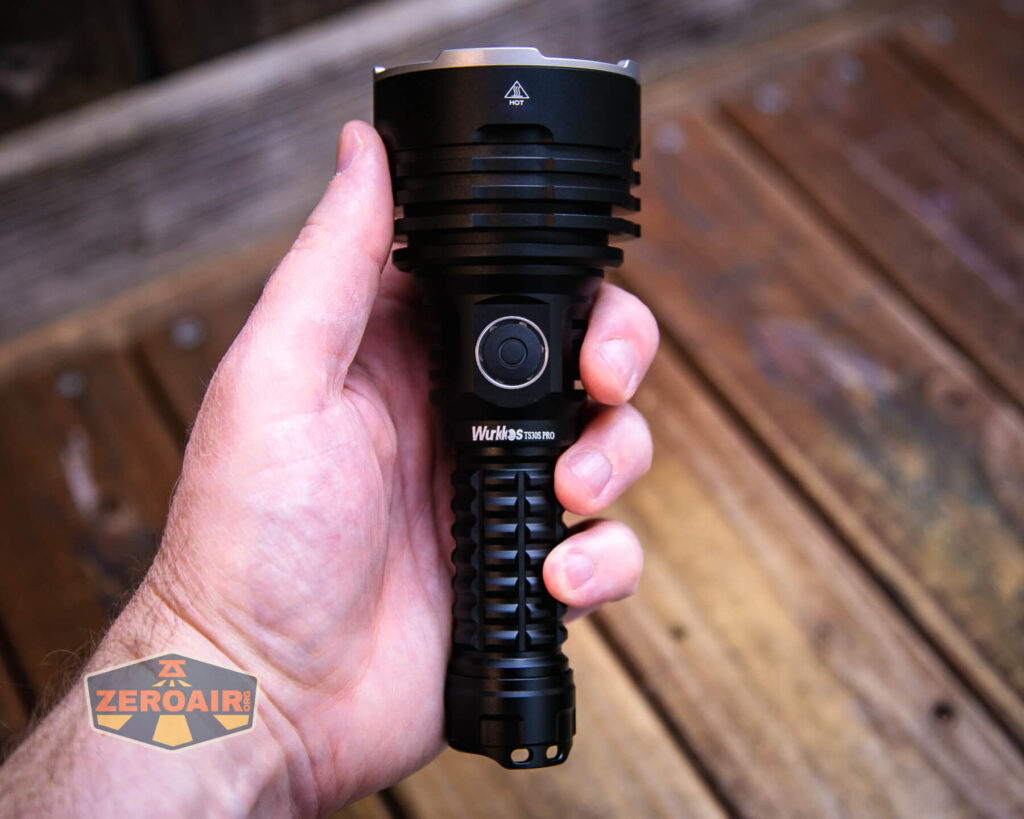
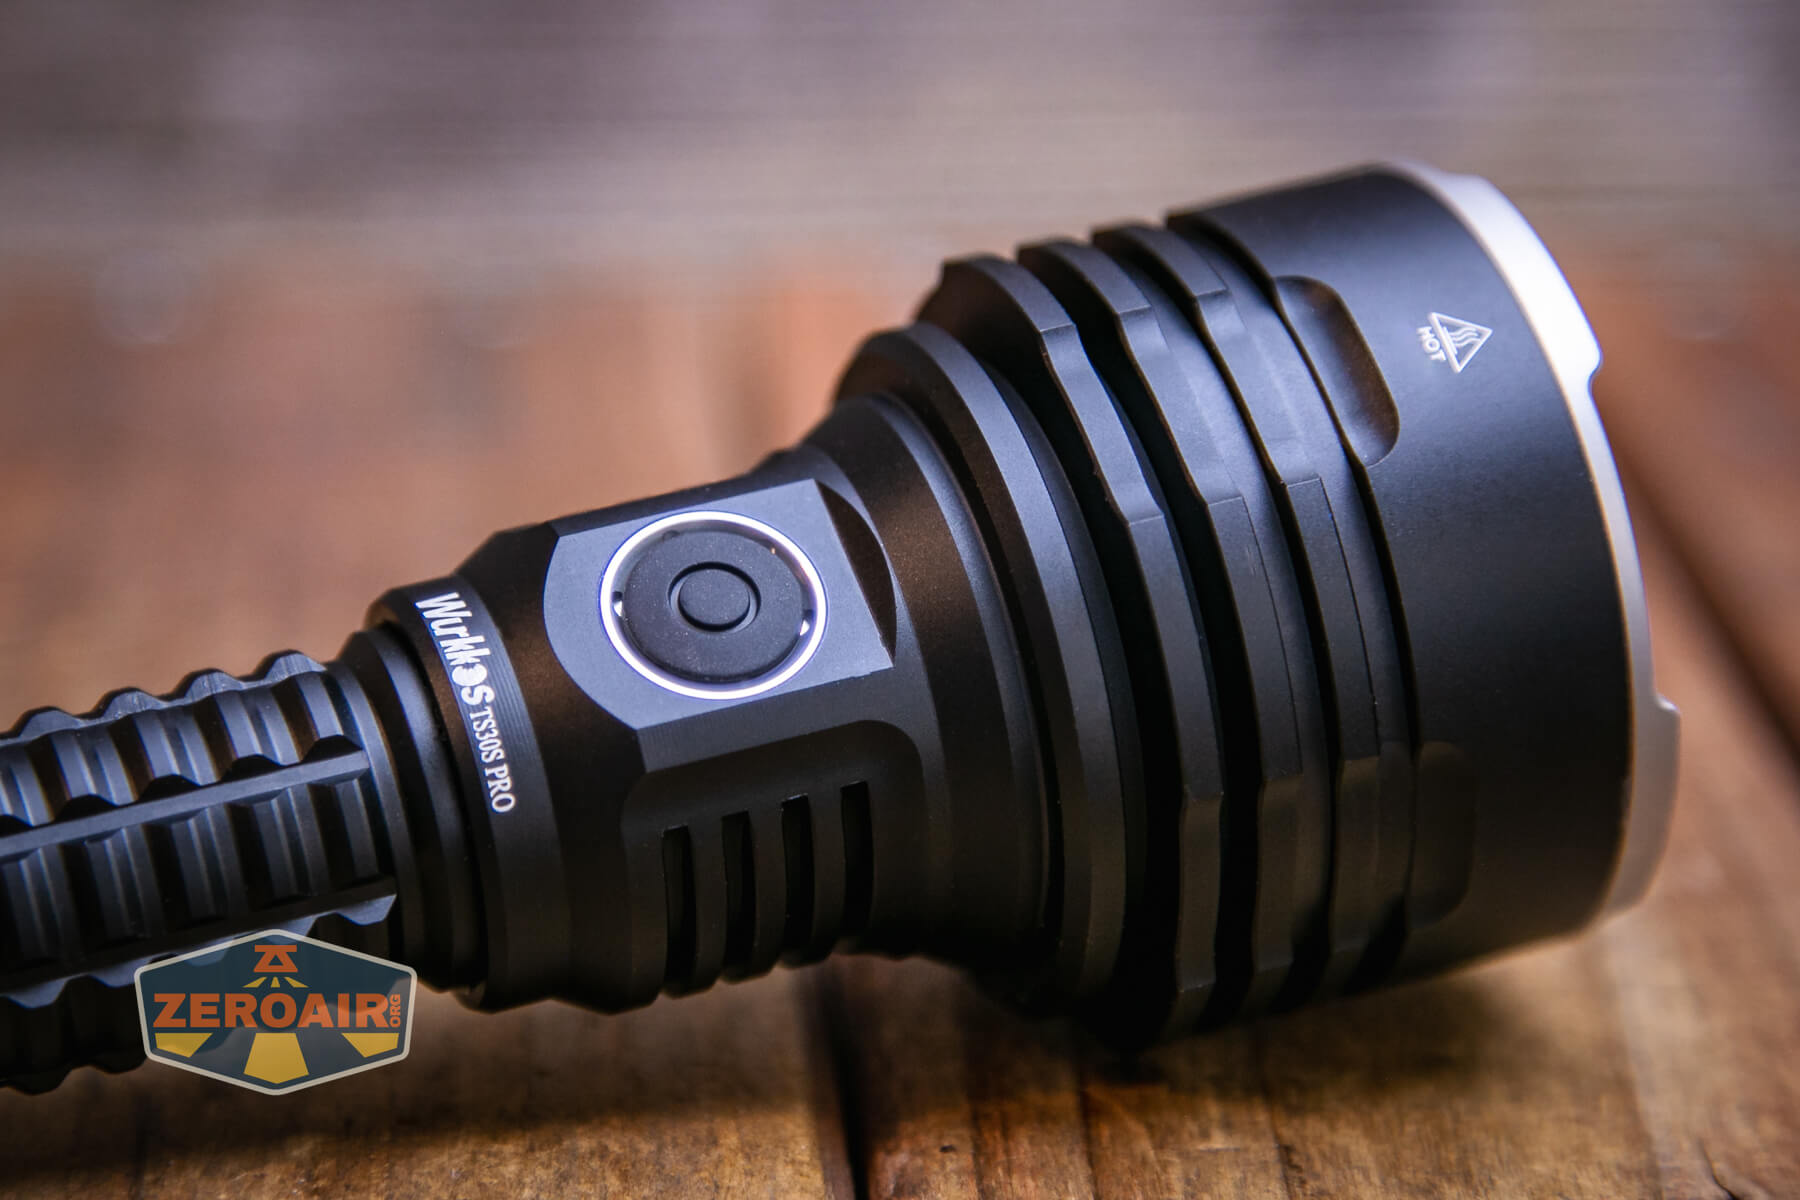
Build Quality and Disassembly

You know, I am not sure how better to say it, but these Wurkkos lights are very nicely built. This light is around $77 or so, and the build quality is perfectly adequate at that price point


You’ll note a bit of cooling fin around the switch area. These aren’t very deep. Most of the cooling fin depth is around the reflectors. Reflectors are metal and should have good contact inside the head there, so cooling through these fins should be good.
On the tailcap, there’s a nice beefy spring.

Both the head and tail will come off the cell tube. For cell swaps, it’s much easier to remove the head. This seems intentional. The head has only a brass button for contacting the cell. That’s a bit of an update from the TS30S, which had a big brass contact point in the head.

The tailcap has no switch (this is an e-switch-only light).

Size and Comps
Dimension: 157.2mm (length) x61mm (head diameter)
Weight: 265 grams (without battery)


If the flashlight will headstand, I’ll show it here (usually the third photo). If the flashlight will tailstand, I’ll also show that (usually in the fourth photo).

Here’s the test light with the venerable Convoy S2+. Mine is a custom “baked” edition Nichia 219b triple. A very nice 18650 light!
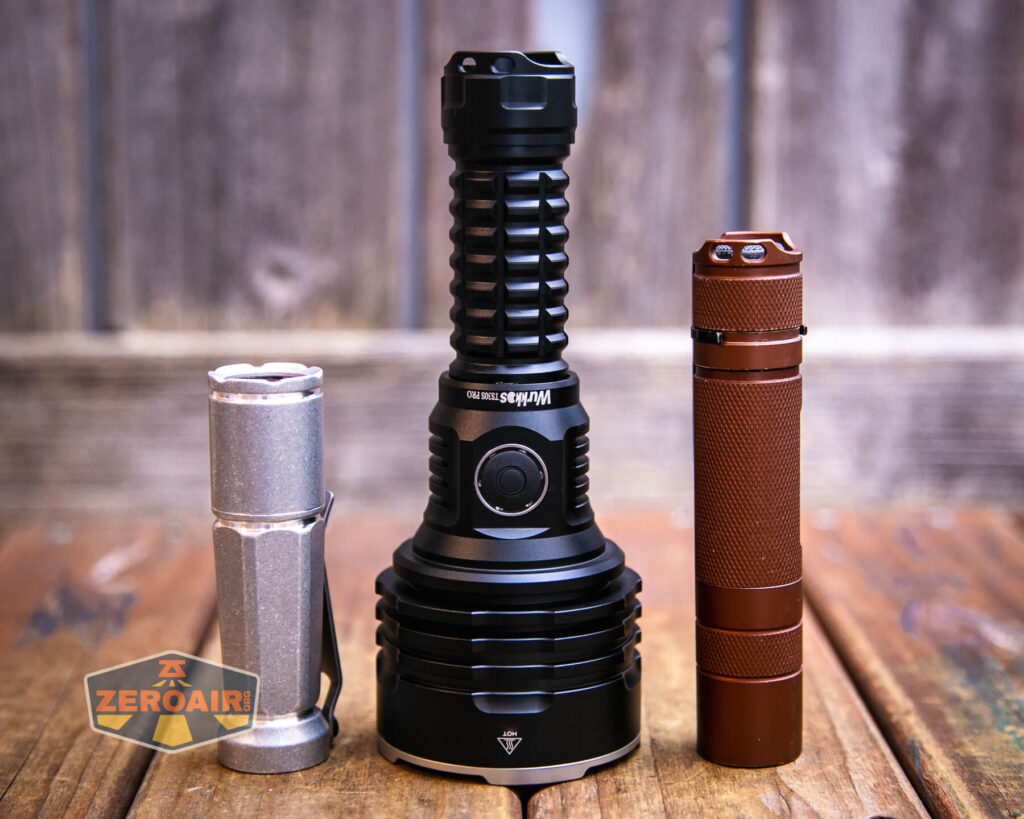

Also above on the left is a new feature light!! Laulima Metal Craft sent this Todai in tumbled aluminum for some size comparison photos like the ones above. Laulima has a bunch of incredible items. I’ve tested one (the Laulima Metal Craft Hoku) (the official site for Hoku is here) that was a Friend Fund Friday review. I was impressed enough by that Hoku that I bought a Laulima Metal Craft Diamond Slim (also in tumbled aluminum) (review is upcoming!) These lights by Laulima have impeccable build quality and not only that, they’re quite configurable. There are some (great, actually) default configurations, but Joshua Dawson (of Laulima Metal Craft) is open to ideas and emitter options and the like. I haven’t reviewed this Todai, but I have to say, it feels absolutely fantastic and I love it thus far. (Notably, I love how warm and eggy those emitters look through the TIR.)
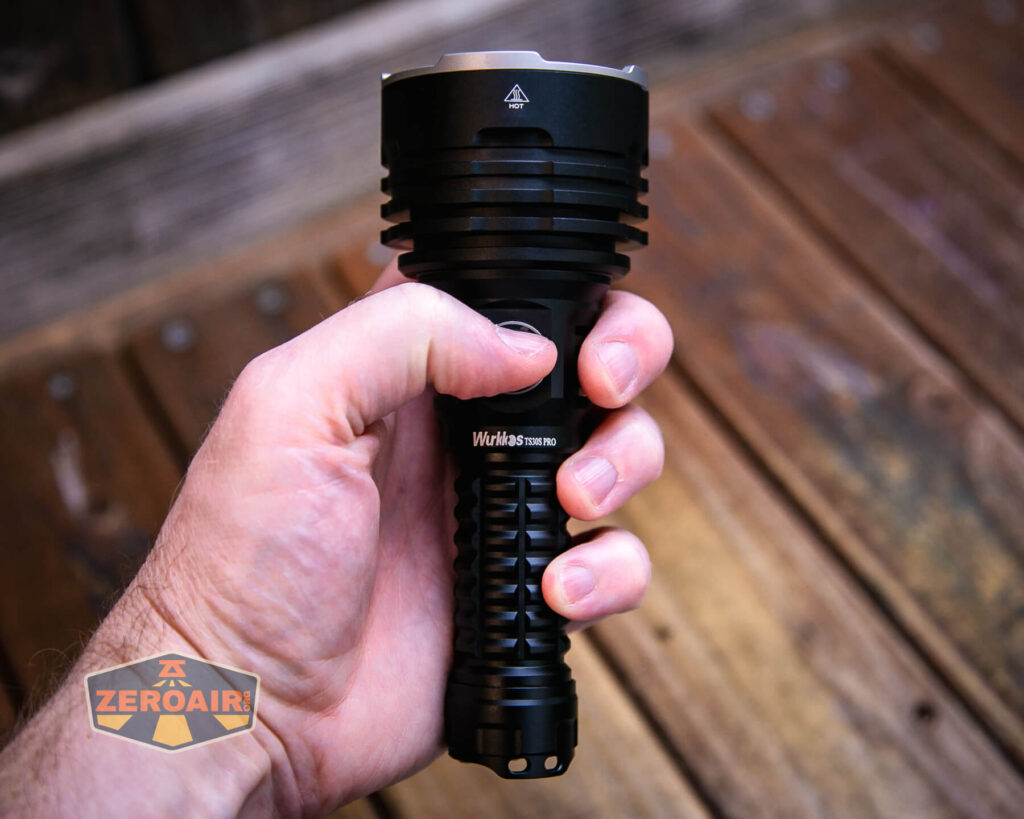
Retention and Carry
I’ll call the primary means for carrying the Wurkkos TS30S Pro powerbank flashlight to be the included lanyard.
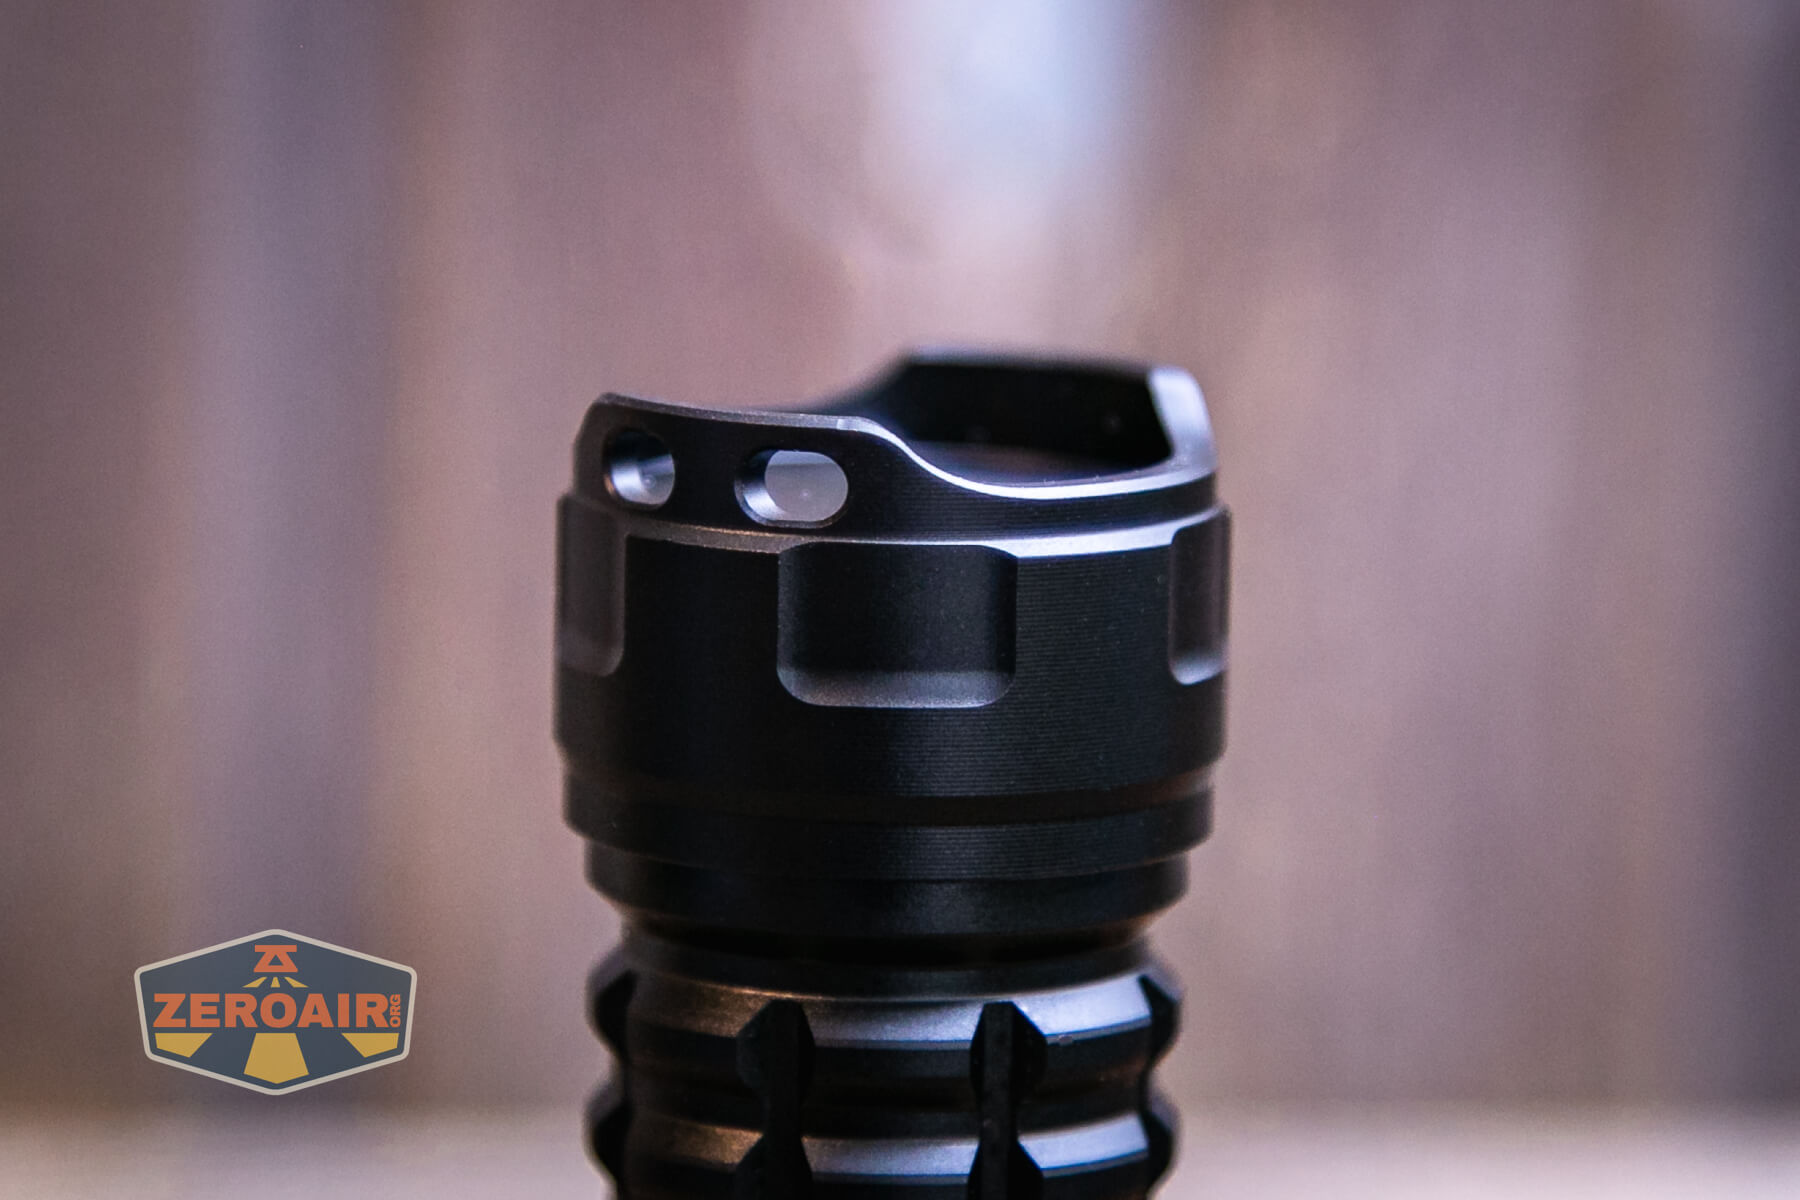
This lanyard attaches through one of the two holes in the tailcap. Each hole is a single hole, and so the lanyard does obstruct perfect tailstanding just a little bit.

There’s no pouch or belt clip or anything else. The lanyard is it!
Power and Runtime
The Wurkkos TS30S Pro powerbank flashlight is powered by a single 21700 lithium-ion cell. If you buy the kit (which you should), you’ll get this 5000mAh seen below.
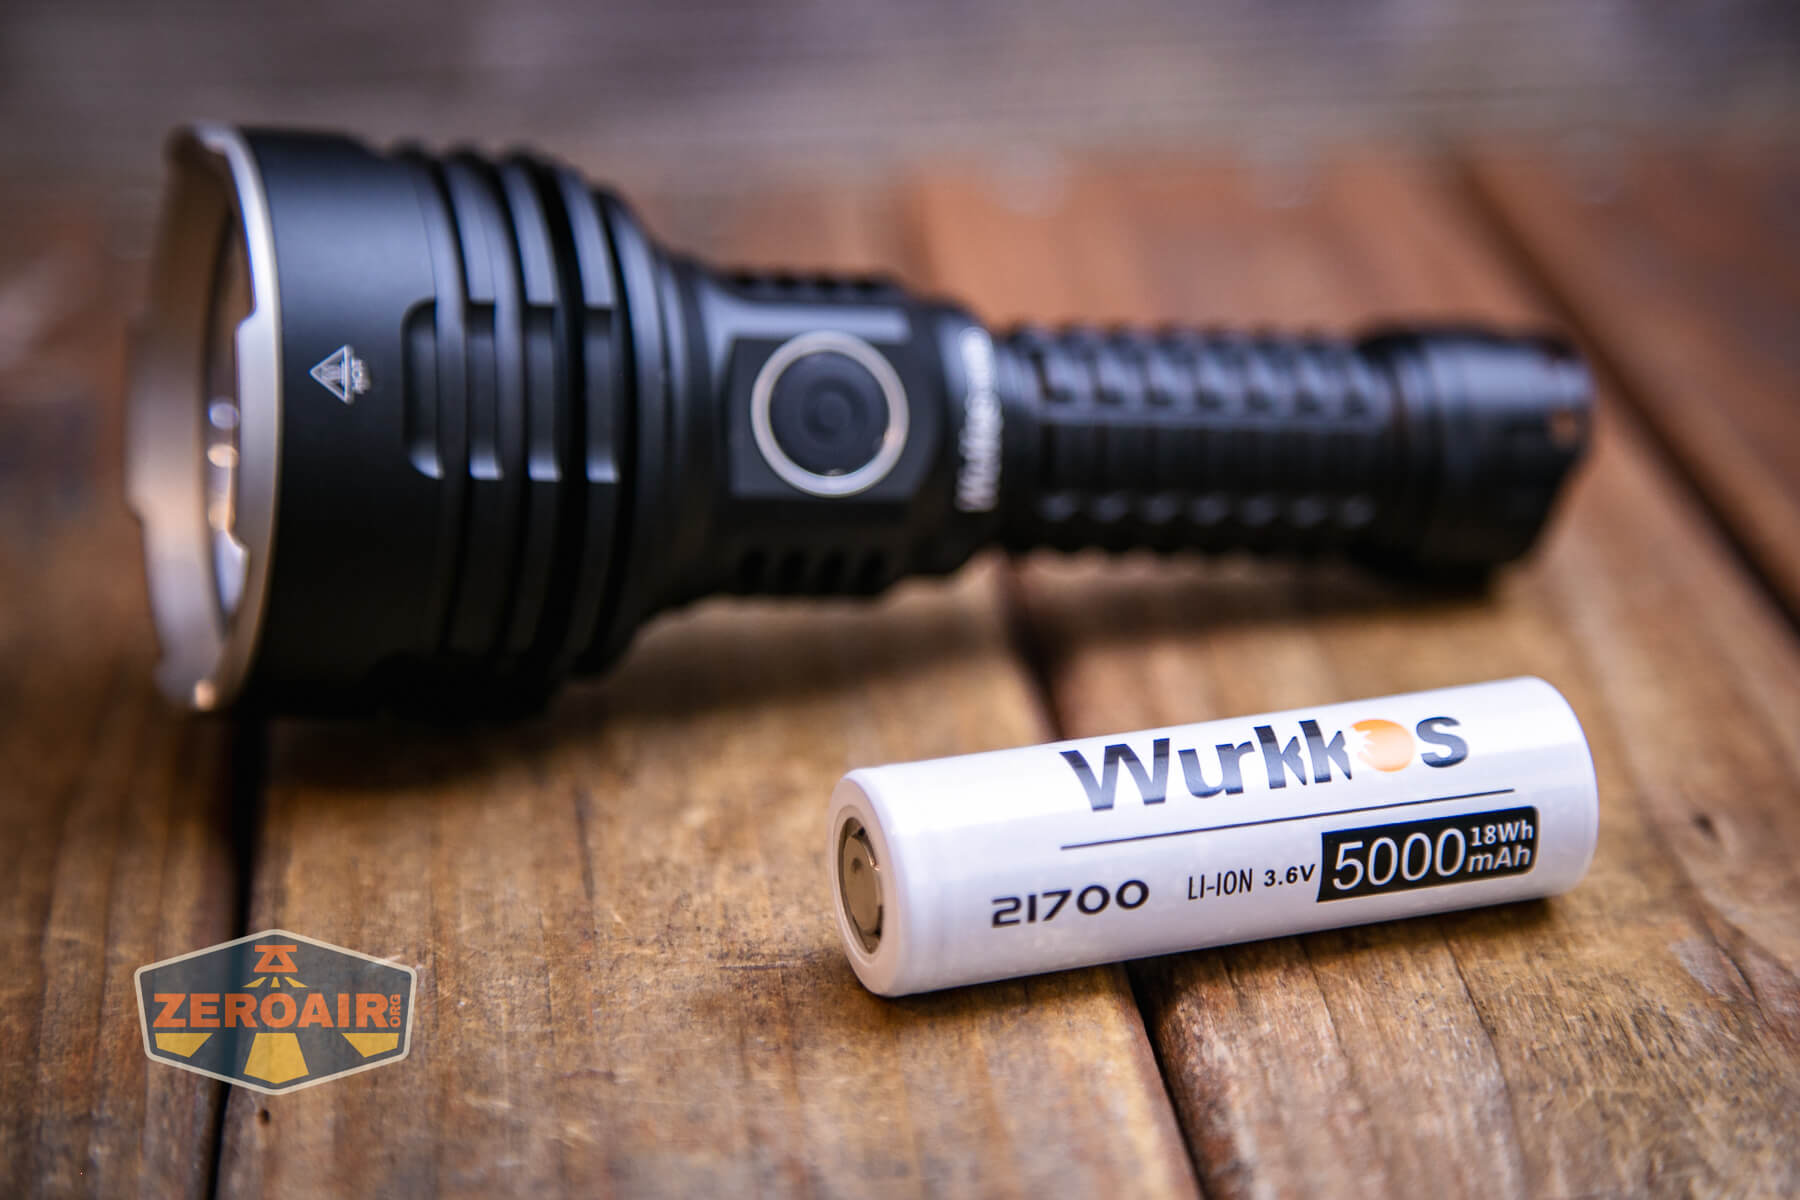
This is a standard 21700 cell. With the internal setup of the TS30S Pro, any 21700 should work fine. The cell is installed in the normal direction – positive terminal toward the head.

Below you can see a few runtimes. I was impressed by the output… Except that the light claims 6000 lumens, and even at startup I’m only seeing around 4200 lumens. So it’s too bad that the light doesn’t hit its claim even with the included cell but this output is still extraordinary – over 3500 lumens for almost 2 minutes.
In this case, I calibrated the light through the Anduril interface, for current temperature and also maximum temperature. I set the max to 60 degrees Celsius. That’s higher than I usually go.


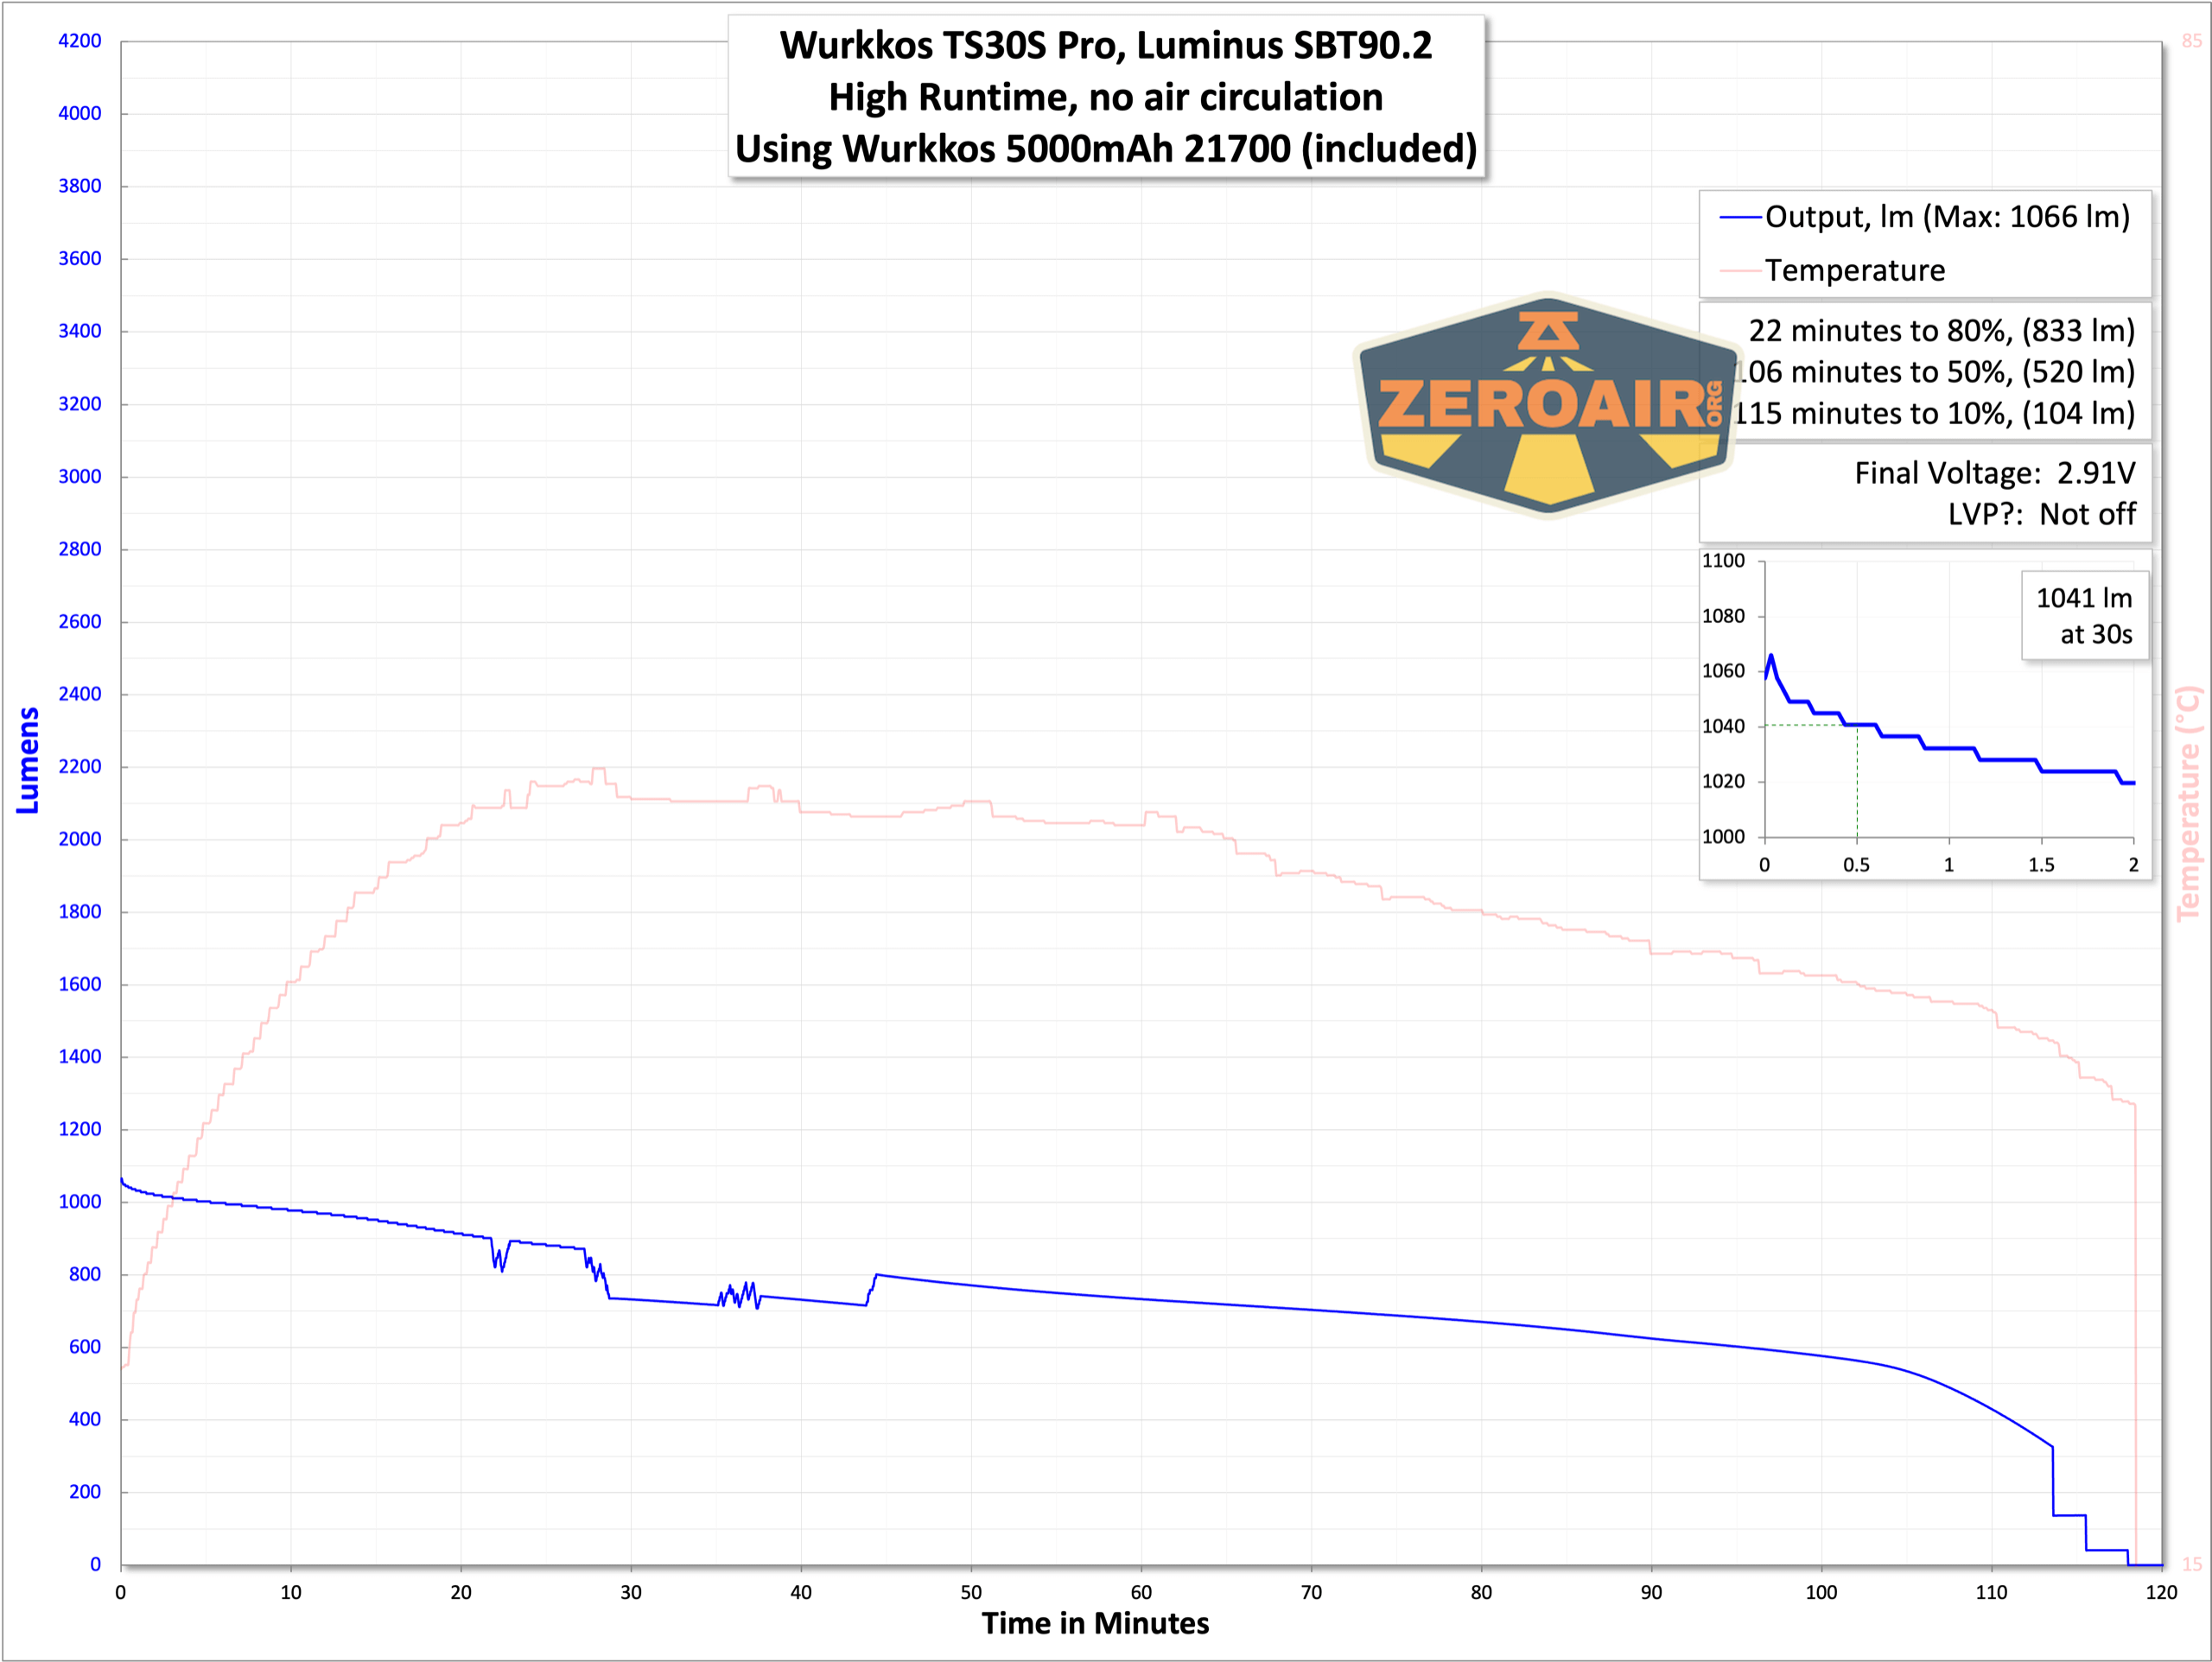

The third-highest output is still over 1000 lumens. These outputs track downward with cell voltage, and then finally have some stepdowns to very low output. Anduril does have low voltage protection, but you’ll see the low voltage by low output long before the shutoff.
Charging
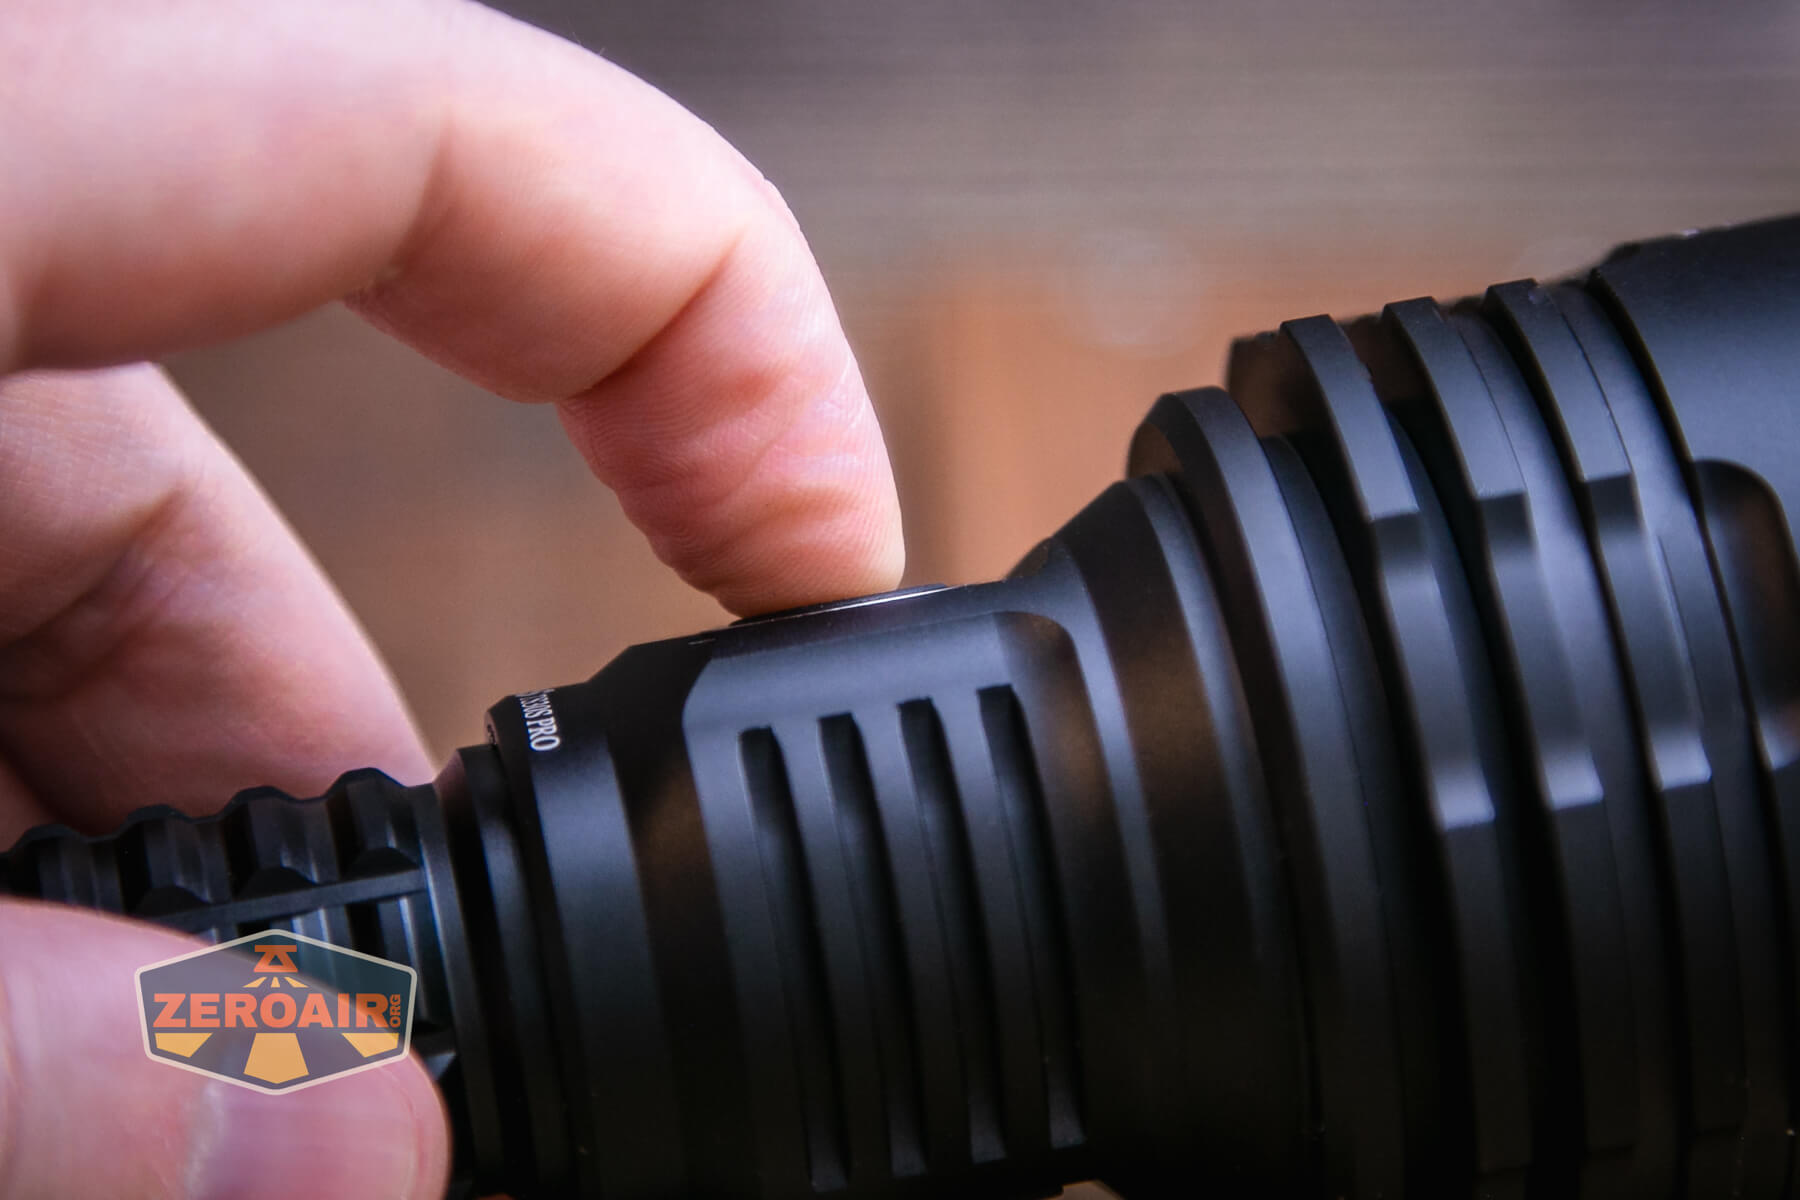
The Wurkkos TS30S Pro powerbank flashlight has built-in USB-C charging. This charging port is opposite to the switch and fairly easy to notice by feel – the charge port cover is grippy, while the switch is stubbly (knurled).


I am very pleased with this charging port cover – it sits very securely, but is also easy to open when needed.
An appropriate cable is included for charging: USB to USB-C.

Here are a couple of charge graphs. First, from USB to USB-C, which is the intended way (that’s the cable Wurkkos includes, after all). Charging looks great, and is notably consistent. Charging doesn’t even take very long, which is impressive for a 5000mAh cell. But that’s what you get with a max current of around 2A. This is good charging.
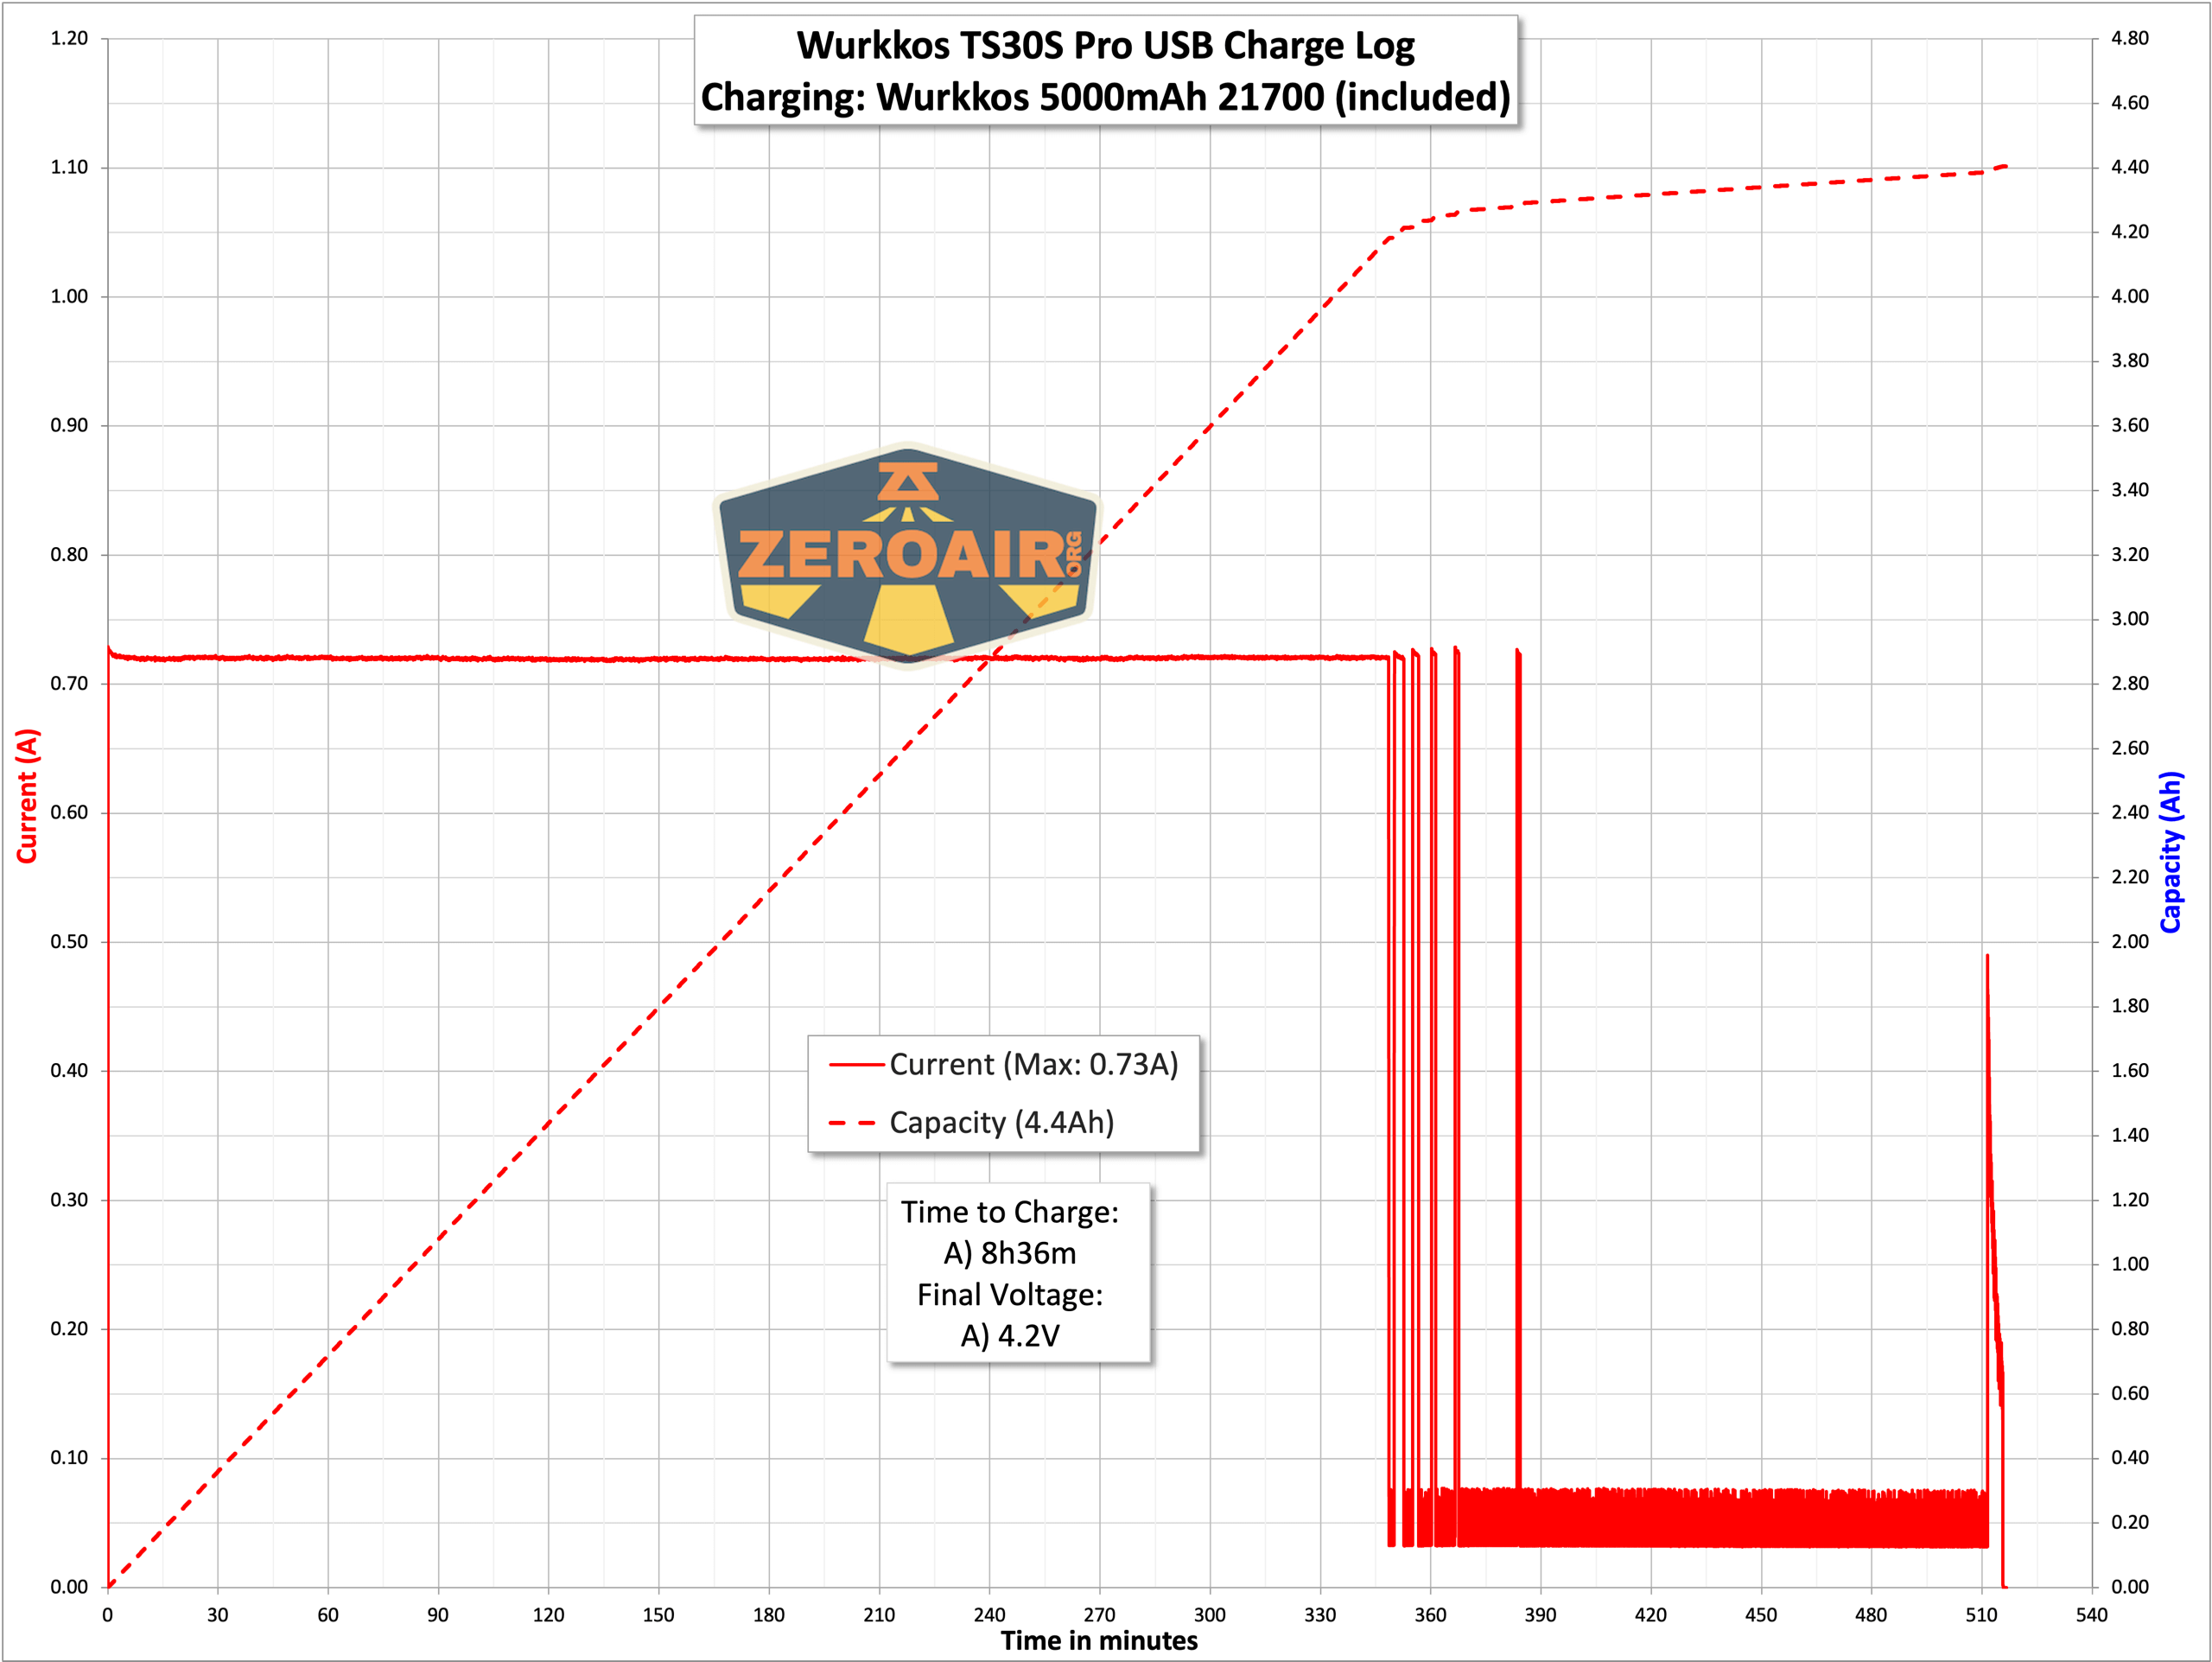
I also tested a bit with USB-C to USB-C. This charging works just fine too. The time required is the same as with USB-A charging.

Powerbank
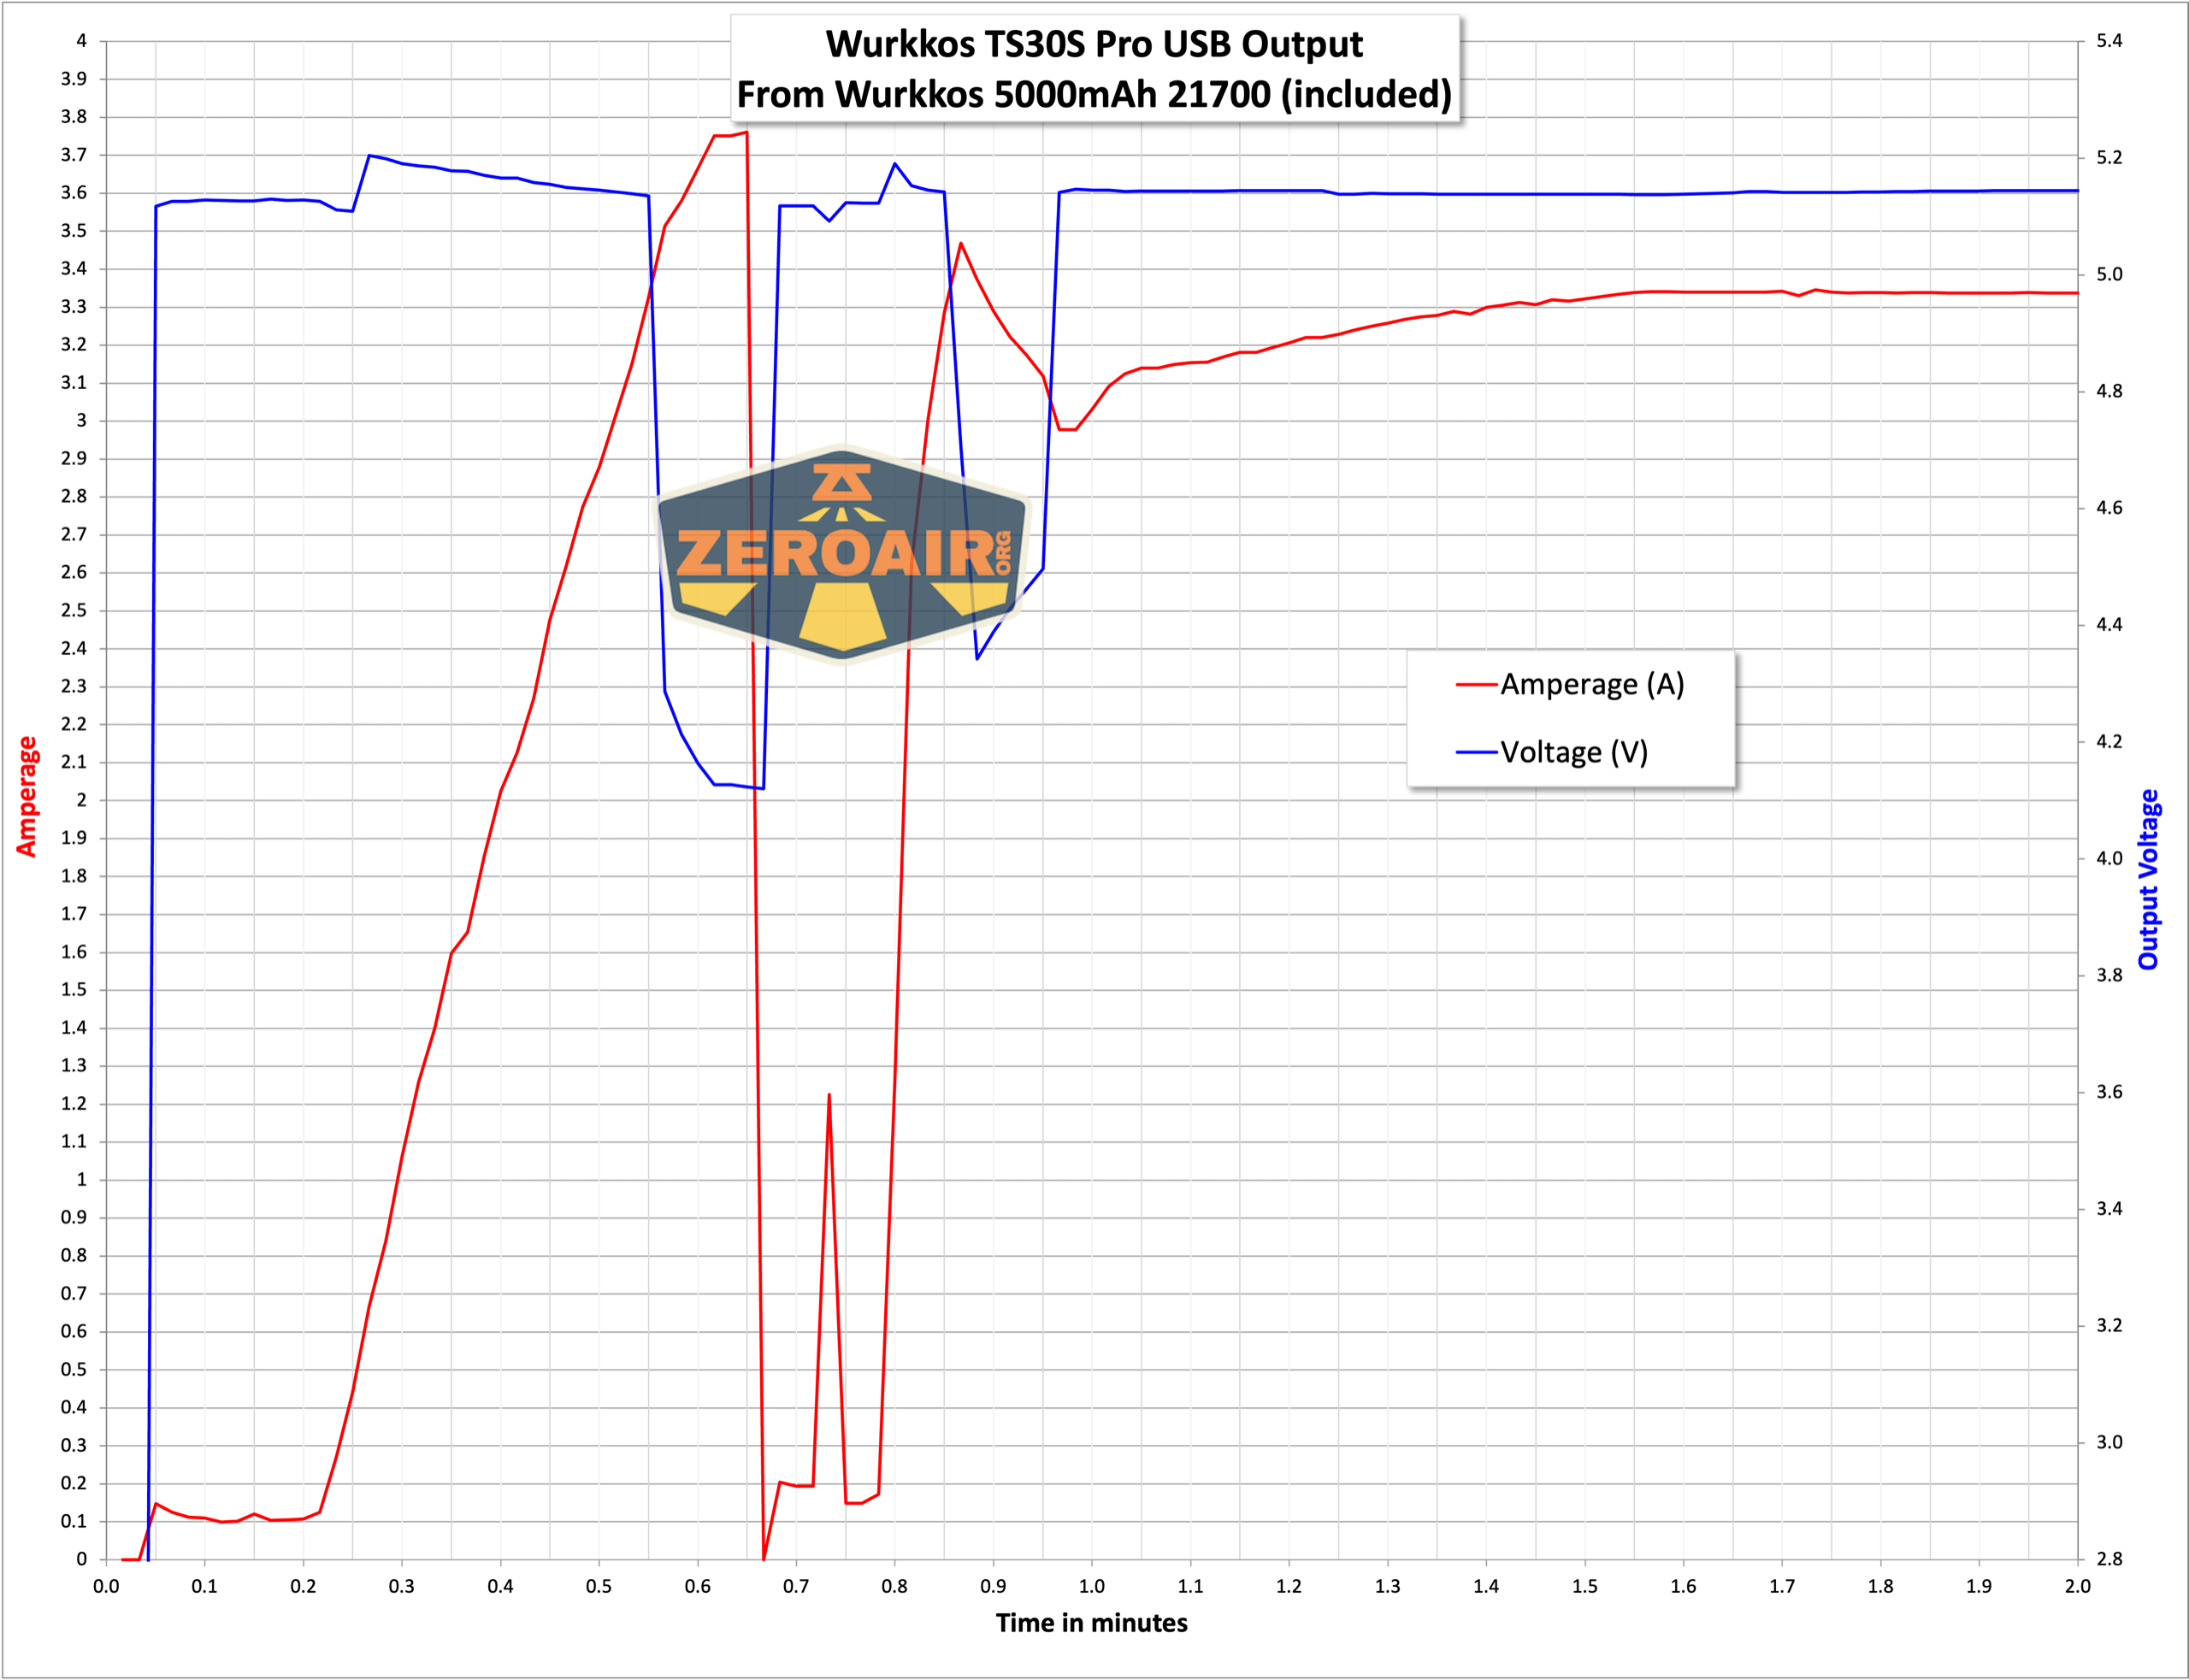
Here’s a bit of powerbank testing. The first graph is the stress testing, so to speak – pulling as much current as I can out of the port before the light shuts off. This one puts down nearly 4A (but the voltage dips at that current).
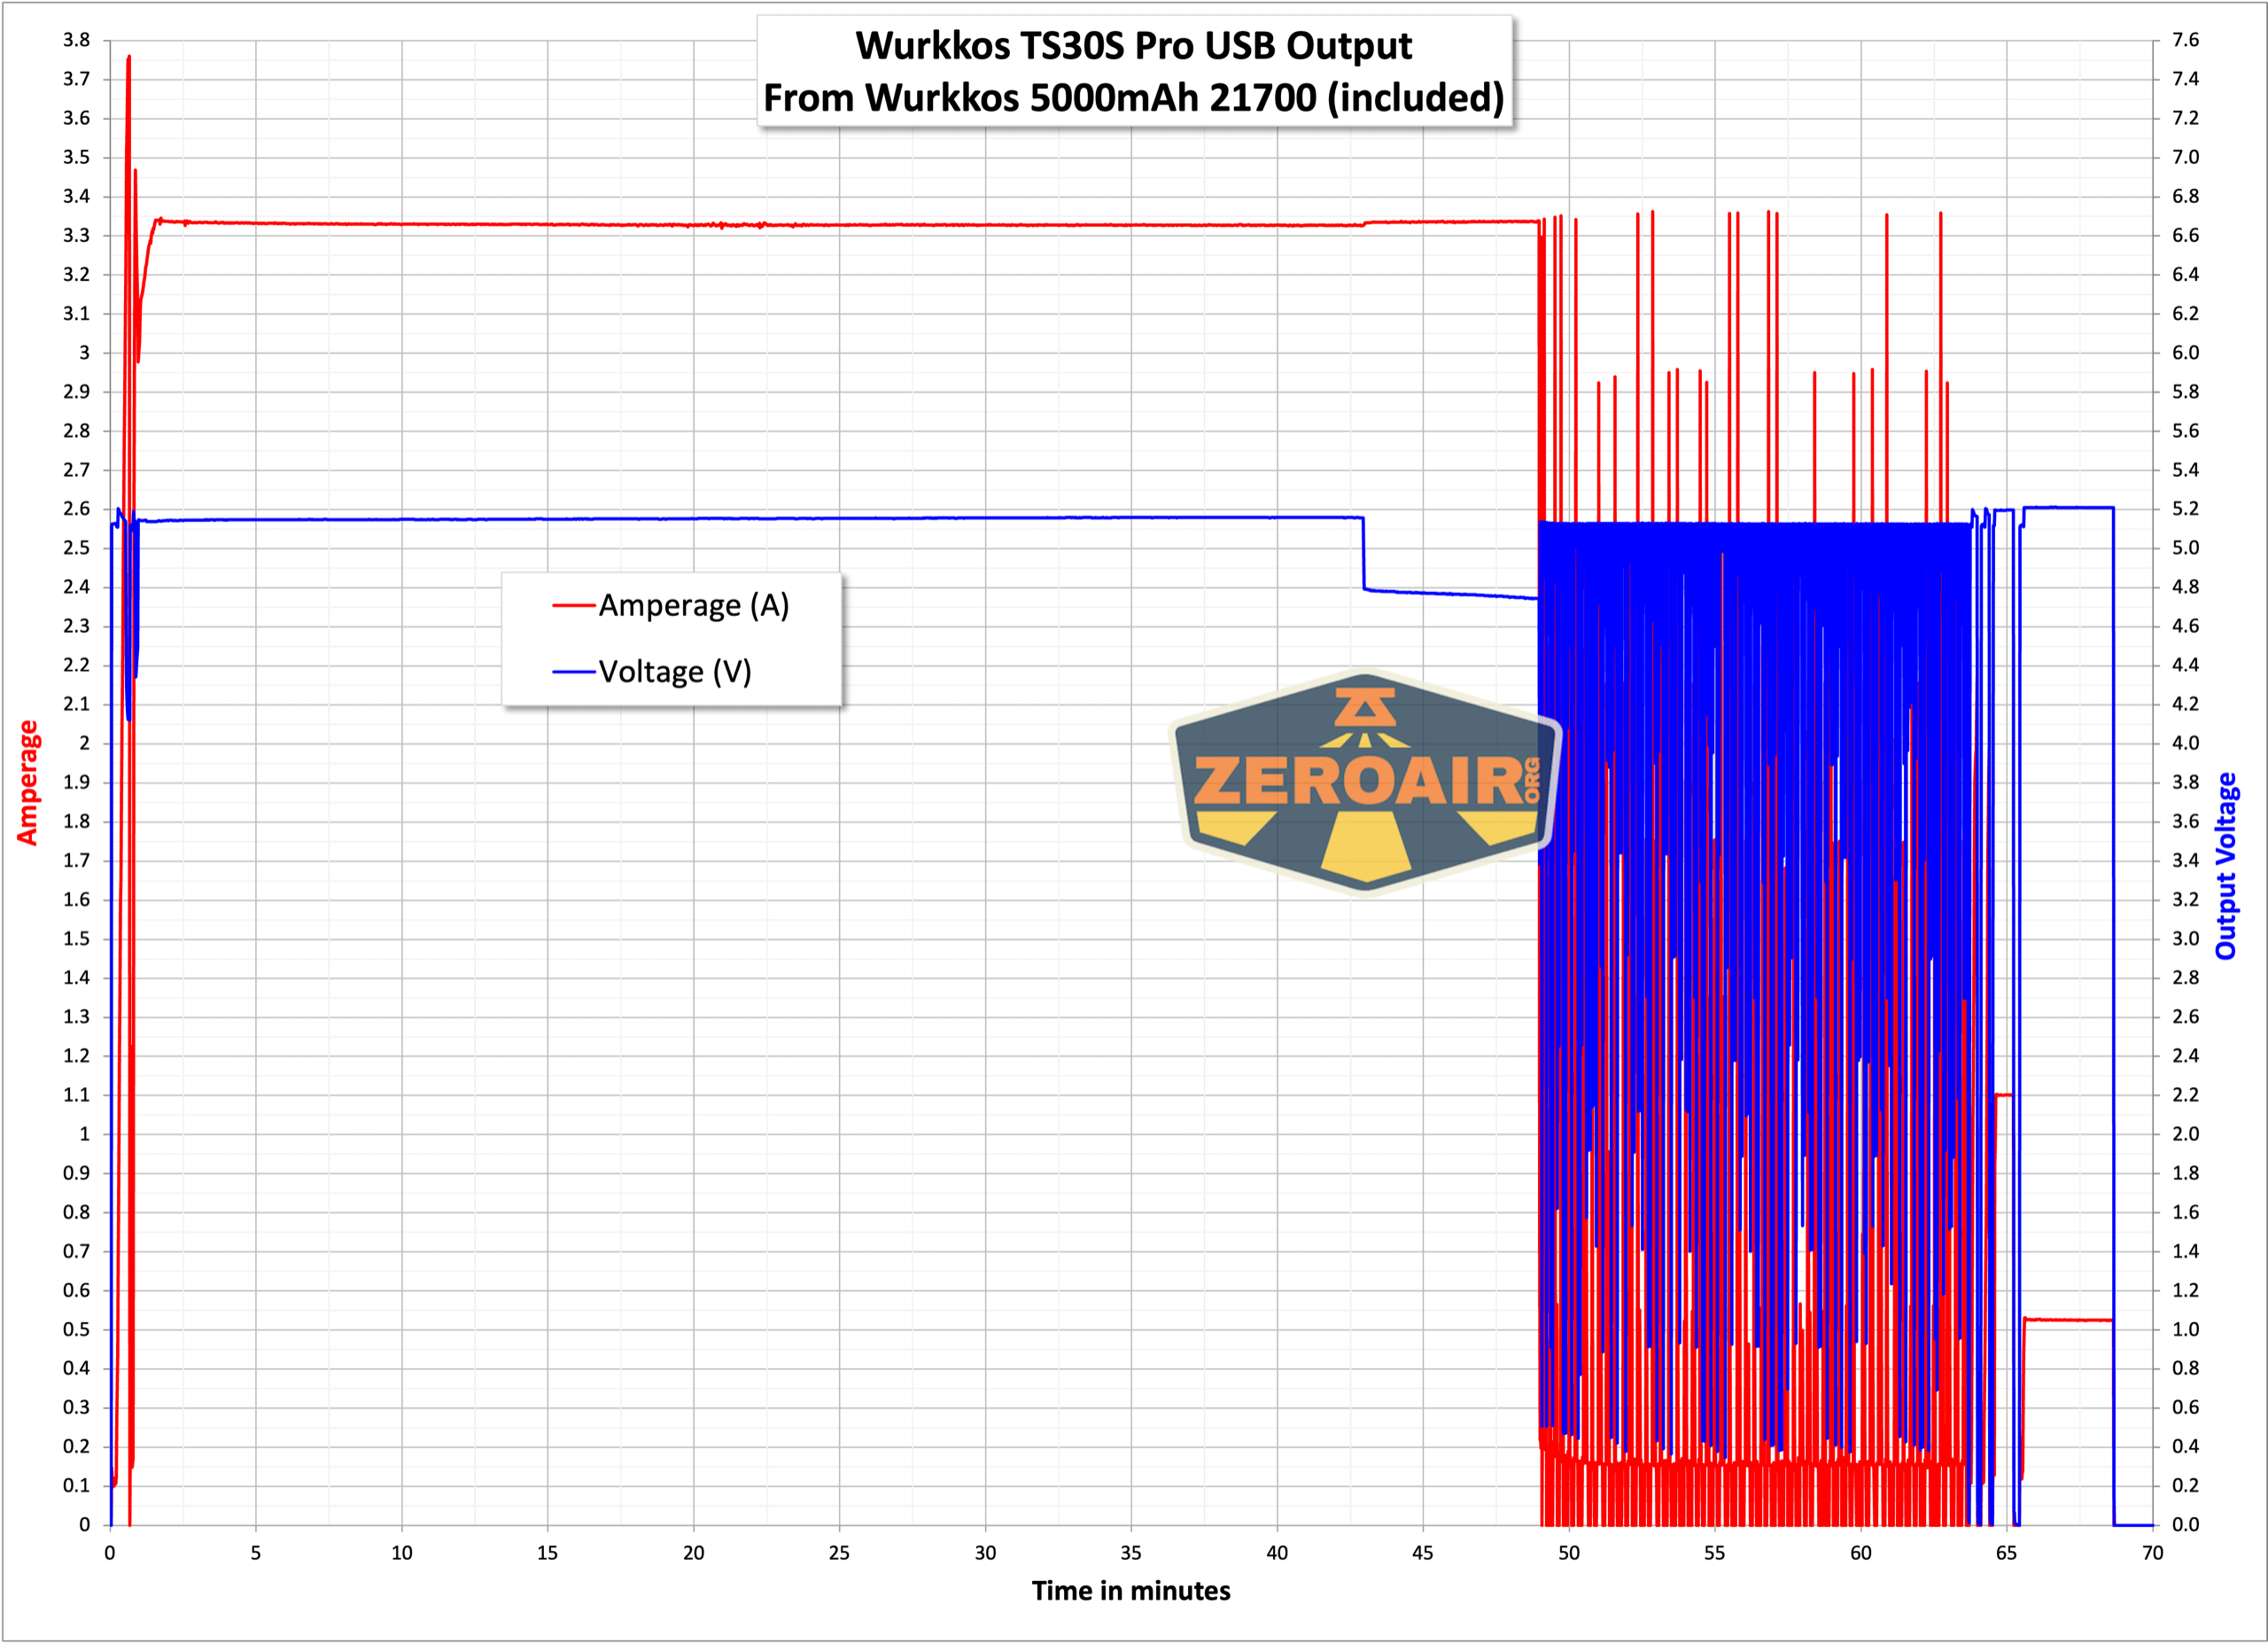
And here’s the full window of that test. Toward the end, the powerbank shuts off and then comes back on – that’s just with my testing equipment; I’m not sure how it’d work on a phone or whatever.
When discharging through the powerbank feature, the switch is orange. The switch will turn blue when the battery is low.
Modes and Currents
| Mode | Mode Claimed Output (lm) | Claimed Runtime | Measured Lumens | Tailcap Amps |
|---|---|---|---|---|
| Turbo (Double Click from on) | – | 4243 (0s) 3855 (30s) | >18.10 | |
| Highest Stepped | – | – | 1041 | 2.83 |
| – | – | 358 | 1.10 | |
| – | – | 101 | 0.25 | |
| – | – | 38.7 | 0.09 | |
| – | – | 13.3 | 0.03 | |
| – | – | 3 | [low] | |
| Lowest Stepped |
– | – | 0.3 | [low] |
| Lowest Ramped | – | – | [low] | [low] |
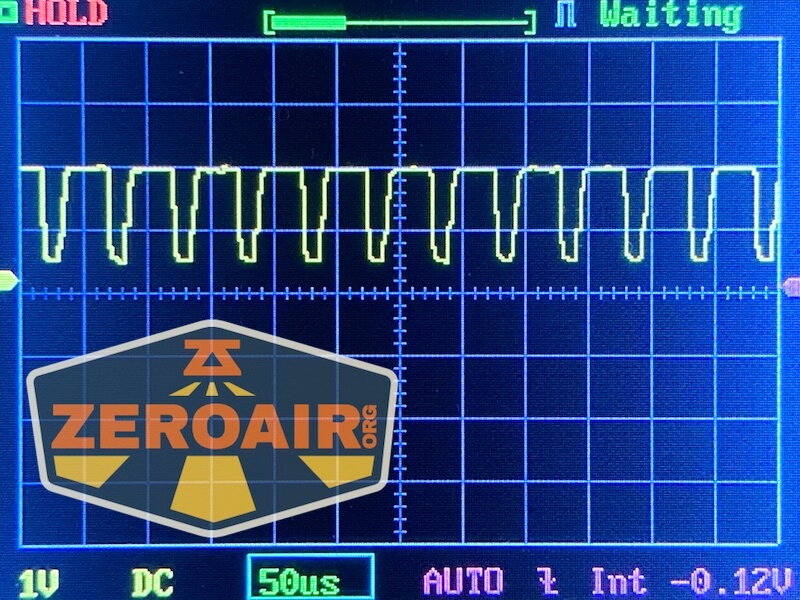
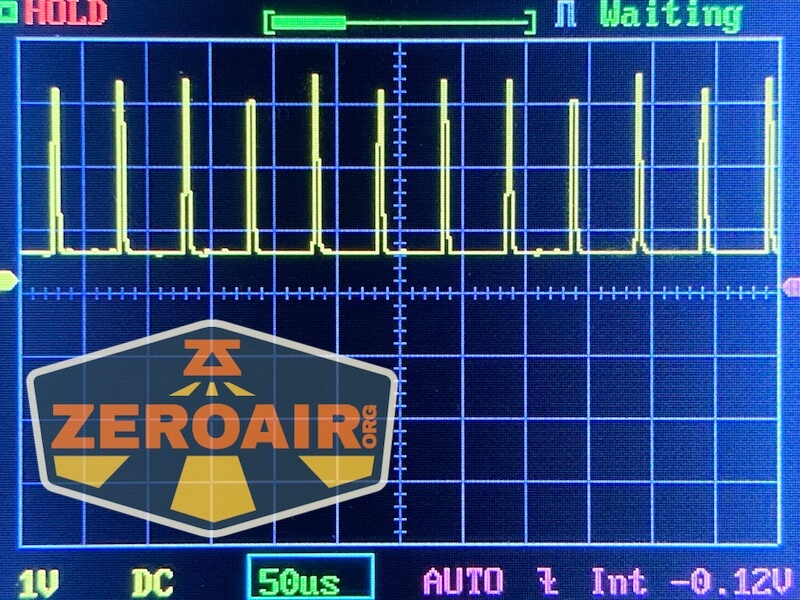
Pulse Width Modulation
There is PWM on all modes except Turbo. On all but the lowest output level, it’s not PWM that I can call “noticeable.” It’s plenty fast PWM.


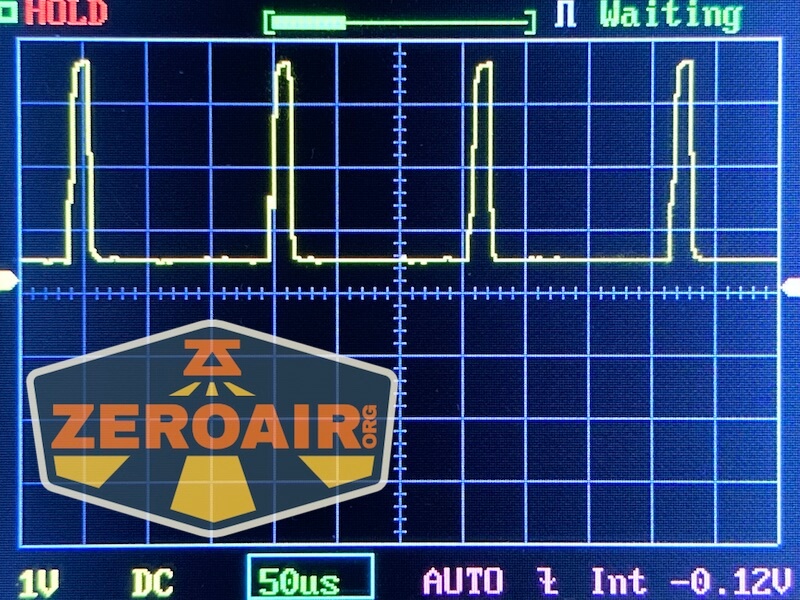
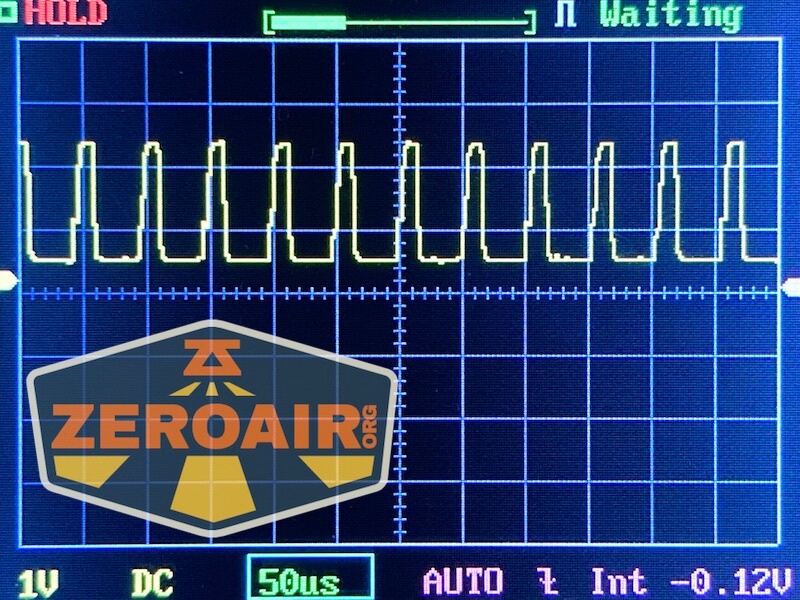


Here you can see a “baseline” – a chart with almost no light hitting the sensor.
Then there’s the Ultrafire WF-602C flashlight, which has some of the worst PWM I’ve seen. It’s so bad that I used a post about it to explain PWM! Here are multiple timescales (10ms, 5ms, 2ms, 1ms, 0.5ms, 0.2ms) to make comparing this “worst” PWM light to the test light easier. That post also explains why I didn’t test the WF-602C at the usual 50us scale.
User Interface and Operation
A side e-switch is used in the Wurkkos TS30S Pro powerbank flashlight. This switch is exactly like that of the FC13 I reviewed previously. It is a soft and low switch with a translucent center and edges that show colors – RGB!
The switch is configurable, according to the manual. You will need to be in Advanced user interface to configure the switch!

The light ships with Andúril2! I’m not completely sure which version of Anduril the Wurkkos FC13 flashlight has, but the text below should at least get you started on using the light. I think it’s an improvement over the first iteration(s). There are some things some users might not love about it, but I think overall it feels much more approachable. I will note though that the nomenclature might be a bit confusing – the light (all lights with Andúril2) ships in Simple UI. This is not Muggle Mode. You may think “Well duh” and by now you’ve already seen the blistering runtime on turbo of Simple, so you get it. But just be aware, don’t hand this light to the uninitiated thinking they won’t set their hand on fire while using Simple UI. Here is where I’d tell you how to switch to muggle mode. There is no muggle mode.
Here’s a user interface table! This table is directly from ToyKeeper’s Andúril2 manual, which you can view here:
http://toykeeper.net/torches/fsm/anduril2/anduril-manual.txt
I am putting this in a table here with ToyKeeper’s permission. Thanks, TK! This is so much better than me writing it because it’s more reliable, and I completely trust its accuracy (at least, if I can paste it accurately). I’m breaking it up a little differently than ToyKeeper did, though I certainly understand why it was done her way originally.
The manual covers secondary RGB output – that works here too but it’s on the switch. That’s a downside, because while you’re actuating the switch (for example, during a hold action) it’s hard to see what the switch response is (for example, if
you want to cycle the switch RGB modes). But you just have to sort that out. It’s possible.
First, the table for Either User Interface. These actions work whether you’re in Simple or Advanced UI.
| State | Action | Result |
|---|---|---|
| Off | 1C | On (ramp mode, memorized level) |
| Off | 1H | On (ramp mode, floor level) |
| Off | 2C | On (ramp mode, ceiling level) |
| Off | 3C | Battcheck mode |
| Off | 4C | Lockout mode |
| Off | 13H | Factory reset (on some lights) |
| Off | 15+C | Version check |
| Ramp | 1C | Off |
| Ramp | 1H | Ramp (up, with reversing) |
| Ramp | 2H | Ramp (down) |
| Ramp | 3H | Tint ramping (on some lights) |
| Ramp | 3H | Momentary turbo (on lights without tint ramping) |
| Ramp | 4C | Lockout mode |
| Lockout | 1C/1H | Momentary moon (lowest floor) |
| Lockout | 2C/2H | Momentary moon (highest floor, or manual mem level) |
| Lockout | 4C | On (ramp mode, memorized level) |
| Lockout | 4H | On (ramp mode, floor level) |
| Lockout | 5C | On (ramp mode, ceiling level) |
| Batt check | 1C | Off |
A table for only Simple User Interface:
| State | Action | Result |
|---|---|---|
| Off | 2H | On (momentary ceiling level) |
| Off | 10H | Disable Simple UI |
| Ramp | 2C | Go to/from ceiling |
A table for only Advanced (aka “Full”) User Interface:
| State | Action | Result |
|---|---|---|
| Off | 2H | On (momentary turbo) |
| Off | 3H | Strobe mode (whichever was used last) |
| Off | 5C | Momentary mode |
| Off | 7C | Aux LEDs: Next pattern Switch LEDs: Next option |
| Off | 7H | Aux LEDs: Next color |
| Off | 10C | Enable Simple UI |
| Off | 10H | Simple user interface ramp config menu (1: floor, 2: ceiling, [3: steps]) |
| Ramp | 2C | Go to/from ceiling (or turbo if at ceil already) |
| Ramp | 3C | Change ramp style (smooth / stepped) |
| Ramp | 5C | Momentary mode |
| Ramp | 5H | Sunset timer on, and add 5 minutes |
| Ramp | 7H | Ramp config menu (1: floor, 2: ceiling, [3: steps]) |
| Ramp | 10C | Turn on manual memory and save current brightness |
| Ramp | 10H | Manual memory config menu (1: off, 2: set timeout) |
| Lockout | 7C | Aux LEDs: Next pattern |
| Lockout | 7H | Aux LEDs: Next color |
| Lockout | 10H | Auto-lock config menu (1: set timeout) |
| Strobe (any) | 1C | Off |
| Strobe (any) | 2C | Next strobe mode |
| Strobe (any) |
3H | Tint ramping (on some lights) |
| Strobe (any) | 5C | Momentary mode (using current strobe) |
| Candle | 1H/2H | Brighter / dimmer |
| Candle | 5H | Sunset timer on, add 5 minutes |
| Party strobe | 1H/2H | Faster / slower |
| Tactical strobe | 1H/2H | Faster / slower |
| Biking | 1H/2H | Brighter / dimmer |
| Lightning | 1H | Interrupt current flash or start new one |
| Batt check | 2C | Next blinky mode (Temp check, Beacon, SOS) |
| Batt check | 7H | Voltage config menu |
| Temp check | 1C | Off |
| Temp check | 2C | Next blinky mode (Beacon, SOS, Batt check) |
| Temp check | 7H | Thermal config menu |
| Beacon | 1C | Off |
| Beacon | 1H | Configure beacon timing |
| Beacon | 2C | Next blinky mode (SOS, Batt check, Temp check) |
| SOS | 1C | Off |
| SOS | 2C | Next blinky mode (Batt check, Temp check, Beacon) |
| Momentary | Any | On (until button is released) |
| Momentary | Disconnect power | Exit Momentary mode |
| Config menus | Hold | Skip current item with no changes |
| Config menus | Release | Configure current item |
| Number entry | Click | Add 1 to value for current item |
To be completely honest, I’m not entirely sure yet what’s the best way to tell if you’re in Simple user interface or Advanced UI. Based on what I see here and with the light in hand, I think the fewest clicks way will be 3 clicks from on (technically “Ramp” in the table, but I think “On” is accurate.) This action – 3C from Ramp – in Advanced user interface will iterate smooth or stepped. In Simple UI, this action will do nothing. There are other ways, though. For example, double-clicking from the top of the ramp will either do nothing or go to Turbo. If it does nothing, then you’re in Simple. If it goes to 11, then you’re in Advanced. One more reliable way to check between Simple and Advanced is to enter Batt Check (3C from off) then see what 2C does. In simple, the light will just turn off. In Advanced, the light will go to the temperature check.
Another great way to tell, thanks to a reader is to see what the lowest level of ramping is. Advanced user interface has a quite low low. Simple user interface has a much higher “lowest level.”
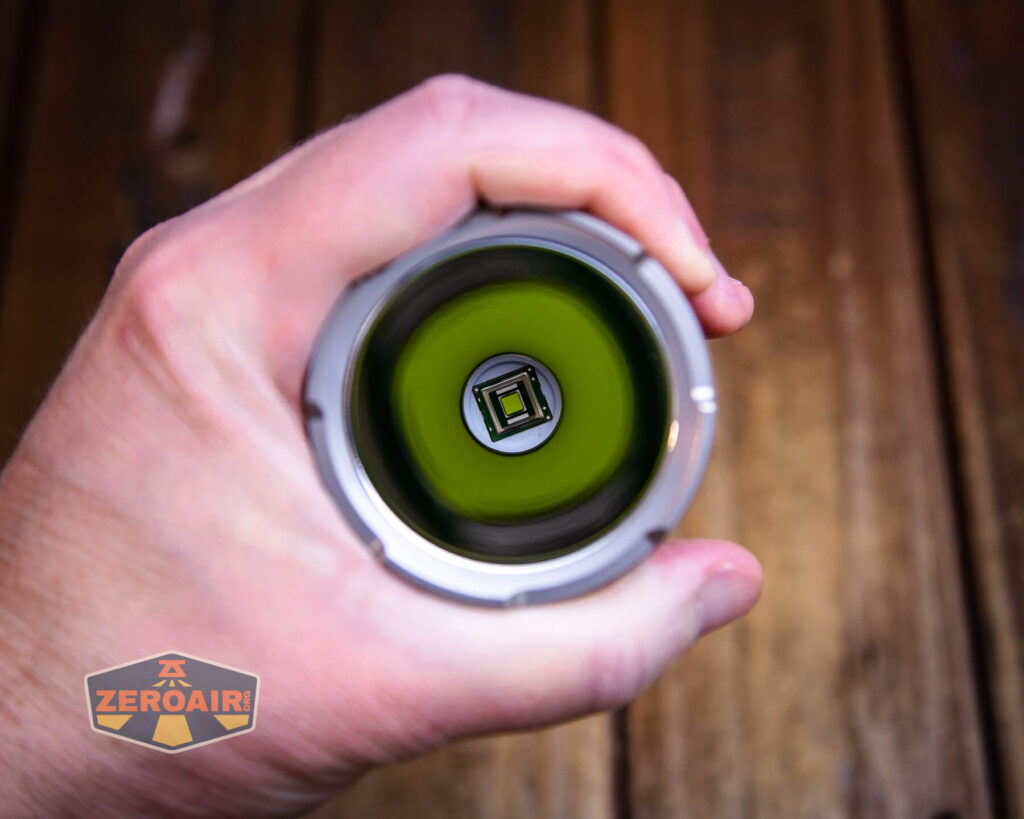
LED and Beam
Wurkkos has in the TS30S Pro the impressive Luminus SBT90.2 emitter. This is a crazy emitter. It both throws and just puts out a massive amount of light.
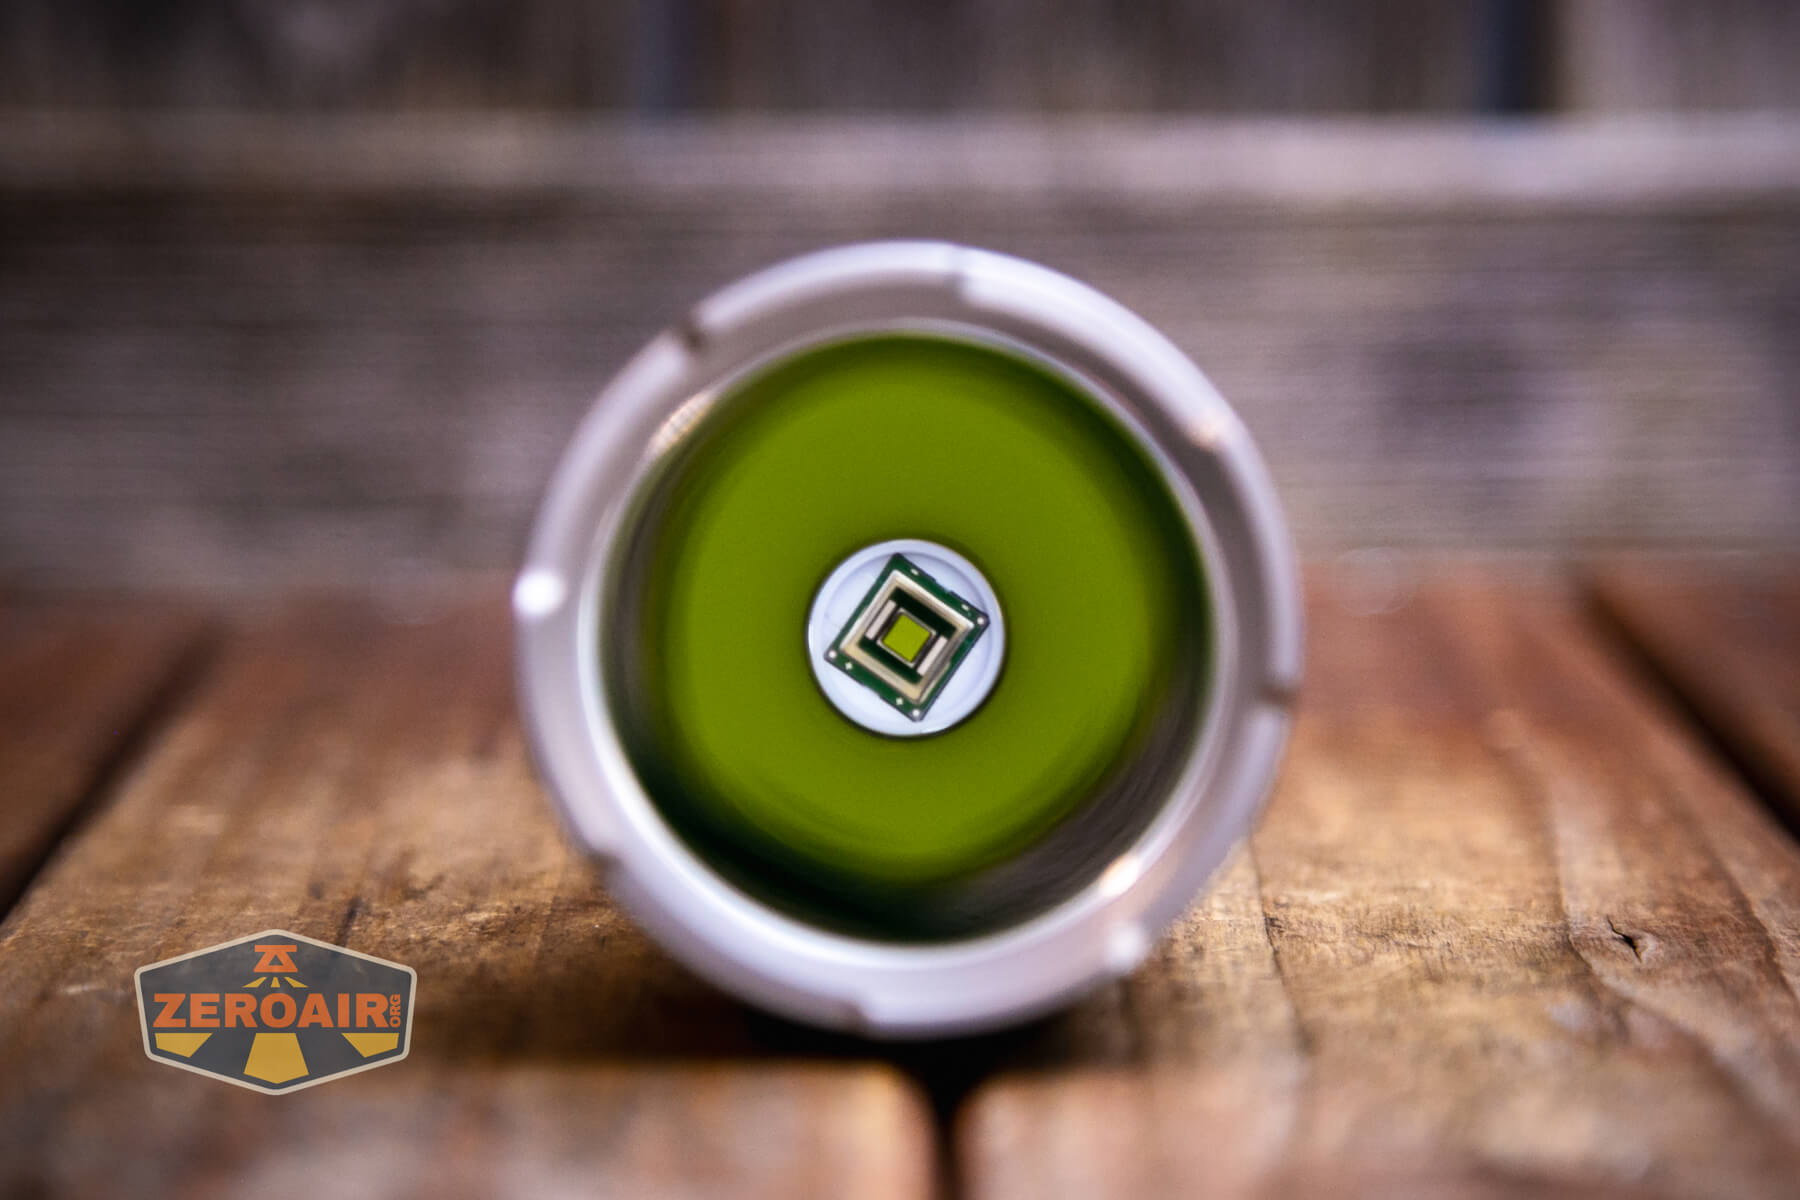
The Luminus SBT90.2 is coupled with a deep smooth reflector.


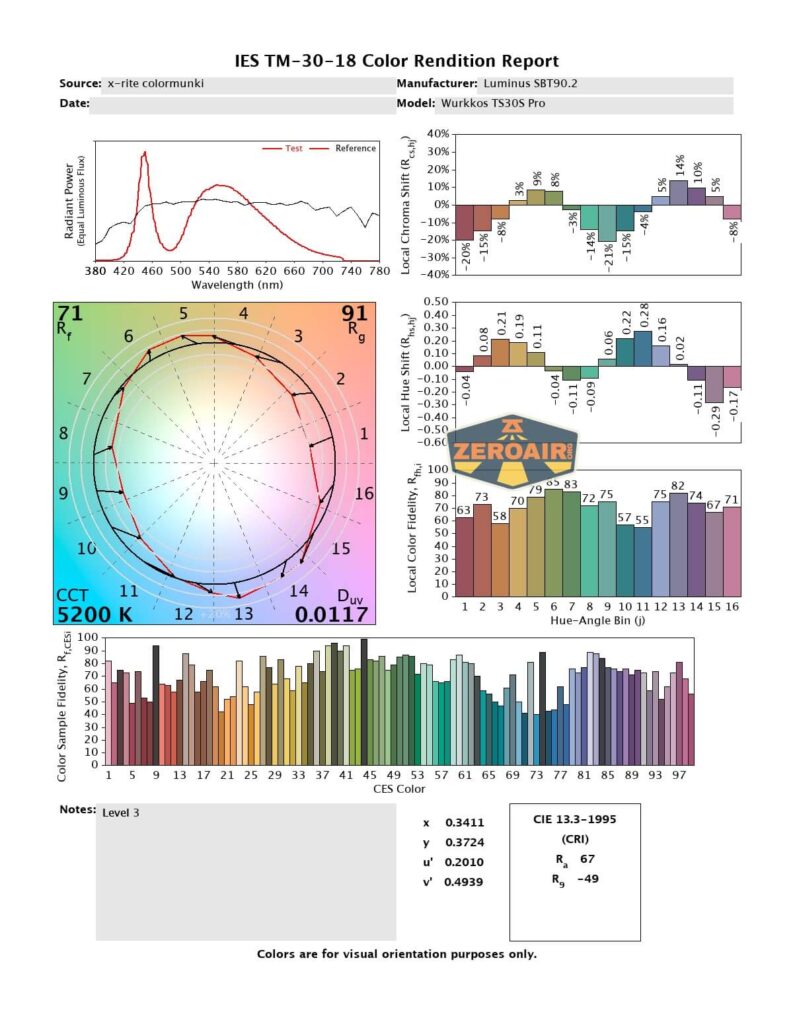
LED Color Report (CRI and CCT)
This emitter ranges from a fairly warm 4300K to a cooler 6100K (when driven harder). This is perfectly acceptable, and could be considered good, even. CRI is low, at around 70.


Beamshots
These beamshots always have the following settings: f8, ISO100, 0.3s shutter, and manual 5000K exposure. These photos are taken at floor level, and the beam hits the ceiling around 9 feet away.


Tint vs BLF-348 (KillzoneFlashlights.com 219b version)
(affiliate link)
I keep the test flashlight on the left and the BLF-348 reference flashlight on the right.


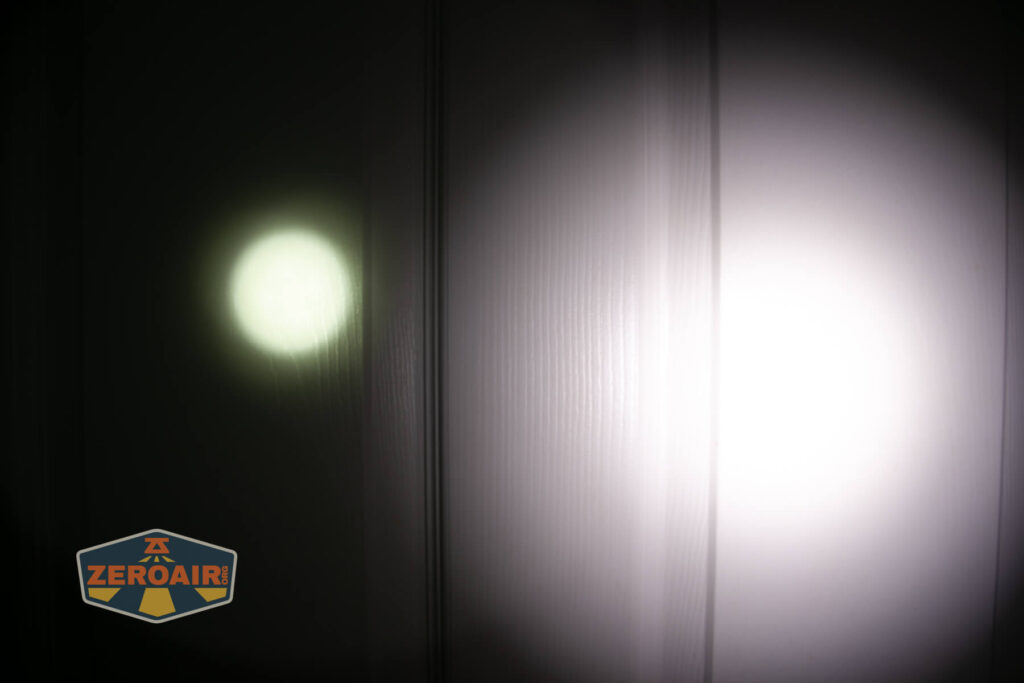
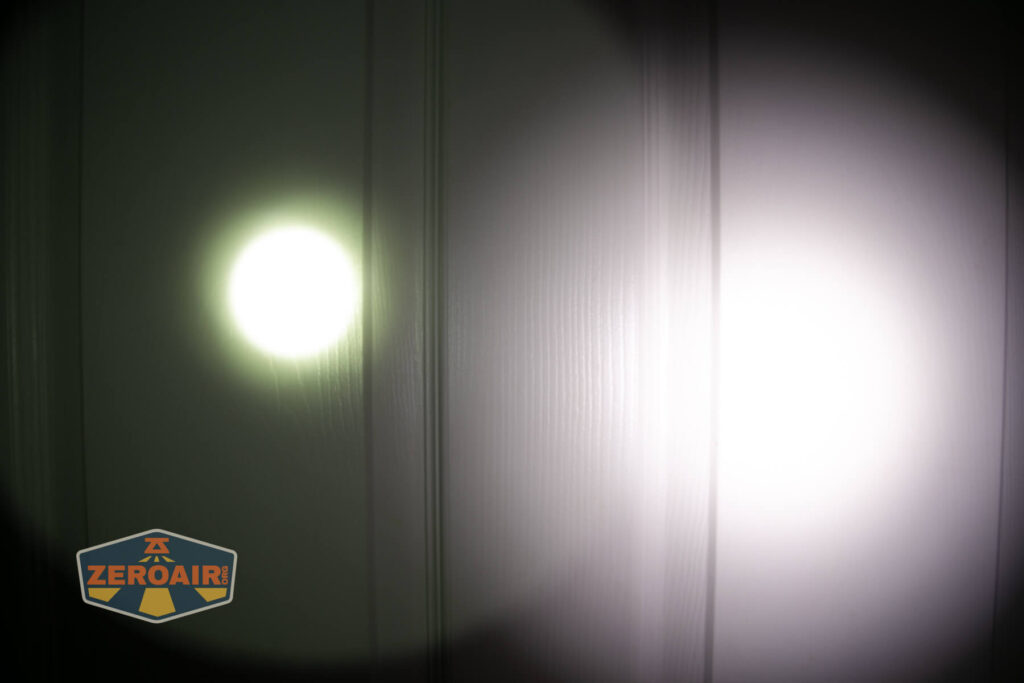


I compare everything to the KillzoneFlashlights.com 219b BLF-348
because it’s inexpensive and has the best tint!
Conclusion
What I like
- Massive output!
- Excellent build quality
- Uses Anduril, which has something for everyone
- Low is low, but useful with
the SBT90.2 - Charging looks very good
- USB-C to USB-C works
What I don’t like
- Lanyard-only carry
- Doesn’t hit specified output
Notes
- This content originally appeared at zeroair.org. Please visit there for the best experience!
- Please use my Amazon.com referral link to help support zeroair.org!
- Please support me on Patreon! I deeply appreciate your support!