
Olight Perun 3 Headlamp Review
The Olight Perun 3 headlamp is an update to the older Perun 2. This version has triple emitters, a red secondary, and an avoidable proximity sensor. Read on!
Official Specs and Features
Here’s a referral link to the Olight Perun 3 headlamp product page.
Versions
At least two bodies are available – black (seen here) and orange. I think they all have the same emitter, though.
Price
The Olight Perun 3 headlamp has an introductory price of $74.99.
What’s Included
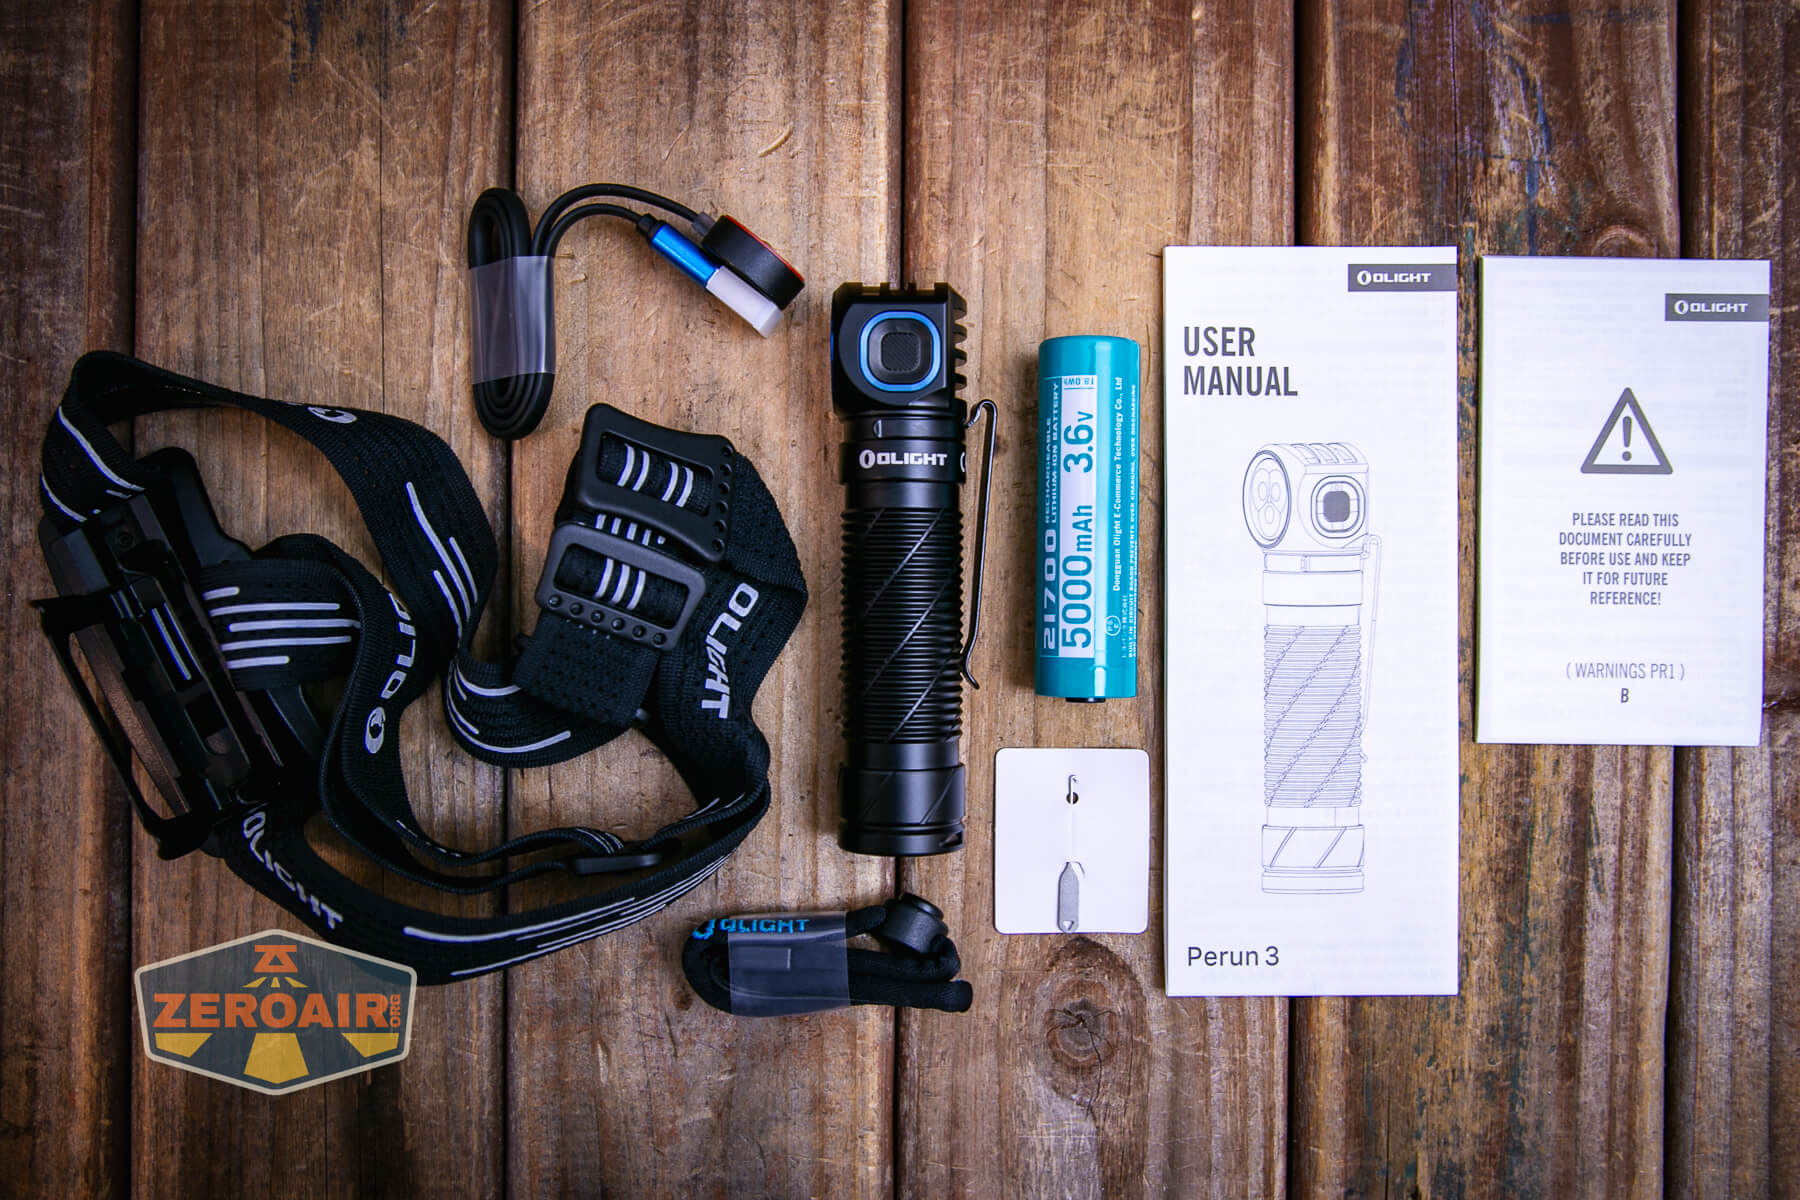
- Olight Perun 3 headlamp
- Olight 5000mAh 21700 (customized and proprietary, required)
- Headband
- Pocket clip
- Charge cable (USB to proprietary magnetic)
- Lanyard
- Lanyard pull
- Manual
Package and Manual


Build Quality and Disassembly

Build quality is great. It’s funny to see that tight little triple of emitters in this Perun 3 – the older version was a single!


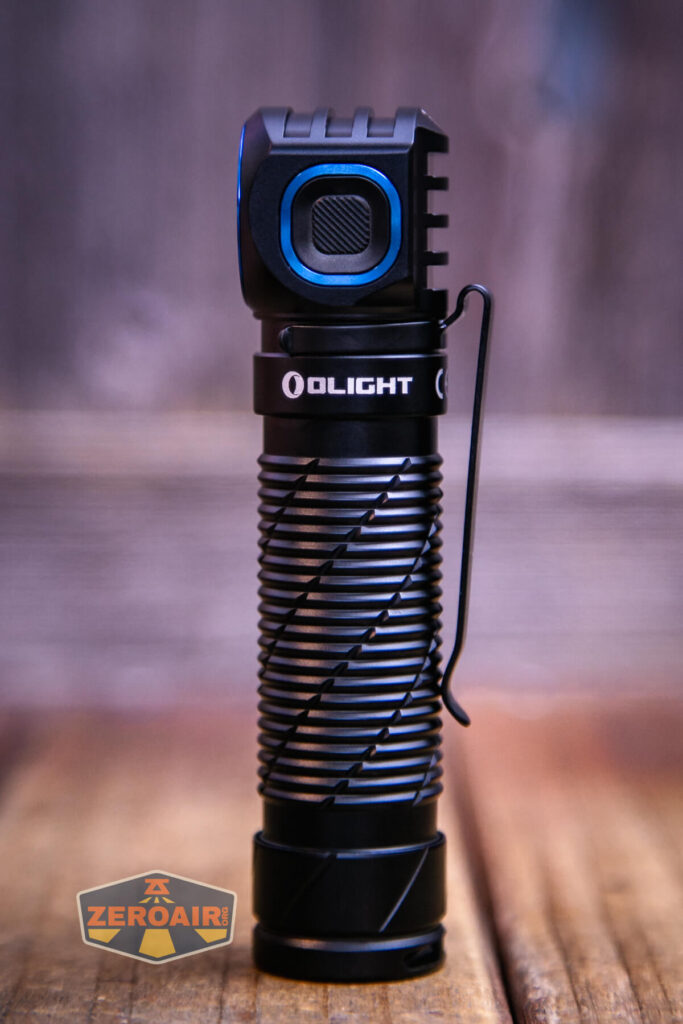
The head has some deep cooling grooves. And that’s another update – on this version, the cooling fins sort of wrap the head, and the switch is now on the side. I don’t know if that specifically is better, but I do strongly prefer the switch on this version. Neither 2 nor 3 were able to headstand, though.
Here’s a better look at the cooling fins on the head.

The head and cell tube are one piece (if not due to milling, then due to glue – whatever the case, they don’t separate). But the tailcap has nice anodized threads.

There’s a spring in the head and tail. The tail (above) has dual springs for contacting the proprietary cell.

Size and Comps
Weight 5.29 oz (150 g)
Length 4.59 in (116.8 mm)
Head Diameter 1.10 in (28 mm)
Body Diameter 1.04 in (26.6 mm)


If the flashlight will headstand, I’ll show it here (usually the third photo). If the flashlight will tailstand, I’ll also show that (usually in the fourth photo).


Here’s the test light with the venerable Convoy S2+. The version below is a custom laser-engraved Convoy S2+ host by GadgetConnections.com. I did a full post on an engraved orange host right here! Or go straight to GadgetConnections.com to buy your Convoy S2+ now!


Also above is the light beside a TorchLAB BOSS 35, an 18350 light. I reviewed the aluminum version of that light in both 35 and 70 formats. I also reviewed that specific edition, the “Oveready BOSS FT Collector Vintage Brass” 35. I love it!
Retention and Carry
This is really a headlamp but not in the sense that it can be used only as a headlamp. It includes a pocket clip. Interestingly, the pocket clip does not attach through the areas where the headband connects, but more on that later.

The pocket clip is a one-way clip and attaches only on the head end.
A lanyard loop is present in the tailcap.

The headband is what I’d consider the “new style” that most manufacturers seem to be using now. Gone are the days of silicone loops (thankfully) and now we have clip-in style connectors. I prefer these except that they stand some (maybe small?) chance of scratching your light. I didn’t experience that with this connector from Olight, though.

The headband is directional, partly because there’s a top strap but also because of the offset you can see below.

There’s a groove that allows the pocket clip to be in place while the light is mounted – that’s very nice.


I wouldn’t call the top strap removable “on the fly” (but of course, you could permanently remove it – you can borrow my scissors.)


Here you can see the light mounted and the pocket clip in use. It’s a good setup!


The final mention is the magnet. Yes, this magnet is primarily used as a charge base connector, but it’s surprisingly strong enough to hold this long heavy light horizontally.
Power and Runtime
The Olight Perun 3 headlamp is powered by a single lithium-ion cell. A cell is included at all purchase levels of this light. It’s the 5000mAh customized, proprietary 21700 cell.

This cell has a plastic shroud around the positive terminal, and also has an exposed negative terminal on the positive end, too. This shroud is tall and will prevent the cell from being charged in most bay chargers.
Installation of the cell is opposite to what I call the “usual” way. The positive terminal goes into the body, and the negative terminal is toward the head.

In case you forget that opposite-ness, you can regard this little icon inside the cell tube.

Below you can see a few runtime tests. This is pretty standard fare, I think, and as usual, I appreciate the flat output.


I do not think this version has the vibration sensor that the Perun 2 had, but I’ll want to have a look at the manual to confirm. I didn’t notice it, anyway. The light does shut off with low voltage protection.
Charging
The charge connector is the same as other recent Olights. It’s the MCC charger, and on this light goes up to (or over) 2A charging.


Specifically, it’s an MCC1A/1.5A/2A charge base.


Charging to “absolutely complete termination” takes nearly 9 hours. But the green light on the charge base will come on LONG before that (probably just after that drop at 210 minutes, below). The light will really be good to go at that point!

Modes and Currents
| Mode | Mode Claimed Output (lm) | Claimed Runtime | Measured Lumens | Tailcap Amps |
|---|---|---|---|---|
| Turbo | 3000-800-600 | 2m+180m+30m | 2721 (0s) 2693 (30s) |
~9 (but unsure) |
| High | 600-120 | 300m+30m | 546 (0s) 535 (30s) |
0.81 |
| Medium | 120 | 25h | 109 | 0.14 |
| Low | 30 | 89h | 28 | 0.03 |
| Moon | 5 | 20d | 4 | [low] |
Pulse Width Modulation
No PWM on any of the 5 modes. The 6th mode below is the red output.


Here you can see a “baseline” – a chart with almost no light hitting the sensor. Then there’s the Ultrafire WF-602C flashlight, which has some of the worst PWM I’ve seen. It’s so bad that I used a post about it to explain PWM! Here are multiple timescales (10ms, 5ms, 2ms, 1ms, 0.5ms, 0.2ms) to make comparing this “worst” PWM light to the test light easier. That post also explains why I didn’t test the WF-602C at the usual 50us scale.
User Interface and Operation
A single button controls the Olight Perun 3 headlamp. It’s a new style of e-switch. The edges are flush with the head and it is a bit concave, with the lined part being flat. There’s also a tiny indicator. That indicator is not lit in the photo below, but you can see the tiny indention above the lined part of the switch.

I like this switch quite a bit (particularly when thinking about the switch of the Perun 2). It’s no better than the metal switch of other new Olights though (like the Baton Turbo). Still, it’s a great switch.

Here’s a user interface table!
| State | Action | Result |
|---|---|---|
| Off | Click | On (Mode Memory, Moon, LMH only) |
| Off | Hold | Moon |
| On | Double Click | Turbo |
| On | Hold | Mode advance (Moon, LMH only) |
| Turbo | Double Click | Exit Turbo to previous mode (except if previous was high, then results in Medium) |
| Any | Triple Click | SOS |
| SOS | Click | Off |
| On | Click | Off |
| On | Click and Hold (quickly) | Timer (Single blink: 3 minutes, Double blink: 9 minutes) |
| Timer | Click and Hold (quickly) | Switch between 3 and 9 minute timers. |
| Off | Hold (>2s) | Lockout |
| Lockout | Hold (~2s) | Unlock (and goes to Moonlight) |
| Off | Double Click | Red |
| Red | Hold | Red SOS |
LED and Beam
I’m not sure if Olight says directly that these are Osram P9, but that’s almost certainly what these are. There are three, of course, and they each have a (part of a) TIR optic. In the very center is the red emitter.

Yay to center secondary emitters!


LED Color Report (CRI and CCT)
CRI is cool white, certainly, at between 6600K and 7100K. CRI is low and the Duv is right around the BBL (which is a good thing).


Beamshots
These beamshots always have the following settings: f8, ISO100, 0.3s shutter, and manual 5000K exposure. These photos are taken at floor level, and the beam hits the ceiling around 9 feet away.


Tint vs BLF-348 (KillzoneFlashlights.com 219b version) (affiliate link)
I keep the test flashlight on the left and the BLF-348 reference flashlight on the right. These photos are taken around 18 inches from the door.


I compare everything to the KillzoneFlashlights.com 219b BLF-348 because it’s inexpensive and has the best tint!
Summary and Conclusion
The Olight Perun 3 headlamp seems like a worthy upgrade to the previous edition. I like the triple emitters. The proximity sensor never really got in my way. It might be nice to have a second mode on that red output, though the single mode that’s in place now is not oppressively bright. Charging is acceptable, but as usual, I’d really prefer to not have proprietary cells.
The Big Table
| Olight Perun 3 headlamp | |
|---|---|
| Emitter: | Osrap P9 (Cool White) |
| Price in USD at publication time: | $74.99 |
| Cell: | 1×21700 |
| Runtime Graphs | |
| LVP? | Yes |
| Switch Type: | E-Switch |
| Quiescent Current (mA): | ? |
| On-Board Charging? | Yes |
| Charge Port Type: | Proprietary Magnetic |
| Charge Graph | |
| Power off Charge Port | with cell: all modes without cell: no modes |
| Claimed Lumens (lm) | 3000 |
| Measured Lumens (at 30s) | 2693 (89.8% of claim)^ |
| Candela per Lumen | 2.61 |
| Claimed Throw (m) | 160 |
| Candela (Calculated) in cd (at 30s) | 267lux @ 5.748m = 8822cd |
| Throw (Calculated) (m) | 187.8 (117.4% of claim)^ |
| Claimed CCT | – |
| Measured CCT Range (K) | 6600-7100 Kelvin |
| Item provided for review by: | Olight |
| All my Olight reviews! | |
^ Measurement disclaimer: Testing flashlights is my hobby. I use hobbyist-level equipment for testing, including some I made myself. Try not to get buried in the details of manufacturer specifications versus measurements recorded here; A certain amount of difference (say, 10 or 15%) is perfectly reasonable.
What I like
- Complete package
- Sensor is very effective (and good if you’re looking for a sensor light to prevent a lot of reflected light)
- User interface is easy to memorize (or just guess)
- Great build quality
- Good for hands-free use (as a headlamp or using the magnet)
What I don’t like
- Customized and proprietary cell
- Proprietary charging (but at least it matches other recent Olight charging lights)
- Low CRI
- Just one mode on red
Notes
- This content originally appeared at zeroair.org. Please visit there for the best experience!
- Please use my Amazon.com referral link to help support zeroair.org!
- Please support me on Patreon! I deeply appreciate your support!