Wurkkos HD03 Clip Flashlight Review
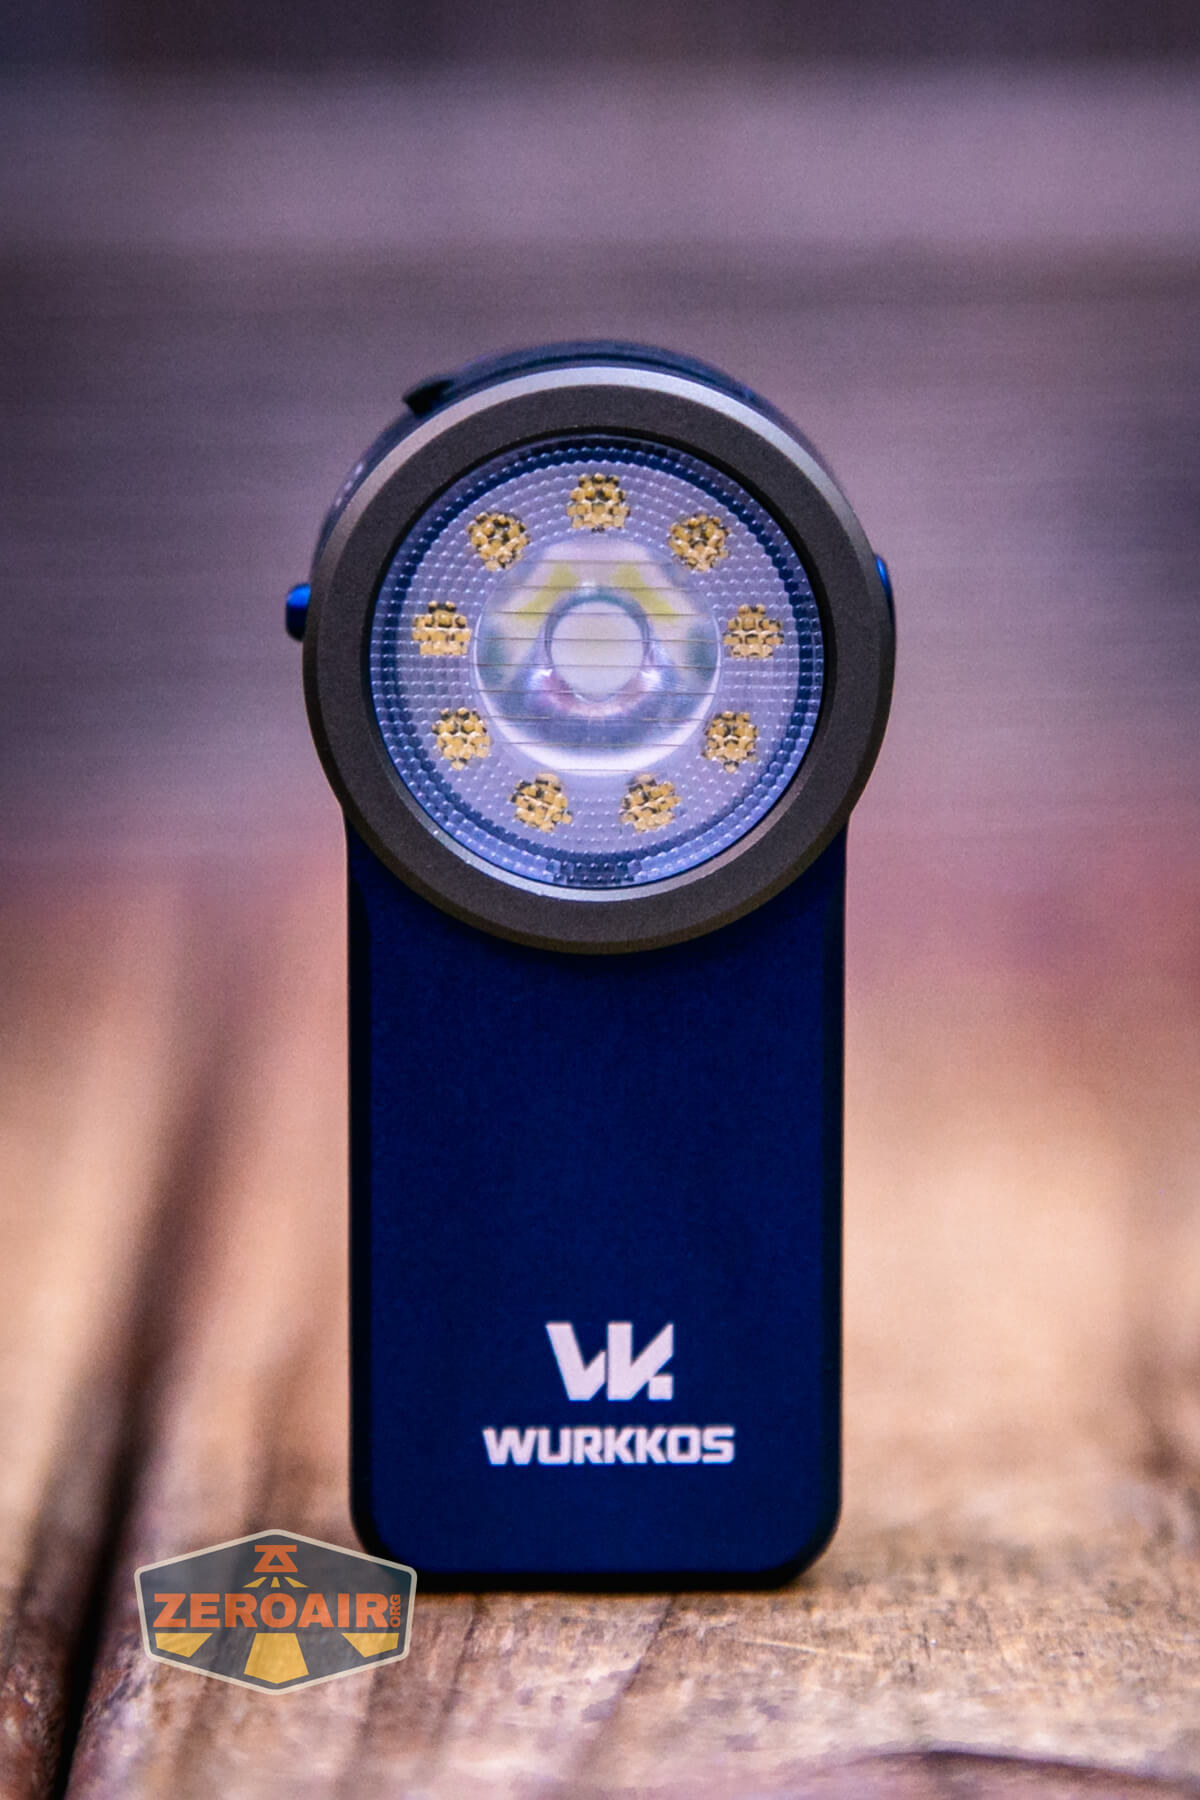
The Wurkkos HD03 clip flashlight has a single throw emitter and a ring of high CRI flood emitters and stepless RGB! There’s a clip and a magnet, too! Read on!
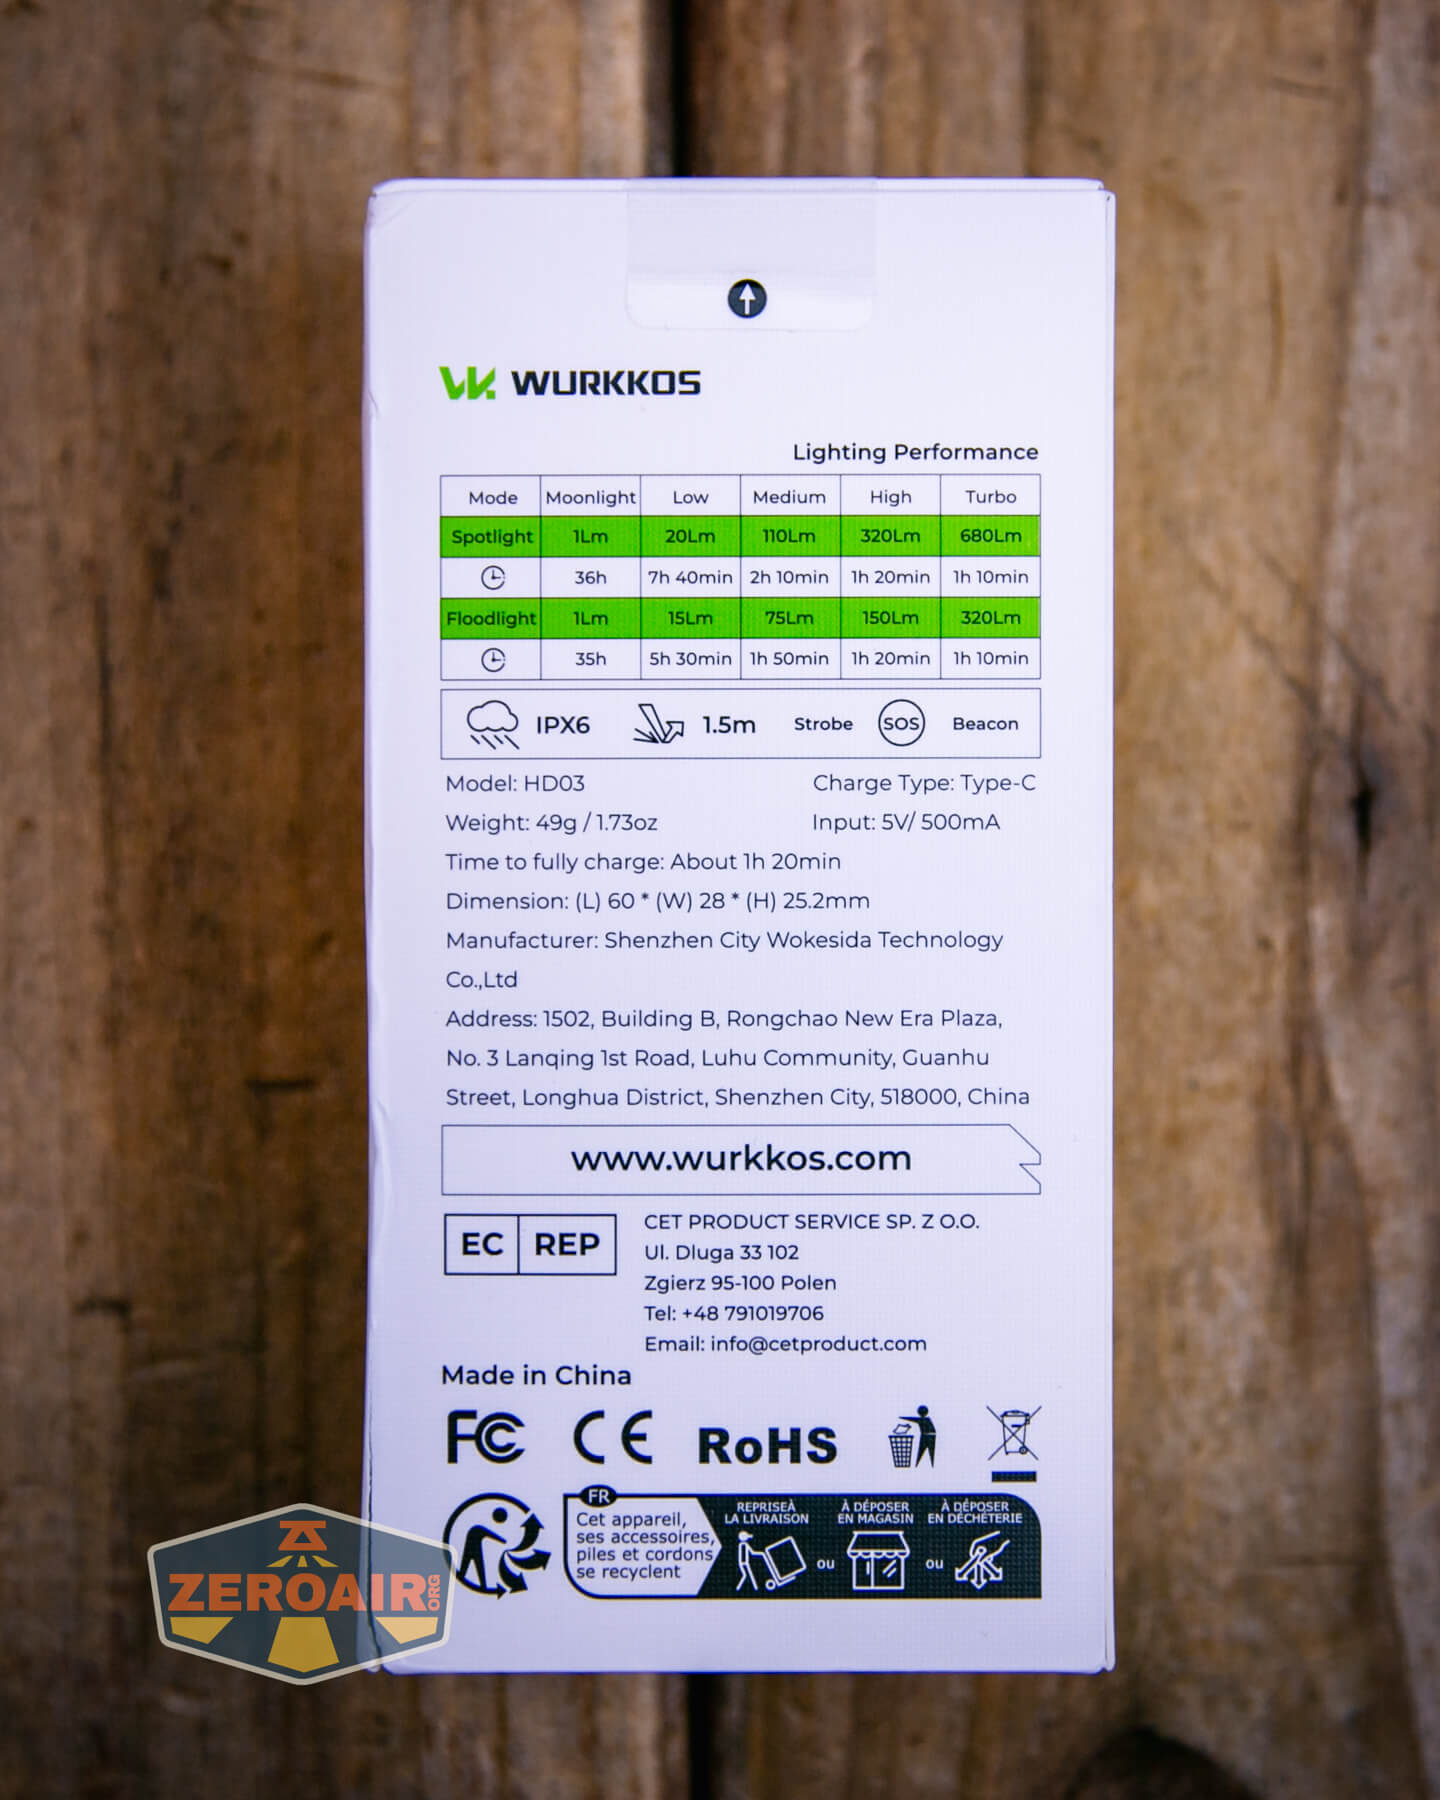
Official Specs and Features
Here’s a link to the Wurkkos HD03 clip flashlight product page.
Versions
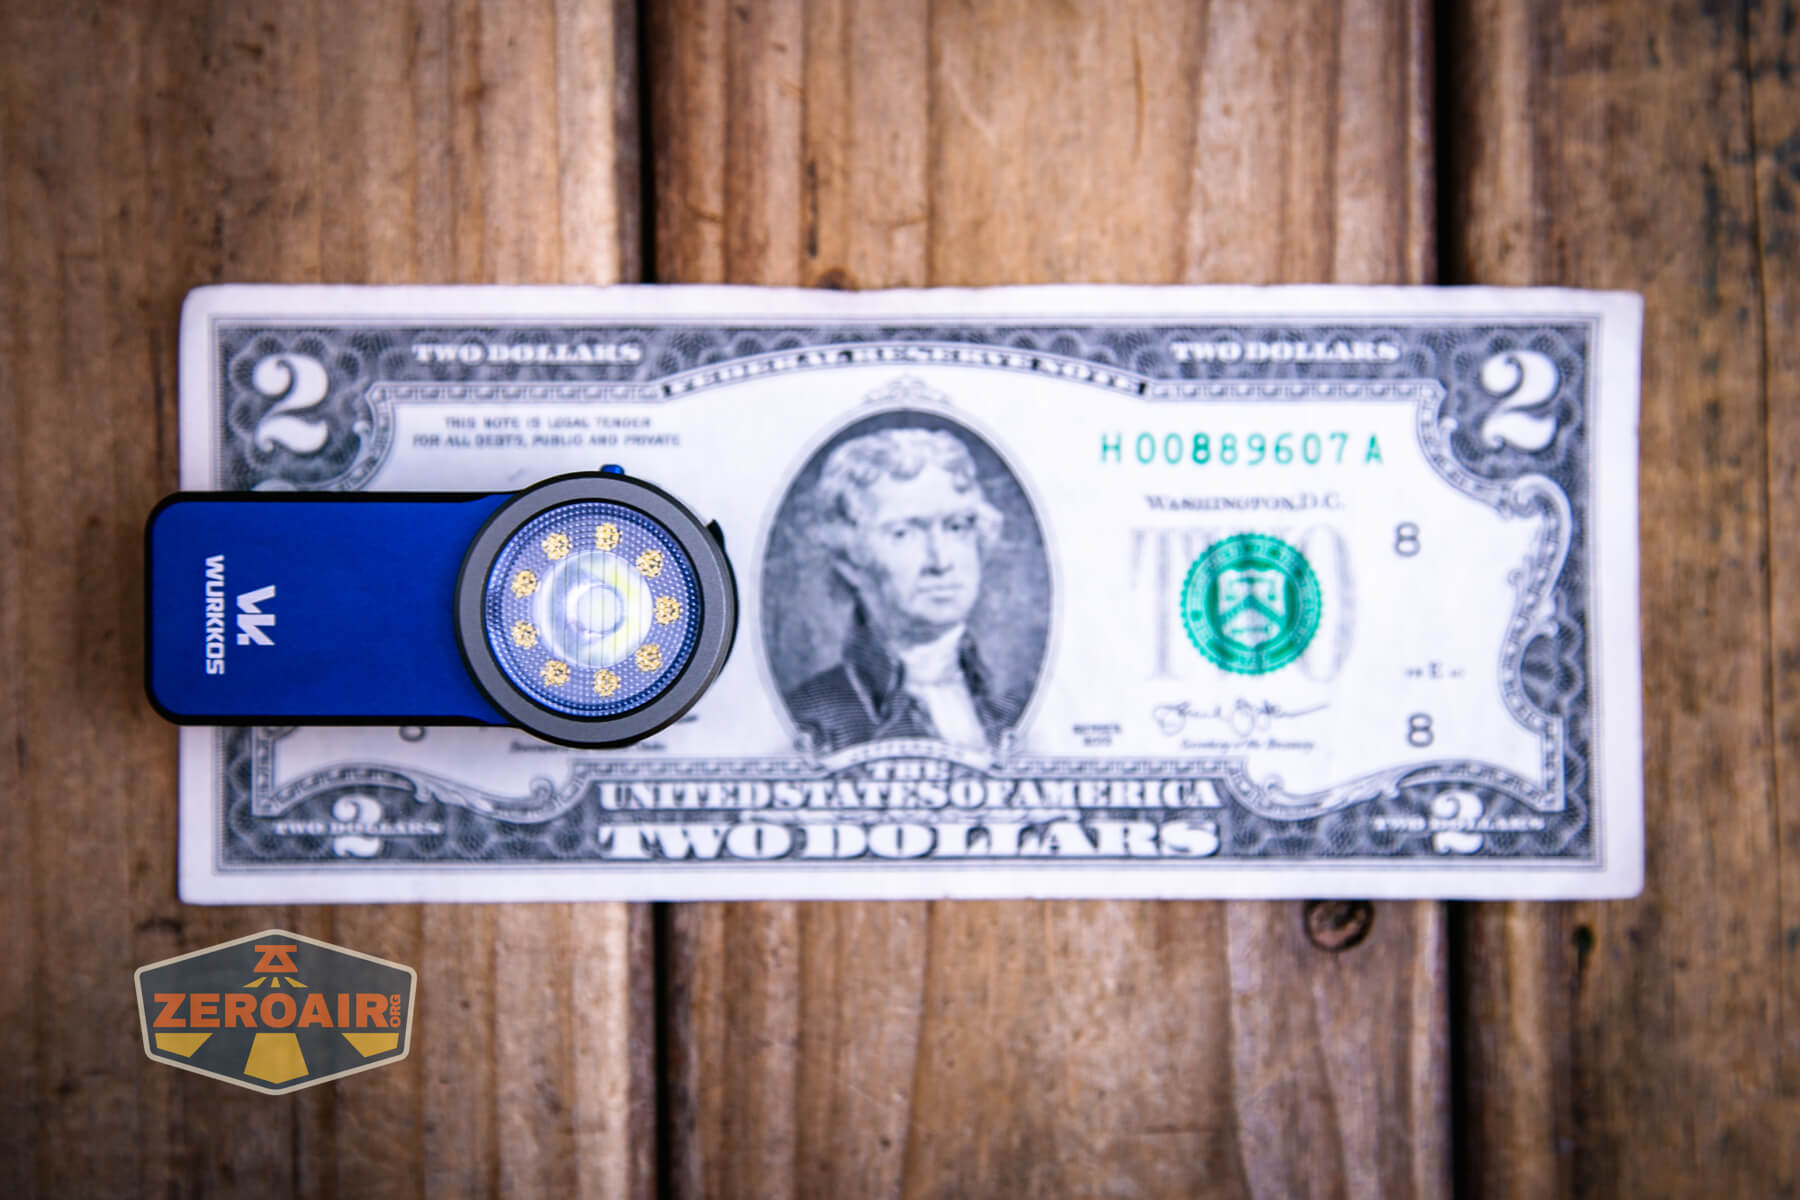
Only one version is available, but it comes in three body colors. Blue (seen here), orange, and green.
Price
The Wurkkos HD03 clip flashlight lists for over $30, is on sale for $20, and has been as low as $18 on flash sales. (referral link to Amazon.)
What’s Included
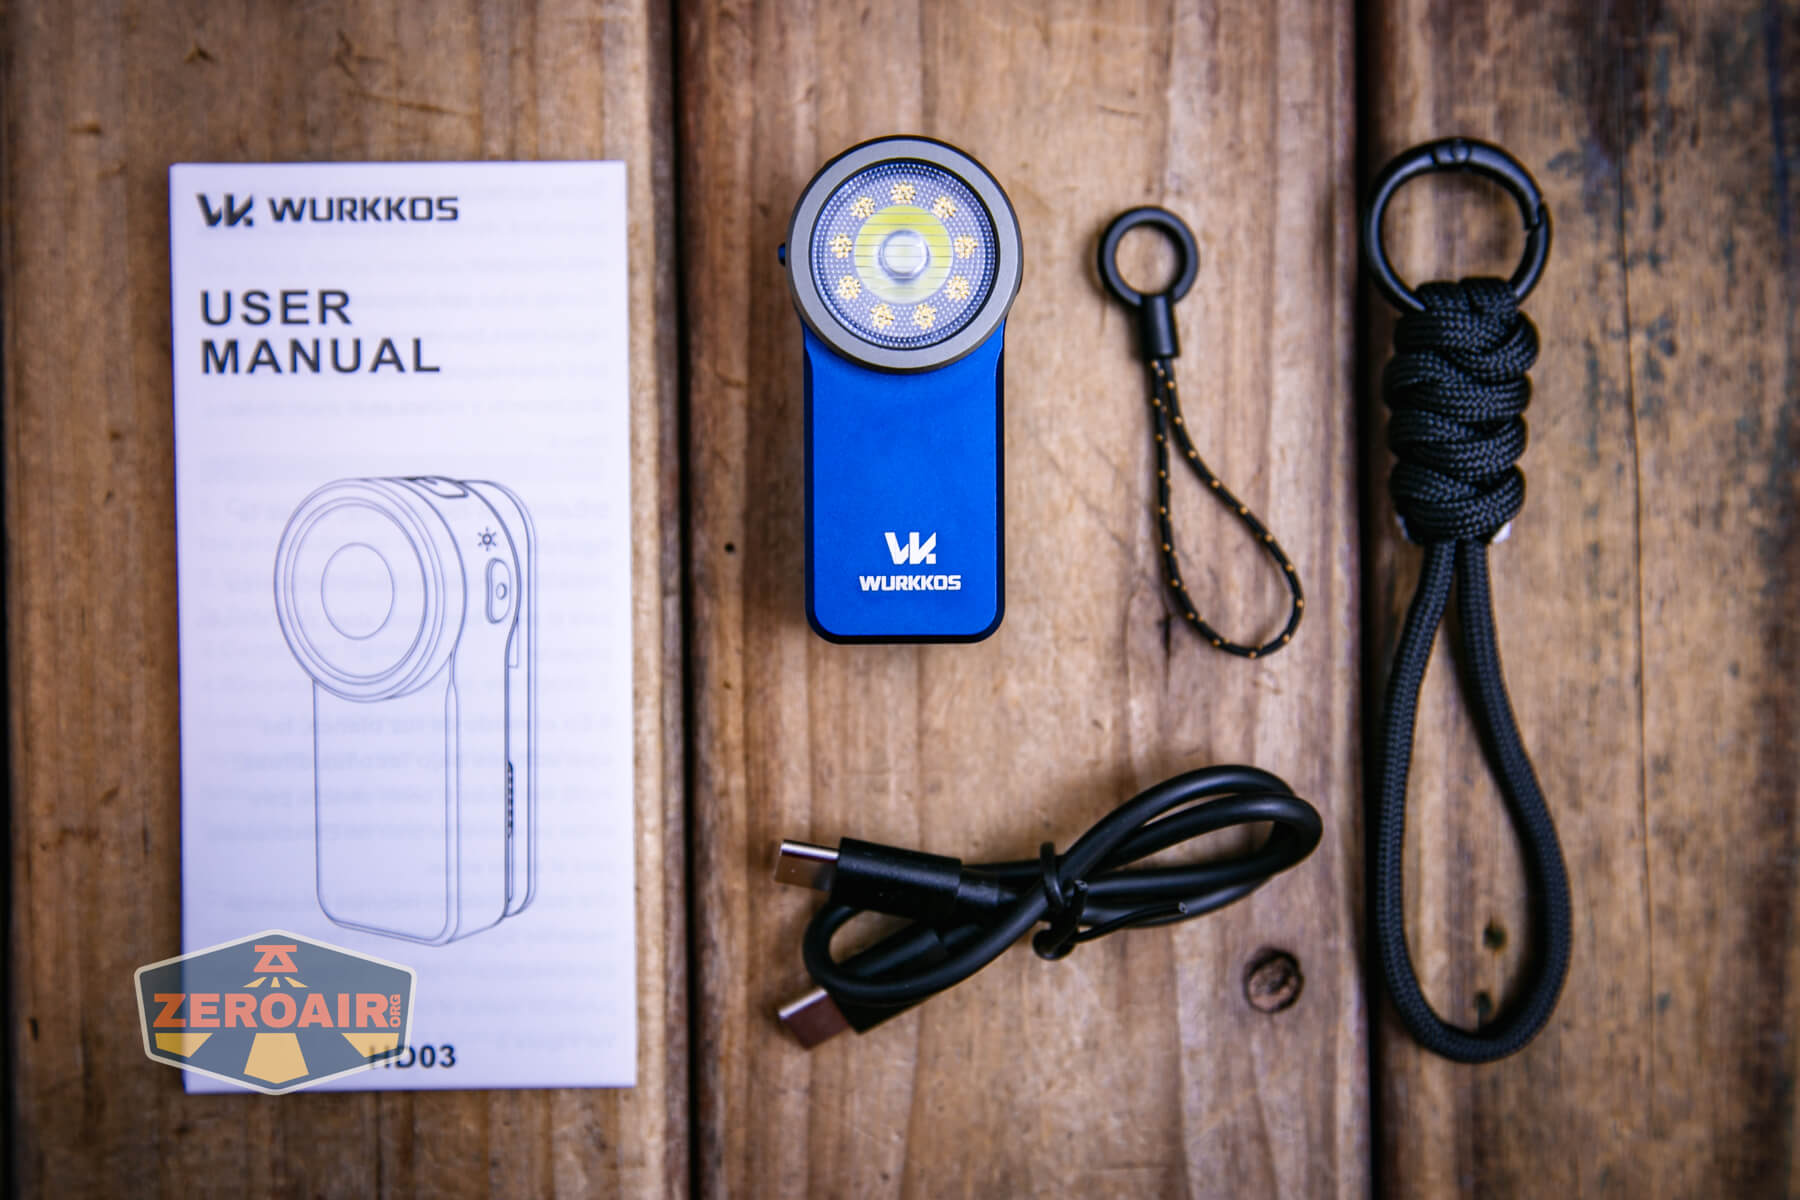
- Wurkkos HD03 clip flashlight
- Charging cable
- Lanyards (2 types)
- Manual
Package and Manual

Build Quality and Disassembly

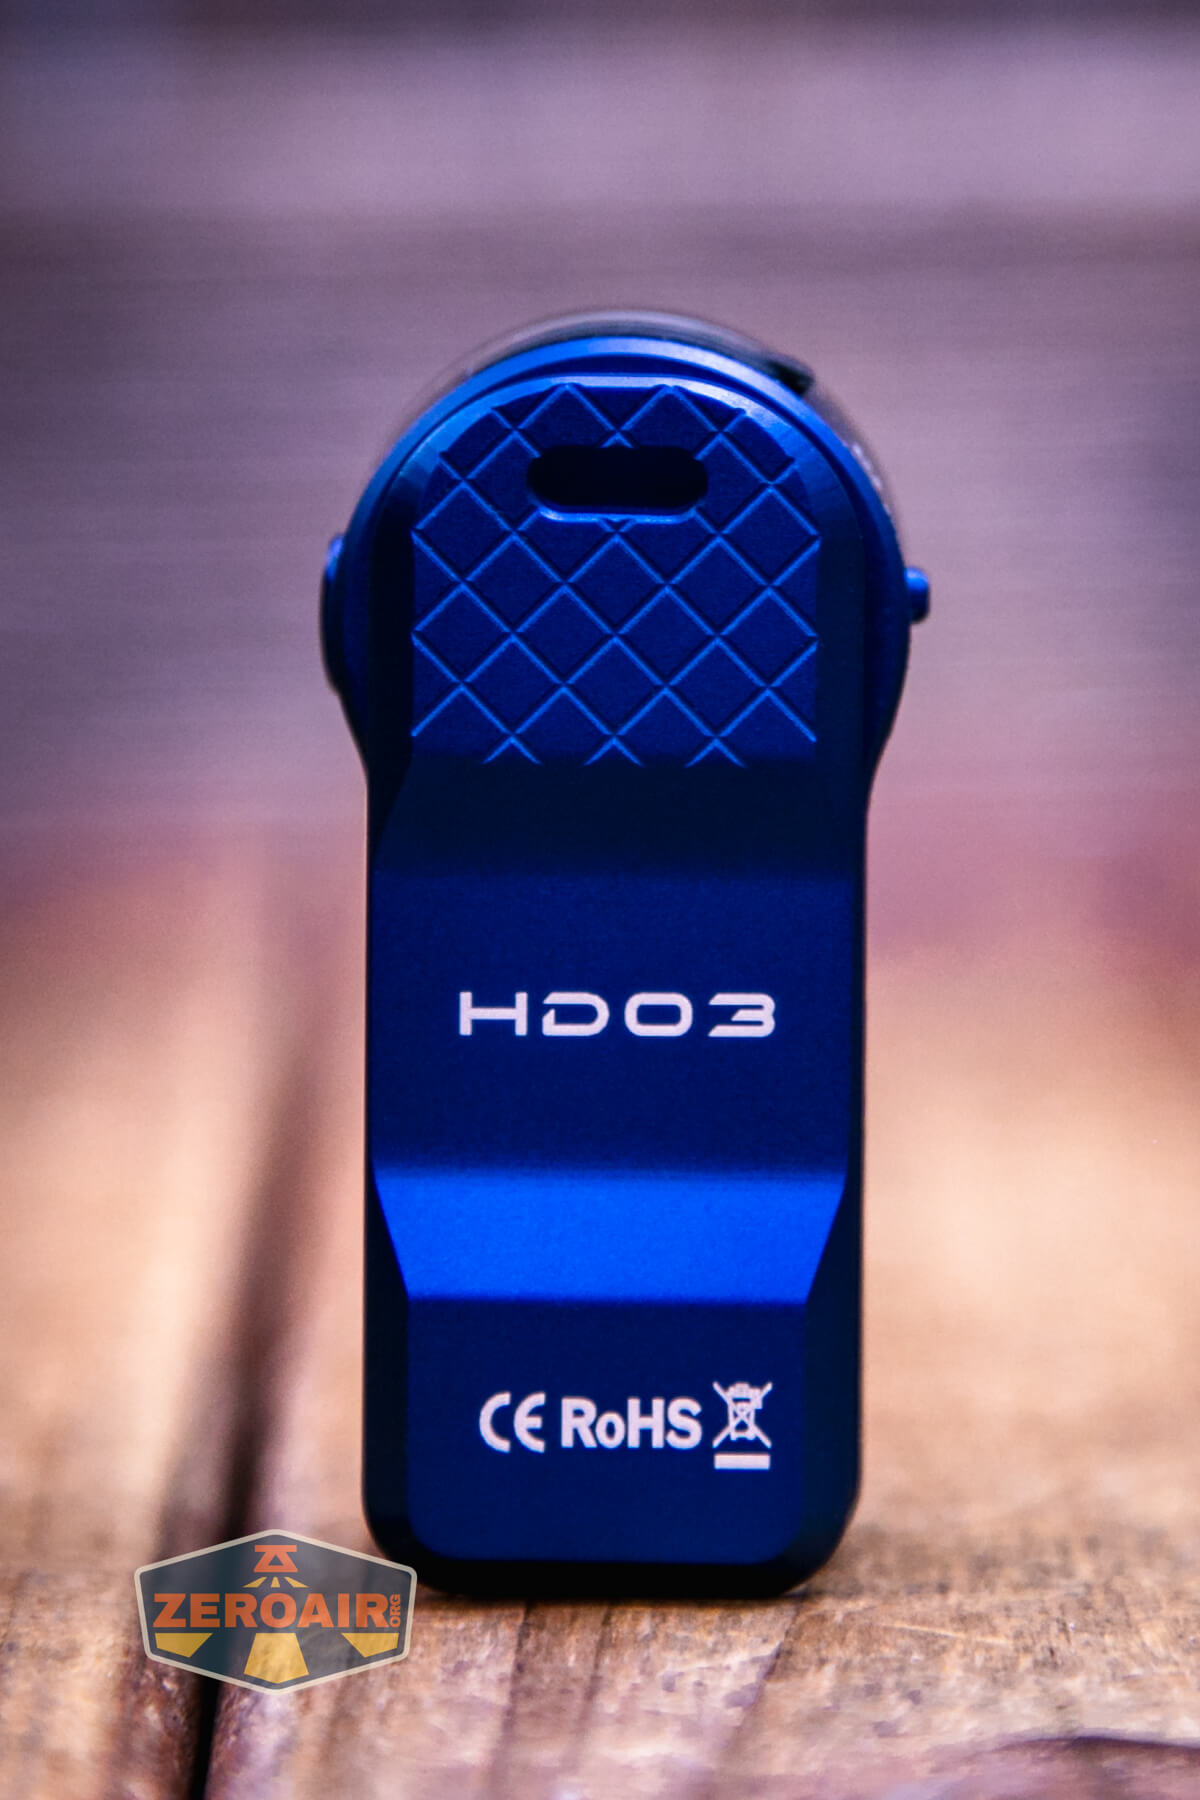
The Wurkkos HD03 clip flashlight is solid, like most of these little clip lights are. I don’t think this one is simply press-fit together – I believe there’s at least one screw on the back. You’d have to remove the clip somehow to get to that screw, though.
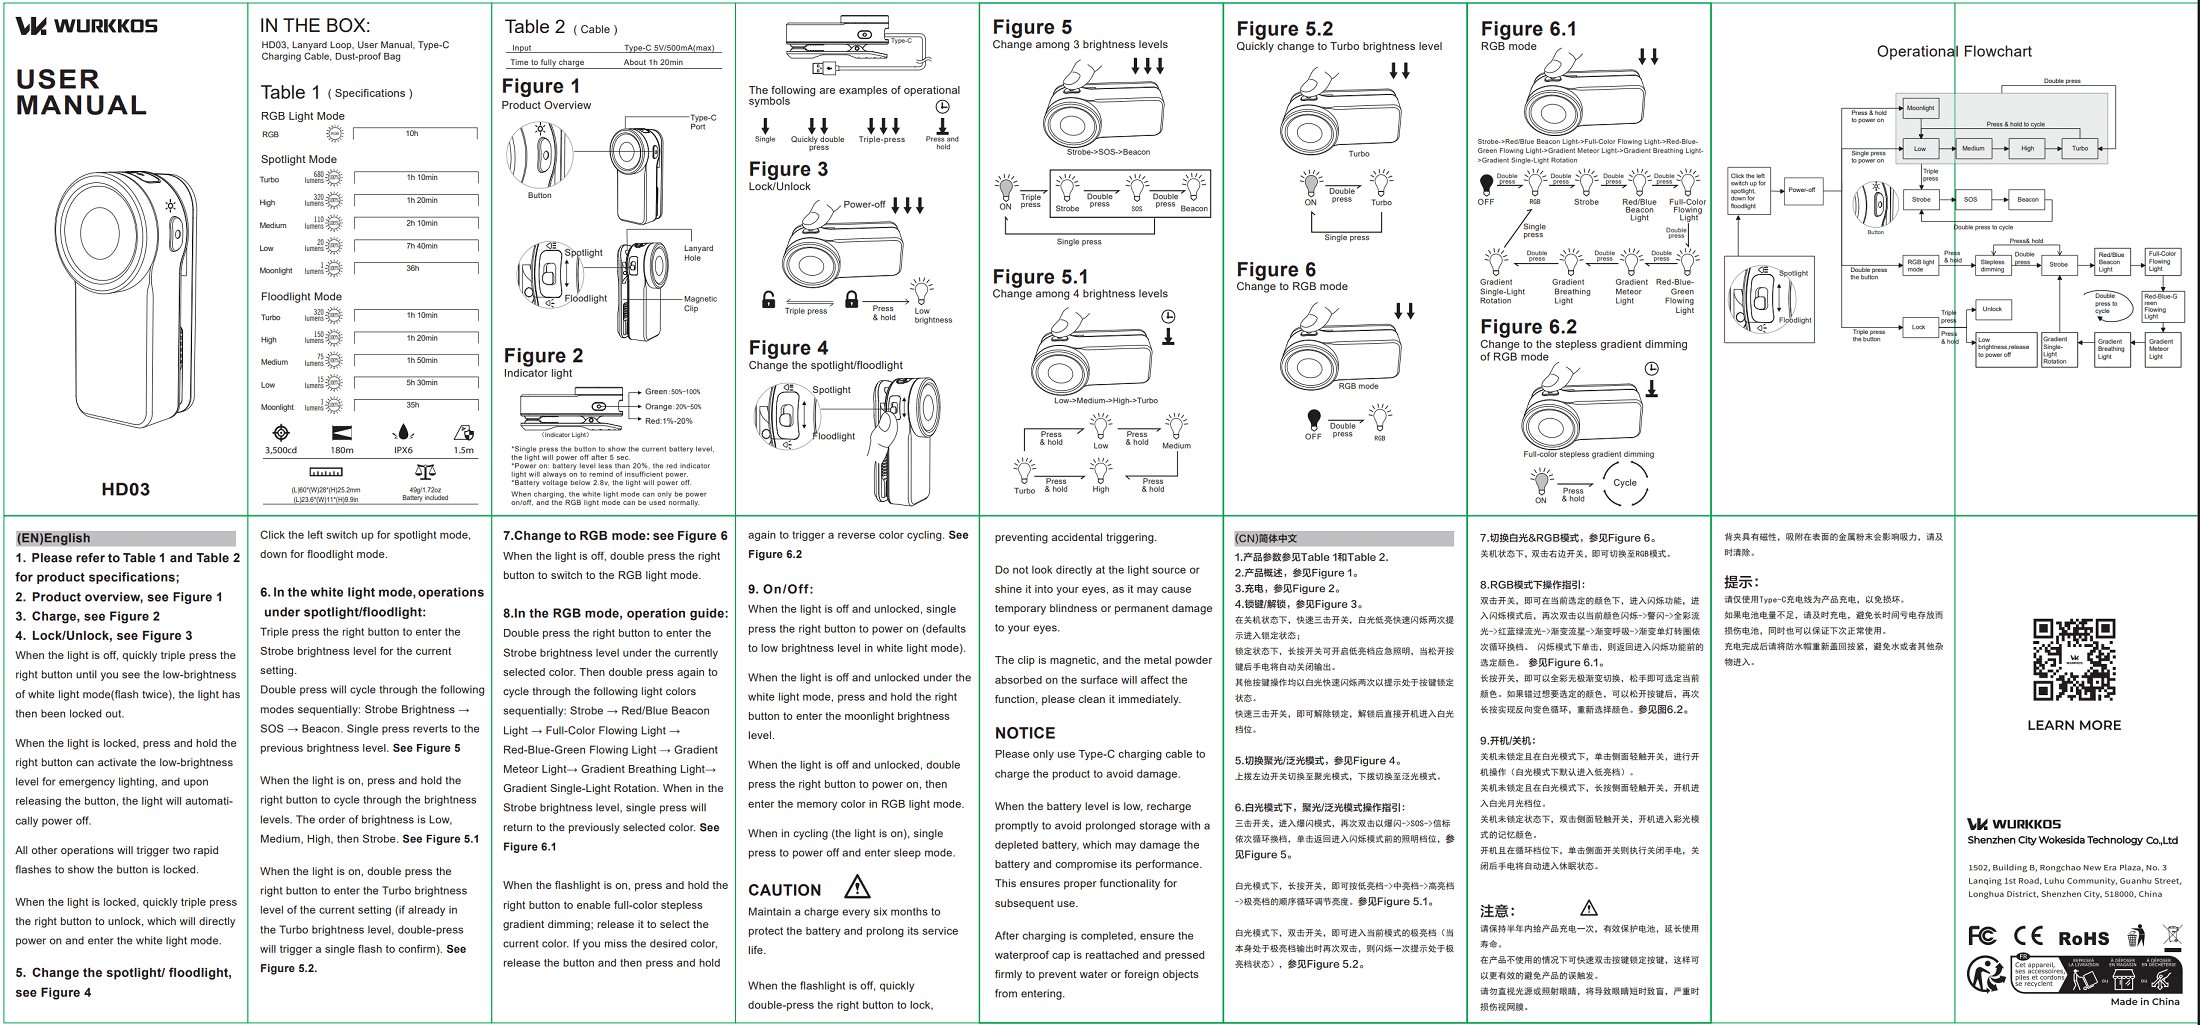
Size and Comps
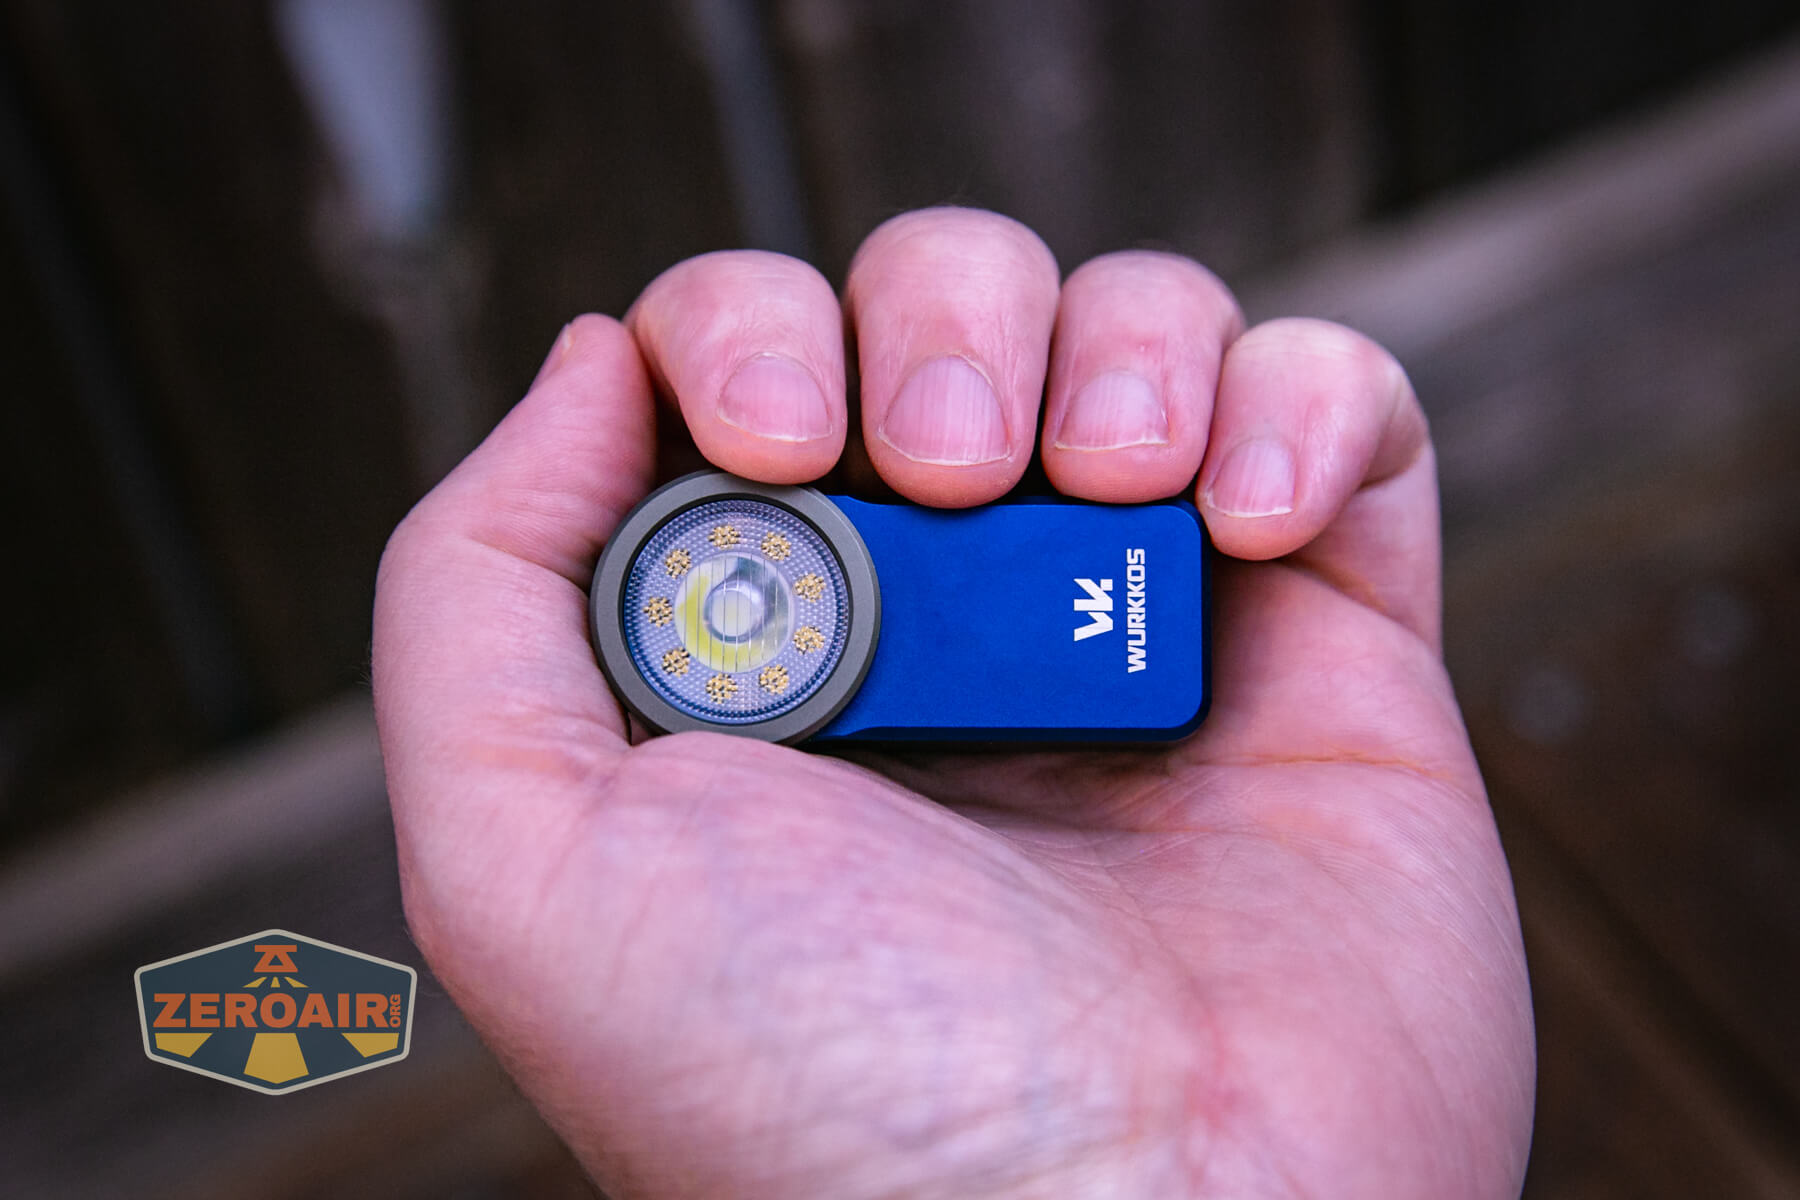
60mm x 28mm x 25.2mm and 49g.
If the flashlight can headstand, I’ll show it here. If it can tailstand, I’ll also show that here!
Here’s the test light with the venerable Convoy S2+. The version below is a custom laser-engraved Convoy S2+ host by GadgetConnections.com. I did a full post on an engraved orange host right here! Or go straight to GadgetConnections.com to buy your Convoy S2+ now!
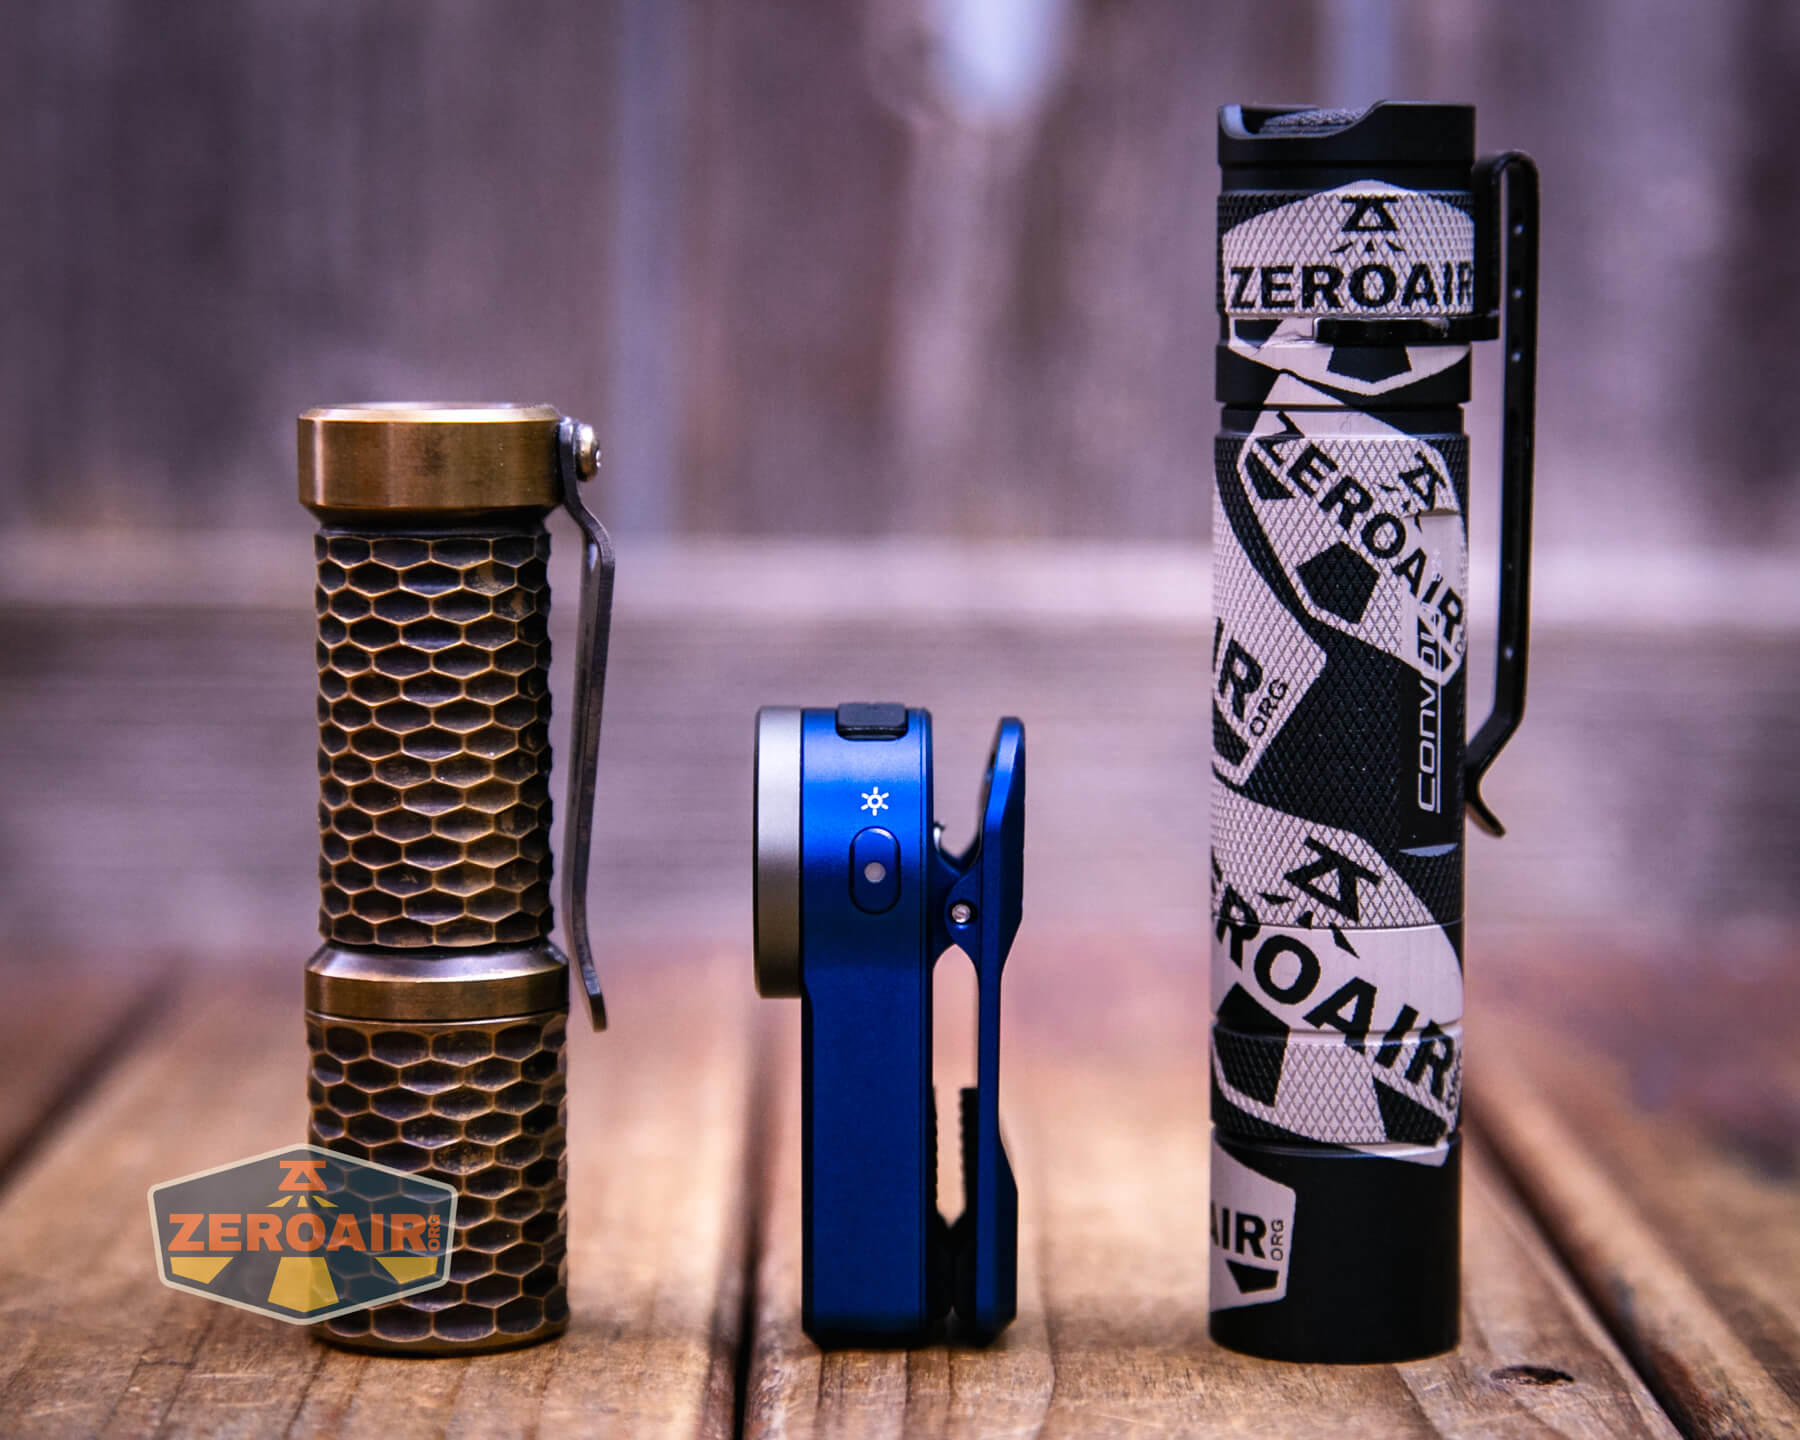

Also in the photo above, my Standard Reference Material (SRM) flashlight is the Hanko Machine Works Trident, an 18350 light. While I have not reviewed or tested the Gunner Grip version seen here, I have tested a Hanko Machine Works Trident Total Tesseract in brass. I love the Trident, and it’s a striking contrast to the inexpensive Convoy S2+, another great SRM.
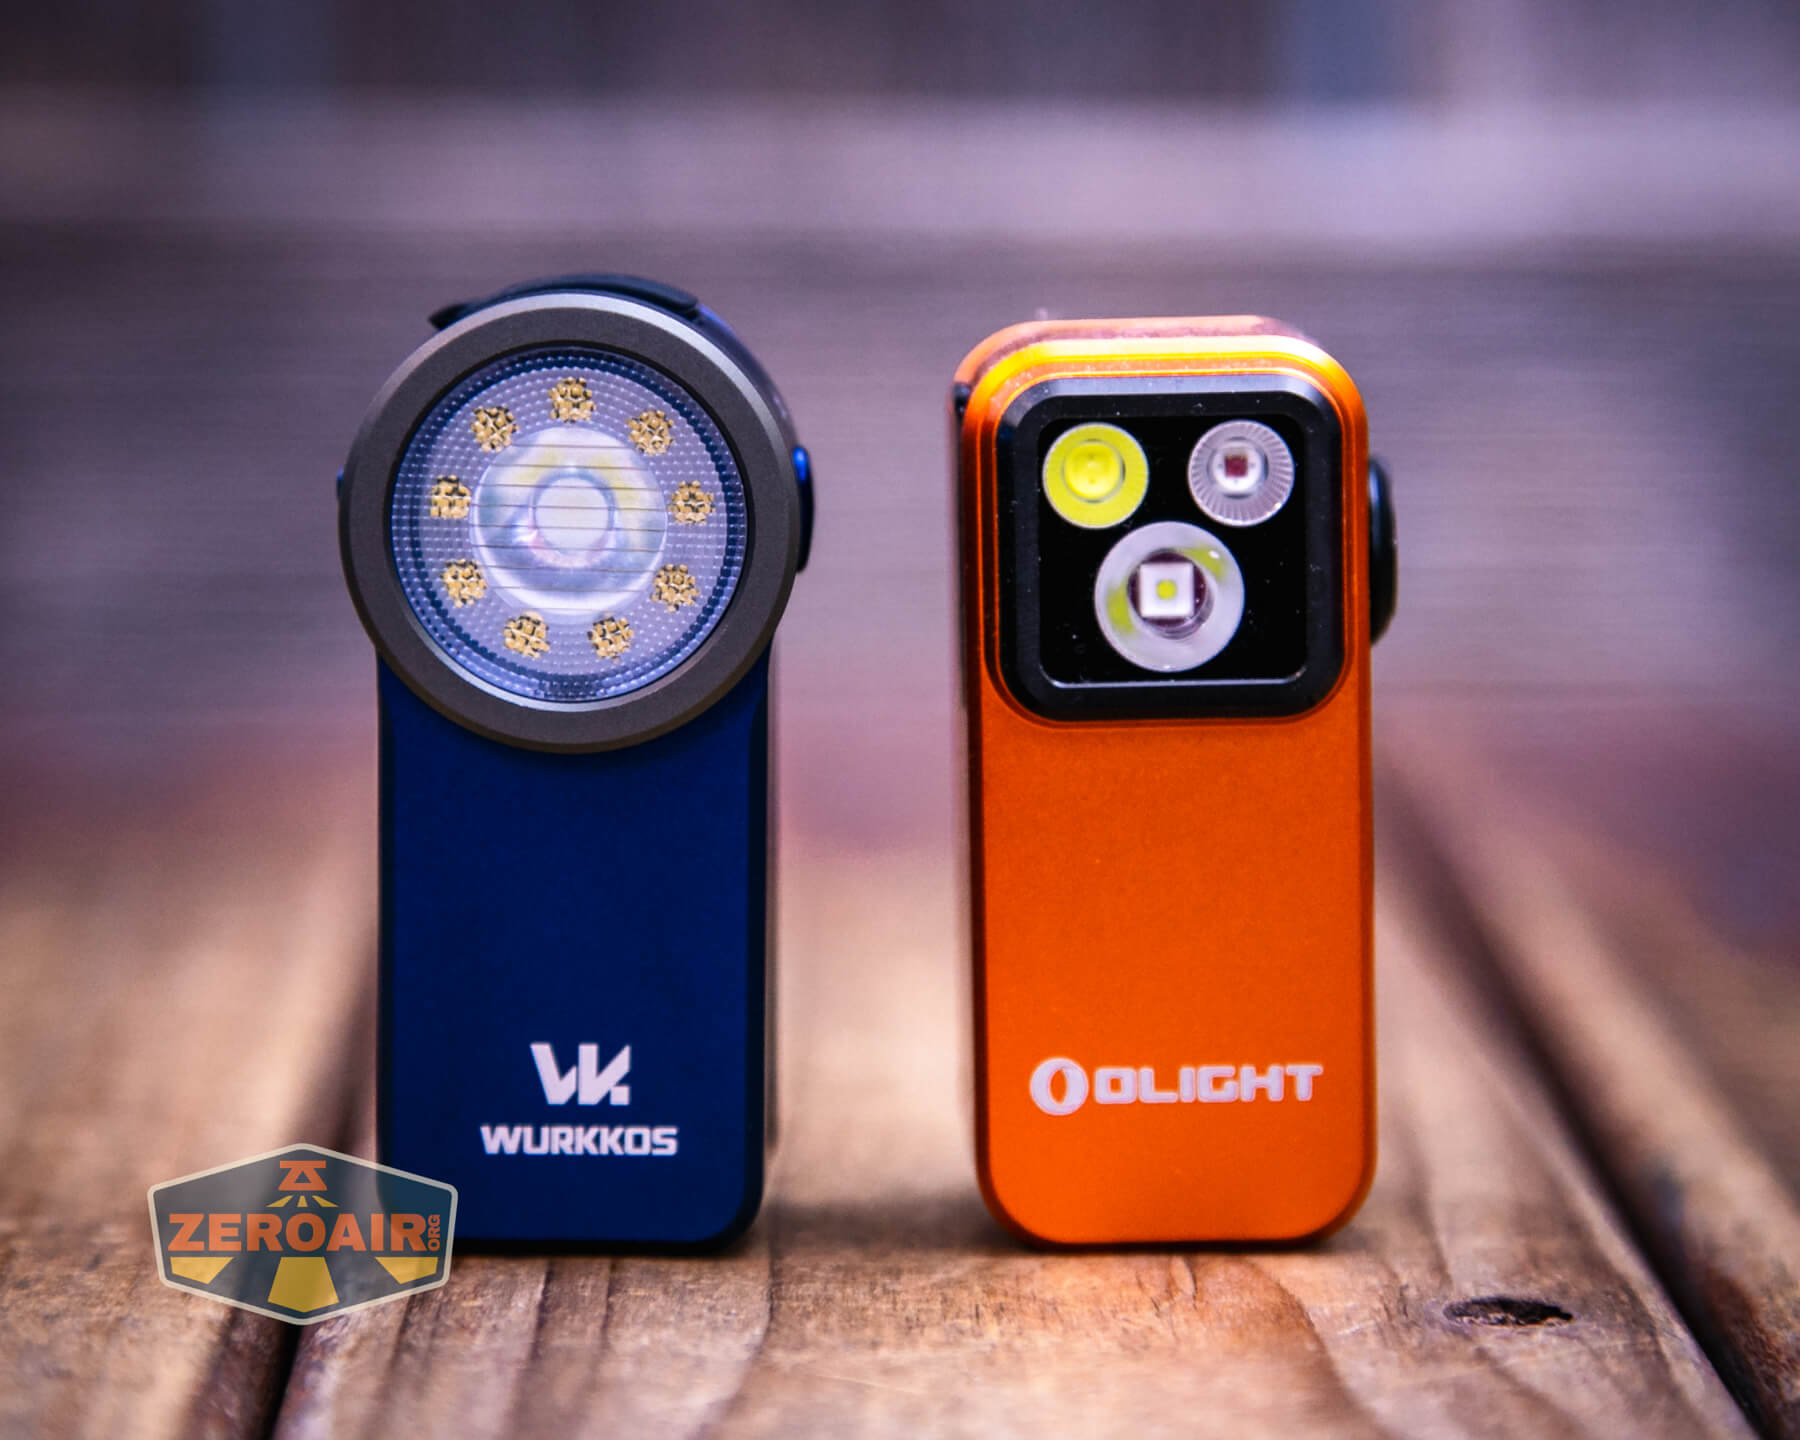
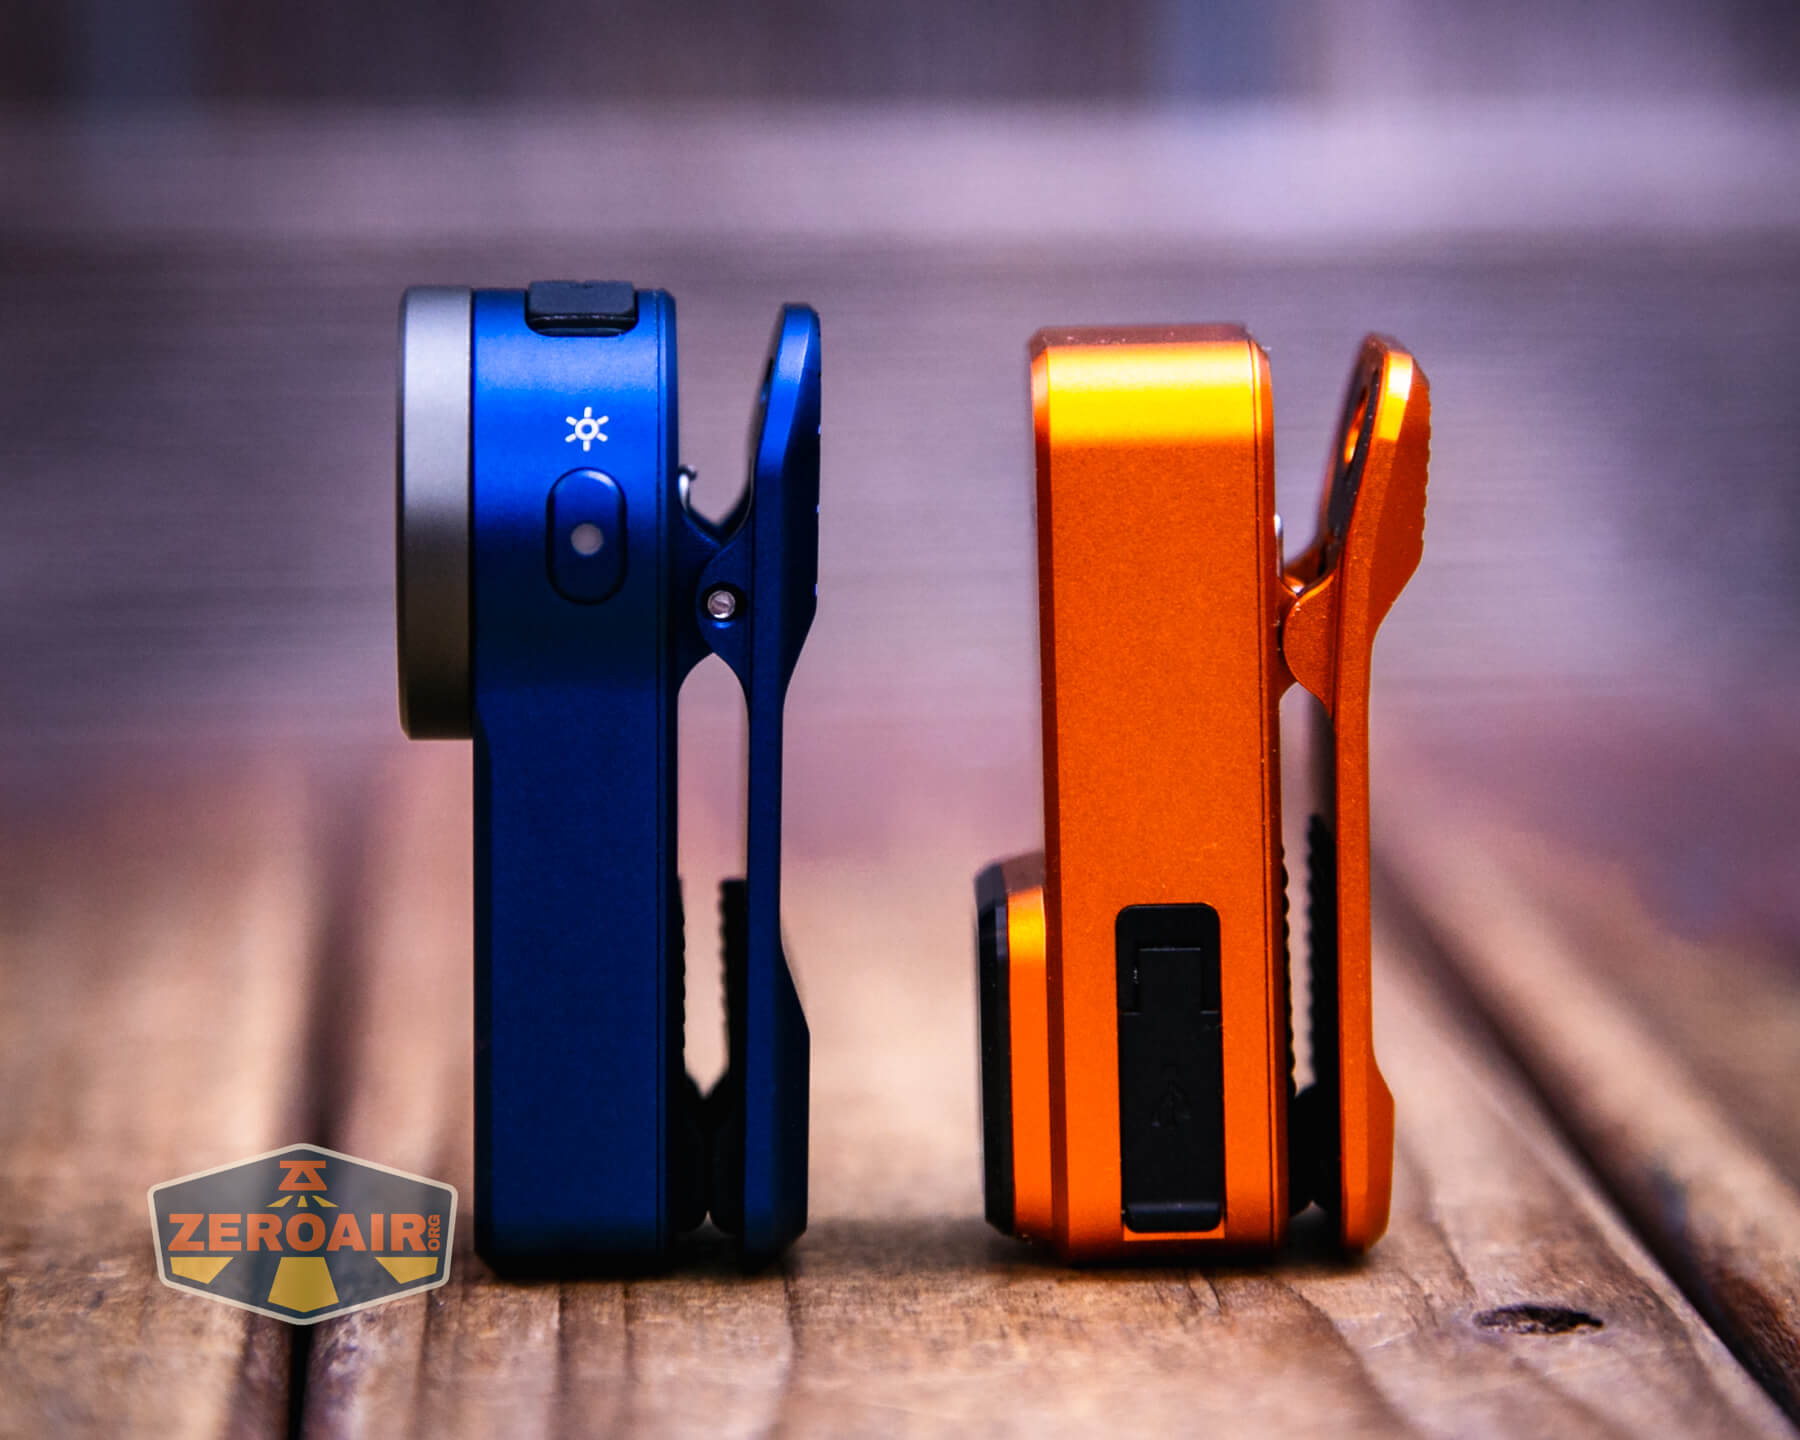
Here’s the Wurkkos HD03 clip flashlight with an Olight Oclip Pro light. They are very similar in size!
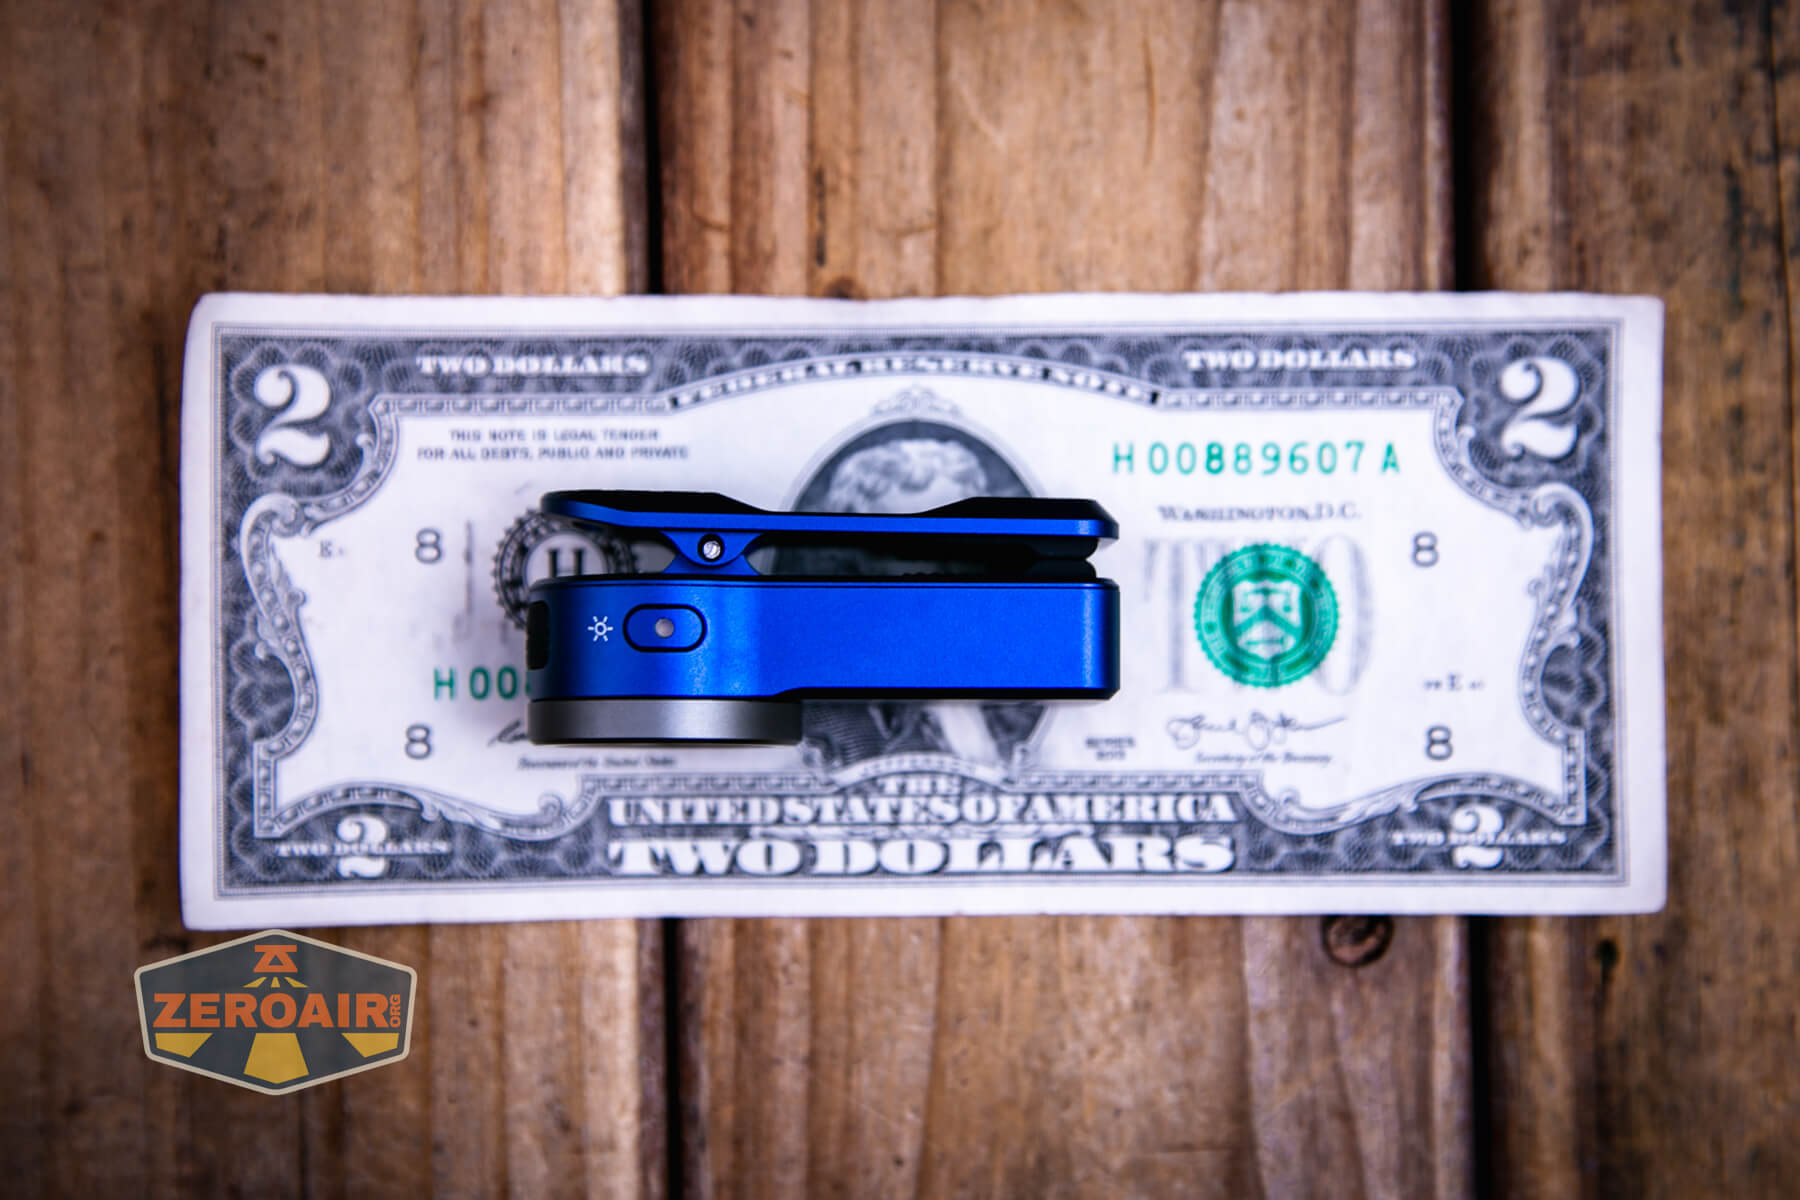
Retention and Carry
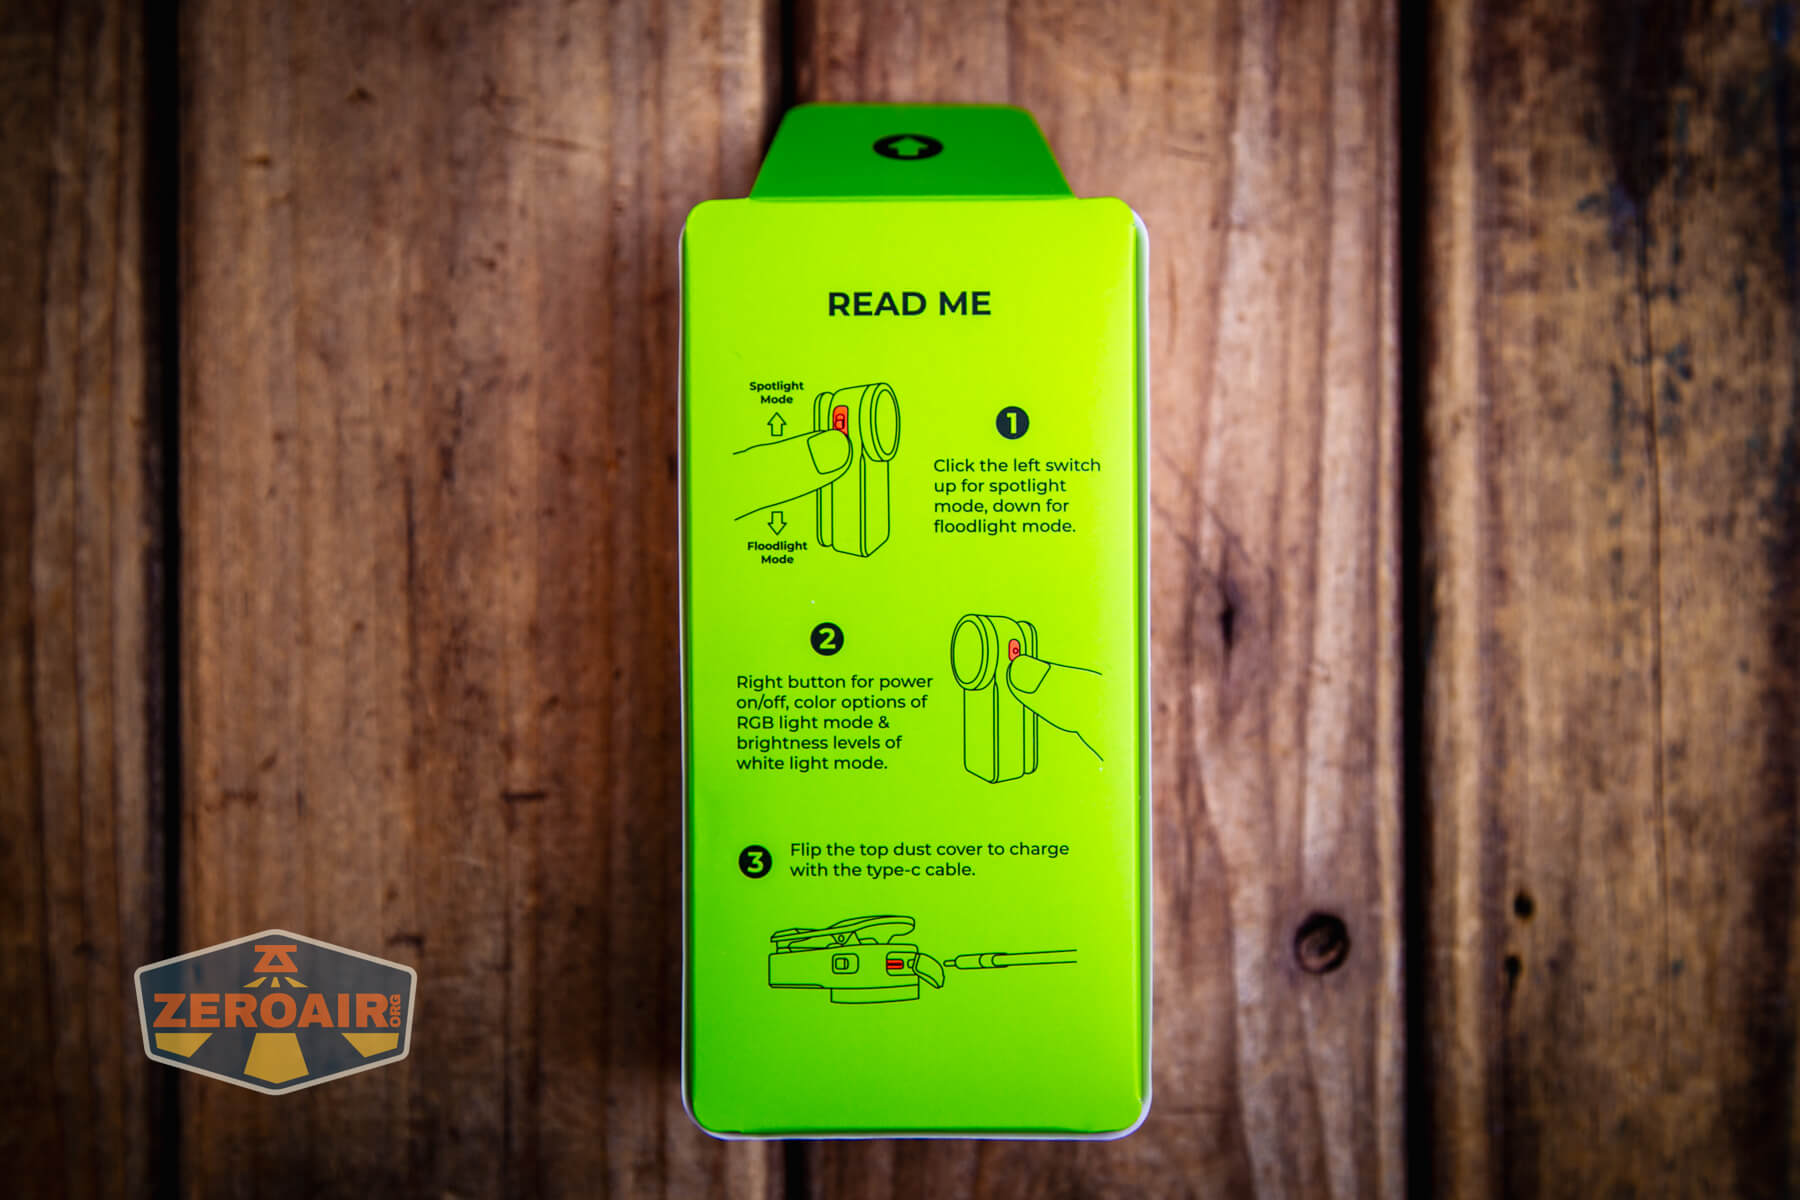
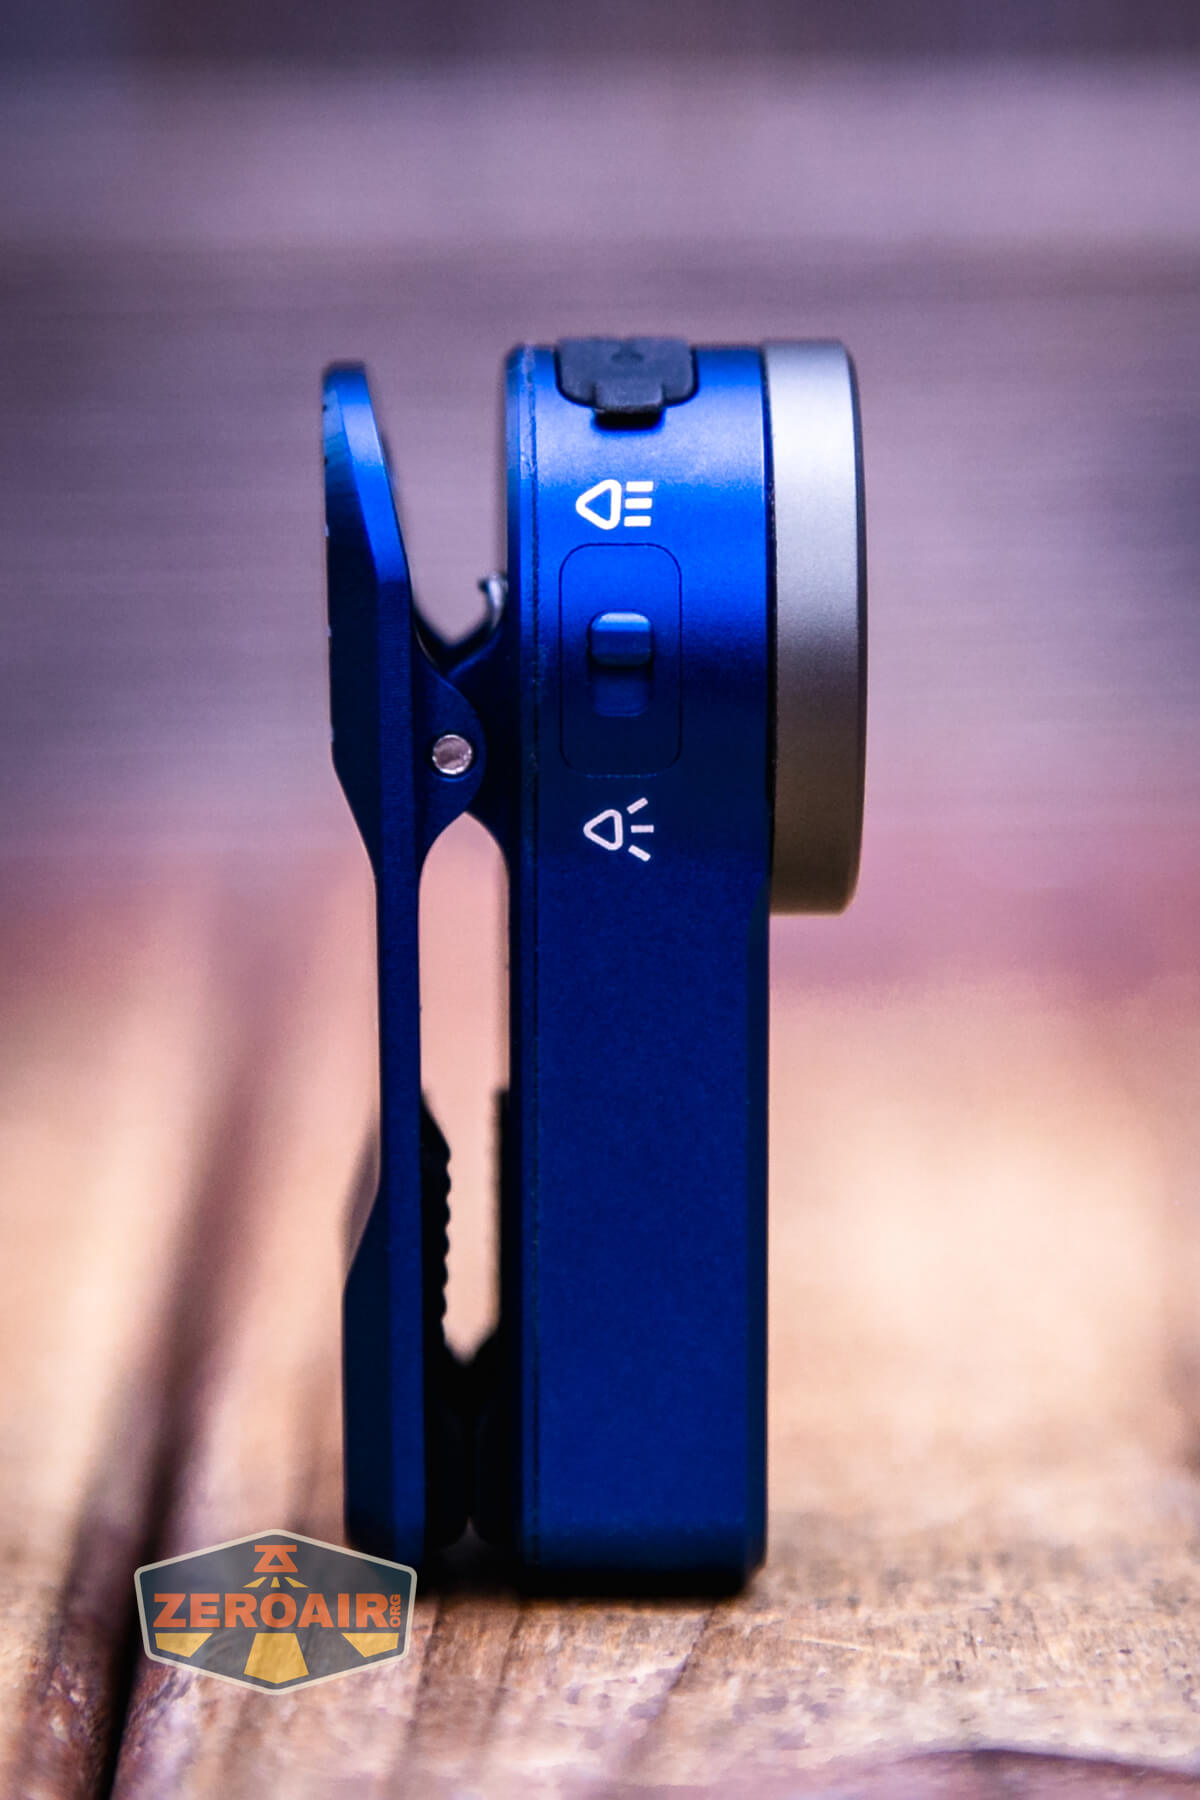
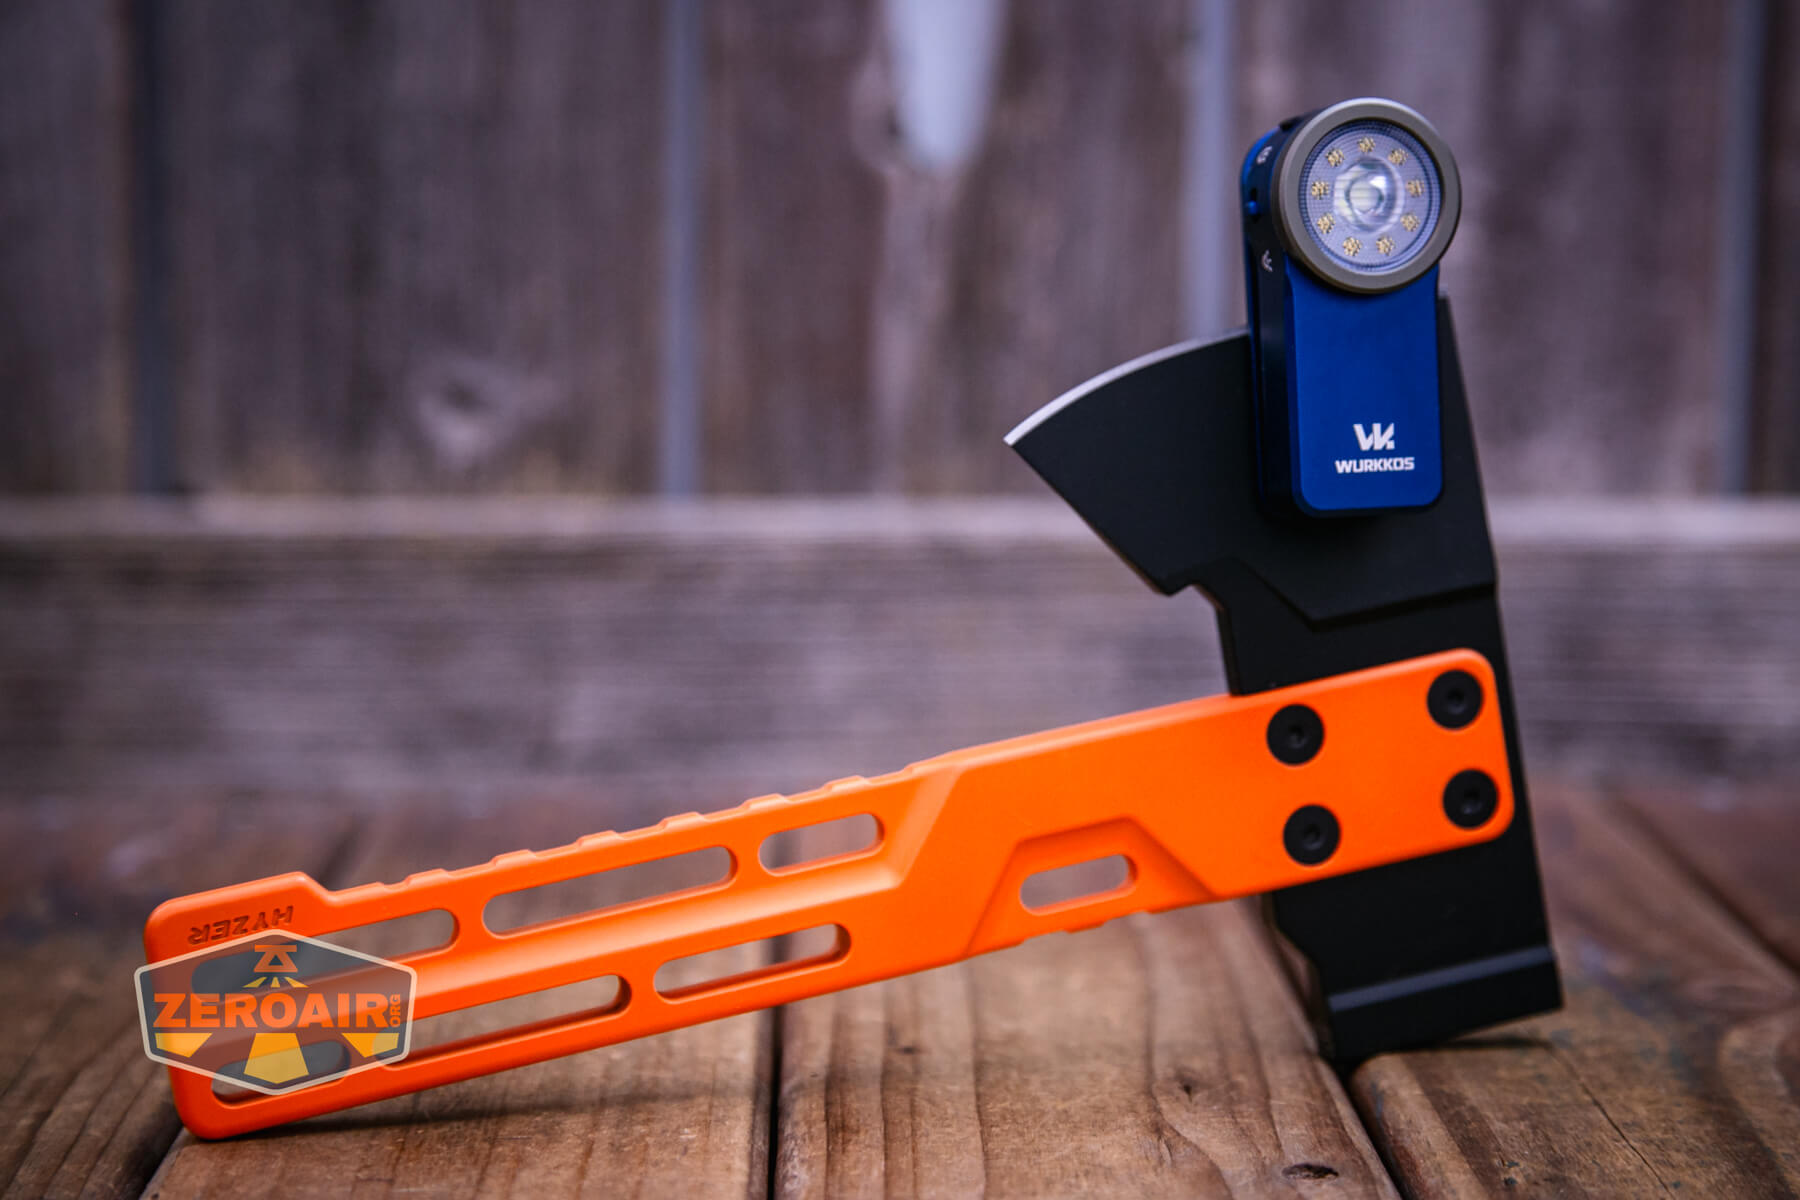
You can infer based on the name that this is a clip light. And it is! Inside the opening are a couple of little grip feet. It’s a useful clip and would attach nicely as a bicycle light or backpack light.
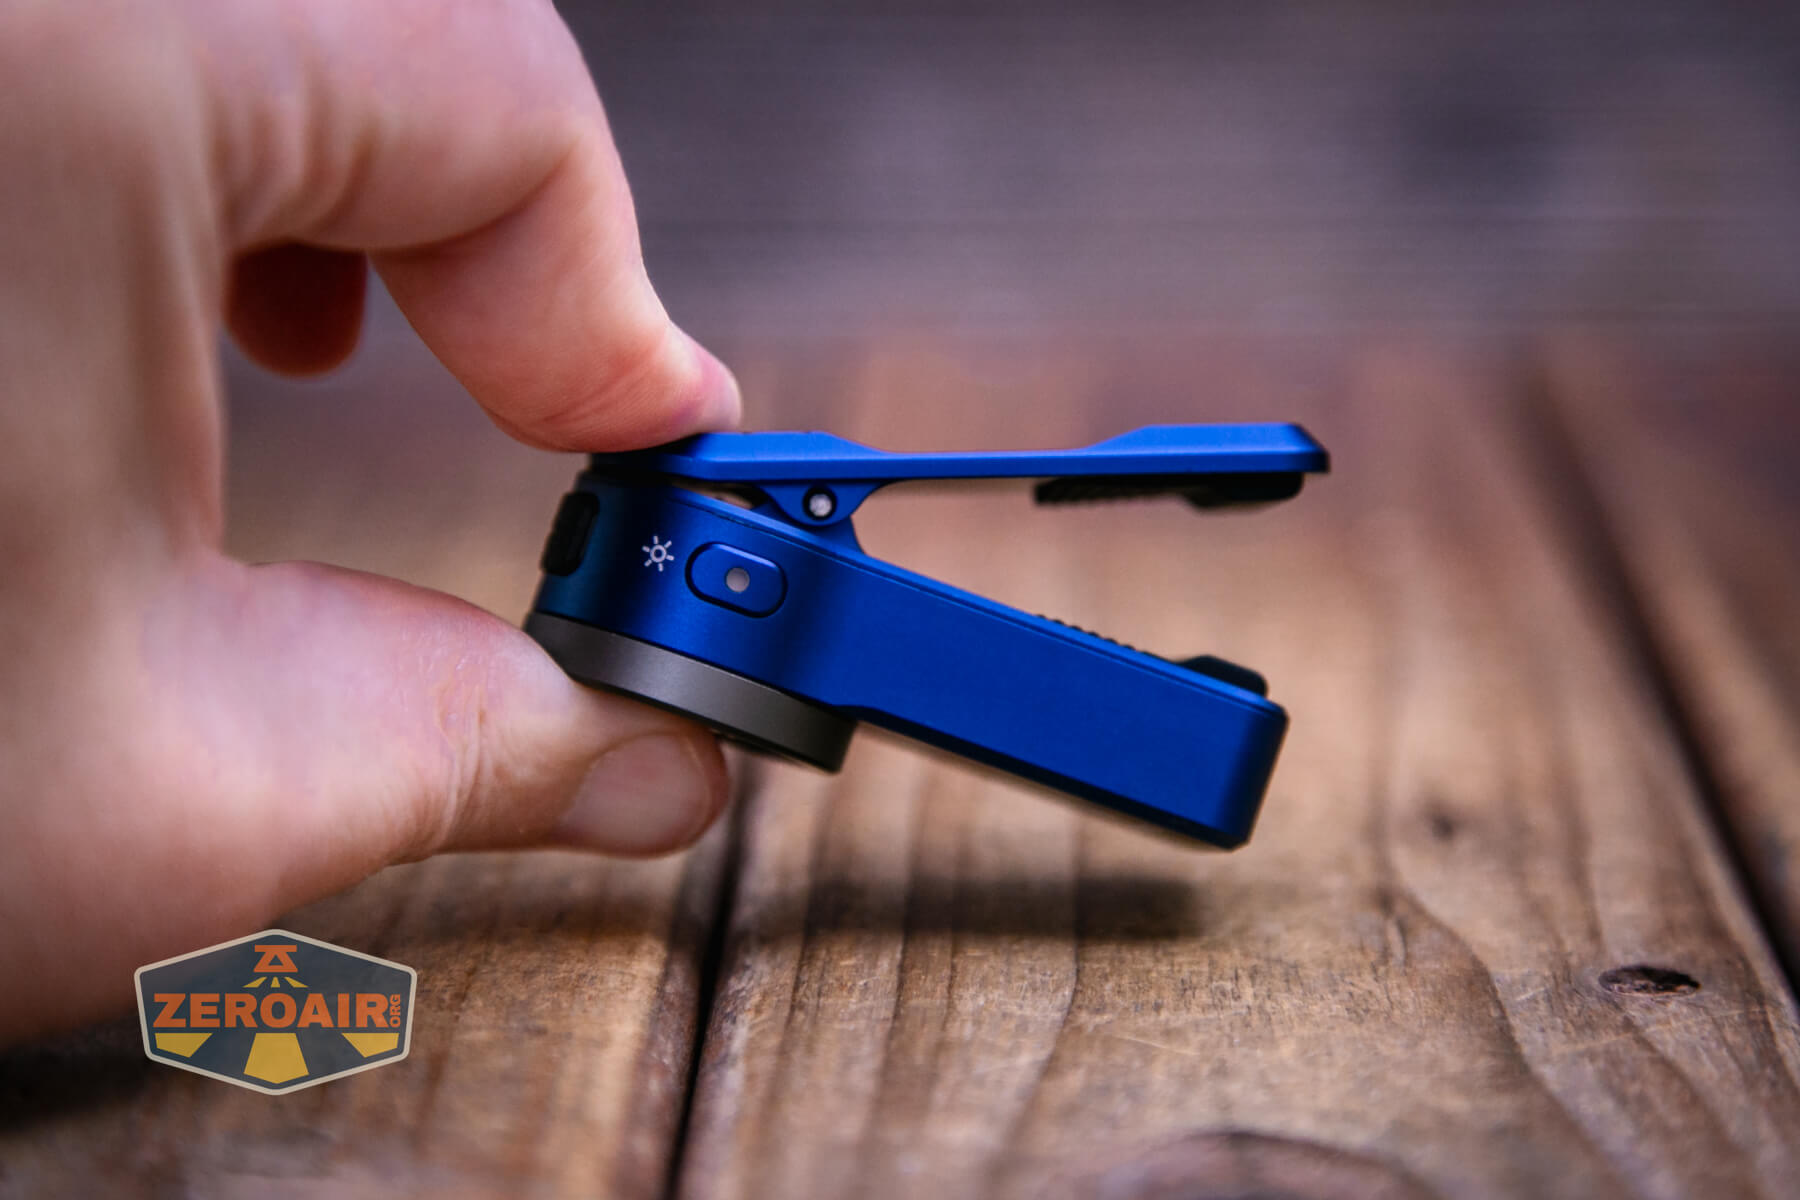
The clip is quite useful!
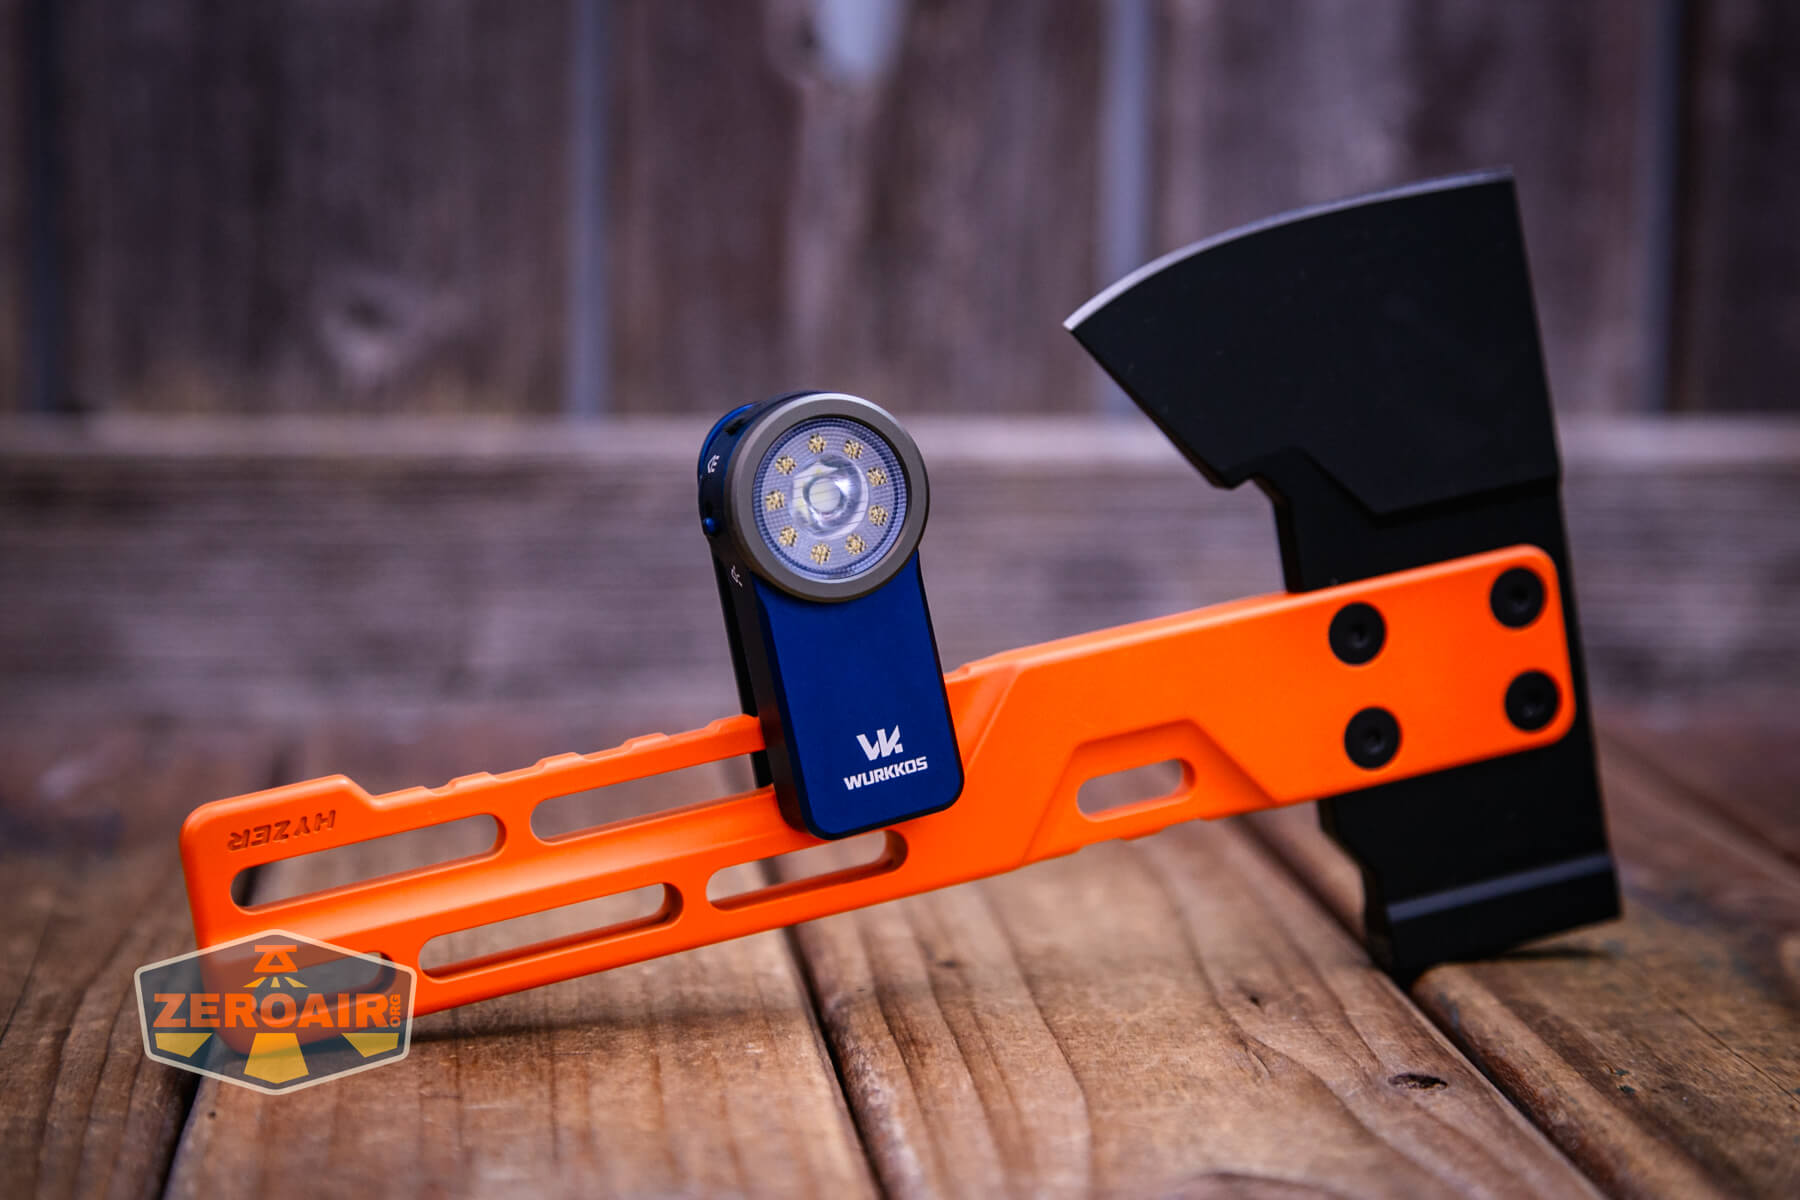
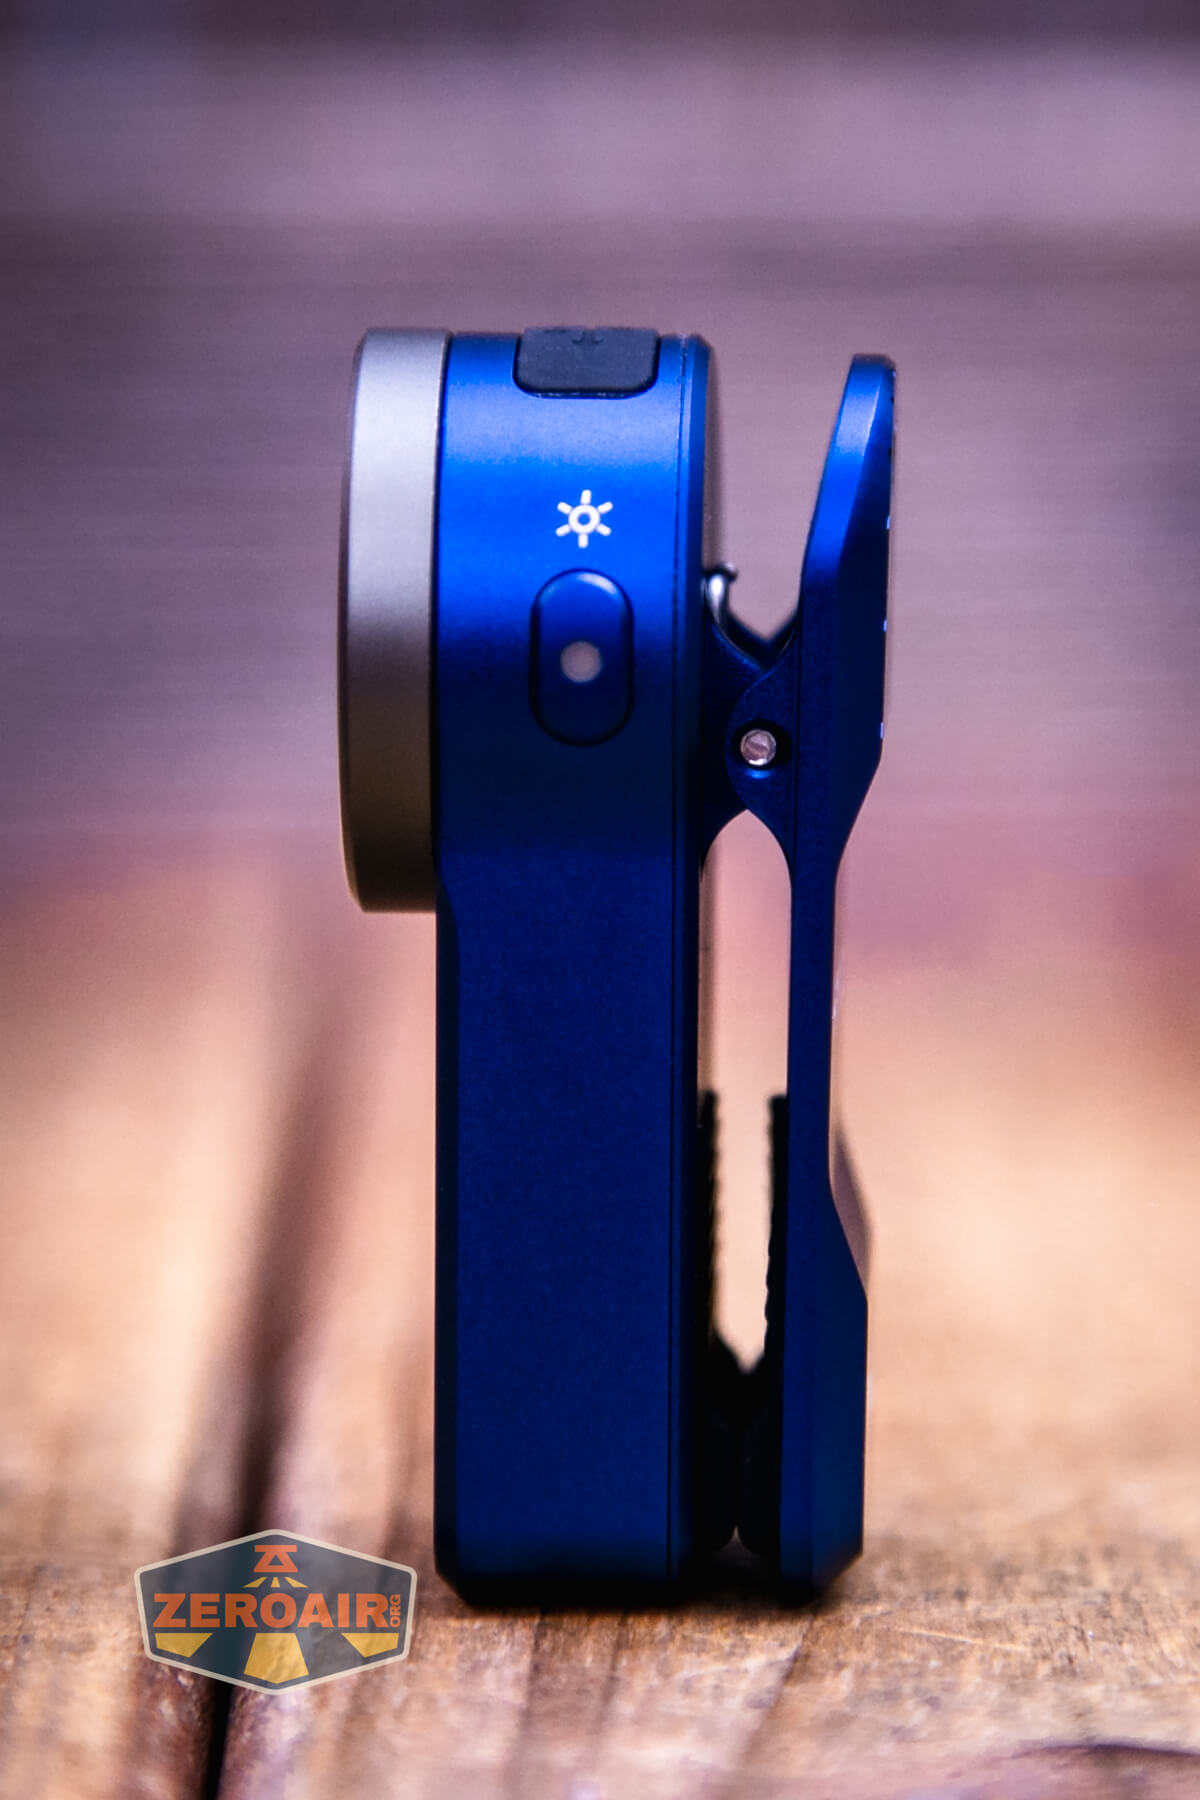
There’s a magnet too.
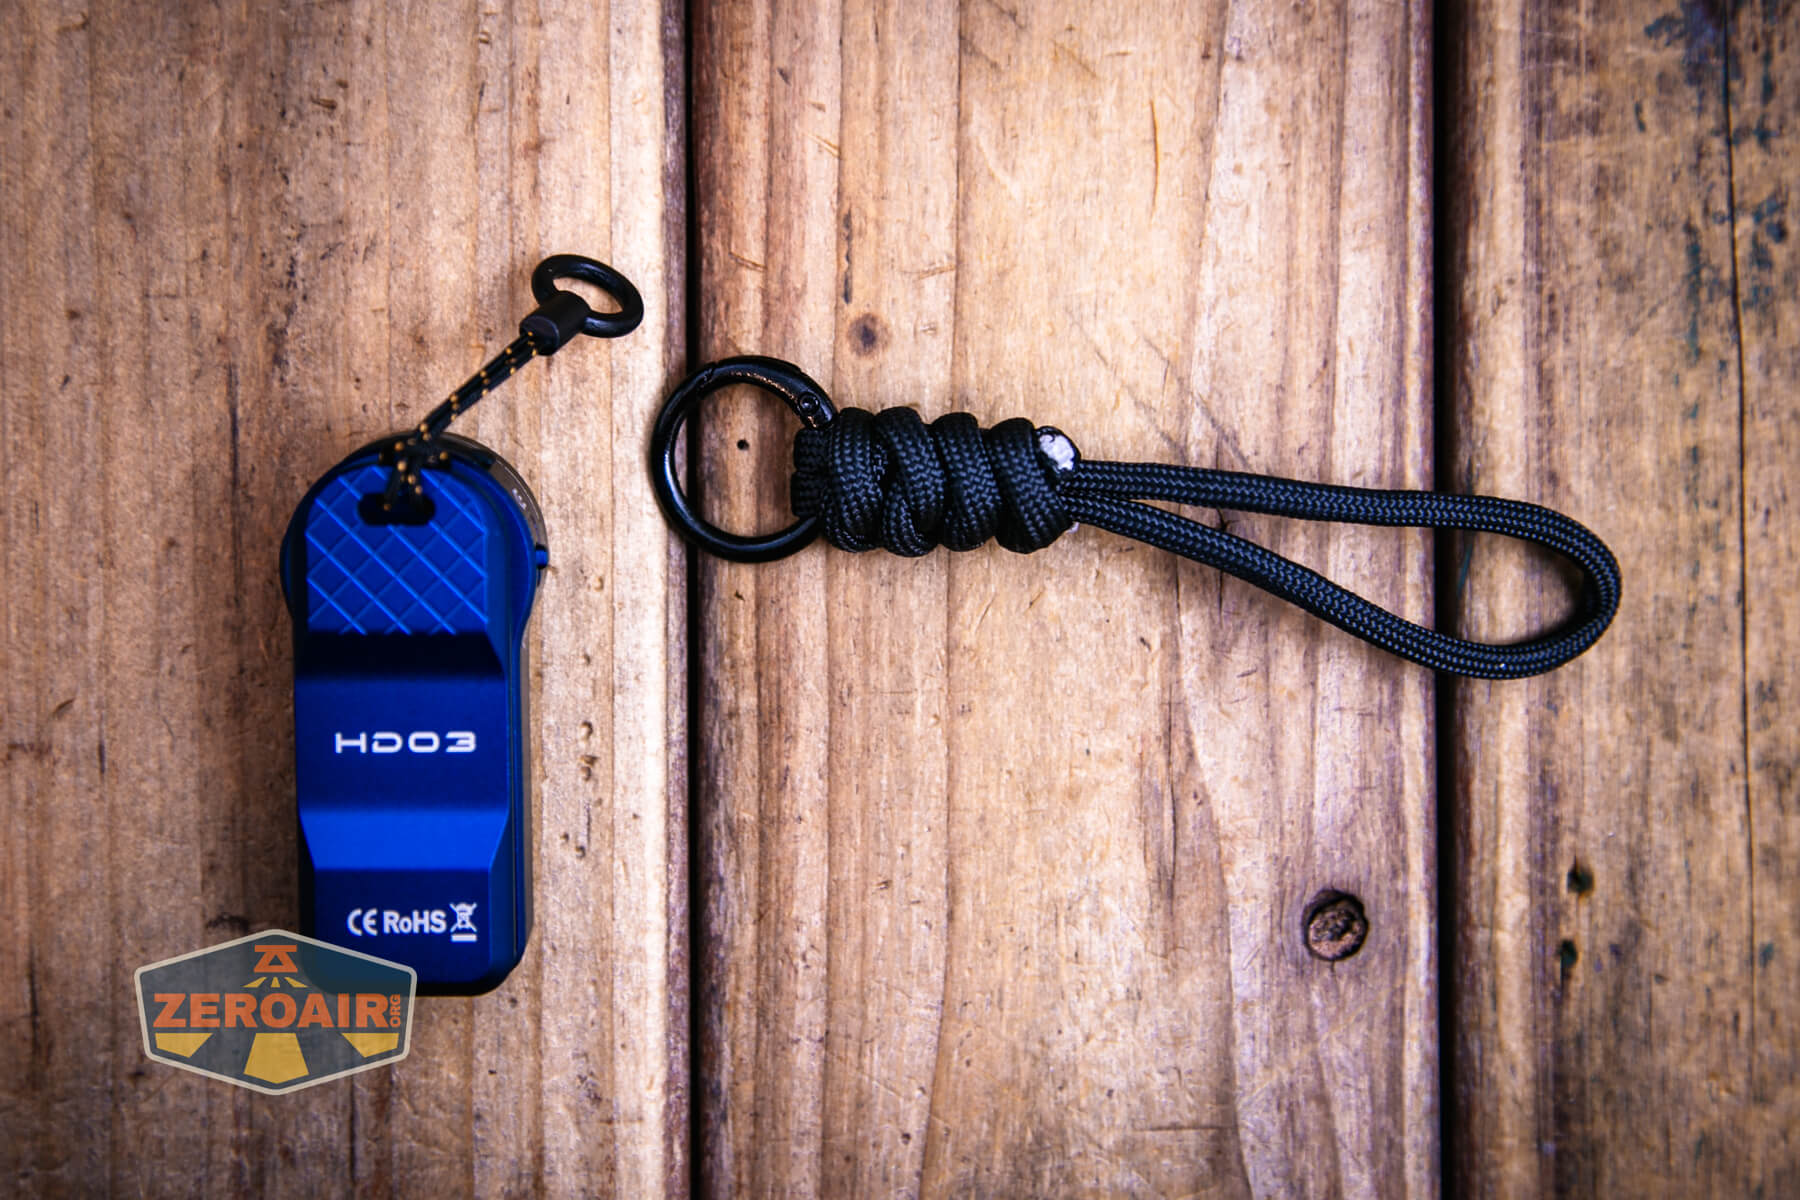
A couple of lanyard options are included.
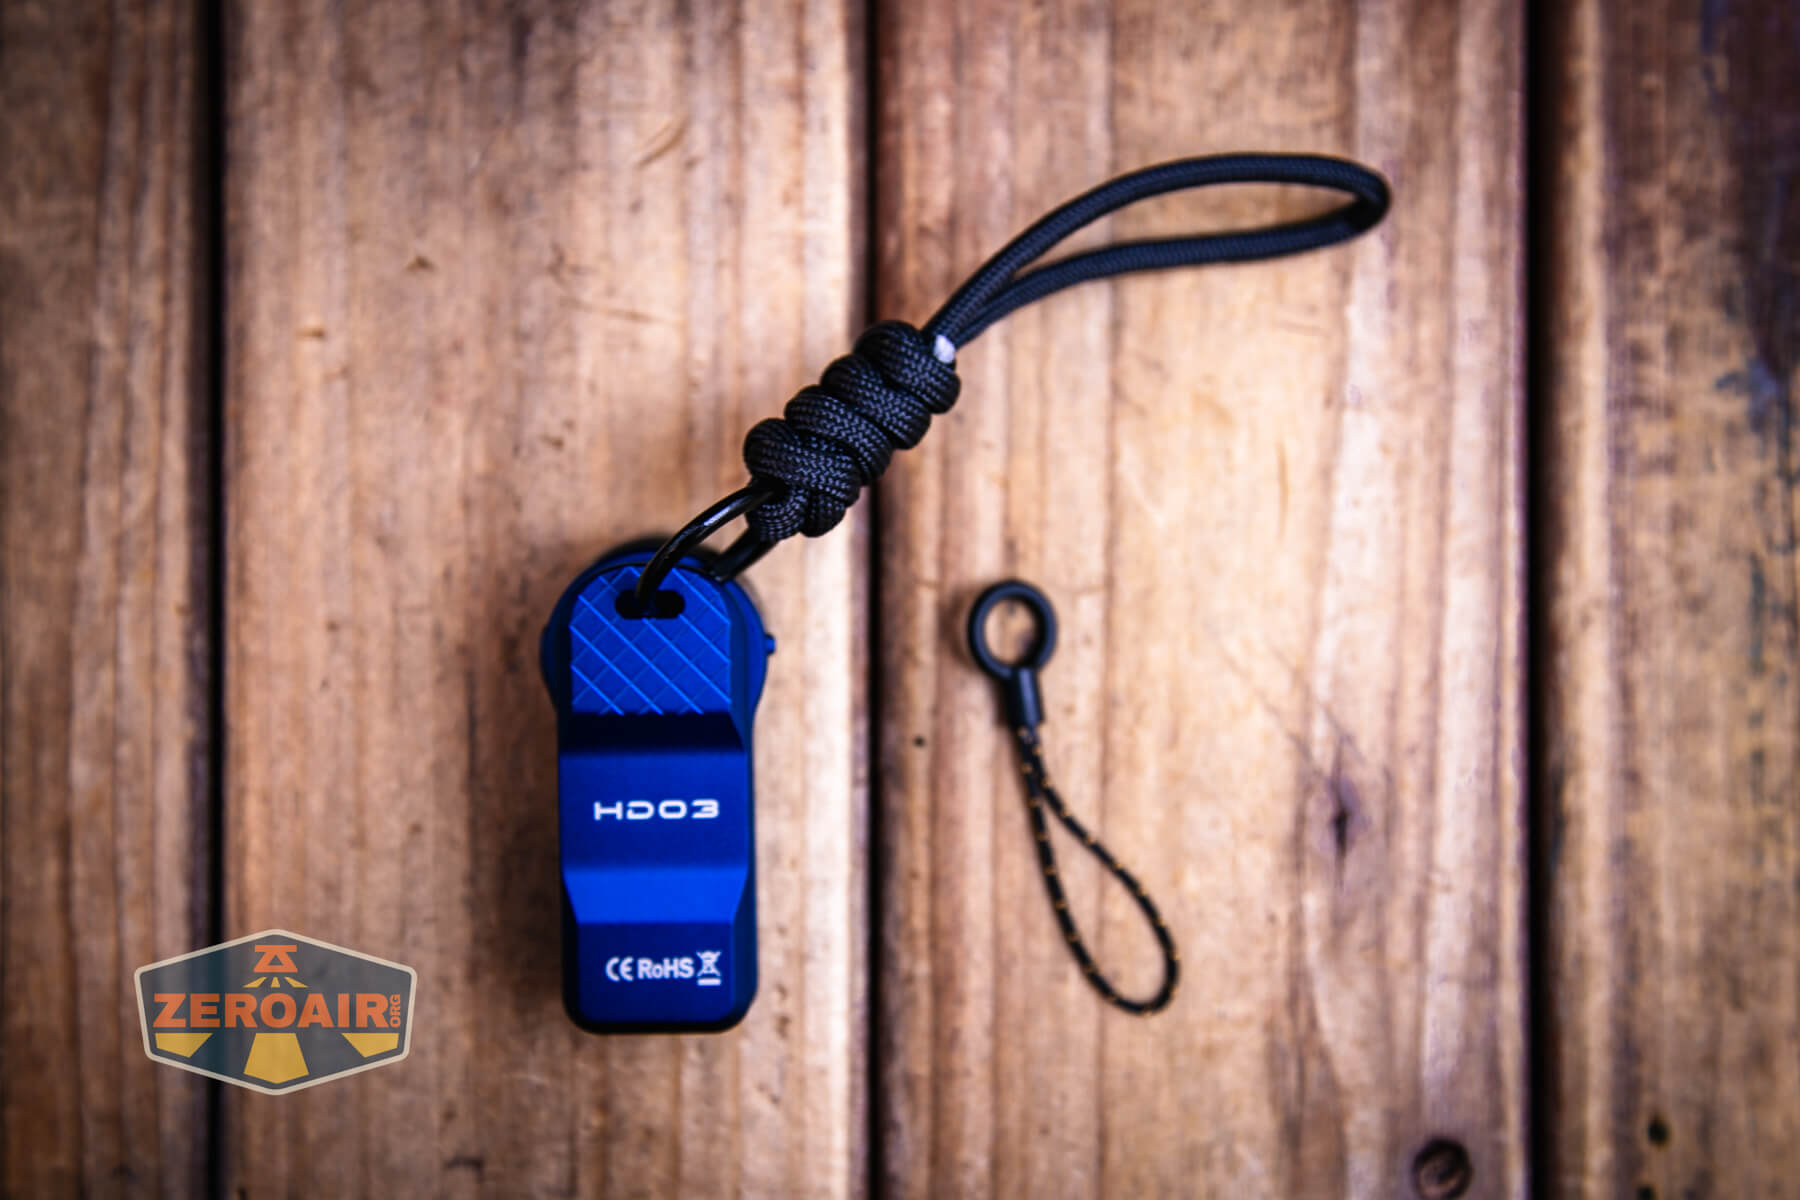
You could attach those in any number of ways, including using them together for a quick-release scenario.
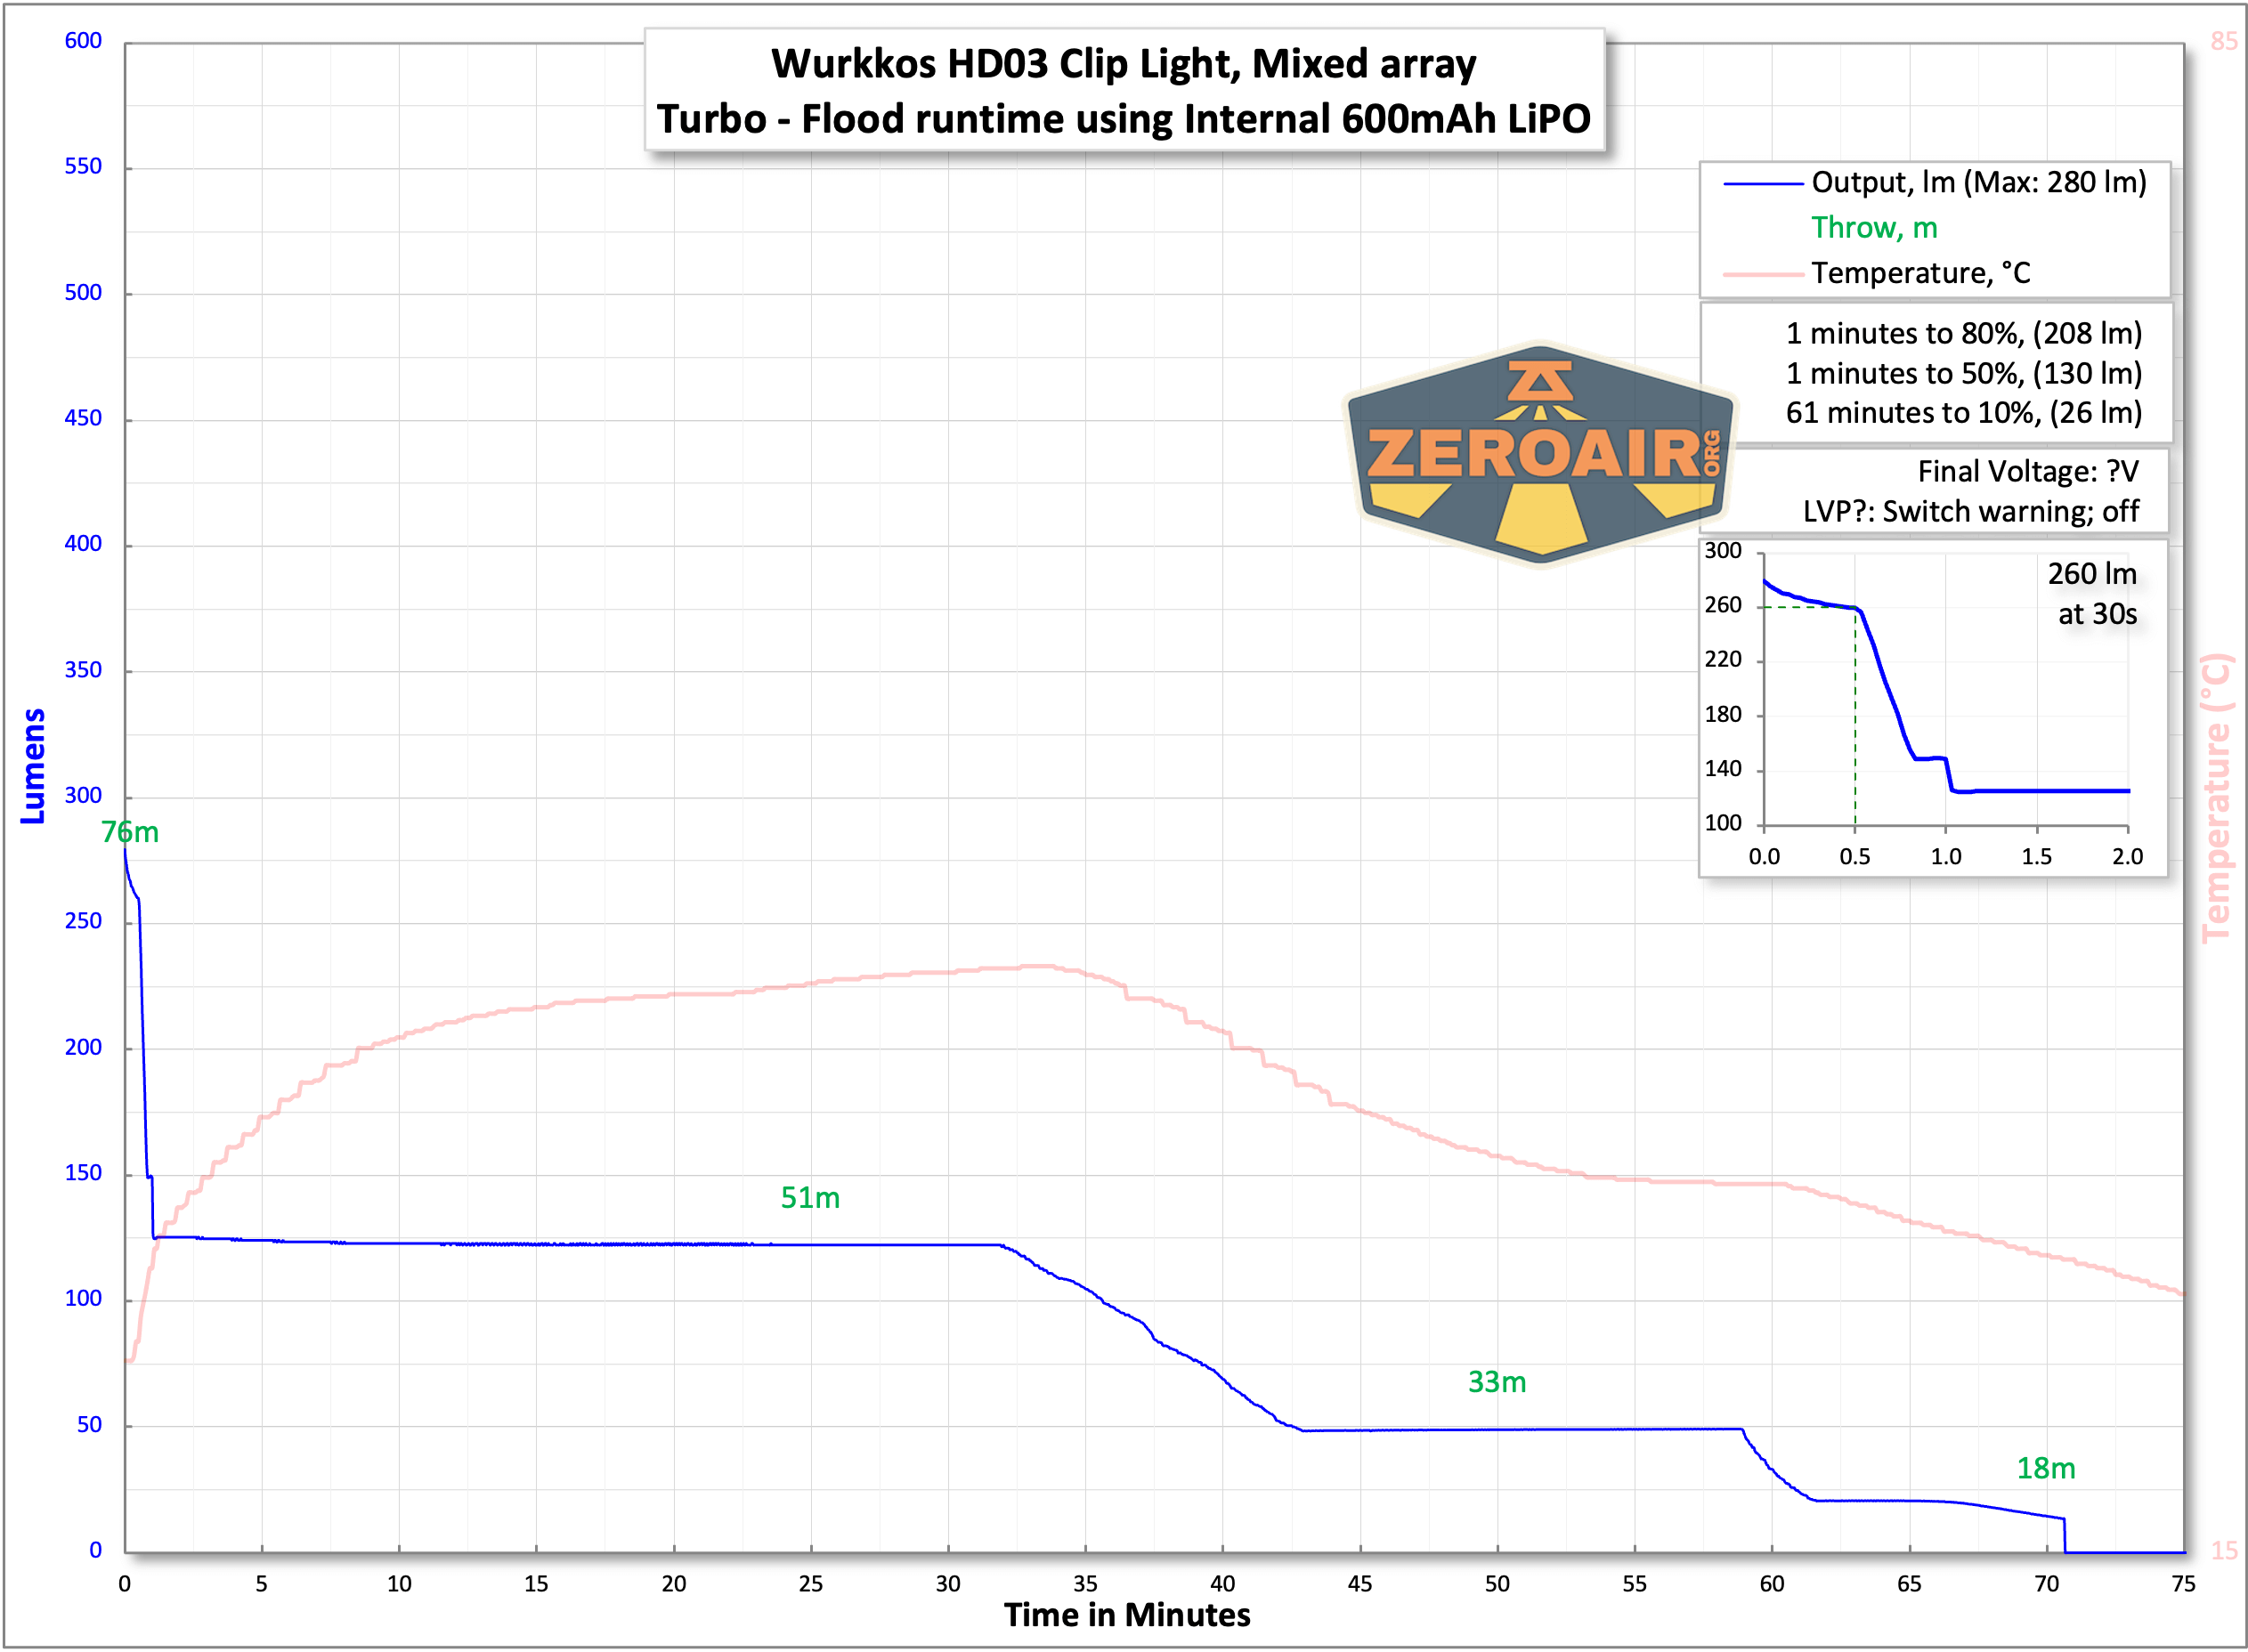
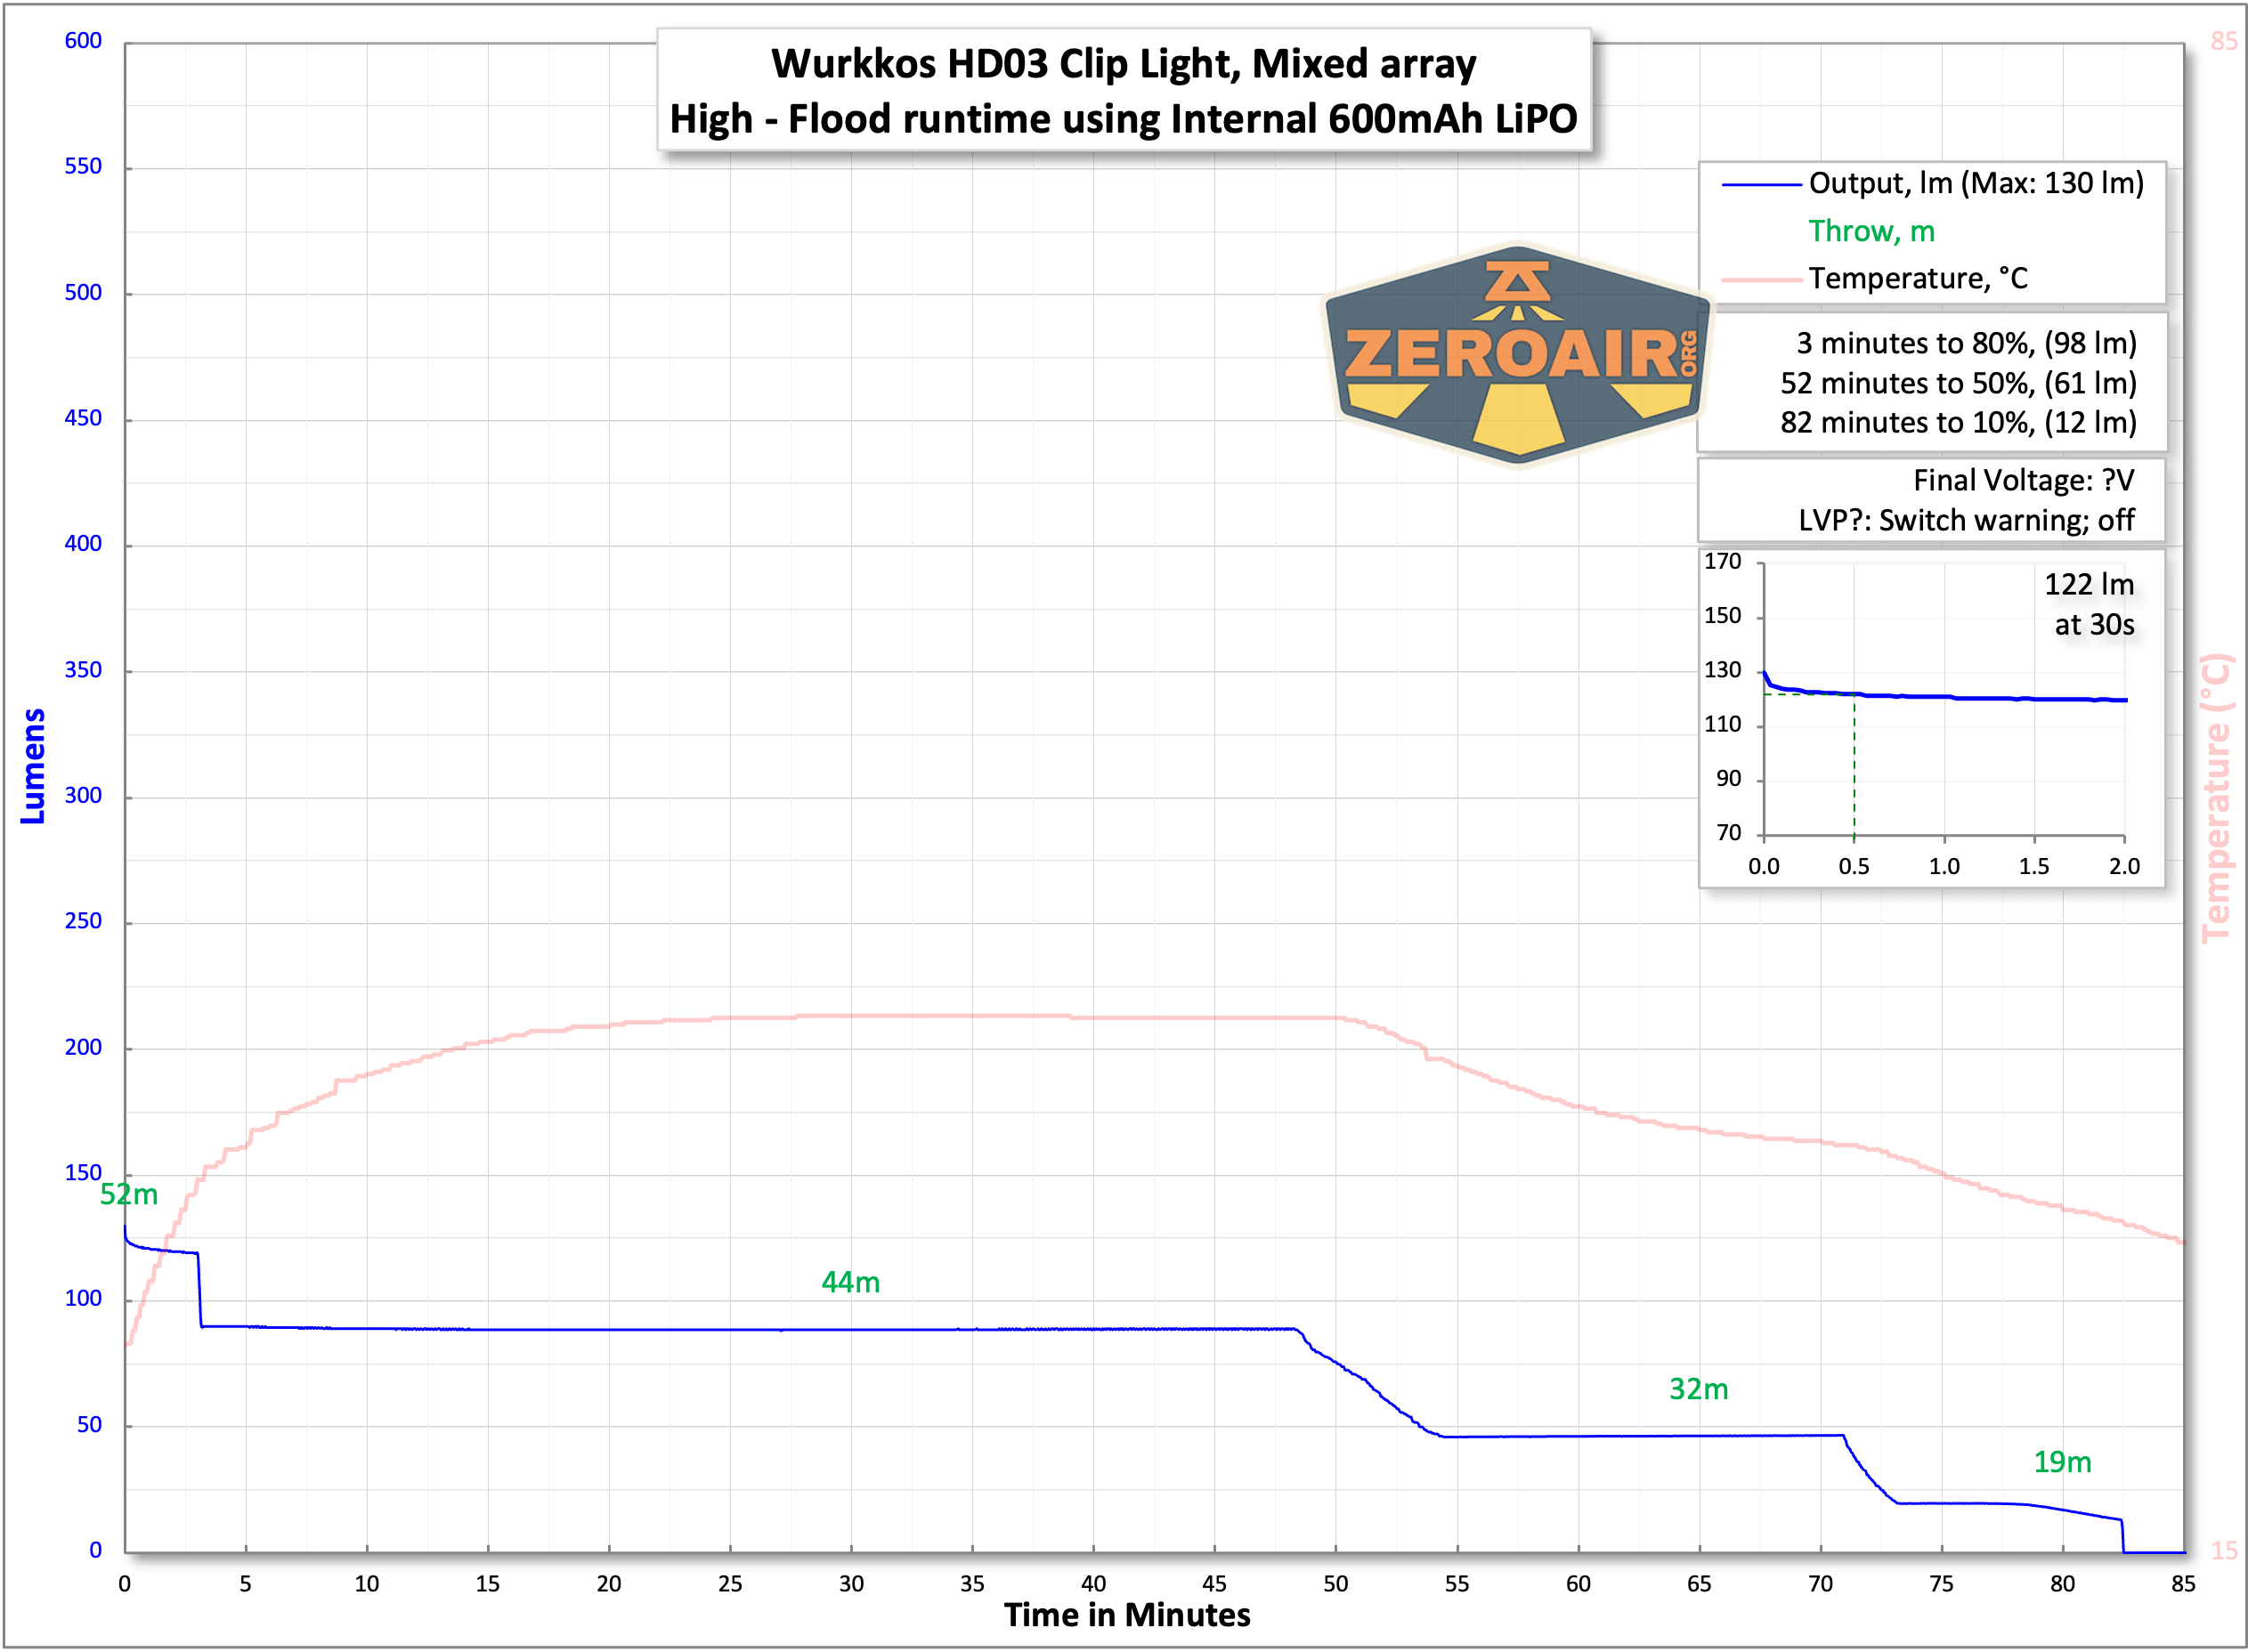
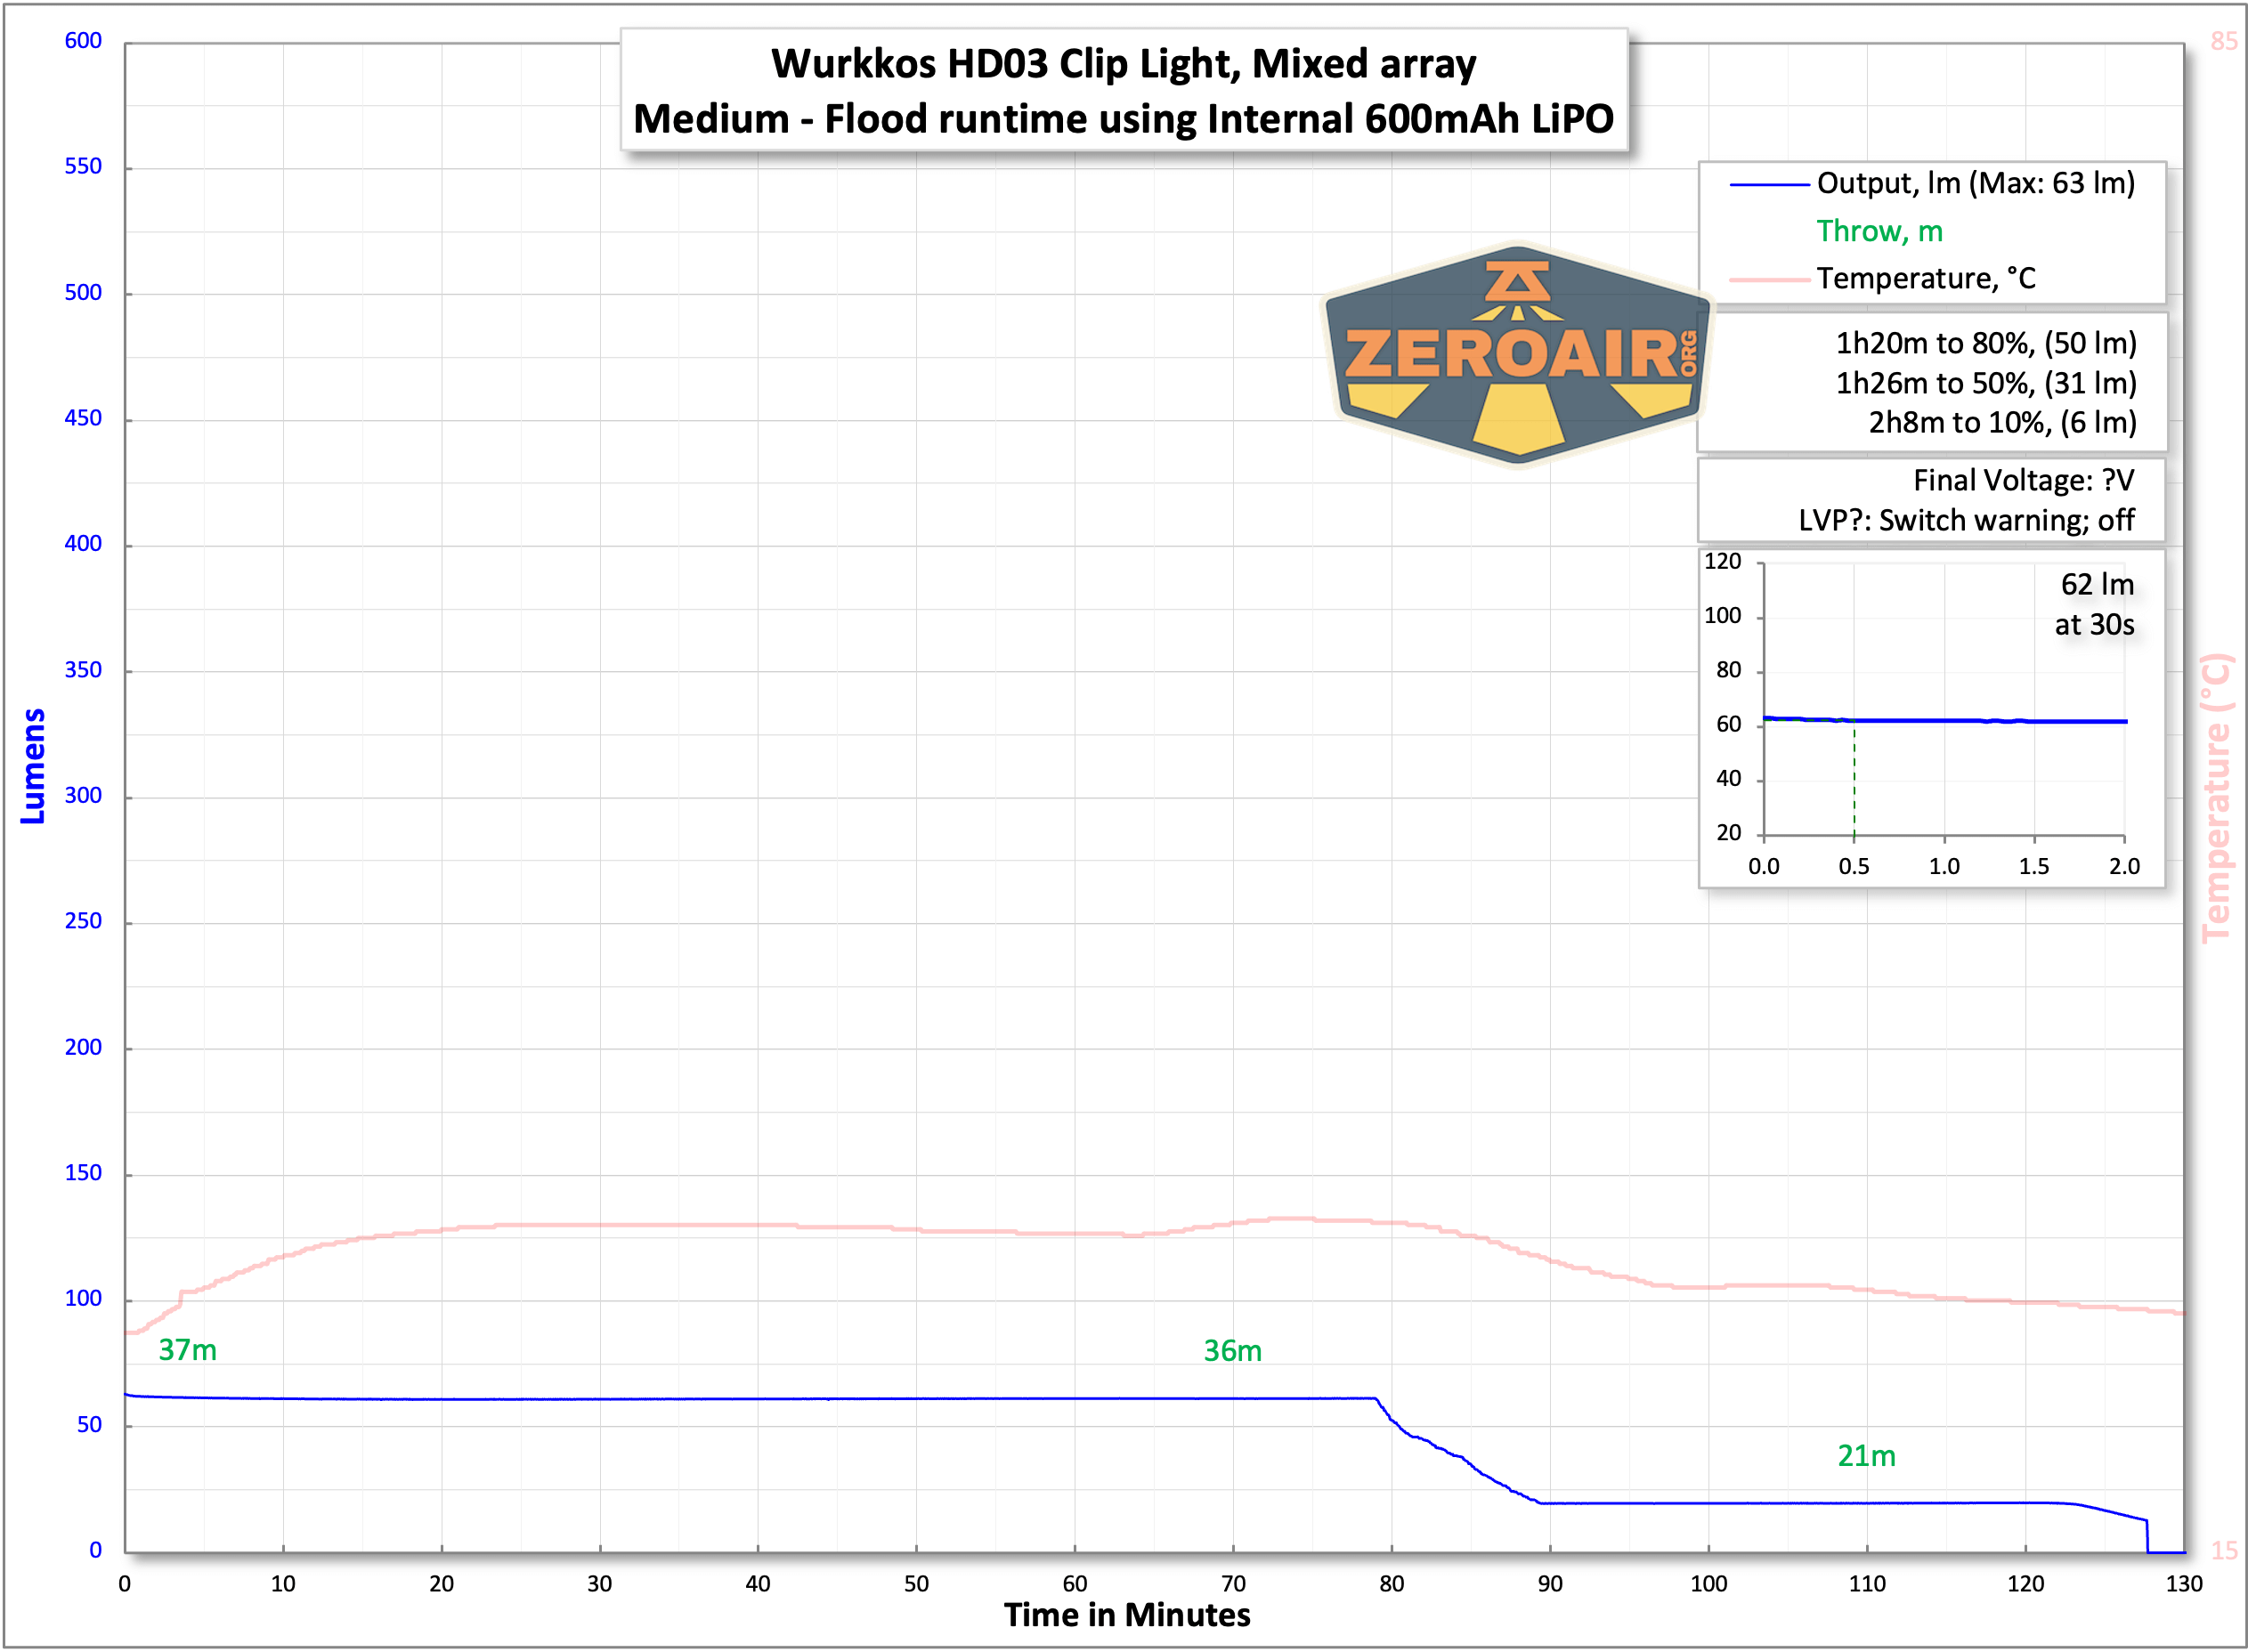
Power and Runtime
Wurkkos says the built-in battery is a 600mAh LiPO. I don’t know how to access this battery, though.
Below you can see the runtimes of some modes for both white lights.


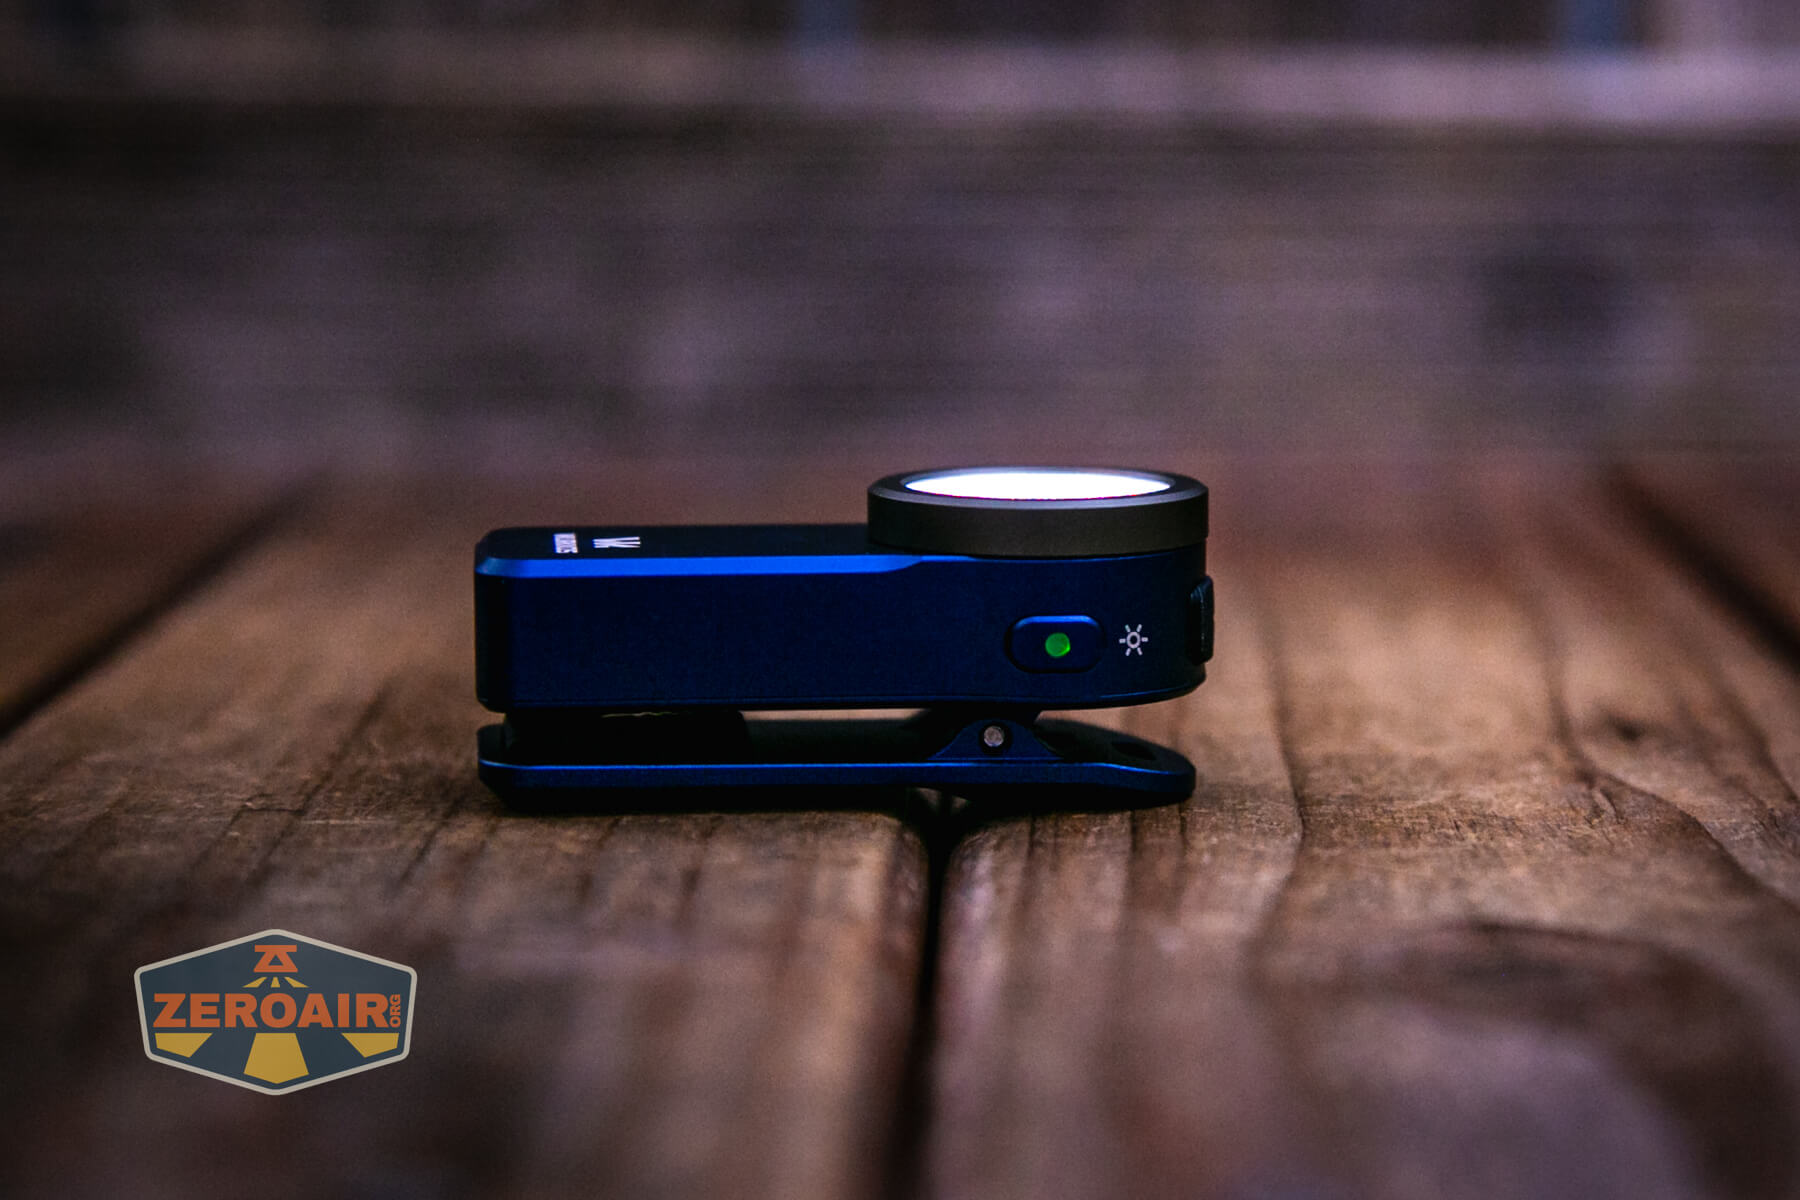
The switch indicates the general battery level. It does so while running (for a few seconds after being turned on), and the switch indicates as follows:
Green: 50-100% power
Orange: 20-50% power
Red: 1-20% power
The temperature lines in these charts are included as general context, not precise measurements. The values represent the range (min to max) during testing, but should not be taken as exact readings. Temperature sensors are attached however feasible and not always on the bezel or hottest spot (assuming that can even be clearly defined). Even with ideal placement, too many variables affect temperature to definitively state a specific max value.
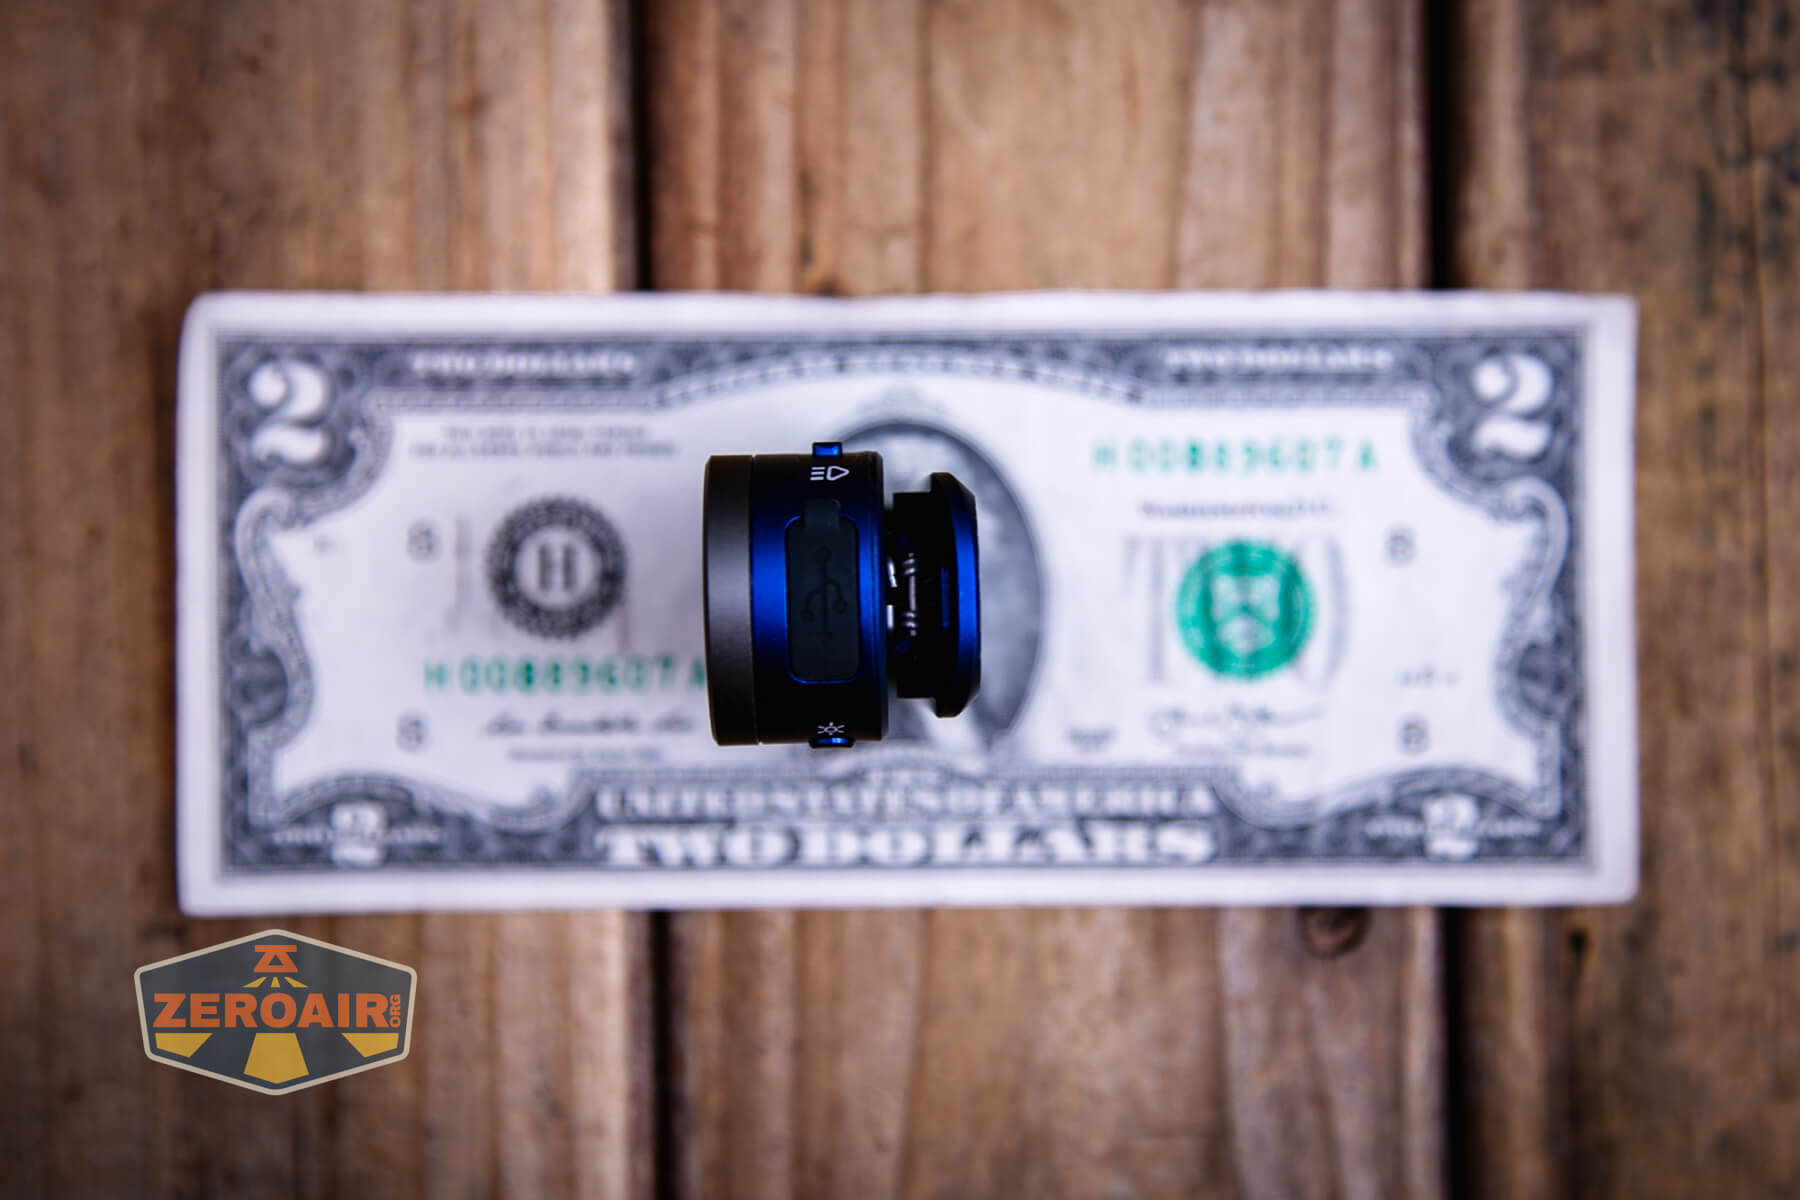
Charging
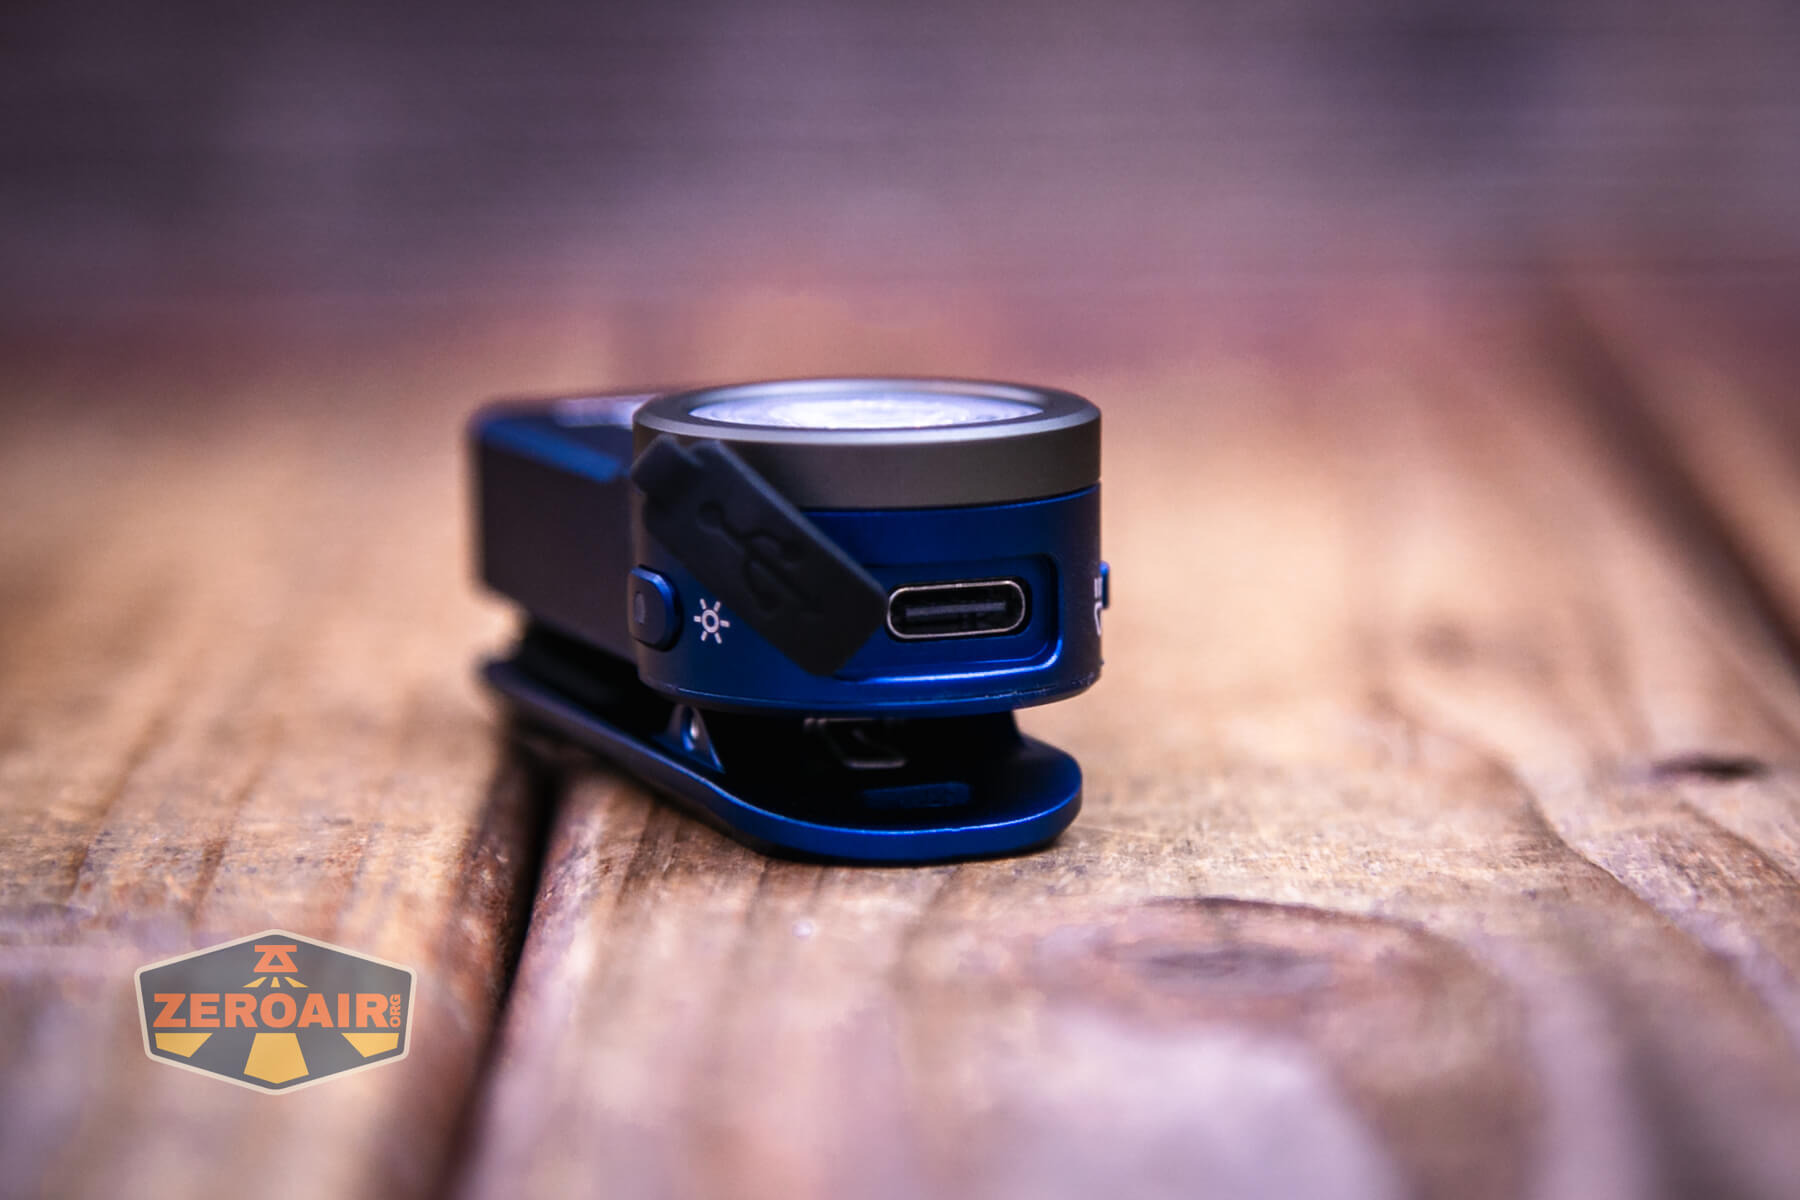
Of course, with a built-in battery, there must be built-in charging. I’m pleased to say that charging is by way of a USB-C port on the top of the head.
Wurkkos also provides a USB-C to USB-C charging cable.
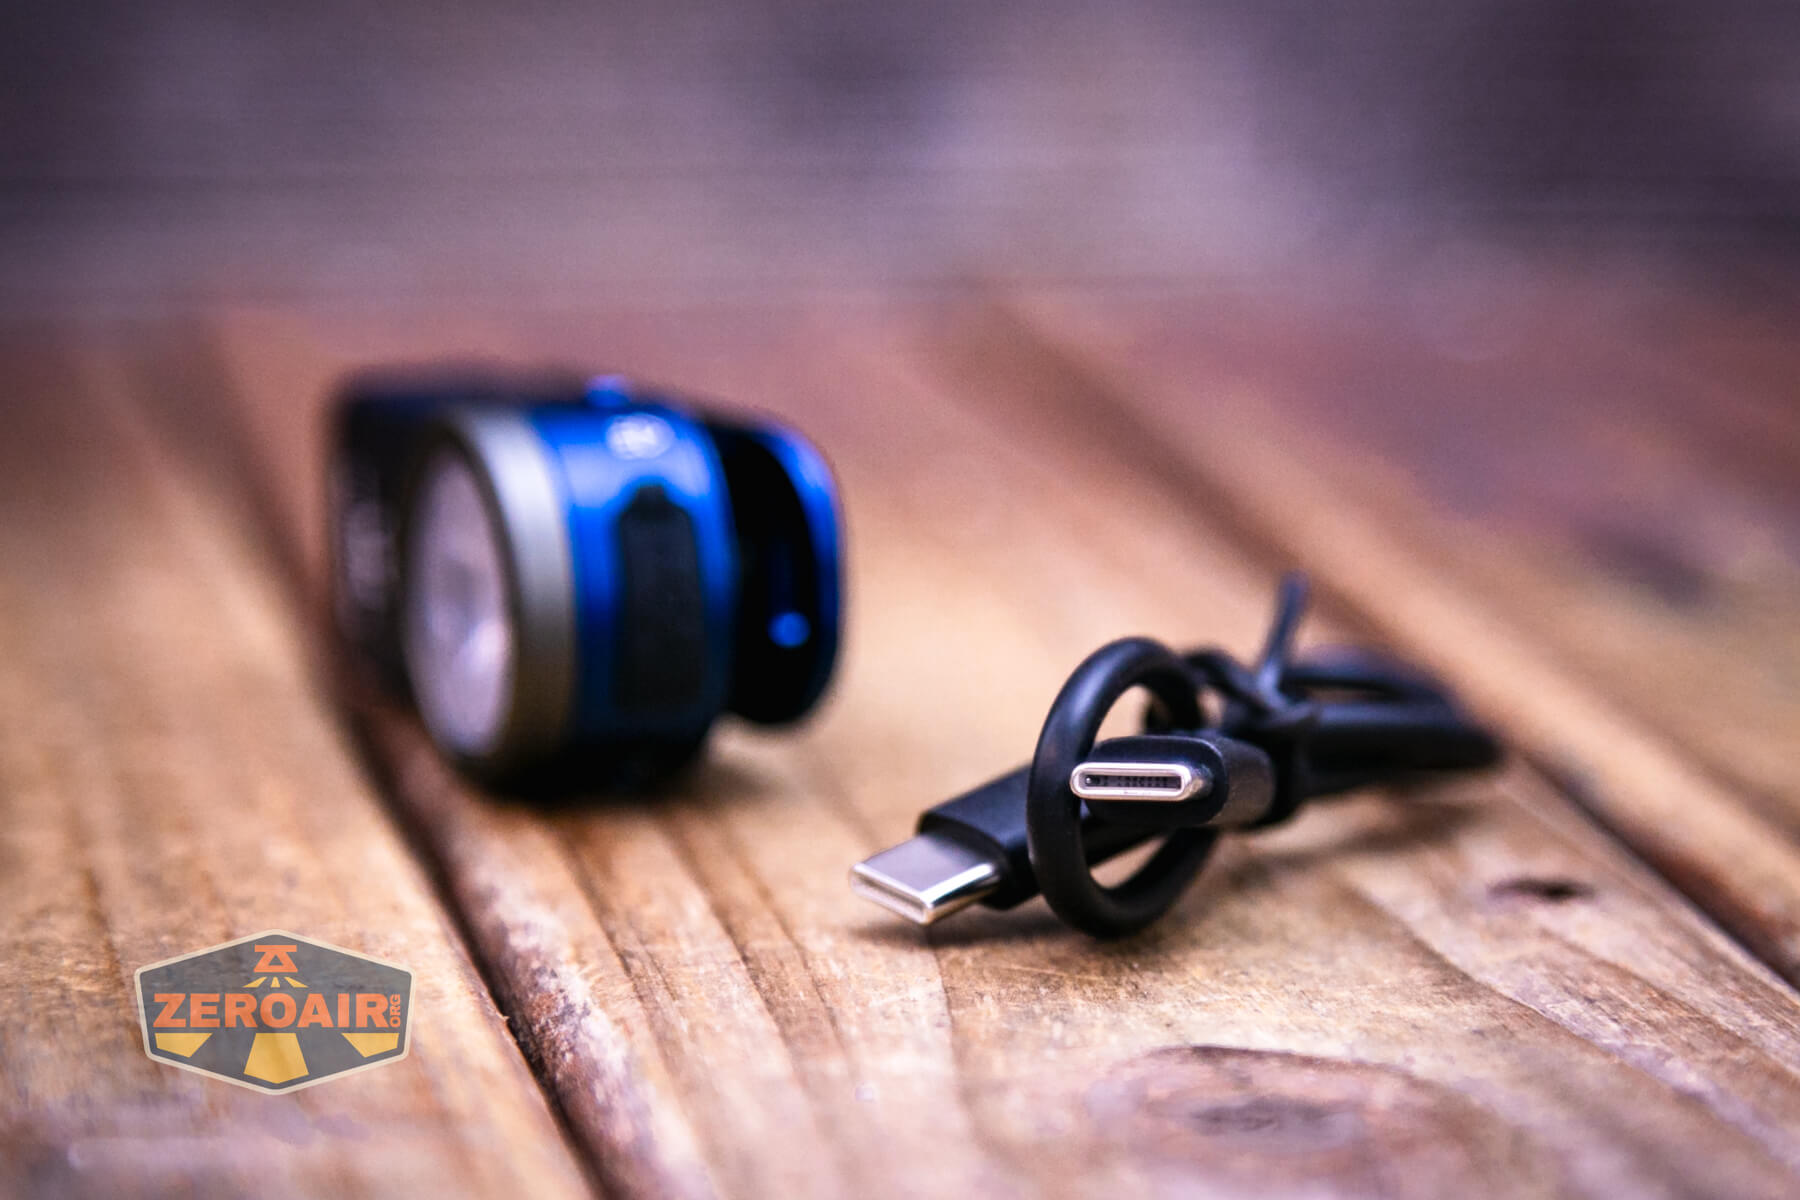
Charging via either C to C or A to C works just fine and takes around an hour and a half.

Modes and Currents
| Mode | Mode Claimed Output (lm) | Claimed Runtime | Measured Lumens |
|---|---|---|---|
| Spot – Turbo | 680 | 1h10m | 568 (0s) 533 (30s) |
| Spot – High | 320 | 1h20m | 267 |
| Spot – Medium | 110 | 2h10m | 89 |
| Spot – Low | 20 | 7h40m | 16 |
| Spot – Moonlight | 1 | 36h | 4 |
| Flood – Turbo | 320 | 1h10m | 280 (0s) 260 (30s) |
| Flood – High | 150 | 1h20m | 130 |
| Flood – Medium | 75 | 1h50m | 63 |
| Flood – Low | 15 | 5h30m | 15 |
| Flood – Moonlight | 1 | 35h | 0.7 |
Pulse Width Modulation
Each mode uses PWM. Some of it is not quick, and you’re likely to notice it.
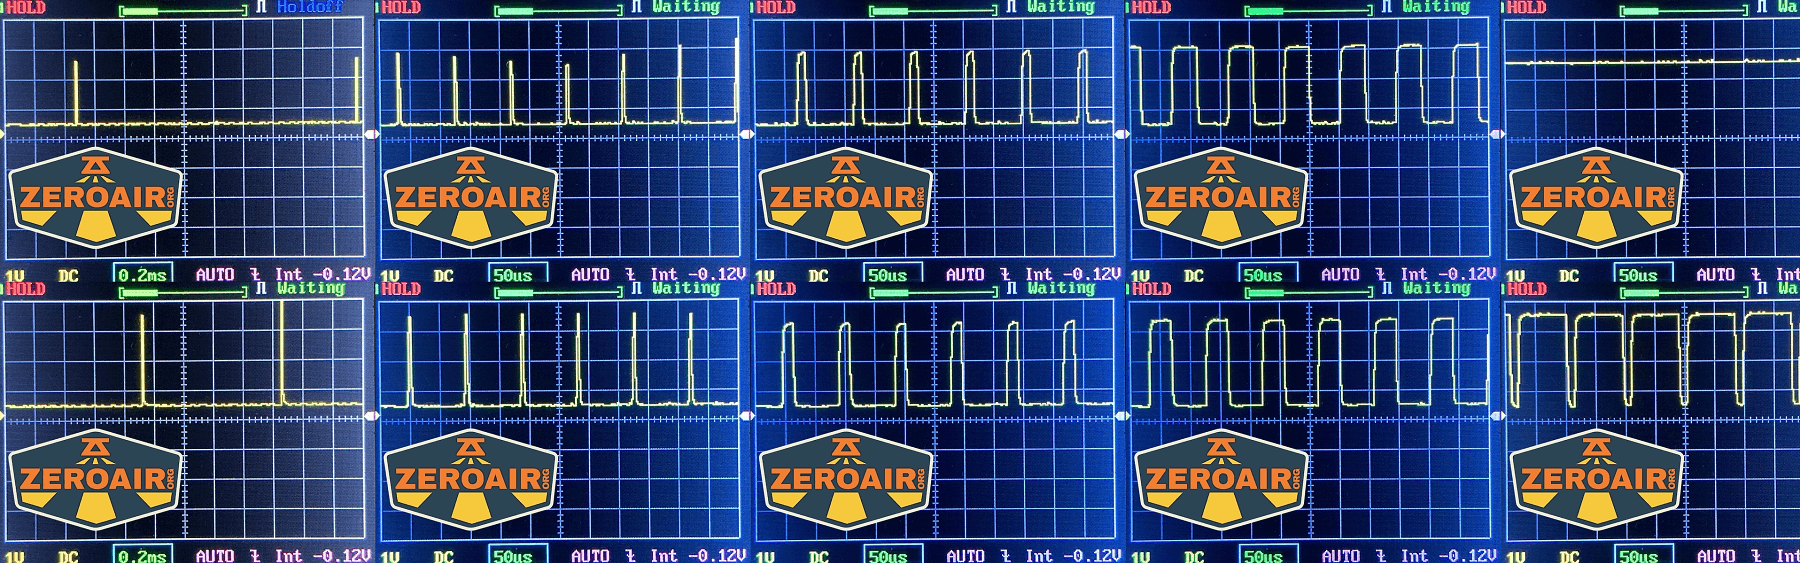
Click here to see a “baseline” – a chart with almost no light hitting the sensor.
Then there’s the Ultrafire WF-602C flashlight, which has some of the worst PWM I’ve seen. It’s so bad that I used a post about it to explain PWM! Here are multiple timescales (10ms, 5ms, 2ms, 1ms, 0.5ms, 0.2ms) to make comparing this “worst” PWM light to the test light easier. That post also explains why I didn’t test the WF-602C at the usual 50us scale.
User Interface and Operation
The Wurkkos HD03 clip flashlight features an e-switch on the side of the head. The metal-covered switch has an indicator in the center. It’s indicating in green, below.
I found that at times, the switch cover might get angled such that it can stick below the edge of the body. It’s easily manageable, but annoying.
Here’s a user interface table! Opposite the e-switch is a selector switch. Using this, you may select between flood and throw. The user interface for flood and throw is the same, which is nice.
| State | Action | Result |
|---|---|---|
| Off | Hold | Moonlight |
| Off | Click | Low |
| Off | Double click | RGB (memorized color) |
| Off | Click 3x | Lock |
| Lock | Click 3x | Unlock |
| Lock | Hold | Momentary low |
| On | Hold | Mode advance (Low, Medium, High, Turbo) |
| On | Double click | Turbo |
| Turbo | Click^ | Previous state |
| On | Click 3x | Strobe |
| Strobe | Double click | Strobe advance (Strobe, SOS, Beacon) |
| Strobe group | Click | Previous steady mode |
| RGB on | Hold | Stepless advancing through RGB^^ |
| RGB on | Double click | Current RGB Strobe |
| RGB strobe | Double click | RGB strobe advance (8 options) |
| RGB strobe | Click | Previous steady RGB |
^ The manual has this wrong – it states that double clicking goes back to the previous state. Double clicking from Turbo just goes back to Turbo, though.
^^ The manual describes this as “stepless dimming” but it’s not dimming, it’s advancing through the RGB options (in a stepless way.)
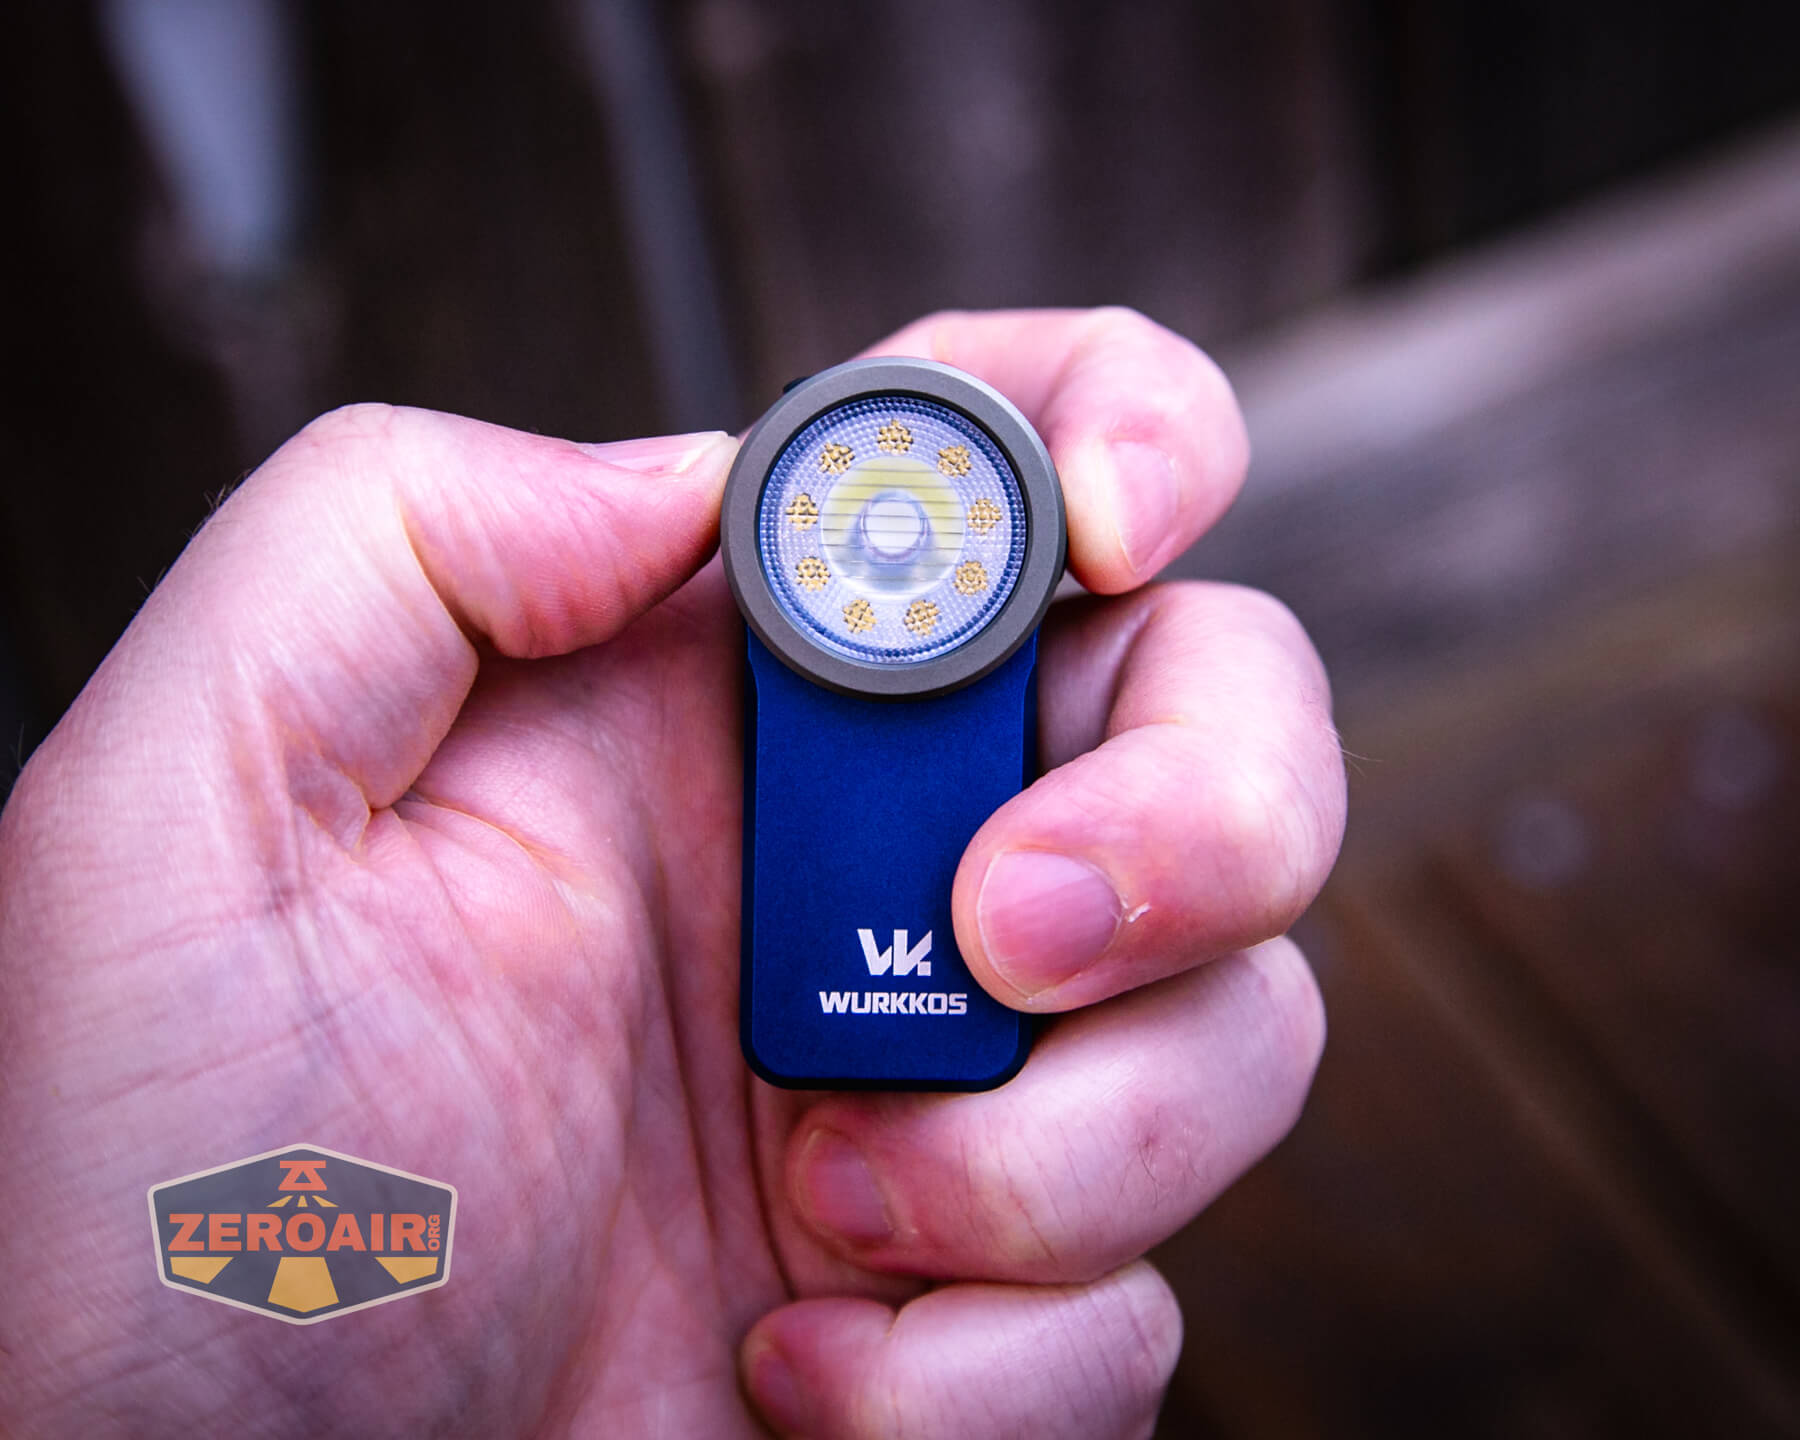
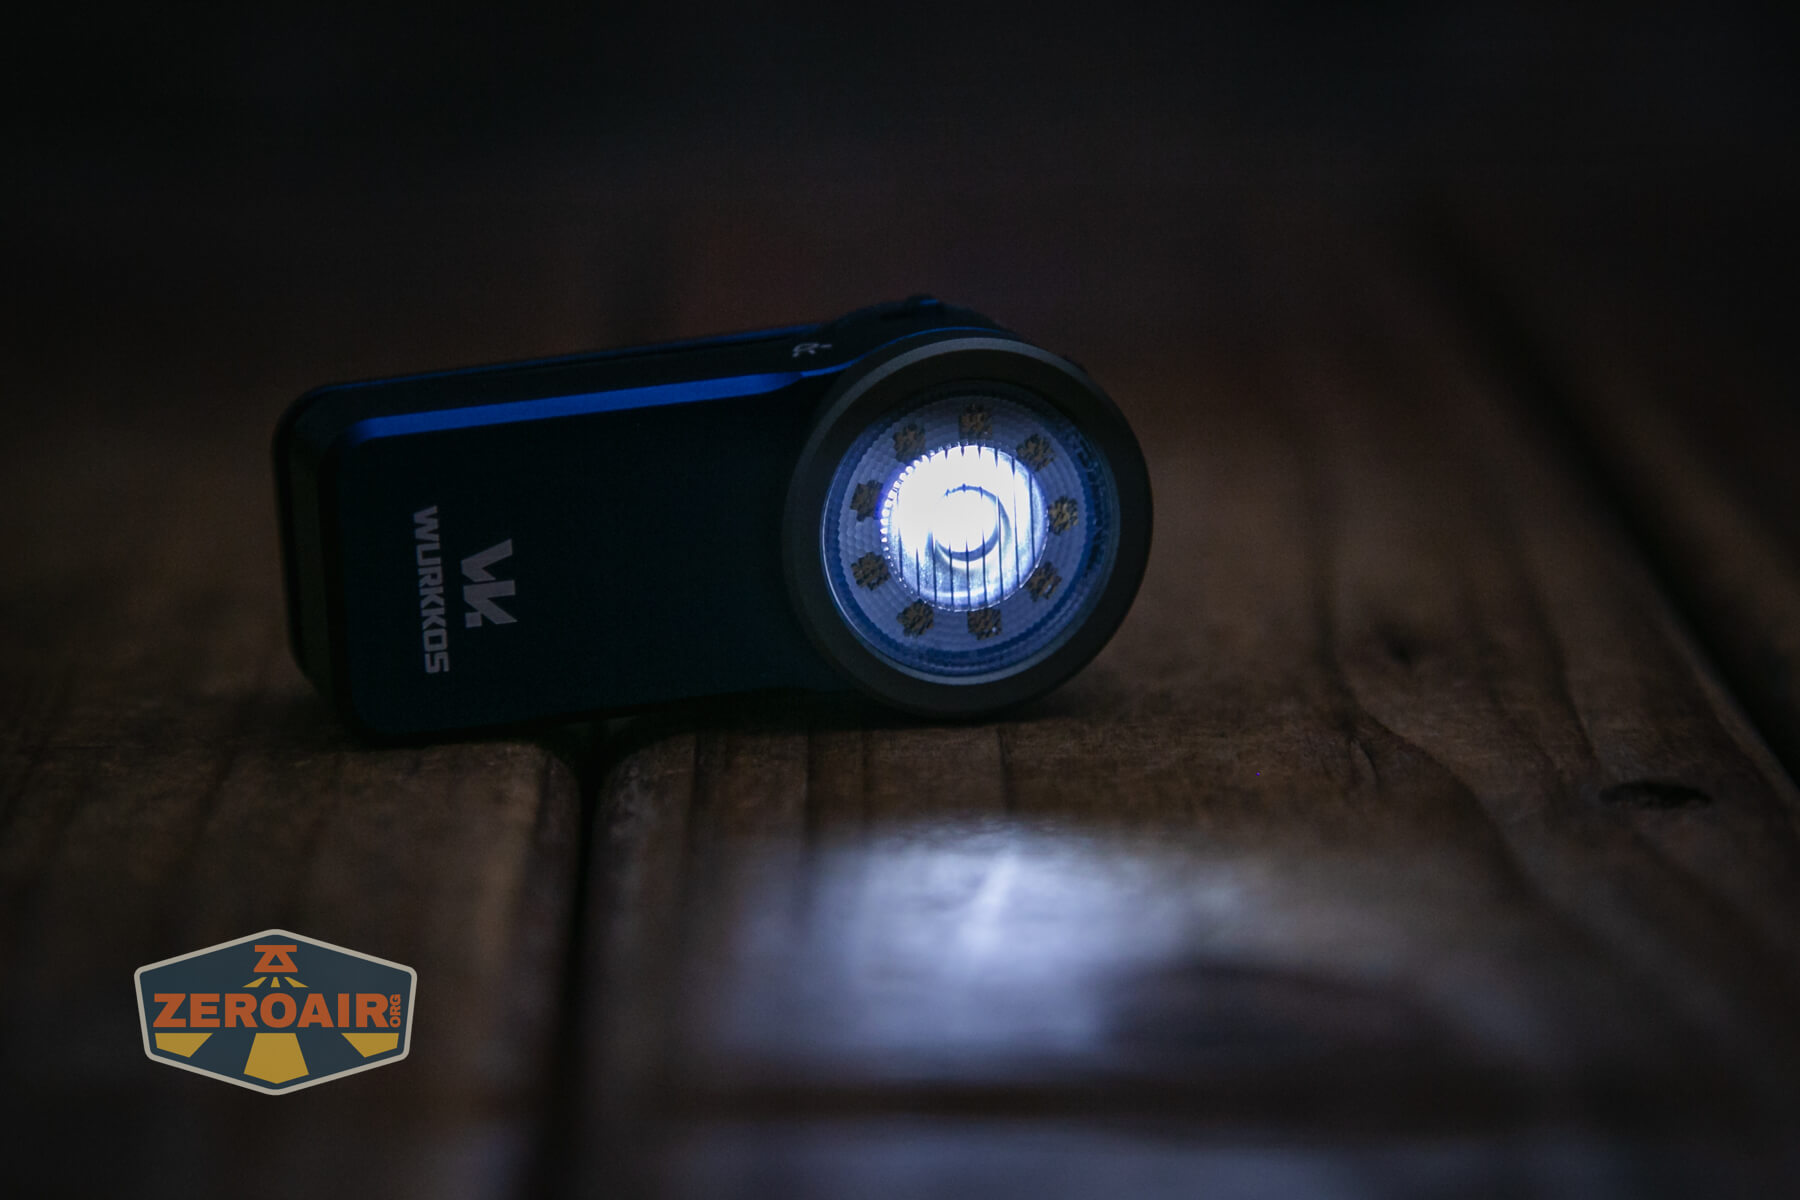
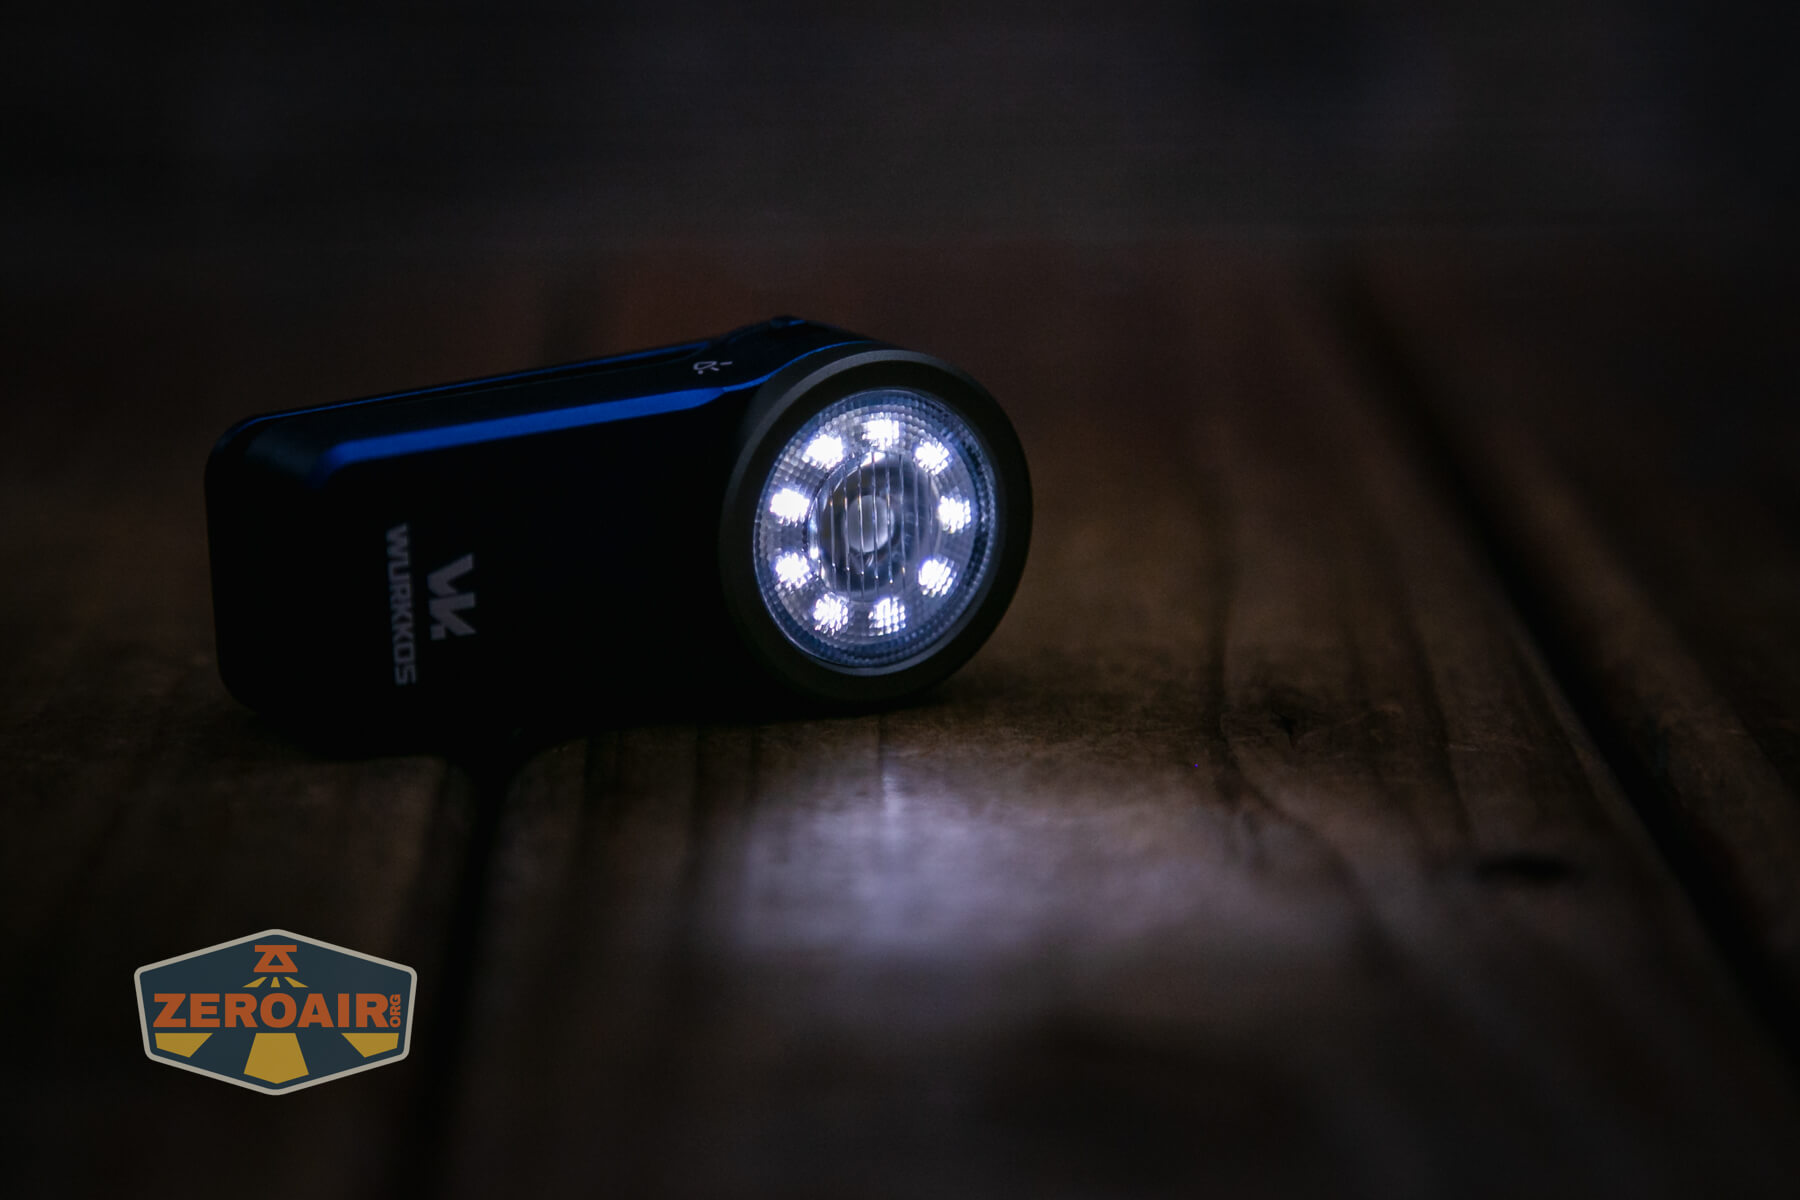
LED and Beam
Wurkkos doesn’t state what emitters are used here. The flood emitters are behind a dimpled TIR and the spot emitter has a more standard TIR for good throw. Below you can see lines across this TIR, too, and yes, that does affect the beam profile. It’s sort of a “bicycle” profile.
LED Color Report (CRI and CCT)
The throw emitter is cool white and low CRI, but I’m happy to report that the flood emitter is both neutral white and high CRI!
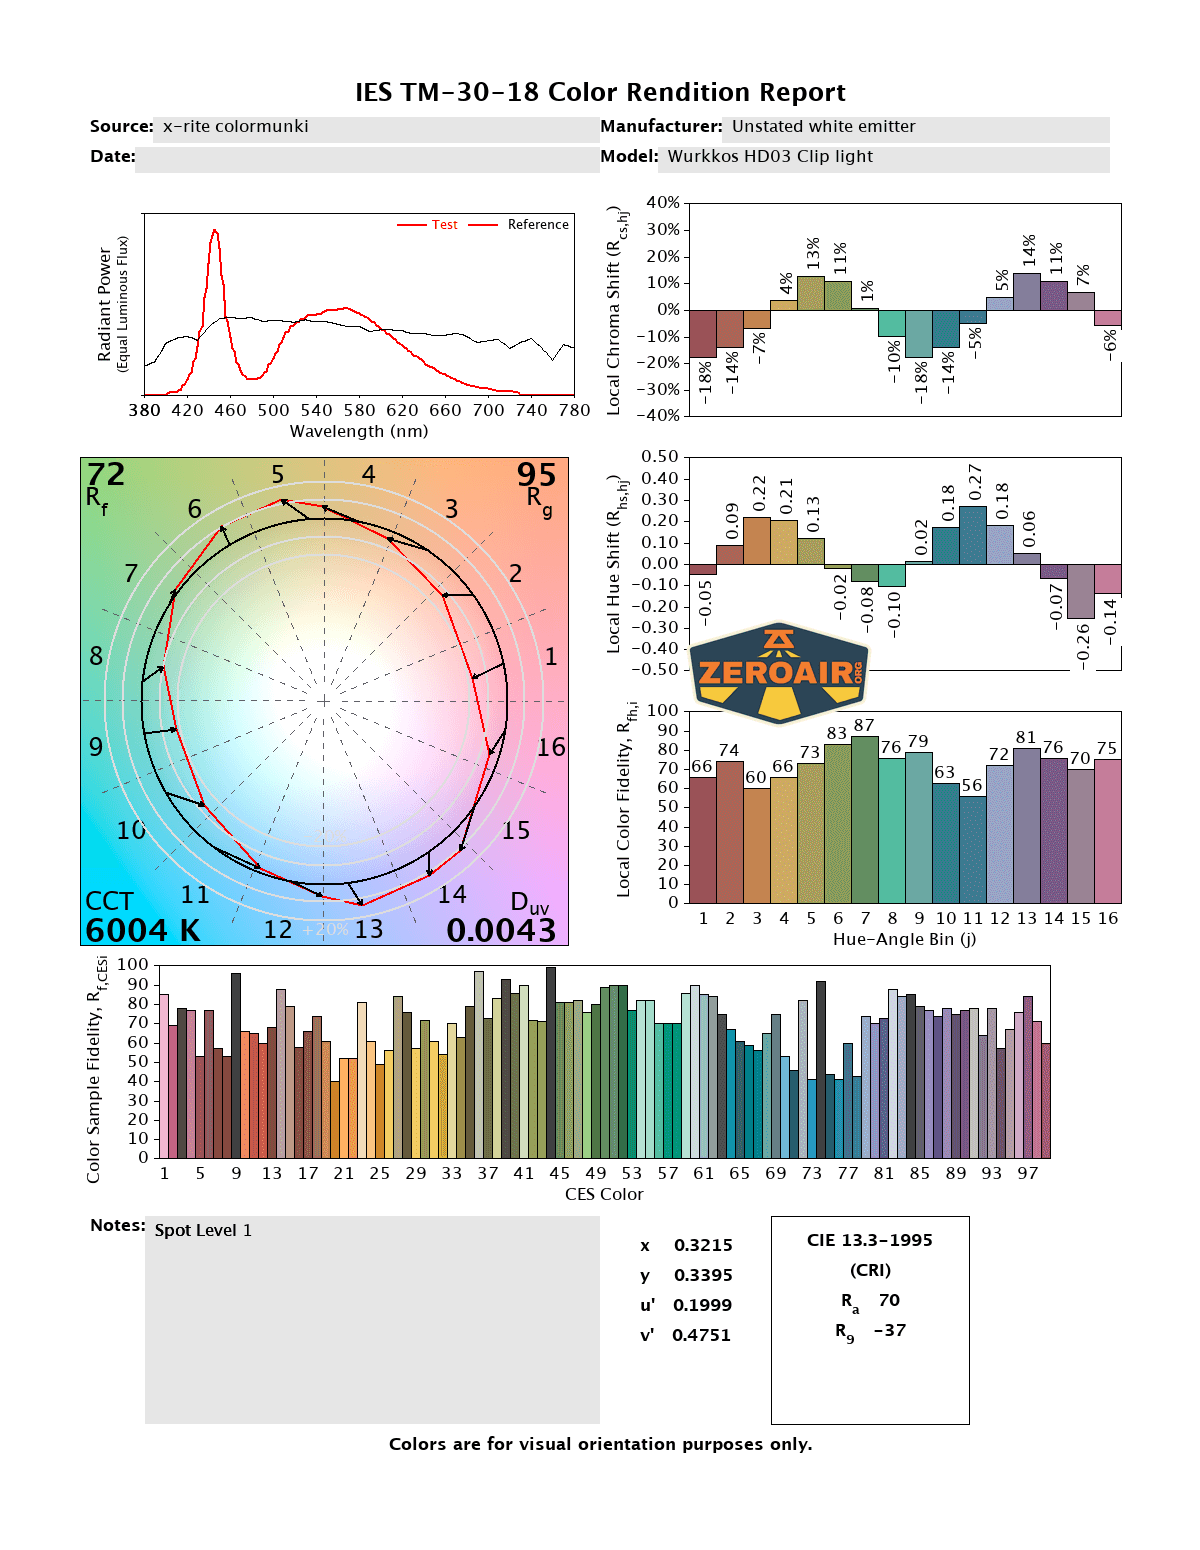

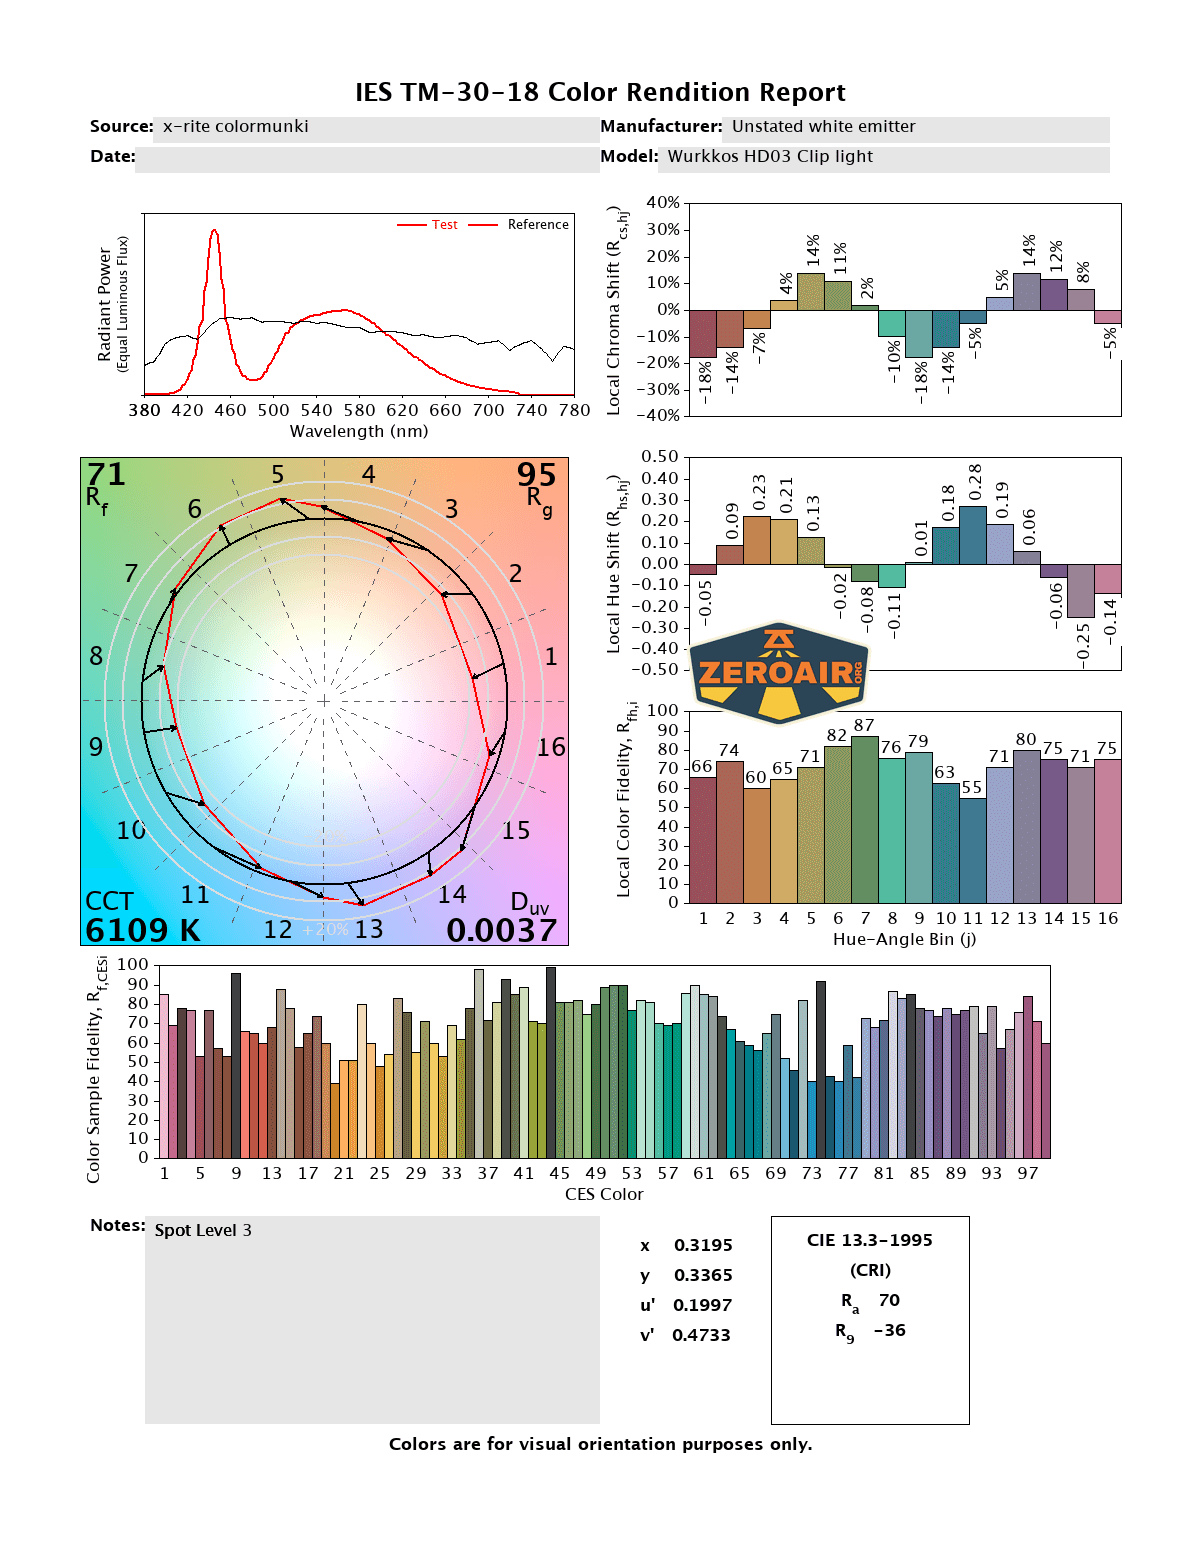

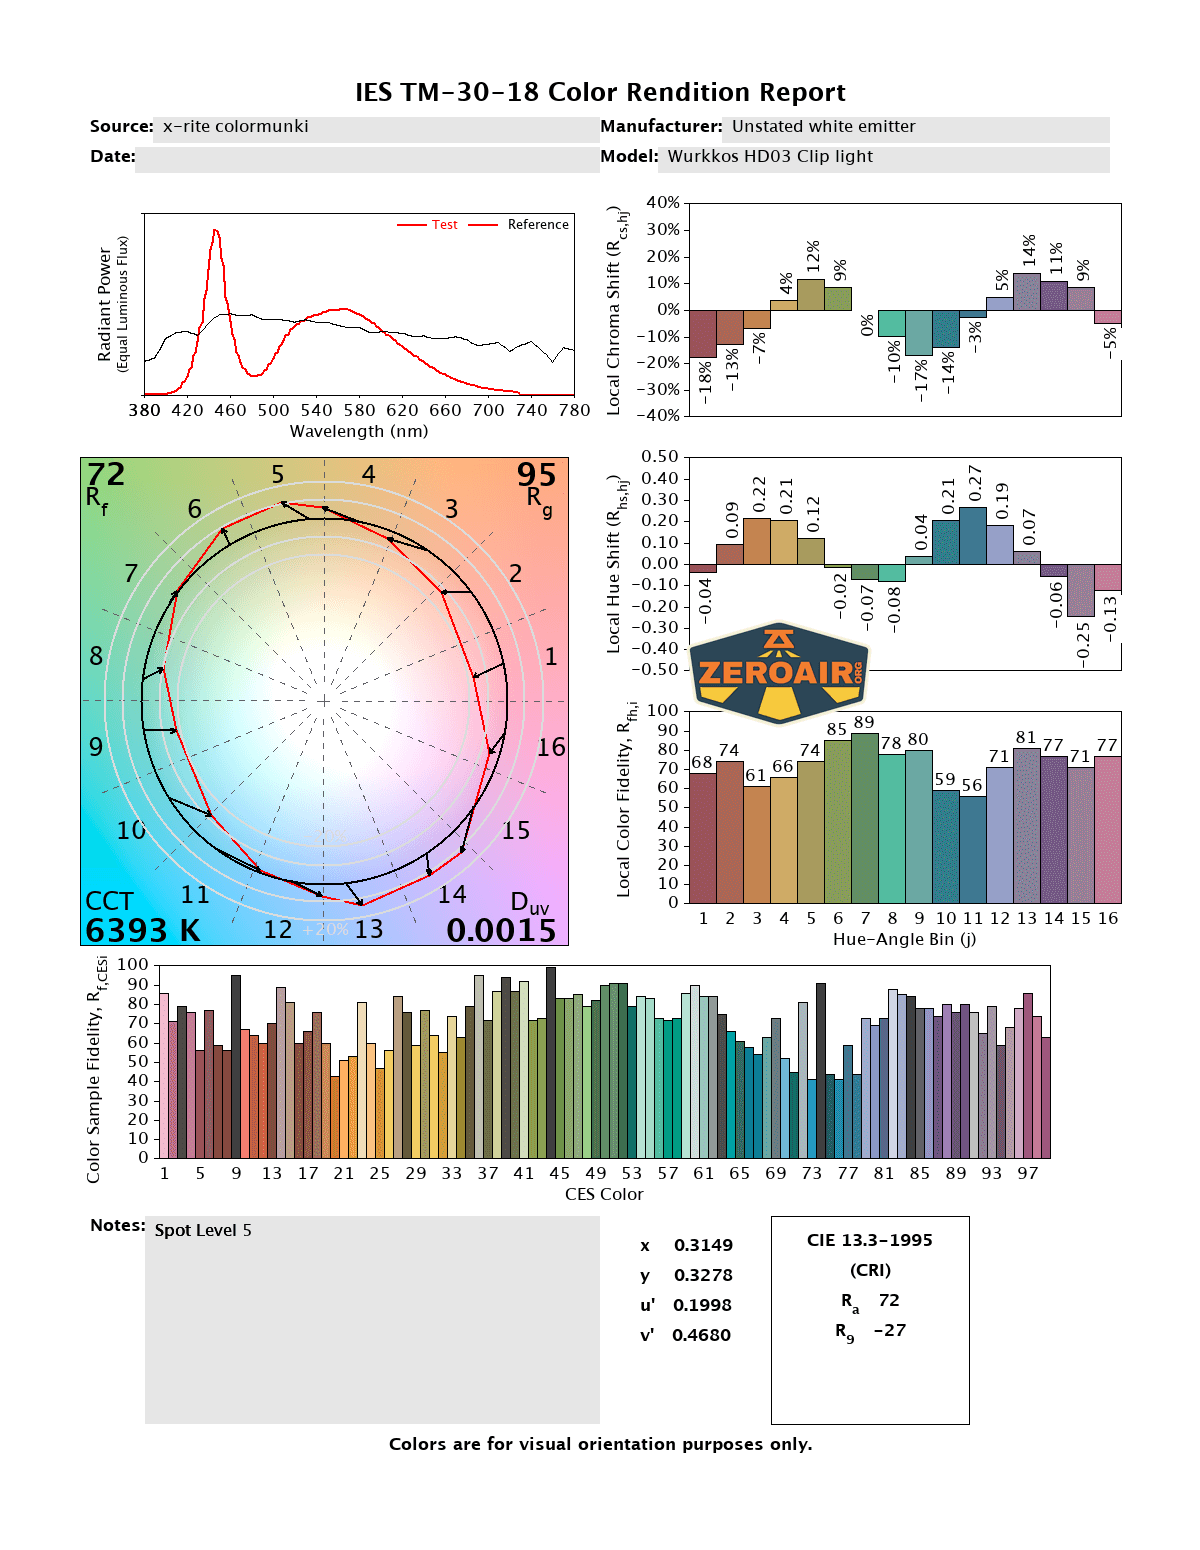


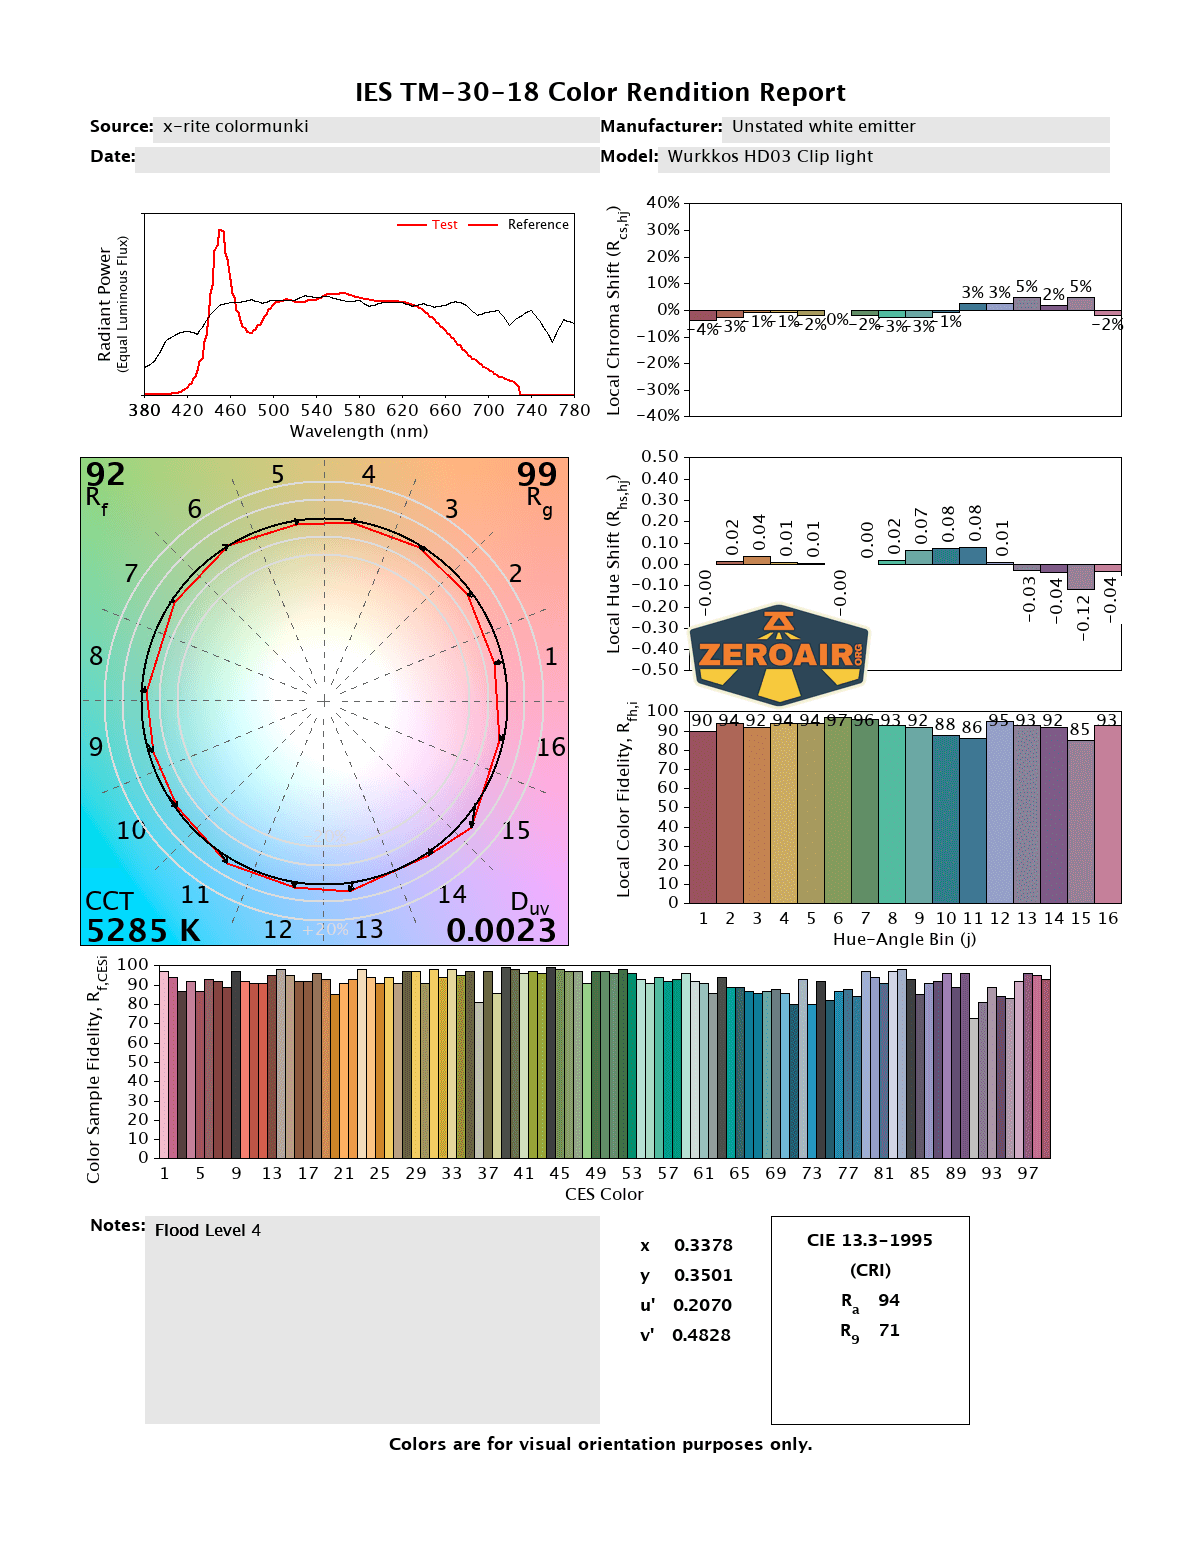

CCT (Correlated Color Temperature) refers to the measurement of the color appearance of light, expressed in Kelvins (K), which indicates whether the light is warm (yellowish) or cool (bluish). A lower CCT (below 3000K) is considered warm light, while a higher CCT (above 5000K) gives cooler, bluish light.
CRI (Color Rendering Index) is a measure of how accurately a light source renders colors in comparison to natural sunlight. Scored on a scale from 0 to 100, higher CRI values indicate that colors appear more true to life and vibrant, similar to how they would look under the sun.
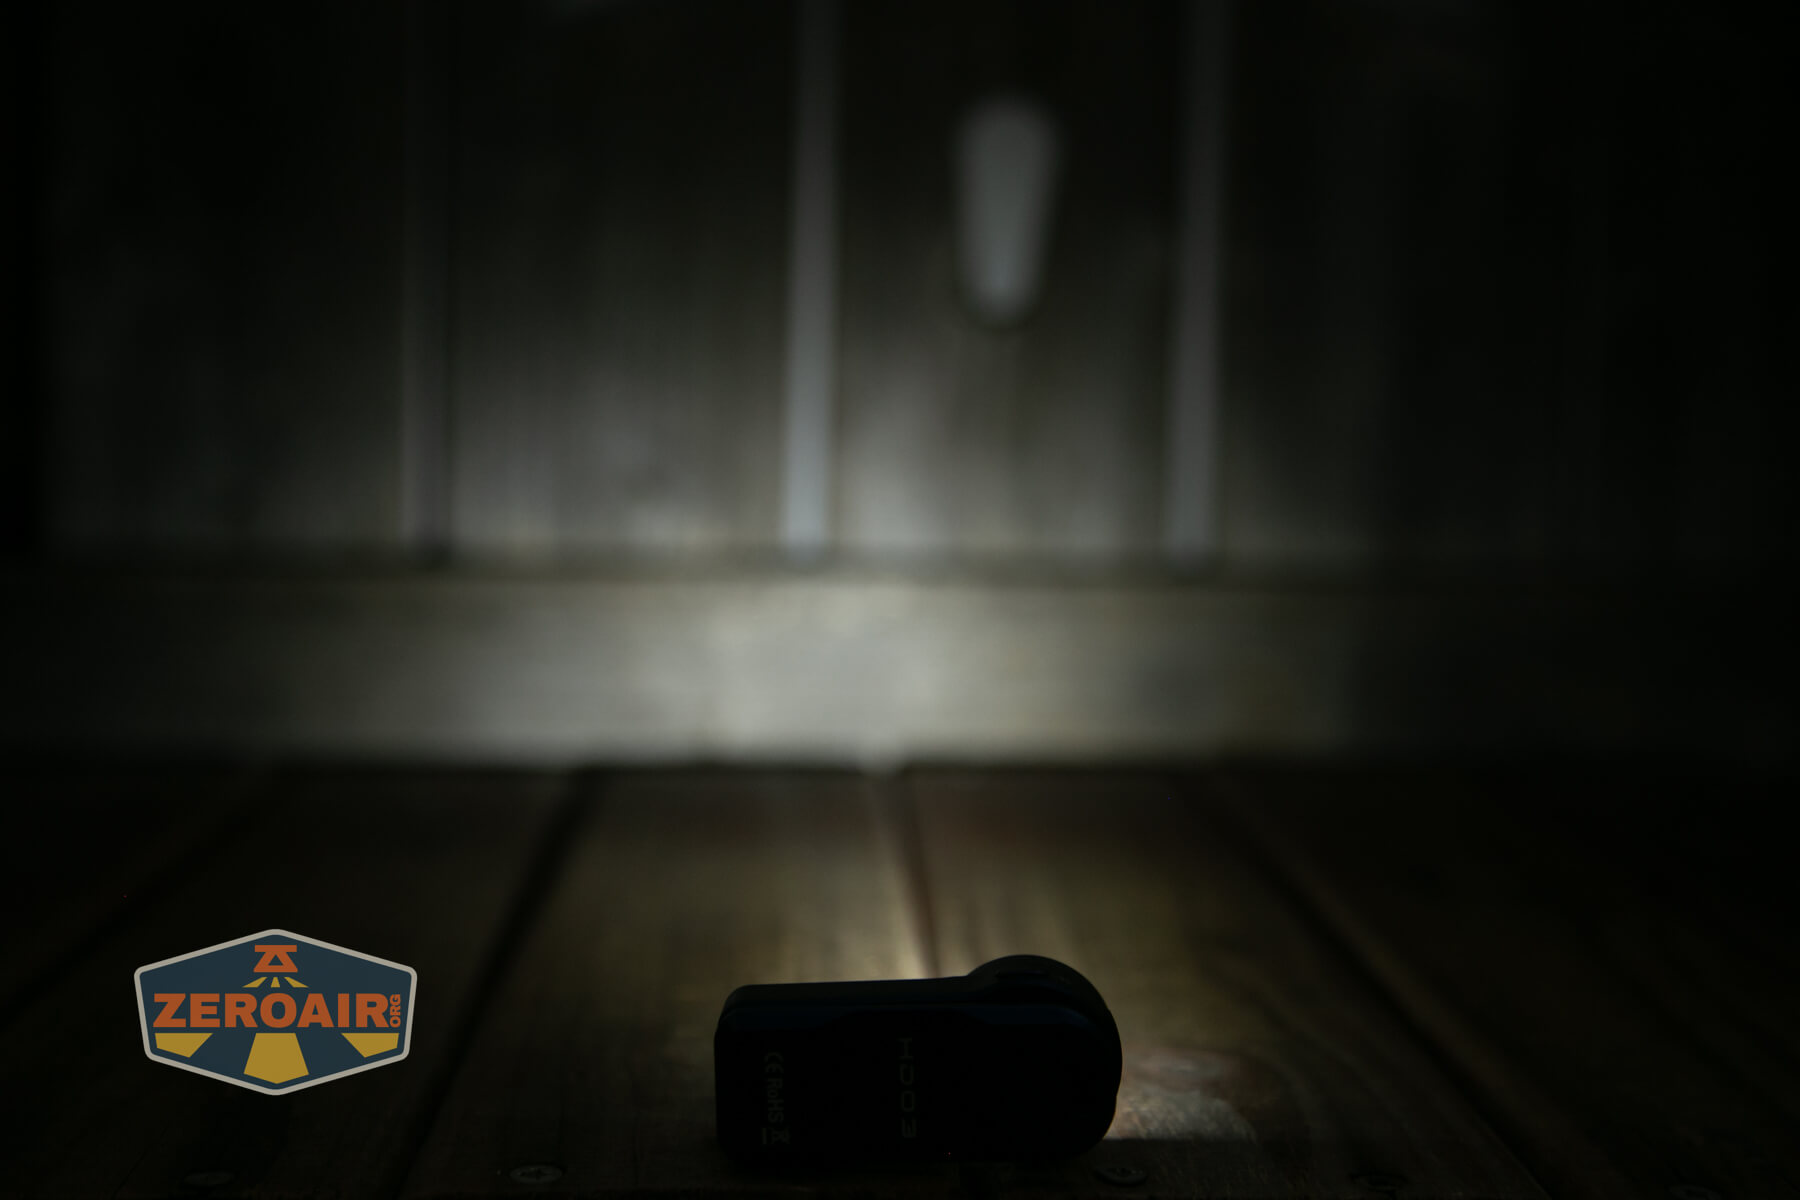
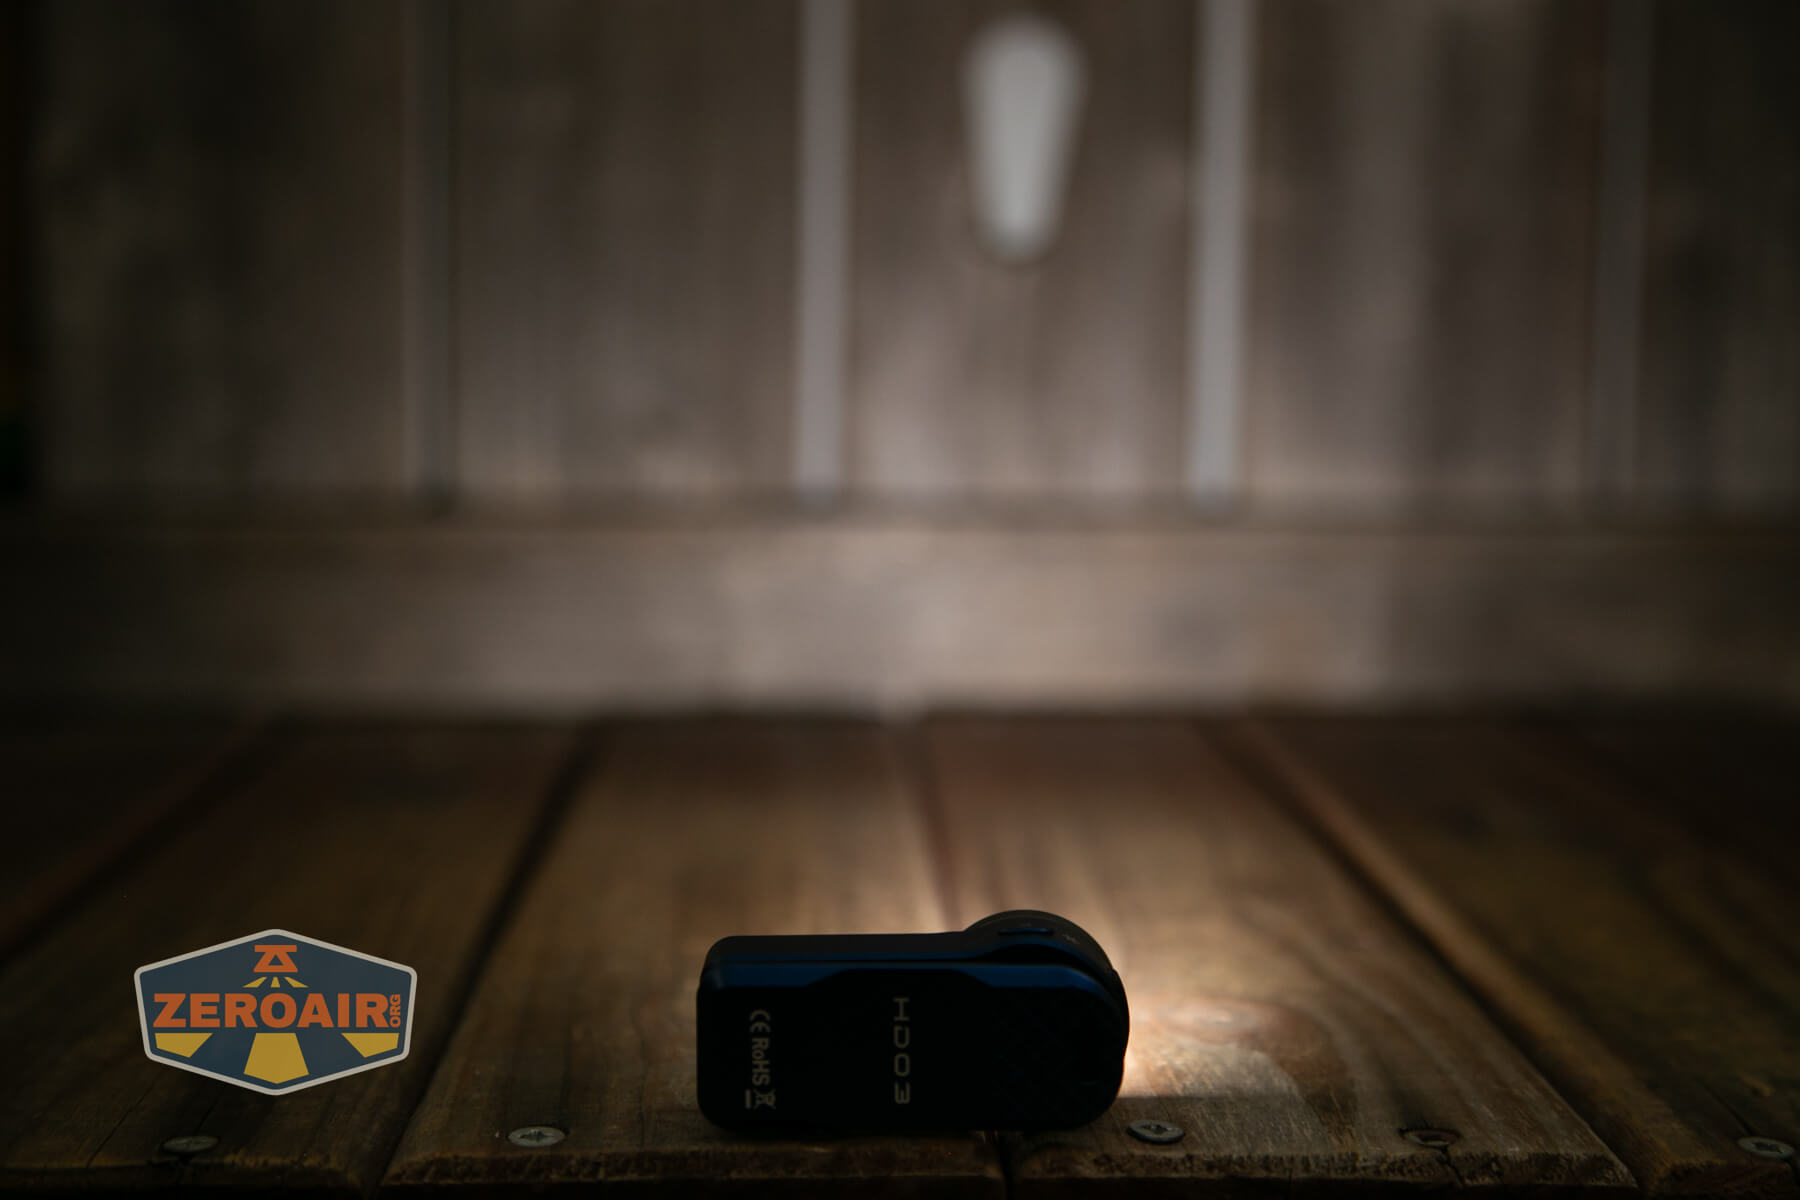
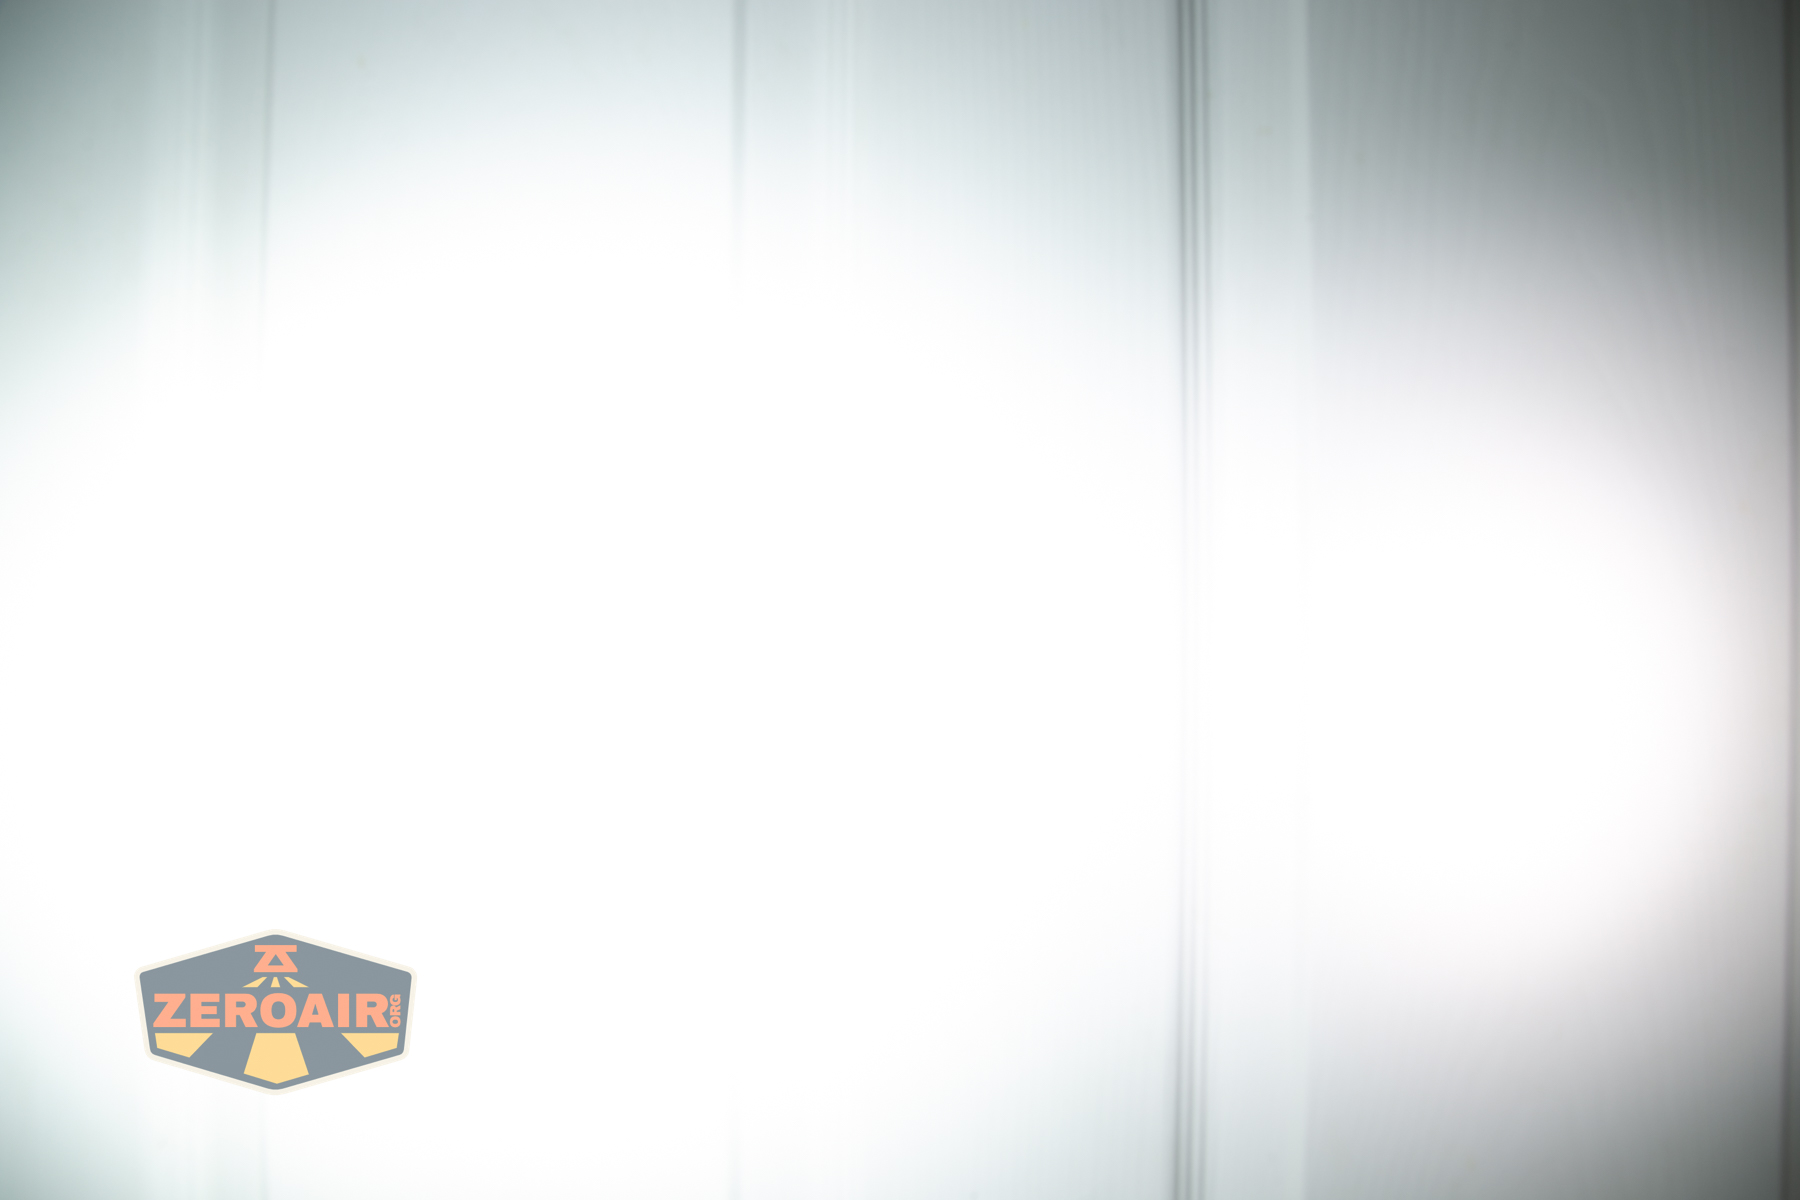
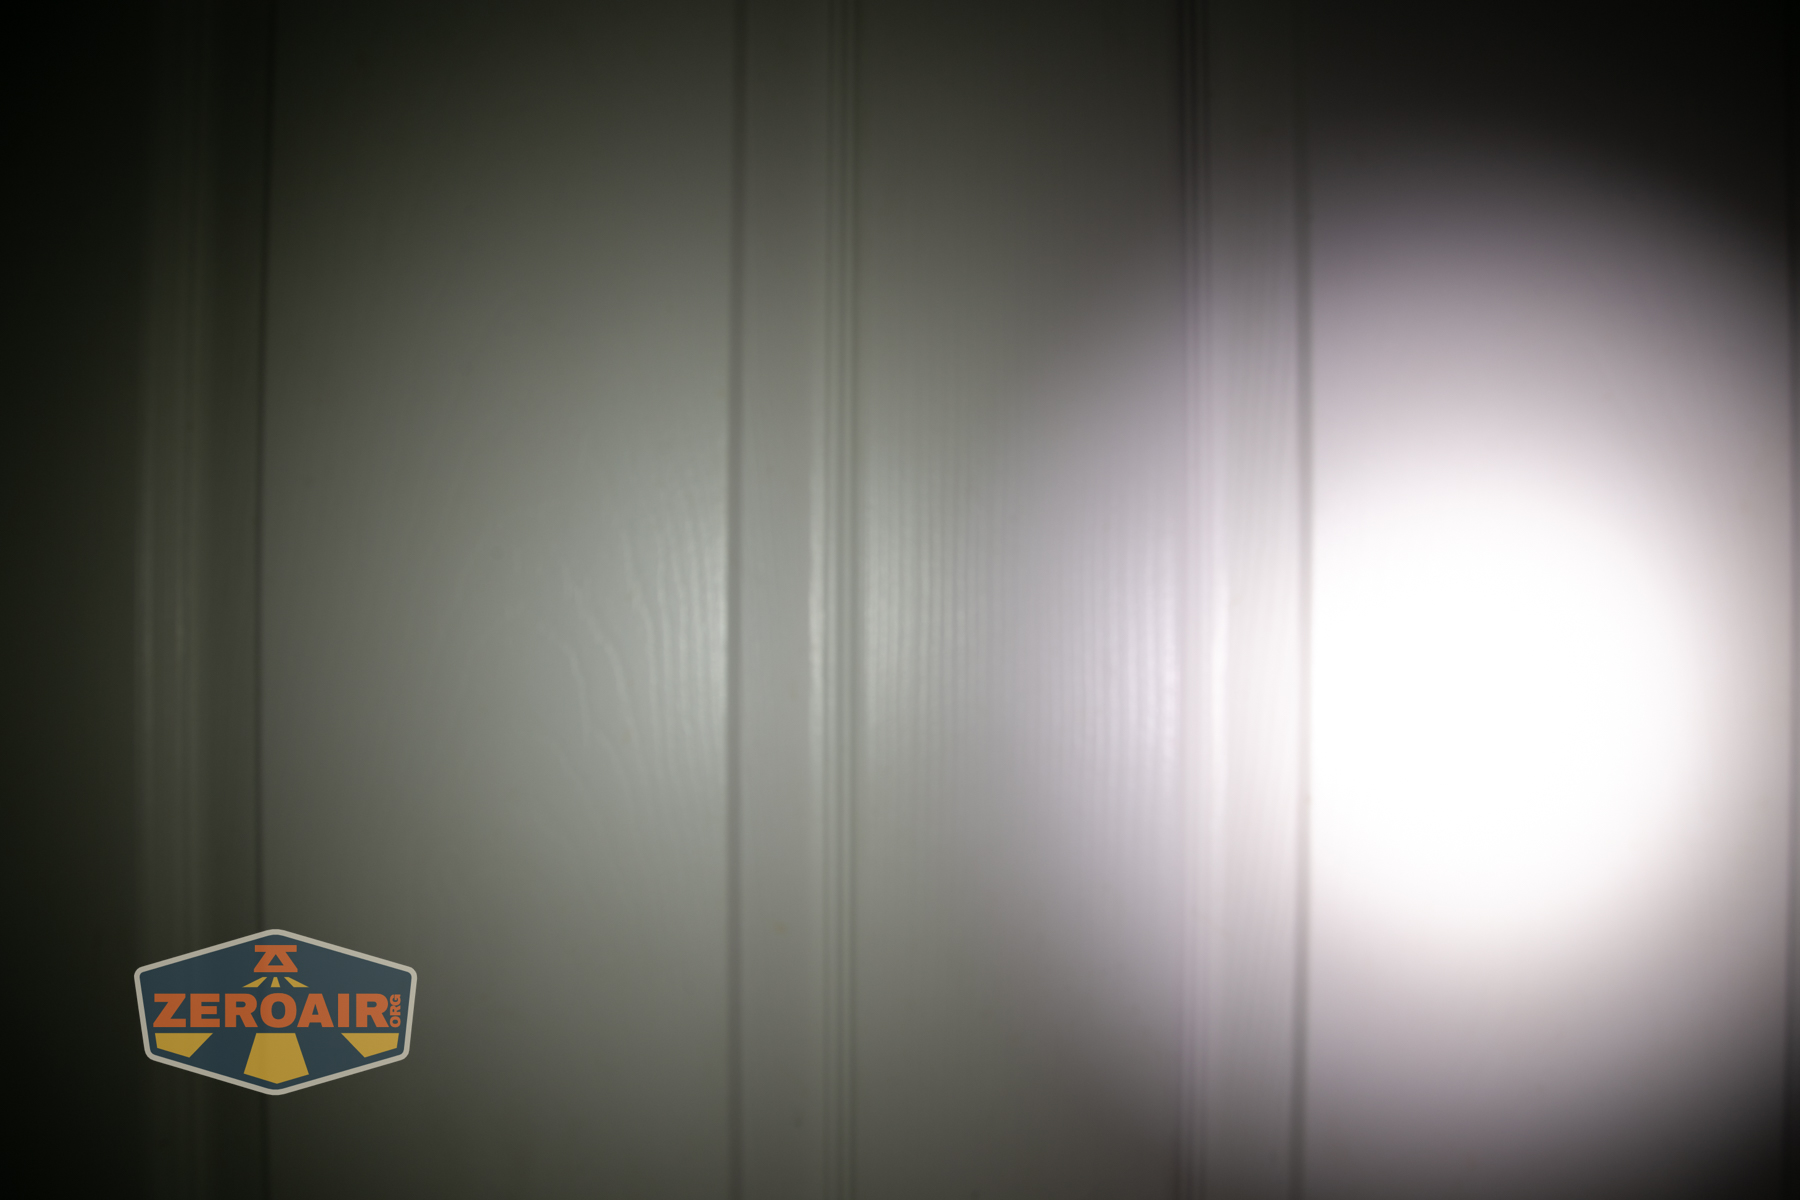
Beamshots
These beamshots always have the following settings: f8, ISO100, 0.3s shutter, and manual 5000K exposure. These photos are taken at floor level, and the beam hits the ceiling around 9 feet away.


Tint vs BLF-348 (KillzoneFlashlights.com 219b version) (affiliate link)
I keep the test flashlight on the left and the BLF-348 reference flashlight on the right. These photos are taken around 18 inches from the door.
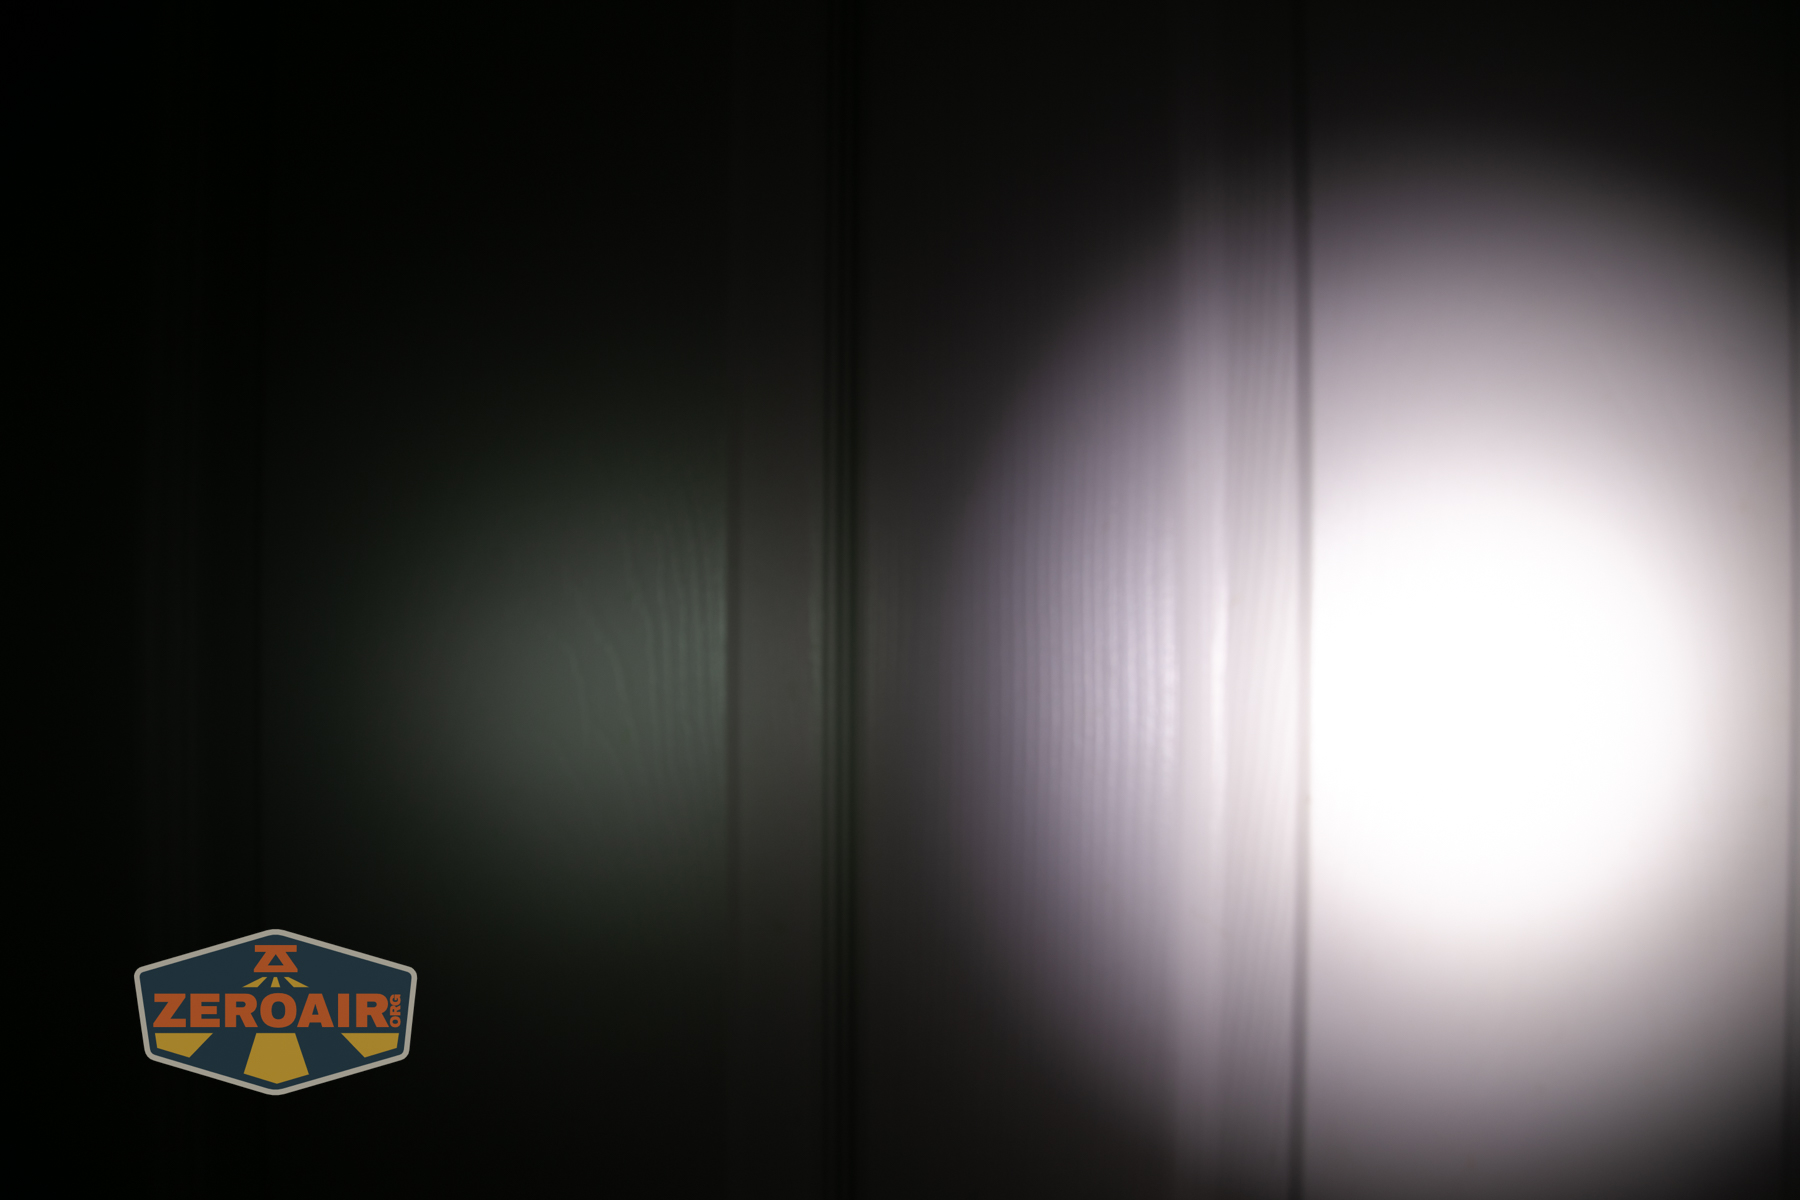
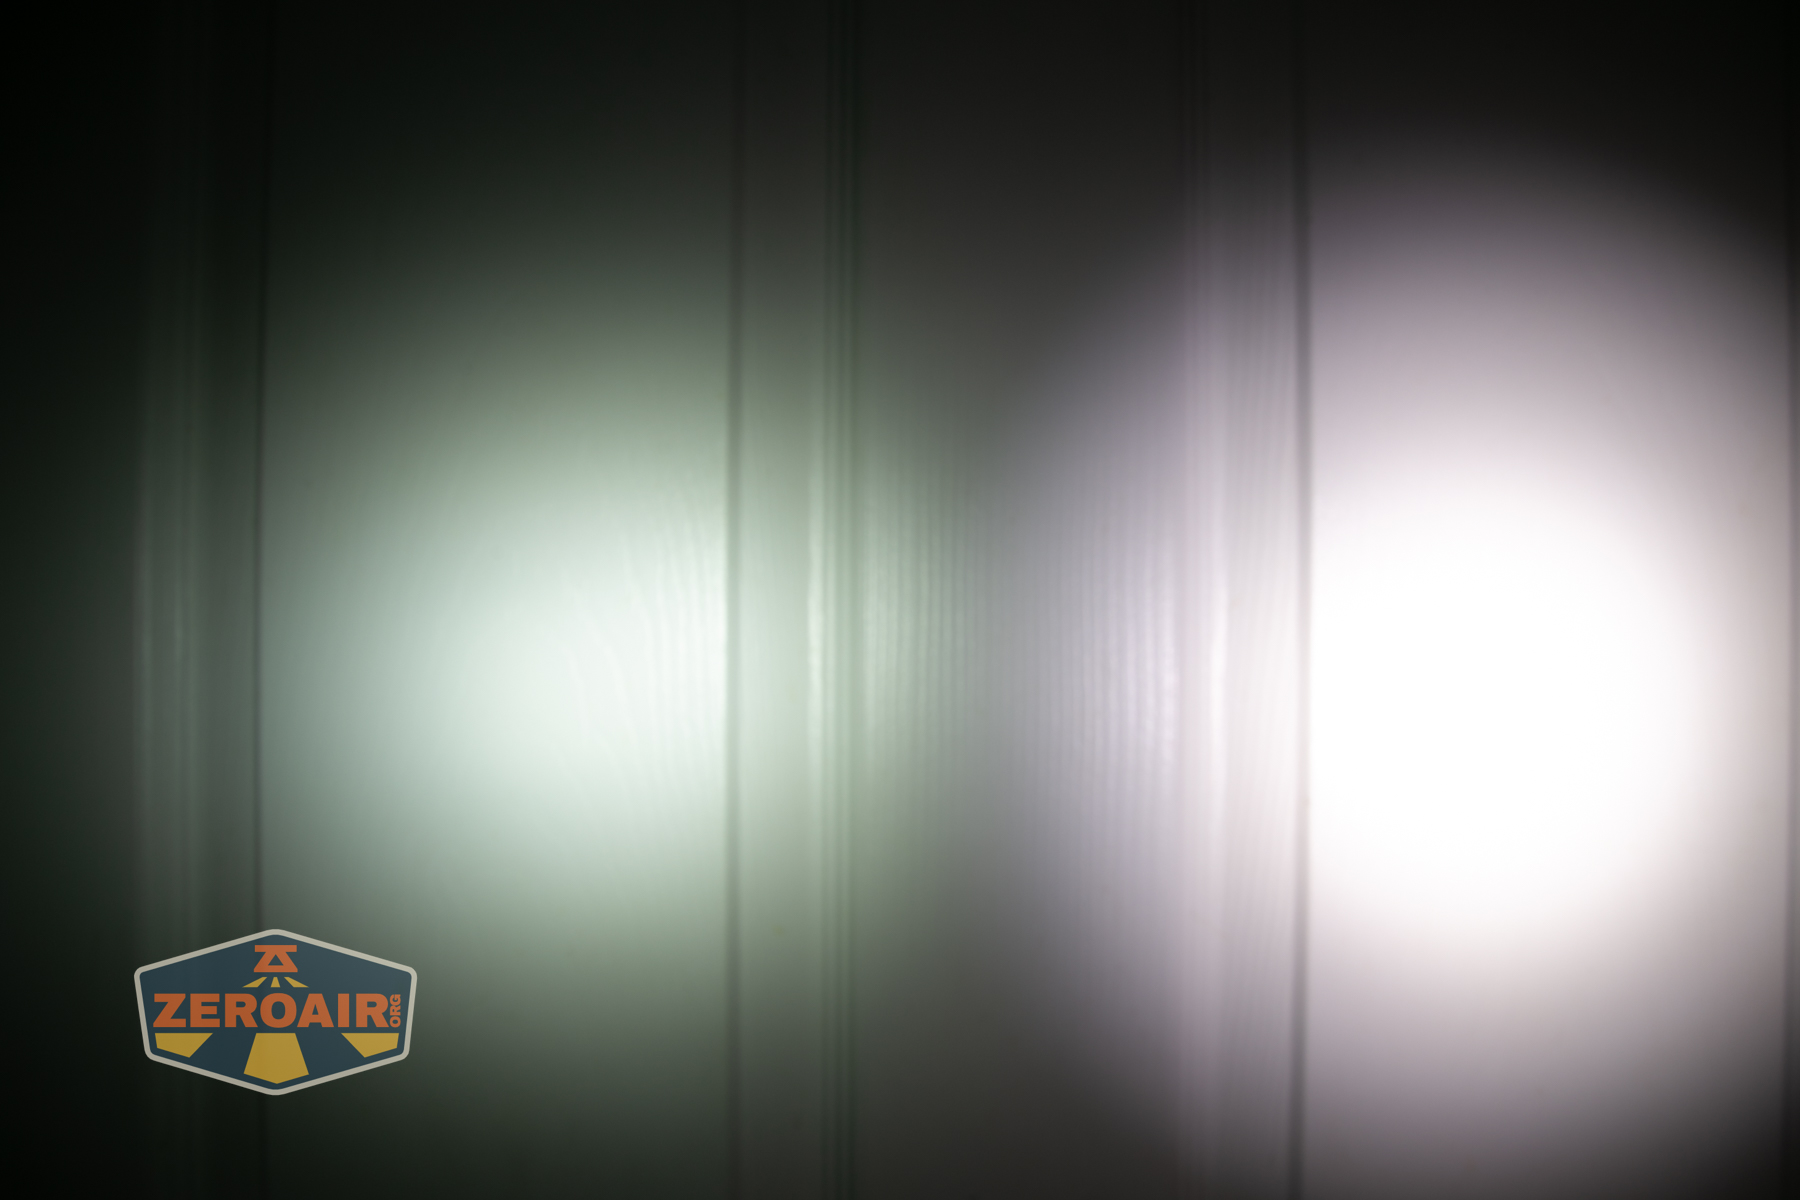
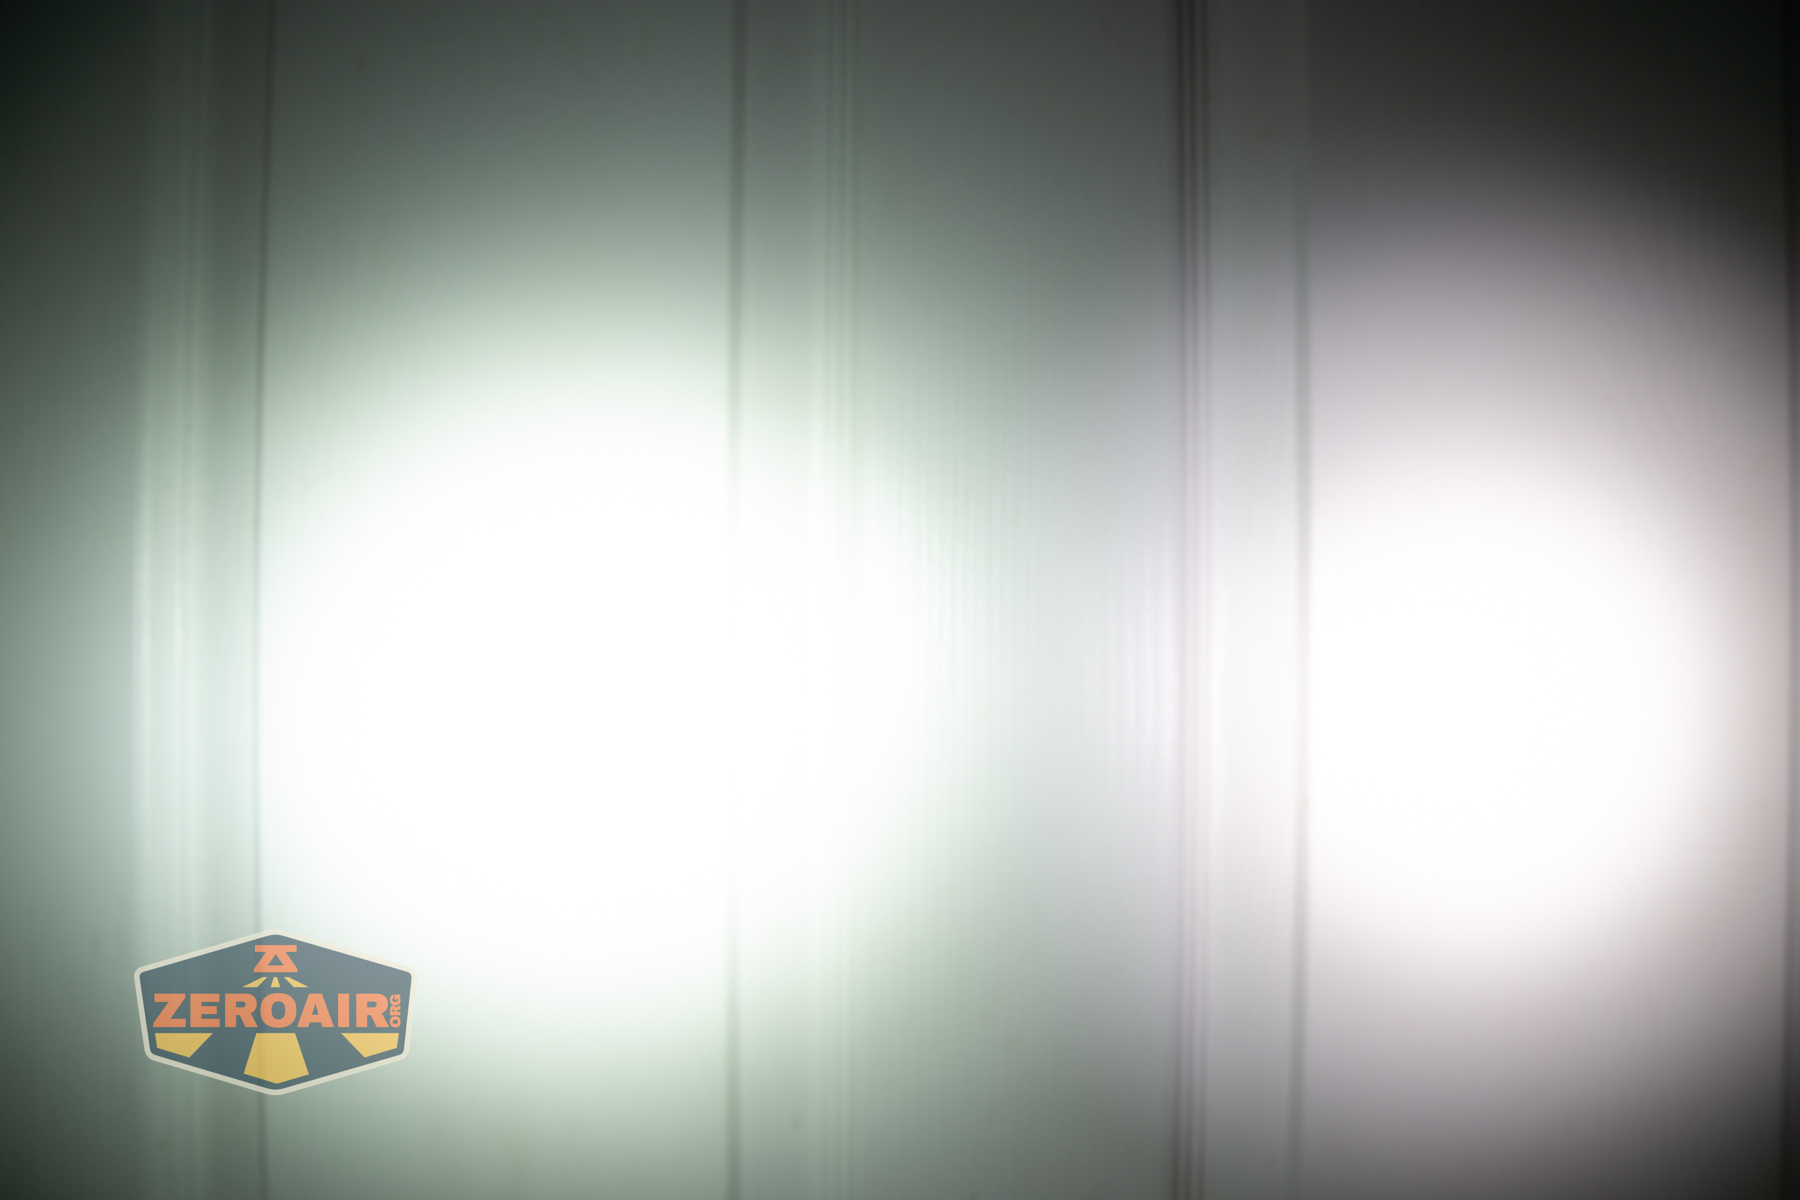

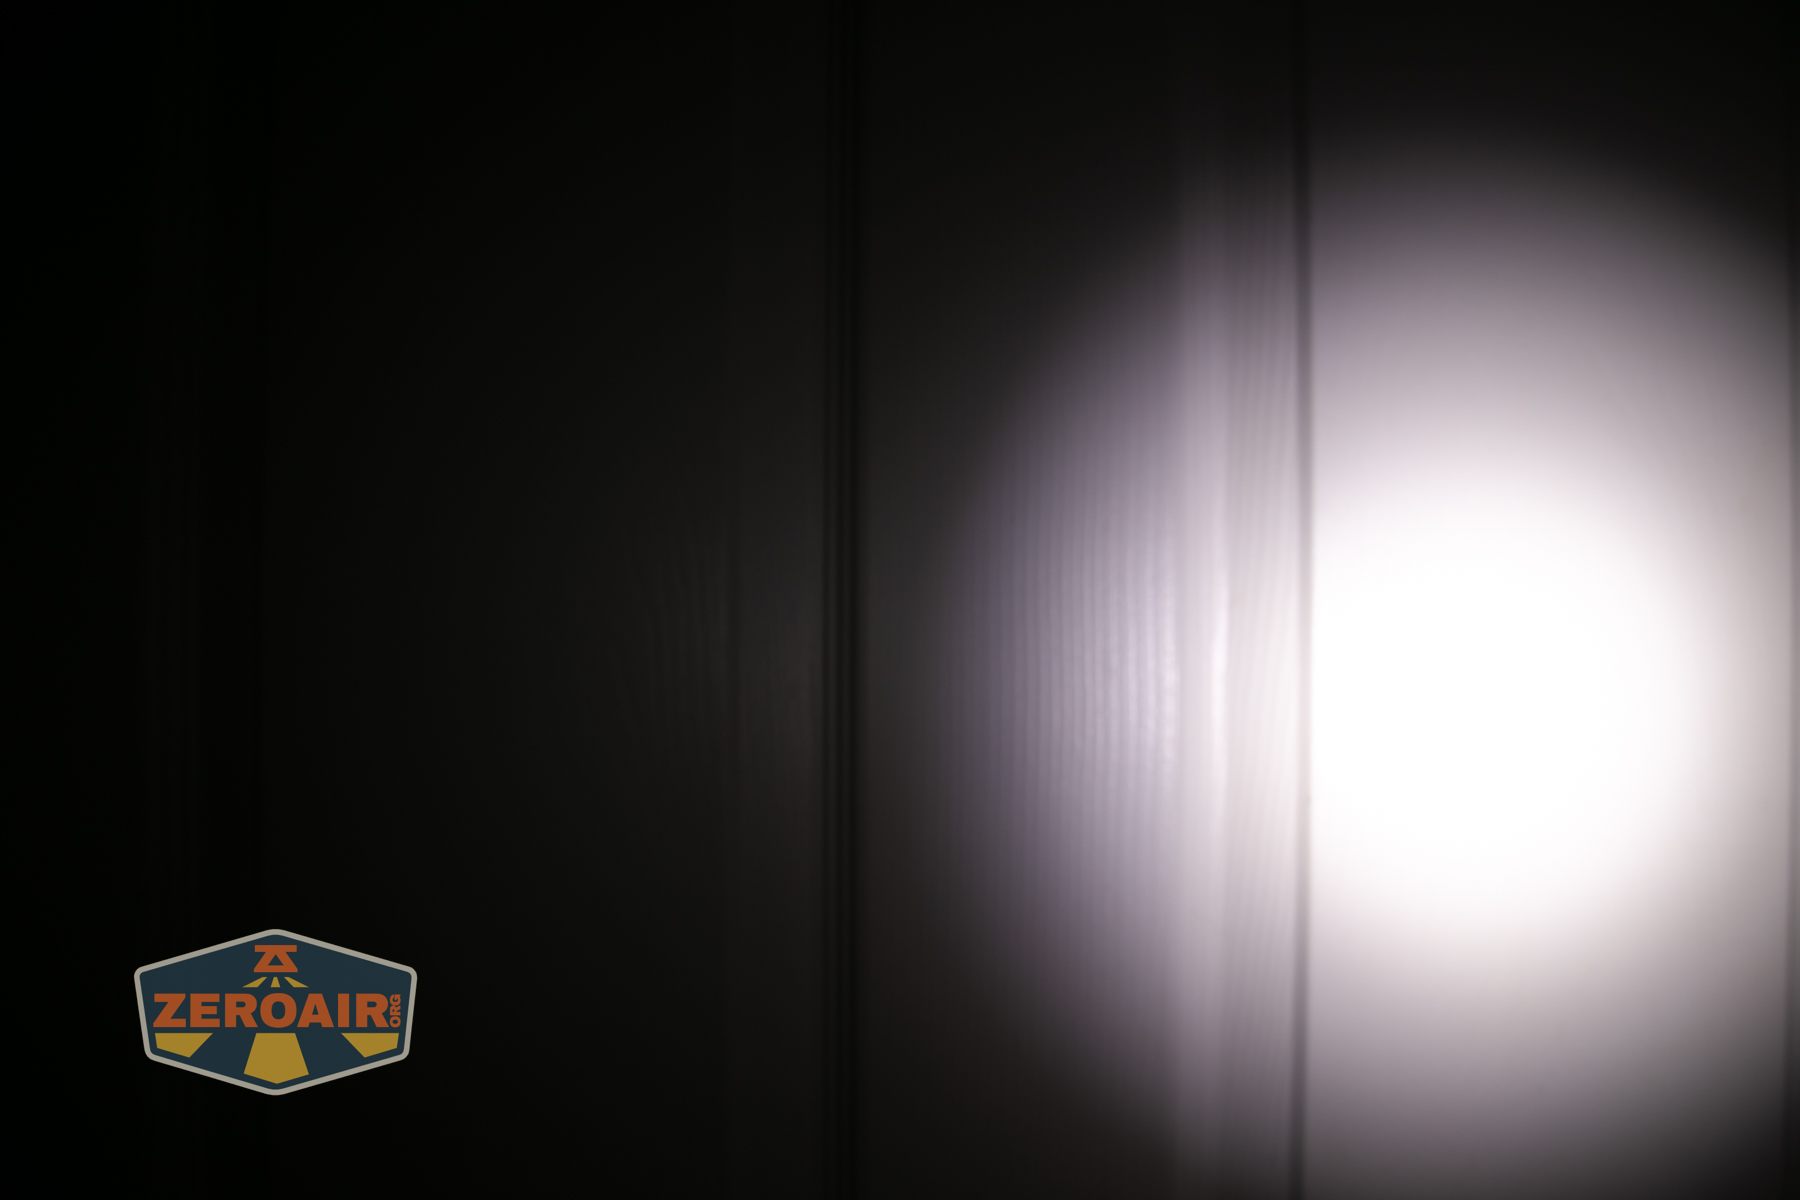
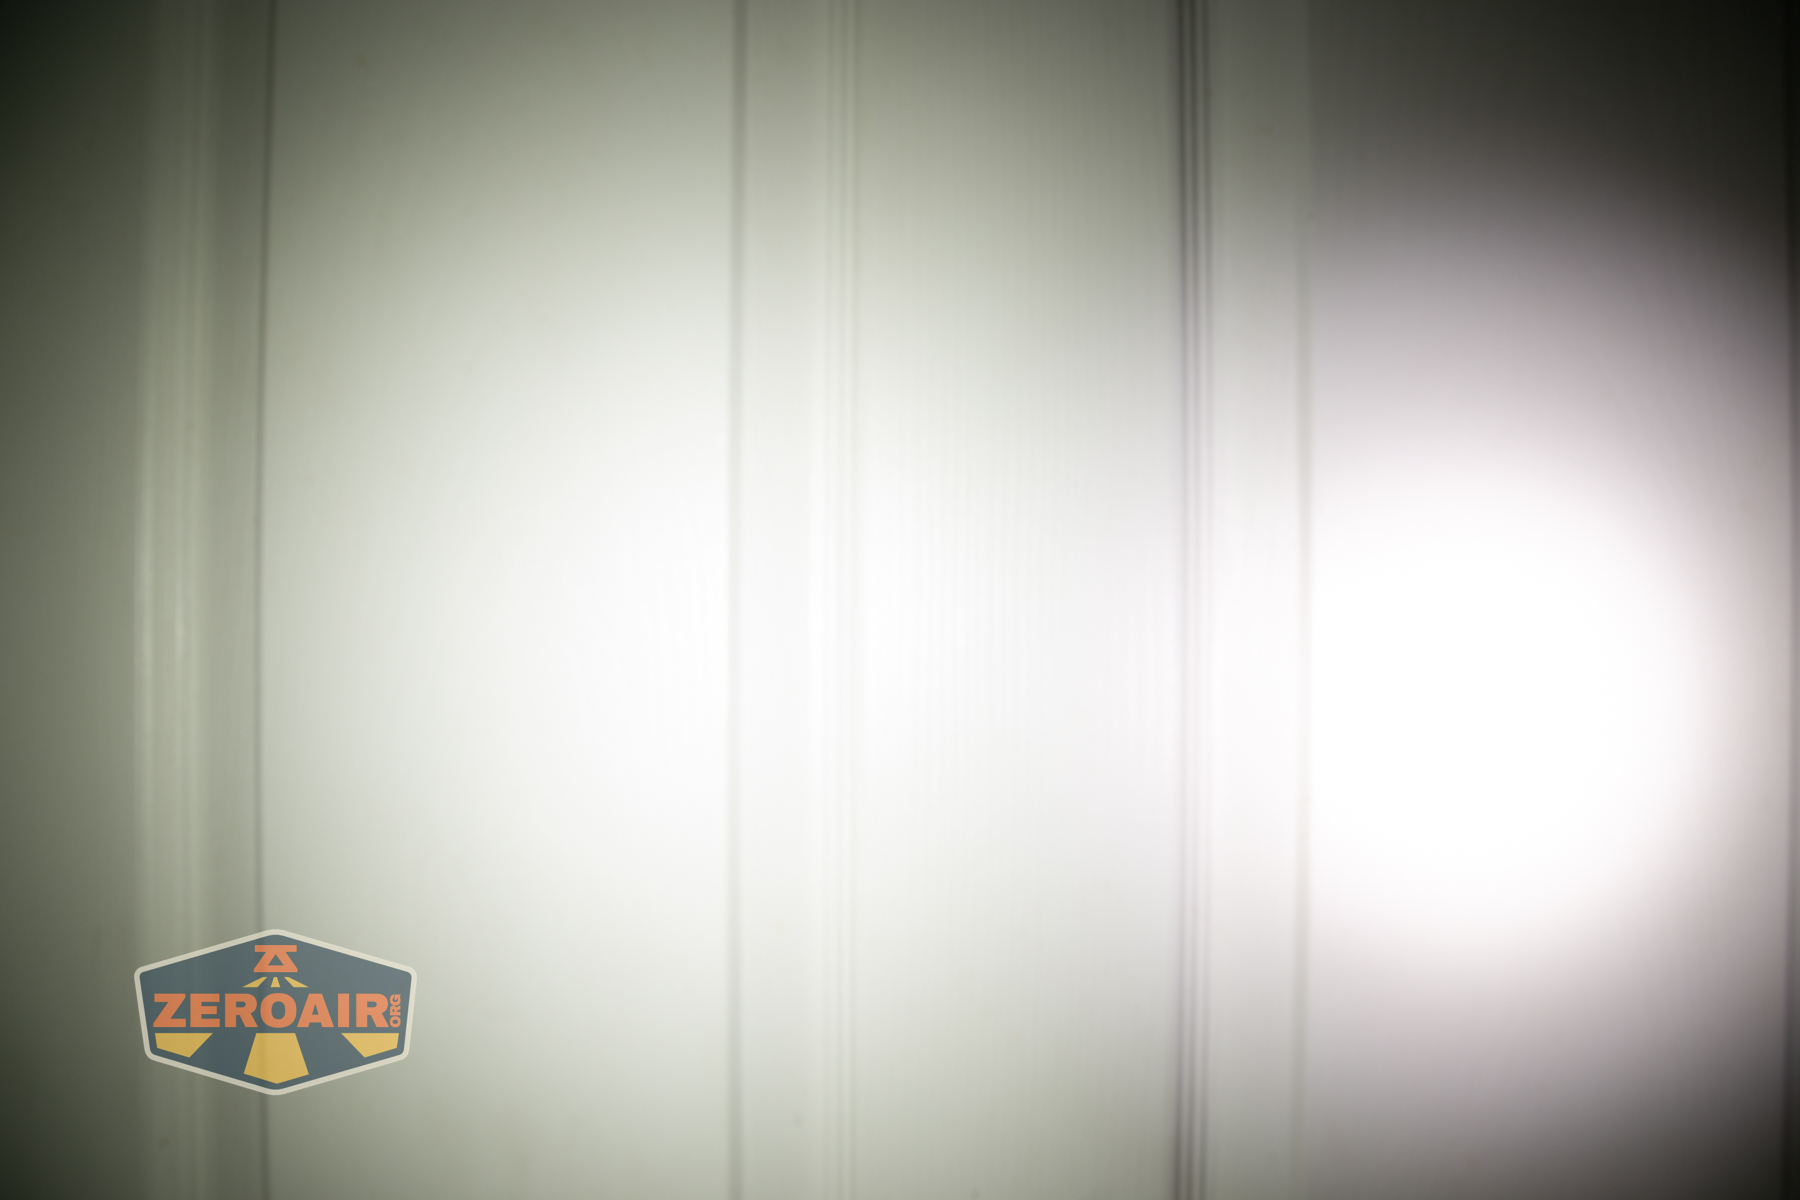
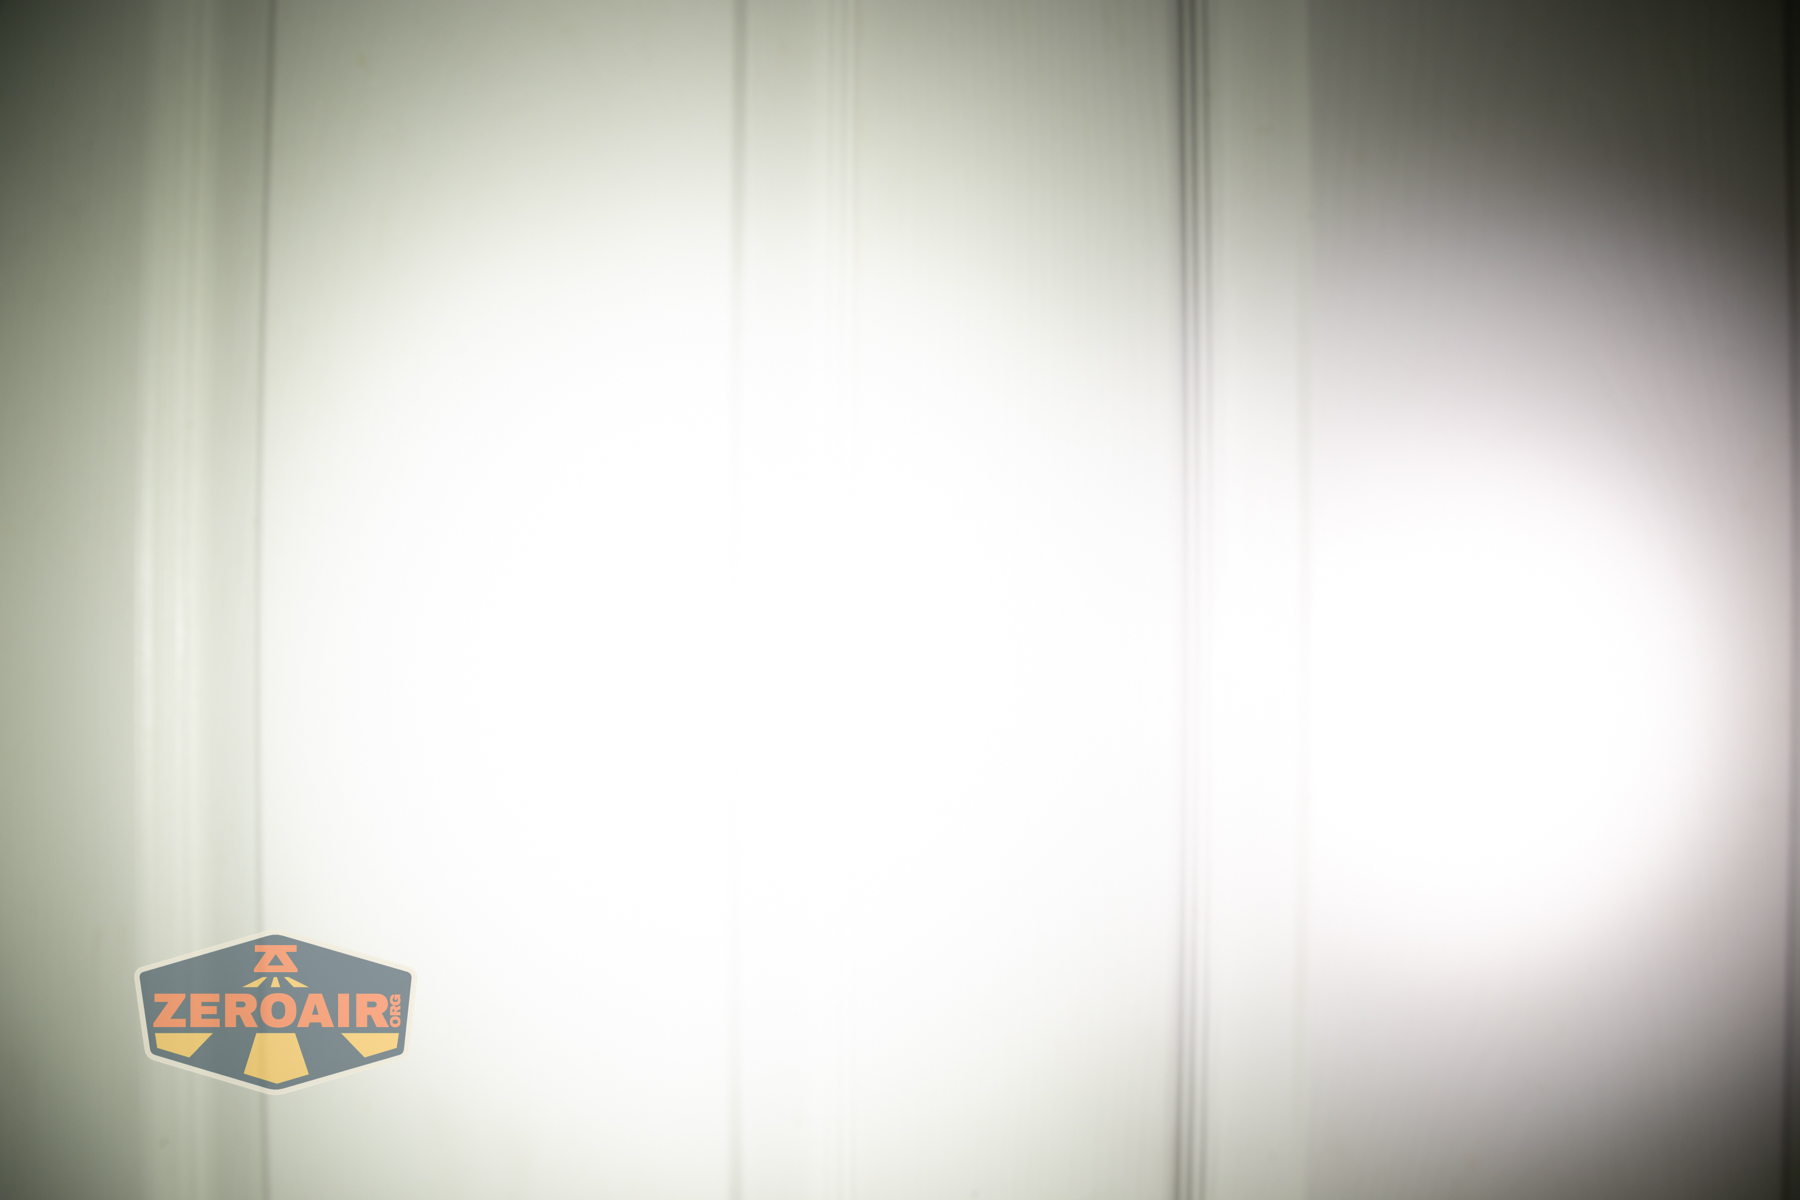
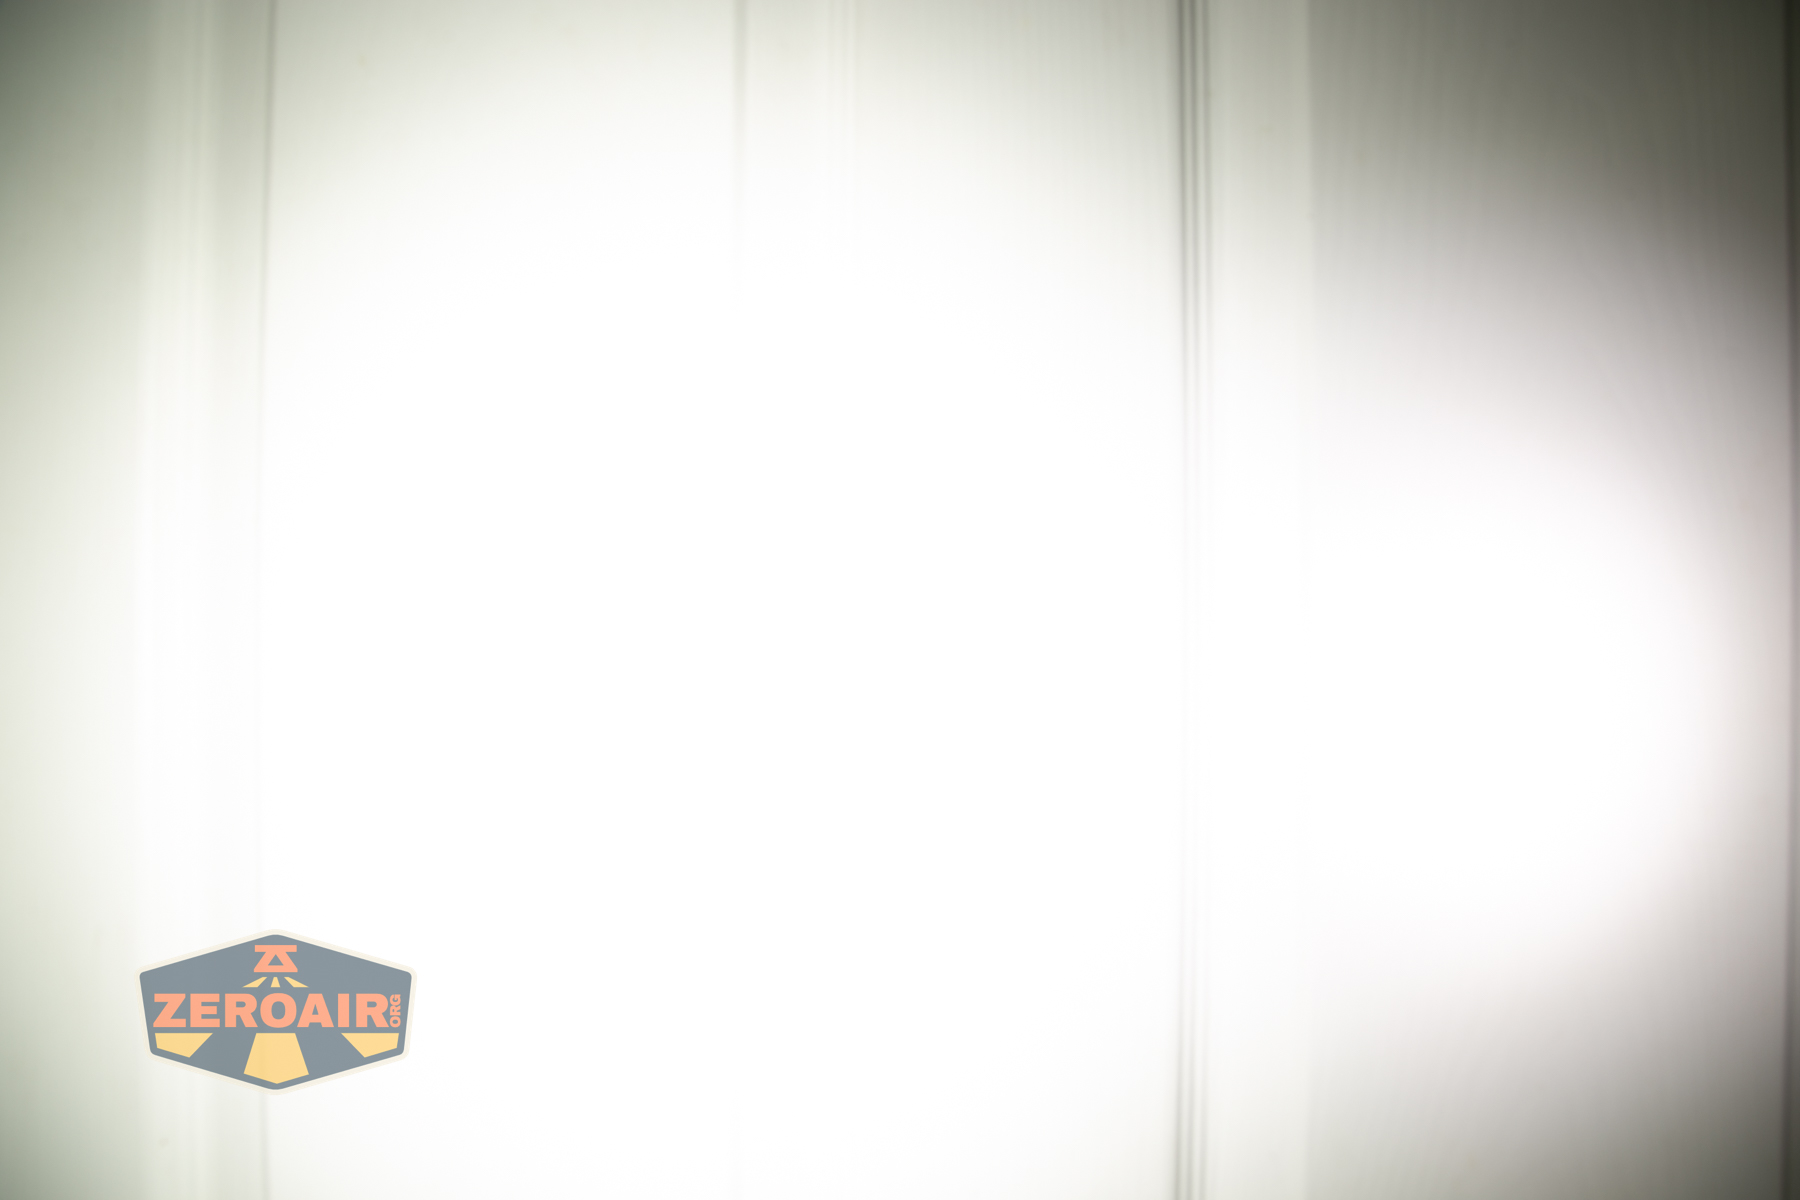
I compare everything to the KillzoneFlashlights.com 219b BLF-348 because it’s inexpensive and has the best tint!
Summary and Conclusion
This light is on sale now for around $18 and that’s a pretty incredible price. I do recommend grabbing one. If nothing else, the RGB options (of which there are many, and many of those are very interesting) would be fun for kids! Charging works great, and I love that the flood emitters are high CRI.
The Big Table
| Wurkkos HD03 clip flashlight | |
|---|---|
| Emitter: | Multiple options |
| Price in USD at publication time: | $17.99 |
| Cell: | Internal |
| Runtime Graphs | |
| LVP? | Probably |
| Switch Type: | E-Switch |
| Quiescent Current (mA): | ? |
| On-Board Charging? | Yes |
| Charge Port Type: | USB-C |
| Charge Graph | |
| Power off Charge Port | Just one mode but flood and throw both offer that one mode. |
| Claimed Lumens (lm) | Throw: 680 Flood: 320 |
| Measured Lumens (at 30s) | Throw: 533 (78.4% of claim)^ Flood: 260 (81.3% of claim)^ |
| Candela per Lumen | Throw: 5.4 Flood: 1.96 |
| Claimed Throw (m) | Throw: 180 Flood: – |
| Candela (Calculated) in cd (at 30s) | Throw: 110lux @ 5.441m = 3256cd Flood: – |
| Throw (Calculated) (m) | Throw: 114.1 (63.4% of claim)^ Flood: – |
| Claimed CCT | Throw: – Flood: – |
| Measured CCT Range (K) | Throw: 6000-6400Kelvin Flood: 5200-5300 Kelvin |
| Item provided for review by: | Wurkkos |
| All my Wurkkos reviews! | |
^ Measurement disclaimer: Testing flashlights is my hobby. I use hobbyist-level equipment for testing, including some I made myself. Try not to get buried in the details of manufacturer specifications versus measurements recorded here; A certain amount of difference (say, 10 or 15%) is perfectly reasonable.
What I like
- Build quality
- Very low cost
- Interesting RGB options (not sure I’ve seen all these mixes before!)
- High CRI flood emitters
- USB-C charging works well
What I don’t like
- Green throw emitter
- Beam profile shaper for throw channel
- E-switch cover gets stuck occasionally
Notes
- This content originally appeared at zeroair.org. Please visit there for the best experience!
- Please use my Amazon.com referral link to help support zeroair.org!
- Please support me on Patreon! I deeply appreciate your support!