Skilhunt H300 V4 TIR Headlamp Review
The Skilhunt H300 v4 TIR headlamp has Skilhunt’s good user interface and also a new emitter specially made for the brand! High CRI and great CCT! Read on!
Official Specs and Features
Here’s a referral link to the Skilhunt H300 v4 TIR headlamp product page.
Versions
This is version four – the Skilhunt H300 v4 TIR headlamp. There are multiple body colors of this V4. There’s also an option to have a TIR (as seen here) or a reflector (the reflector version is named “H300R”). V4 still offers many emitter choices, too. Plenty to choose from!
Price
List price for the Skilhunt H300 v4 TIR headlamp, as seen in this post, is $75.90. It’s available now! Use my referral link to get to the Skilhunt H300 v4 TIR headlamp page.
What’s Included

- Skilhunt H300 v4 TIR headlamp
- Skilhunt 3500mAh 18650
- Charging cable (USB to proprietary magnetic)
- Lanyard
- Headband and headmount
- Spare o-rings
- Rubber magnet replacement
- Pocket clip
- Manual
Package and Manual


Build Quality and Disassembly
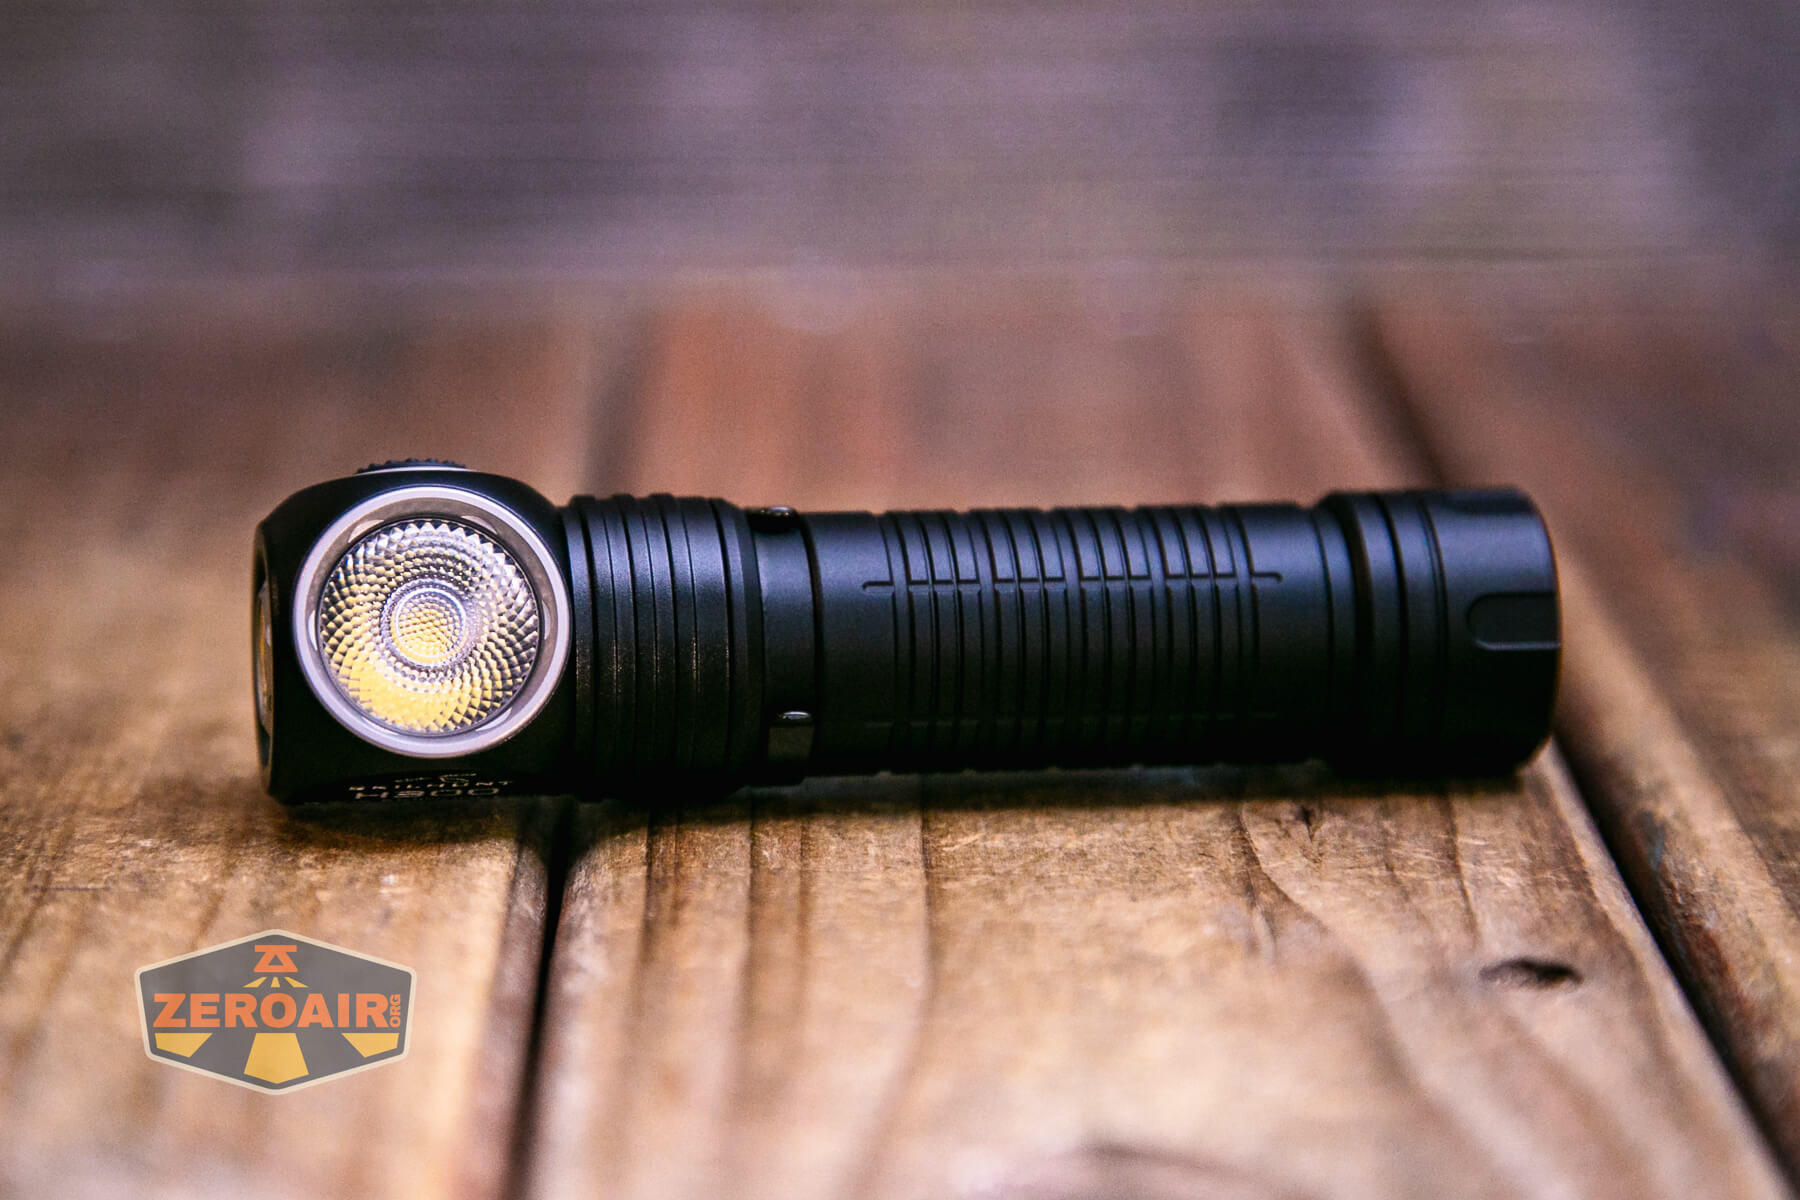
The Skilhunt H300 v4 TIR headlamp is identical in build (and build quality) to v3. I tested a V3 with a different emitter a while back. As far as the build goes, this one isn’t really different. The big story here is that this one uses Skilhunt’s own emitter! And you can see the testing of that toward the end of this post.


The tailcap is easy to remove and reveals fairly short and anodized threads.

The tailcap has a beefy tailcap spring and also a magnet. The spring is removable, as is the magnet. Skilhunt includes a rubber “magnet delete” for replacing that magnet. It’s a nice touch that probably 1% of users will actually use.
Size and Comps
Length 104.7mm / 4.12 inch
Head diameter 25.2mm / 0.99 inch
Body diameter 21.6mm/0.85 inch
Weight: 54g / 1.90 oz (without battery)


Here’s the light in hand.


Here’s the test light with the venerable Convoy S2+. The version below is a custom laser-engraved Convoy S2+ host by GadgetConnections.com. I did a full post on an engraved orange host right here! Or go straight to GadgetConnections.com to buy your Convoy S2+ now!


Also in the photo above, my Standard Reference Material (SRM) flashlight is the Hanko Machine Works Trident, an 18350 light. While I have not reviewed or tested the Gunner Grip version seen here, I have tested a Hanko Machine Works Trident Total Tesseract in brass. I love the Trident, and it’s a striking contrast to the inexpensive Convoy S2+, another great SRM.
Retention and Carry
Skilhunt updated the pocket clip for V4 of the H300. This one has the two-way carry option, and (as before) can attach only on the head end.

Also included is a lanyard, which attaches through this little hole in the tailcap.


The plastic attachment that connects to the headband has a clip-in slot for the Skilhunt H300 v4 TIR headlamp. It’s very easy to use.

As you can see below, there are three band slots, including one that allows an over-the-head band.

The headband is standard Skilhunt, and that’s good.


Skilhunt has very adequately covered how to build this headband, so I’ll just link their video.

The (removable) magnet used in the tailcap holds the light securely.

Finally, a mesh baggie is included.

Power and Runtime
The Skilhunt H300 v4 TIR headlamp runs on a single lithium-ion cell. It’s sized for a 18650, and an appropriate cell is included.

Notably, the working voltage mentioned on the H300 product page is 2.8V to 8.4V, so you could likely run two 18350 cells in this light if you wish.
The 18650 fits into the H300 with the positive terminal toward the head, as seen below.

In case you forget that bit of information, there’s a sticker just inside the tube to help.

Here are a few runtime tests. I wouldn’t say there’s anything super surprising here. Output is very stable once a stepdown has happened, and low voltage protection is observed. There’s also a low voltage warning in the indicating e-switch. The switch also indicates the power level upon turning the H300 on. The indication it gives indicates the power level as follows:
Blue constant: 100-80% power
Blue blinking: 80-50% power
Red constant: 50-20% power
Red blinking: 20-0% power


I went back and added another runtime test on level 7, since there were some questions about the quick drop in the first test. The result below matches what Skilhunt says they expect. I do not know what the difference is.


The temperature lines in these charts are included as general context, not precise measurements. The values represent the range (min to max) during testing, but should not be taken as exact readings. Temperature sensors are attached however feasible and not always on the bezel or hottest spot (assuming that can even be clearly defined). Even with ideal placement, too many variables affect temperature to definitively state a specific max value.
Charging
The Skilhunt H300 v4 TIR headlamp also has built-in charging, just like the other Skilhunt headlamps. This charging is by way of a magnetic charge port at the top of the light.

This is the “MC-20” version, though, which is advanced over some previous versions, like the MC-10. I think charging is a bit faster here. The charger also has a little indicator as well – while charging, the indicator is red. When complete, it’s blue.

Charging looks fine and requires nearly 3 hours to complete.

Modes and Currents
| Mode | Mode Claimed Output (lm) | Claimed Runtime | Measured Lumens | Tailcap Amps |
|---|---|---|---|---|
| T1 | 1650 + 545 + 390 | 1m/90m/50m | 1622 (0s) 1127 (30s) |
7.15 |
| T2 | 845+ 410 + 250 | 3m/135m/50m | 775 (0s) 766 (30s) |
2.55 |
| H1 | 410 + 250 | 140m/50m | 356 | 1.05 |
| M1 | 105 | 12h | 92 | 0.24 |
| M2 | 23 | 55h | 23 | 0.06 |
| L1 | 4 | 350h | 3.8 | 24.4mA |
| L2 | 0.4 | – | 0.4 | 7.6mA |
Pulse Width Modulation
One thing to love about these lights is the lack of PWM. The second moonlight mode does have some peaks, but I don’t believe that to be PWM.

Click here to see a “baseline” – a chart with almost no light hitting the sensor.
Then there’s the Ultrafire WF-602C flashlight, which has some of the worst PWM I’ve seen. It’s so bad that I used a post about it to explain PWM! Here are multiple timescales (10ms, 5ms, 2ms, 1ms, 0.5ms, 0.2ms) to make comparing this “worst” PWM light to the test light easier. That post also explains why I didn’t test the WF-602C at the usual 50us scale.
User Interface and Operation
The Skilhunt H300 v4 TIR headlamp is operated by a single switch. It’s an indicating e-switch on the head. The switch has a silicone cover and is translucent, and has the little design printed on recent Skilhunt switch covers. It requires minimal force and has a positive, quiet actuation. If you’ve had other Skilhunt headlamps, you’ll be very comfortable with this switch. That said, this switch cover feels a bit thinner than previous iterations.

The switch is just barely proud, and the action is very good.


Here’s a user interface table! Note that this is the same user interface as is on the recent M300 lights, and likely many of the other new-generation Skilhunt lights. That’s fine because I love it, and I also love the delivery of a consistent and reliable user experience.
| State | Action | Result |
|---|---|---|
| Off | Hold | Low (Memory between L1 and L2) |
| L1 or L2 | Hold | Iterate between L1 and L2 |
| Any | Click 2x | Turbo (Memory between T1 and T2) |
| Off | Click 4x | Lockout (Three blinks of main emitters to confirm and the switch turns red briefly) |
| Lockout | Click 4x | Unlock to Low group (memory, can be L1/L2) |
| Lockout | Click 2x | Iterate lockout indicator^ |
| Lockout | Hold | Momentary Output (Appears to be approximately L1) |
| L1/L2 | Click | Off |
| Off | Click | On in “Main Group” (Mode memory M2/M1/H) |
| Main Group | Hold | Mode advance (M2 > M1 > H) |
| Main Group | Click | Off |
| T1/T2 | Hold | Iterate between T1 (higher) and T2 (lower) output |
| T1/T2 | Click | Off |
| T1/T2 | Click 2x | Main Group (memory output) |
| Any | Click 3x | Strobe Group (with memory) |
| Strobe Group | Click 3x | Previous Group (T1/T2 or M2/M1/H, depending on how you accessed Strobe Group)^^ |
| Strobe Group | Hold | Strobe Advance (S1 > S2 > S3)^^^ |
| On | Click | Off |
^ Lockout indicator blinks a red switch every 2-3 seconds.
^^ Aside from just general mode memory (which you know I don’t like), this seems to me to be the only place where you may need to immediately remember what mode you were in so you have the experience you expect. However, the difference is getting the two highest white outputs, or the three main white outputs – it won’t be that dramatic even if you don’t remember. Also note that if you access the strobe group from off, triple-clicking will not return to off. For continuity, it should! In fact, if you accessed the strobe from an off state, a triple-click sends the light to the Main group!
^^^ Strobes are like this:
S1: Disorienting strobe of White (turbo, ish)
S2: SOS (main white, some mid-High output)
S3: Beacon (one highish blink every second or so)
I’ll note that it seems like Skilhunt has cleaned up the user interface a bit, which is appreciated. For example, holding while in the strobe group used to turn the light off, but now is consistent with other levels, and does a mode advance action. So that’s good. Also, this light retains the improvement of a click+click/hold going from low to the lowest main group. There’s a bit of a weird pause, though. But it does technically work right.
LED and Beam
Skilhunt offers quite a few emitter options for the H300. In this test, it’s Skilhunts’ own emitter, the F50S-HCRI, which is high CRI at 5000K, as well as (more specifically) R9580. It’s a very good emitter. The box labels it the “SL-F50-S-6V.”
This post is about the TIR version. As you probably noticed above, I also have the reflector version. I’ll post data on that soon. The two lights have surprisingly similar data, and in my opinion, picking between the two will just come down to which you prefer.

Technically, the reflector version has a bit higher output (probably because of better transmission out of the front of the light). And technically, the TIR version has slightly higher cd/lm. But practically, even having the two lights right in front of m,e not crossing the beams, the difference is marginal.

If it came down to me making a choice for you, I’d say no, but remind you that the TIR is plastic, and this light uses >7A on turbo. Even if the plastic is heat-resistant, the reflector is aluminum, and aside from being much more heat-resistant, it can also serve to move heat away from the emitter, too. So the reflector seems like a better choice!
LED Color Report (CRI and CCT)
And here’s the big point of even testing this light. The CRI and CCT! Skilhunt specifies this is the R9580. That first number (95) is the CRI claim, and testing proves that. The average here is 98! VERY high! And that second set of two numbers is the “r9” number, in this case, 80. That would be a fantastic r9 value, and we’d most often say that’s how “good the reds are” – in this case, above 90 in most of the testing. Also VERY good. One final point is that the Duv is right around the BBL, another very good thing. It trends from negative (a little pinkish) to around zero (which stays out of “greenish” territory).


CCT (Correlated Color Temperature) refers to the measurement of the color appearance of light, expressed in Kelvins (K), which indicates whether the light is warm (yellowish) or cool (bluish). A lower CCT (below 3000K) is considered warm light, while a higher CCT (above 5000K) gives cooler, bluish light.
CRI (Color Rendering Index) is a measure of how accurately a light source renders colors in comparison to natural sunlight. Scored on a scale from 0 to 100, higher CRI values indicate that colors appear more true to life and vibrant, similar to how they would look under the sun.
Beamshots
These beamshots always have the following settings: f8, ISO100, 0.3s shutter, and manual 5000K exposure. These photos are taken at floor level, and the beam hits the ceiling around 9 feet away.


Tint vs BLF-348 (KillzoneFlashlights.com 219b version) (affiliate link)
I keep the test flashlight on the left and the BLF-348 reference flashlight on the right. These photos are taken around 18 inches from the door.


I compare everything to the KillzoneFlashlights.com 219b BLF-348 because it’s inexpensive and has the best tint!
Summary and Conclusion
I loved the H300 from previous generations. The Skilhunt H300 v4 TIR headlamp is great for more than just the new emitter. It gets the new user interface, which allows access from L to main without going through the higher main modes – very good. But the main point is how great this emitter is. It has high output, amazing CRI, great r9, nice Duv, and can apparently handle plenty of current (over 7A, without going crazy pinkish). So this is a very good headlamp and an amazing new emitter made by Skilhunt! Stay tuned if you need to see the differences between TIR and reflector, too!
The Big Table
| Skilhunt H300 V4 Headlamp | |
|---|---|
| Emitter: | SL-F50-S-6V (TIR) |
| Price in USD at publication time: | $75.90 |
| Cell: | 1×18650 |
| Runtime Graphs | |
| LVP? | Yes |
| Switch Type: | E-switch |
| Quiescent Current (mA): | ? |
| On-Board Charging? | Yes |
| Charge Port Type: | Proprietary magnetic |
| Charge Graph | |
| Power off Charge Port | “with cell: all modes without cell and/or tailcap: no” |
| Claimed Lumens (lm) | 1650 |
| Measured Lumens (at 30s) | 1127 (68.3% of claim)^ |
| Candela per Lumen | 6.8 |
| Claimed Throw (m) | 175 |
| Candela (Calculated) in cd (at 30s) | 337lux @ 5.139m = 8900cd |
| Throw (Calculated) (m) | 188.7 (107.8% of claim)^ |
| Claimed CCT | 5000 |
| Measured CCT Range (K) | 5000-5300 Kelvin |
| Item provided for review by: | Skilhunt |
| All my Skilhunt reviews! | |
^ Measurement disclaimer: Testing flashlights is my hobby. I use hobbyist-level equipment for testing, including some I made myself. Try not to get buried in the details of manufacturer specifications versus measurements recorded here; A certain amount of difference (say, 10 or 15%) is perfectly reasonable.
What I like
- New emitter by Skilhunt
- High CRI
- Great R9
- Consistently great user interface
- User interface allows access to many options from off
- Working voltage up to 8.4V so can use 18350×2 (but probably not with an output bump)
- Reflector and TIR options
- Good headband and connector
What I don’t like
- Proprietary magnetic charging
- Stepdown from turbo
Notes
- This content originally appeared at zeroair.org. Please visit there for the best experience!
- Please use my Amazon.com referral link to help support zeroair.org!
- Please support me on Patreon! I deeply appreciate your support!
Just ordered this light with F50S with the TIR optic because I’m sensitive to the stark “edge” or transition from spill to darkness apparent in most reflector beams. I have a 144ar TIR version of this light and like its smooth beam profile. Does the orange peel reflector version handle the spill to darkness transition smoothly? I know you said the beams are nearly identical but thought I’d ask. Thanks!
The reflector beam is a bit tighter, yeah. But I don’t think you’d be disappointed with either!
I think you miscategorized, this should not be labeled 18650×2 lol
lol yes