Olight Marauder Mini 2 Compact Powerful Flashlight Review
The Olight Marauder Mini 2 is available in three colors: black, blue, and orange. It has throw, flood, red, and a clever side lantern. Read on!
Official Specs and Features
Here’s a referral link to the Olight Marauder Mini 2 product page.
Versions
There’s only one version (same emitters for all), but three body colors are available: black, blue, and orange (seen here).
Price
The Olight Marauder Mini 2 introductory price is $175.99, with an MSRP of $219.99.
What’s Included

- Olight Marauder Mini 2 flashlight
- Olight 32650 cell (proprietary and customized)
- Charge cable
- Lanyard
- Manual etc
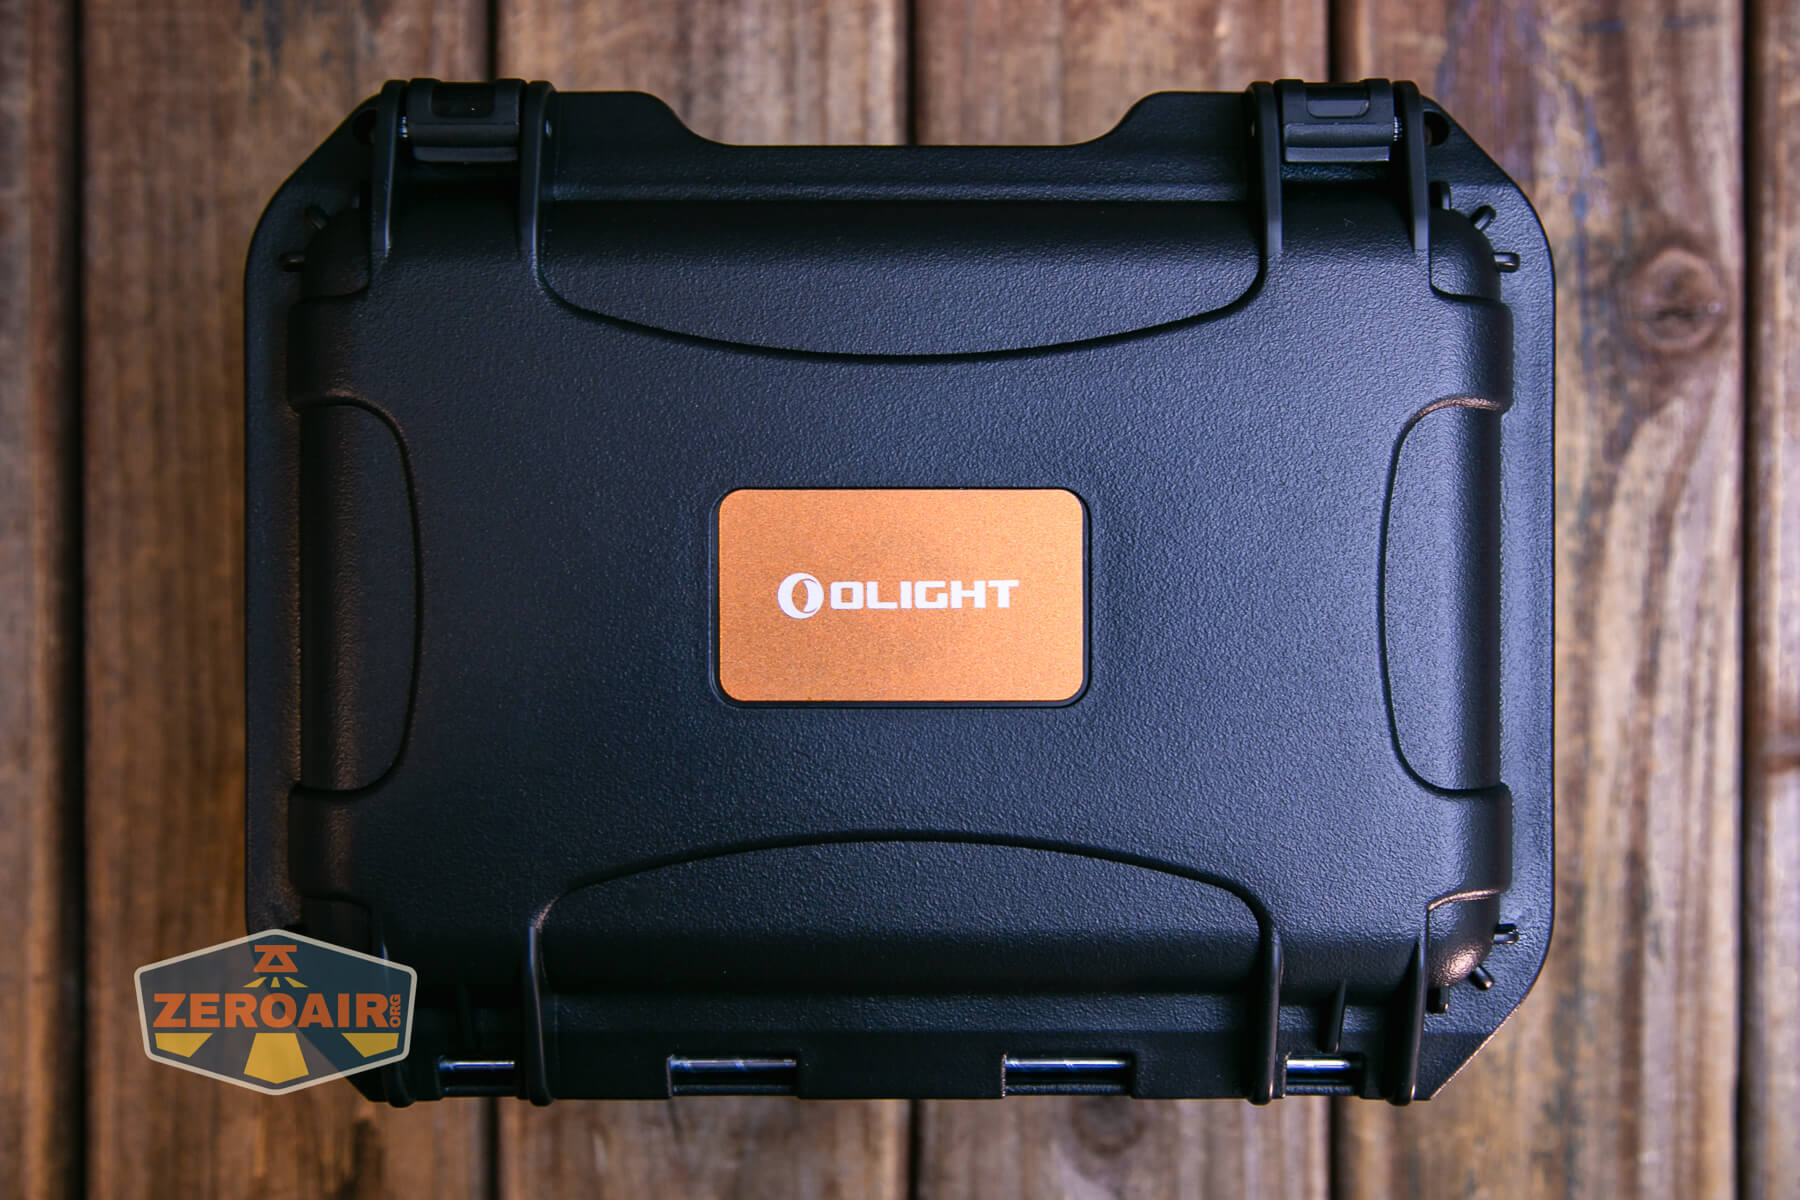
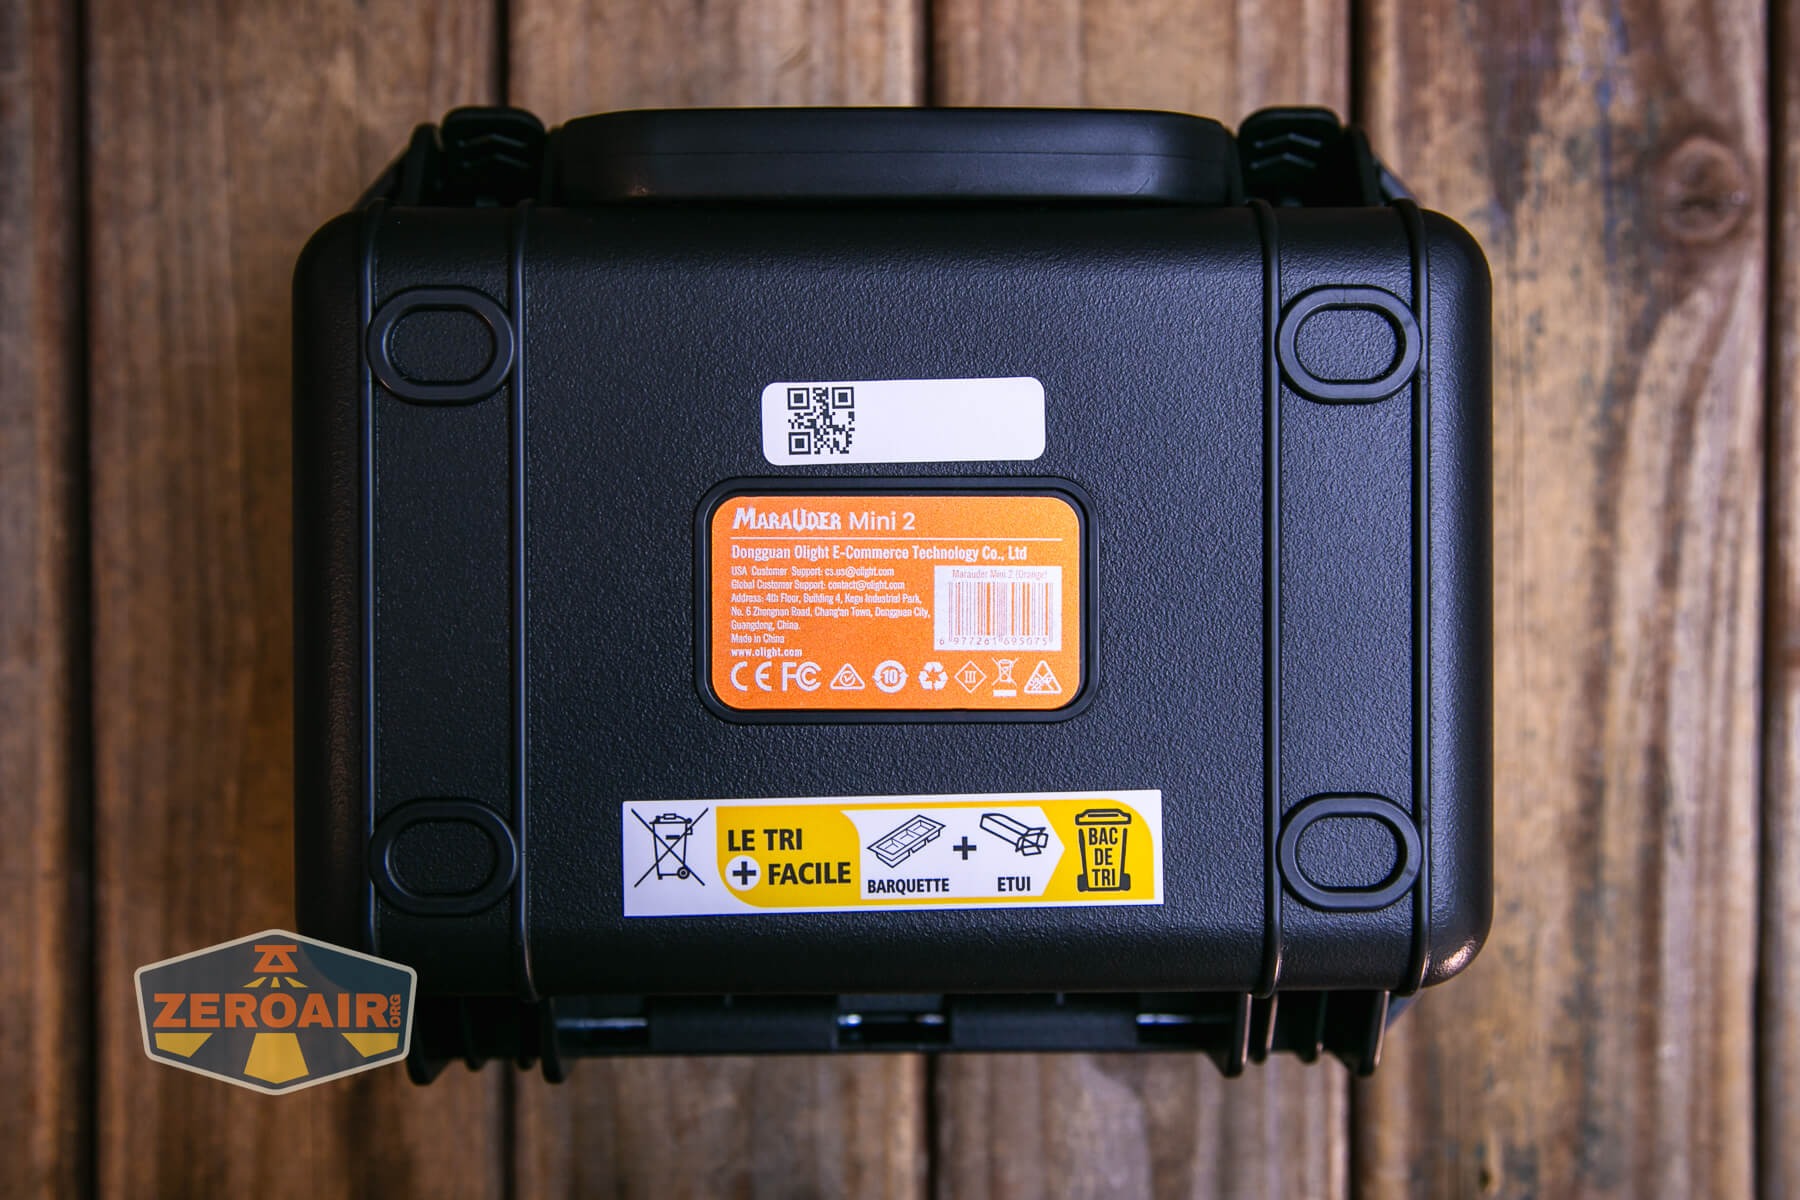
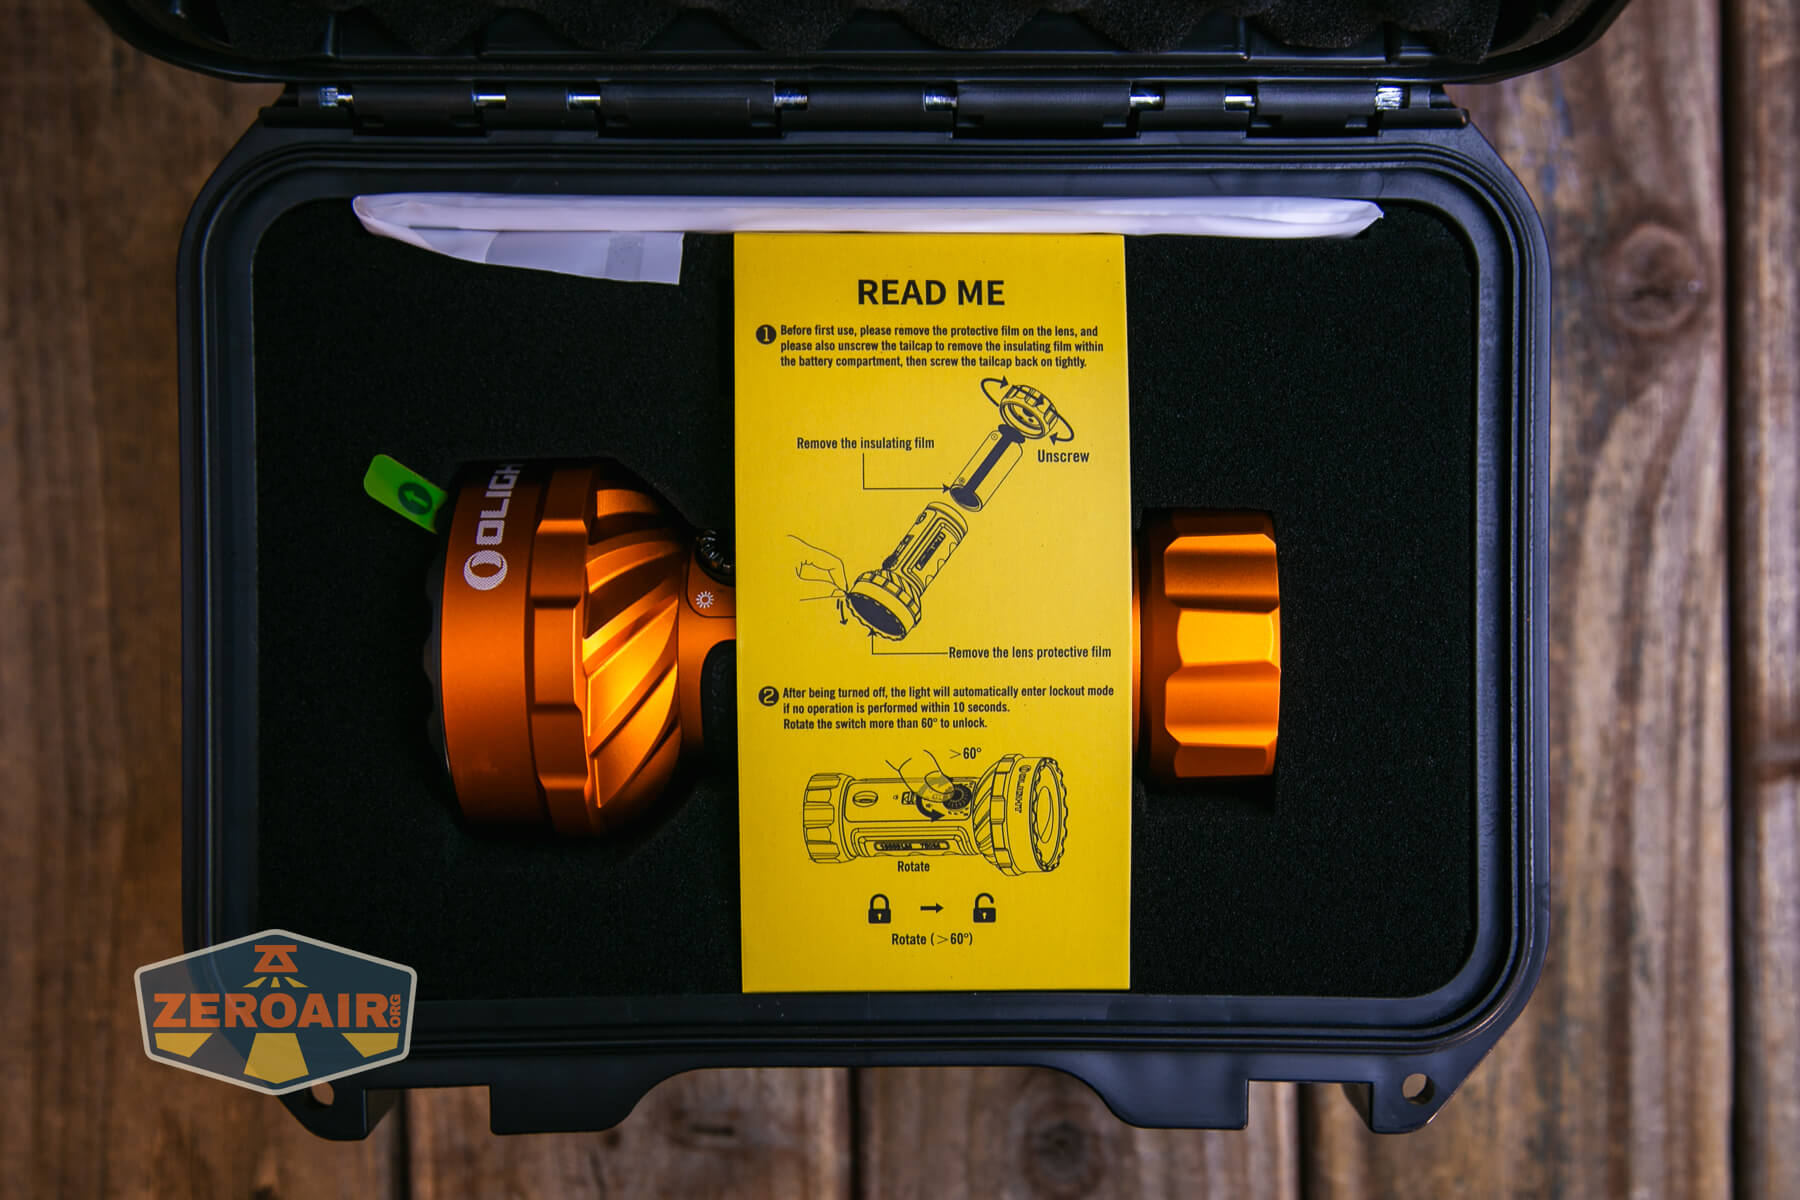
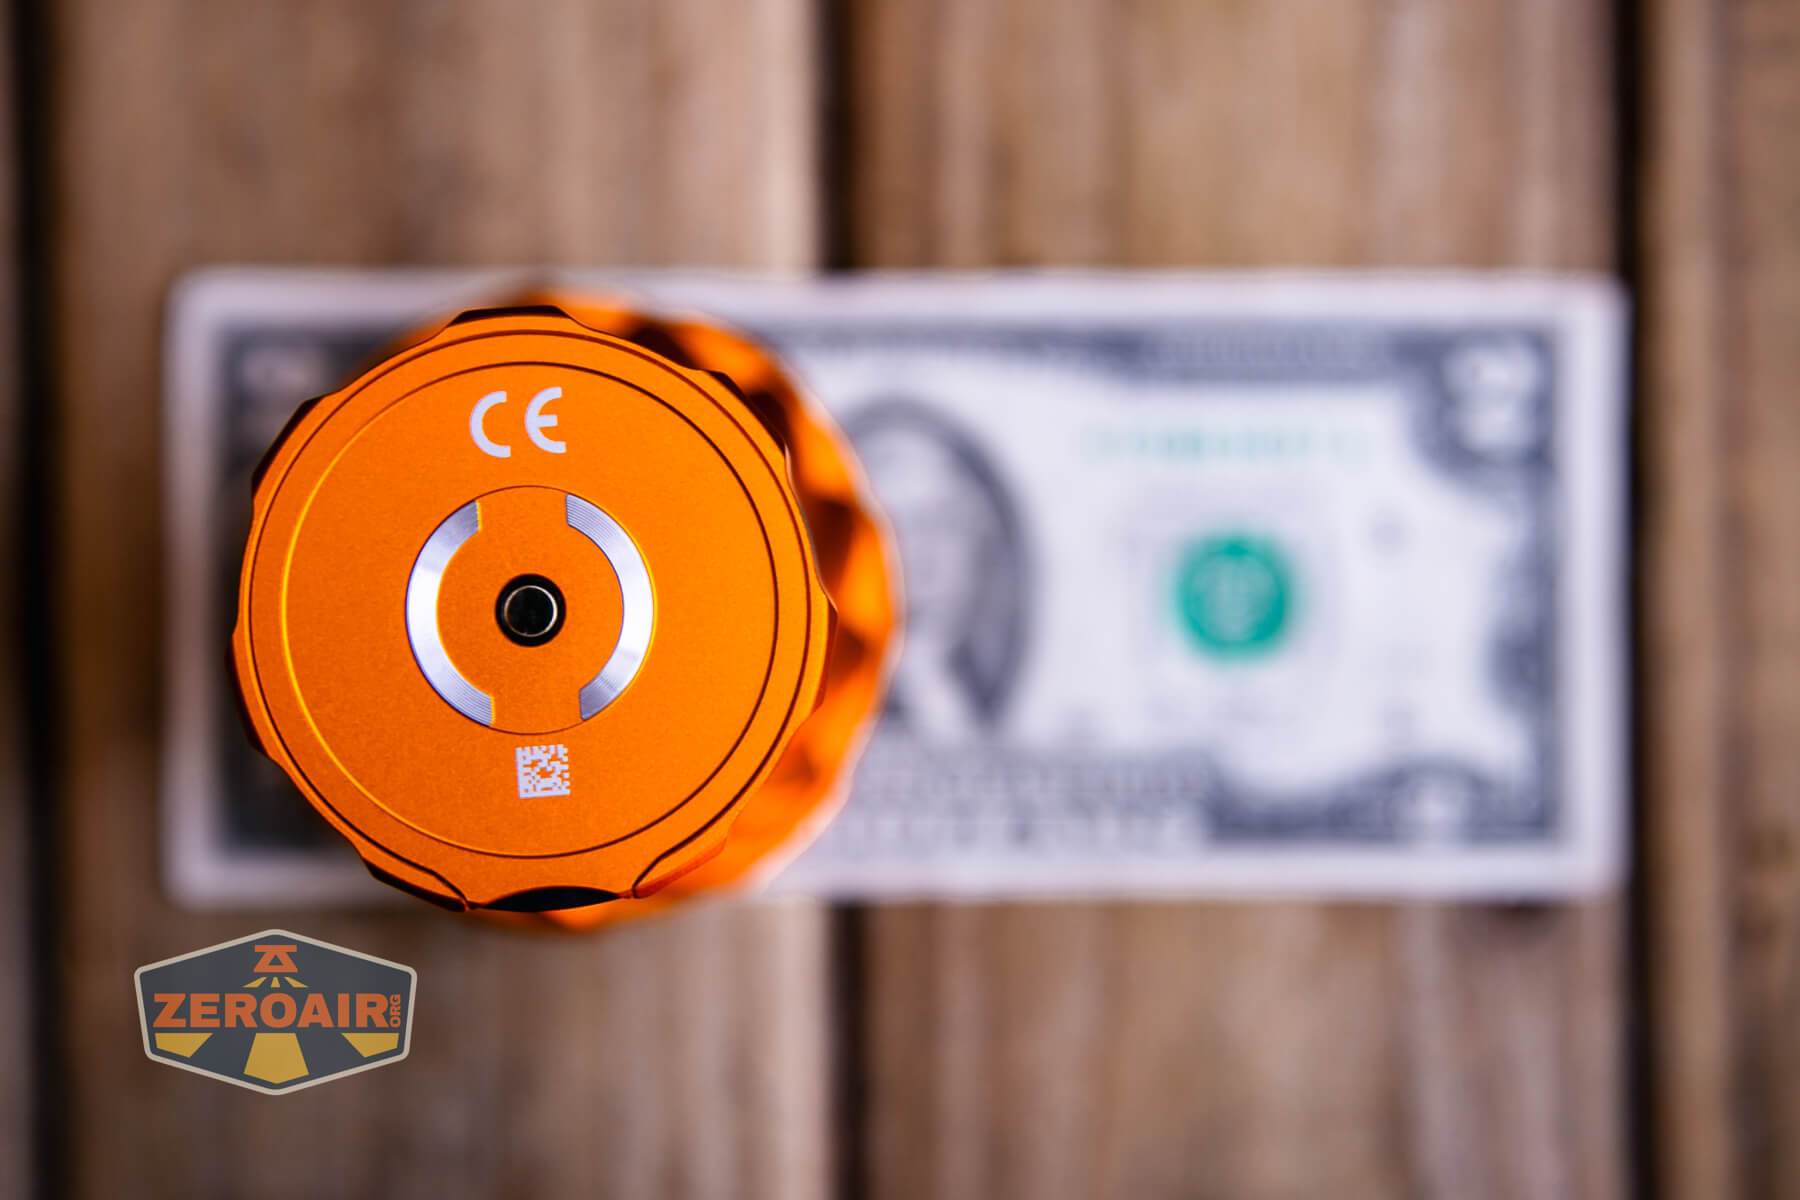
Package and Manual
Build Quality and Disassembly
First off, the build quality of the Olight Marauder Mini 2 is great. No surprise there, but I’ll state it for the record. Next, you may notice that the Olight Marauder Mini 2 is very similar to the original Marauder Mini. And that’s a good thing; it was a great light, too!


The Olight Marauder Mini 2 has a big grip area and the Marauder Mini 2 logo. The grip is textured, comfortable, and – it’s hard to see it here but – not flat. There are sort of “finger ridges” there.

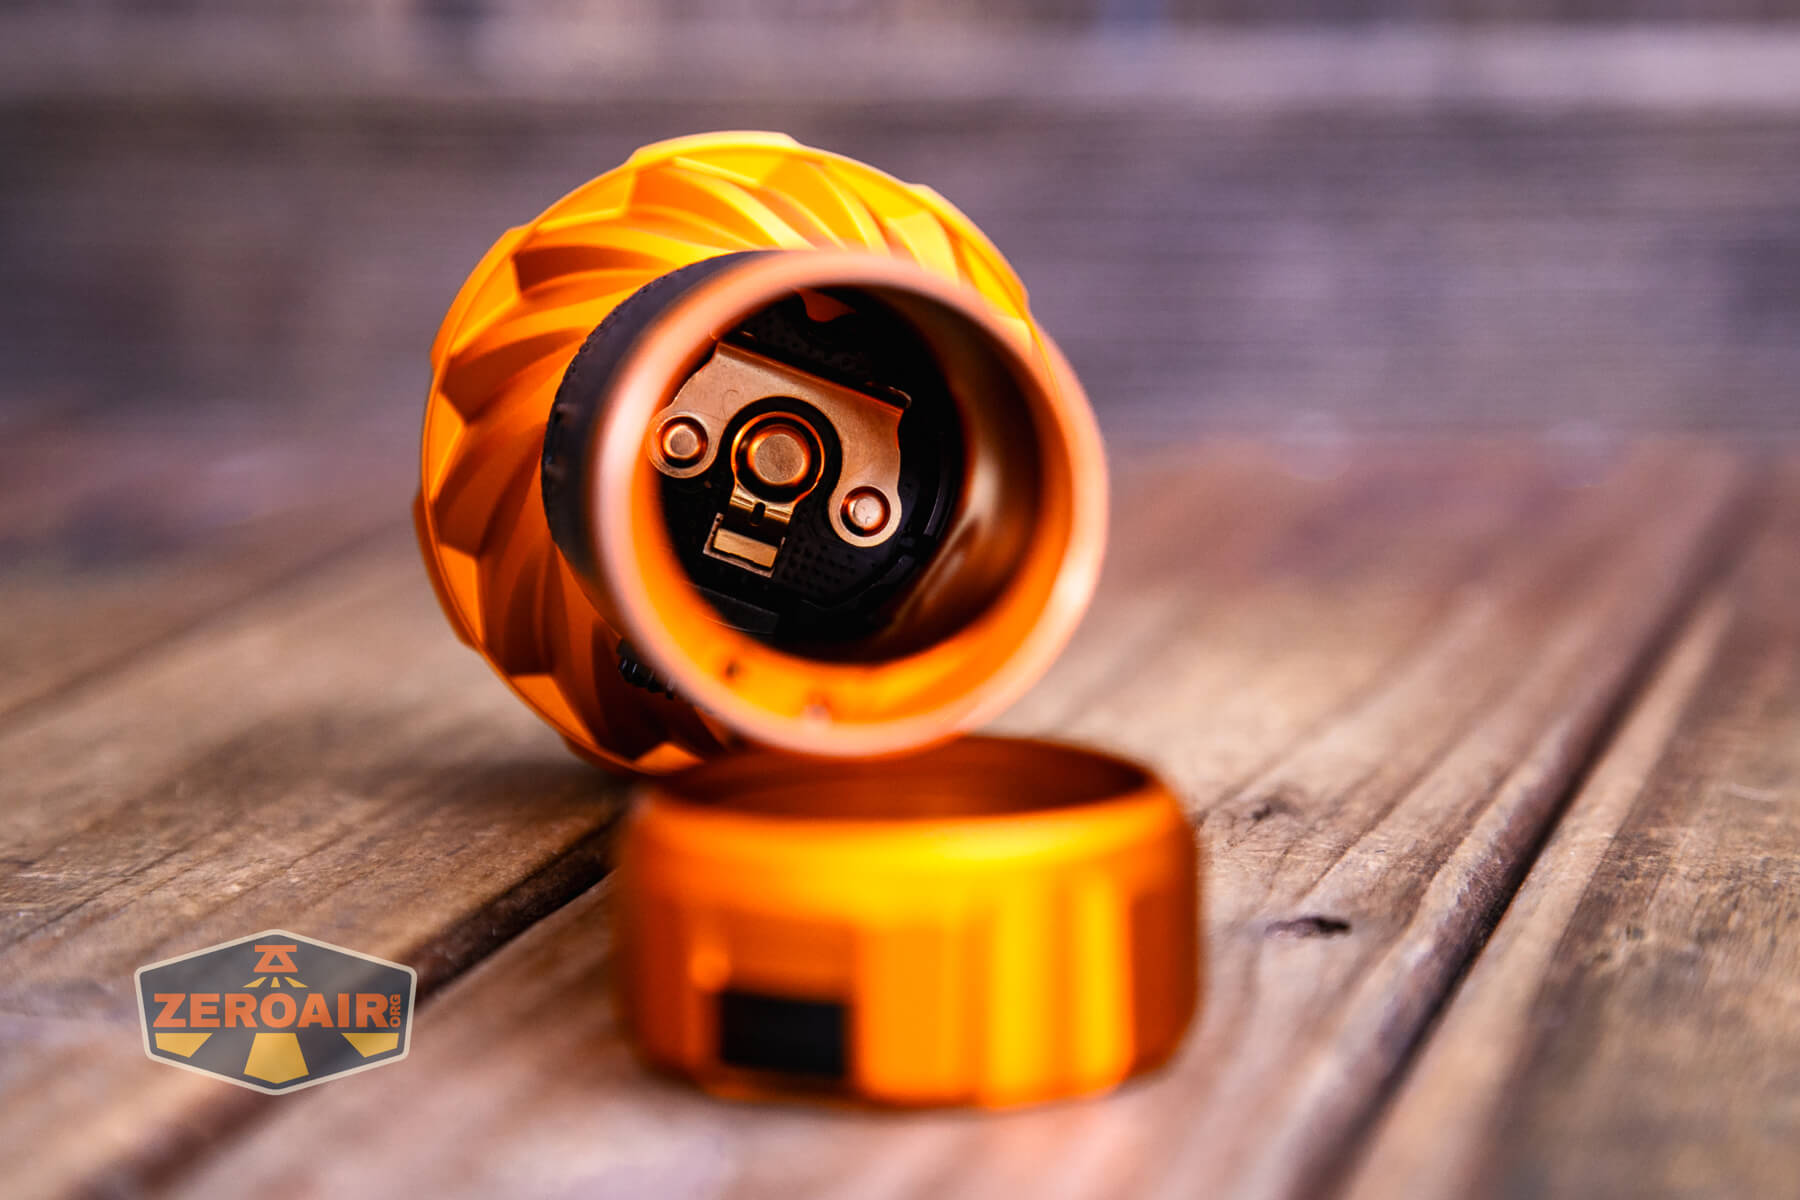
The Olight Marauder Mini 2 has a removable tailcap, just like the original. This means the 32650 cell is replaceable. No matter how hard it is to get or whether you have to buy them from Olight directly or whatever, it’s replaceable.
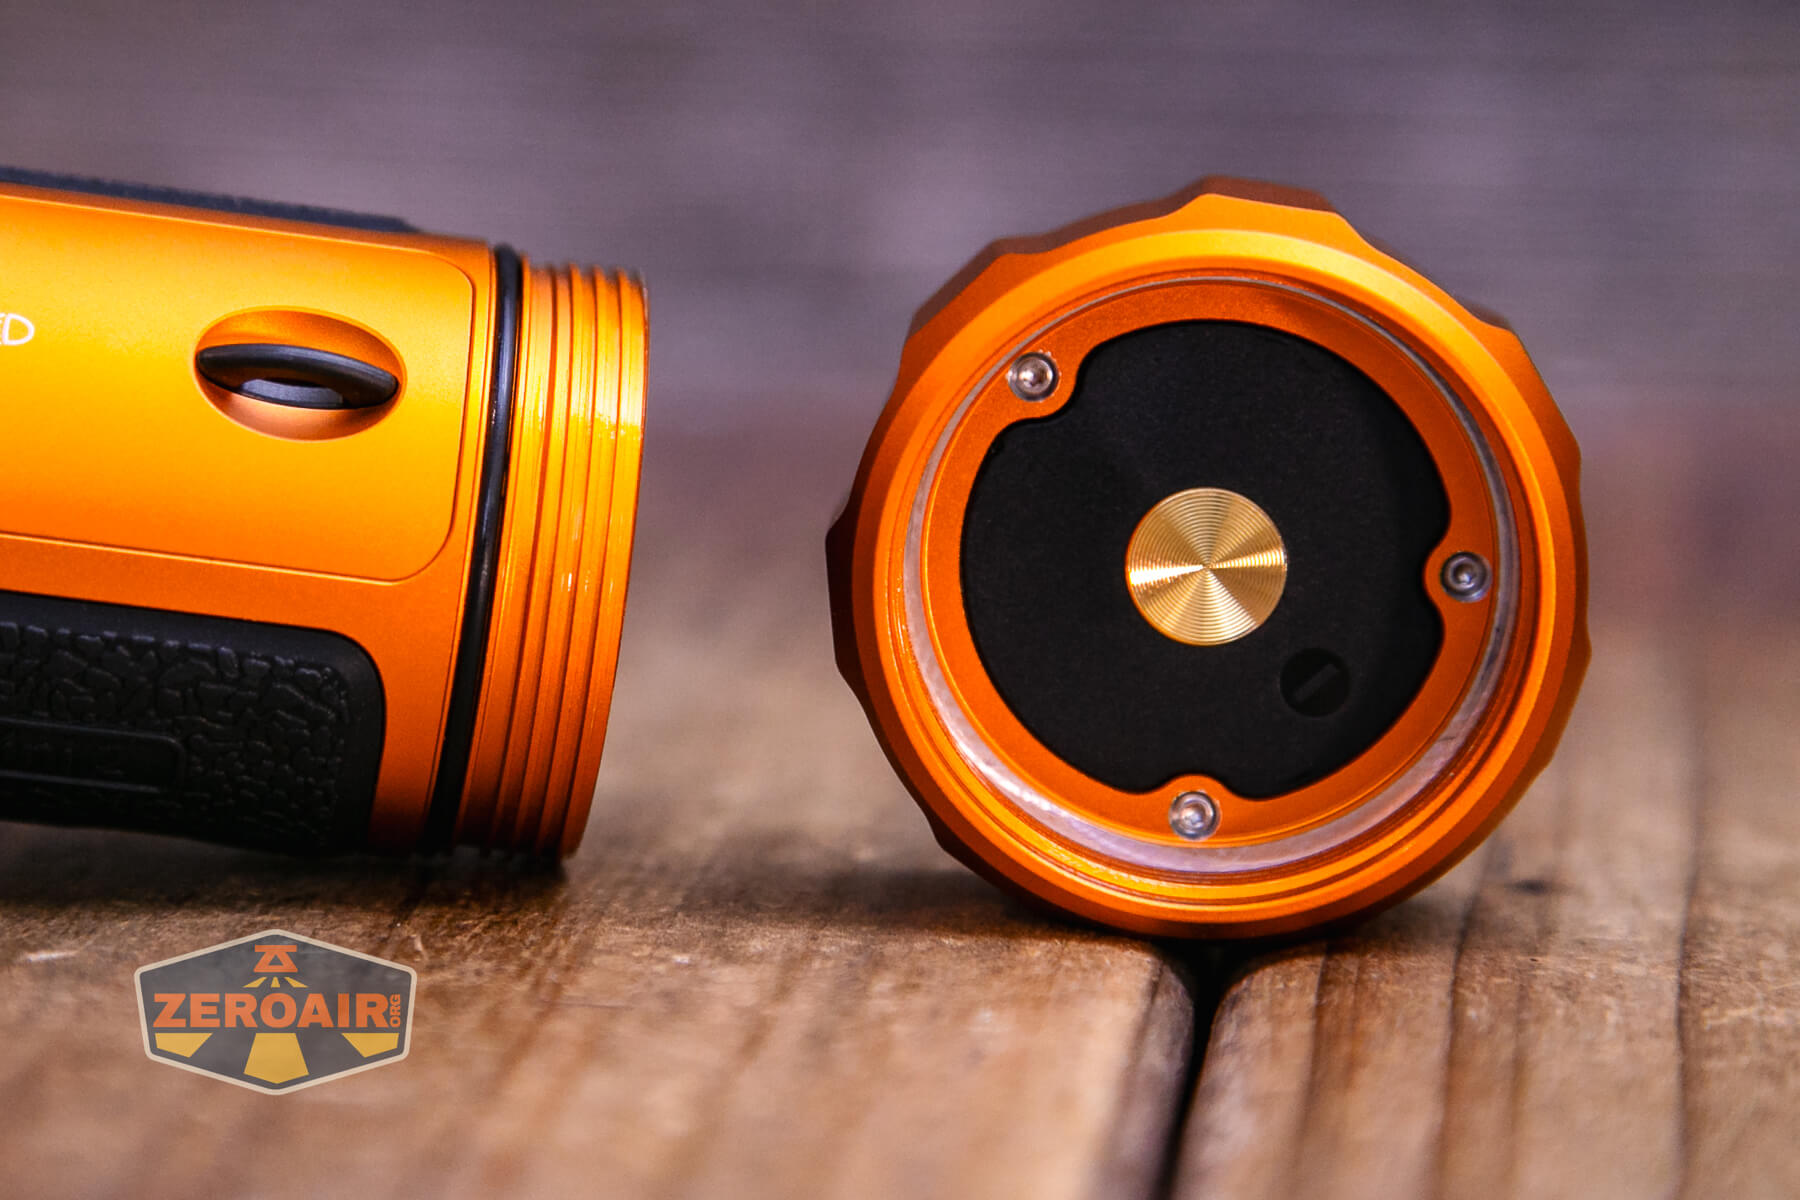
Inside, you can see the contacts. Those contacts hit the customized cell in the right place, and also explain why you can’t use a “standard” 32650 cell in this light.
Size and Comps
Weight: 16.4 oz (465 g) (Battery Included)
Length: 133 mm
Head Diameter: 66 mm
The Olight Marauder Mini 2 is ever so slightly larger than the Olight Marauder Mini.

Here’s the light in hand:


Here’s the test light with the venerable Convoy S2+. The version below is a custom laser-engraved Convoy S2+ host by GadgetConnections.com. I did a full post on an engraved orange host right here! Or go straight to GadgetConnections.com to buy your Convoy S2+ now!
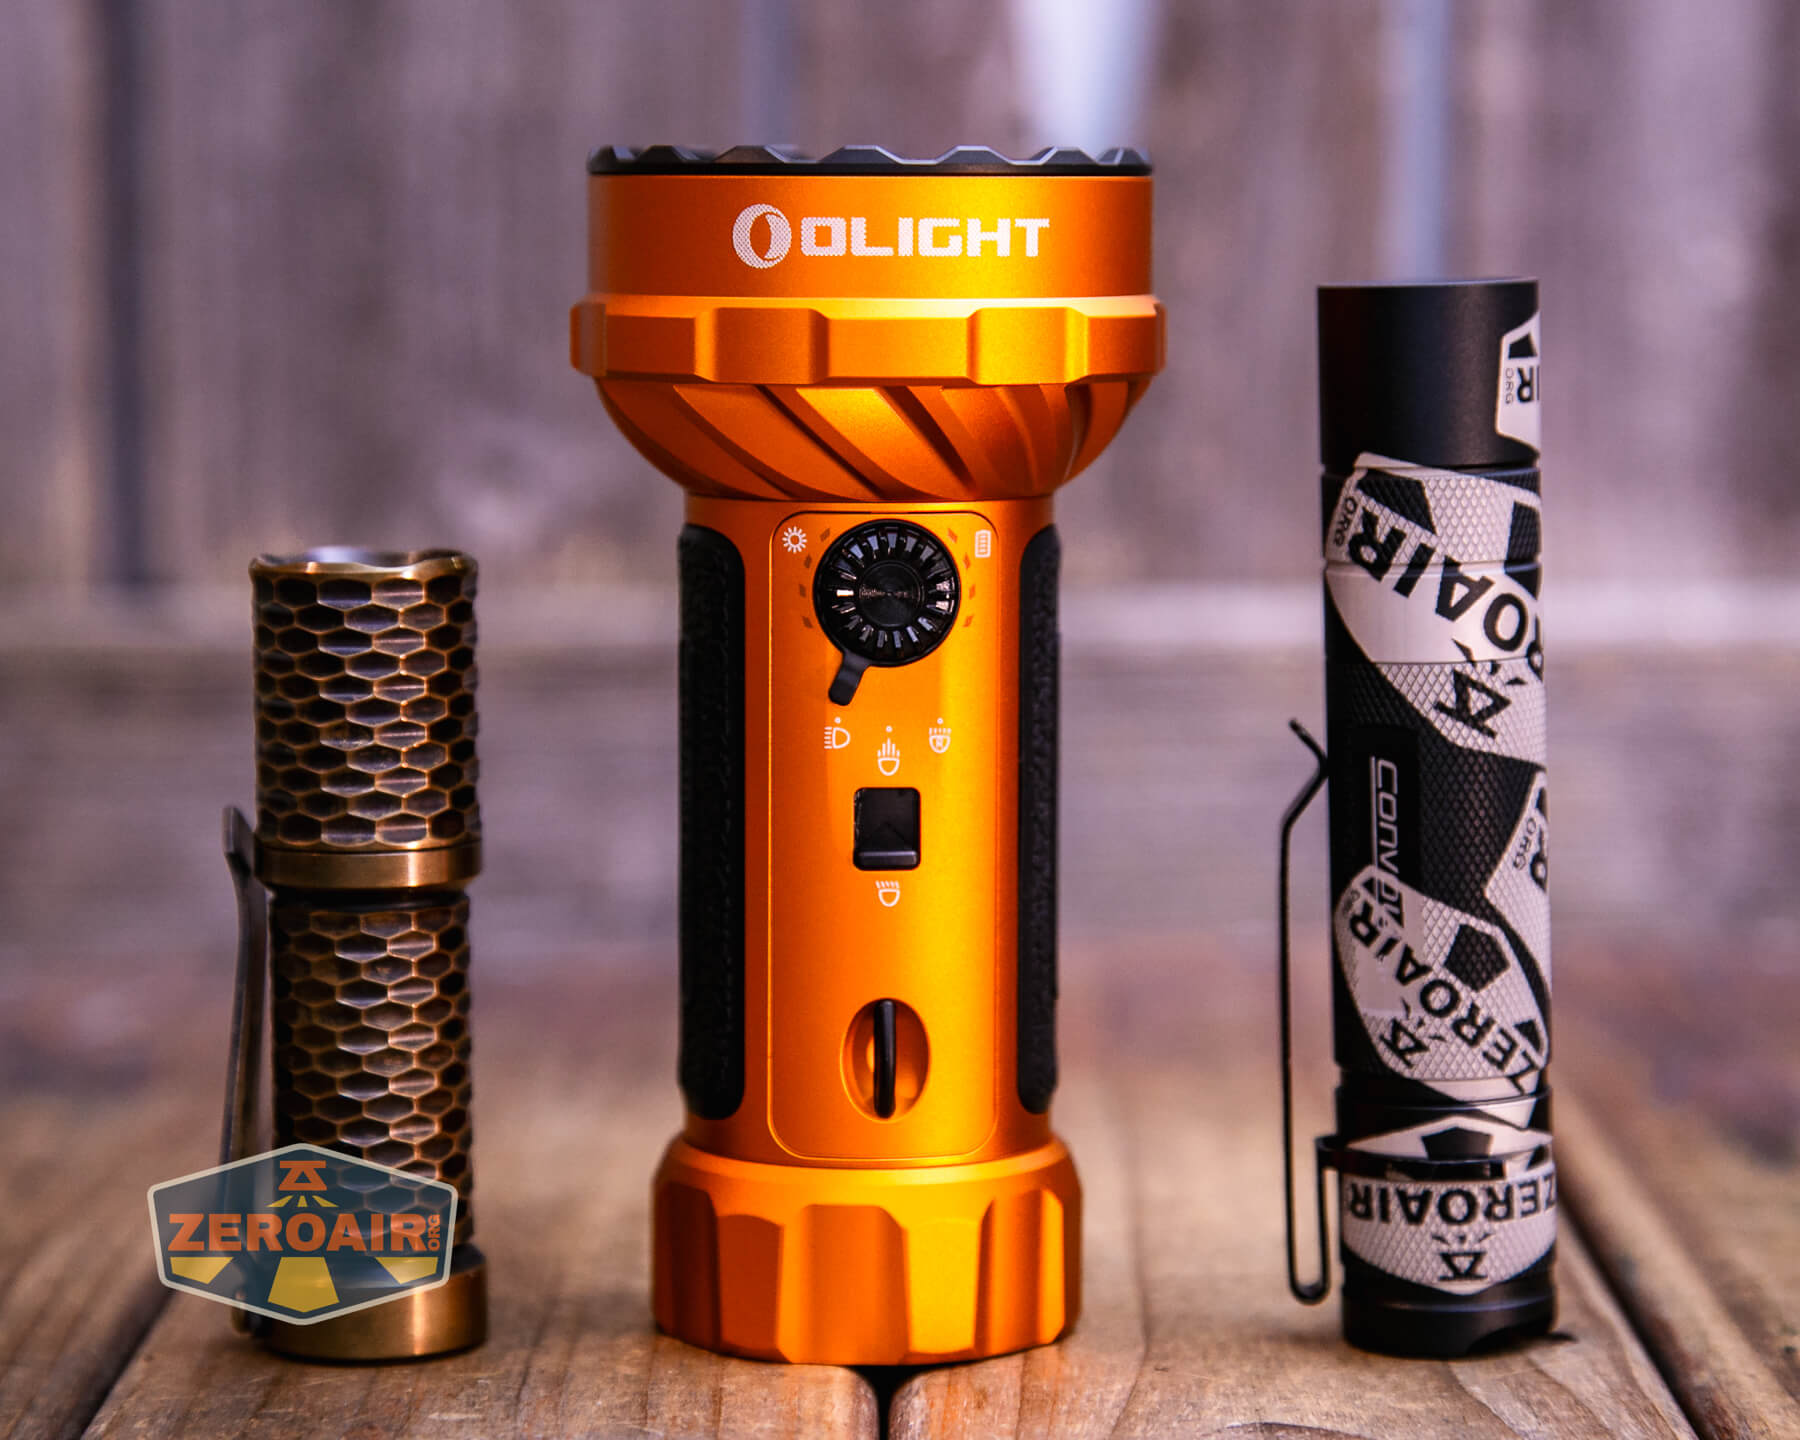

Also in the photo above, my Standard Reference Material (SRM) flashlight is the Hanko Machine Works Trident, an 18350 light. While I have not reviewed or tested the Gunner Grip version seen here, I have tested a Hanko Machine Works Trident Total Tesseract in brass. I love the Trident, and it’s a striking contrast to the inexpensive Convoy S2+, another great SRM.
Retention and Carry
Primarily, you’ll be carrying this light by means of the lanyard, which attaches through this “coin slot loop” (pictured above). Olight includes this lanyard/charging cable.
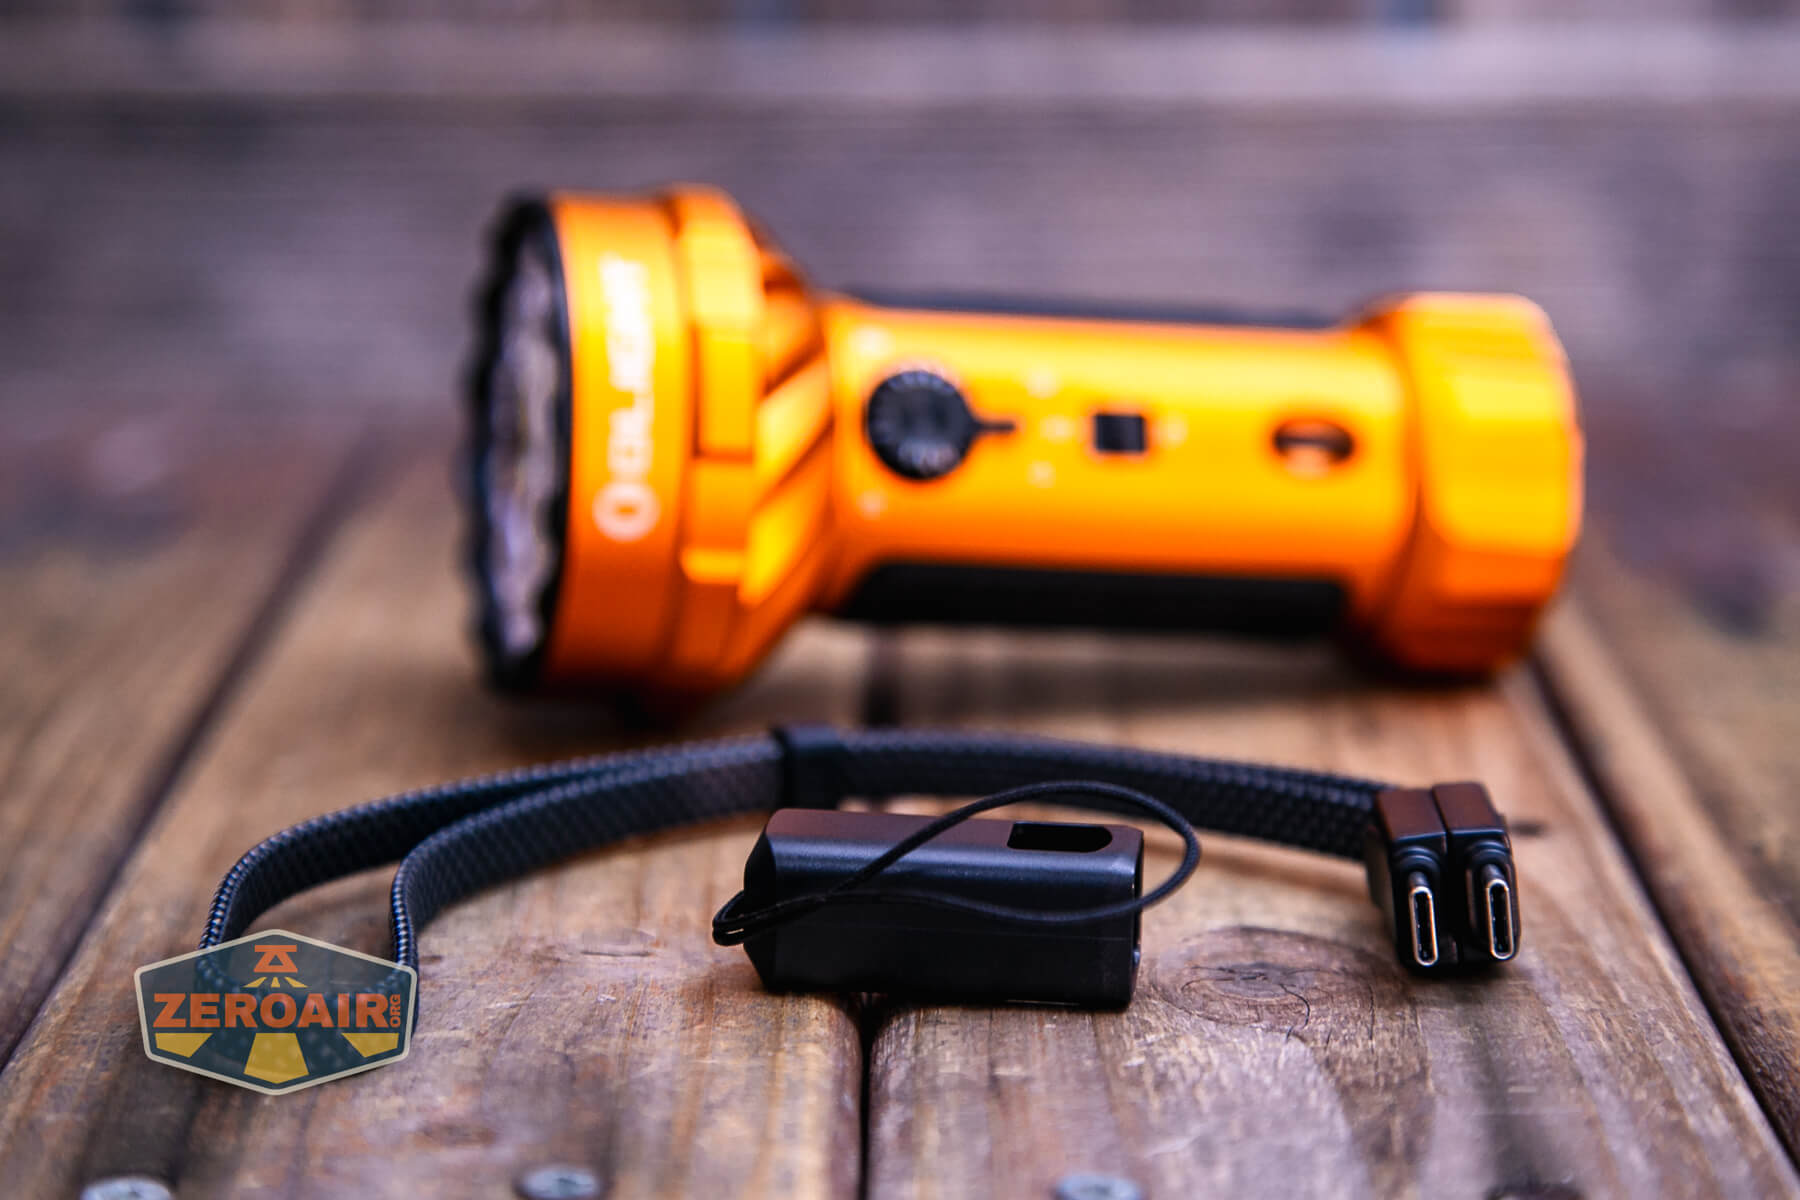
The Olight Marauder Mini 2 is a big light to trust with the connections where the USB-C connectors go into the little plastic housing. Essentially, you’re trusting the weight of this pricey flashlight to two slip-in clips. I’d definitely keep the light in hand and use the lanyard as only a wrist strap!
One change from the original (Olight Marauder Mini “1”) package is that this package, while it has a much nicer case, does not include a sheath.
Power and Runtime
The Olight Marauder Mini 2 uses a single lithium-ion cell. Much like many of Olight’s other cells, this one is customized and proprietary in that it has a shroud around the positive contact and has both positive and negative contact points on the positive end.

This is not the end of the world. It’s very nice that it’s even possible to change the cell, even if we’re required to buy one directly from Olight. I am also pleased that this light runs on a single lithium-ion cell; any configuration of series or parallel just adds more complexity than I often like to fool with. (That said, cells in series or parallel are exactly why a light like the bigger Marauder 2 has the cells built in.)
The cell goes into the light in the usual direction – positive end toward the head.

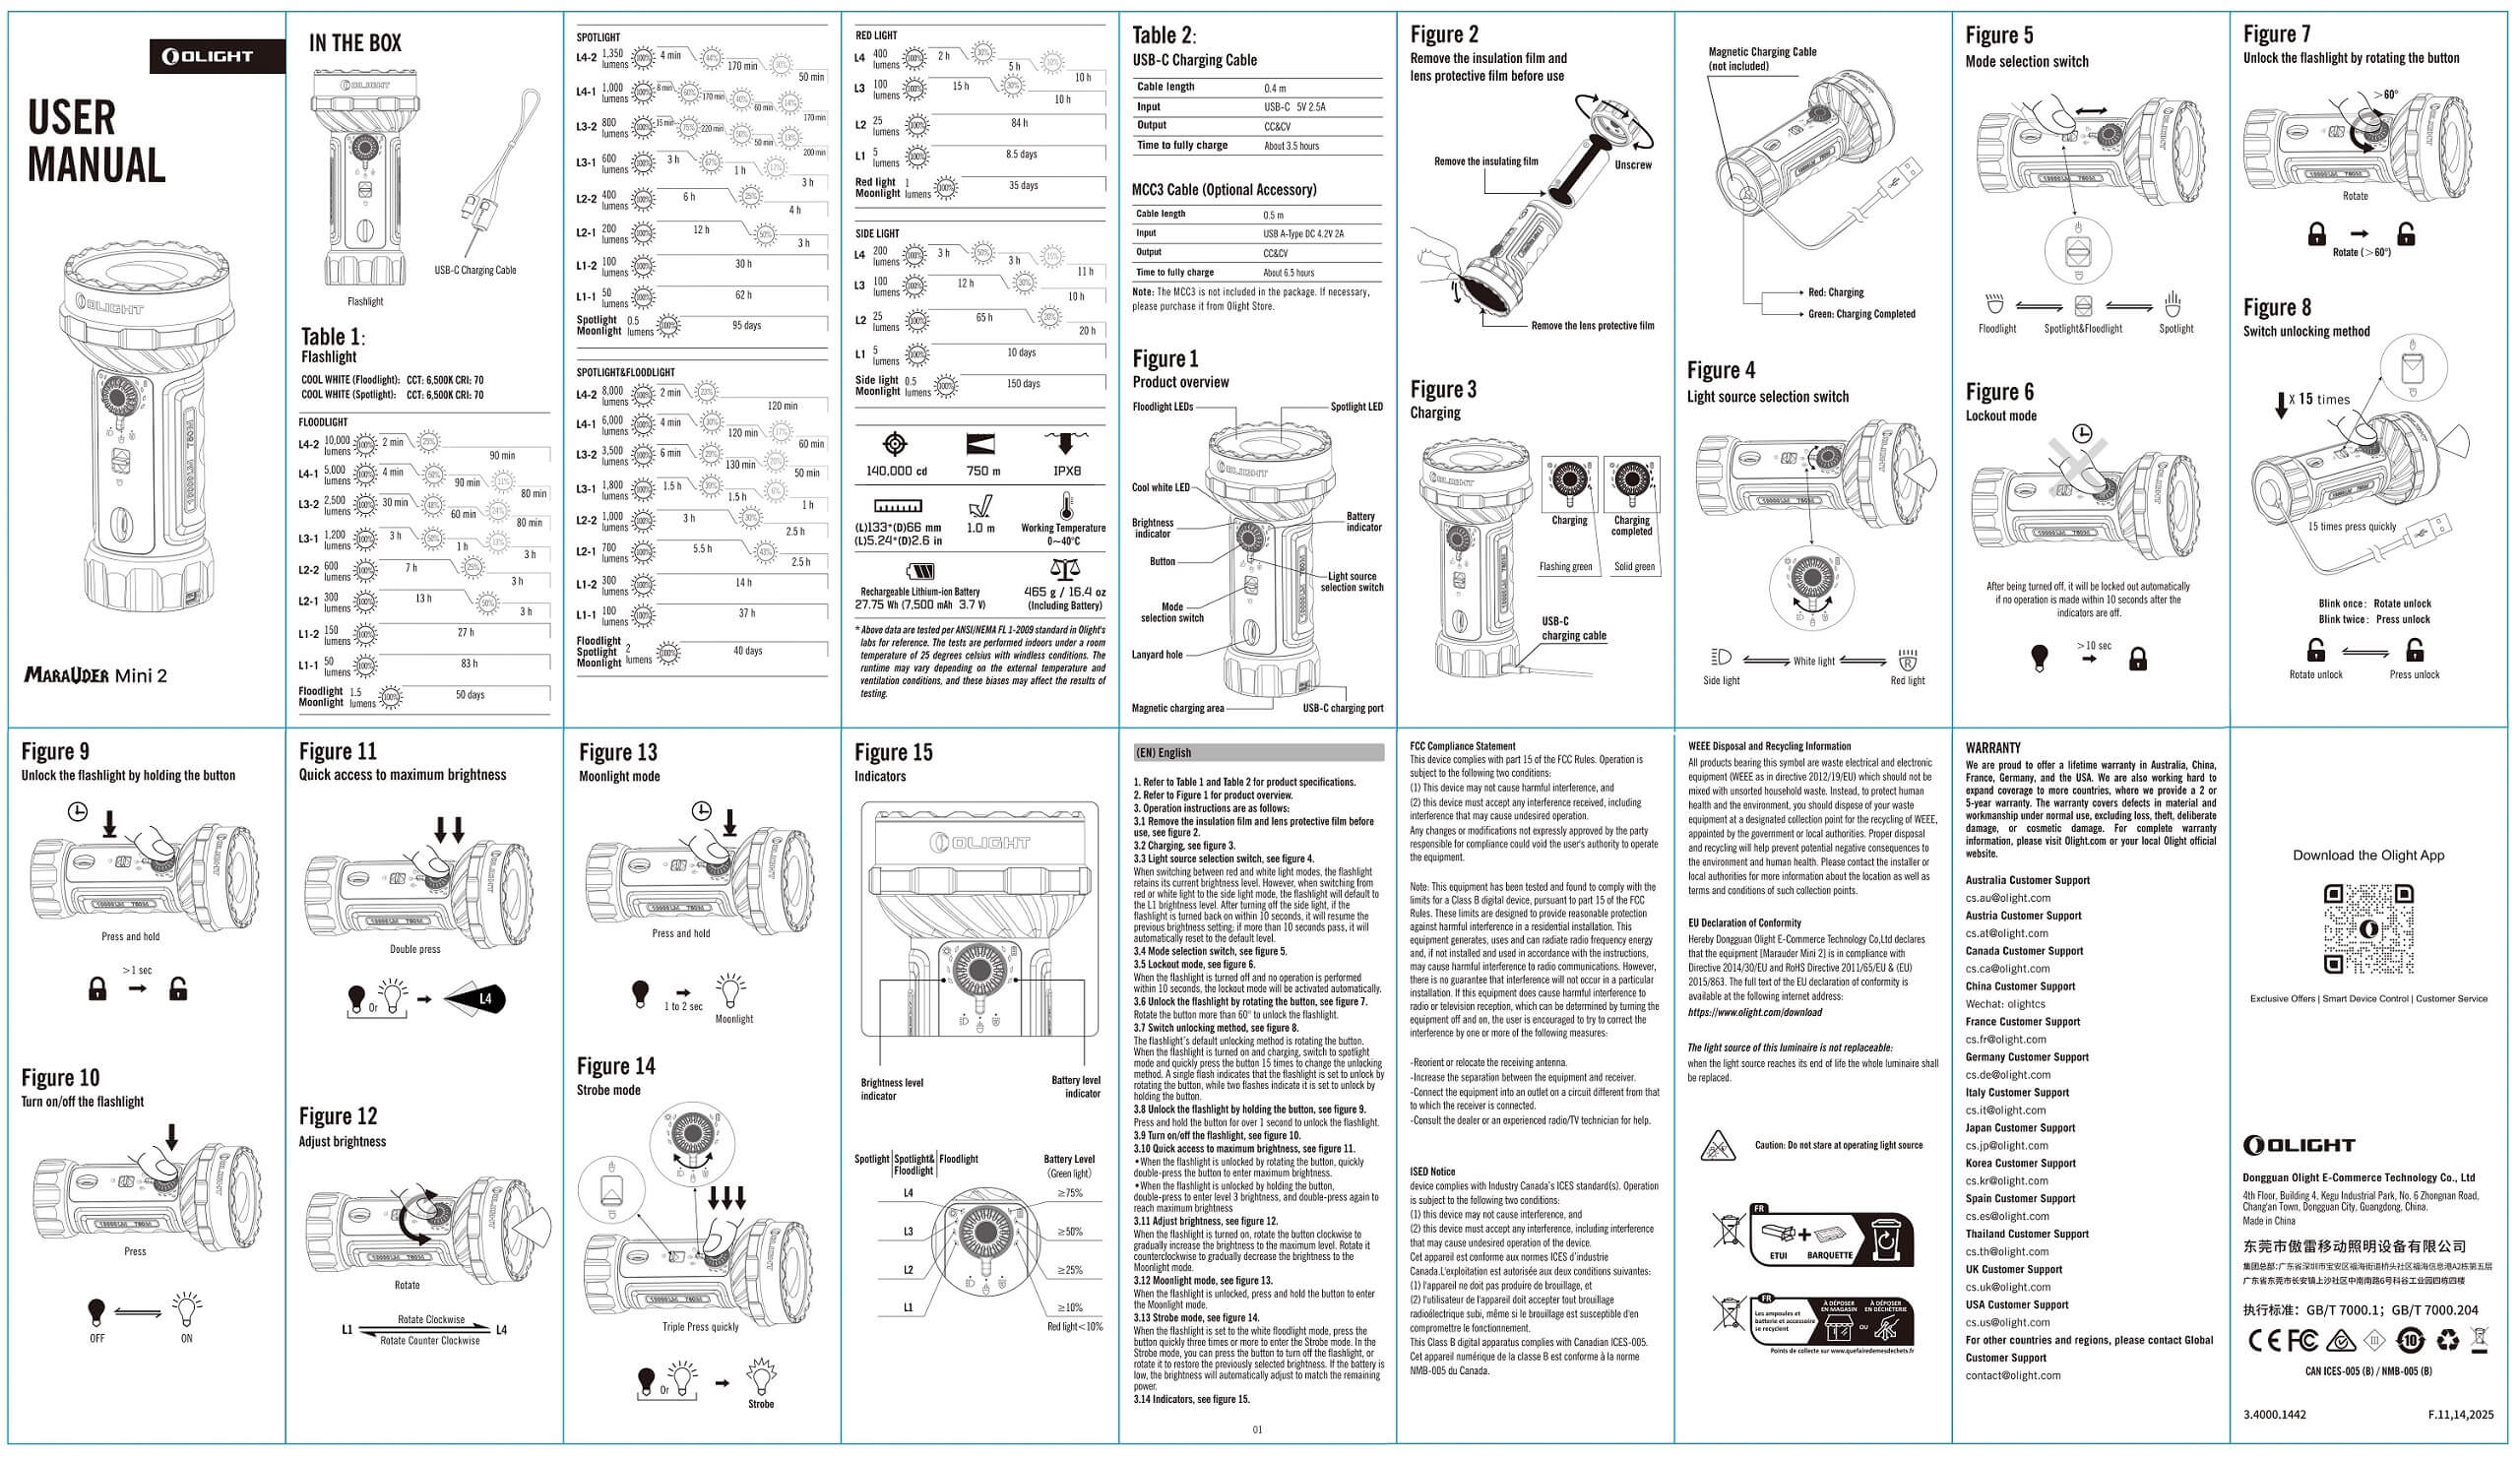
Here are a number of runtime tests. I tried to select the highest modes, which include two tests with “both” front white options, and then the highest for both separate front white options.


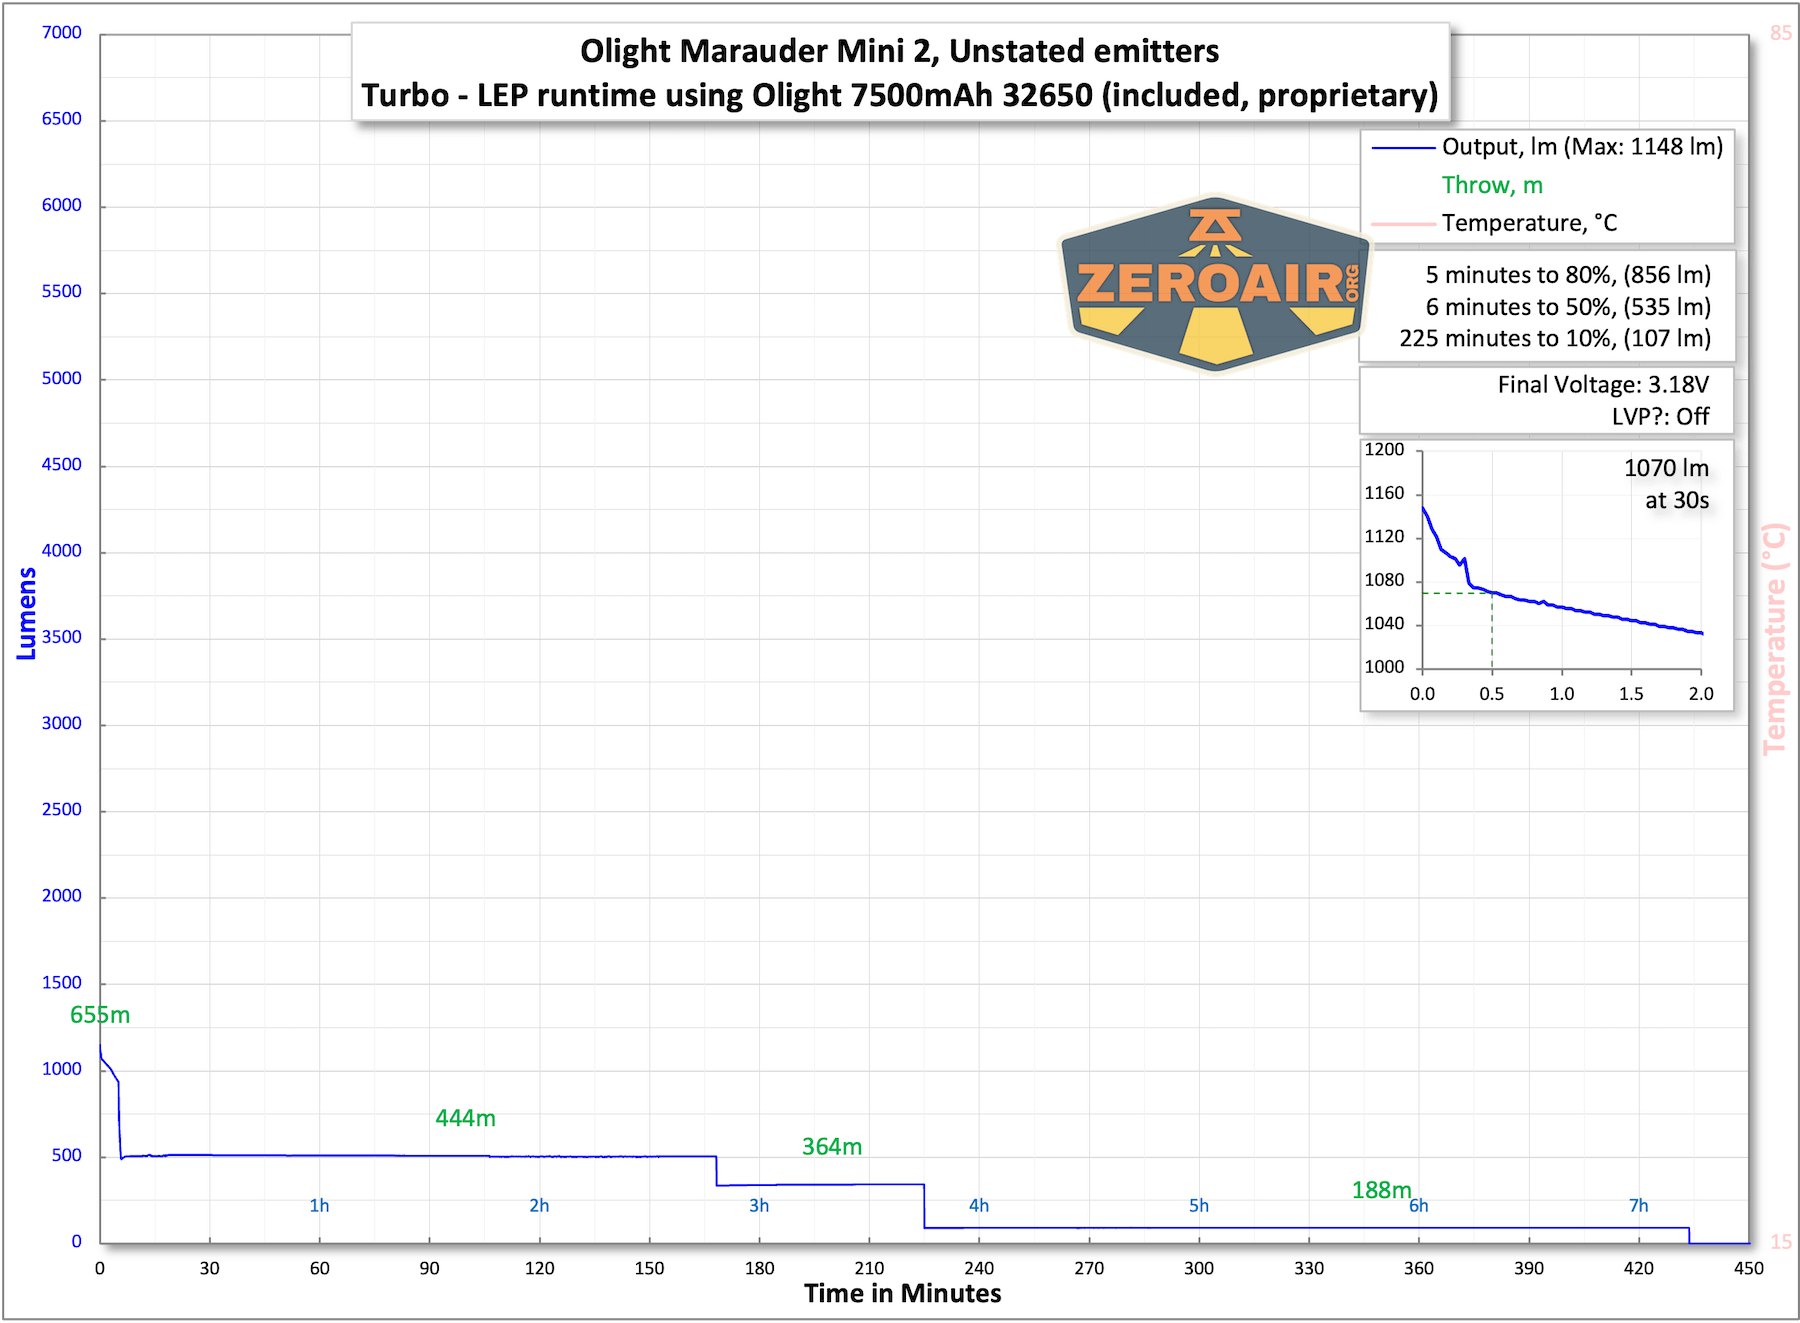
The light does shut off with low voltage protection, and the stepdowns seem to approximate what Olight’s manual claims.
The temperature lines in these charts are included as general context, not precise measurements. The values represent the range (min to max) during testing, but should not be taken as exact readings. A temperature sensor is not always attached to the bezel (or even the hottest spot, assuming that could be defined). Even with ideal placement, too many variables affect temperature to definitively state a specific max value.
Charging
The Olight Marauder Mini 2 offers charging via USB-C. It also still retains Olight’s proprietary magnetic charging.
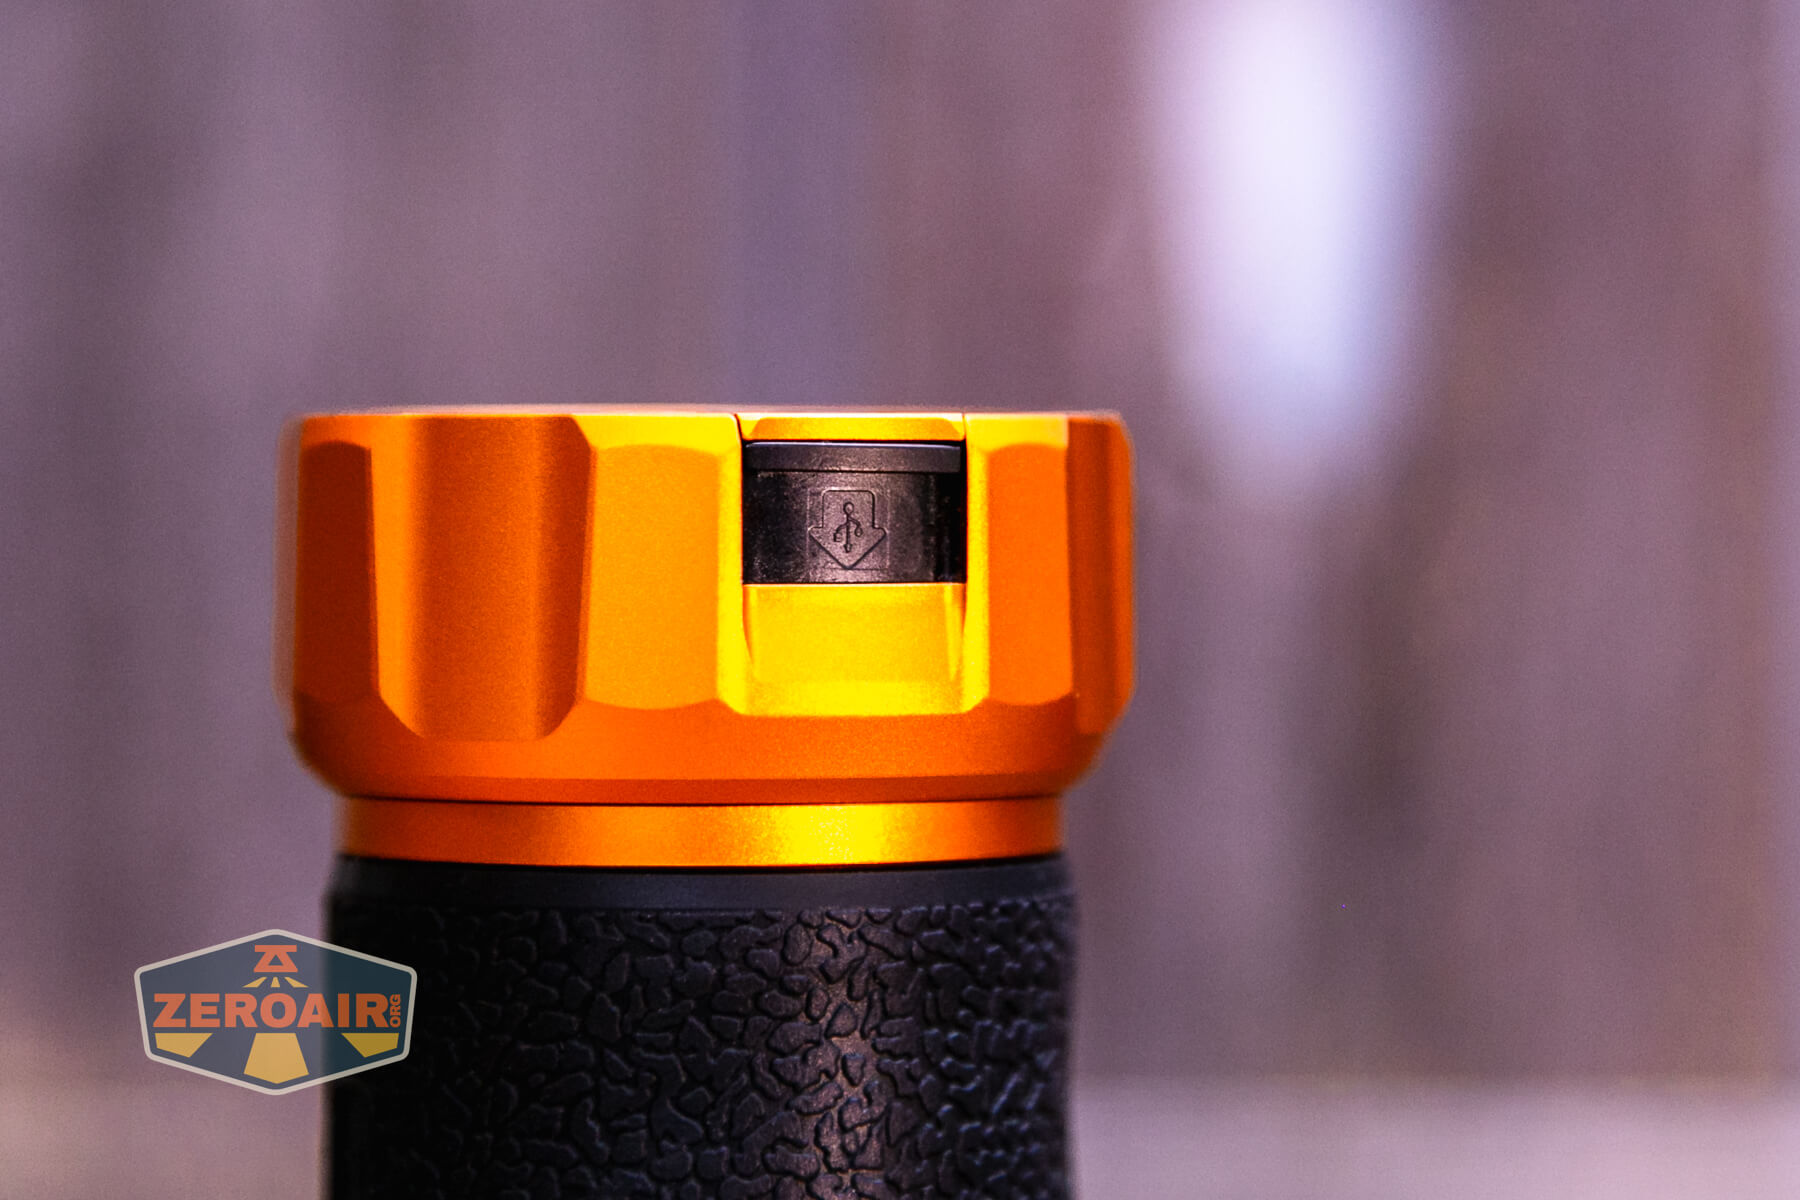
The charging port here has a little sliding door. The light will work with the sliding door open, but it’s probably bad practice to leave it open all the time. I like that the door isn’t hinged, as this seems less likely to break off accidentally.

Again, here’s the lanyard charging cable. The cable is USB-C to USB-C. It’s a fine (short) cable.
Charging is fine and quick at around 2.7A. For this 7500mAh cell, that’s a very low rate, but it should make the battery last a good long time. That said, it’s noteworthy that the charging doesn’t seem to take advantage of any power delivery options and charges at only 5V.

There’s an indicator on the rotary e-switch that gives a charging indication.
Modes and Currents
I’m not sure what Olight calls these modes, but to maintain my sanity, I’m just going to label them 1-9 with 9 being the highest, and indicate which light is being tested. You’ll get it. (Or if you don’t get it, this probably isn’t the data that would matter to you anyway.) The manual does cover the scheduled stepdowns. I have not put that information in this table, as it’s listed as percentages in the manual. If you wish to see that information, please consult the manual in the section above.
| Mode | Mode Claimed Output (lm) | Claimed Runtime | Measured Lumens | Tailcap Amps |
|---|---|---|---|---|
| 9 – Flood front | 10000 | 2m | 6927 (0s) 6762 (30s) |
20.11 |
| 8 – Flood front | 5000 | 4m | 3748 (0s) 3723 (30s) |
8.76 |
| 7 – Flood front | 2500 | 30m | 1872 | 3.66 |
| 6 – Flood front | 1200 | 3h | 924 | 1.69 |
| 5 – Flood front | 600 | 7h | 469 | 0.84 |
| 4 – Flood front | 300 | 13h | 239 | 0.43 |
| 3 – Flood front | 150 | 27h | 124 | 0.22 |
| 2 – Flood front | 50 | 83h | 34 | 0.05 |
| 1 – Flood front | 1.5 | 50d | 1.2 | [low] |
| 9 – Both front | 8000 | 2m | 6098 (0s) 5659 (30s) |
18.22 |
| 8 – Both front | 6000 | 4m | 4602 (0s) 4773 (30s) |
12.26 |
| 7 – Both front | 3500 | 6m | 2684 | 6.53 |
| 6 – Both front | 1800 | 1.5h | 1499 | 3.51 |
| 5 – Both front | 1000 | 3h | 917 | 2.05 |
| 4 – Both front | 700 | 5.5h | 541 | 1.14 |
| 3 – Both front | 300 | 14h | 234 | 0.44 |
| 2 – Both front | 100 | 37h | 109 | 0.15 |
| 1 – Both front | 2 | 40d | 1.5 | [low] |
| 9 – Spot front | 1350 | 4m | 1148 (0s) 1070 (30s) |
6.11 |
| 8 – Spot front | 1000 | 8m | 944 | 4.02 |
| 7 – Spot front | 800 | 15m | 727 | 2.56 |
| 6 – Spot front | 600 | 3h | 565 | 1.78 |
| 5 – Spot front | 400 | 6h | 275 | 1.01 |
| 4 – Spot front | 200 | 12h | 204 | 0.48 |
| 3 – Spot front | 100 | 30h | 98 | 0.21 |
| 2 – Spot front | 50 | 62h | 48 | 0.09 |
| 1 – Spot front | 0.5 | 95d | 0.55 | [low] |
| 5 – Red | 400 | 2h | [261] | 1.94 |
| 4 – Red | 100 | 15h | [85] | 0.32 |
| 3 – Red | 25 | 84h | [29] | 0.08 |
| 2 – Red | 5 | 8.5d | [6.5] | [low] |
| 1 – Red | 1 | 35d | [1] | [low] |
| 5 – Side white | 300 | 3h | [147] | 0.99 |
| 4 – Side white | 100 | 12h | [84] | 0.40 |
| 3 – Side white | 25 | 65h | [22.5] | 0.07 |
| 2 – Side white | 5 | 10d | [4.5] | [low] |
| 1 – Side white | 0.5 | 150d | [0.22] | [low] |
The numbers in brackets above are estimates. I am not calibrated for red lumens, and the side white emitter is mounted in such a way that I can’t access it in a calibrated way.
Pulse Width Modulation
None of the modes exhibits PWM in any mode. So the order here is essentially irrelevant. But the last row is the red emitter.
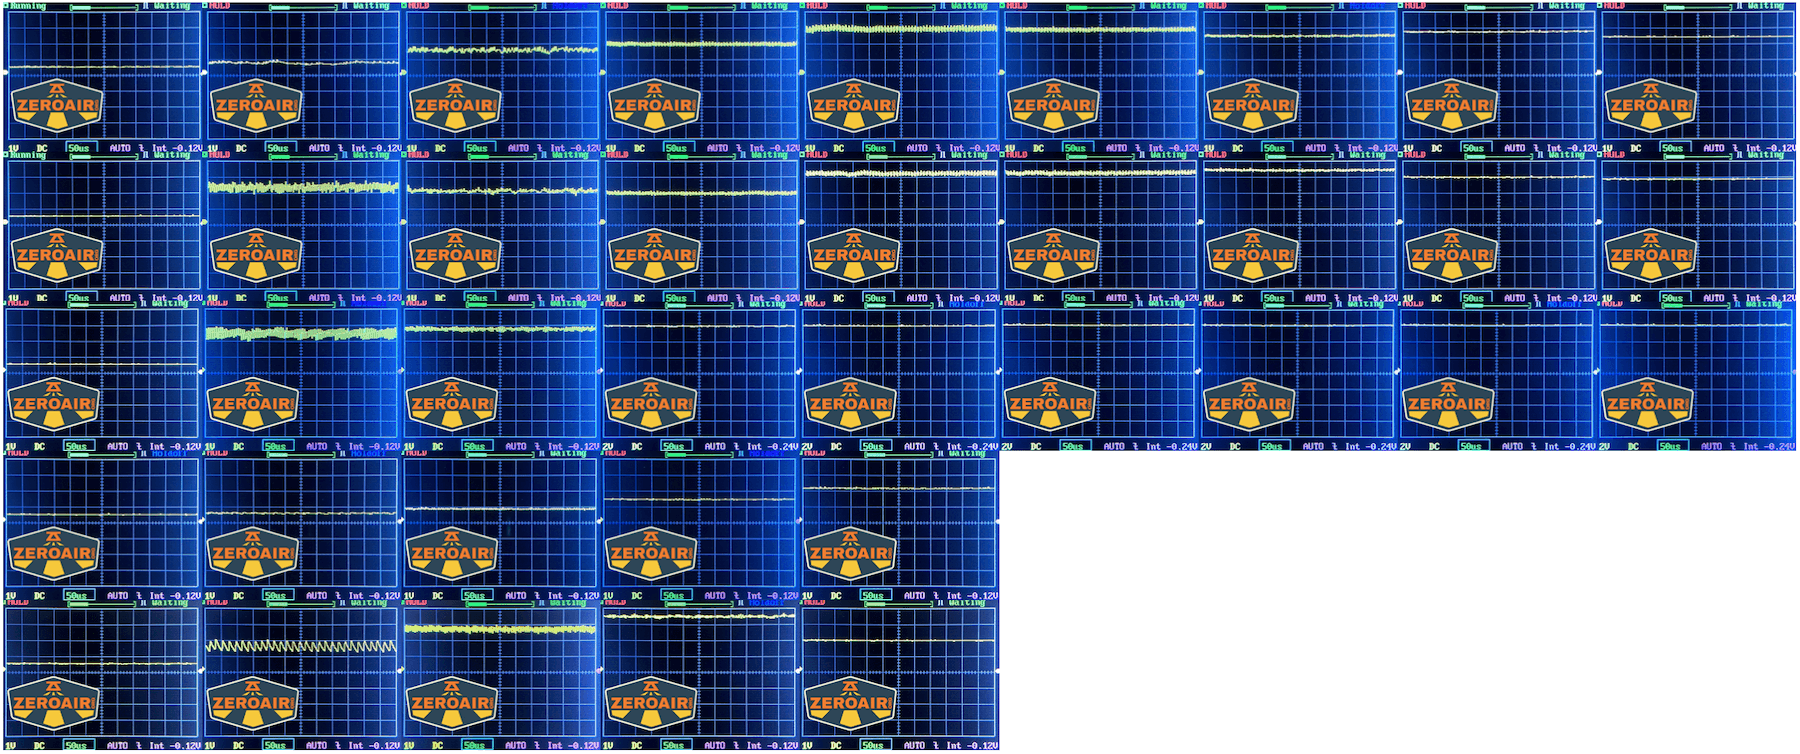
Click here to see a “baseline” – a chart with almost no light hitting the sensor.
Then there’s the Ultrafire WF-602C flashlight, which has some of the worst PWM I’ve seen. It’s so bad that I used a post about it to explain PWM! Here are multiple timescales (10ms, 5ms, 2ms, 1ms, 0.5ms, 0.2ms) to make comparing this “worst” PWM light to the test light easier. That post also explains why I didn’t test the WF-602C at the usual 50us scale.
User Interface and Operation
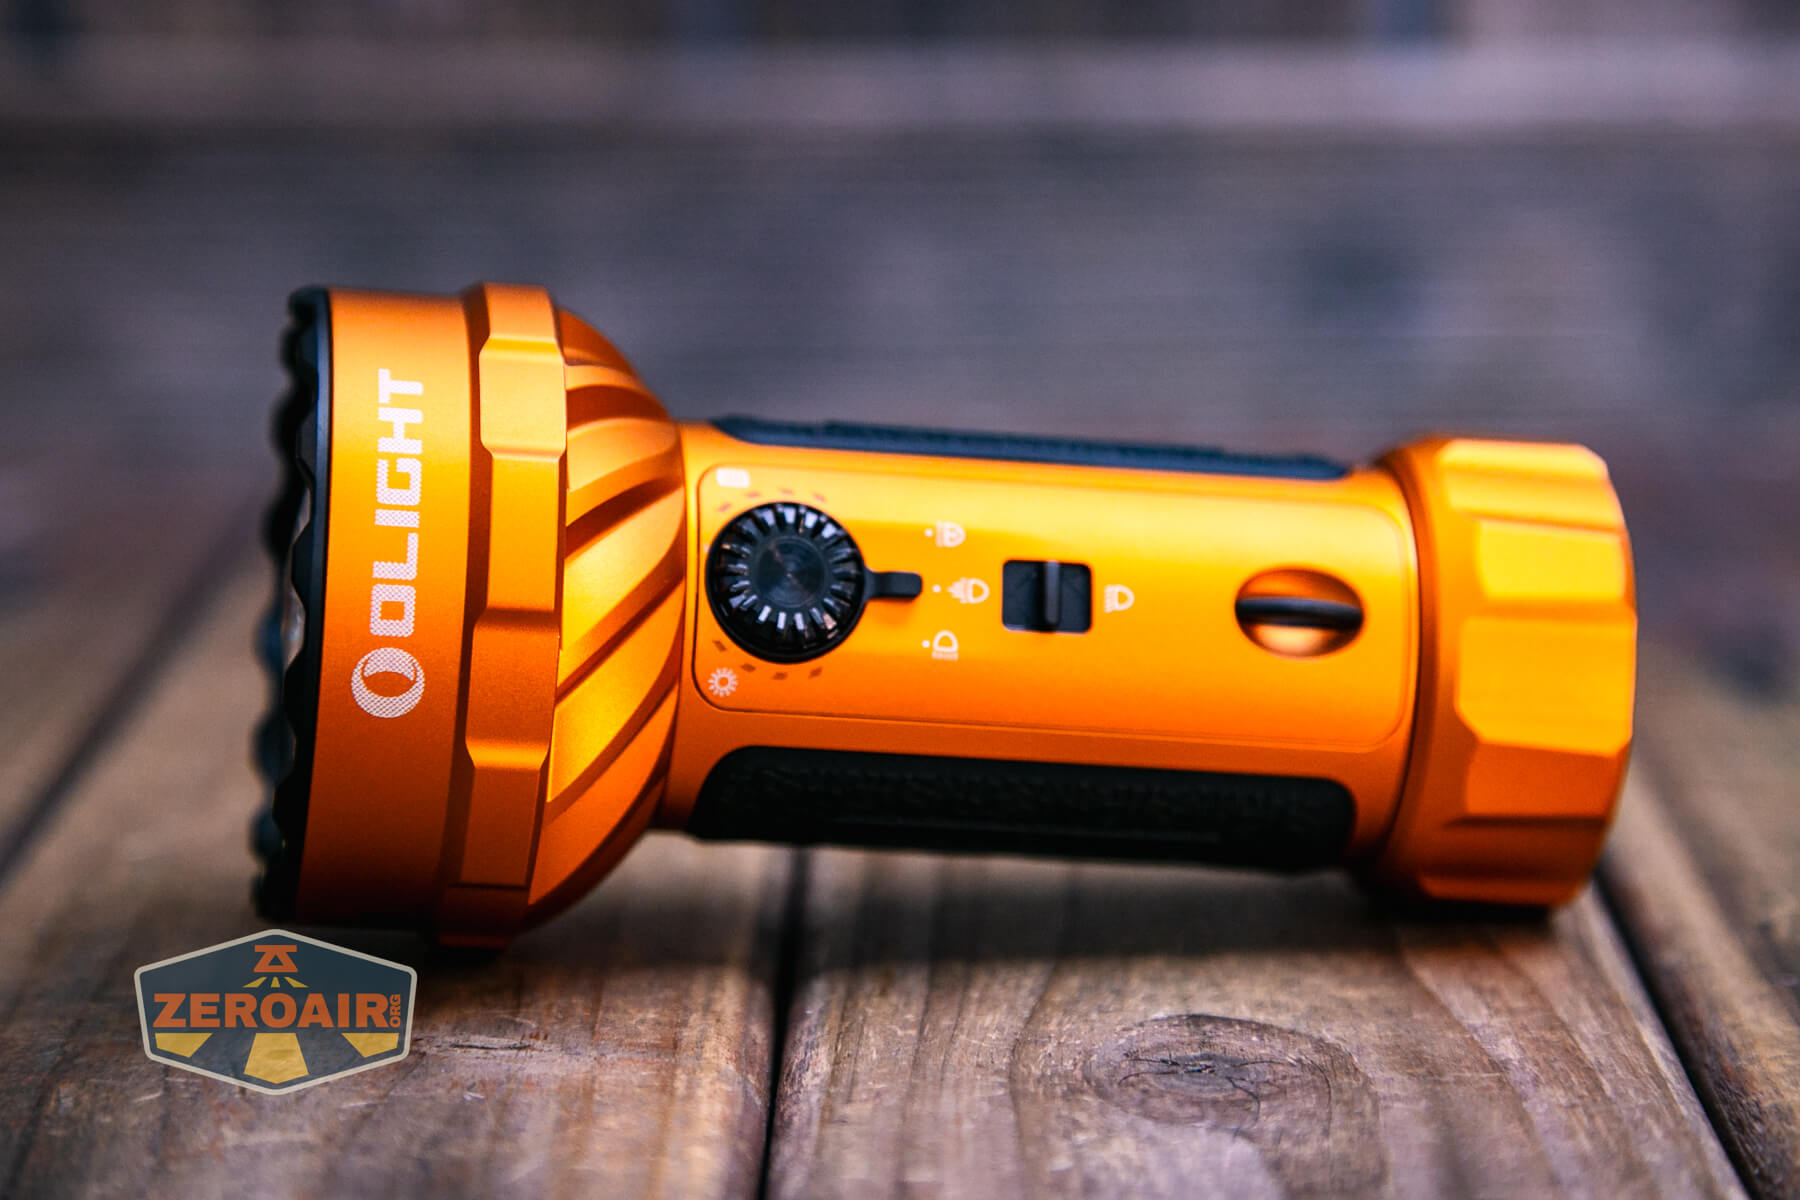
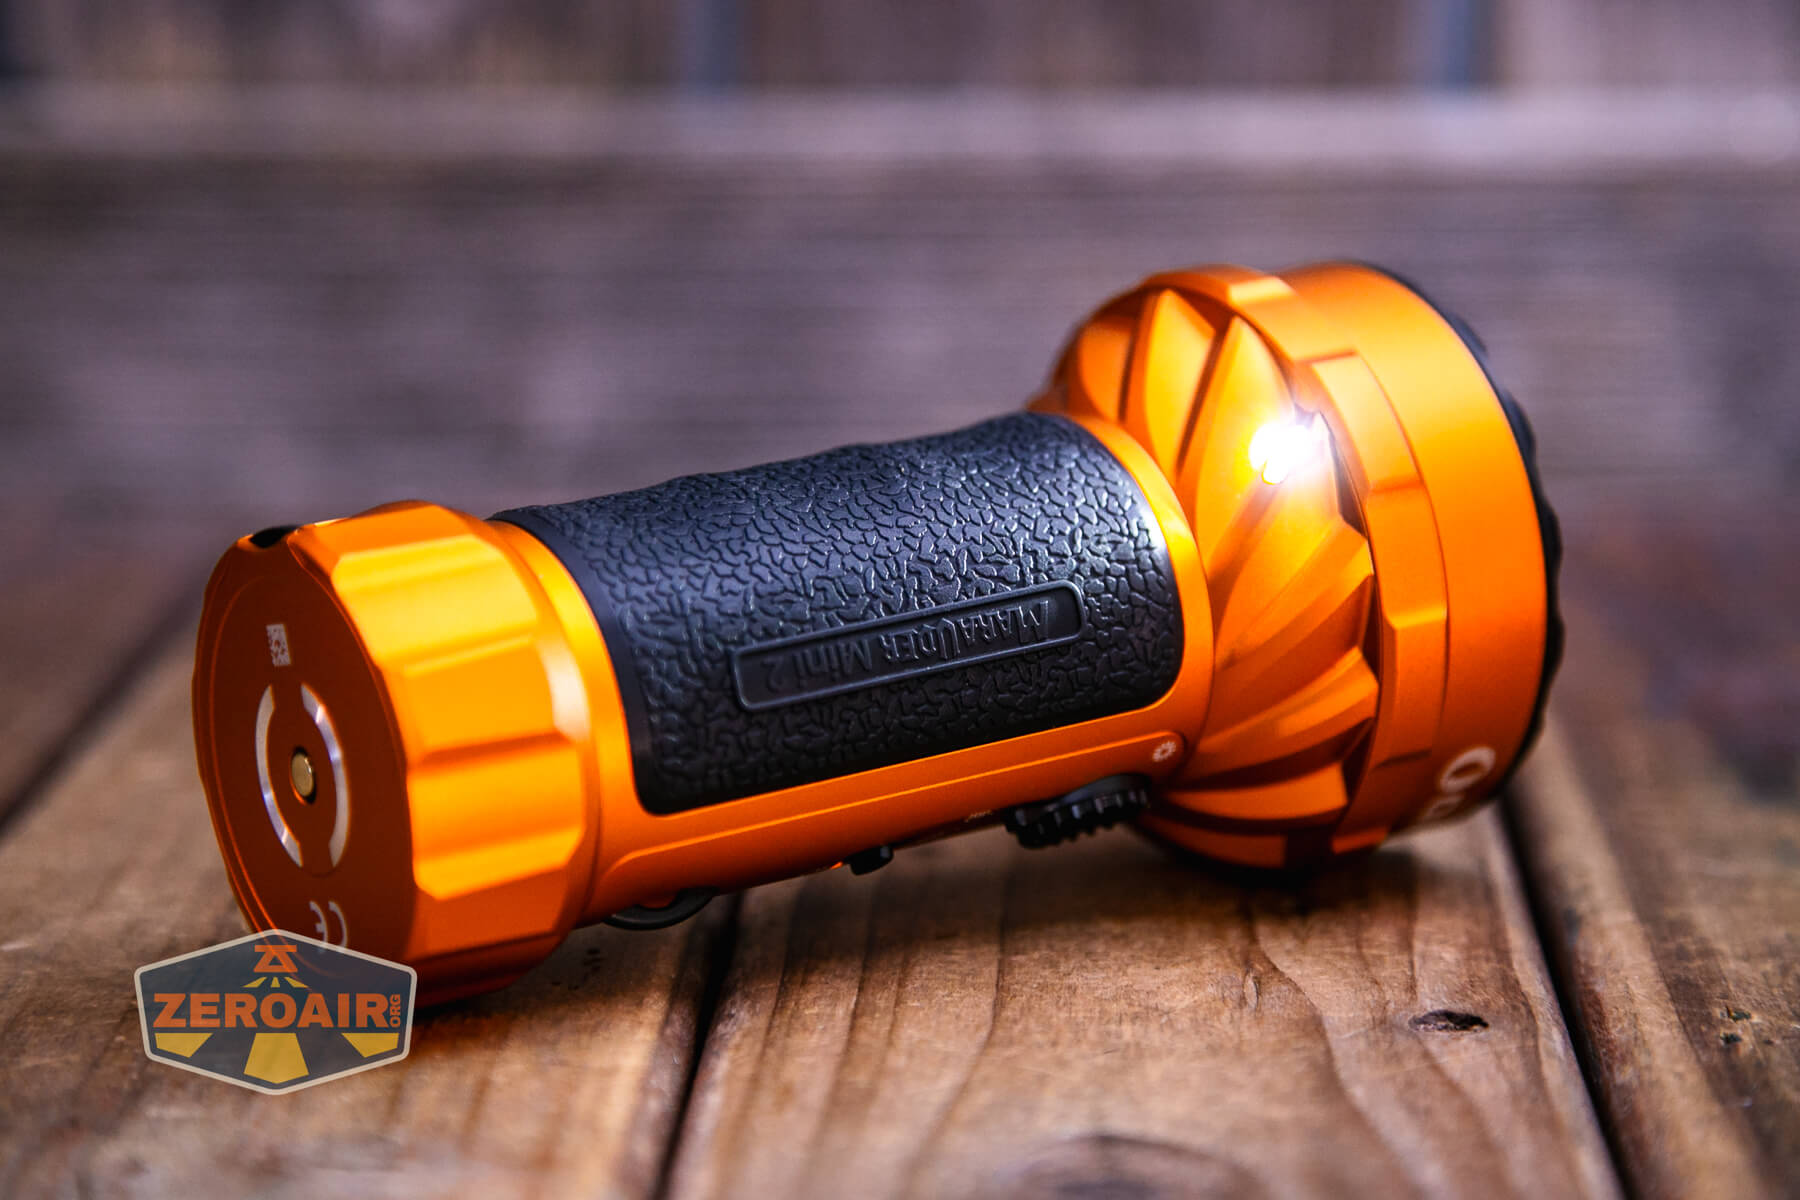
There are three switches on the Olight Marauder Mini 2 flashlight. First is this rotary switch. One notable change from the original is that the indicators hare much more subtle. You might even say they “look nicer” but that’s very subjective. I would say that!
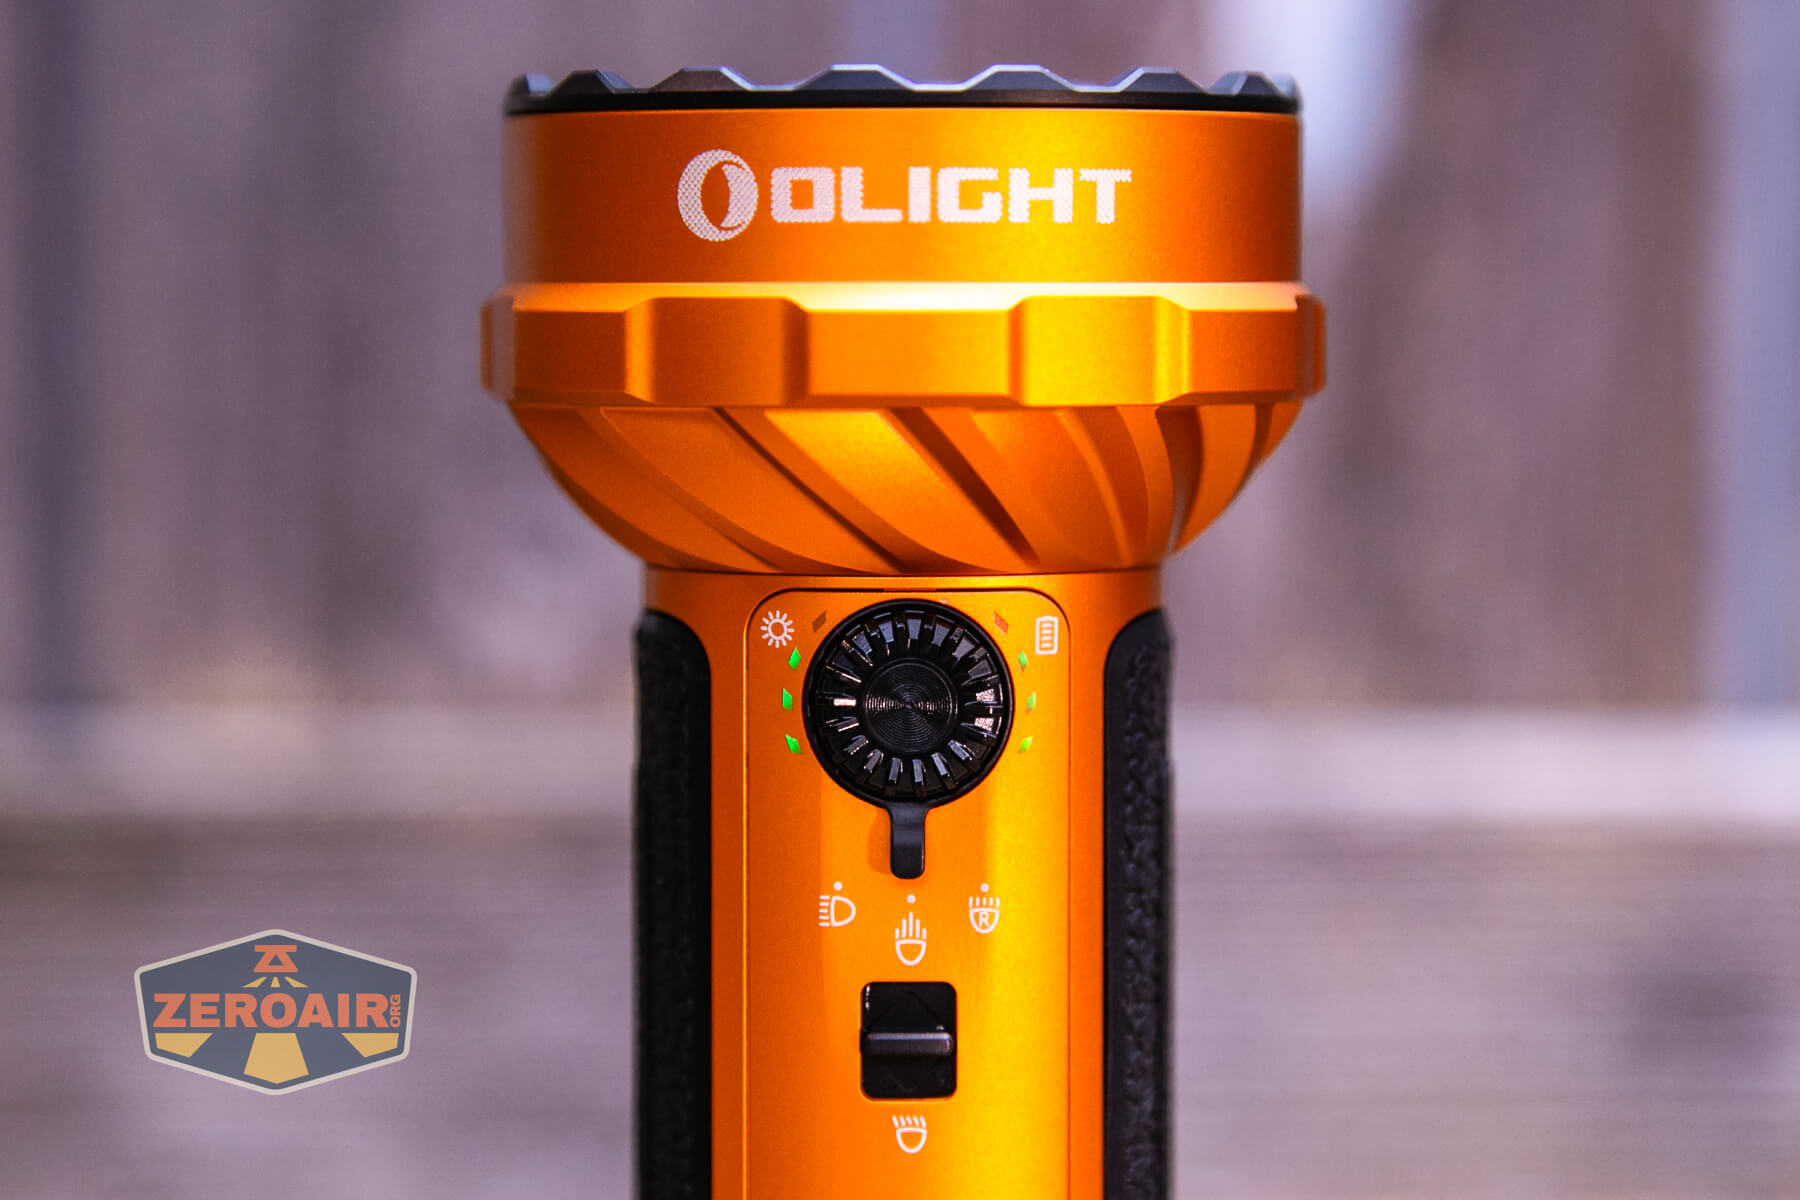
On, or sort of under, but attached to and part of the rotary switch is a toggle that selects between (leftmost) side white (I would call “lantern”) light, white front lights (middle position), and finally (rightmost) is the red toggle.
If the first toggle is in the middle position, you get three further options with the toggle switch below (in the photo above, it’s the bottom-most switch). Options on that switch are: flood, both, and spot.
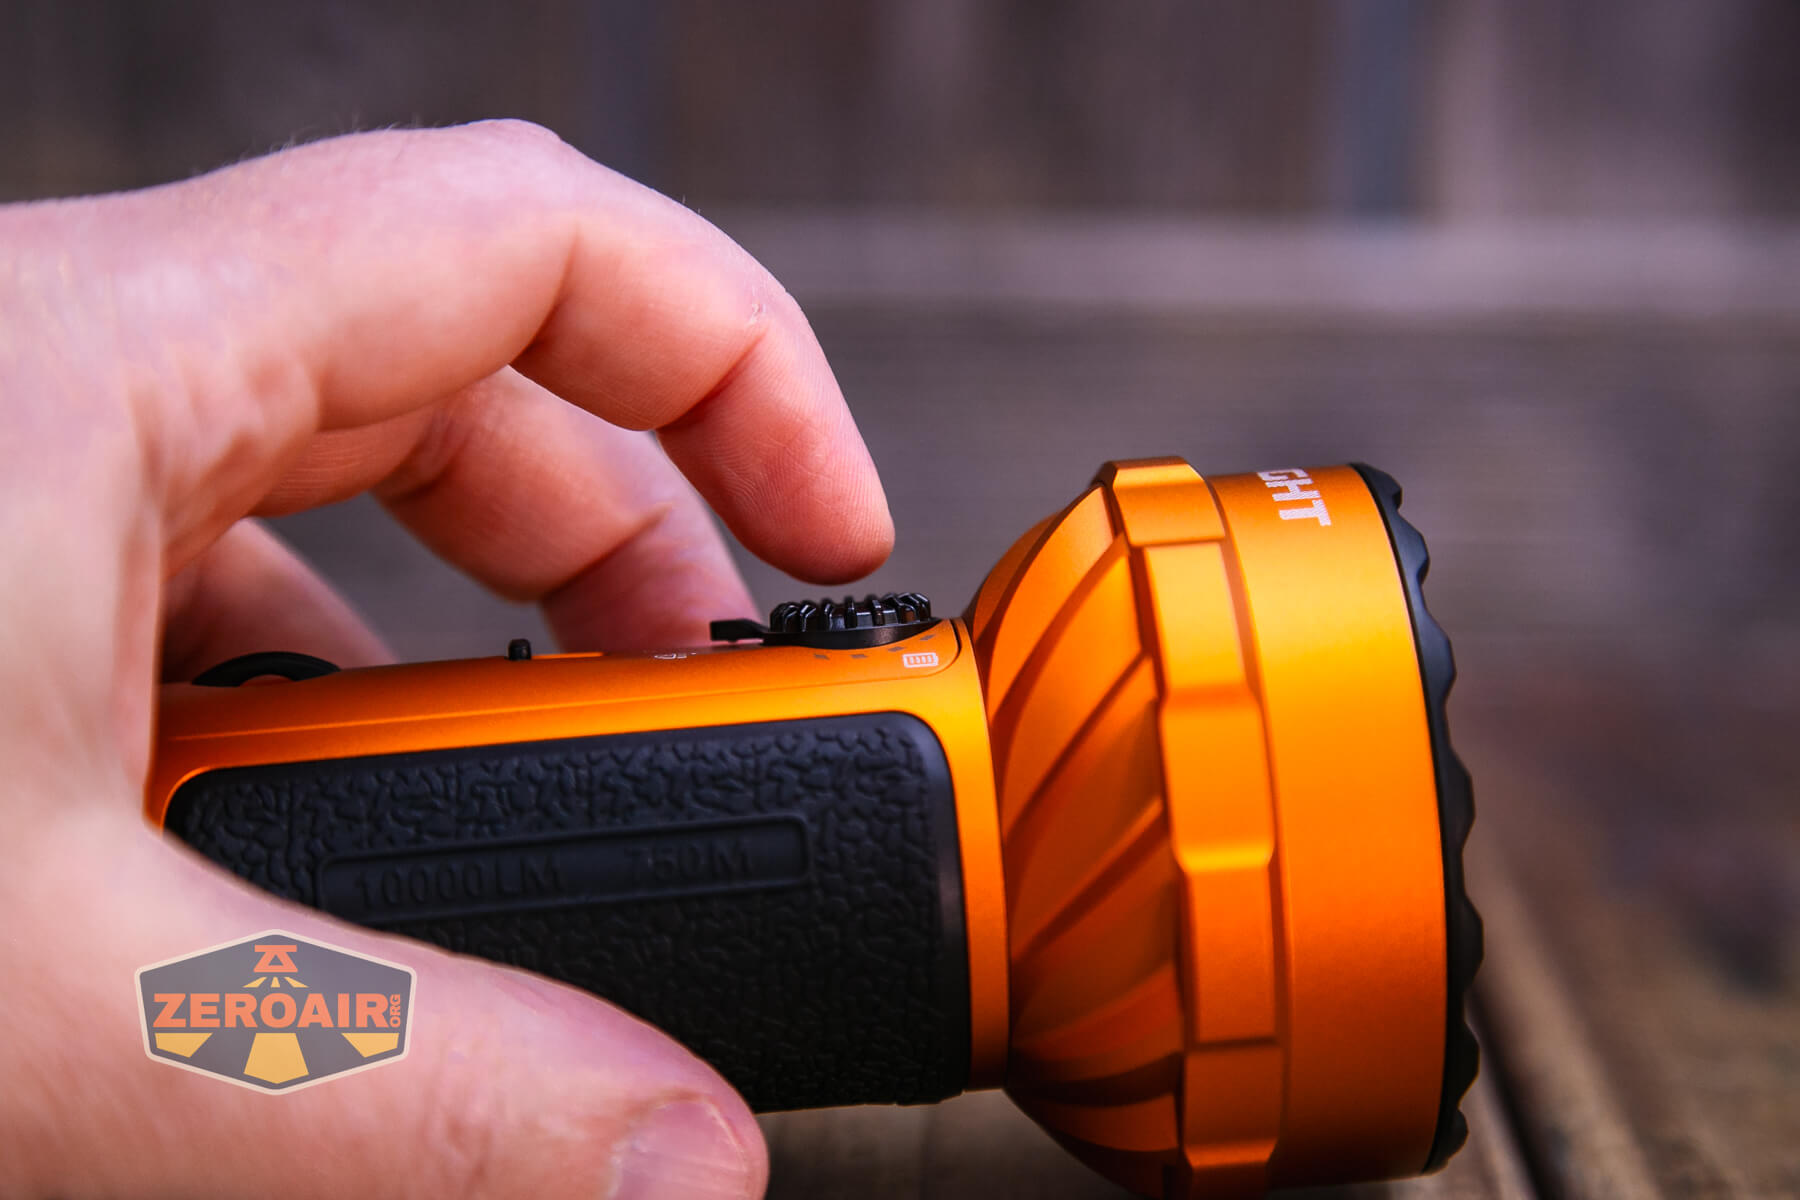
The press action on the e-switch is very low. Rotating this rotary controller is fine, but I was constantly frustrated by it. It’s not a position rotary. When rotating it does have detents (faux clicks) but they don’t correspond to levels. What makes the level change is sort of accelerating the rotatry into the next position. For me this is frustrating, because I tended to click once and expect a level change, then not get the level change, and then give the rotary more of a whirl, and overshoot my target.
In the field I’m sure this is all fine. But testing 9 modes individually, it was frustrating. (I actually had this exact same dislike on the original Olight Marauder Mini – it seems that this interface hasn’t changed.)

Here’s a user interface table! Generally the user interface for all front white modes are the same and the user interface for “lantern” white and front red are the same.
The front white emitters have 9 levels. Side white (lantern) and red have only 5 levels each.
| State | Action | Result |
|---|---|---|
| Off | Click Rotary Switch | Battery indicator (if the light has been off >10s) |
| Off | Rotate Rotary Switch 60 degrees | Unlock |
| Unlocked | Click Rotary Switch | On in previously used level. (Level can not be changed while output is off.) |
| On | Rotate Switch Clockwise | Increase output level |
| On | Rotate Switch Counterclockwise | Decrease output level |
| On | Click Rotary Switch | Off |
| Any | Flip the Toggle nearest rotary control | Switch from lantern to front white to red |
| Unlocked | Double Click Rotary Switch | Highest level for selected mode |
| Unlocked | Triple Click Rotary Switch | Strobe |
| Spotlight mode on and charging (on charging base) | Press e-switch 15x | Iterate between 60 degree rotate to unlock and hold the button to unlock |
| Off | Hold | Lowest level of selected output |
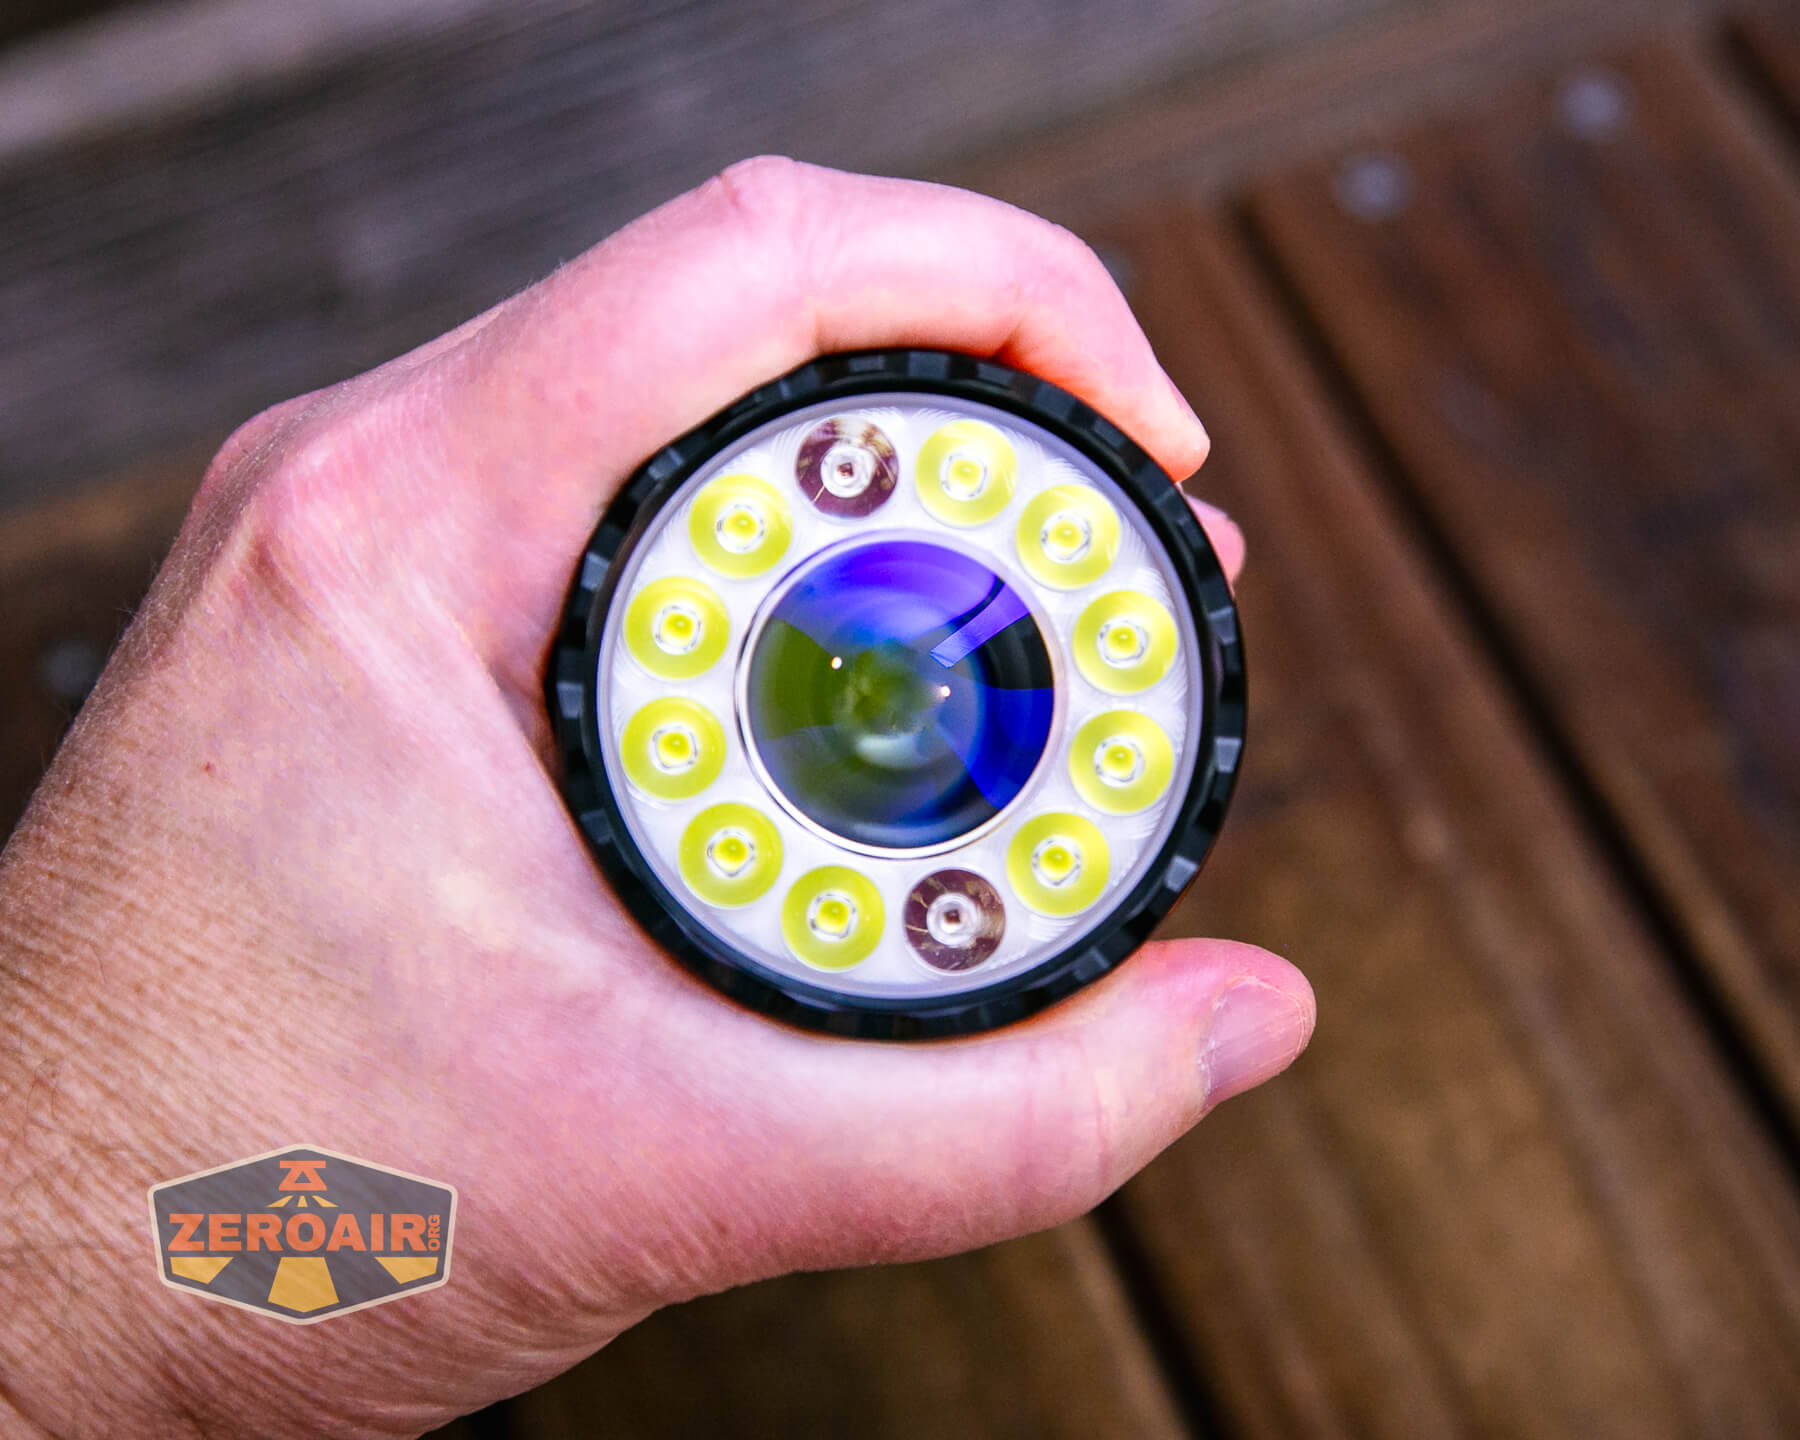
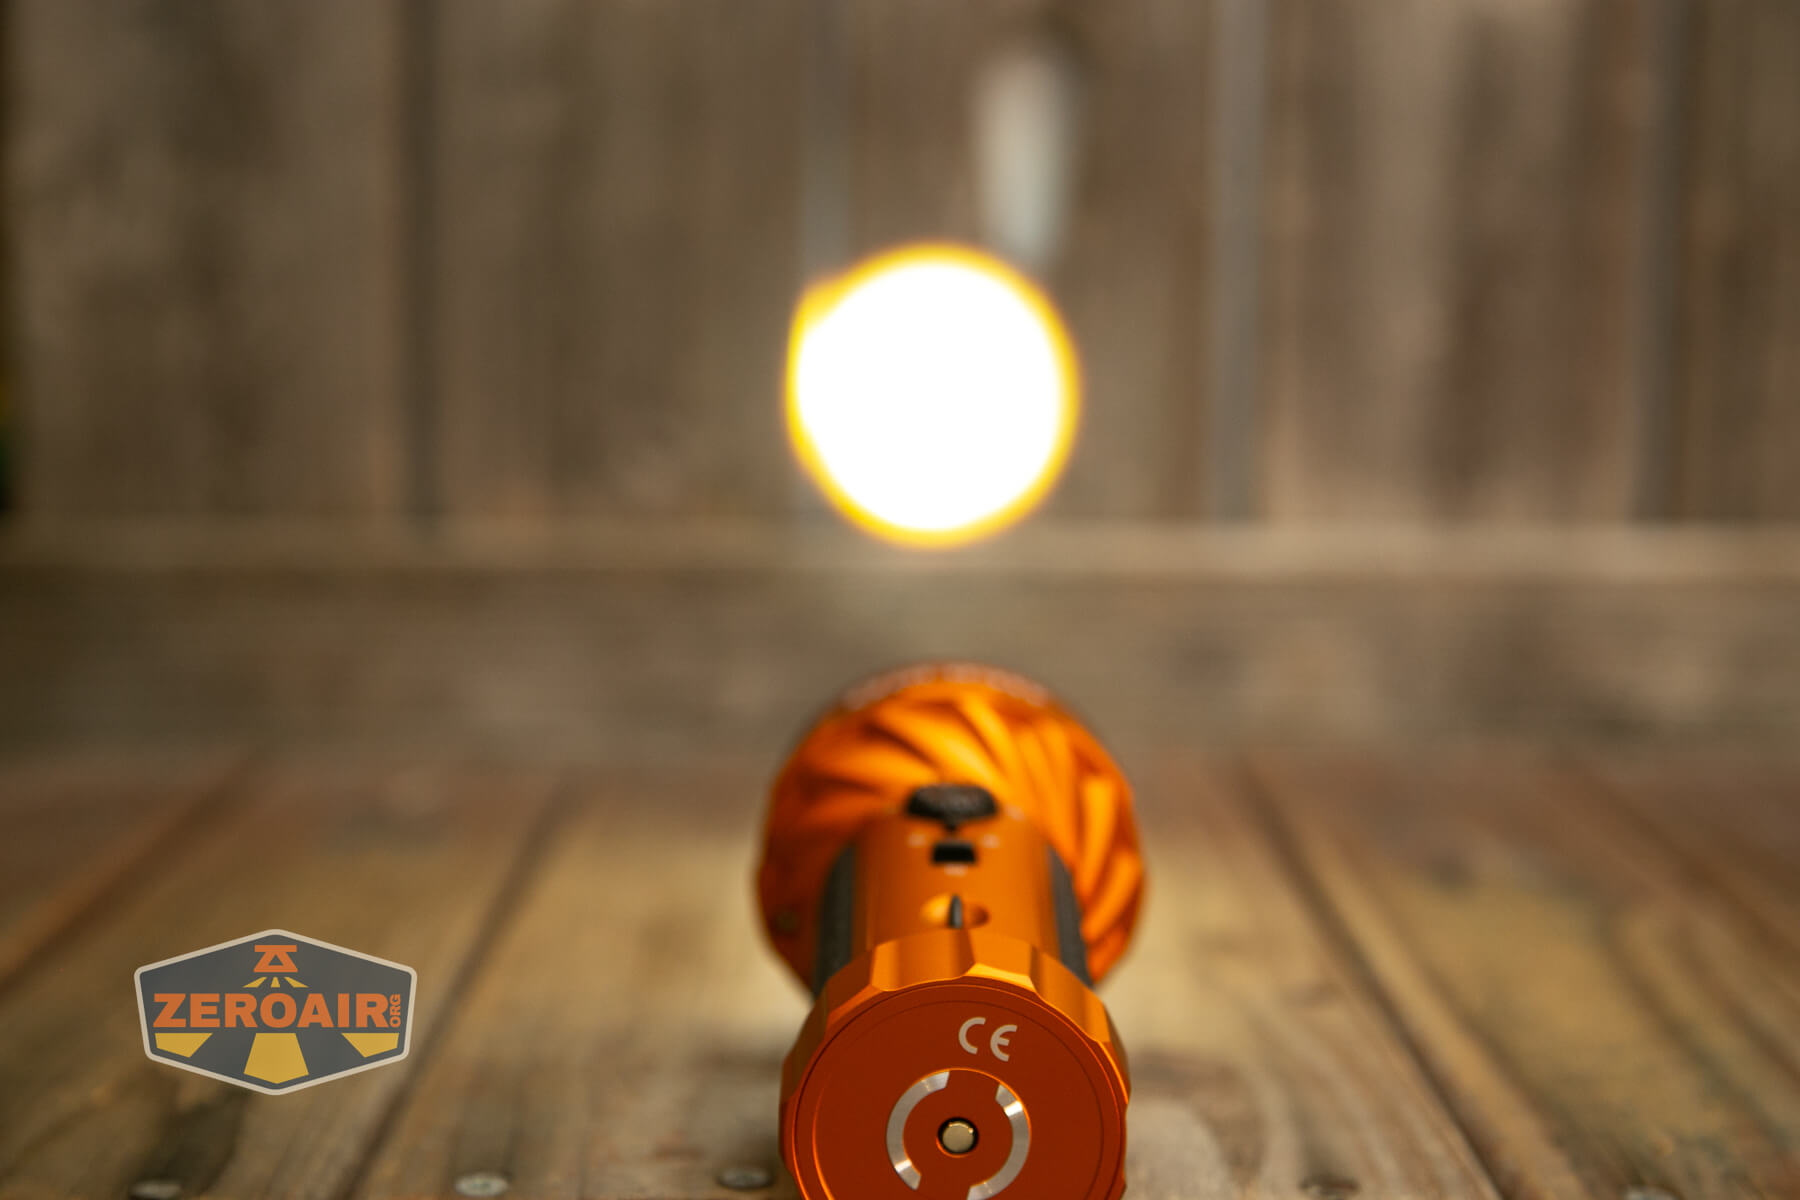
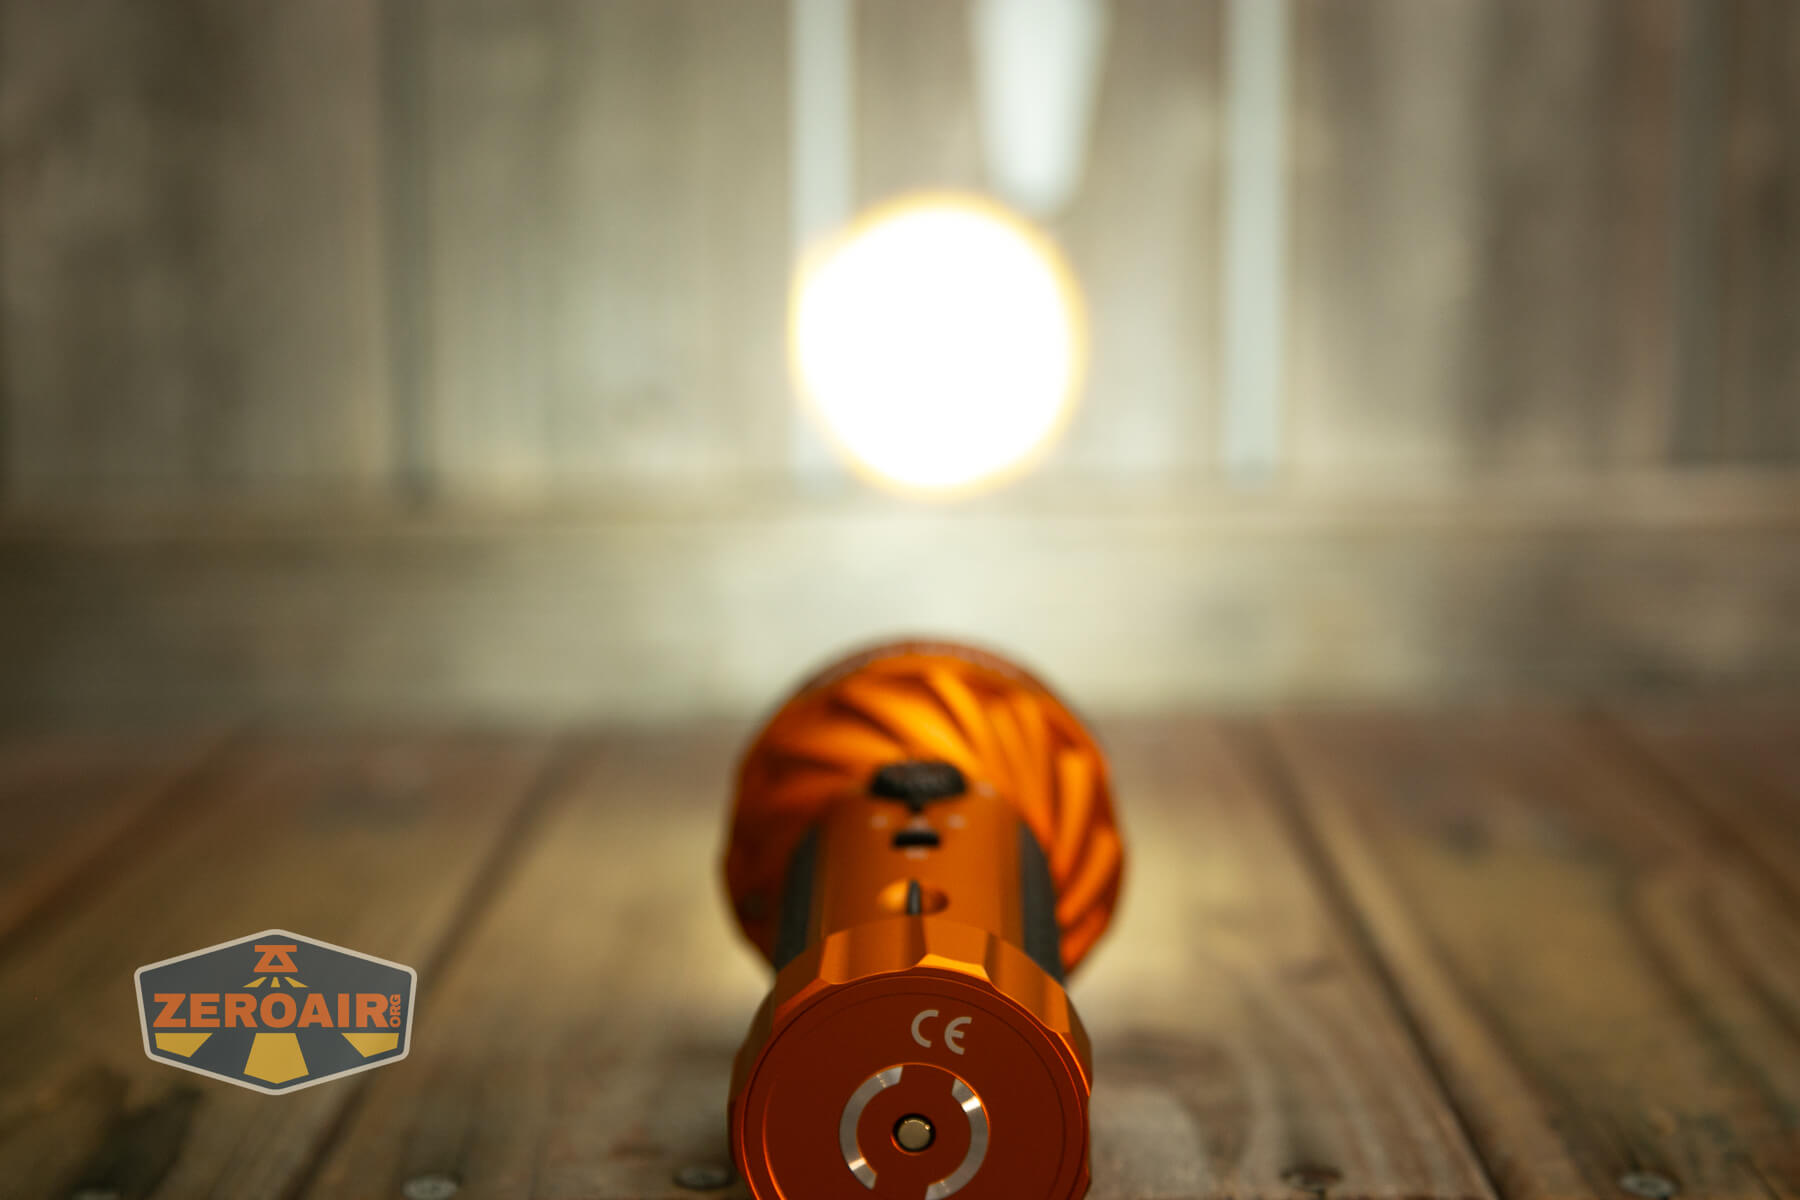
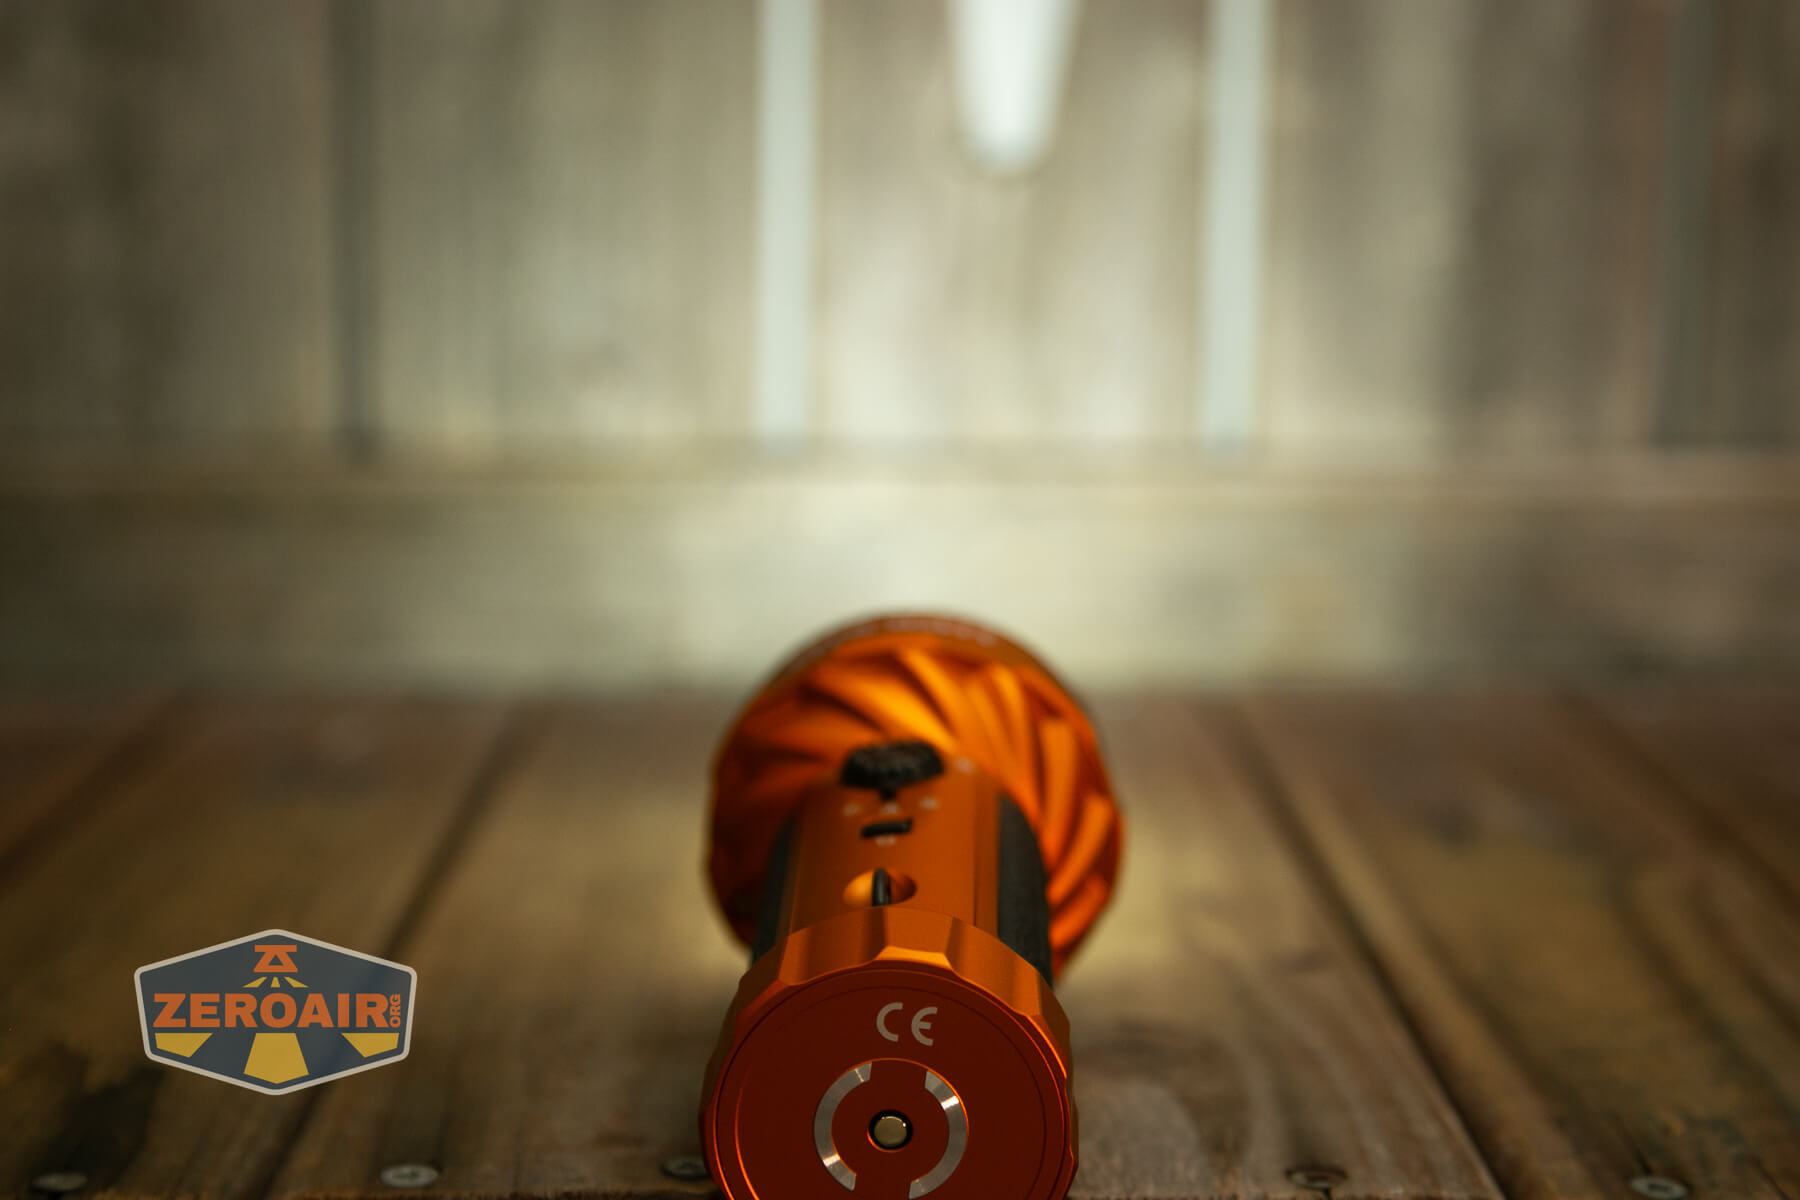
LED and Beam
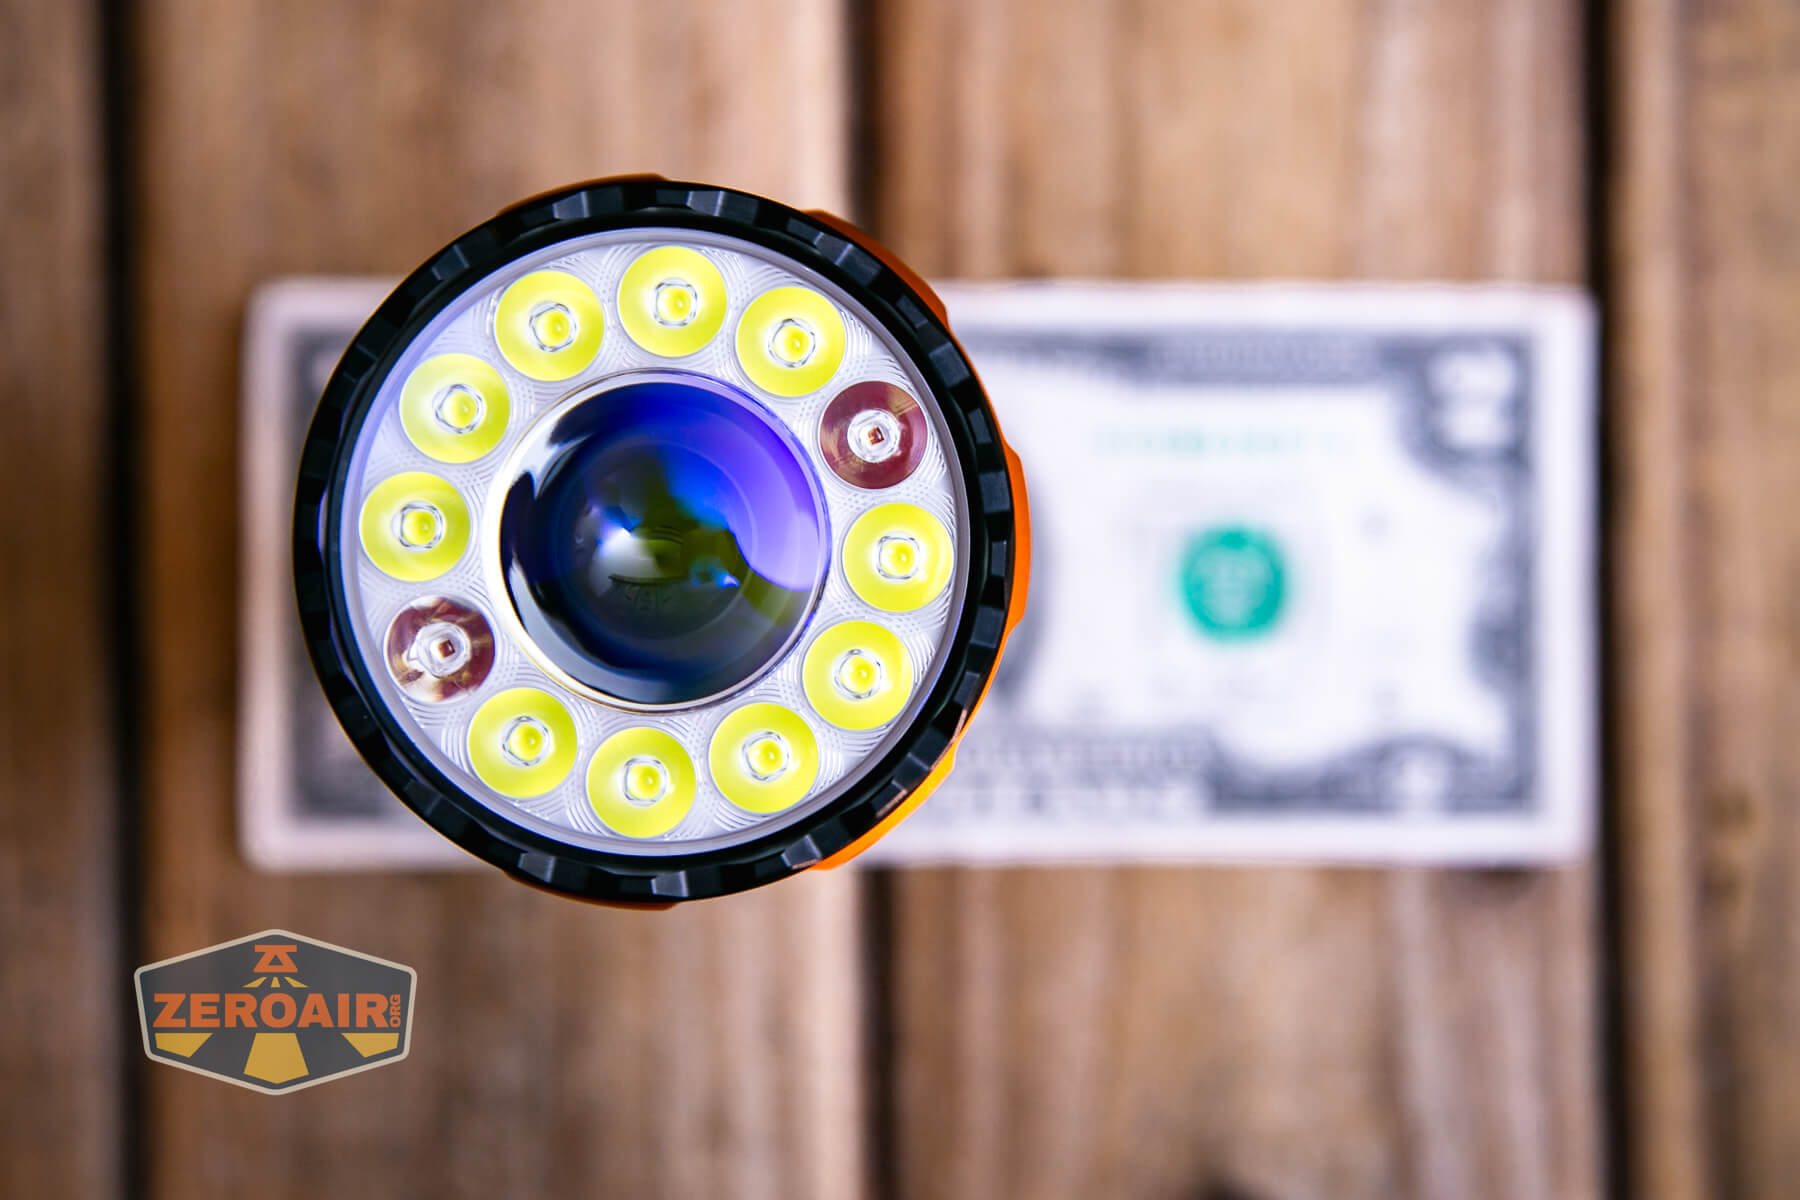
I can’t see where Olight has any specific definitions of what the emitters in the Olight Marauder Mini 2 flashlight are. At the very least, I can guess that the flood emitters are Osram P9. Olight does state the CCT. Flood and throw emitters are both 6500K. There’s no claim about the side light, though.
I love this side light. I’m not even saying it’s super useful, and it’s definitely not the CRI and CCT I want in a position like this, but I just love that it’s there. It’s super surprising and novel, and I love it.
Now, do I wish it to be high CRI and warm? Absolutely! Does it look like it could be swapped? Not at all. It’s still neat though!

LED Color Report (CRI and CCT)
Below you can see the cool white nature of both the floody front emitters and the side white lantern emitter (second row). Both are very cool white and both are low CRI.

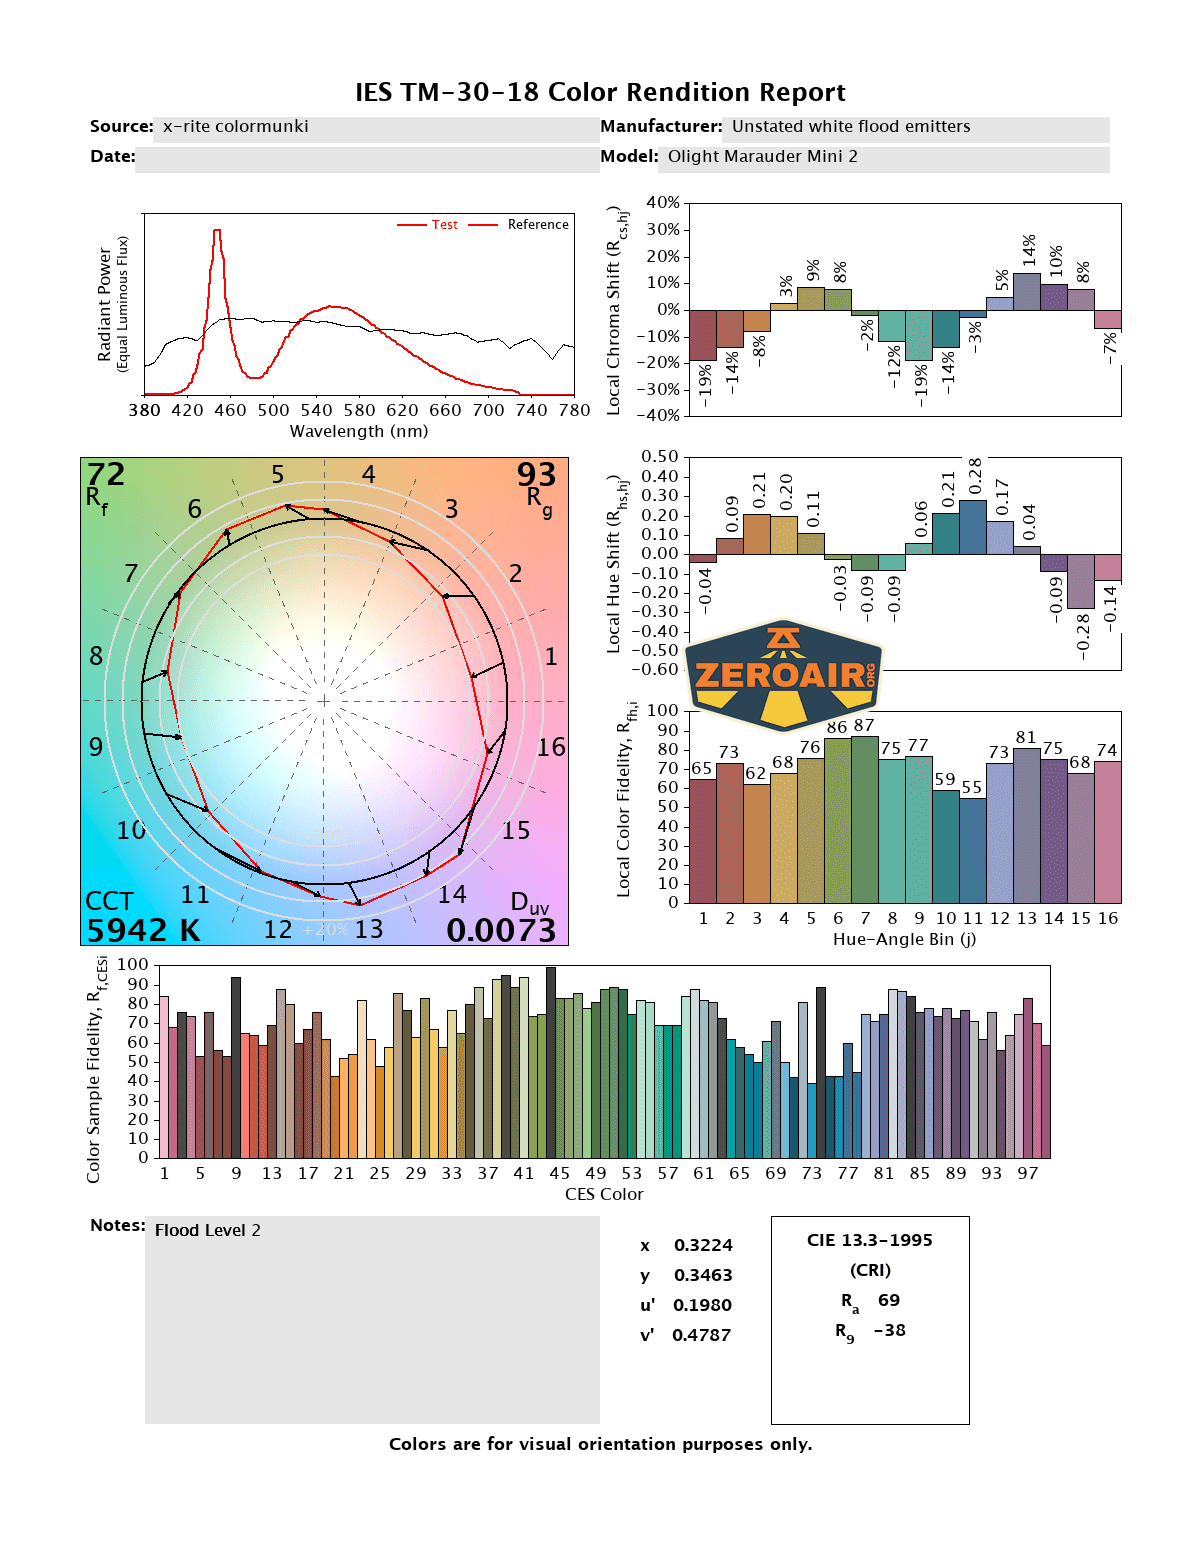

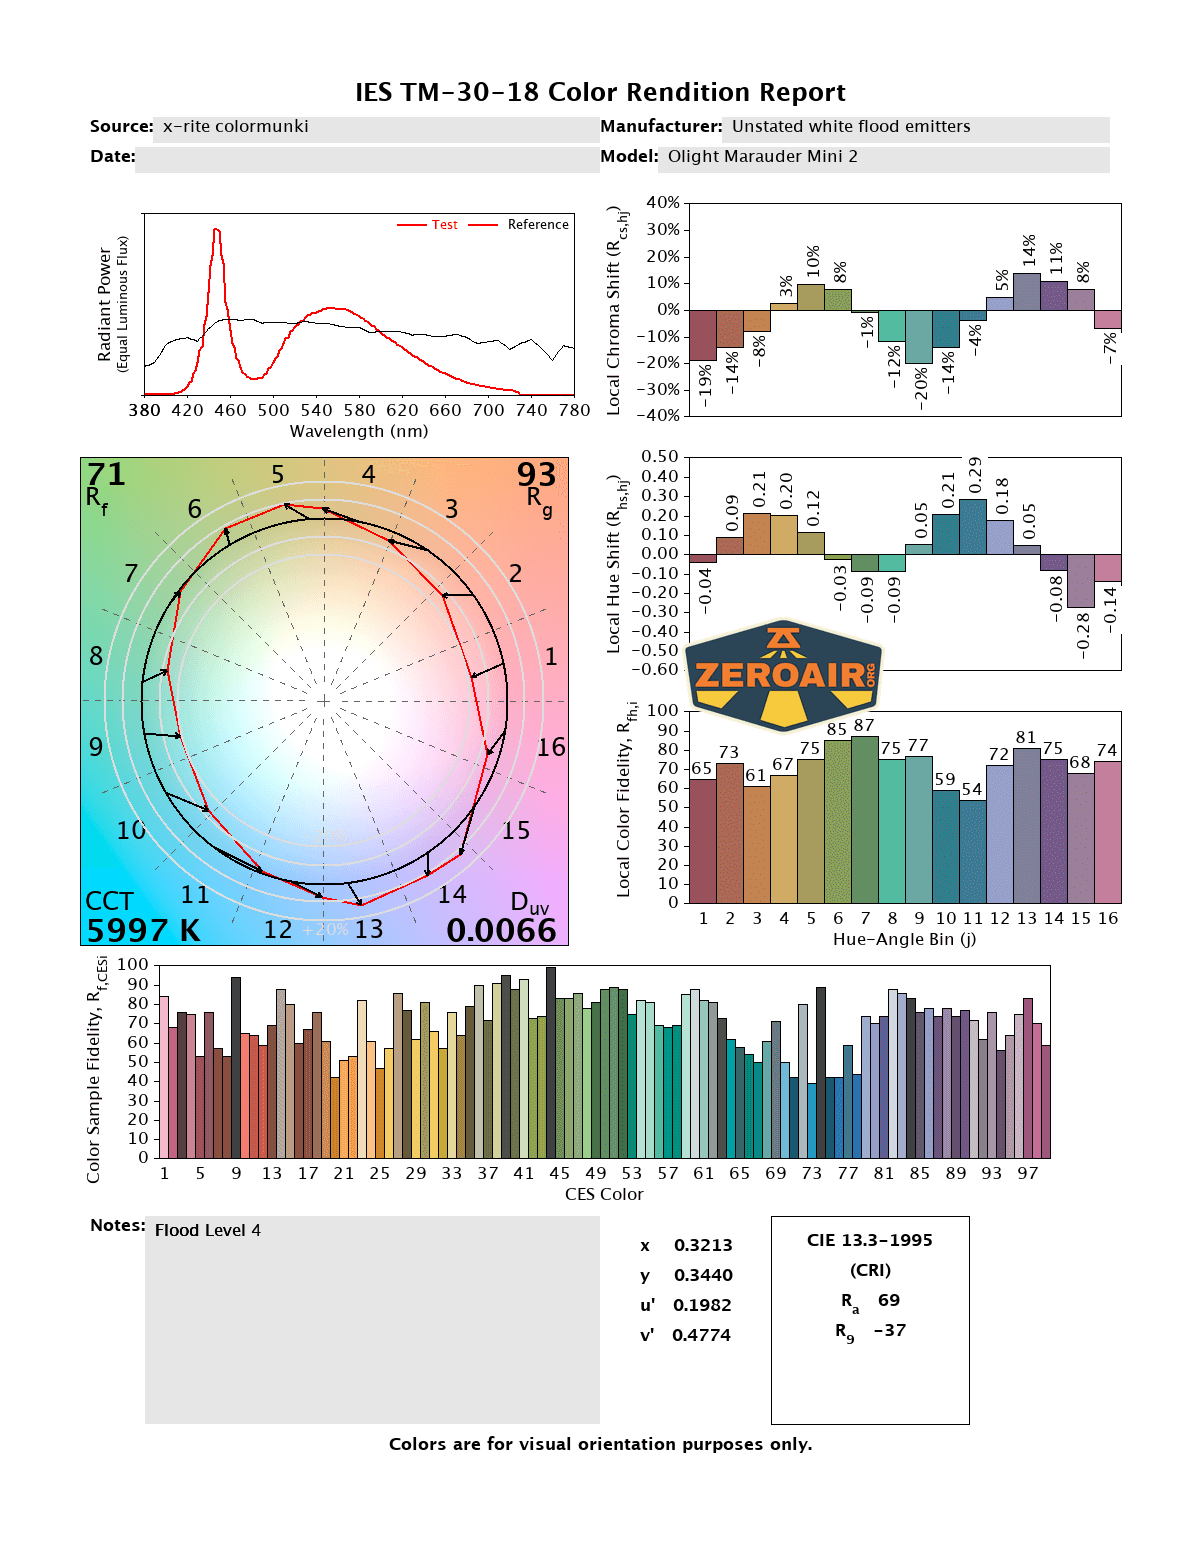

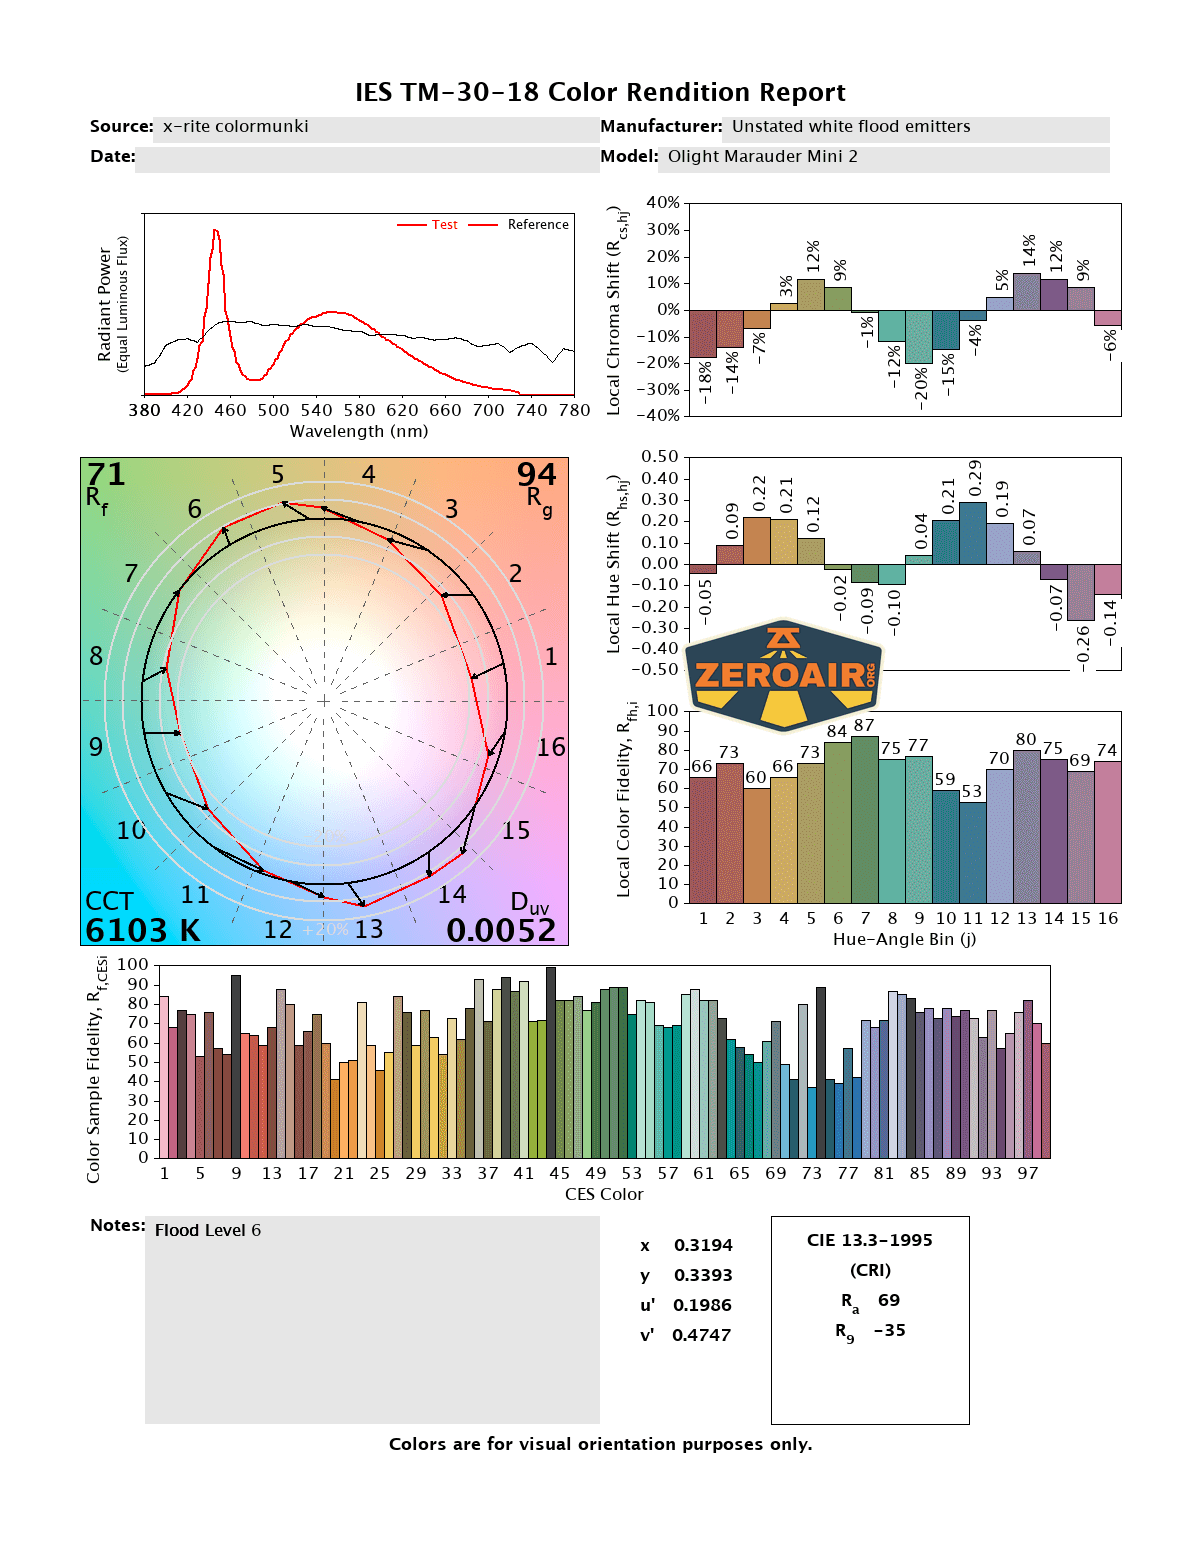


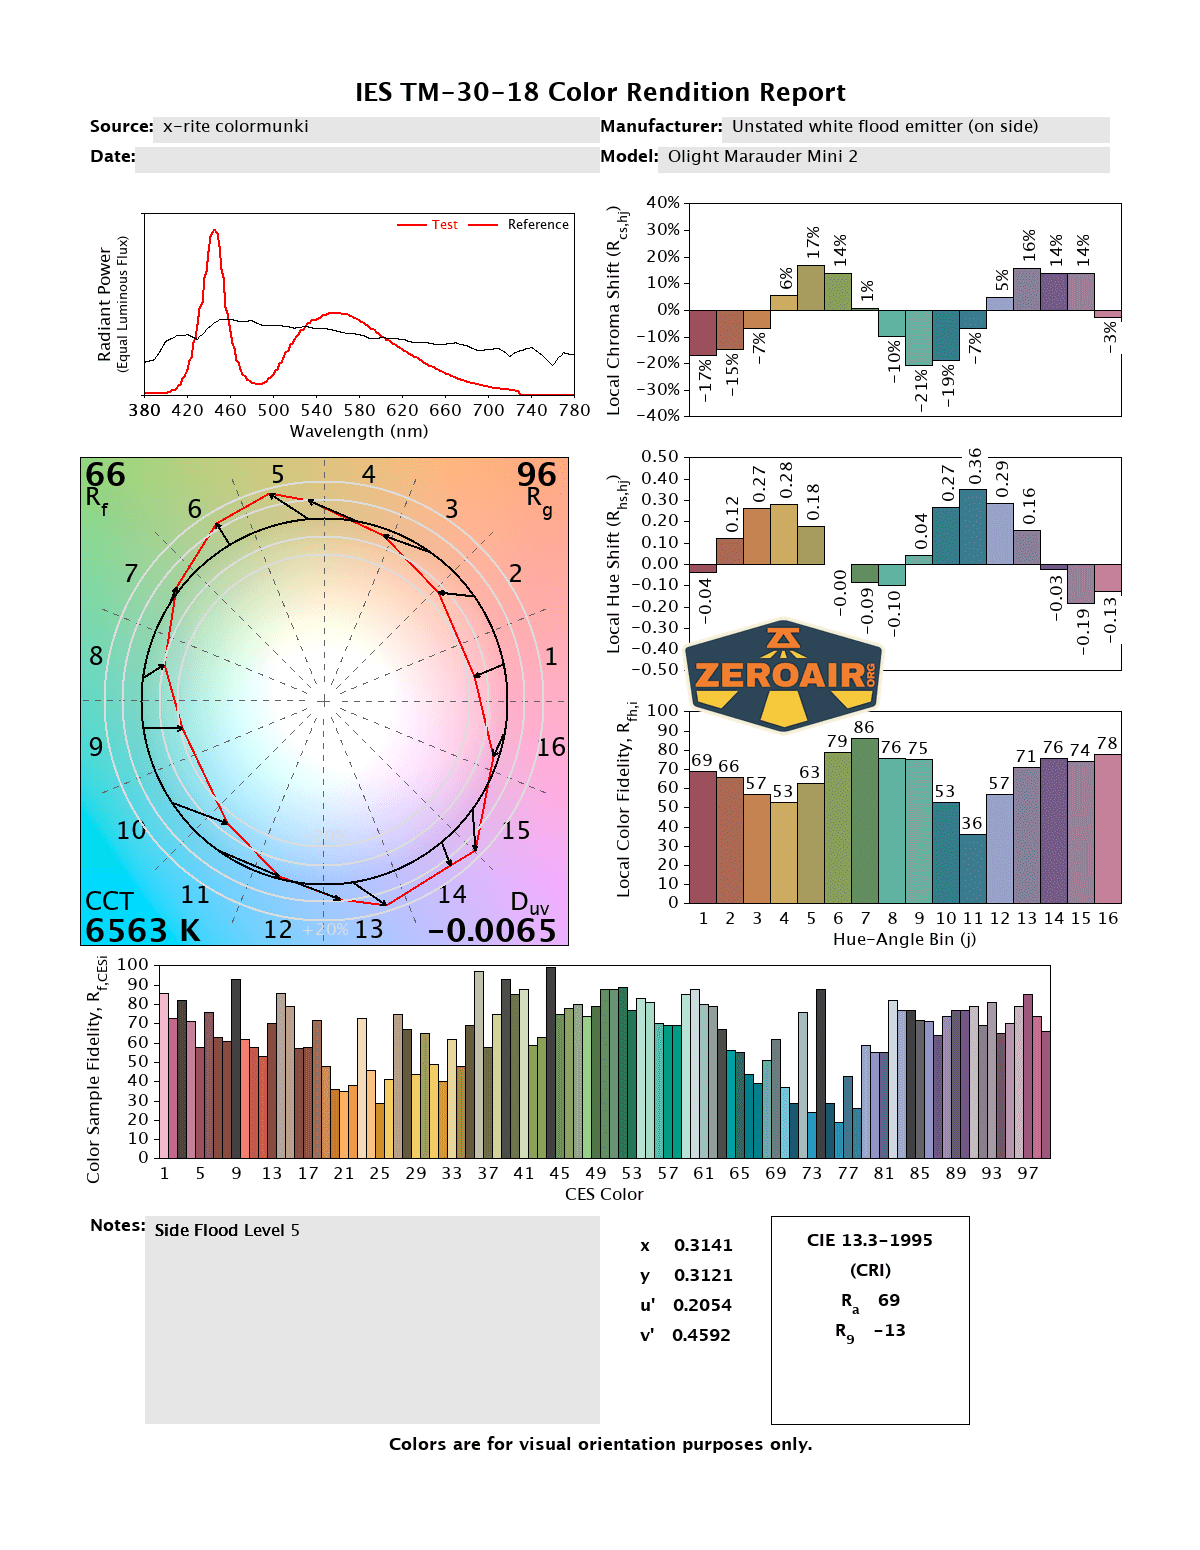
CCT (Correlated Color Temperature) refers to the measurement of the color appearance of light, expressed in Kelvins (K), which indicates whether the light is warm (yellowish) or cool (bluish). A lower CCT (below 3000K) is considered warm light, while a higher CCT (above 5000K) gives cooler, bluish light.
CRI (Color Rendering Index) is a measure of how accurately a light source renders colors in comparison to natural sunlight. Scored on a scale from 0 to 100, higher CRI values indicate that colors appear more true to life and vibrant, similar to how they would look under the sun.
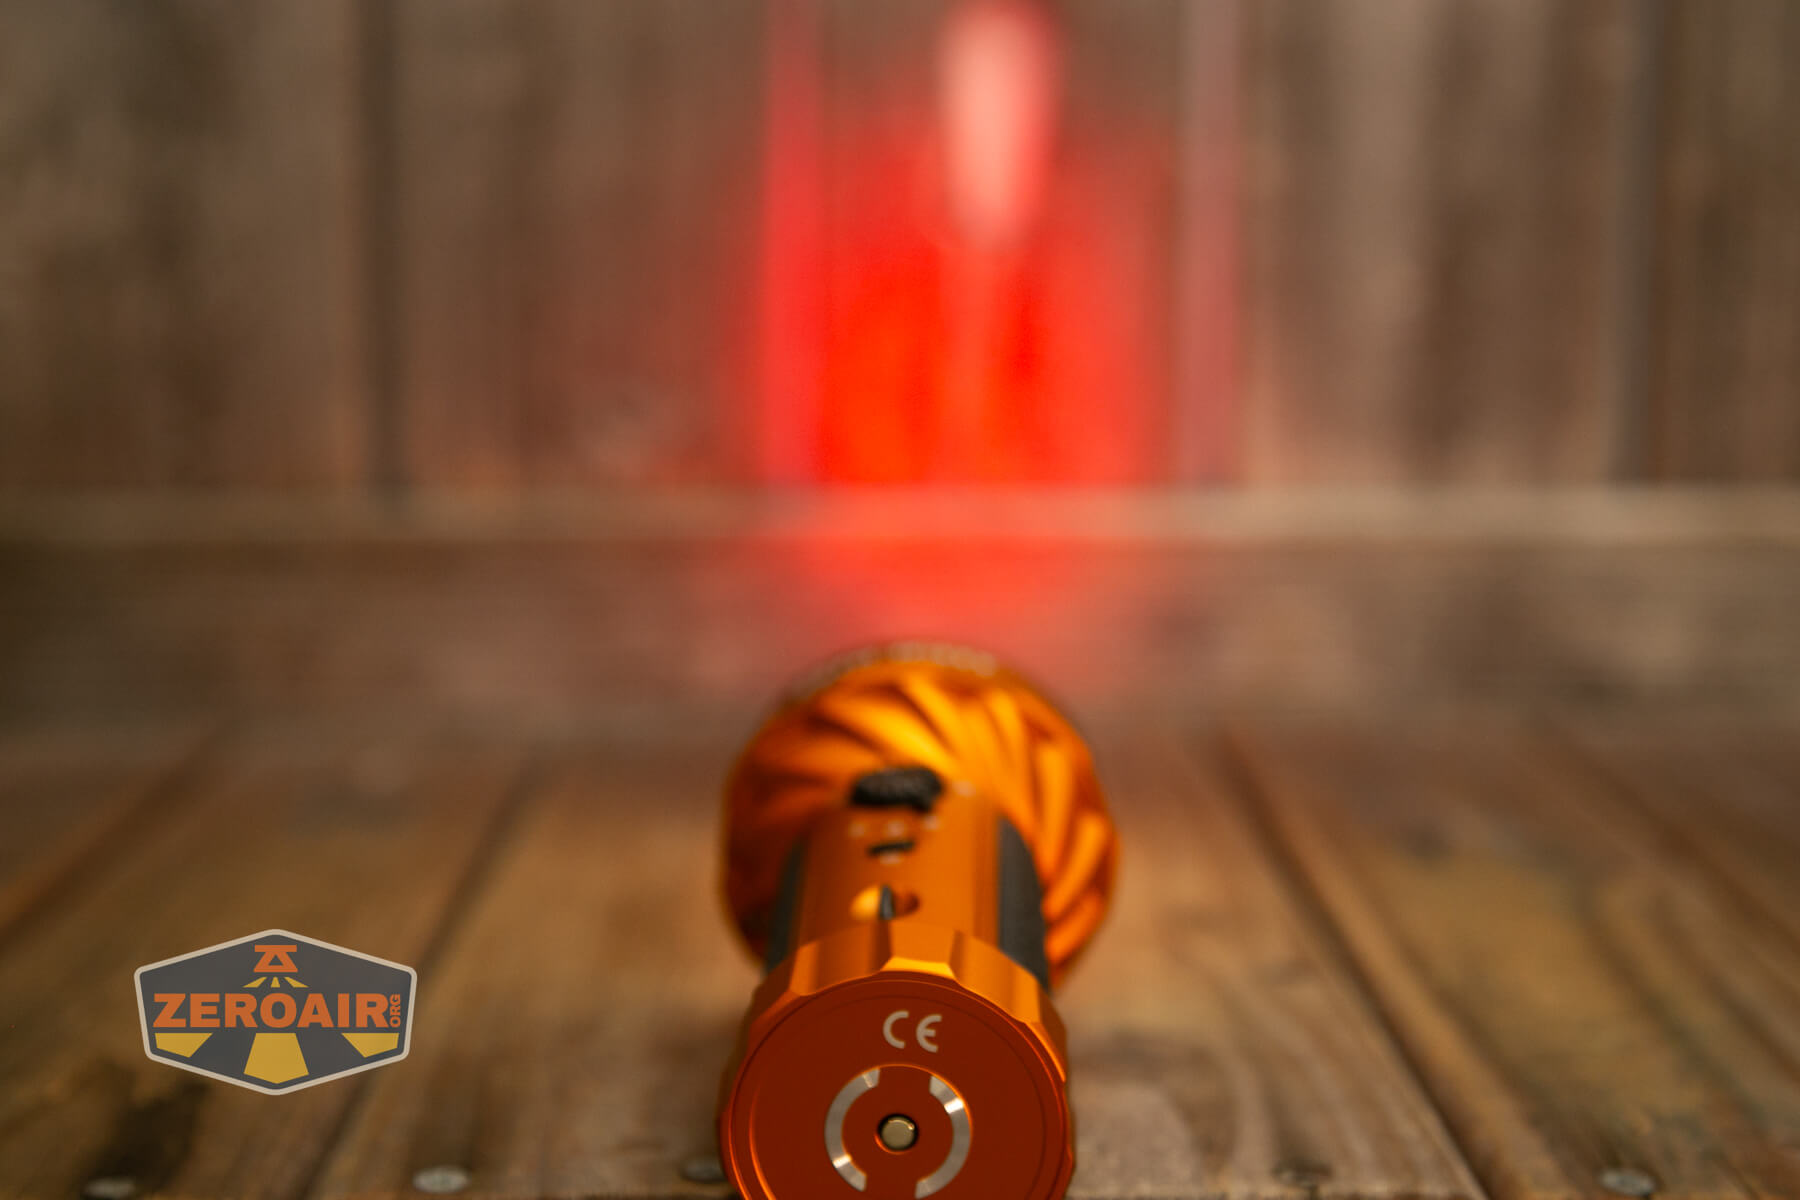
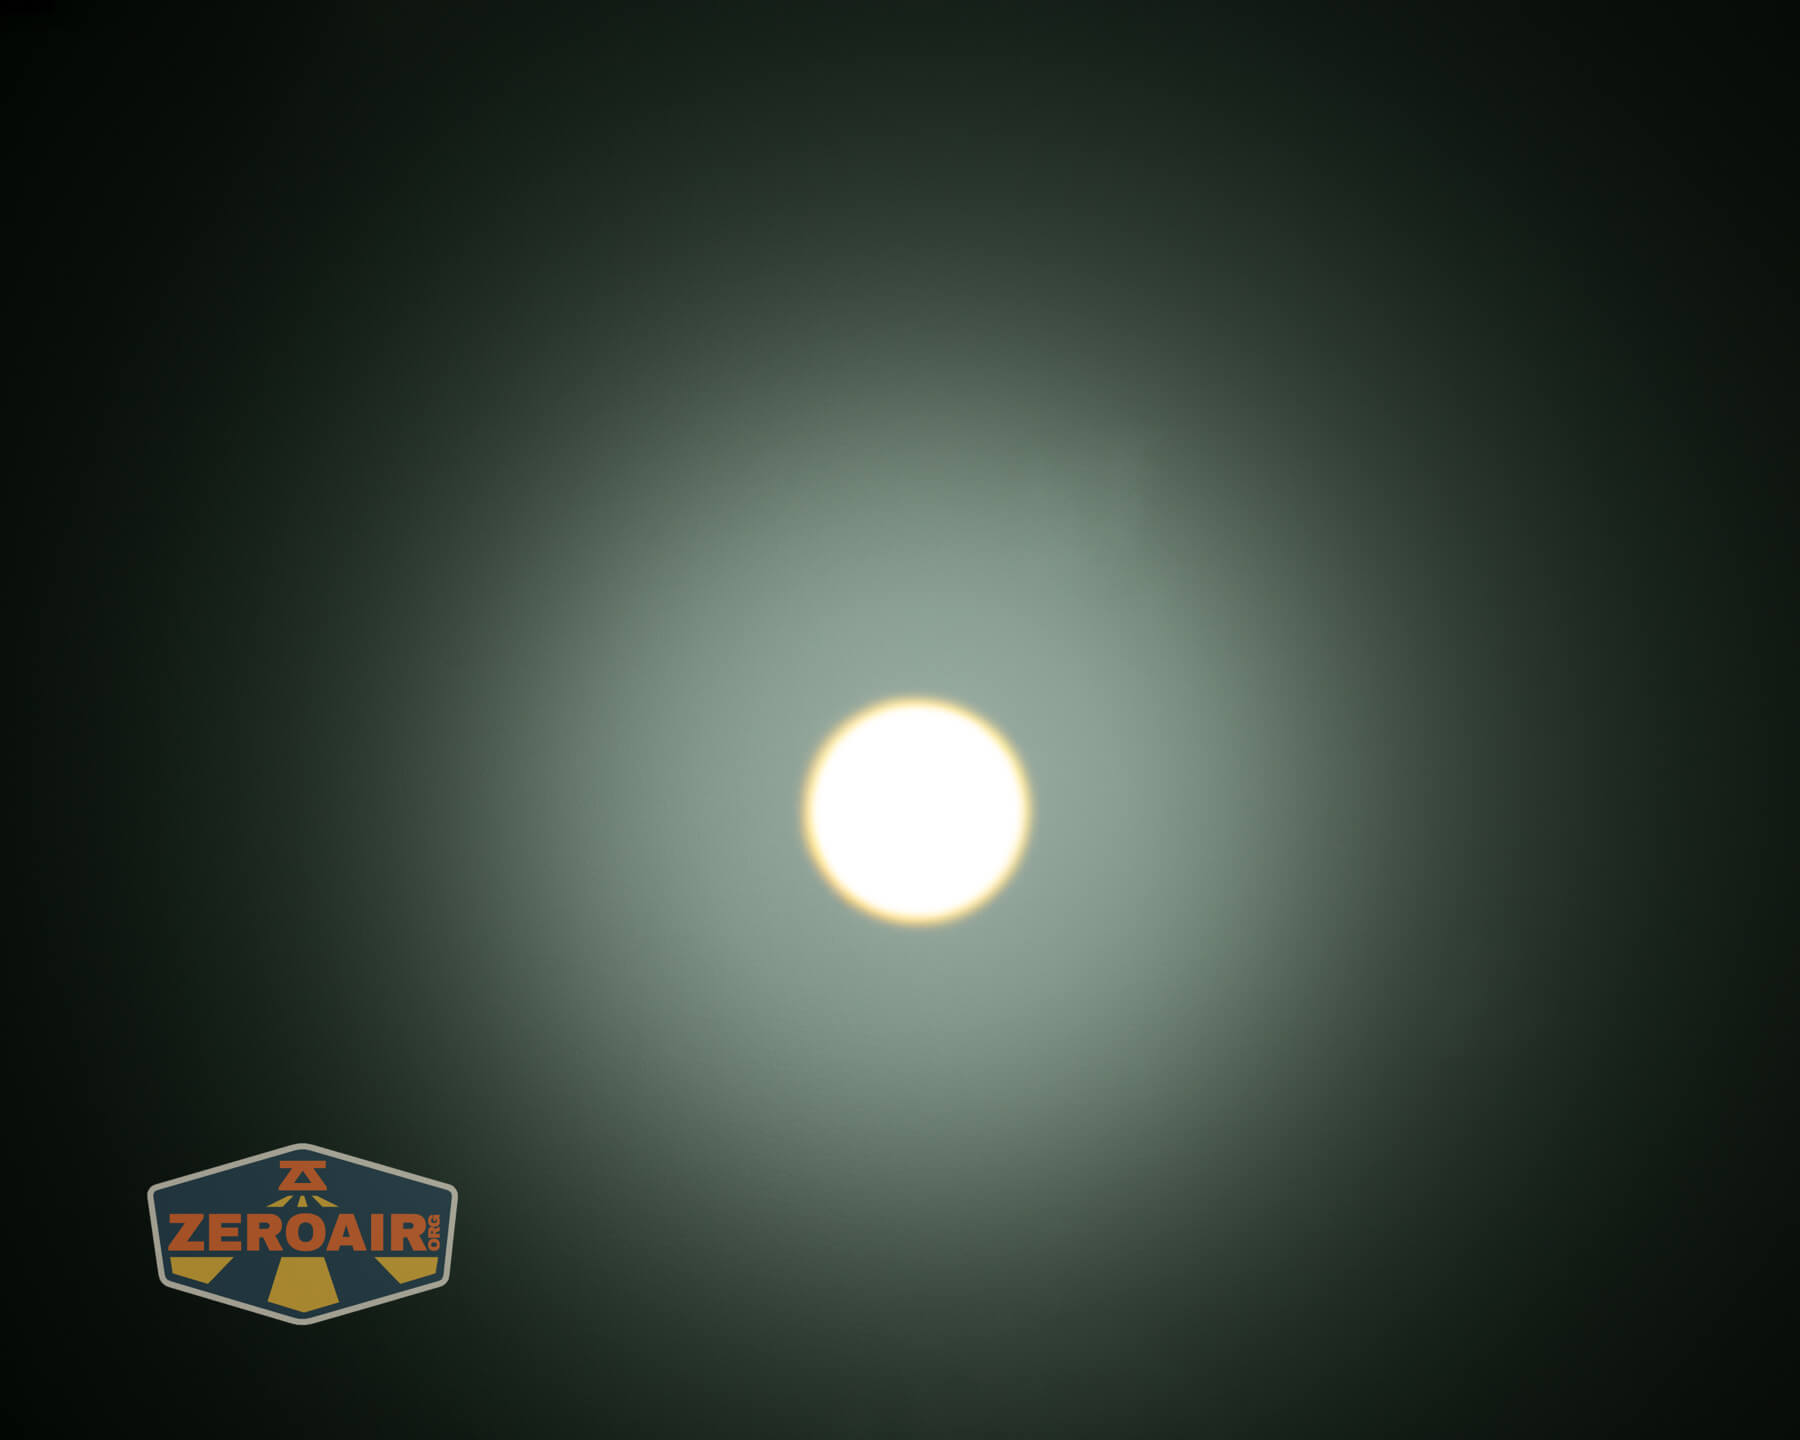
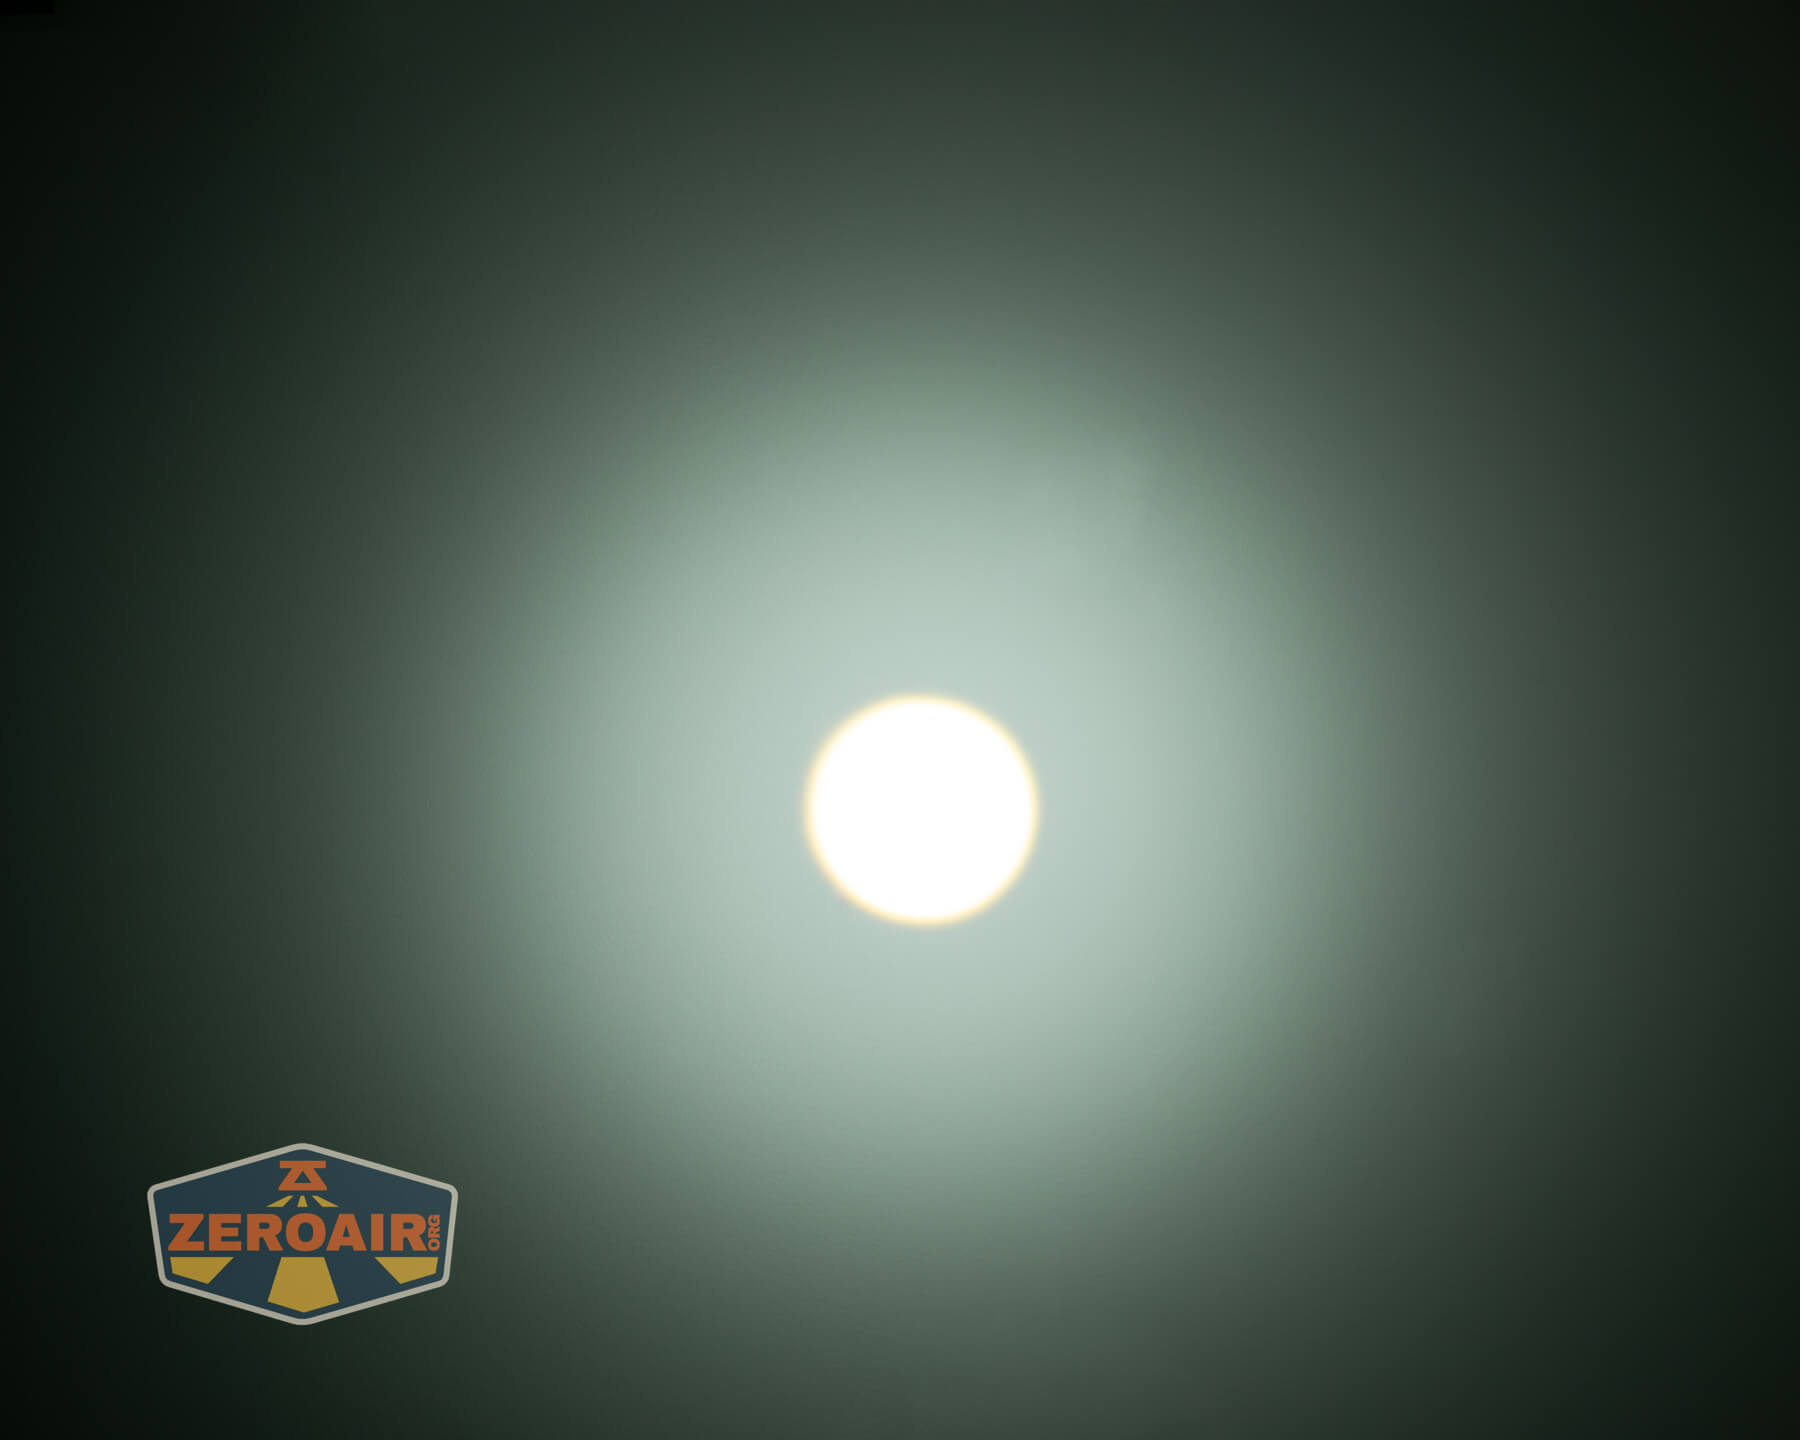
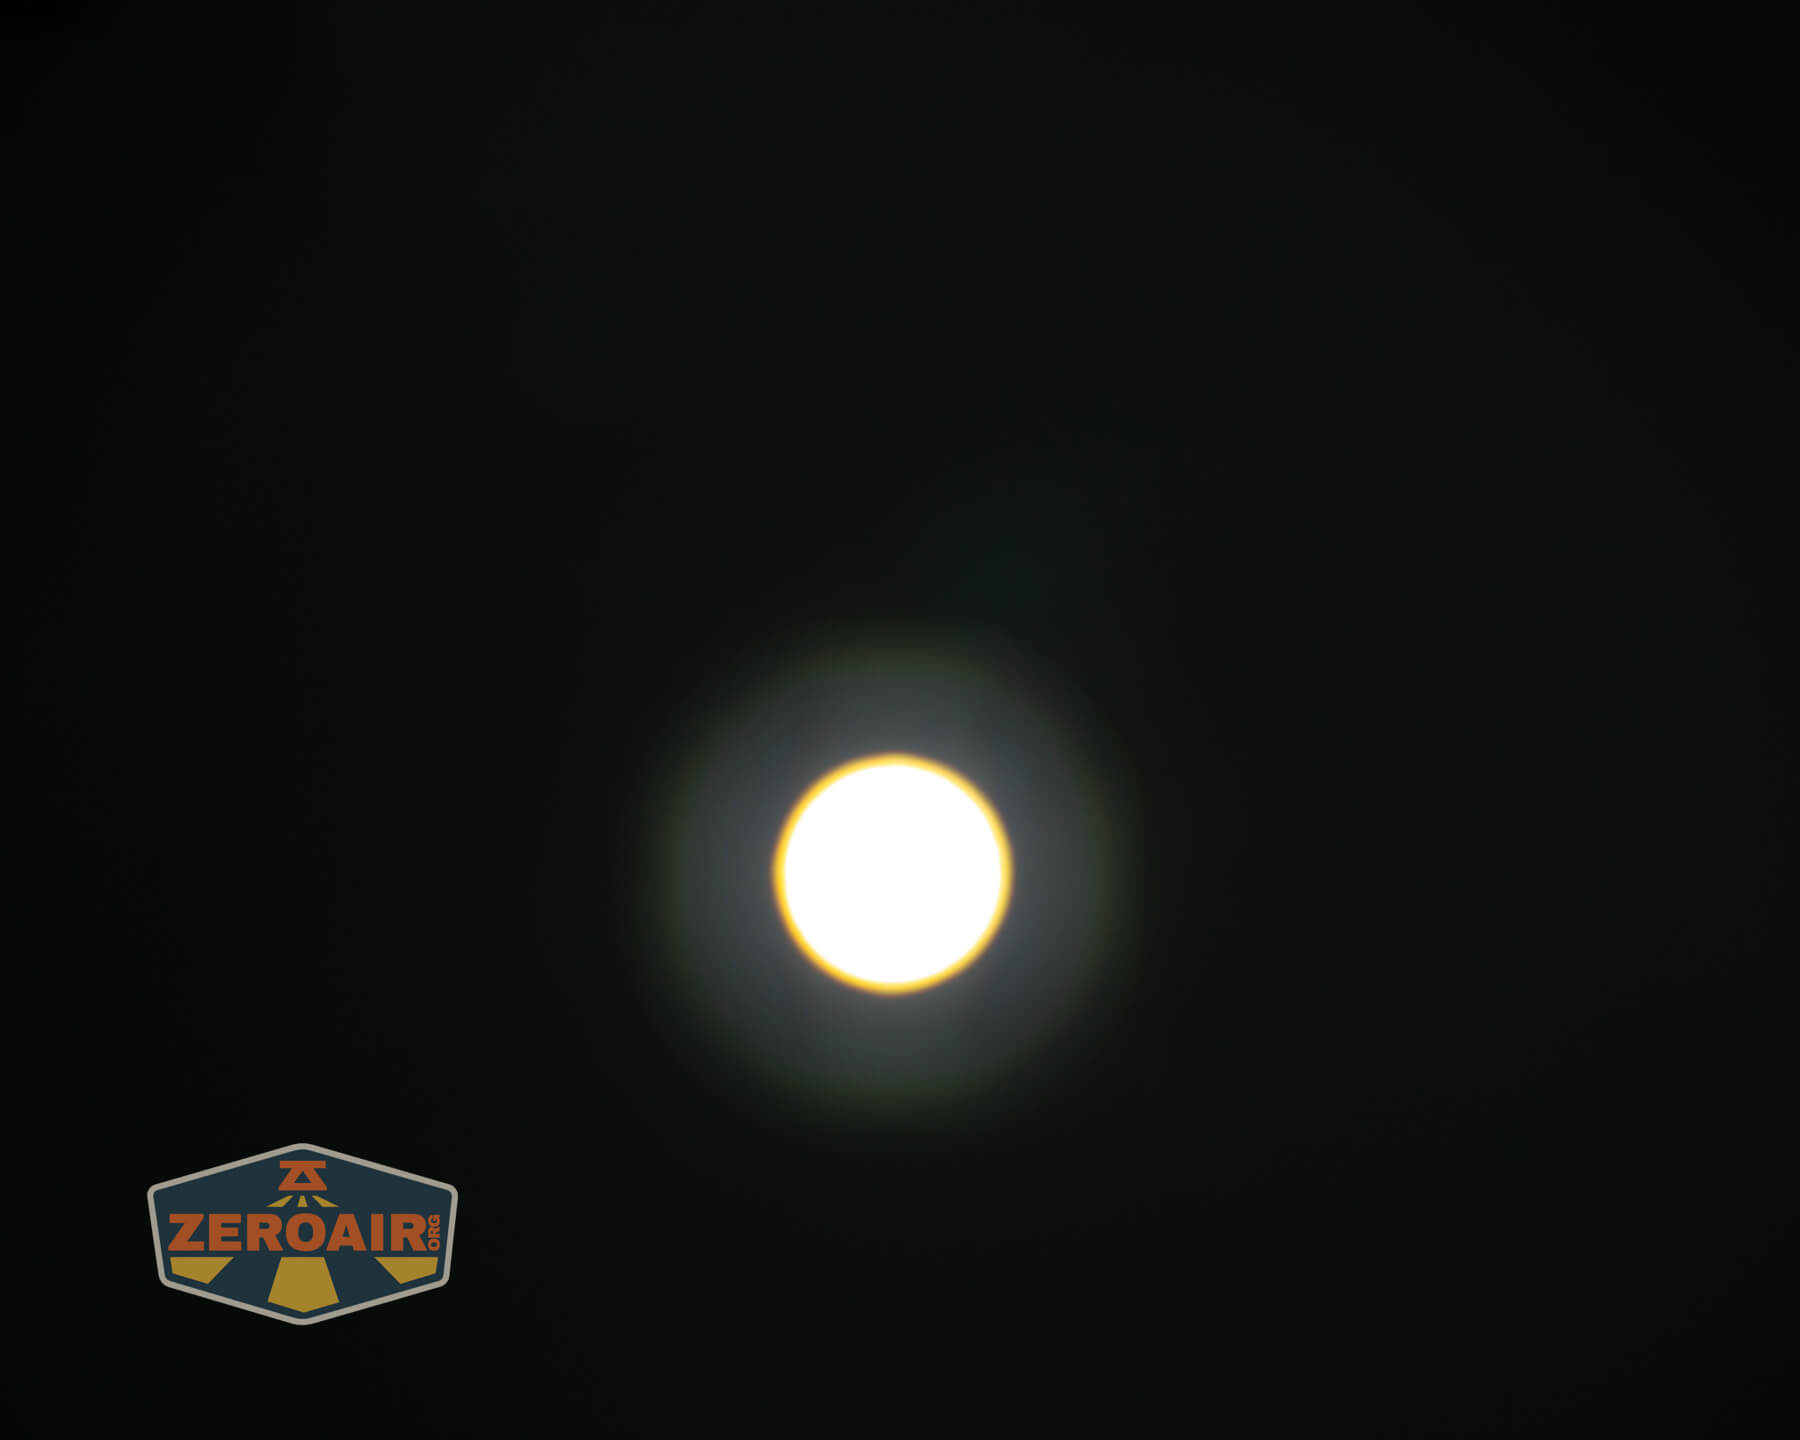
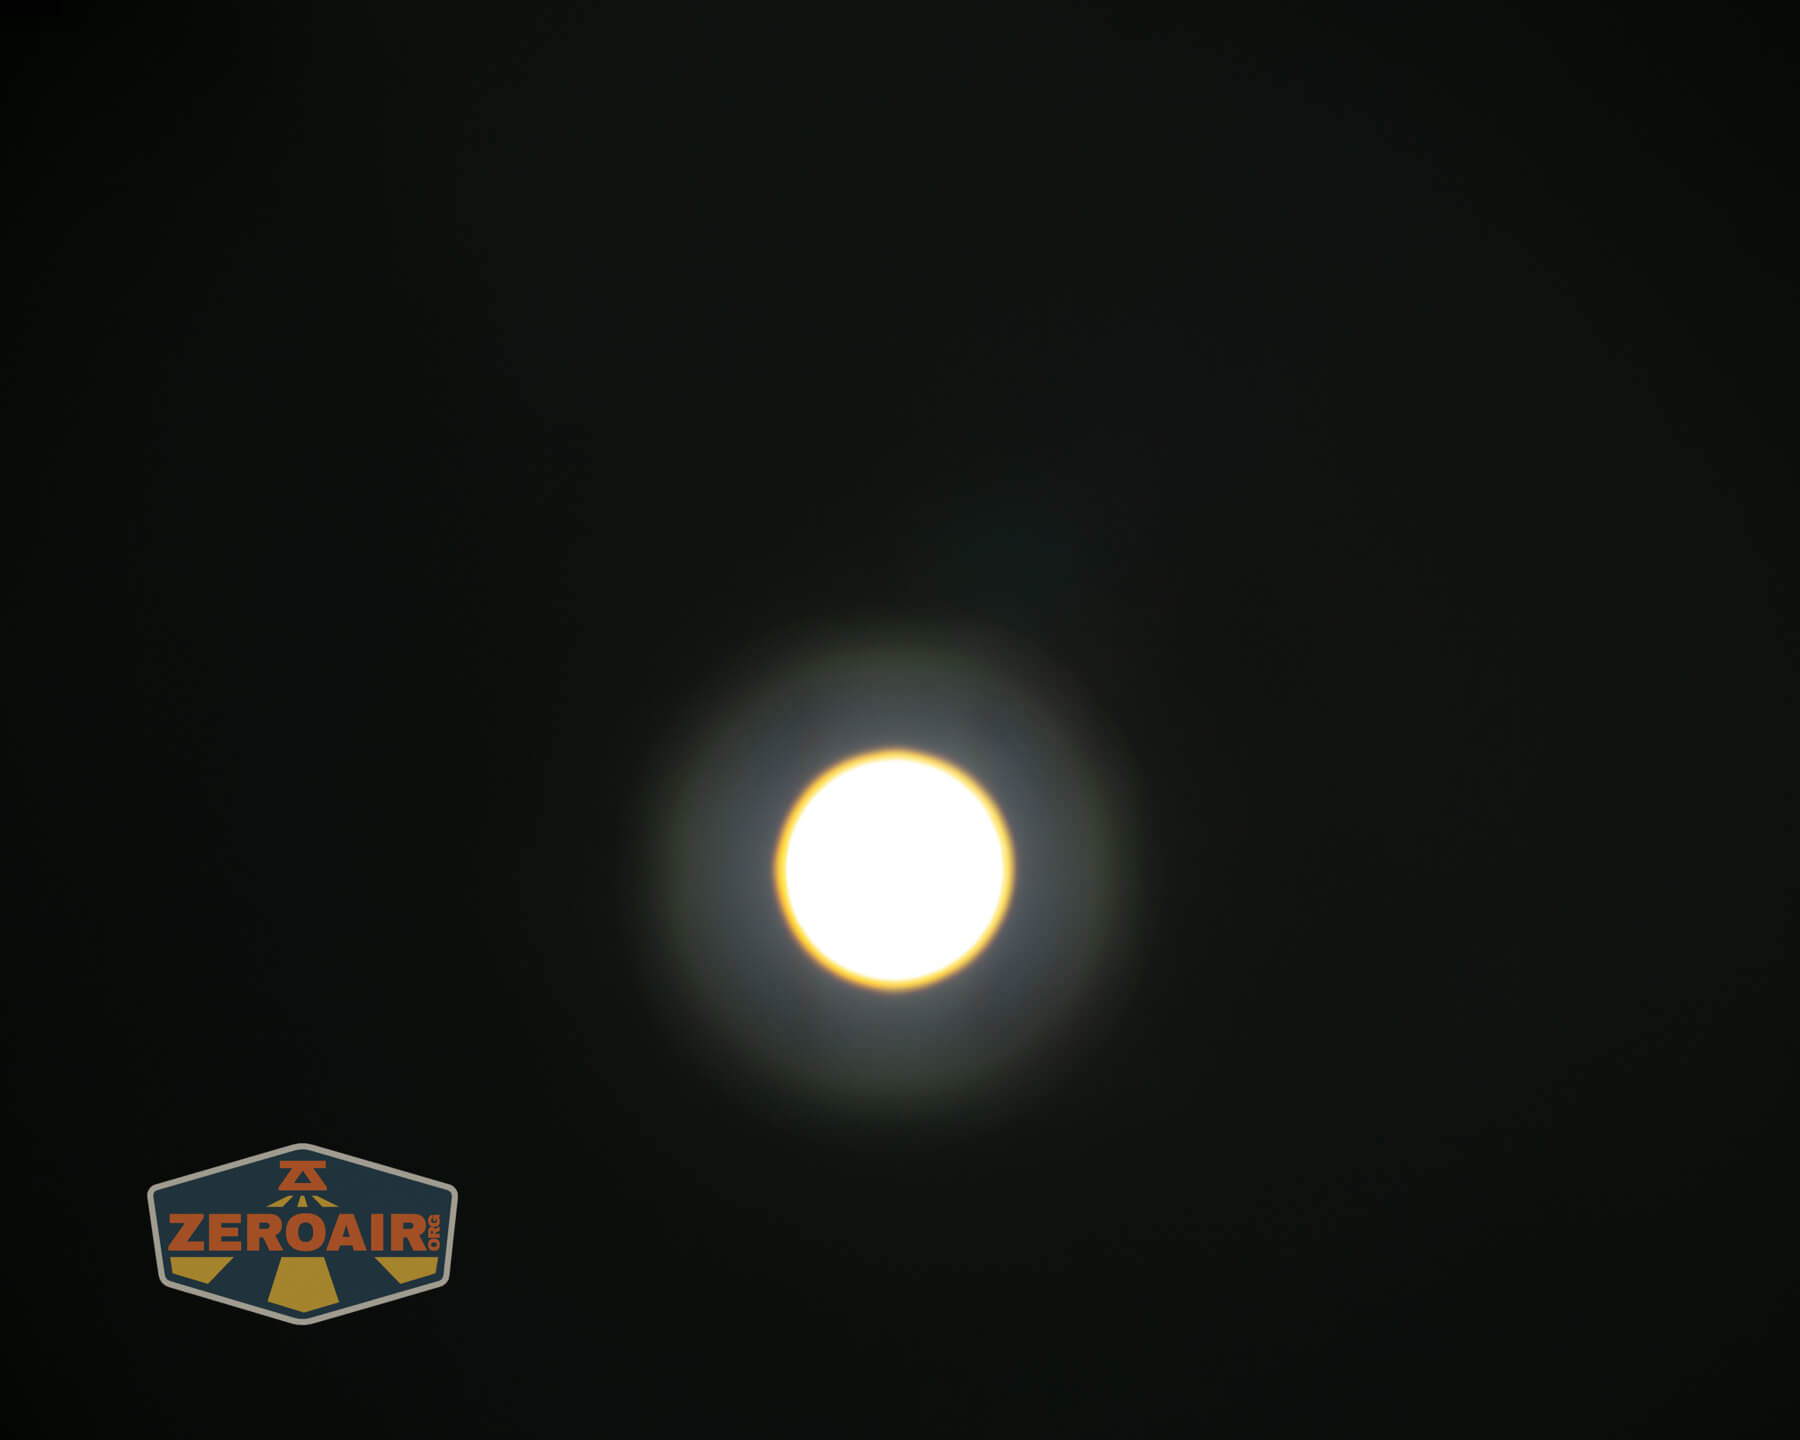
Beamshots
These beamshots always have the following settings: f8, ISO100, 0.3s shutter, and manual 5000K exposure. These photos are taken at floor level, and the beam hits the ceiling around 9 feet away.


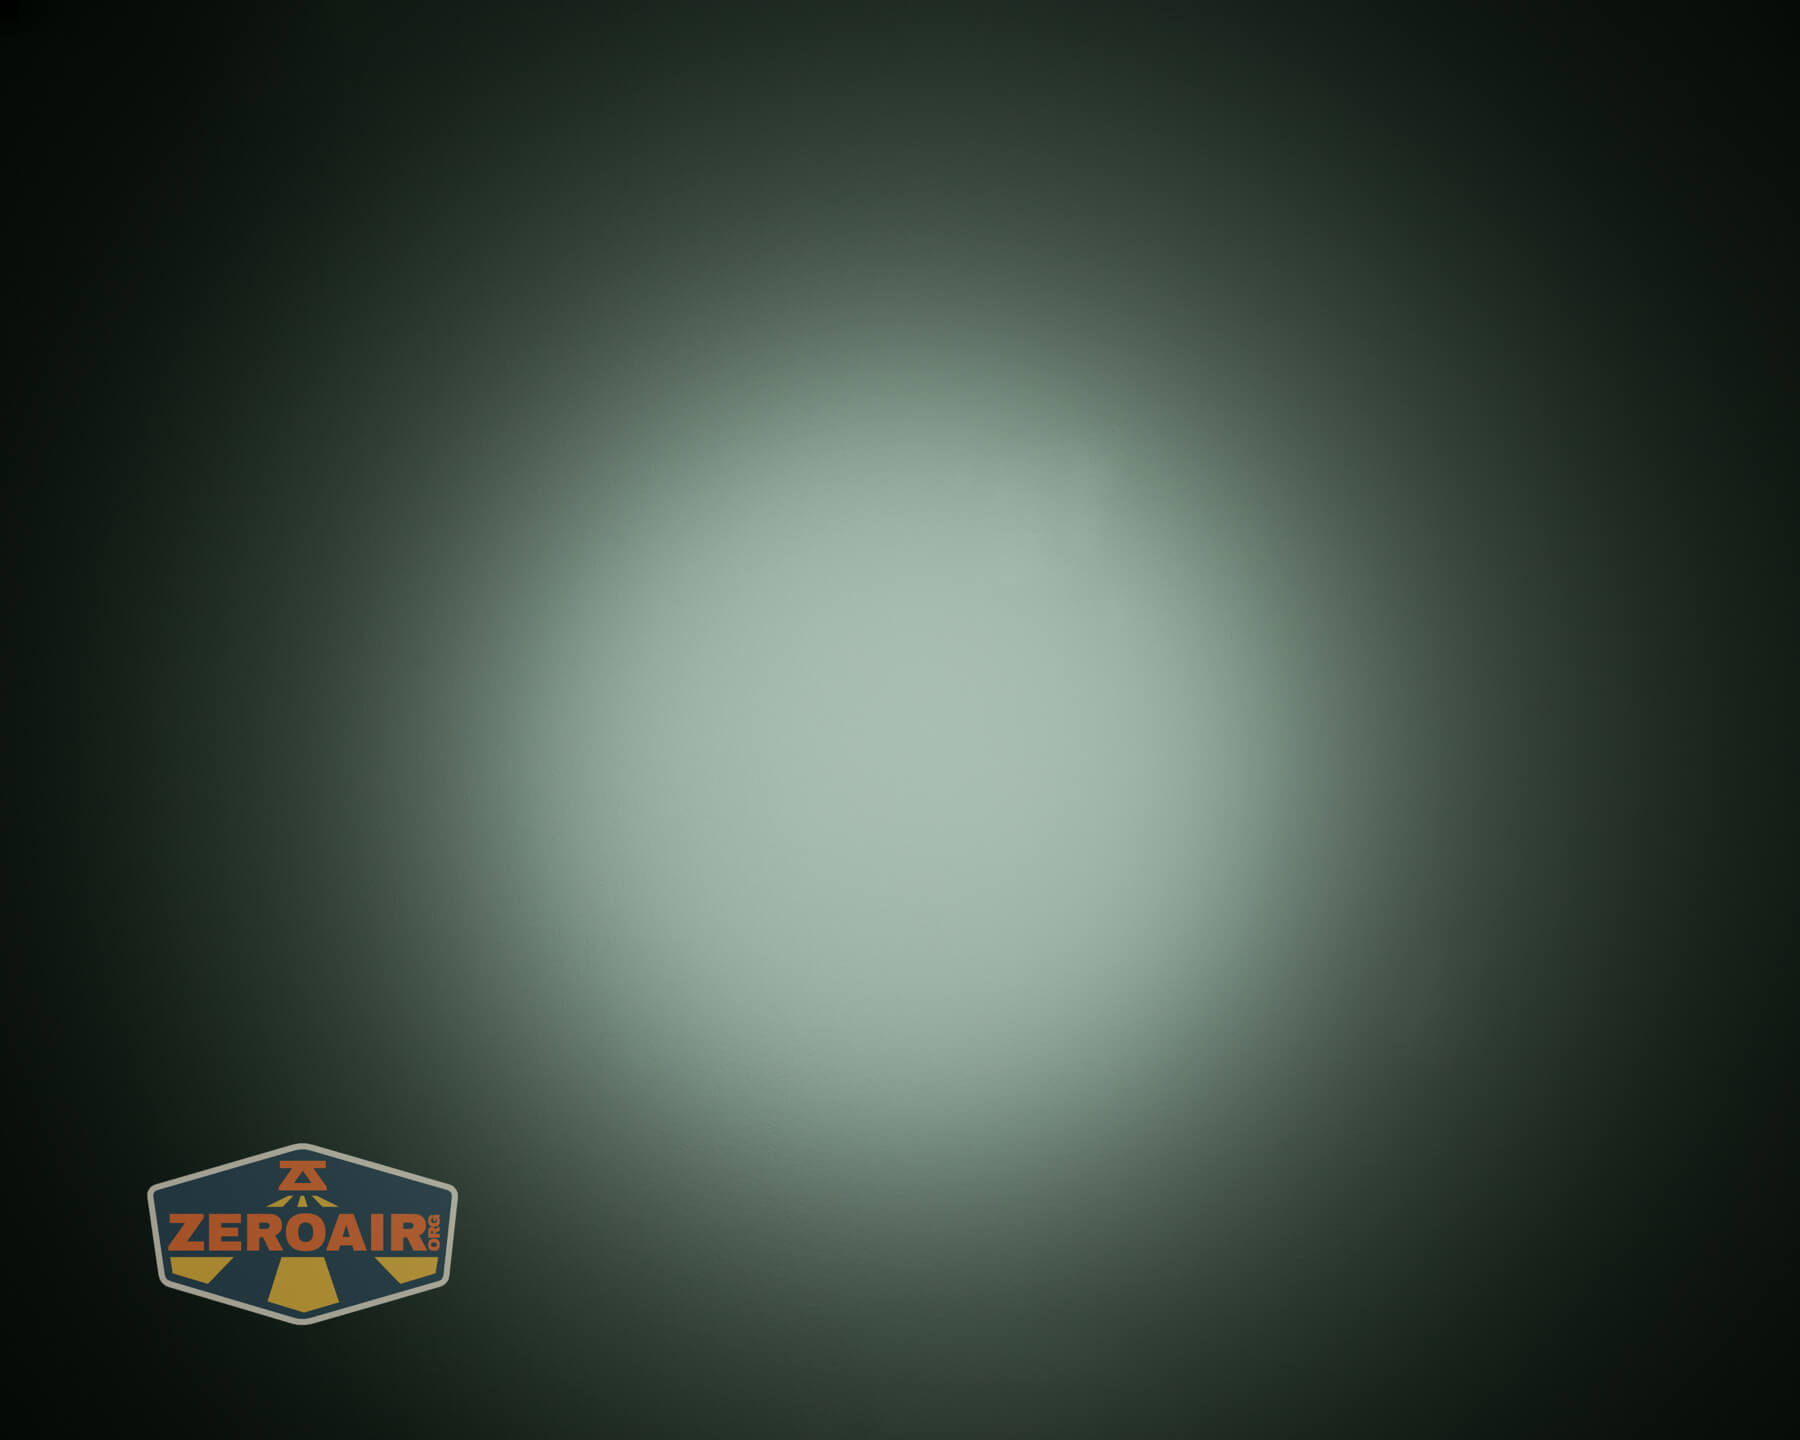


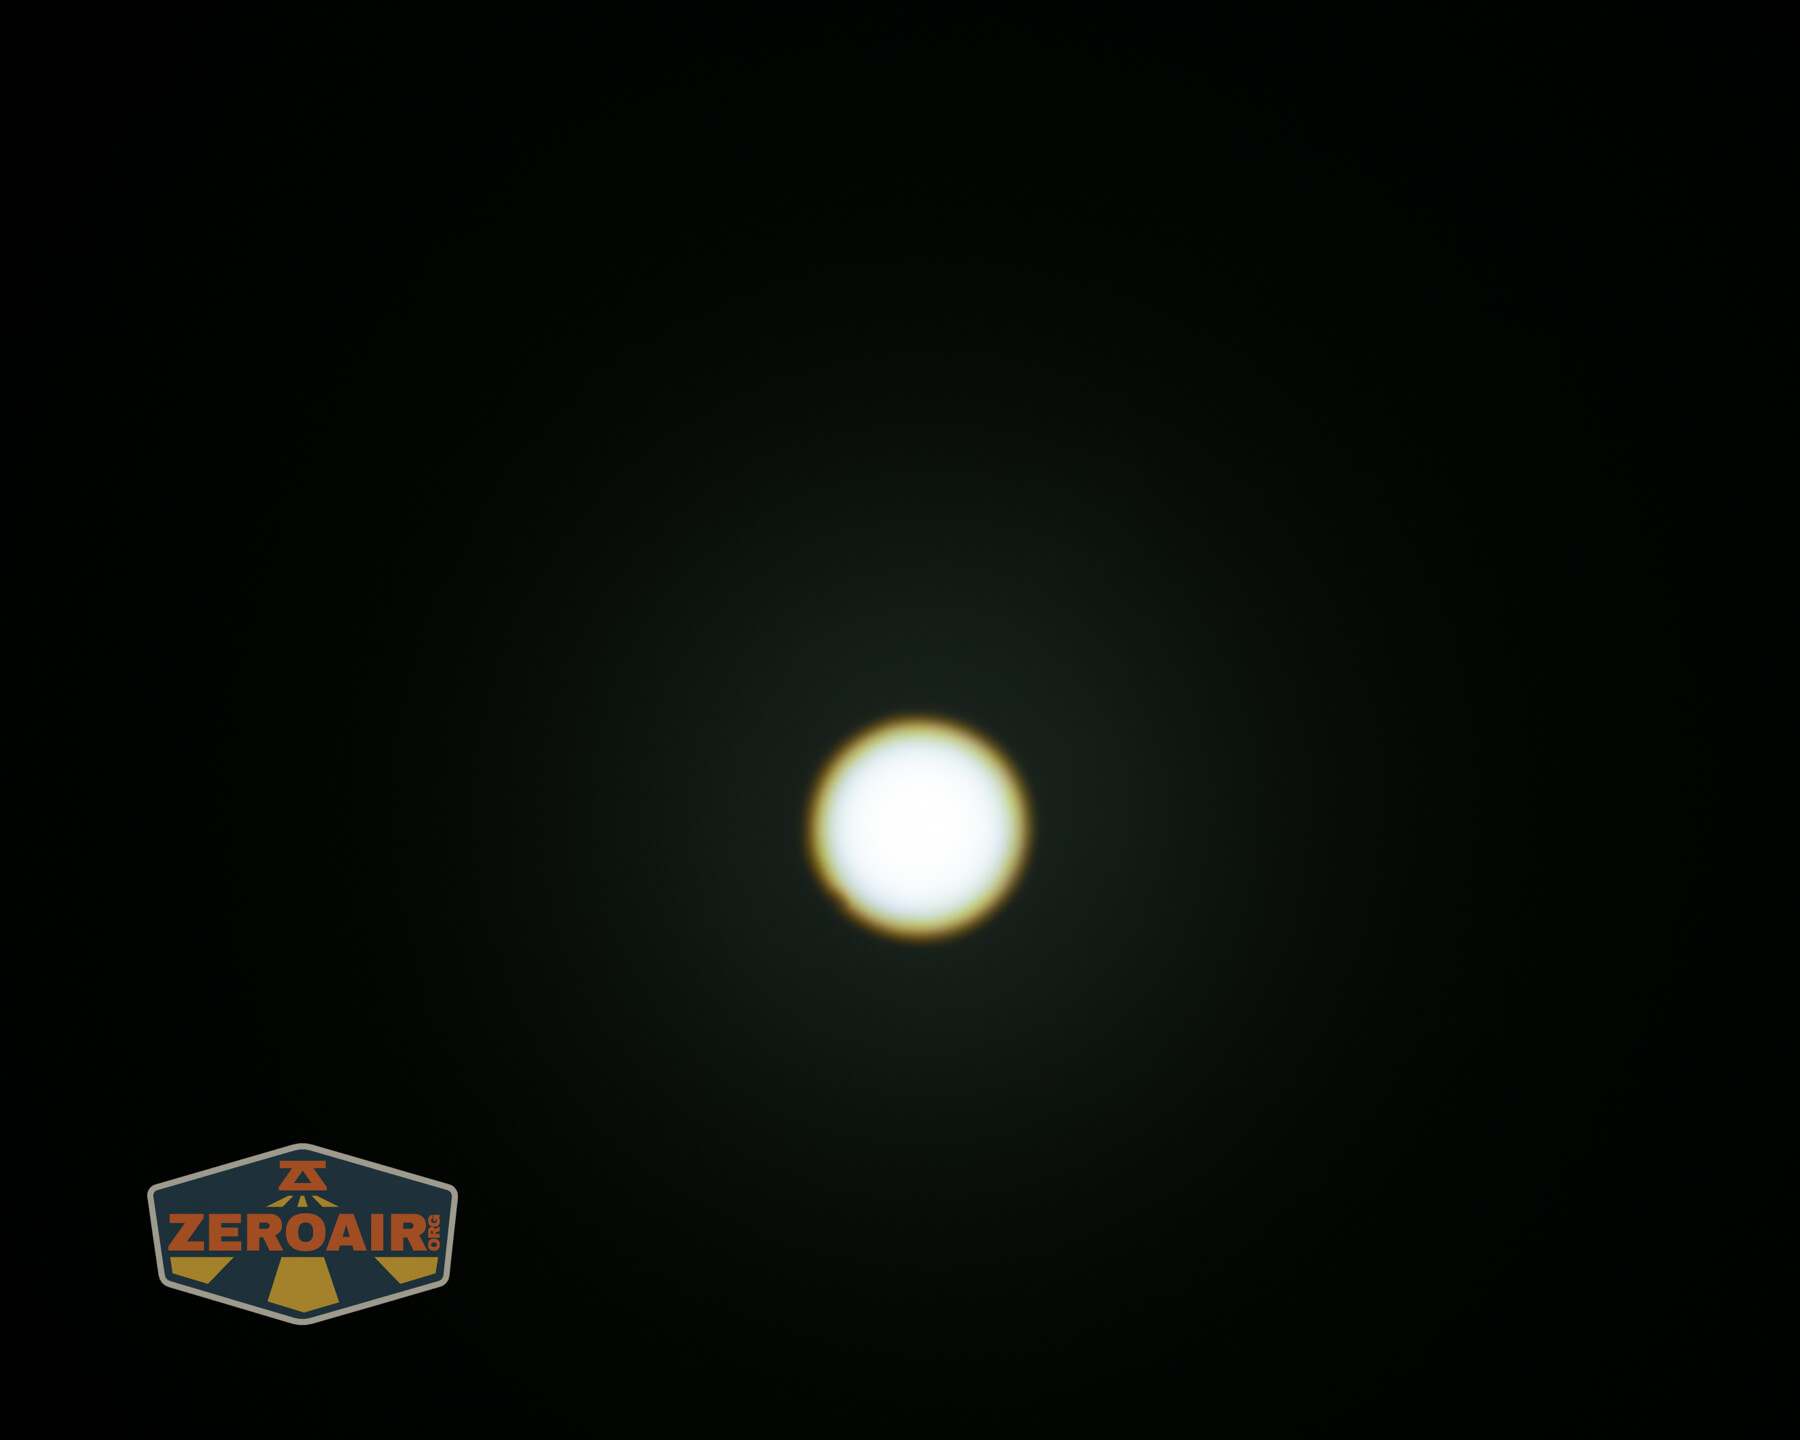


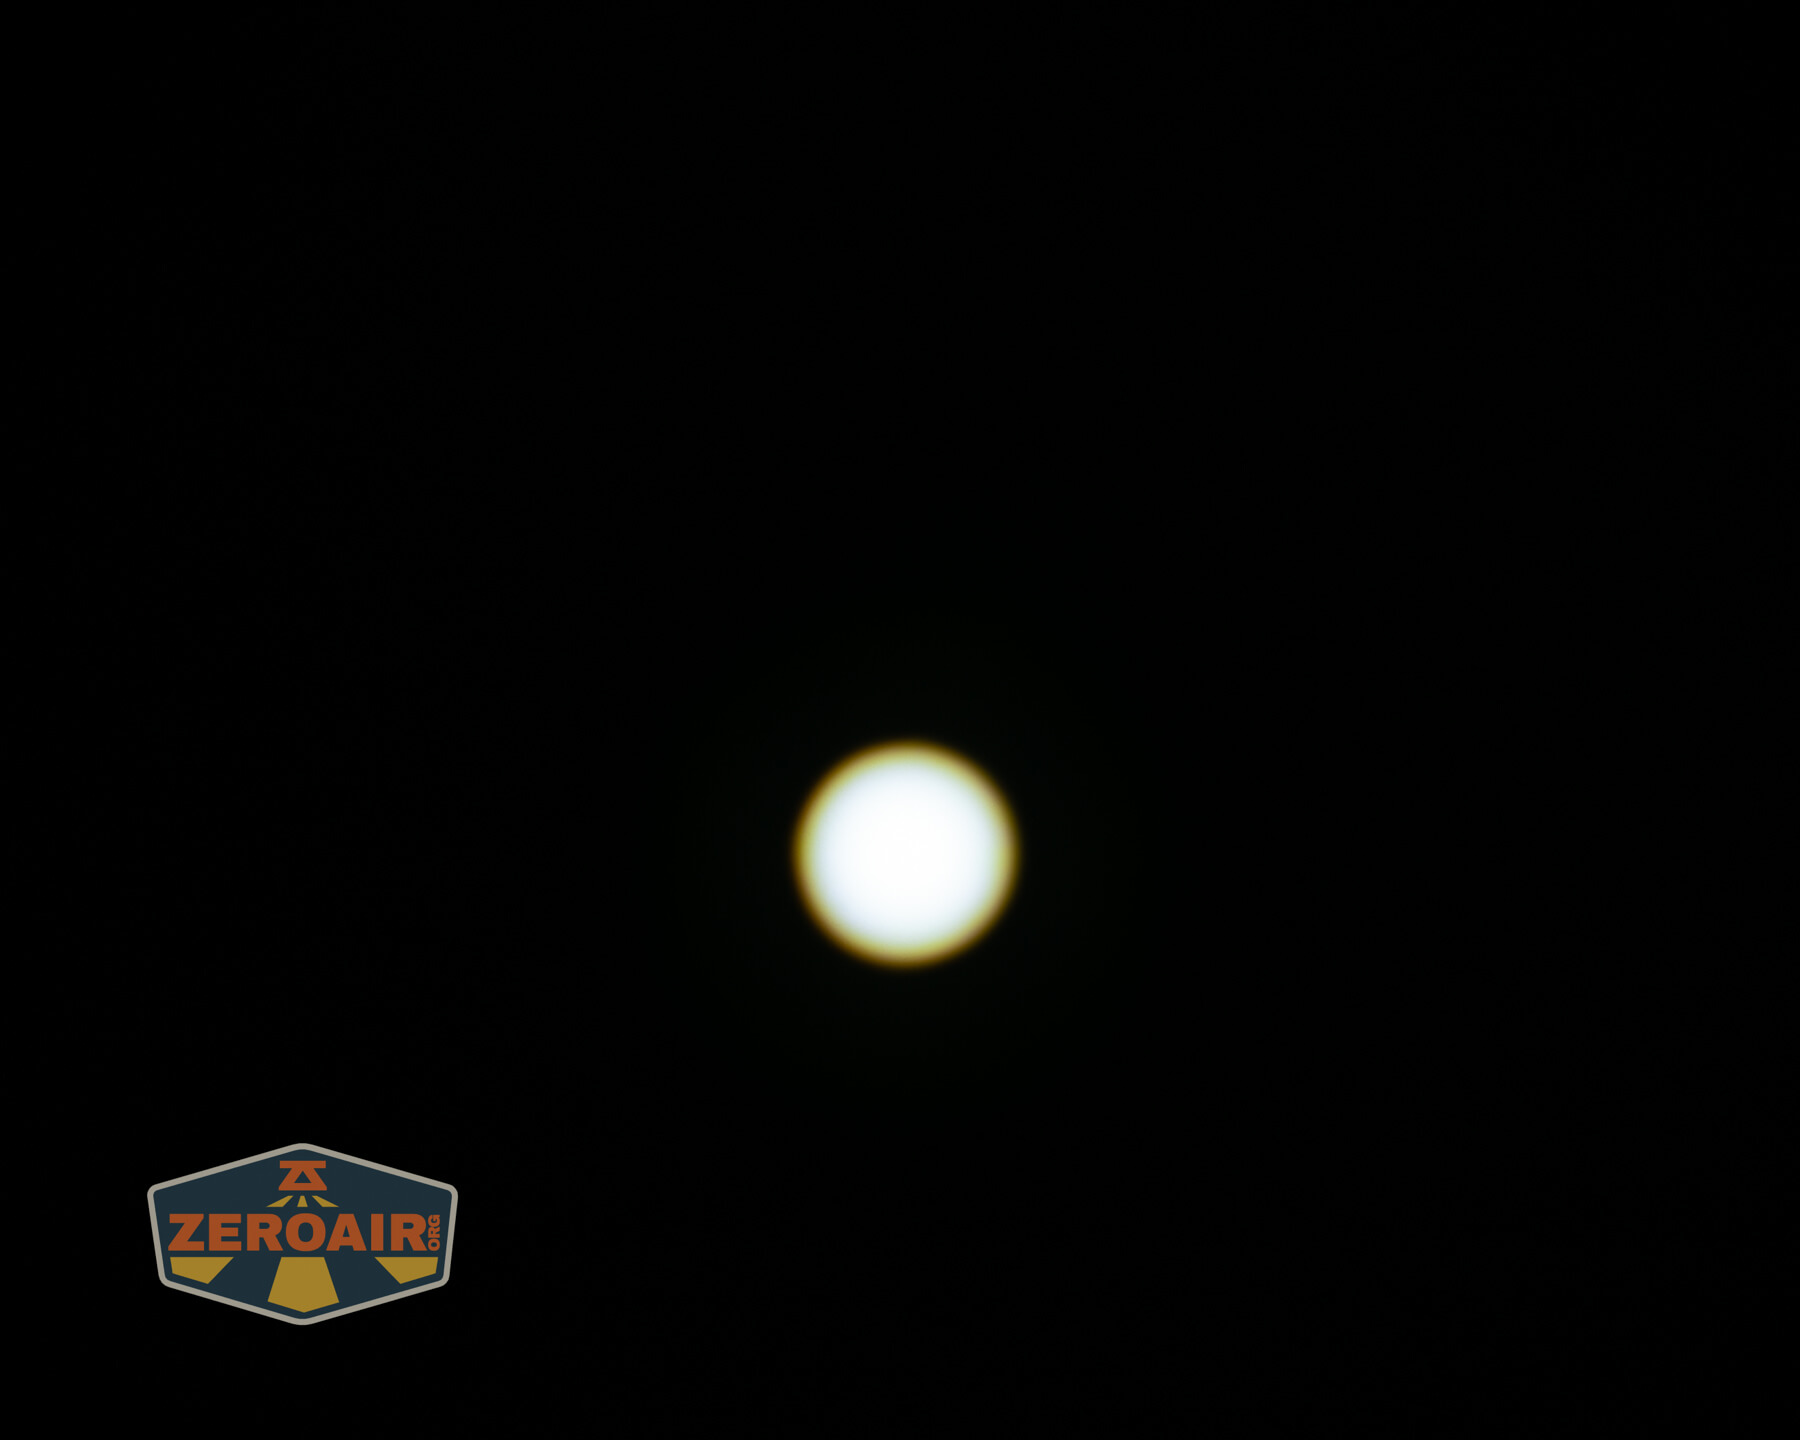
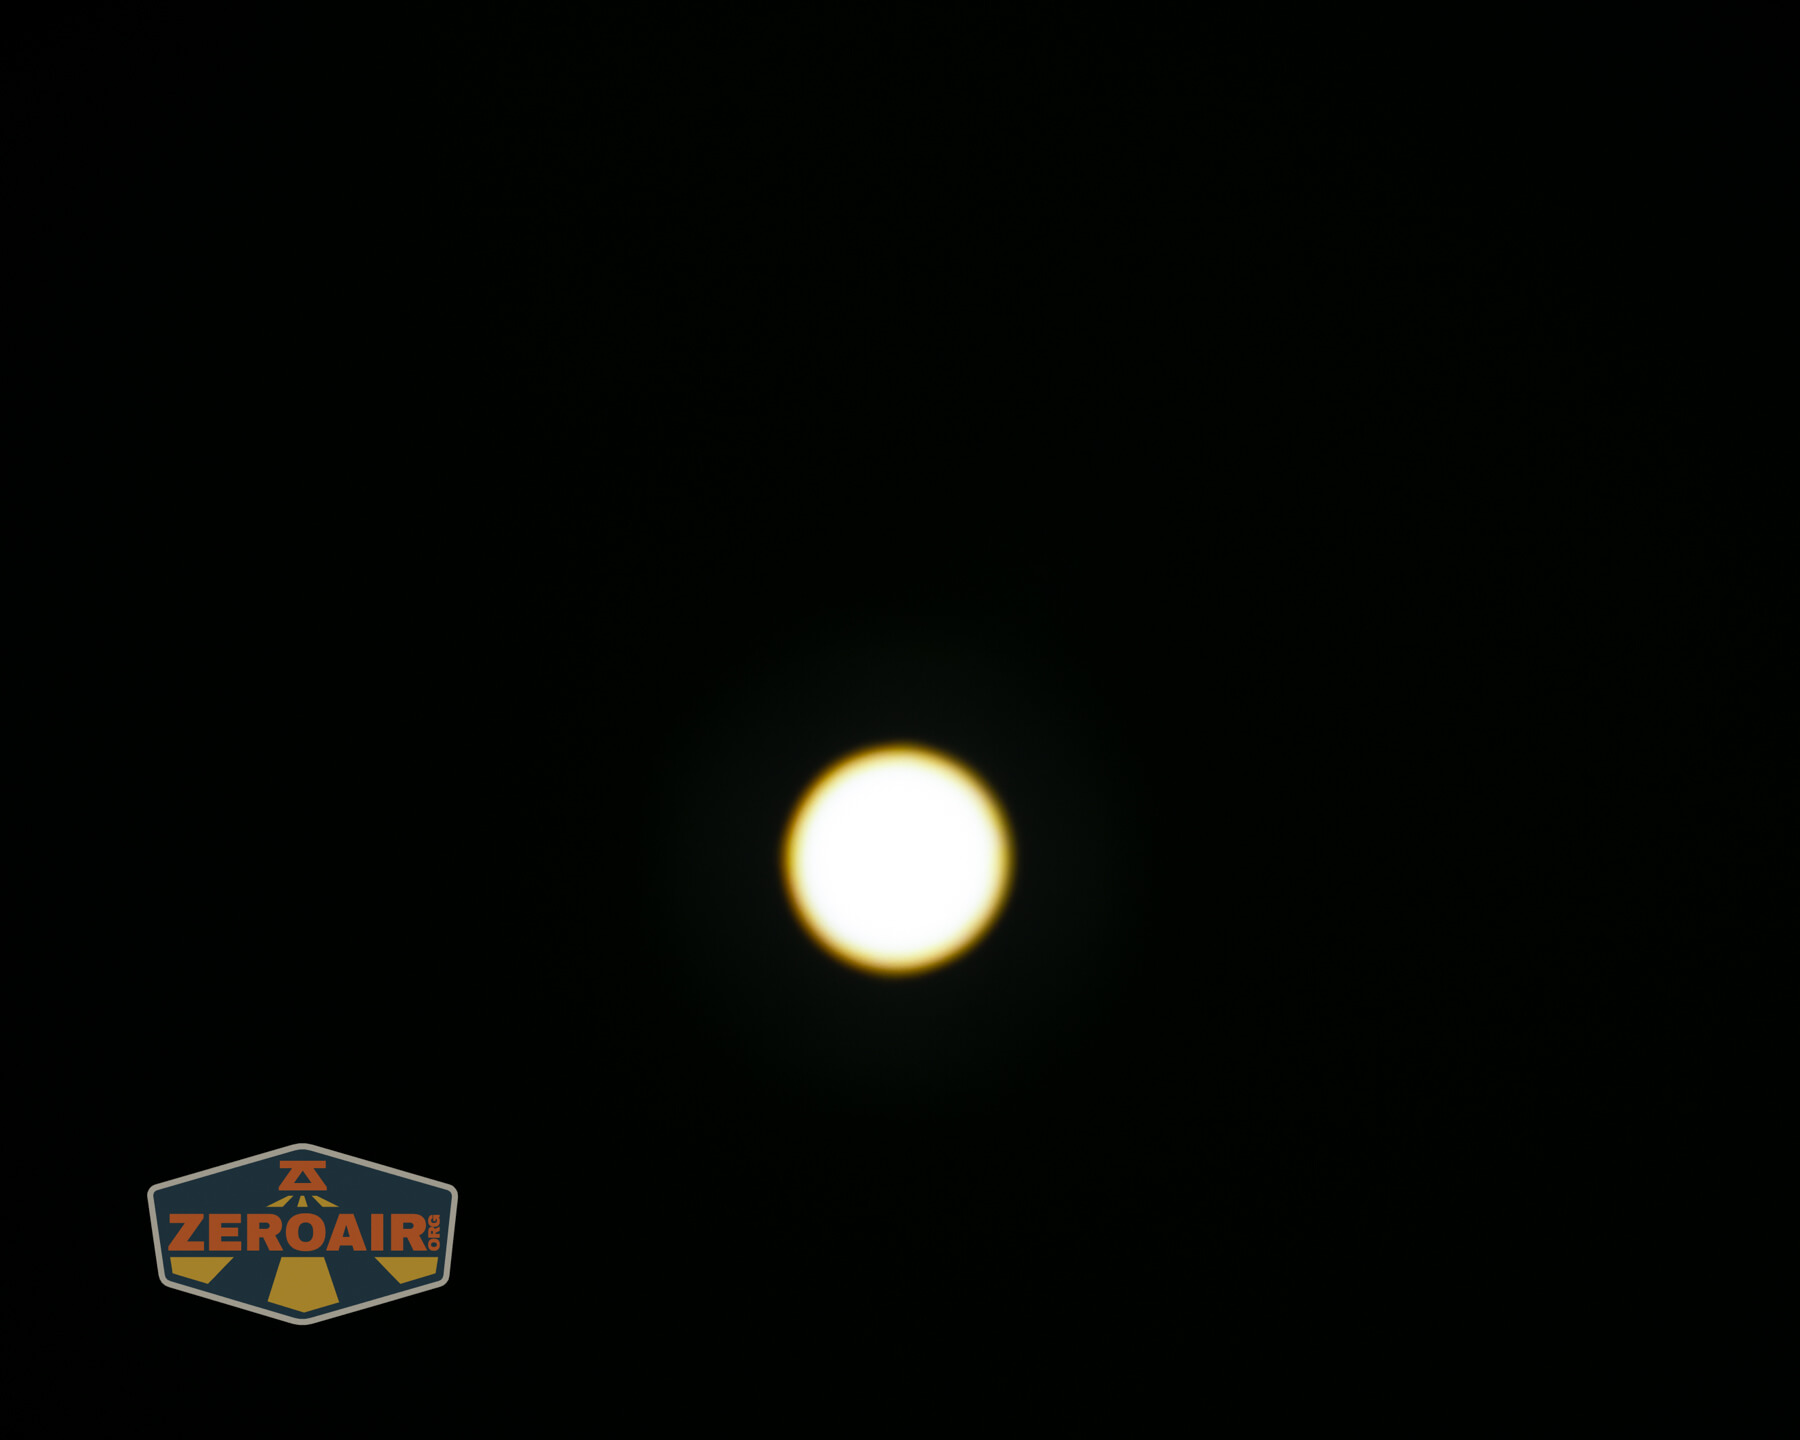
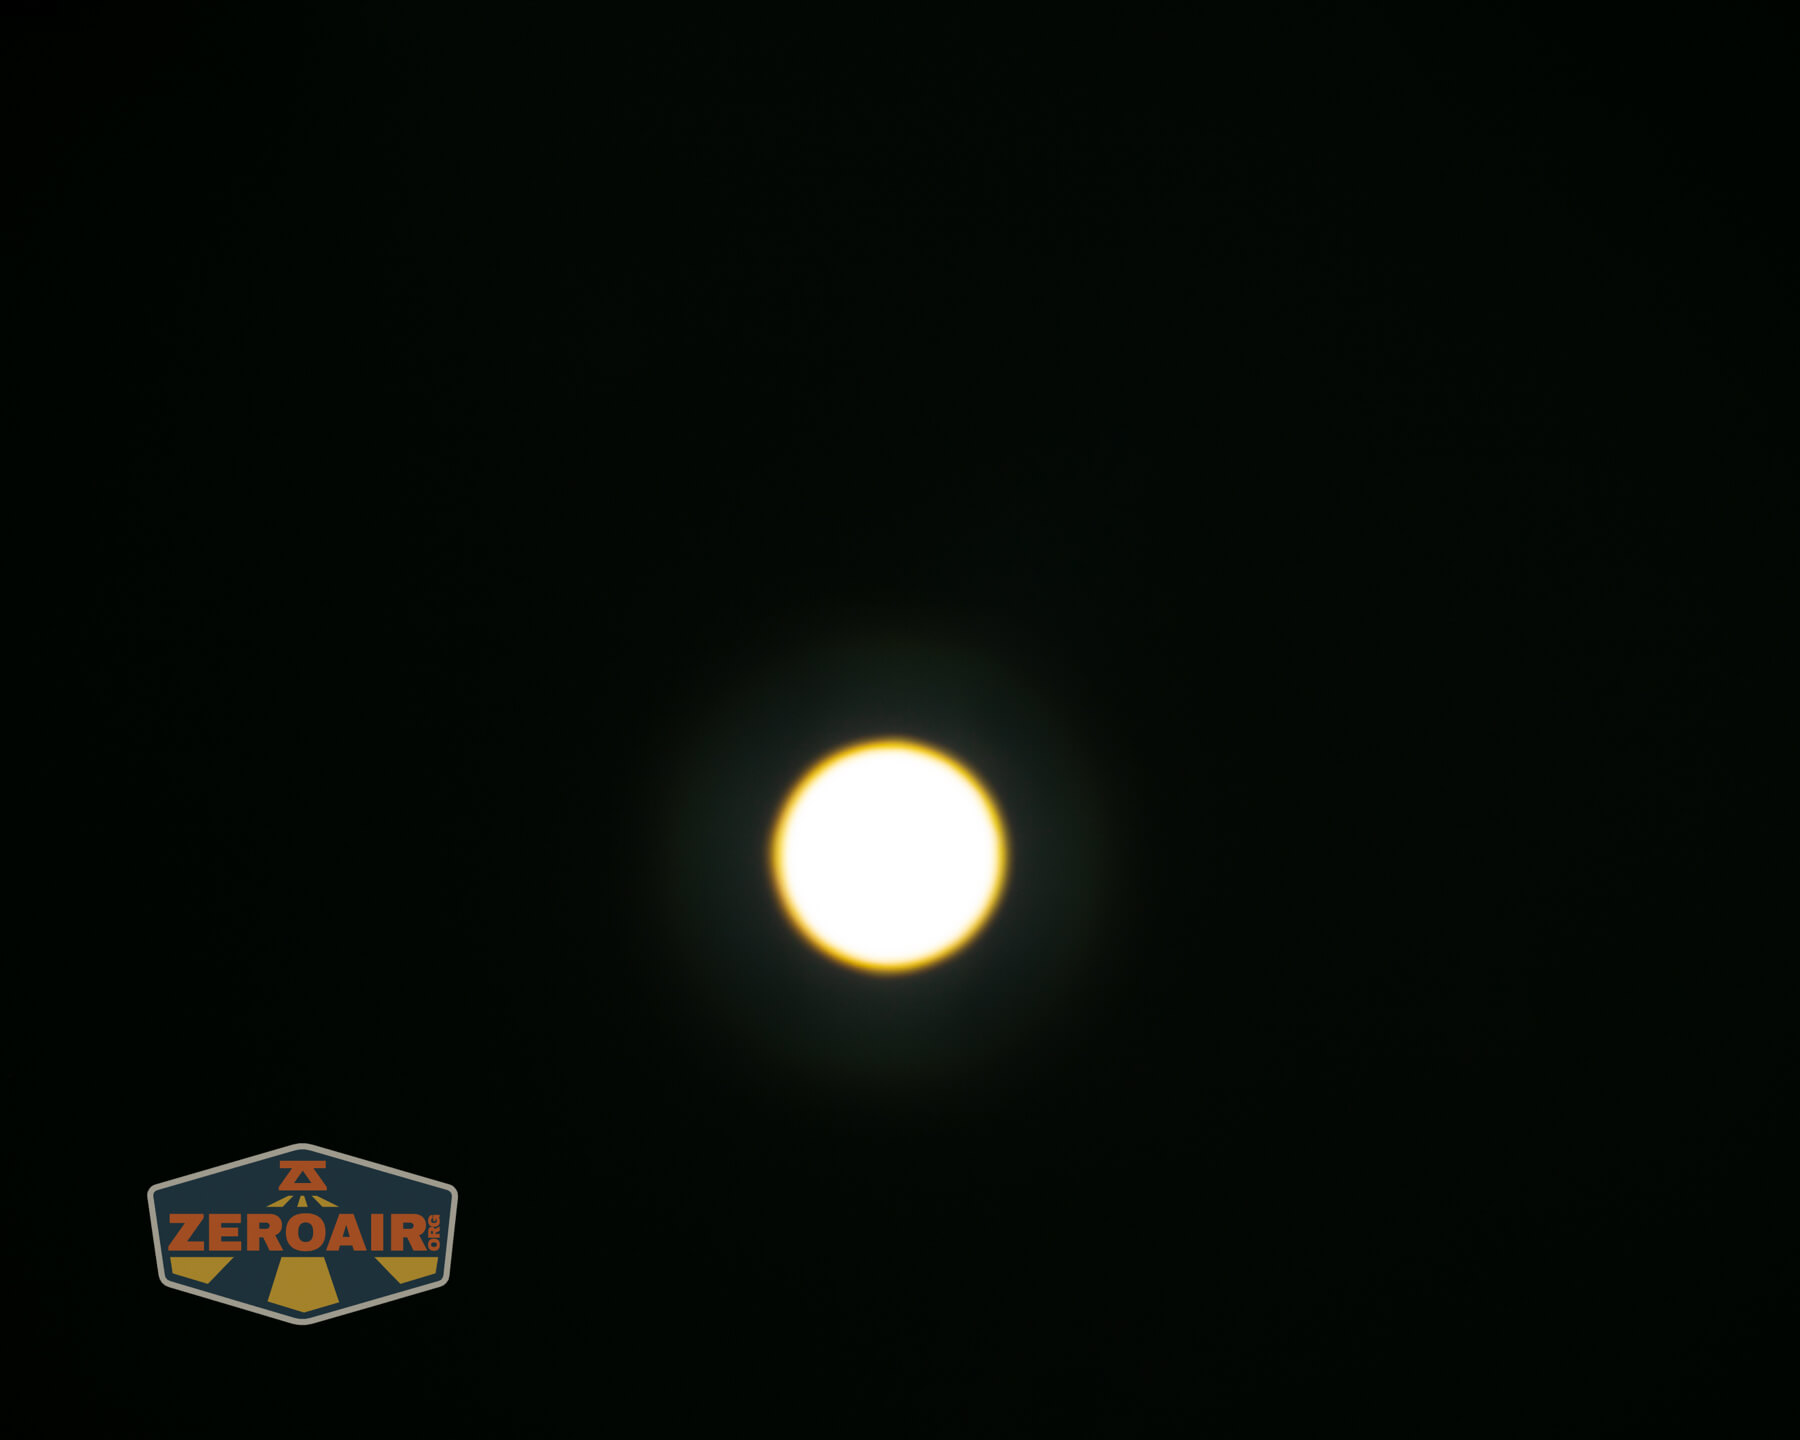

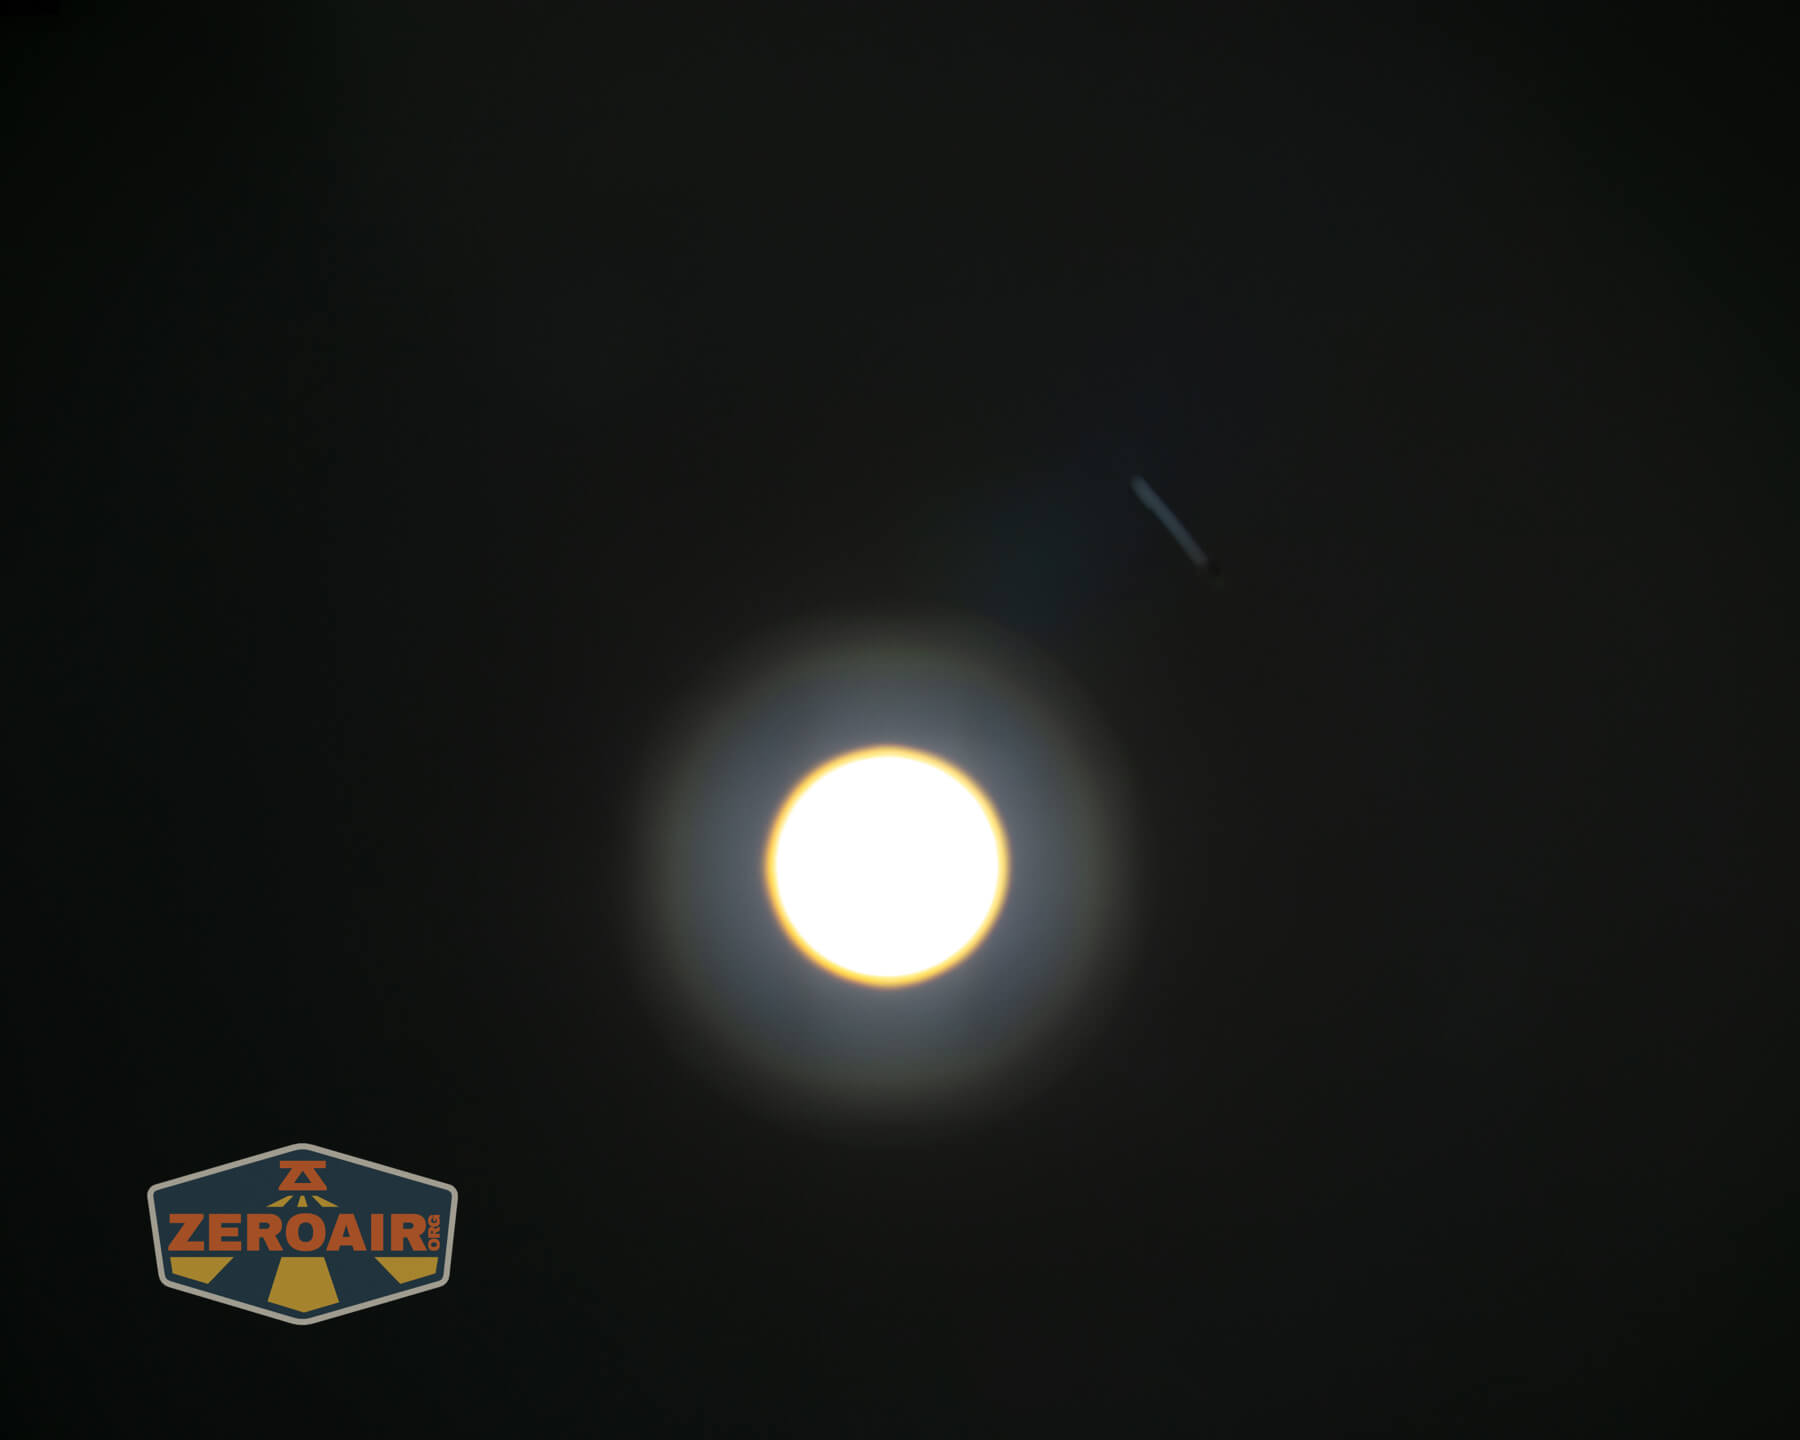
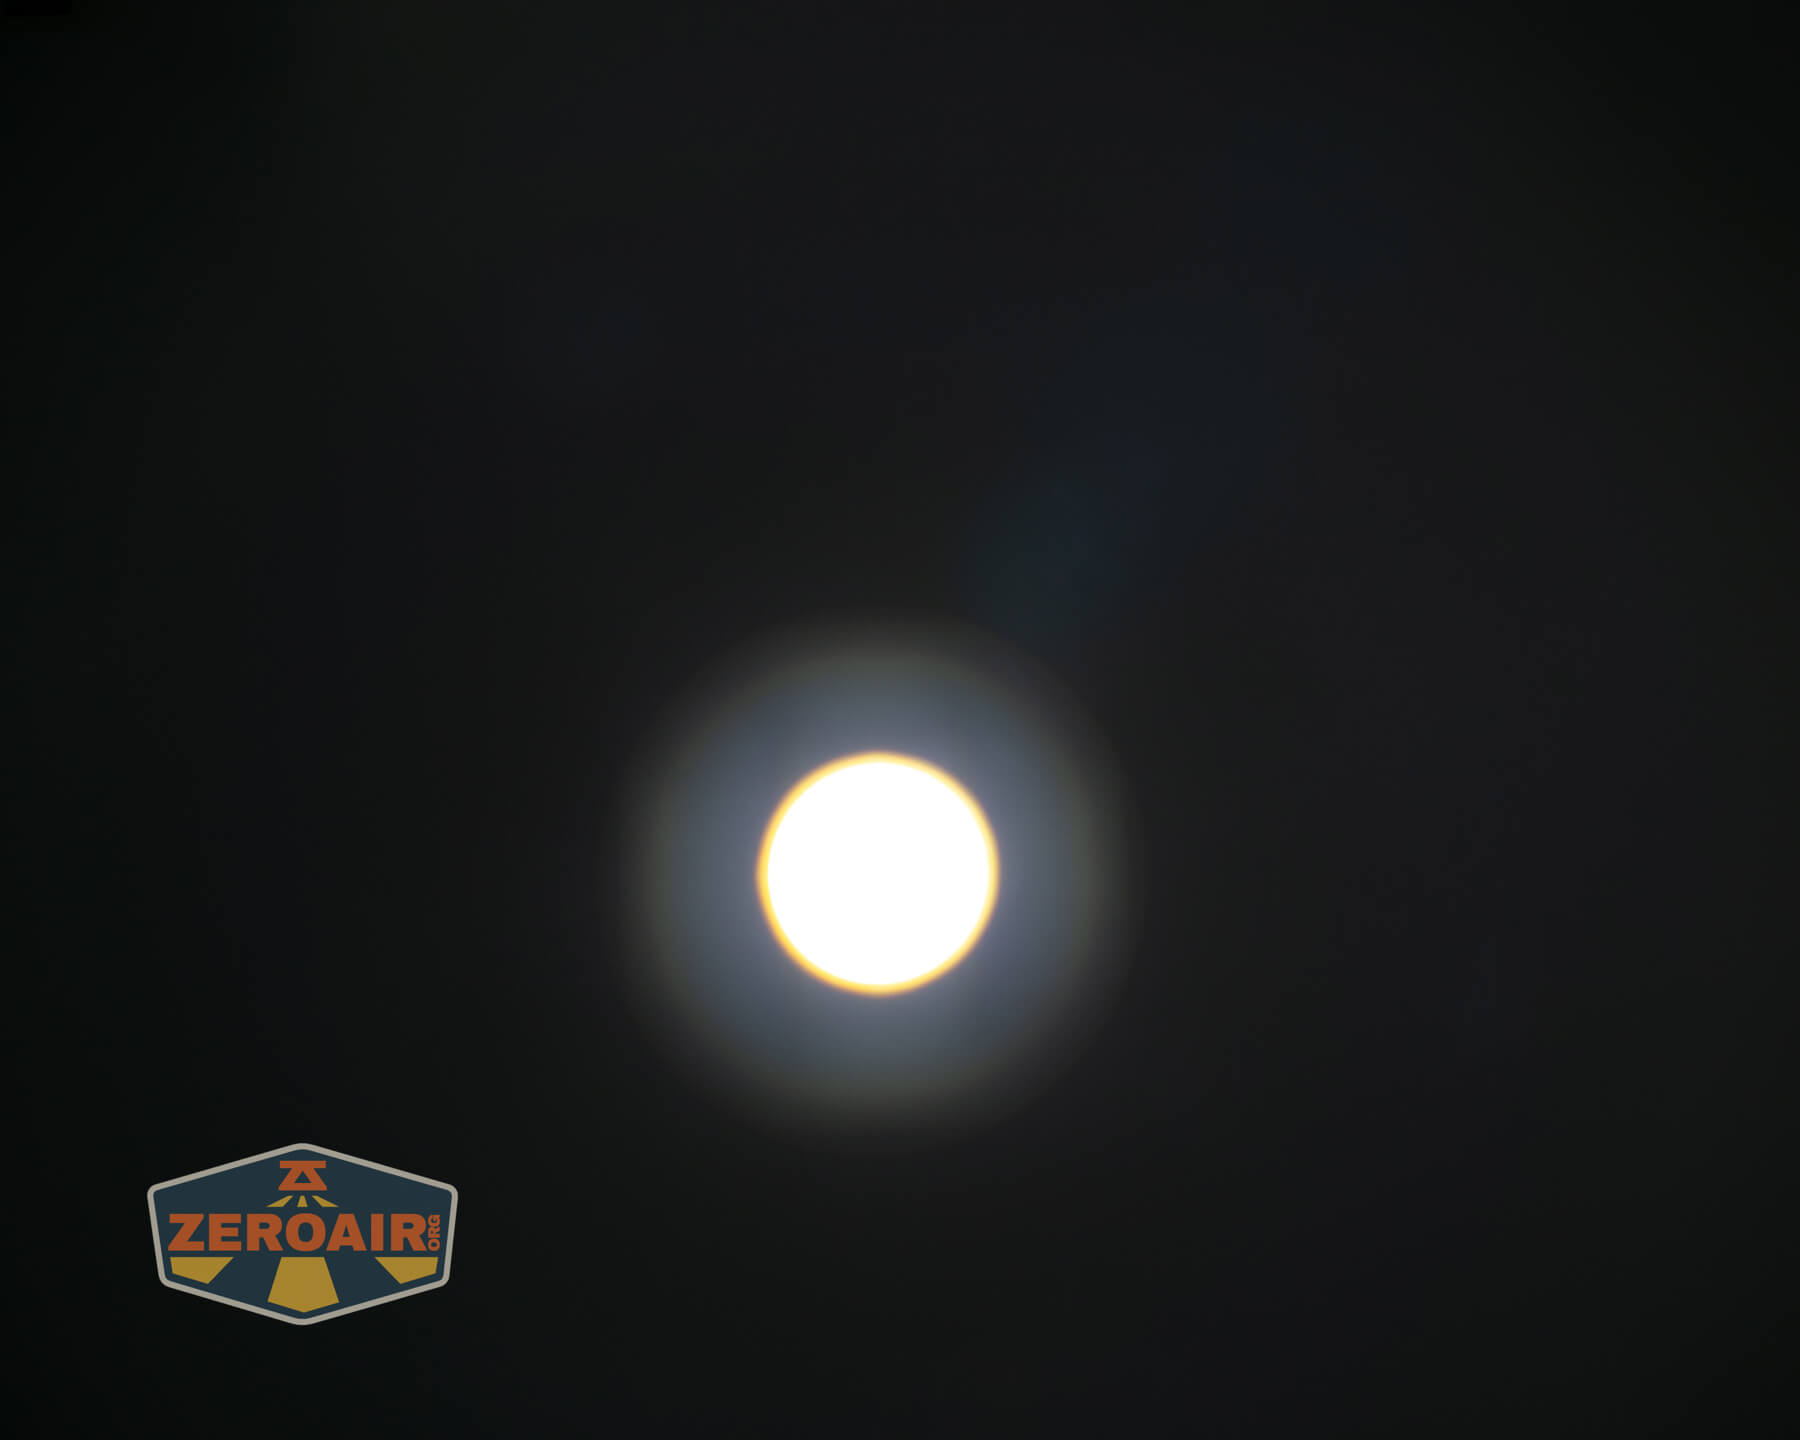


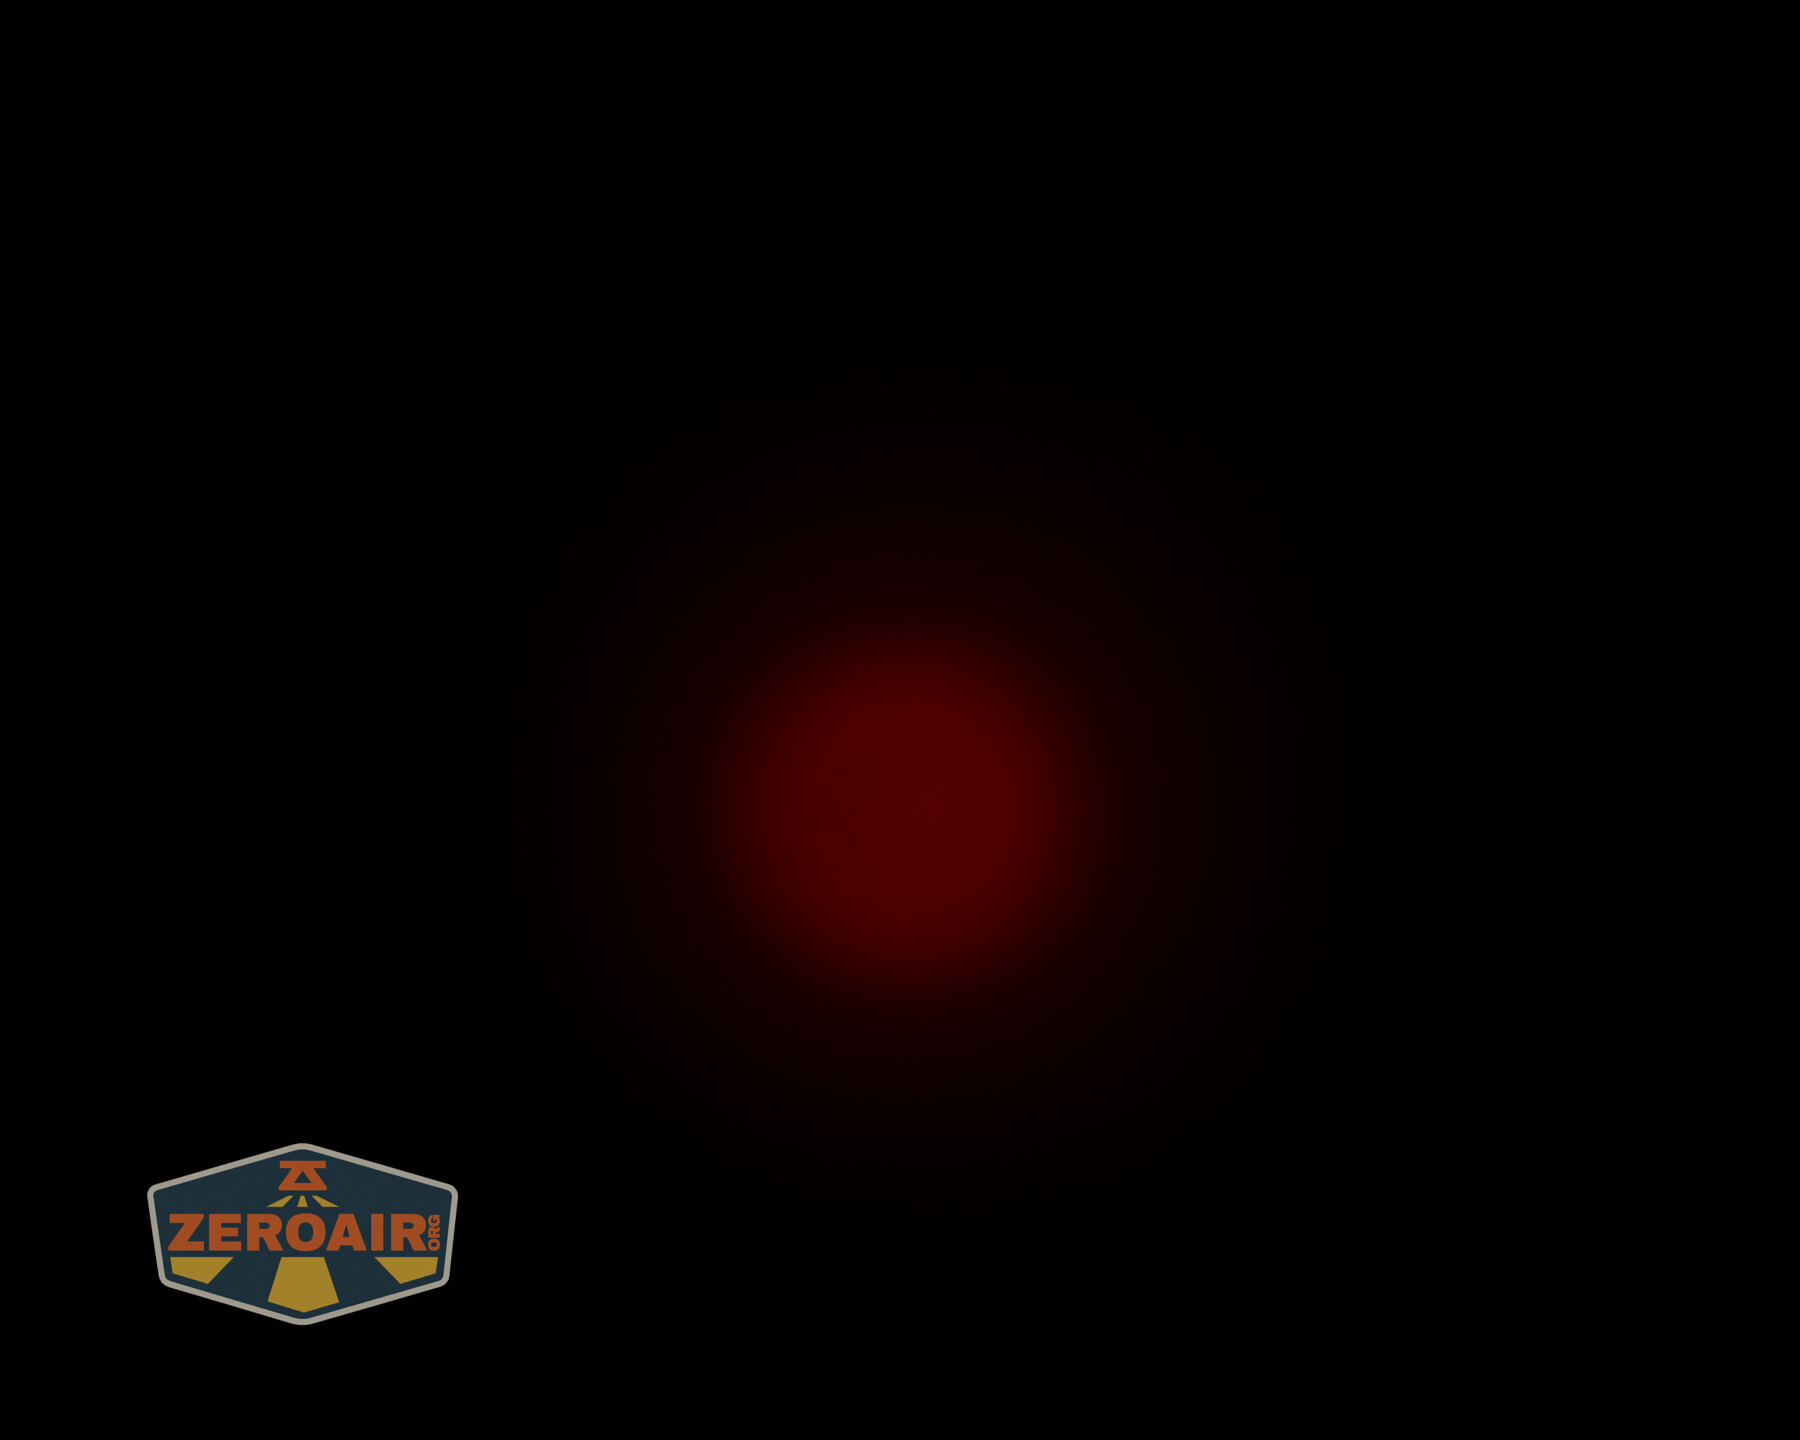


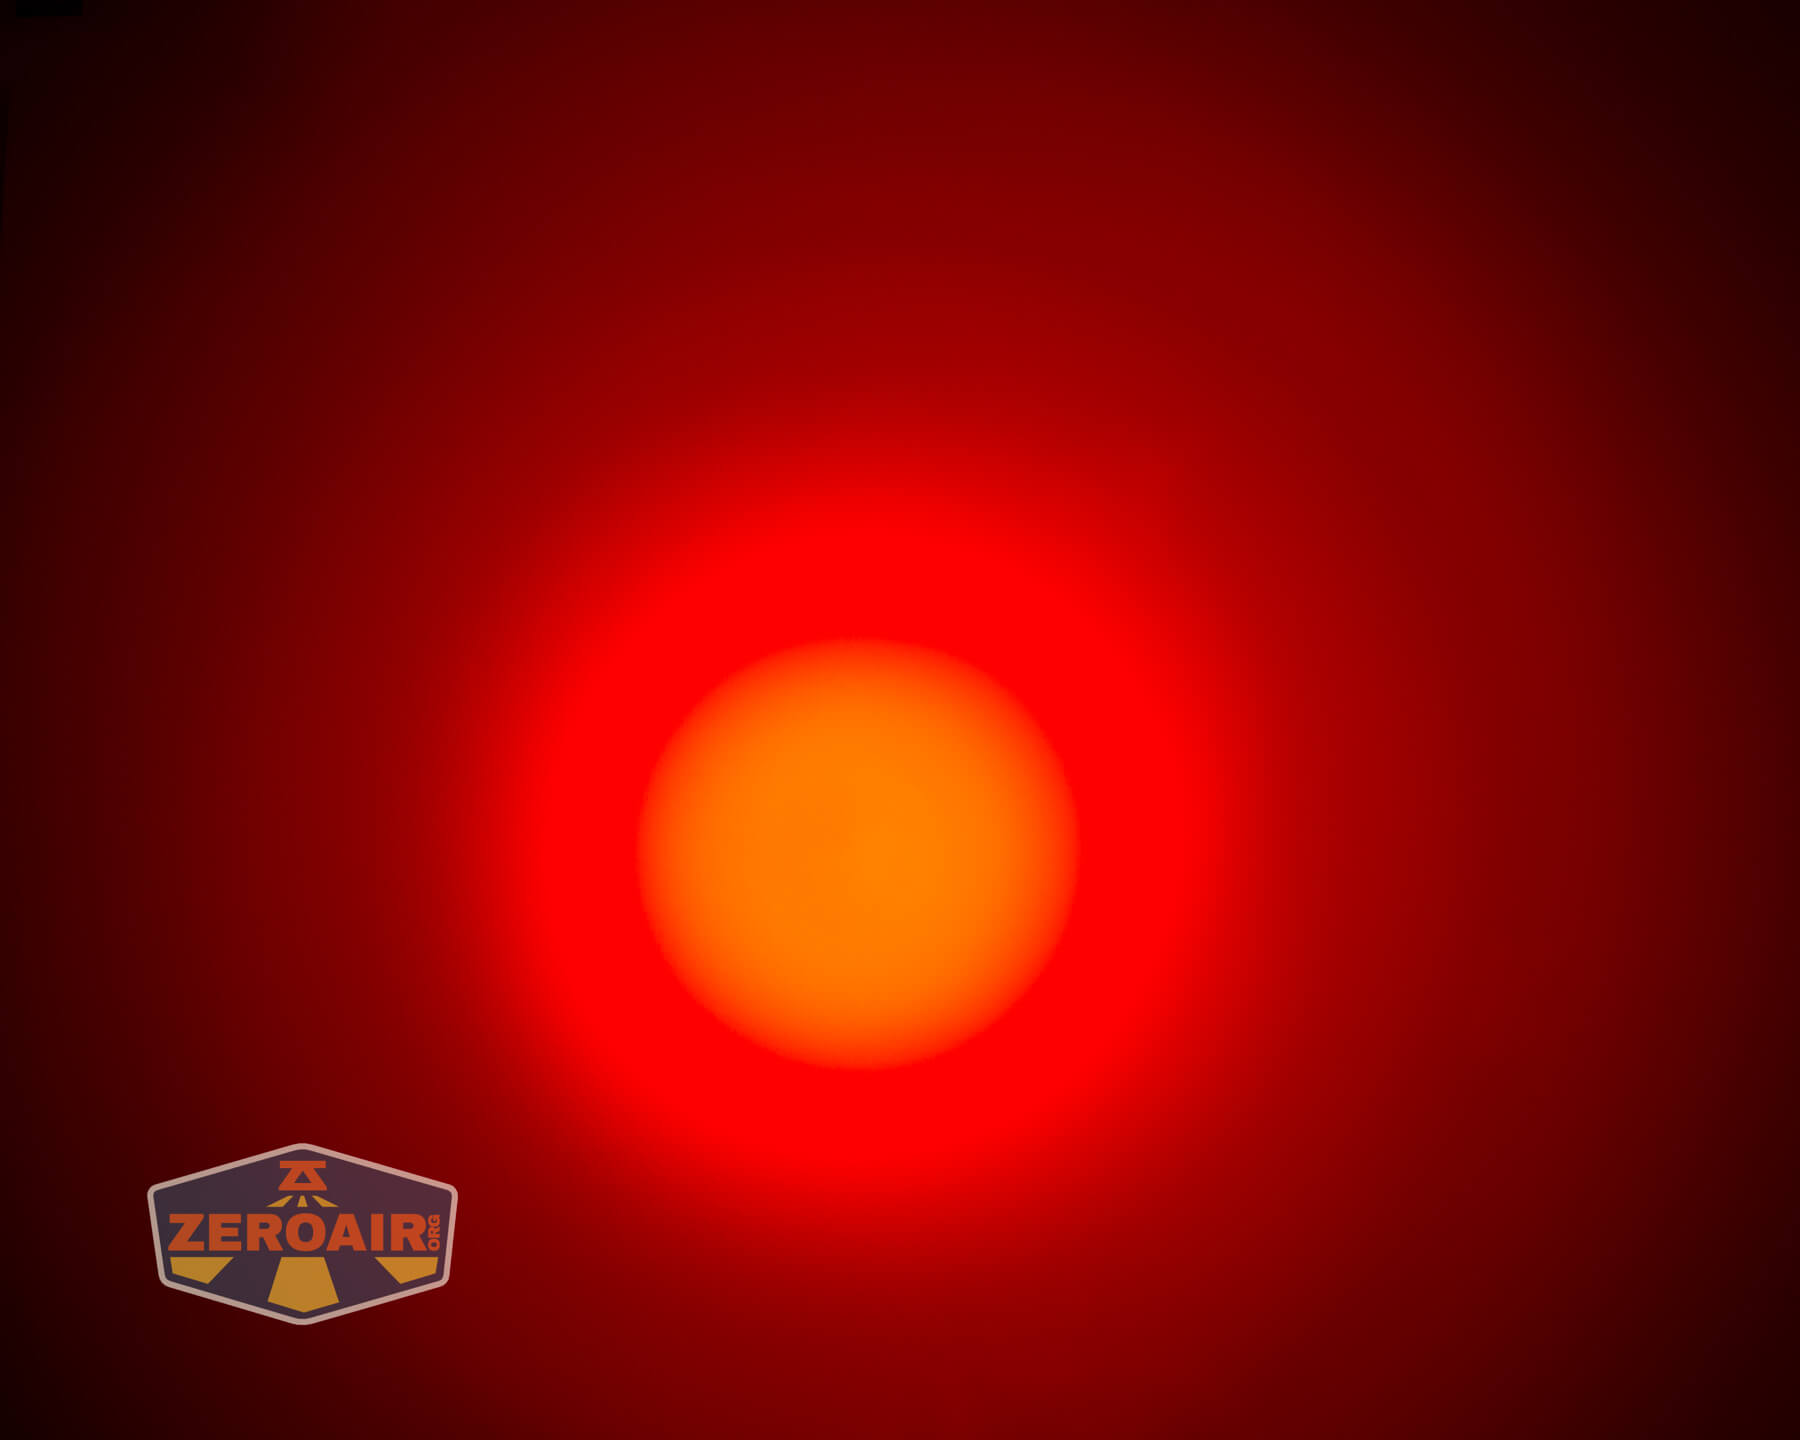
Tint vs BLF-348 (KillzoneFlashlights.com 219b version) (affiliate link)
I keep the test flashlight on the left and the BLF-348 reference flashlight on the right. These photos are taken around 18 inches from the door.
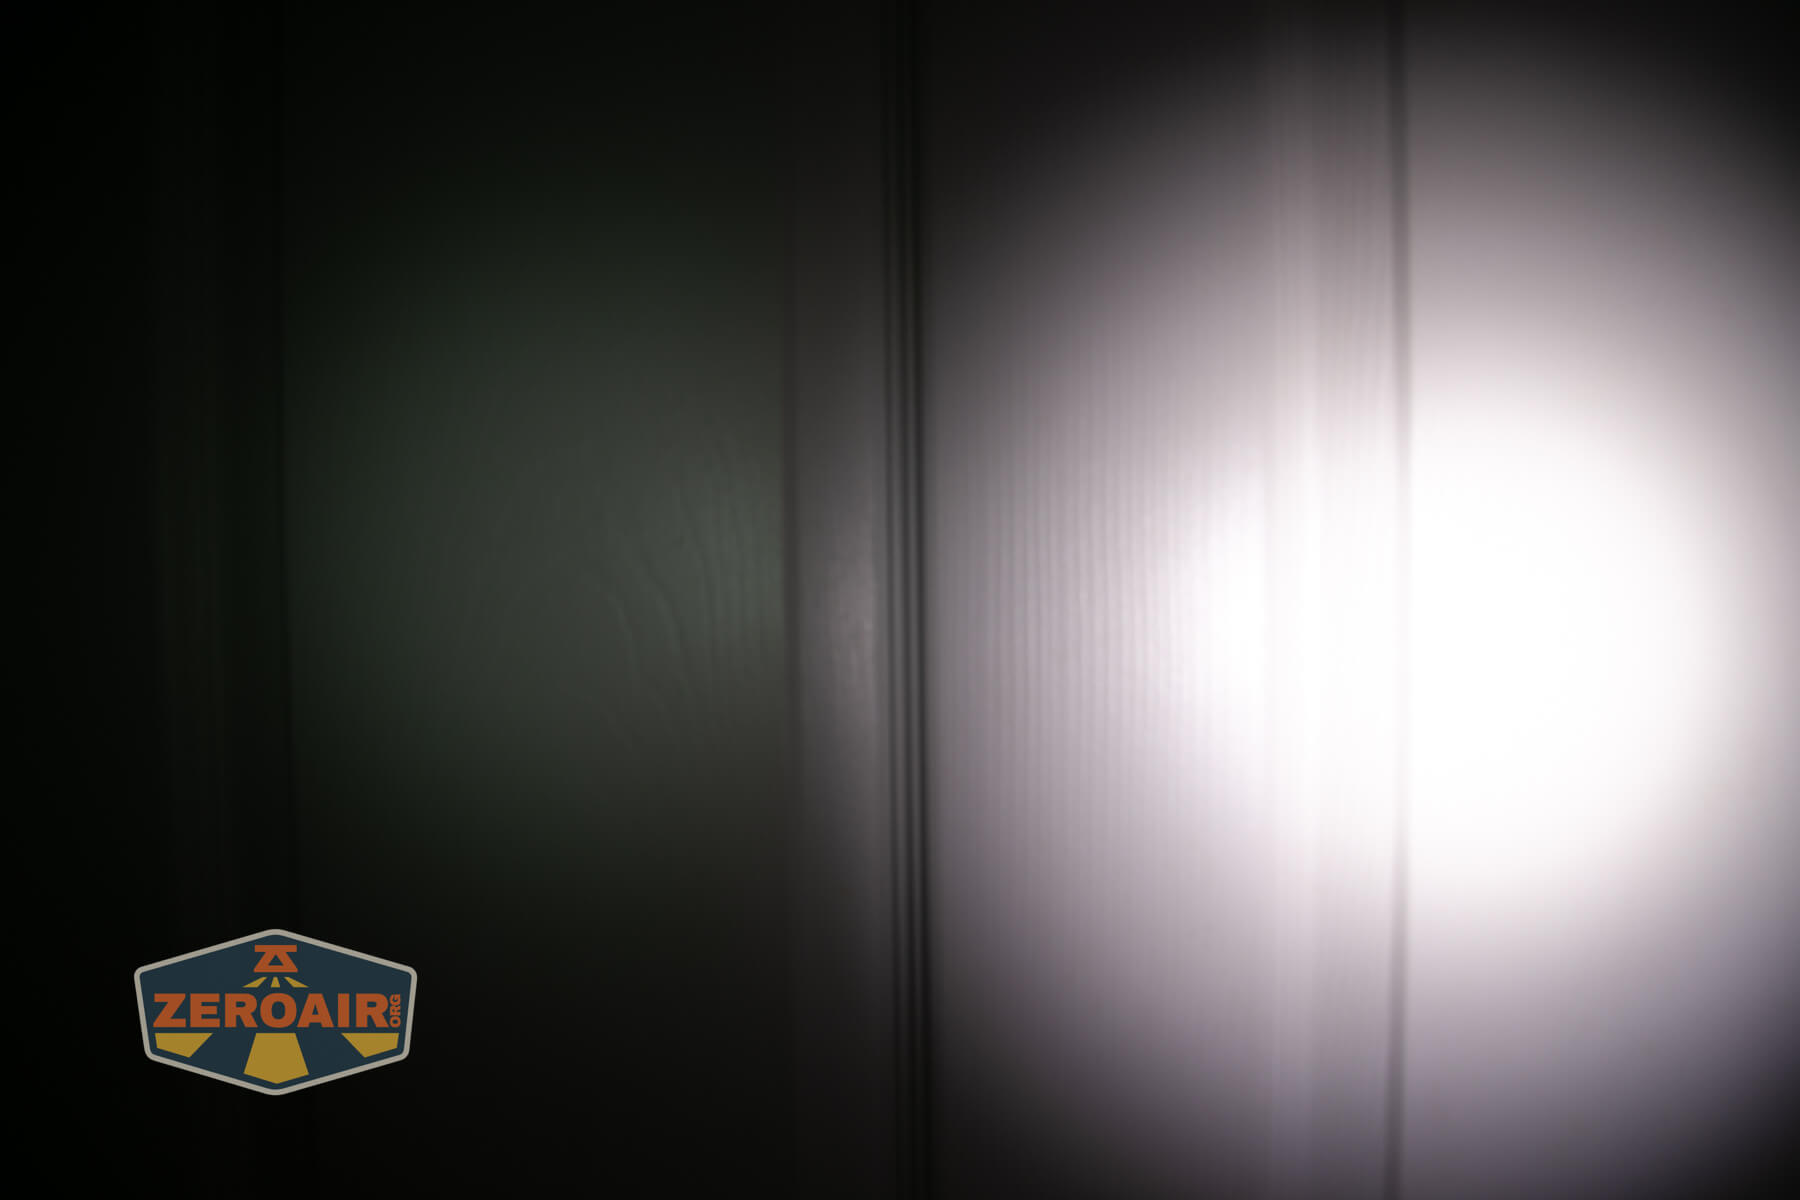


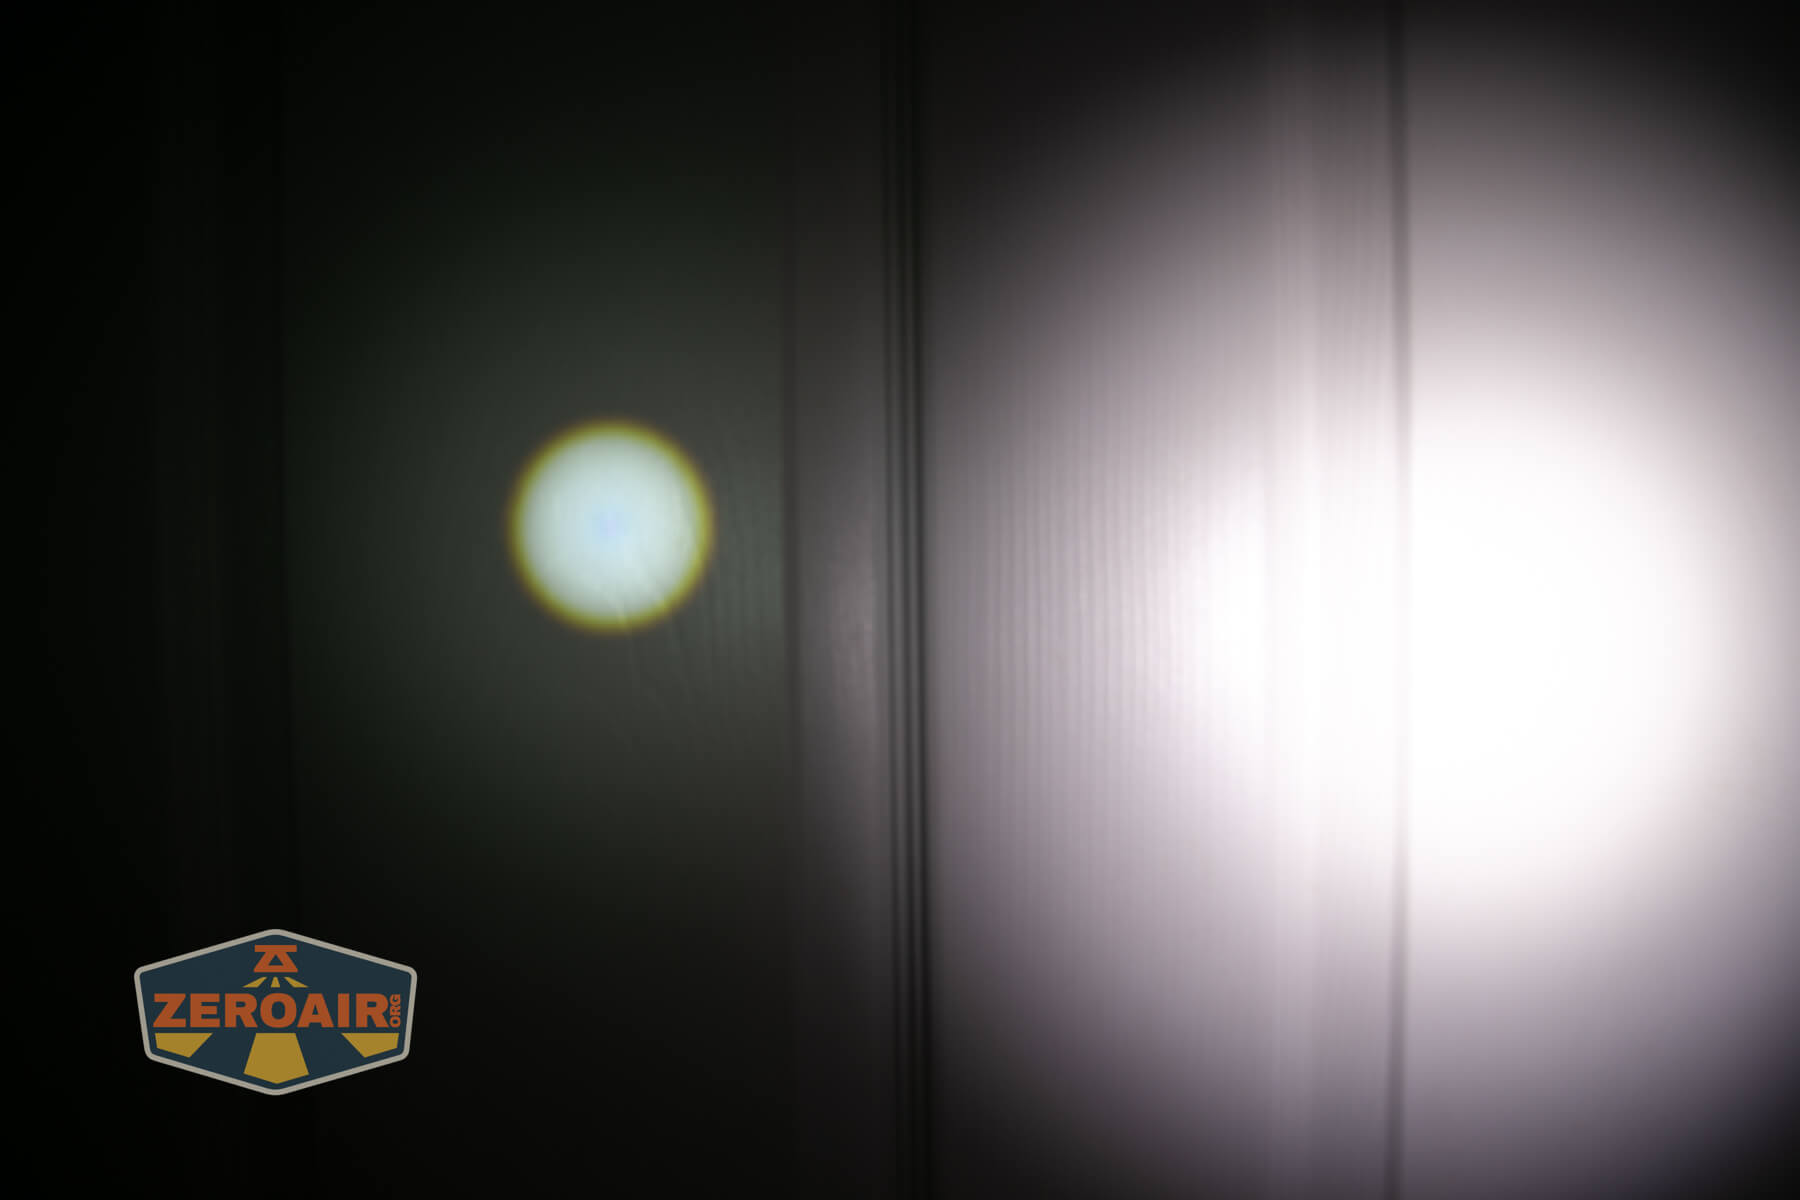
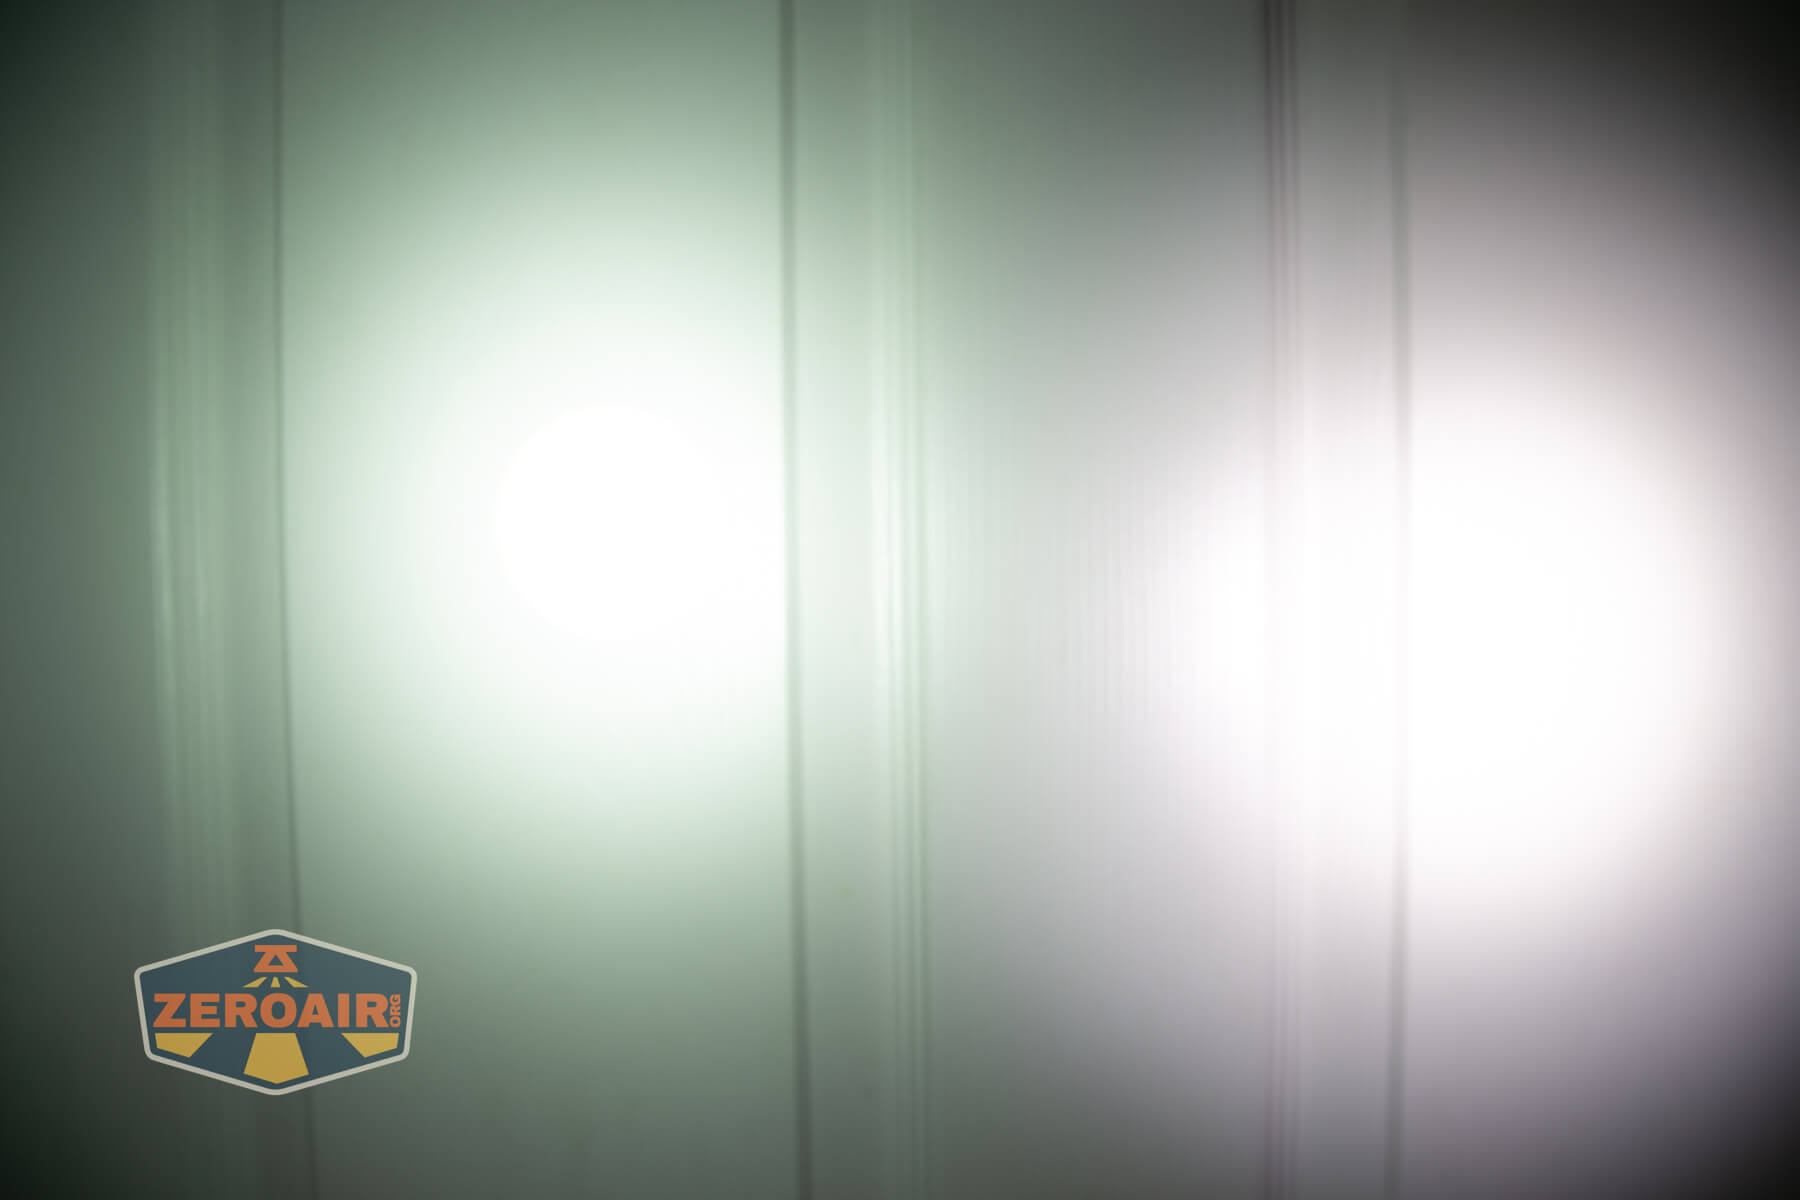


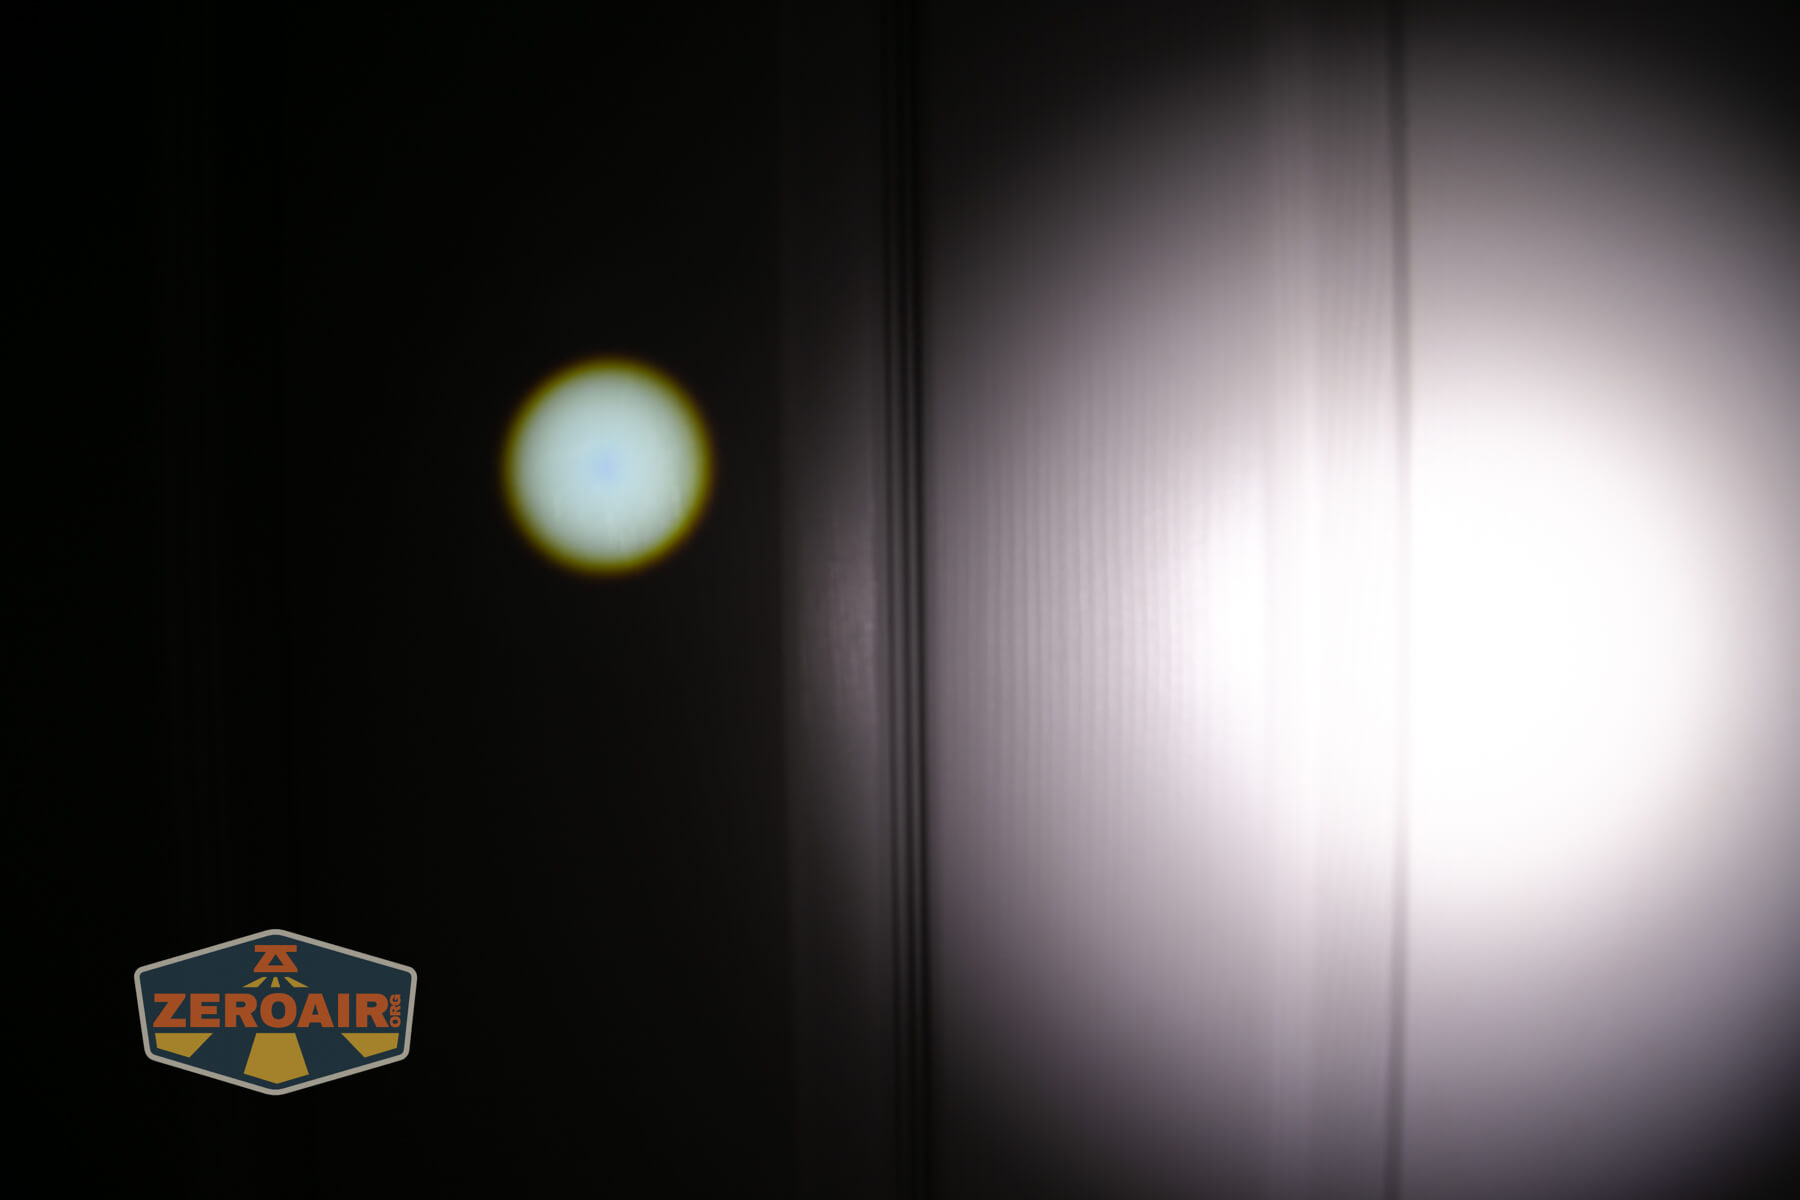

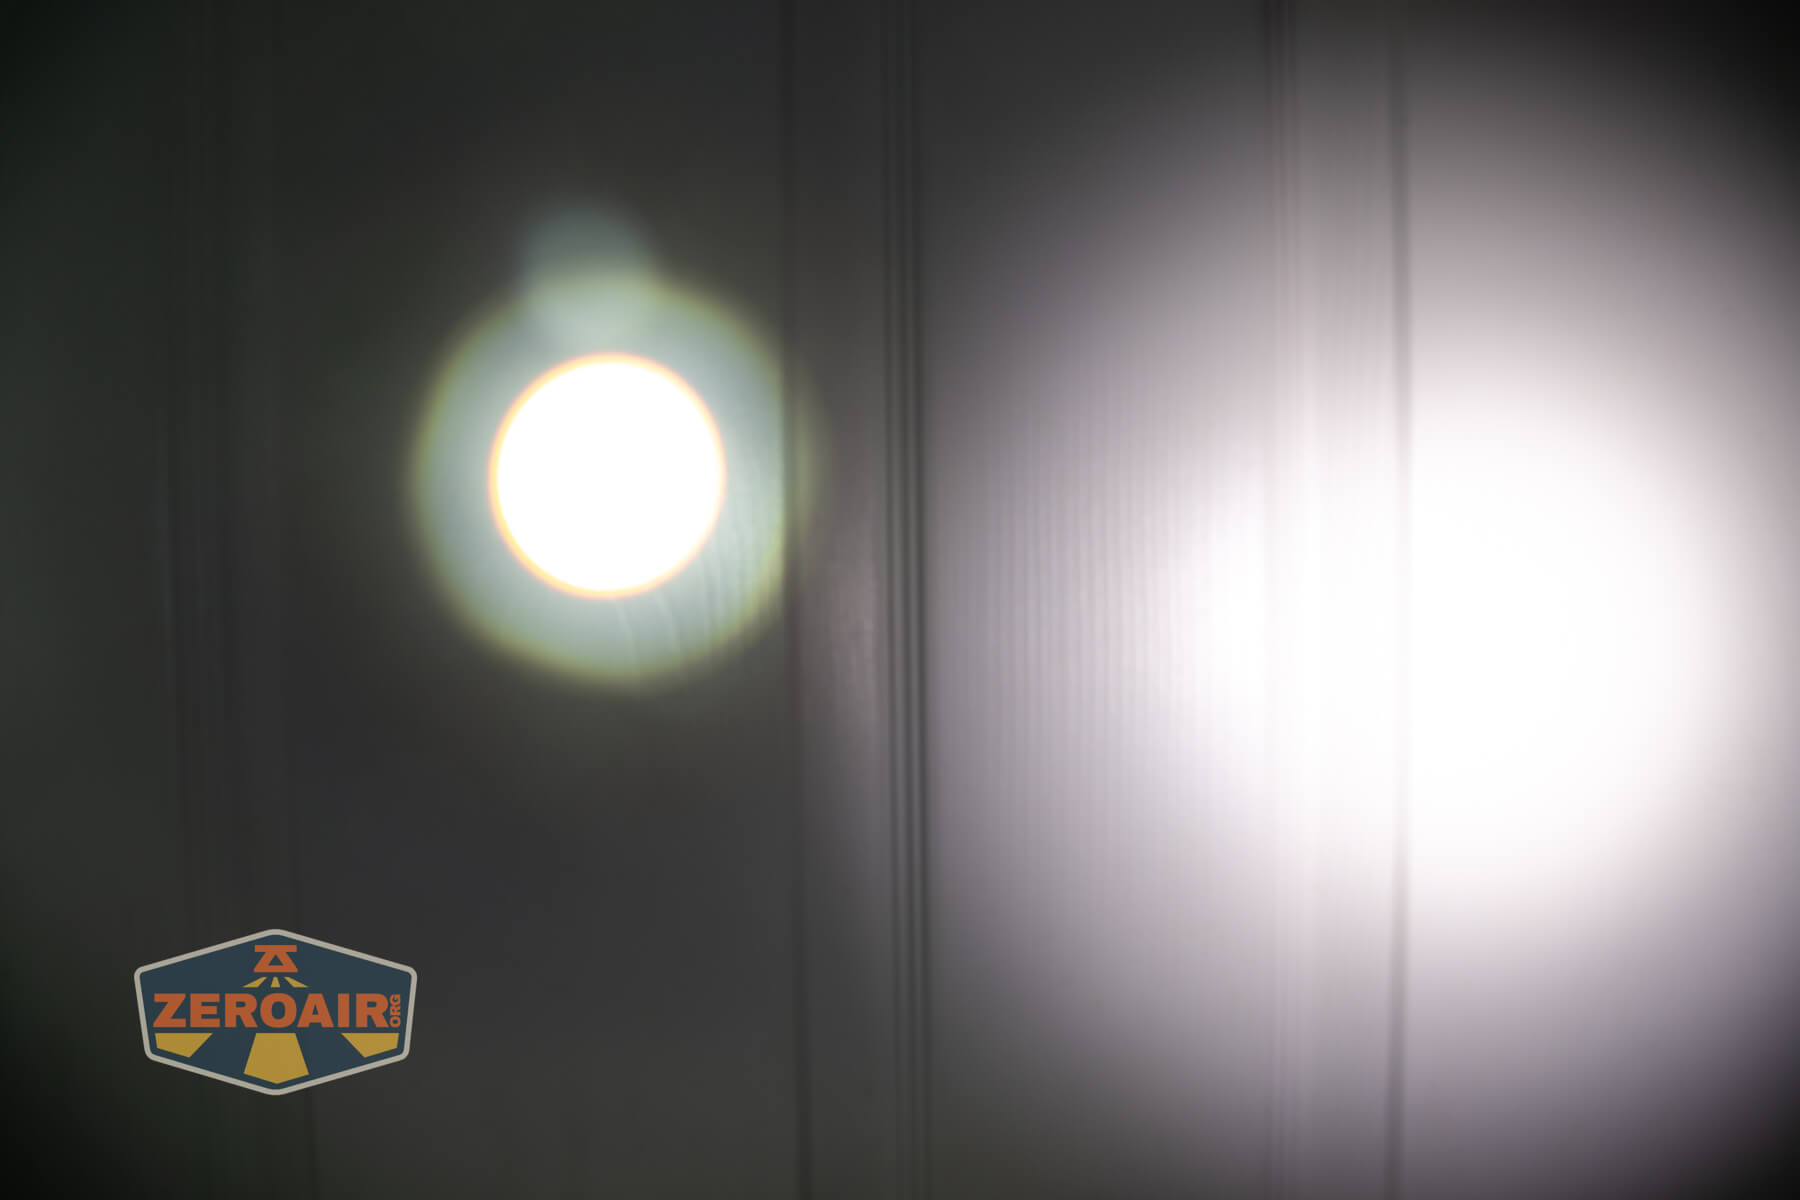


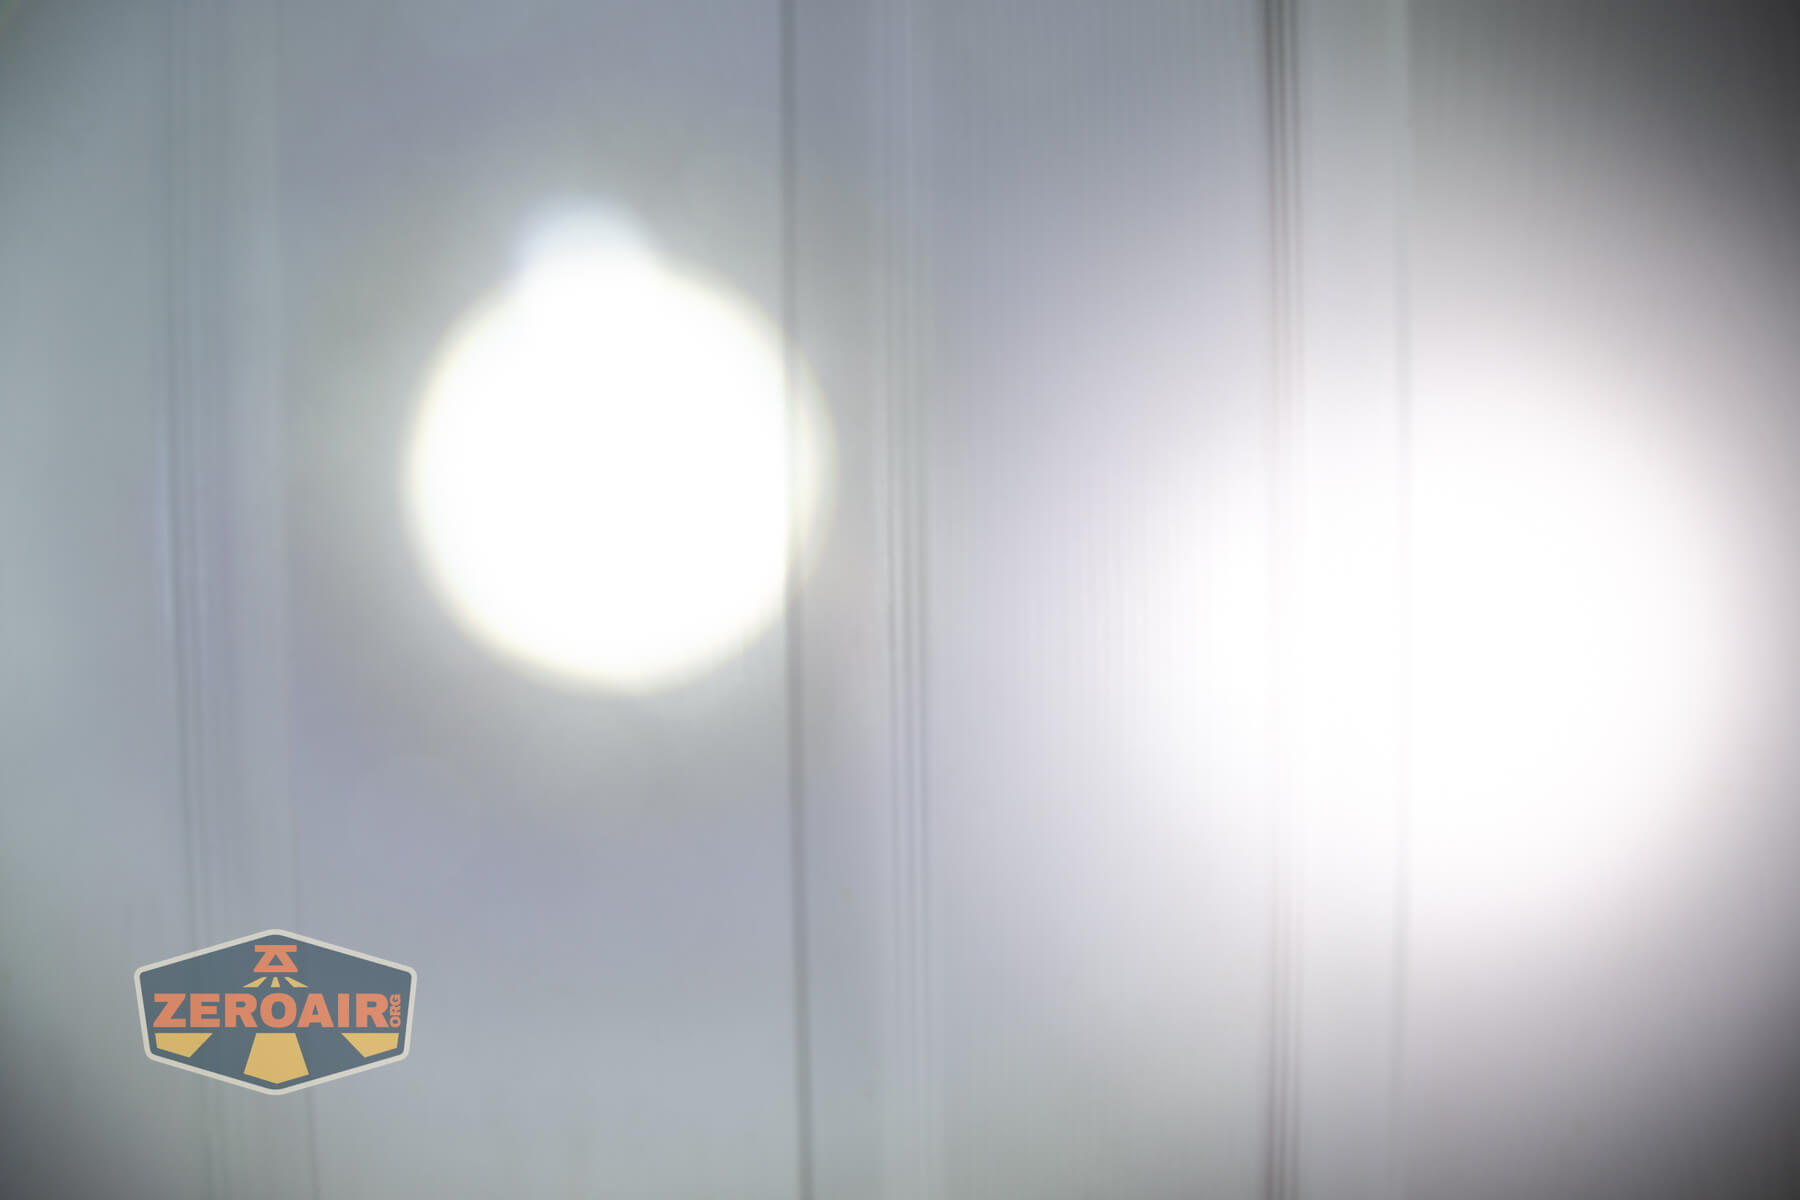
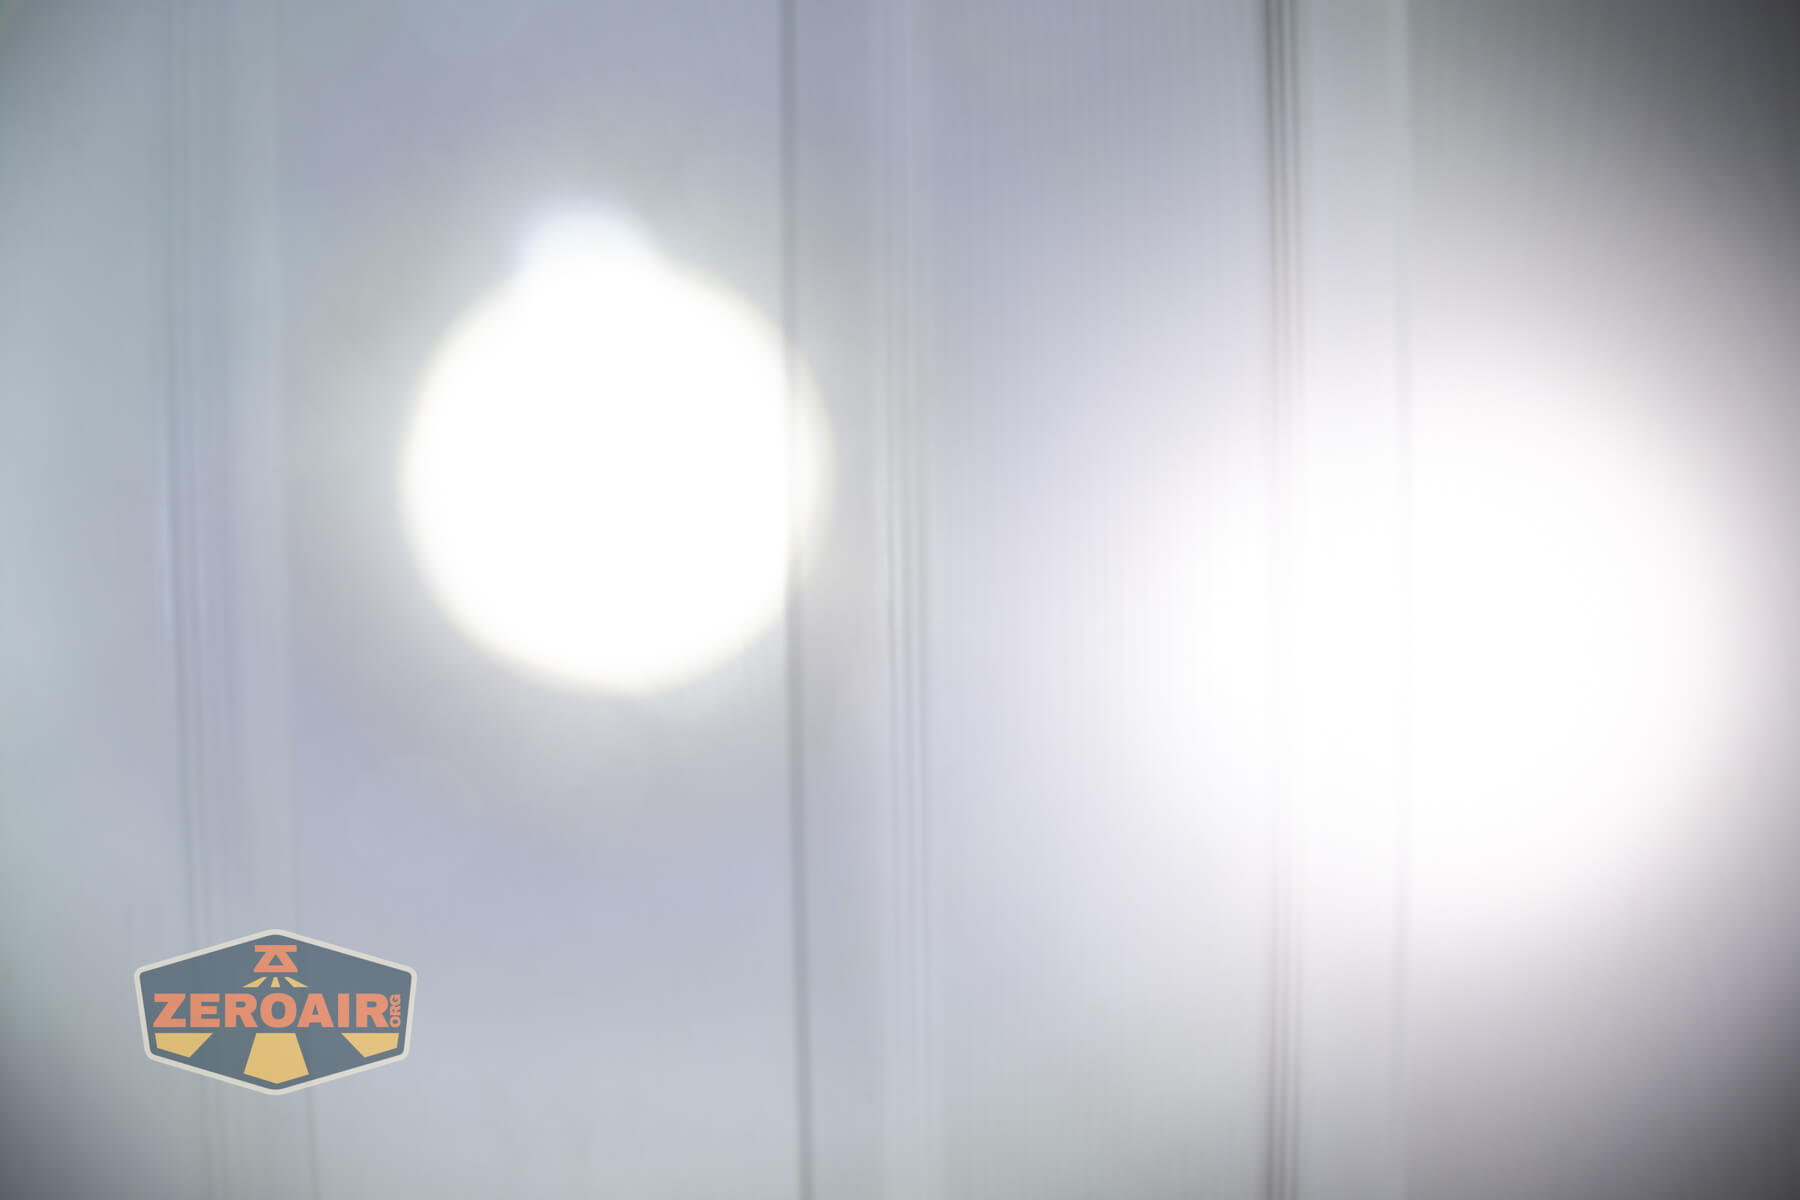


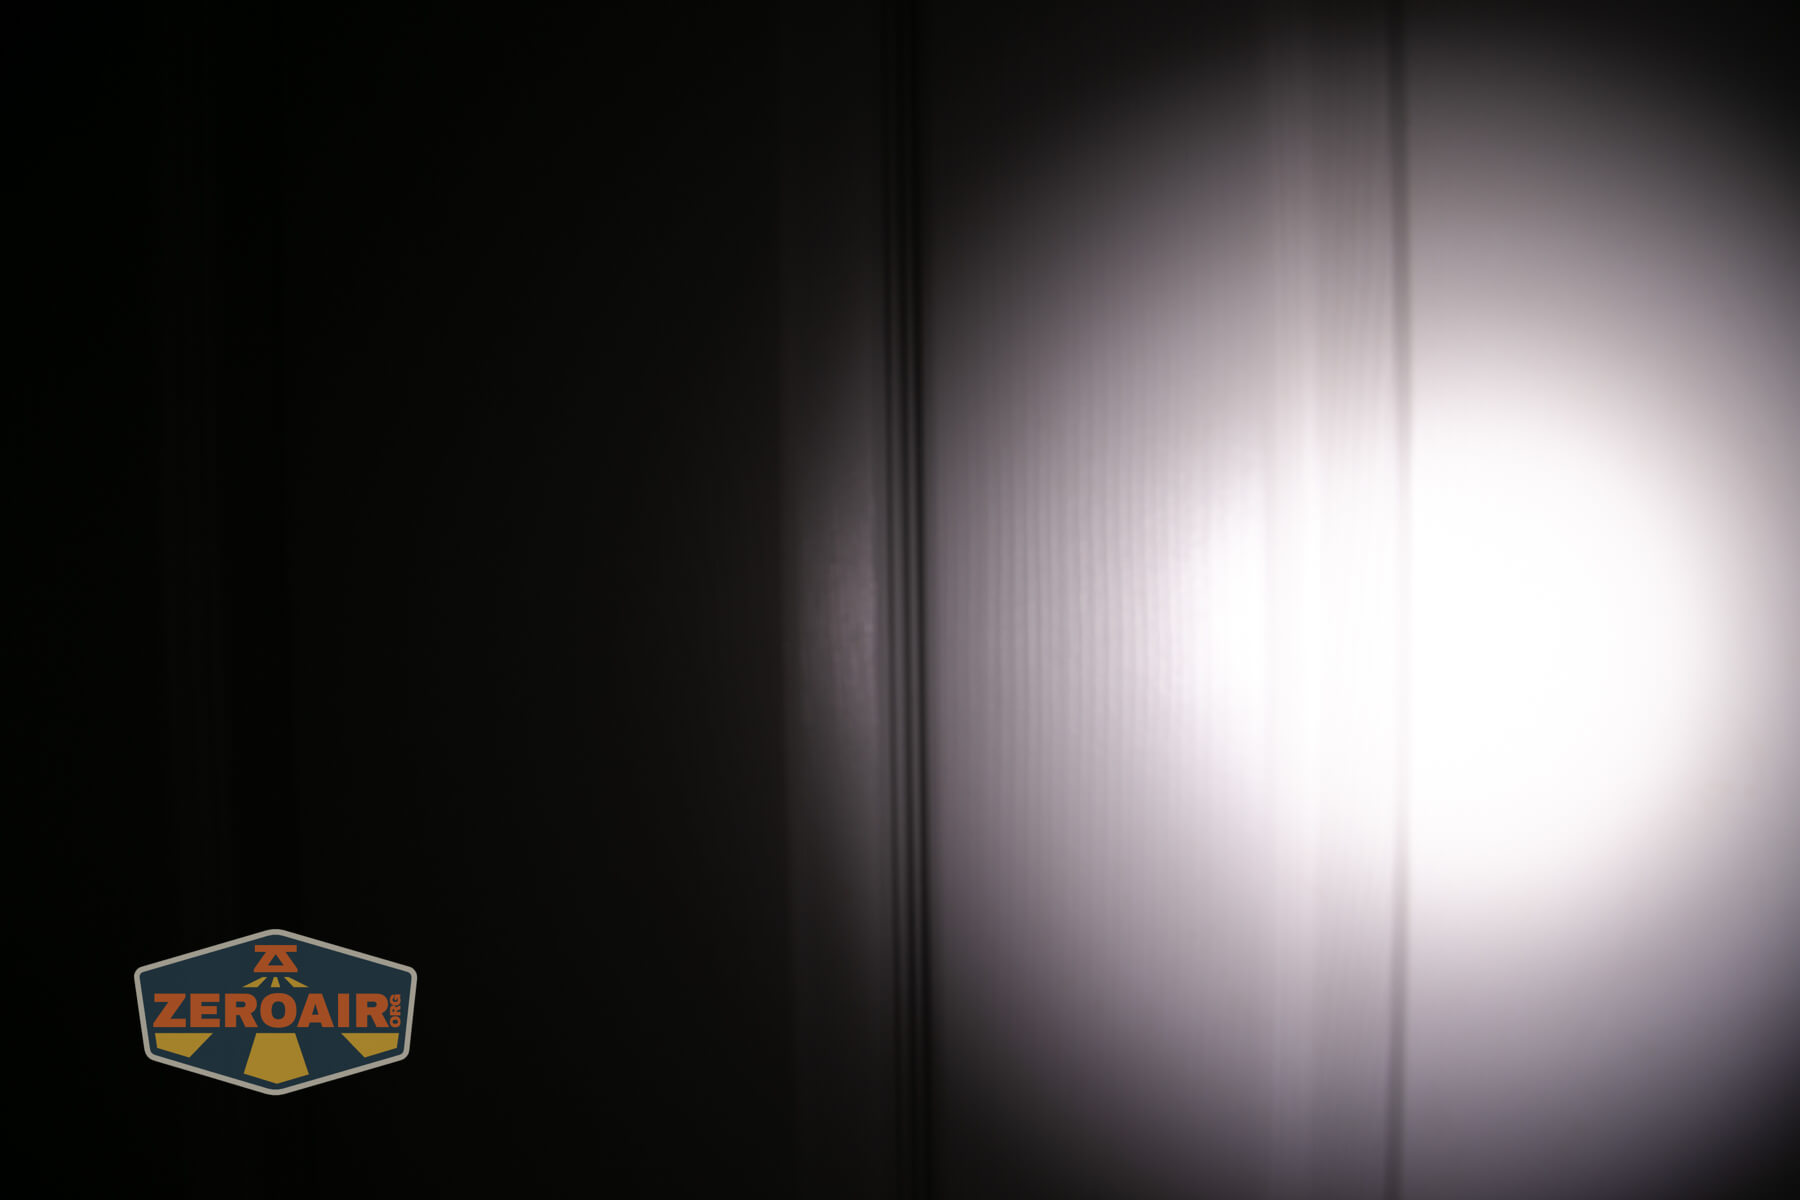
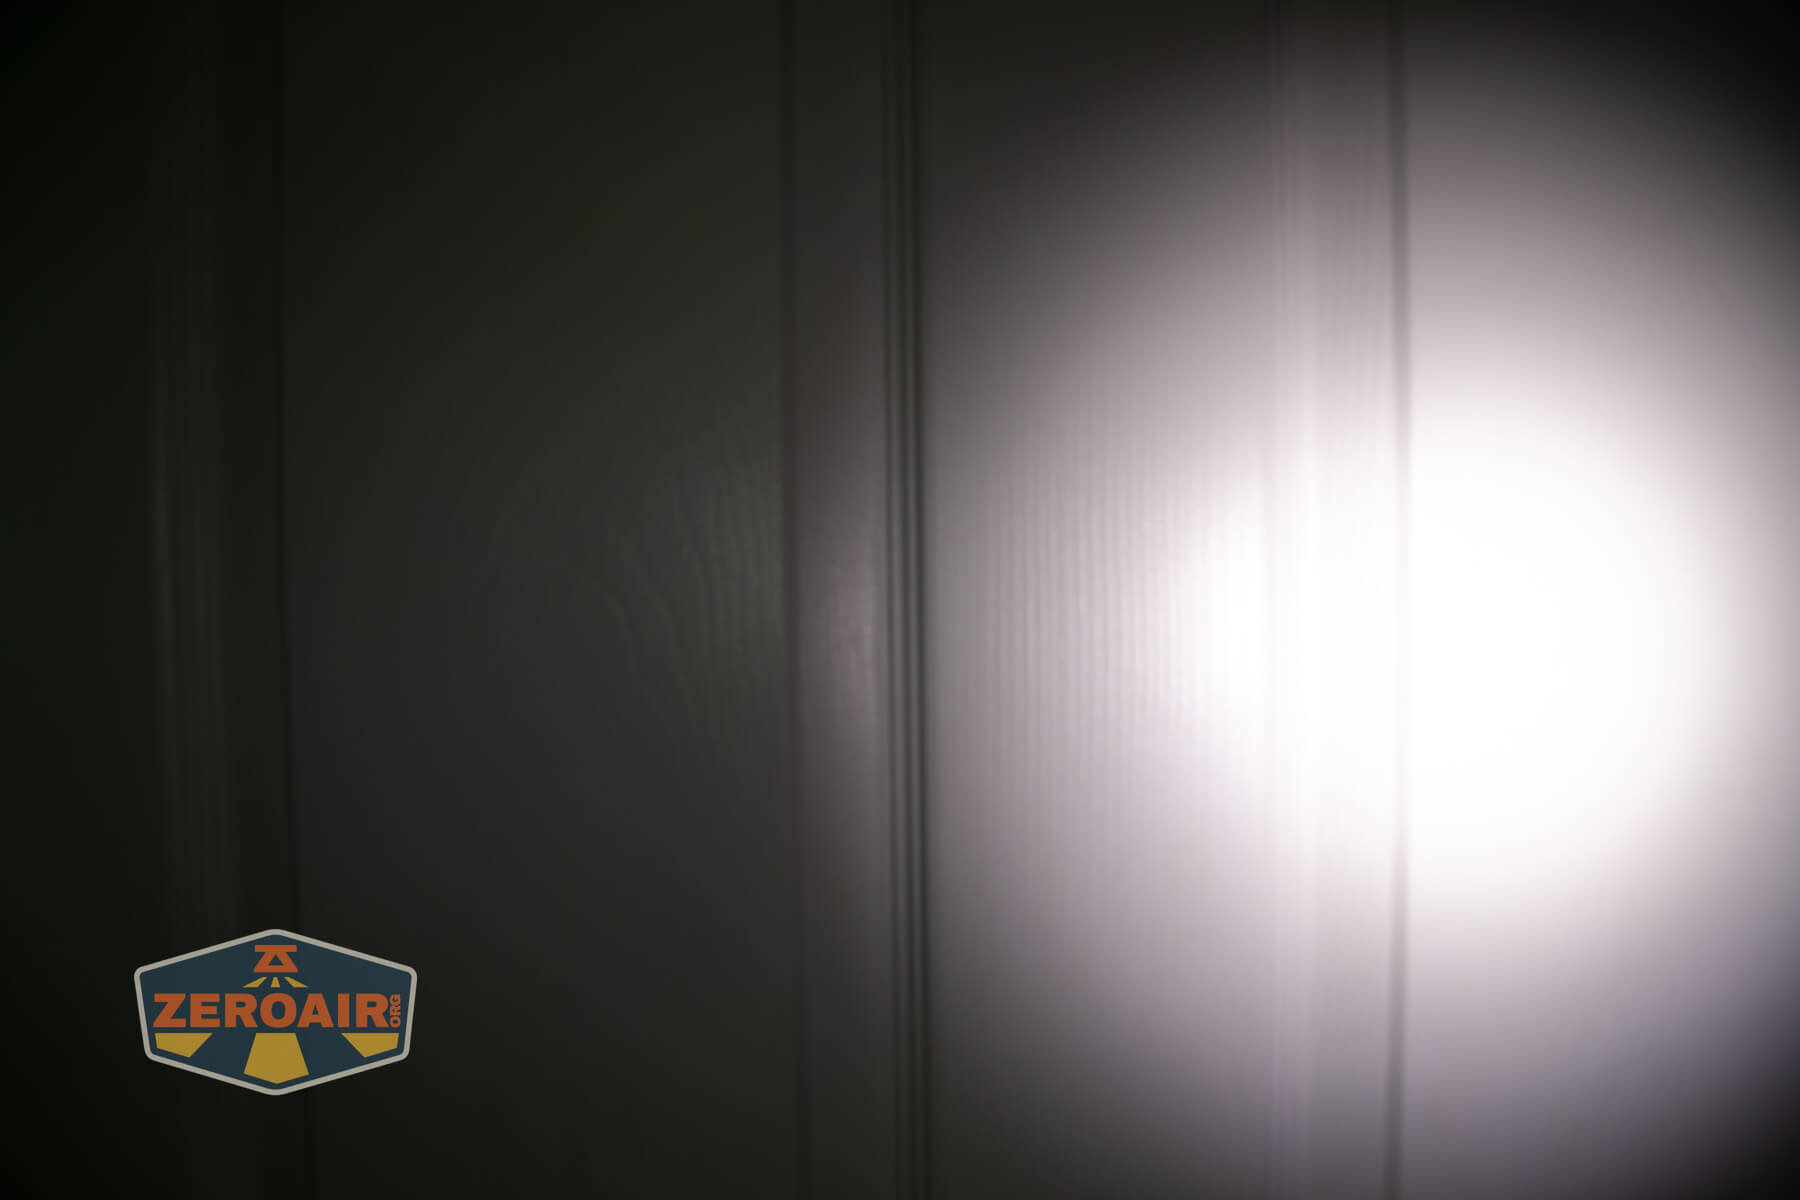
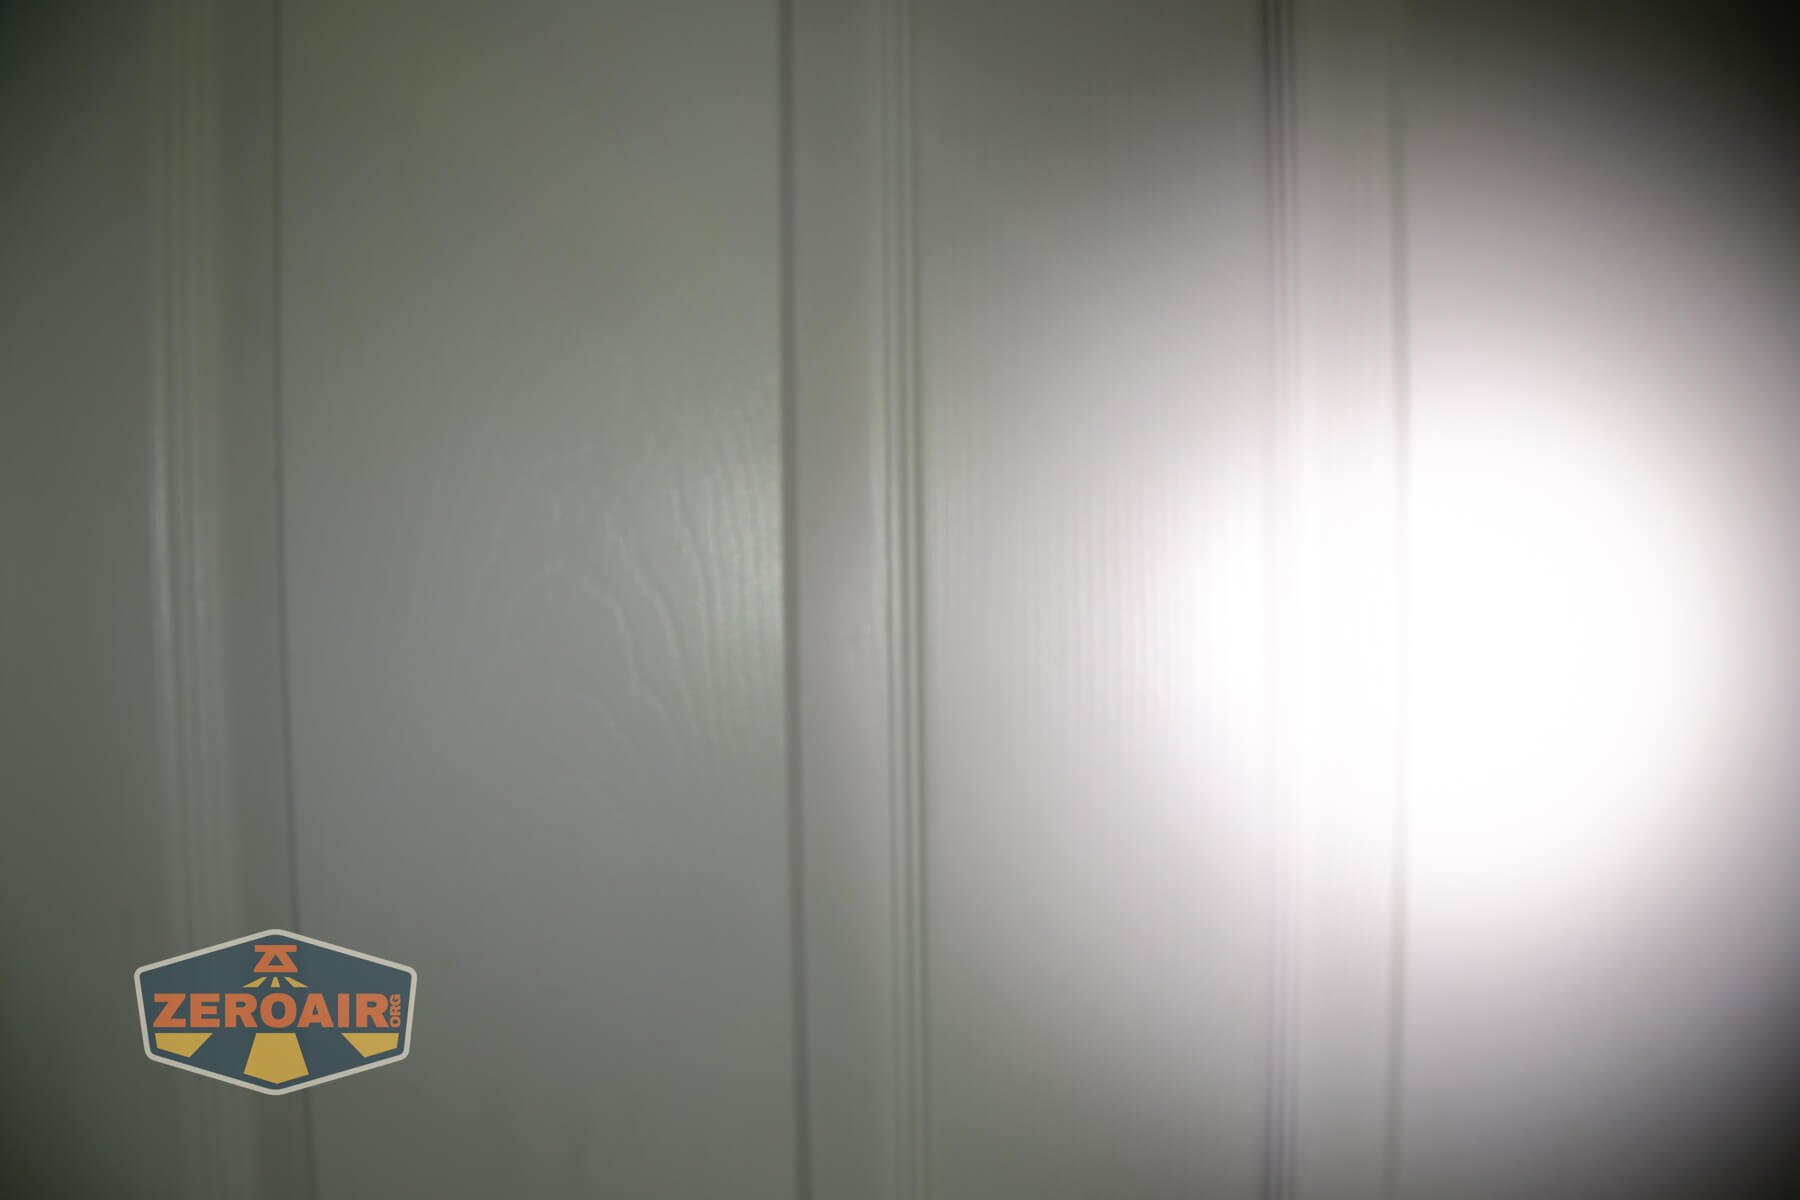
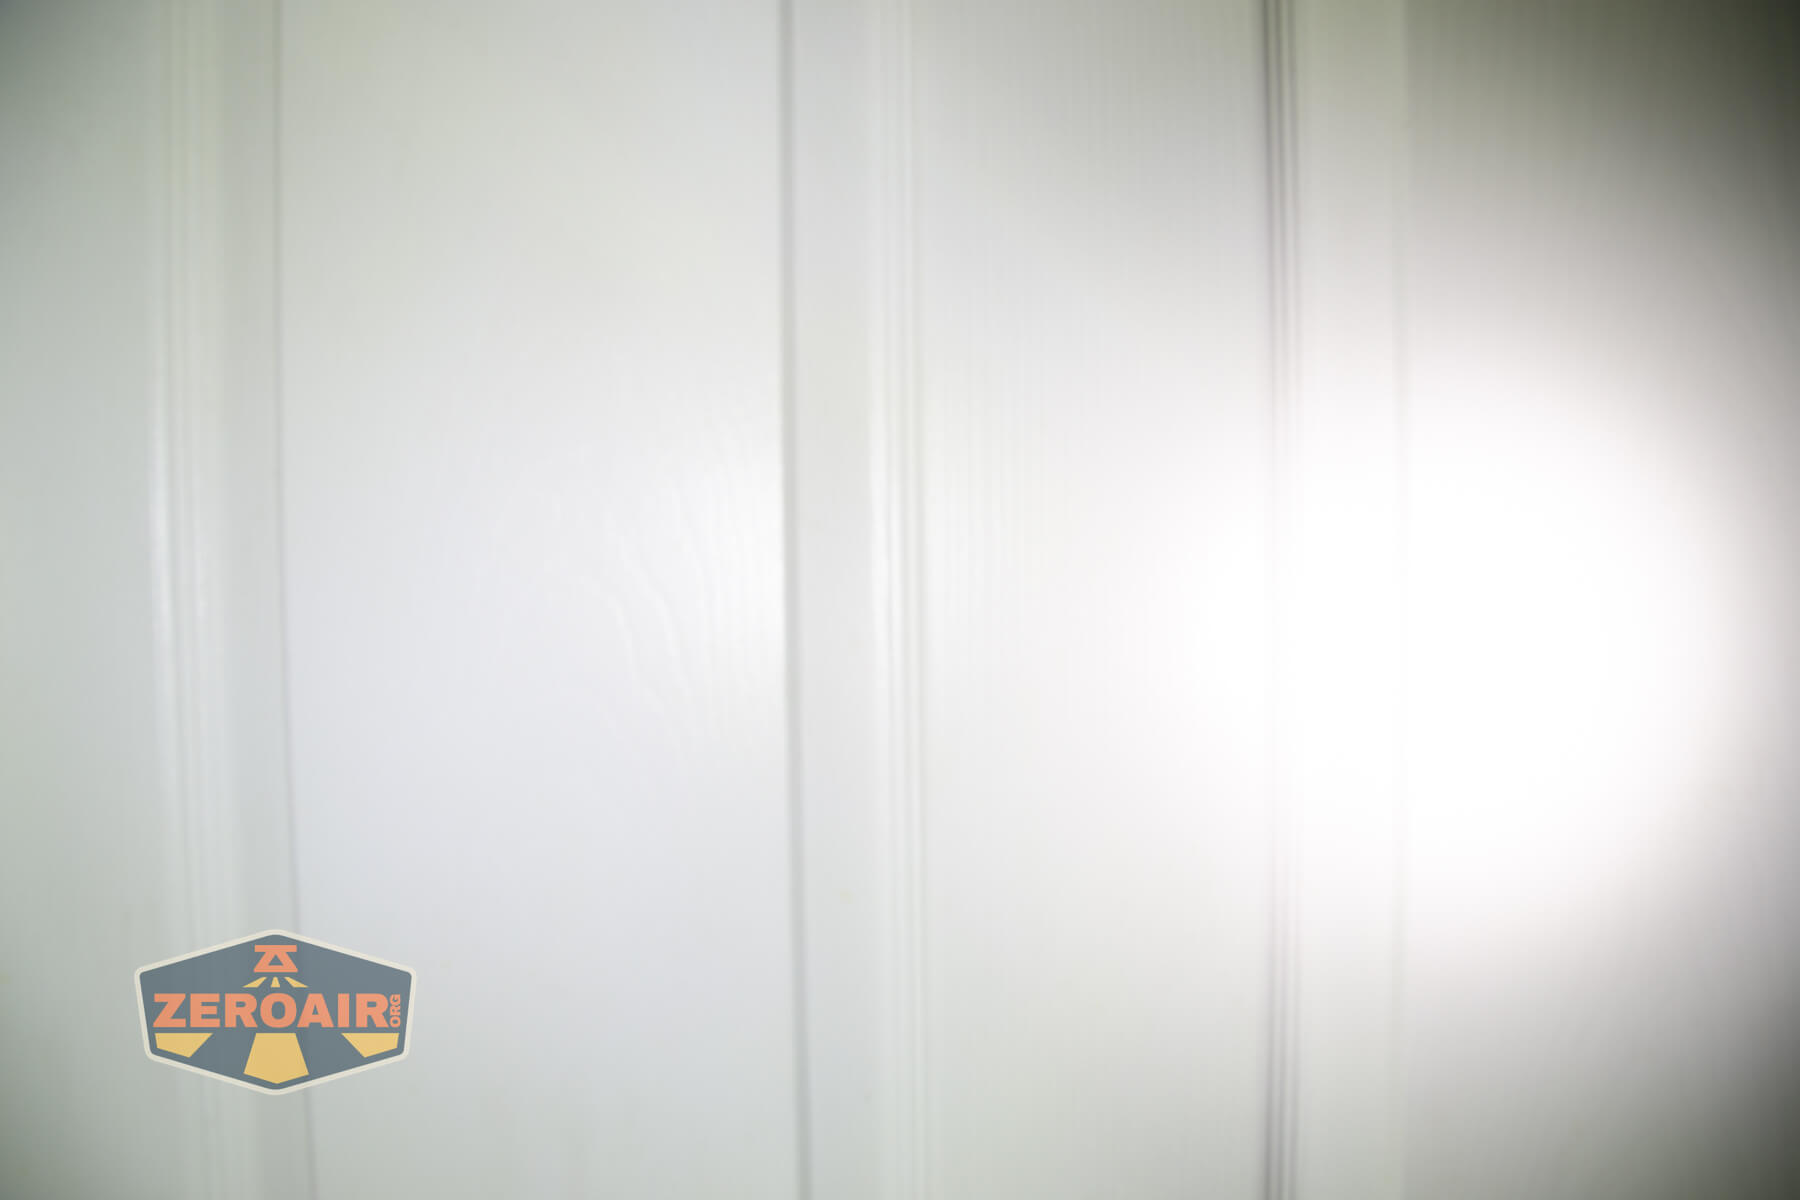


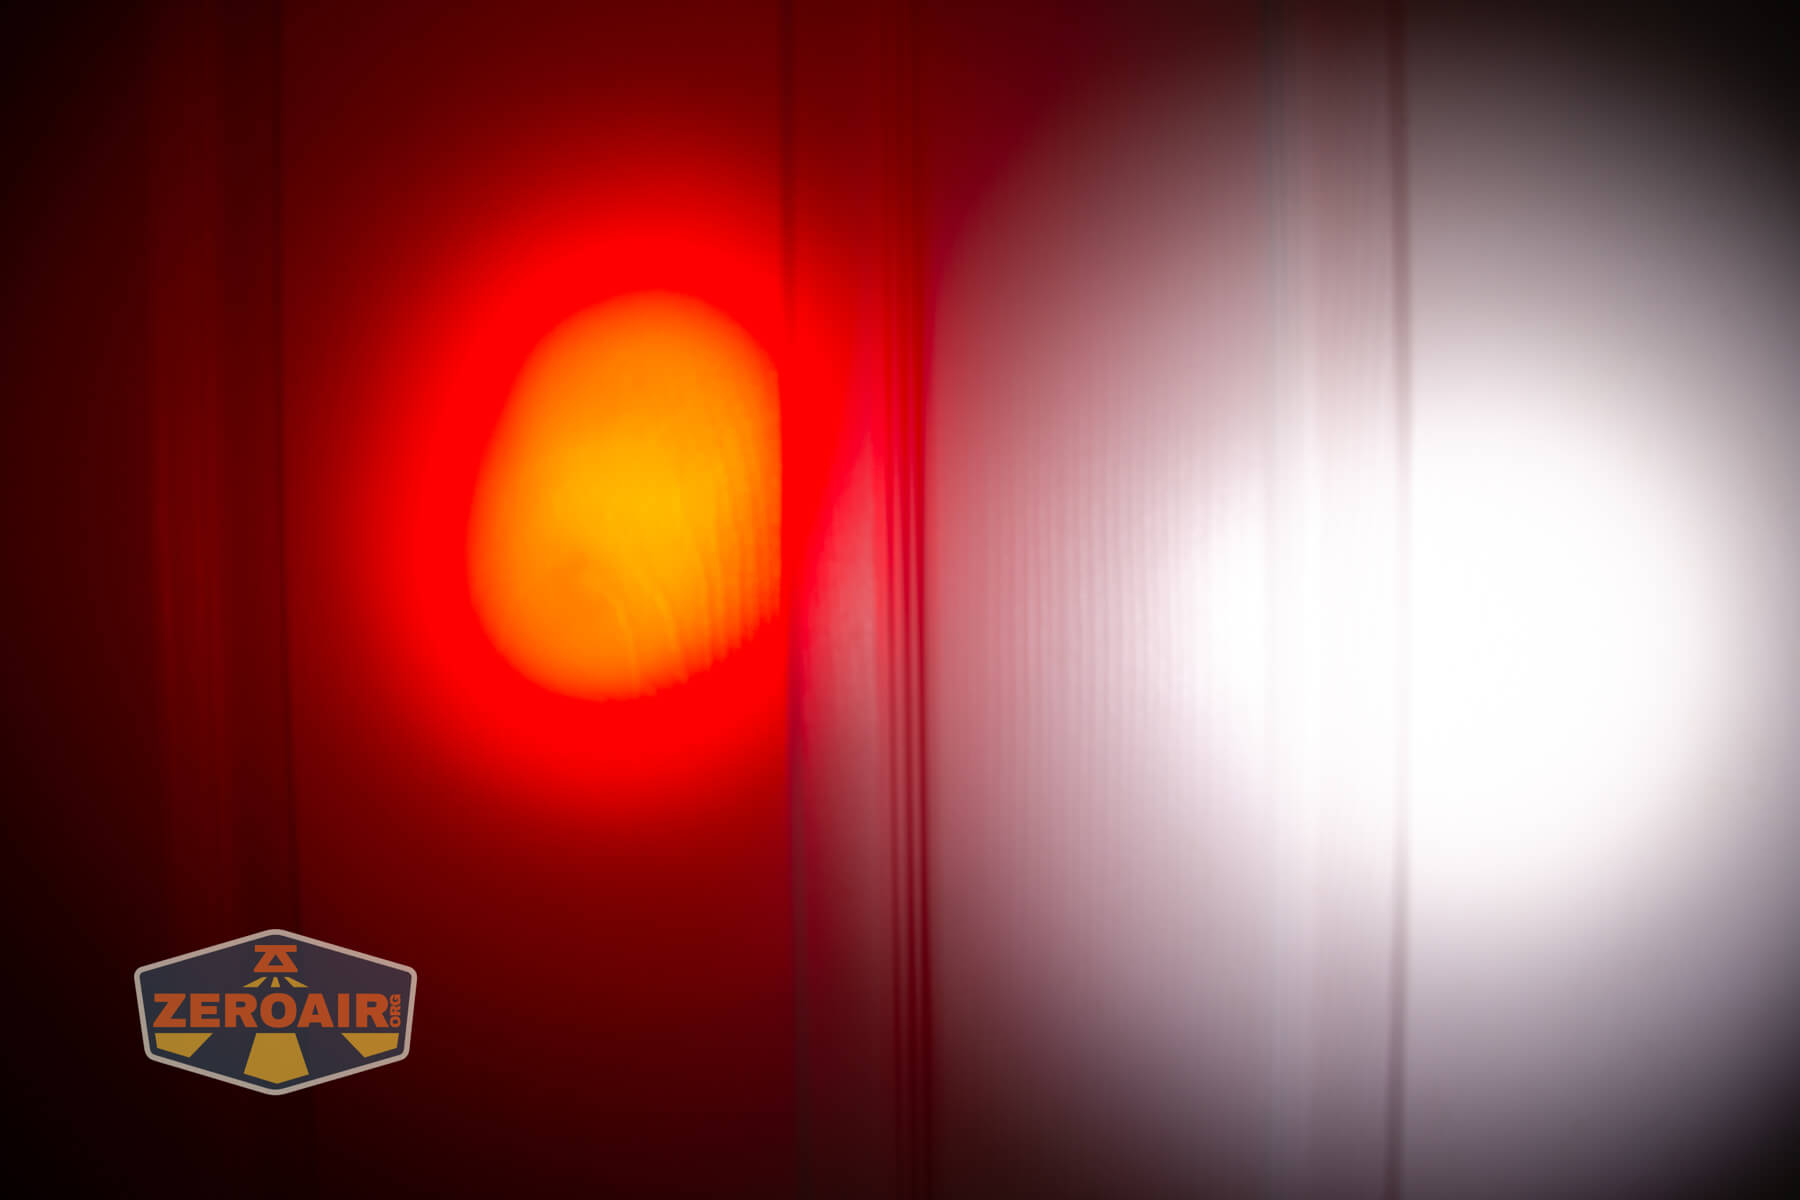
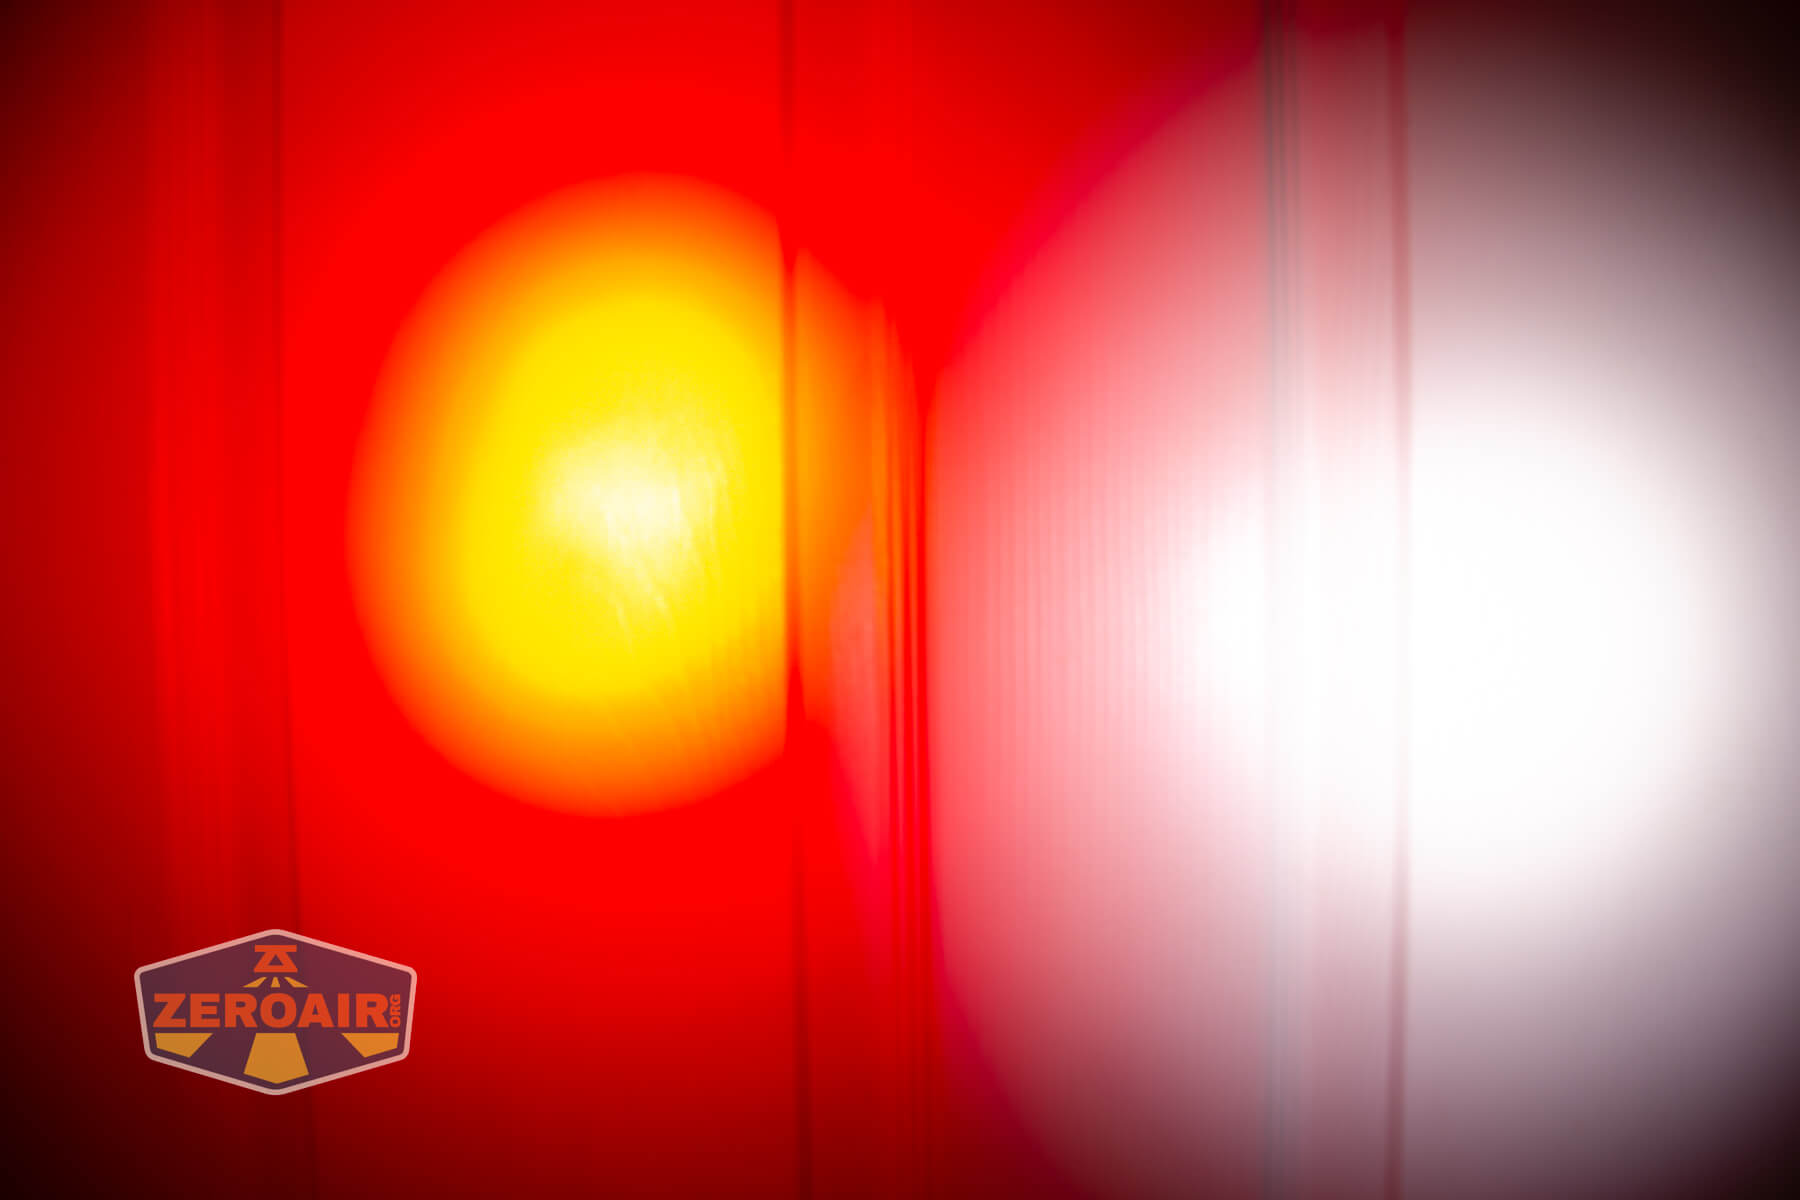
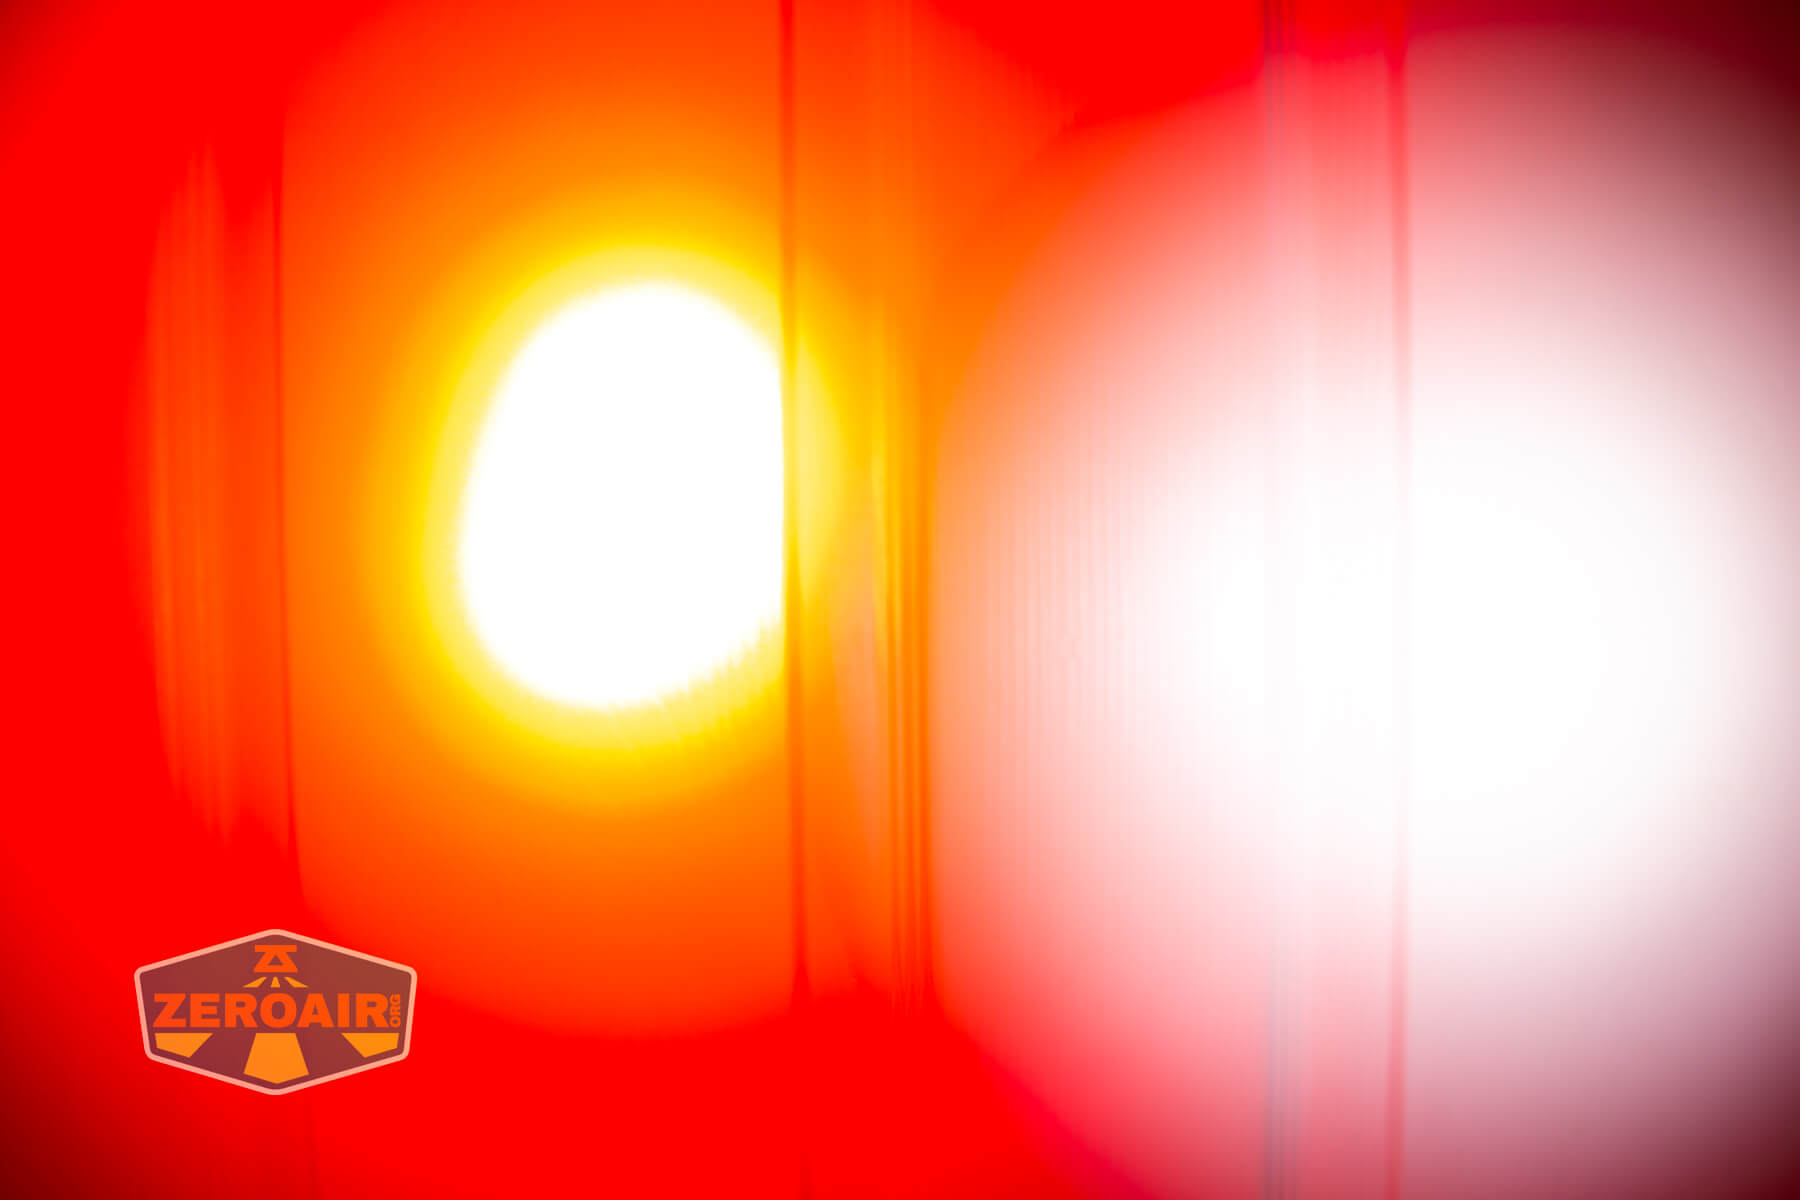
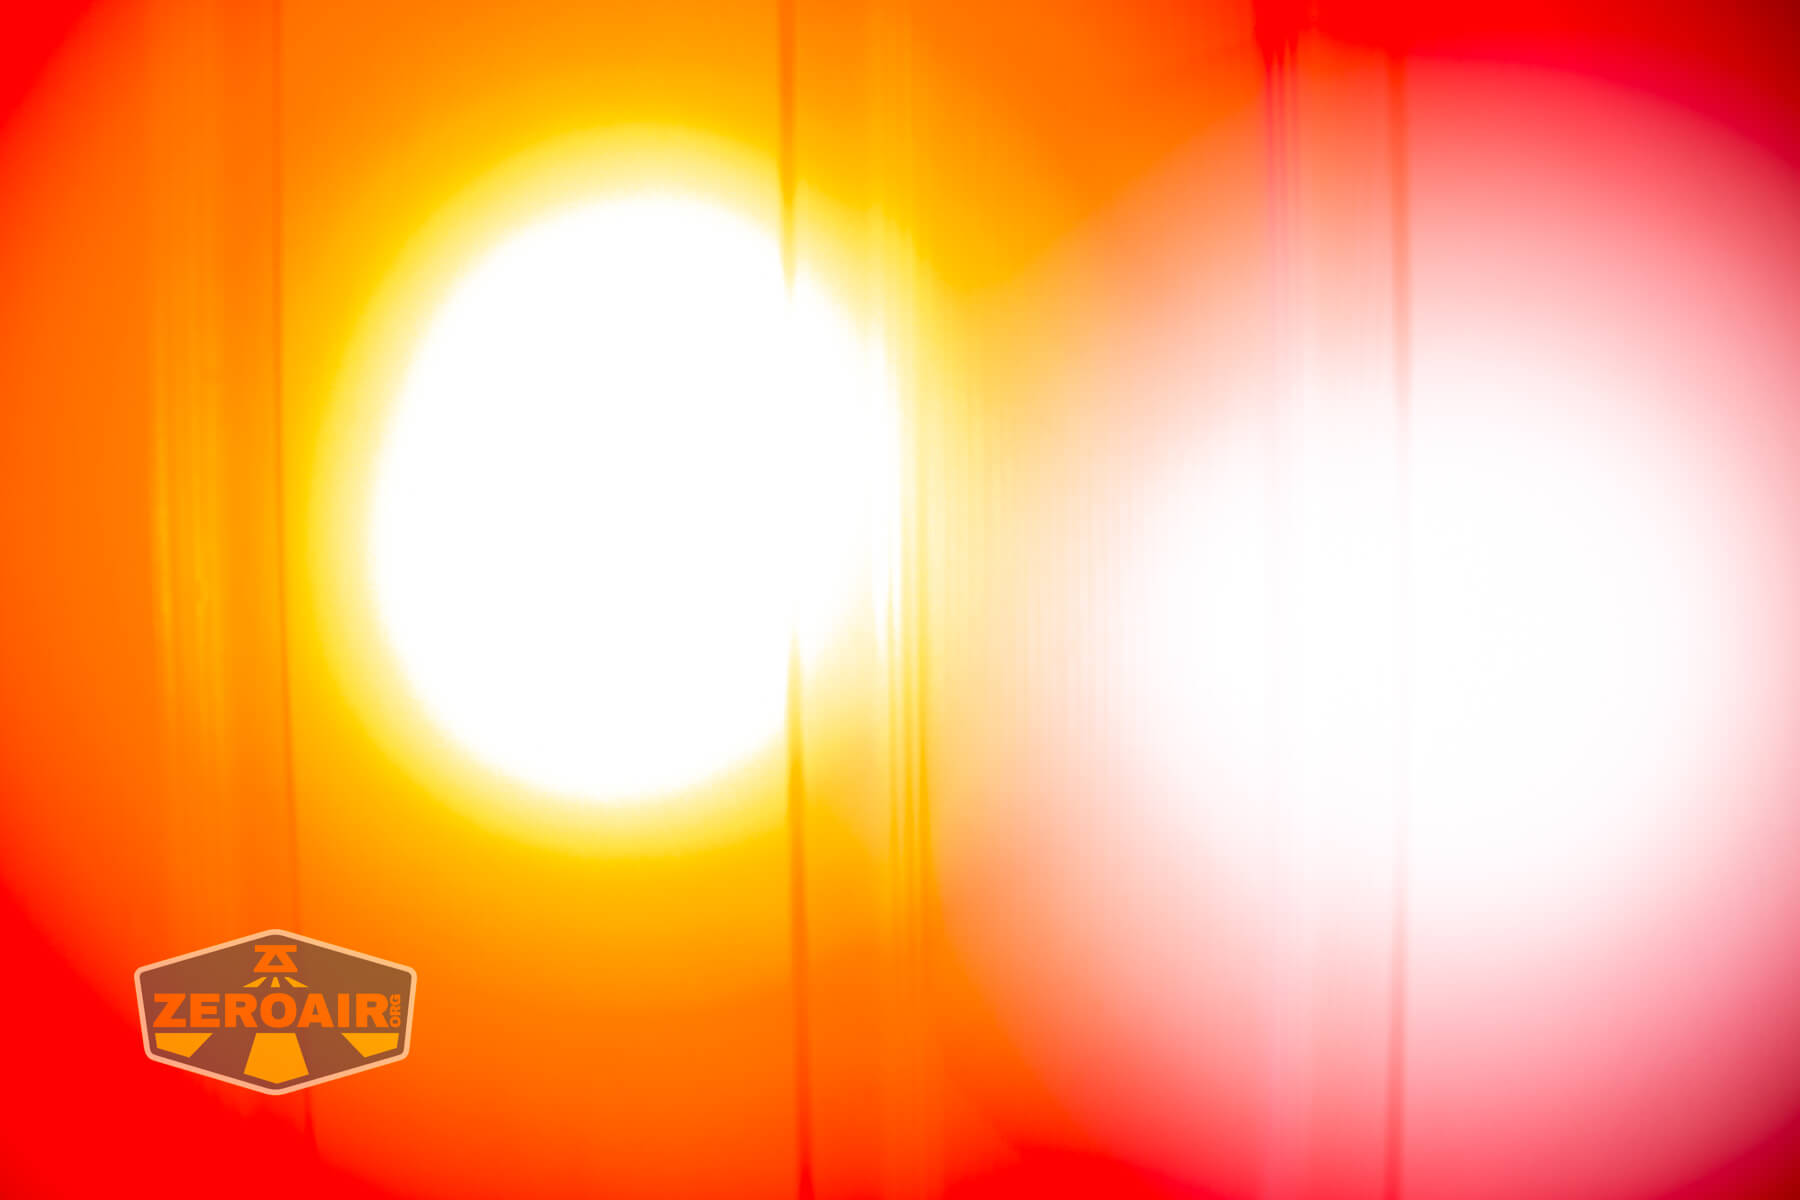
I compare everything to the KillzoneFlashlights.com 219b BLF-348 because it’s inexpensive and has the best tint!
Summary and Conclusion
The Olight Marauder Mini 2 is fantastically novel, particularly owing to the side white lantern. It’s very throwy and very floody, and has a lantern built into the side! The user interface is reasonably intuitive, especially if the rotary control is natural to you (it’s not natural to me). I like that flood and throw can be mixed (but you can’t mix levels of each). Nine levels of front white is plenty of levels (no need for infinite), and five levels of red and lantern – also plenty. It’s just a wholly good mode selection. I don’t mind the proprietary battery so much since it’s removable (and as long as Olight makes them available.
The Big Table
| Olight Marauder Mini 2 | |
|---|---|
| Emitter: | Various |
| Price in USD at publication time: | $175.99 |
| Cell: | 1×32650 |
| Runtime Graphs | |
| LVP? | |
| Switch Type: | Multiple |
| On-Board Charging? | Yes |
| Charge Port Type: | USB-C |
| Charge Graph | |
| Power off Charge Port | USB-C: most lower levels (excluding top 1 or 2) Proprietary connector: not tested (not included) |
| Claimed Lumens (lm) | Both: 8000 Spot: 1350 Flood: 10000 |
| Measured Lumens (at 30s) | Both: 5659 (70.7% of claim)^ Spot: 1070 (79.3% of claim)^ Flood: 6762 (67.6% of claim)^ |
| Candela per Lumen | Both: 97 Spot: 152 Flood: 3.1 |
| Claimed Throw (m) | Both: 750 Spot: 750 Flood: – |
| Candela (Calculated) in cd (at 30s) | Both: 3840lux @ 6.083m = 142091cd Spot: 4710lux @ 6.004m = 169786cd Flood: 1059lux @ 4.804m = 24440cd |
| Throw (Calculated) (m) | Both: 753.9 (100.5% of claim)^ Spot: 824.1 (109.9% of claim)^ Flood: 312.7 |
| Claimed CCT | Both: 6500 Spot: 6500 Flood: 6500 |
| Measured CCT Range (K) | Both: – Kelvin Spot: – Kelvin Flood: 5900-6700 Kelvin |
| Item provided for review by: | Olight |
| All my Olight reviews! | |
^ Measurement disclaimer: Testing flashlights is my hobby. I use hobbyist-level equipment for testing, including some I made myself. Try not to get buried in the details of manufacturer specifications versus measurements recorded here; A certain amount of difference (say, 10 or 15%) is perfectly reasonable.
What I like
- Orange body color!
- Good red level choices
- Flood and throw are very floody and throwy, respectively
- User interface is fairly intuitive
- USB-C charging
What I don’t like
- Low CRI and high CCT across the board (for white)
- USB-C charging doesn’t utilize power delivery
- Rotary isn’t detented. It requires
Notes
- This content originally appeared at zeroair.org. Please visit there for the best experience!
- Please use my Amazon.com referral link to help support zeroair.org!
- Please support me on Patreon! I deeply appreciate your support!