Ripsshine OF1 Flashlight Review
The Ripsshine OF1 flashlight uses one 21700 cell to power three Cree XHP50.3 emitters. It runs Andúril and has a proud e-switch. Read on!
Official Specs and Features
Here’s a link to the Ripsshine OF1 flashlight product page.
Versions
I believe there’s just one version of the Ripsshine OF1 flashlight.
Price
The Ripsshine OF1 flashlight has an MSRP of around $55, but a sale/street price of $47.90. It’s available now at FlashlightGo.com.
What’s Included

- Ripsshine OF1 flashlight
- 5000mAh 21700 (standard button top)
- Pocket clip
- Spare o-rings (2)
- Lanyard
- Split ring
- Manual
Package and Manual

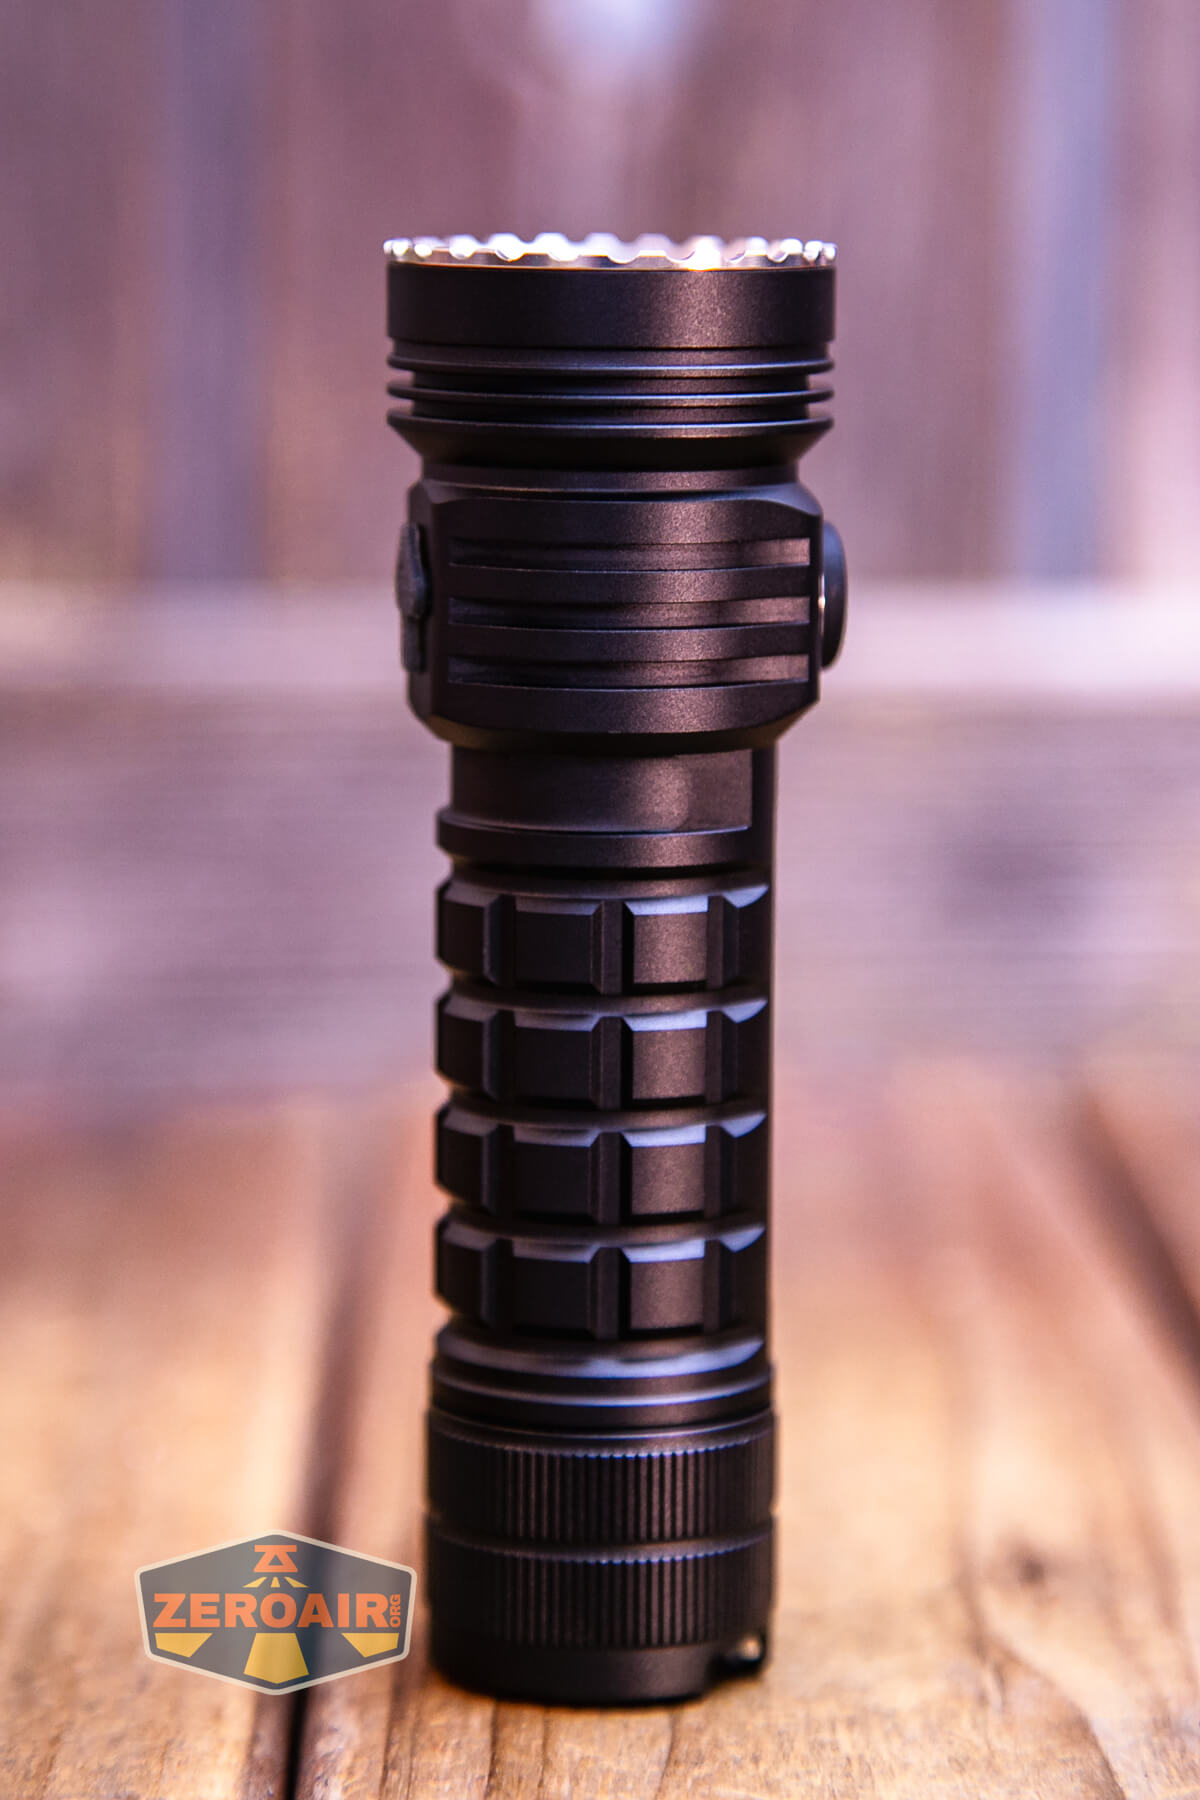
Build Quality and Disassembly
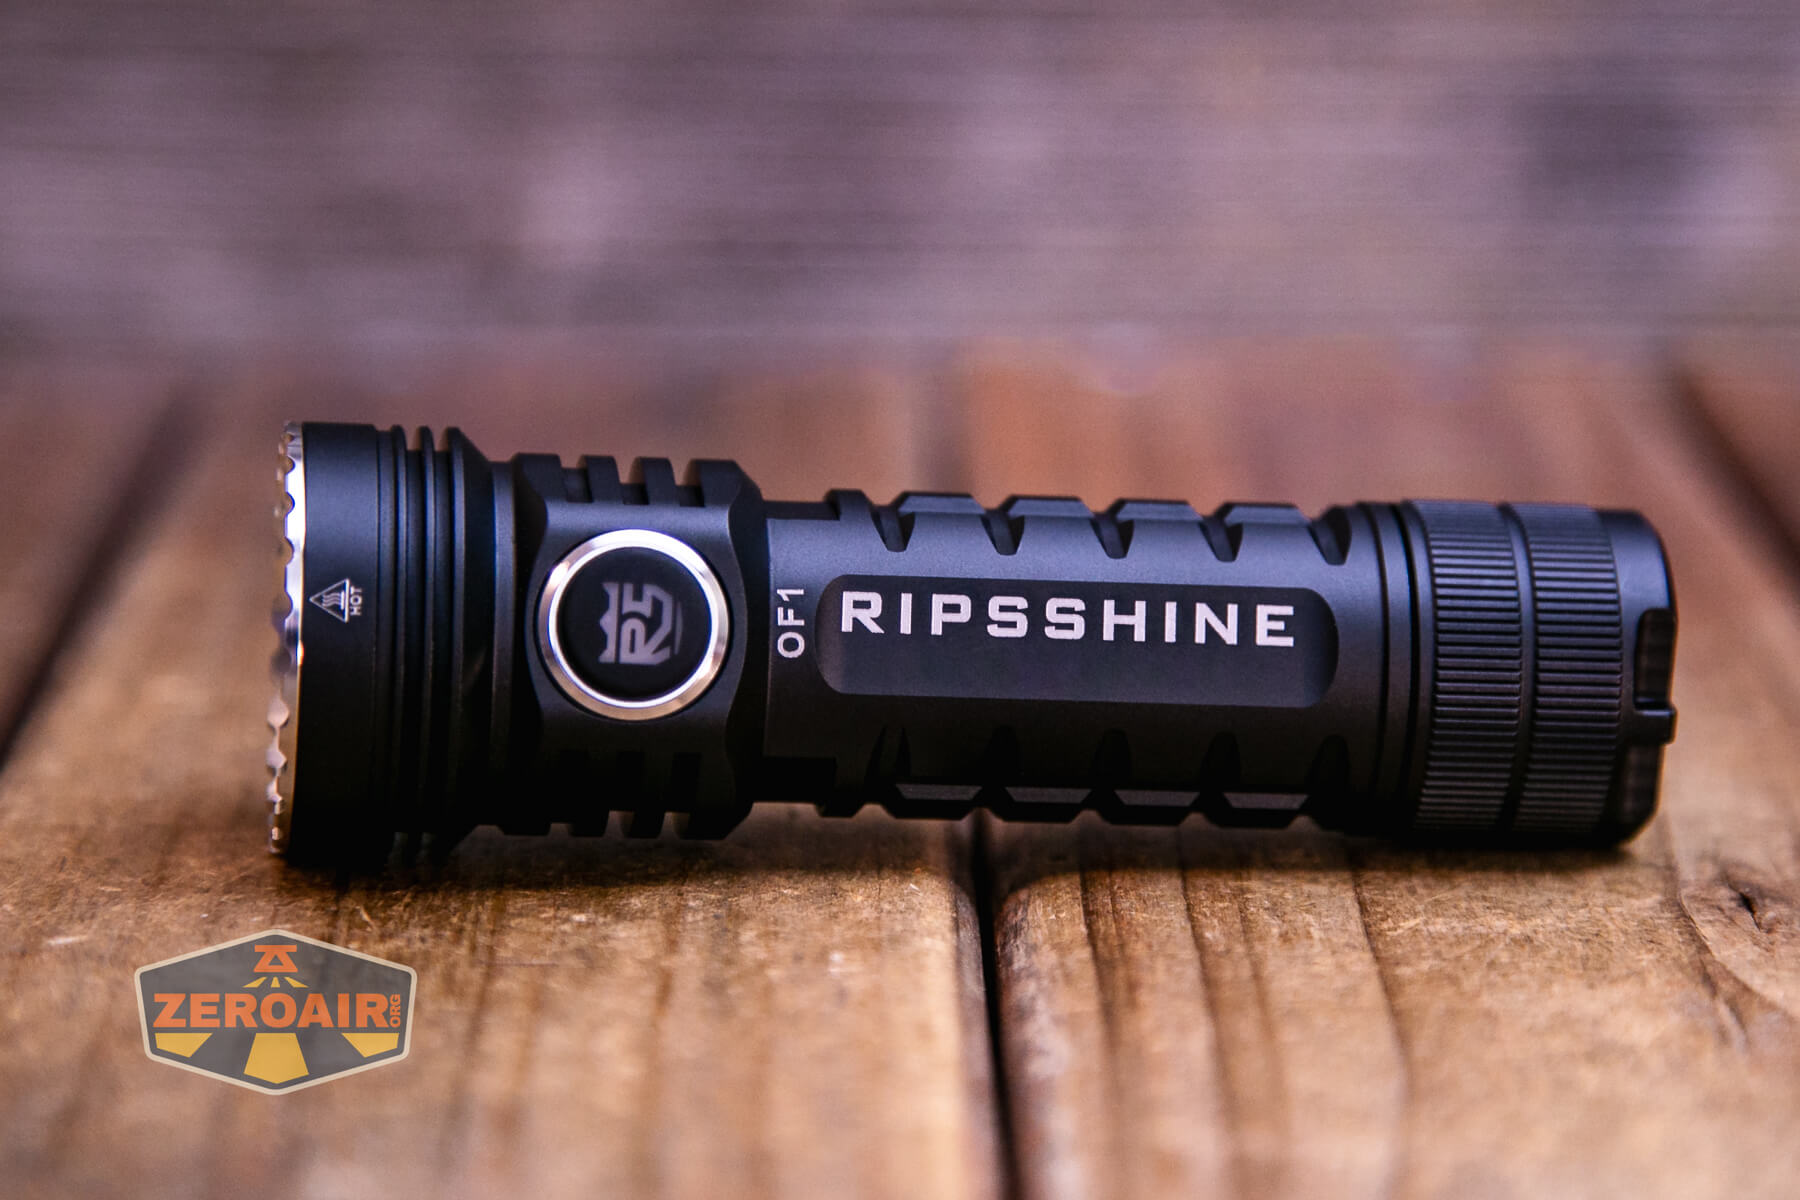
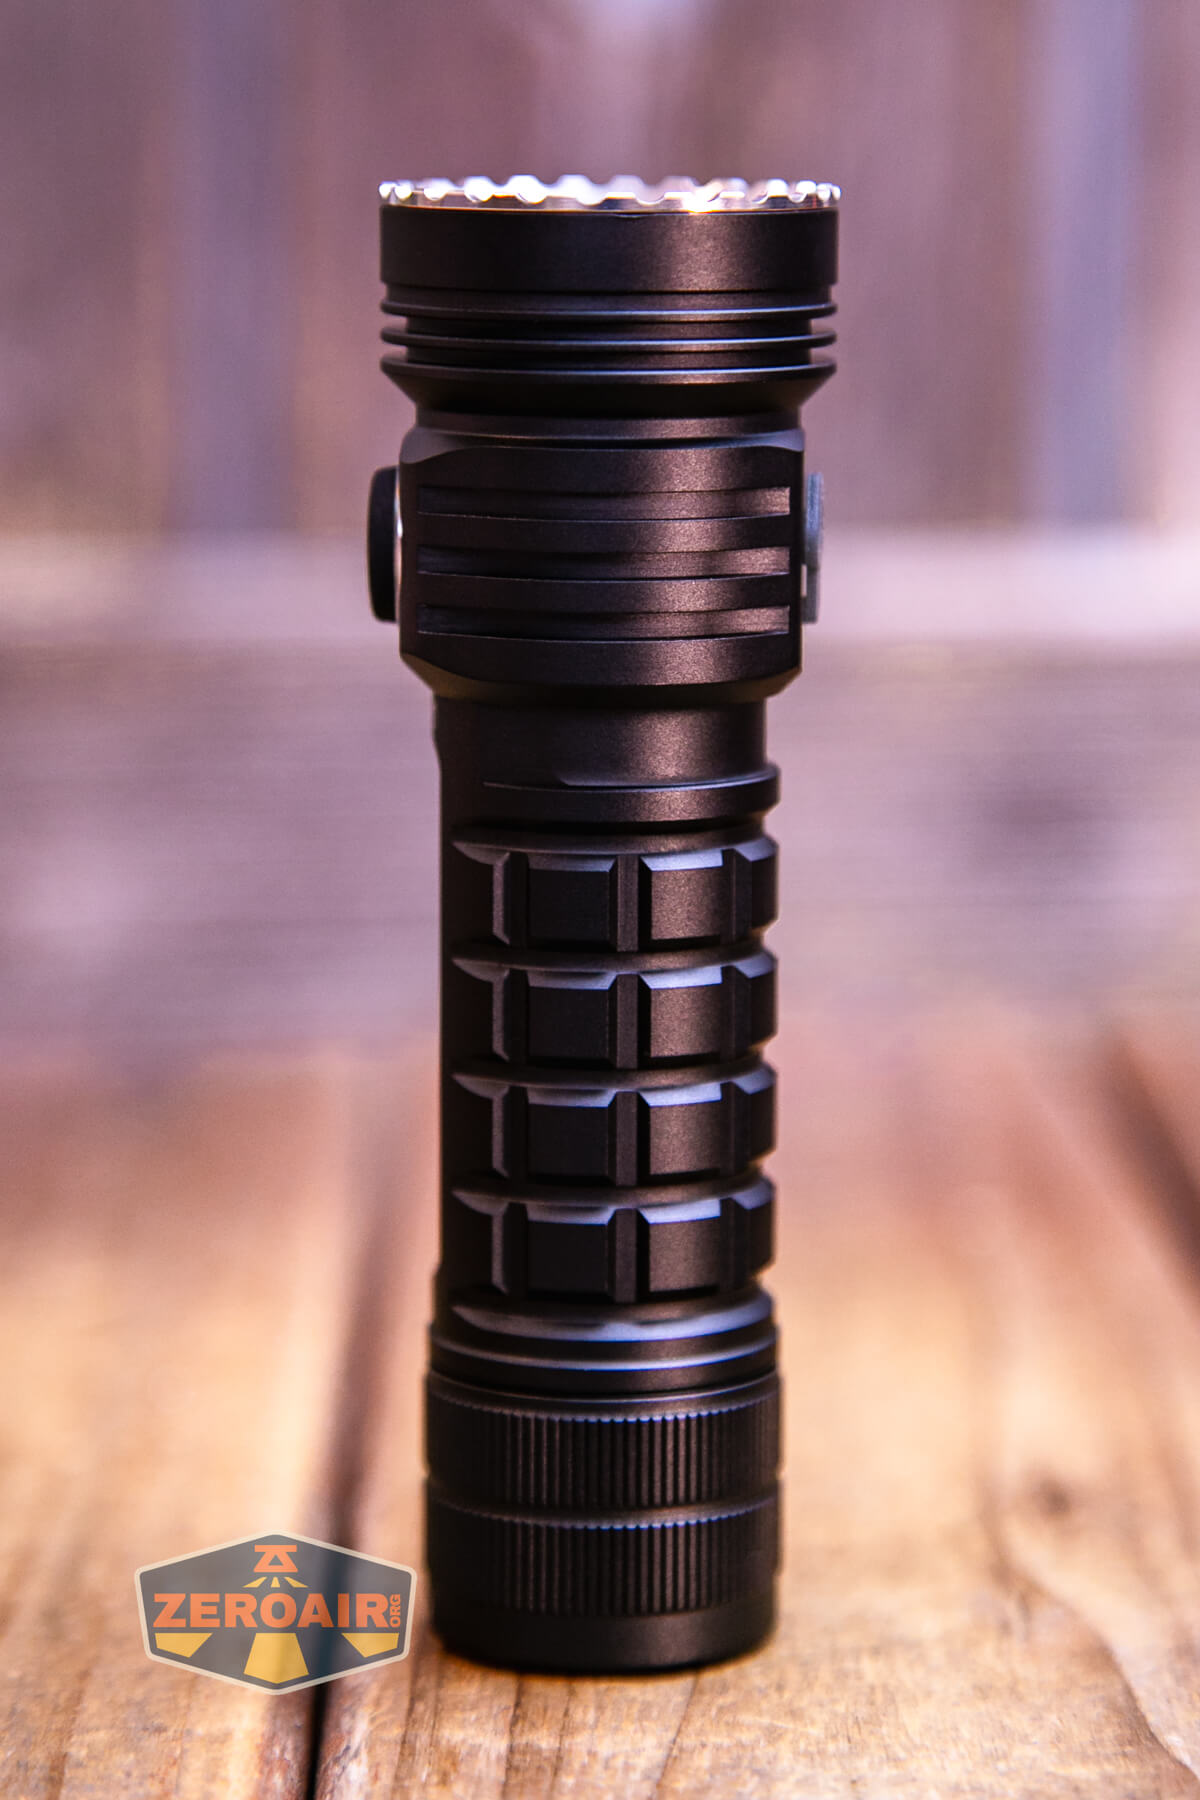
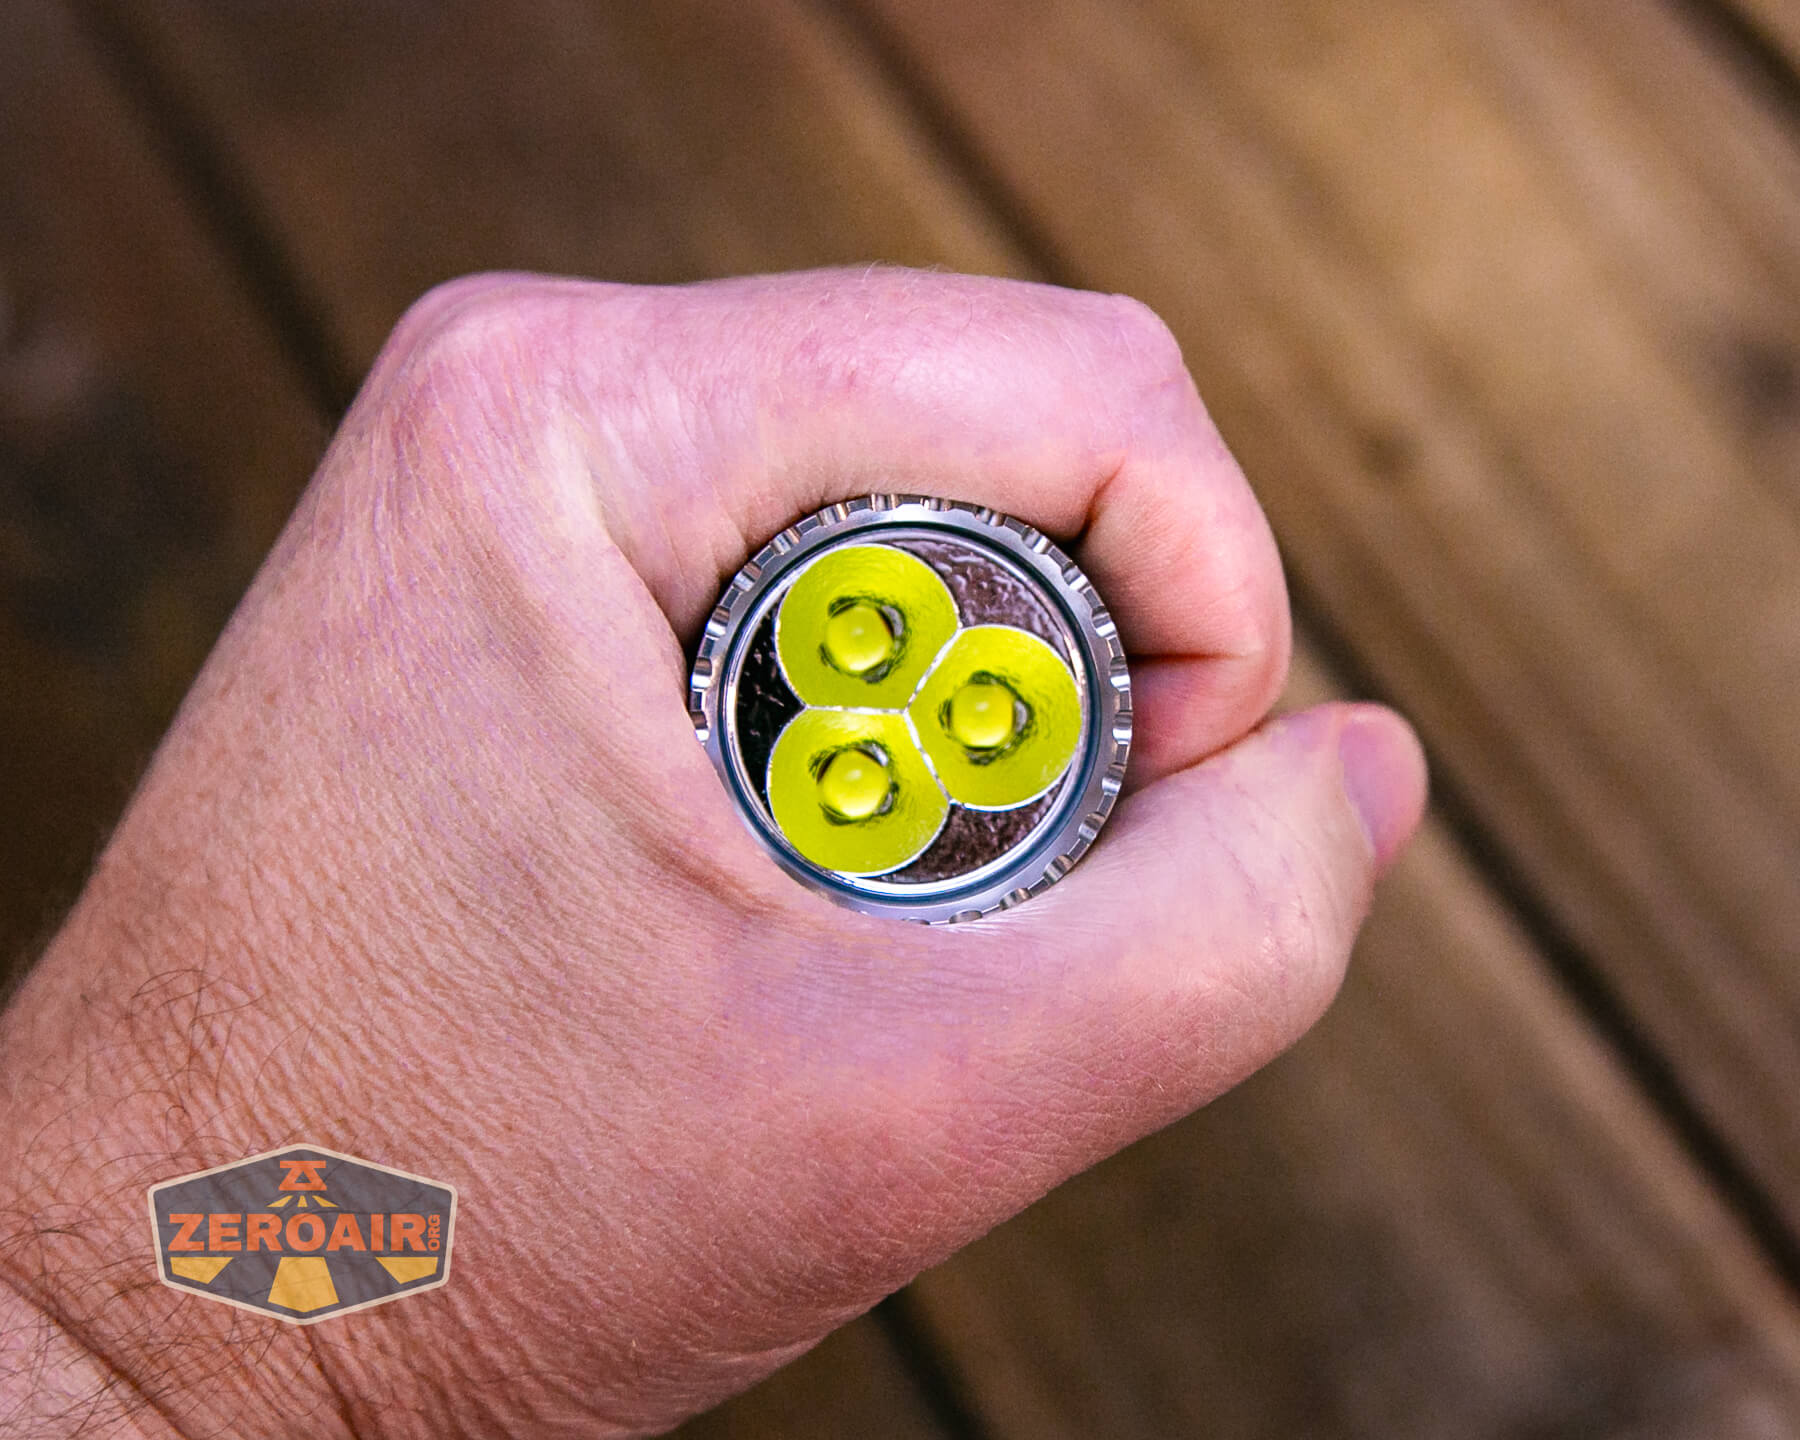
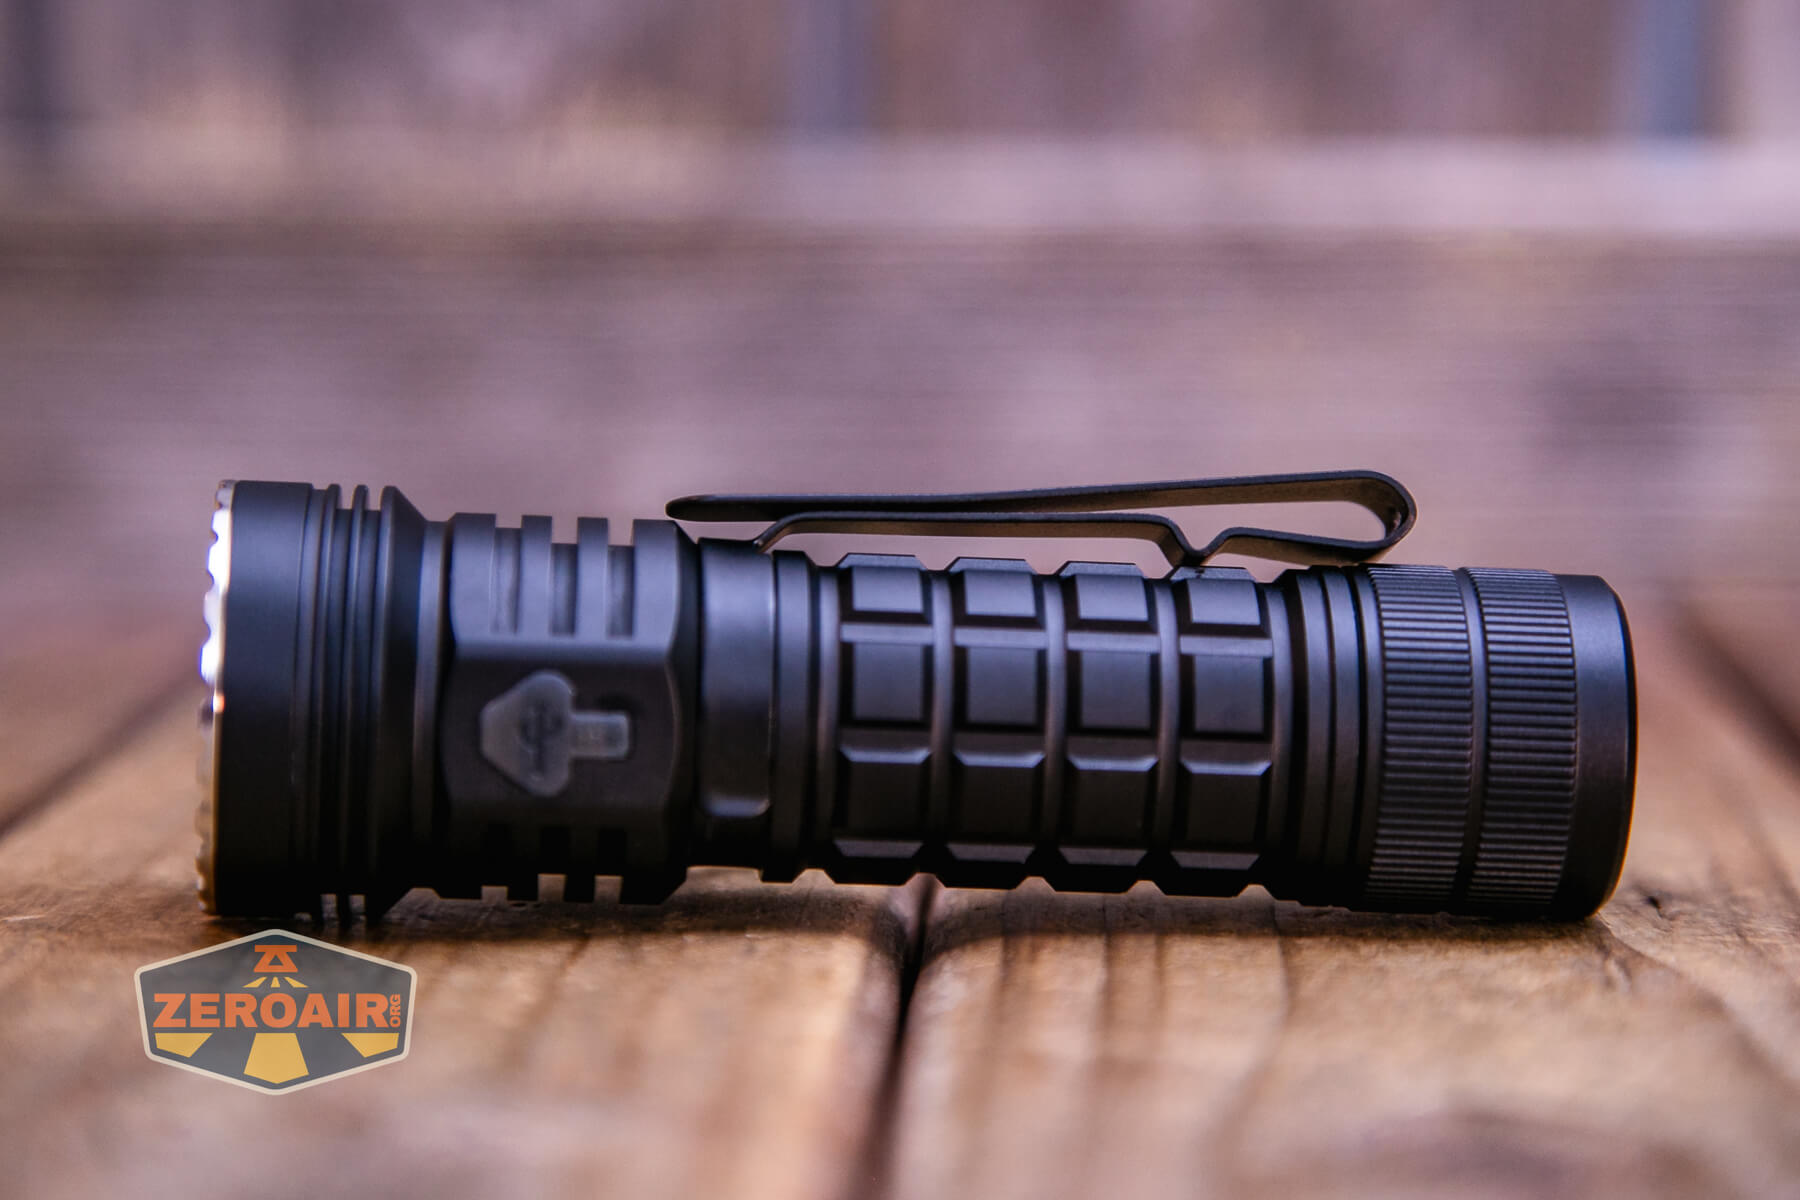
The Ripsshine OF1 flashlight is a beefy sort of light, with a big grip area all along the sides.

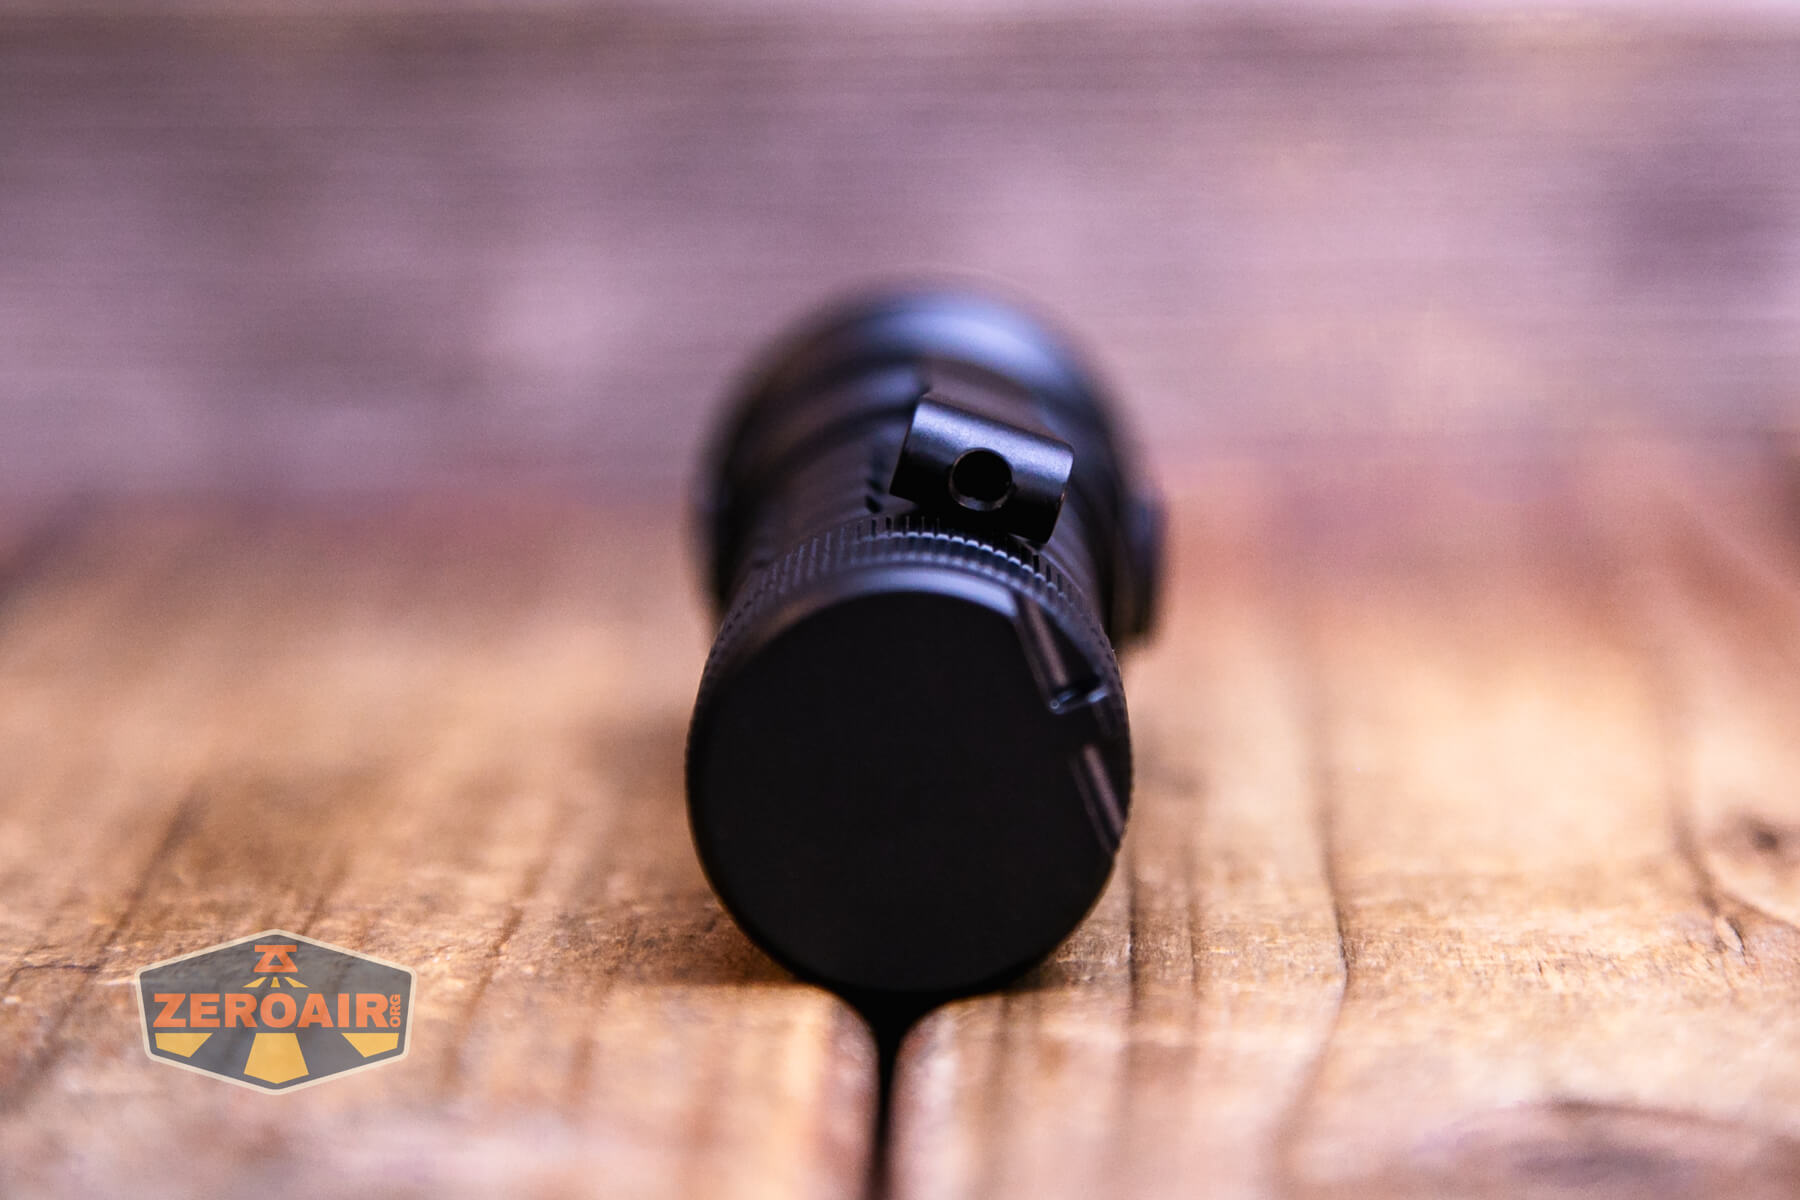
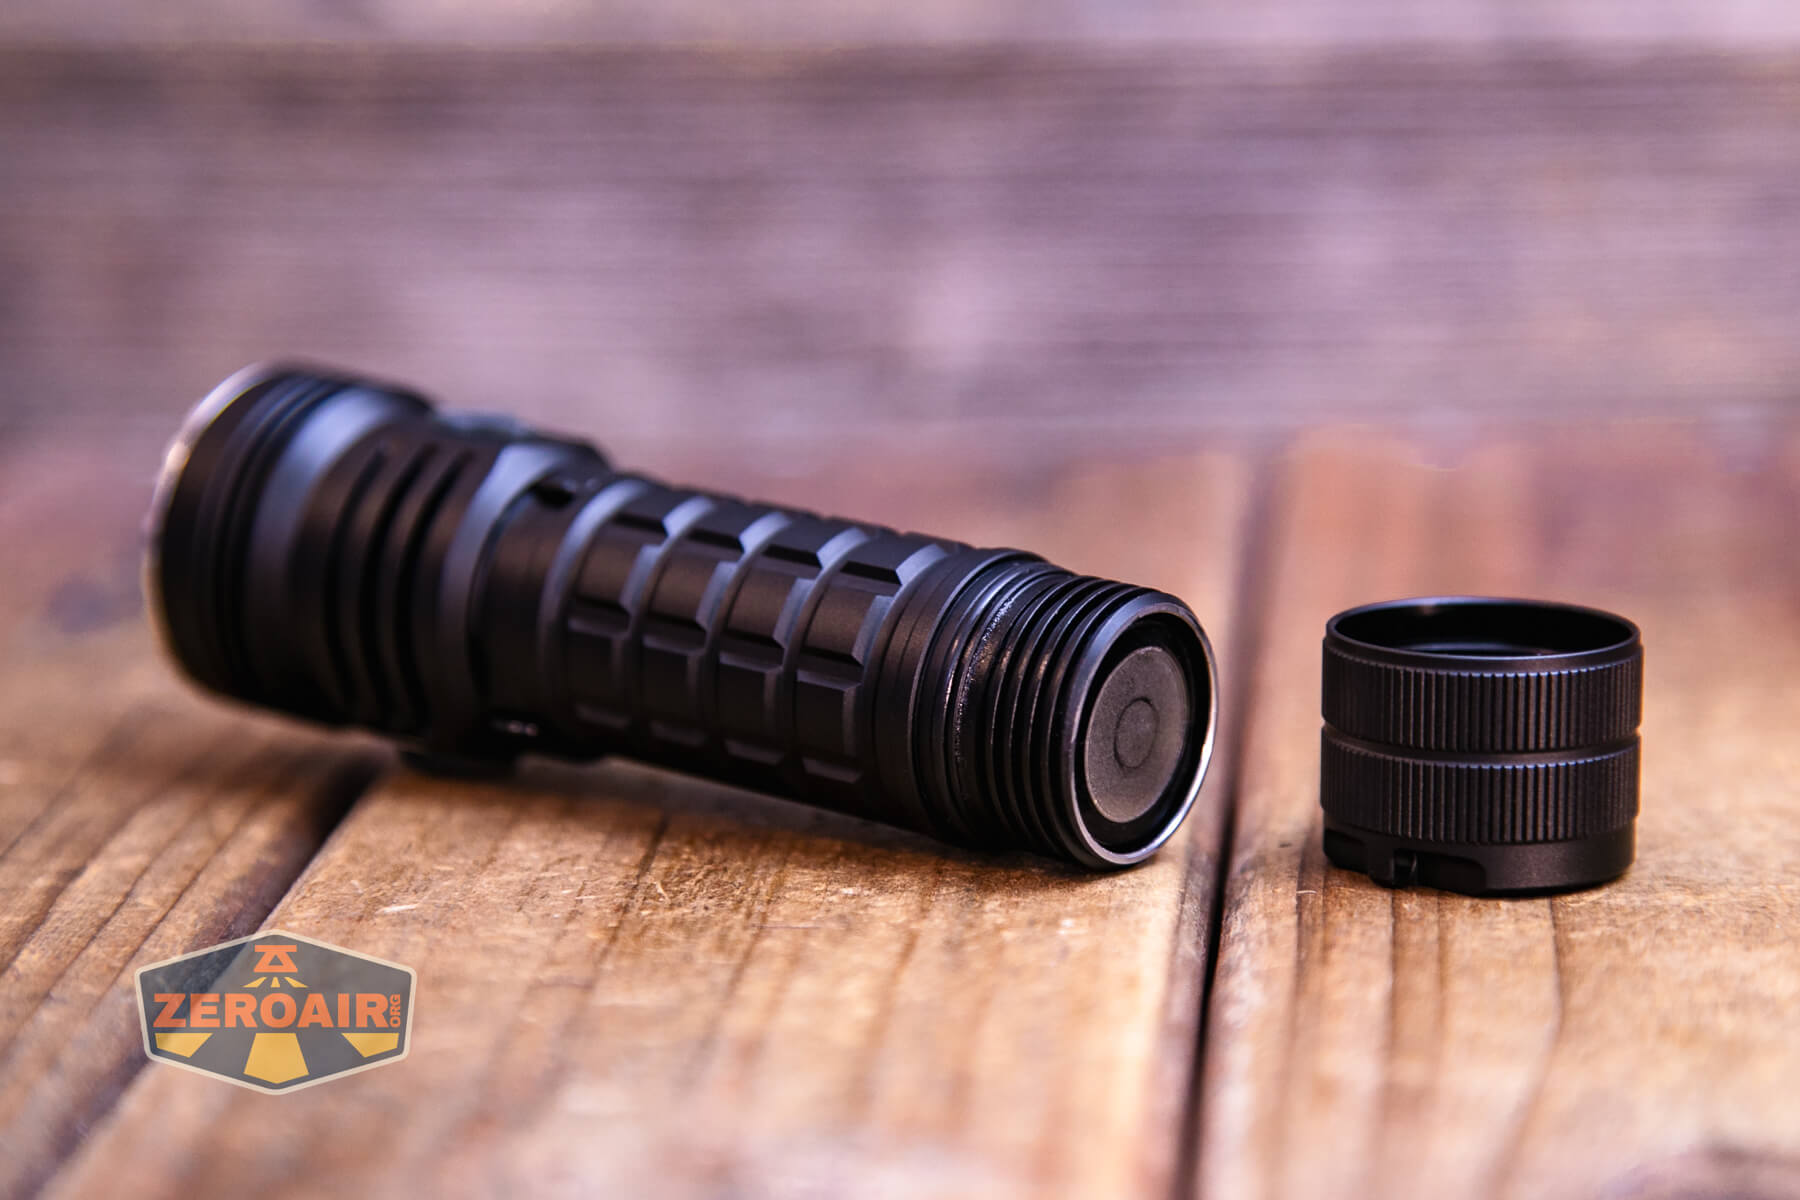
Despite being a fairly heavy light like this, there’s a magnet in the tailcap that is suitable for holding the light. The threads here are very thick and anodized, too.
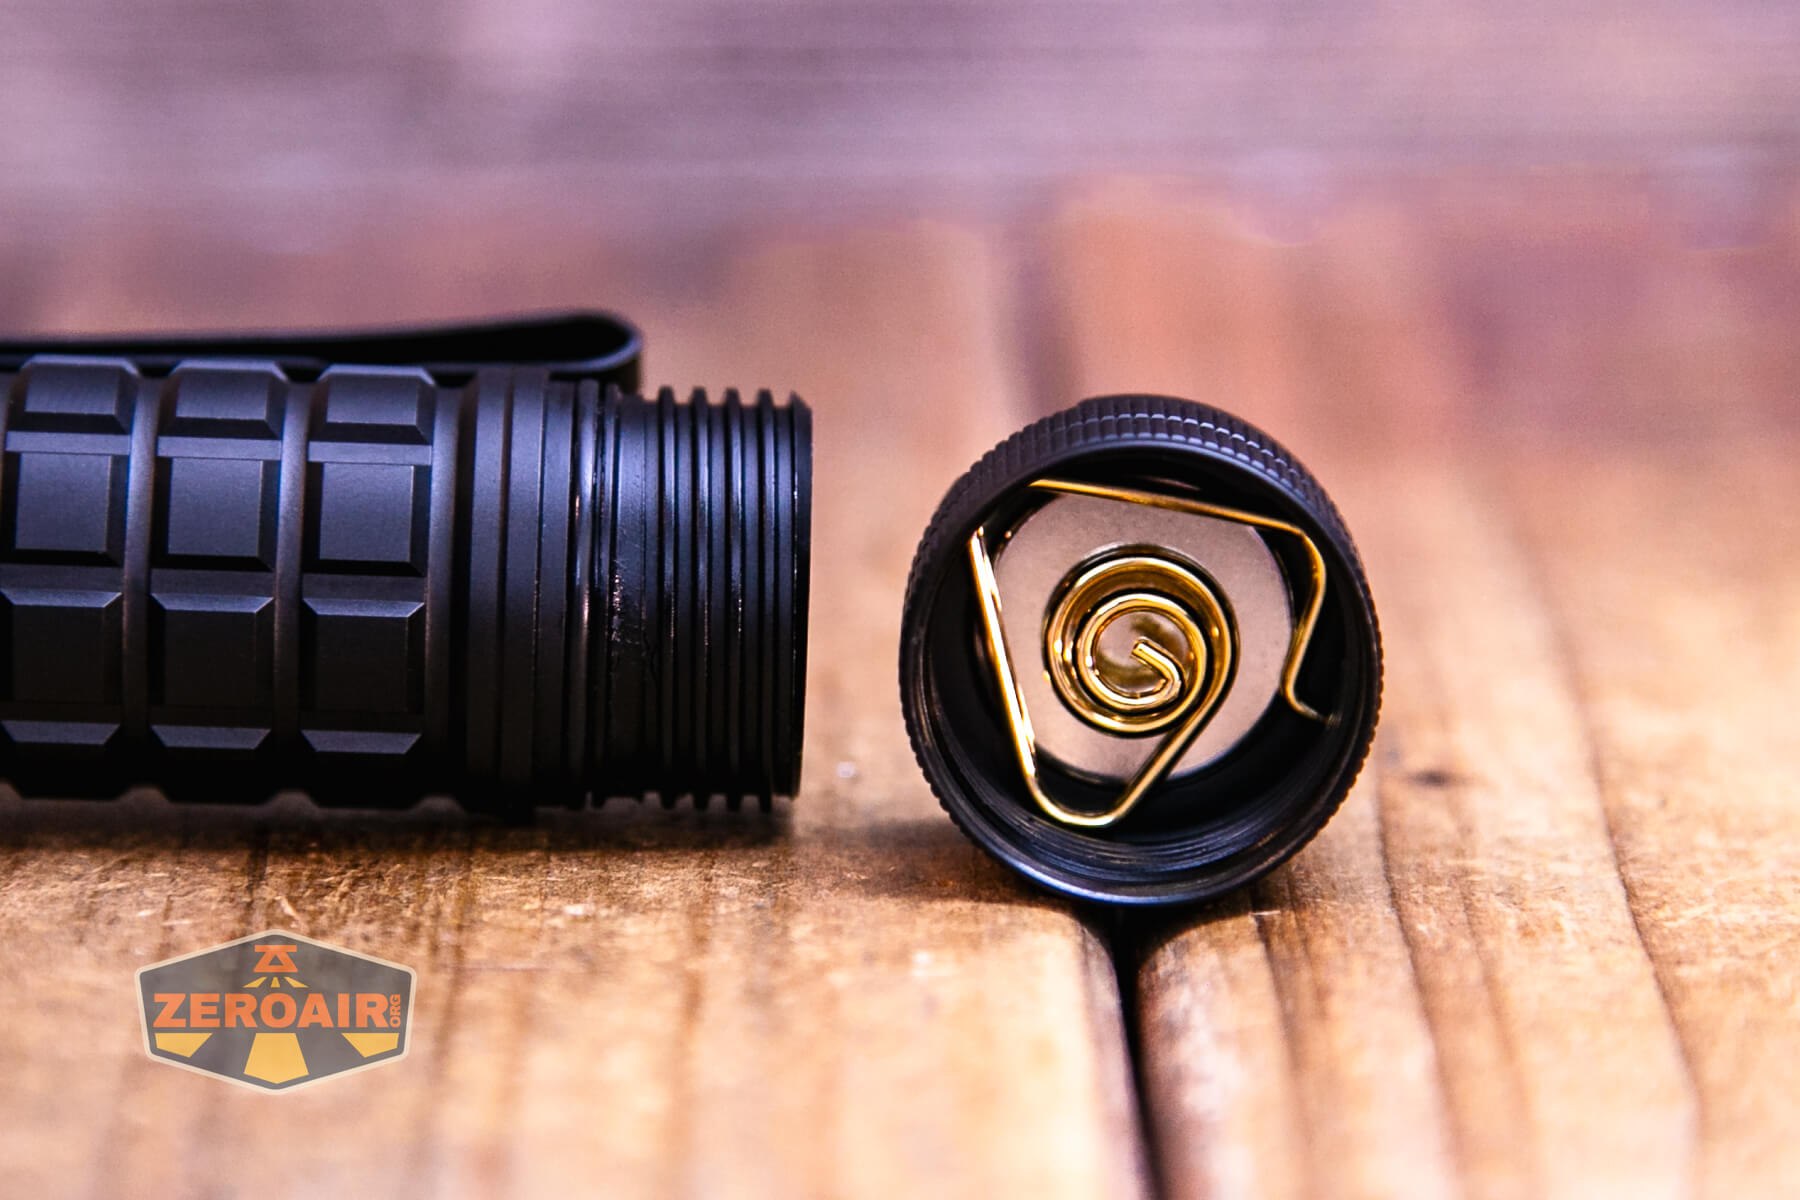
The positive contact uses a button and not a spring.

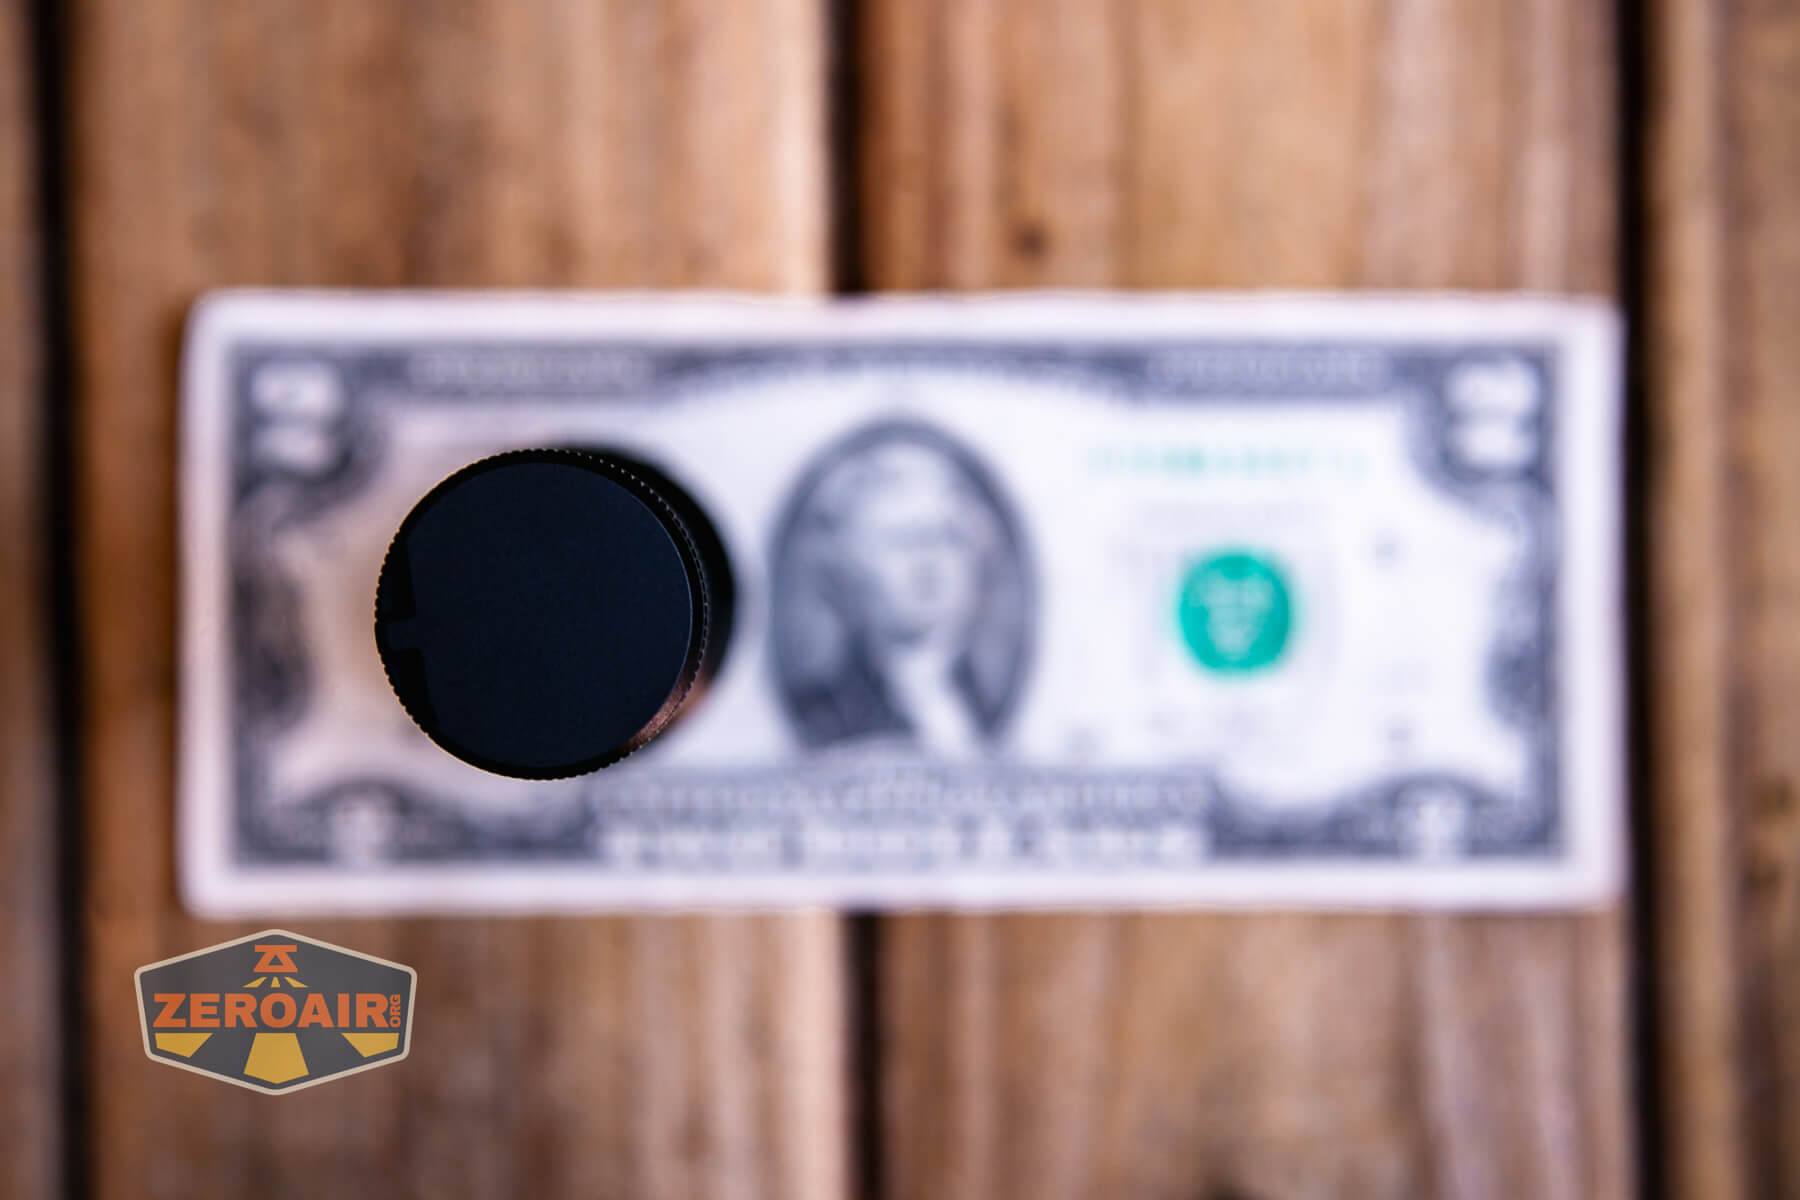
Size and Comps
Size 113mm x 35mm
Weight 108g (only flashlight)


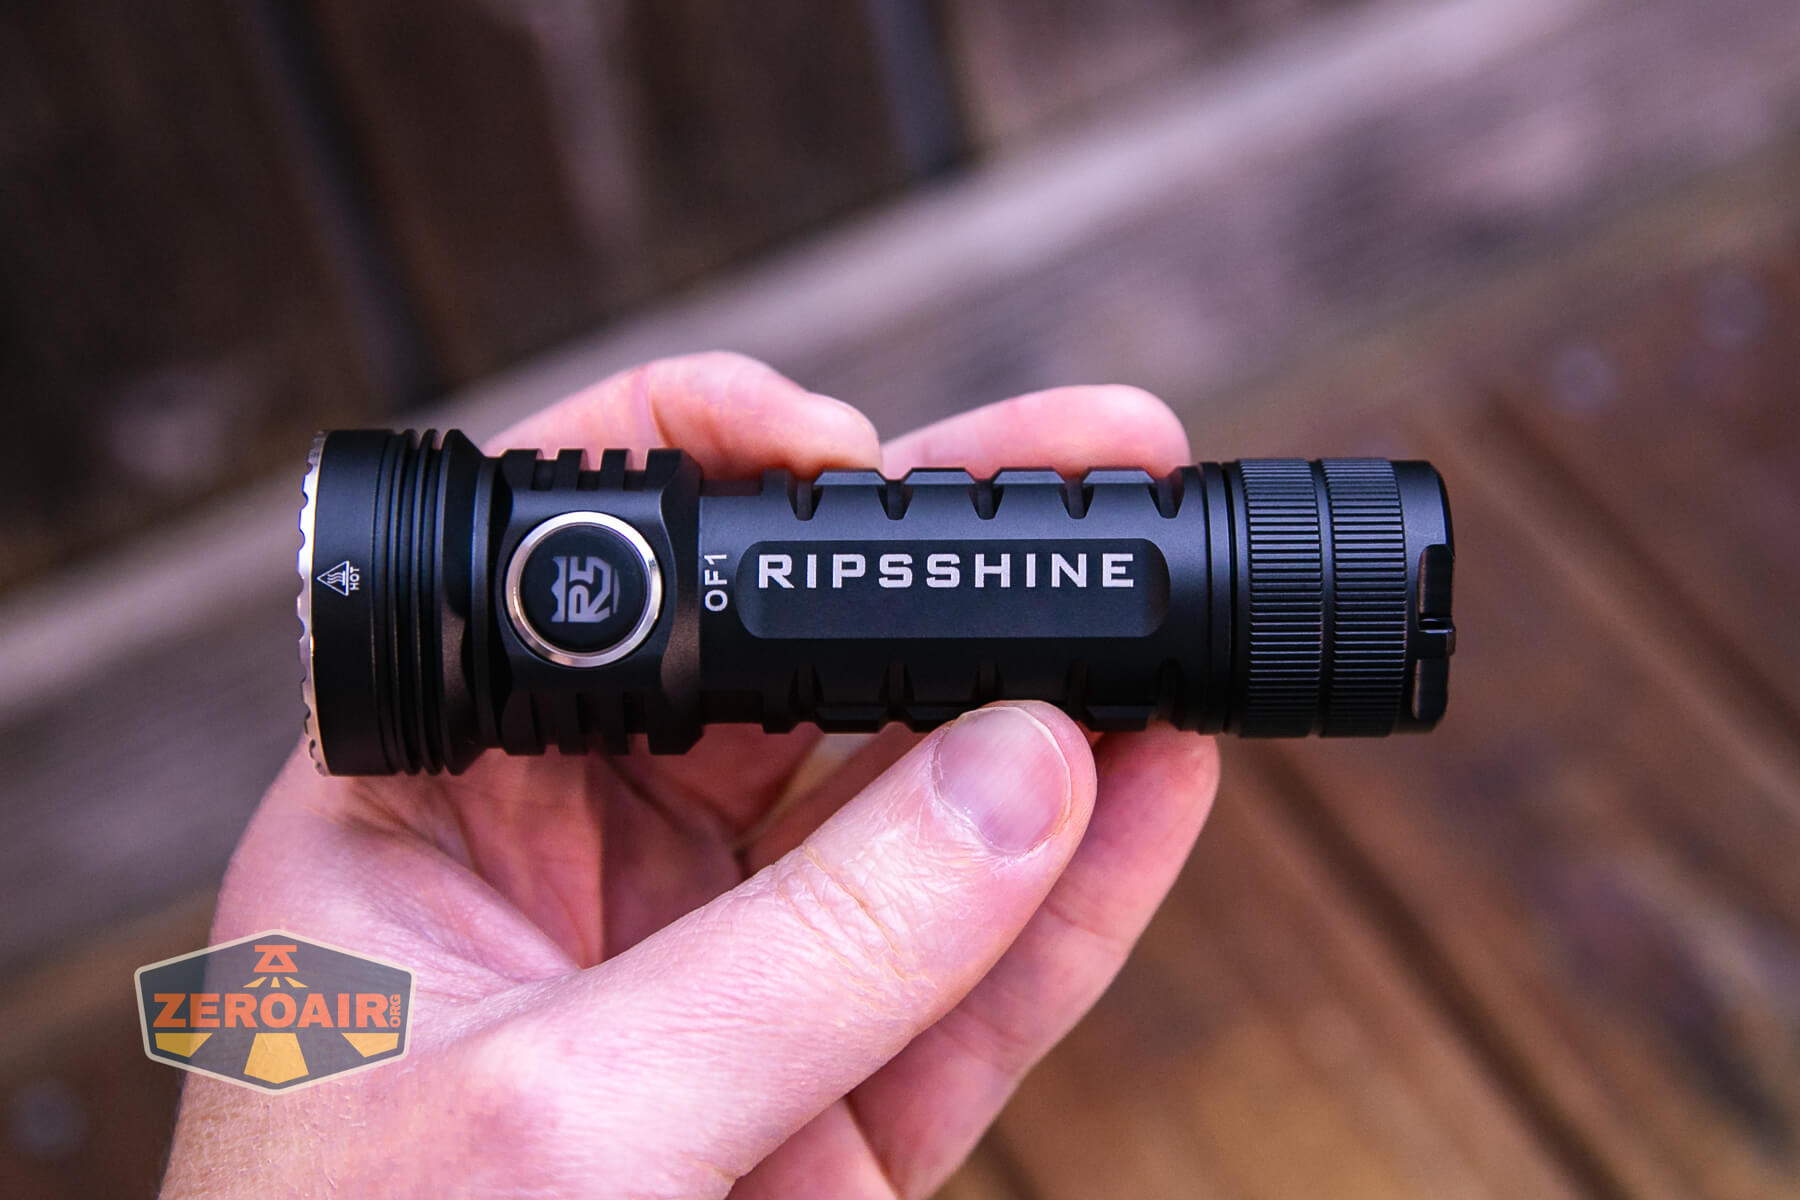
Here’s the light in hand:

Here’s the test light with the venerable Convoy S2+. The version below is a custom laser-engraved Convoy S2+ host by GadgetConnections.com. I did a full post on an engraved orange host right here! Or go straight to GadgetConnections.com to buy your Convoy S2+ now!
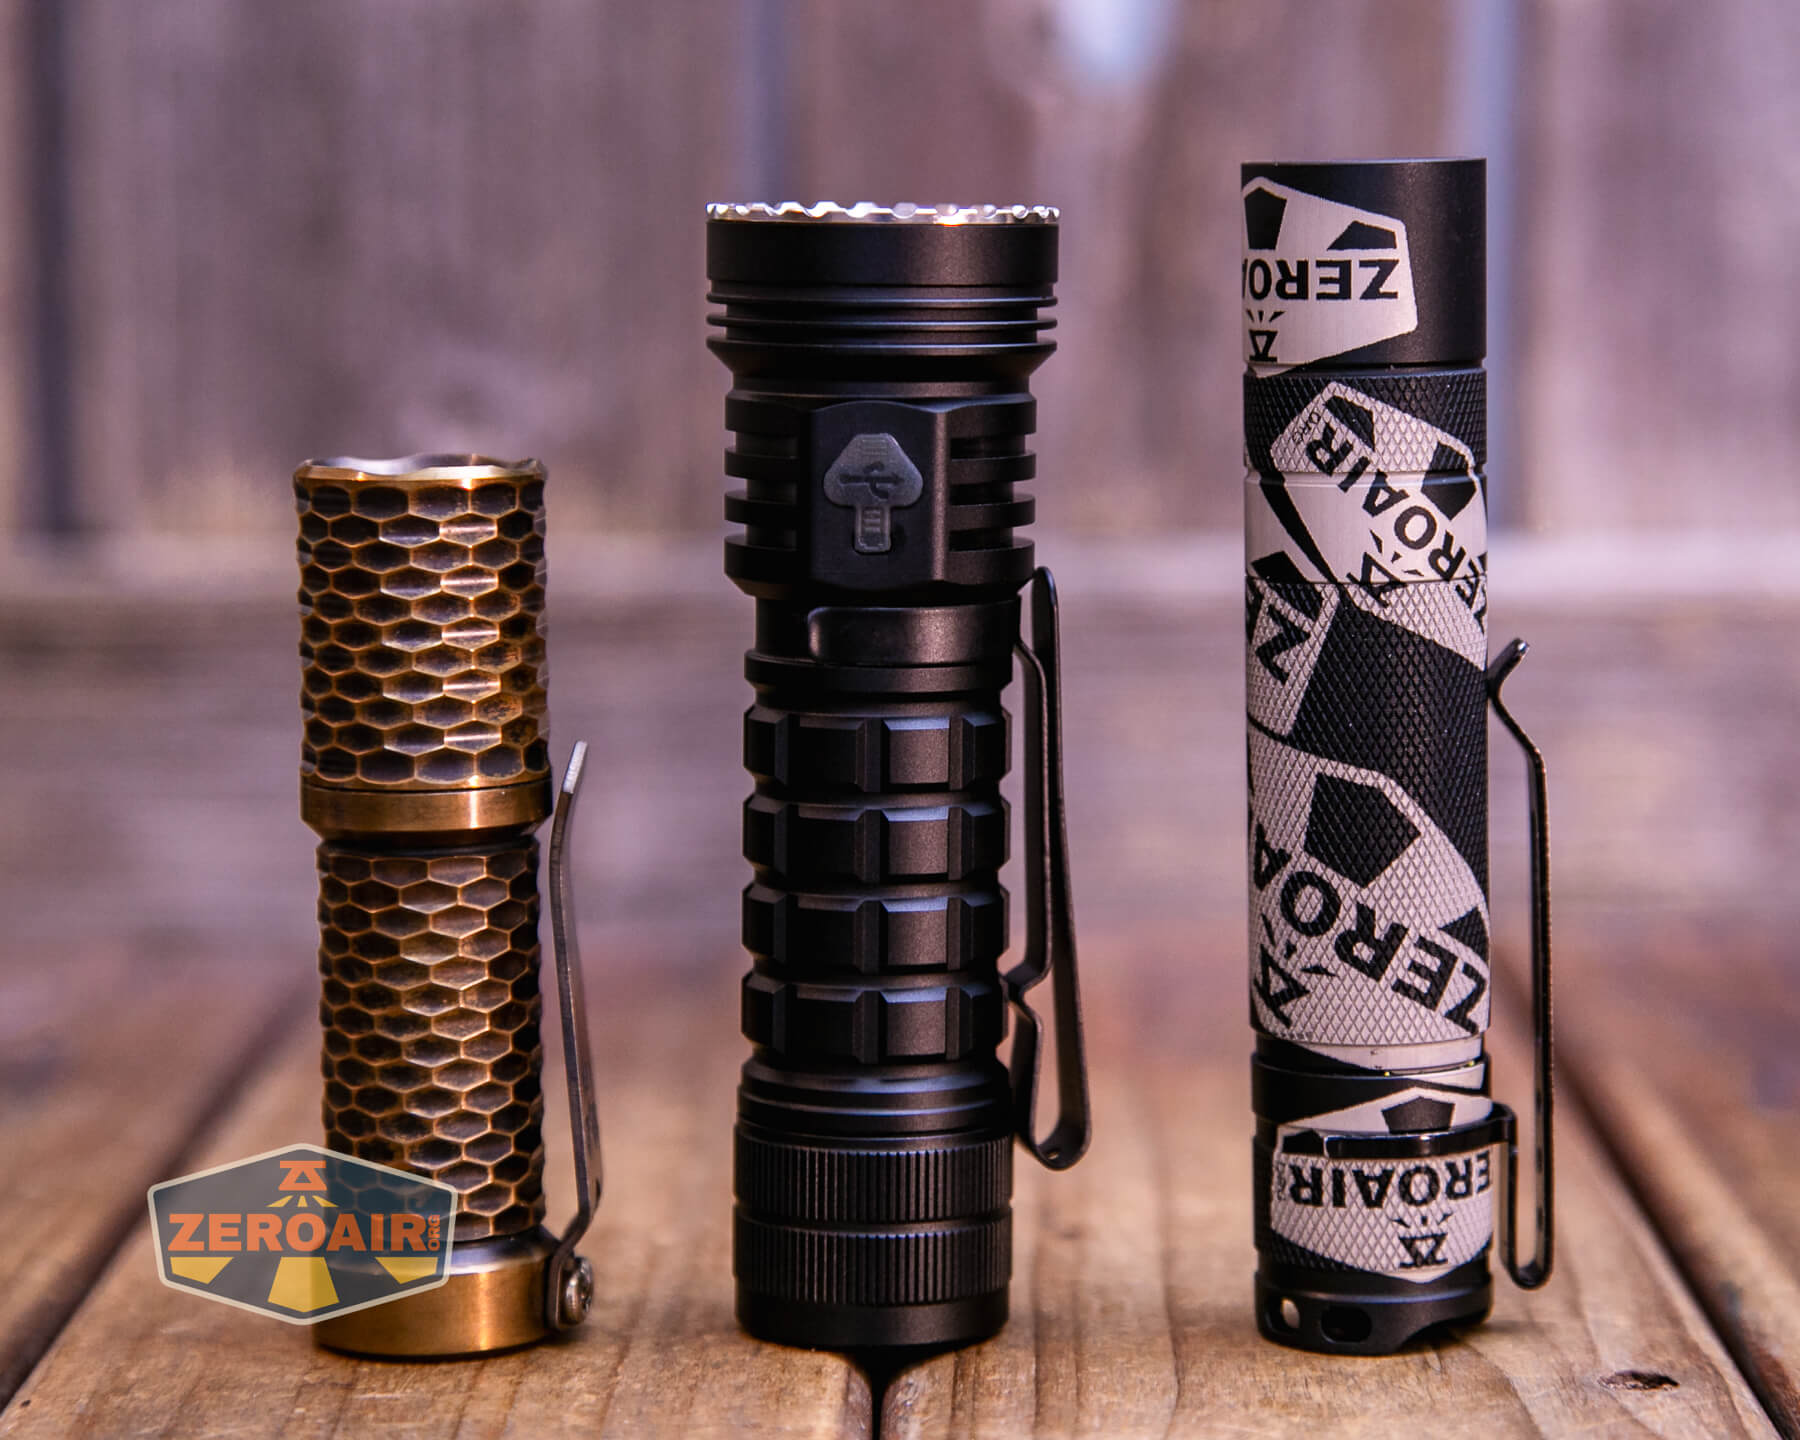
Also in the photo above, my Standard Reference Material (SRM) flashlight is the Hanko Machine Works Trident, an 18350 light. While I have not reviewed or tested the Gunner Grip version seen here, I have tested a Hanko Machine Works Trident Total Tesseract in brass. I love the Trident, and it’s a striking contrast to the inexpensive Convoy S2+, another great SRM.
Retention and Carry
The Ripsshine OF1 flashlight ships with a pocket clip unattached. You can see it below, photographed separately (unusually). It’s bent! But that wasn’t a huge deal: it stretched onto the light and was mostly straightened just by those efforts.

The clip can go only on the head end, but it’s a two-way clip. Thus, you can carry the Ripsshine OF1 flashlight bezel up or down.
The Ripsshine OF1 flashlight also includes a lanyard, which attaches through this hole in the tailcap.

The pocket clip also has a lanyard hole.
The lanyard is a nice, full-featured ordeal, made of paracord and a clip ring, and actually attaches to the light with an included split ring.

The tailcap magnet is strong enough to hold the light.

Power and Runtime
The Ripsshine OF1 flashlight runs on a single lithium-ion cell. A button top 21700 is included, and at 5000mAh, it is a fairly standard cell.
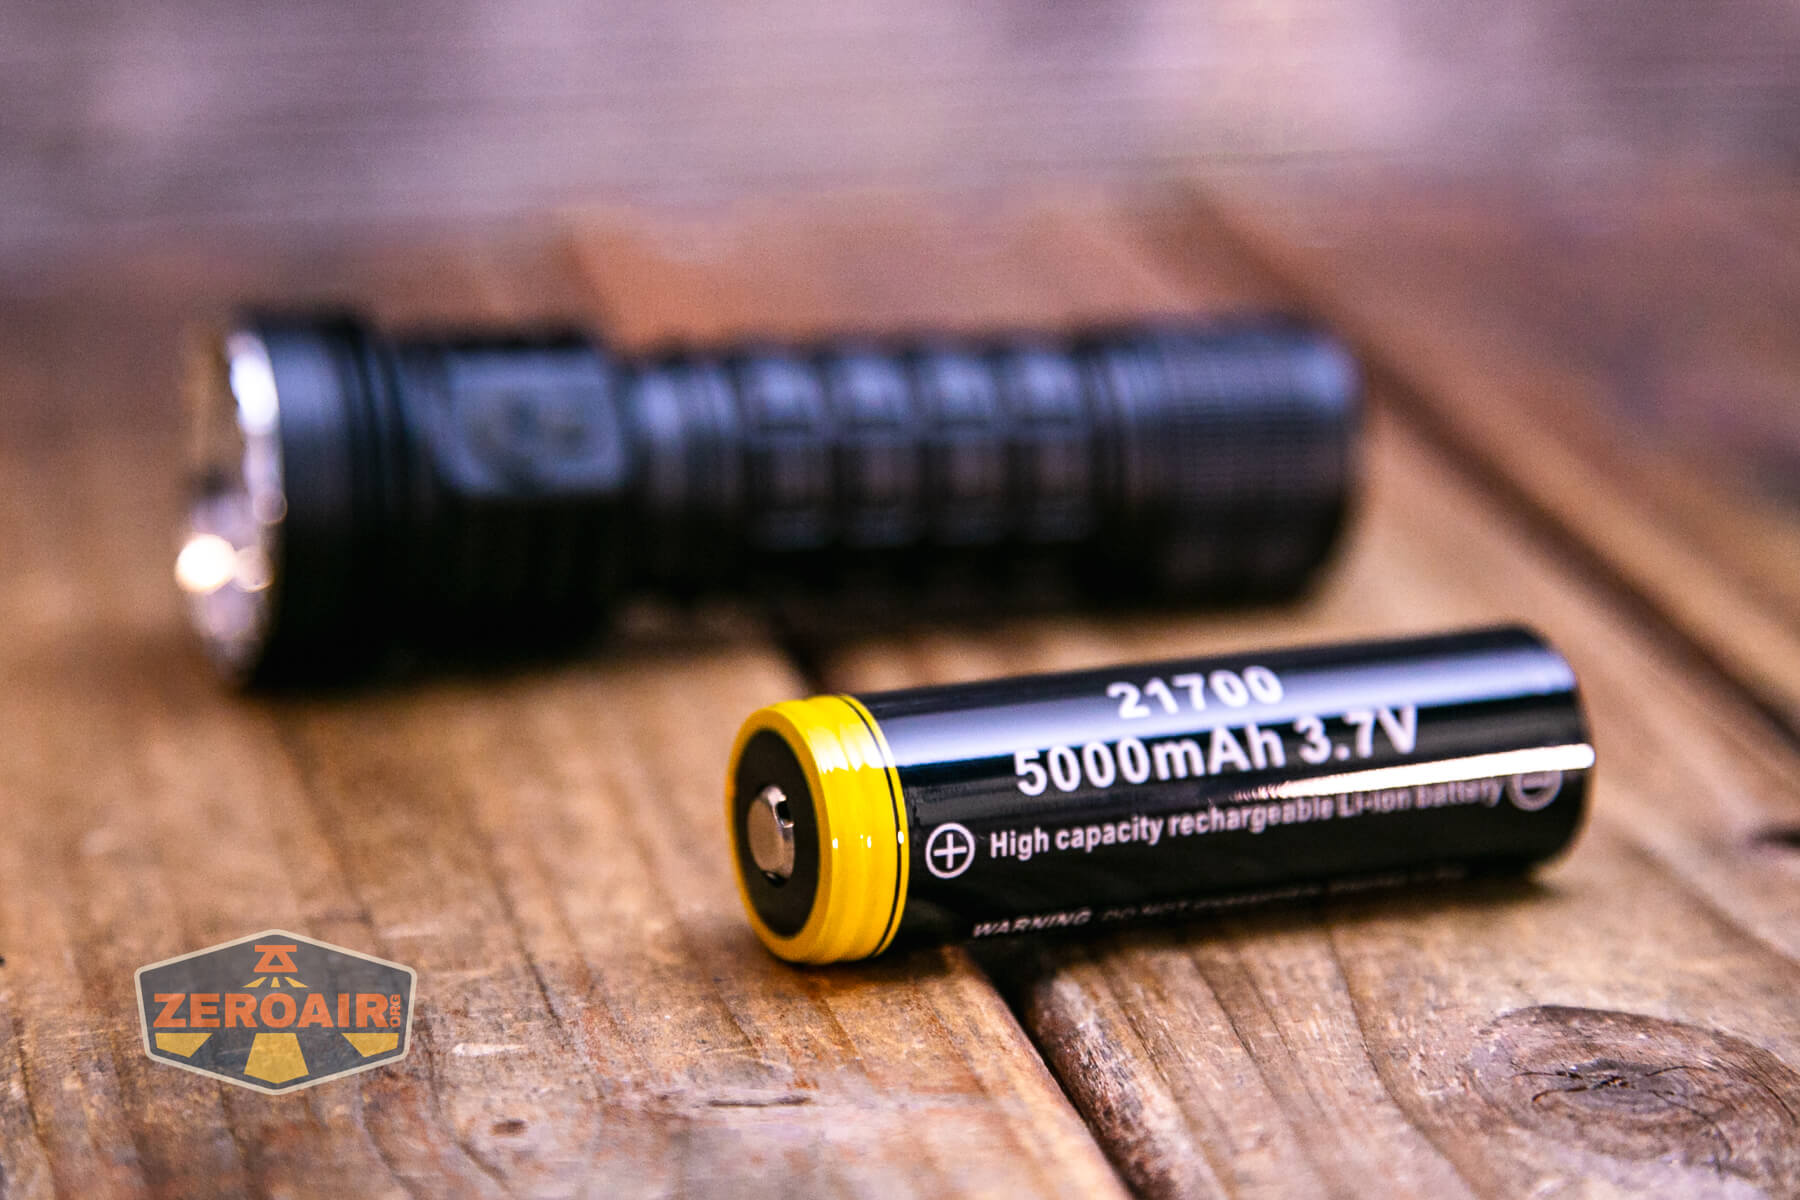
The cell goes into the light positive end (button) first.
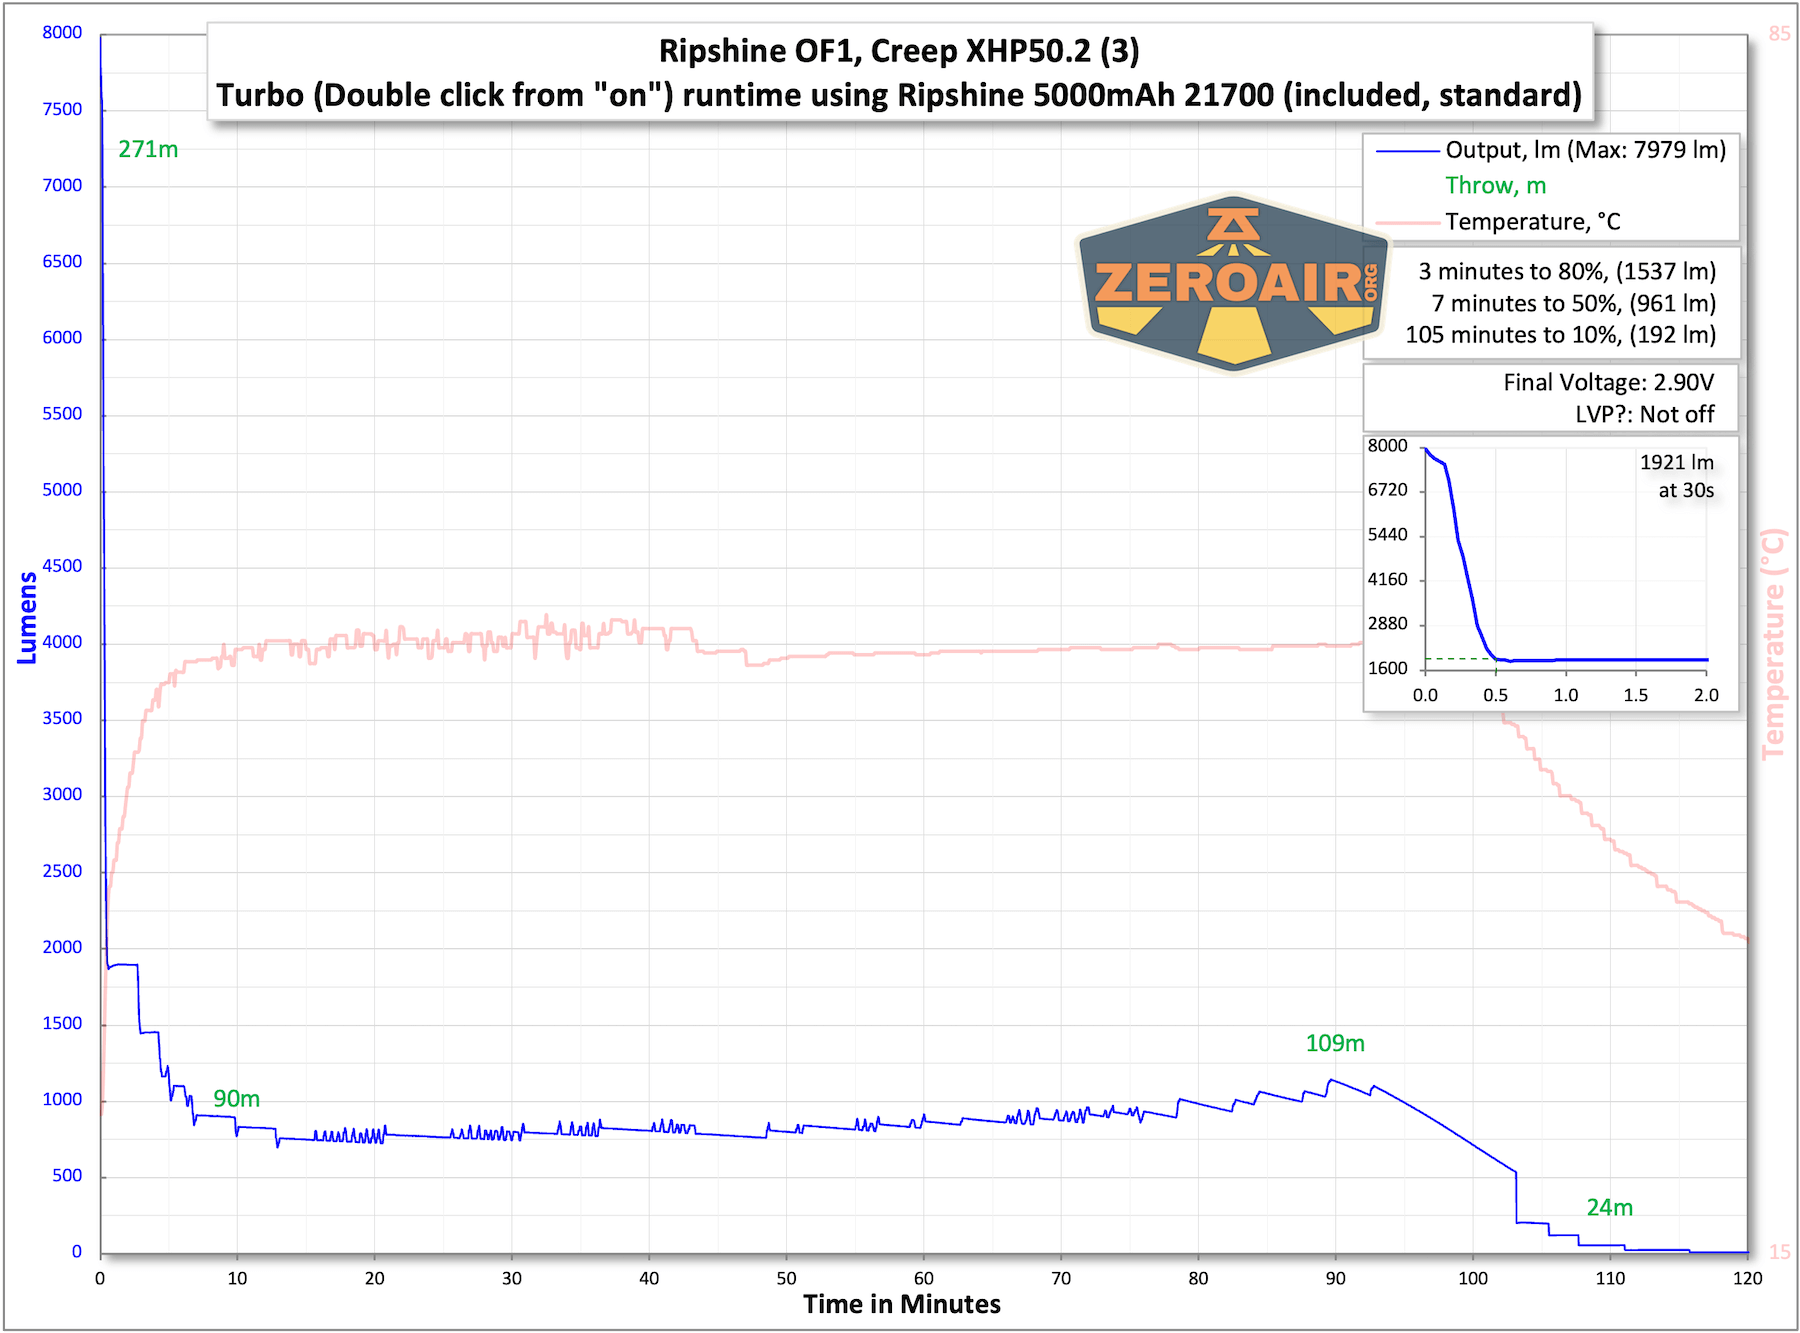
Below you can see a number of runtime charts. The output claim is 10,000 lumens. I didn’t see that even at startup, and the light drifts down from the initial 8000 lumens very quickly. It then settles at about 1600 lumens. From there, all the top three modes are about the same, at around 1000 lumens.


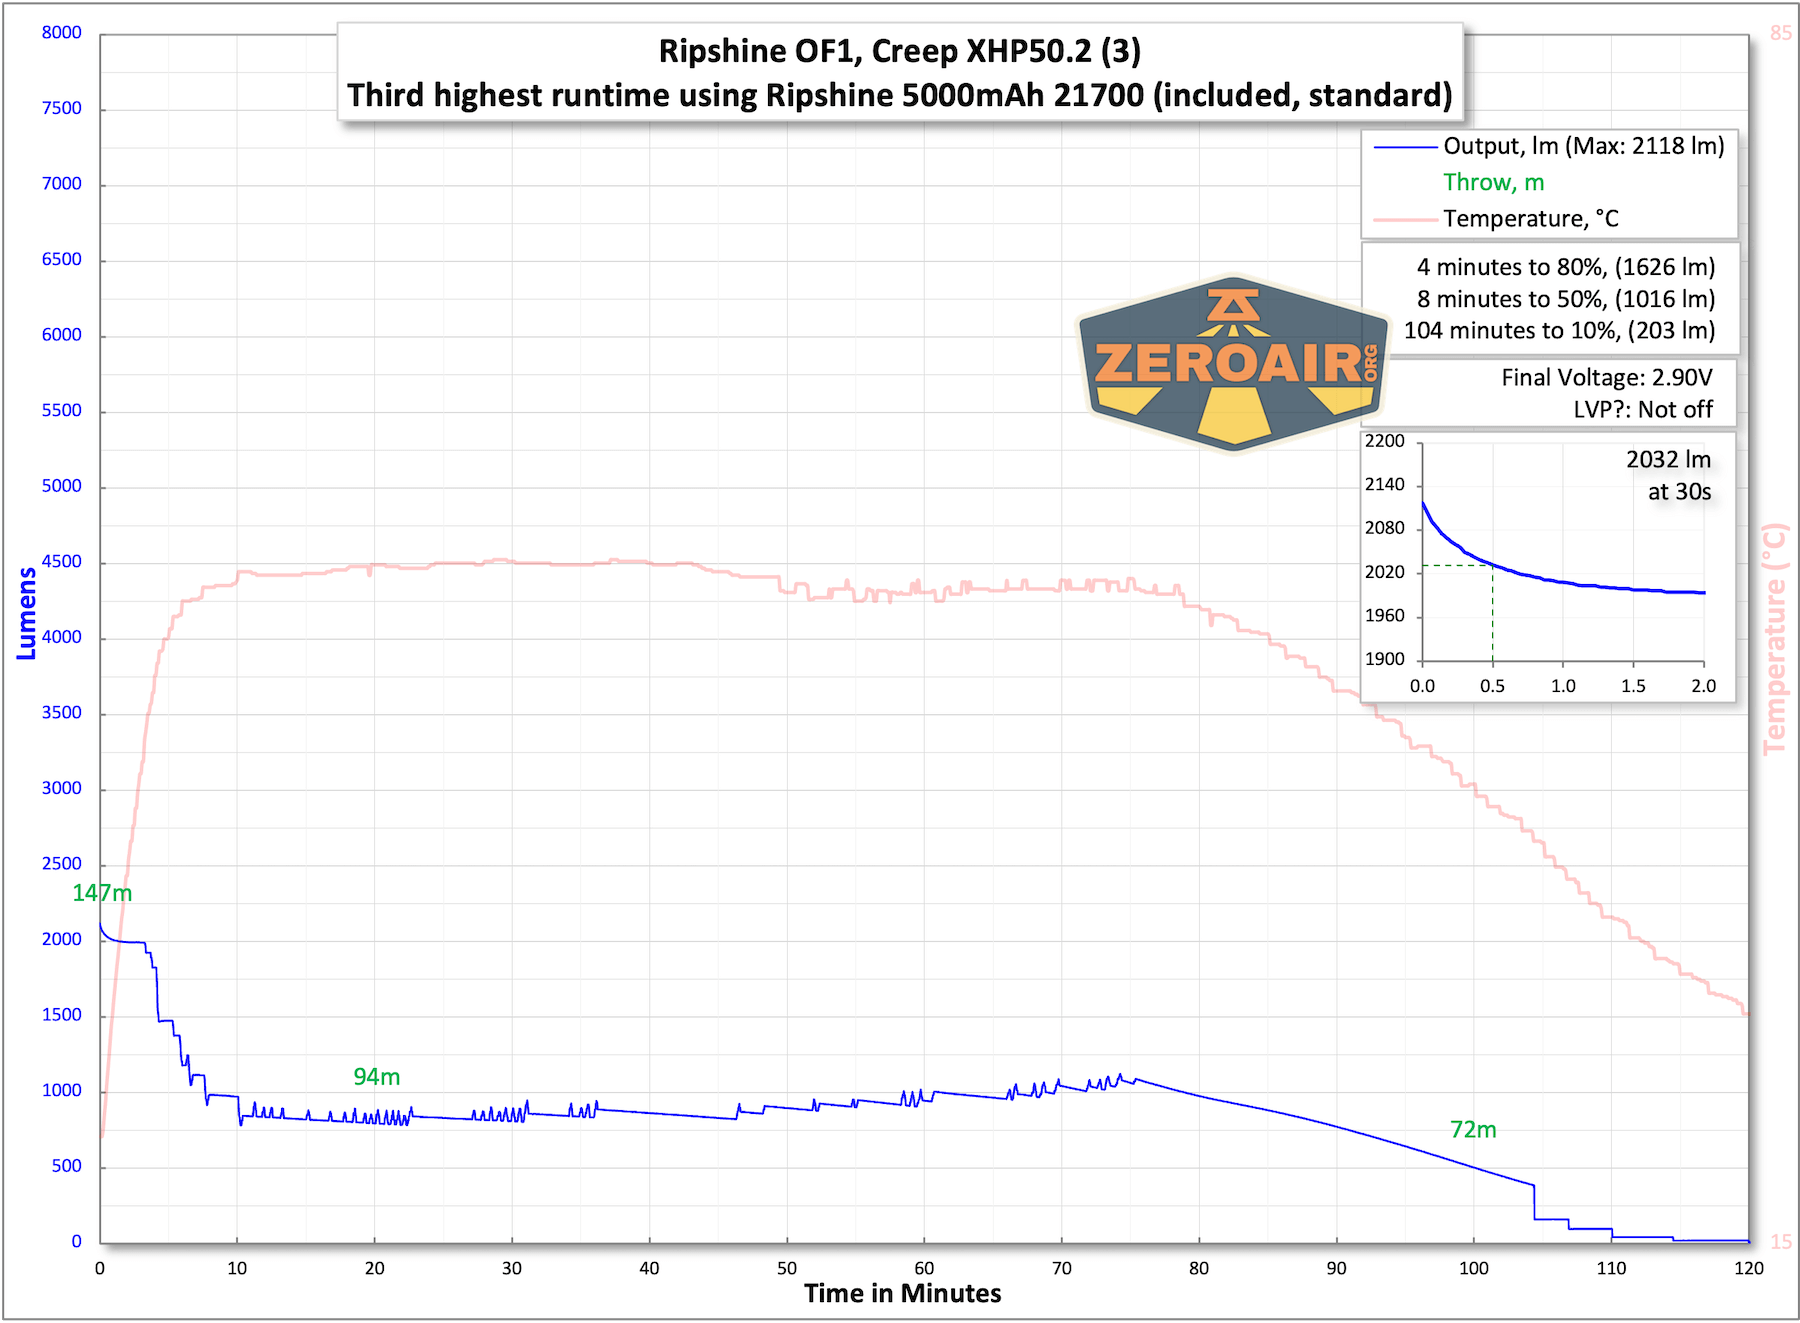
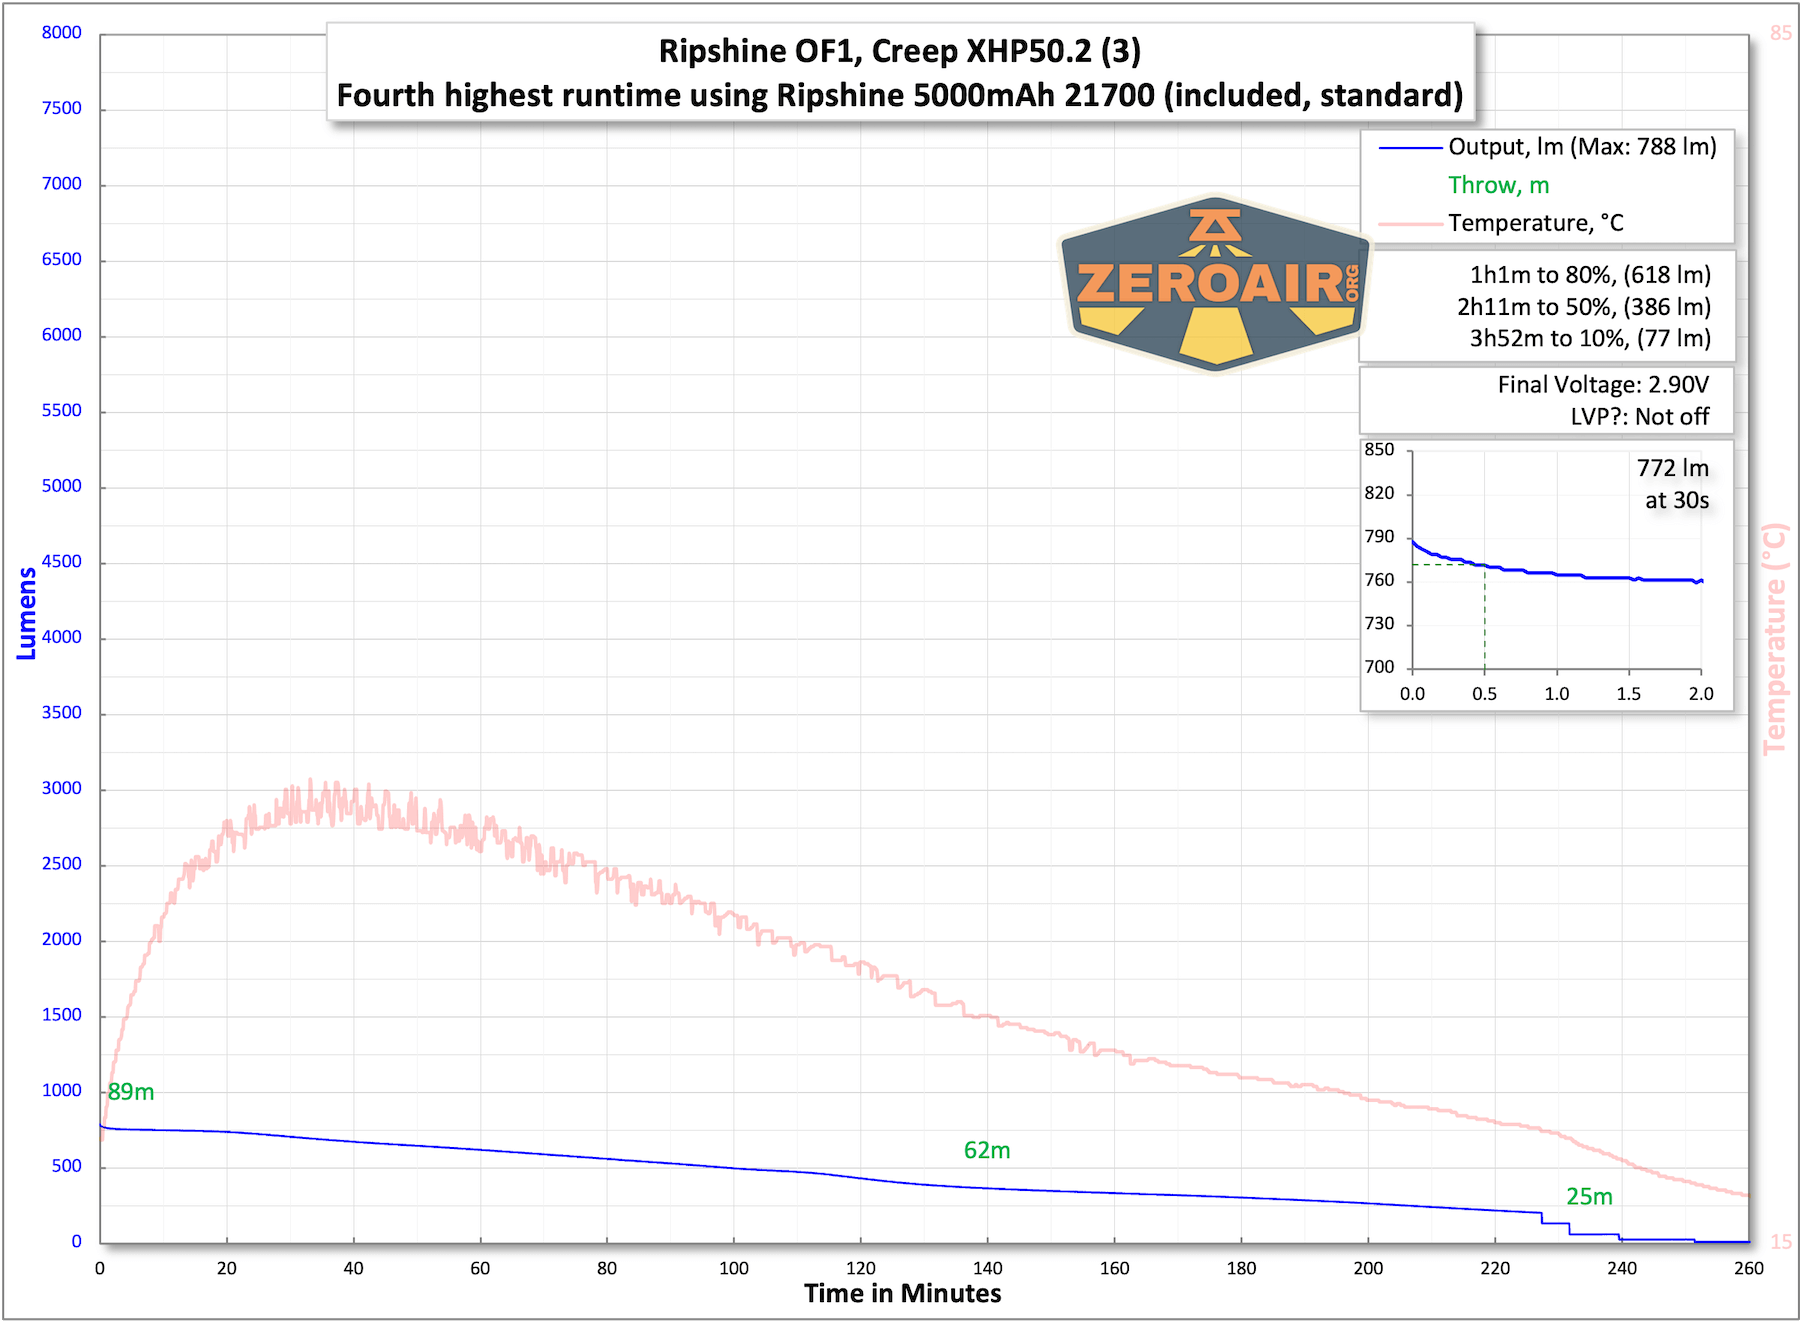
The temperature lines in these charts are included as general context, not precise measurements. The values represent the range (min to max) during testing, but should not be taken as exact readings. Temperature sensors are attached however feasible and not always on the bezel or hottest spot (assuming that can even be clearly defined). Even with ideal placement, too many variables affect temperature to definitively state a specific max value.
Charging
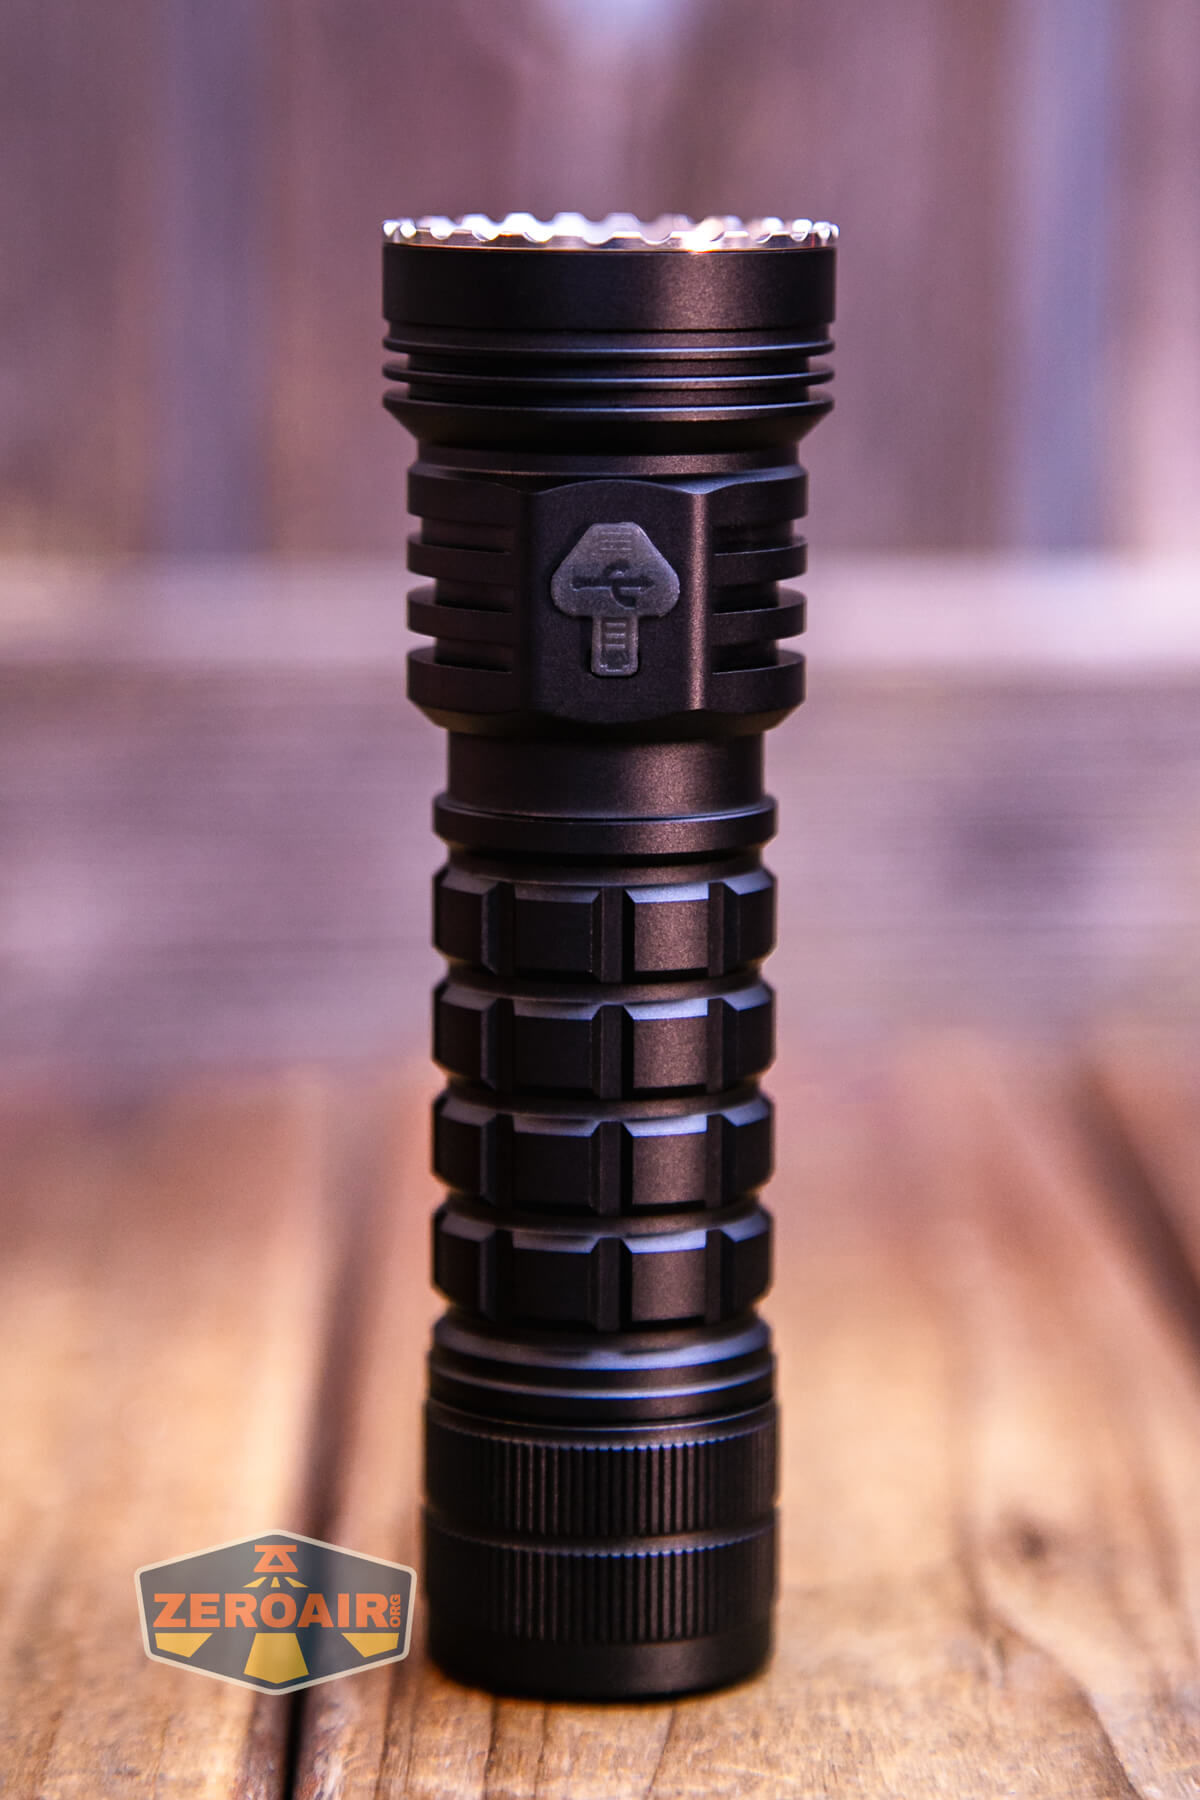
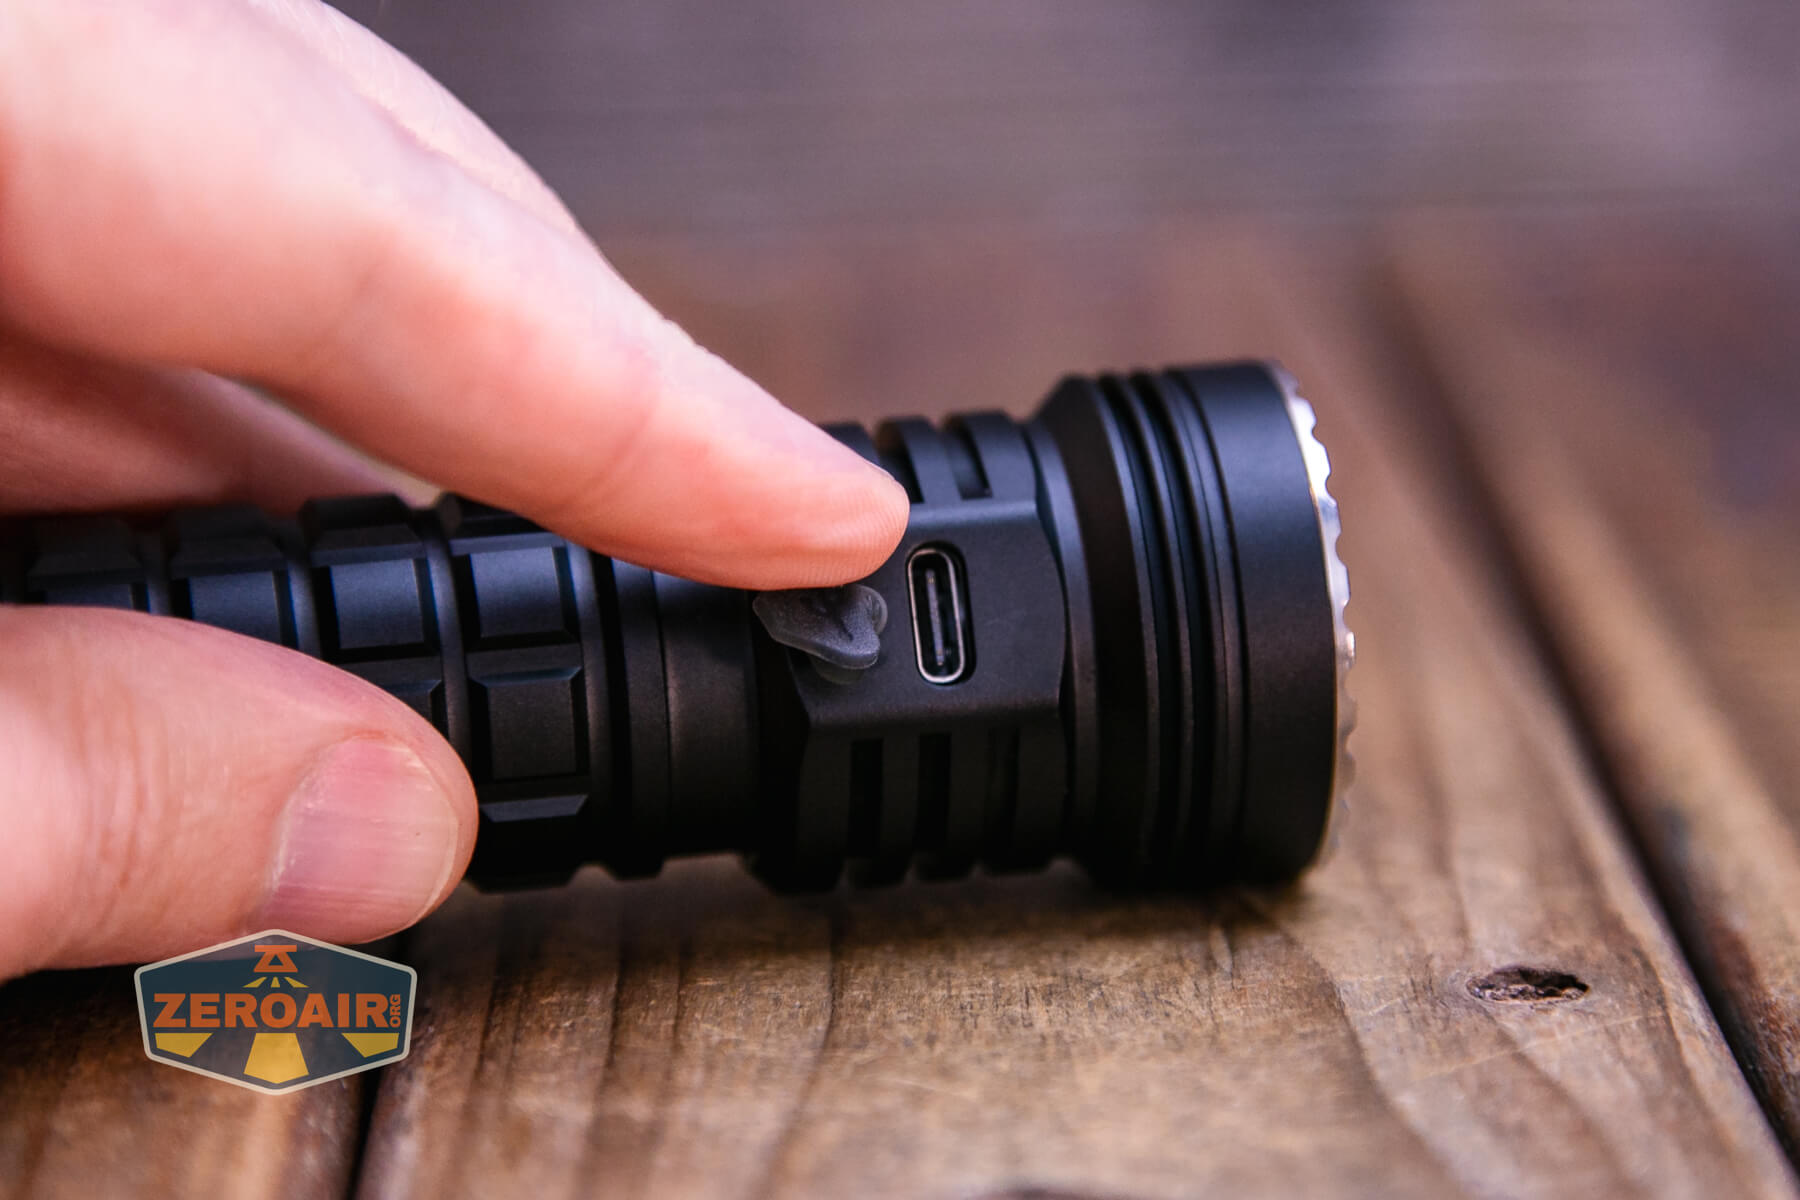
The Ripsshine OF1 flashlight offers USB-C charging. The charge port has a press-in cover.
Ripsshine includes a USB to USB-C charging cable.

Charging looks fine and works the same for A to C as it does for C to C. A full charge takes around 2 hours and 20 minutes.

Modes and Currents
| Mode | Mode Claimed Output (lm) | Claimed Runtime | Measured Lumens | Tailcap Amps |
|---|---|---|---|---|
| Turbo (Double Click from on) | 10000 | – | 7979 (0s) 1921 (30s) |
13.35 |
| Highest Stepped | – | – | 4045 (0s) 3592 (30s) |
3.87 |
| – | – | 2118 (0s) 2032 (30s) |
1.71 | |
| – | – | 788 | 0.80 | |
| – | – | 159 | 0.34 | |
| – | – | 65 | 0.13 | |
| – | – | 17.7 | 0.02 | |
| Lowest Stepped | – | – | 1.34 | 5.6mA |
| Lowest Ramped | – | – | 0.09 | 1.90mA |
Pulse Width Modulation
There is PWM on all modes except Turbo. On all but the lowest output level, it’s not PWM that I can call “noticeable.” It’s plenty fast PWM. Below, the modes go from lowest (row 1, column 1) to highest (row 2, last position). The first mode is set off separately because it’s the only mode from ramping (on ramping, low is lower than the lowest stepped mode).

Click here to see a “baseline” – a chart with almost no light hitting the sensor.
Then there’s the Ultrafire WF-602C flashlight, which has some of the worst PWM I’ve seen. It’s so bad that I used a post about it to explain PWM! Here are multiple timescales (10ms, 5ms, 2ms, 1ms, 0.5ms, 0.2ms) to make comparing this “worst” PWM light to the test light easier. That post also explains why I didn’t test the WF-602C at the usual 50us scale.
User Interface and Operation
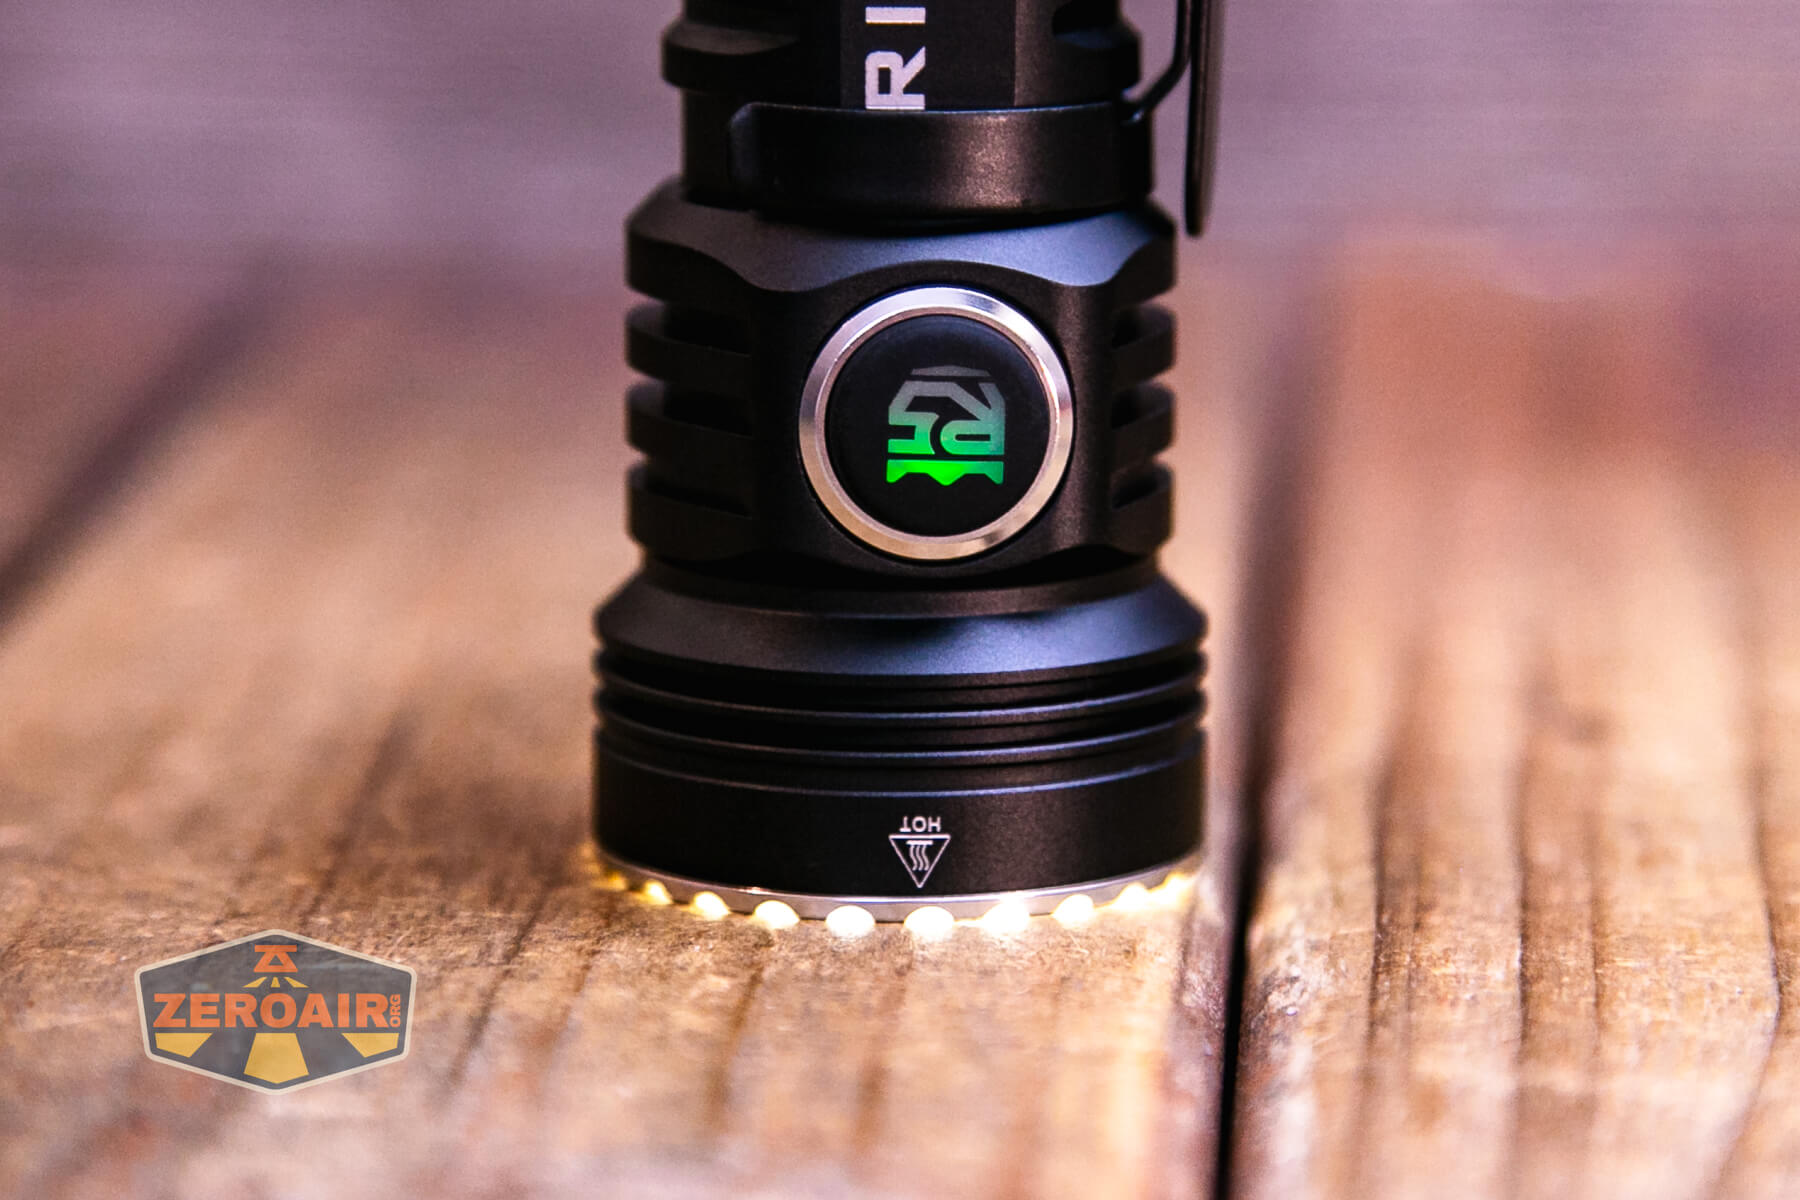
The switch seen on the Ripsshine OF1 flashlight is an indicating e-switch. It is a very proud switch with a translucent center that allows the switch to indicate in green and blue.

Very proud!


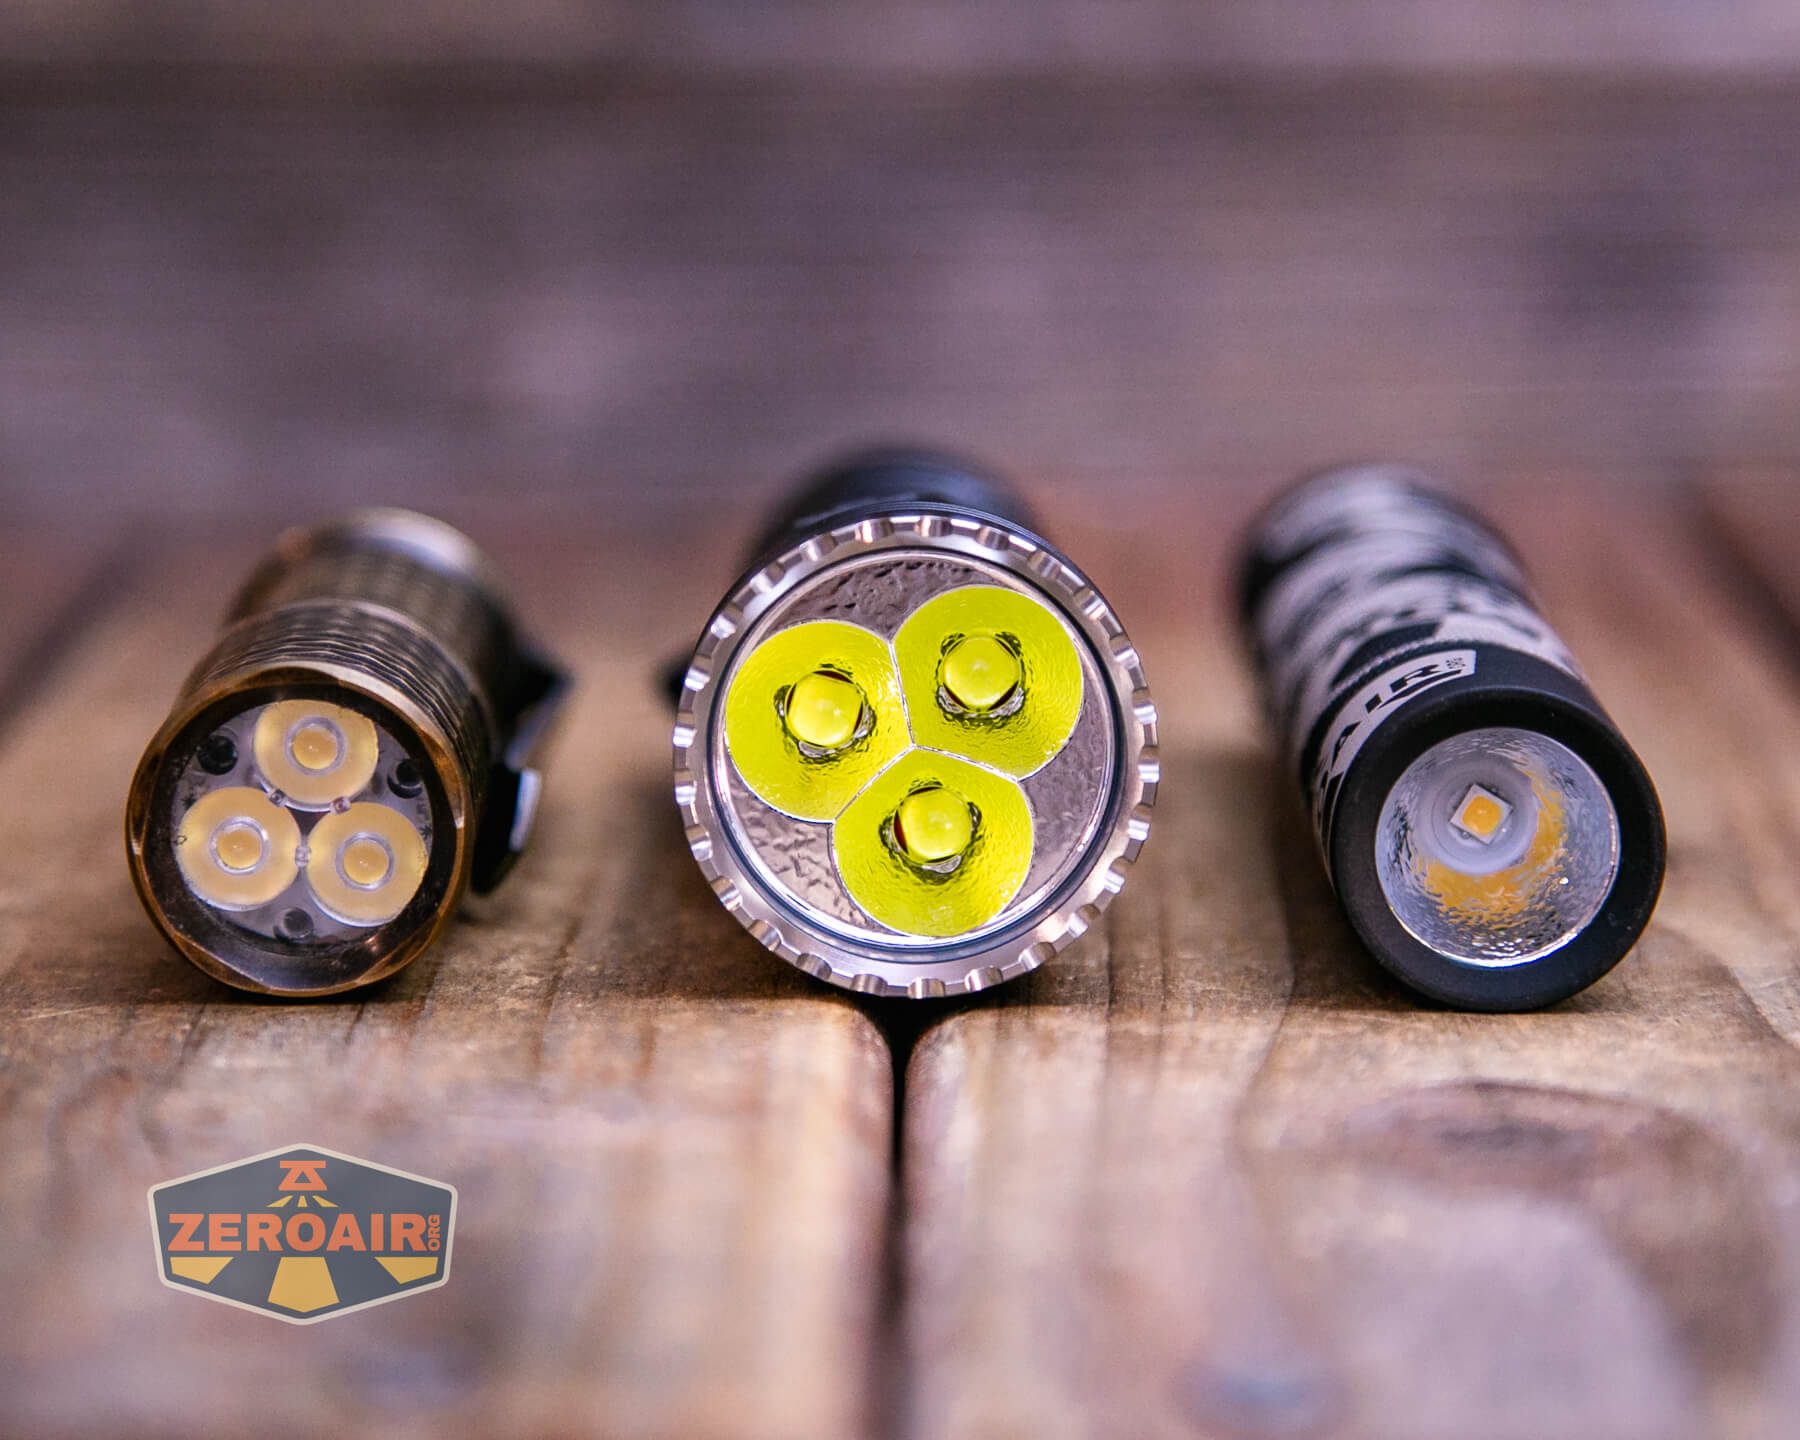
The bezel has small teeth, which I really love.
Andúril2 is great, and I think it’s an improvement over the first iteration(s). There are some things some users might not love about it, but I think overall it’s much more approachable. I will note, though, that the nomenclature might be a bit confusing – the light (all lights with Andúril2) ships in Simple UI. This is not Muggle Mode. You may think “Well, duh,” and by now you’ve already seen the blistering runtime on turbo of Simple, so you get it. But just be aware, don’t hand this light to the uninitiated, thinking they won’t set their hand on fire while using Simple UI. Here is where I’d tell you how to switch to Muggle mode. There is no Muggle mode.
A newer and up-to-date version can be seen here:
https://github.com/ToyKeeper/anduril/blob/trunk/docs/anduril-manual.md
Since the manual (linked above) has changed, I need to go through it all again to confirm that this table is the “most right.” Lights ship with revisions all the time anyway, so you might even get an updated version from what I have.
The table below is direct and in full from ToyKeeper. All actions may not apply to all lights, including the one in this review. The table is the version from 20241229. It’s a little different from my usual user interface table layout, but I’m preserving all the info from GitHub here.
This is a table of all button mappings in Anduril, in one place:
| Mode | UI | Button | Action |
|---|---|---|---|
| Off | Any | 1C |
On (ramp mode, memorized level) |
| Off | Any | 1H |
On (ramp mode, floor level) |
| Off | Any | 2C |
On (ramp mode, ceiling level) |
| Off | Simple | 2H |
On (momentary ceiling level) |
| Off | Full | 2H |
On (momentary turbo) |
| Off | Any | 3C |
Battcheck mode |
| Off | Full | 3H |
Strobe mode (whichever was used last) |
| Off | Any | 4C |
Lockout mode |
| Off | Full | 5C |
Momentary mode |
| Off | Full | 6C |
Tactical mode |
| Off | Full | 7C |
Aux LEDs: Next pattern |
| Off | Full | 7H |
Aux LEDs: Next color |
| Off | Full | 9H |
Misc Config menu (varies per light): ?1: tint ramp style ?2: jump-start level |
| Off | Full | 10C |
Enable Simple UI |
| Off | Simple | 10H |
Disable Simple UI |
| Off | Full | 10H |
Simple user interface ramp config menu: 1: floor 2: ceiling 3: steps 4: turbo style |
| Off | Any | 13H |
Factory reset (on some lights) |
| Off | Any | 15+C |
Version check |
| Ramp | Any | 1C |
Off |
| Ramp | Any | 1H |
Ramp (up, with reversing) |
| Ramp | Any | 2H |
Ramp (down) |
| Ramp | Any | 2C |
Go to/from ceiling or turbo (configurable) |
| Ramp | Full | 3C |
Change ramp style (smooth / stepped) |
| Ramp | Full | 6C |
(same as above, but on multi-channel lights) |
| Ramp | Full | 3H |
Momentary turbo (when no tint ramping) |
| Ramp | Full | 4H |
Momentary turbo (on multi channel lights) |
| Ramp | Any | 4C |
Lockout mode |
| Ramp | Full | 5C |
Momentary mode |
| Ramp | Full | 5H |
Sunset timer on, and add 5 minutes |
| Ramp | Full | 7H |
Ramp config menu: (for current ramp) 1: floor 2: ceiling 3: speed / steps |
| Ramp | Full | 10C |
Turn on manual memory and save current brightness |
| Ramp | Full | 10H |
Ramp Extras config menu: 1: switch to automatic mem, not manual mem 2: set manual mem timeout 3: ramp after moon or not 4: advanced user interface turbo style 5: smooth steps |
Multi-channel Lights
| Mode | UI | Button | Multi-channel lights only! |
|---|---|---|---|
| Any | Any | 3C |
Next channel mode (i.e. next color mode) |
| Any | Any | 3H |
Tint ramp (if this mode can) |
| Any | Full | 9H |
Channel mode enable/disable menu: N: click (or not) to enable (disable) mode N |
Lockout Mode
| Mode | UI | Button | Action |
|---|---|---|---|
| Lockout | Any | 1C/1H |
Momentary moon (lowest floor) |
| Lockout | Any | 2C/2H |
Momentary moon (highest floor, or manual mem level) |
| Lockout | Any | 3C |
Unlock (go to “Off” mode) |
| Lockout | Any | 3H |
Next channel mode (if more than one enabled) |
| Lockout | Any | 4C |
On (ramp mode, memorized level) |
| Lockout | Any | 4H |
On (ramp mode, floor level) |
| Lockout | Any | 5C |
On (ramp mode, ceiling level) |
| Lockout | Full | 7C |
Aux LEDs: Next pattern |
| Lockout | Full | 7H |
Aux LEDs: Next color |
| Lockout | Full | 10H |
Auto-lock config menu: 1: set timeout in minutes (0 = no auto-lock) |
Strobe Group Modes
| Mode | UI | Button | Action |
|---|---|---|---|
| Strobe (any) | Full | 1C |
Off |
| Strobe (any) | Full | 2C |
Next strobe mode |
| Strobe (any) | Full | 3C |
Next channel mode (saved per strobe mode) |
| Strobe (any) | Full | 4C |
Prev strobe mode |
| Strobe (any) | Full | 5C |
Momentary mode (using current strobe) |
| Party strobe | Full | 1H/2H |
Faster / slower |
| Tactical strobe | Full | 1H/2H |
Faster / slower |
| Police strobe | – | – | None (brightness is Ramp Mode’s last-used level) |
| Lightning | Full | 1H |
Interrupt current flash or start new one |
| Candle | Full | 1H/2H |
Brighter / dimmer |
| Candle | Full | 5H |
Sunset timer on, add 5 minutes |
| Biking | Full | 1H/2H |
Brighter / dimmer |
Blinky Modes
| Mode | UI | Button | Action |
|---|---|---|---|
| Batt check | Any | 1C |
Off |
| Batt check | Full | 2C |
Next blinky mode (Temp check, Beacon, SOS) |
| Batt check | Full | 3C |
Next channel mode (for number blinks only) |
| Batt check | Full | 7H |
Voltage config menu 1: voltage correction factor … 5: -0.10V 6: -0.05V 7: no correction 8: +0.05V 9: +0.10V … 2: post-off voltage display seconds |
| Temp check | Full | 1C |
Off |
| Temp check | Full | 2C |
Next blinky mode (Beacon, SOS, Batt check) |
| Temp check | Full | 7H |
Thermal config menu 1: set current temperature 2: set temperature limit |
| Beacon | Full | 1C |
Off |
| Beacon | Full | 1H |
Configure beacon timing |
| Beacon | Full | 2C |
Next blinky mode (SOS, Batt check, Temp check) |
| SOS | Full | 1C |
Off |
| SOS | Full | 2C |
Next blinky mode (Batt check, Temp check, Beacon) |
Momentary Mode
| Mode | UI | Button | Action |
|---|---|---|---|
| Momentary | Full | Any | On (until button is released) |
| Momentary | Full | Disconnect power | Exit Momentary mode |
Tactical Mode
| Mode | UI | Button | Action |
|---|---|---|---|
| Tactical | Full | 1H |
High (tactical slot 1) |
| Tactical | Full | 2H |
Low (tactical slot 2) |
| Tactical | Full | 3H |
Strobe (tactical slot 3) |
| Tactical | Full | 6C |
Exit (go back to Off Mode) |
| Tactical | Full | 7H |
Tactical Mode config menu: 1: tactical slot 1 2: tactical slot 2 3: tactical slot 3 |
Config Menus
| Mode | UI | Button | Action |
|---|---|---|---|
| Config menus | Full | Hold | Skip current item with no changes |
| Config menus | Full | Release | Configure current item (goes to Number Entry menu) |
| Number entry | Full | Click | Add 1 to value for current item |
| Number entry | Full | Hold | Add 10 to value for current item |
This light specifically ships with Andúril version 202101250322. As SammysHP notes on BudgetLightForum:
… they choose this ancient firmware with an outdated microcontroller and parameters for a flashlight with completely different properties? And with no way to update the firmware (no flashing pads and a microcontroller that can barely run a subset of current Anduril features) it’s not worth getting it.
That may be useful information for you if you ever plan on flashing this light (ie, you won’t be able to). But if not, maybe it’s no big deal.
LED and Beam
The Ripsshine OF1 flashlight uses three Cree XHP50.3 emitters. I can’t see any claim to CCT, but they’re cool white.
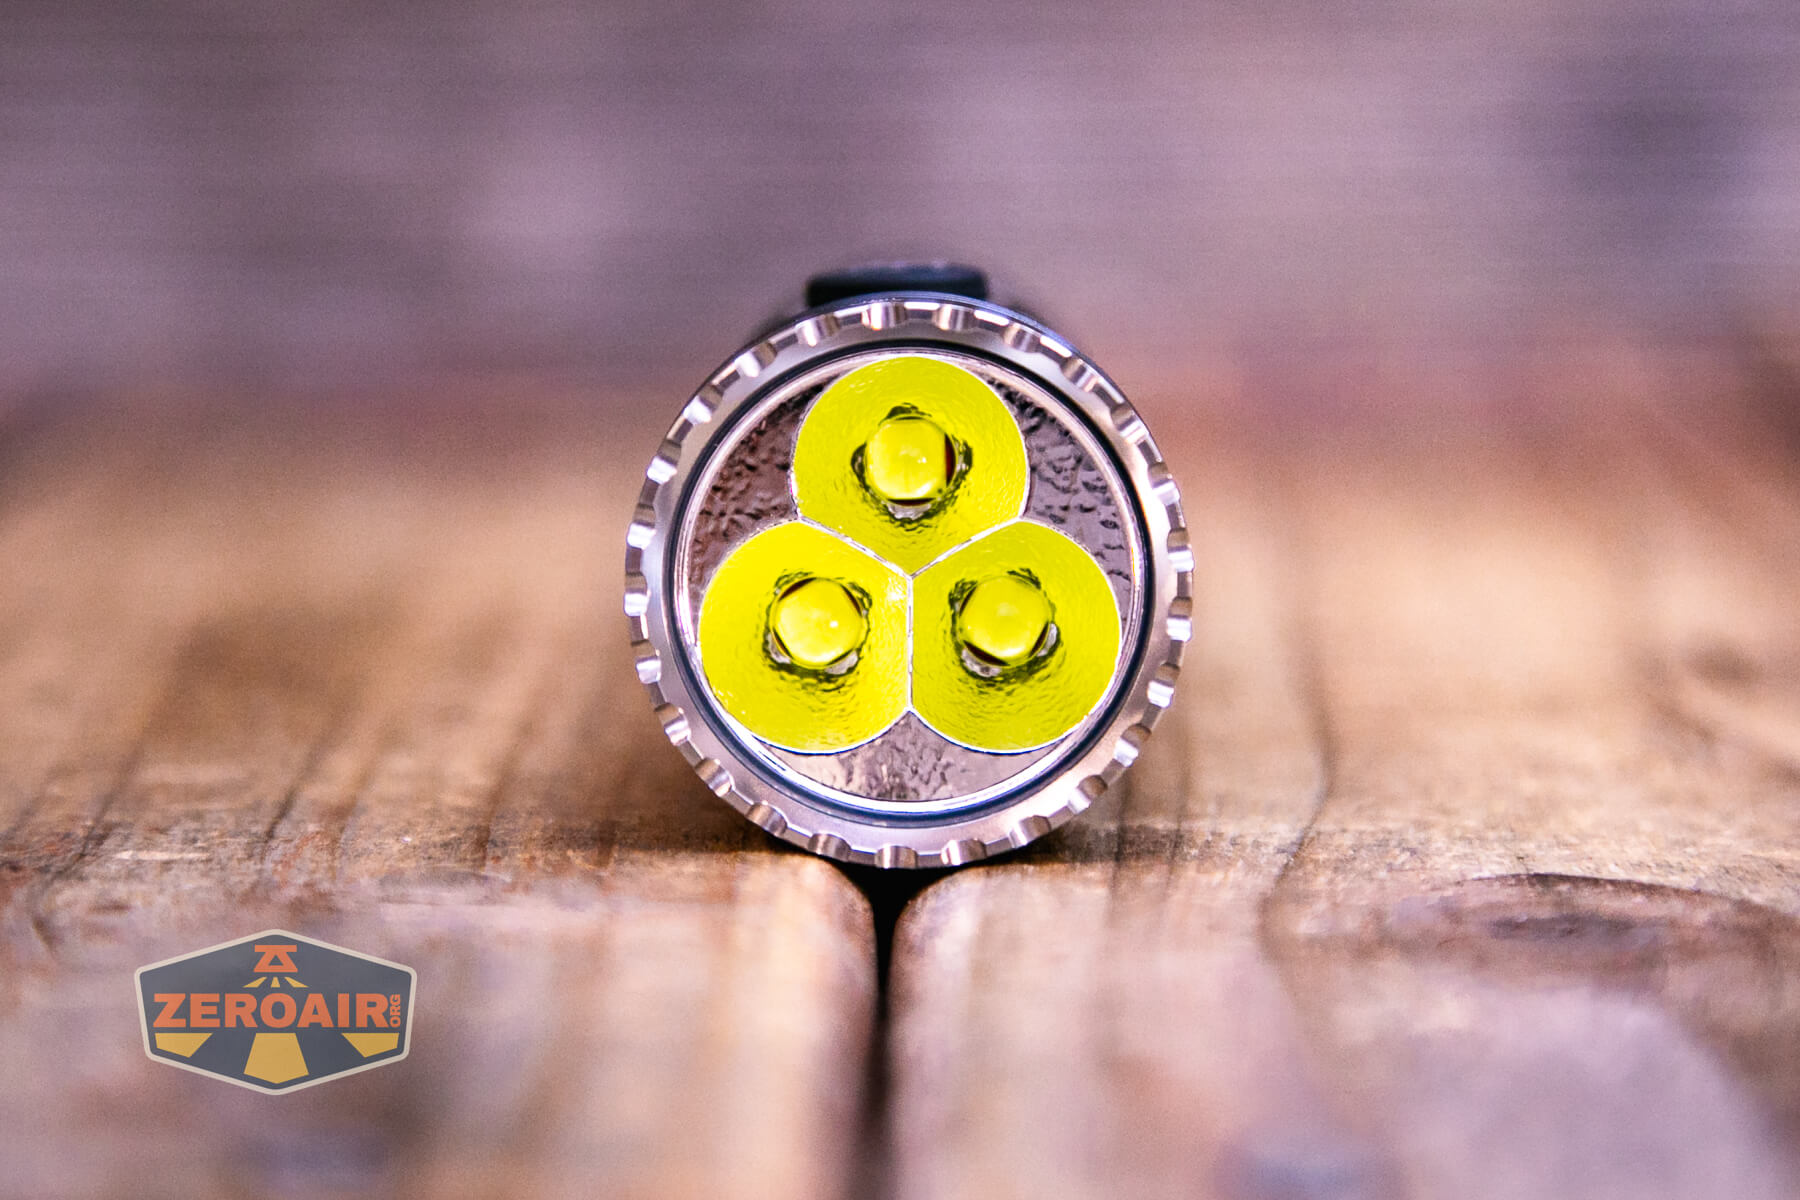
The beam is quite floody.
LED Color Report (CRI and CCT)
Below you can see the actual CCT and CRI measurements – cool white (above 6000K) for all modes, and low CRI.

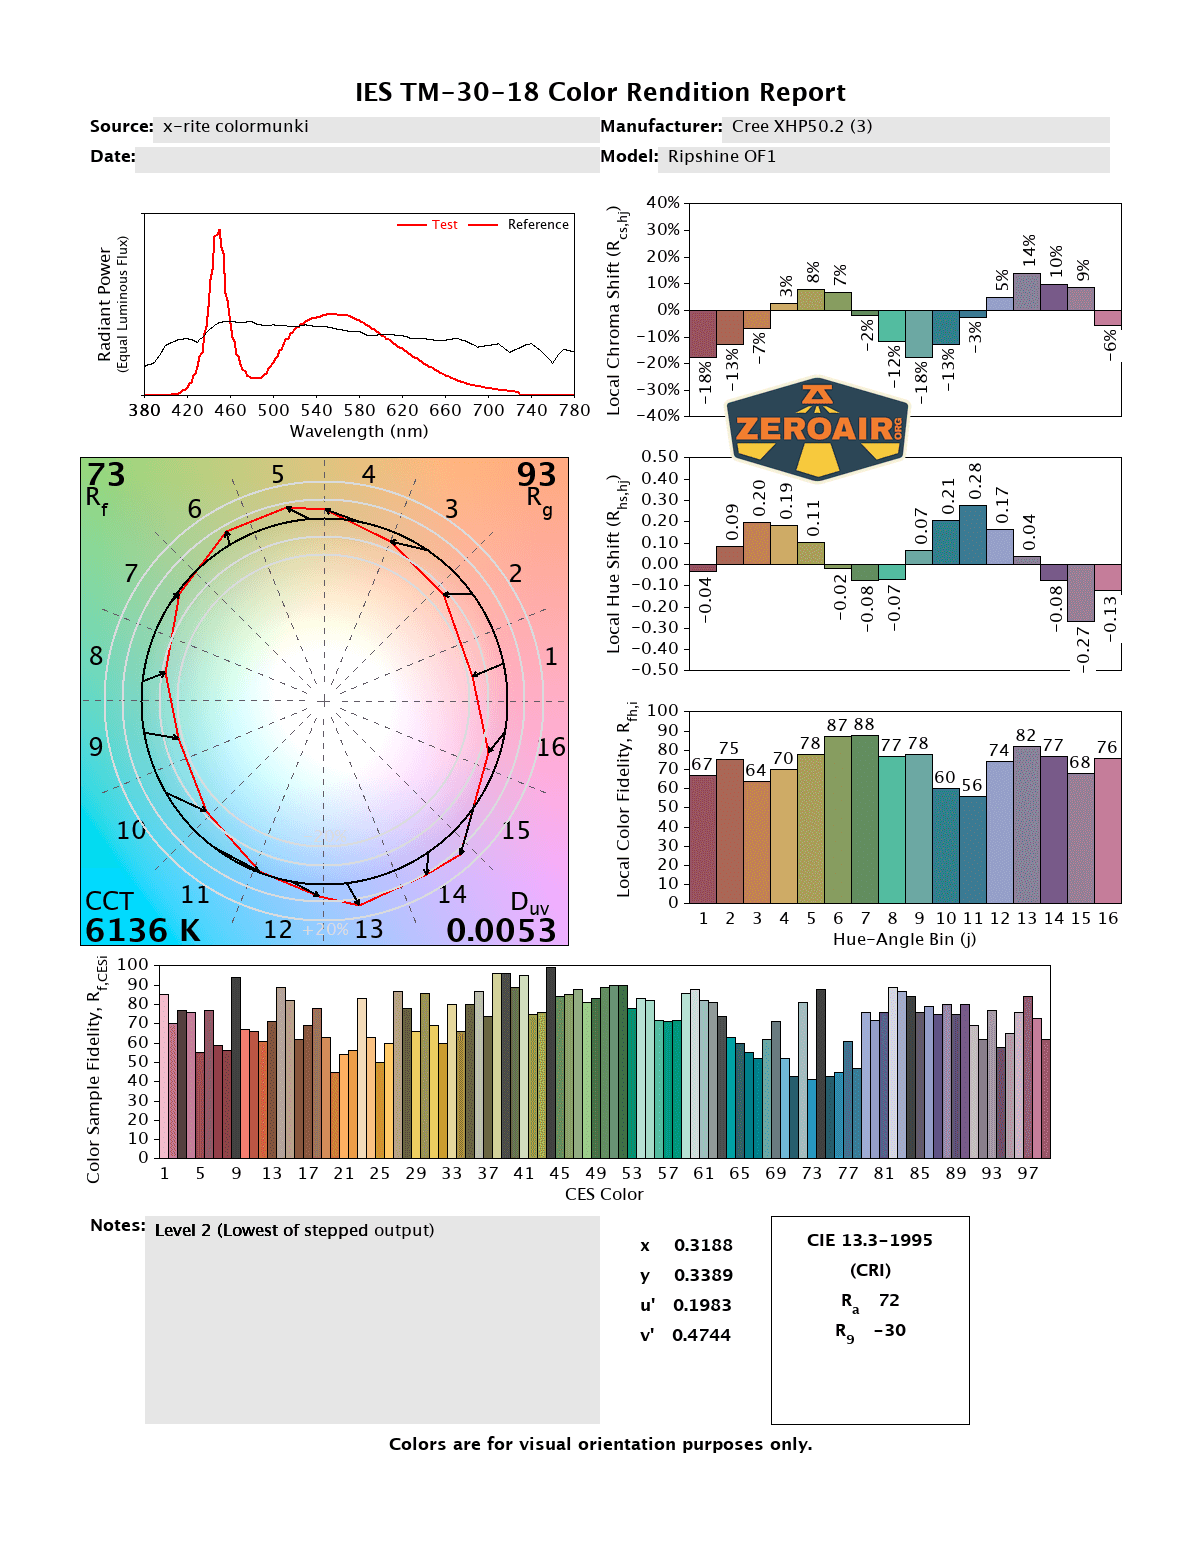

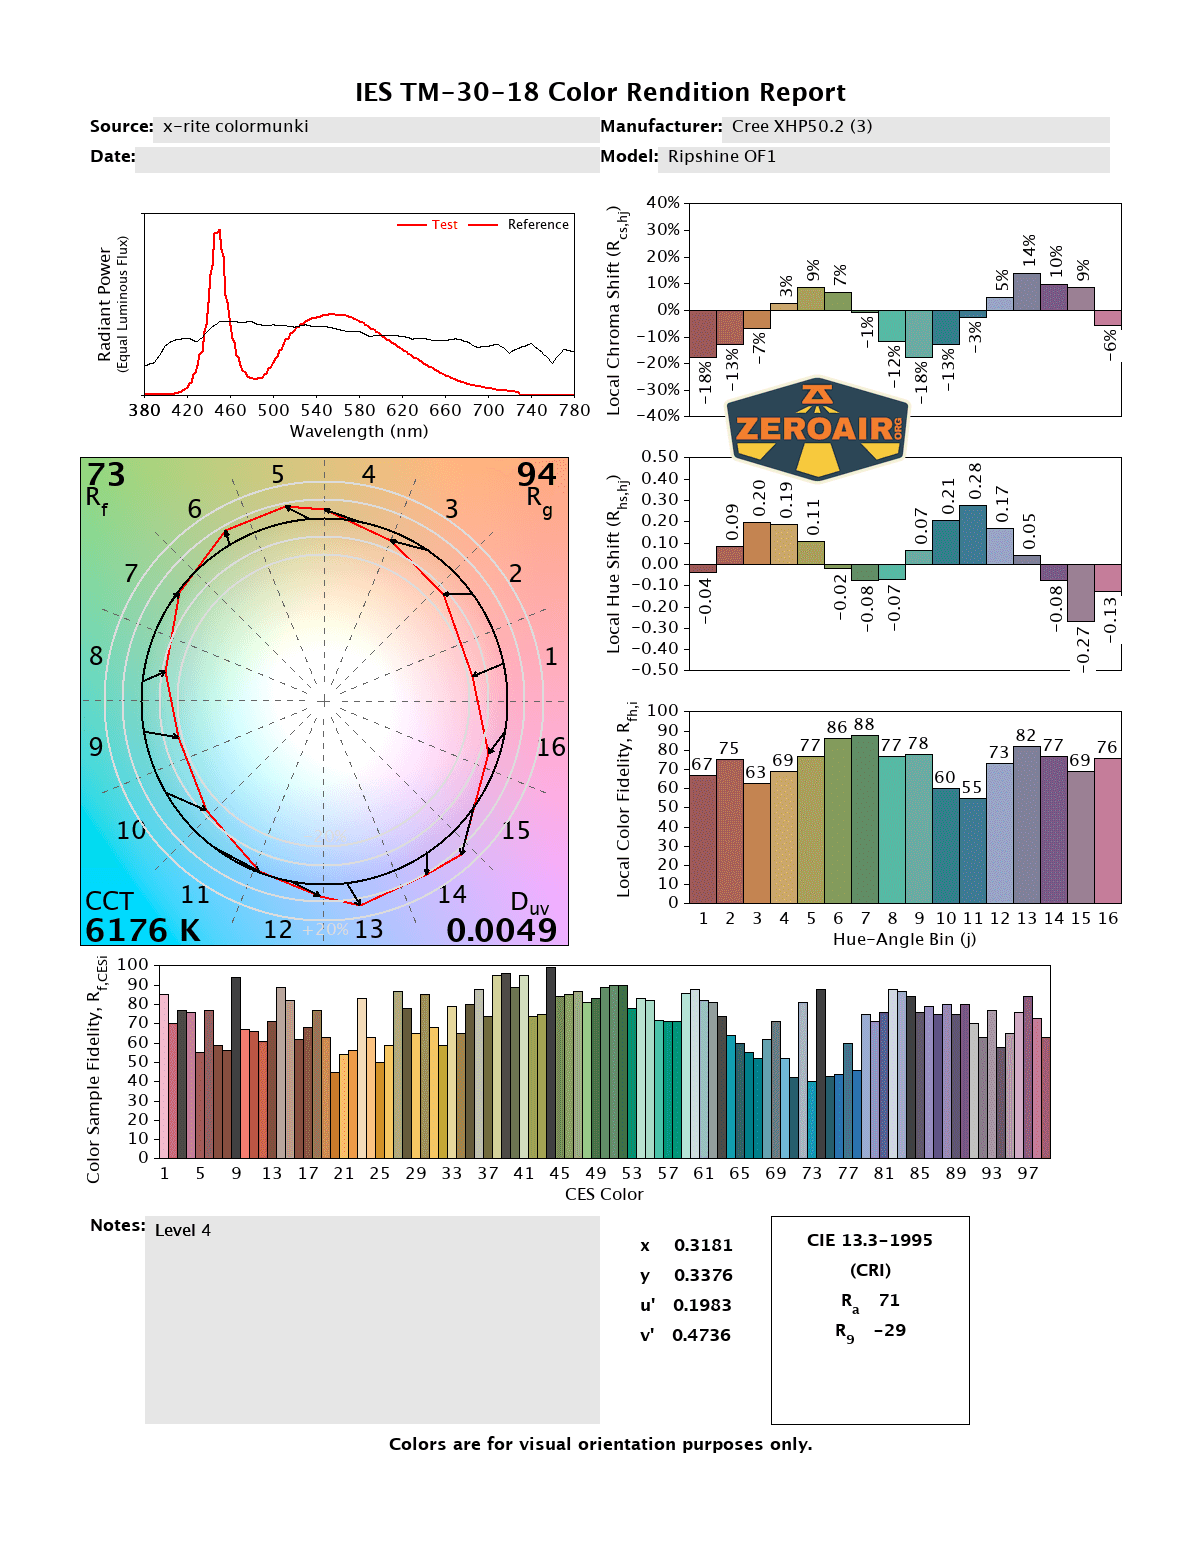
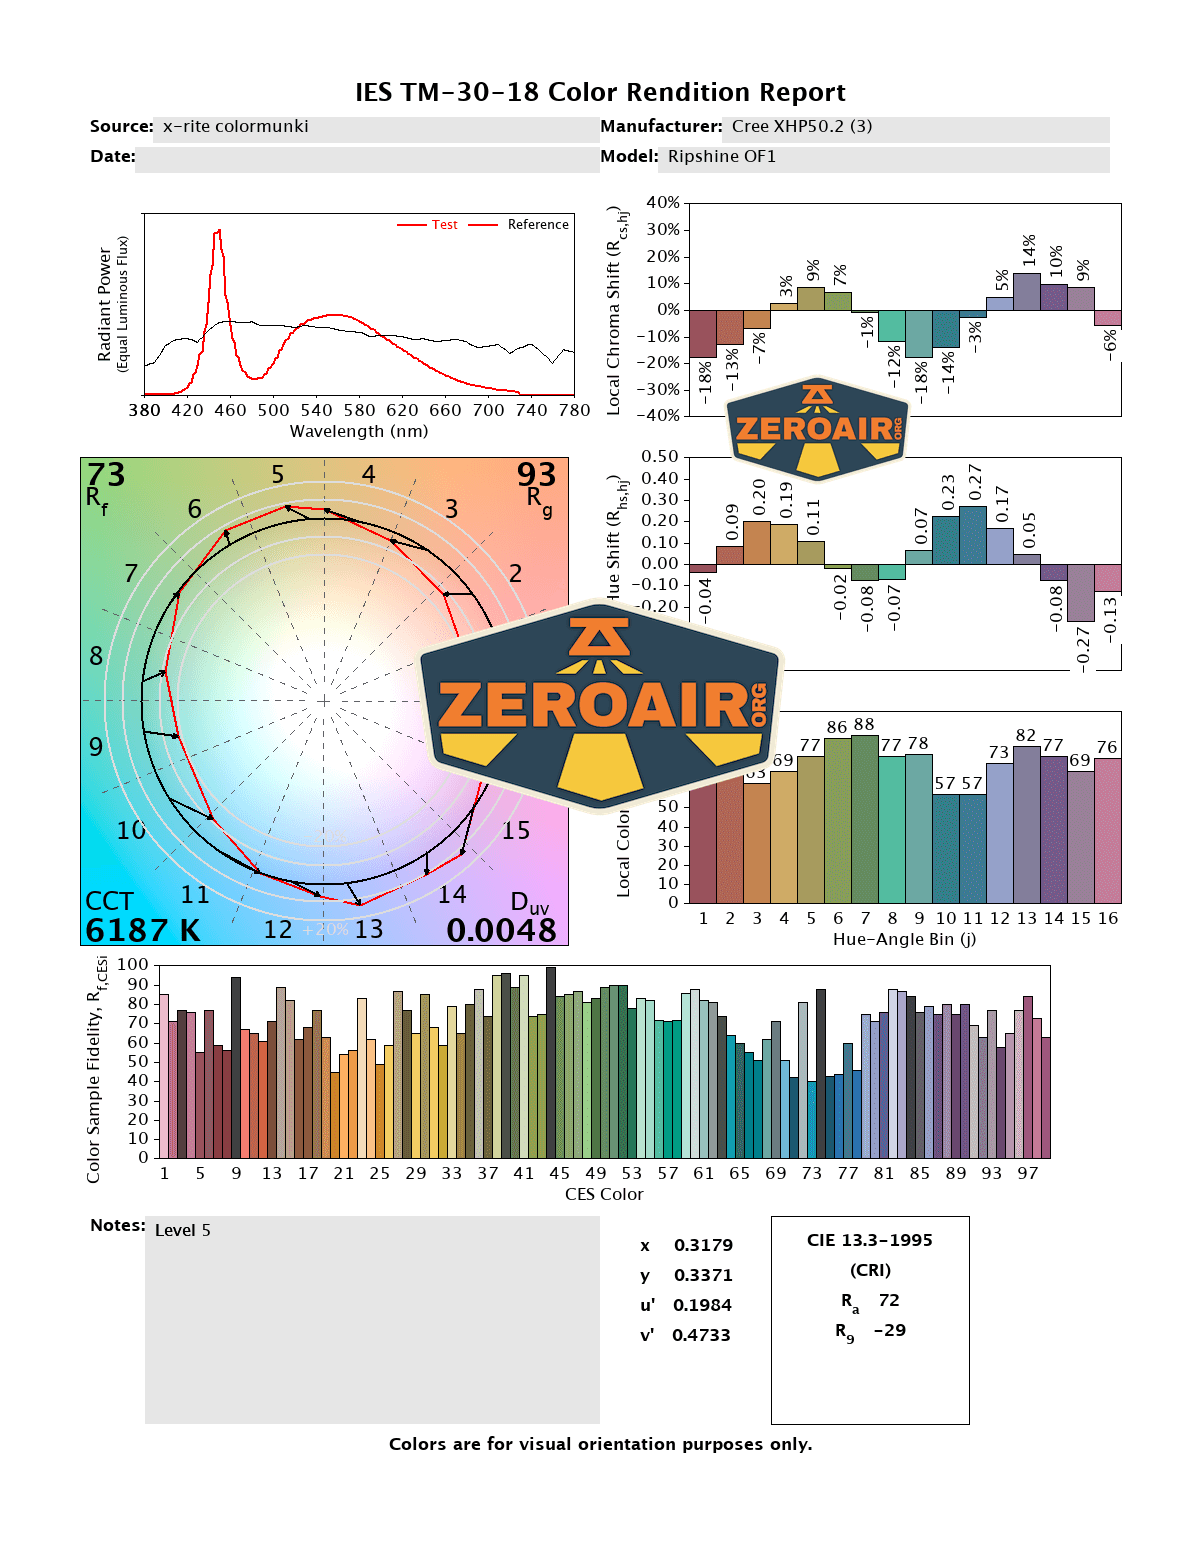
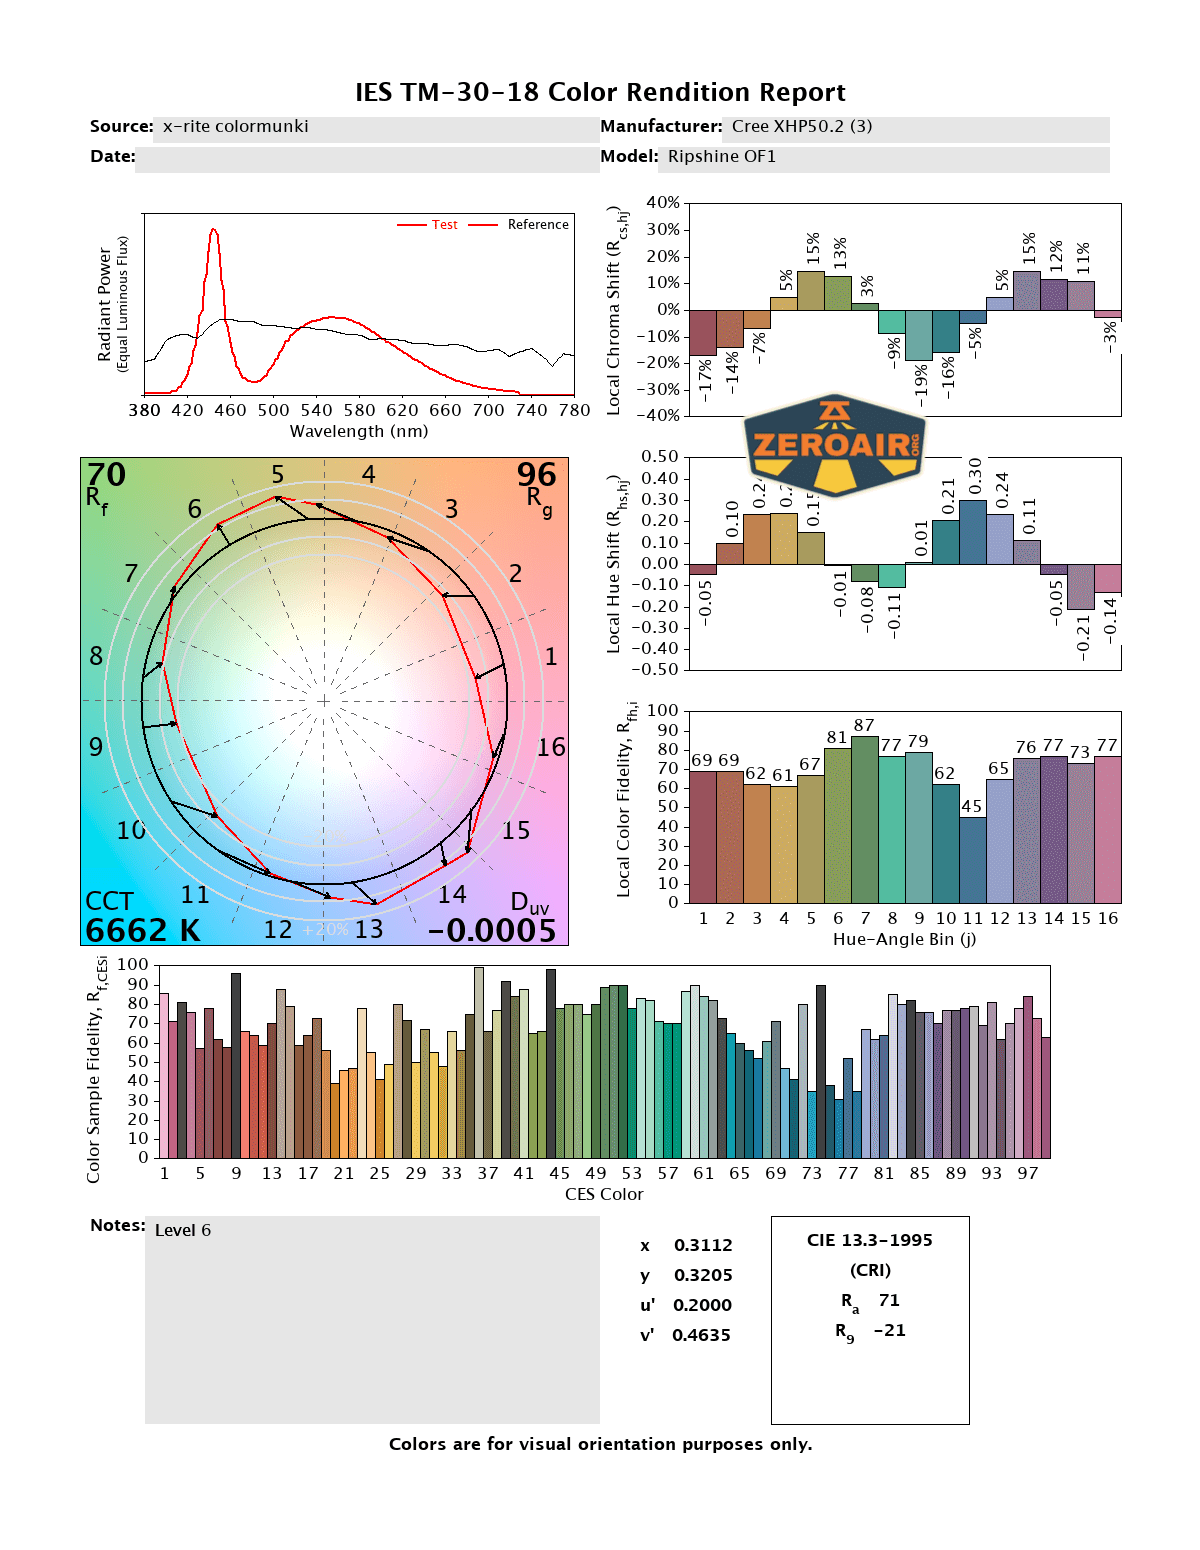
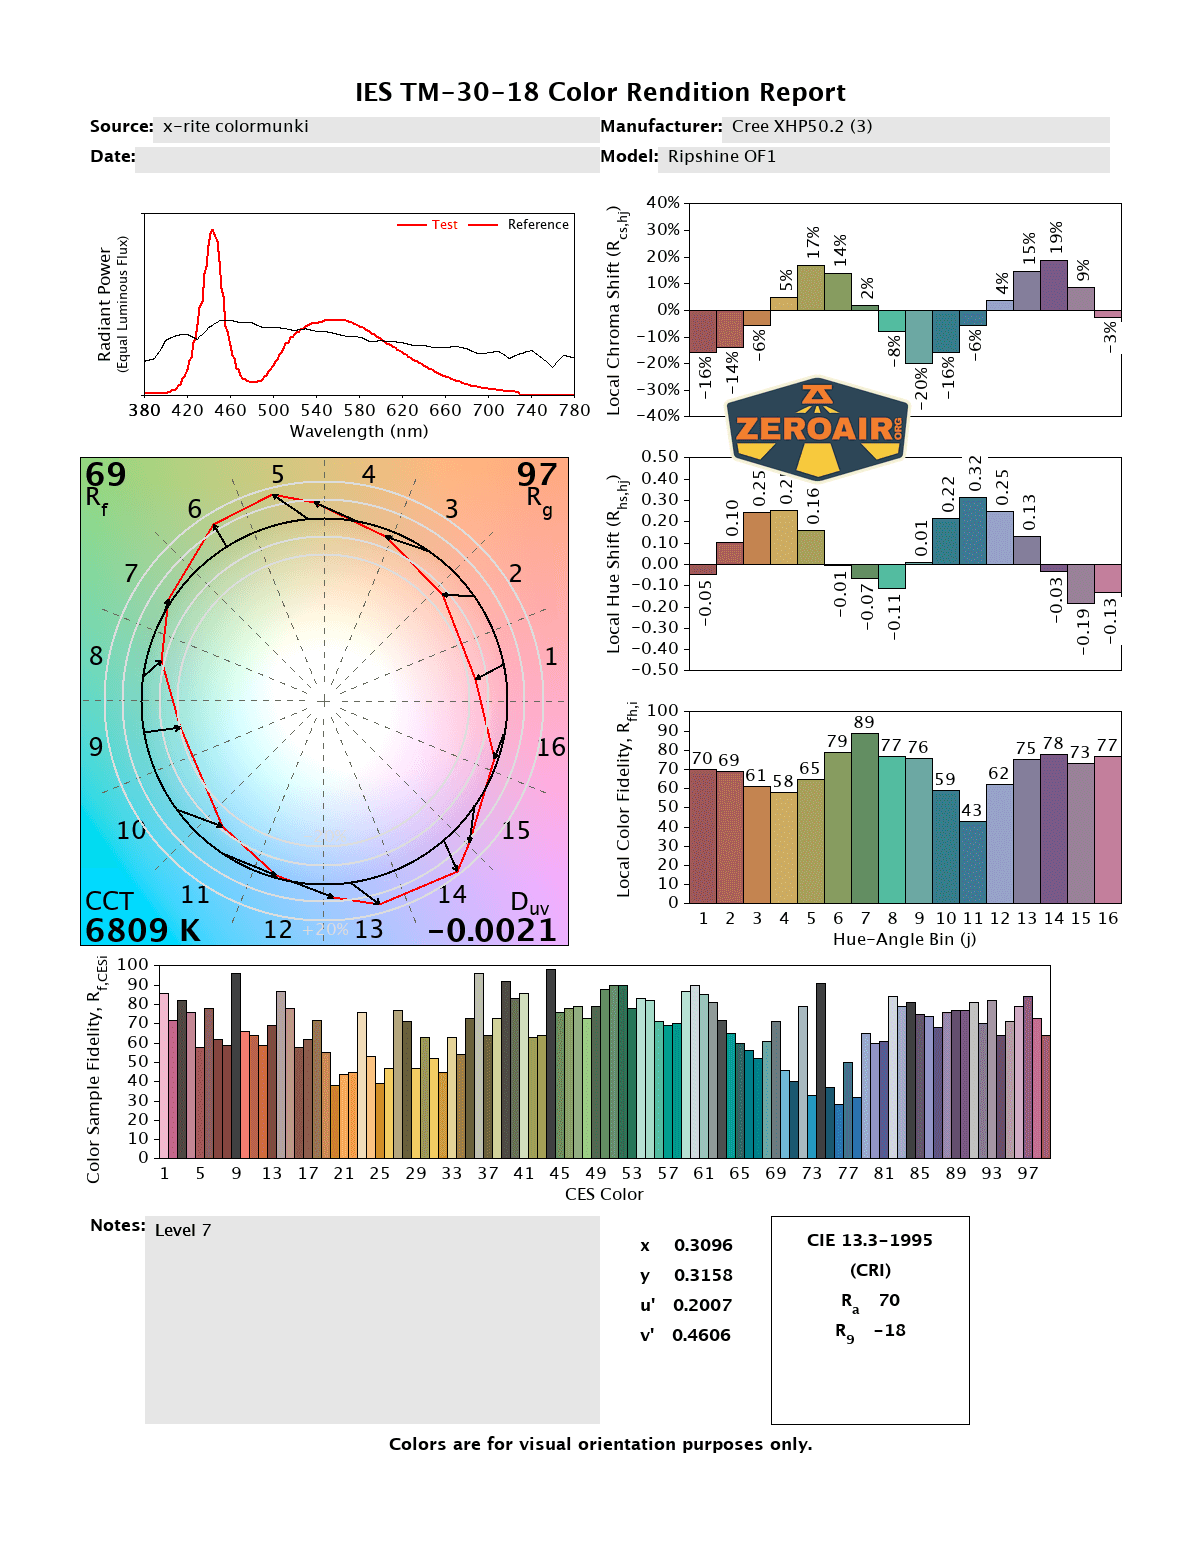
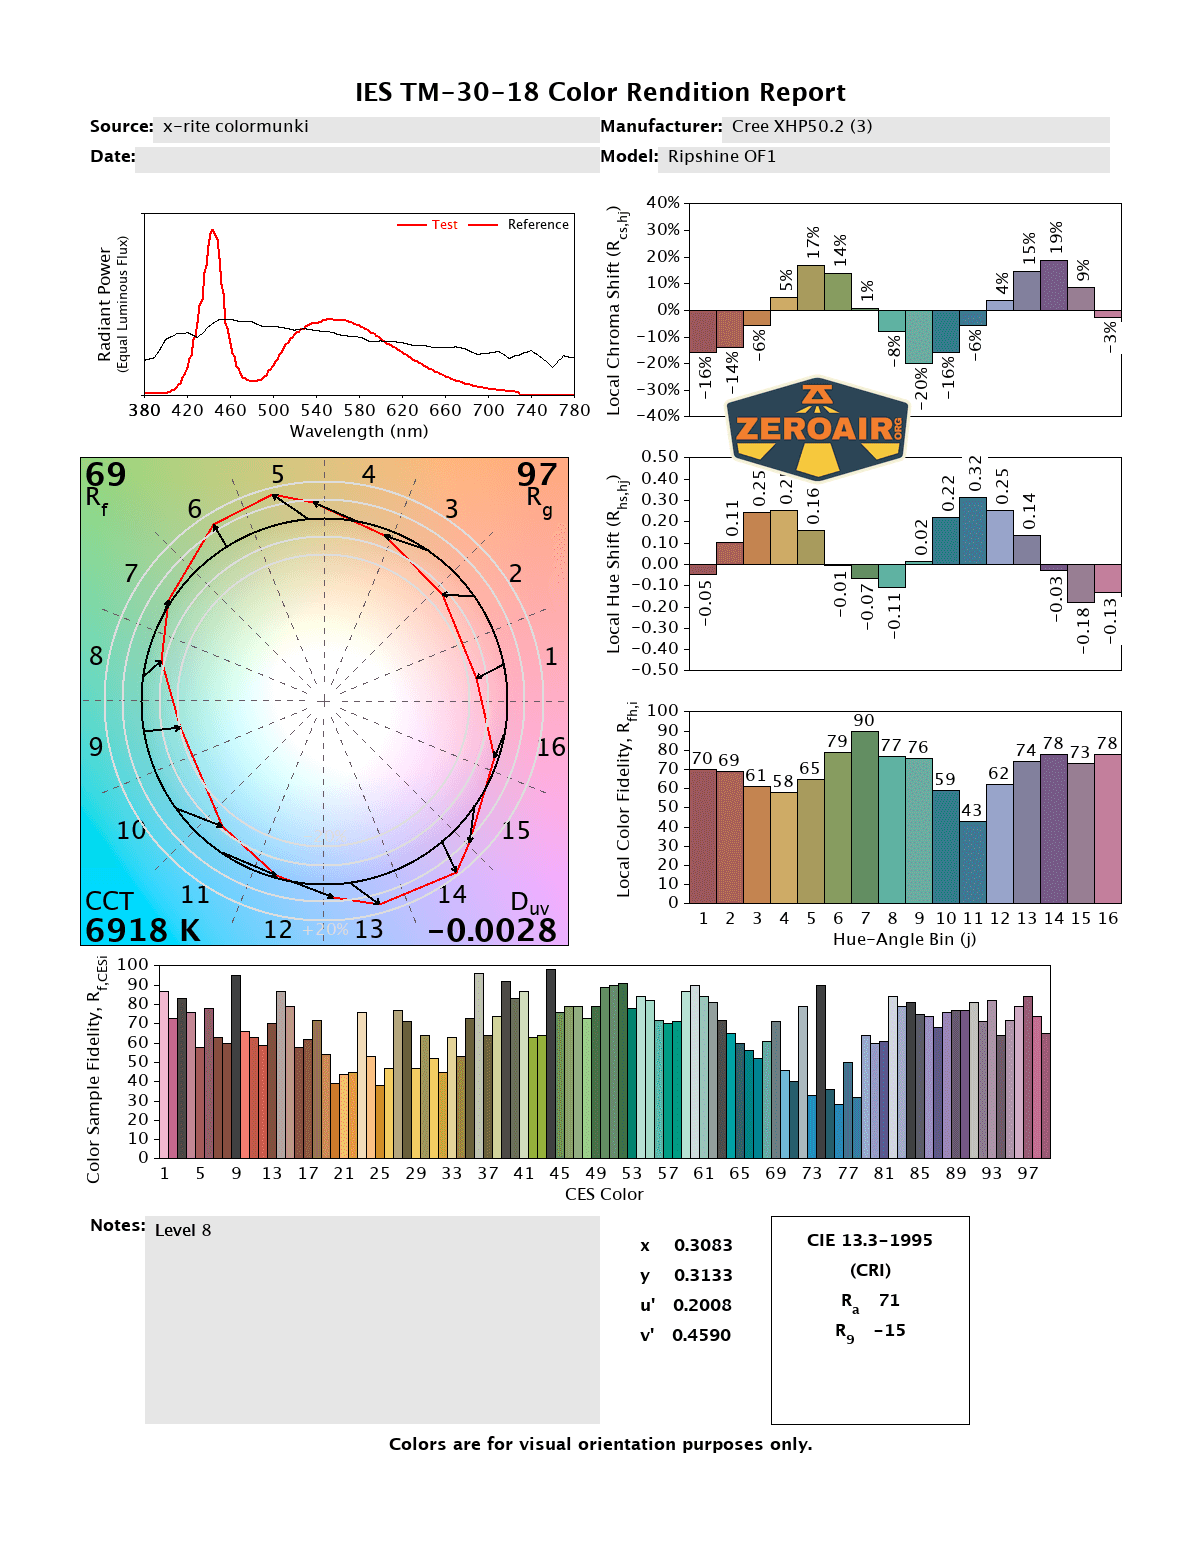

CCT (Correlated Color Temperature) refers to the measurement of the color appearance of light, expressed in Kelvins (K), which indicates whether the light is warm (yellowish) or cool (bluish). A lower CCT (below 3000K) is considered warm light, while a higher CCT (above 5000K) gives cooler, bluish light.
CRI (Color Rendering Index) is a measure of how accurately a light source renders colors in comparison to natural sunlight. Scored on a scale from 0 to 100, higher CRI values indicate that colors appear more true to life and vibrant, similar to how they would look under the sun.
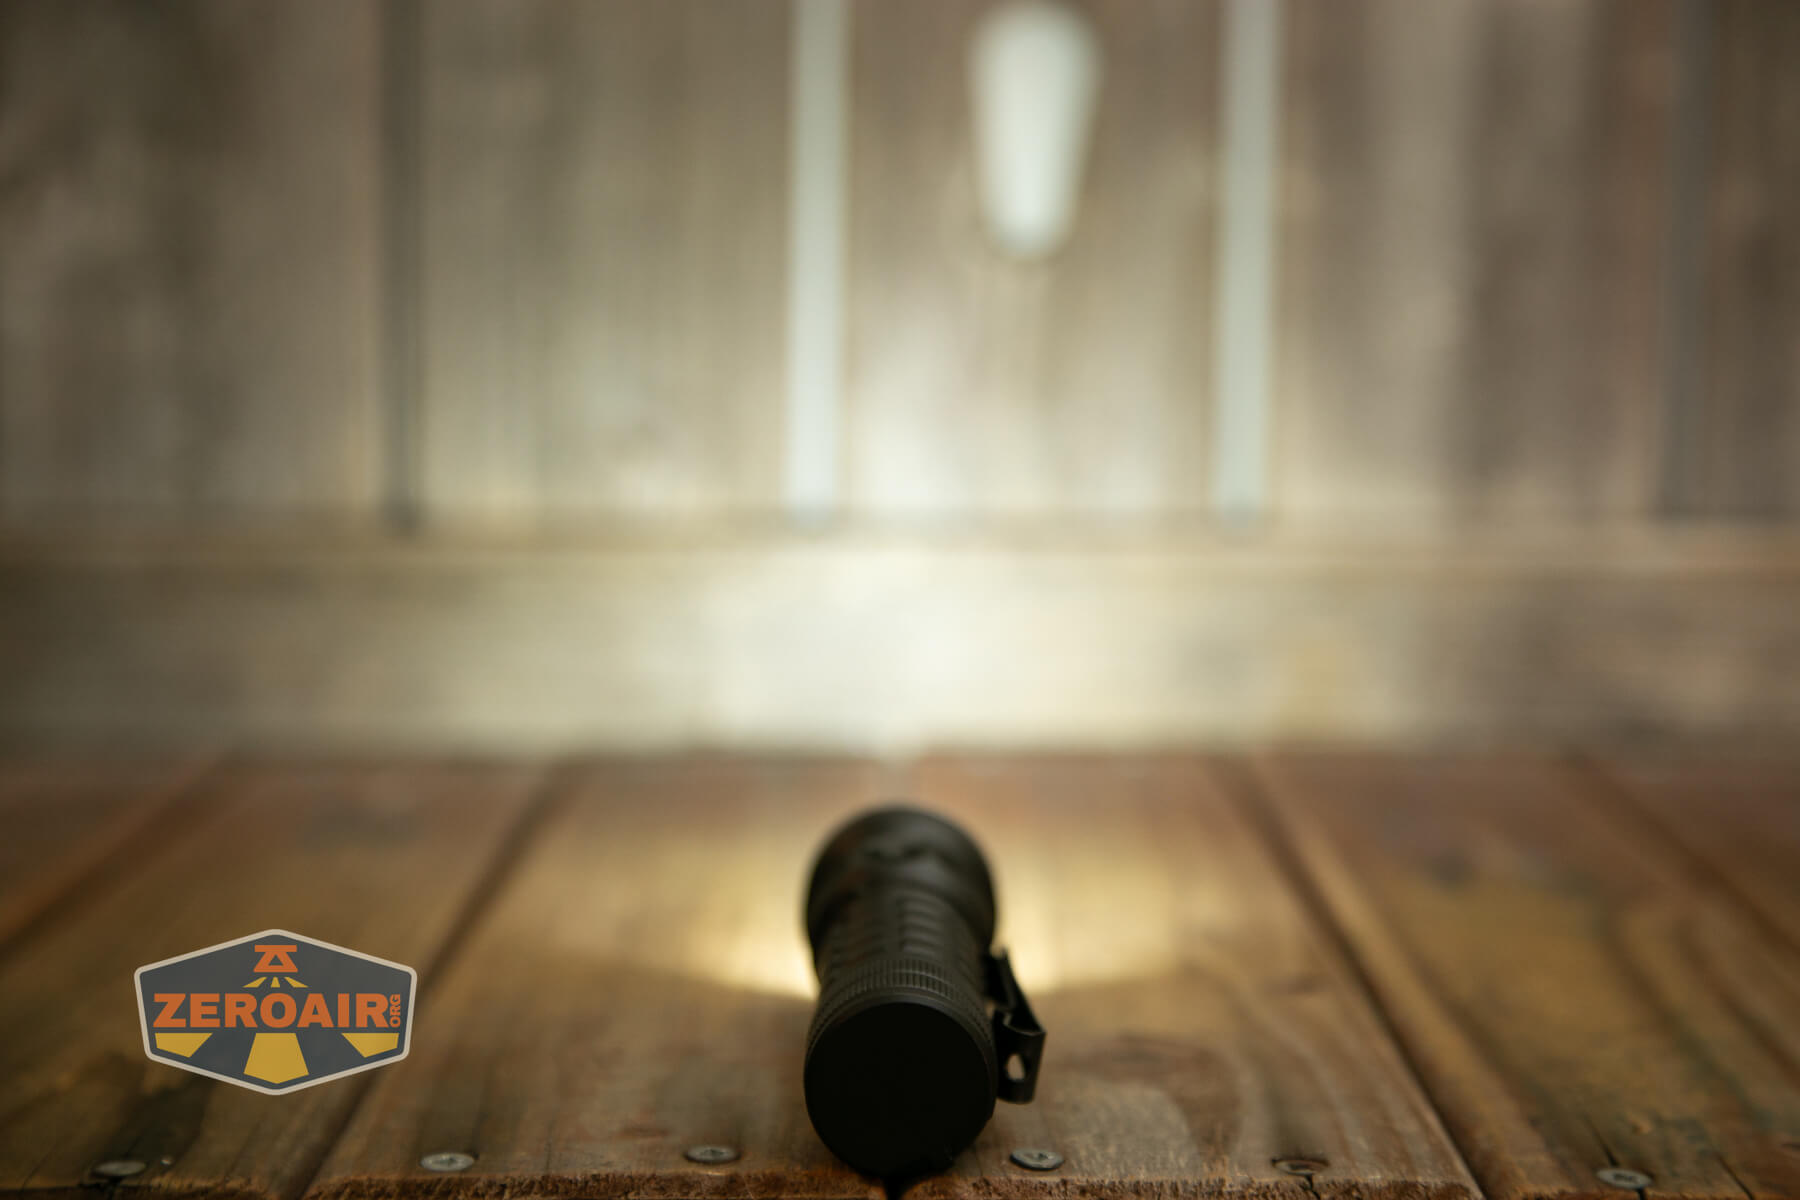
Beamshots
These beamshots always have the following settings: f8, ISO100, 0.3s shutter, and manual 5000K exposure. These photos are taken at floor level, and the beam hits the ceiling around 9 feet away.


Tint vs BLF-348 (KillzoneFlashlights.com 219b version) (affiliate link)
I keep the test flashlight on the left and the BLF-348 reference flashlight on the right. These photos are taken around 18 inches from the door.


I compare everything to the KillzoneFlashlights.com 219b BLF-348 because it’s inexpensive and has the best tint!
Summary and Conclusion
The Ripsshine OF1 flashlight offers a nice format (it’s a good size). Output is good (briefly) but cool white. The user interface should be familiar to most of us, and is quite programmable (as Andúril is). I don’t love the cool white emitters, and while it’s not a big deal to me, the inability to be flashed with new firmware might be a problem for some. The price isn’t bad at all, though!
The Big Table
| Ripshine OF1 Flashlight | |
|---|---|
| Emitter: | Cree XHP50.2 (3) |
| Price in USD at publication time: | $47.60 |
| Cell: | 1×21700 |
| Runtime Graphs | |
| LVP? | Yes |
| Switch Type: | E-switch |
| Quiescent Current (mA): | ? |
| On-Board Charging? | Yes |
| Charge Port Type: | Yes |
| Charge Graph | |
| Power off Charge Port | with cell: lowest 5 modes without cell and/or tailcap: lowest modes only |
| Claimed Lumens (lm) | 10000 |
| Measured Lumens (at 30s) | 1921 (19.2% of claim)^ |
| Candela per Lumen | 2.6 |
| Claimed Throw (m) | 302 |
| Candela (Calculated) in cd (at 30s) | 444lux @ 4.924m = 10765cd |
| Throw (Calculated) (m) | 207.5 (68.7% of claim)^ |
| Claimed CCT | – |
| Measured CCT Range (K) | 6100-6900 Kelvin |
| Item provided for review by: | Flashlightgo.com |
| All my Ripshine reviews! | |
^ Measurement disclaimer: Testing flashlights is my hobby. I use hobbyist-level equipment for testing, including some I made myself. Try not to get buried in the details of manufacturer specifications versus measurements recorded here; A certain amount of difference (say, 10 or 15%) is perfectly reasonable.
What I like
- Low price
- Includes cell
- Familiar user interface (Andúril)
- Overall design (specifically toothy bezel!)
- Frag pattern makes for great grip
What I don’t like
- Cool white
- Old Andúril version
- Big stepdowns on highest few modes
- Low CRI
Notes
- This content originally appeared at zeroair.org. Please visit there for the best experience!
- Please use my Amazon.com referral link to help support zeroair.org!
- Please support me on Patreon! I deeply appreciate your support!