
Wuben A1 Spotlight Review
Wuben has introduced the Wuben A1 Spotlight, a spotlight that’s an absolute beast. This light throws over 2500 meters and claims 20,000 lumens! Read on!
Official Specs and Features
Here’s a link to the Wuben A1 spotlight product page.
Versions
There’s only one version of the Wuben A1 spotlight.
Price
Wuben has the A1 priced at $988.99. You might say that’s expensive, but I’d recommend viewing the post first. Buy yours now at wubelight.com!
However! Wuben was kind enough to give me a 20% off coupon… 20% off $988.99 is a massive discount! That brings the price down to around $792. Much more palatable than $988, even if 988 isn’t all that bad! Here’s the coupon:
wubena1
If that one doesn’t work, try this one for 20% off:
zeroair20
Short Review
I’ll jump right into the price concern – yes, $988.99 is a lot of money. This isn’t an EDC light though. In fact, Wuben bills it for use for search and rescue (SAR) on helicopters, ships, and from vehicles. It really throws and not just that, but it really throws a lot of light! Add to those facts that it can be used as powerbank too, and the price begins to seem more reasonable.
Long Review
The Big Table
| Wuben A1 Spotlight | |
|---|---|
| Emitter: | Luminus SBT90 (4) |
| Price in USD at publication time: | $988.99 at wubenlight.com (referral link) use this coupon for 20% off! wubena1or zeroair20 |
| Cell: | Internal (8×21700, likely soldered) |
| Runtime Graphs | |
| LVP? | Yes |
| Switch Type: | E-Switch |
| Quiescent Current (mA): | ? |
| On-Board Charging? | Yes |
| Charge Port Type: | Barrel Plug (19V) |
| Power off Charge Port | |
| Claimed Lumens (lm) | 20000 |
| Measured Lumens (at 30s) | 14064 (see notes below in the Power section) |
| Candela per Lumen | 70.5 |
| Claimed Throw (m) | 2500 |
| Candela (Calculated) in cd (at 30s) | 29800lux @ 7.413m = 1637587cd |
| Throw (Calculated) (m) | 2559.4 (102.4% of claim)^ |
| Claimed CCT | – |
| Measured CCT Range (K) | 5100-5300 Kelvin |
| Item provided for review by: | Wuben |
| All my Wuben reviews! | |
^ Measurement disclaimer: Testing flashlights is my hobby. I use hobbyist-level equipment for testing, including some I made myself. Try not to get buried in the details of manufacturer specifications versus measurements recorded here; A certain amount of difference (say, 10 or 15%) is perfectly reasonable.
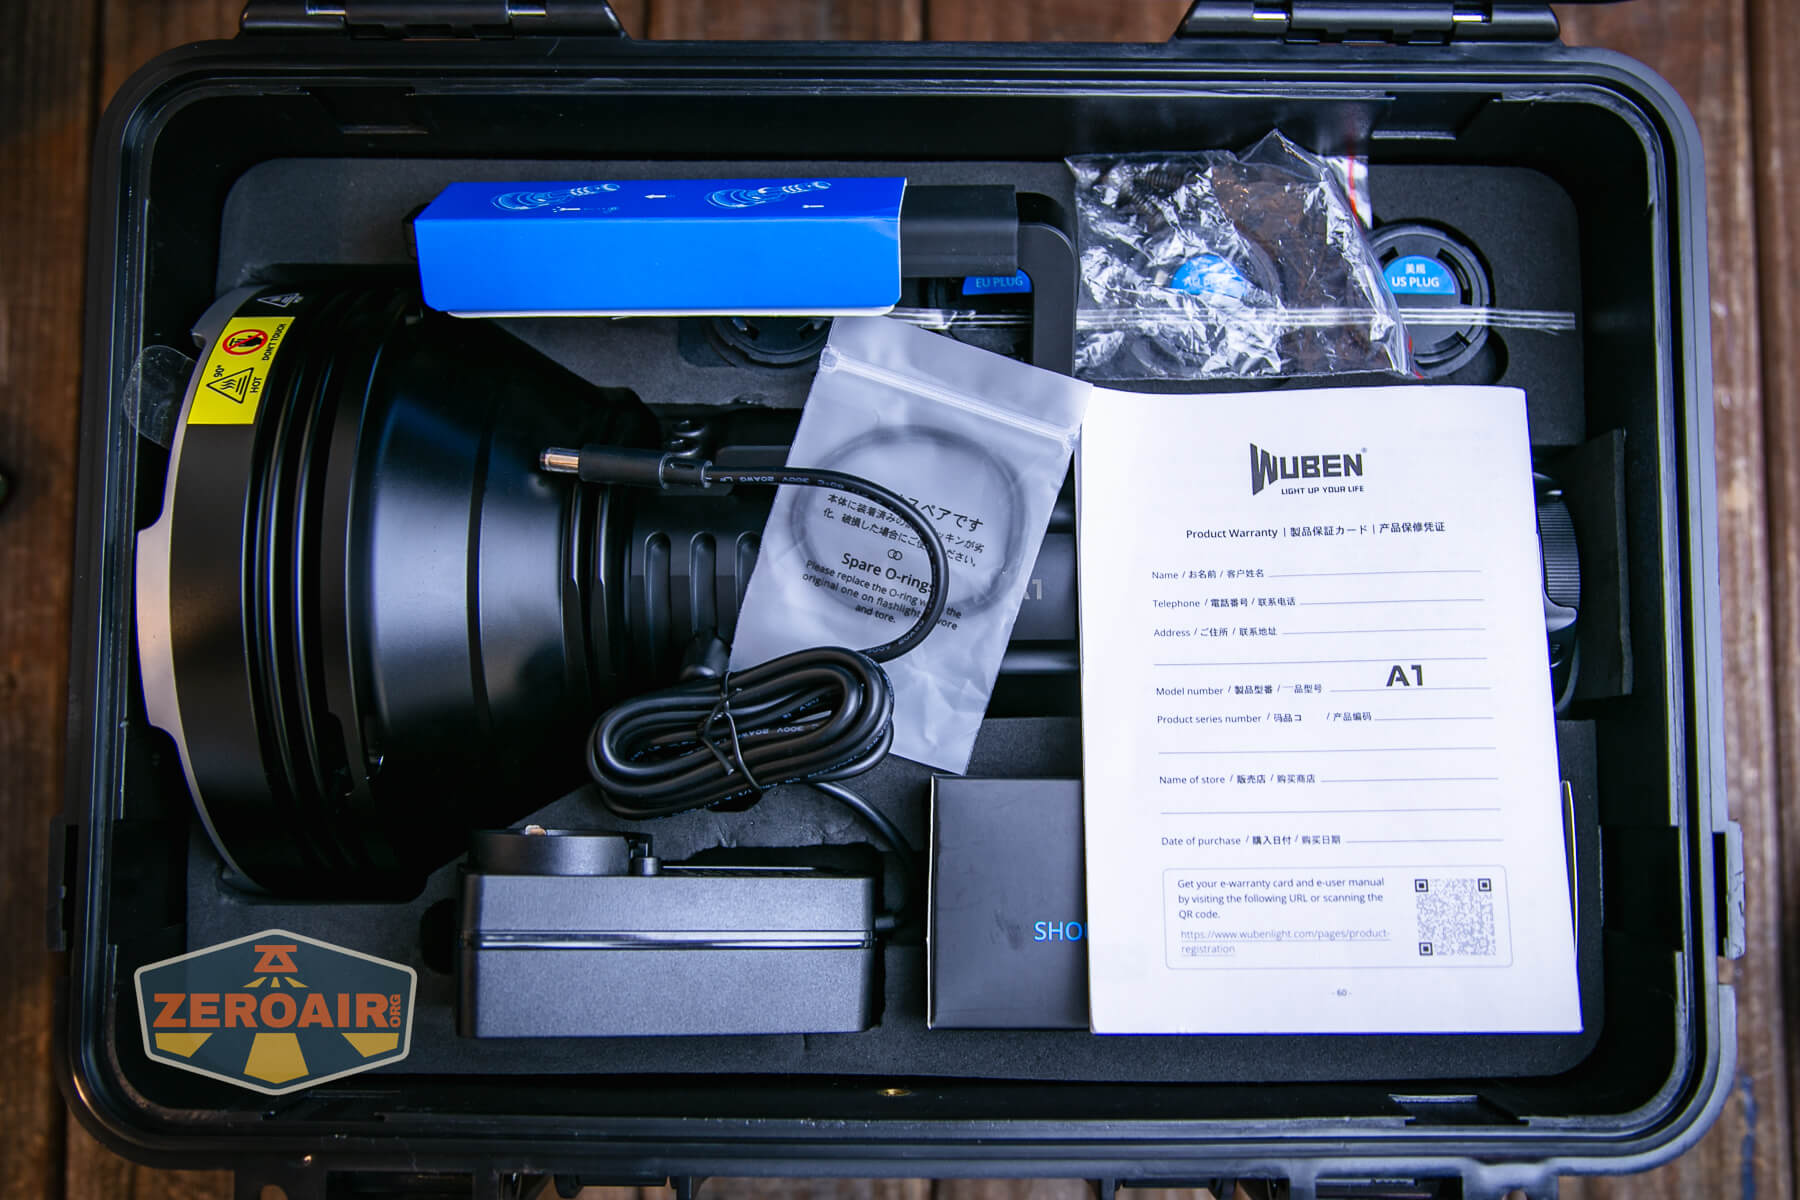
What’s Included

- Wuben A1 Spotlight
- Remote control
- Shoulder strap
- Wall wart with four location-specific adapters
- Spare o-rings (2)
- Spare screws for the handle mount
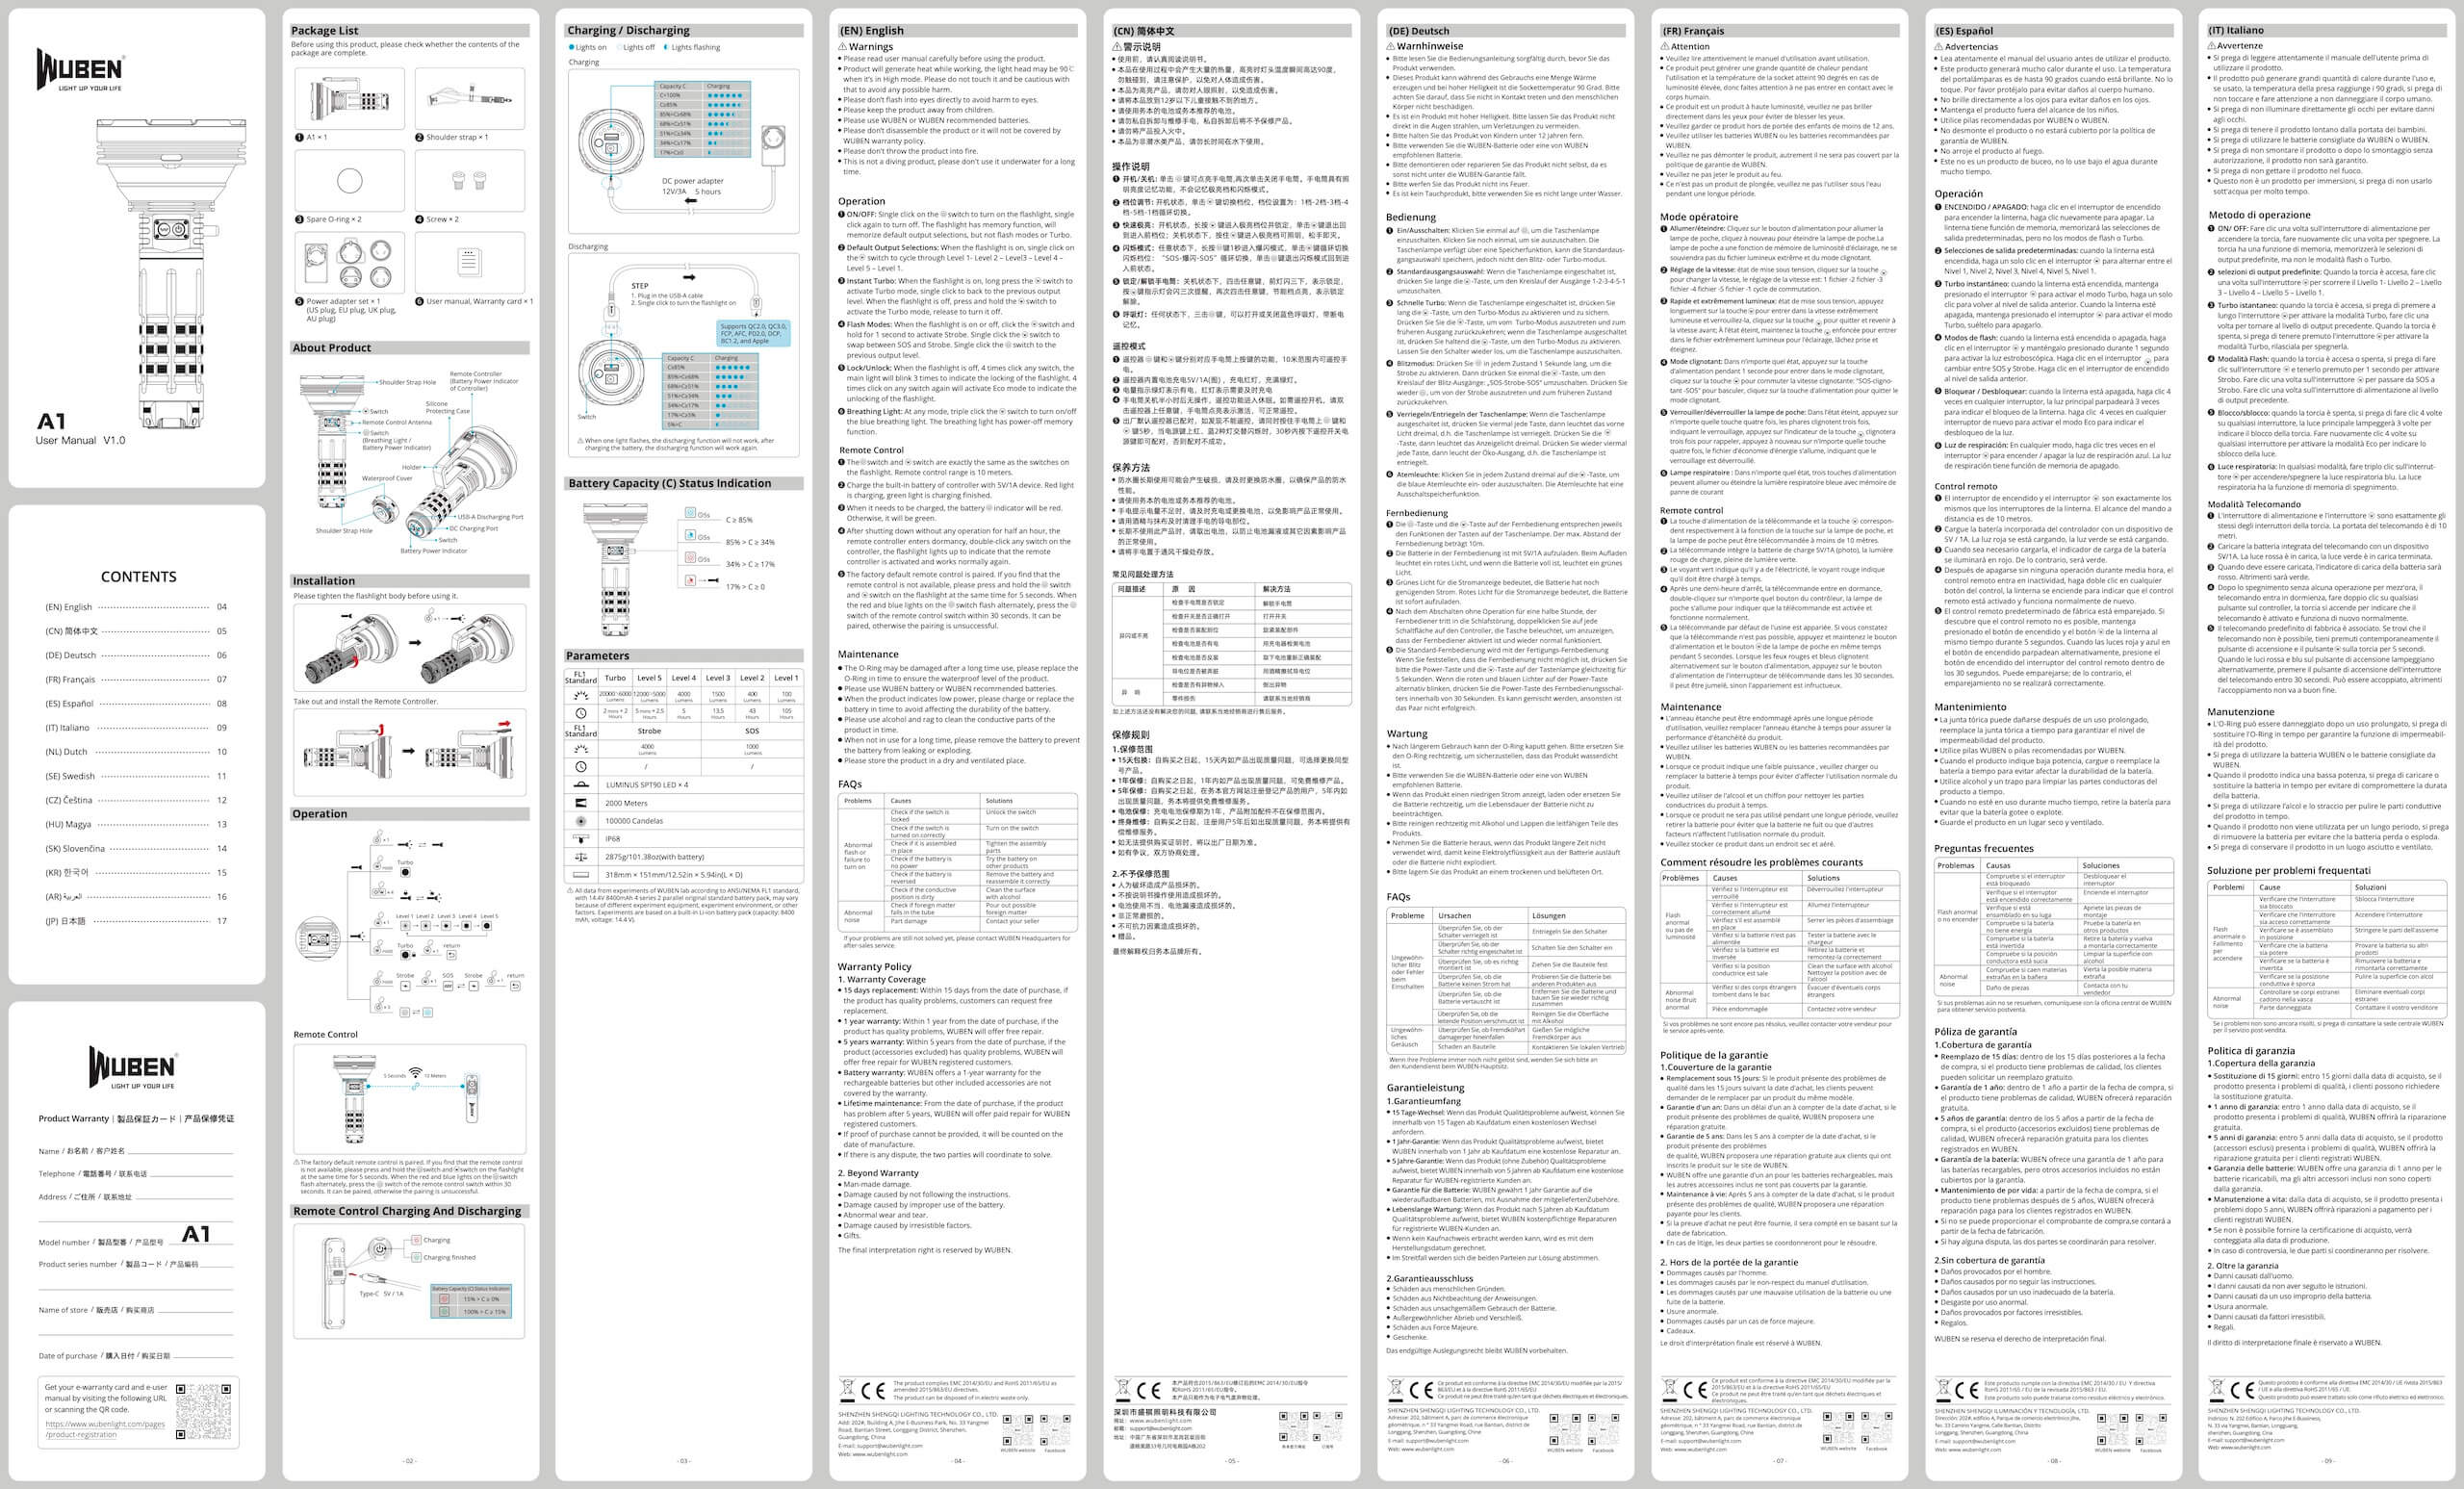
- Manual
Package and Manual


Build Quality and Disassembly

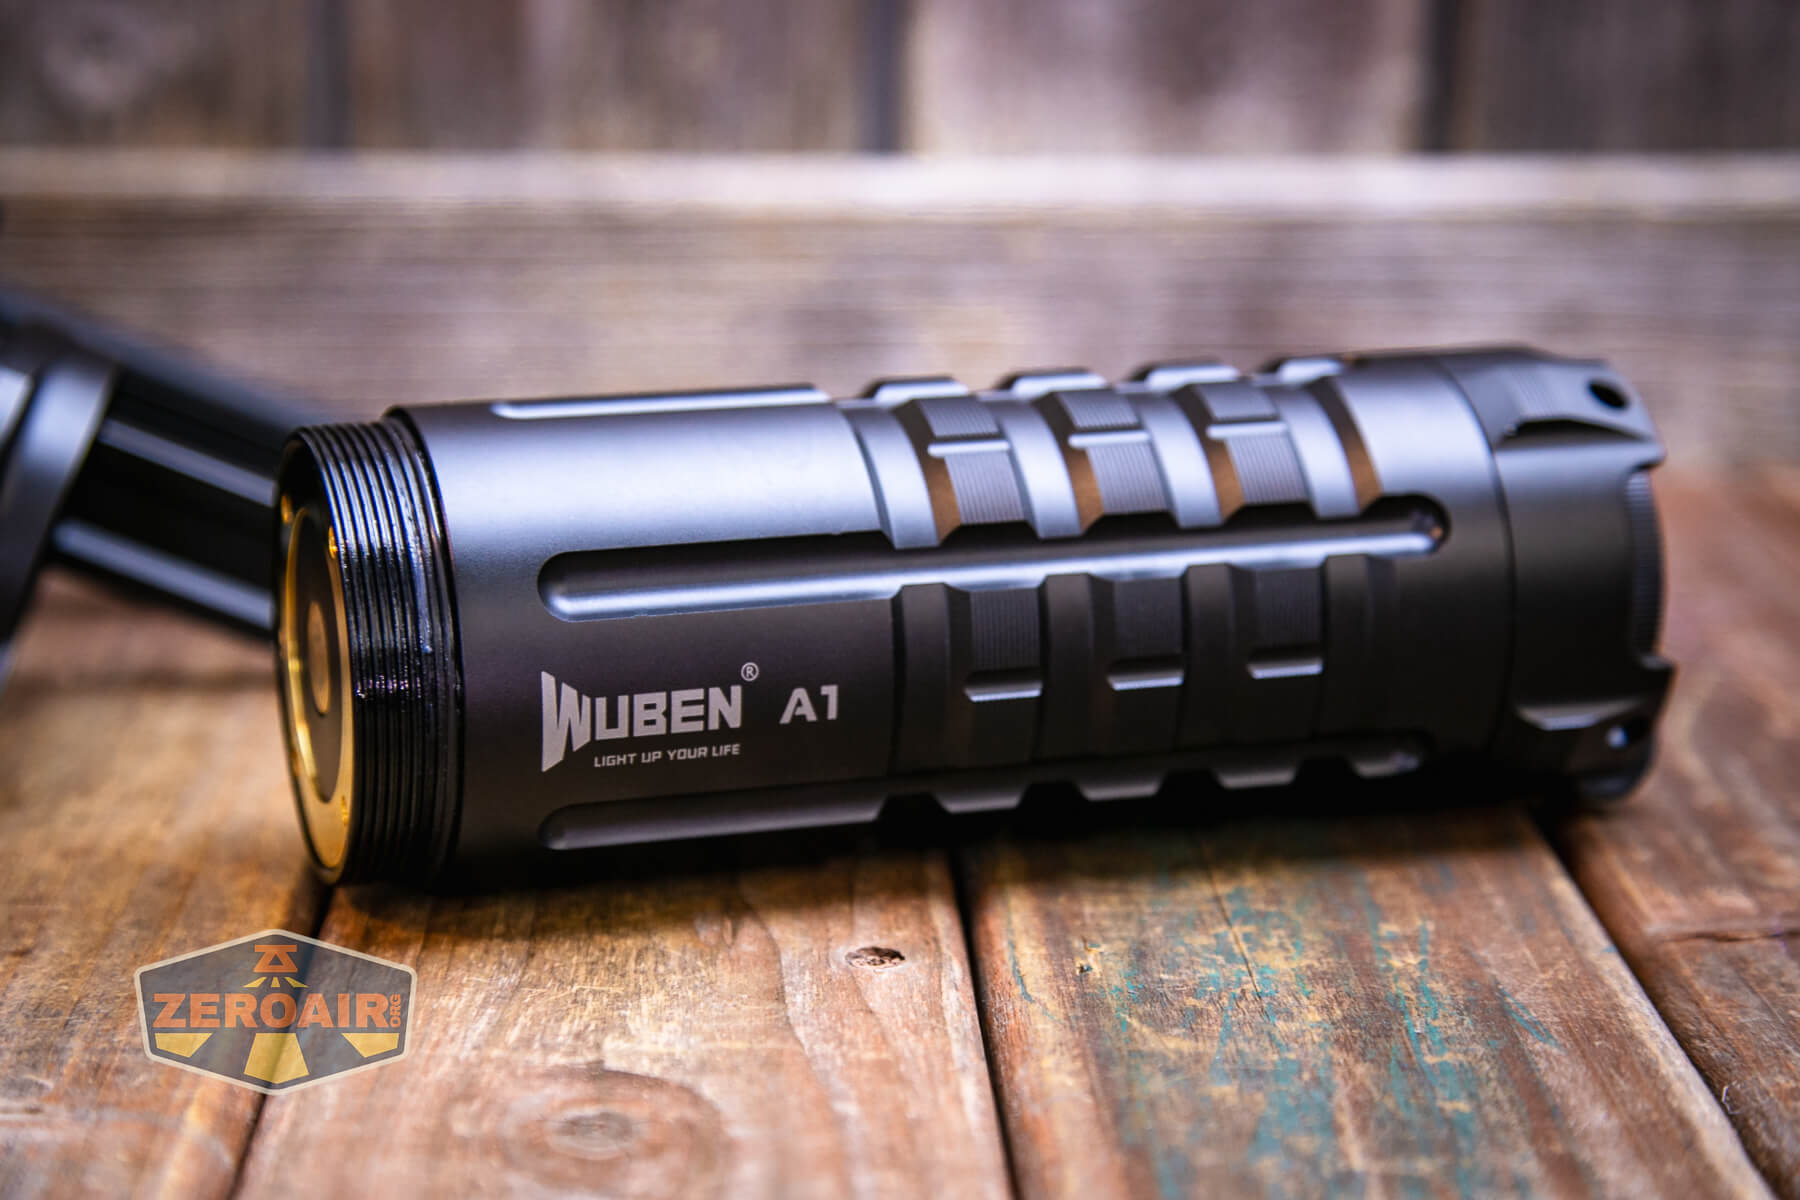
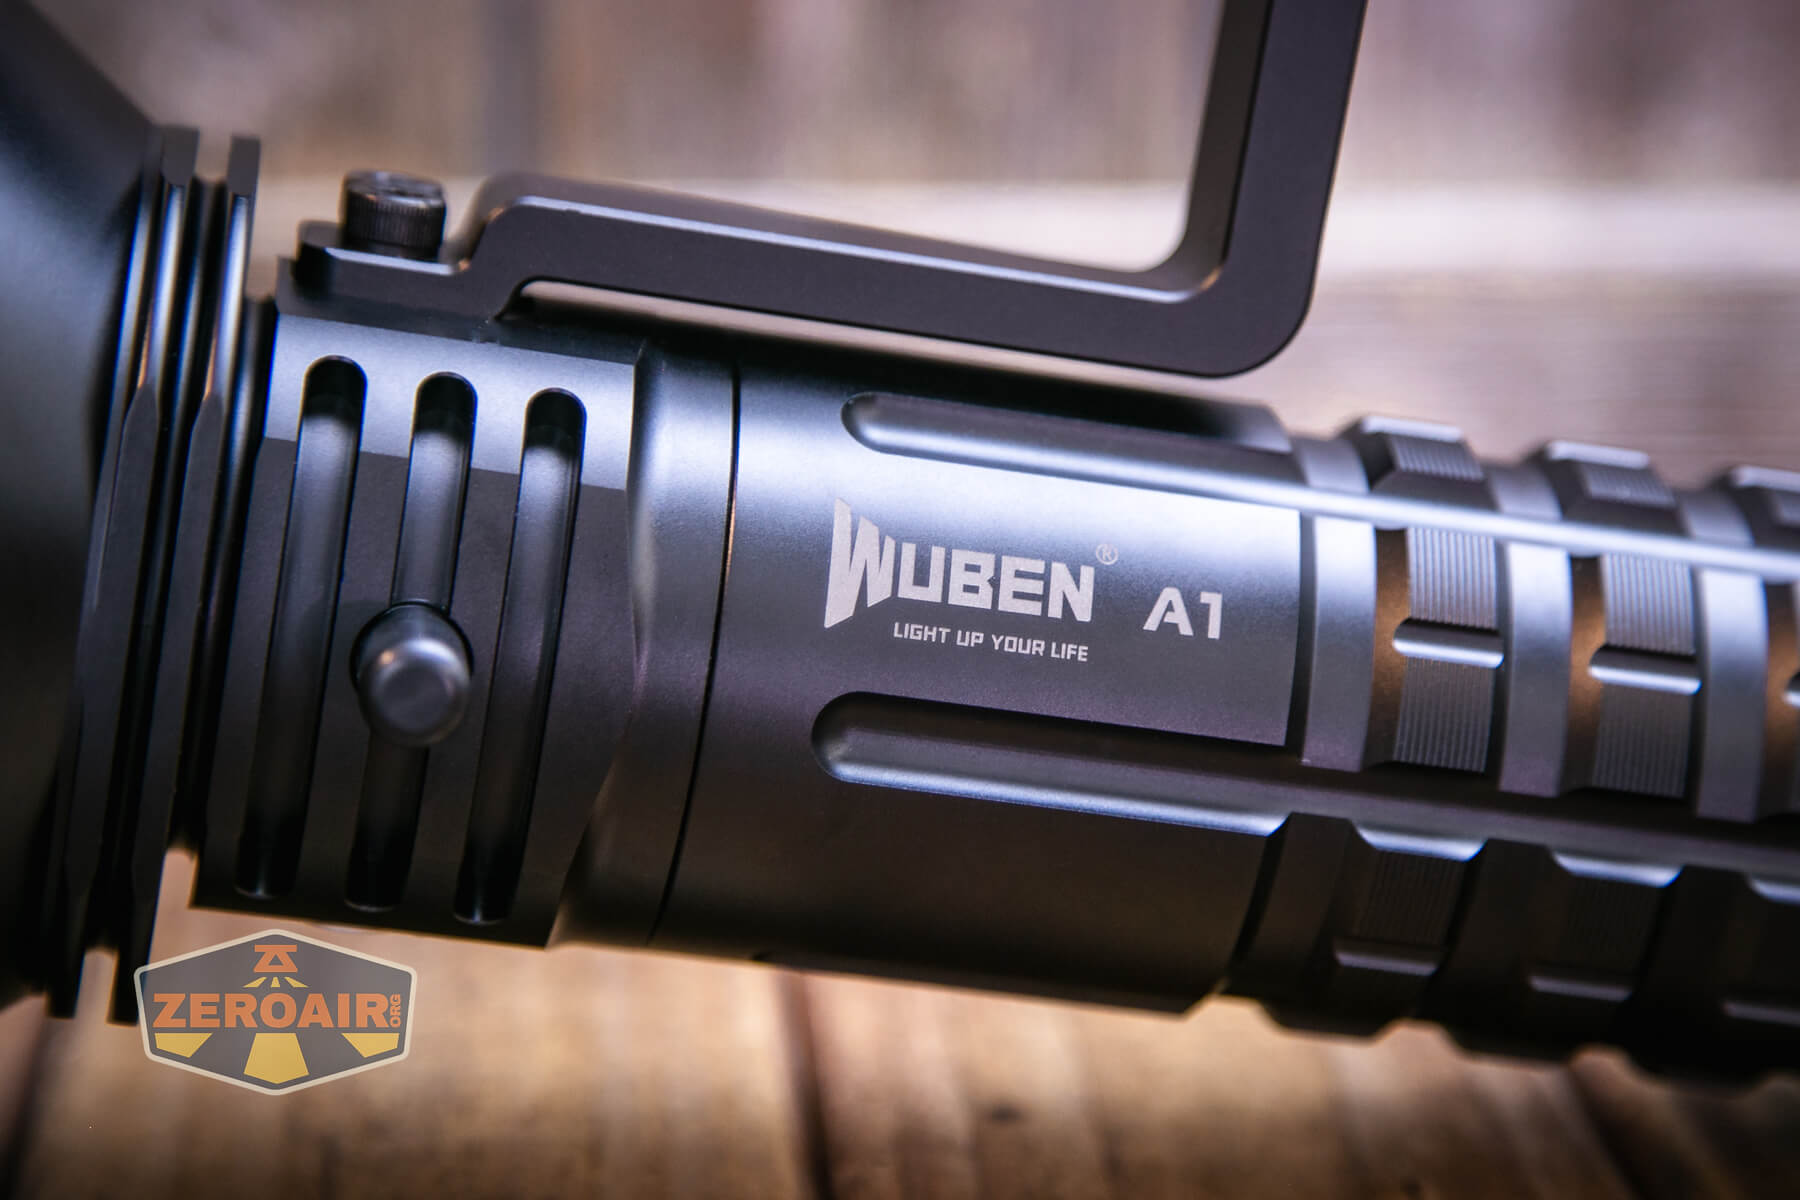
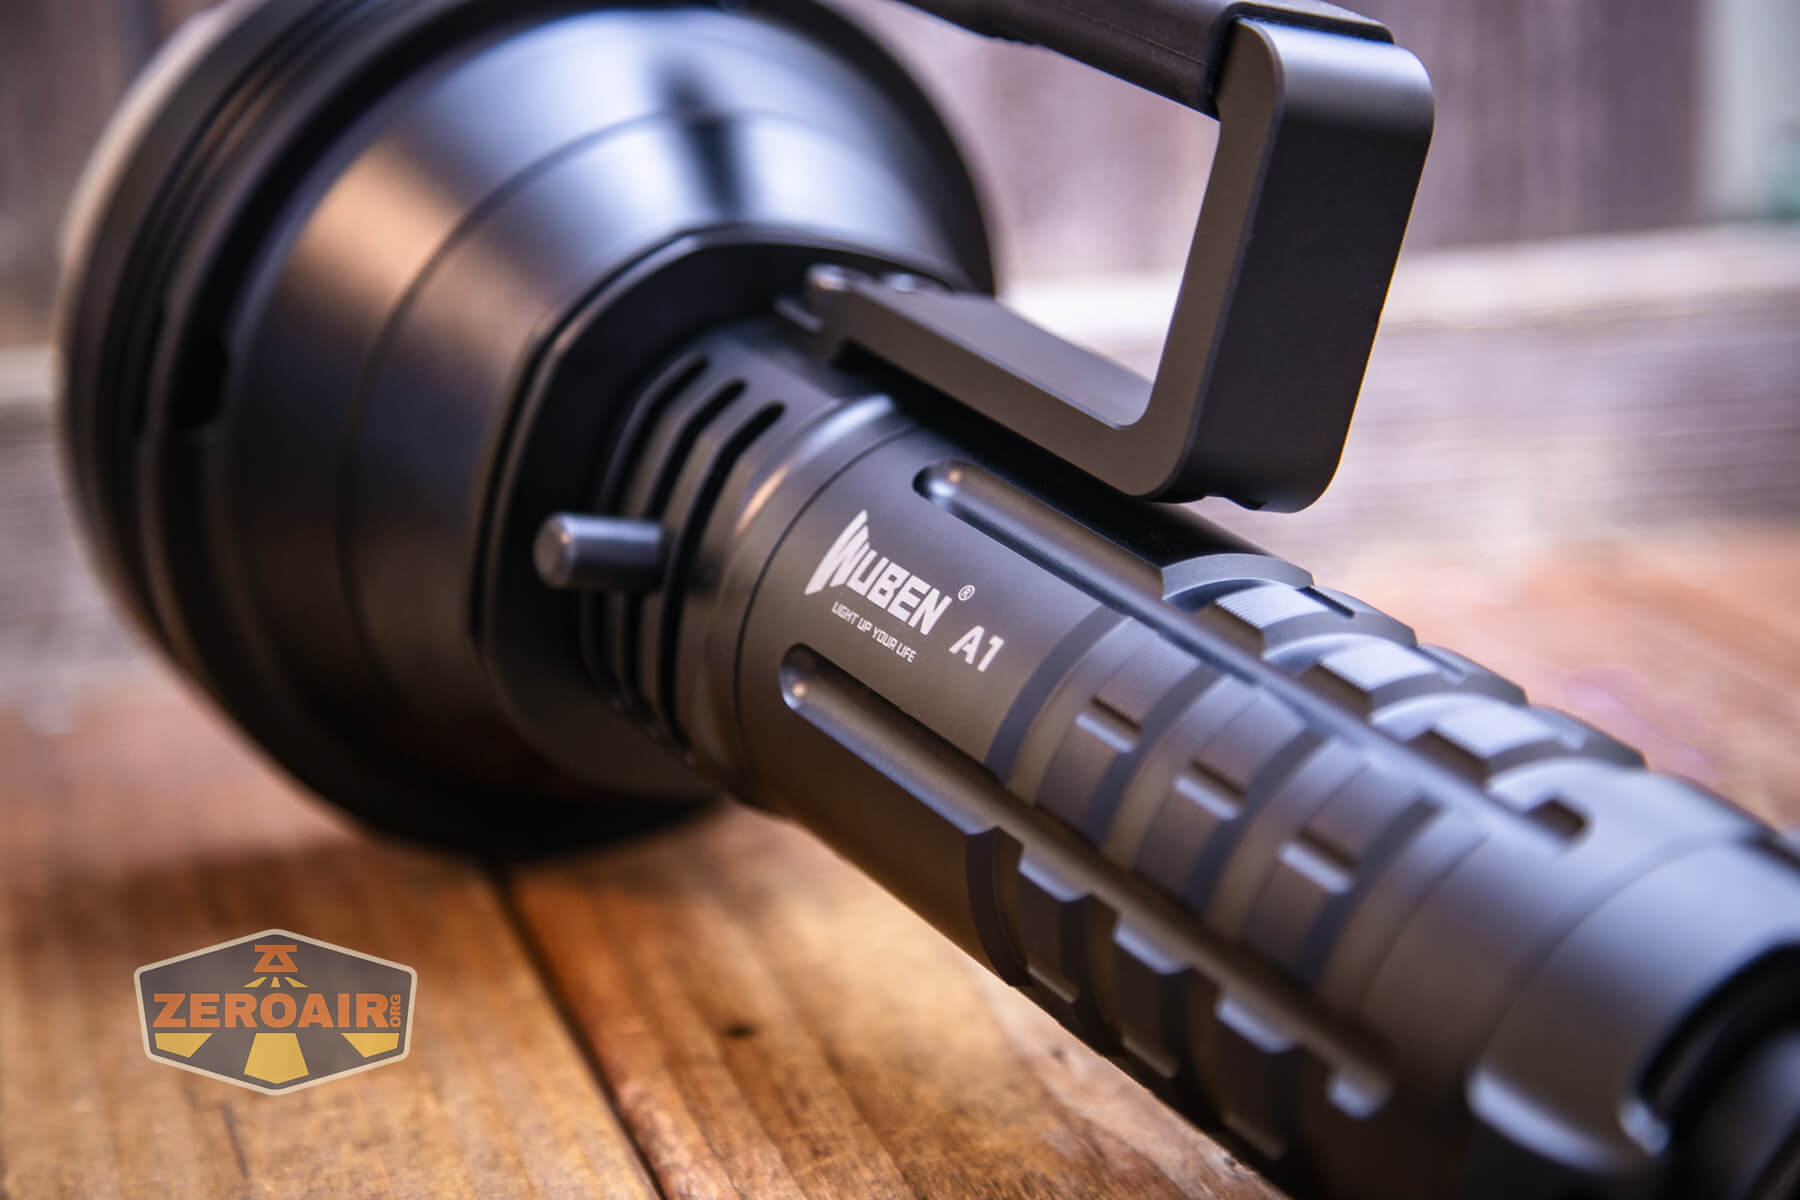
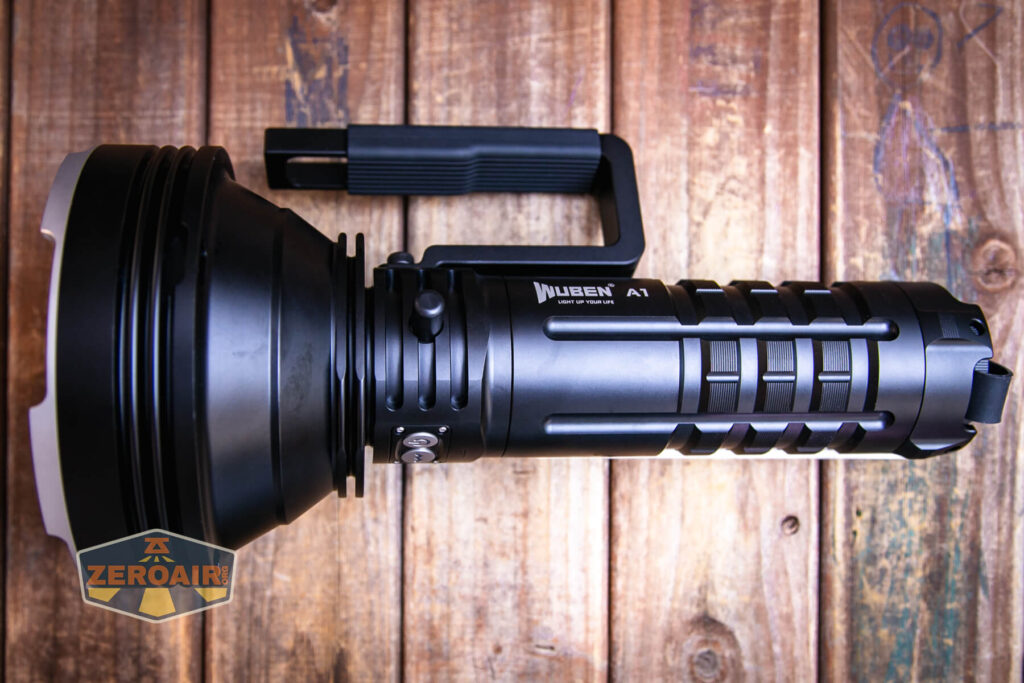
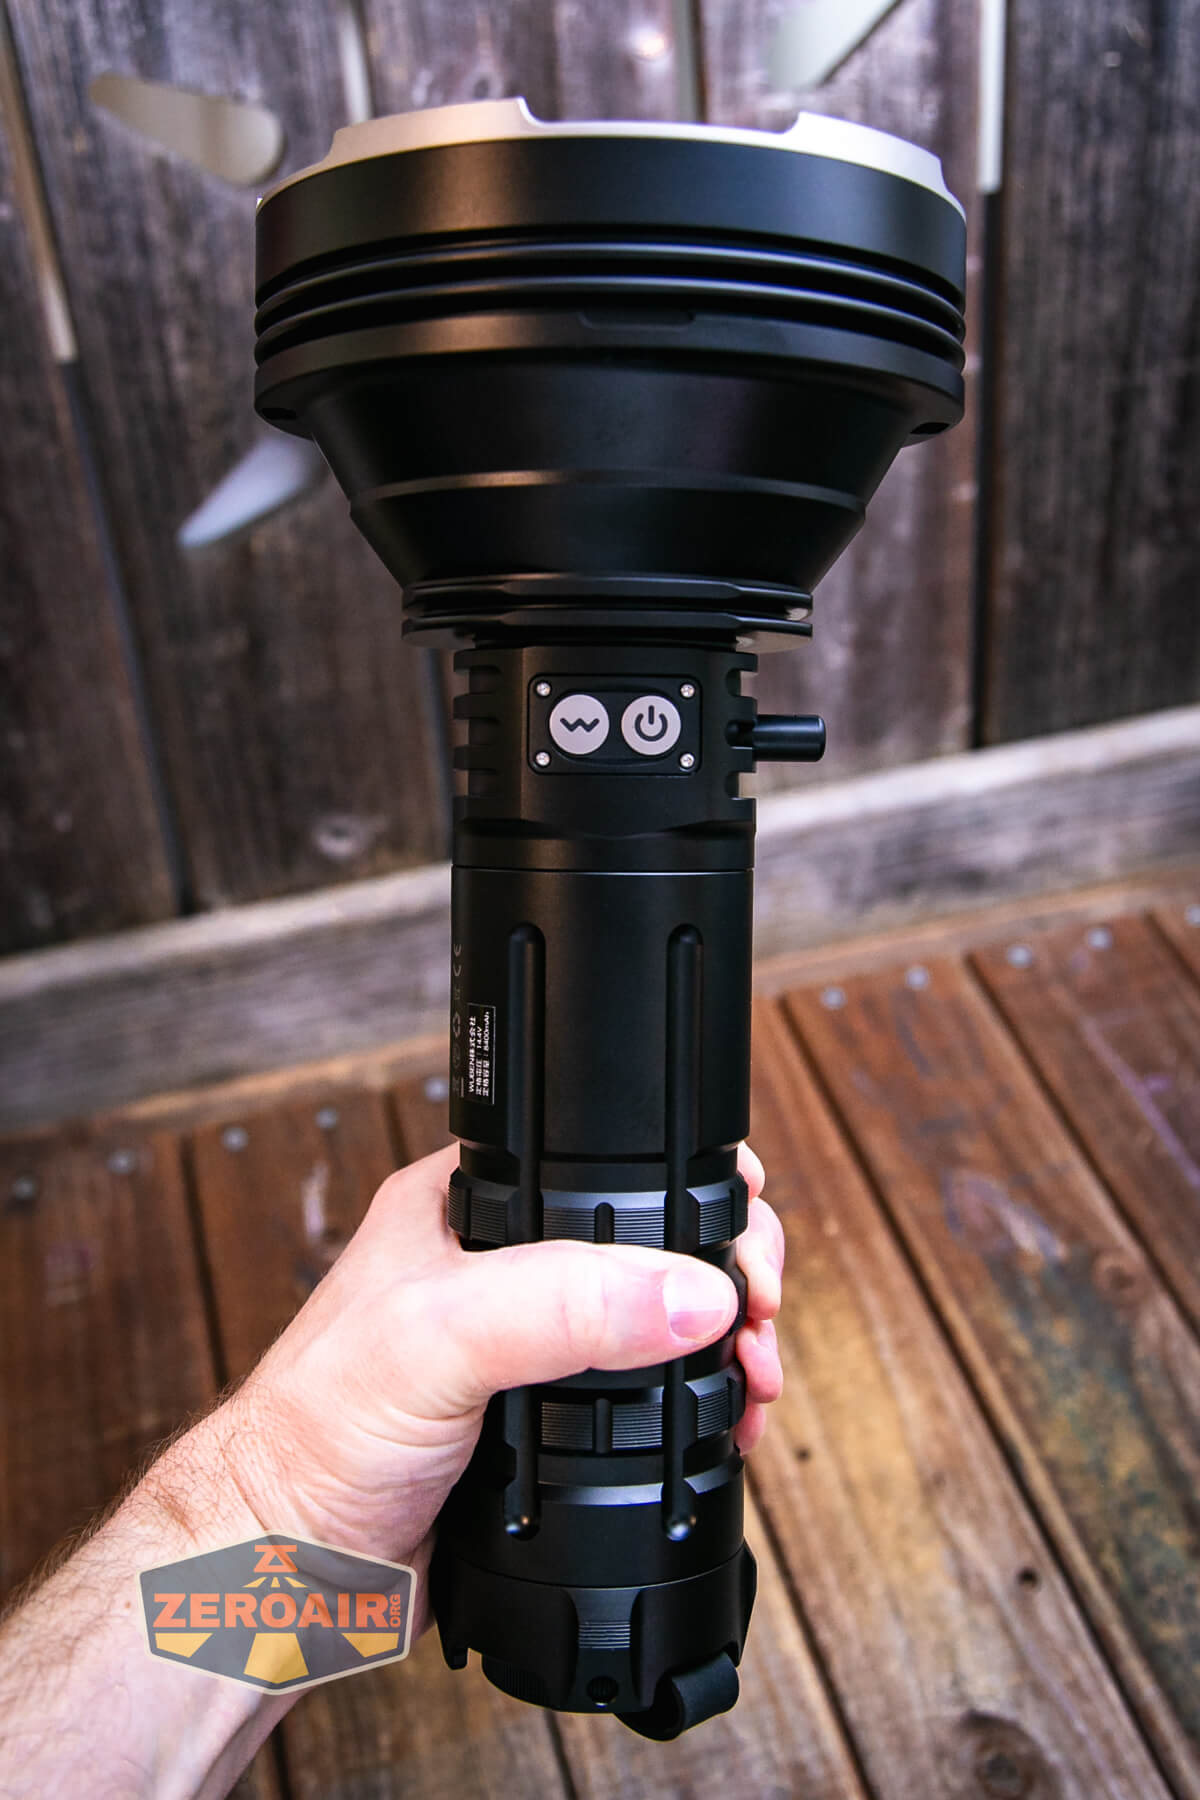
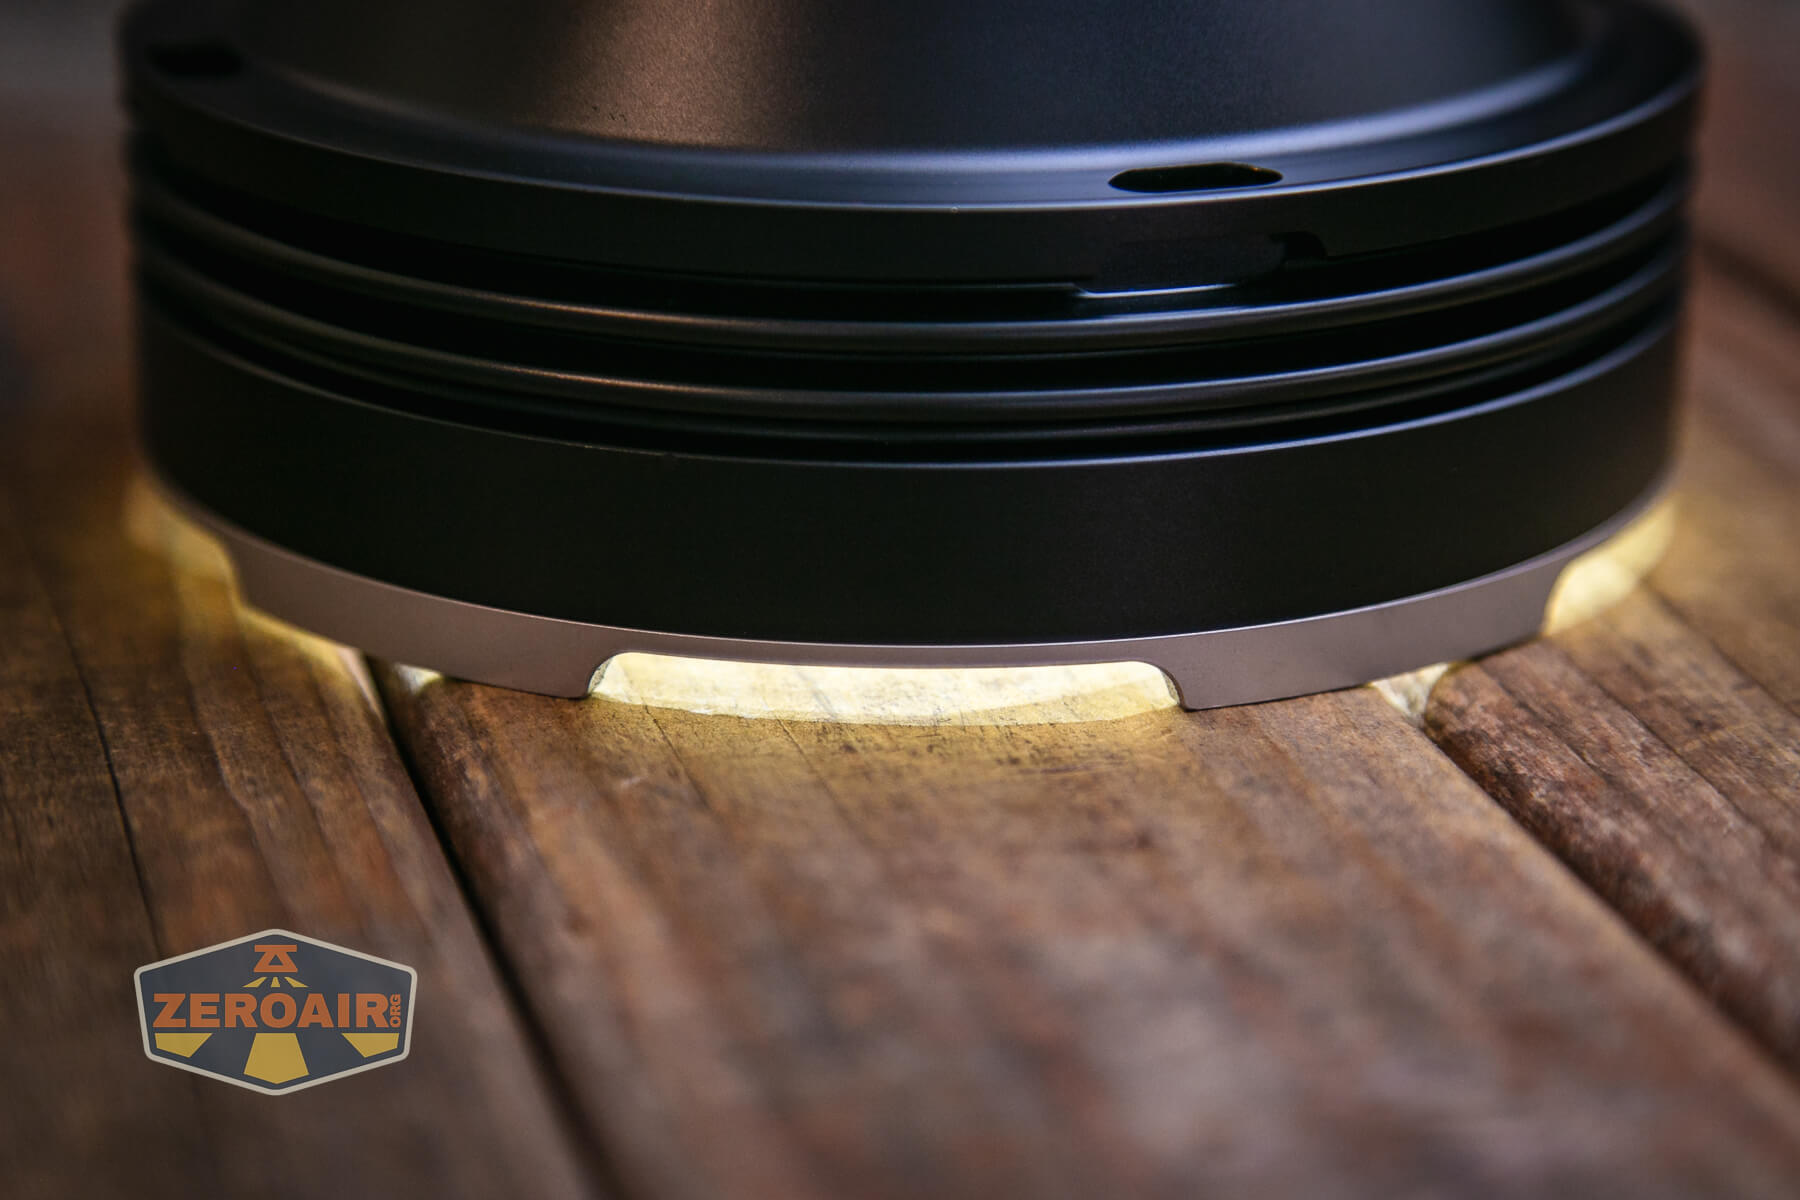
The Wuben A1 spotlight is remarkably large. (More on that later, relevant to the Power section.) It’s heavy and large, but there’s a point to all that – it throws!! The build quality is great though. For example, the handle is very secure, plenty grippy, and also well balanced. It’s a very nice setup.


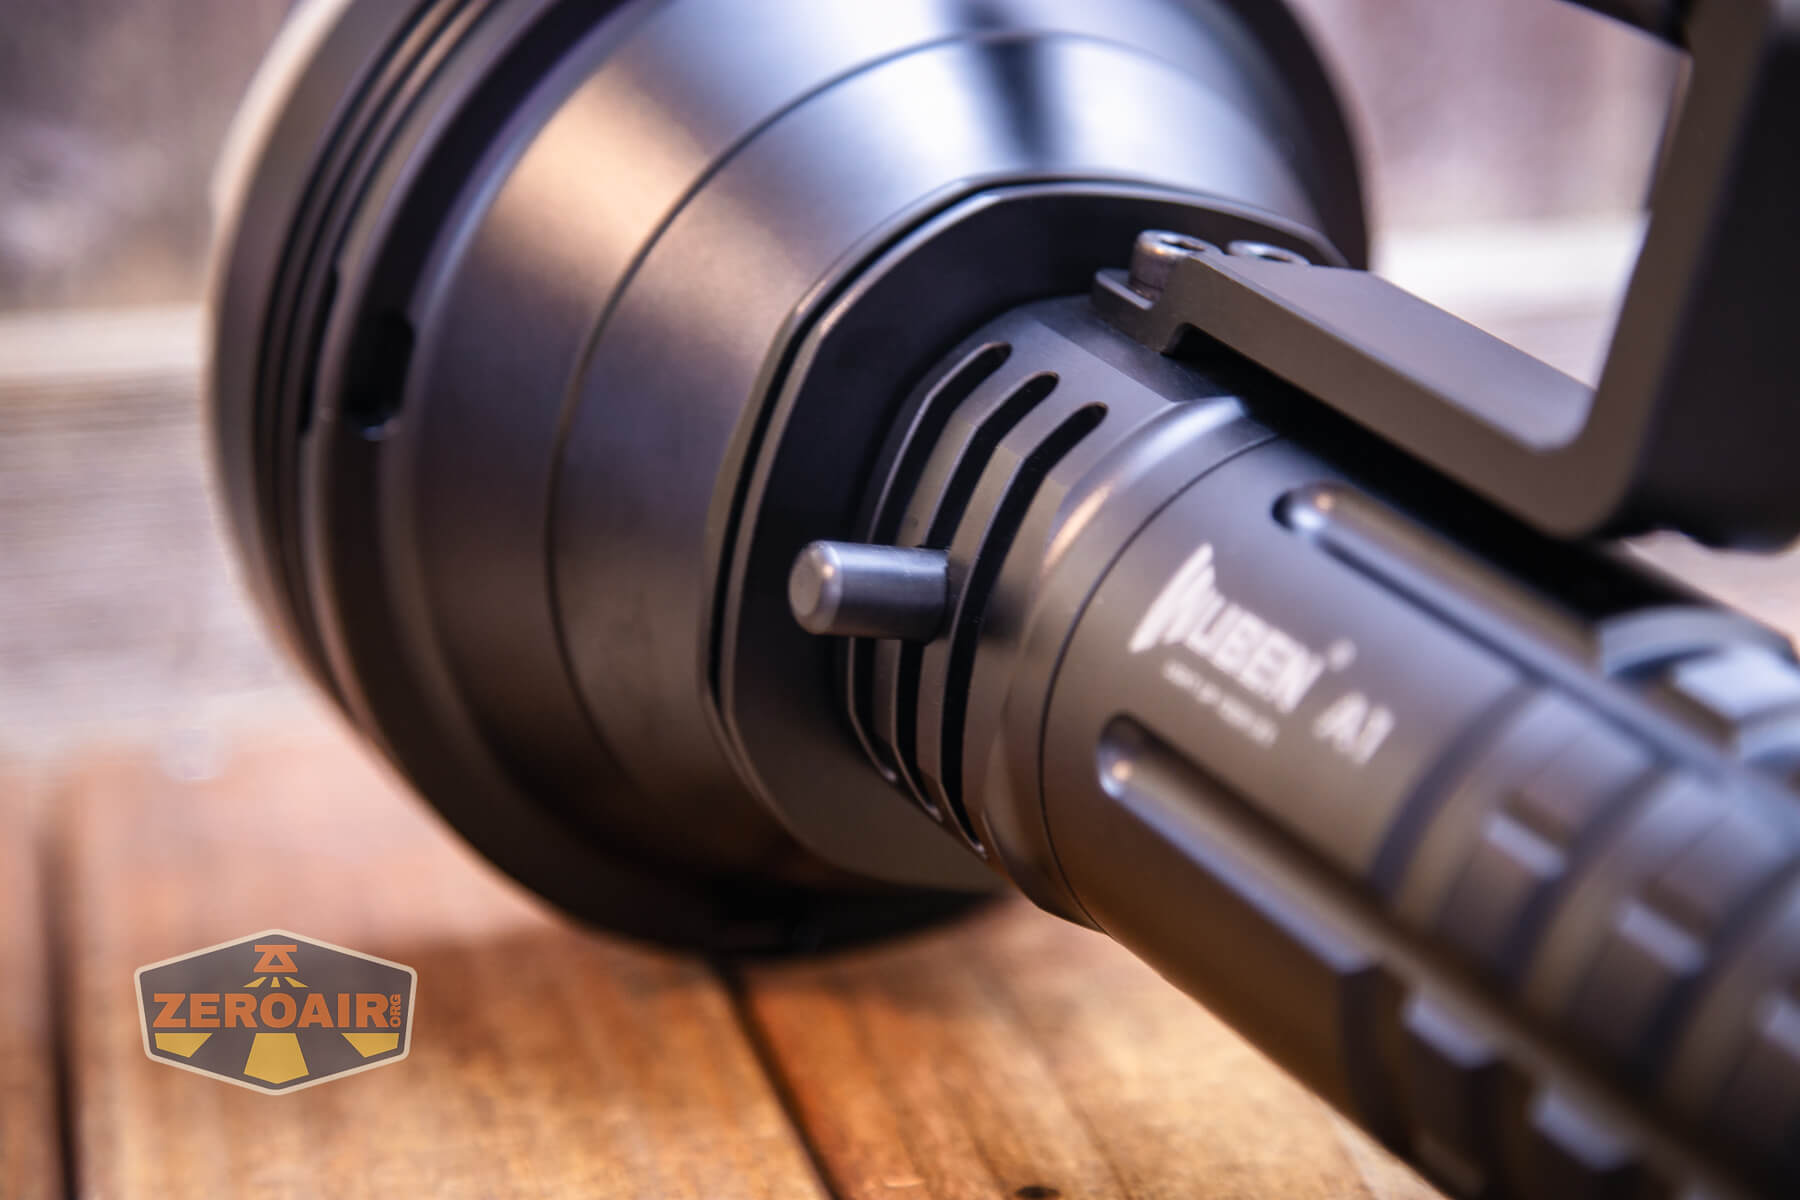
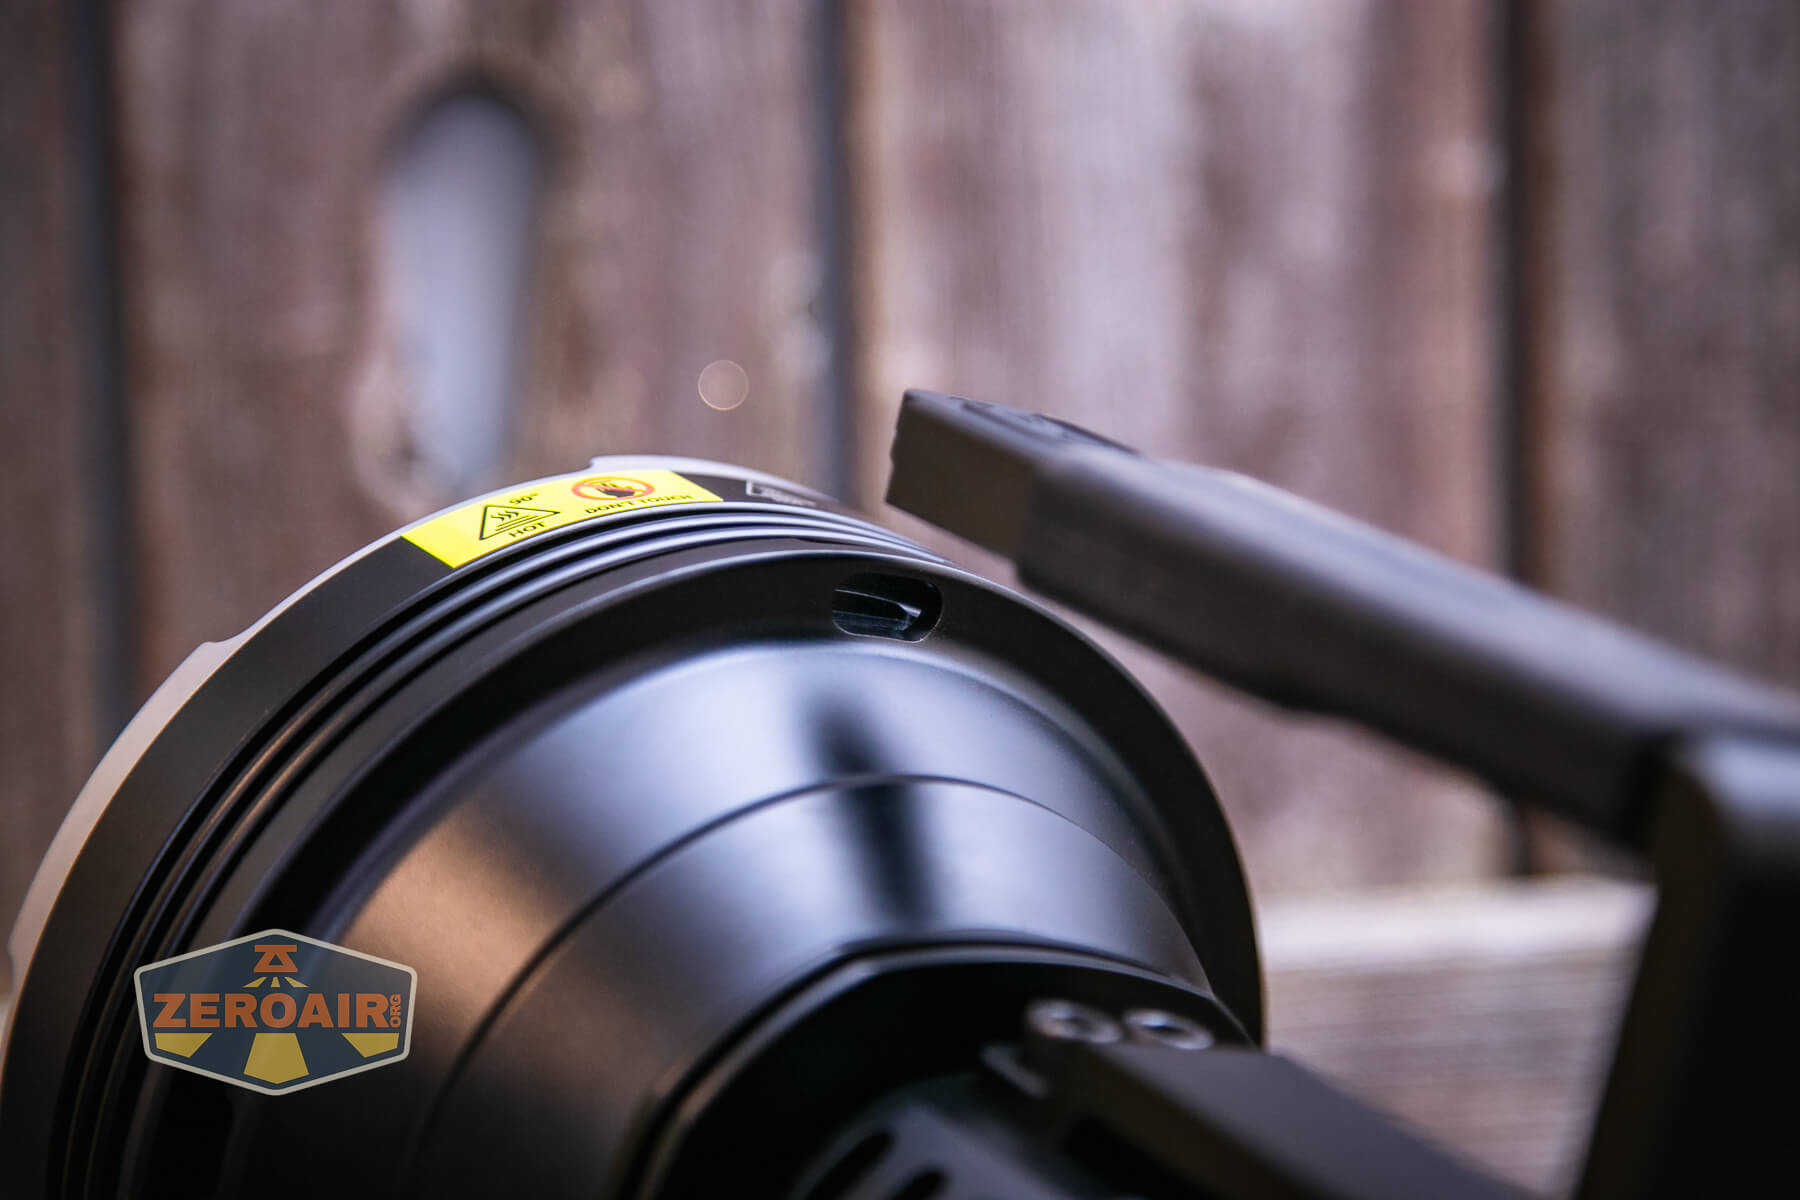
Check out the balance! The A1 rests on the handle very perfectly. Around the head and in the switch area you can see there are some cooling fins. You’ll also note the yellow sticker on the head indicating a temperature warning. That sticker says 90 degrees (doesn’t give a unit, but it’s definitely Celsius; you can see that information in testing below.) Take note of that warning… the light gets HOT!

The battery makes up the handle, completely.
Contact between the handle (battery) and head are not brass, but some kind of plated metal. They seem sufficient, and that spring is beefy!
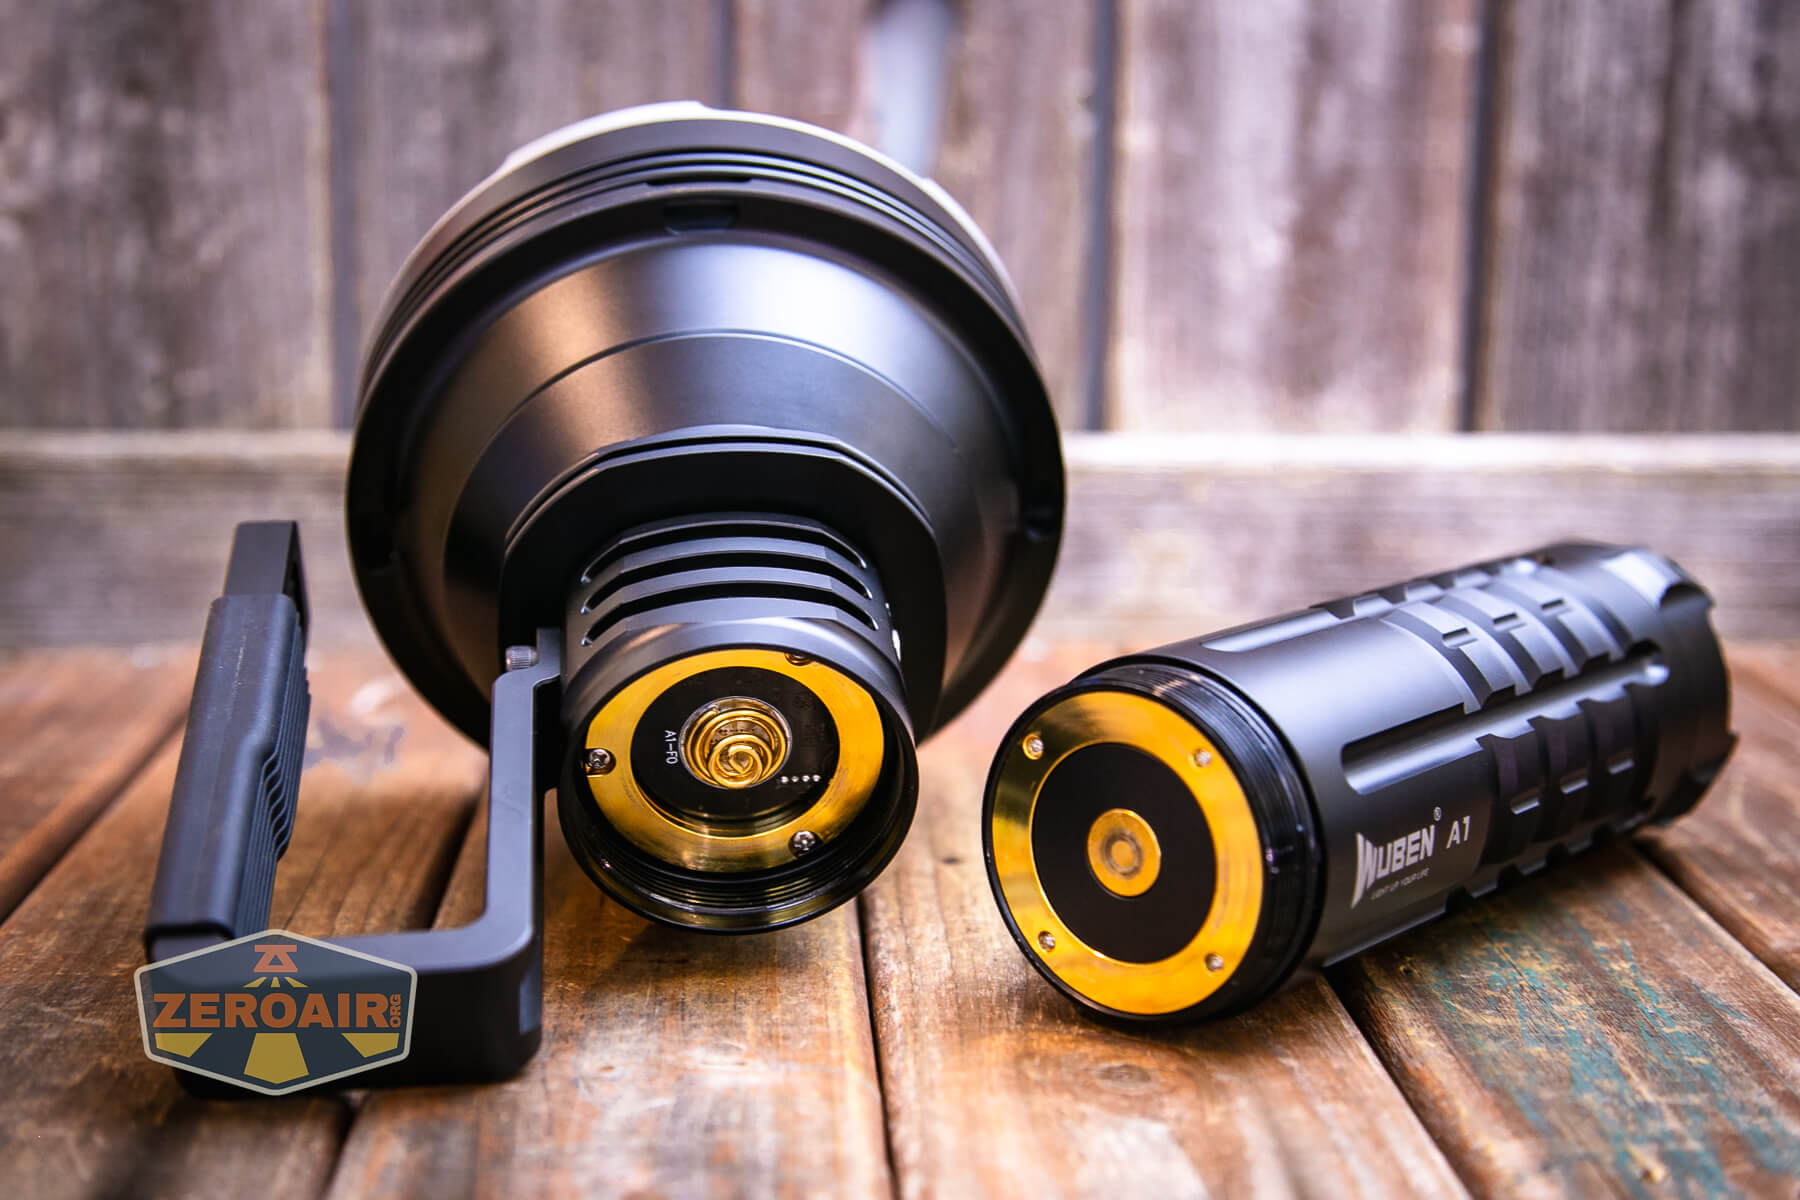
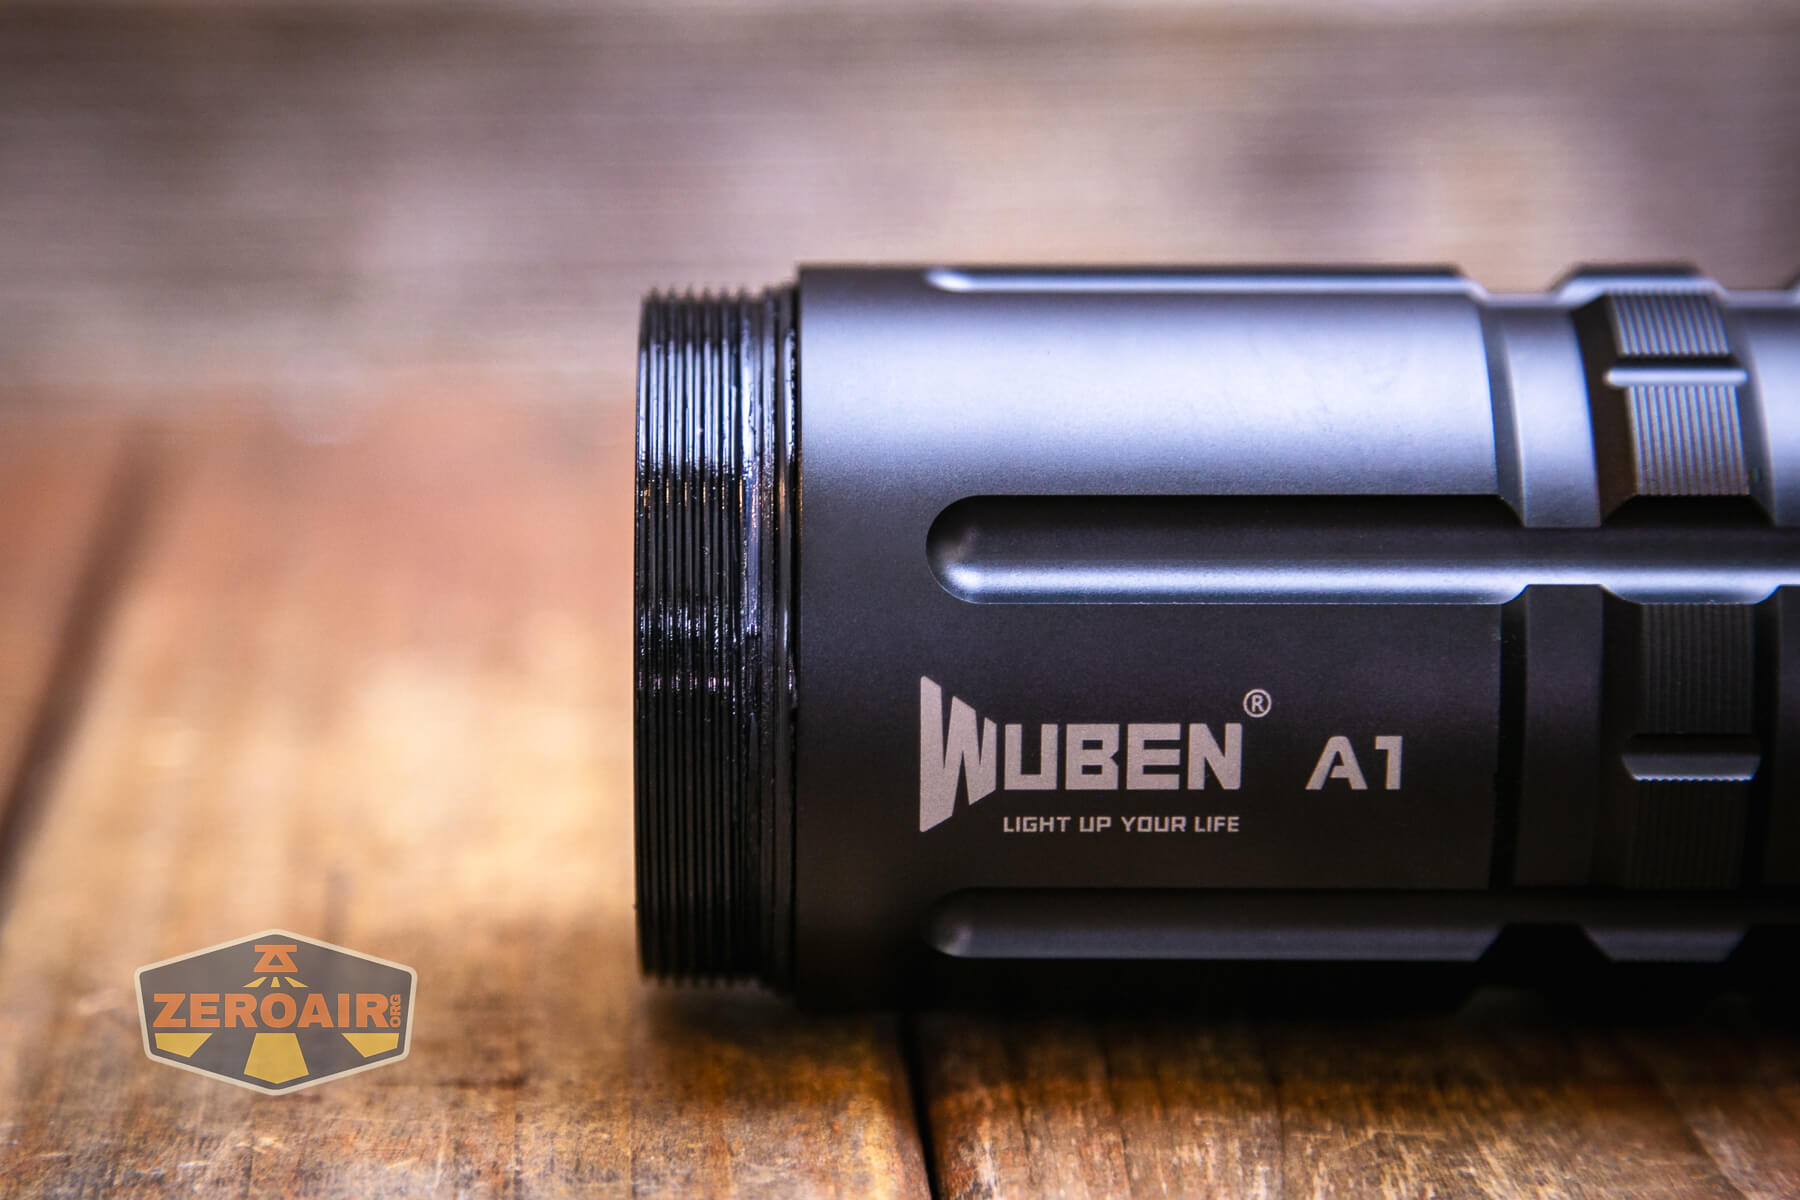
Threads on the battery are very smooth, high quality, and nicely lubed. They are quite long though, so a surprising amount of turning is required to swap the battery. You may never even have to do that though, since the A1 spotlight has built-in charging.
Here’s that yellow sticker:
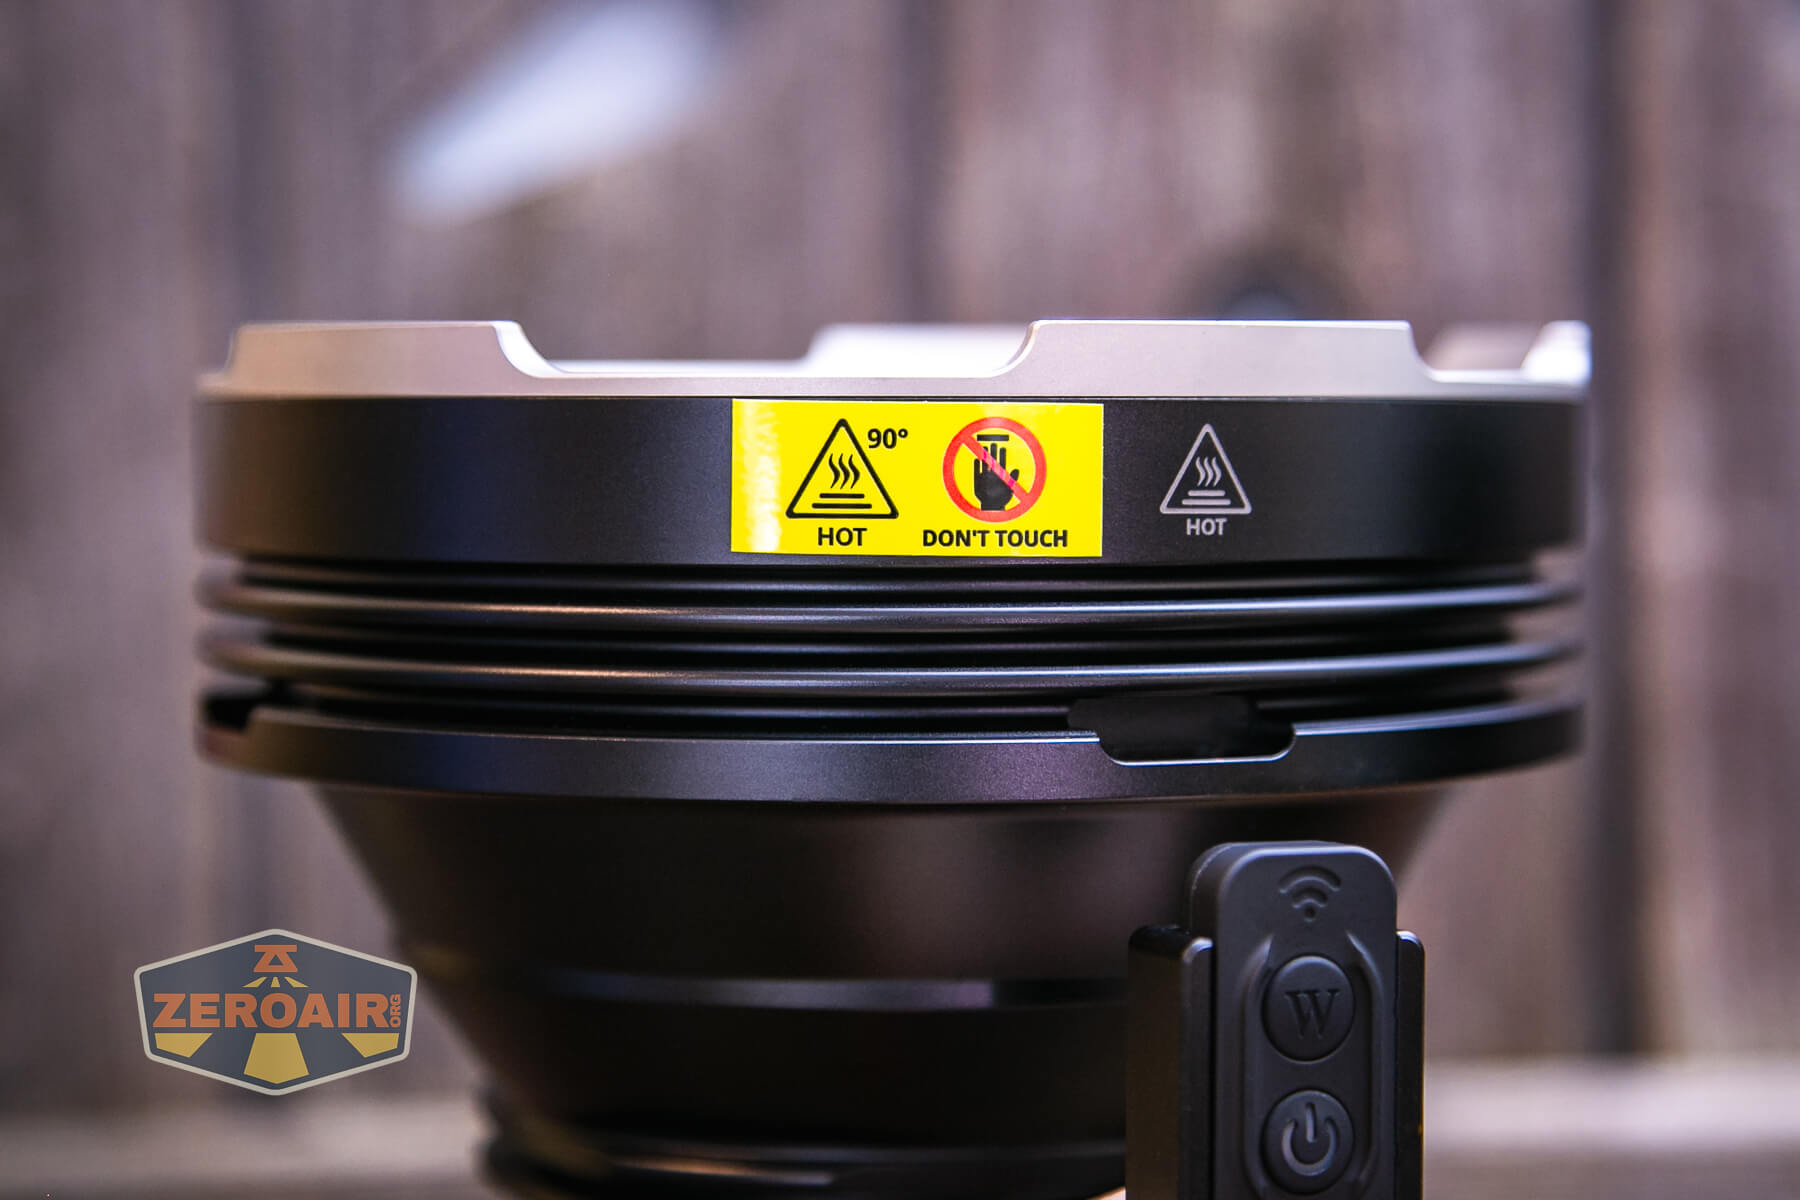
This tailcap is my one complaint about the light. It’s a really minor complaint. There’s a soft loop that captures the tailcap. This loop is actually a part of the gasket that makes the tailcap watertight (or I’d just take the thing off). This loop prevents the A1 from tailstanding in a secure way. It’s super annoying (but also not a fatal flaw.)
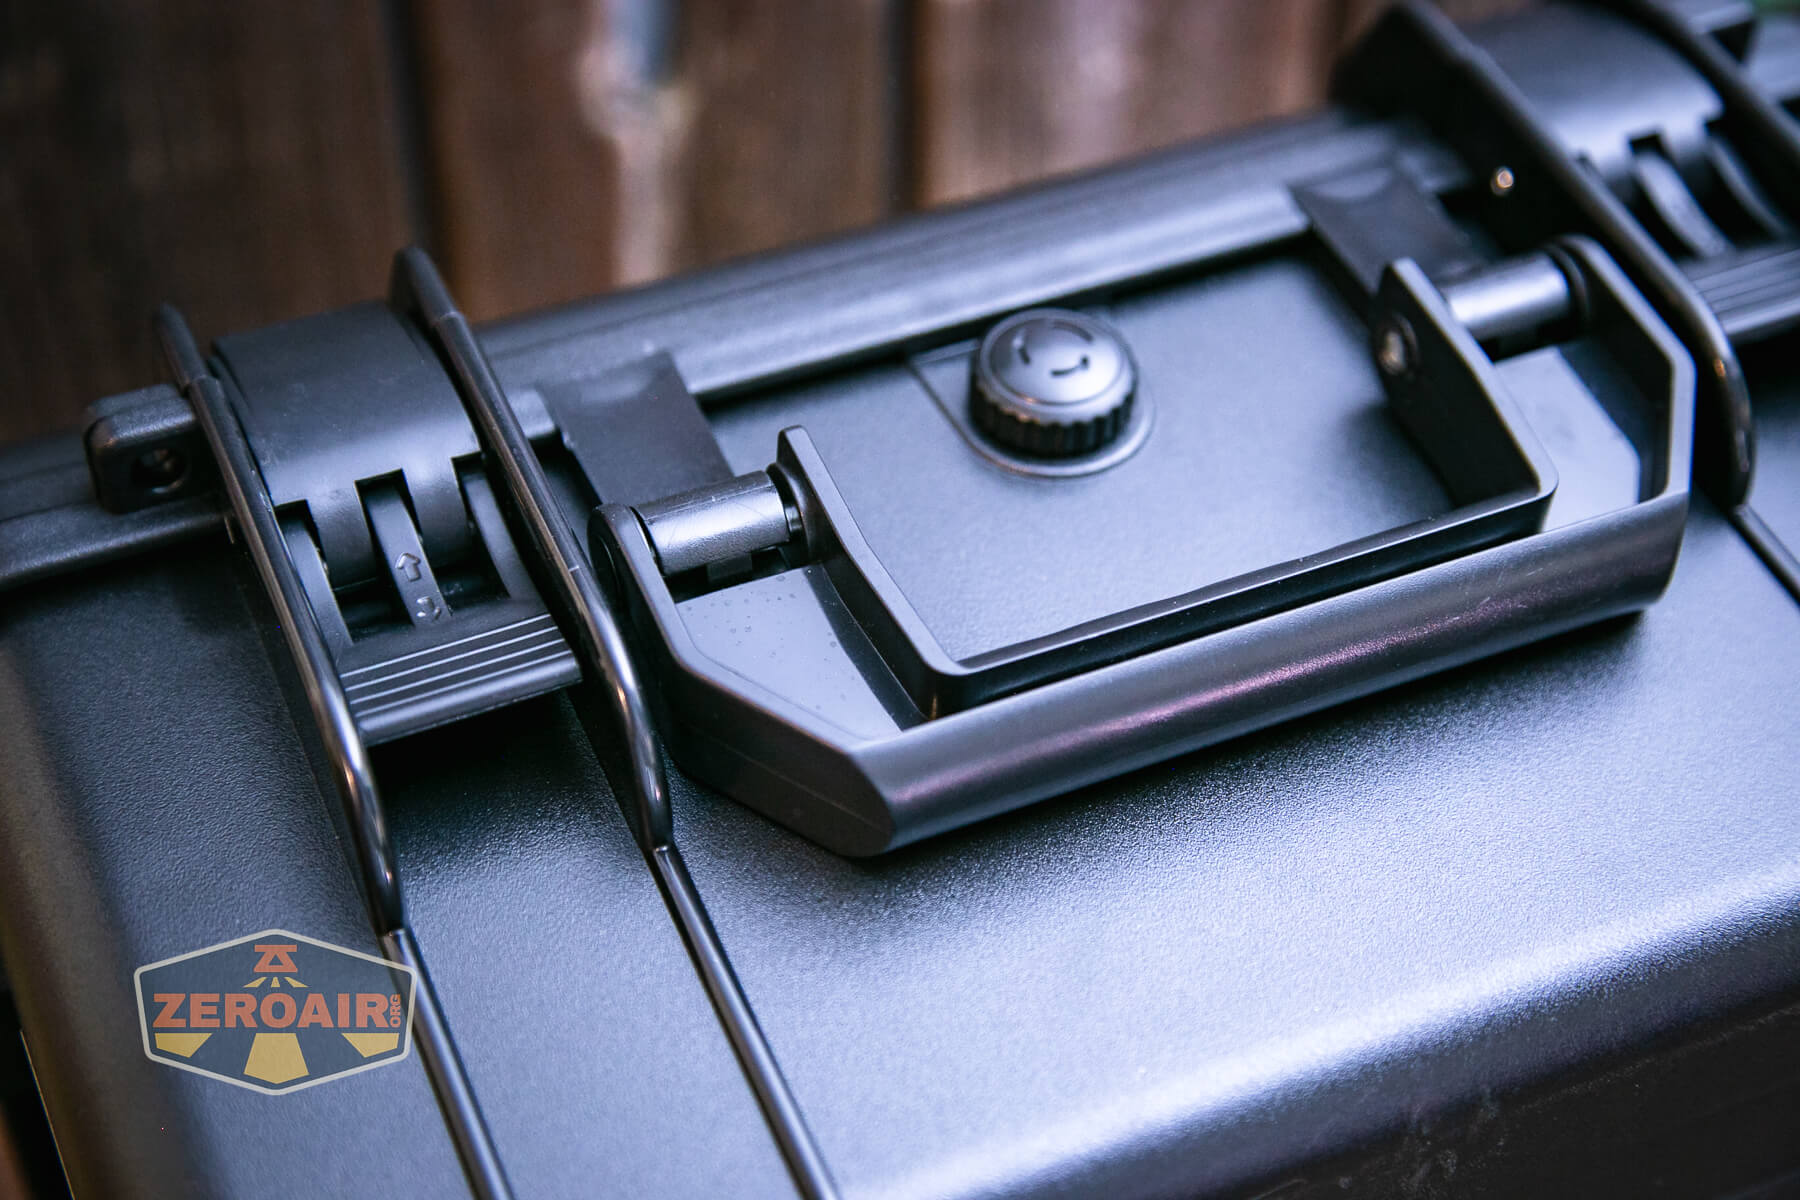
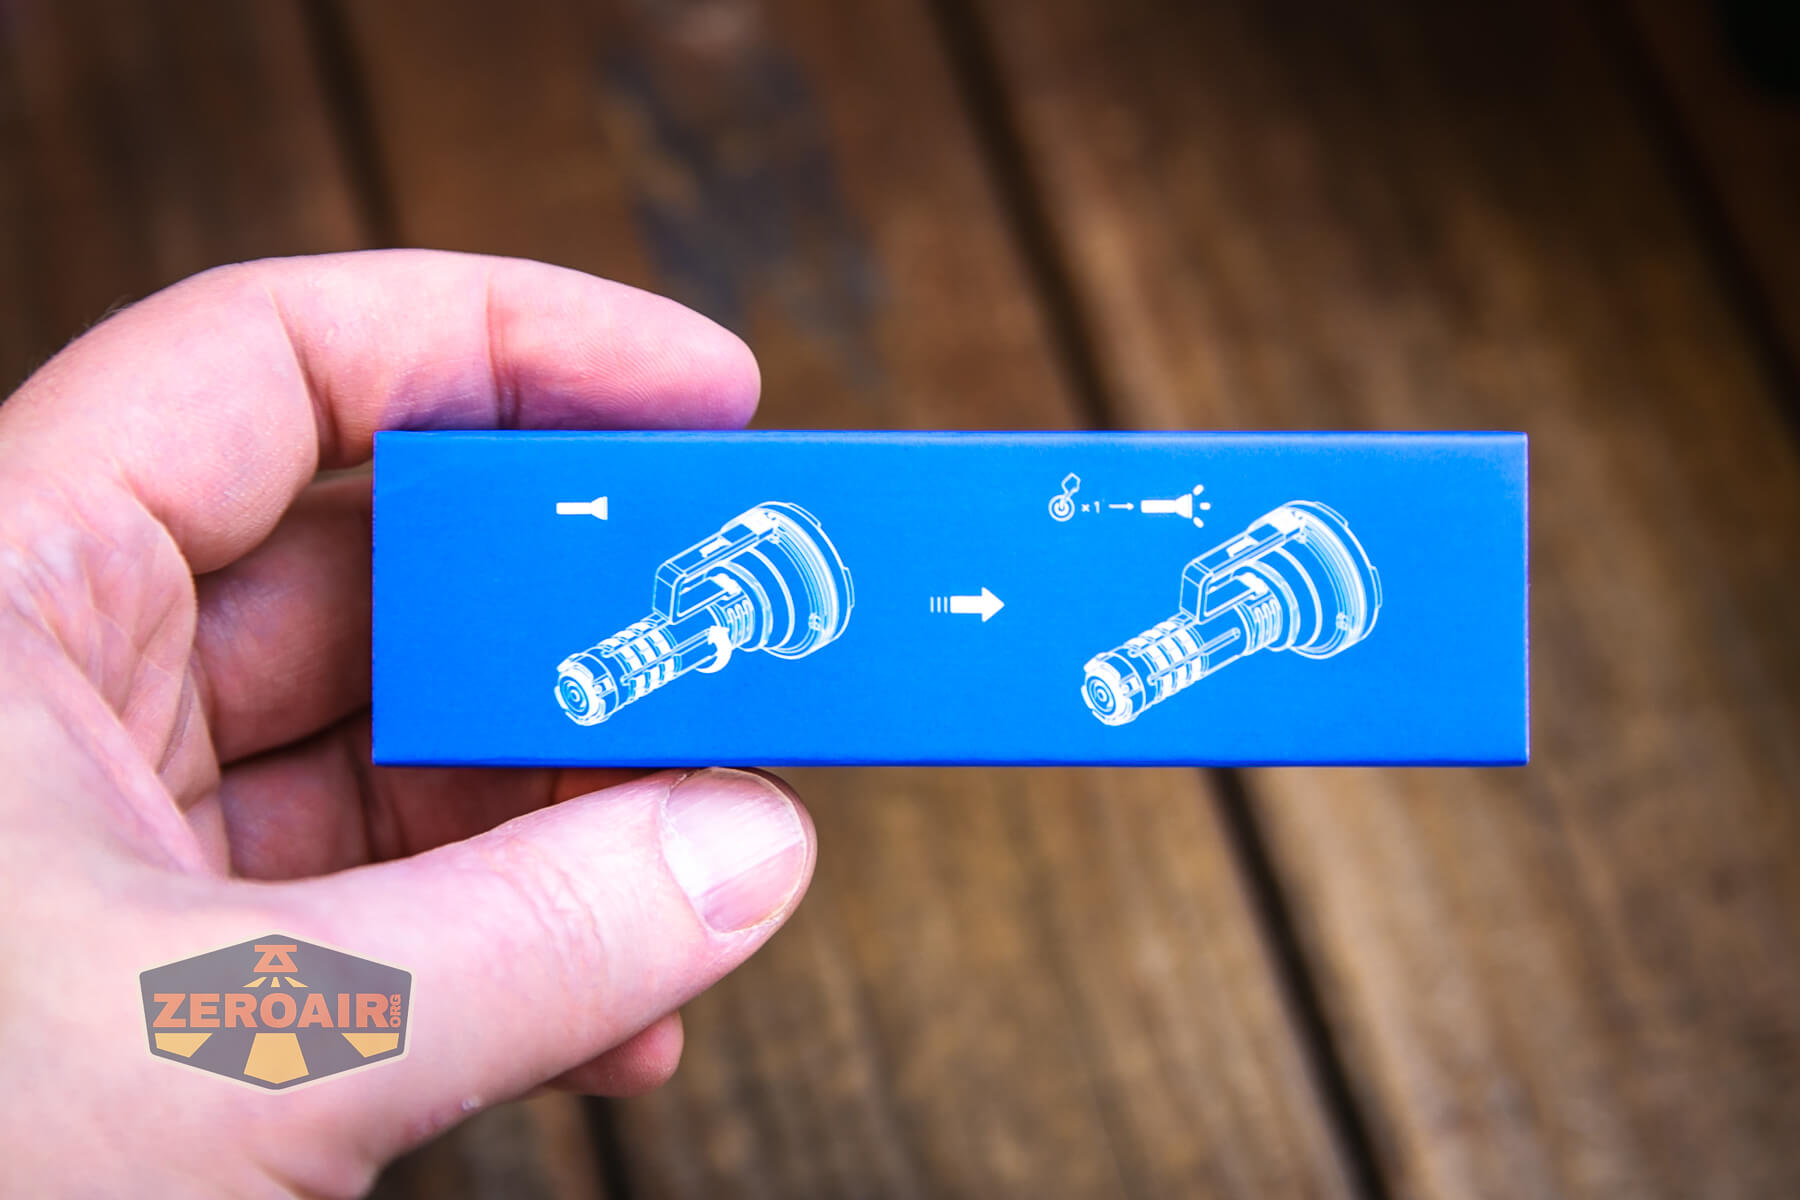
I am still not sure what this little knob is. It doesn’t seem to unscrew, and the shoulder strap attaches elsewhere… (Update: it’s the remote control antenna.)
Size and Comps
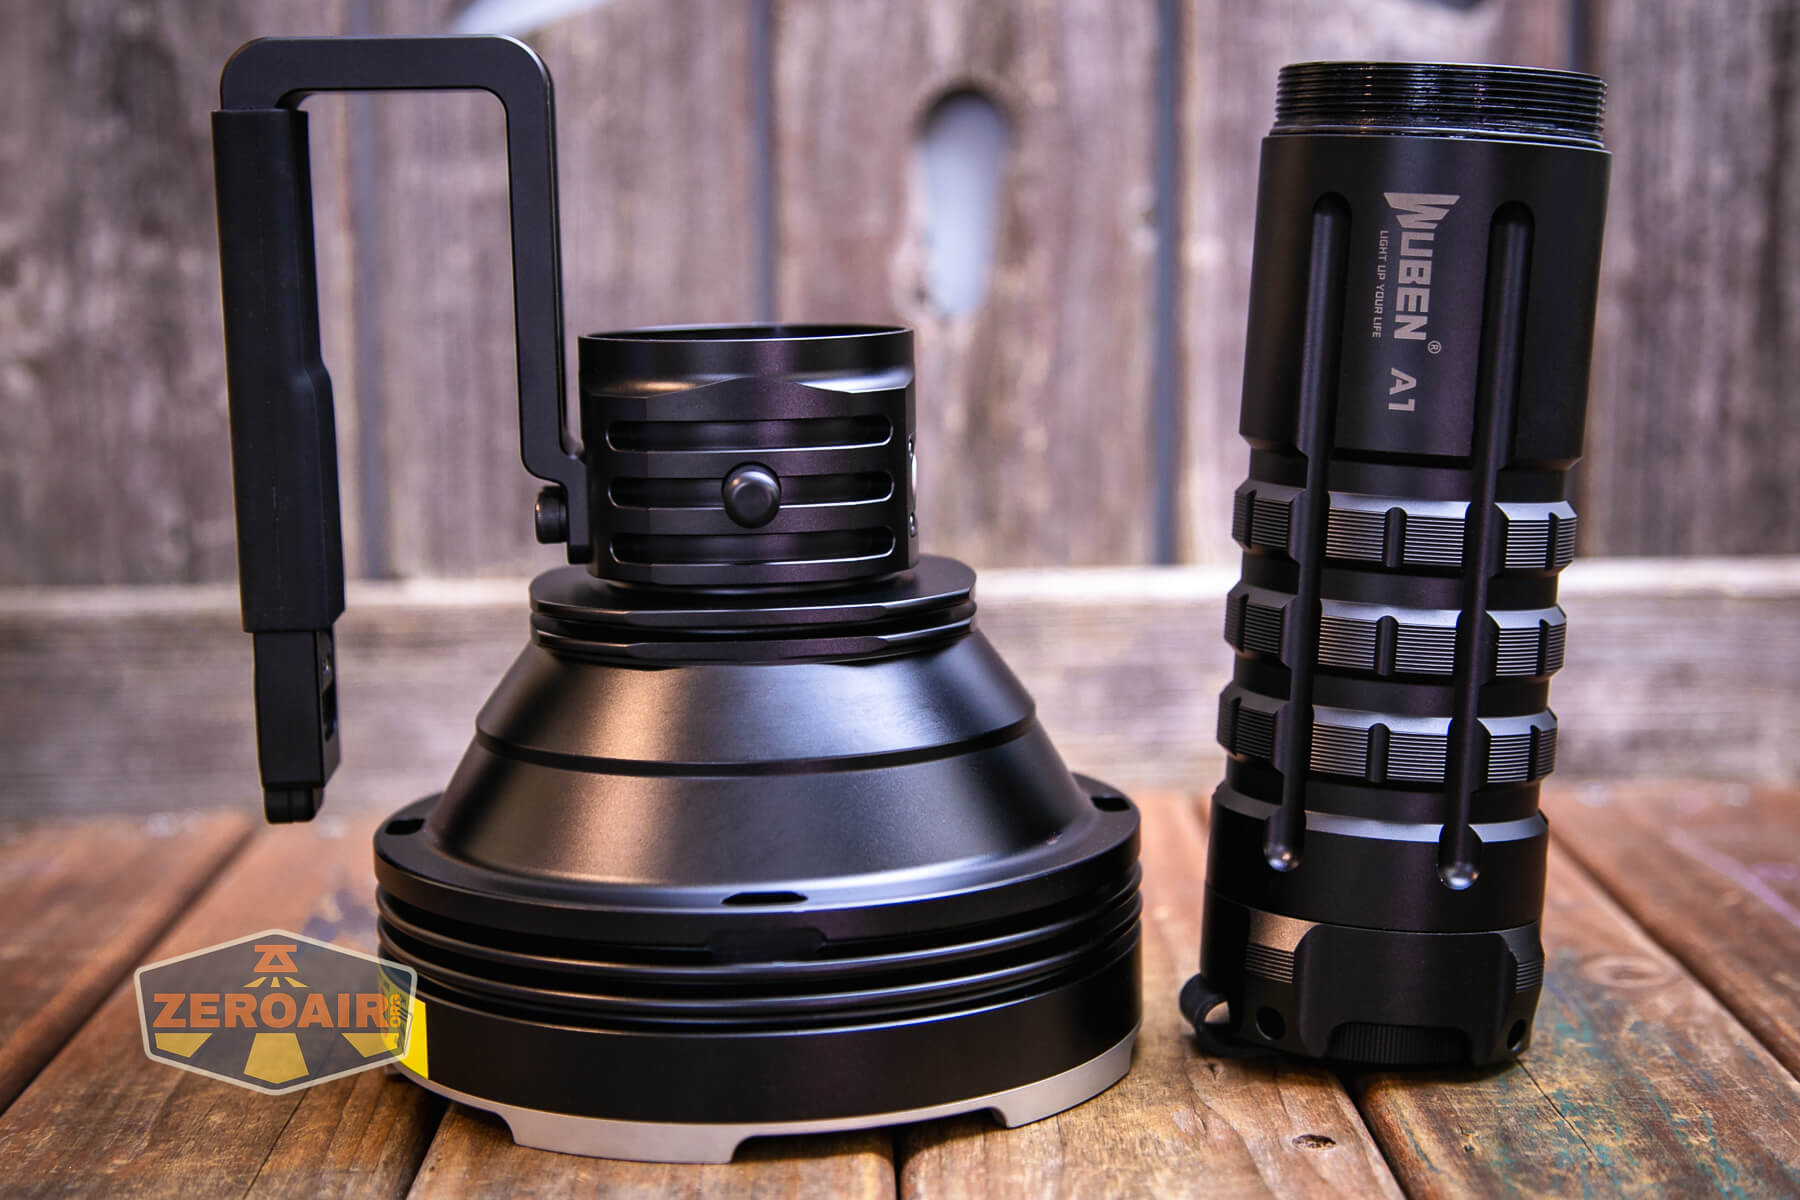
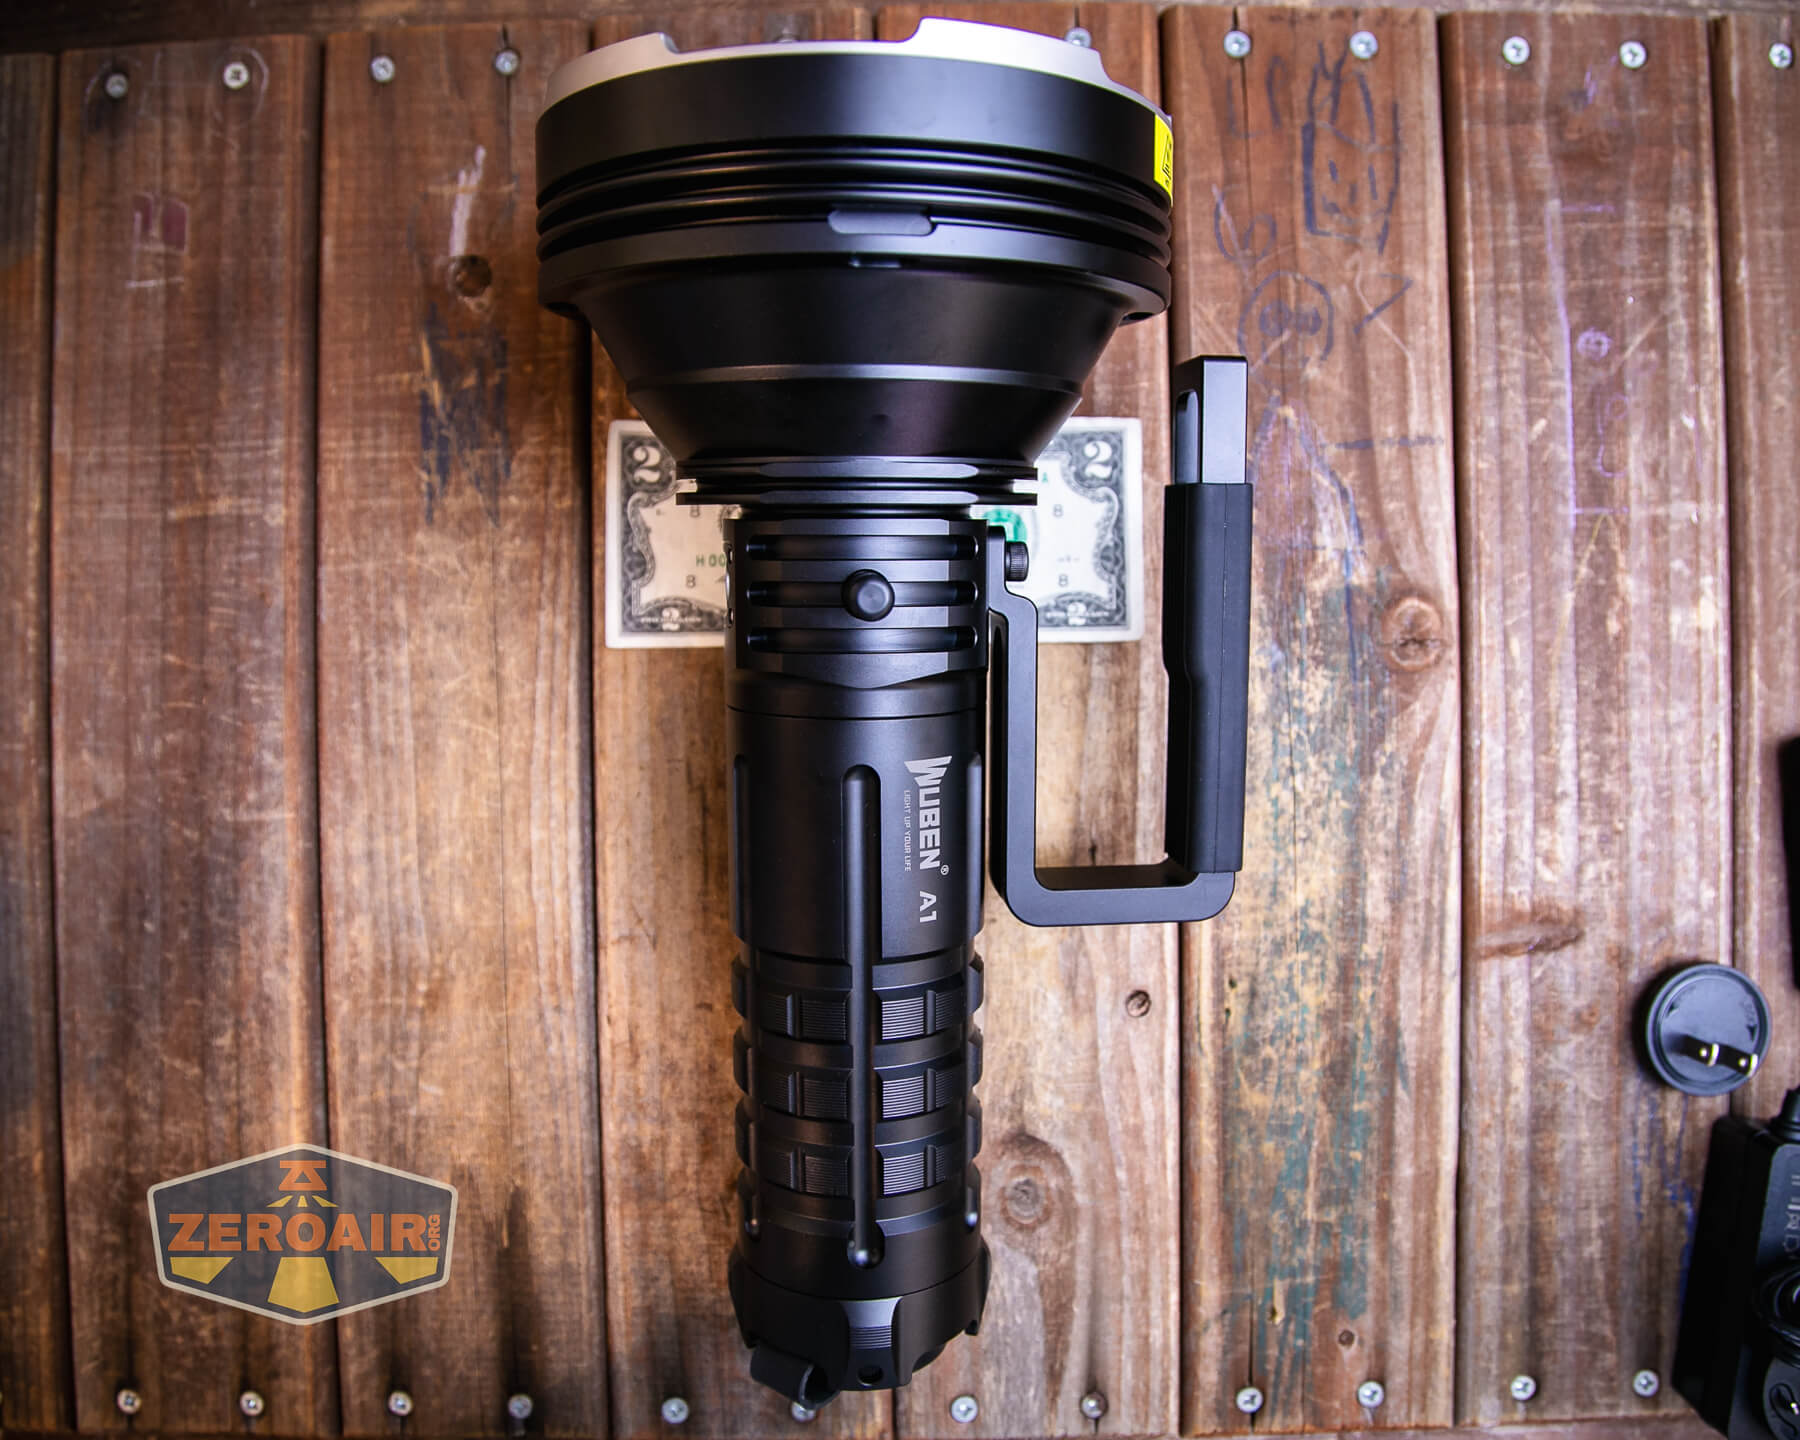
Officially the A1 is 318mm x 151mm and weighs 2875g (with battery.)


If the flashlight will headstand, I’ll show it here (usually the third photo). If the flashlight will tailstand, I’ll also show that (usually in the fourth photo).

Here’s the test light with the venerable Convoy S2+. Mine is a custom “baked” edition Nichia 219b triple. A very nice 18650 light!
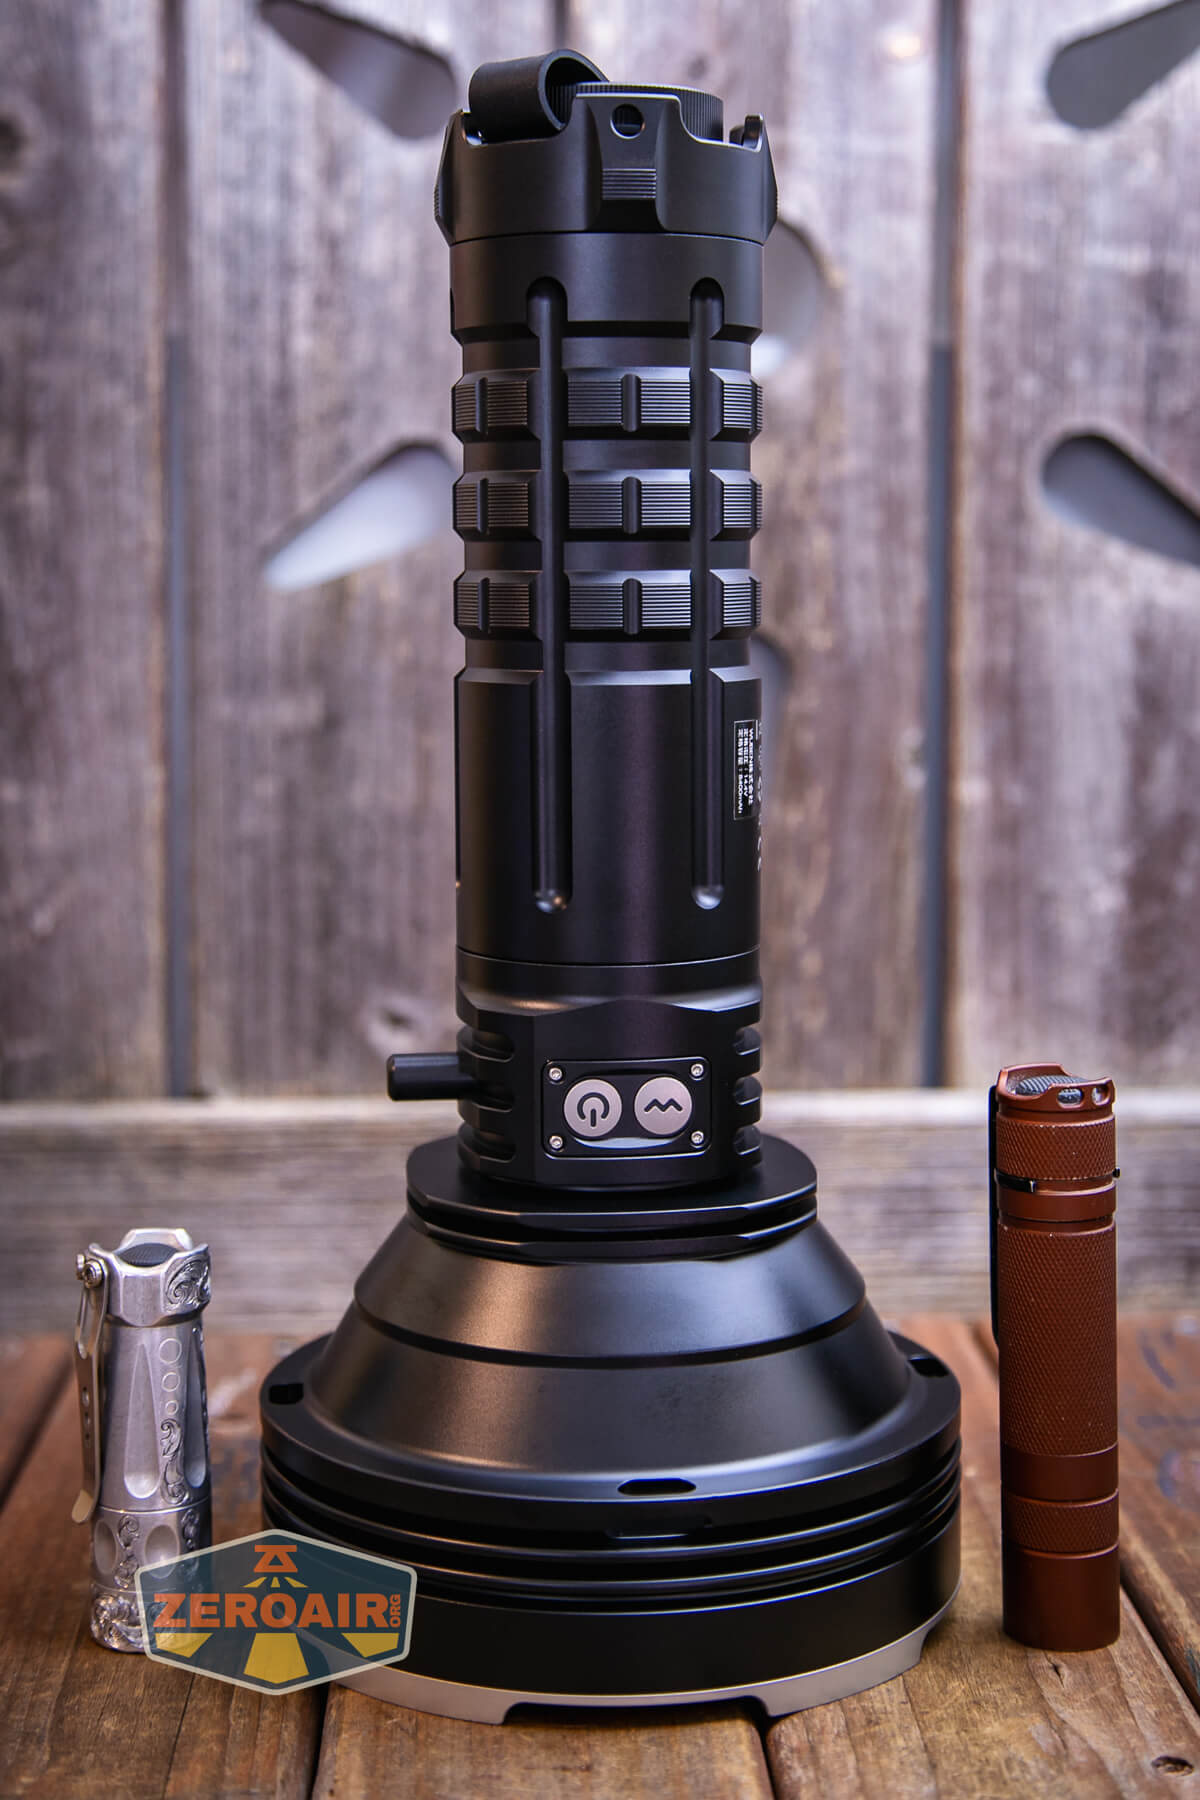
Also above is the light beside my custom-engraved TorchLAB BOSS 35, an 18350 light. I reviewed the aluminum version of that light in both 35 and 70 formats.
Retention and Carry
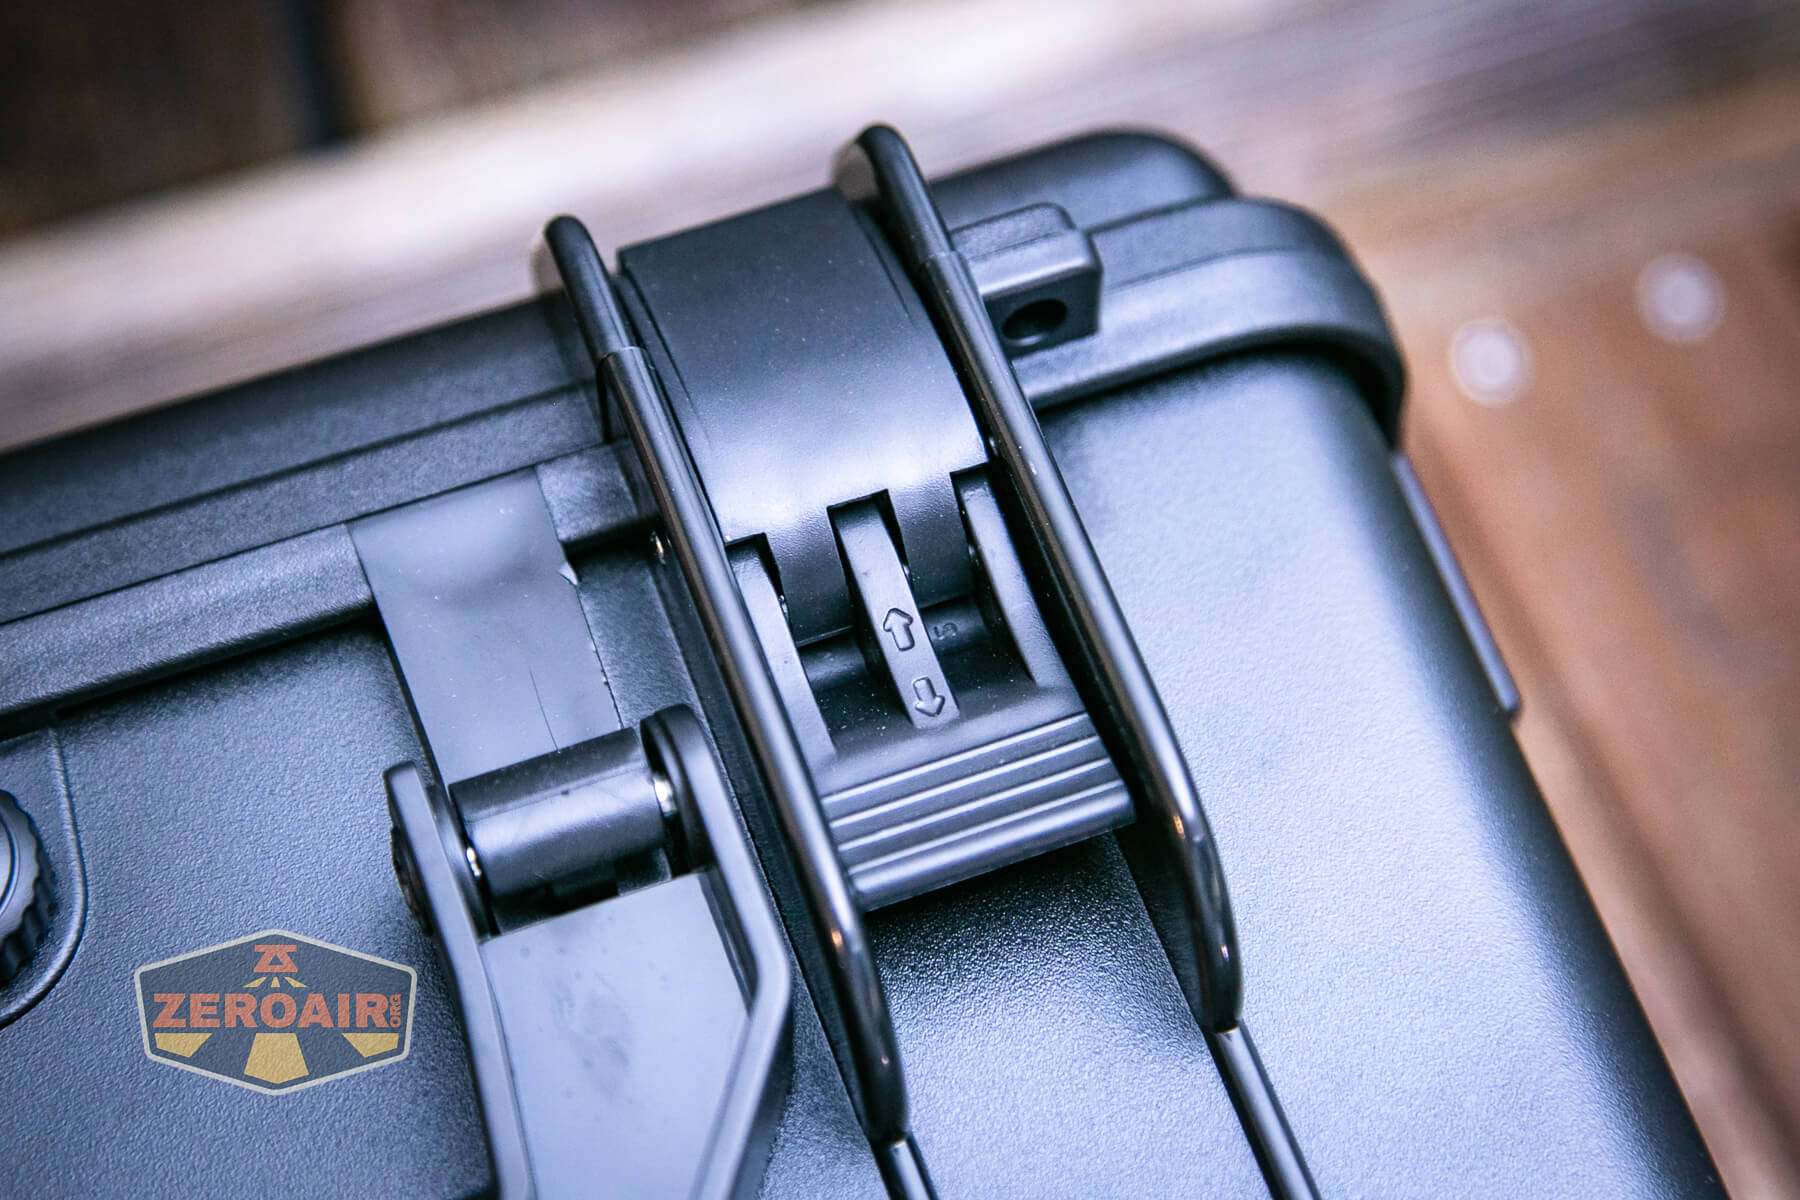
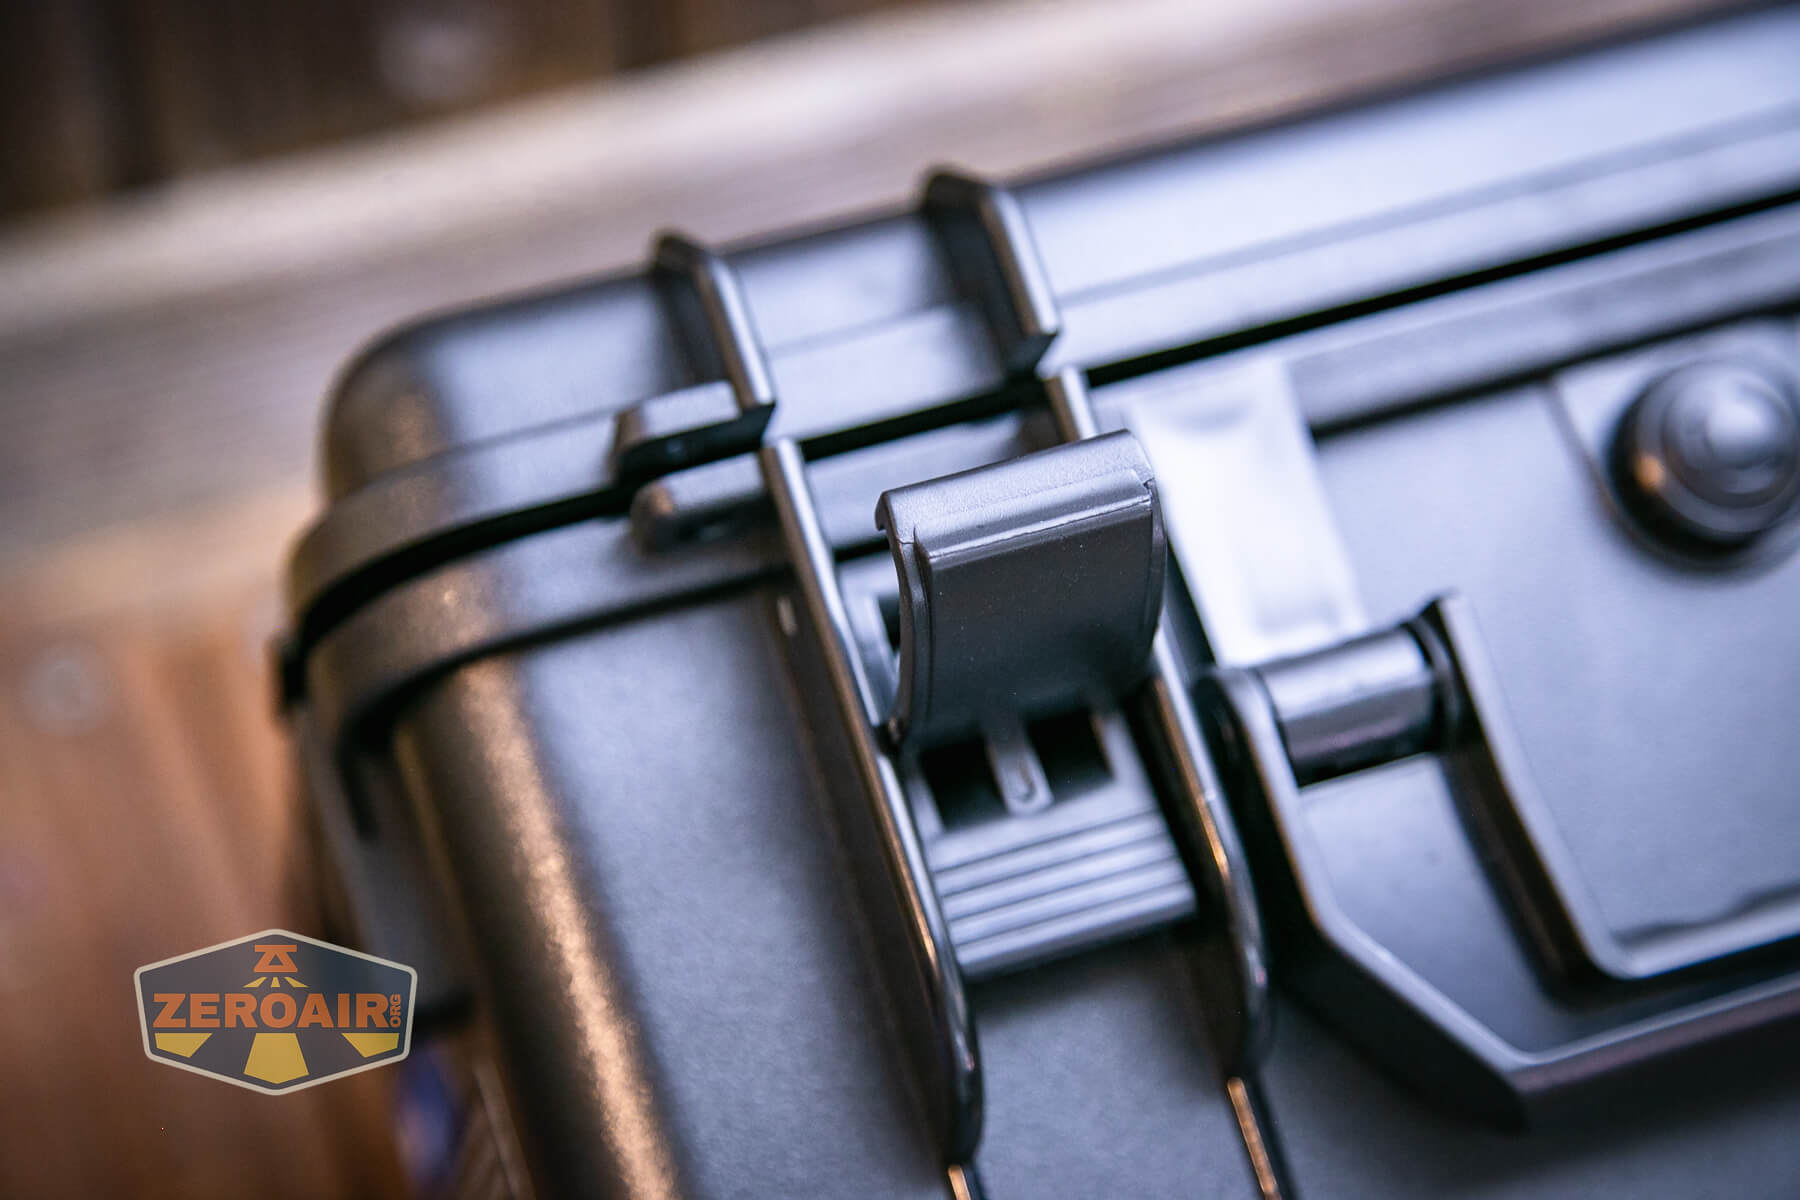
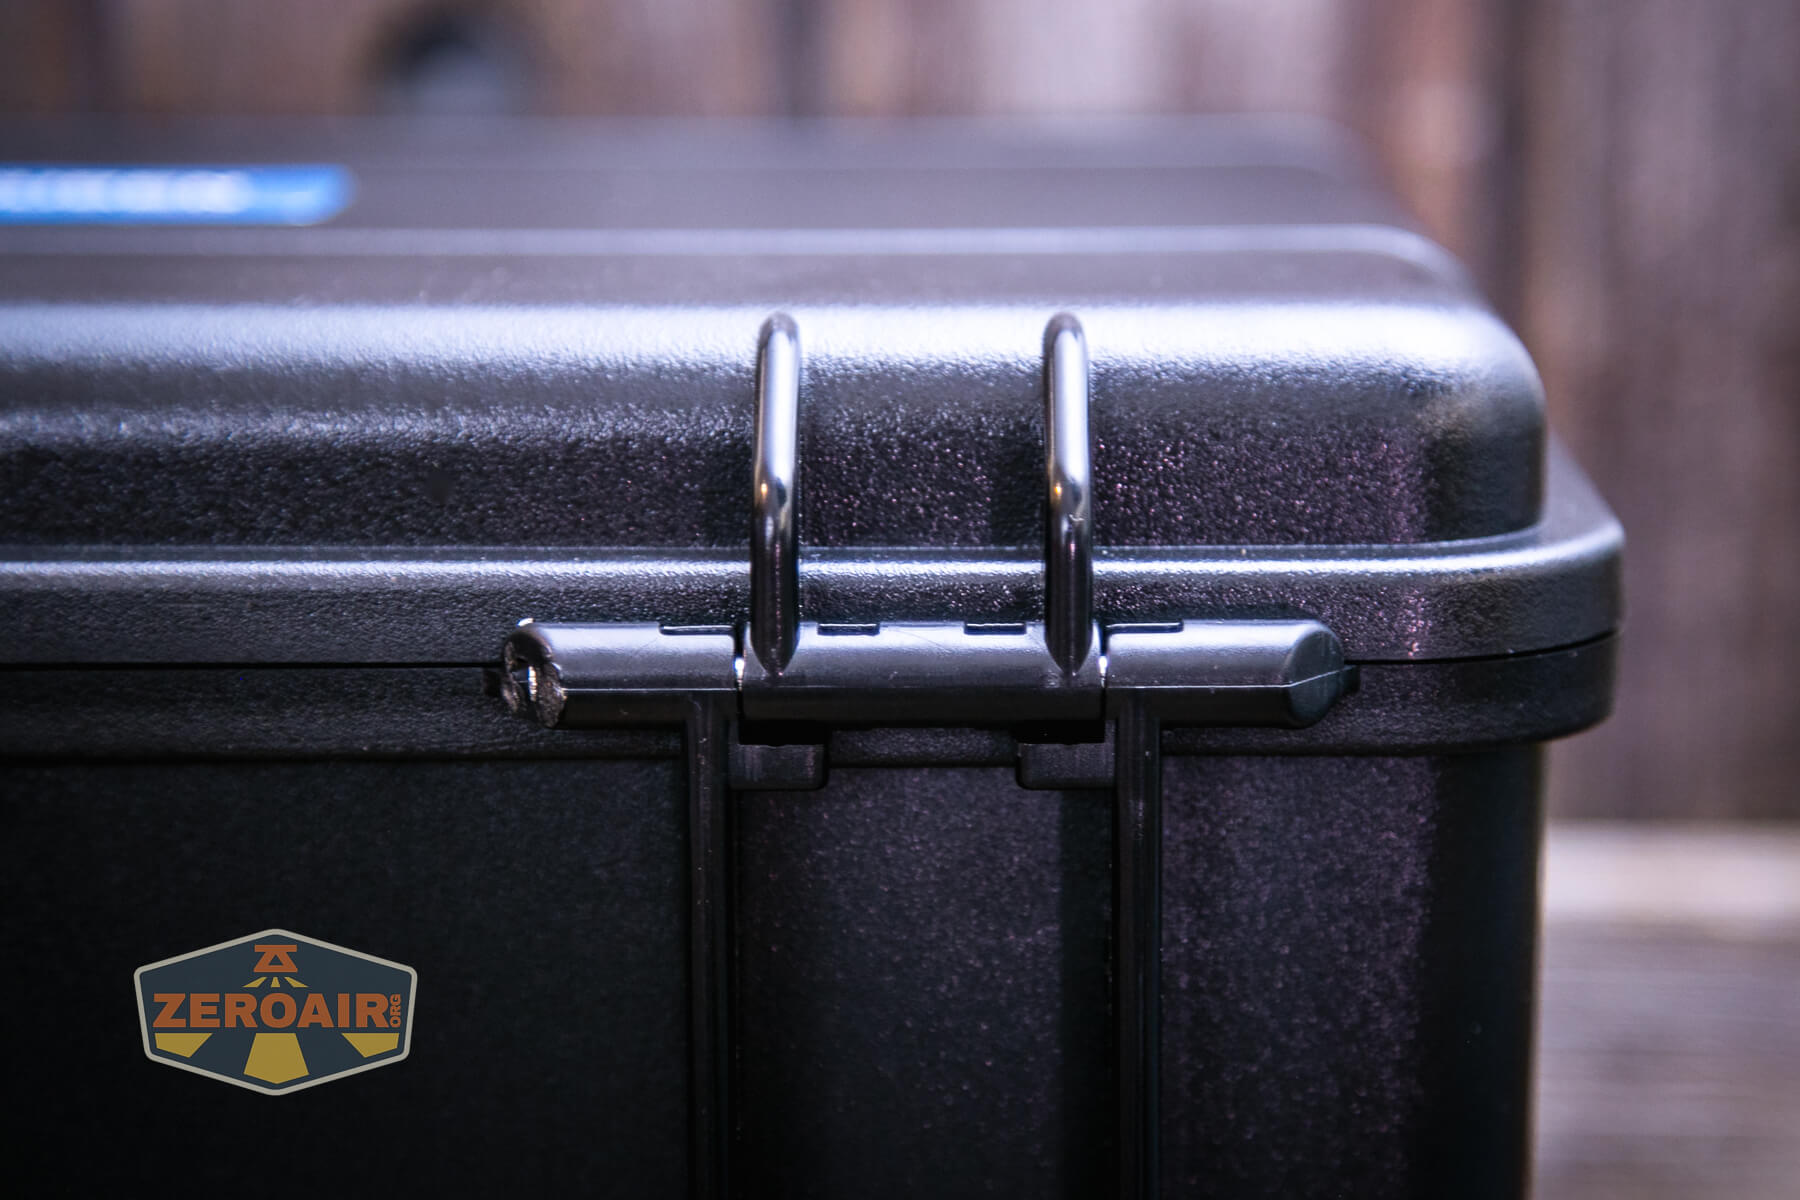
The first way to carry the A1 has been covered in the photos above – the A1 ships with a very nice hard plastic case that’s very much like a Pelican case. It’s not a Pelican brand case but I have to say, the quality is on par with Pelican.
After that, there’s this handle that is attached already. This is a “dumb” handle in that it doesn’t have any electronics (specifically: no wires) but it does have switches thanks to the included remote control!
The handle is great. There’s a grippy wrapper and that wrapper doubles for holding the remote control.
Next up is the shoulder strap.
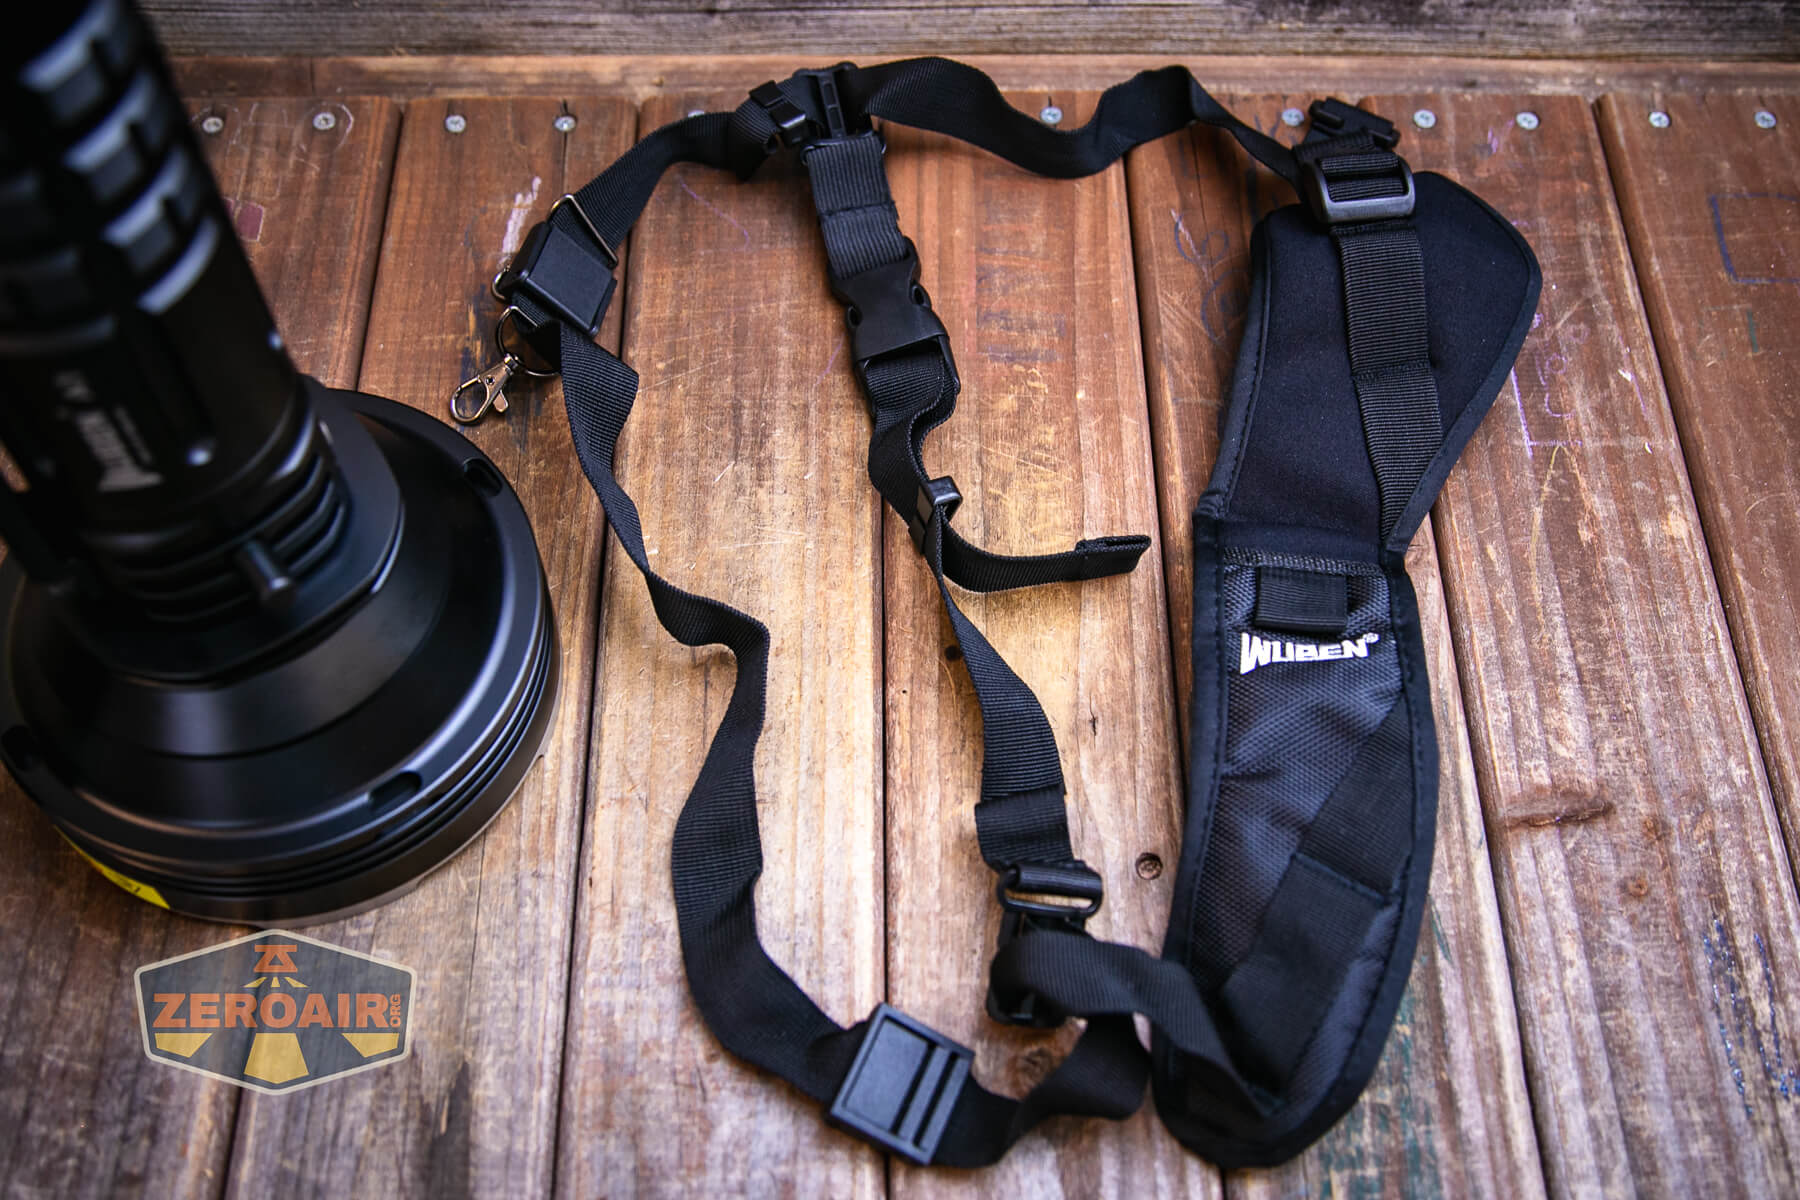
The shoulder strap is what I’d call “unusually considered” – it seems to be intended for carry and use which might be more than you can say about many shoulder straps.
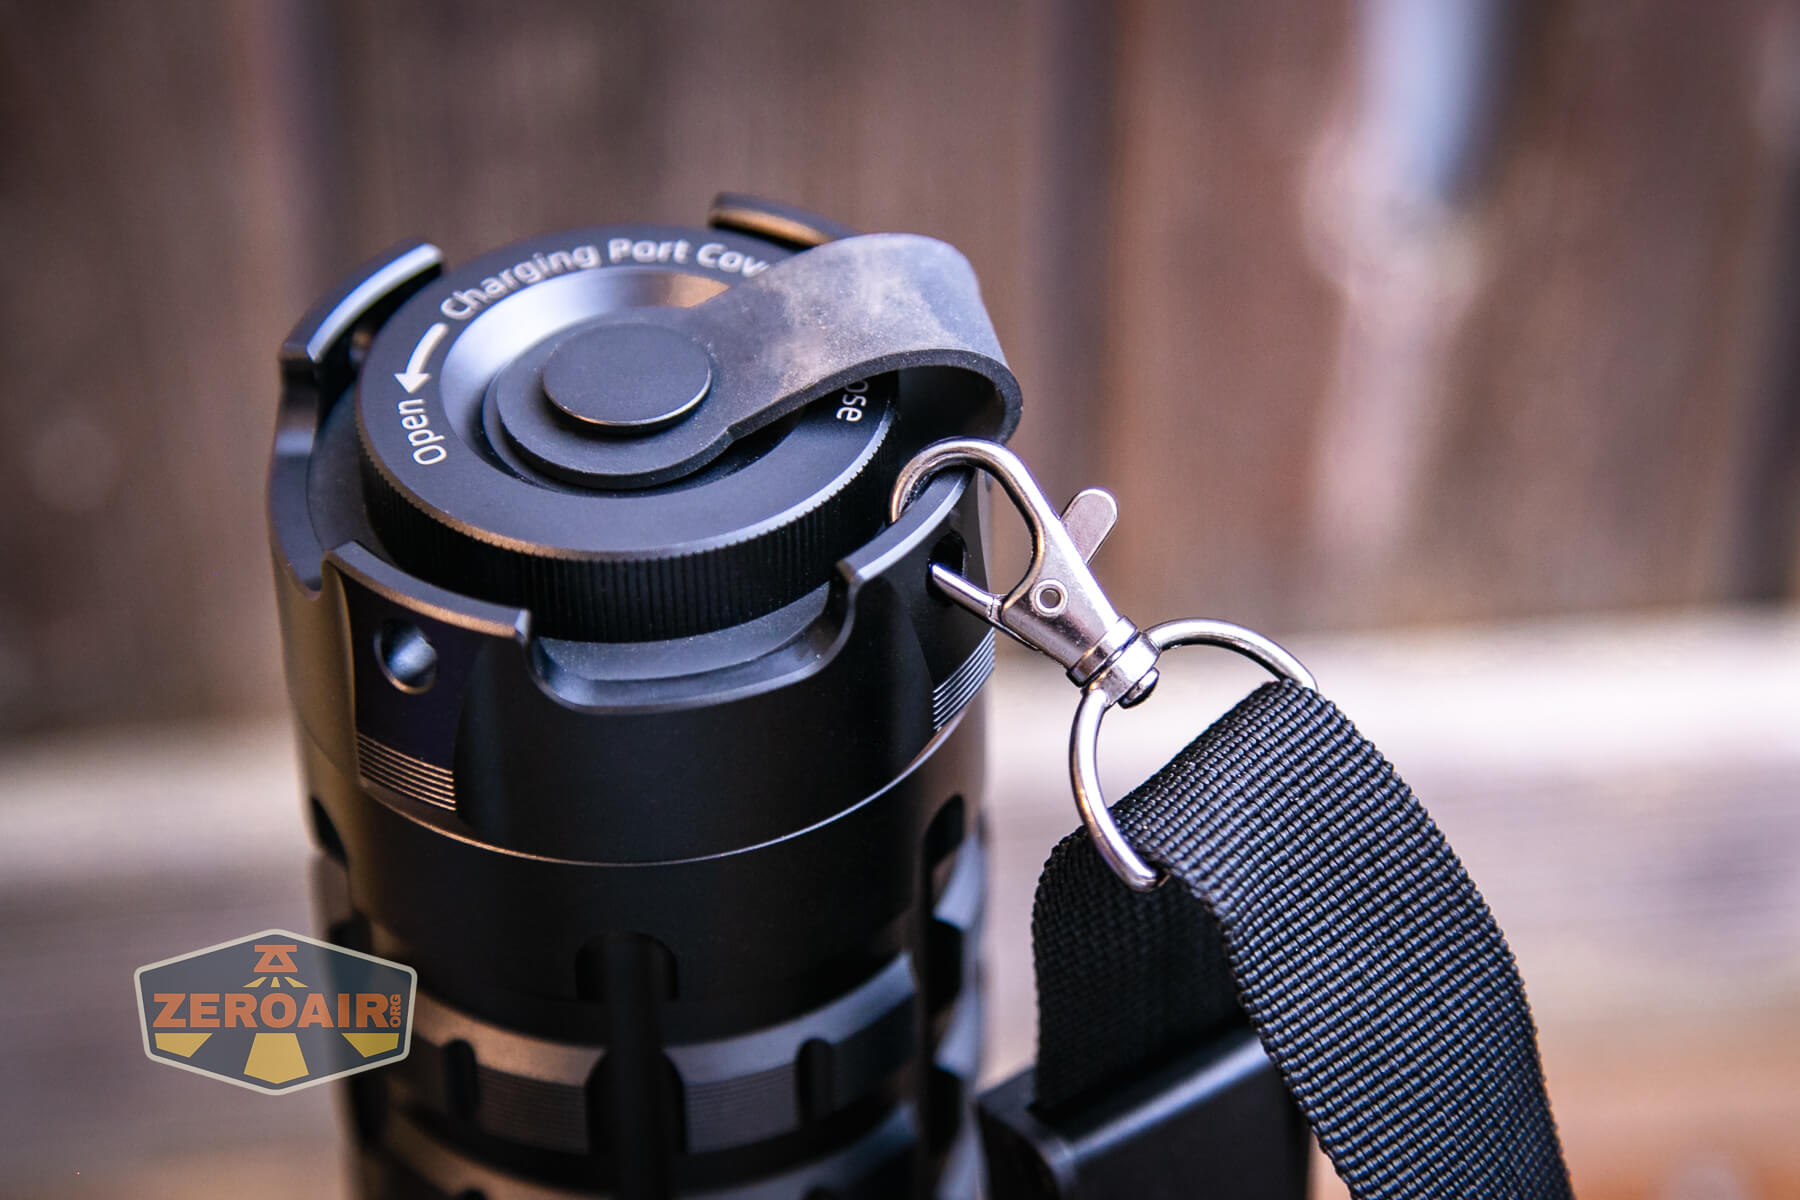
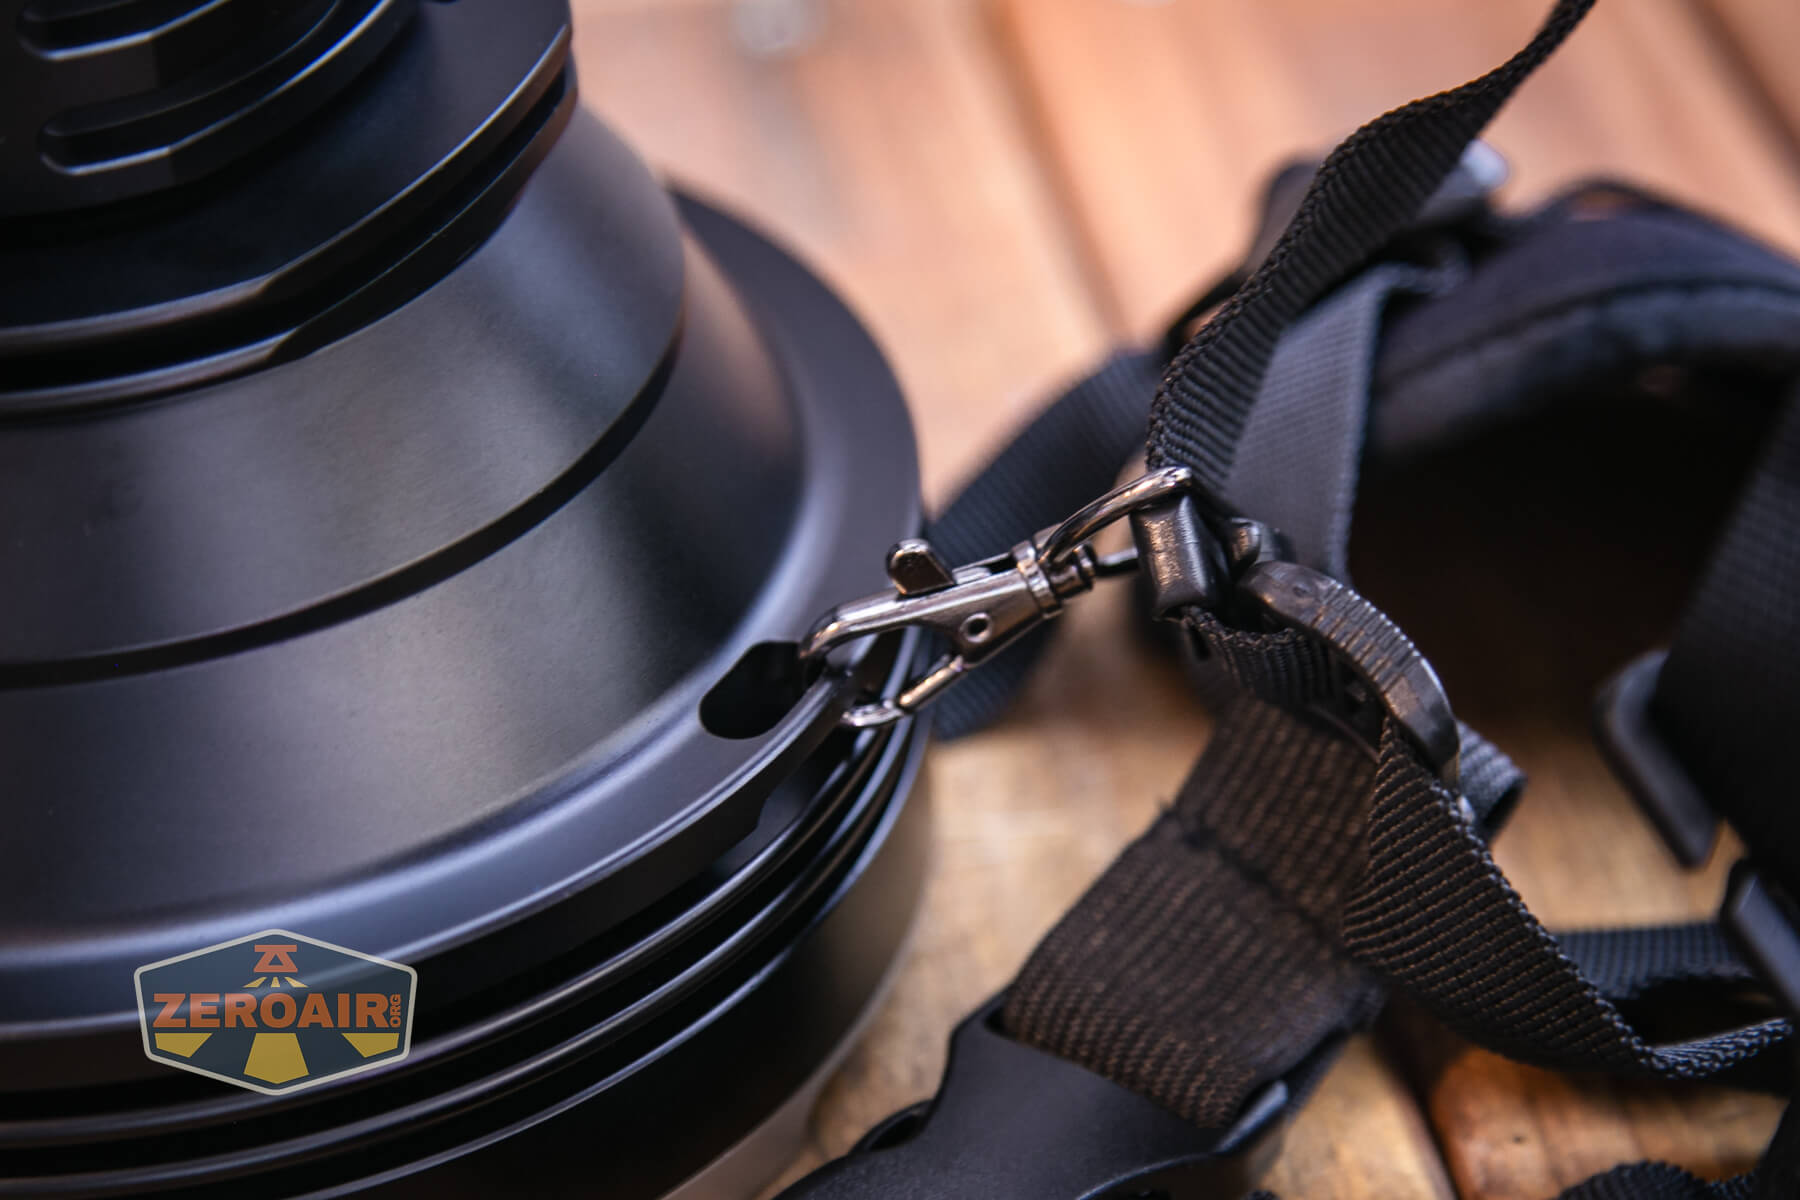
One connection point is on the head, which you can see below.
The other (and you’ll need to use both) is on the tailcap, where there are four holes suitable for the connection.
The connection is made by a user-friendly hook.
Power and Runtime
The Wuben A1 spotlight ships with the required battery. It’s a battery – one piece. But internally it’s eight 21700 cells that are probably soldered. They aren’t user serviceable, anyway.
The battery seems to be a 4s2p configuration – four cells in series, which makes the nominal voltage 14.8V. Fully charged voltage is around 16.8 or 16.9V, though. Then there’s the second bank (the “2p” part), making the capacity much higher. All in all, this is an exceptionally capable battery.
Here are three runtime tests.

You won’t see me say this often, but the temperature got hot enough on Turbo that I actually backed the light off… When I got over 90 degrees C, I stepped the light down (to low, I believe) so that the temperature could come down. It did, and I reset the light to turbo a few more times. Each time, the max output dropped a little. and by the end (around 106 minutes), Turbo was much diminished.
One thing to note on this output (and this is the point I mentioned in The Big Table that you should read.) My calibrated setup isn’t suited for a light with a head as big as this Wuben A1. So this isn’t strictly a calibrated test – some light was spilling out the side. however, it’s pretty close because the light is so throwy; despite being bigger than my tube, most of the light did get to the meter. In any case, the total output is definitely somewhat higher than what’s displayed in the graph.
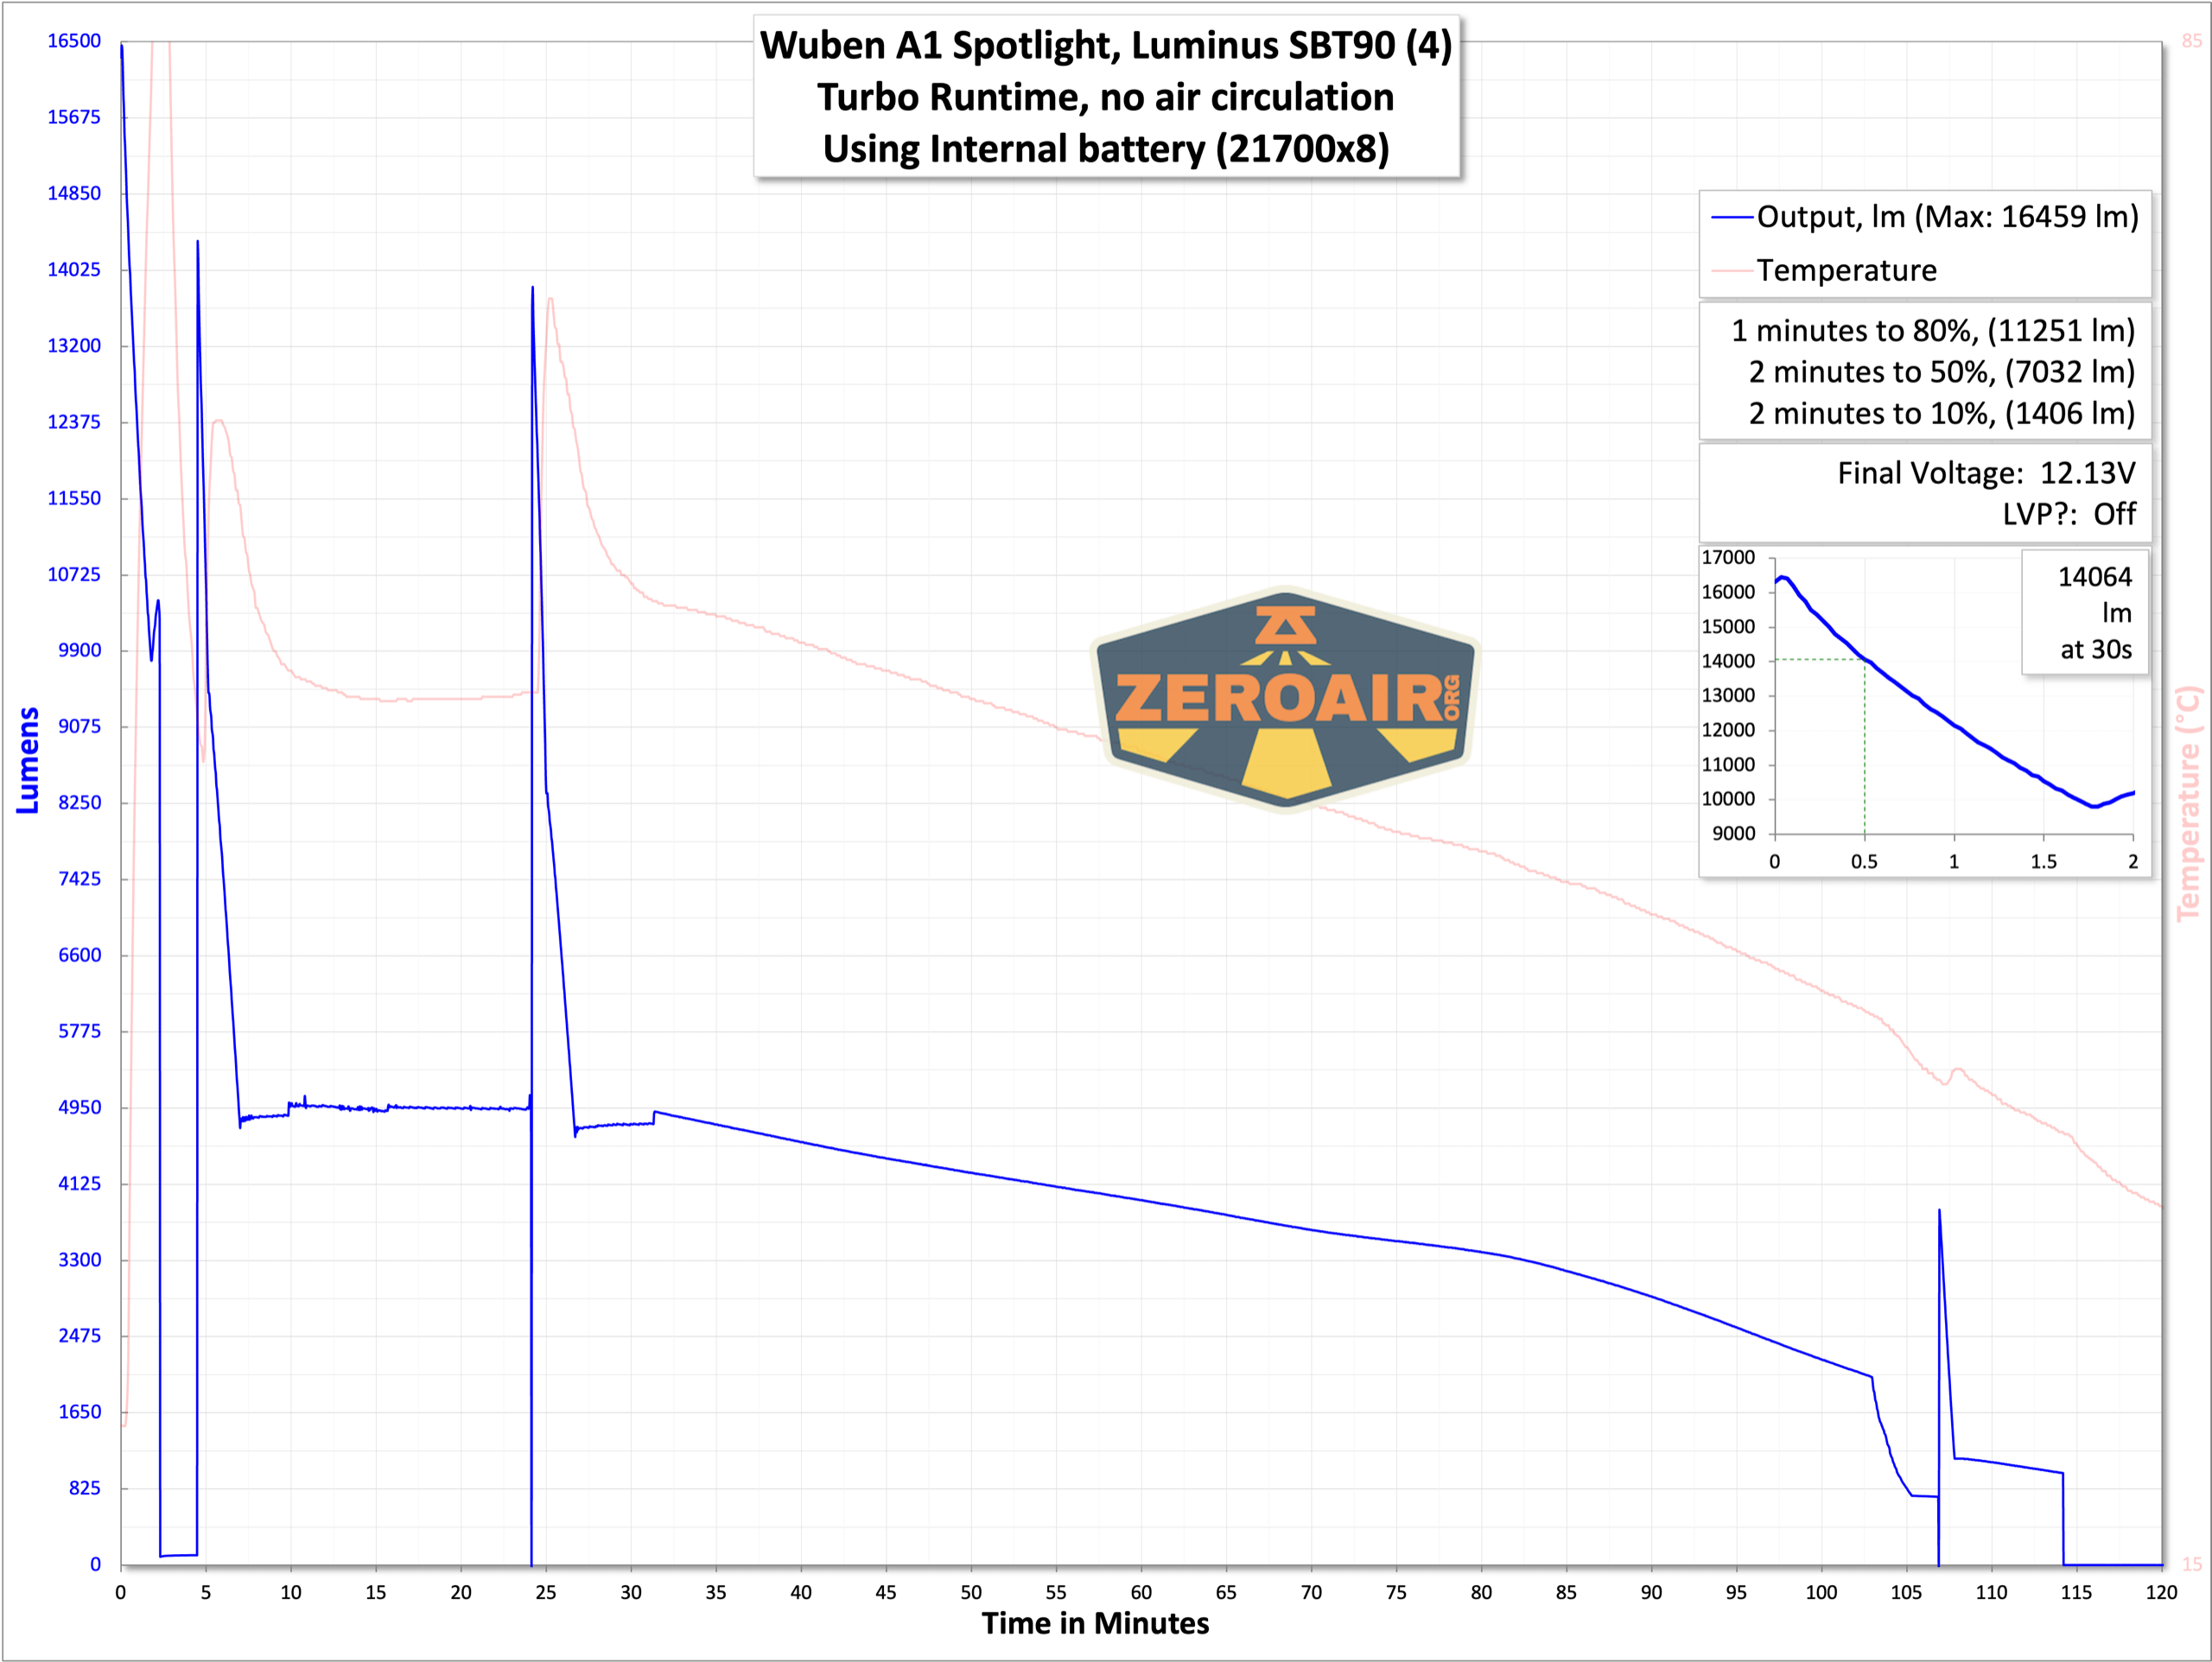

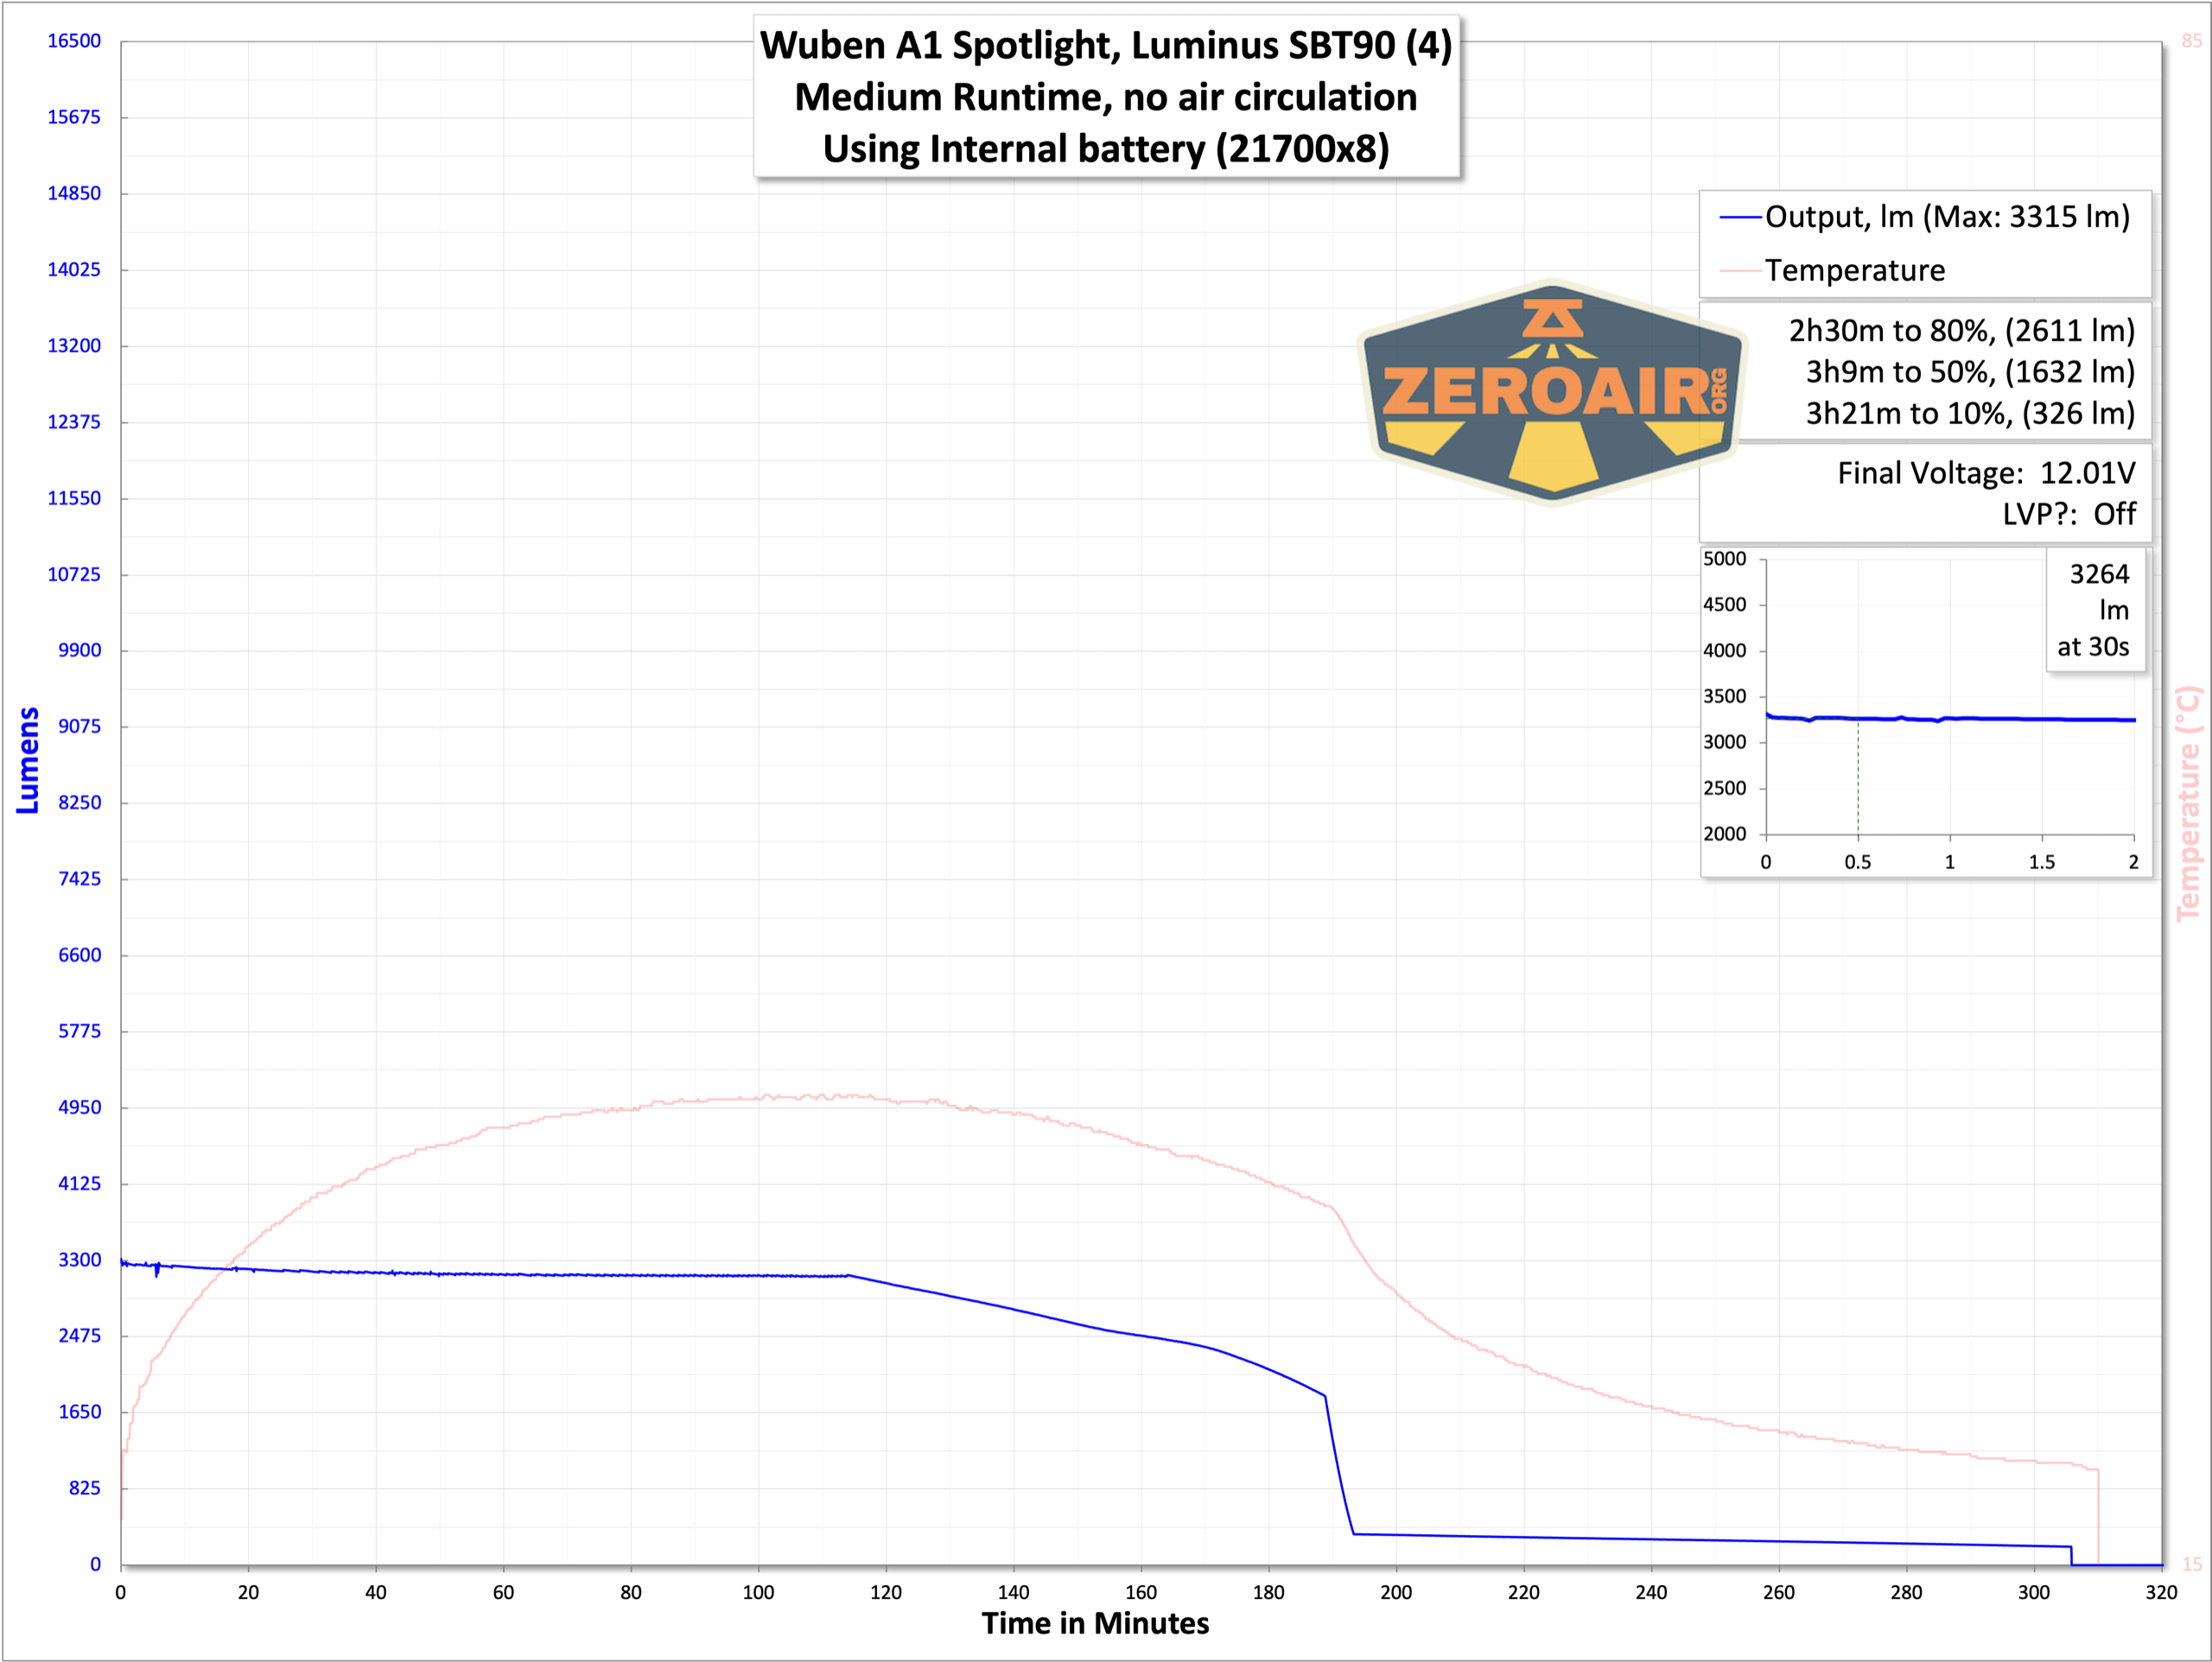
Low voltage protection is observed in every test, with the light shutting off at around 12V. (So 12V/4= around 3V per cell; perfectly good.)
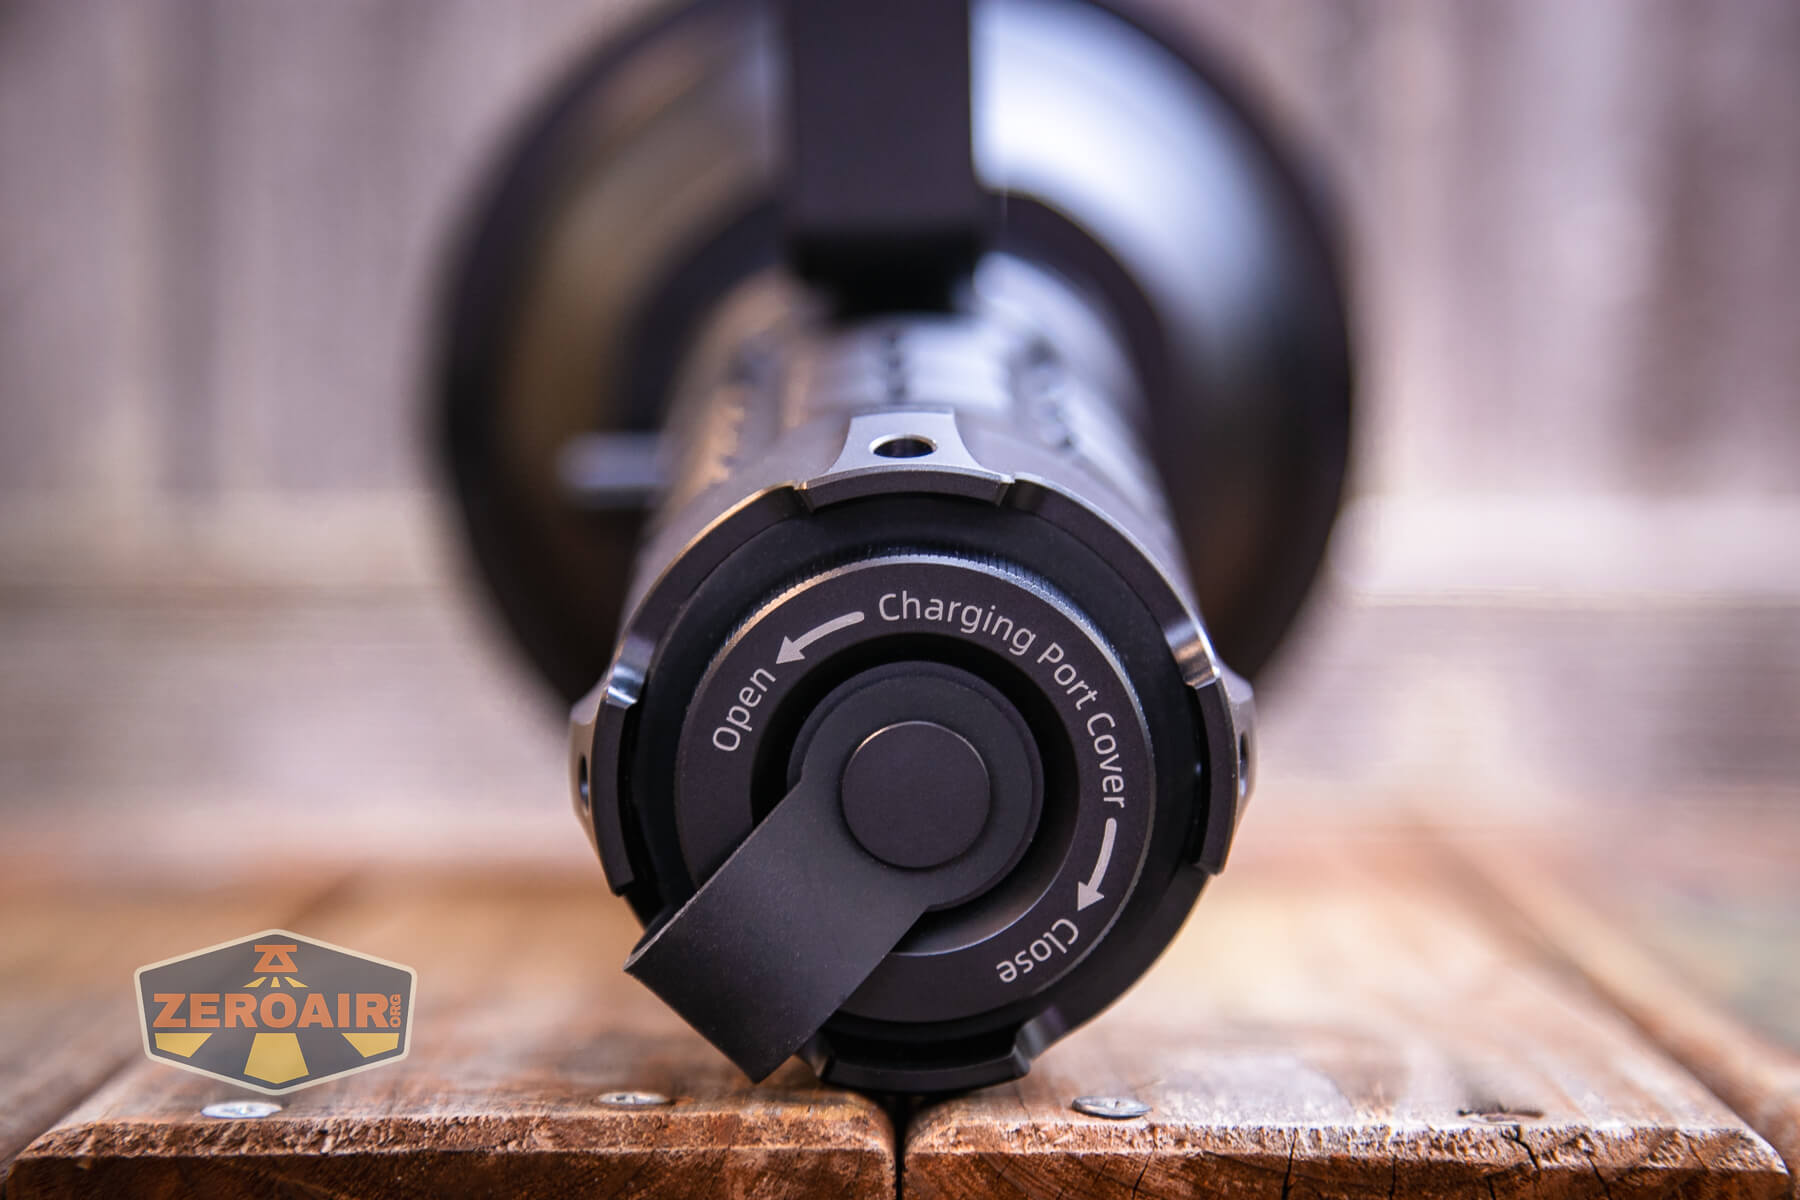
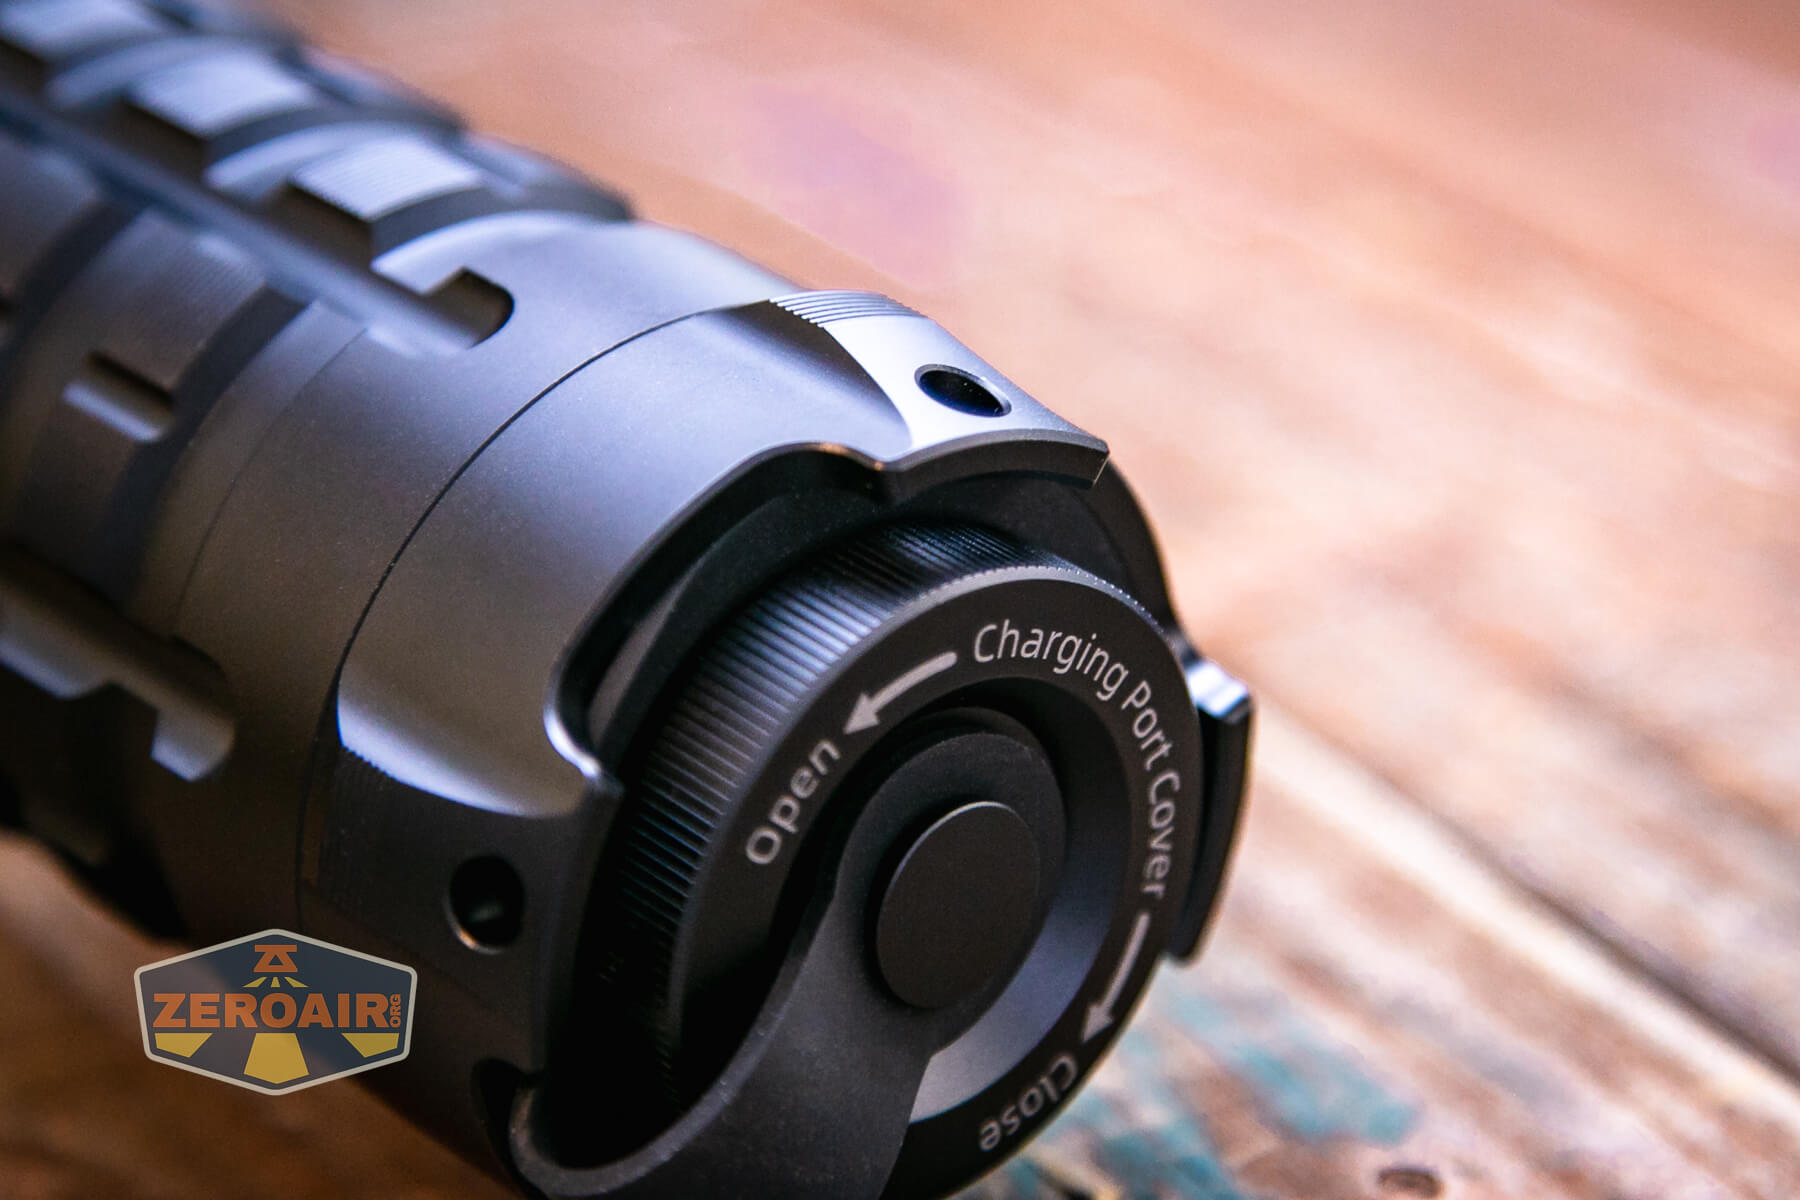
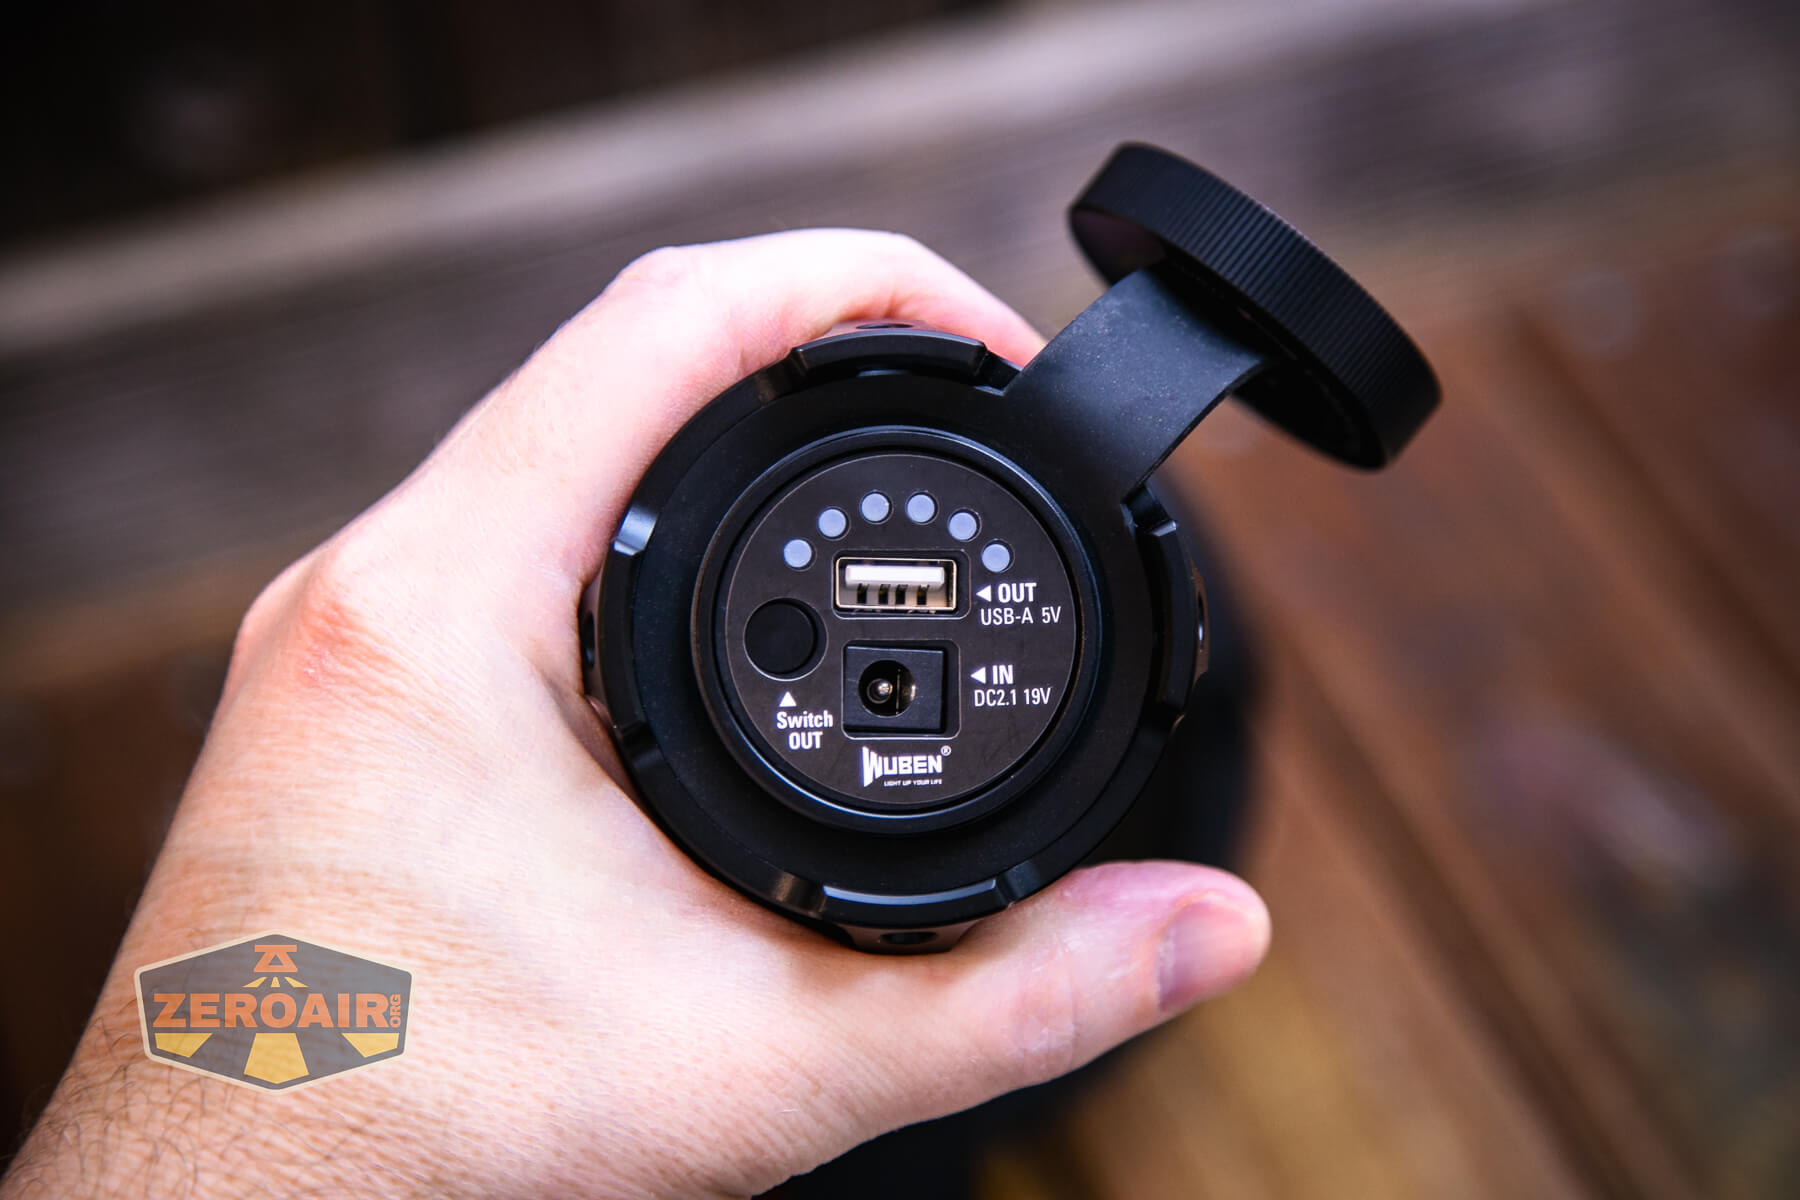
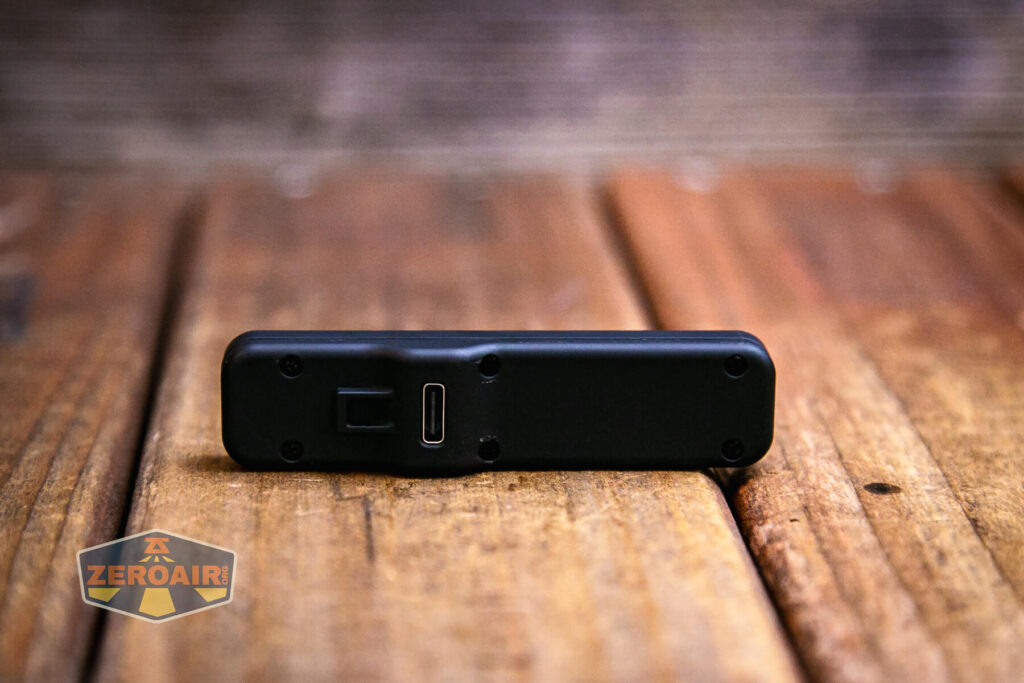
Charging
Along with the built in battery comes onboard charging. On the A1, this is by way of a DC barrel plug. The plug is accessed by this port on the tail. Here you can see the little soft flap that the tailcap is both attached to and screws down on to, and provides the watertightness of the tailcap.
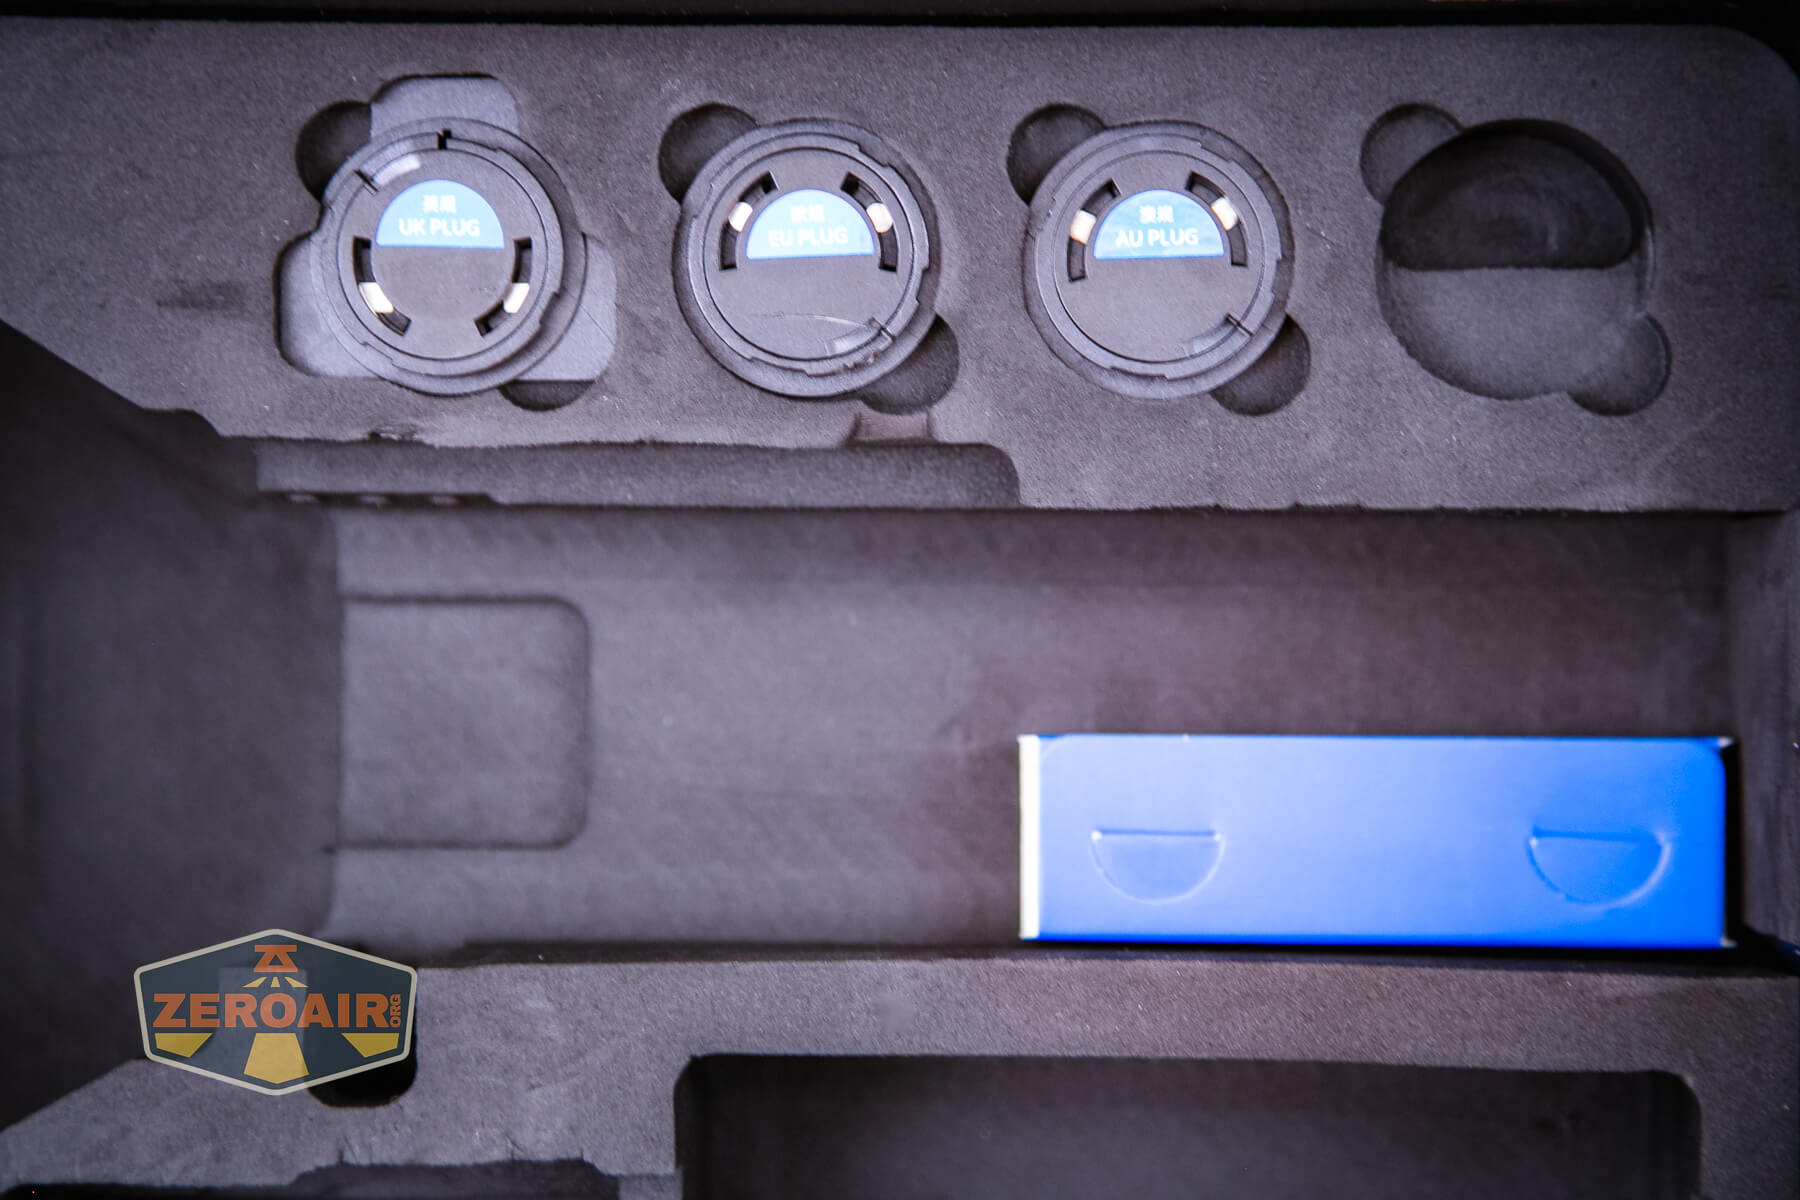
Wuben includes a wall wart, which is rated for 19V and 3A.
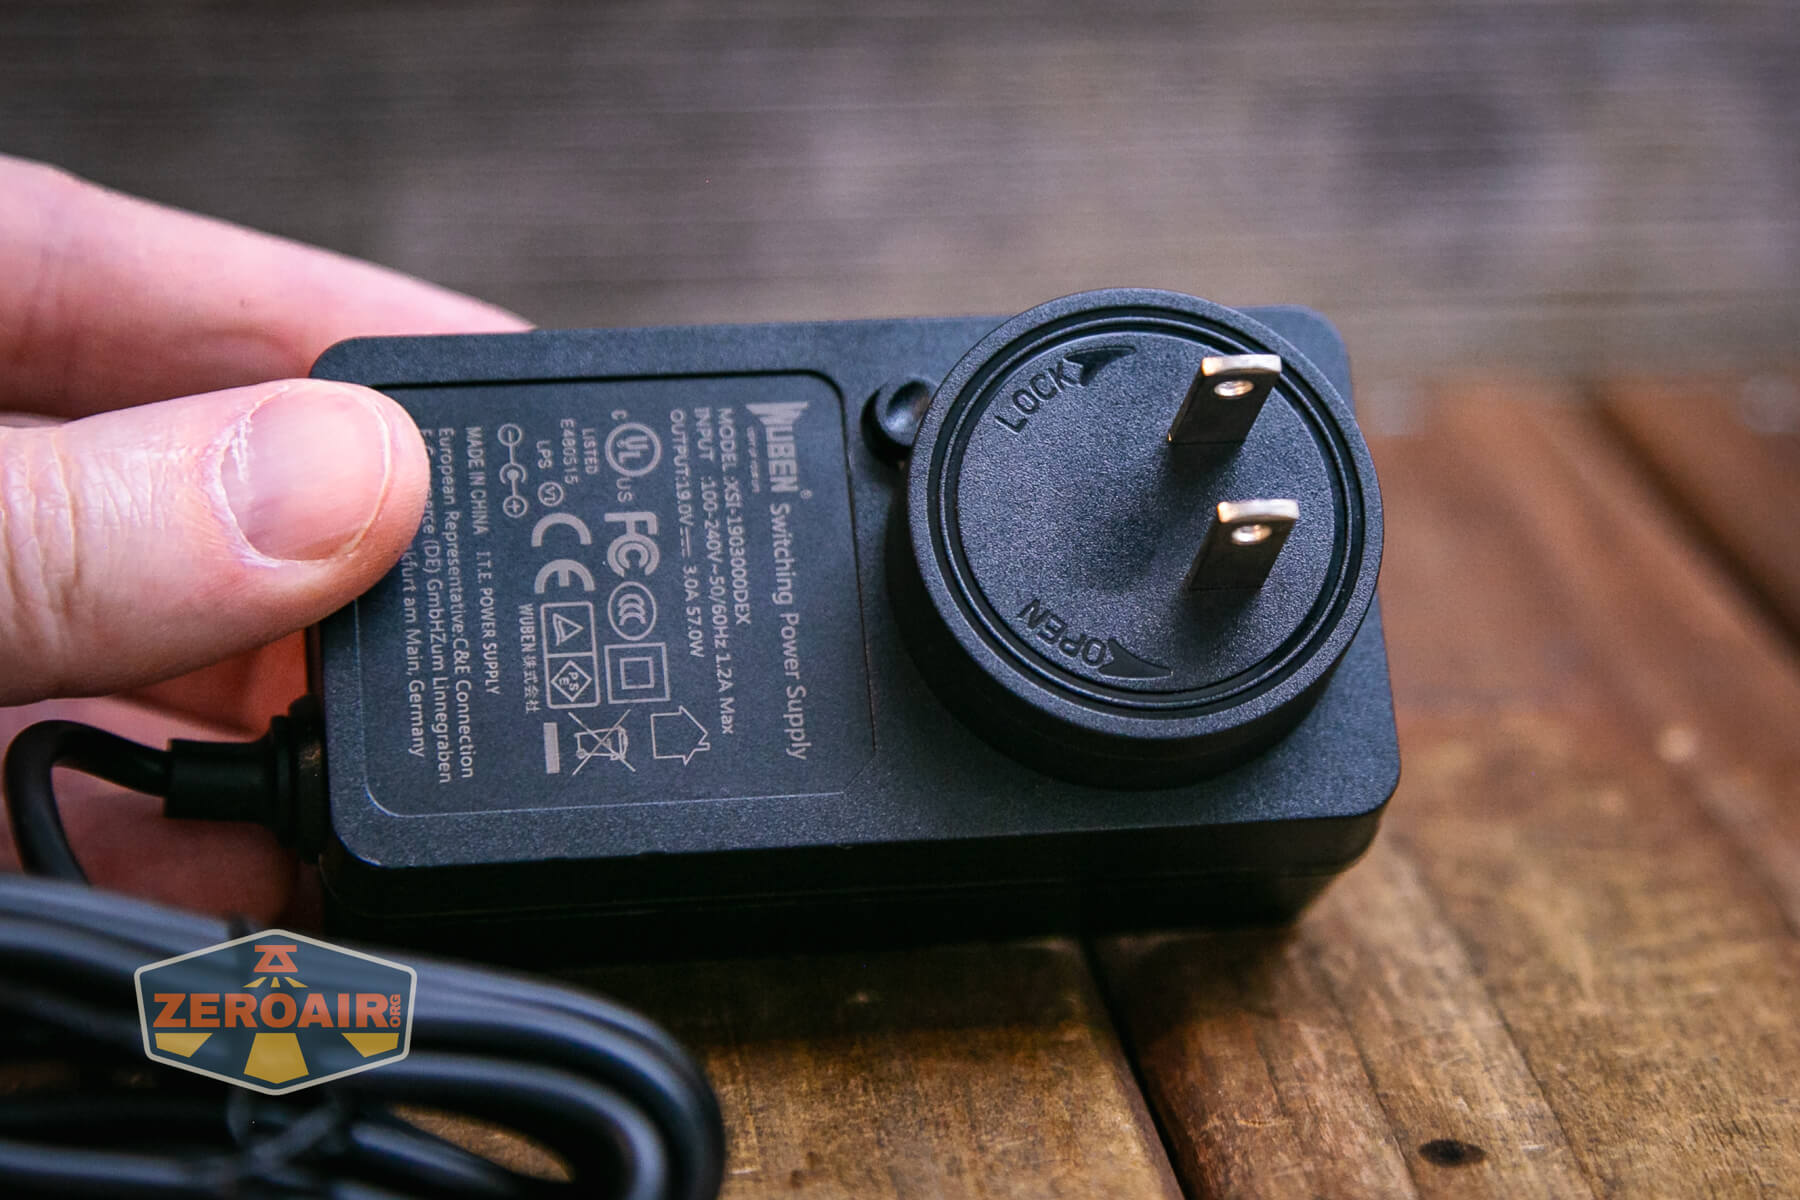
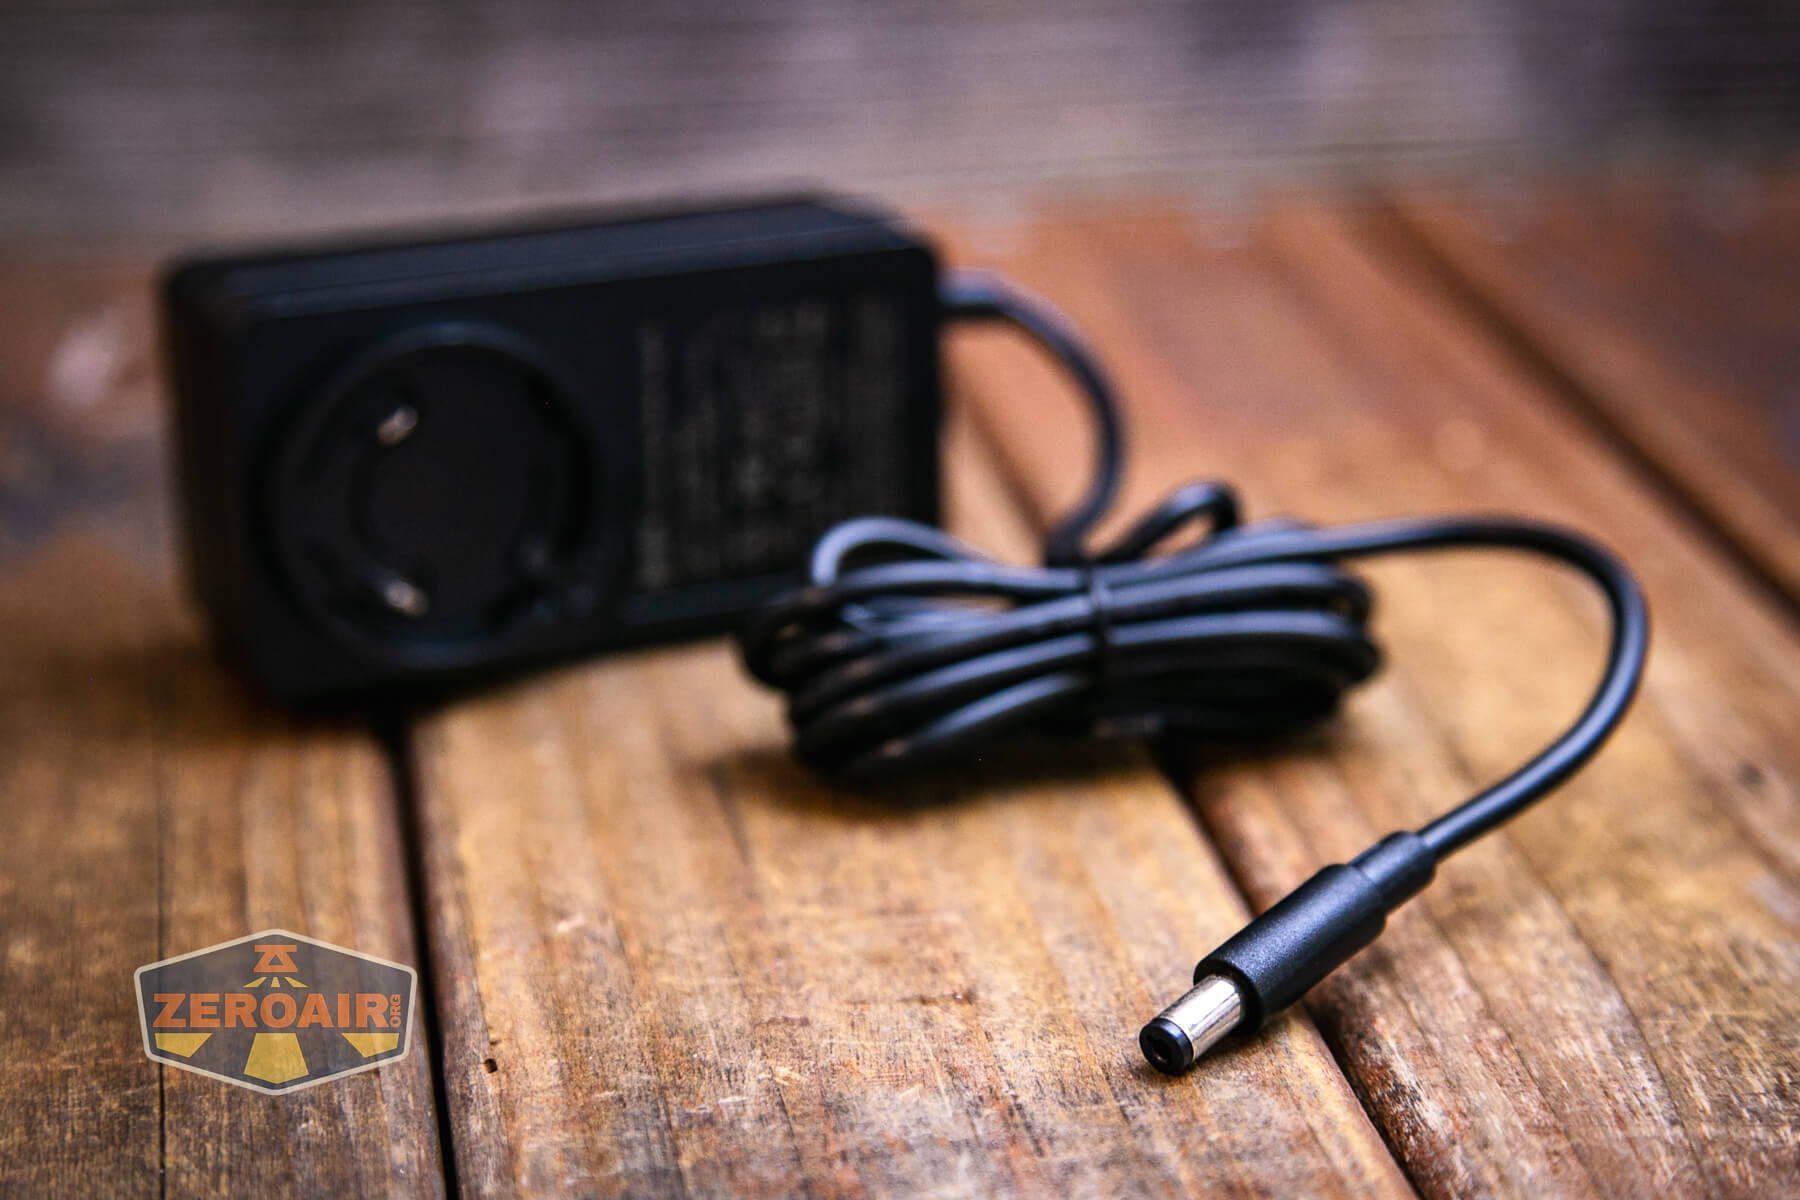
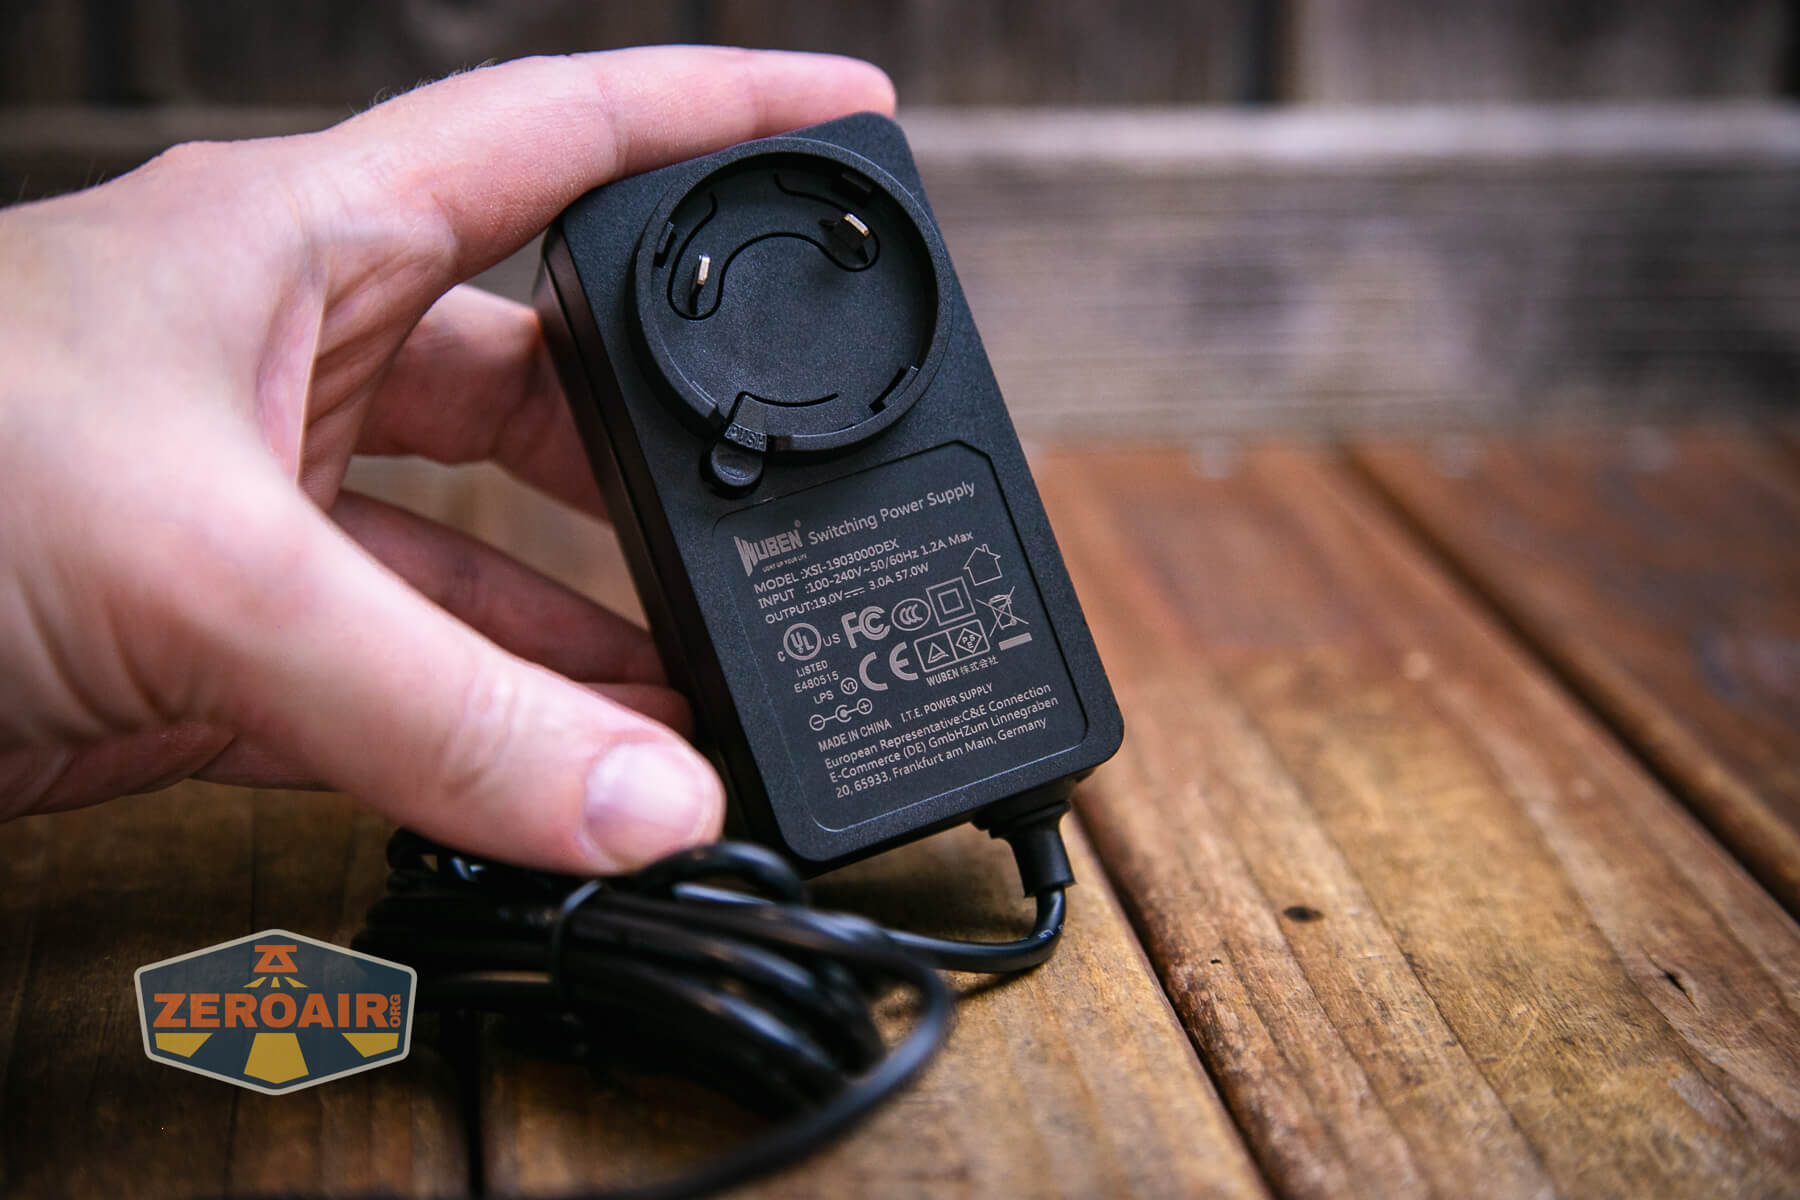
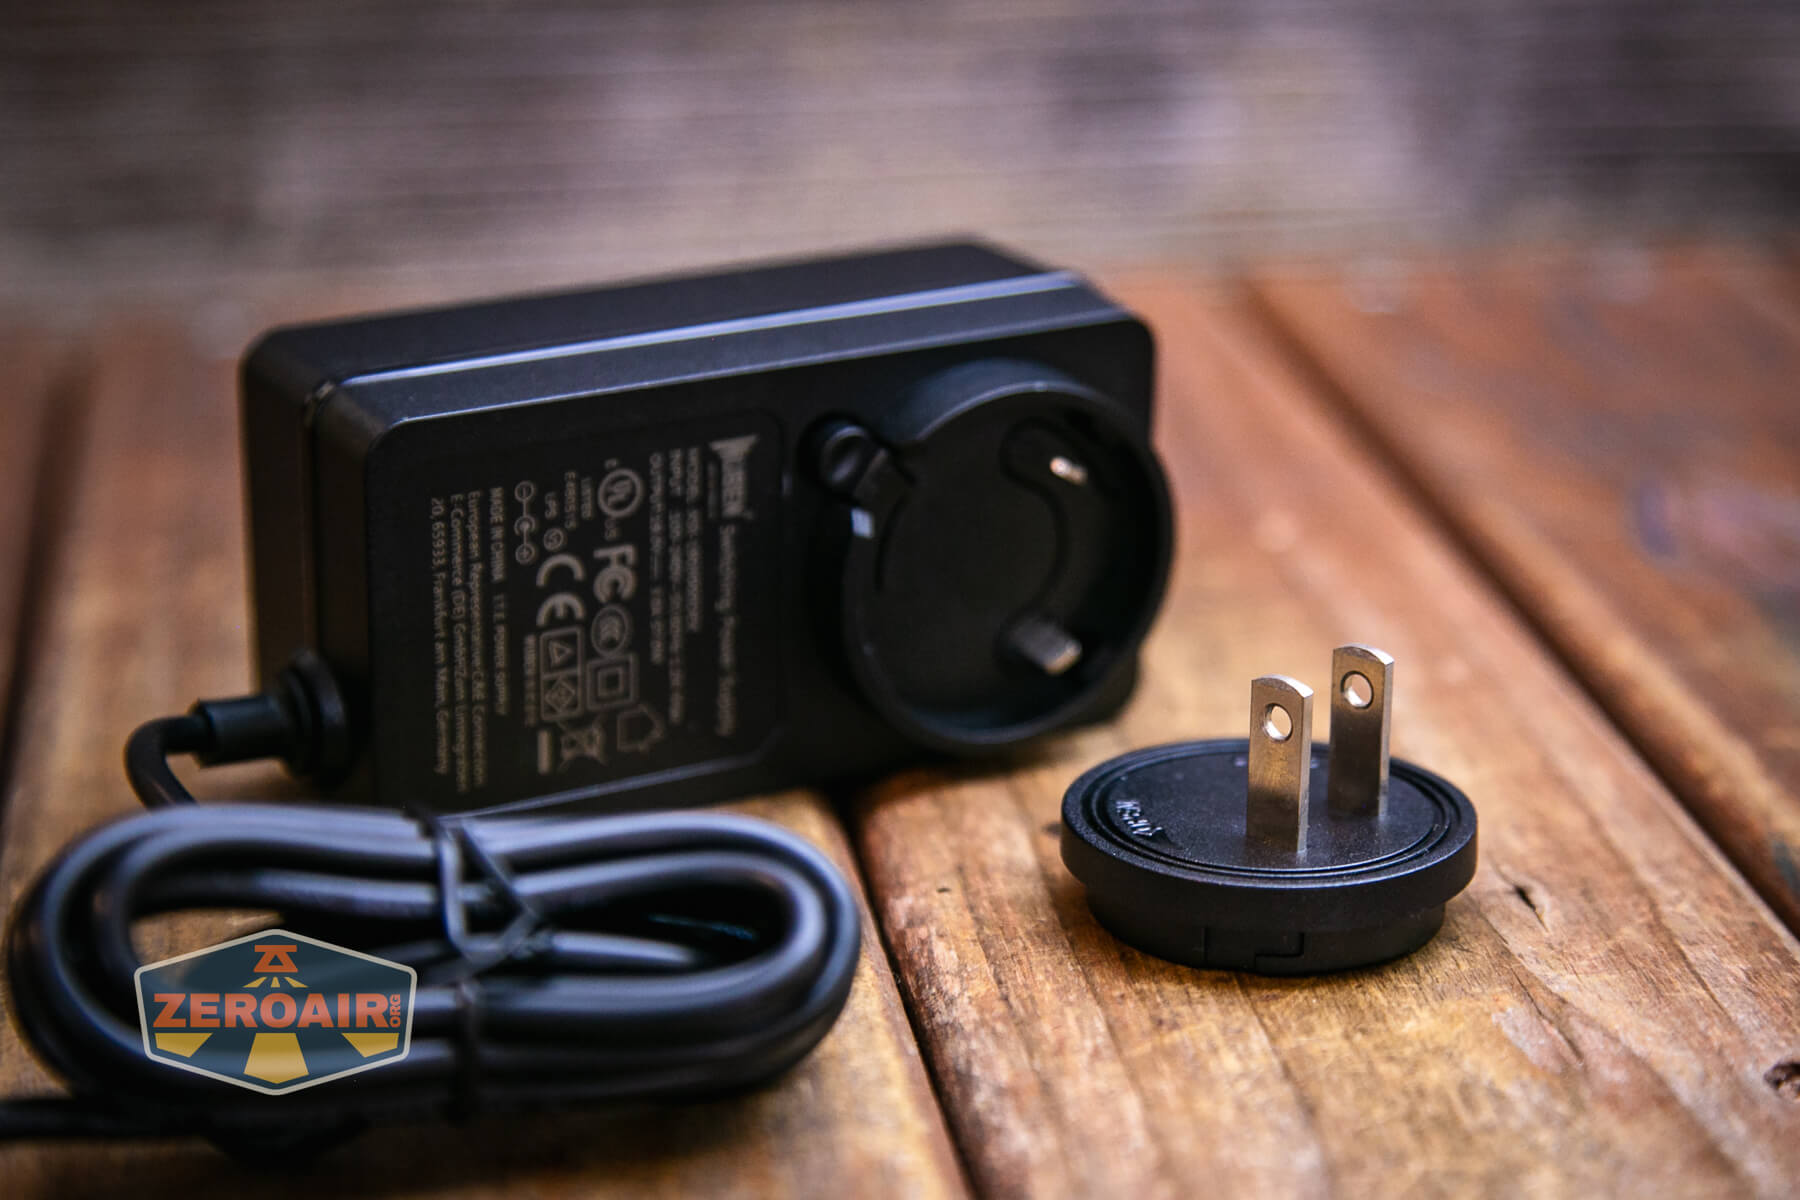
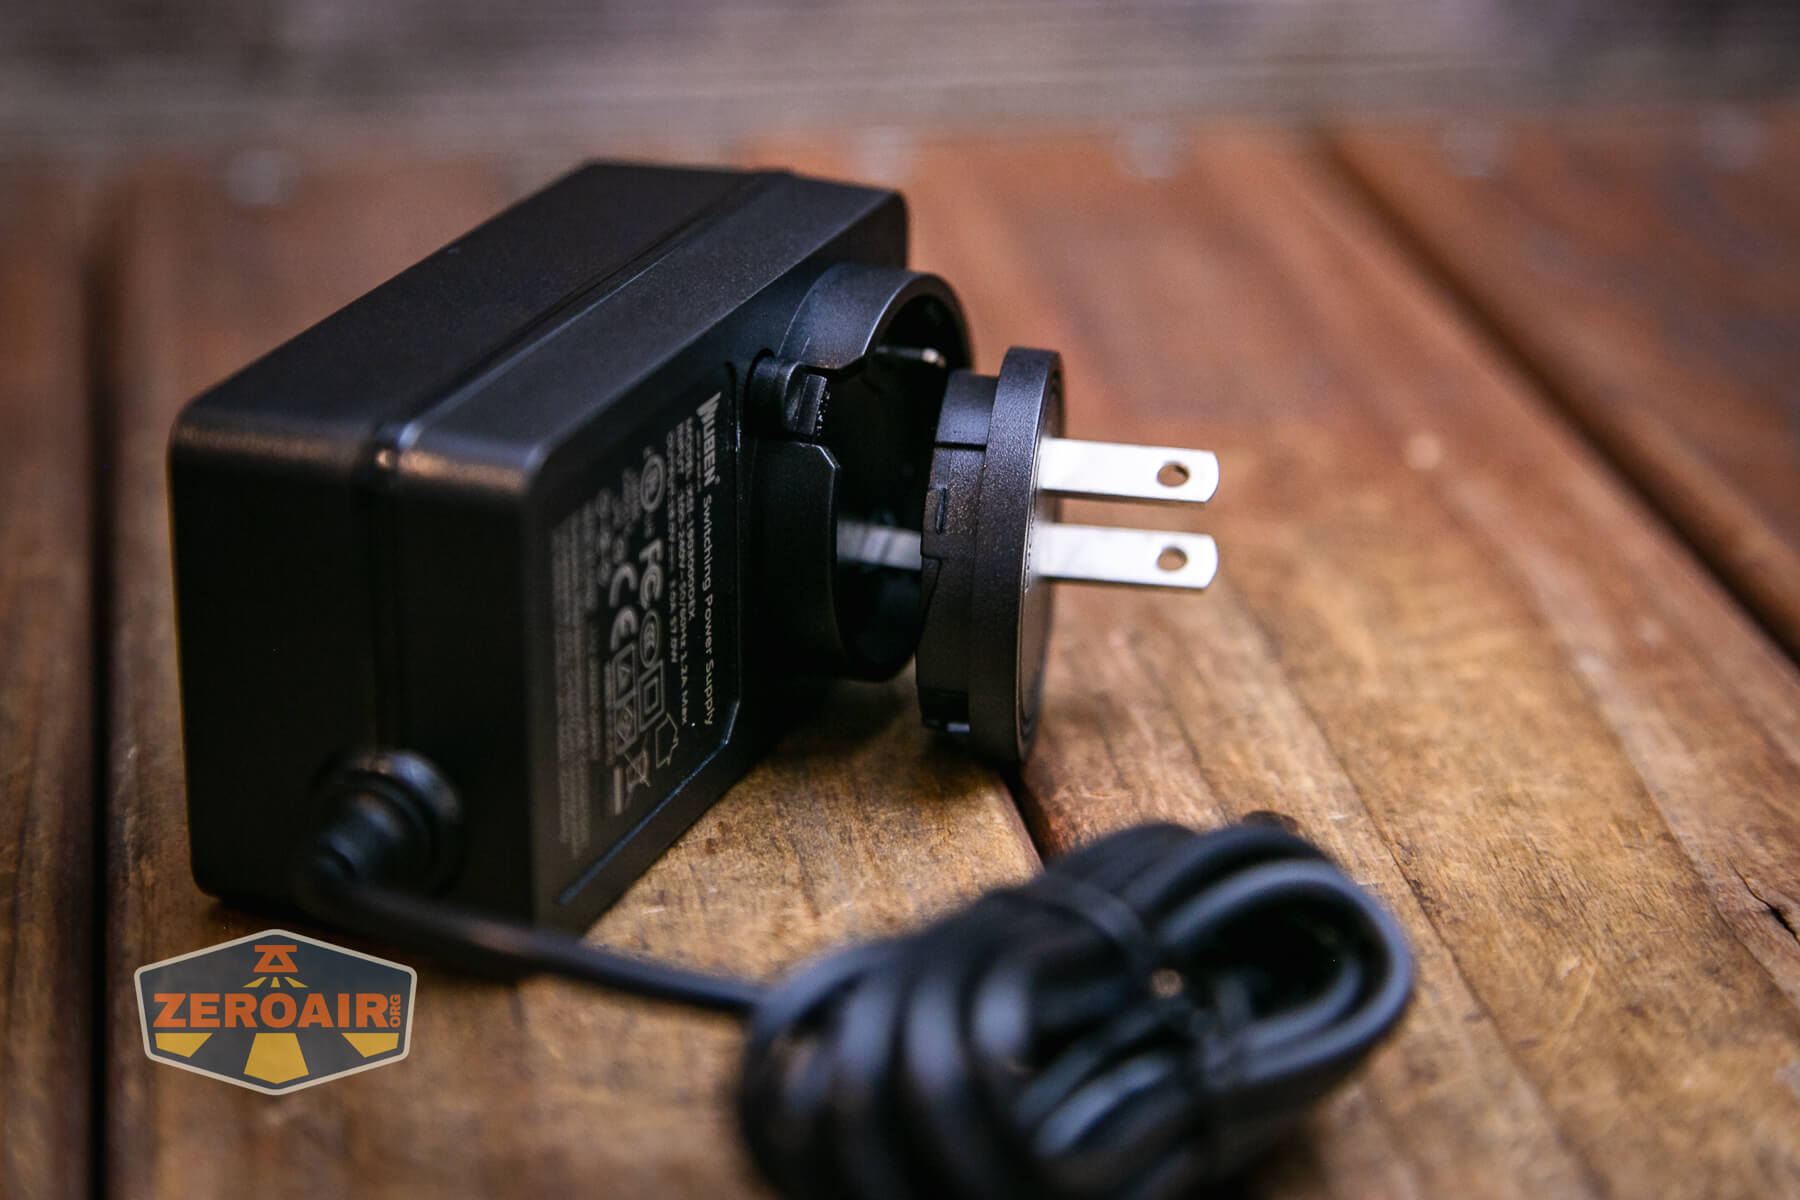
The wall wart is versatile though, because you get these four location-specific plugs. EU, UK, US, and AU options are all included with the package.


These adapters have a nice little place to live permanently in the case, too.
I can’t log DC power yet, but can report that the A1 charges in a fairly blistering sub-3 hours!
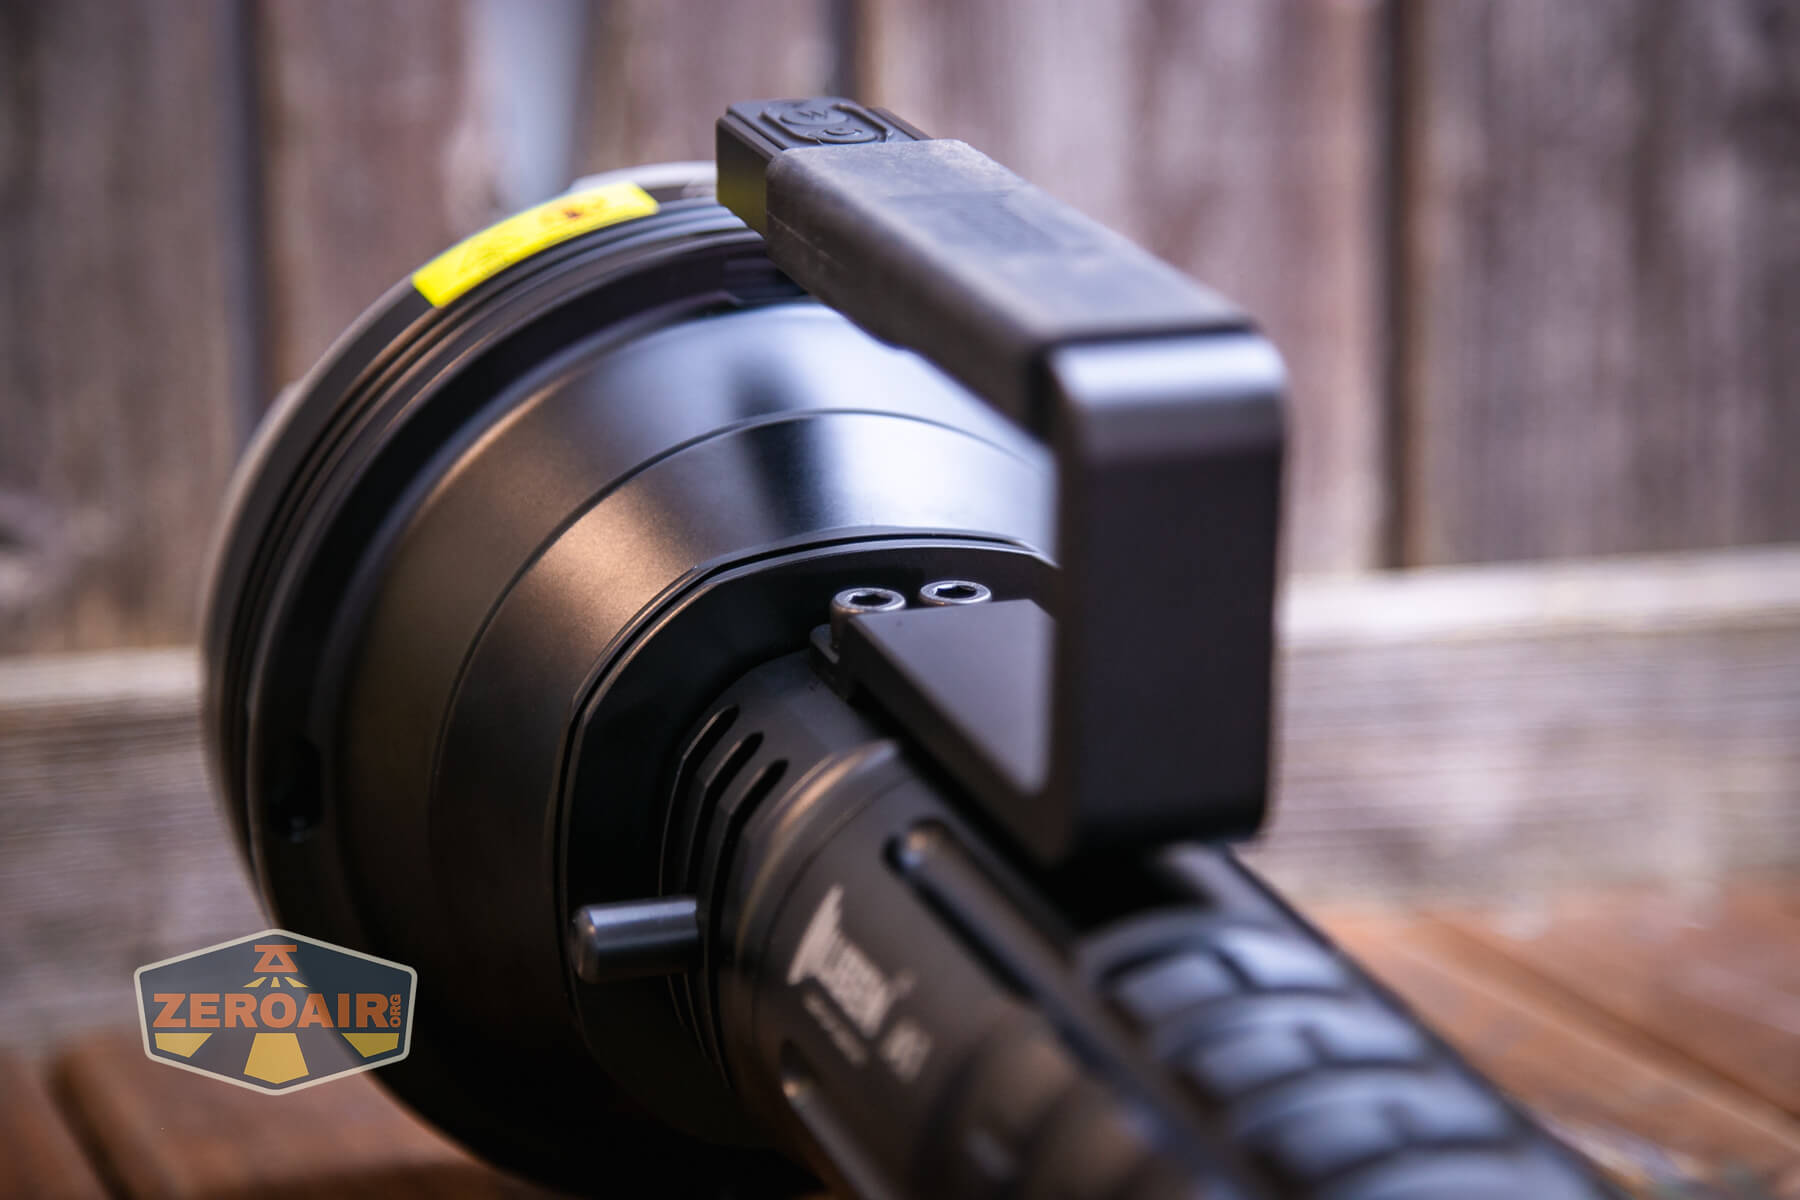
Powerbank
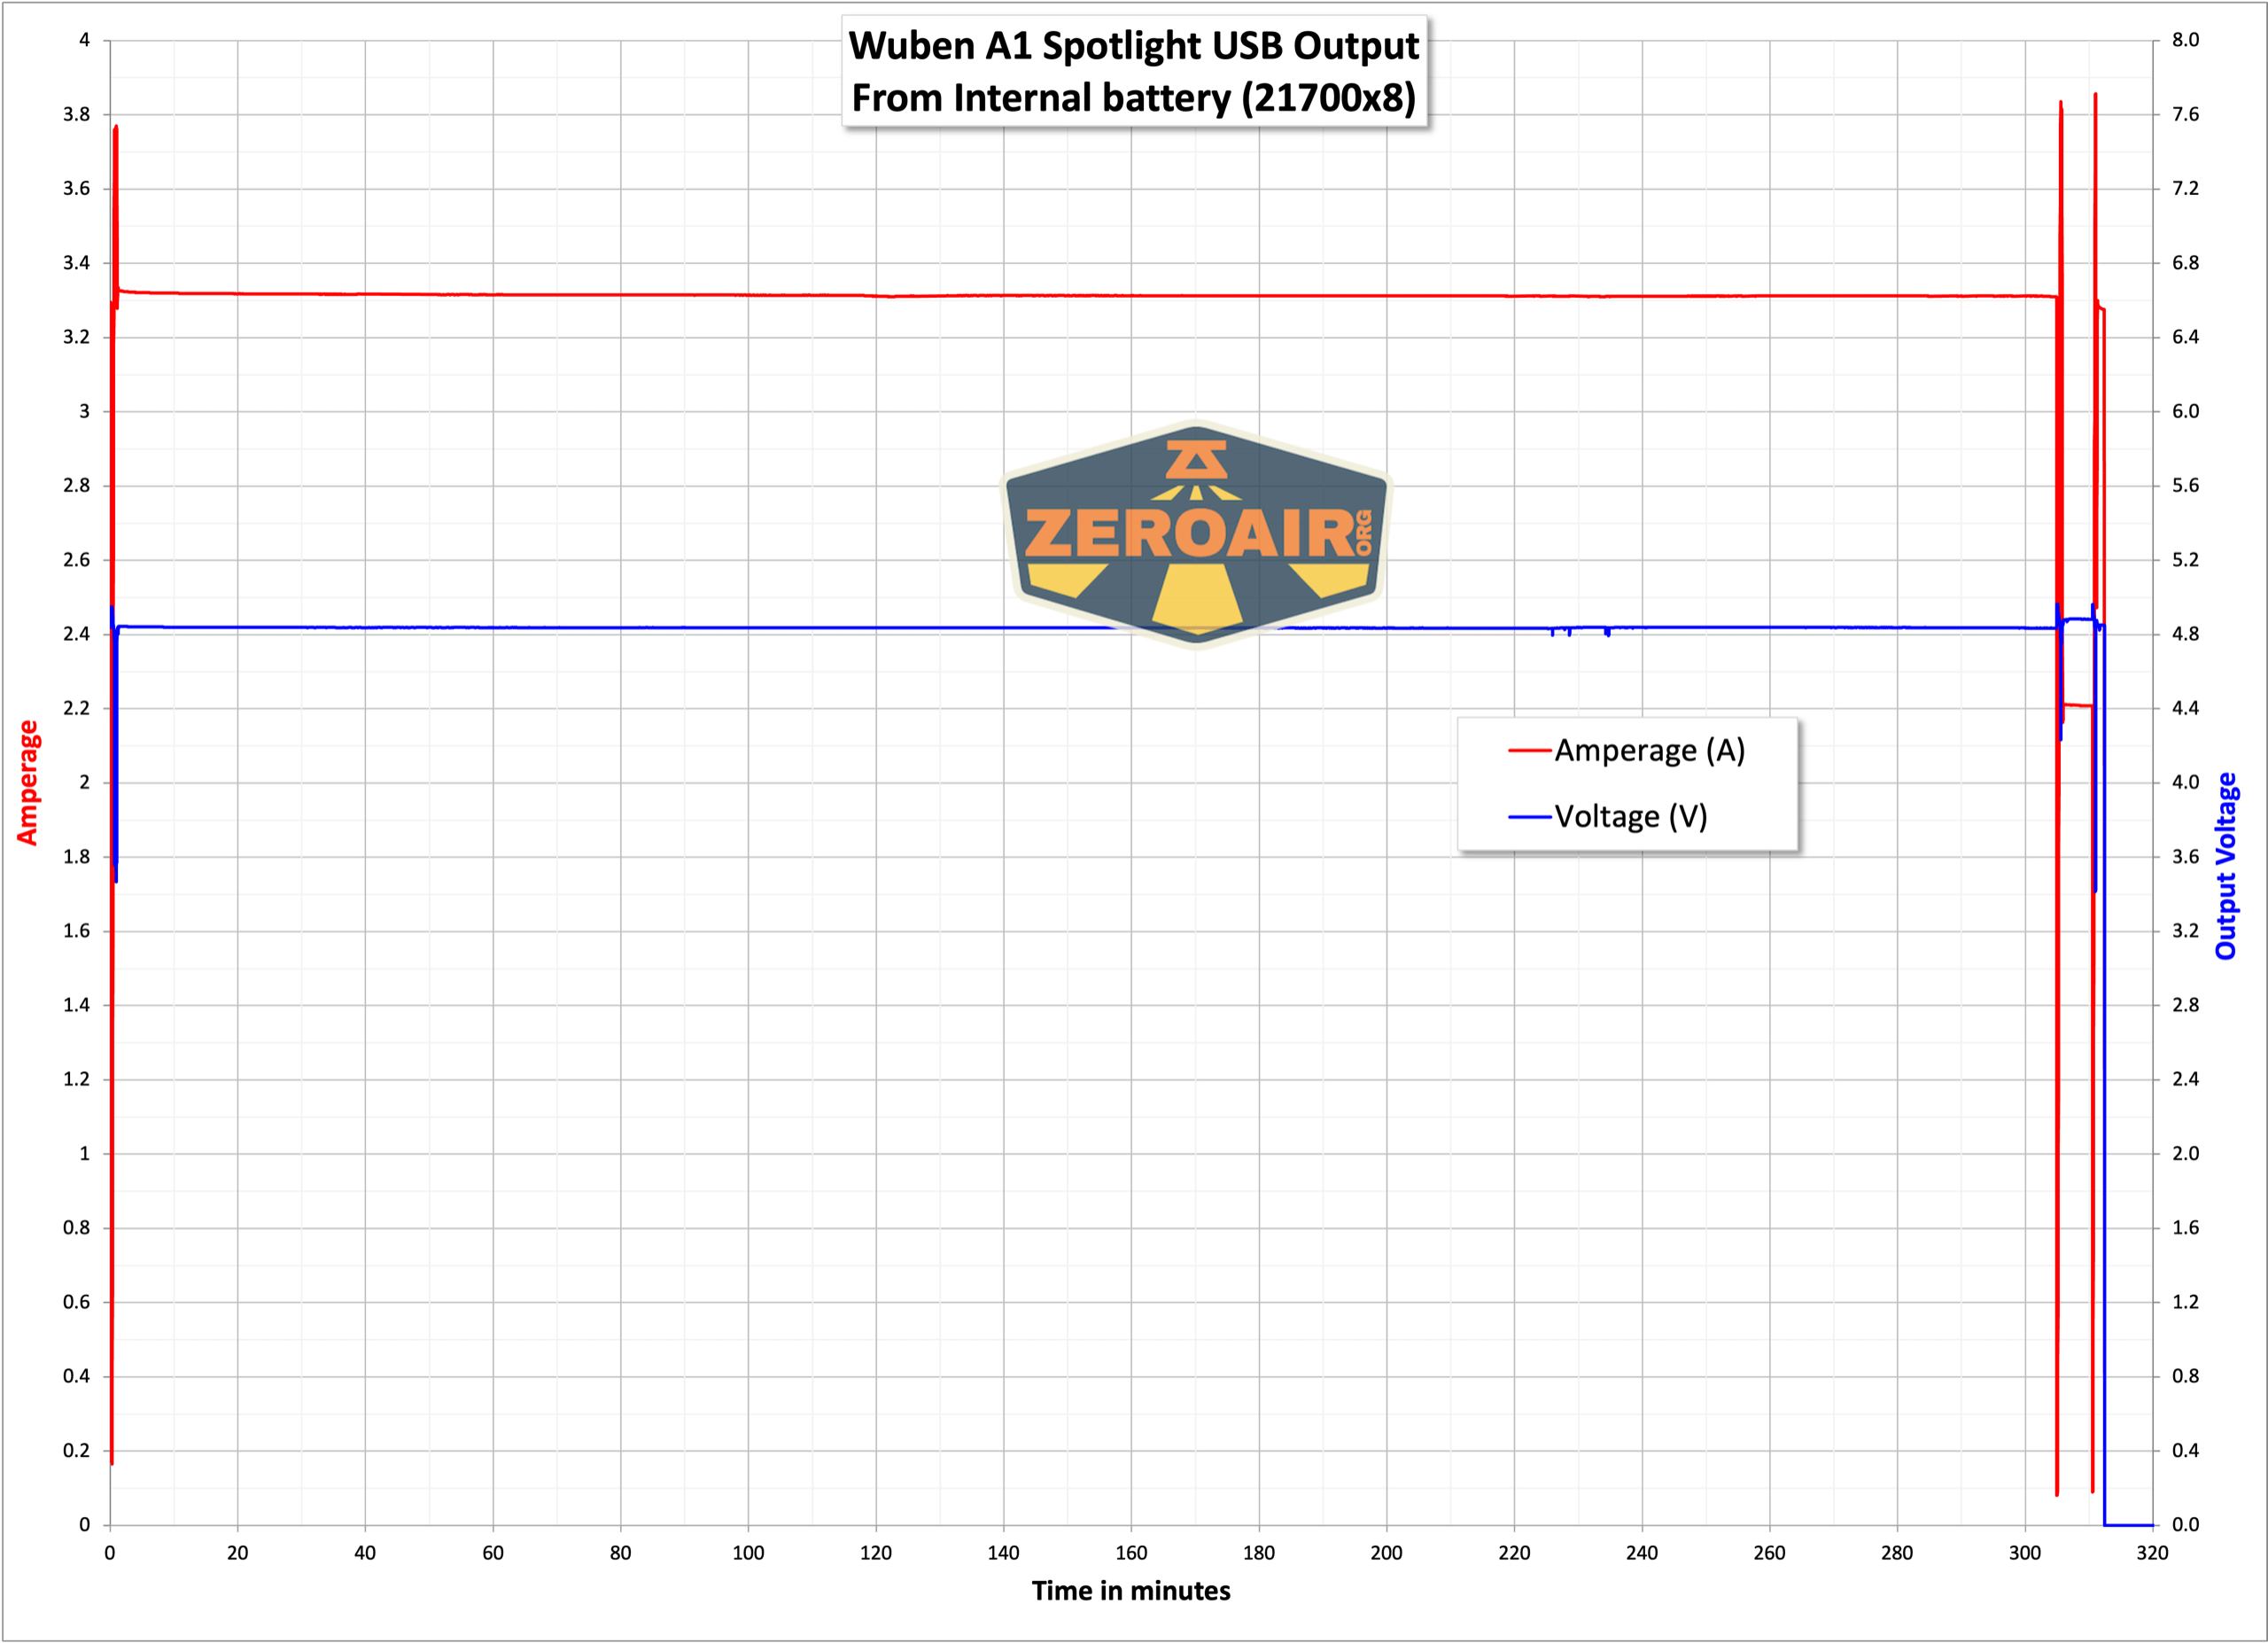
One fantastic feature of the Wuben A1 spotlight is the powerbank function. There’s a single USB port near the charging port. It’s a USB-A port. By default, this port is not “on” but clicking that little black button (labeled “Switch OUT”) will activate it.
Below you can see the output voltage as output current increases (to a maximum of around 3.8A). At this point, the voltage has dropped to around 3.6V (obviously well below specification). However, at around 3.3A, the voltage is perfectly fine, at around 4.8V.
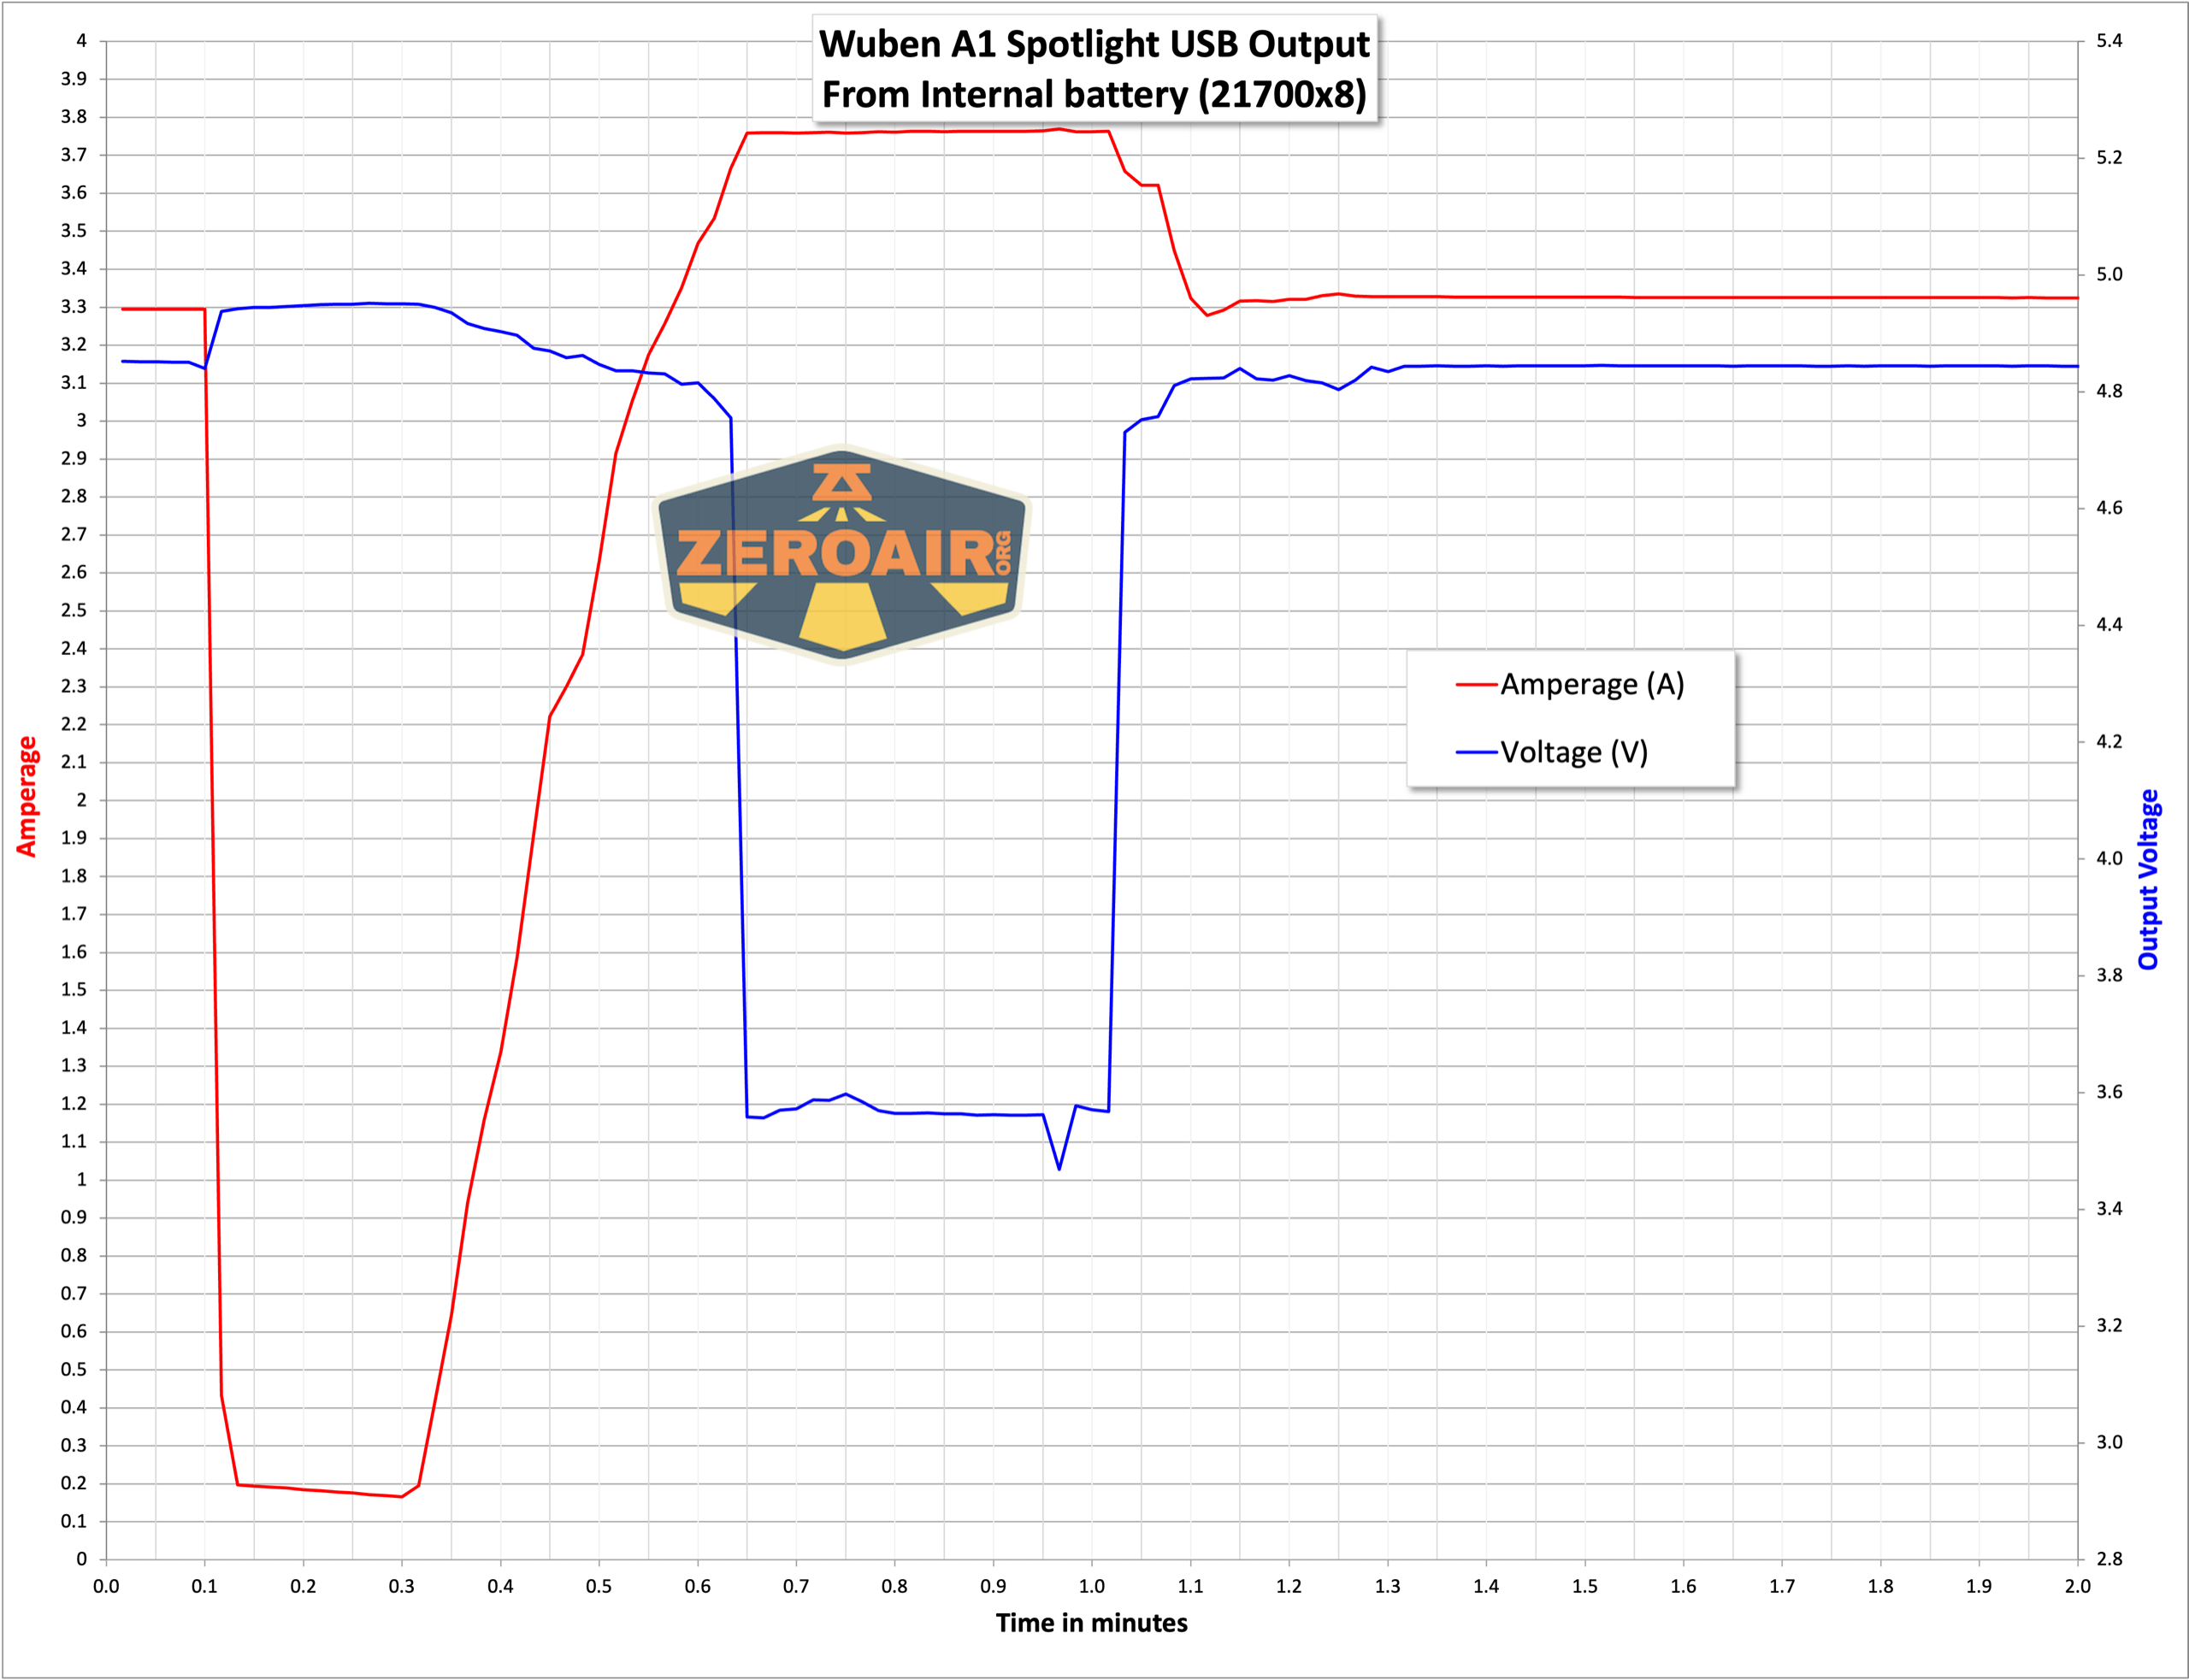
There’s a lot of power in this large battery. The output carried on at around 3.3A for over 5 hours! Plenty of power for charging a cellphone (or more).
Modes and Currents
| Mode | Mode Claimed Output (lm) | Claimed Runtime | Measured Lumens | Tailcap Amps (16.8V) |
|---|---|---|---|---|
| Turbo | 20,000 – 6,000 | 2m+2h | 16459 (0s) 14064 (30s) |
>18 |
| Level 5 | 12,000 -5,000 | 5m+2.5h | 9929 | 11.42 |
| Level 4 | 4,000 | 5h | 3264 | 2.59 |
| Level 3 | 1,500 | 13.5h | 1257 | 0.70 |
| Level 2 | 400 | 43h | 352 | 0.25 |
| Level 1 | 100 | 105h | 95 | 0.10 |
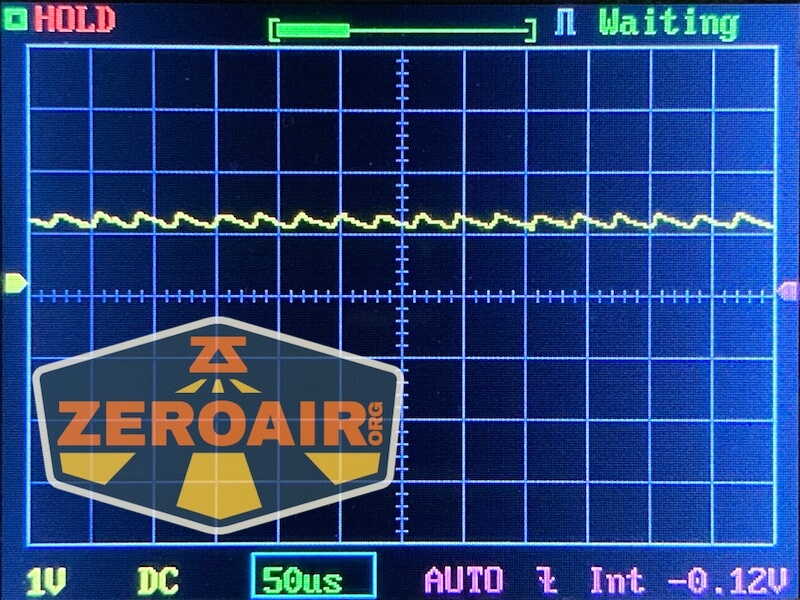
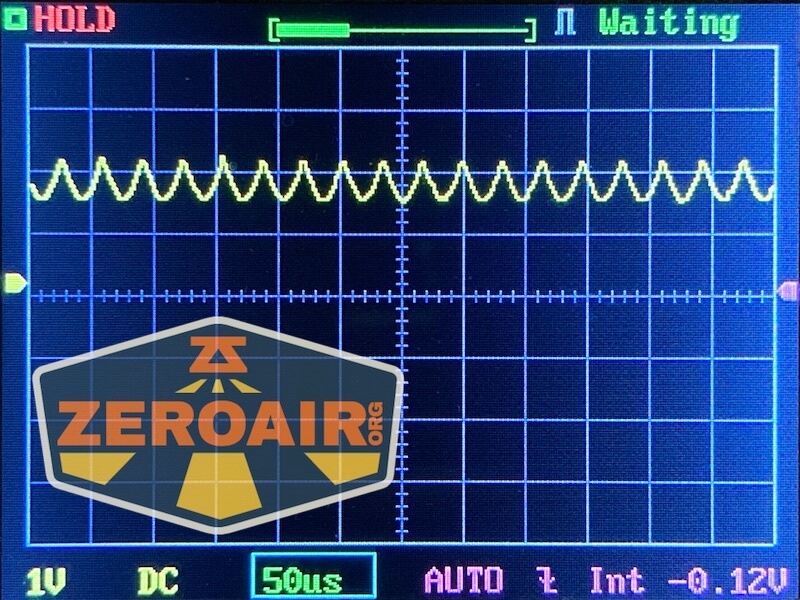
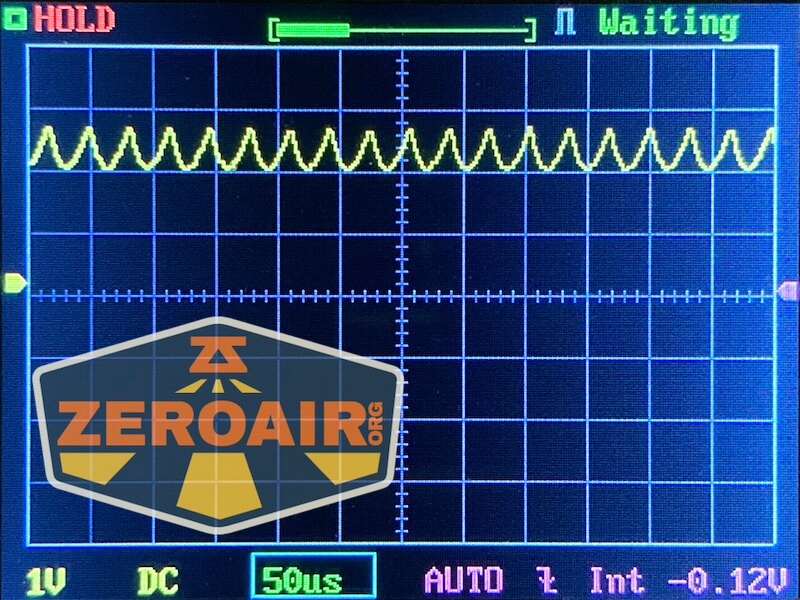
Pulse Width Modulation
None of the outputs use PWM.
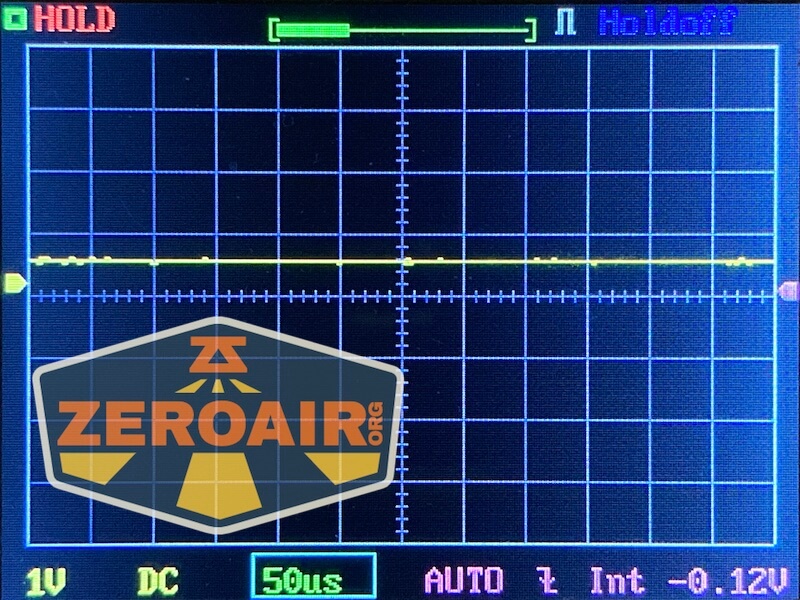
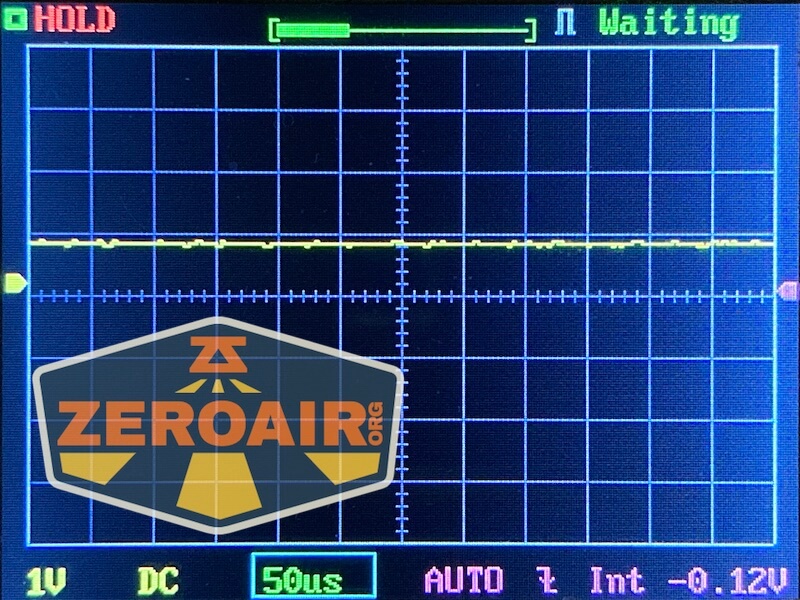

Here you can see a “baseline” – a chart with almost no light hitting the sensor.
Then there’s the Ultrafire WF-602C flashlight, which has some of the worst PWM I’ve seen. It’s so bad that I used a post about it to explain PWM! Here are multiple timescales (10ms, 5ms, 2ms, 1ms, 0.5ms, 0.2ms) to make comparing this “worst” PWM light to the test light easier. That post also explains why I didn’t test the WF-602C at the usual 50us scale.
User Interface and Operation
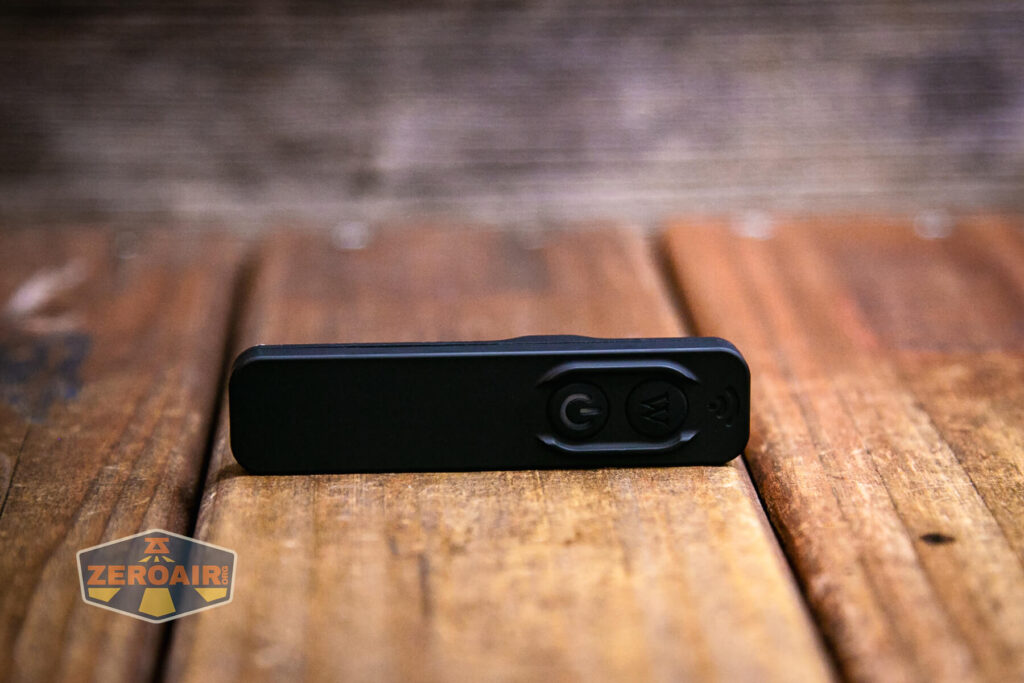
There are a number of ways to interact with the Wuben A1. First, and what I’ve failed to get an adequate photo of, are the two switches attached to the light itself. These are e-switches. One is for power and one is for modes.
The other way to interact with the A1 is this remote switch. It also has the same set of switches – power and mode. The user interface between this remote and the onboard switches is the same.

The remote is neat and has been my preferred way to use the A1.

I did find that sometimes I needed to click the built-in power button before the remote became active. I think this is by design.

Storage for the remote is right there in the handle and is very secure.

Here’s a user interface table! The table covers both onboard switches and remote control switches.
| State | Action | Result |
|---|---|---|
| Off | Click power switch | On (mode memory) |
| On | Click power switch | Off |
| Any | Hold mode switch | Turbo |
| Off | Click both switches 4x | Iterate lockout |
| On | Click mode switch | Mode advance (1-5) |
| Turbo | Click mode switch | Return to previous |
| Any | Hold power switch | Strobe |
| Strobe Group | Click mode switch | Iterate between Strobe and SOS |
| Strobe group | Click power switch | Return to previous |
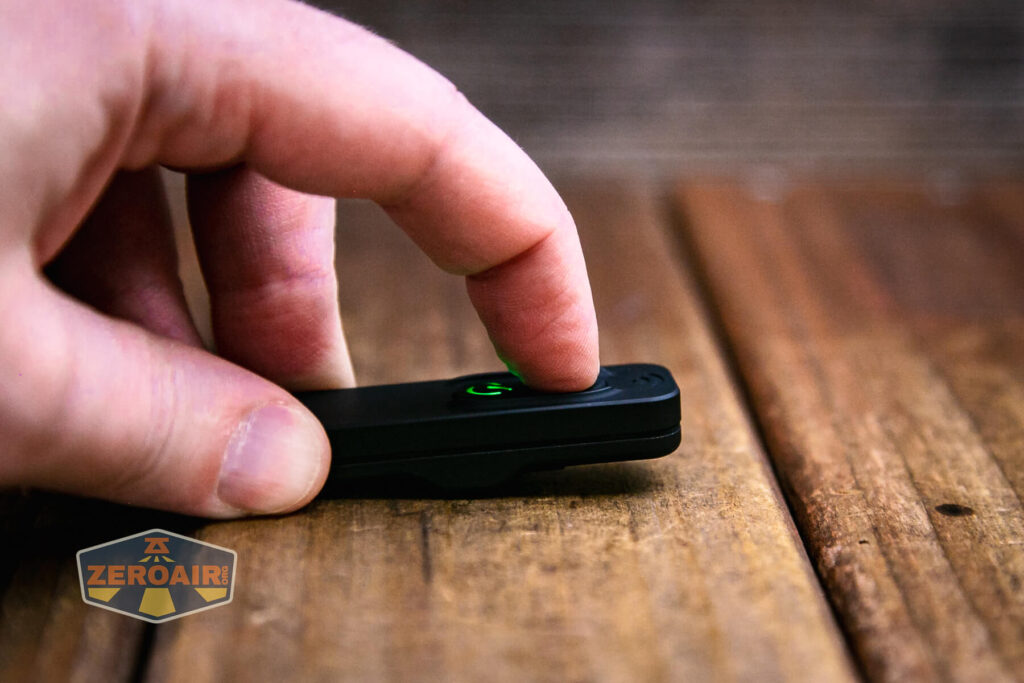
| Any | Click power switch 3x | Switch indicator^ |
| Off (when remote is not connected) | Hold both on flashlight body for 5s and wait for red and blue lights on the power switch to flash, then press power switch on remote within 30s. | Remote is paired |
^ This seems to be simply a blue switch locator function (not a battery check).
LED and Beam
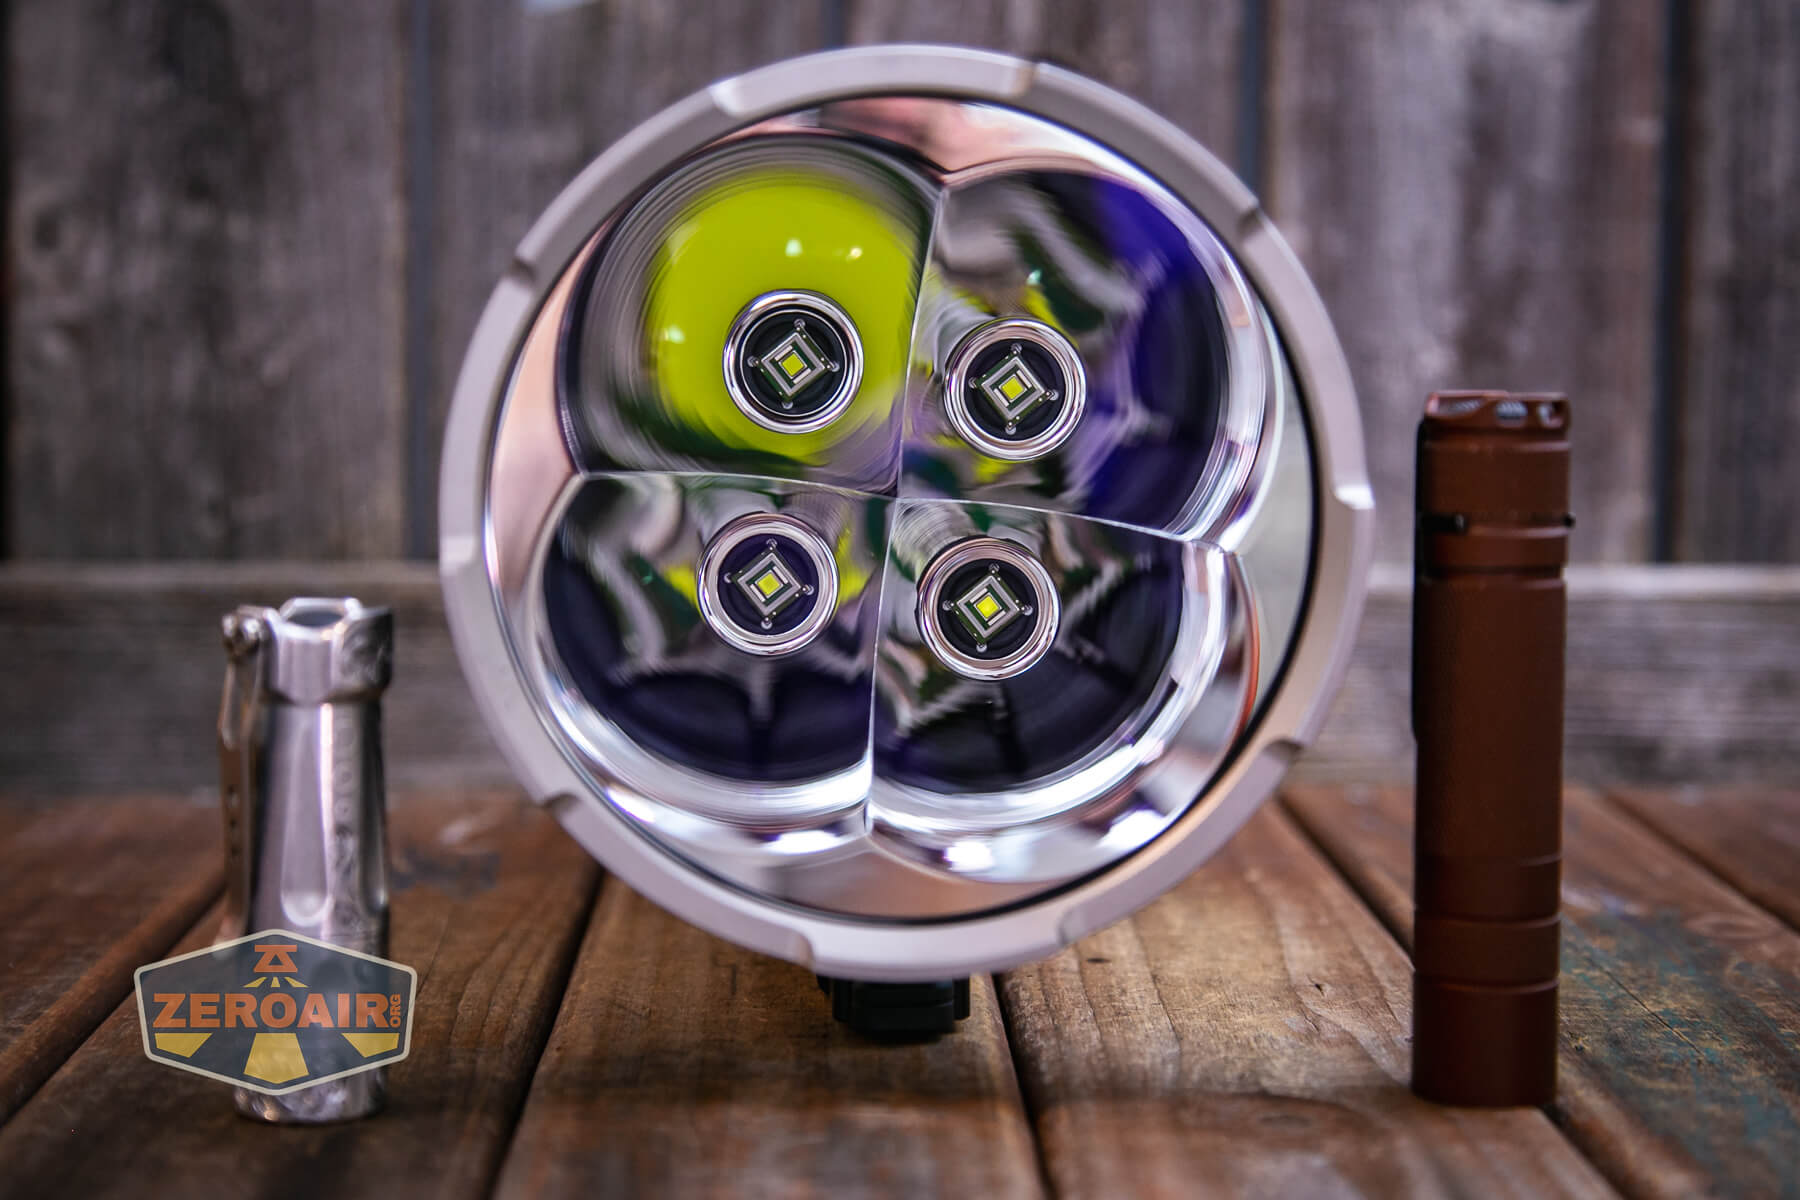
Wuben went with four beast-mode emitters in the A1. These are Luminus SBT90 emitters, and these emitters alone are very expensive! (Around $70 if you buy just one!) So just in emitters, we have accounted for a large part of the cost of the A1.
These are a great choice for this thrower, too. They love to be driven hard and they provide great throw. Each has part of a smooth reflector helping that throw, too.


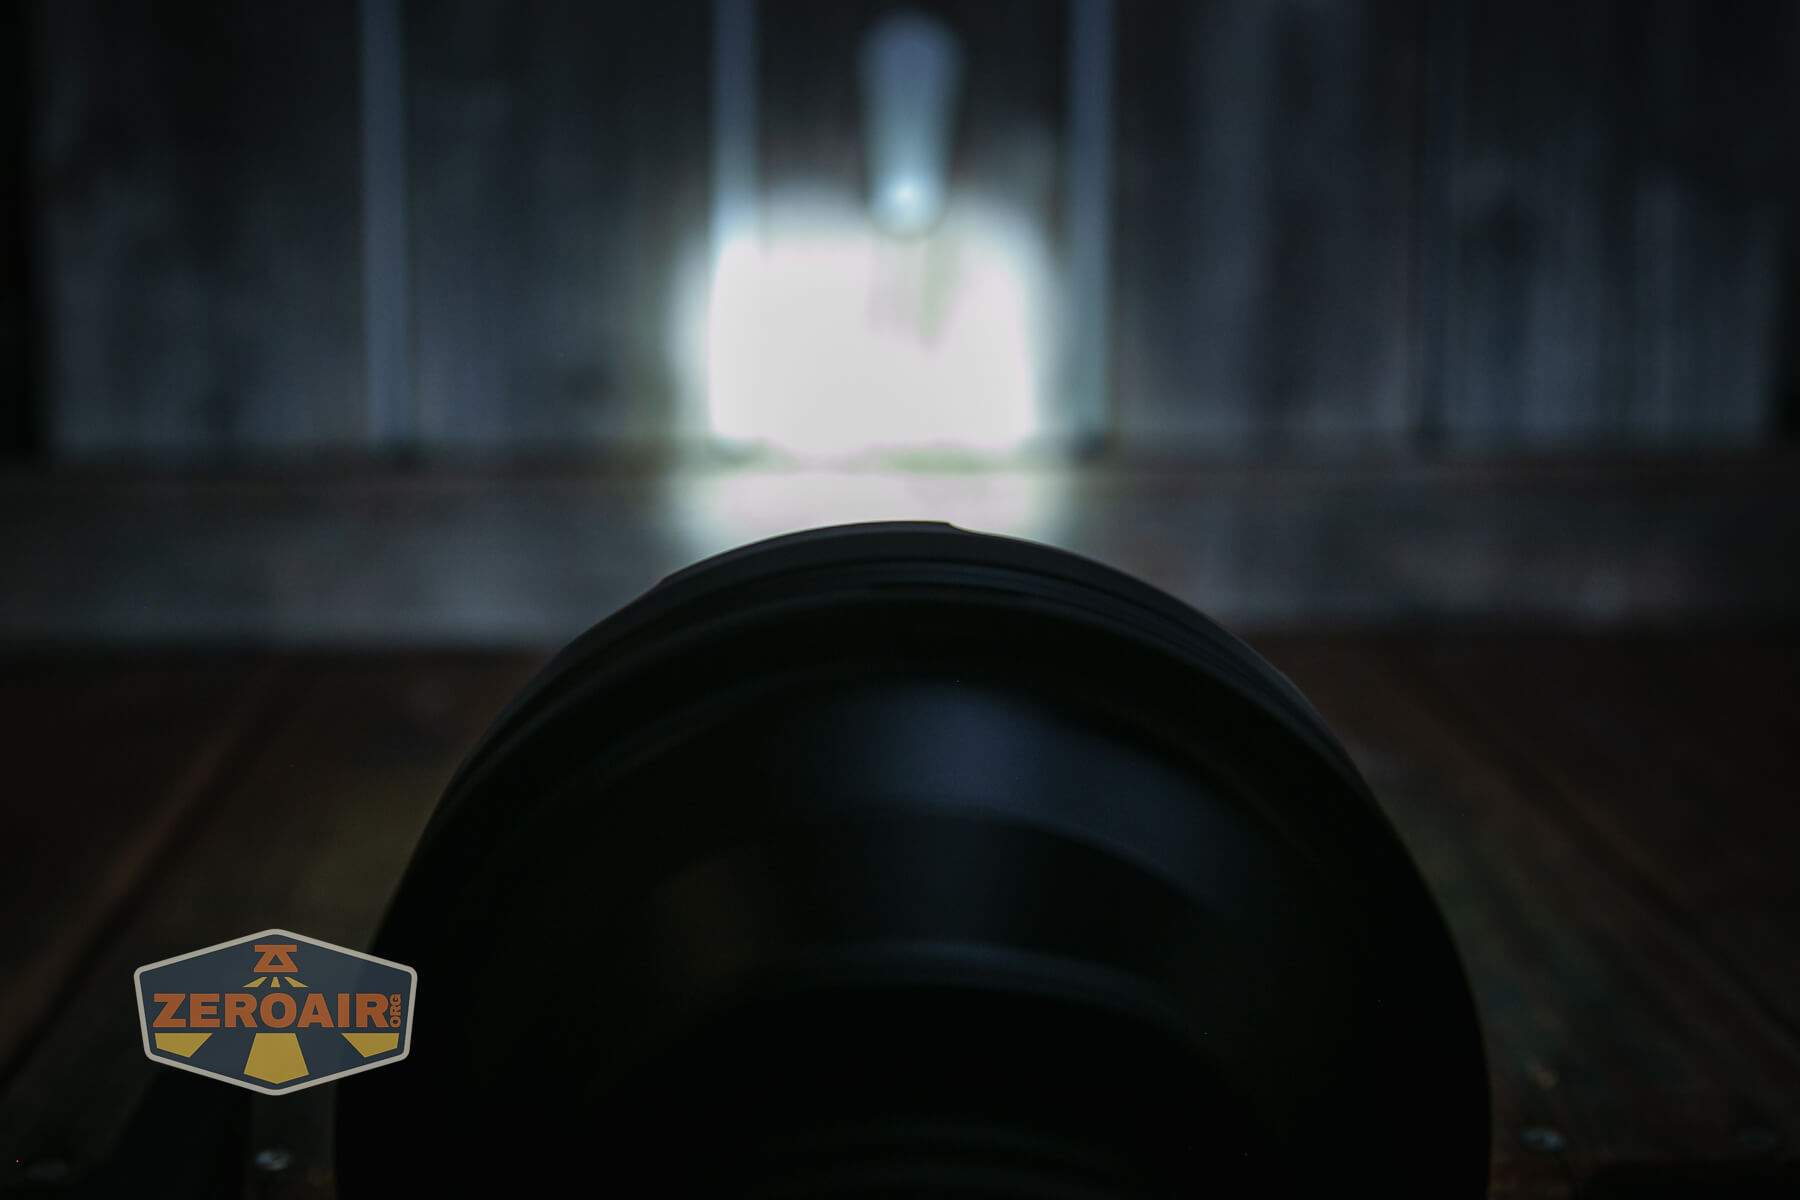
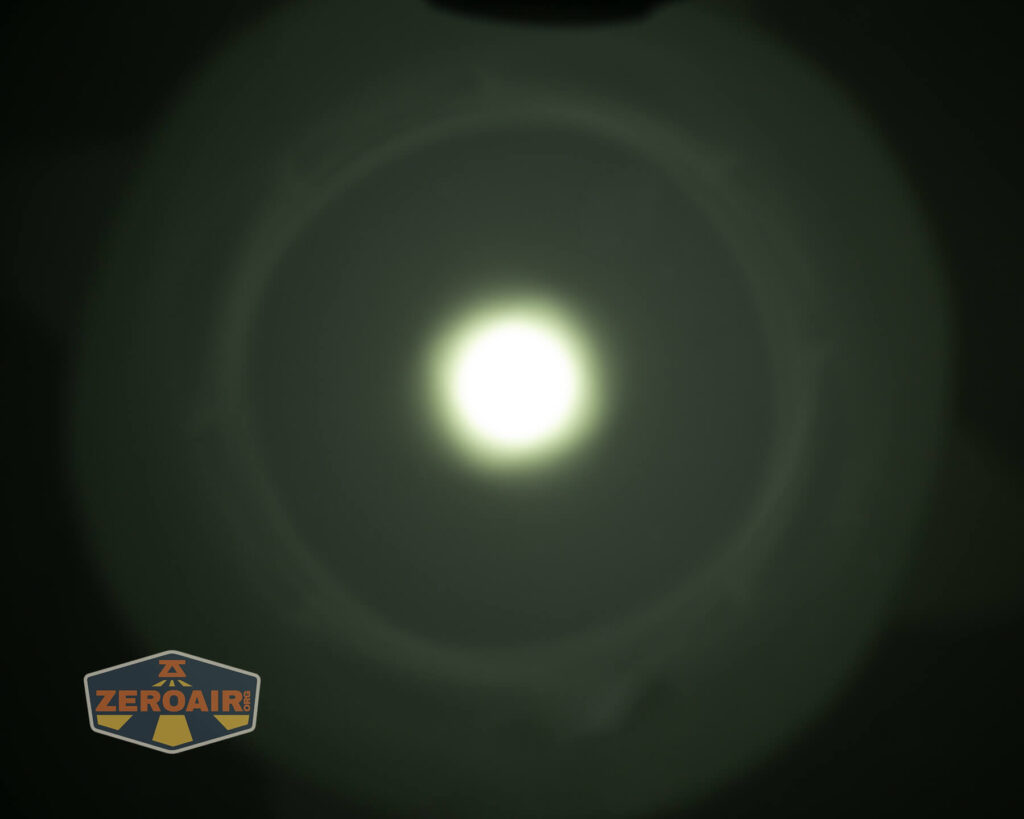
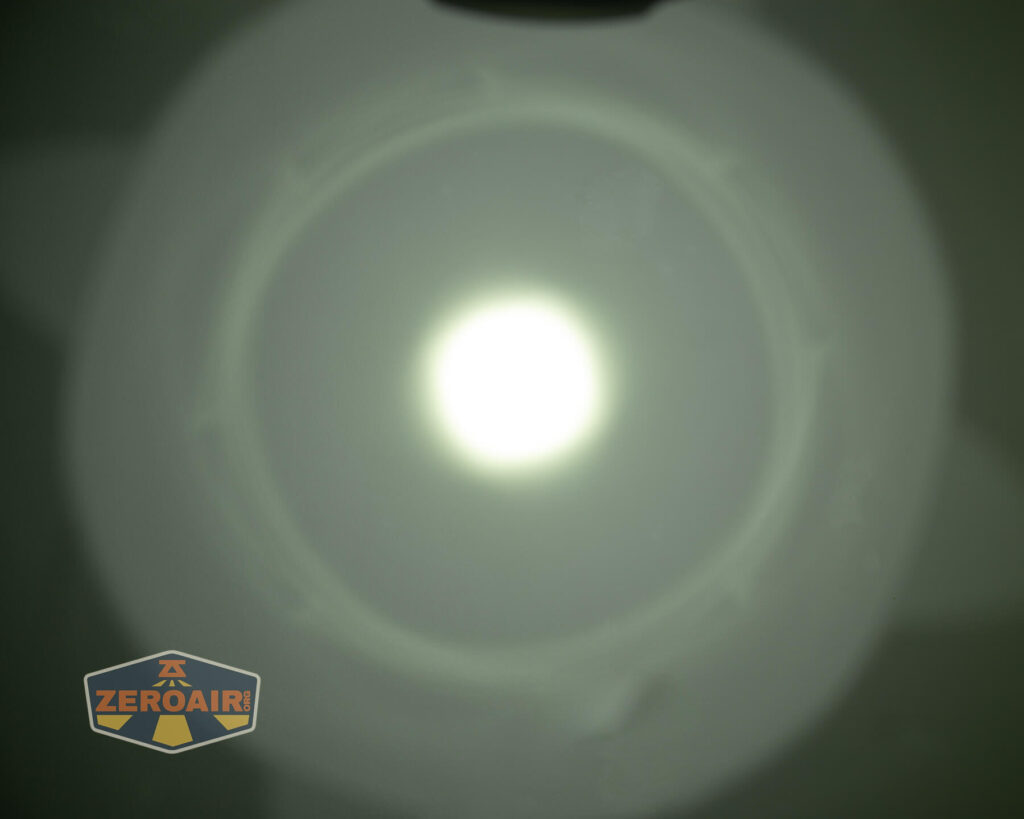
Up close (and in the photo above) you can see the quad shape of the beam profile. At any distance, you will not notice this.
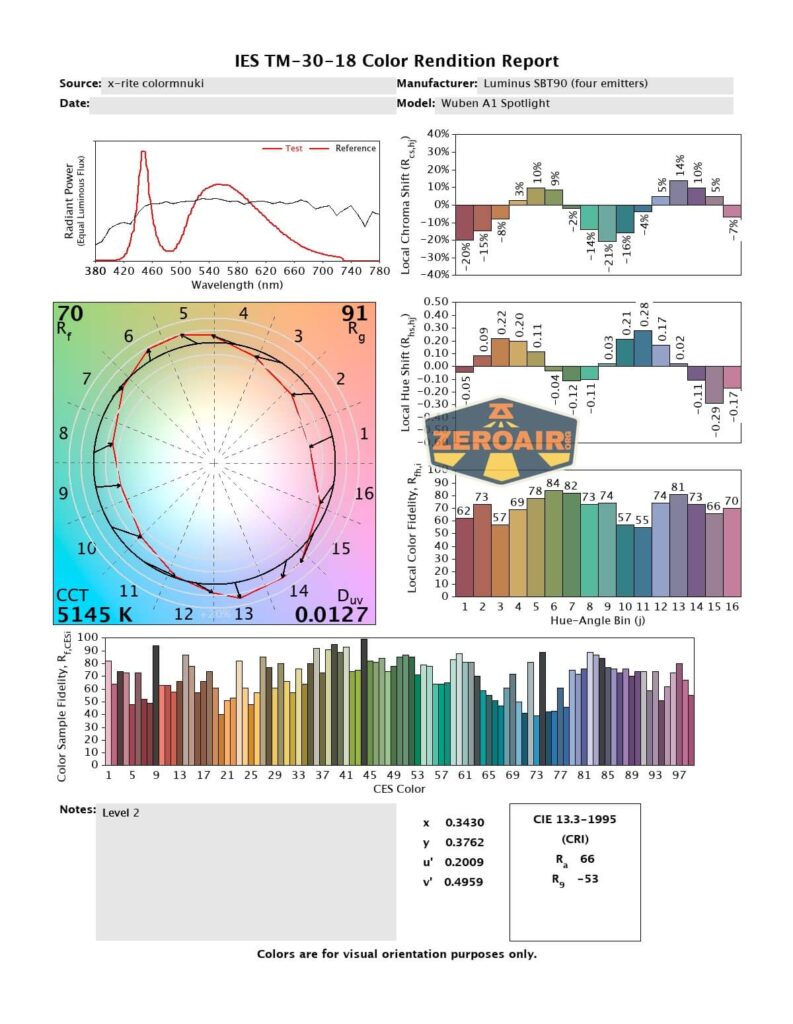
LED Color Report (CRI and CCT)
My sensor was saturated on the highest two modes, so we’ll have to just look at the CRI and CCT of the lower four output levels. The CCT is very good – around 5200K. CRI is low, as we’d expect, but still, for a light like this, it’s ok to let that slide.


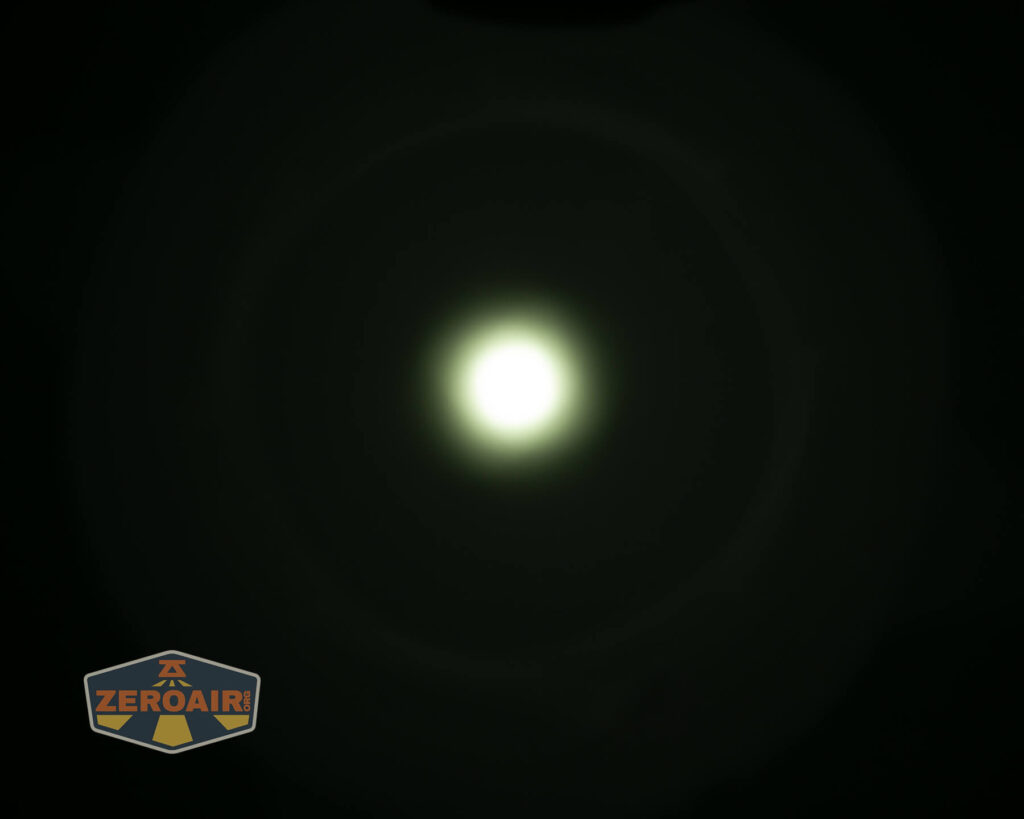
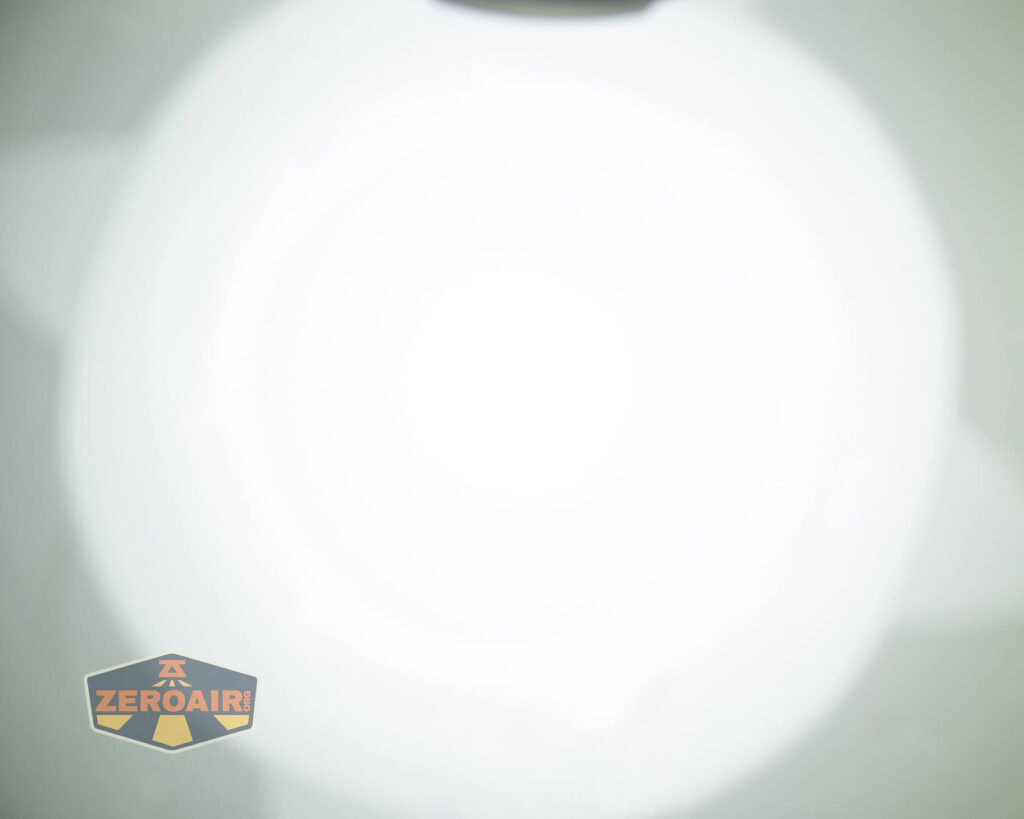
Beamshots
These beamshots always have the following settings: f8, ISO100, 0.3s shutter, and manual 5000K exposure. These photos are taken at floor level, and the beam hits the ceiling around 9 feet away.

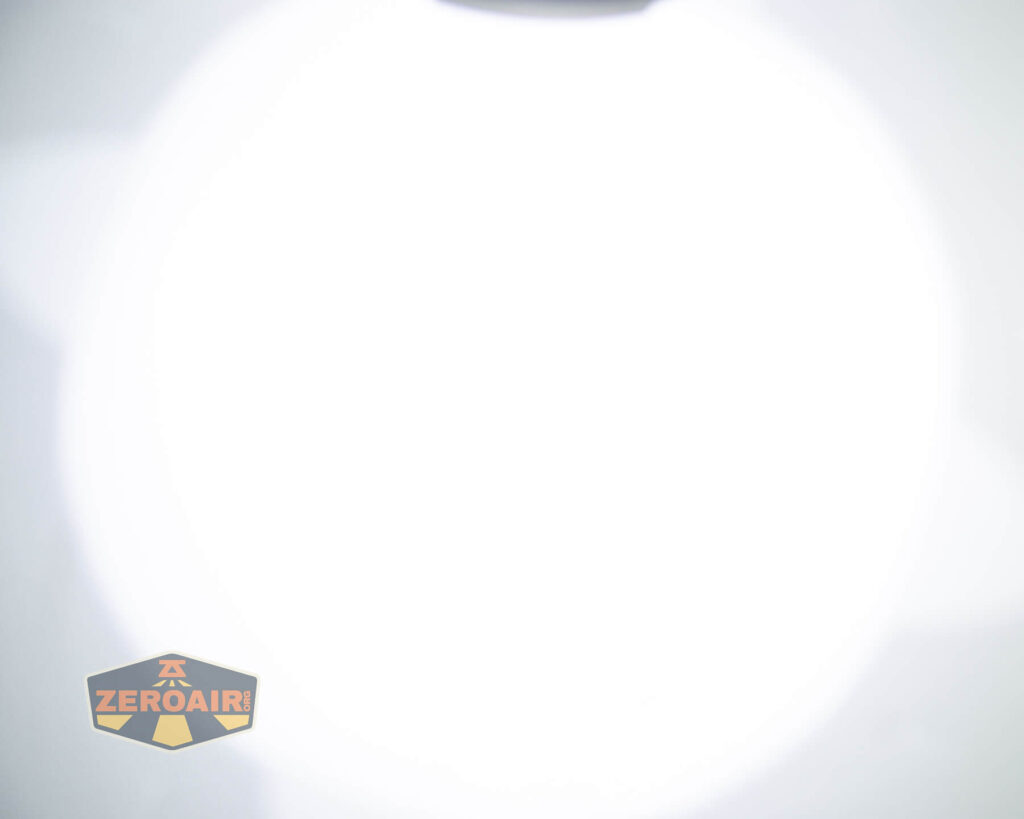
Tint vs BLF-348 (KillzoneFlashlights.com 219b version) (affiliate link)
I keep the test flashlight on the left and the BLF-348 reference flashlight on the right.
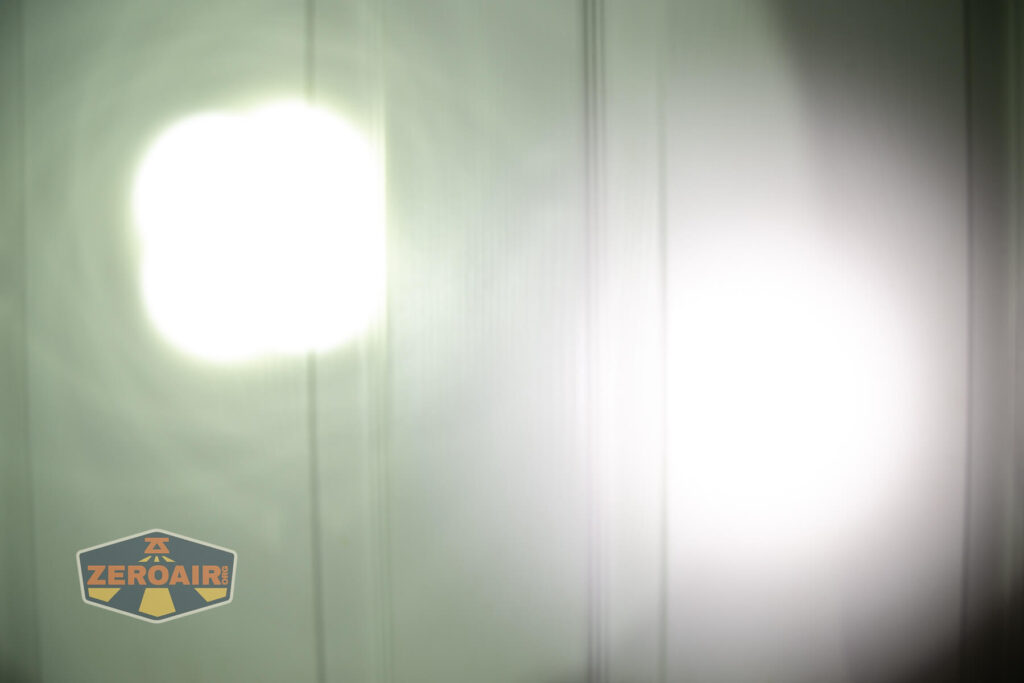
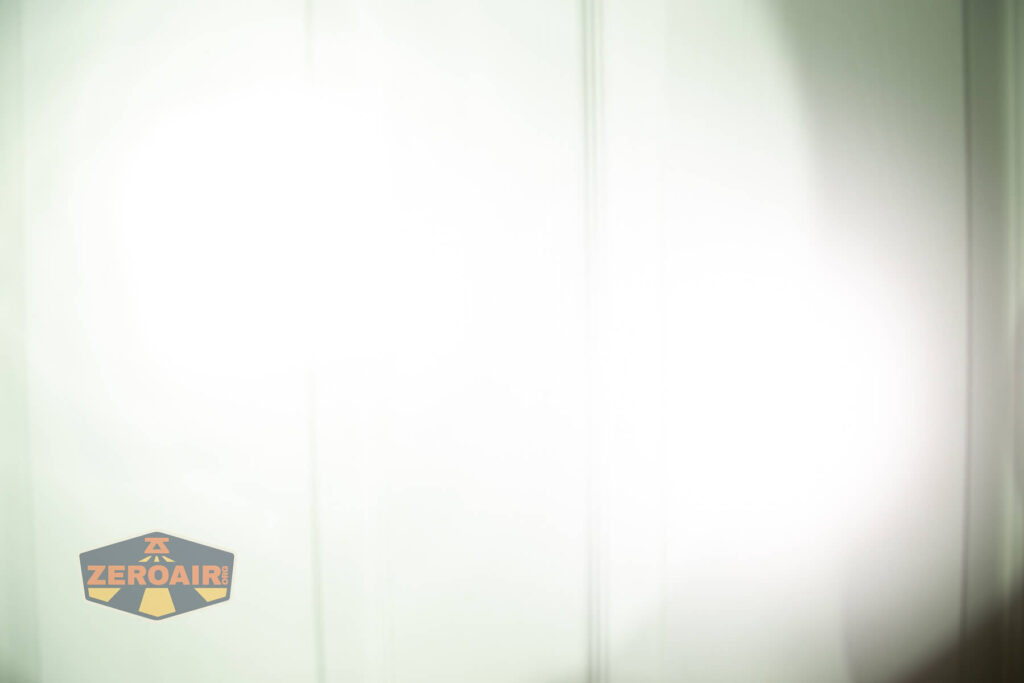


I compare everything to the KillzoneFlashlights.com 219b BLF-348 because it’s inexpensive and has the best tint!
Conclusion
Go buy the Wuben A1 Spotlight!! Use this 20% off coupon!! wubena1
What I like
- Absolutely massive throw
- Remote control is a neat feature
- Good build quality
- Nice carry case
- Very high output
- Excellent powerbank function (3A for >5h)
- Good balance
- Six modes is a good choice
- Low at 100 lumens is a reasonable low
What I don’t like
- Barrel plug charging. (USB-C can deliver this amount of power and be used as a powerbank)
- Gets very hot on Turbo
- Batteries are built-in (I do get it – they’re being driven very hard and need to be very capable cells, which is accomplished most easily by making them permanent)
Notes
- This content originally appeared at zeroair.org. Please visit there for the best experience!
- Please use my Amazon.com referral link to help support zeroair.org!
- Please support me on Patreon! I deeply appreciate your support!
Discover more from ZeroAir Reviews
Subscribe to get the latest posts sent to your email.
Little knob is remote control antenna. Someone didn’t read posted manual 😉
What’s a manual. 🙂
Thank you for the note!
I always get a good chuckle when you post the dollar bill shots with massive flashlights. It’s never not funny.
Thank you for your dedication to hilariously consistent reviews.
Haha I love it, thank you!