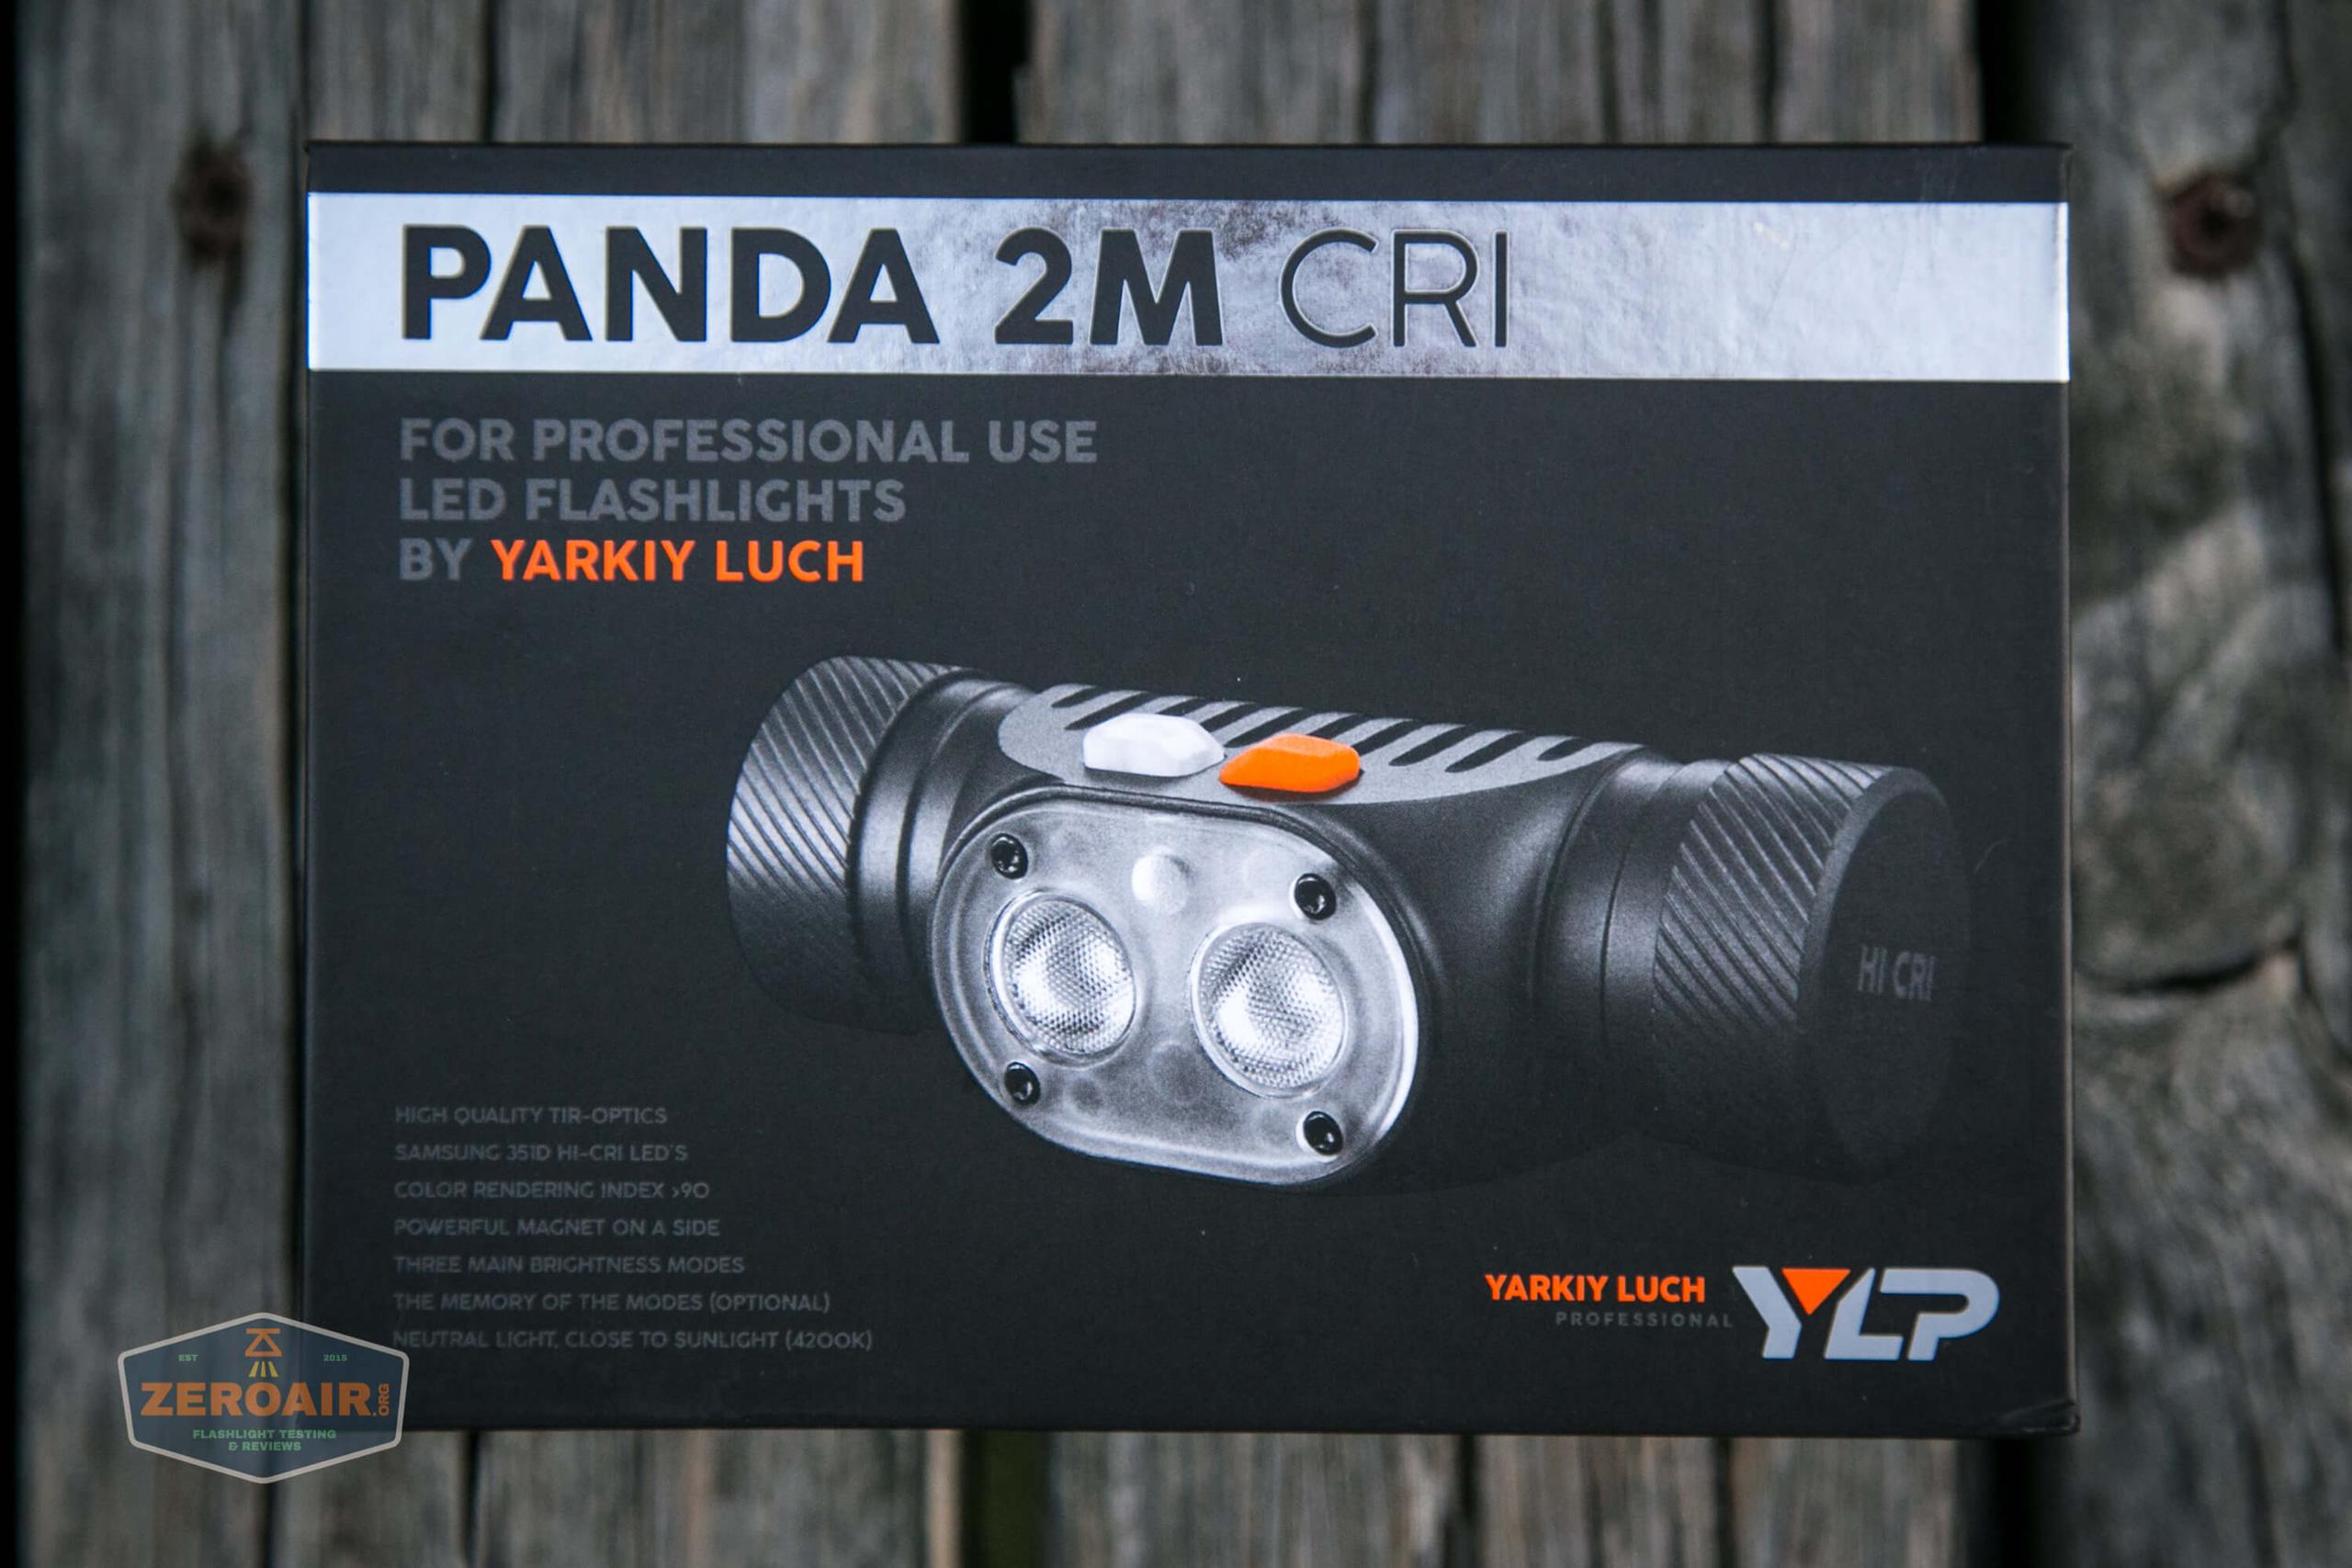
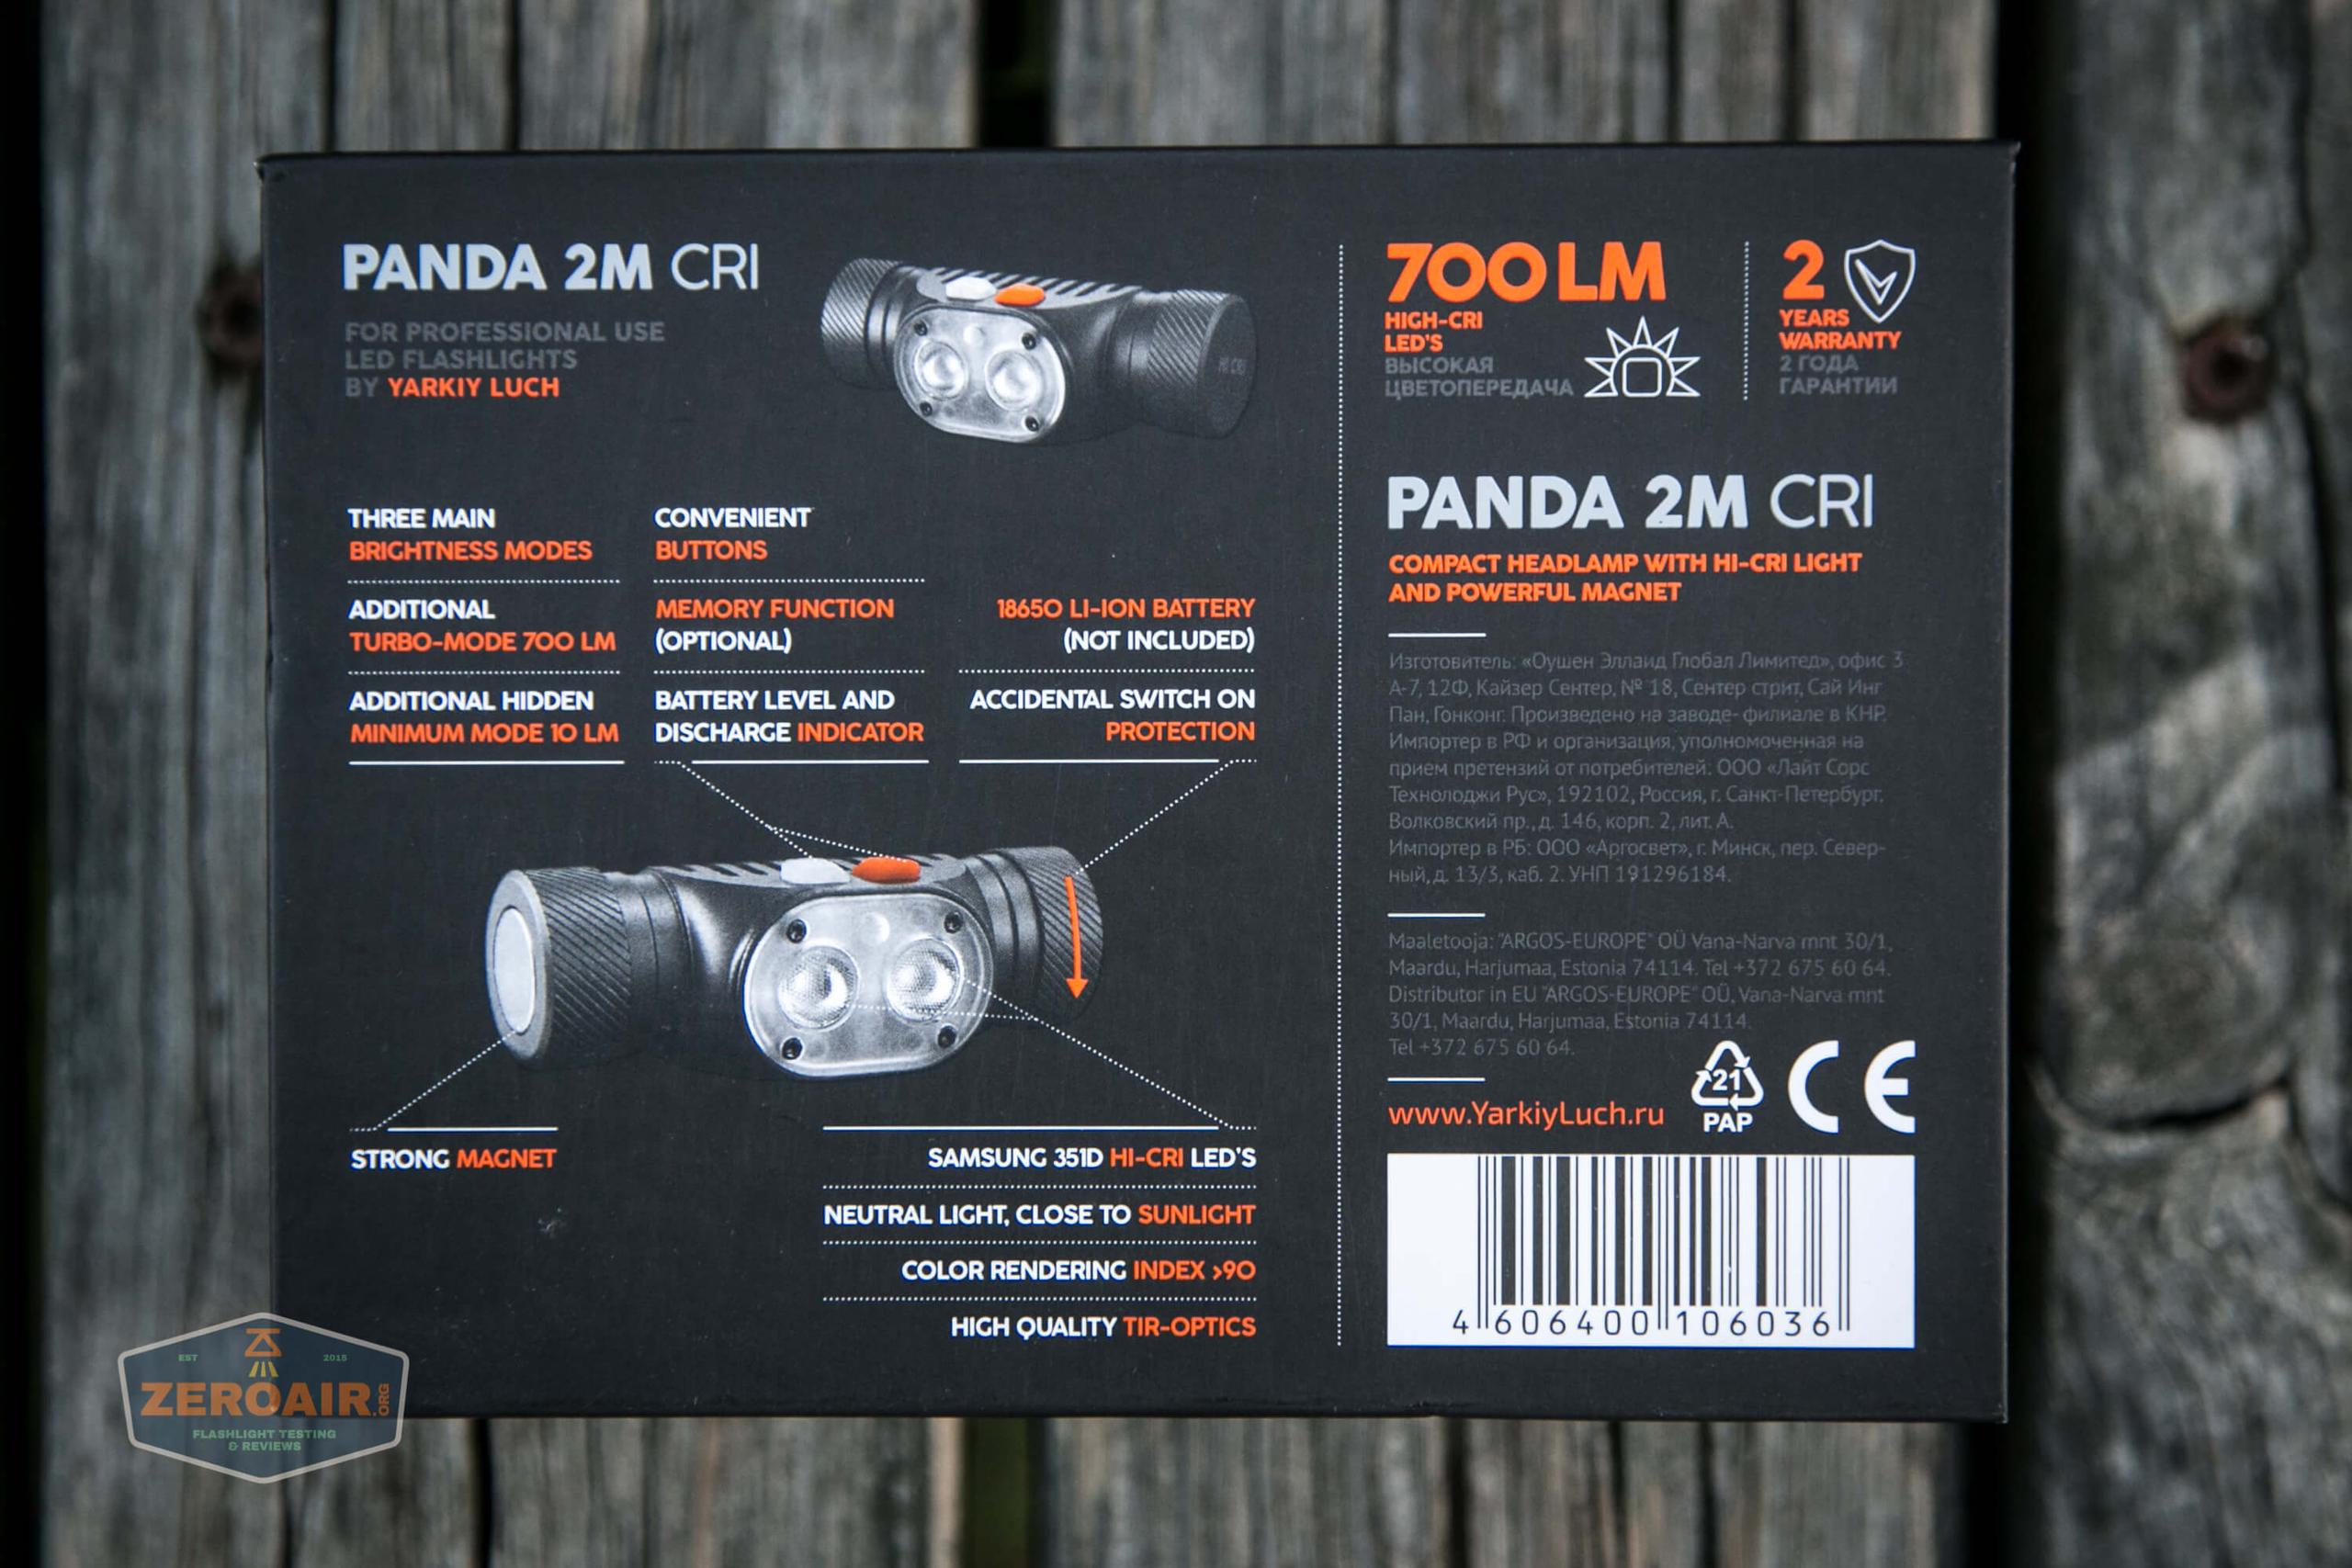
YLP Panda 2M CRI Headlamp Review
Here’s the YLP Panda 2M CRI Headlamp, offering high CRI in a warm CCT and a dual switch interface. It’s a neat little light; read on!
Official Specs and Features
Here’s a link to the YLP Panda 2M CRI Headlamp product page.
Versions of the YLP Panda 2M CRI Headlamp
I believe this to be the only version of this light. But the Panda headlamp is a whole series by YLP. Here’s what’s current:
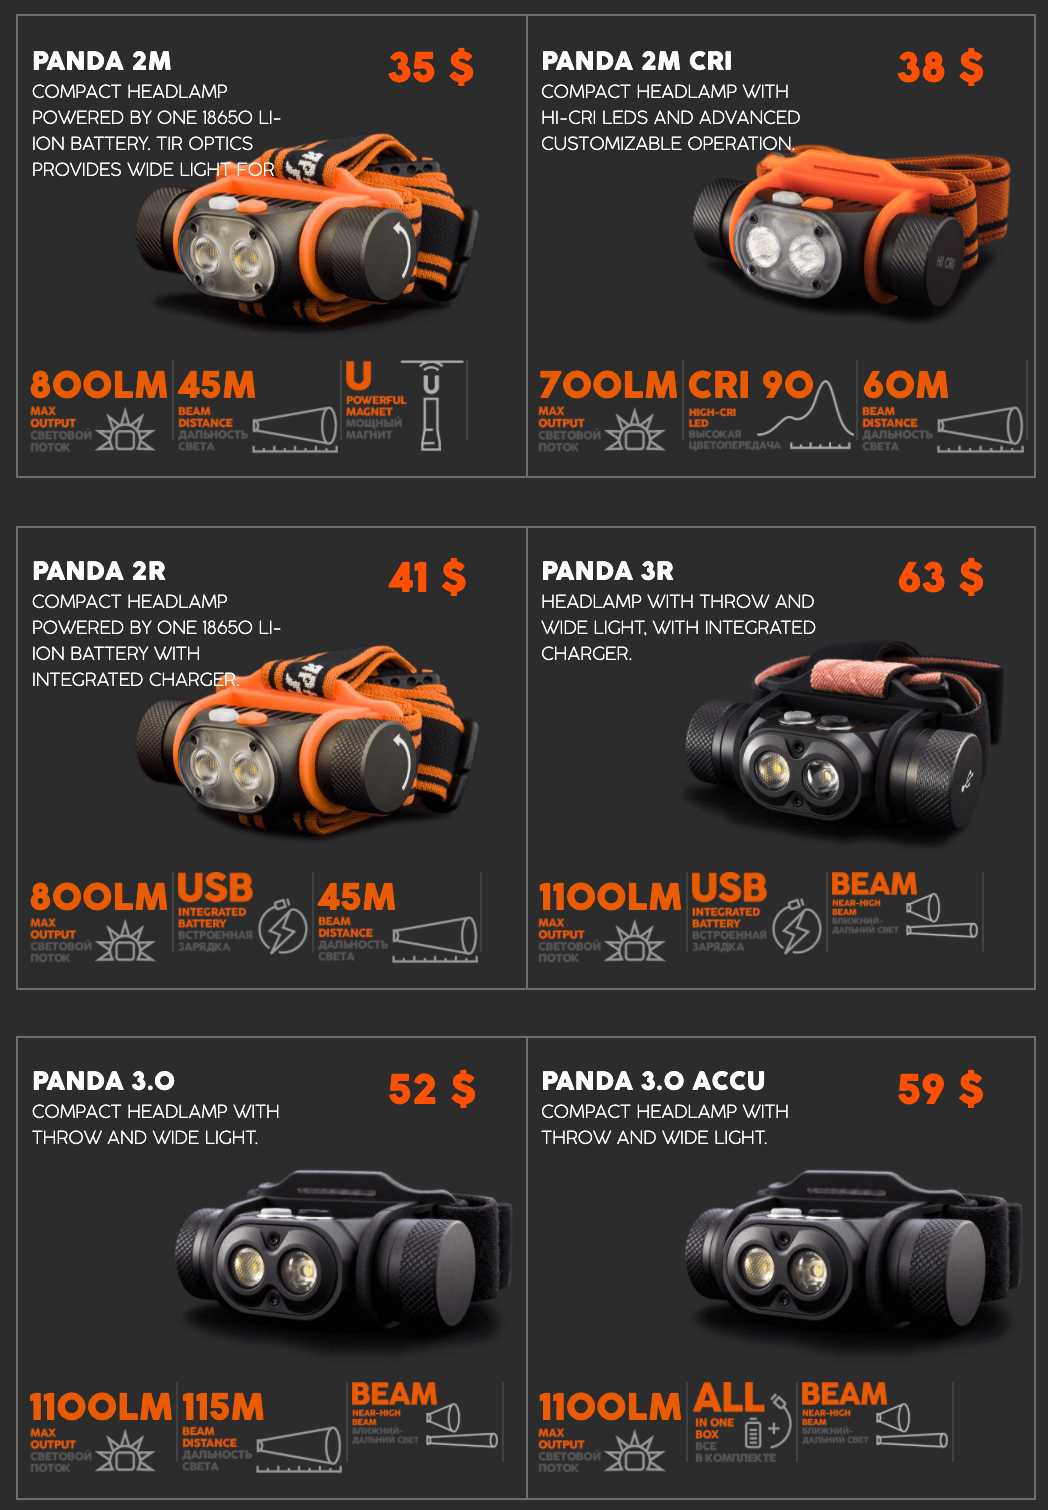
Price
The light, as reviewed here, is $38 shipped. These lights ship from Russia, and despite things swinging back into “normal,” you might find the progress once it reaches Russian customs, and then your own customs could take a little while.
Short Review
Good build quality, nice CRI, nice and warm temperature. This light is tough to beat for the price!
Long Review
The Big Table
| YLP Panda 2M CRI Headlamp | |
|---|---|
| Emitter: | Samsung LH351D (NW 4200К, MIN 90CRI ) |
| Price in USD at publication time: | $38.00 |
| Cell: | 1×18650 |
| Turbo Runtime | High Runtime |
| LVP? | No |
| Switch Type: | E-Switch |
| Quiescent Current (A): | ? |
| On-Board Charging? | No |
| Claimed Lumens (lm) | 700 |
| Measured Lumens (at 30s) | 612 (87.4% of claim)^ |
| Candela per Lumen | 1.9 |
| Claimed Throw (m) | 60 |
| Candela (Calculated) in cd (at 30s) | 129lux @ 3.096m = 1236cd |
| Throw (Calculated) (m) | 70.3 (117.2% of claim)^ |
| All my YLP reviews! | |
^ Measurement disclaimer: Testing flashlights is my hobby. I use hobbyist-level equipment for testing, including some I made myself. Try not to get buried in the details of manufacturer specifications versus measurements recorded here; A certain amount of difference (say, 10 or 15%) is perfectly reasonable.
What’s Included
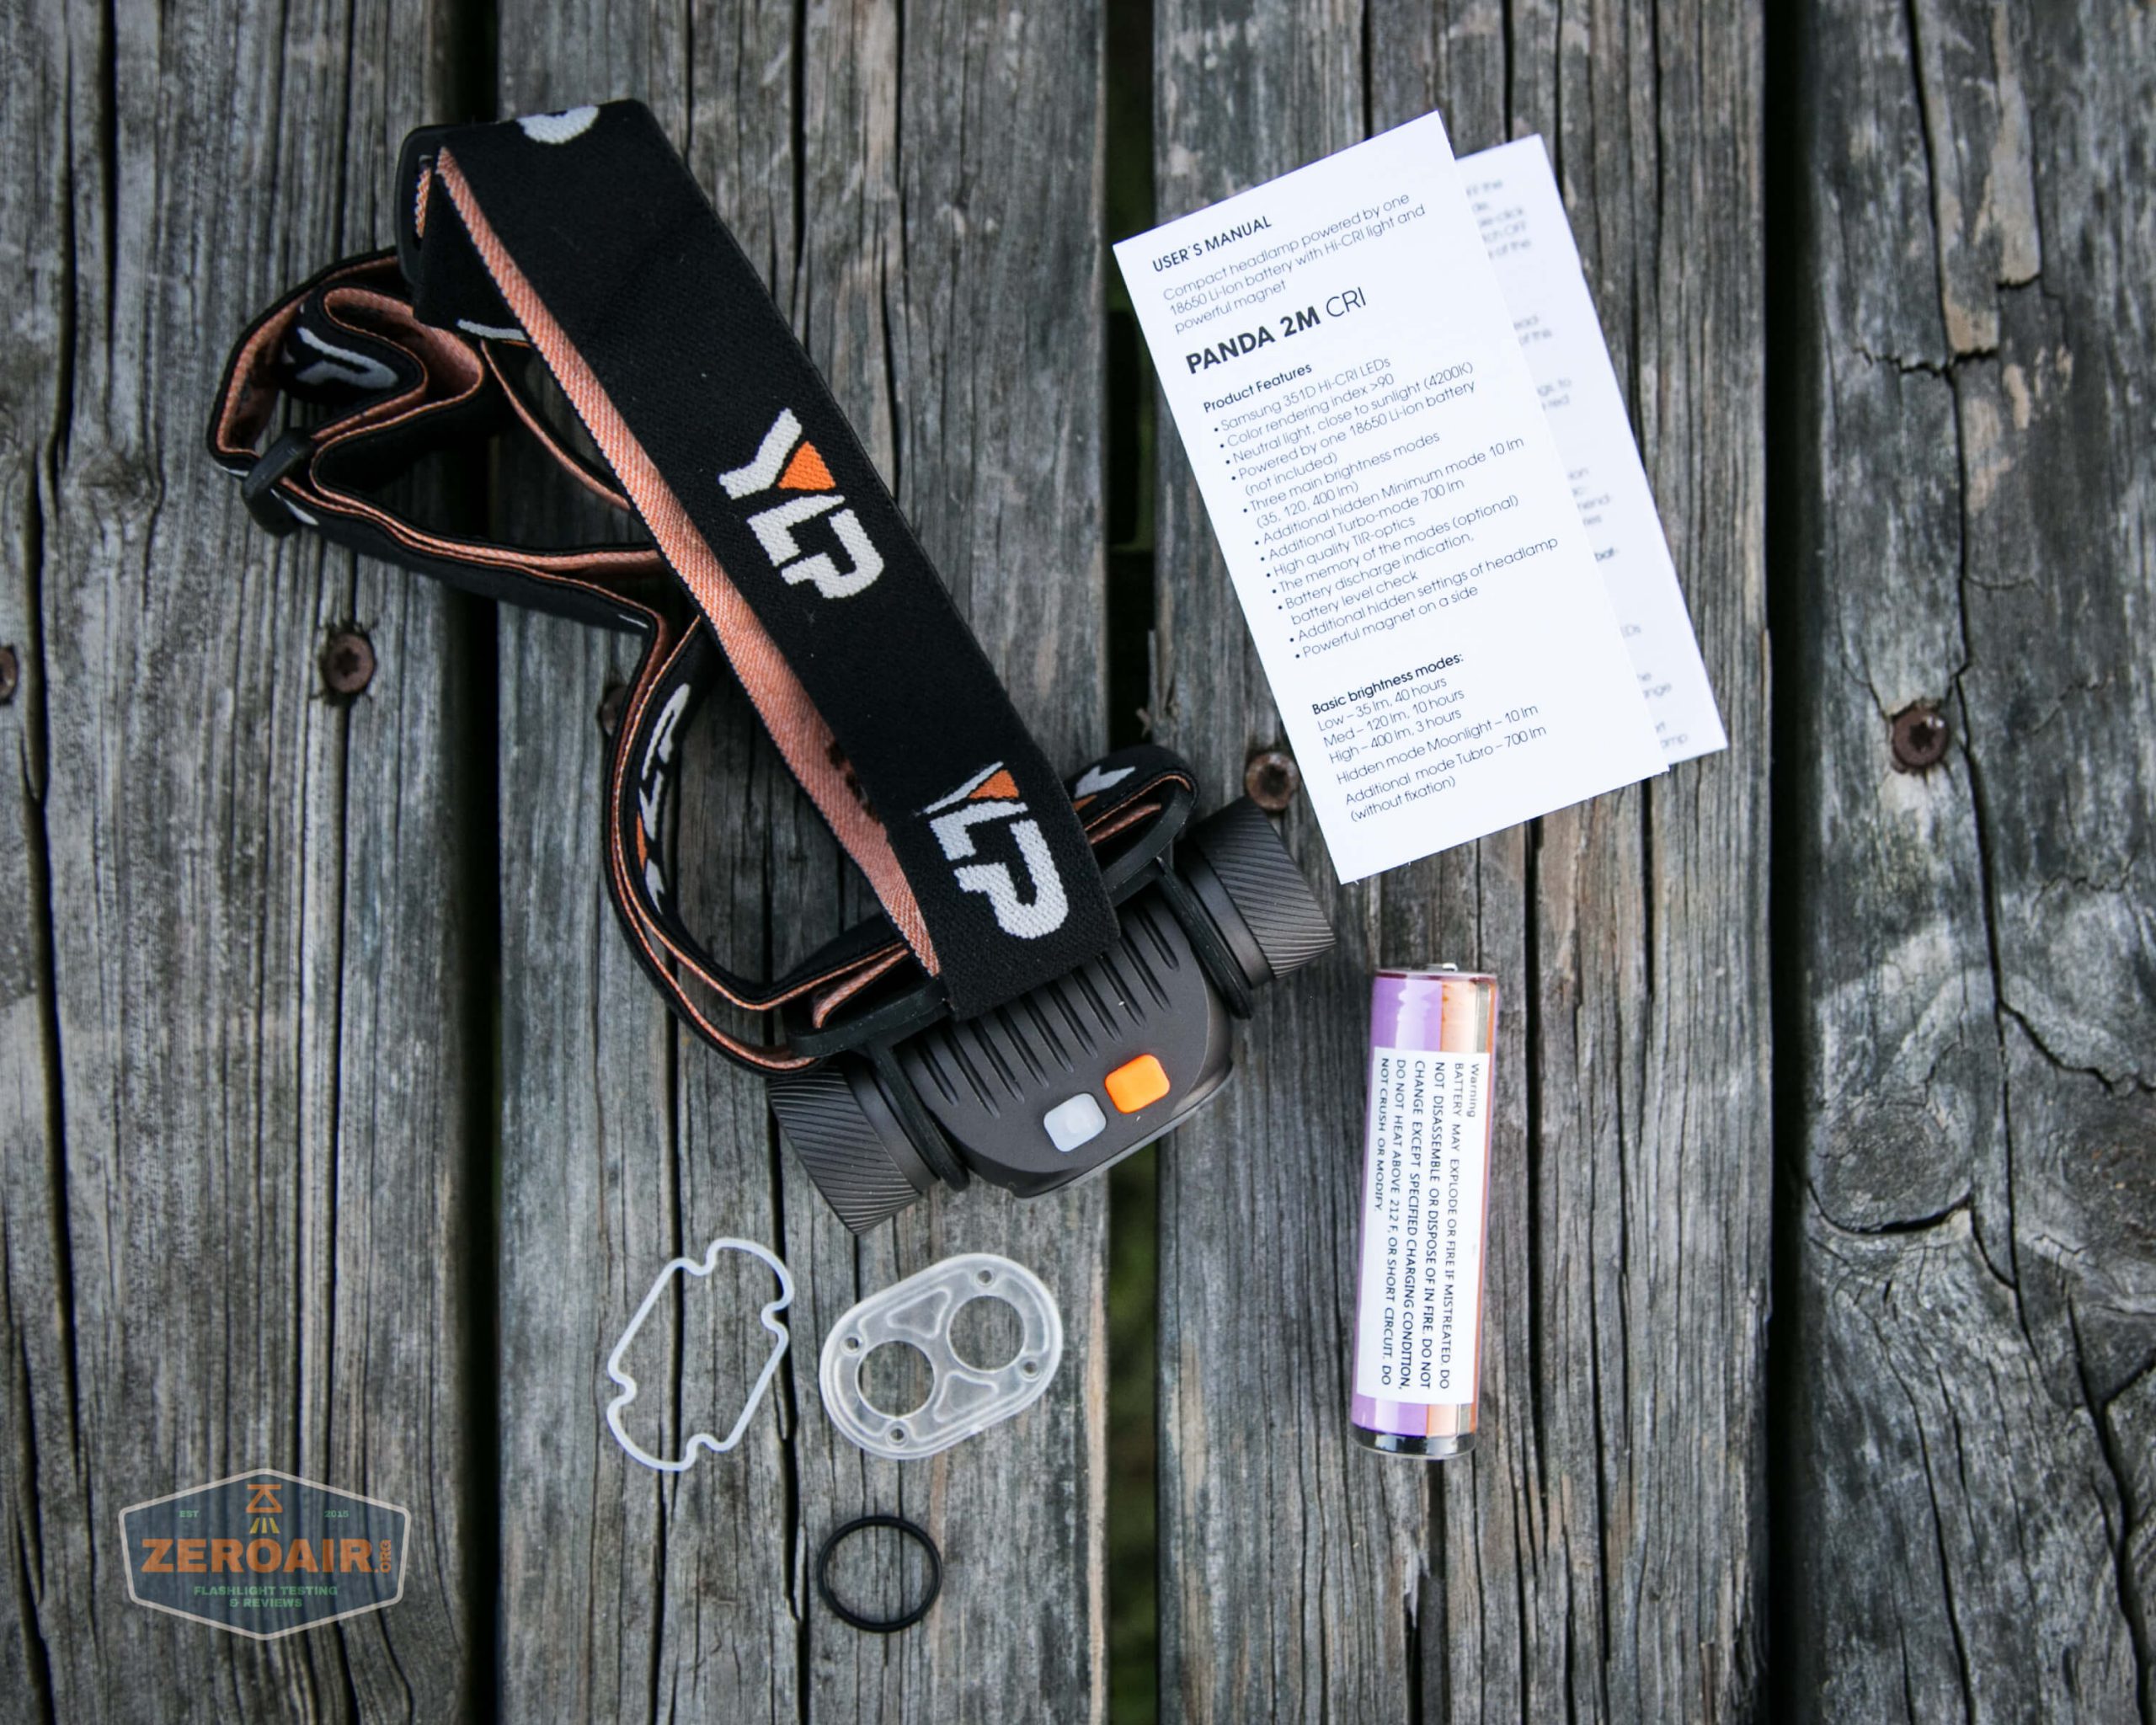
- YLP Panda 2M CRI Headlamp
- Spare Lens cover
- Spare o-ring (2 types)
- Head band
- Manual
- Customized (but standard) Samsung 30q 18650 (my package, unclear if all packages include the cell)
Package and Manual
Build Quality and Disassembly
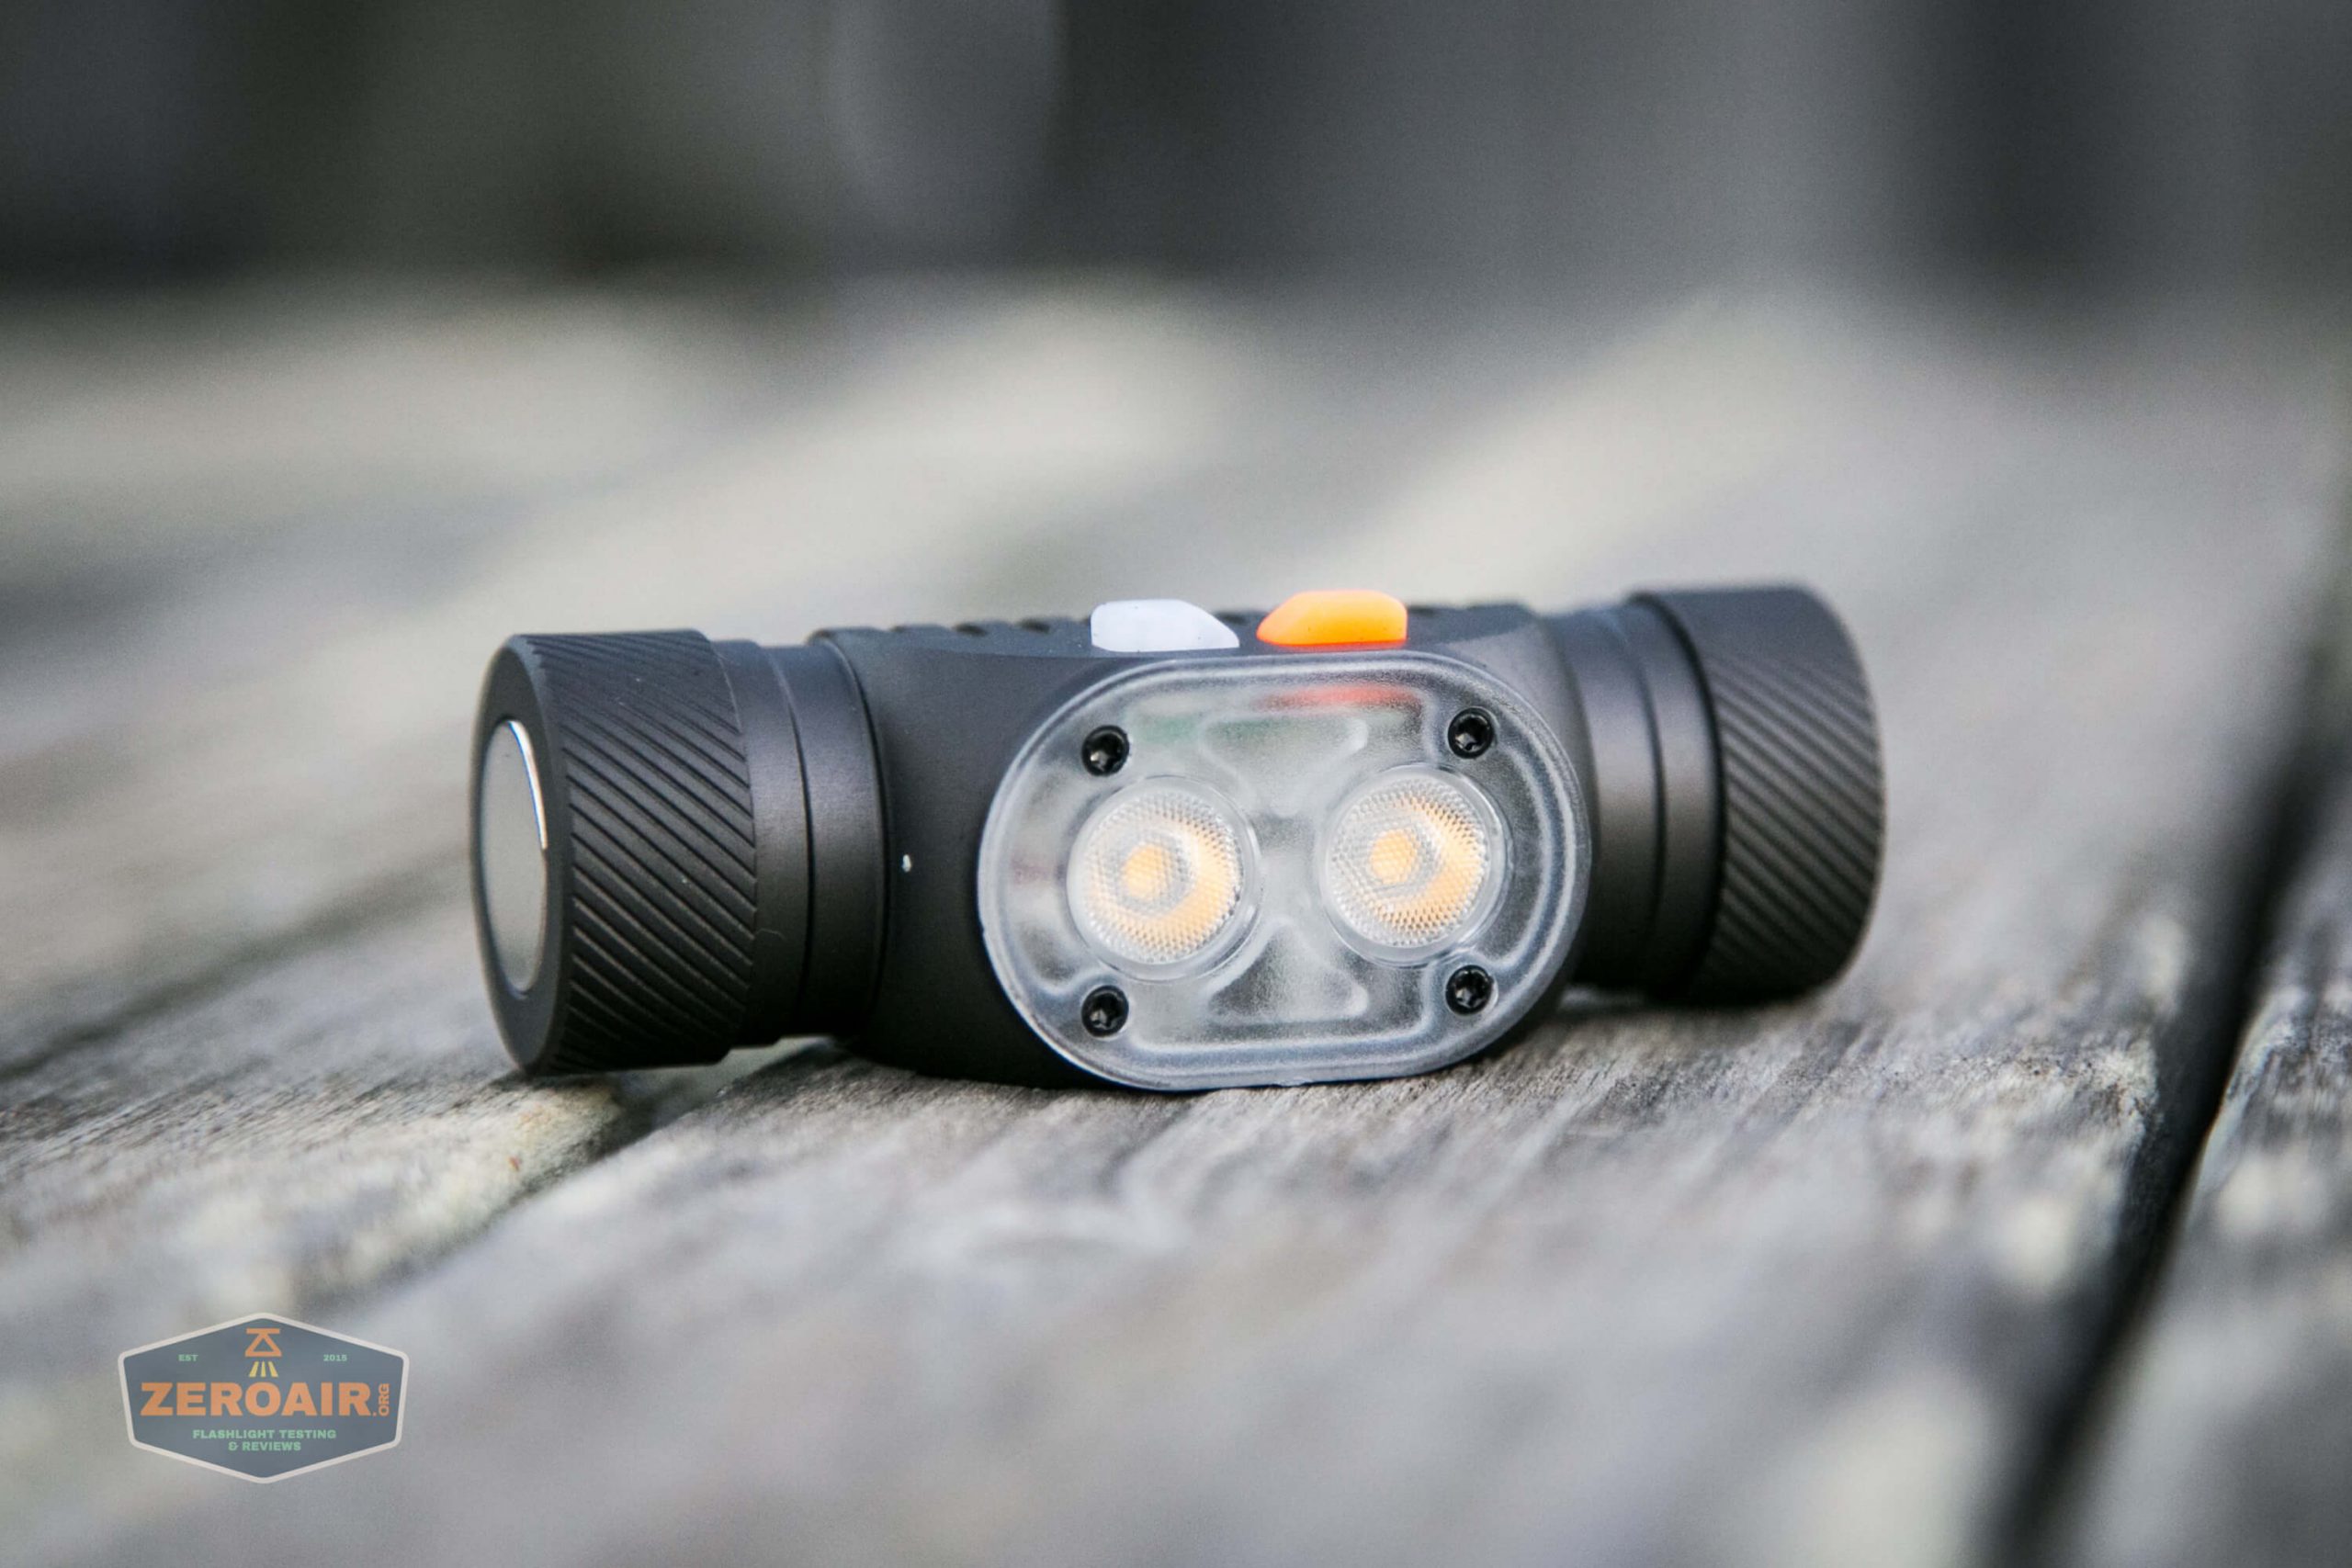
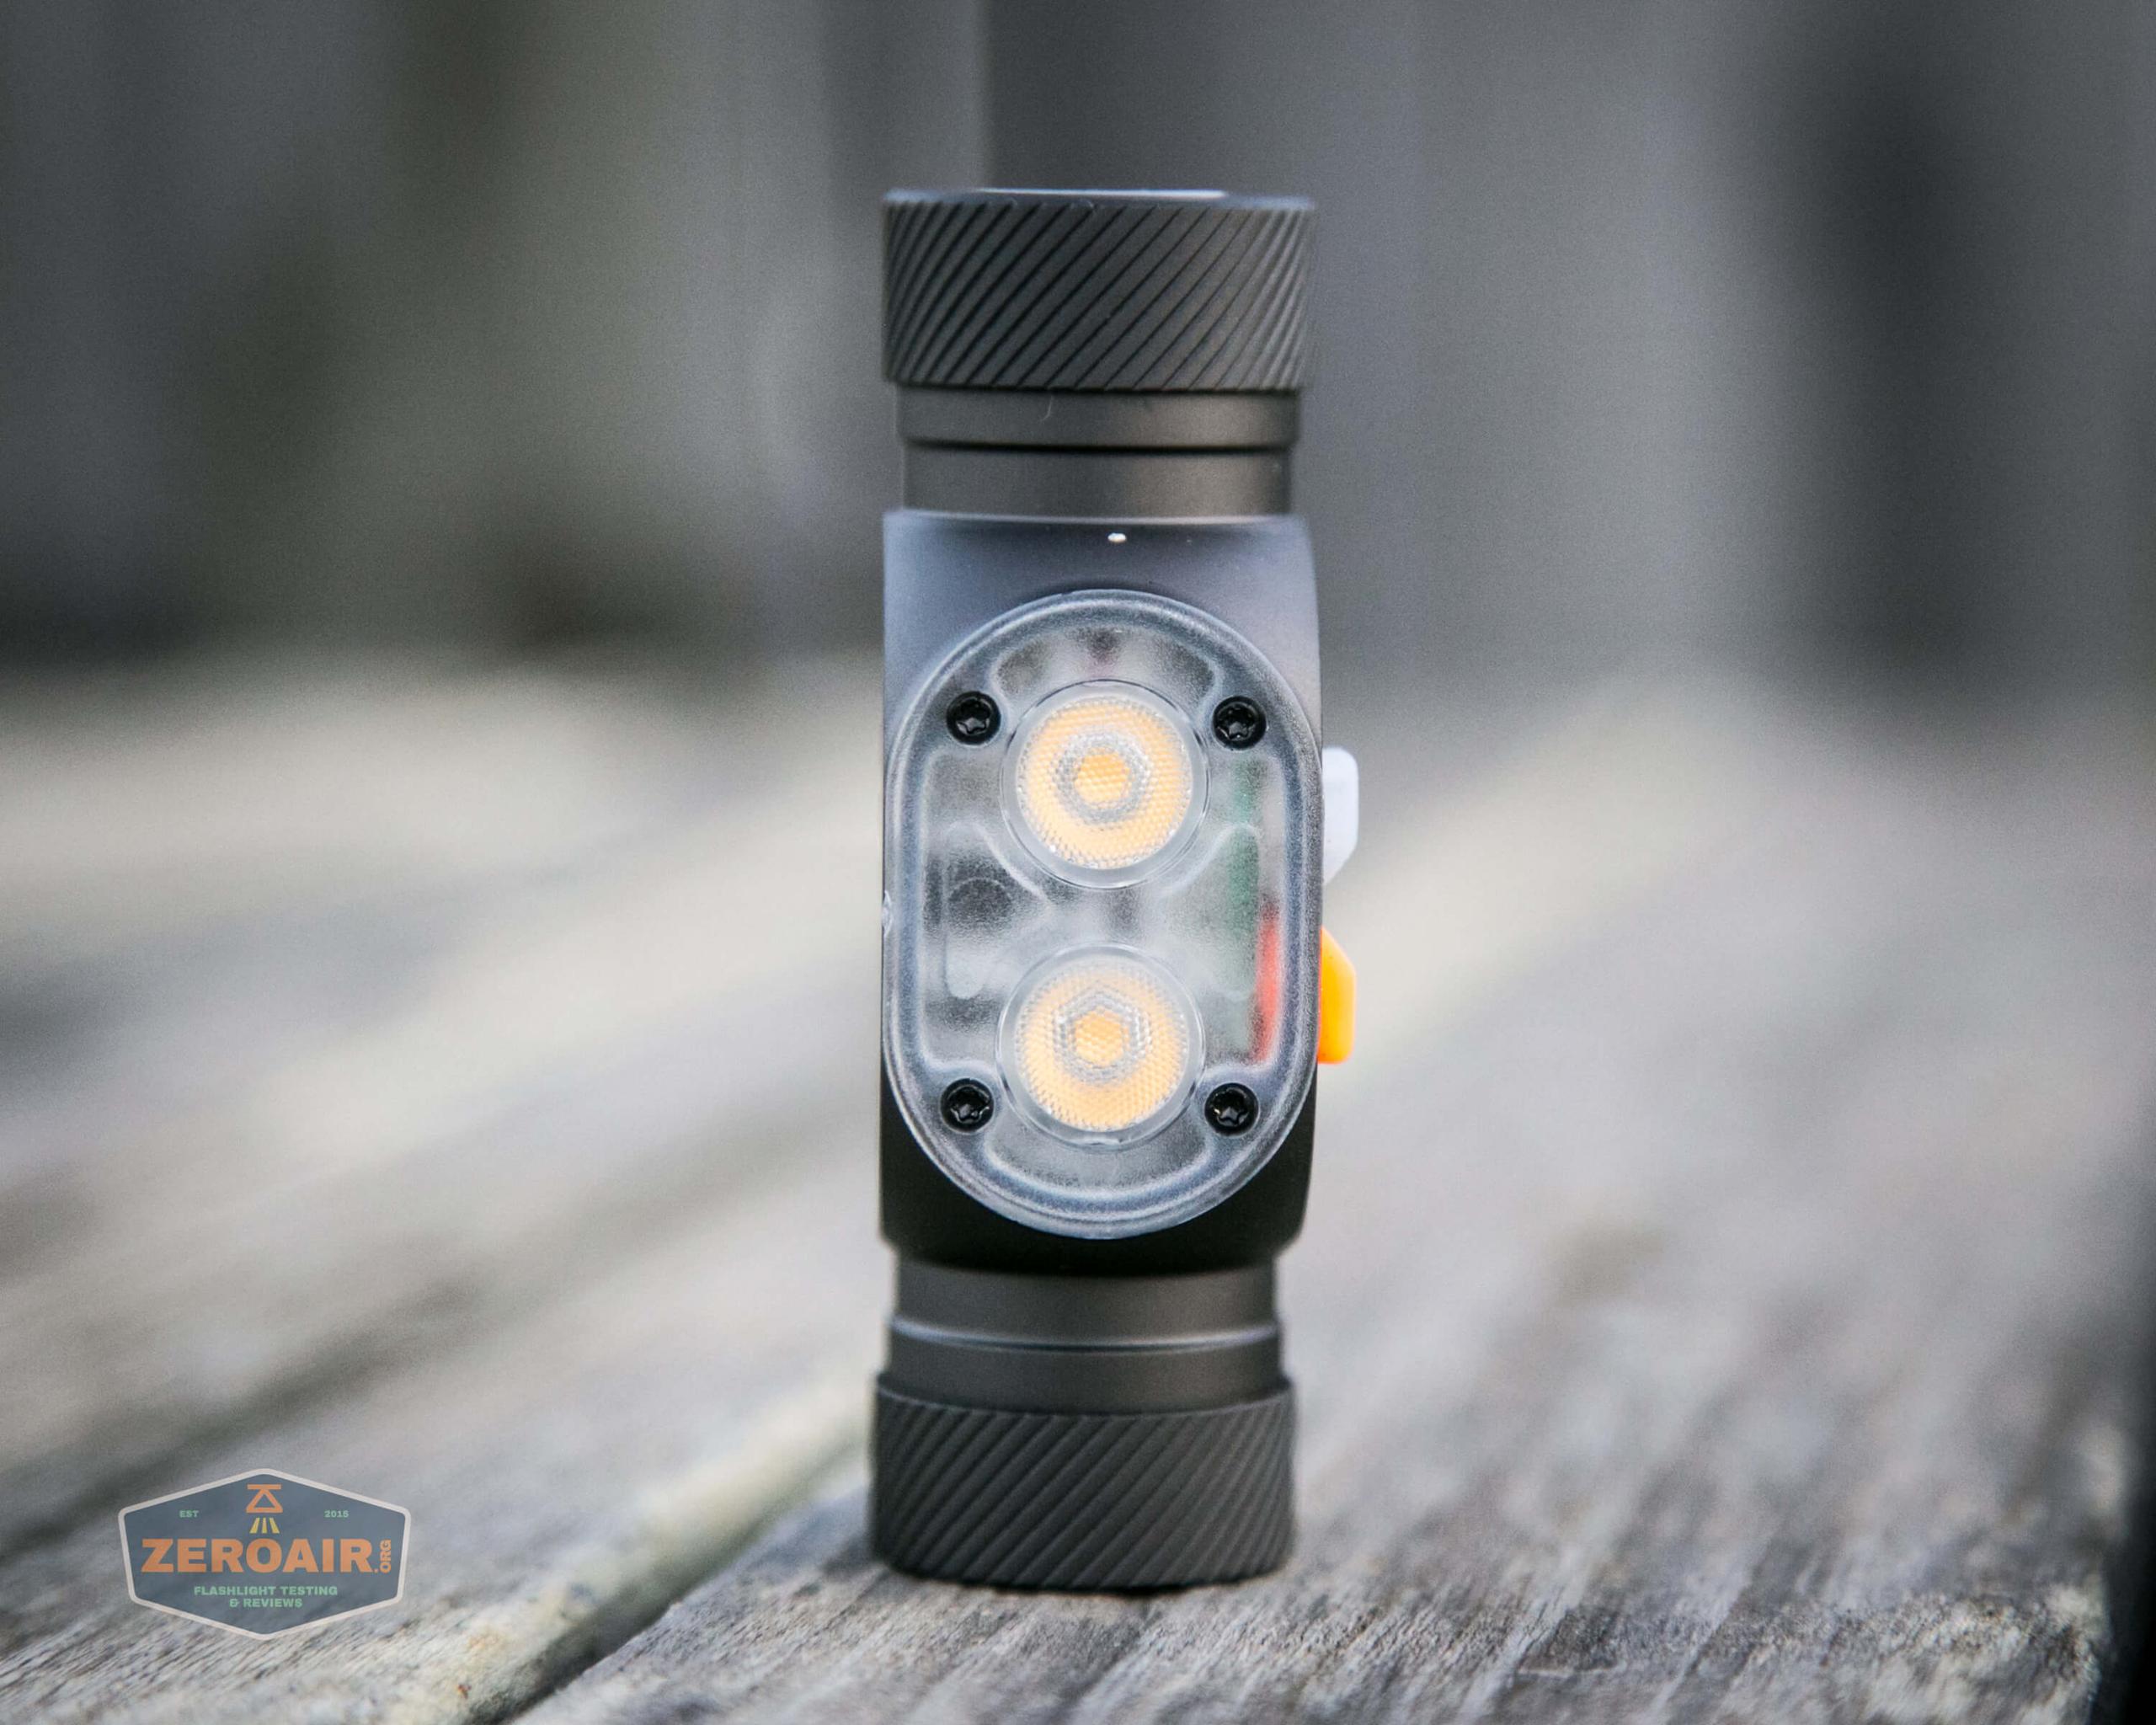
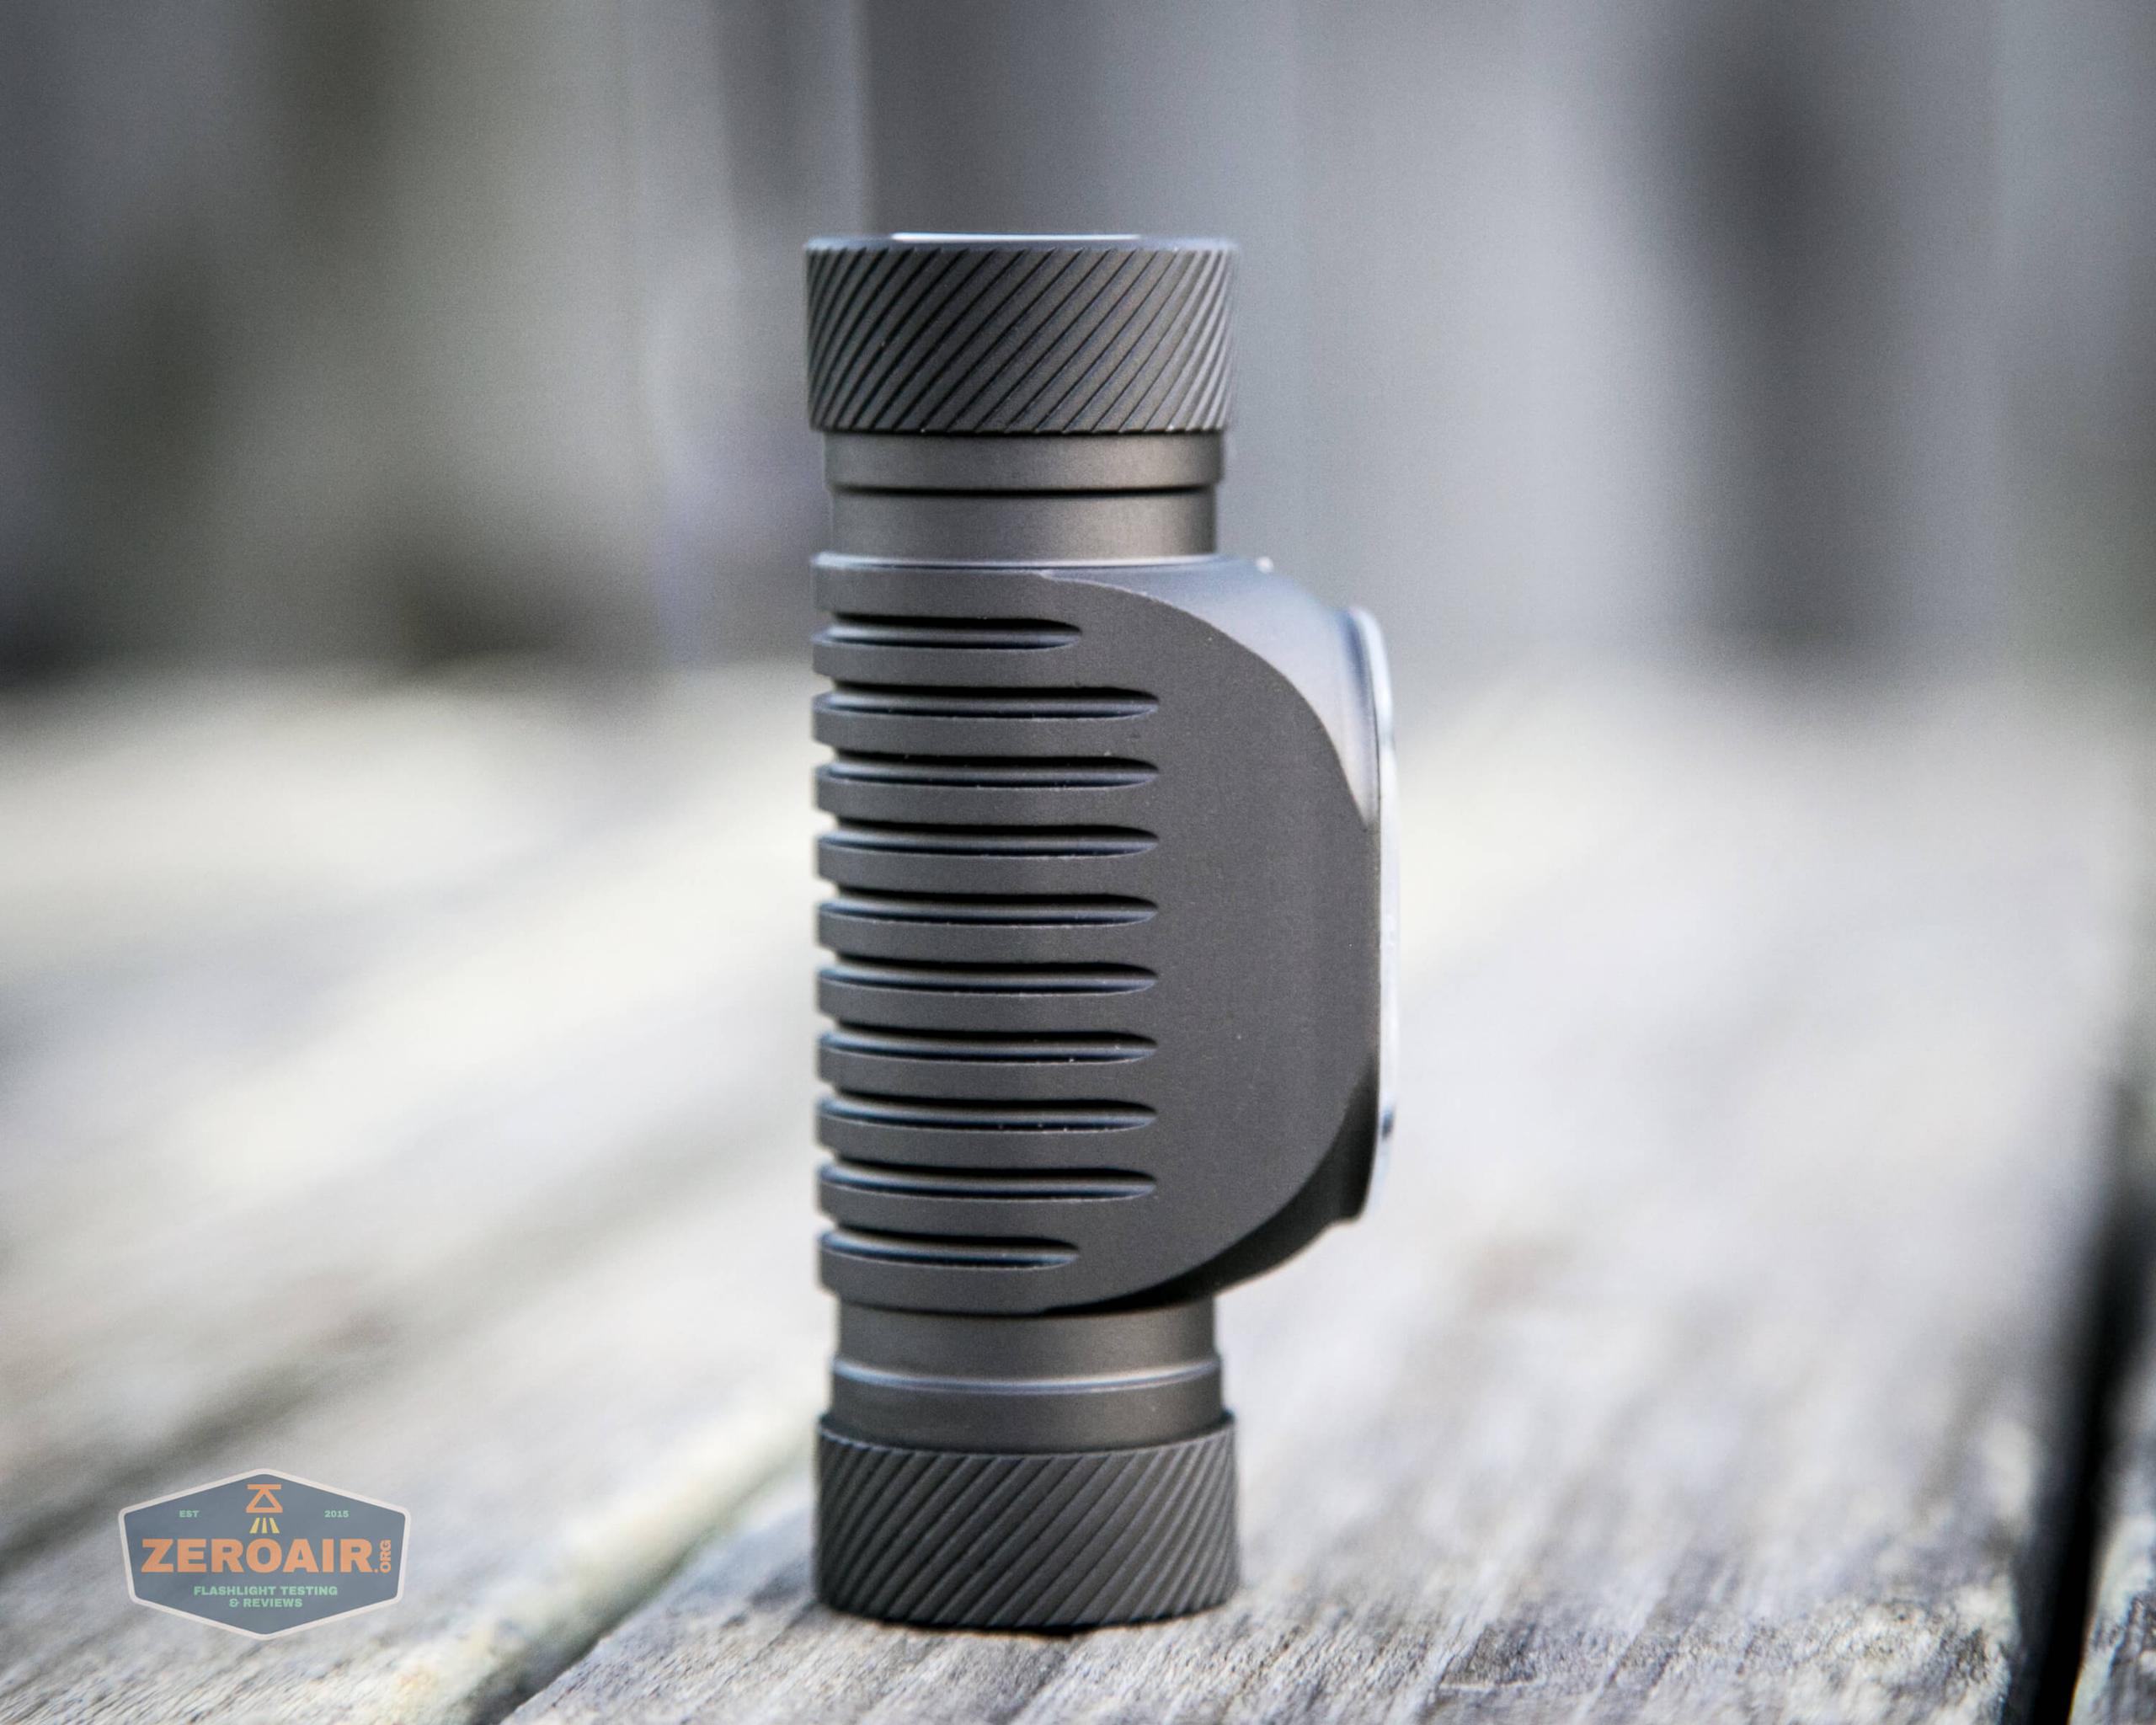
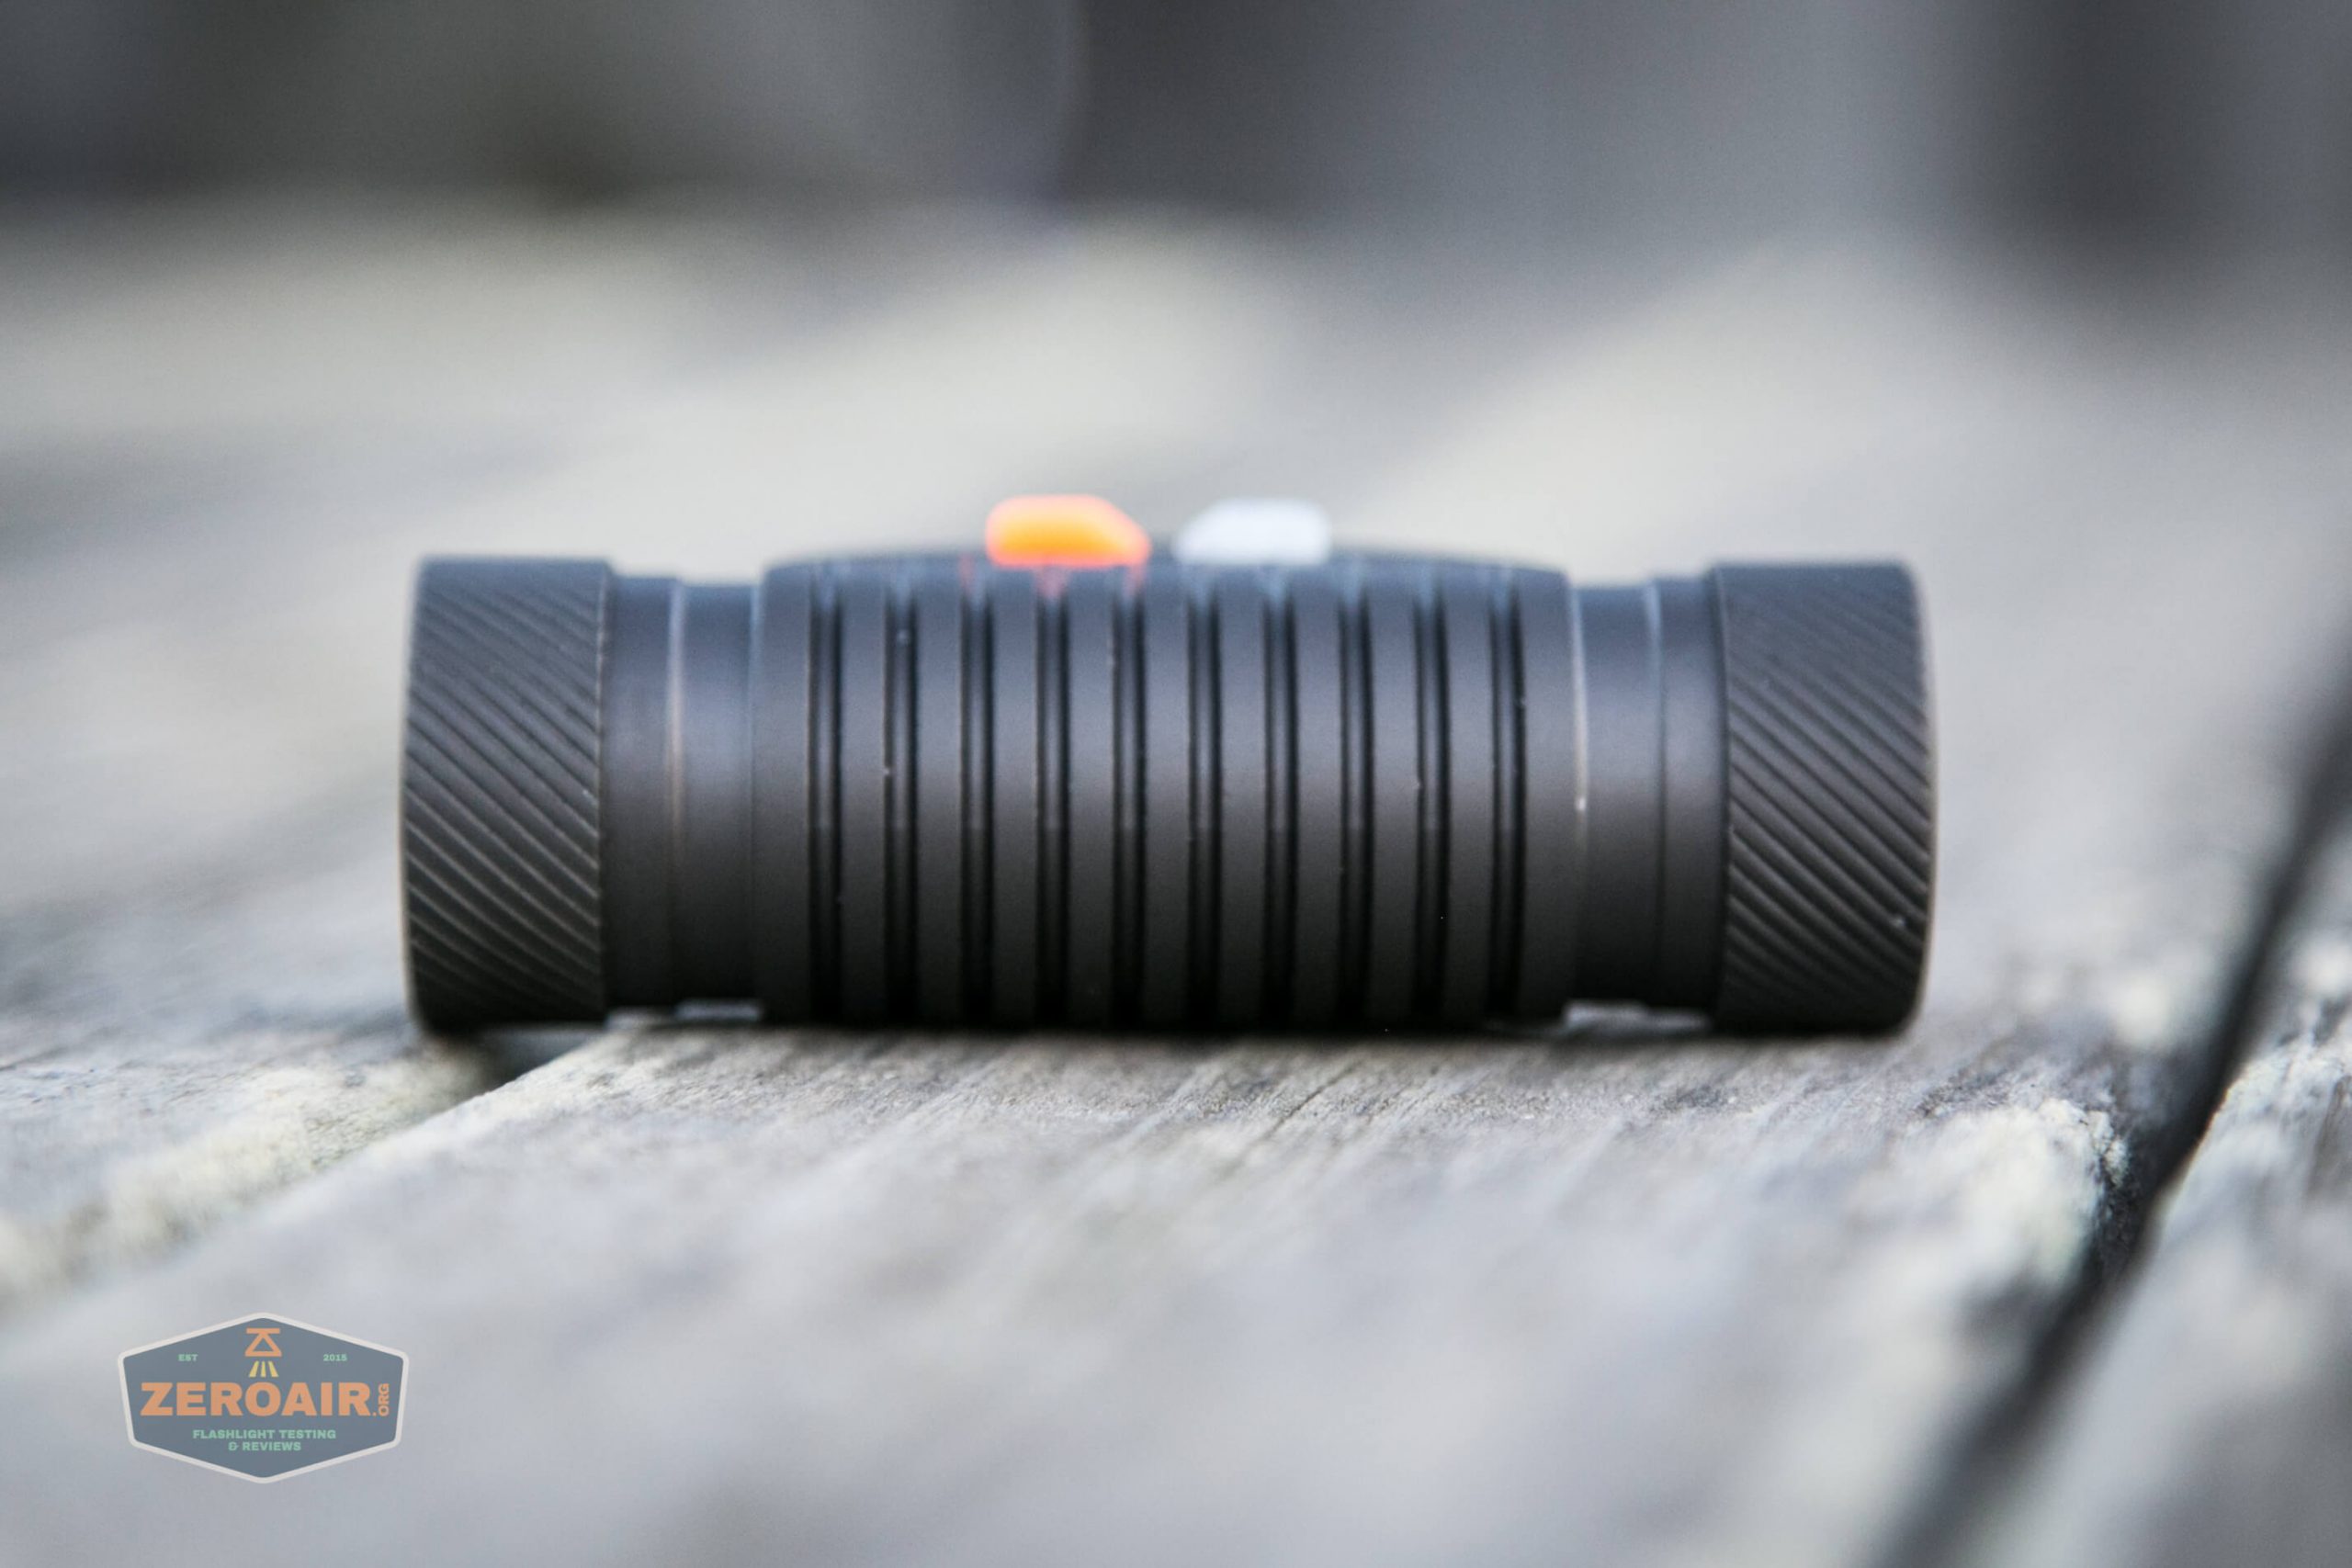
The body has a nice amount of grooves so that heat will be dispersed.

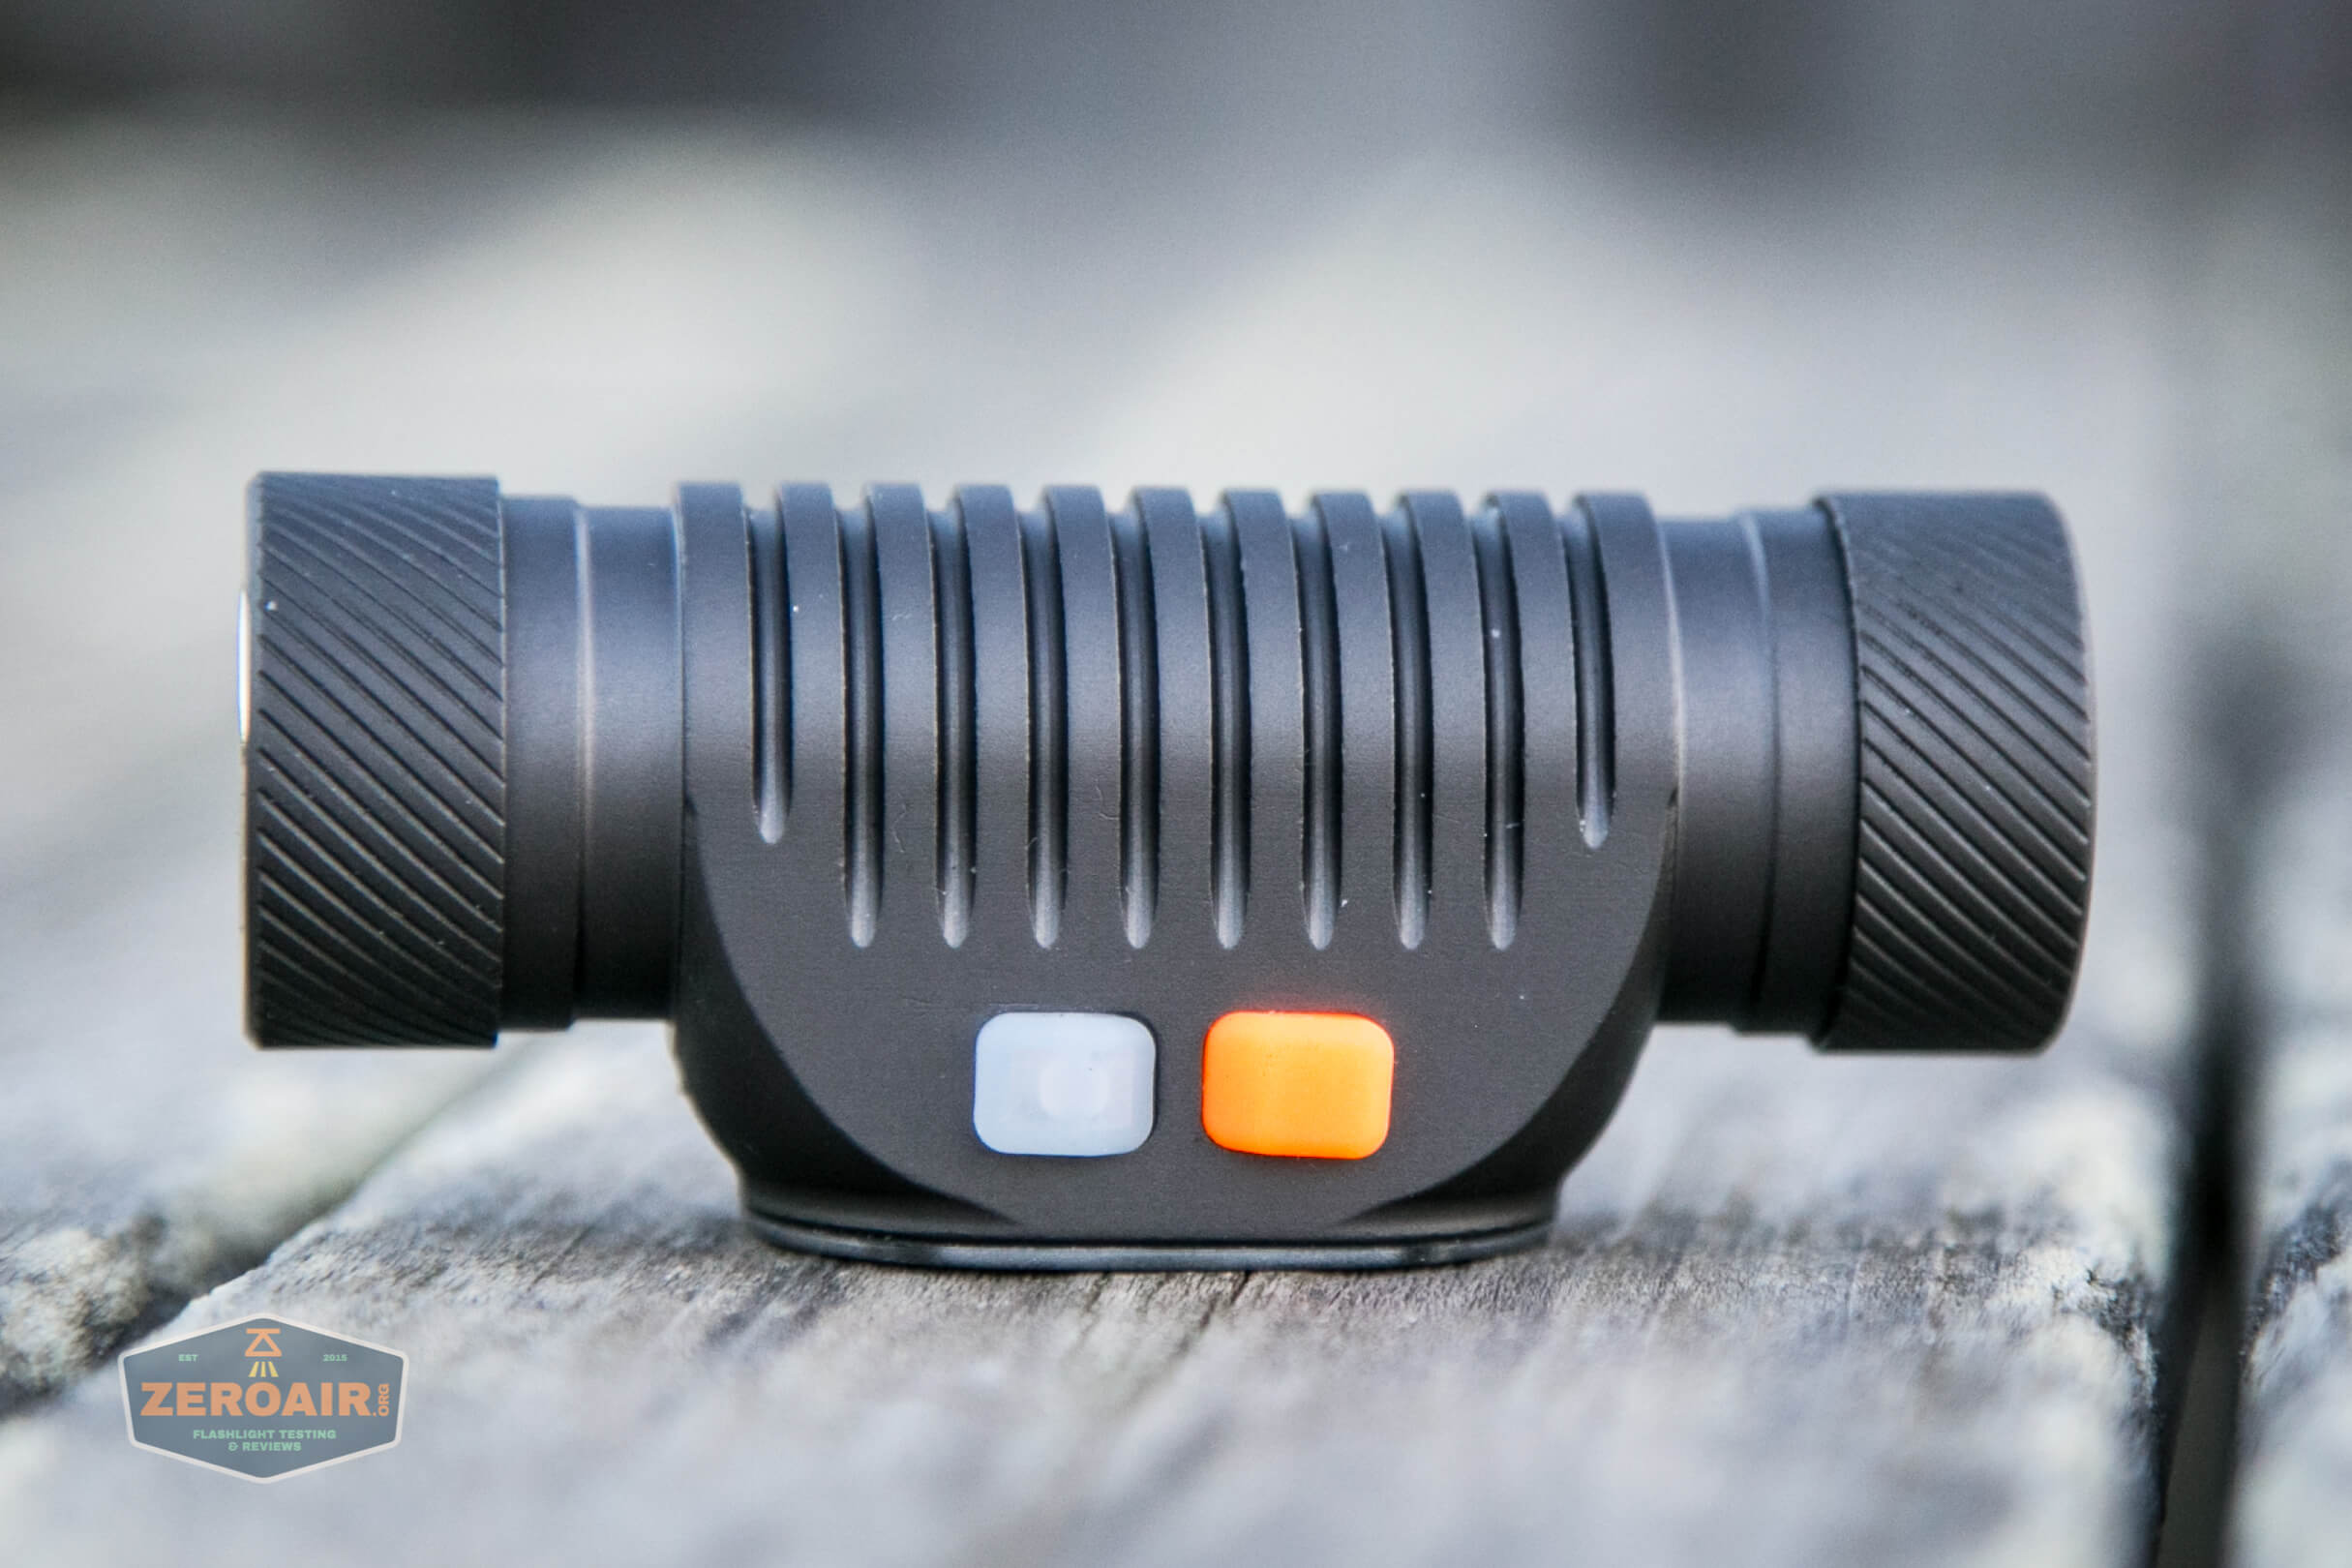
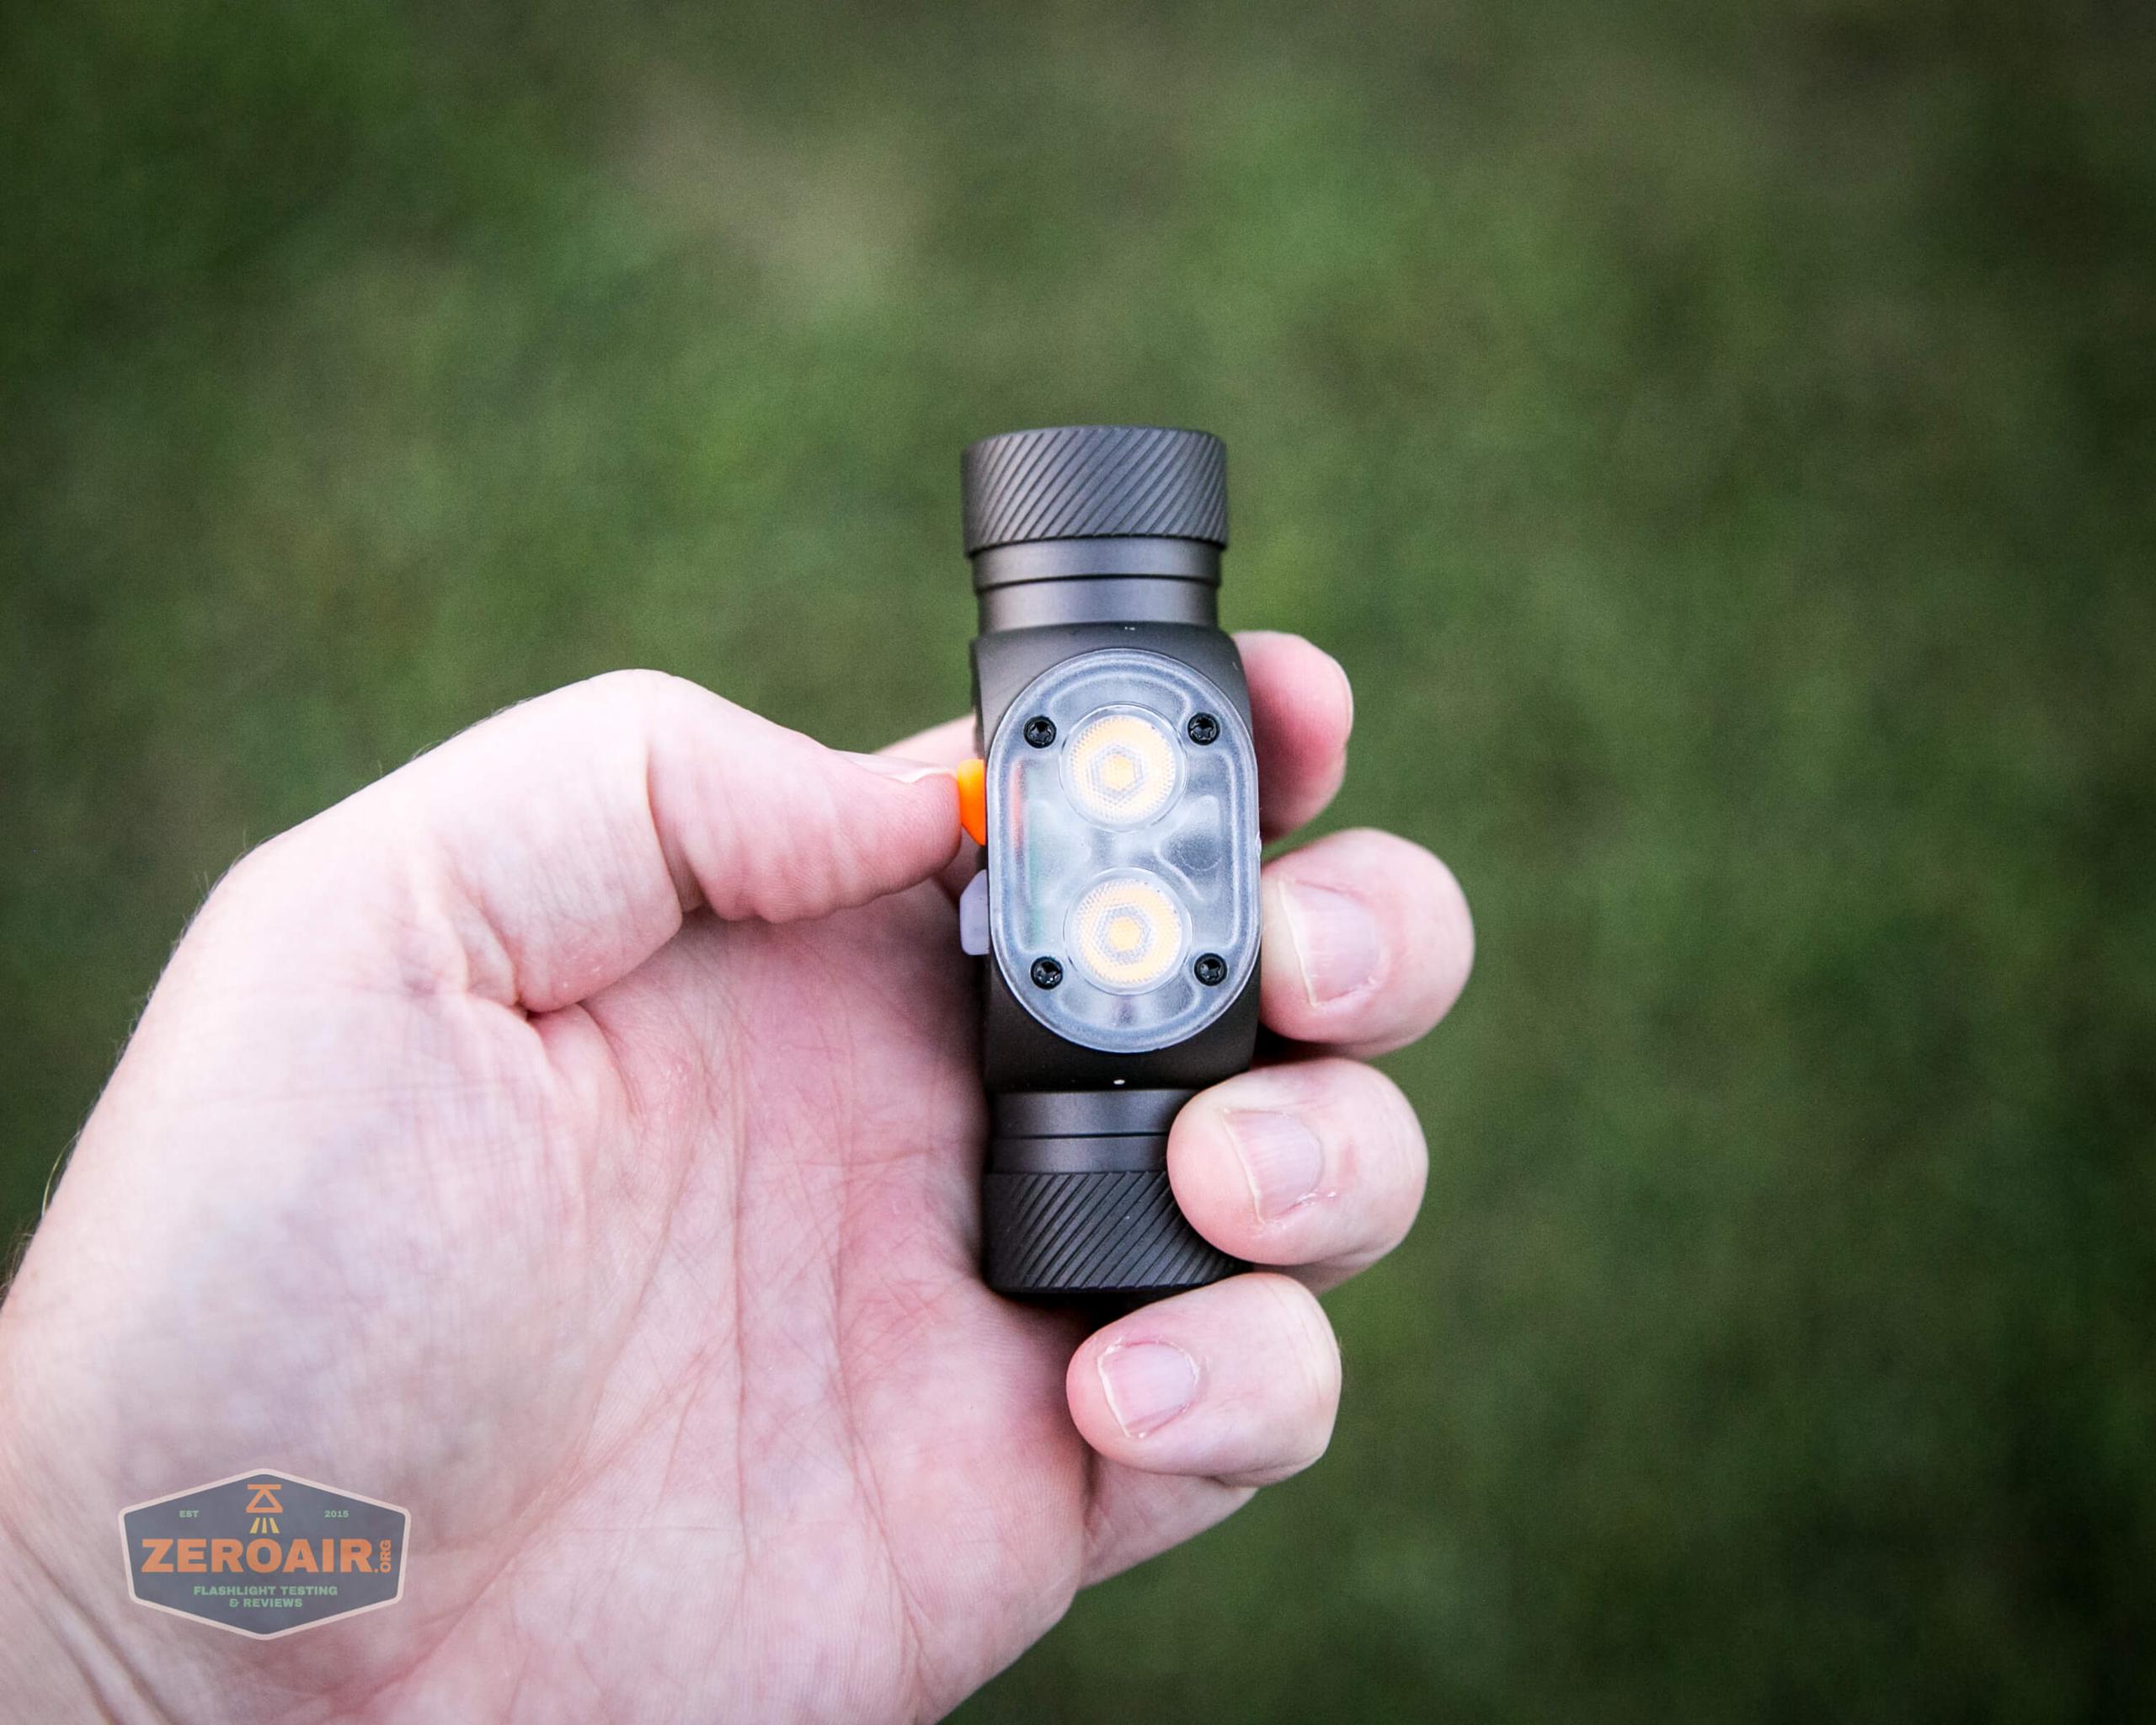
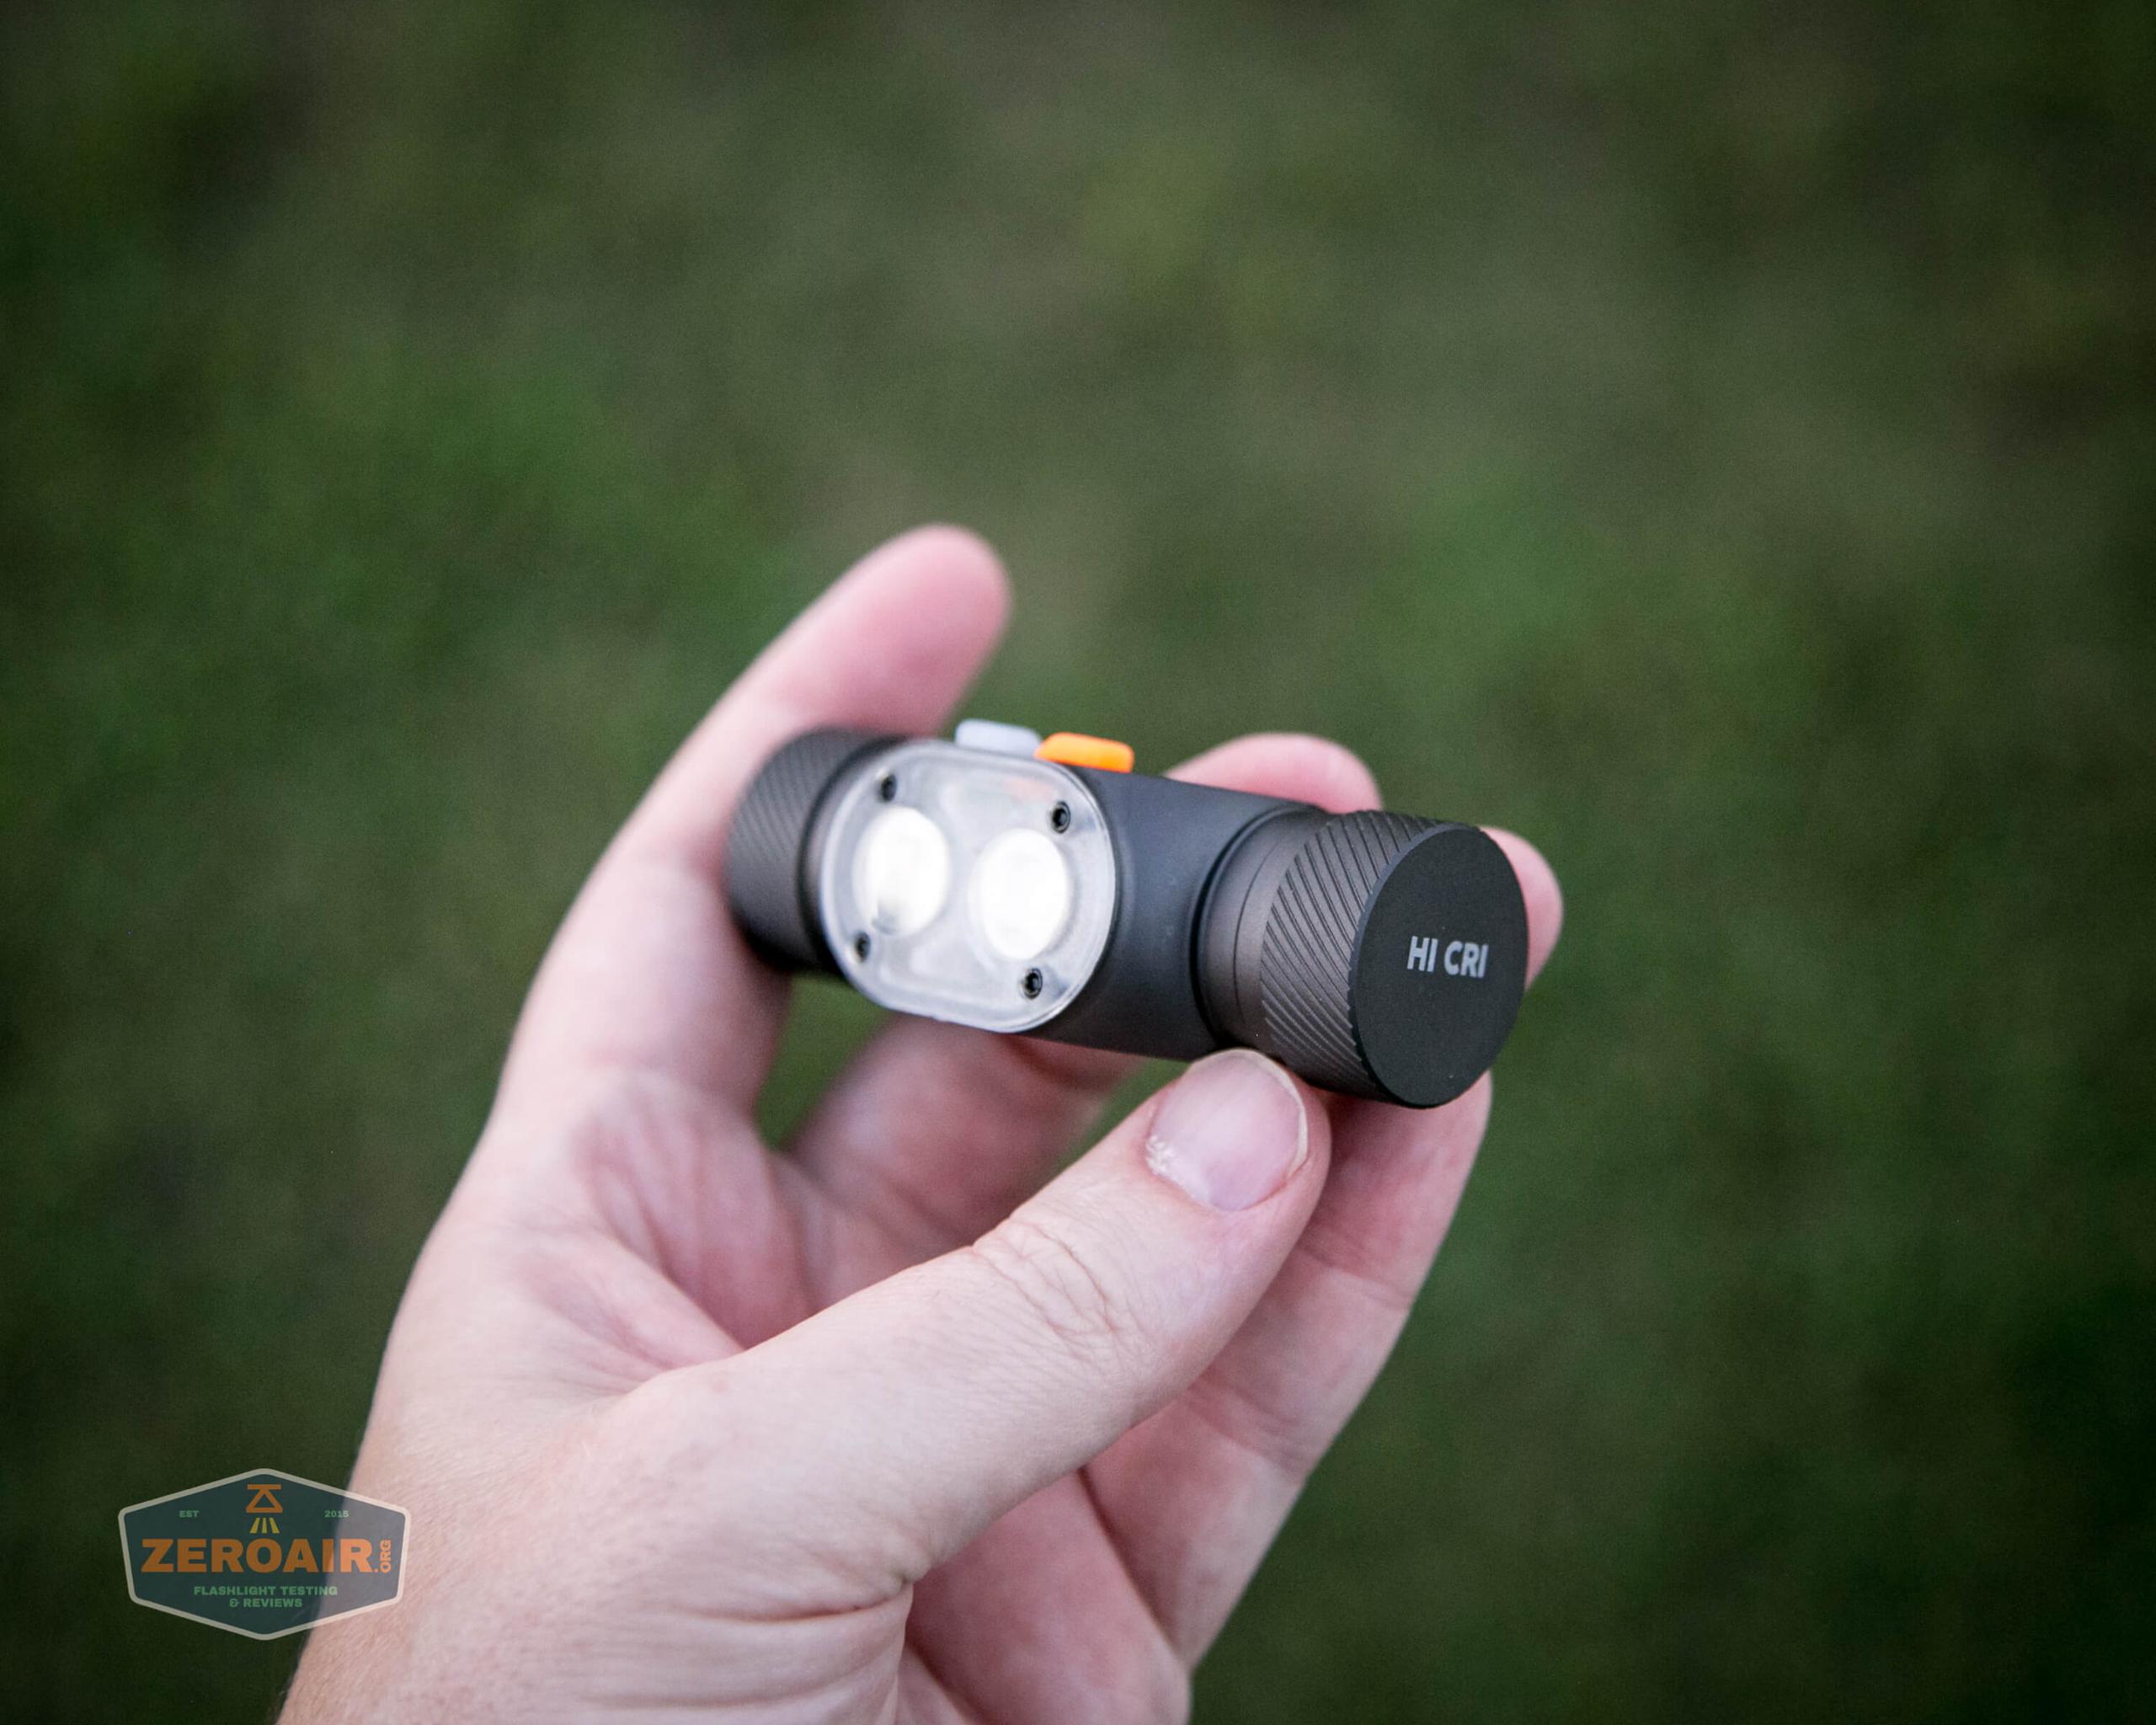
There’s minimal printing on the light, including (actually “limited to”) the HI CRI text on the tailcap. This is also the tailcap, which is removable.
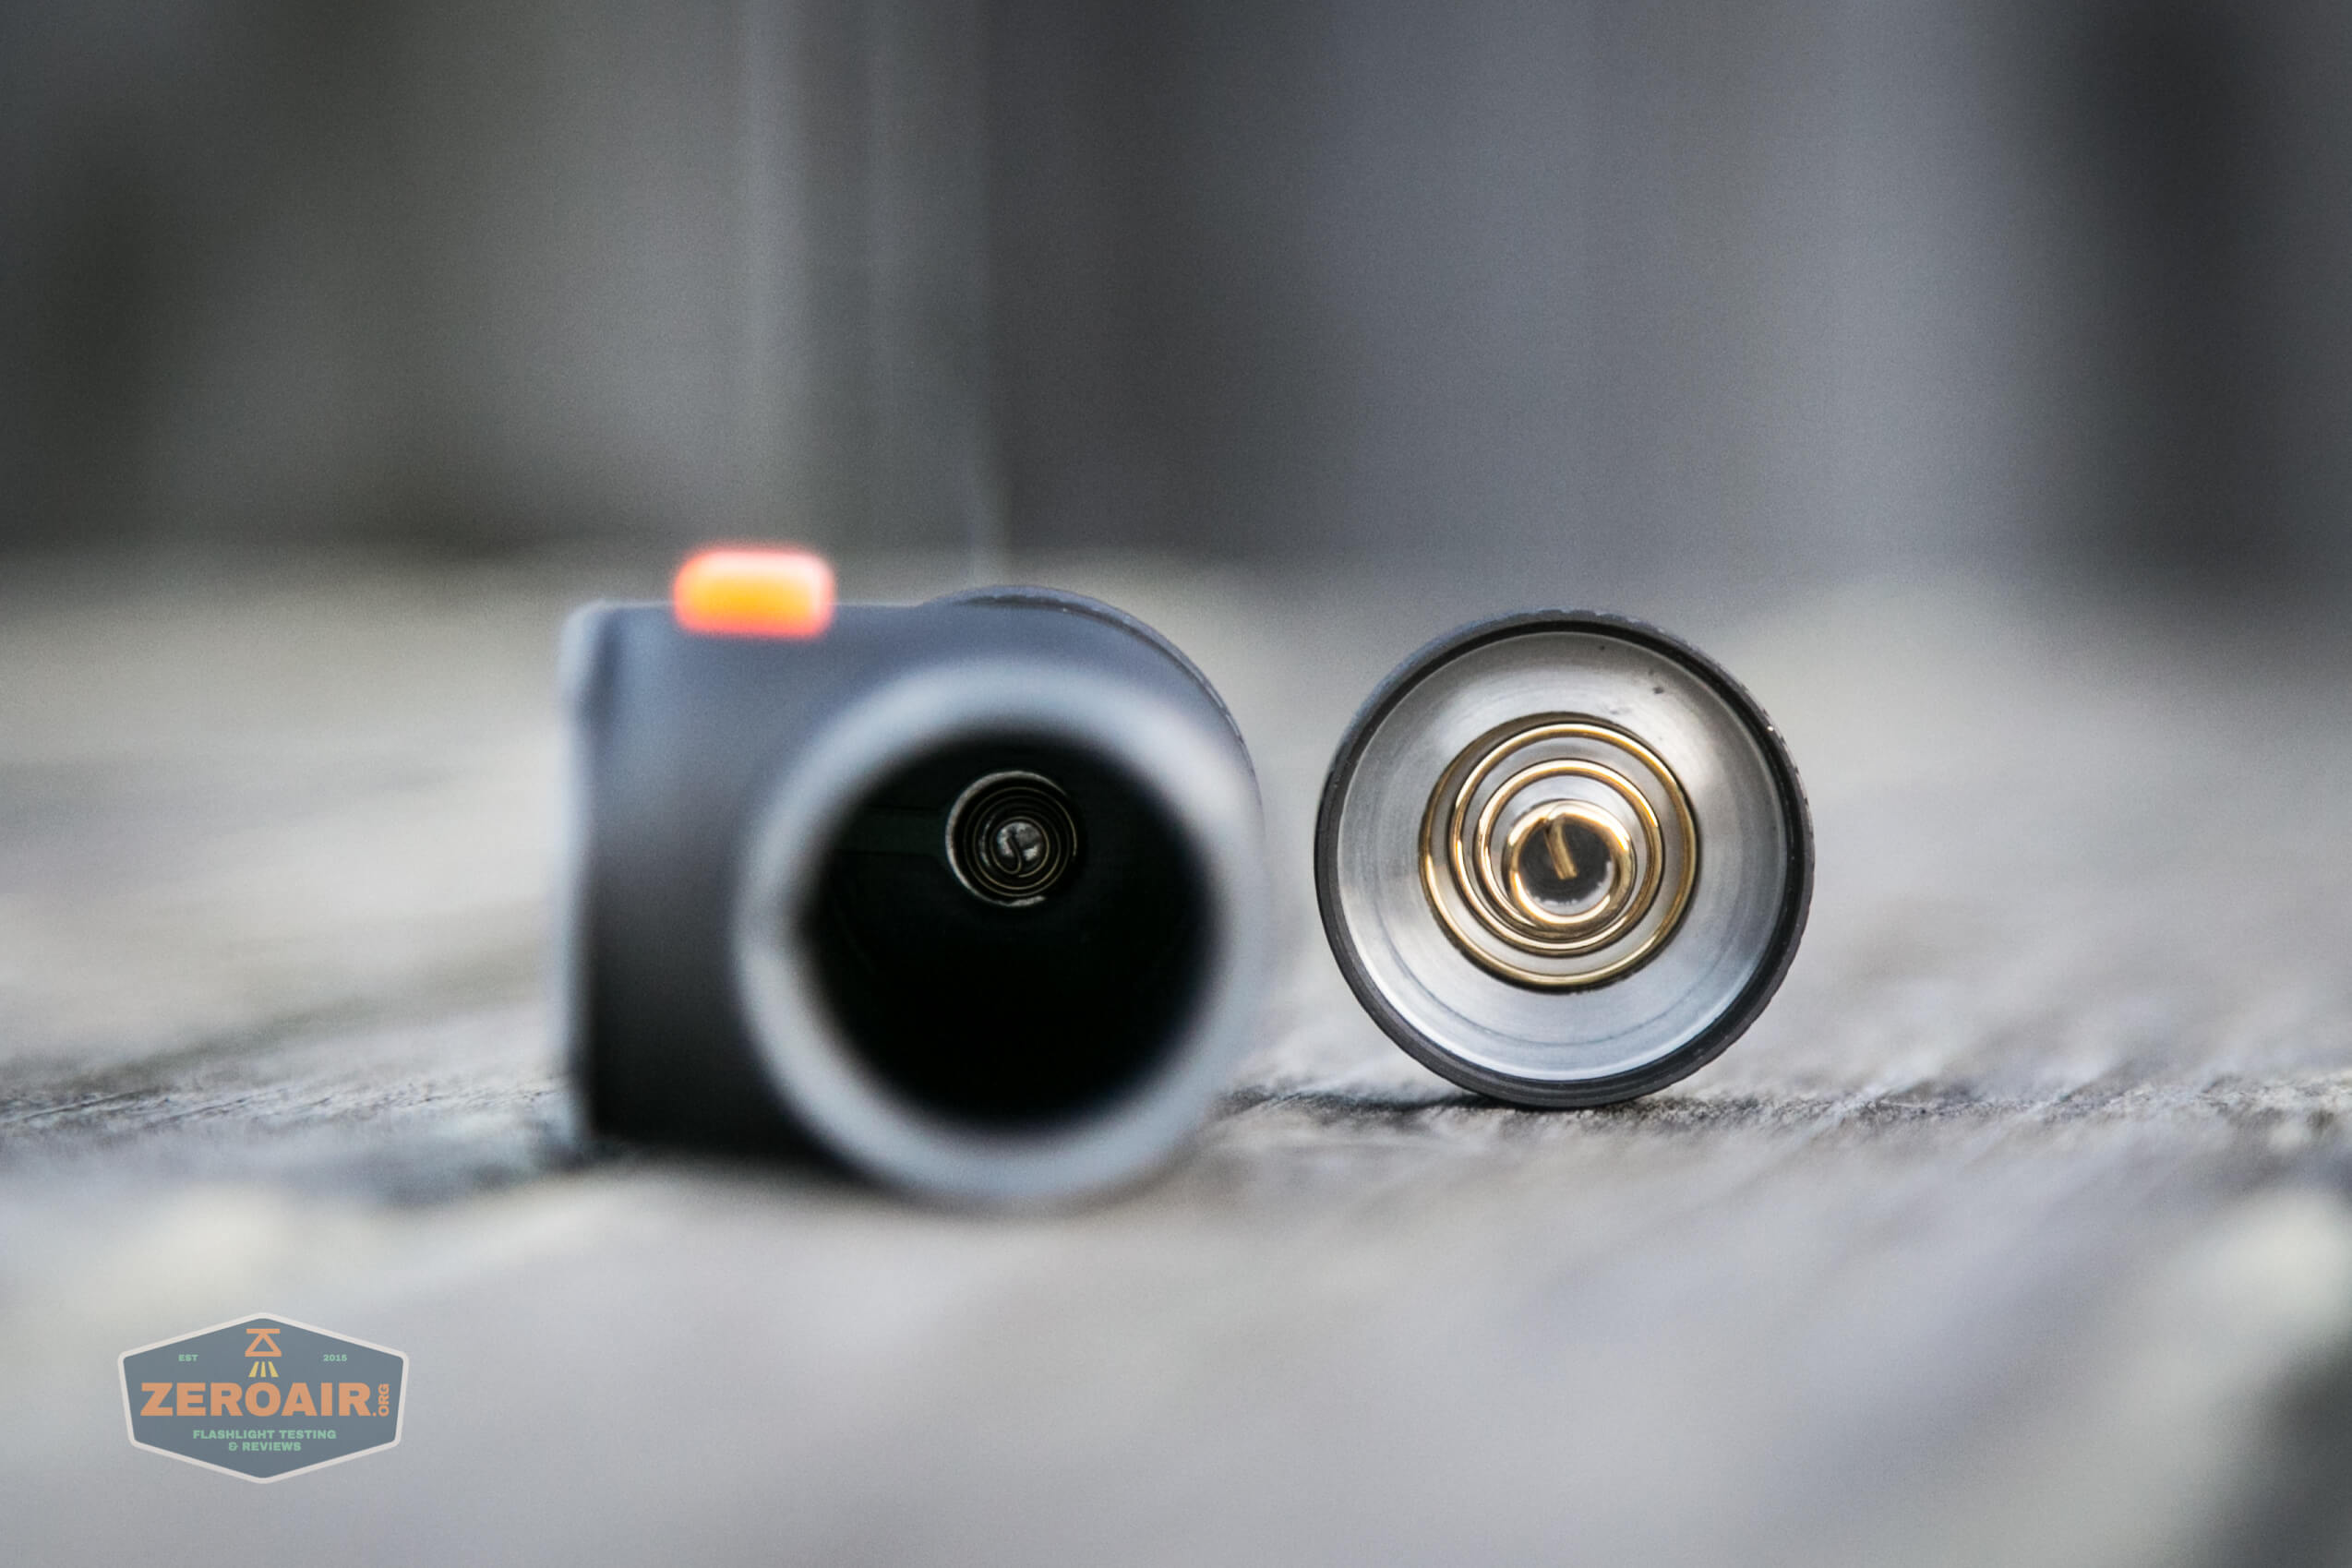
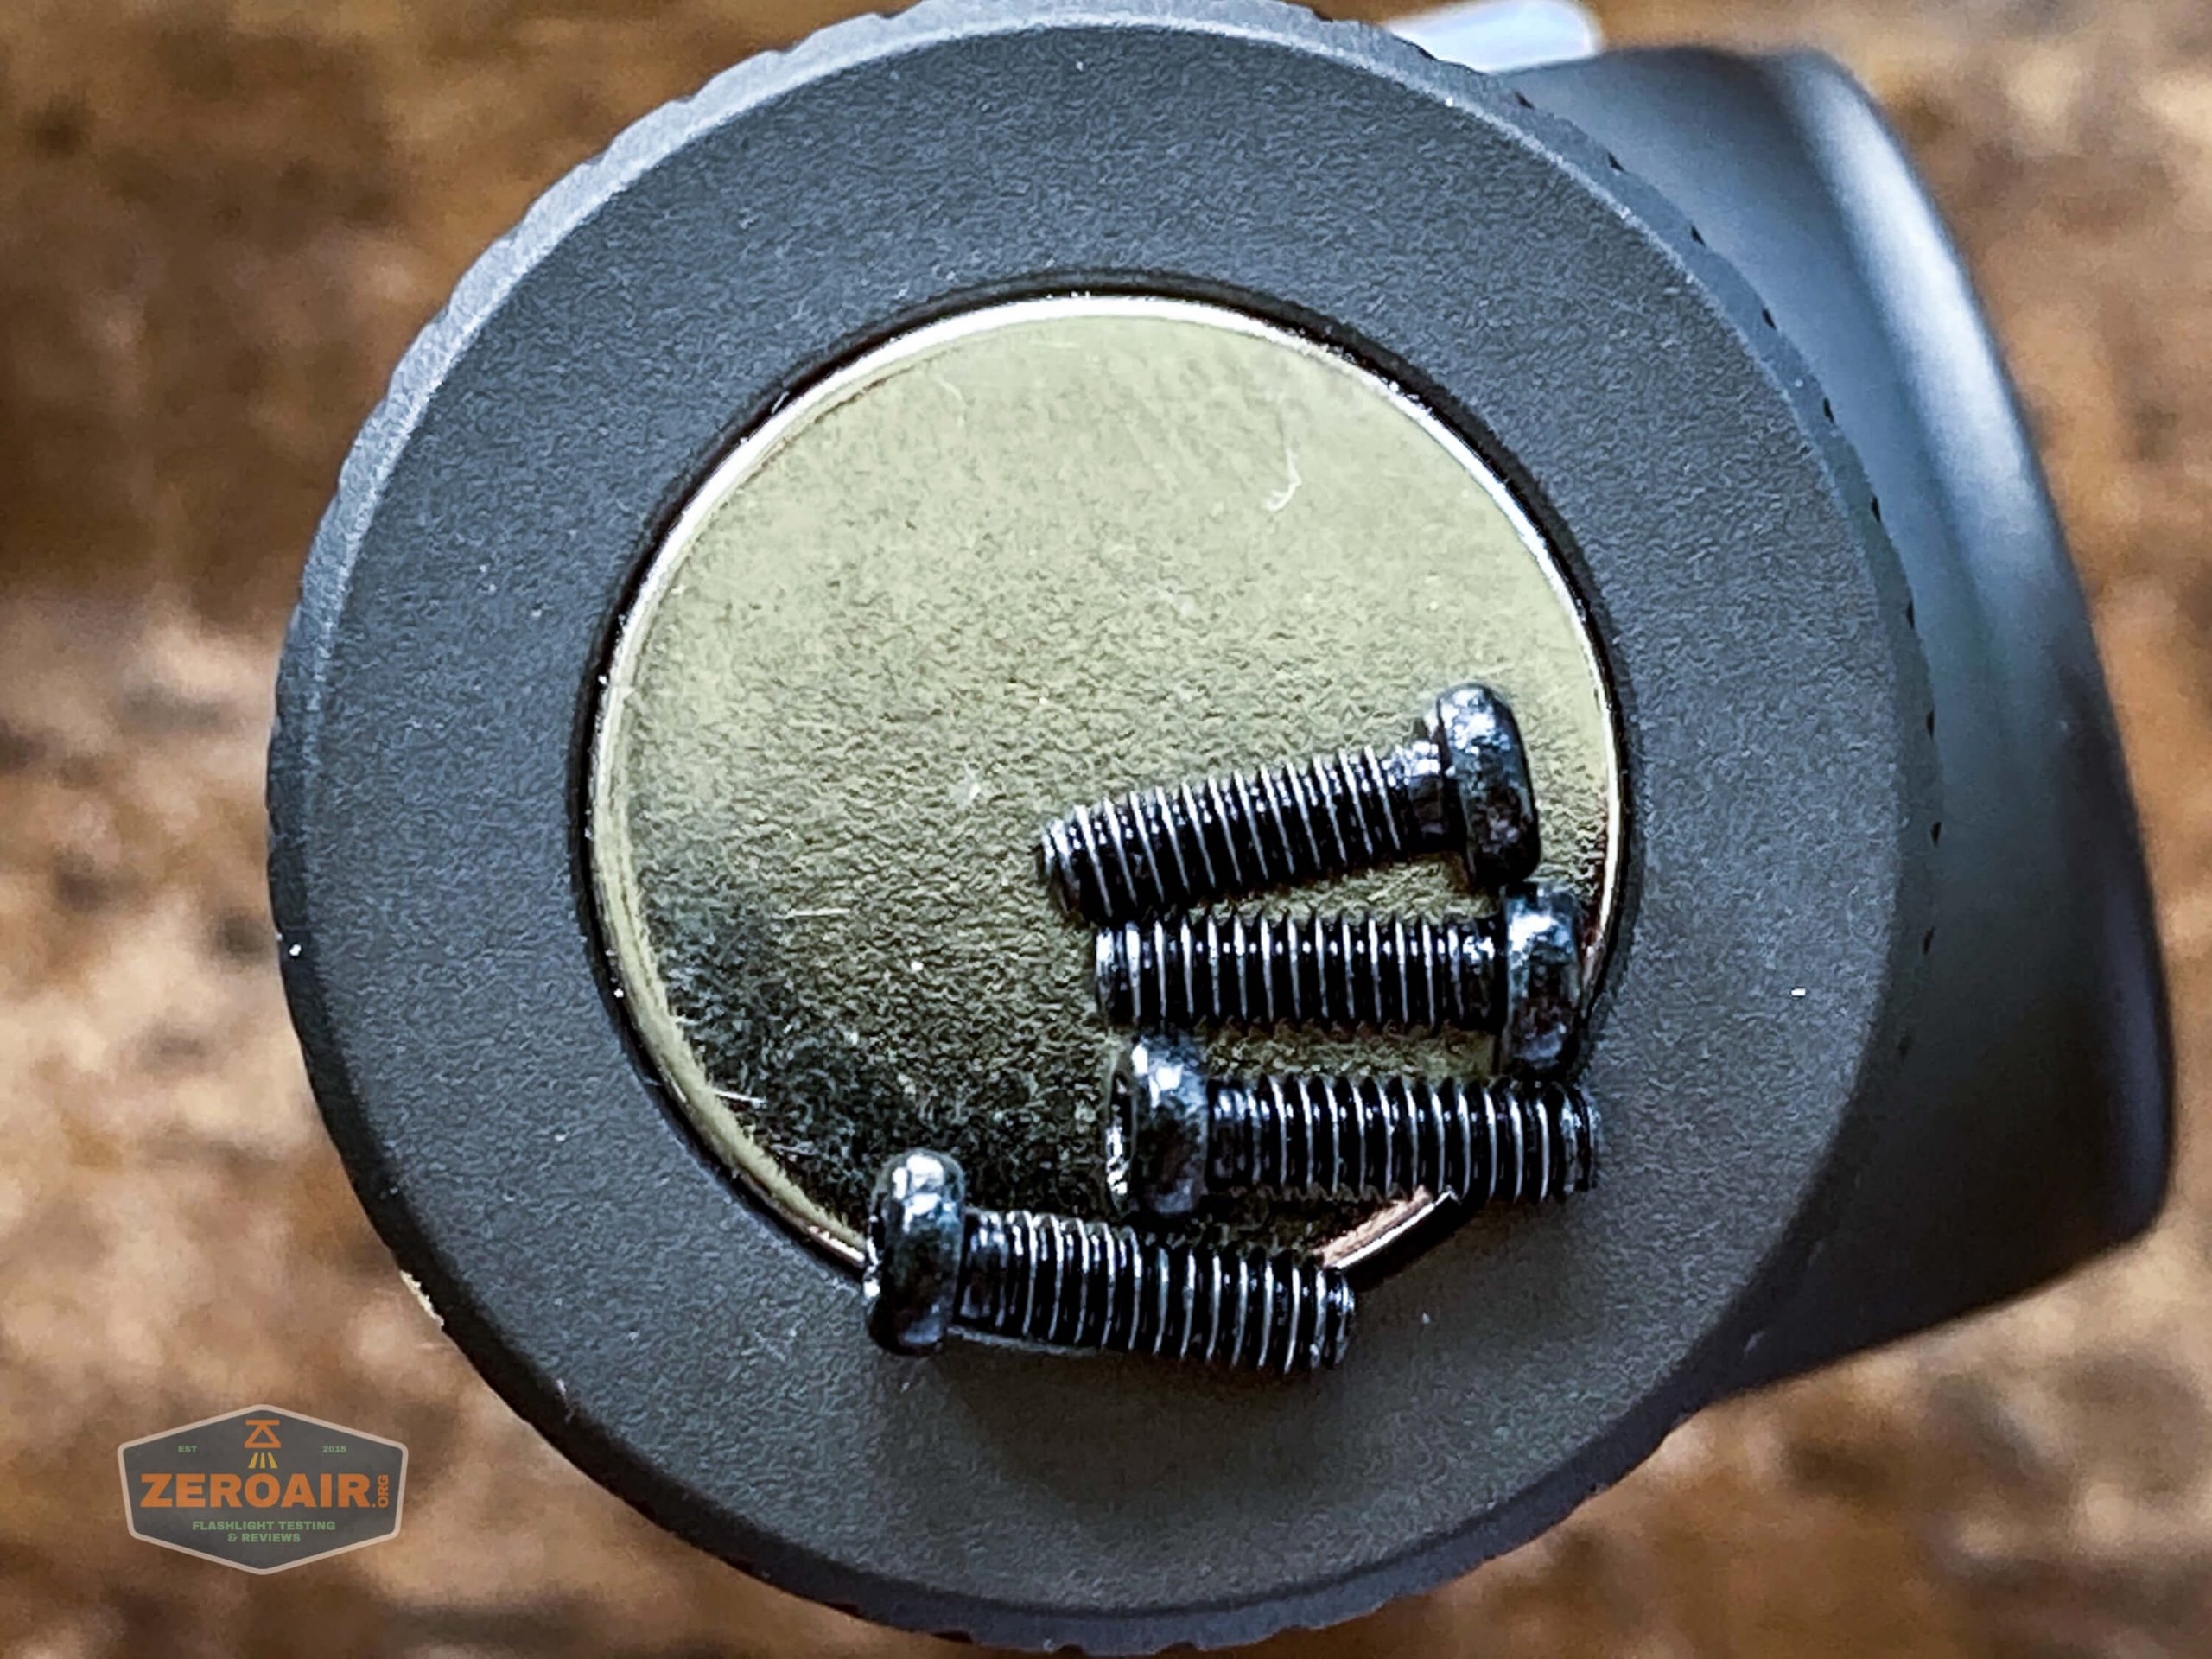
The other tailcap has this exposed magnet.

The threads on the Panda 2M CRI are about as smooth as titanium threads (this is not a titanium light). They’re just a bit grainy.
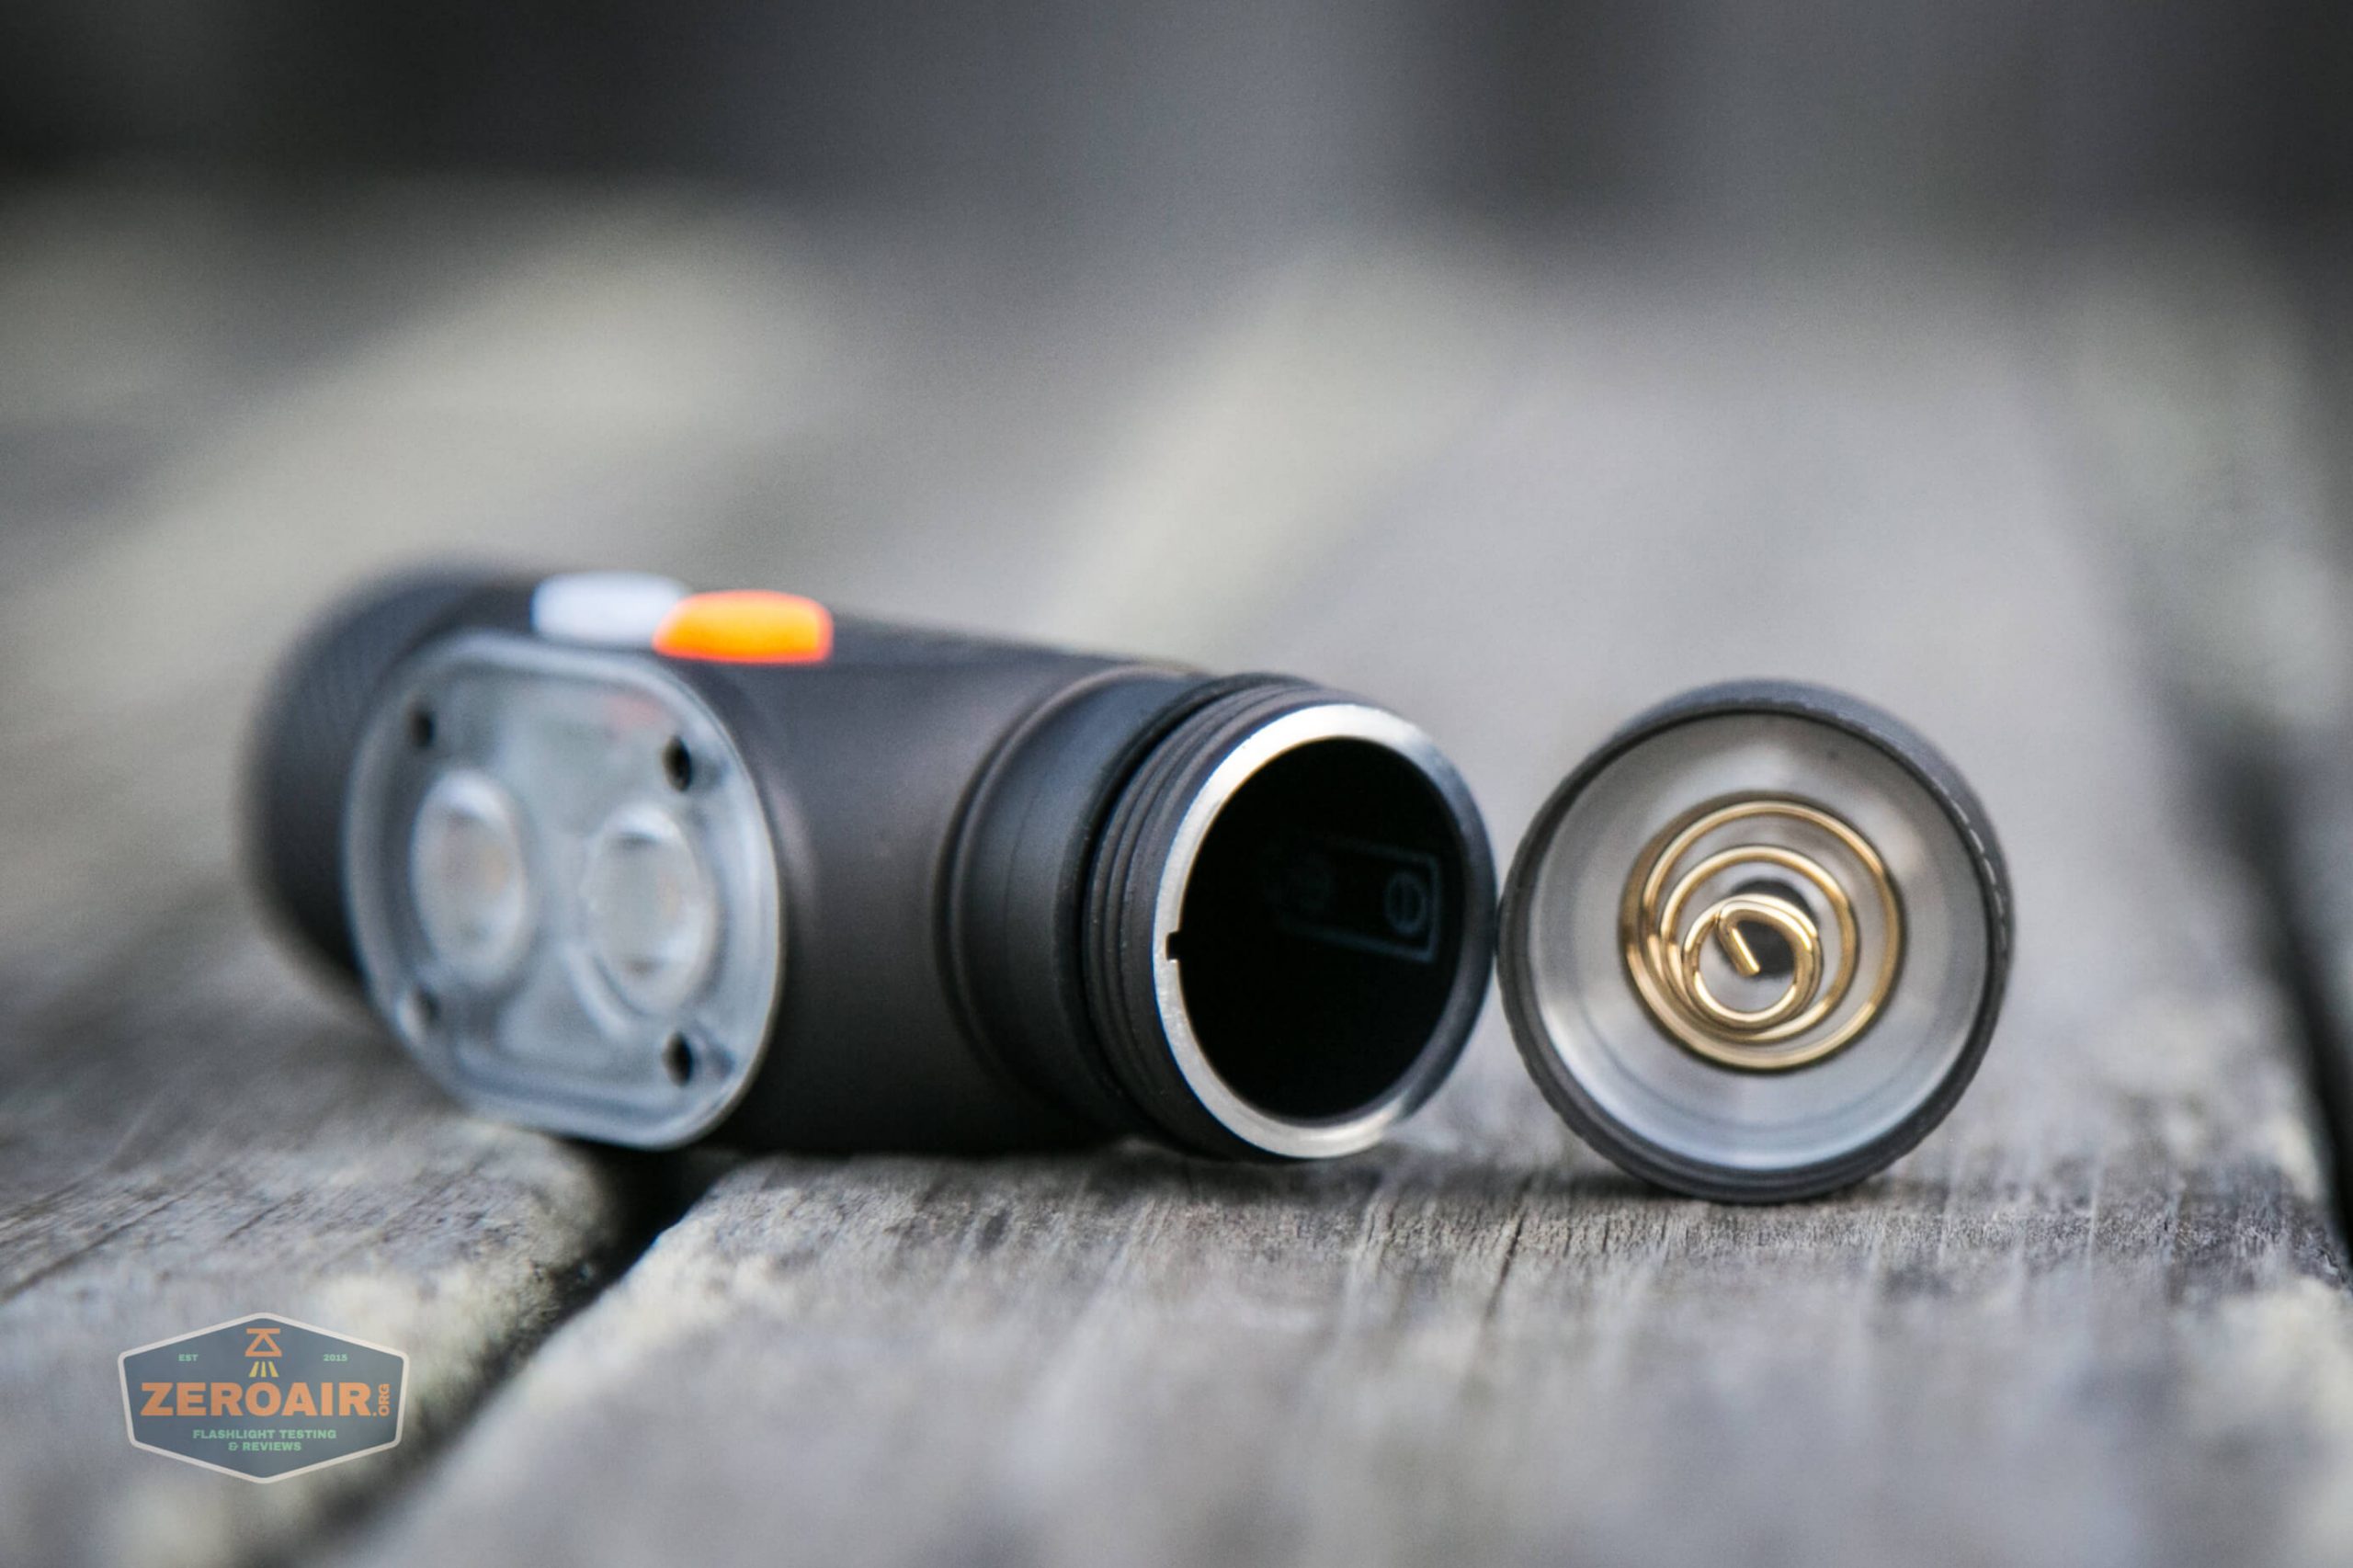
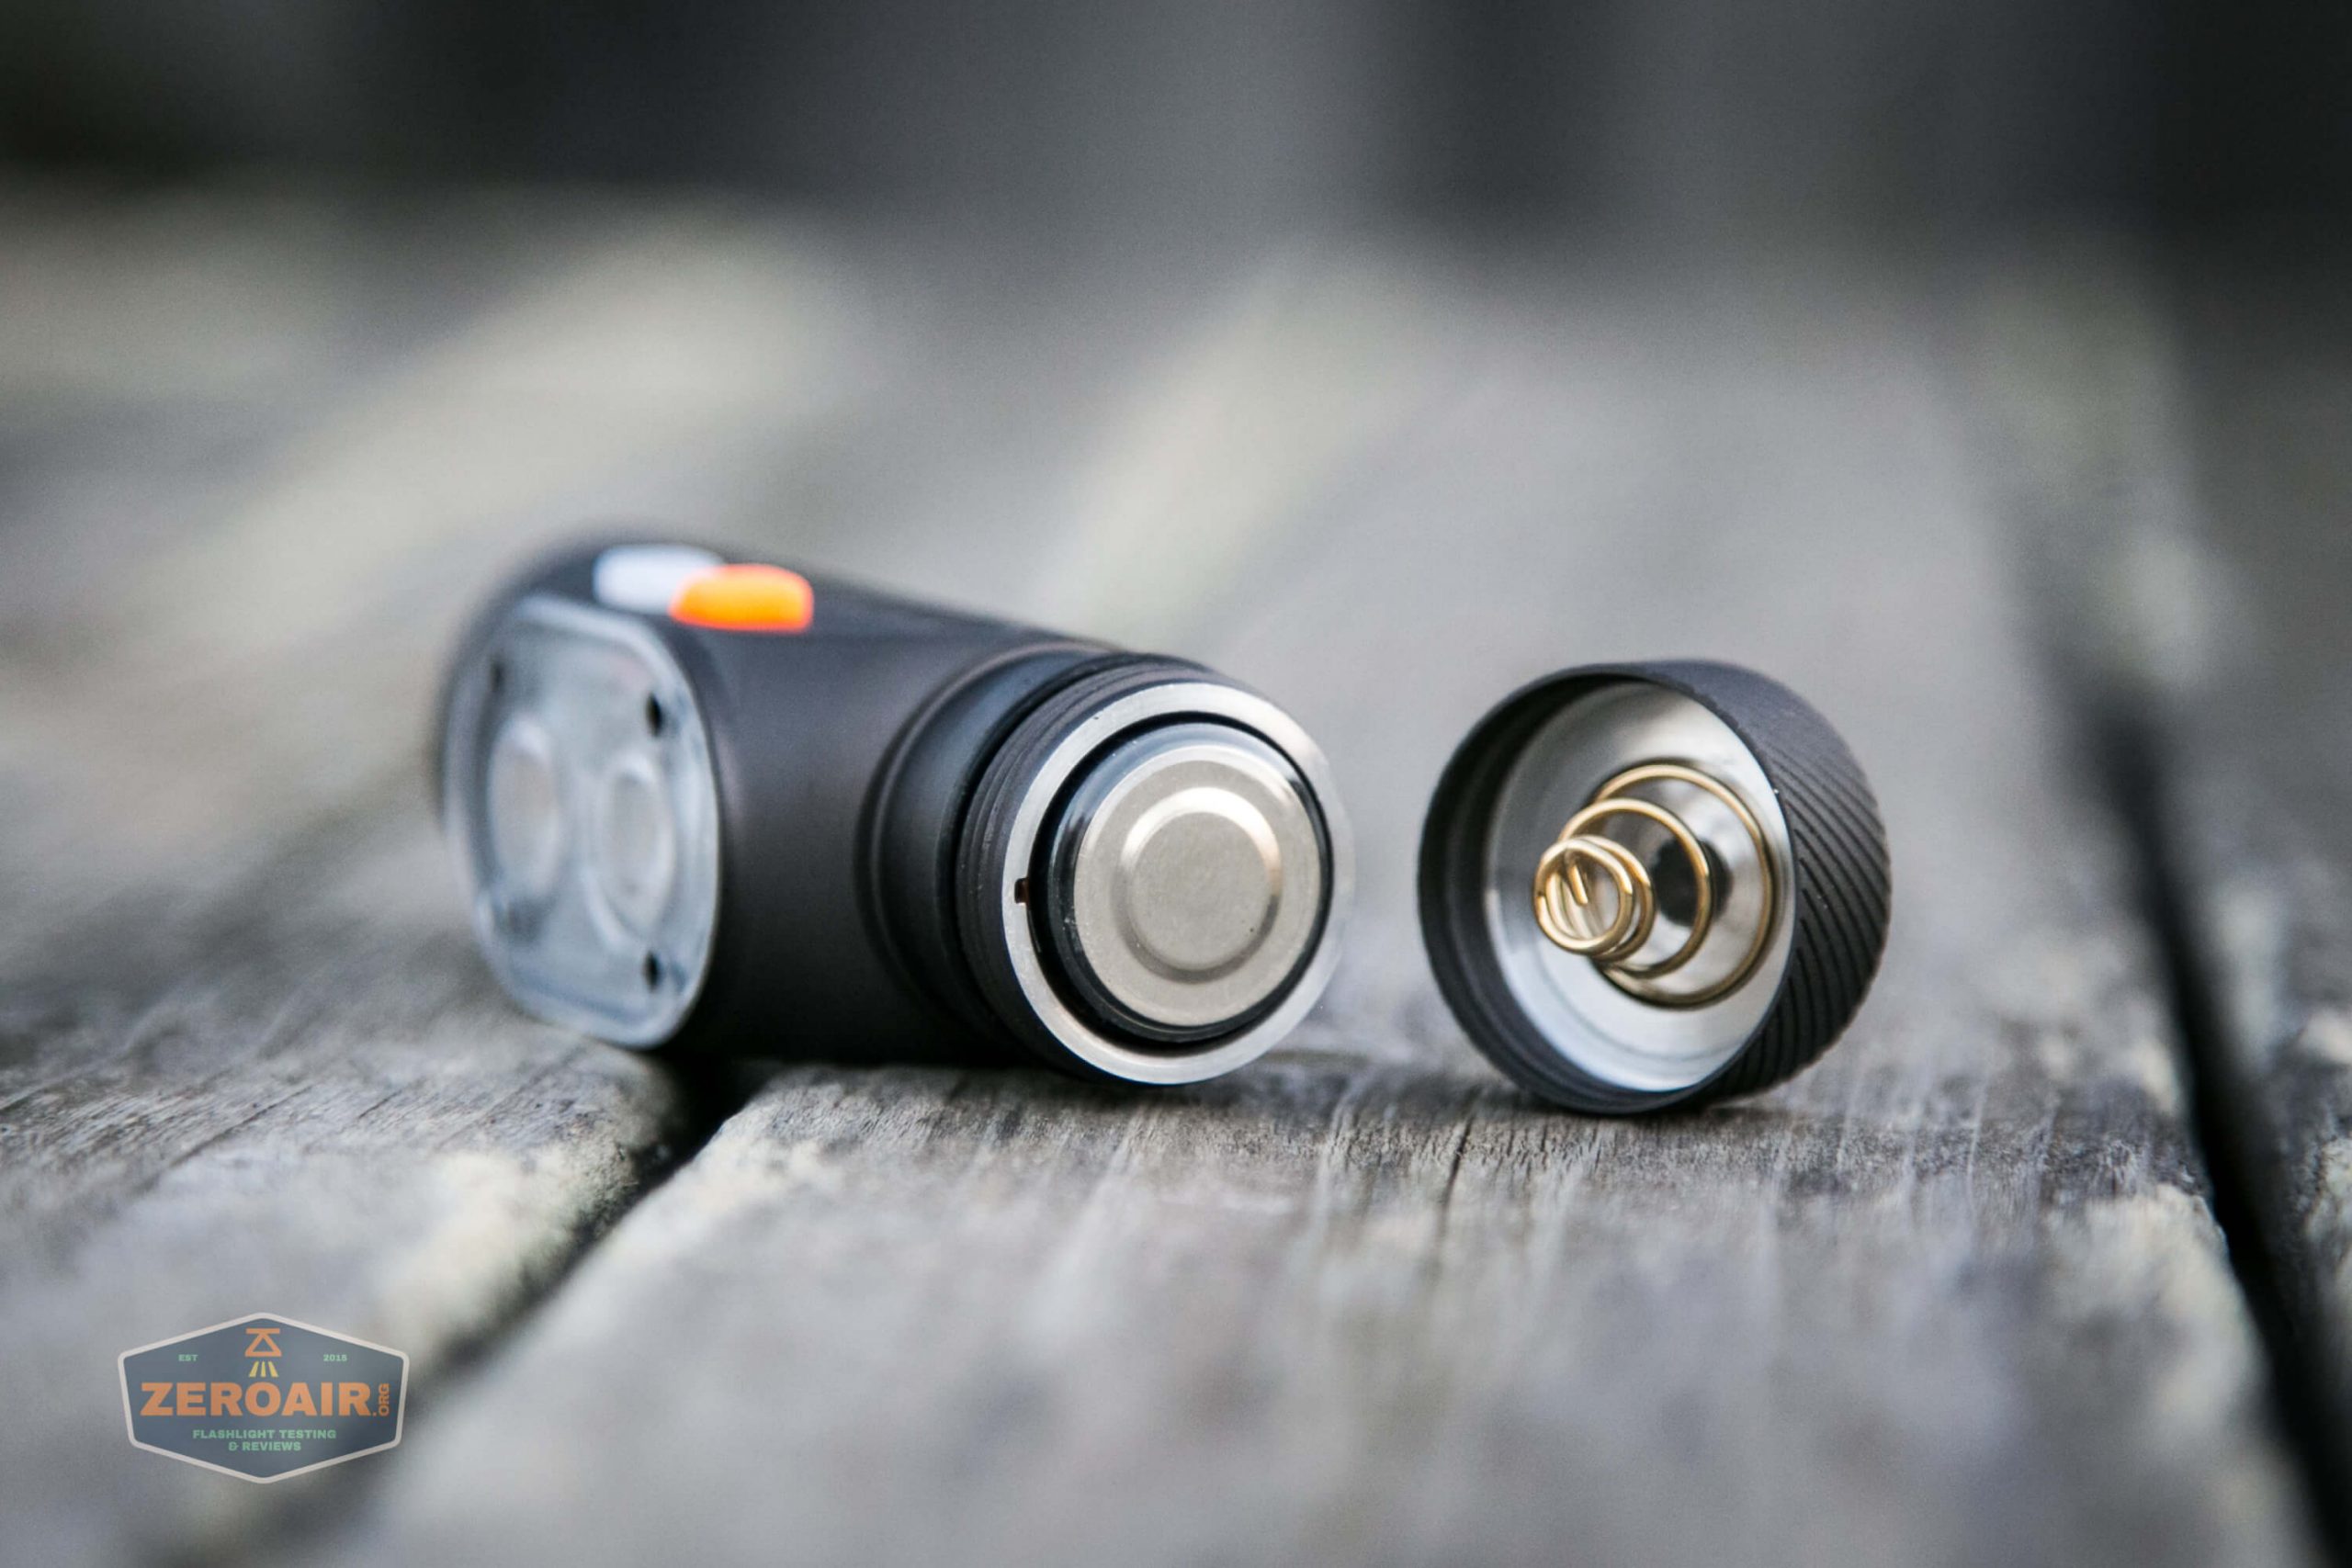
A spring is present on both the head and tail. The head spring is small, but the tail spring is thick and springy.
The threads are short and triangle cut. The tailcap provides ample grip, both with the grooves, and because the anodizing is matte.

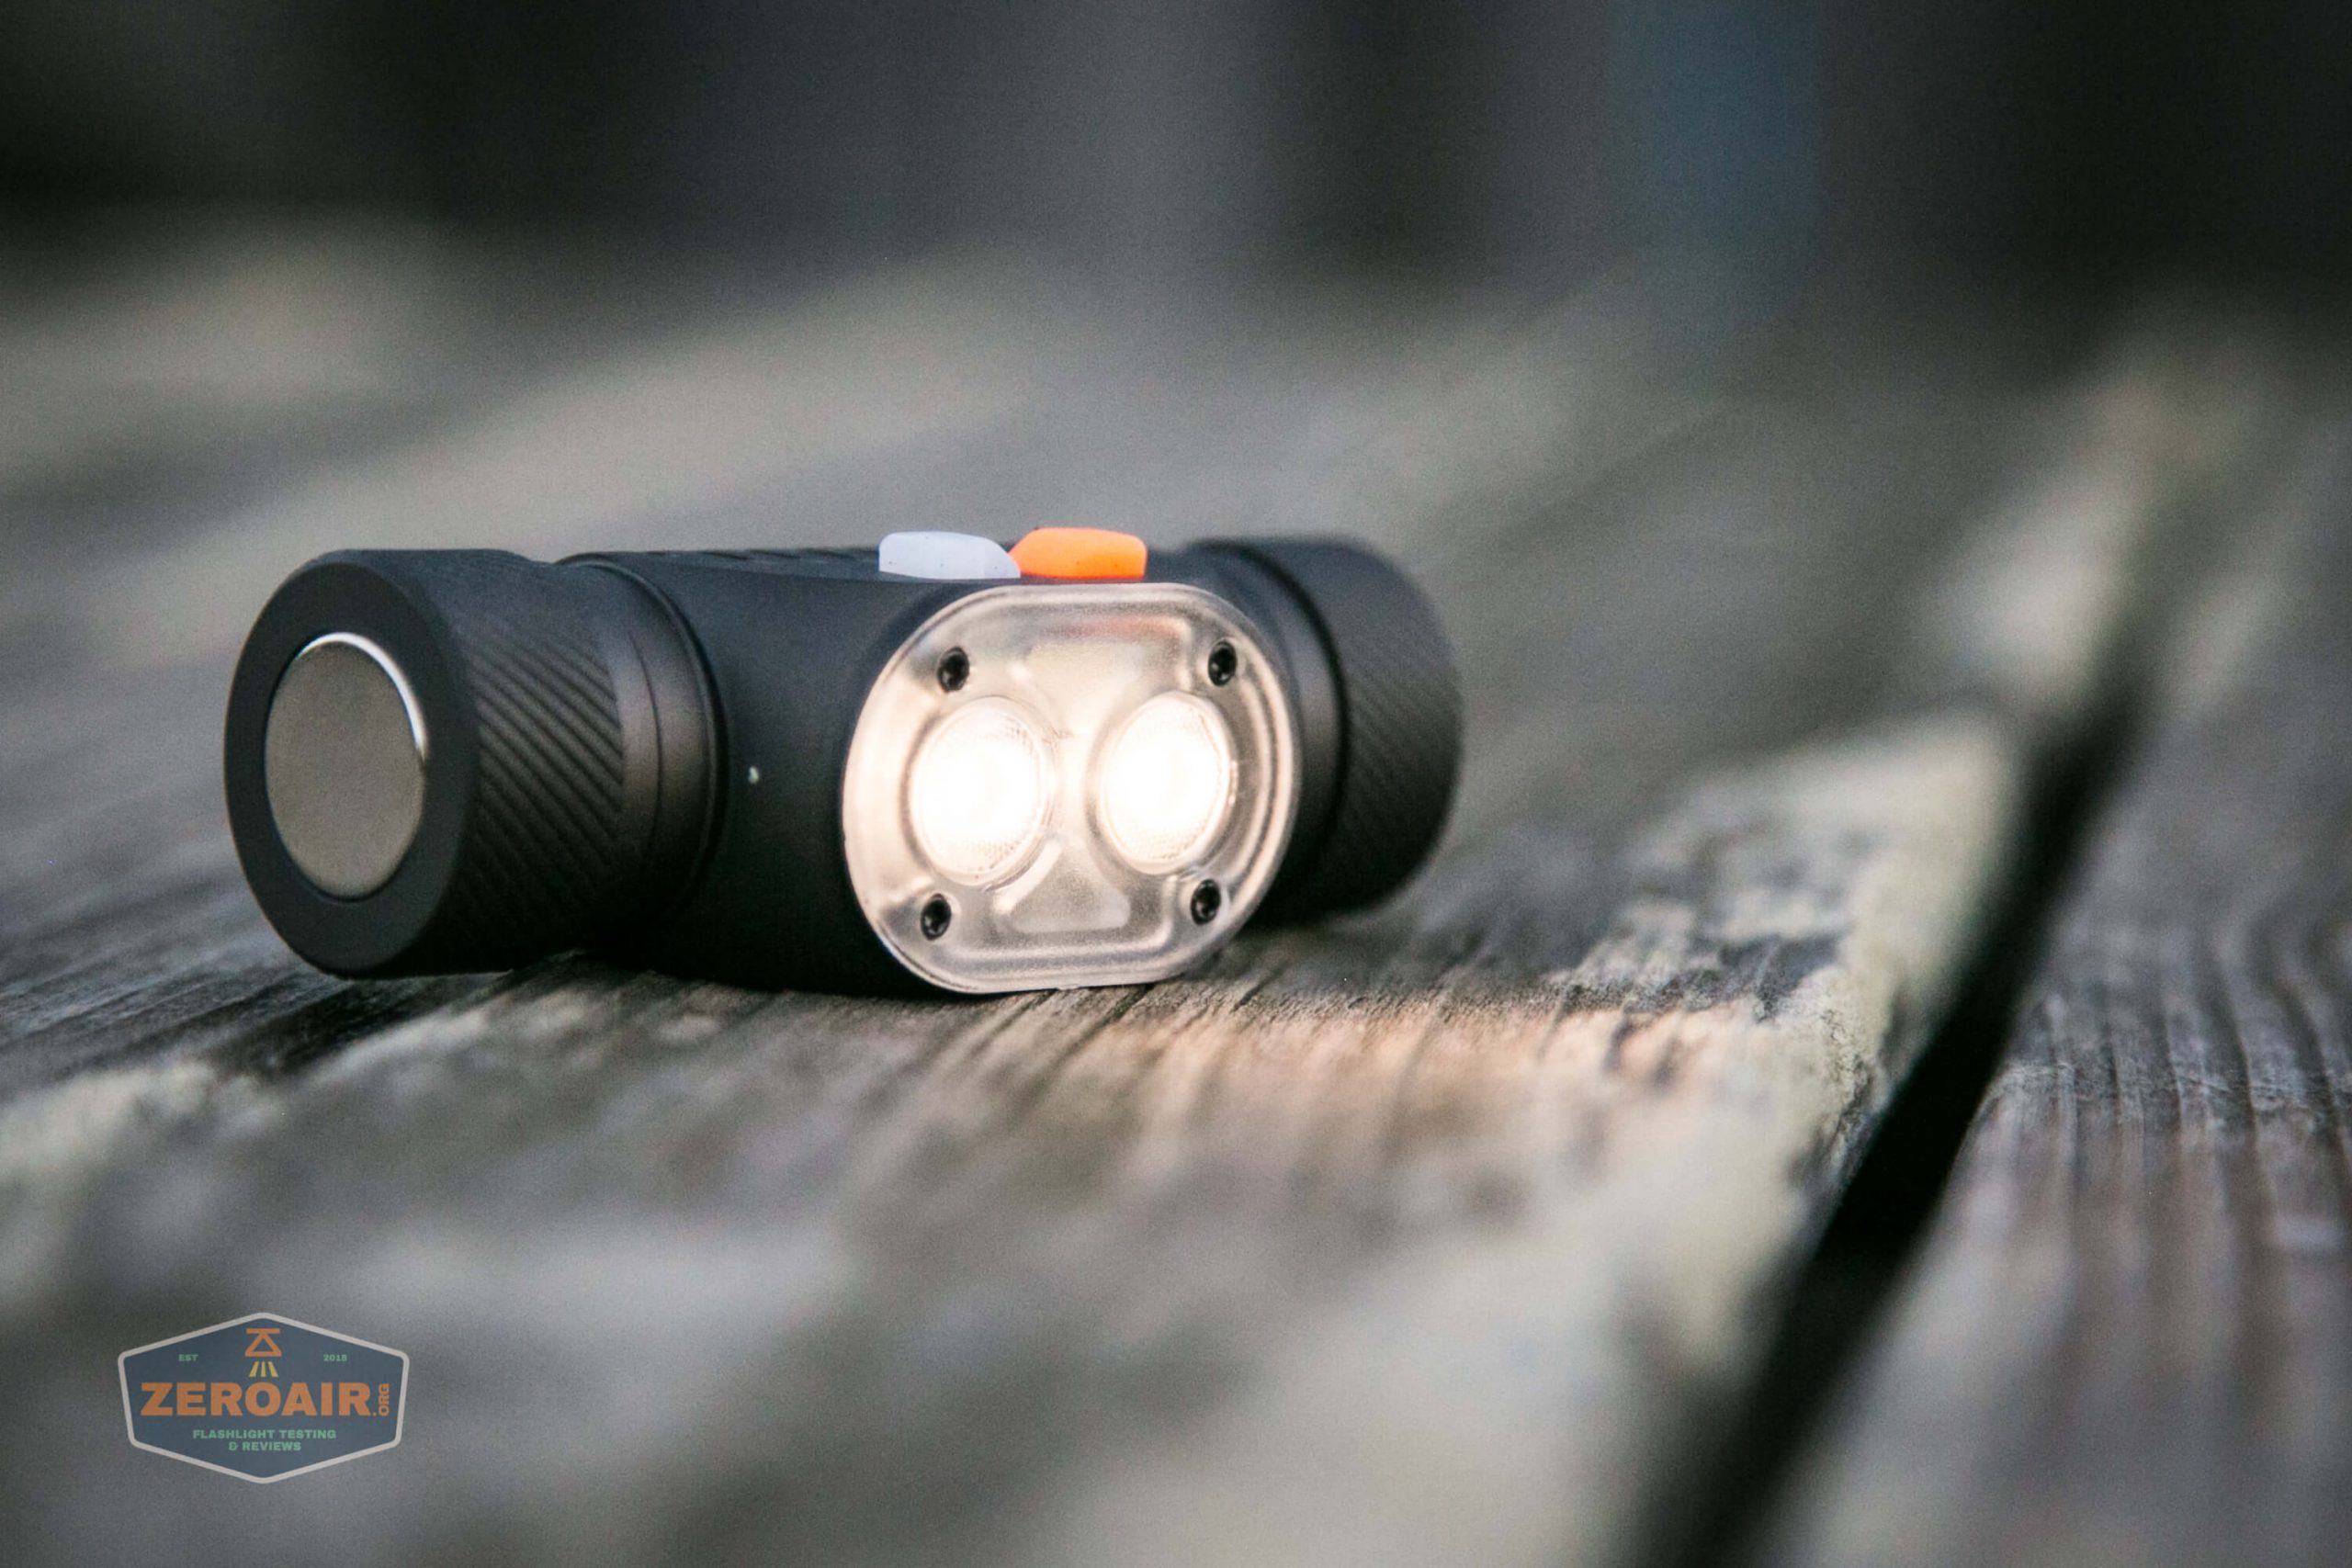


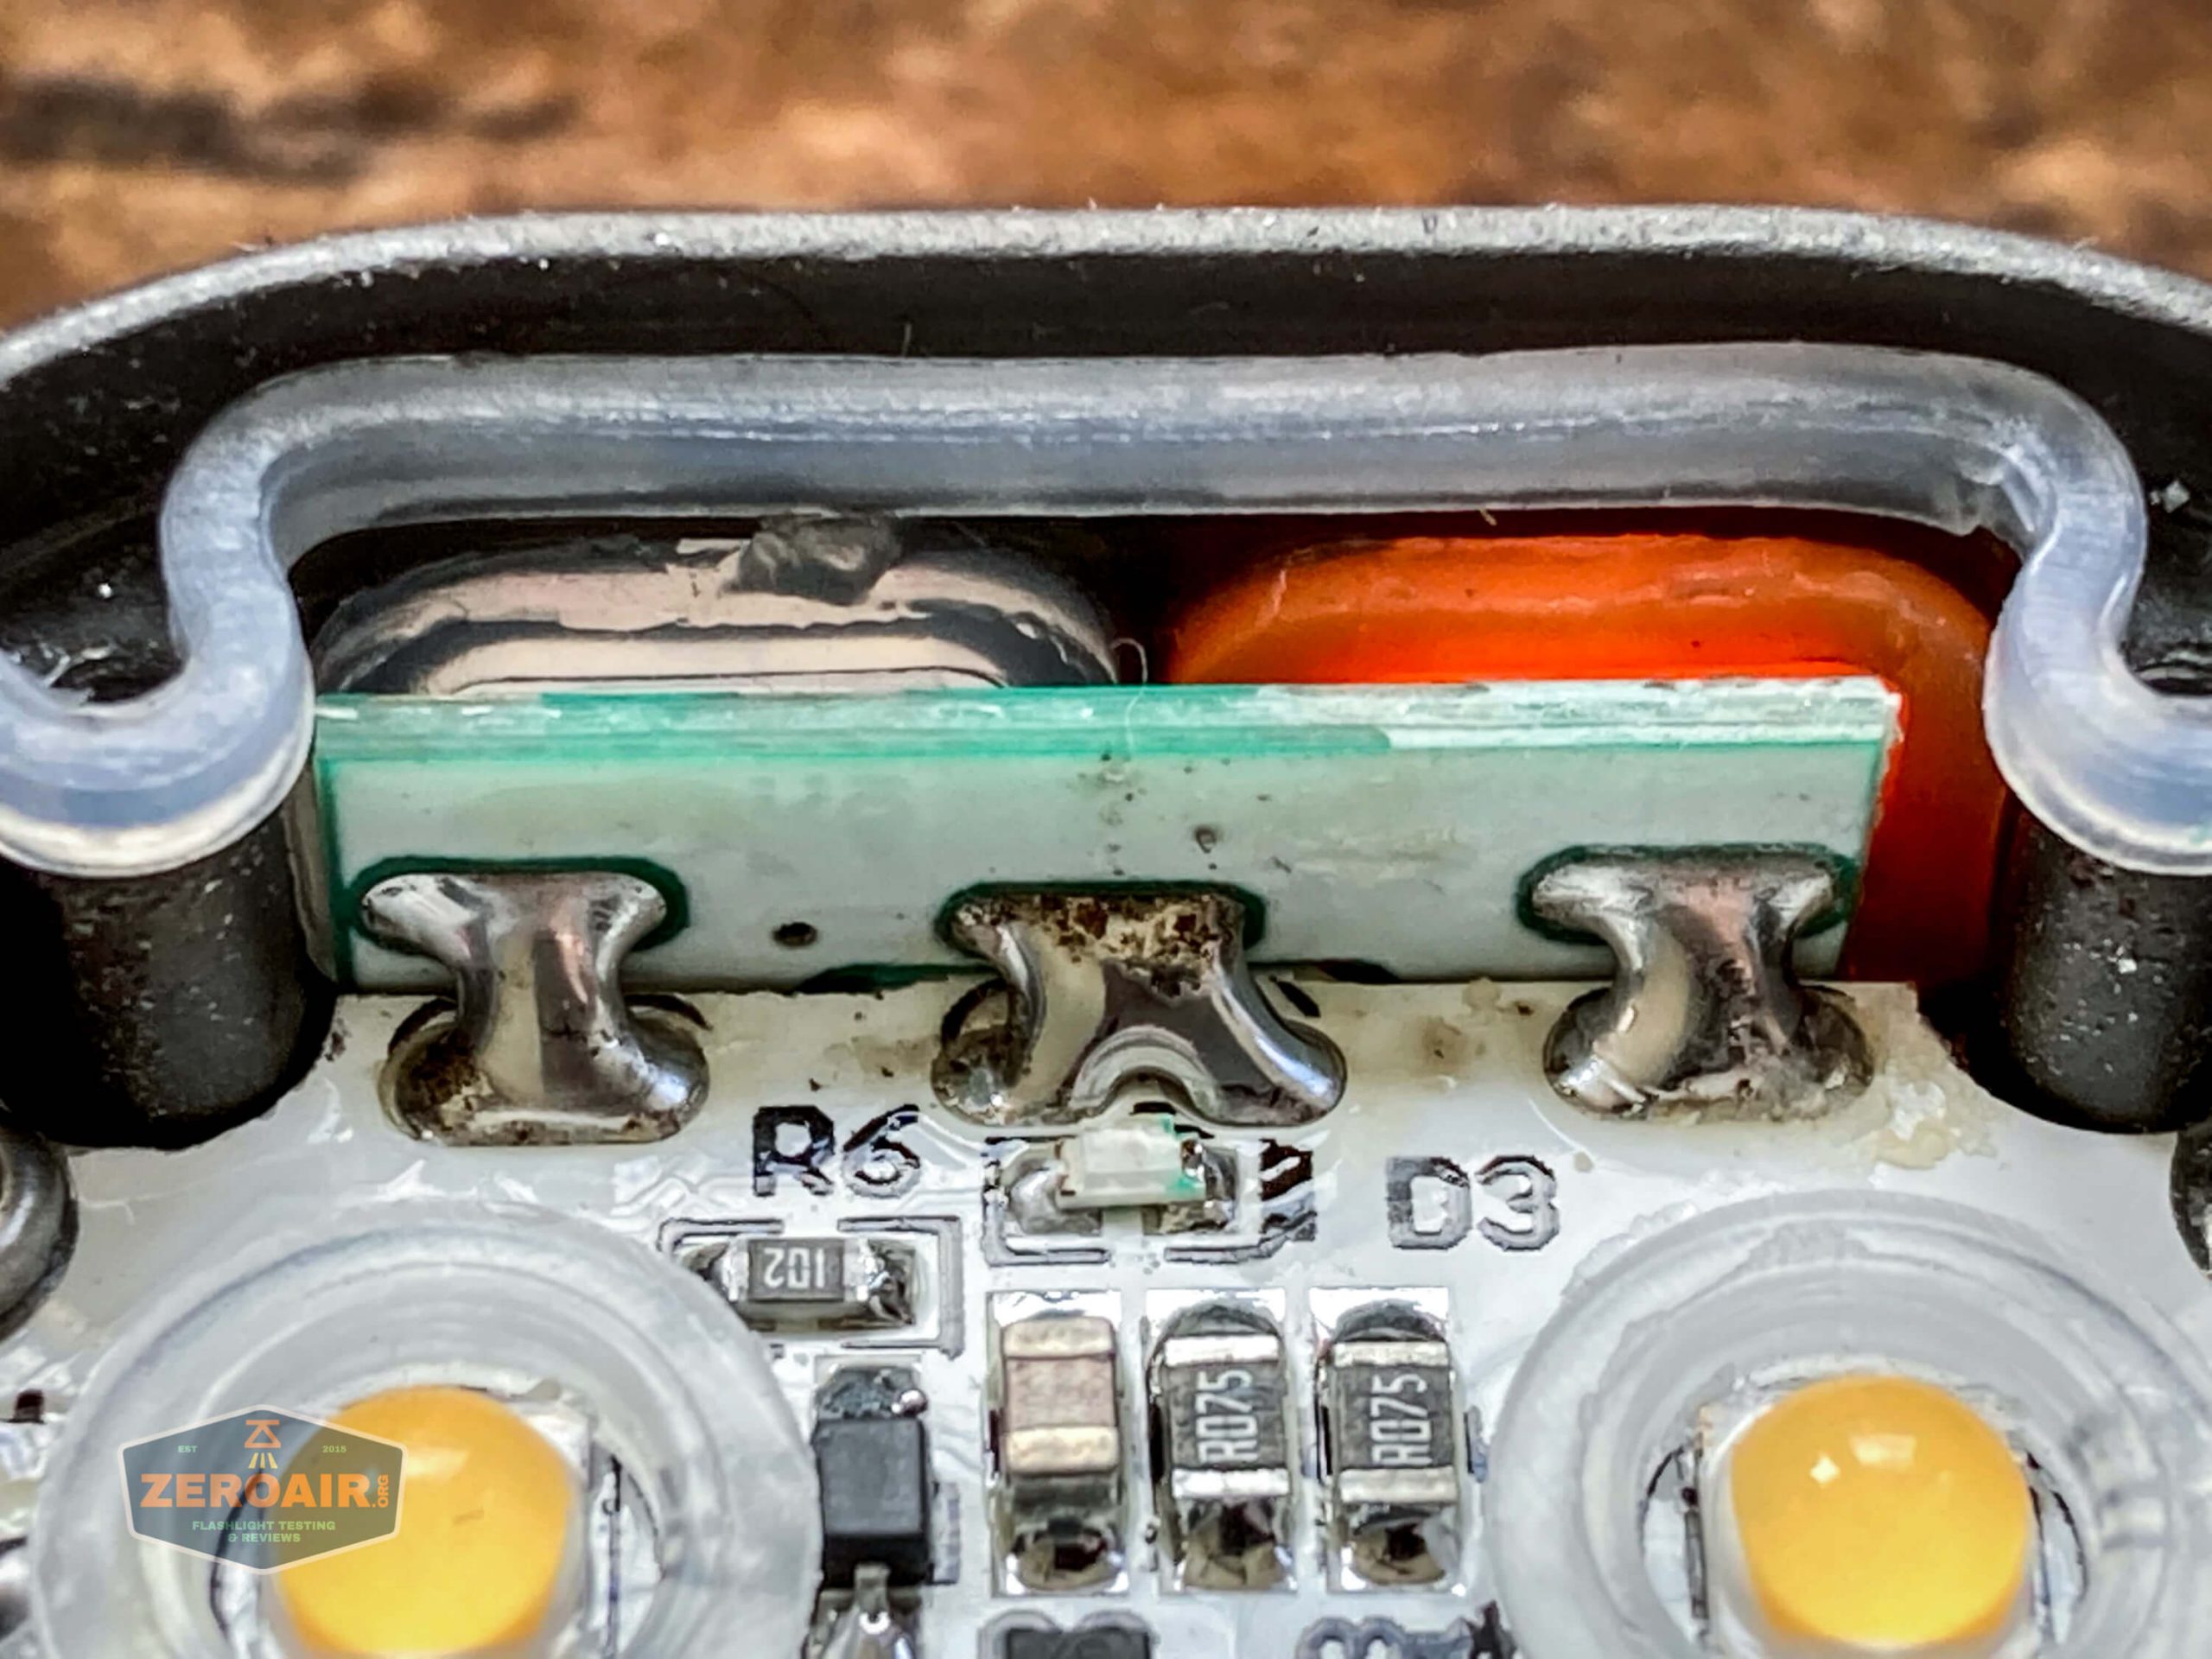
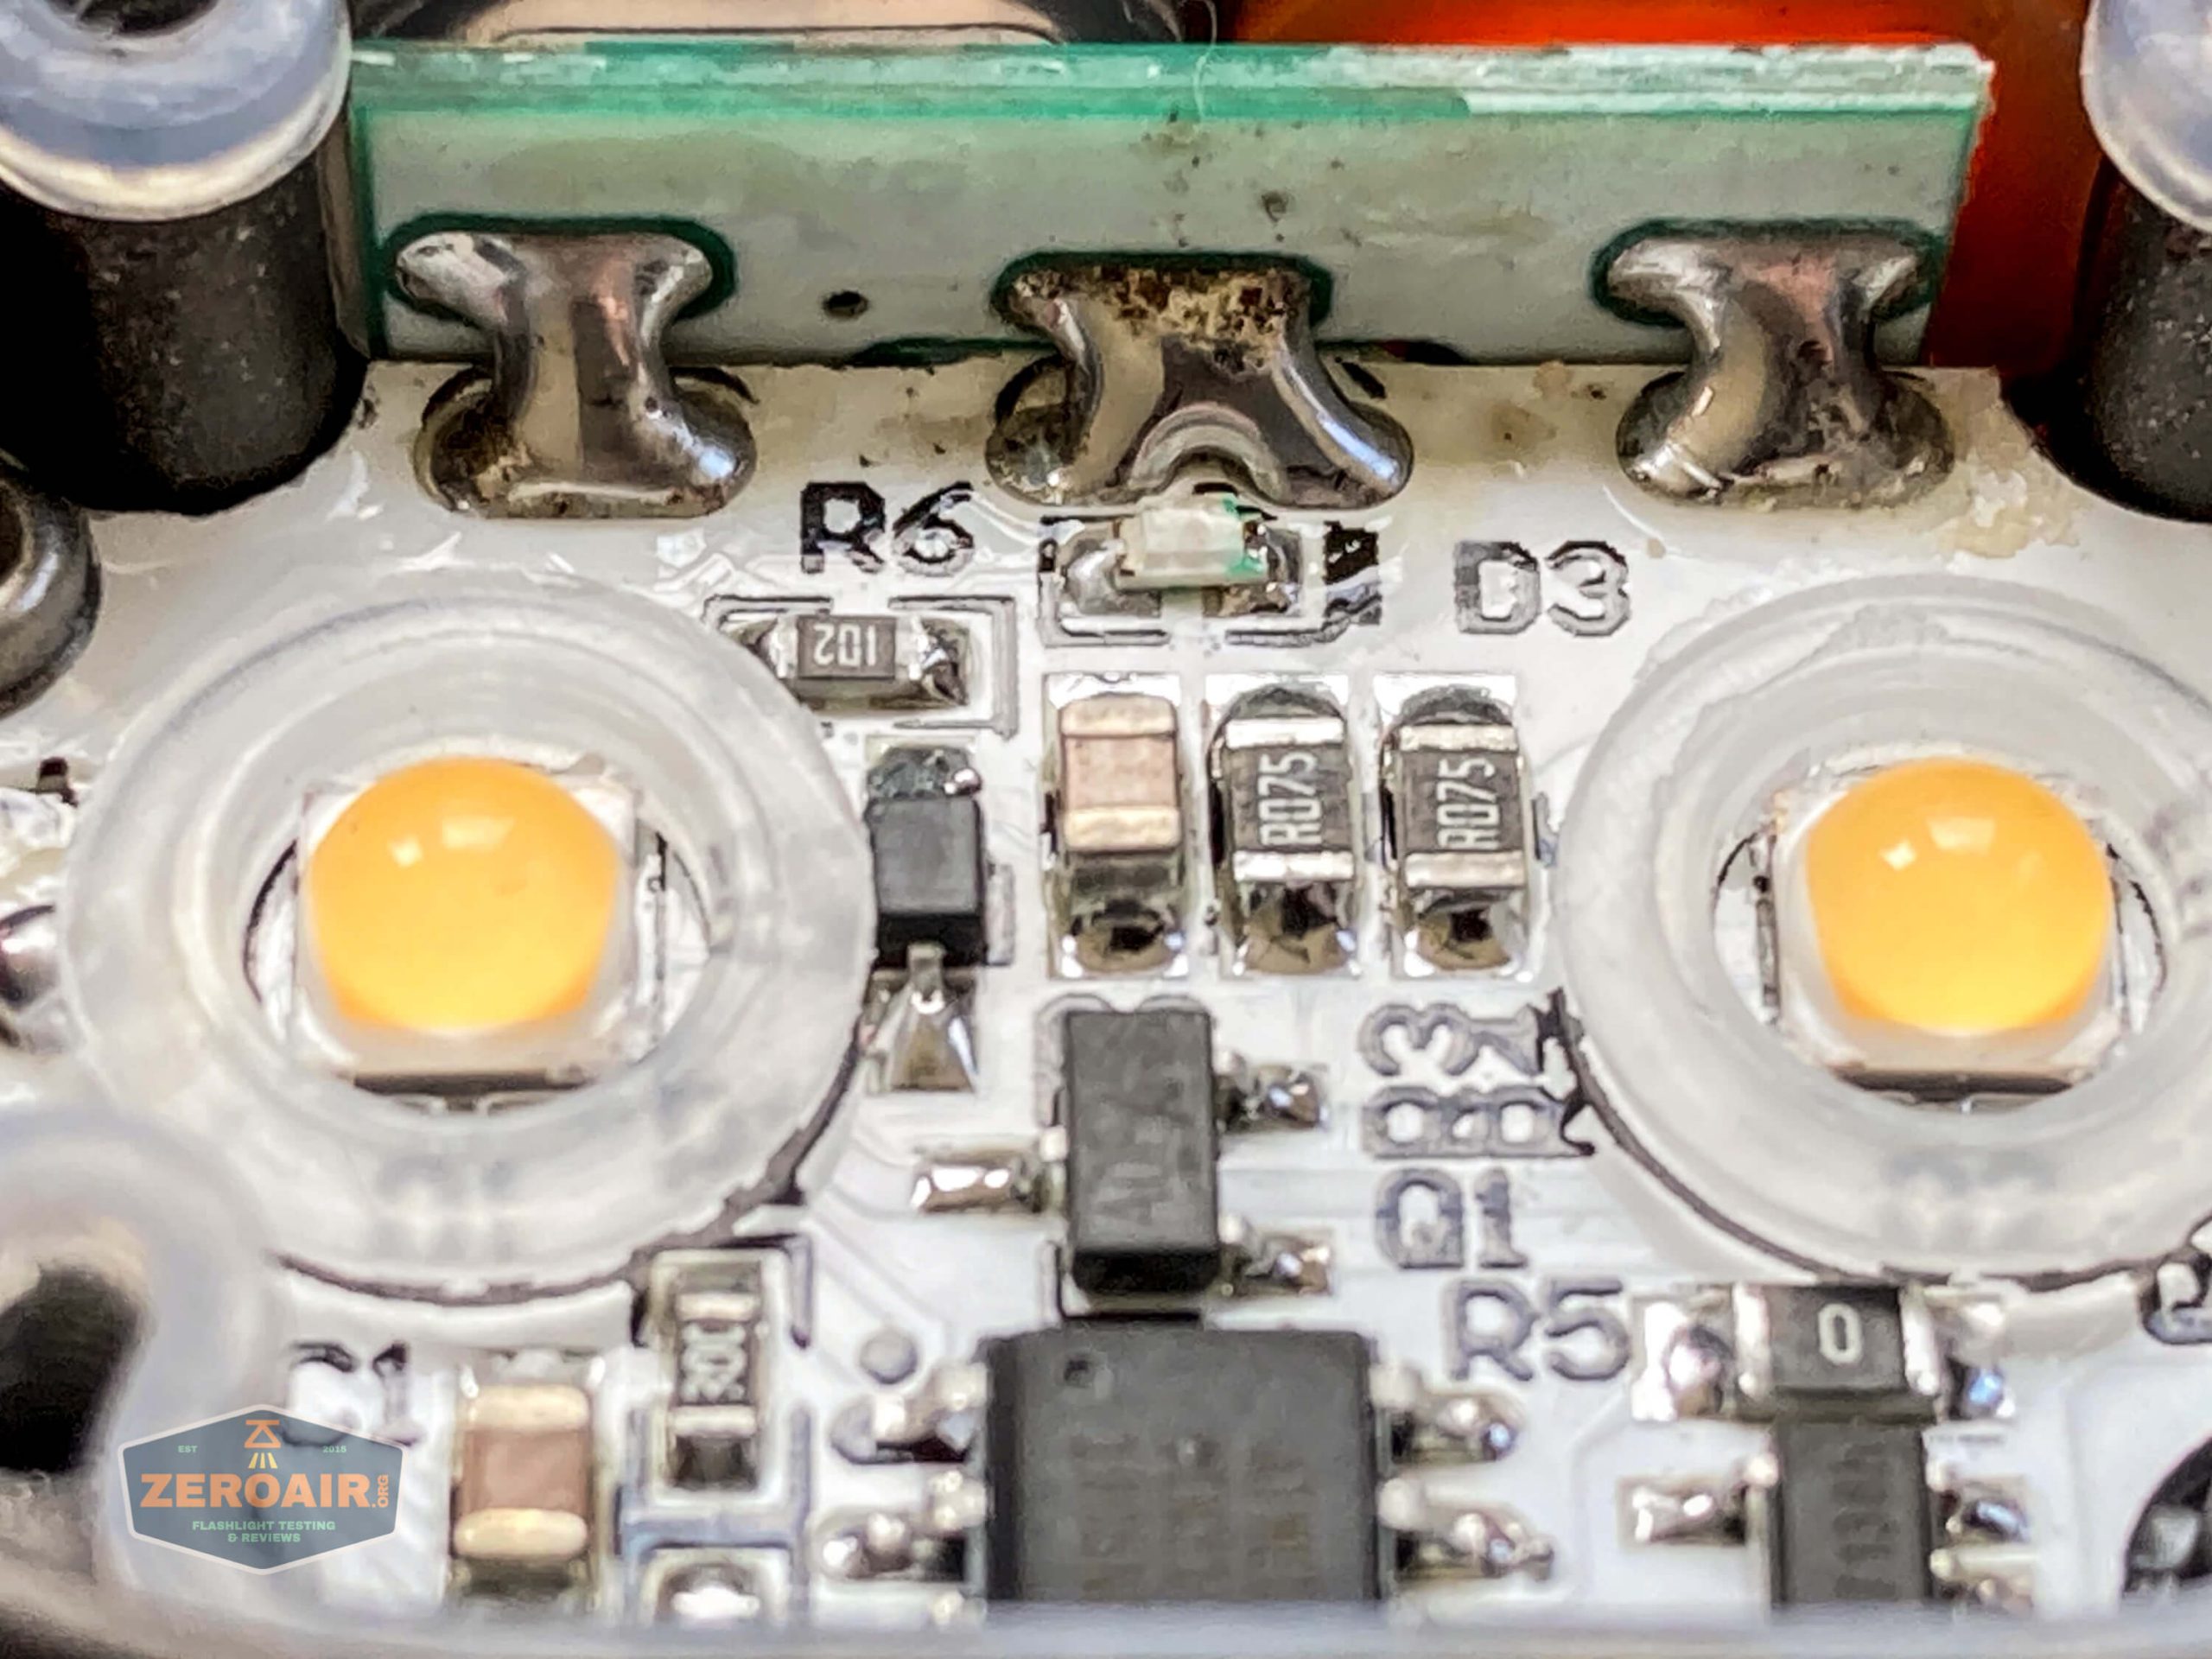
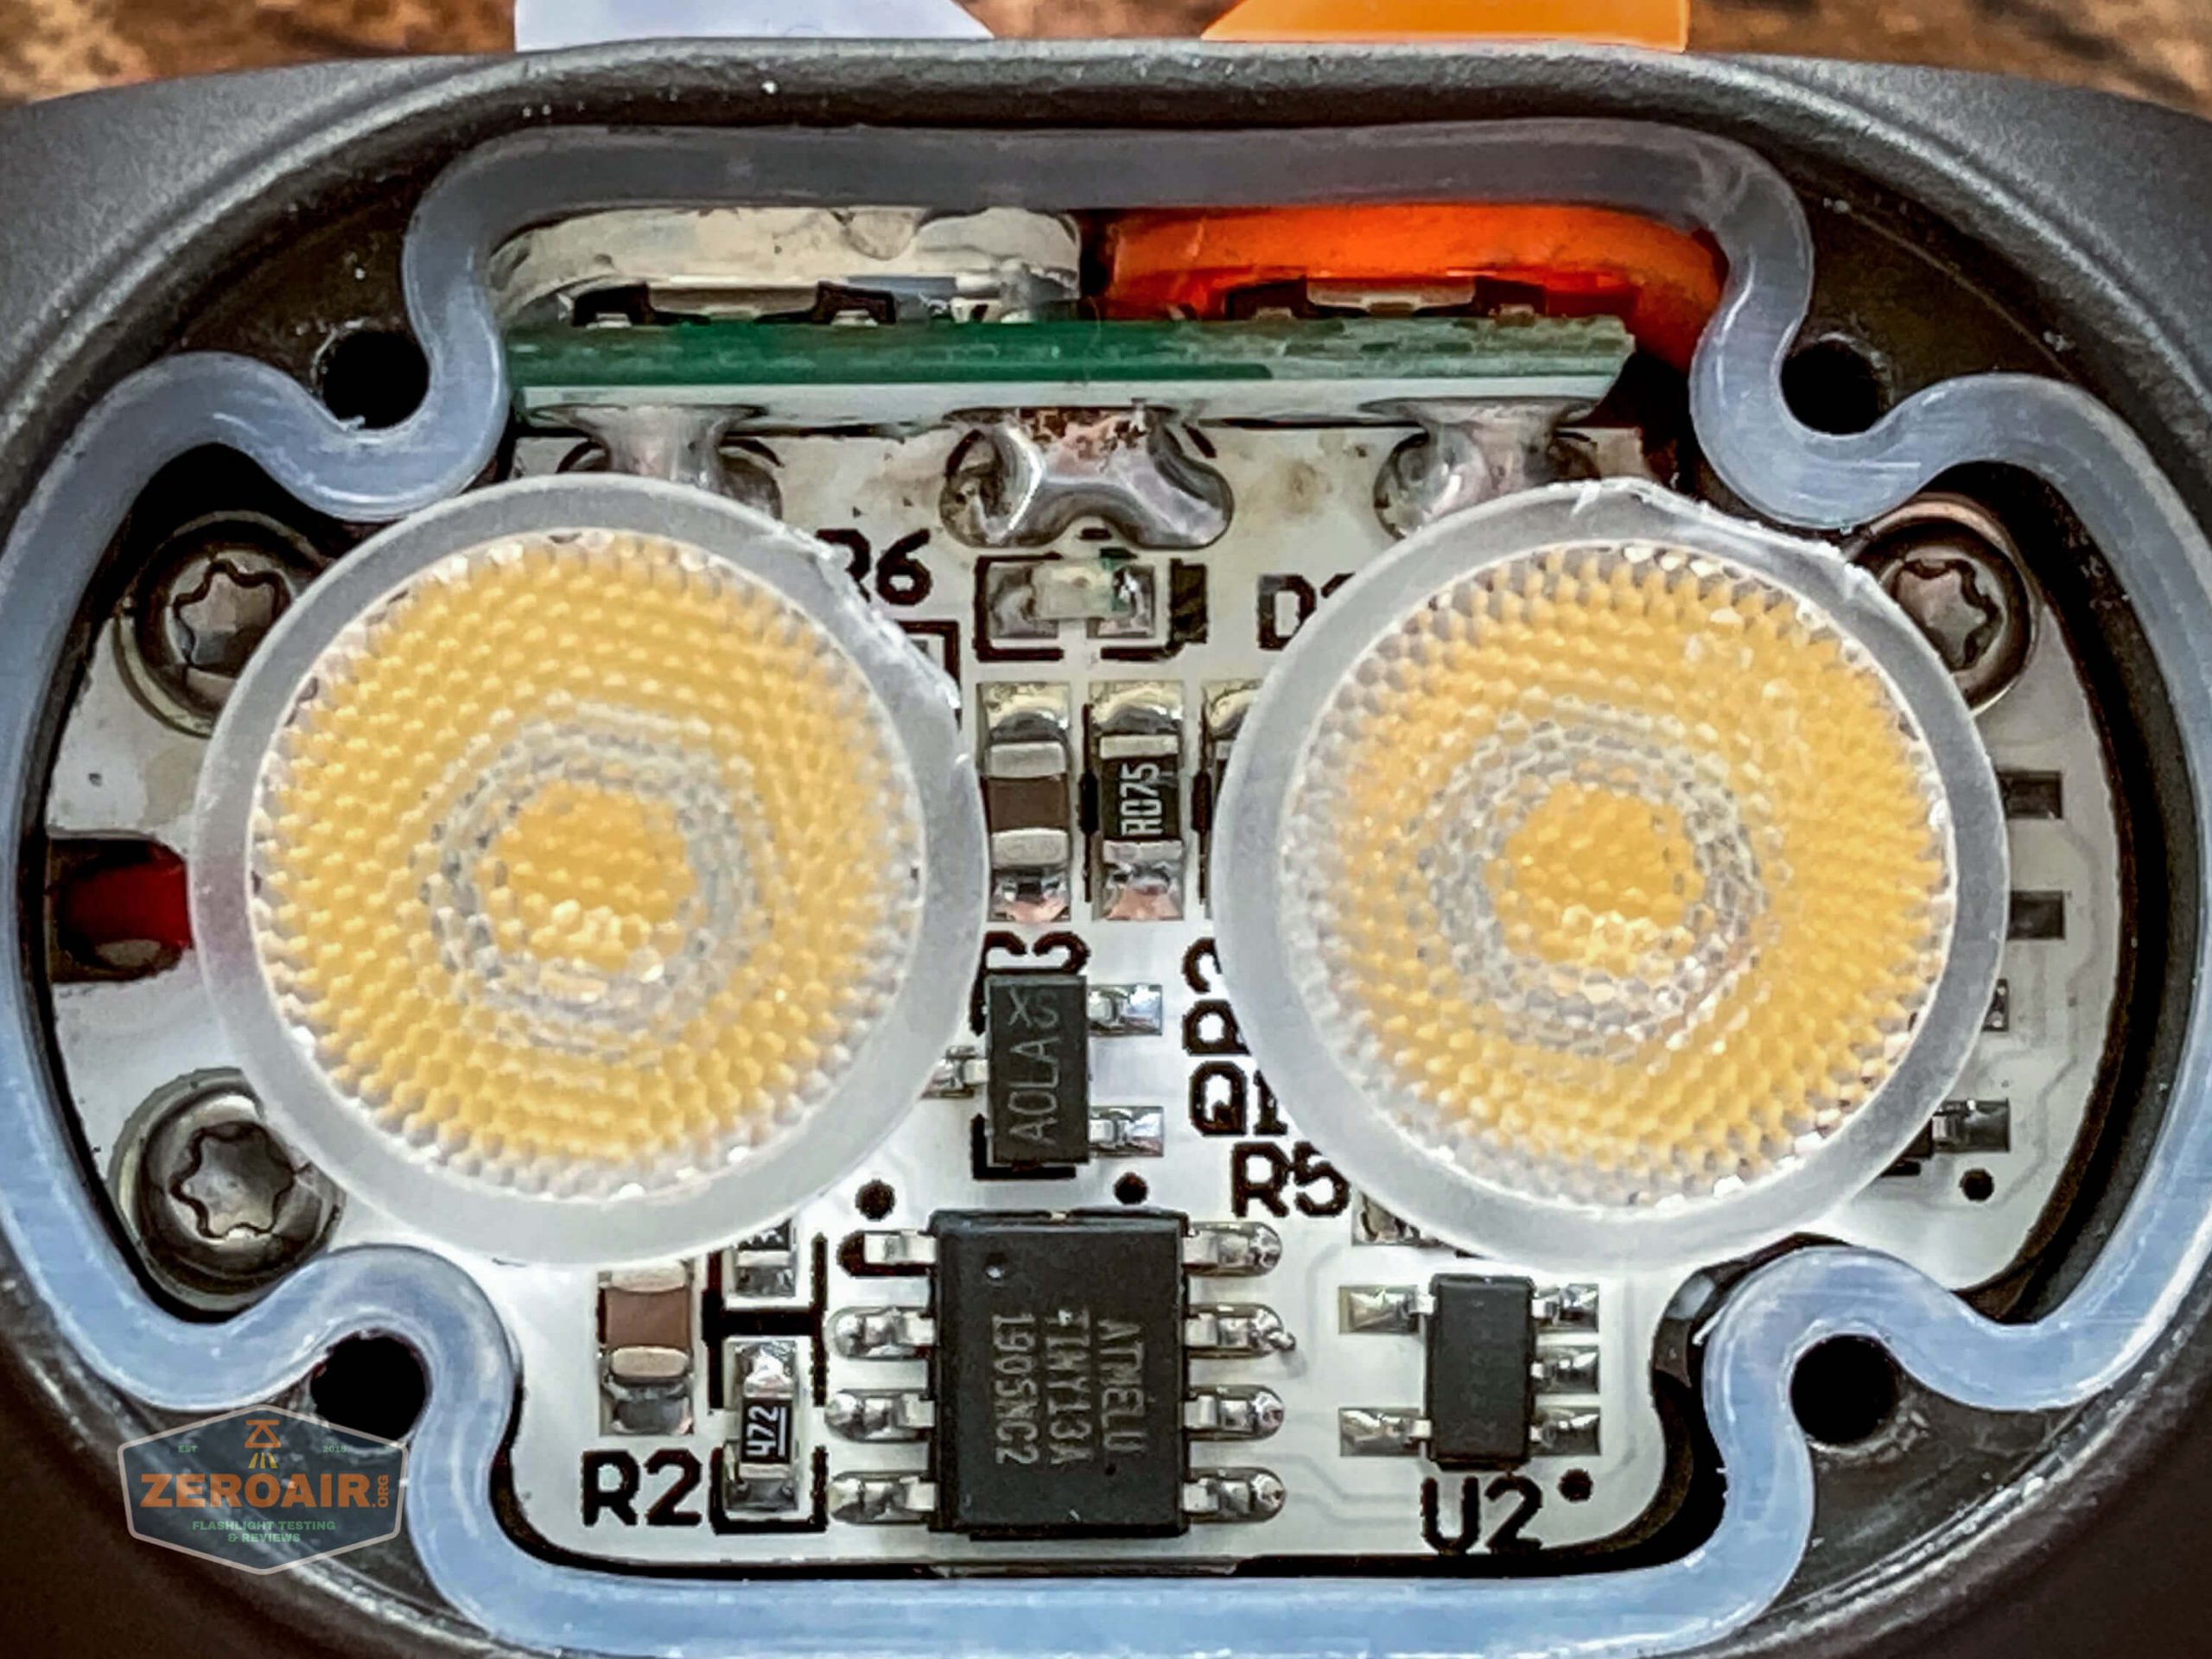
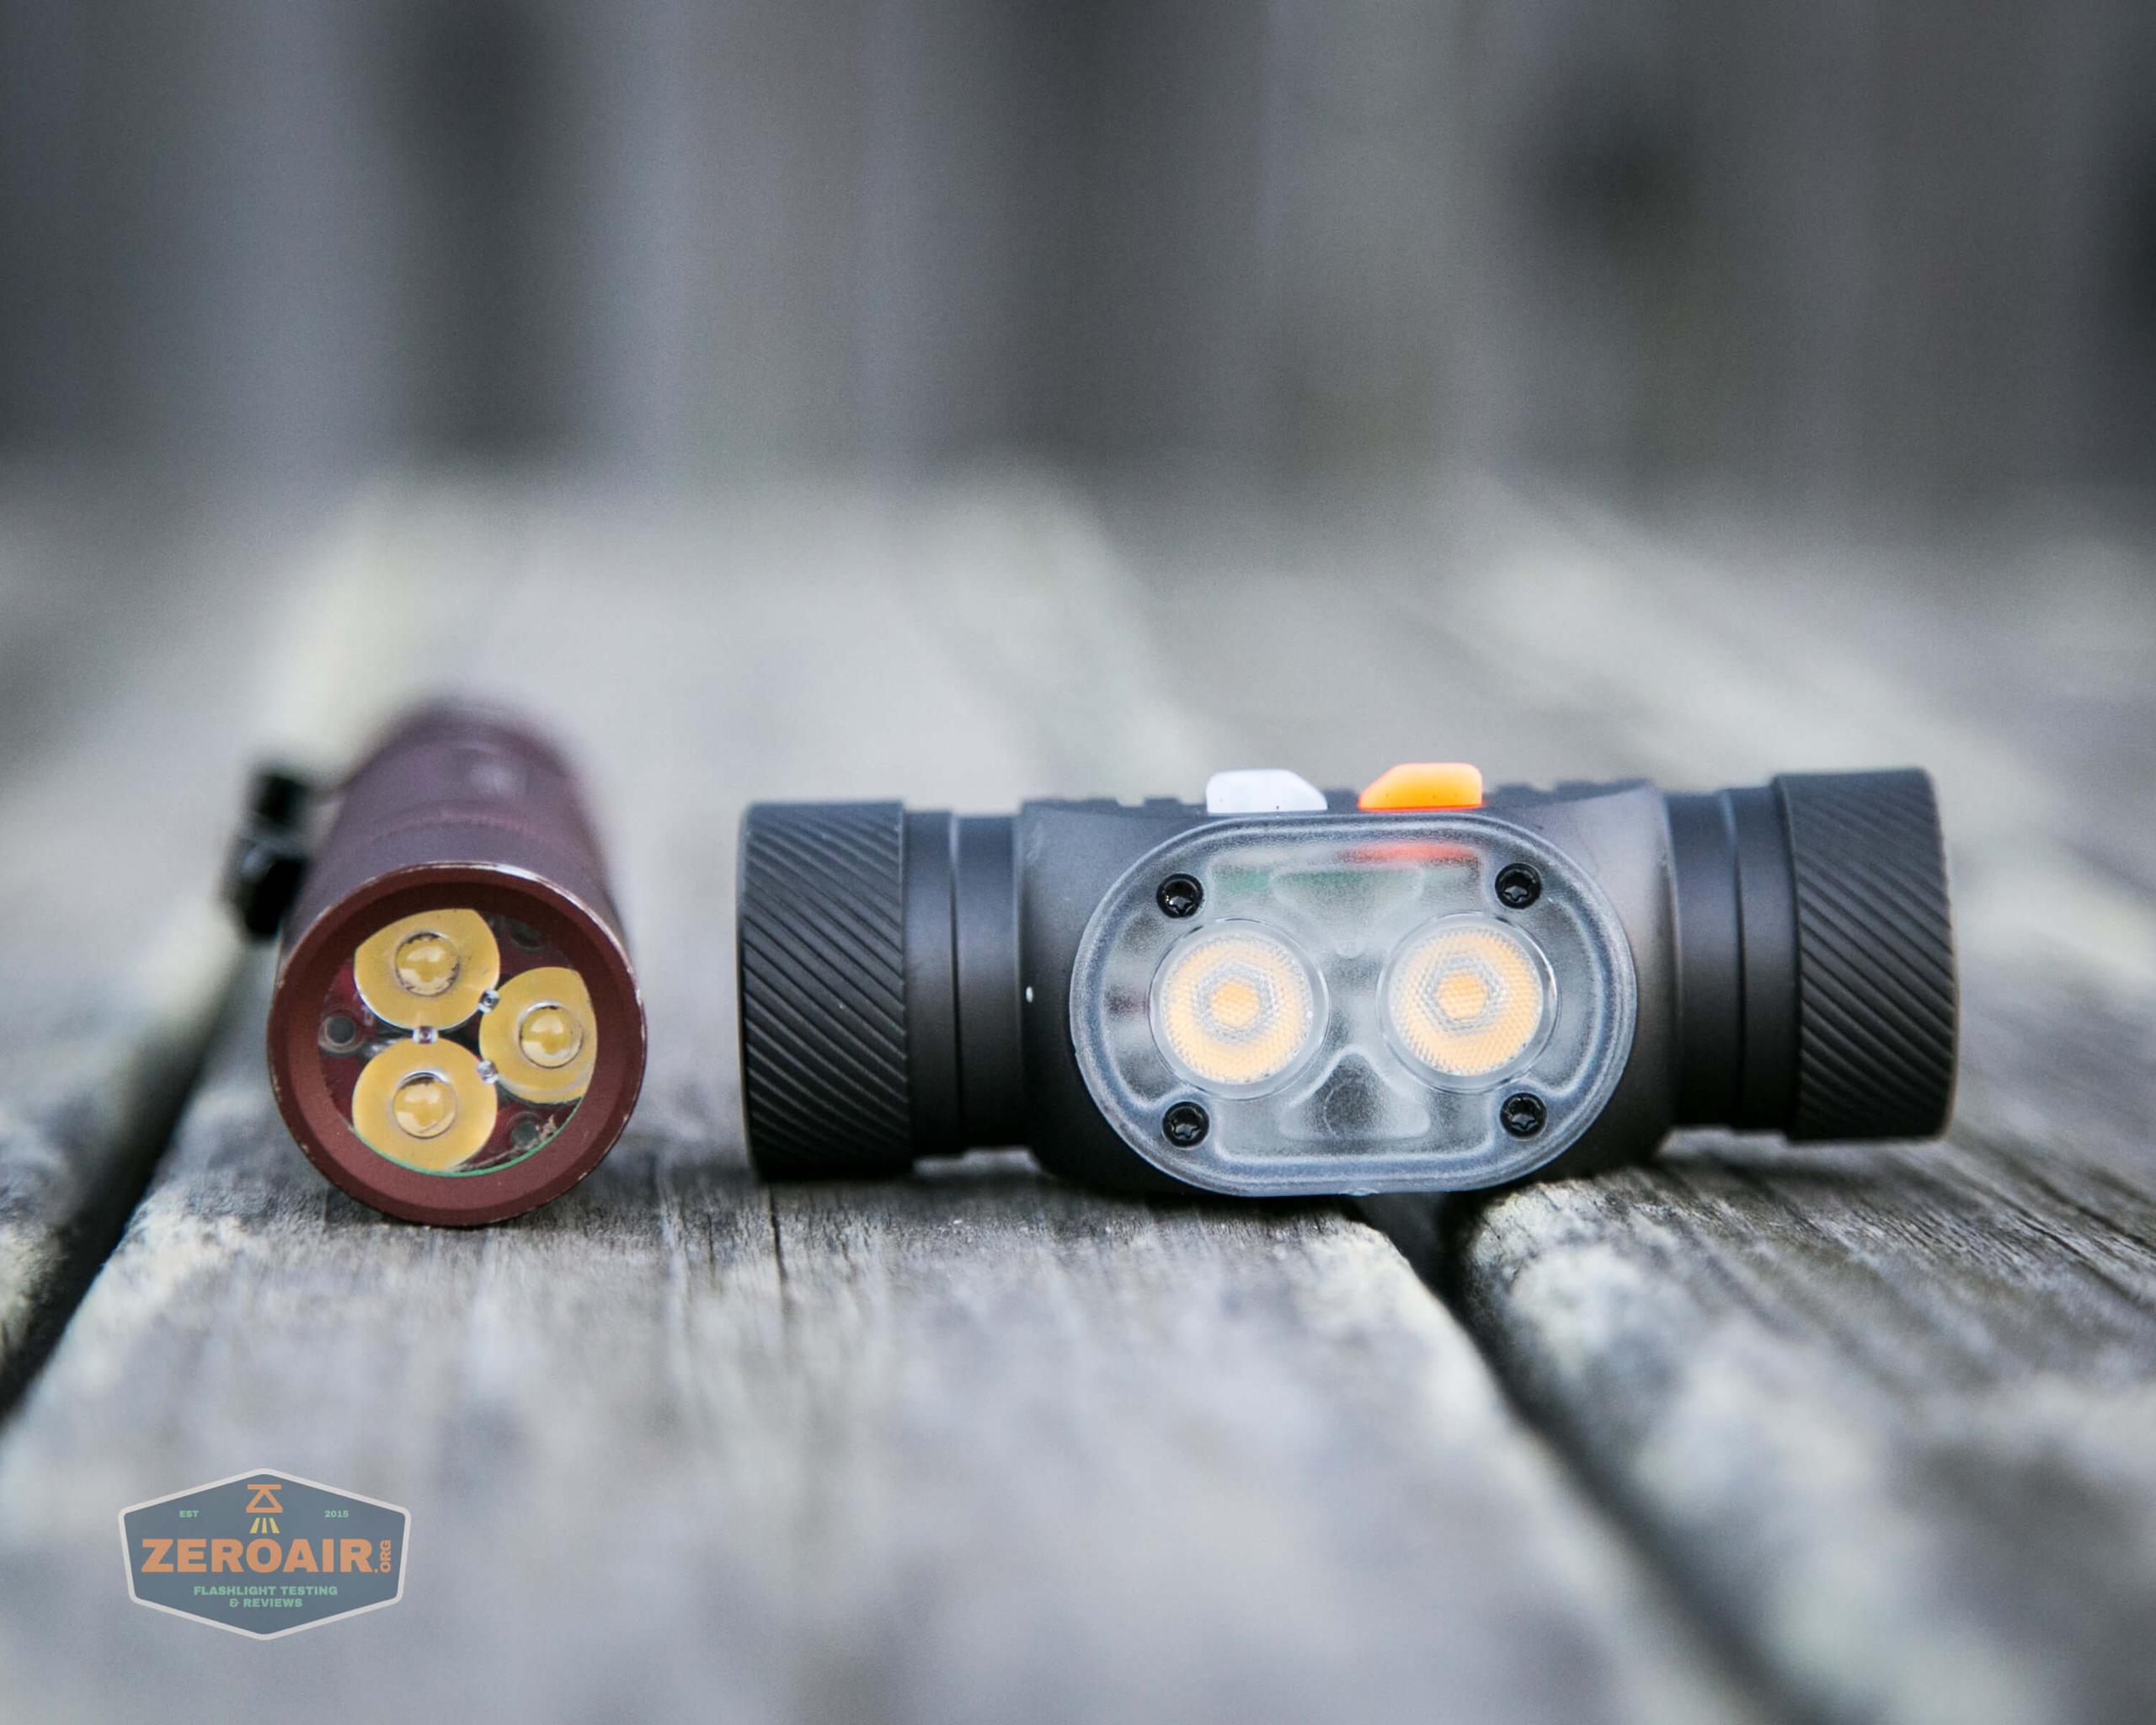
The front cover is removable easily. It is held in place by three T6 Torx screws.
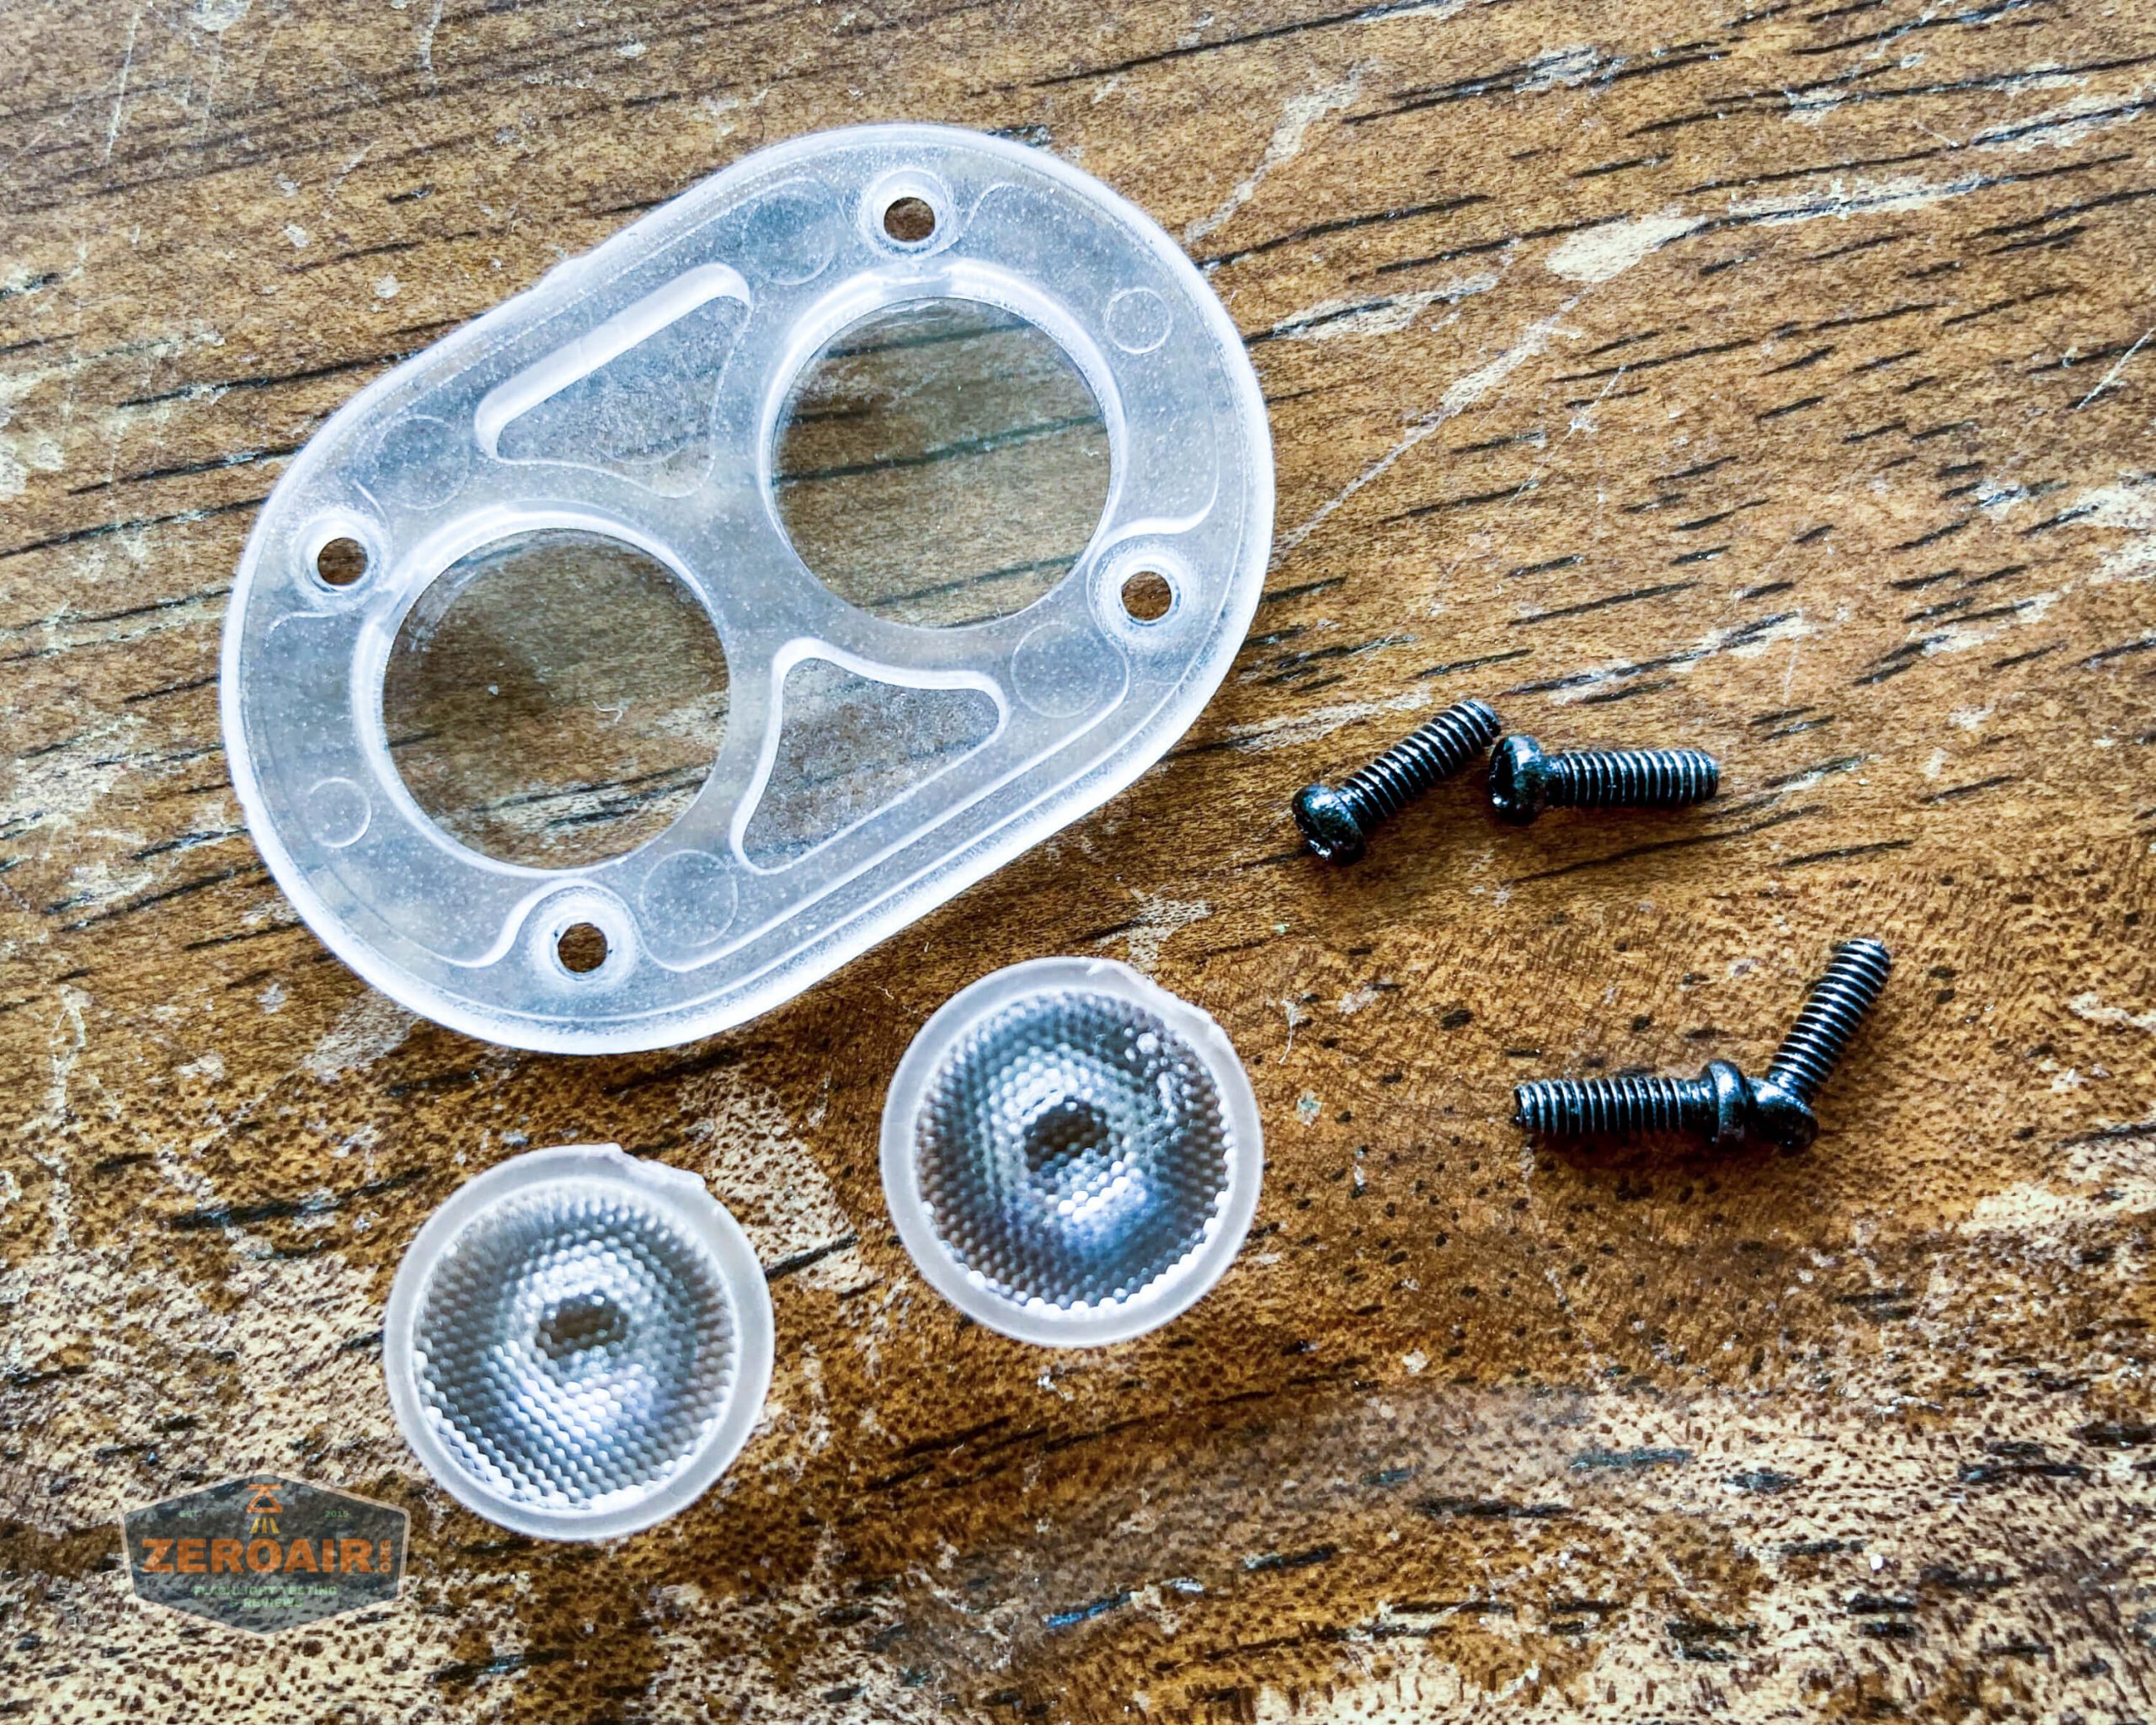
The MCPCB is also held in place by Torx screws – I think also T6, and just 3 of them.
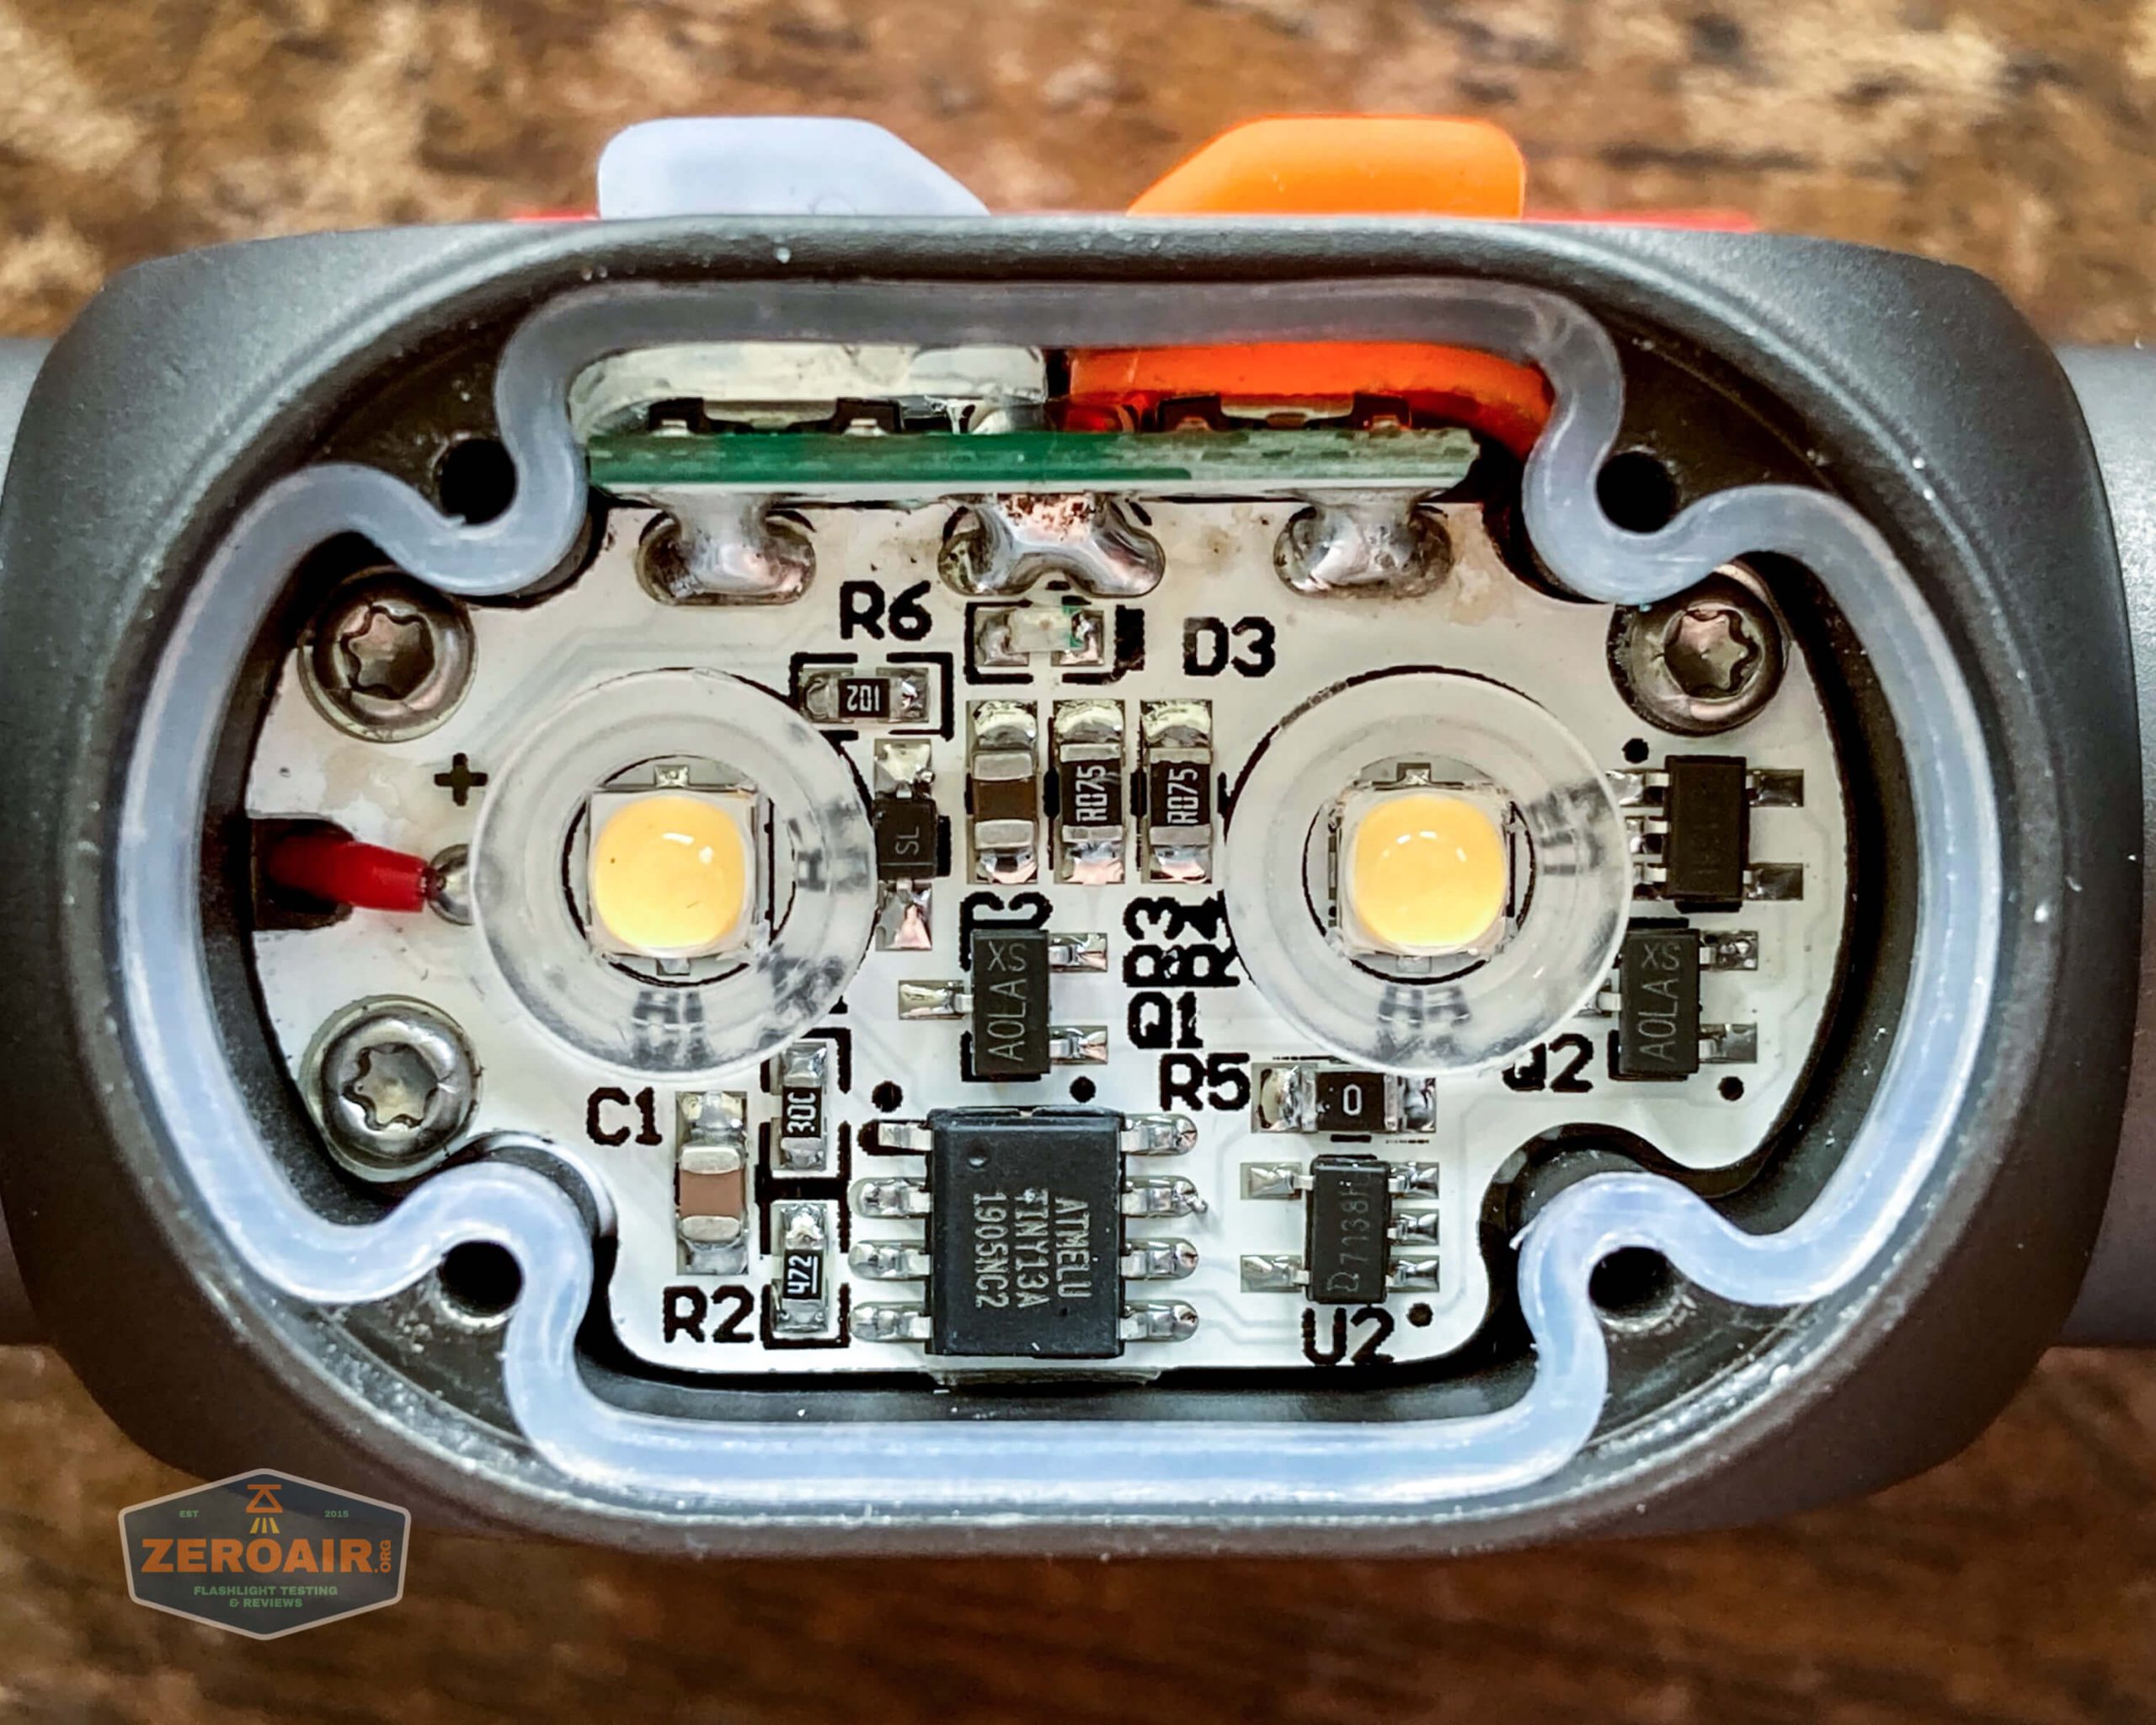
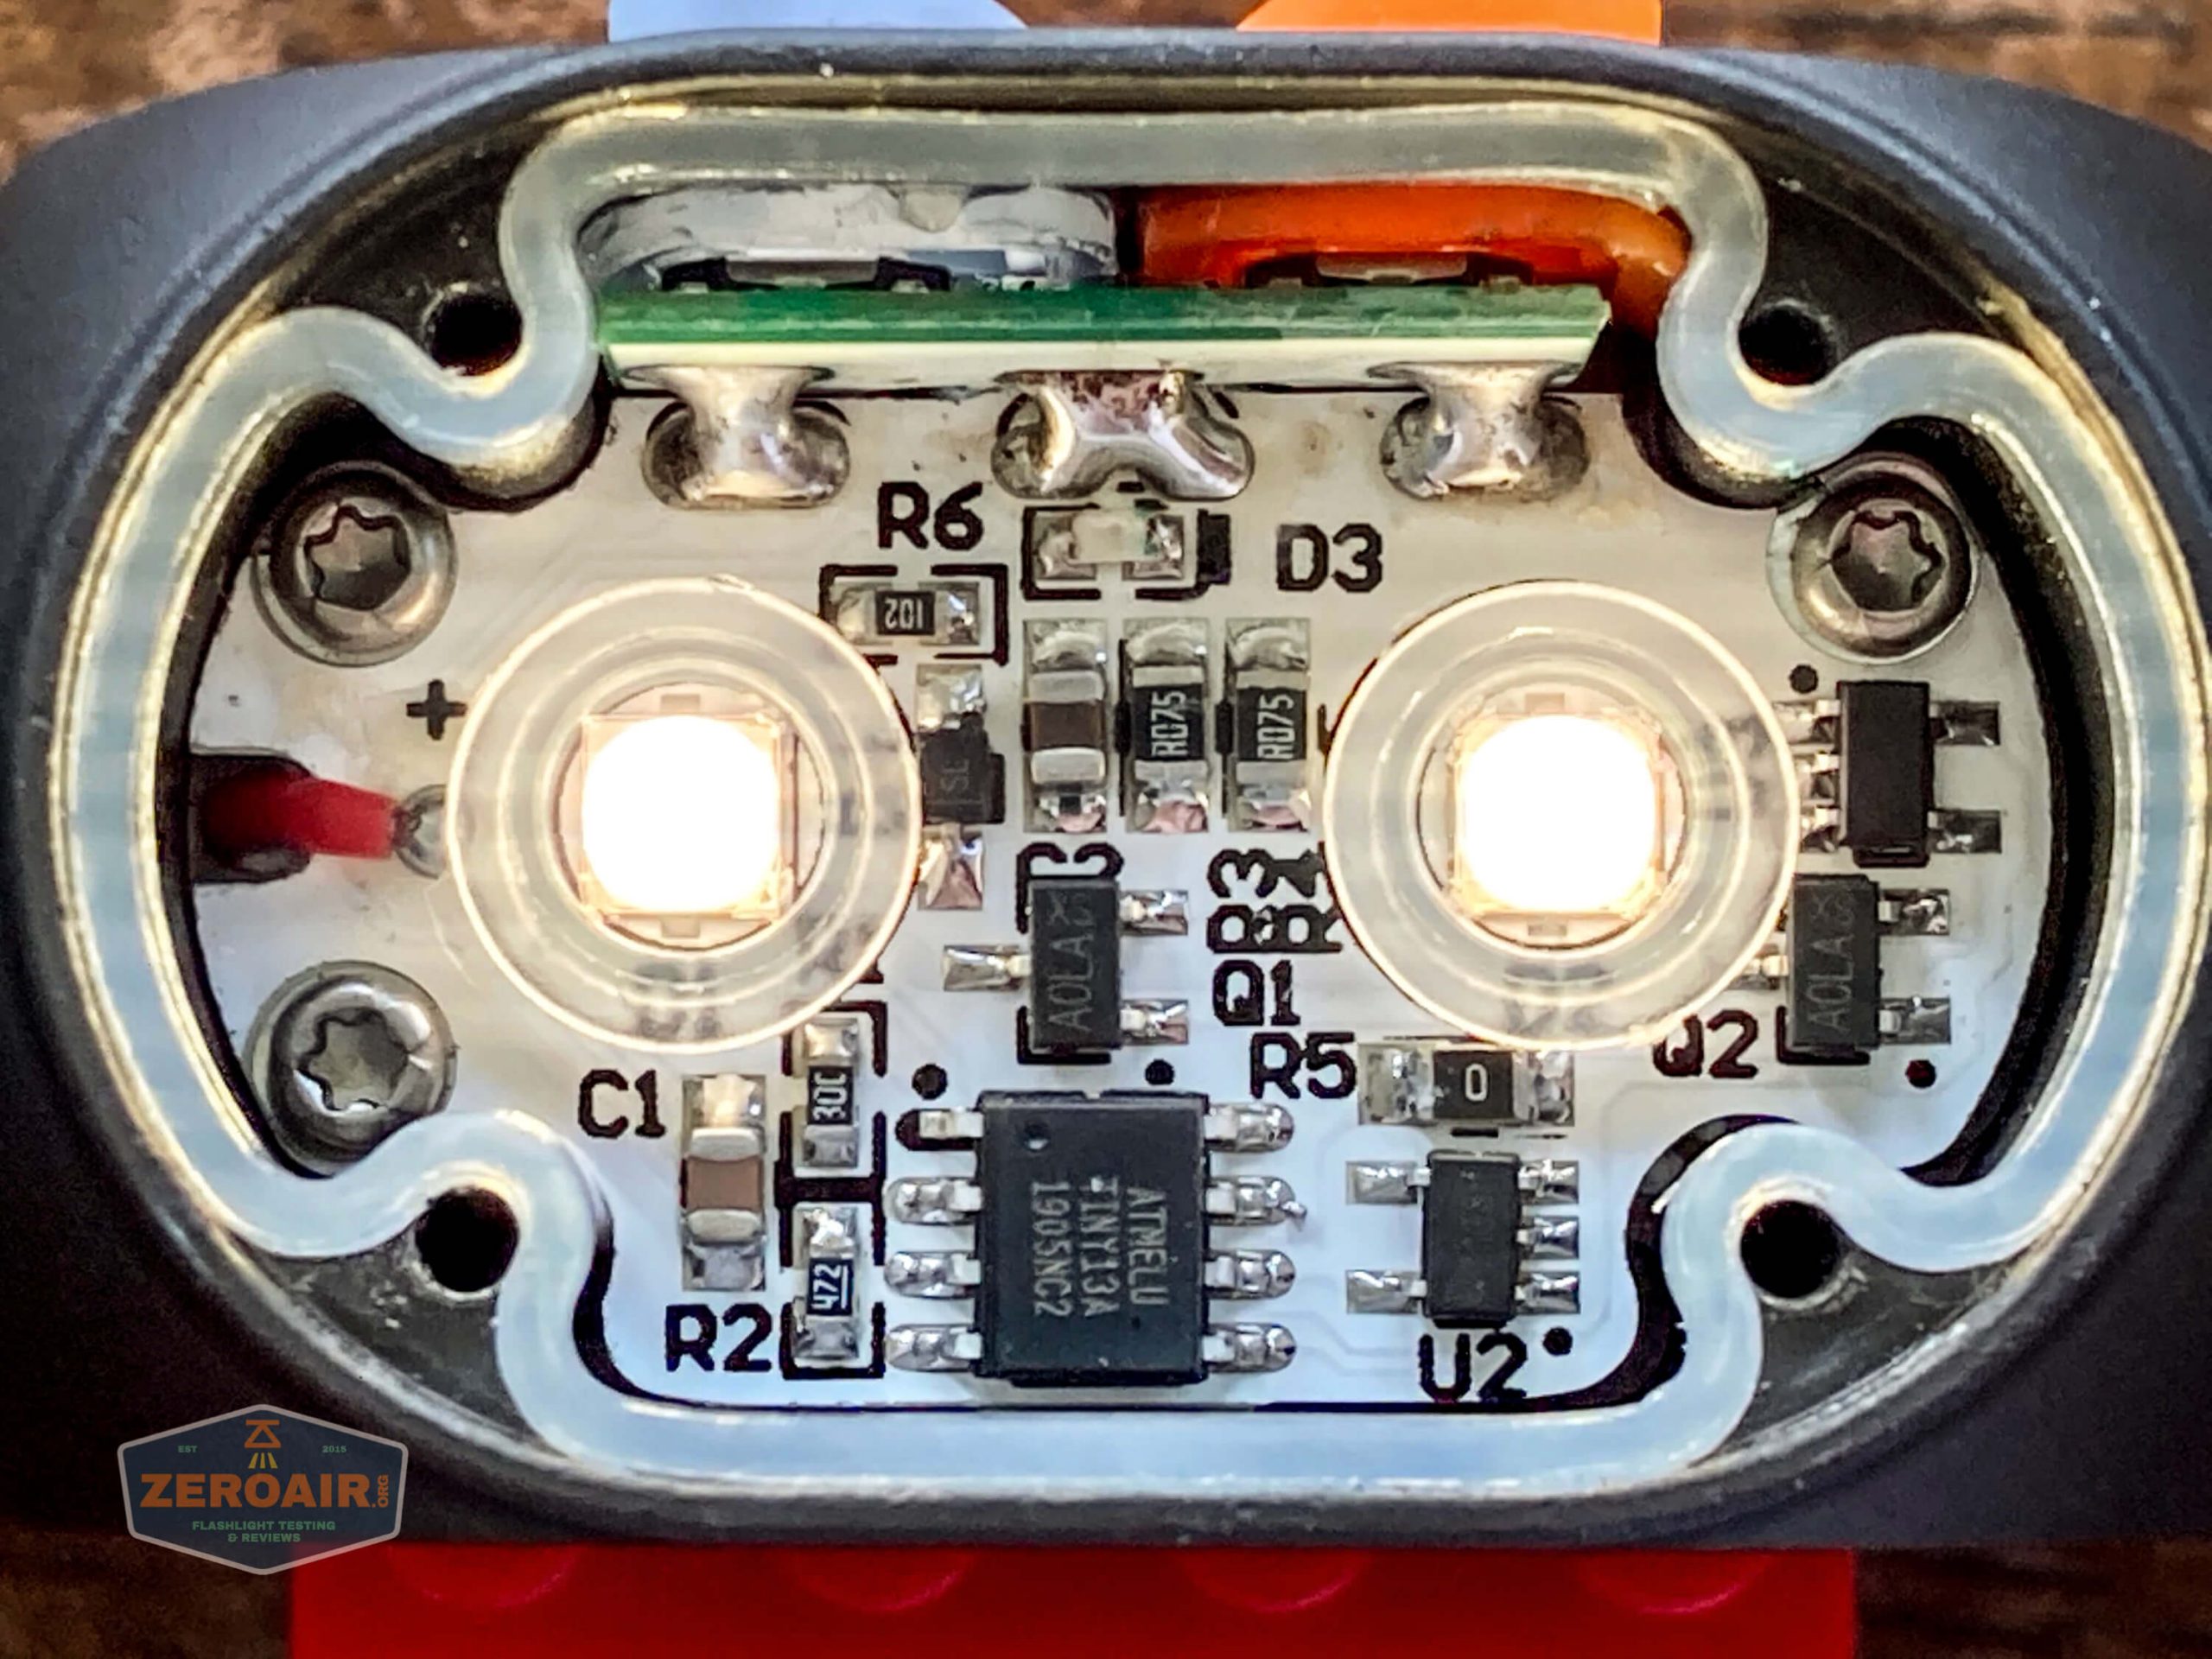
The switches have a solid connection to the MCPCB, but it looks to be a completely soldered connection.
Also, in case you ever need a light holder for taking photos like the above, Legos can be your friend. 😀
The tailcap magnet found those four screws.
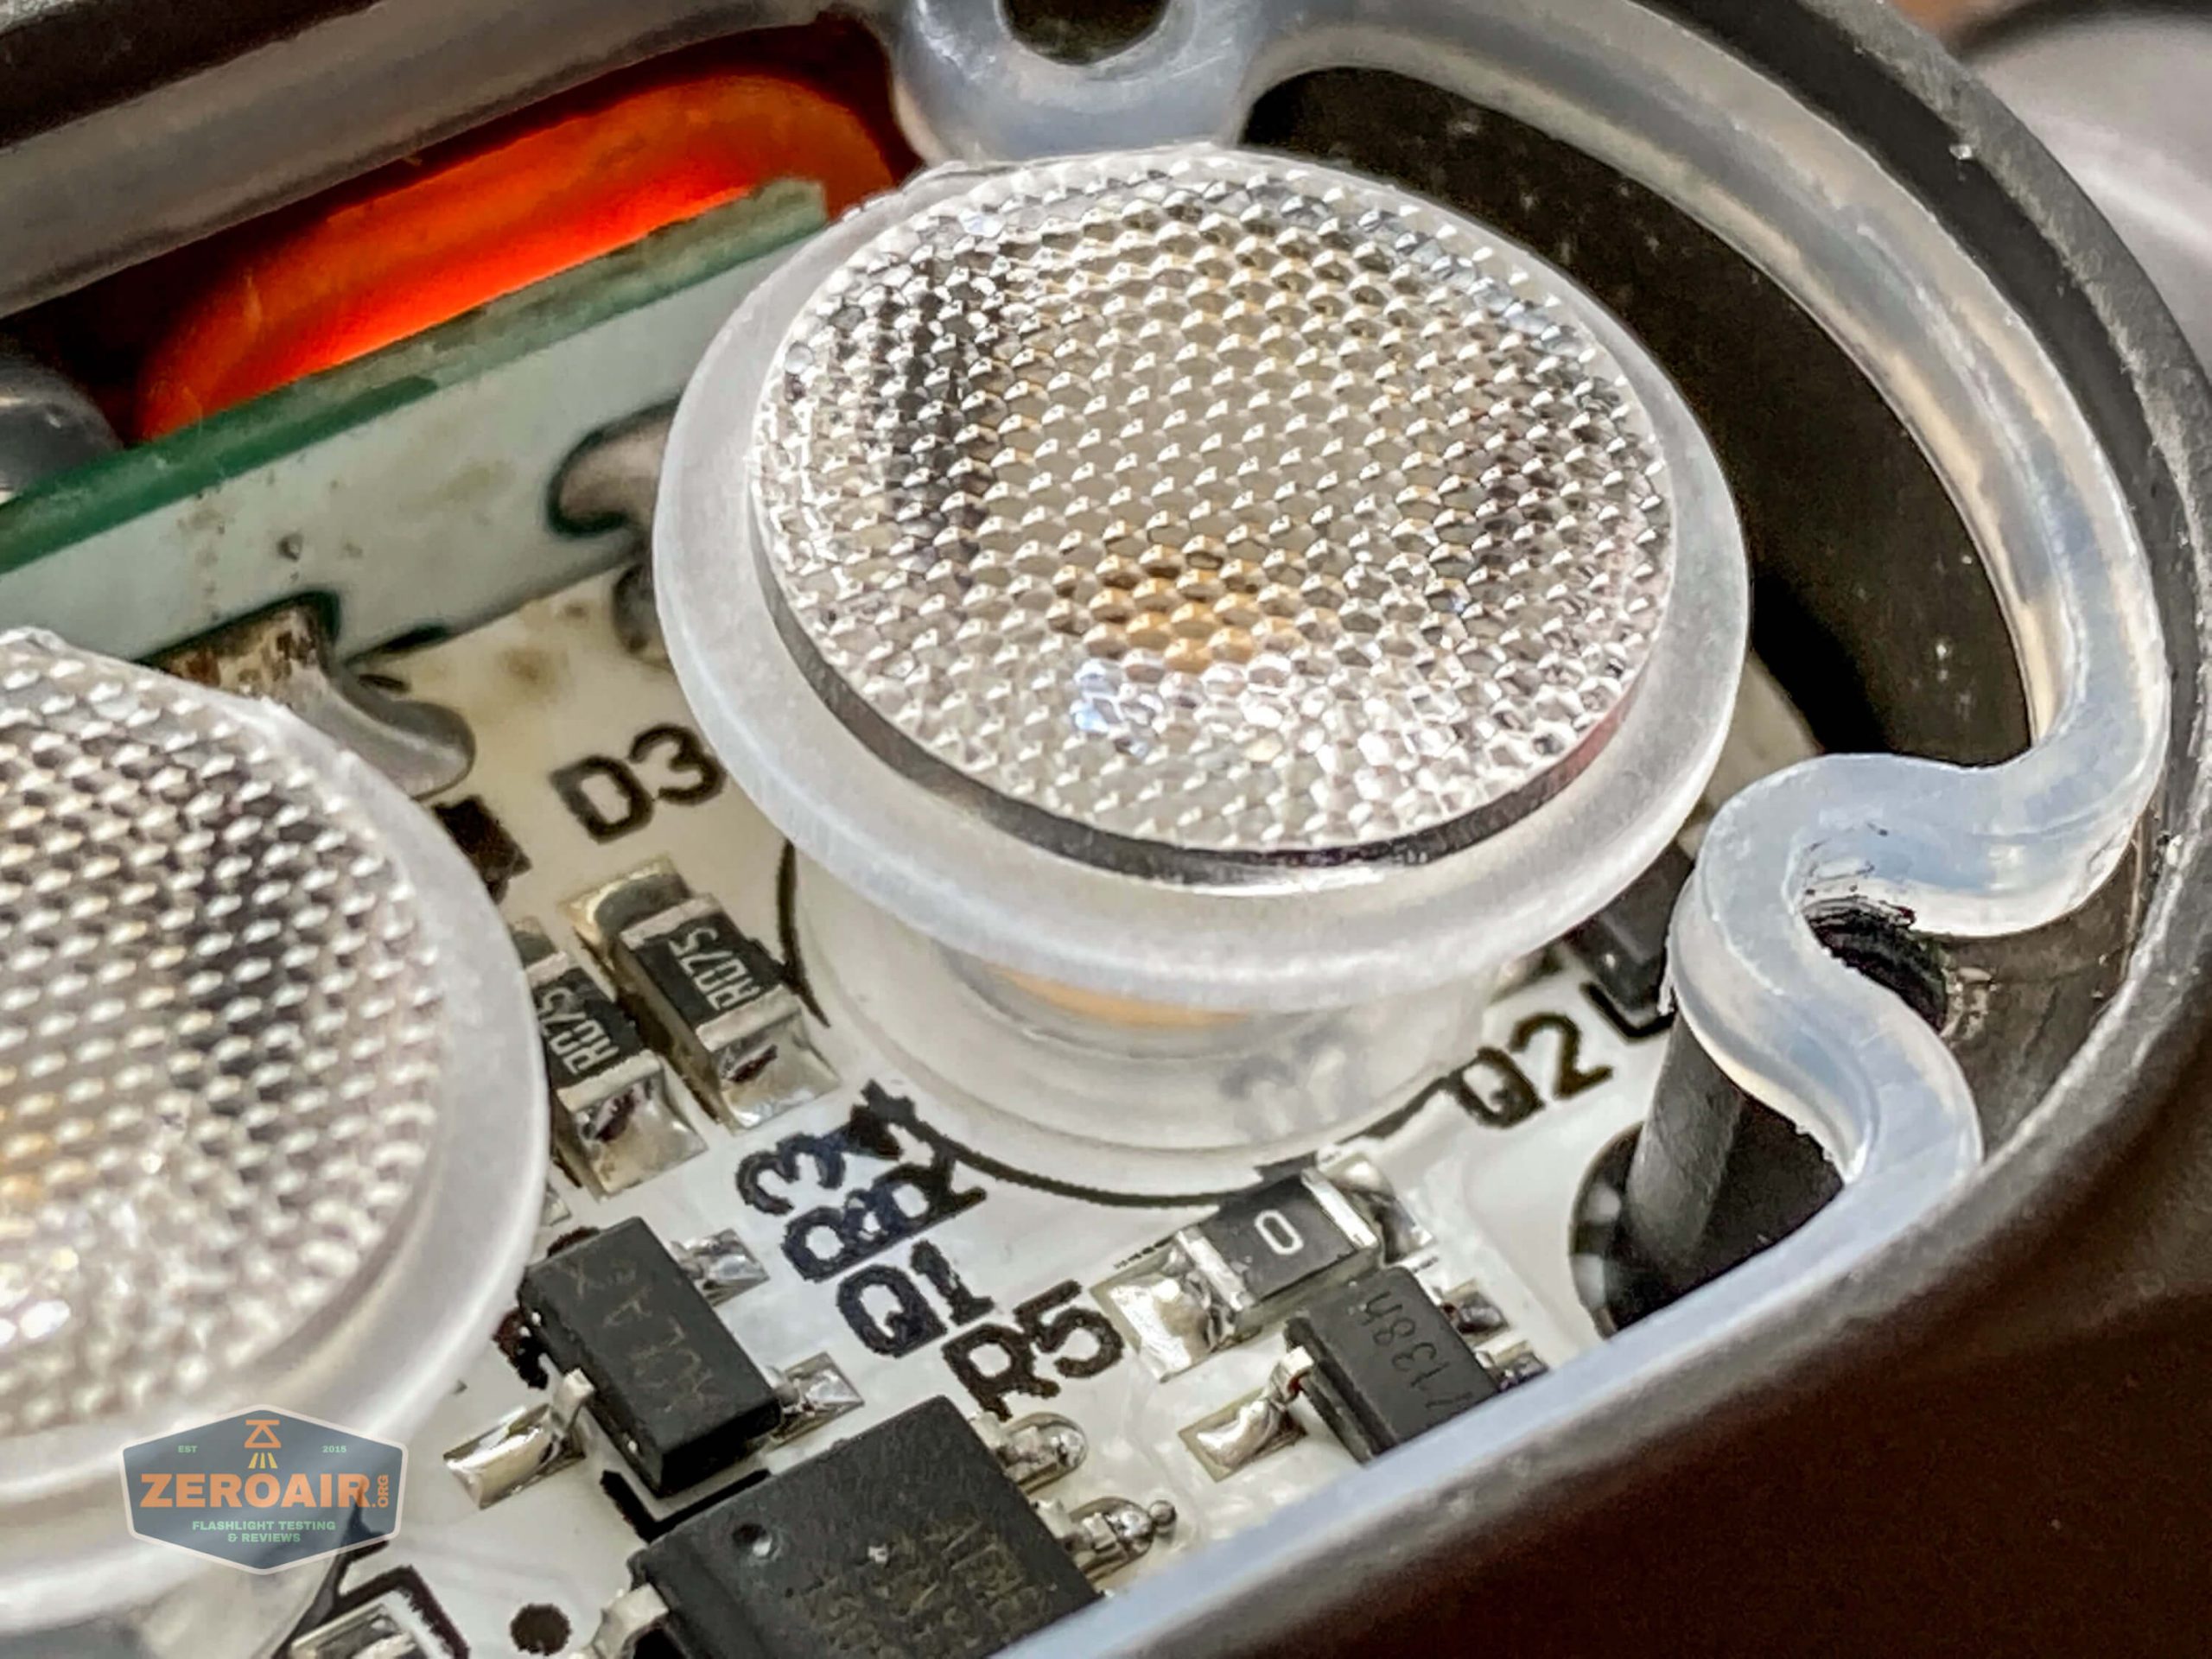
The TIRs just rest over the emitters and are held in place by the screwed-down cover.
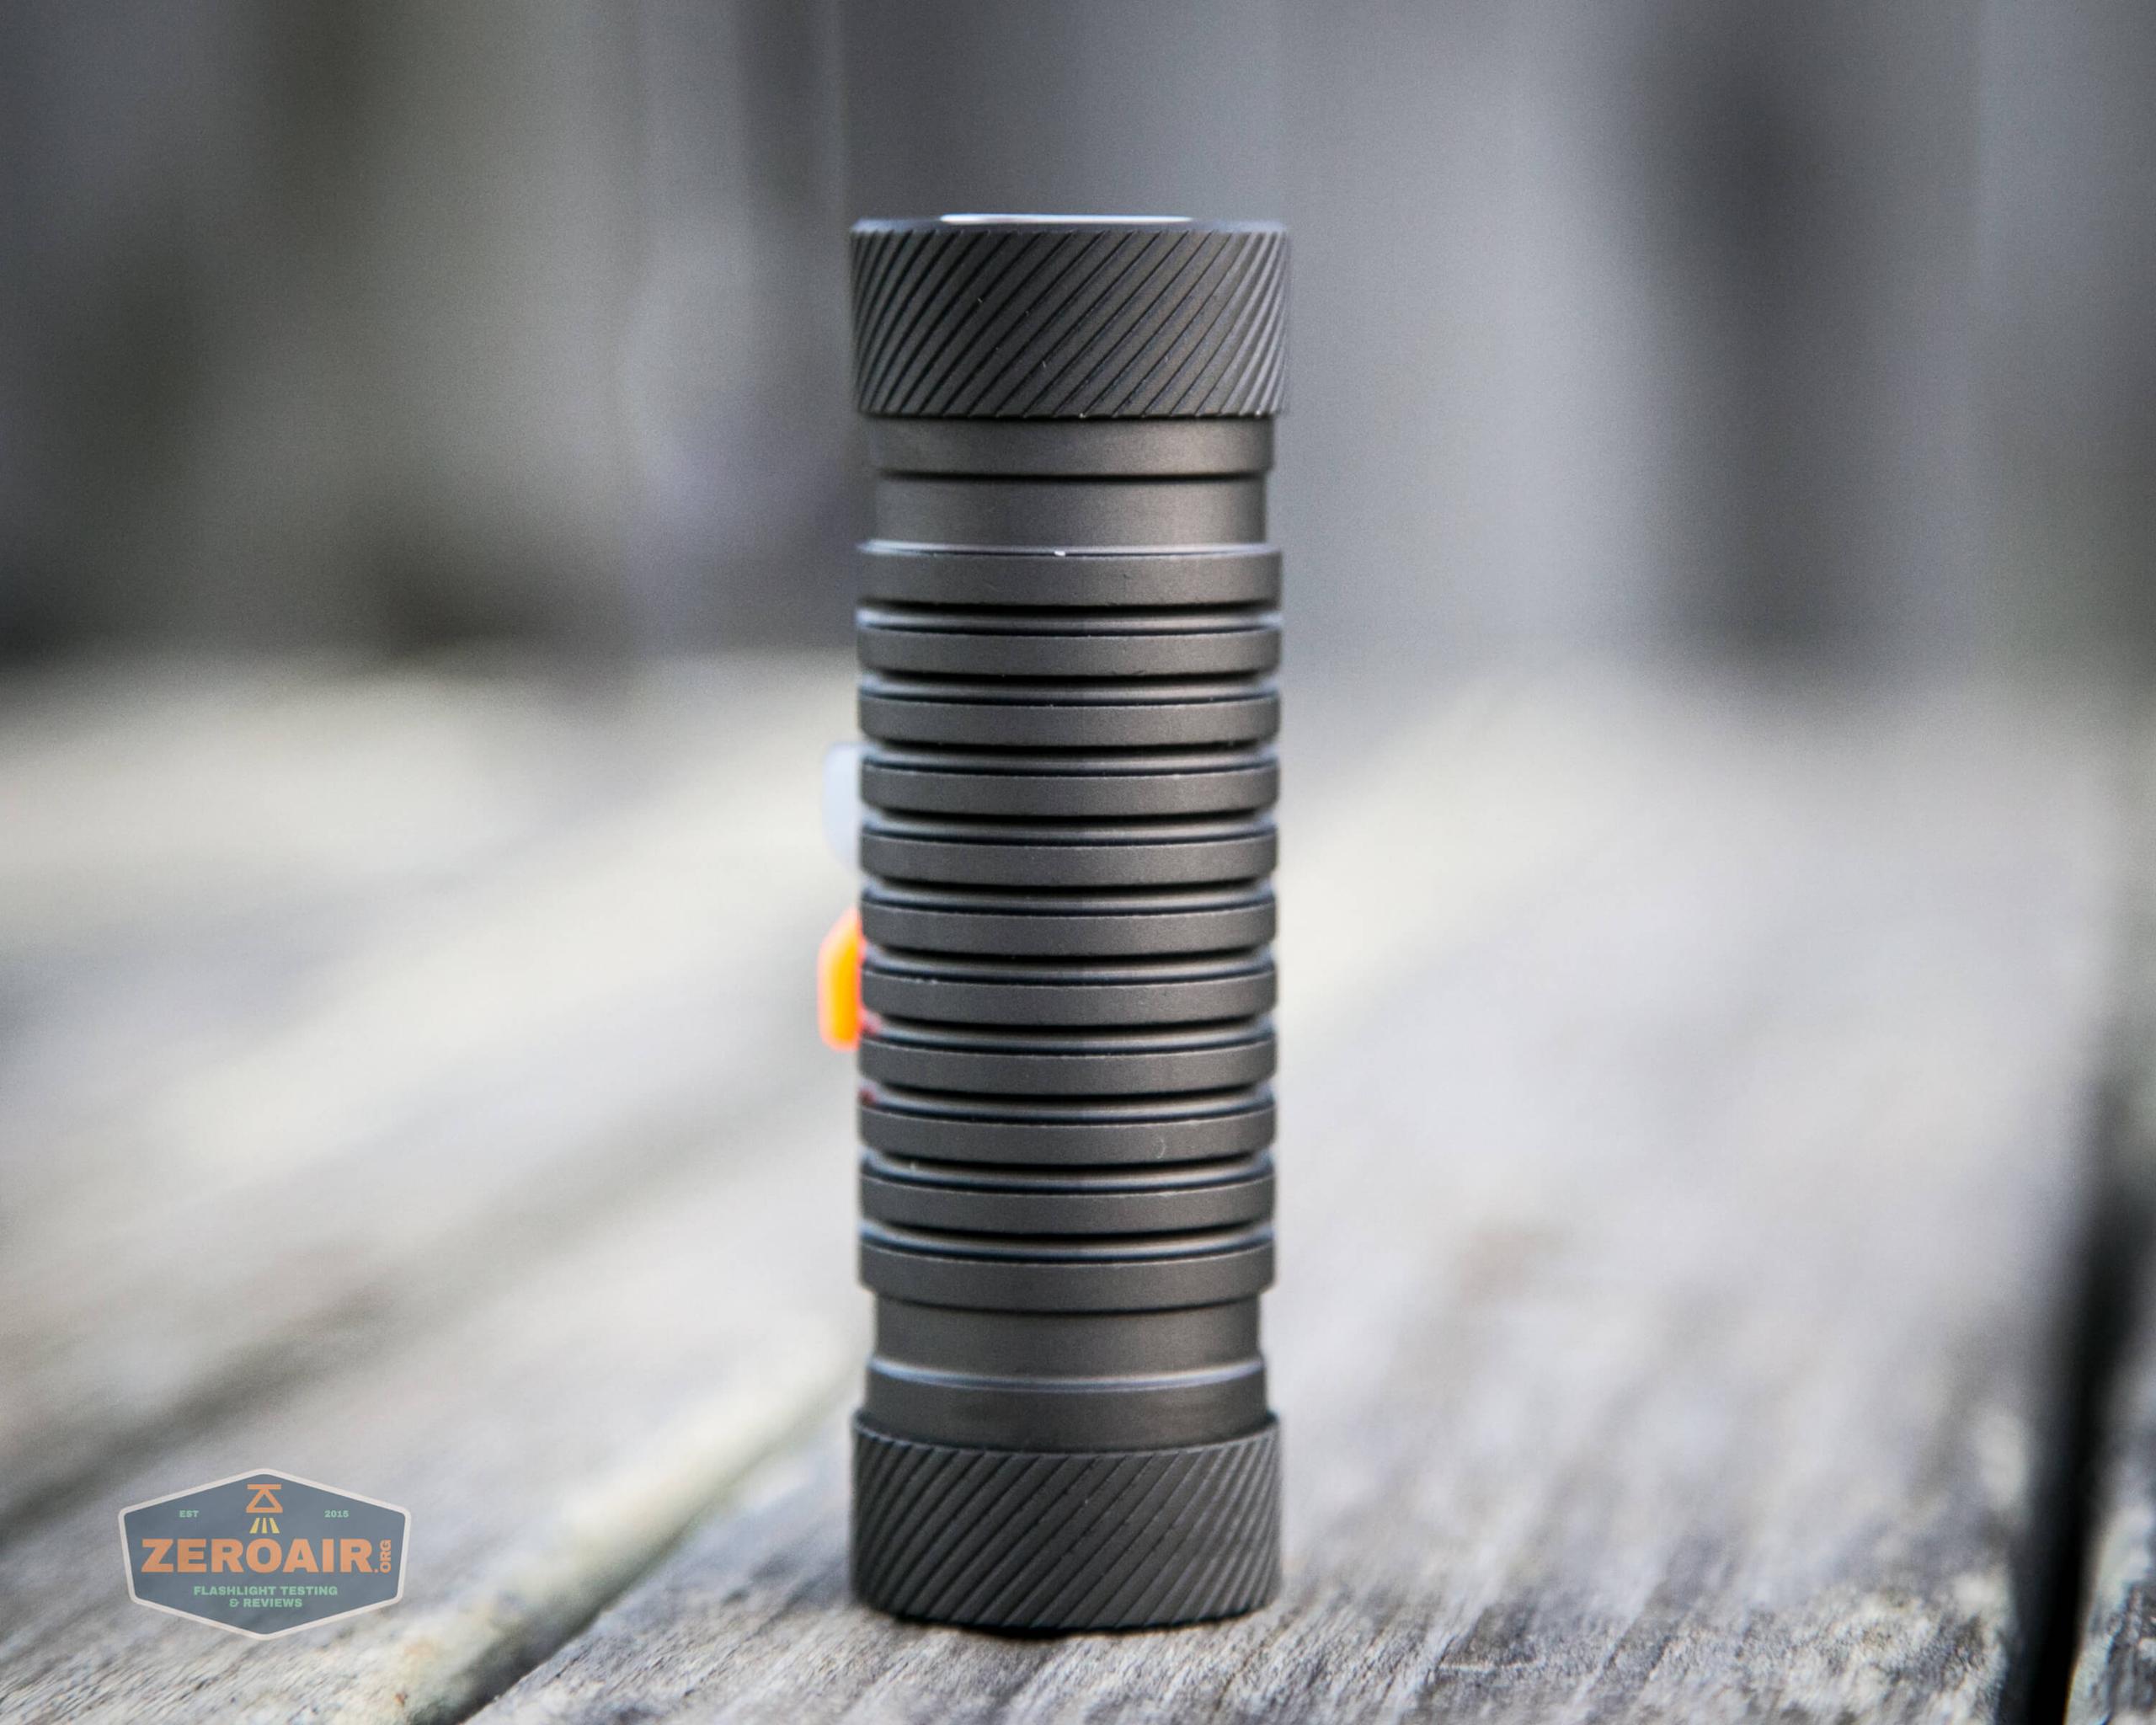
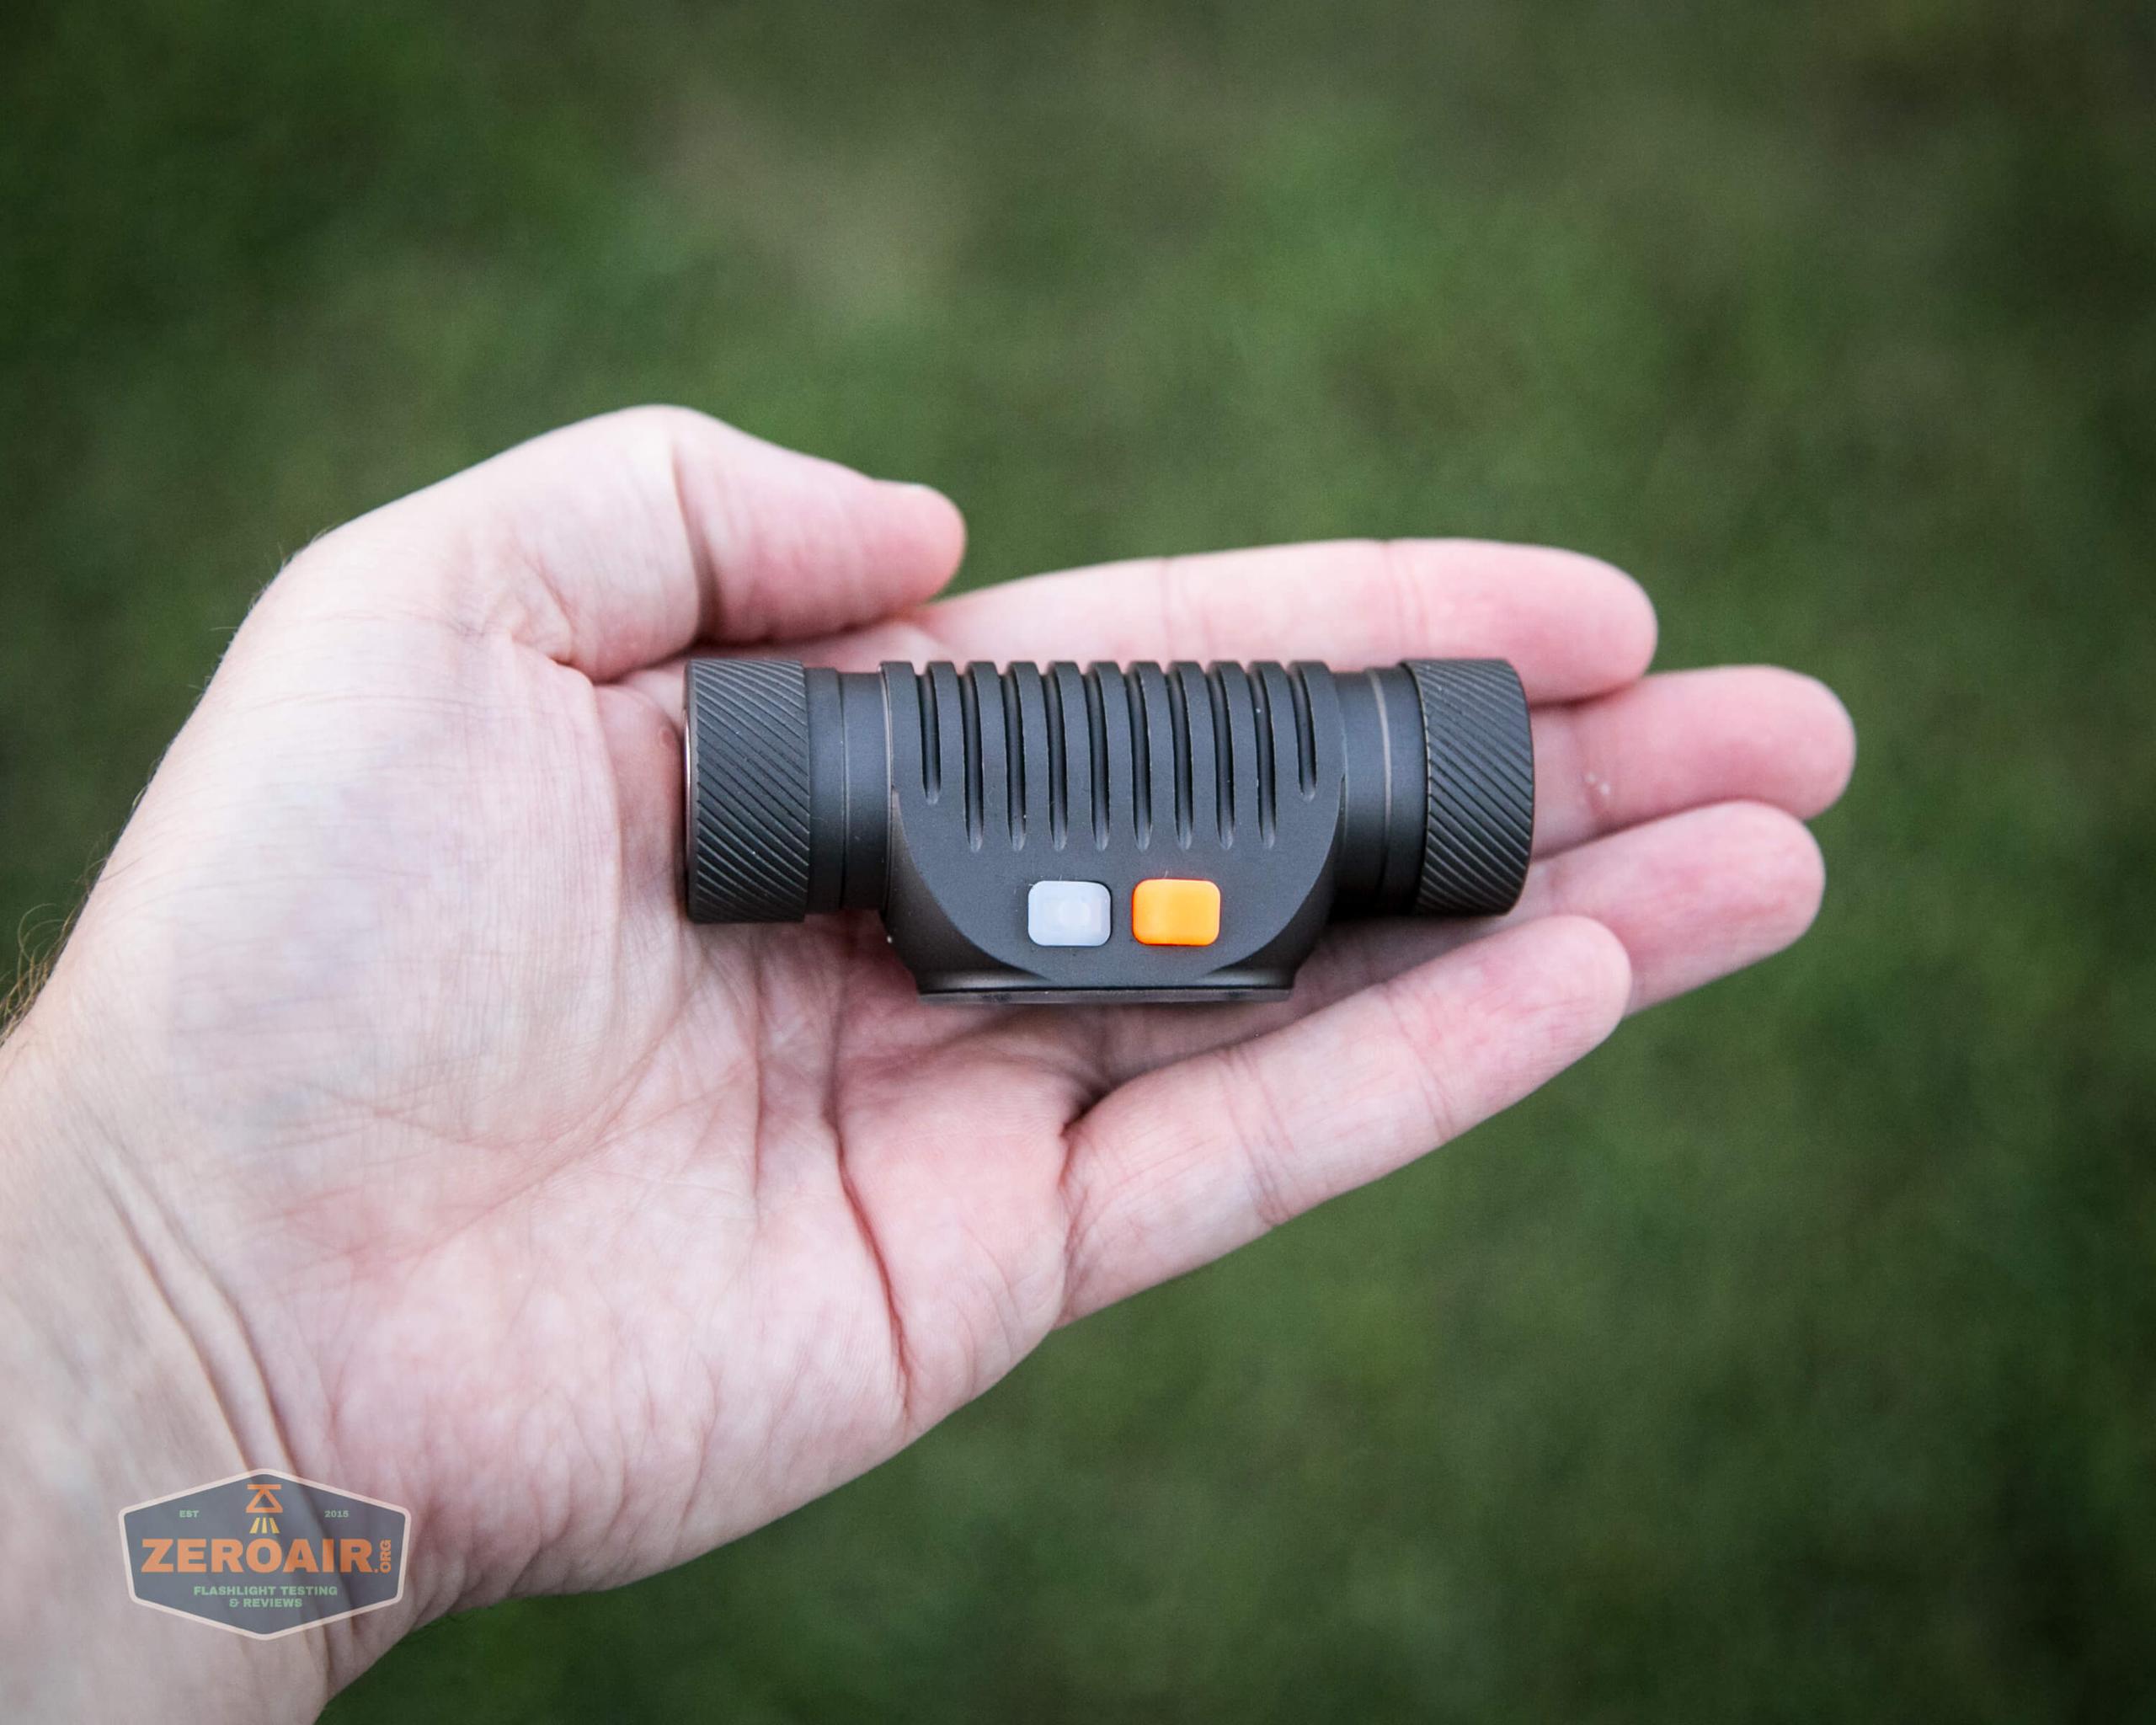
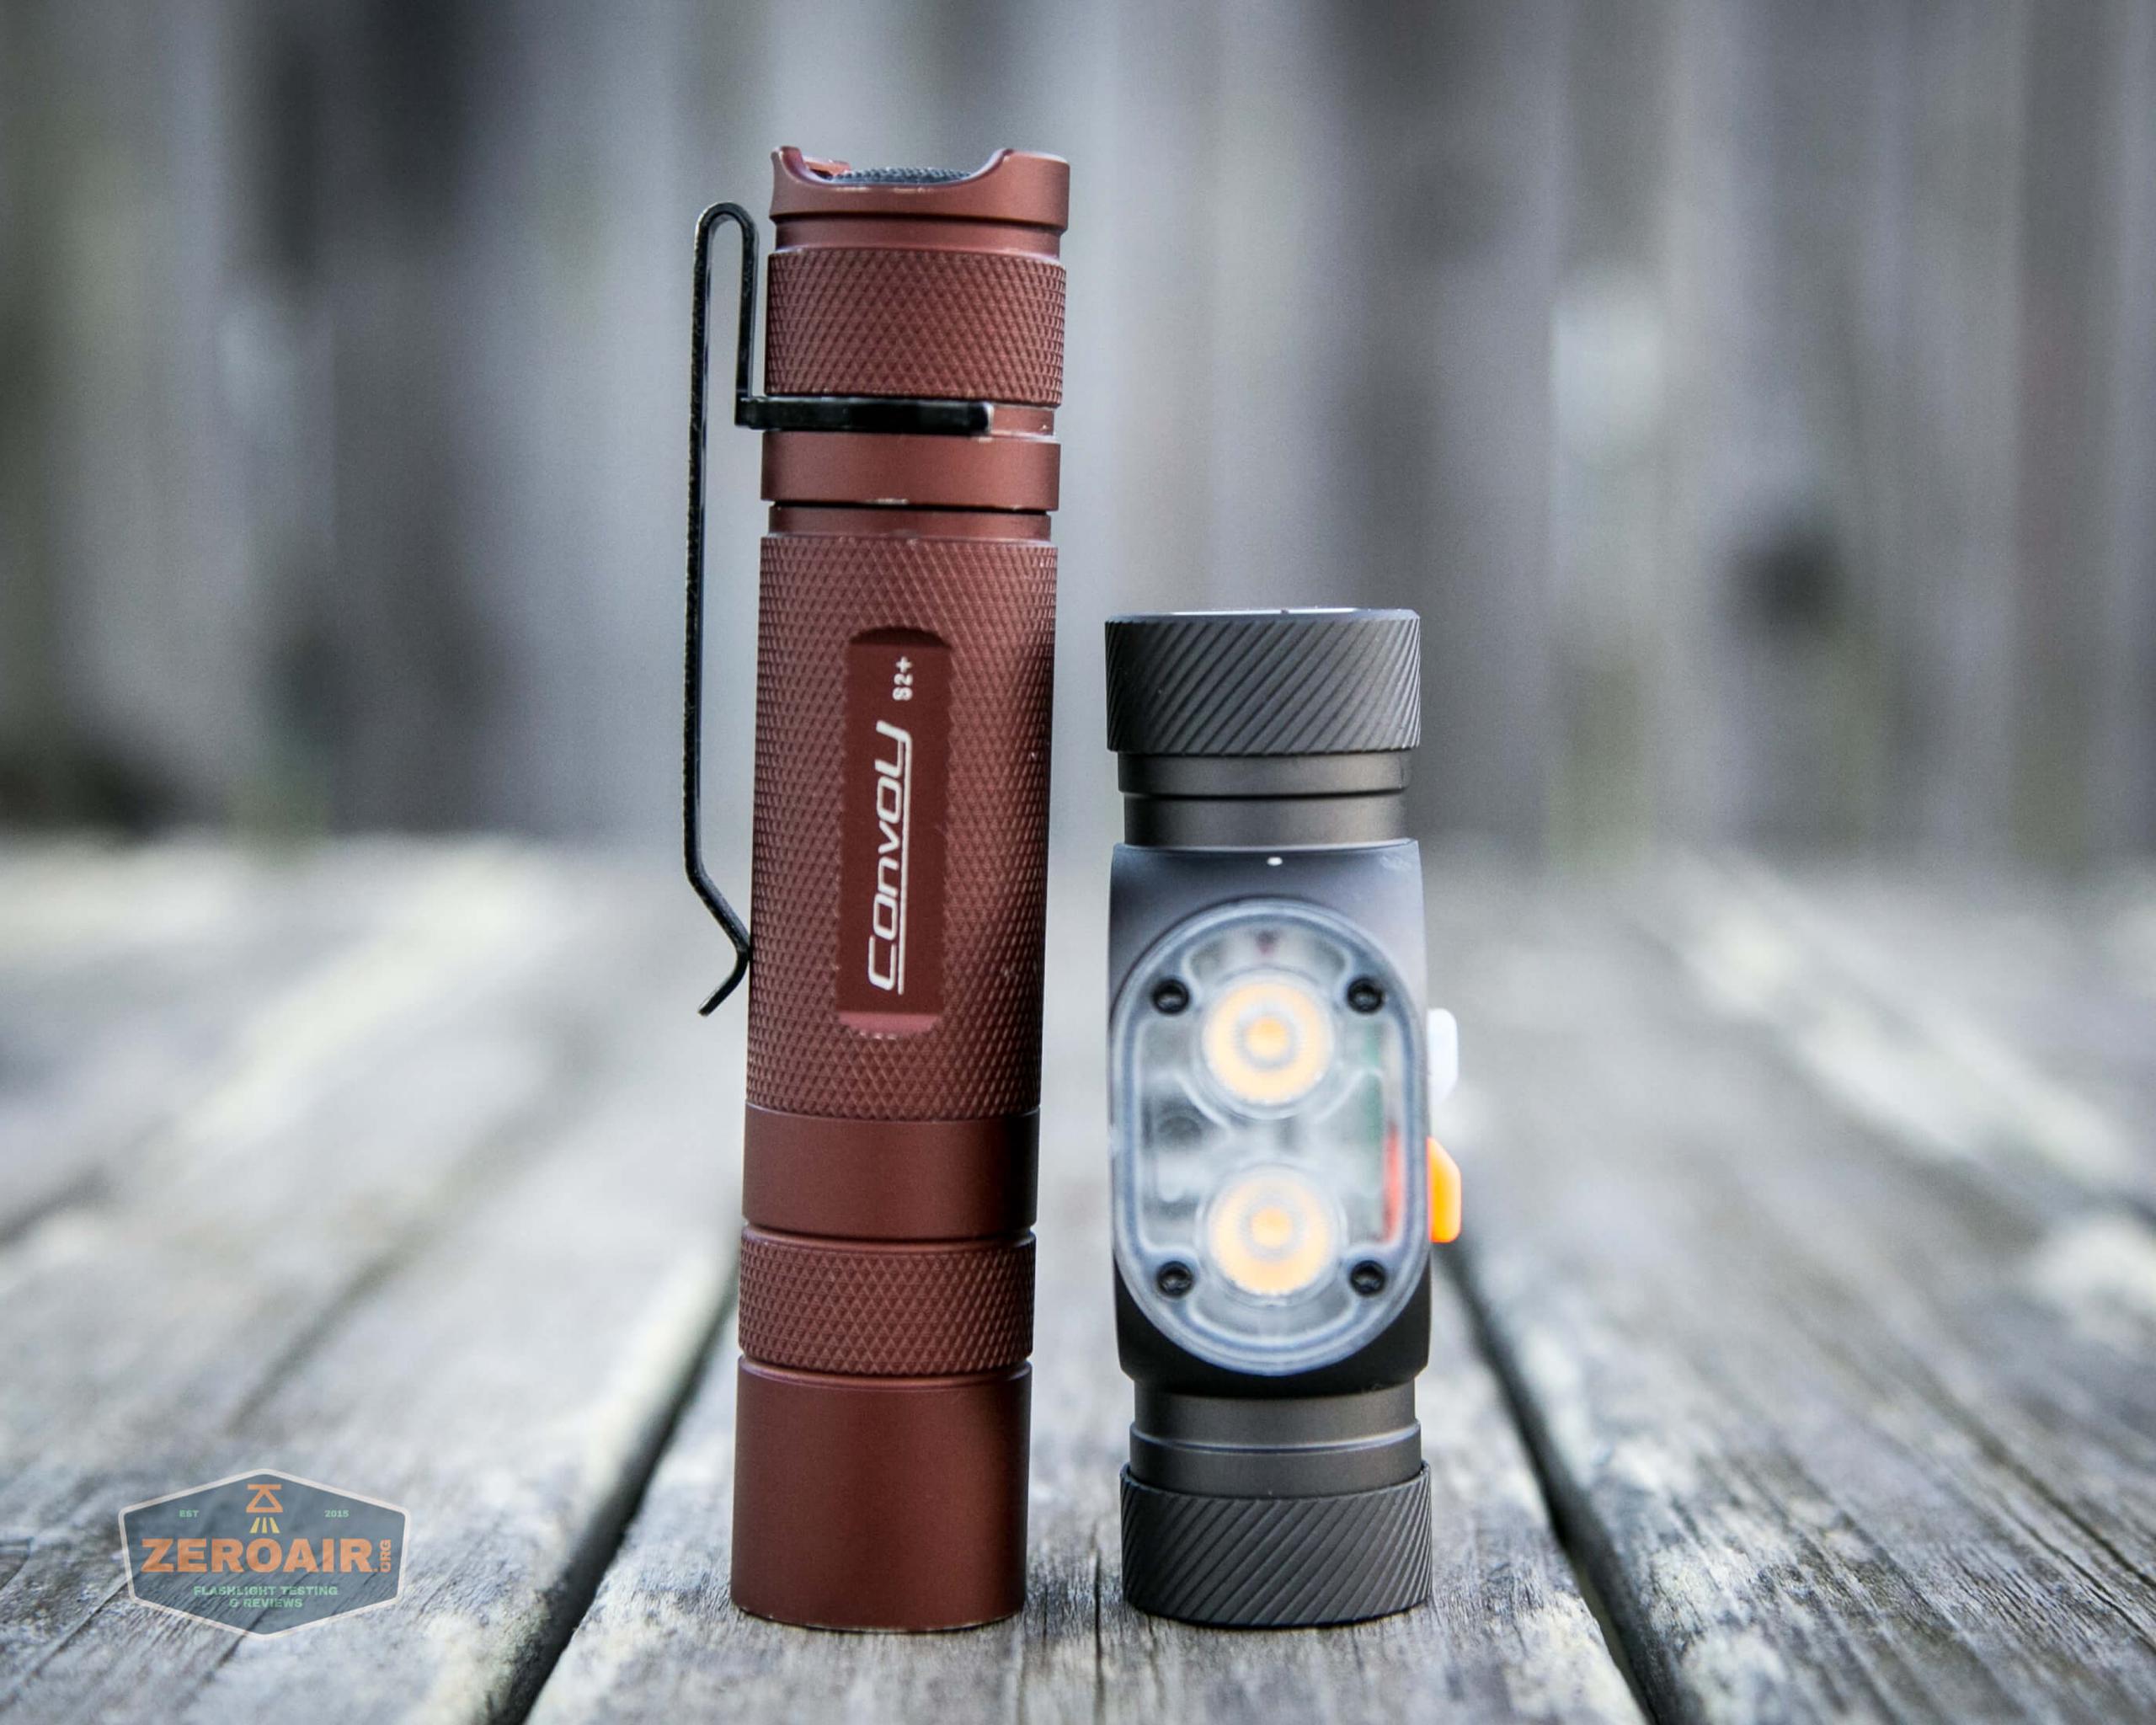
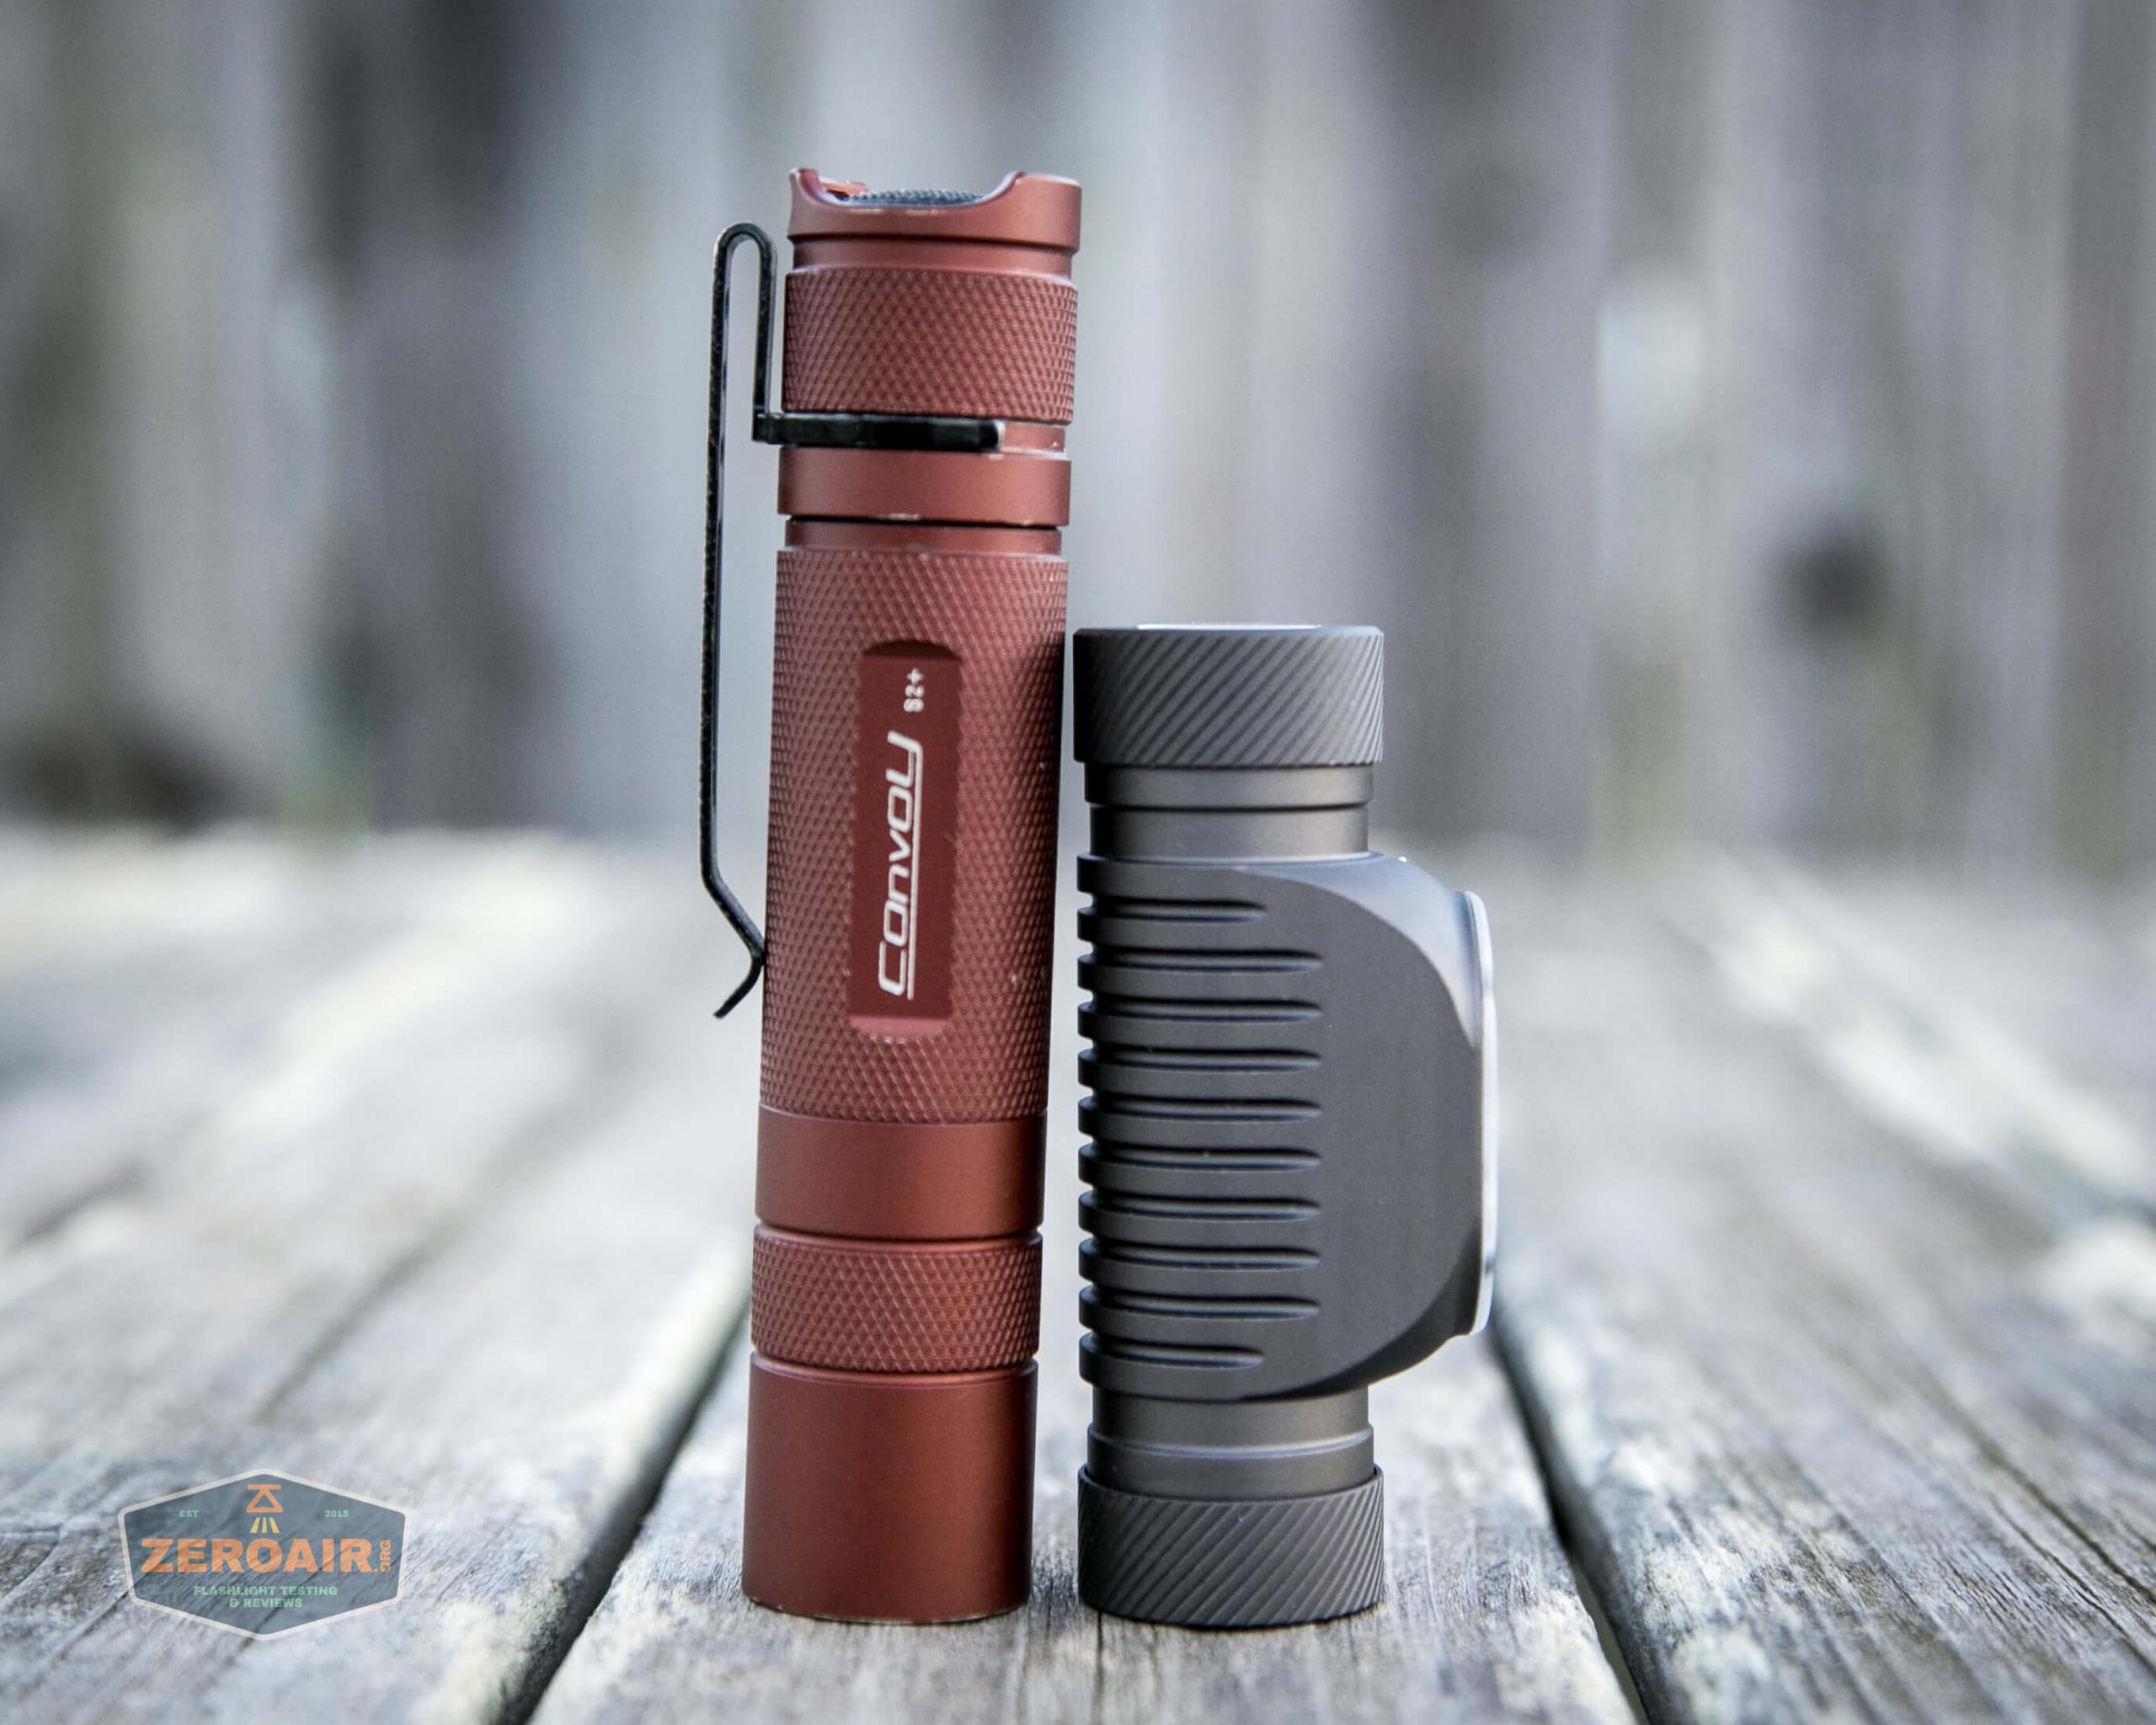
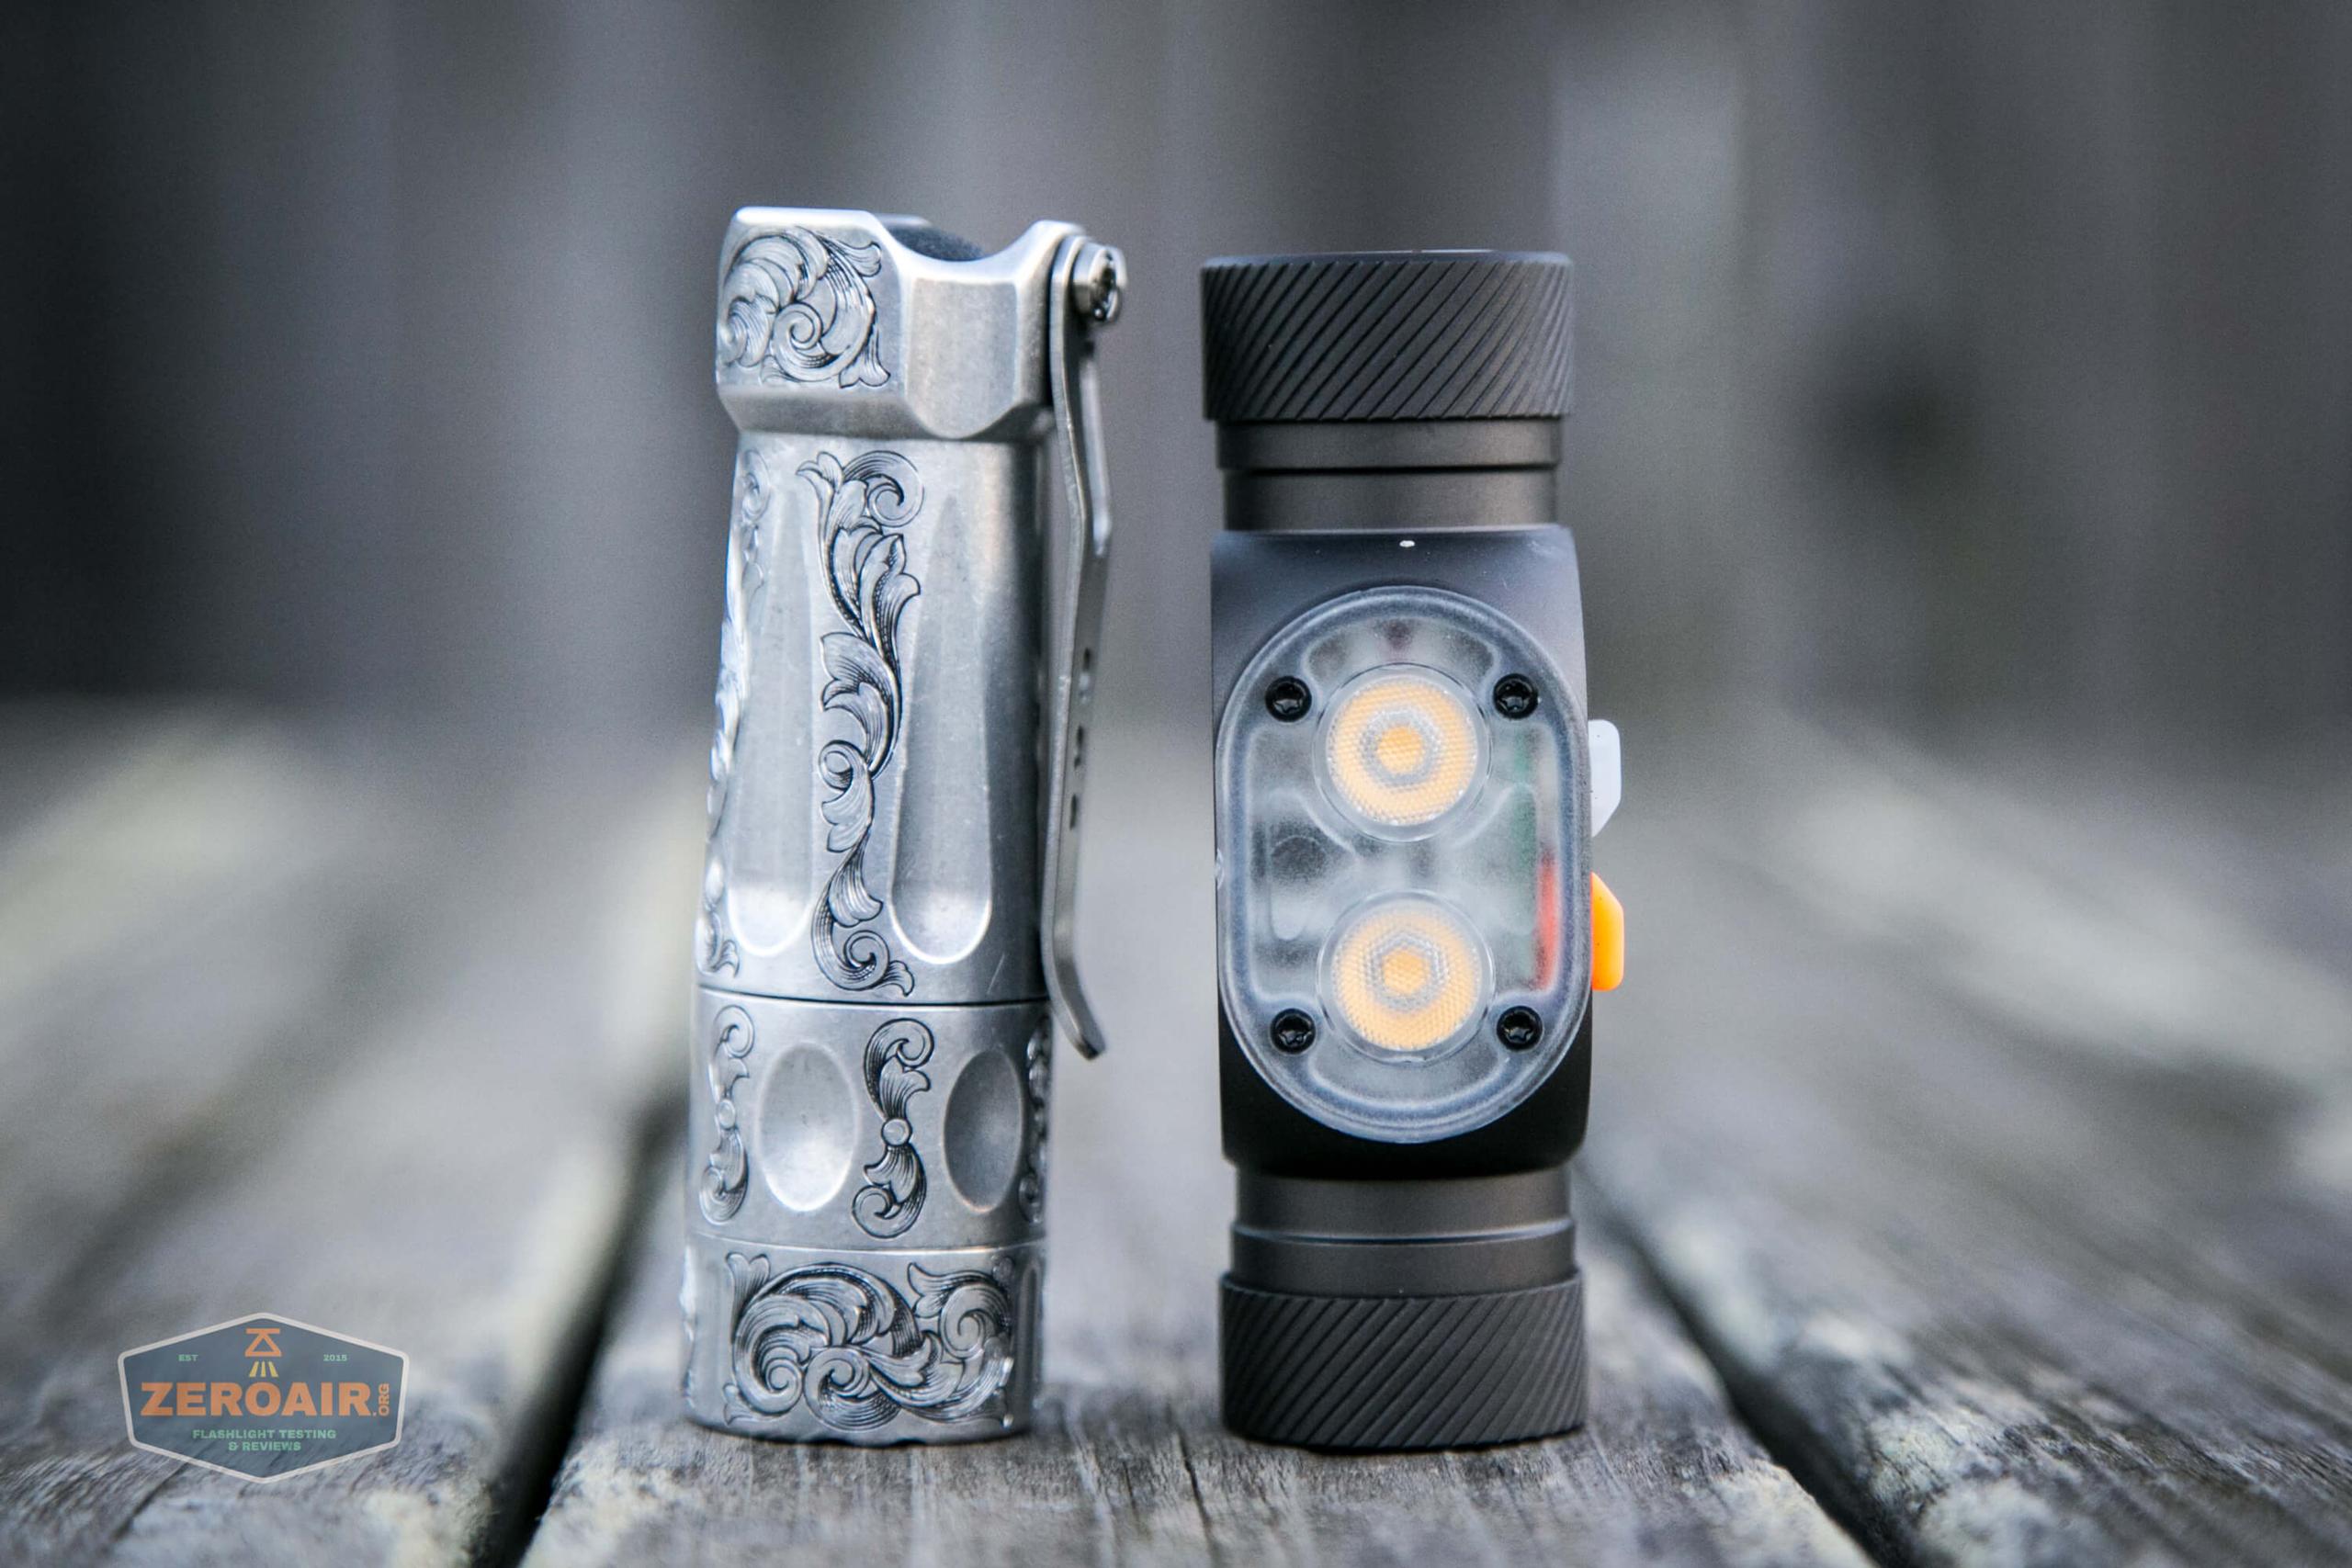
Size and Comps
Dimensions: LENGTH 81mm, WIDTH 31.5mm
Weight: 59g


Retention and Carry
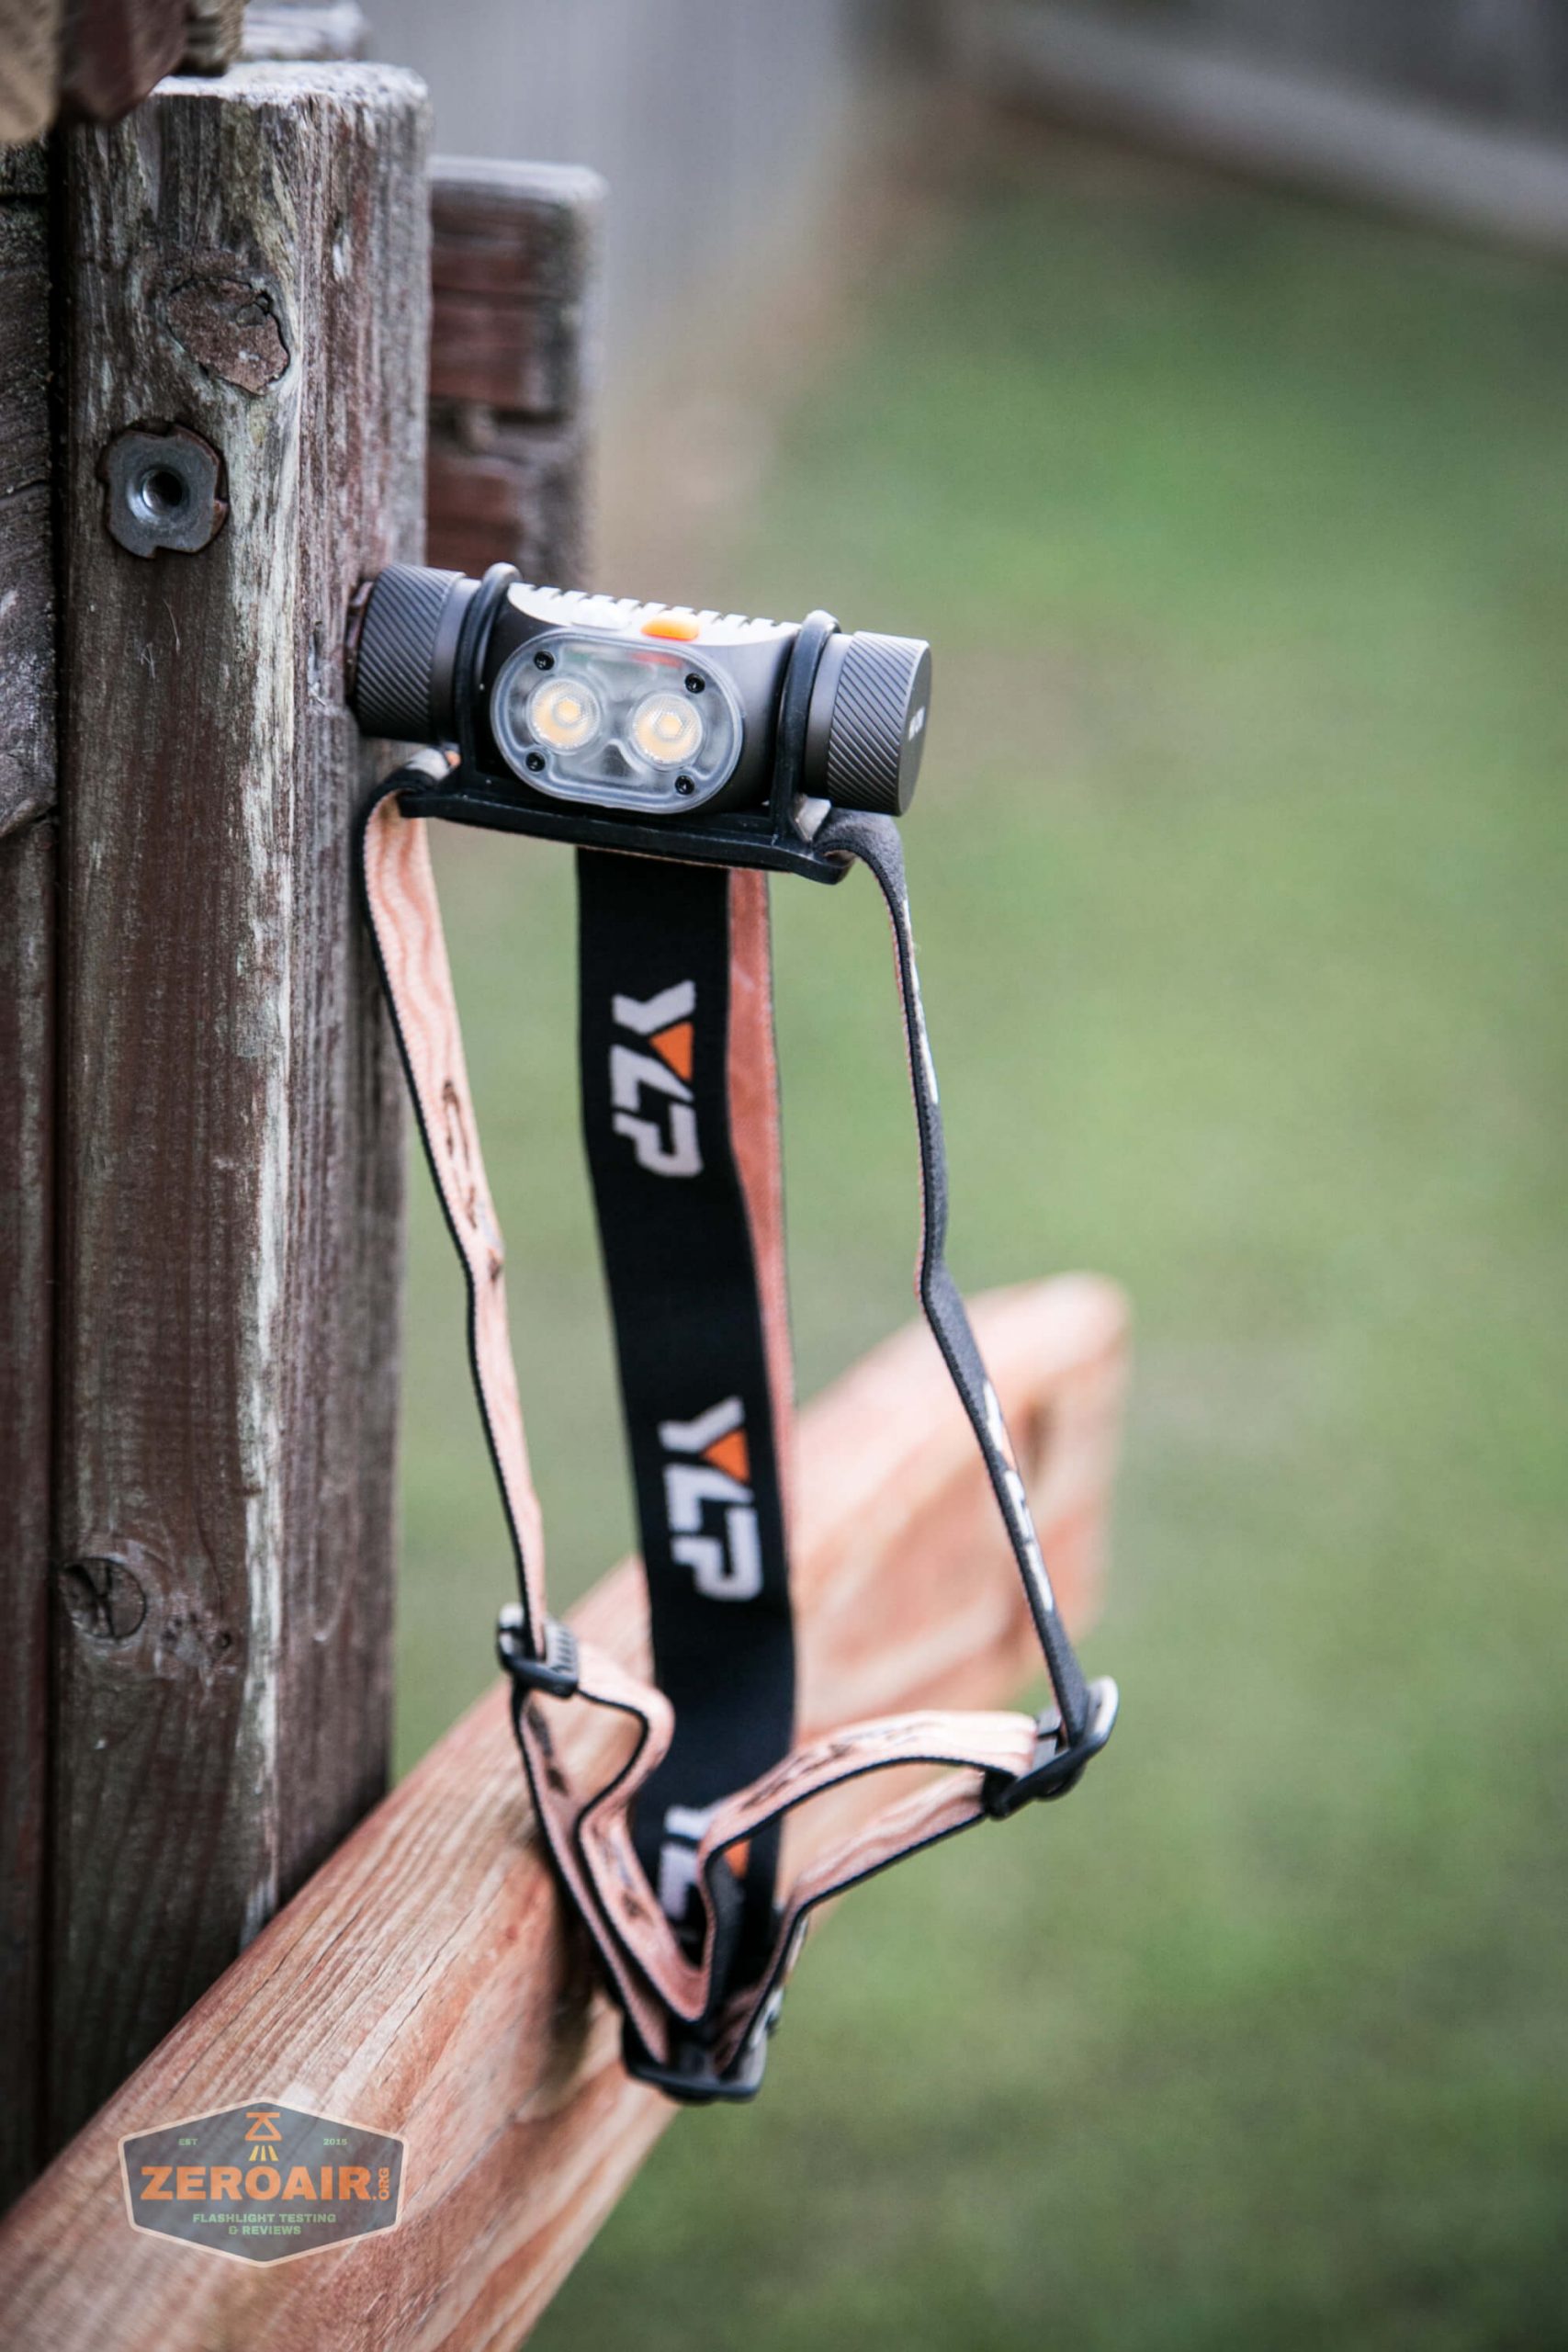
This is a headlamp, and a headband is included. It’s a nice soft stretchy band, with YLP branding.
The holder is a silicone loop holder that fits over both ends. The light installs with little difficulty.
The over-the-top strap doesn’t appear to be removable – see below that the silicone part has a molded spot for connection.


But it could be removed if you wished.

Also included is a magnet, which seems to be glued into the base. The magnet is quite strong.
There is no pocket clip or any other means of carry.
Power and Runtime
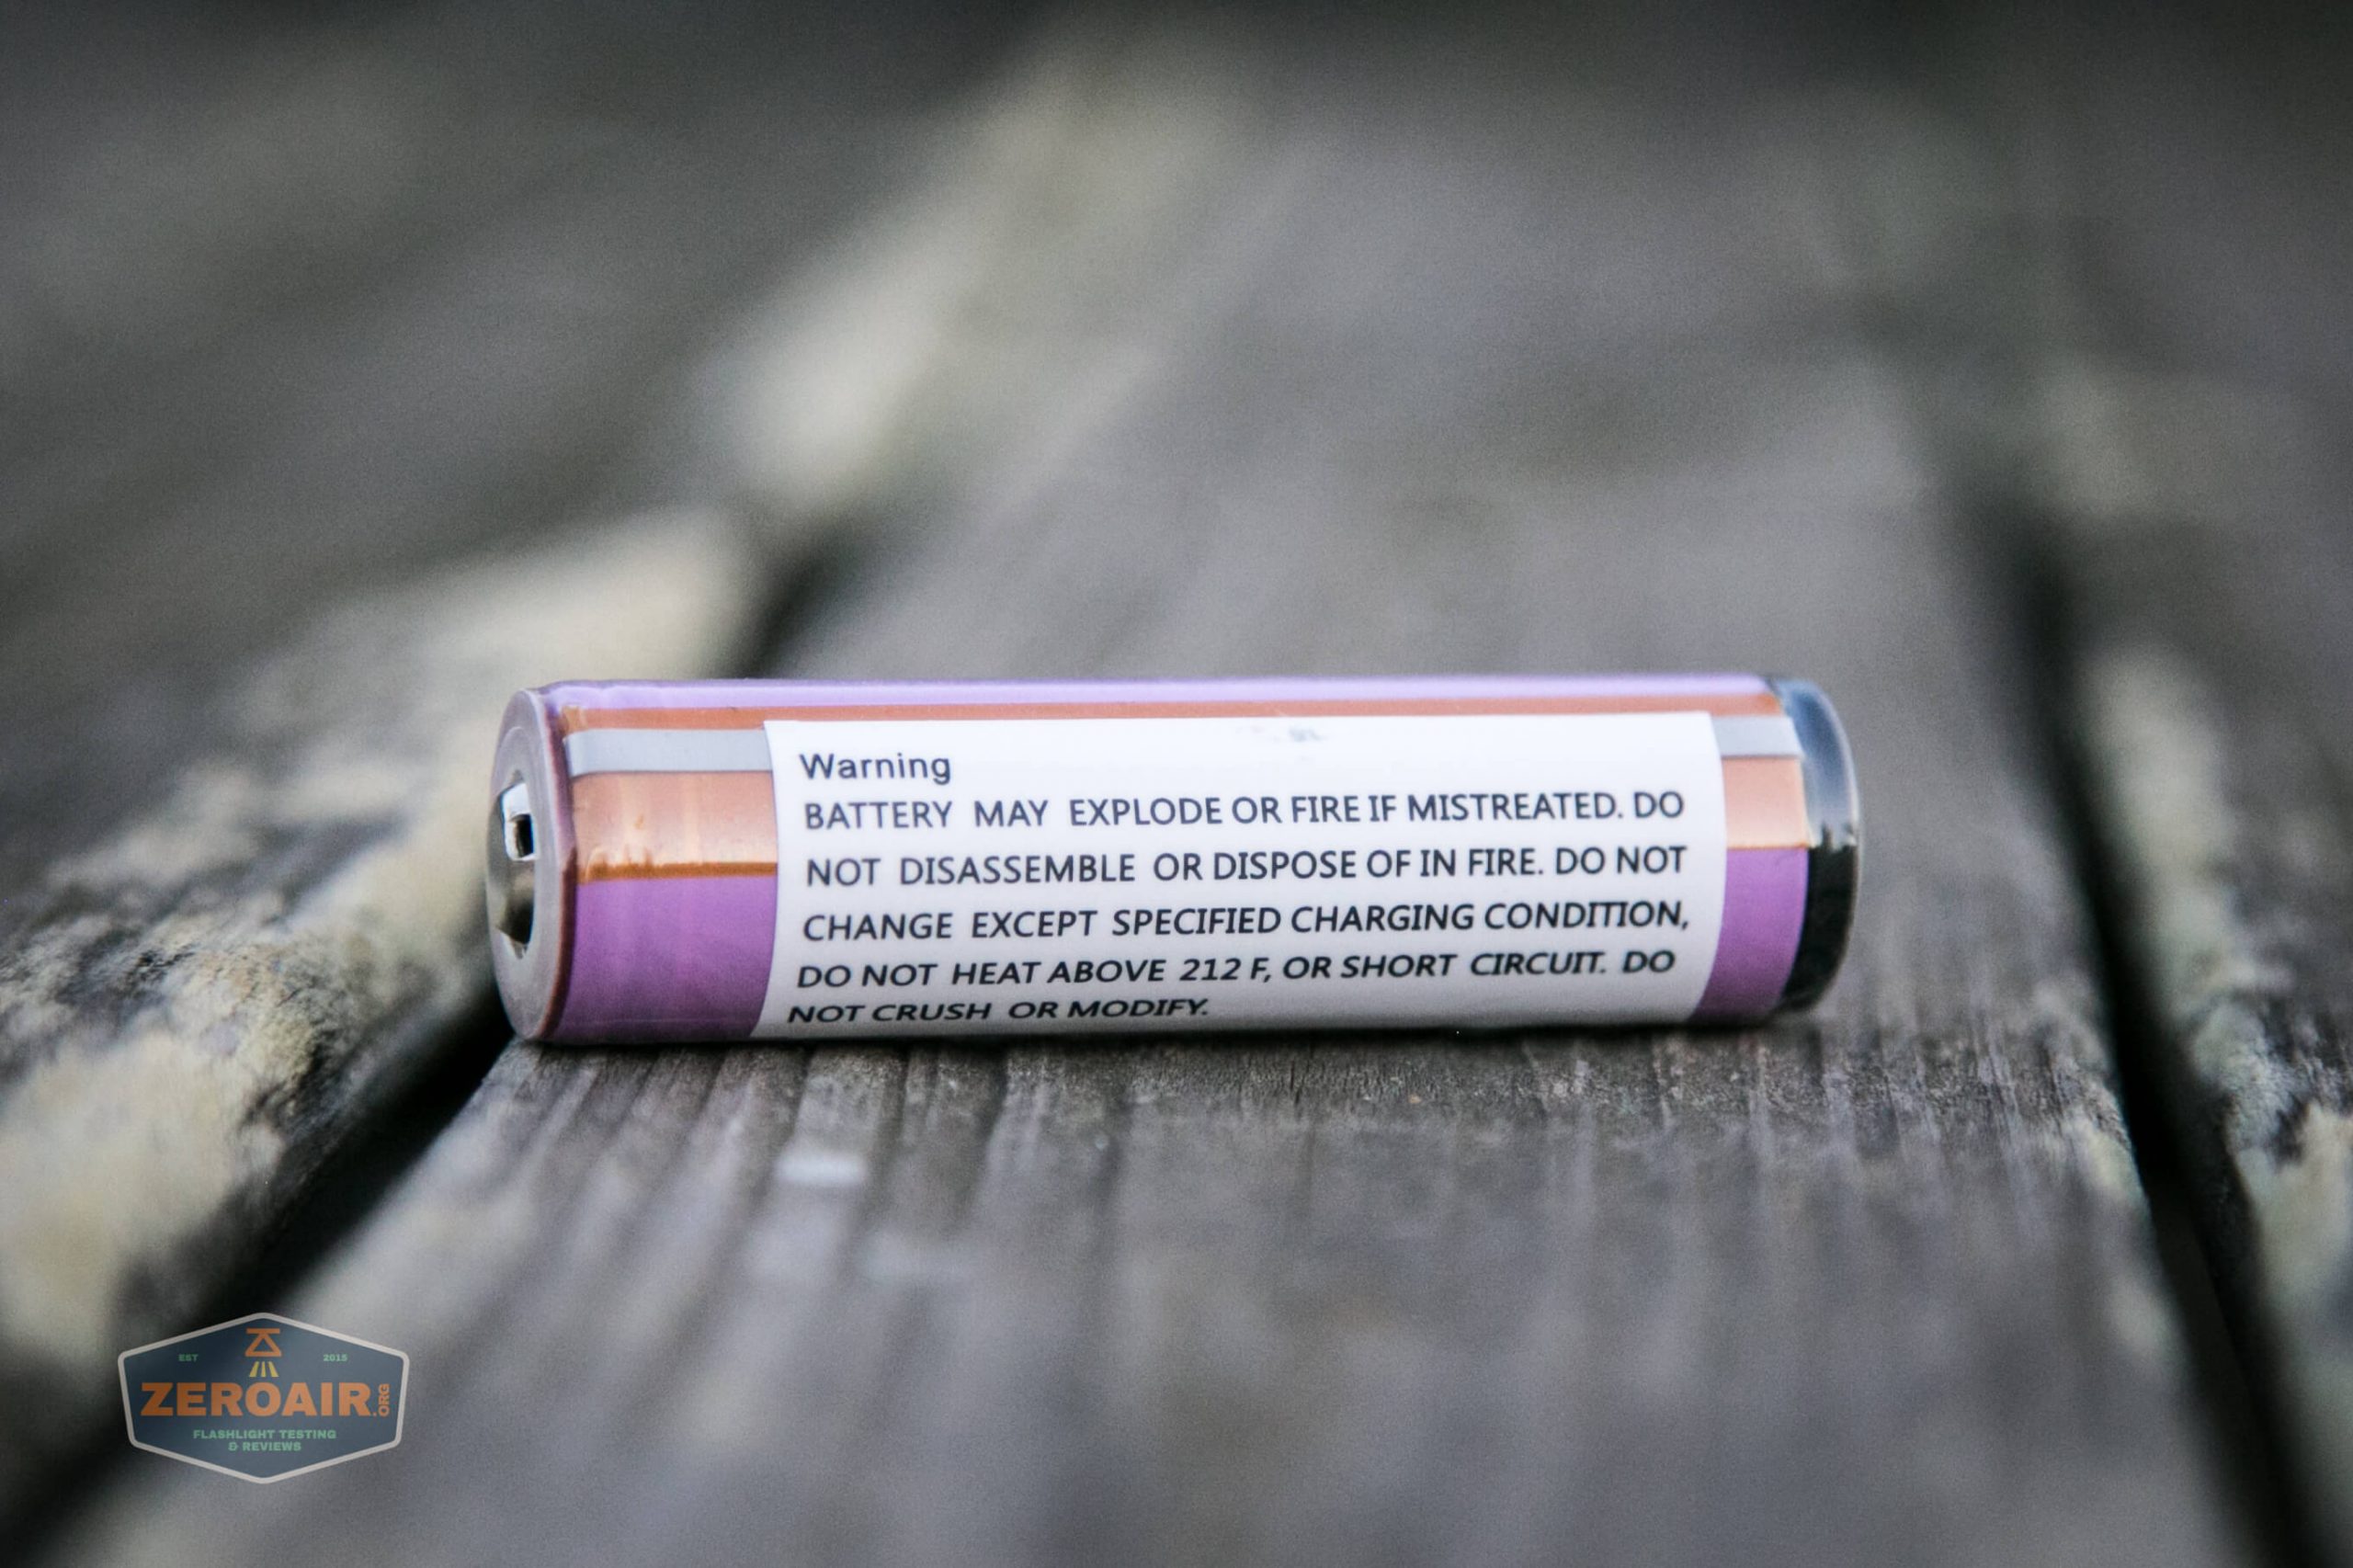
The Panda 2M CRI is powered by a single lithium-ion cell. A 18650 fits, and in my case, a single 18650 was included. This cell looks to be a 30q rewrap, with some added bits – possibly protection circuits.
The tail end has an unusual shape (which is part of the “added bits”), so that’s why I call this a “customised” 18650. Standard 18650 cells do work just fine in the light. This cell is long enough that the tailcap gives resistance when tightening down.
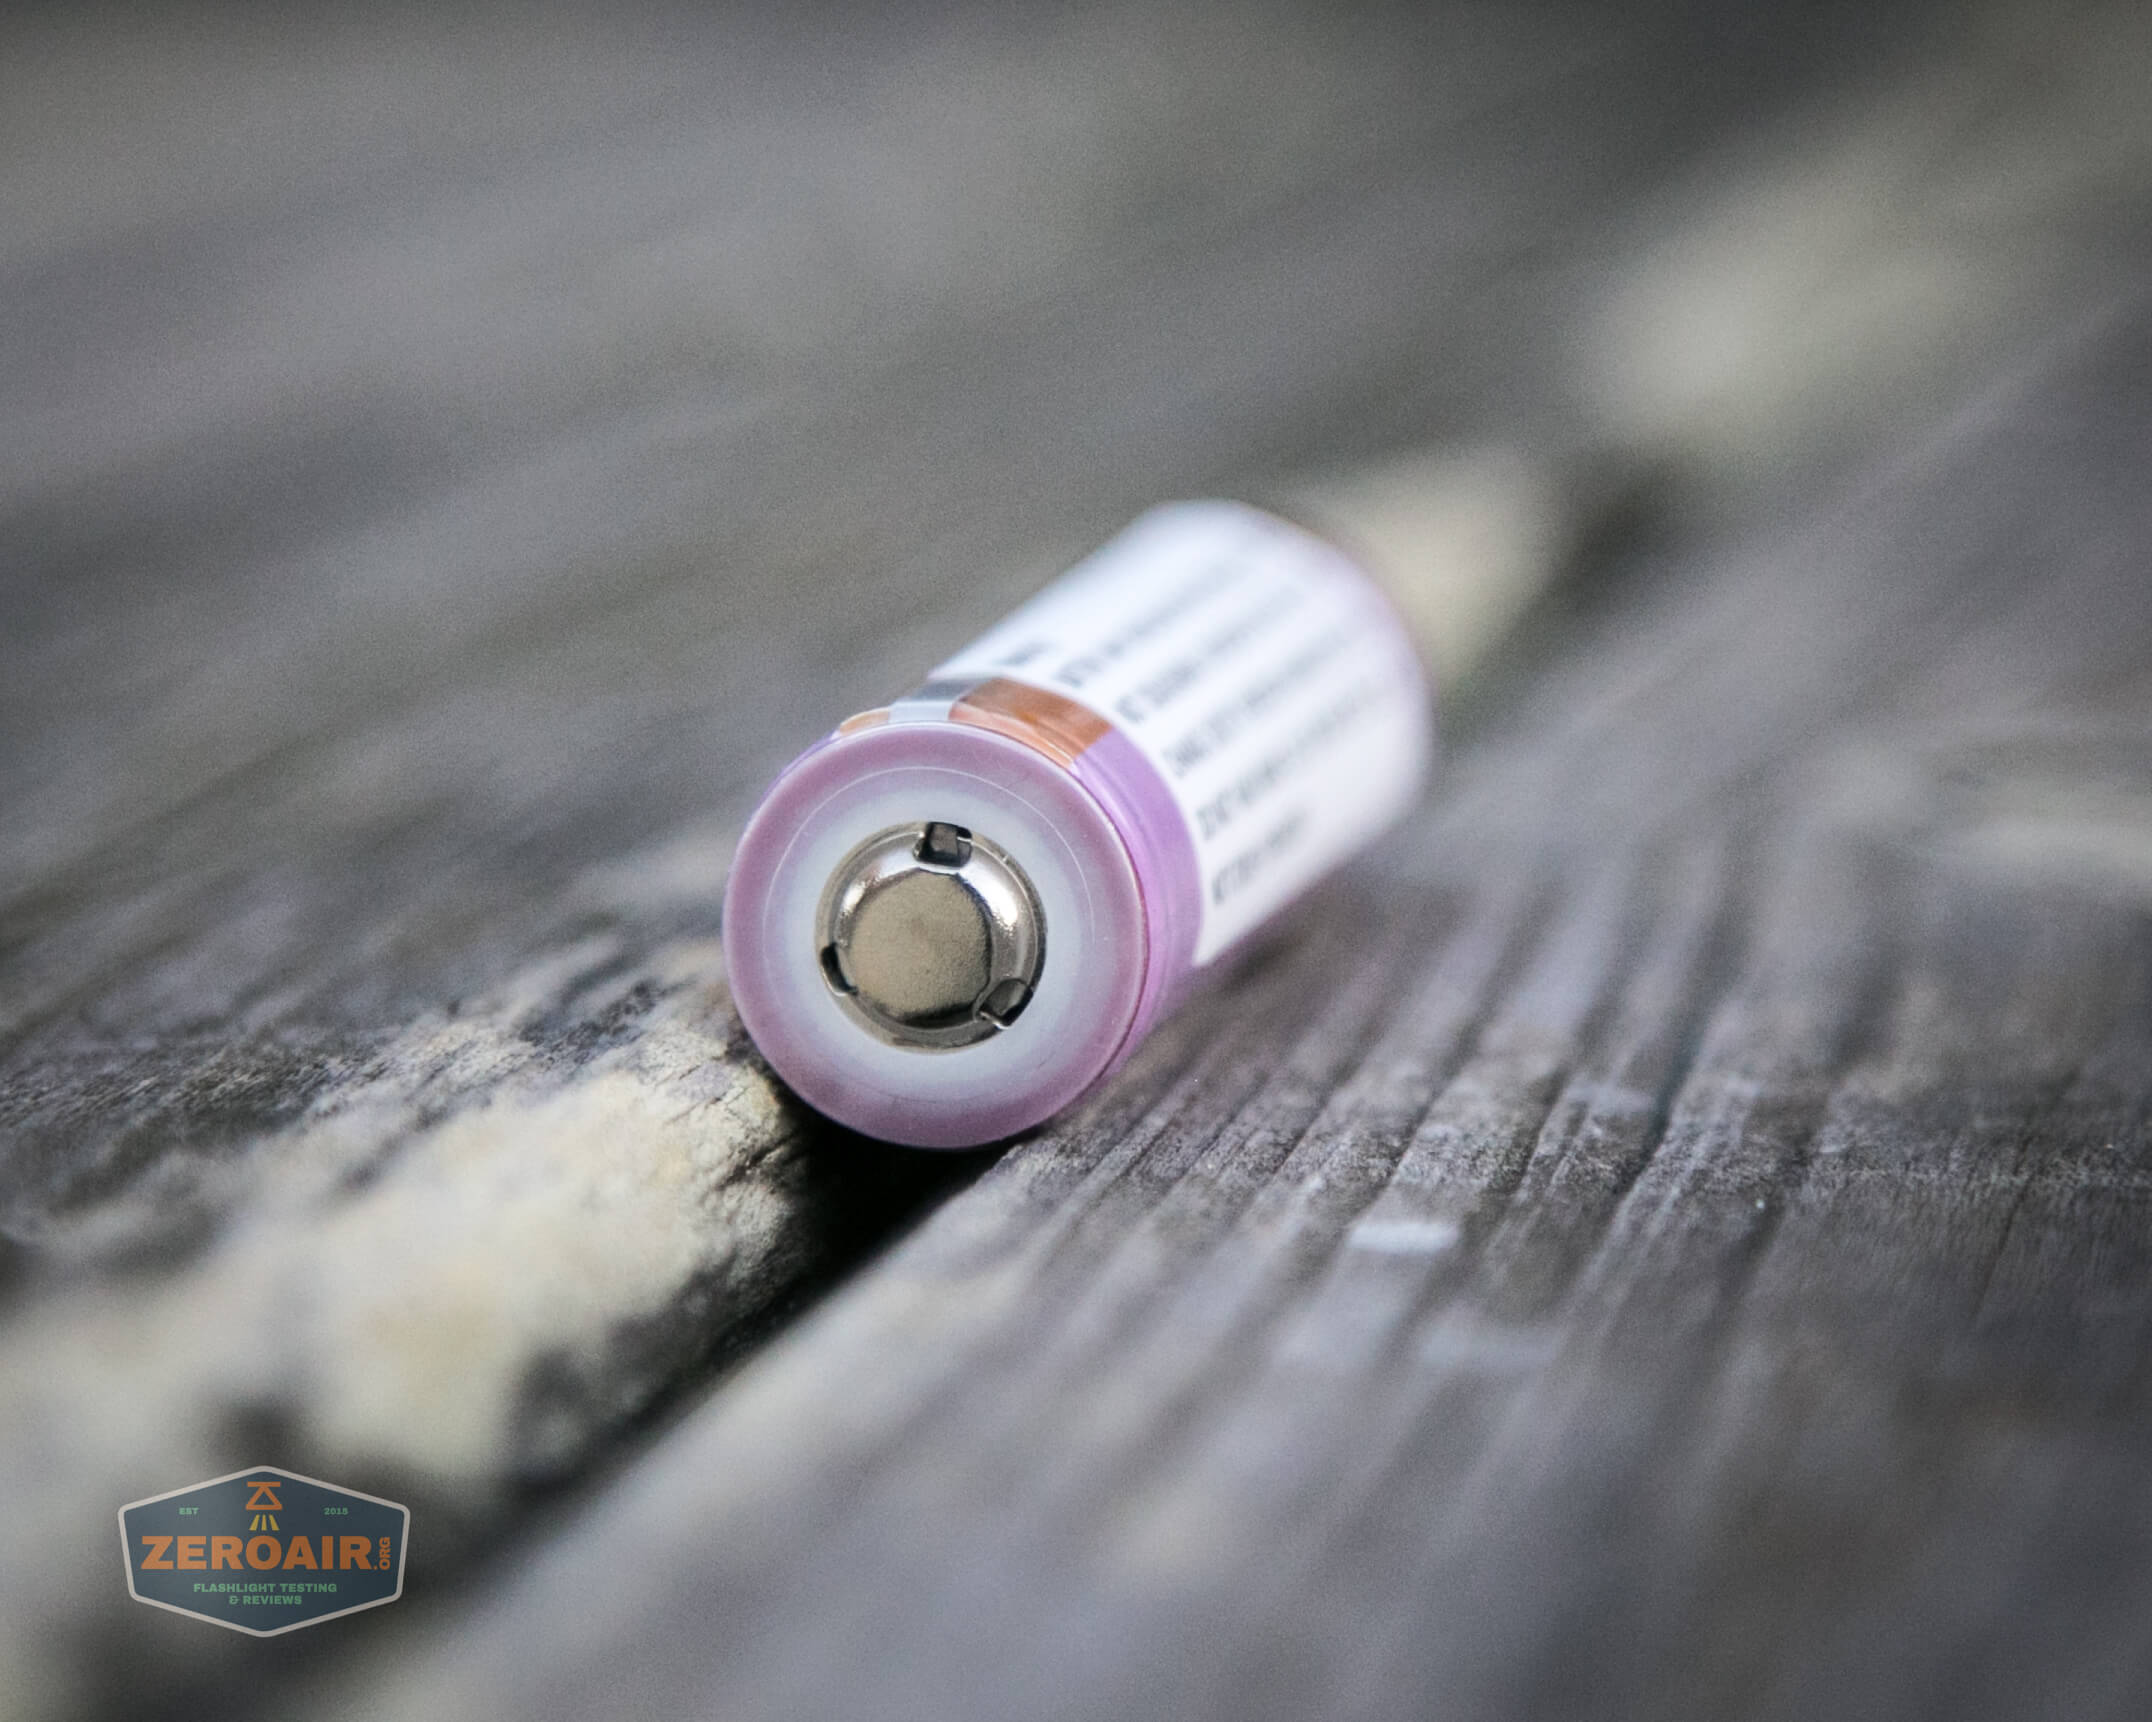
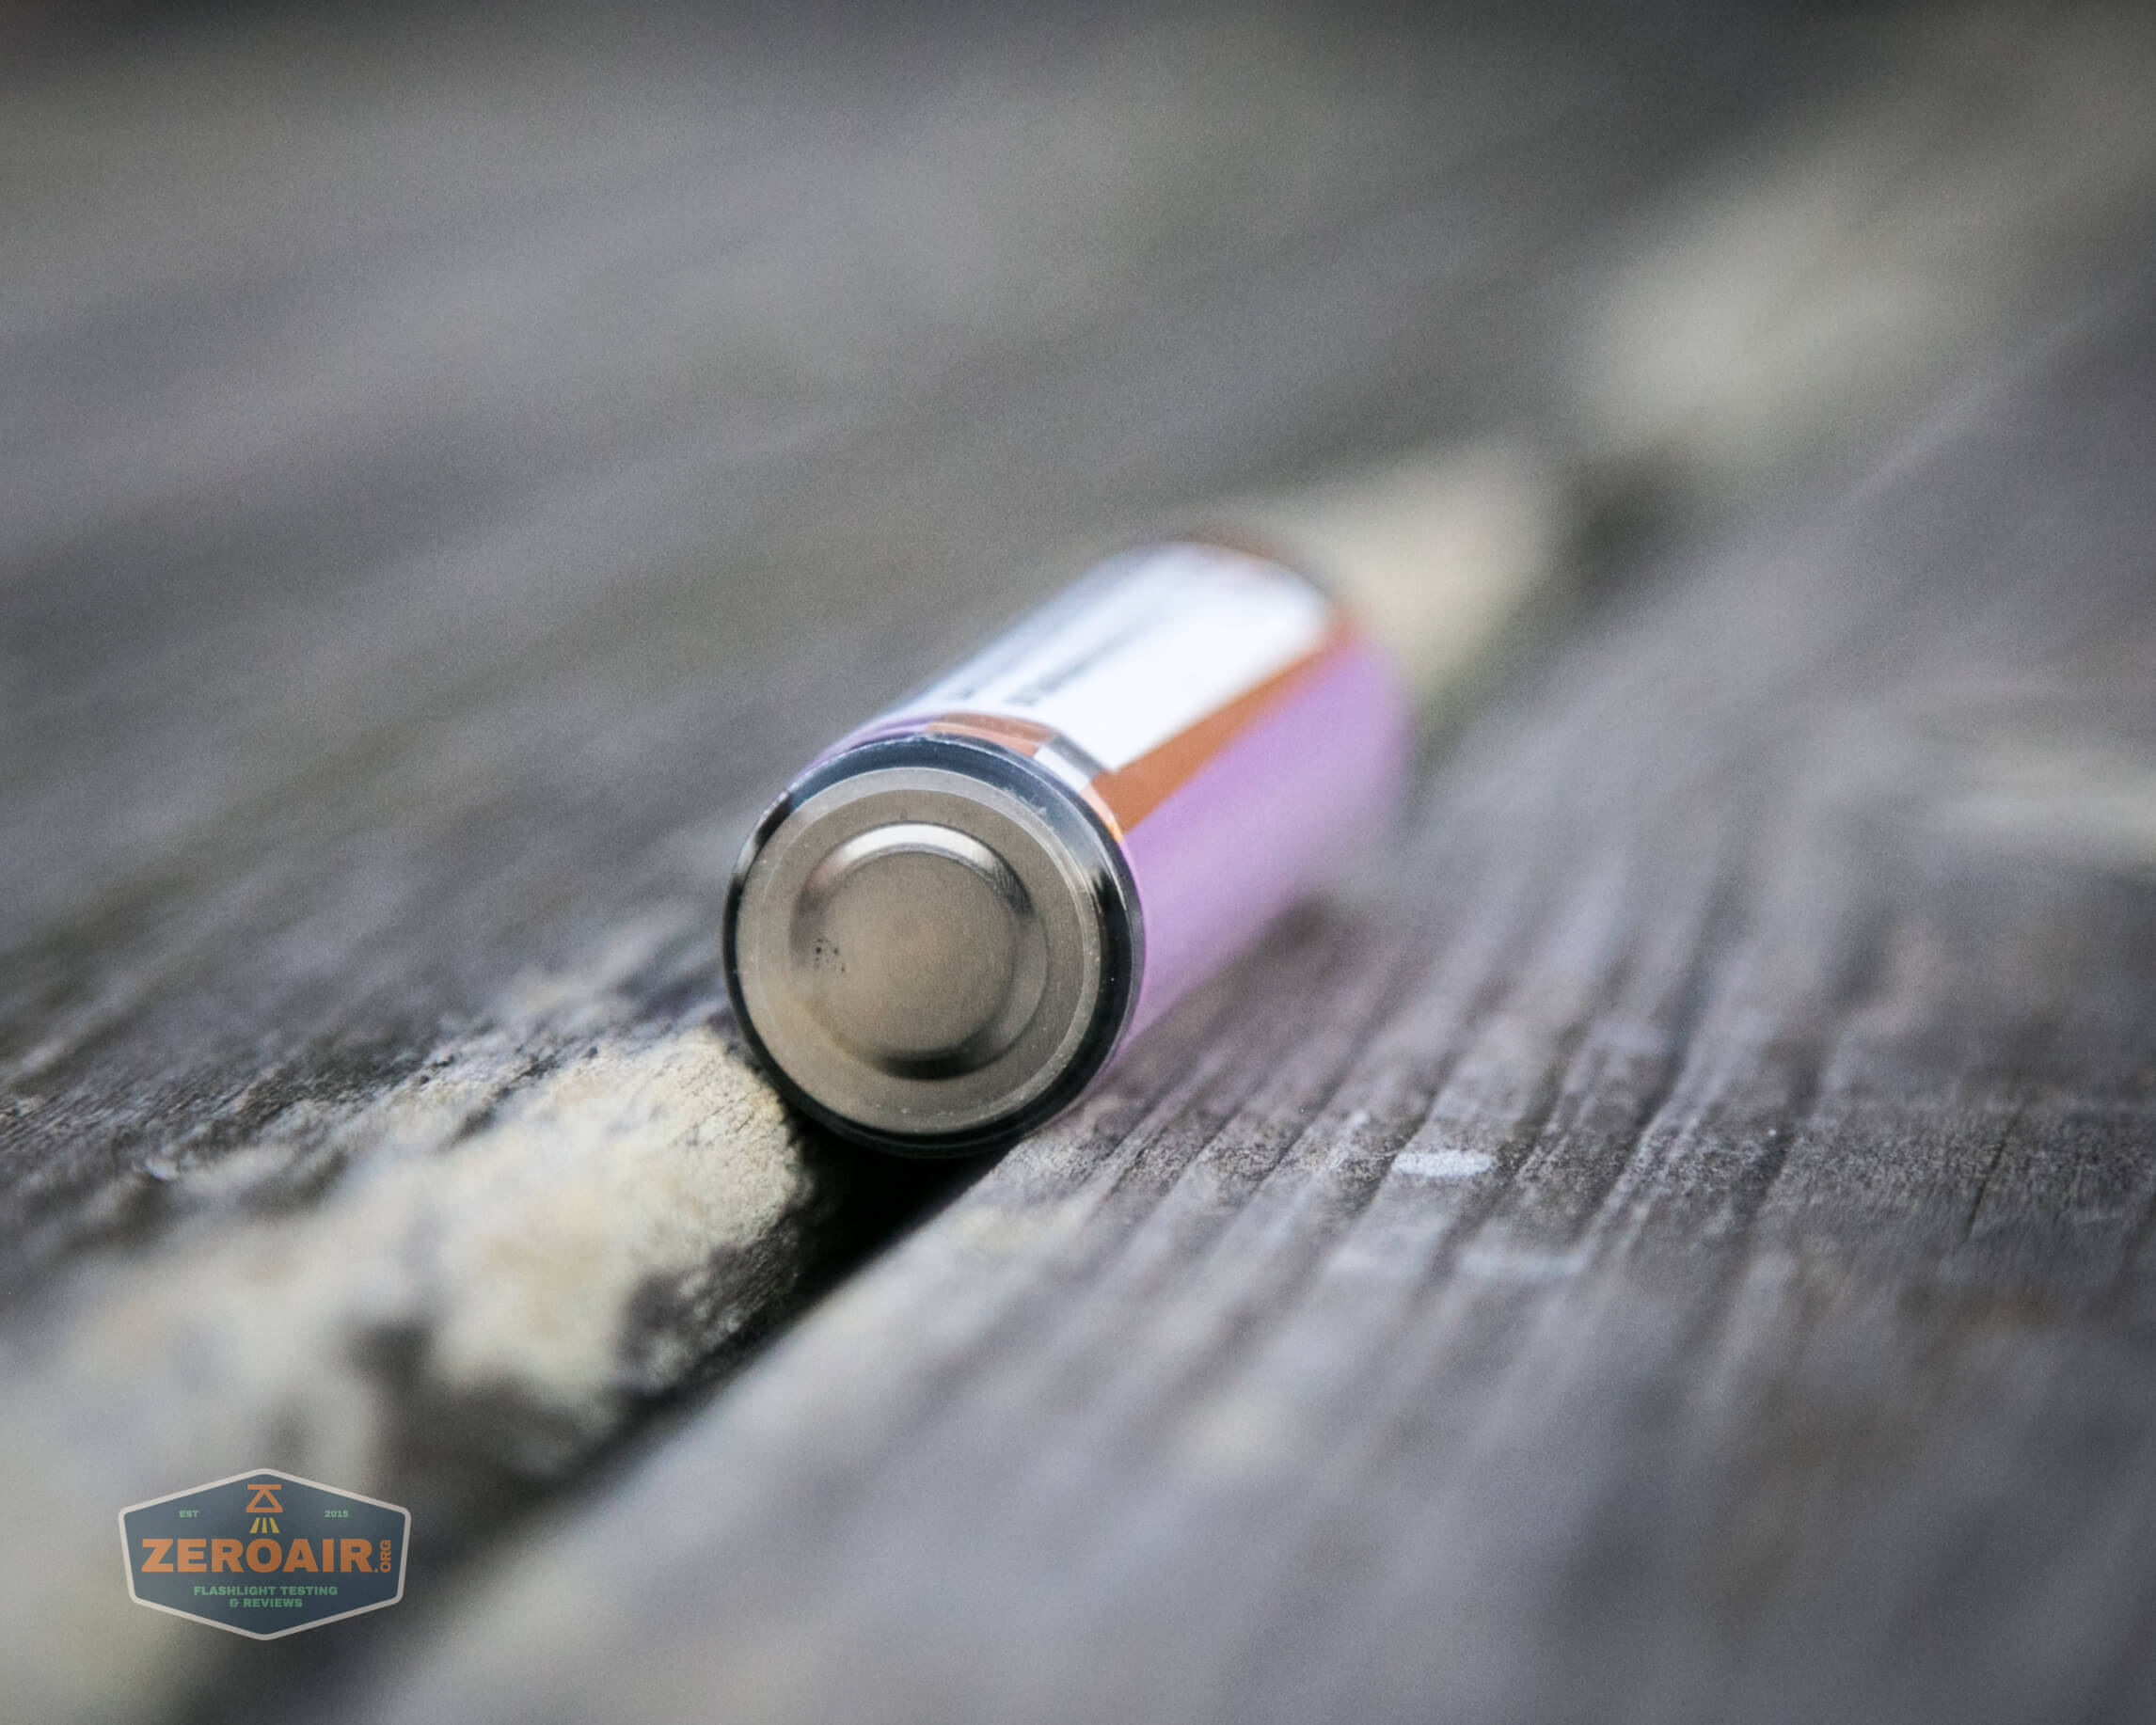
The cell is installed by putting the positive (button) end first (flat tops work too). (Below, the negative end is seen, despite also having a little “bump.”)
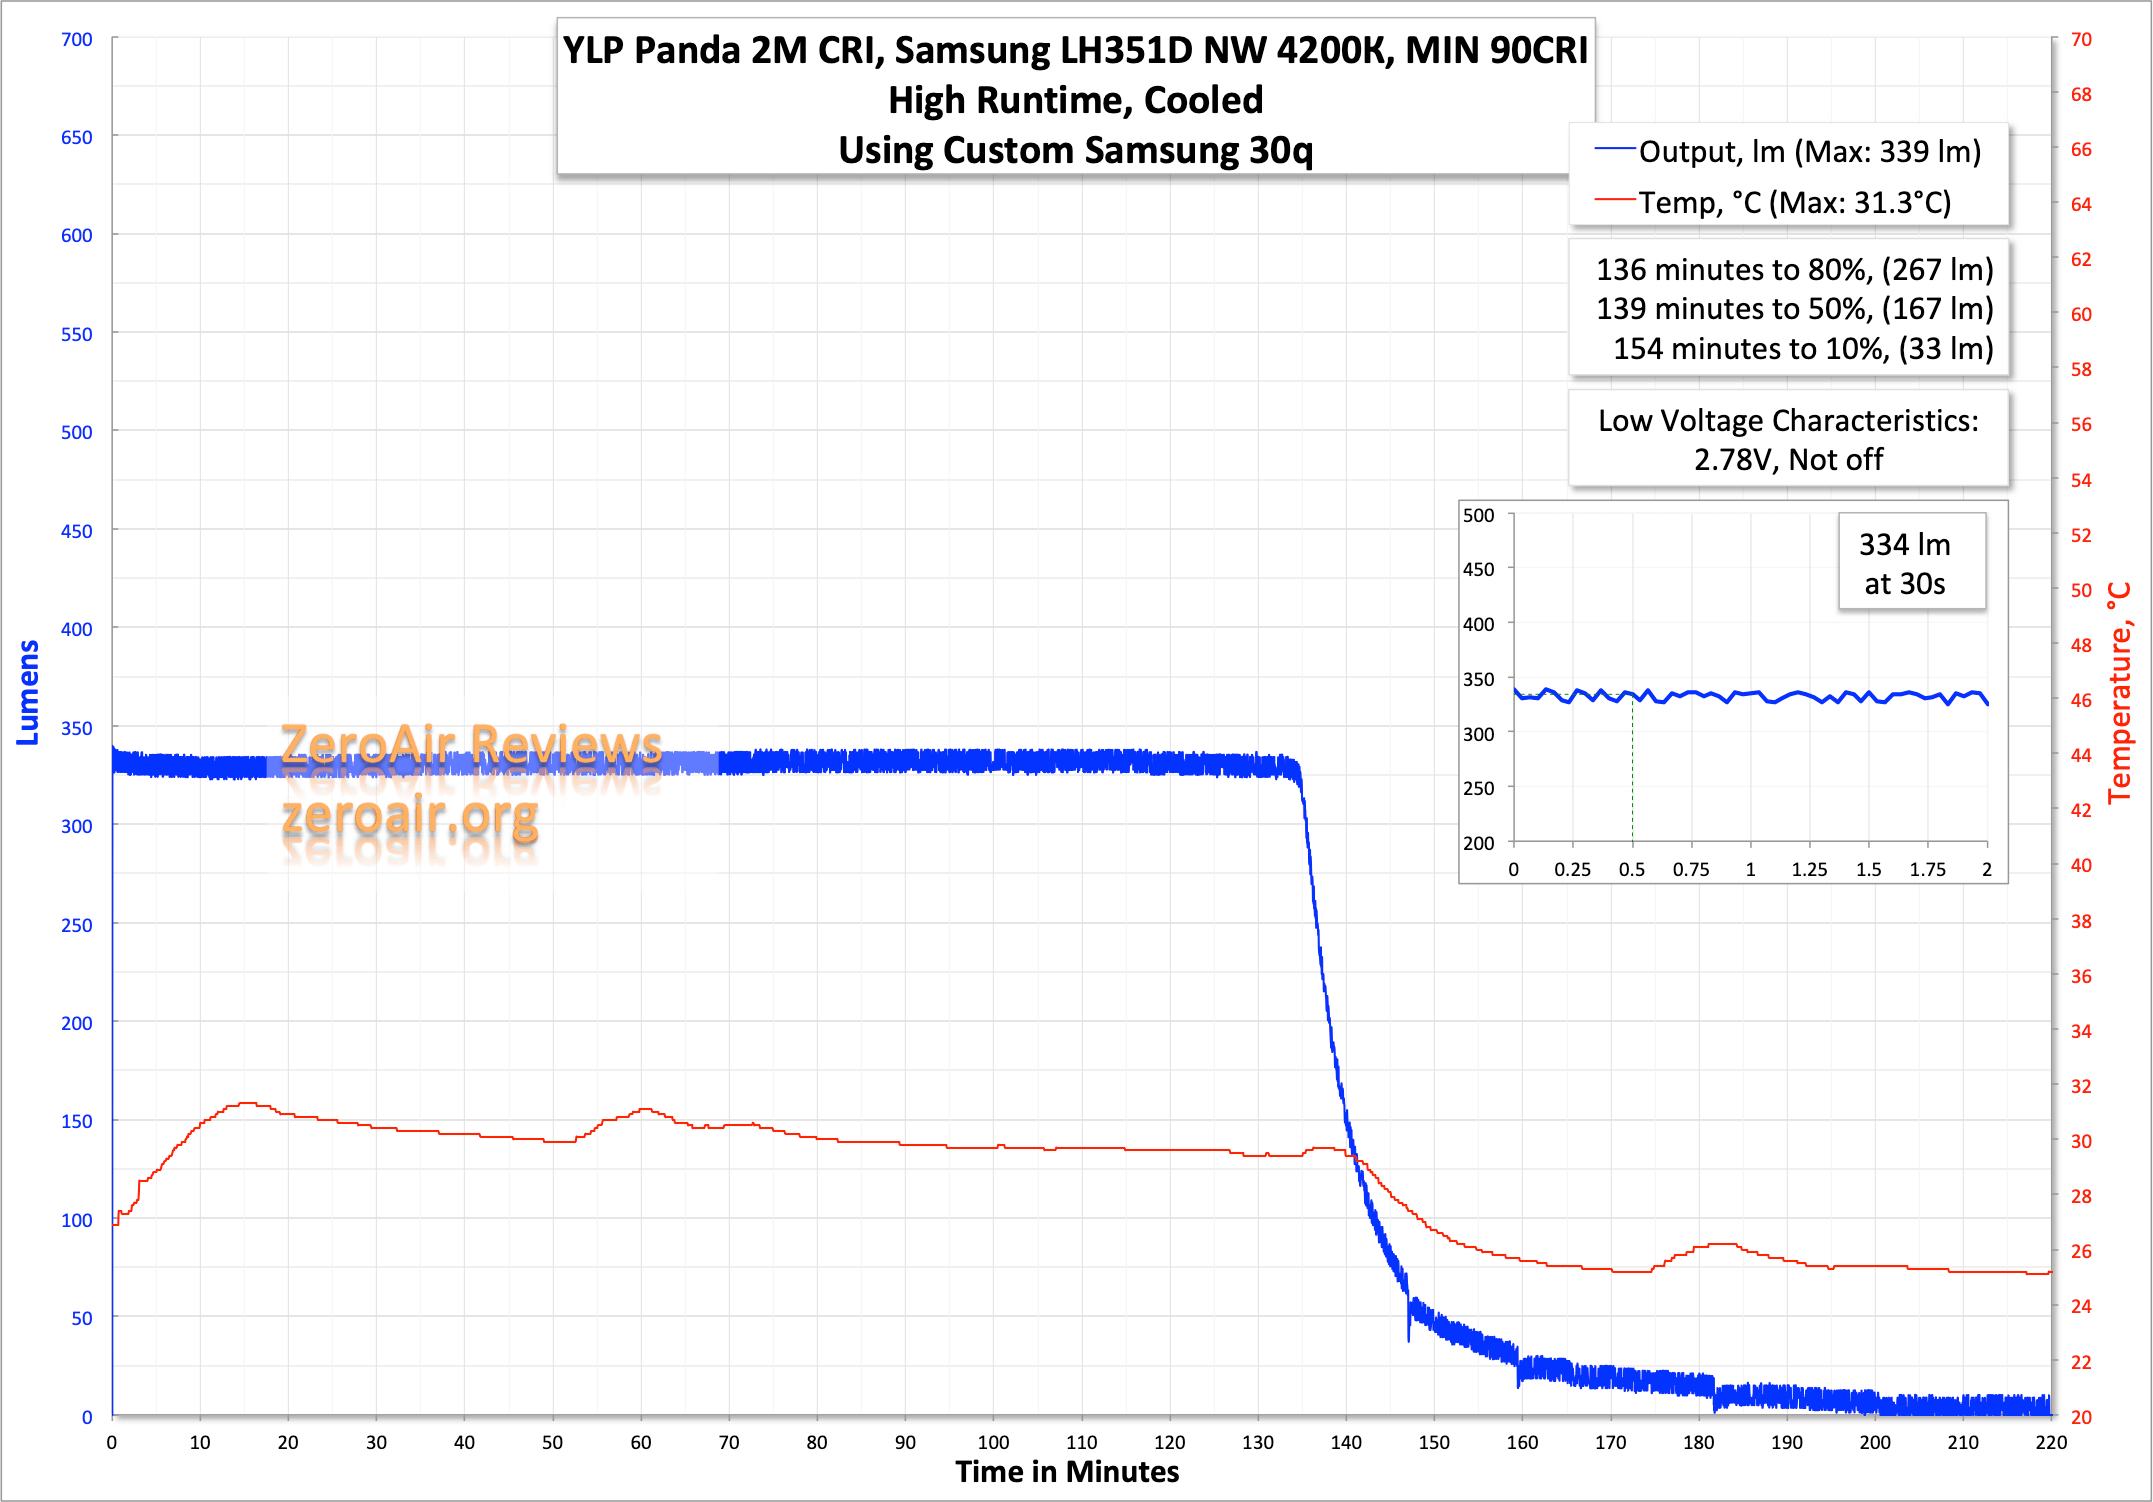
Here are a few runtimes. There isn’t a mode that is steady Turbo. So any of the blips of turbo below represent me actually holding the momentary turbo switch. Turbo seems to just track the cell voltage downward.

High is pleasantly stable, but output isn’t that high – only 334 lumens recorded. But that lasted over 2 hours, which is good for a warm High CRI light.
Medium is also very stable, at around 124 lumens for nearly 8 hours.
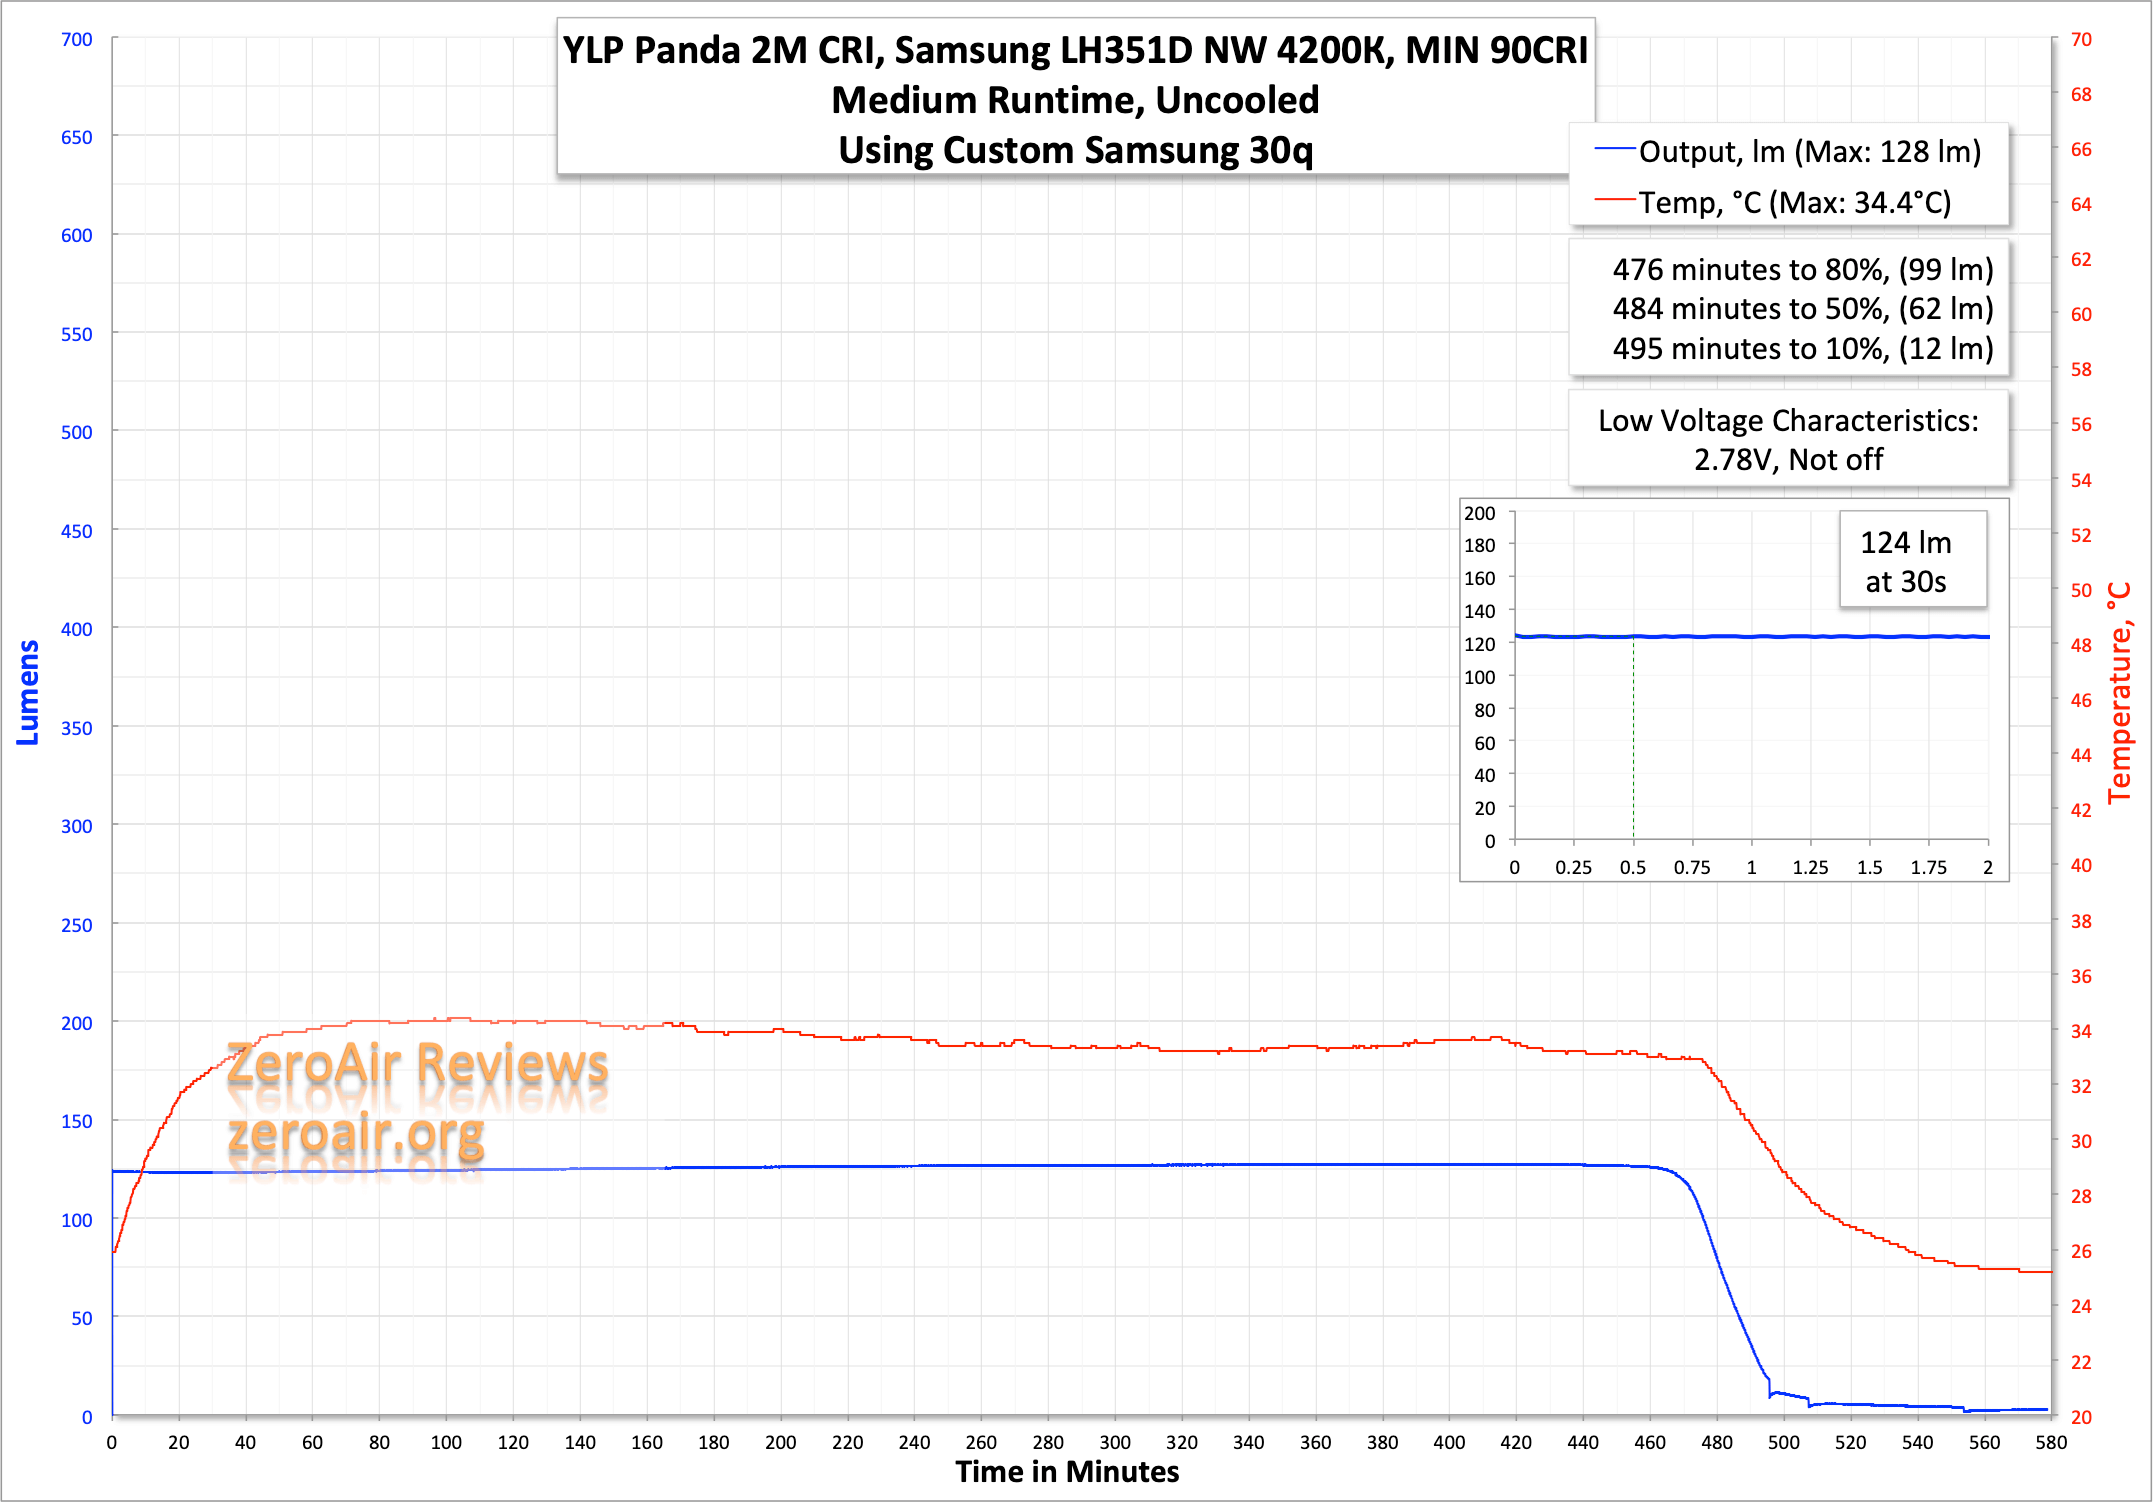
None of these runtimes seems to exhibit LVP, although by the time the cell voltage was low, output had greatly diminished. On bench power, the light did not exhibit any LVP at all. It never shut off electrically, and the emitters were still on to around 2.1V.
Modes and Currents
| Mode | Mode Claimed Output (lm) | Claimed Runtime | Measured Lumens | Tailcap Amps |
|---|---|---|---|---|
| Turbo | 700 | (Momentary only) | 612 | 2.19 |
| High | 400 | 3h | 334 | 1.14 |
| Medium | 120 | 10h | 124 | 0.59 |
| Low | 35 | 40h | 25 | 0.05 |
| Moonlight | 3 | – | 4 | 0.01 |
Pulse Width Modulation
The lower 3 modes have PWM. On Moonlight, the PWM doesn’t seem consistent and can even be perceived as a flicker in the light. Above Moonlight, it’s not noticeable at all.
 Here you can see a “baseline” – a chart with almost no light hitting the sensor.
Then there’s the Ultrafire WF-602C flashlight, which has some of the worst PWM I’ve seen. It’s so bad that I used a post about it to explain PWM! Here are multiple timescales (10ms, 5ms, 2ms, 1ms, 0.5ms, 0.2ms) to make comparing this “worst” PWM light to the test light easier. That post also explains why I didn’t test the WF-602C at the usual 50us scale.
User Interface and Operation
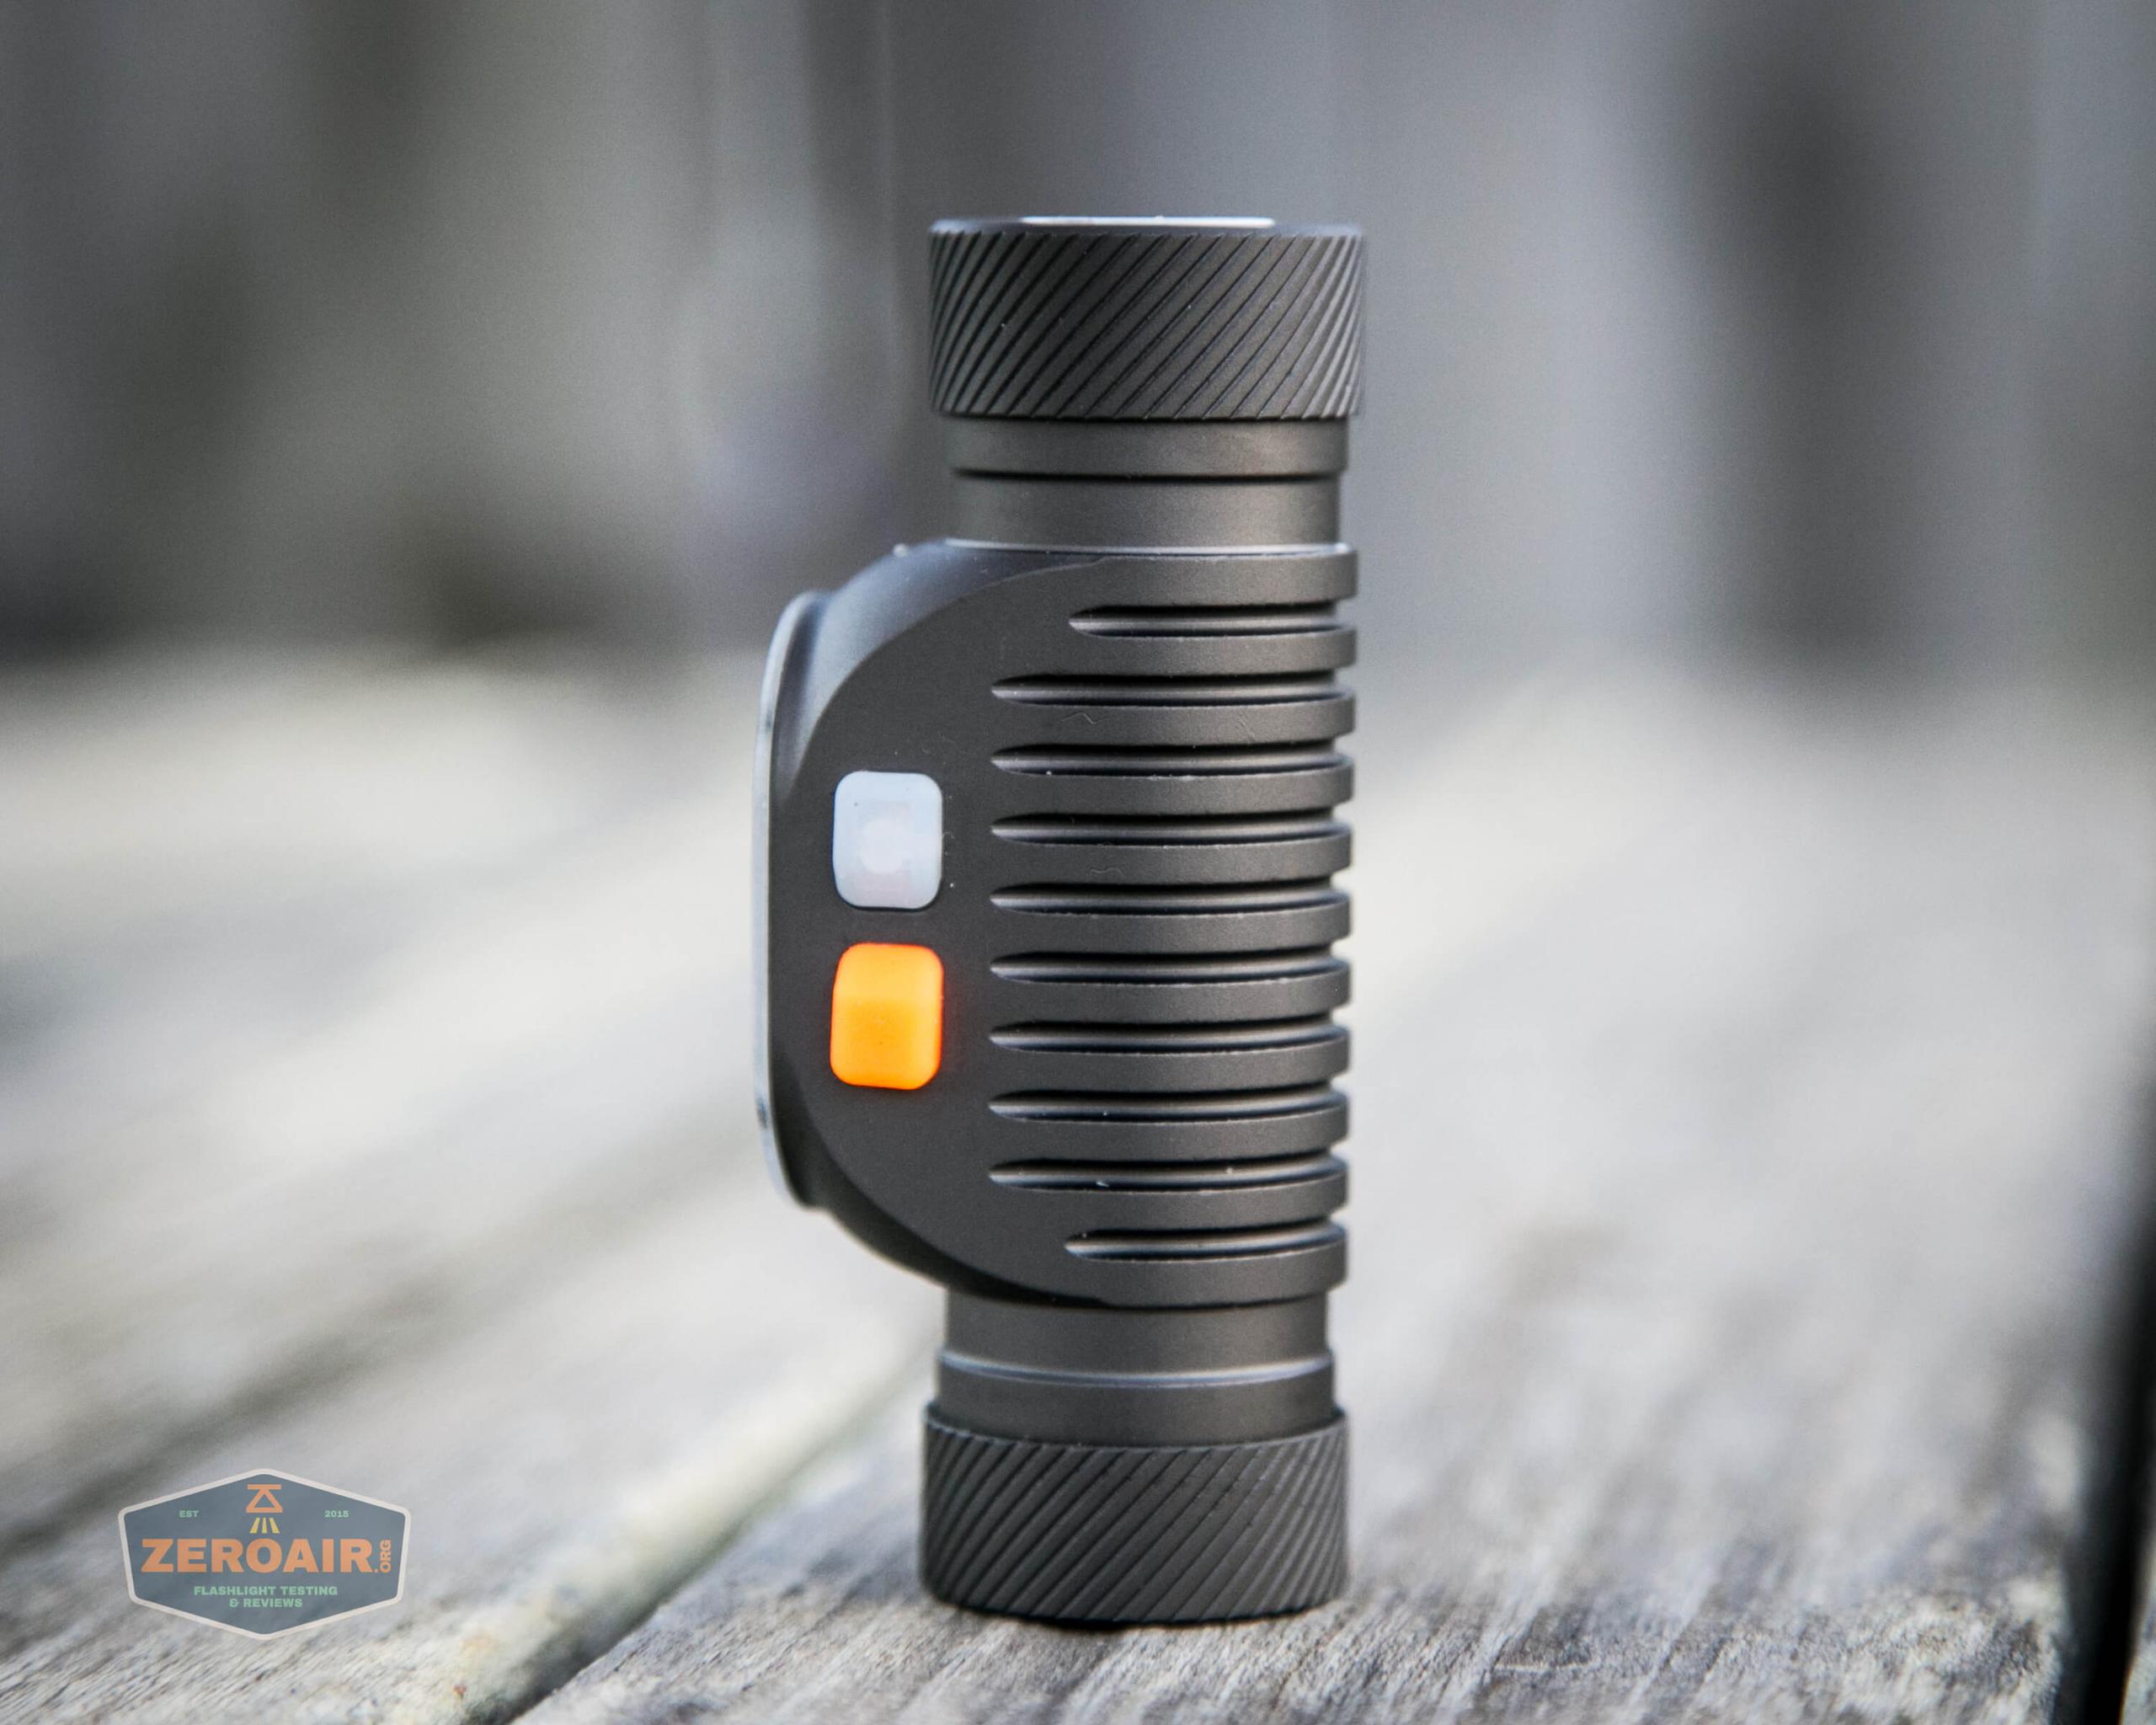
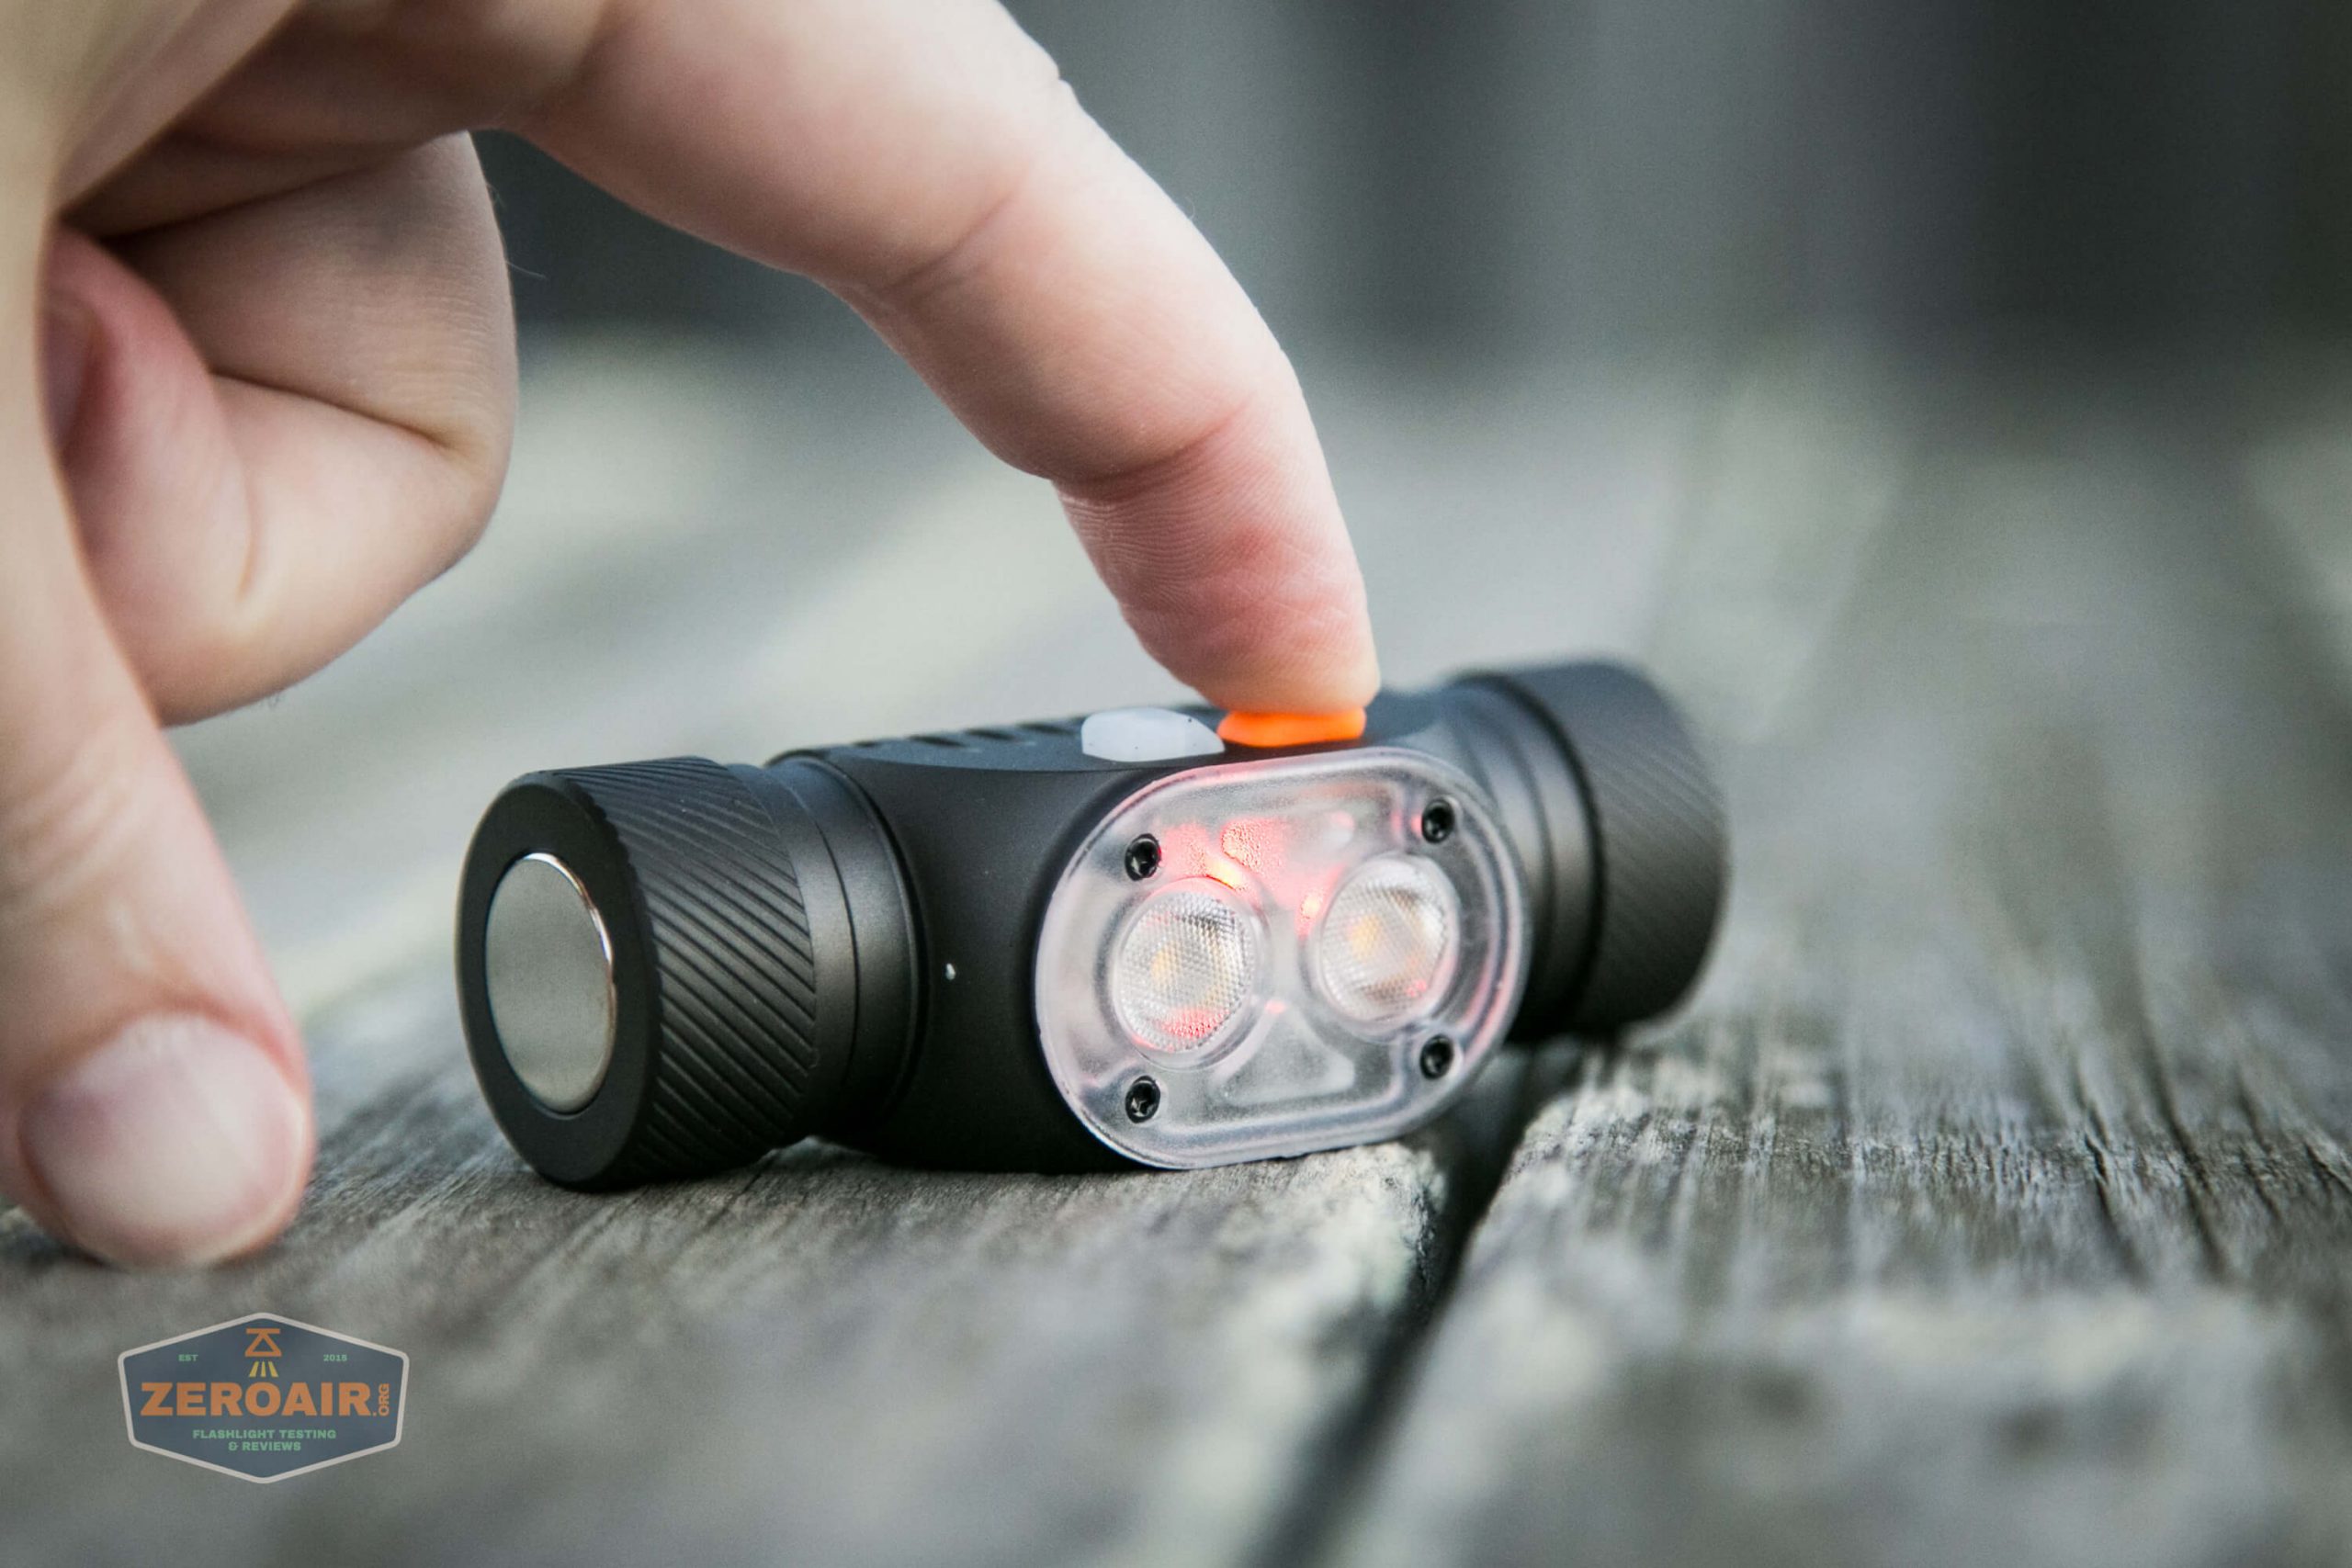
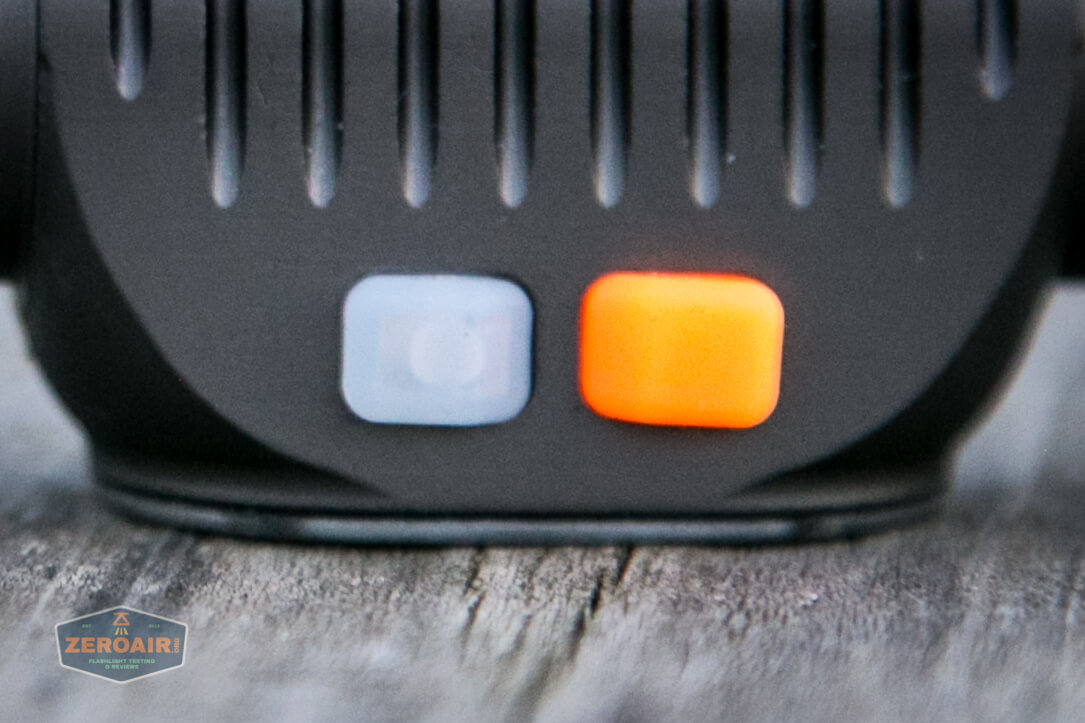
There are two switches on the YLP light. The manual calls them simply the “white button” and the “red button.” (Red, yes, but I find it very much more orange.) These switches are very clicky and very positive. They require absolutely direct input from the user, and it has to be completely intentional. They’re very stiff and extremely unlikely to get pressed accidentally.
The red (orange) controls mainly the turbo aspect of the light, although it also activates a red light when the light is off.
The user interface is also configurable. The manual states the factory defaults, and I have tested the light on the factory defaults, but some of them can be changed. More on that below.
Here’s a user interface table for default actions, some of which can be changed!
| State | Action | Result |
|---|---|---|
| Off | Click Red Button (RB) | Momentary Red indicator |
| Off | Click White Button (WB) | On – Mode Memory (LMH only) |
| Off | Hold WB | Moonlight |
| On | Click WB | Off |
| On | Hold WB | Mode advance (LMH only) |
| Off | Hold RB (12s) | Iterate Mode Memory Memory: 3x white flash No memory: 1x white flash |
| Off (If Memory is off) | Click WB | Low |
| Off (If Memory is off) | Double Click WB | Medium |
| Off (If Memory is off) | Triple Click WB | High |
| Off | Click RB 12x | Reset User changes |
| Off | Click RB 20x | Enter programming mode (Red light blinks once to confirm programming mode) |
| Programming mode | Click RB 20x | Exit programming mode (Red light blinks thrice to confirm programming mode) |
| Programming mode | Turn Light on to Mode needing programming | Click then Click and hold and light emitters will cycle options. Release at desired output (mode is then programmed) |
| Programming mode | Click RB 4x | Program Beacon (default is off). When programming beacon, red emitter will flash 1/2/3/4/5x – click RB during the blink (1/2/3/4/or 5) to change beacon setting (off/1s/2s/3s/4s) |
| Programming mode | Click RB 6x | Turbo Timer setting (default is 0s). When programming Turbo duration, red emitter will flash 1/2/3/4/5x – click RB during the blink (1/2/3/4/or 5) to change turbo setting (off/5s/10s/15s/20s) |
| Programming mode | Click RB 8x | Default Click action for no-memory settings. When programming Default Click action, red emitter will flash 1/2/3x – click RB during the blink (1/2/3) to change default click action (Low/Med/High). |
| Programming mode | Click RB 10x | Change between hard mode changes and soft/smooth mode changes. Red will blink 1x or 3x. Click during 1x for abrupt mode changes, and during 3x for smooth mode changes. |
The manual that ships with the light doesn’t cover how to access the subgroups. It says to reference the website. Here is what the website provides:
There are a bunch of settings in there that you can change. You can add a locator beacon with various delays between blinks (periodicity). You can change Moonlight, Low, Medium, and High output between 2 output levels (or 5 for Moonlight). You can change the transition between modes from abrupt to smooth (though smooth is still mostly abrupt – it’s not “ramping”). There’s also a setting for Turbo shutdown, which prevents Turbo from being “momentary.” And clicking 20x to get into and out of programming every time I wanted to see if a change worked, really worked over my thumbs. I would not purchase this light simply for accessing the programming options. If you like the light otherwise, then sure.
Note that changing the brightness levels requires you to enter programming (from off, click red 20x). Then turn the light on (white button) to the mode you want to program, then wait >3s. Then click and hold (two actions there – full click and an immediate half click (aka hold the button when it bottoms out)). Then the emitters will cycle through the possible options.
It’s possible to program multiple things while inside the programming option. You aren’t required to exit programming just to change a different setting.
Programming takes some practice, that’s for certain. But the manual (above) does seem to cover it.
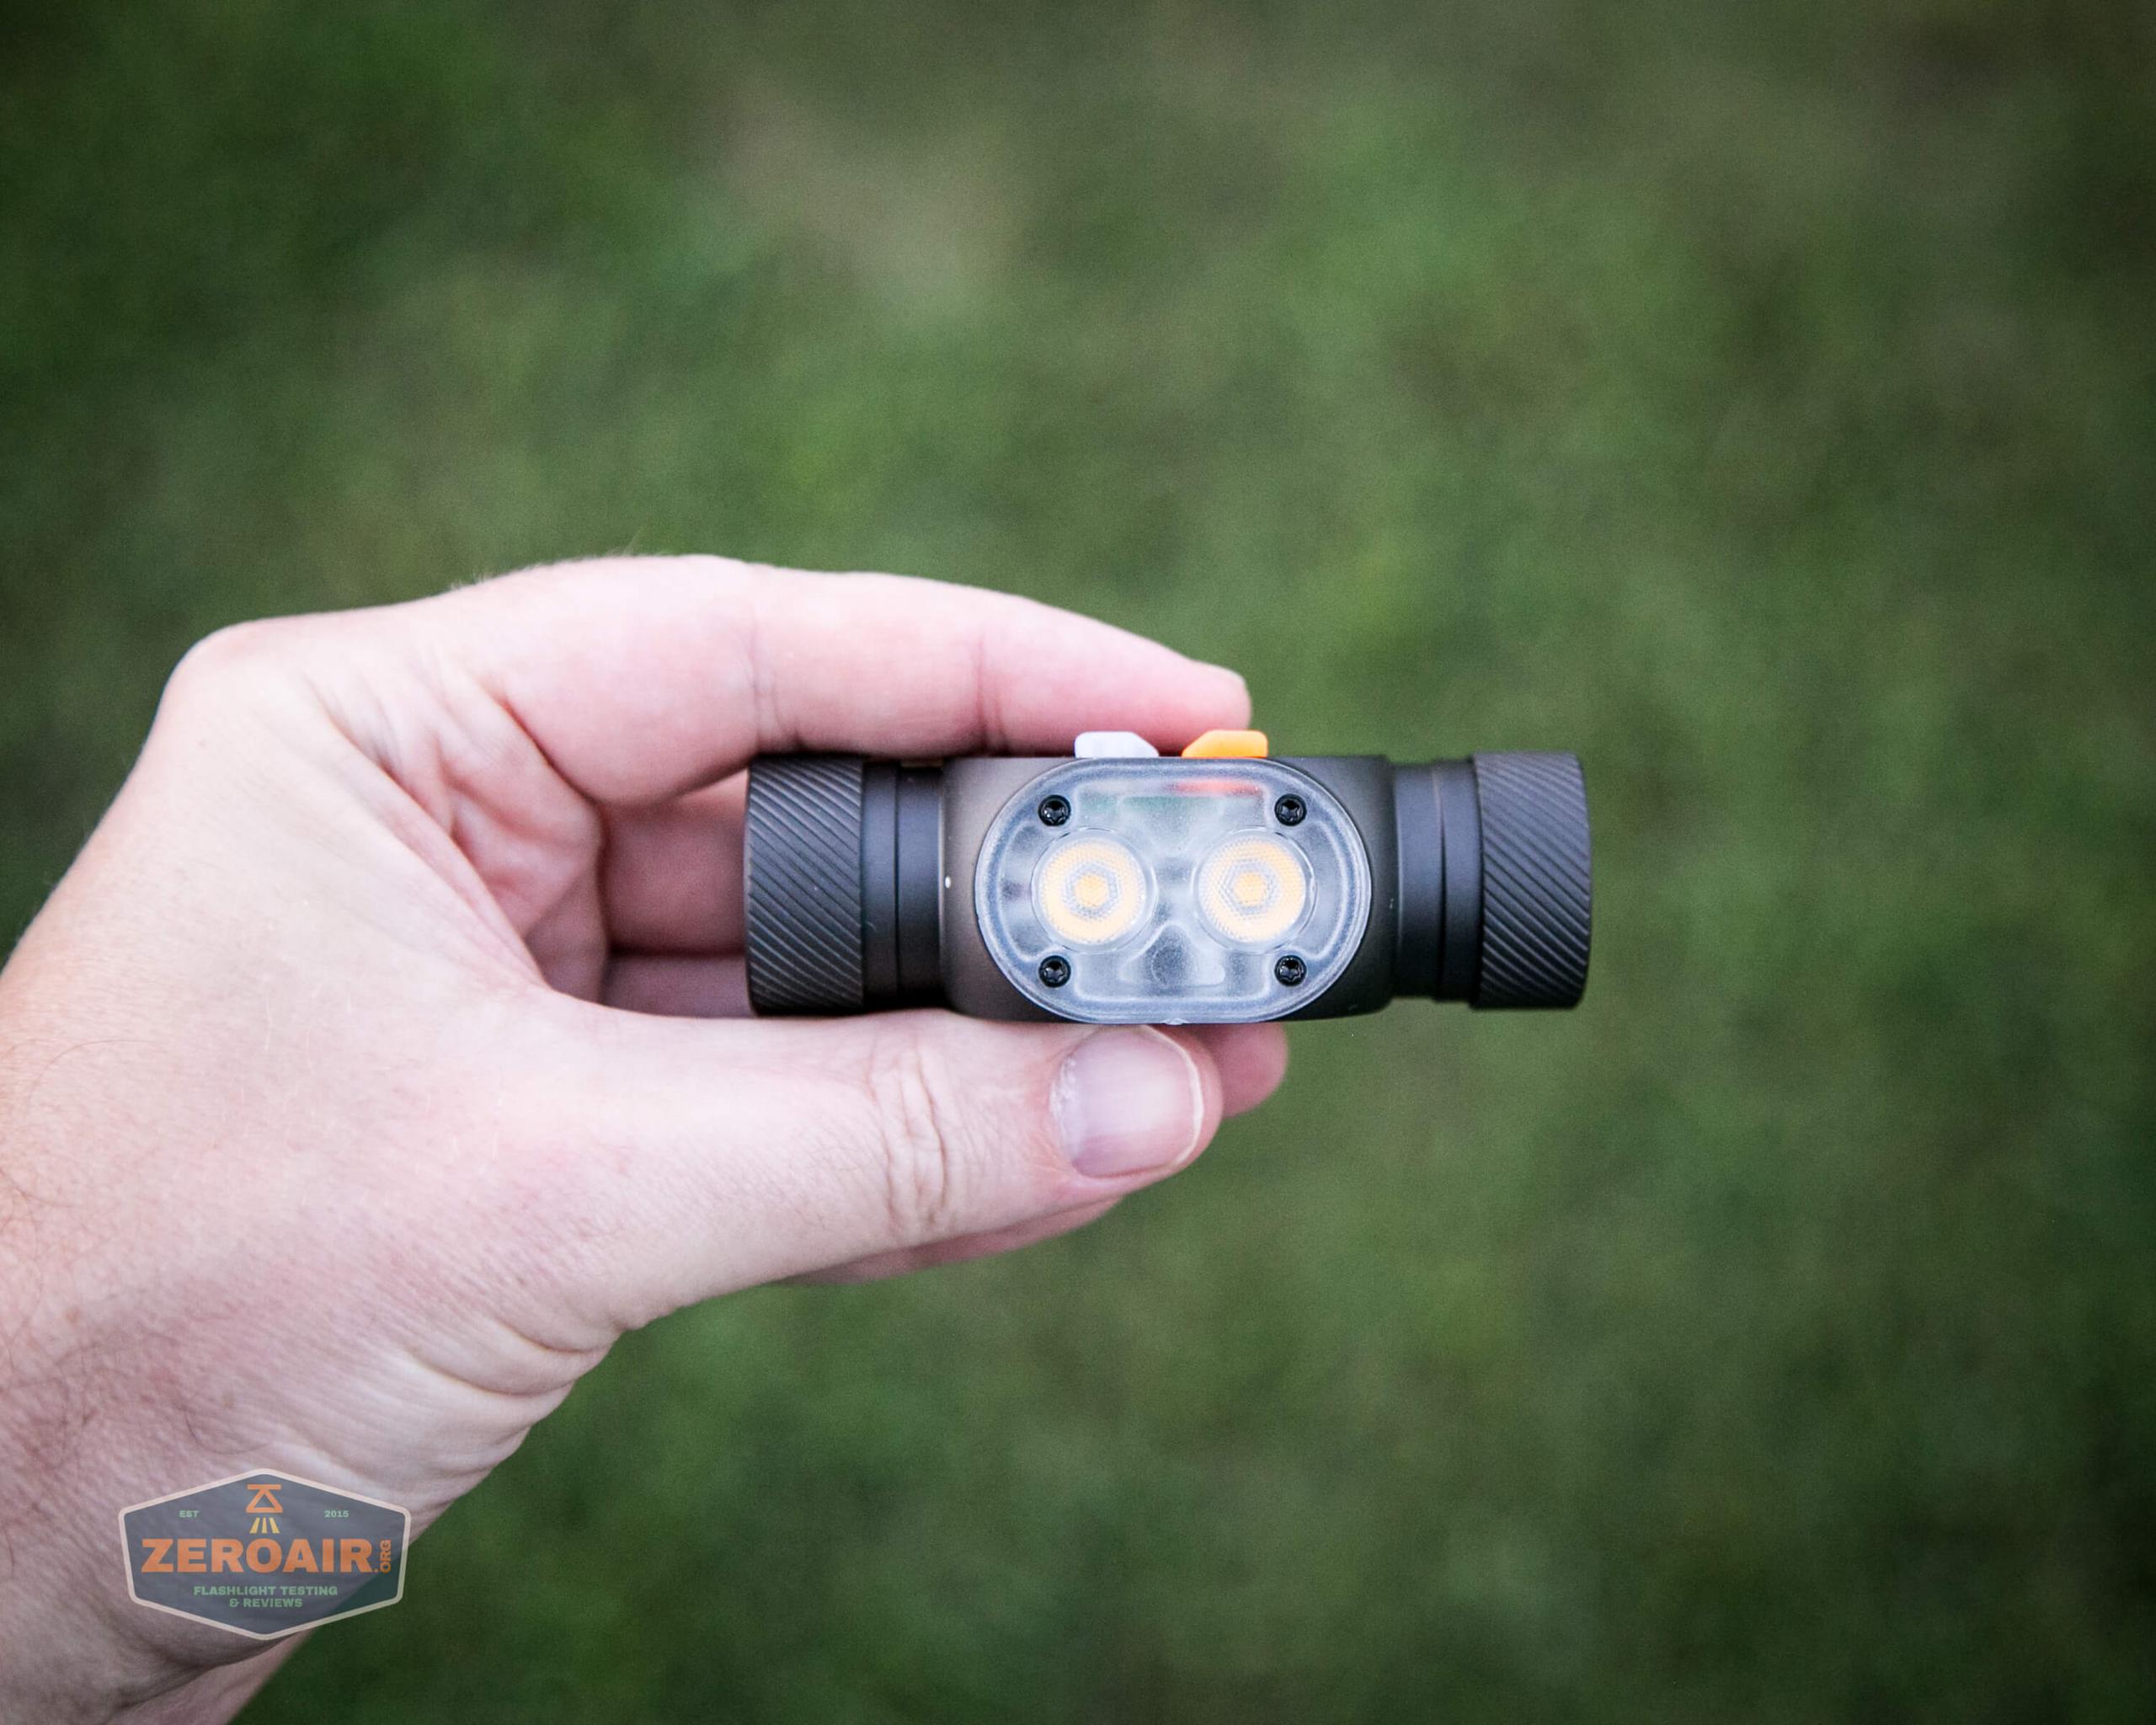
LED and Beam
The YLP Panda 2M CRI has installed two Samsung LH351d emitters at 4200K temperature, and minimum 90CRI. The 4200K temperature is considerably warm and quite nice.
As described above, these emitters are behind TIR optics, which are themselves held in place by a screwed-down cover.
Here’s a shot of the red emitter, which lights as a beacon (if you turn it on in programming).
Beamshots
These beamshots always have the following settings: f8, ISO100, 0.3s shutter, and manual 5000K exposure. These photos are taken at floor level, and the beam hits the ceiling around 9 feet away.


Tint vs BLF-348 (KillzoneFlashlights.com 219b version) (affiliate link)
I keep the test flashlight on the left and the BLF-348 reference flashlight on the right.
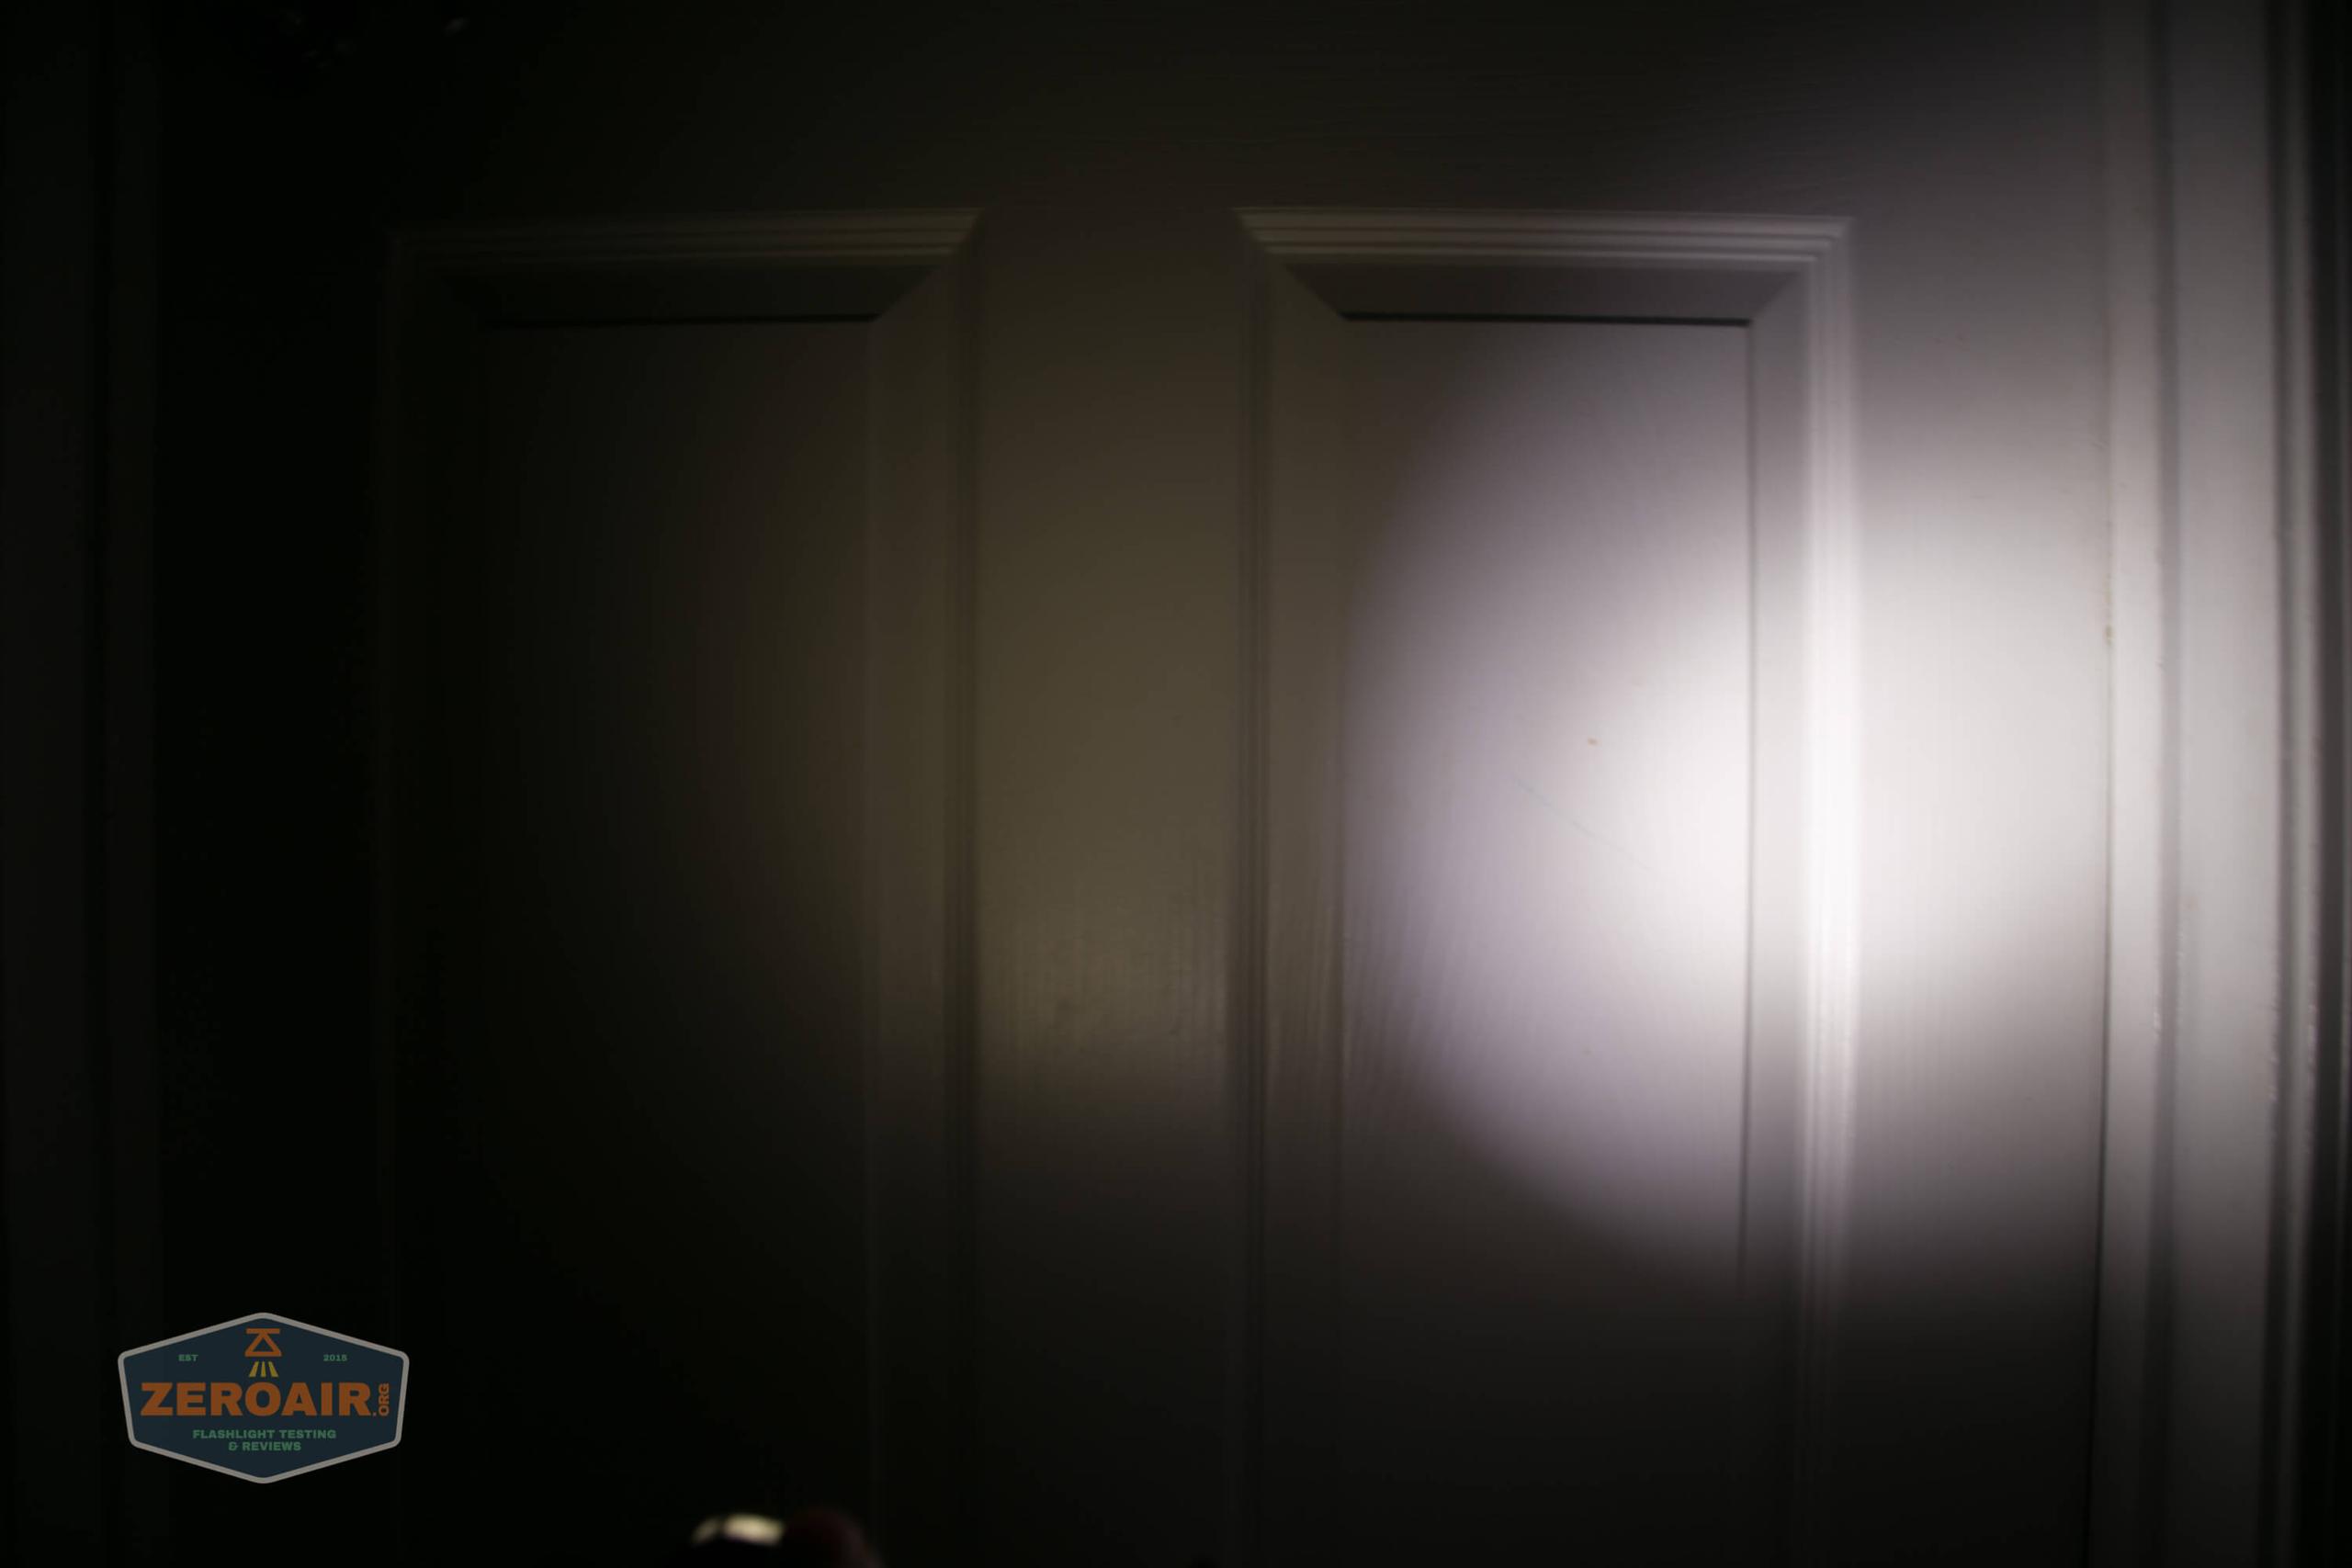


I compare everything to the KillzoneFlashlights.com 219b BLF-348 because it’s inexpensive and has the best tint!
Conclusion
What I like
- High CRI
- NW (or even warm) 4200K Tem
- Good build quality
- Good headband
- Strong magnet
- Comparably low cost
What I don’t like
- PWM on Moonlight is quite noticeable
- No LVP
- Programmability is spotty
Notes
- This light was provided by YLP for review. I was not paid to write this review.
- This content originally appeared at zeroair.org. Please visit there for the best experience!
- Use my amazon.com referral link if you’re willing to help support making more reviews like this one!
- Please support me on Patreon! I deeply appreciate your support!
Discover more from ZeroAir Reviews
Subscribe to get the latest posts sent to your email.
I have this light and really like it as a close use light. Others have stated it does have lvp at 2.65, their site says to use protected cells so I’m not sure what to think. I try to use only lights with lvp so batteries can be moved around to other single cell lights. Thanks for the review.
All I can report is my experience – in the runtimes the light didn’t shut off. And also testing with a bench power supply, the light didn’t shut off.