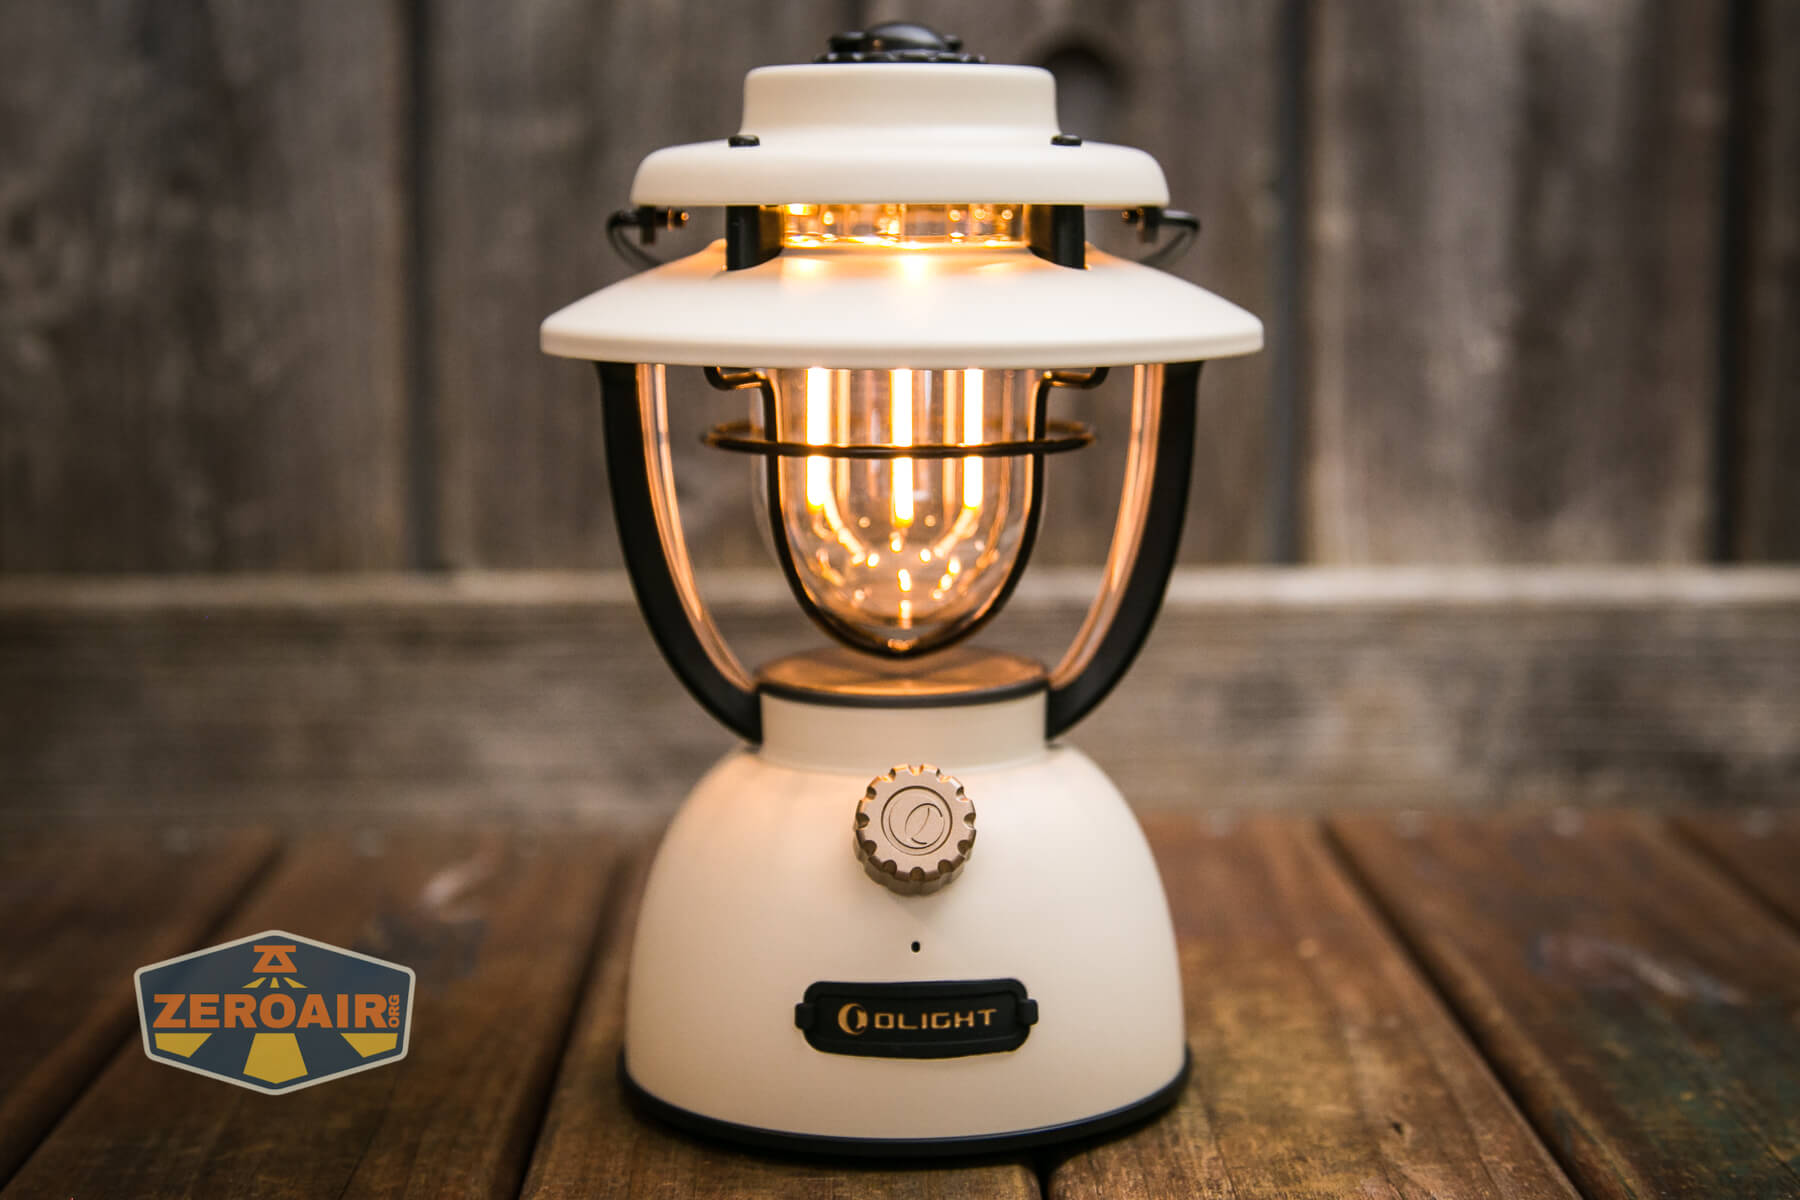
Olight Olantern Classic 2 Pro Lantern Review
Check out the Olight Olantern Classic 2 Pro Lantern! It has a classic (even “iconic!”) look with warm white output, and a powerbank too! Read on!
Official Specs and Features
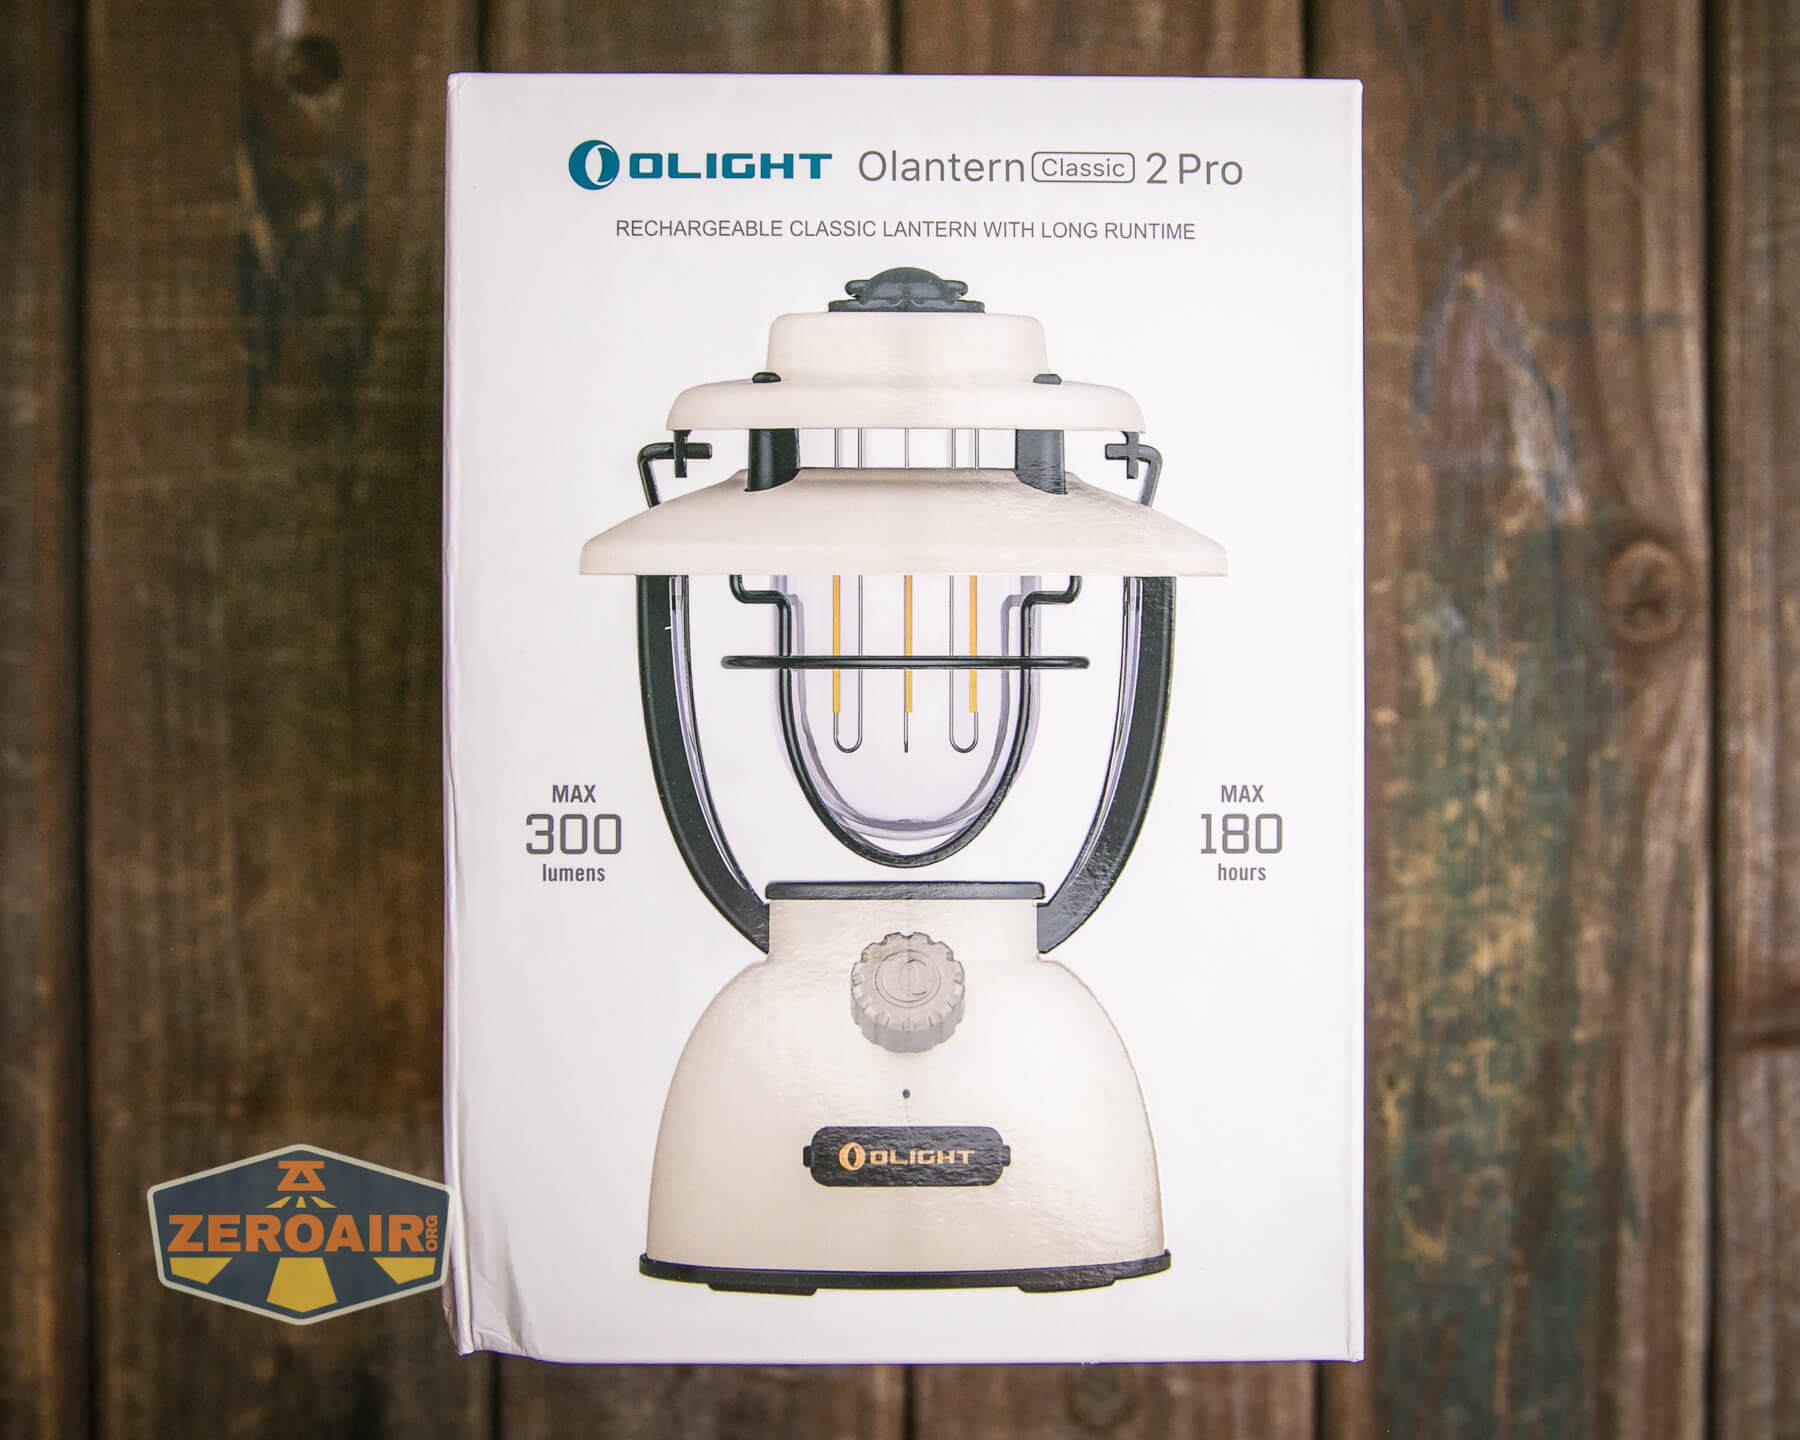
Here’s a ShareaSale link to the Olight Olantern Classic 2 Pro Lantern product page.
Versions
There are three body colors of the Olight Olantern Classic 2 Pro Lantern. There’s “Clay Beige” (seen here) as well as Forest Green and Vintage Copper.
Price
The going price (at MSRP) for the Olight Olantern Classic 2 Pro Lantern is $99.95 at Olight.com/store.
Short Review
This lantern might be worth the cost for just the nostalgia alone… Anyway, it’s an iconic/classic look, but also very useful! I do love this lantern, but the MSRP of ~$100 is a bit hard to swallow.
Long Review
What’s Included
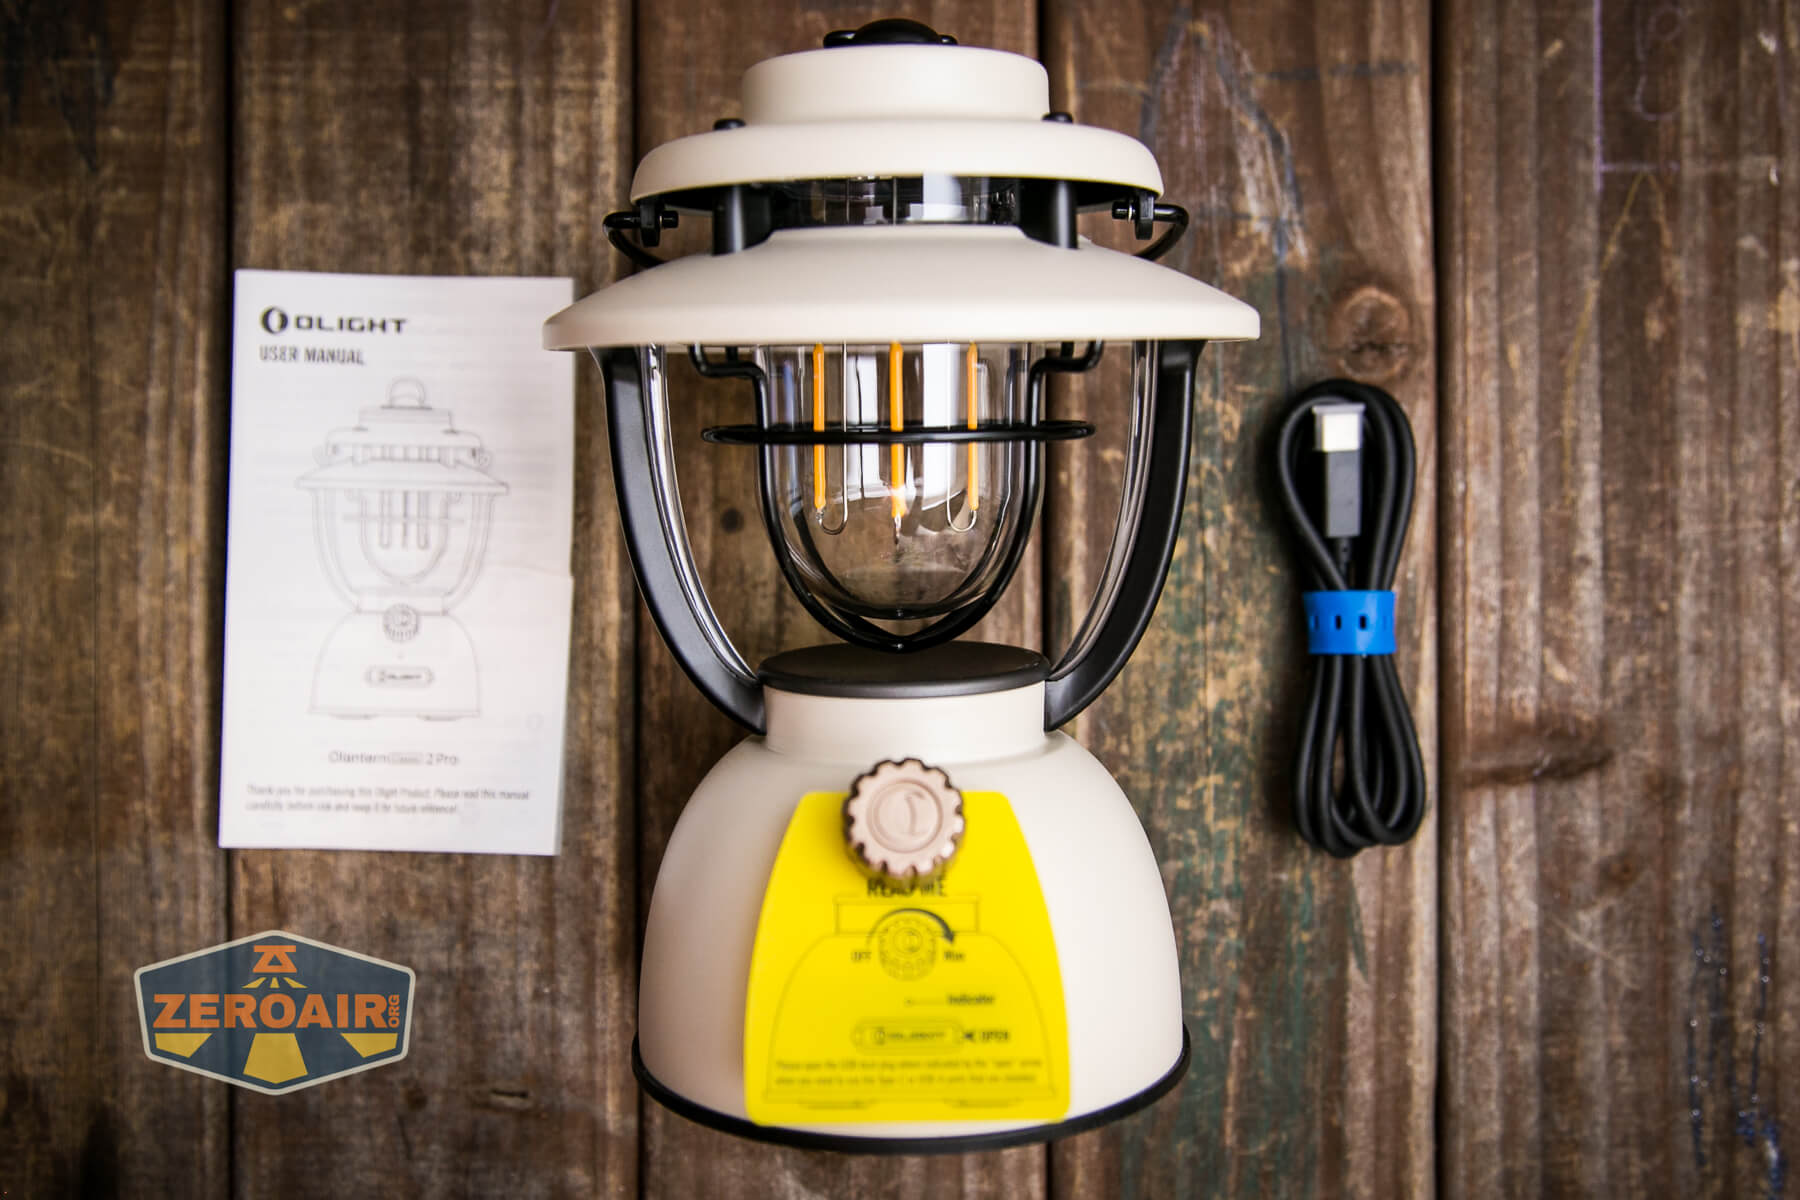
- Olight Olantern Classic 2 Pro Lantern
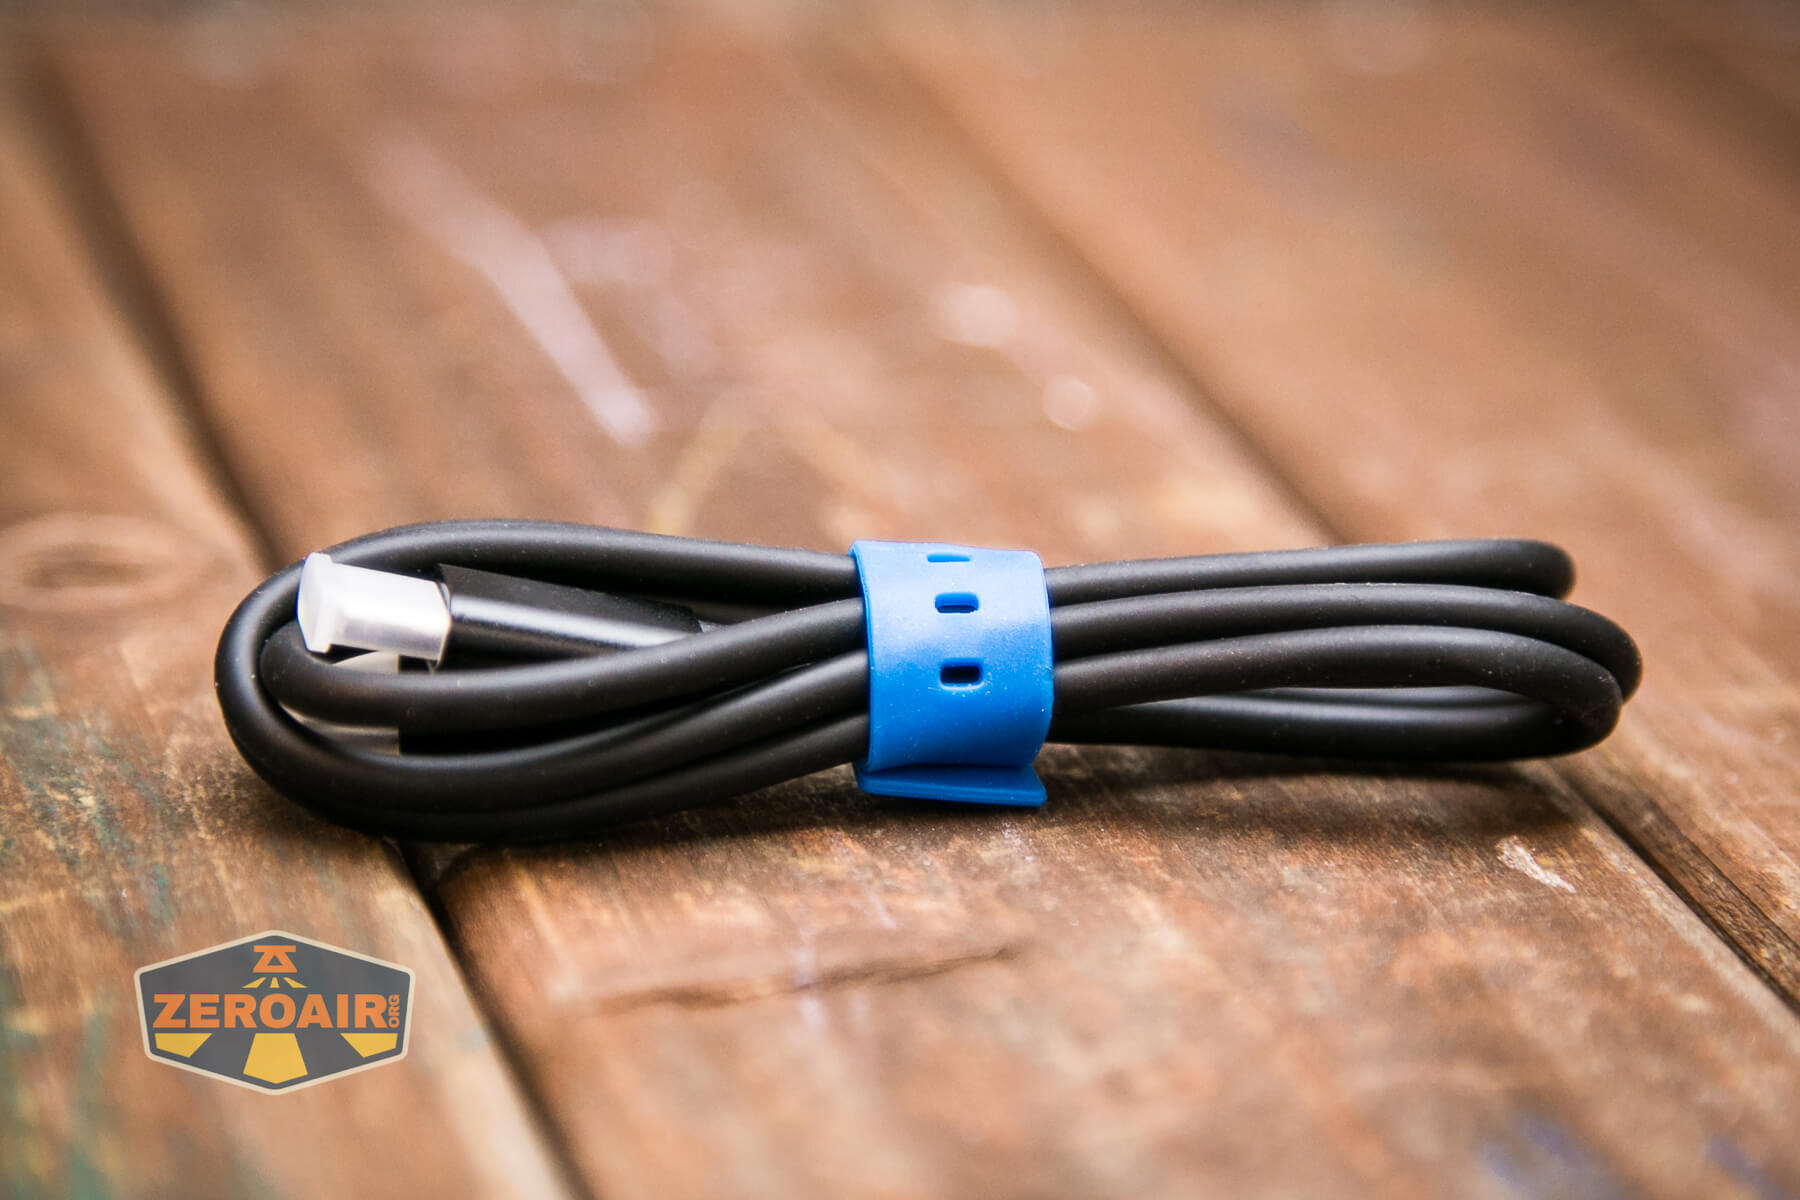
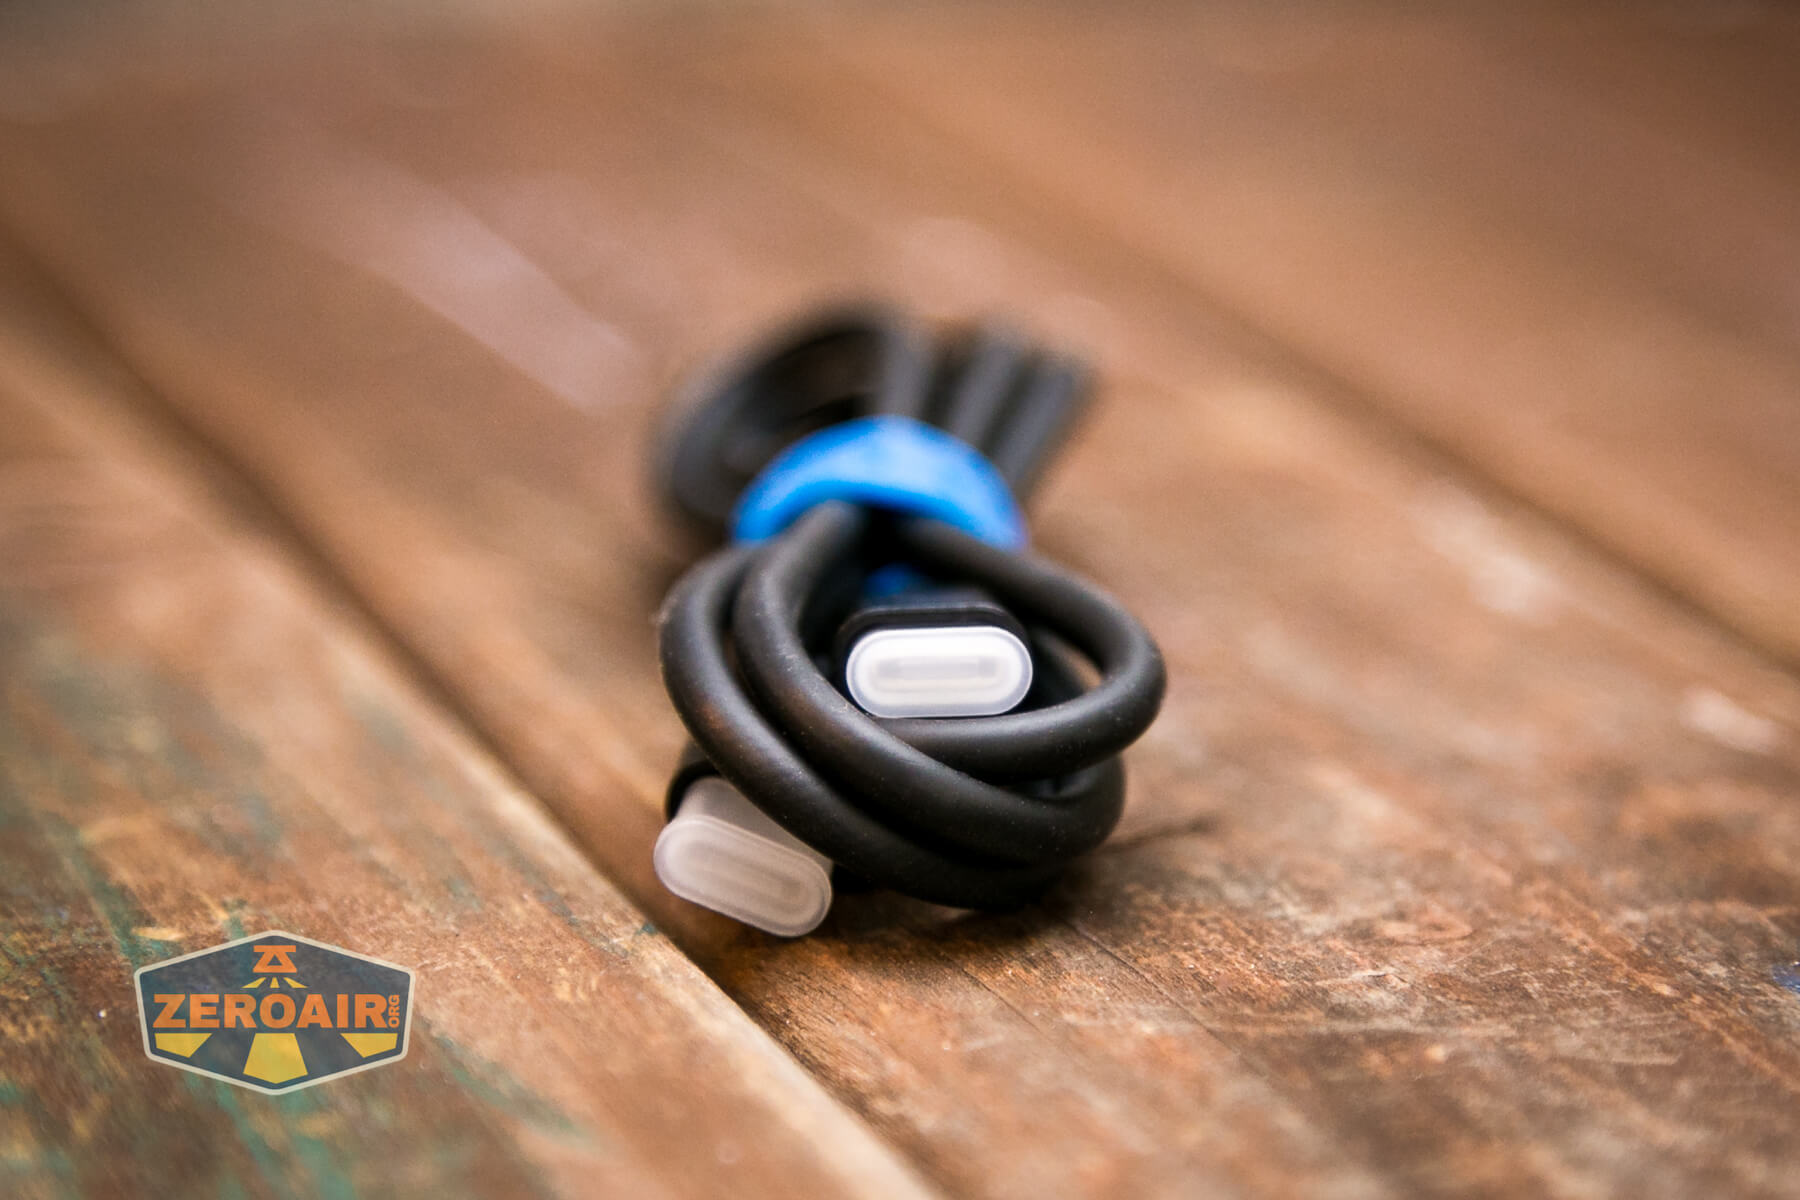
- Charging cable (USB-C to USB-C)
- Manual
Package and Manual

Build Quality and Disassembly
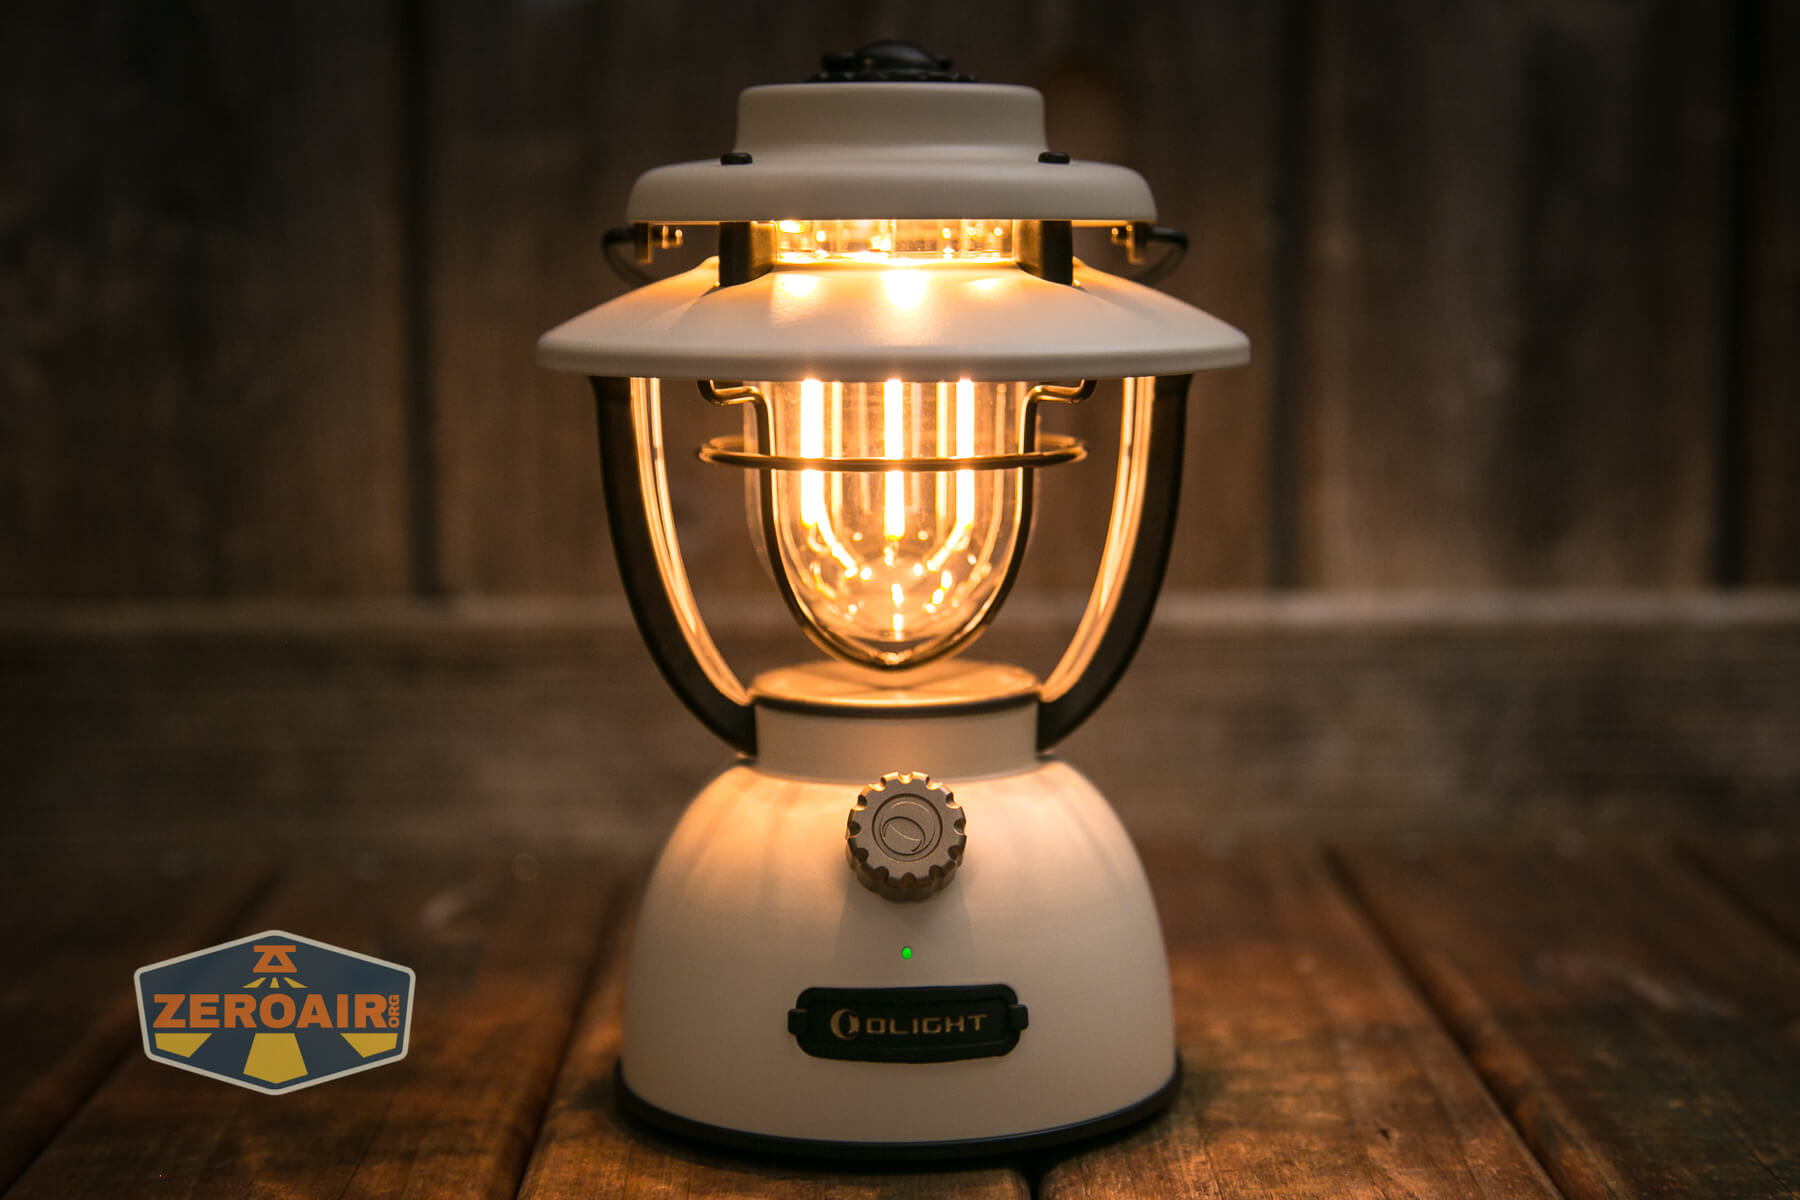
I’m not doing much testing on the Olight Olantern Classic 2 Pro Lantern, and more just photos for you to get an idea of the product. I’d happily test output, and all that, but lanterns are hard to test in a way that I haven’t sorted out. The 360° output means I can’t test the total lumens. And so on.
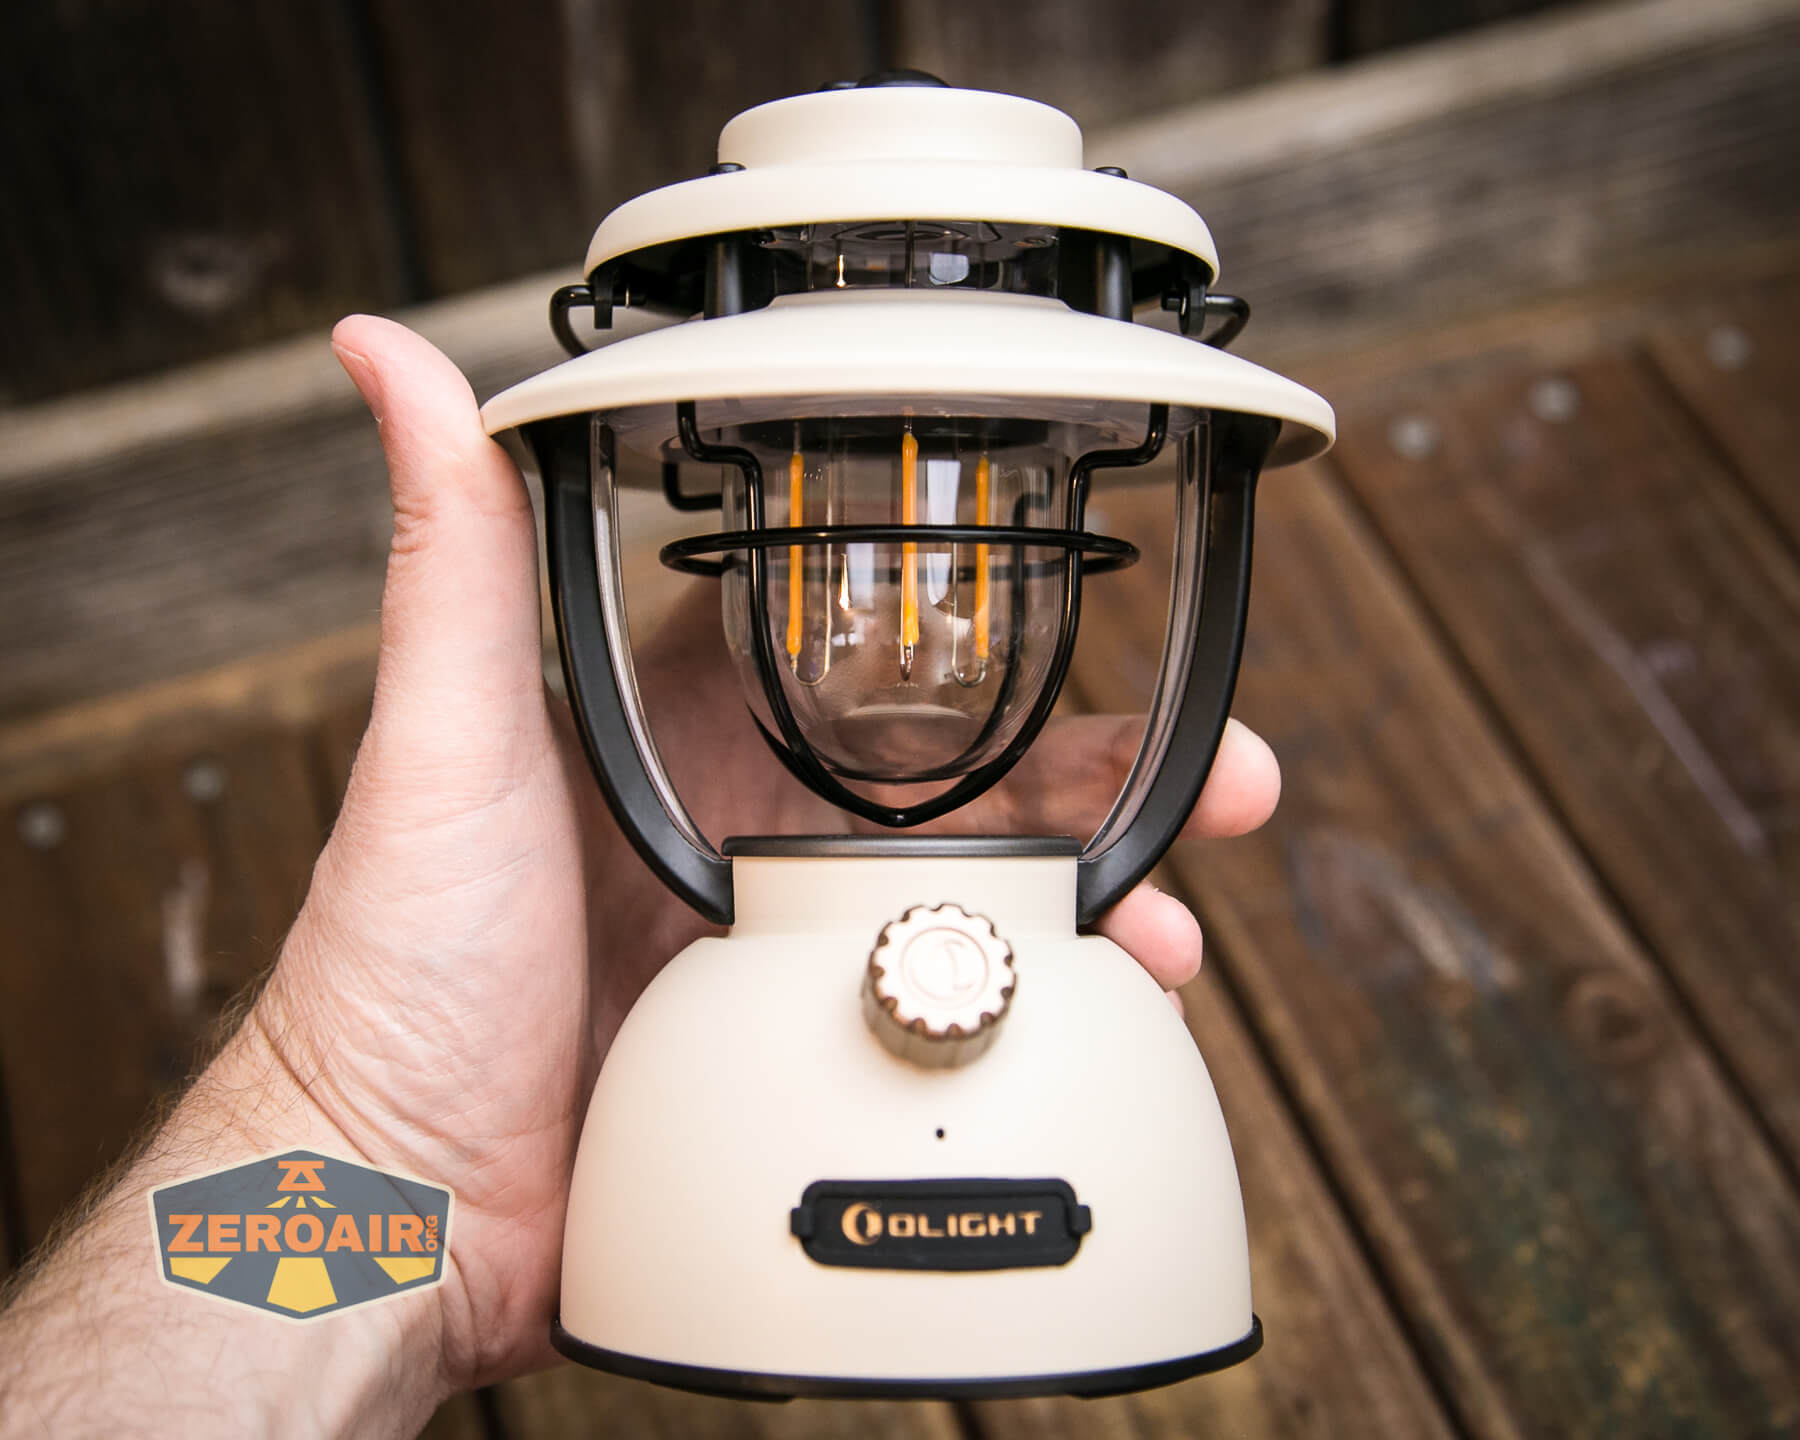
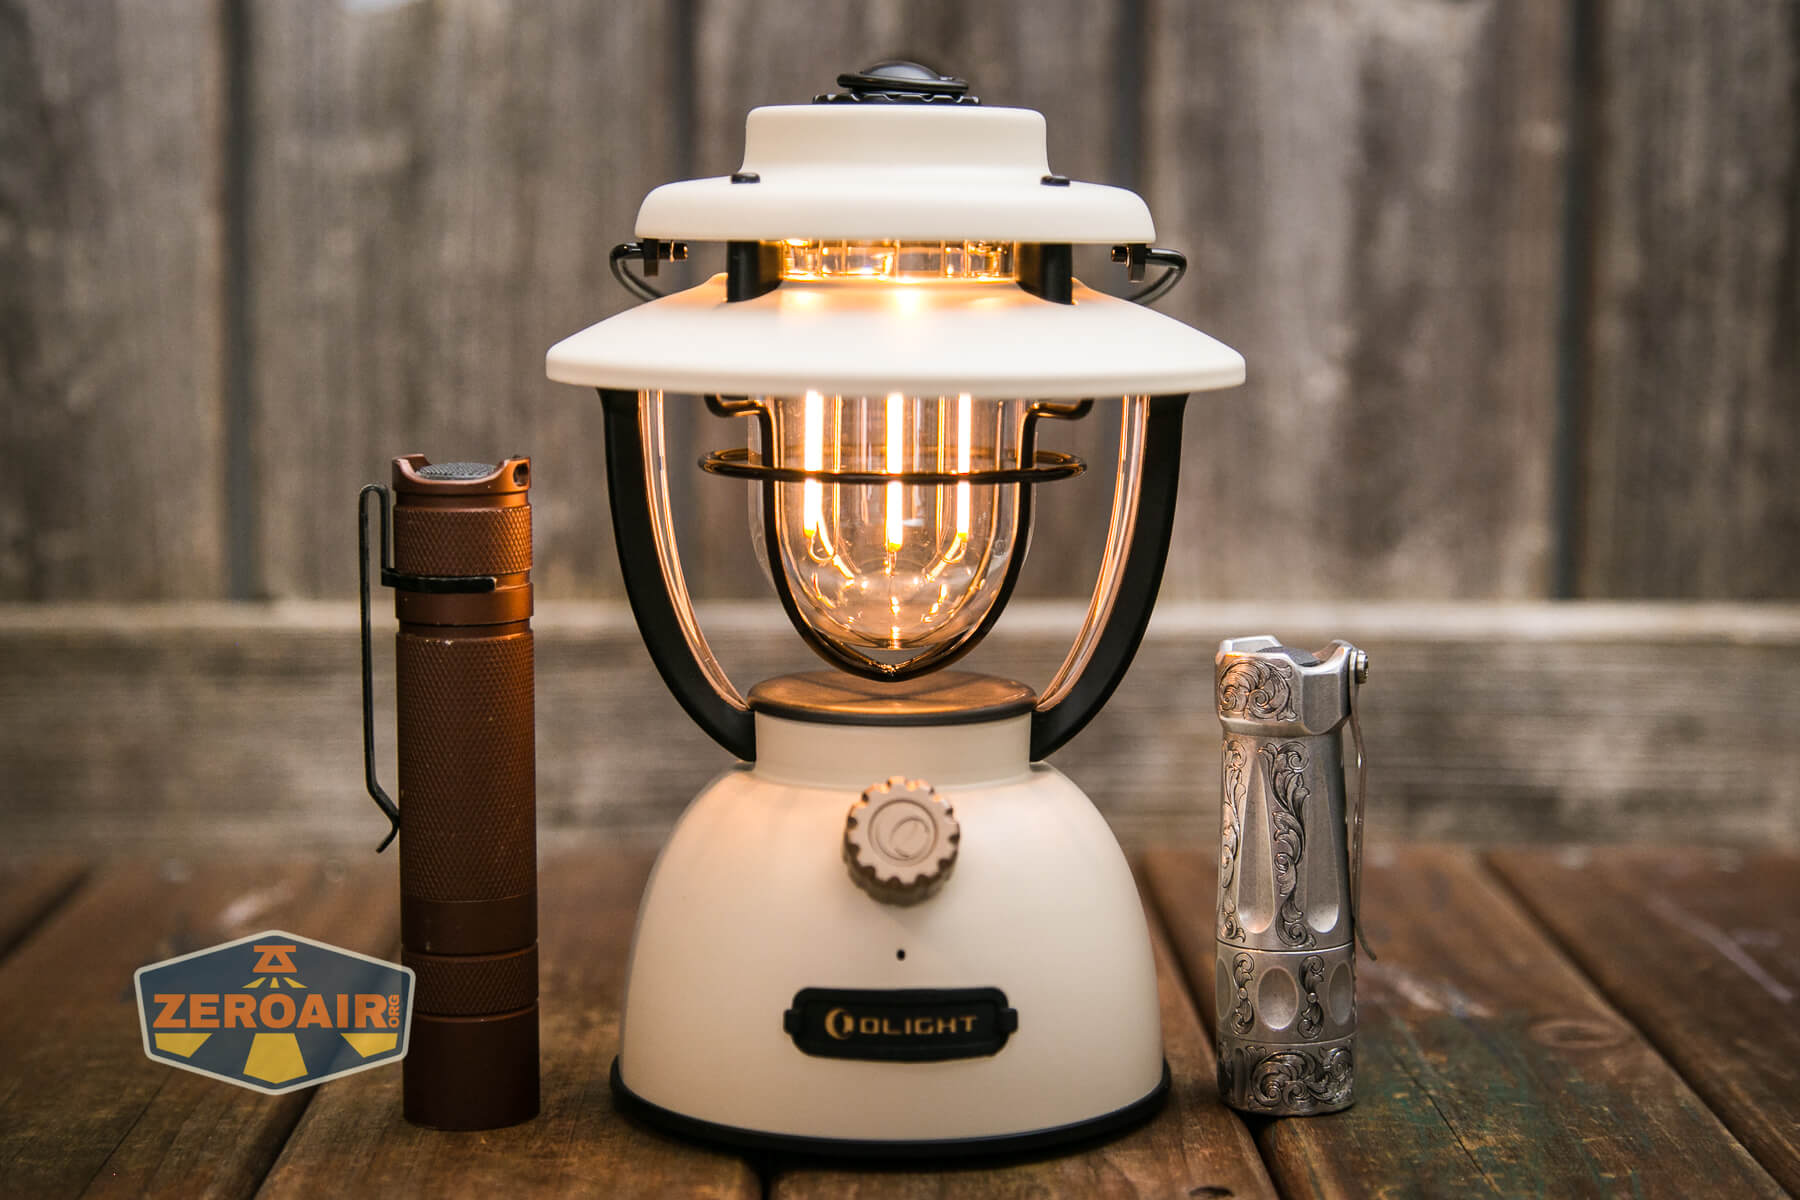
But you can get a great feel for the lantern here, I think. It’s not really a small product. Couple the nostalgic “Classic” nature of the product, and I don’t think you’d really want something super small here!
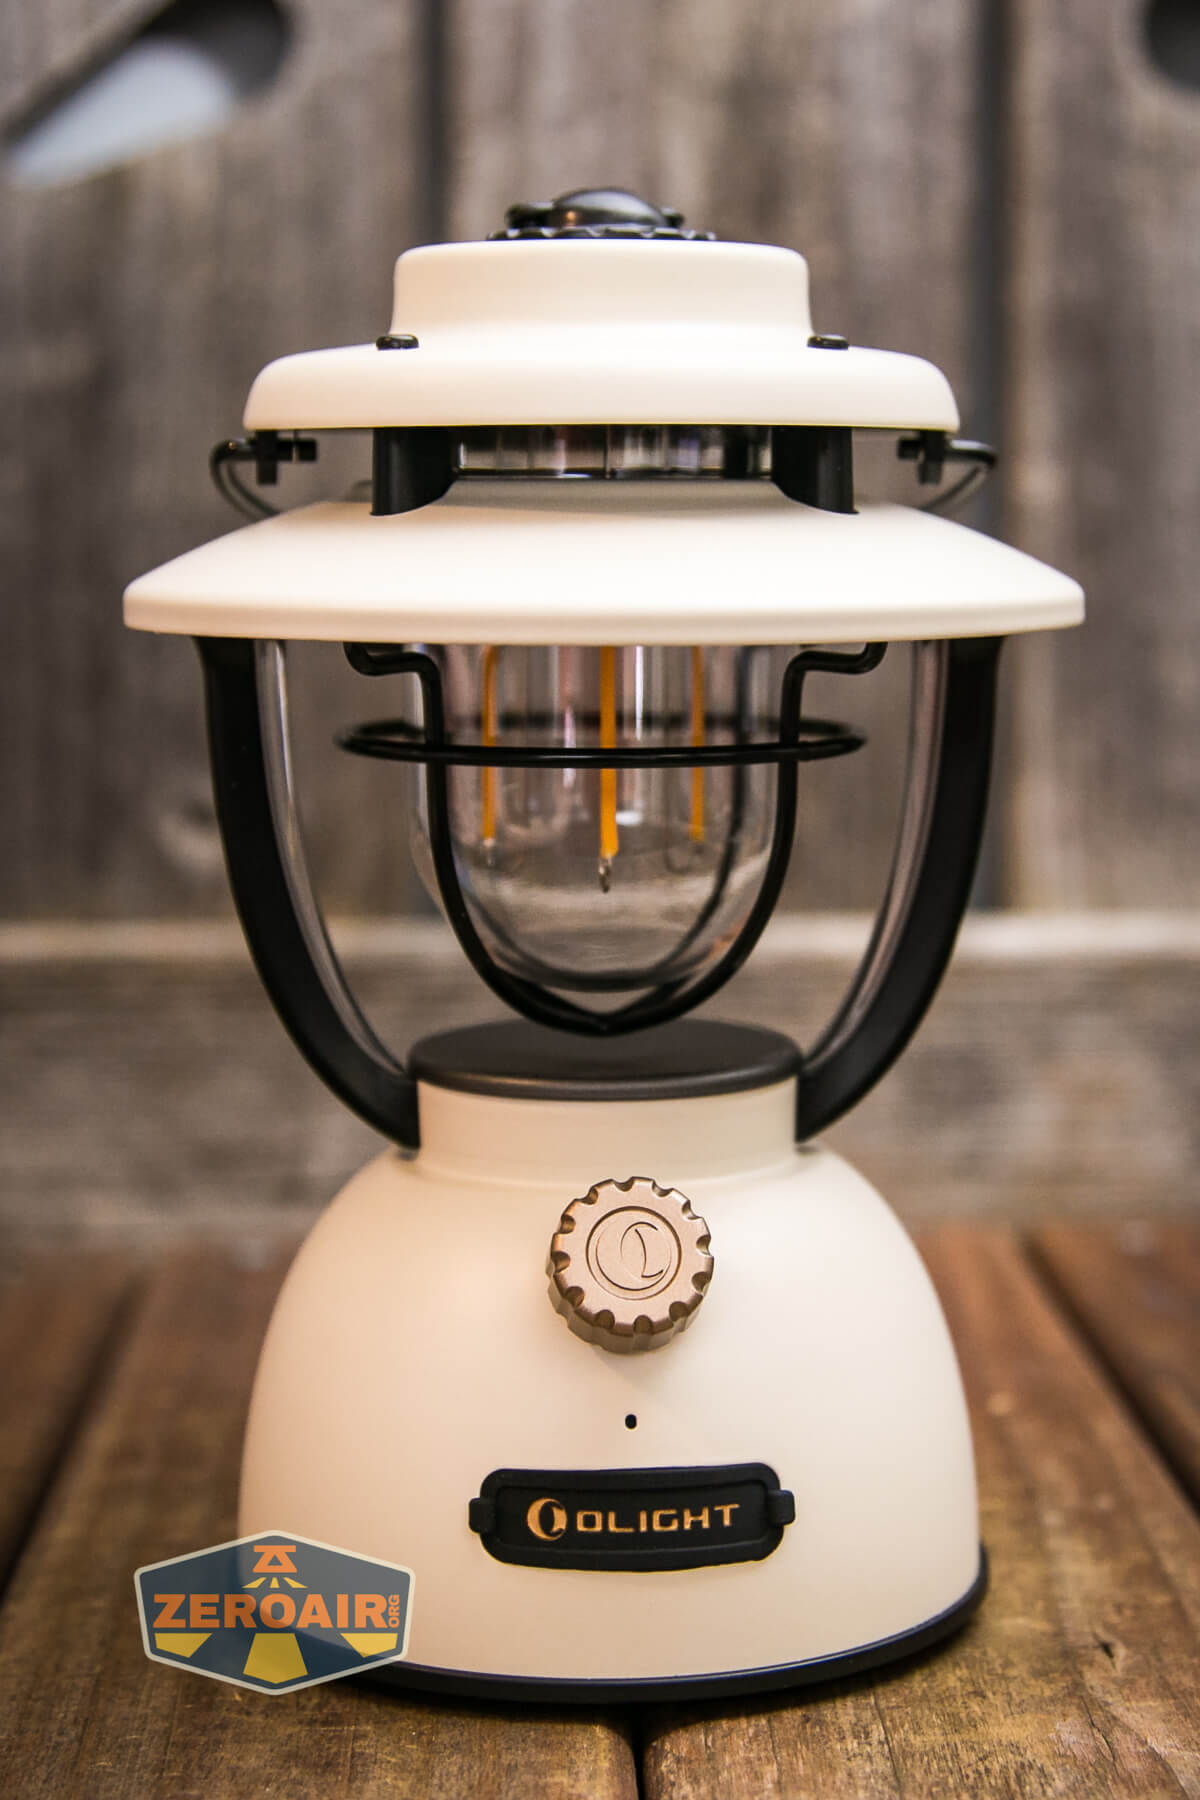
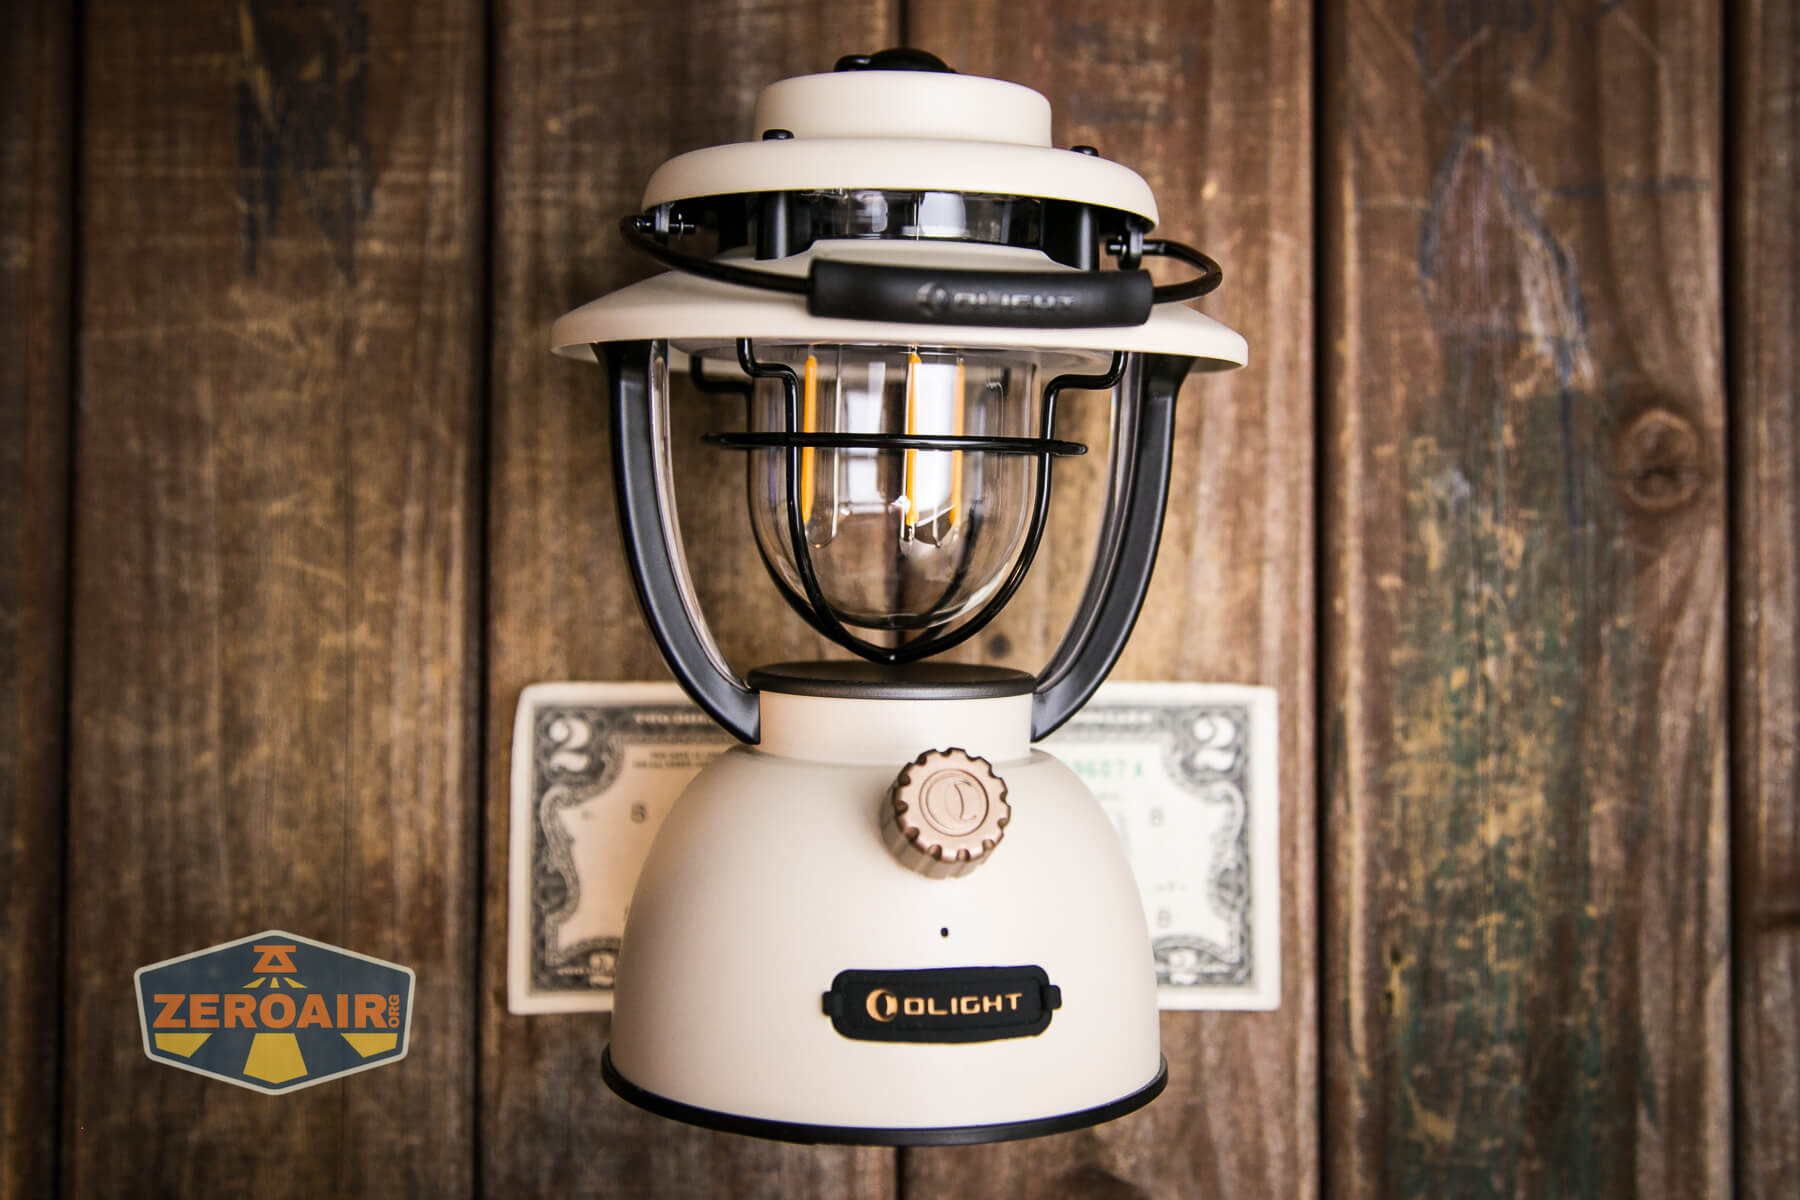
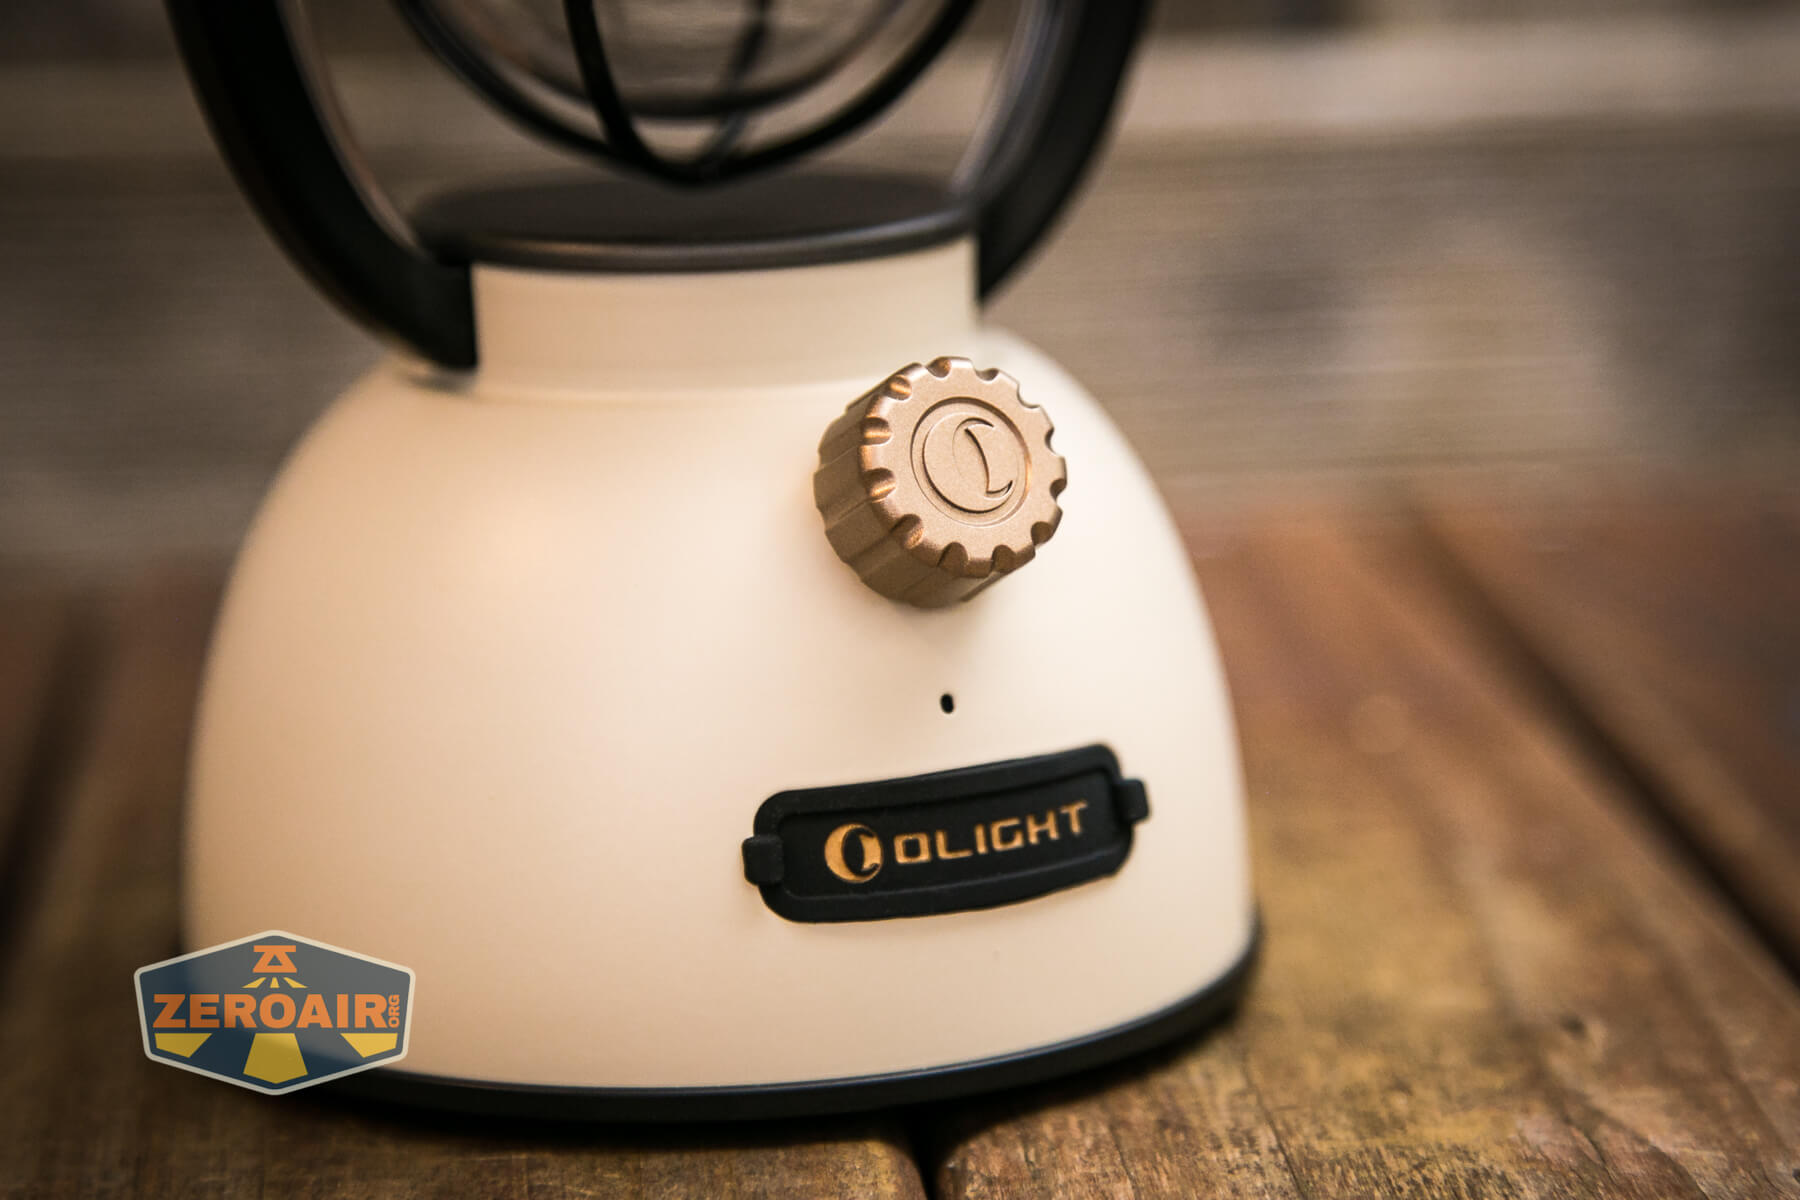
The build quality is great. Olight built the Olantern Classic 2 Pro Lantern from metal parts, giving it a very high-quality feel. Unfortunately, nothing on this lantern can be disassembled. This does mean that the cell or battery that’s inside is built in and not to be removed. That does put a finite lifespan on the Olight Olantern Classic 2 Pro Lantern.
Size and Comps
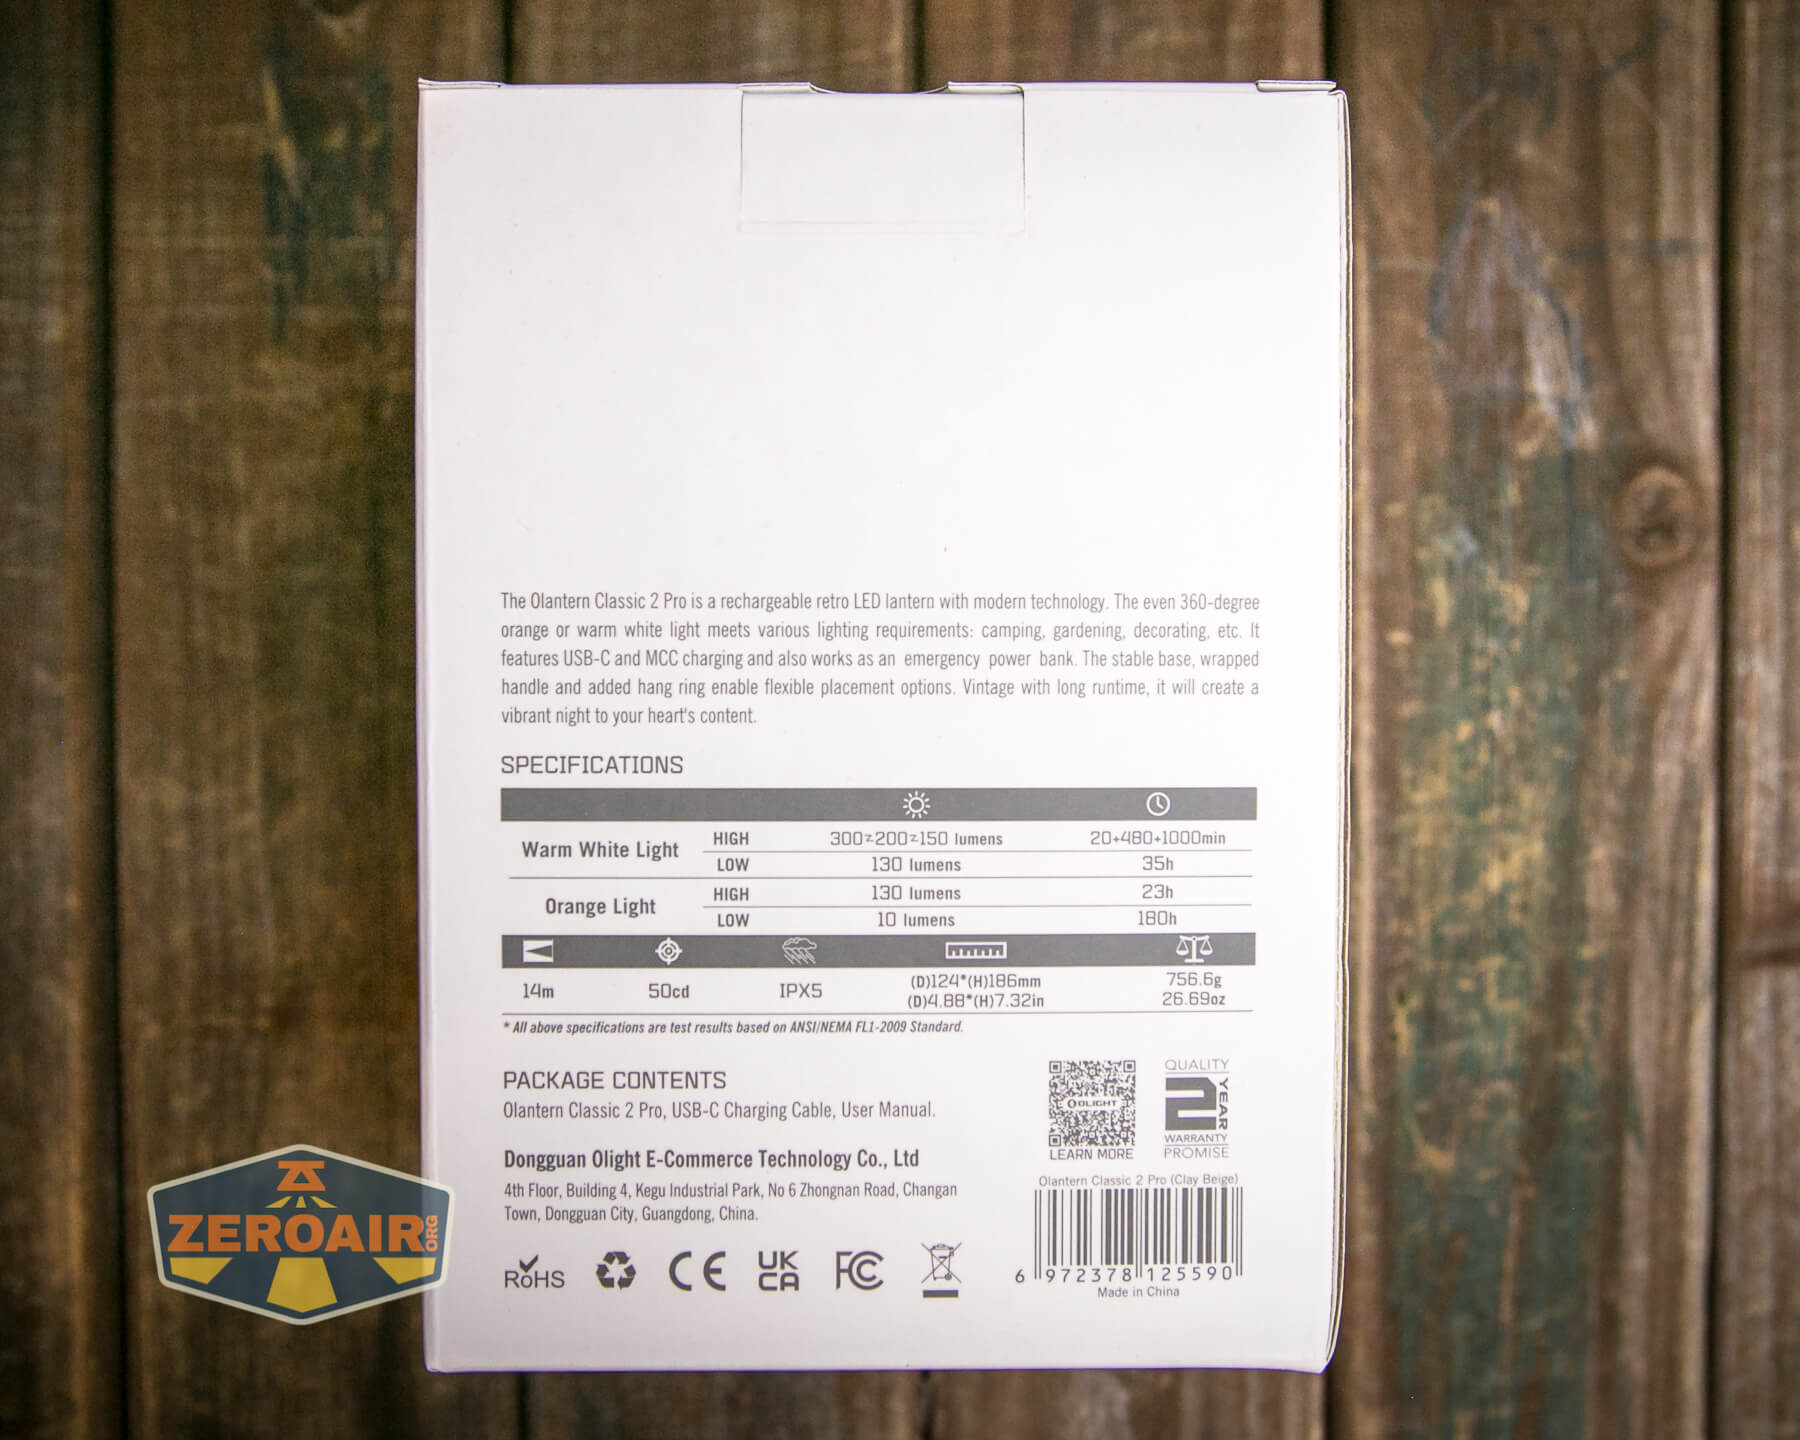
Weight: 26.69 oz (756.6 g)
Height: 7.32 in (186 mm)
Cap Diameter: 4.88 in (124 mm)
If the flashlight will headstand, I’ll try to show it here. If the flashlight will tailstand, I usually show that here, too.
Here’s the test light with the venerable Convoy S2+. Mine is a custom “baked” edition Nichia 219b triple. A very nice 18650 light! And also beside my custom-engraved TorchLAB BOSS 35, an 18350 light. I reviewed the aluminum version of that light in both 35 and 70 formats.
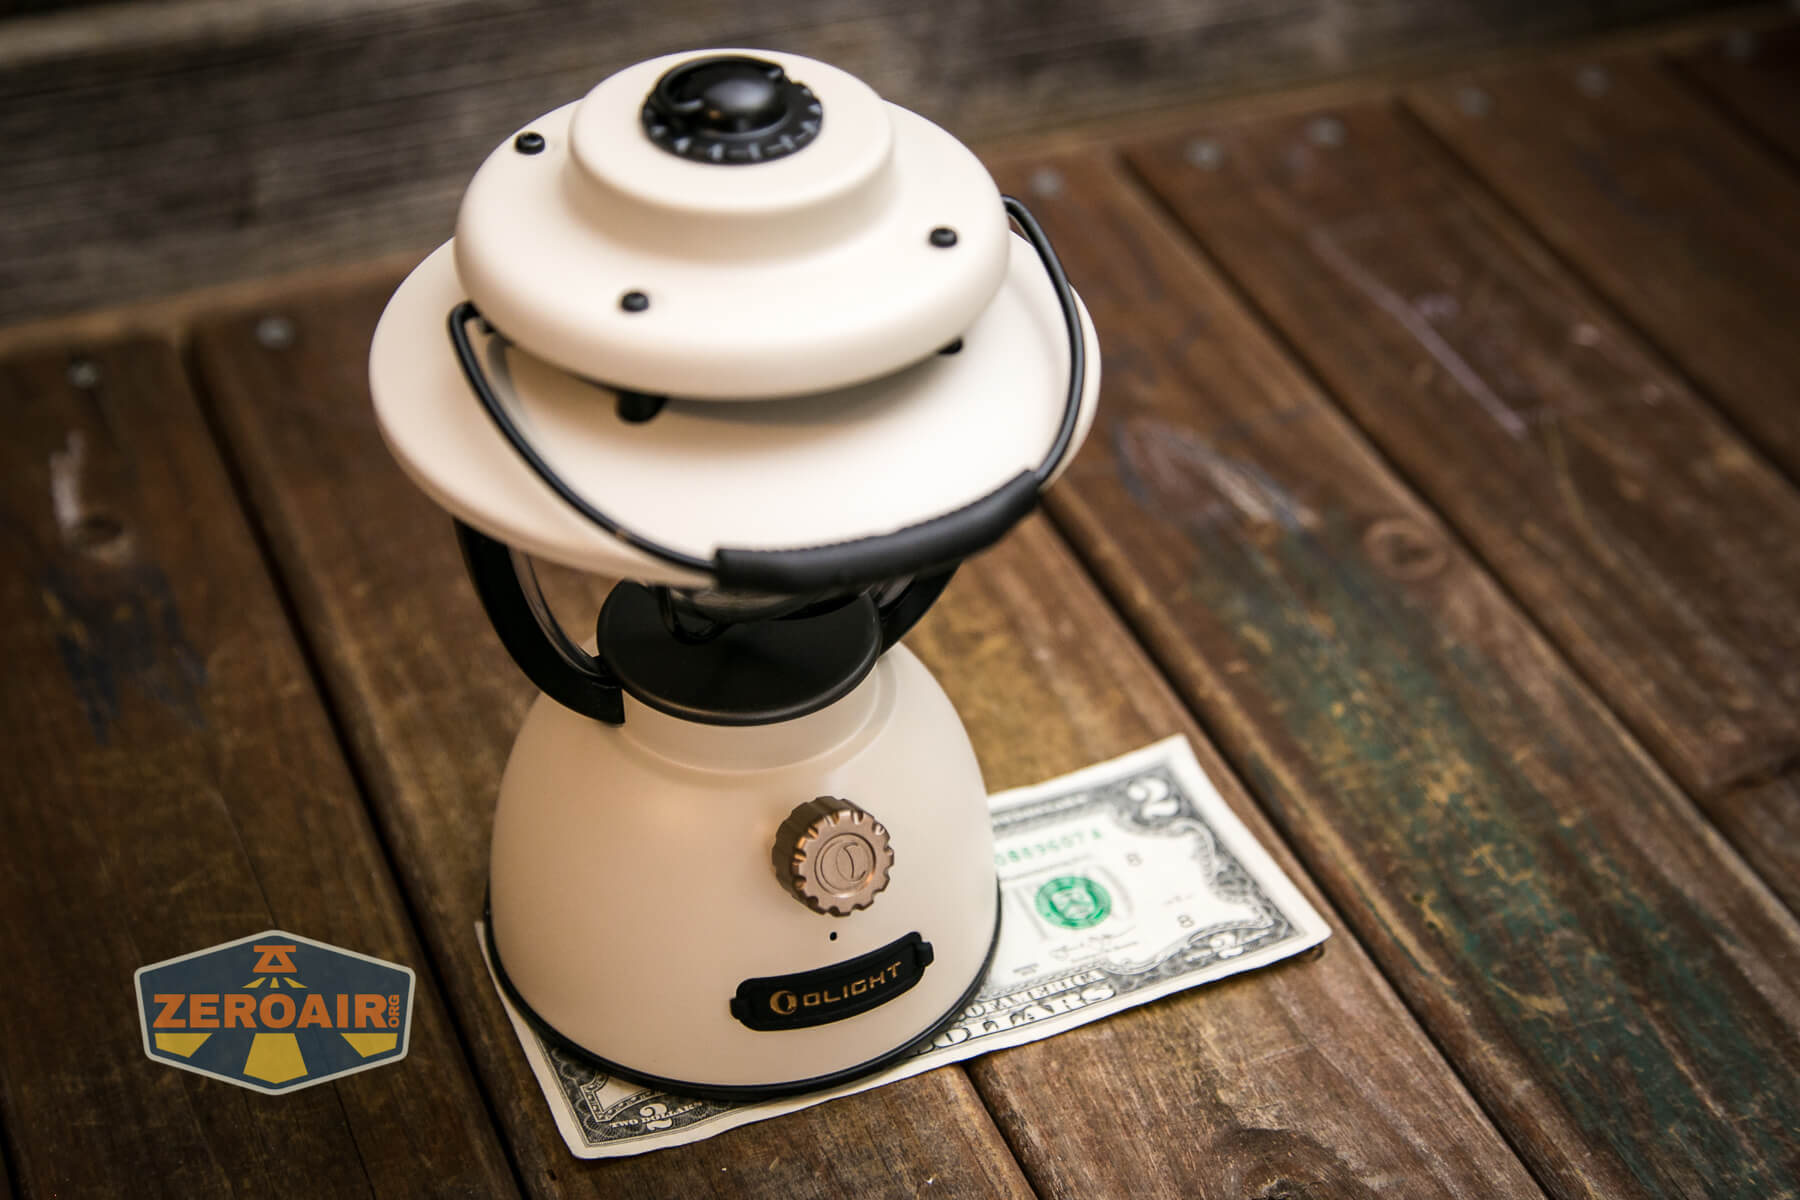
Retention and Carry
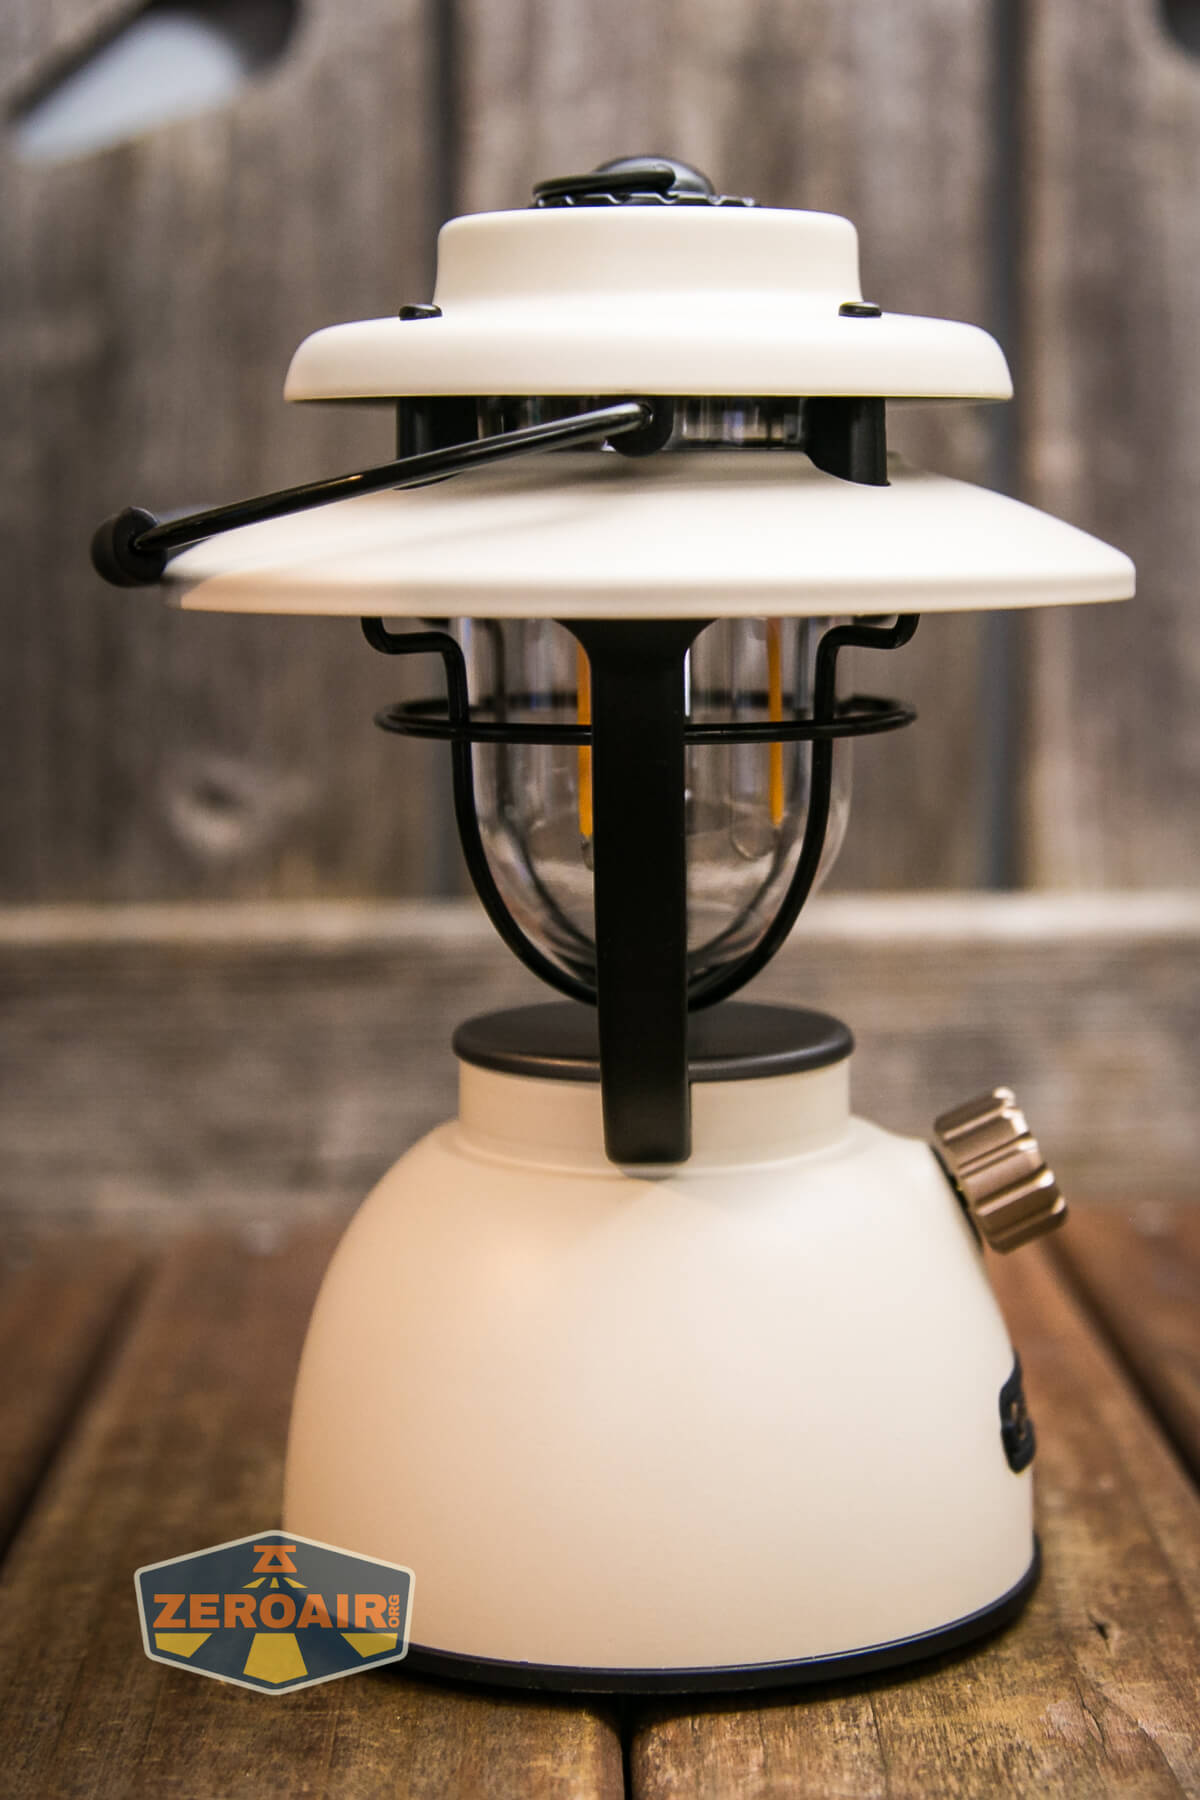
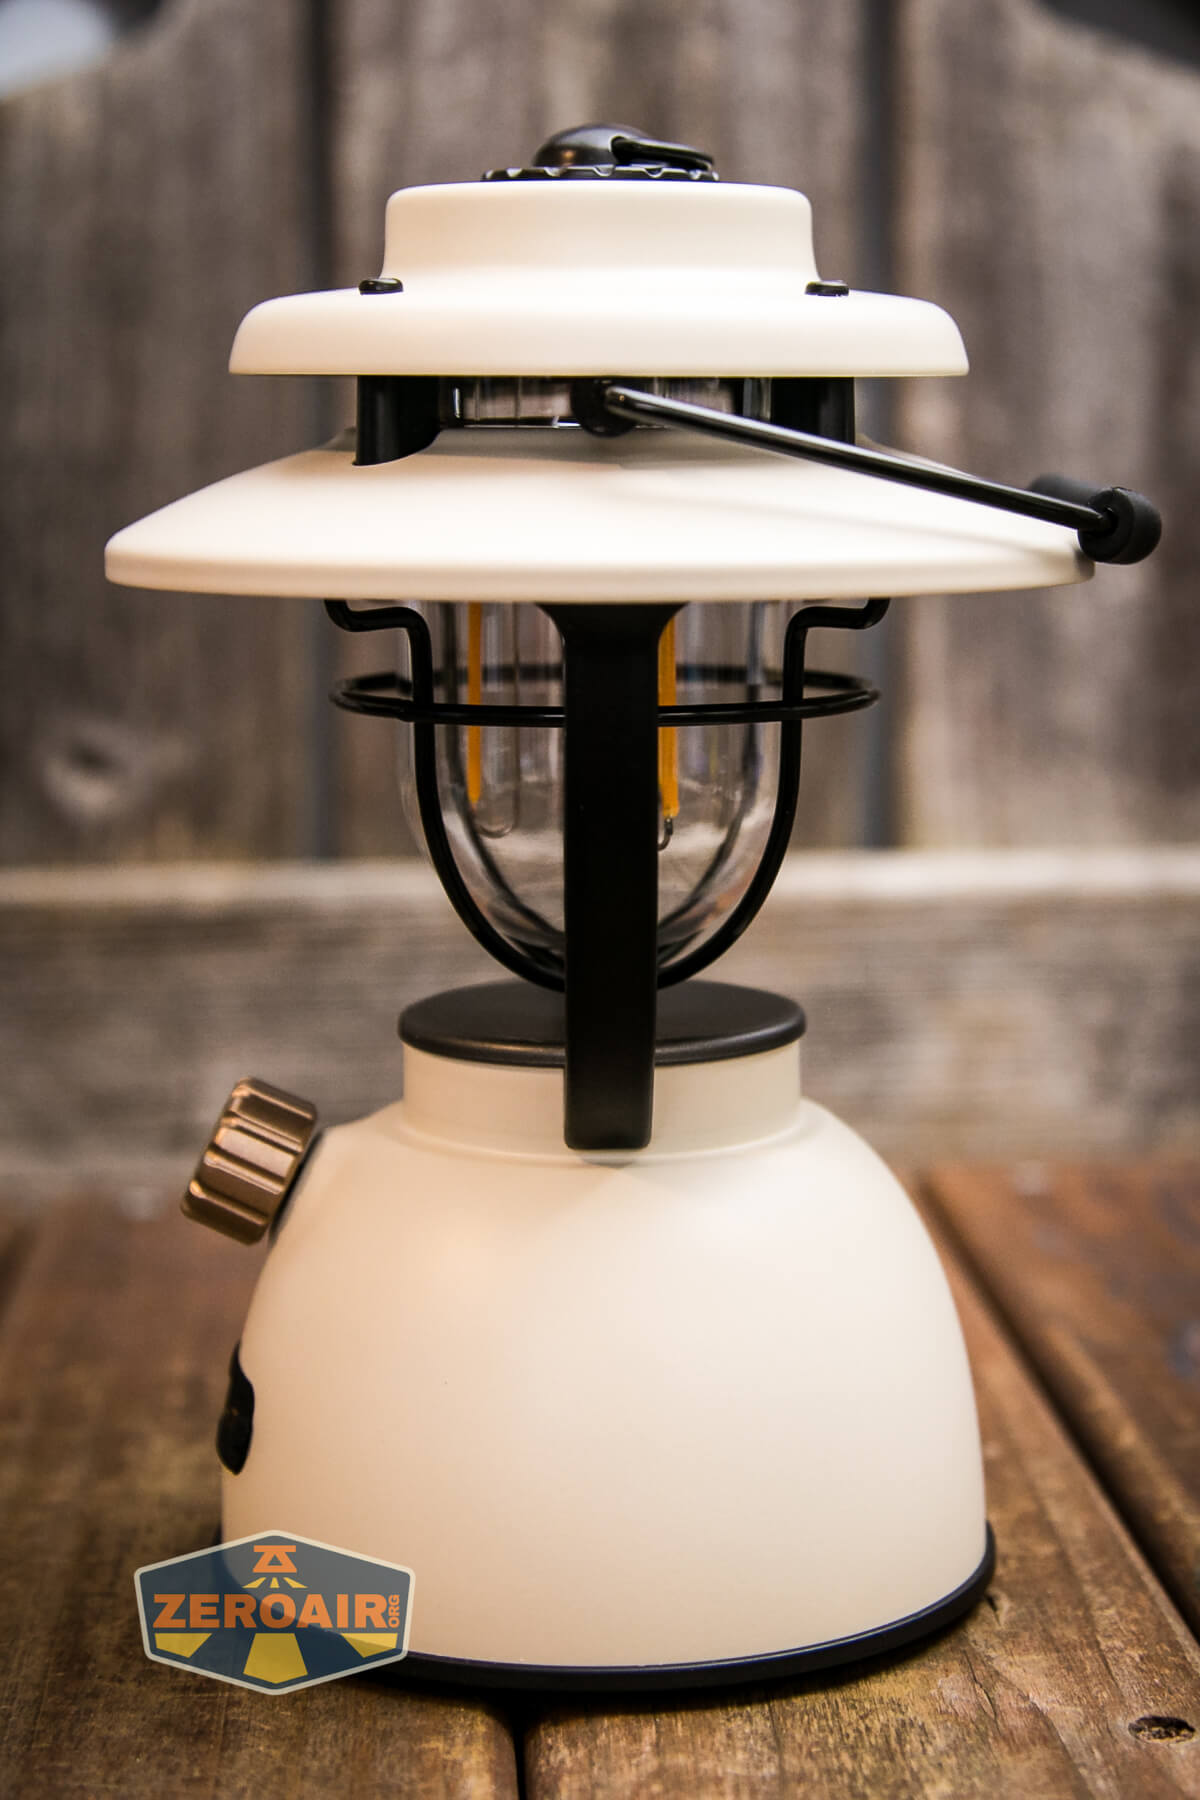
The top has two loops. They’re both suitable to hang the lantern from, but this smaller one is probably the most ideal for a hanging display.

The other loop, seen below, is clearly a handle. I have toted this lantern around my house for days now and can say that this handle works well. You can just barely see it in the connection points below, but the handle is held in place not just by tension, but also by little c-clips. The handle won’t just fall out.

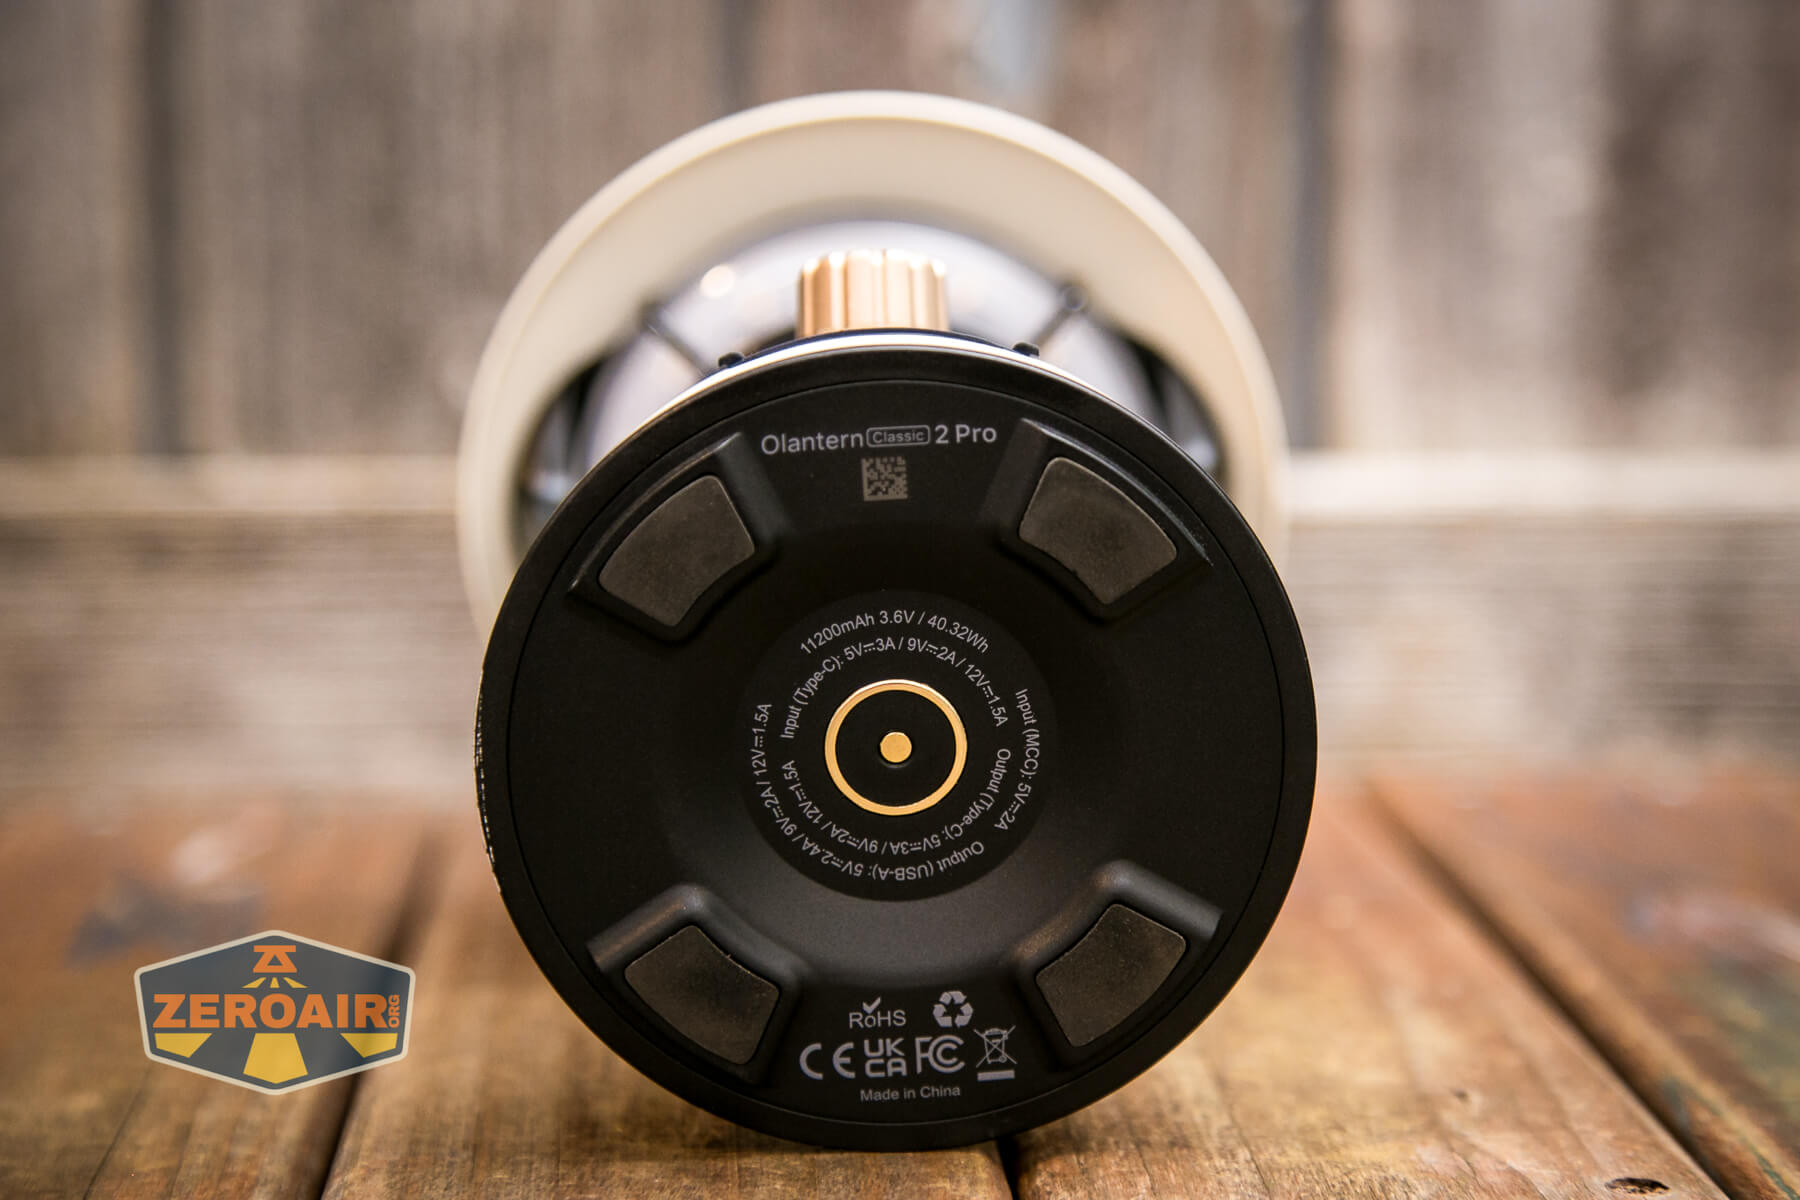
The base (which you can see below) has four grippy pads that help keep the lantern on a flat surface, too.
Power and Runtime
While I didn’t test output for any of the modes (they’re not discrete), I can say that the built-in battery is an 11,200mAh battery – probably three or four 18650 cells in parallel. I’ve mentioned this on a few Olight products before, but I’d really love if the lantern base served as a charger for 18650 cells, such as what’s in the Olight Warriors and Batons. I understand why they don’t do that, but what a neat feature it’d be!
Again, the battery in the Olight Olantern Classic 2 Pro Lantern is not replaceable.
Charging
Interestingly, there are a couple of ways to charge the Olight Olantern Classic 2 Pro Lantern. The most common way is the standard Olight magnetic charging base. This is the Olight proprietary connector, but if you’re like me, you already have 10 of these cables lying around.
One is not included, so you need to already have one if you want to charge this way. However, this isn’t really the best way to charge. The best way is the USB-C port behind this little cover.
Charging will be much faster when using USB-C, as this USB-C port can accept 1.5A at 12V, or 18W. (The MCC would need to be pumping out over 4A to reach 18W charging in the proprietary charge base – that’s not possible.)
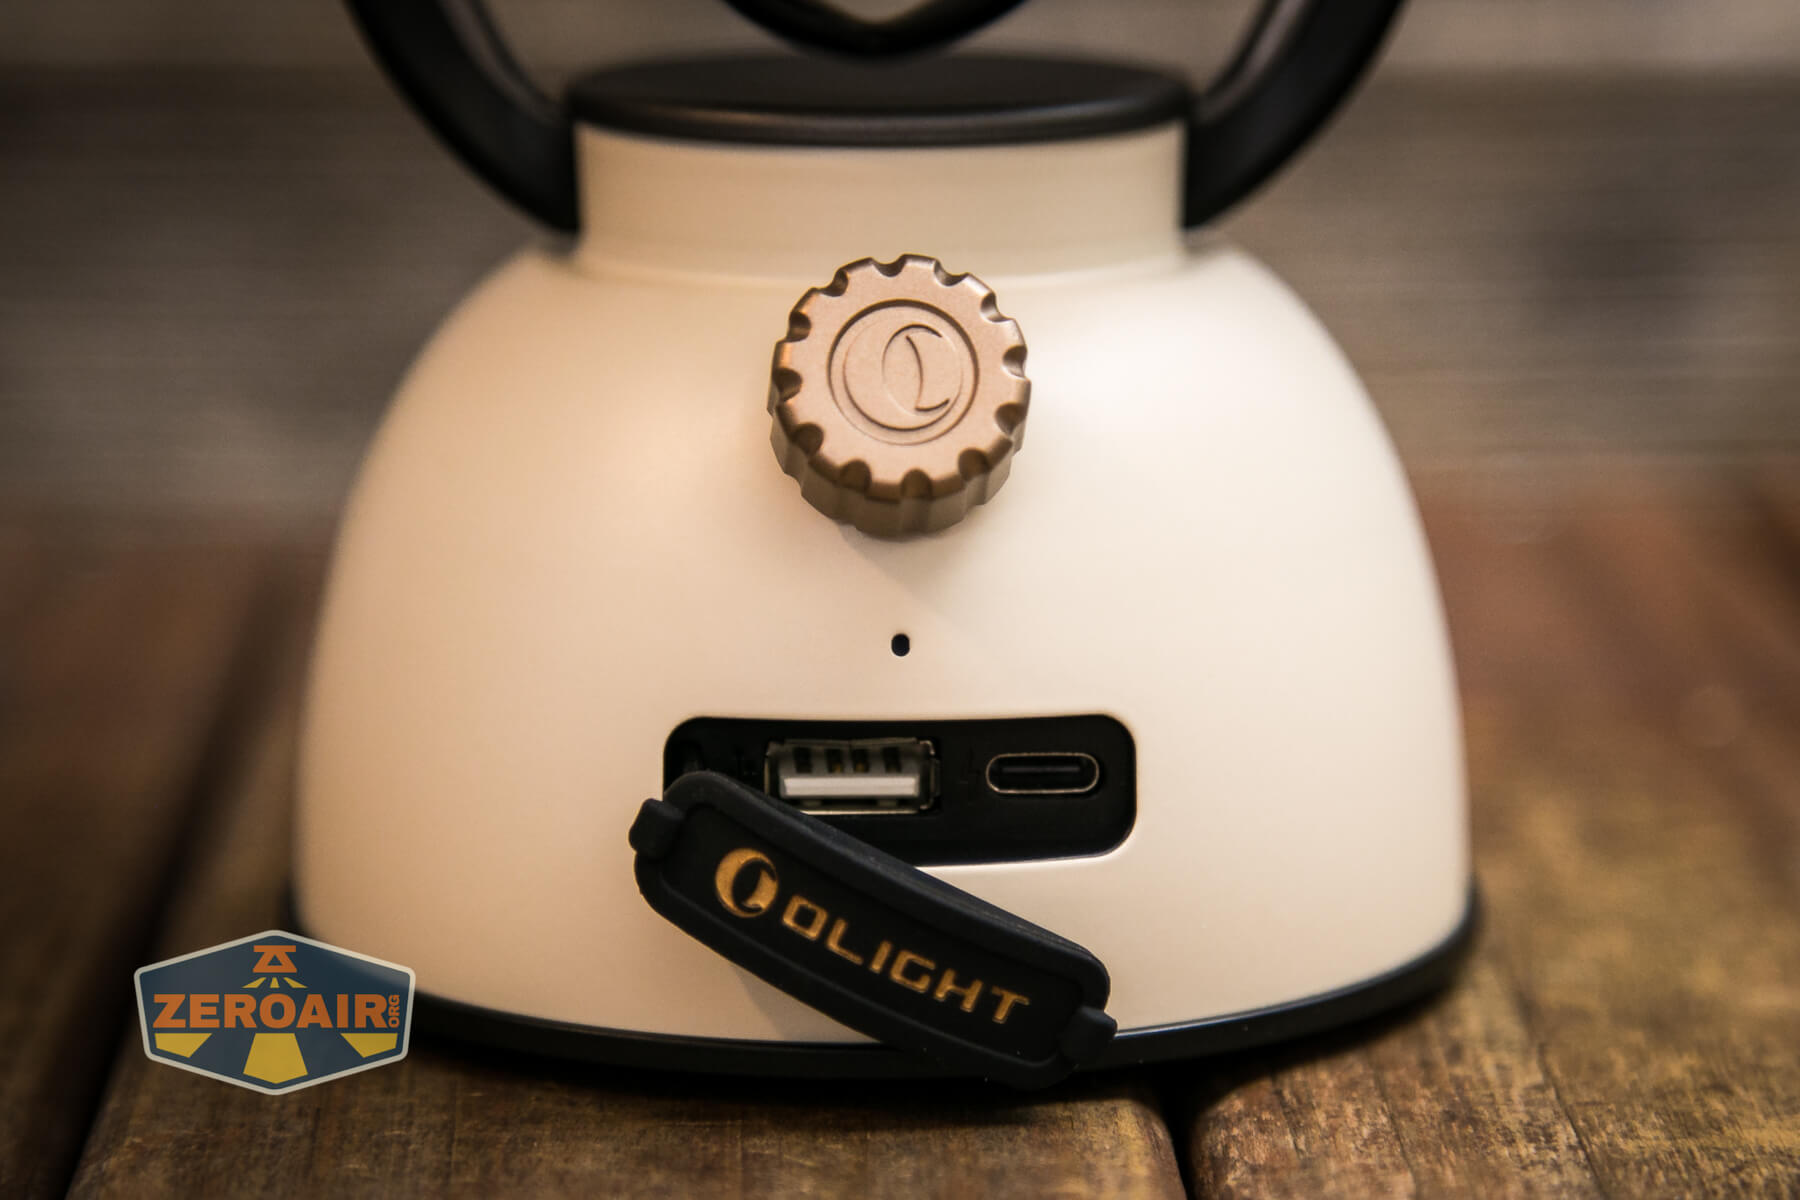
Olight does include a charging cable for using USB-C to USB-C, though. I have a few and can say that these cables are of very nice quality.
Powerbank
While I’m not going to cover it with any testing, the Olantern can serve as a powerbank, too. There’s a standard USB port that is useful for charging things like cell phones or whatever. The USB-C port can also serve as a power source, too – it’s not just for charging! The C port can output at 5V, 9V, and 12V! In fact, the USB-A port can output all these voltages, too!
The 11,200mAh battery that’s built-in should provide a number of complete charges to mobile phones. Or many charges, if you’re charging something like the Olight Baton!
User Interface and Operation
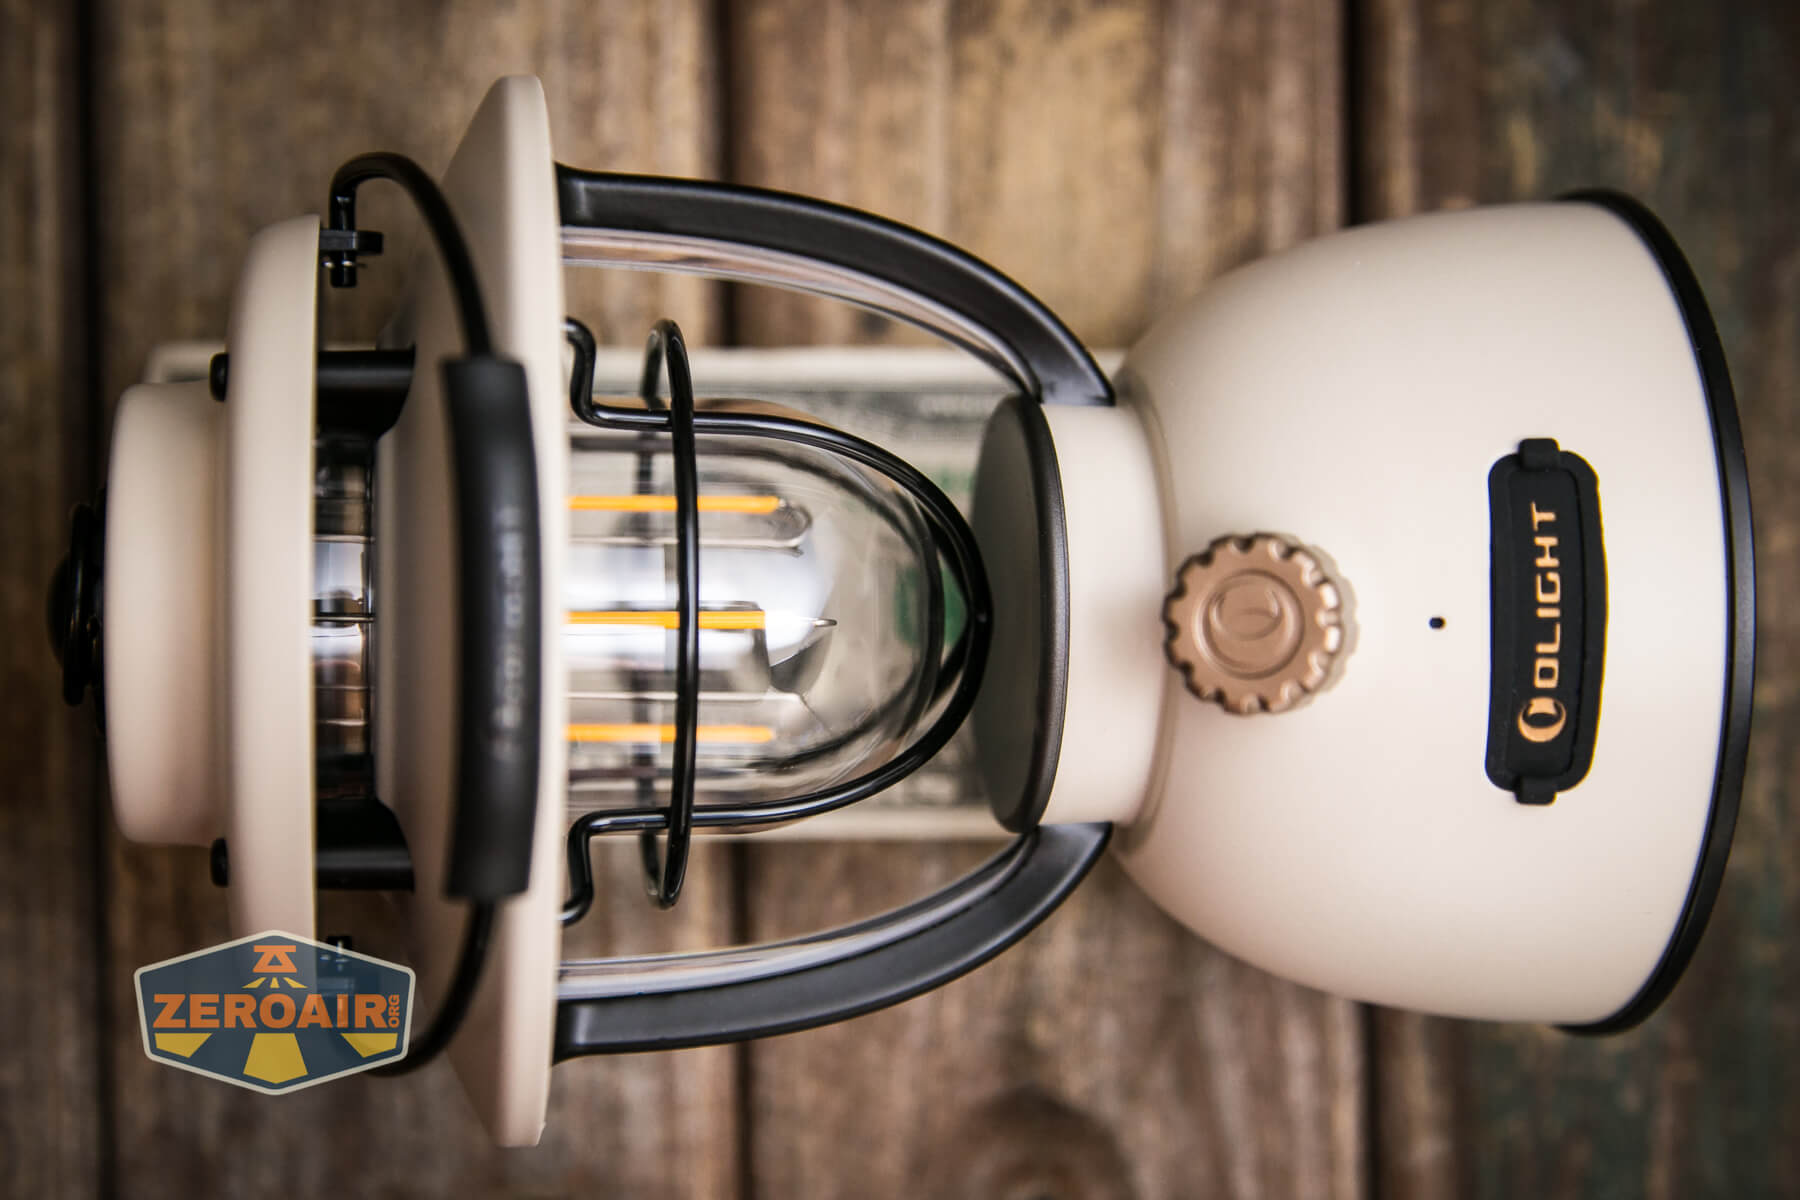
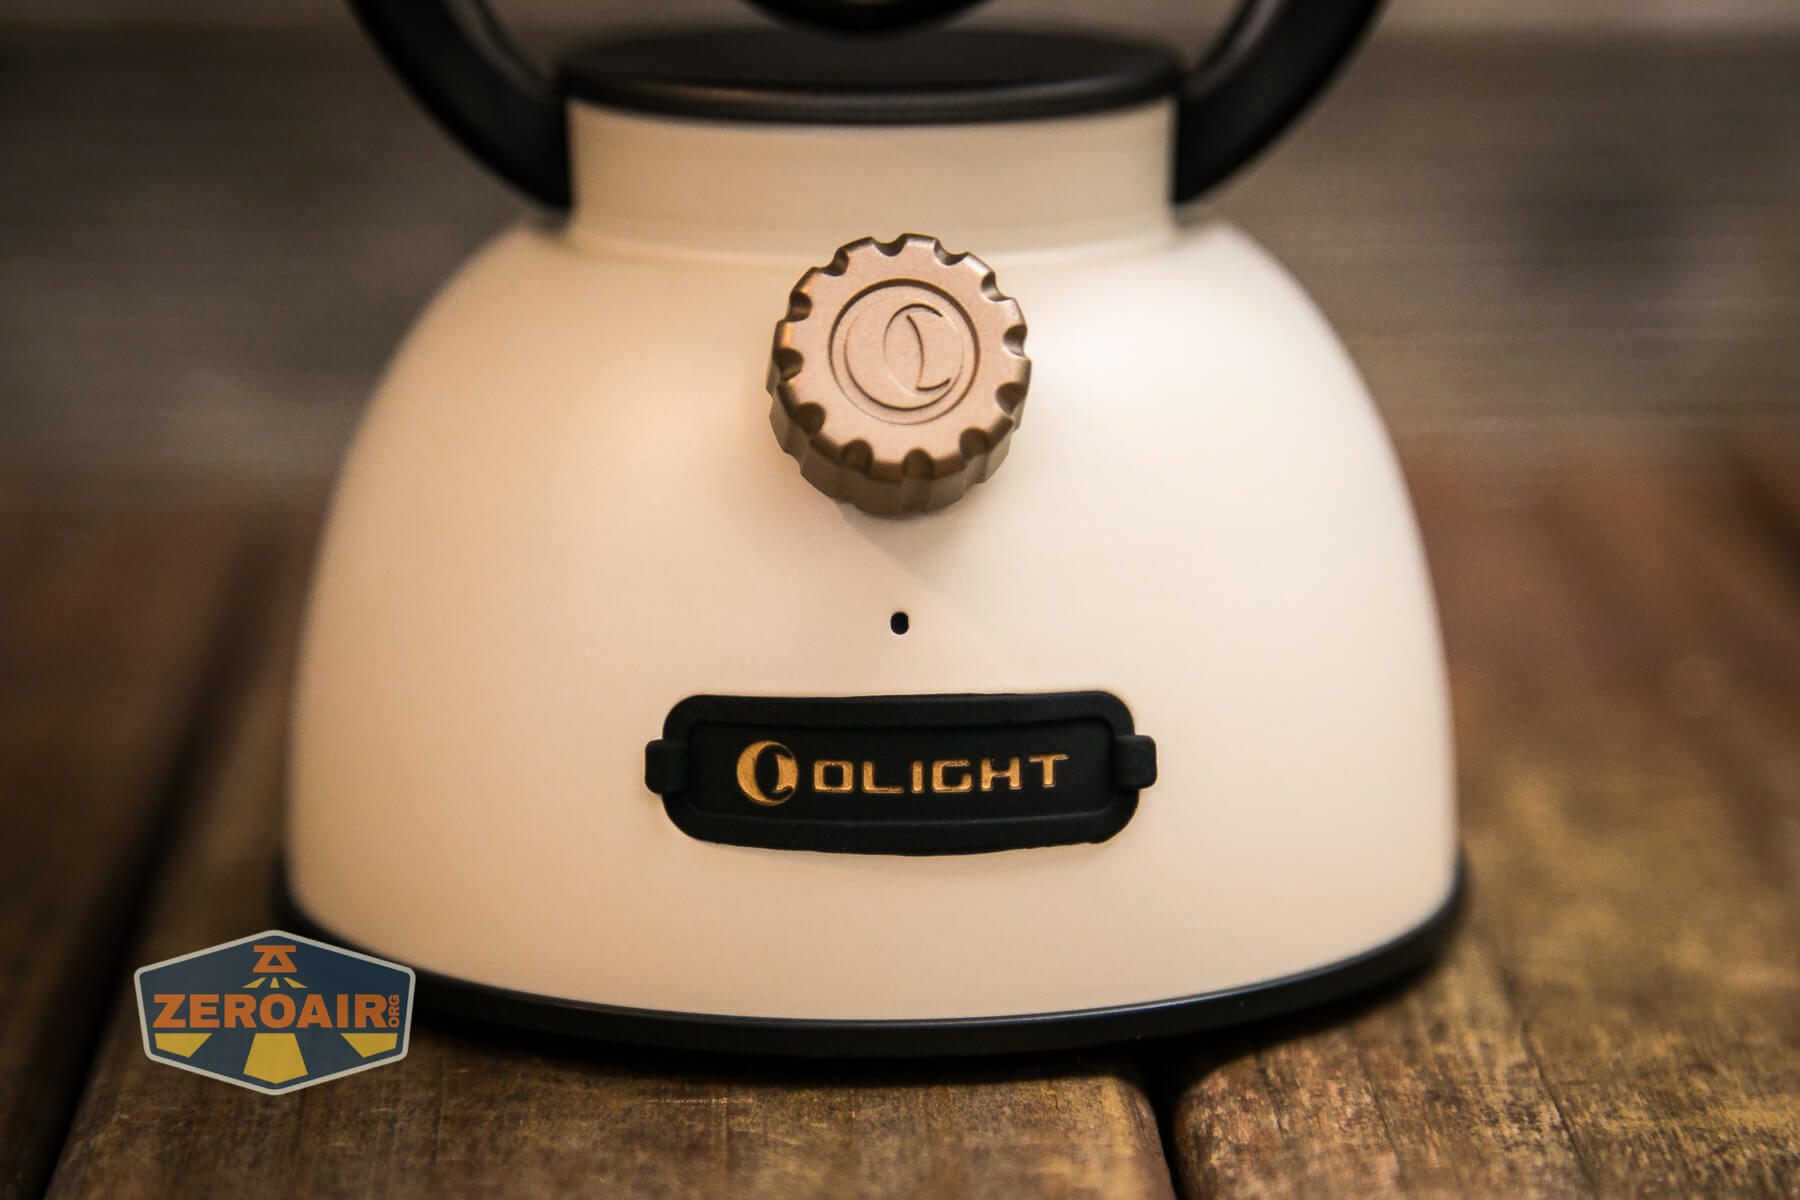
All control of the Olight Olantern Classic 2 Pro Lantern is through this one dial you see below.
Rotate the dial clockwise to turn the lantern on and to increase output. Rotate the dial counterclockwise to decrease output and ultimately turn the light off.
This dial is my one complaint about the lantern. It’s a minor complaint, but hear me out.
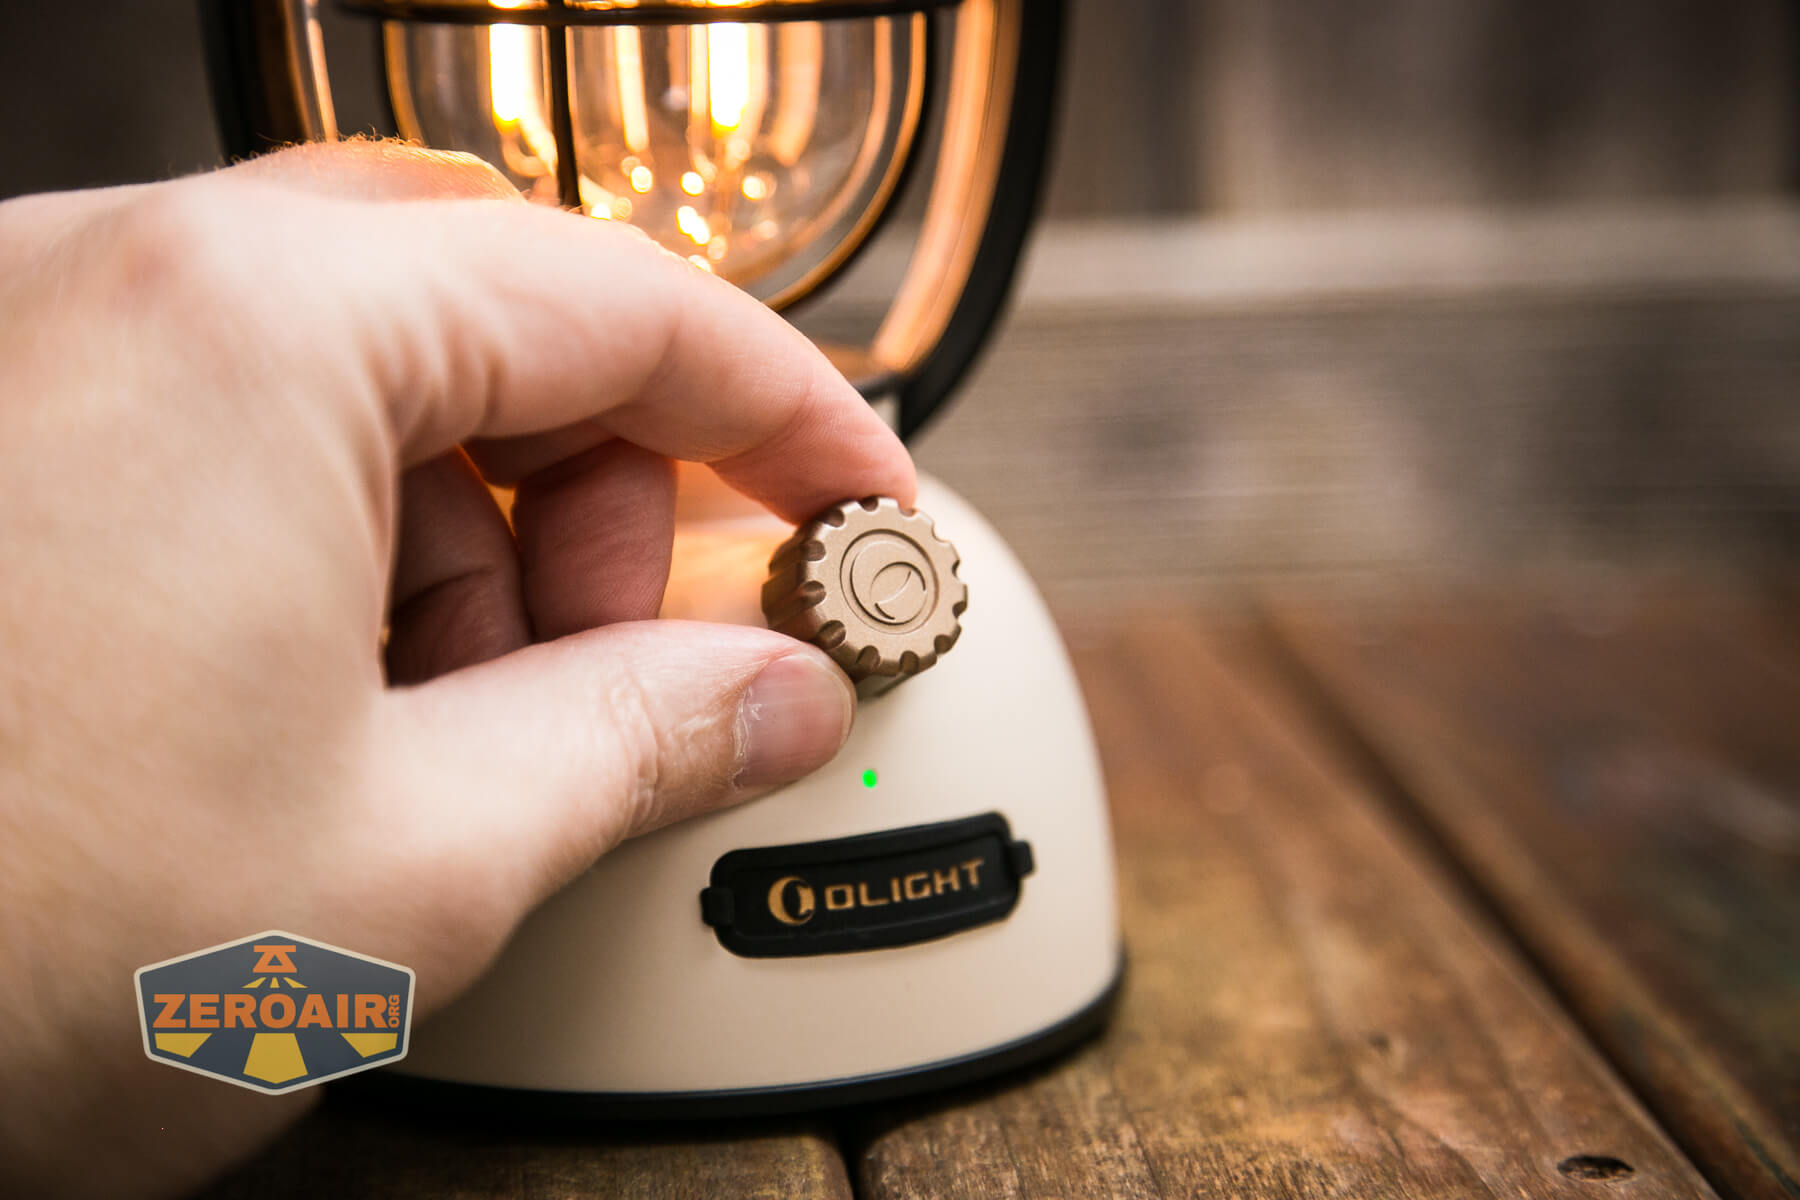

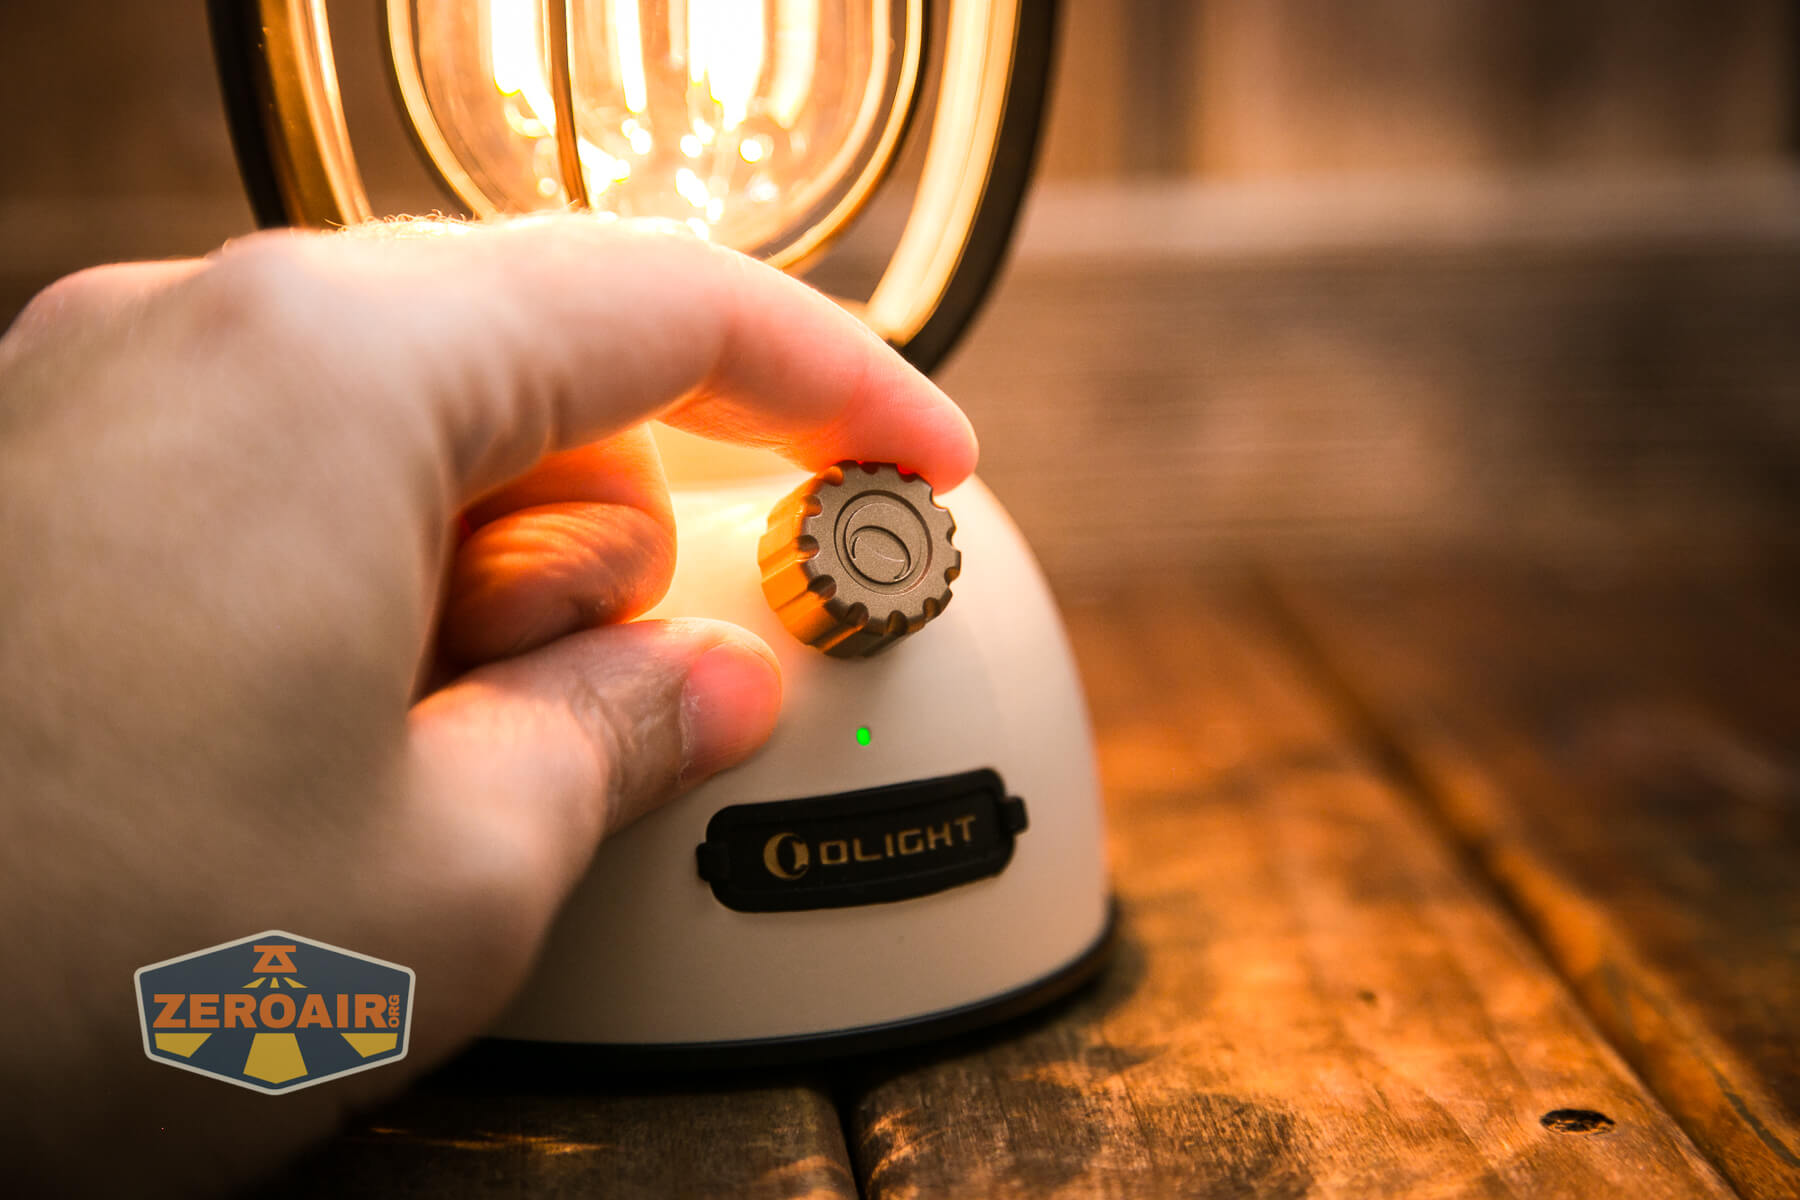
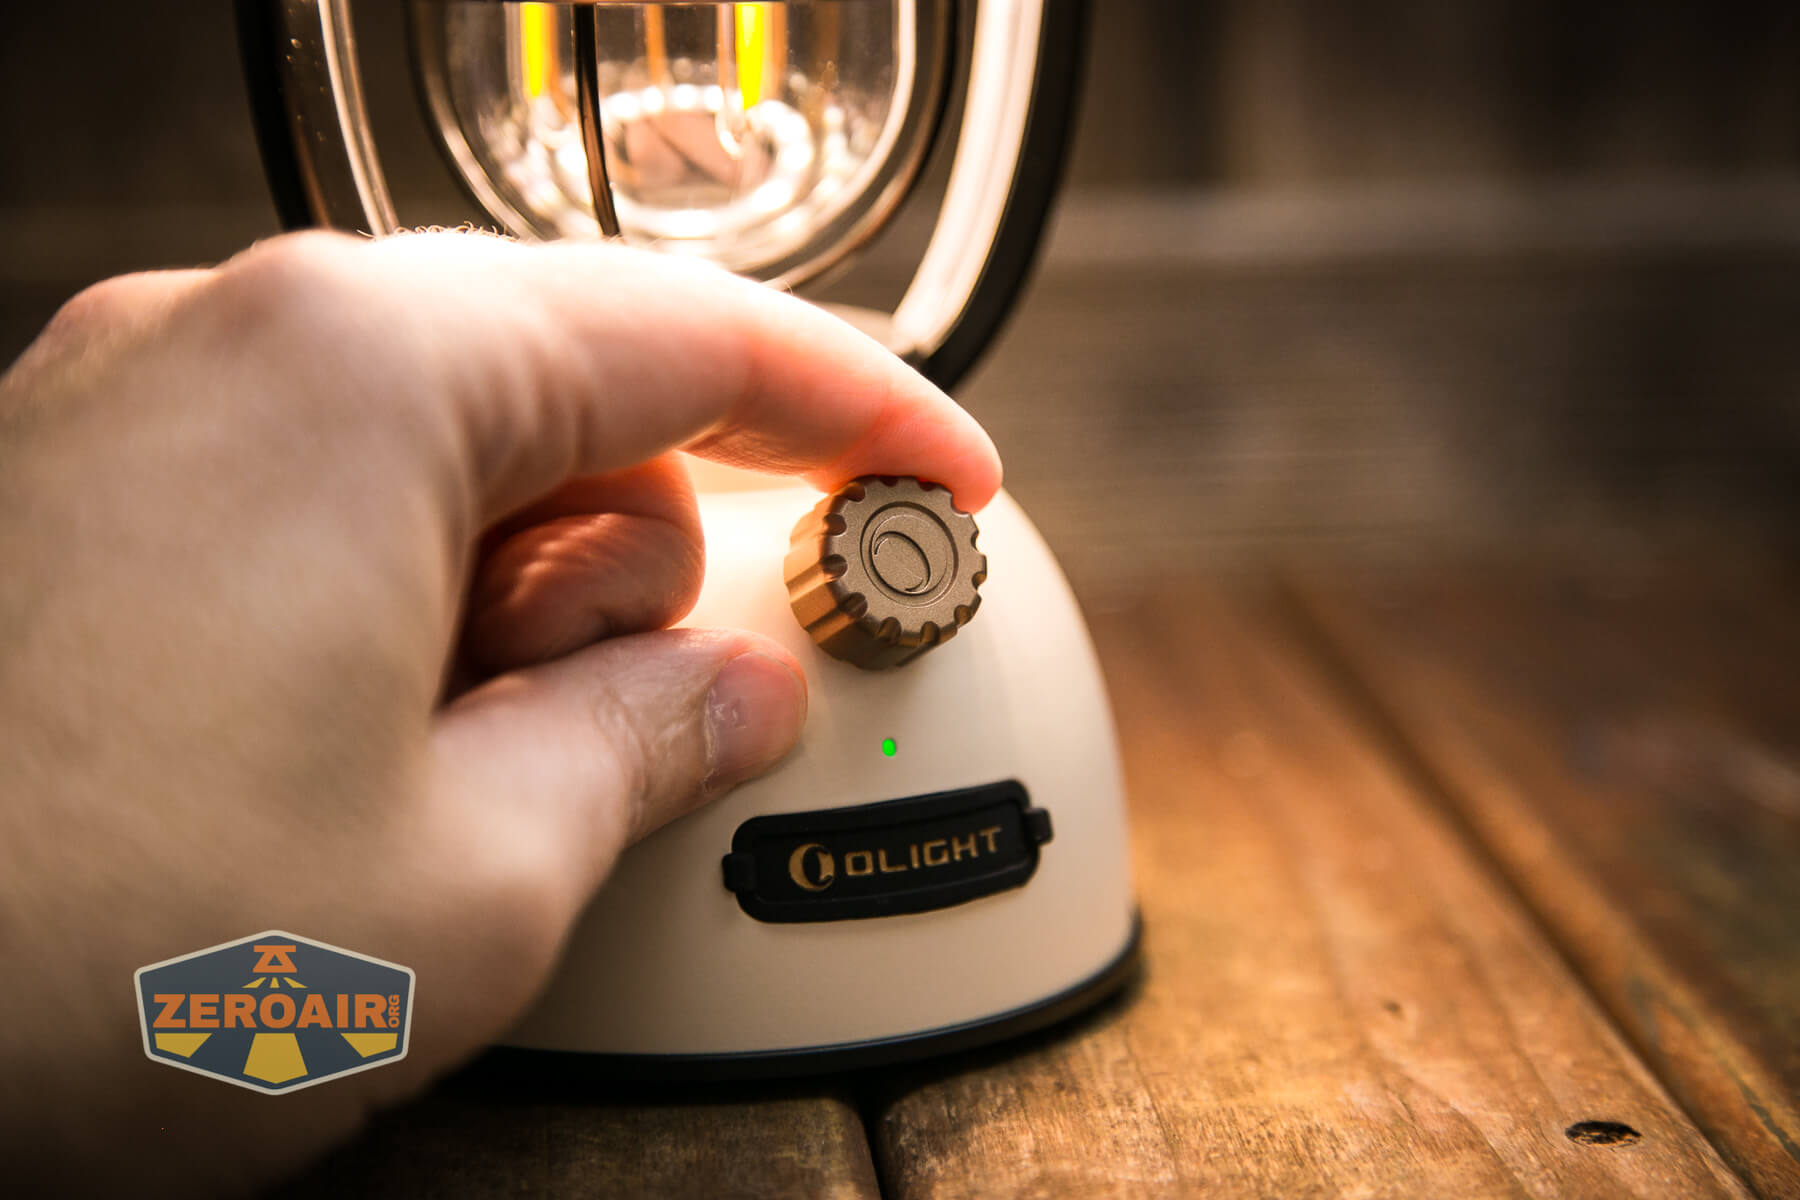
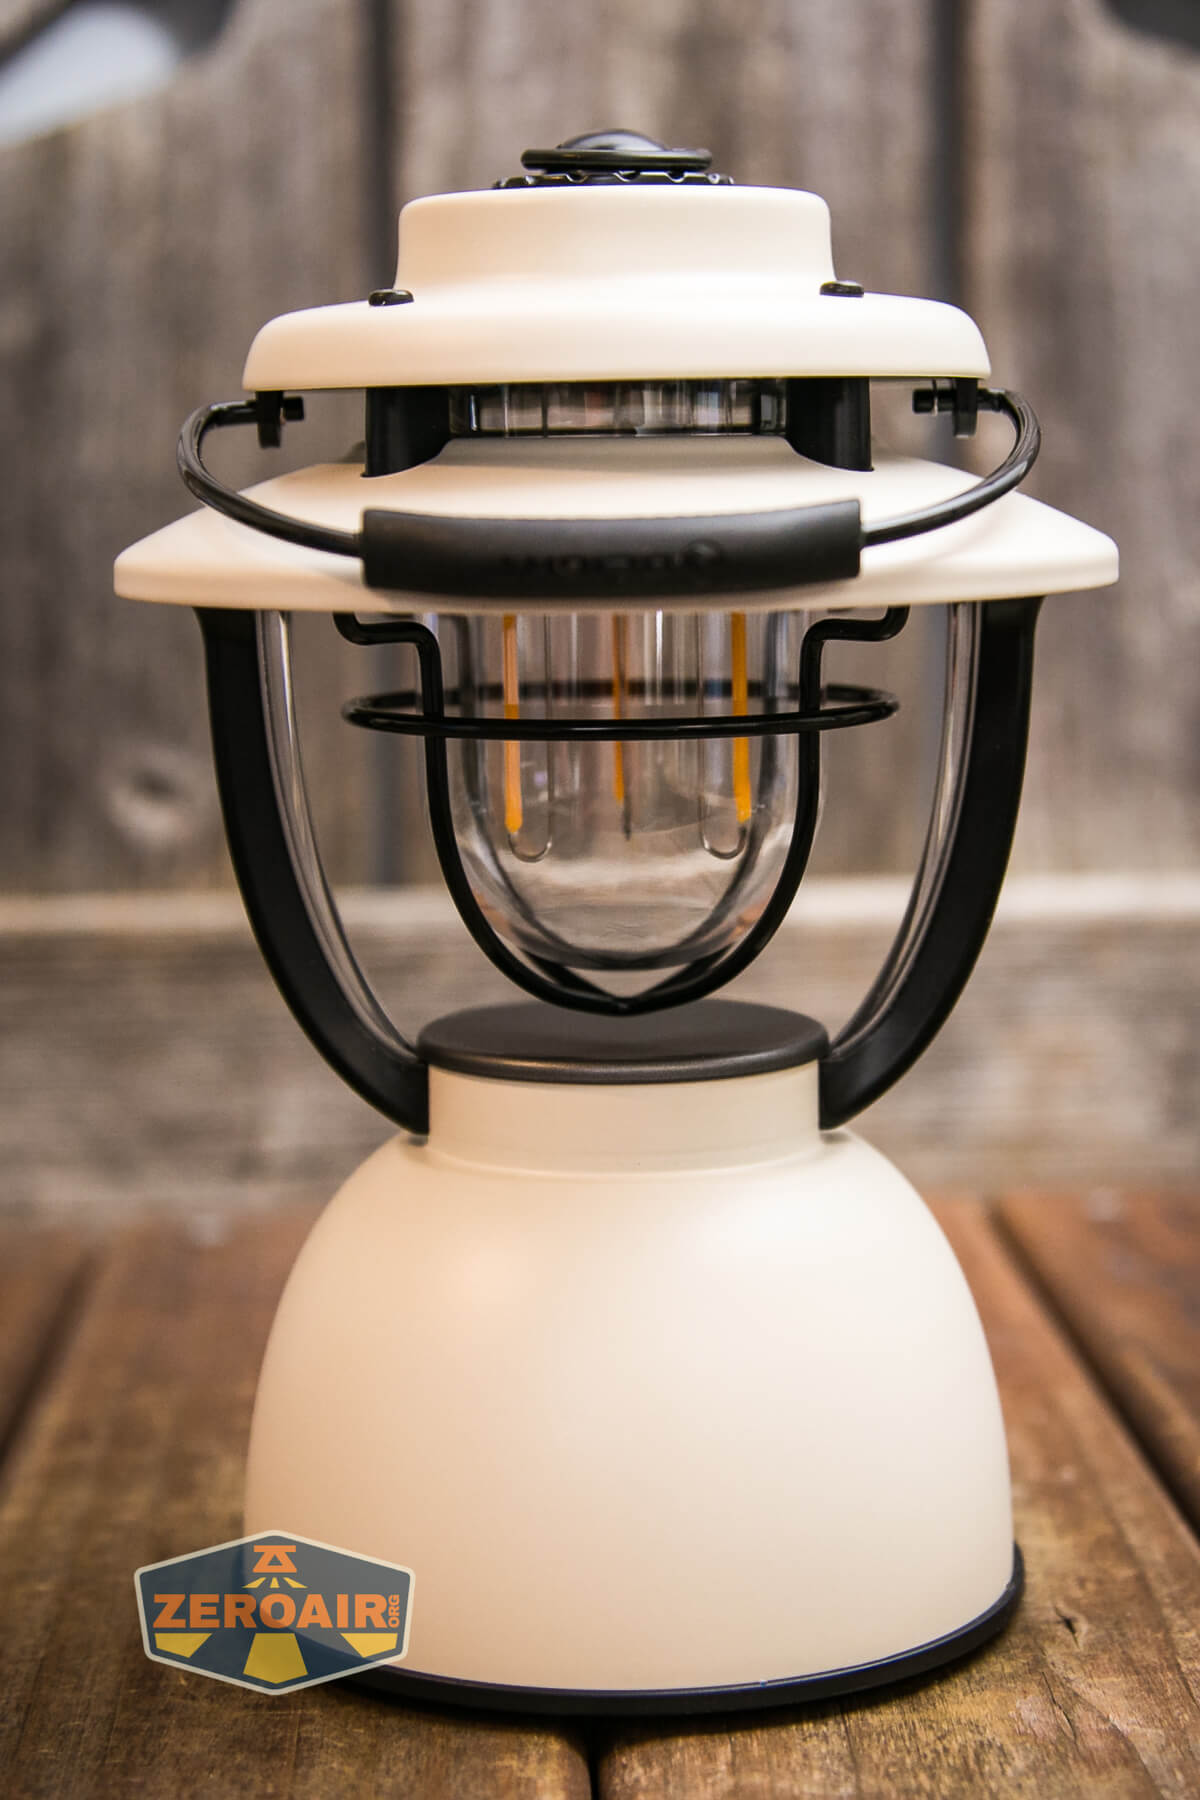
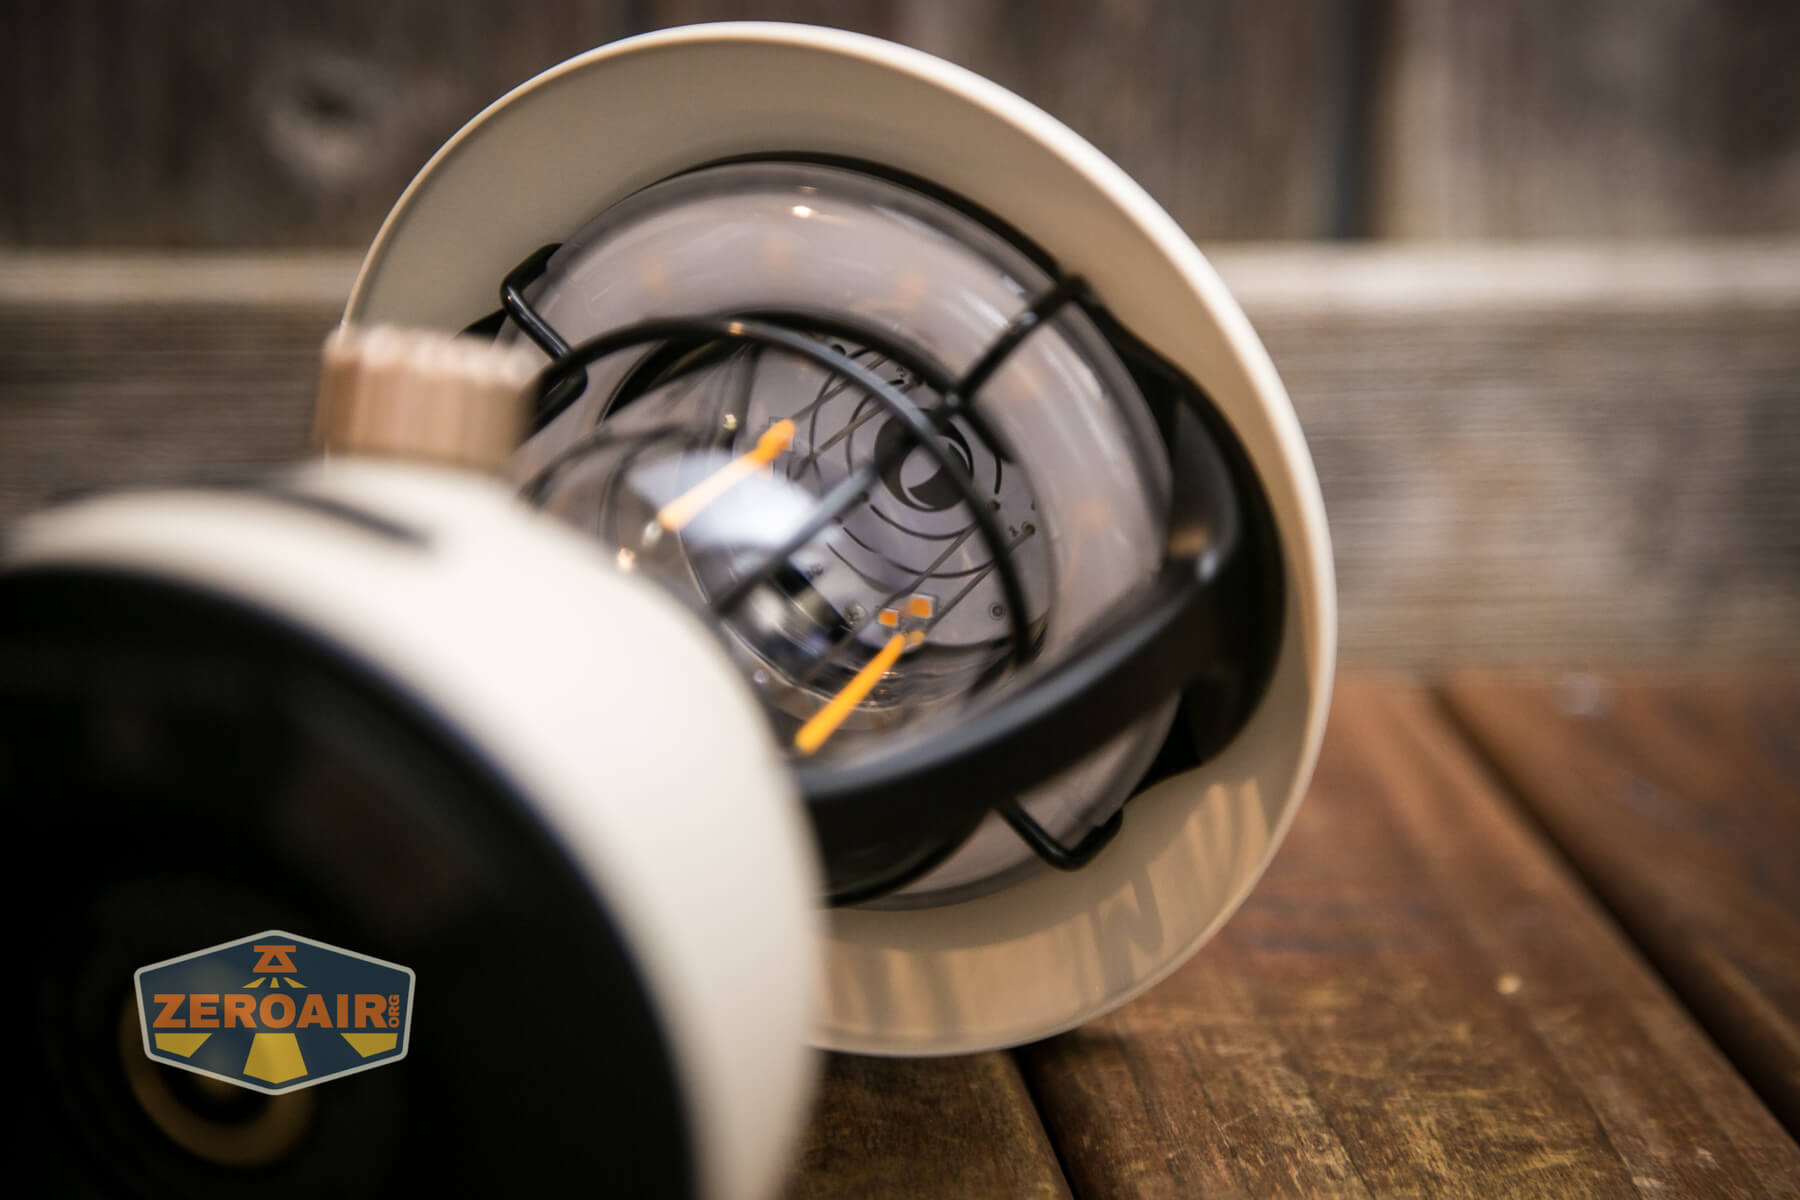
There’s a very loud and positive click when going from off to on. The click provides a great bit of resistance, which is good – you won’t accidentally turn the light on, and you’ll know definitively when the light is off. The clicking is loud but not annoyingly so. When going from lower output (which is very warm white) to higher output (which is warm white but less warm) the lantern actually switches sets of emitters. Below, you can see the higher output emitters.
Also, the emitter arrays are separate – you switch from one to the other. The light fades between them, but it’s always either one set or the other on.
This is my issue – there’s no detent at all in the dial when you’re switching from one set to the other. I need a little divot there so that I can get just on the cusp of the highest very warm output, or the lowest output of the less warm output.
There’s a hard stop for the highest output, with the total rotation being around 3/4 of a complete turn. That’s good. It’s just a stop, though, no detent or click or anything.
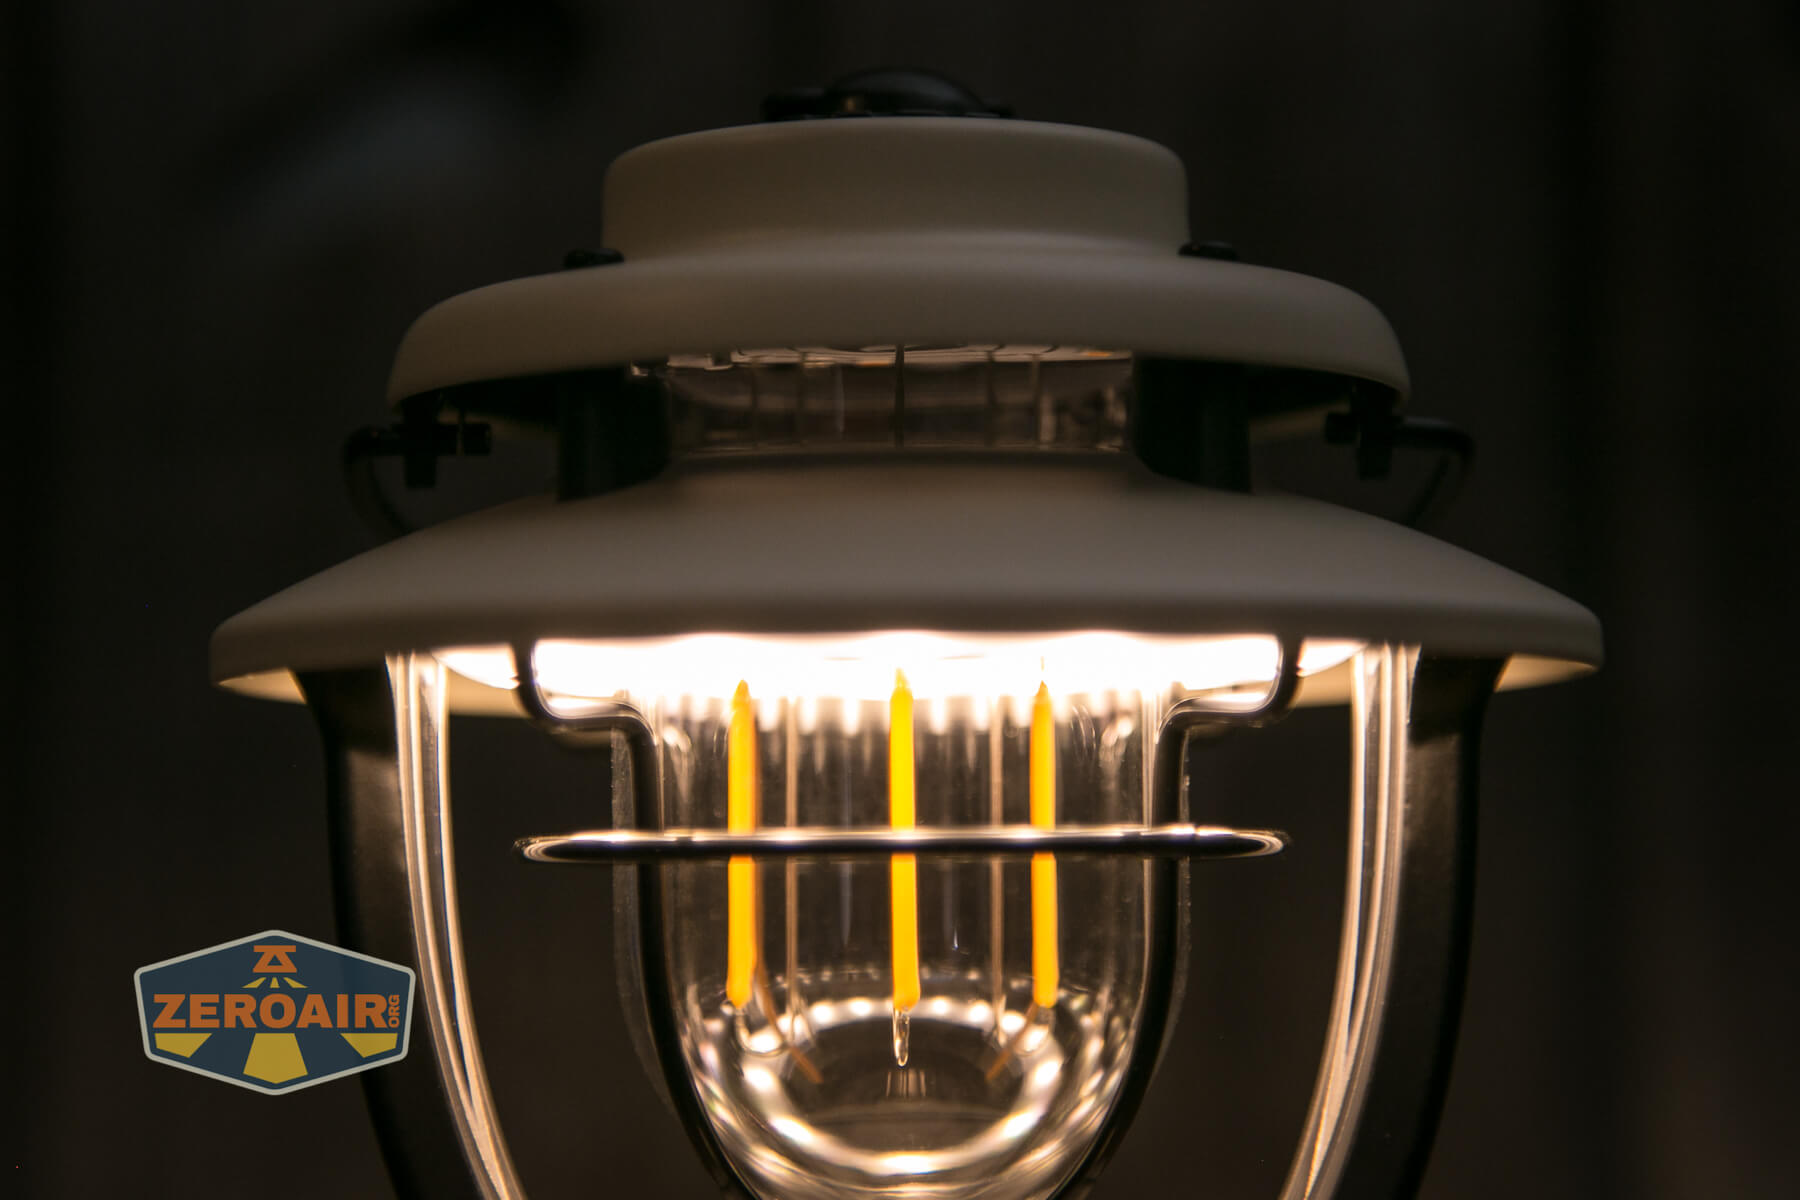
LED and Beam
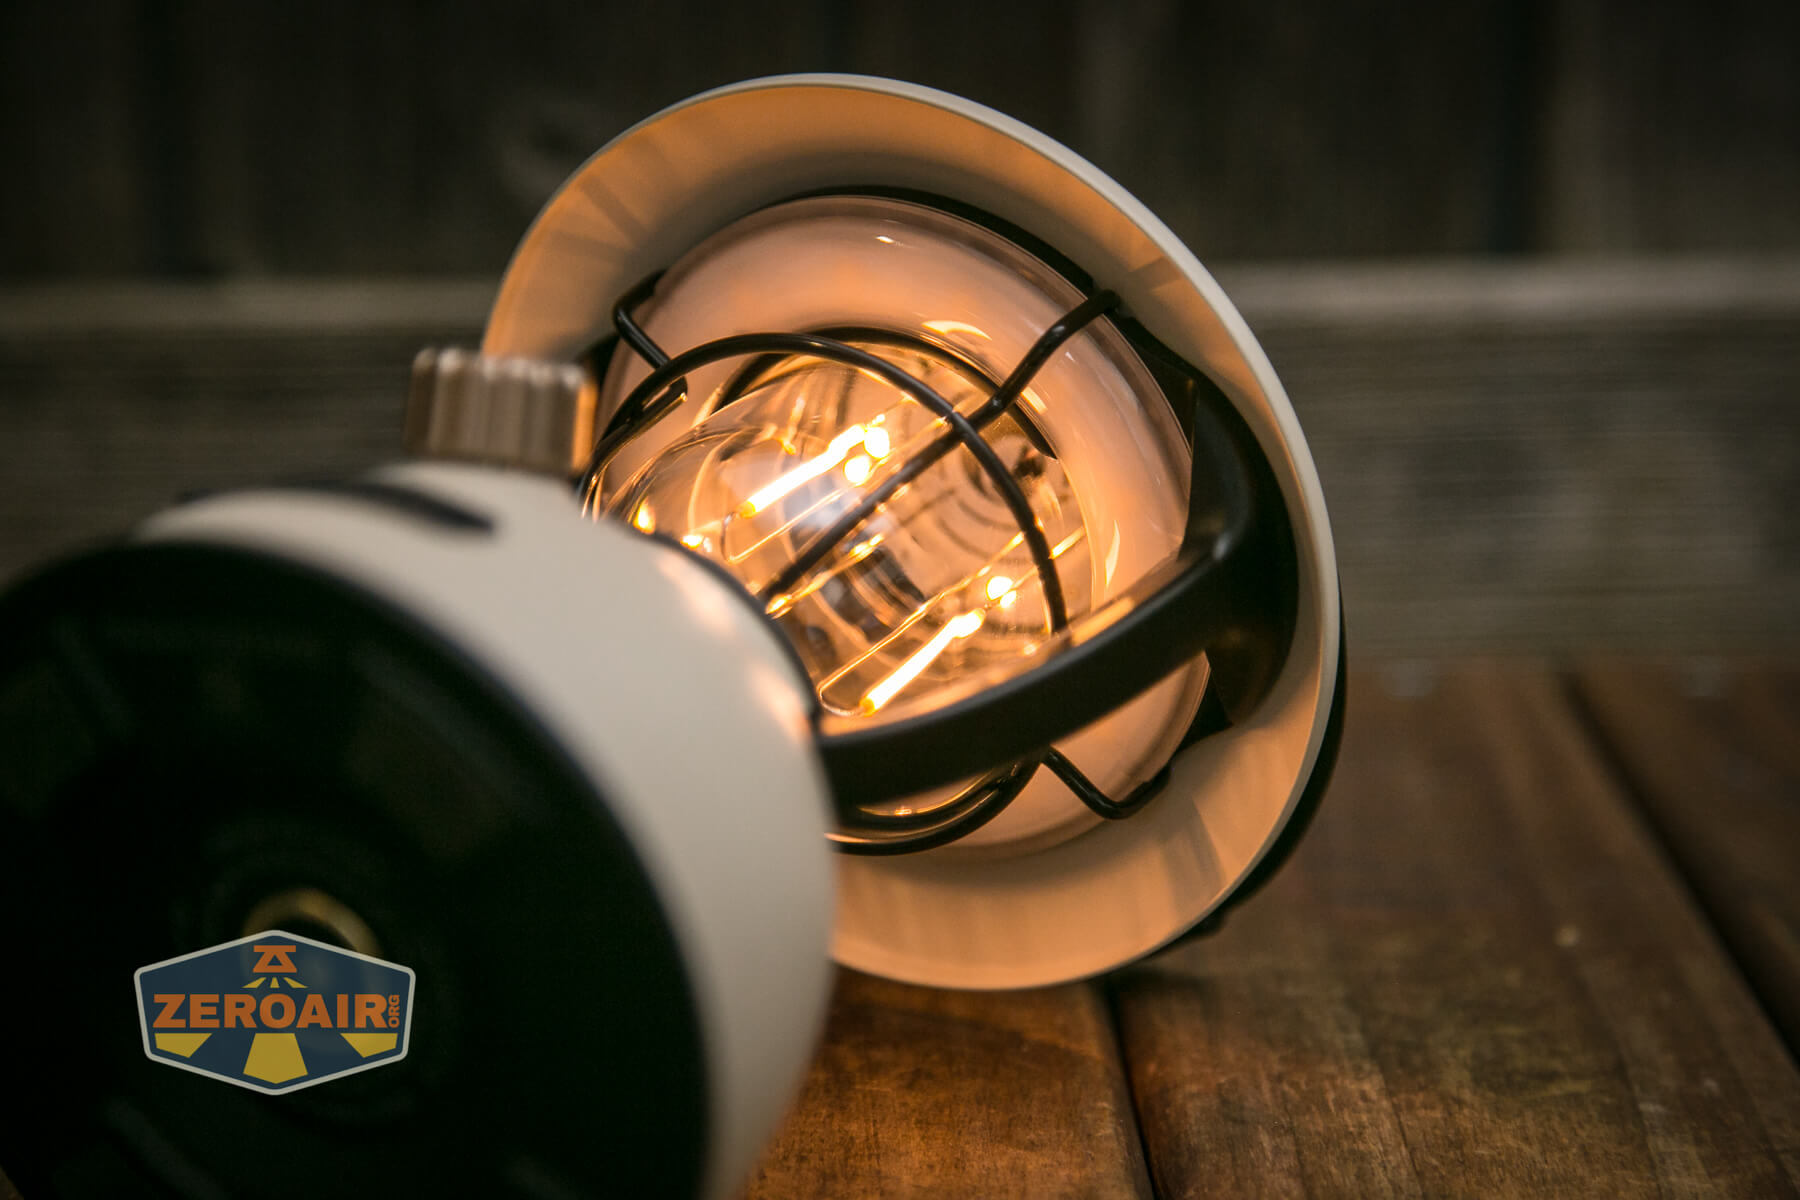
Olight doesn’t state what emitters are used in the Olantern Classic 2 Pro Lantern. As I said above, there are two sets. The tube-like long emitter array is for very warm white. The others, which are sort of hidden under that larger cap, are warm white (but less warm white), and are in action below:

Here’s warm white in action.
There’s not really a state where both sets of emitters stay on at the same time. When you ramp up, the emitters do fade between one set and the other, but they still do not stay on while the other output is selected.
The brighter LEDs get a diffuser.
The middle picture below is during the transition.
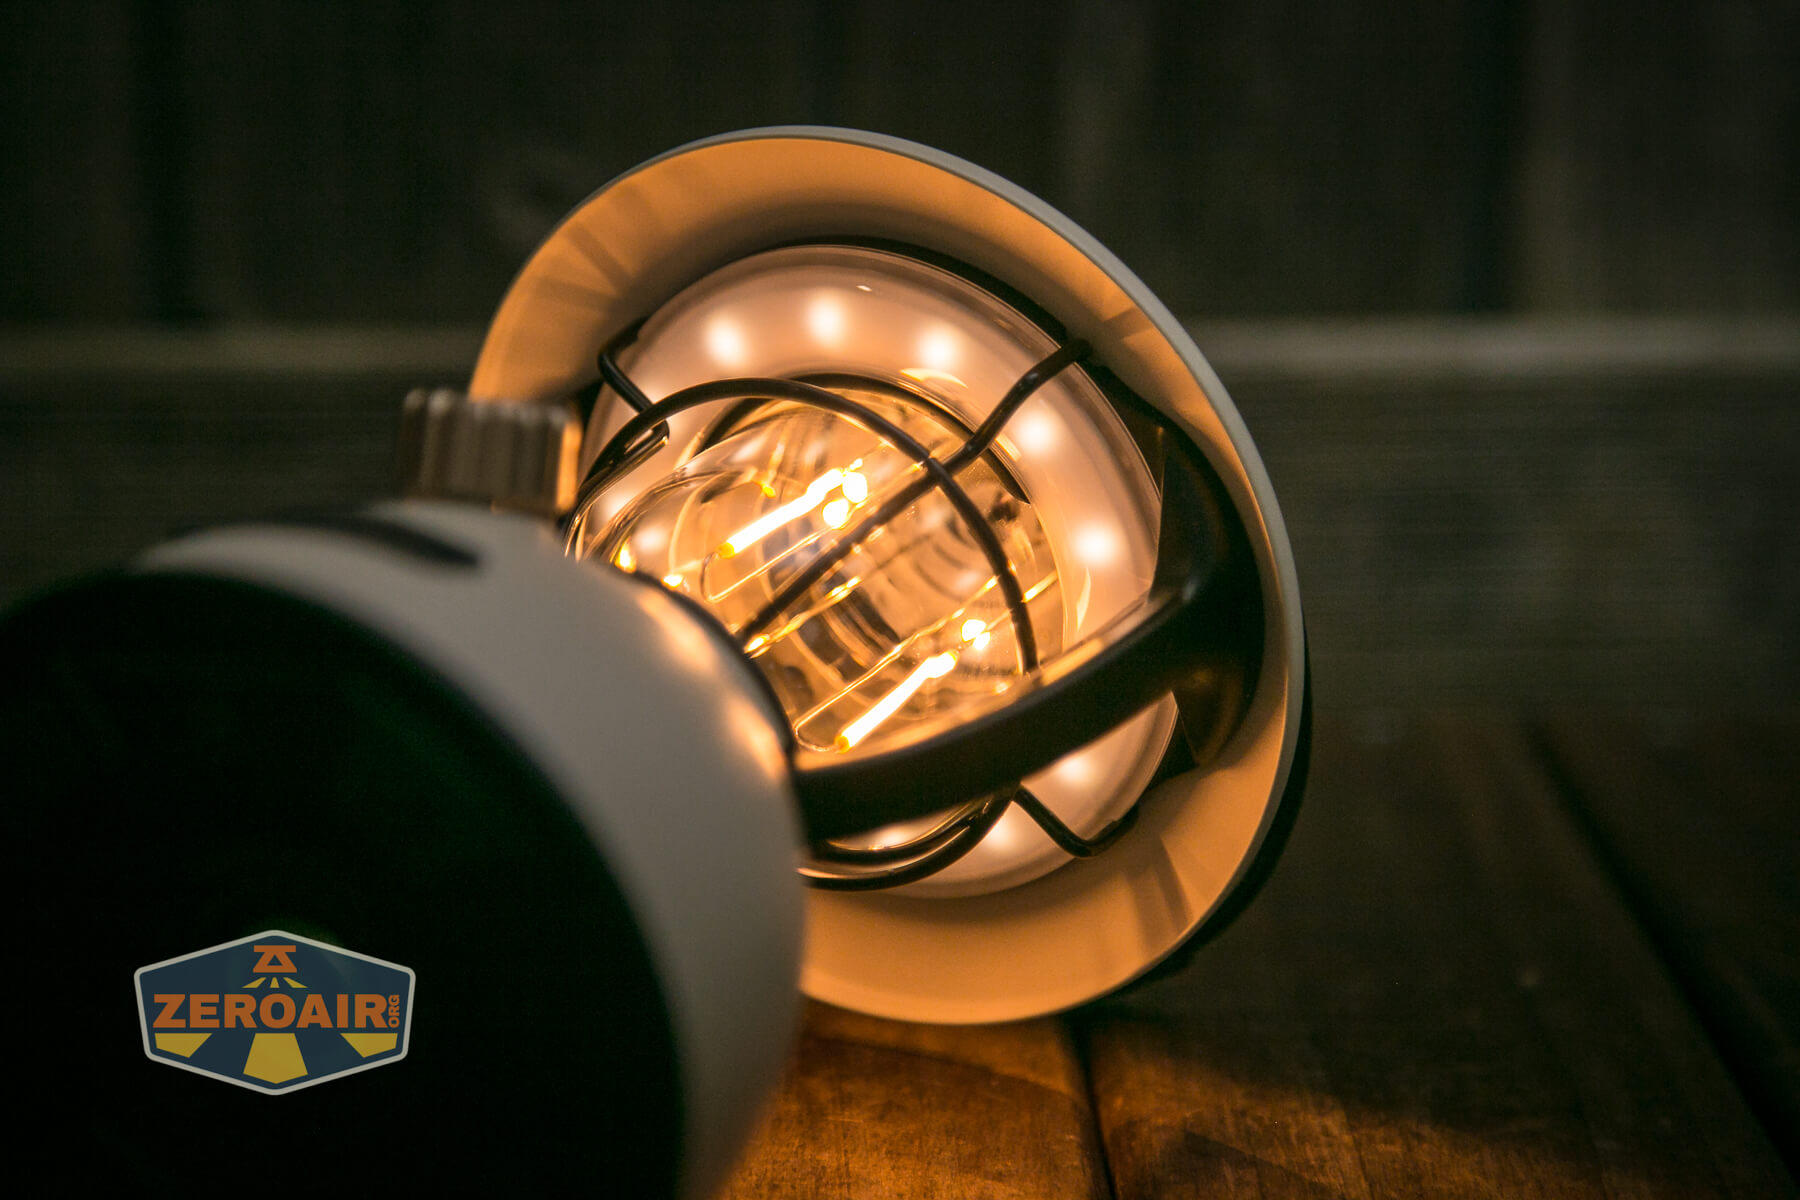
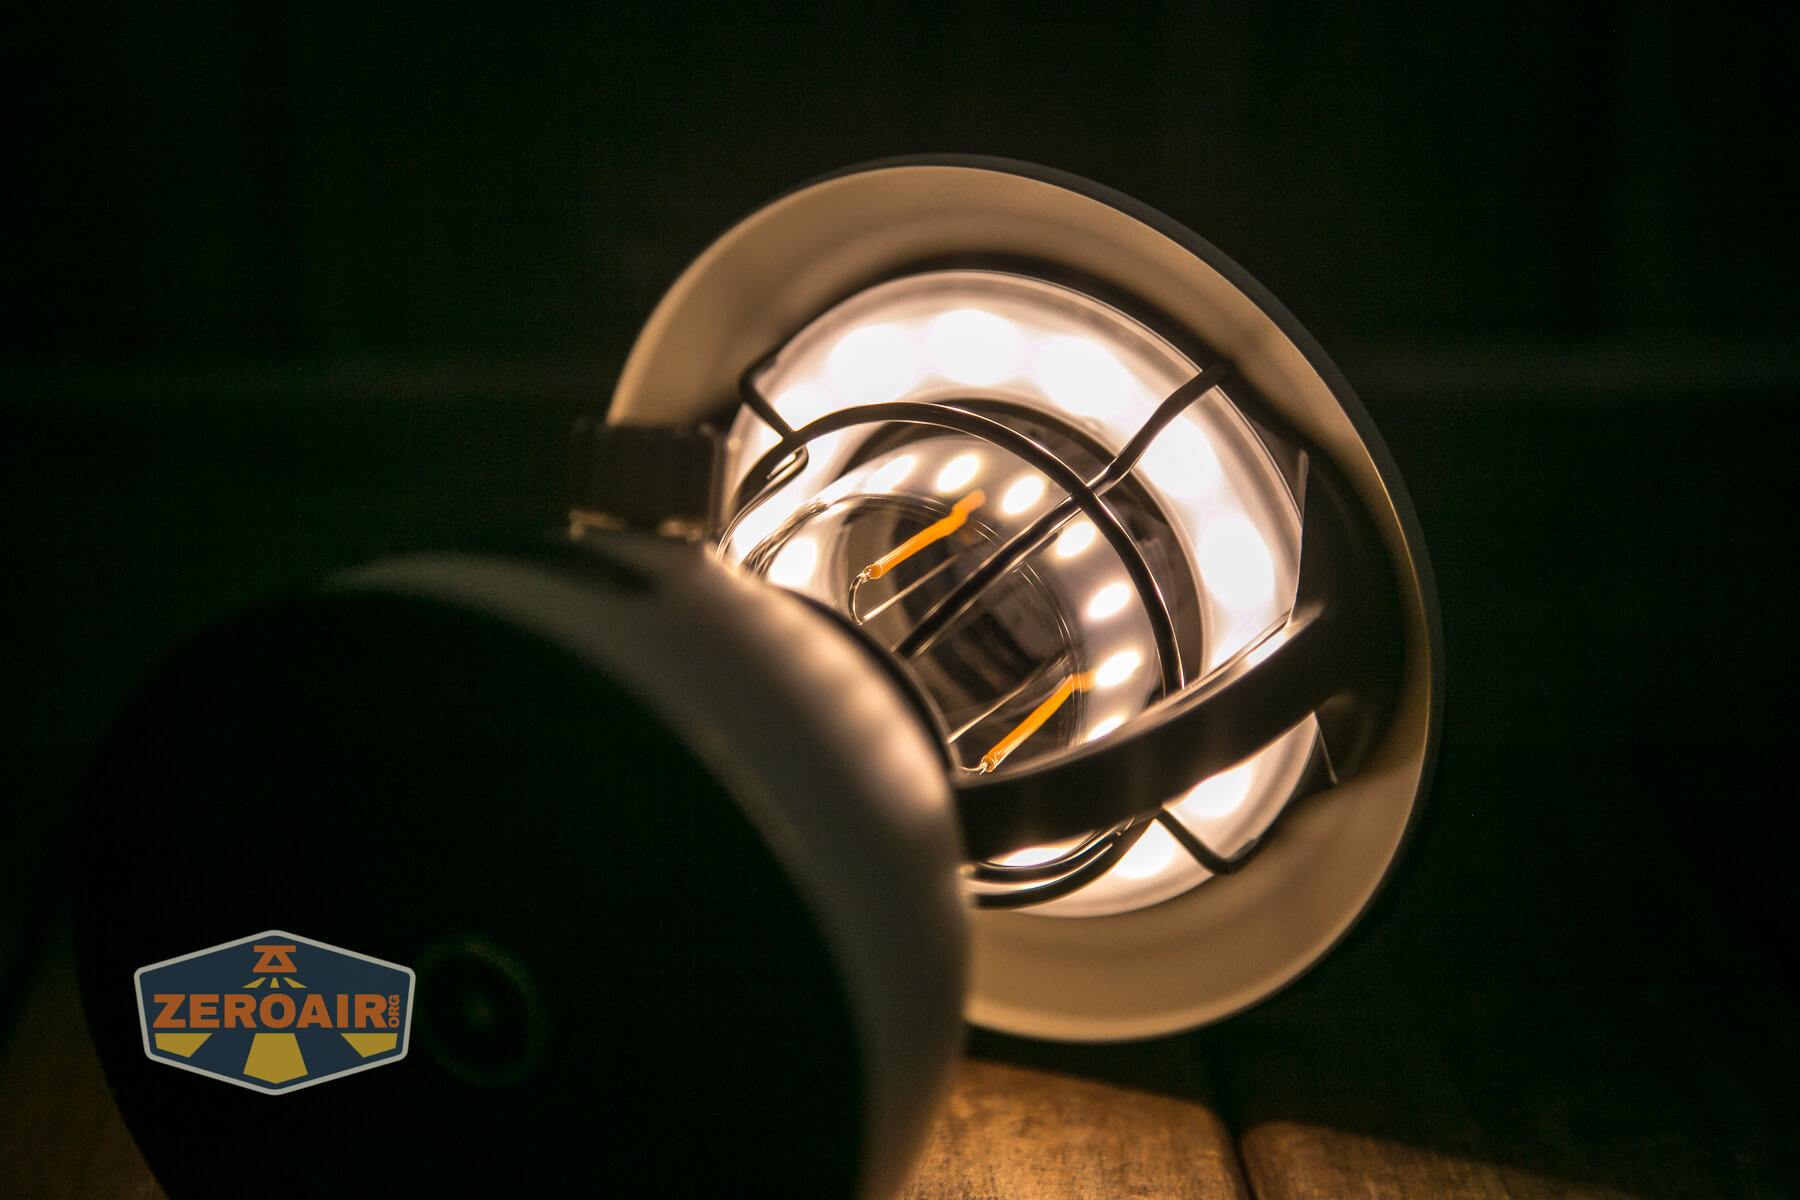
Those warm white tubes are aided by more standard LEDs in the cap, which are also warm white.

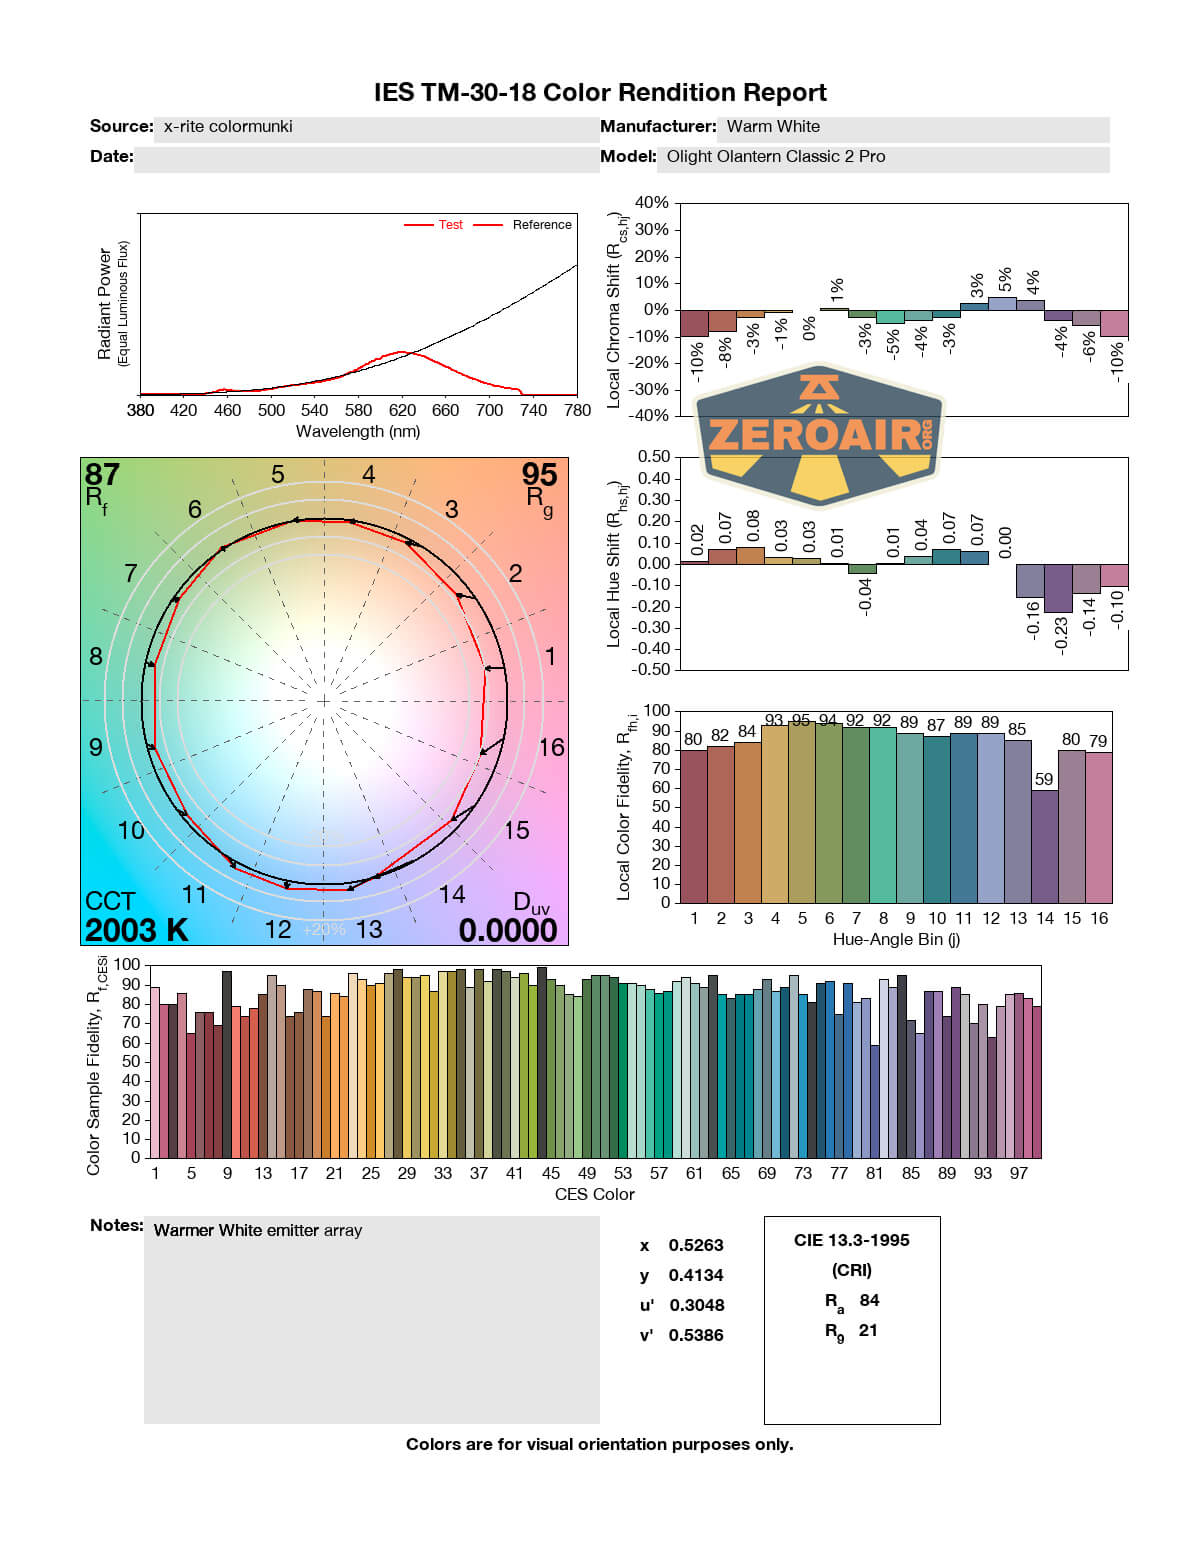
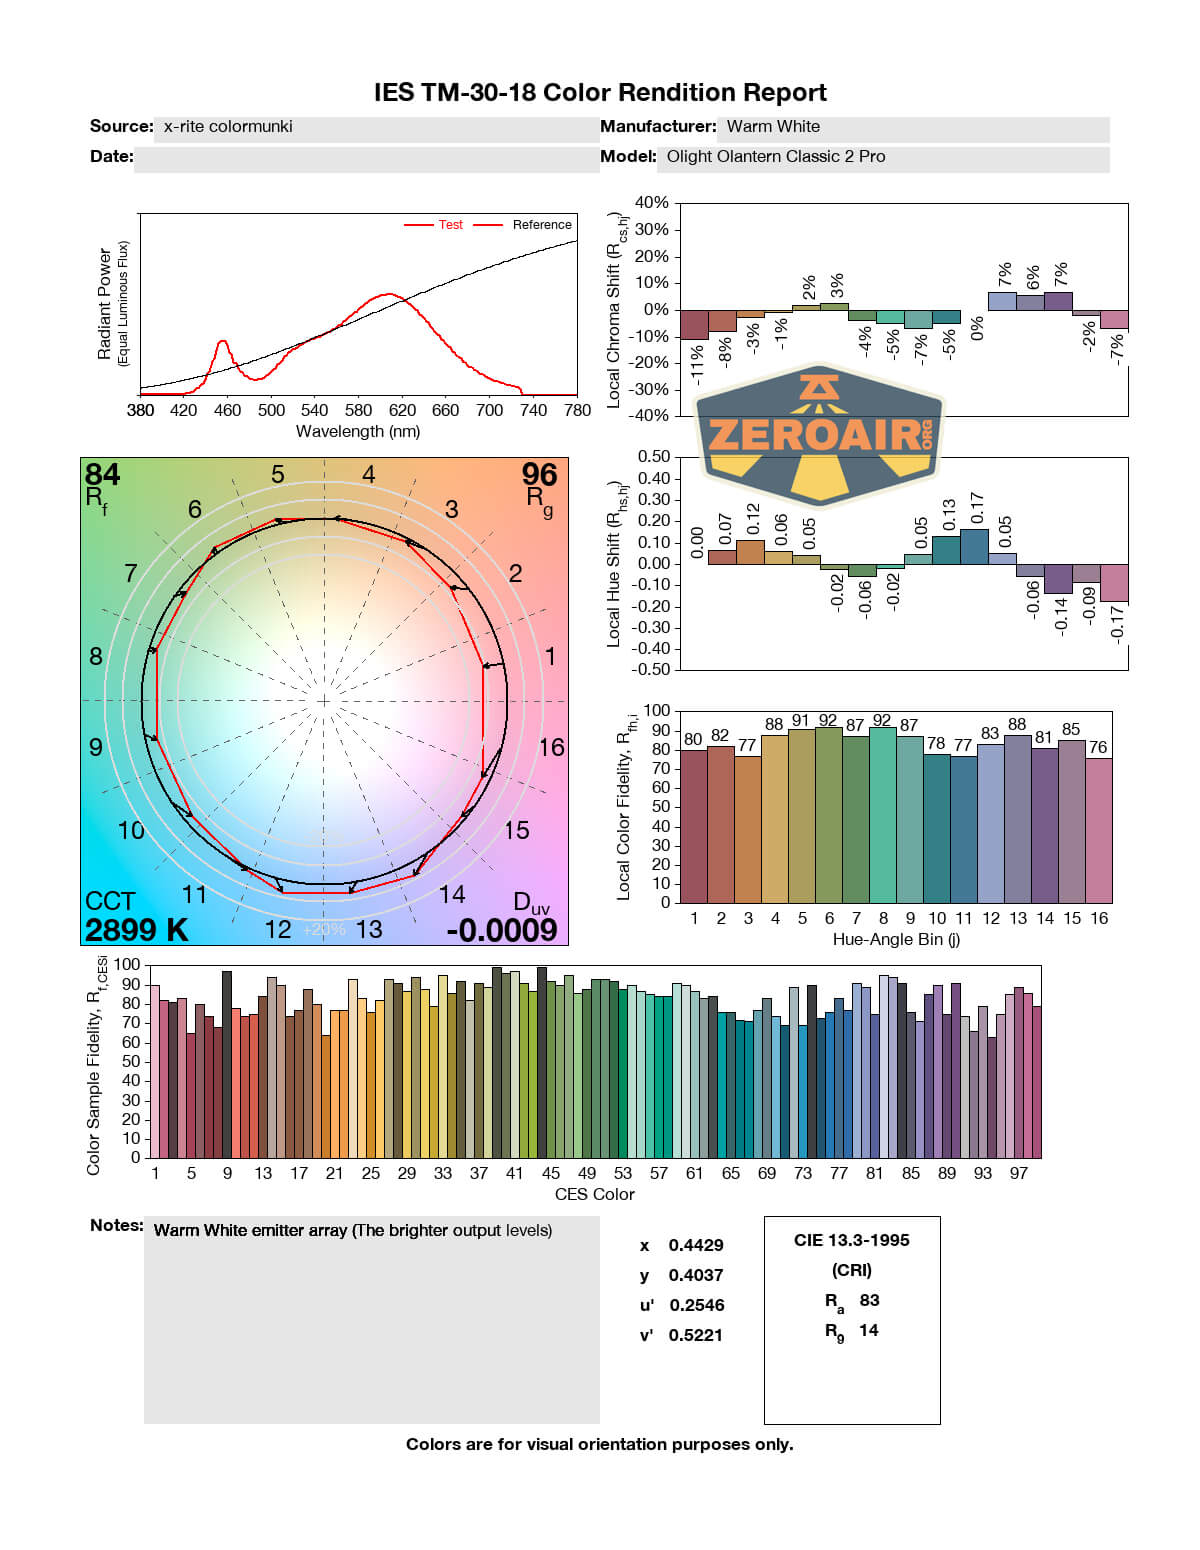
LED Color Report (CRI and CCT)
The two outputs have quite different CCT – the warmer white is around 2000K, and the cooler brighter white is still very warm, at around 2800K. Both have middle-level CRI, at around 84. The 2000K emitter has a Duv of 0.0000 – exactly on the bbl! Fortunately, neither has any green shift at all. This is a very acceptable, even great, report.
Conclusion
What I like
- Very good design
- USB-C powerbank at 5V, 9V, and 12V
- USB-A powerbank at 5V, 9V, and 12V!!
- Very simple user interface
- Very warm white (2000K) option
- Brighter but less warm 2800K
What I don’t like
- Not available in the classic red (or orange) color
- No detent to indicate switching between emitter arrays
- Costly, at $100
Notes
- This content originally appeared at zeroair.org. Please visit there for the best experience!
- Please use my Amazon.com referral link to help support zeroair.org!
- Please support me on Patreon! I deeply appreciate your support!
Discover more from ZeroAir Reviews
Subscribe to get the latest posts sent to your email.
I think this is using PWM
PWM