
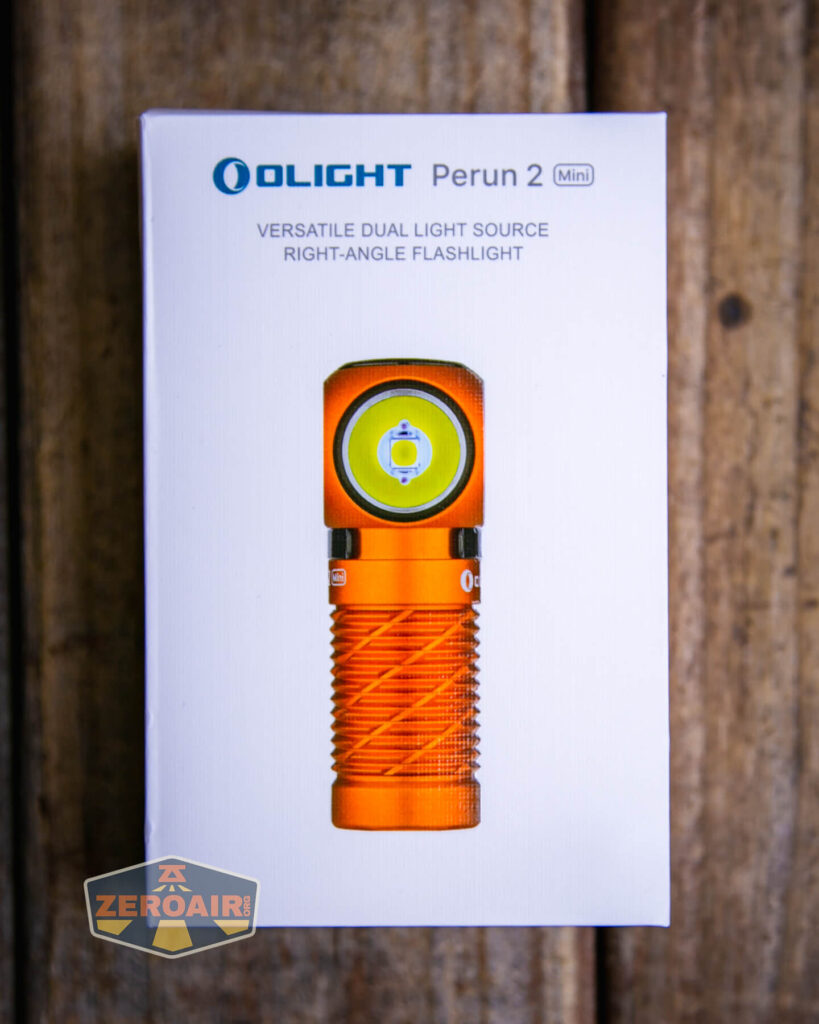
Olight Perun 2 Mini Headlamp Review
The Olight Perun 2 Mini headlamp is available with high output as well as a secondary red emitter. Available in neutral white, too! Read on!
Official Specs and Features
Here’s a link to the Olight Perun 2 Mini headlamp product page.
Versions
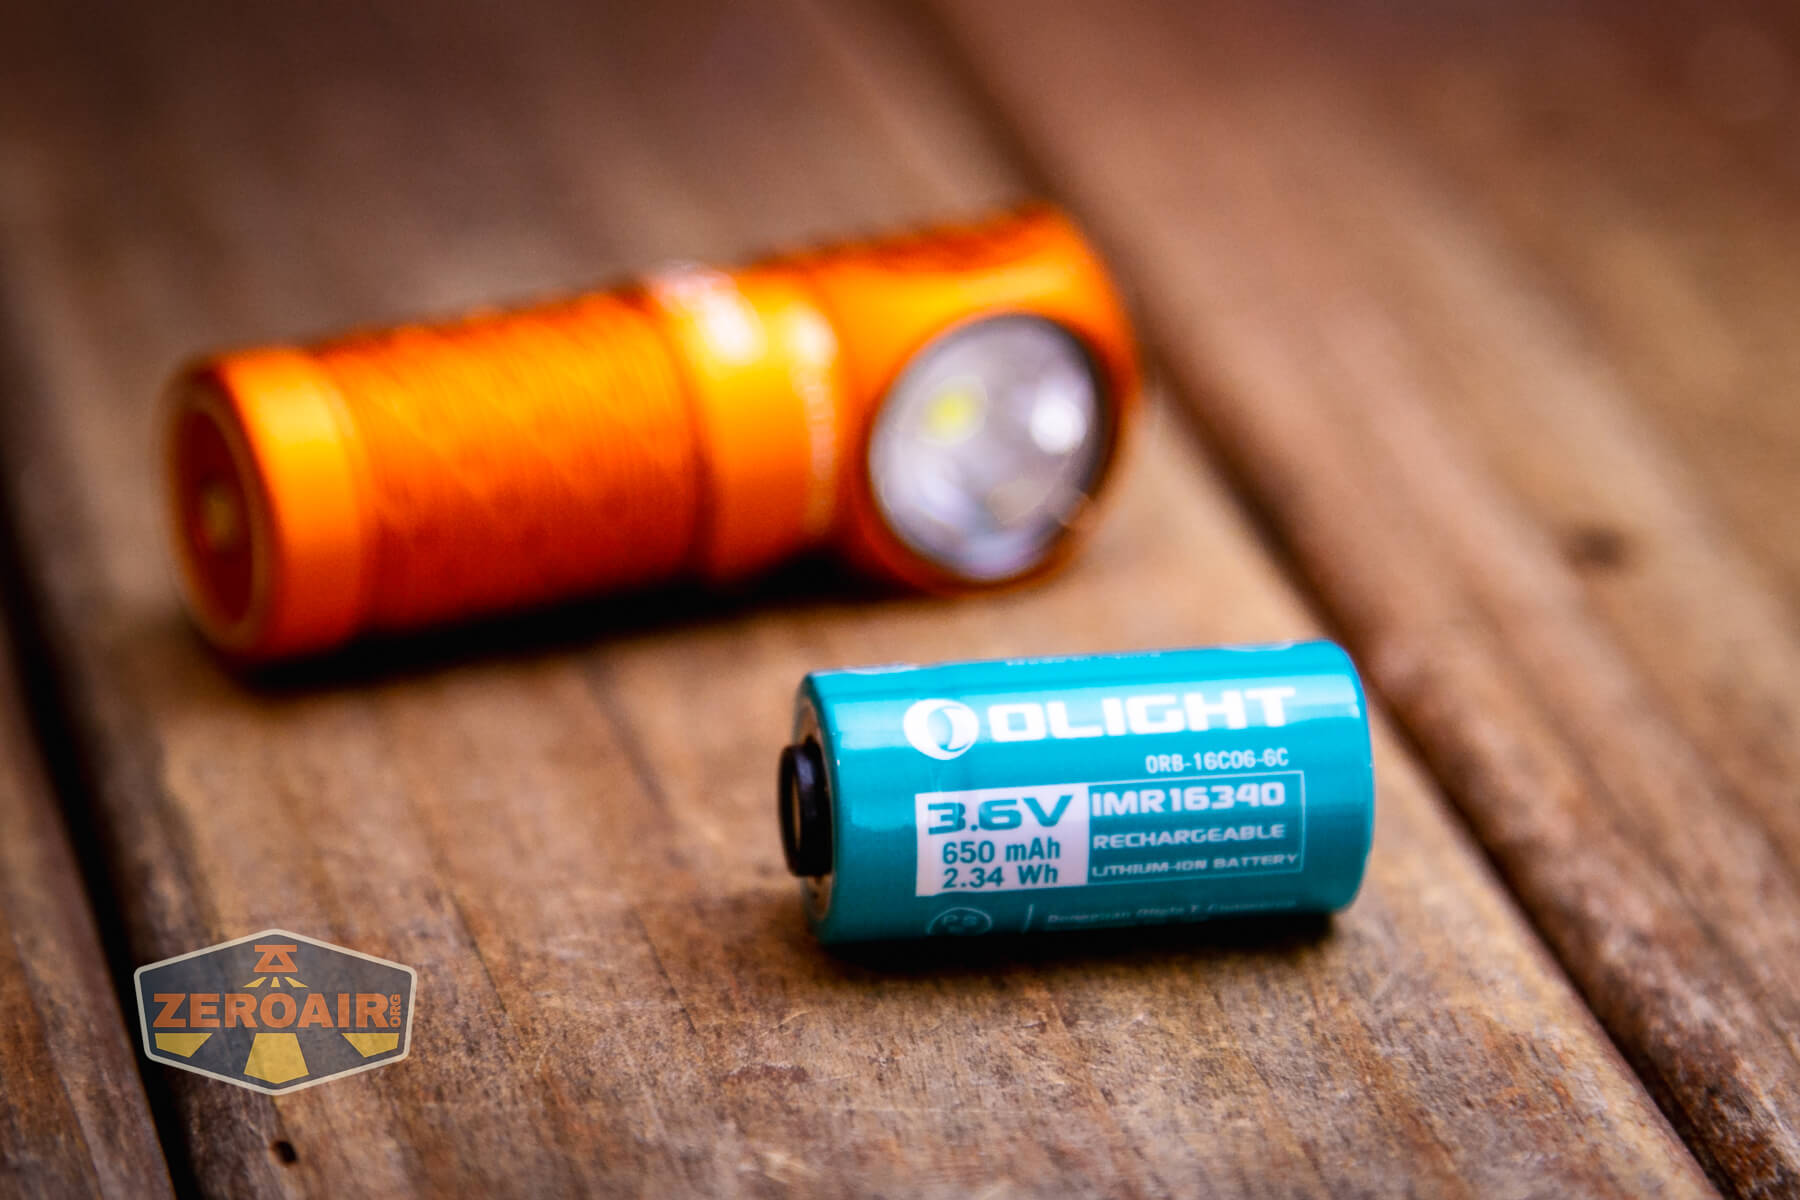
Three body color versions are available: black, lime green, and orange (seen here). All three are available in cool white (as seen in this review,) but black is also available in neutral white.
Price
When available, the Olight Perun 2 Mini headlamp sells for $64.99. That’s a ShareASale link.
Short Review
I really appreciate the addition of a red emitter to this headlamp, even though I would love more than just one mode. Otherwise, the improvements to the Perun 2 Mini over the Perun Mini are nice and appreciated. The new indicator on the switch is fantastic, too!
Long Review
The Big Table
| Olight Perun 2 Mini Headlamp | |
|---|---|
| Emitter: | Unstated (Probably Osram P9) |
| Price in USD at publication time: | $64.99 at olightstore.com |
| Cell: | 1×16340 |
| Runtime Graphs | |
| LVP? | Yes |
| Switch Type: | E-Switch |
| Quiescent Current (mA): | ? |
| On-Board Charging? | Yes |
| Charge Port Type: | Proprietary Magnetic |
| Charge Graph | |
| Power off Charge Port | “with cell: all modes without cell: no modes” |
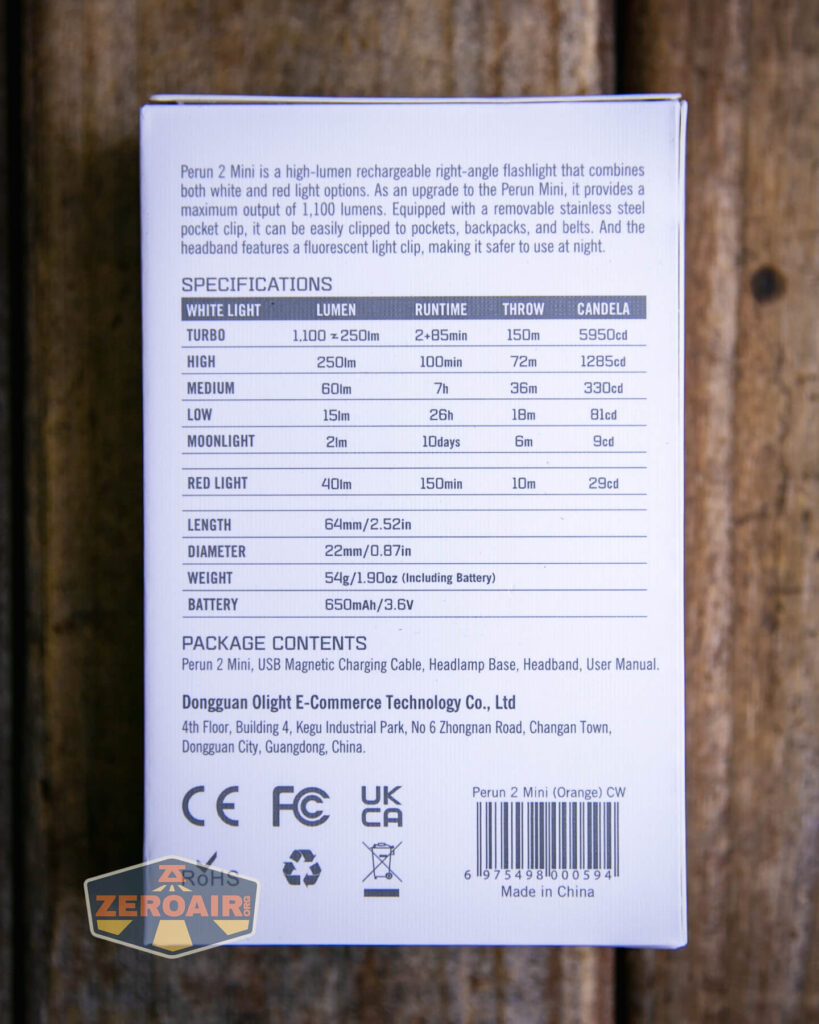
| Claimed Lumens (lm) | 1100 |
| Measured Lumens (at 30s) | 1086 (98.7% of claim)^ |
| Candela per Lumen | 6.76 |
| Claimed Throw (m) | 150 |
| Candela (Calculated) in cd (at 30s) | 309lux @ 4.537m = 6361cd |
| Throw (Calculated) (m) | 159.5 (106.3% of claim)^ |
| Claimed CCT | 5700-6700 |
| Measured CCT Range (K) | 5800-6400 Kelvin |
| Item provided for review by: | Olight |
| All my Olight reviews! | |
^ Measurement disclaimer: Testing flashlights is my hobby. I use hobbyist-level equipment for testing, including some I made myself. Try not to get buried in the details of manufacturer specifications versus measurements recorded here; A certain amount of difference (say, 10 or 15%) is perfectly reasonable.
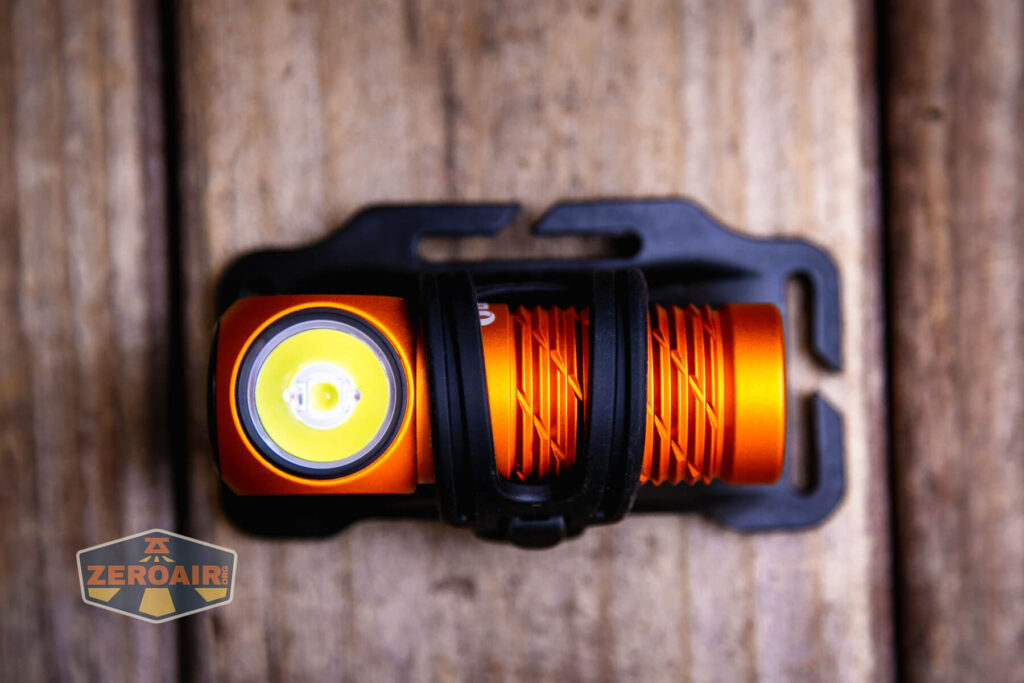
What’s Included

- Olight Perun 2 Mini Headlamp
- Olight “Customized” 650mAh 16340
- Olight headband
- Headband light attachment
- Charge cable (USB to proprietary magnetic) (1A max)
- Manual
Package and Manual
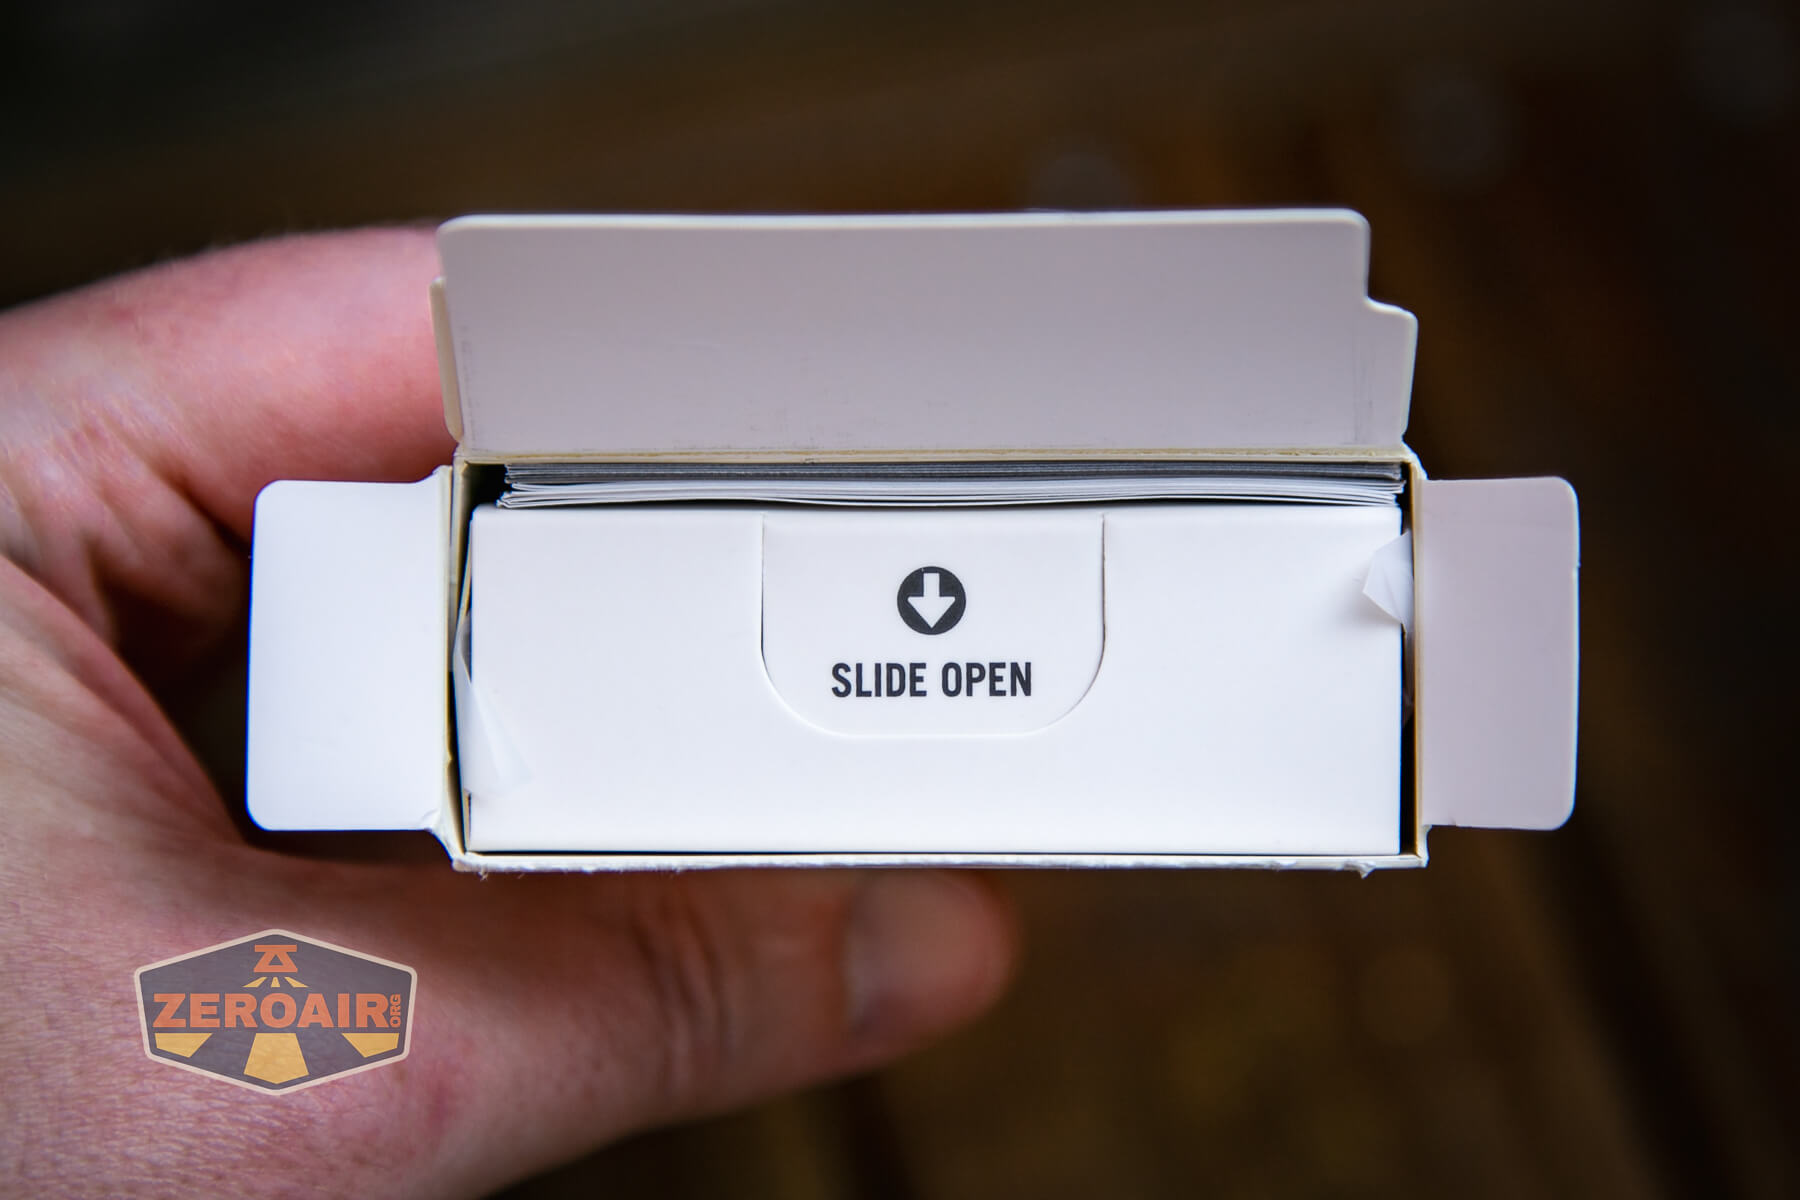
Have I said lately how much I hate these tear-off strip-style box openings? I do.


Build Quality and Disassembly
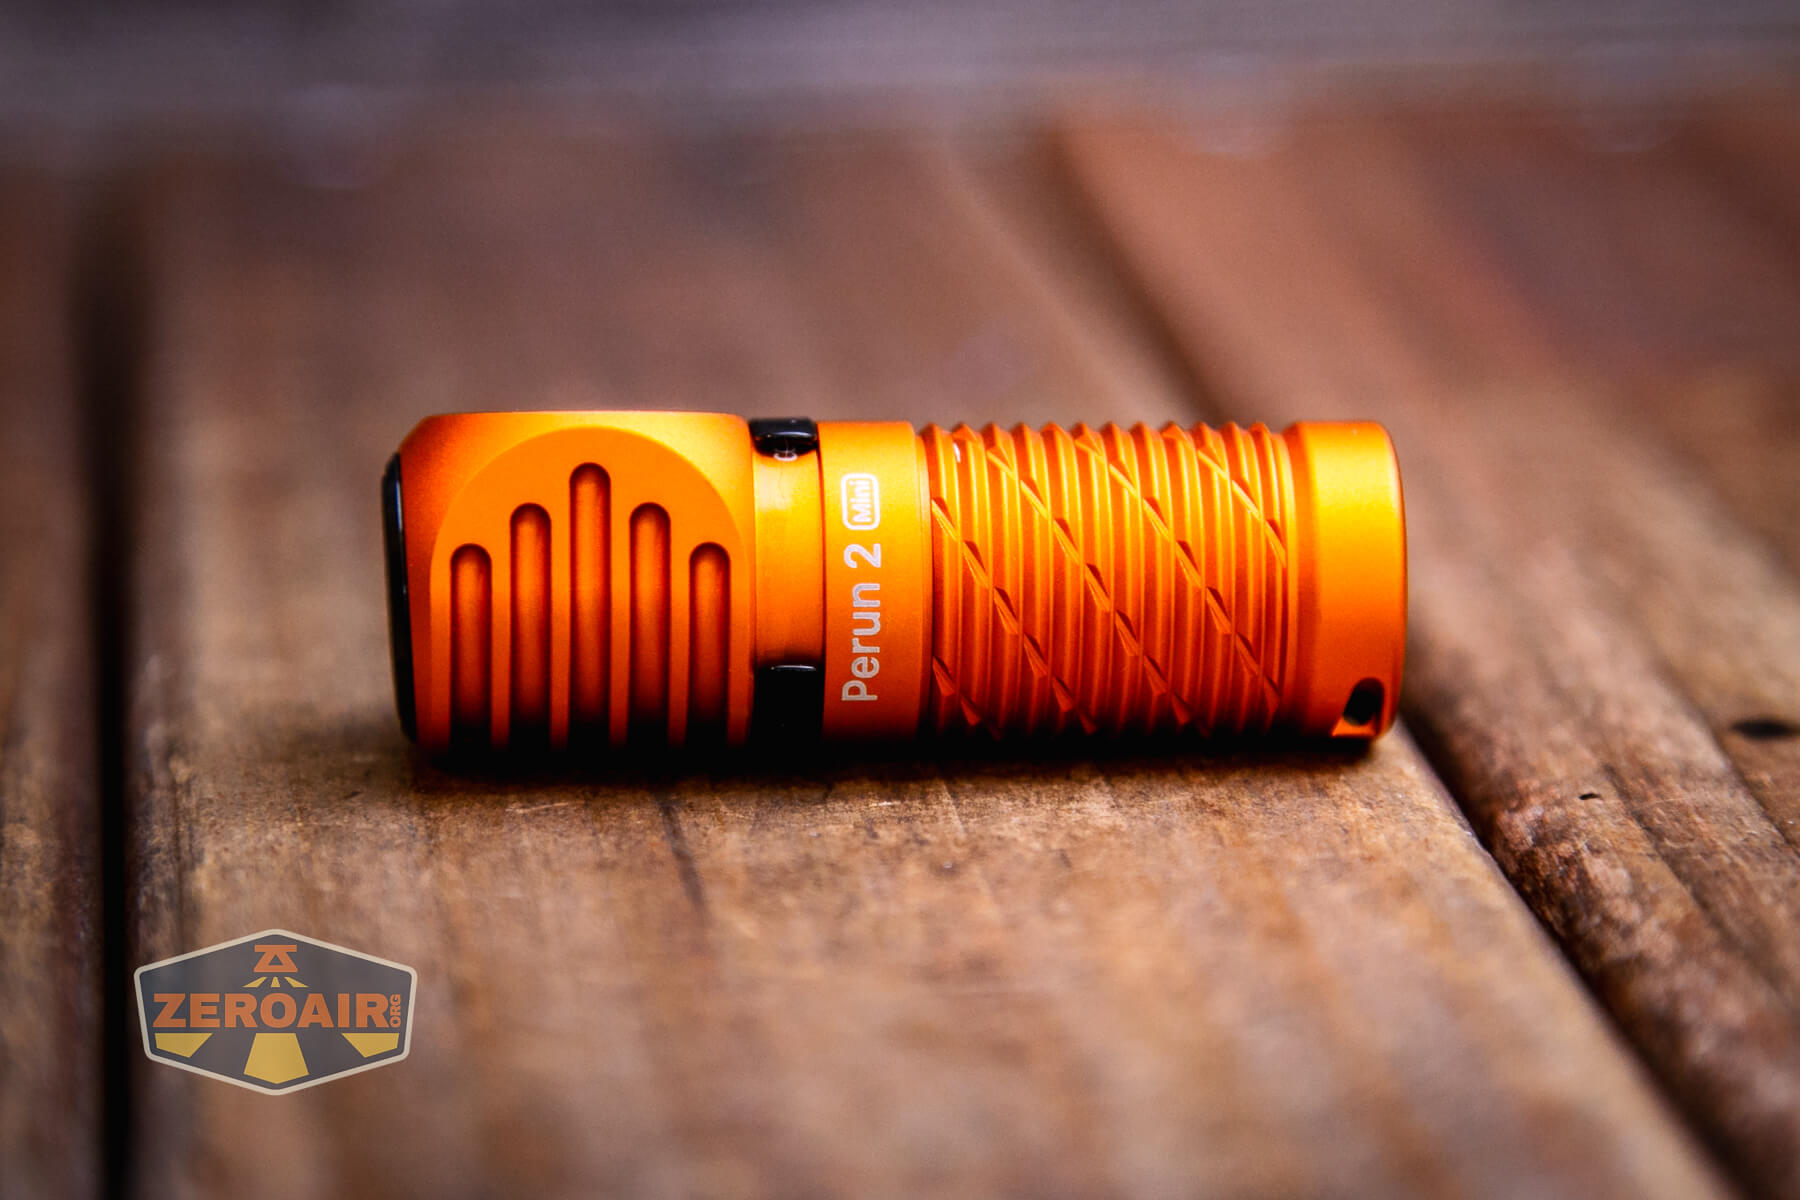
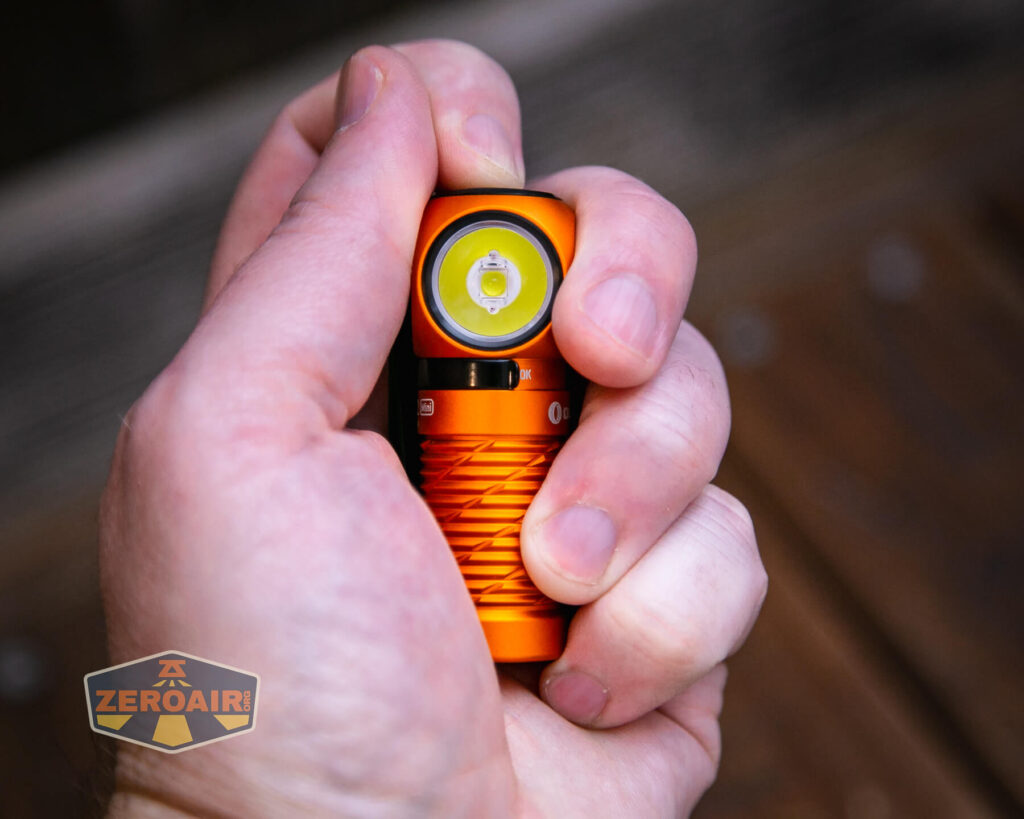
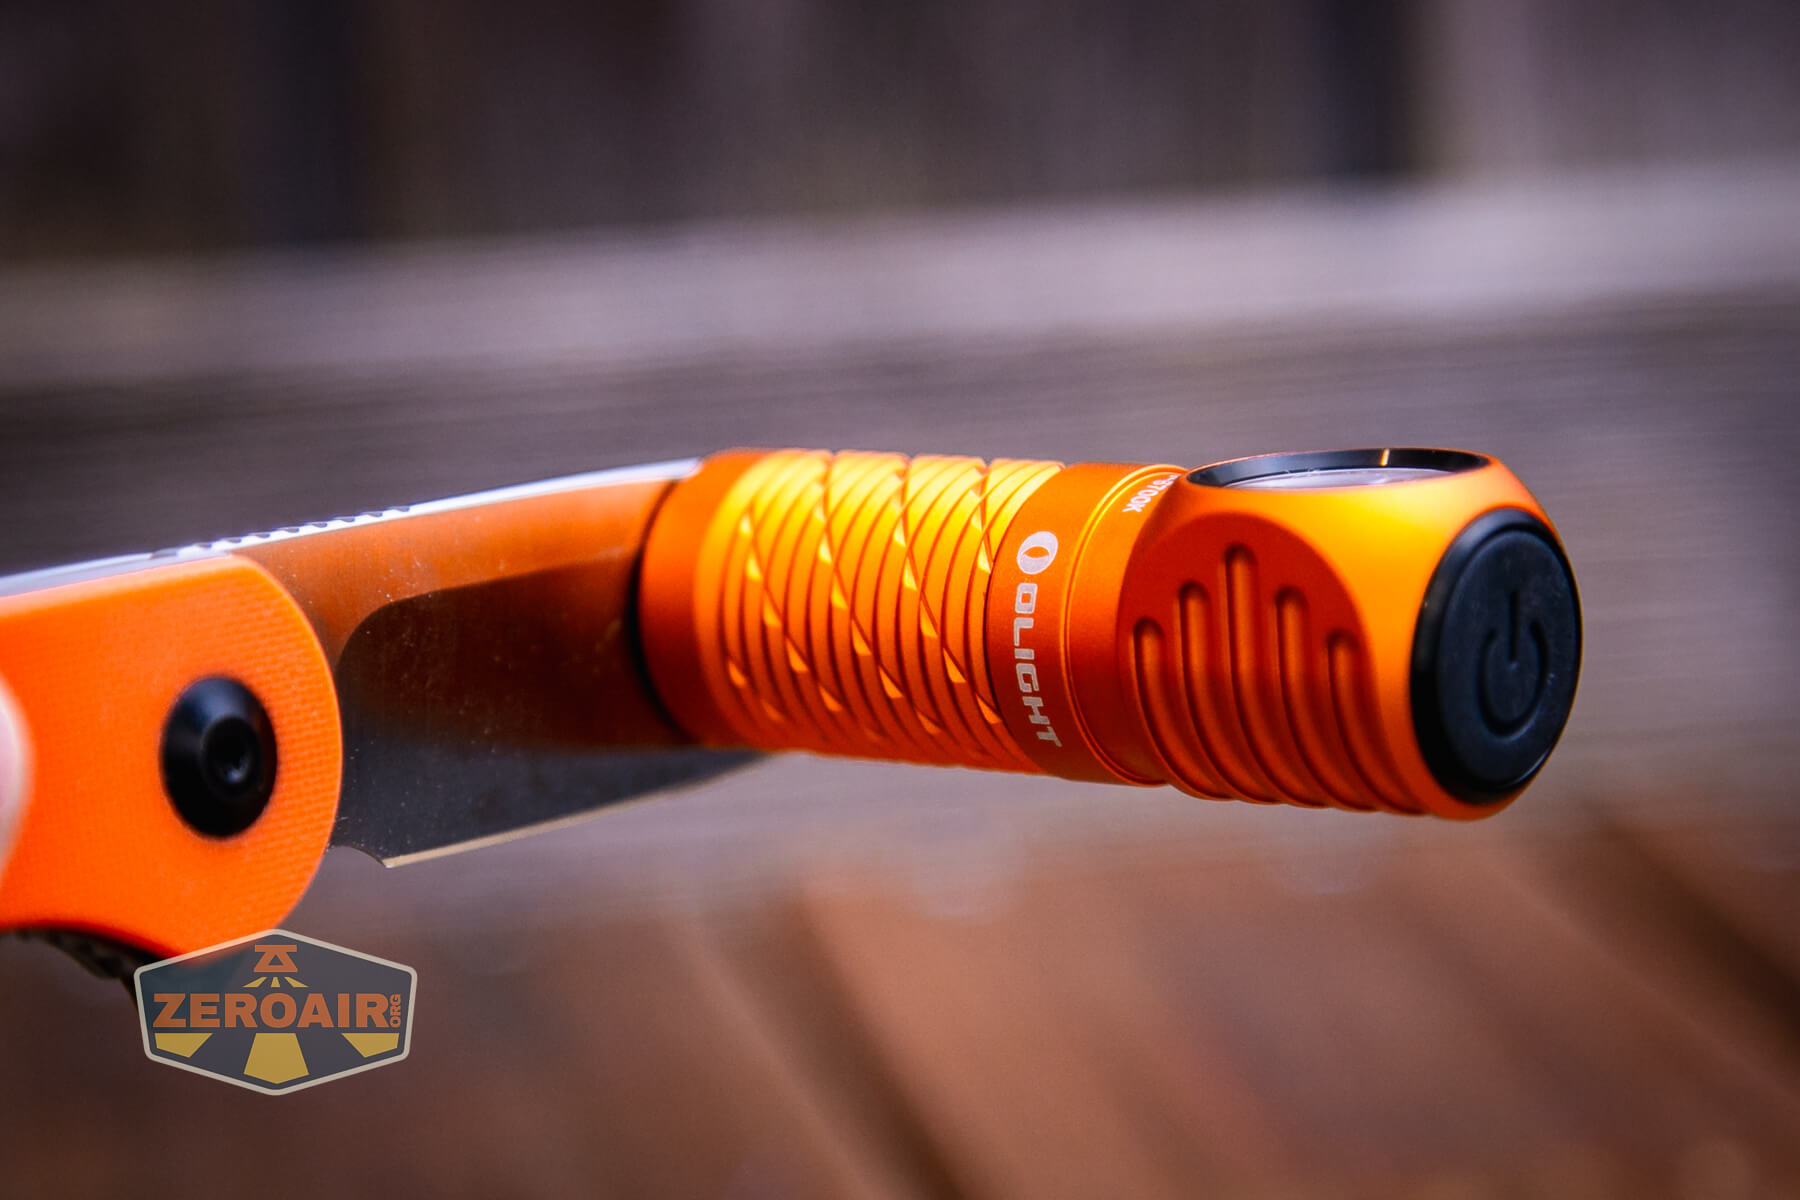
I’m happy that Olight went with the introductory version including orange. Sometimes orange only comes later.


The build quality is good as you’d expect. The light feels smooth in the hand, and the body provides adequate grip for unscrewing the body.
The head has deep cooling fins.

It also unscrews from the body – and that’s the extent of the parts.

The head end has a short spring and a rubber gasket. That gasket more or less prevents the cell from being installed incorrectly. What’s inside the tail there are contacts for both positive and negative, and are springy.
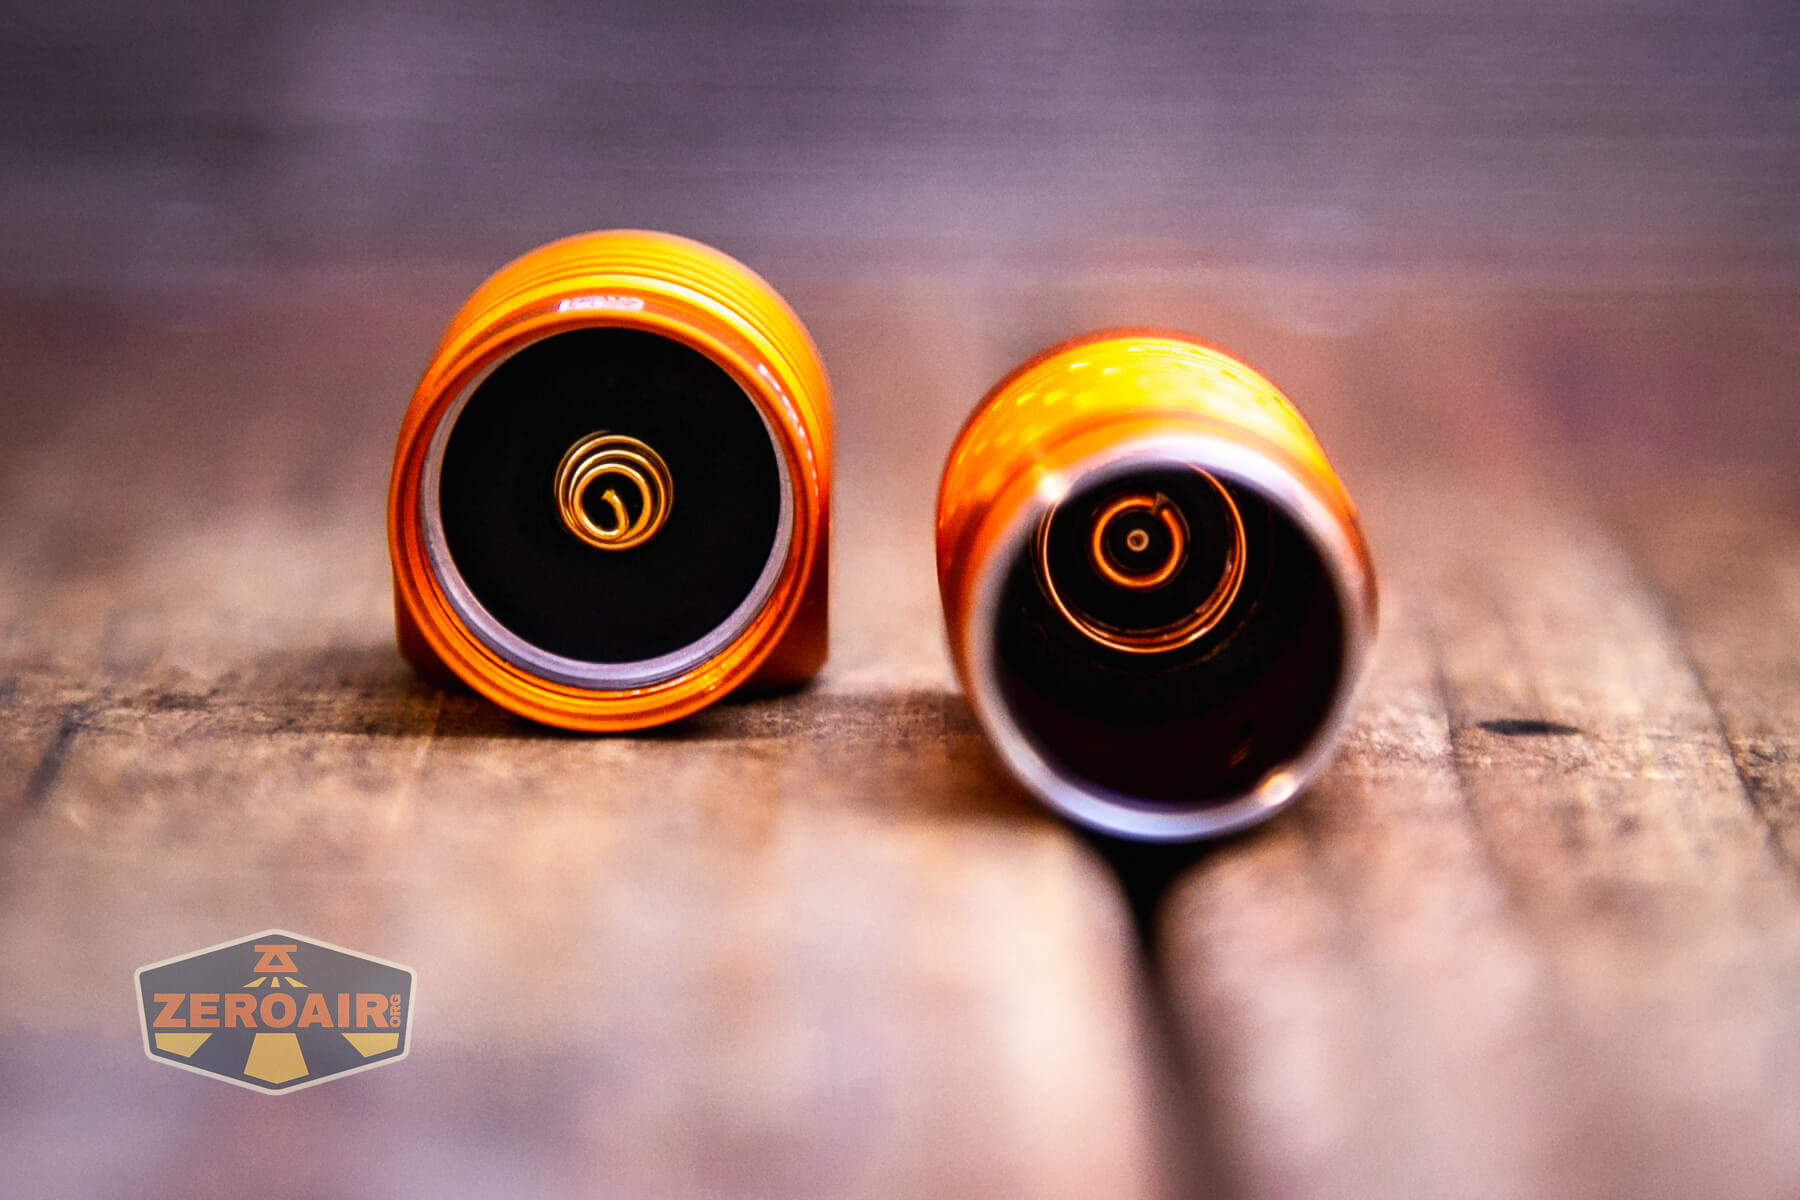
The tailcap has a charging connection.

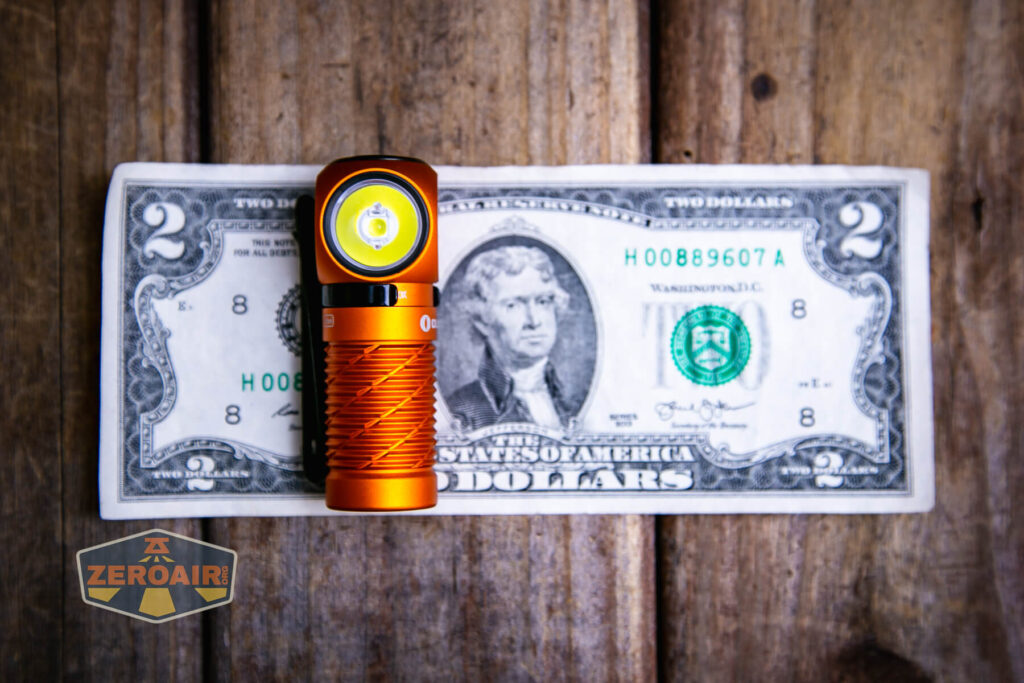
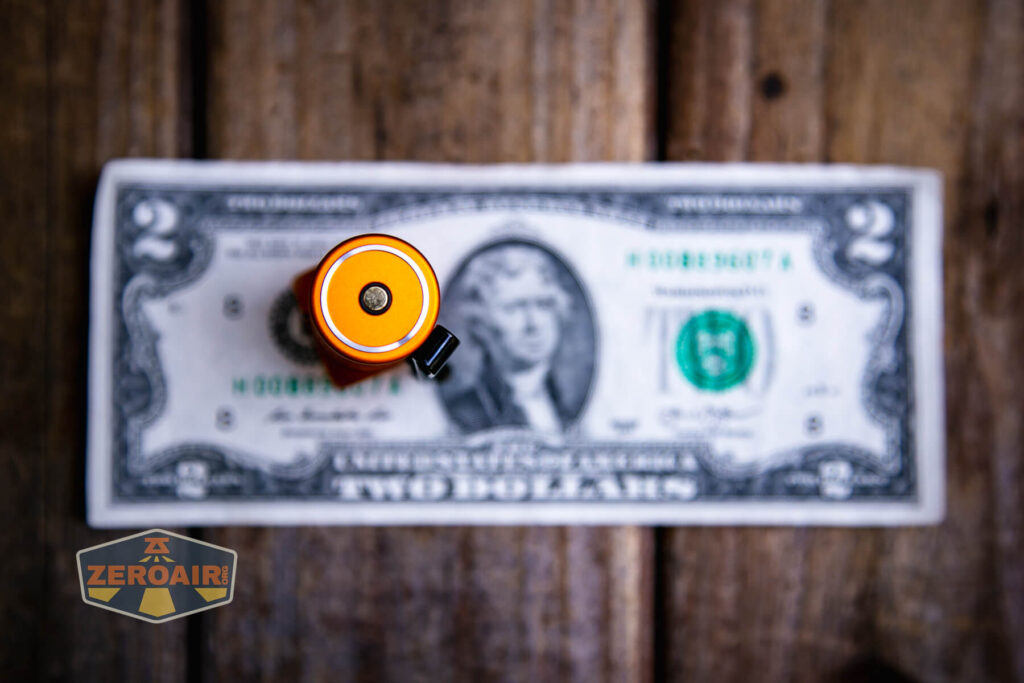
Size and Comps
Weight: 1.90 oz (54 g) (including battery)
Length: 2.52 in (64 mm)
Head Diameter: 0.87 in (22 mm)
Body Diameter: 0.81 in (20.6 mm)


If the flashlight will headstand, I’ll show it here (usually the third photo). If the flashlight will tailstand, I’ll also show that (usually in the fourth photo).


Here’s the test light with the venerable Convoy S2+. Mine’s a custom “baked” edition Nichia 219b triple. A very nice 18650 light.

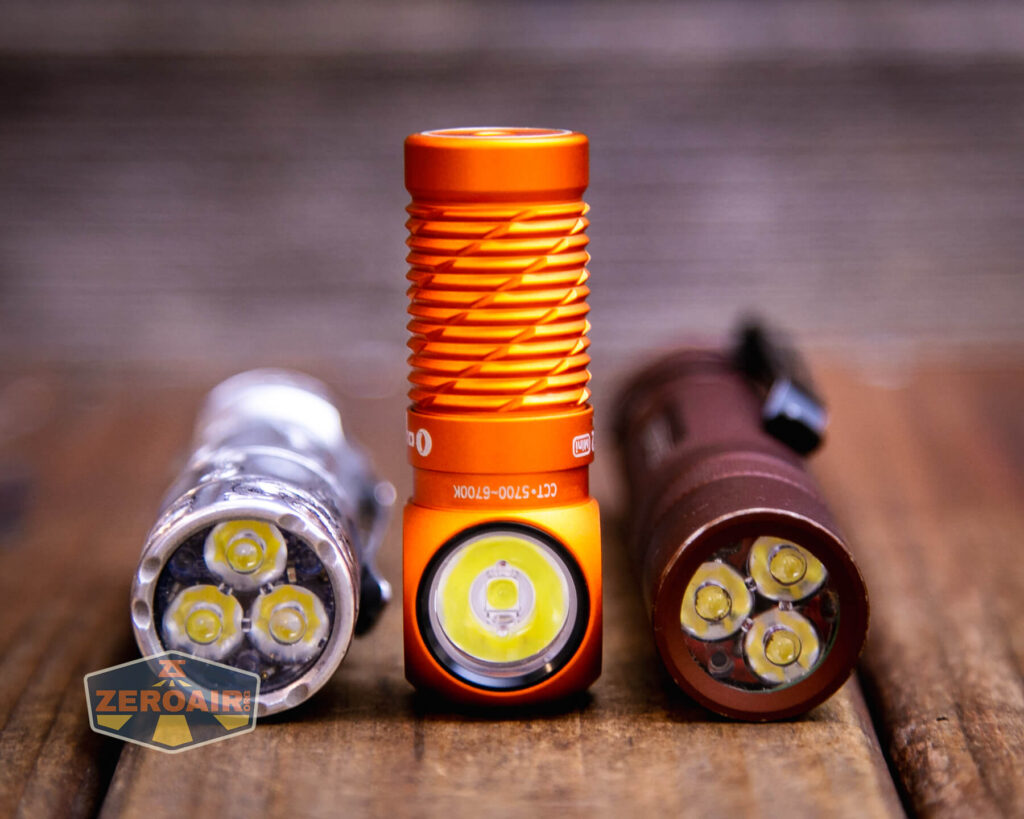
Also above is the light beside my custom engraved TorchLAB BOSS 35, an 18350 light. I reviewed the aluminum version of that light in both 35 and 70 formats.
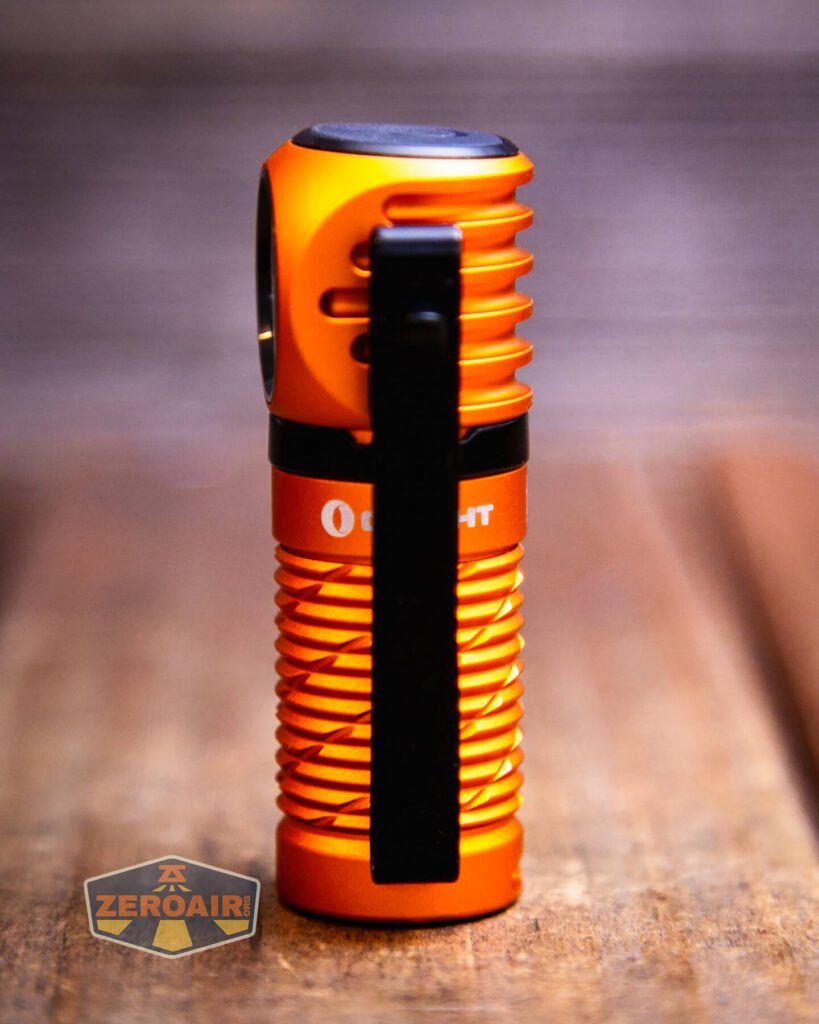
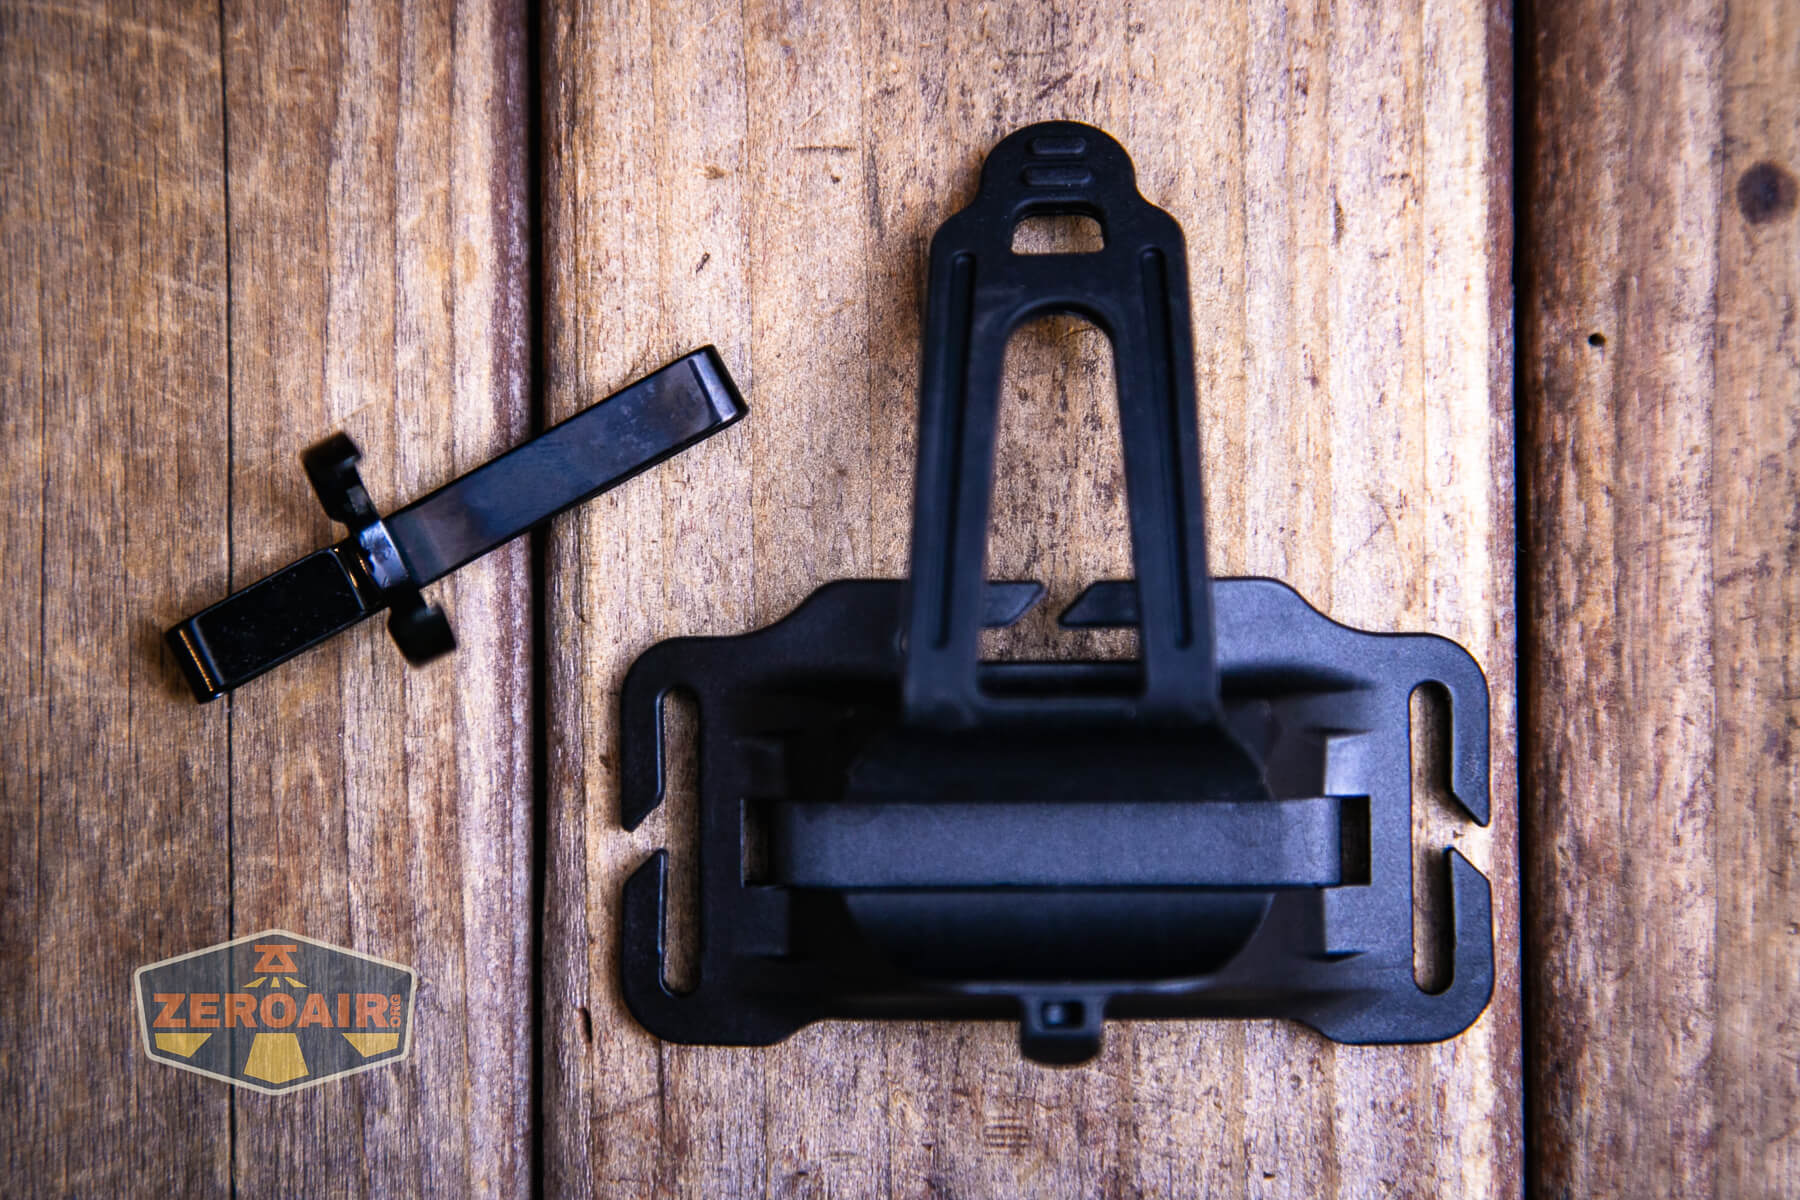
Retention and Carry
Since it ships attached to the light, let’s talk about the pocket clip first. It’s a black friction-fit “two-way” clip. The clip has a little lanyard hole in the shoulder, too.

This clip would allow attachment to the bill of a cap, though this being a right-angle light means that won’t be that ideal.
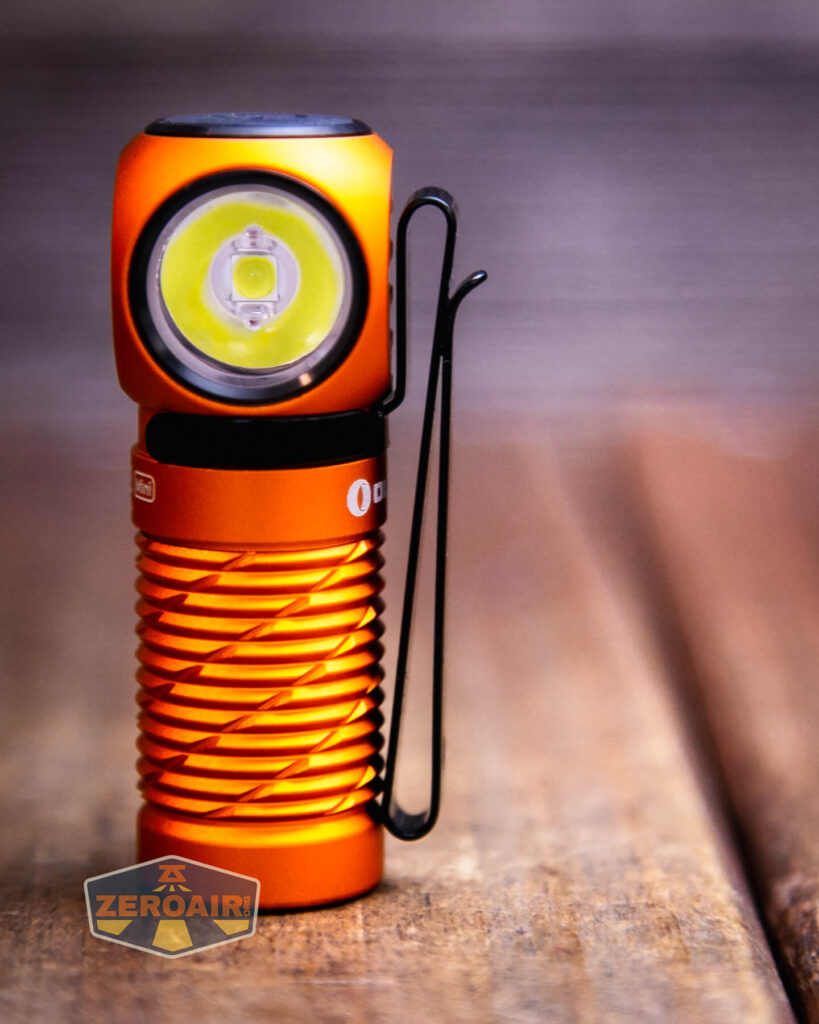
Next up is this headband attachment, which I think is a great improvement over that of the Perun Mini (it used a velcro patch-style attachment, in case you forgot.) (And also the headband was included as an additional item).
This one attaches to the included headband, and is sufficient.

The light can rotate quite a bit and is not hard to rotate.
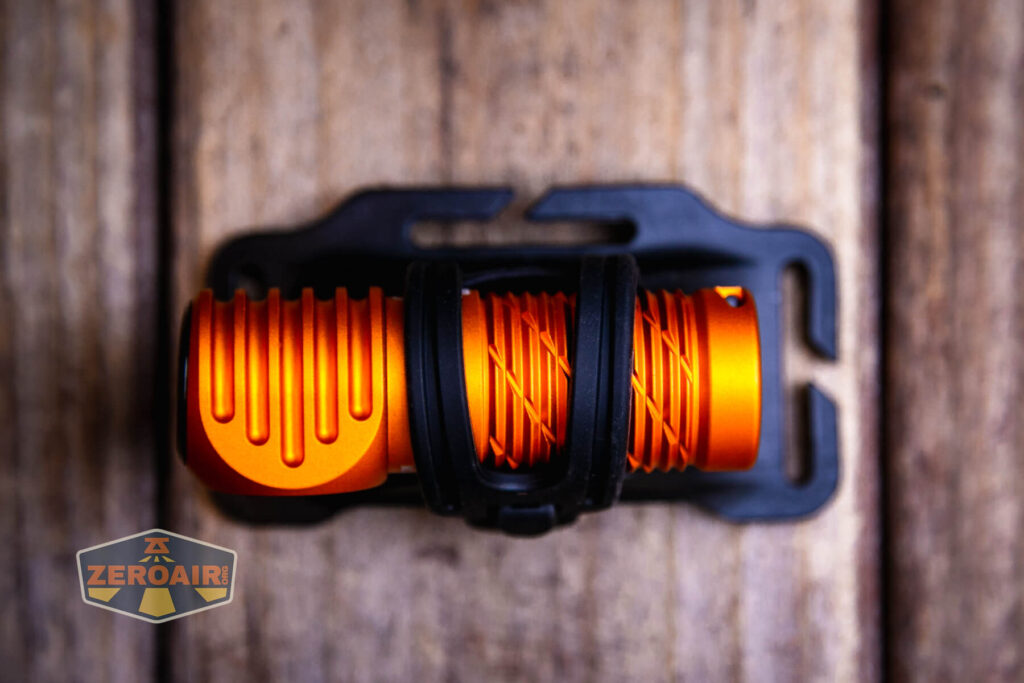
Interestingly, this headband mount is also built to allow the pocket clip to be left on the light!
That’s a nice (and smart) feature.

Here you can see the groove where the pocket clip should go. This grove isn’t a problem if you don’t have the pocket clip on the Olight Perun 2 Mini headlamp, though.

While it looks like there are two slots of tightness on this mount, there aren’t. If you go with the “looser one” the light will not stay in place. Good connection requires the use as seen below.

The headband (not the part seen below) touches your forehead. But still, this is pleasantly contoured and soft.


The headband attachment makes an interesting transition from hard plastic to soft. I’ll be interested to see the longevity of this connection.

The Olight Perun 2 Mini headlamp offers a lanyard connection point too, but no lanyard.


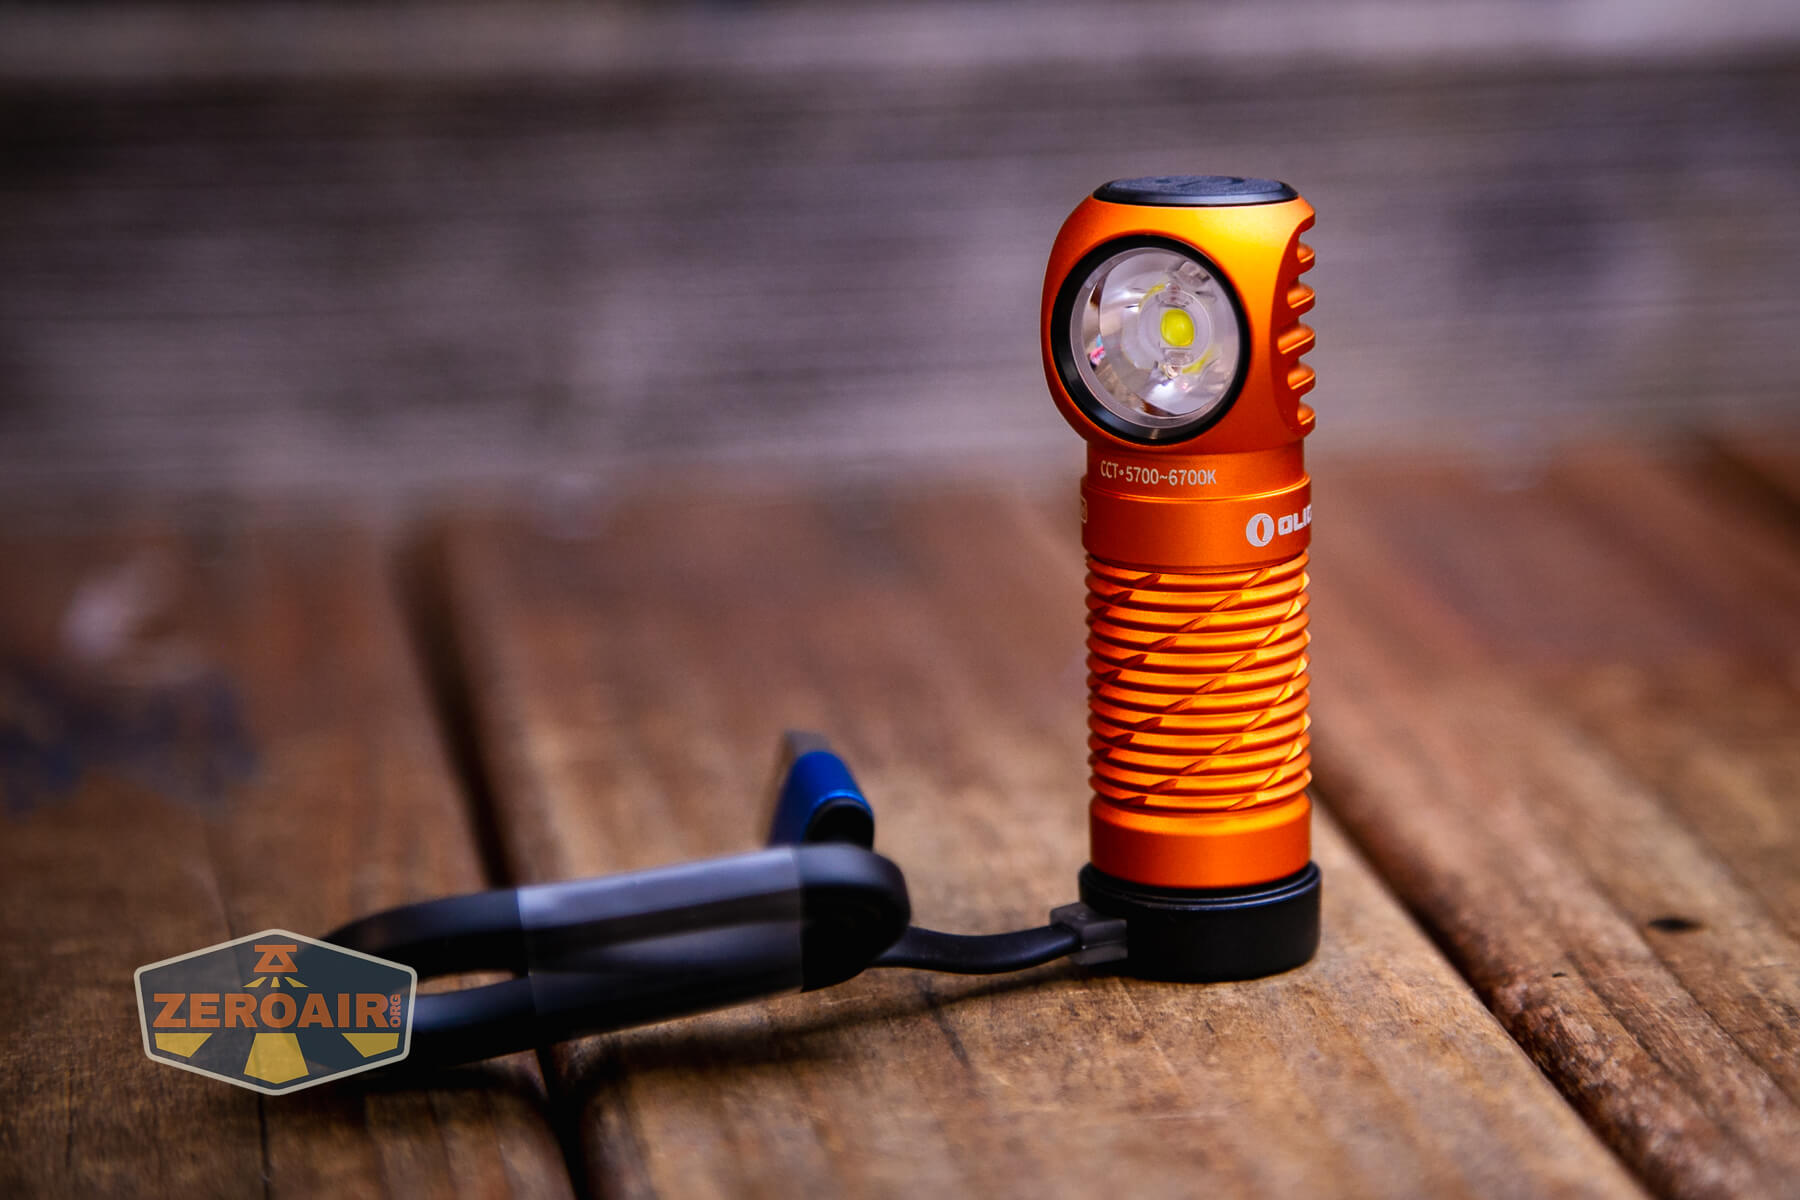
Finally, the magnet in the base, which is used for charging, is perfectly sufficient to retain the light in multiple positions.

Power and Runtime
Olight includes the cell required for the Perun Mini. It’s a “customized” 16340, with a claimed 650mAh. “Customized” in this case means the positive is in the usual place, but there’s a ring of negative surrounding that.
Interestingly, non-proprietary 16340 cells will operate fully on all modes. Of course, charging will not work with non-proprietary cells.

Here are a number of runtimes.

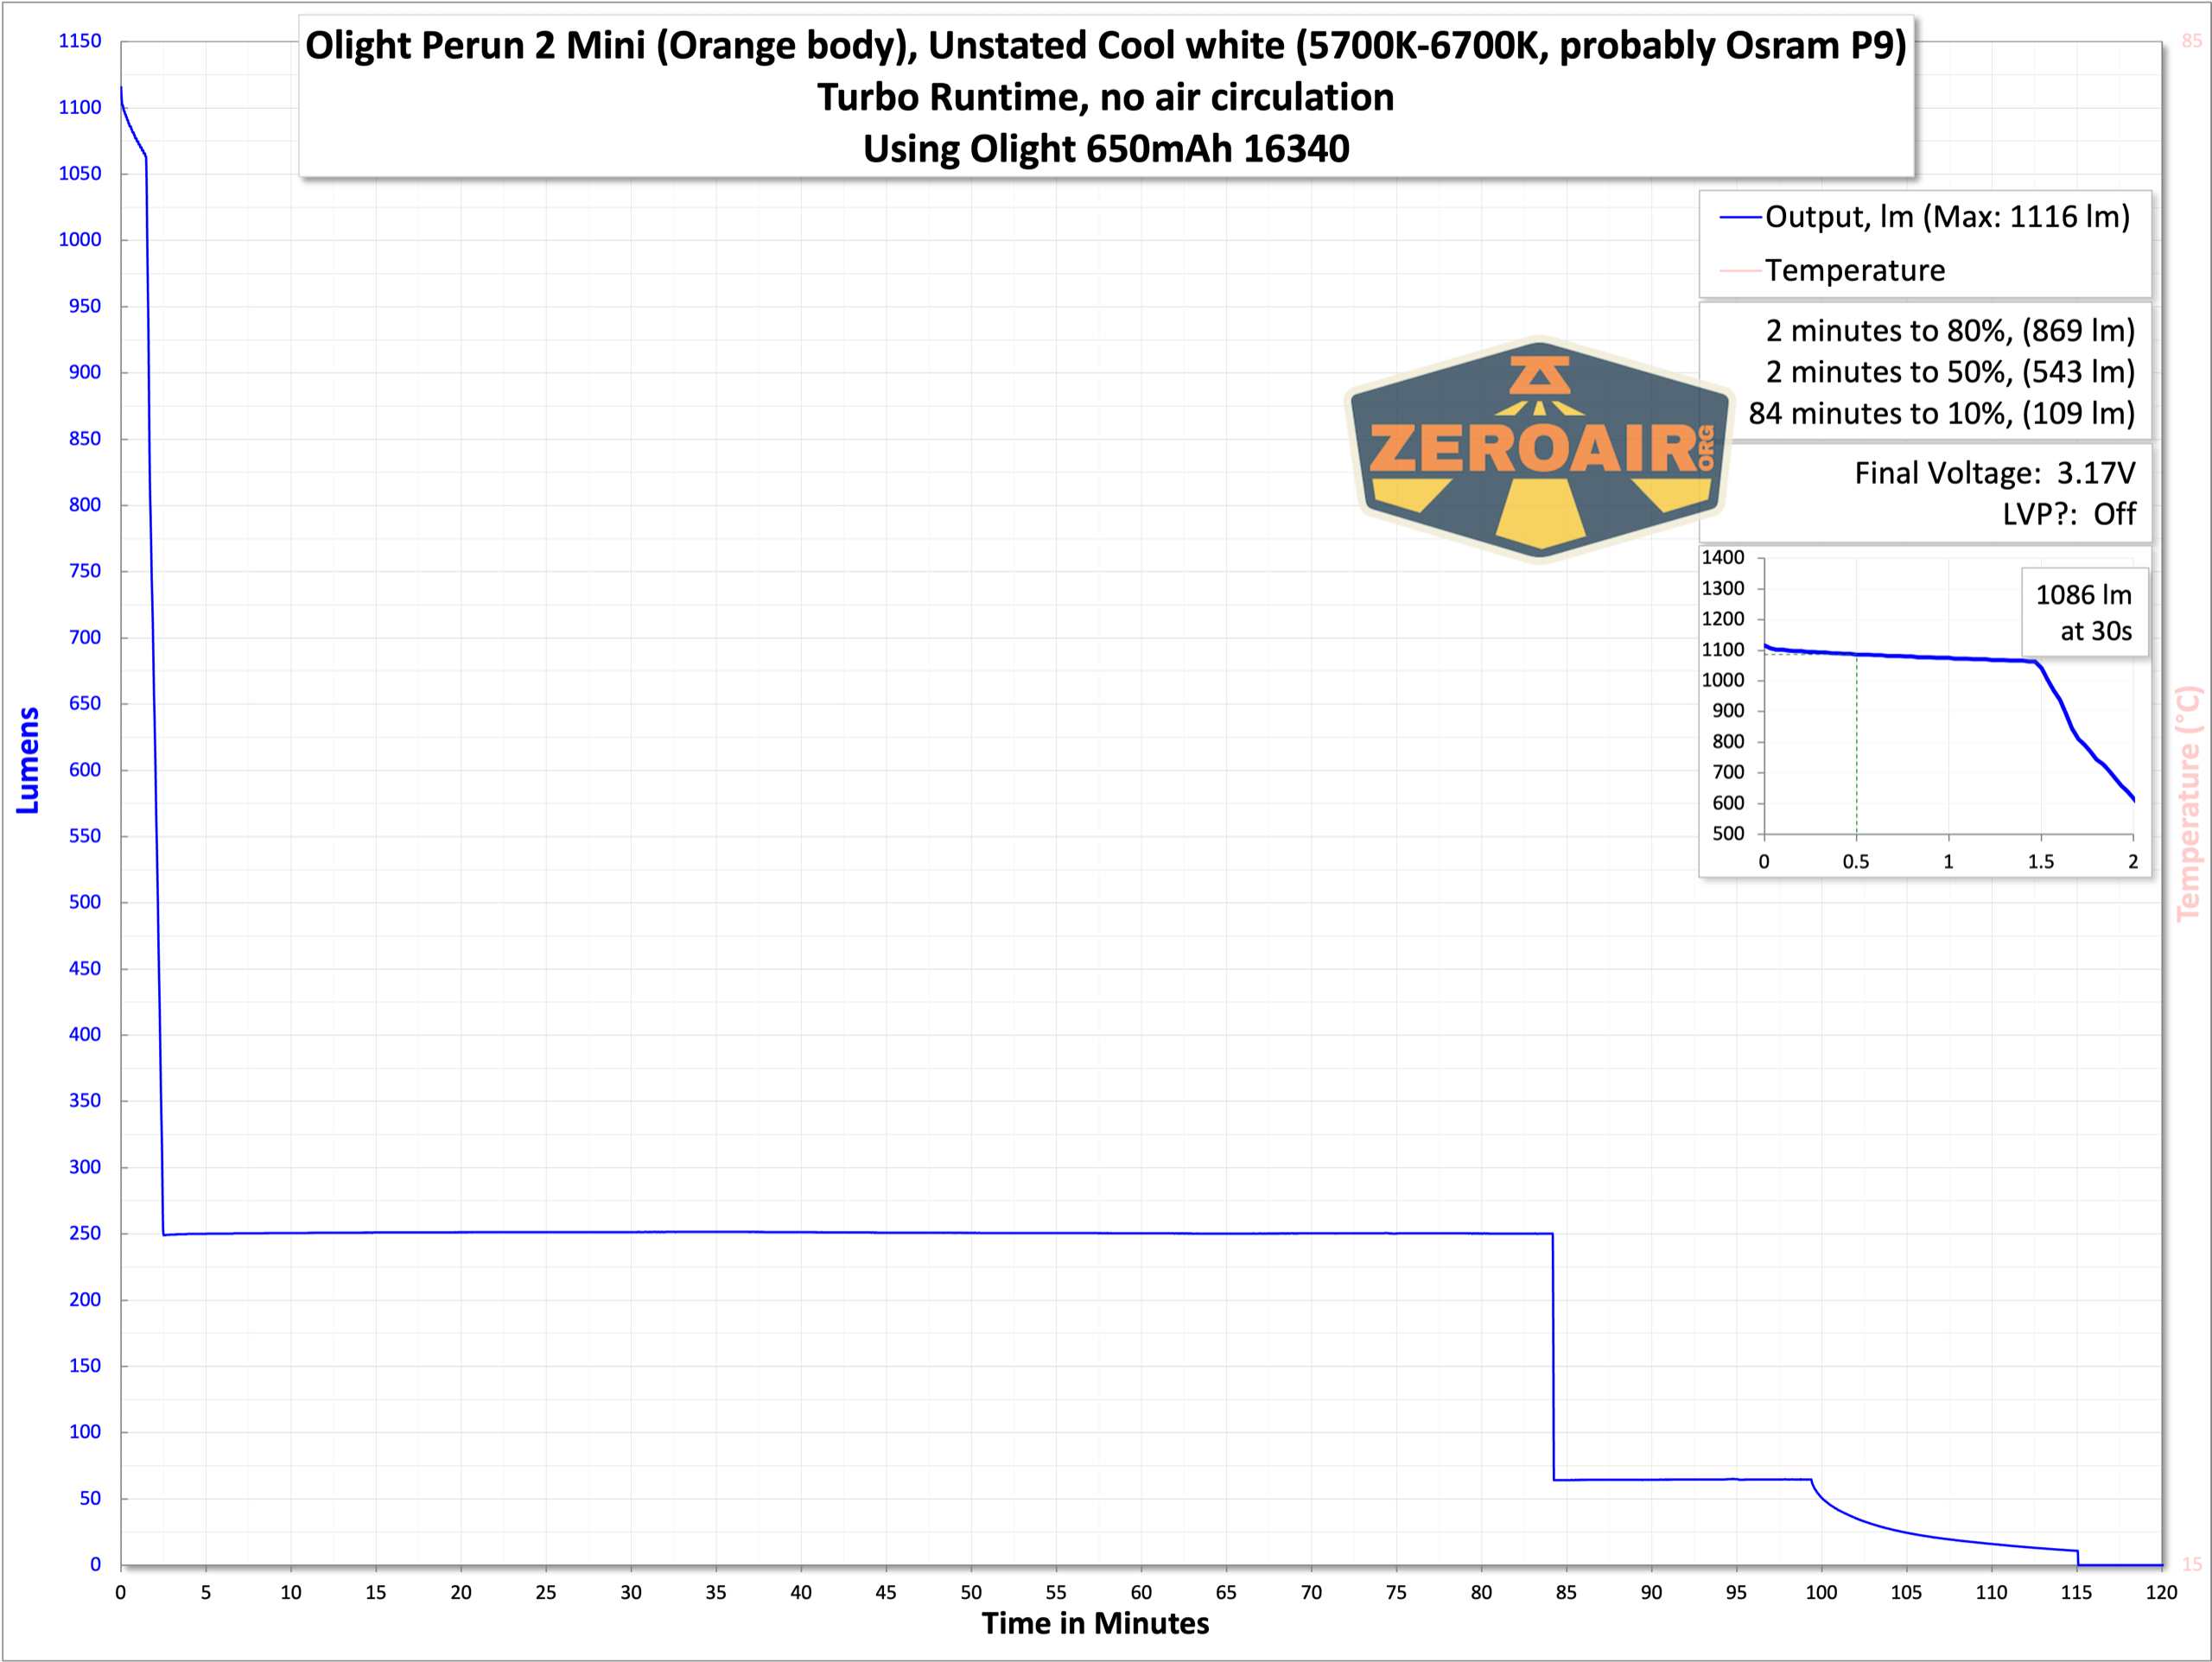


The Olight Perun 2 Mini headlamp does have built-in low voltage protection, and shuts off at around 3V or so.
Charging
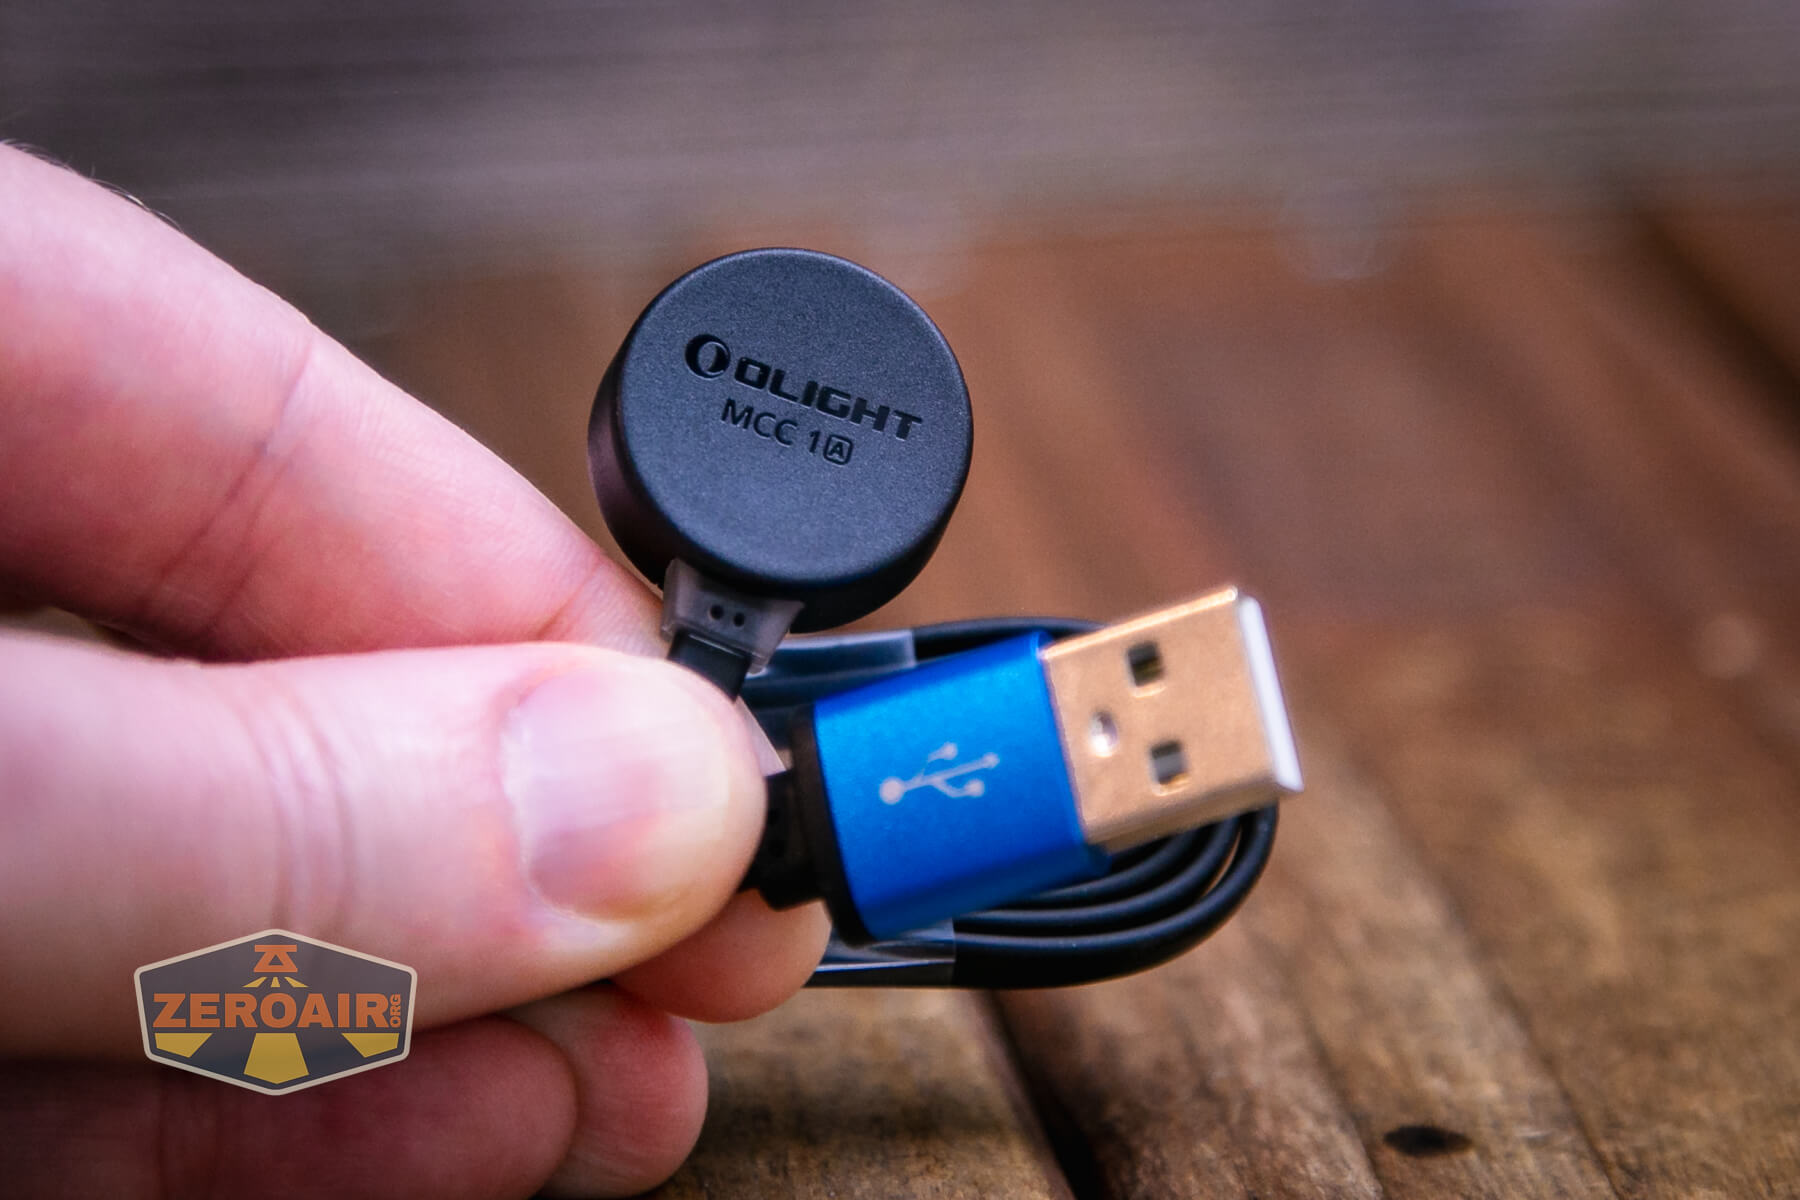
The light has built-in charging as well. Included is a cable – USB to magnetic connector. This one is the “MCC 1A” and that’s important since there are many versions that look just about the same.
The charger snaps very cleanly to the light, and the light will sit upright on the base, too.
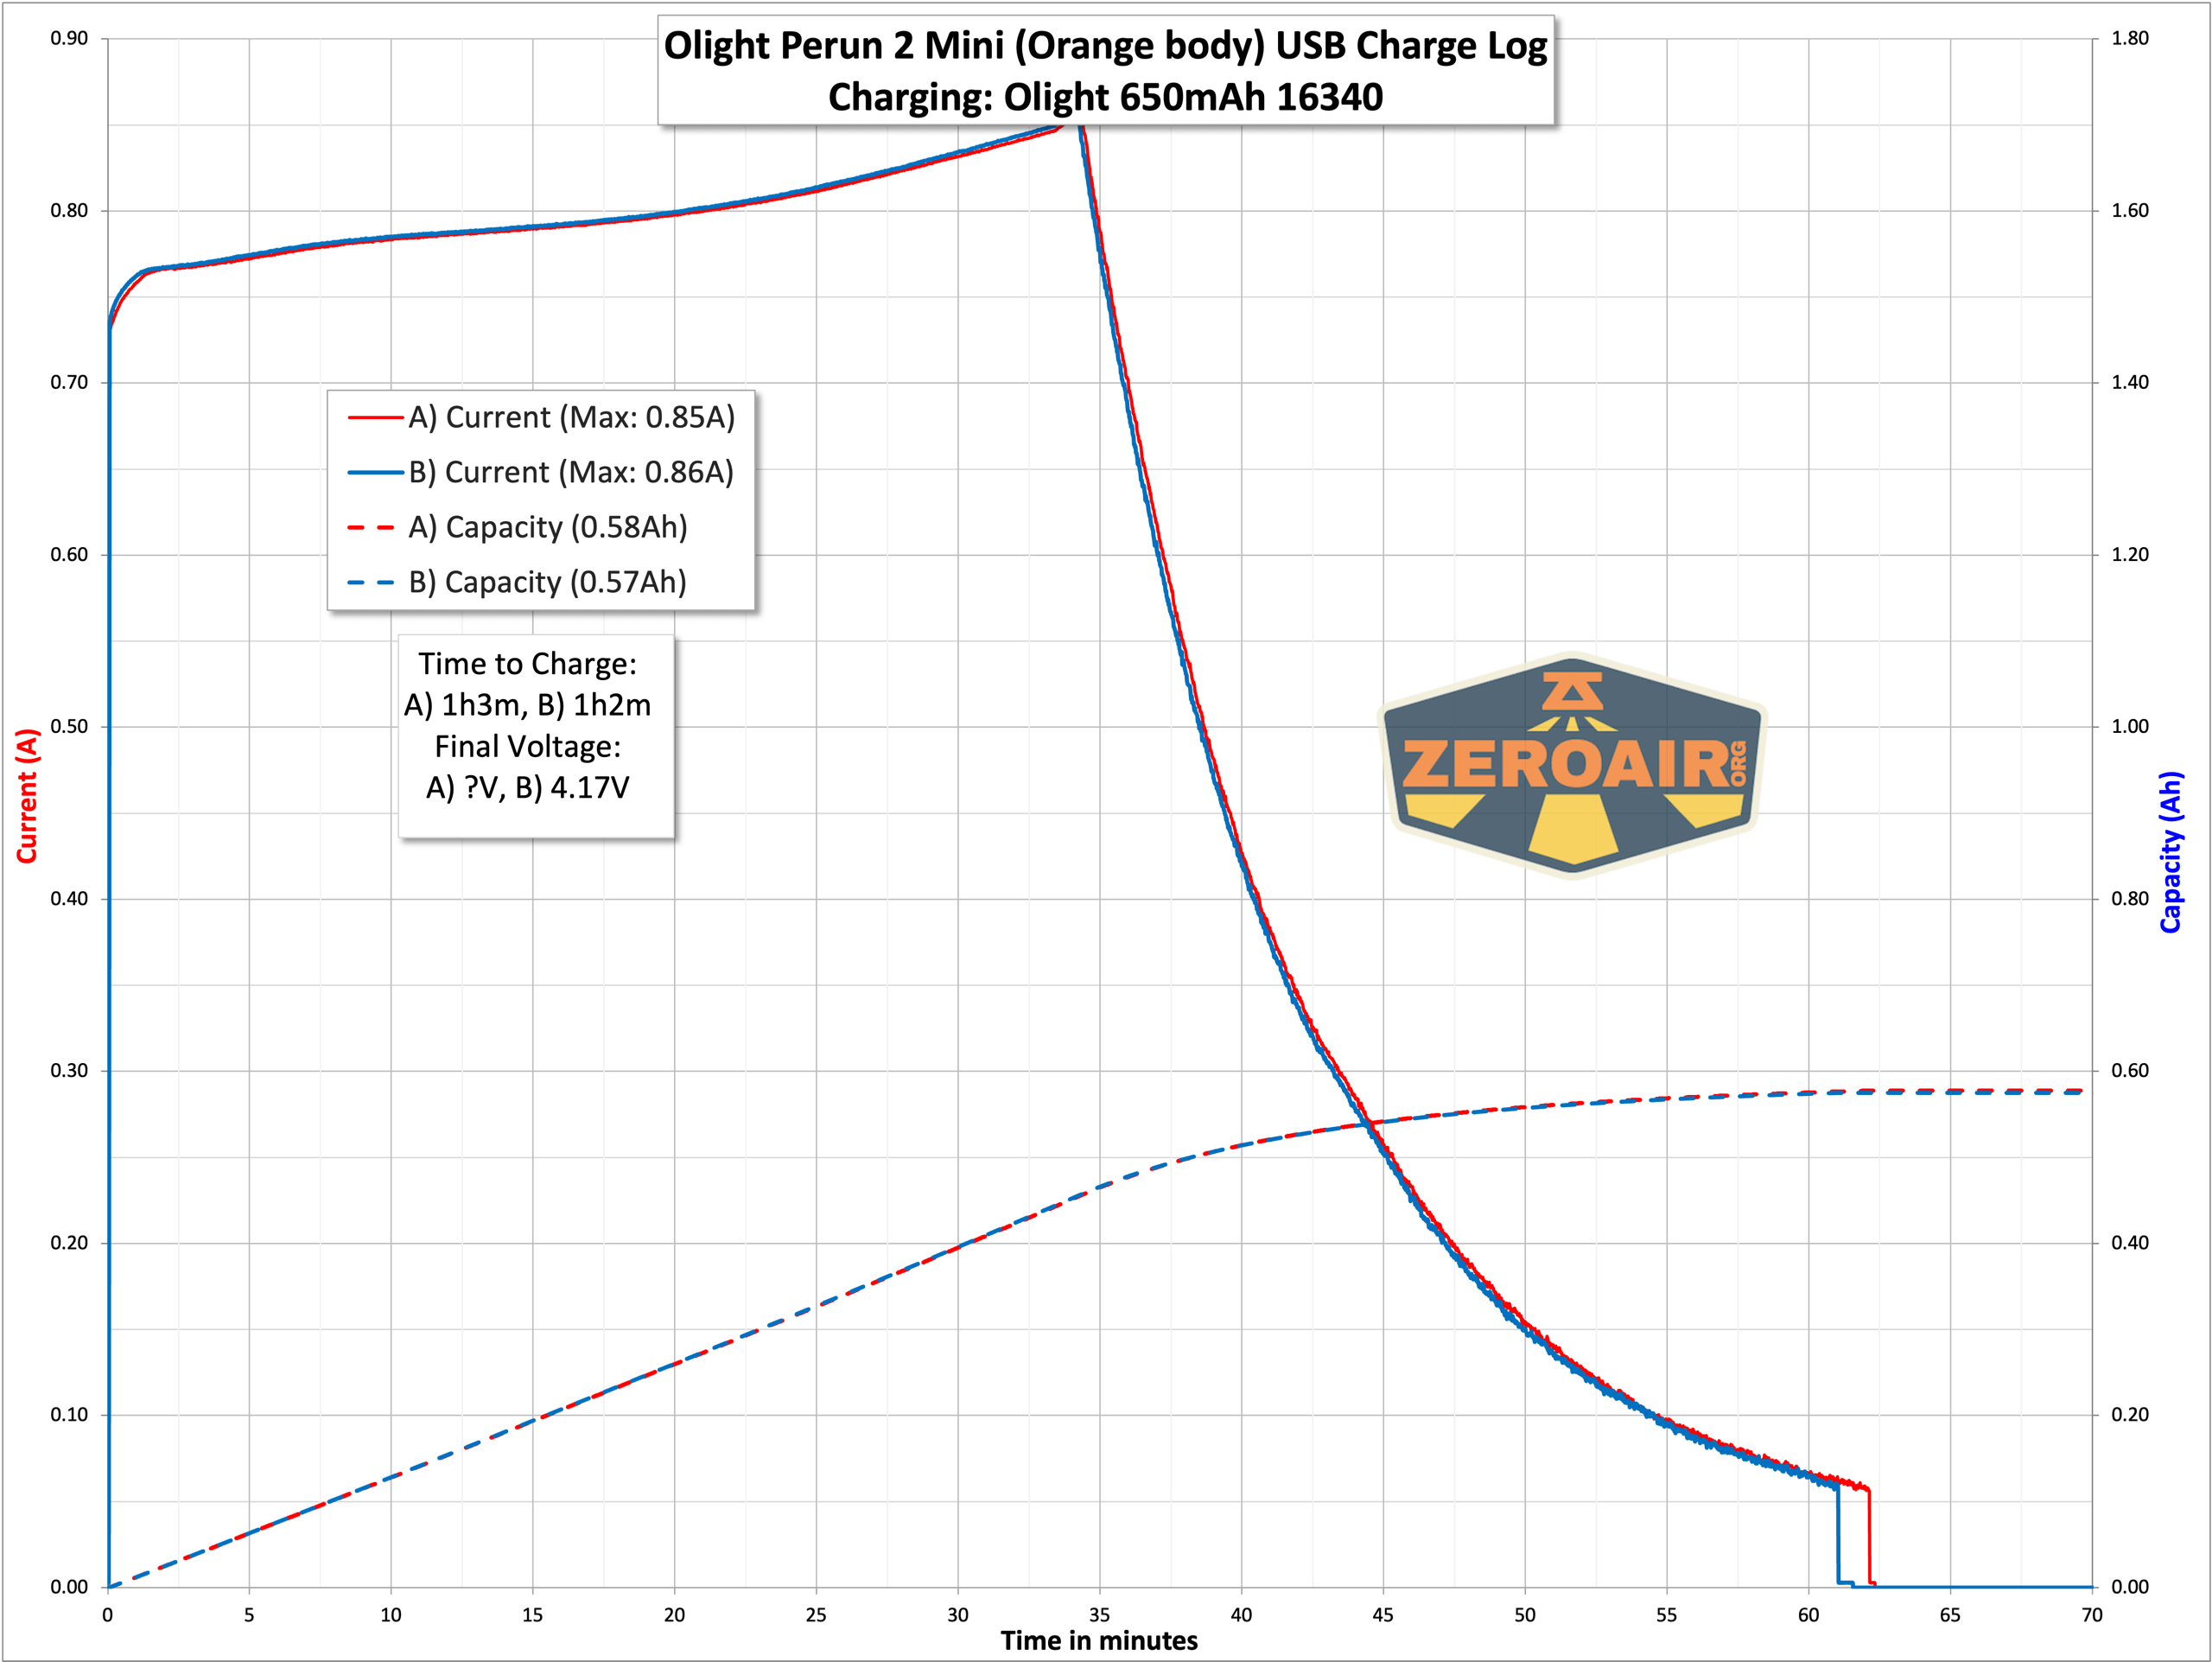
Here’s a charge graph. Charging is good, and well over 1C.
Modes and Currents
| Mode | Mode Claimed Output (lm) | Claimed Runtime | Measured Lumens | Tailcap Amps |
|---|---|---|---|---|
| Turbo | 1100/250 | 2m/85m | 1086 | 2.23 |
| High | 250 | 100m | 249 | 0.34 |
| Medium | 60 | 7h | 61 | 0.08 |
| Low | 15 | 26h | 16 | 0.01 |
| Moon | 2 | 10d | 2 | ~ |
| Red | 40 | 150m | 42 | 0.21 |
Pulse Width Modulation
No PWM on any mode. Yay! These are sort of squiggles but not actual PWM. The right-most photo (here and below) is the red mode.

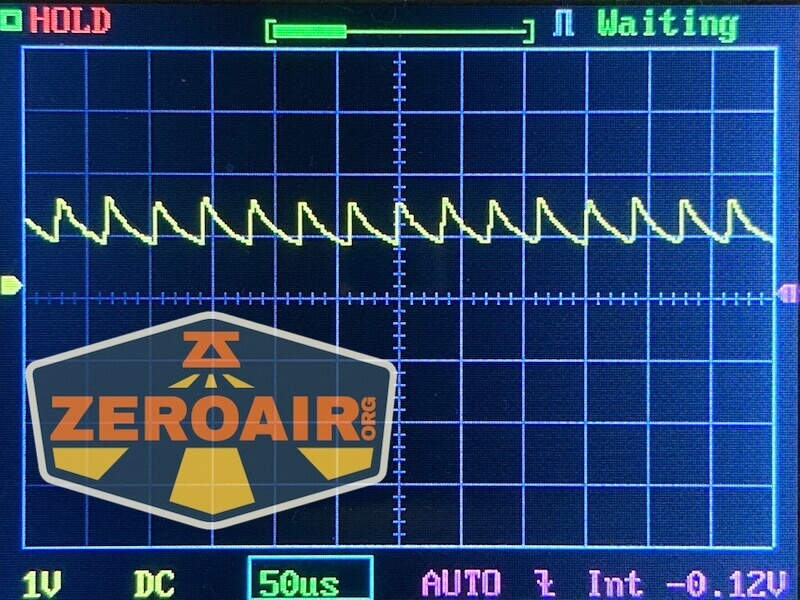
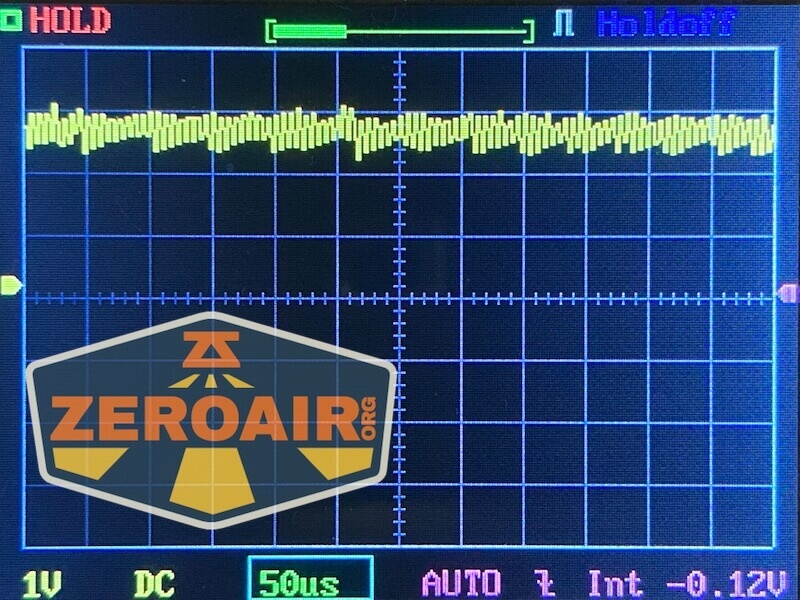


Here you can see a “baseline” – a chart with almost no light hitting the sensor.
Then there’s the Ultrafire WF-602C flashlight, which has some of the worst PWM I’ve seen. It’s so bad that I used a post about it to explain PWM! Here are multiple timescales (10ms, 5ms, 2ms, 1ms, 0.5ms, 0.2ms) to make comparing this “worst” PWM light to the test light easier. That post also explains why I didn’t test the WF-602C at the usual 50us scale.
User Interface and Operation
The Olight Perun 2 Mini headlamp uses a single e-switch on the head. It’s a big flat switch, and nice and soft. It is not the least bit proud, which allows the light to headstand. The Perun Mini is not quite perfectly vertical when headstanding, but works fine.
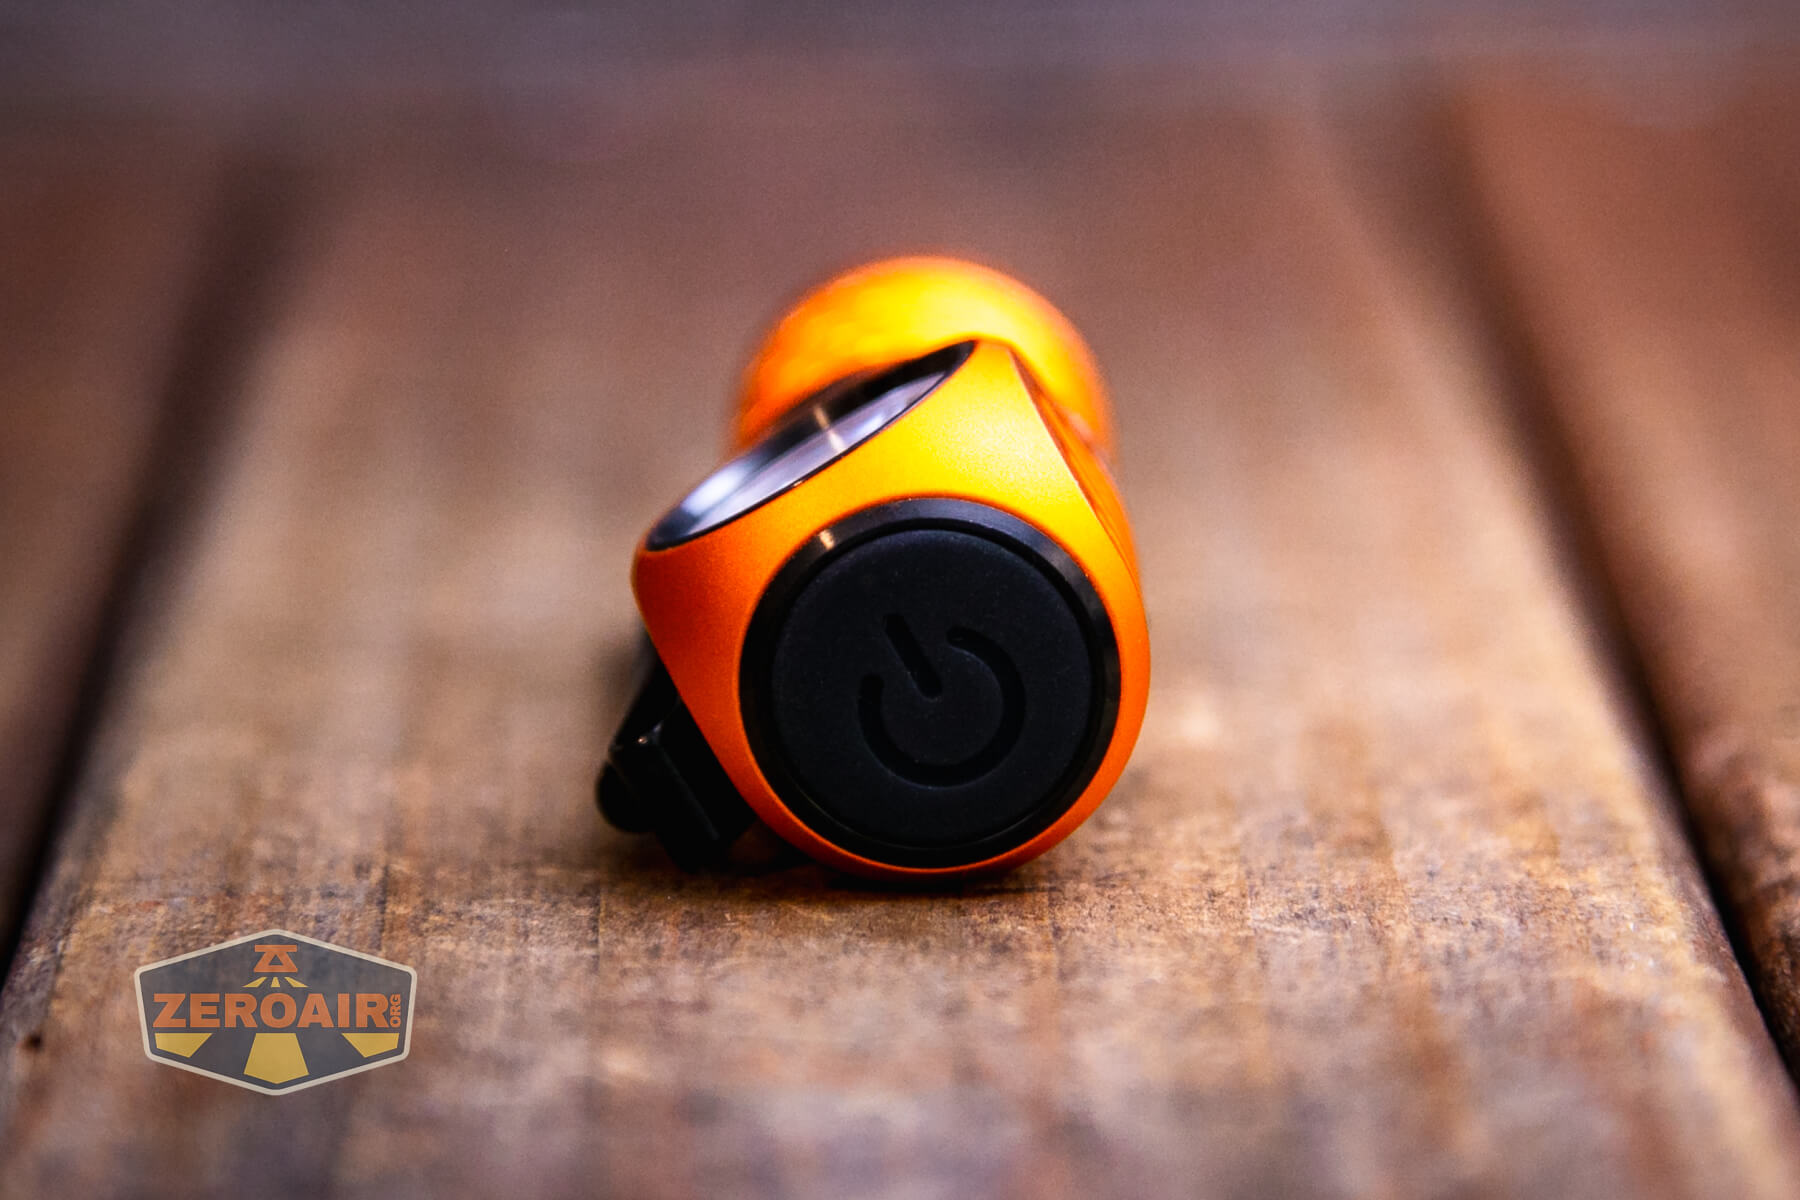
This switch cover is larger than that on the Perun Mini, and that’s a nice advance. The switch also has an indicating dot, which you can see below. It’s subtle, and you won’t notice it except when it’s on.
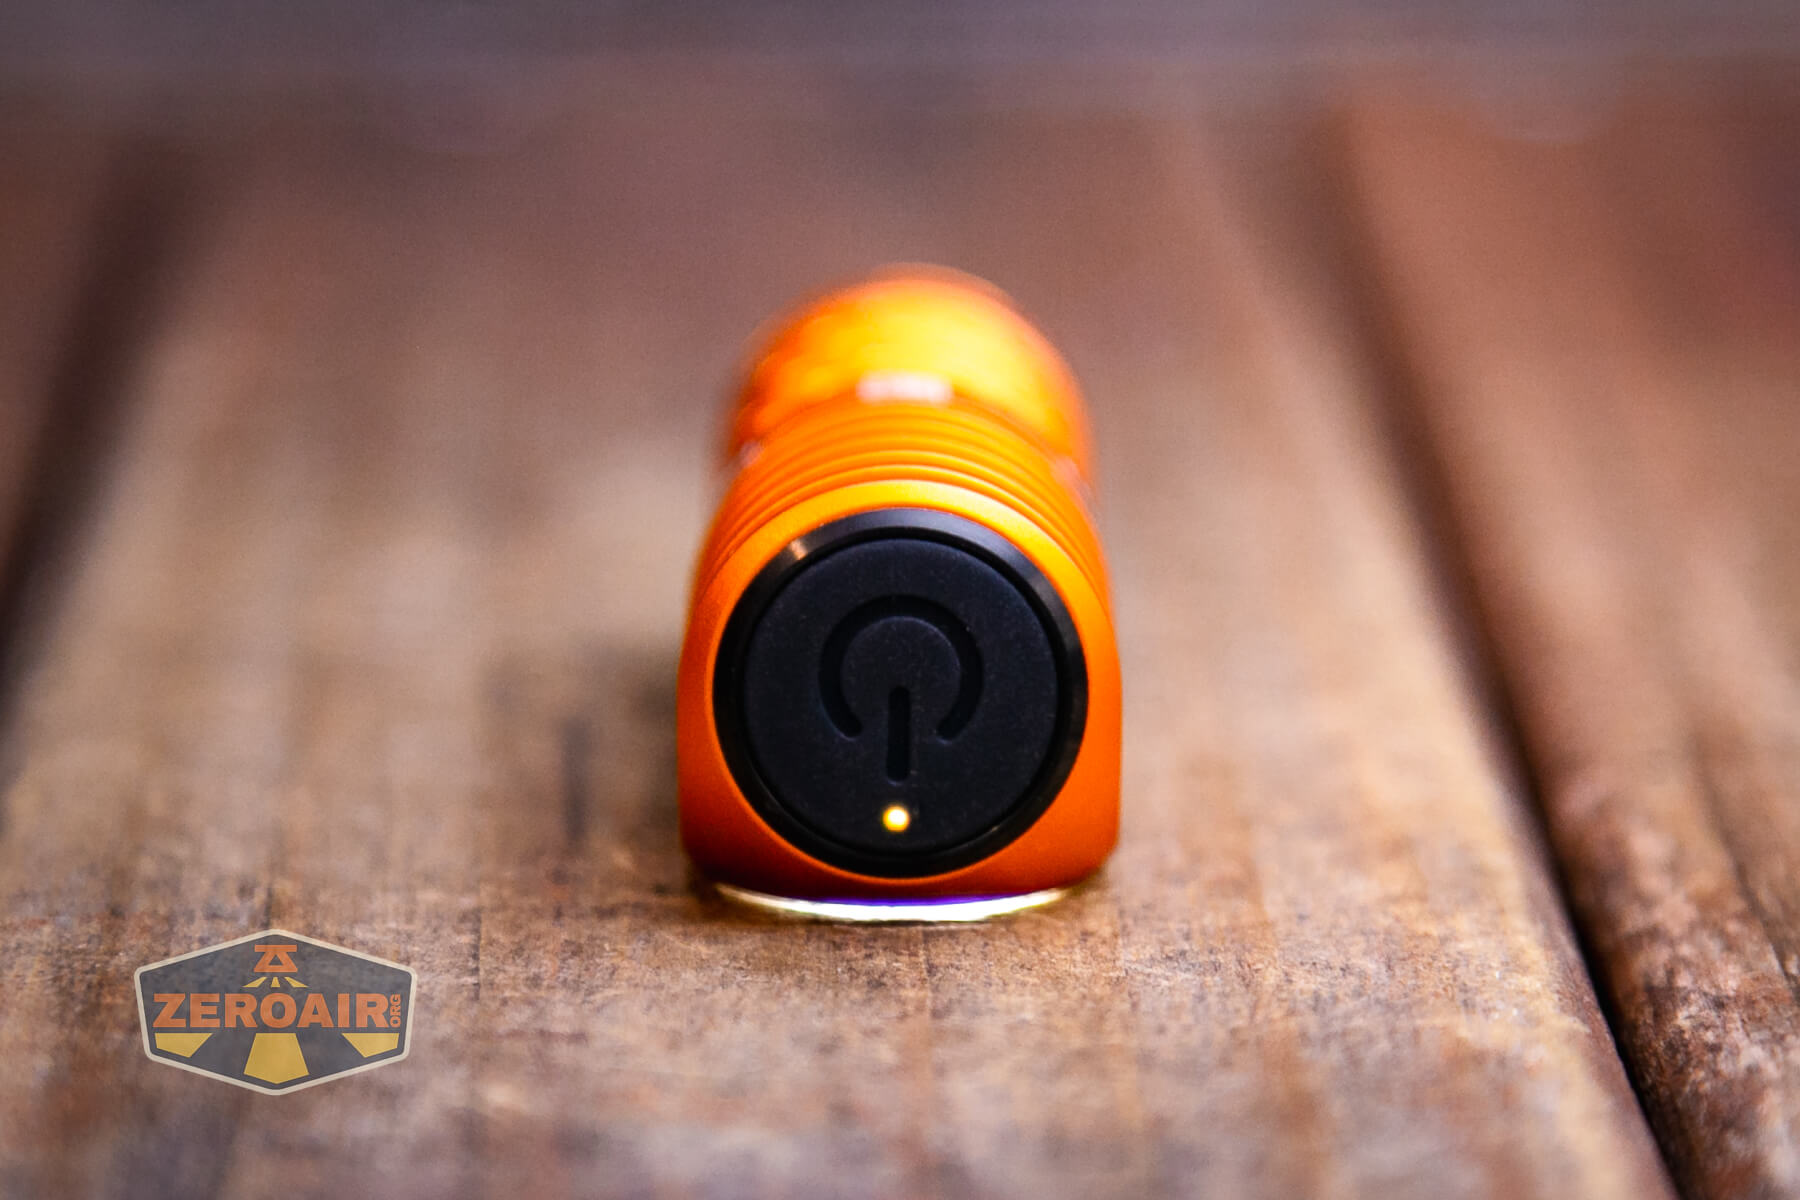
The switch is also just the least bit clicky. I had some complaints about the direction of press on the older Perun Mini, but this one seems just fine. (For the record, the switches don’t really feel all that different.)
Here’s a user interface table!
| State | Action | Result |
|---|---|---|
| Off | Click | On (Mode Memory, Moon, LMH only) |
| Off | Hold | Moon |
| On | Double Click | Turbo |
| On | Hold | Mode advance (Moon, LMH only) |
| Turbo | Double Click | Exit Turbo to previous mode (except if previous was high, then results in Medium) |
| Off | Double Click | Red |
| Red | Hold | SOS |
| SOS | Click | Off |
| On | Click | Off |
| On (White only) | Click and Hold (quickly) | Timer (Single blink: 3 minutes, Double blink: 9 minutes) |
| Timer | Click and Hold (quickly) | Switch between 3 and 9 minute timers. |
| Off | Hold (>2s) | Lockout |
| Lockout | Hold (~2s) | Unlock (and goes to Moonlight) |
The switch indicating feature does tell the battery capacity level, too. It does this for a few seconds when the light is turned on. It indicates as follows:
Green: >60%
Orange: 10-60%
Red: 5-10%
Red Blinking: <5%
In moonlight mode, the switch will only indicate if power is below 5%, in which case it blinks red (so consistent with the above power metrics, but only the “<5%” indicator.)
LED and Beam
The emitter in this light is unspecified. I believe the emitter used in this Perun Mini is an Osram P9. It’s stated as CW, at least.
The light also uses a TIR.


LED Color Report (CRI and CCT)
The Perun 2 Mini output is around 6000K and has low CRI. Red is very red!


Beamshots
These beamshots always have the following settings: f8, ISO100, 0.3s shutter, and manual 5000K exposure. These photos are taken at floor level, and the beam hits the ceiling around 9 feet away.


Tint vs BLF-348 (KillzoneFlashlights.com 219b version) (affiliate link)
I keep the test flashlight on the left and the BLF-348 reference flashlight on the right.
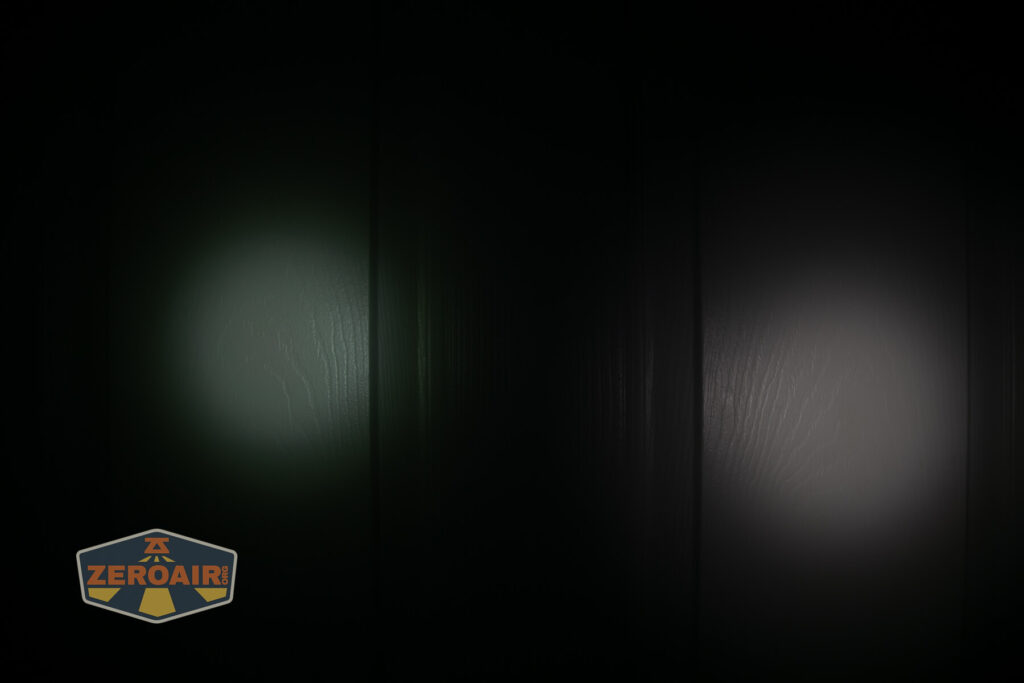


I compare everything to the KillzoneFlashlights.com 219b BLF-348 because it’s inexpensive and has the best tint!
Conclusion on the Olight Perun 2 Mini Headlamp
What I like
- It’s orange.
- Complete package
- Onboard charging looks good
- Small
- Nice indicating feature in the switch
- Hits specifications
What I don’t like
- Unspecified emitter!
- Low CRI
Notes
- This content originally appeared at zeroair.org. Please visit there for the best experience
- Please use my Amazon.com referral link to help support zeroair.org!
- Please support me on Patreon! I deeply appreciate your support!