Olight Warrior Mini 3 Cracked Brass Flashlight Review
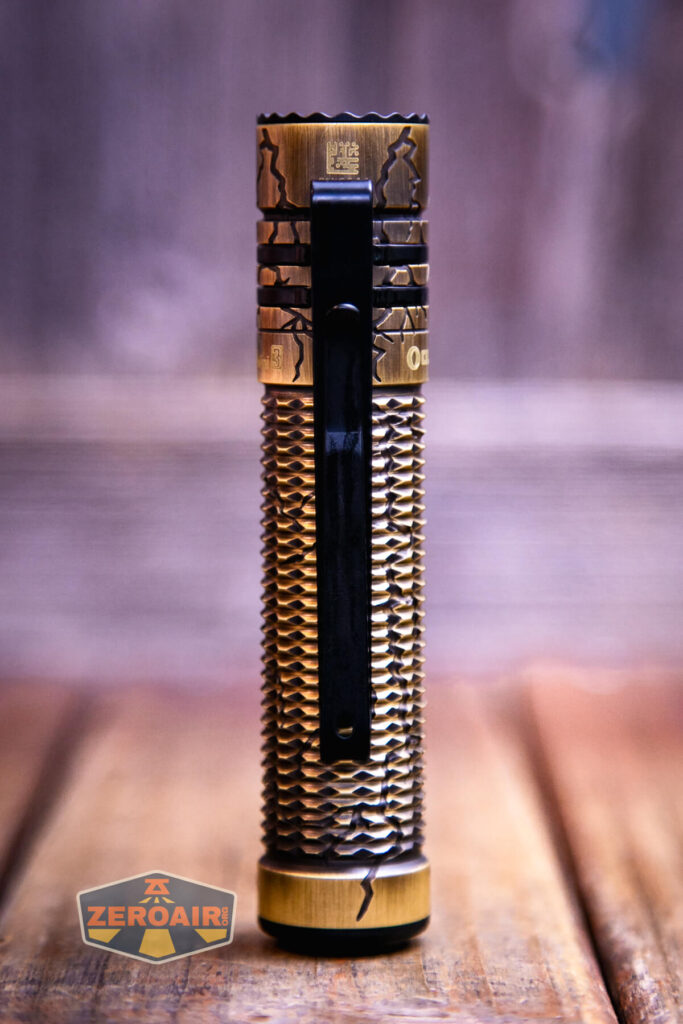
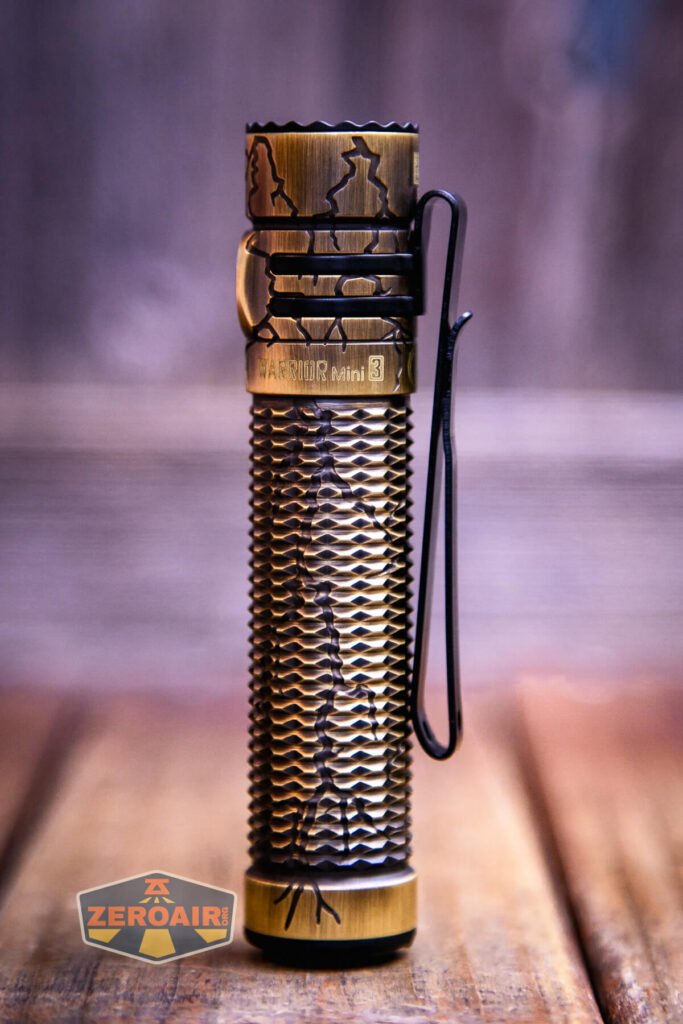
The Olight Warrior Mini 3 Cracked Brass is now available! It has a Luminus SFT-40 emitter, great output, and throw! The brass body offers a great heft!
Official Specs and Features
Here’s a referral link to the official product page.
Versions
As of right now, there appear to be at least four versions of the Olight Warrior Mini 3 flashlight. Black, Midnight Horizon, Forest Gradient, and Cracked Brass (seen here) are available.
Price
This light isn’t on “introductory special” anymore (though some others are). The MSRP of the Olight Warrior Mini 3 Cracked Brass is $109.99, and it’s still available now. The aluminum versions (3) are all $89.99.
Even if you aren’t interested in this Warrior Mini 3 in cracked brass, check out Olight other two new offerings, which I’ve reviewed recently (and are still on the introductory sale price!)
Short Review
The Olight Warrior Mini 3 seems to be a worthy successor to the popular Warrior Mini line of flashlights, and this Cracked Brass is extraordinary. With the Warrior Mini 3, the output is higher, throw is farther, size is smaller – what else would you want? Cracked Brass is an unusual name and I don’t love it, but I do love brass lights! This one is very solid.
Long Review
The Big Table
| Olight Warrior Mini 3 Cracked Brass | |
|---|---|
| Emitter: | (Luminus SFT-40) |
| Price in USD at publication time: | $109.99 |
| Cell: | 1×18650 |
| Turbo Runtime Graph | Medium Runtime Graph |
| LVP? | Yes, and warning |
| Switch Type: | E-Switch |
| Quiescent Current (mA): | ? |
| On-Board Charging? | Yes |
| Charge Port Type: | Proprietary Magnetic |
| Charge Graph | |
| Power off Charge Port | All modes but Turbo |
| Claimed Lumens (lm) | 1750 |
| Measured Lumens (at 30s) | 1450 (82.9% of claim)^ |
| Candela per Lumen | 10.07 |
| Claimed Throw (m) | 240 |
| Candela (Calculated) in cd (at 30s) | 452lux @ 5.865m = 15548cd |
| Throw (Calculated) (m) | 249.4 (103.9% of claim)^ |
| Claimed CCT | 5700-6700 |
| Measured CCT Range (K) | 5600-7200 Kelvin |
| Item provided for review by: | Olight |
| All my Olight reviews! | |
^ Measurement disclaimer: Testing flashlights is my hobby. I use hobbyist-level equipment for testing, including some I made myself. Try not to get buried in the details of manufacturer specifications versus measurements recorded here; A certain amount of difference (say, 10 or 15%) is perfectly reasonable.
What’s Included
The (seemingly raw) brass light does ship sealed!
- Olight Warrior Mini 3 Cracked Brass Flashlight
- Olight 3500mAh customized 18650
- Olight MCC 1A/1.5A/2A charger (USB to proprietary magnetic)
- Wall-mount magnetic base
- Spare sticker for base
- Manual, etc.
Package and Manual
This box is an upgraded package from the aluminum version. It doesn’t have a folding top, but it’s slip-fit and firmer.
Build Quality and Disassembly
The build quality in the Olight Warrior Mini 3 Cracked Brass flashlight is unsurprisingly great. In particular, I like how much smaller the Warrior Mini 3 is than its predecessors. I’ll add that I love the brassness of the light but I’m generally indifferent to the “cracked” aspect of the light. Not that it’s bad – it’s very well done.
It’s practically the same size as a Baton!
The contacts inside are much like previous generations, too. The head has both positive and negative, and the tail (below) has a spring with some (very Zebralight-like) contacts, too.
Size and Comps
Weight: 6.24 oz (177 g) (Including Battery, Pocket Clip)Length: 4.37 in (111 mm)Head Diameter: 0.91 in (23 mm)Body Diameter: 0.91 in (23 mm)
If the flashlight will headstand, I’ll show it here (usually the third photo). If the flashlight will tailstand, I’ll also show that (usually in the fourth photo).
Here’s the test light with the venerable Convoy S2+. The version below is a custom laser-engraved Convoy S2+ host by GadgetConnections.com. I did a full post on an engraved orange host right here! Or go straight to GadgetConnections.com to buy your Convoy S2+ now!
Also above is the light beside a new standard 18350 light! It’s not one I’ve reviewed yet but this is the CWF Arcadian Peanut in aluminum. This one is stonewashed and has the new Quantum Dragon driver – a whole new product! Stay tuned for a full review of this tiny powerhouse!
Here’s this Olight Warrior Mini 3 Cracked brass with the (just released!) Olight Warriot Nano, which I reviewed. The Nano is still on the introductory price, so go grab it now!!
Retention and Carry
This light includes a pocket clip. The pocket clip has a specific place and orientation – just opposite the switch. This is a two-way clip, so technically could be carried bezel up or down, but the only reasonable way is really bezel up. Though the pocket clip is opposite the switch, I didn’t have any problems with accidental activation, and I didn’t tend to lock the light out.
The arms of this clip are much larger than in previous generations, too. This provides a much firmer attachment! In fact, it’s very firm.
This clip is functionally just like that of the Baton 3 Pro, but the clip is much longer.
A new thing Olight is including with this Warrior Mini 3 is the little adapter that allows the clip to be placed on the other end of the light. That will allow (sort of “natively”) the light to be carried bezel down. Now the two-way clip offers that option already… But I think Olight making this little adapter adequately demonstrates how most people seem to feel about two-way clips. Anyway, the two-way part of this clip that would allow bezel down carry didn’t really put the light very deep. So this adapter is better in that regard, too.
Getting that thing off is a pain, though! It doesn’t really rotate “freely” (though you can convince it), so aim for the place you want on your first shot.
I didn’t try it but I don’t know why this part wouldn’t work on the Olight Warrior Nano, too. The adapter is available for 99 cents!
The clip has a little hole, too, which is great for lanyard attachment. (Note: no lanyard is included.)
Of course, the base of the Olight Warrior Mini 3 Cracked Brass flashlight is magnetic because of the way this light charges. But that magnetic base also serves as a great connection point for the Warrior Mini 3, too. Despite the weight of this brass light, the tail magnet has no problem securing the light to a metal surface.
Power and Runtime
The Olight Warrior Mini 3 Cracked Brass flashlight includes a proprietary 18650. There are both positive and negative contacts on the positive end, (and only negative on the negative end). This facilitates onboard charging. These lights will not charge any type of cells except these specific Olight cells.
Just like the Baton 3 Pro, the cell on this Baton fits in the “normal” way – positive (button) toward the head. Despite that, regular button top 18650 cells will not work in this light.
Below you can see the runtime tests for the highest three levels. If you glanced back at the Baton 3 Pro testing posts, you’d note that performance is remarkably similar. Internally, I’d guess the Warrior Mini 3 is very similar to the Baton line!
While the Warrior Mini 3 doesn’t seem to necessarily shut off with low voltage protection, the switch does give an indication that the cell voltage is low.
Charging
Olight offers charging in the Olight Warrior Mini 3 Cracked Brass flashlight. It’s proprietary magnetic, but it’s the same as practically all the other Olights.
The charging base is the common Olight MCC, which can charge at 1A, 1.5A, or 2A. As I said above, this cell can be charged in a regular bay charger too!
Unlike on some other Olights, the charging base here is also a switch! It’s a very good switch and I do love it. The two rings you see below are all part of just one switch, and they actuate together (or really are just one piece). They’re separated for electrical reasons (that is: charging).
I added a charging graph here… The blue line is charging the Warrior Mini 3 with the Arkfeld Pro charging base. It’s nice to know that the “intermittent charging” is a result of the charger and not the light!
Charging proceeds at well over 1A, and the 3200mAh cell is charged in around 4-5 hours. The charging base is red when charging, and green when not being used or the cell is “completely charged.” I noted in charge testing that the indicator on the charger would turn green before the trickle CV phase had stopped putting power into the cell.
The indicating e-switch does not give any charging information, but the charging bases all have a red/green indicator. Red means charging and green means charging is complete. The base turns green long before charging stops, but I’d guess it’s turning green right around the 200-220 minute mark in the graph above. The cell is essentially fully charged at this point.
Modes and Currents
| Mode | Mode Claimed Output (lm) | Claimed Runtime | Measured Lumens | Tailcap Amps |
|---|---|---|---|---|
| Turbo | 1750+500+200 | 2m+210m+30m | 1533 (0s) 1450 (30s) |
5.54 |
| High | 500+200 | 215m-30m | 406 | 0.80 |
| Medium | 120 | 18h | 101 | 0.16 |
| Low | 15 | 165h | 10.8 | 0.01 |
| Moon | 0.5 | 100d | 0.14 | [low] |
One thing that’s nice to note here is that the proximity sensor step down output is the same as Medium – it’s not a separate level. (In this case, I prefer that, but I don’t have a good reason for preferring that.)
Pulse Width Modulation
Nothing really to mention here. None of the modes seem to be using PWM. That wave graph on the second to lowest mode is fun, though.
Here you can see a “baseline” – a chart with almost no light hitting the sensor. Then there’s the Ultrafire WF-602C flashlight, which has some of the worst PWM I’ve seen. It’s so bad that I used a post about it to explain PWM! Here are multiple timescales (10ms, 5ms, 2ms, 1ms, 0.5ms, 0.2ms) to make comparing this “worst” PWM light to the test light easier. That post also explains why I didn’t test the WF-602C at the usual 50us scale.
User Interface and Operation
There are two switches on the Olight Warrior Mini 3 Cracked Brass flashlight. First is the metal tail switch which also is used in charging.
To be honest, I loved the old switch. It had a sort of tripod built in around the switch so that the light would reliably tailstand. But this one has it too! The switch is just proud. It’ll still tailstand easily, but when the switch is pressed, the tripod tail is more revealed.
Next is the indicating side e-switch. Olight continues to subtly refine these switches, and this one is even better still. It has a very flat movement but seems to have added a reliable click. The movement is nice and deep but with no squish at all. This is a surprising level of advancement in e-switches by Olight.
Here’s a user interface table! This is the same user interface as is on the Warrior Mini 2 and the M2R Warrior Pro before it.
| State | Action | Result |
|---|---|---|
| Off | Click Side Switch (SS) | On (Mode Memory) |
| Off | Hold SS | Moon |
| Off | Double Click SS | Turbo |
| Any (Except when the proximity sensor is being “tripped”) | Triple Click SS | Strobe |
| On | Click SS | Off |
| On (Except when the proximity sensor is being “tripped”) | Hold SS | Mode Advance (L>M>H) (Moon and Turbo are excluded from the cycle) |
| Turbo | Double Click SS | Return to previous mode (If previous was “High,” returns to Med) |
| Off | Long Hold SS | Lockout (Technically “Moon then lockout”) |
| Lockout | Click SS | Switch indicating lockout (red for 2s) |
| Lockout | Hold SS | Unlock to Moonlight |
| Any | Hold (“half-press”) Tail Switch (TS) | Med (in Config 1, default) Turbo (in Config 2) |
| Any | Click TS | Turbo (in Config 1) Strobe (in Config 2) |
| Off | Hold TS, Click SS | Switch between Config 1 and 2 (there is no confirmation except the modes seen per Config) |
LED and Beam
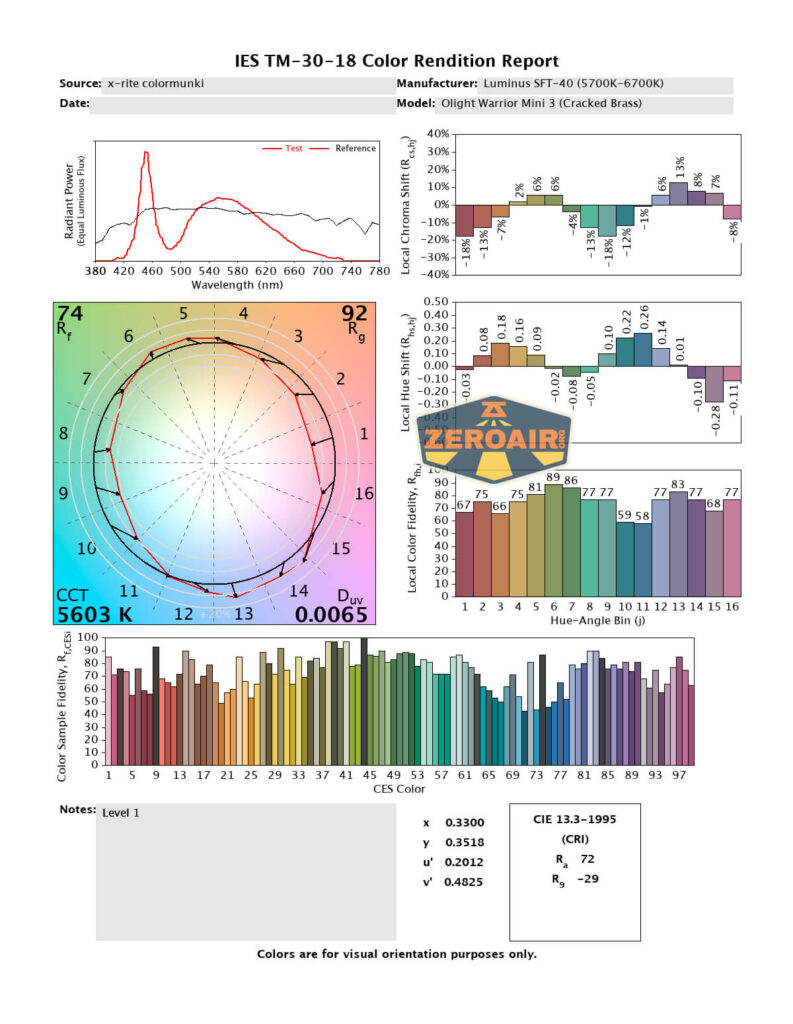
The emitter of choice for this light is a Luminus SFT-40. The temperature is Cool White, at 5700K-6700K. This emitter is under a TIR, but there is no glass over the TIR. That’s a fairly big and unfortunate loss here.
I was unable to unscrew the bezel, but with the right motivation, I bet it’s possible. (Others have done it!)
LED Color Report (CRI and CCT)
The CCT does drift very high to the cool side of things. On the lower modes, Duv is positive, but still, I’d never call it green (nearly perfectly white, really). On turbo, though, where the emitter is being driven hard (>5A), the Duv goes negative, and the beam will probably look more pinkish. This is not a bad emitter choice!
Beamshots
These beamshots always have the following settings: f8, ISO100, 0.3s shutter, and manual 5000K exposure. These photos are taken at floor level, and the beam hits the ceiling around 9 feet away.
Tint vs BLF-348 (KillzoneFlashlights.com 219b version) (affiliate link)
I keep the test flashlight on the left and the BLF-348 reference flashlight on the right.
I compare everything to the KillzoneFlashlights.com 219b BLF-348 because it’s inexpensive and has the best tint!
Conclusion
What I like
- Complete package
- I love the brass aspect of the “Cracked Brass”
- Good (and reliable) user interface
- Very good beam profile (very tight beam!!)
- New and improved clip over version 1
- Cell can be charged in a bay charger
- Proximity sensor can be disabled
What I don’t like
- Cool white emitter
- Proprietary cell
- Proprietary charging
- Proximity sensor
Notes
- This content originally appeared at zeroair.org. Please visit there for the best experience!
- For flashlight-related patches, stickers, and gear, head over to PhotonPhreaks.com!
- Please use my Amazon.com referral link to help support zeroair.org!
- Please support me on Patreon! I deeply appreciate your support!


