CWF Mini Arc Flashlight Review
The CWF Mini Arc flashlight features a custom driver by CWF – the Quantum Chimera. It runs a single 14500 and has a mechanical clicky. Read on for testing!
Official Specs and Features
Here’s a link to the CWF Mini Arc flashlight product page.
Versions
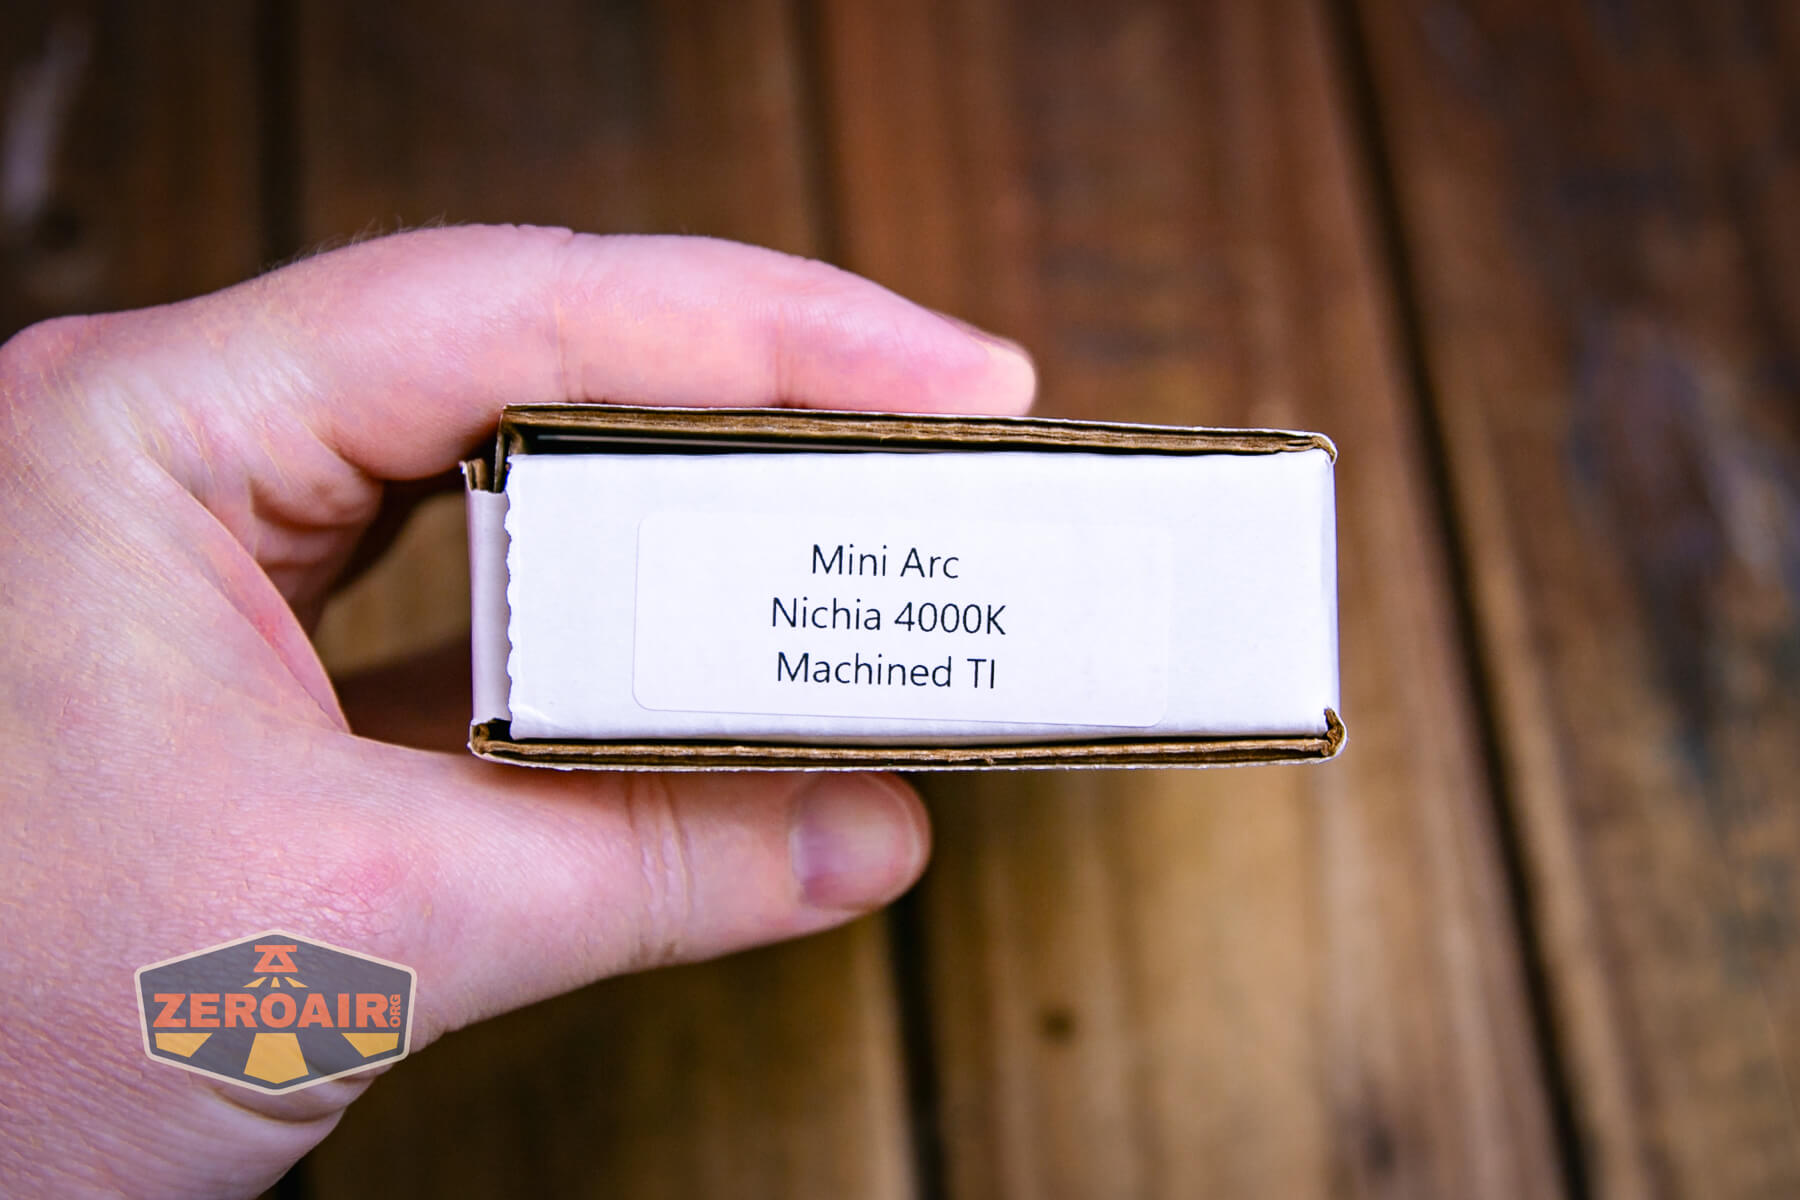
Three versions of the CWF Mini Arc flashlight are currently available. They’re all titanium and differ in finishes (Stonewashed, Tumbled, and Machined). At one time, brass was available, too. I think there have even been some specialty metals. Current versions of the CWF Mini Arc flashlight ship with Nichia 519a, but previously, 219c was offered.
Price
All versions of the CWF Mini Arc flashlight pictured on the official website are listed at $500.
What’s Included

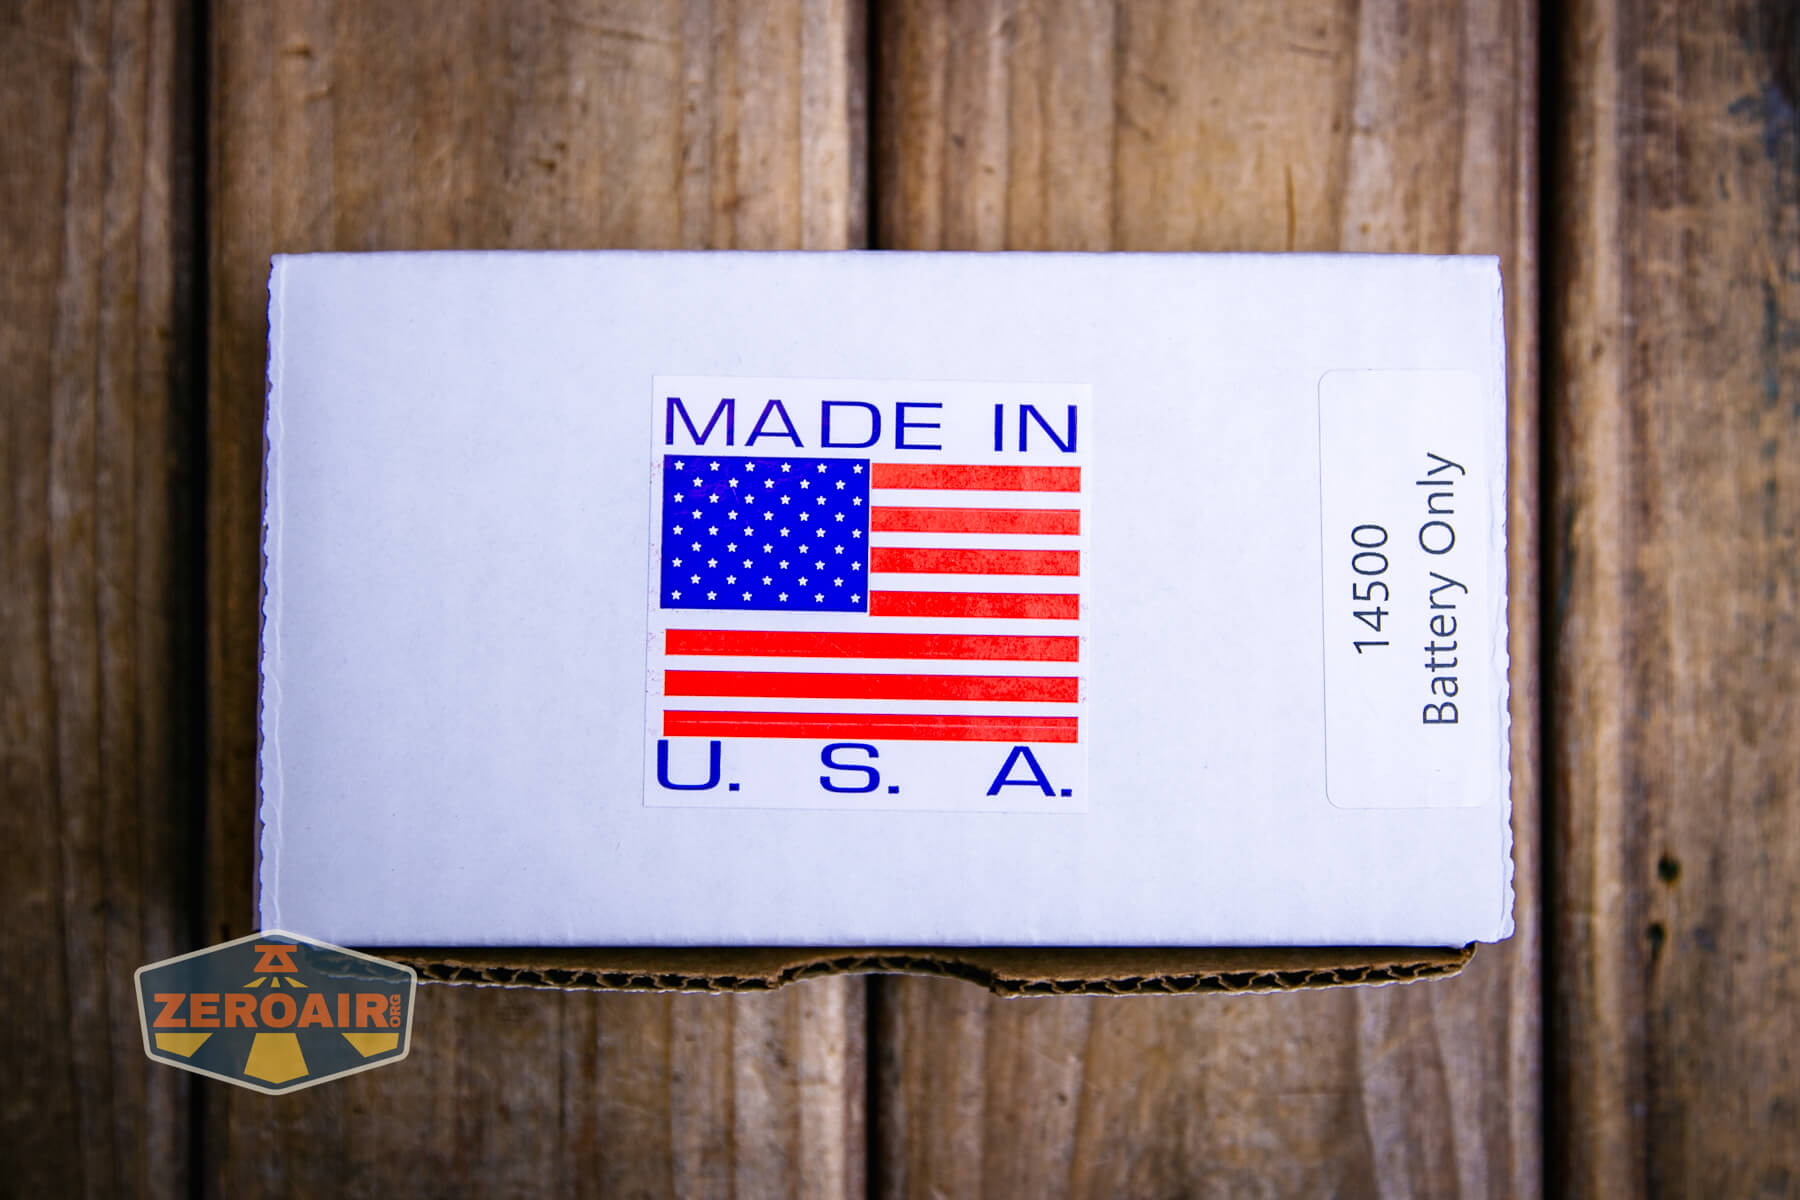
- CWF Mini Arc flashlight
- Vapcell H10 14500
- Programming card/manual
Package and Manual

This card is also the manual. (The manual side can be seen further above.)
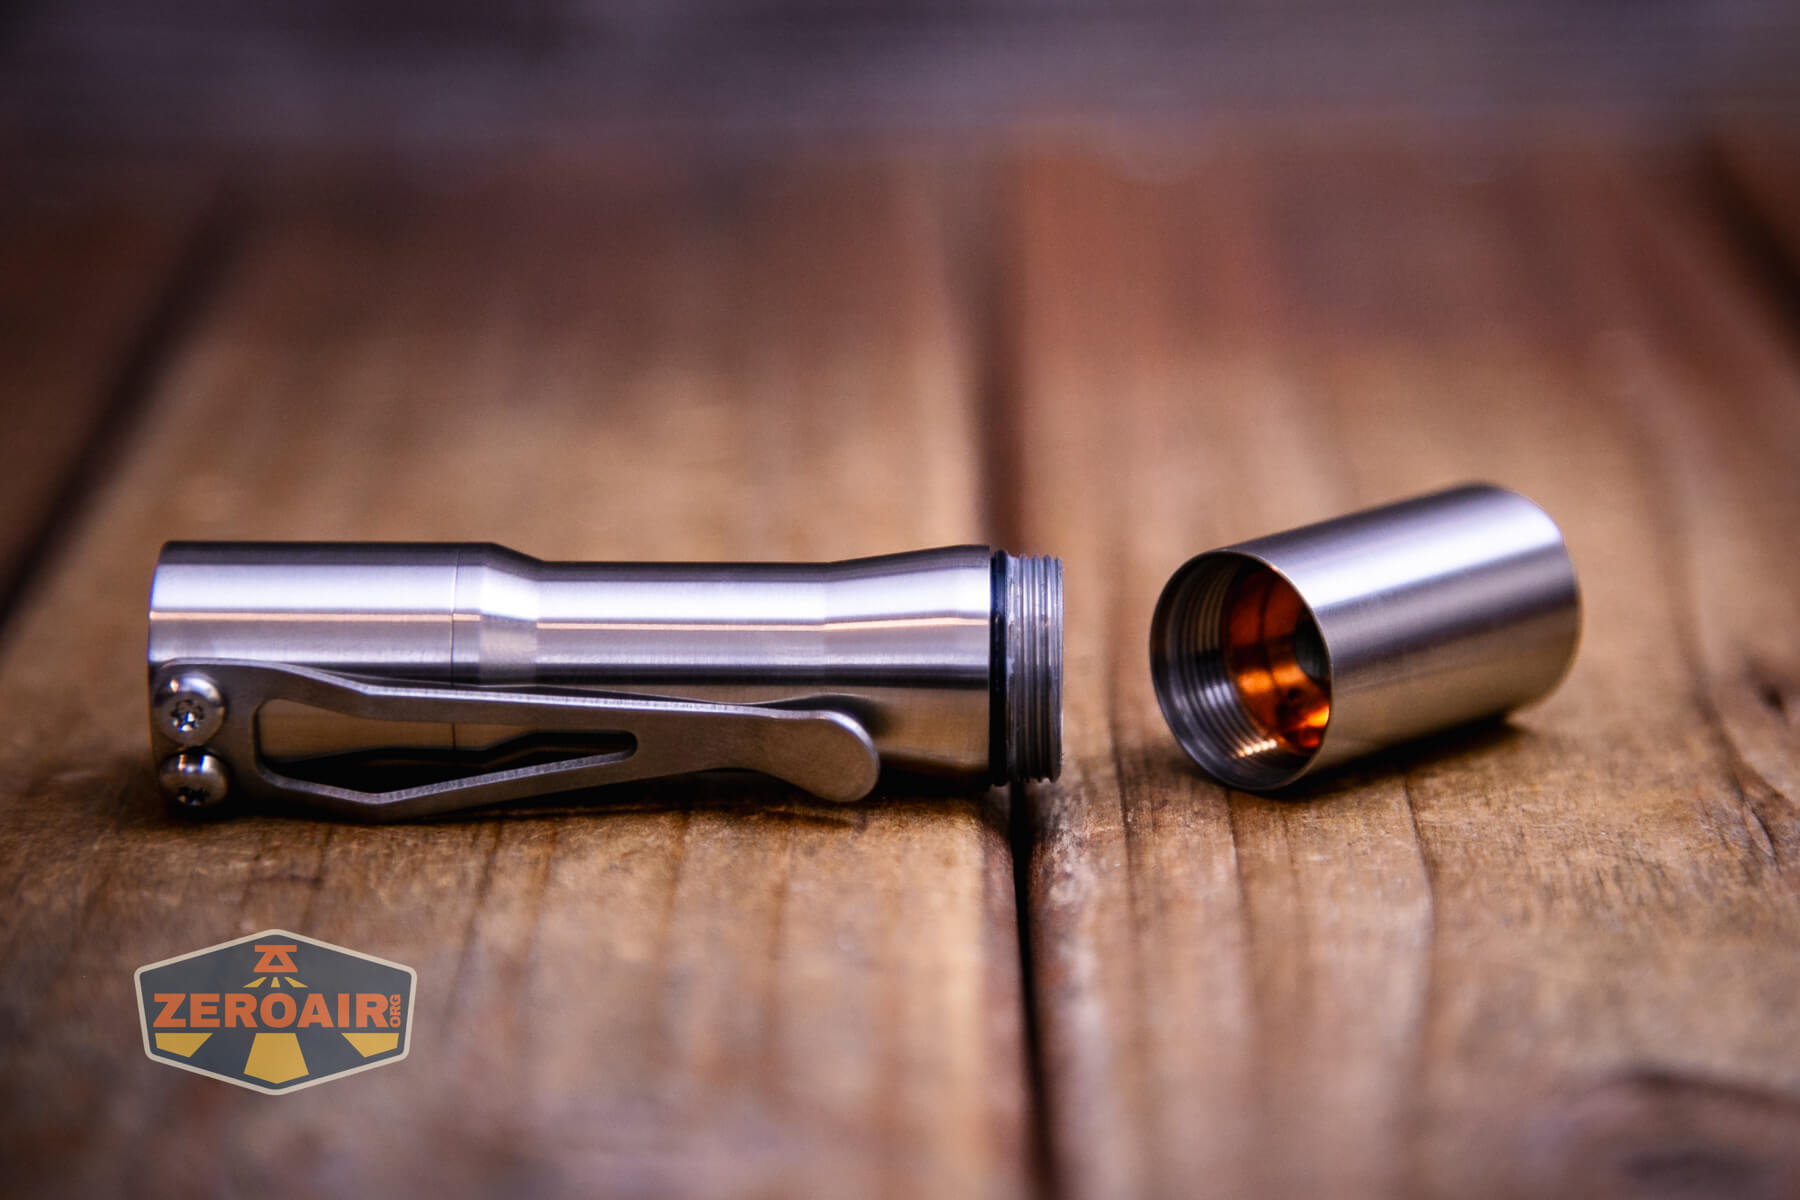
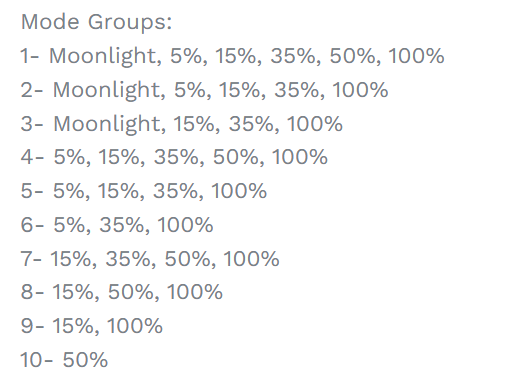
Build Quality and Disassembly
You may have seen my review of the Tactile Turn Apollo flashlight. This CWF Mini Arc flashlight and the Apollo are very similar. In fact, CWF makes the Apollo for Tactile Turn! That’s fine and great, because CWF build quality is very good!
It does mean there’s a ton of overlap between the Mini Arc and Apollo. The main difference is the driver – yes, the Apollo has a Quantum Chimera driver (just like the Mini Arc does), but the Apollo has all programming options stripped out, and offers just three modes. The Mini Arc gets the full driver, programming options and all.
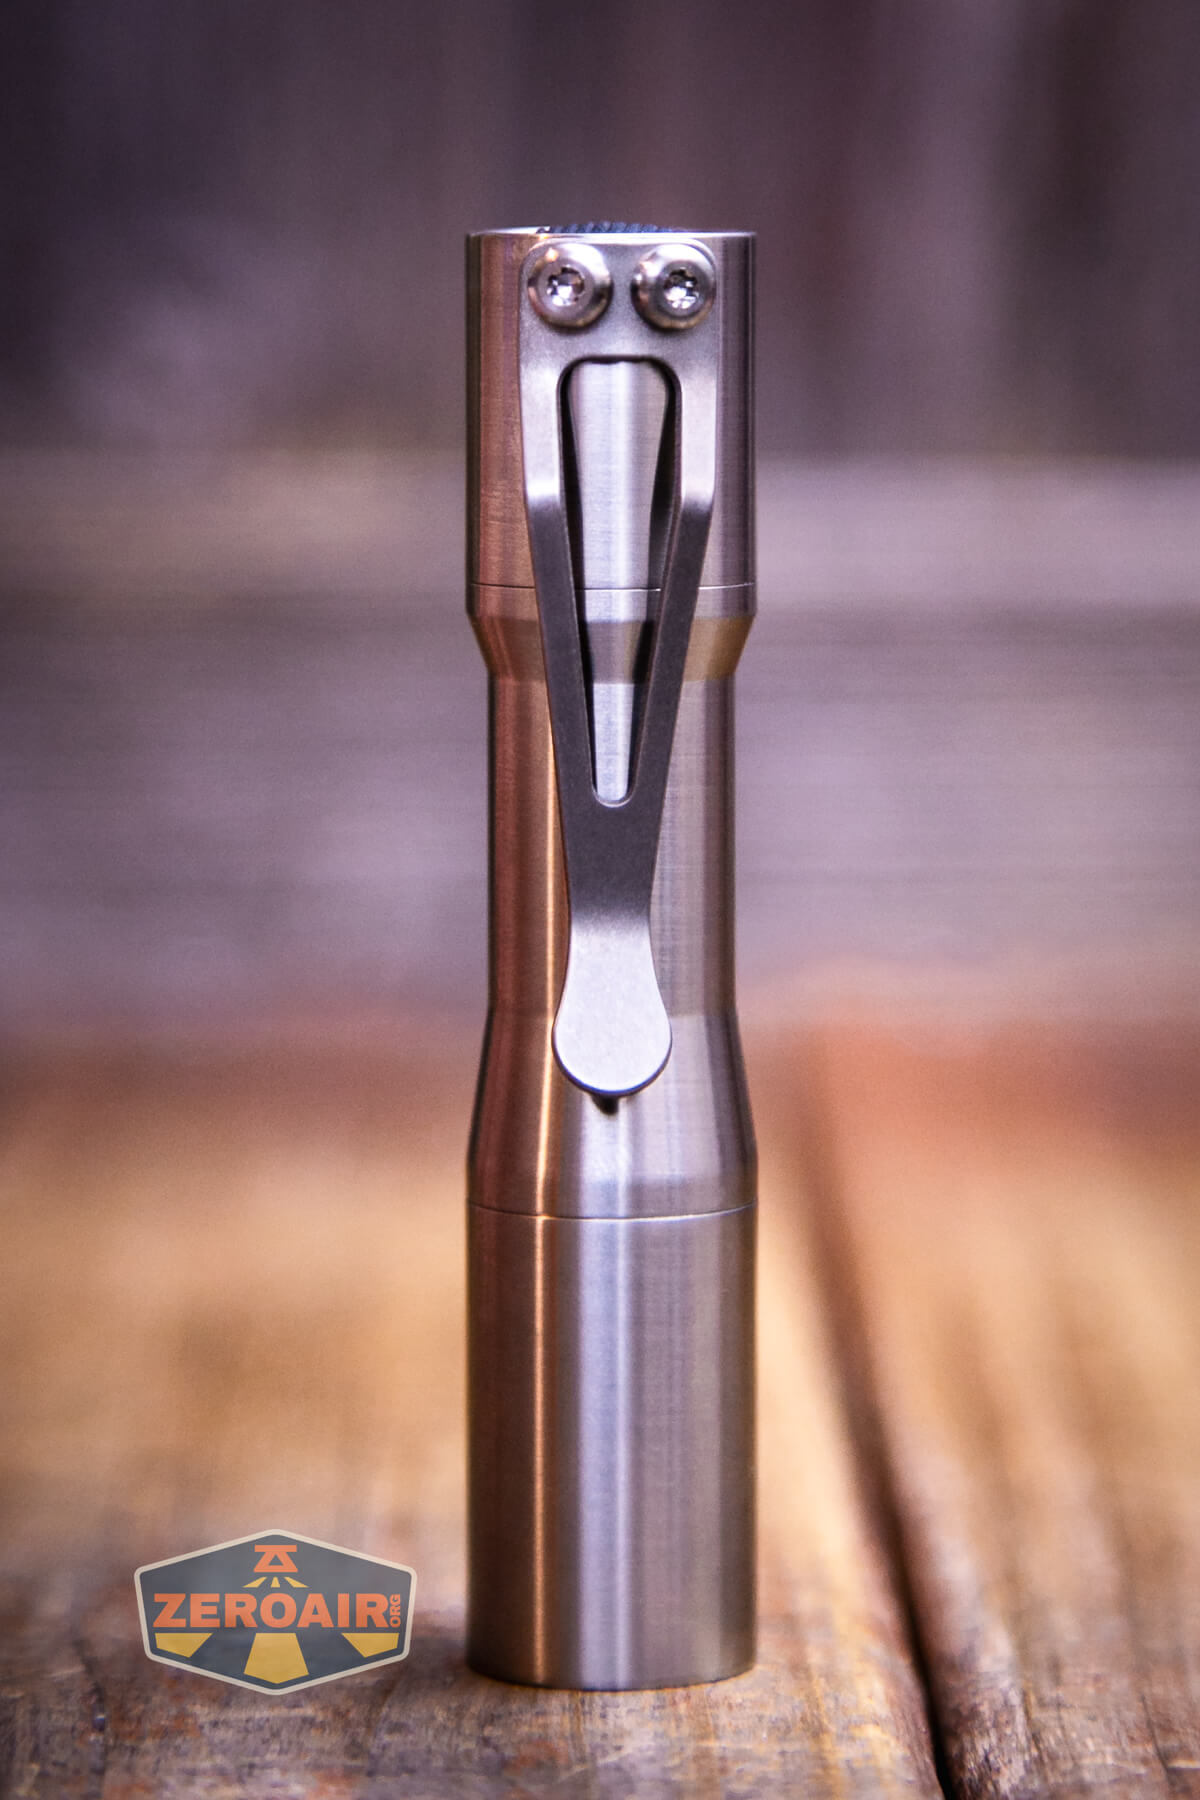
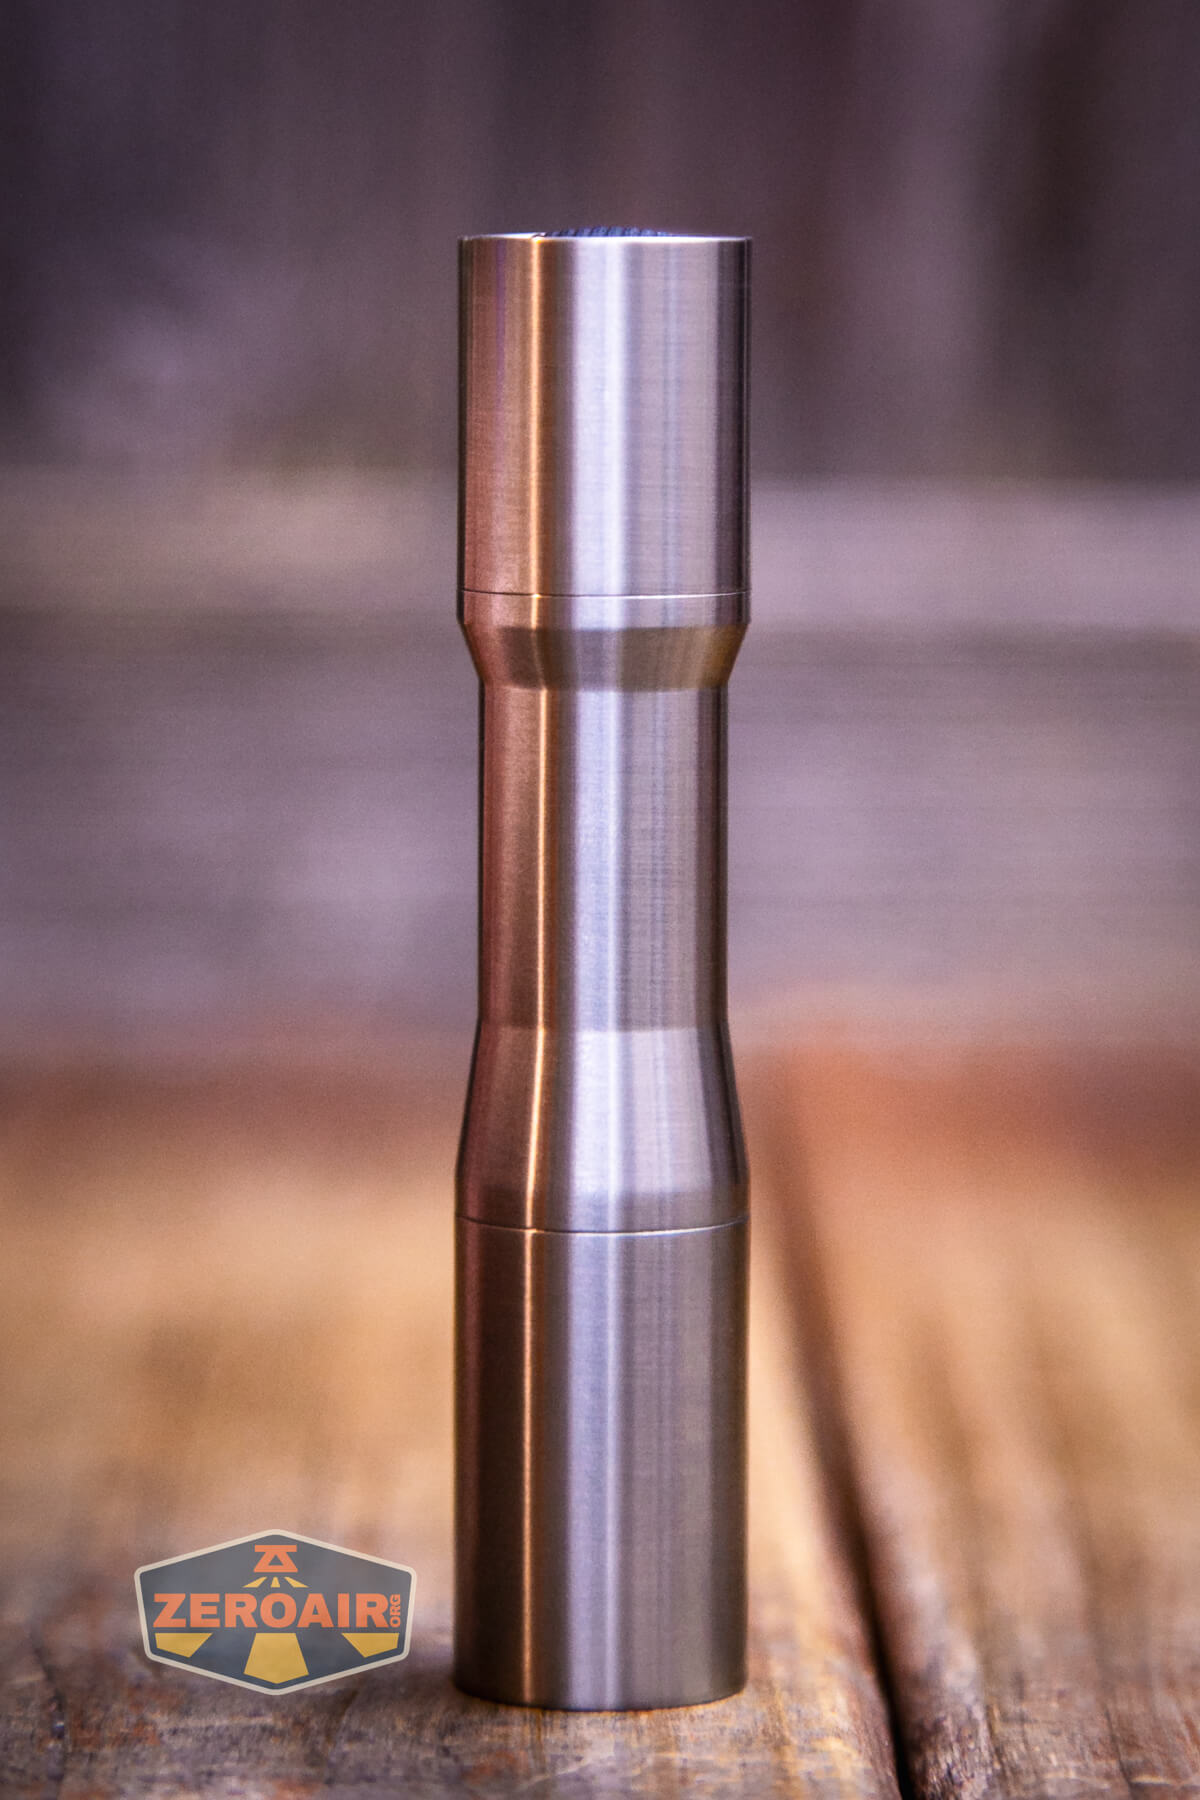
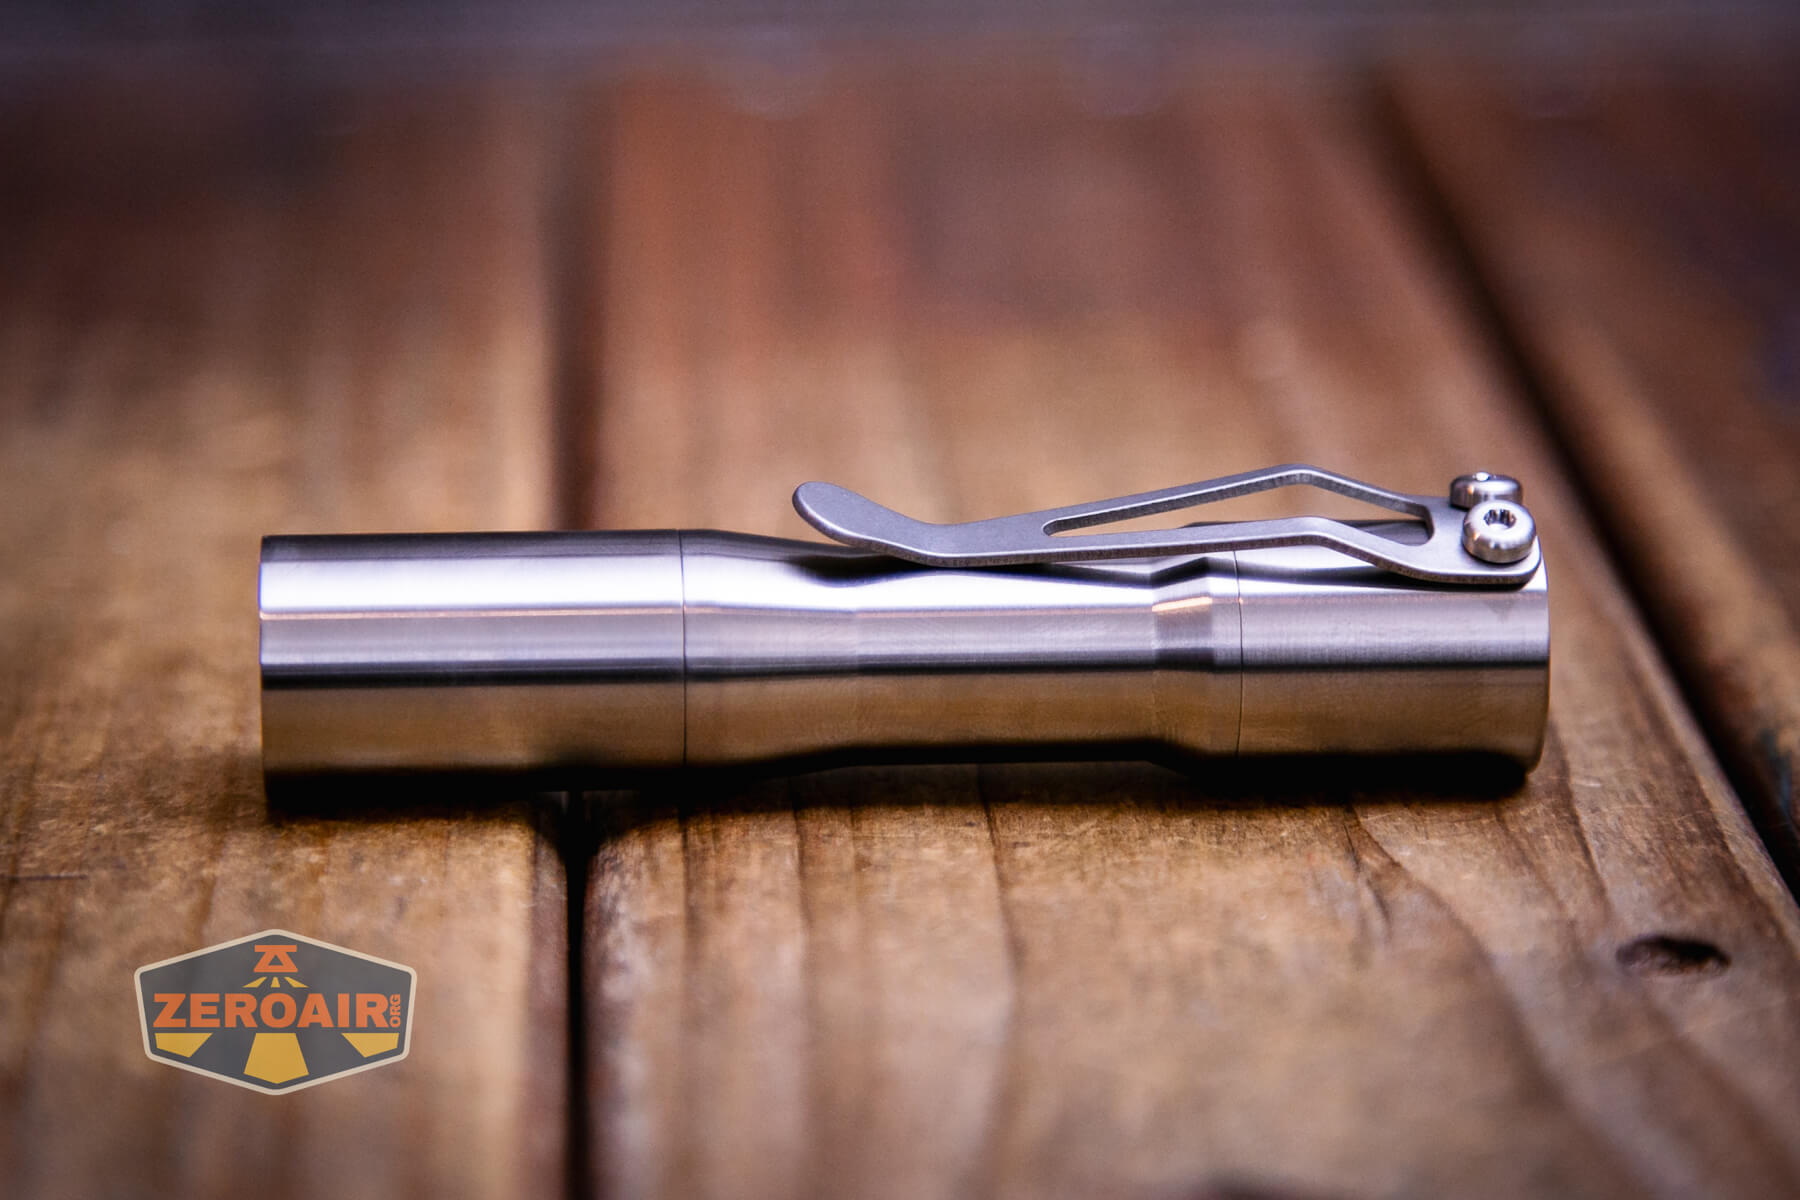
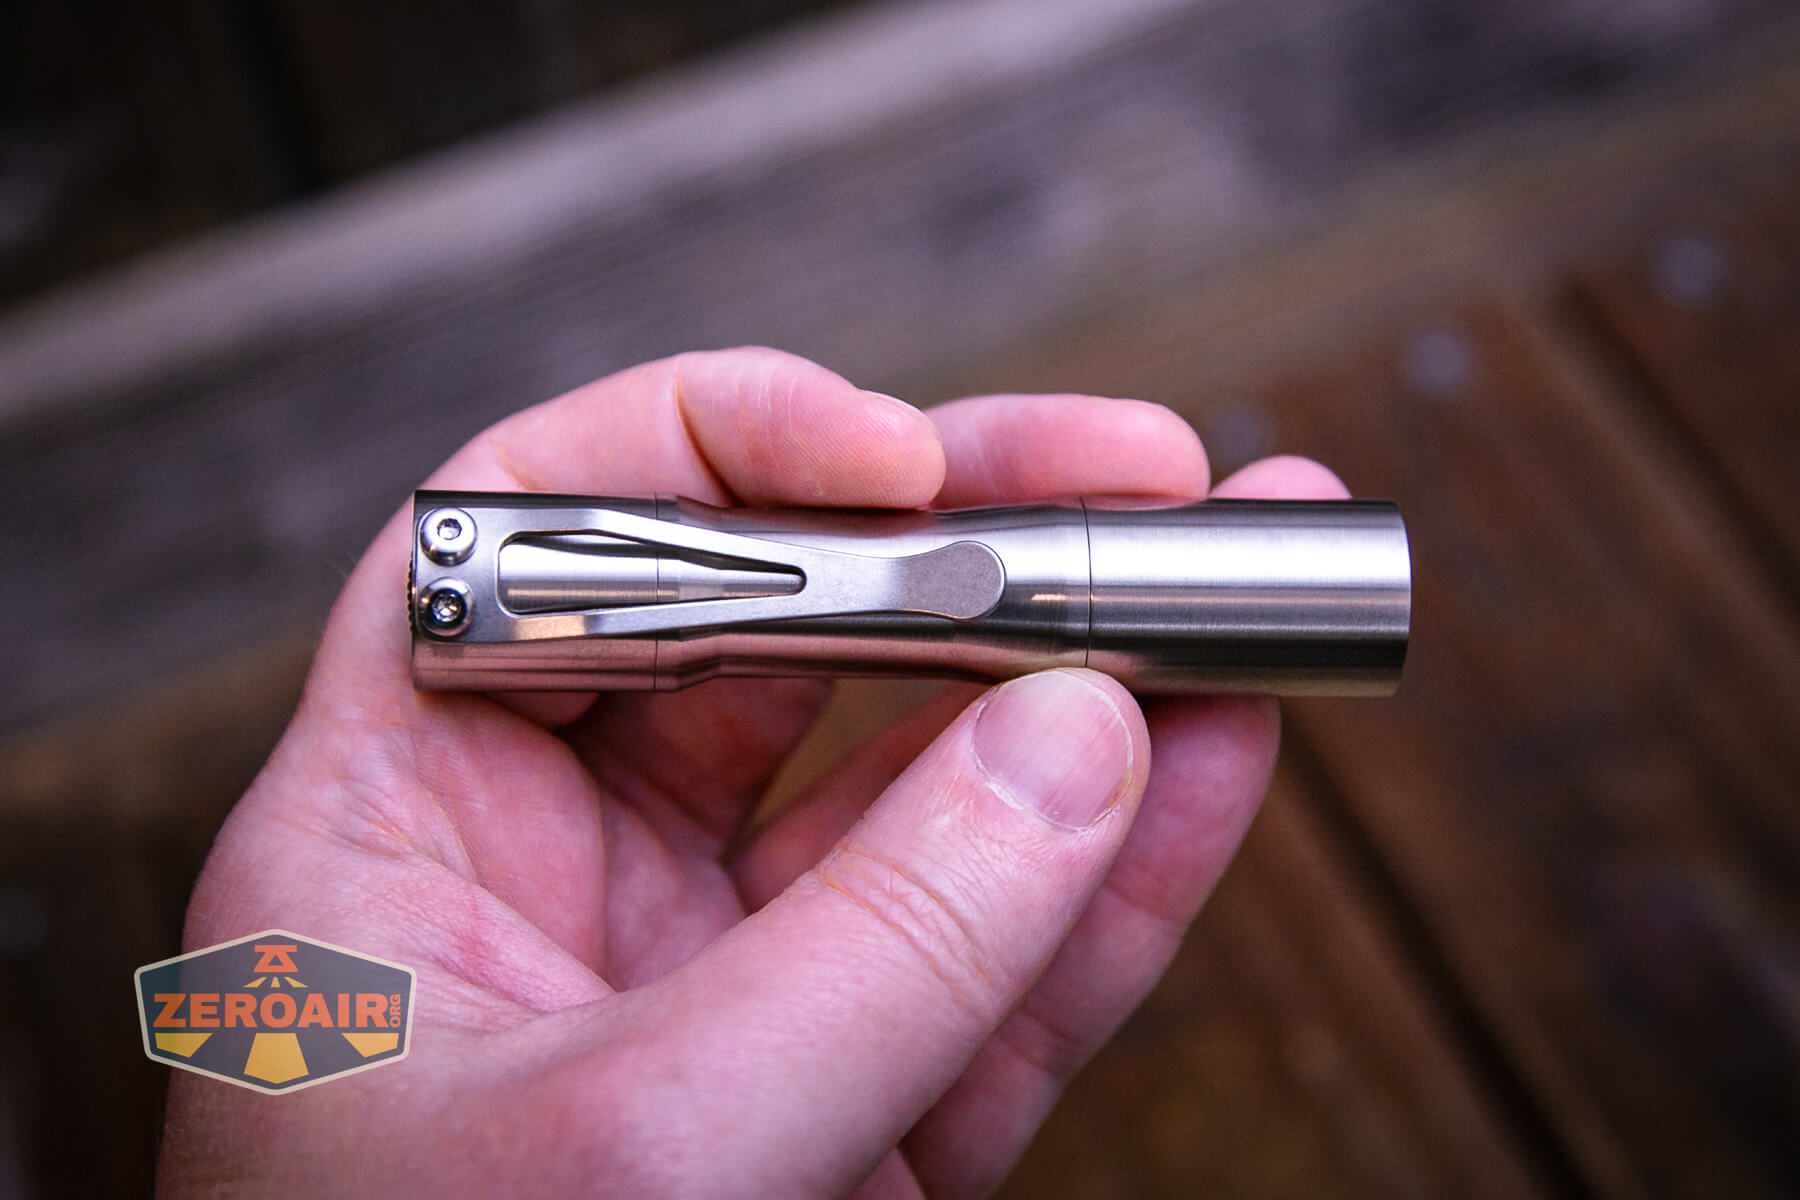
All of the above said, the CWF Mini Arc flashlight’s build quality is very good.
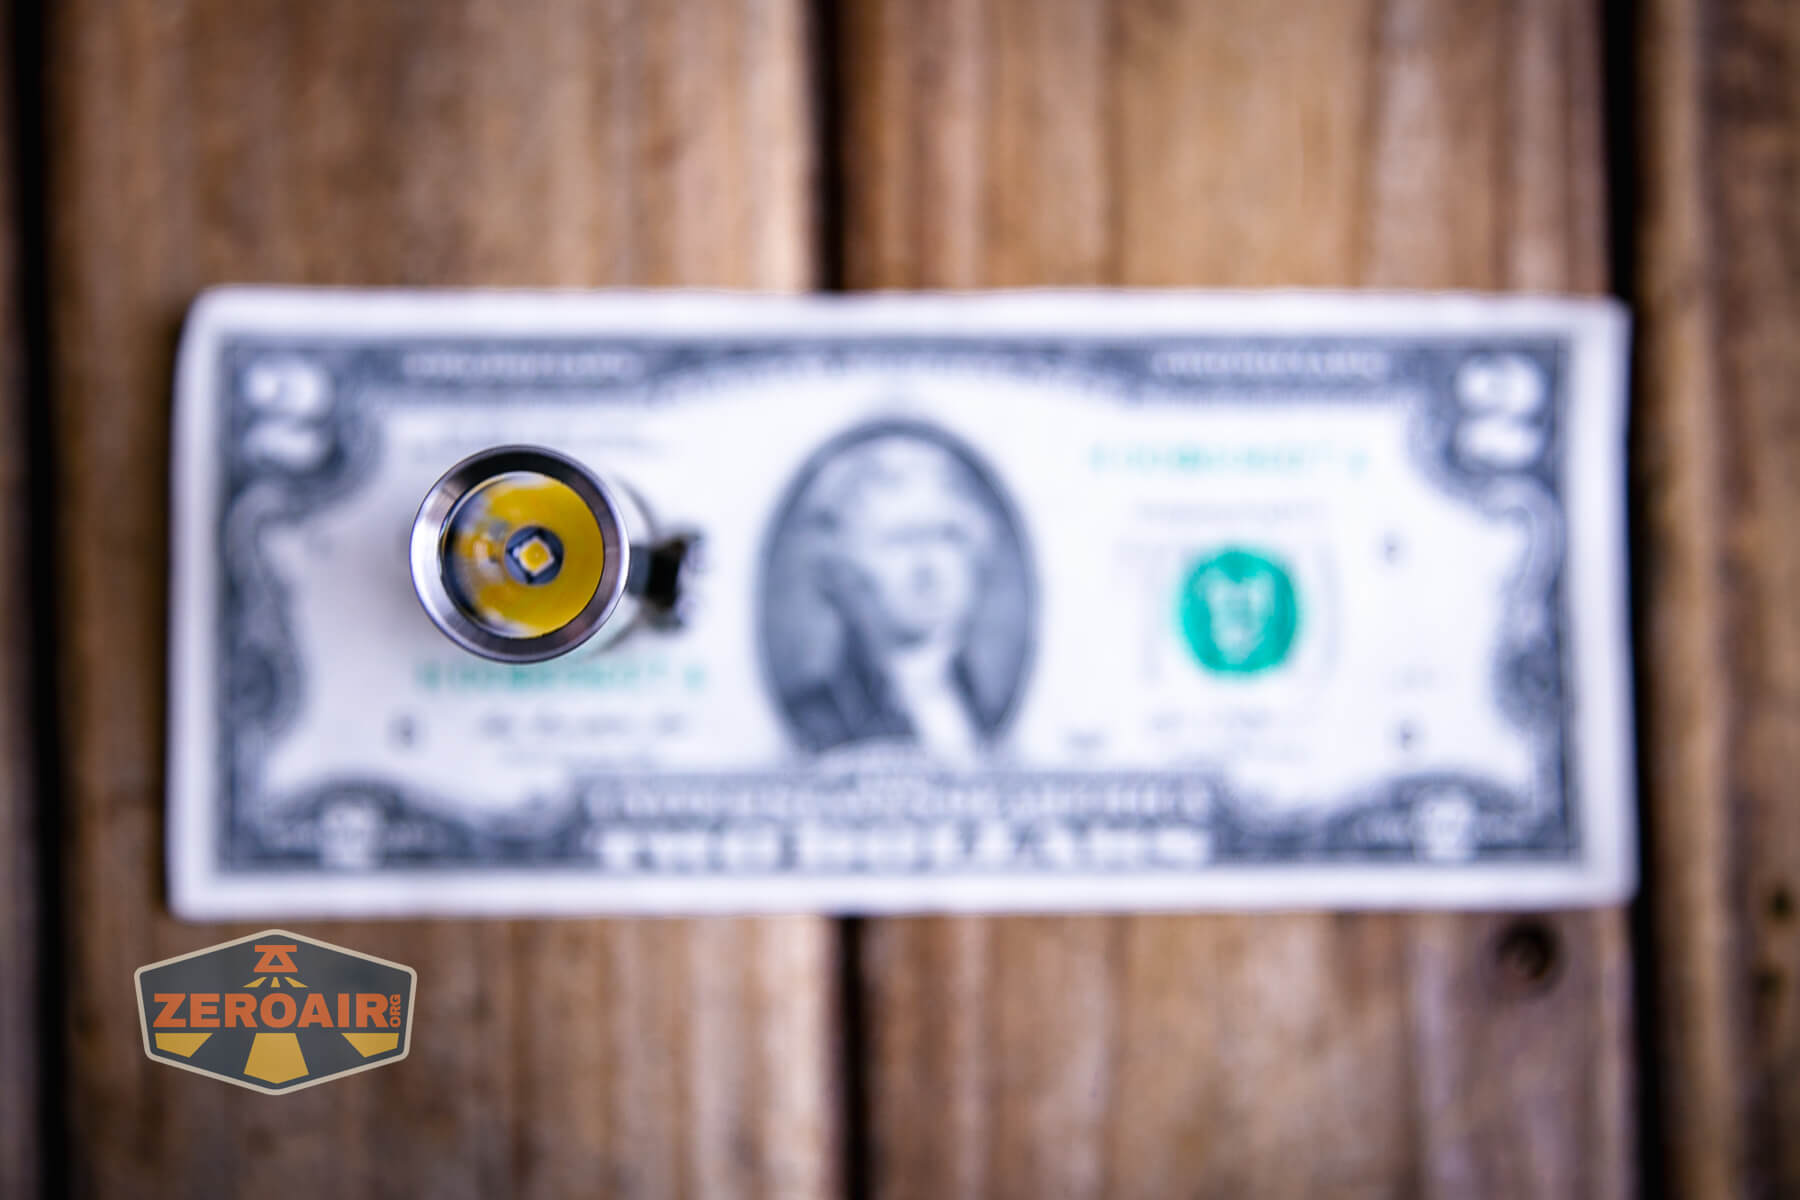
You can also note why this CWF Mini Arc flashlight uses the CWF Quantum Chimeara. It’s a one-sided driver that uses a button on the battery side. Most importantly, the emitter and driver components are on the same side. This means there are no wires to connect from the backside of the emitter board to the driver board. This makes the engine very short! And in turn, the light can be shorter than many 14500 lights, too.
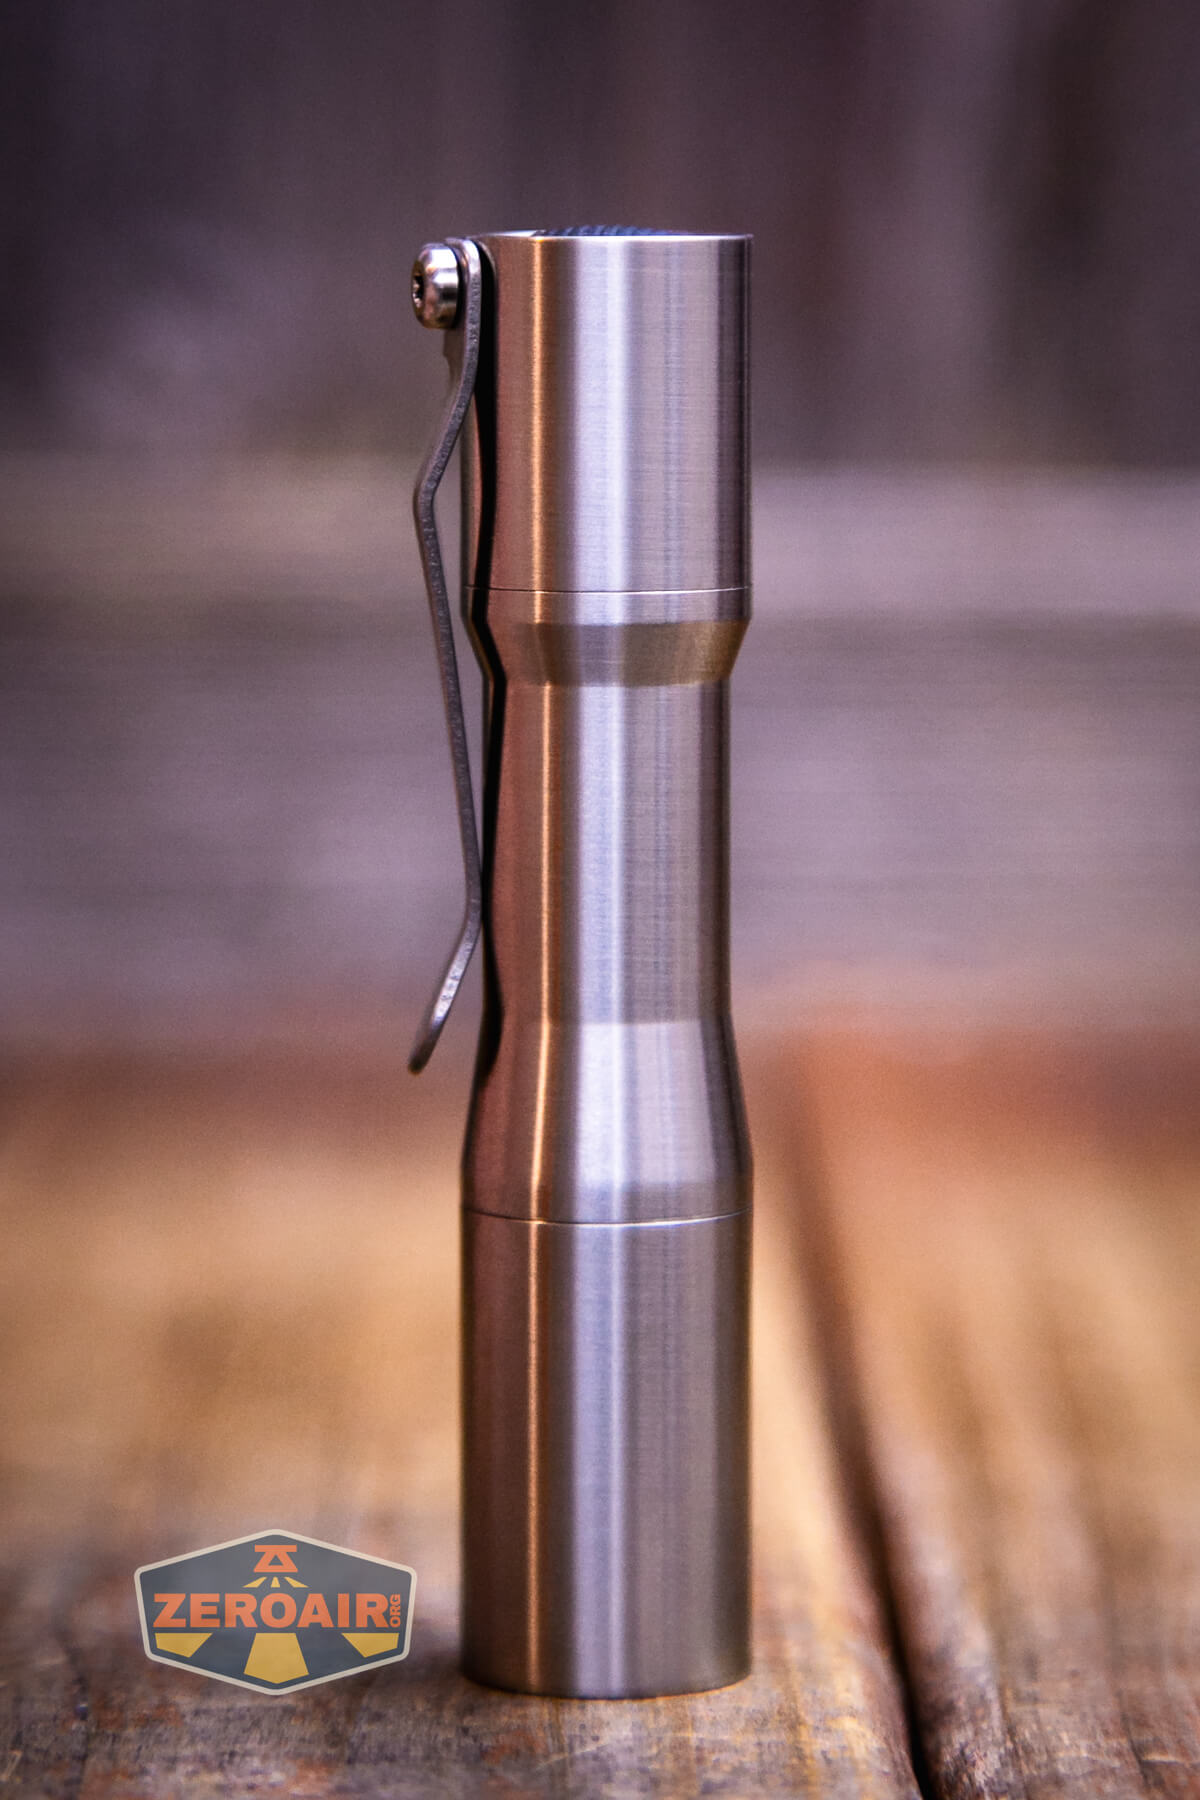
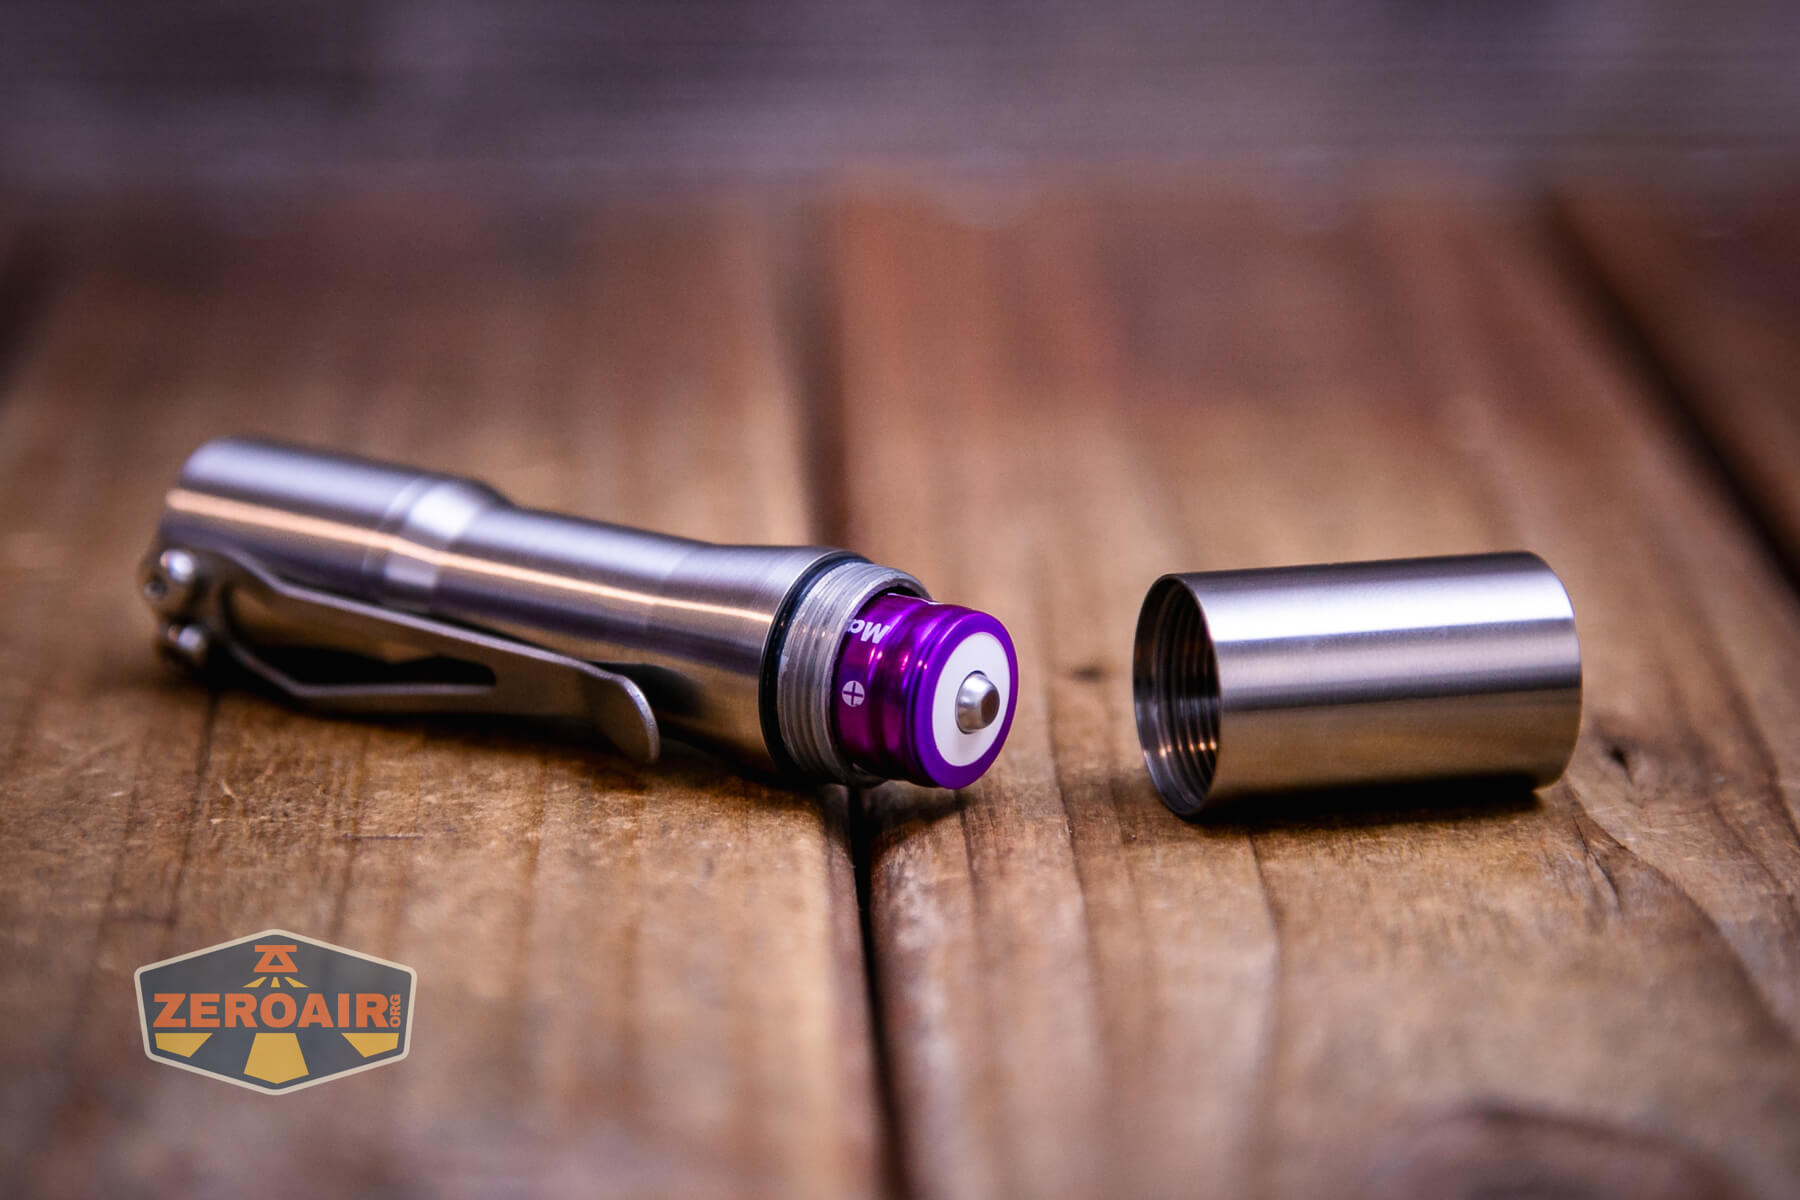
The tailcap seems to be held in place by Loctite or similar – it does not seem removable. Things are better that way, because removing the tailcap can cause this pocket clip to scratch the light’s body.
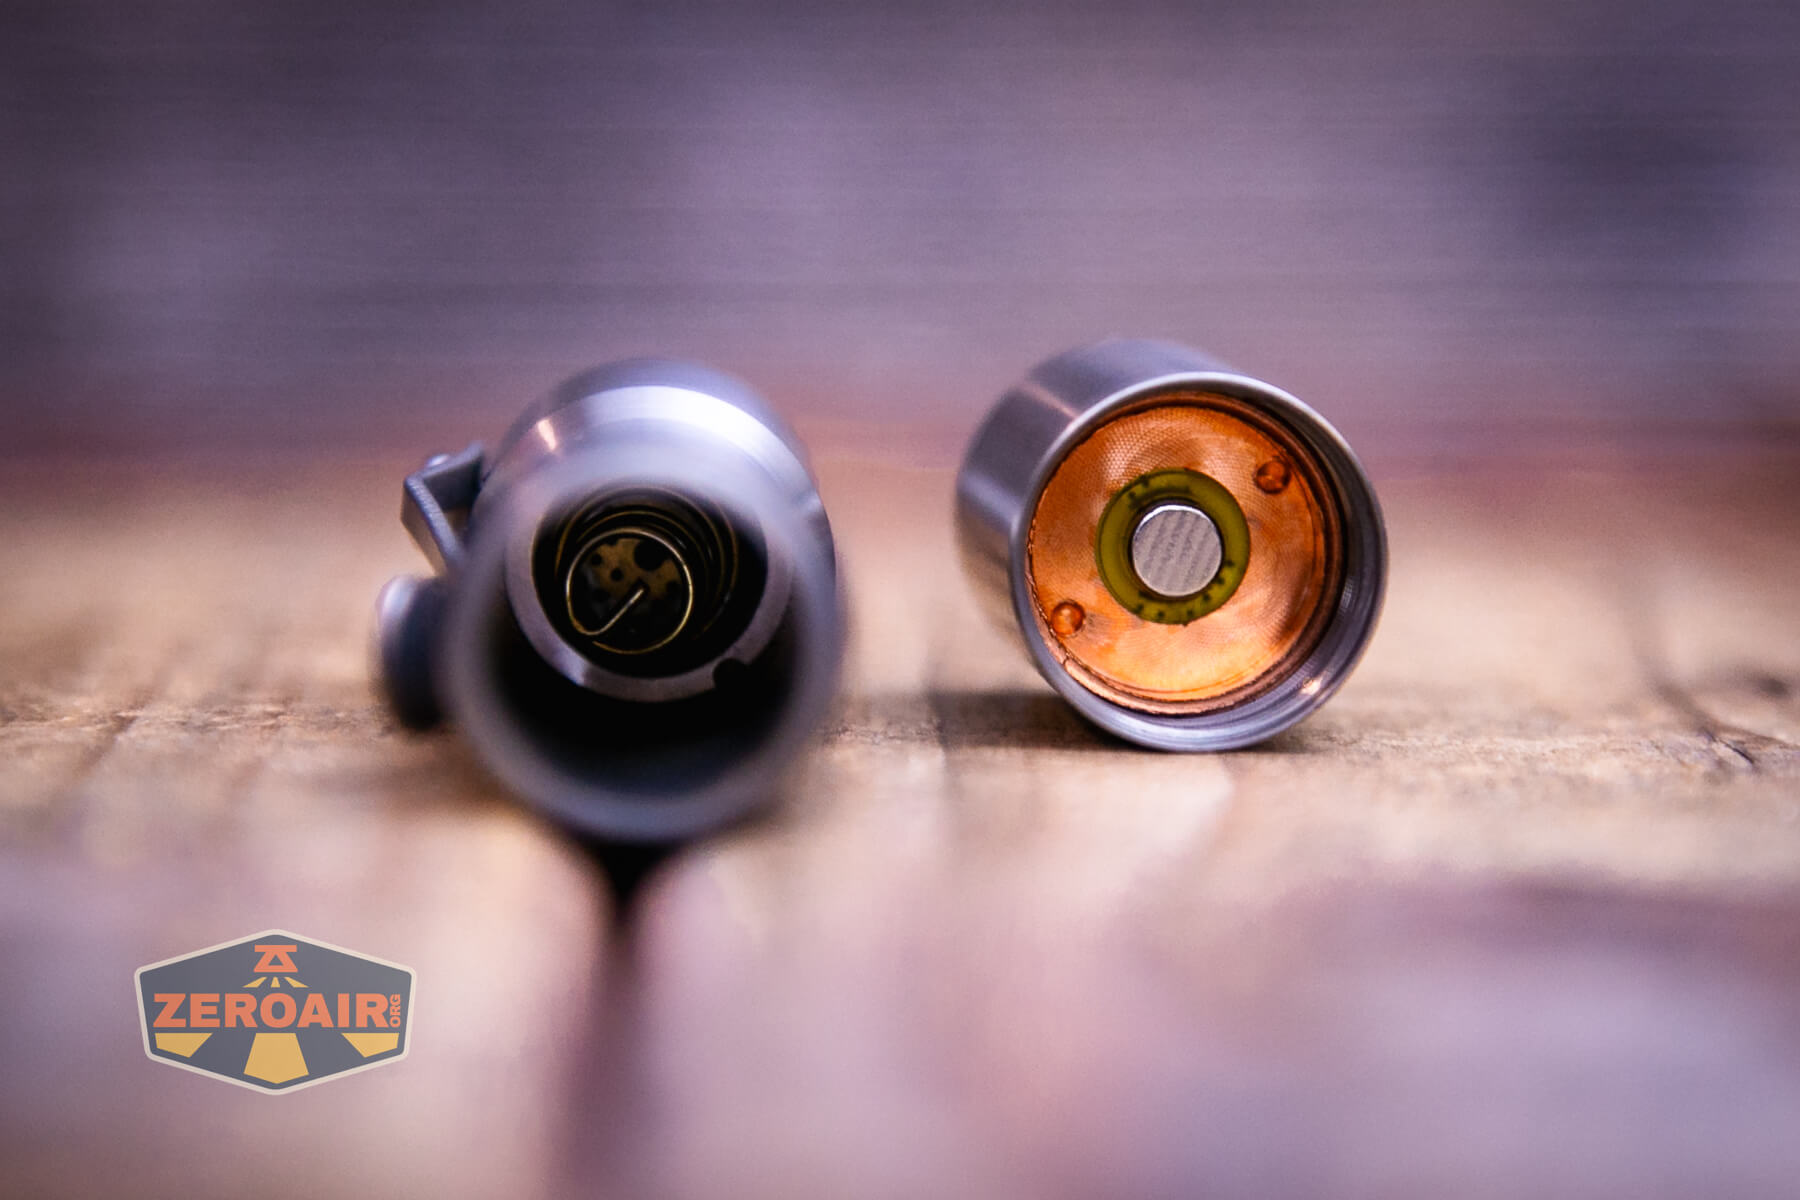
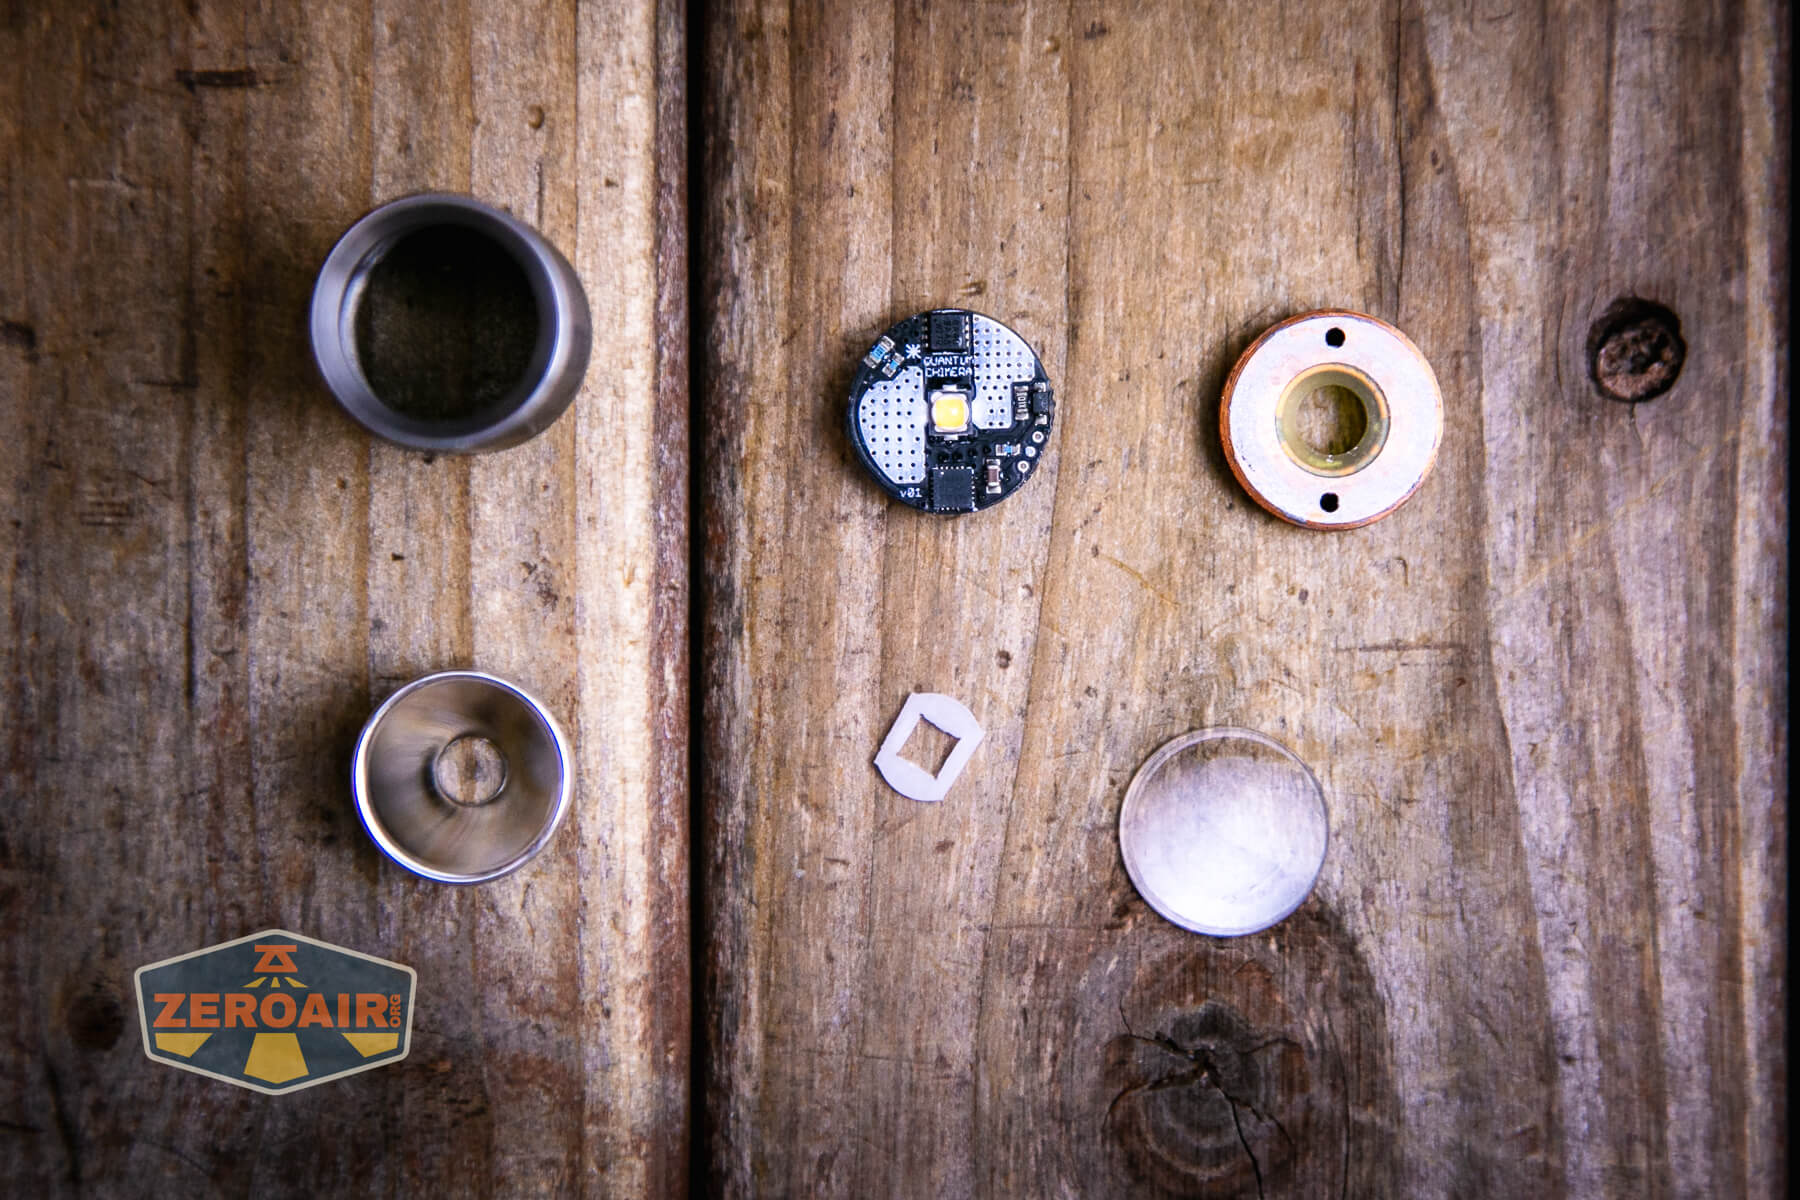
The photos of internals below are from the Tactile Turn Apollo, but I believe the parts are the same (aside from however they remove the programming from the Apollo driver.)
Here are the driver components. You can see how short the pill (the copper bit) is, and where the battery contact goes through the pill. Also, observe the emitter/driver components.

Here’s a better look at the battery contact on the driver.


All in all, this setup makes for a very reasonably sized 14500 flashlight.
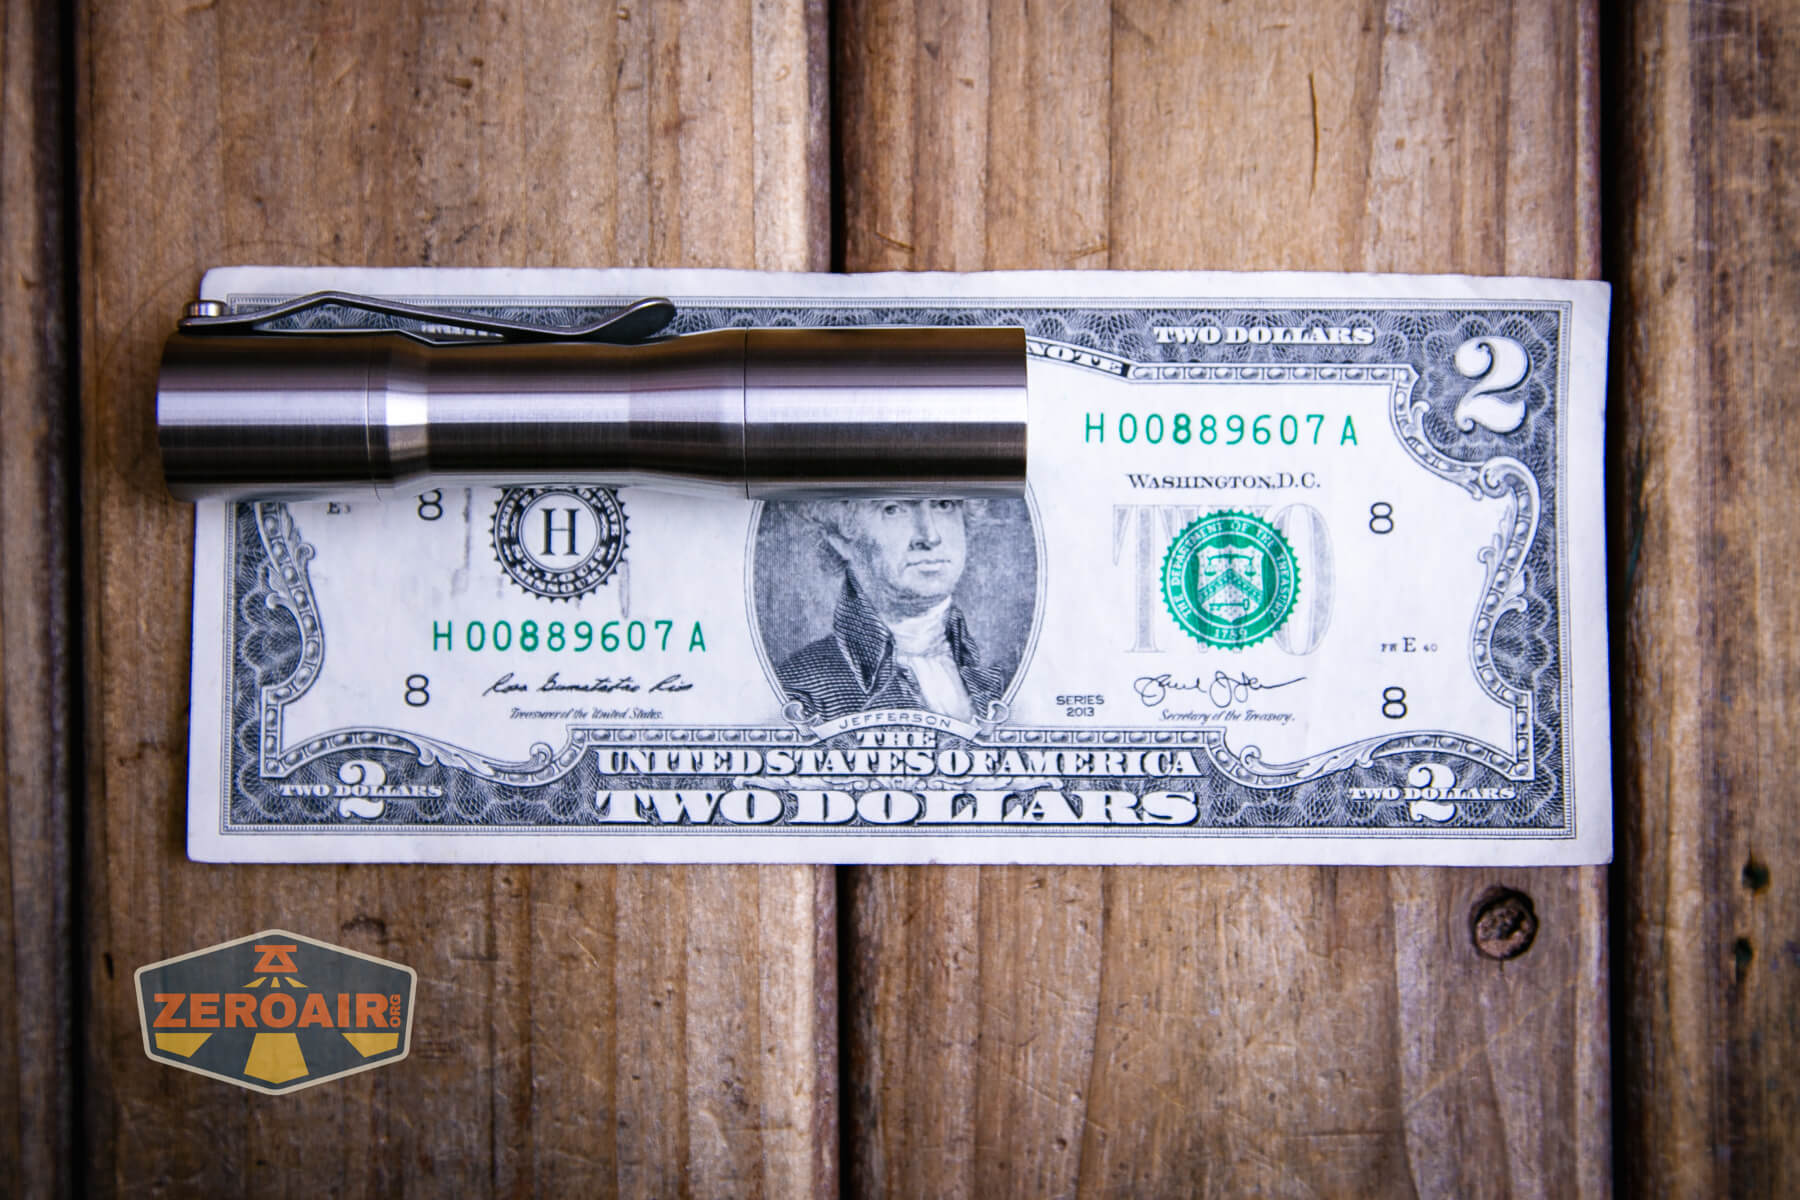
Size and Comps
Diameter: 0.740″
Length: 3.6″
Weight: 1.45oz Titanium
Notably, those dimensions are the same as the Tactile Turn Apollo!
If the flashlight will headstand, I’ll show it here. If the flashlight will tailstand, I’ll also show that here too!
Here’s the test light with the venerable Convoy S2+. The version below is a custom laser-engraved Convoy S2+ host by GadgetConnections.com. I did a full post on an engraved orange host right here! Or go straight to GadgetConnections.com to buy your Convoy S2+ now!
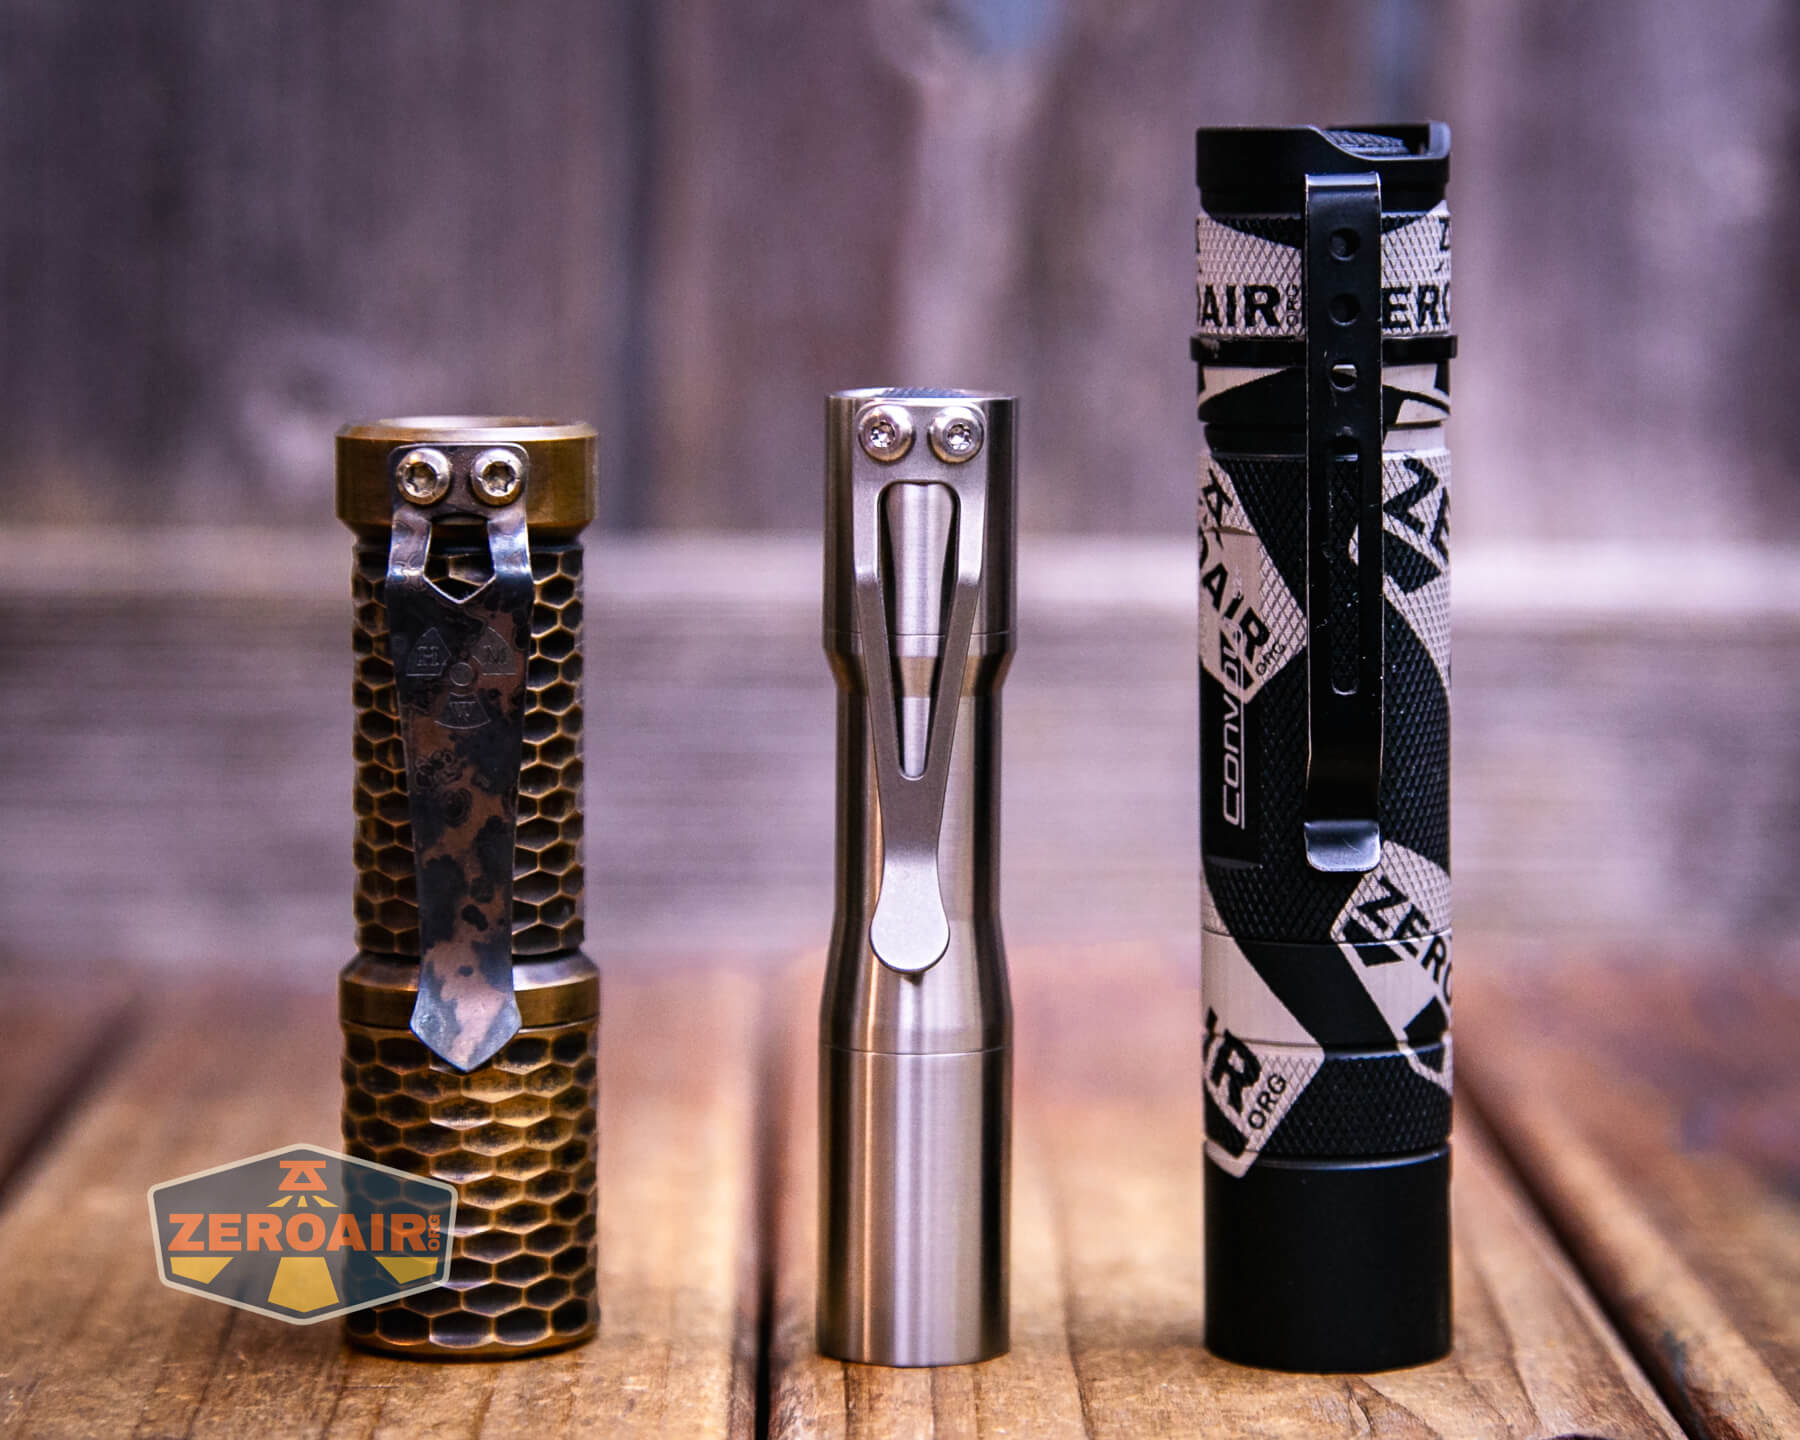

In the photo above, you may note that the SRM (standard reference material) flashlight for comparison has changed! I used a TorchLAB BOSS 35 for ages. Now, what you can see as the 18350 SRM is the Hanko Machine Works Trident. While I have not reviewed or tested the Gunner Grip version seen here, I have tested a Hanko Machine Works Trident Total Tesseract in brass. I love the Trident, and it’s a striking contrast next to the inexpensive Convoy S2+, which also makes a great standard reference material.
Retention and Carry
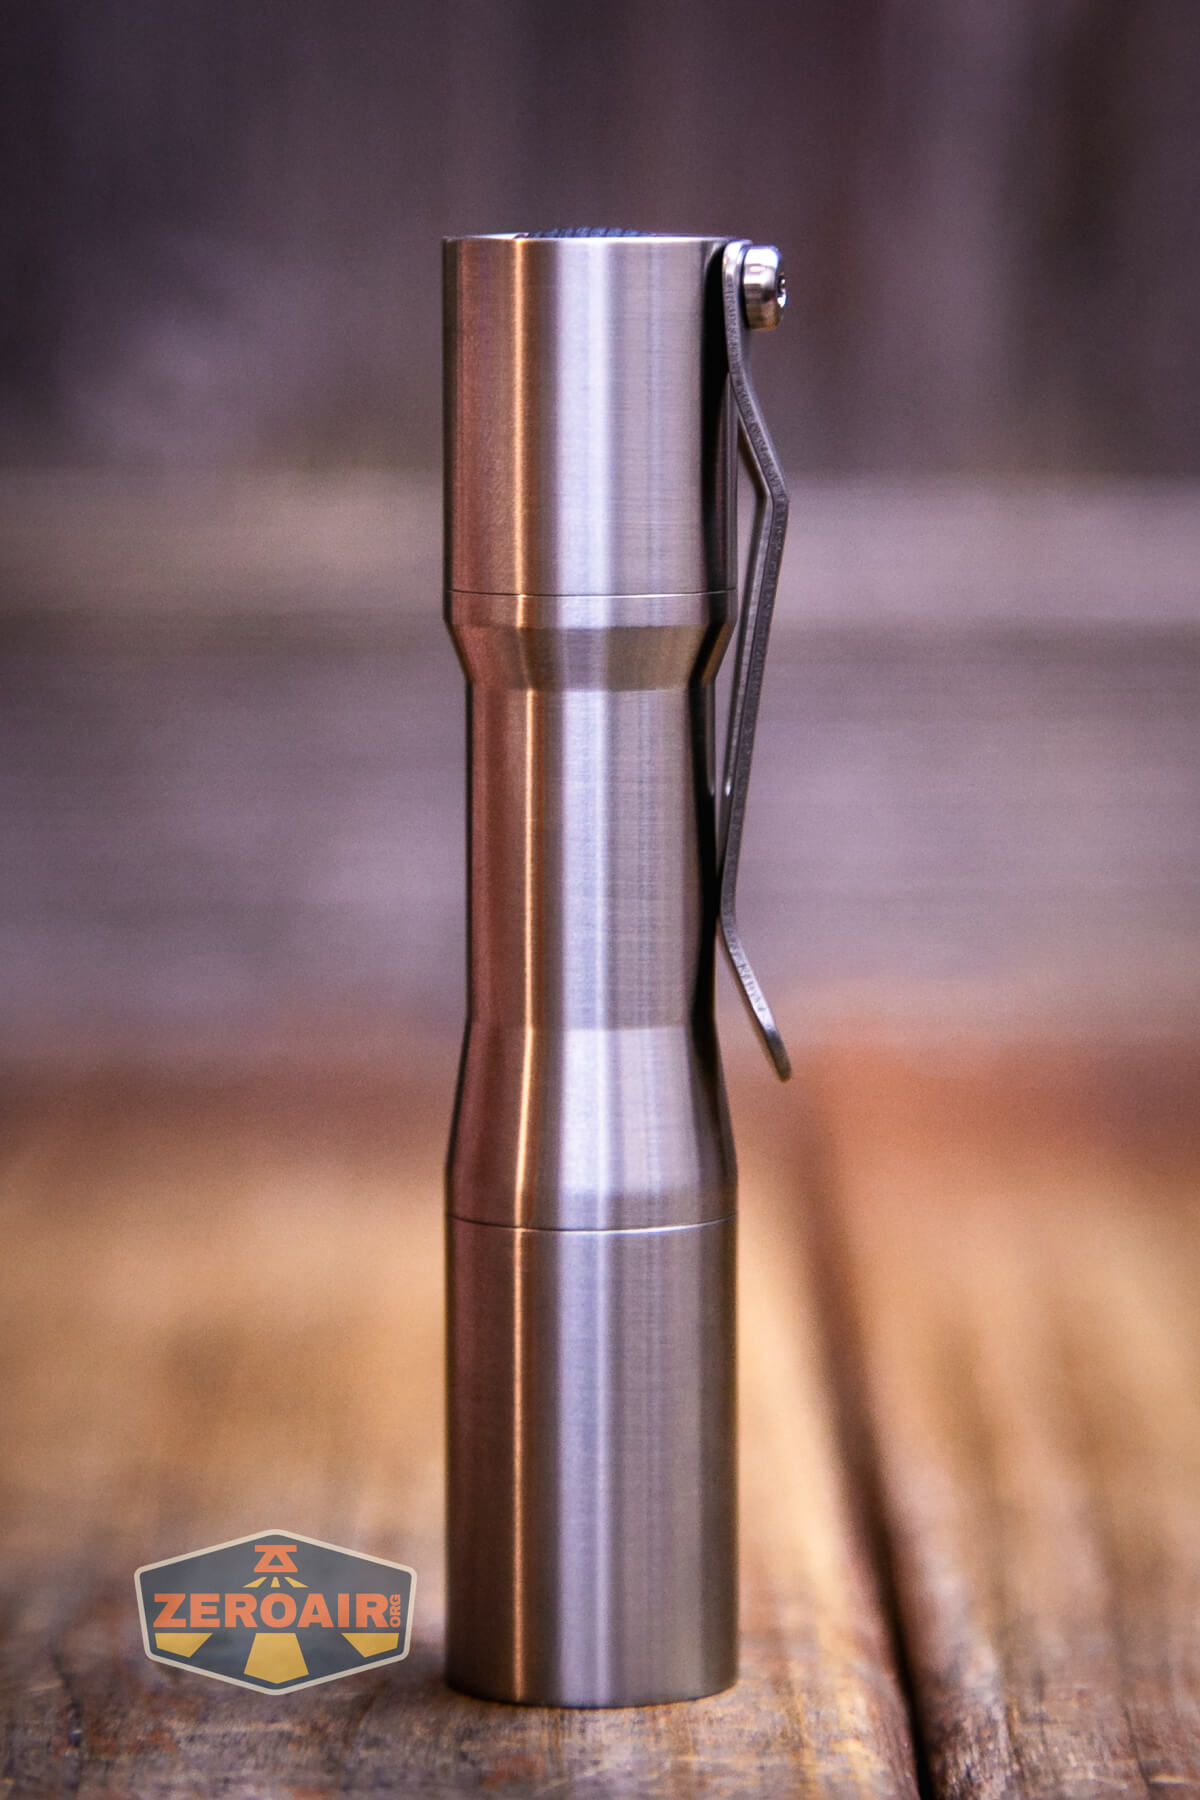
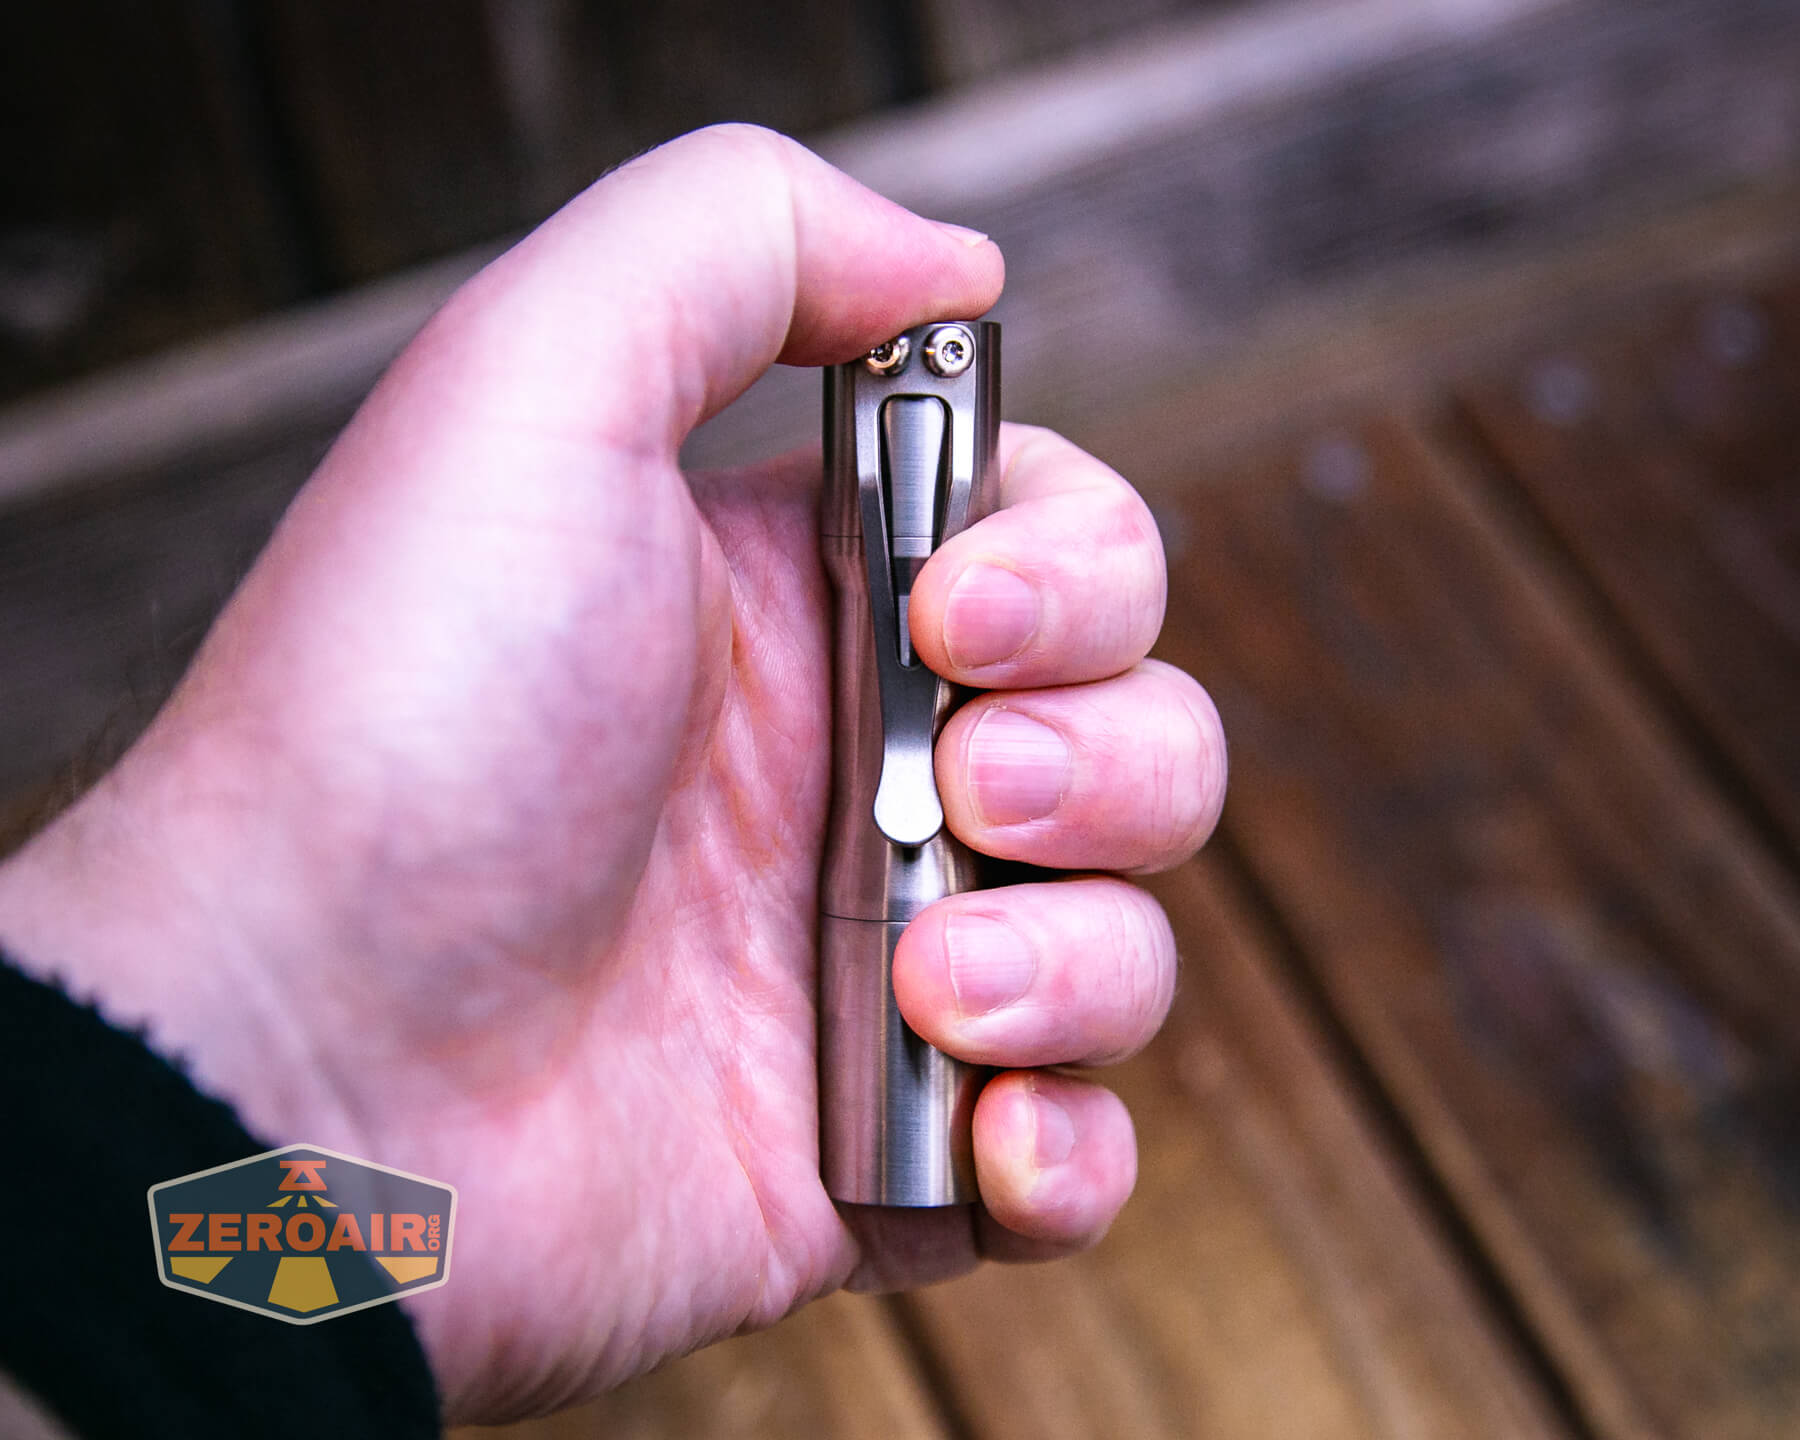
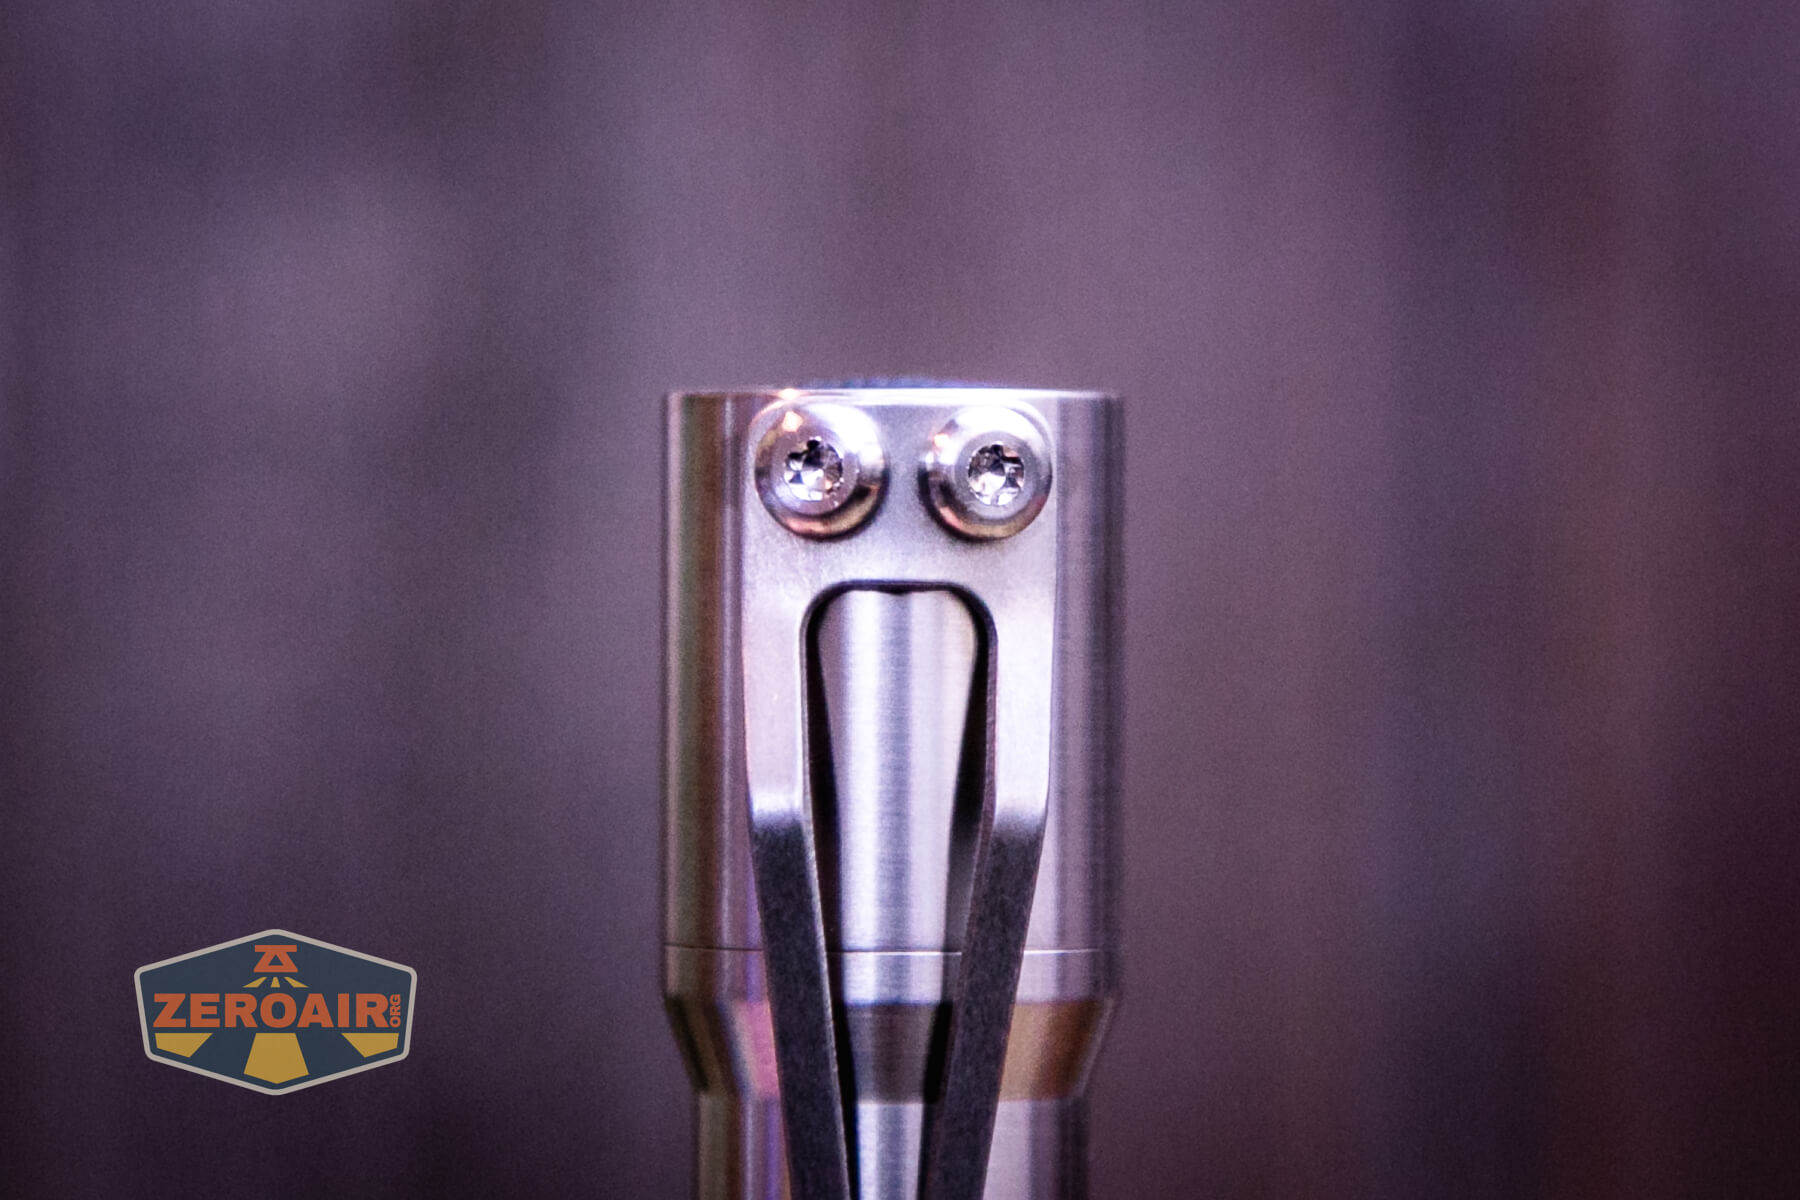
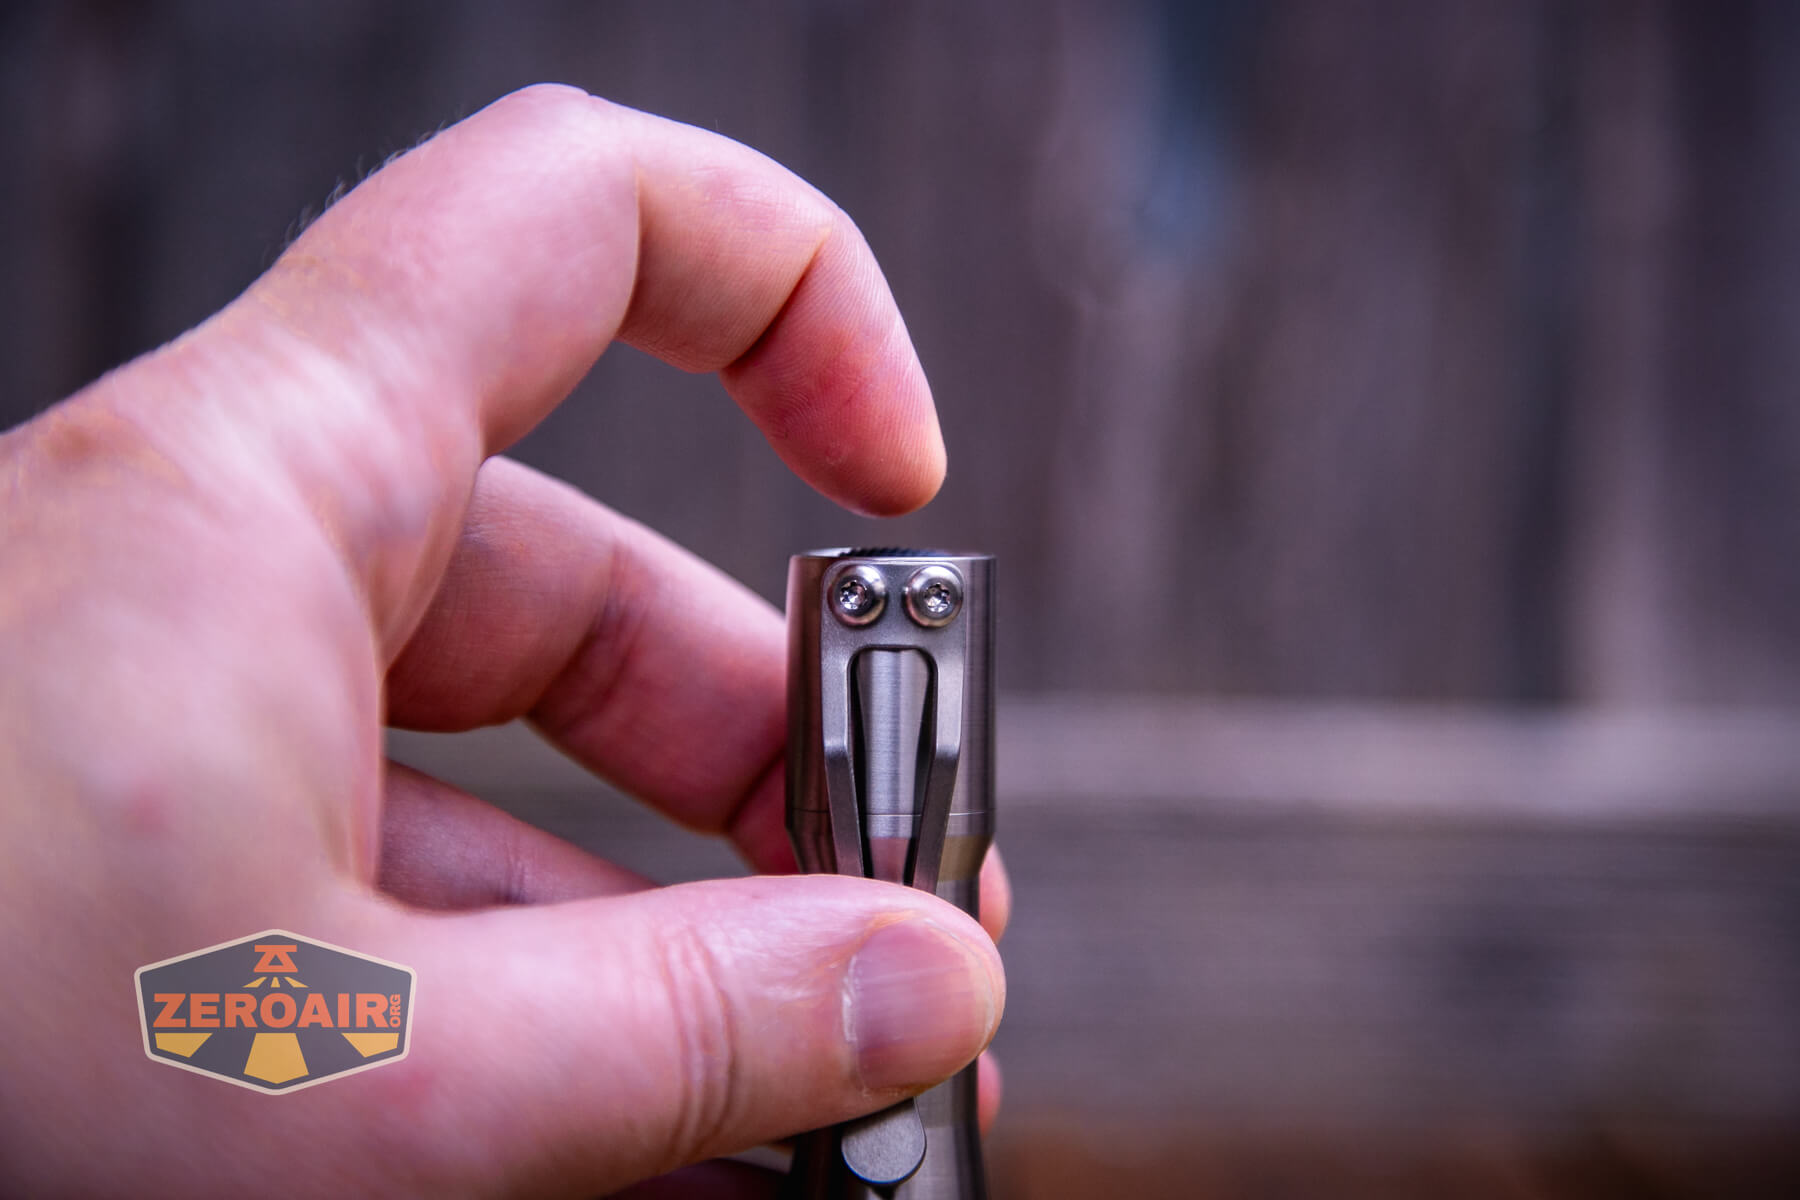
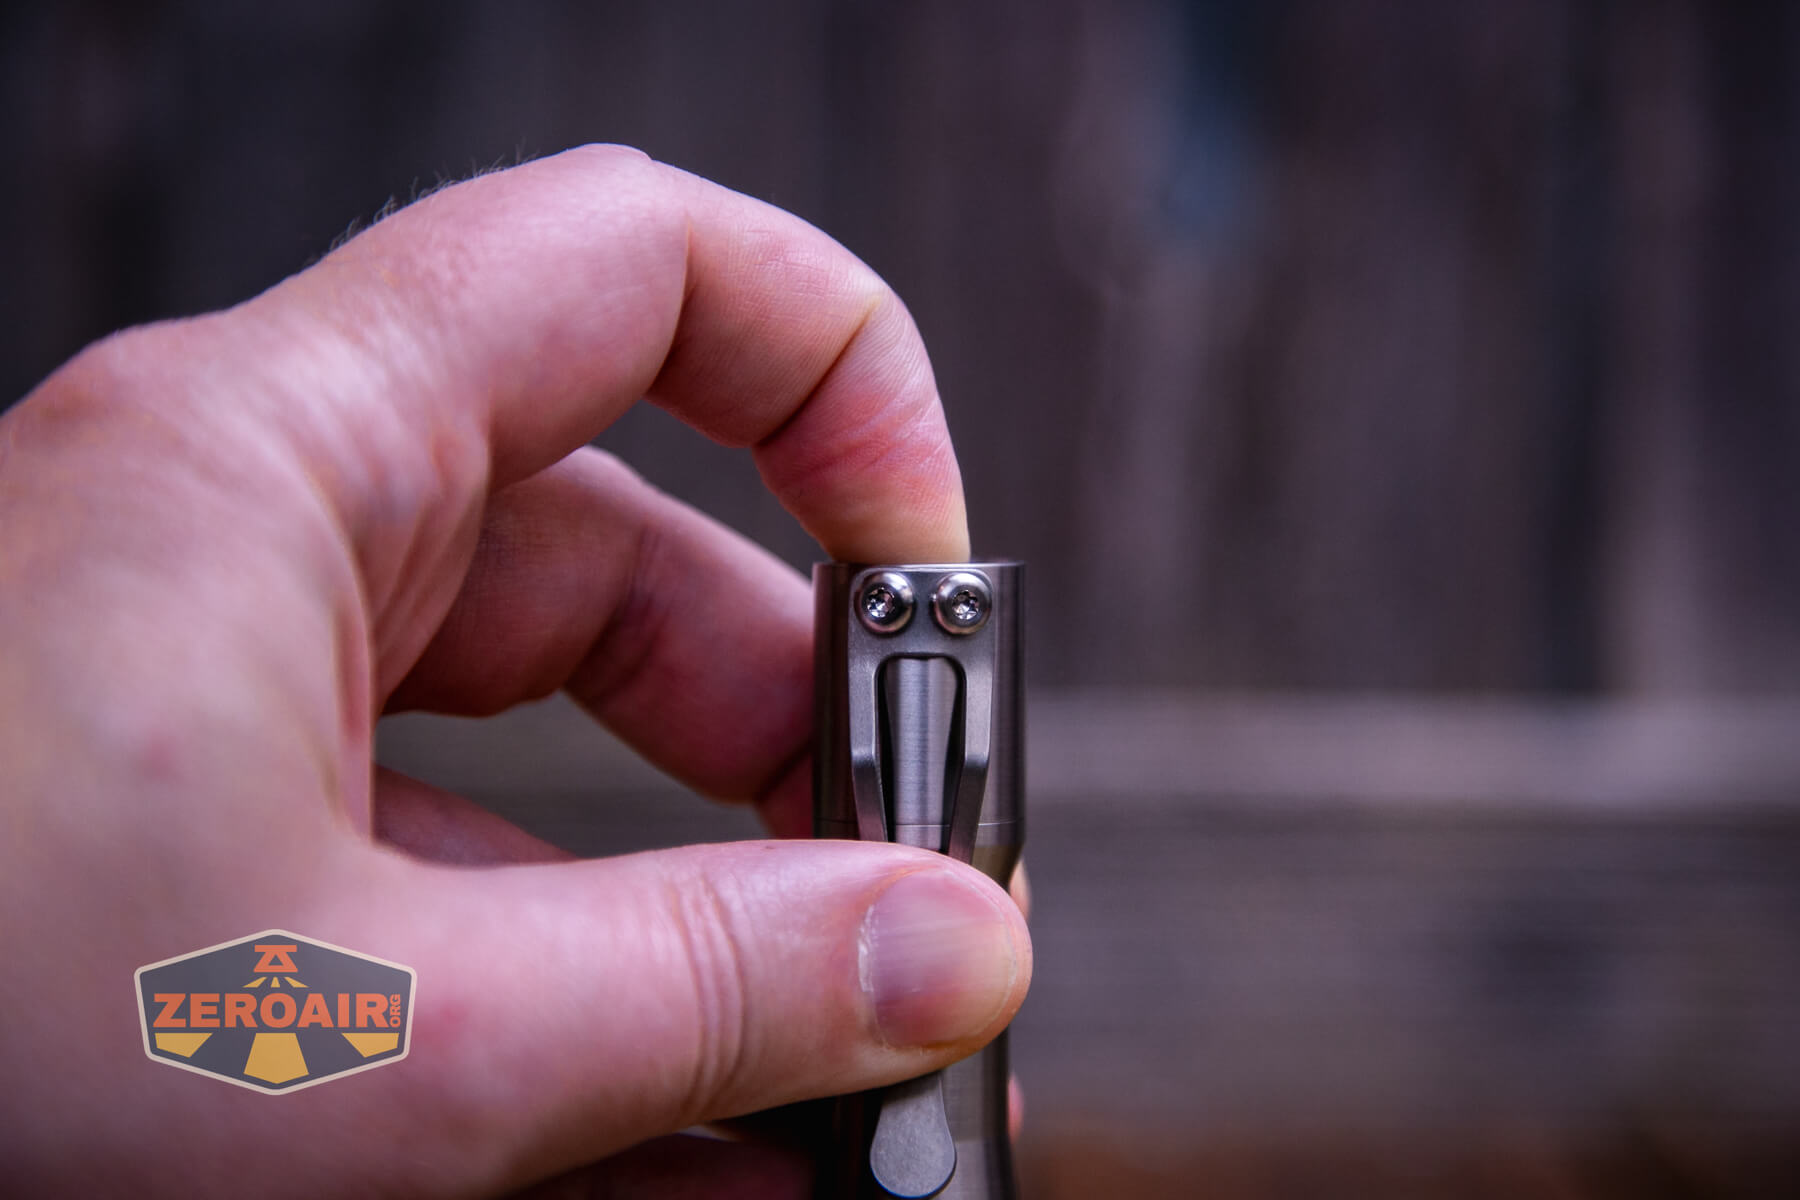
The CWF Mini Arc flashlight ships with a pocket clip installed. It’s a very secure two-screw clip. The clip is also titanium!
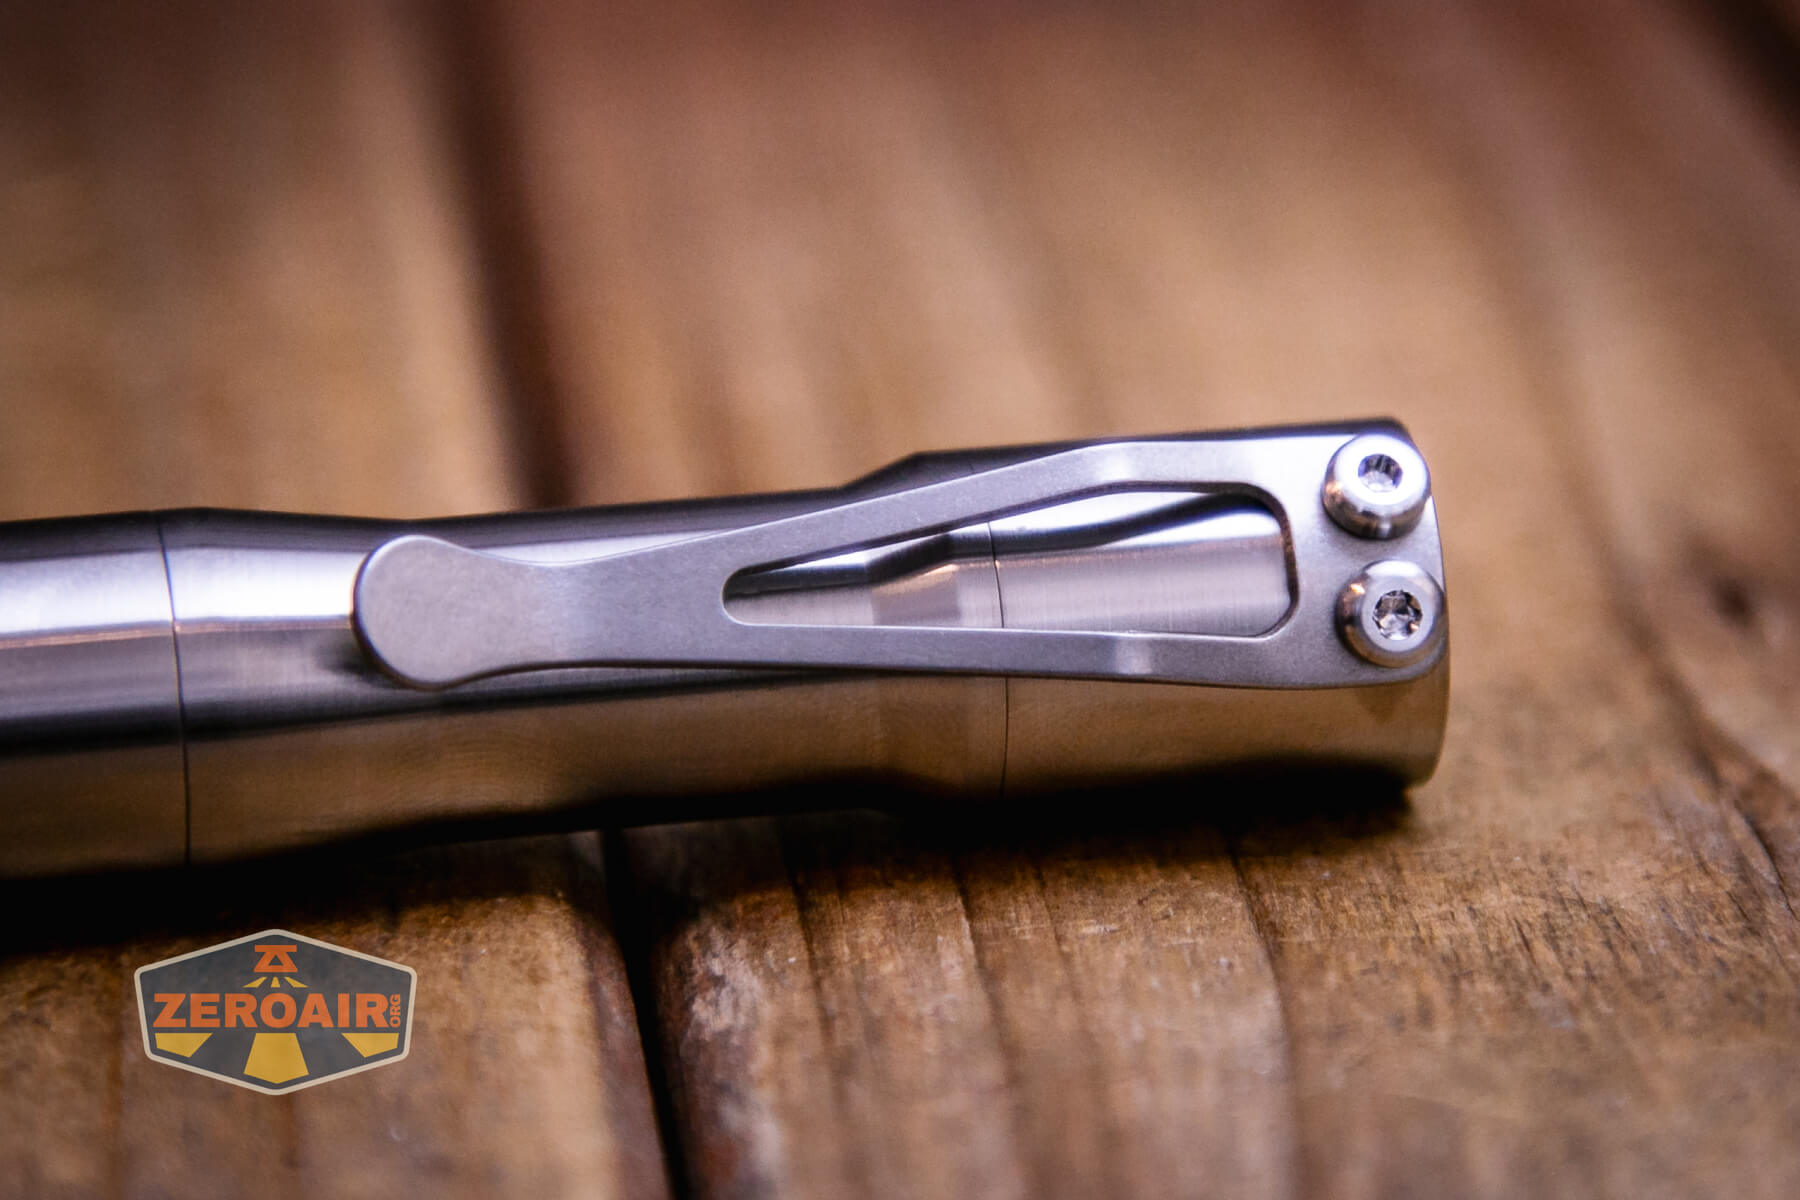
Tension on the clip is just right, and with the smooth body of the Mini Arc, it’s very smooth to use..
The pocket clip has a good opening to attach a lanyard, but a lanyard is not included. There are no magnets or pouches, or anything else included.
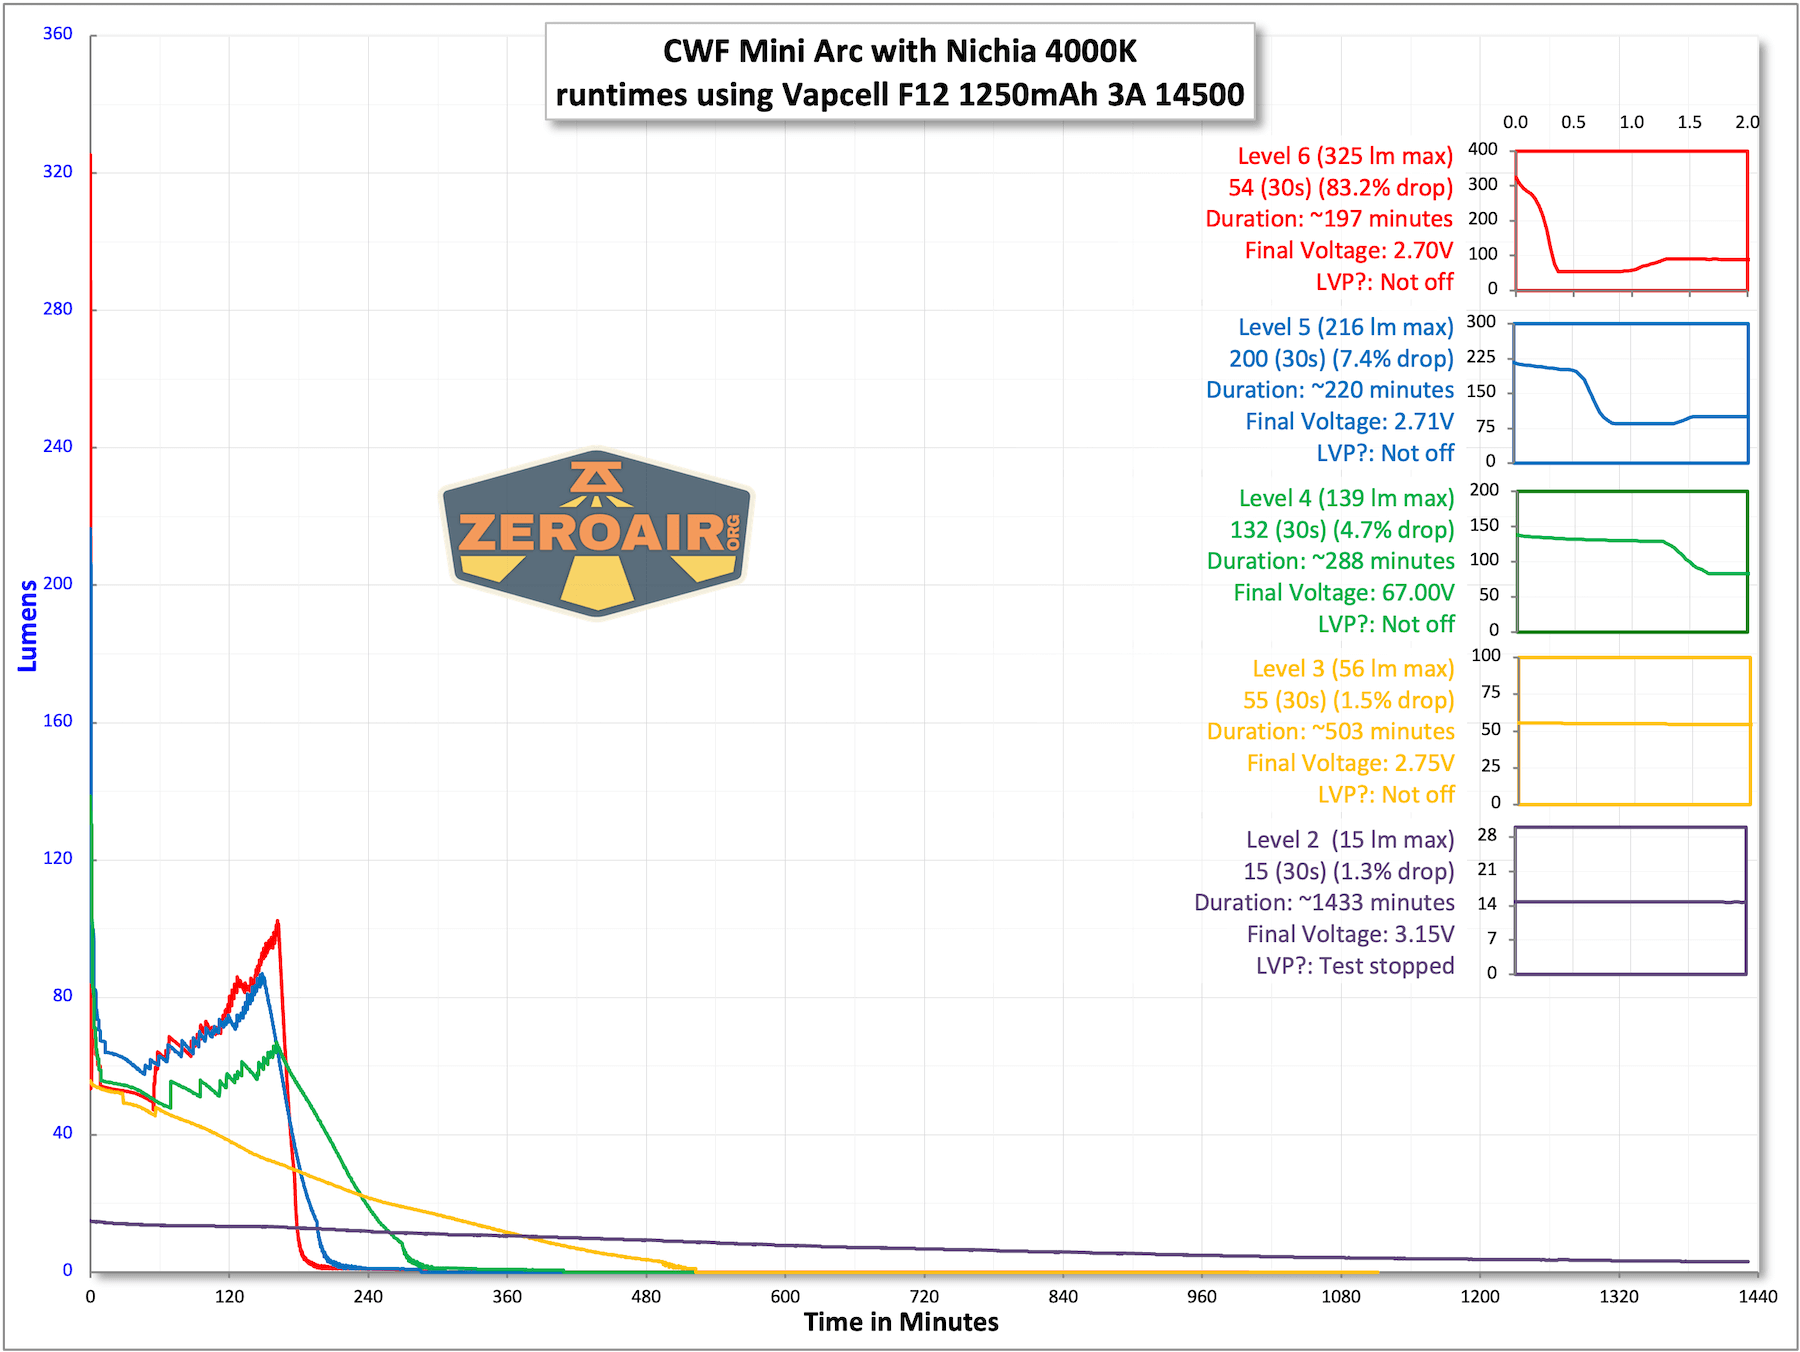
Power and Runtime
The CWF Mini Arc flashlight runs on one lithium-ion battery. It does ship with a 14500, but I am not sure which one. (Possibly this Vapcell H10 seen below, but I can not recall!)

Whatever cell you use (flat top or button top), it goes into the light with the positive end toward the head.
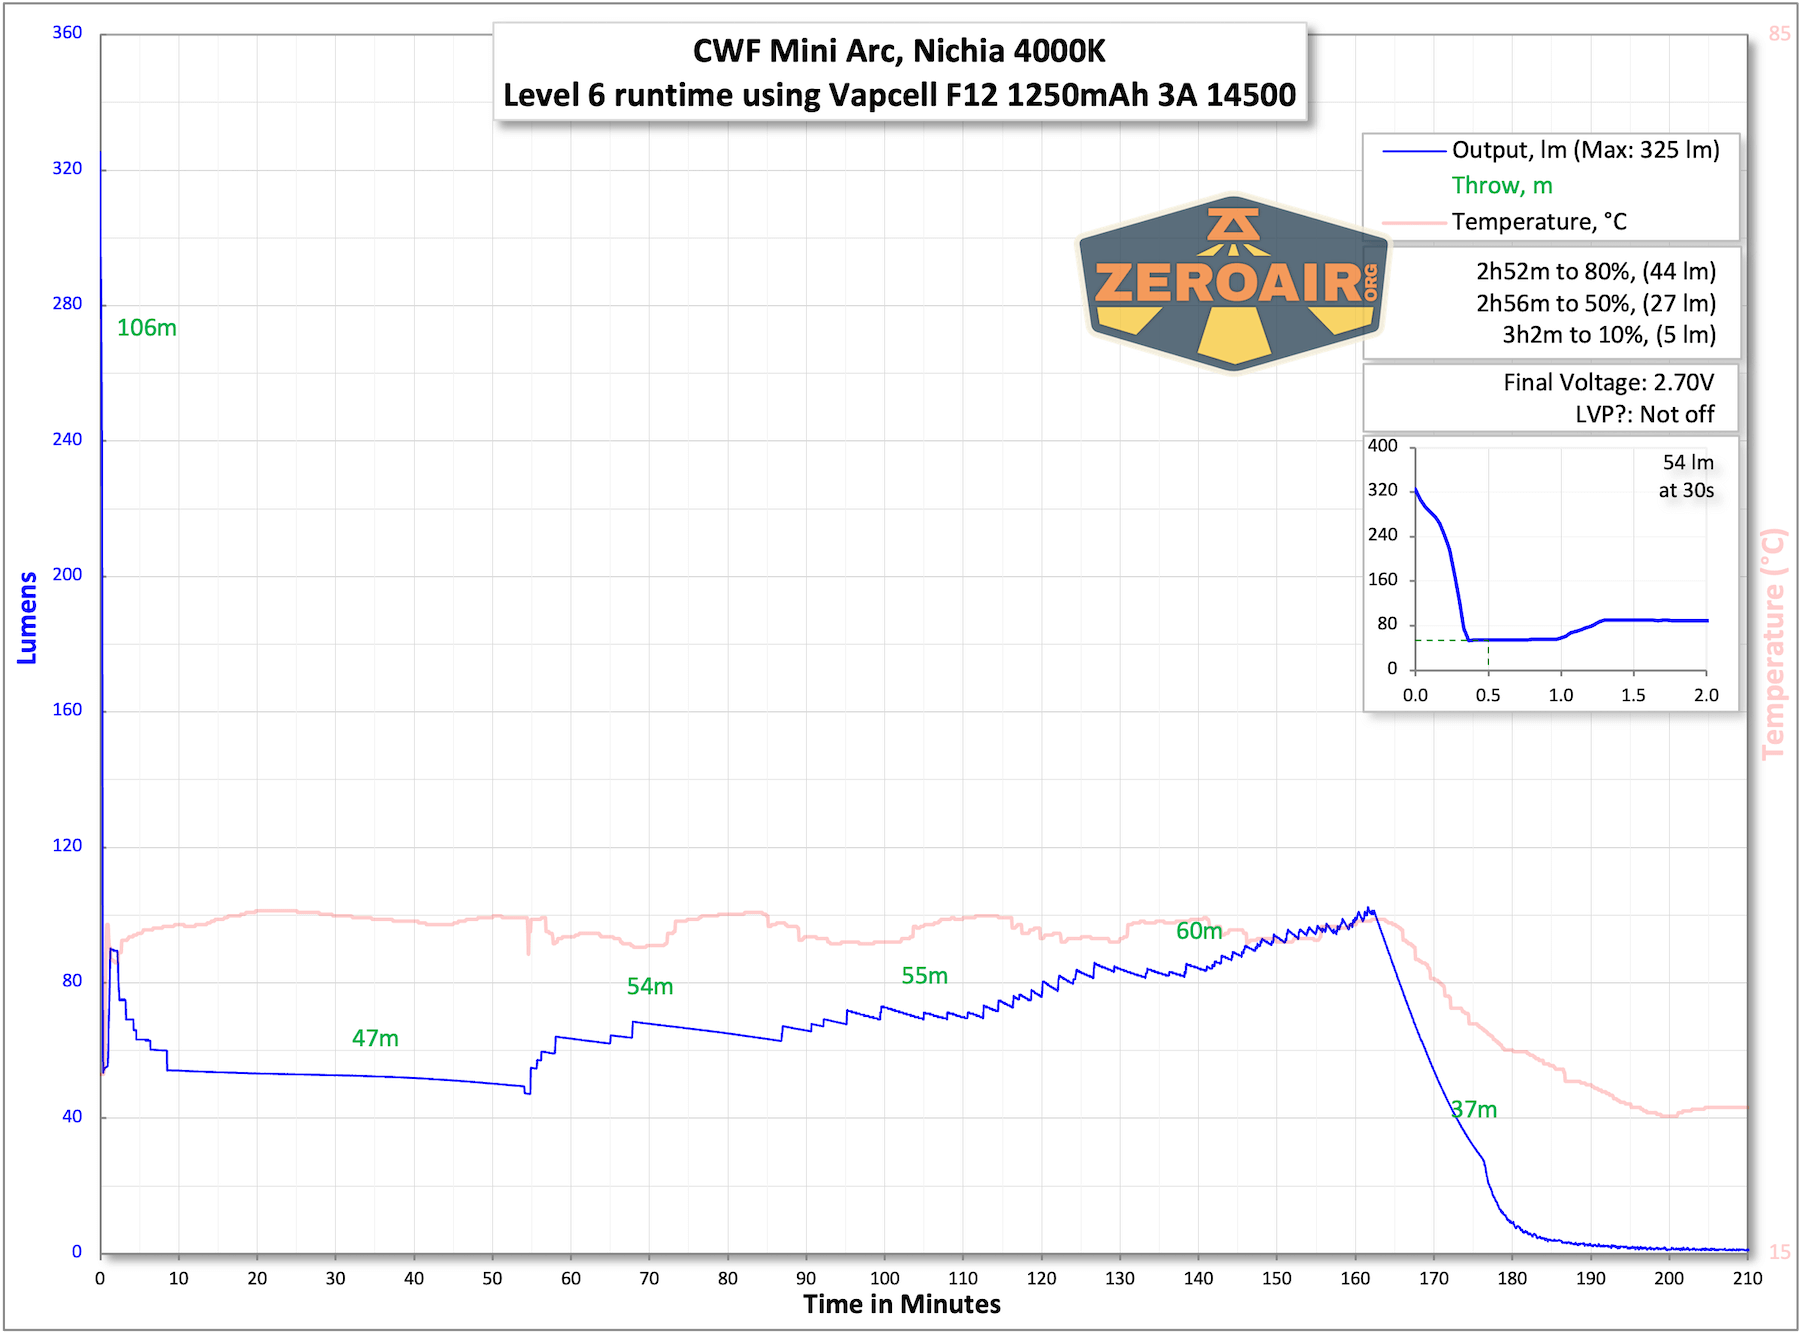
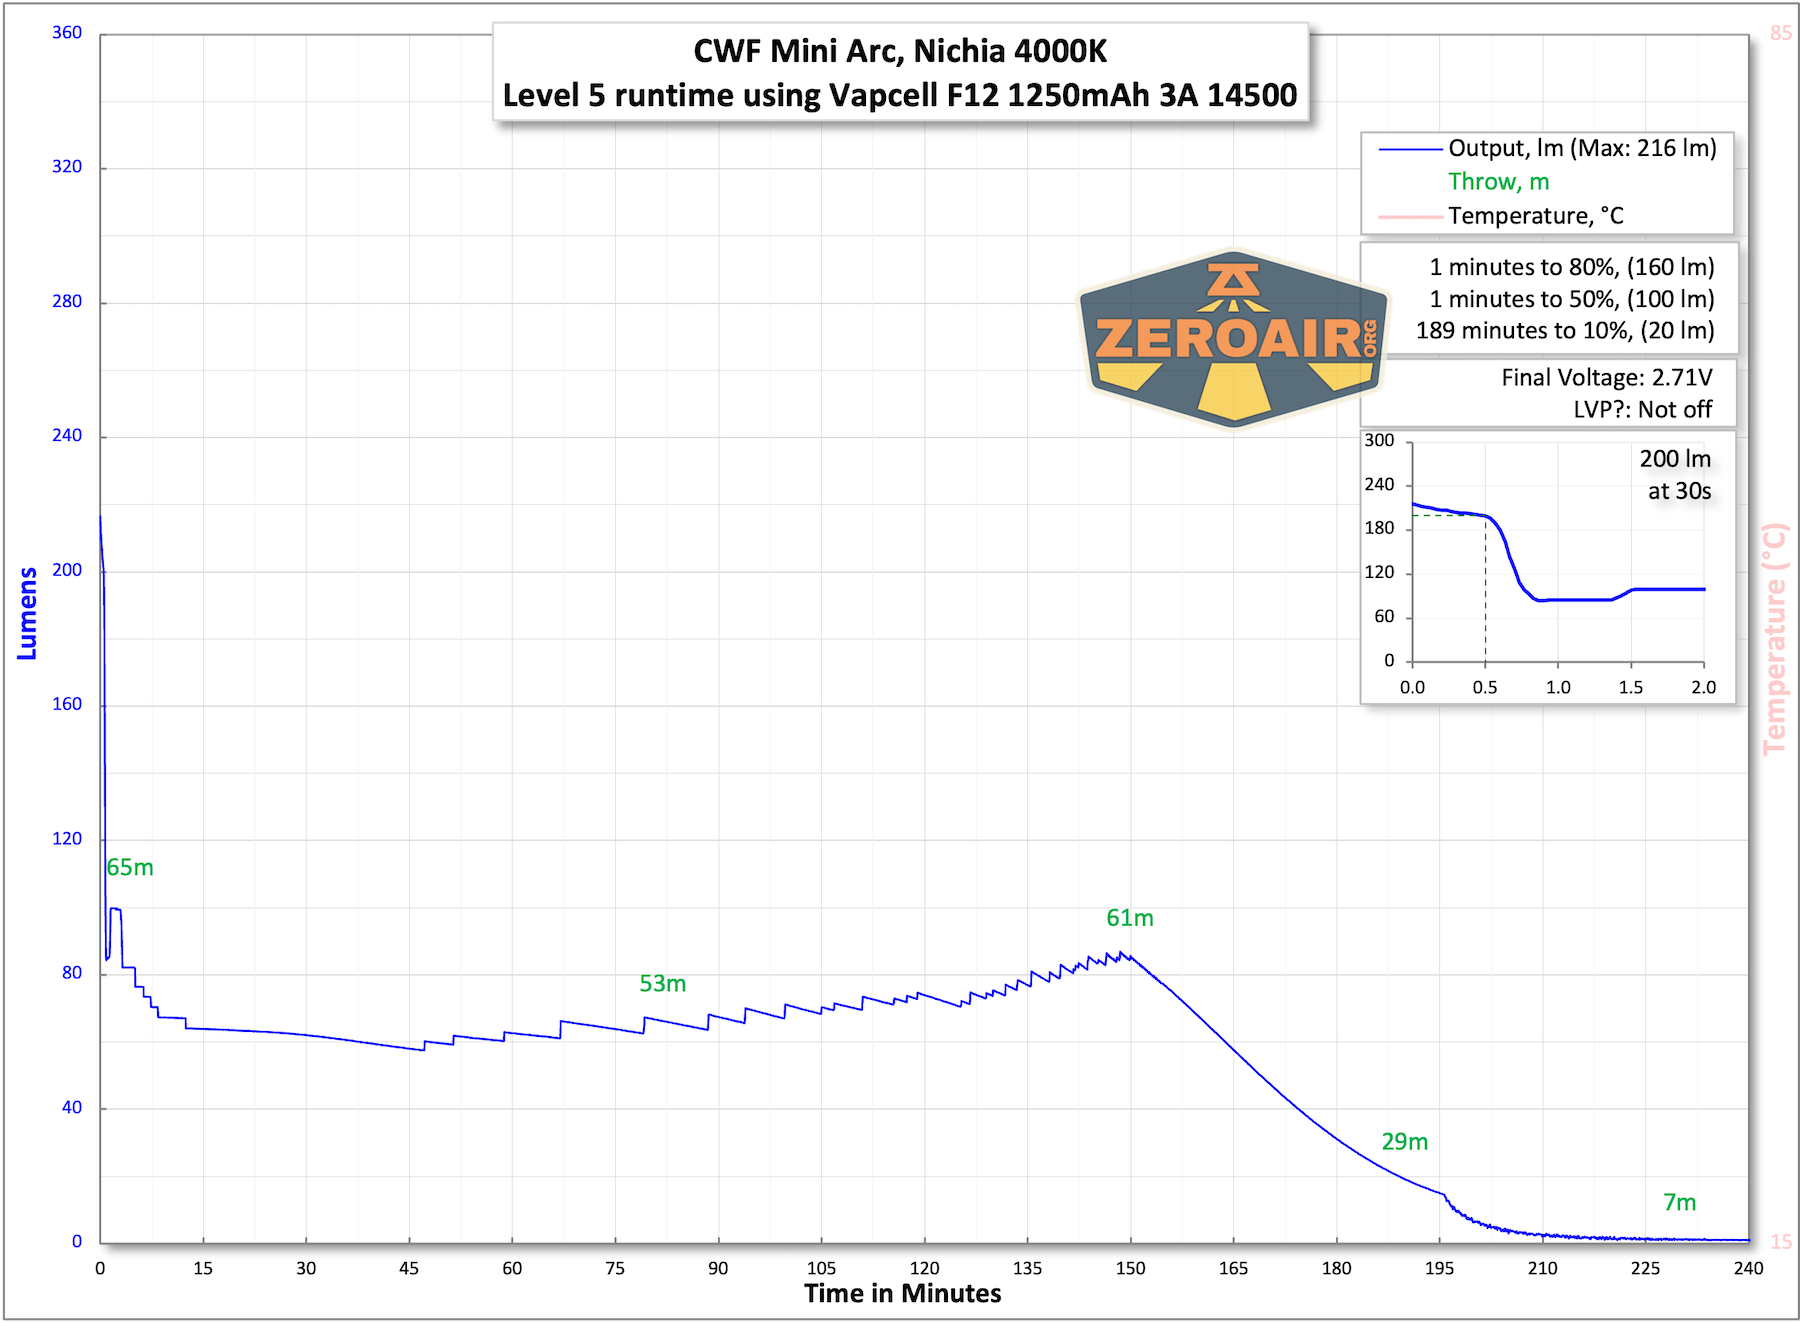
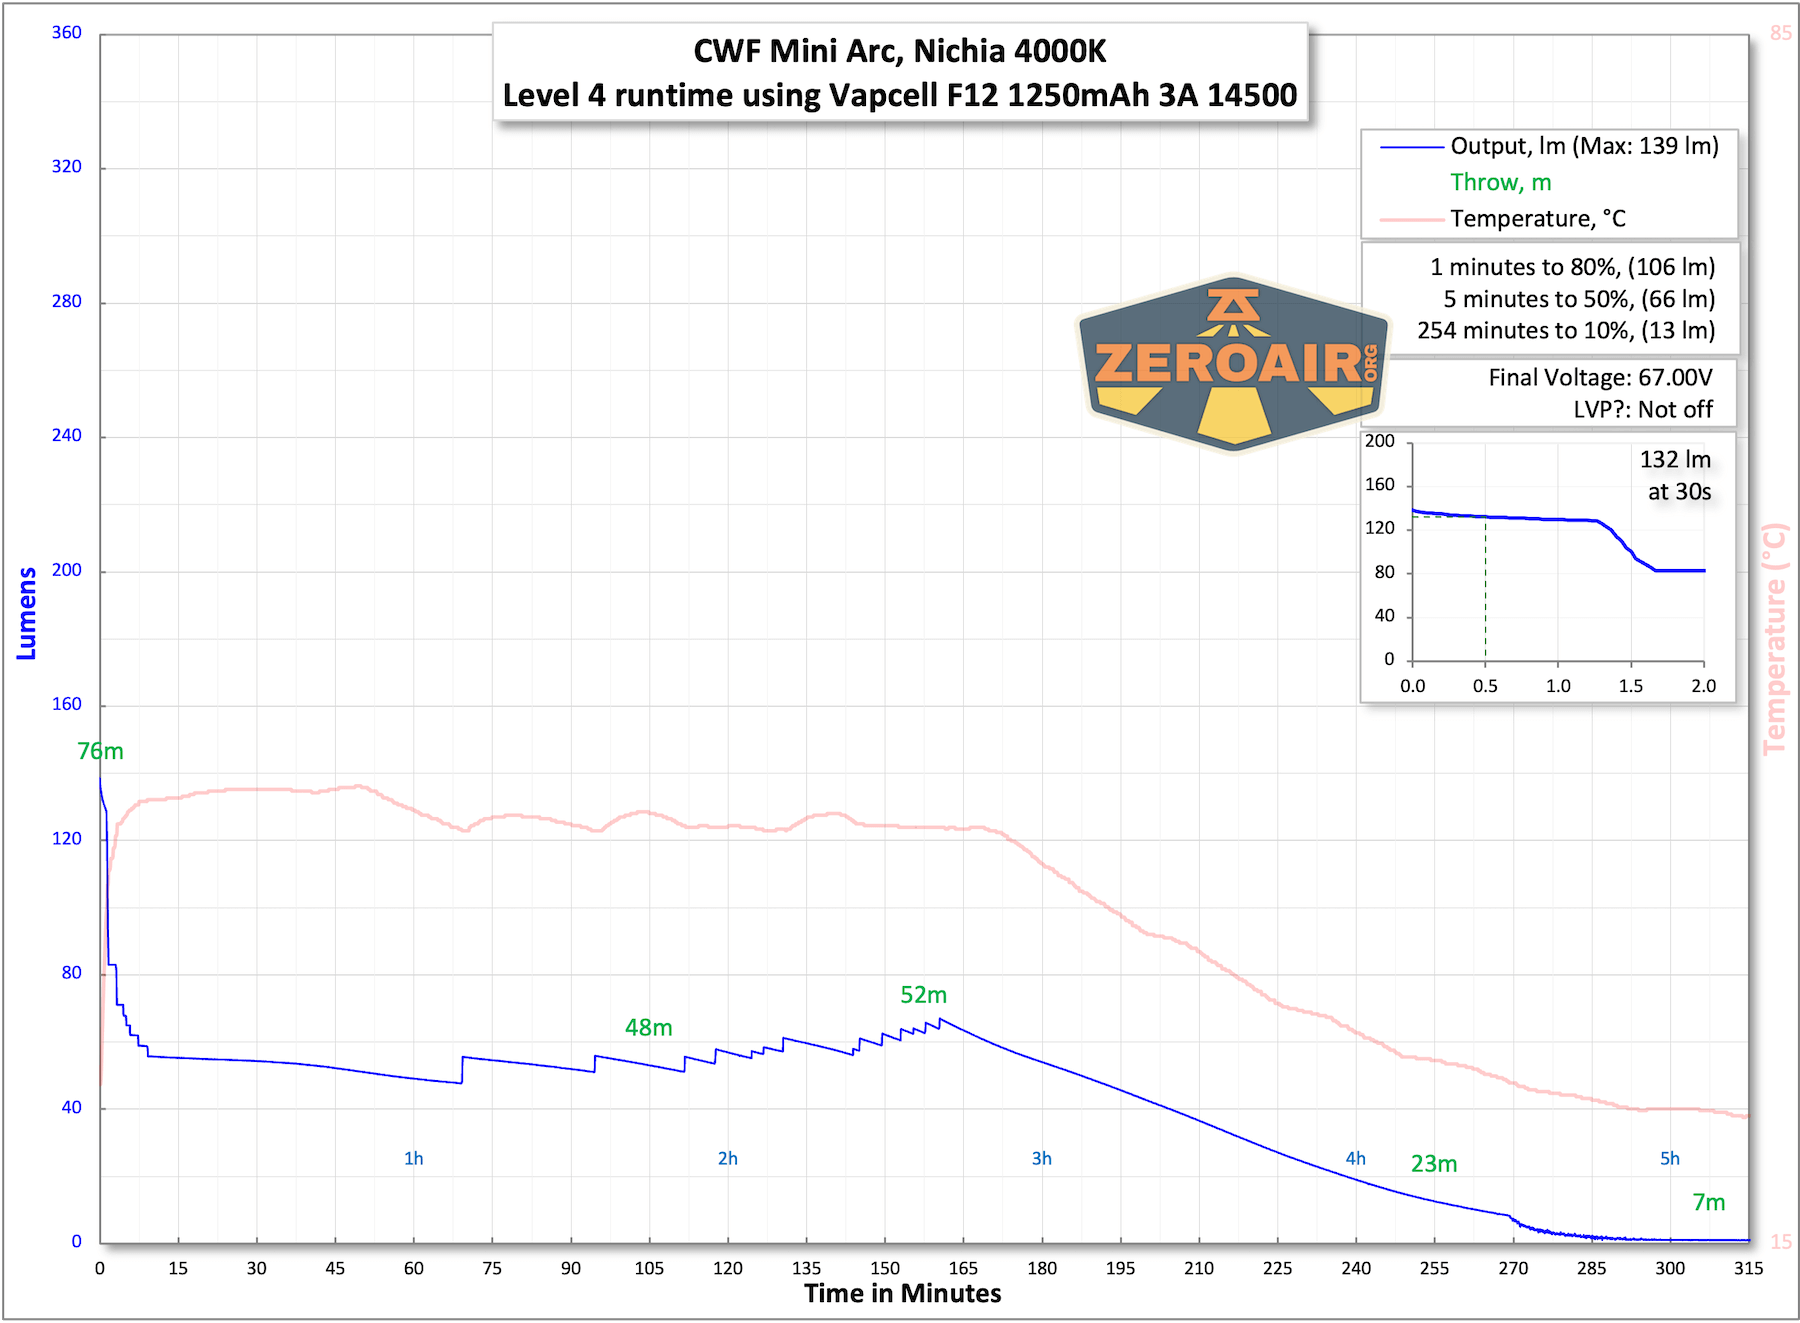
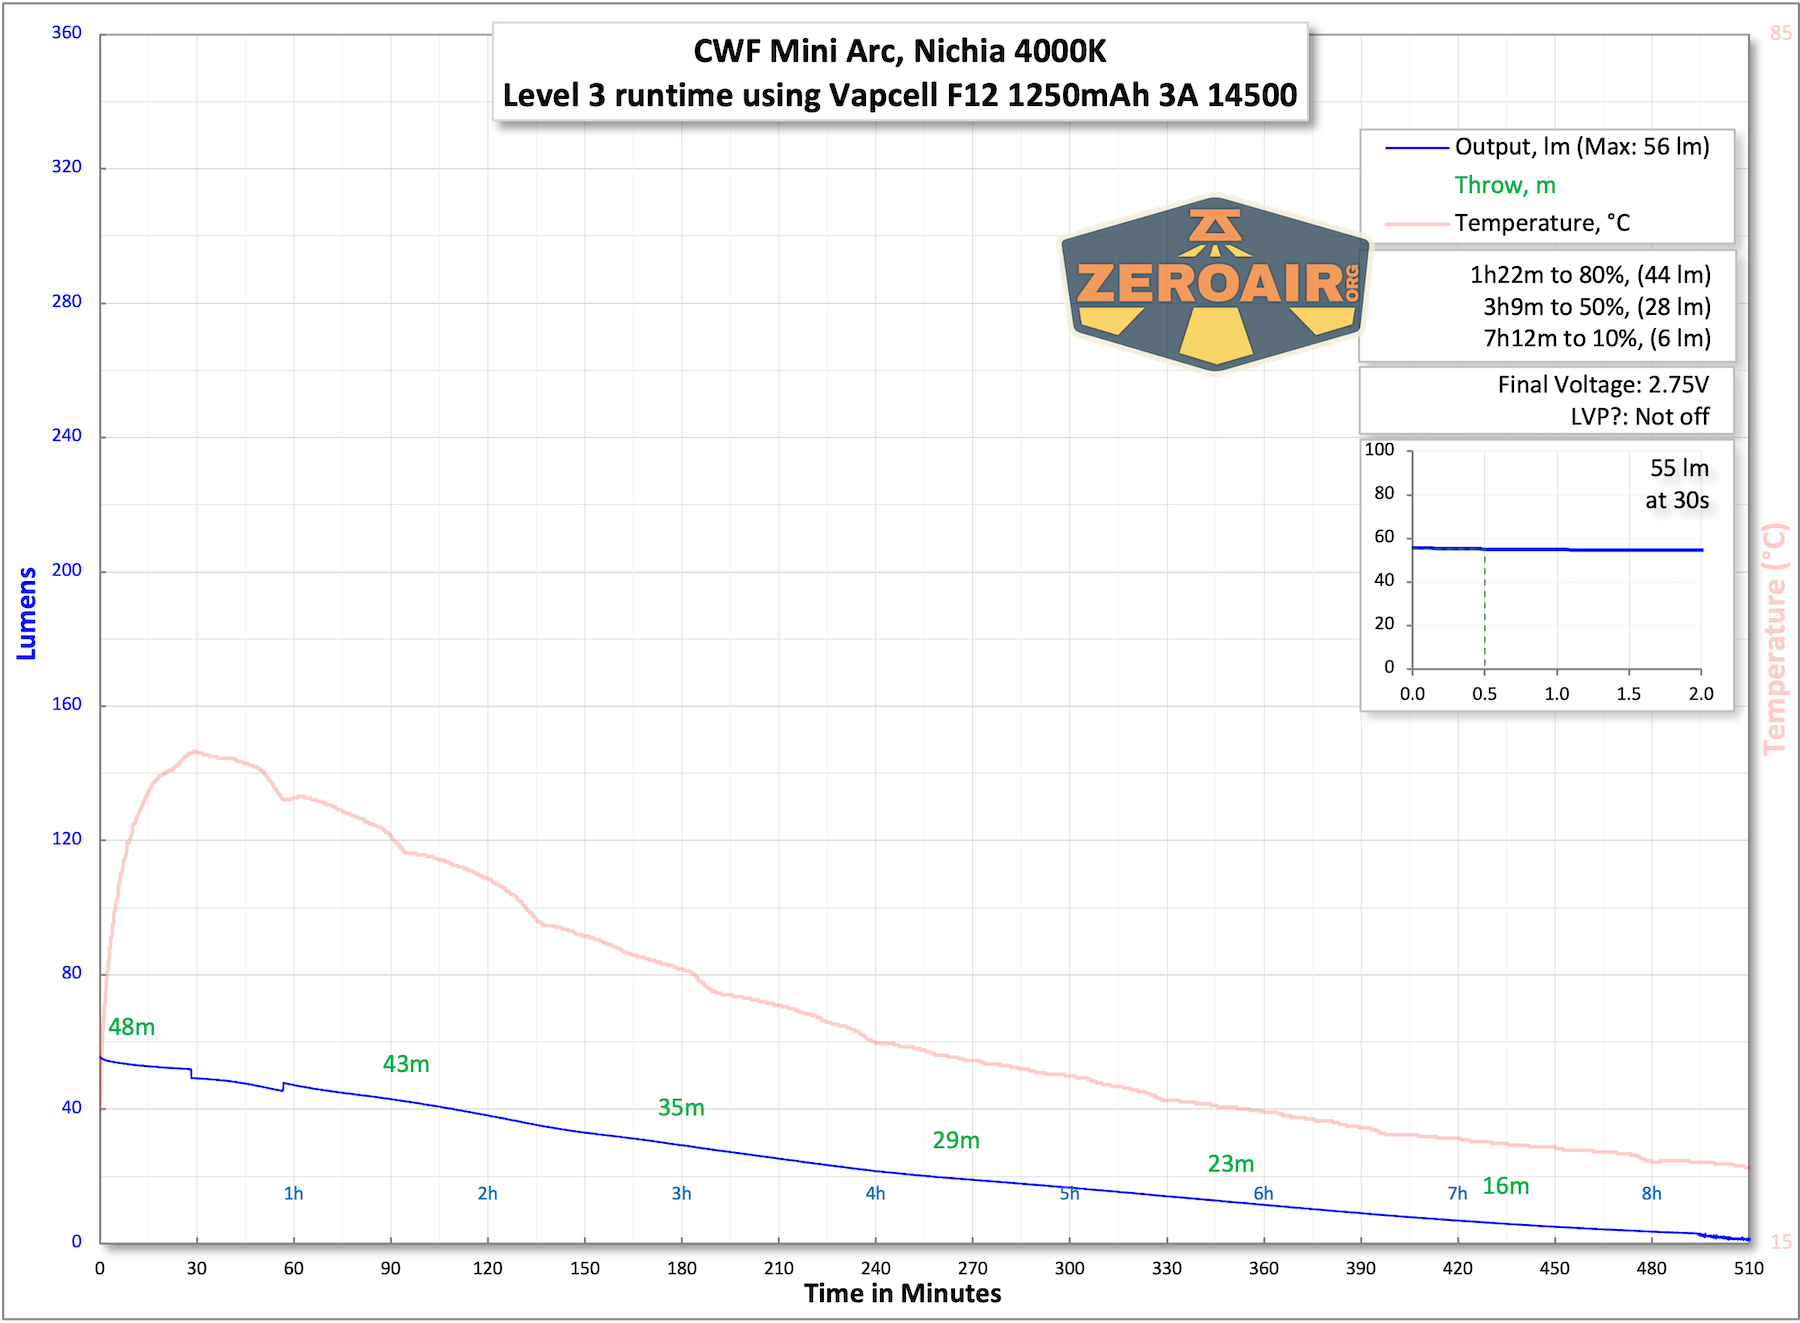
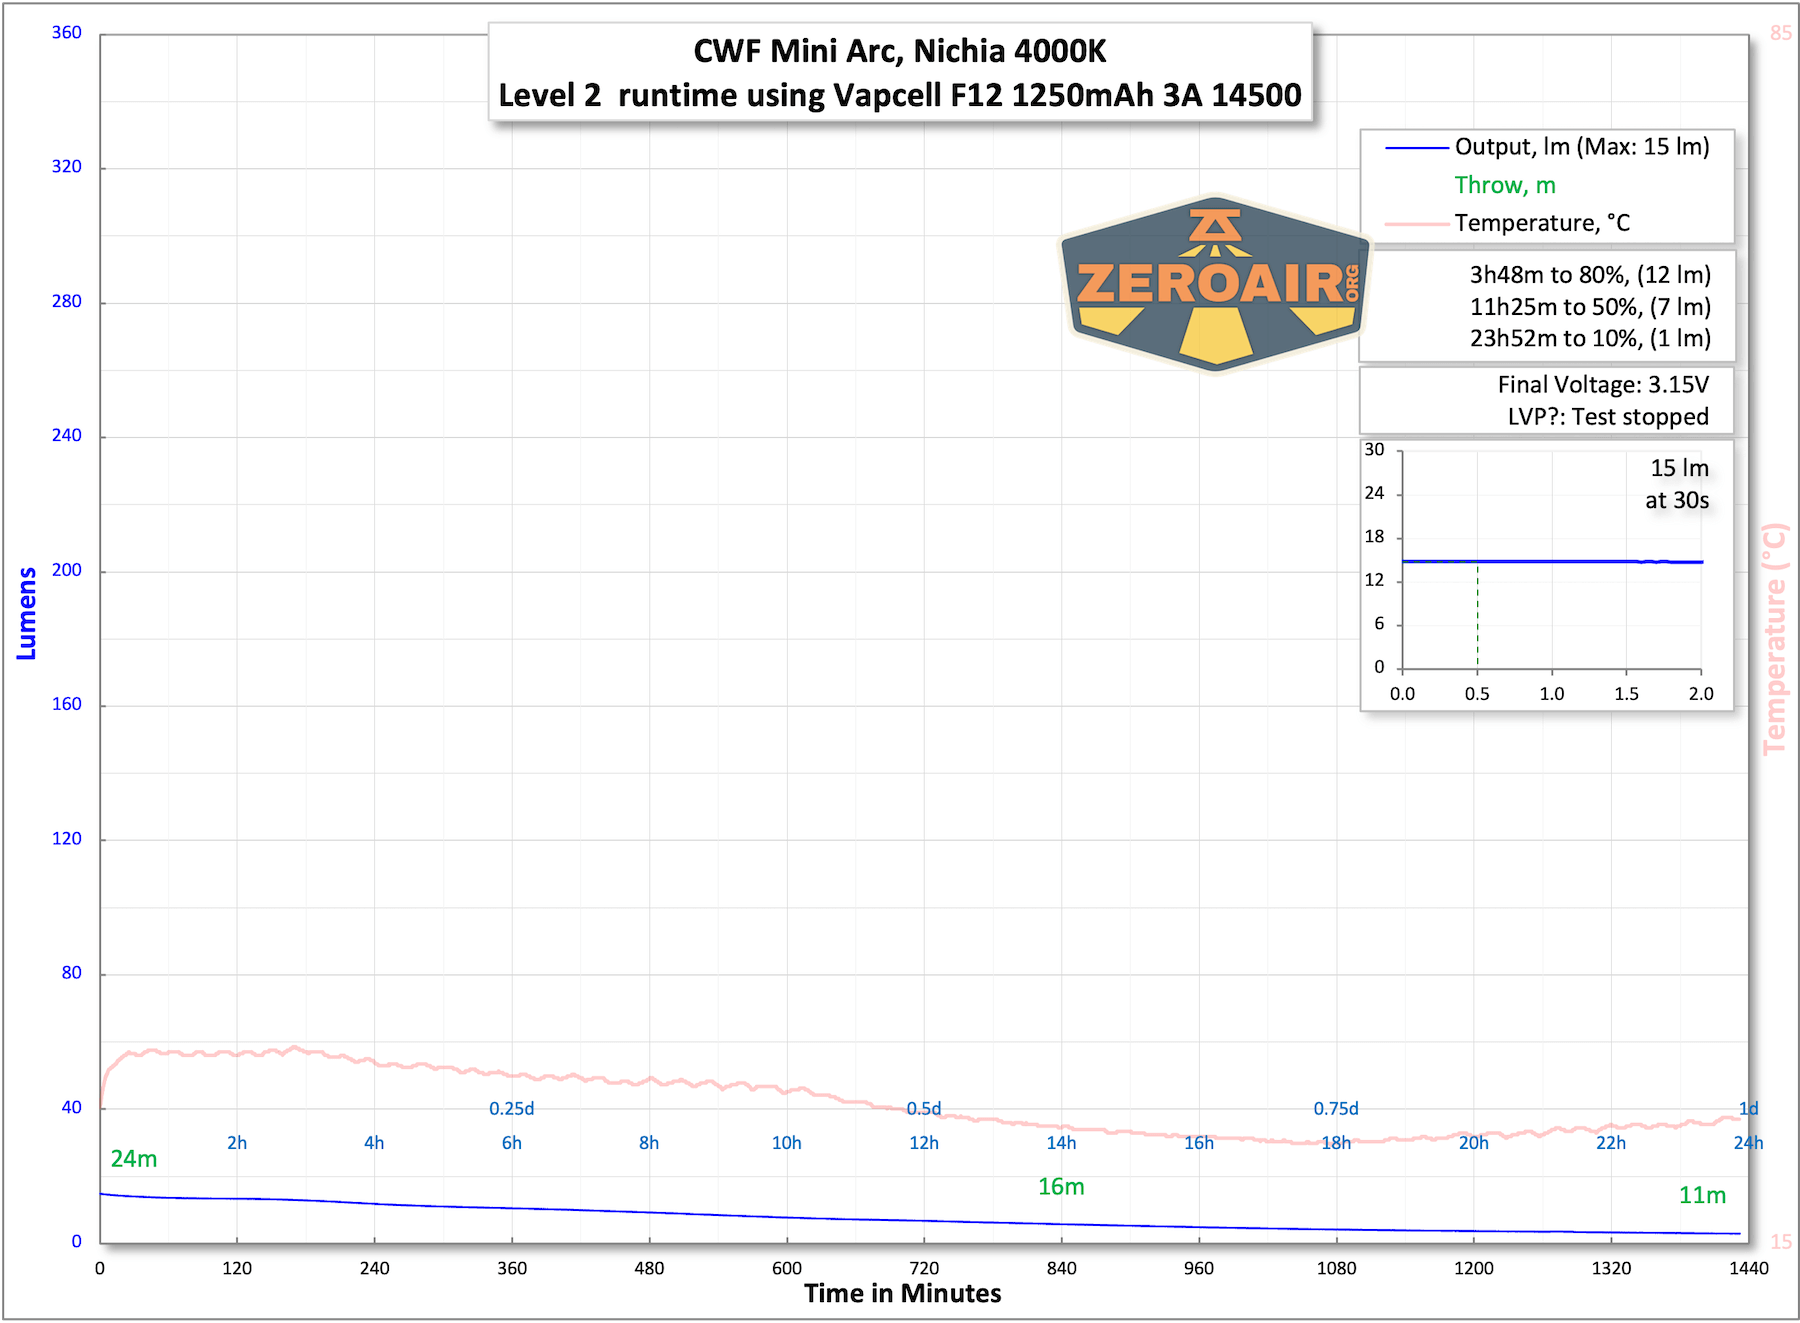
Below are runtime tests for five modes. The Mini Arc claims 520 lumens. I didn’t observe 520 lumens, and the stepdown from the initial output is very dramatic. So you’ll really observe around 80-100 lumens, which does then creep back upward after the light cools a bit. It’s a small titanium light, so there’s not a lot of heat capacity, but I’d still like to see a better duration on High.
The CWF Mini Arc flashlight can not use any AA (1.5V) cells. No primary, no NiMH.
Modes and Currents
| Mode | Mode Claimed Output (lm) | Claimed Runtime | Measured Lumens | Tailcap Amps |
|---|---|---|---|---|
| Level 6 | 520 | – | 325 (0s) 54 (30s) |
2.66 |
| Level 5 | 260 | – | 216 (0s) 200 (30s) |
0.89 |
| Level 4 | 182 | – | 139 | 0.42 |
| Level 3 | 78 | 56 | 0.13 | |
| Level 2 | 26 | 15 | 0.02 | |
| Level 1 | – | – | 0.5 | [low] |
Pulse Width Modulation
Every mode has PWM but it’s fast enough that you’re unlikely to have a problem with it. High is the right-most chart.

Here you can see a “baseline” – a chart with almost no light hitting the sensor.
Then there’s the Ultrafire WF-602C flashlight, which has some of the worst PWM I’ve seen. It’s so bad that I used a post about it to explain PWM! Here are multiple timescales (10ms, 5ms, 2ms, 1ms, 0.5ms, 0.2ms) to make comparing this “worst” PWM light to the test light easier. That post also explains why I didn’t test the WF-602C at the usual 50us scale.
User Interface and Operation
In the CWF Mini Arc flashlight is a reverse mechanical clicky switch.
Being a reverse clicky means you can still change modes while the light is on, but you do not have any momentary output options (from off).
The button does protrude from around the tailcap area just a bit. The light will tailstand, but you can feel the switch cover bulge.
Here’s a user interface table!
| State | Action | Result |
|---|---|---|
| Off | Click | Moonlight (or technically, the lowest mode you have programmed, or memory, if you have that programmed.) |
| On | Click | Off |
| On | Tap | Mode advance (ascending) |
| On | Half press >10x | Configuration Mode (indicated by flashes) |
I showed in the table how to reach the configuration mode. Once in the configuration mode, you must select which thing you wish to change. If you wish to select a different mode group, for example, do the following:
- With the light off, half-press >10x and note when the light stops responding
- When the light stops responding, stop pressing, but continue to hold the switch so that the light is “on”, and the light will begin flashing
- The light will flash “solid” then ramp down.
- If you wish to program options 2-3, you should “cycle the switch” during the ramp.
- If you wish to program option 1 (mode group), you should wait during the first ramp. The light will blink a number of times (the group number number), then step down and blink the next group number.)
- If you want group 1, cycle the light during the next cycle. (So when you’re in programming for Option 1, the light will ramp down, blink, then blink once (which indicates group 1), then blink again. It’s this second ramp you click to select group 1!)
- Light is programmed.
The same general process is used for the other options. Steps 5 and 6 in the list above differ slightly for the other options. Those options are as follows:
^Option 2 = Memory on/off, when the light ramps down, it will blink three times to show you it’s in the third option, and flash red or green several times. Cycle the switch while flashing red if you want memory off and green if you want memory on.
^^Option 3 = Strobe option, when the light ramps down, it will blink four times to show it’s in the fourth option and flash each color several times, cycle switch while flashing red for off, green if you want standard strobe, and blue for bicycle mode. To access these in normal use cycle switch rapidly three times, and it will access either strobe programmed when turned on.
Here’s a list of the mode groups. Basically, nothing difficult about them, so no point in a separate table.
Programming and using the CWF Mini Arc flashlight is basically like using the CWF Peanut. The Peanut has secondary LED options, so that’s one big difference. But programming will generally feel the same between the two.
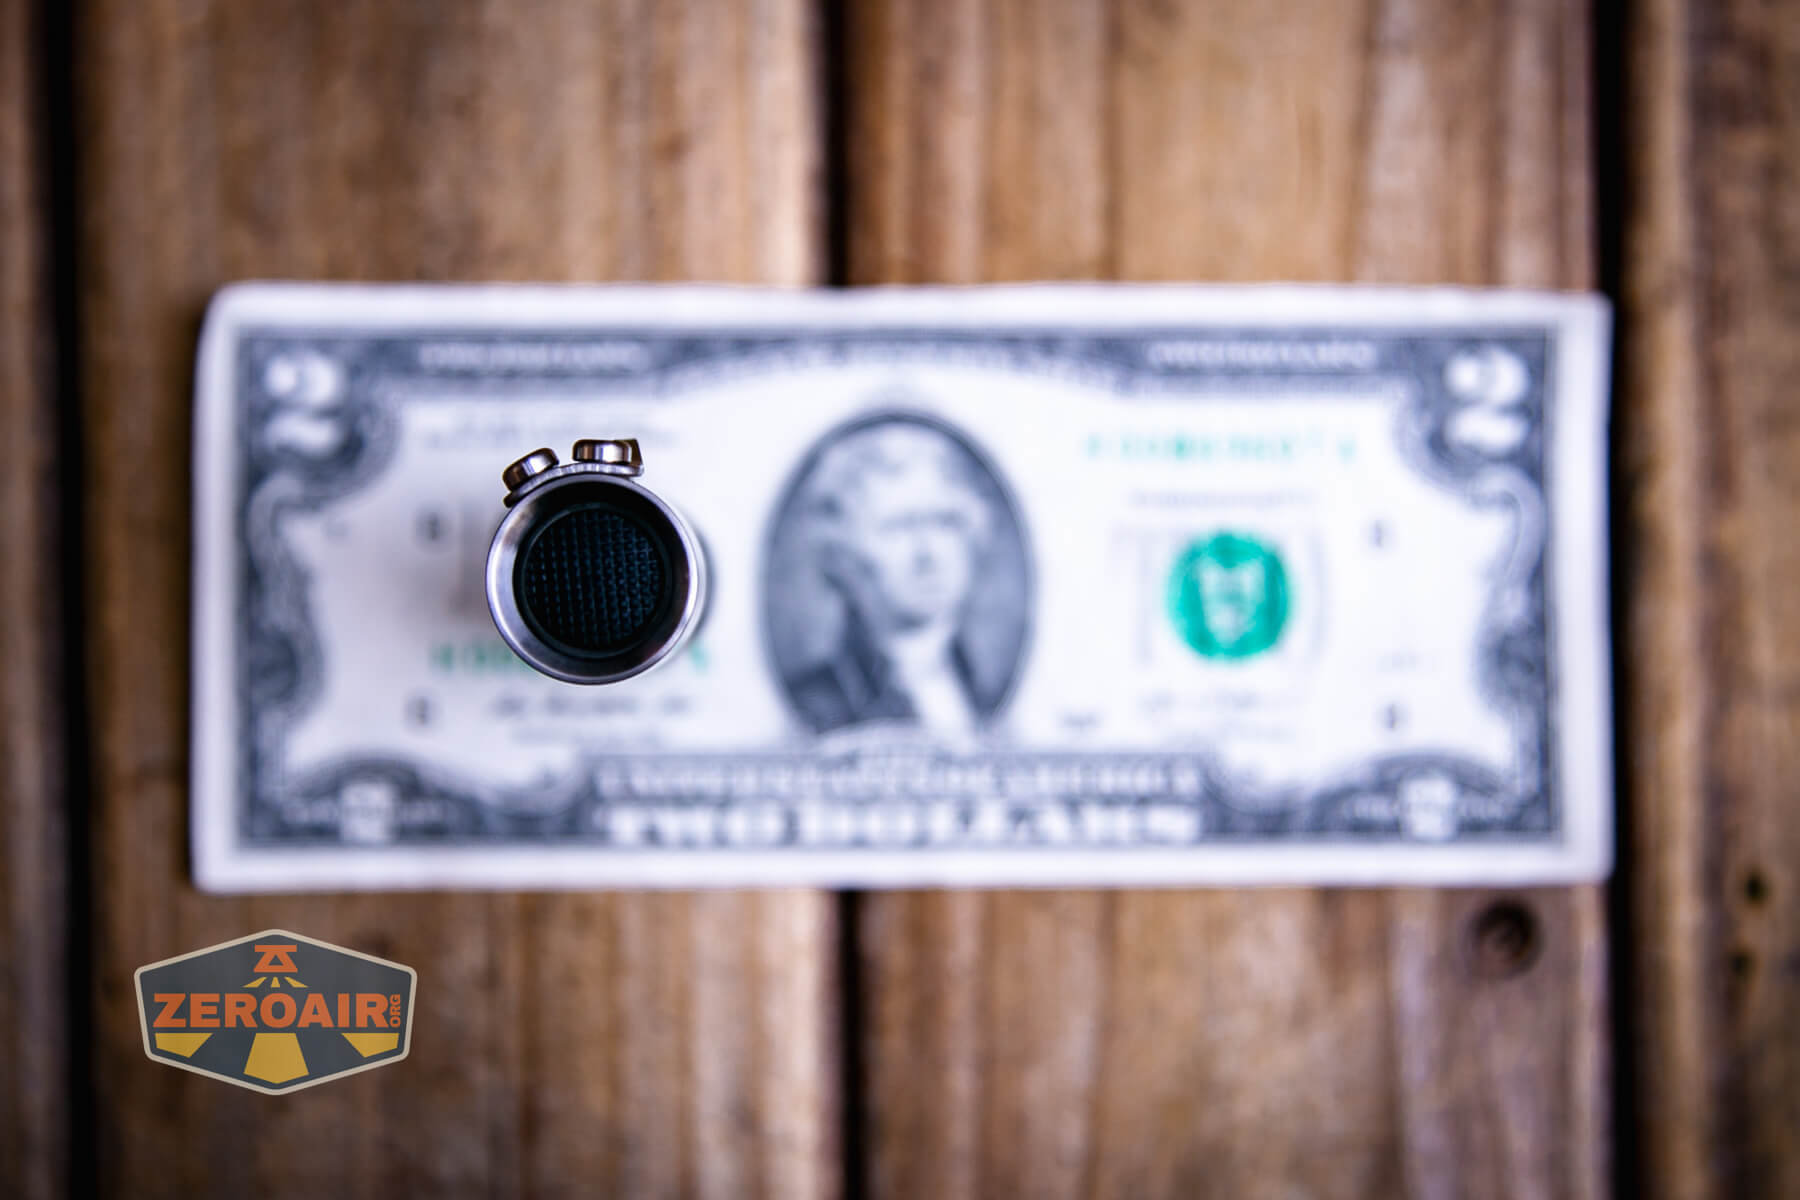
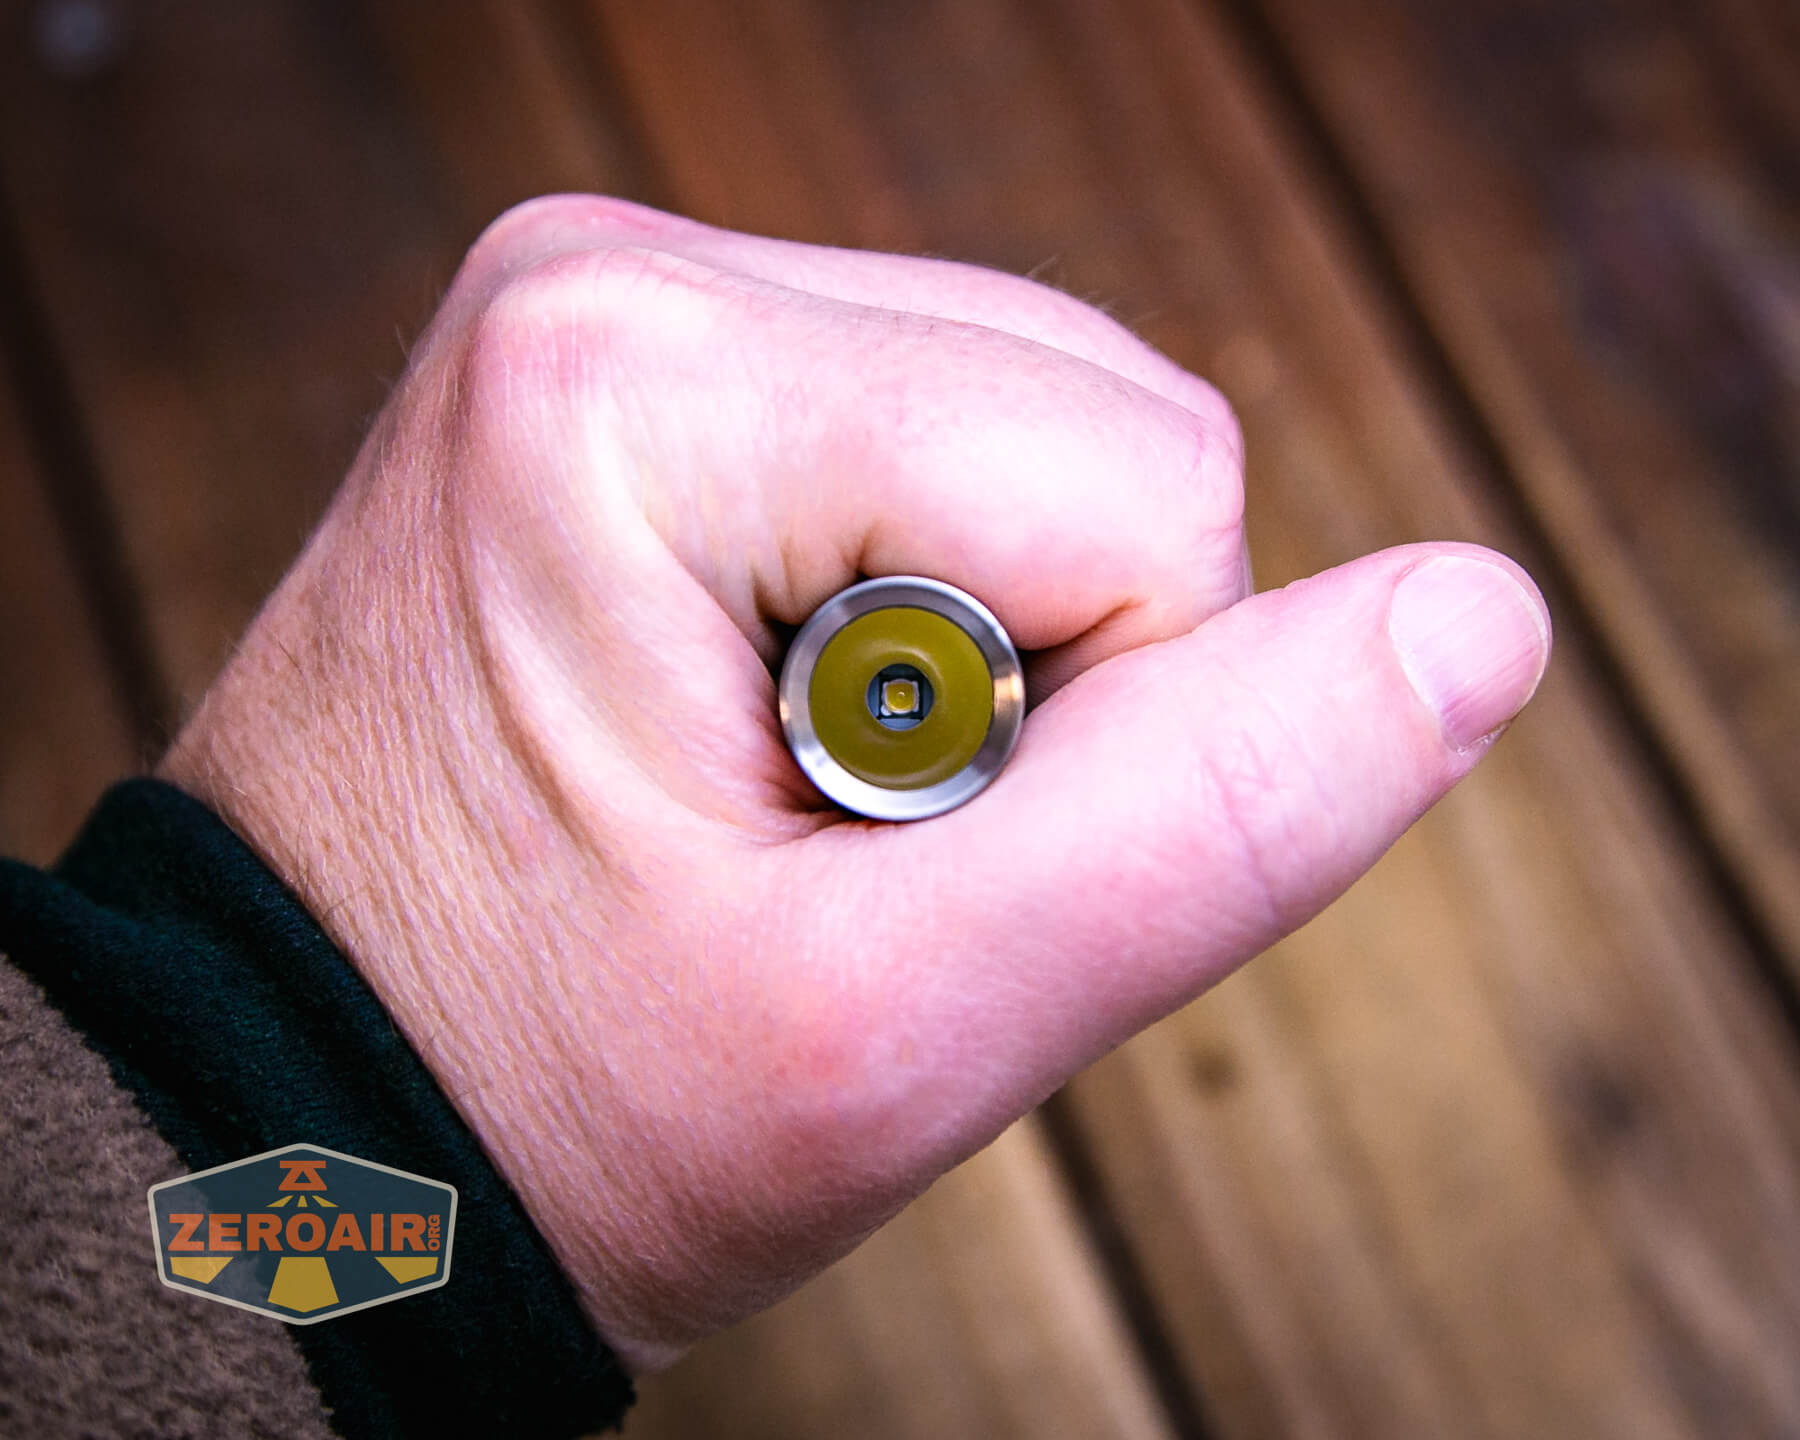
LED and Beam
The CWF Mini Arc flashlight uses a reflector and one Nichia 219c. It’s 4000K (but 5000K 519a is what’s available now).
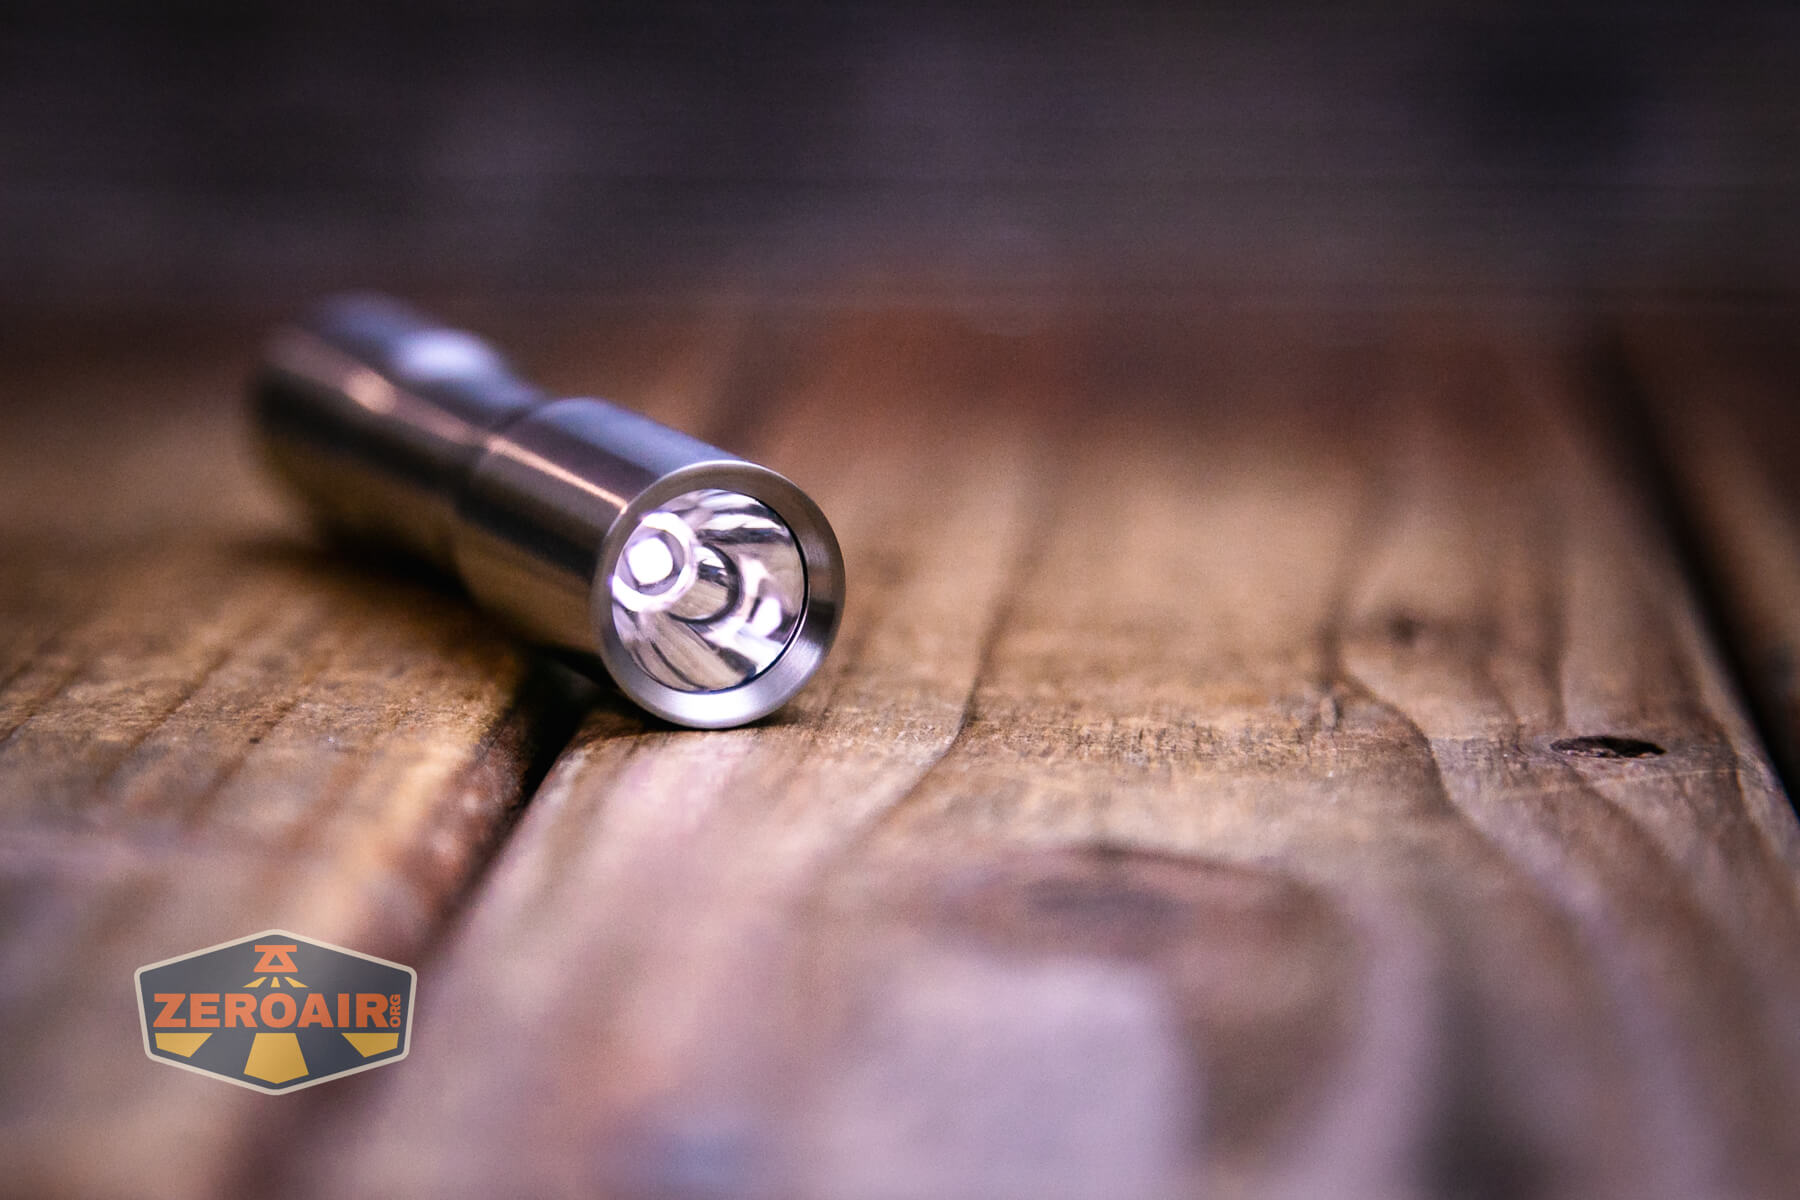
The beam profile is pleasant and useful.
LED Color Report (CRI and CCT)
As stated, the Nichia 219c in this Mini Arc is stated to be 4000K (5000K also available), and that’s about what it measures. CRI is high (yay!) and the Duv stays right around the BBL (it won’t seem excessively green or pink.) This is a solid (maybe “safe”) emitter choice. Yes, 219c is a bit dated, and I’d rather see Nichia 519a, for example. And that’s what’s available now – I’m not even sure you could order 219c. (I’ve had this light for a while, and it’s not just fresh out of the CWF shop, so no fault to anyone for this using the older emitter!
Do note that emitter swaps on this light will be a fairly advanced technique since everything (emitter and driver components) is all on one side of the board!
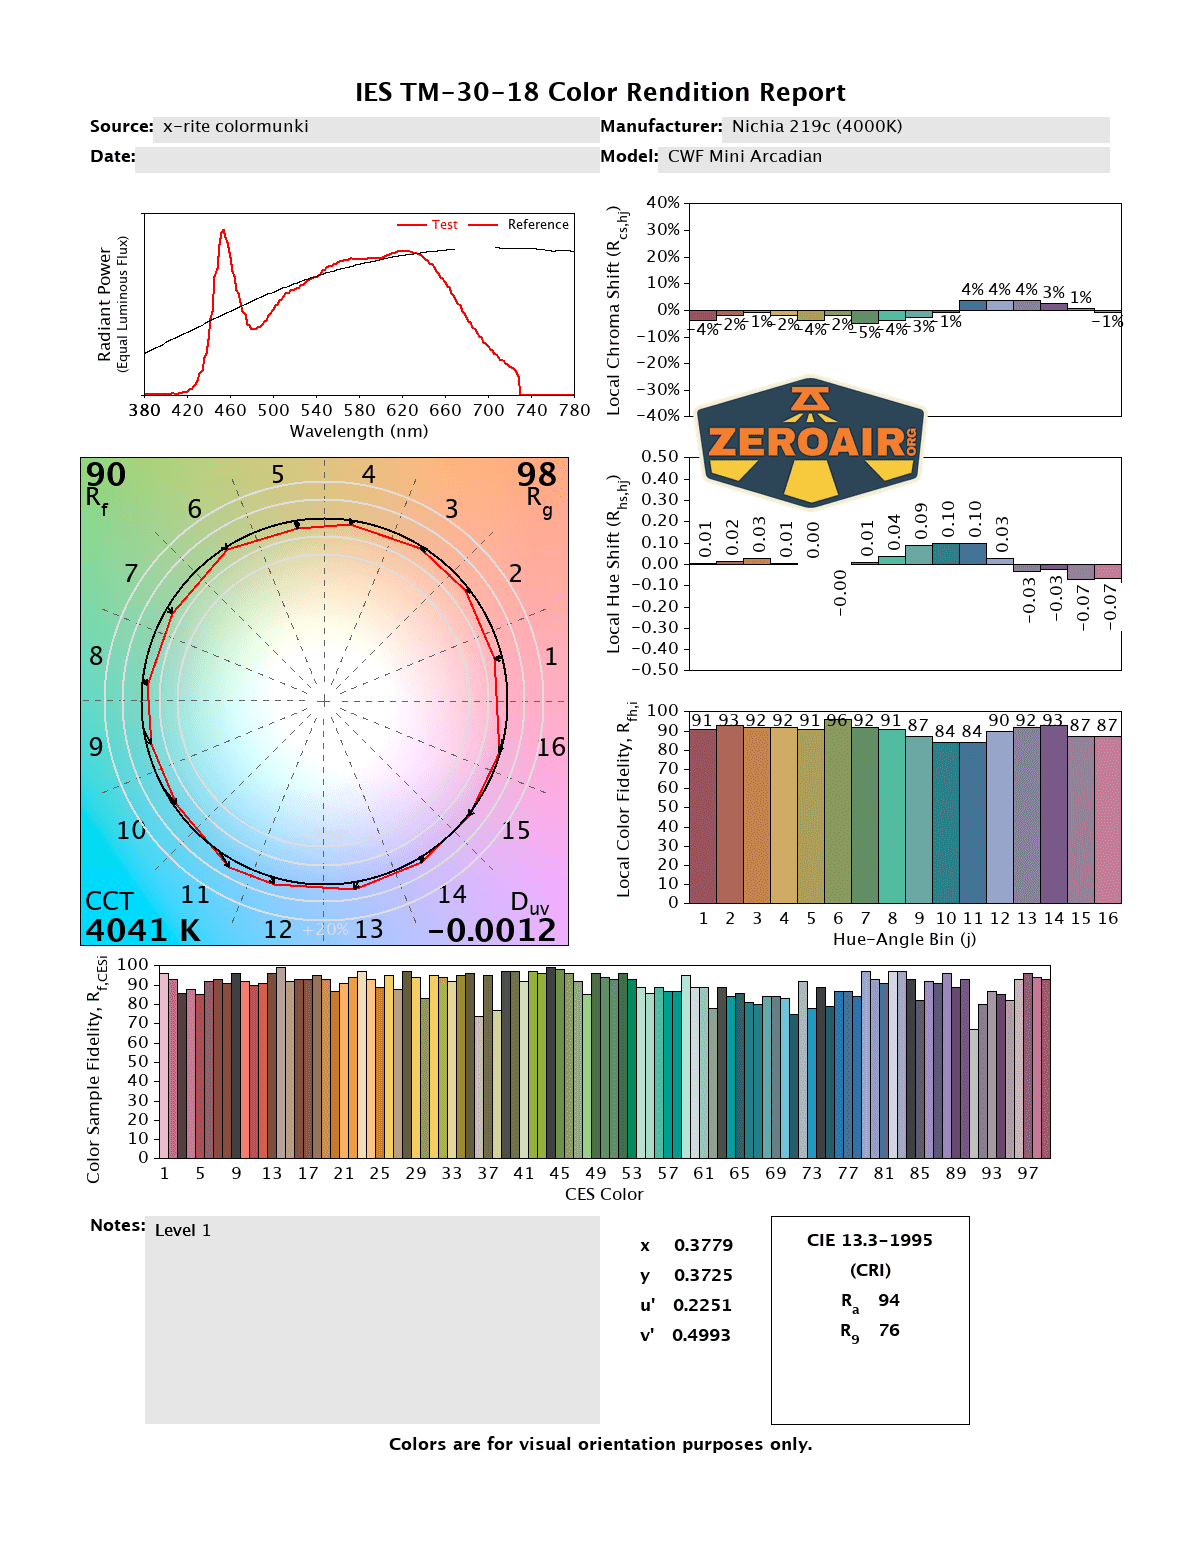


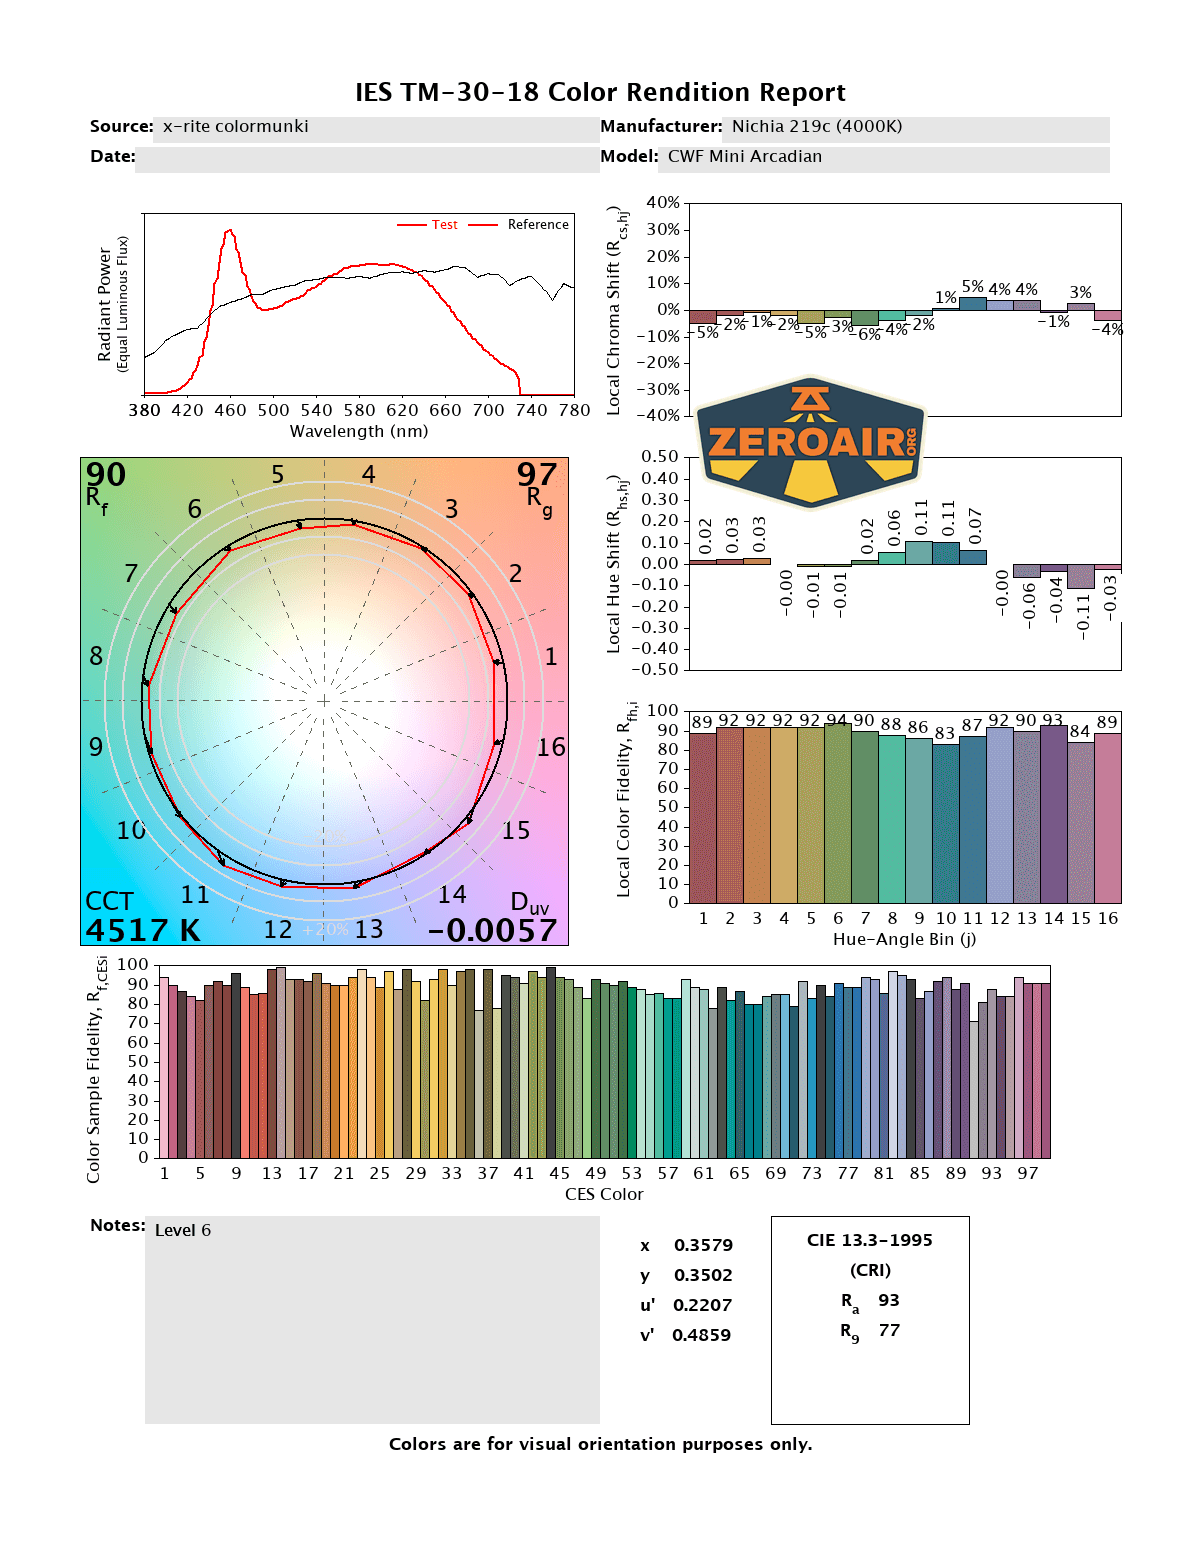
CCT (Correlated Color Temperature) refers to the measurement of the color appearance of light, expressed in Kelvins (K), which indicates whether the light is warm (yellowish) or cool (bluish). A lower CCT (below 3000K) is considered warm light, while a higher CCT (above 5000K) gives cooler, bluish light.
CRI (Color Rendering Index) is a measure of how accurately a light source renders colors in comparison to natural sunlight. Scored on a scale from 0 to 100, higher CRI values indicate that colors appear more true to life and vibrant, similar to how they would look under the sun.
Beamshots
These beamshots always have the following settings: f8, ISO100, 0.3s shutter, and manual 5000K exposure. These photos are taken at floor level, and the beam hits the ceiling around 9 feet away.


Tint vs BLF-348 (KillzoneFlashlights.com 219b version) (affiliate link)
I keep the test flashlight on the left and the BLF-348 reference flashlight on the right. These photos are taken around 18 inches from the door.
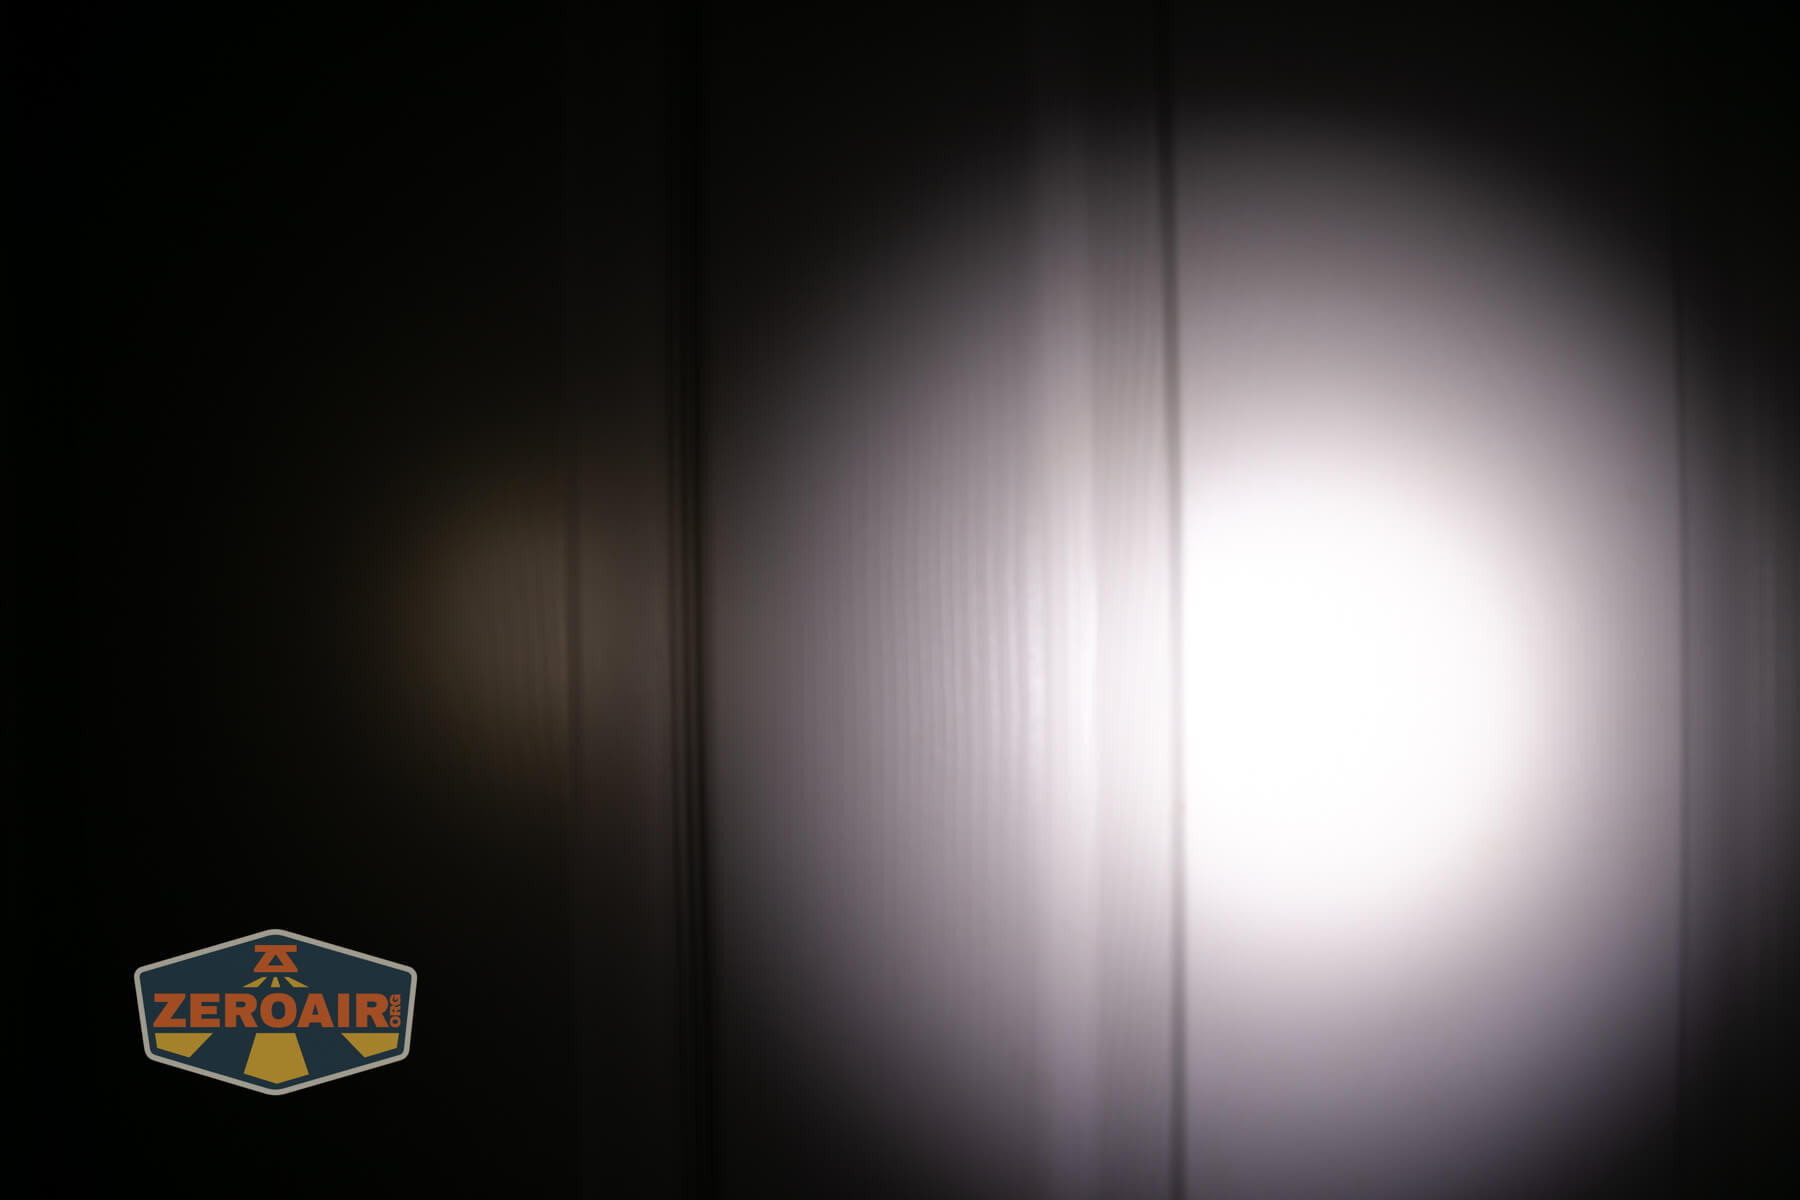
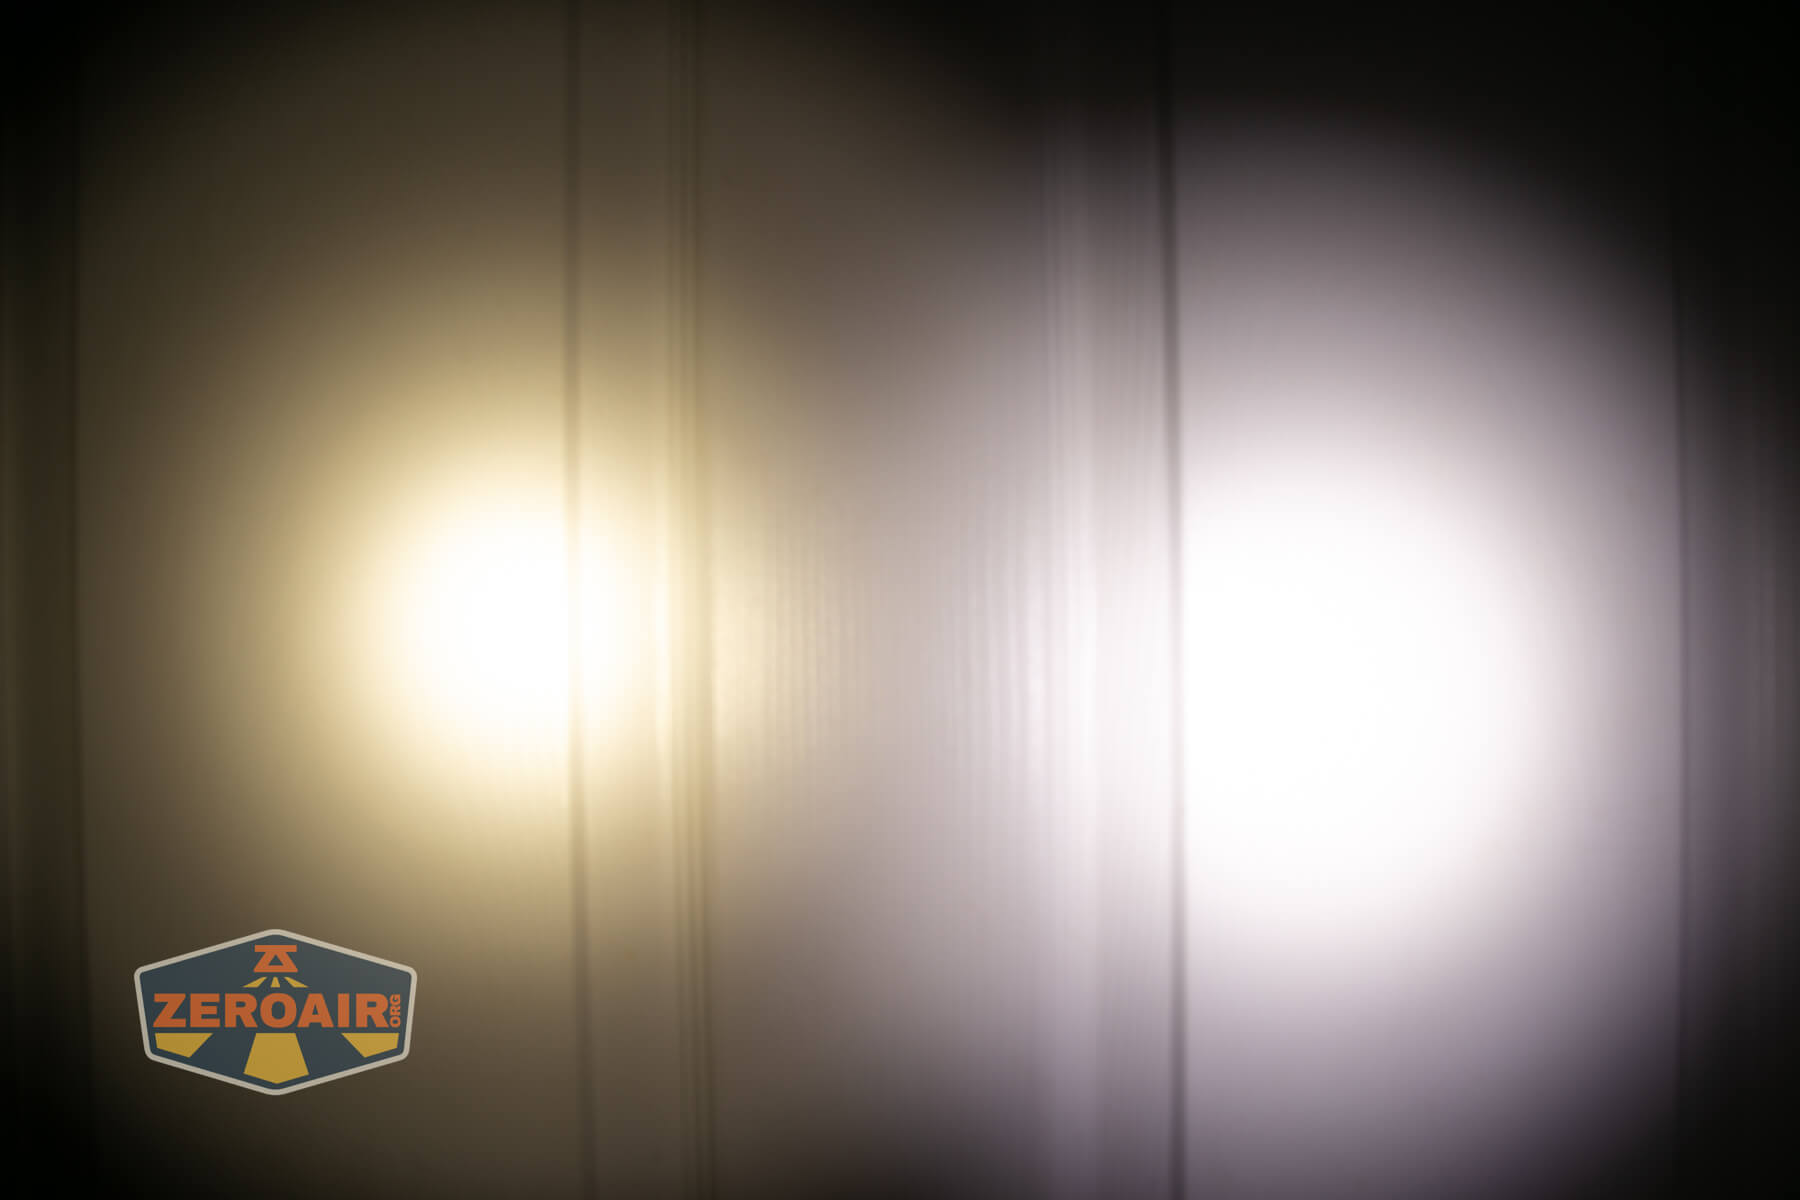
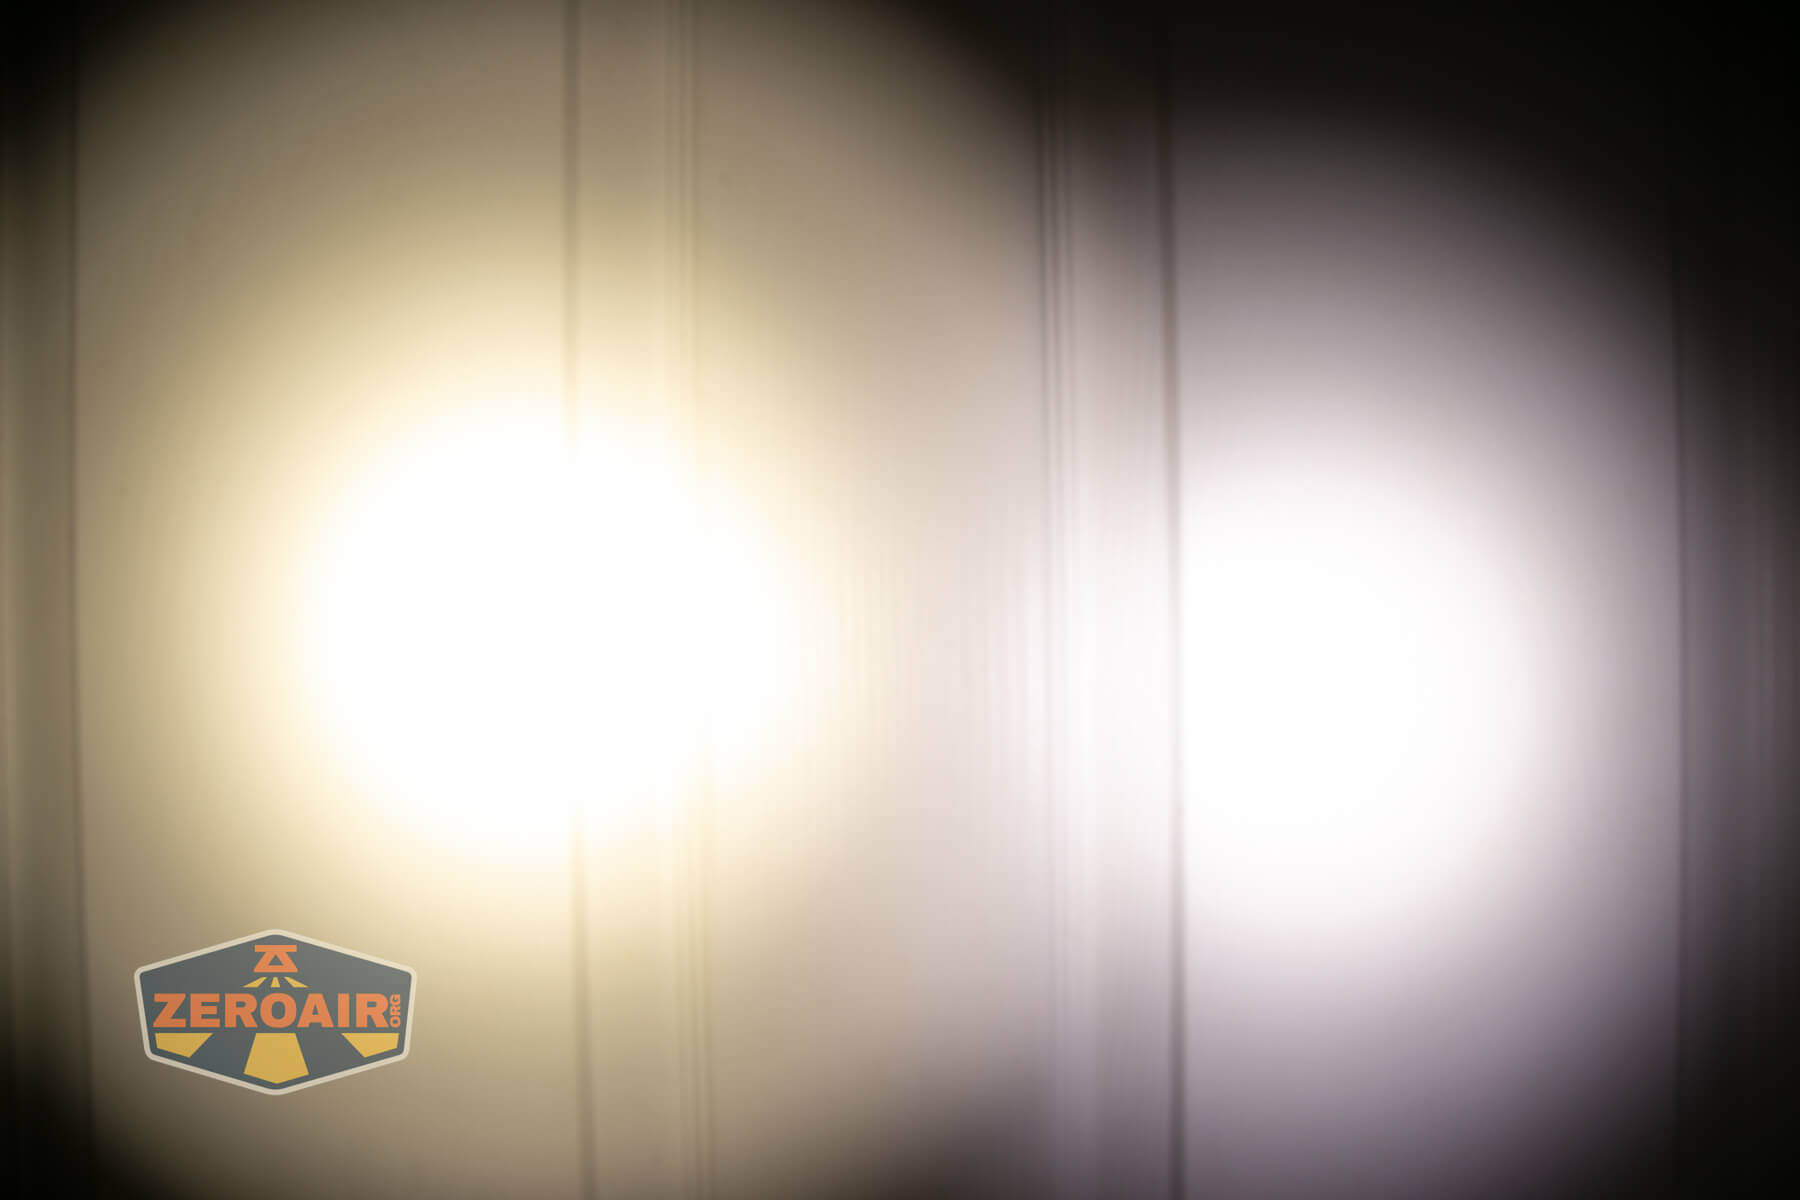
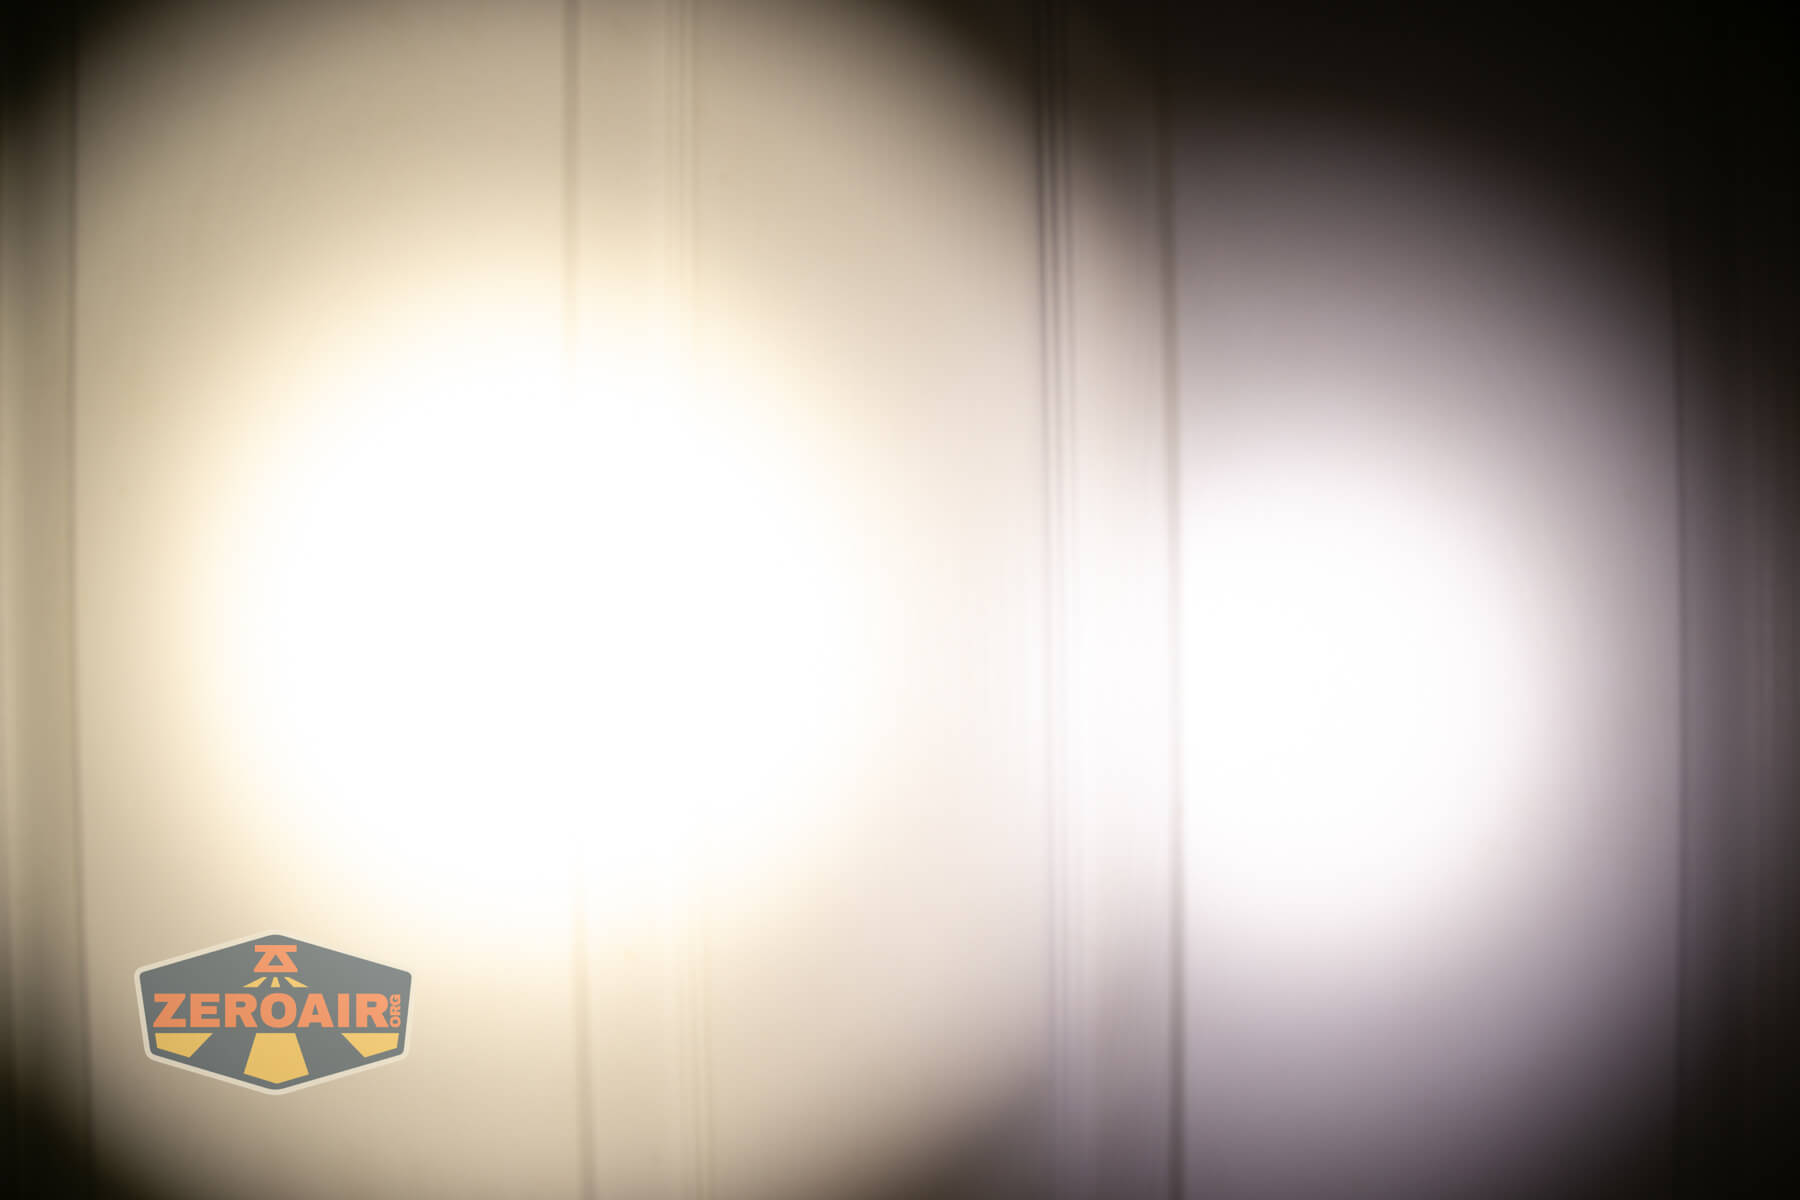
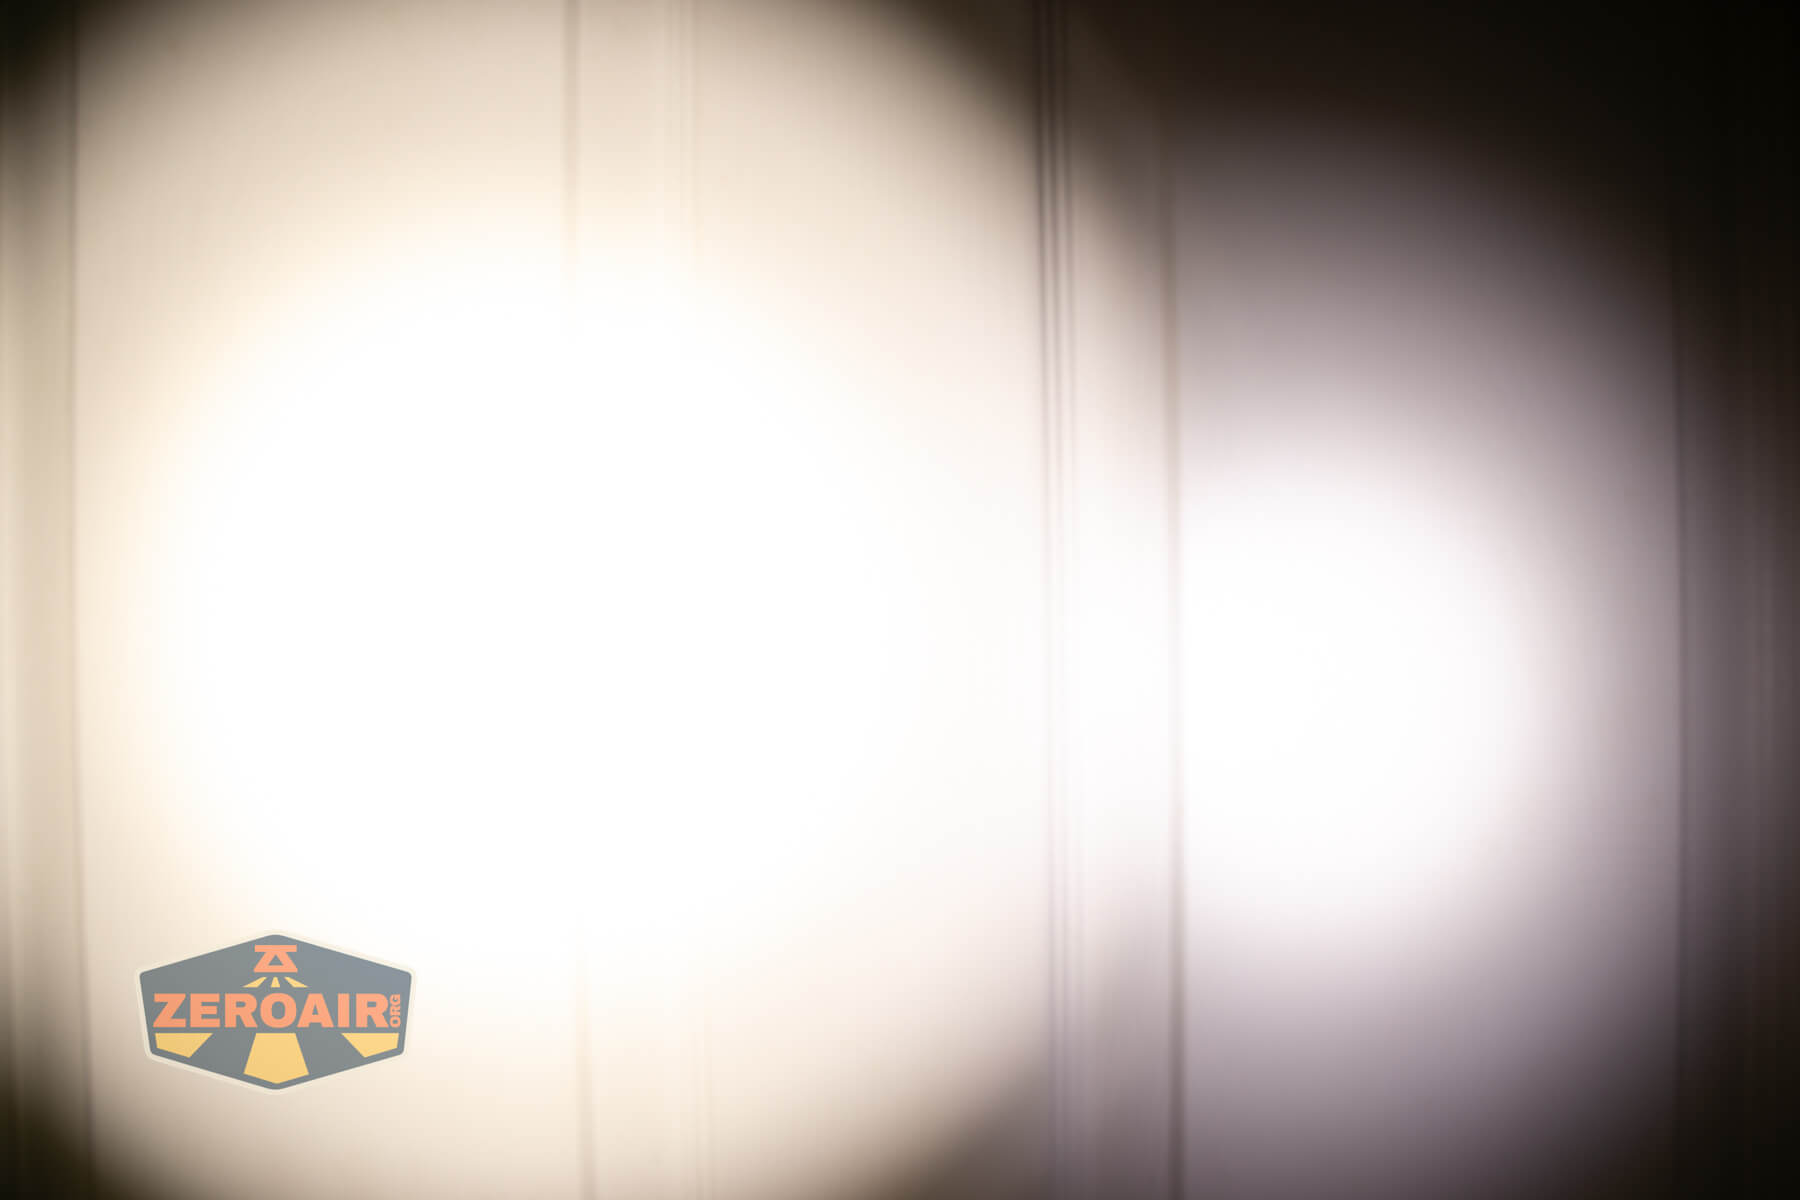
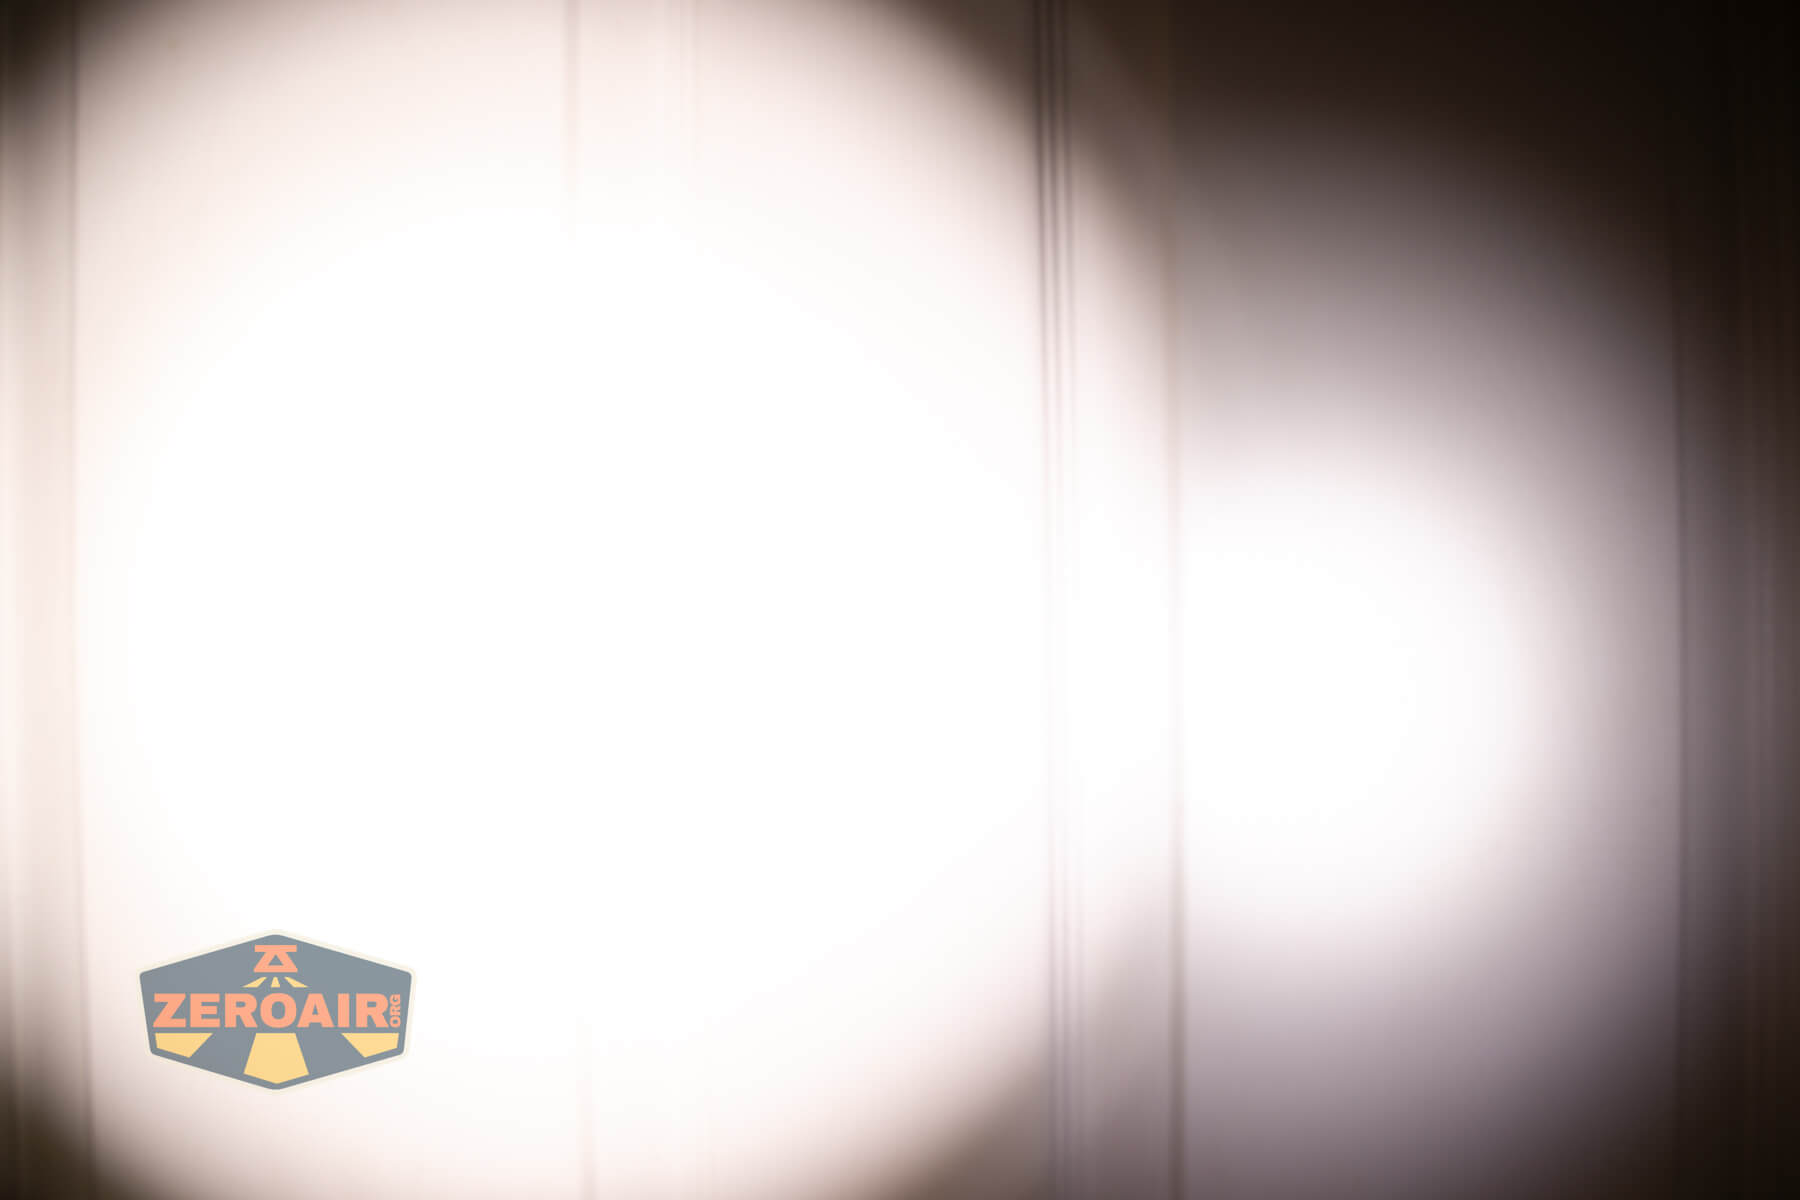
I compare everything to the KillzoneFlashlights.com 219b BLF-348 because it’s inexpensive and has the best tint!
Summary and Conclusion
The CWF Mini Arc flashlight is a neat light. It’s not a high-output light, though. I’m not sure that’s the claim it makes, and in a fair evaluation of the light, that has to be considered. Does it hit 520 lumens? No, but a bigger issue is such a small light as this dealing with the heat produced by 520 lumens, and what realistic expectations are. Realistically, this tiny light will heat up too much to maintain 520 for long anyway. But stepping down to just over 10% of the claim seems egregious.
I appreciate the design similarities to the other Arcadian lights by CWF, and I love matching sets. So if you are a fan of CWF lights like the Peanut or Arcadian (and I am a fan), then this light will slot right into that family just fine.
The Big Table
| CWF Mini Arc flashlight | |
|---|---|
| Emitter: | Nichia 219c (4000K) |
| Price in USD at publication time: | $500.00 |
| Cell: | 1×14500 |
| Runtime Graphs | |
| LVP? | |
| Switch Type: | Mechanical |
| On-Board Charging? | No |
| Claimed Lumens (lm) | 520 |
| Measured Lumens (at 30s) | 54 (10.4% of claim)^ |
| Candela per Lumen | 10.7 |
| Claimed Throw (m) | – |
| Candela (Calculated) in cd (at 30s) | 26lux @ 4.767m = 591cd |
| Throw (Calculated) (m) | 48.6 |
| Claimed CCT | 4000 |
| Measured CCT Range (K) | 4000-4500 Kelvin |
| Item provided for review by: | Me |
| All my CWF reviews! | |
^ Measurement disclaimer: Testing flashlights is my hobby. I use hobbyist-level equipment for testing, including some I made myself. Try not to get buried in the details of manufacturer specifications versus measurements recorded here; A certain amount of difference (say, 10 or 15%) is perfectly reasonable.
What I like
- Build quality
- Pocket clip
- Includes cell
- 14500 is included
- Great beam profile
- Programmability
- No mode memory (if you program the light that way)
What I don’t like
- Cost
- Massive stepdowns on highest 3 modes.
- Can’t run 1.5V AA cells
Notes
- This content originally appeared at zeroair.org. Please visit there for the best experience!
- Please use my Amazon.com referral link to help support zeroair.org!
- Please support me on Patreon! I deeply appreciate your support!
Discover more from ZeroAir Reviews
Subscribe to get the latest posts sent to your email.