
Noctigon K1 21700 Flashlight Review
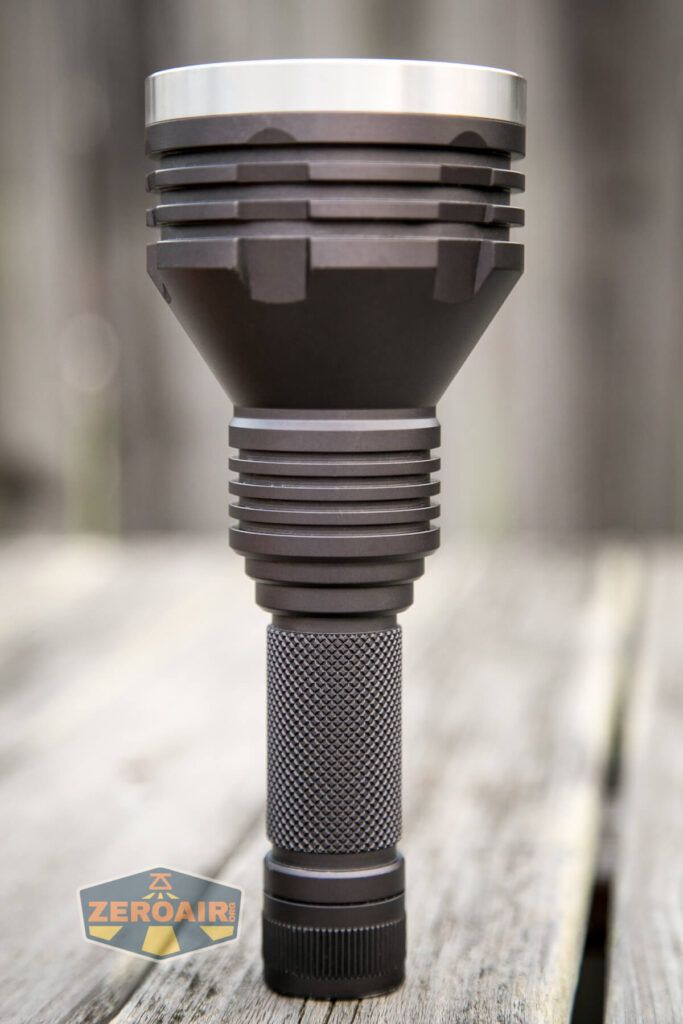
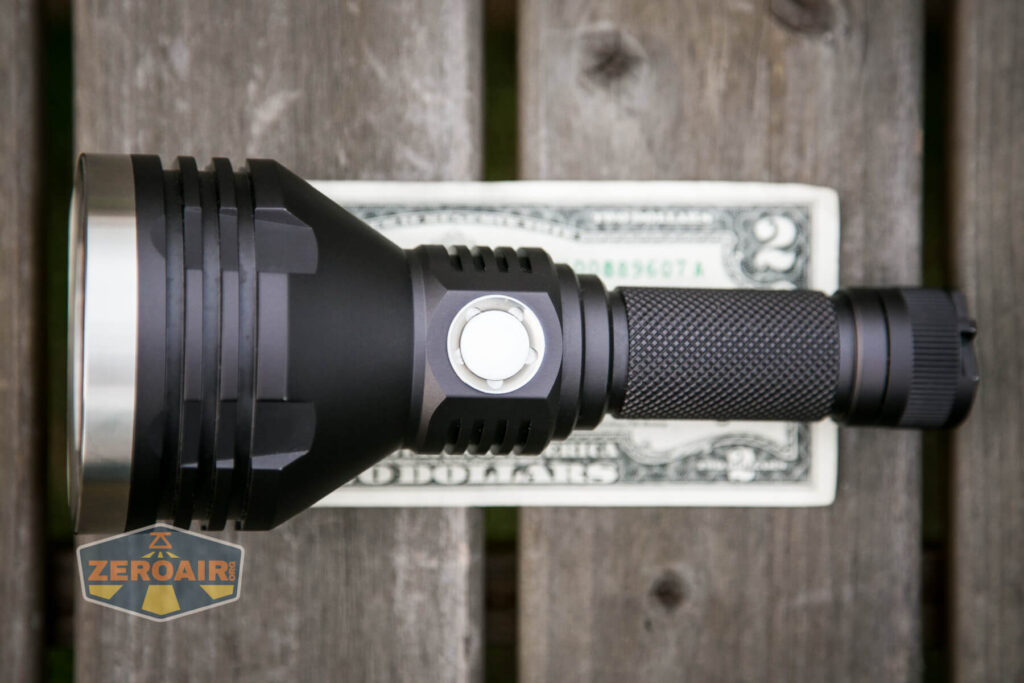
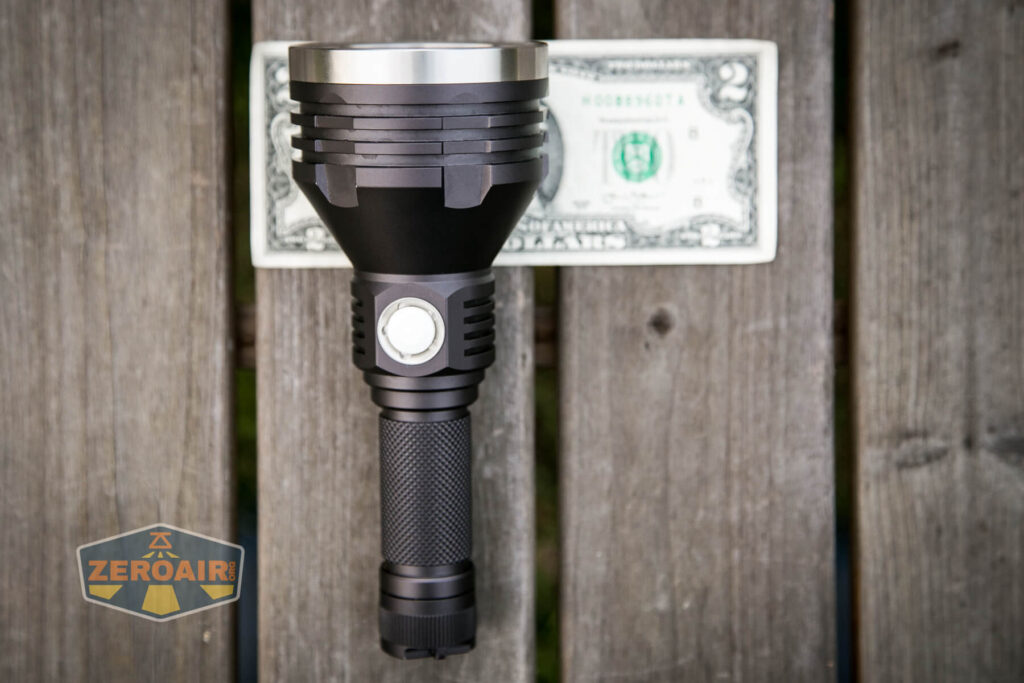
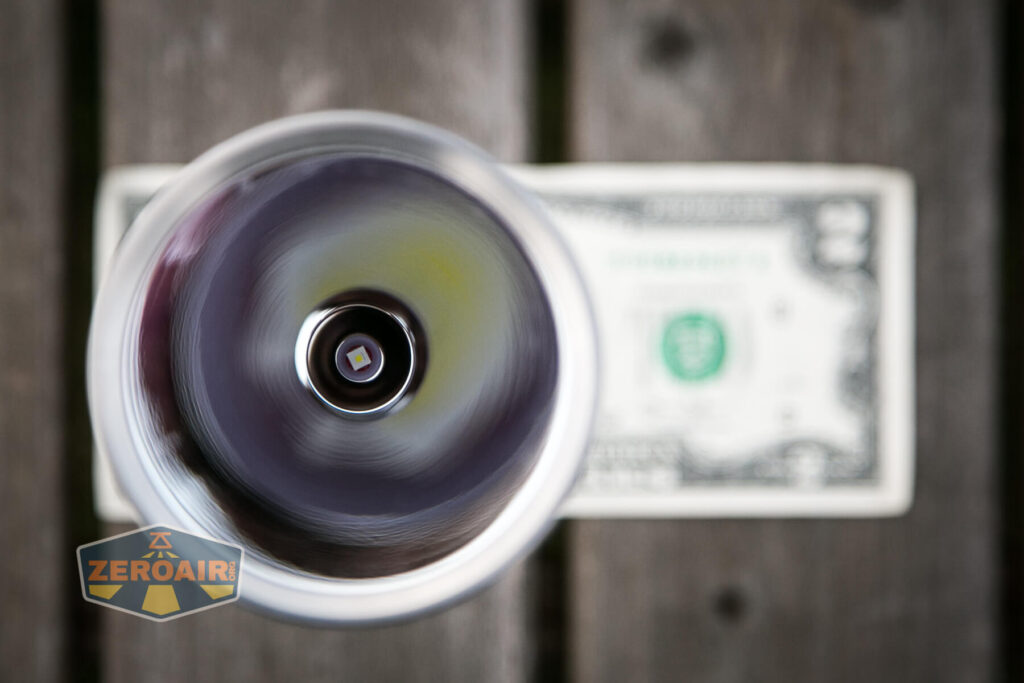
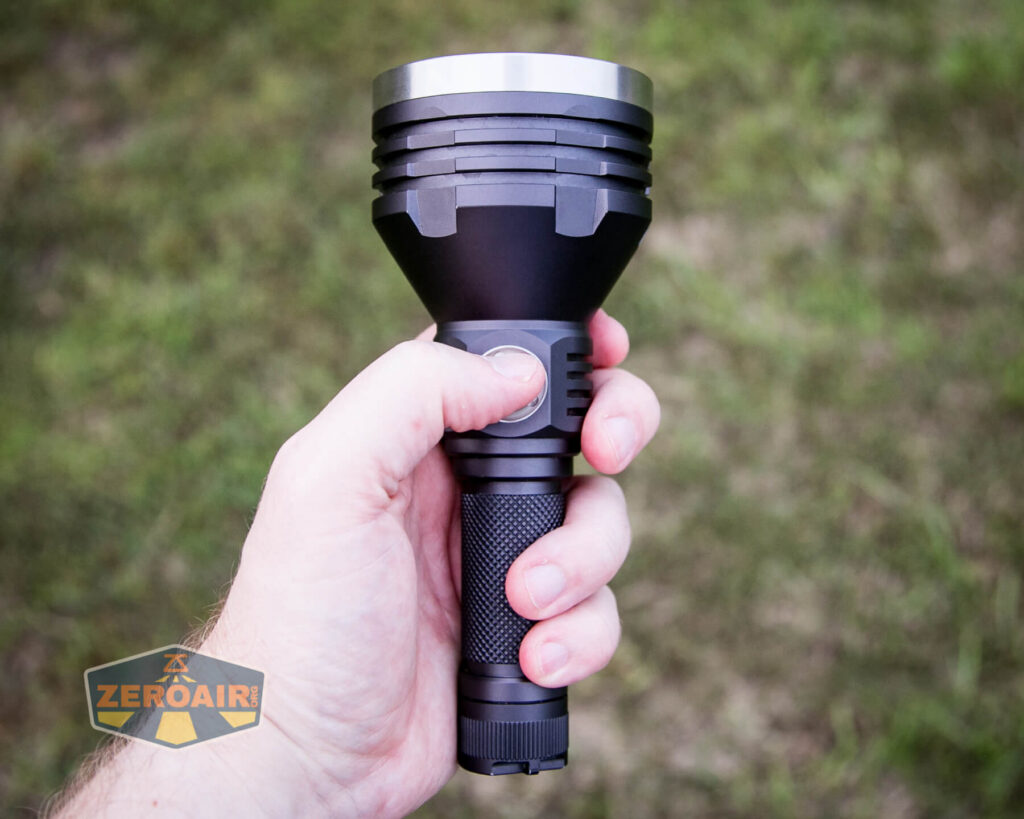
The Noctigon K1 21700 Flashlight is a feature-rich flashlight with many emitter options – seen here with an Osram KW CSLNM1.TG. Read on for a bit of testing.
Official Specs and Features of the Noctigon K1 21700 Flashlight
Here’s a link to the Noctigon K1 21700 flashlight product page.
Versions
Three body colors are available. Black, Dark Grey, and green (seen here). All of these bodies offer the same feature set.

You’ll note probably, that the emitter being seen in this review is not in that list above! That’s because this one is a special order… and you could order it too if you wanted. You’d need to send an email to work out those details, but it can be done (and it’s easy!)
Price
As seen here, the Noctigon K1 21700 Flashlight goes for $89.95.
Short Review
Let me meme this short review right quick:
![]()
You probably remember that post from Reddit. This is a review of that flashlight. It’s a very, very good thrower. It’s the beacon.
Long Review
The Big Table
| Noctigon K1 21700 Flashlight | |
|---|---|
| Emitter: | Osram KW CSLNM1.TG ((1mm2)) |
| Price in USD at publication time: | $89.95 |
| Cell: | 1×21700 |
| Turbo Runtime Graph | Turbo Runtime Graph |
| LVP? | |
| Switch Type: | E-Switch |
| Quiescent Current (mA): | ? |
| On-Board Charging? | Yes |
| Charge Port Type: | USB-C |
| Charge Graph | |
| Power off Charge Port | – |
| Claimed Lumens (lm) | 900 |
| Measured Lumens (at 30s) | 790 (87.8% of claim)^ |
| Candela per Lumen | 739.7 |
| Claimed Throw (m) | 1612.5 |
| Candela (Calculated) in cd (at 30s) | 11940lux @ 7.18m = 615536cd |
| Throw (Calculated) (m) | 1569.1 (97.3% of claim)^ |
| All my Noctigon reviews! | |
^ Measurement disclaimer: Testing flashlights is my hobby. I use hobbyist-level equipment for testing, including some I made myself. Try not to get buried in the details of manufacturer specifications versus measurements recorded here; A certain amount of difference (say, 10 or 15%) is perfectly reasonable.
What’s Included

Mine’s a loaner without the full retail package. I got the Noctigon K1 21700 Flashlight and a carry holster only.
Package and Manual
Noctigon uses a cardboard box with a label sticker, so that’s what you’re likely to get with this one, too.
There is no manual (!!). Maybe there was and it wasn’t included with my package. But this is a typical Anduril flashlight, so you probably already know how that works. I’ll cover it below anyway.
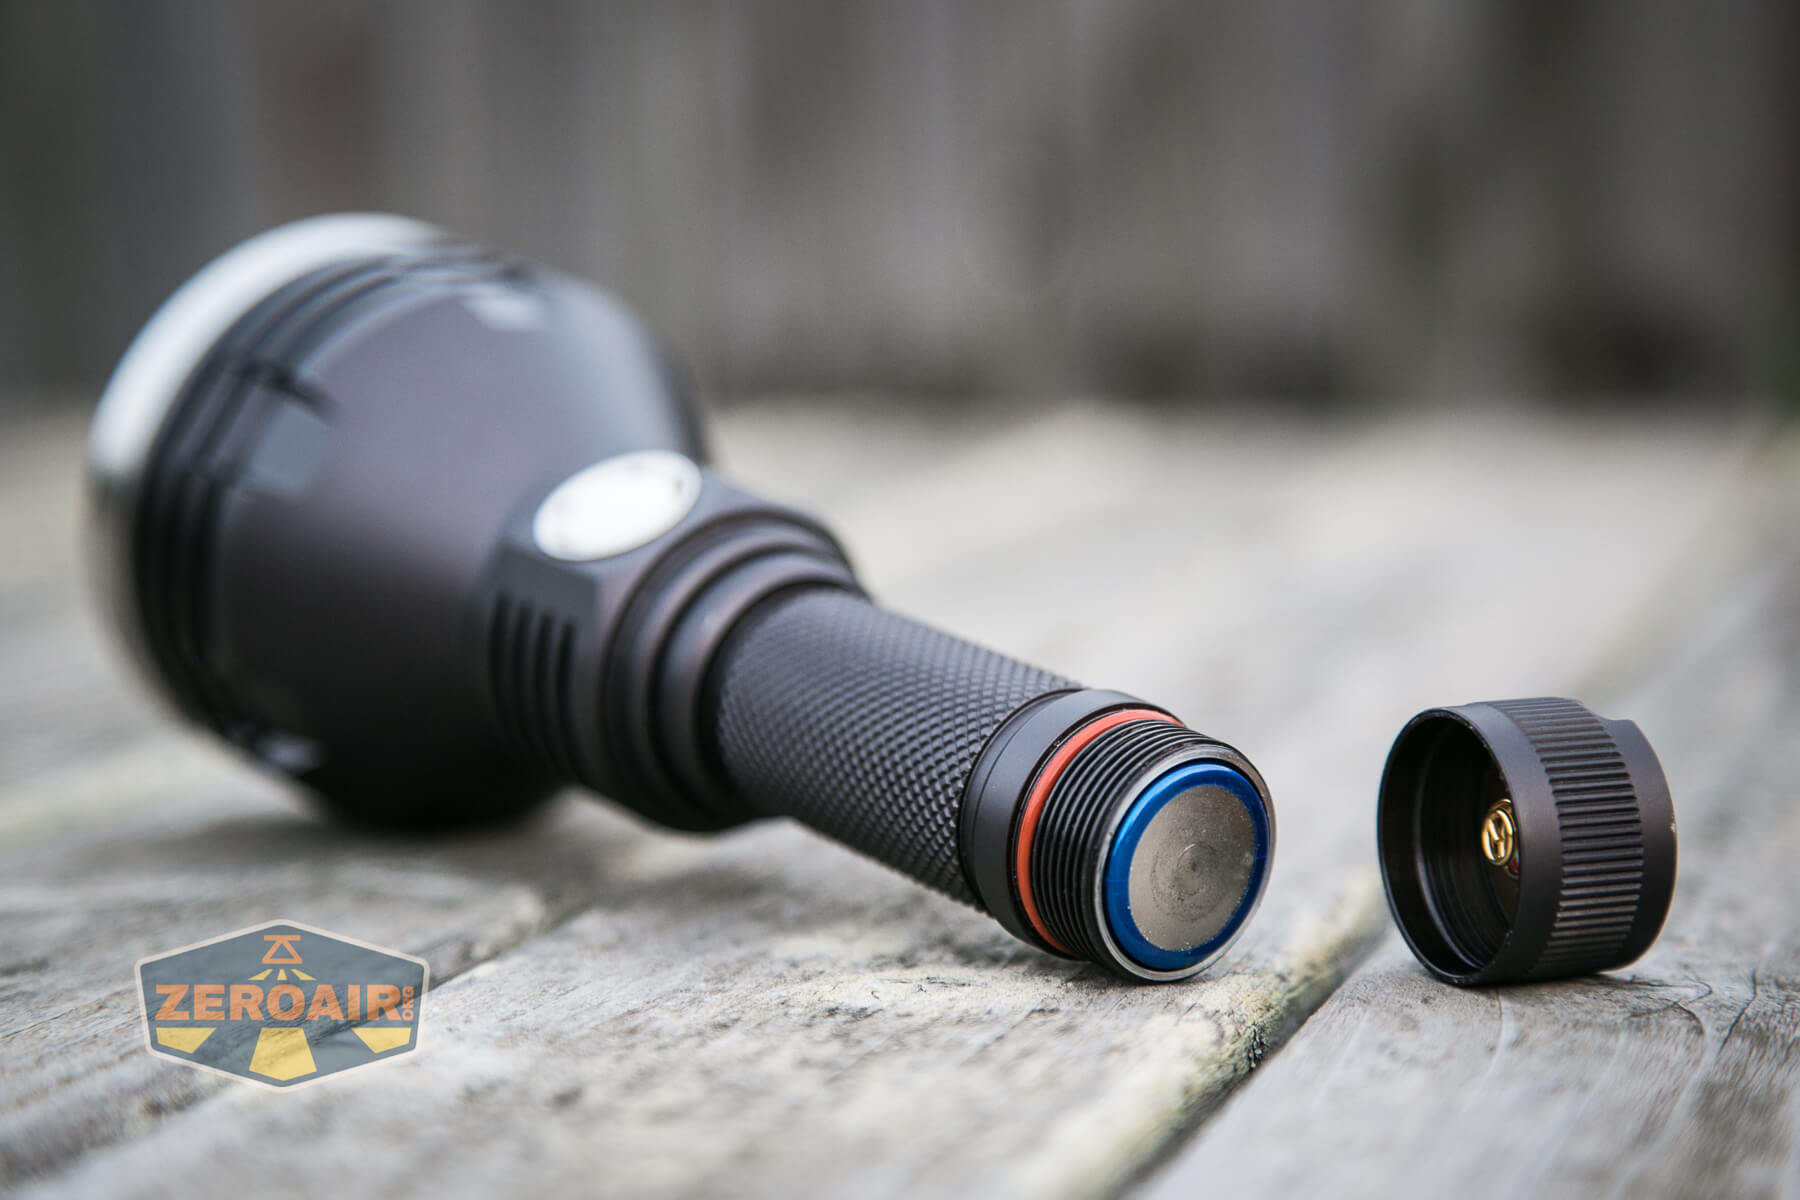
Build Quality and Disassembly

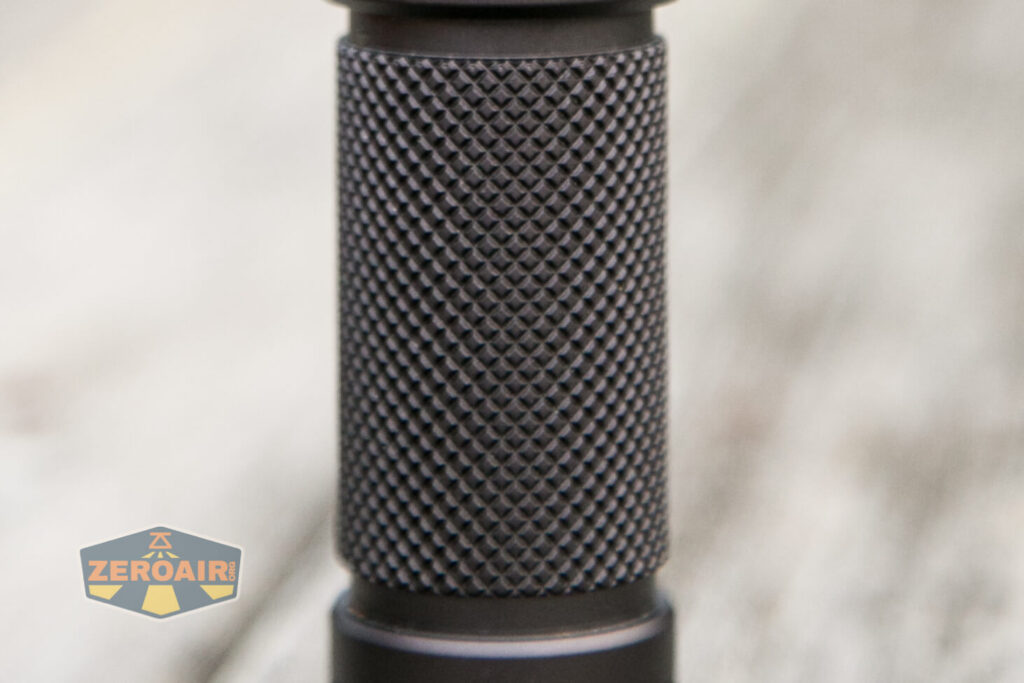
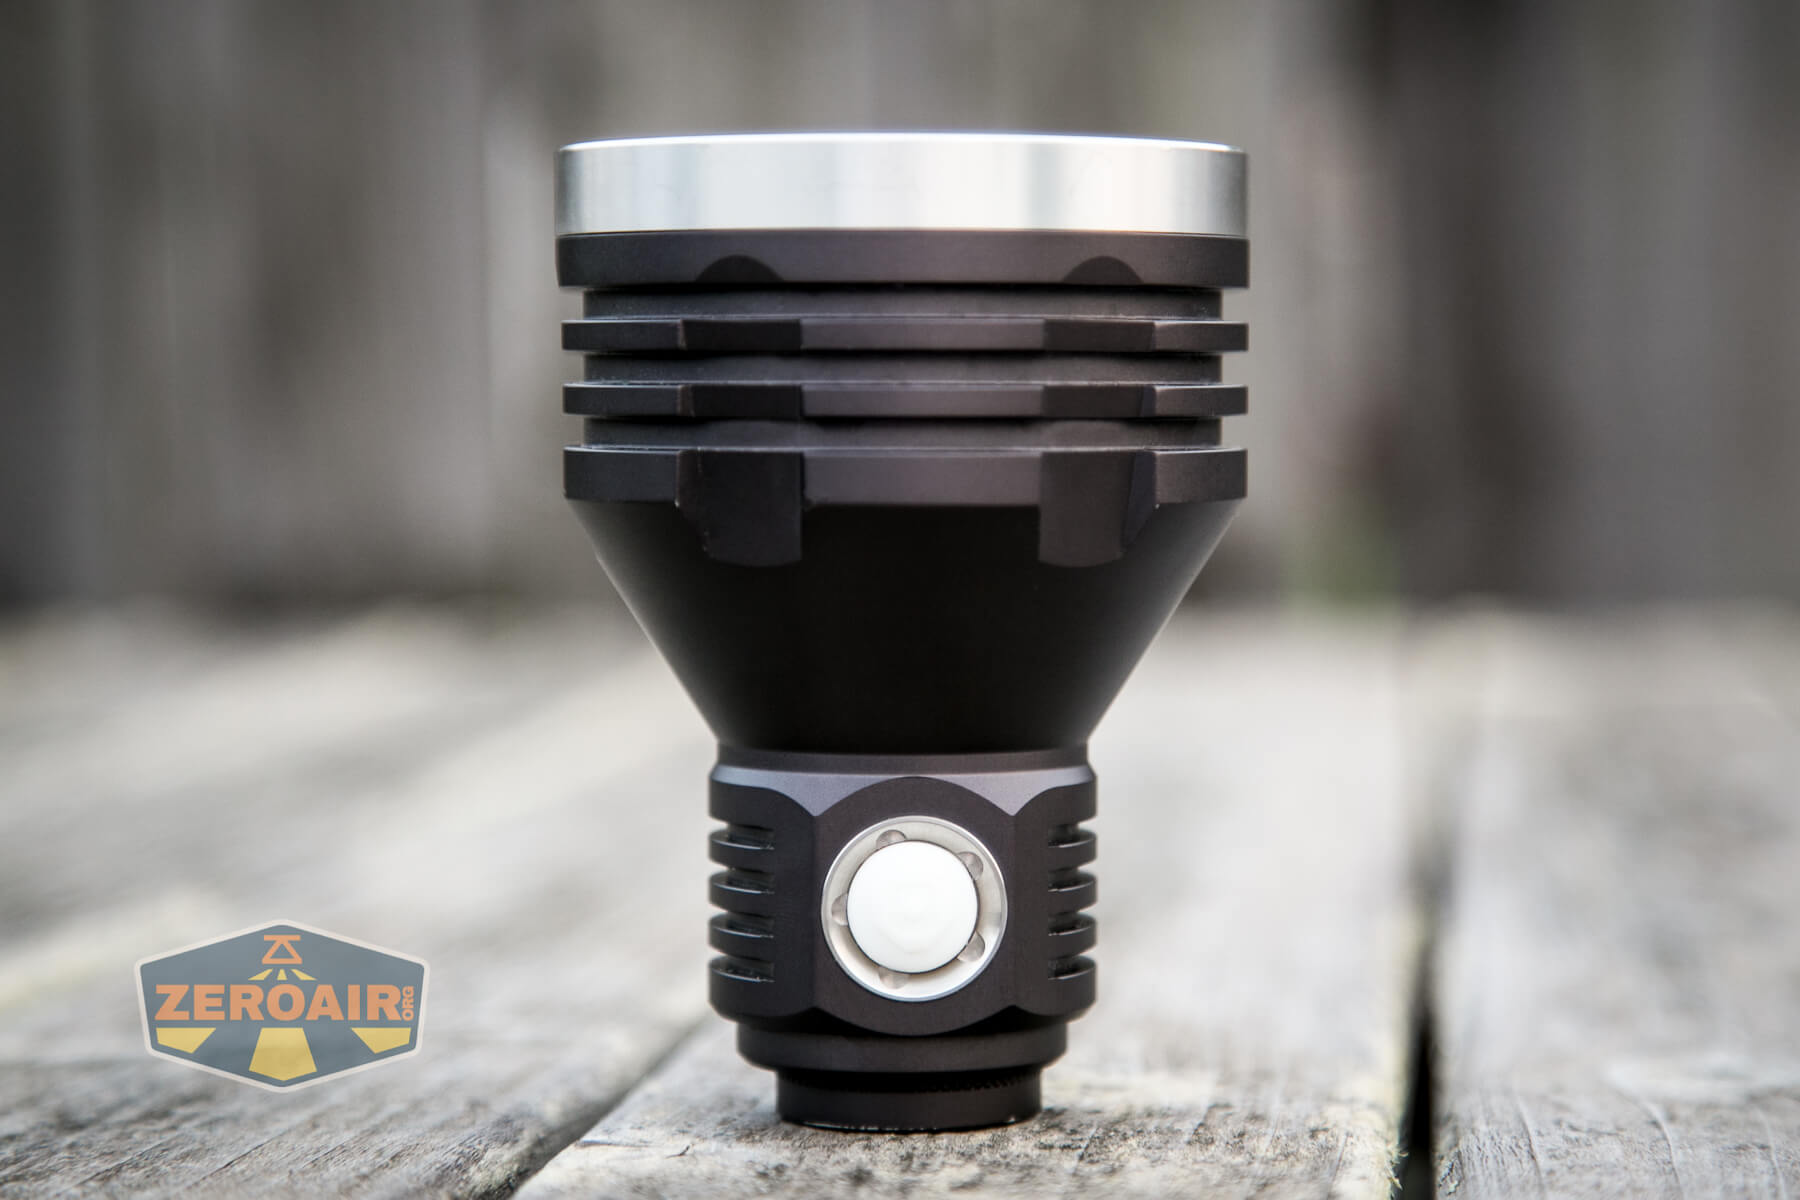
The same that I said about the Noctigon K9.3 can be said about the Noctigon K1 21700 flashlight. It’s hard to opine enough about the build quality of this light. Used to be that these were a low-cost category of lights. With this light clocking in at around $90, that can no longer be said. And we don’t have to hold it to a “higher standard” but the build quality needs to be commensurate with the price asked.


It is – this light is extremely well built, and I have no complaints. In fact, this one comes to me used (or “as a user” so to speak) and it’s still nearly flawless. That speaks to the owner having soft touch, or the light being very robust and taking use very well (or both, obviously). There are some sharp edges that have worn down a bit from use, but even that is fairly minimal.


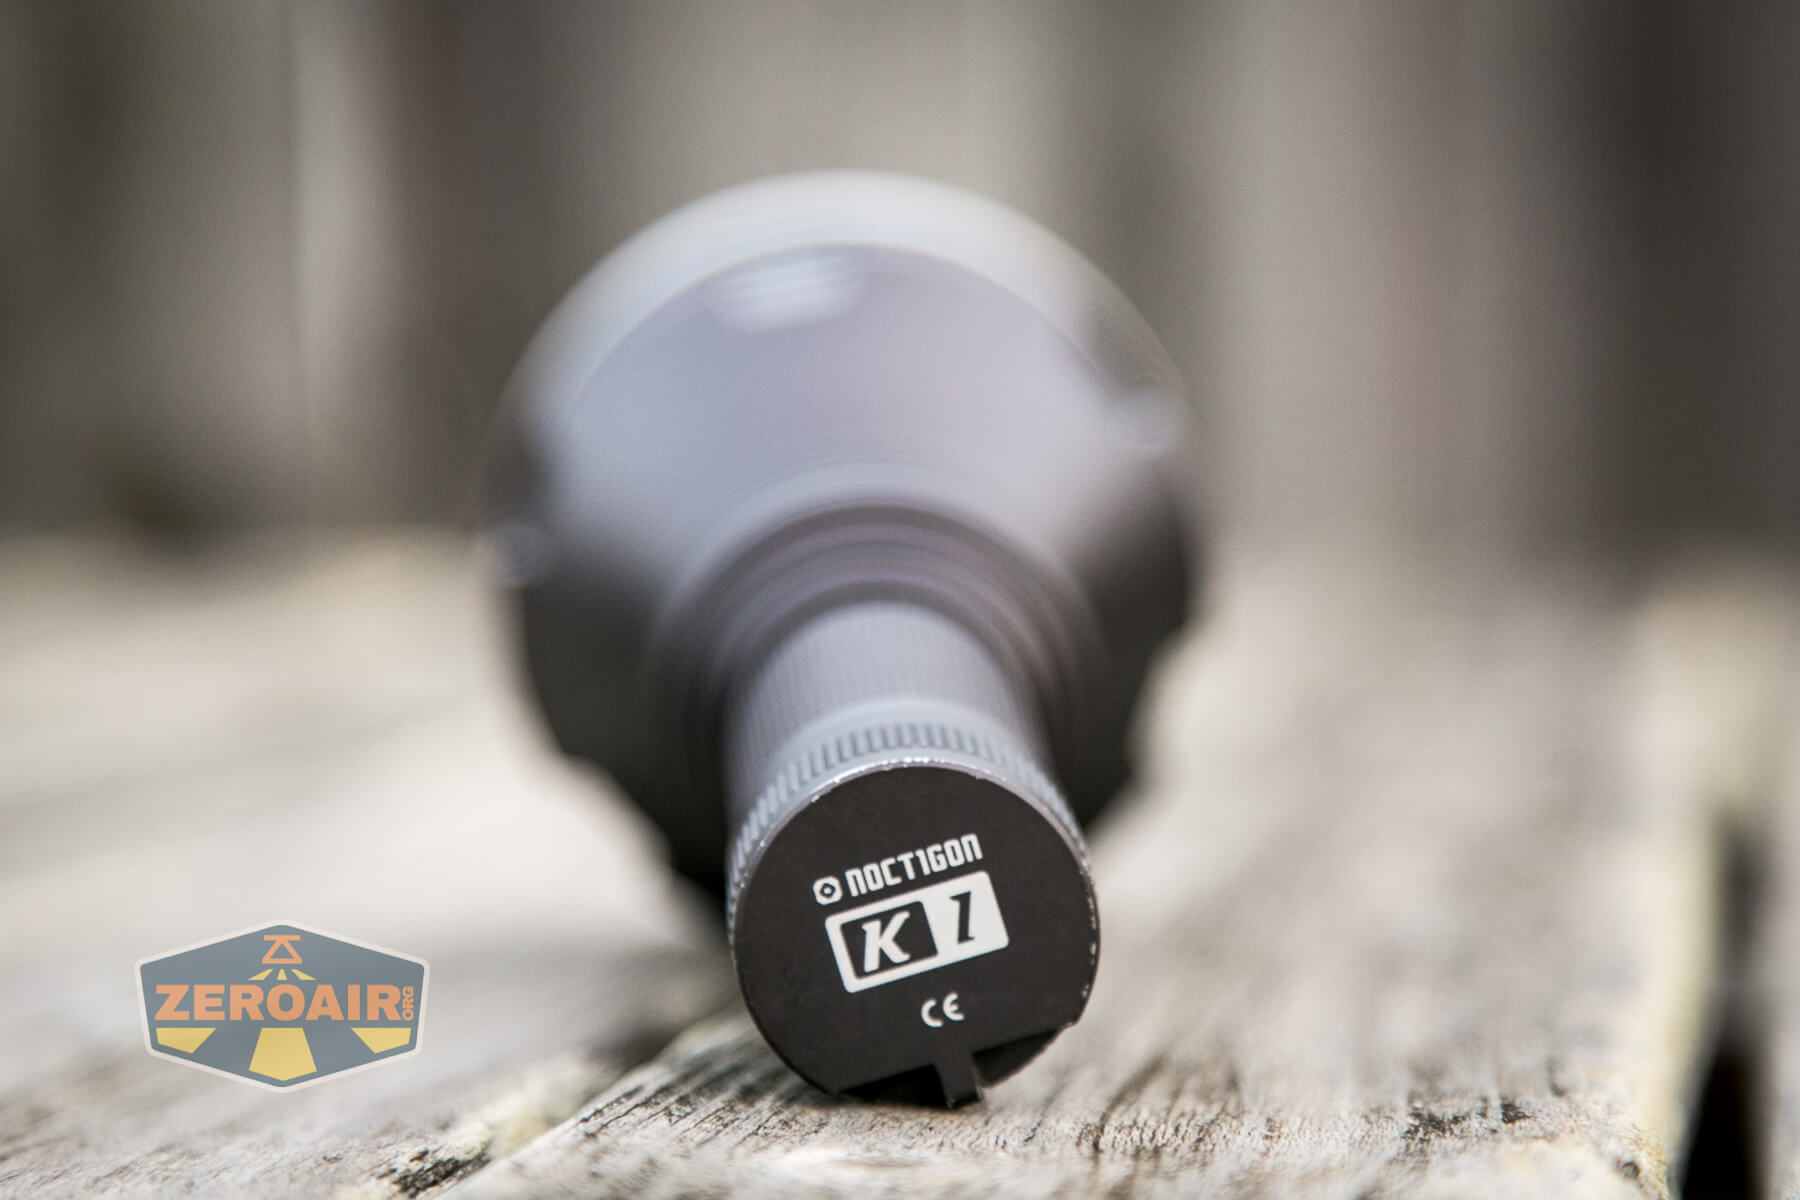
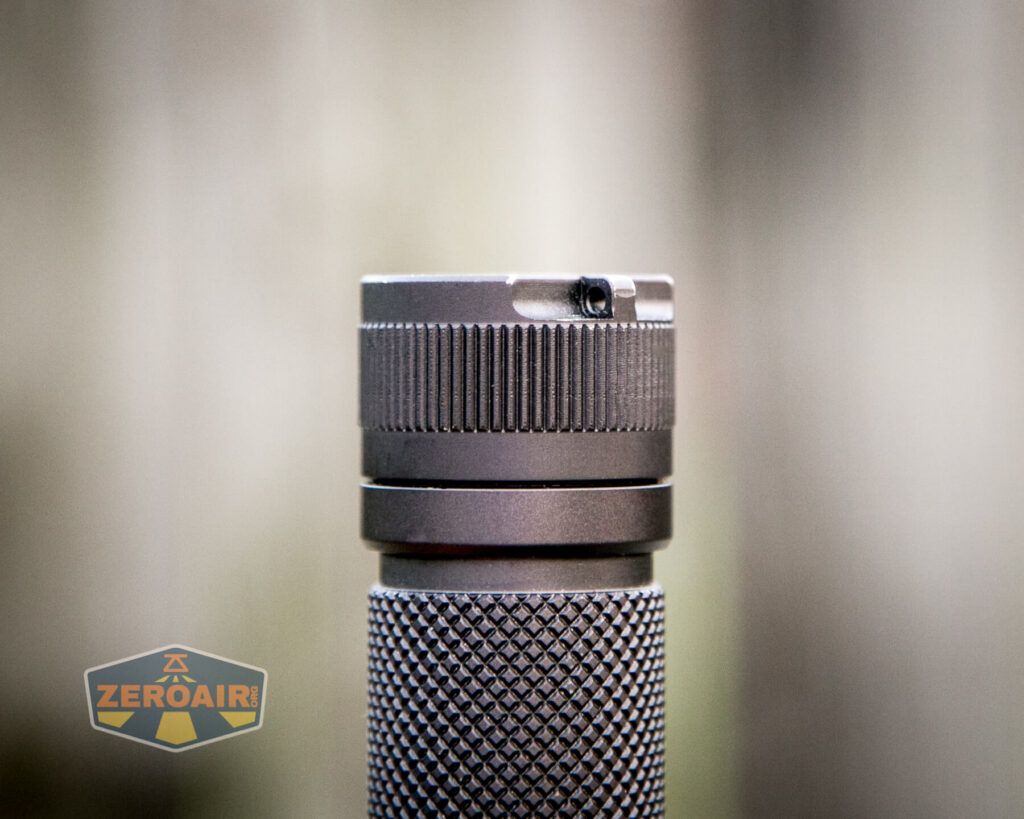
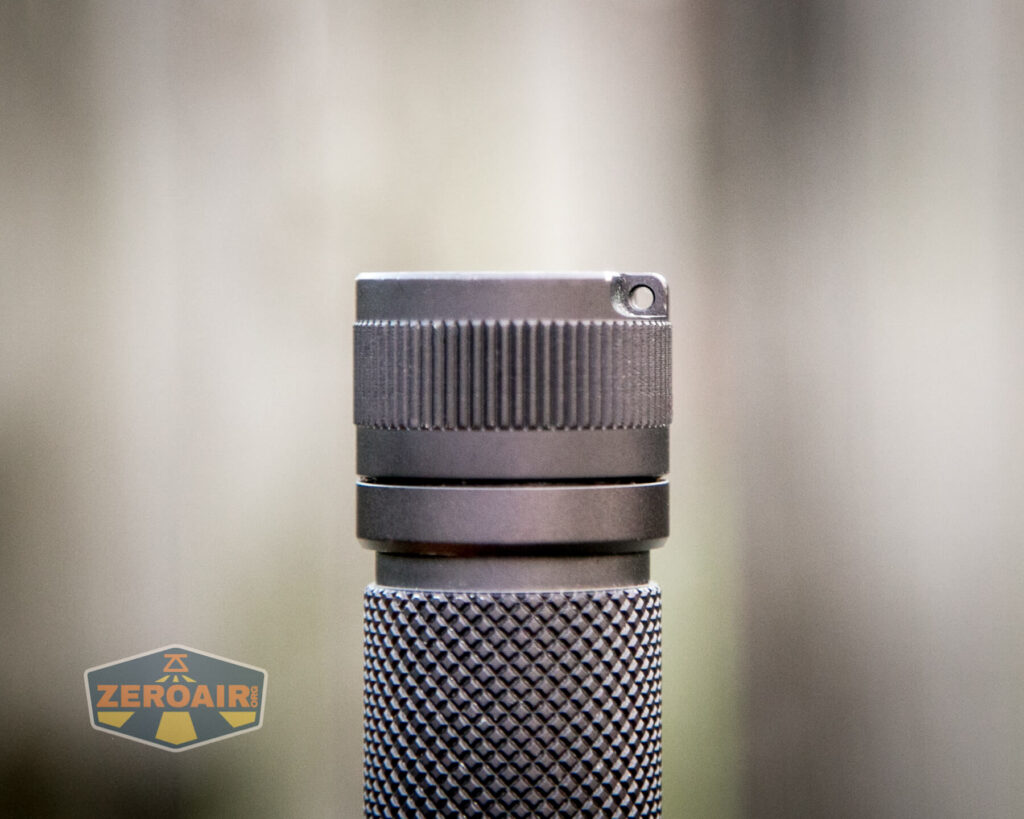
Noctigon uses minimal branding on the K1 21700 Flashlight. It’s seen only on the tailcap.
As with other Noctigon lights, the tailcap has reeding which aids in tailcap removal.

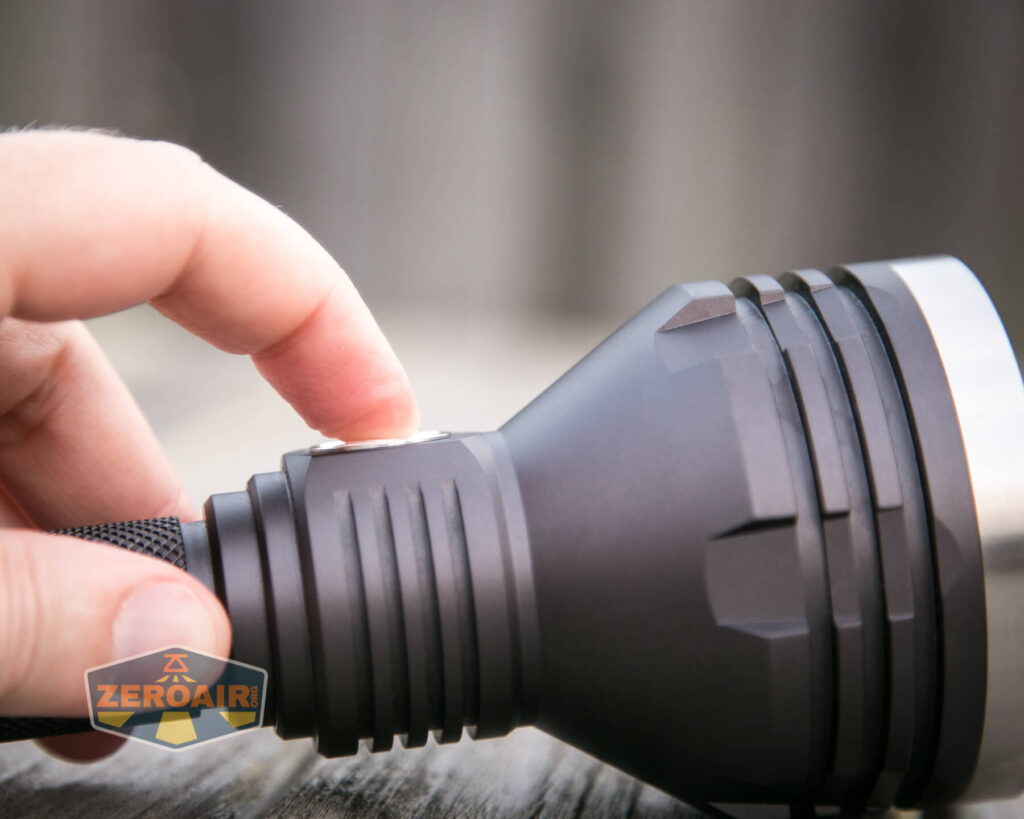
On the body is deep and very consistent knurling.

Cooling fins on the head are deep and well finished. Smartly, the bezel is stainless steel.

The Noctigon K1 21700 flashlight also benefits from some cooling fins in the “neck” area, around the switch.

Removing the tailcap reveals anodized square-cut threads, with minimal lube. They’re quite long threads, so many twists are required. The tailcap has a spring, too.

It’s also possible to remove the head, and the same thread conditions apply here. The cell tube is not reversible.
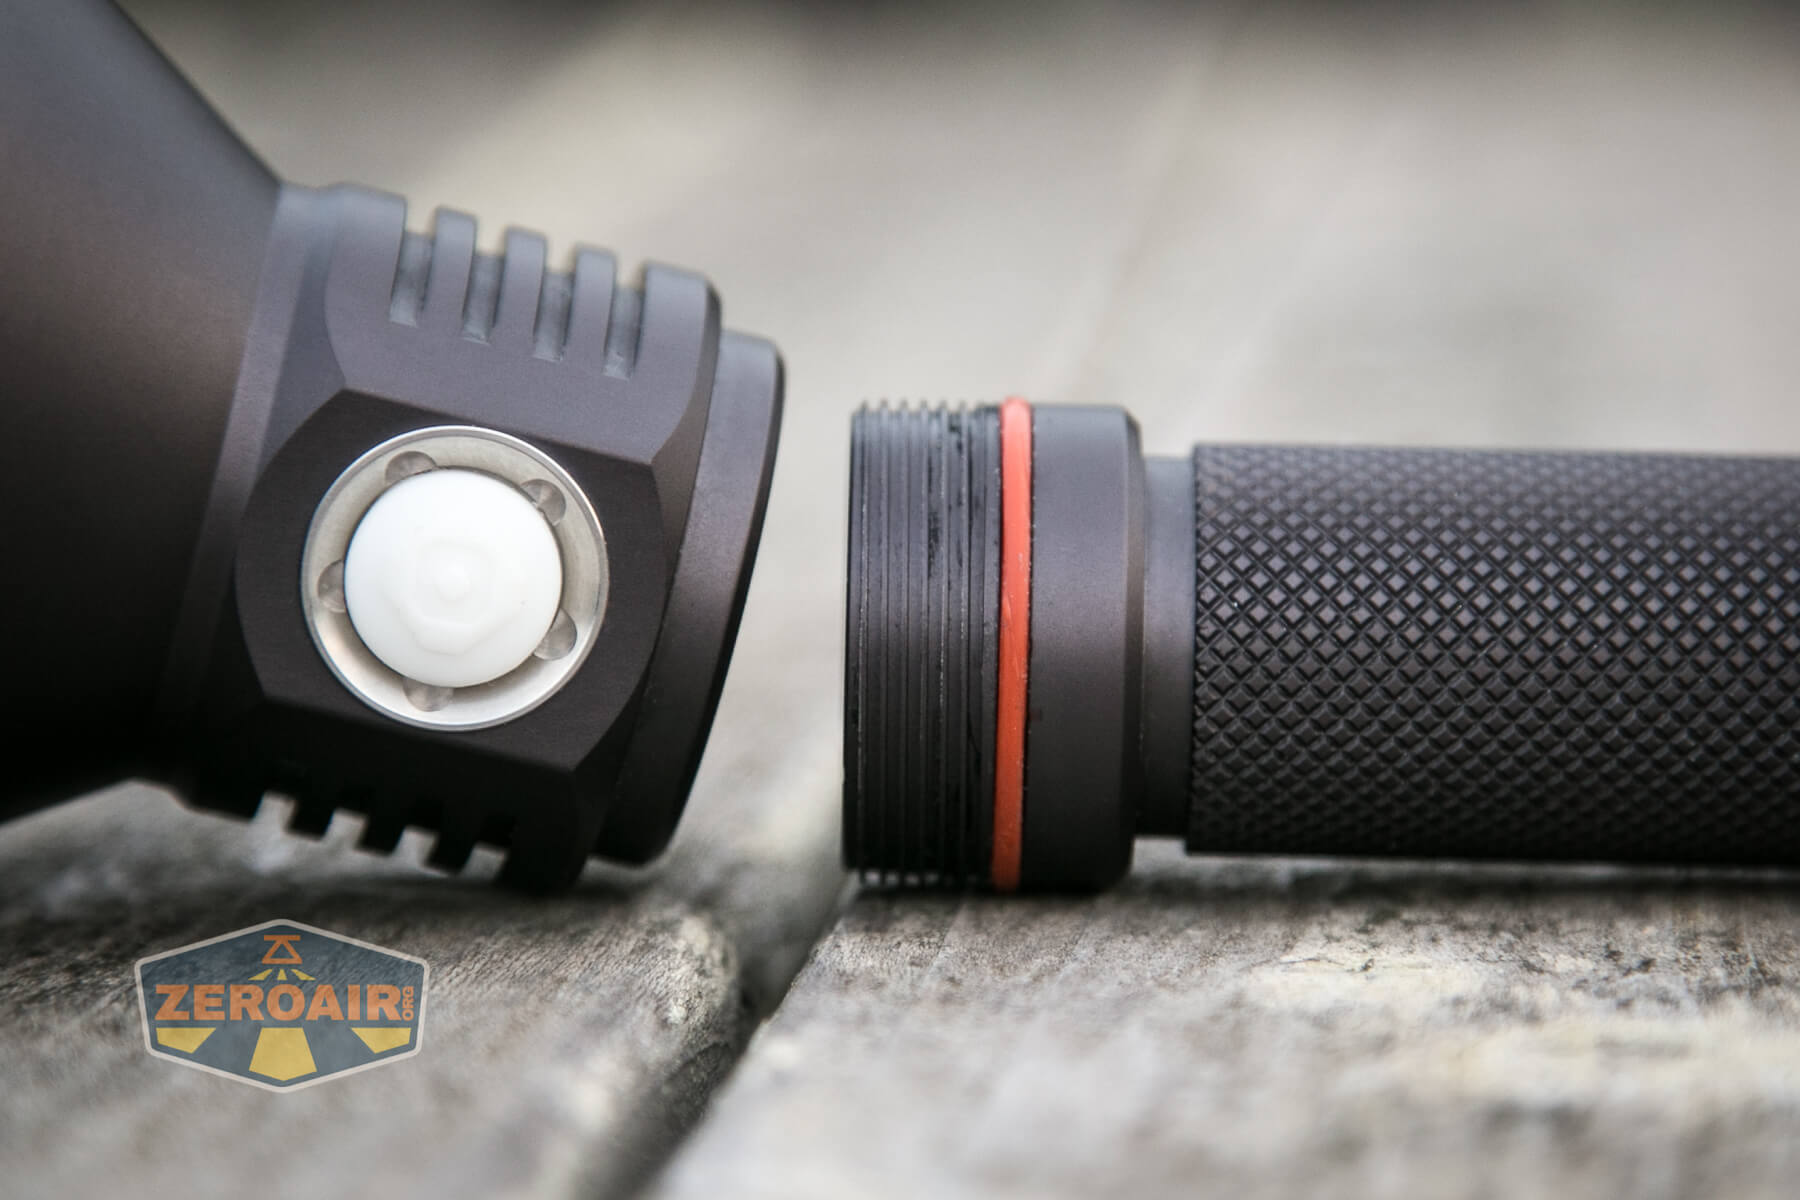
Both head and tail have springs.

The driver, seen below, looks to have flashing pads, which should allow flashing new firmware into the light.

The cell tube is completely removable. There are no other size cell tubes available, though.

Size and Comps
Dimensions: 173mm (length) * 72mm (head) * 26.5mm (body)

If the flashlight will headstand, I’ll show it here (usually the third photo). If the flashlight will tailstand, I’ll show that here, too (usually the fourth photo).


Here’s the test light with the venerable Convoy S2+. Mine’s a custom “baked” edition Nichia 219b triple. A very nice 18650 light.
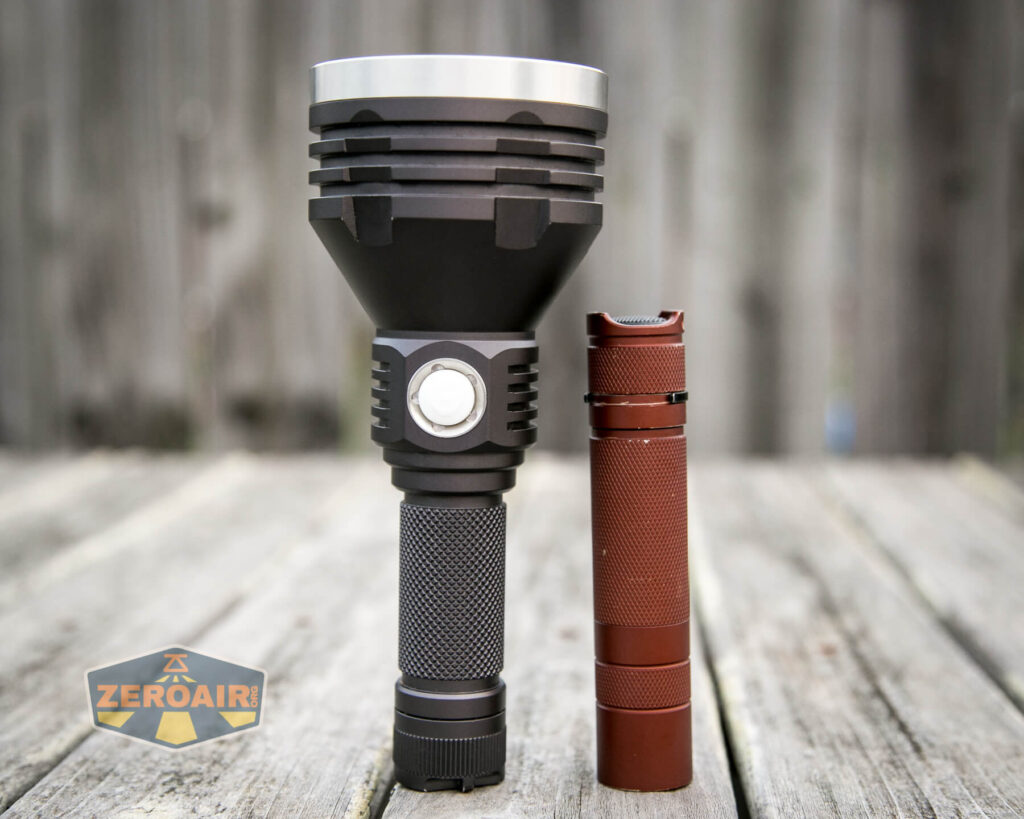

And here’s the light beside my custom-engraved TorchLAB BOSS 35, an 18350 light. I reviewed the aluminum version of that light in both 35 and 70 formats.


Hey shawty, it’s your birthday.
Retention and Carry
The main way to carry this Noctigon K1 21700 flashlight is going to be the included pouch.

It’s a directional pouch, with bezel-up carry only.

The light hangs out the bottom of the holster, and the light can not be used while in place.


There is a lanyard too, which attaches through this hole in the tailcap.
Power and Runtime
The Noctigon K1 21700 flashlight runs on one lithium-ion. The default is a single 21700. I tested with a flat top unprotected cell – the Vapcell seen below.

The cell is installed into the light in the usual way – positive terminal toward the head. Through the tailcap end (as seen below) is the only way to install cells, too. You will see why below.
Below are a couple of runtimes. Turbo only, but both before and after calibration.


Charging
Surprisingly the Noctigon K1 21700 flashlight has built-in charging! There’s a USB-C port on the positive side of the cell tube.

This is why the cell can only go into the light through the tail end – the head end is “captured.” Note the difference in this one and the K9.3 – this one lacks the opaque plastic guard. I’m not sure if the owner removed it, or if it shipped this way.

Anyway, I like the view into those electronics. And it really makes the red or green charge indicators pop!! Red means “charging” and green means “charging completed.”

A charge cable isn’t included but I can say that either USB or USB-C sources work just fine with this setup. Charging is about the same between the two, and fairly quick.

Modes and Currents
| Mode | Mode Claimed Output (lm) | Claimed Runtime | Measured Lumens | Tailcap Amps |
|---|---|---|---|---|
| Turbo (double click from on state) | 900 | – | 790 | 4.68 |
| 7 | – | – | 687 | 3.24 |
| 6 | – | – | 527 | 2.13 |
| 5 | – | – | 371 | 1.32 |
| 4 | – | – | 226 | 0.74 |
| 3 | – | – | 119 | 0.36 |
| 2 | – | – | 52 | 0.14 |
| 1 | – | – | 12 | 0.03 |
| Lowest (Accessible from the ramping group only) | – | – | 3 | 0.01 |
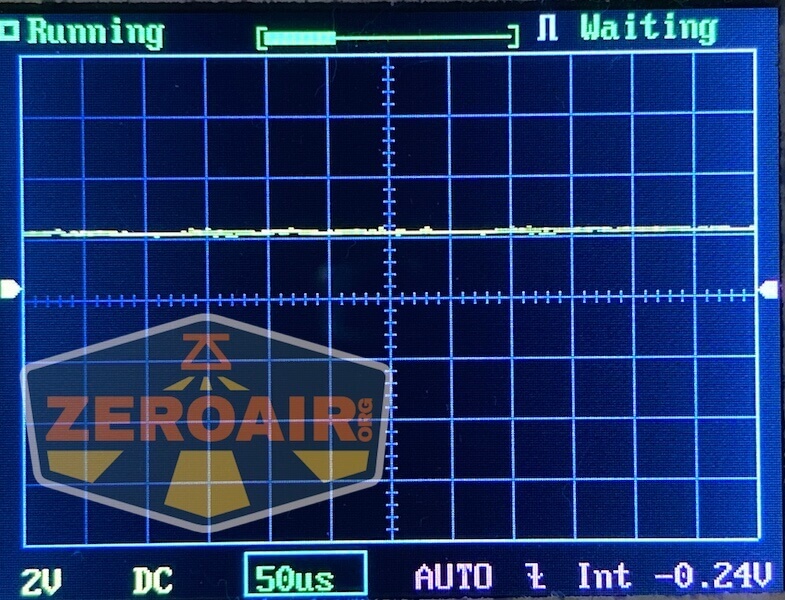
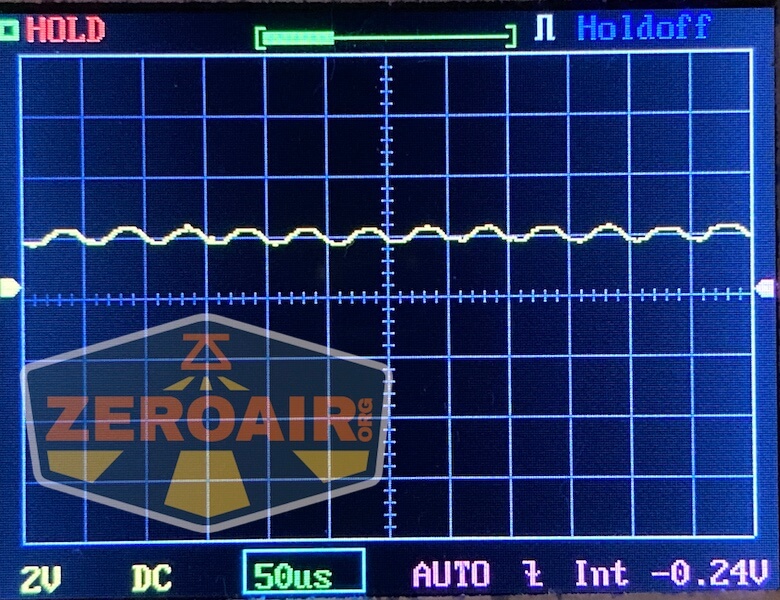
Pulse Width Modulation
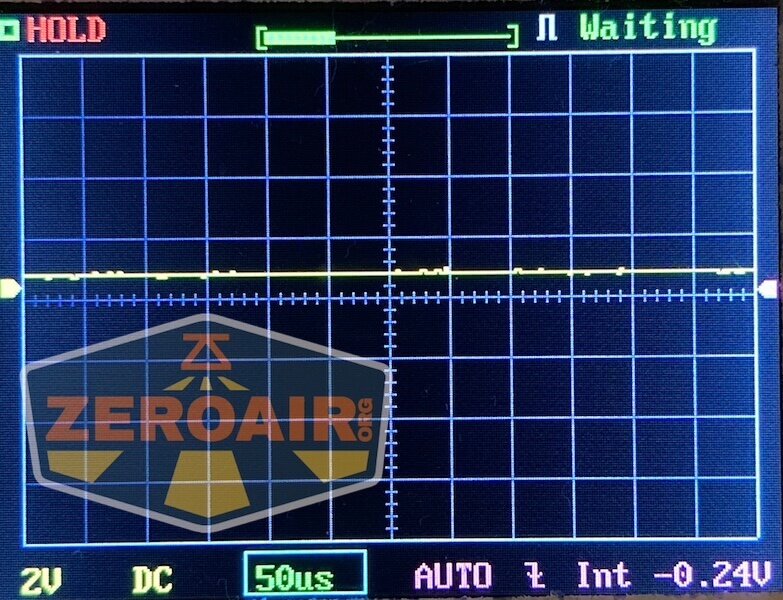


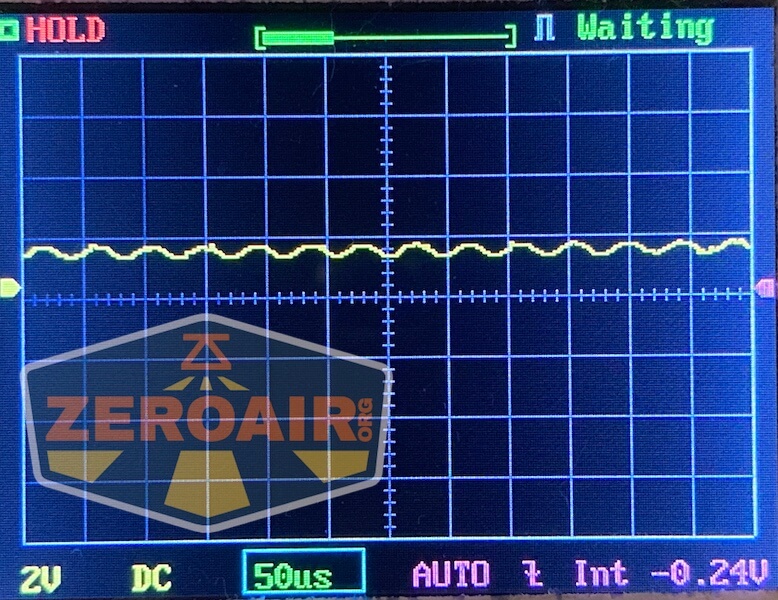

Here you can see a “baseline” – a chart with almost no light hitting the sensor.
Then there’s the Ultrafire WF-602C flashlight, which has some of the worst PWM I’ve seen. It’s so bad that I used a post about it to explain PWM! Here are multiple timescales (10ms, 5ms, 2ms, 1ms, 0.5ms, 0.2ms) to make comparing this “worst” PWM light to the test light easier. That post also explains why I didn’t test the WF-602C at the usual 50us scale.
User Interface and Operation
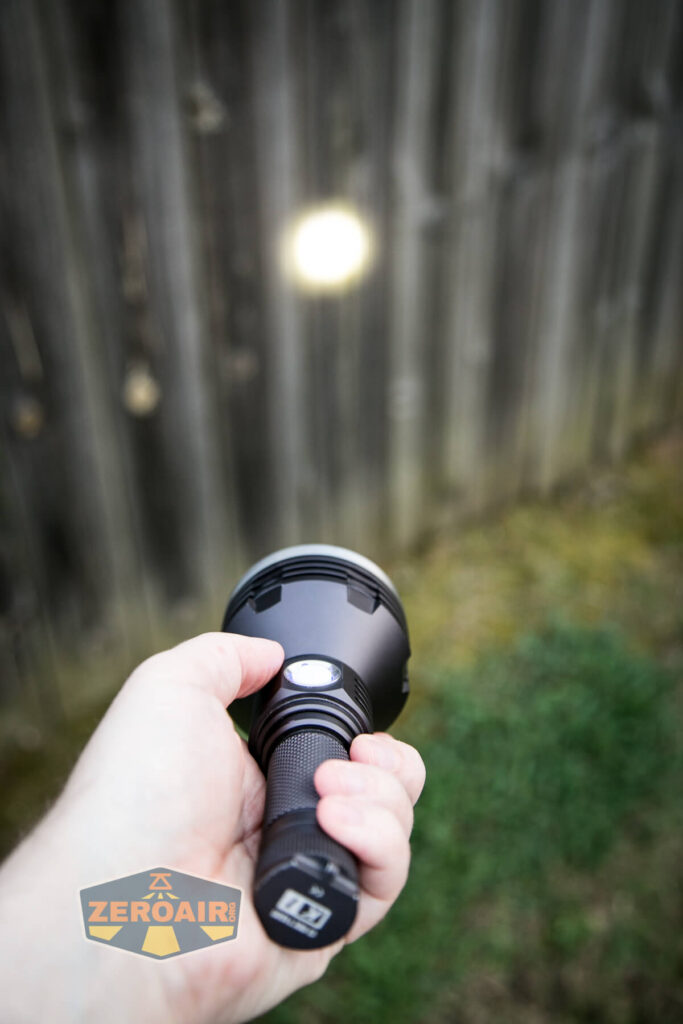
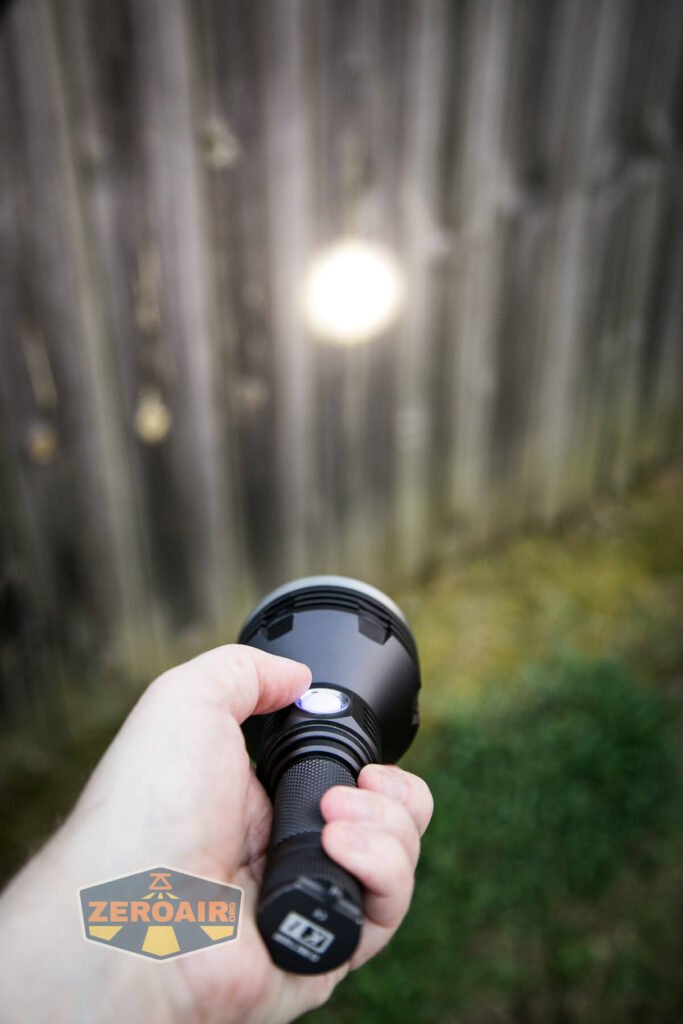
A side e-switch is used in the Noctigon K1 21700 flashlight. This switch (unlike on the K9.3) is multi-colored and offers some information about cell voltage and the like.

The switch is proud, but the action is low.


The user interface here is ToyKeeper’s Anduril, which at this point is very well covered. I’ve reviewed other lights with it, too. Here’s ToyKeeper’s user interface graphic:

Here’s a user interface table anyway!
| State | Action | Result |
|---|---|---|
| Off | Hold | On (Low) |
| Off | Click | On (Mode Memory) |
| Off | Click 2x | Highest Hybrid Mode |
| Off | Click 3x | Blinkie Mode Group |
| Off | Click 4x | Lockout |
| Off | Click 5x | Momentary |
| Off | Click 6x | Muggle |
| Off | Click, Click, Hold | Strobe Group (Mode Memory Strobe) |
| On | Click, Click, Hold | Switch between Channels (Main Channel and Secondary Channel) |
| Strobe Group | Click 2x | Strobe Cycle (Candle > Bike Flasher > Party Strobe > Tactical Strobe > Lightning Storm) |
| Blinkie Mode Group | Click 2x | Blinke Cycle (Sunset > Beacon > TempCheck > BattCheck) |
| On | Click 3x | Switch between Stepped and Smooth Ramp |
| On | Click 4x | Ramp Configuration |
| TempCheck | Click 4x | Thermal Configuration |
| Beacon | Click 4x | Beacon Configuration |
| Lockout | Click 4x | Off |
| Strobe Group | Click | Off |
| (Basically) On | Click | Off |
| Candle | Click 3x | 30-minute timer to off |
| Strobe Group | Hold | Heighten selected mode (Make faster or brighter) |
| Strobe Group | Click, Hold | Lessen selected mode (Make slower or dimmer) |
| On | Click 2x | FET Turbo |
| Ramp Configuration | [Wait for Single flash] Click N time for level N. | Selection of the “Low” you like best by clicking 1, 2, 3, etc. where 1, 2, 3, etc are different levels of low. |
| Ramp Configuration | [Wait for Second flash] Click N time for 1+Turbo-N. | Selection of the “Ceiling” you like best by clicking 1, 2, 3, etc. where 1, 2, 3, etc are different Ceiling levels. |
| Ramp Configuration | [Wait for Third flash] Click for how many steps you want in Stepped mode. | Sets Number of Steps. |
| Thermal Configuration | [Wait for First flash] Click for N times for N degrees C. | Displays Current Temperature. |
| Thermal Configuration | [Wait for Second flash] Click for N times for 30C + N. | Sets Temperature Limit. |
| Beacon Configuration | [Wait for First flash] Click for N times N seconds per flash | Sets Beacon Speed. |
If you want to see how to calibrate the thermals, see this part of the FW1A review.
I checked this as Version 20191217 of Anduril.
LED and Beam
By special request to intl-outdoor.com this user got an Osram Flat White Osram KW CSLNM1.TG (1mm2) emitter in the K1.

That’s an option you might or might not like – it might be a little cooler than you wanted (see below), but it will provide the best throw out of those options listed.

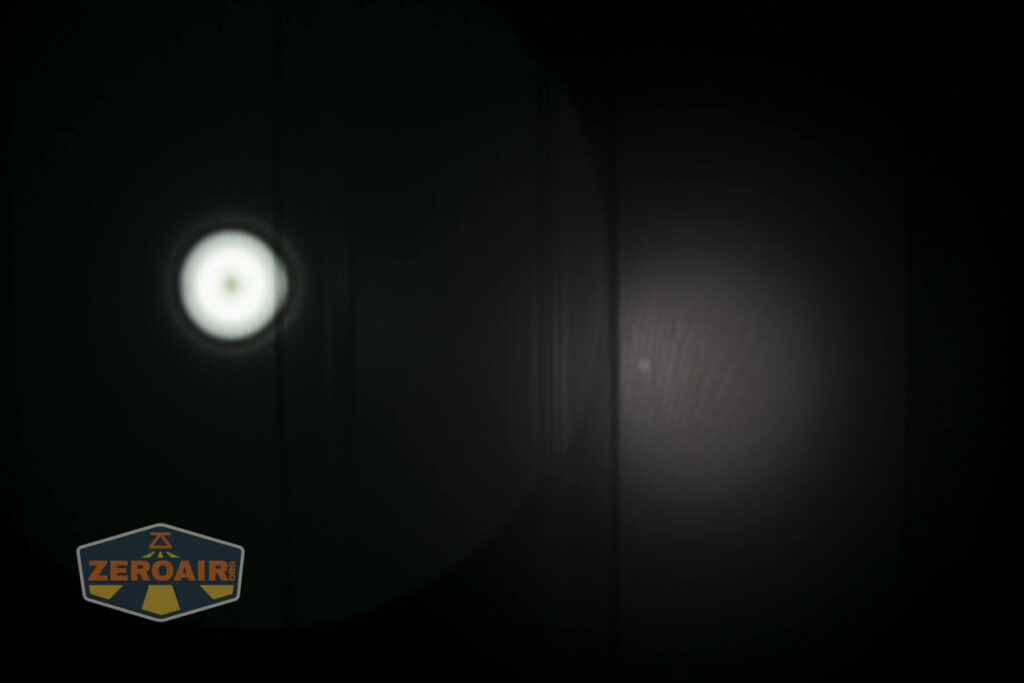
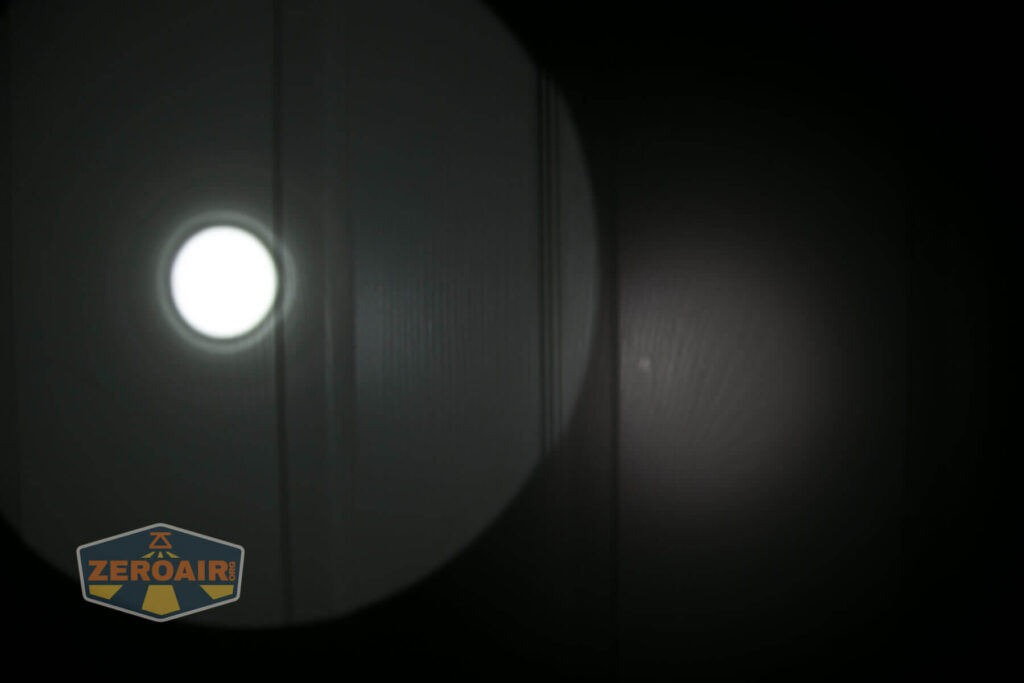
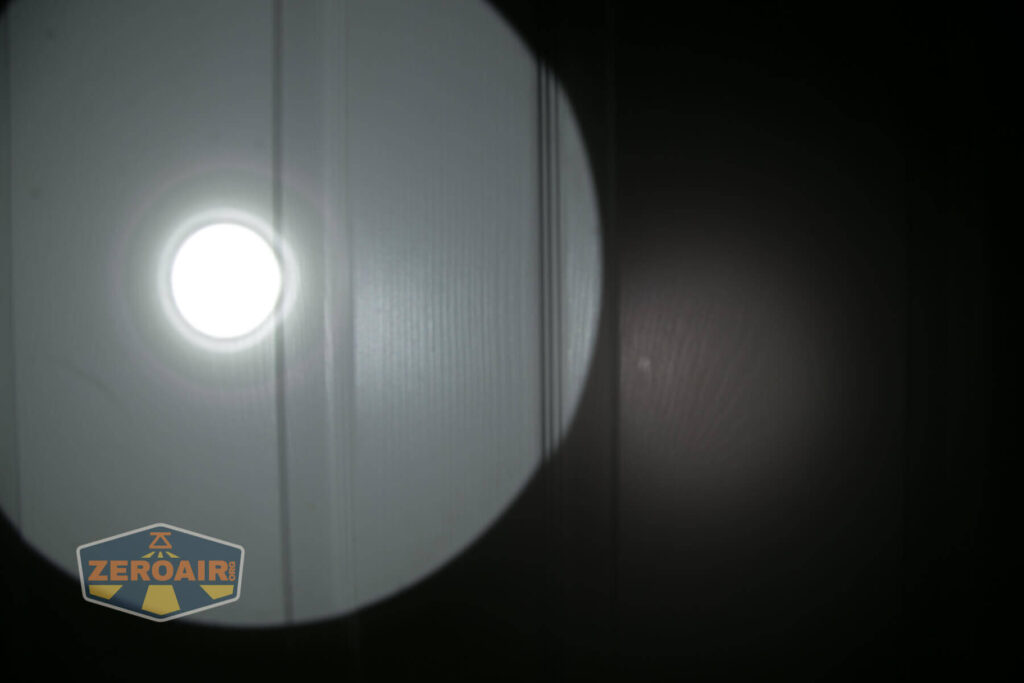
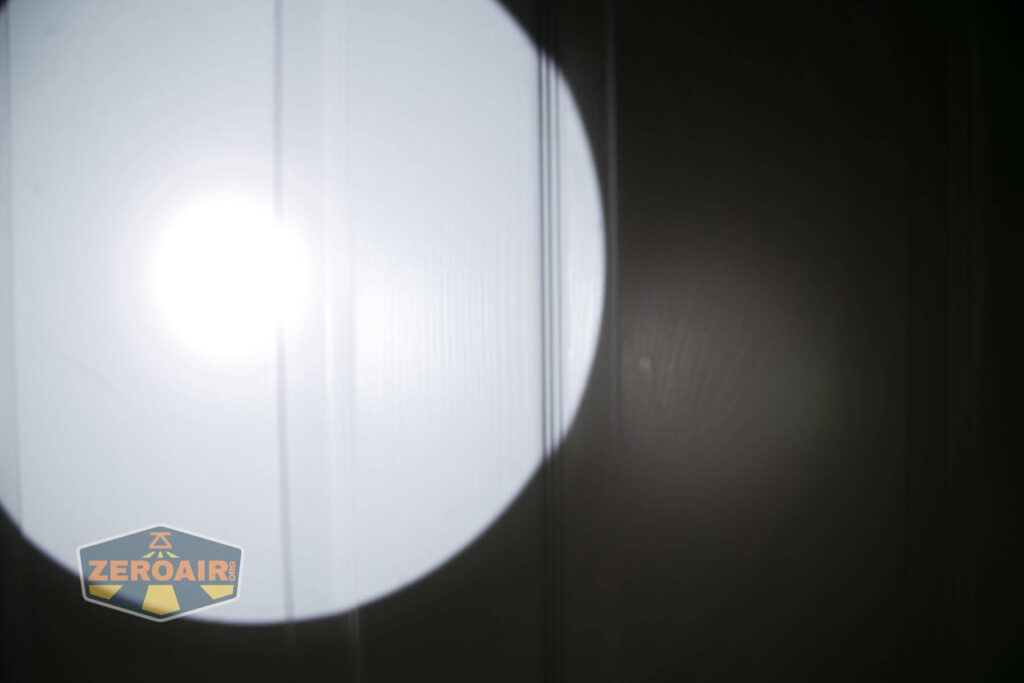
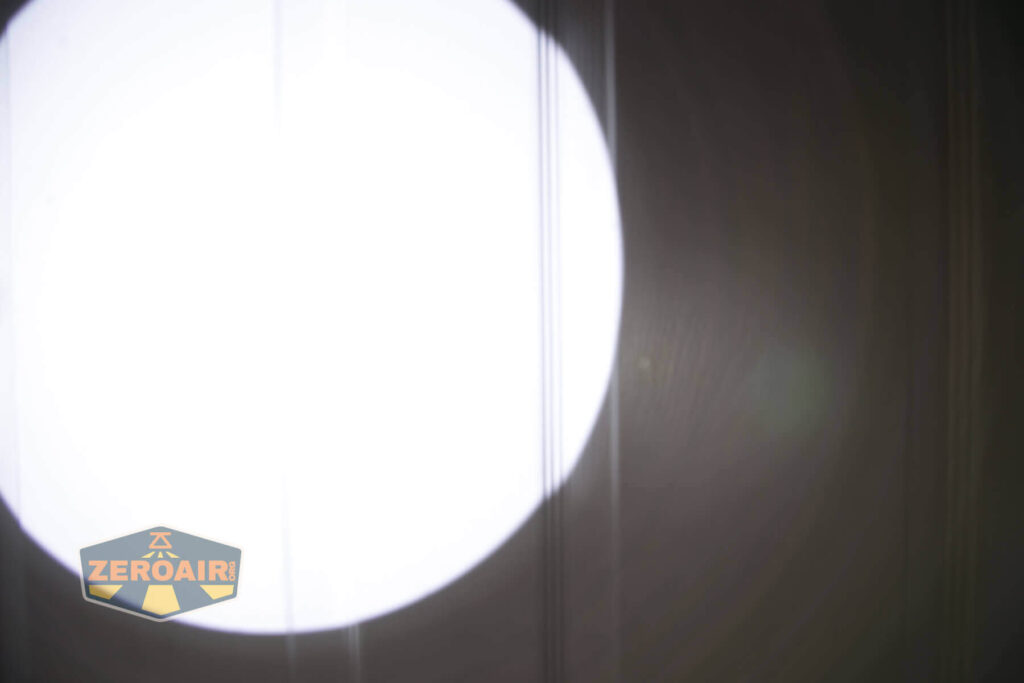
As a single emitter flashlight, this light gets fitted with a smooth deep reflector. Perfect for throw!

And wow does it throw.

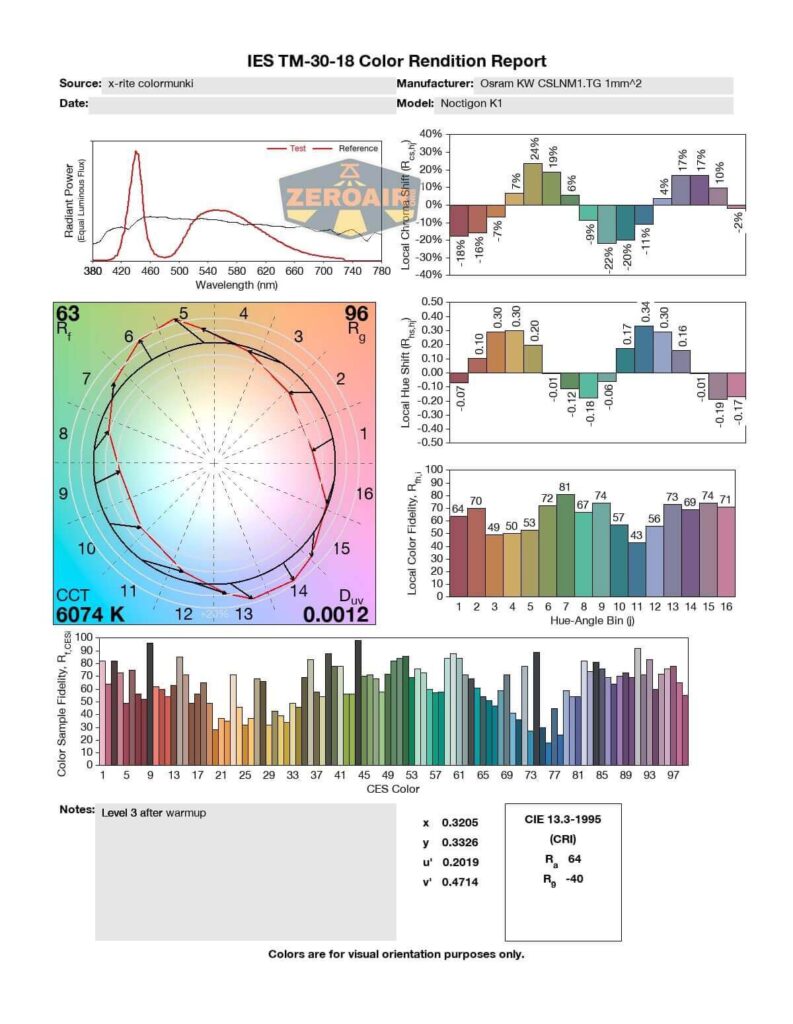
LED Color Report (CRI and CCT)
As the current to the emitter goes up, the CCT goes up (dramatically) too. I was unable to test the higher modes because the extreme throwyness of this light saturates my tester.


Beamshots
These beamshots always have the following settings: f8, ISO100, 0.3s shutter, and manual 5000K exposure. These photos are taken at floor level, and the beam hits the ceiling around 9 feet away.
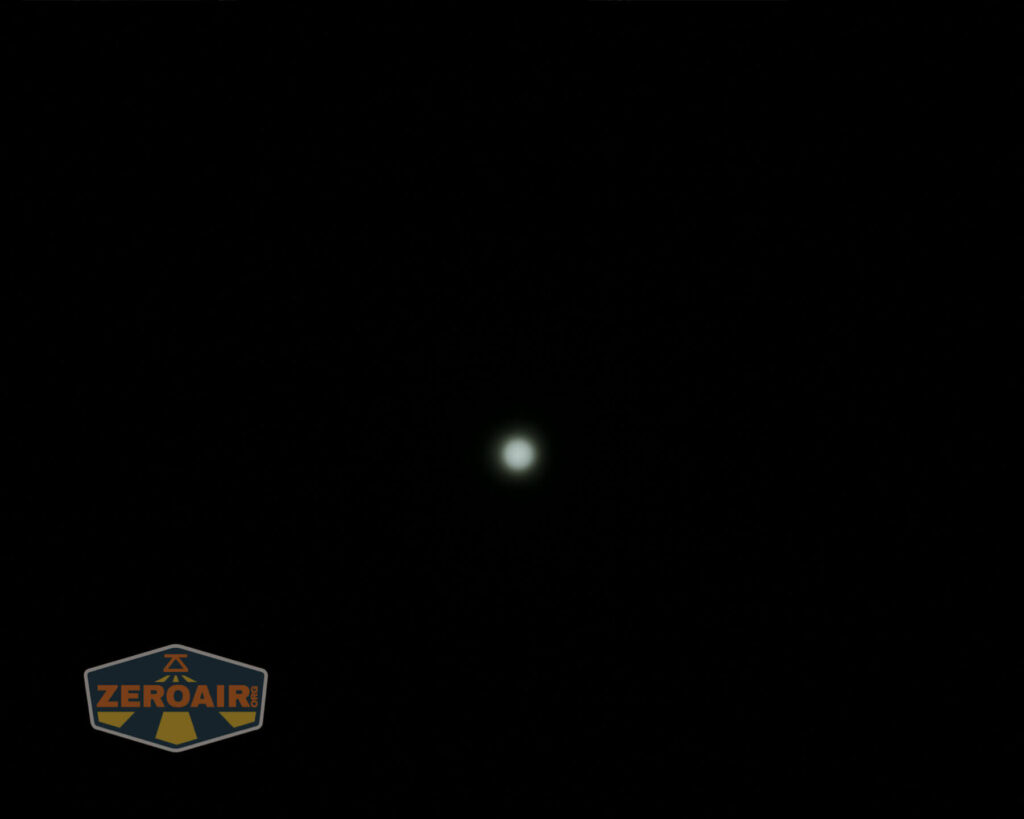


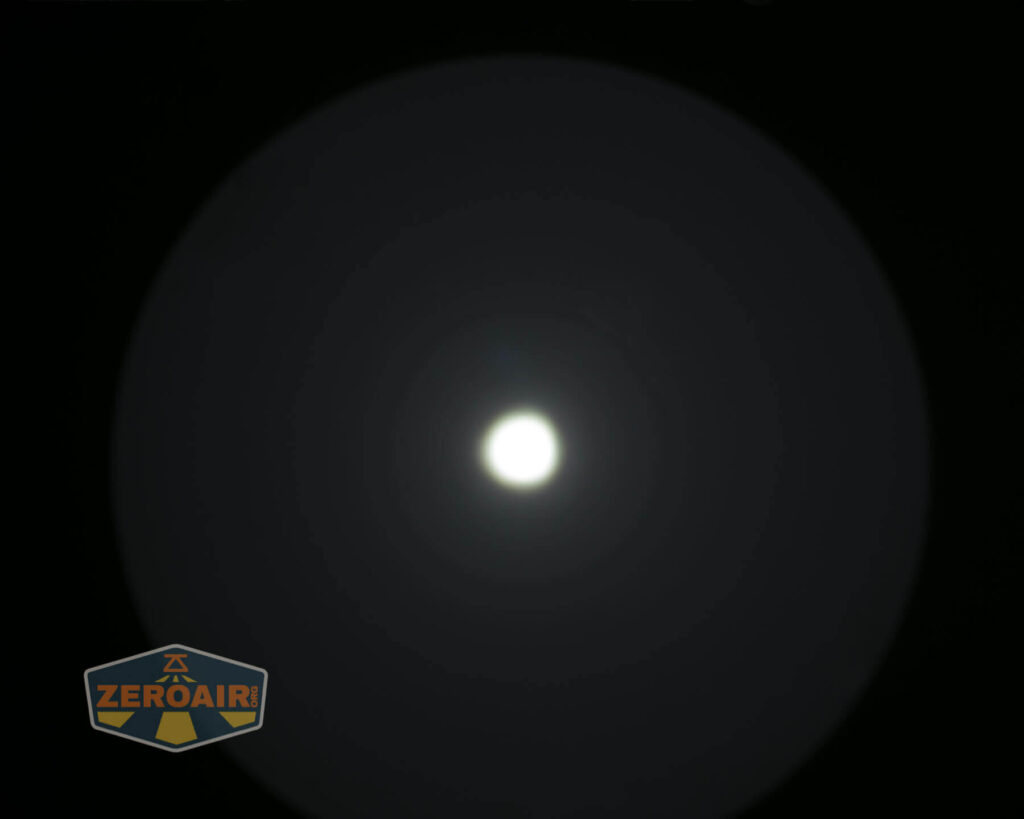
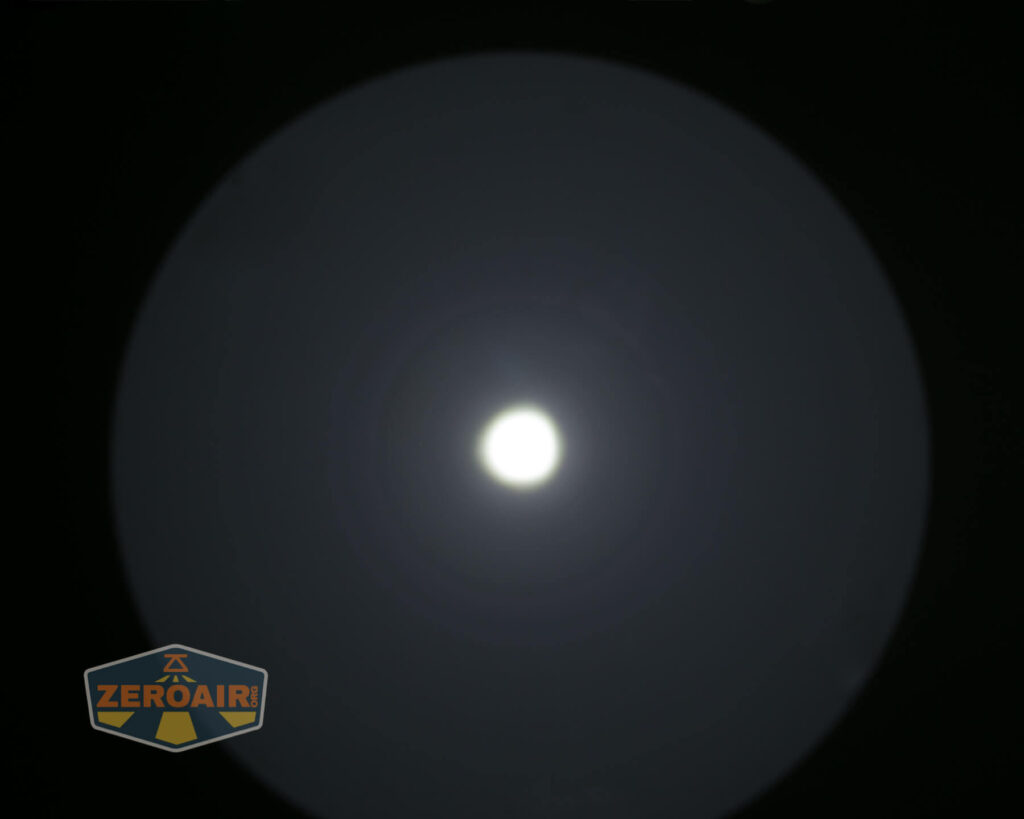
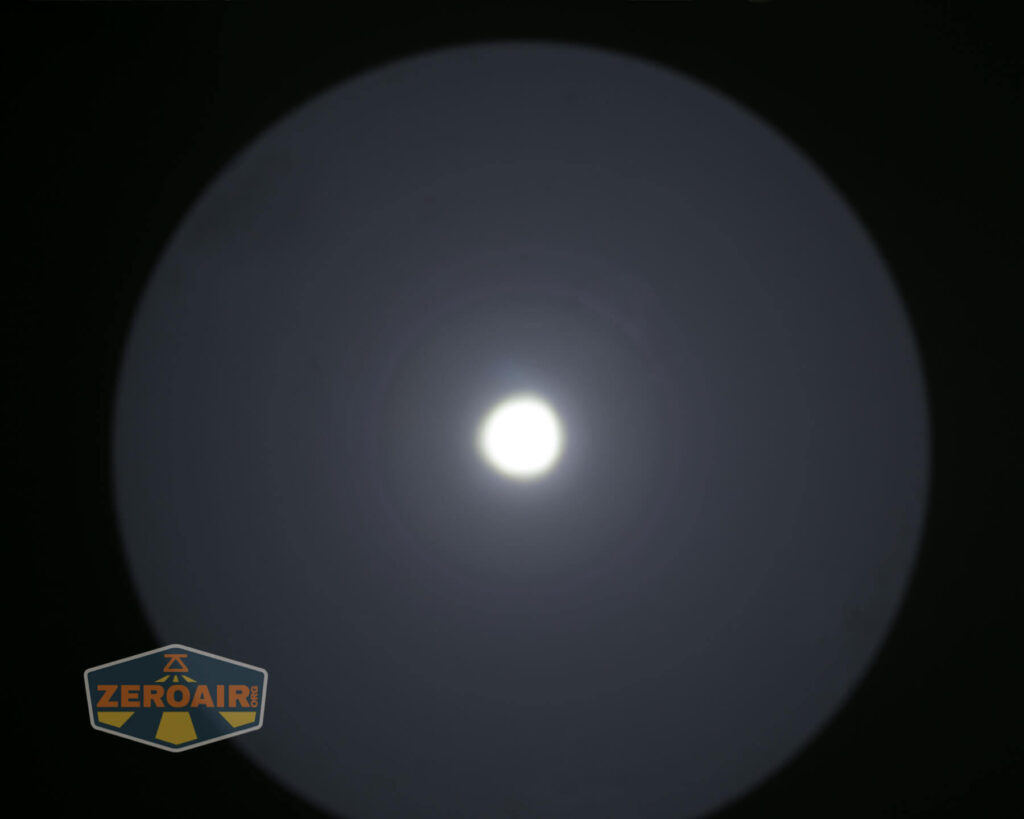
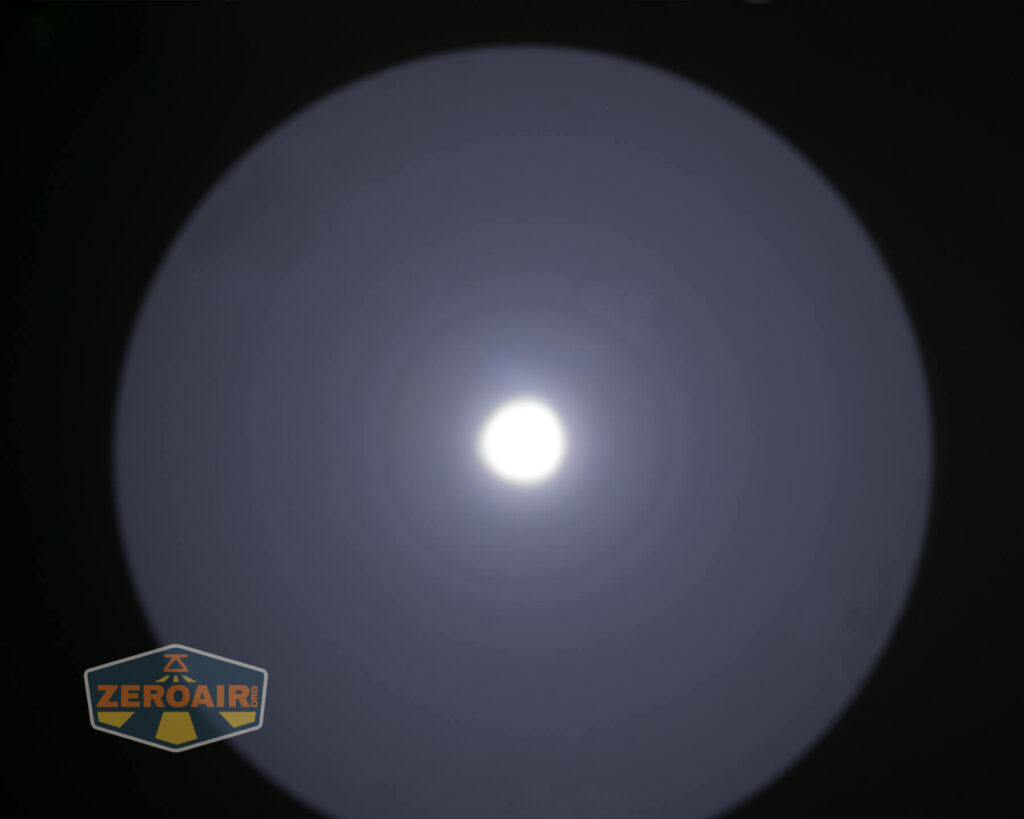
Tint vs BLF-348 (KillzoneFlashlights.com 219b version) (affiliate link)
I keep the test flashlight on the left and the BLF-348 reference flashlight on the right.


I compare everything to the KillzoneFlashlights.com 219b BLF-348 because it’s inexpensive and has the best tint!
Conclusion
What I like
- Great build quality
- The beacons are lit
- Plenty of emitter options
- USB-C charging works well (and quickly)
- Andúril user interface
- I love that a 4000K XHP35 HI is available. Such a great emitter if you prioritize CCT over just extreme throw.
What I don’t like
- No belt clip
Notes
- This light was provided by barry_baltimore for review. I was not paid to write this review.
- This content originally appeared at zeroair.org. Please visit there for the best experience!
- For flashlight-related patches, stickers, and gear, head over to PhotonPhreaks.com!
- Please use my Amazon.com referral link to help support zeroair.org!
- Please support me on Patreon! I deeply appreciate your support!