Acebeam L19 V2.0 Flashlight Review
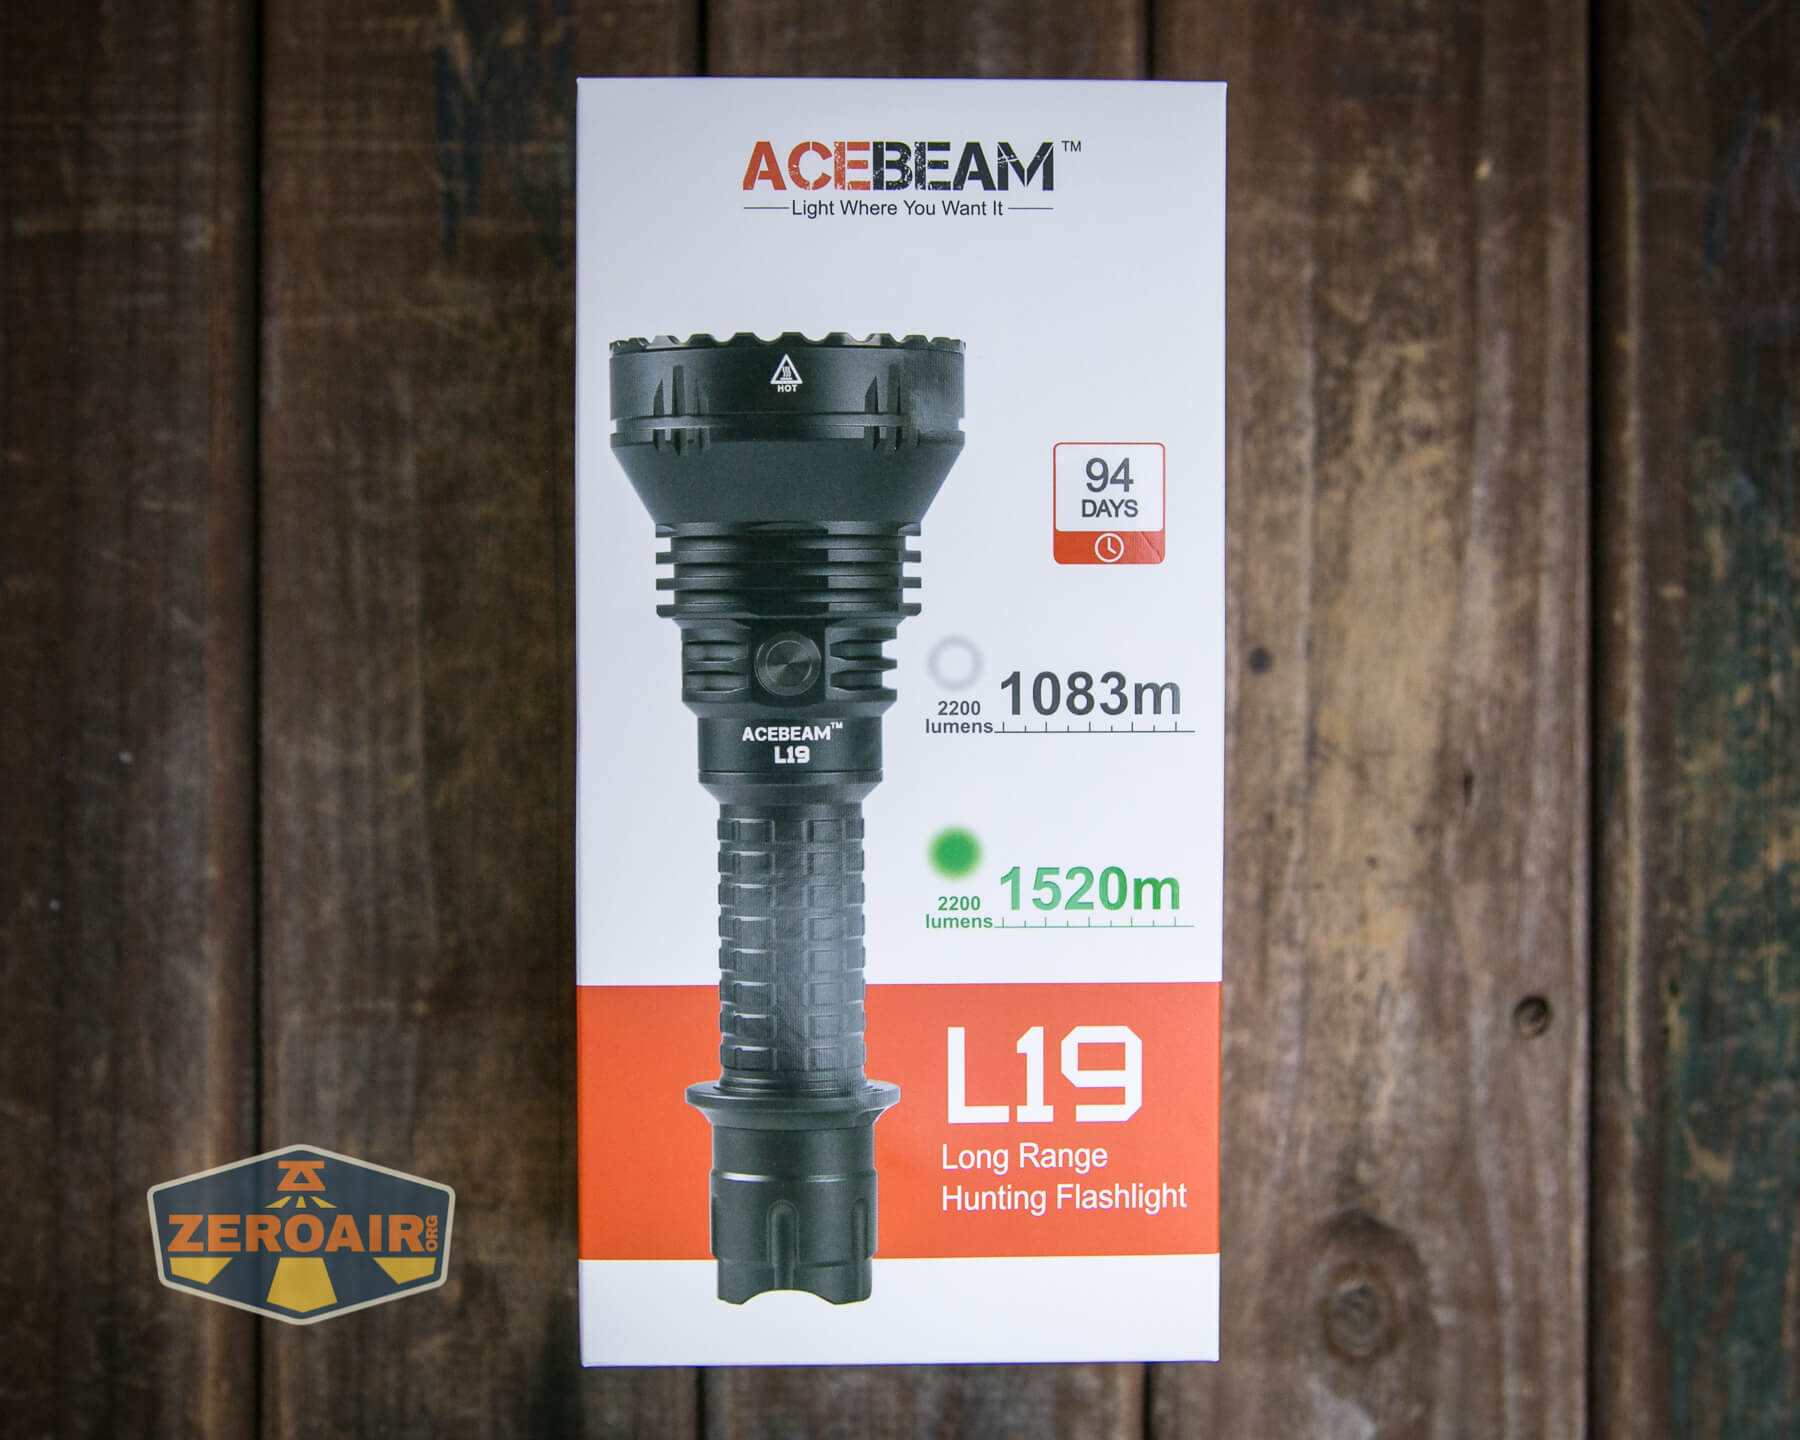
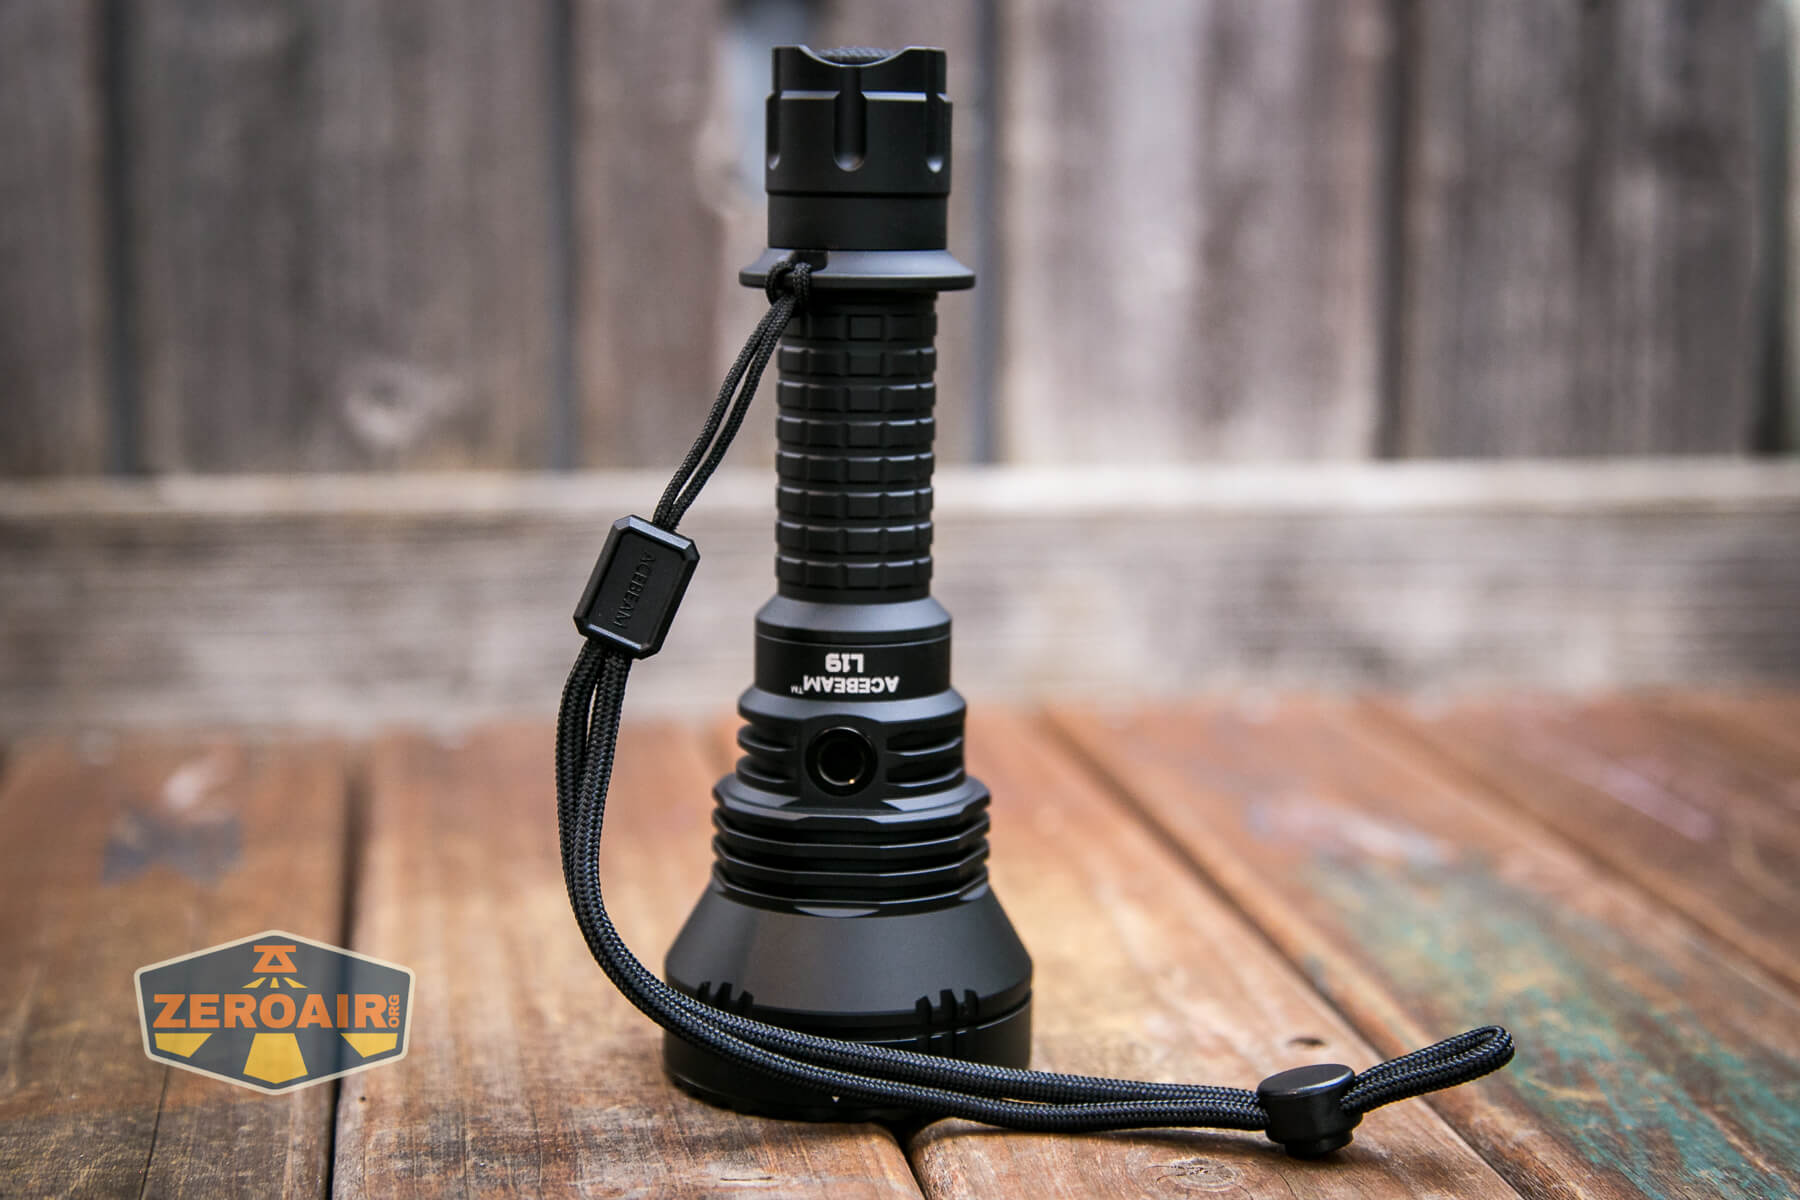
The Acebeam L19 V2.0 flashlight is out, and it’s an update! This one has a Luminus SFT-40 and uses a single 21700 (included). Read on for testing!
Official Specs and Features
Here’s a referral link to the Acebeam L19 V2.0 flashlight product page at killzoneflashlights.com.
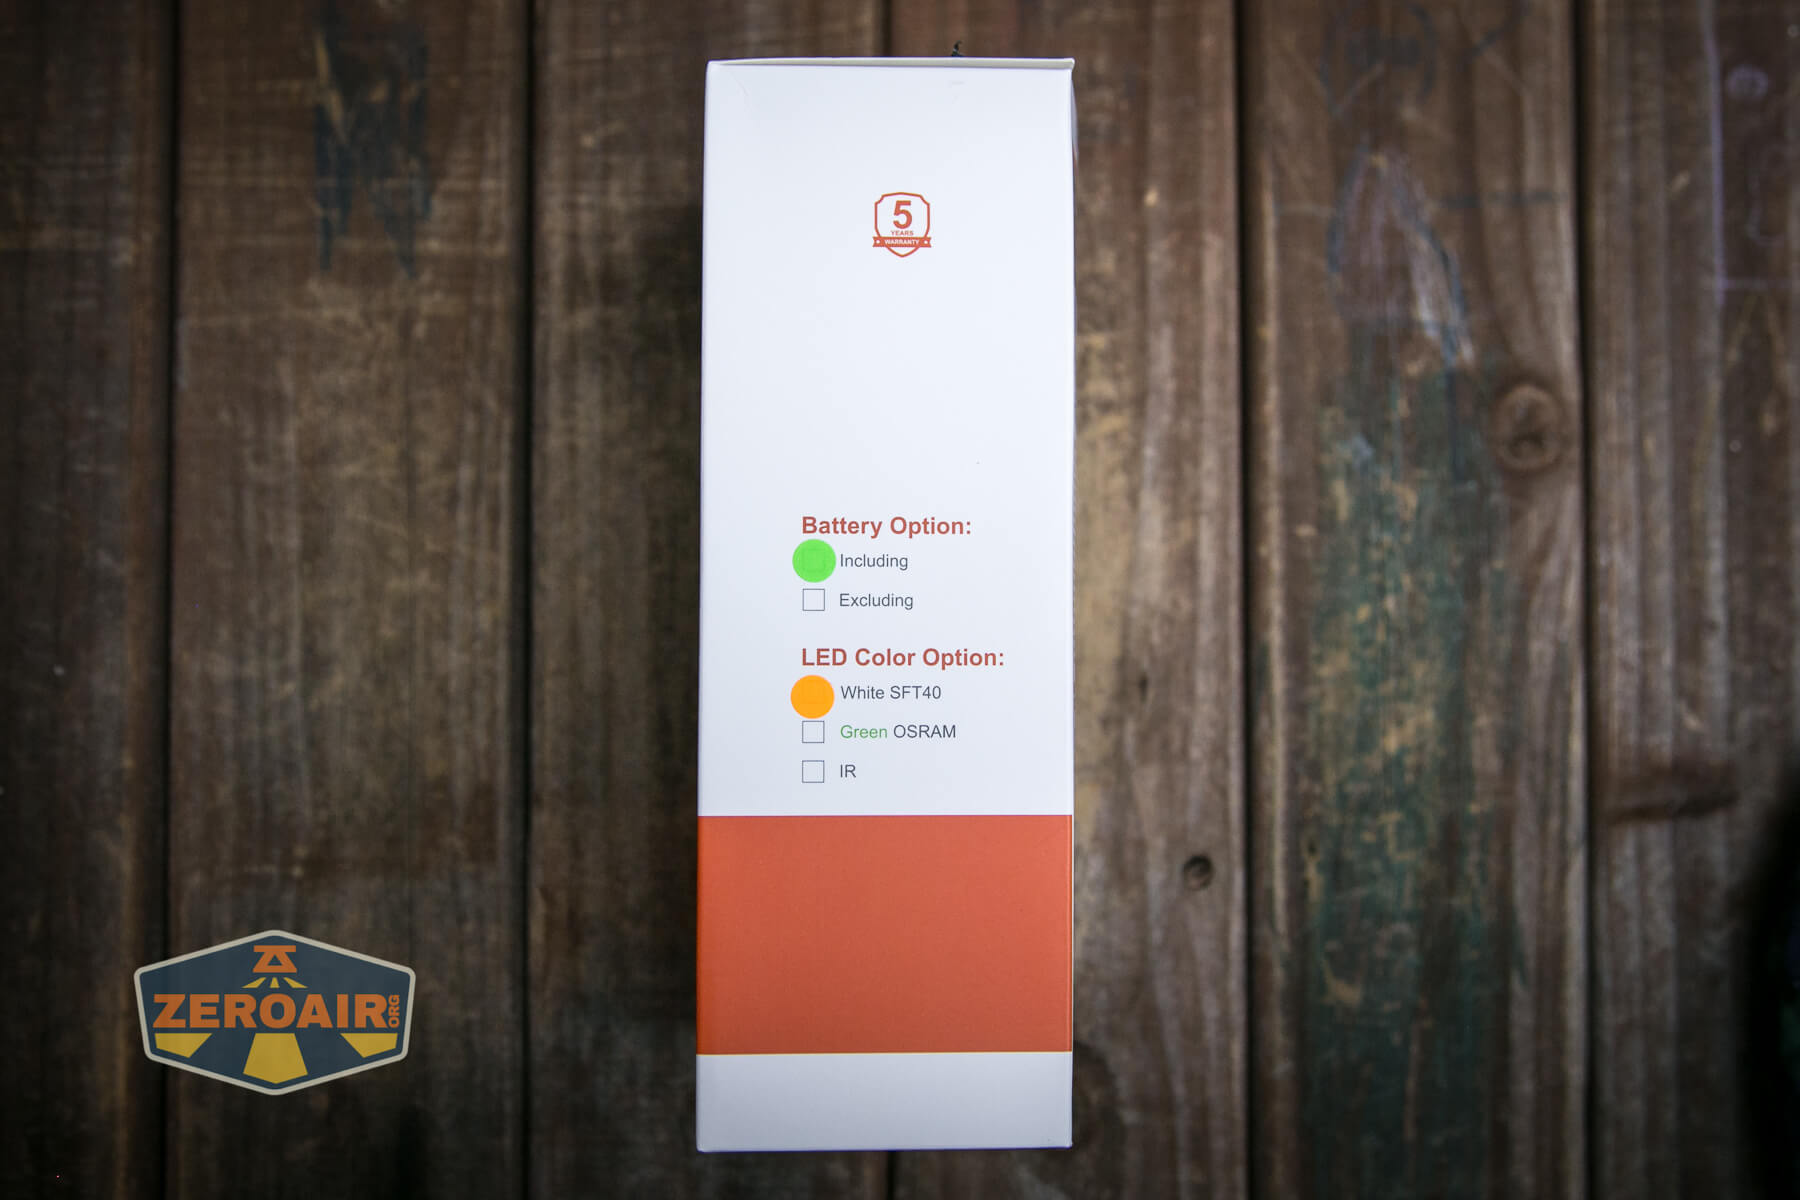
Versions
This is obviously version 2 of the L19. It offers a few updates, including (mainly) this Luminus SFT-40 emitter. There are some cosmetic changes, too.
Price
Short Review
I’m a big Acebeam fan. This thrower meets the expectations of a thrower and has a very nice dual-switch interface.
Long Review
The Big Table
| Acebeam L19 V2.0 Flashlight | |
|---|---|
| Emitter: | Luminus SFT-40 (6500K) |
| Price in USD at publication time: | $119.90 |
| Cell: | 1×21700 |
| Turbo Runtime Graph | High Runtime Graph |
| LVP? | |
| Switch Type: | Both |
| Quiescent Current (mA): | – |
| On-Board Charging? | Yes |
| Charge Port Type: | USB-C |
| Charge Graph | |
| Power off Charge Port | – |
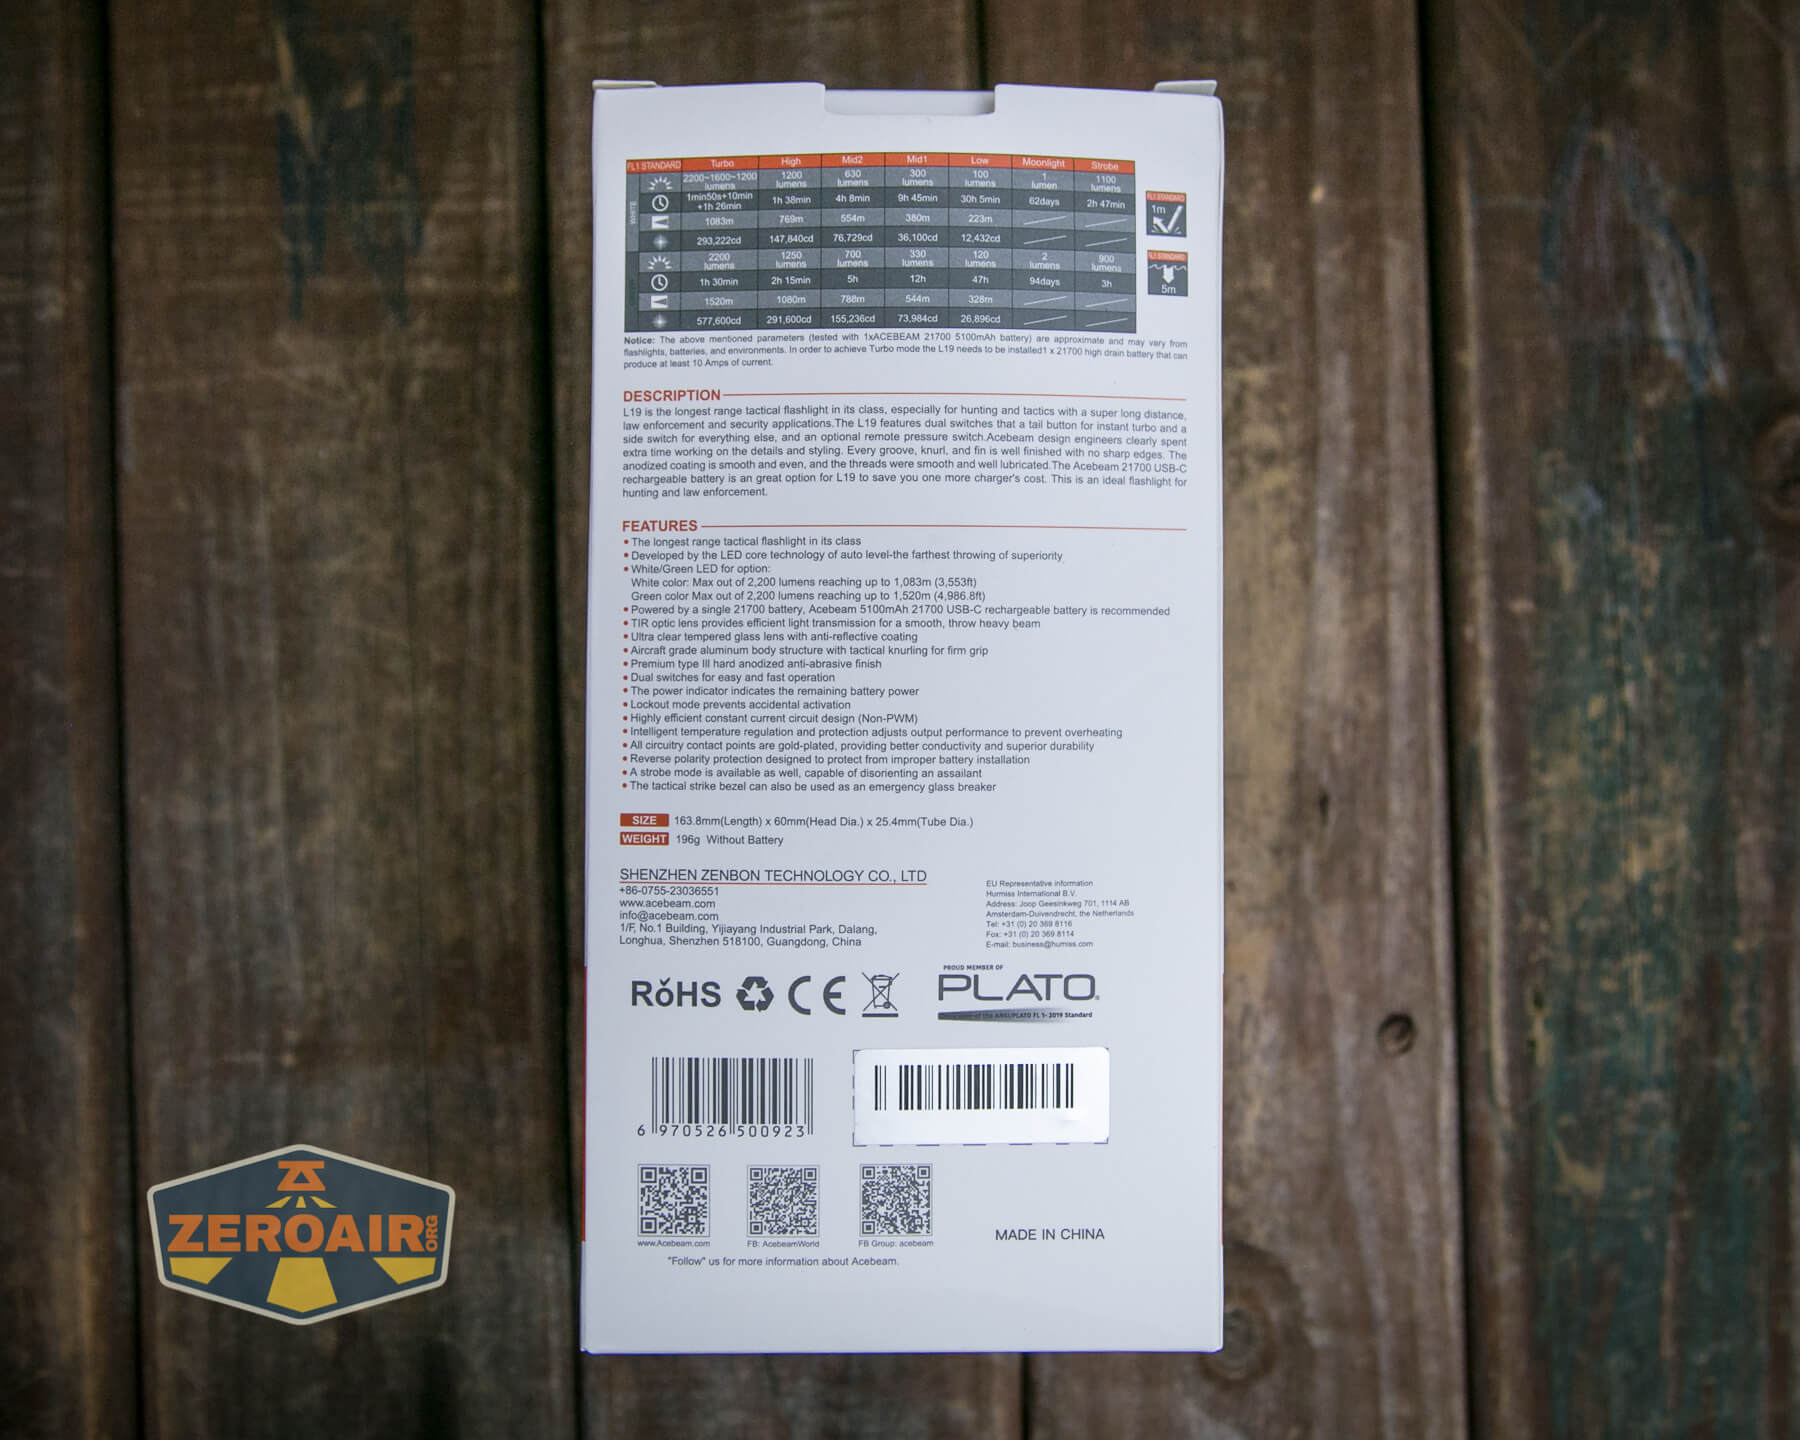
| Claimed Lumens (lm) | 2200 |
| Measured Lumens (at 30s) | 1250 (56.8% of claim)^ |
| Candela per Lumen | 216.2 |
| Claimed Throw (m) | 1083 |
| Candela (Calculated) in cd (at 30s) | 6800lux @ 6.412m = 279573cd |
| Throw (Calculated) (m) | 1057.5 (97.6% of claim)^ |
| Claimed CCT | 6500 |
| Measured CCT Range (K) | 6100-7600 Kelvin |
| Item provided for review by: | Acebeam |
| All my Acebeam reviews! | |
^ Measurement disclaimer: Testing flashlights is my hobby. I use hobbyist-level equipment for testing, including some I made myself. Try not to get buried in the details of manufacturer specifications versus measurements recorded here; A certain amount of difference (say, 10 or 15%) is perfectly reasonable.
What’s Included
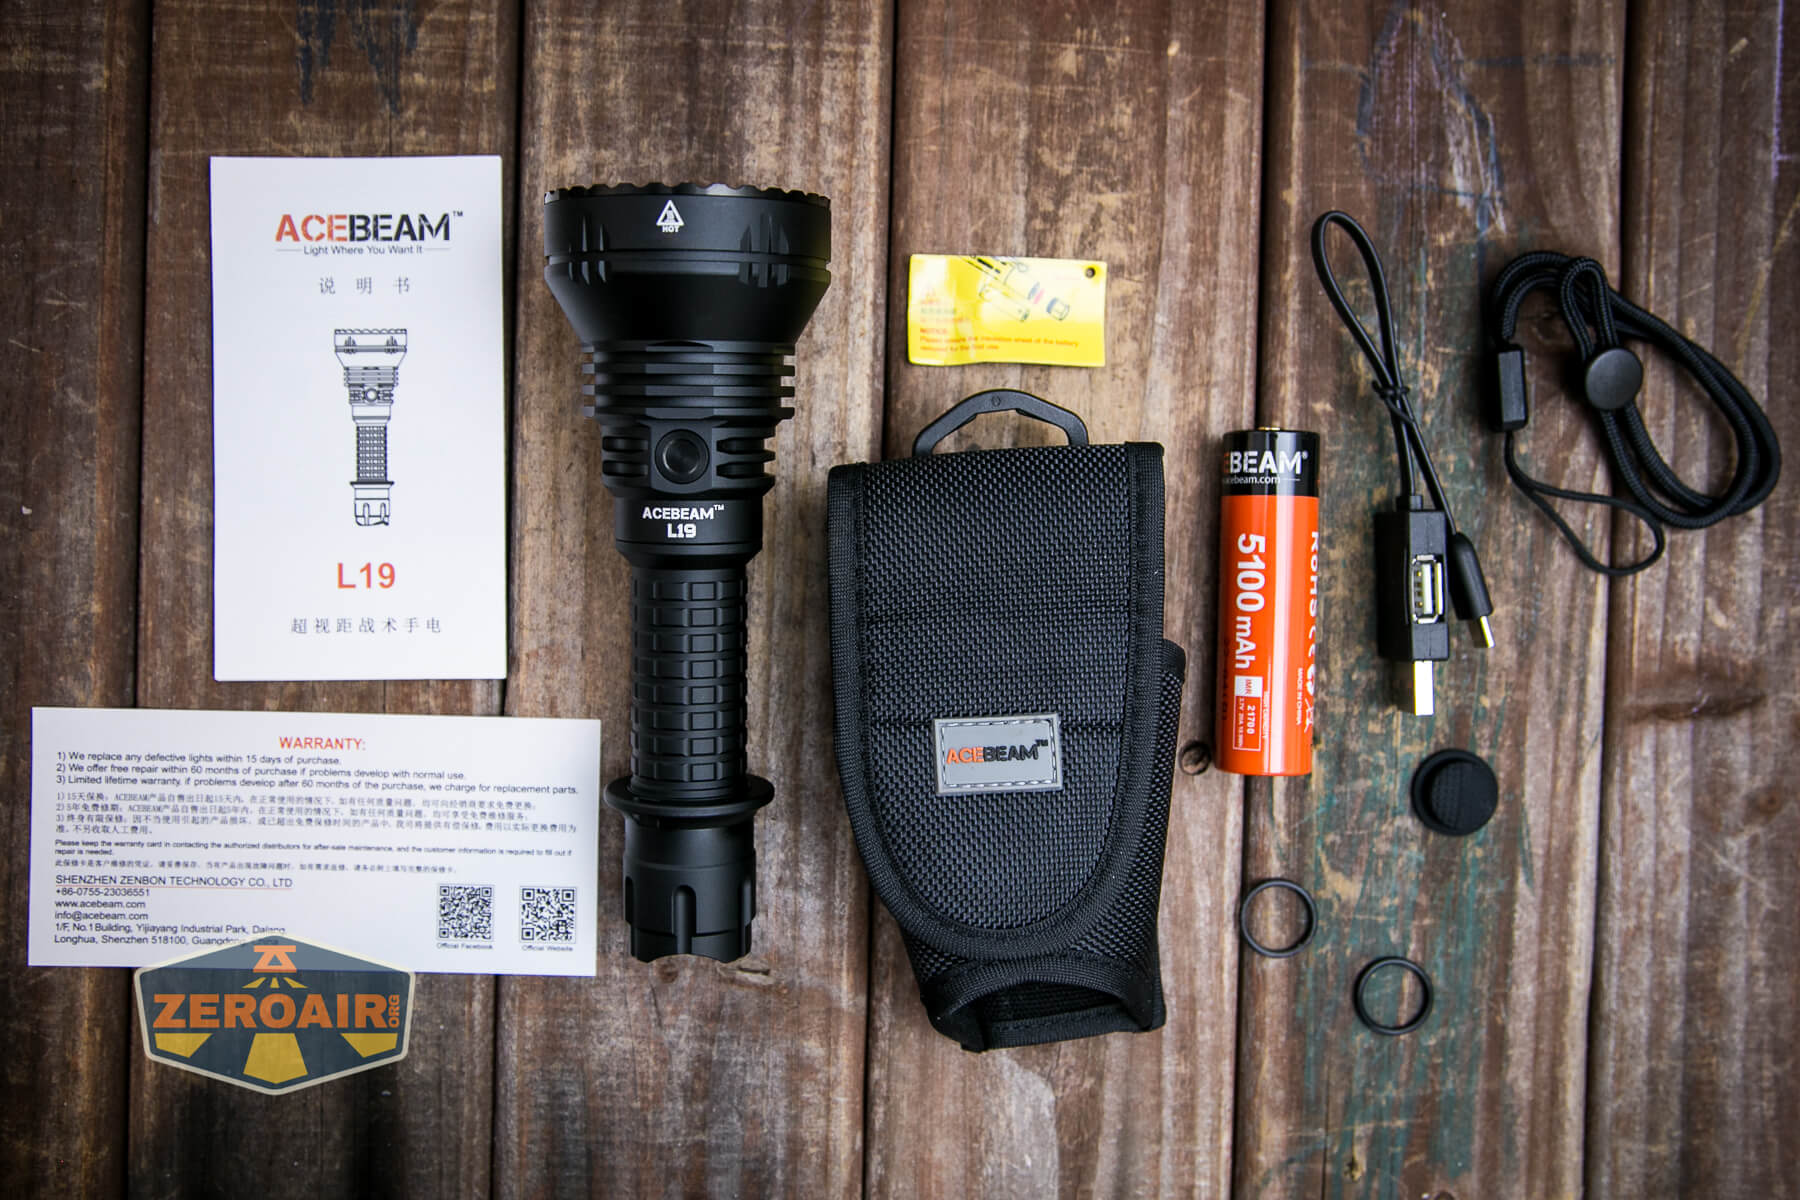
- Acebeam L19 V2.0 flashlight
- Acebeam 5100mAh 21700
- Spare o-rings (2)
- Spare switch cover
- Charge Cable (USB to USB-C)
- Nylon pouch
- Lanyard
- Manual and papers
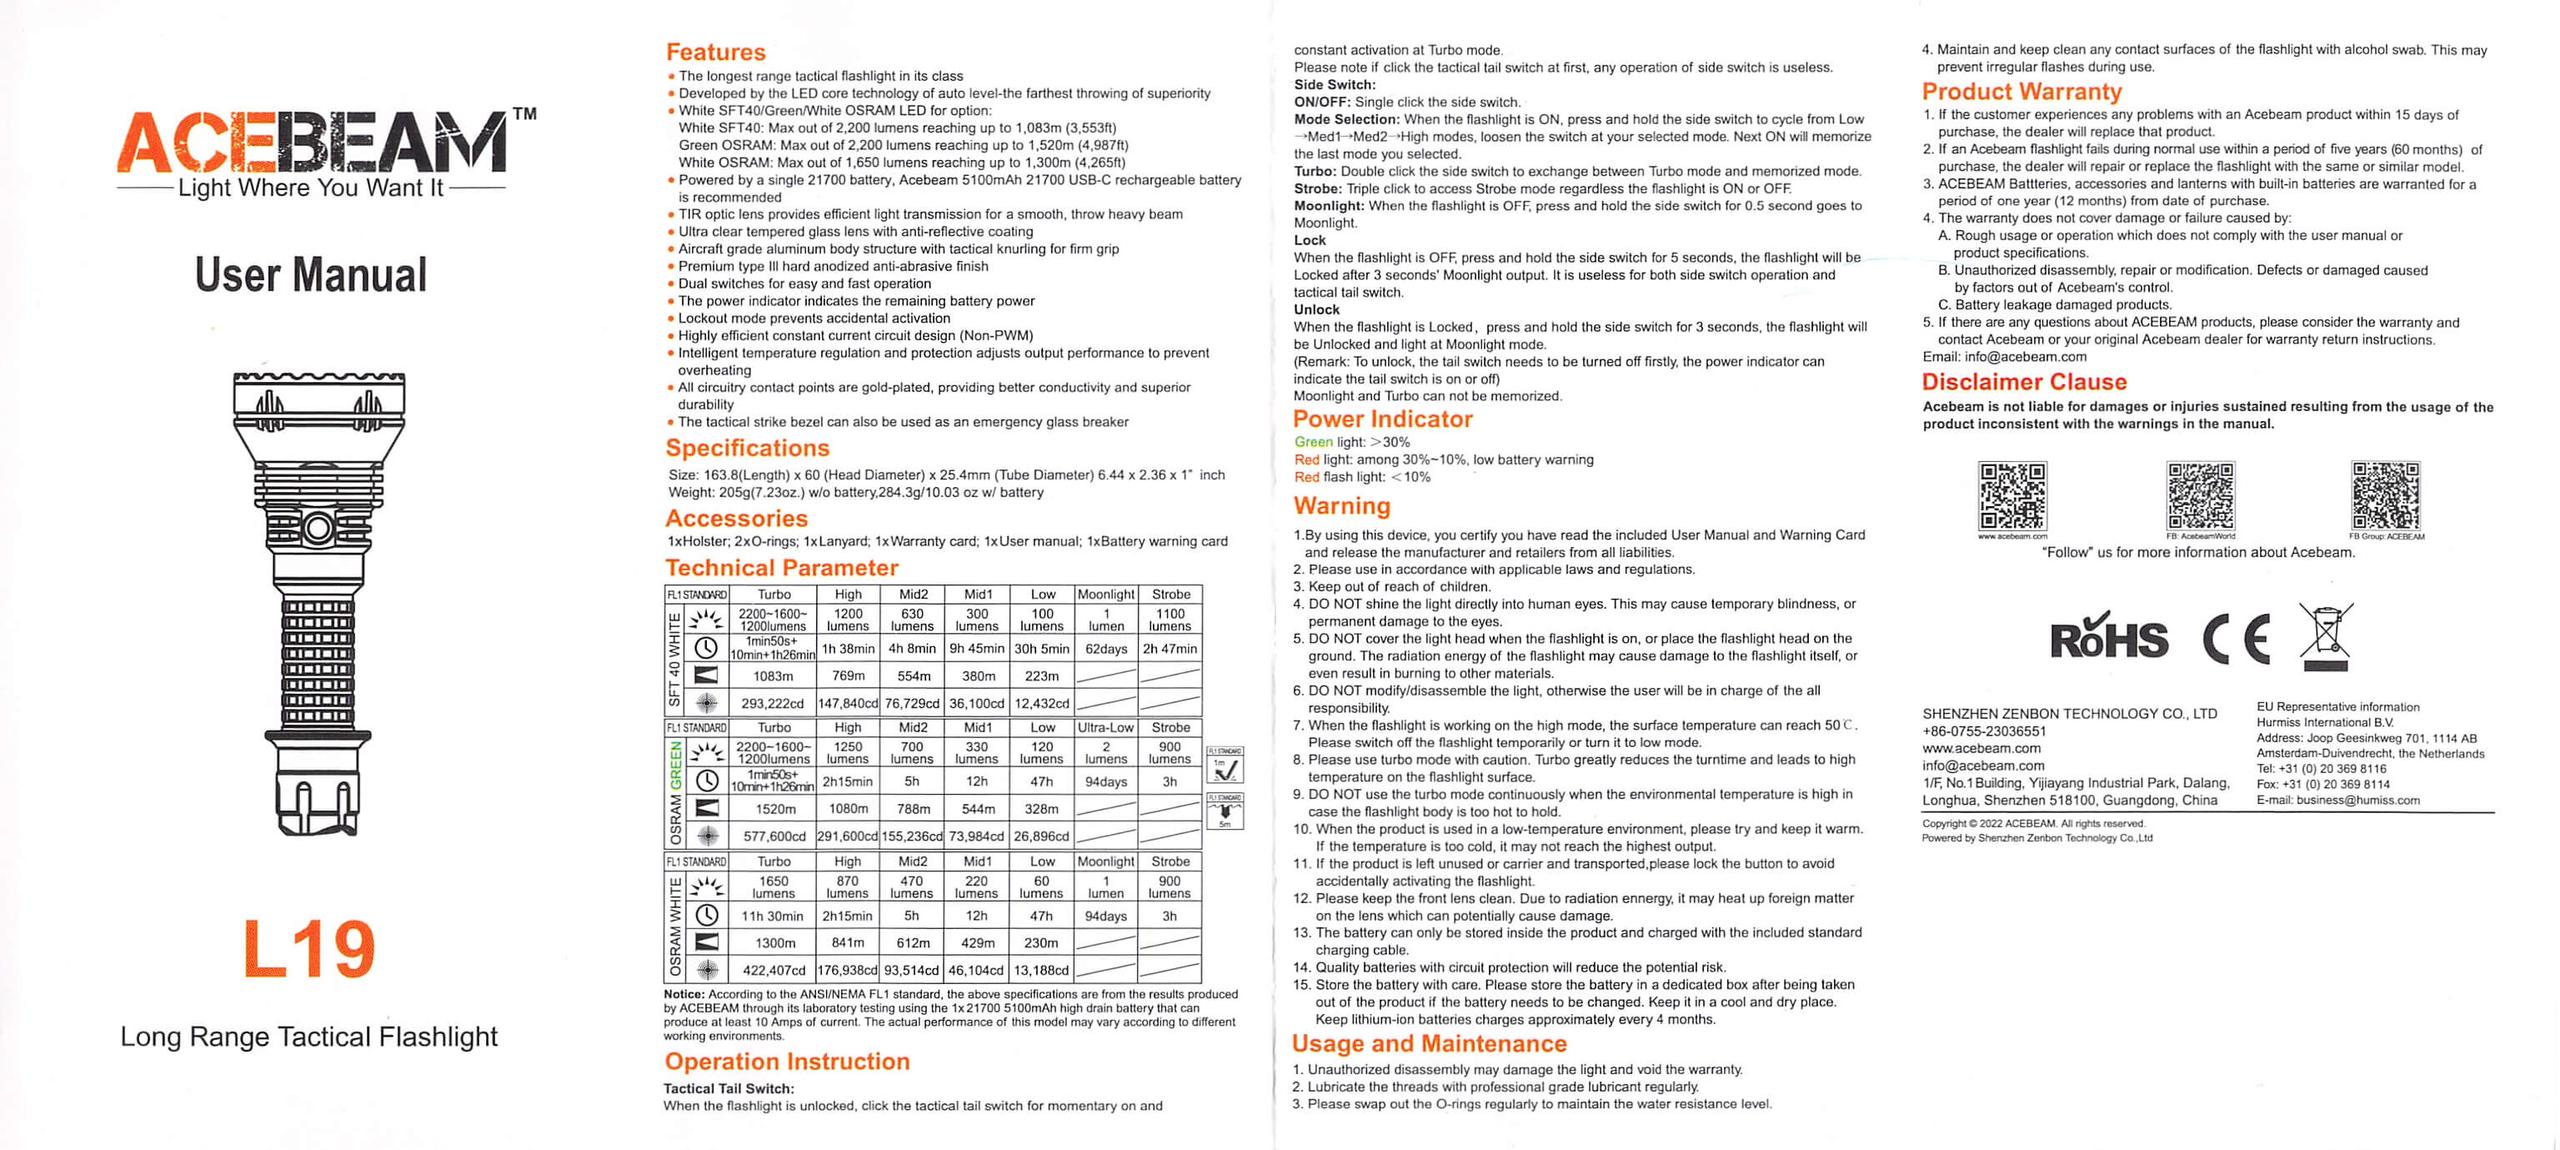
Package and Manual
Build Quality and Disassembly

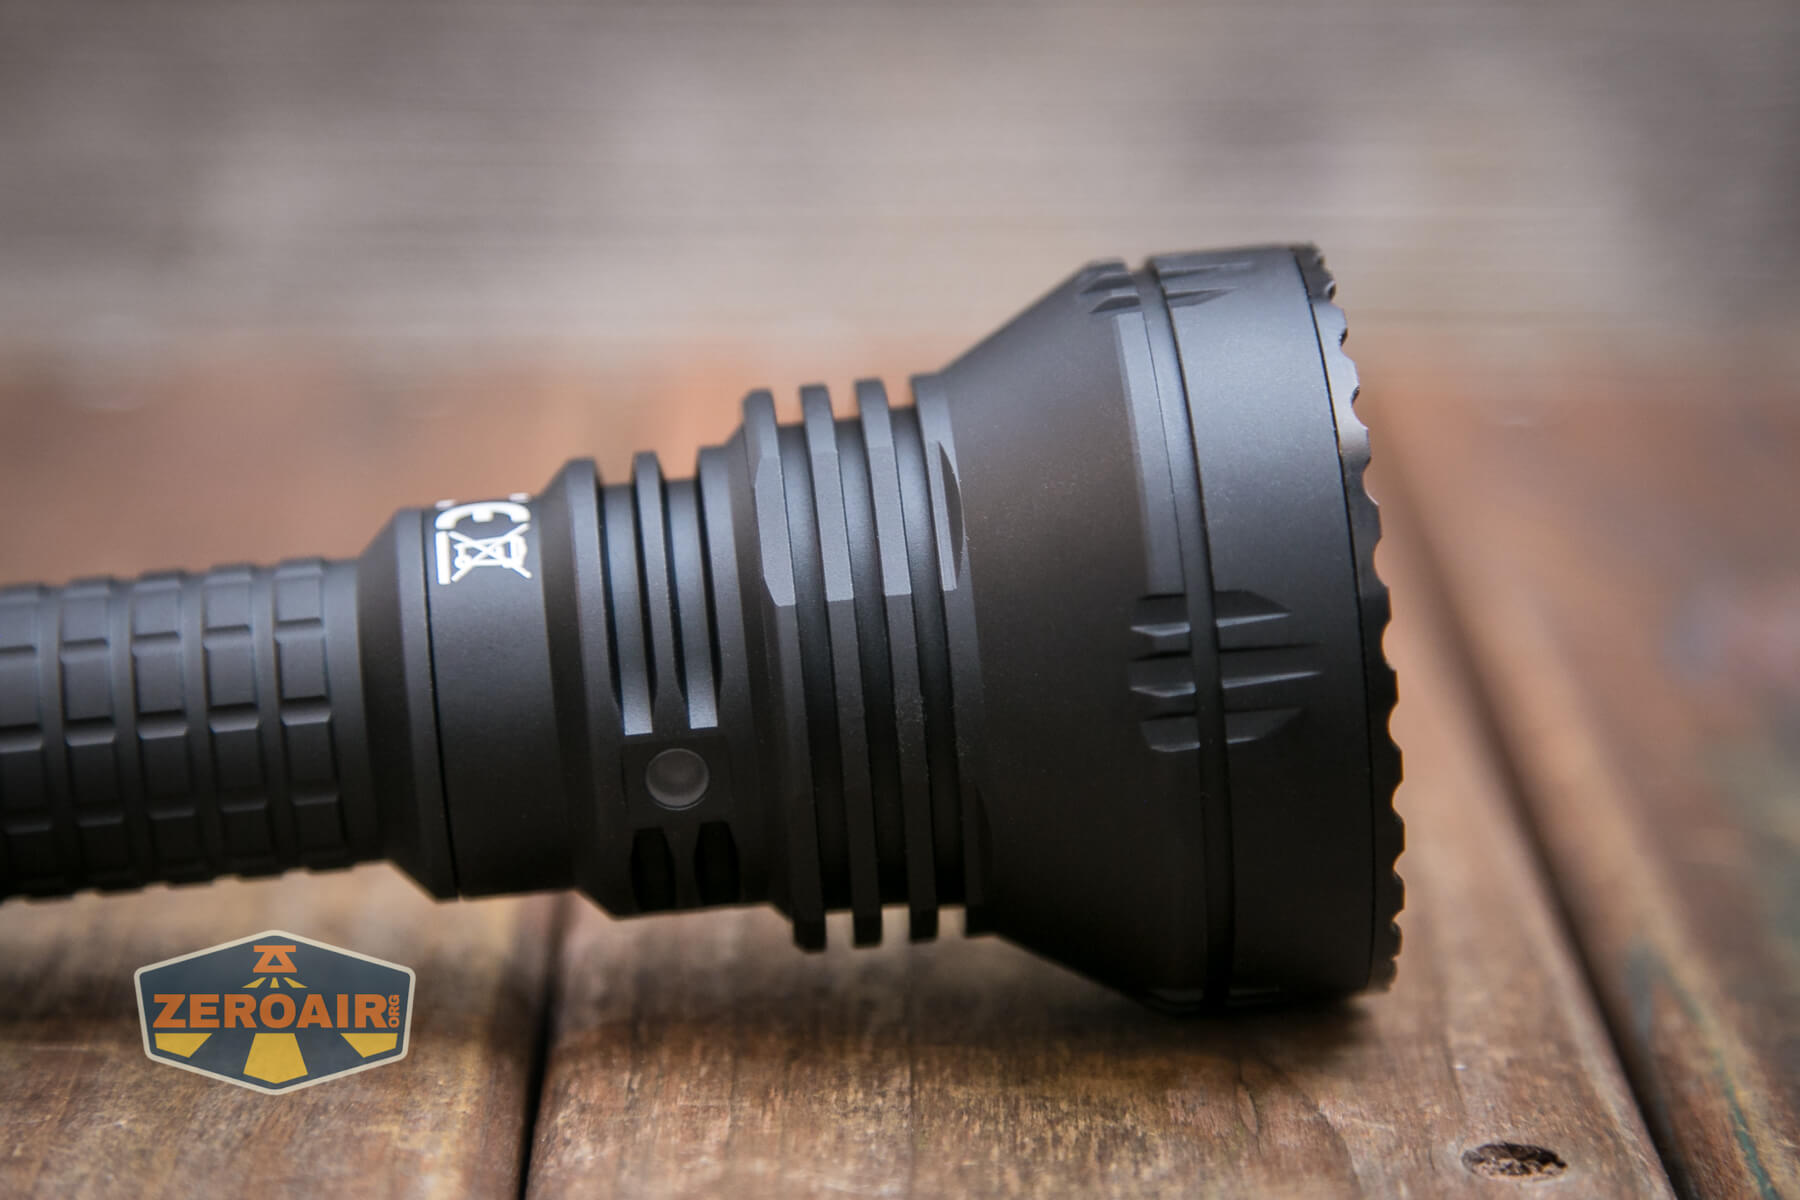
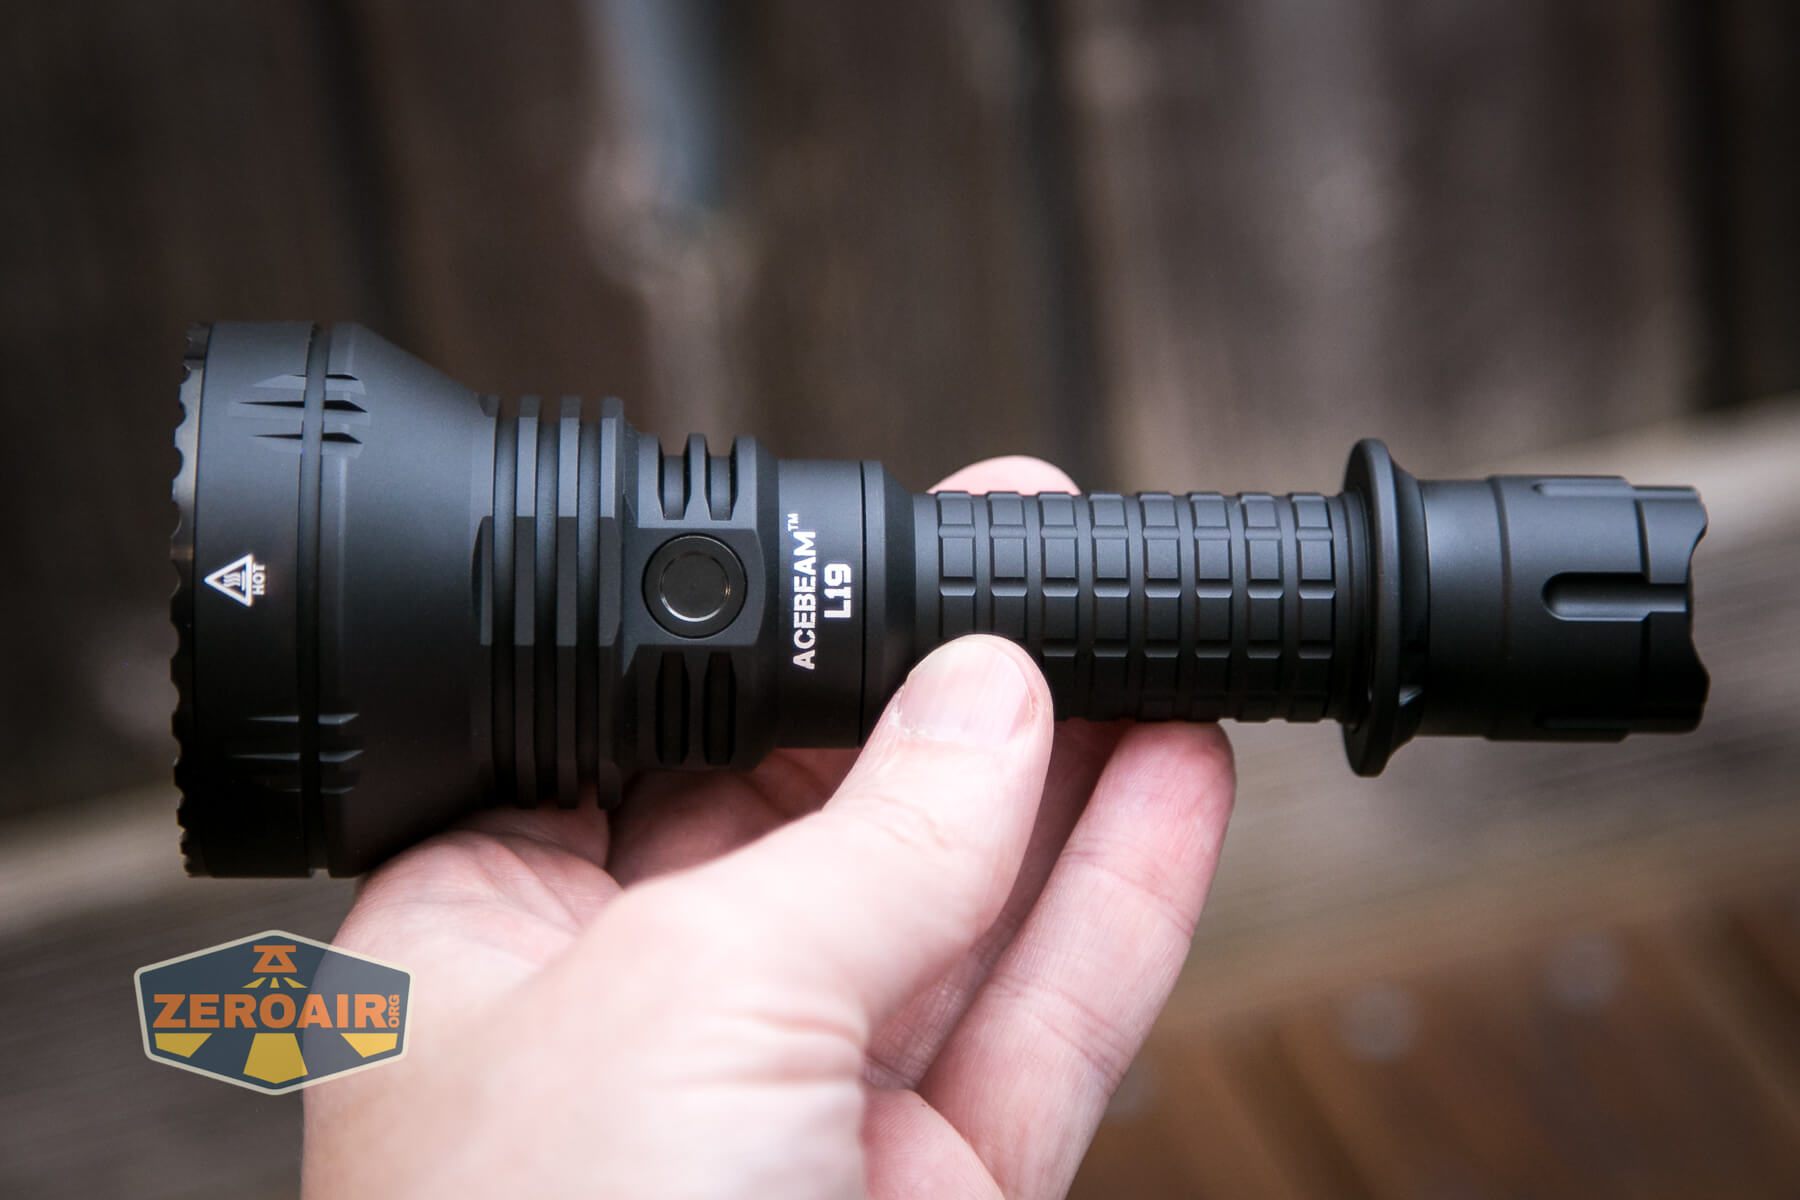
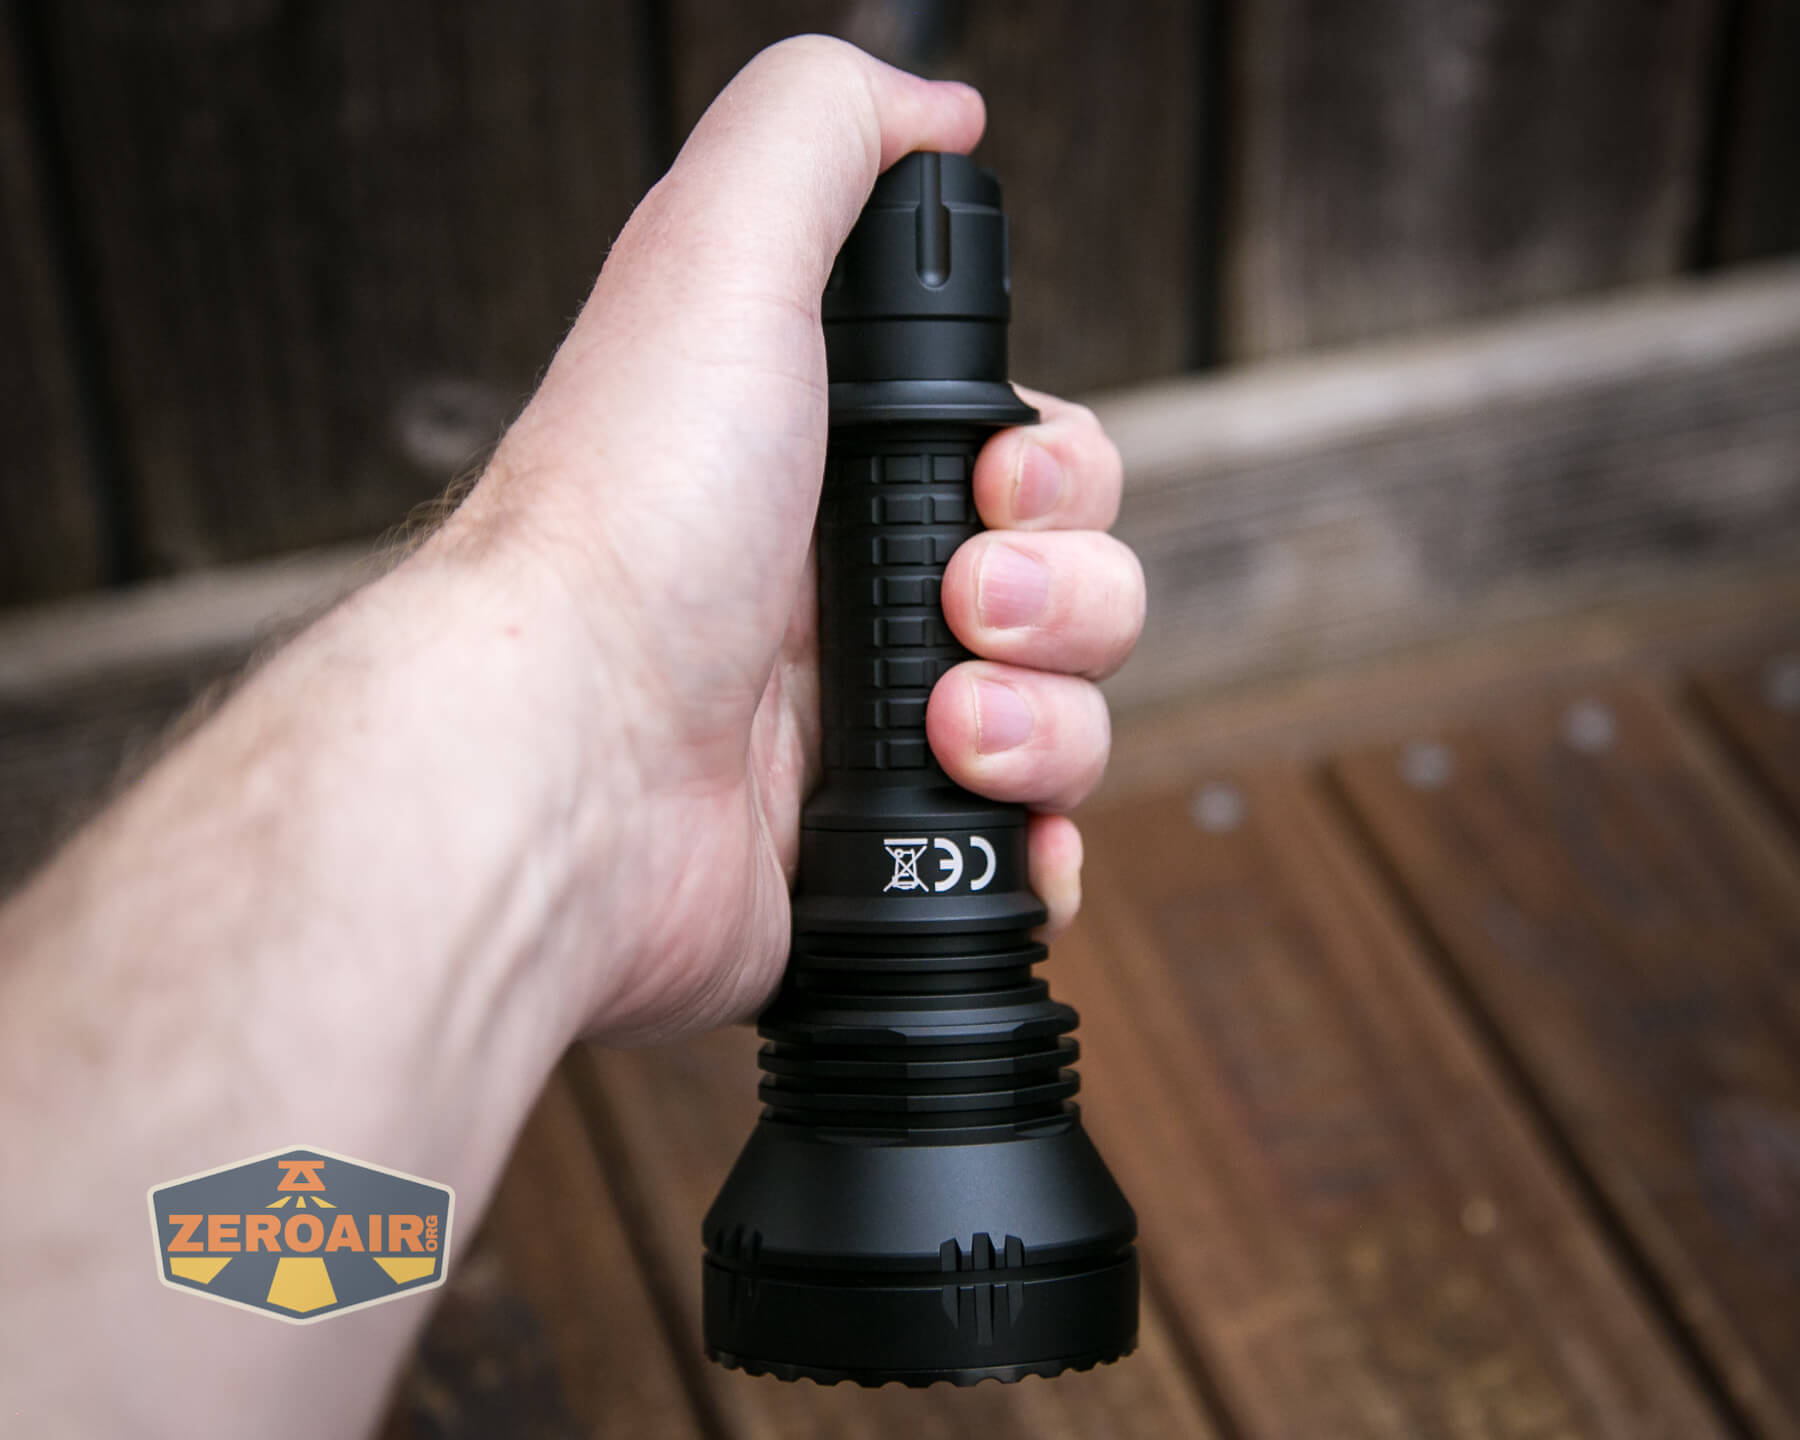
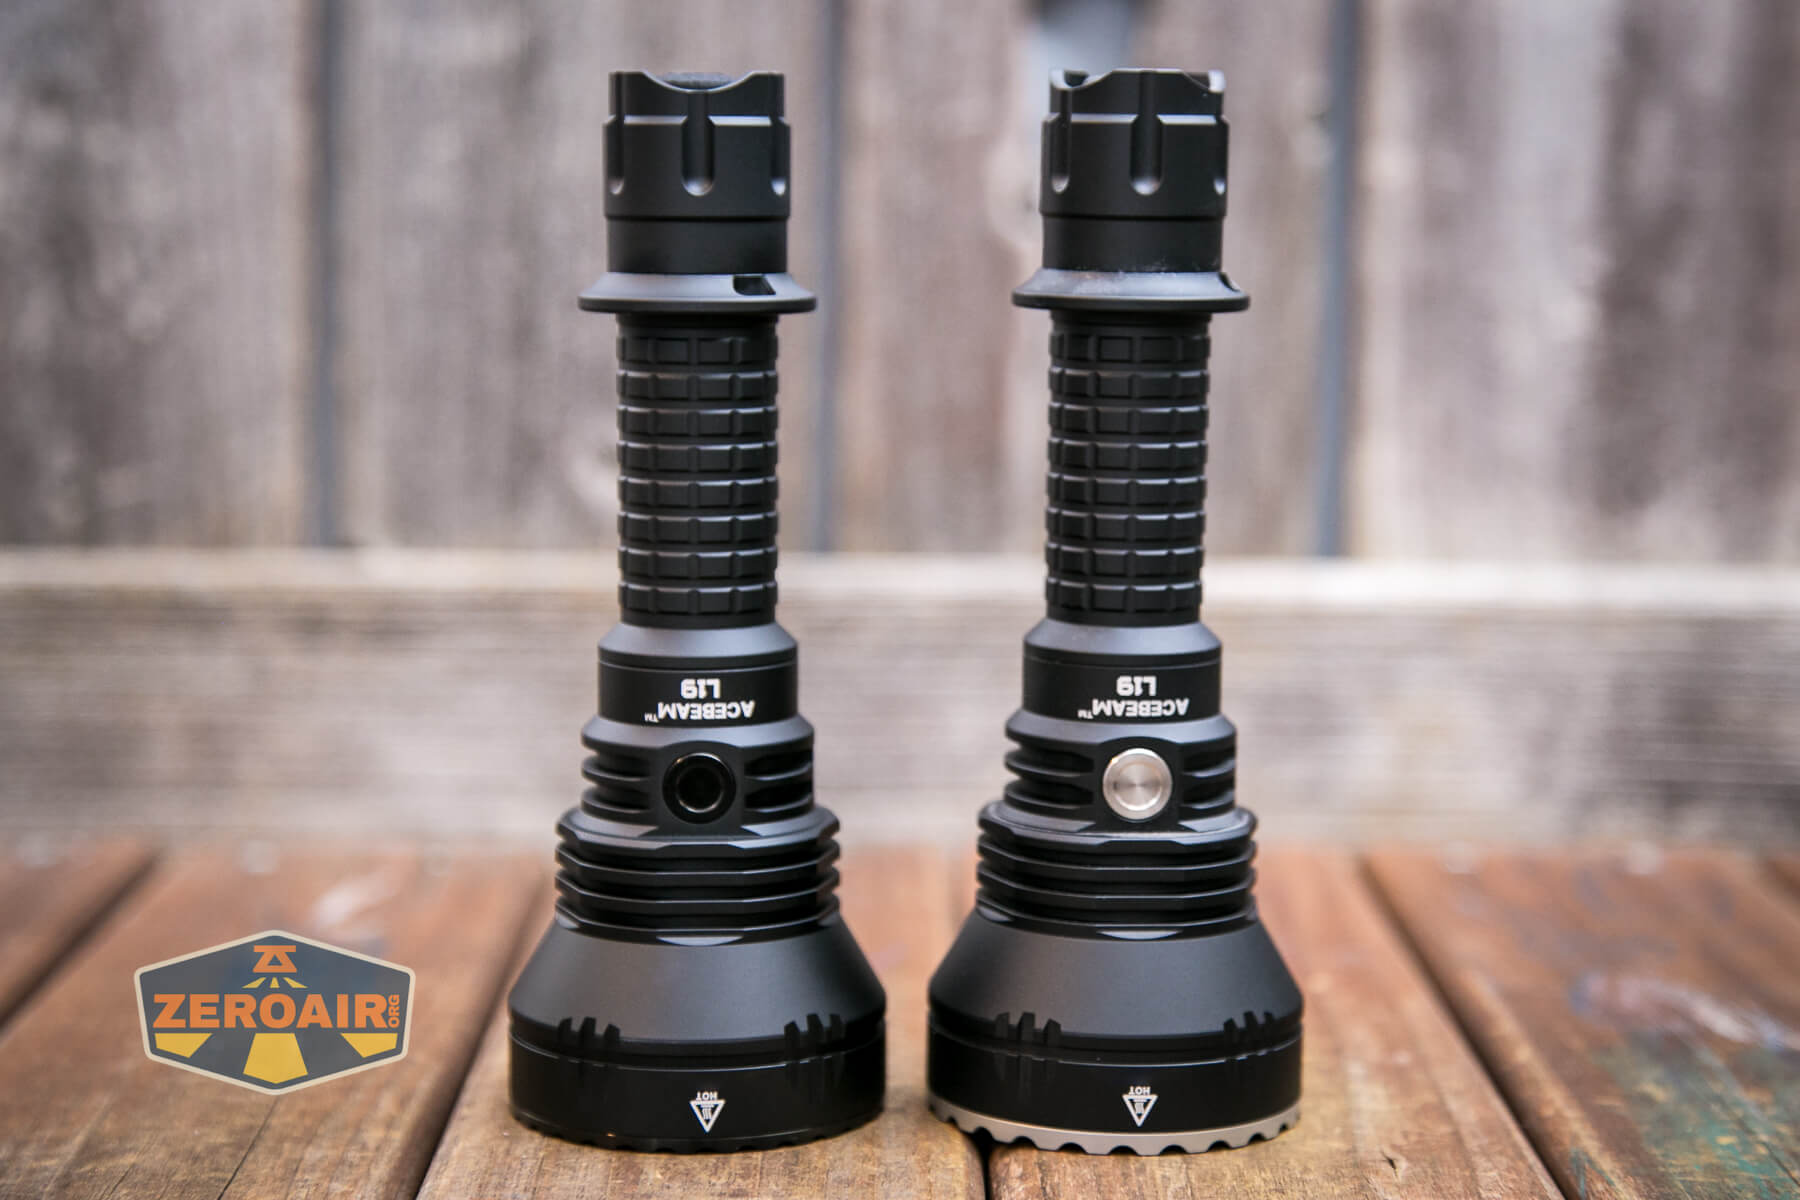
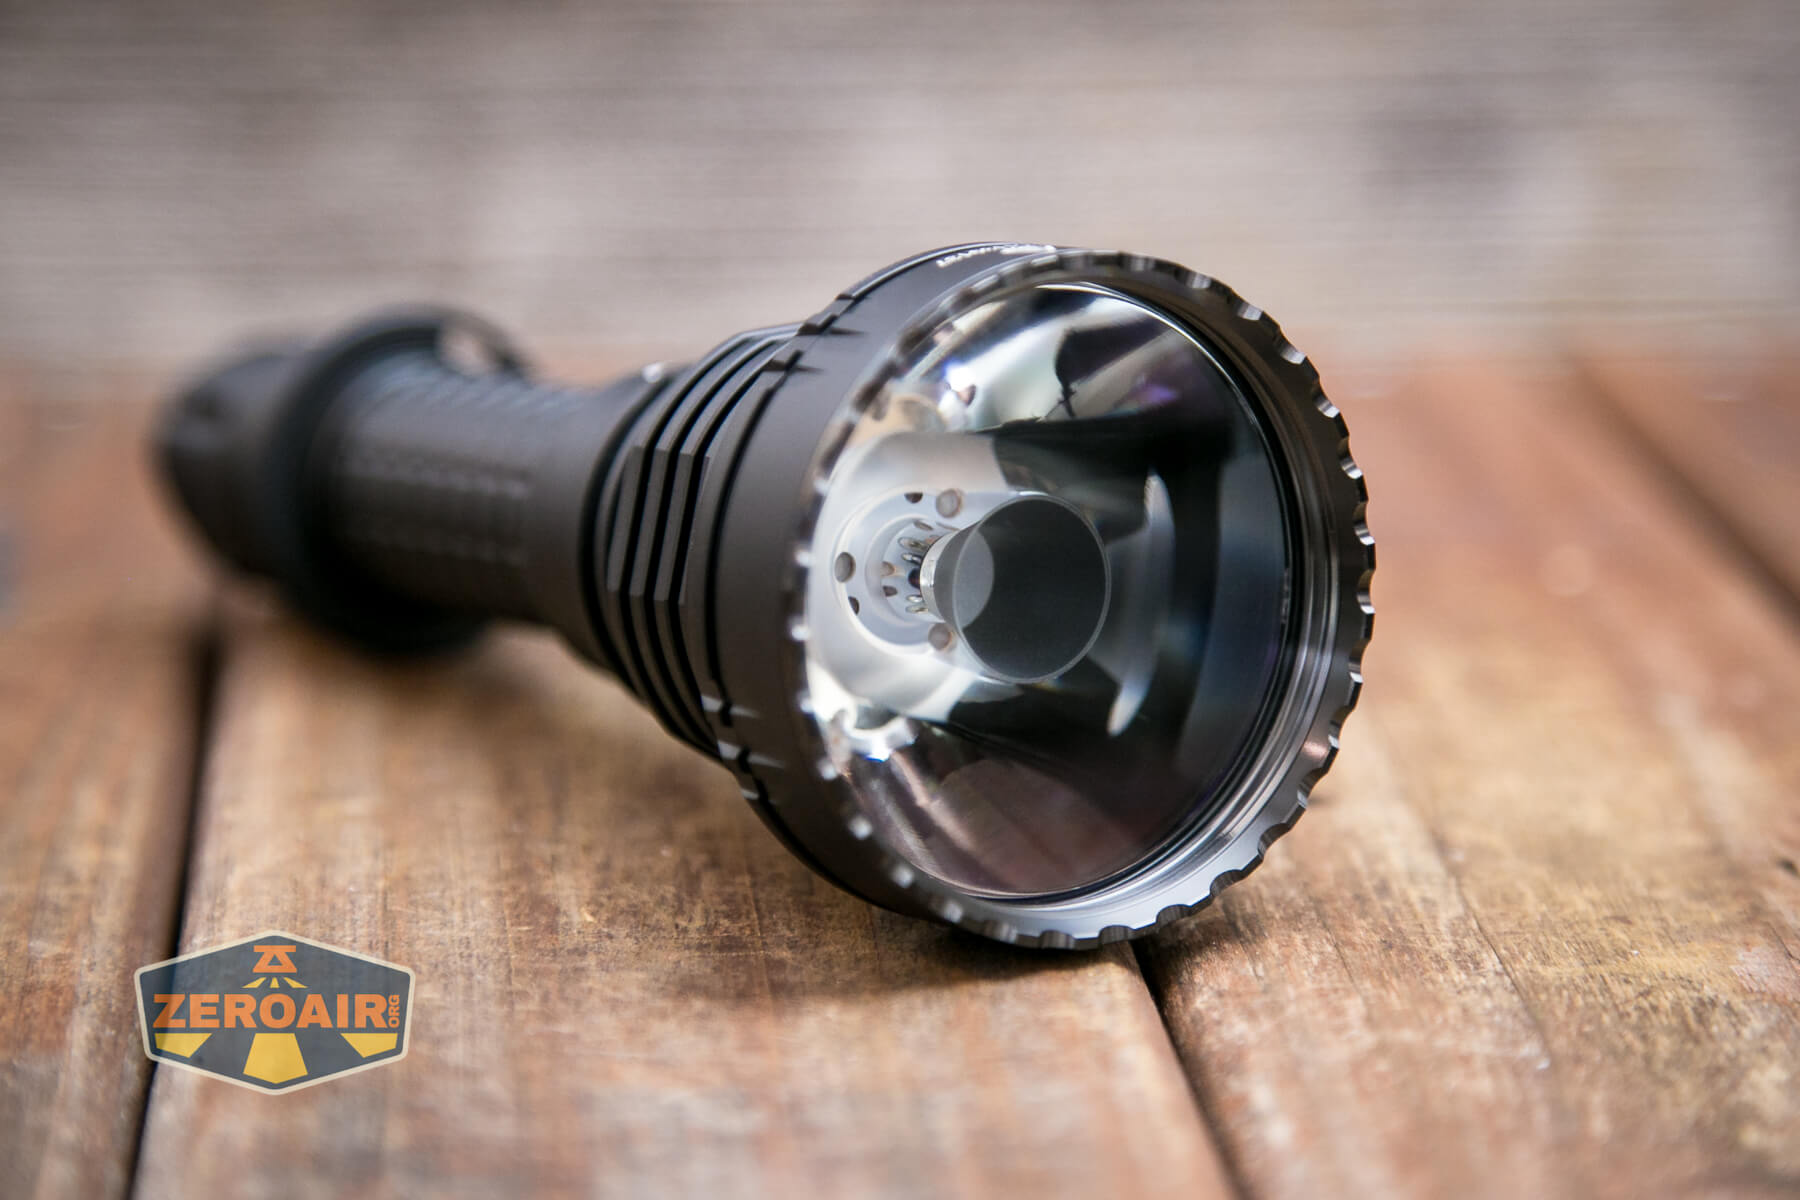
Like practically all other Acebeam lights, this L19 has fantastic build quality. Also, like the original L19, this light has a great shape for a handheld thrower. The two are very similar, really differing only in the emitter choice, as well as some minor cosmetic things. For example, this one has a black bezel.
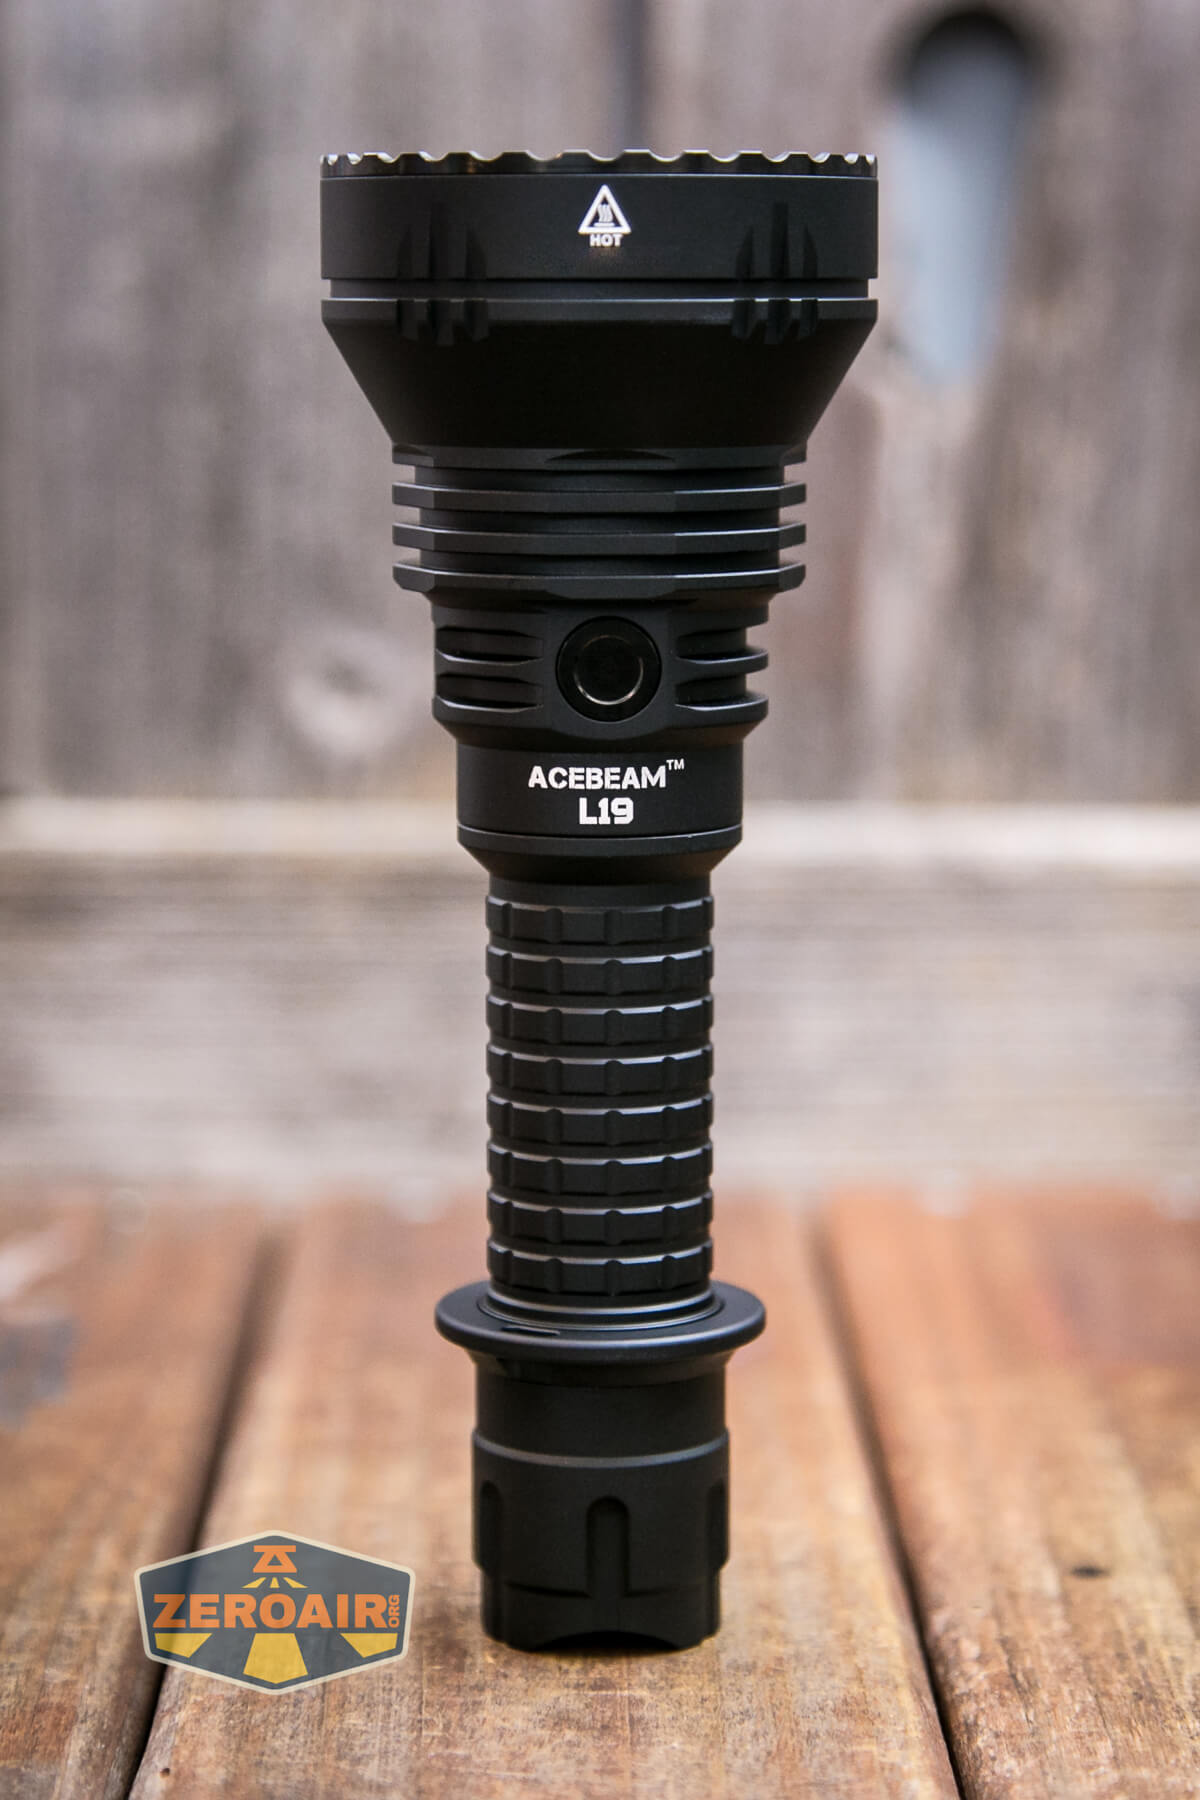


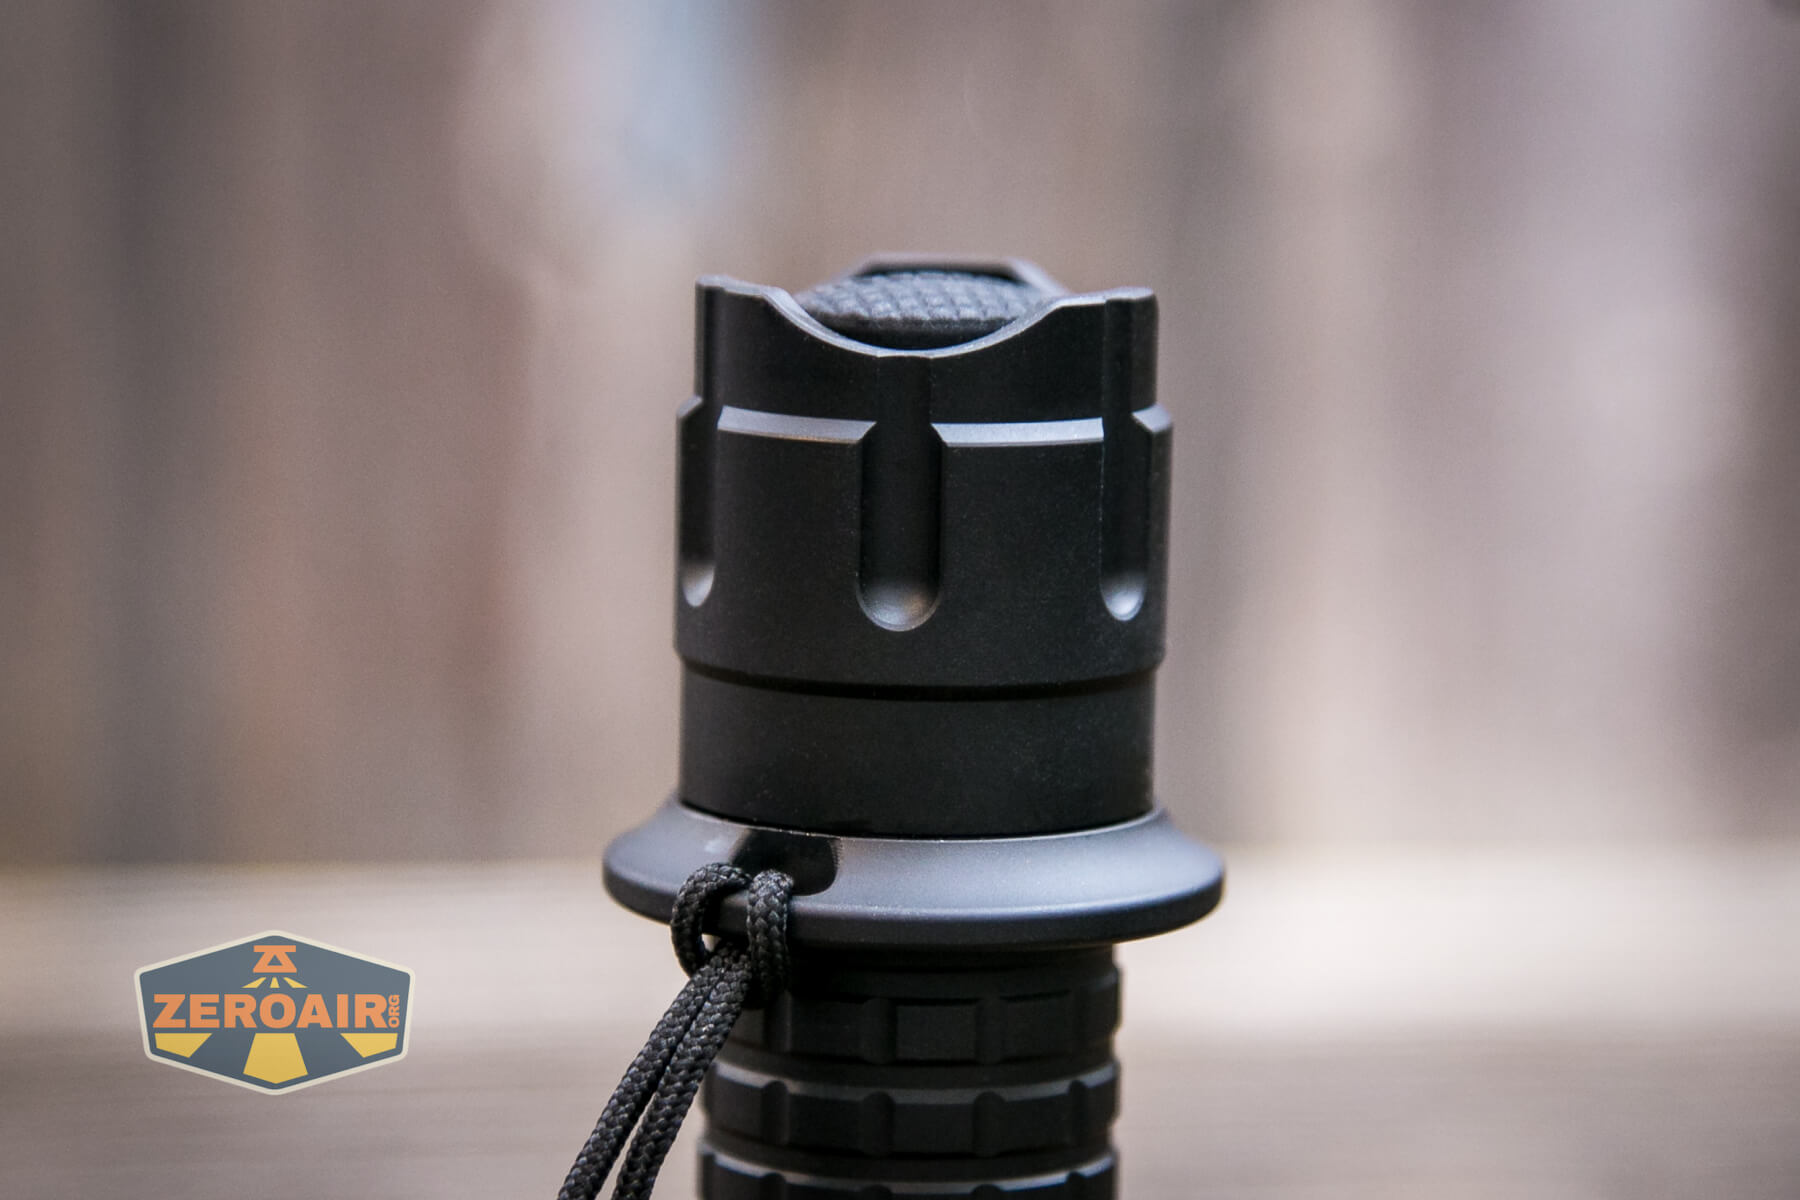
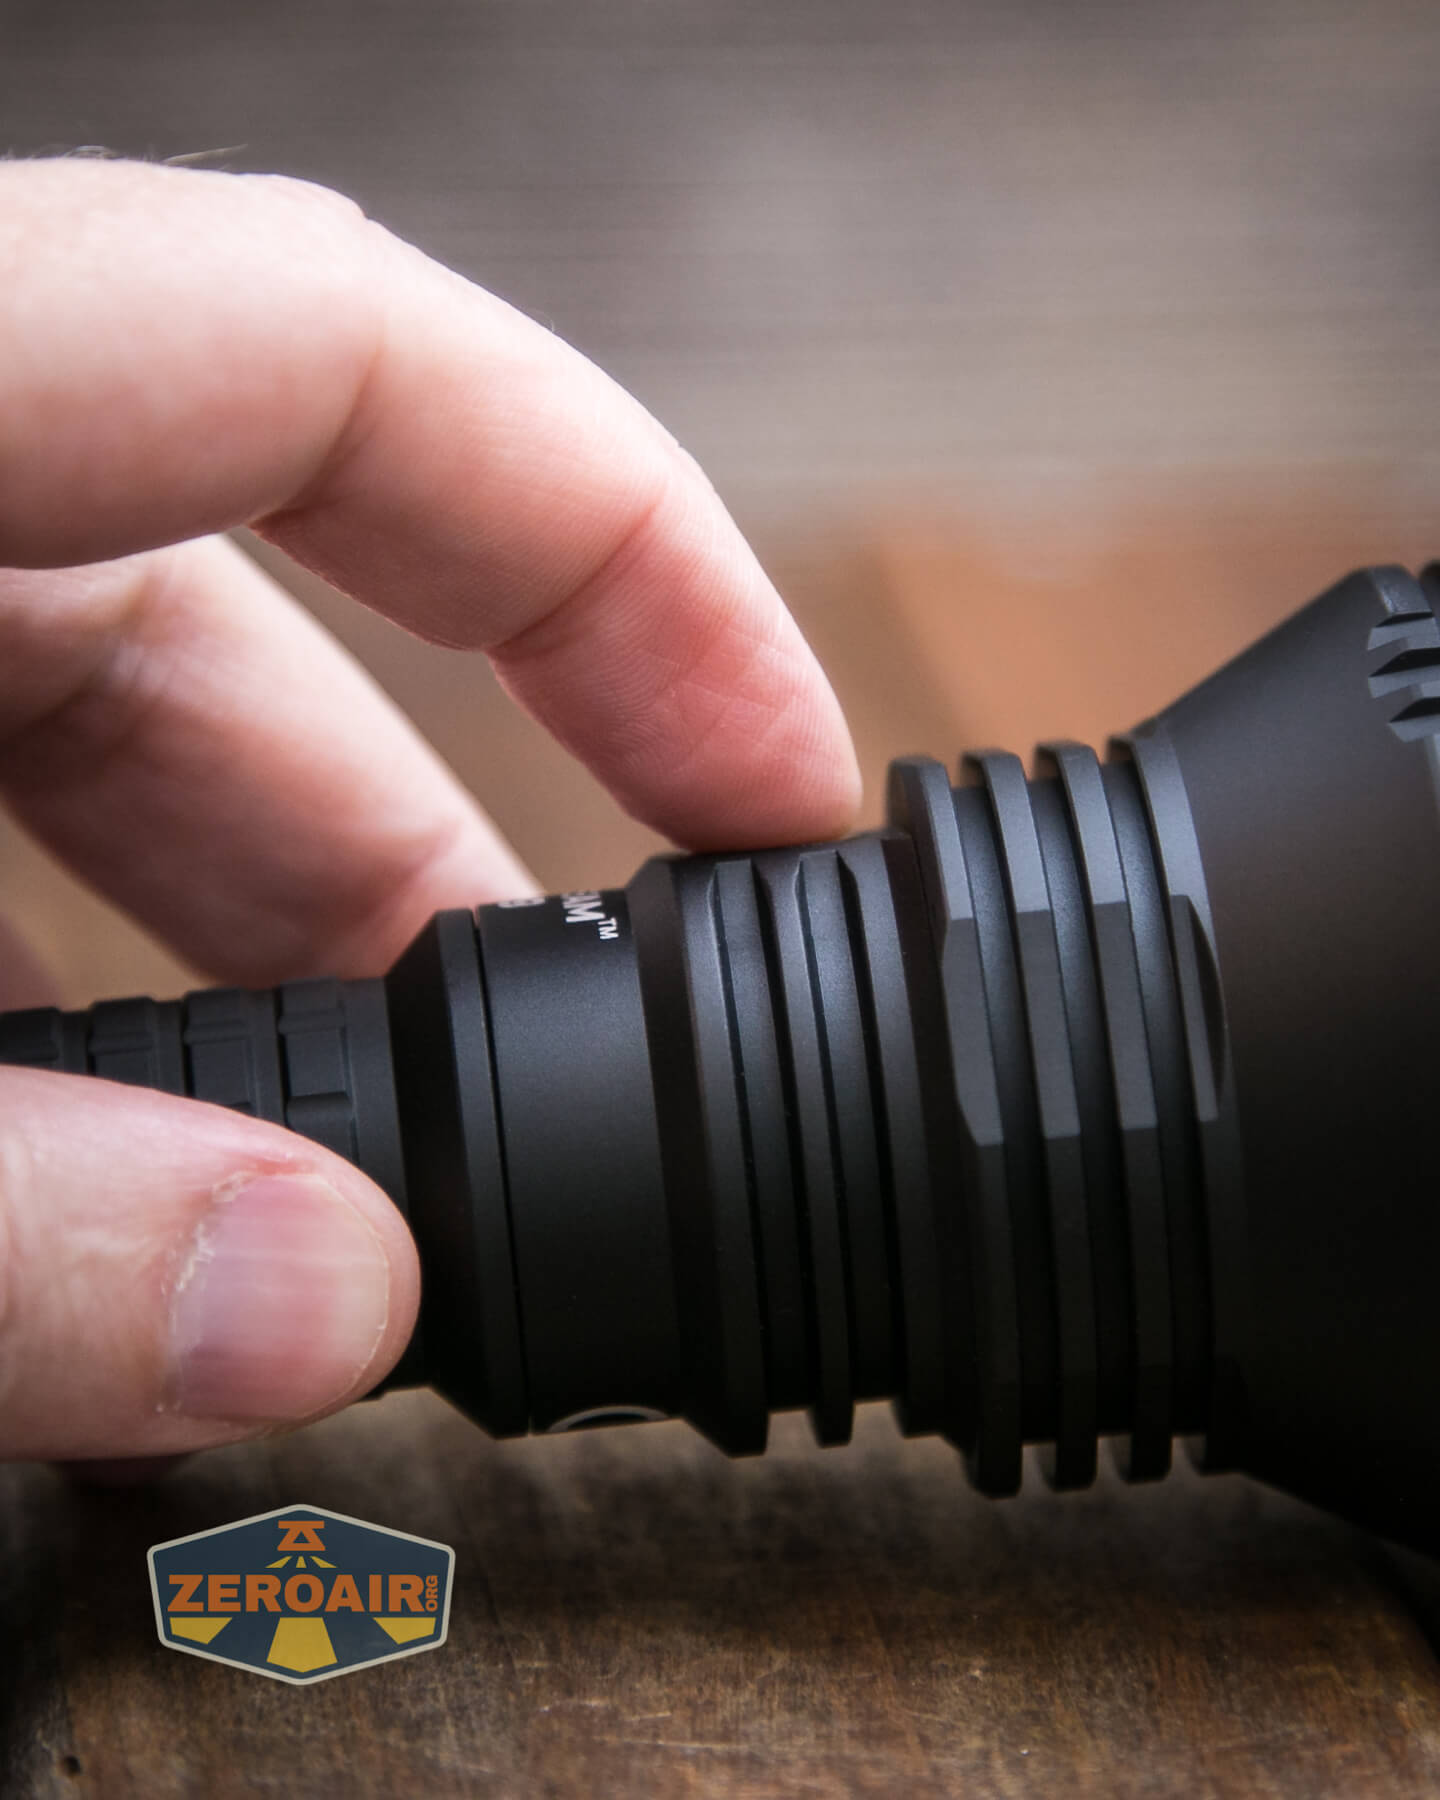
The head end has cooling fins of minimal depth.
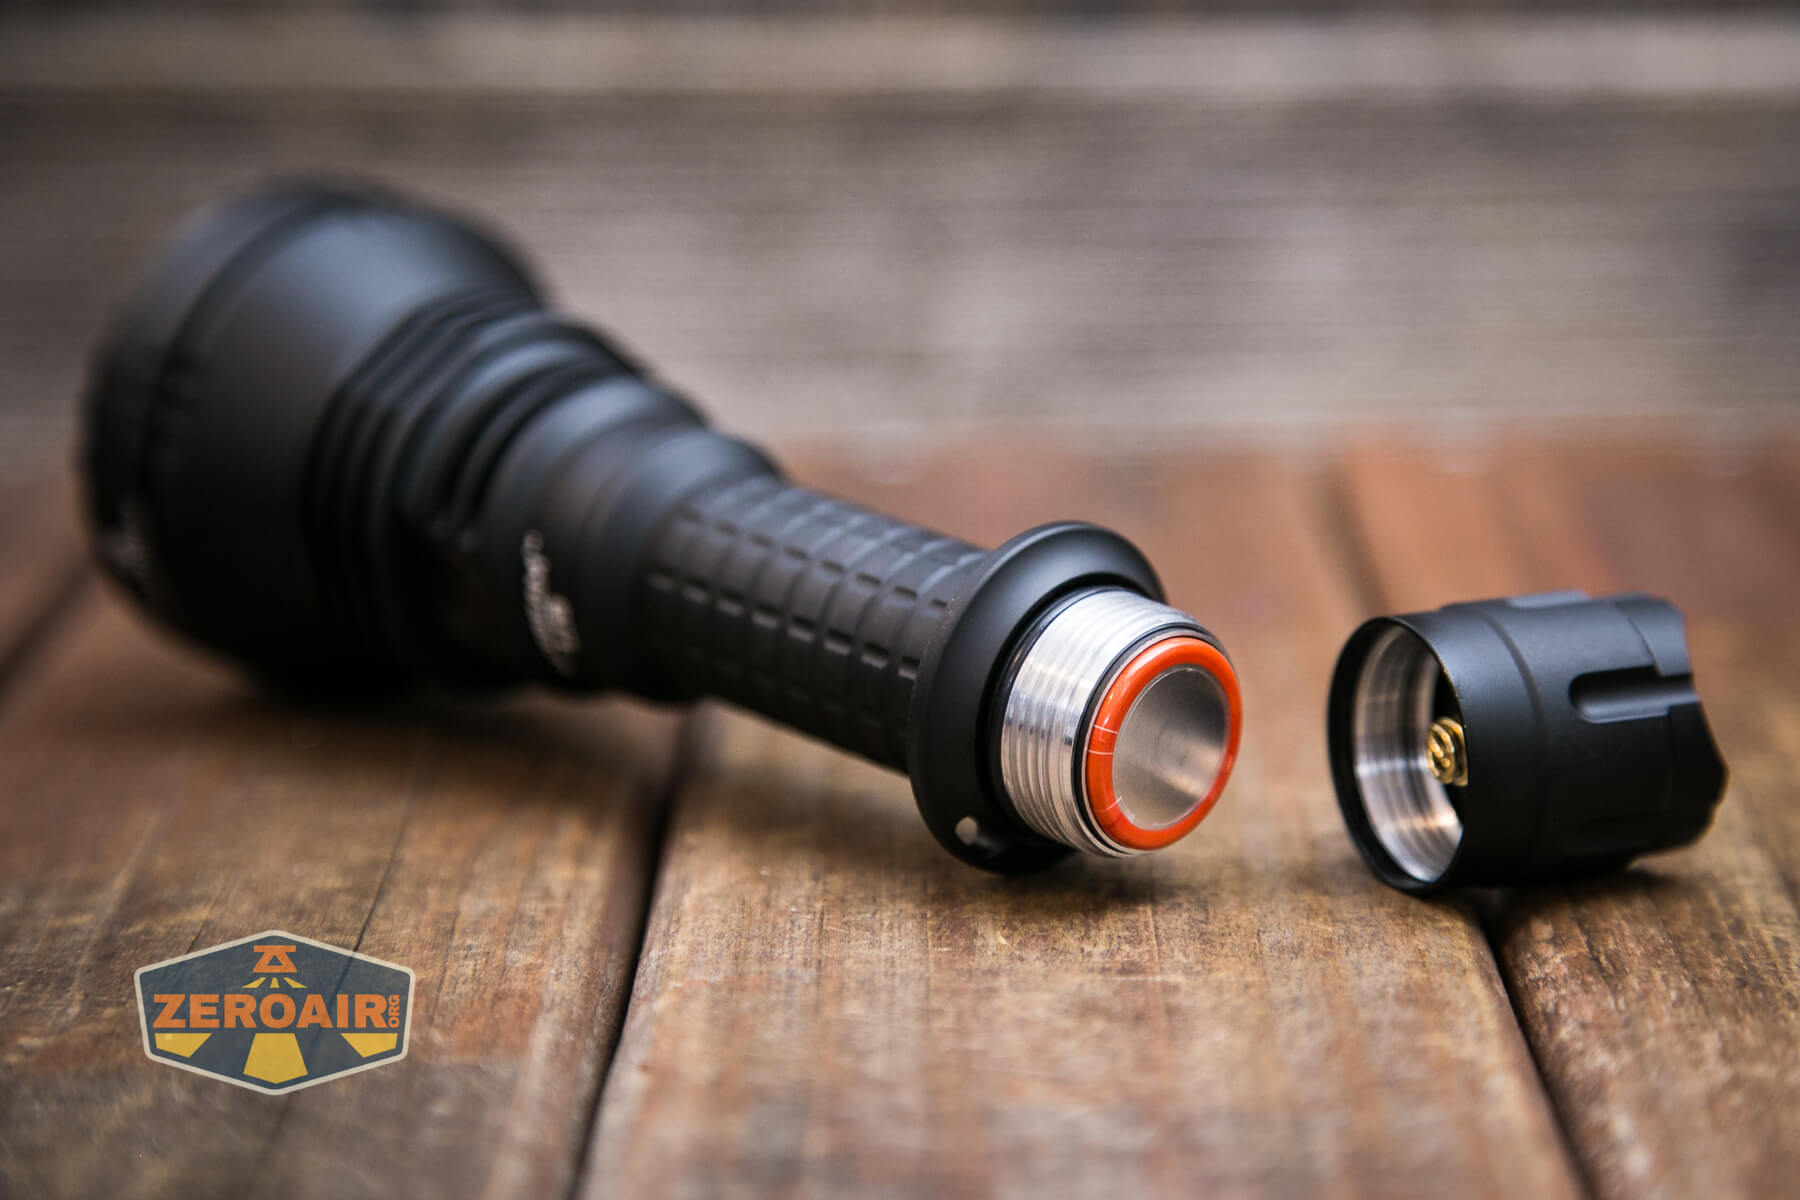
Threads on the cell tube are very smooth. They’re unanodized, square cut, well-lubed (maybe a bit extra lube), and somewhat long. All in all, a very good user experience when removing the tailcap. The tailcap has a spring and some other contacts there for the e-switch magic.
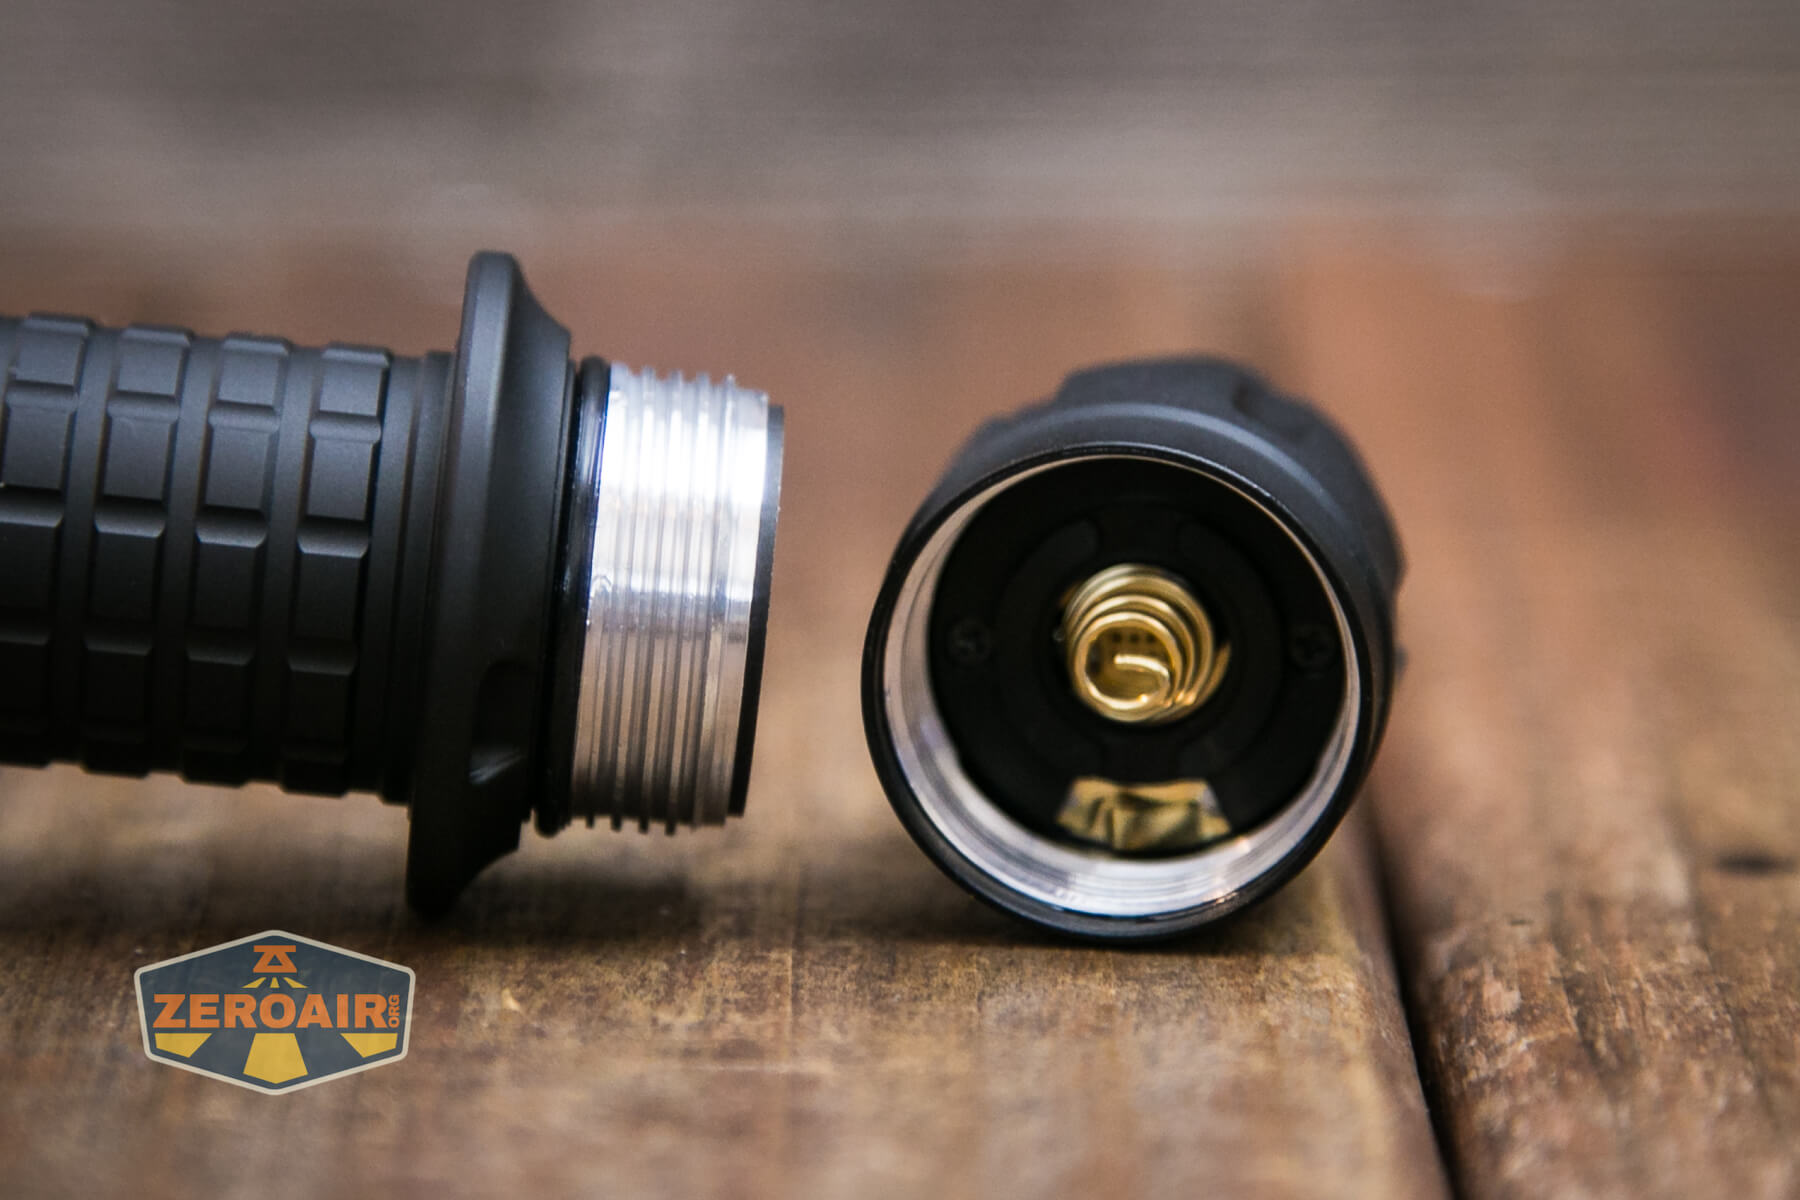
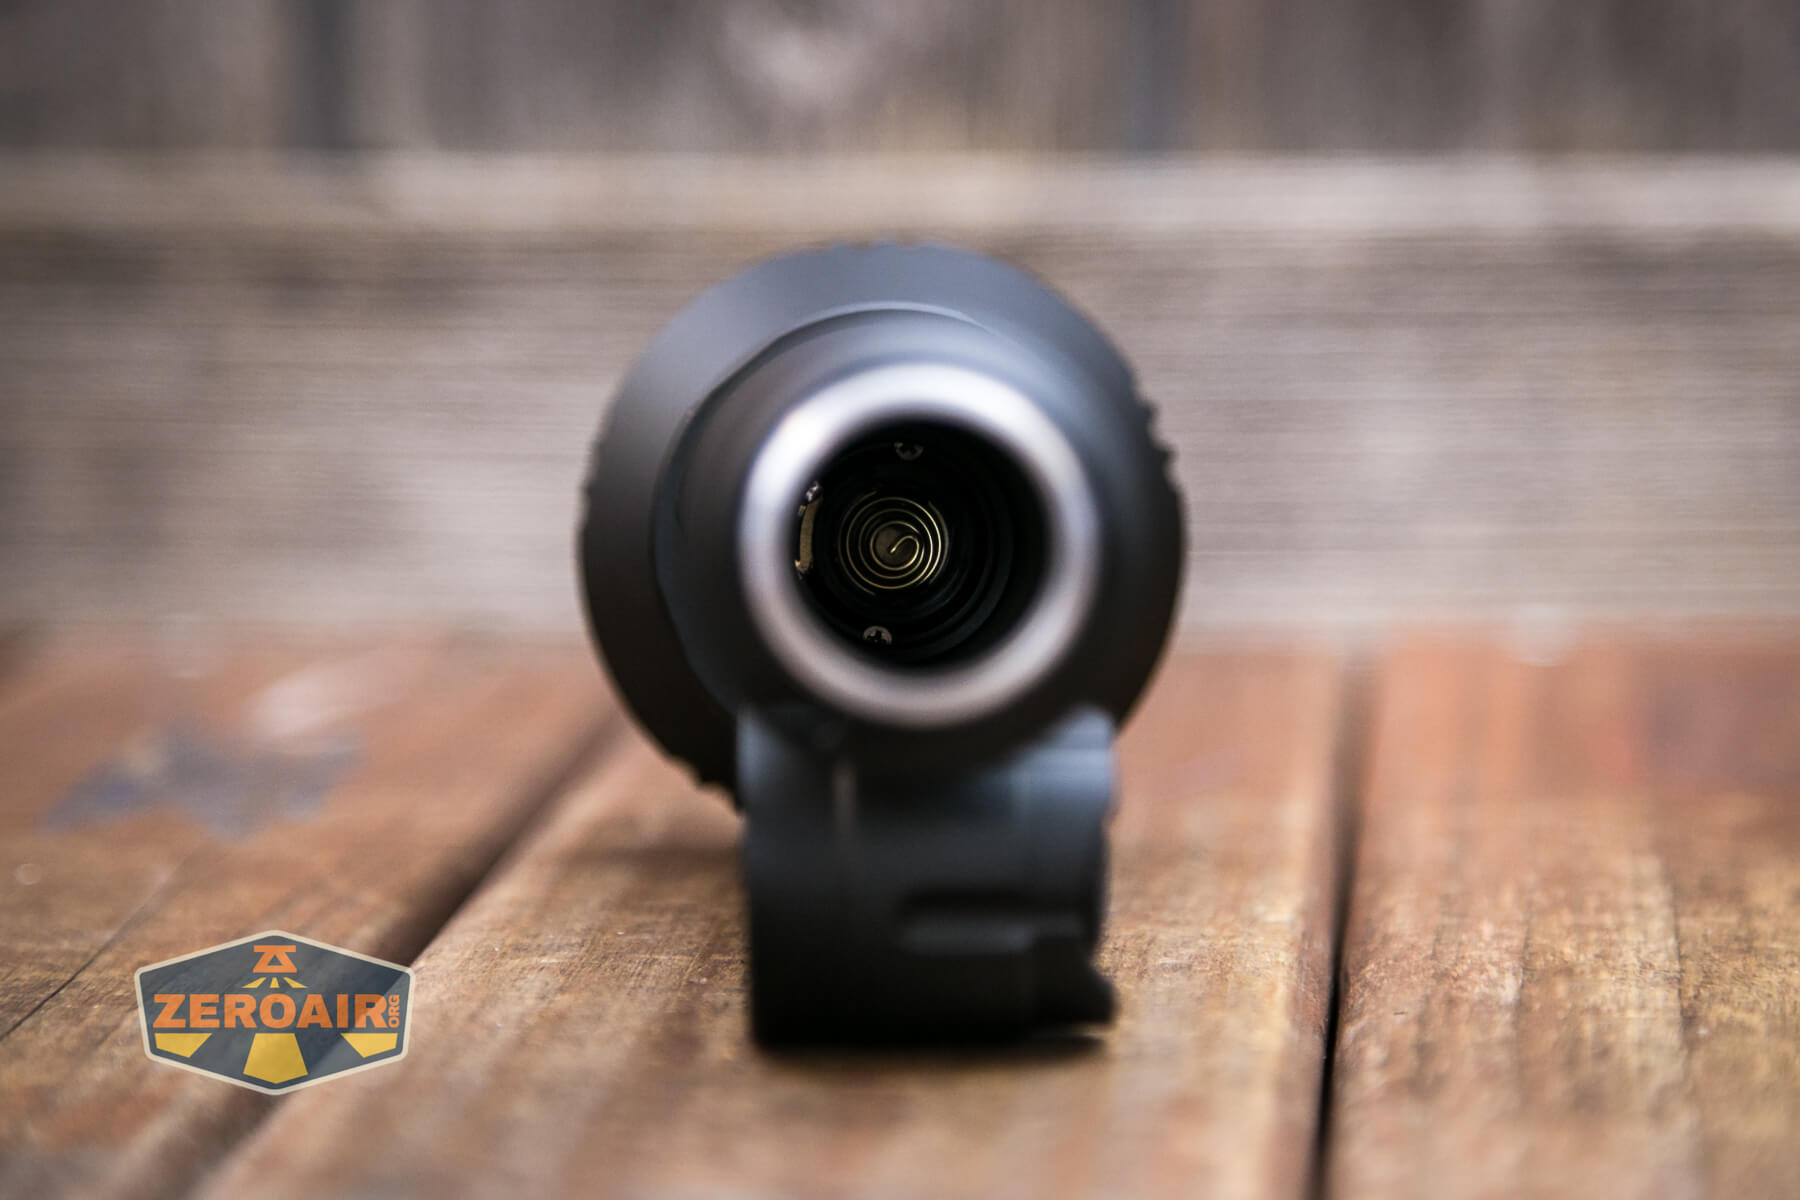
The head end also has a beefy spring, too.
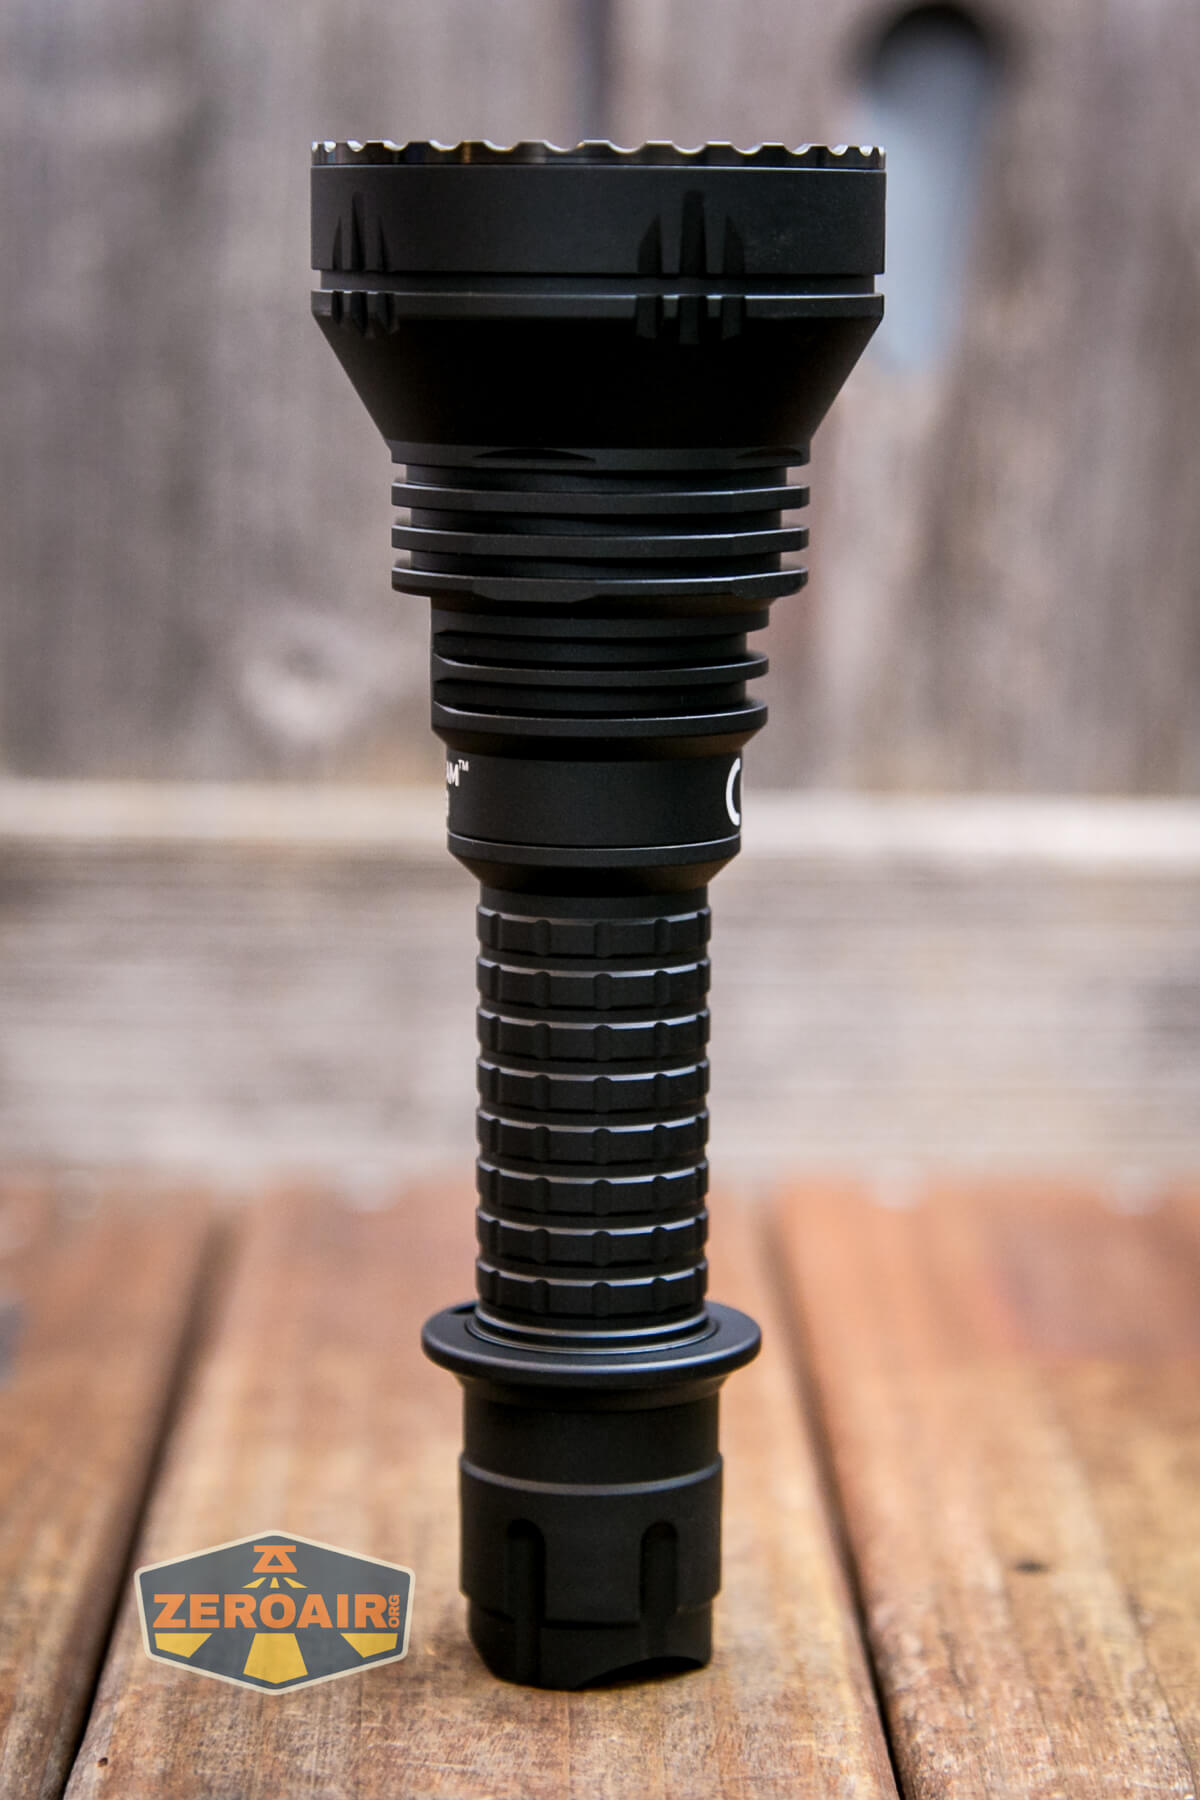
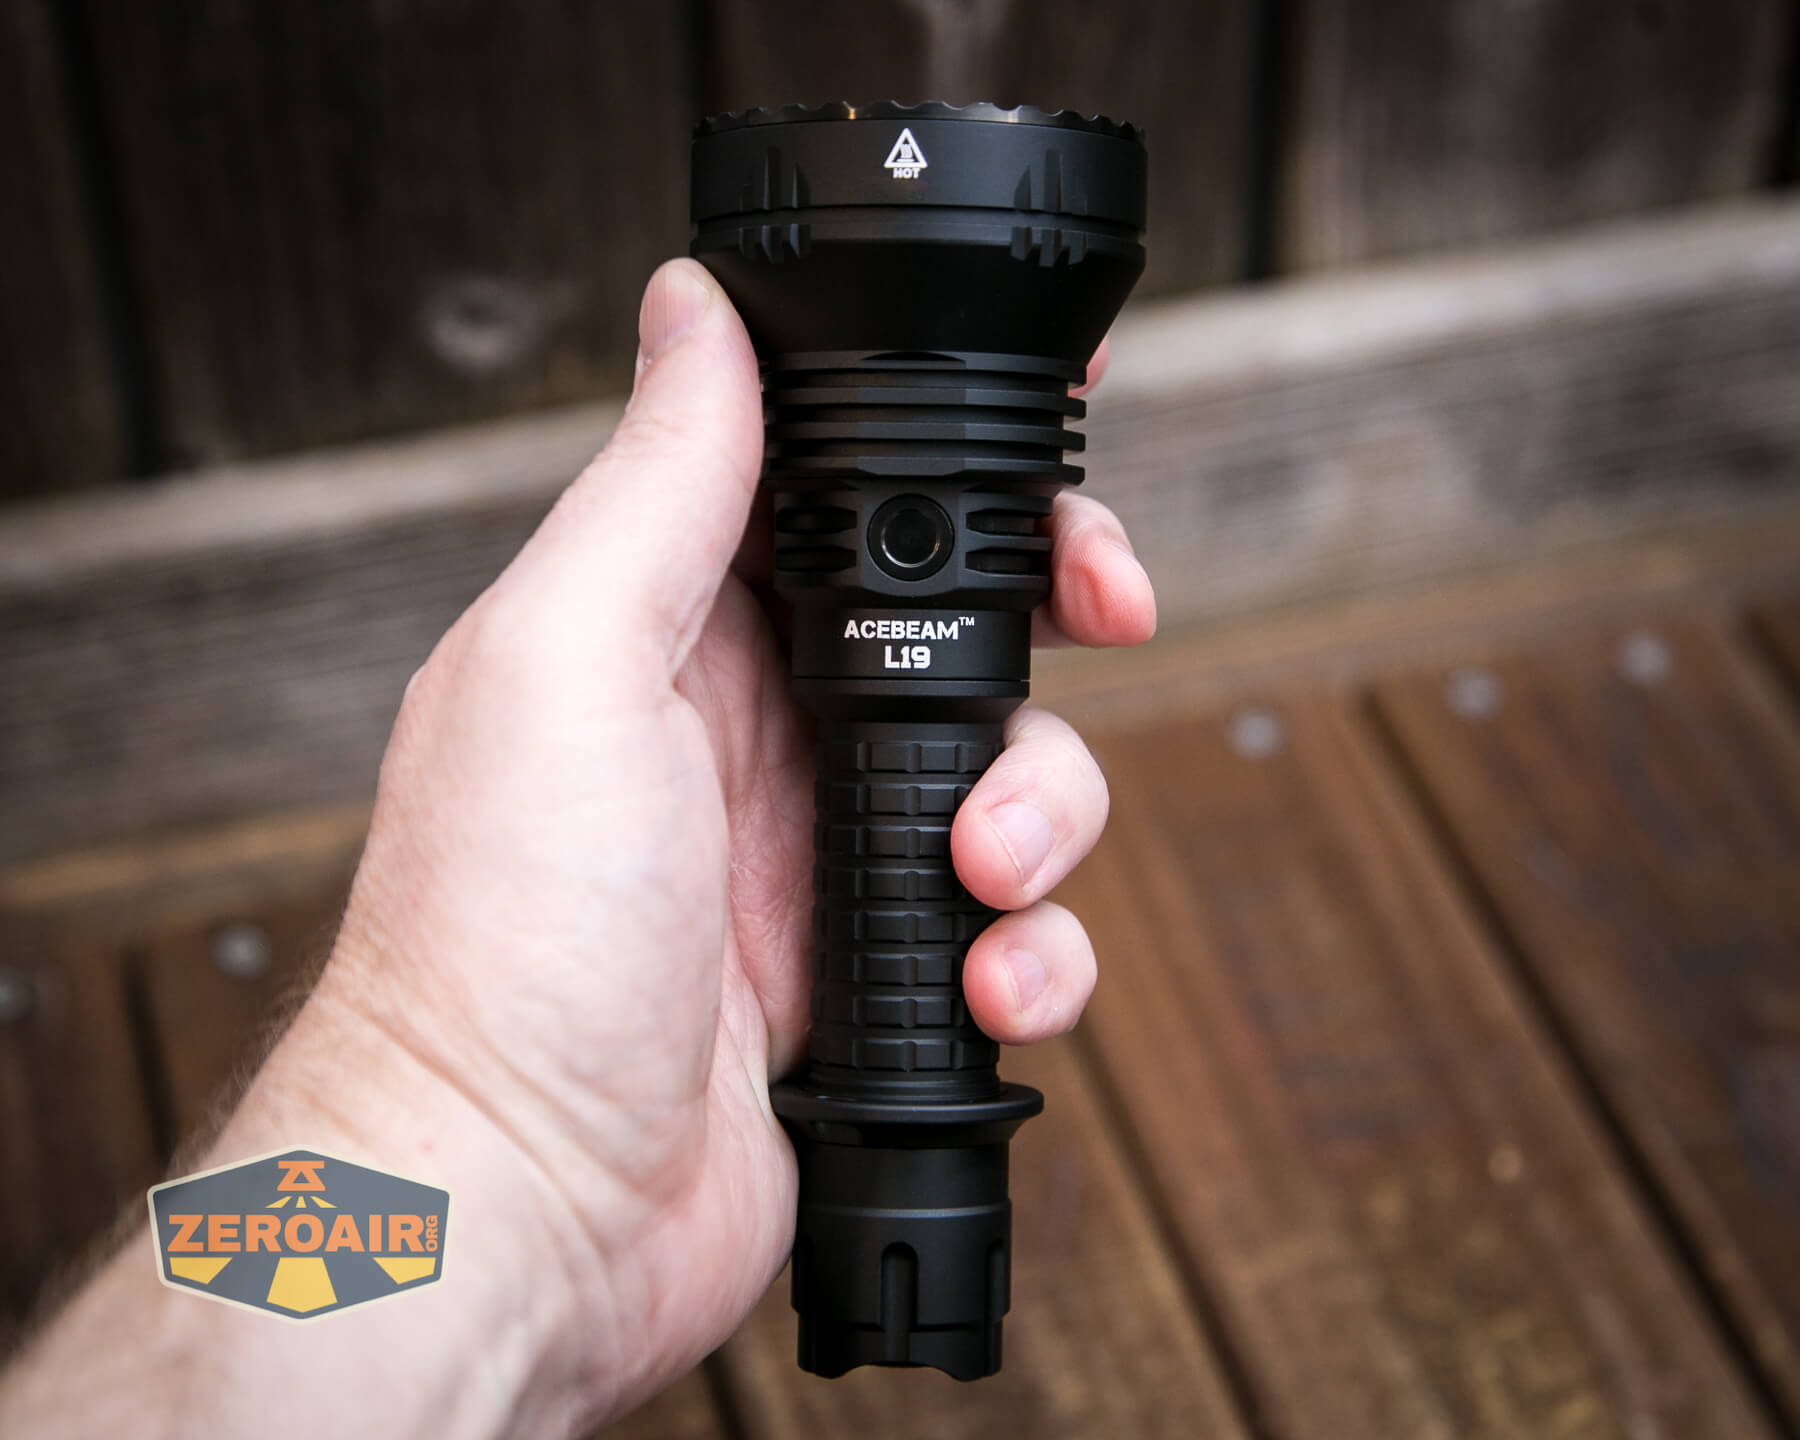
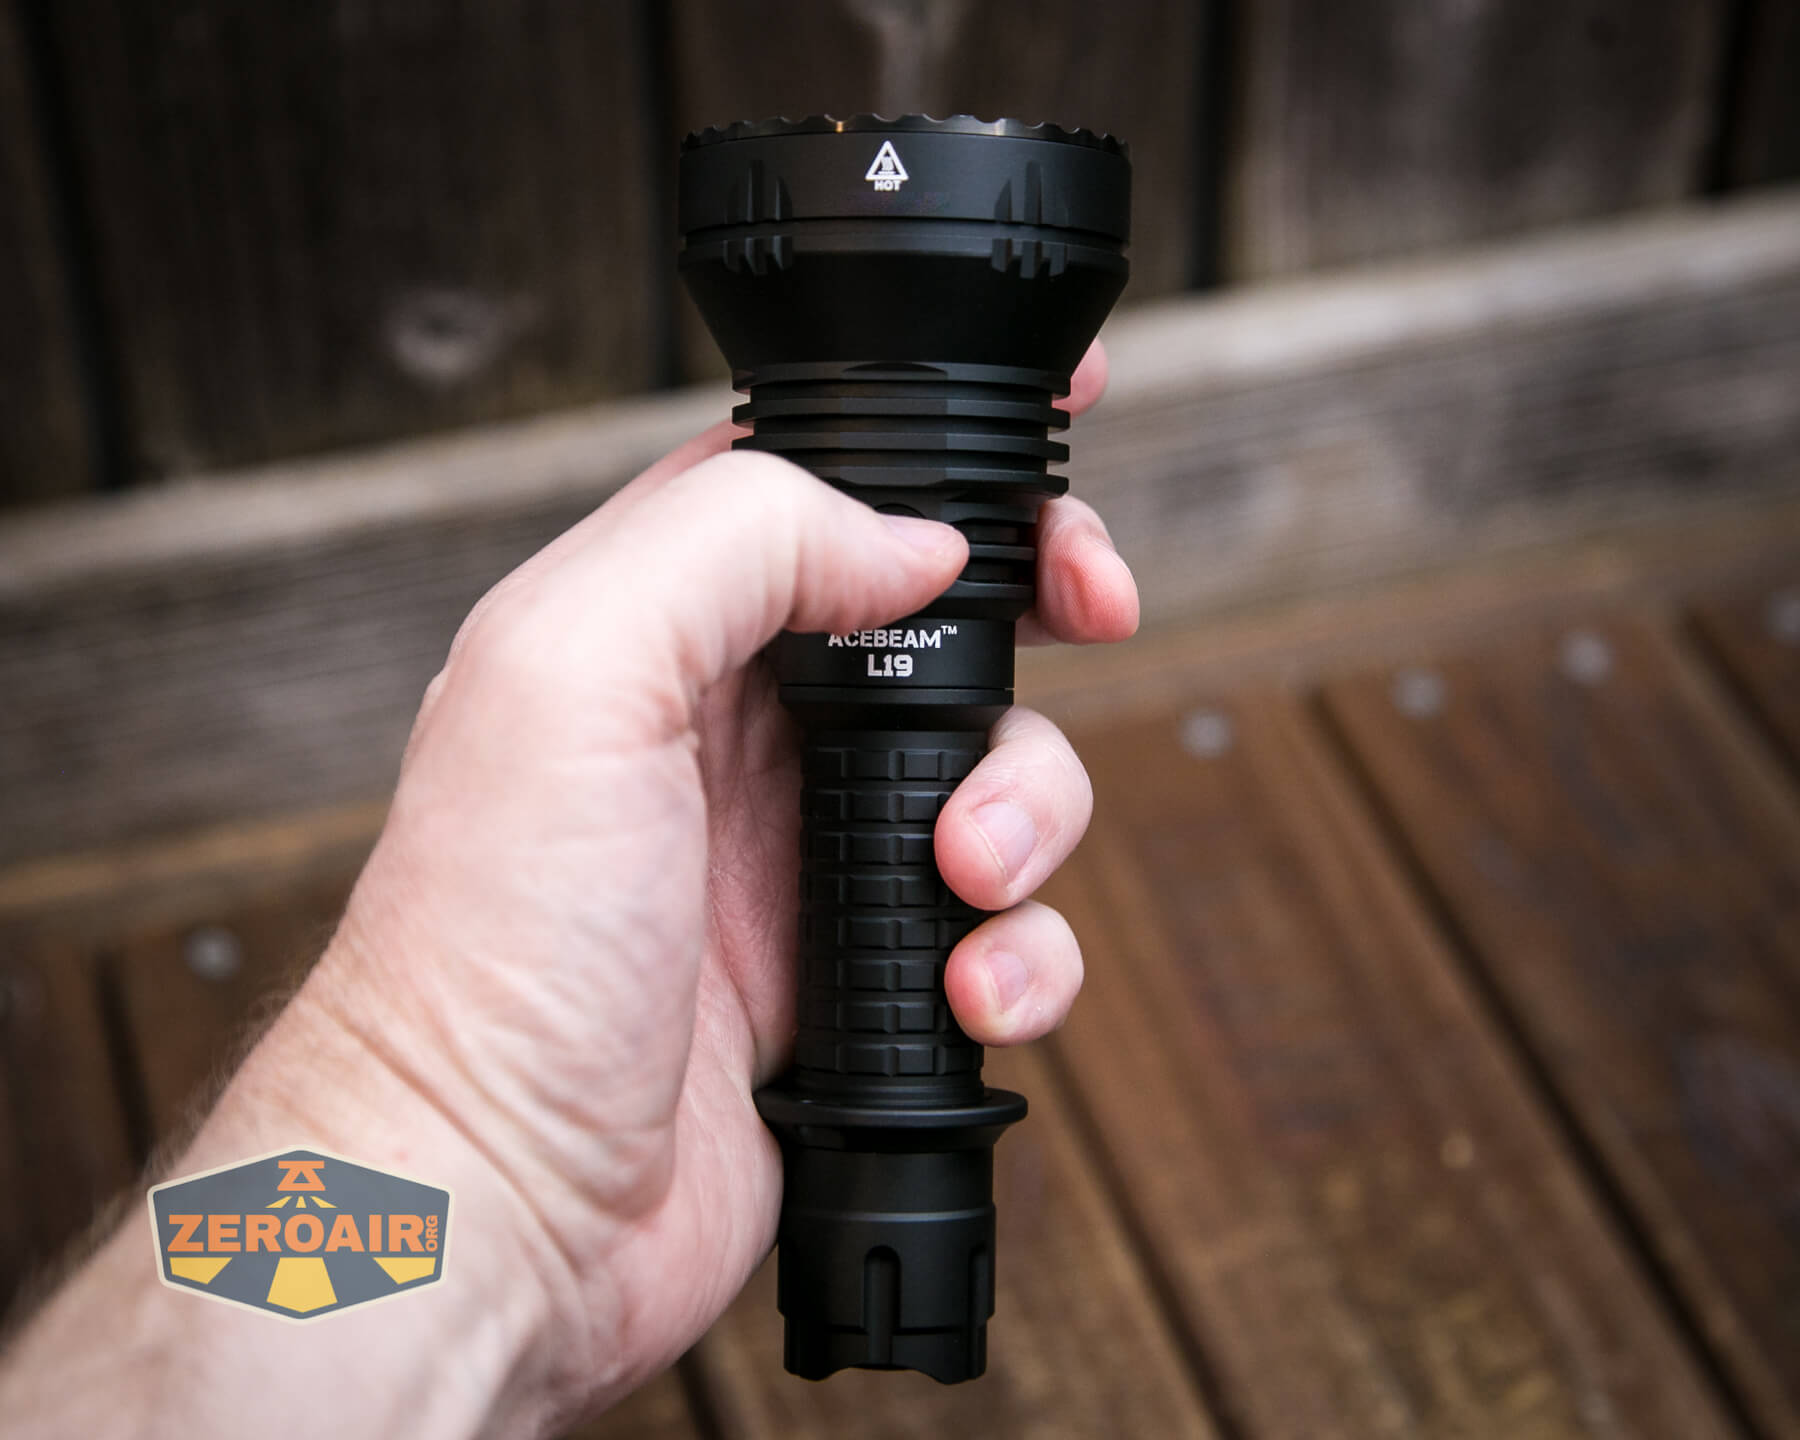
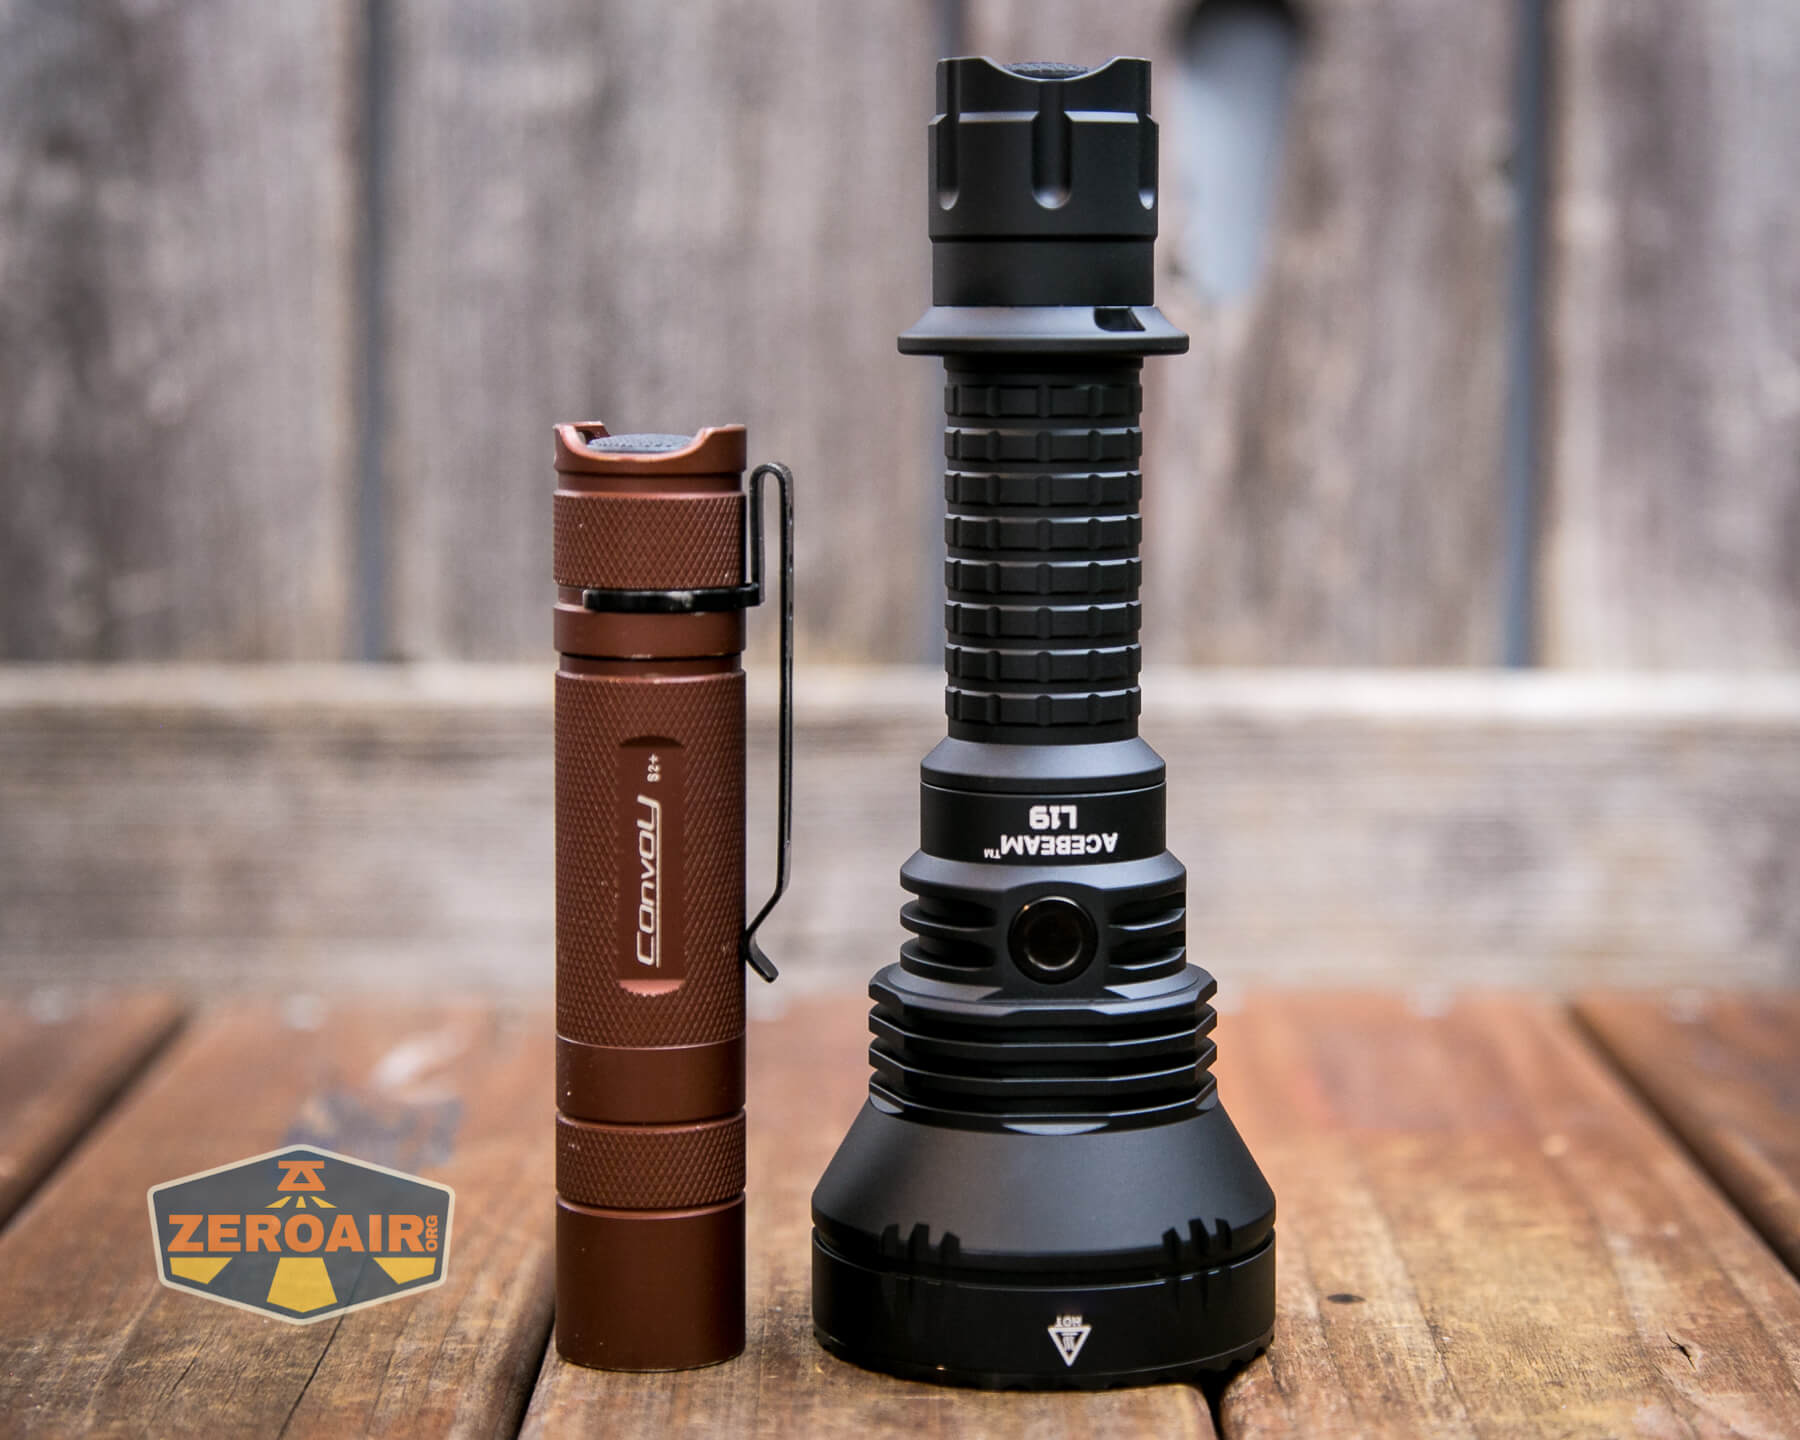
Size and Comps
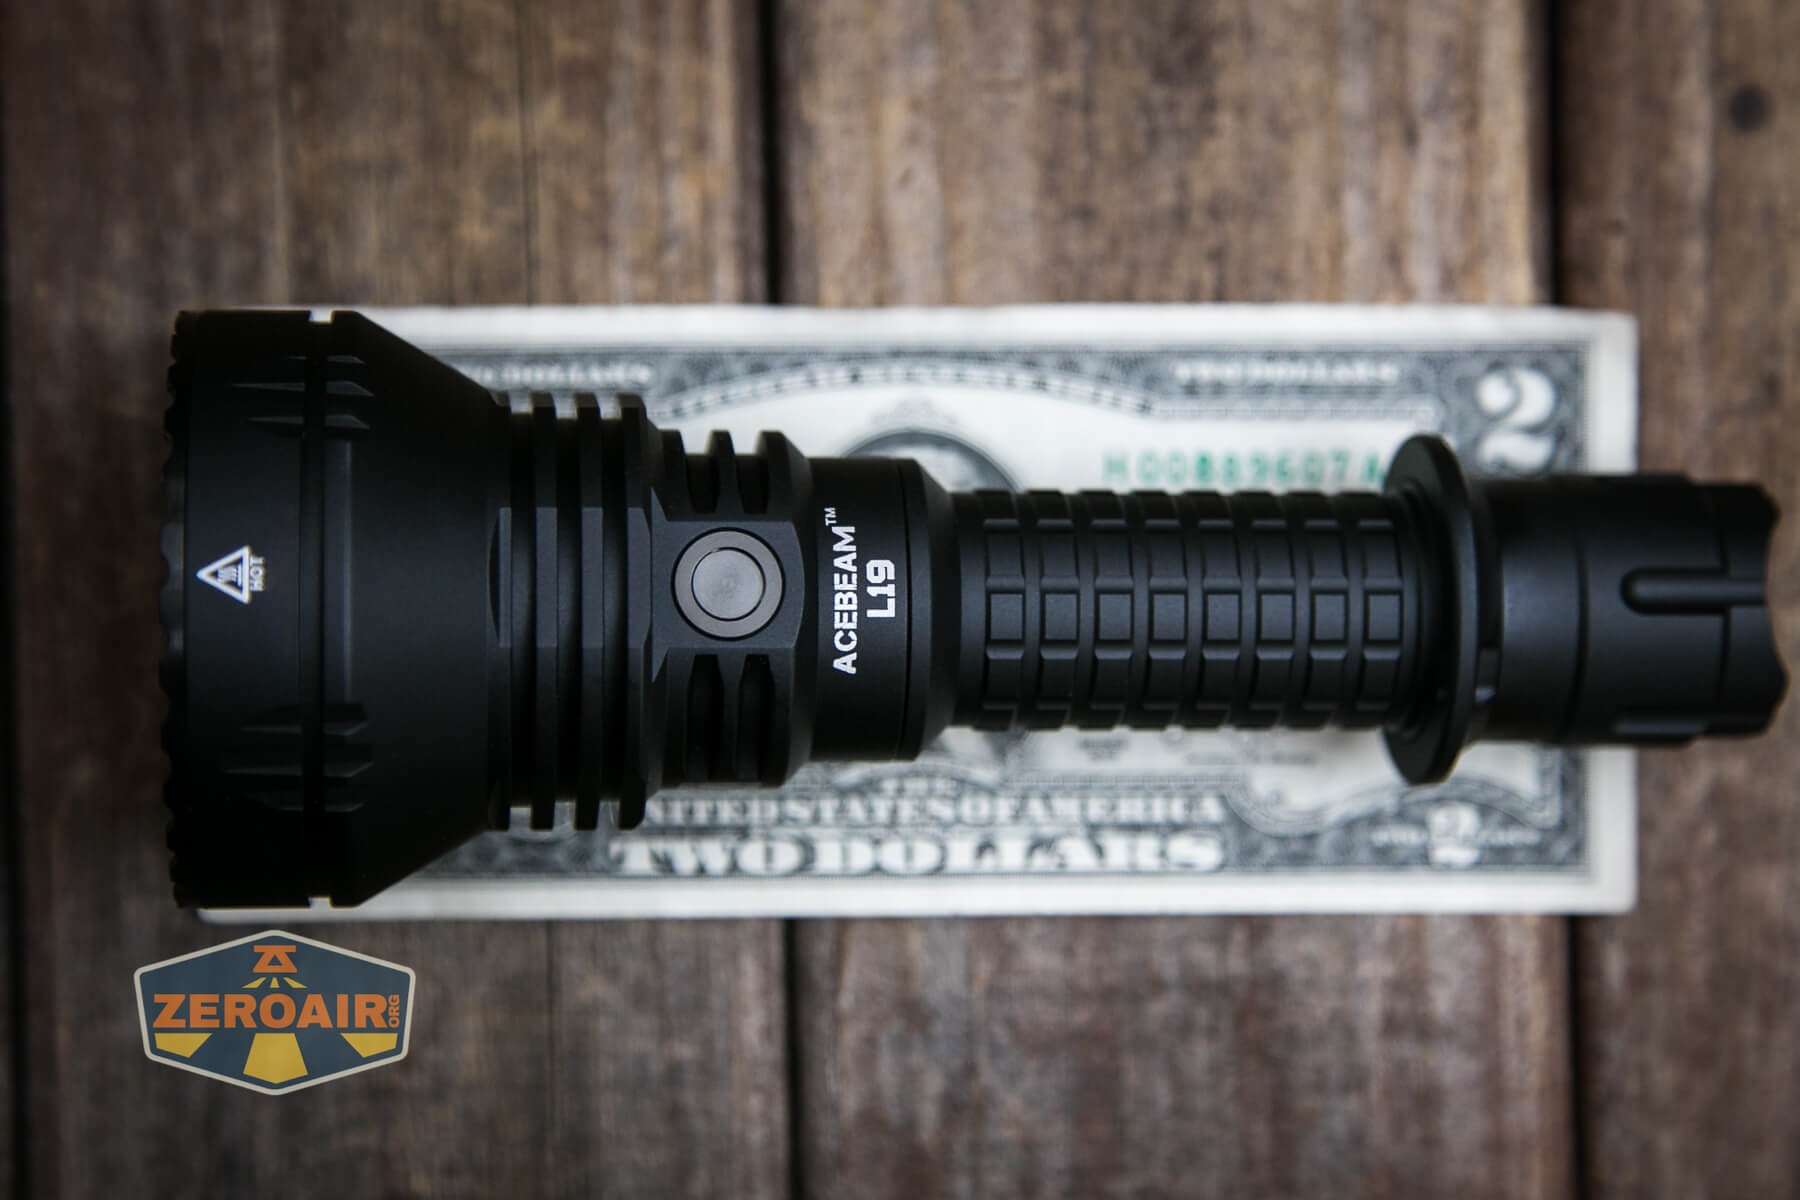
163.8mm (LENGTH) X 60mm (HEAD DIAMETER) X 25.4mm (TUBE DIAMETER)
Weight: 266g (6.91OZ.) including battery.

If the flashlight will headstand, I’ll show it here (usually the third photo). If the flashlight will tailstand, I’ll show that here, too (usually the fourth photo).
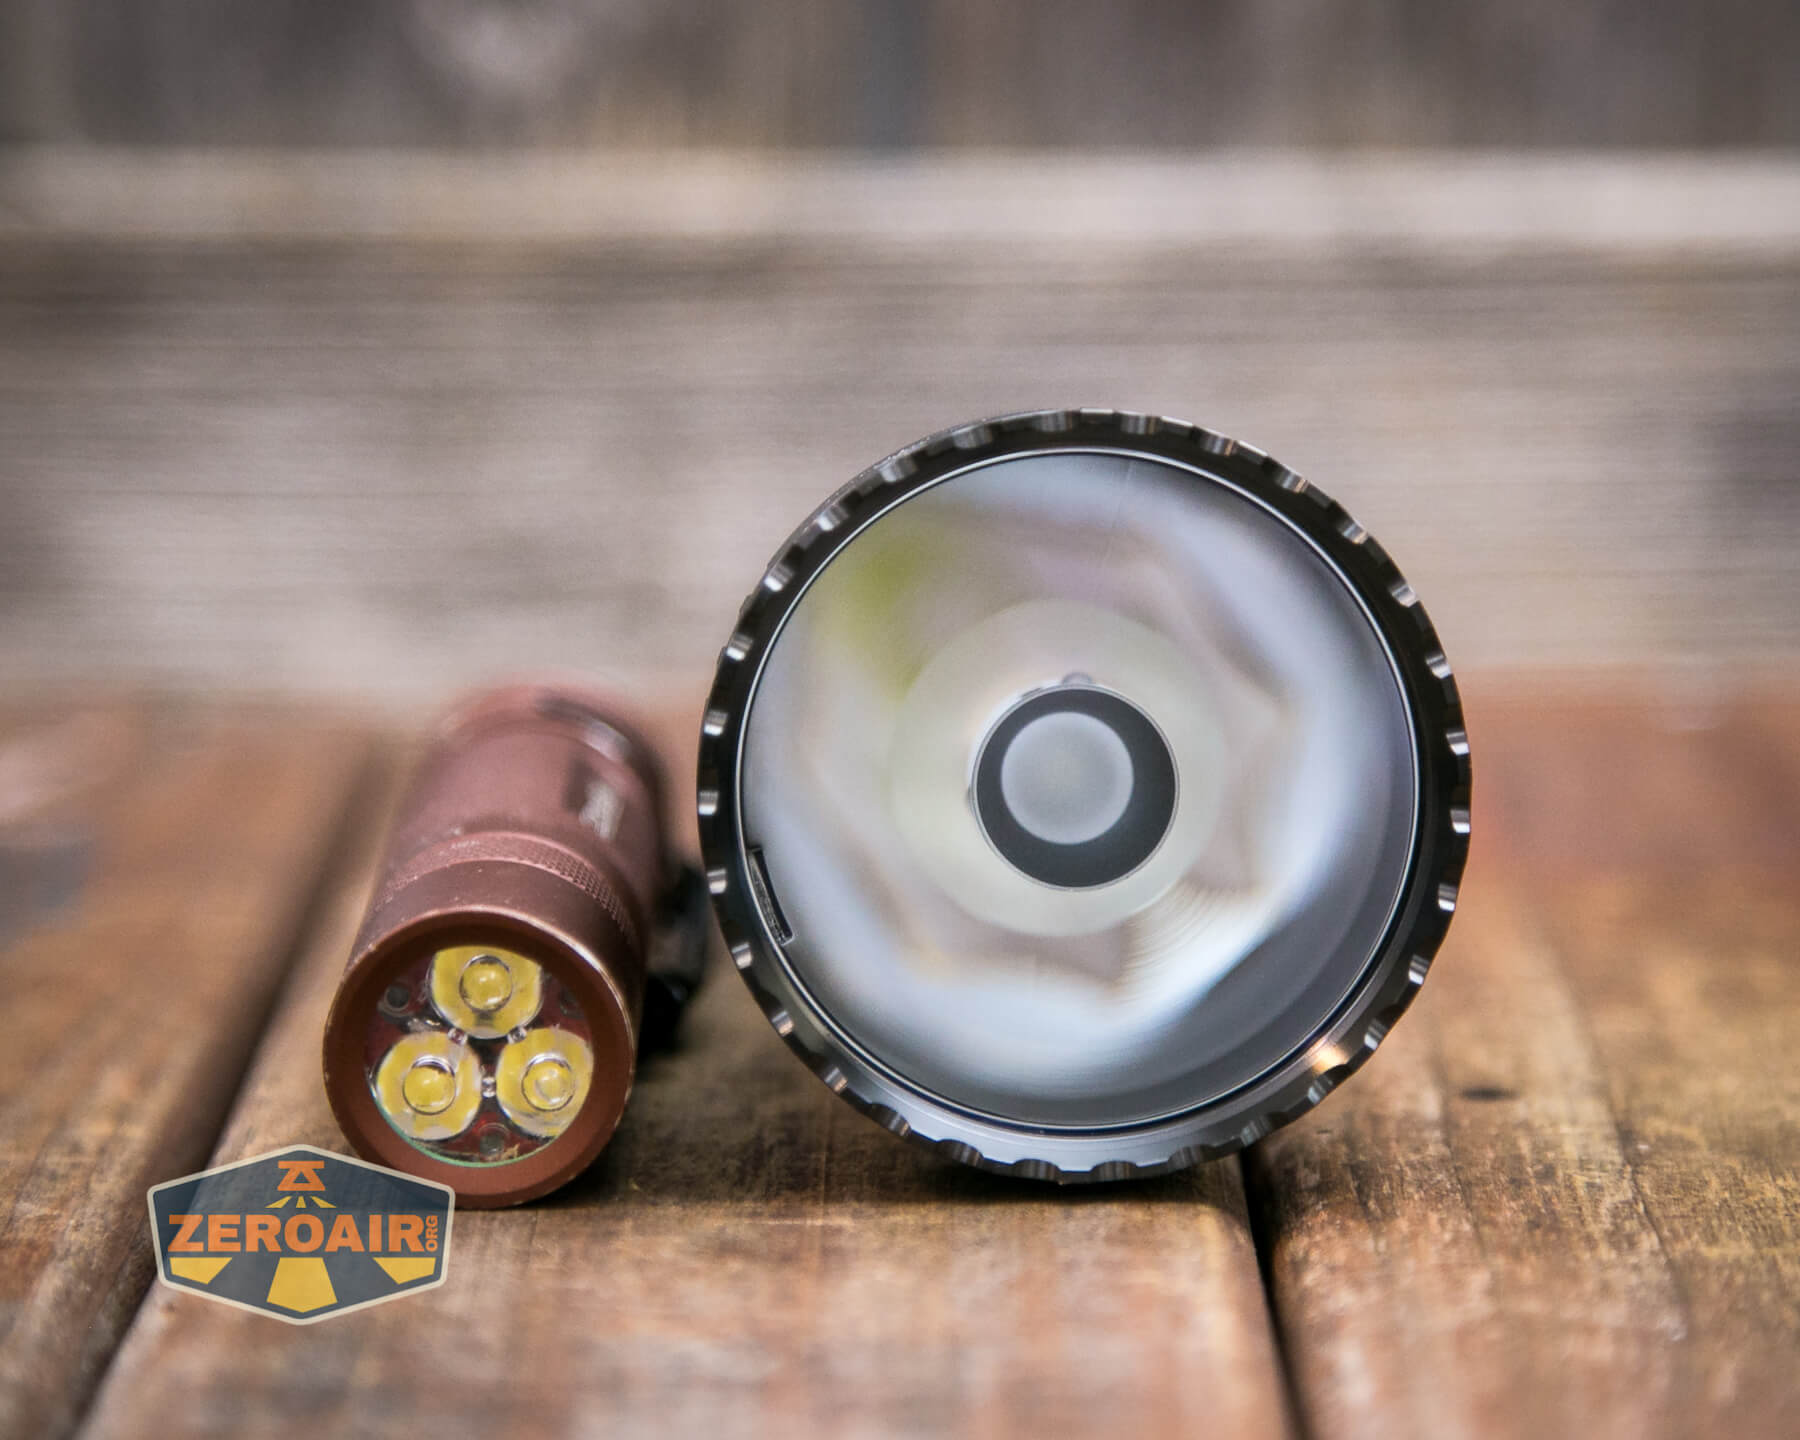
Here’s the test light with the venerable Convoy S2+. Mine’s a custom “baked” edition Nichia 219b triple. A very nice 18650 light.
And here’s the light beside my custom-engraved TorchLAB BOSS 35, an 18350 light. I reviewed the aluminum version of that light in both 35 and 70 formats.

Here are the two L19’s side by side.
Retention and Carry
First, there’s a tactical ring that offers a lanyard connection point.
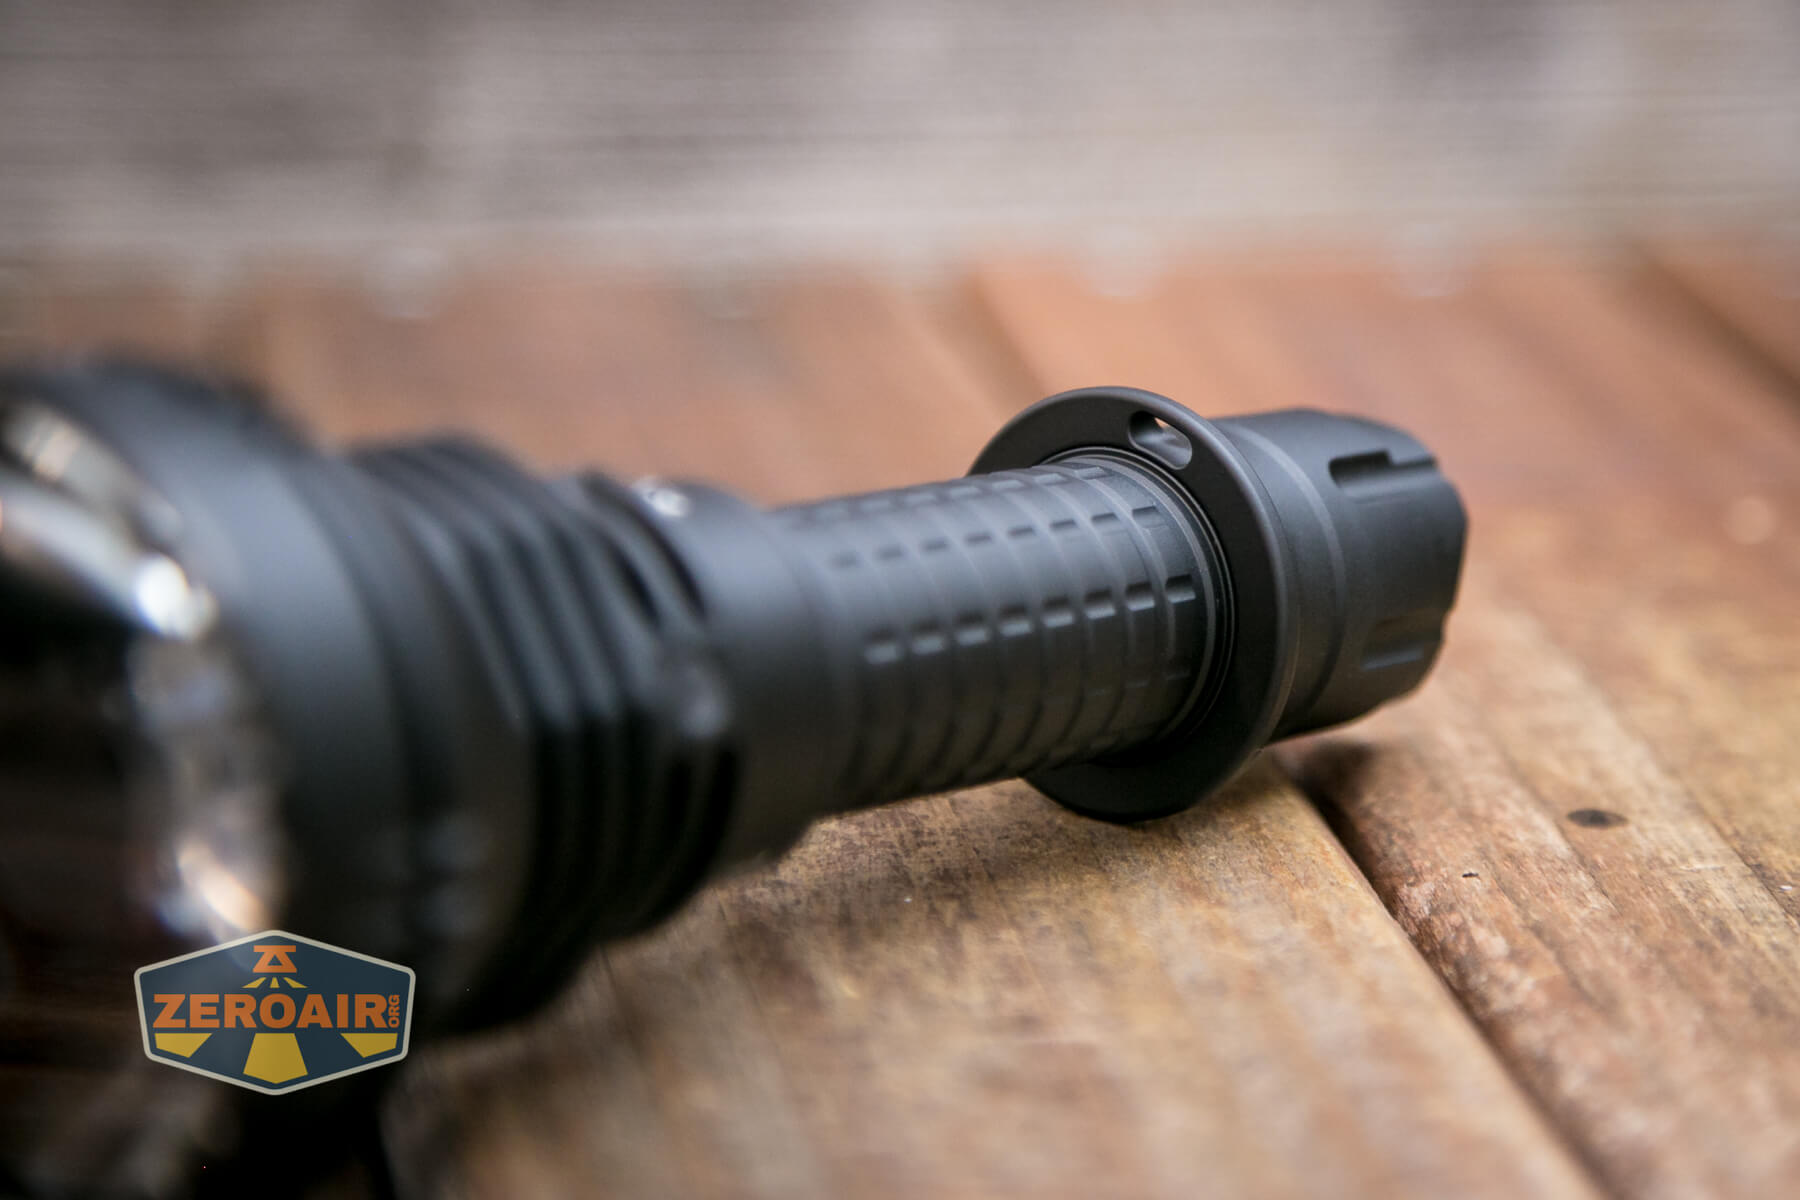
This ring feels metal, but I’m not completely sure if it’s metal or hard plastic.
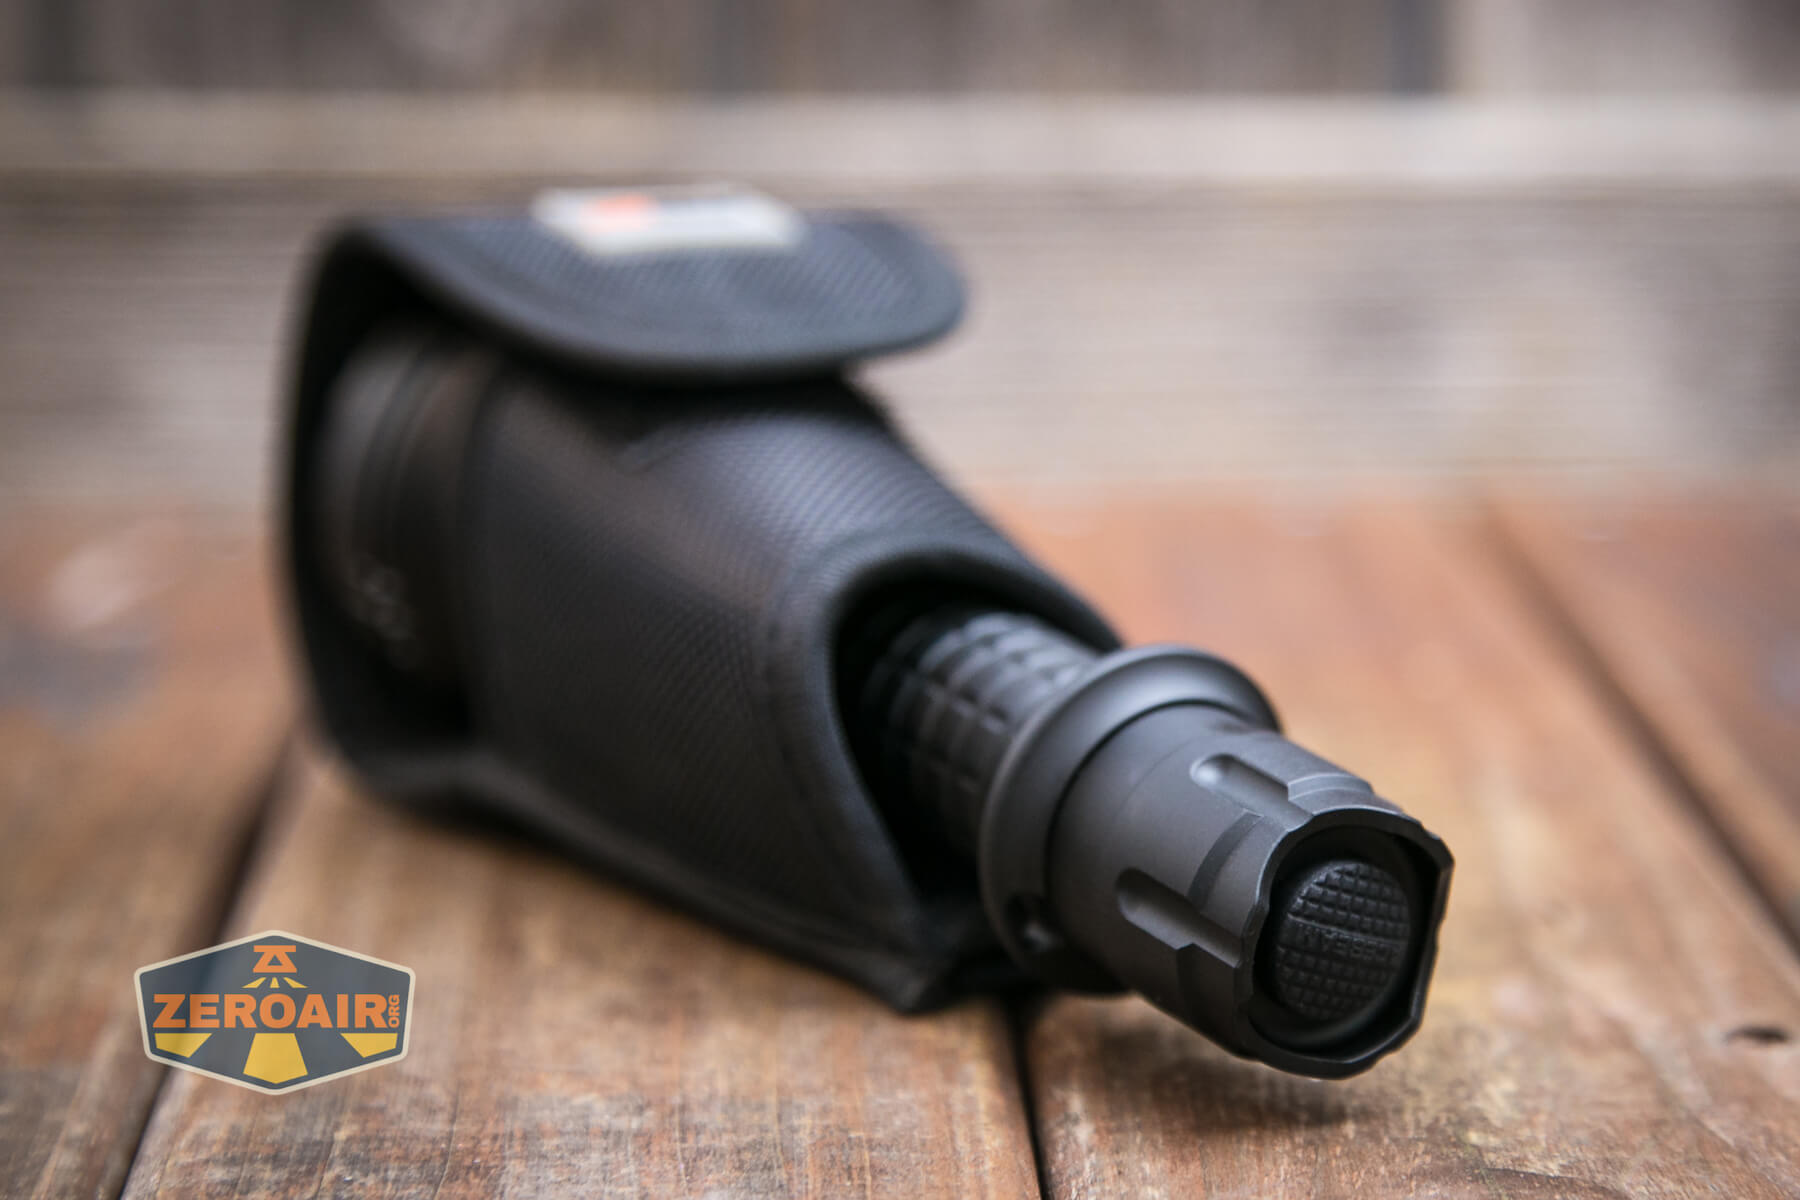
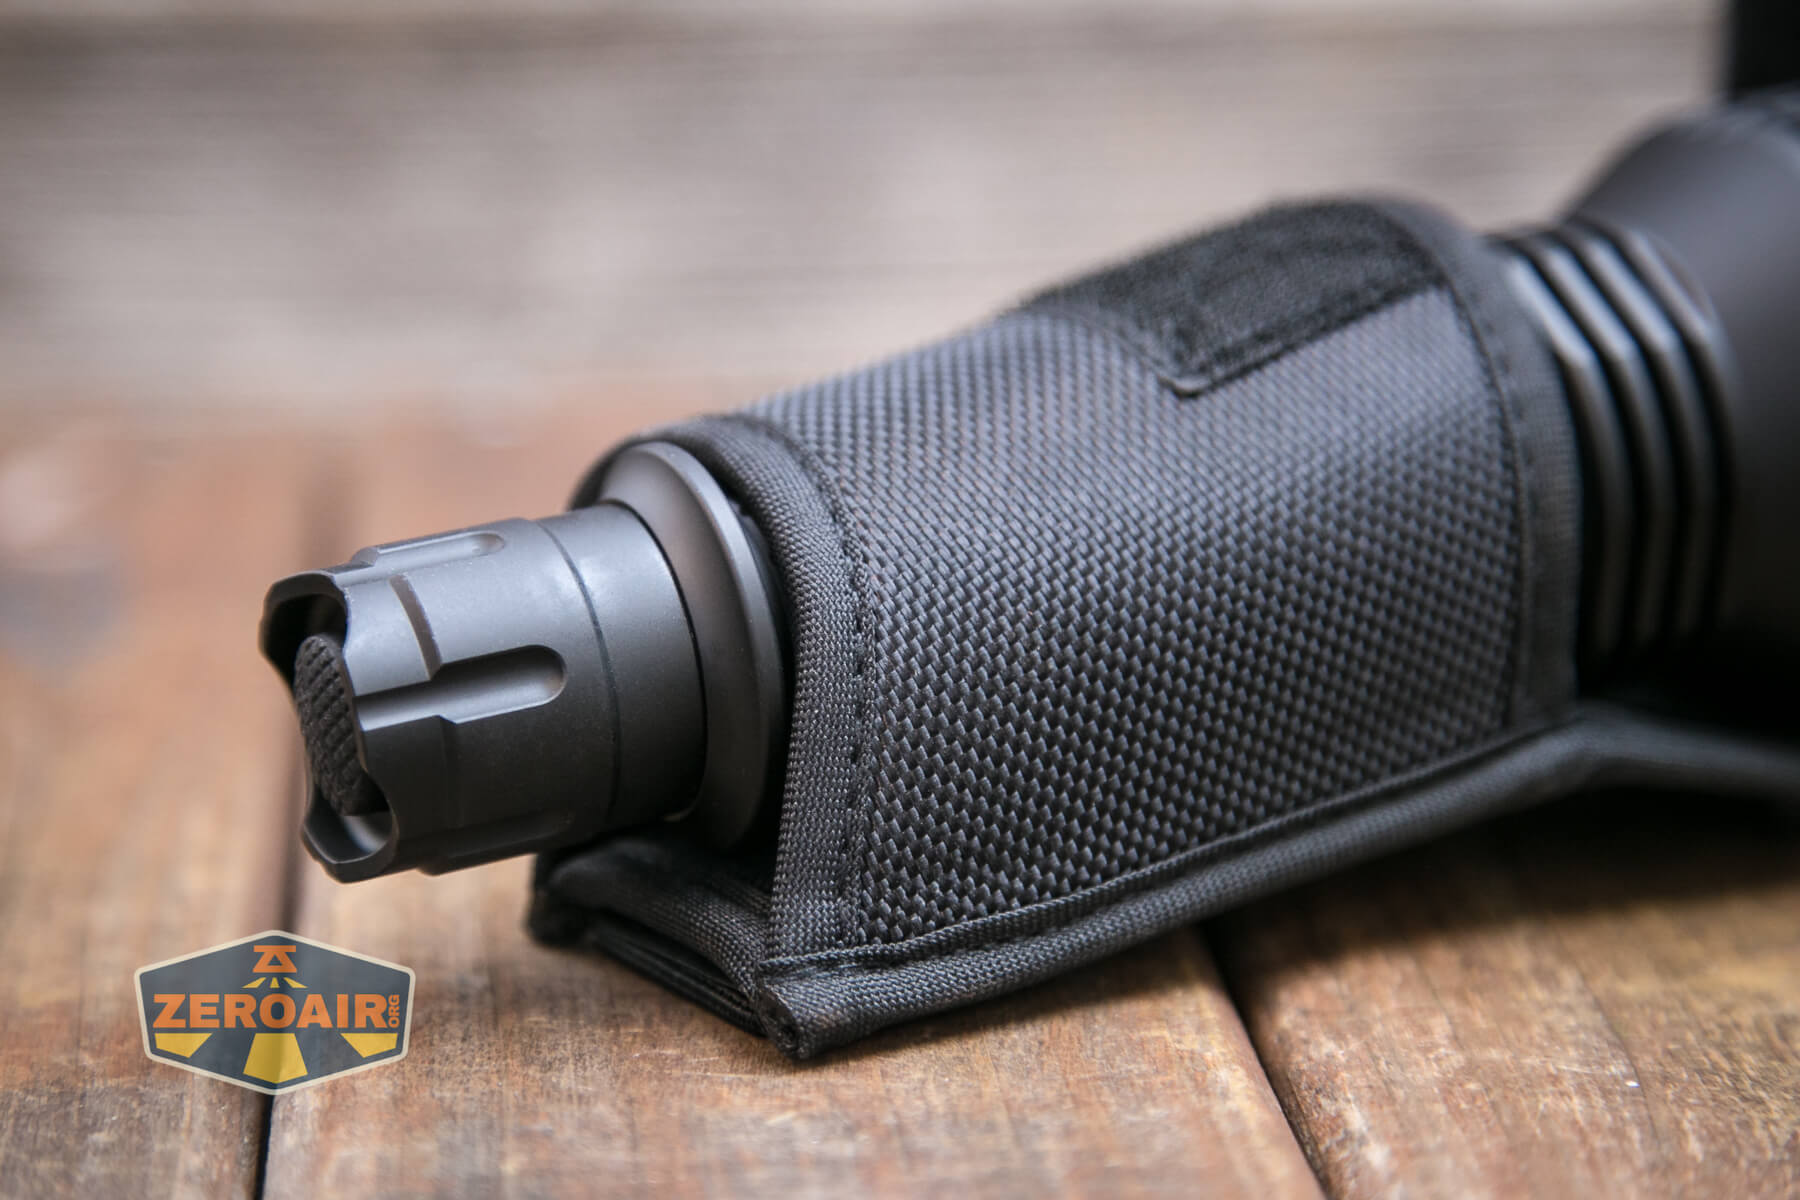
Next is the nylon pouch, which is the same as that used for the L19 previously.
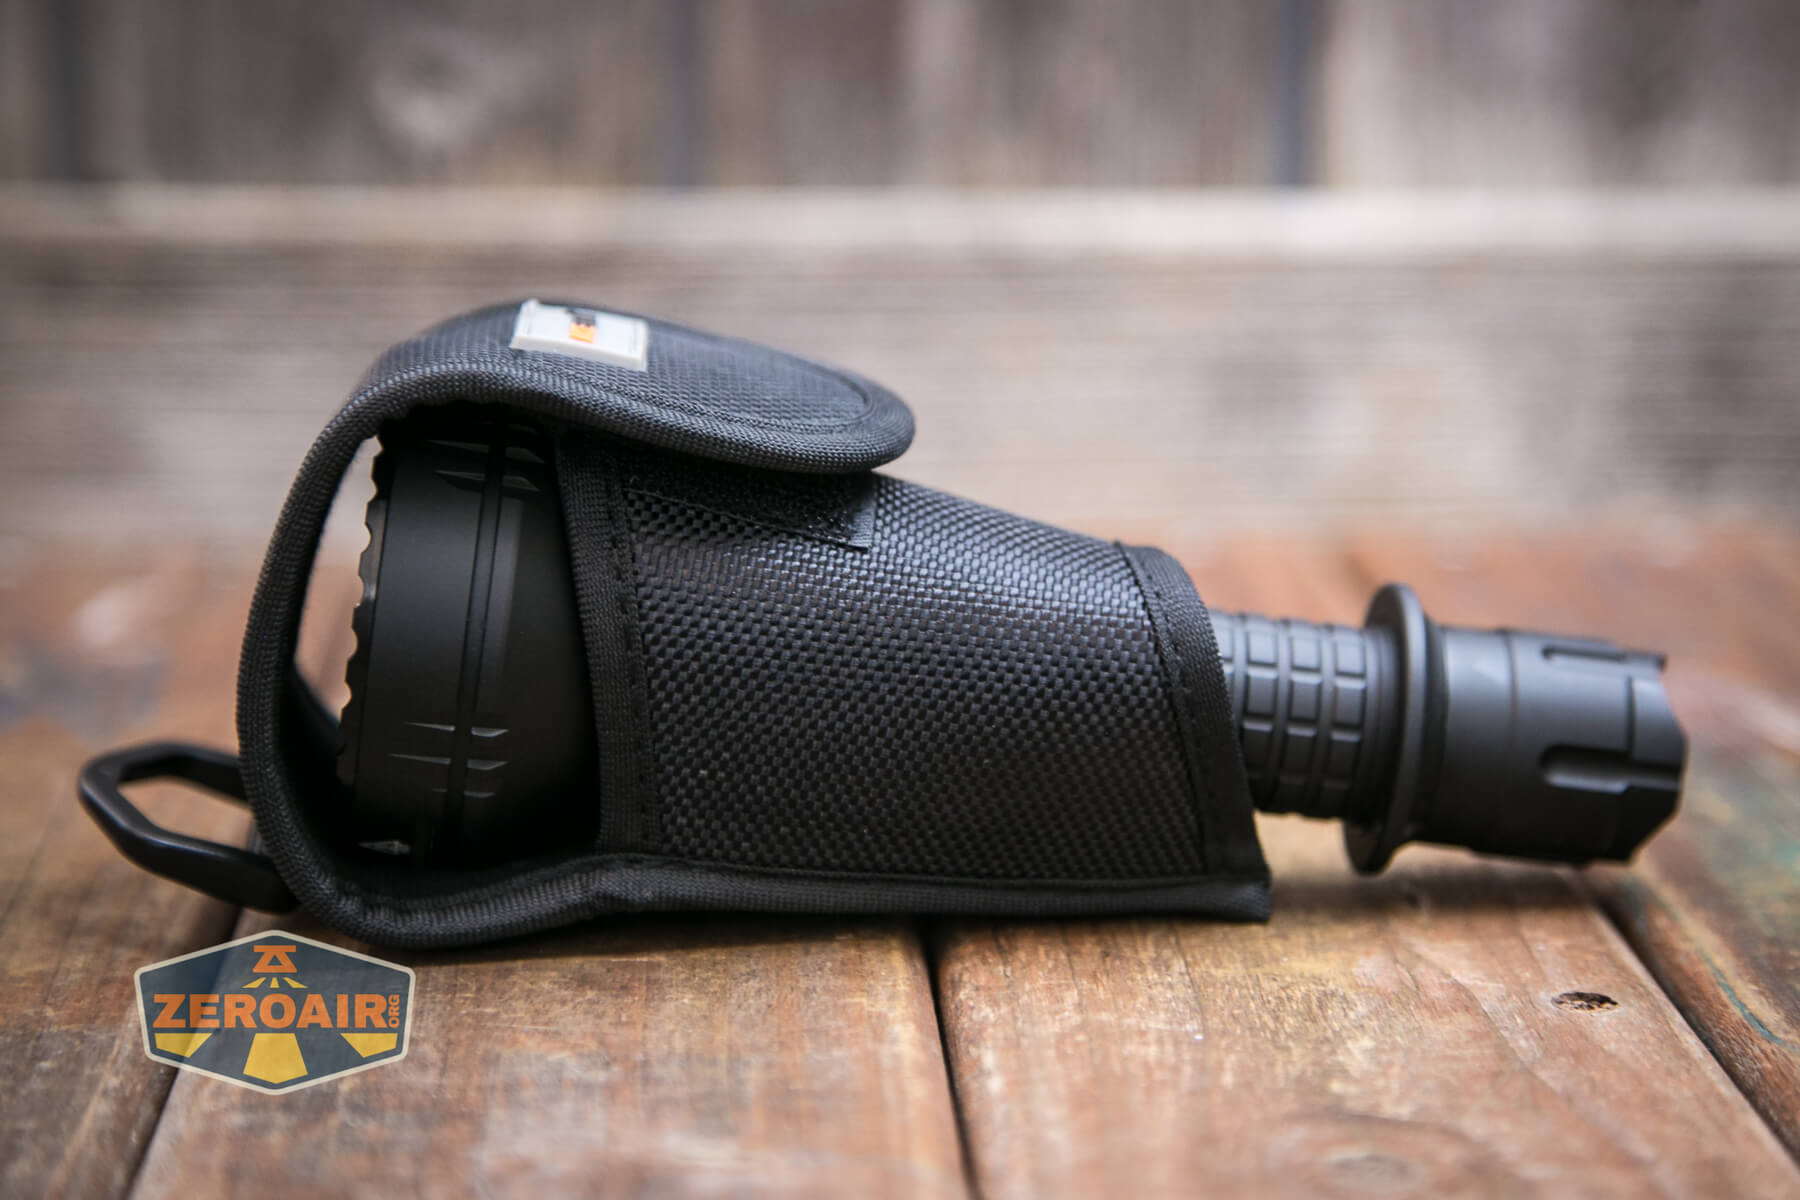
This is a directional pouch and allows for bezel-up carry only. The light will not go into the pouch in the other direction.
You’ll note that this means the tactical ring goes through the small end of the pouch. When removing the light, the tactical ring will catch a bit. The tactical ring is removable (though it is very reluctant to slide over one of the o-rings (a good thing)), and if you use the light in this pouch but don’t really need the tac ring, you’ll likely want it removed for ease of access.

There is no pocket or belt clip.
This is a tactical light, though, and Acebeam does offer a number of related accessories. There’s a rail mount of some sort, for example. A remote switch is available, too.
Power and Runtime
Power to the Acebeam L19 V2.0 flashlight is from a single lithium-ion cell. My package included a cell, and I think now (as opposed to the option on the original), the cell is included at the purchase price. The cell is a 5100mAh 21700.
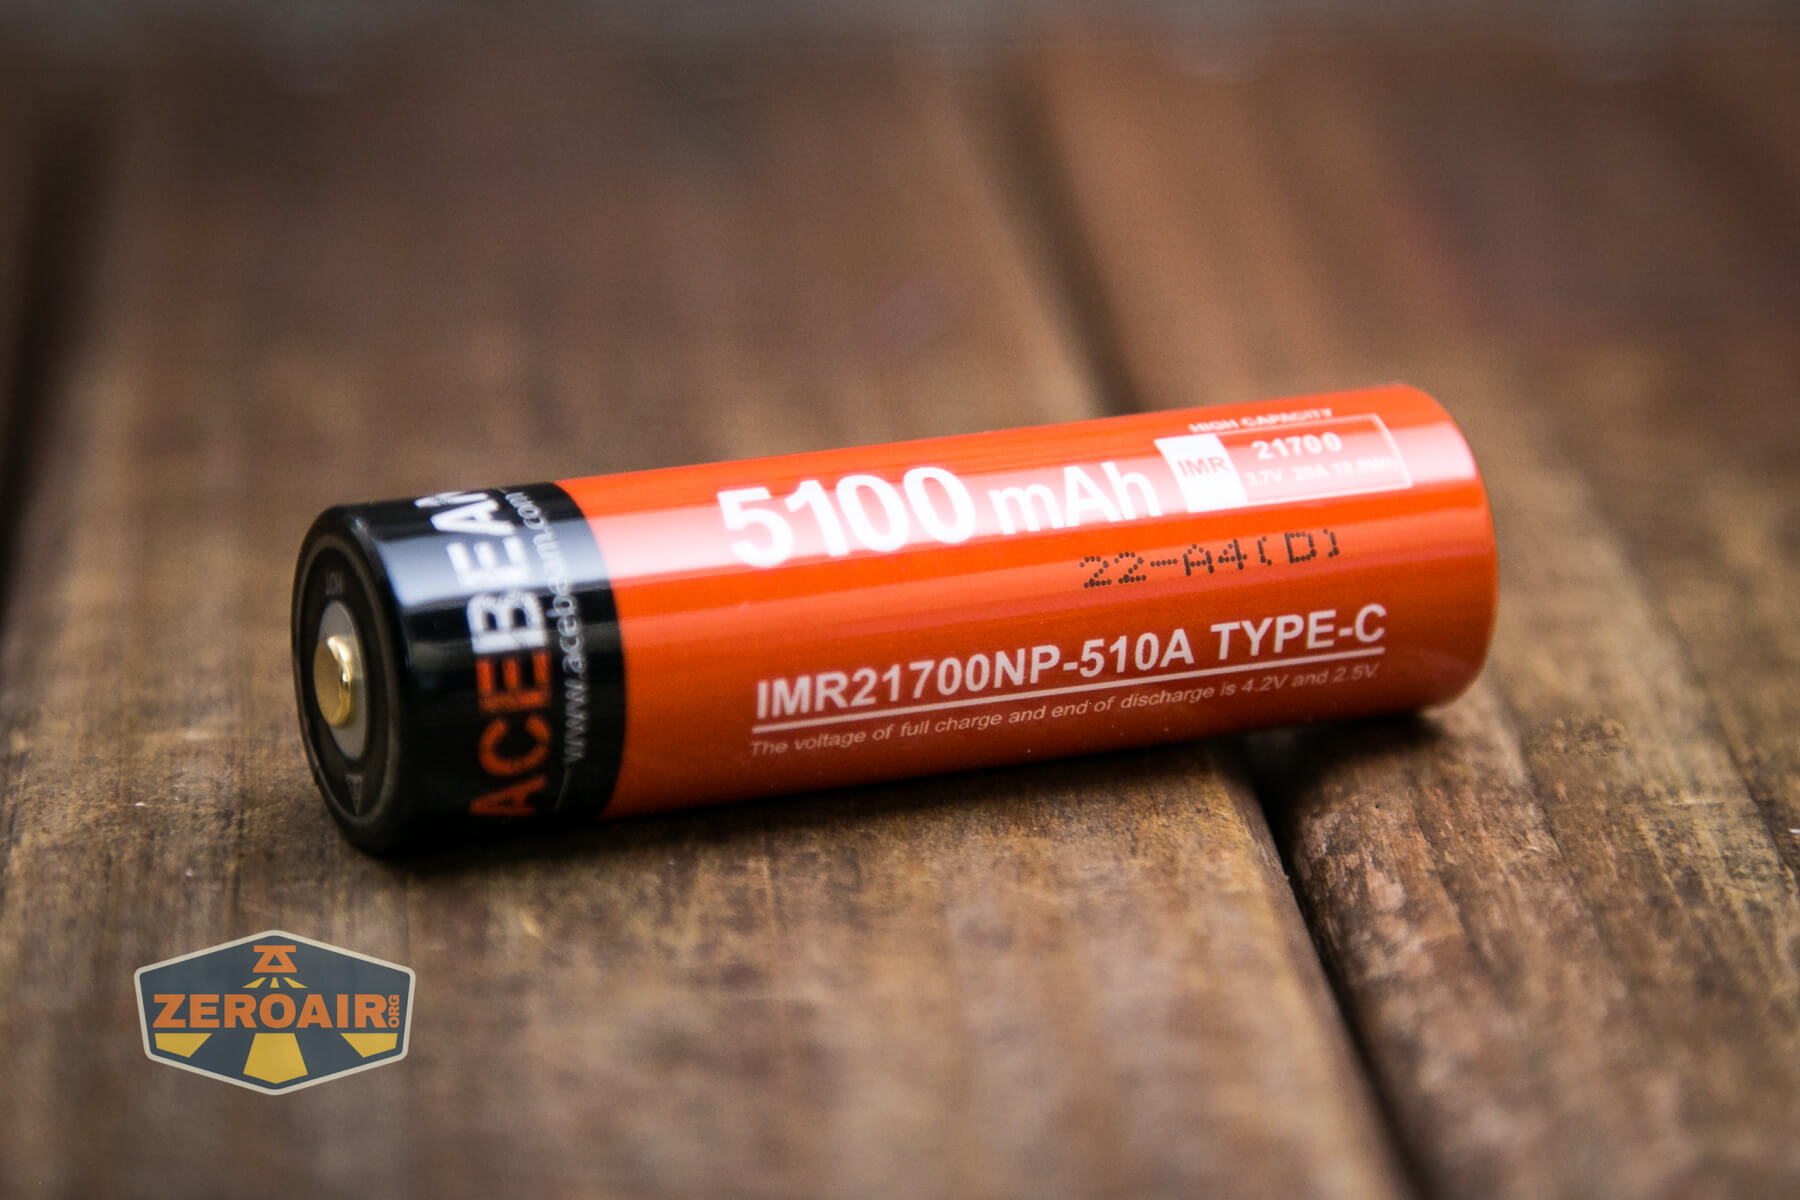
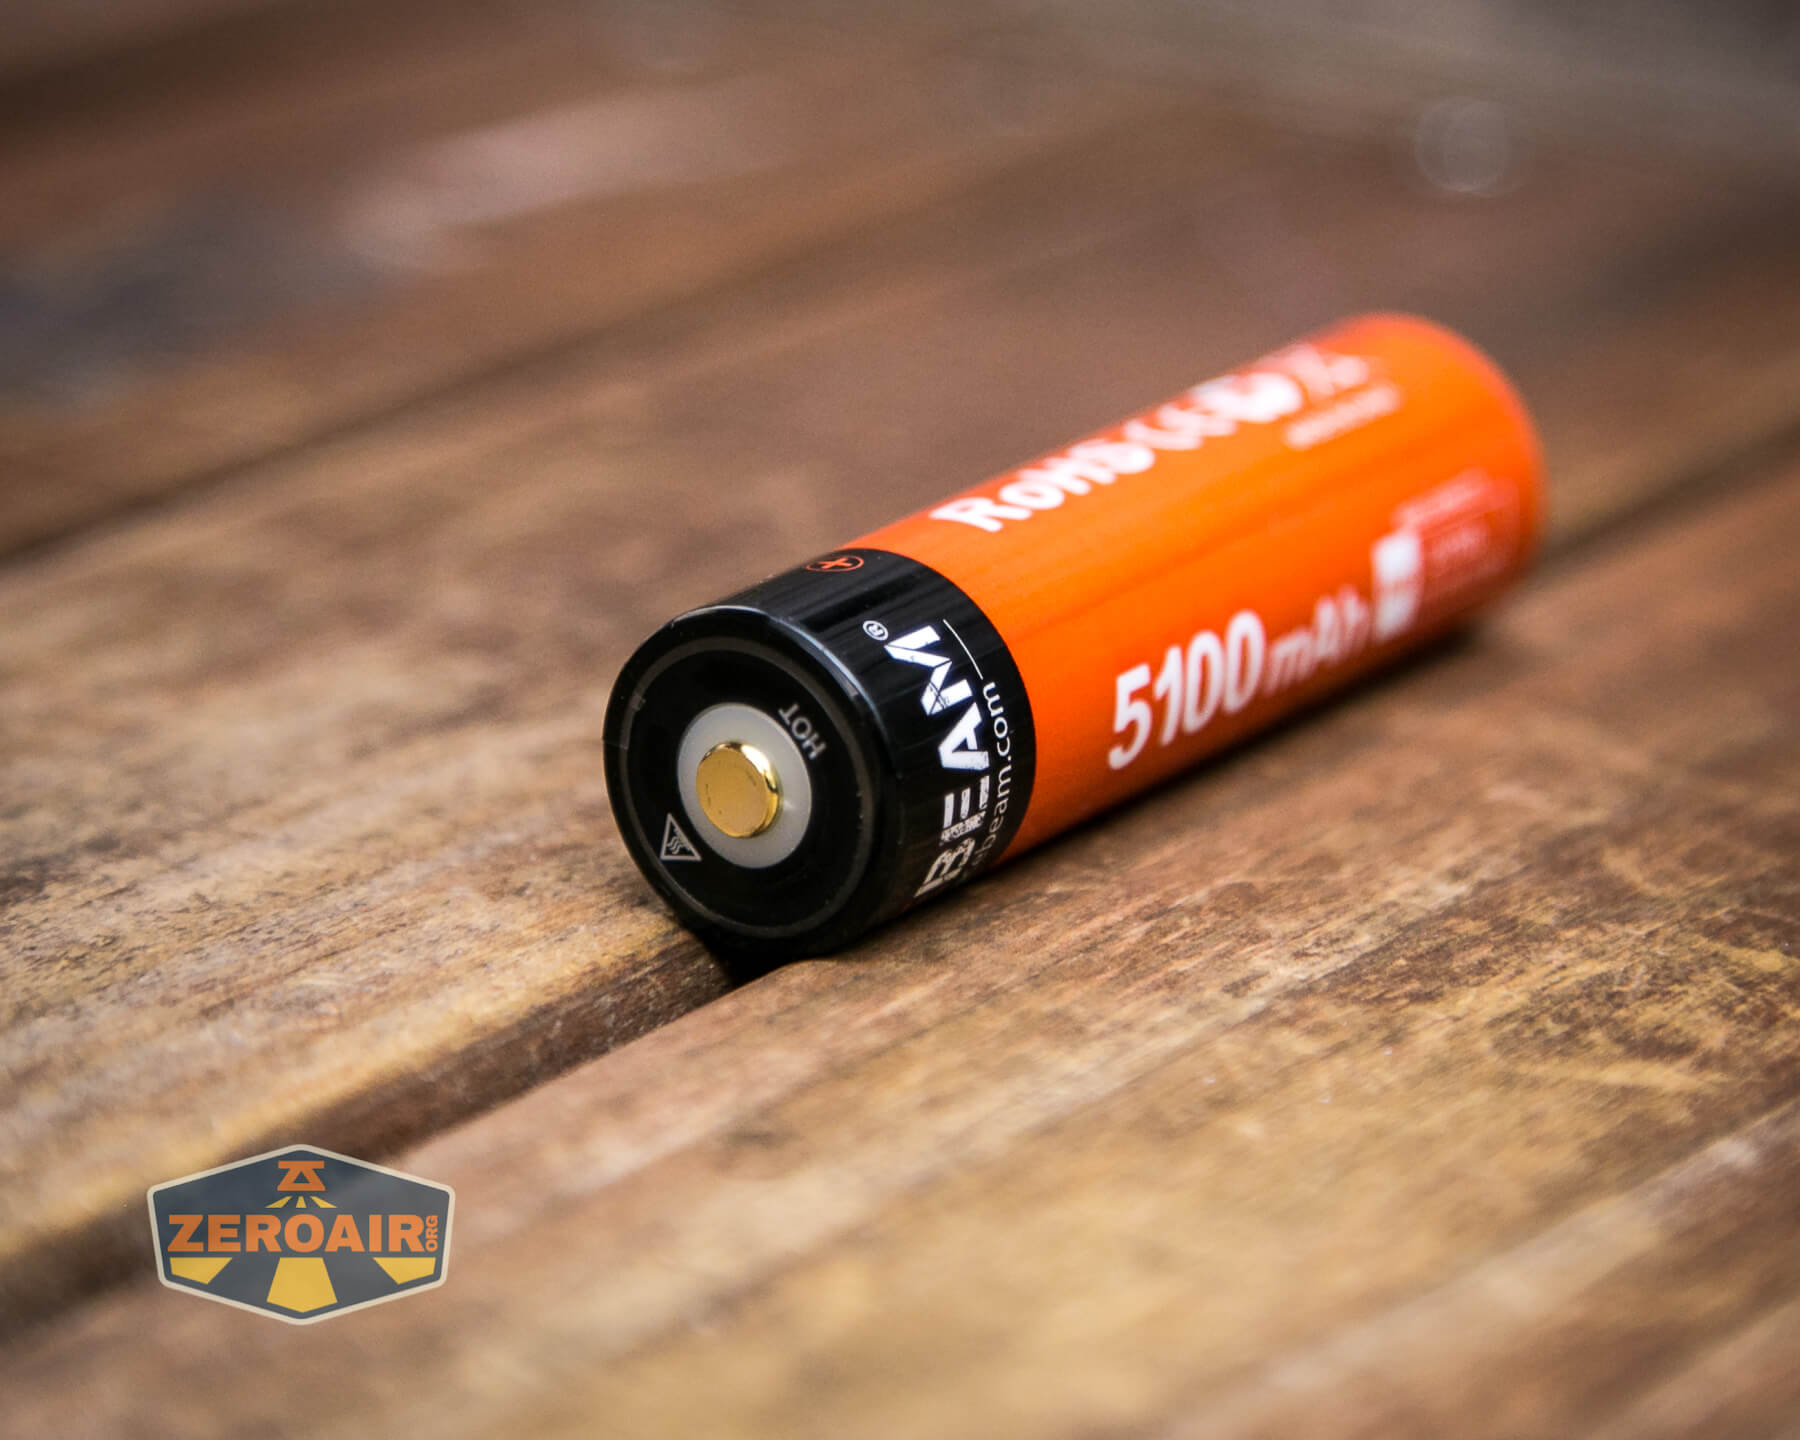
The cell is a button top.
The cell is installed into the L19 in the usual way – positive terminal toward the head.
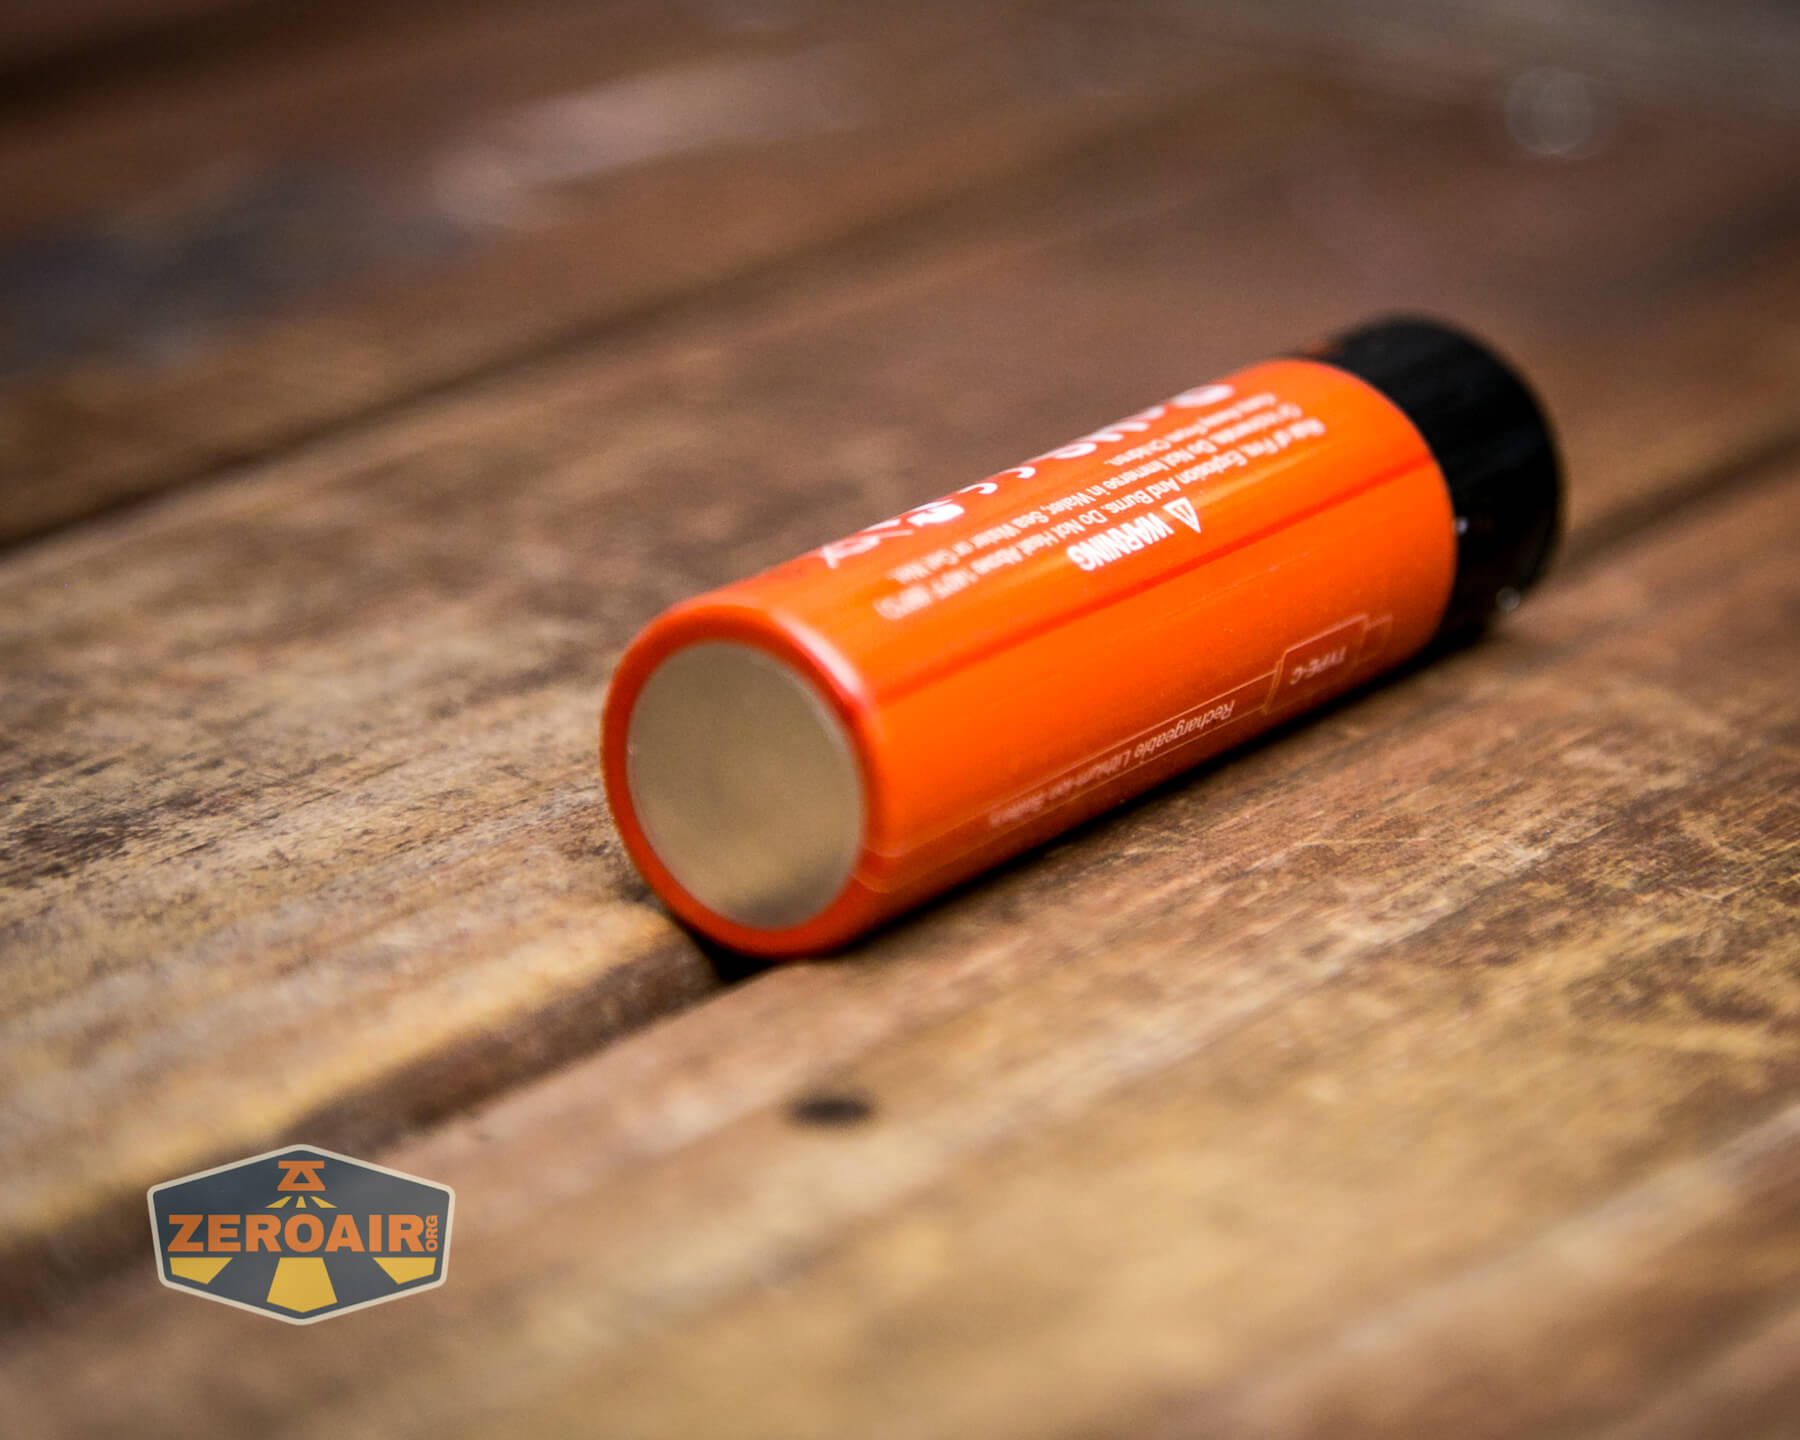
The included cell fits well, but a flat top unprotected cell also fits and works.
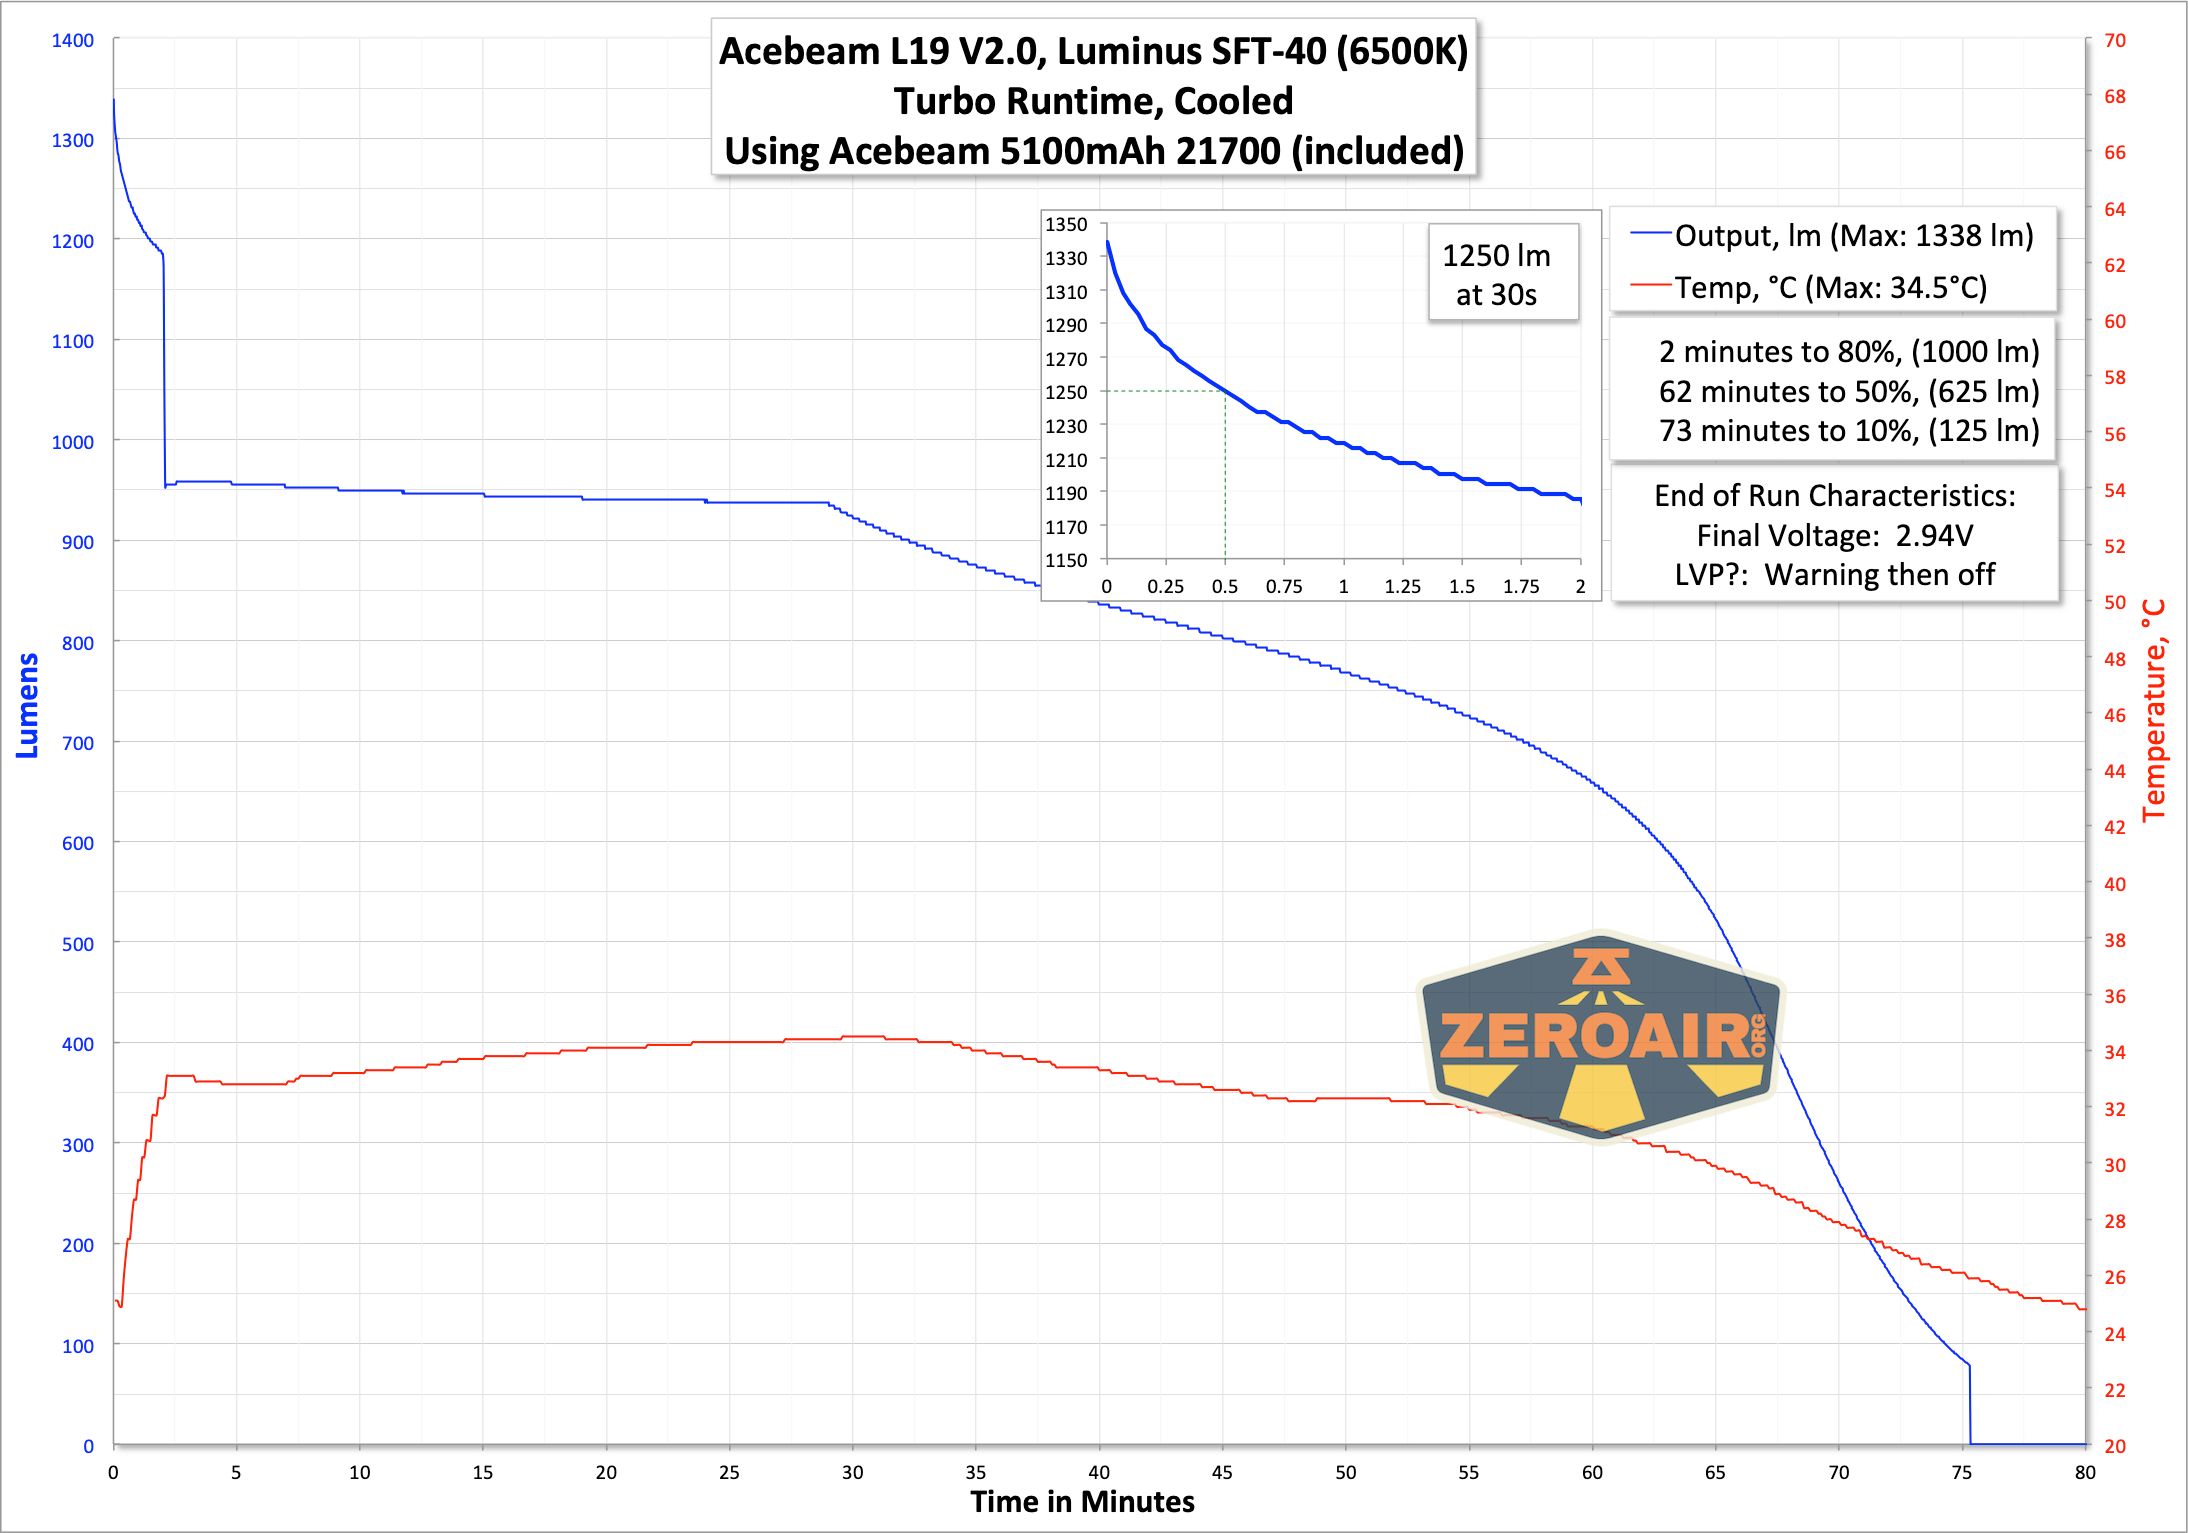
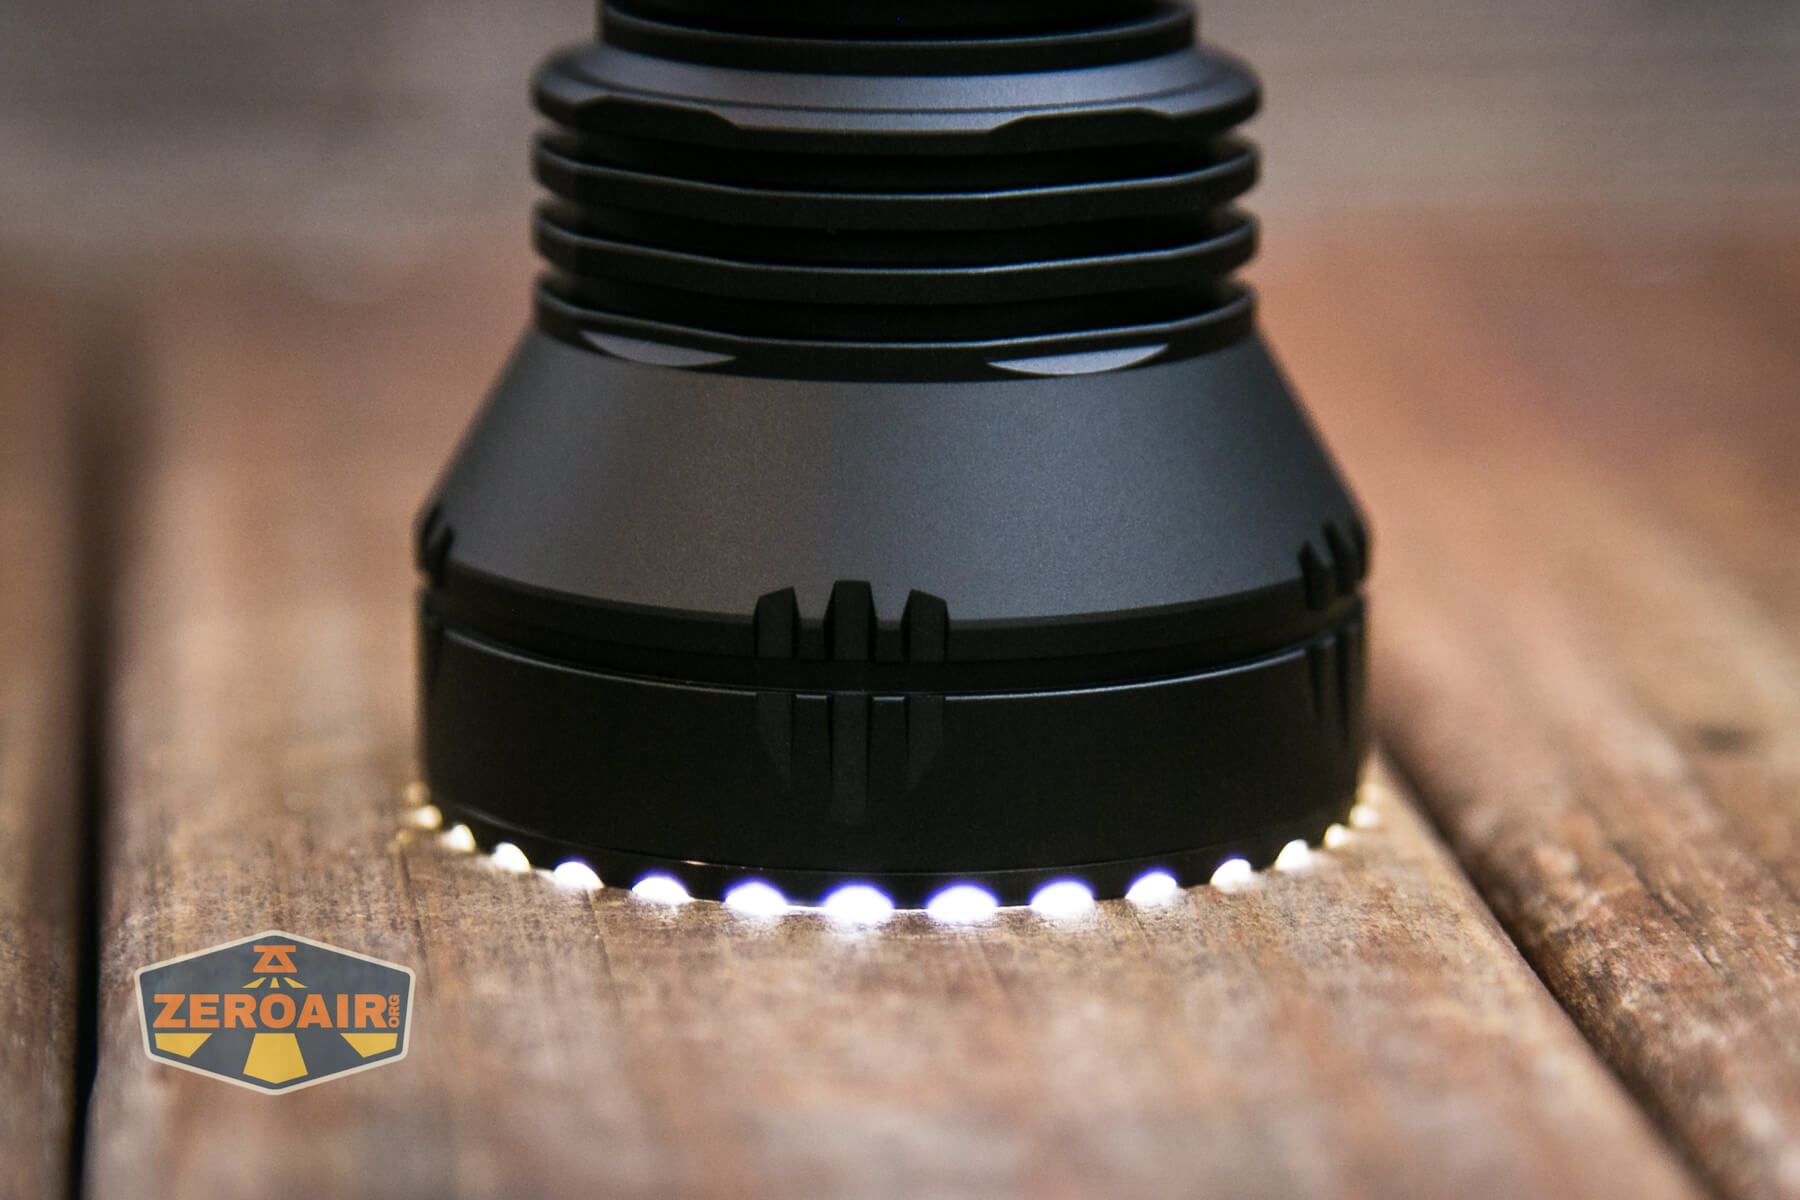
Here are a few runtimes. While I love the bezels like this, which have flutes (or “teeth”) that allow light to escape when headstanding, this does affect runtime tests in a way that I haven’t yet been able to correct for. When any light escapes this way, it’s not captured in these tests. As a result, the total output is definitely higher than what I see below, but by how much I am not sure. Also, this beam is very throwy, which might not be picked up perfectly in my “consumer-calibrated” measuring device. More important than the total output being below the claim, the throw is on the mark. So I wouldn’t really worry much about the measured output being lower (much lower) than the claim.
On bench power, the low voltage characteristics are as follows:
3.1V: red indication
2.9V: red flash indication
2.7V: light is off
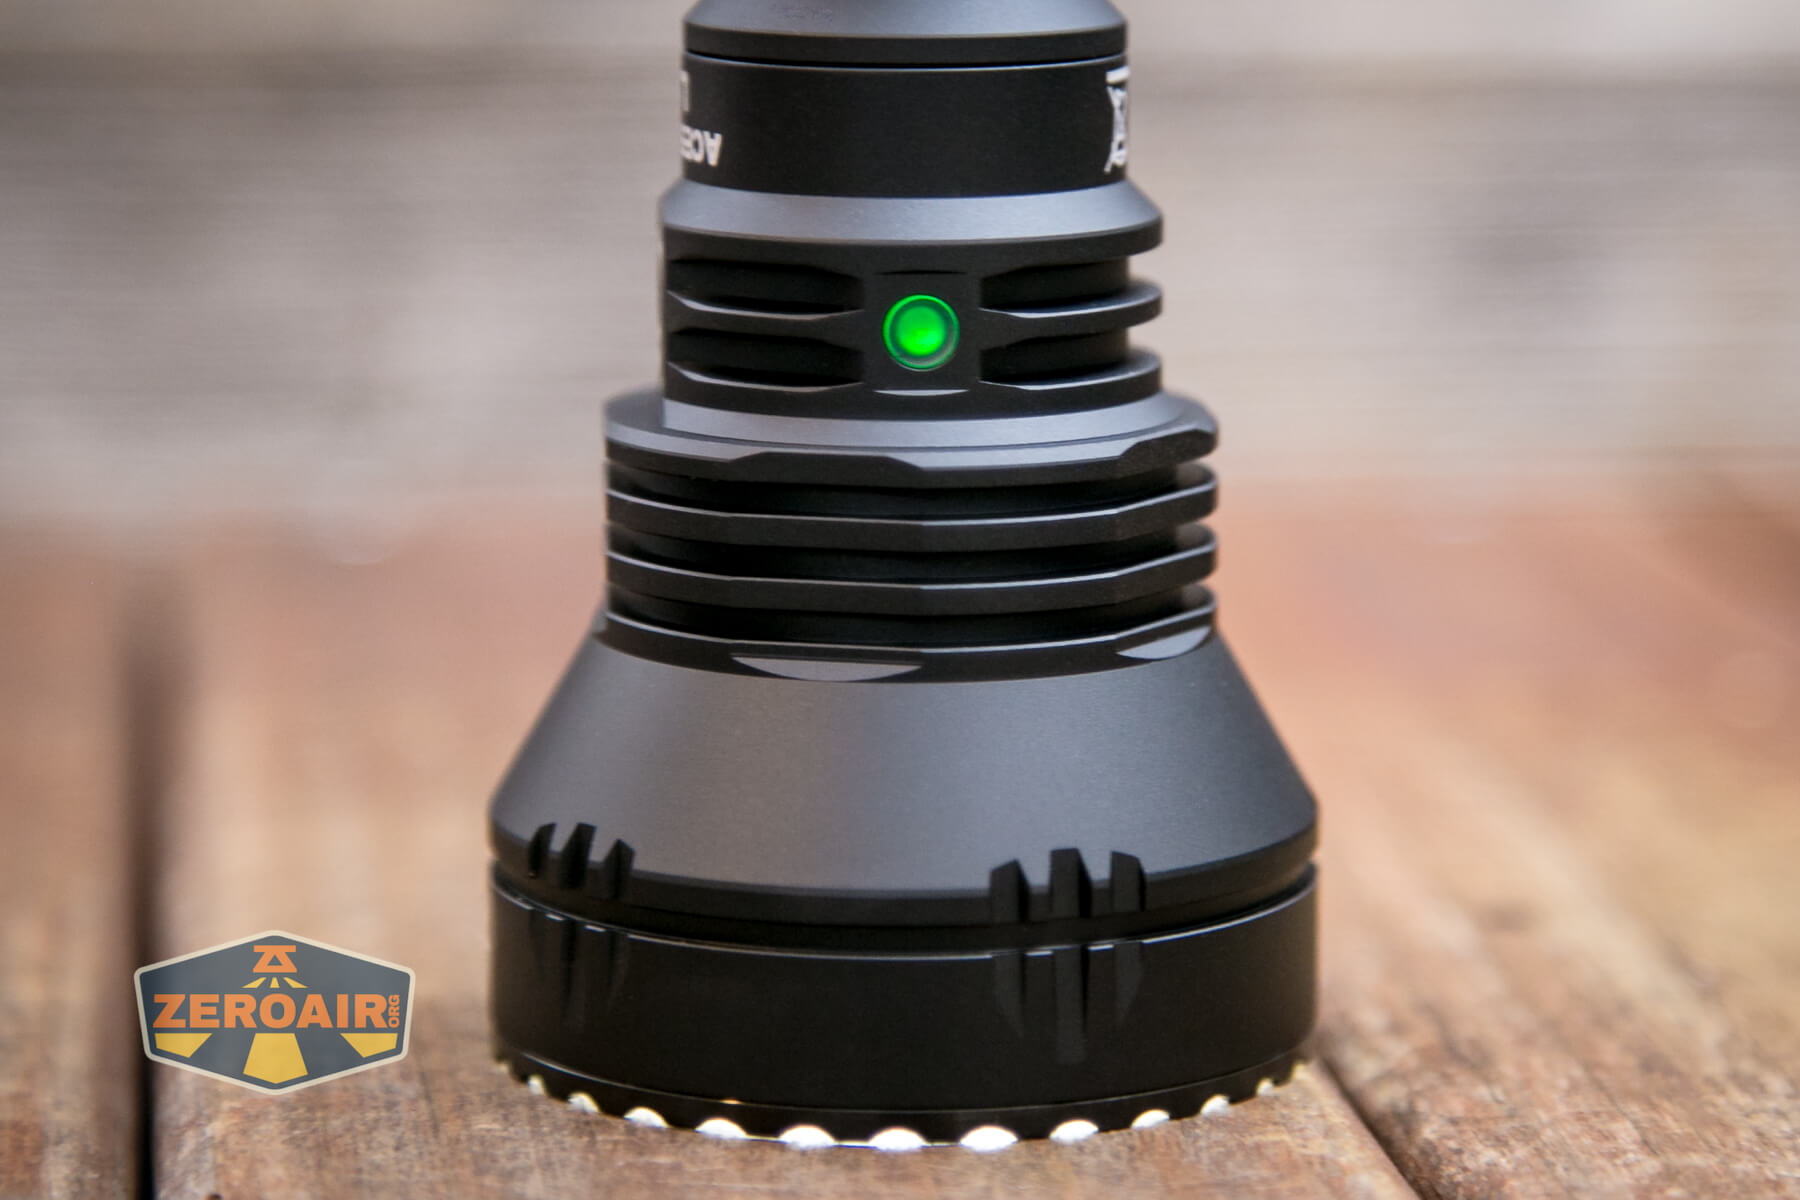
While we’re on the topic of power, note that this LED indicator does provide cell power information.
The LED on the head near the switch also indicates power, as follows:
Green: >30% power
Red: Between 10 and 30% power
Red Flashing: <10% power
Charging
This cell has a USB-C charge port in the head!
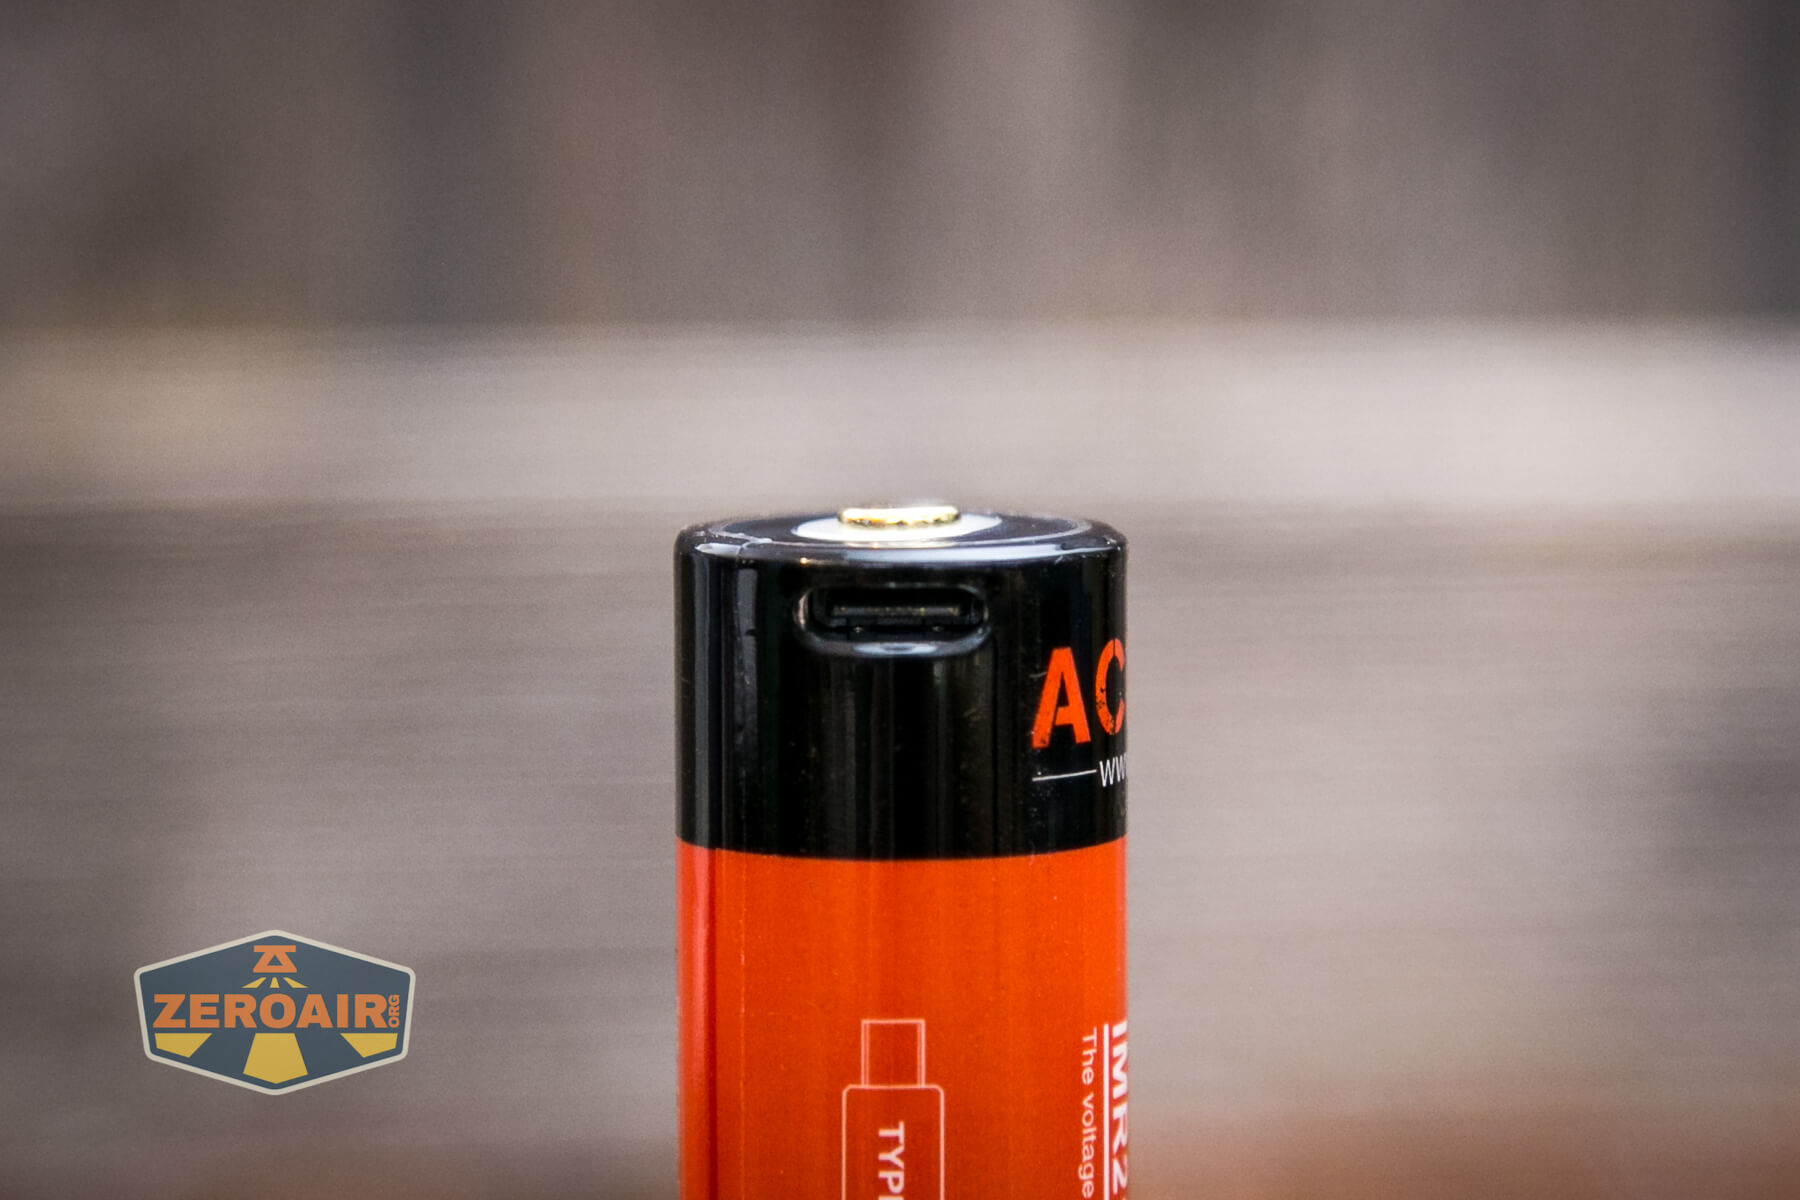
Not only that, but there’s a charge indicator on the positive end of the cell. This is a bit different from the cell formerly sold by Acebeam, though. The indicator is hidden behind that white ring.

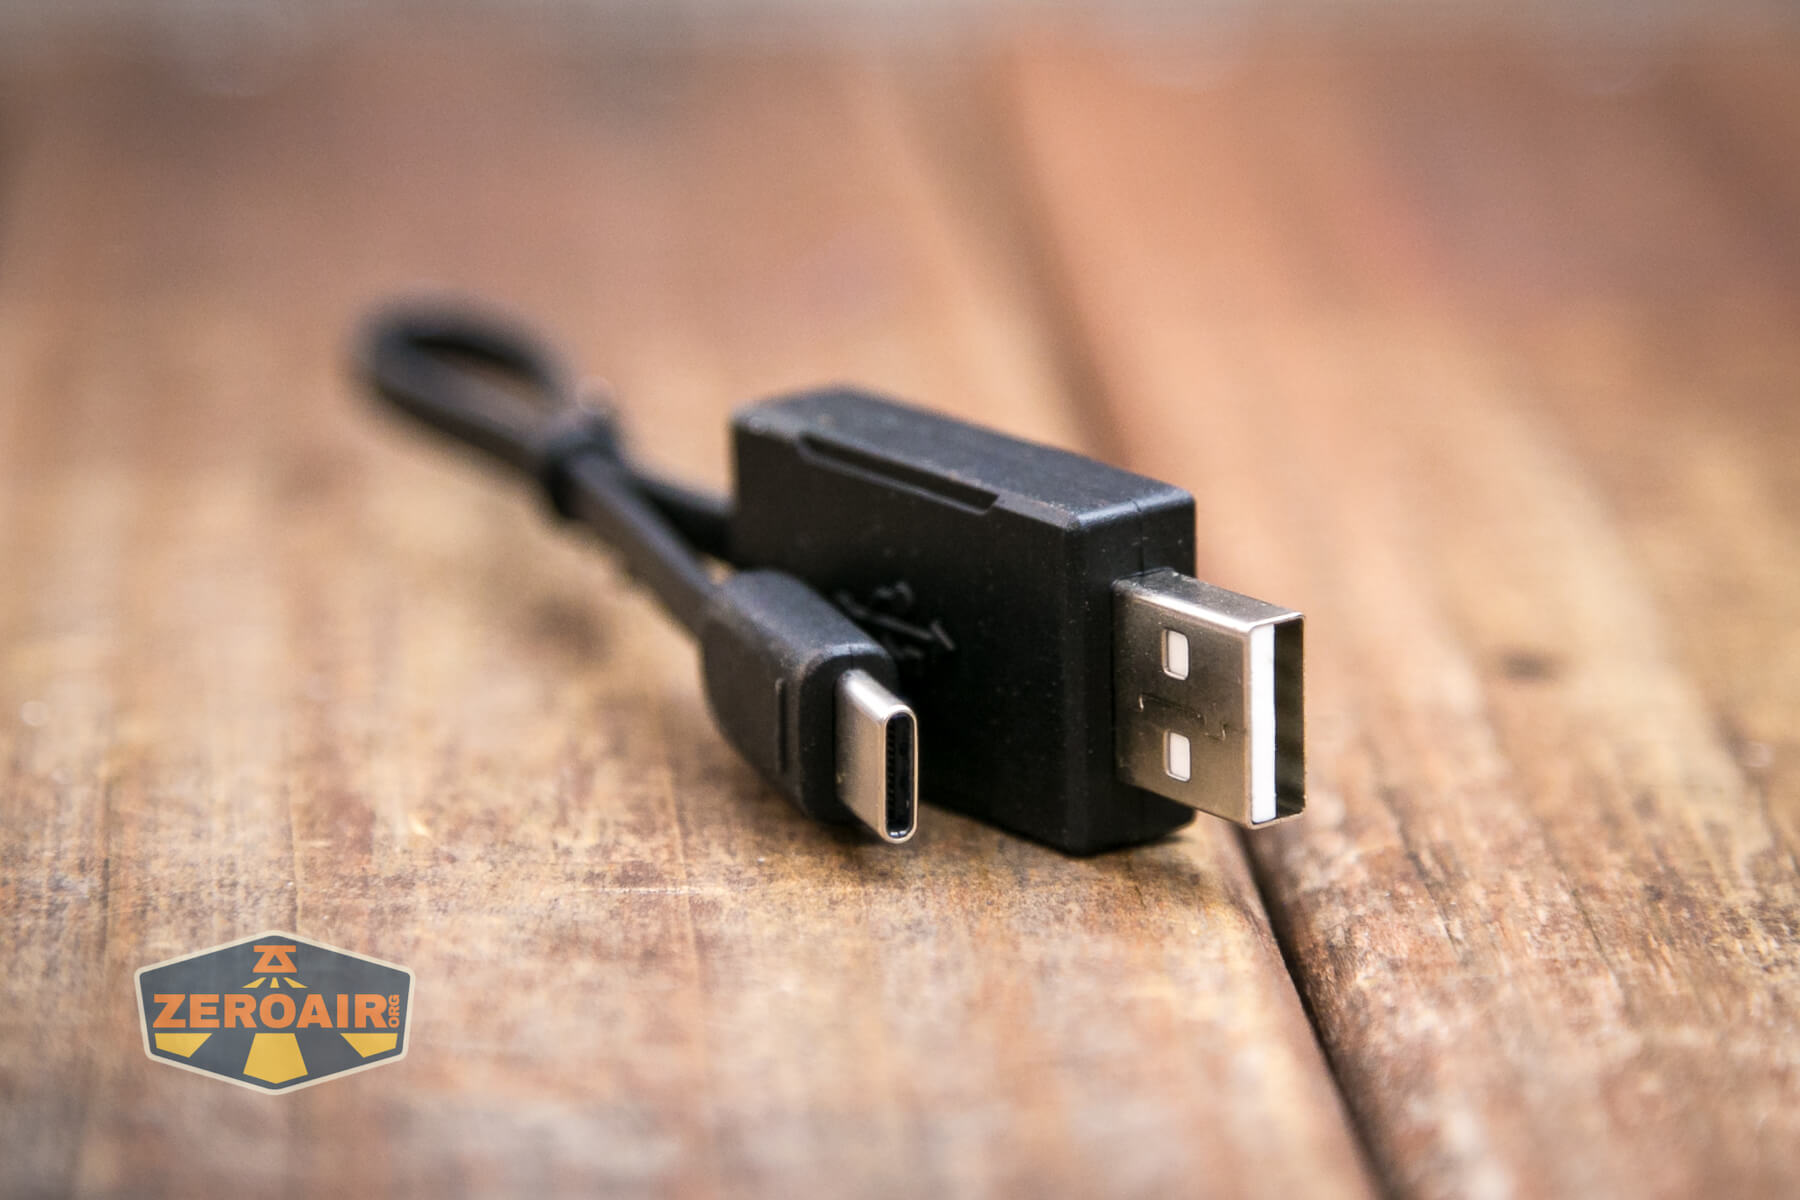
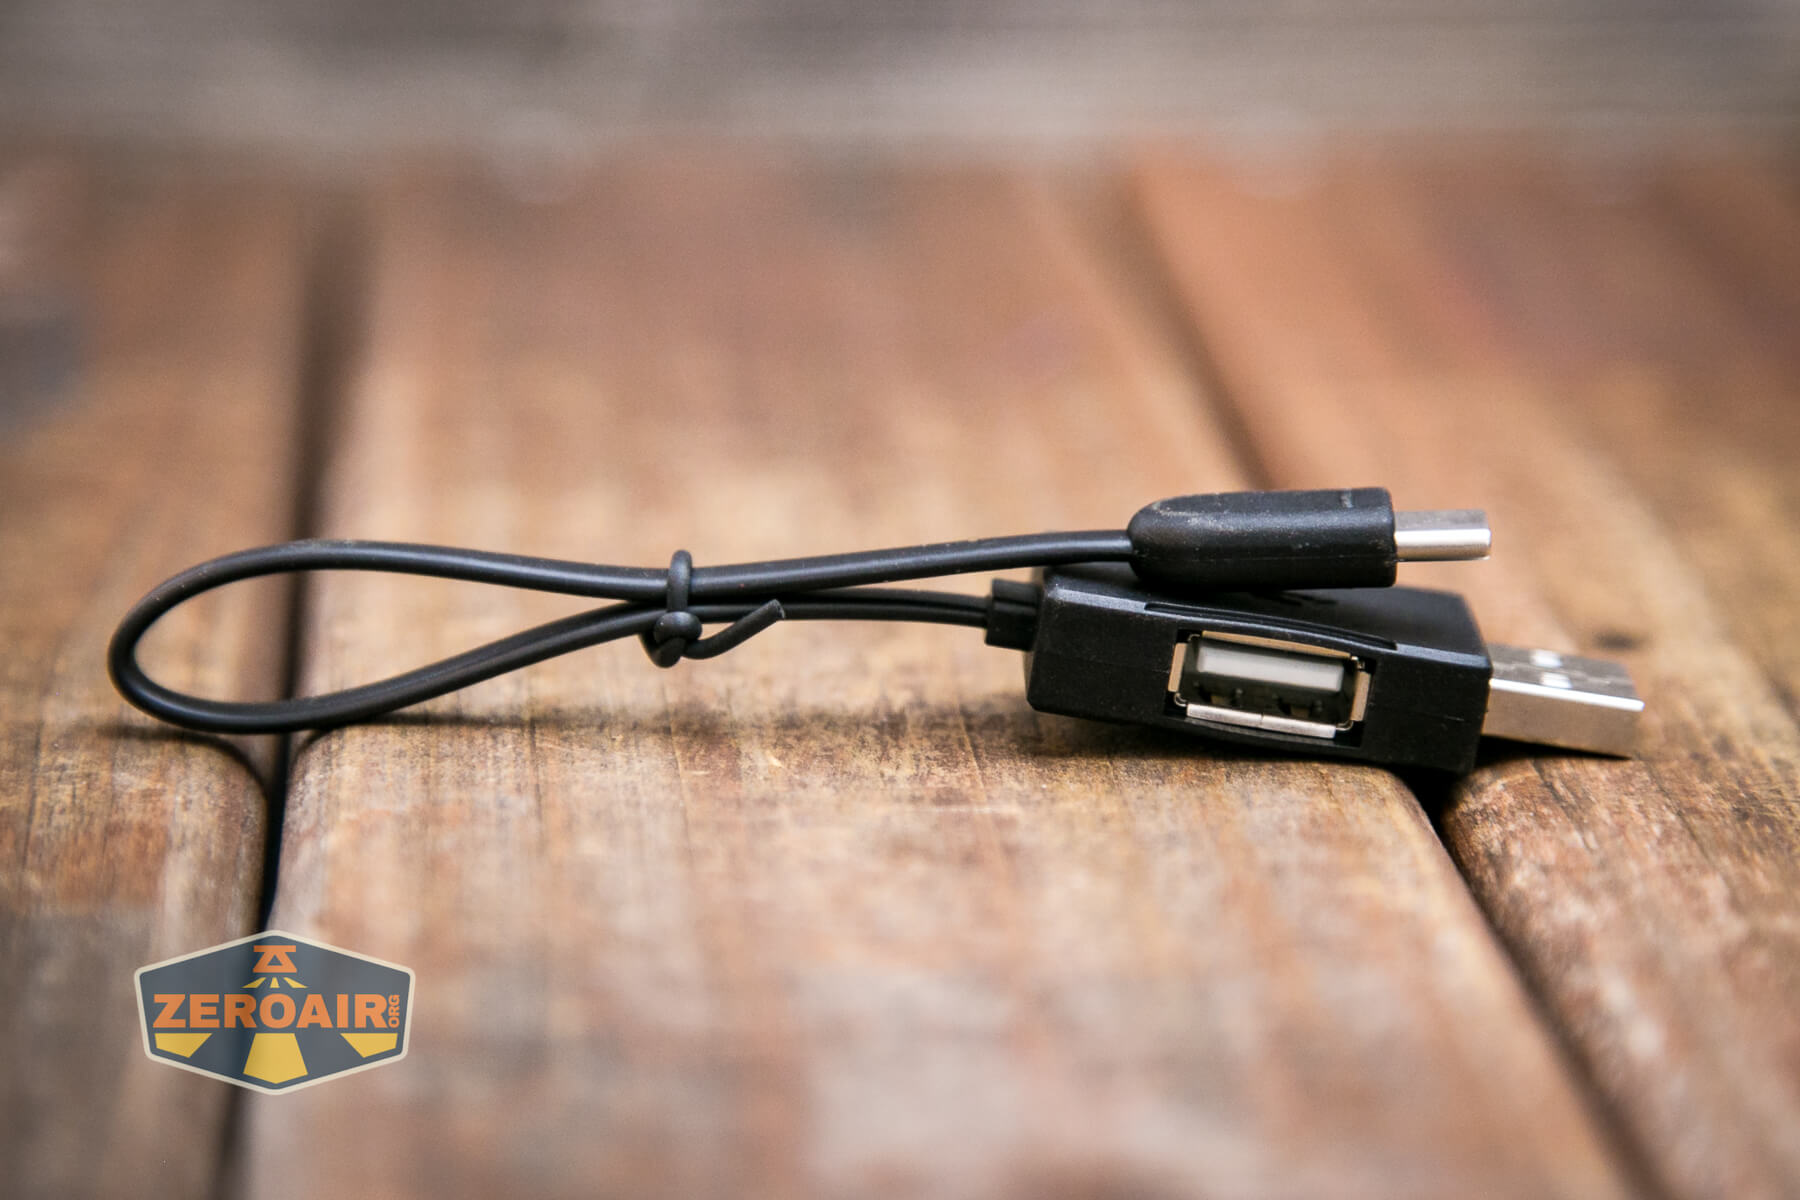
Also included is a charging cable. It’s a short cable with USB on one end and USB-C on the other. The USB end has a female USB port too, for using the cell as a powerbank (!!!).
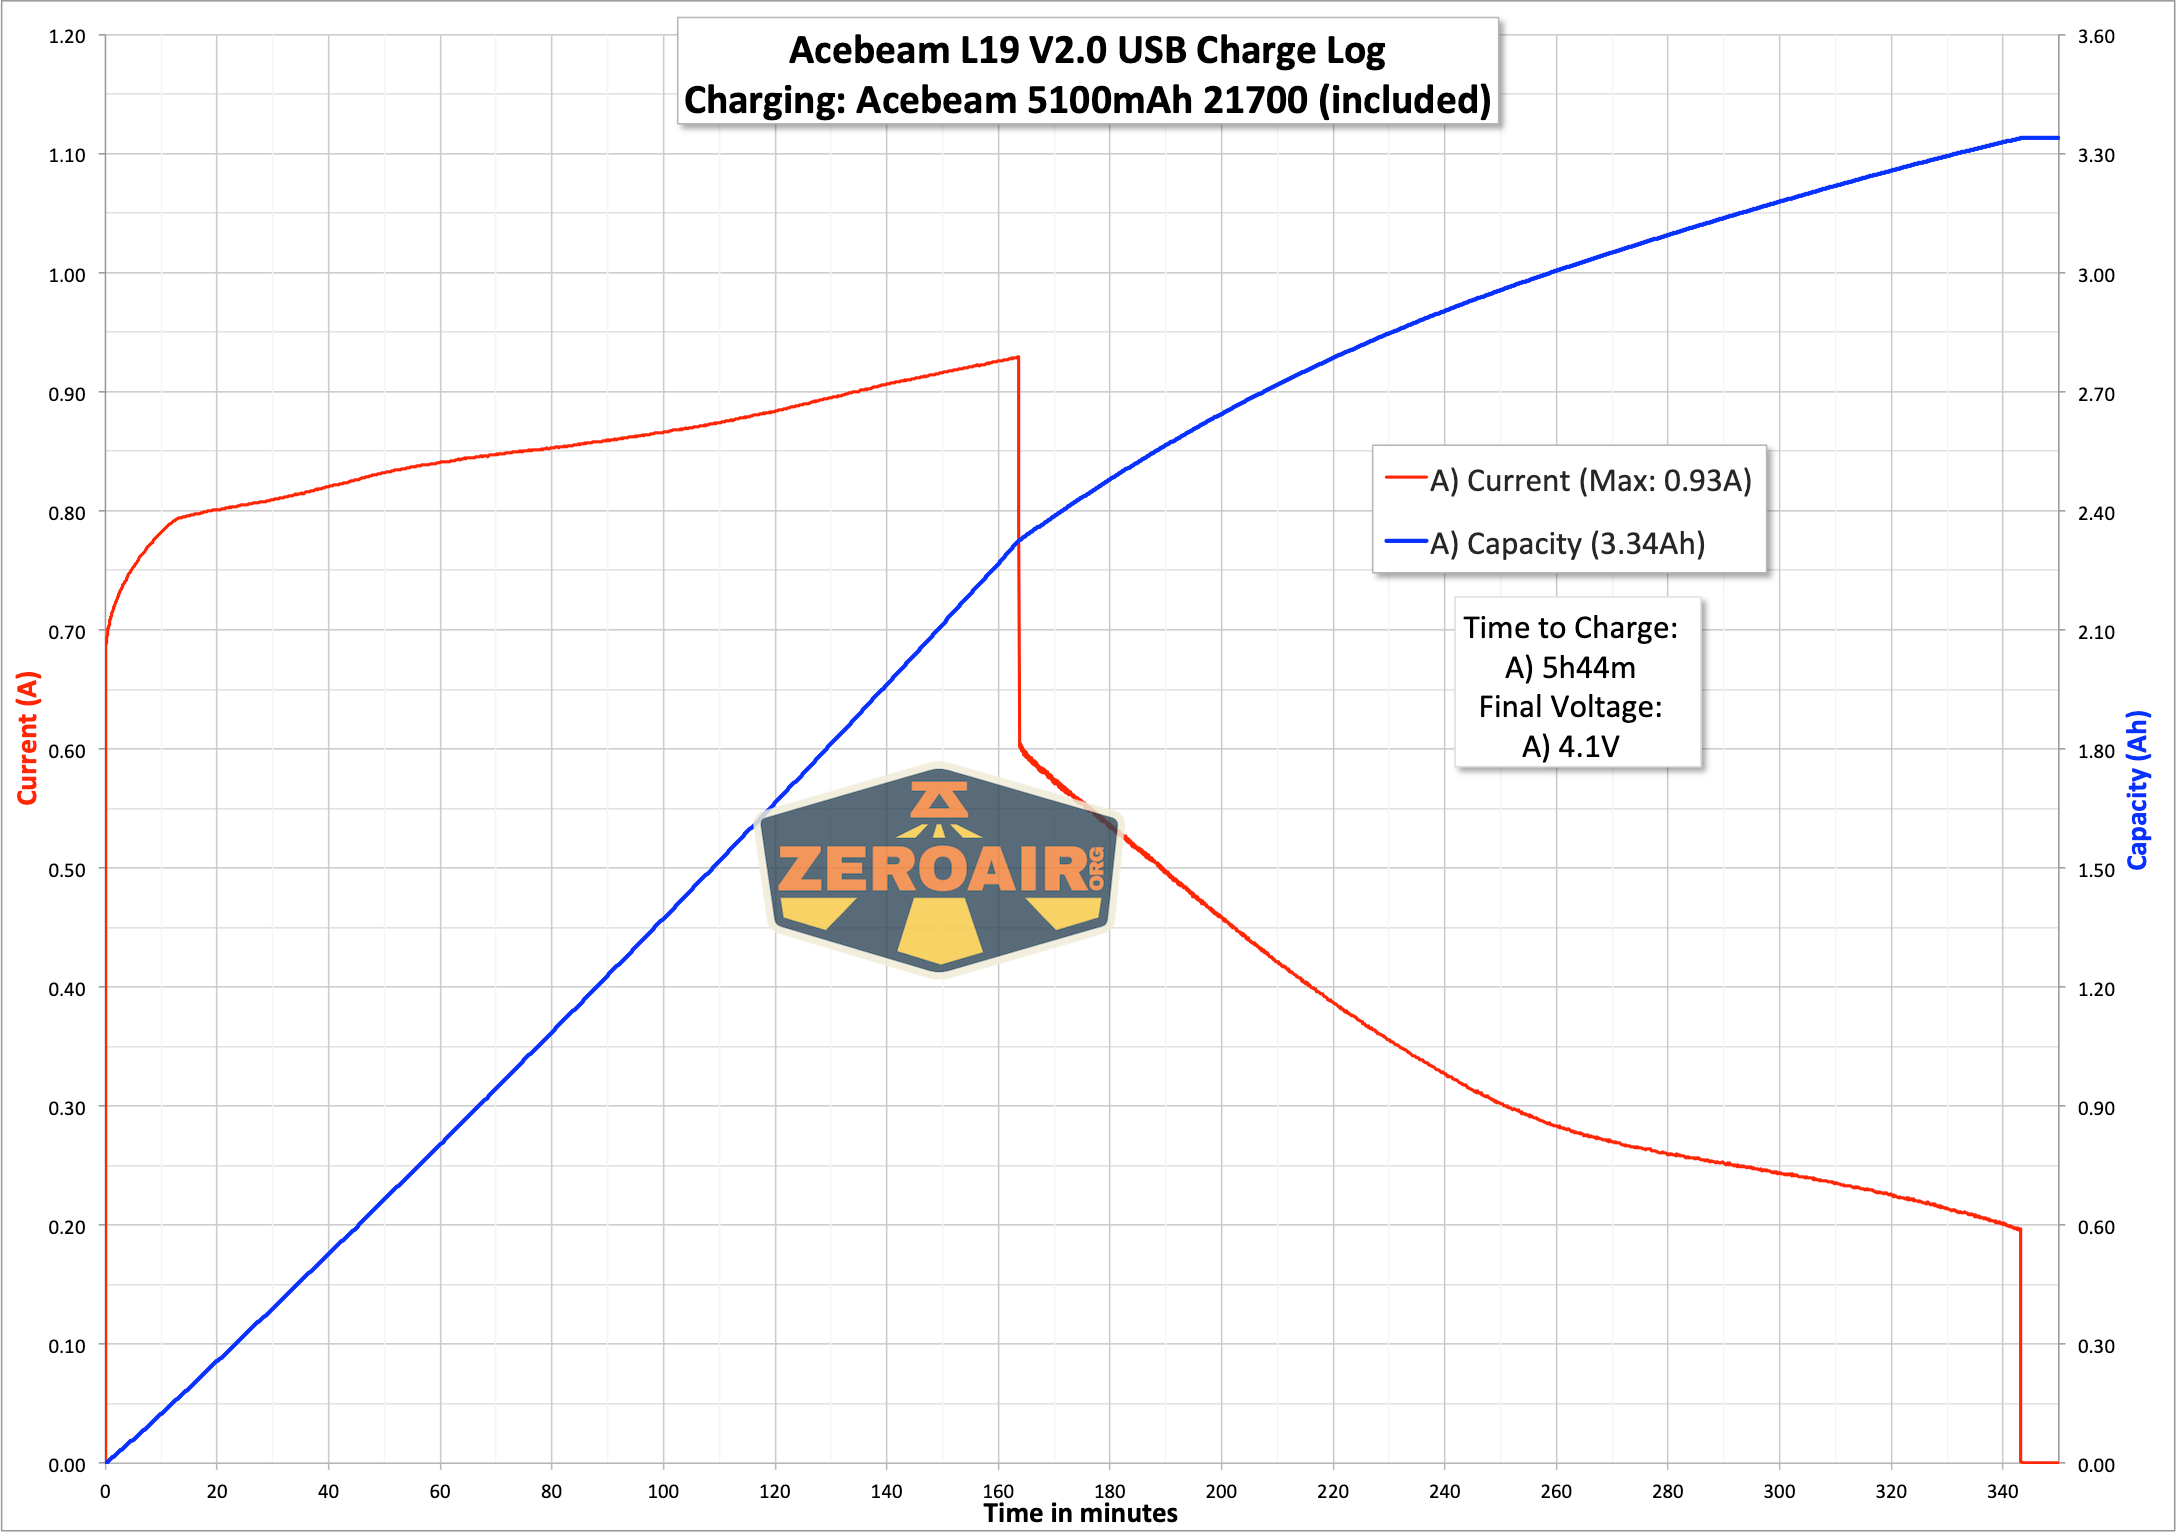
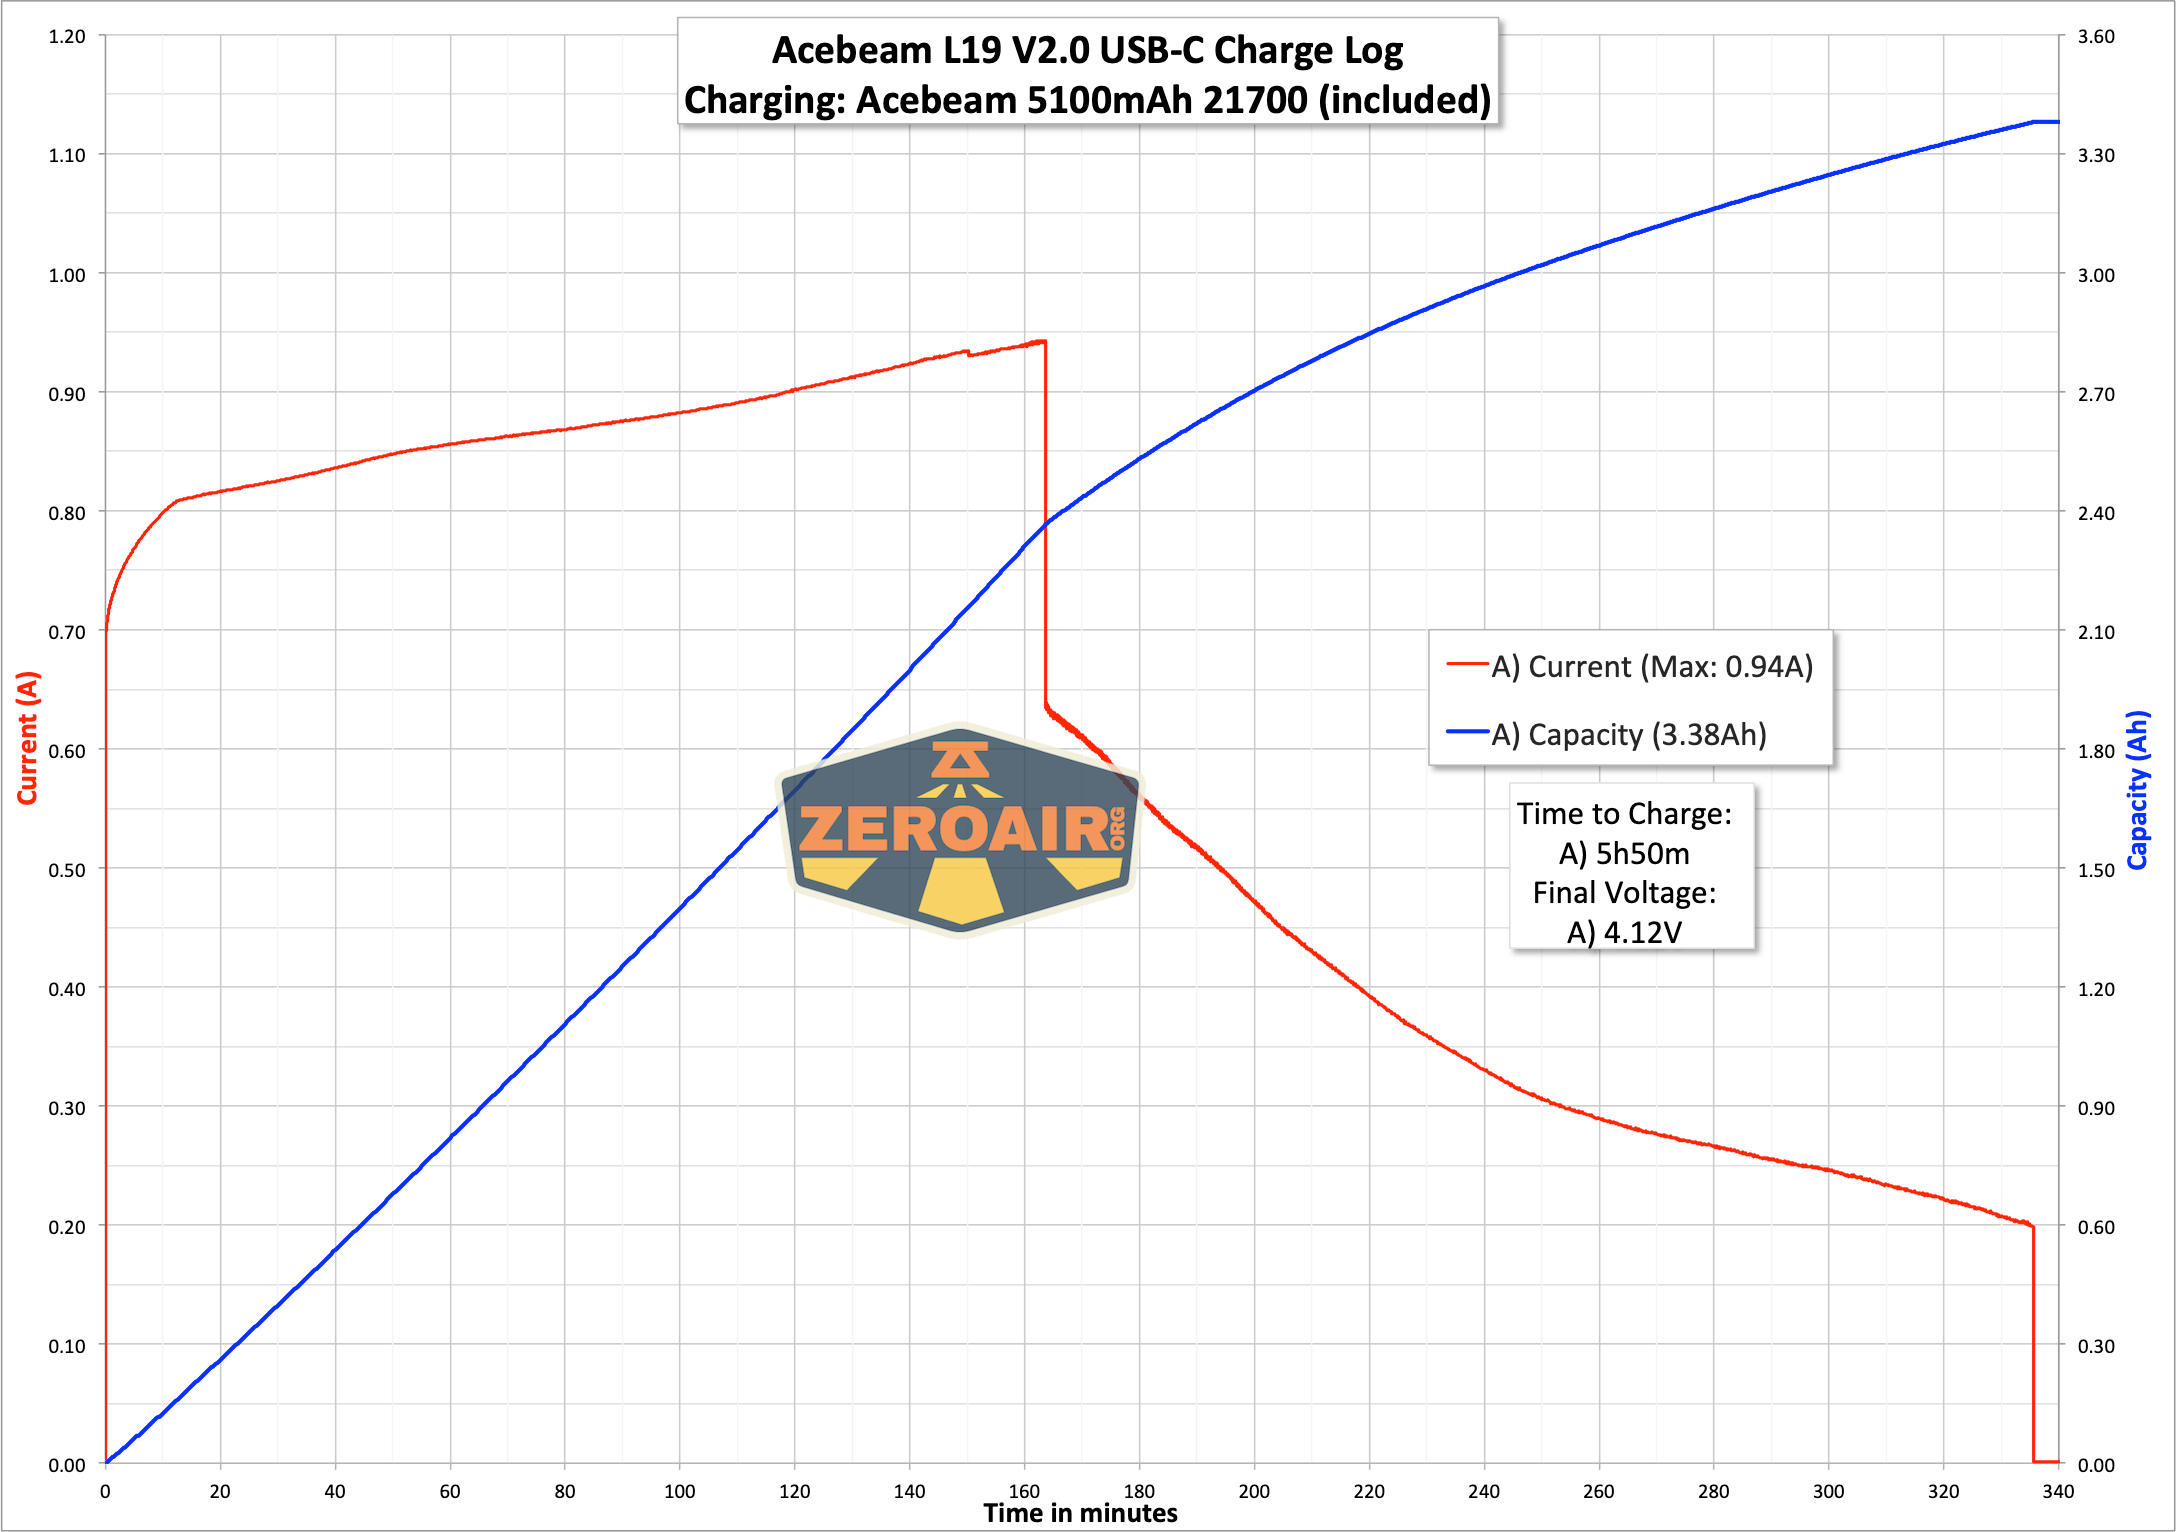
Here’s a charge graph. This is from USB power (not USB-C). Charging is good, but just a bit slow at around 1A. That’s around 0.2C, which is fantastic for your cell life but requires five hours to complete.
C to C charging works just fine on the cell, too!
Powerbank
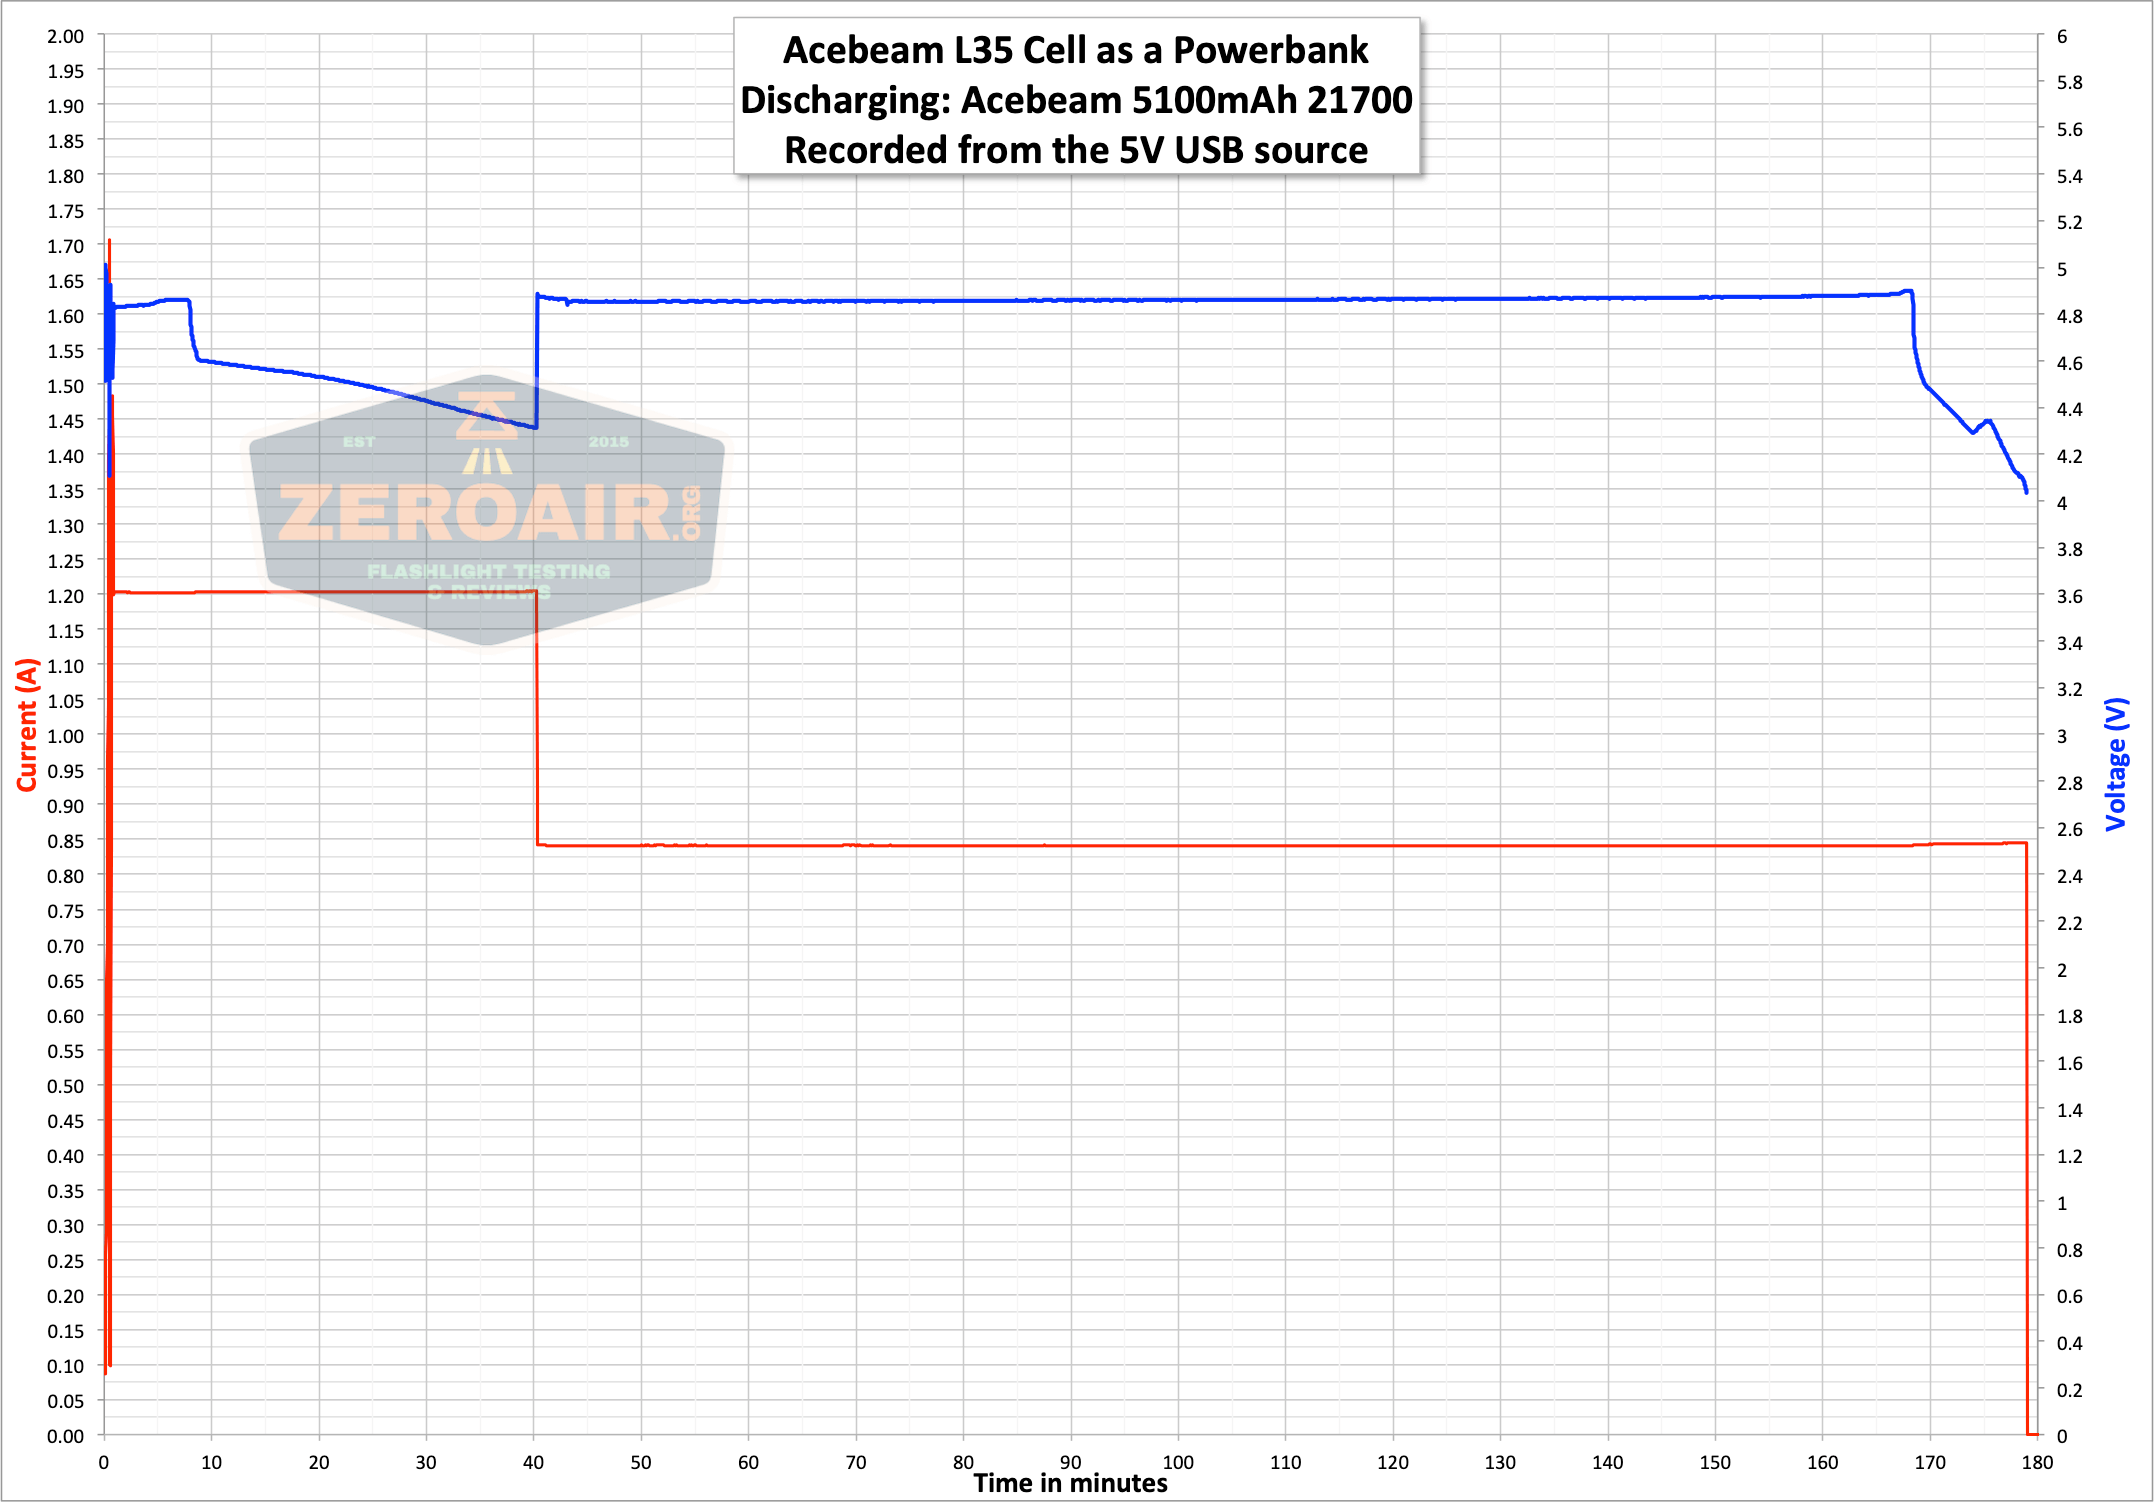
The data below is from the L35 test, but the cell being used is the same model.
You may wonder, with a charge cable of that sort, can this cell be used as a powerbank?! Well, the answer is YES. The L35 product page does not cover this (probably because the cell is technically a separate product). And the cell product page does not cover it either, so I just had to poke around for maximums. Looks like the cell is good to around 1.2A output while staying at (or nearly) in USB spec. With the 5100mAh capacity, you’re likely to get a cell phone charge out of it. Here are a couple of graphs. This covers a ramp up to max before the output shuts off, and also (then) a steady run of around 1.2A output from the cell powerbank.
Here’s some detail just of the first ~1m. I take the discharge up to the point it shuts off, and then restart it. Then I set the output to around 1.2A. When the voltage dropped out of range, I lowered the draw to around 0.8A.
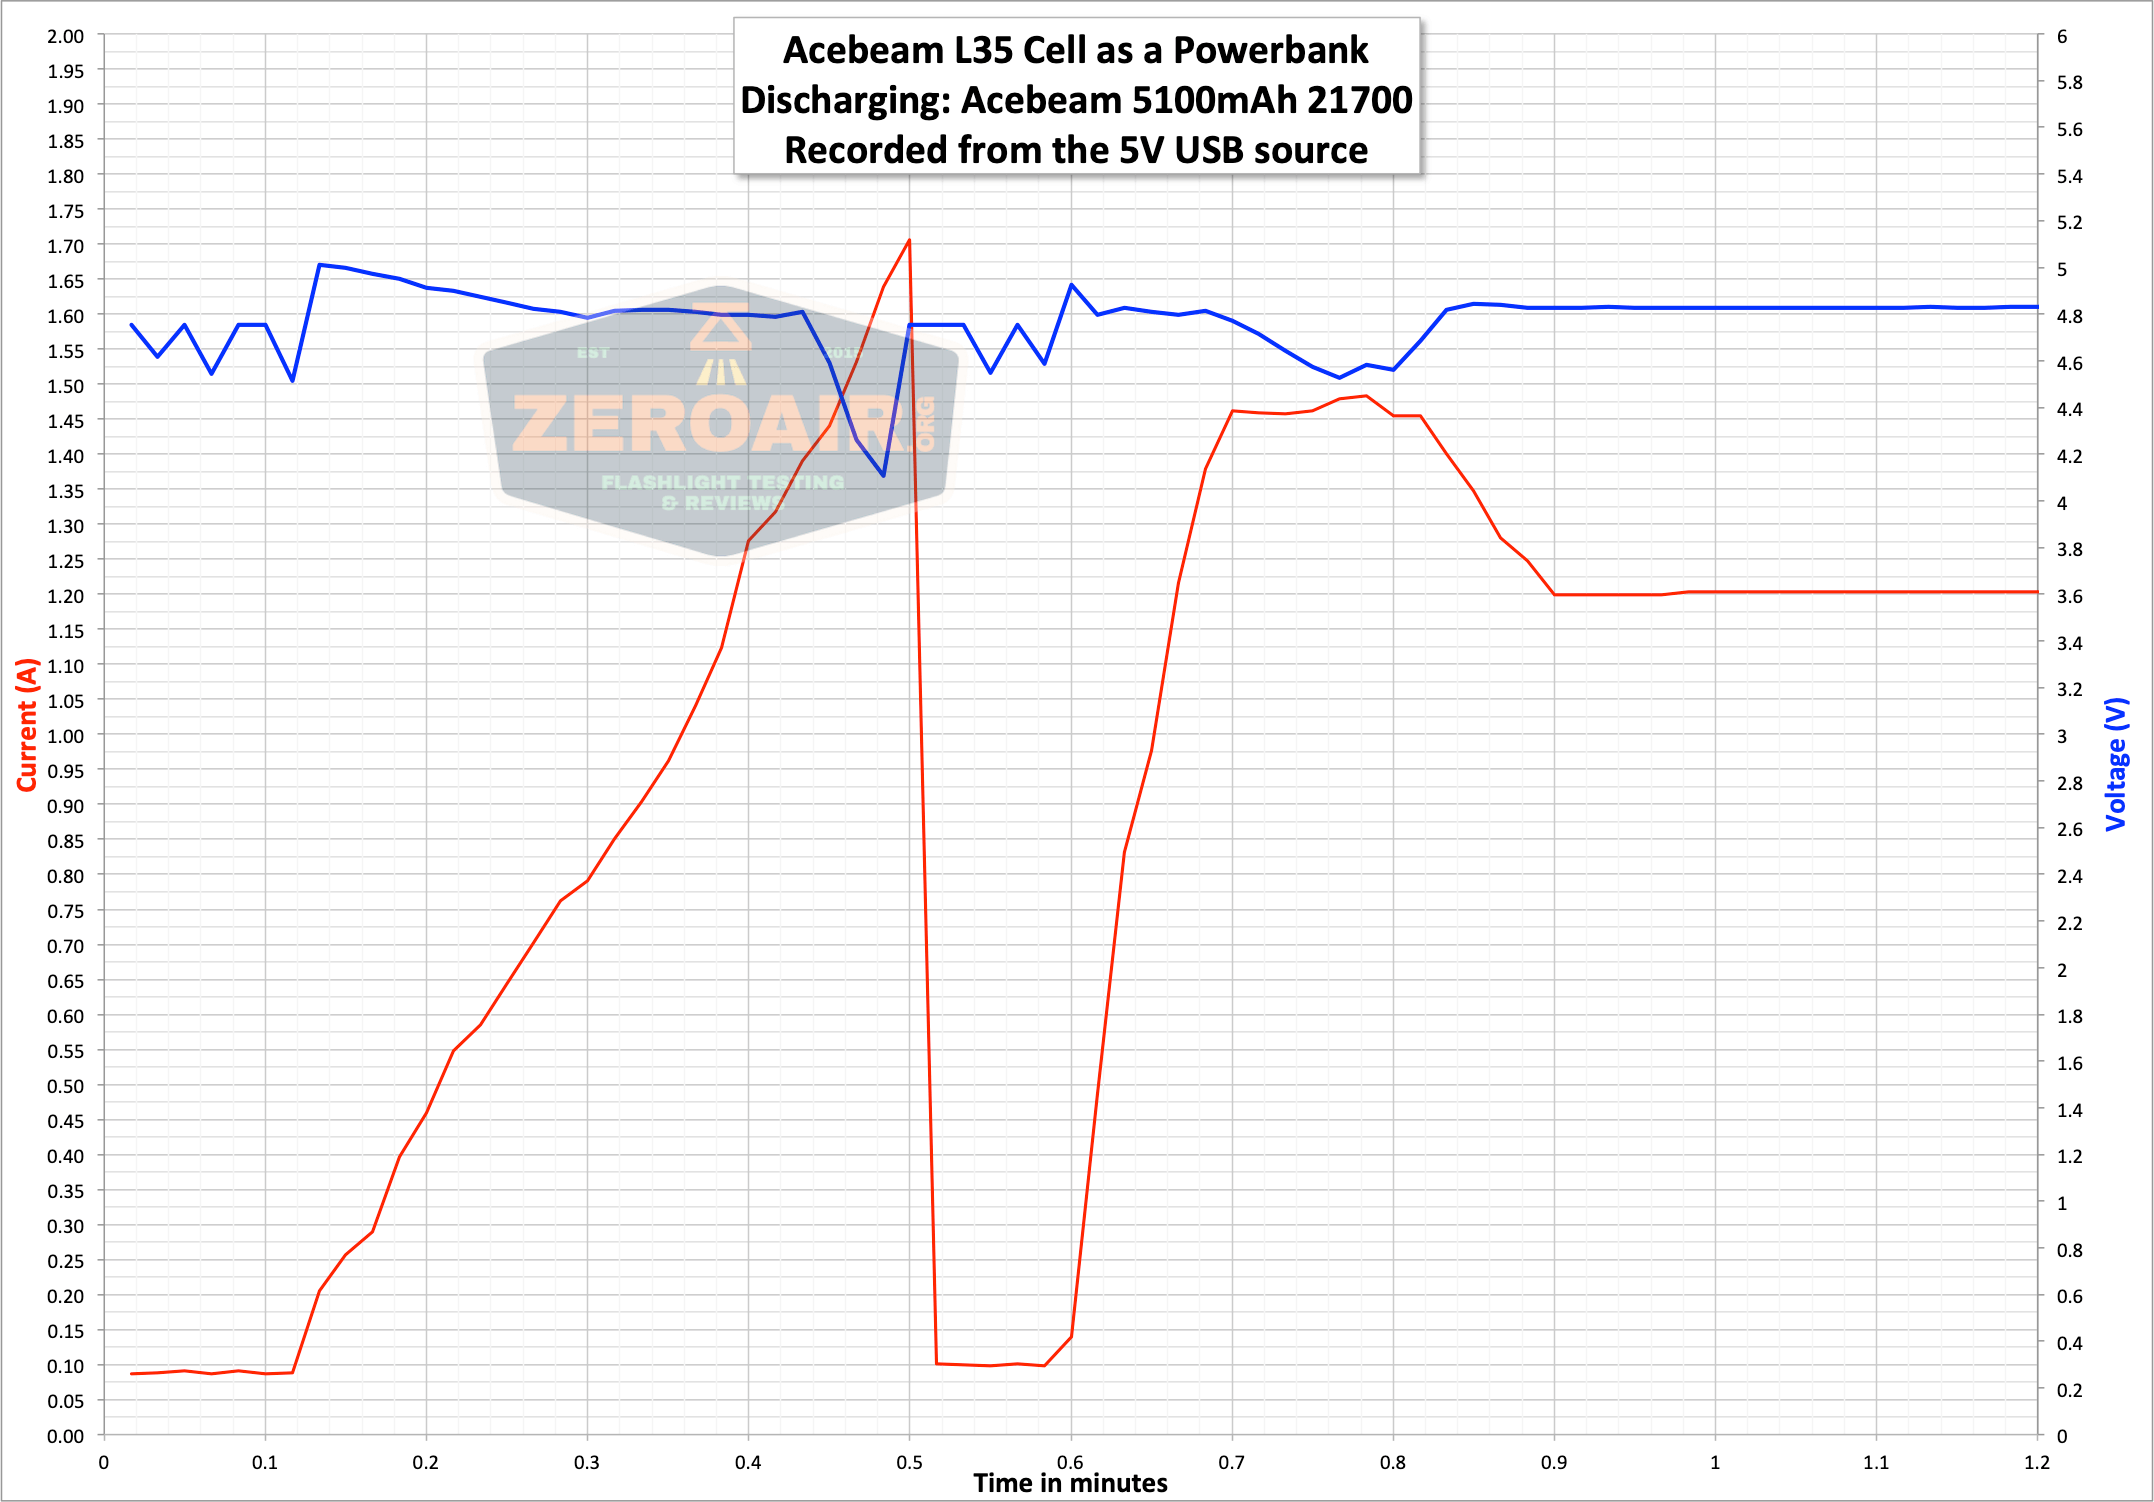
In powerbank mode, the cell will stop outputting current at around 2.9V.
Modes and Currents
| Mode | Mode Claimed Output (lm) | Claimed Runtime | Measured Lumens | Tailcap Amps |
|---|---|---|---|---|
| Turbo | 2200-1600-1200 | 1m50s-10m-1h26m | 1250 | 7.32 |
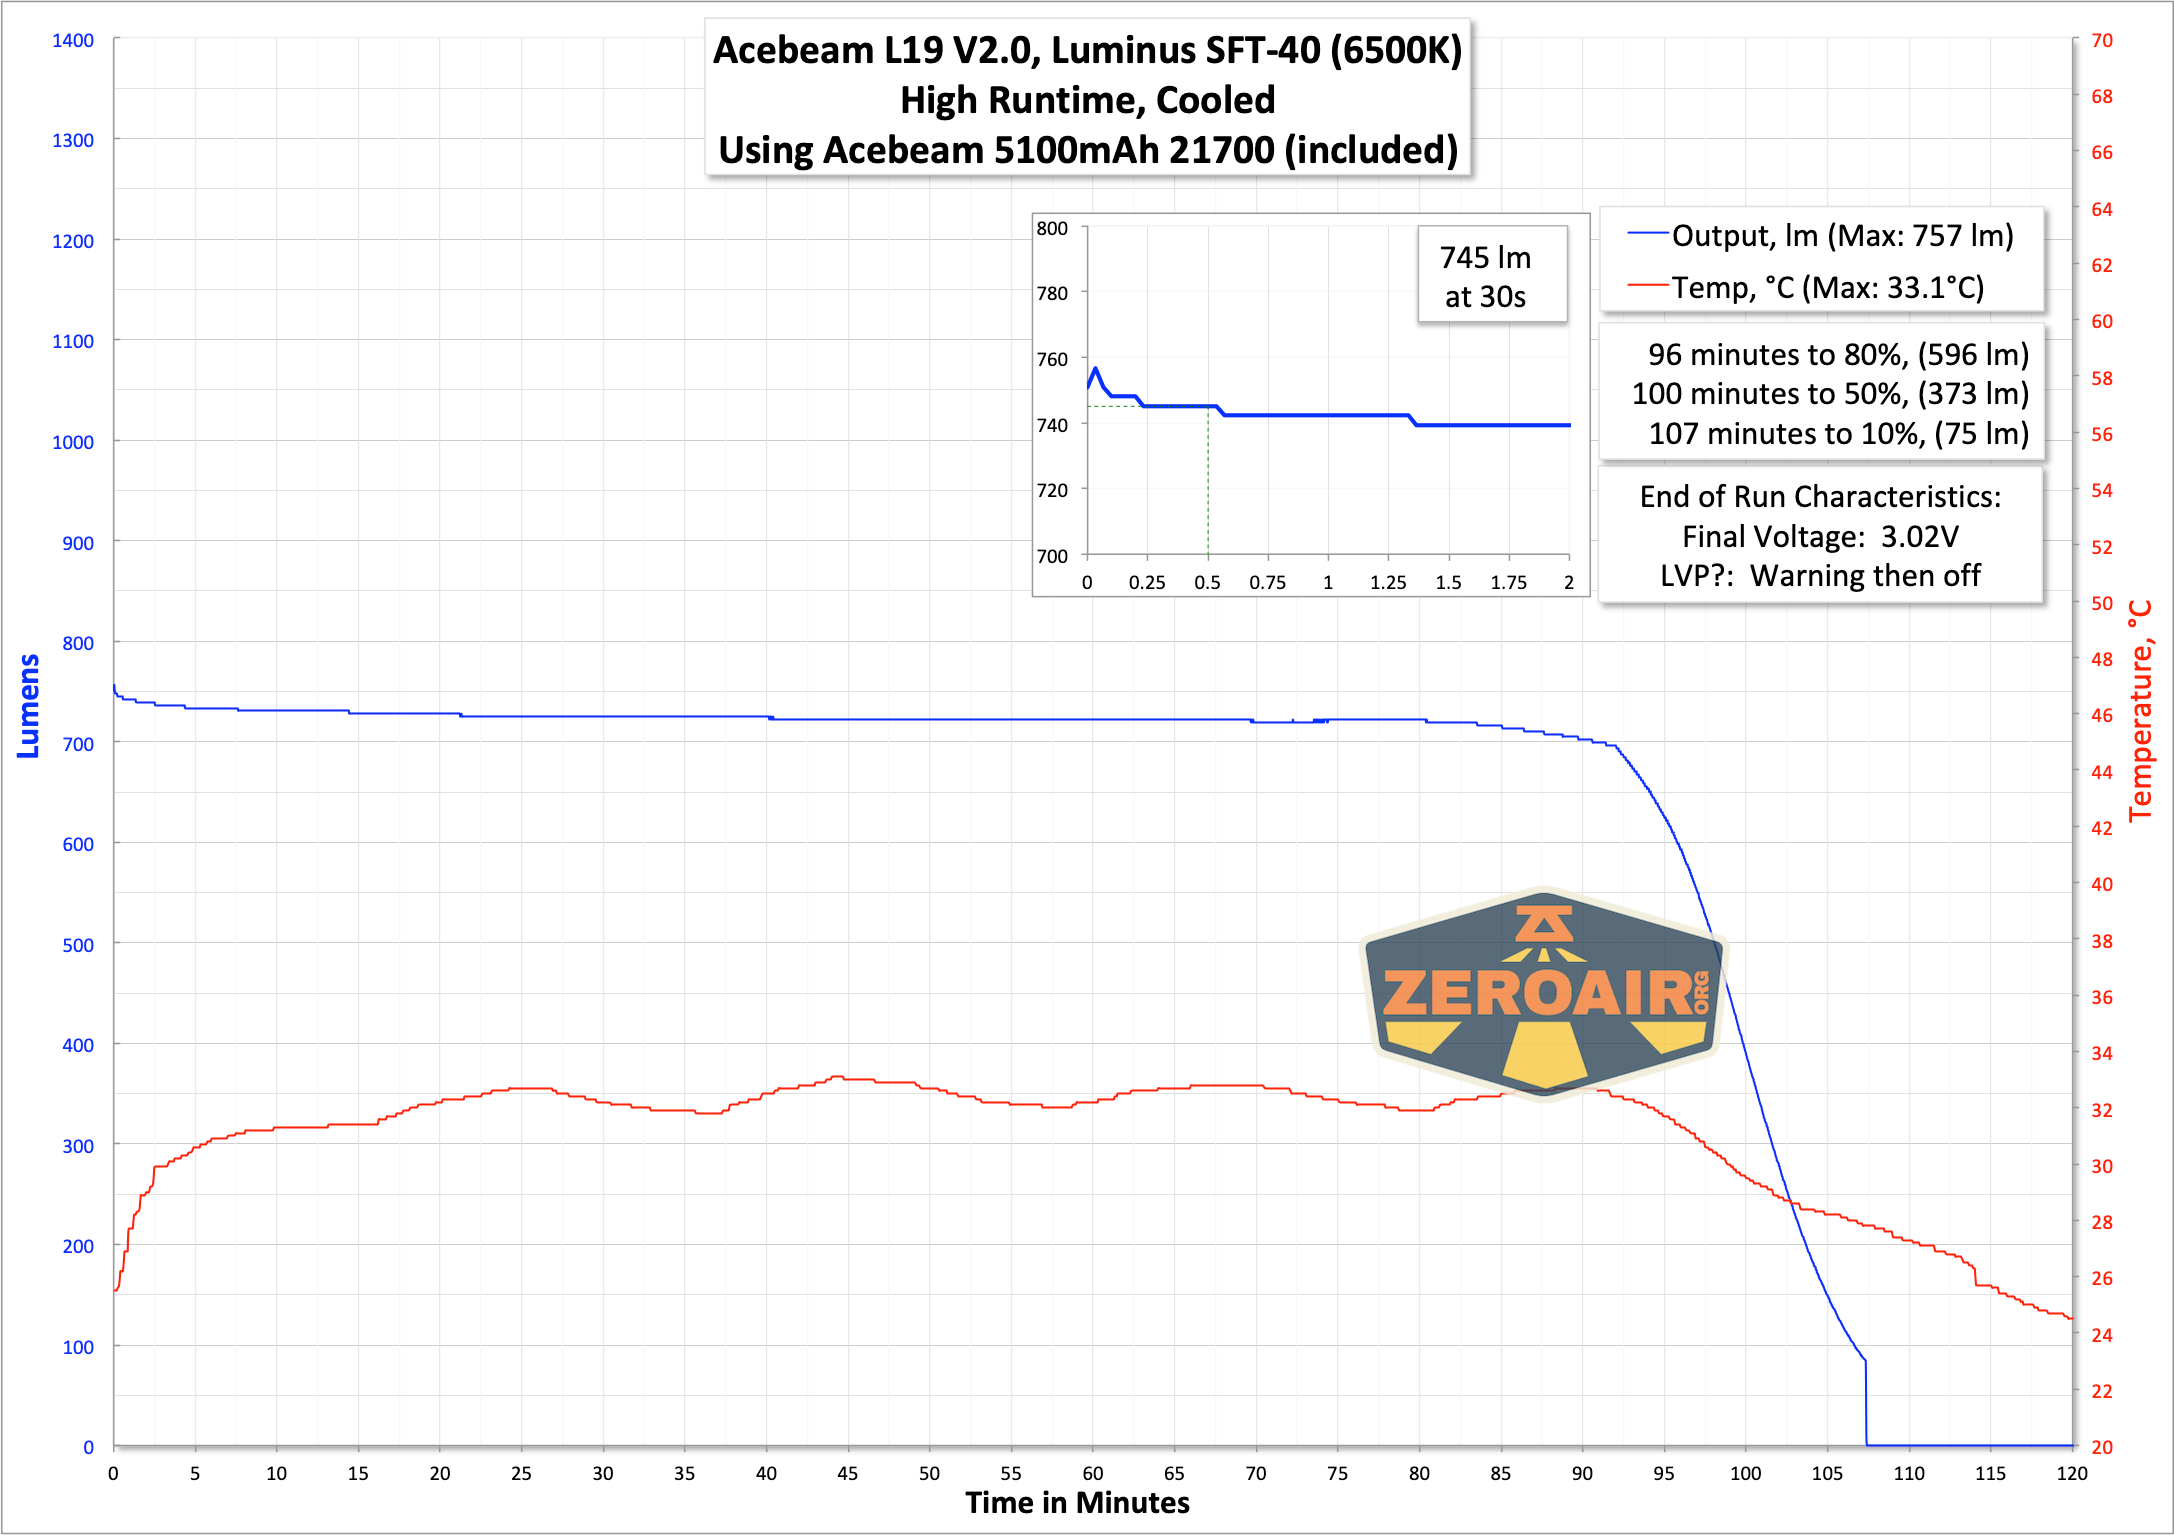
| High | 1200 | 1h38m | 745 | 2.40 |
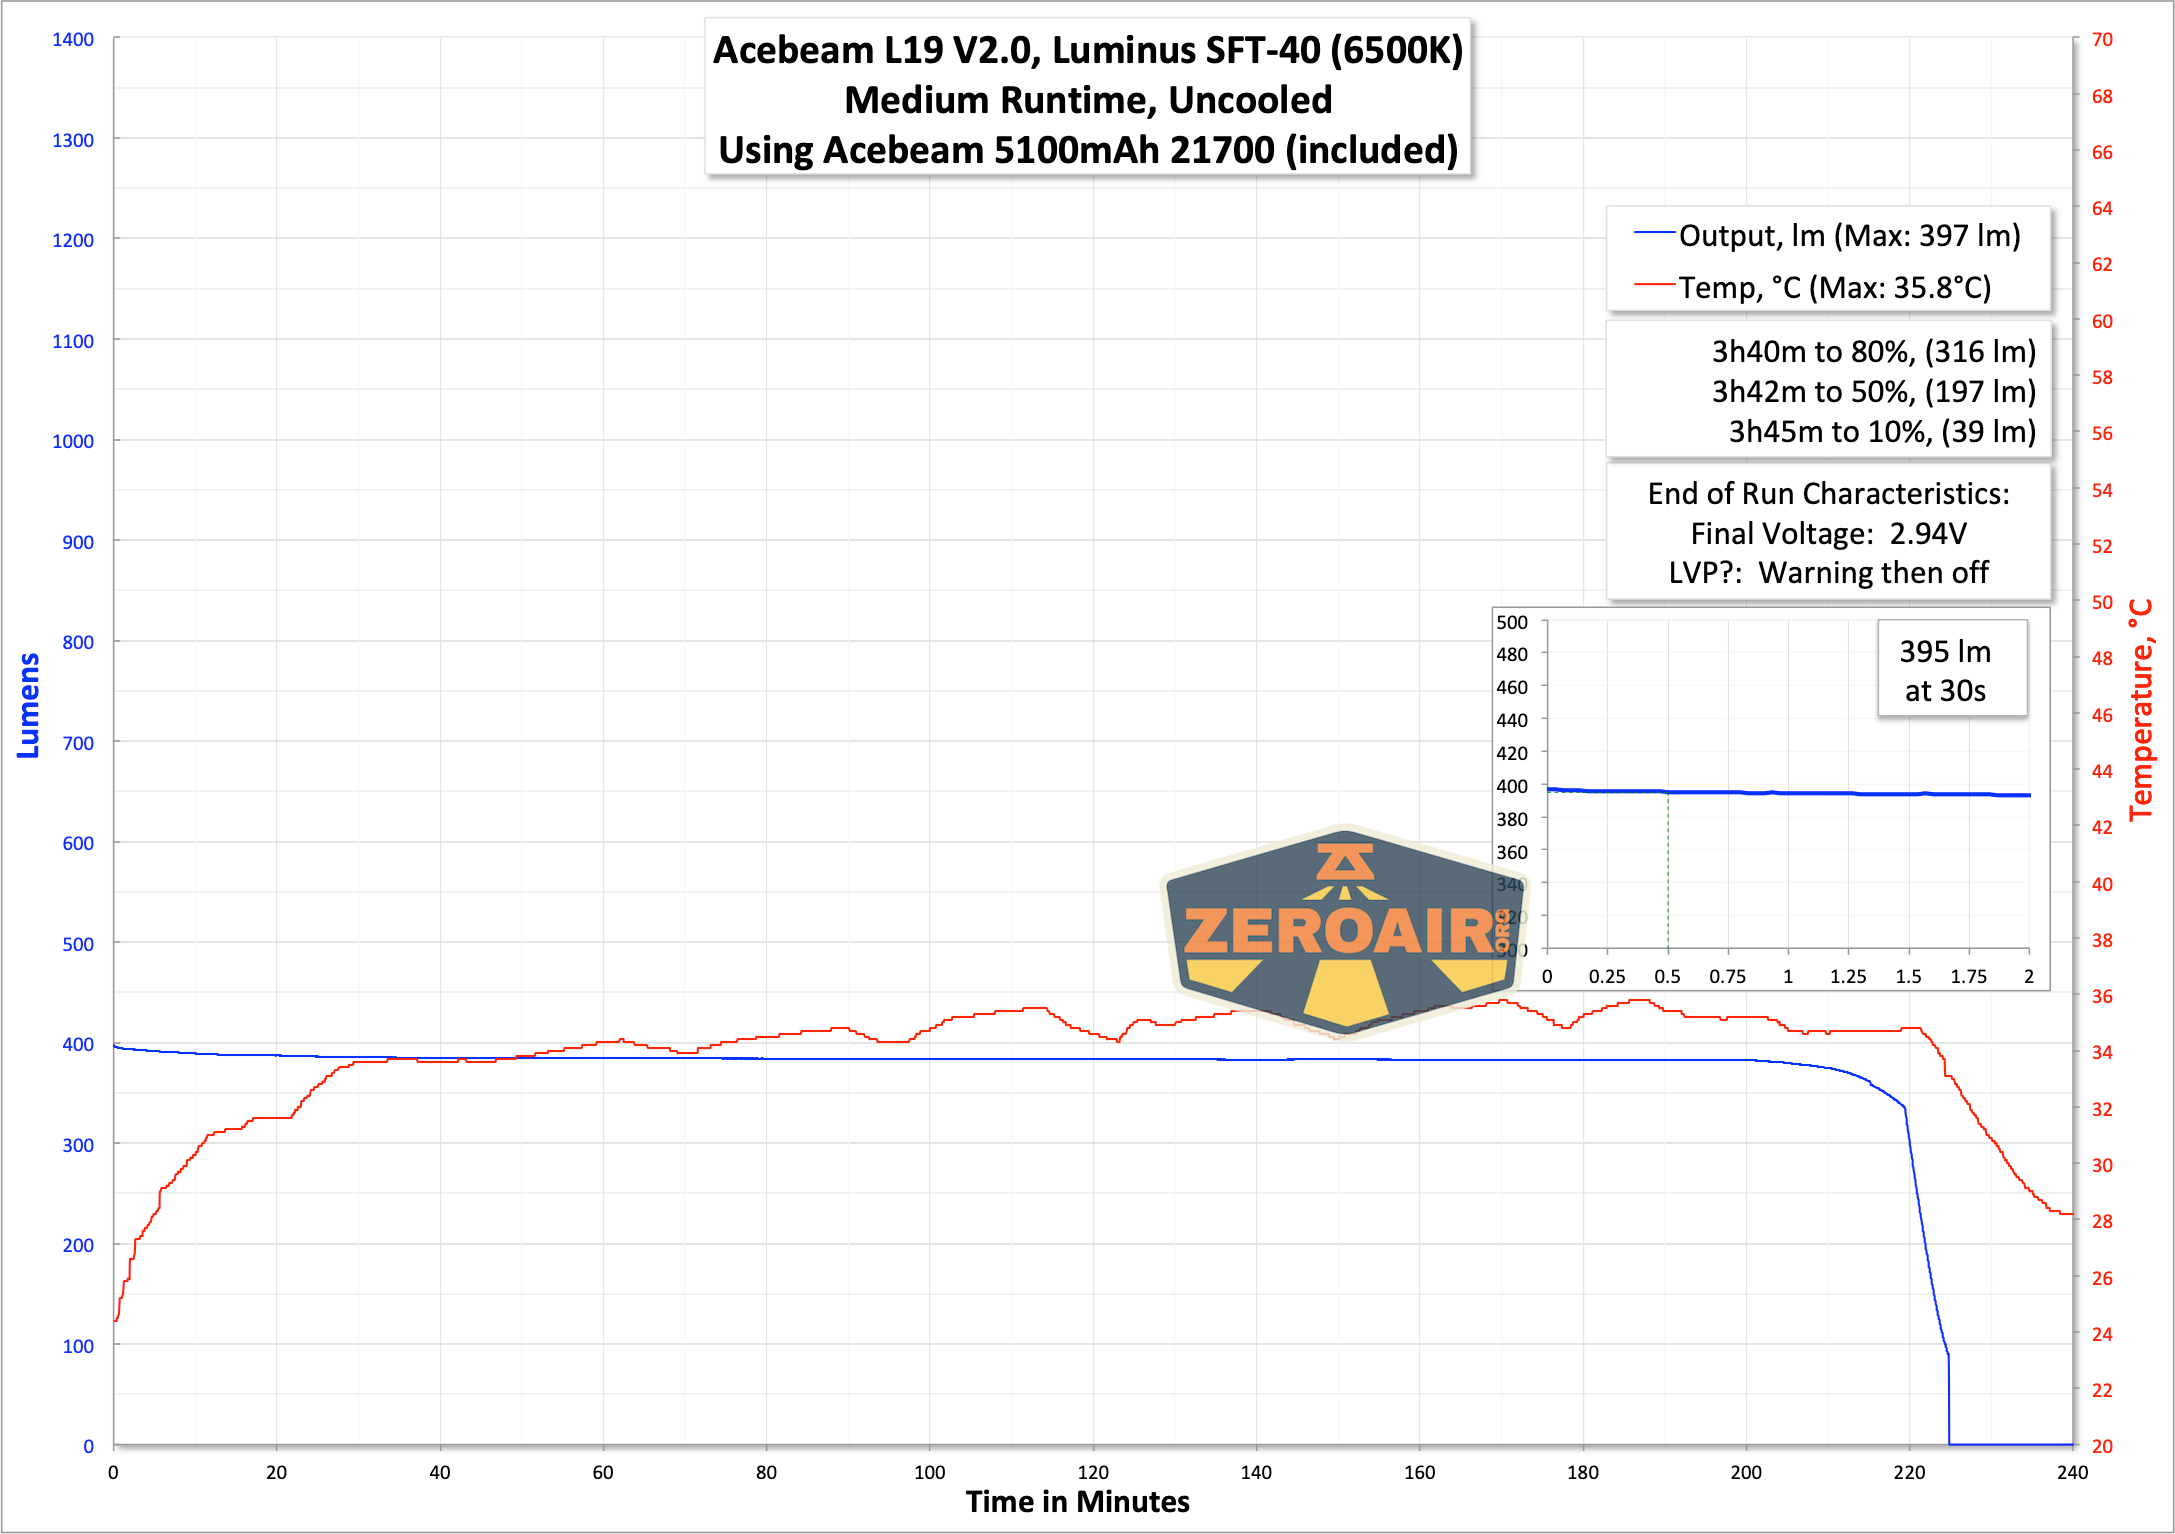
| Mid2 | 630 | 4h8m | 395 | 1.02 |
| Mid1 | 300 | 9h45m | 189 | 0.44 |
| Low | 100 | 30h5m | 63 | 0.14 |
| Moonlight | 1 | 62d | 0.4 | 0.00 |
Pulse Width Modulation
The L35 does not have PWM on any mode! That’s great. And one of the things I love about Acebeam flashlights.
 Here you can see a “baseline” – a chart with almost no light hitting the sensor. Then there’s the Ultrafire WF-602C flashlight, which has some of the worst PWM I’ve seen. It’s so bad that I used a post about it to explain PWM! Here are multiple timescales (10ms, 5ms, 2ms, 1ms, 0.5ms, 0.2ms) to make comparing this “worst” PWM light to the test light easier. That post also explains why I didn’t test the WF-602C at the usual 50us scale.
User Interface and Operation
The user interface here is exactly the same as on the L35 and original L19. I do think these two would be a good pair. L35 for massive output, and L19 for massive throw.
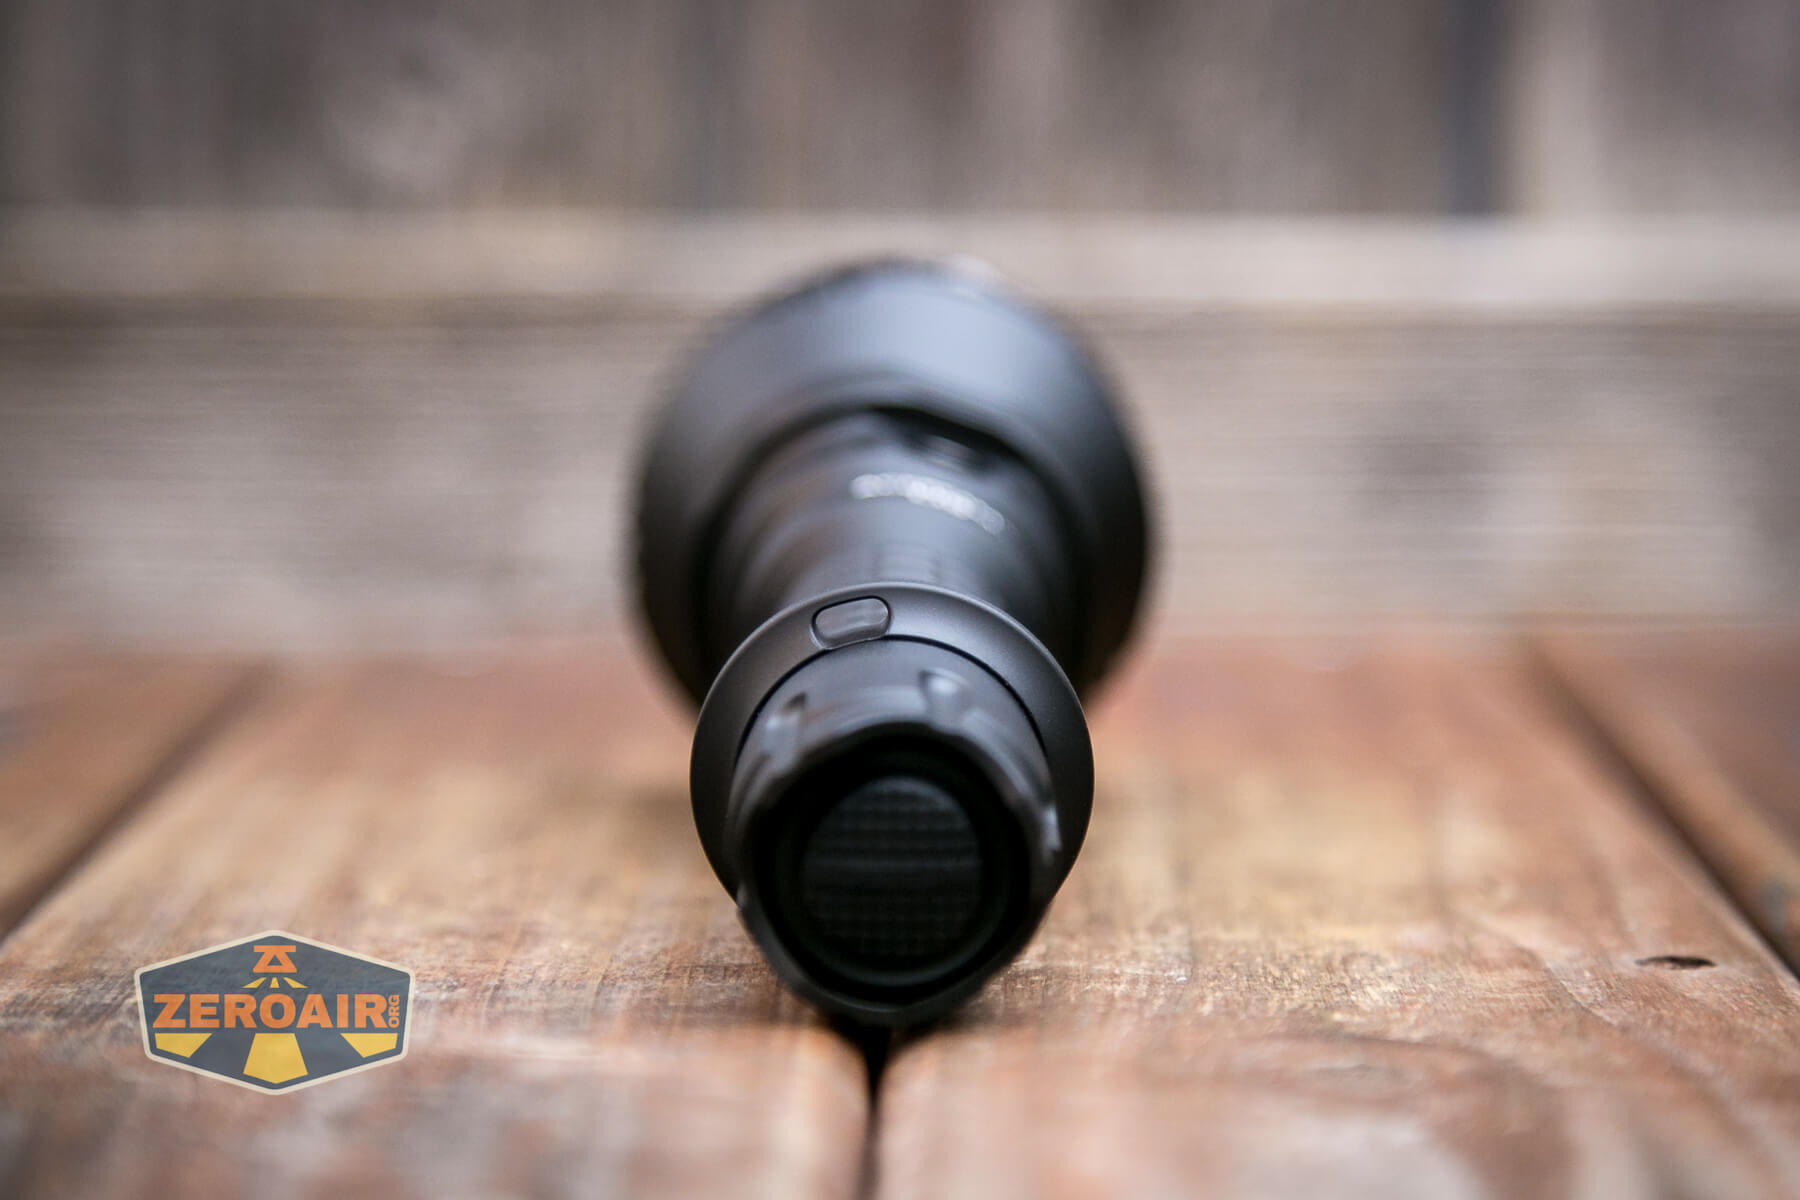
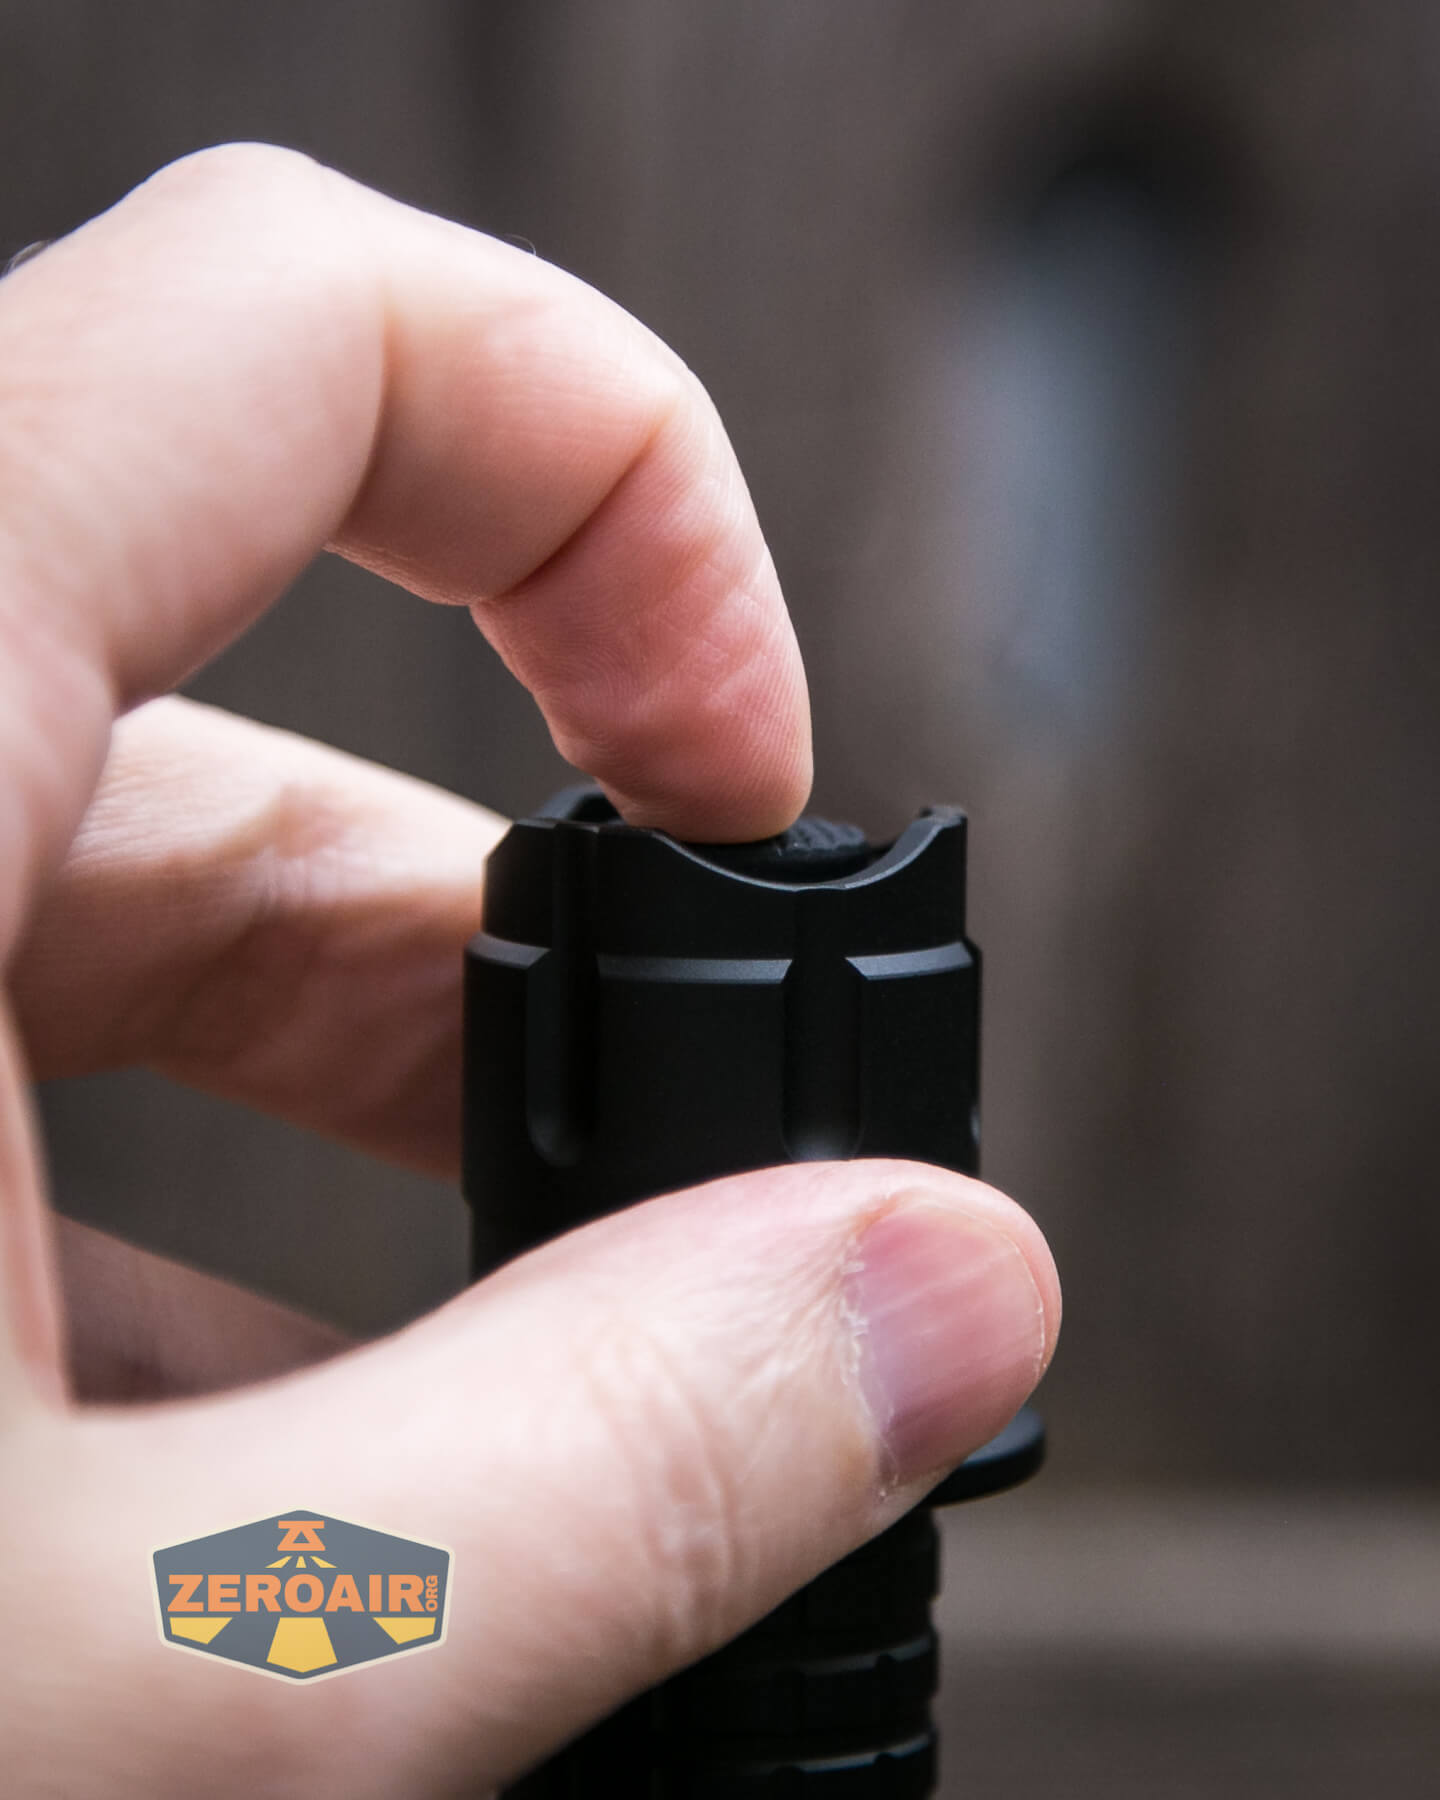
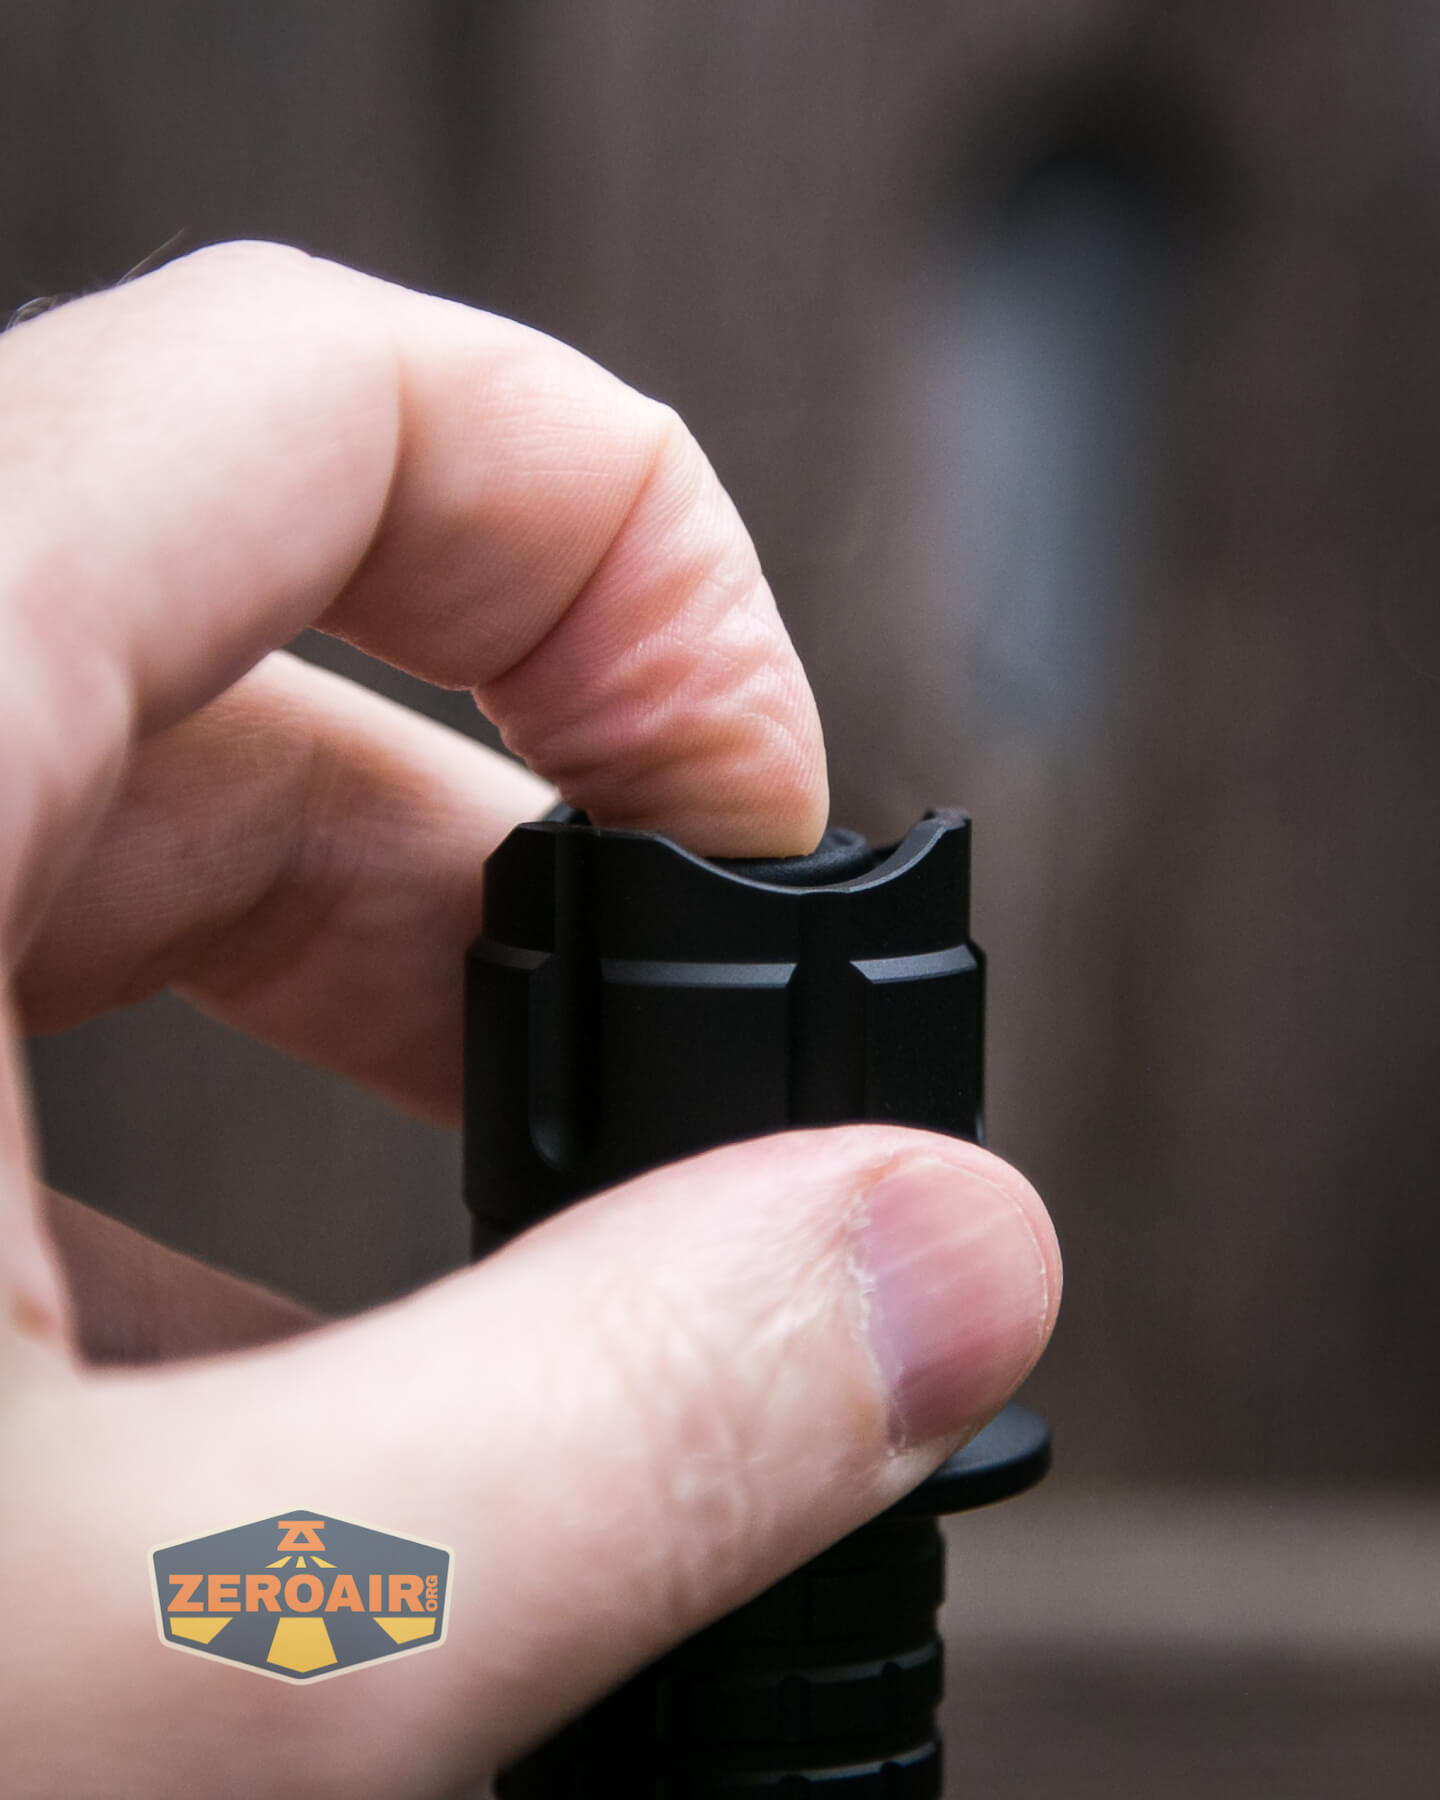
There are two switches on the Acebeam L19 V2.0 flashlight. First is this tailcap switch, which feels to me to be a mechanical switch. It clicks very positively and has a forward clicky action. This means there’s a momentary option.
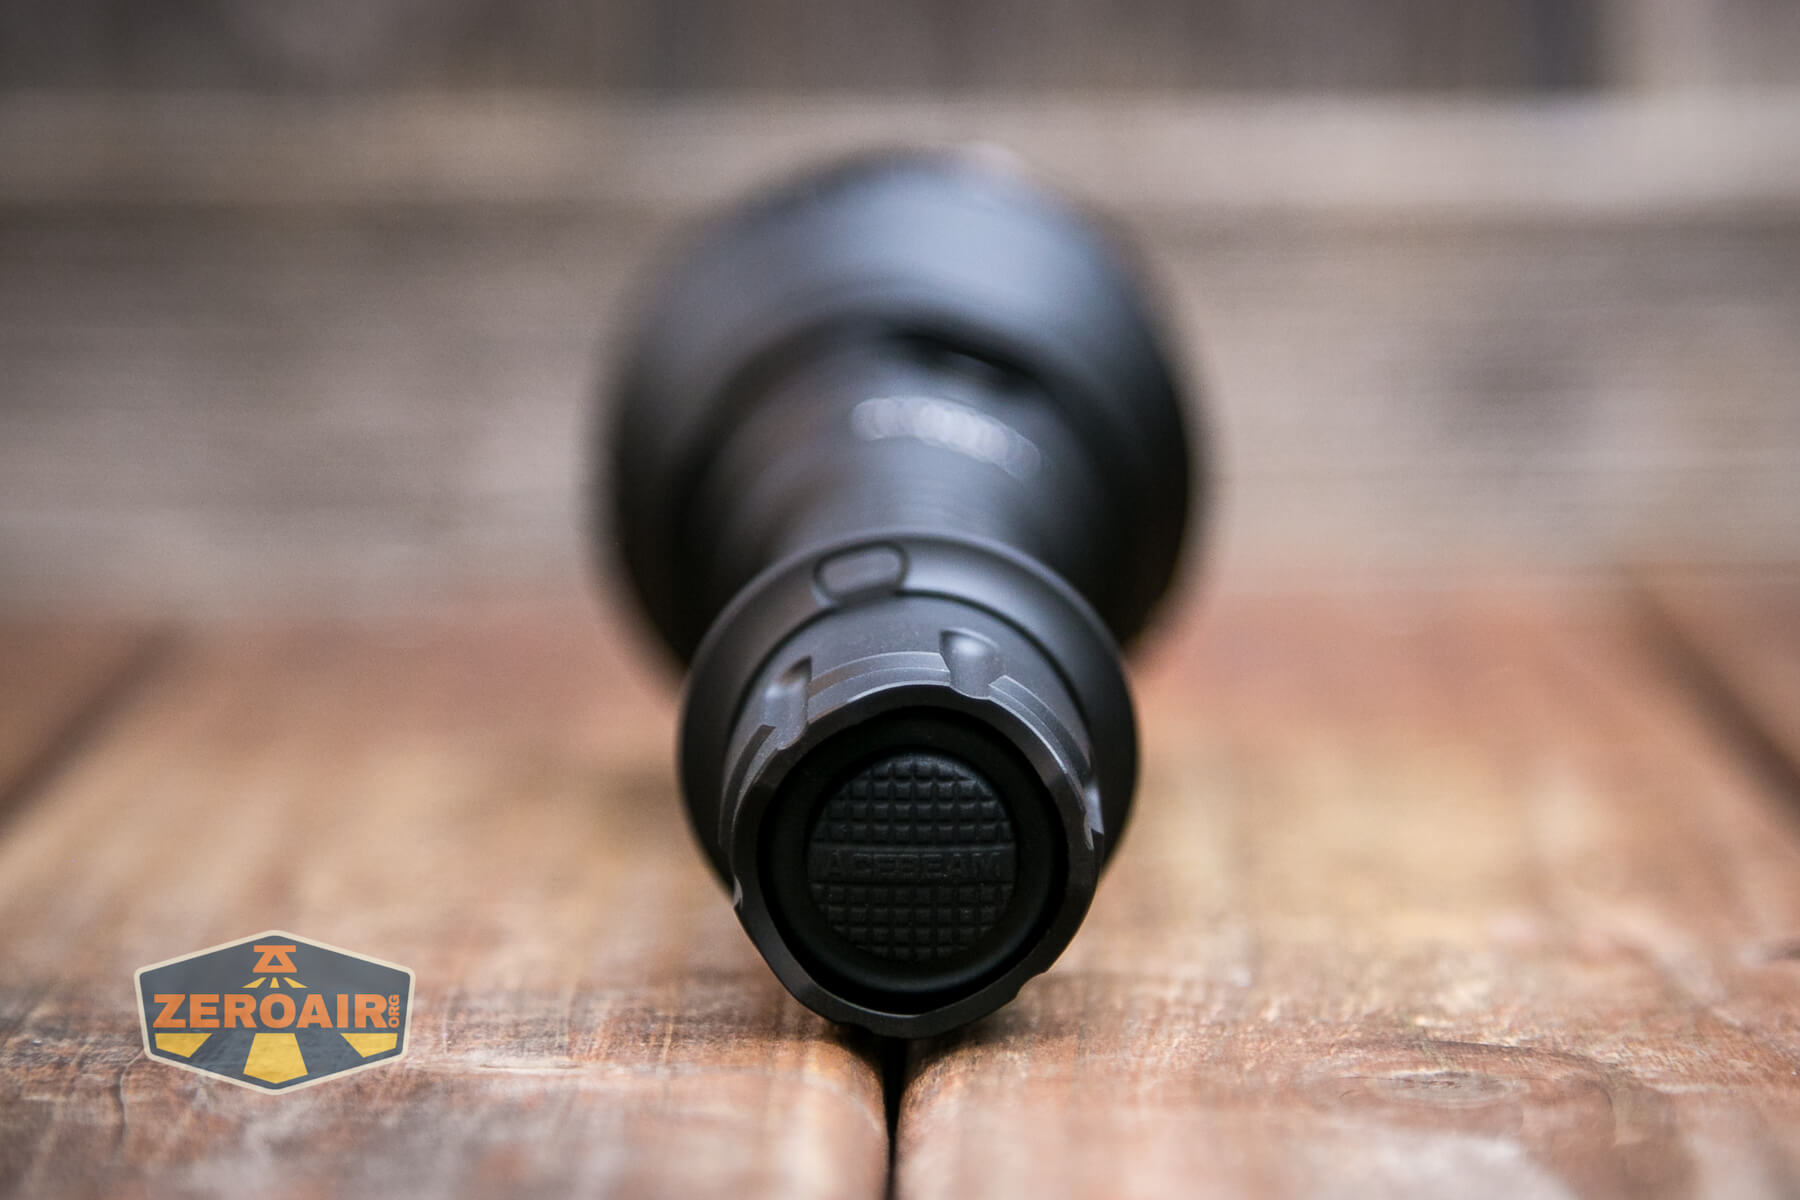

This switch sits under the tailcap, and so tailstanding works just fine. The tailcap is nice, in fact – it’s a “tripod” style and not the bi-pod popular on many other lights (such as the Convoy S2+).

There’s also a replacement tailcap that adds a remote pressure switch to this Acebeam L19. I don’t have that, but I can say that it’d probably be great for long(er) gun usage!
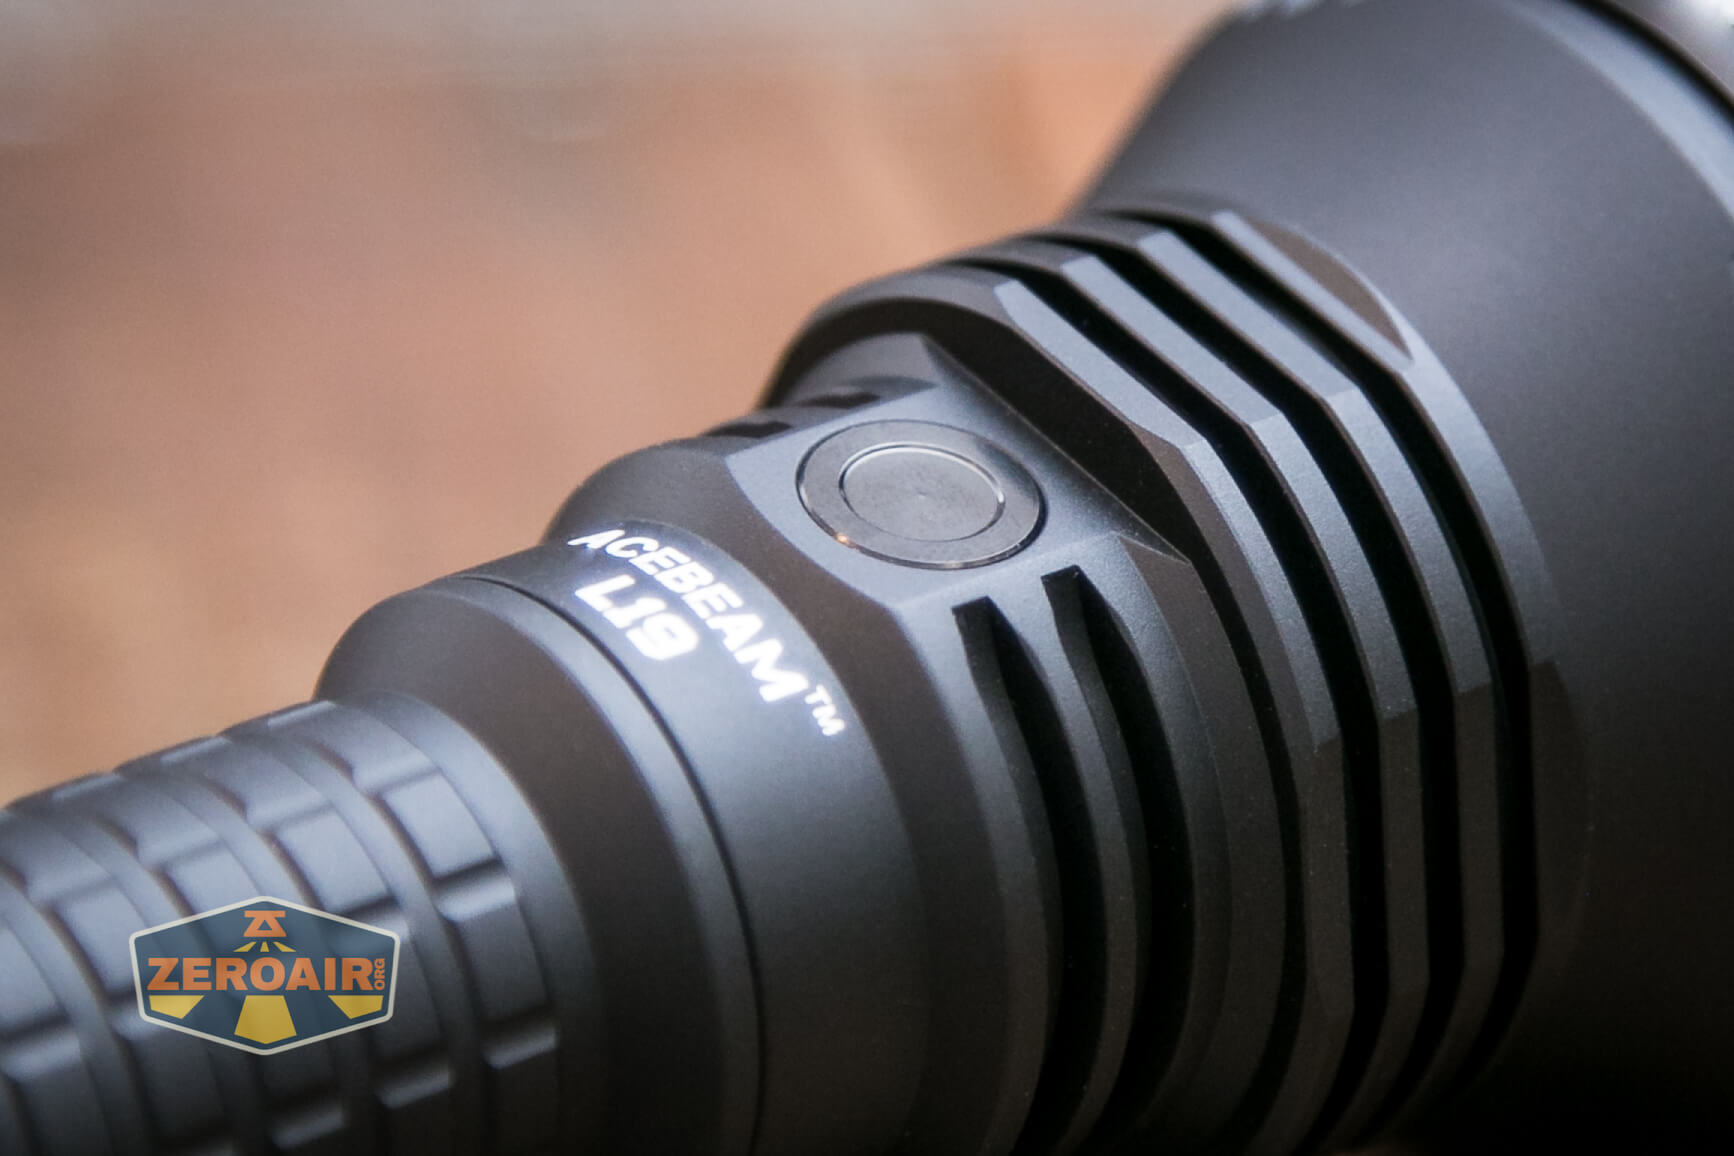
Also, for the operation of the L19 is a side e-switch. The switch has a metal cover and is completely flush with the body. It’s possible to find the switch without looking, because the opposite side has cooling fins and is therefore not smooth.

The user interface is a little interesting, but quite easy. The tailswitch takes absolute precedence. No matter if the light is on or off, or on through one of the e-switch modes, clicking the tailswitch into the on position will always yield turbo. Reliable switches are useful.
Here’s a user interface table!
| State | Action | Result |
|---|---|---|
| Off (and unlocked) | Click Tail Switch (TS) | Turbo |
| Off (and unlocked) | Tap TS | Momentary Turbo |
| Off | Click Side Switch (SS) | On (Mode memory (excluding Moonlight and Turbo)) |
| Off | Hold SS | Moonlight |
| On (by TS action) | Any SS action | No change in state |
| On (by SS action) | Hold SS | Mode advance (L>M1>M2>H) |
| Off | Double Click SS | Turbo |
| On (by SS action) | Double Click SS | Turbo |
| Turbo (from SS) | Double Click SS | Previously used mode |
| Any (except Turbo from TS) | Triple Click SS | Strobe |
| Off | Hold SS 5s | Lockout (Indicated by triple flash in Moonlight) |
| Lockout | Hold SS 3s | Unlock to Moonlight^ |
^ The tailswitch must be in the off position to unlock! The manual states that the power indicator can show whether the tailswitch is “on” or “off” but doesn’t state how, and I’m unclear on this. It’s possible to do this by feel, though. When “of,f” the tail switch button is quite firm. When “on,” the tailswitch has around 1.5mm-2mm of give.
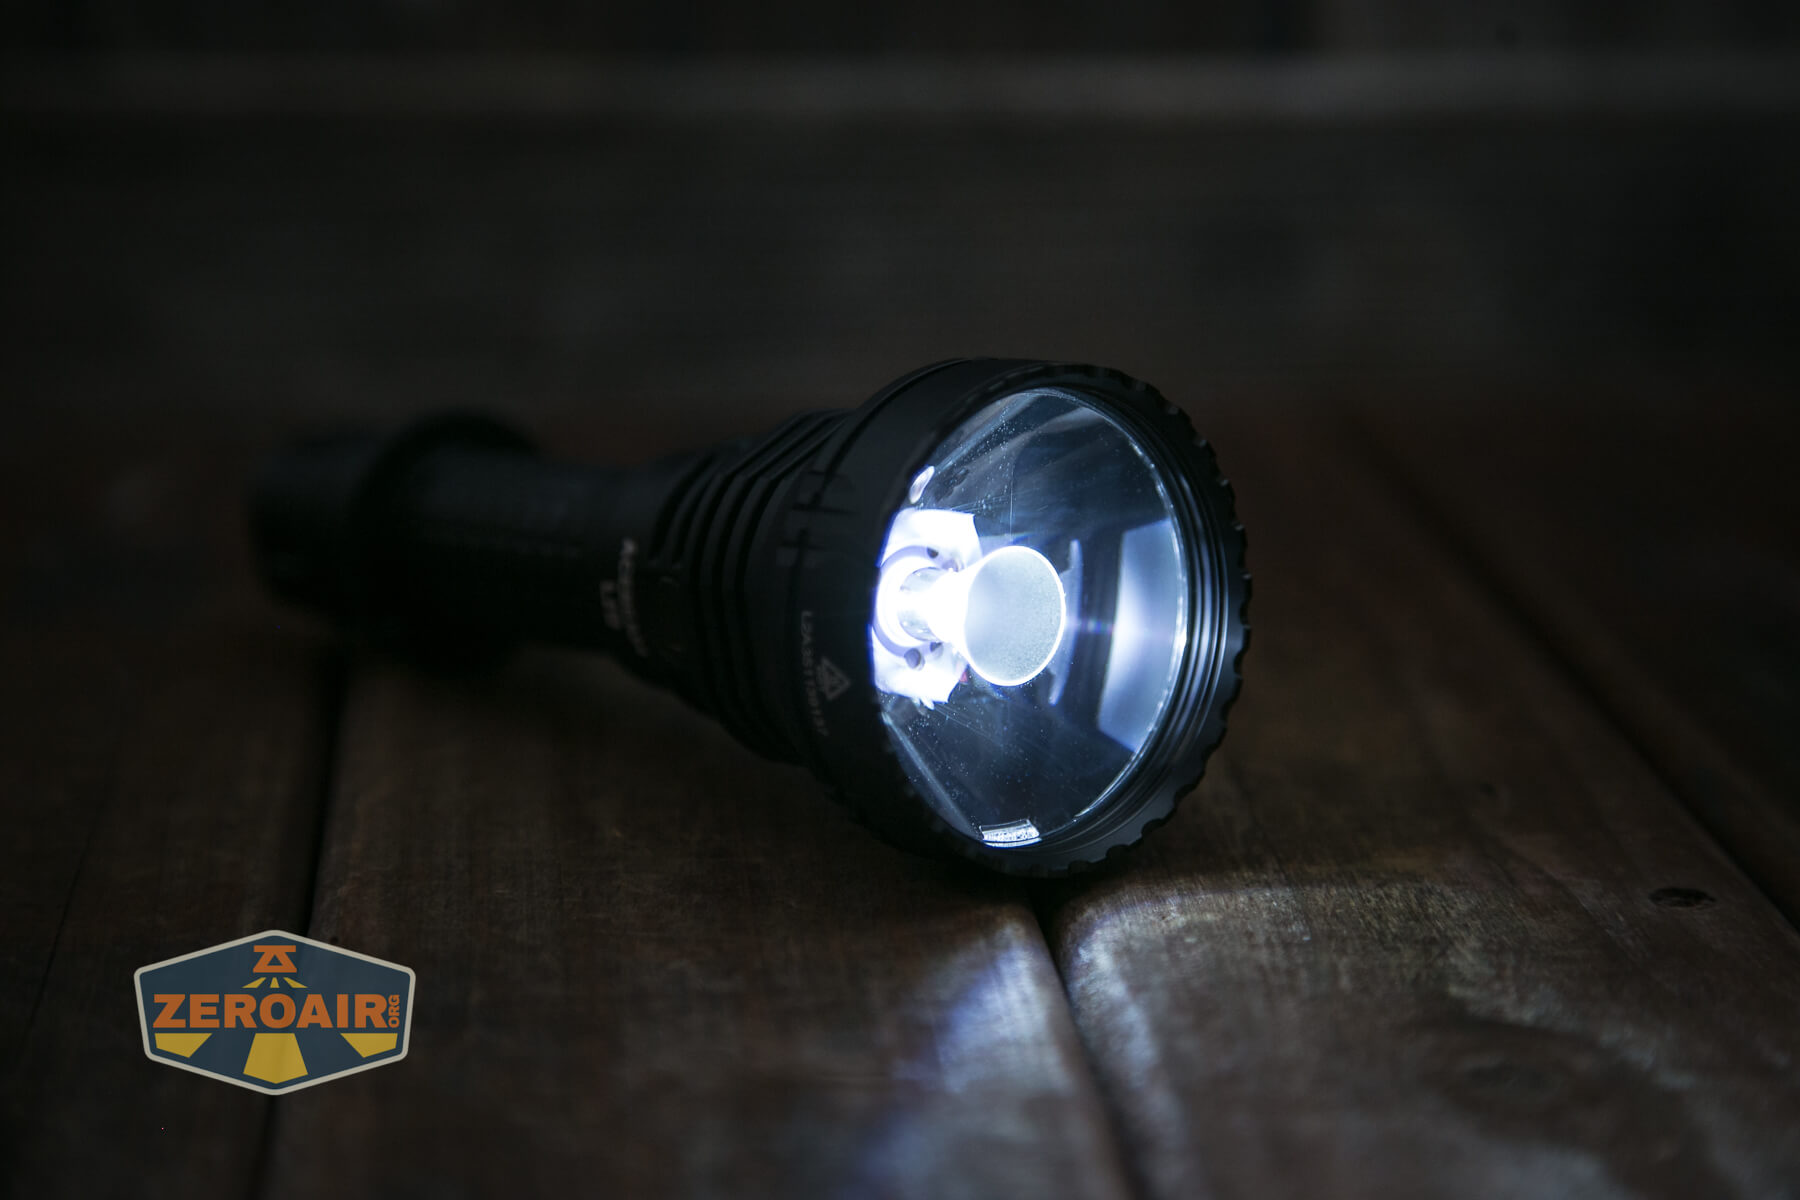
LED and Beam
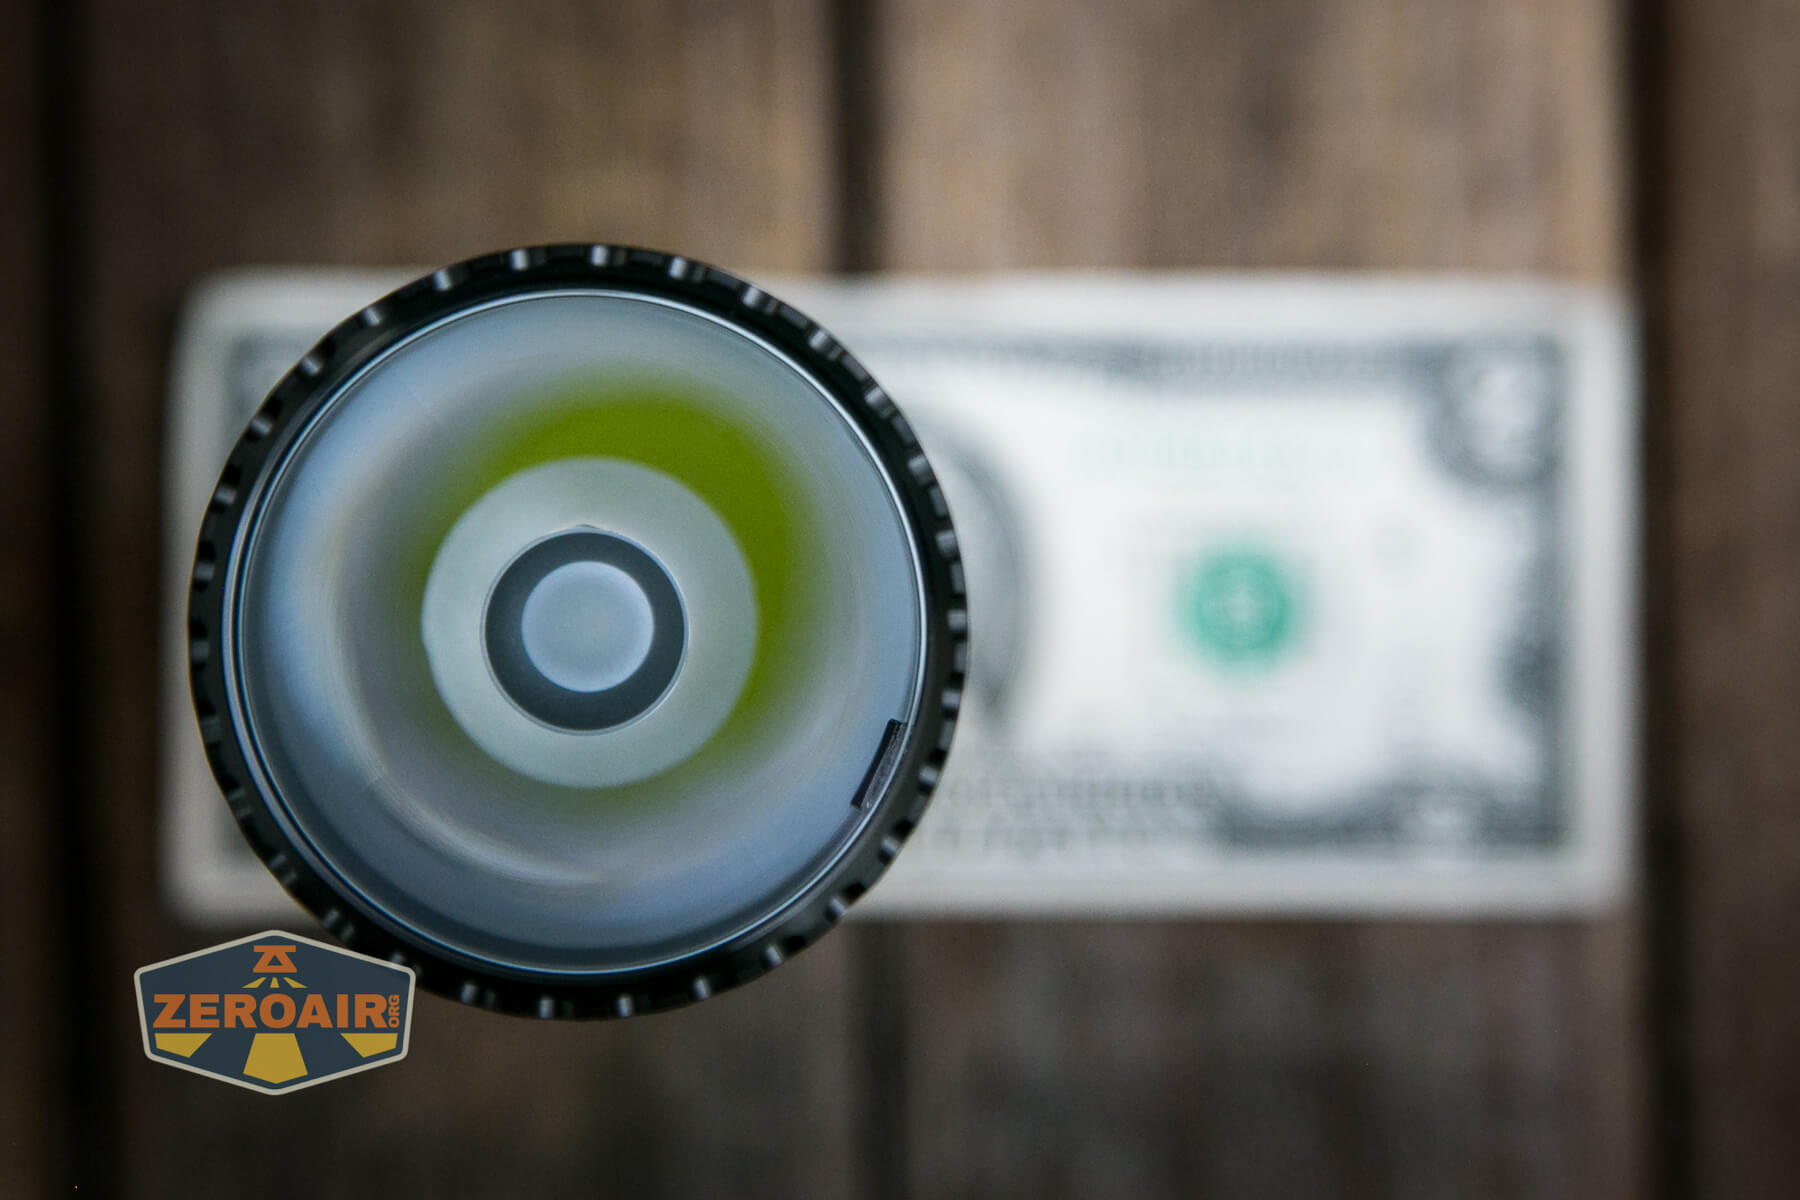
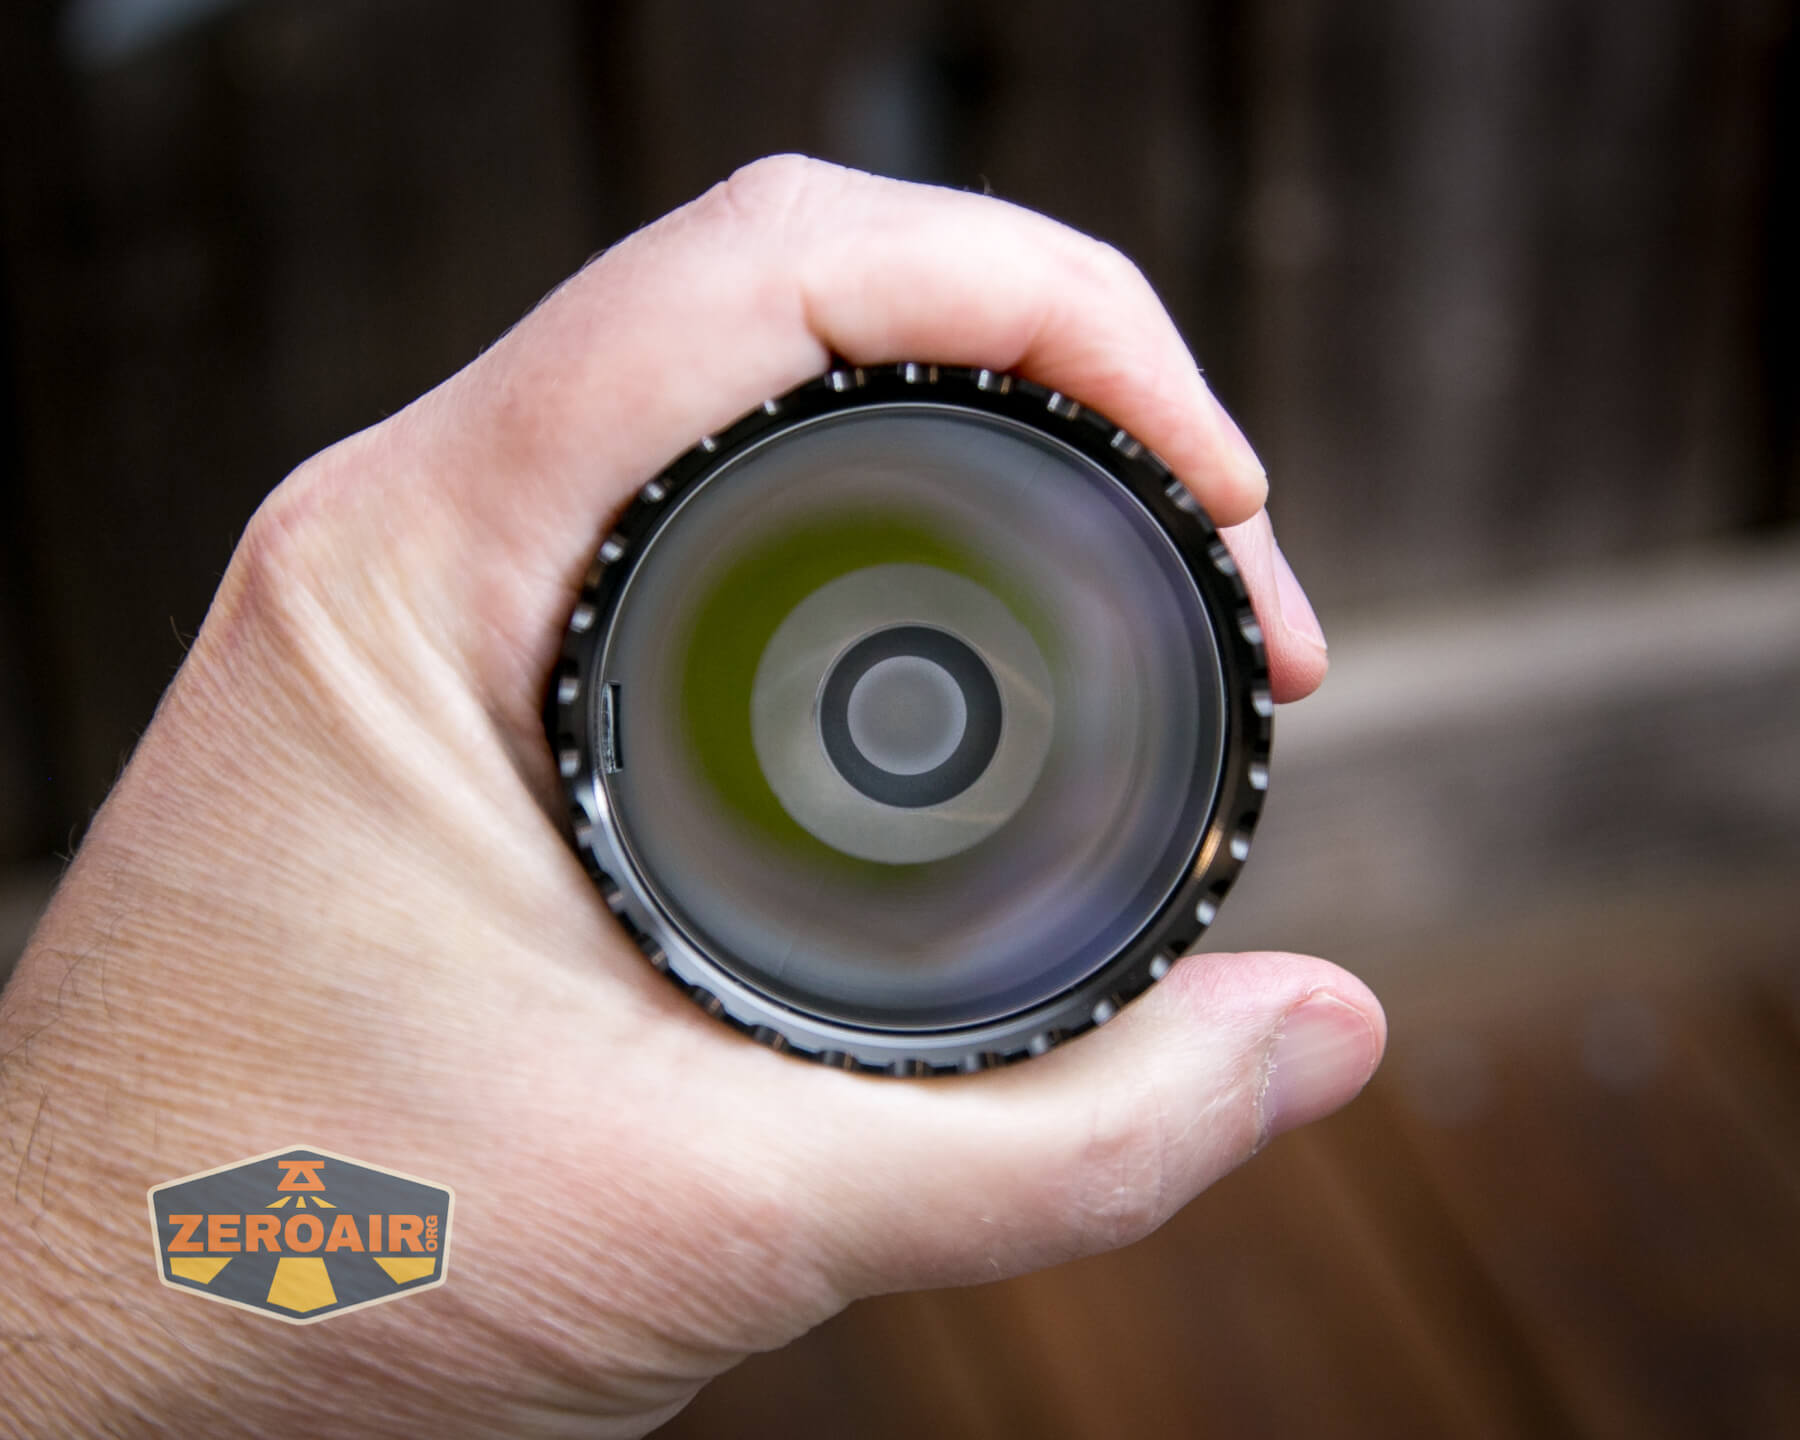
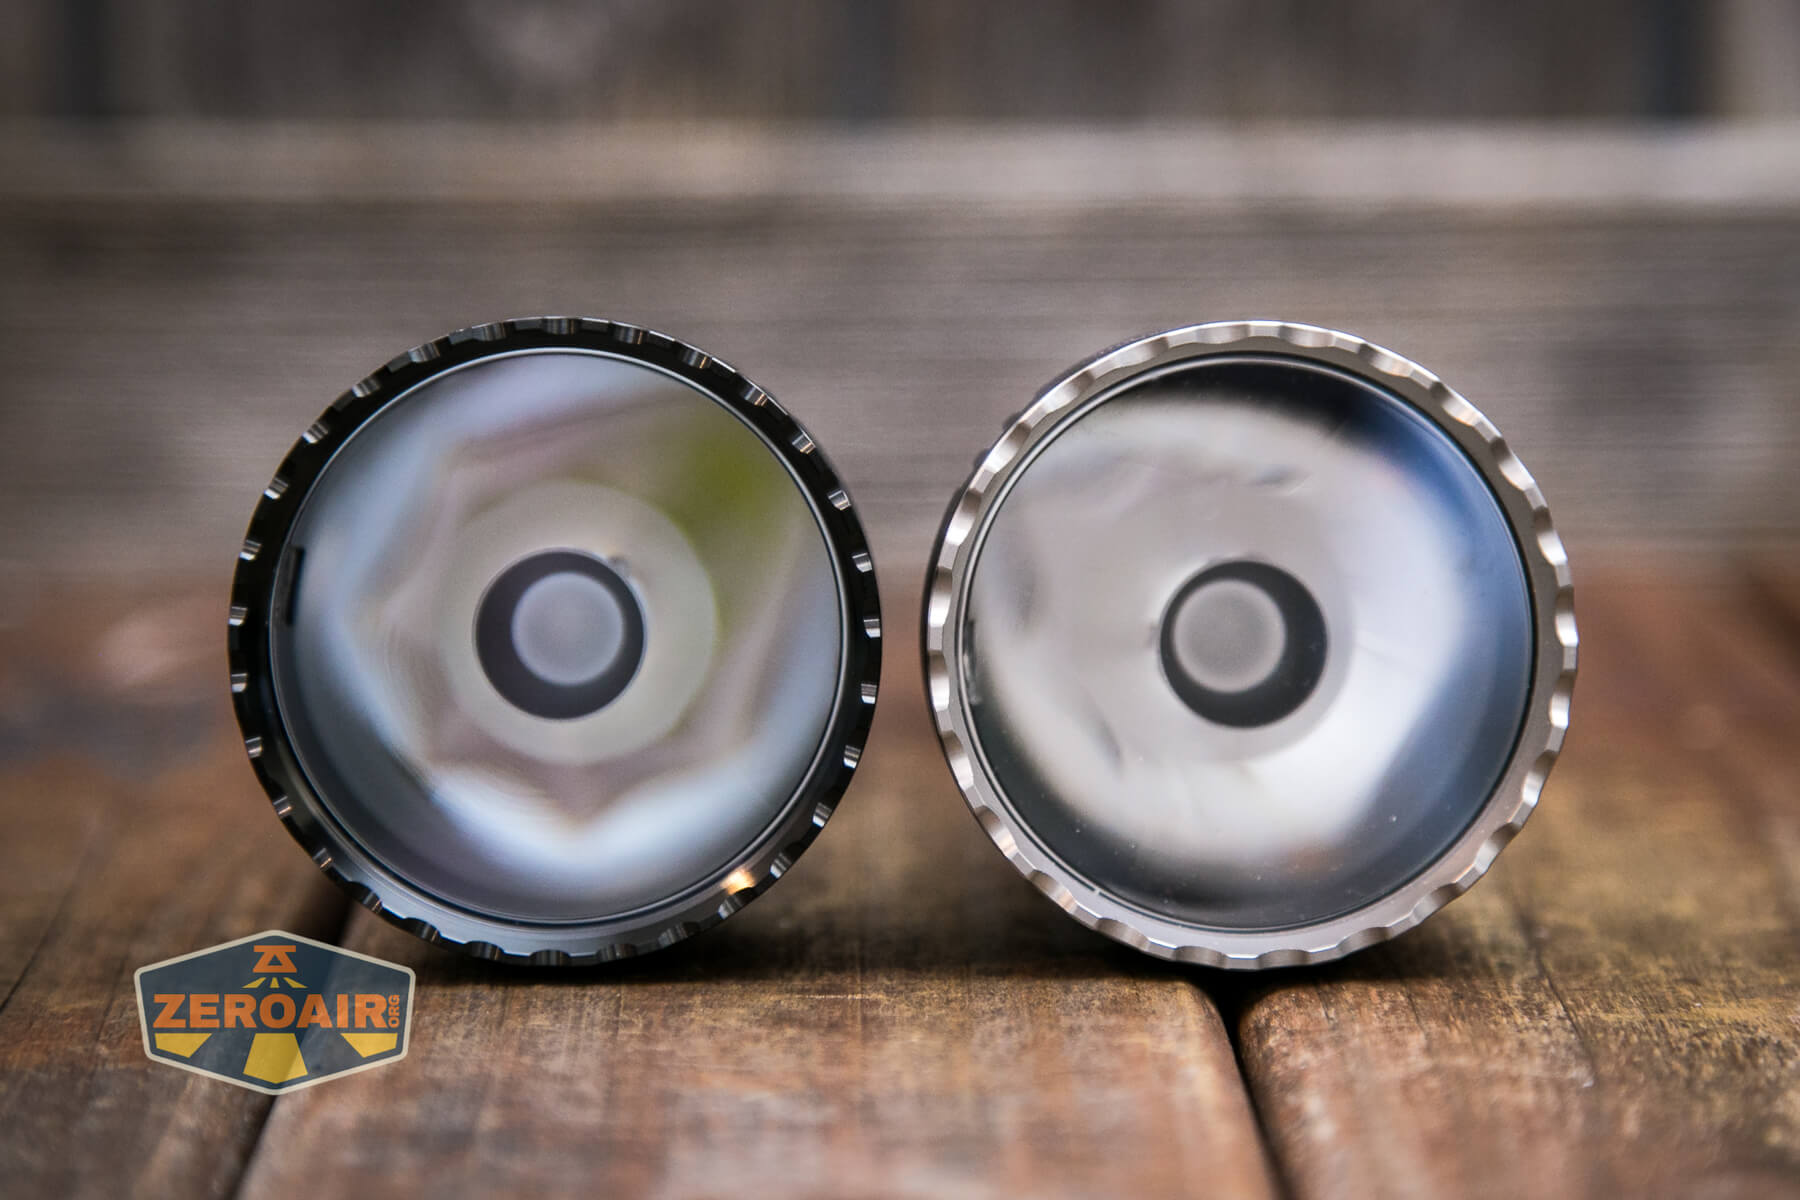
Probably the main update for this new version is the emitter. This is a Luminus SFT-40 emitter.
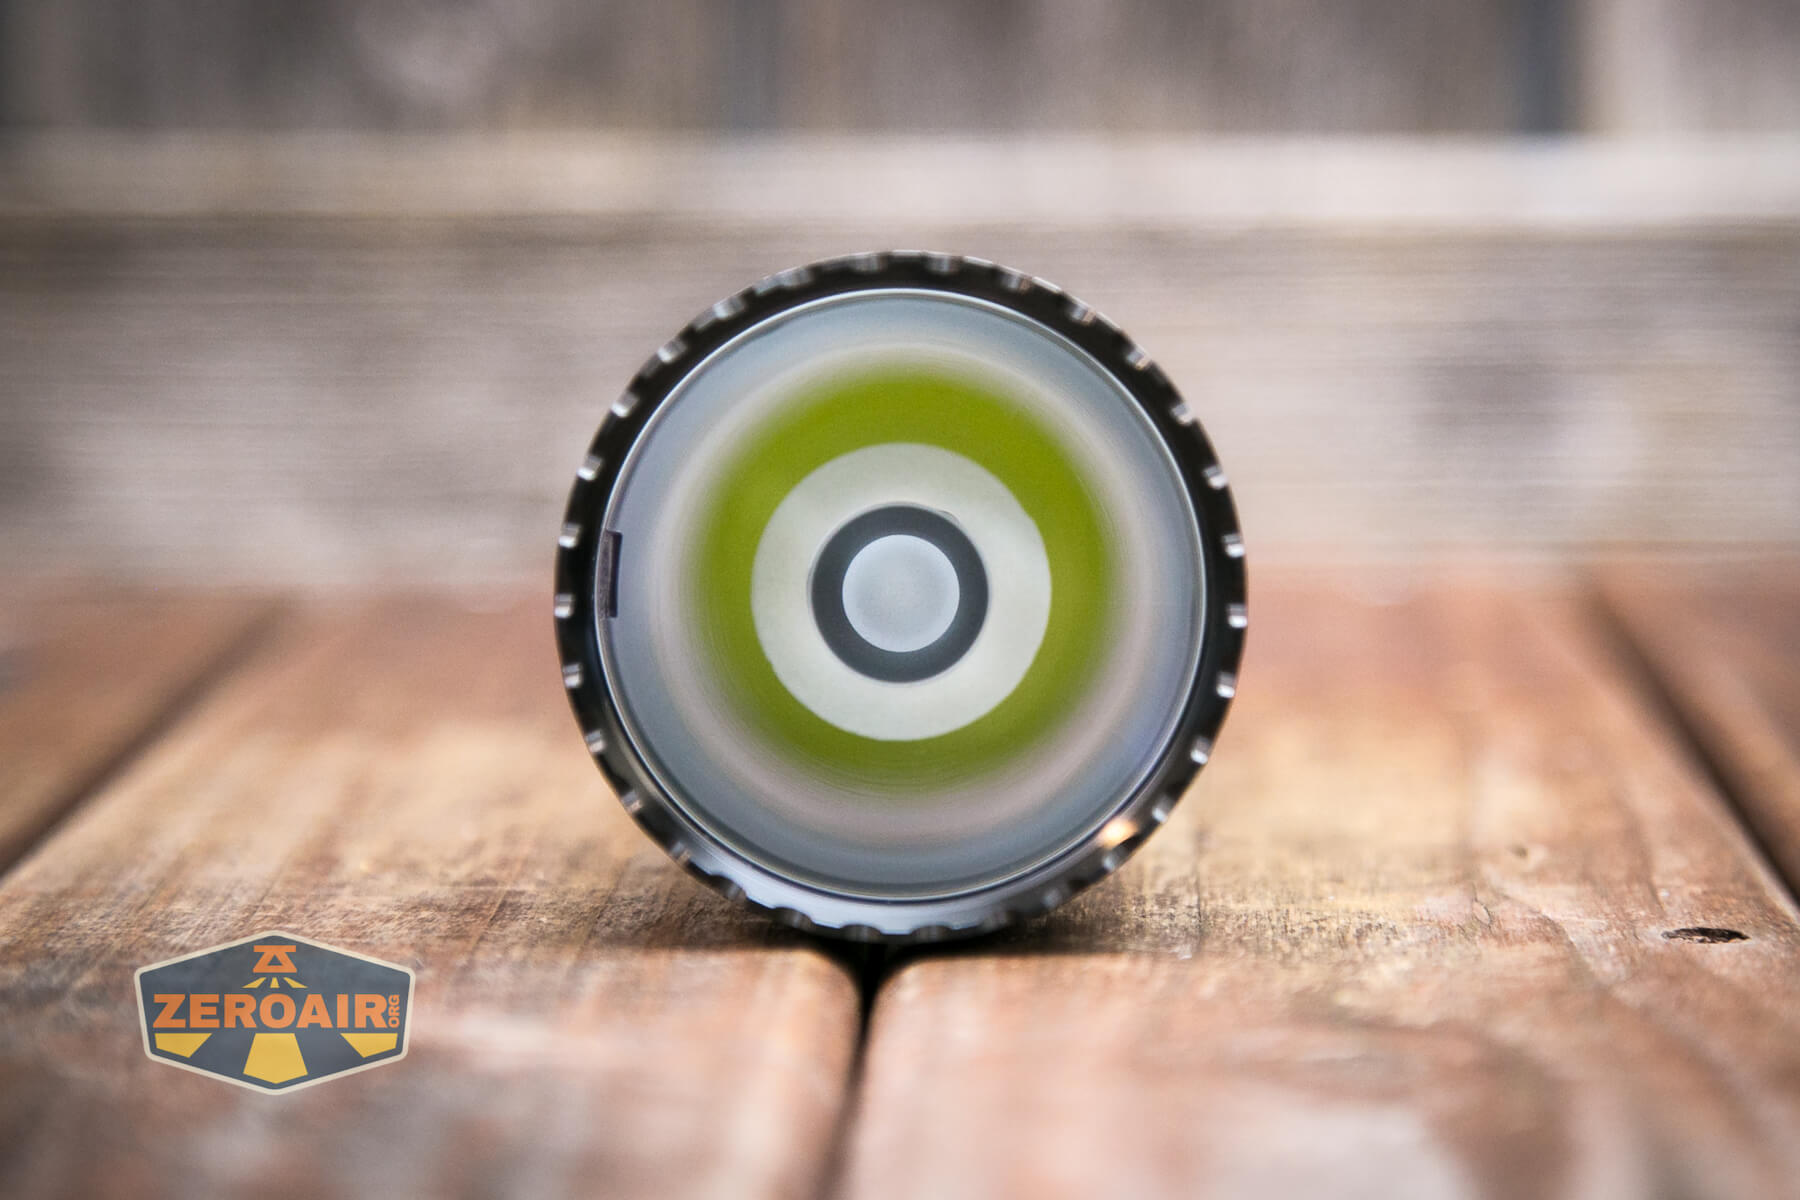
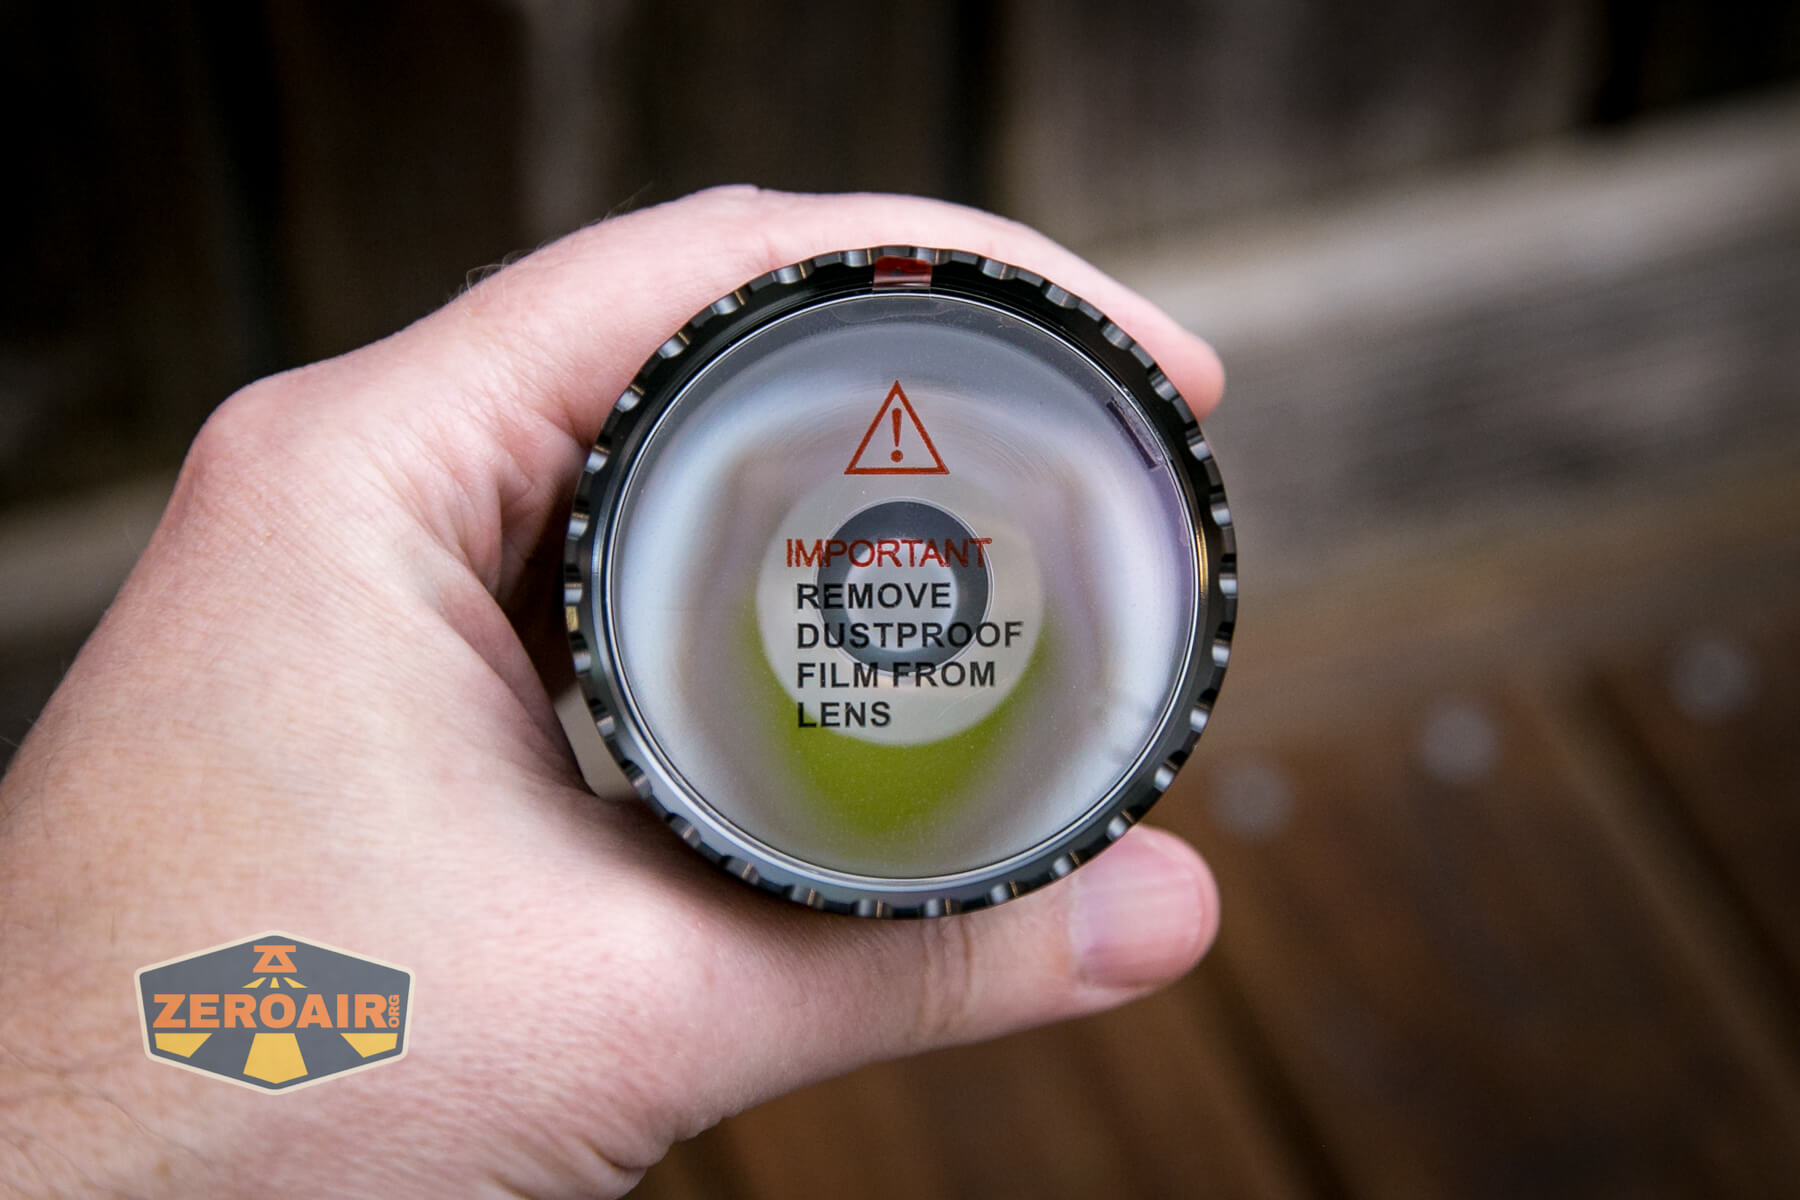
This emitter benefits from a TIR. I believe the TIR has a lens over the top, but I can say for certain that the front is smooth (i.e., you can’t feel that little center circle).
Due to the toothy bezel, light does/will escape when headstanding.
This little indicating LED in the head is not directly opposite to the e-switch; it’s only 90 degrees to the side. So in the photo below, the e-switch is in that flat spot on the left. This is a good indicator and gives access to the switch without covering the indicator.

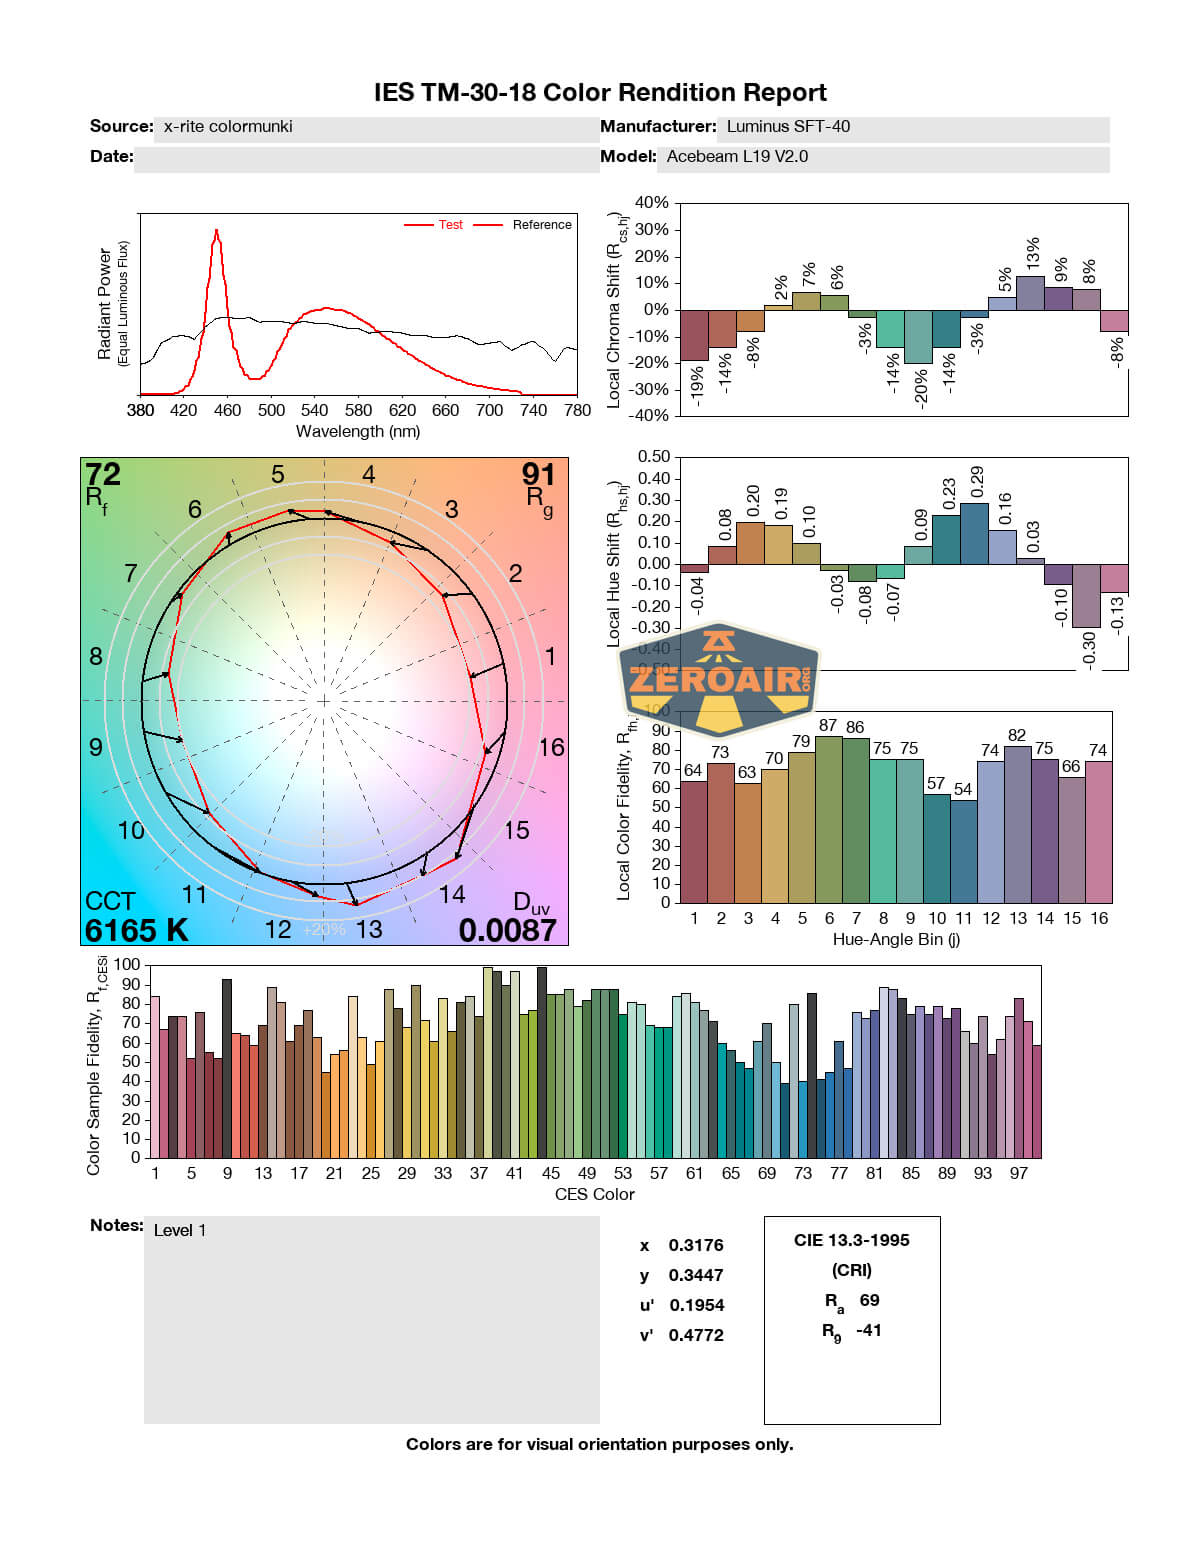
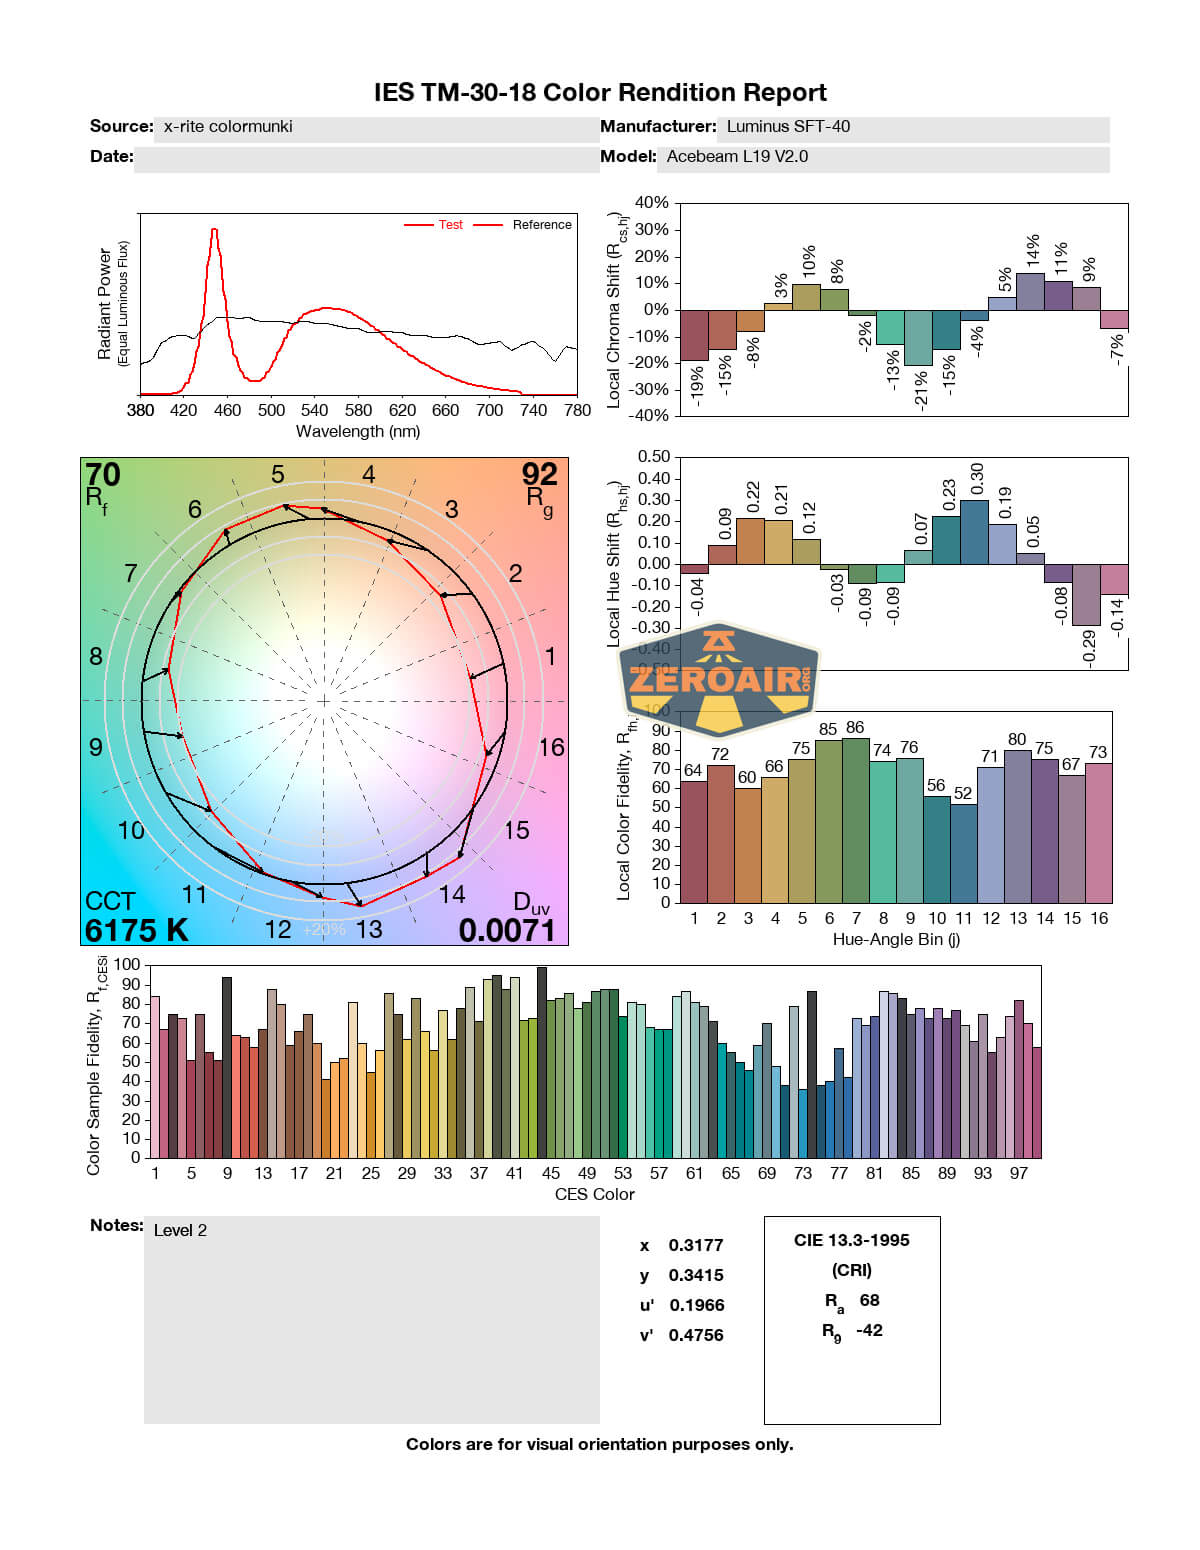
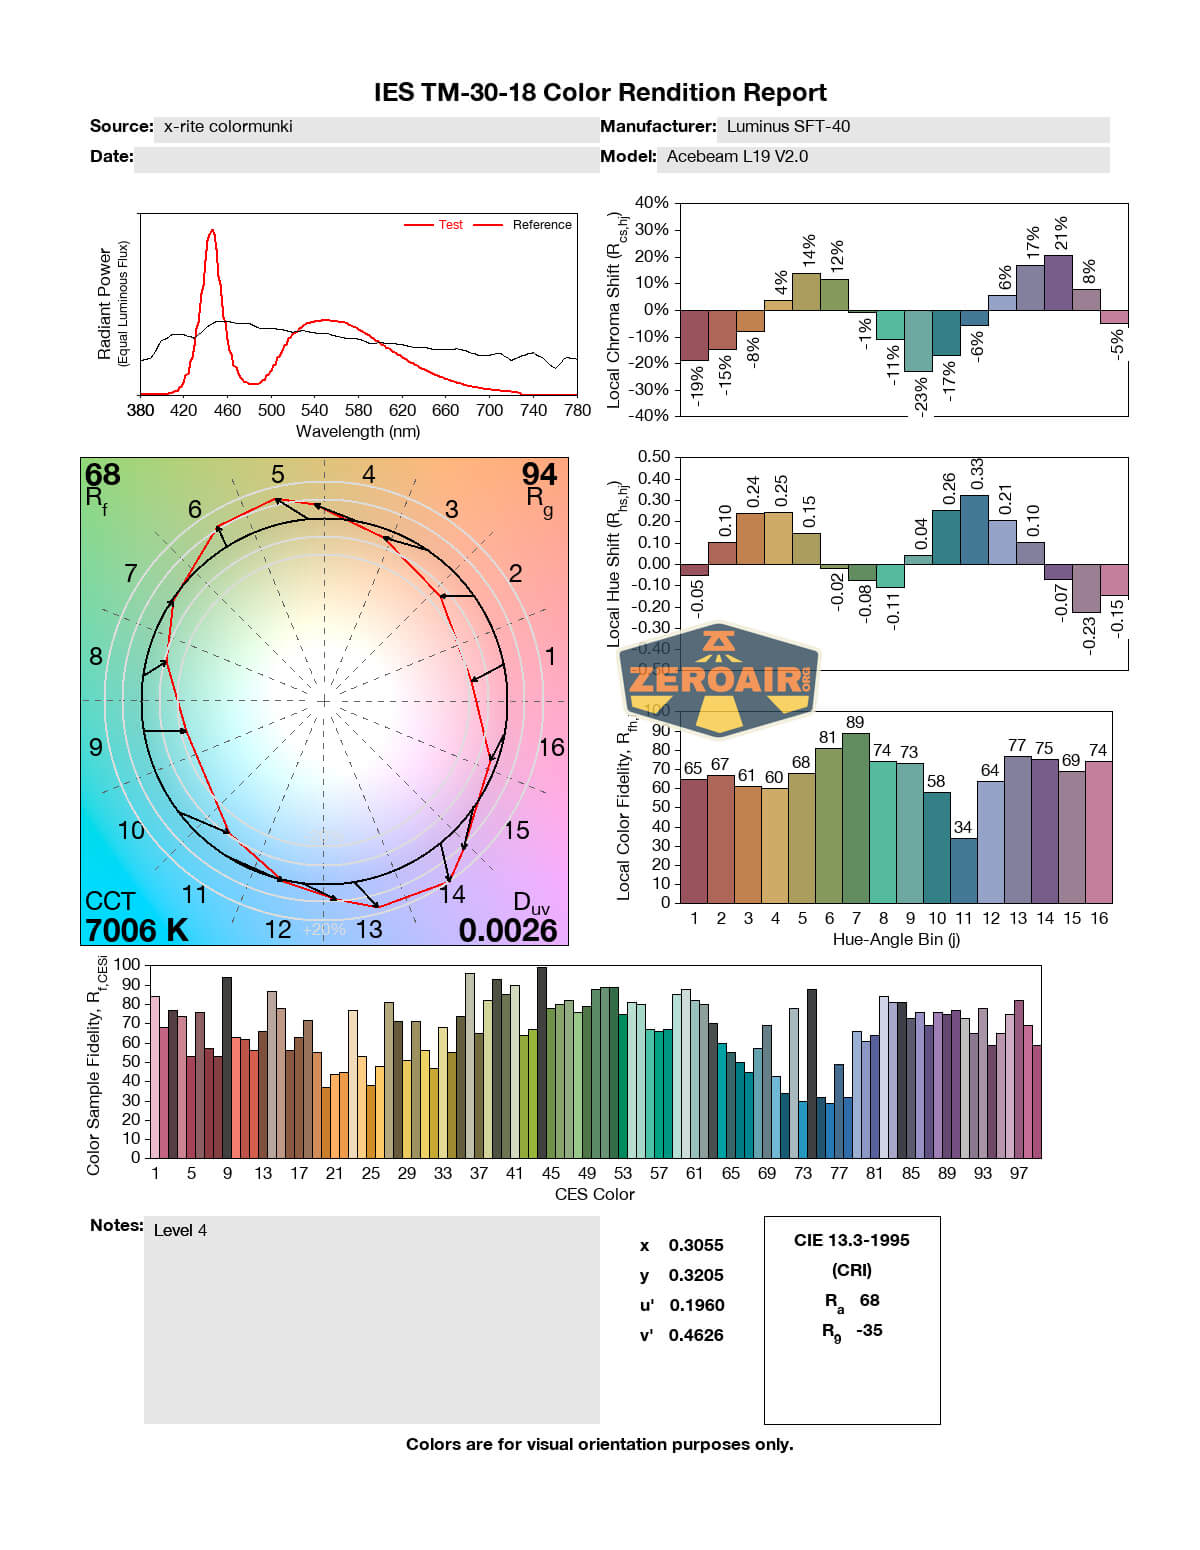
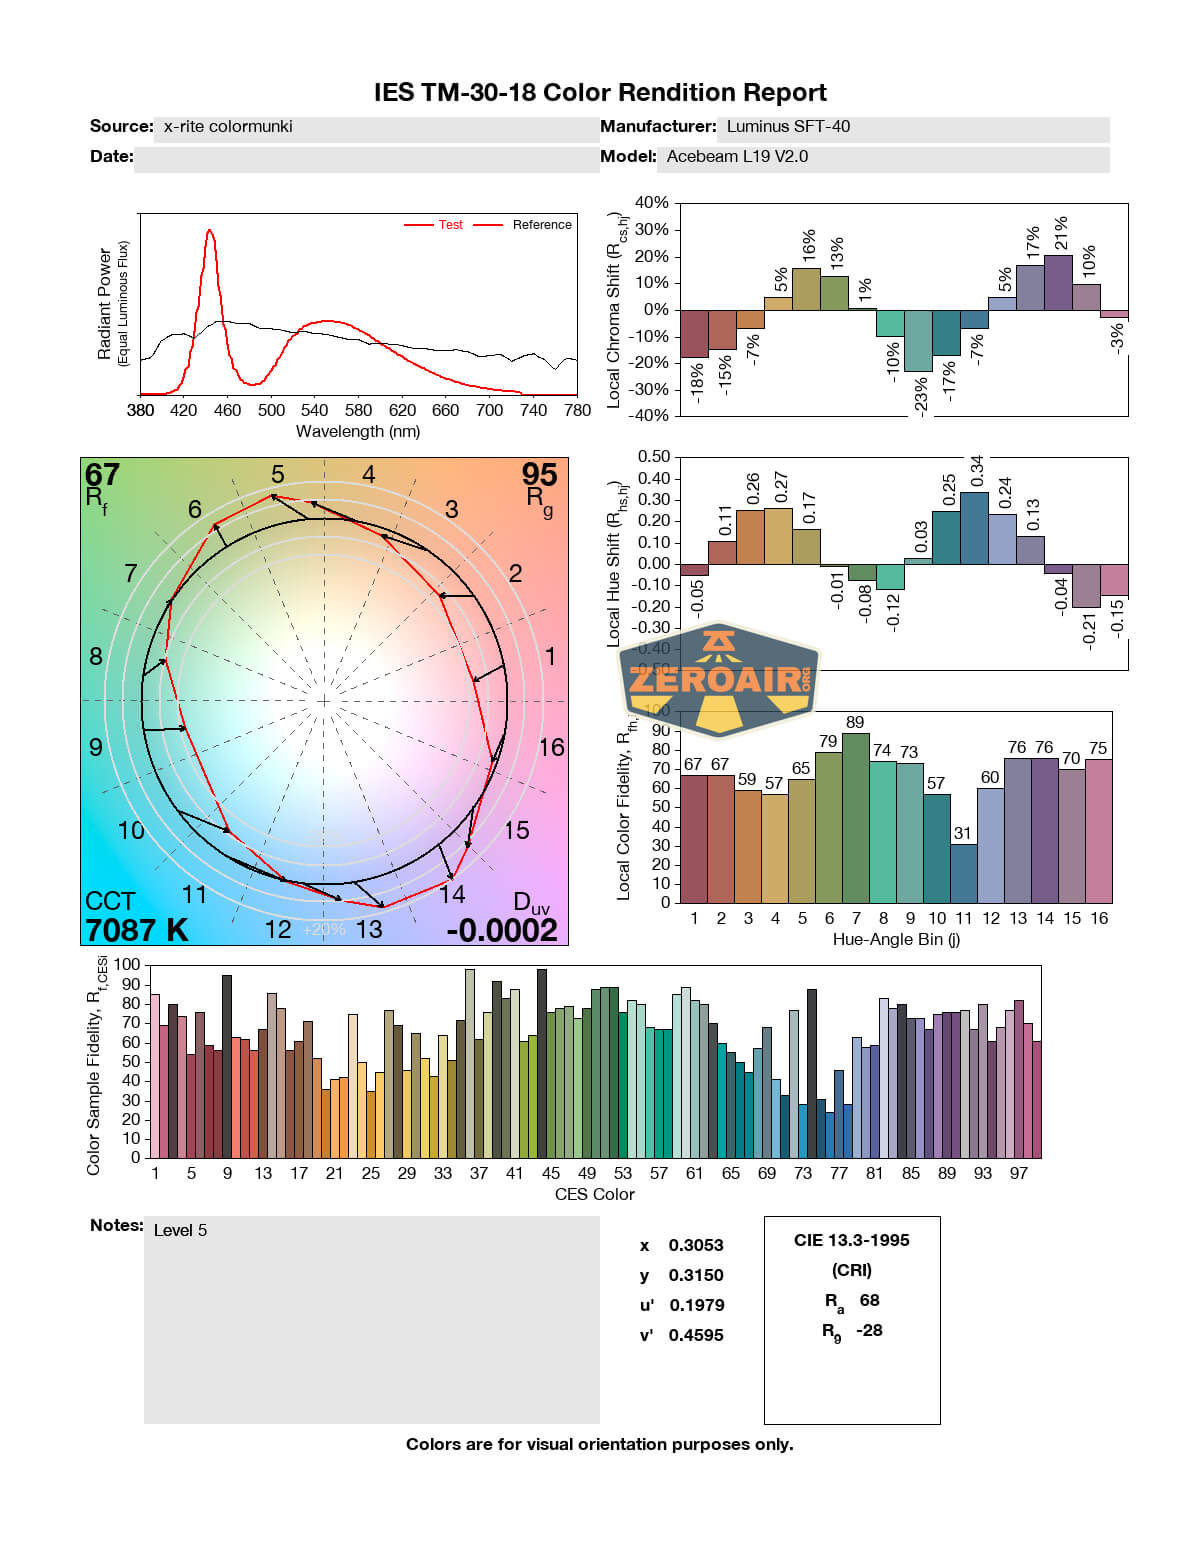
LED Color Report (CRI and CCT)
The CCT on this emitter ranges from cool to very cool – around 6600K to 7500K. That’s very cool for EDC purposes, but common and expected in tactical usage. So this is acceptable. The CRI is fairly low too, at around 70.


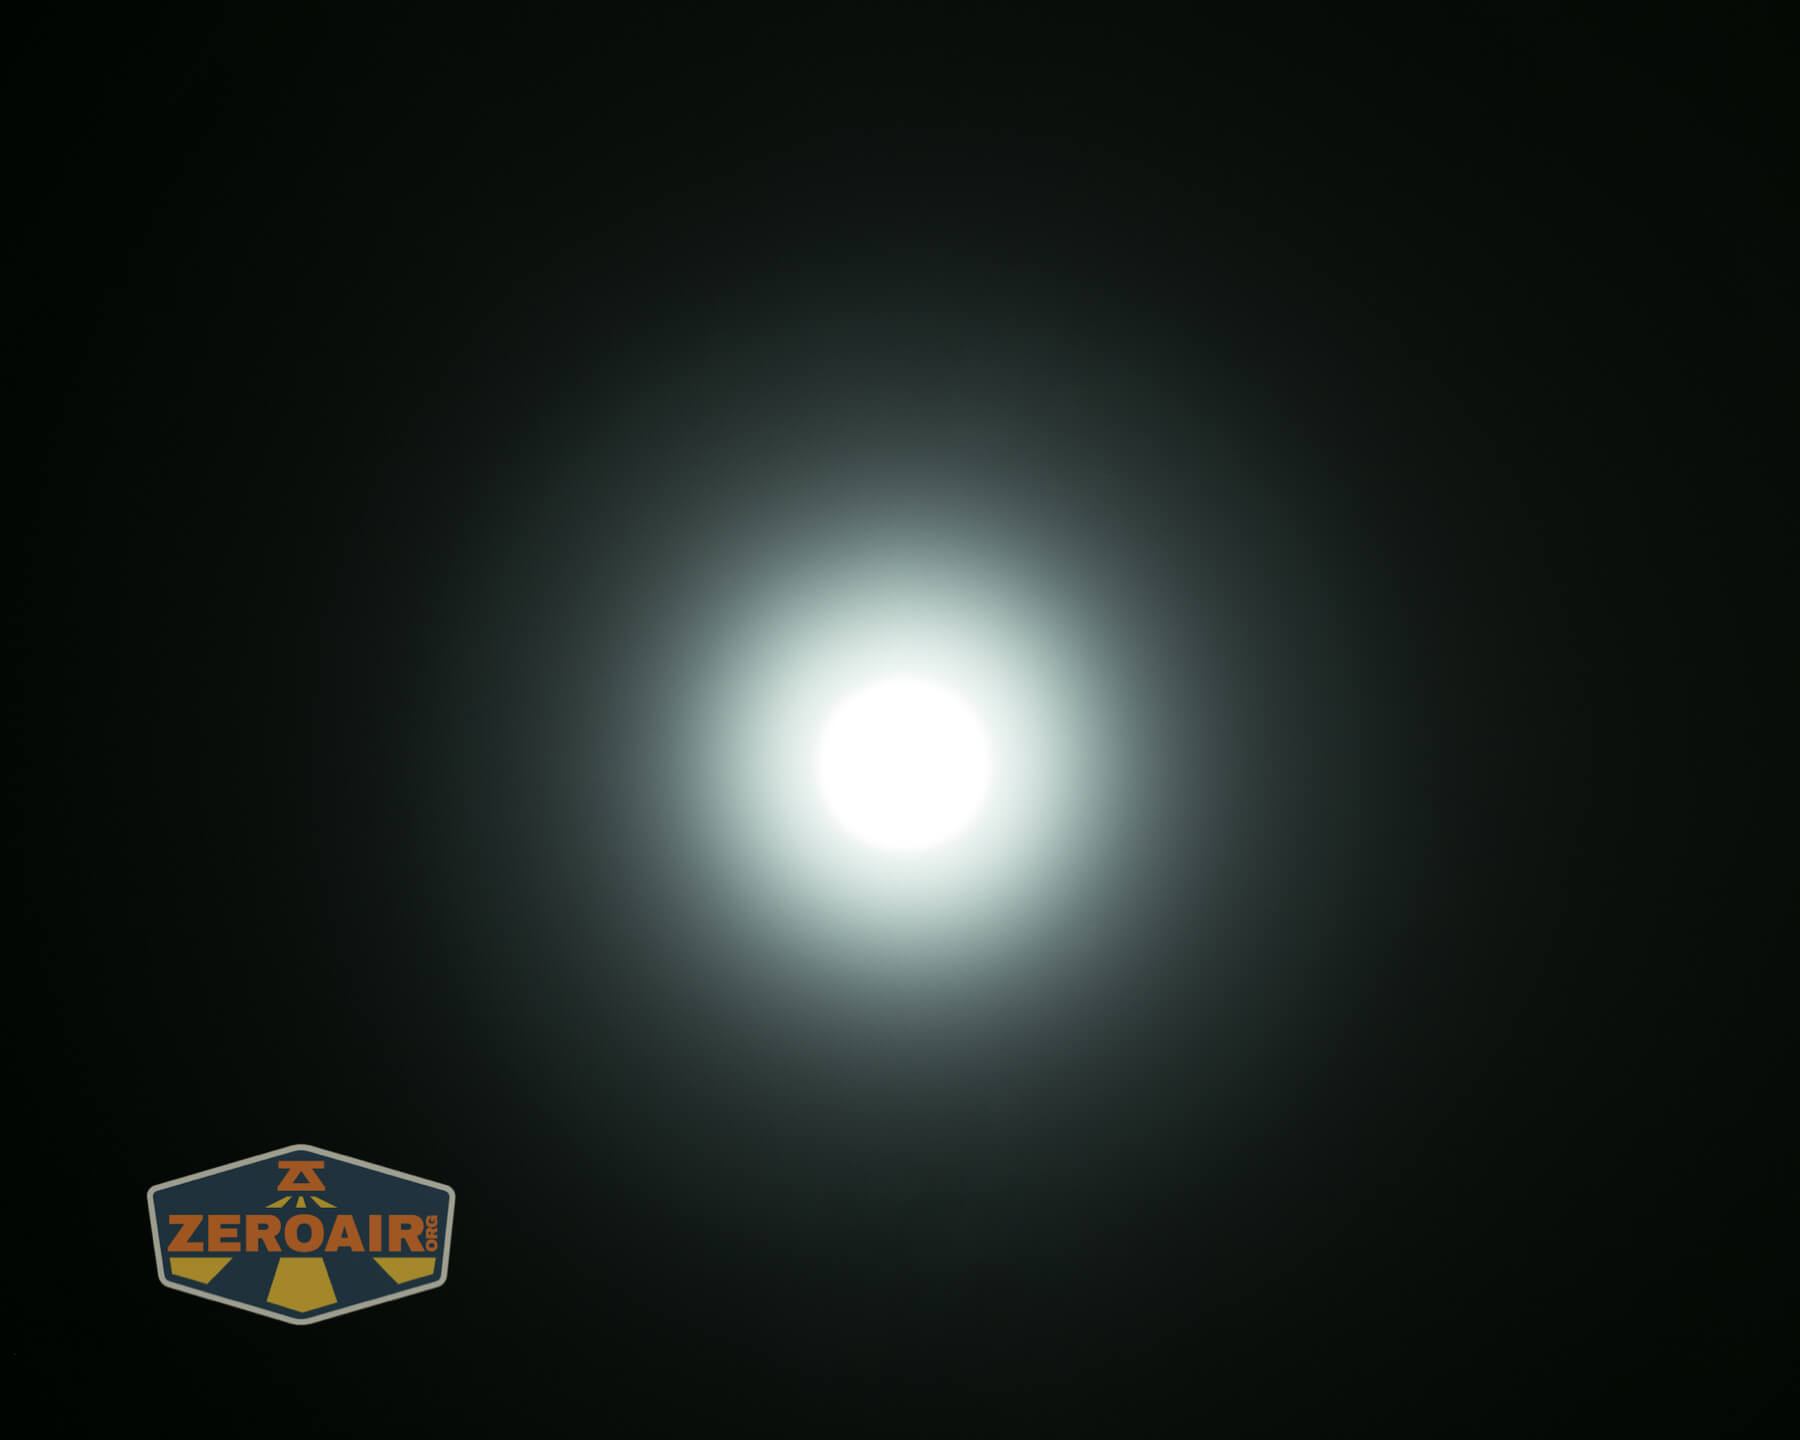
Beamshots
These beamshots always have the following settings: f8, ISO100, 0.3s shutter, and manual 5000K exposure. These photos are taken at floor level, and the beam hits the ceiling around 9 feet away.


Tint vs BLF-348 (KillzoneFlashlights.com 219b version) (affiliate link)
I keep the test flashlight on the left and the BLF-348 reference flashlight on the right.
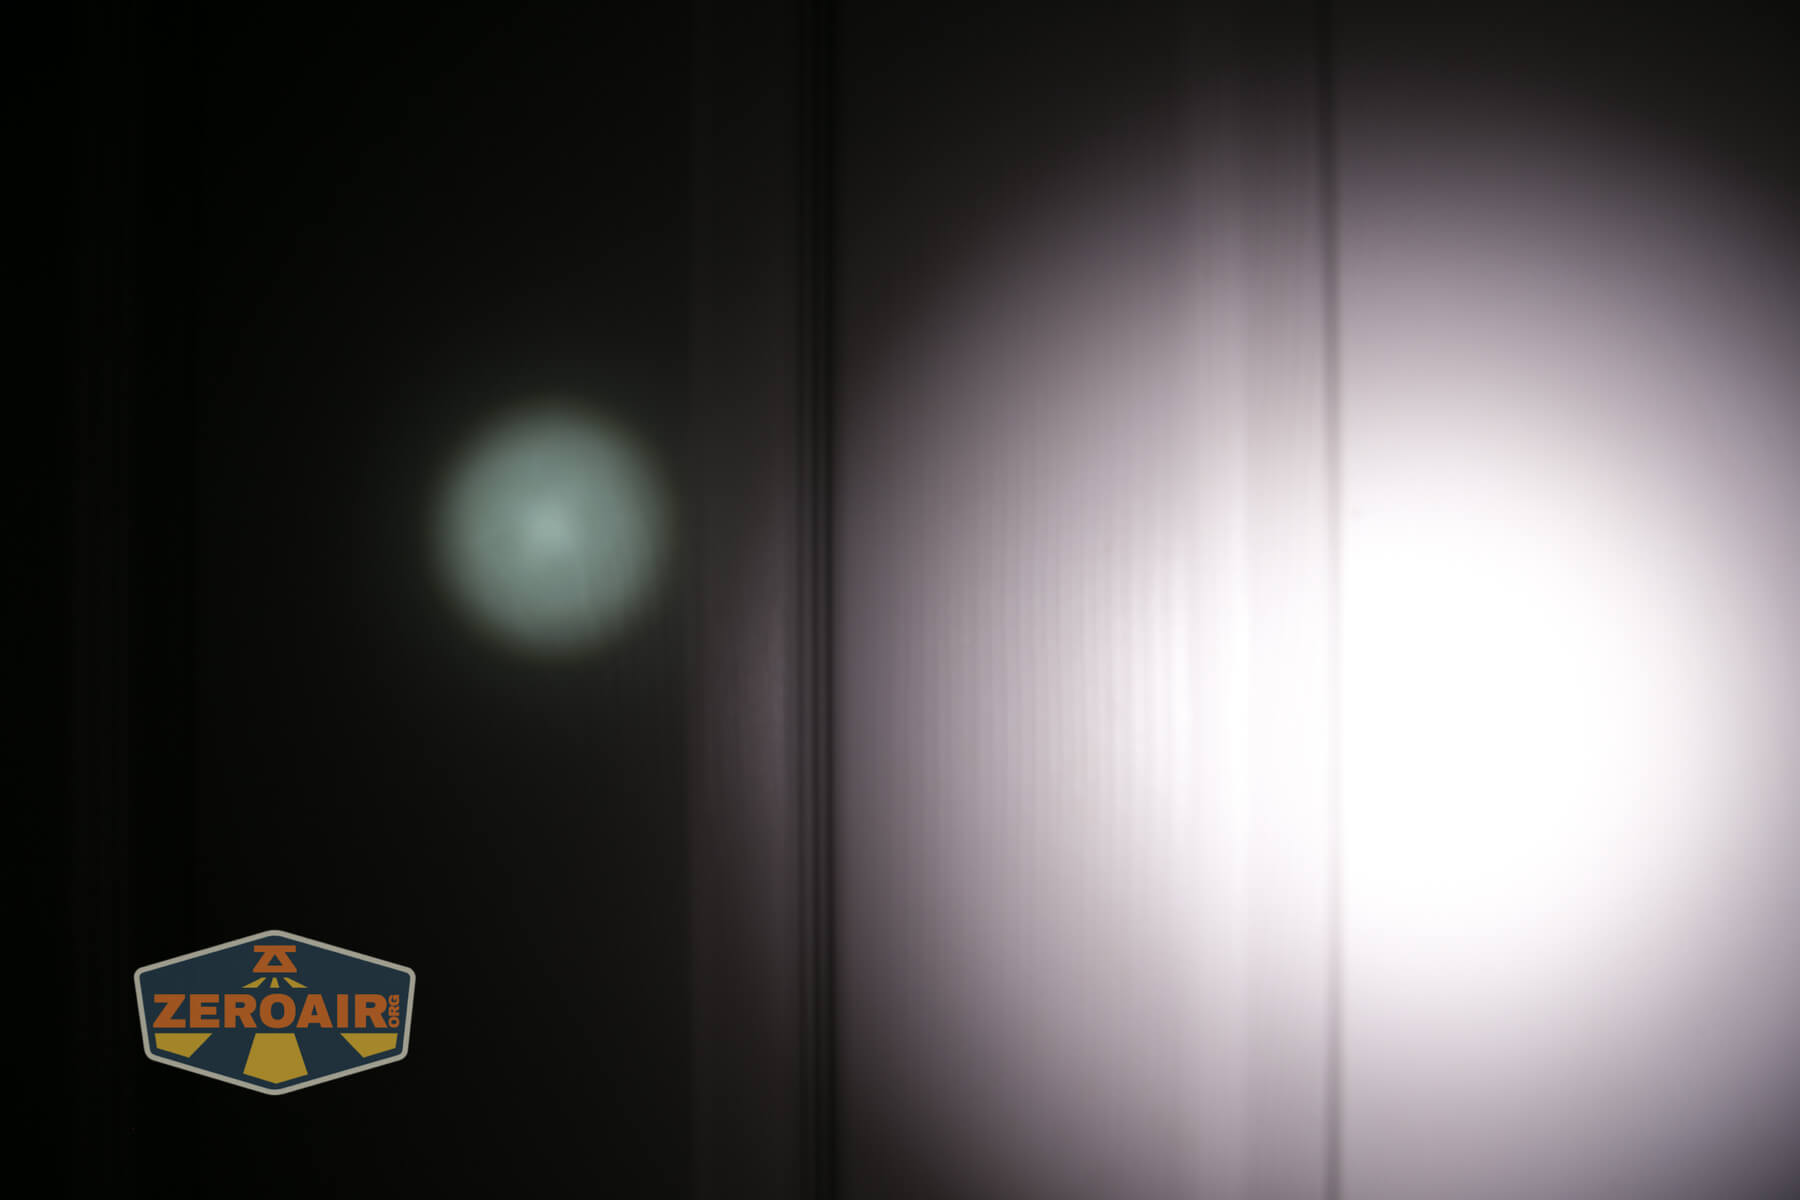
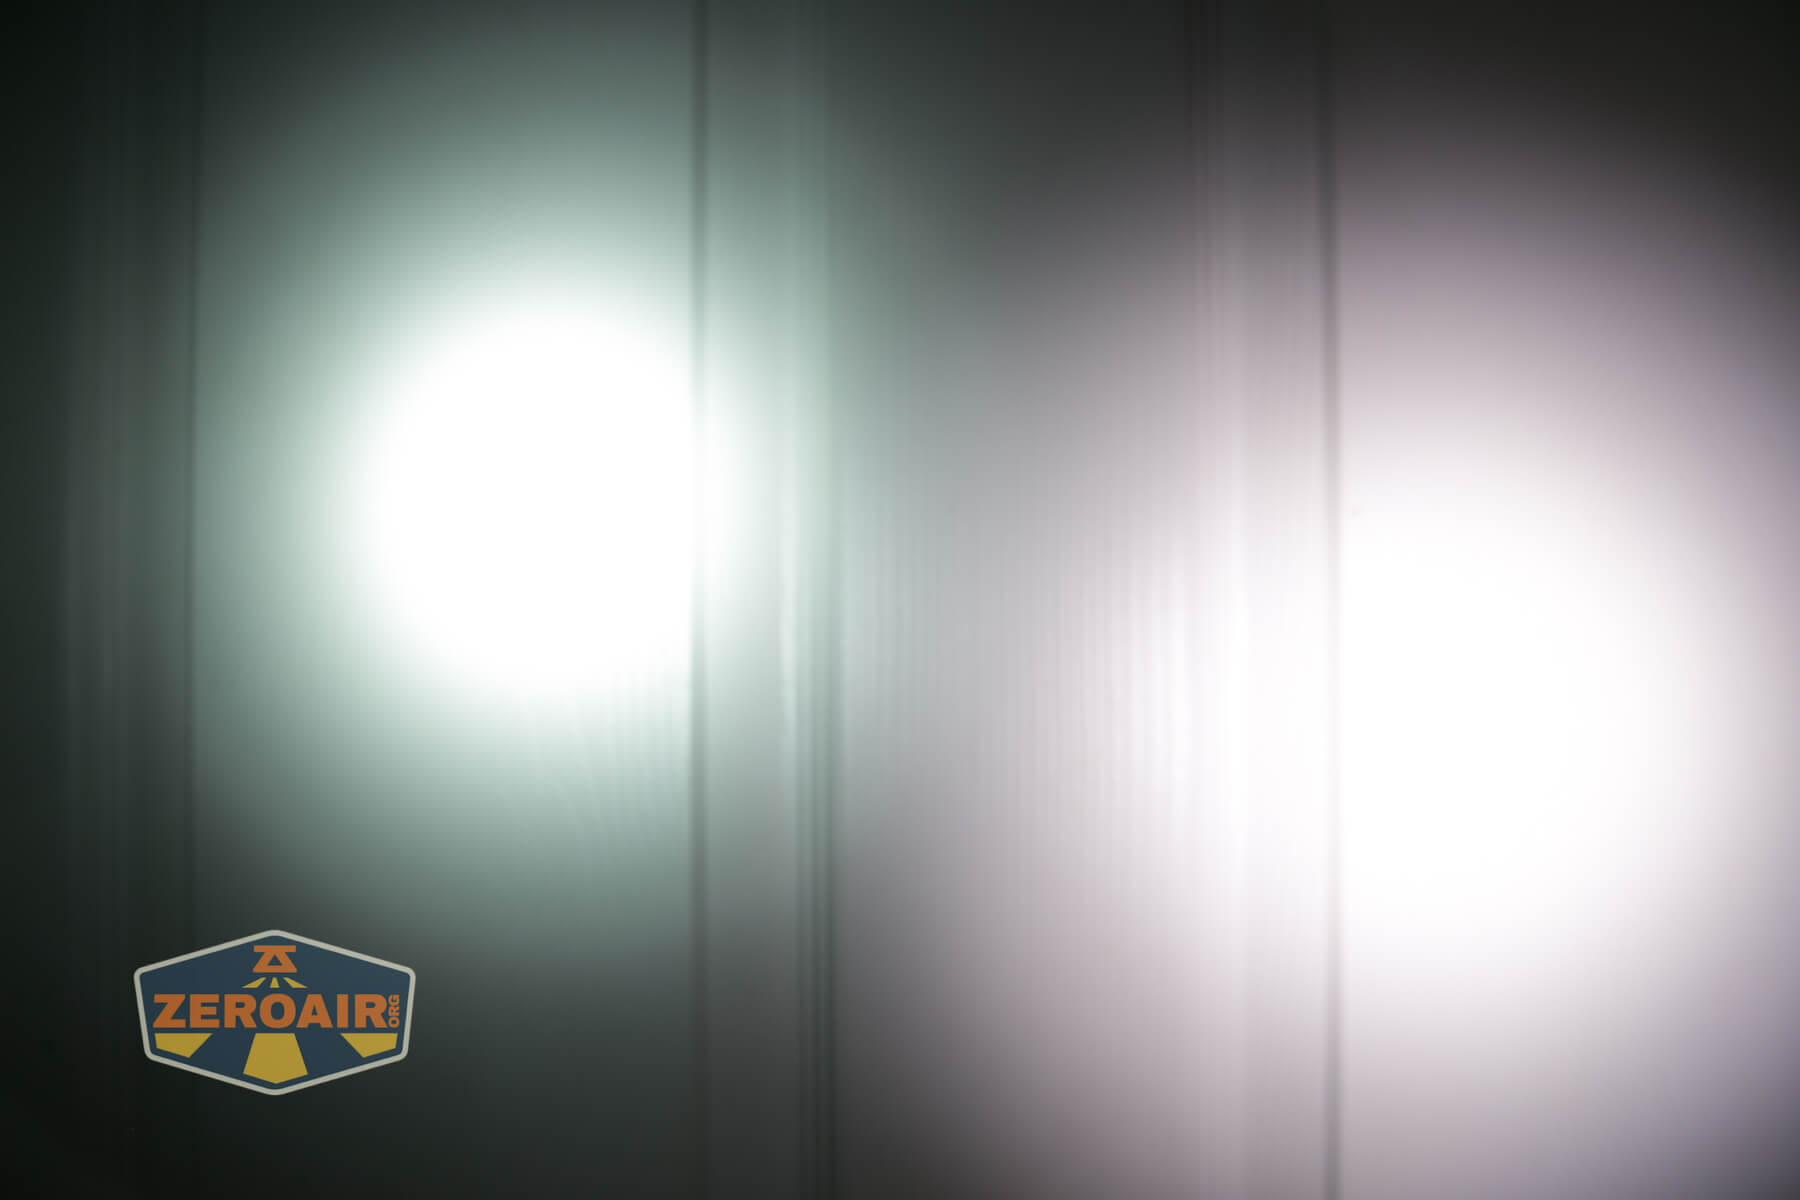
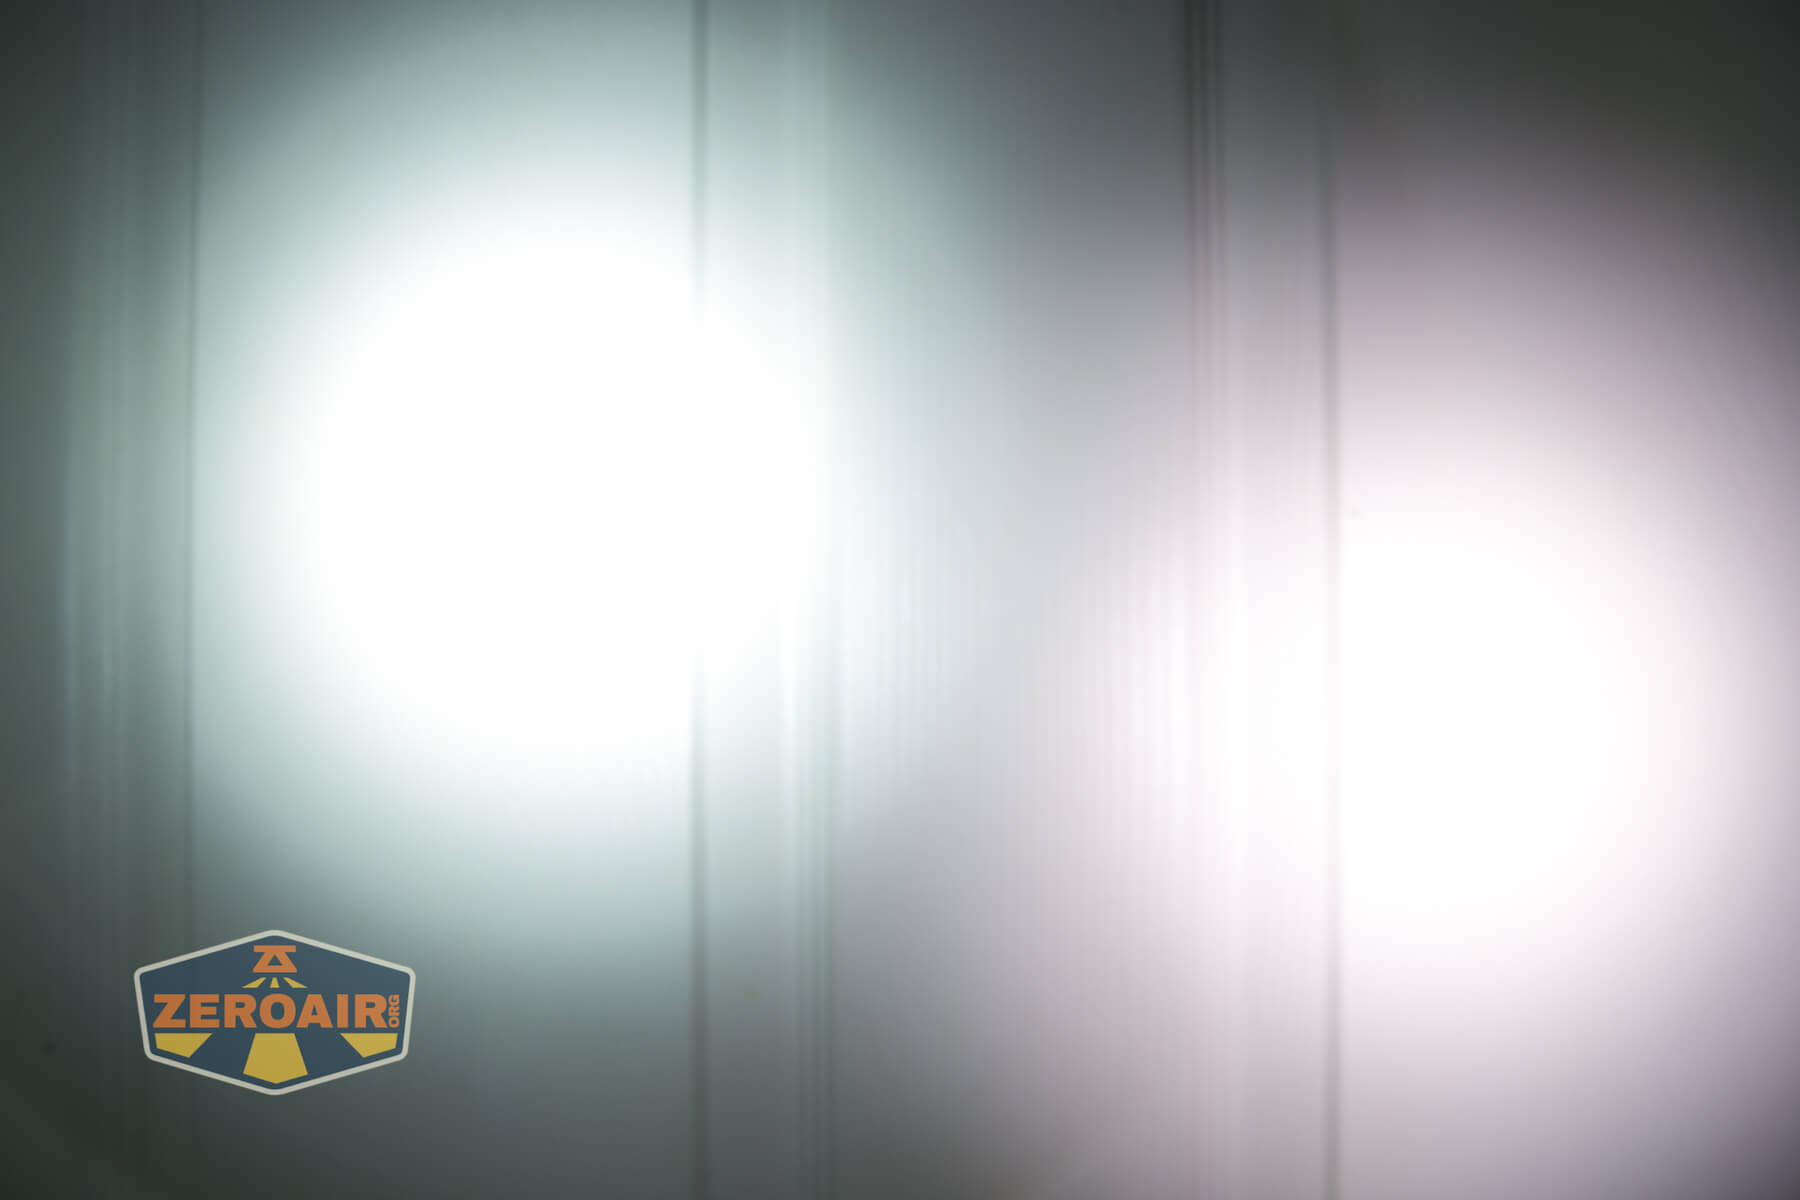


I compare everything to the KillzoneFlashlights.com 219b BLF-348 because it’s inexpensive and has the best tint!
Conclusion
What I like
- Great beam profile
- Good user interface
- Very good throw
- The optional cell can be used as a powerbank
- No pulse width modulation
What I don’t like
- Cell charging is a little slow
- The tactical ring makes removal from the nylon pouch difficult
- Light doesn’t seem close to total output specification (but does hit throw numbers, which seems more important to me).
Notes
- This content originally appeared at zeroair.org. Please visit there for the best experience!
- Please use my Amazon.com referral link to help support zeroair.org!
- Please support me on Patreon! I deeply appreciate your support!
Discover more from ZeroAir Reviews
Subscribe to get the latest posts sent to your email.