Wuben X-0 Knight Brass Flashlight Review
The Wuben X-0 Knight brass is now available! It still offers USB-C charging as well as many Tritium slots and a novel design. Read on!
Official Specs and Features
Here’s a link to the Wuben X-0 Knight Brass flashlight product page.
Versions
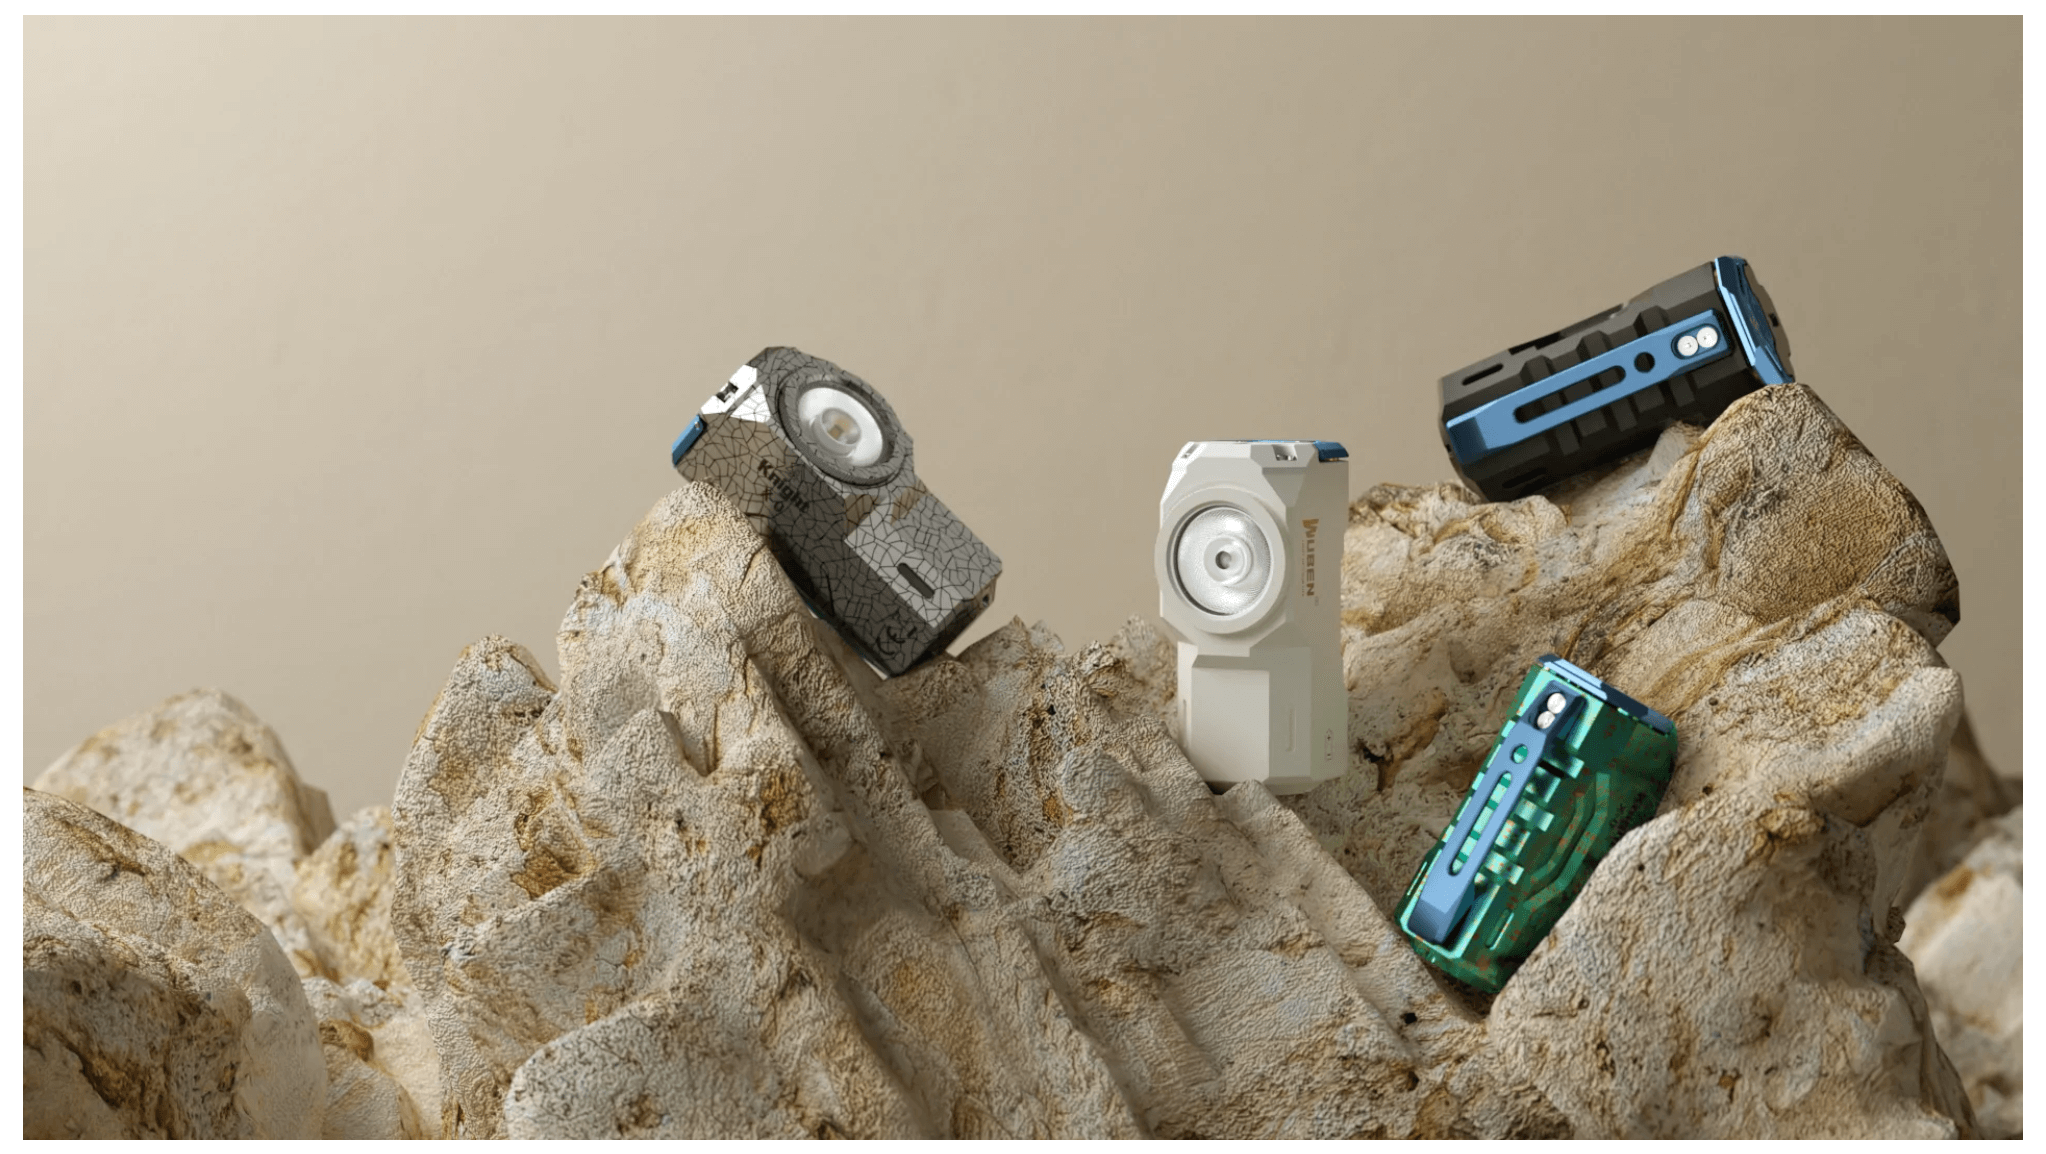
There are two emitter options, and they’re available in different body finishes. Both aluminum and titanium are available. Below, the white and black are aluminum, and the green and grey are titanium. Here’s a stock photo by Wuben. The emitters are Osram P9 and Samsung LH351d – based on specs, I think this is the Samsung version. Obviously, after this stock photo, Wuben has added the brass version seen here.
Price
The Wuben X-0 Knight in Brass comes in at $88 and is available (outside of the Kickstarter campaign) now from Wuben. I was also given a 20% discount code! I believe it’ll work on most or all Wuben products. Here’s the code:
zeroair20
Short Review
This is a funny little light. Wuben is no stranger to making lights with built-in batteries, but this is not one!! The Wuben X-0 Knight brass flashlight uses a standard 18350 cell, and despite whatever you might read elsewhere, it’s quite easy to change. It’s quite a neat light, and if you’re in the market for a neat light, it’s a good one to grab. It’s not even expensive, and the aluminum is still quite fetching. The brass really is quite fantastic, too. I can pick up some of the smell brass usually has, but this light has a bead blast finish or something that makes the brassy smell quite minimal indeed.
Long Review
The Big Table
| Wuben X-0 Knight Brass Flashlight | |
|---|---|
| Emitter: | Samsung LH351d |
| Price in USD at publication time: | $86.00
Here’s a 20% off coupon, too: |
| Cell: | 1×18350 |
| Runtime Graphs | |
| LVP? | Yes |
| Switch Type: | E-Switch |
| Quiescent Current (mA): | 0.01 |
| On-Board Charging? | Yes |
| Charge Port Type: | USB-C |
| Charge Graph | |
| Power off Charge Port | with cell: all modes without tailcap or cell: all modes |
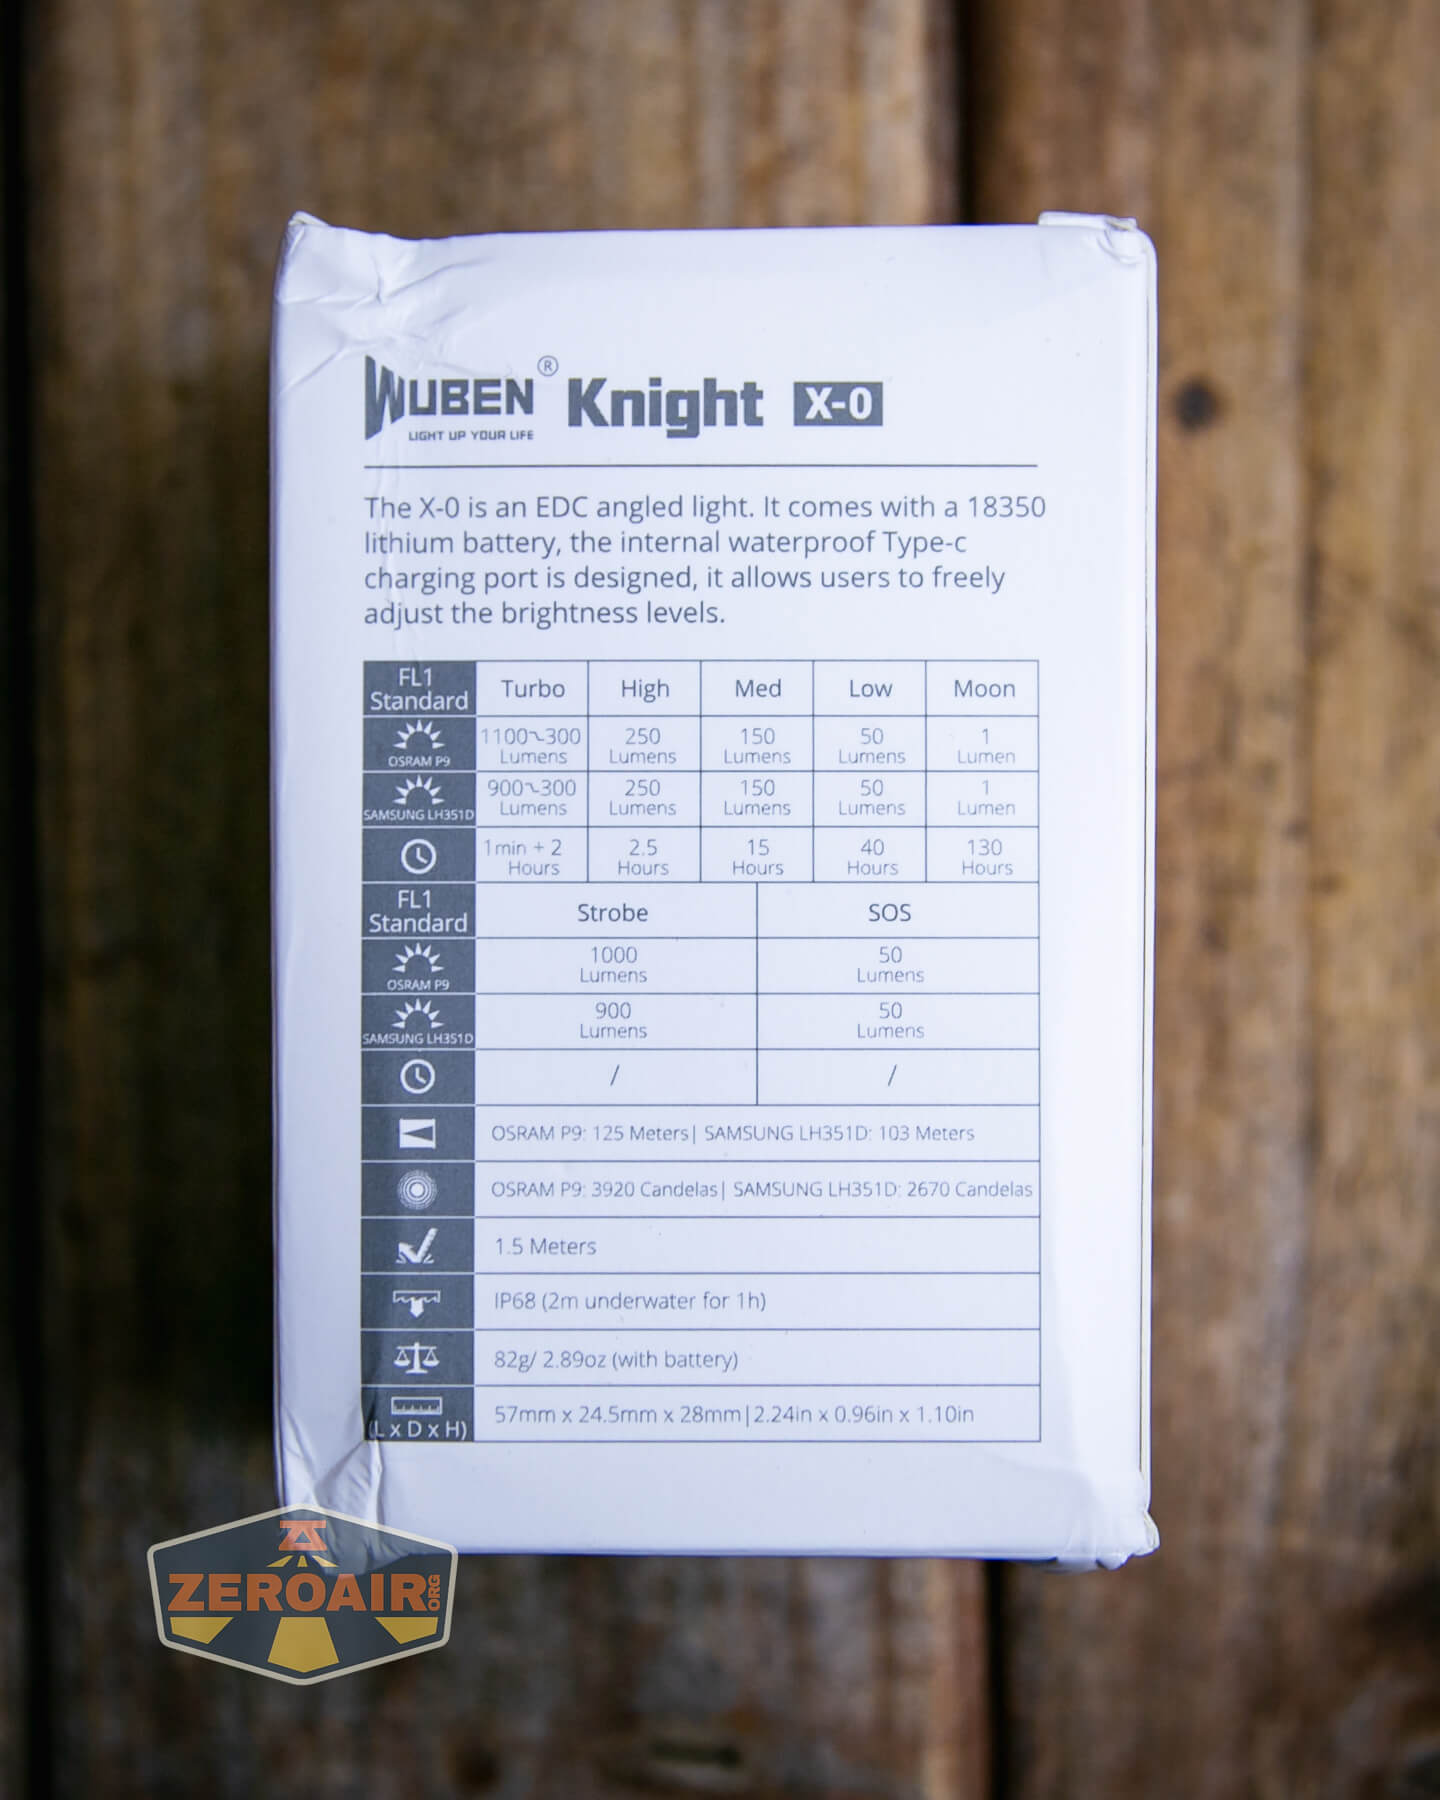
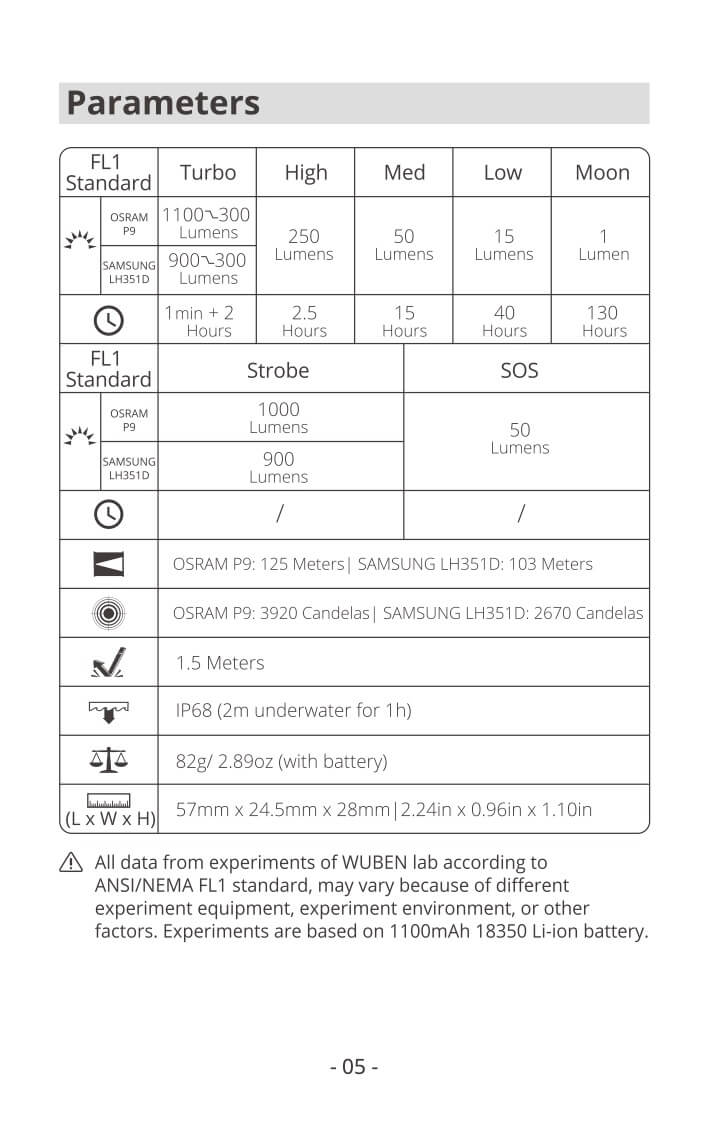
| Claimed Lumens (lm) | 900 |
| Measured Lumens (at 30s) | 855 (95% of claim)^ |
| Candela per Lumen | 3.7 |
| Claimed Throw (m) | 103 |
| Candela (Calculated) in cd (at 30s) | 142lux @ 5.131m = 3738cd |
| Throw (Calculated) (m) | 122.3 (118.7% of claim)^ |
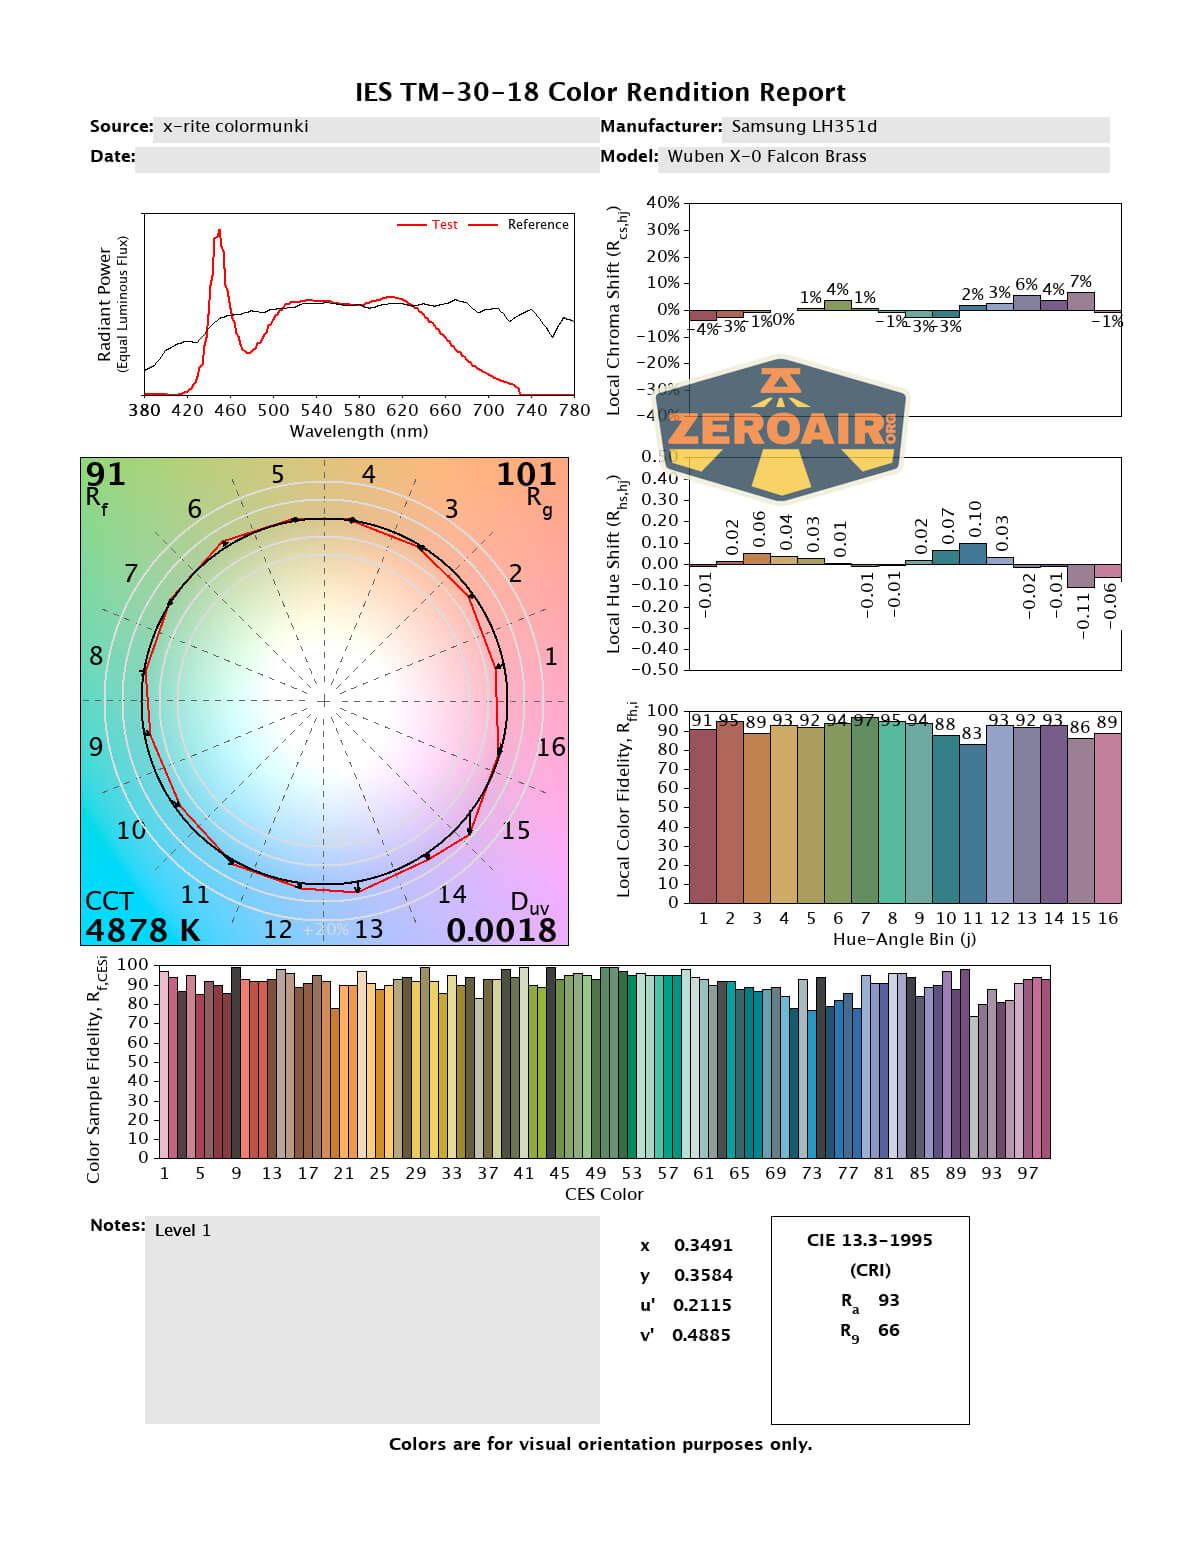
| Claimed CCT | – |
| Measured CCT Range (K) | 4900-5200 Kelvin |
| Item provided for review by: | Wuben |
| All my Wuben reviews! | |
^ Measurement disclaimer: Testing flashlights is my hobby. I use hobbyist-level equipment for testing, including some I made myself. Try not to get buried in the details of manufacturer specifications versus measurements recorded here; A certain amount of difference (say, 10 or 15%) is perfectly reasonable.
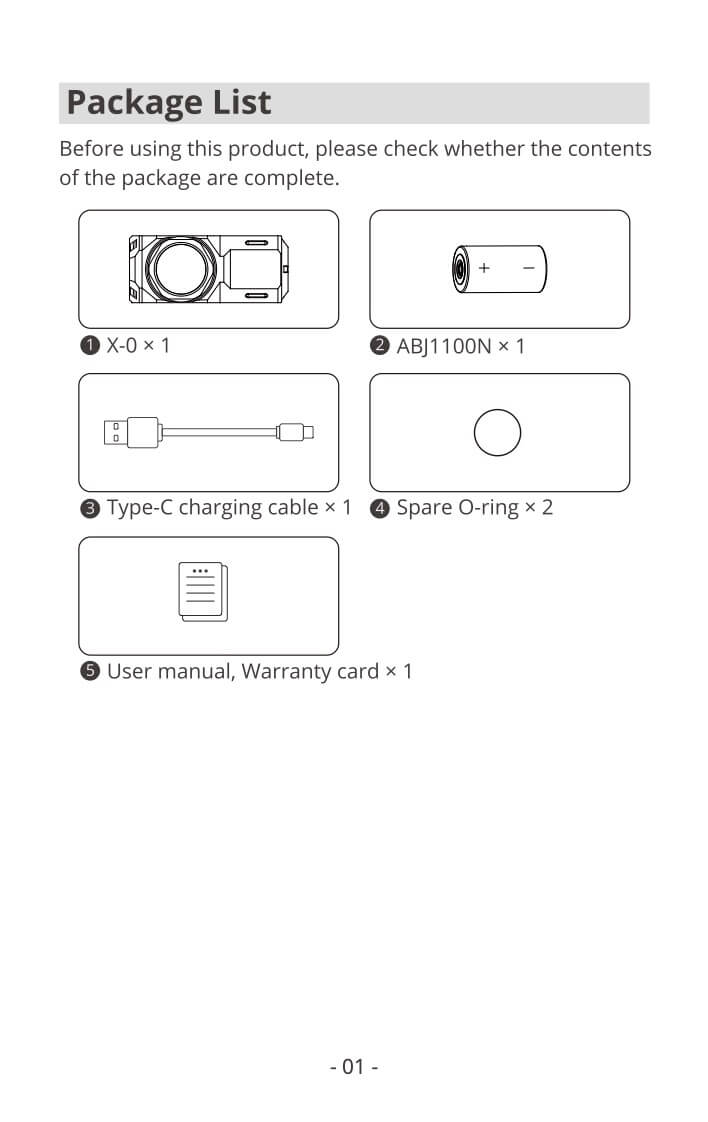
What’s Included
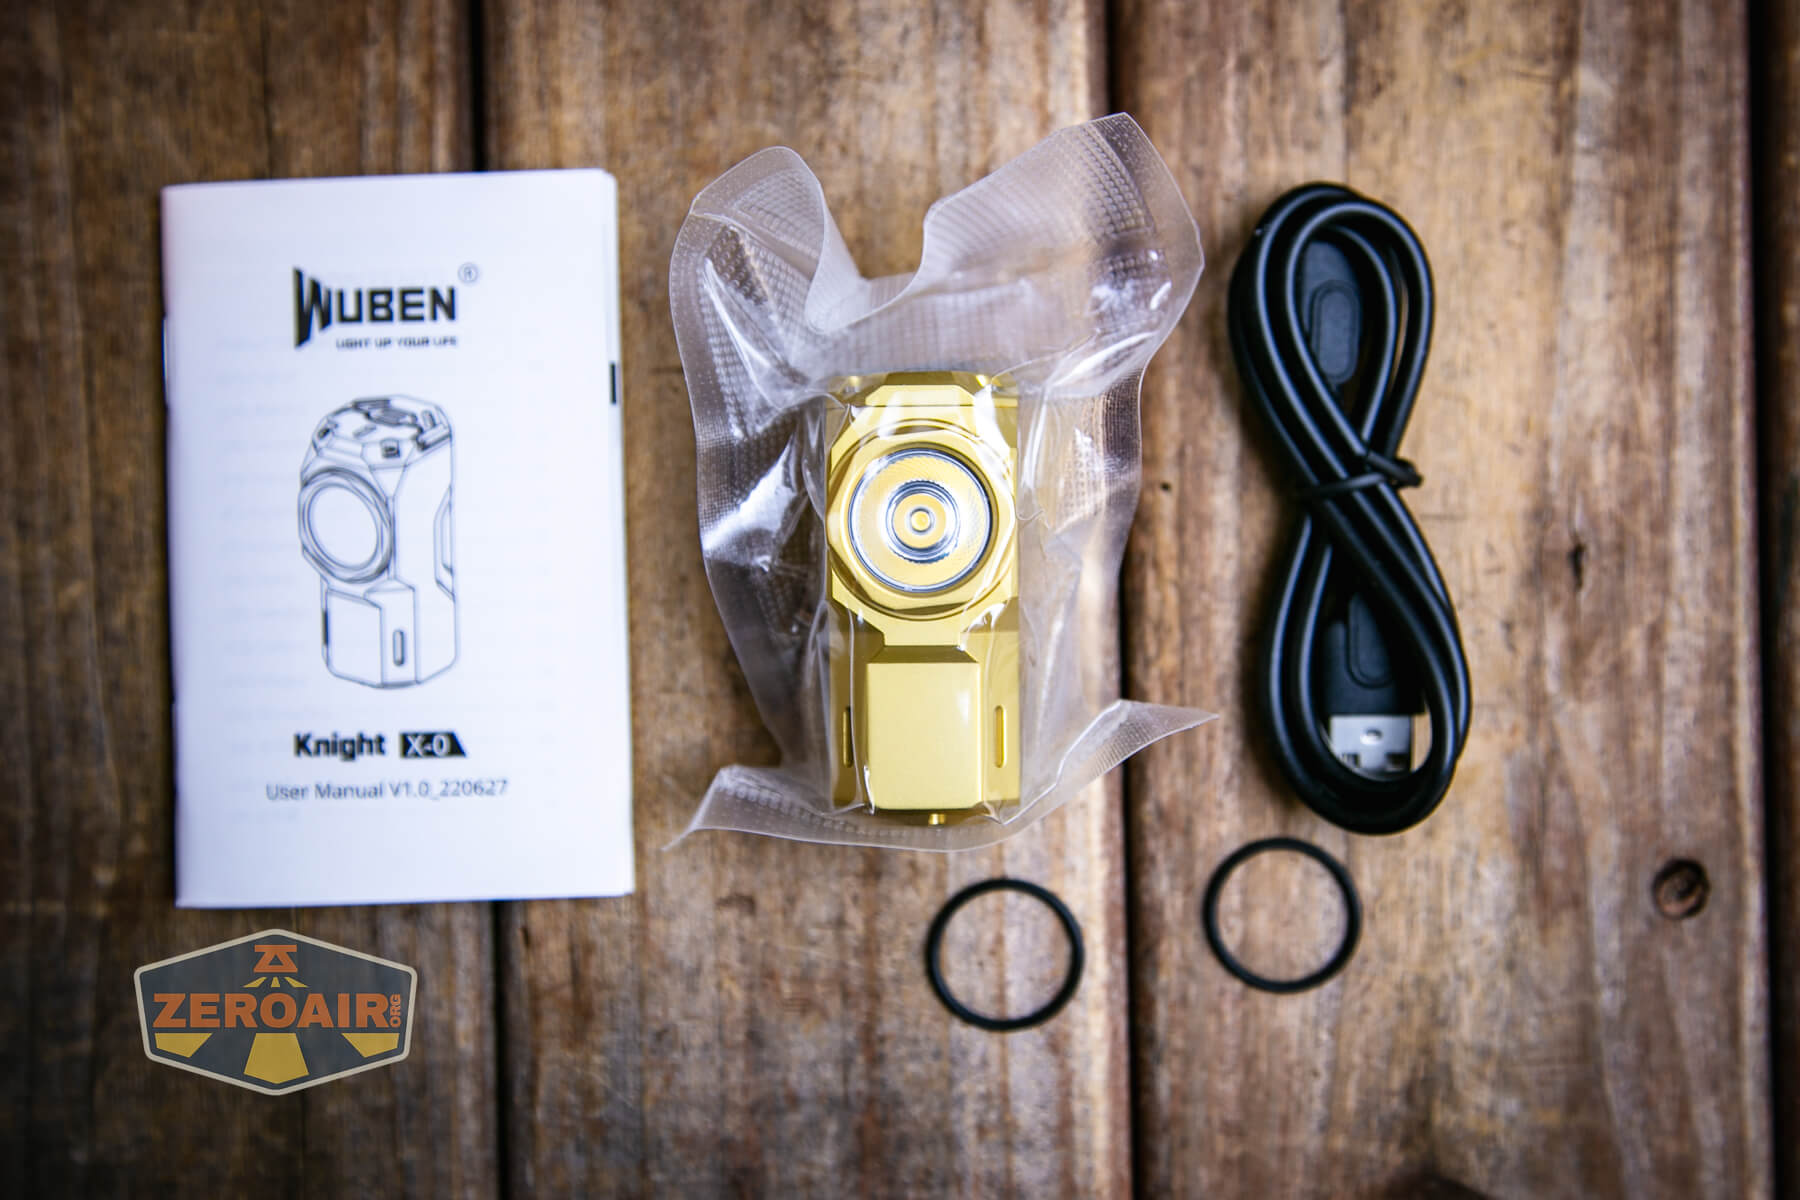
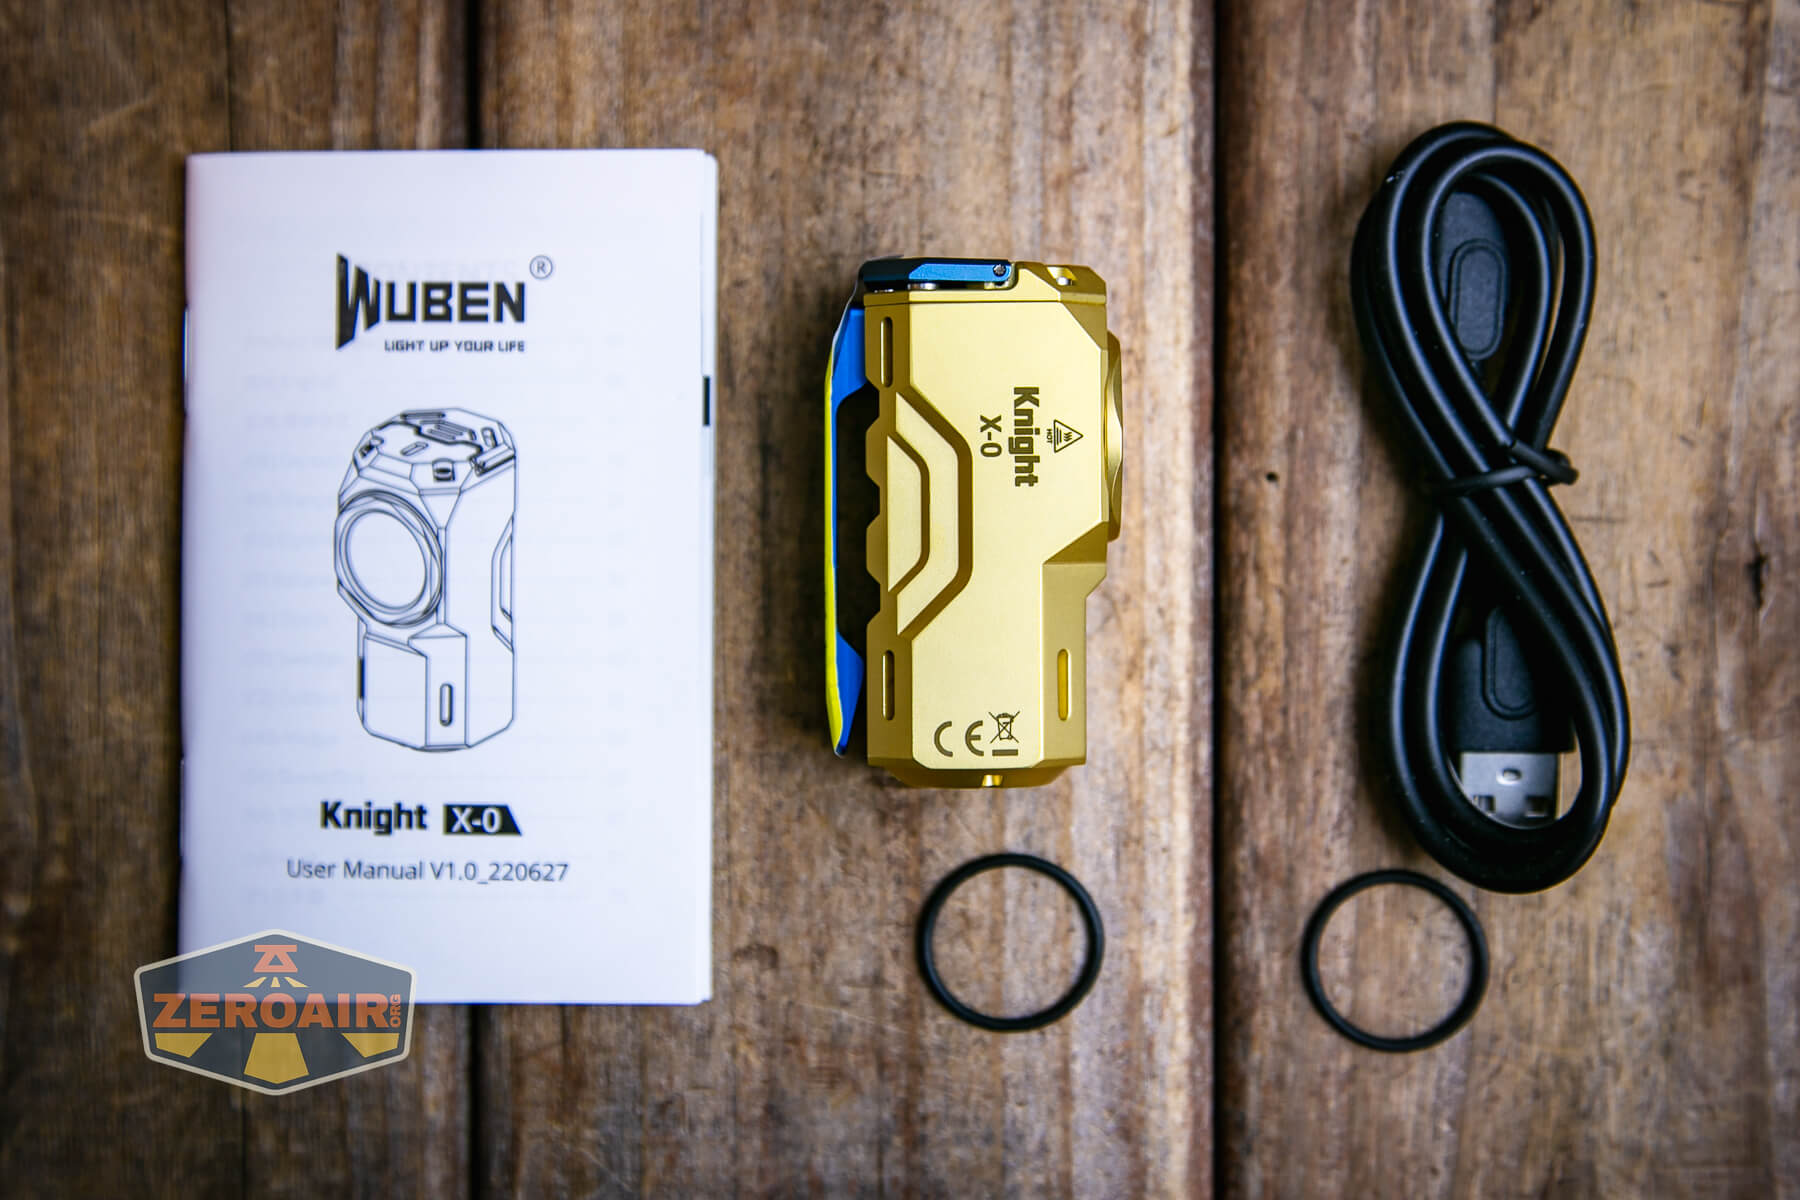
- Wuben X-0 Knight brass flashlight
- Spare o-rings (2)
- Charging cable (USB to USB-C)
- Manual
Package and Manual
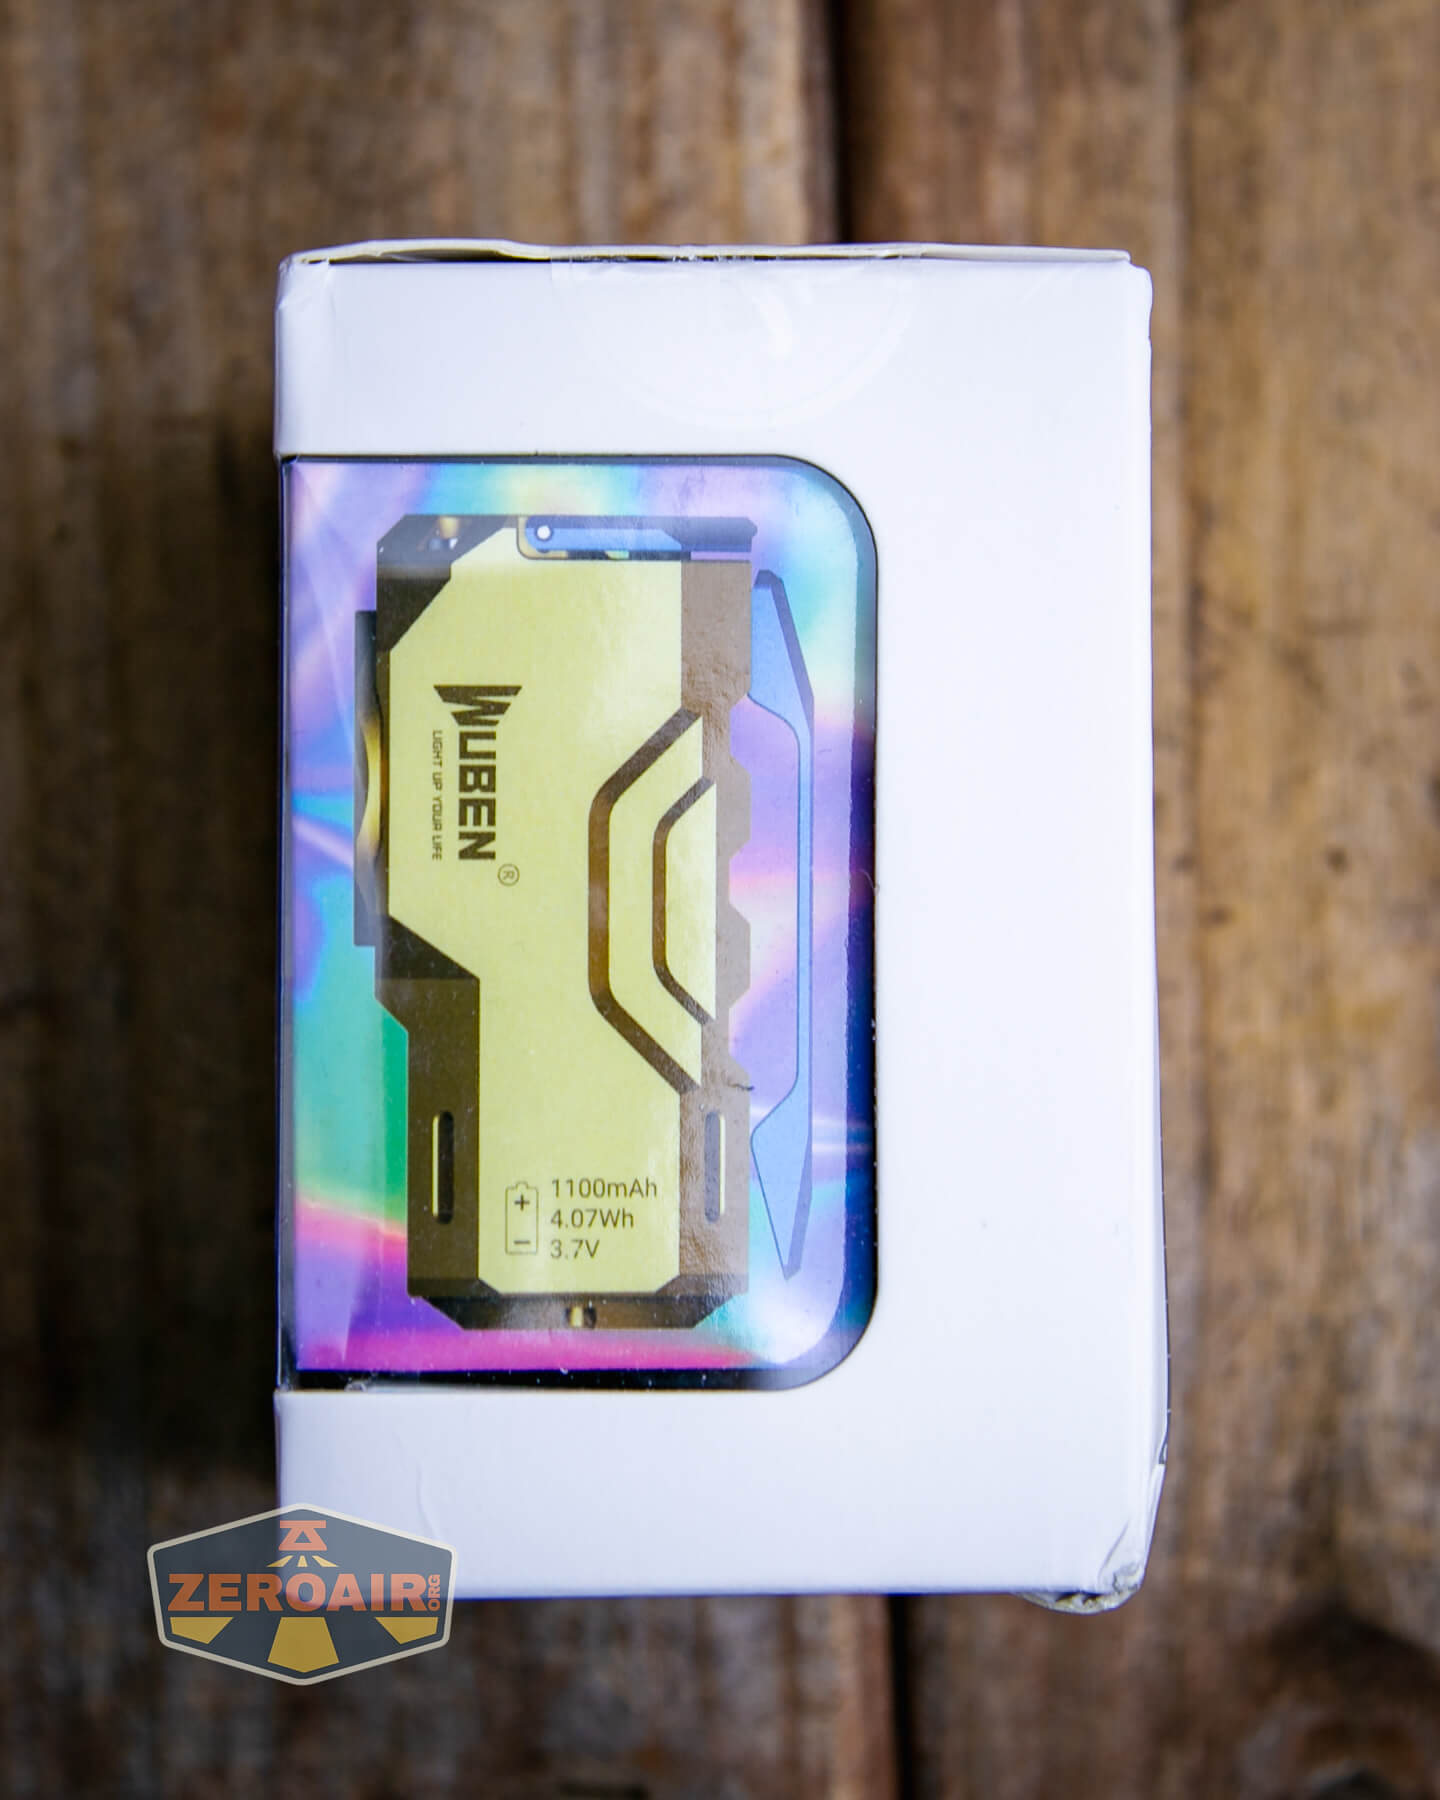

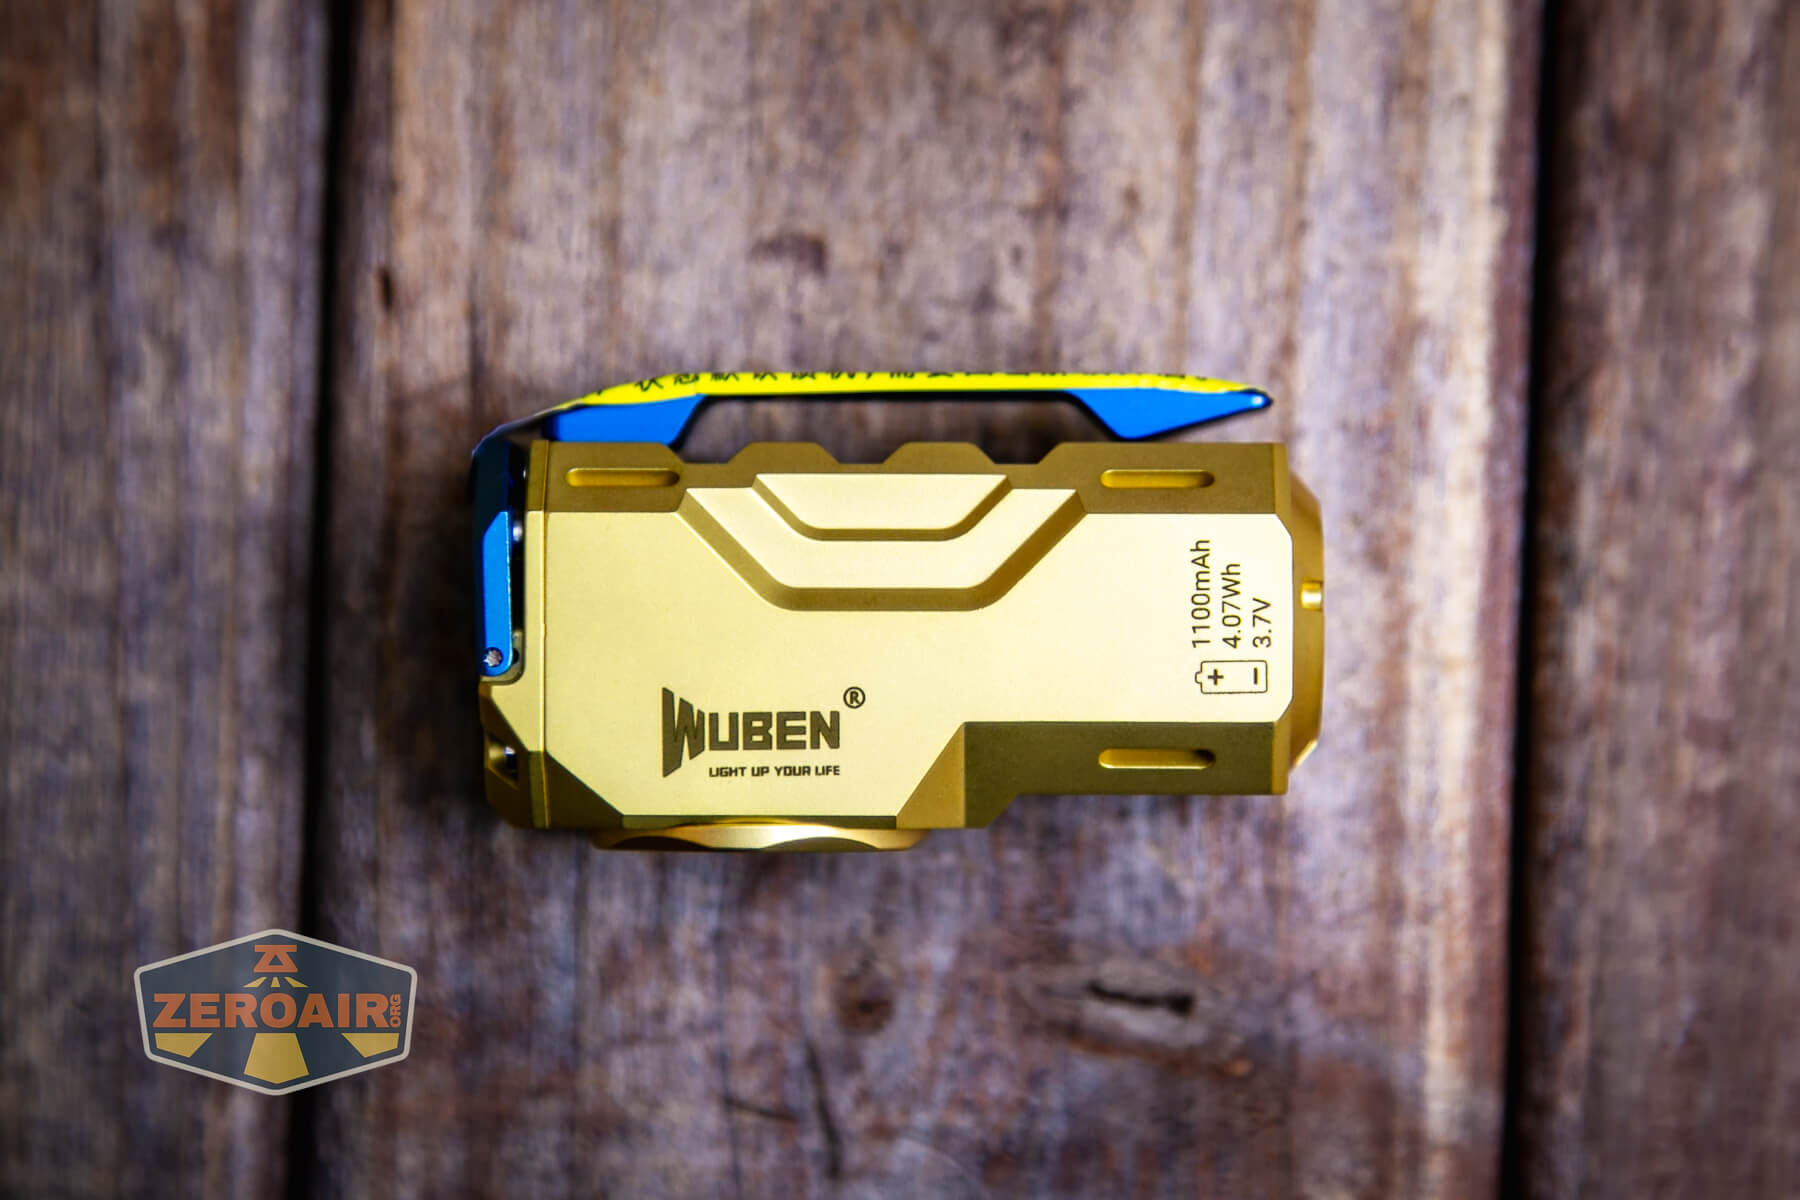
Below are photos of the Wuben X-0 Knight brass flashlight straight out of the sealed baggie. Thus, these are “pre-patina.”

Build Quality and Disassembly
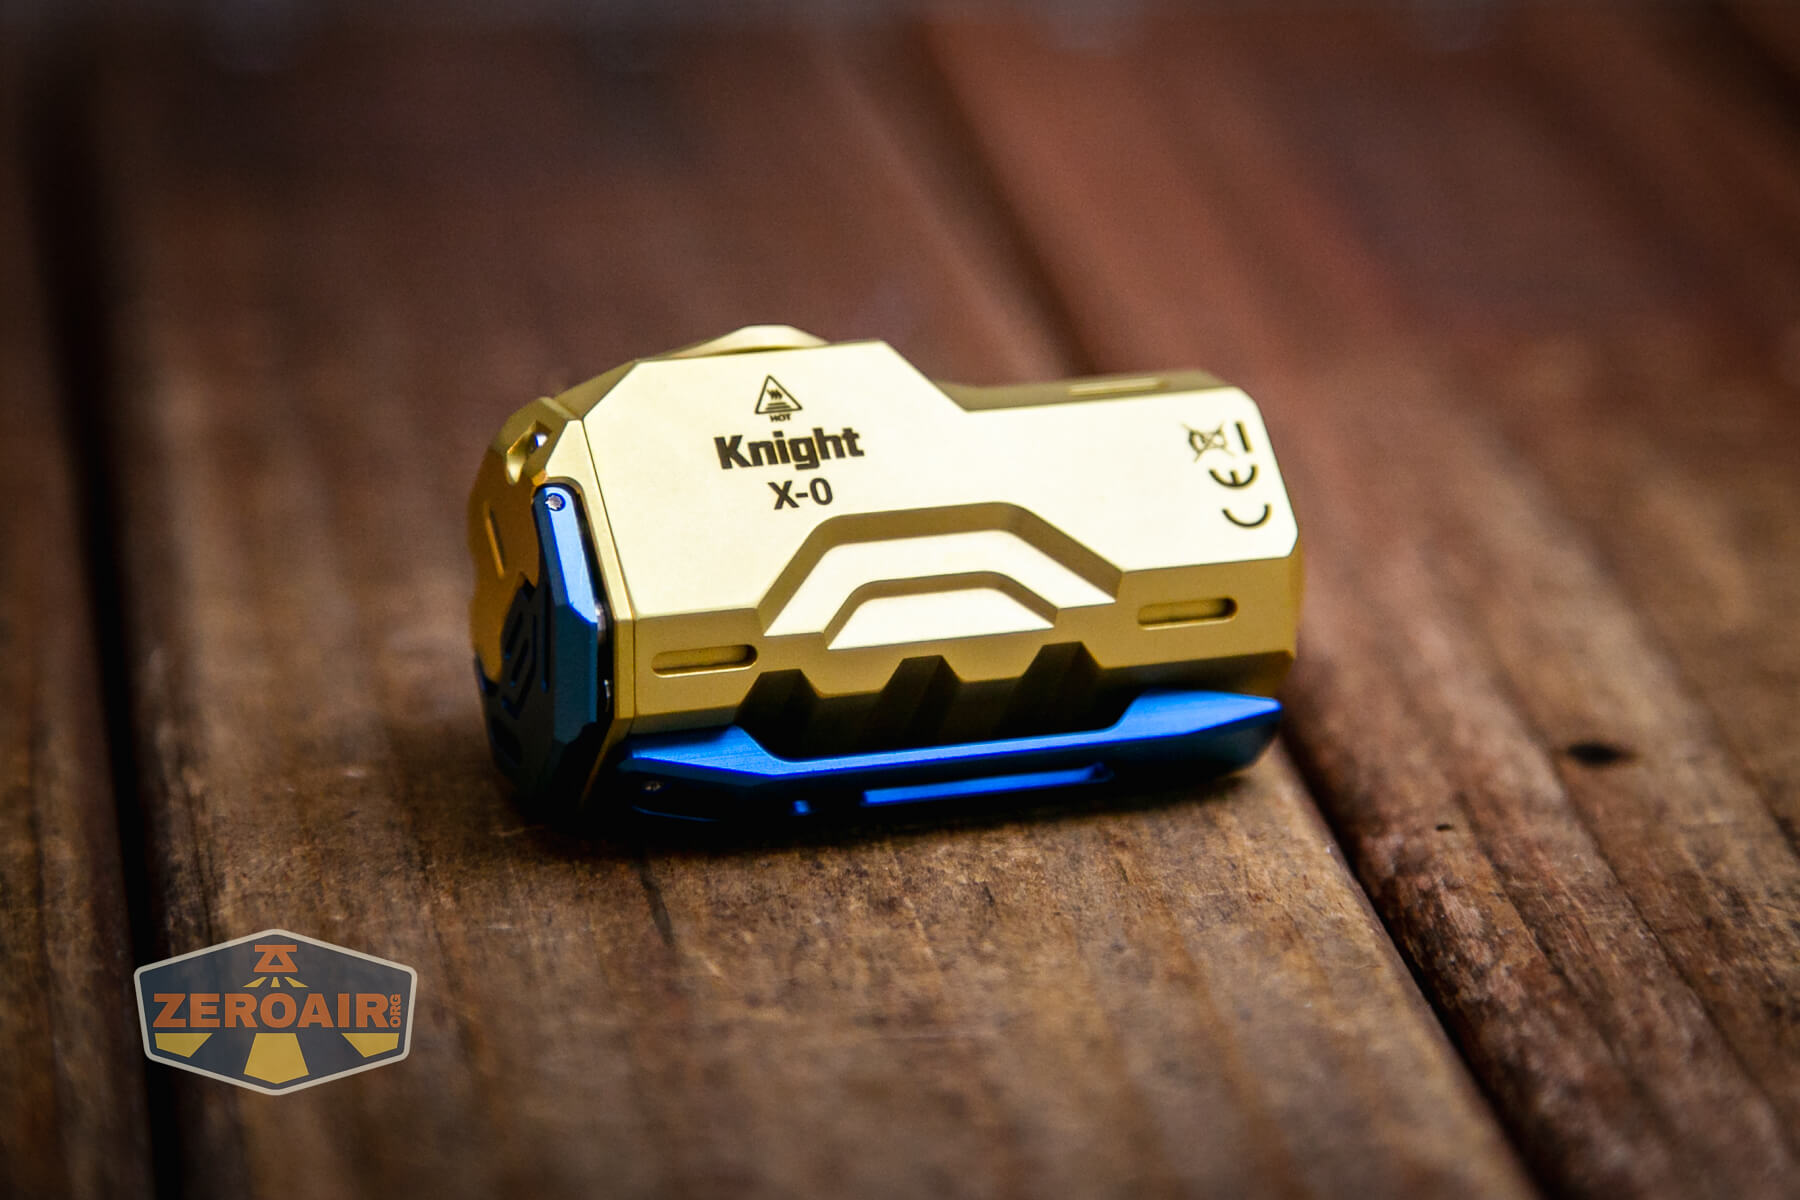
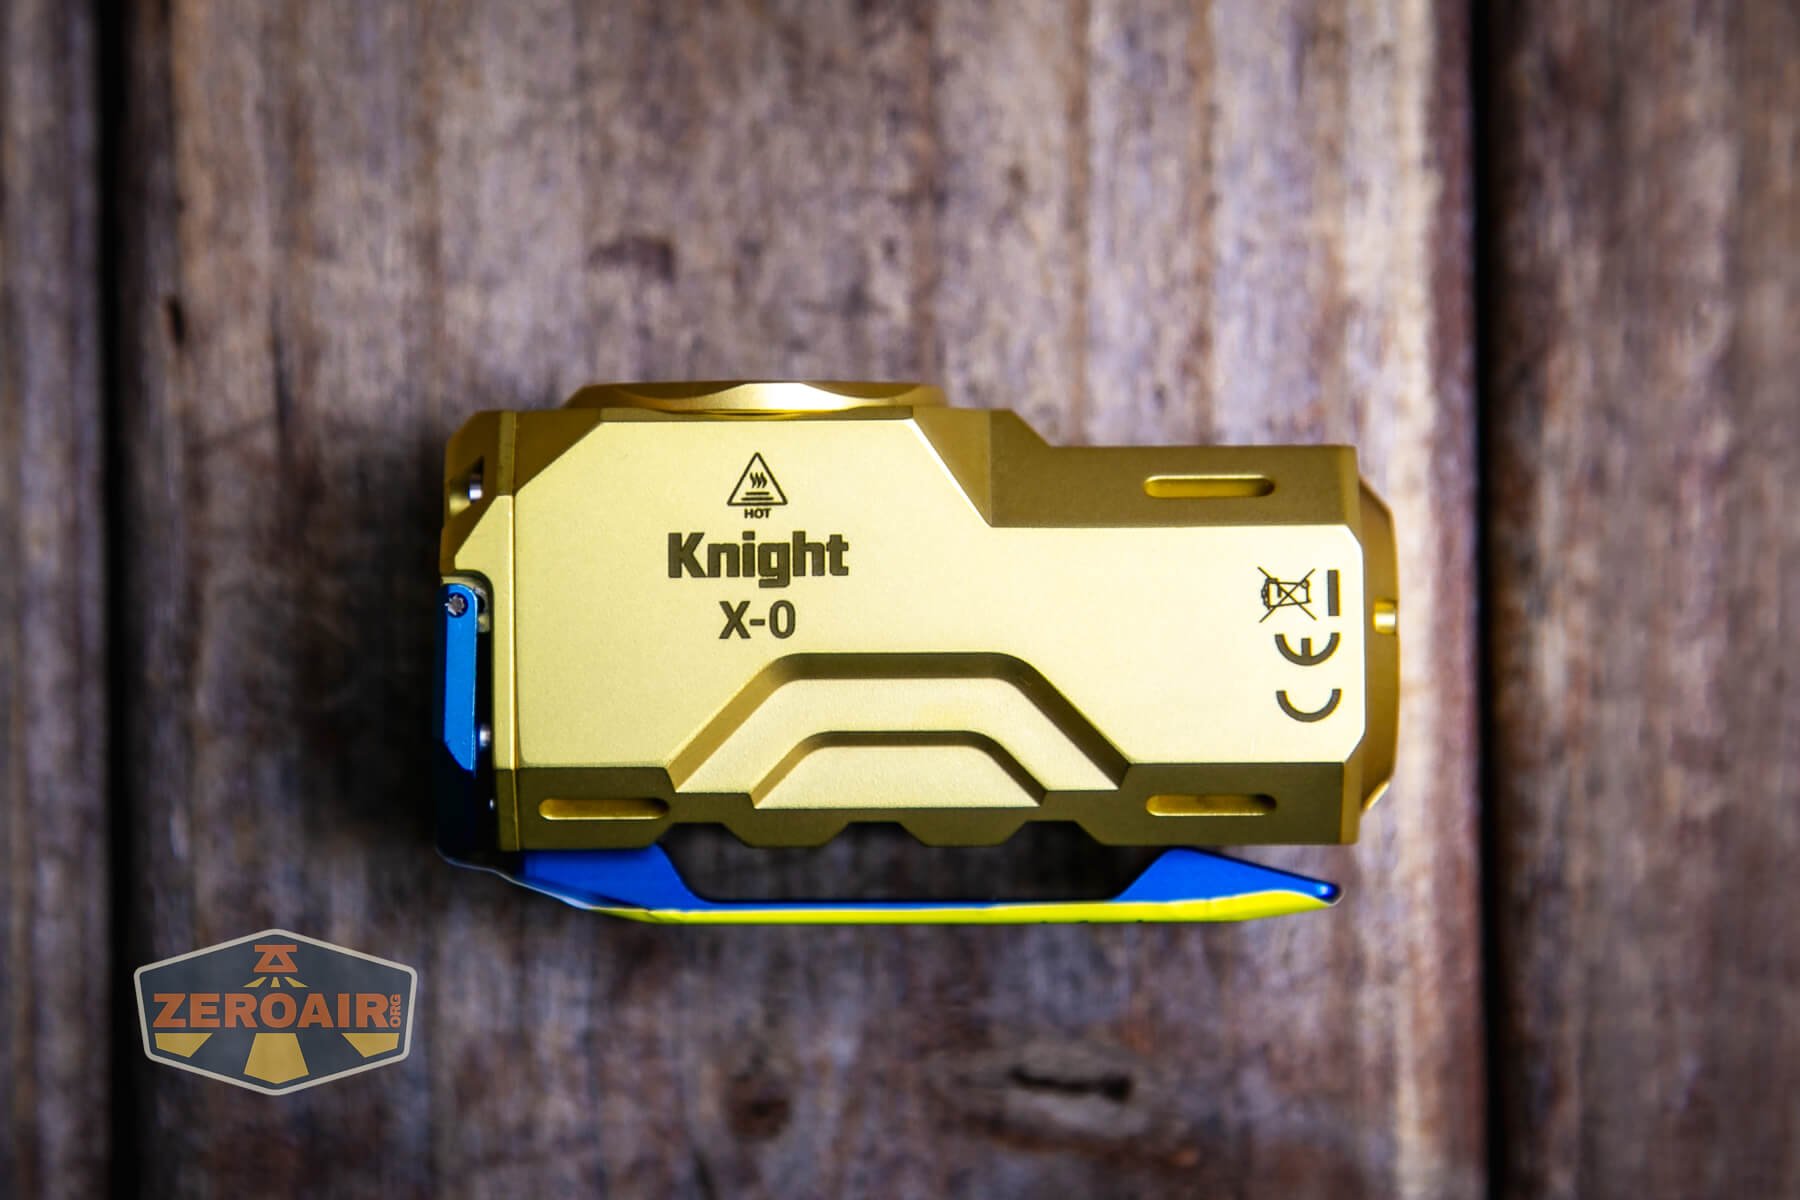
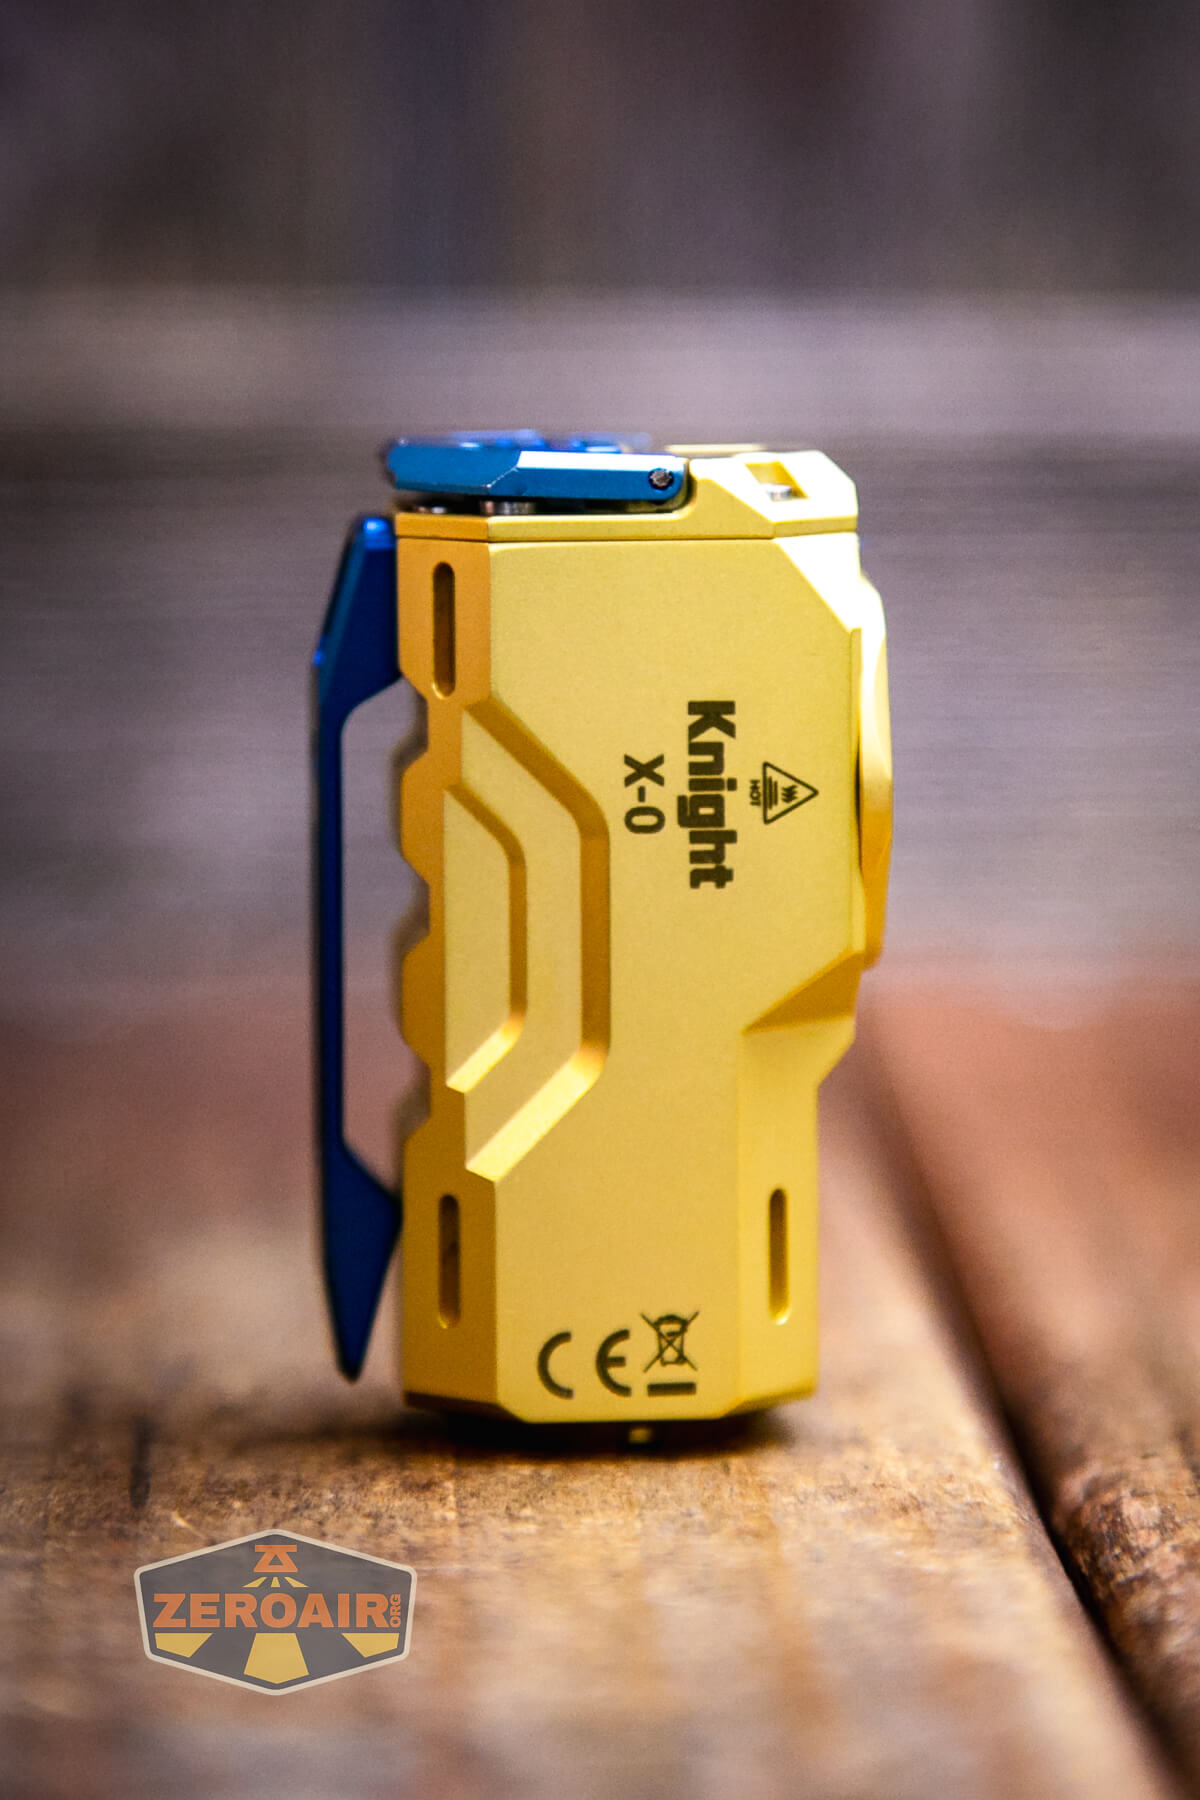
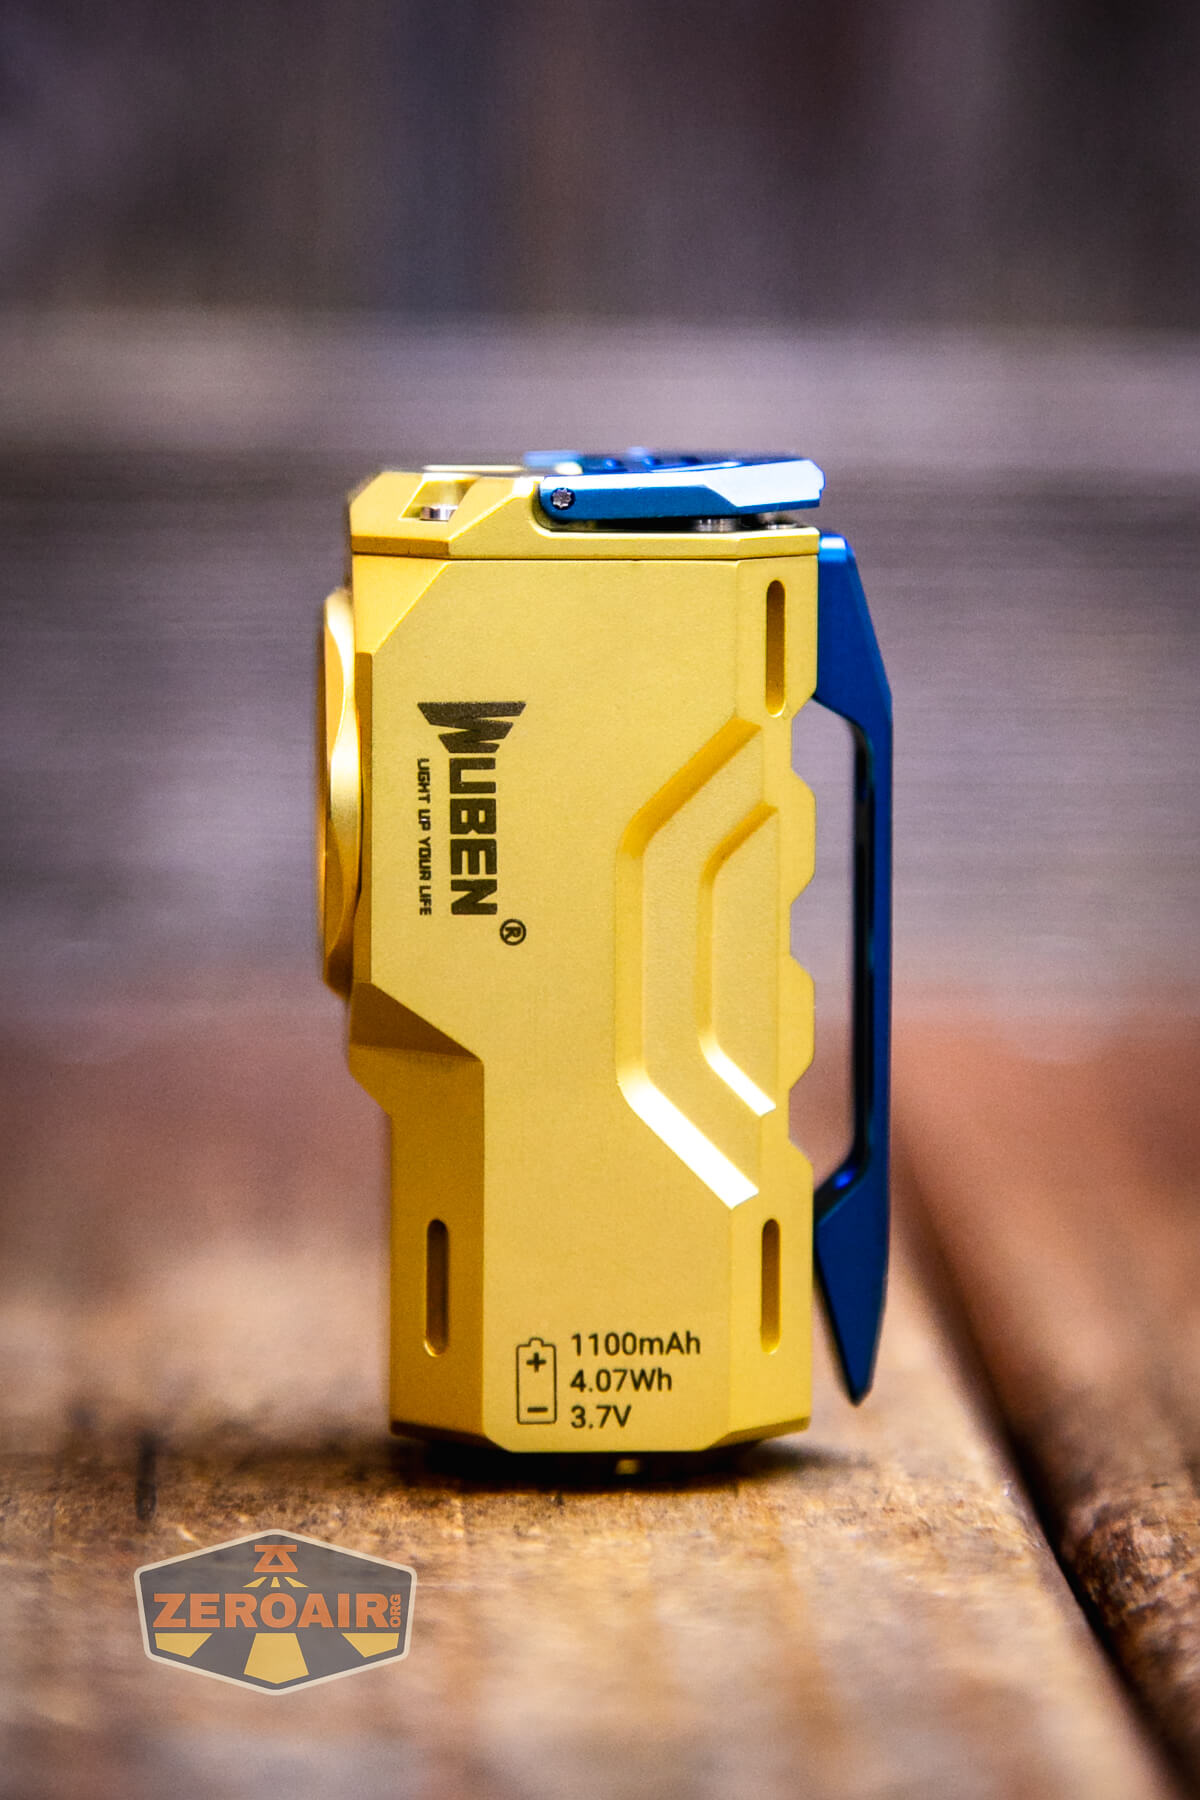
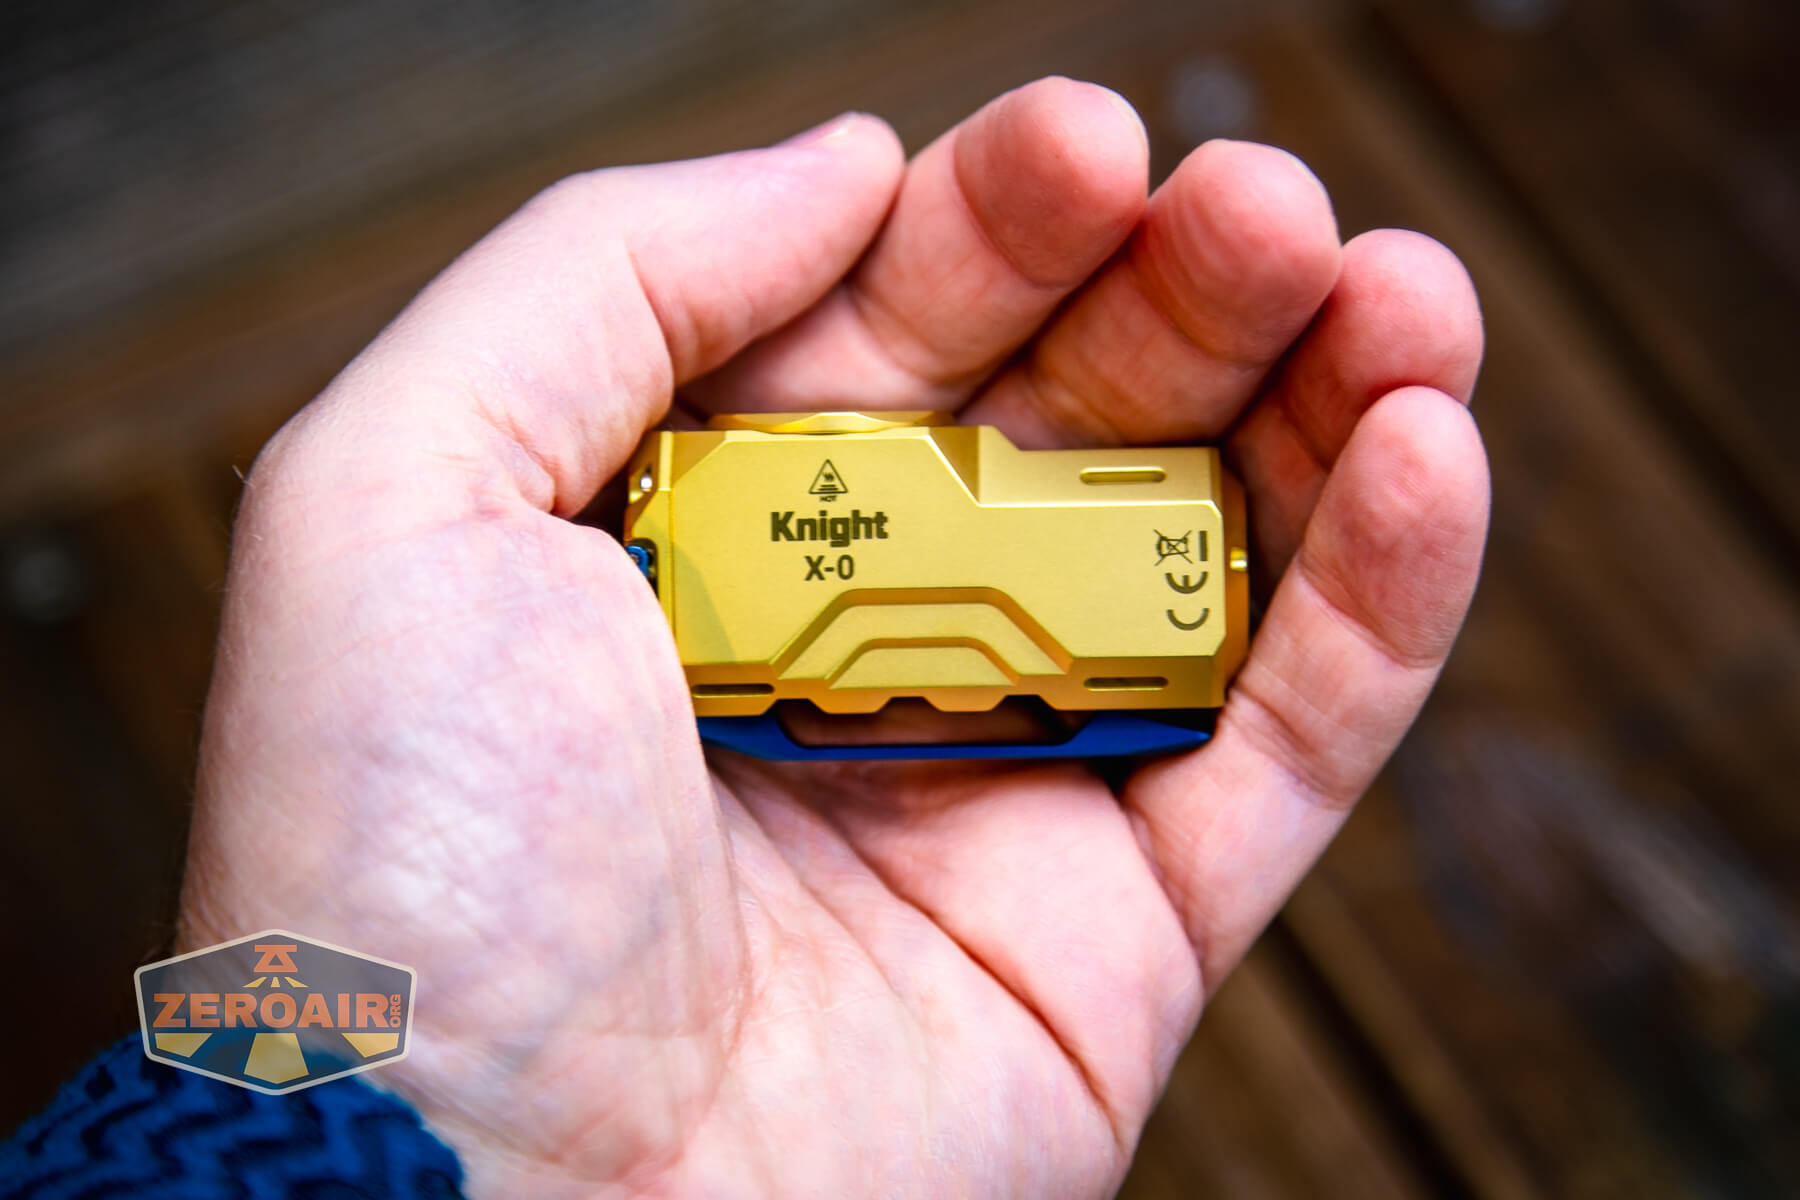
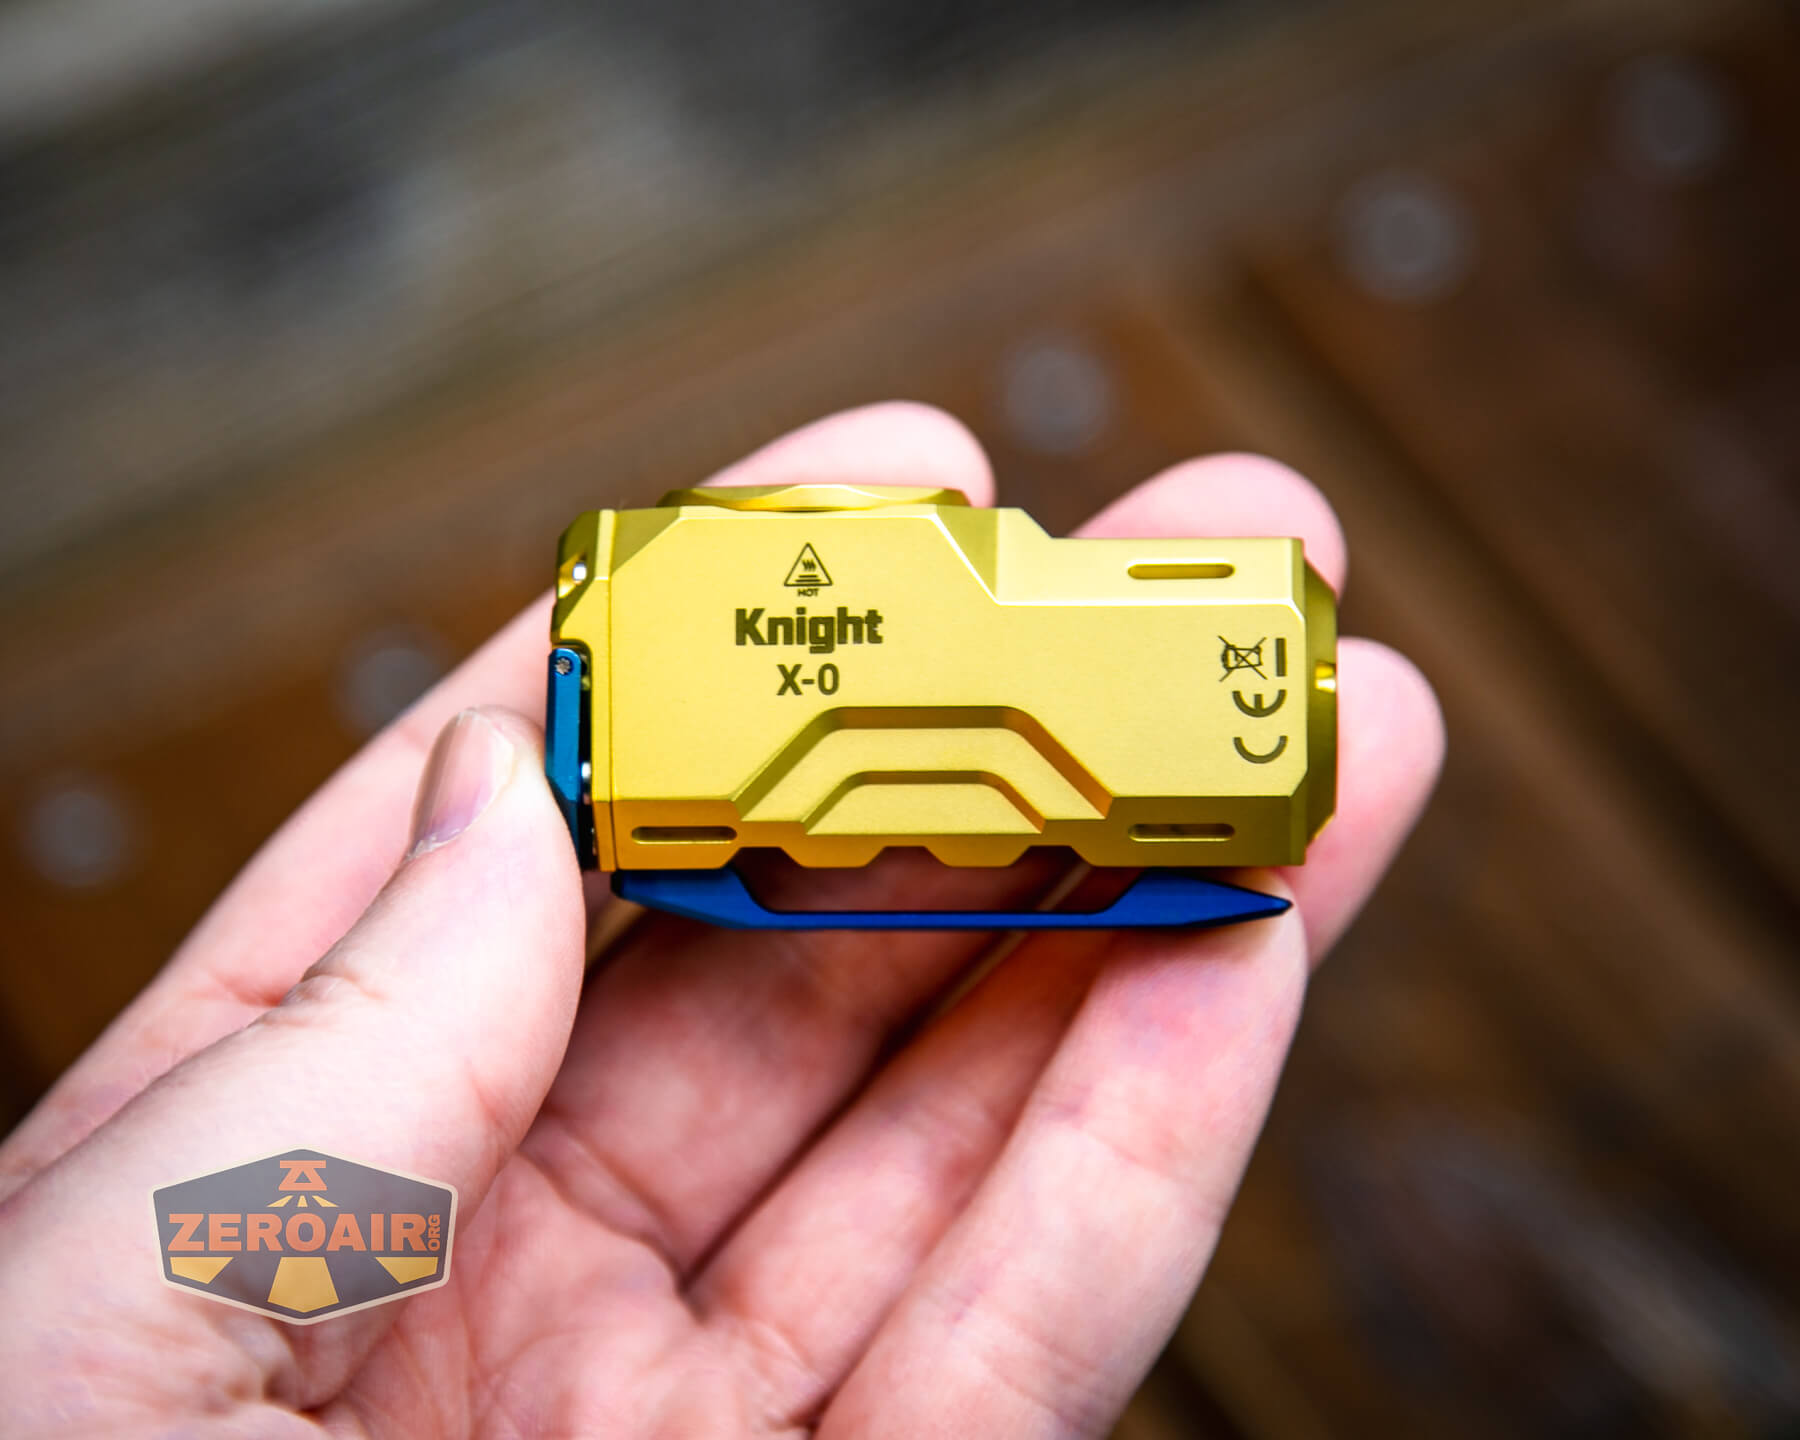
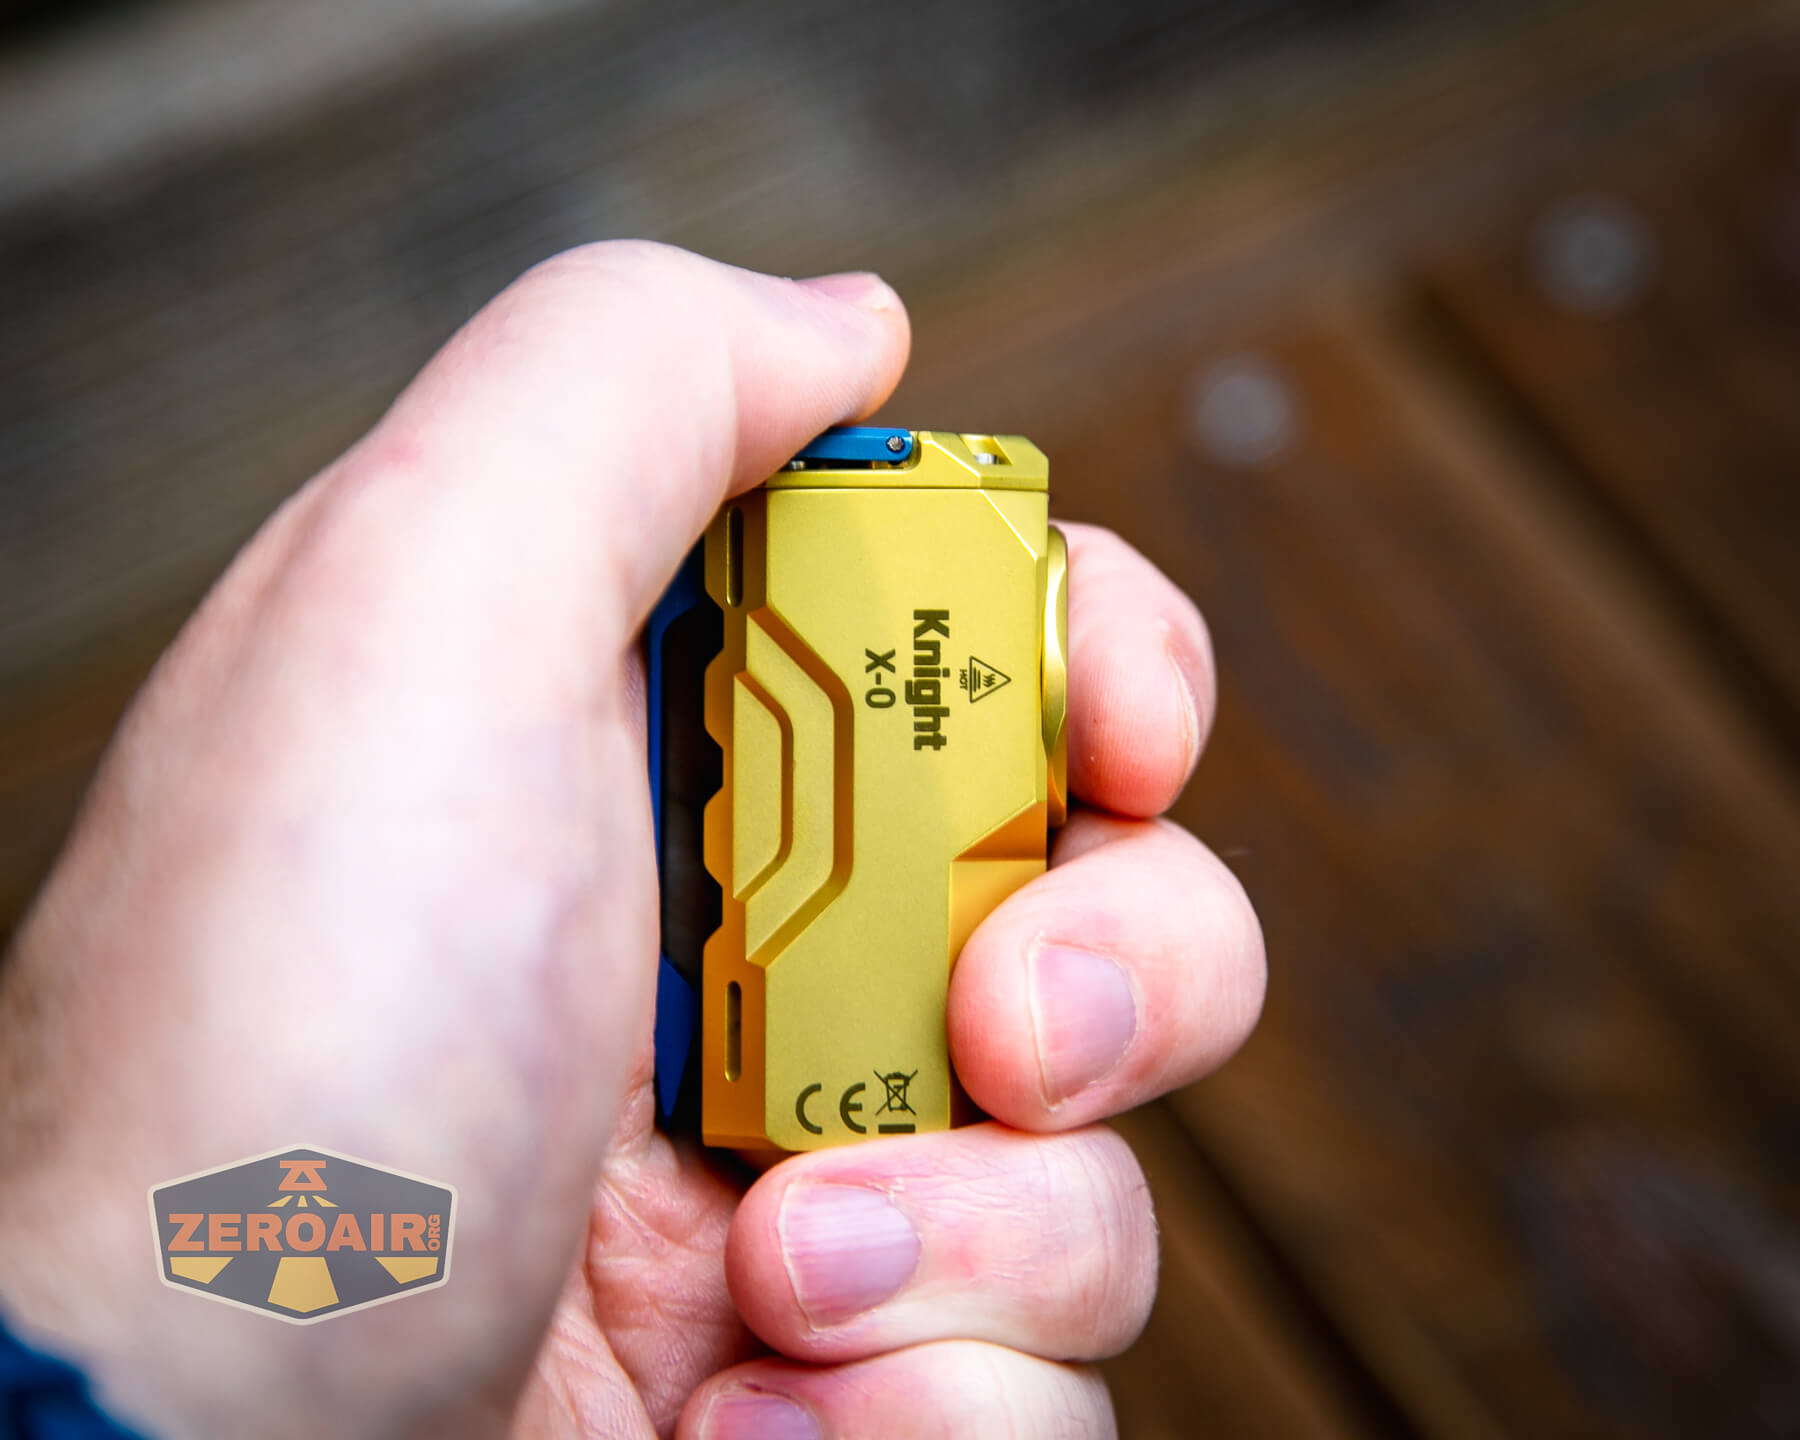
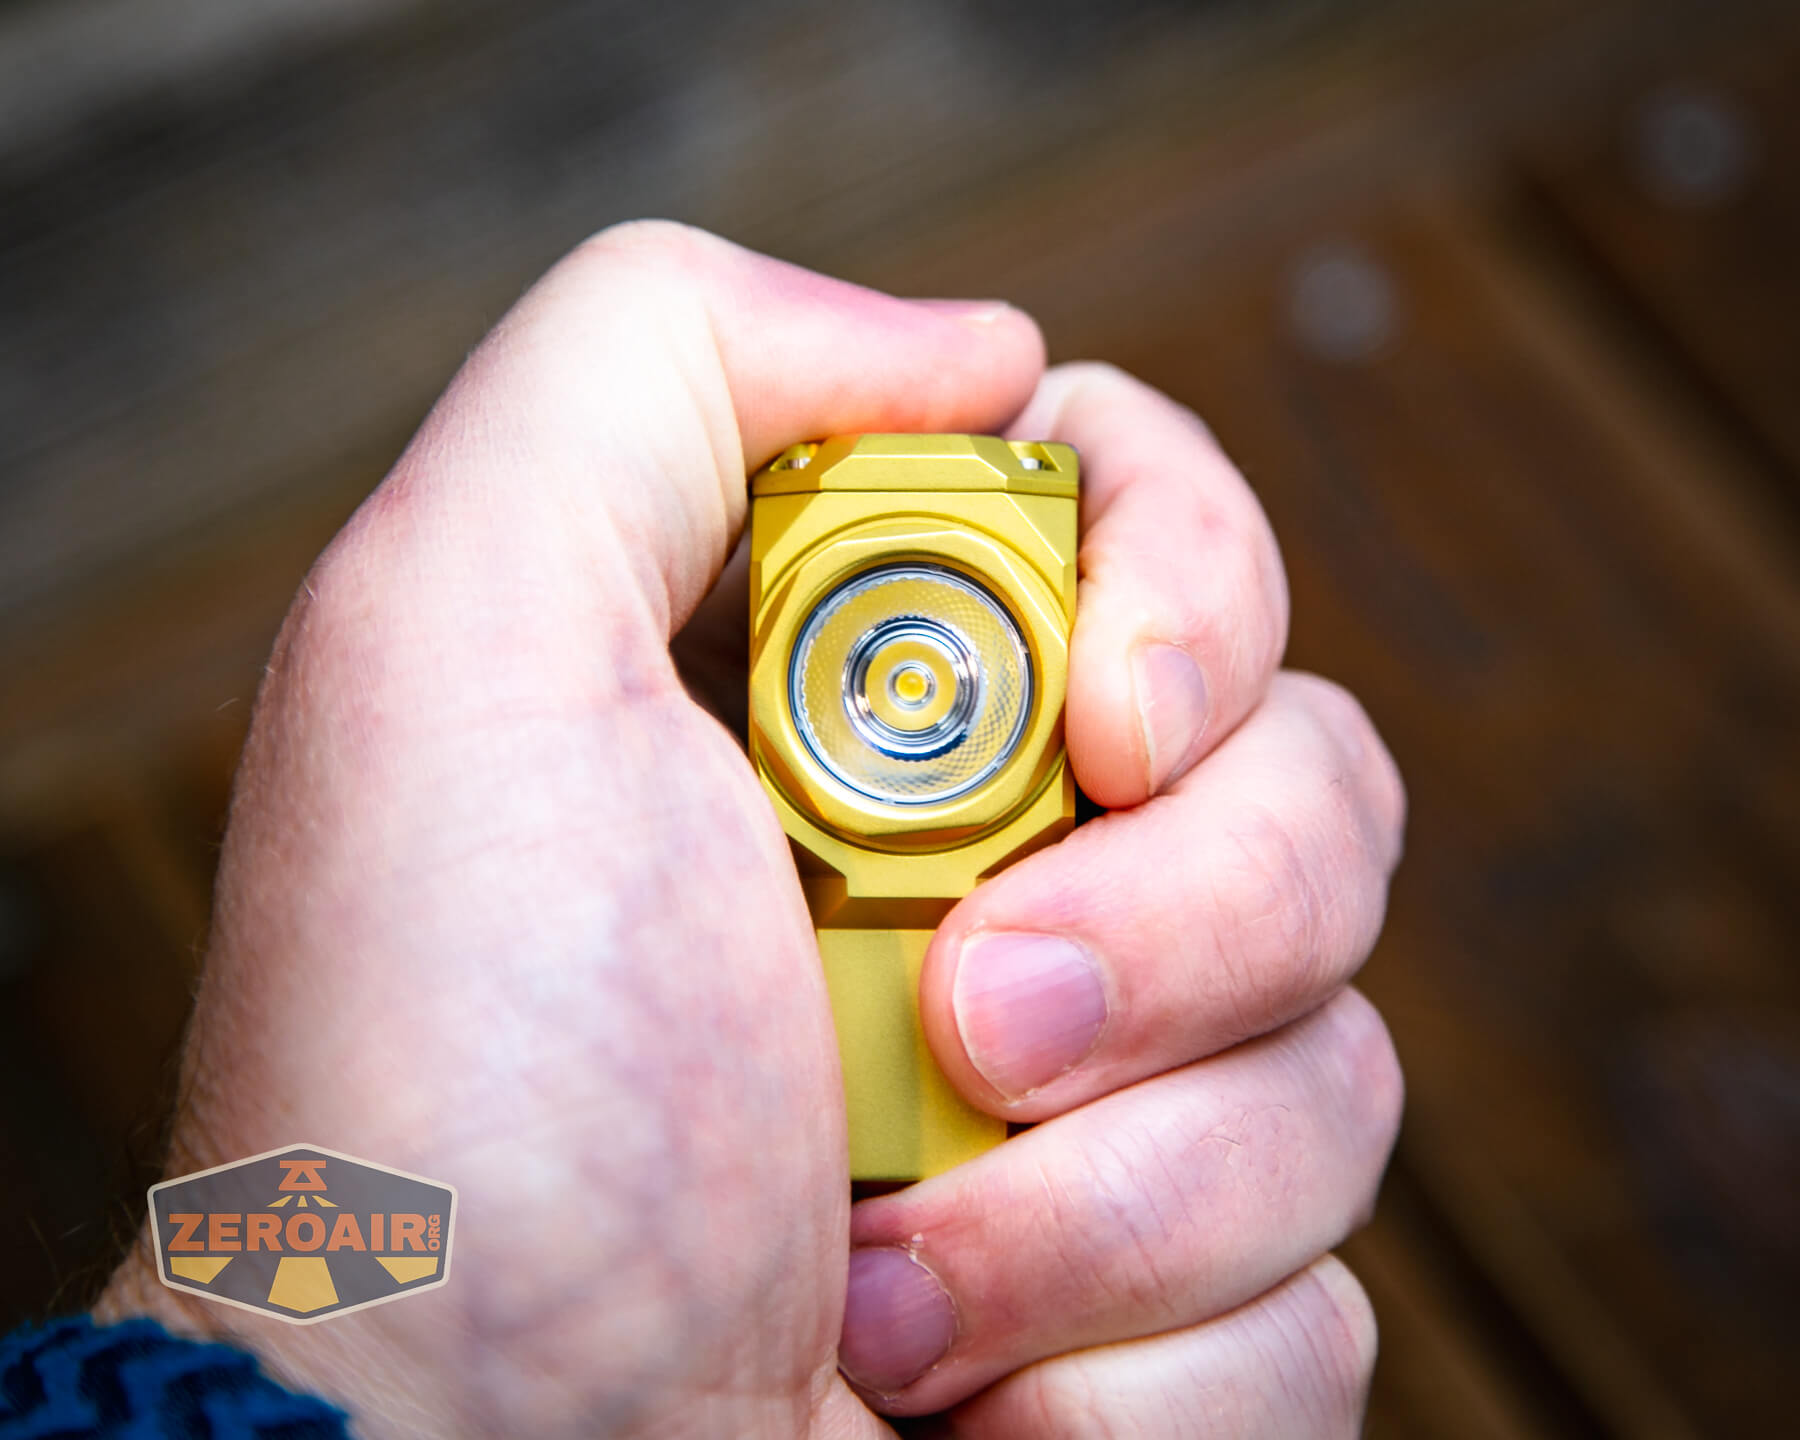
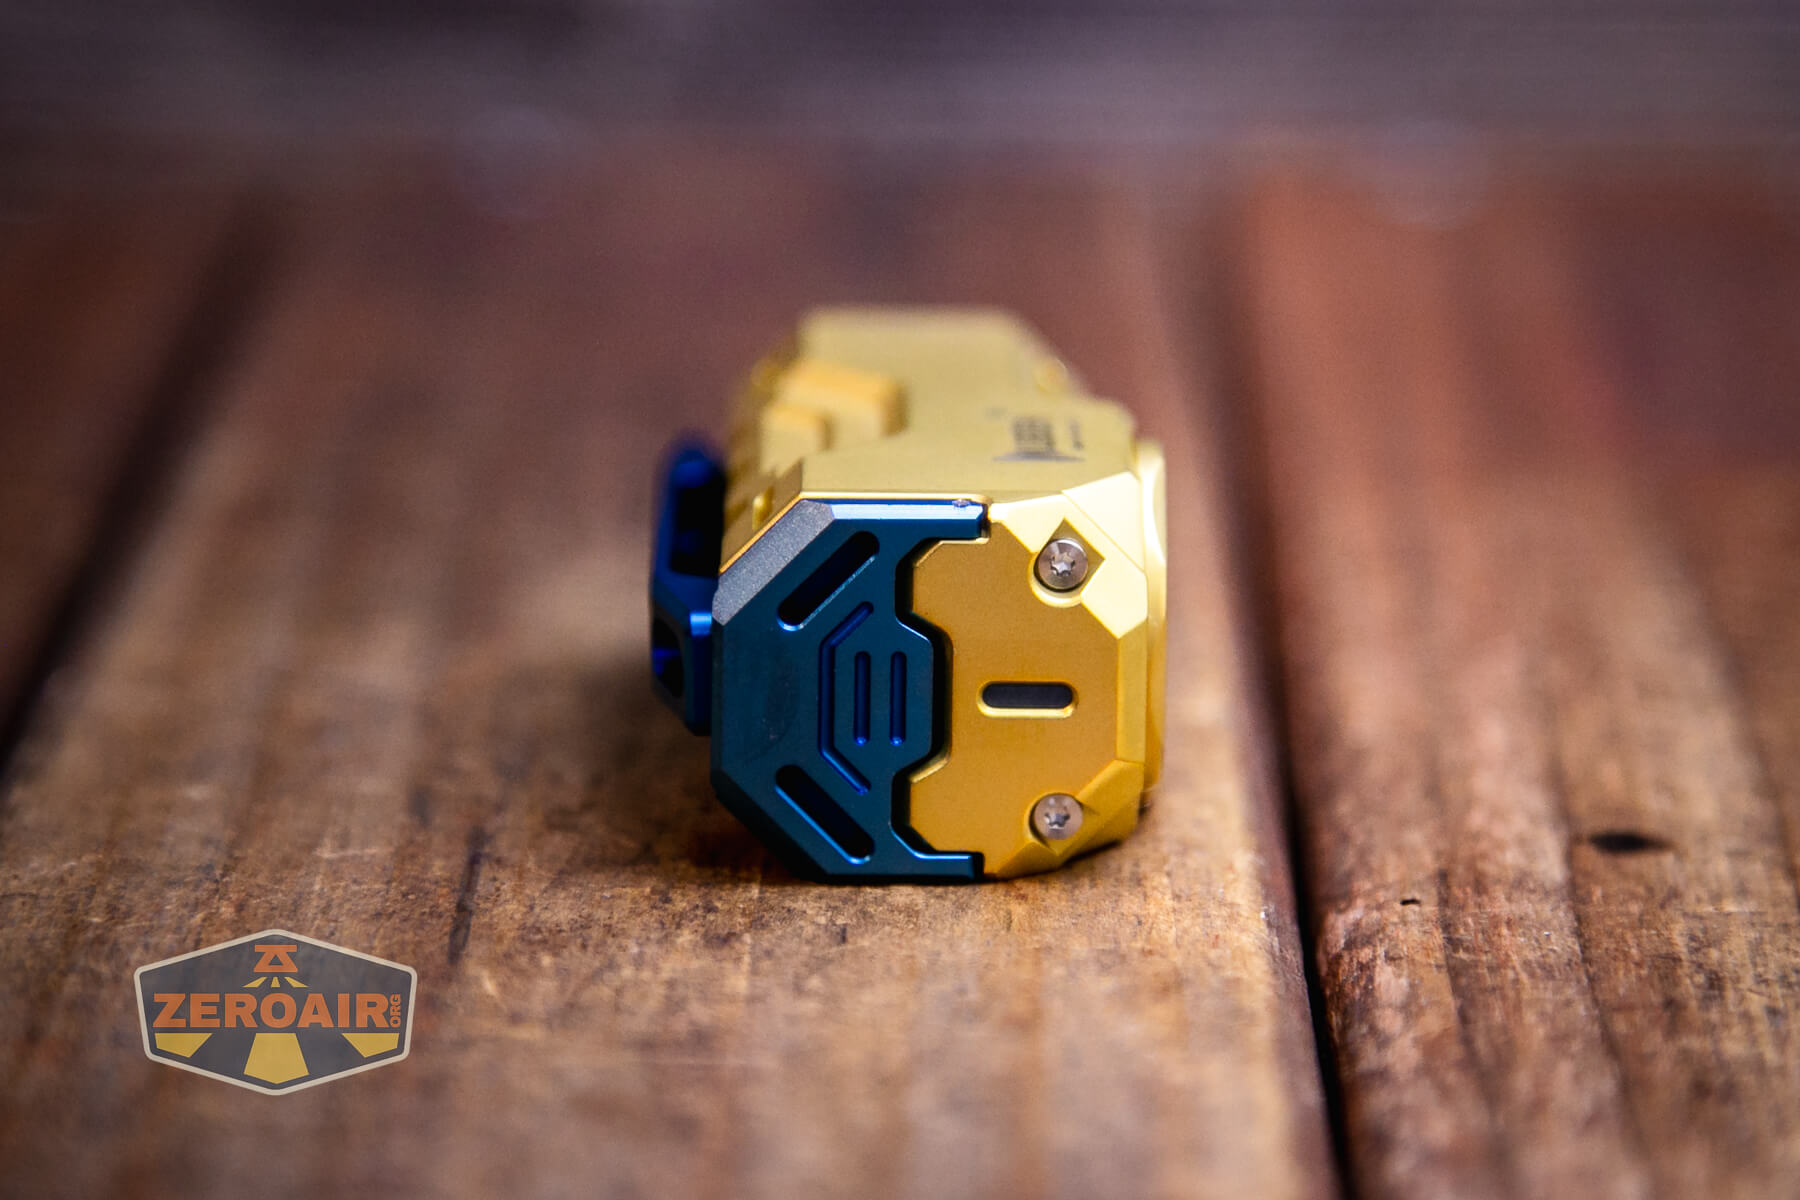
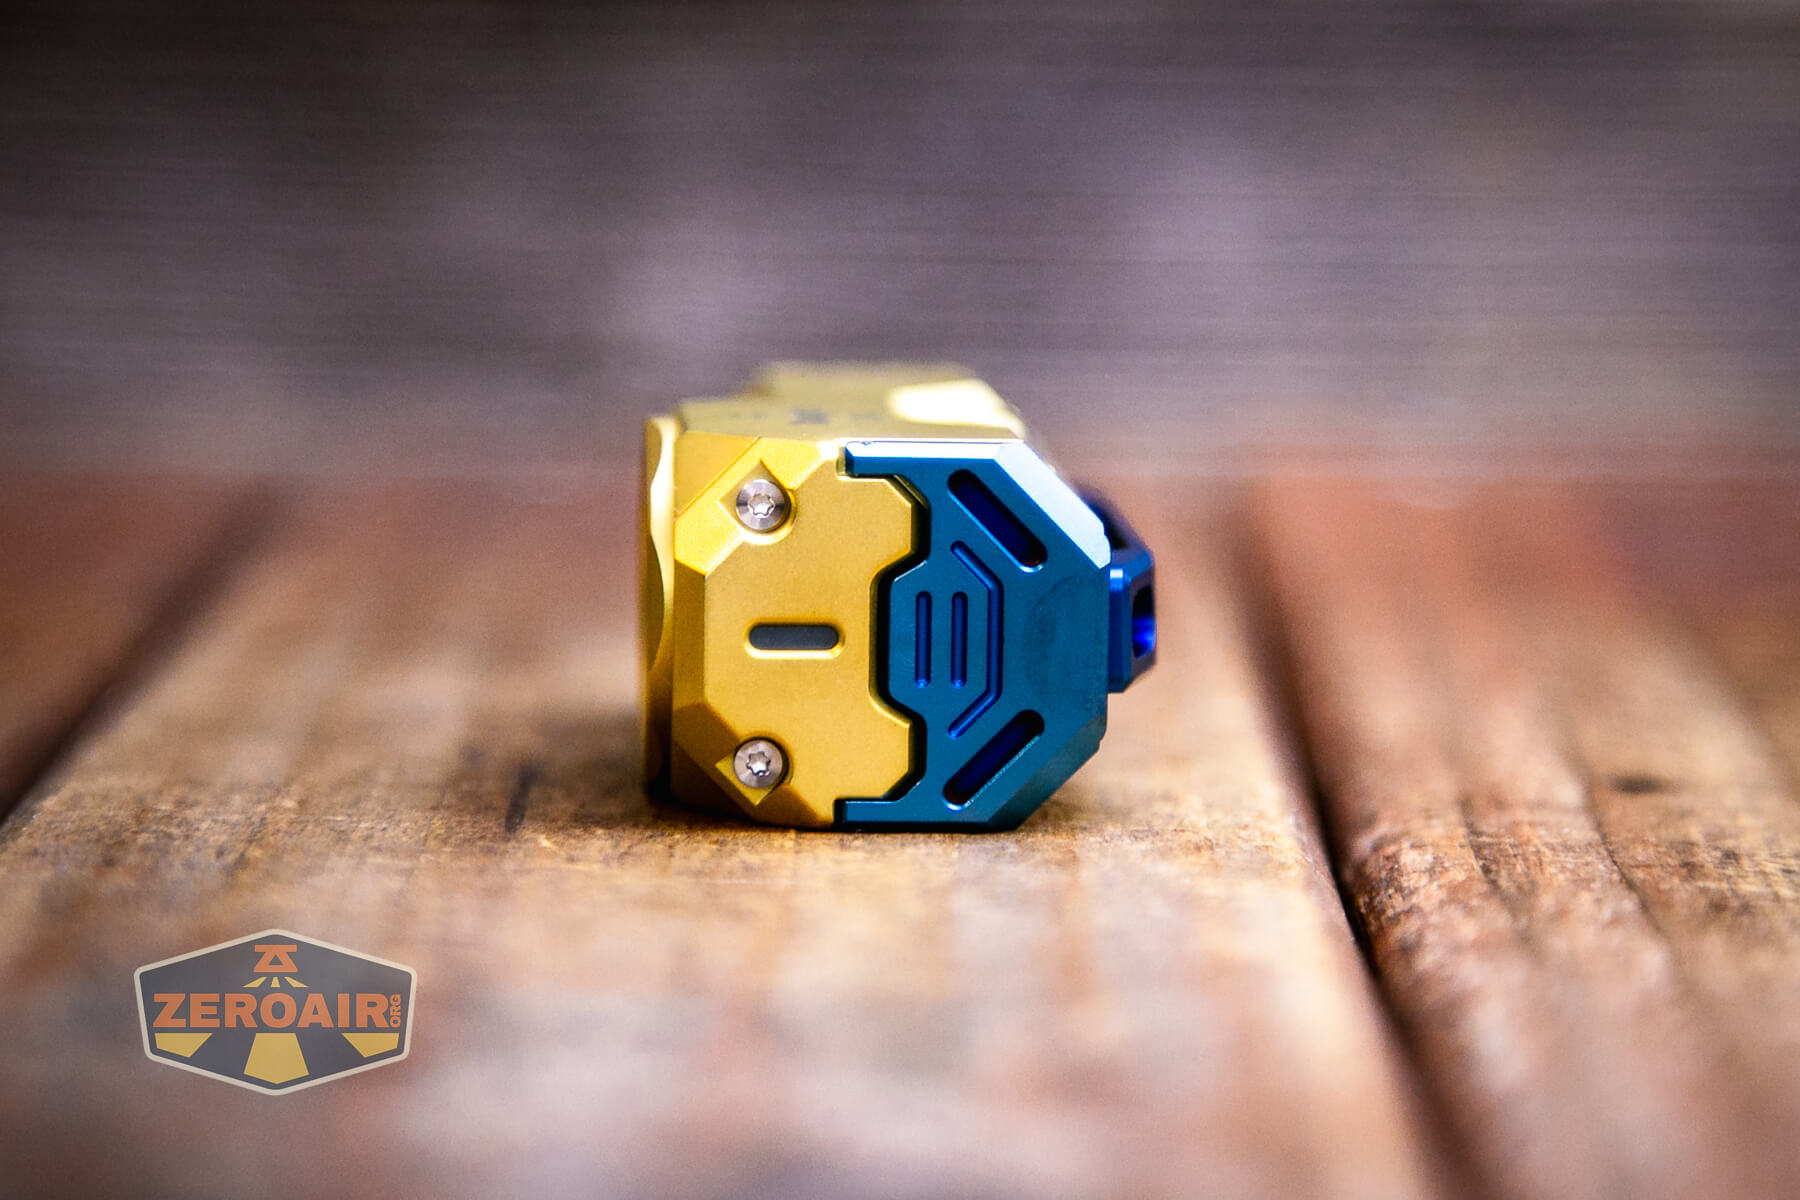
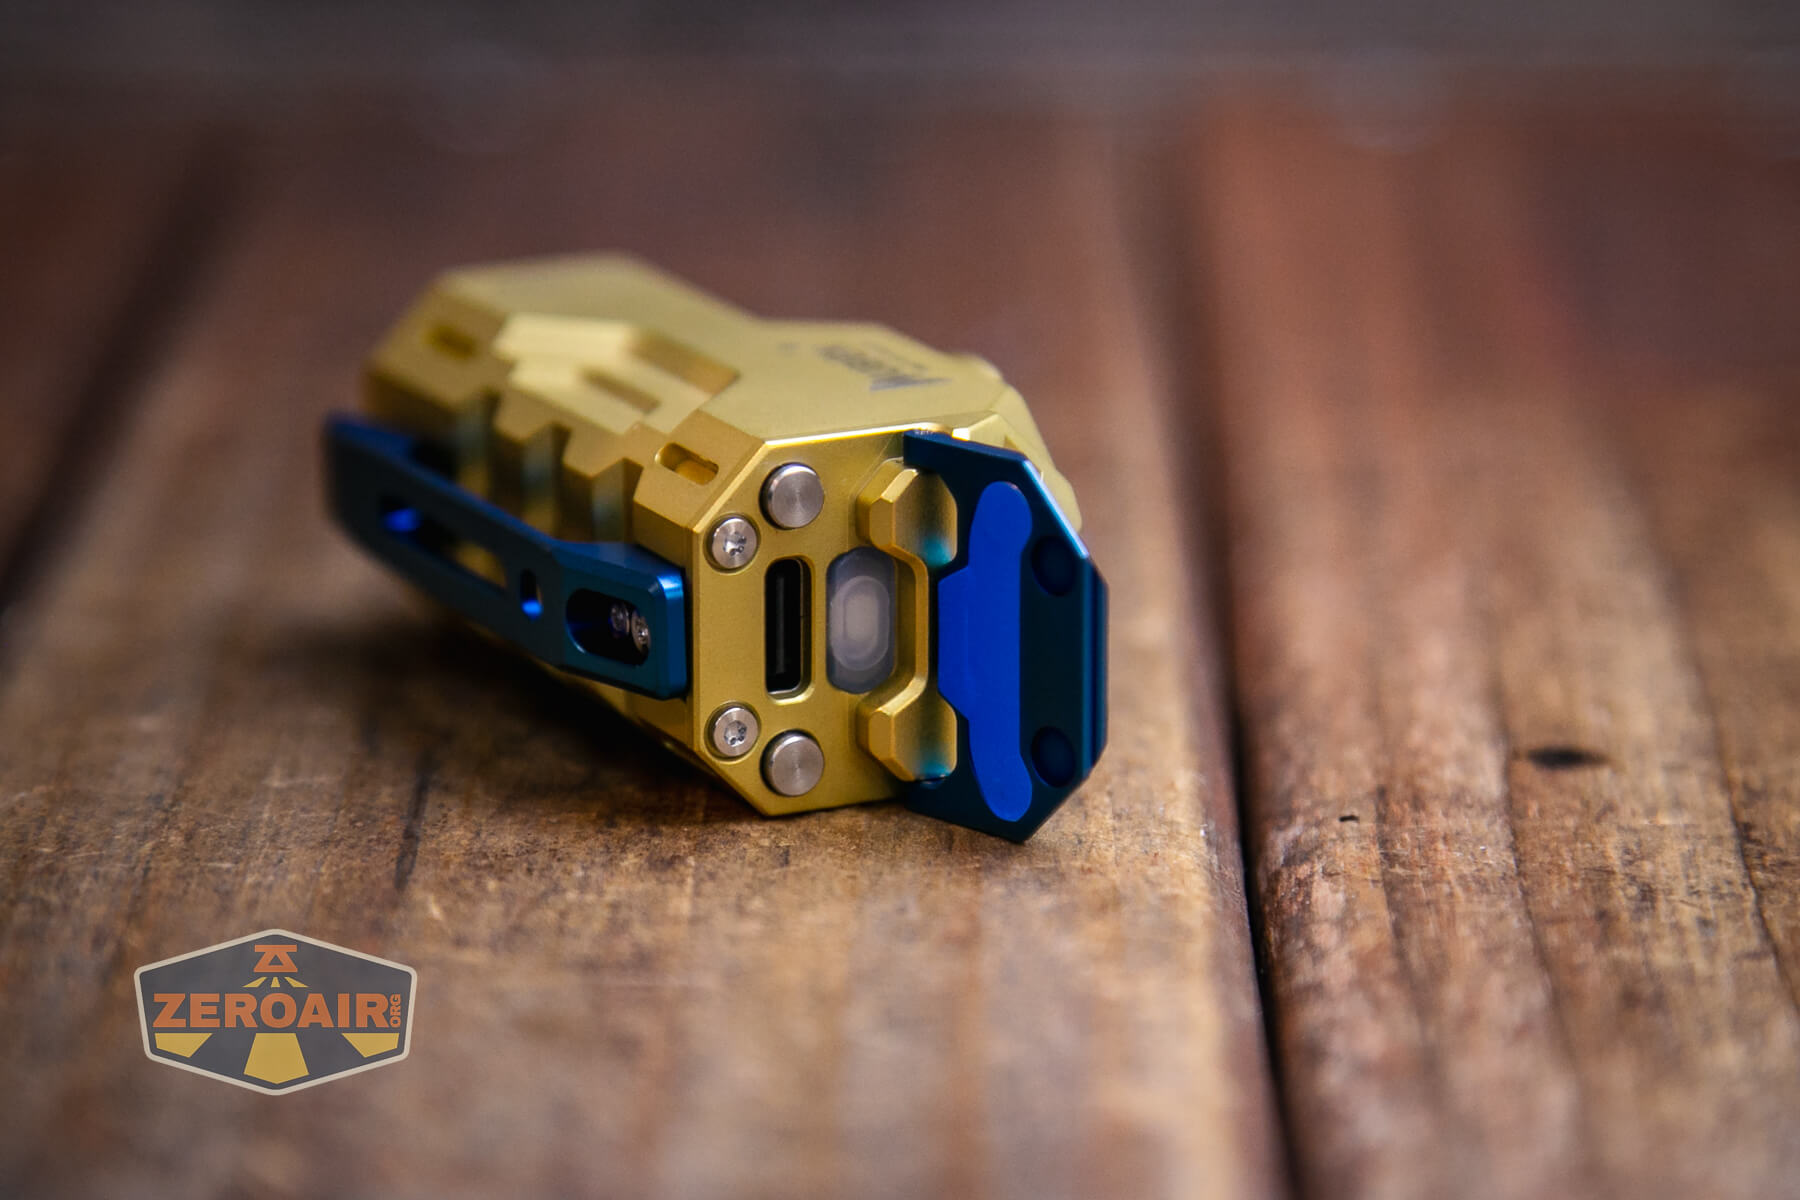
Like the Wuben X-0 Knight in aluminum that I already reviewed, the Wuben X-0 Knight in brass manages to have a matte finish while still clearly being brass.
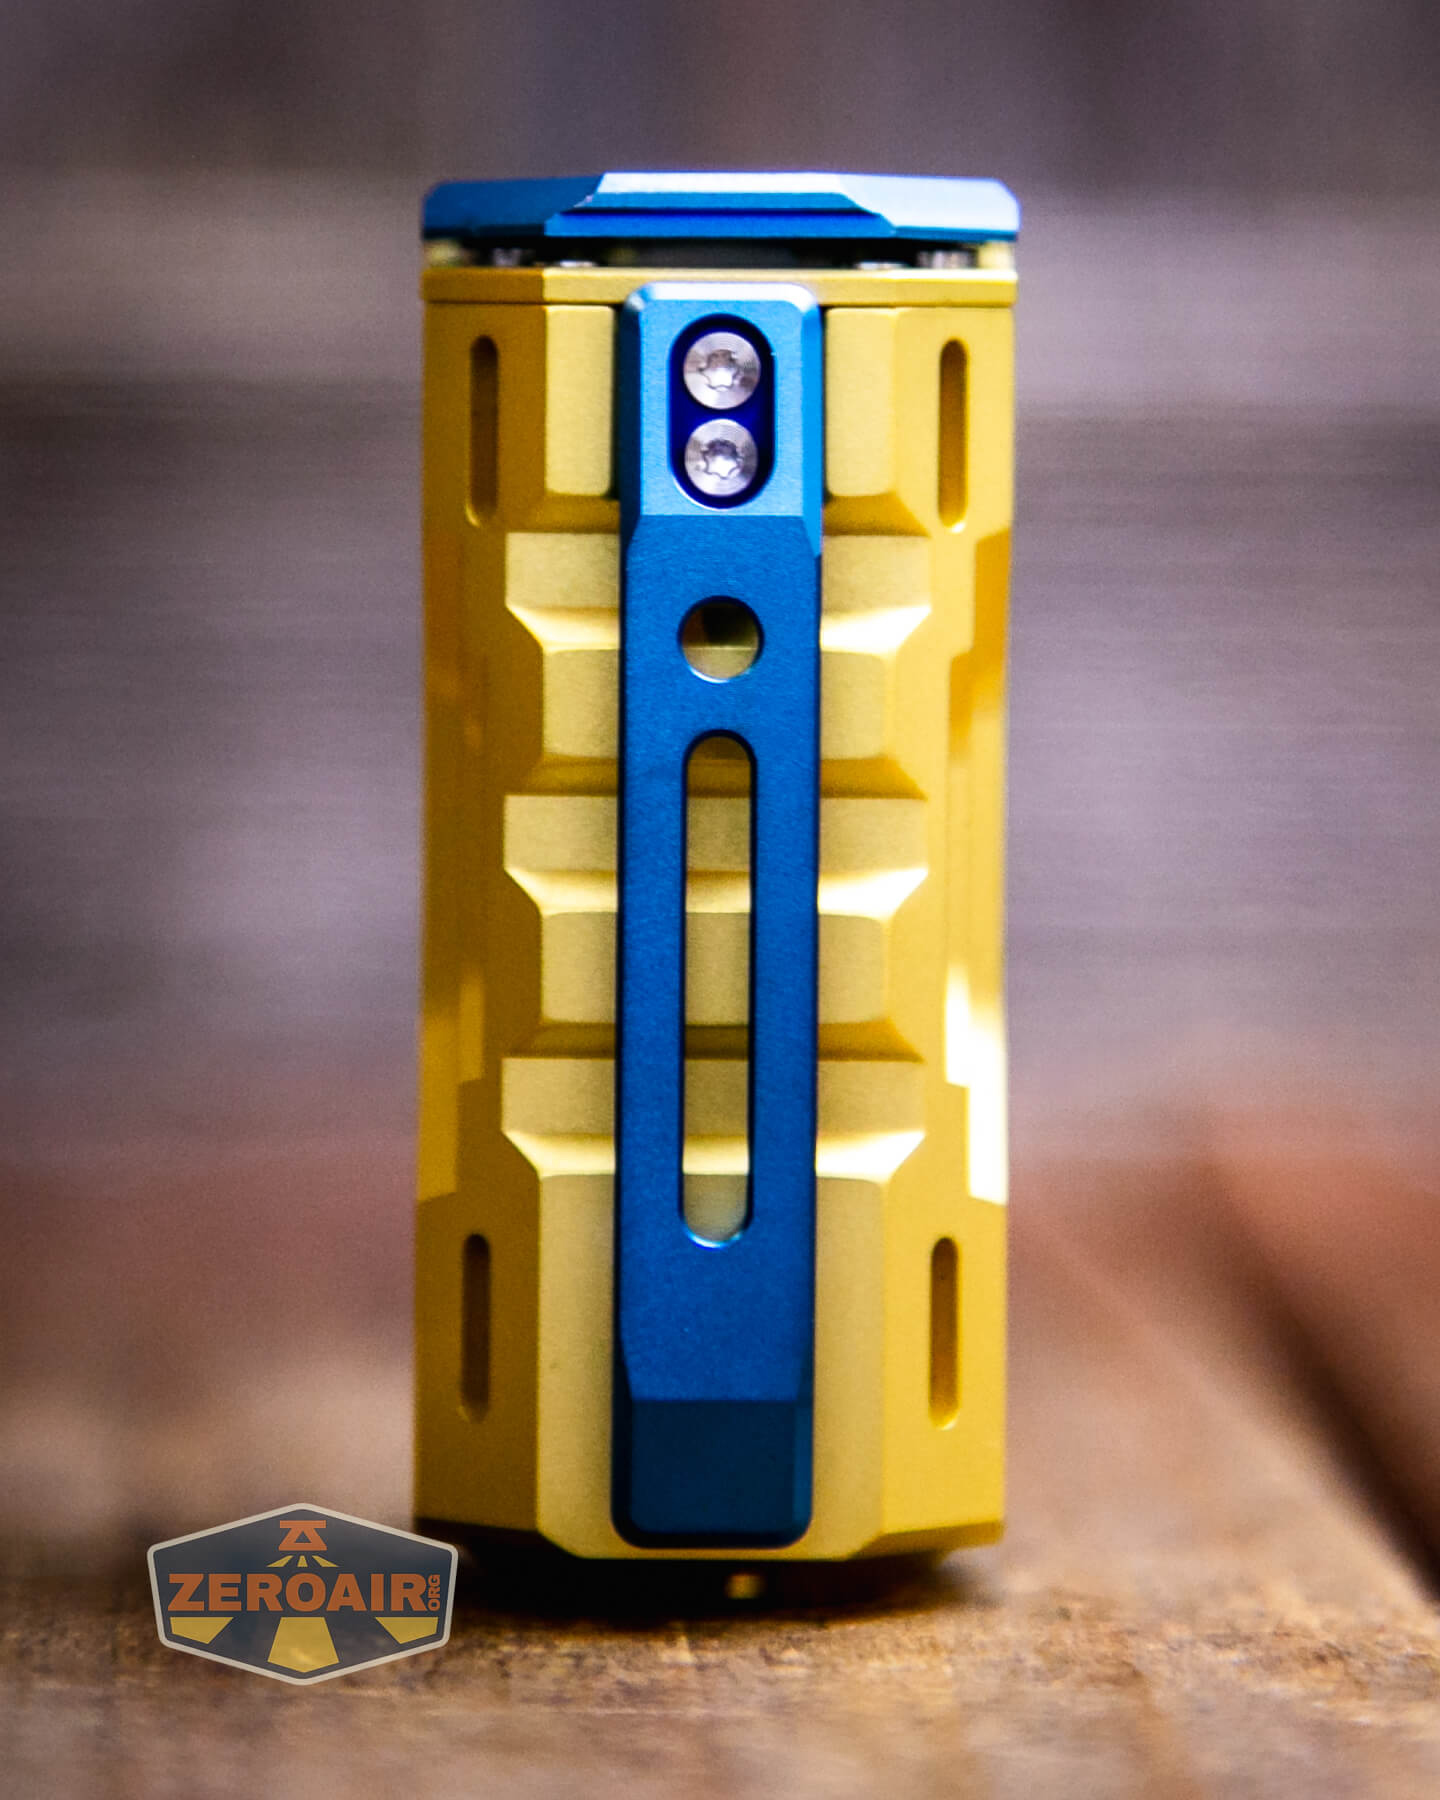
Next, note that this light is very angular – there’s not much tube-ishness going on here! That’s a nice change of pace. You’ll like that or not like it, but either way, I can say that it’s a nice anti-roll feature. 

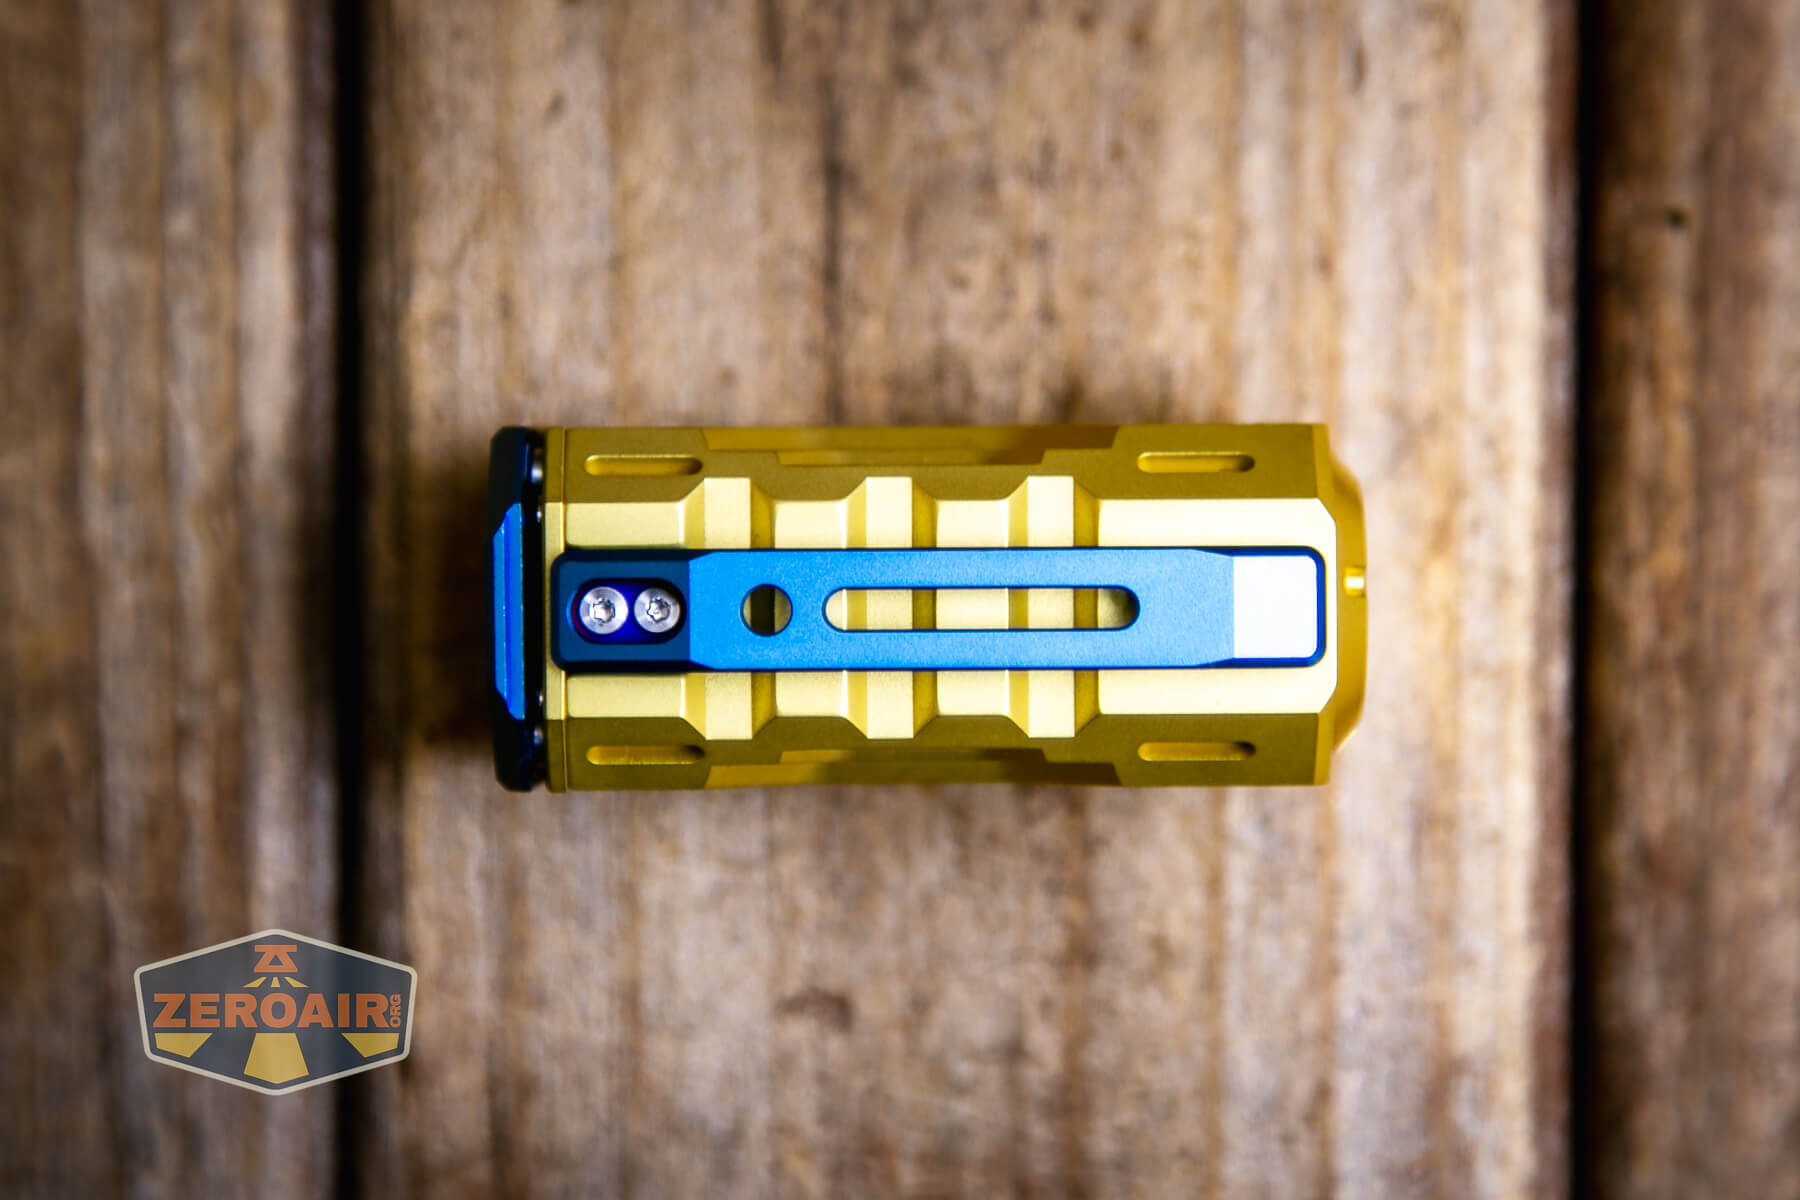
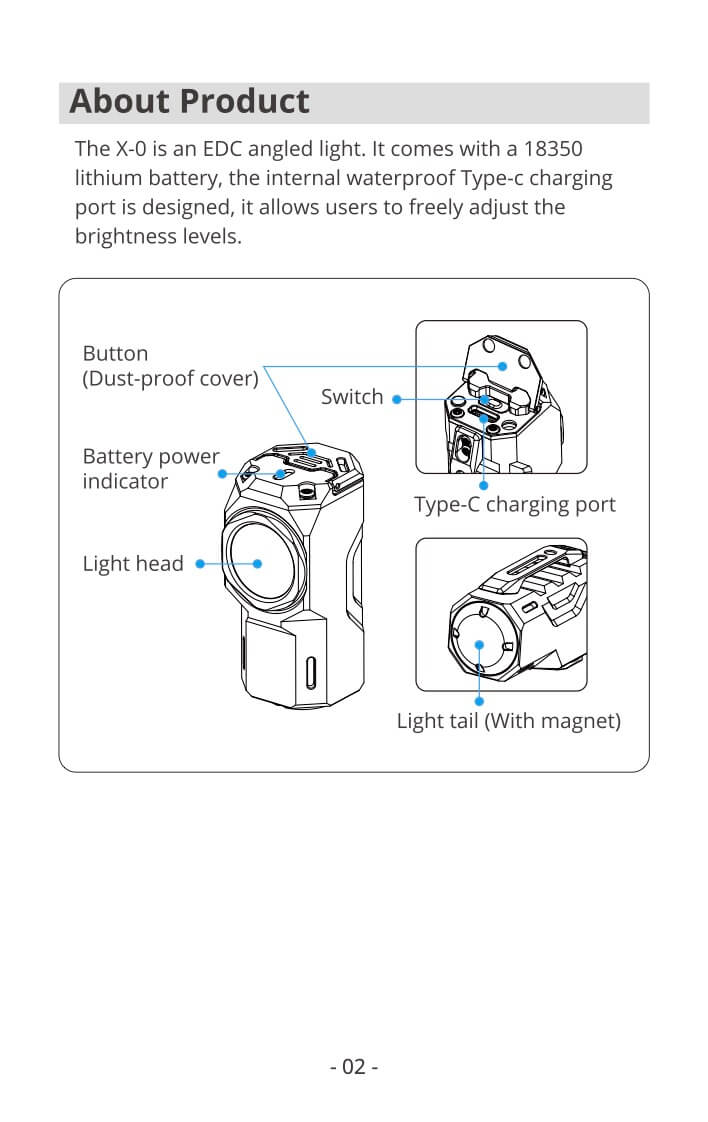
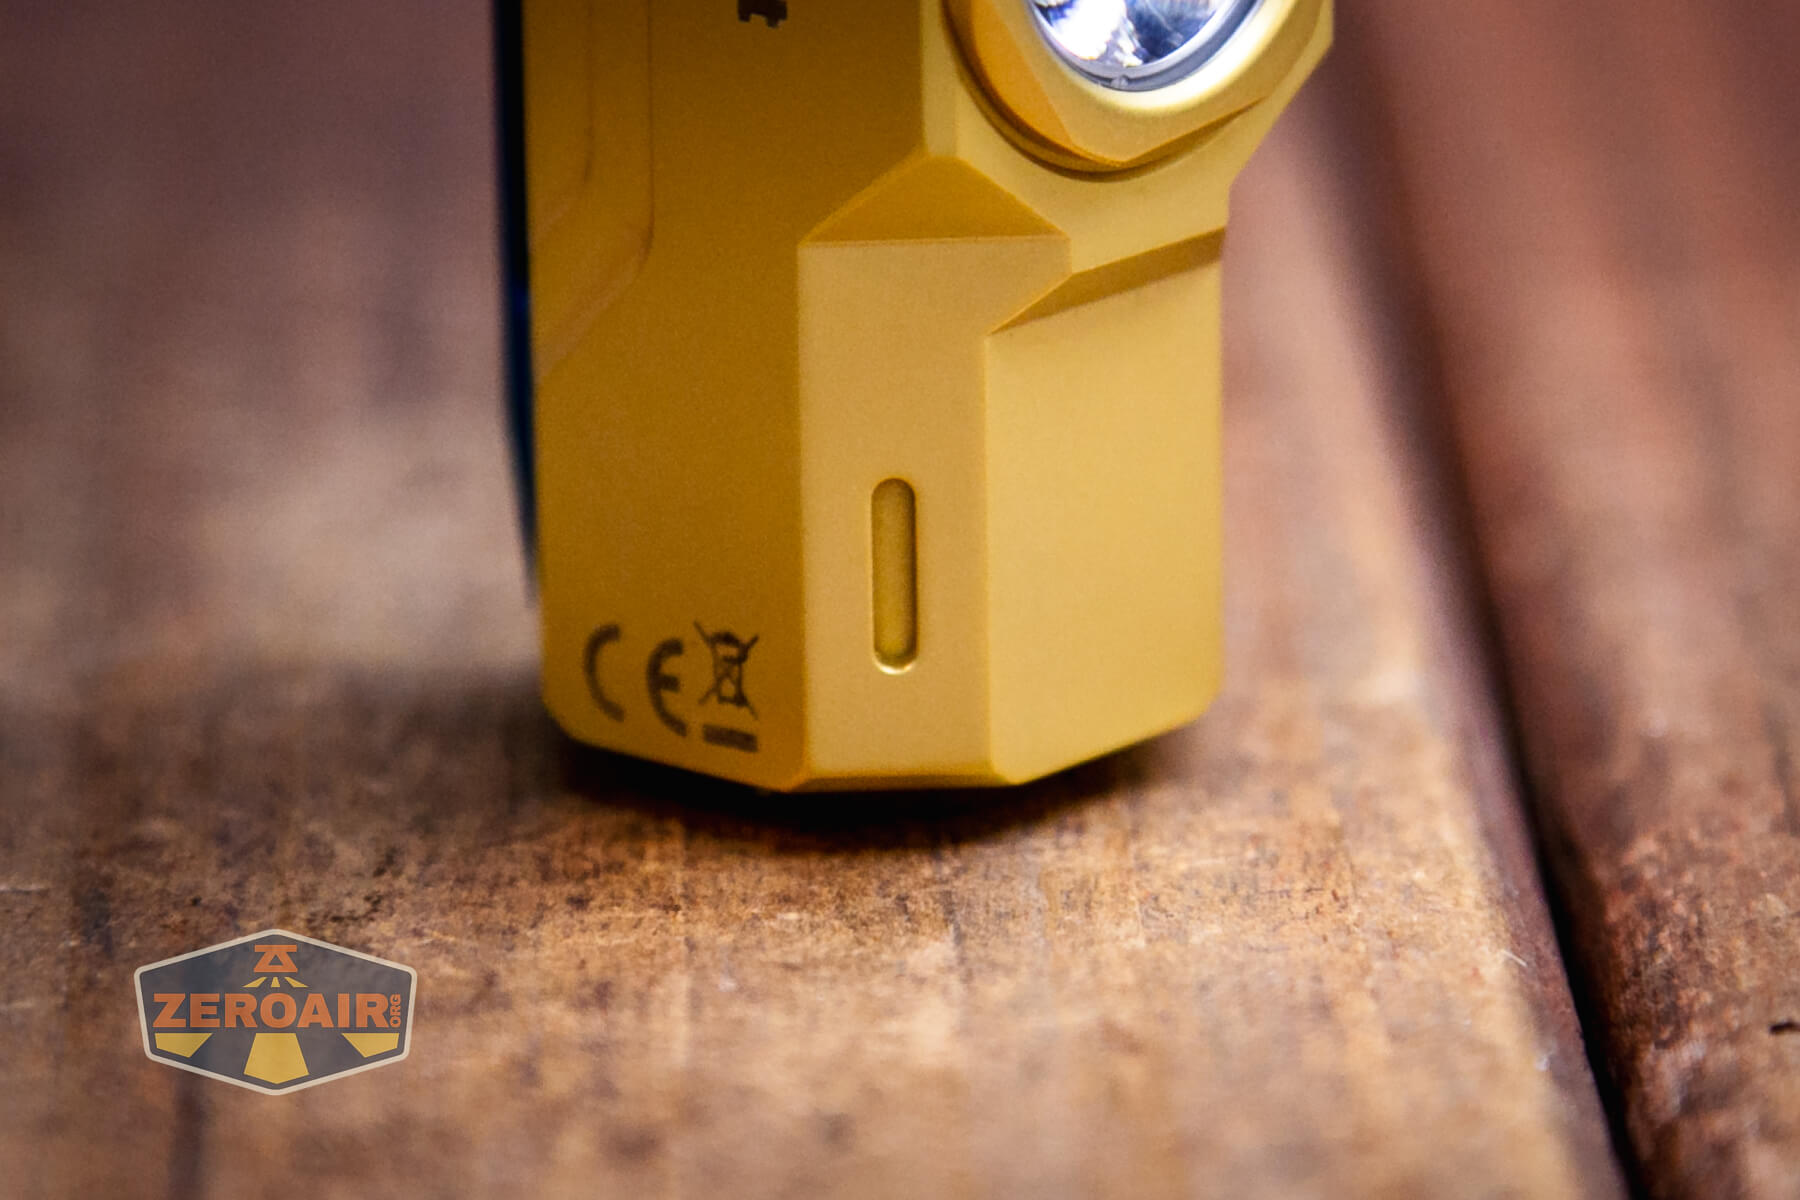
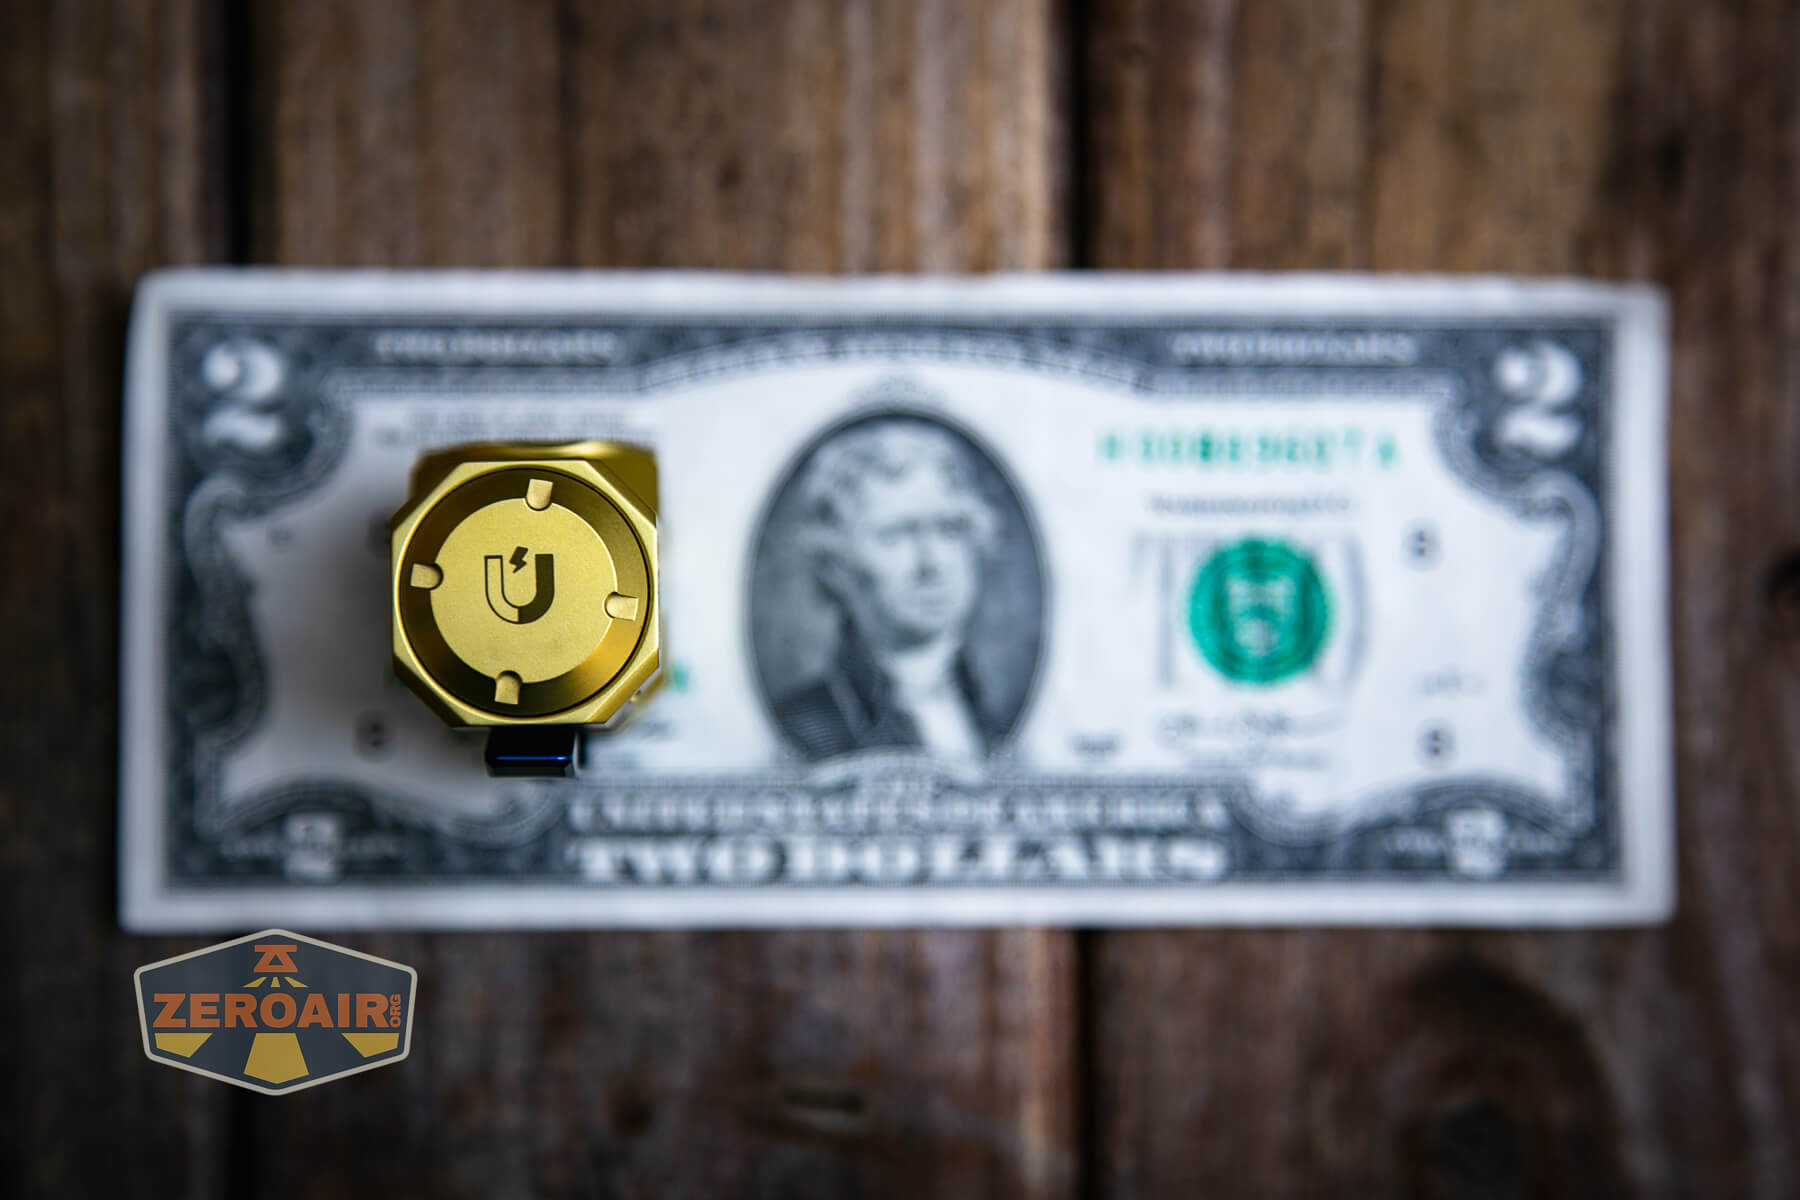
There are a few slots for tritium all over the light (I count six), but the slot to the right that you see below is not one of them. The slot below is an indicator! Those two slots on the blue part (at right) are tritium slots!
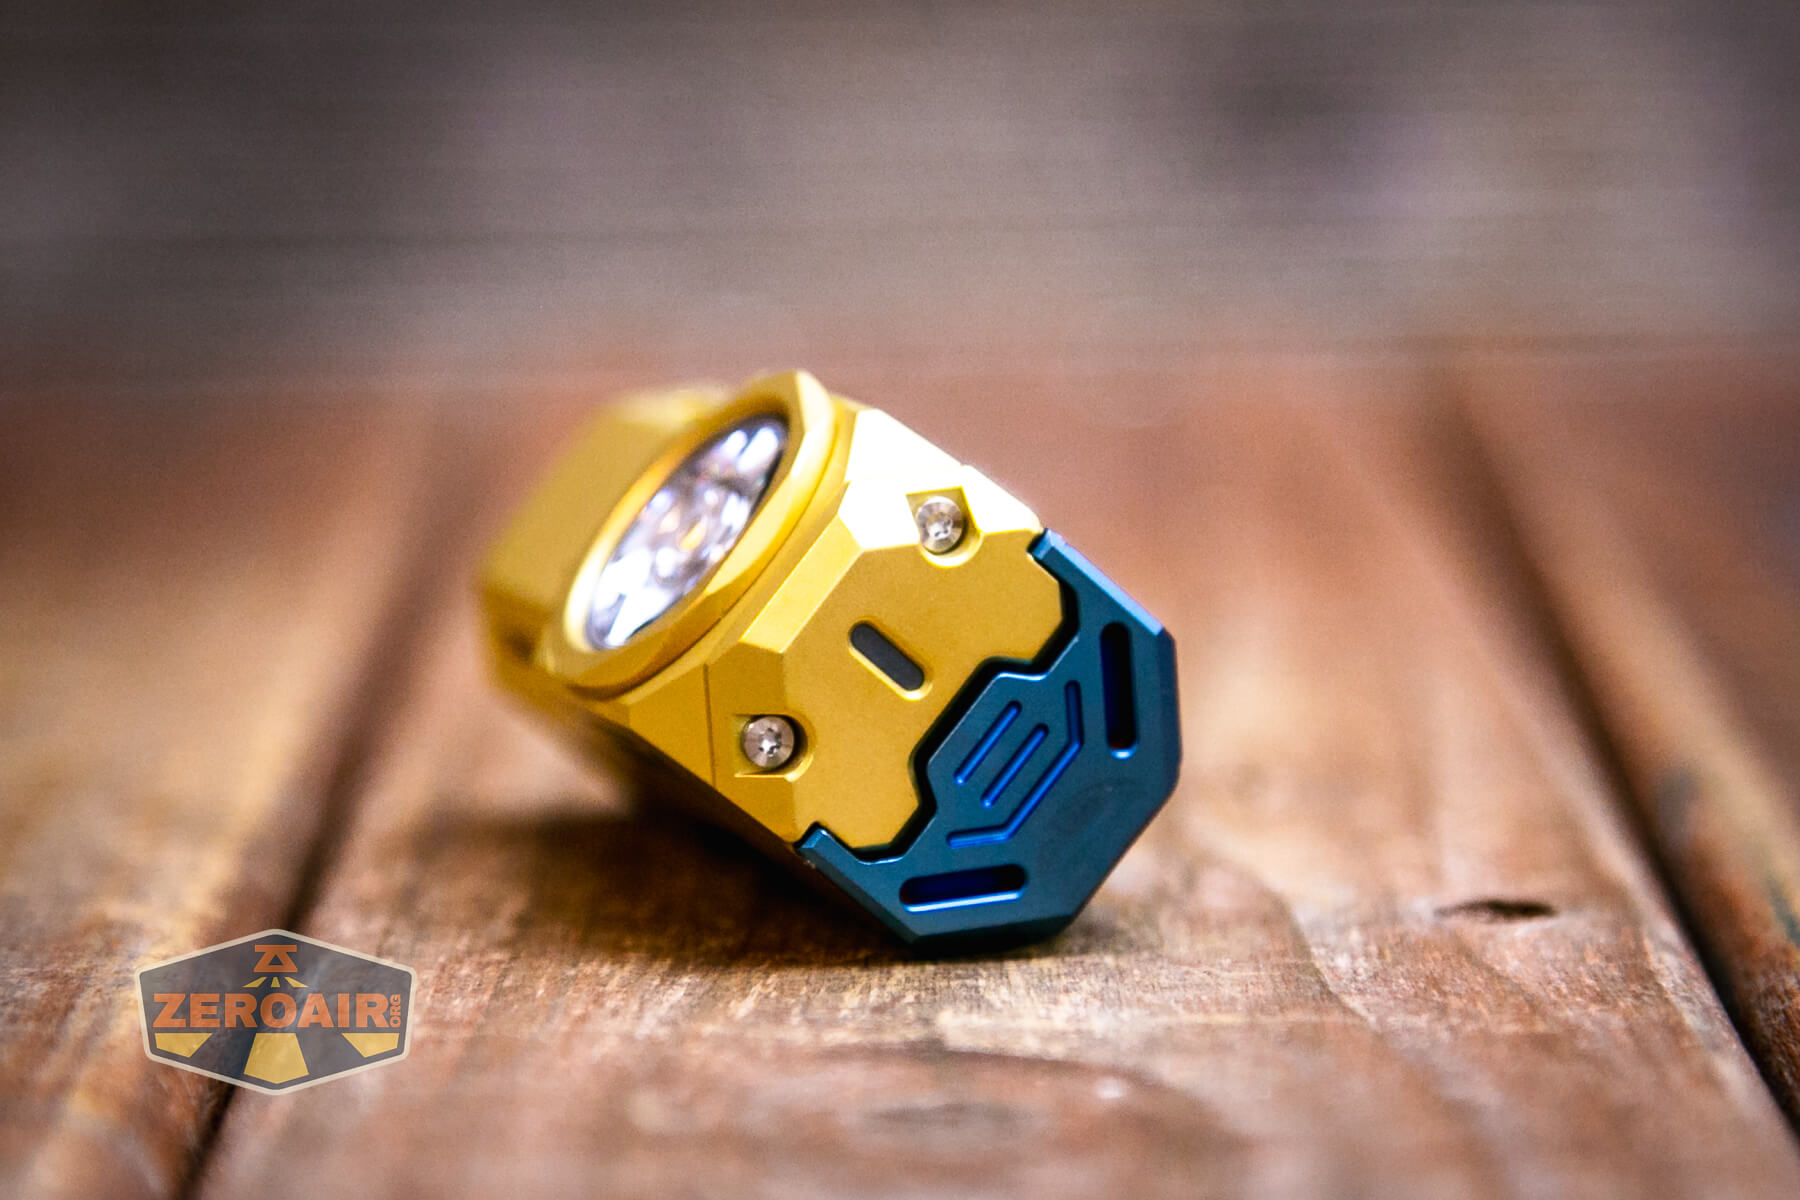
The slot you see in the brass below, however, is one of the tritium slots.
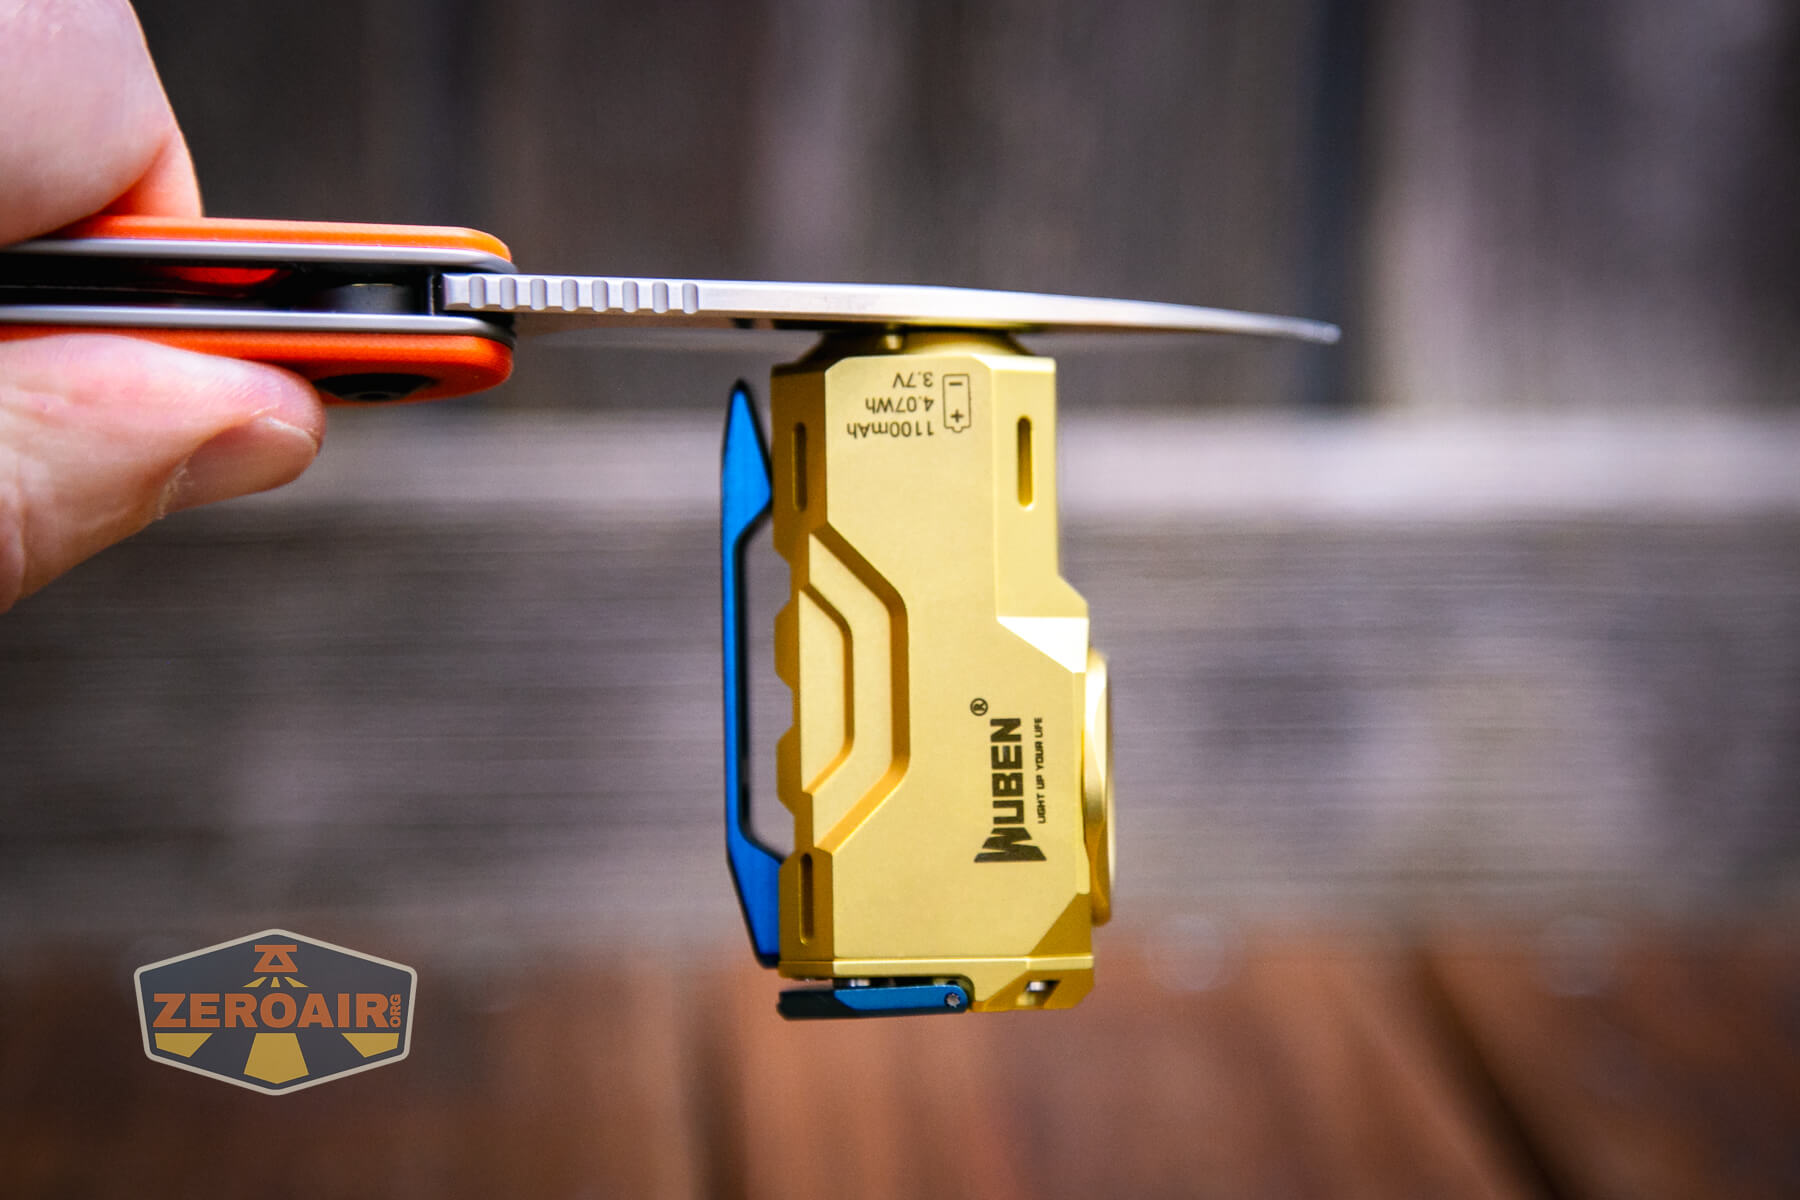
The tailcap is removable. Thus, the Wuben X-0 Knight is a “right-angle” brass flashlight. This tailcap was a point of contention for many users who feared that the (standard!) 18350 used in this light was not replaceable. It is very replaceable. I don’t even think you really need any special tools to remove this tailcap. I used a pair of (plastic!) tweezers, but the threads are smooth enough, and the closure is “clean” enough that you could use makeshift probably nearly anything – a paper clip, for example. Yes, you will probably not remove this tailcap by hand, but no, you won’t need a watchmaker’s case back removal tool!
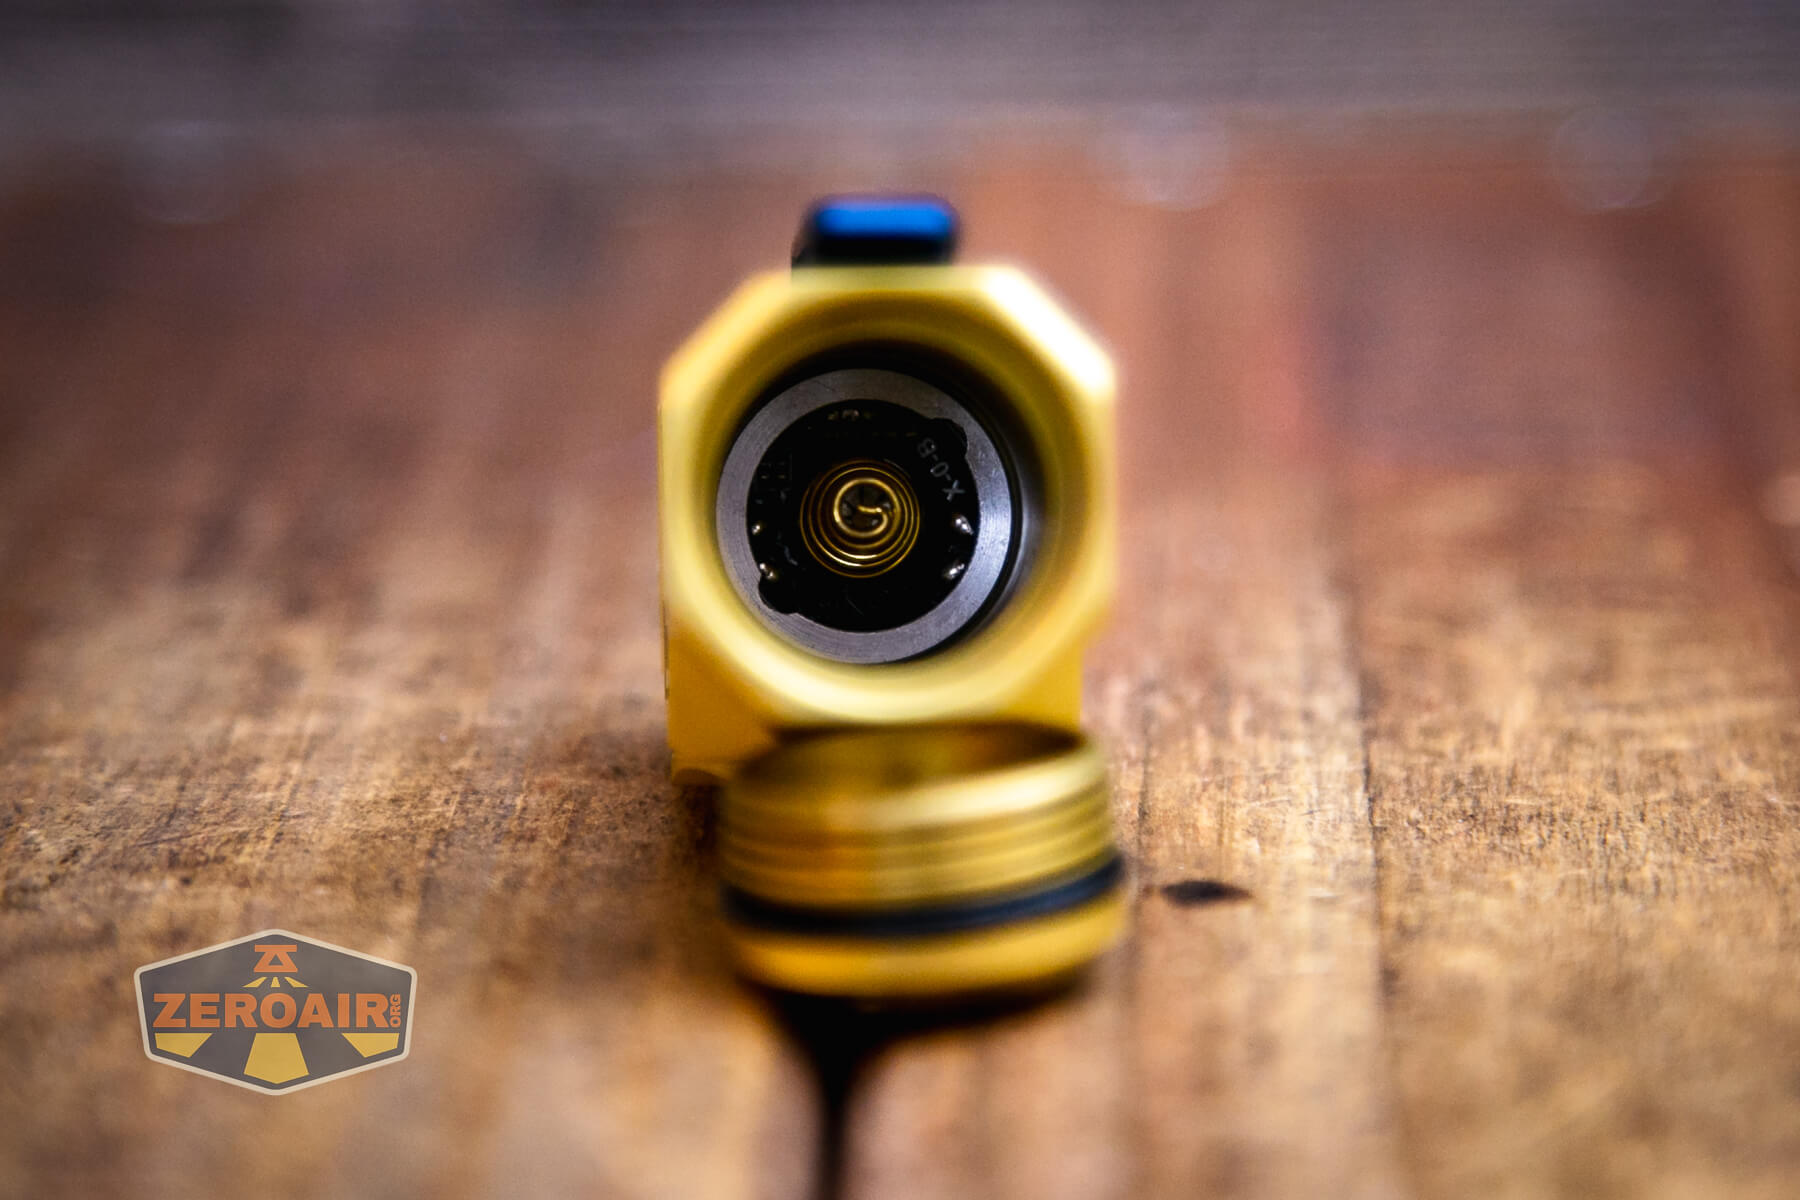
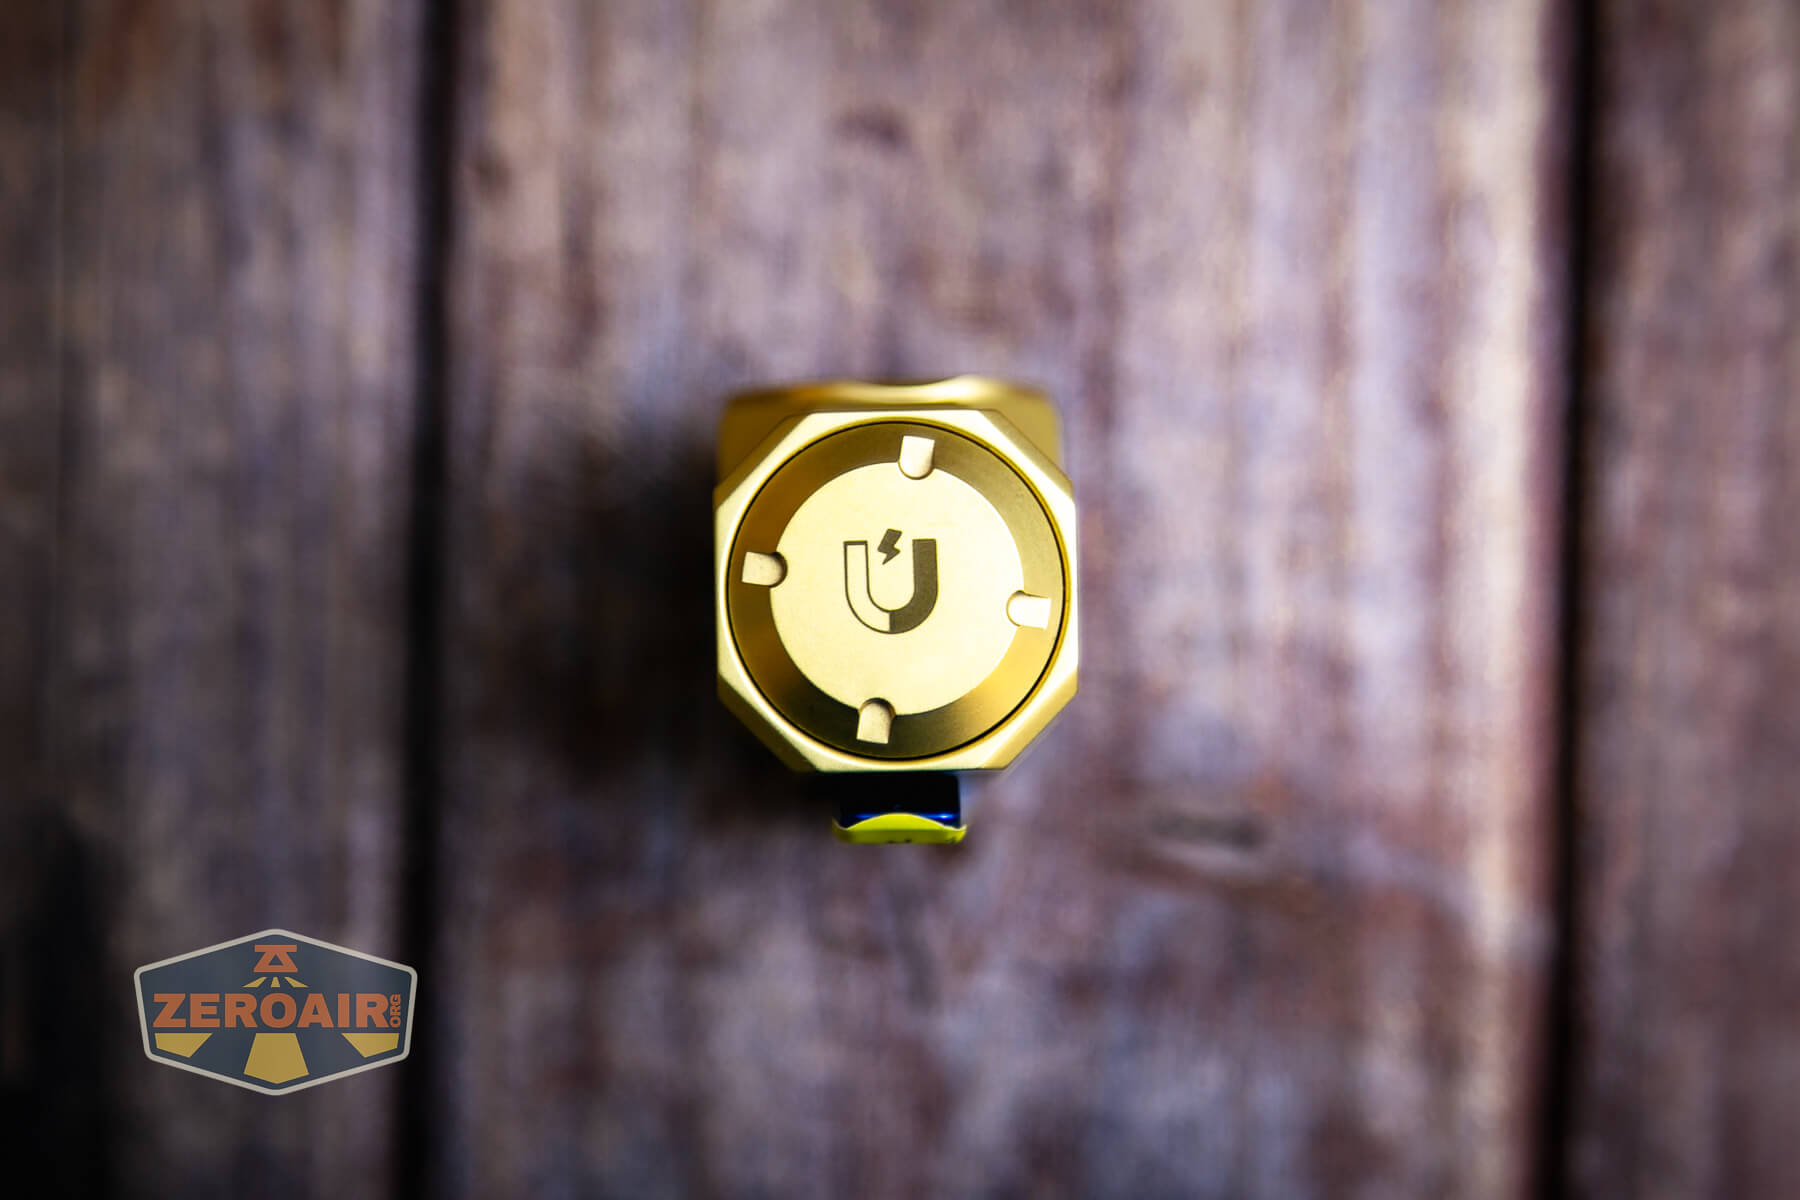
Inside the tailcap is this brass bit, which is slotted – I think you could remove the magnet in there if you wanted to do so.

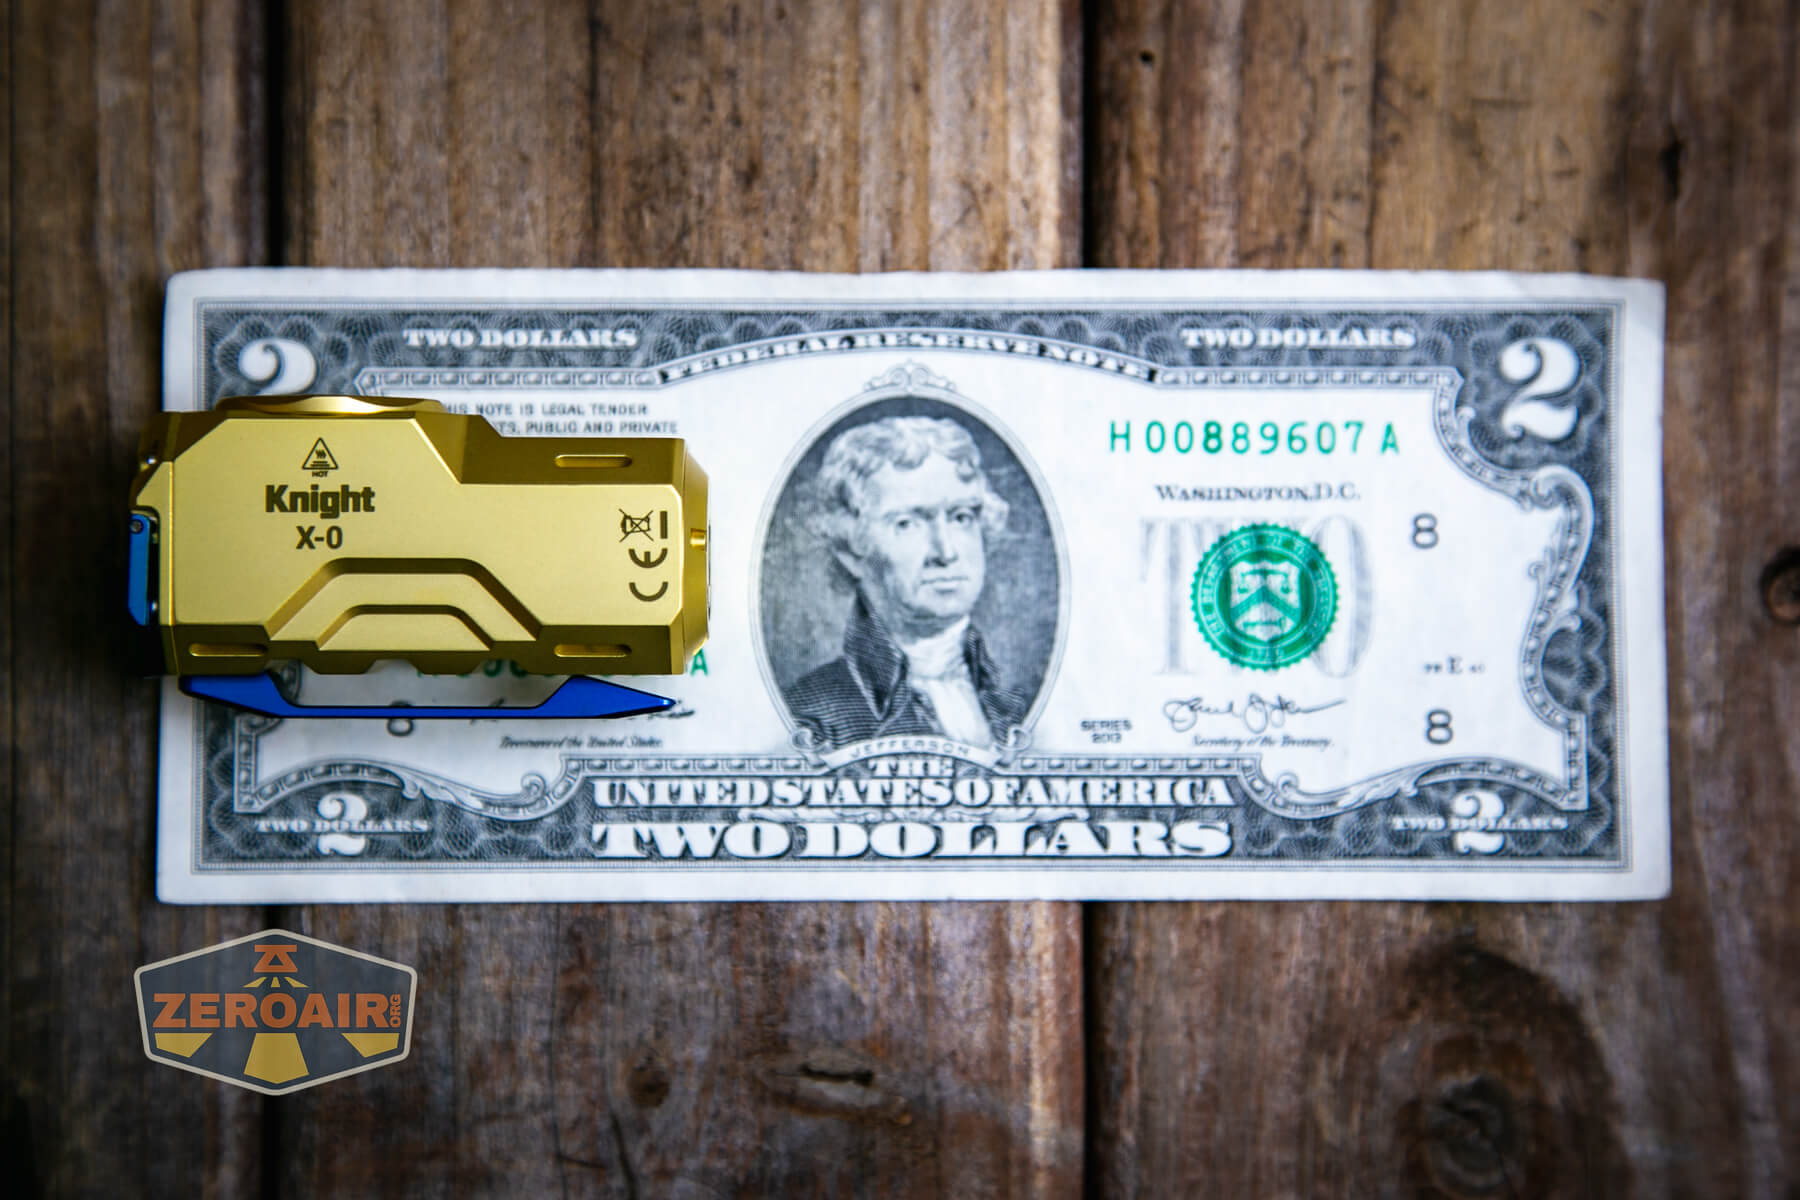
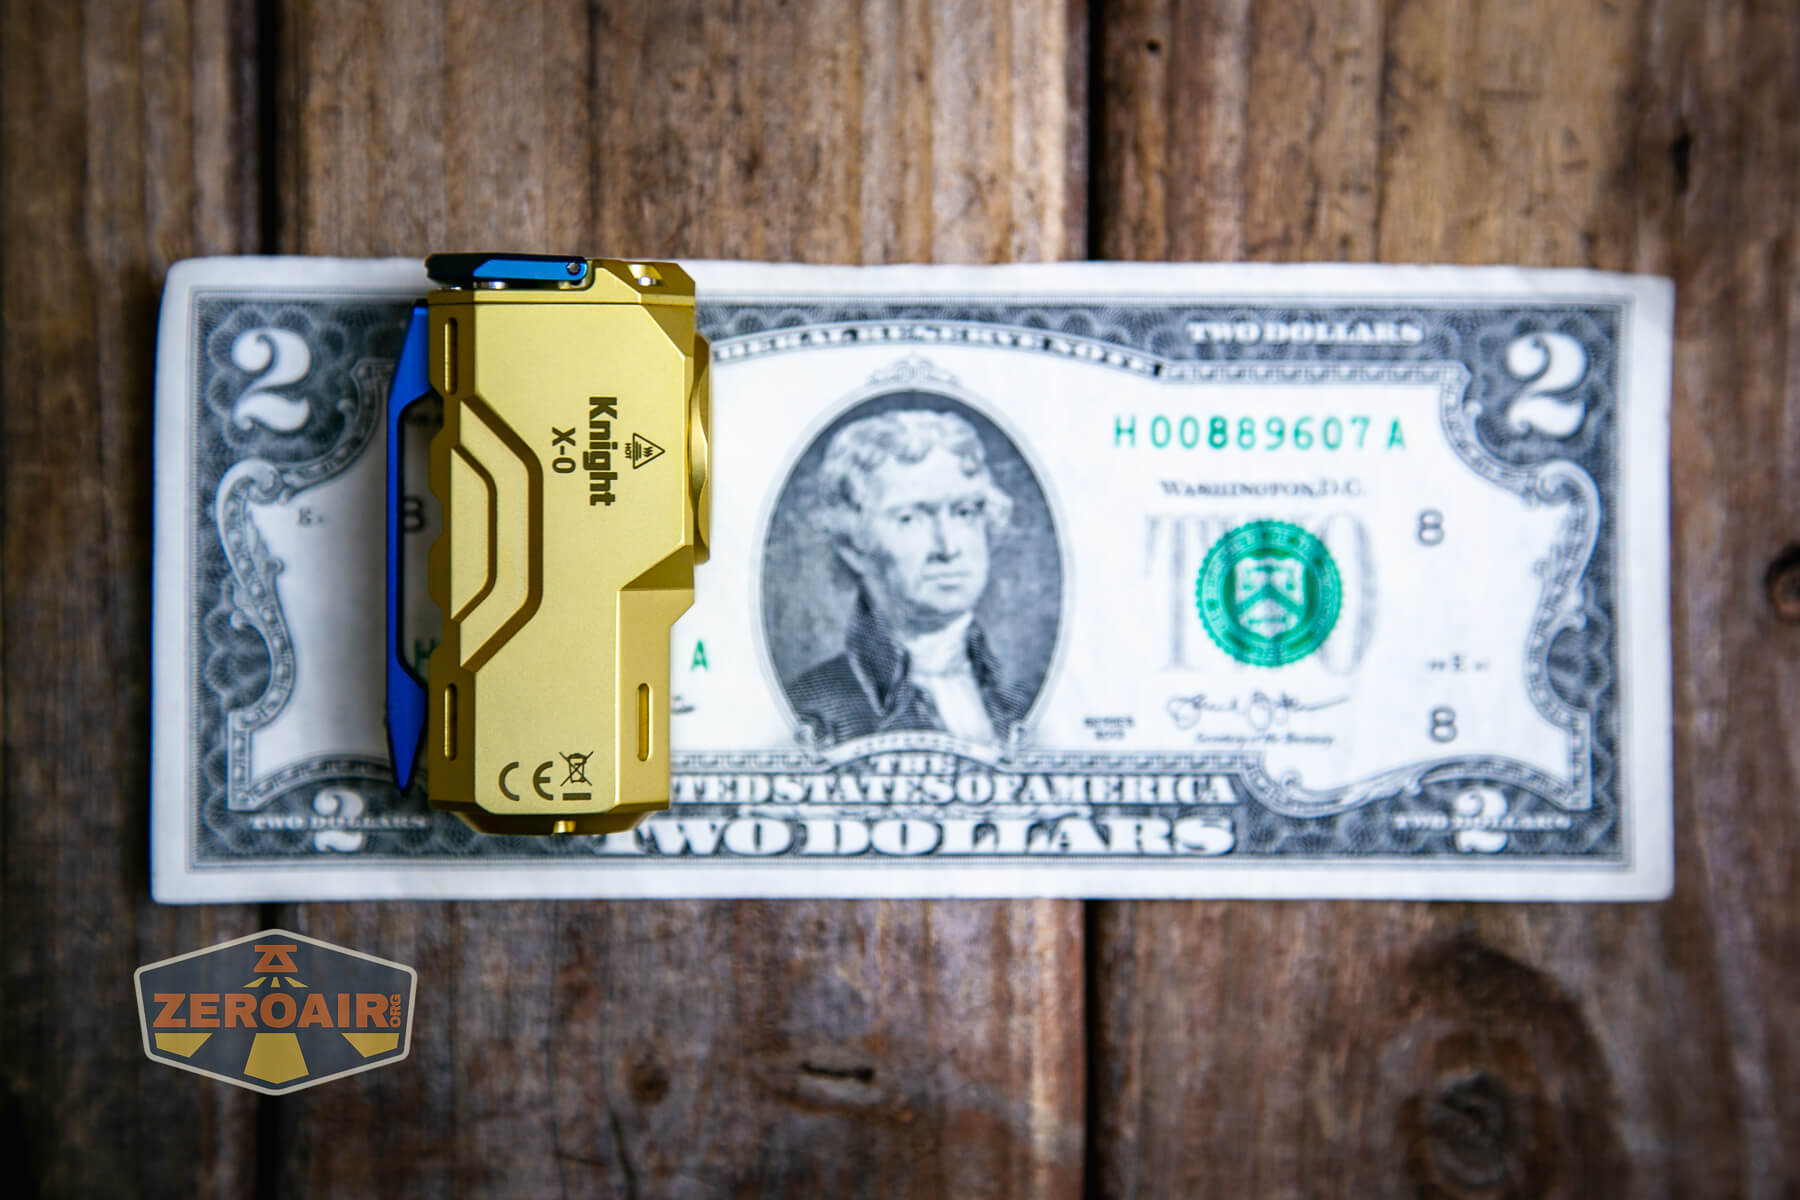
Size and Comps
I’m going to add Wuben’s illustration here because it’s great!
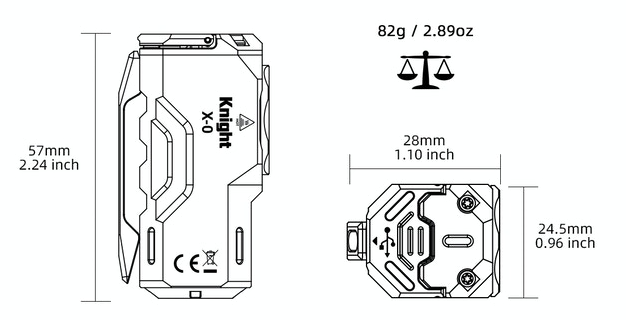
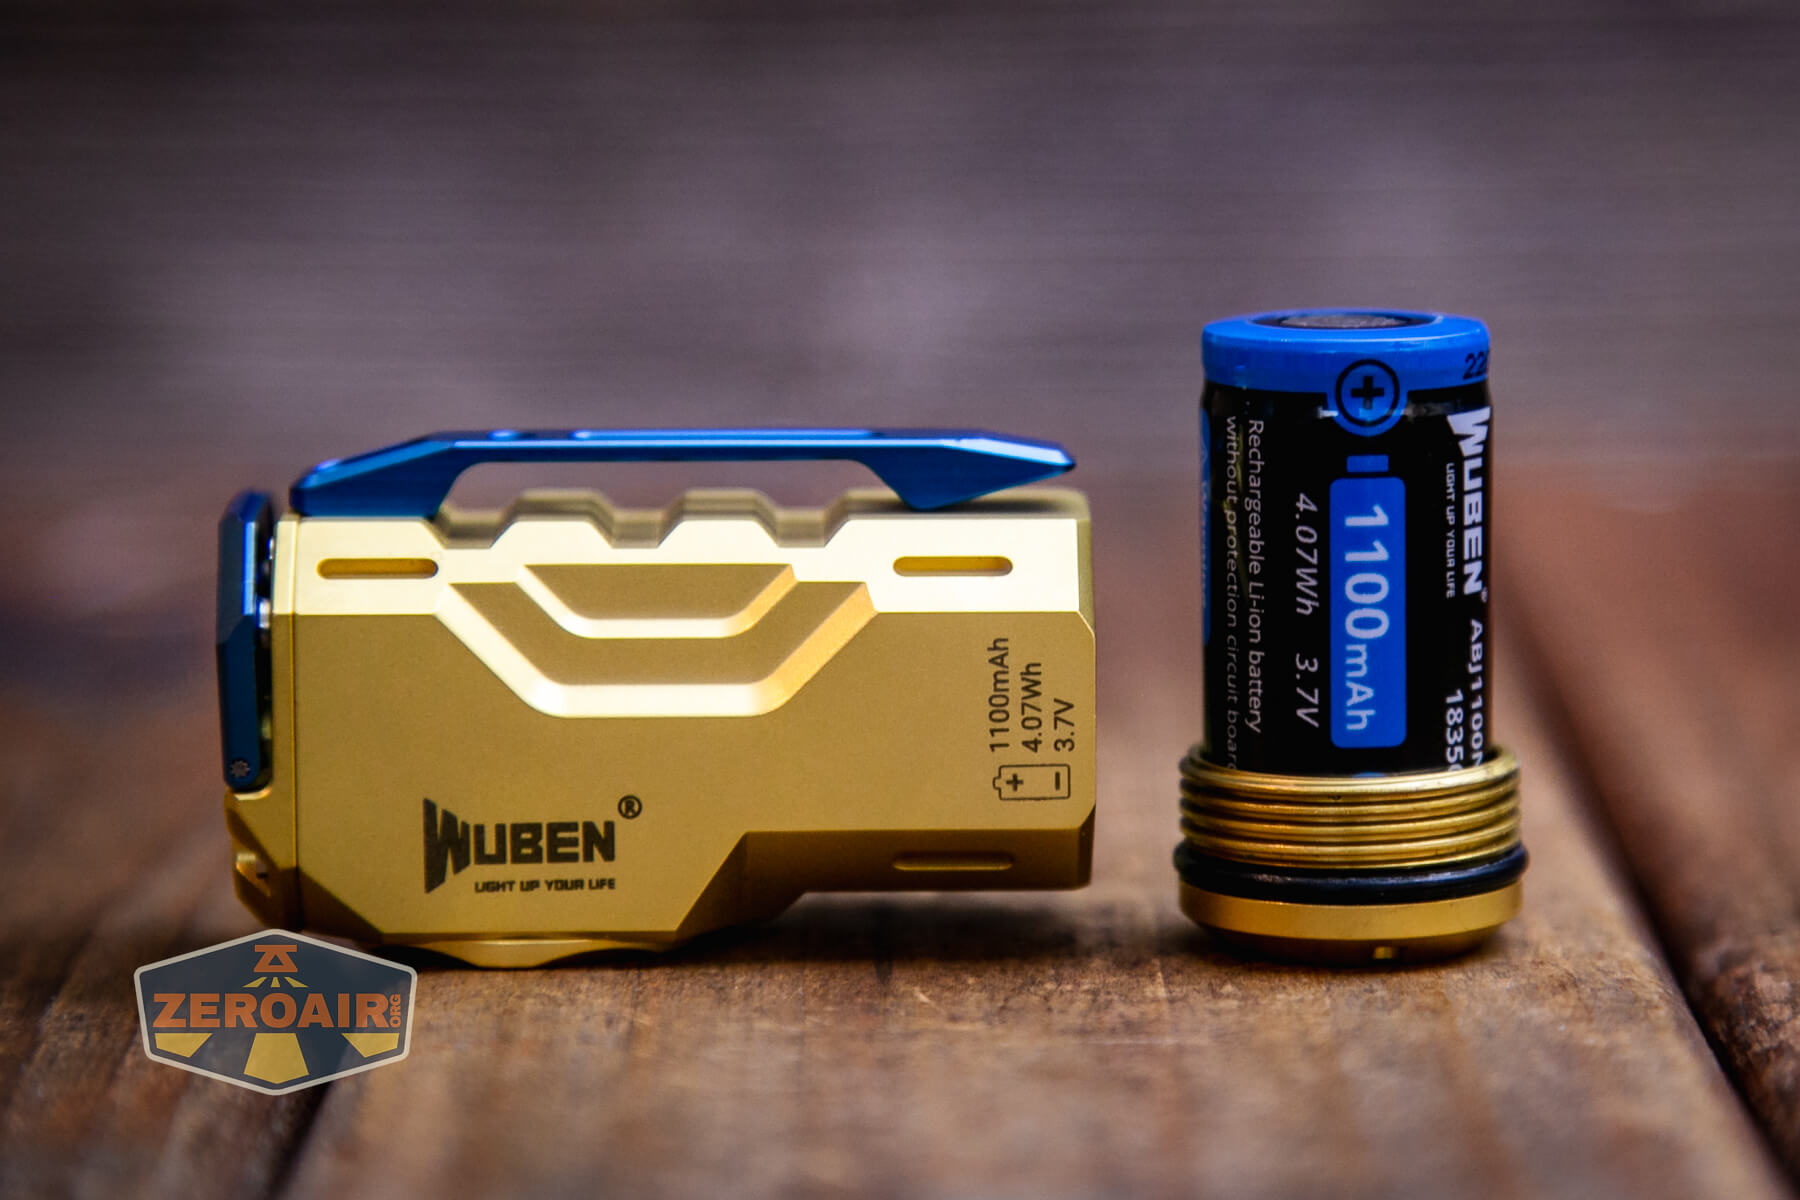
Officially: 57mm long, 24.5mm and 28mm across, and 82g (for aluminum). Brass actually weighs 156.8g (with cell).
If the flashlight will headstand, I’ll show it here (usually the third photo). If the flashlight will tailstand, I’ll also show that (usually in the fourth photo).
Here’s the test light with the venerable Convoy S2+. Mine is a custom “baked” edition Nichia 219b triple. A very nice 18650 light!
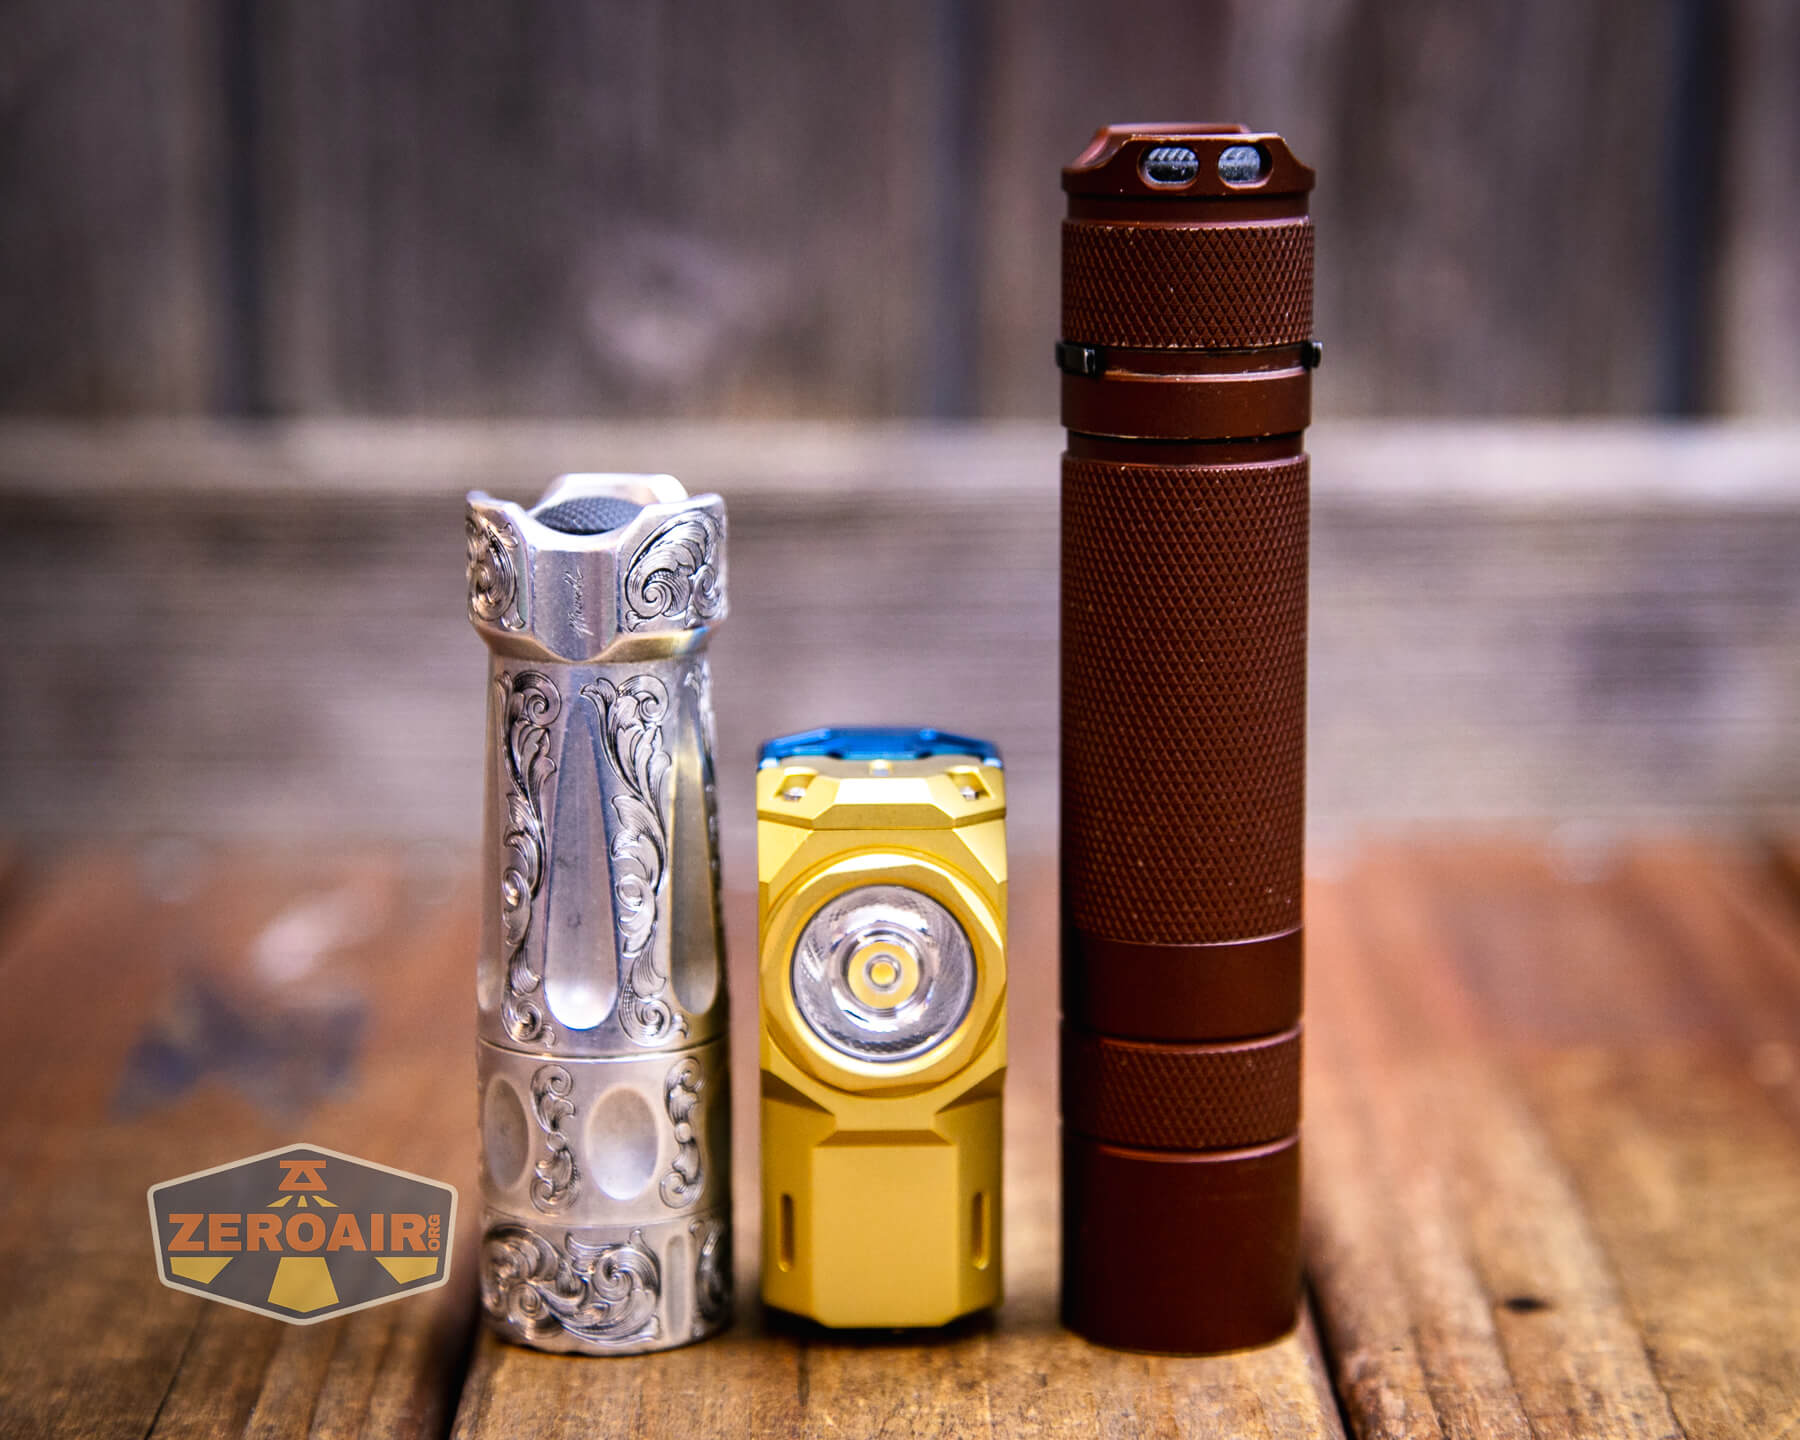

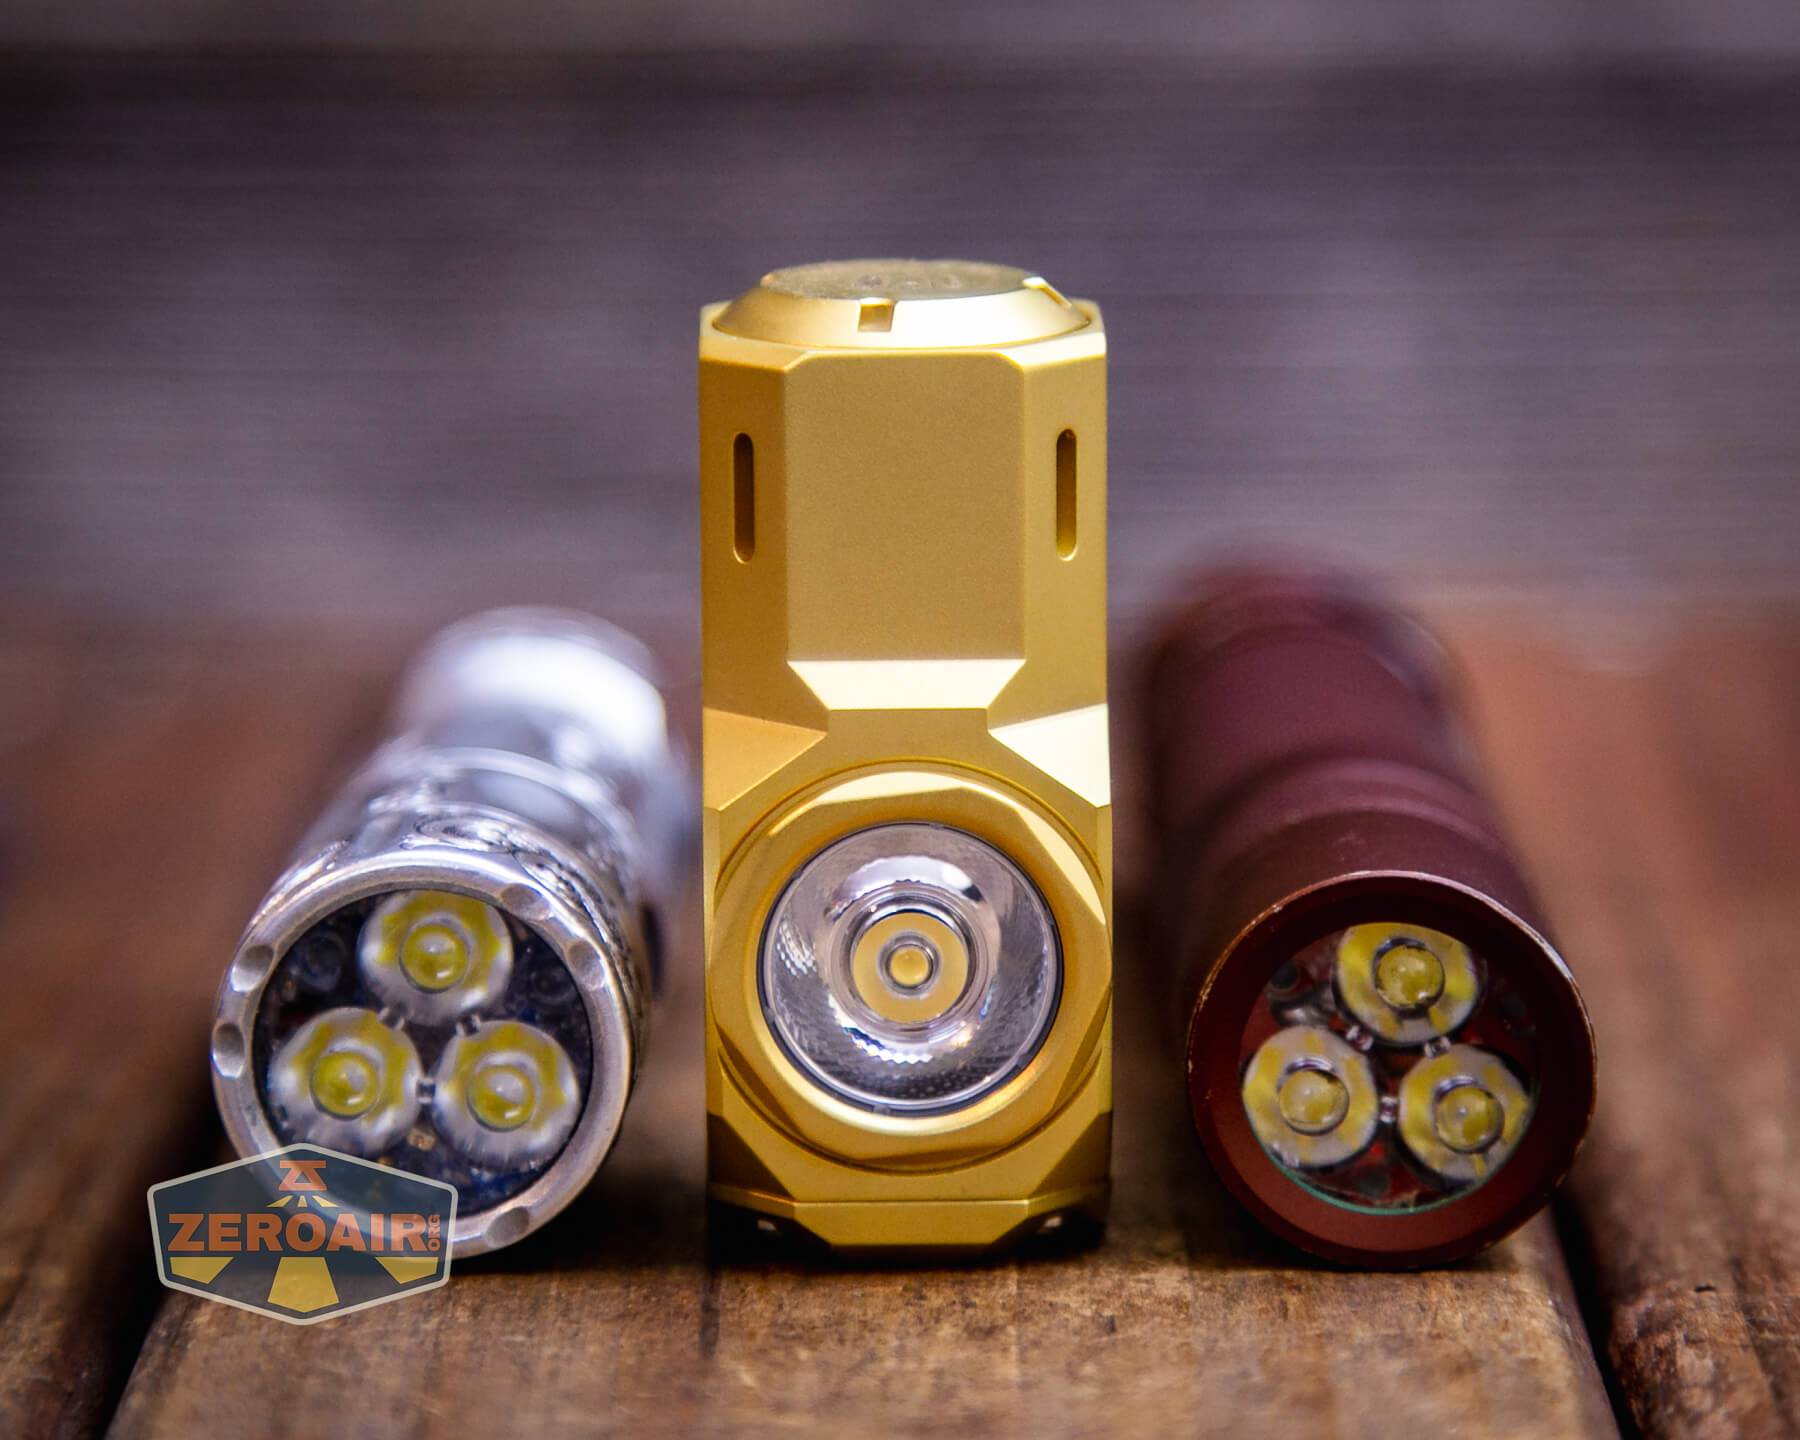
Also above is the light beside my custom-engraved TorchLAB BOSS 35, an 18350 light. I reviewed the aluminum version of that light in both 35 and 70 formats.
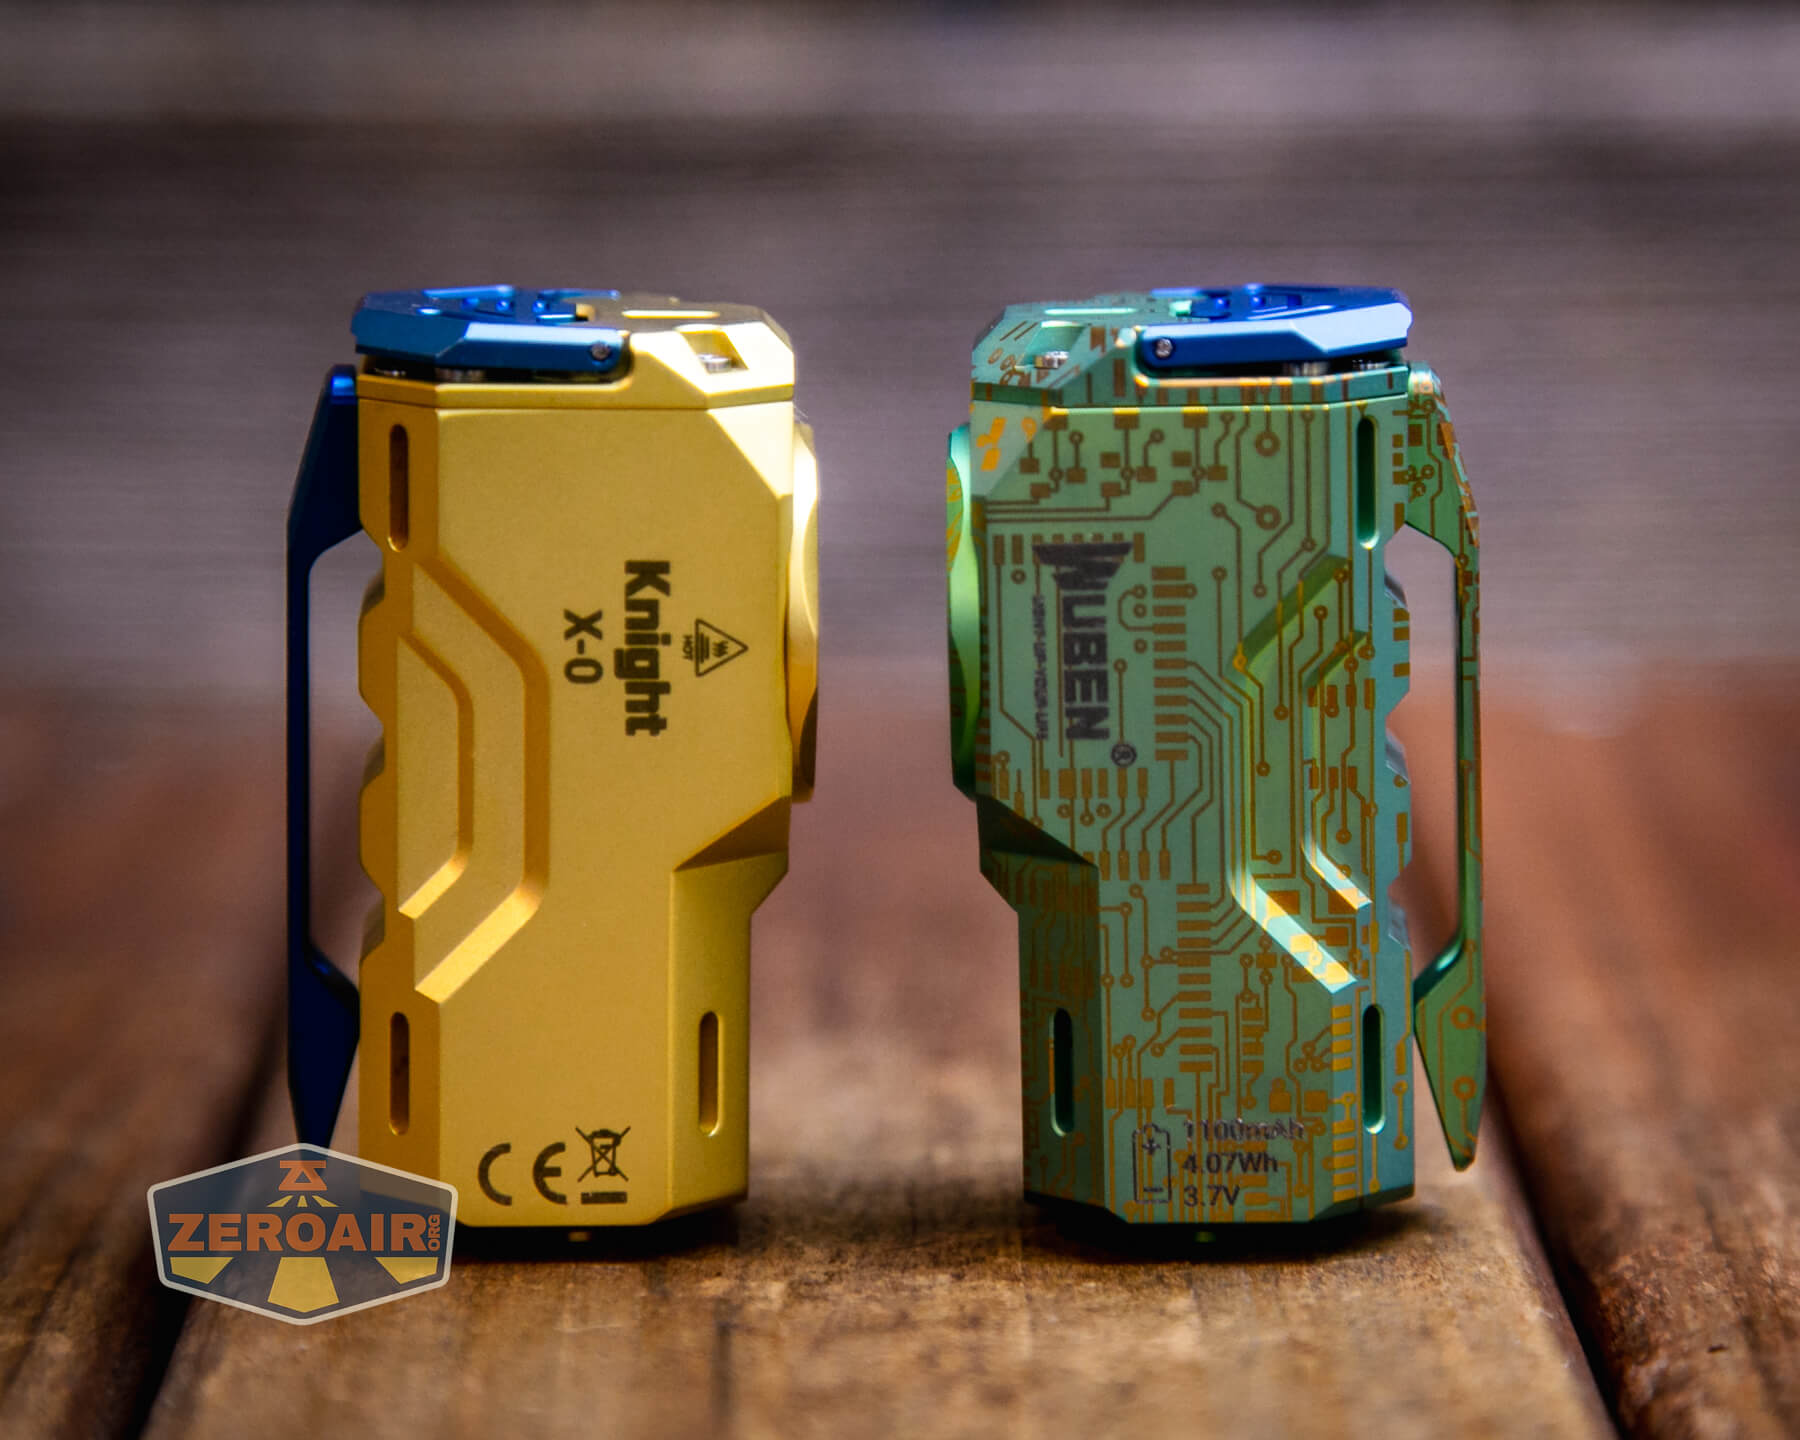
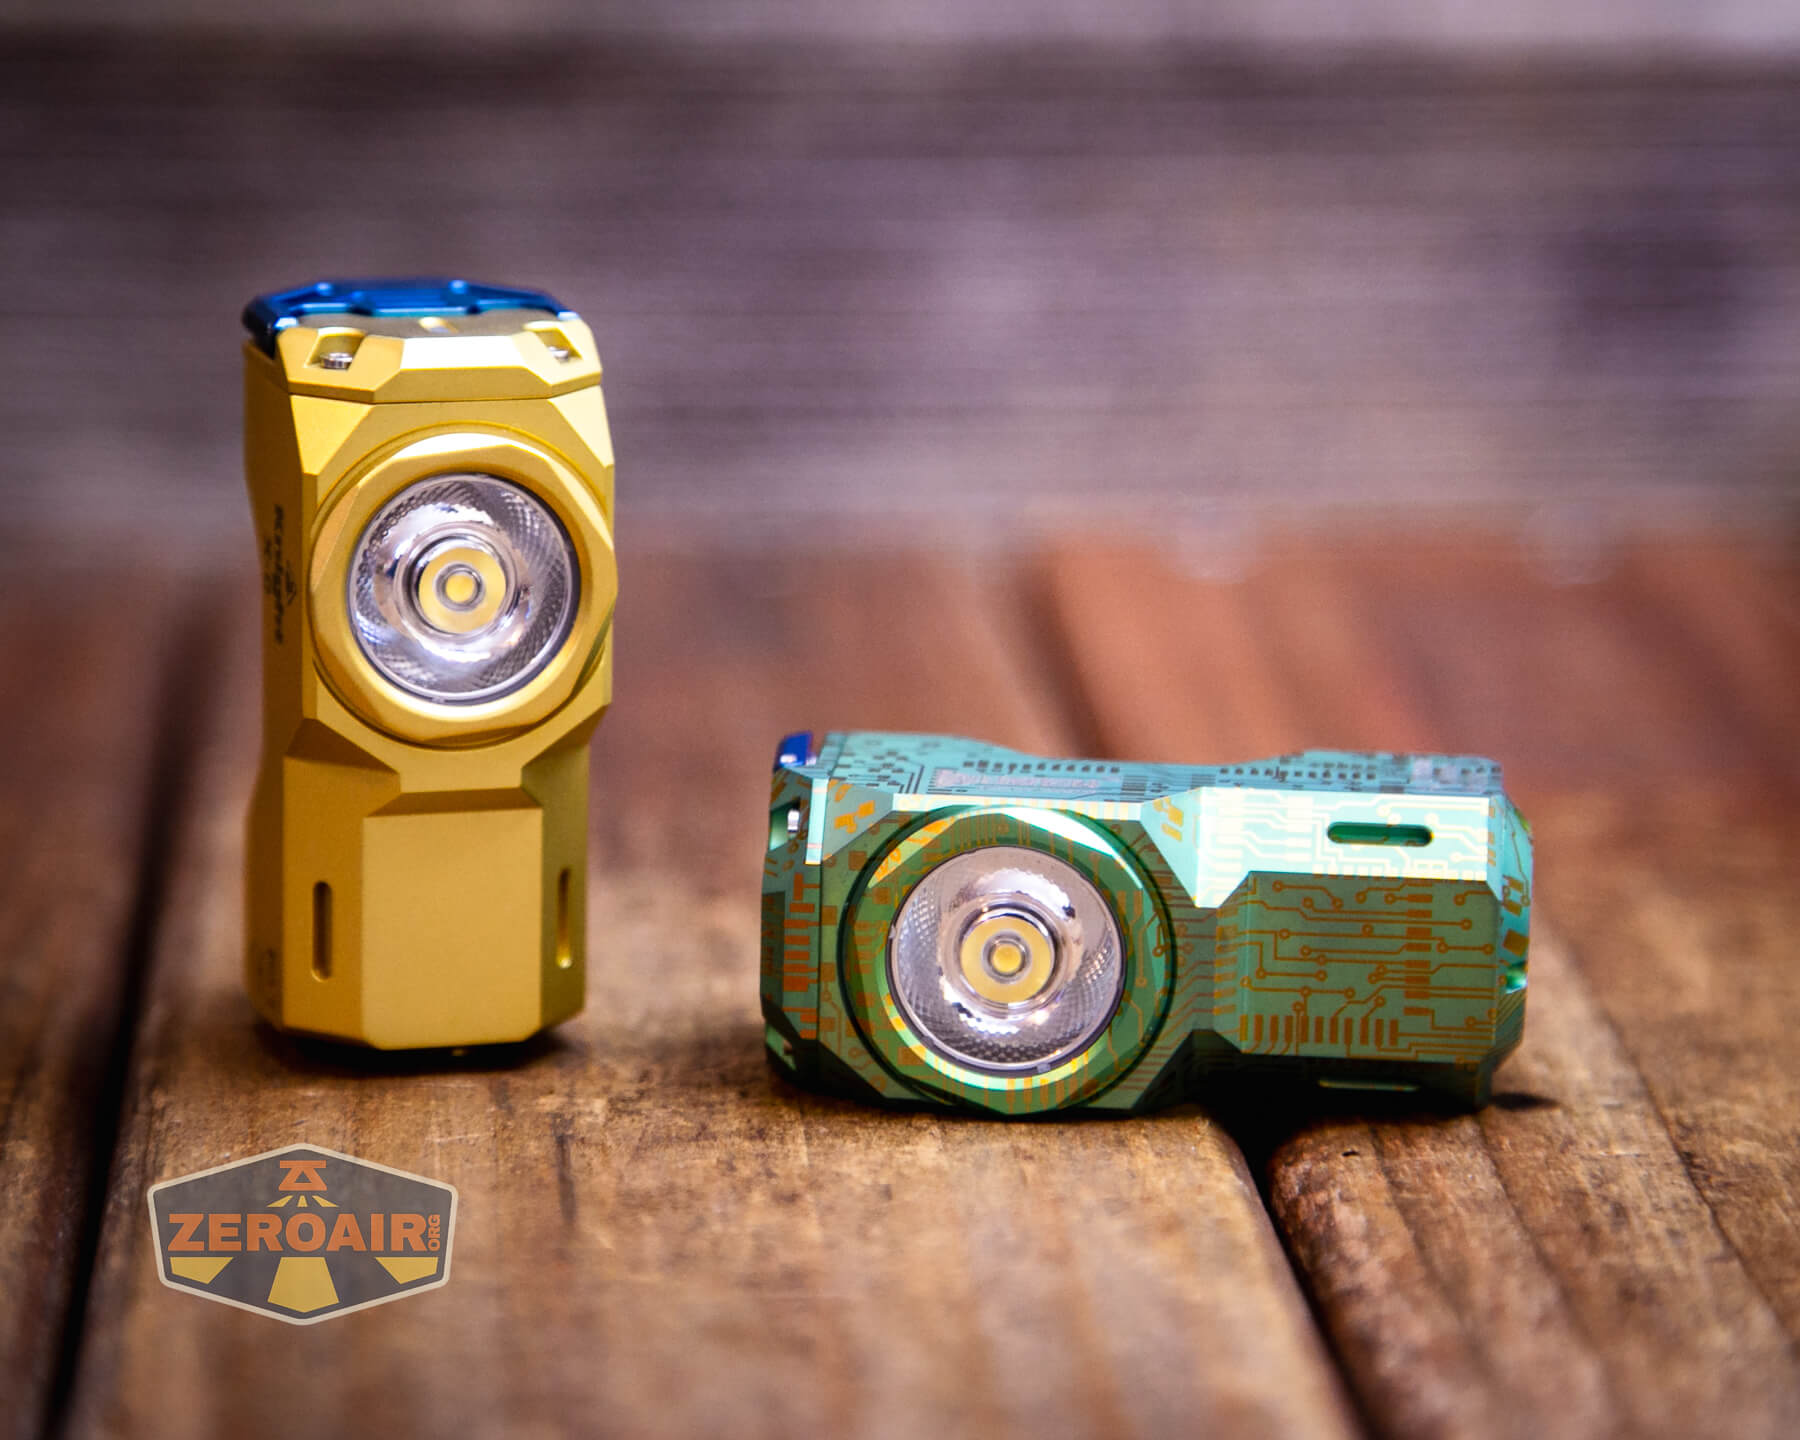
Wuben was kind enough to send over this titanium version, too! It’ll have a separate post soon. 🙂
Retention and Carry
A screw-down pocket clip is attached from the factory. This clip carries the design of the body, which is a nice touch.
The clip also matches the switch in the color of anodizing. Another nice touch!
I did find the clip just a bit hard to use because the mouth is quite narrow and it’s across a flat part of the light (the whole light is flat parts!). Anyway, the carry isn’t as deep as I’d want to carry such a short light, so I would certainly carry this light deep in a pocket. I’d lock it out first. 
The pocket clip has a couple of holes for a lanyard, but a lanyard is not included.
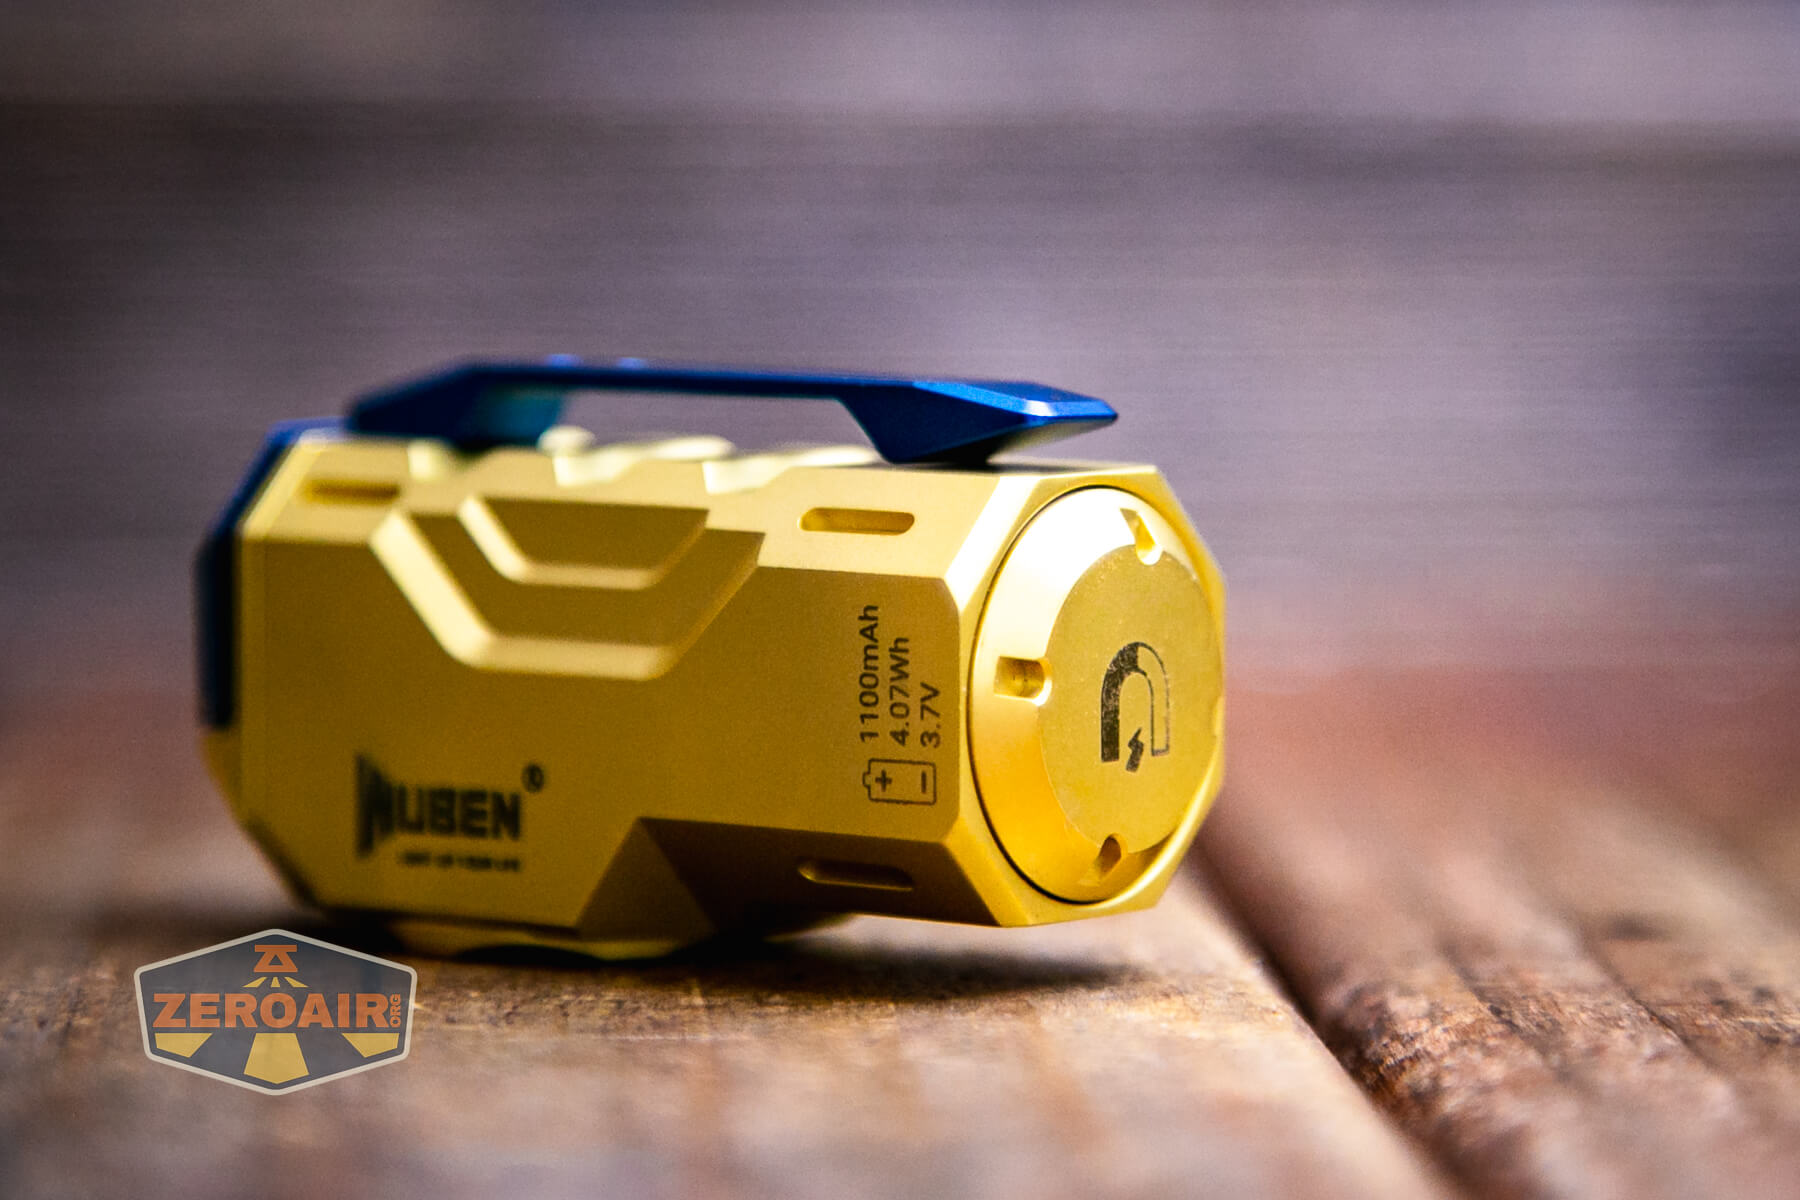
There’s also a magnet, which I mentioned above. The magnet is strong enough to hold the Wuben X-0 Knight brass flashlight in any orientation.
Power and Runtime
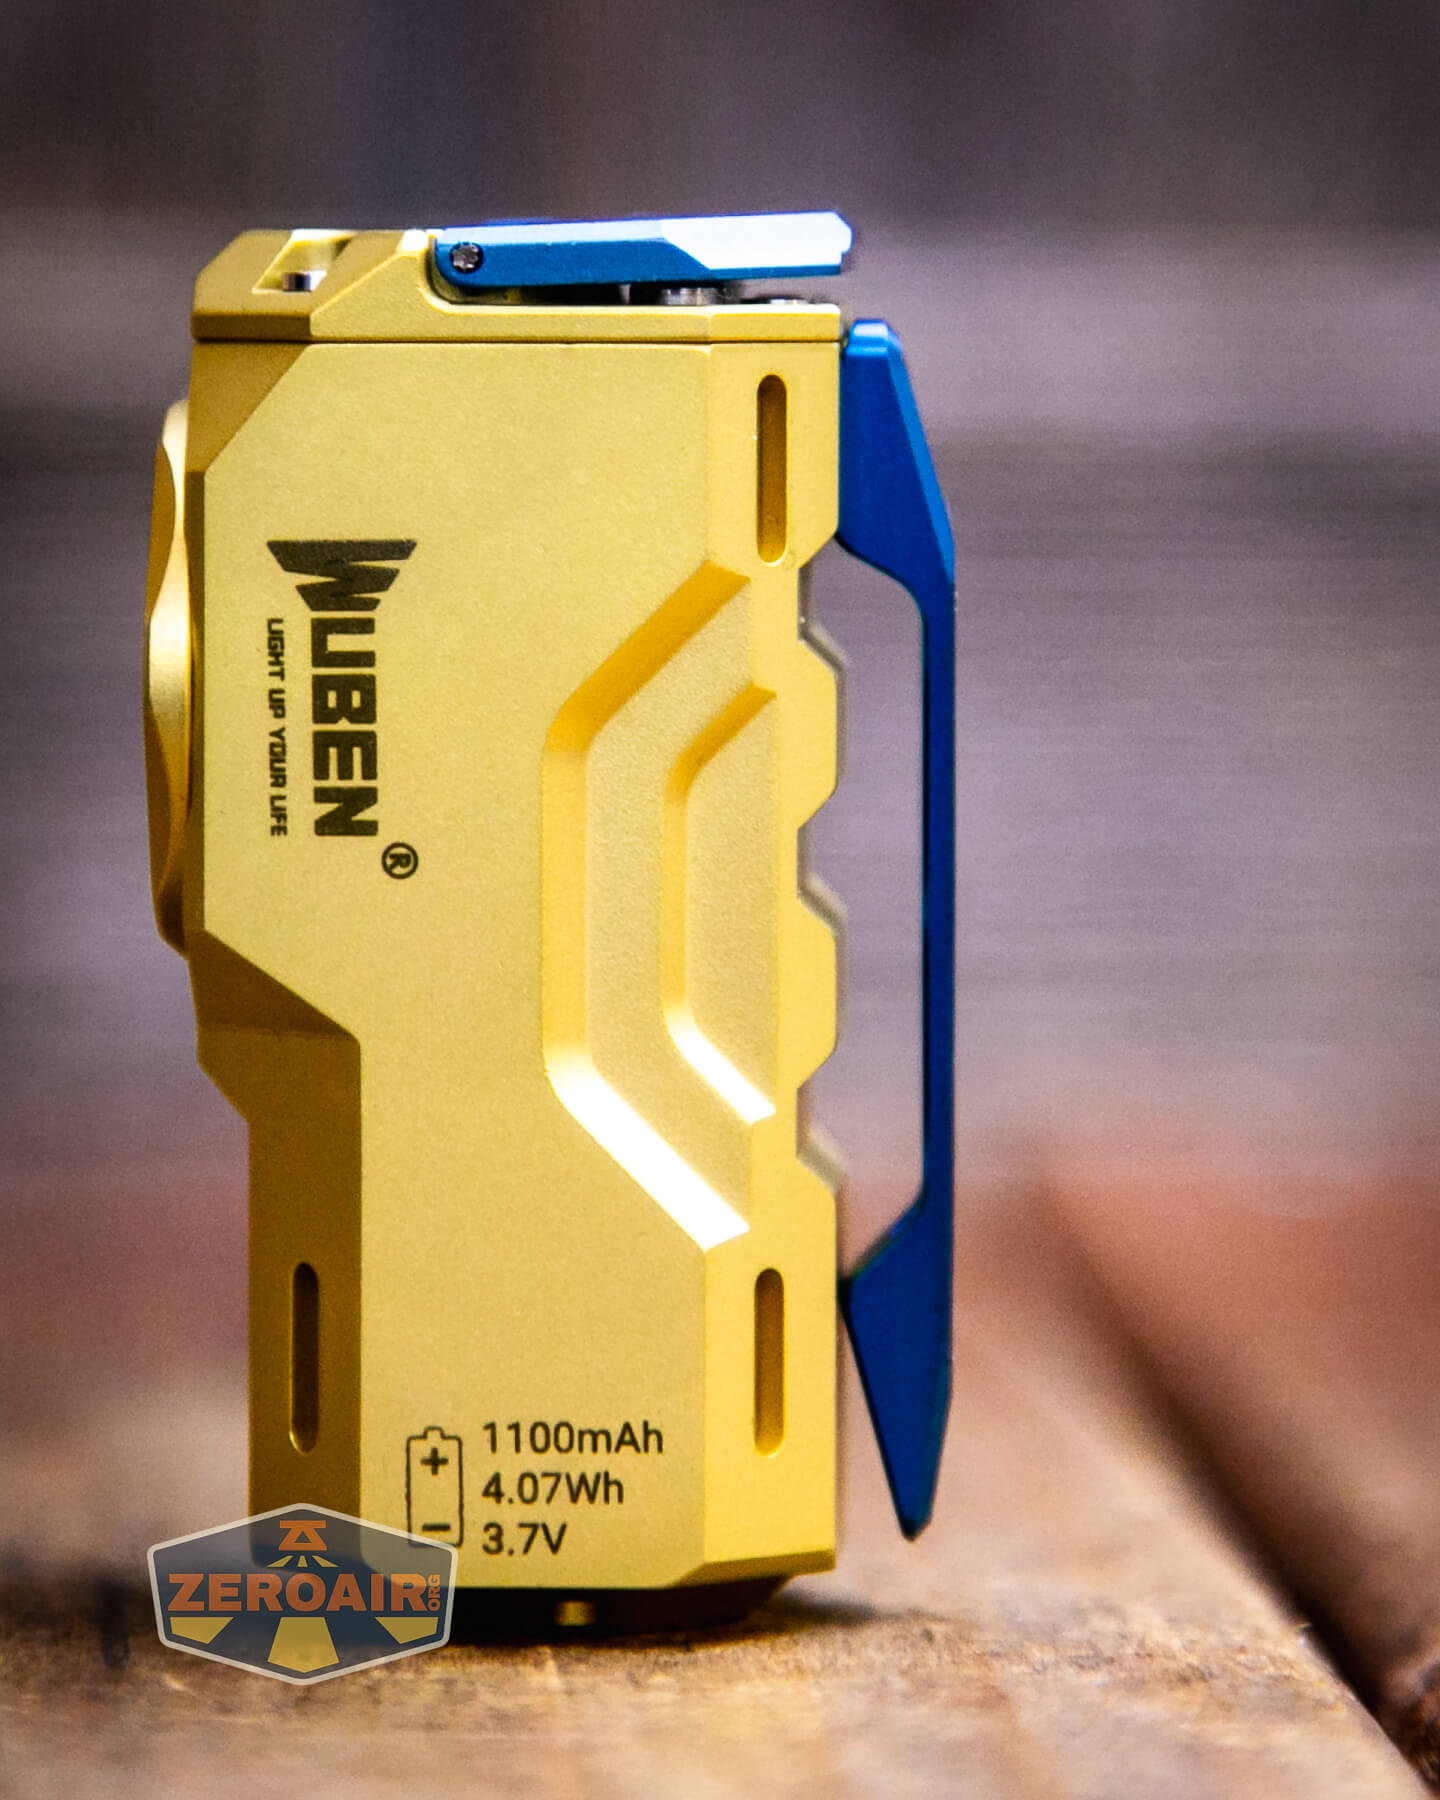
The Wuben X-0 Knight flashlight runs on a single 18350 cell. The button top cell you see below is included! Note the updated branding from the cell I received in the aluminum version.
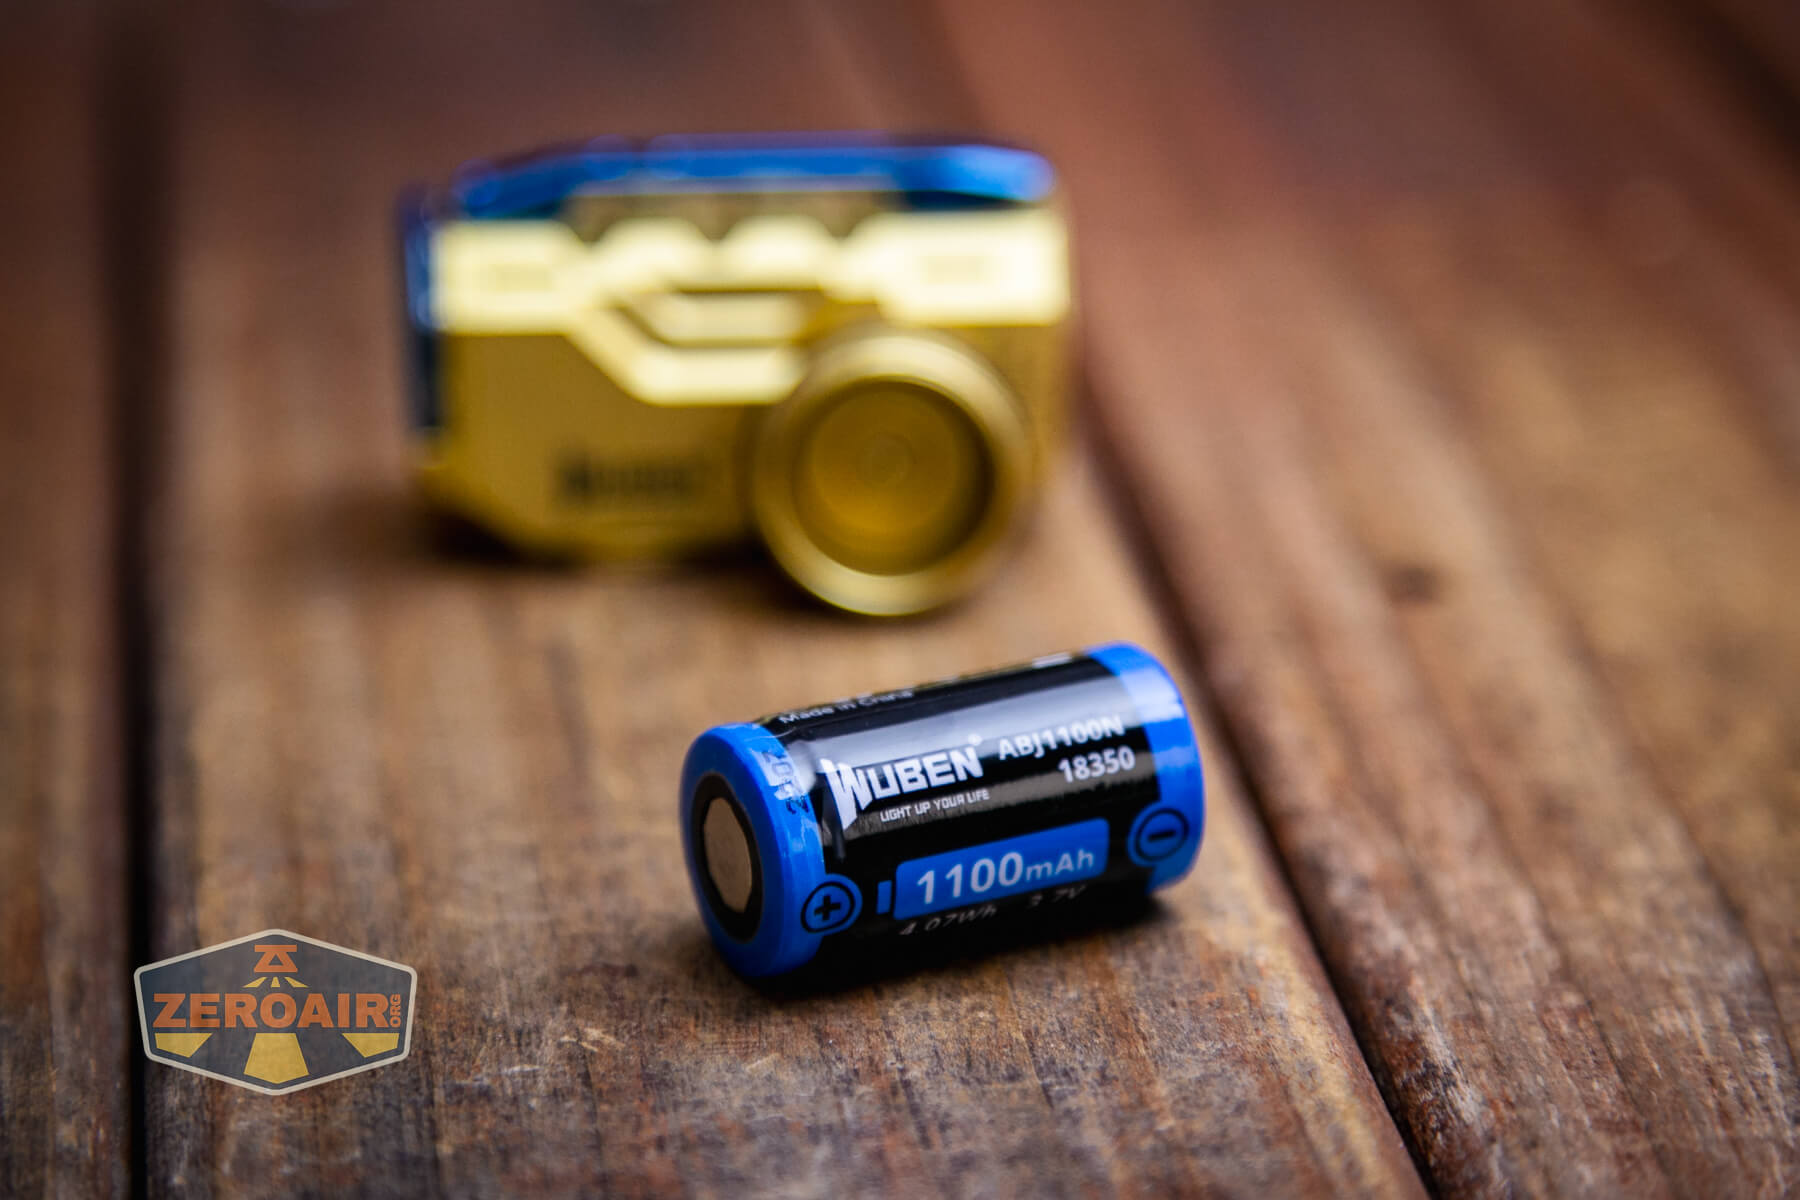
This is a 1100mAh 18350. The cell goes into the light in the usual orientation: positive terminal (button) toward the head.
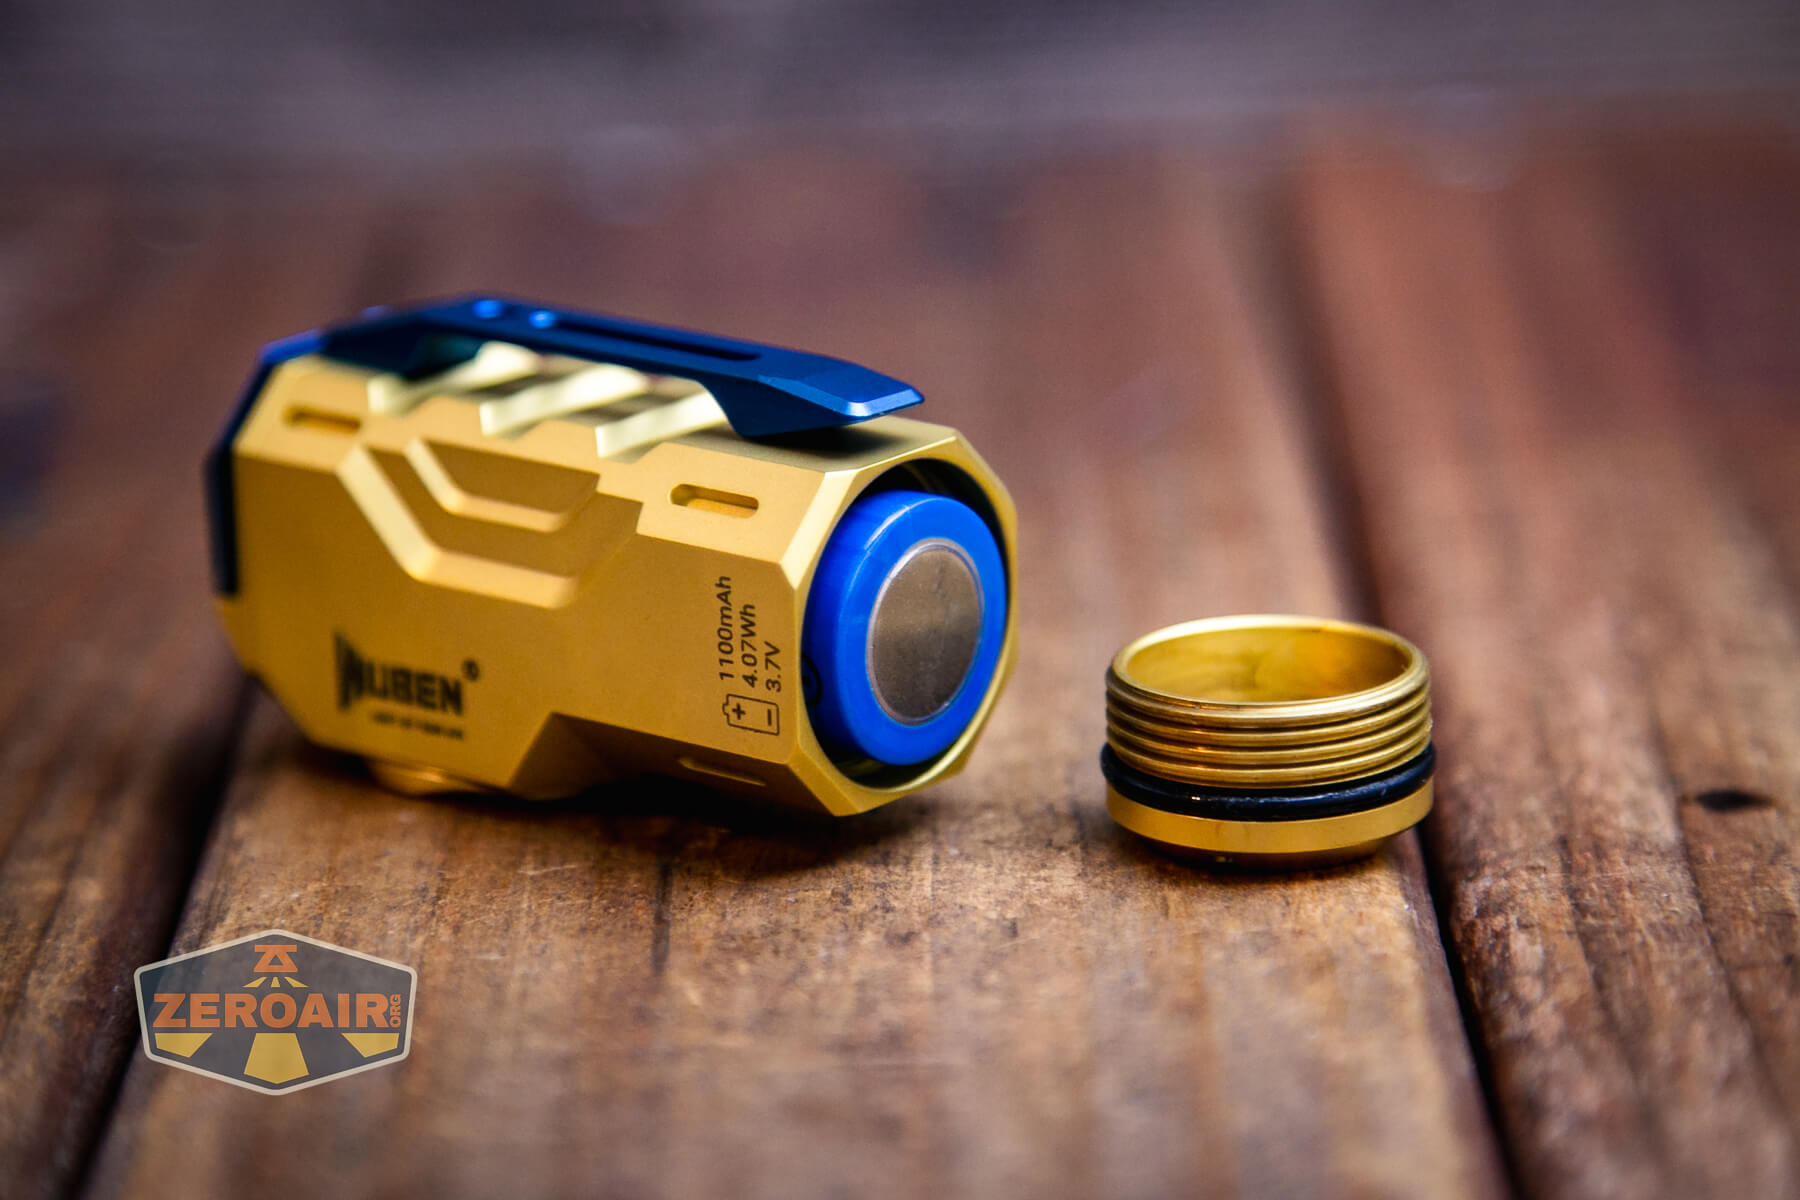
As covered above, the tailcap is removable. You’ll want to use some tweezers or something, but once you’ve gotten past the initial turn or so, the tailcap can be removed by hand. Removal is not difficult!
On the body is a marking as a reminder for cell orientation. It also includes the information for the cell. I find both of these to be quite unnecessary.

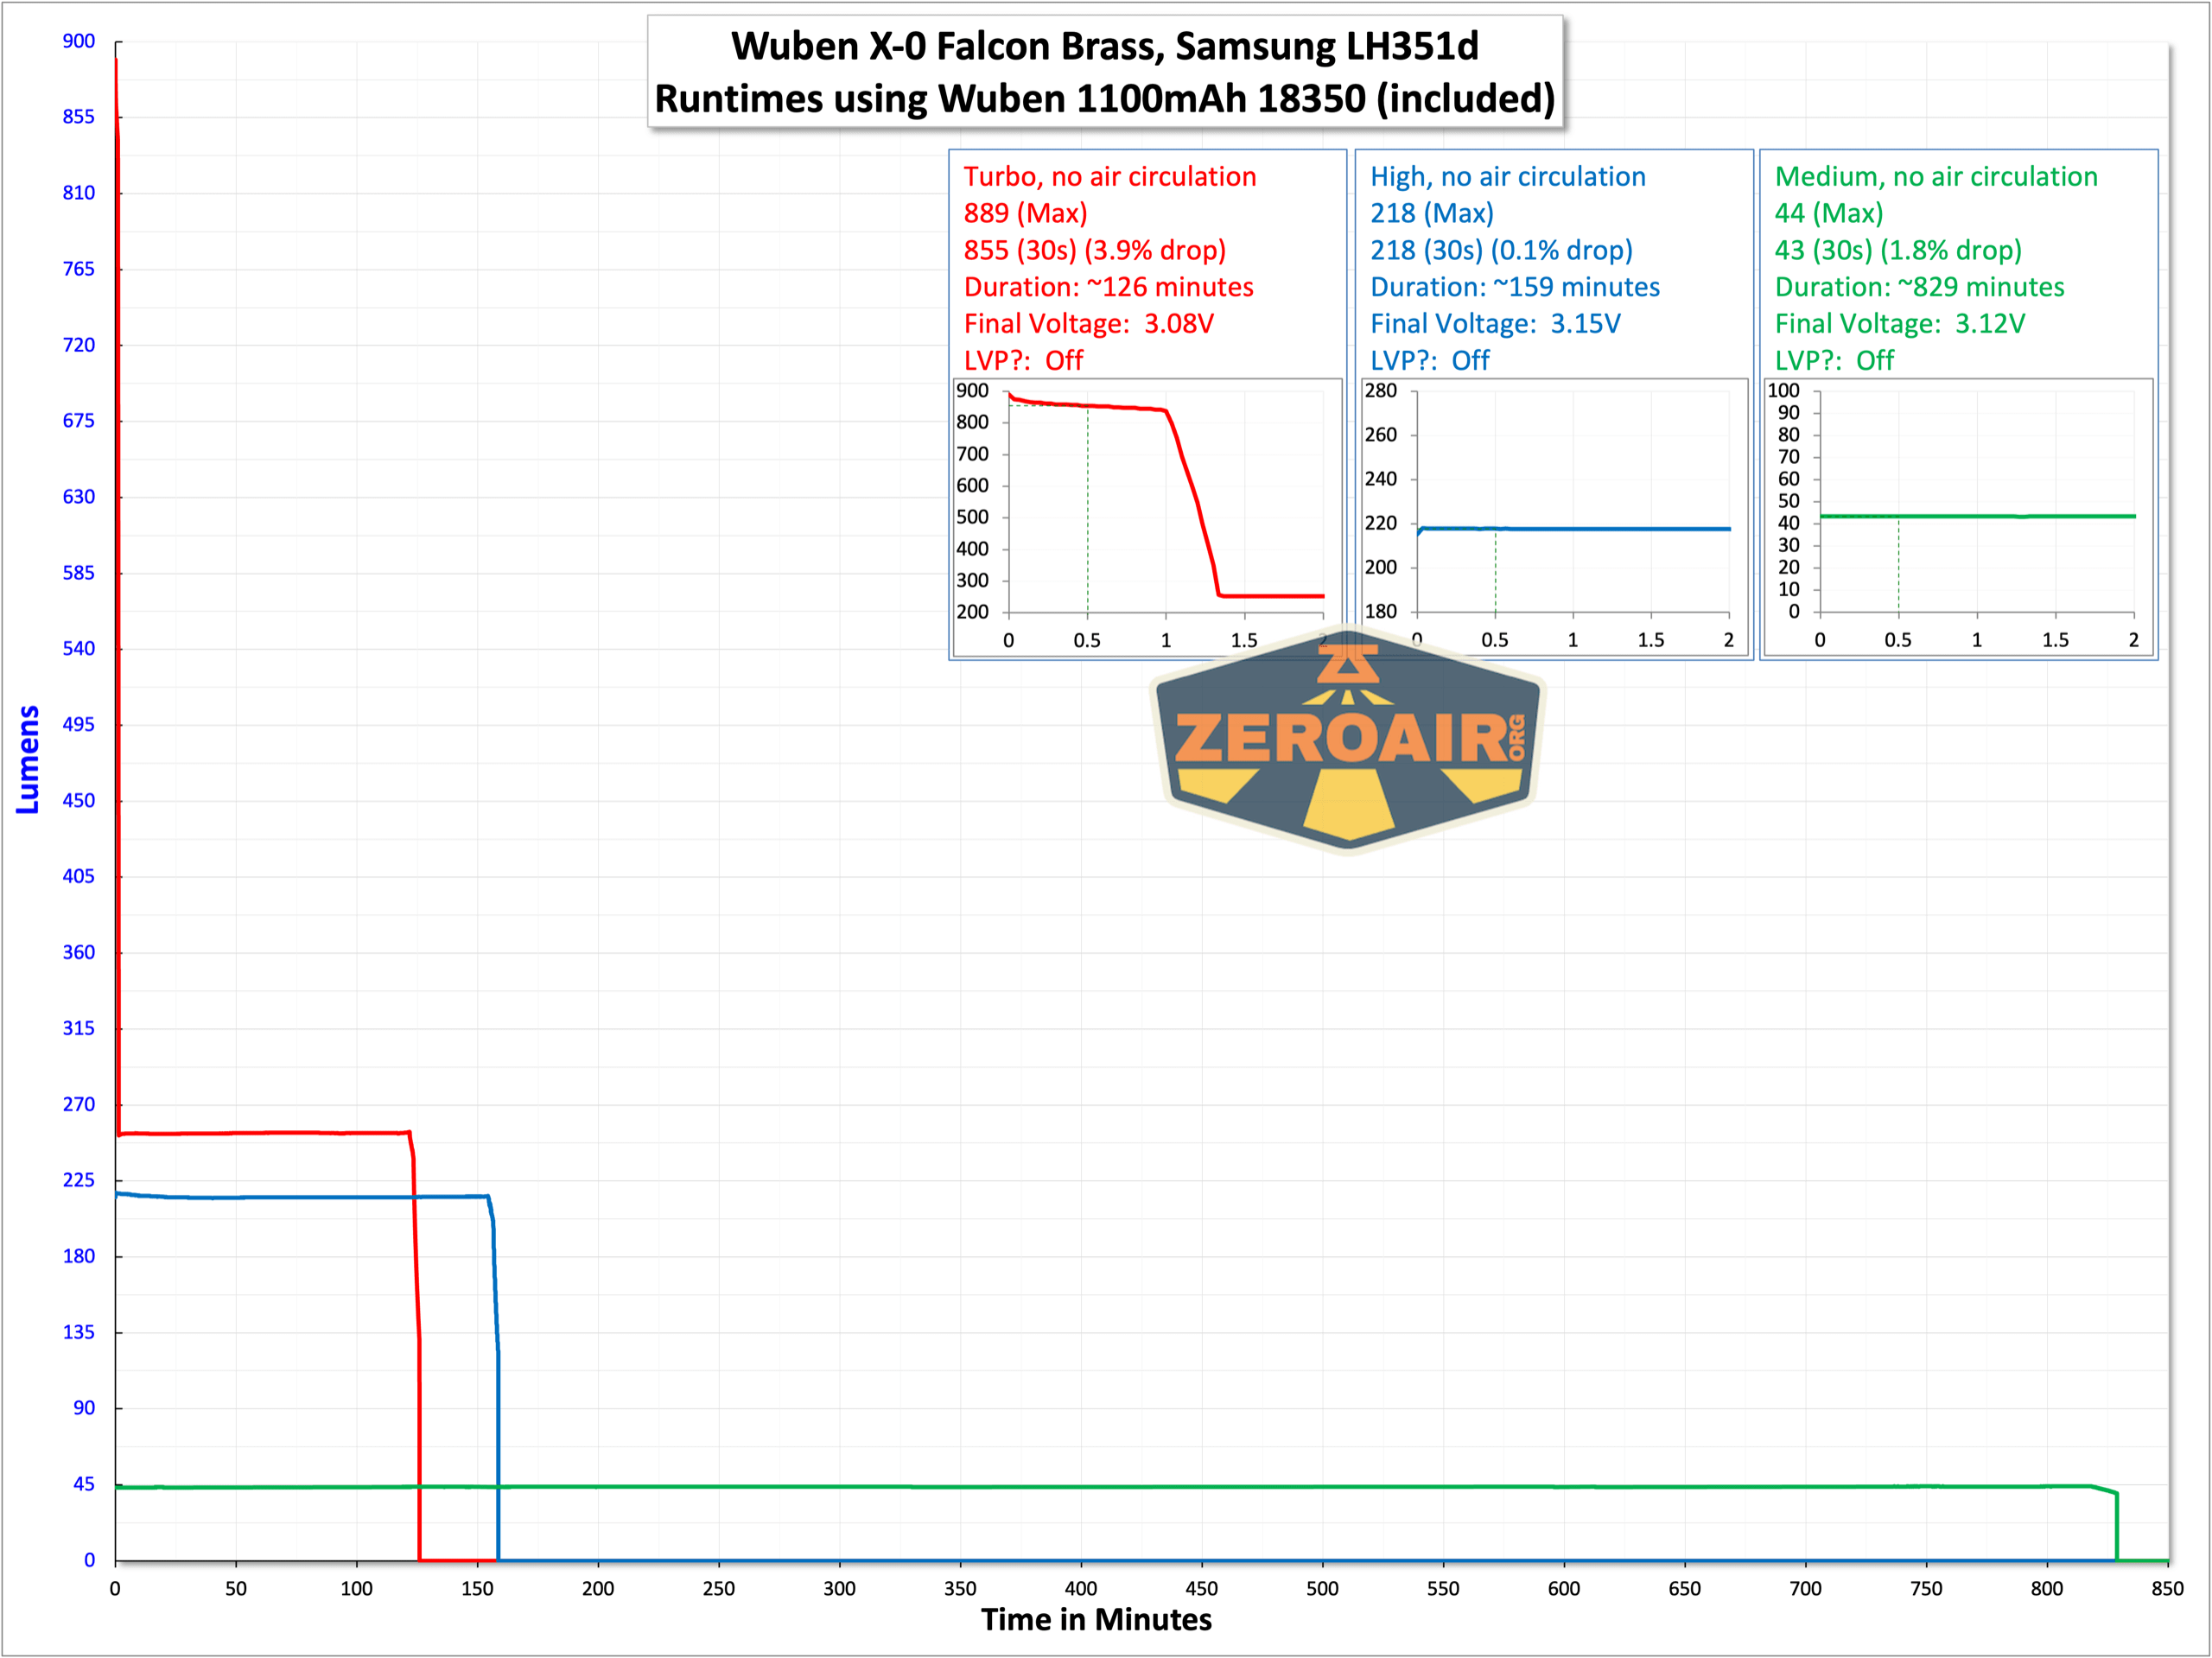
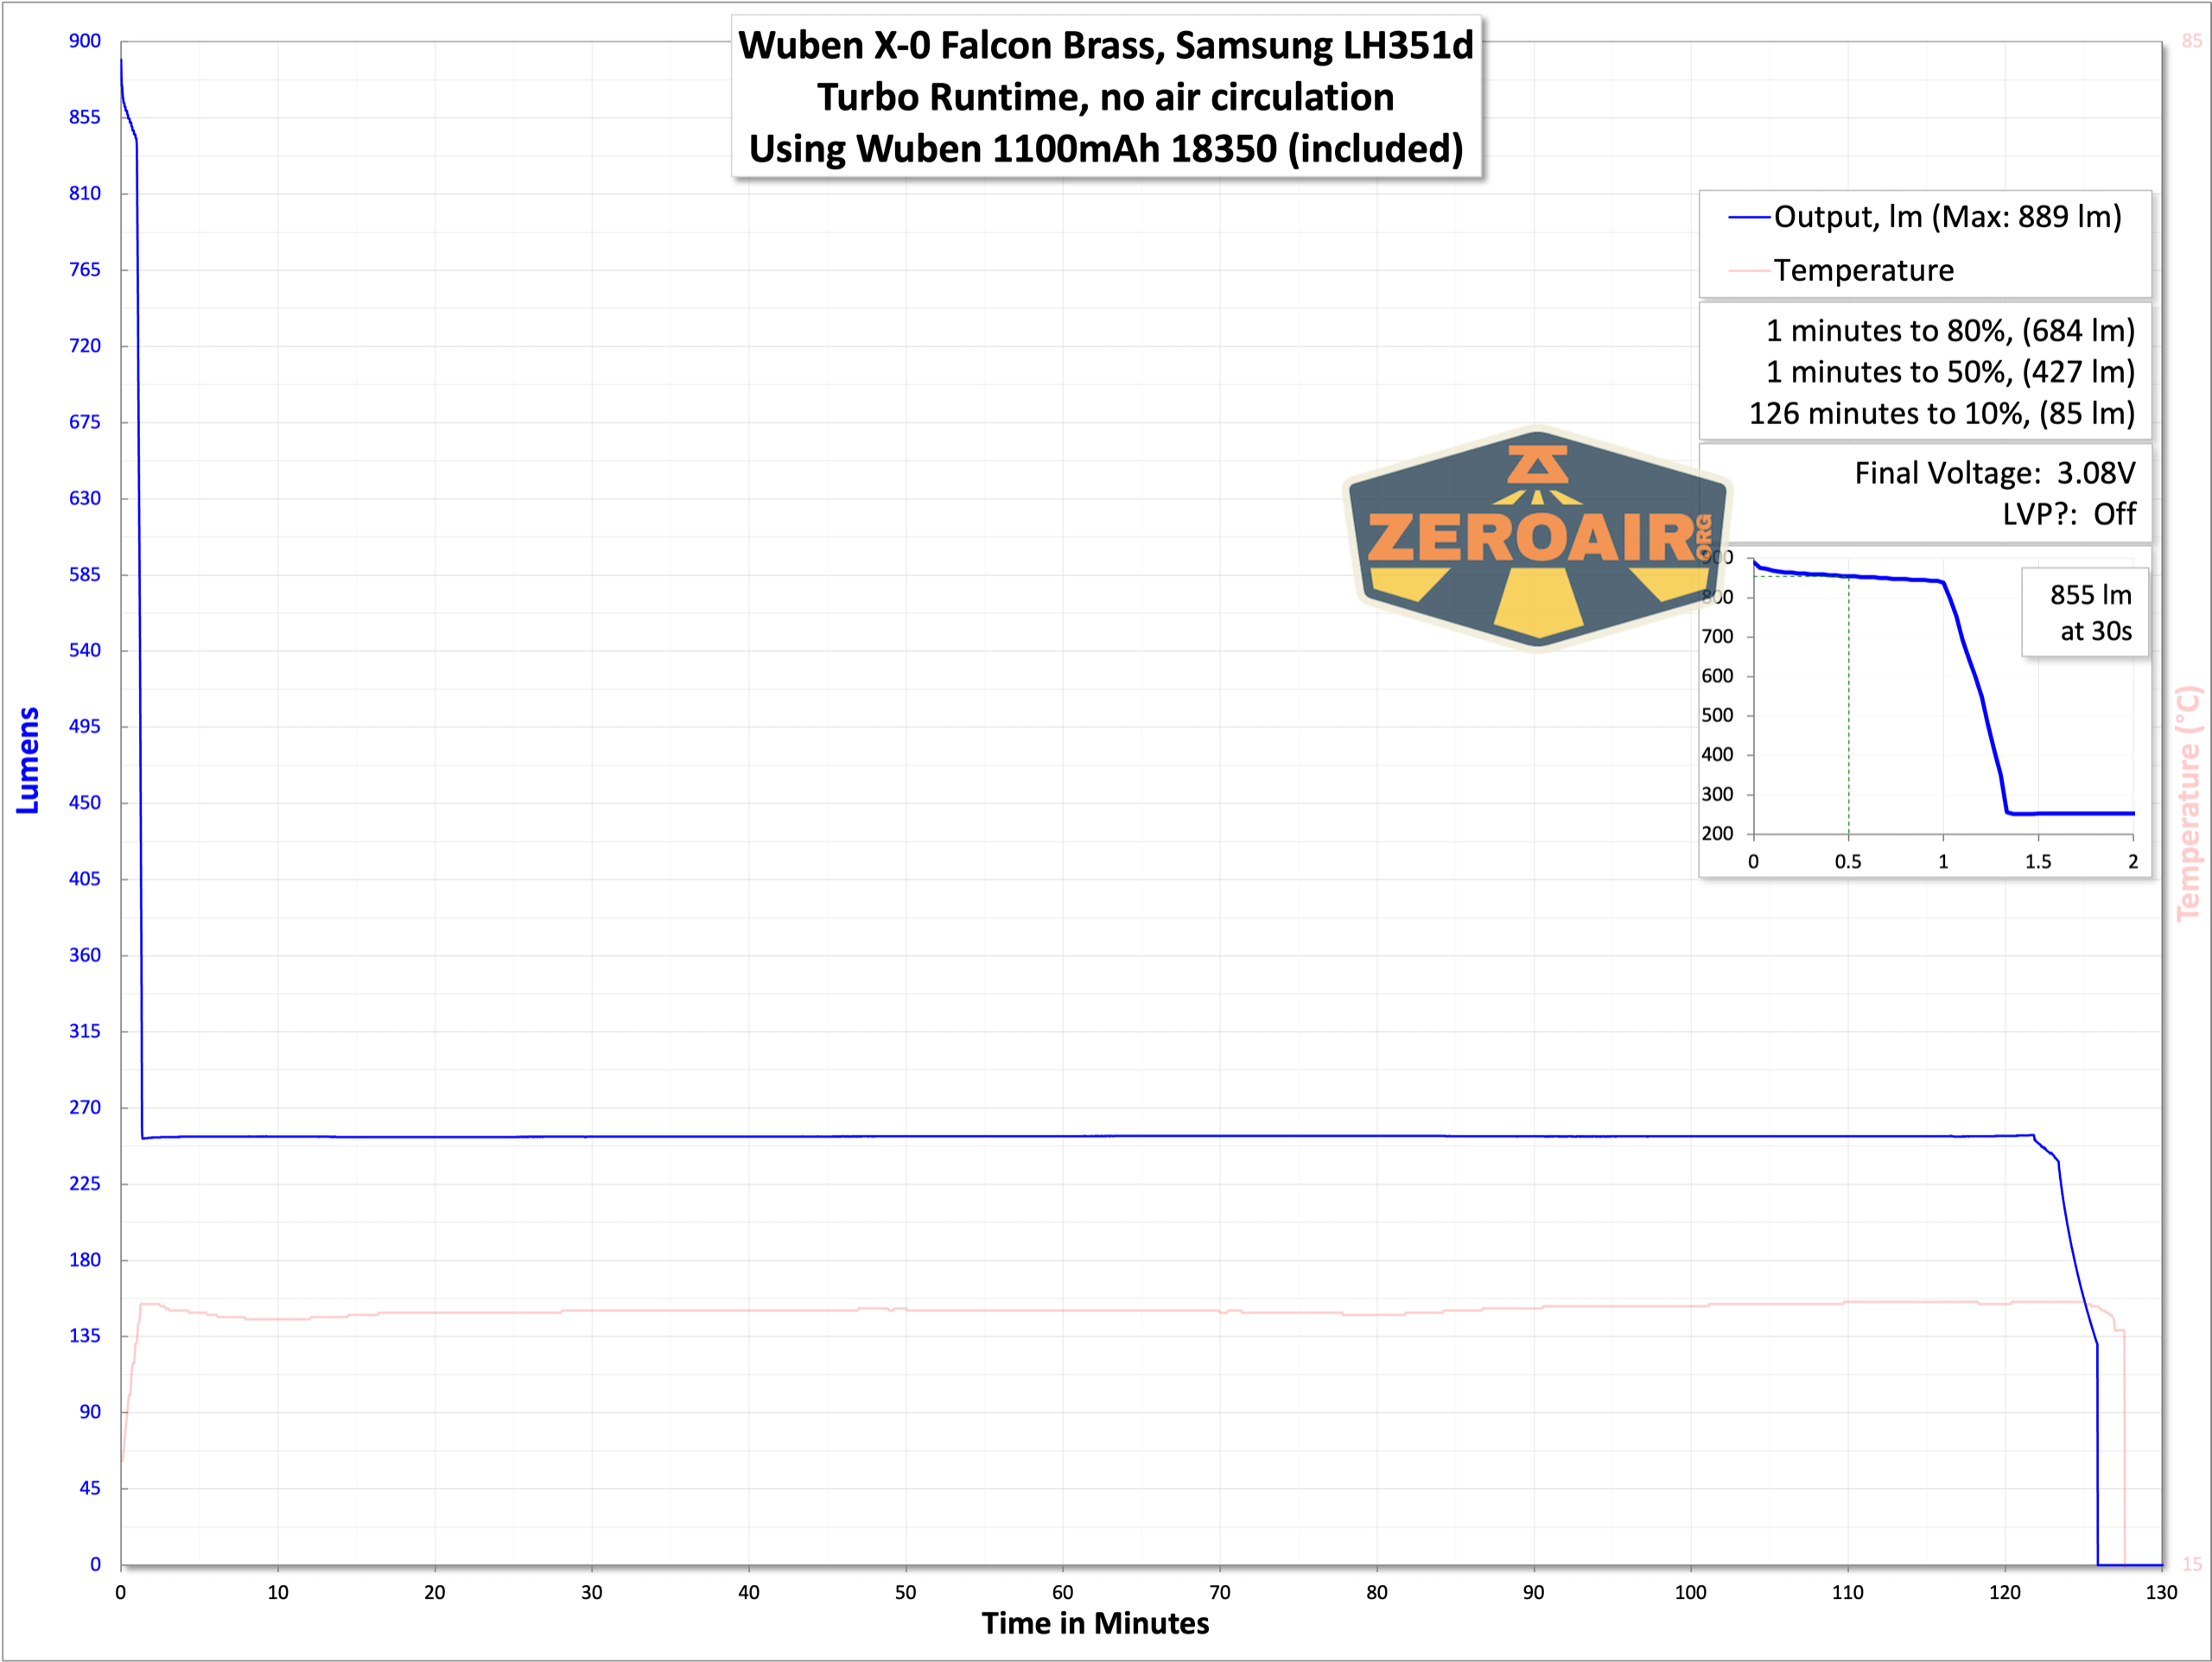
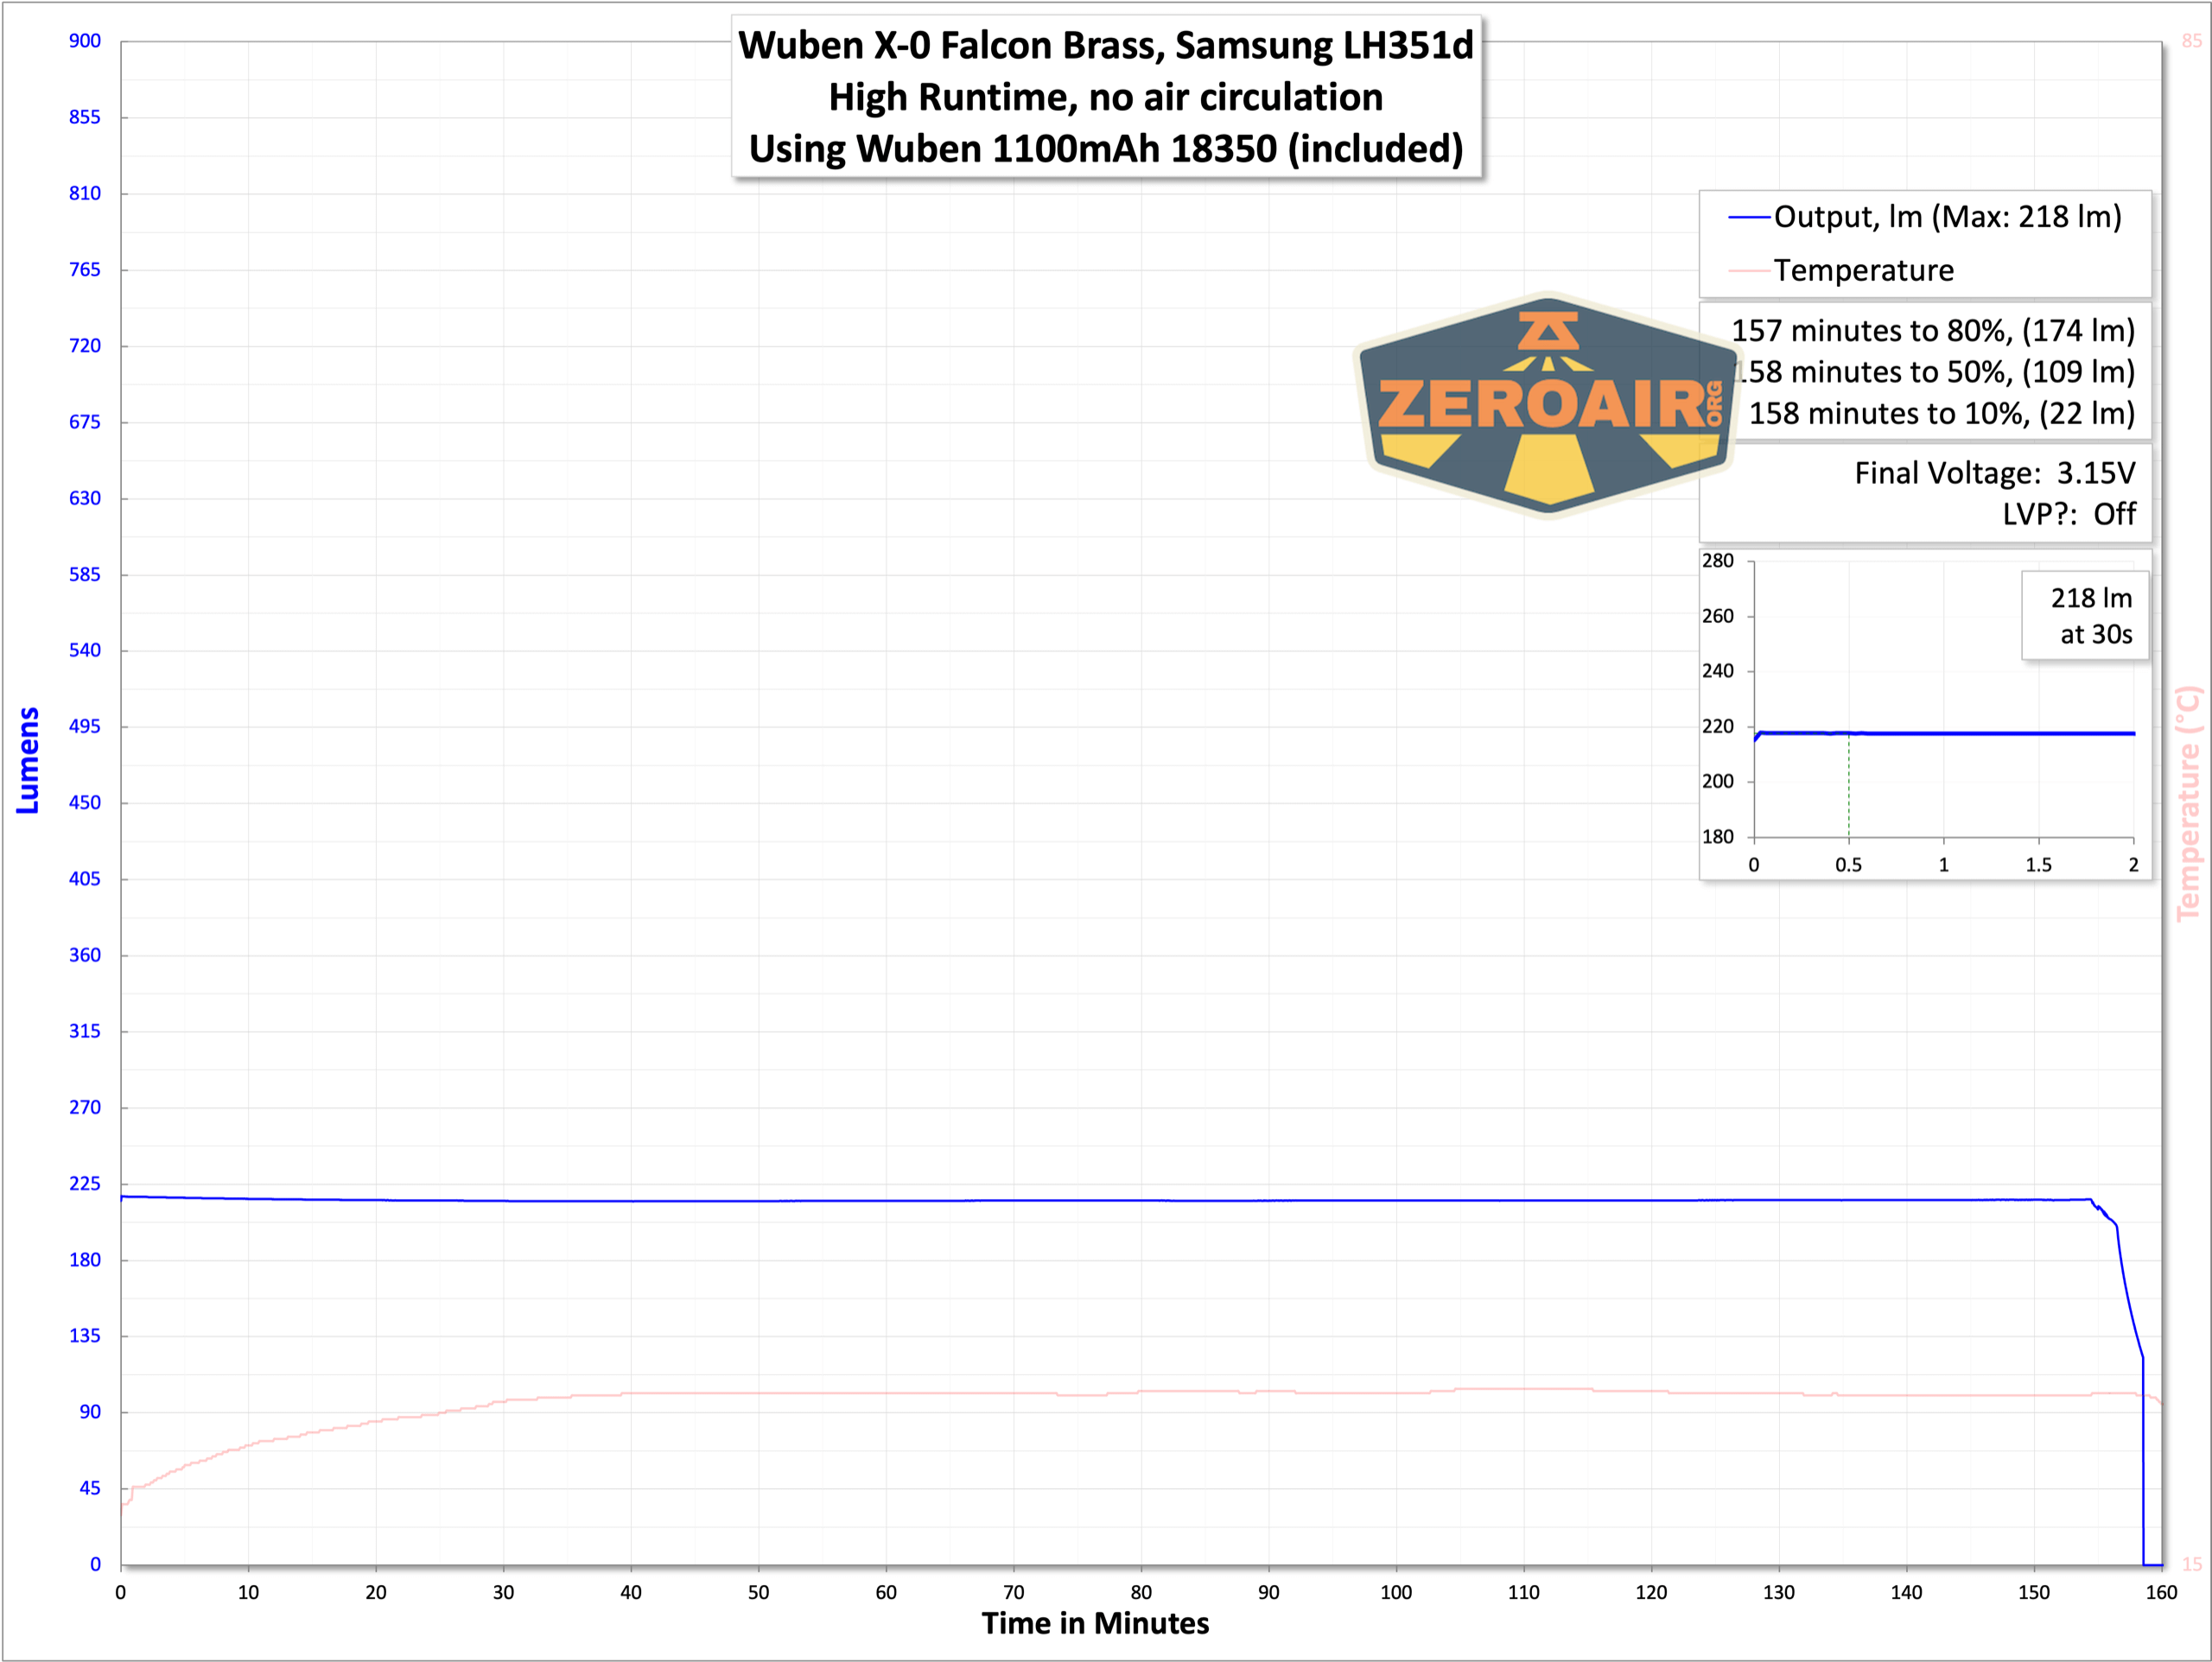
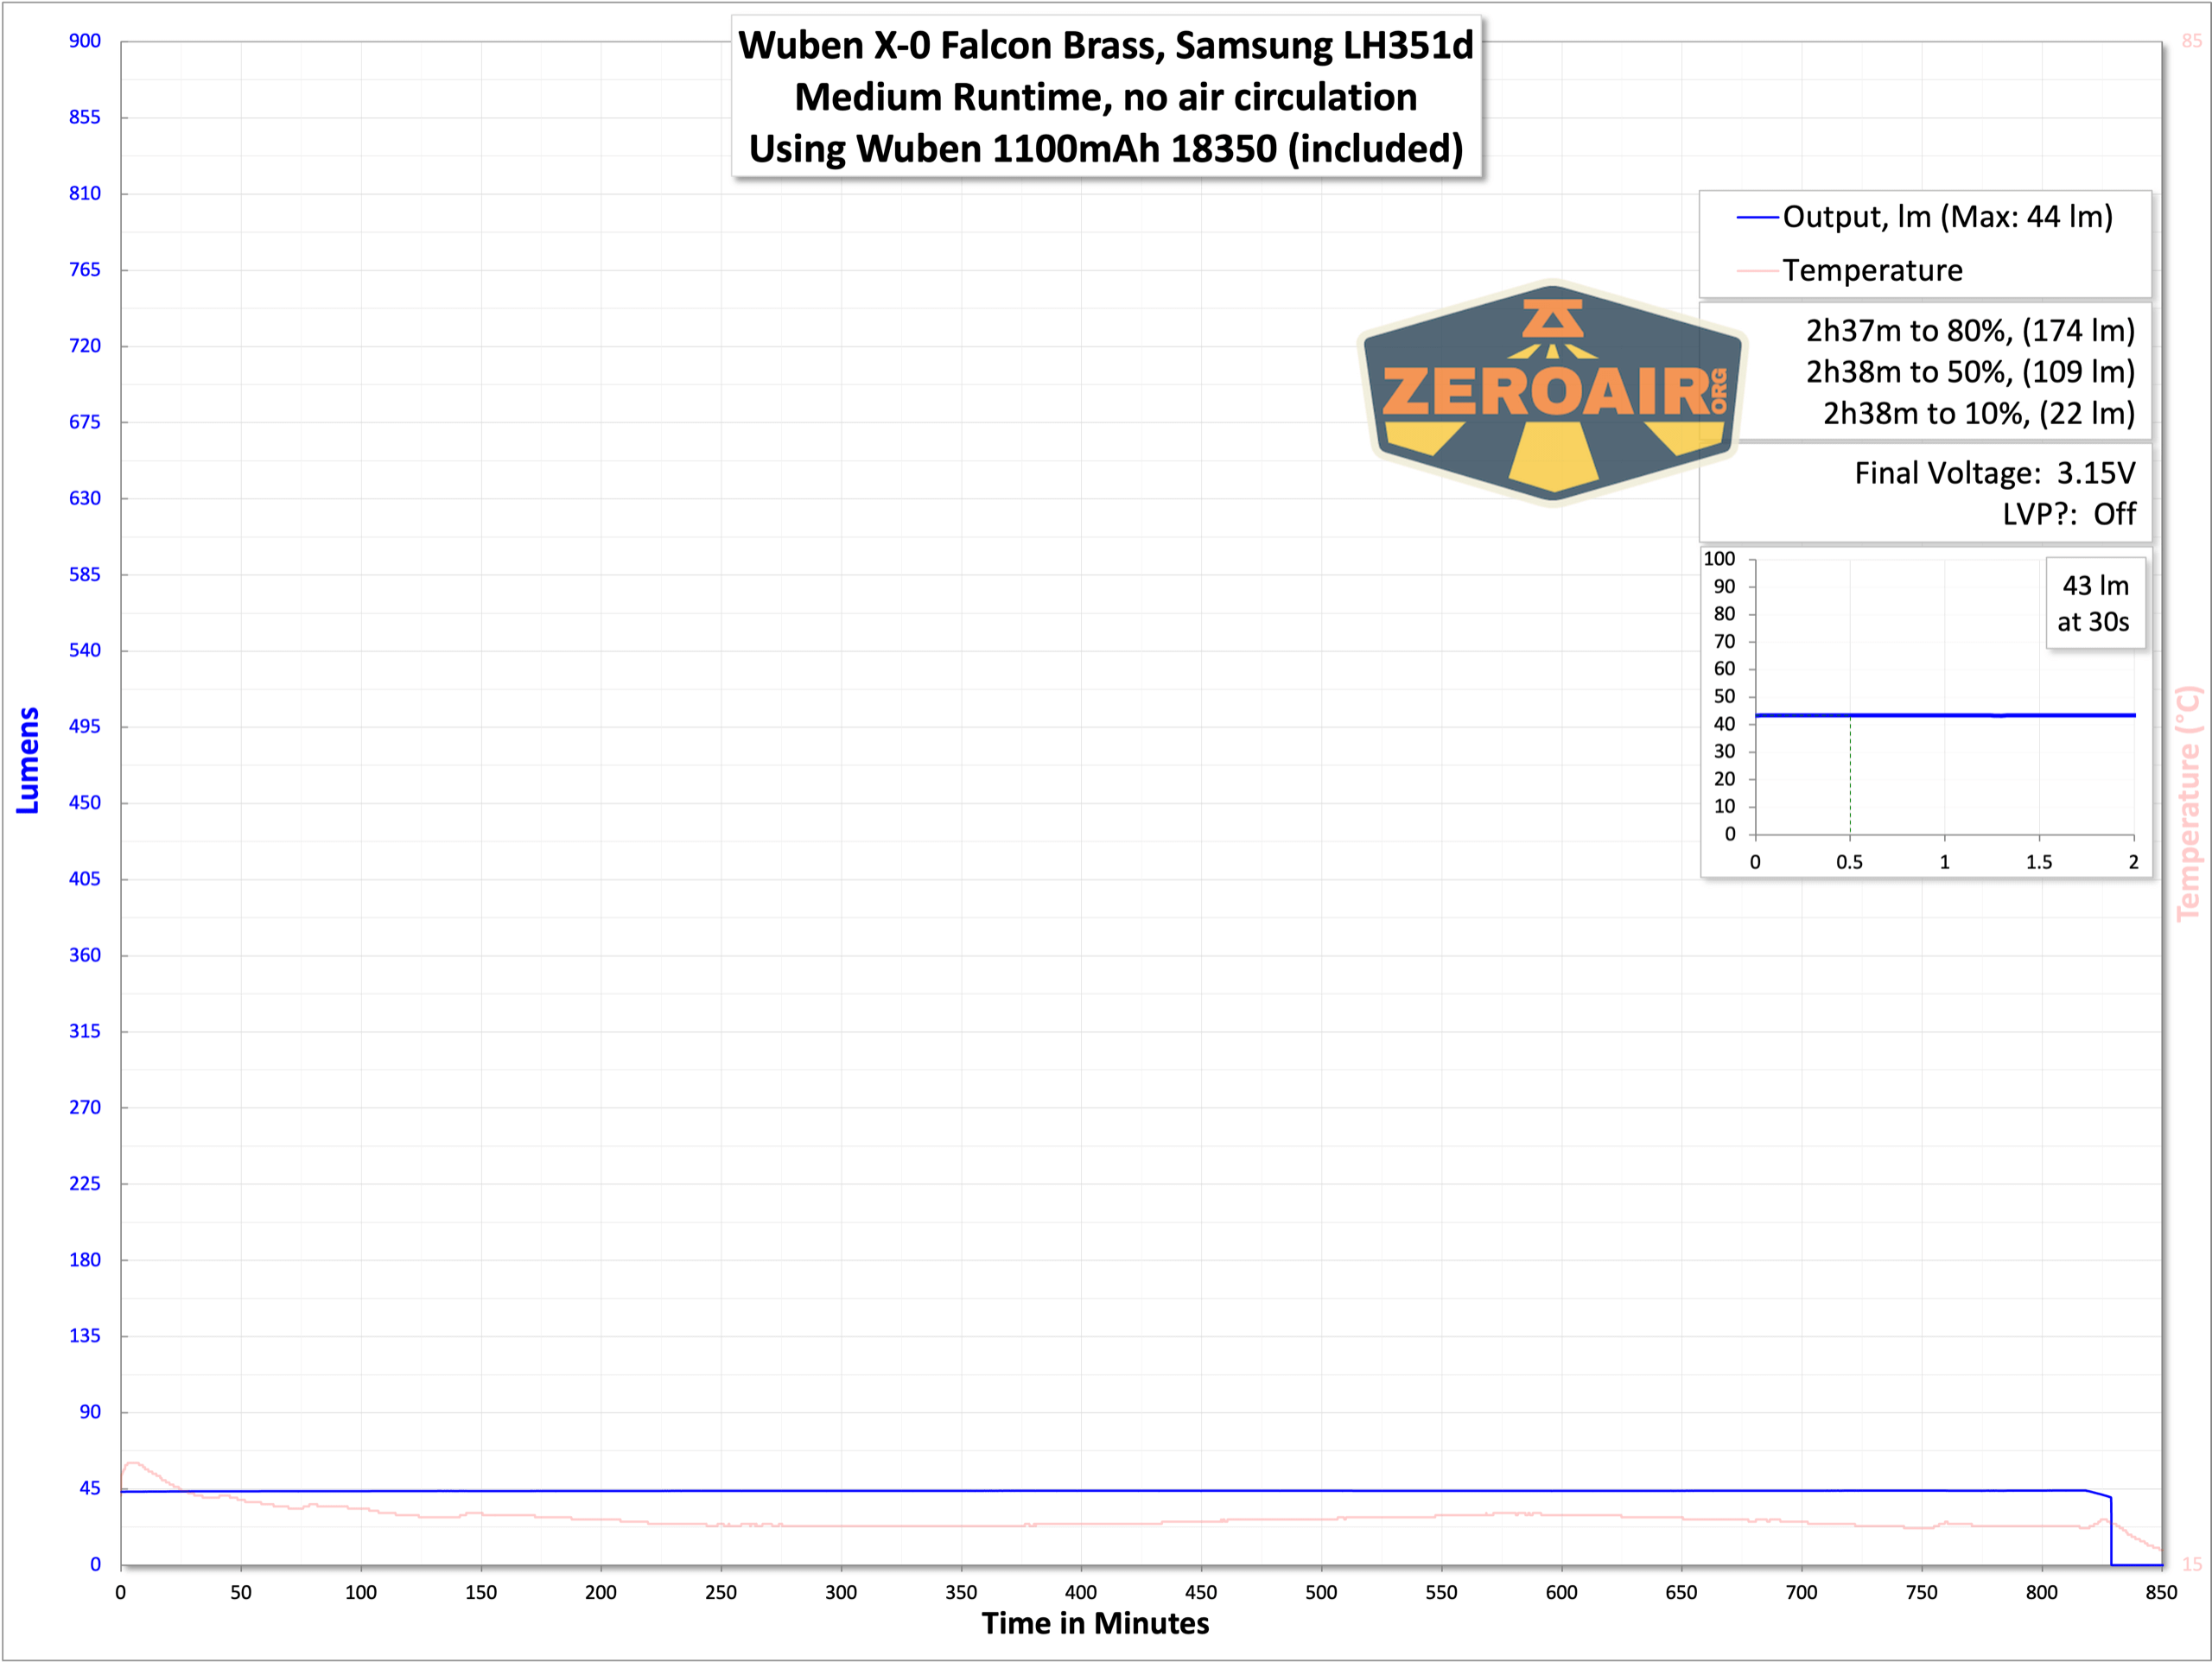
Below are a few runtimes. Wuben seems to have reduced the claimed output for this Samsung version (or just updated the manual, more likely). That’s nice! I’m pleased to see around 1 minute at over 800 lumens. After that, the output (and output on all other modes, too) is extremely stable. Fantastic. The light shuts off when cell voltage gets low, too – around 2.8V or so.
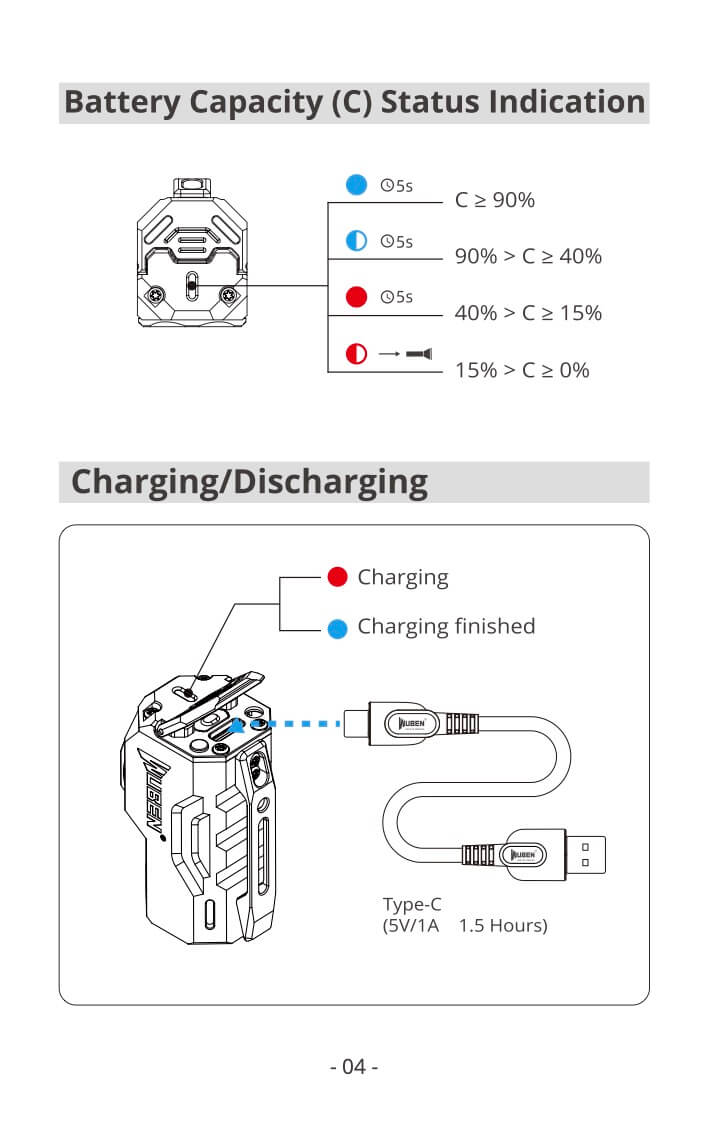
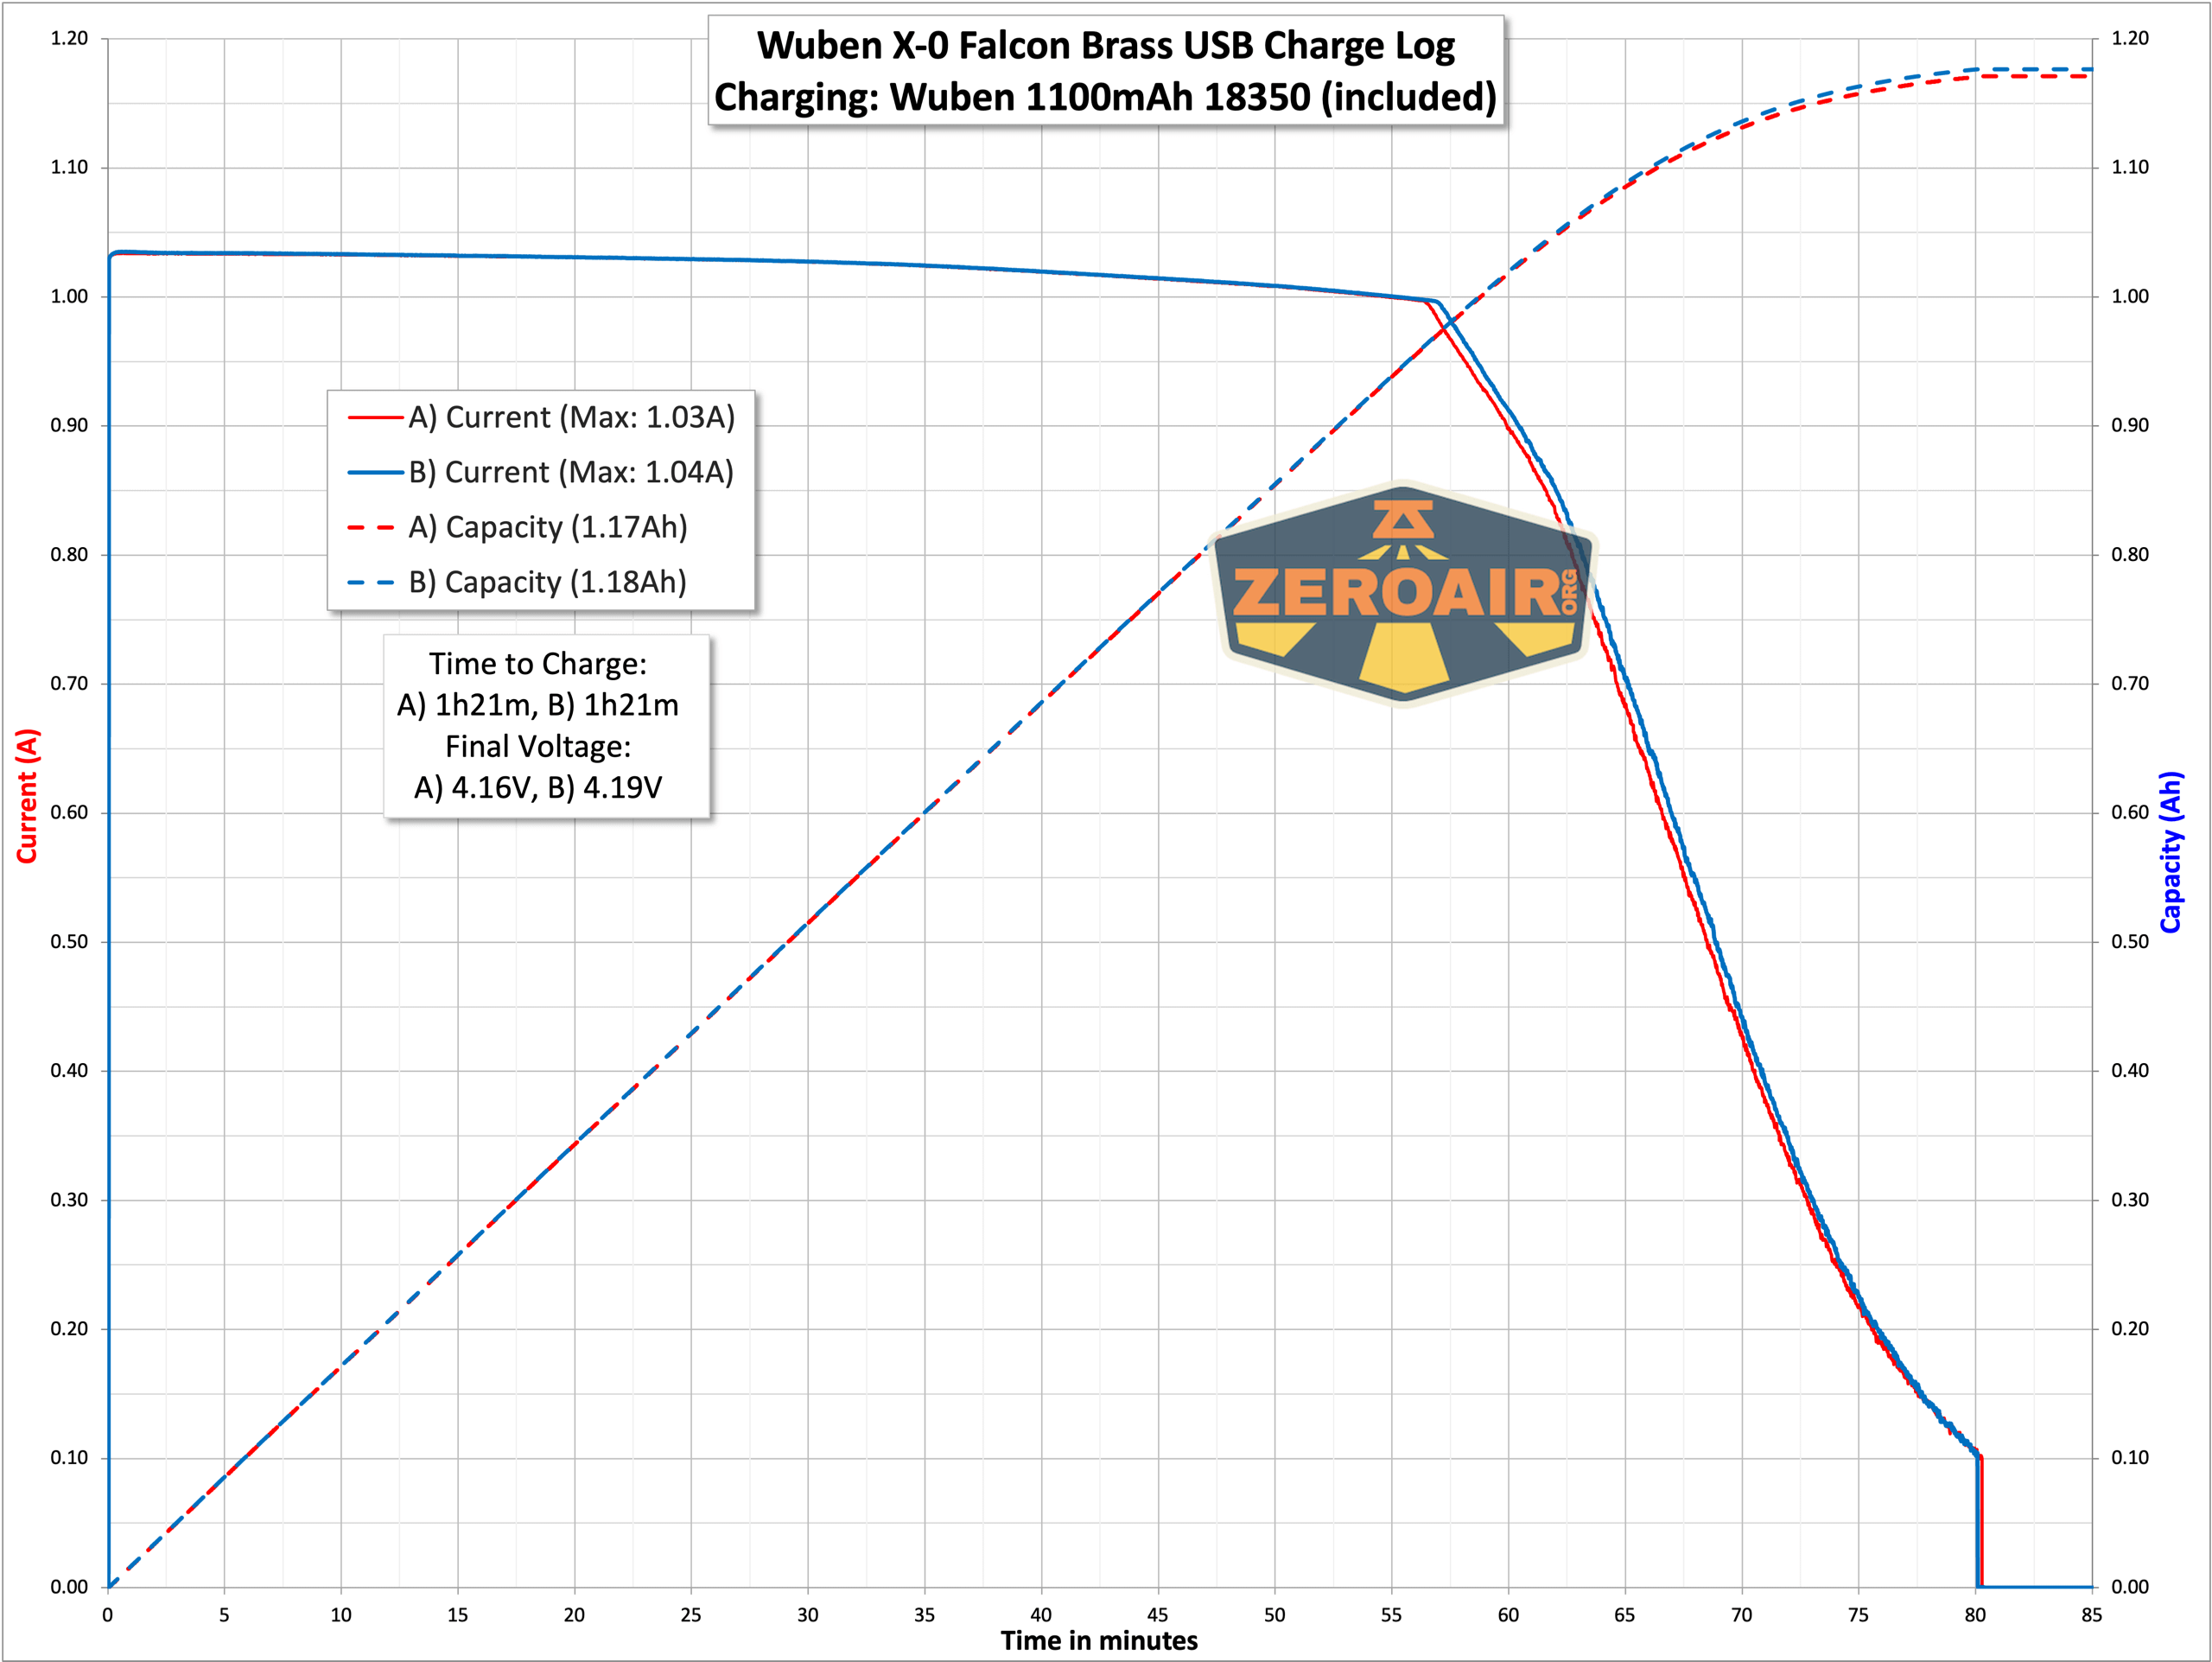
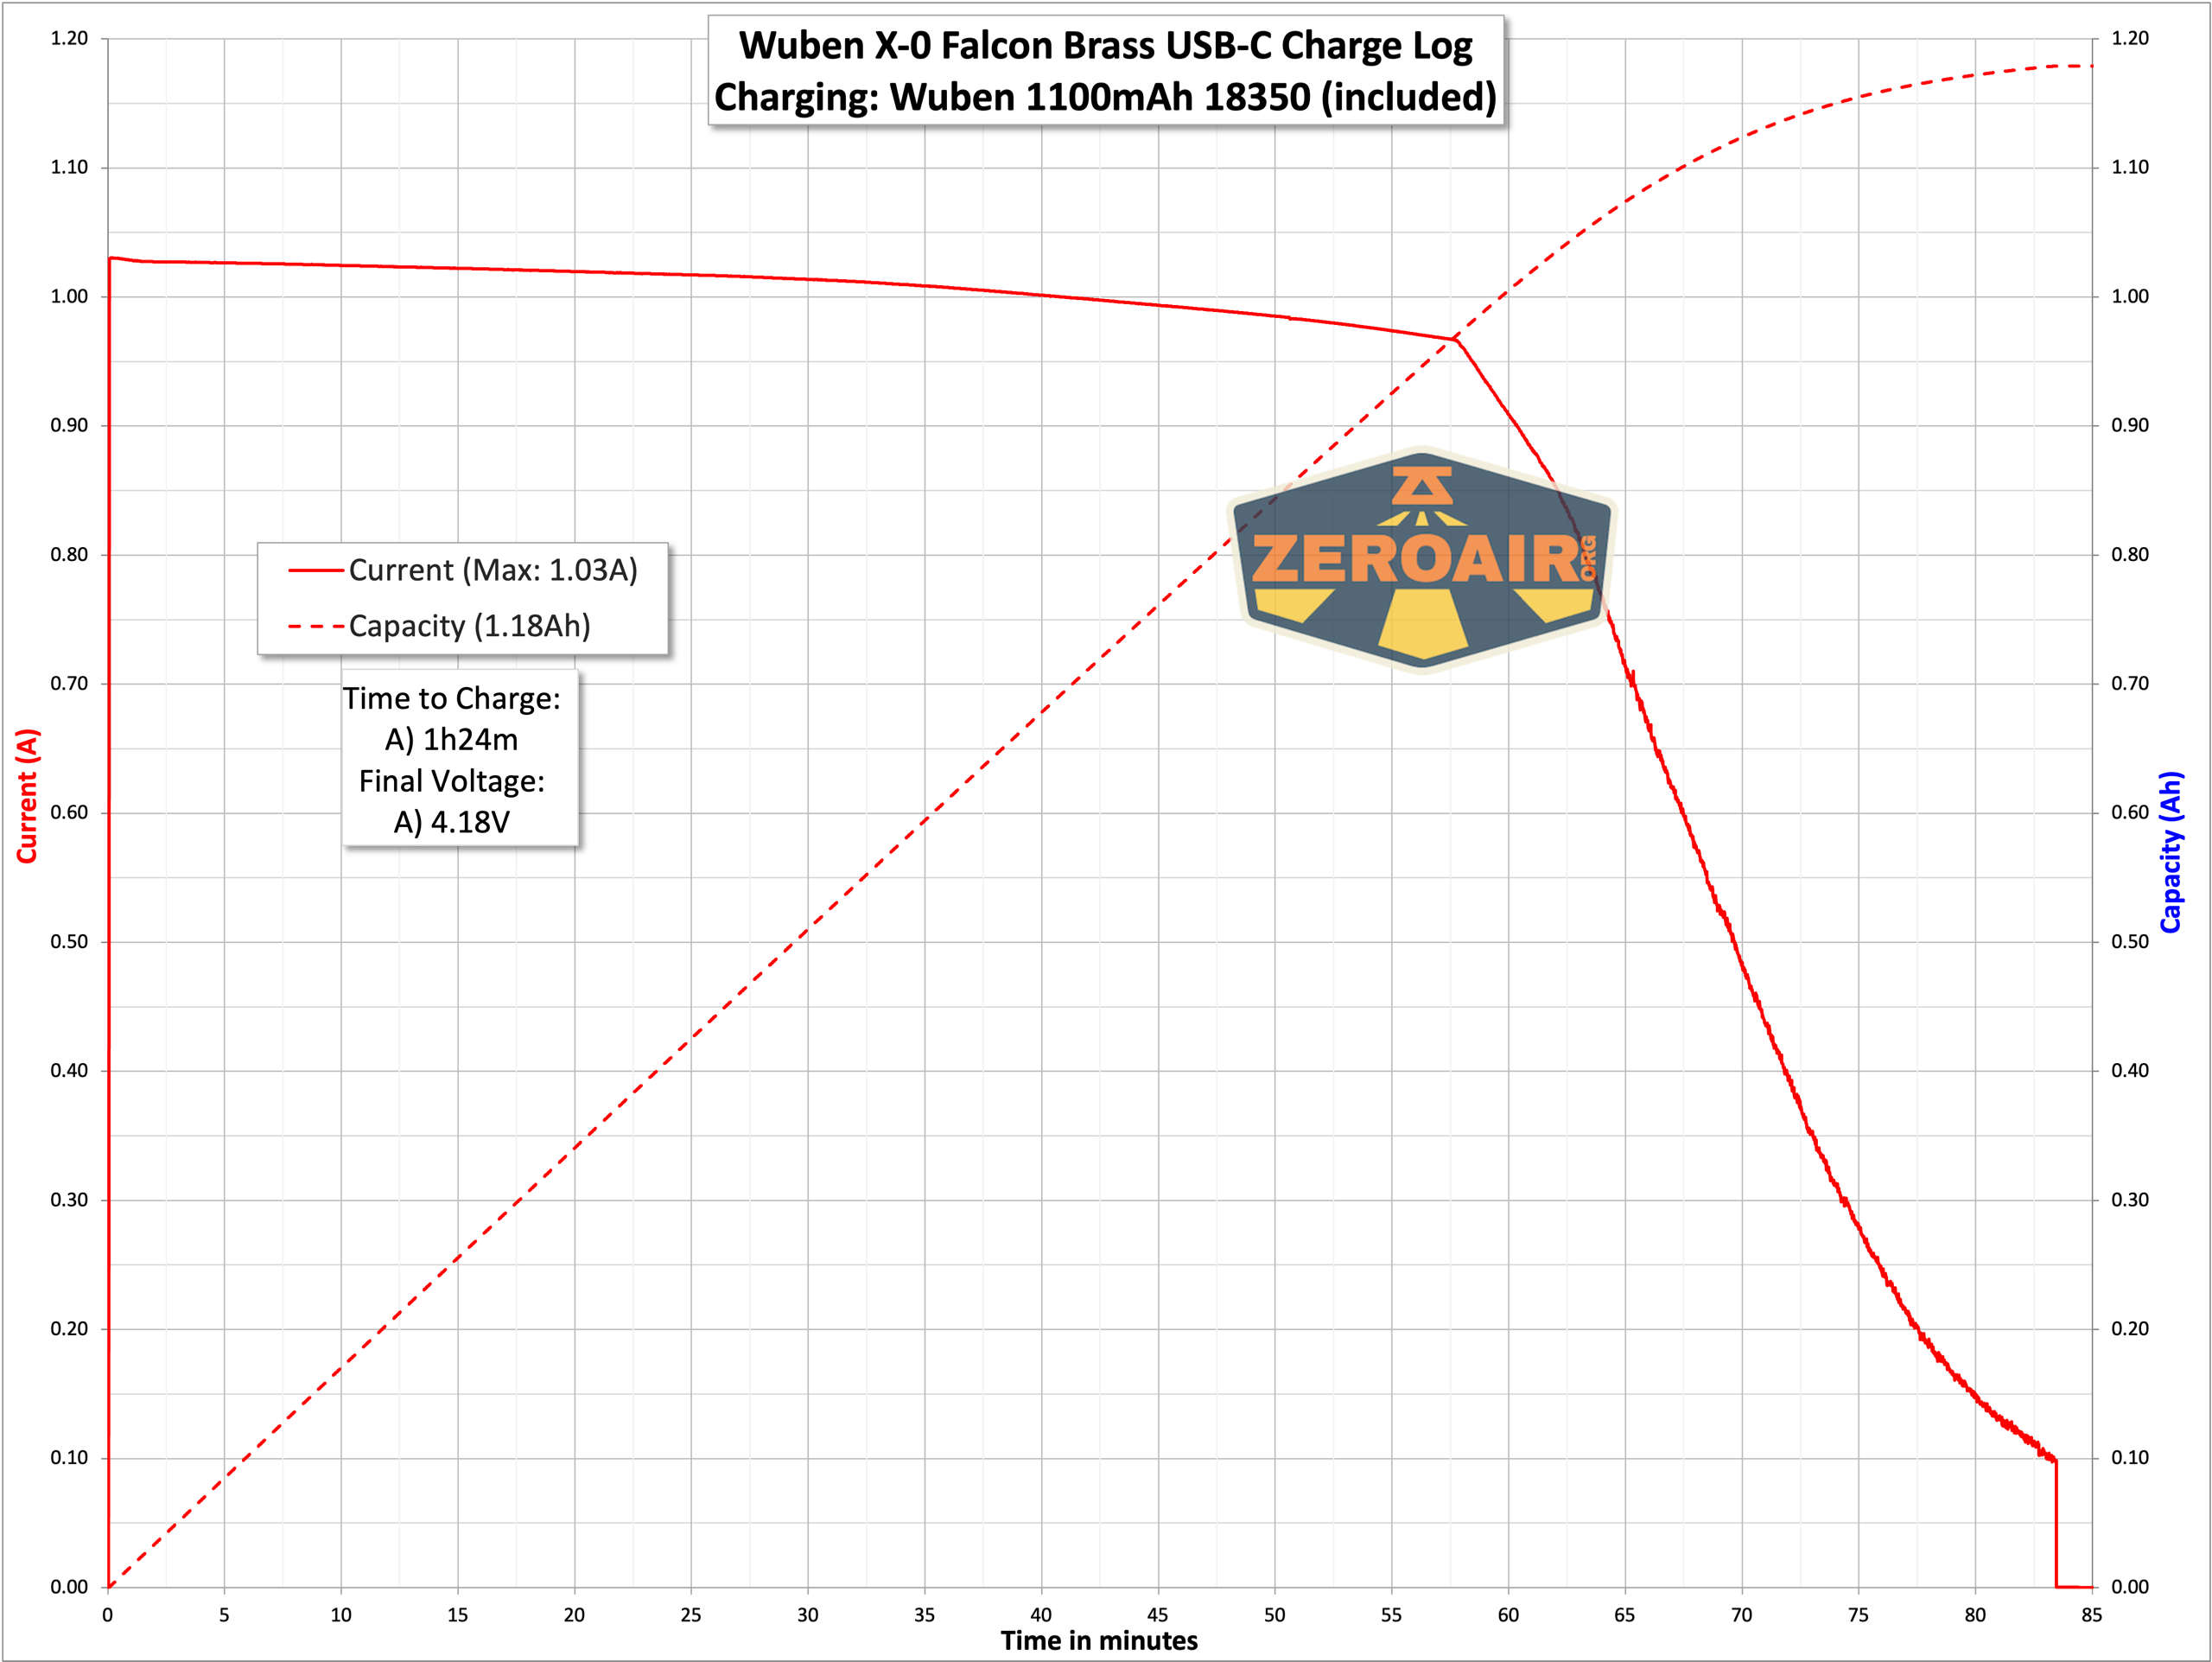
Charging
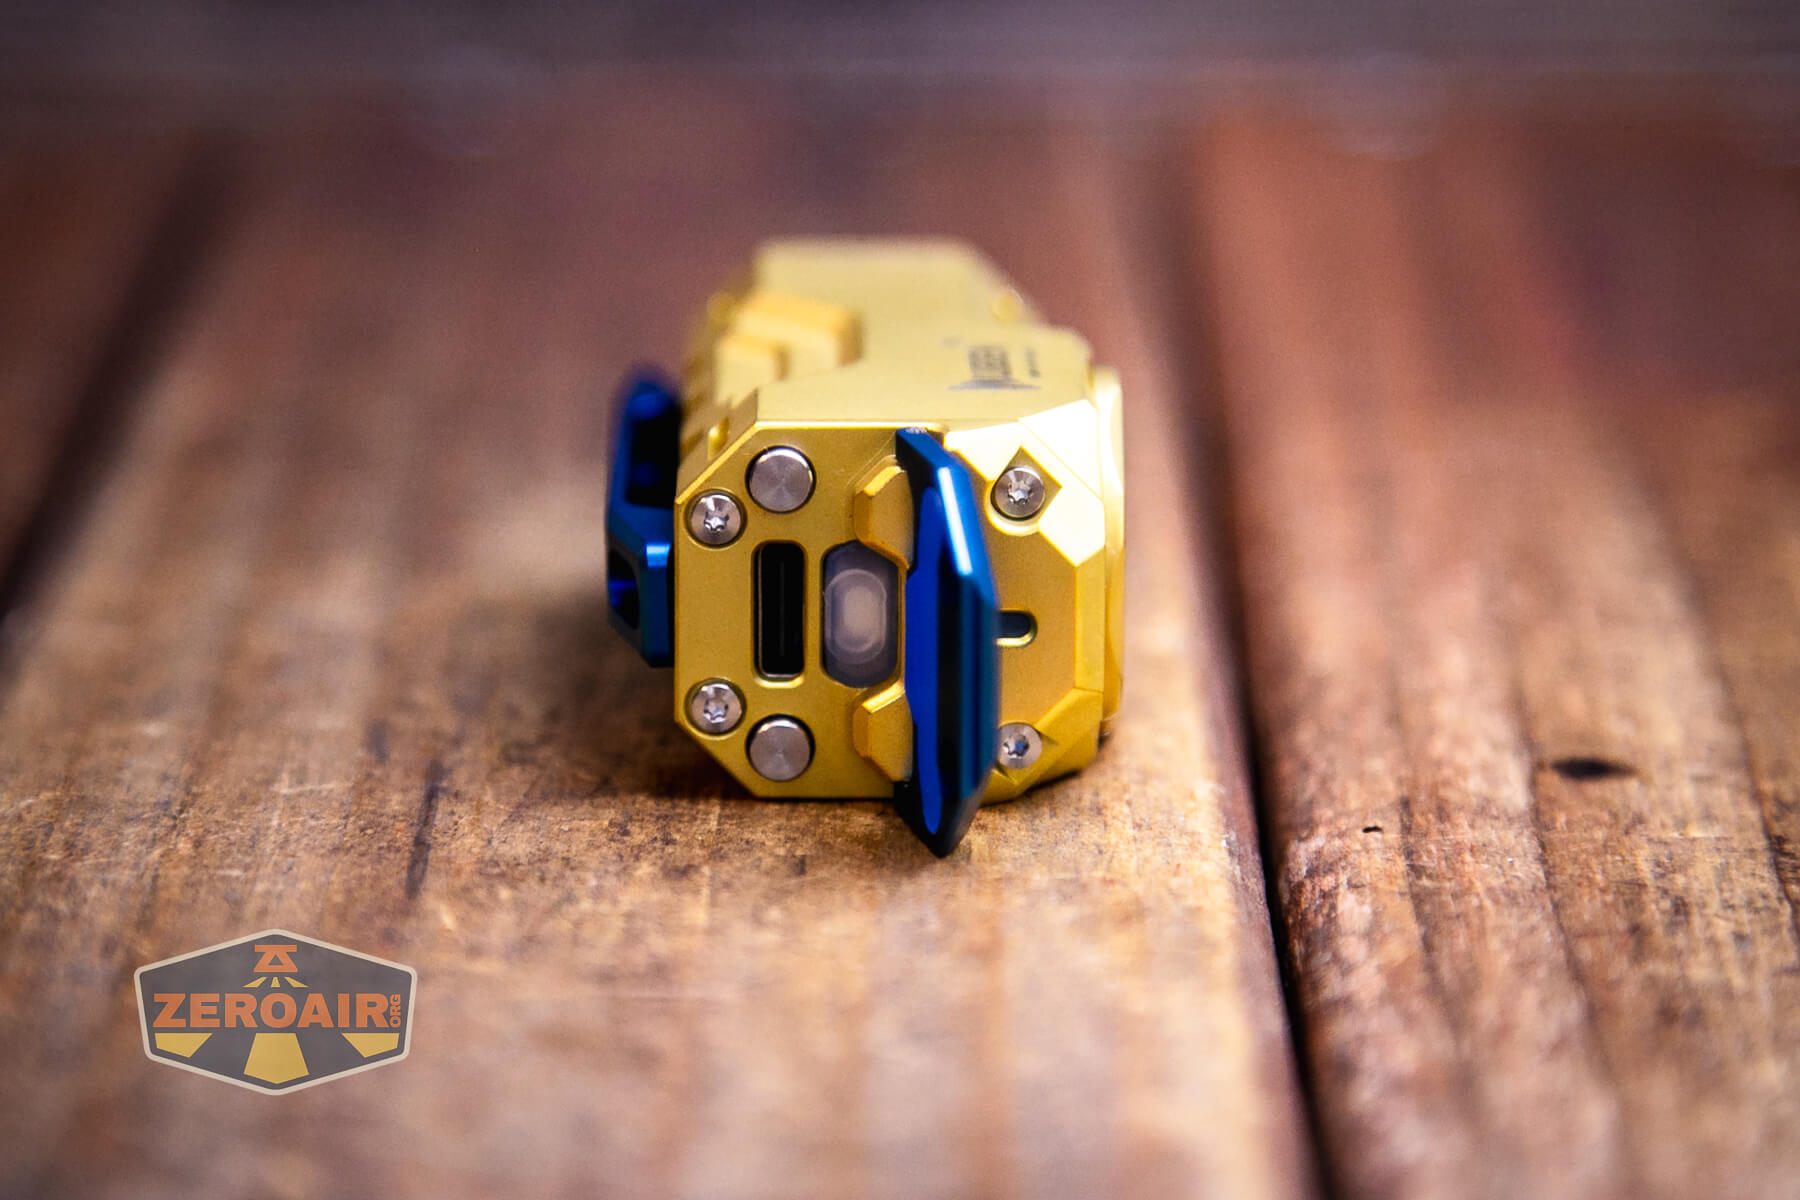
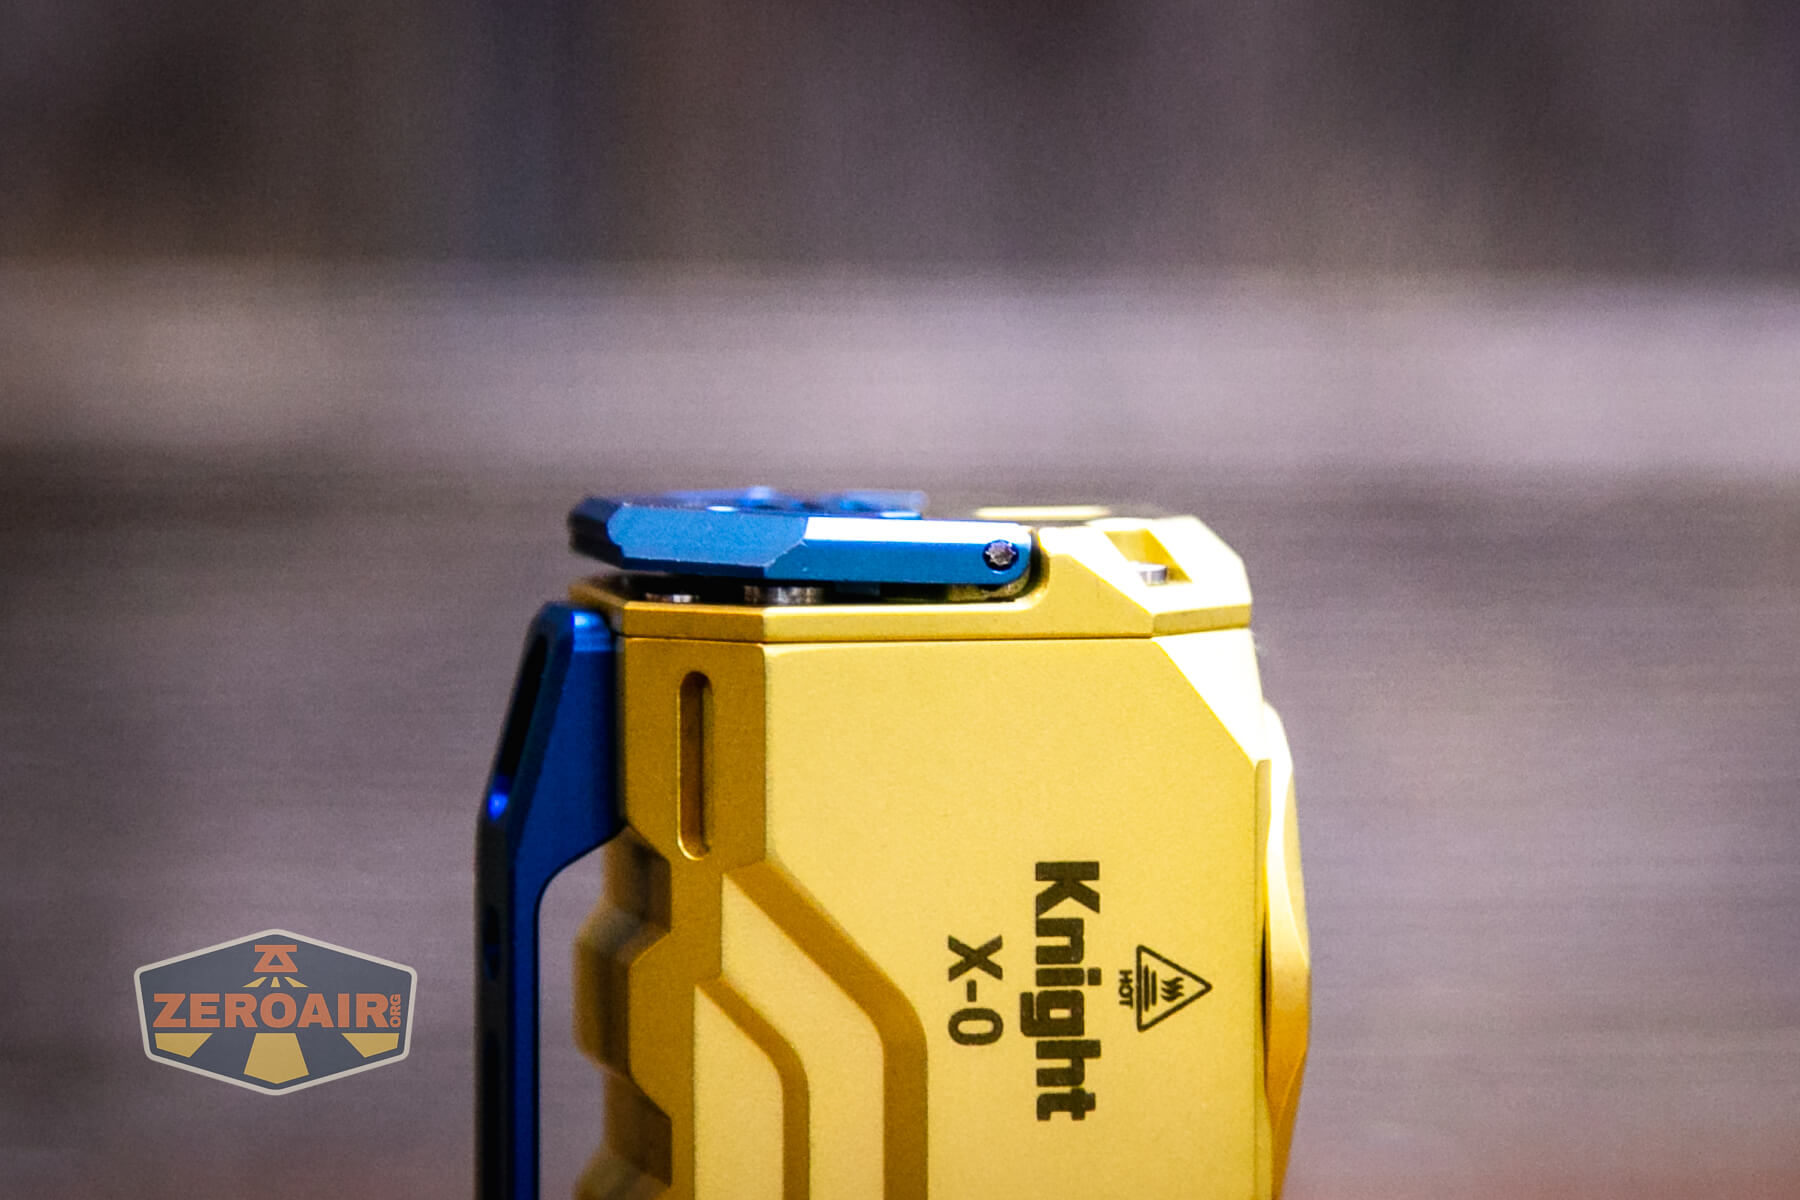
Wuben put a USB-C port in the top (or “head”) of this light. They say this is a waterproof port.
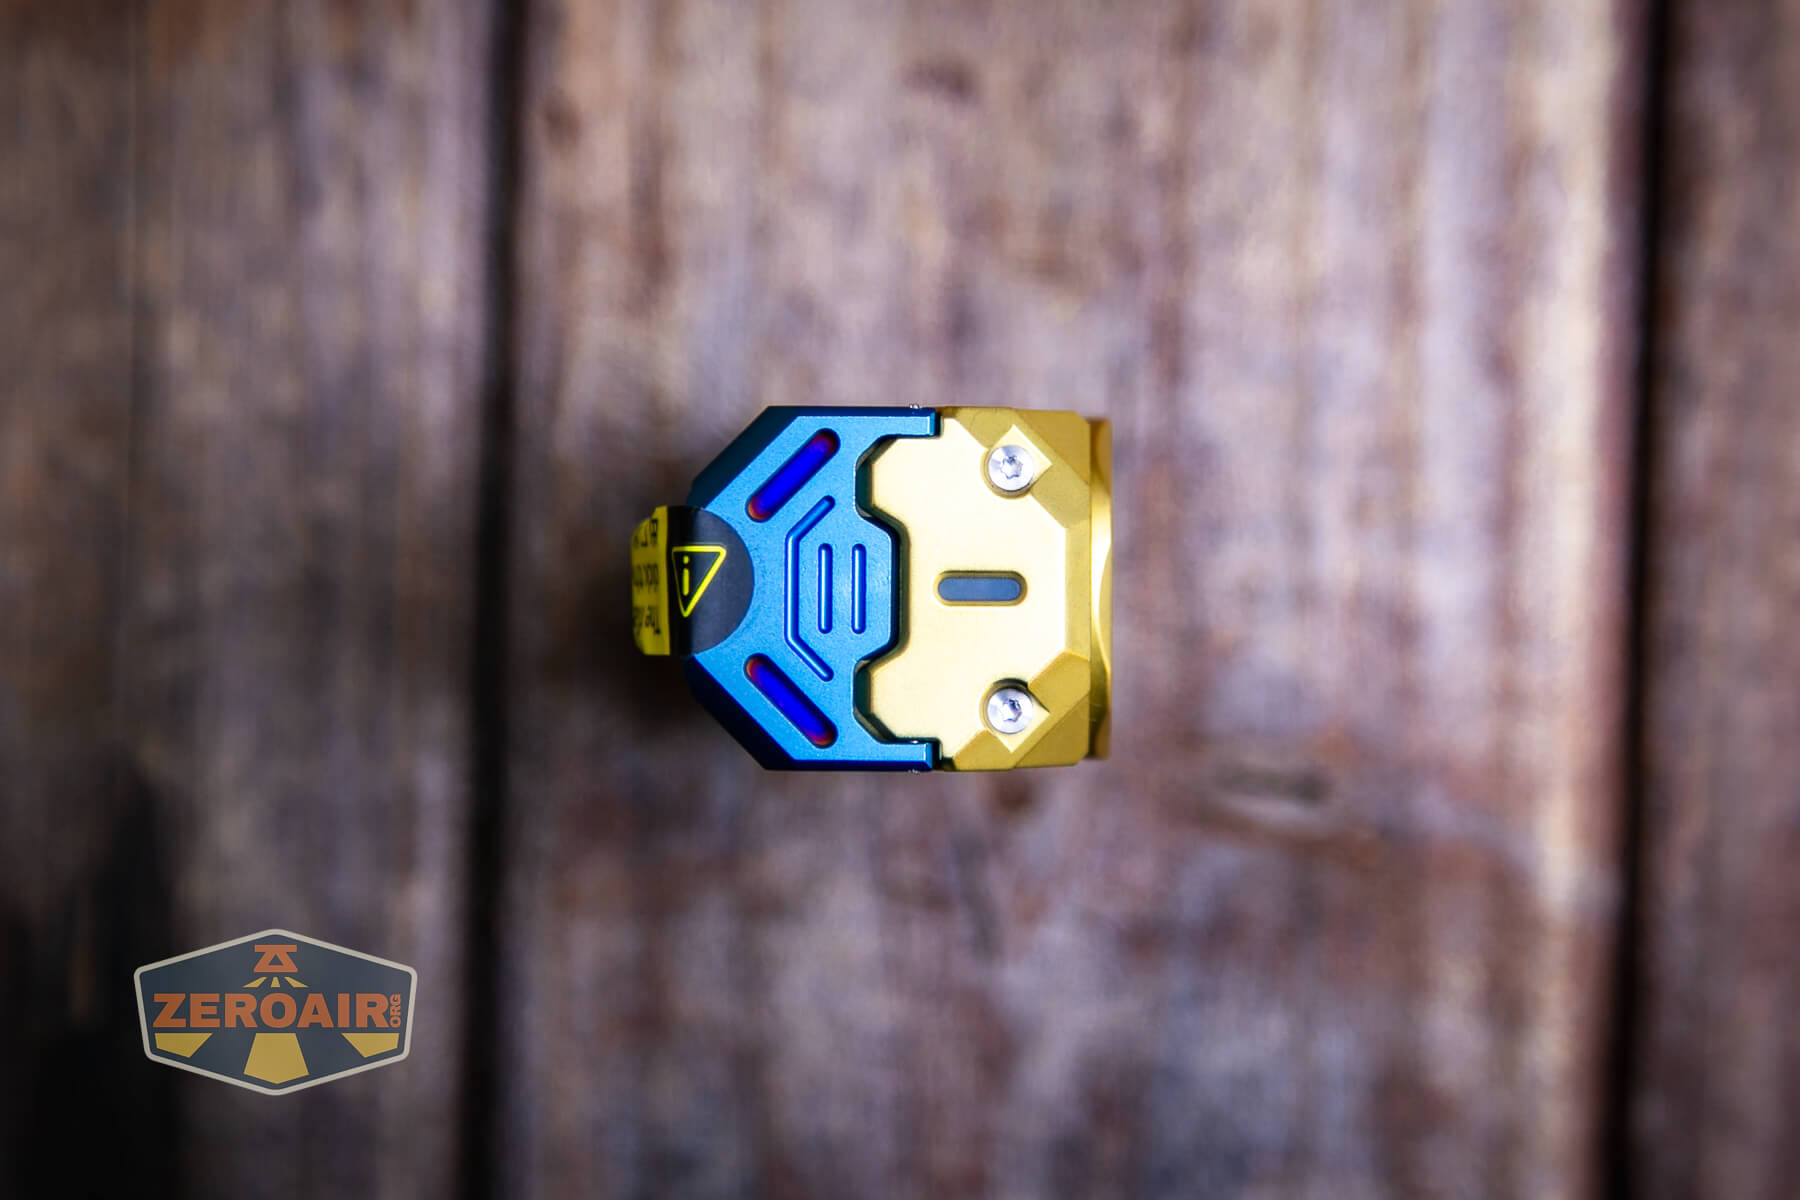
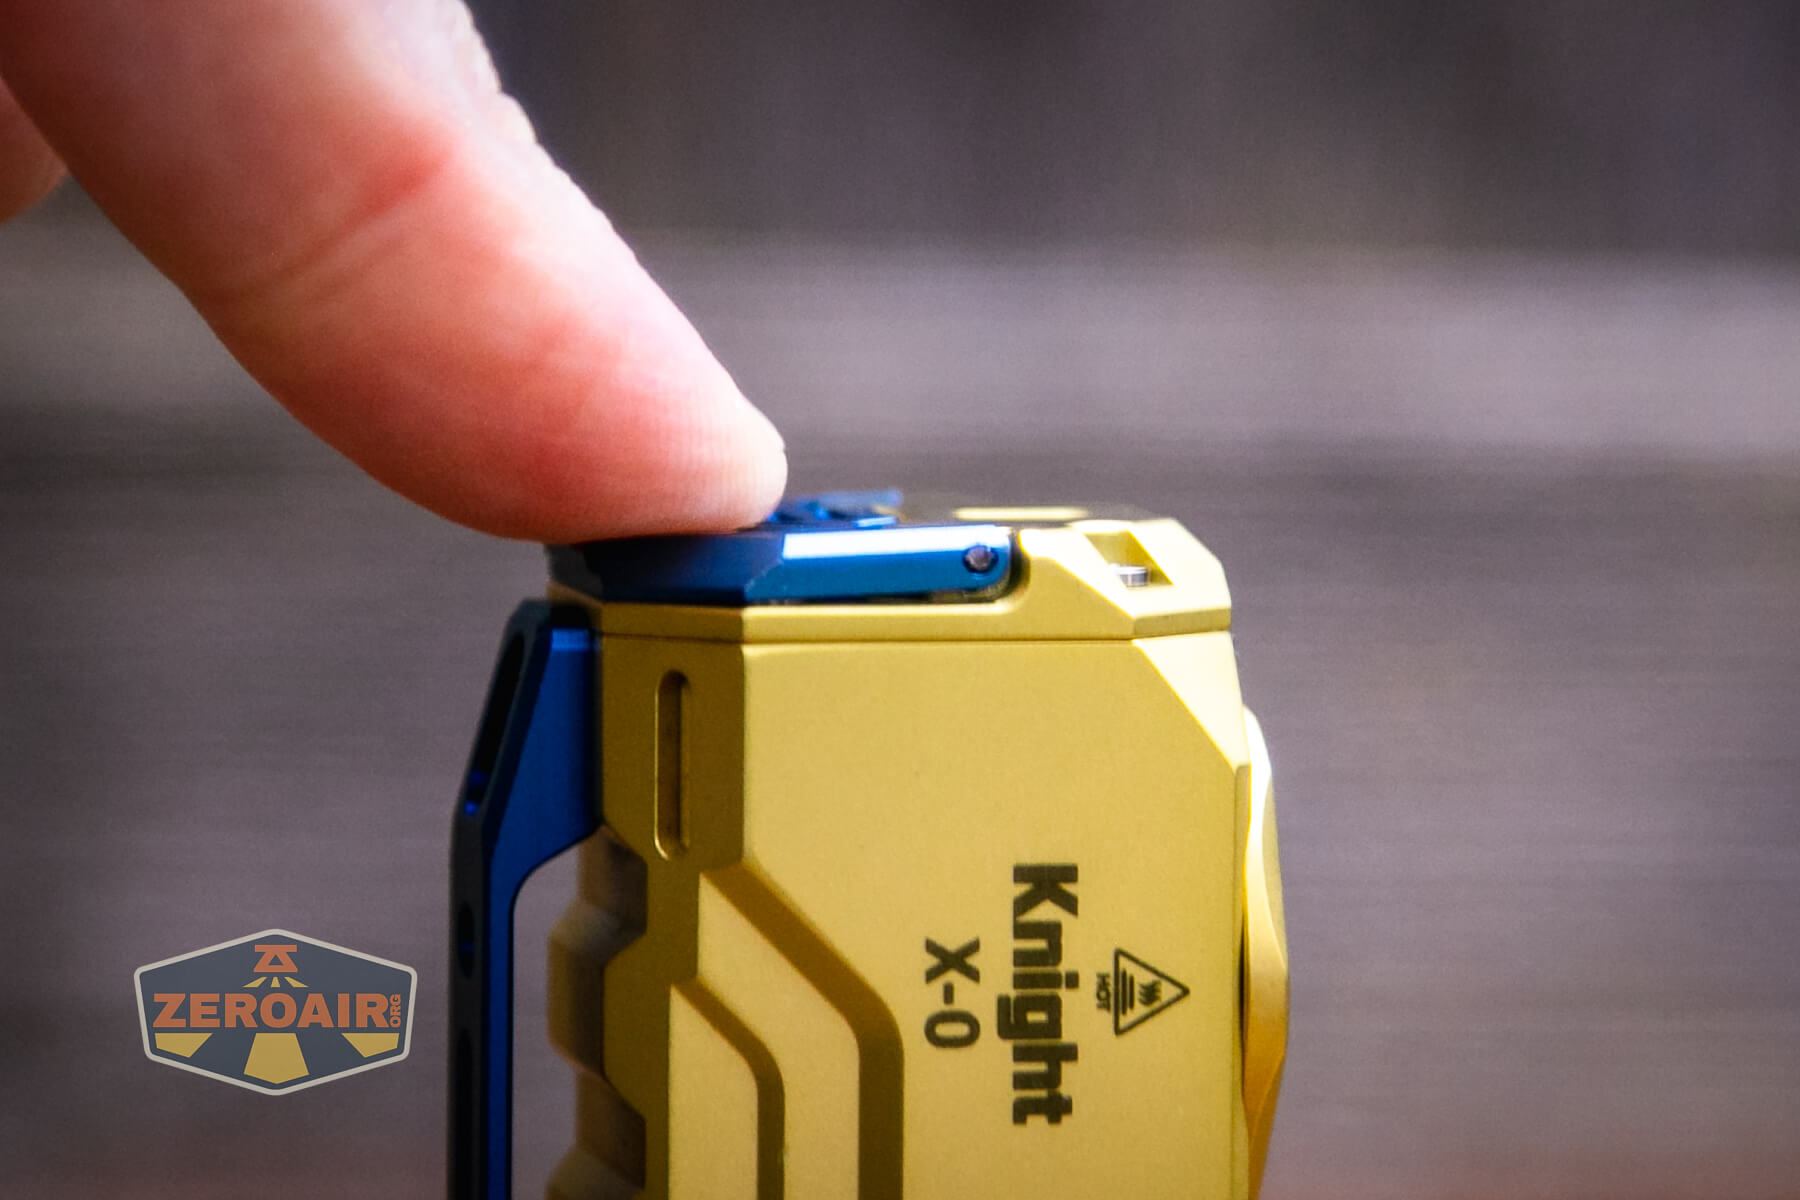
The port is accessed by flipping up this blue, hinged switch cover. In fact, it’s not just a switch cover. It’s a lever switch, a charge port cover, and a place to install tritium! Quite versatile.
Wuben includes a charging cable, too, which is USB to USB-C.

Both A to C and C to C charging work just fine.
Modes and Currents
| Mode | Mode Claimed Output (lm) | Claimed Runtime | Measured Lumens | Tailcap Amps |
|---|---|---|---|---|
| Turbo | 900-300 | 1m-2h | 889 (0s) 855 (30s) |
2.81 |
| High | 250 | 2.5h | 218 | 0.39 |
| Med | 150 | 15h | 43 | 0.07 |
| Low | 50 | 40h | 15 | 0.02 |
| Moon | 1 | 130h | 1.7 | 4.1mA |
Pulse Width Modulation
I don’t think what we see here is really “PWM” but just more of a sawtooth. I don’t find it to be visible during use, anyway.

Here you can see a “baseline” – a chart with almost no light hitting the sensor.
Then there’s the Ultrafire WF-602C flashlight, which has some of the worst PWM I’ve seen. It’s so bad that I used a post about it to explain PWM! Here are multiple timescales (10ms, 5ms, 2ms, 1ms, 0.5ms, 0.2ms) to make comparing this “worst” PWM light to the test light easier. That post also explains why I didn’t test the WF-602C at the usual 50us scale.
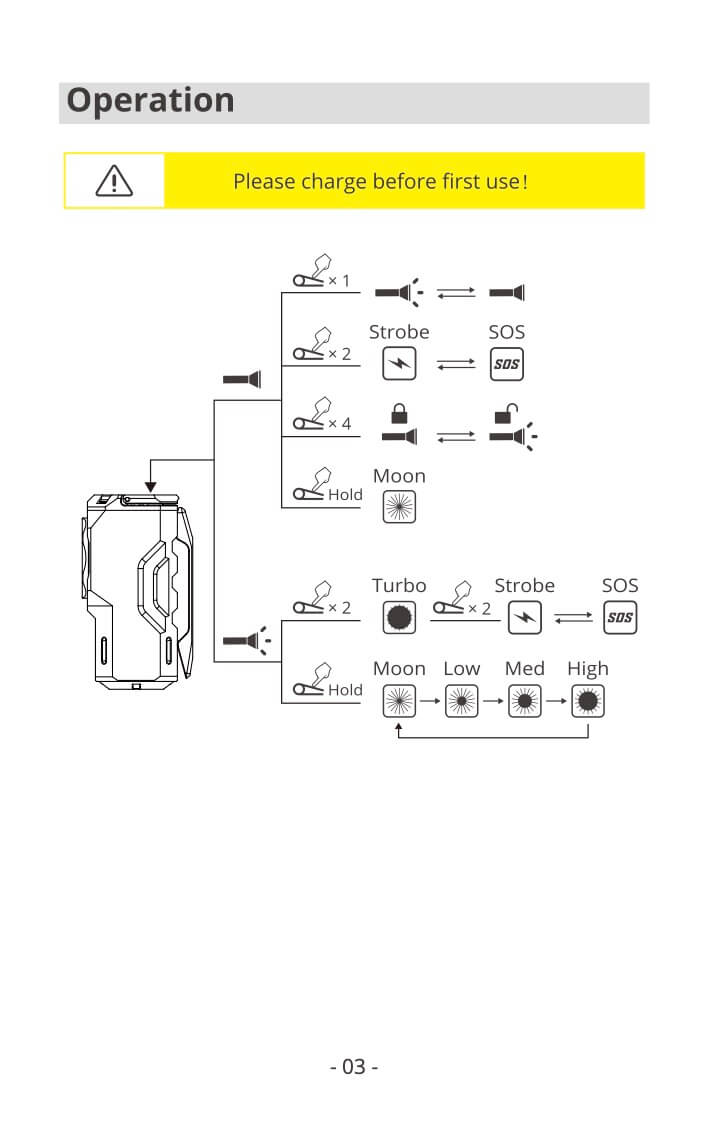
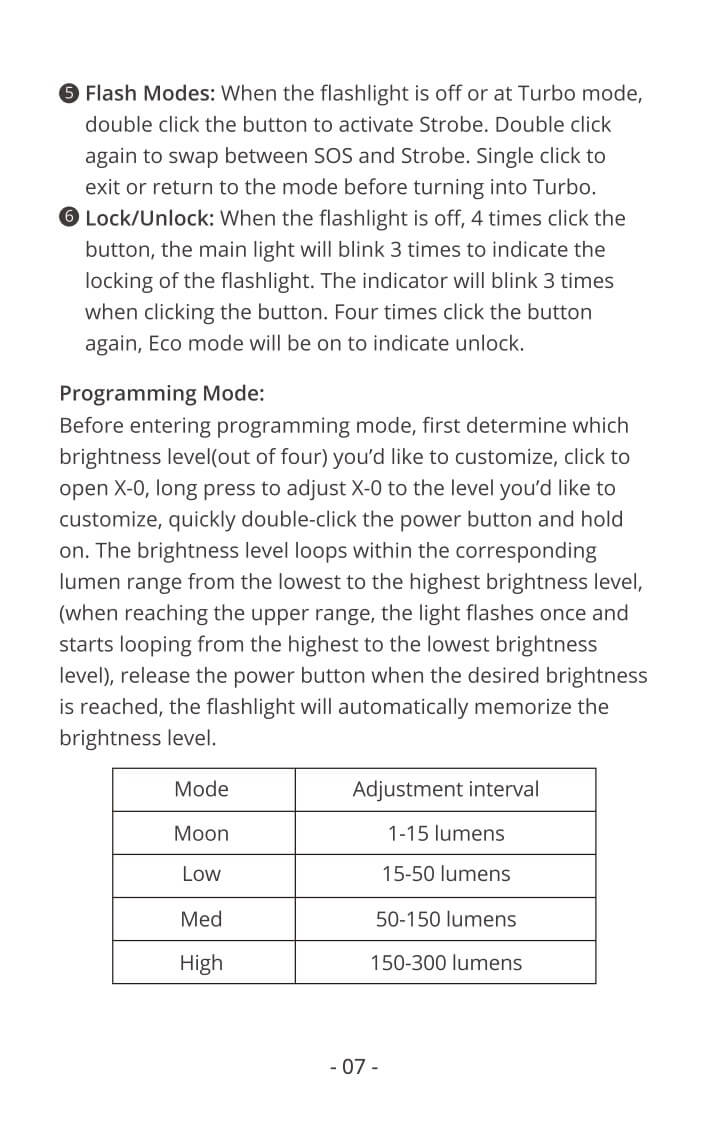
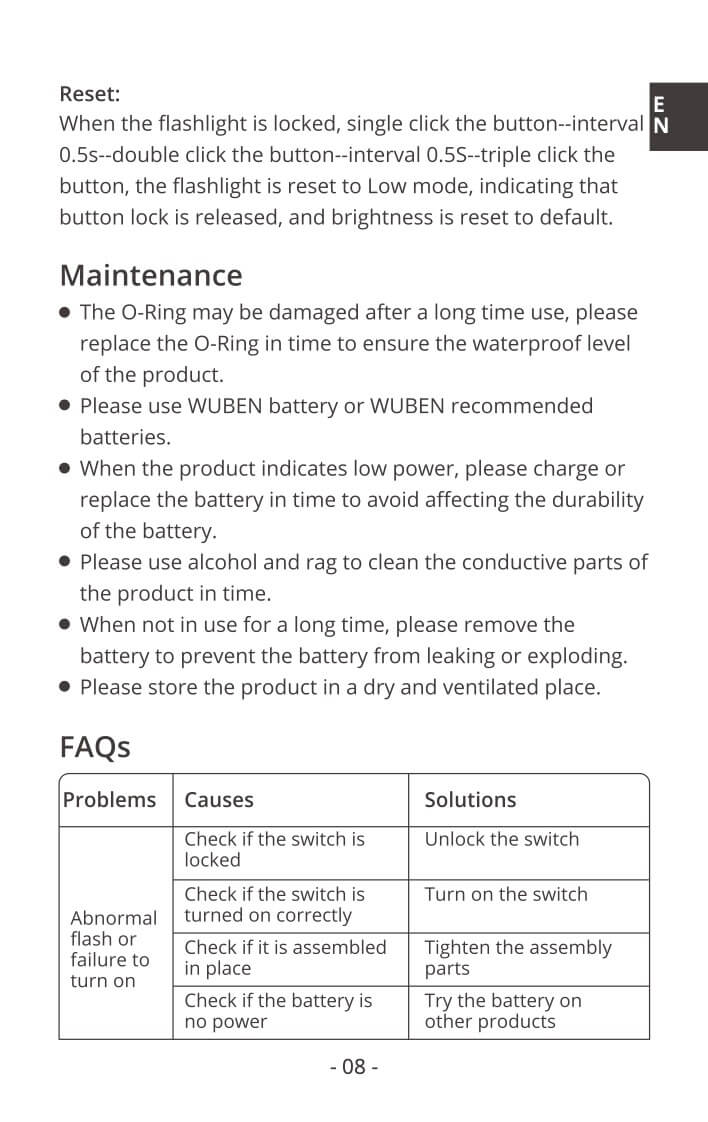
User Interface and Operation
The switch itself is a soft-cover e-switch. But over that switch is the blue anodized lever-style switch. This metal part also serves as a charging port cover.
The action in this switch is great.
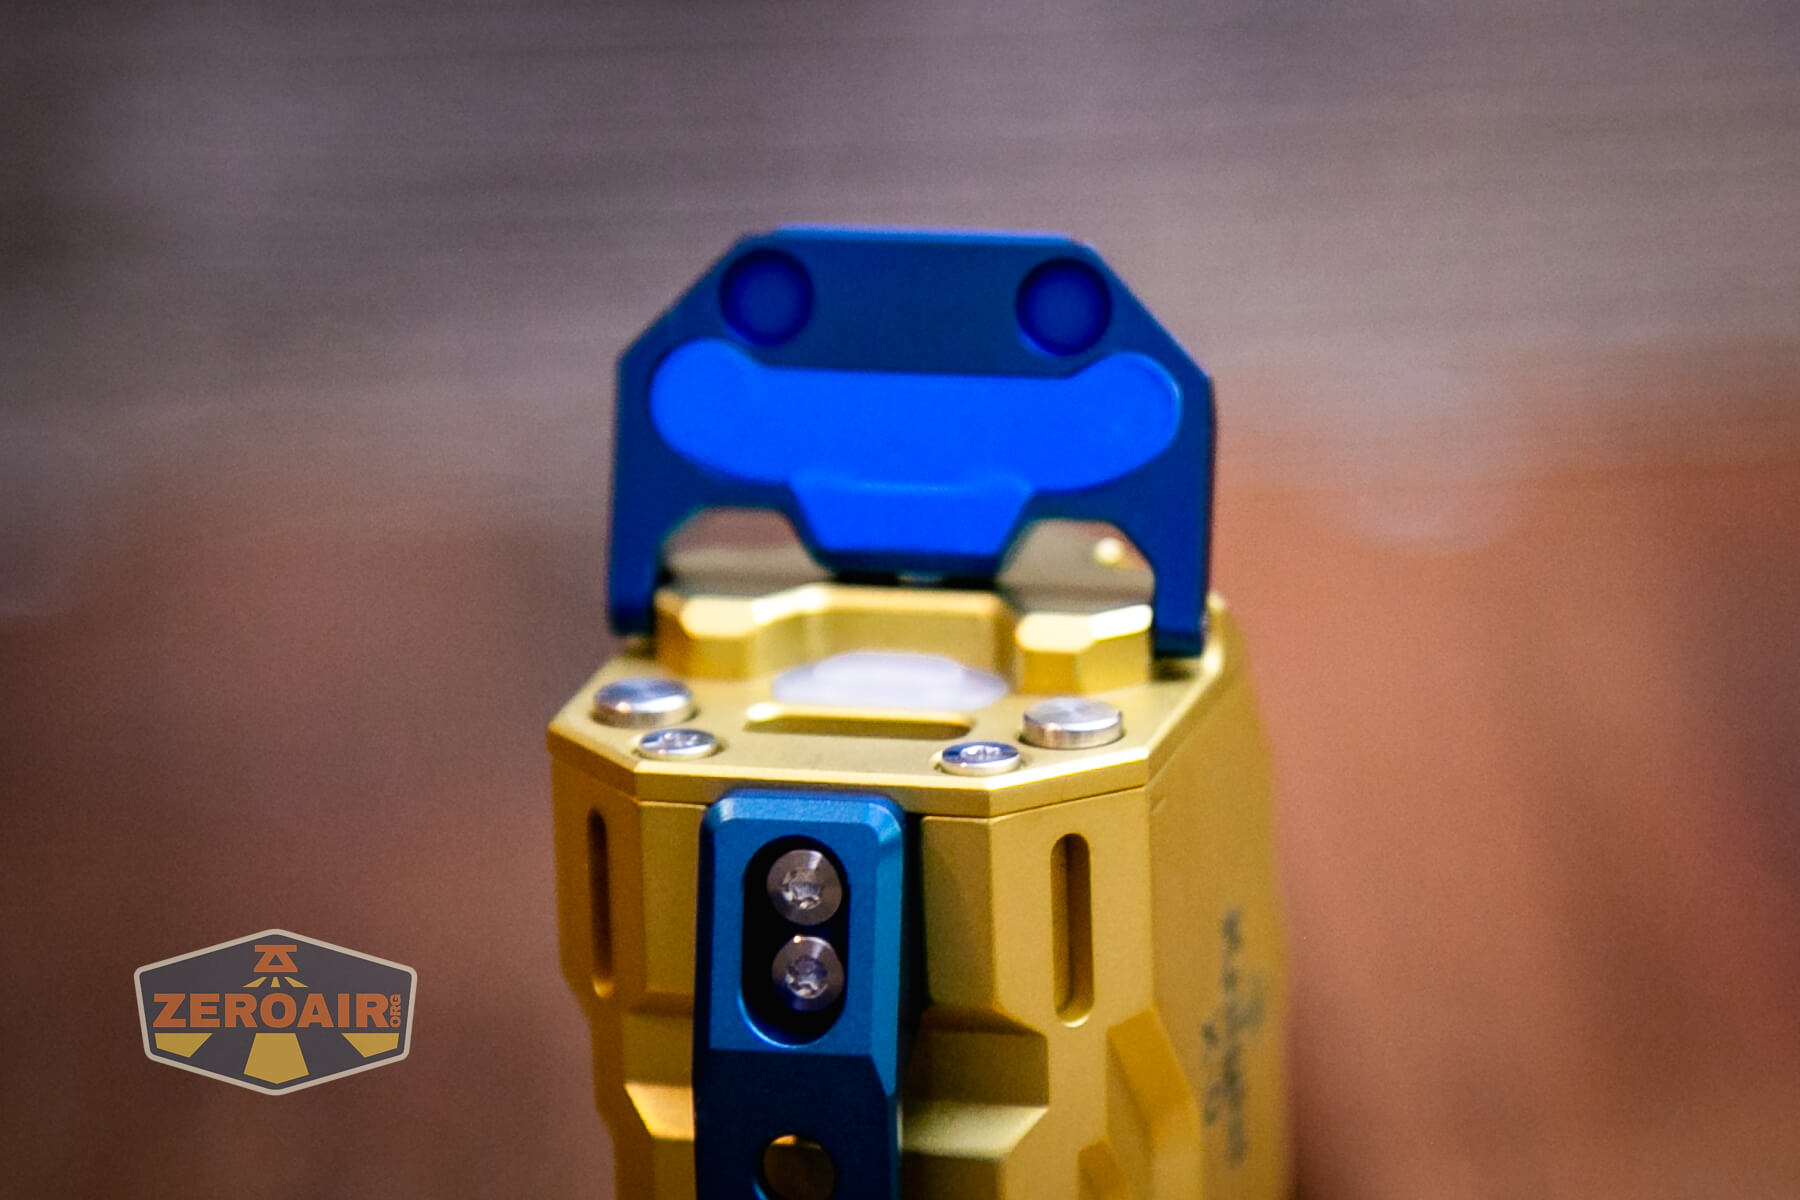
You’ll see it below, but there are two metal buttons for this metal cover to rest against. Interestingly, on the aluminum version, they used brass! But on the brass version, they seem to have used stainless steel. When the cover goes from “up” (all the way up) to down, there’s a very pleasant ‘thonk’ that I can’t even describe. The cover has no bounce at all, and because of this thonk, it could be described adequately as a fidget toy, too. Turns out that those two brass buttons are springy, and “catch” the cover when it lands. It’s exceptionally pleasant.
It’s possible to use the e-switch without the levered part. That switch is fairly tiny and fairly hidden, though. As you can see, the switch cover is translucent. It doesn’t directly have indicating features (I think), but the indicator visible from the top of the light (not visible in the photo below because of the hinged cover) has indicating features that also light up the switch just a bit.
Here’s a user interface table!
| State | Action | Result |
|---|---|---|
| Off | Click | On (Mode Memory) and battery indicator from near-switch LED^ |
| On | Hold | Mode advance (Moon, Low, Med, High) |
| On | Double click | Turbo |
| On | Click | Off |
| Off | Hold | Eco (Or “Moon”, they call it both) |
| Off or Turbo | Double Click | Strobe |
| Strobe | Double Click | SOS |
| Strobe | Click | Return to previous state except Turbo, which resumes to Moon |
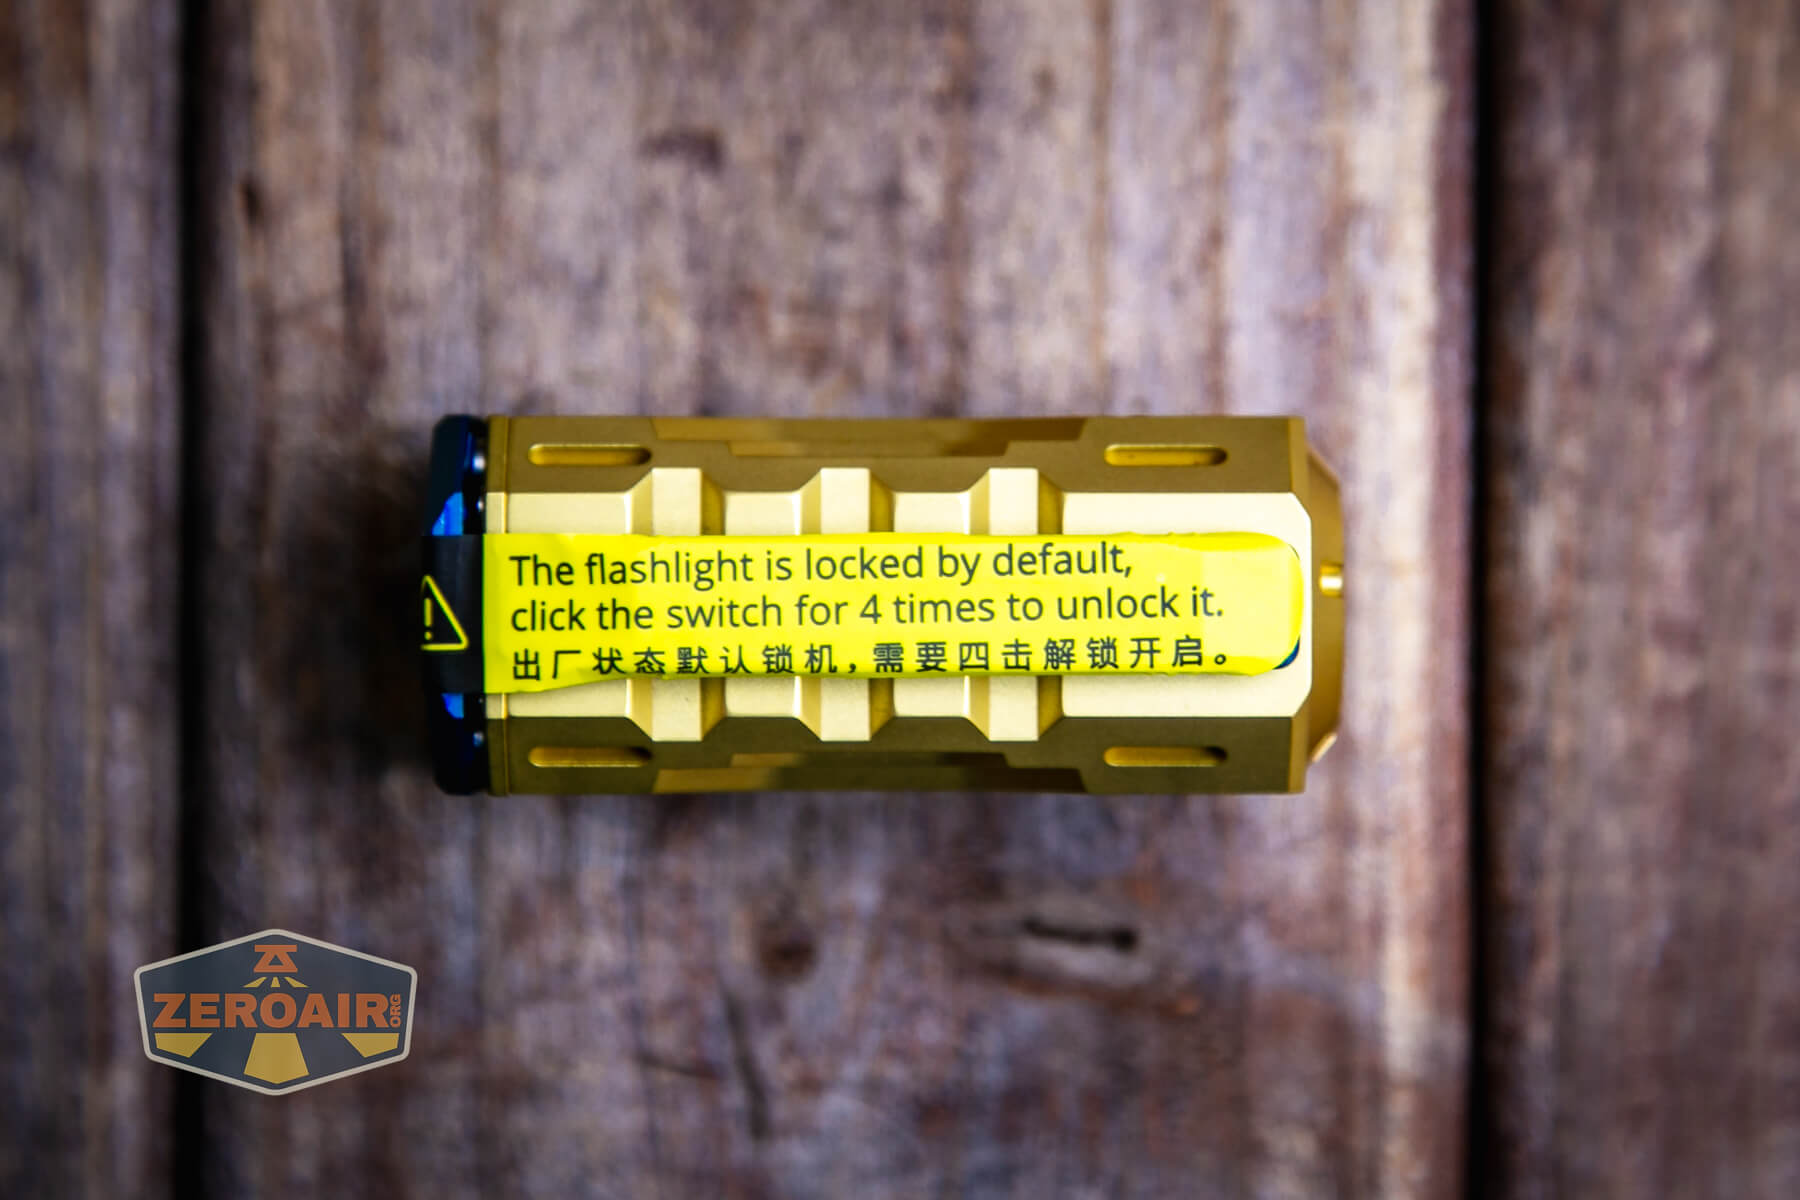
| Off | Click 4x | Lockout (indicated by three blinks from main emitter) |
| Lockout | Click | Lockout indication by LED indicator near switch |
| Lockout | Click 4x | Unlock to Moon |
| Any steady mode (excluding Turbo) | Click then Hold (two actions; it’s not just “hold” it’s: click first then hold) | Program output of selected mode^^ |
| Lockout | Click [wait], Double Click [wait], Triple Click | Resets light to default state. Light unlocks and turns on to Eco to confirm. |
^ Battery indication is as follows (from the near-switch LED)
Blue steady: ≥90% power
Blue flashing: 90% to ≥40% power
Red steady: 40% to ≥15% power
Red flashing: 15% to ≥ 0% power
^^ In programming mode, the output ramps up to the maximum possible for that level and blinks then begins ramping down to the lowest output possible for that mode and again blinks. When you release the switch, that mode is programmed to that output level.
LED and Beam
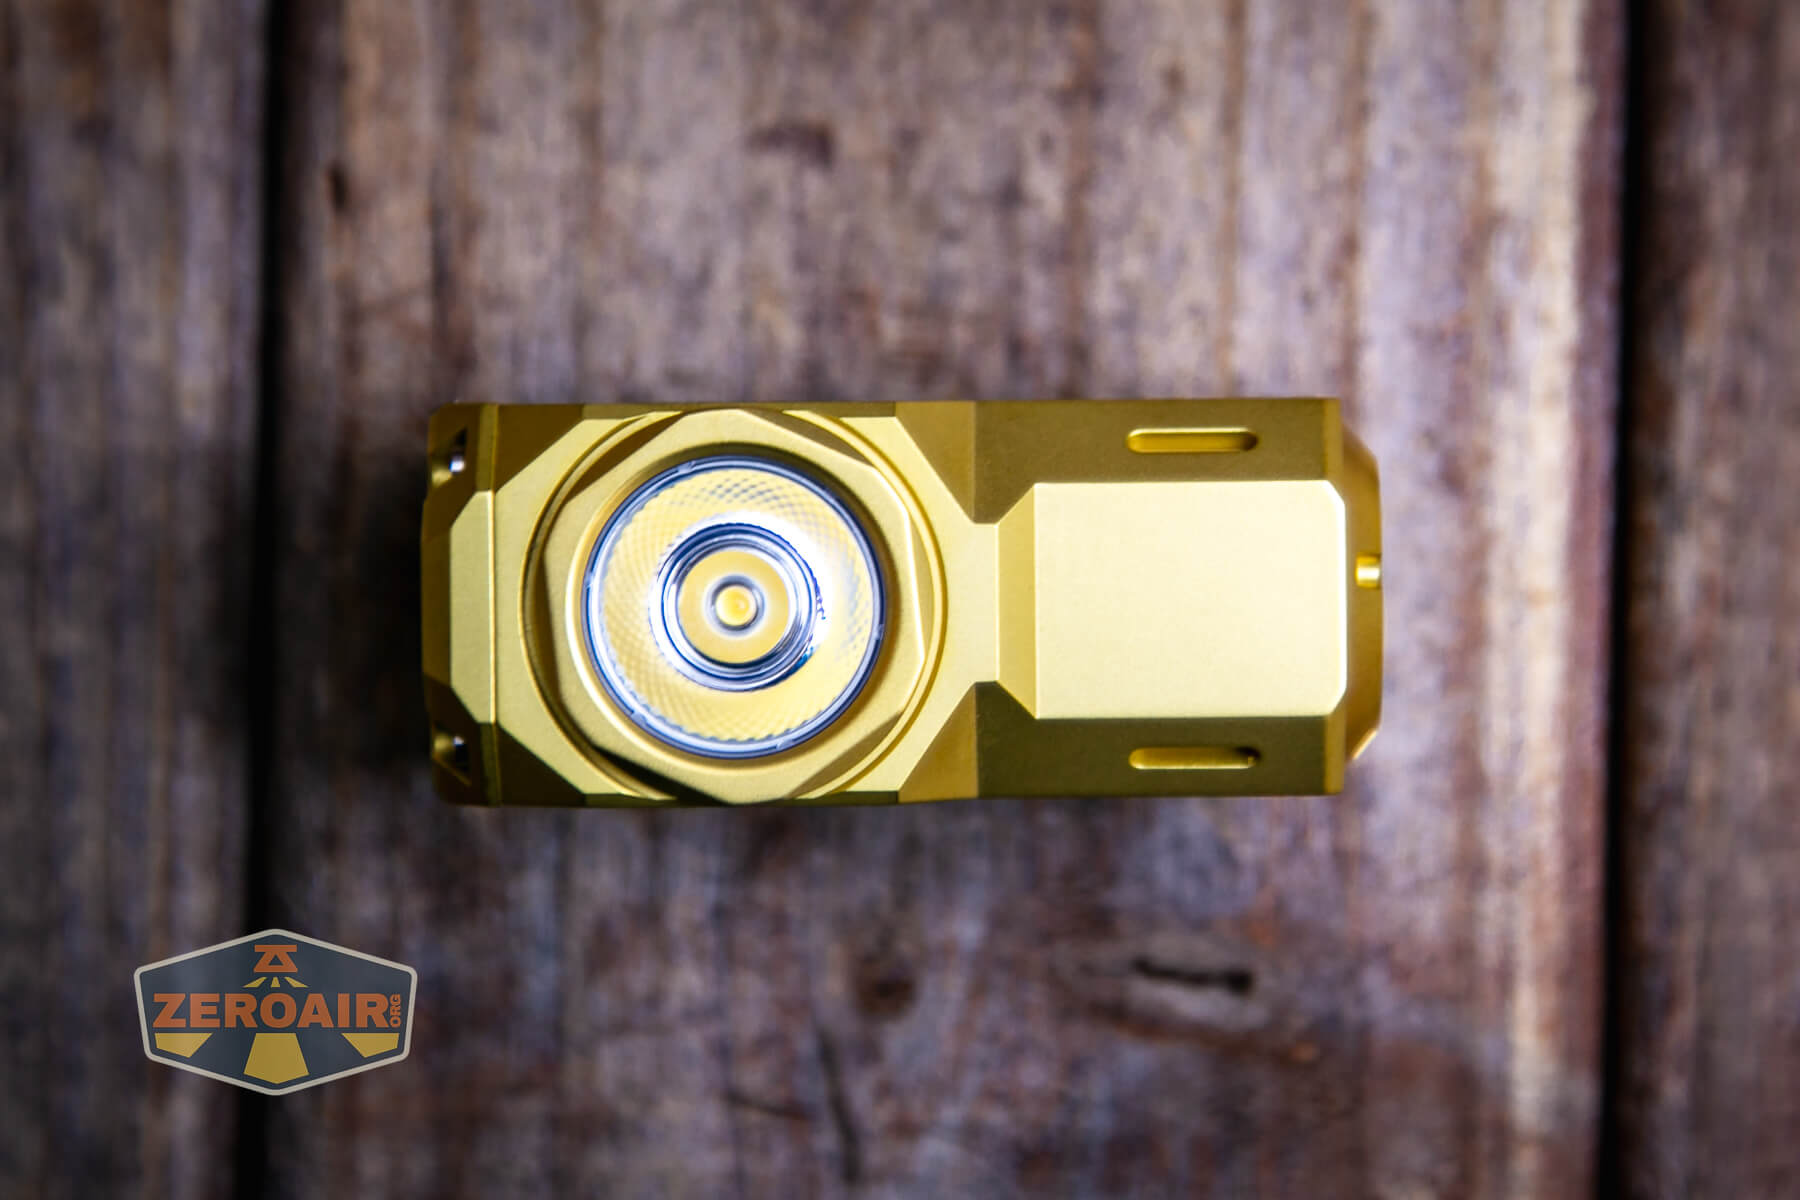
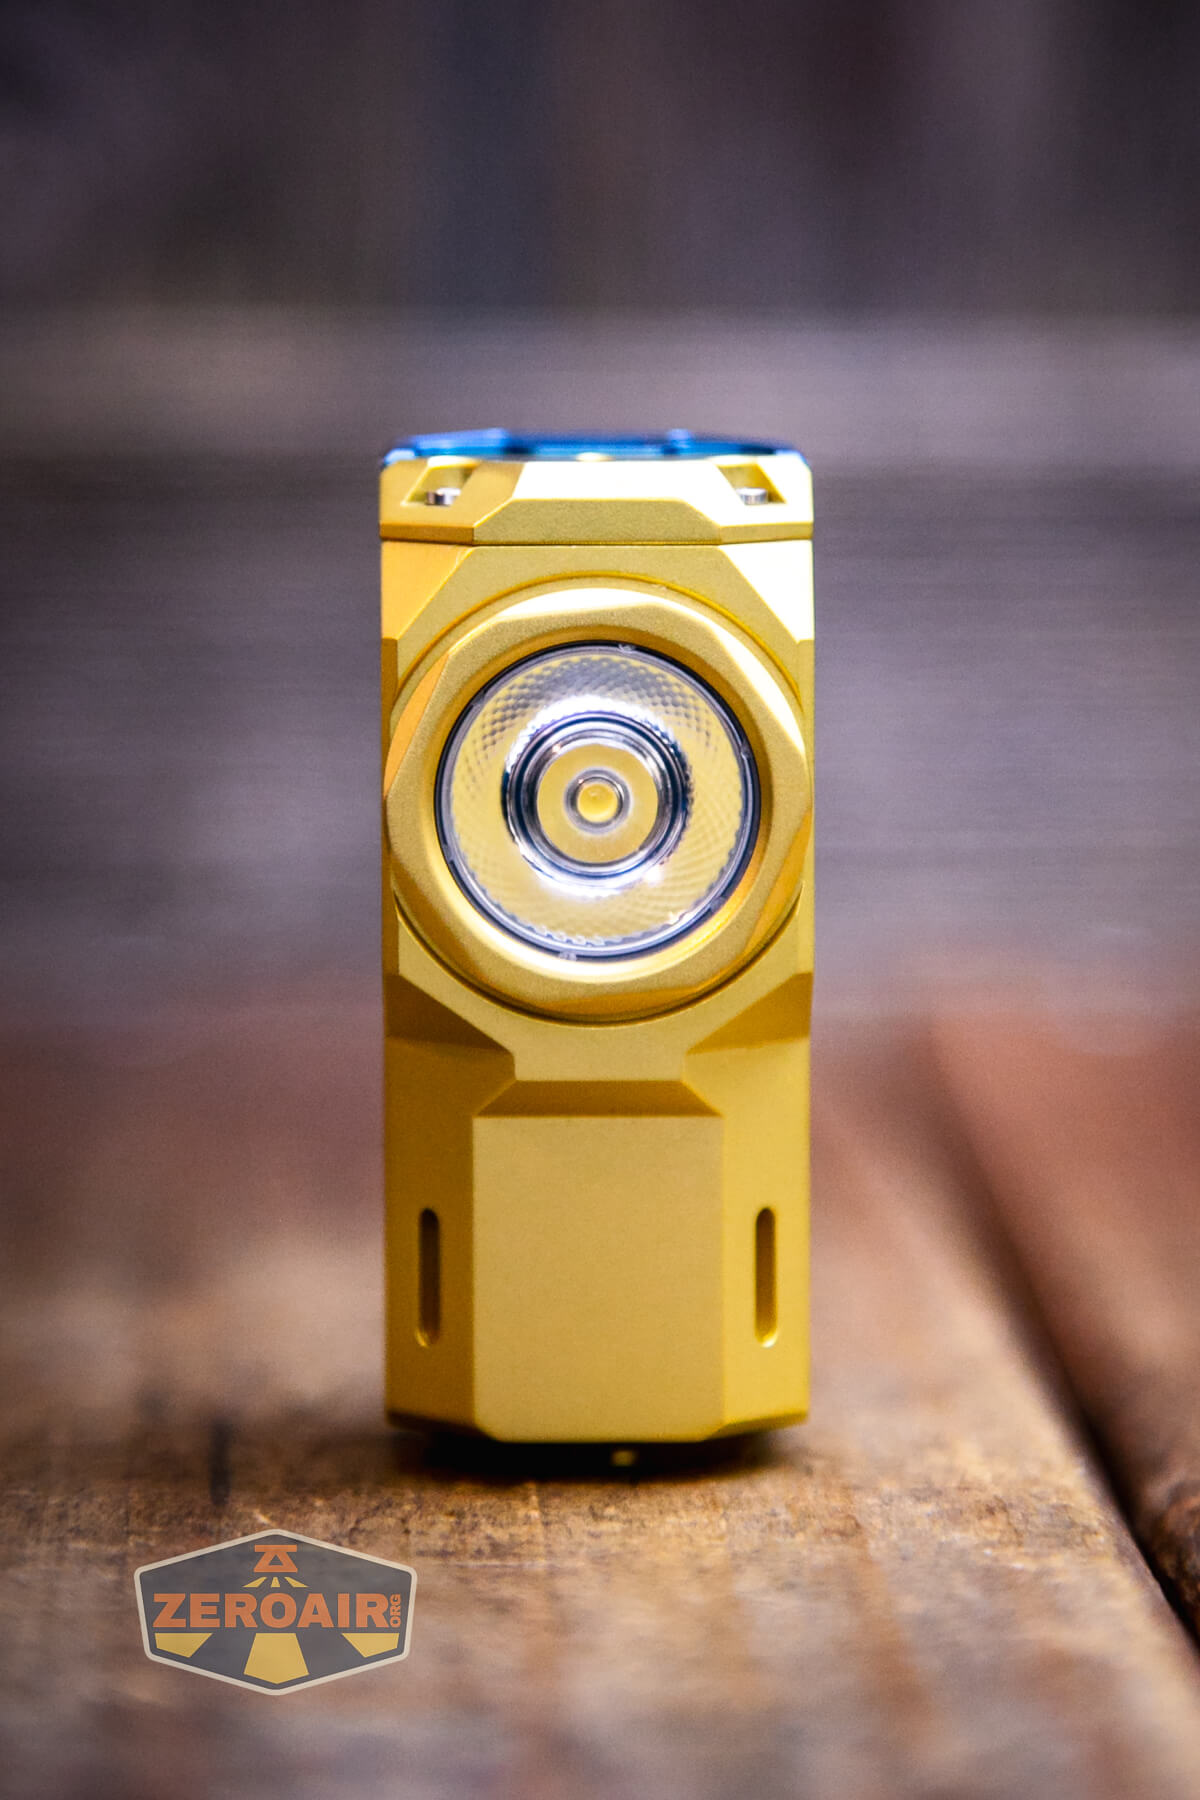
There are two emitter options on the Wuben X-0 Knight brass flashlight. Osram P9, which will have higher output but be cooler white, and Samsung LH351d, which I have here.
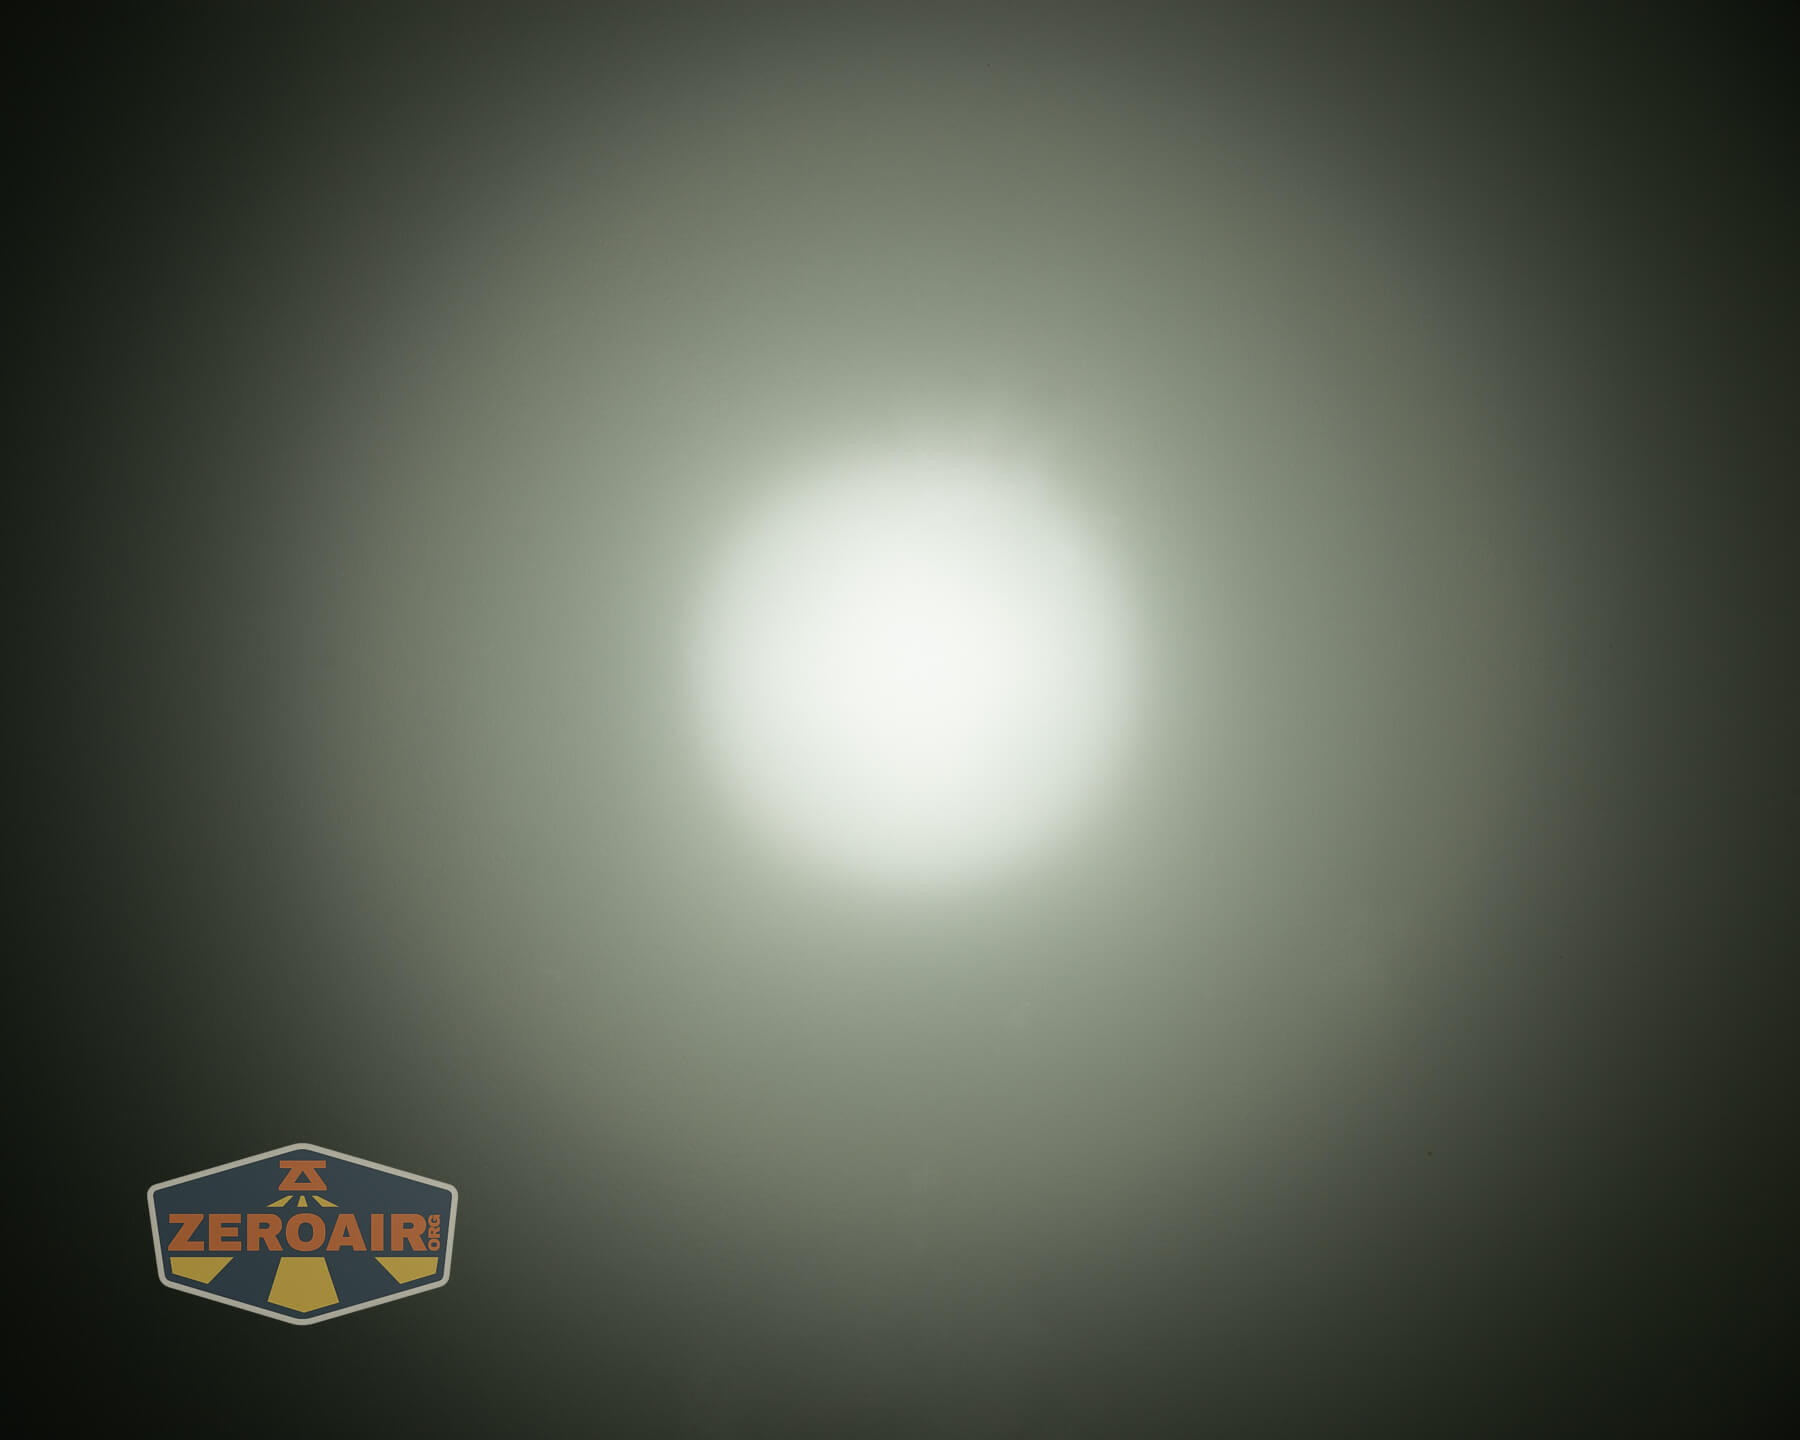
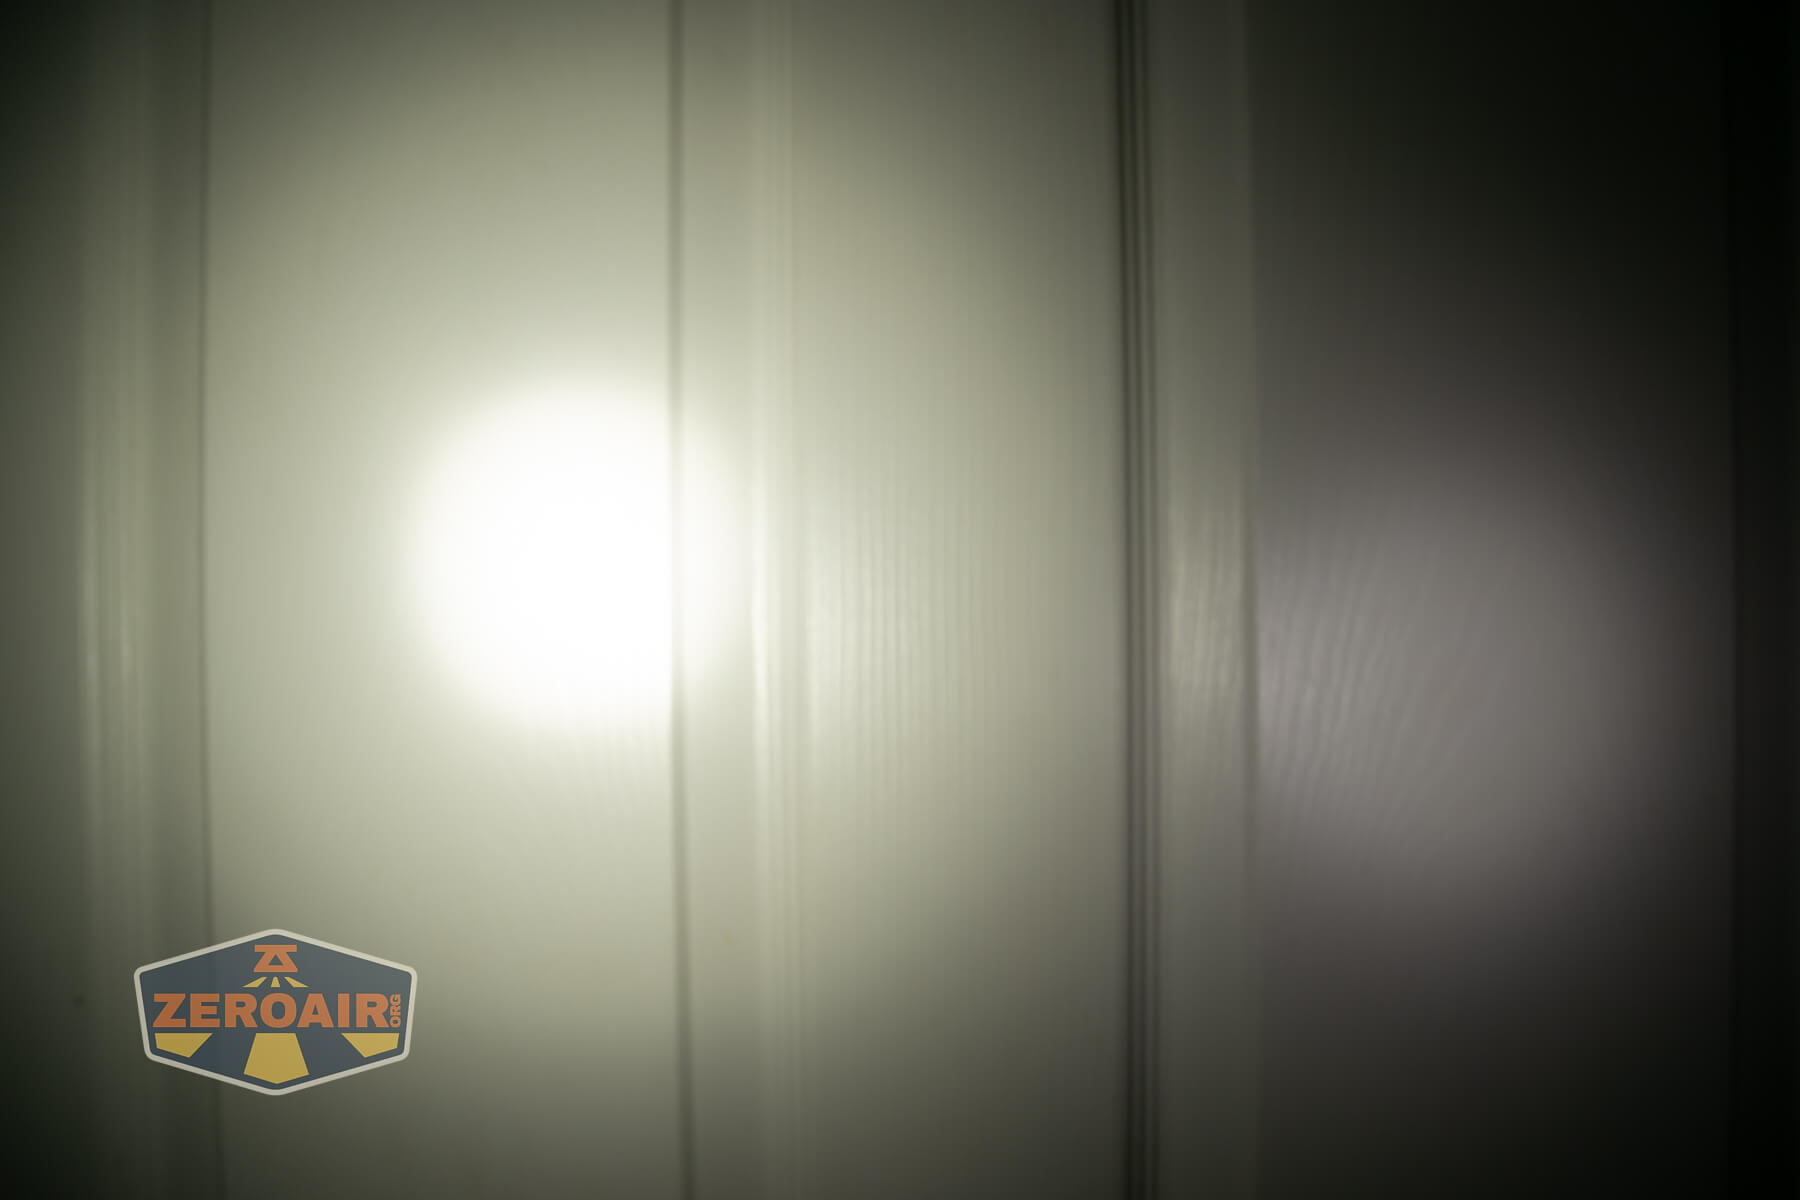
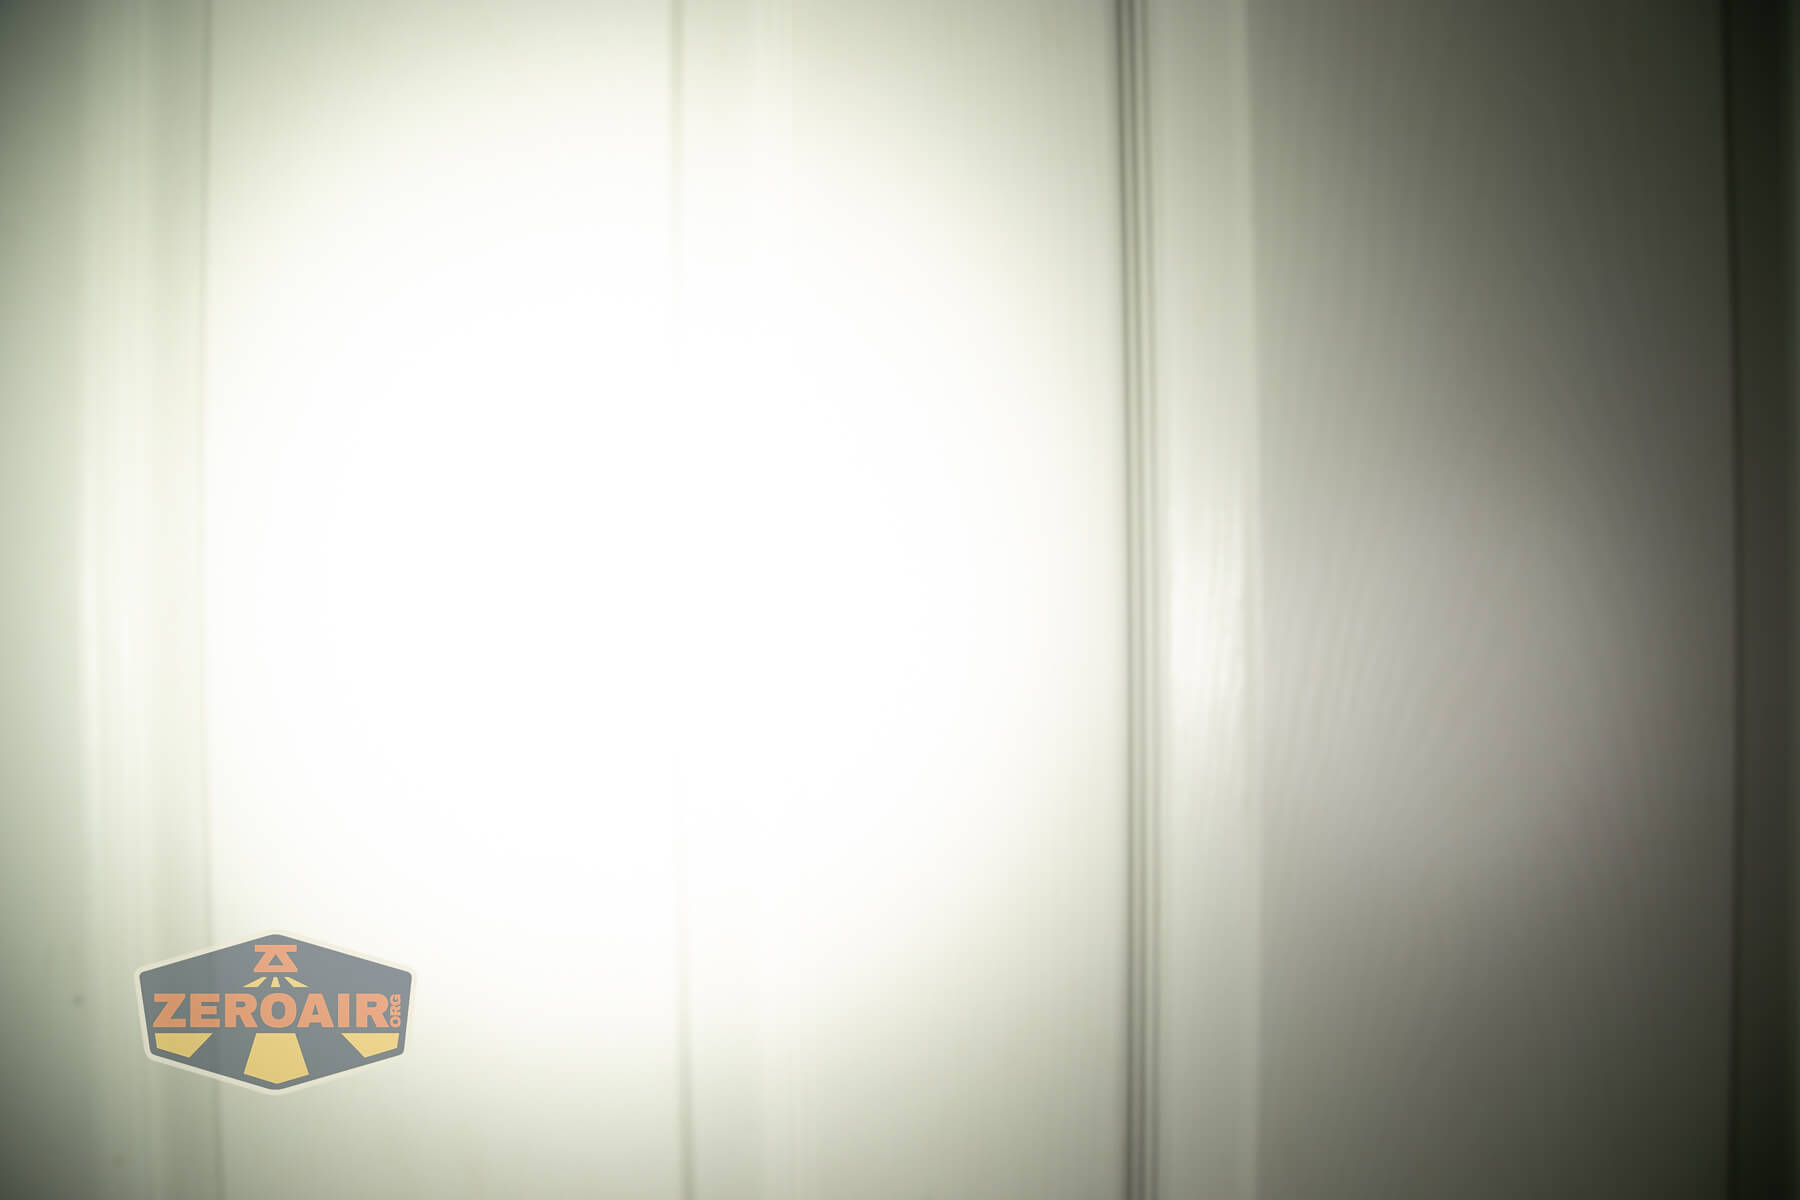
As you can see above, Wuben has used this very shallow TIR optic, which gives a very throwy beam profile (which I love!)
LED Color Report (CRI and CCT)
What we have here from this Samsung LH351d is a pleasantly neutral white (around 4700K to 5200K) and surprisingly high CRI.


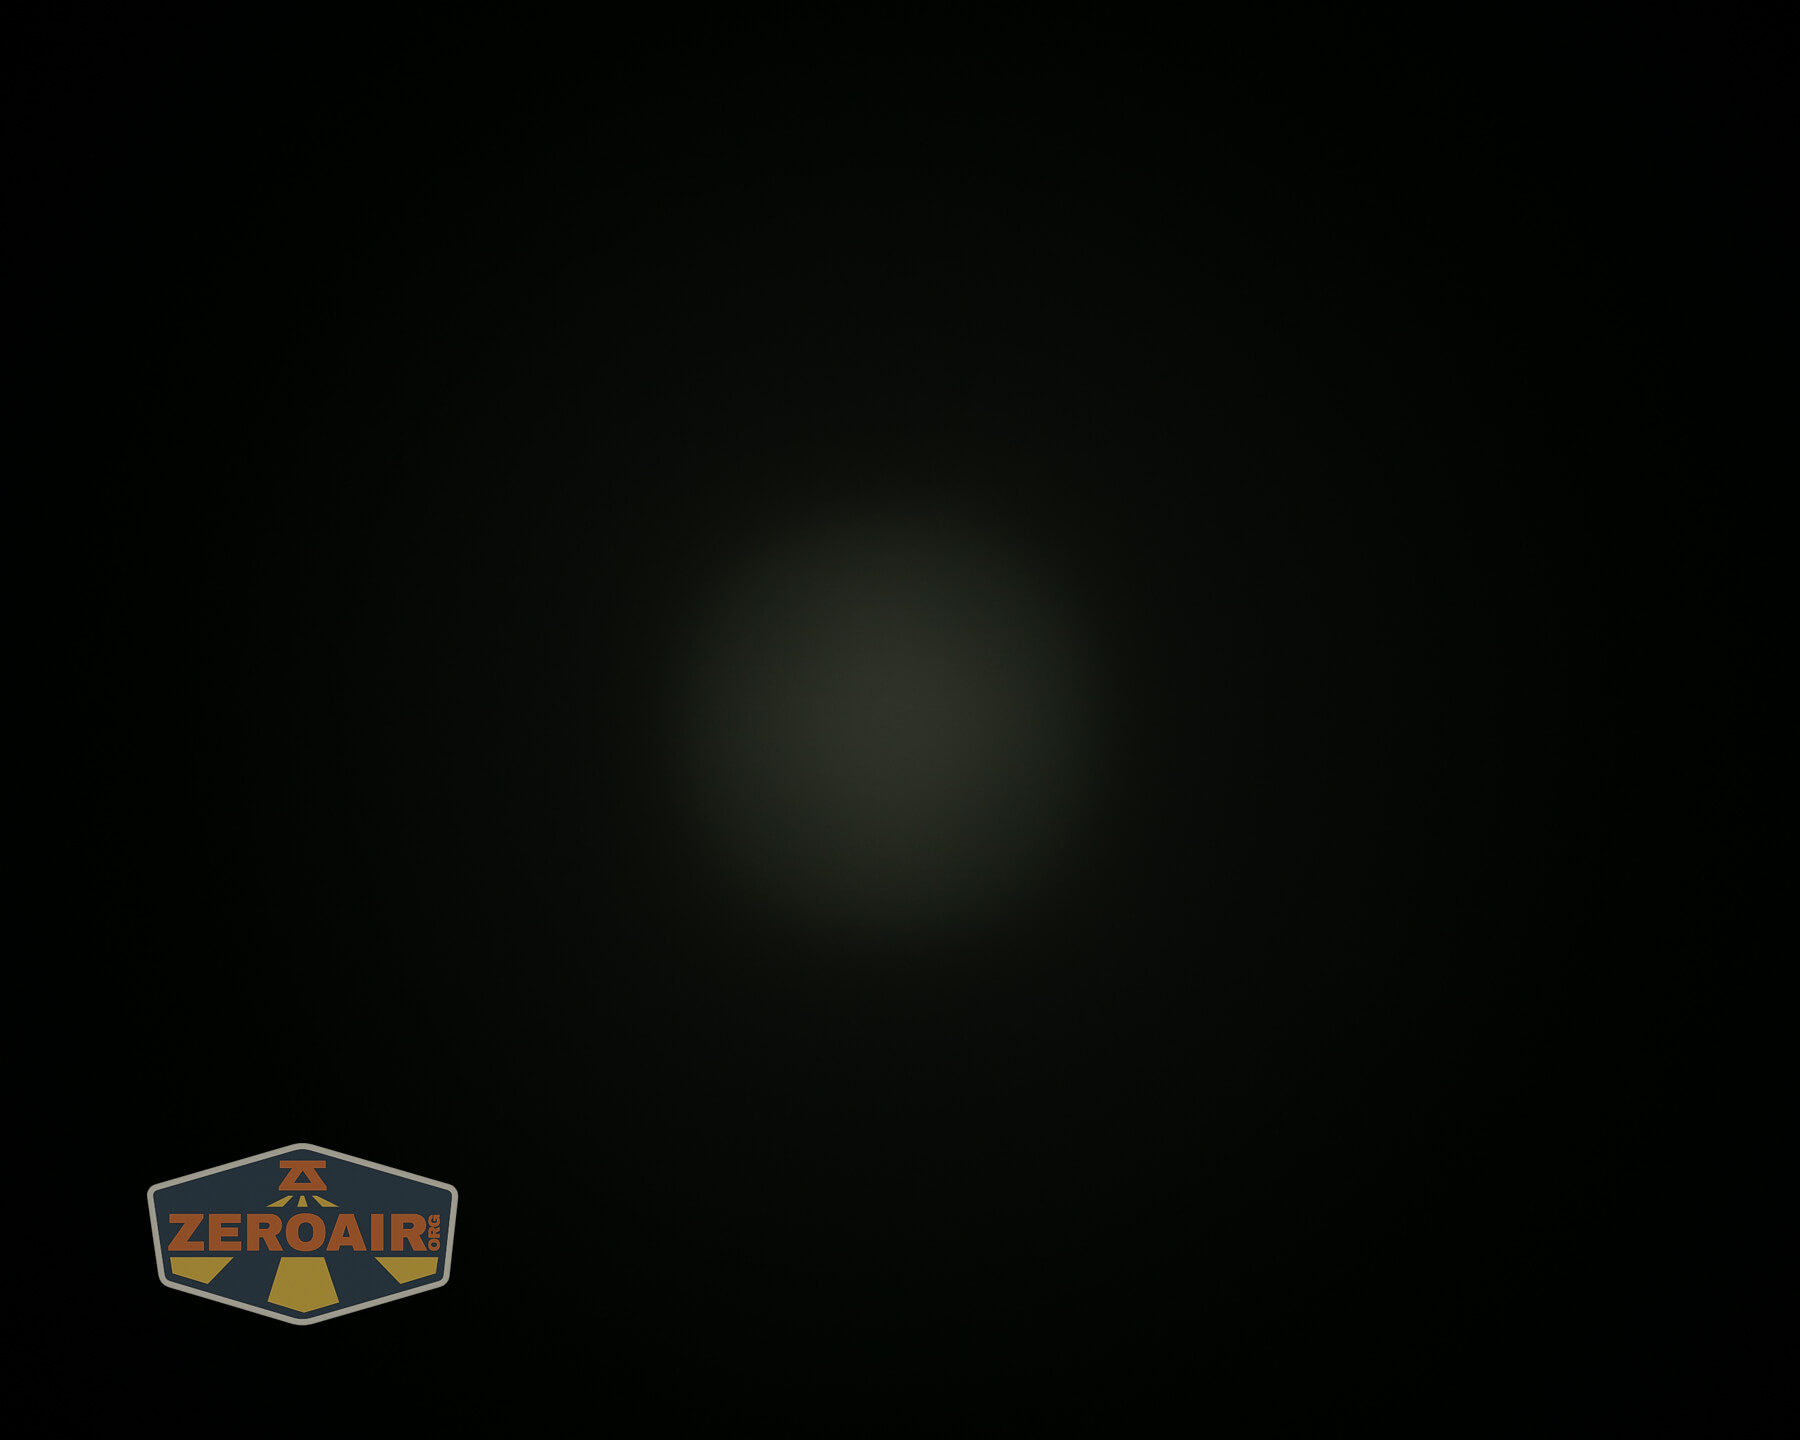
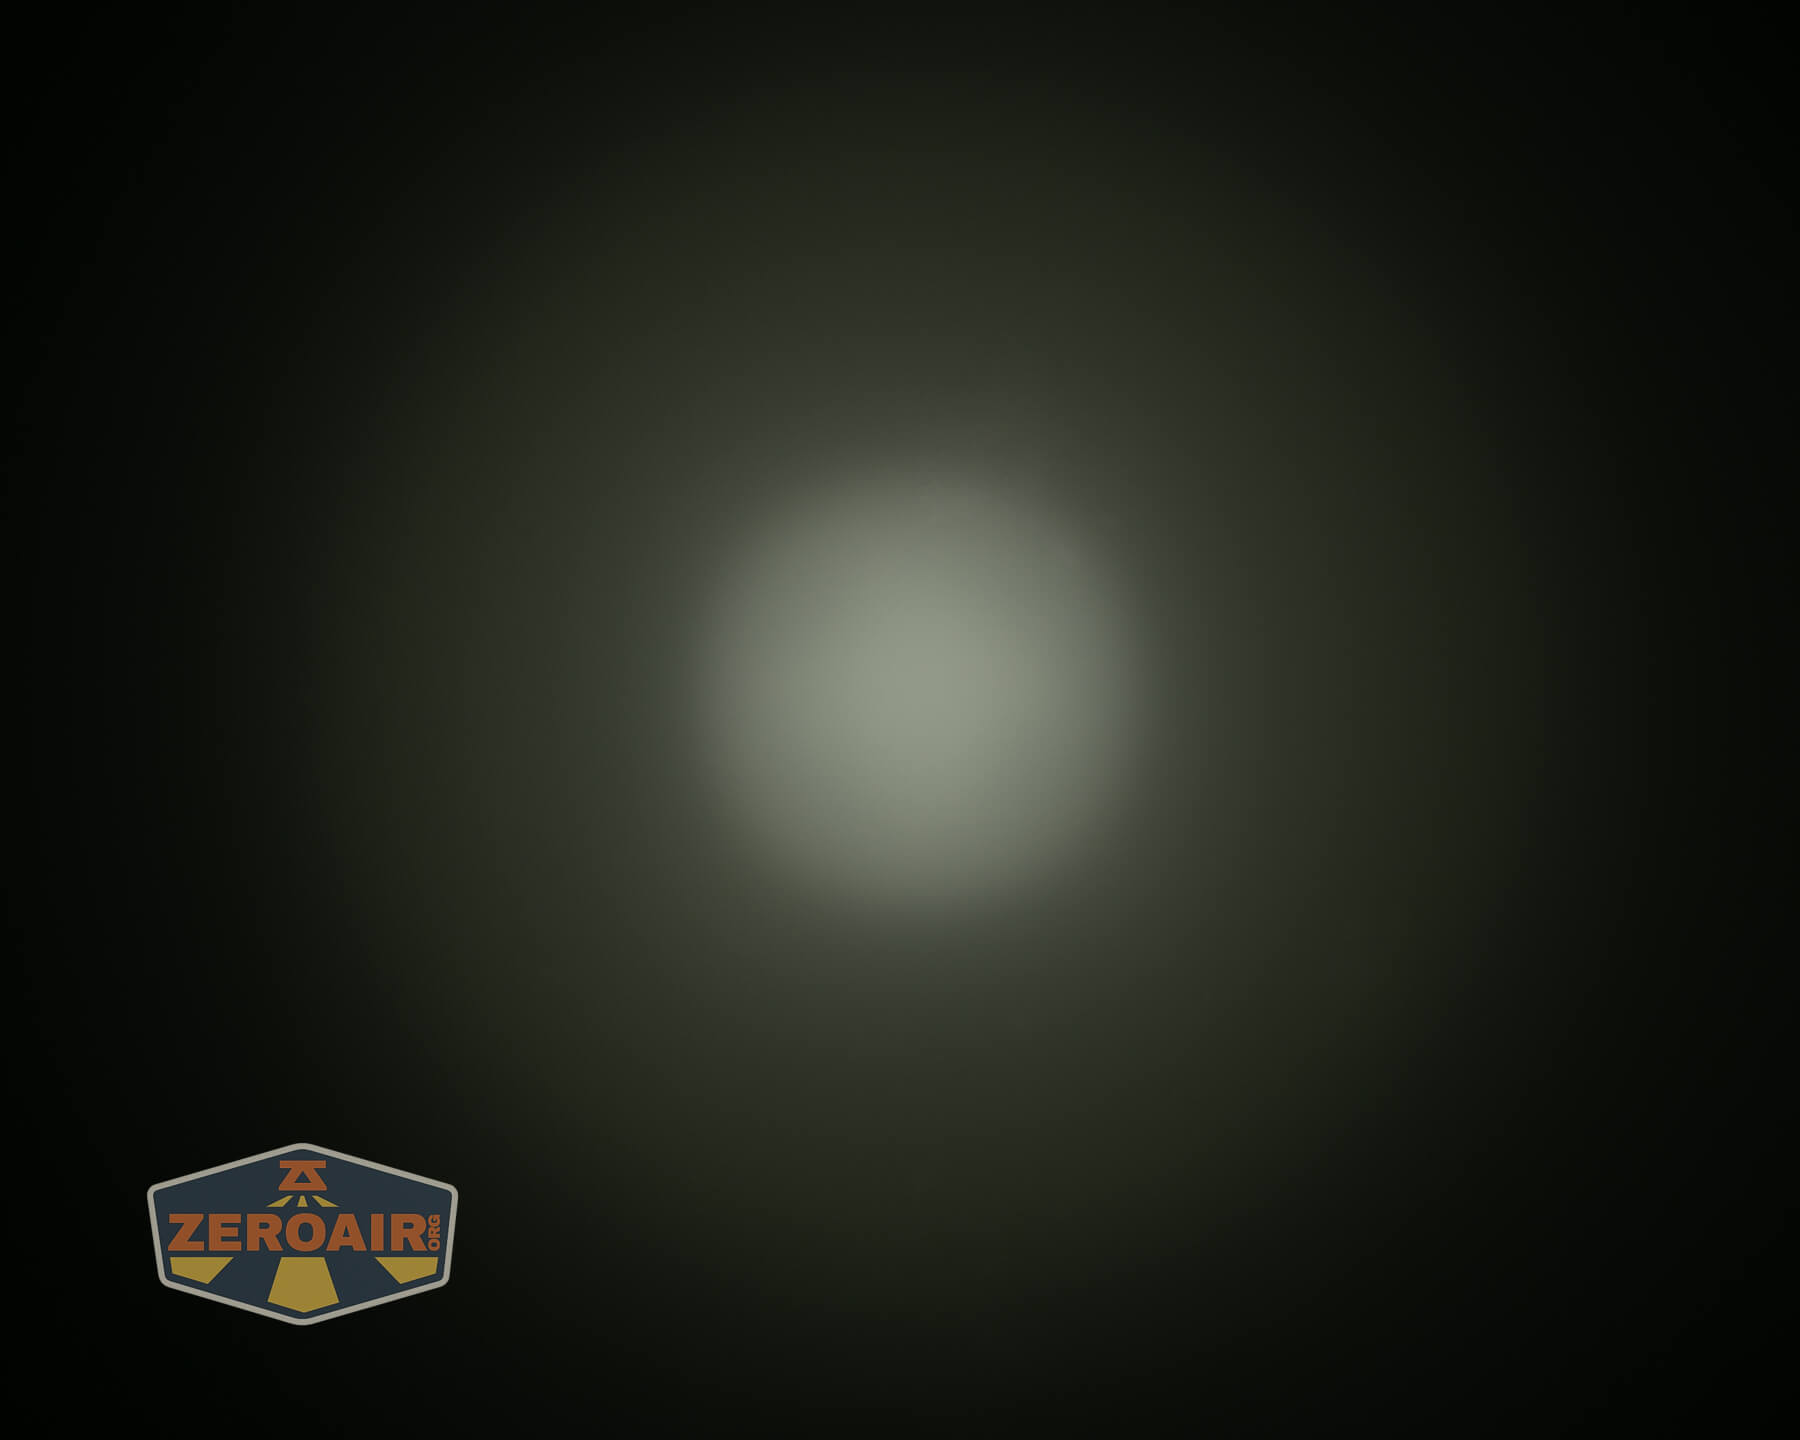
Beamshots
These beamshots always have the following settings: f8, ISO100, 0.3s shutter, and manual 5000K exposure. These photos are taken at floor level, and the beam hits the ceiling around 9 feet away.

Tint vs BLF-348 (KillzoneFlashlights.com 219b version) (affiliate link)
I keep the test flashlight on the left and the BLF-348 reference flashlight on the right.
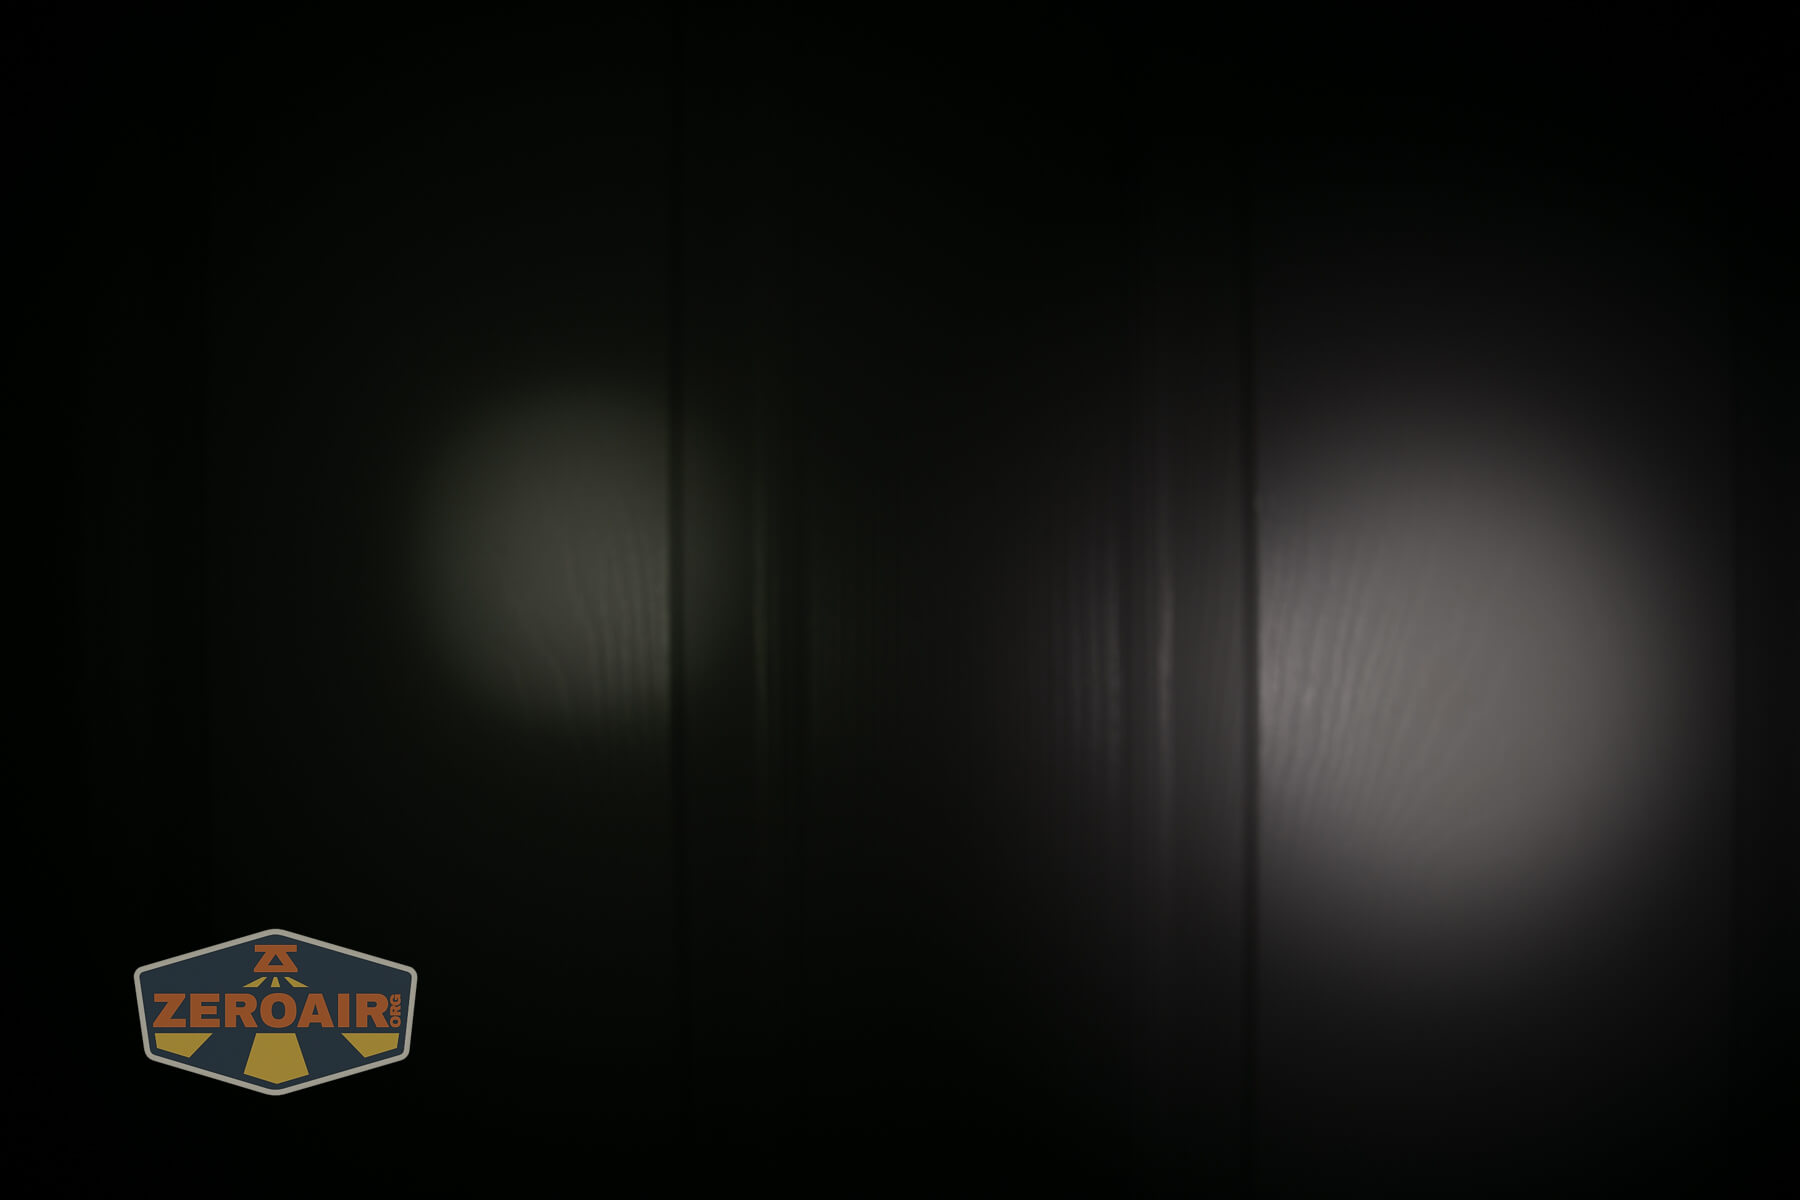
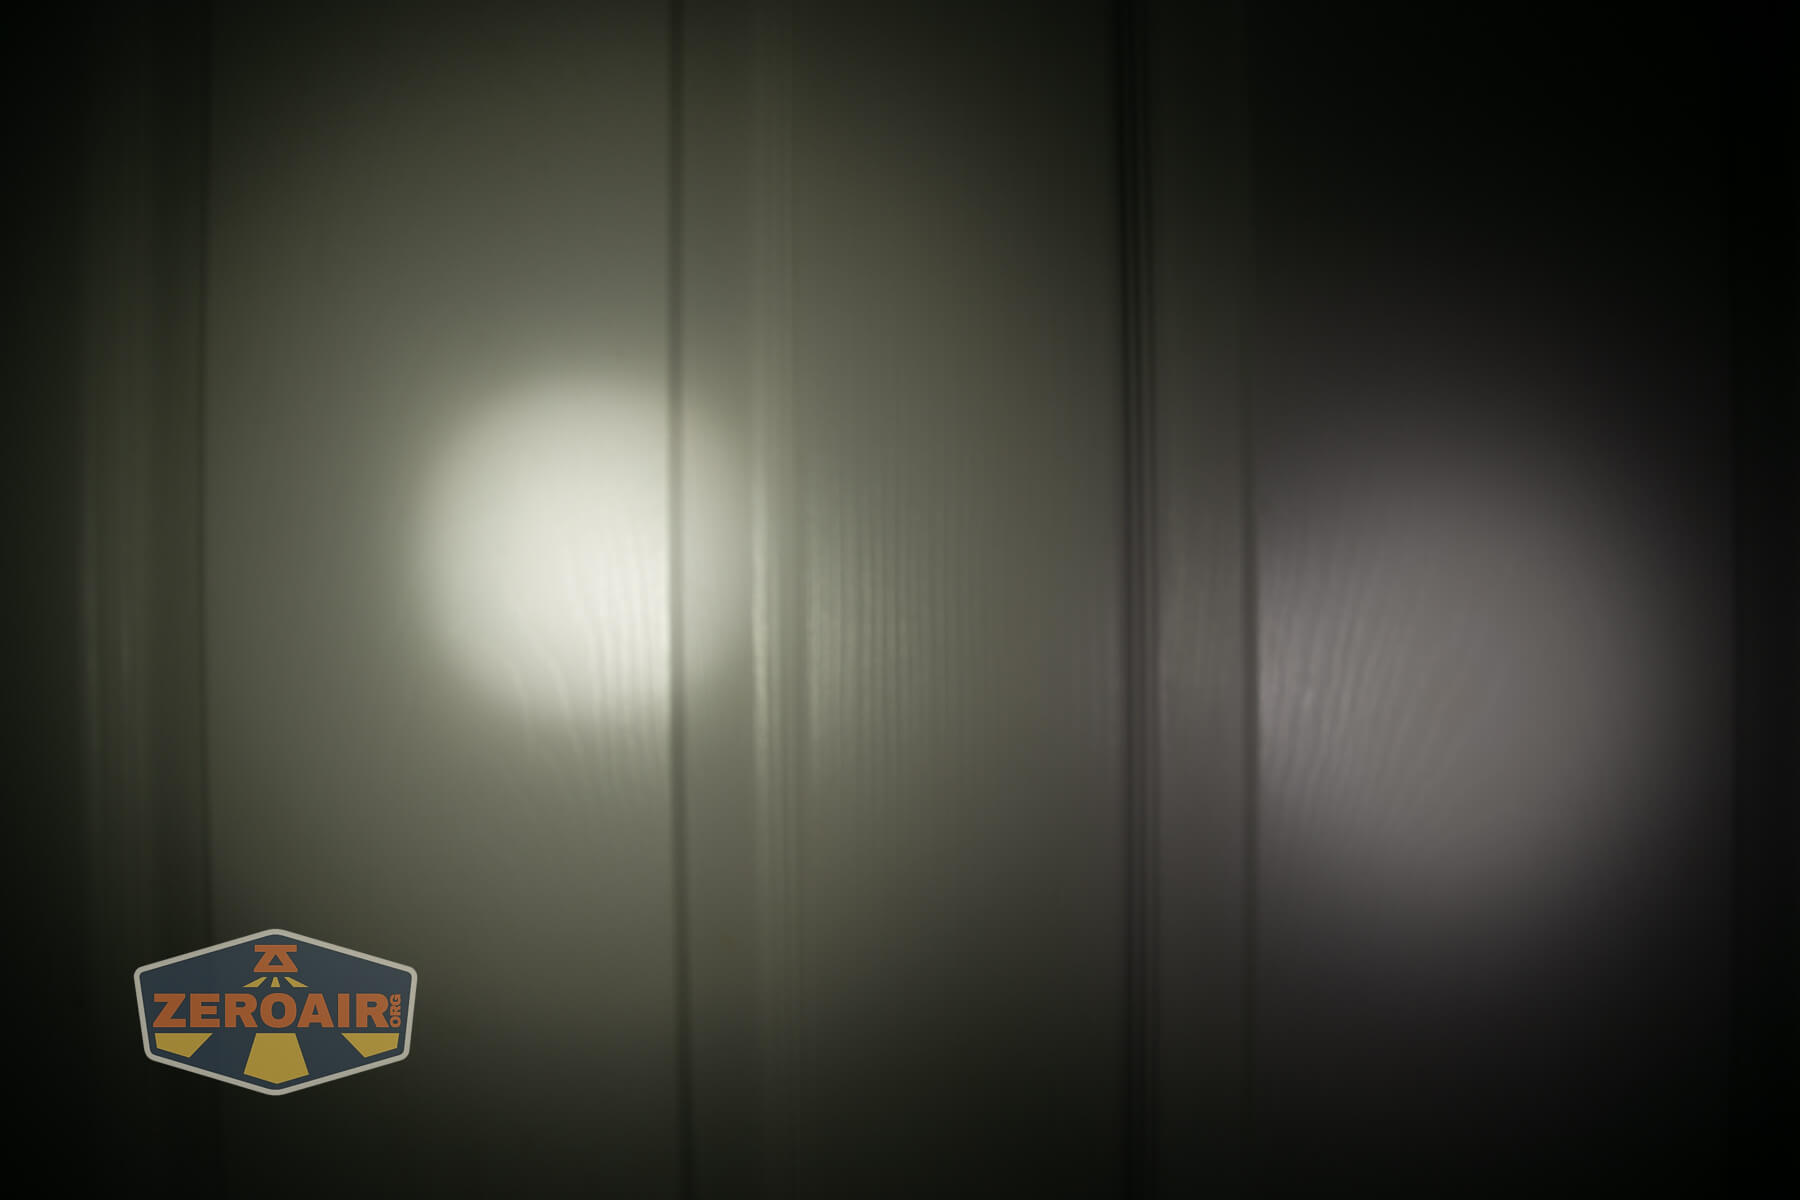
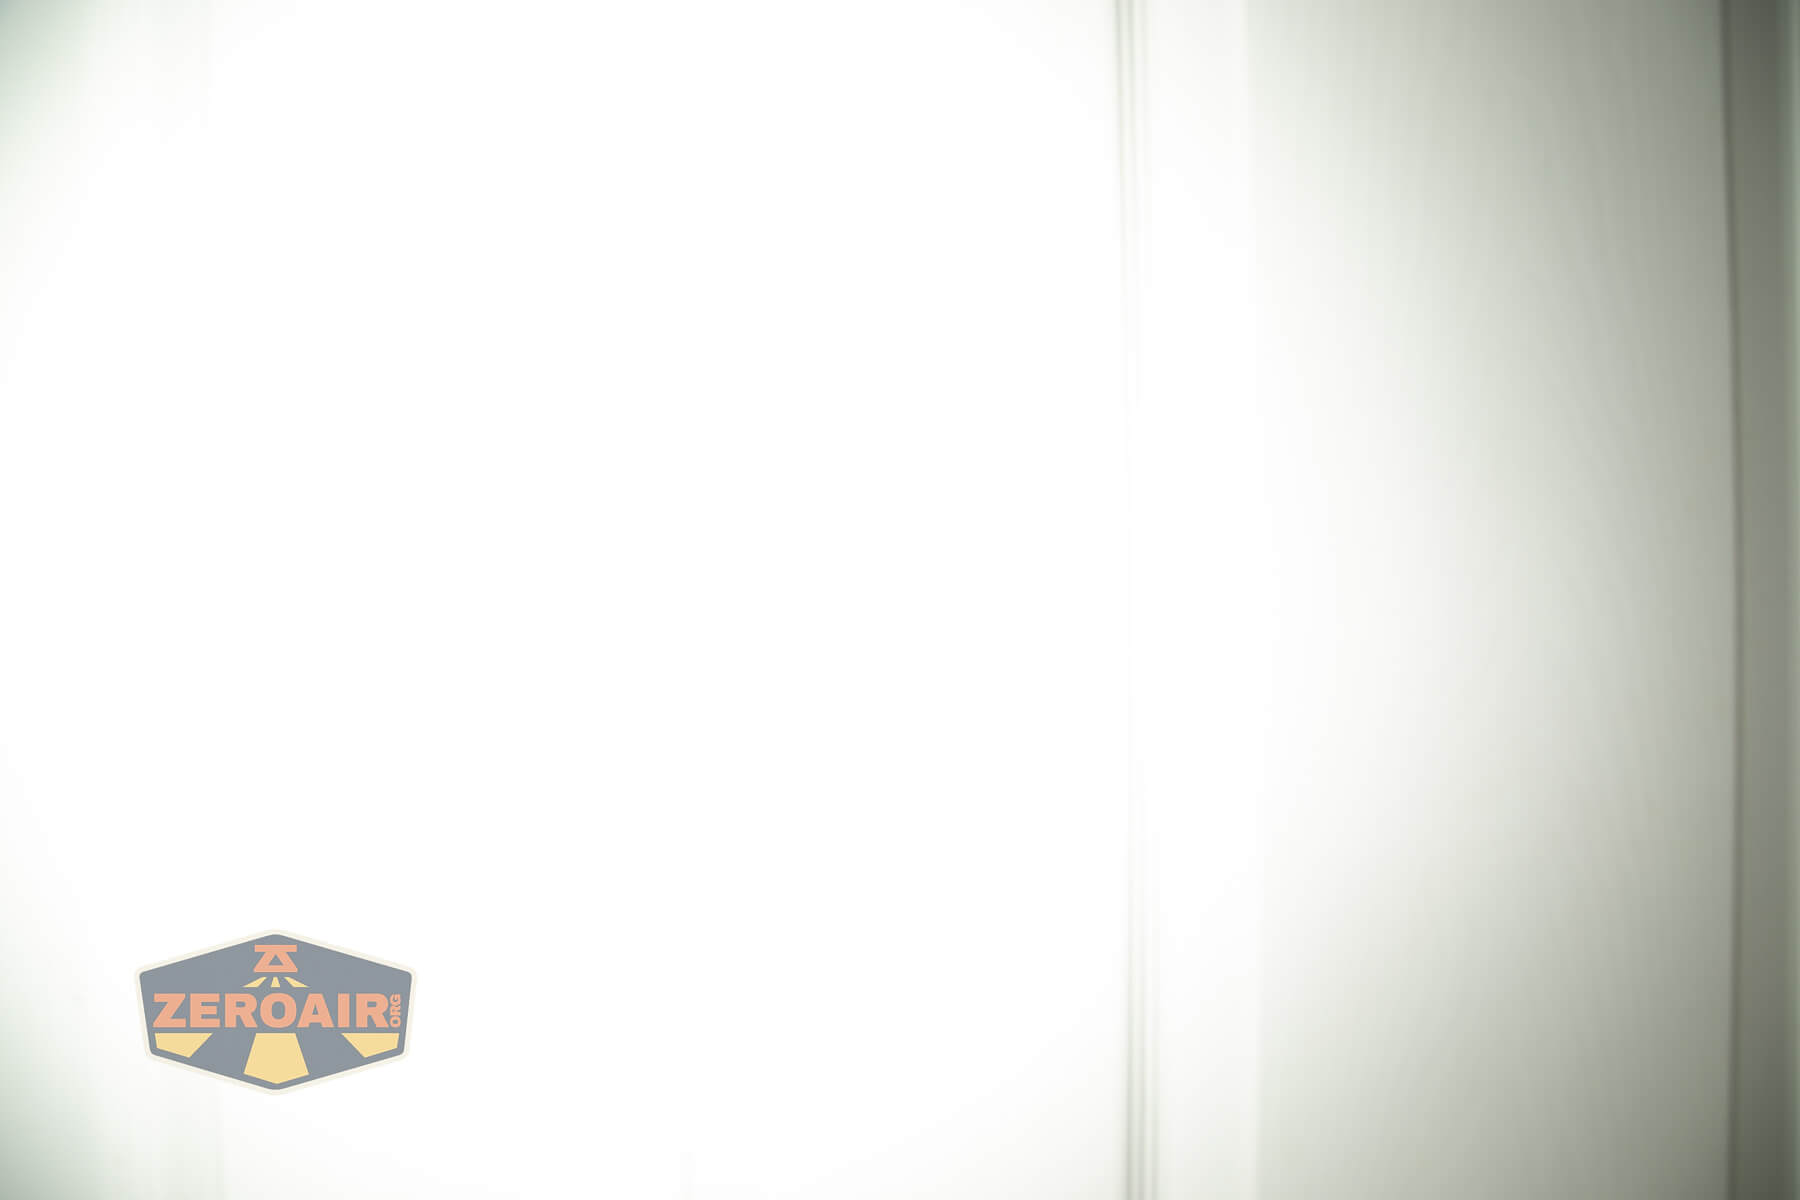
I compare everything to the KillzoneFlashlights.com 219b BLF-348 because it’s inexpensive and has the best tint!
Conclusion
What I like
- Good CCT (4700K-5200K)
- Good CRI (93)
- Brass body!
- Great user interface
- Programmable modes
- Plenty of tritium slots
- Replaceable 18350 (standard!)
- Unique design
What I don’t like
- Exposed USB-C port (even if it’s waterproof)
- Hard to use pocket clip
Notes
- This content originally appeared at zeroair.org. Please visit there for the best experience!
- Please use my Amazon.com referral link to help support zeroair.org!
- Please support me on Patreon! I deeply appreciate your support!
Discover more from ZeroAir Reviews
Subscribe to get the latest posts sent to your email.