Lumintop SD90 Flashlight Review
The Lumintop SD90 flashlight is an updated SD90 with current features and a great new emitter. That light was already fun, and the update is better!
Official Specs and Features
Here’s a link to the Lumintop SD90 flashlight product page.
Versions
I believe there’s just one version of the Lumintop SD90 flashlight.
Price
The going price for this thrower is $379.00.
Short Review
Wow, what a feature set on this Lumintop SD90 flashlight. First of all, I love the look of this light. This is a very flashlighty flashlight. You may already know it, but I love that design aspect of lights. Aside from the looks, this light is quite a performer! Luminus SBT90.2 emitters are usually great, and this is no exception.
Long Review
The Big Table
| Lumintop SD90 | |
|---|---|
| Emitter: | Luminus SBT90.2 |
| Price in USD at publication time: | $379.00 |
| Cell: | 4×18650 |
| Turbo Runtime Graph | High Runtime Graph |
| LVP? | Yes |
| Switch Type: | E-Switch |
| Quiescent Current (mA): | 0.18mA with green switch
0.04mA with switch off |
| On-Board Charging? | Yes |
| Charge Port Type: | USB-C |
| Charge Graph | |
| Power off Charge Port | with cells: all modes
other configurations: no modes |
| Claimed Lumens (lm) | 7500 |
| Measured Lumens (at 30s) | 4421 (58.9% of claim)^ (see note on cells in Power and Runtime section!) |
| Candela per Lumen | 157.4 |
| Claimed Throw (m) | 1700 |
| Candela (Calculated) in cd (at 30s) | 19310lux @ 5.924m = 677661cd |
| Throw (Calculated) (m) | 1646.4 (96.8% of claim)^ |
| Claimed CCT | – |
| Measured CCT Range (K) | 4600-6100 Kelvin |
| Item provided for review by: | Lumintop |
| All my Lumintop reviews! | |
^ Measurement disclaimer: Testing flashlights is my hobby. I use hobbyist-level equipment for testing, including some I made myself. Try not to get buried in the details of manufacturer specifications versus measurements recorded here; A certain amount of difference (say, 10 or 15%) is perfectly reasonable.
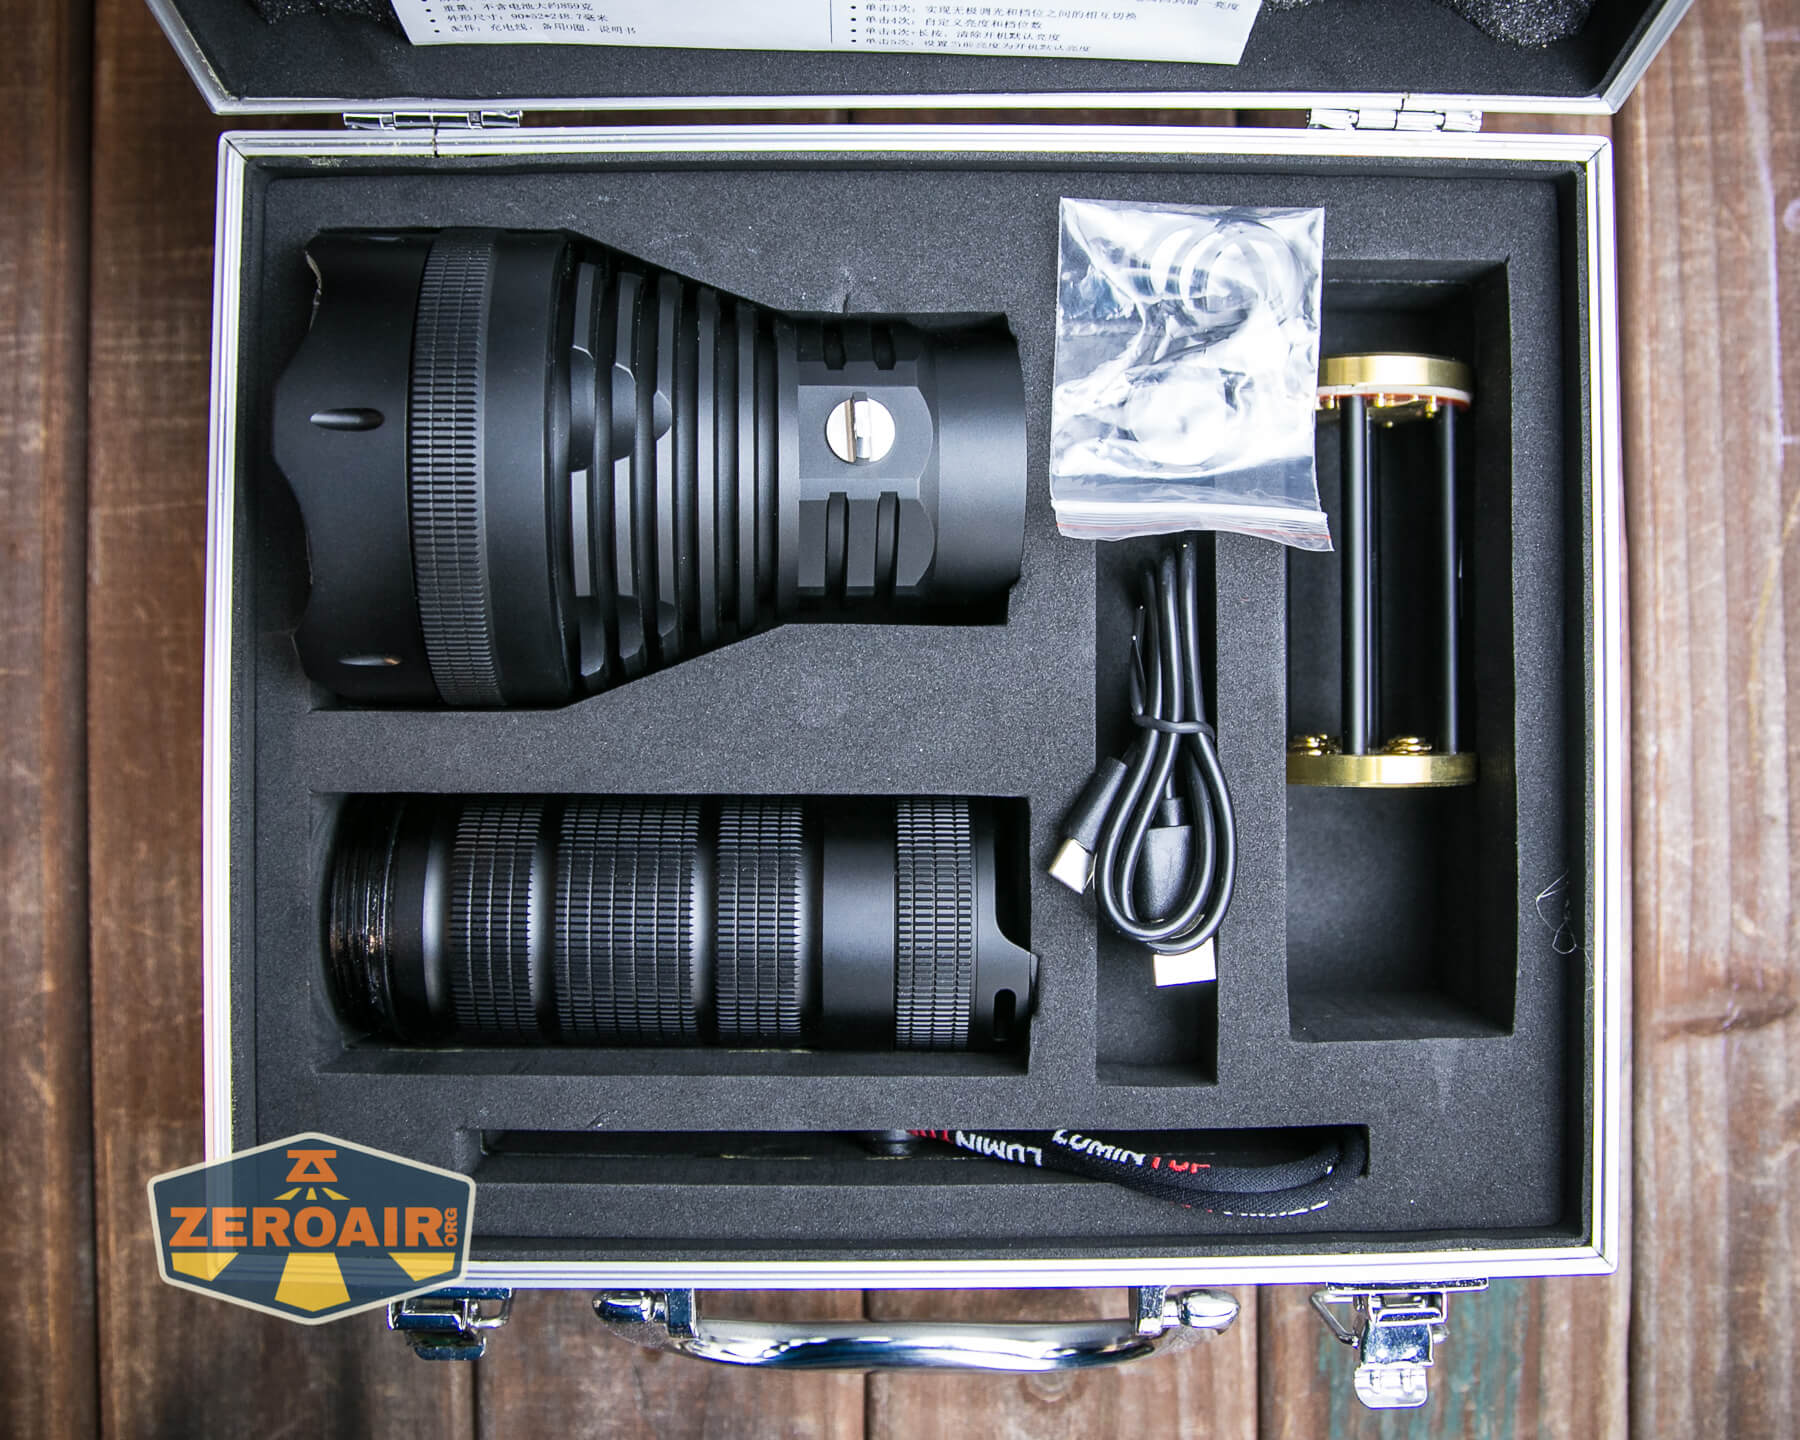
What’s Included

- Lumintop SD90 Flashlight
- Lanyard
- Spare o-rings (2)
- Manual
Package and Manual

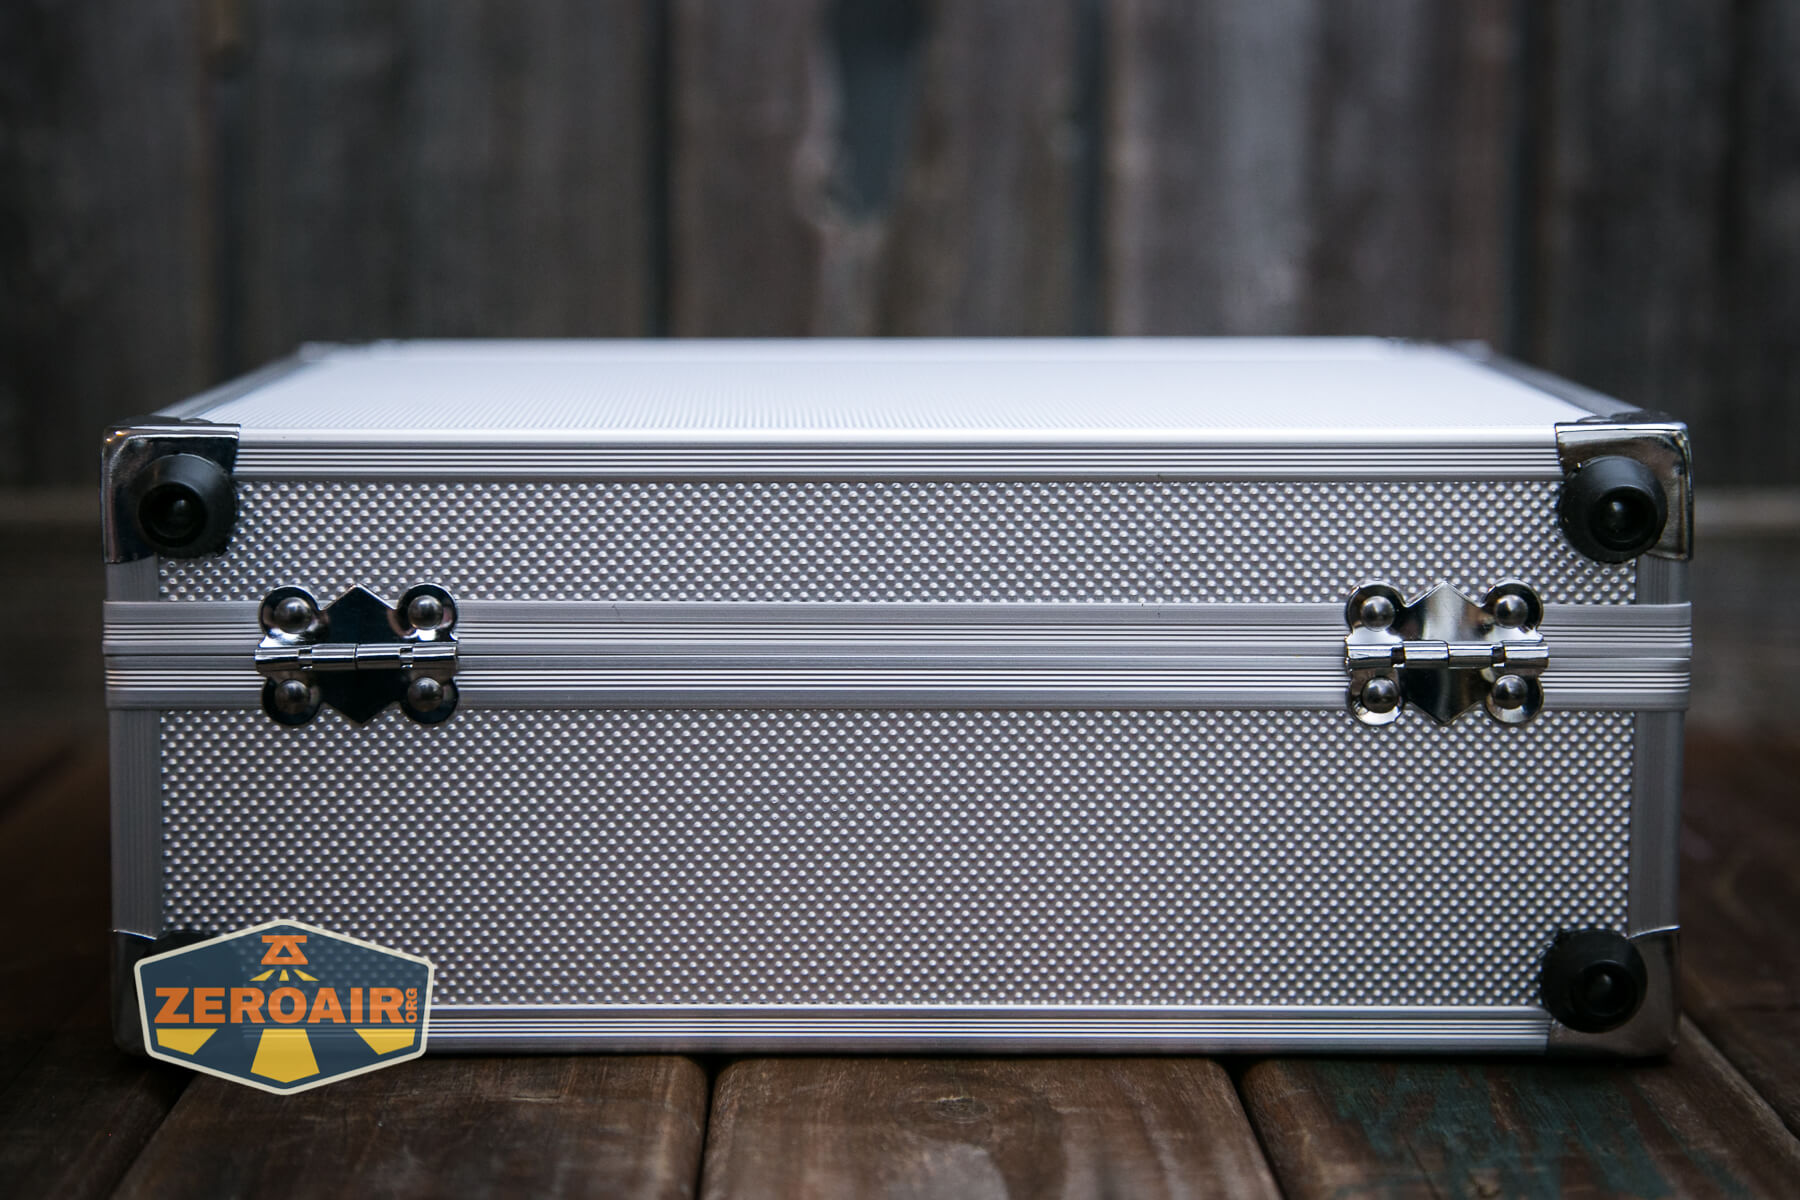
Behold the case the Lumintop SD90 ships in. What a great case! Based on how the light performs and just the overall characteristics of it, this seems like a great light to leave in an automobile as an emergency-use light.

A plastic cover is over the lens.
Build Quality and Disassembly
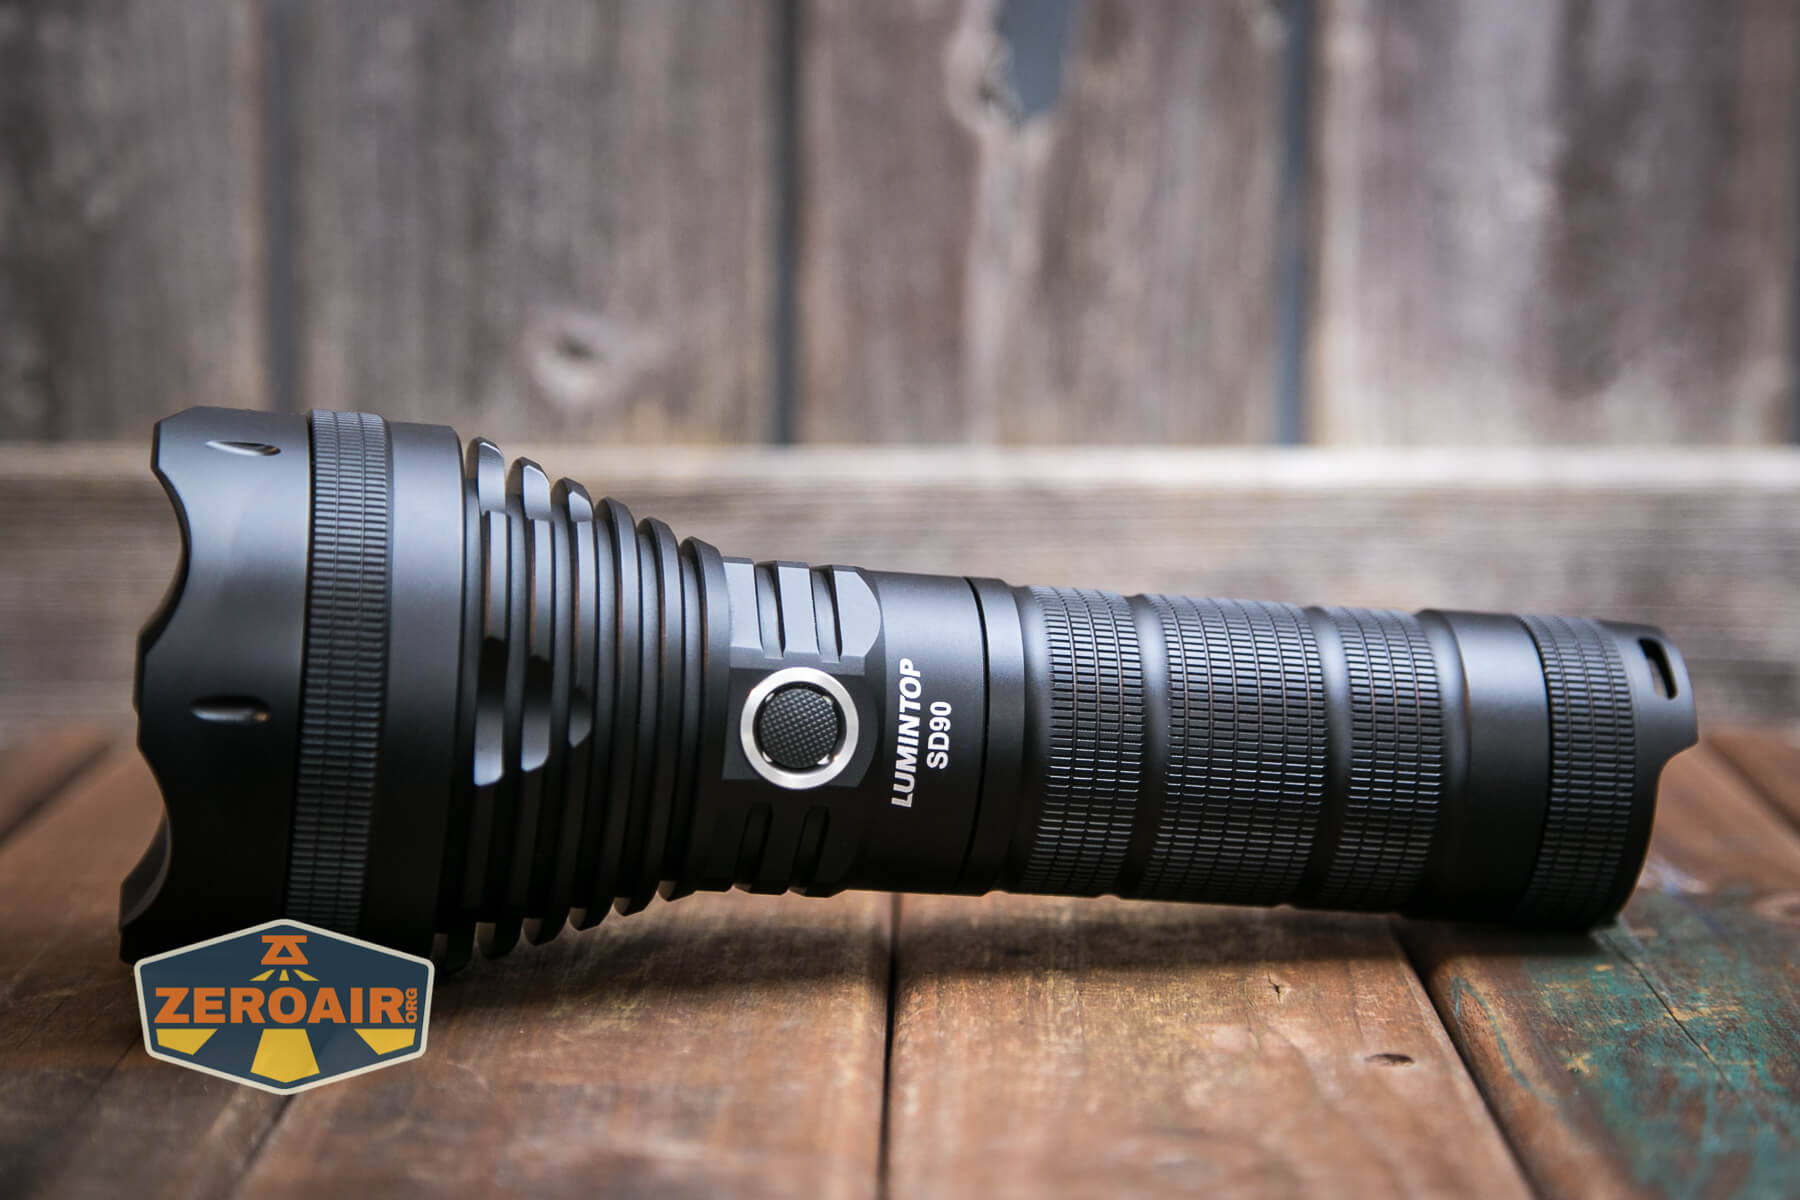
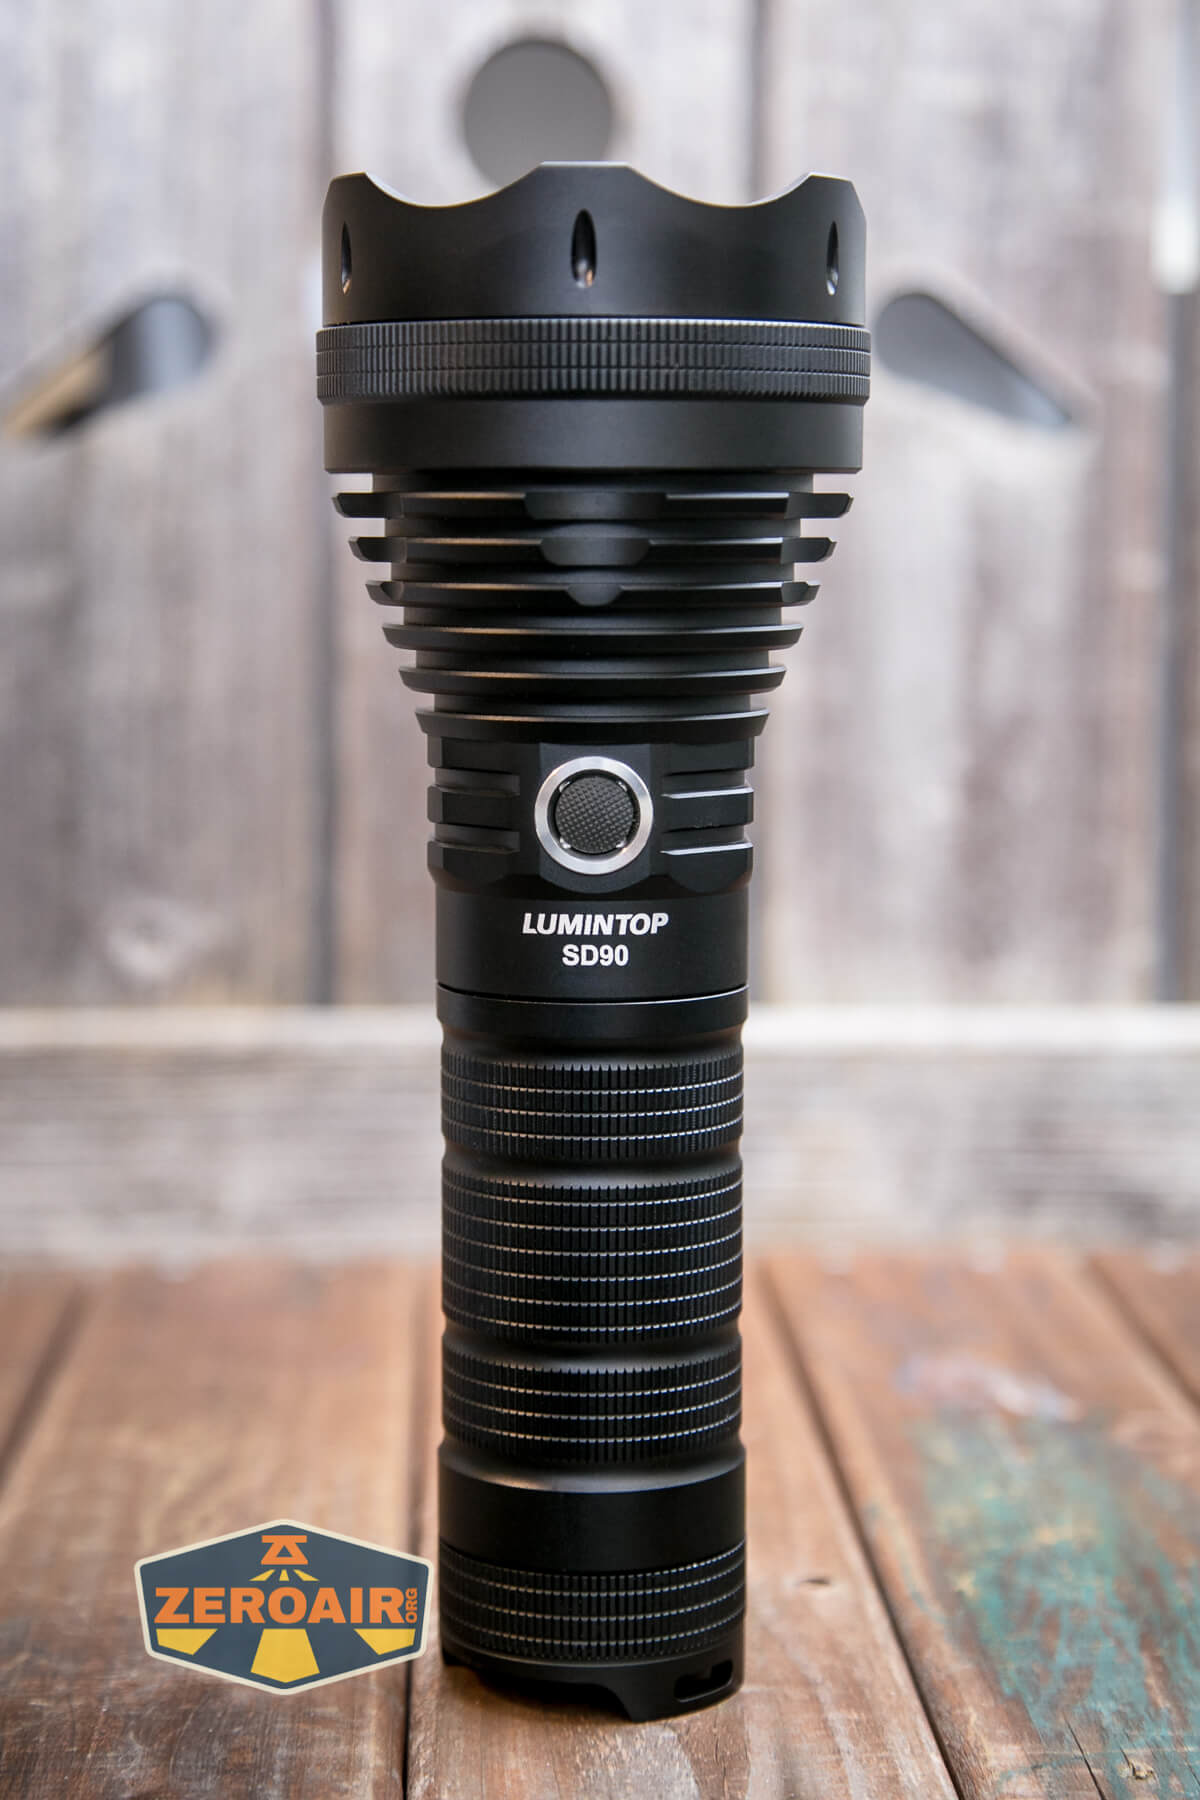
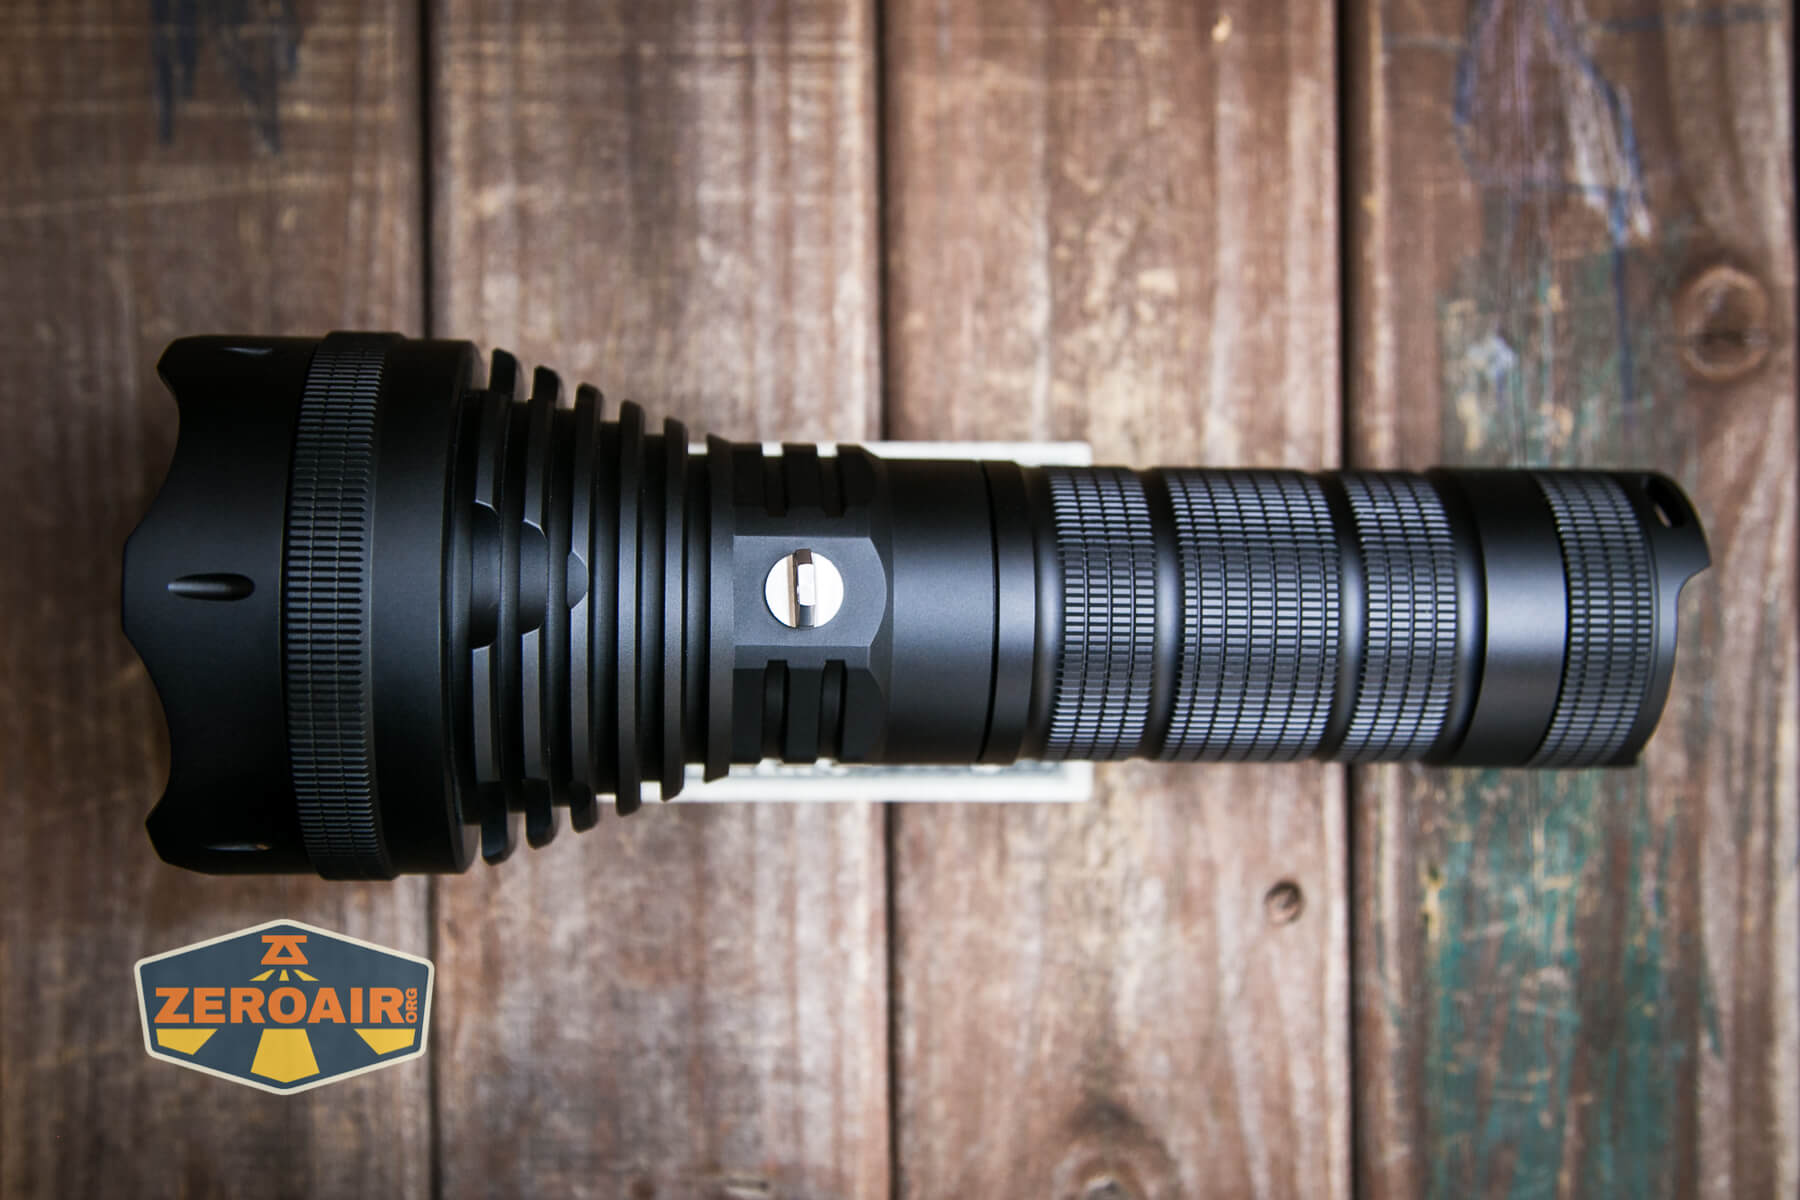
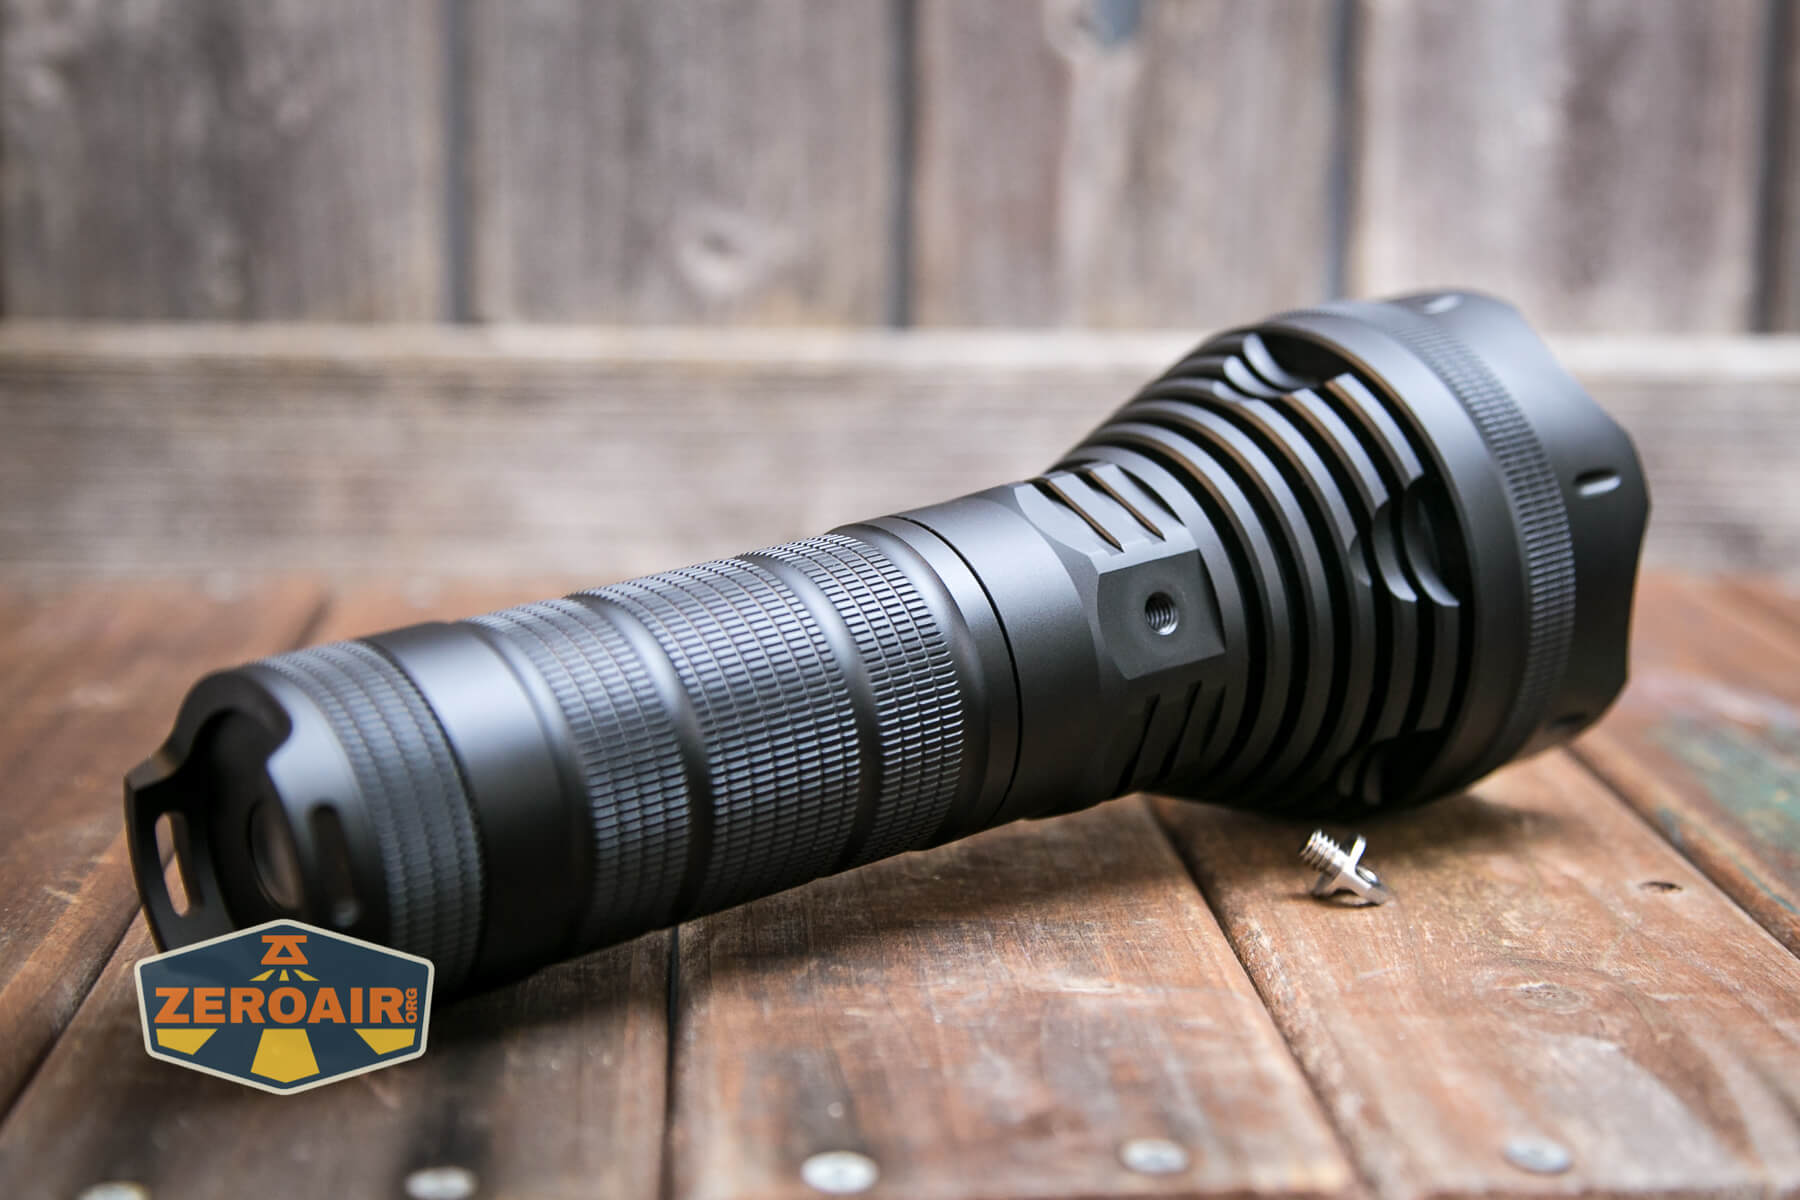
The SD90 is clearly from the “top tier” of Lumintop production. Build quality is great. As I said above, the design (shape!) is also great!
I mentioned above that the SD90 is an update to an older model. Technically true, but that old model had a different name. It was the Lumintop SD75, and I tested one way back when. Some important (and great) changes have been made where needed, but the overall design has stayed basically the same (which is great, too).
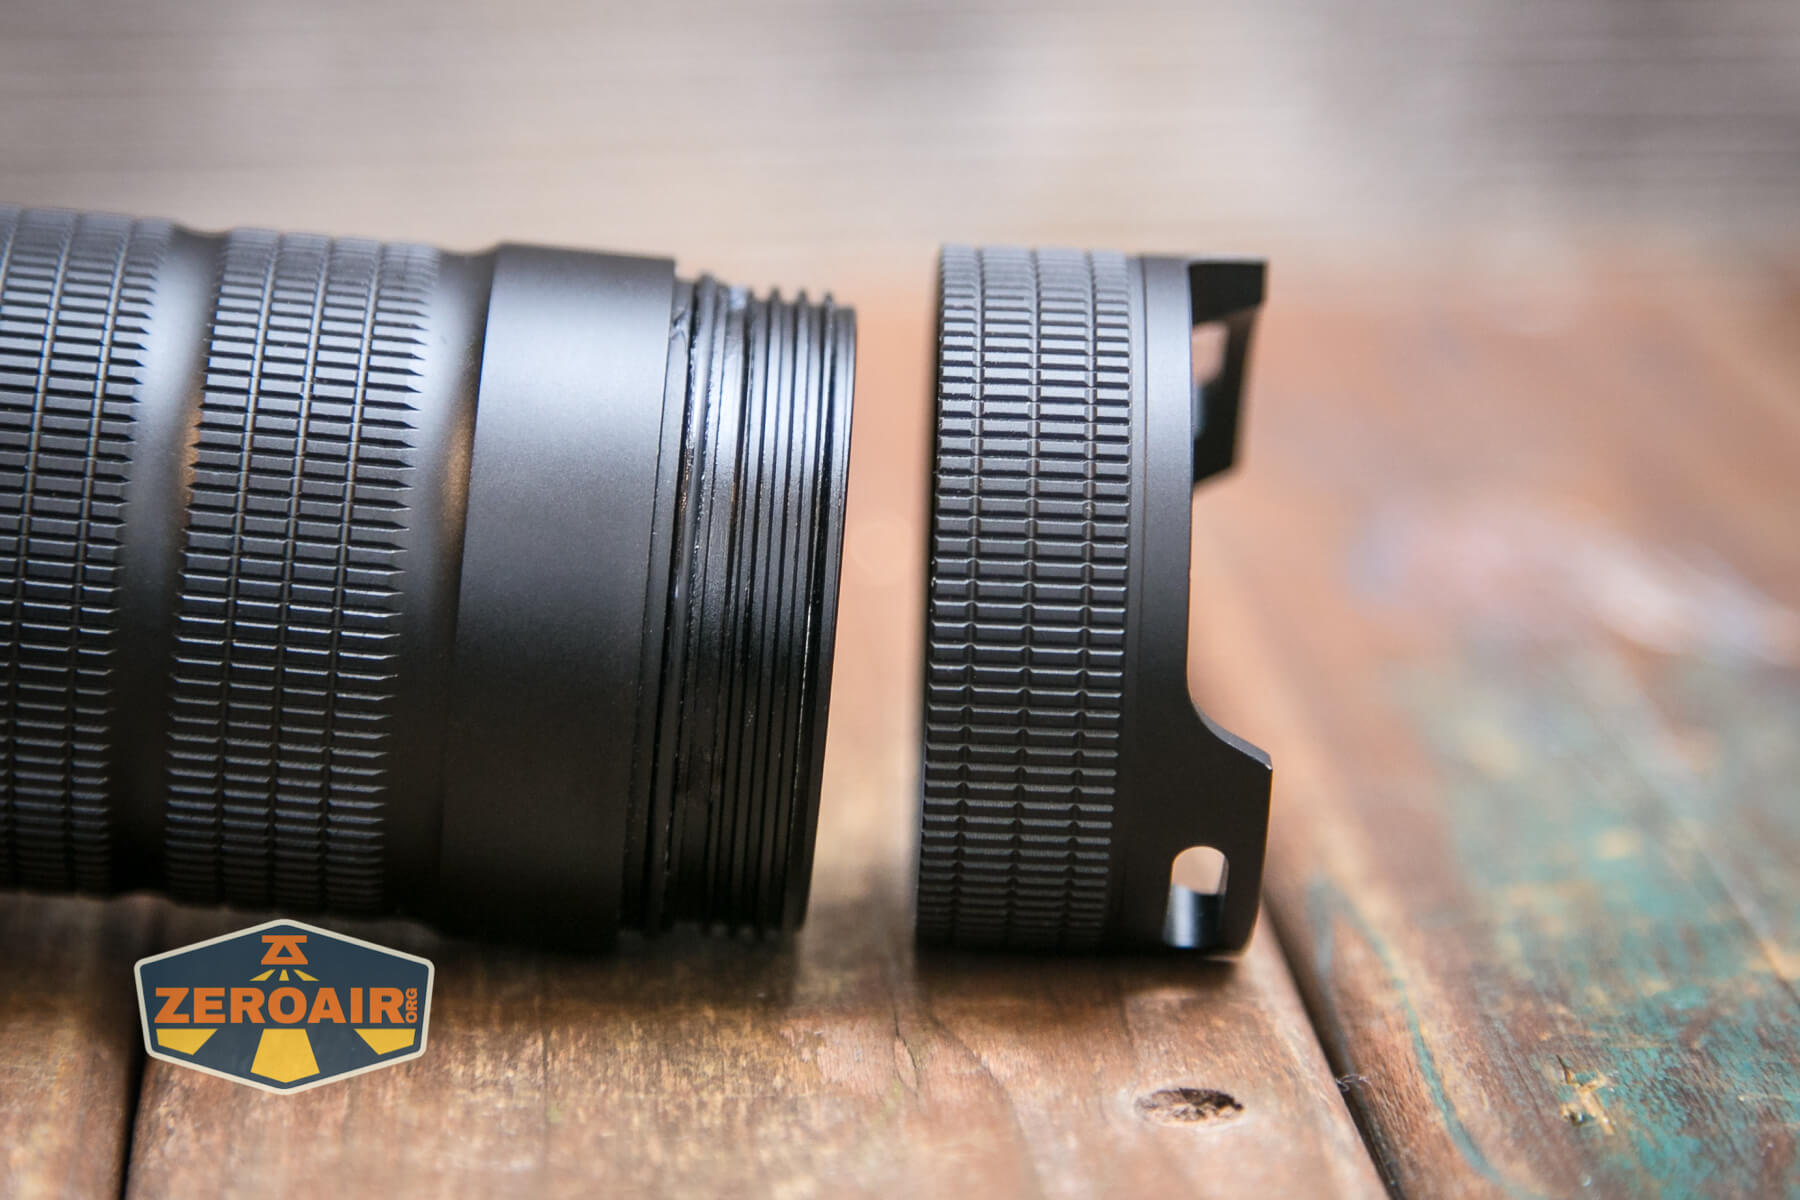
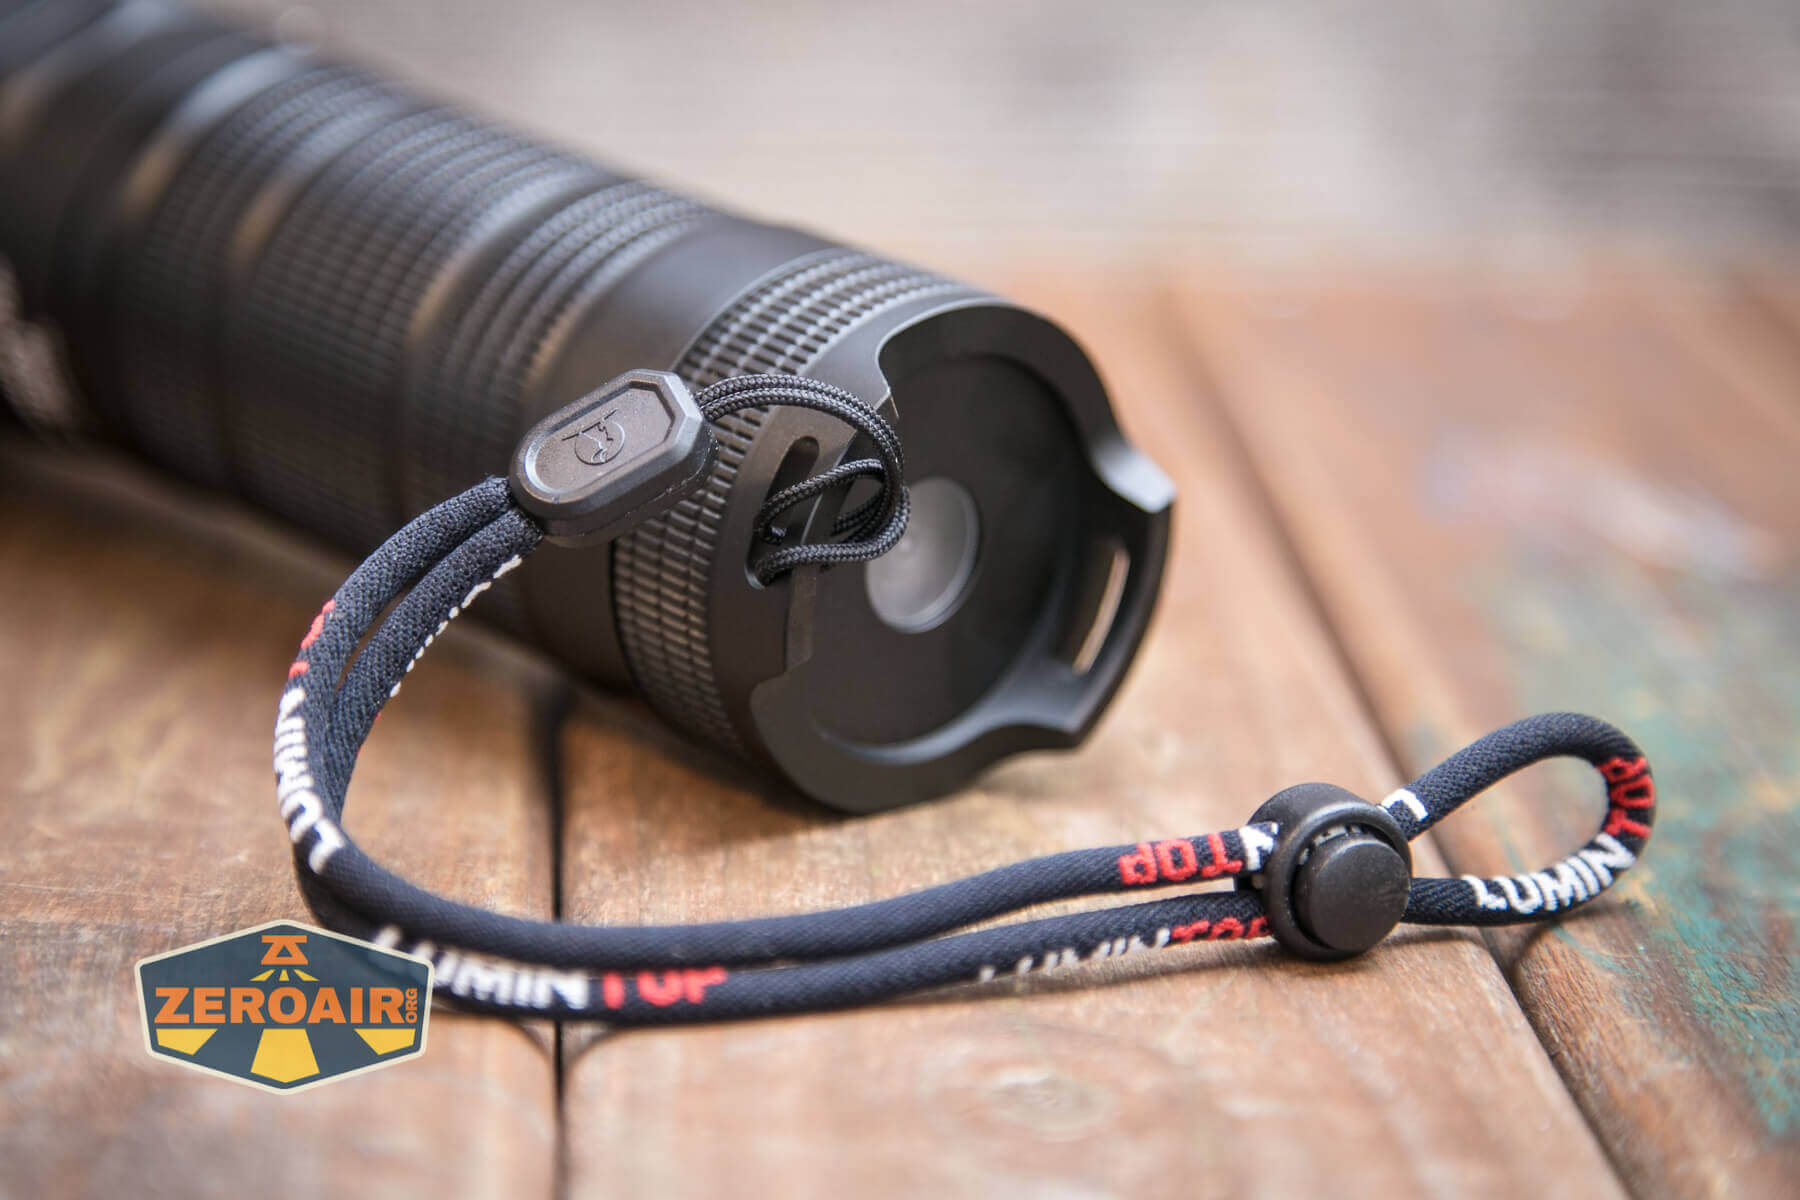
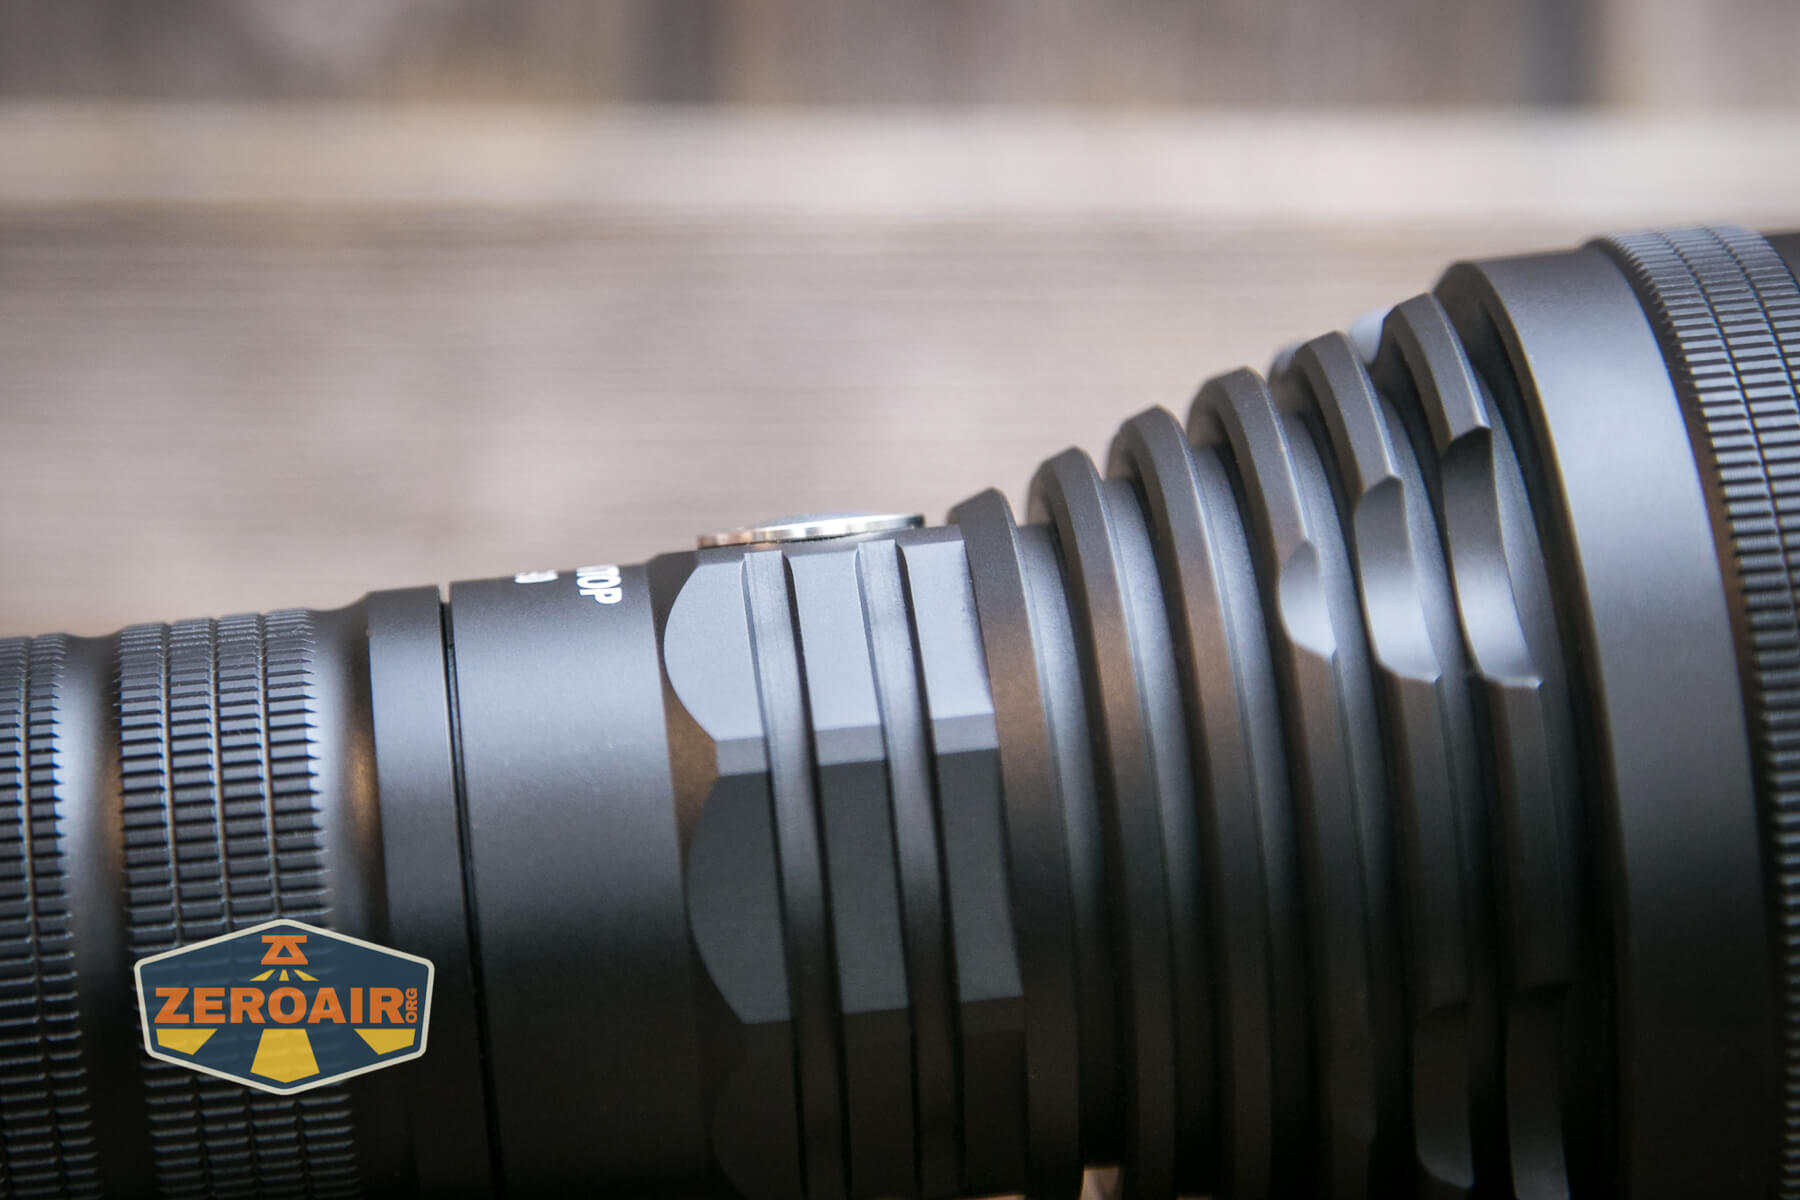
Big, thick, beefy threads are seen on the tailcap. This tailcap has a nice grip area, too.
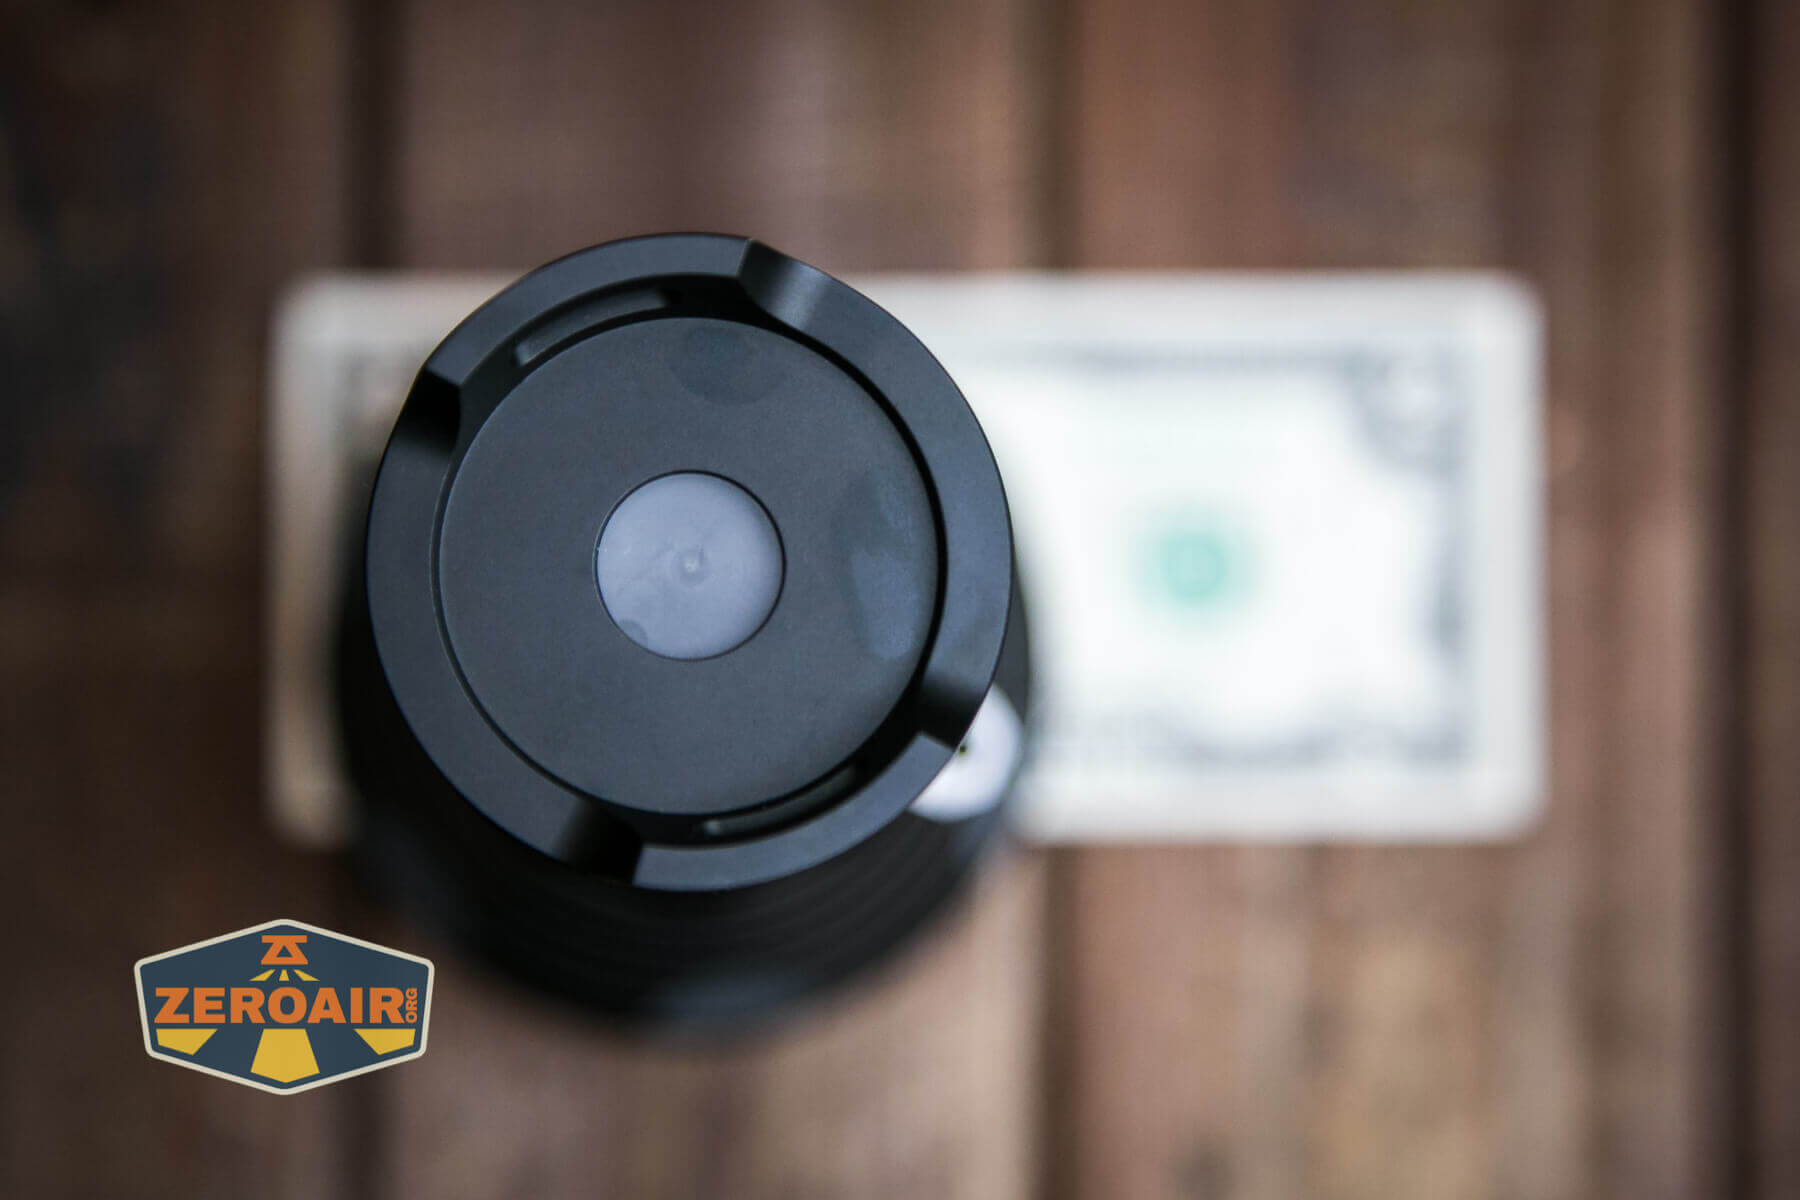
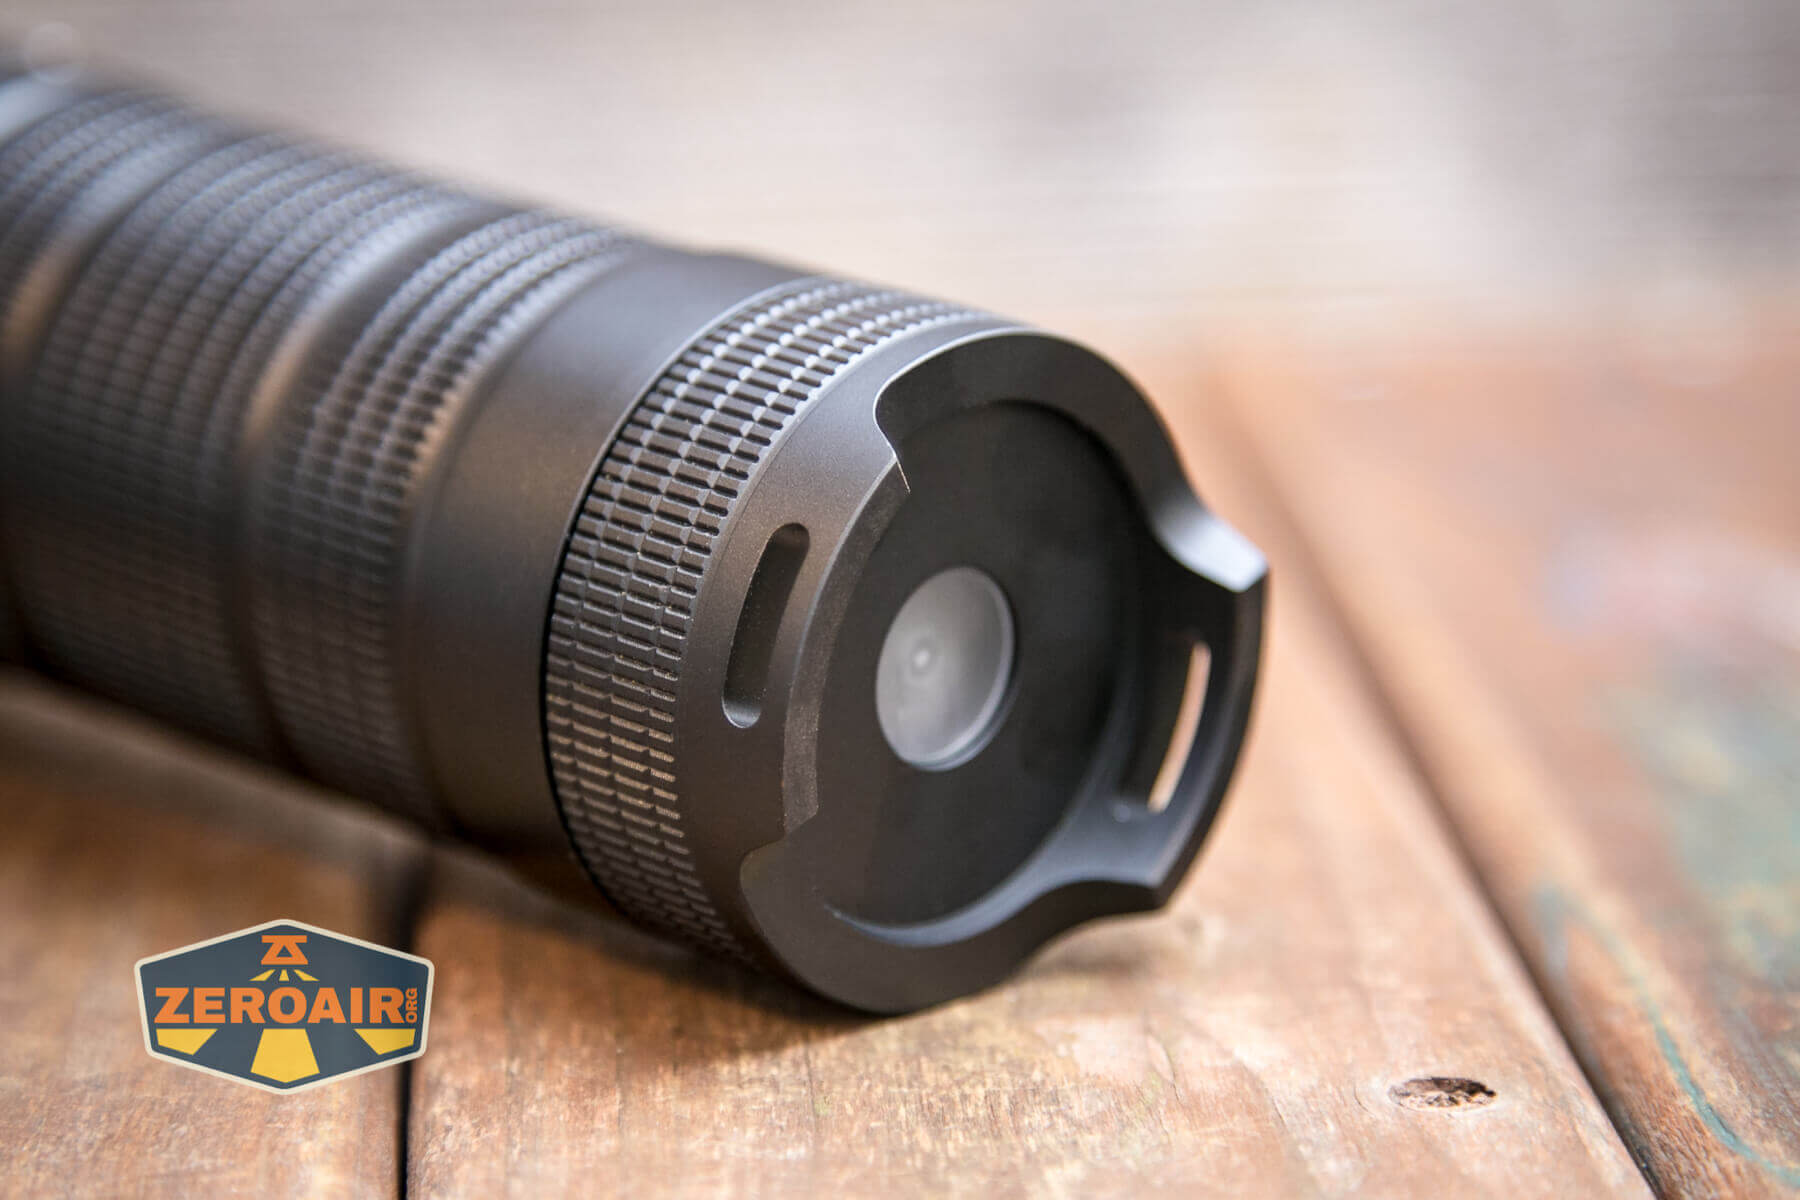
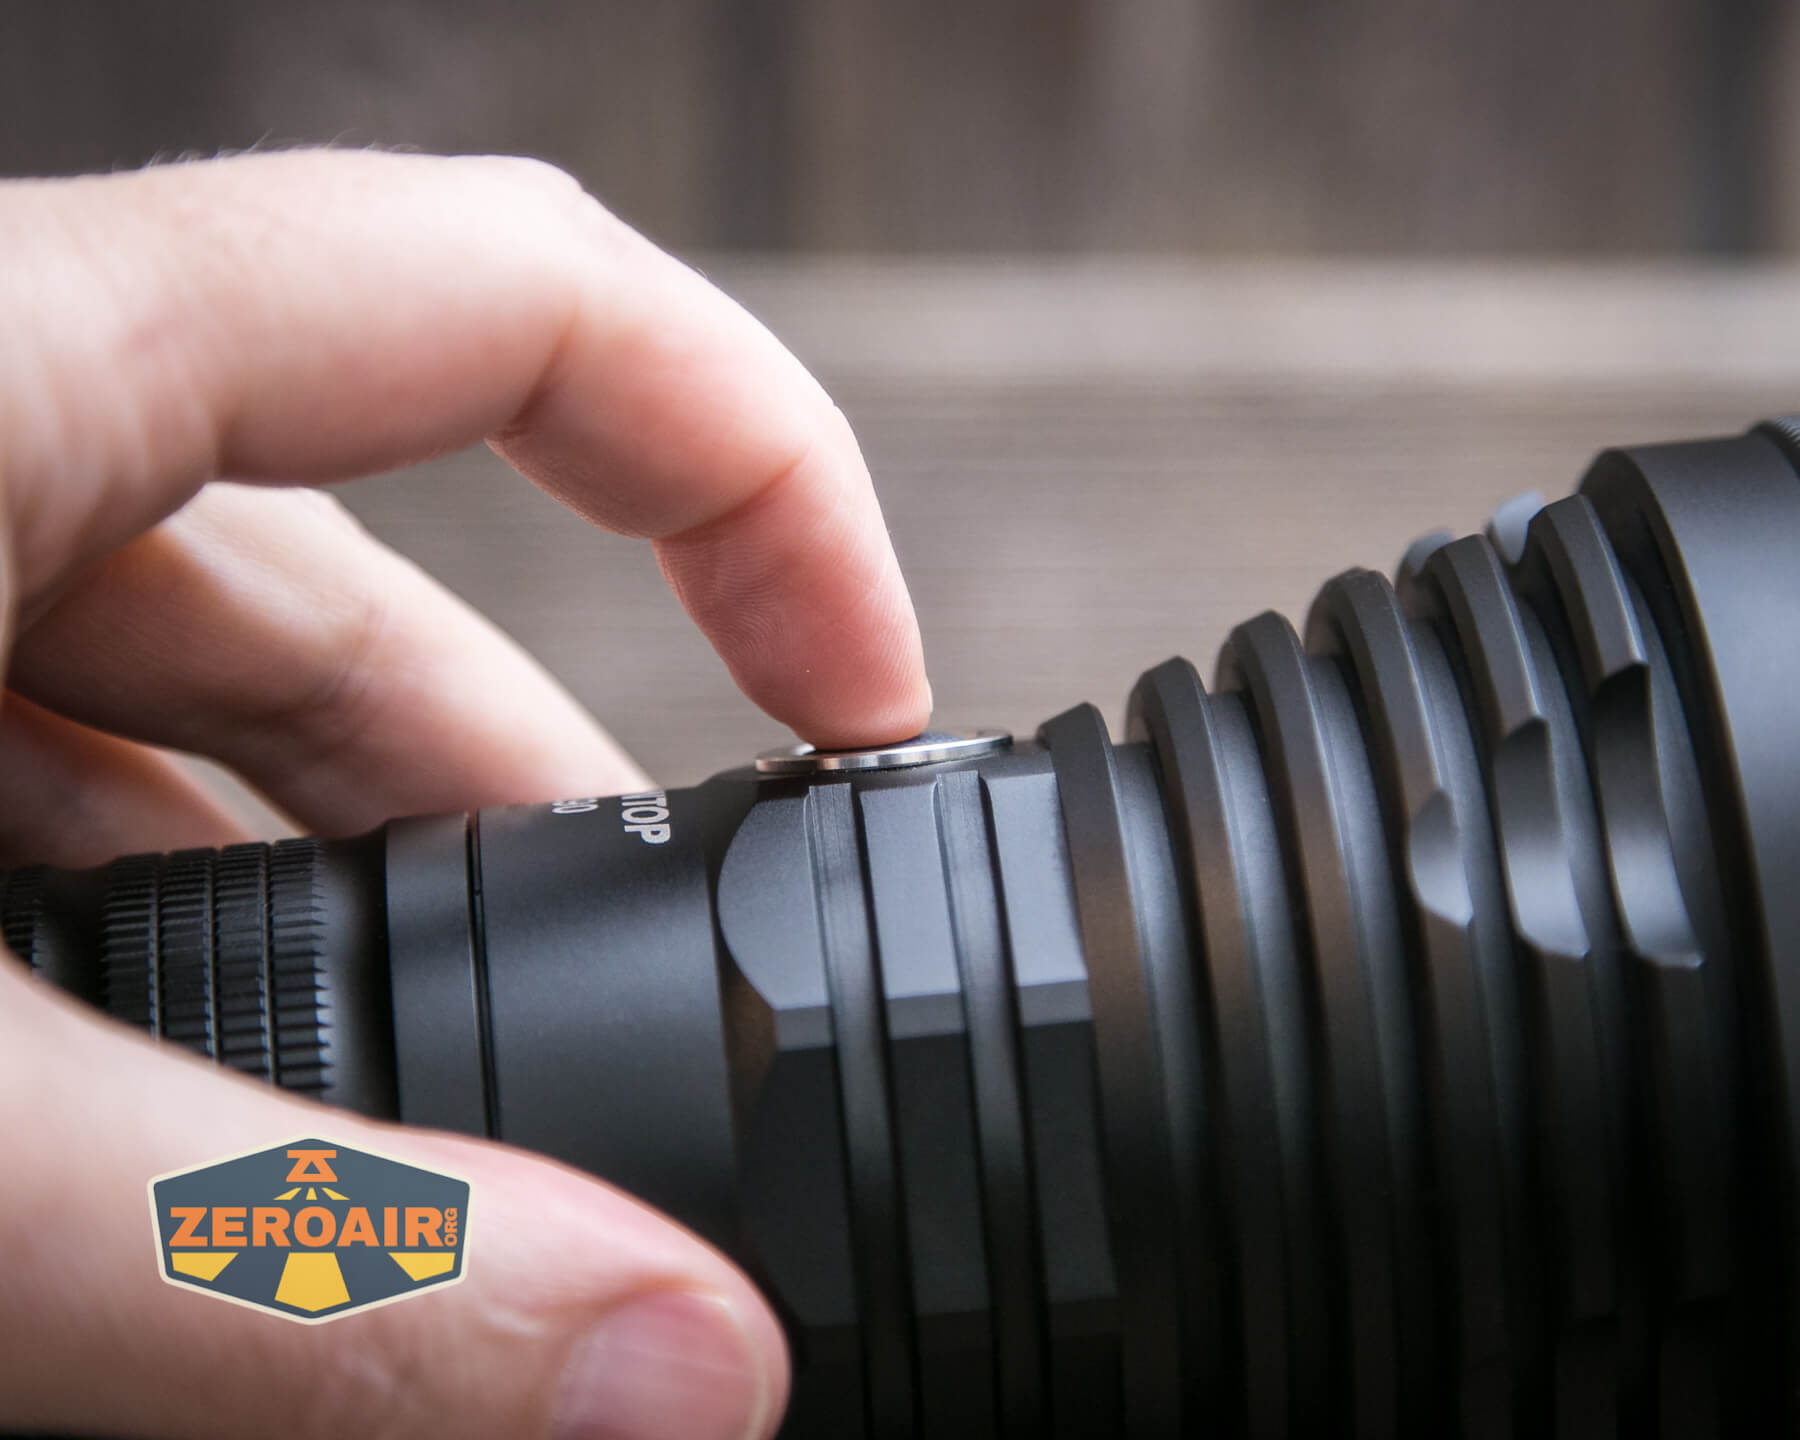
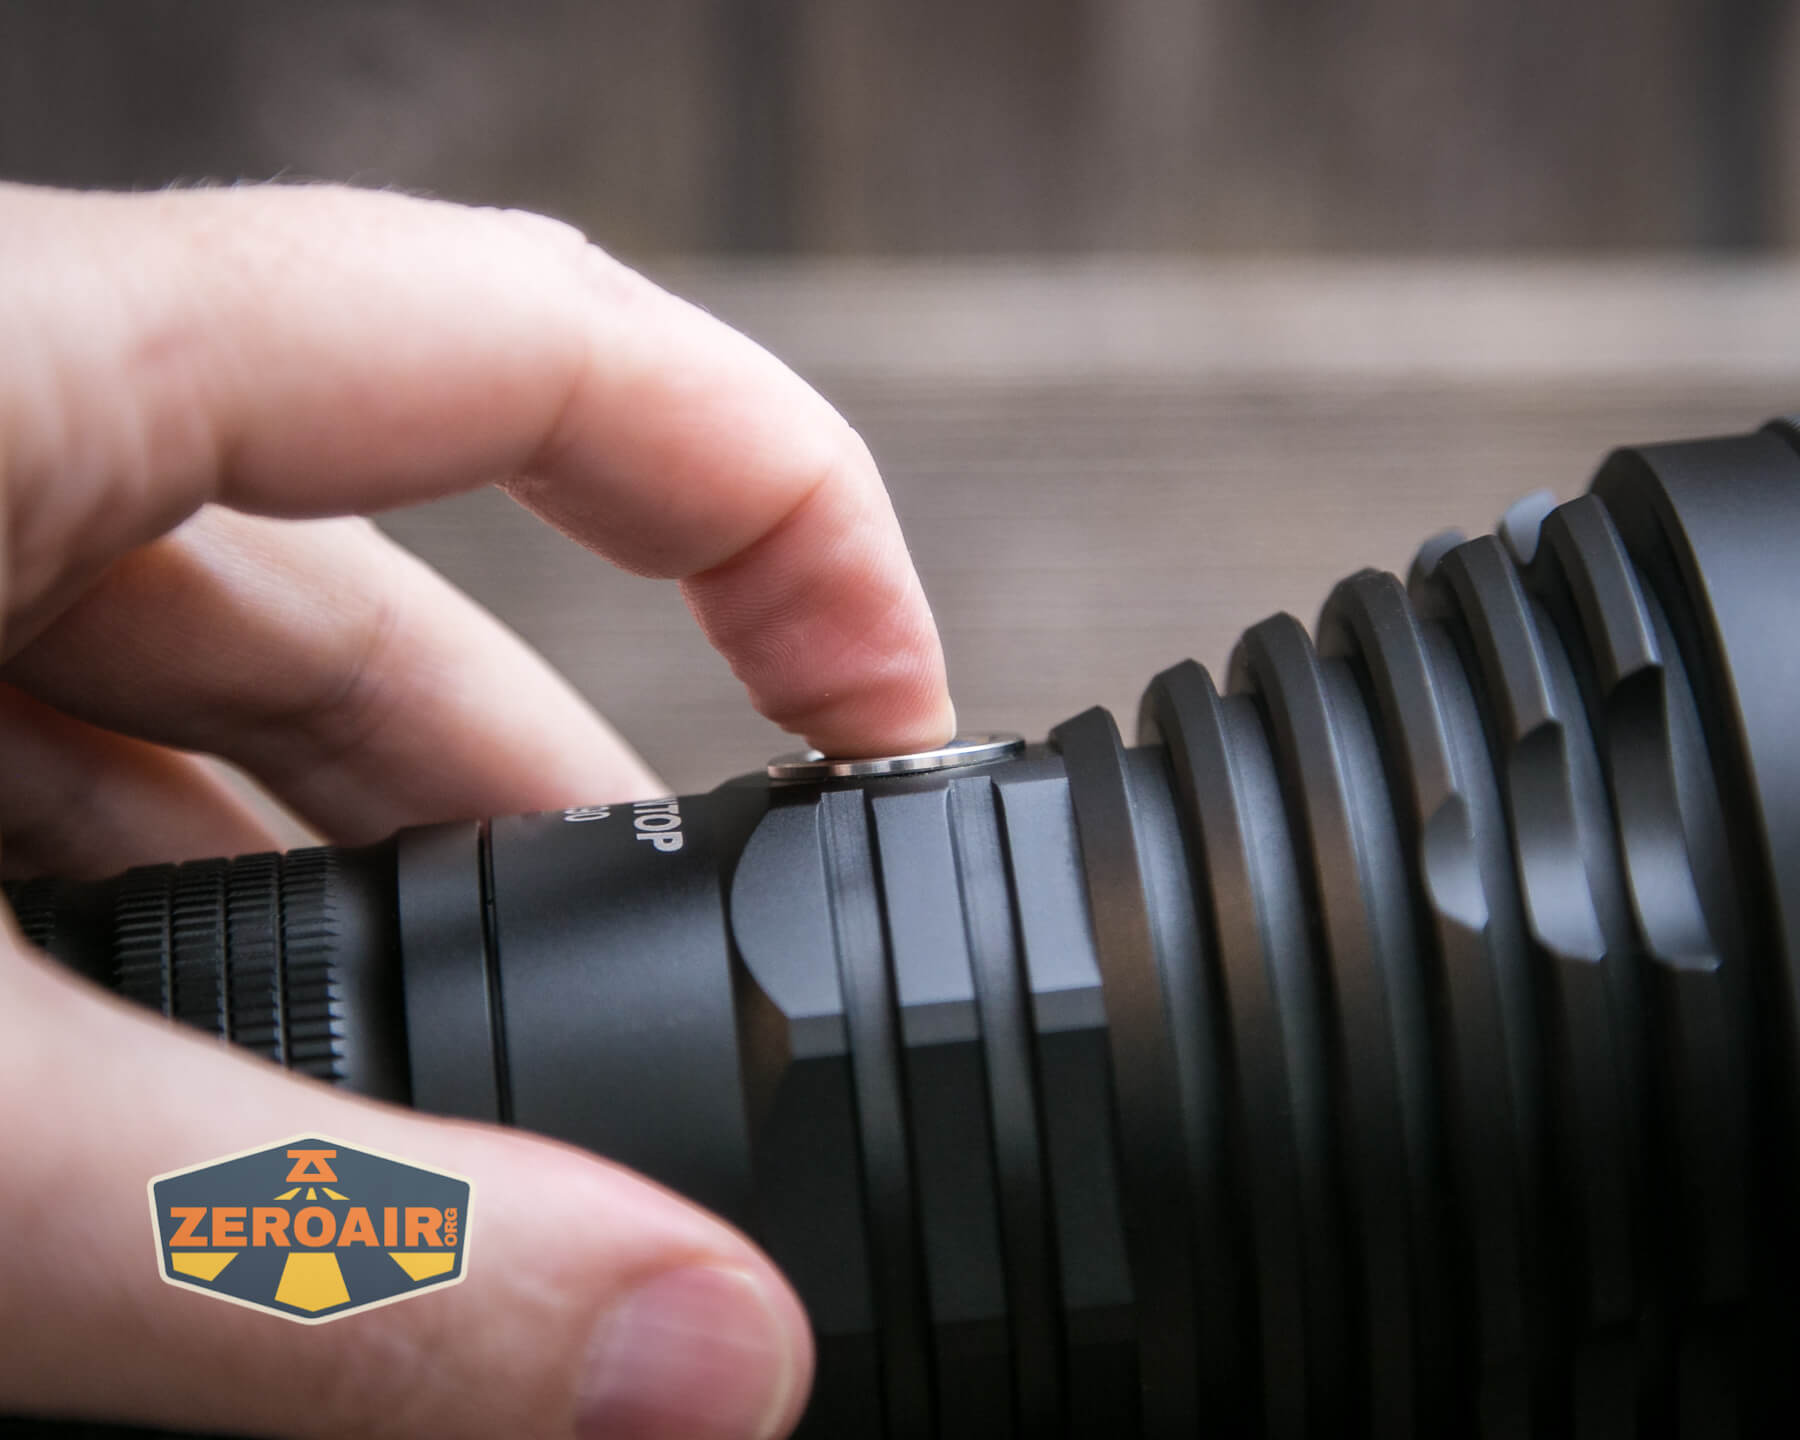
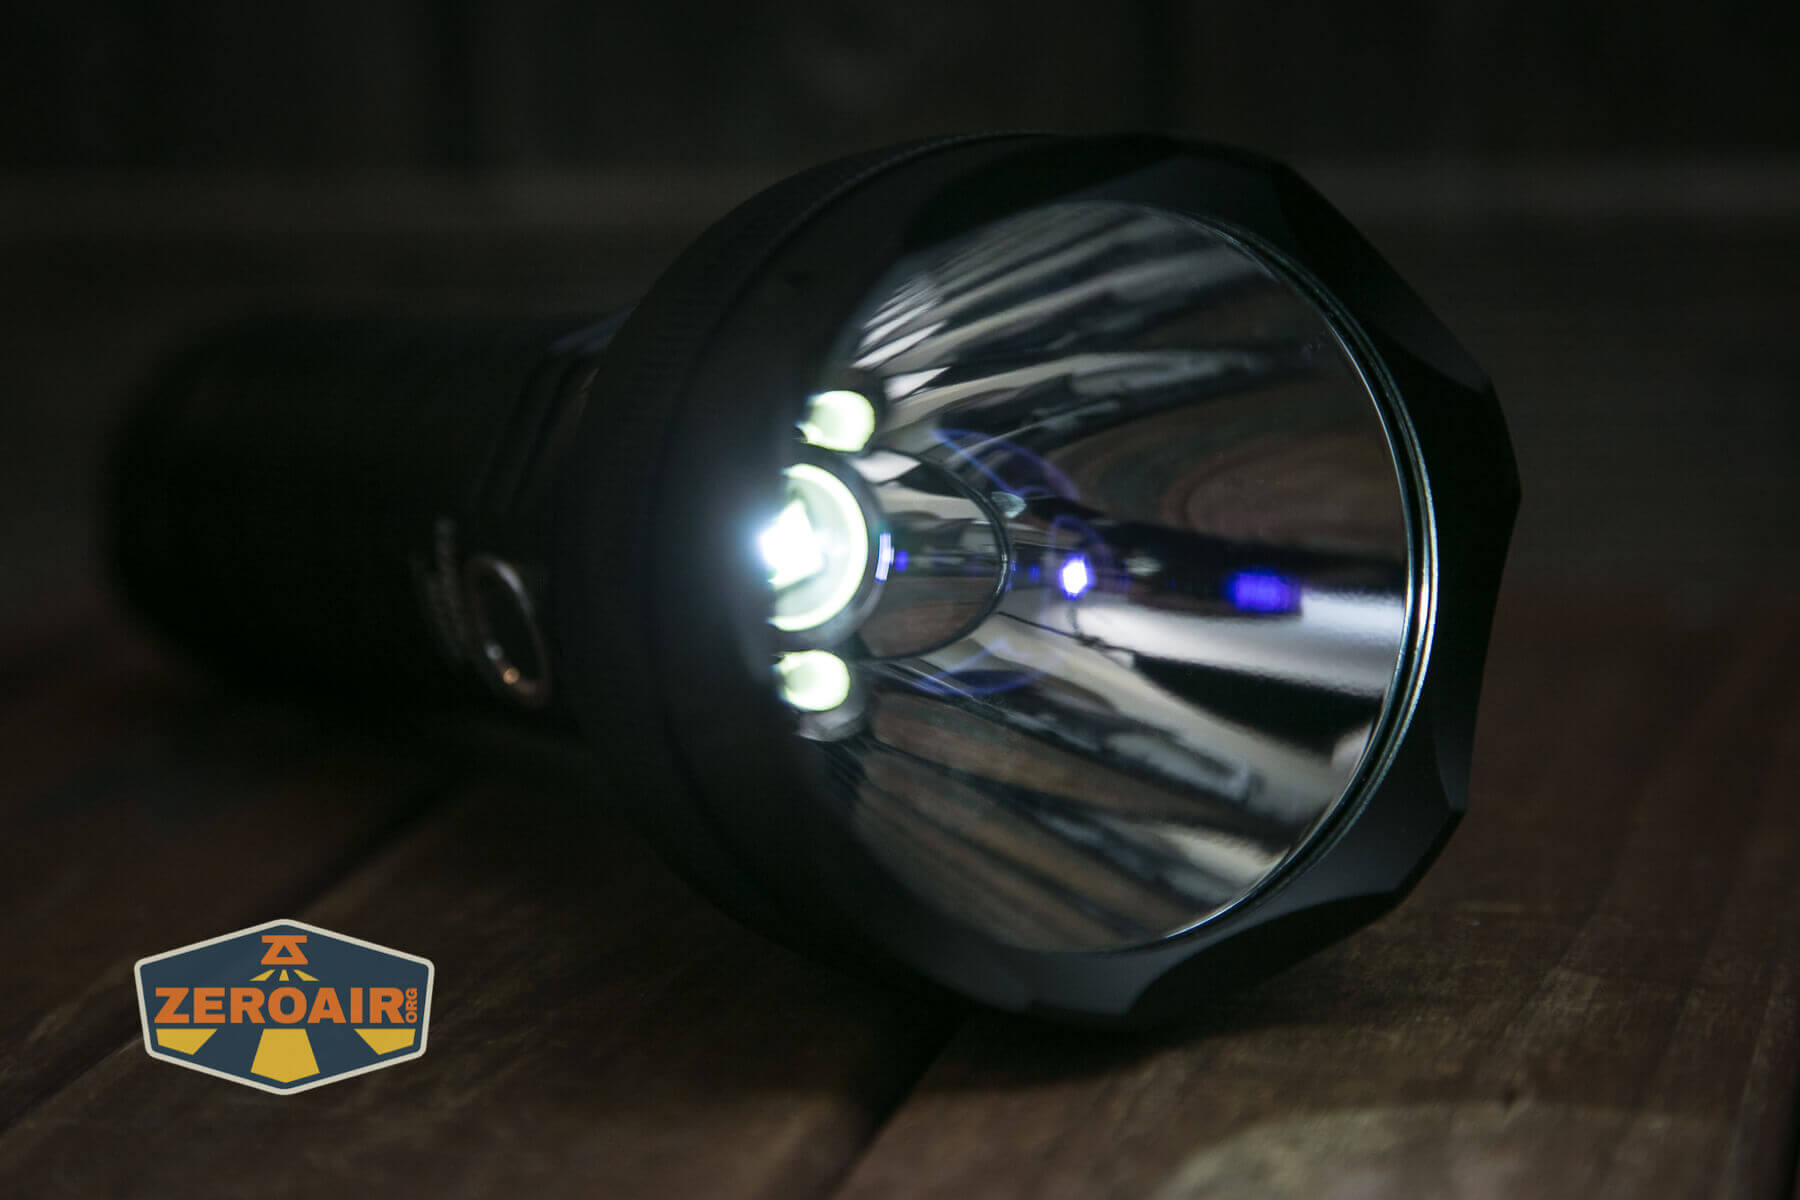
On the tailcap is this interesting little window.

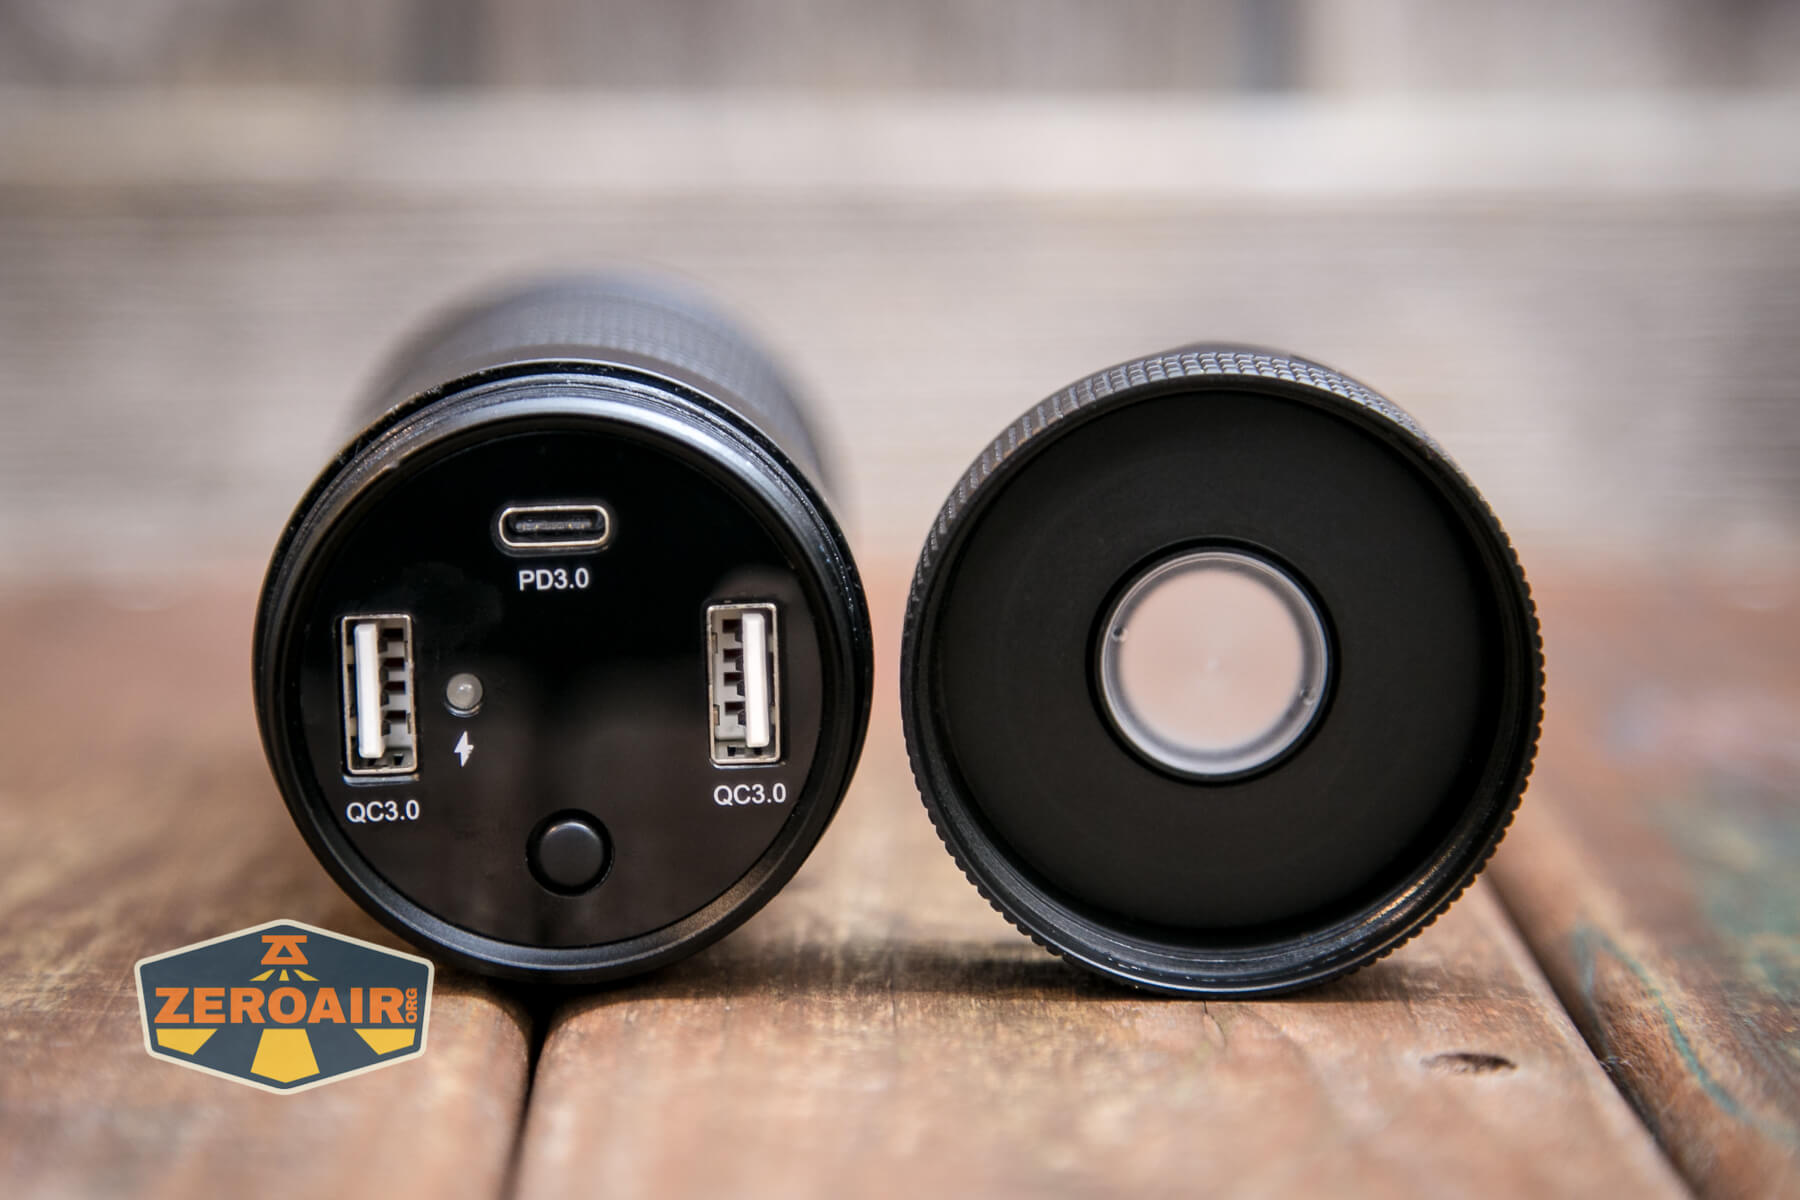
With the tailcap off, you can see more of why there’s a little window. Directly under the window are LEDs that give certain indications. Also under this tailcap are three ports – two USB-A ports (both QC3.0) and one USB-C port (PD3.0). The USB-C is for charging the internal cells. The USB-A ports are for using the light as a powerbank.
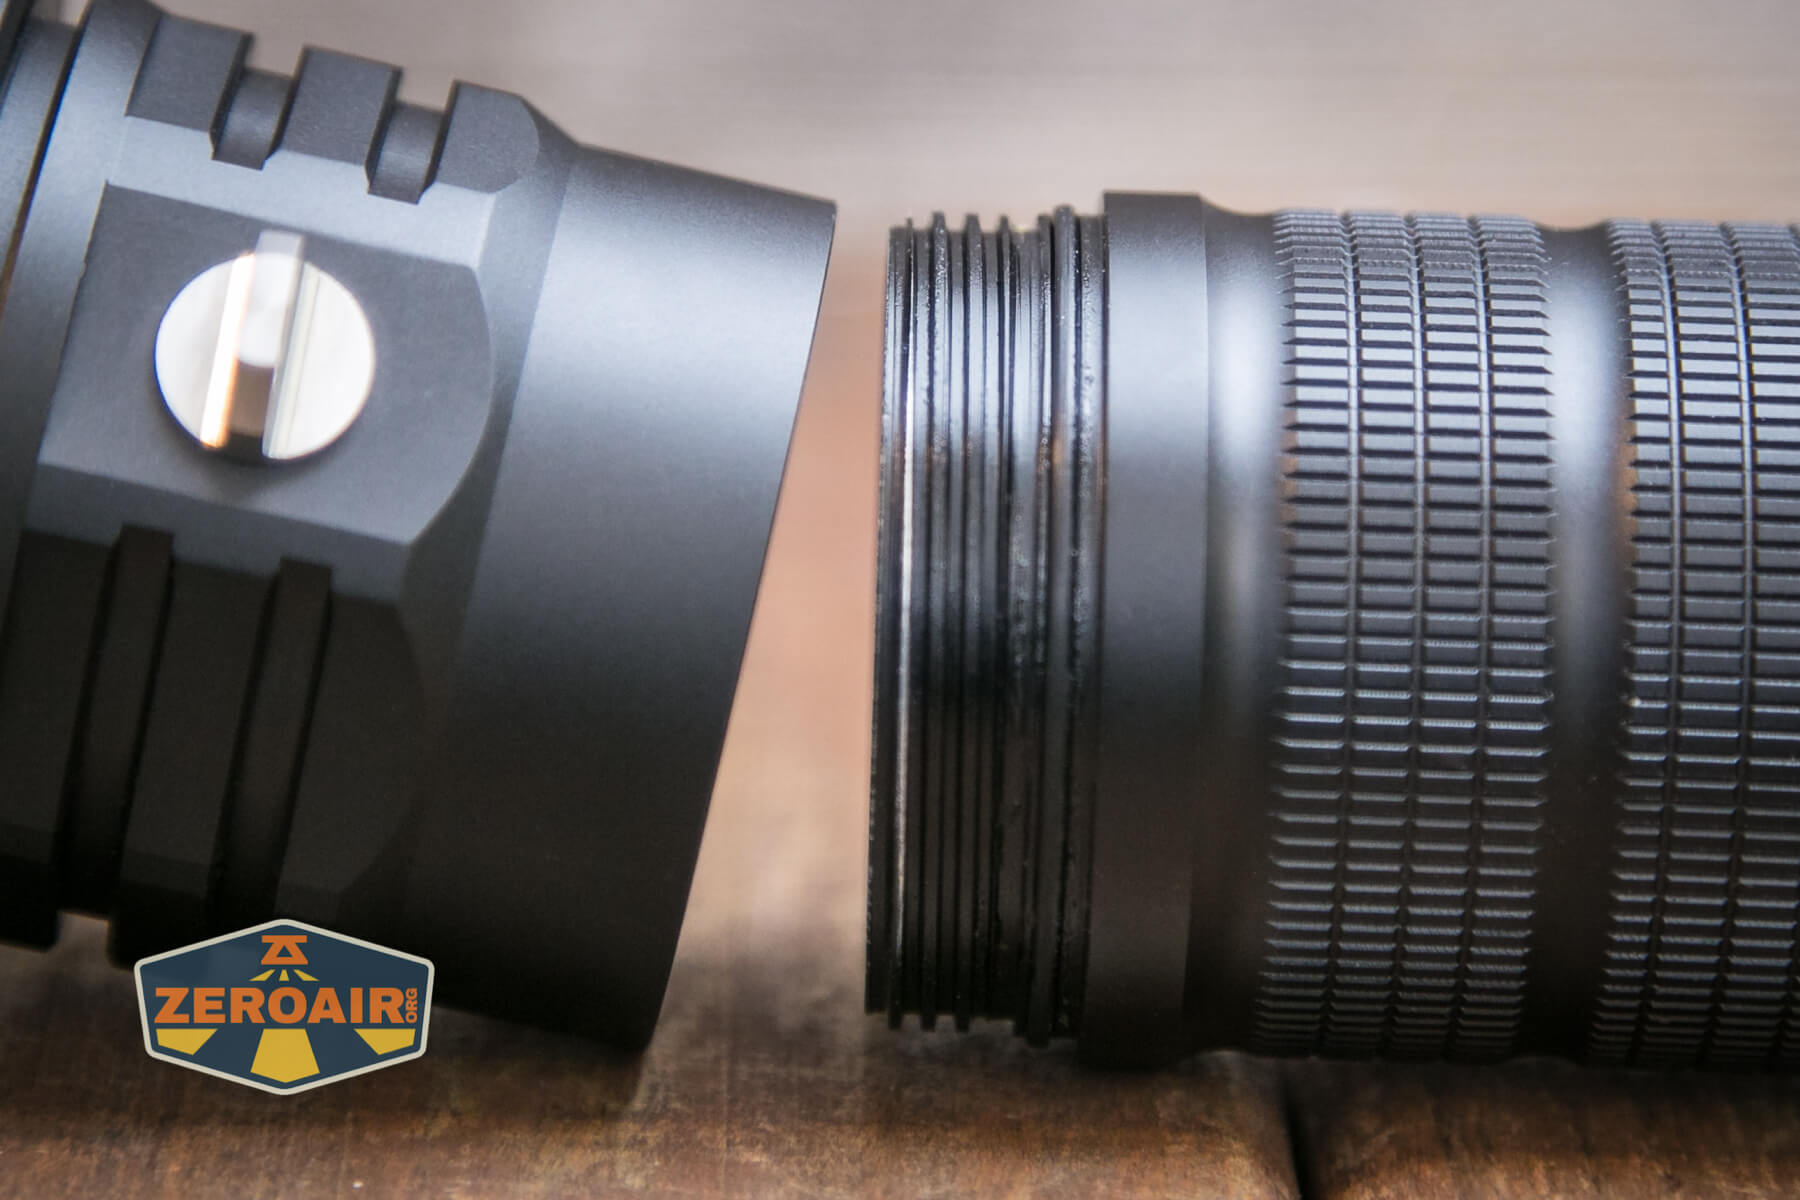
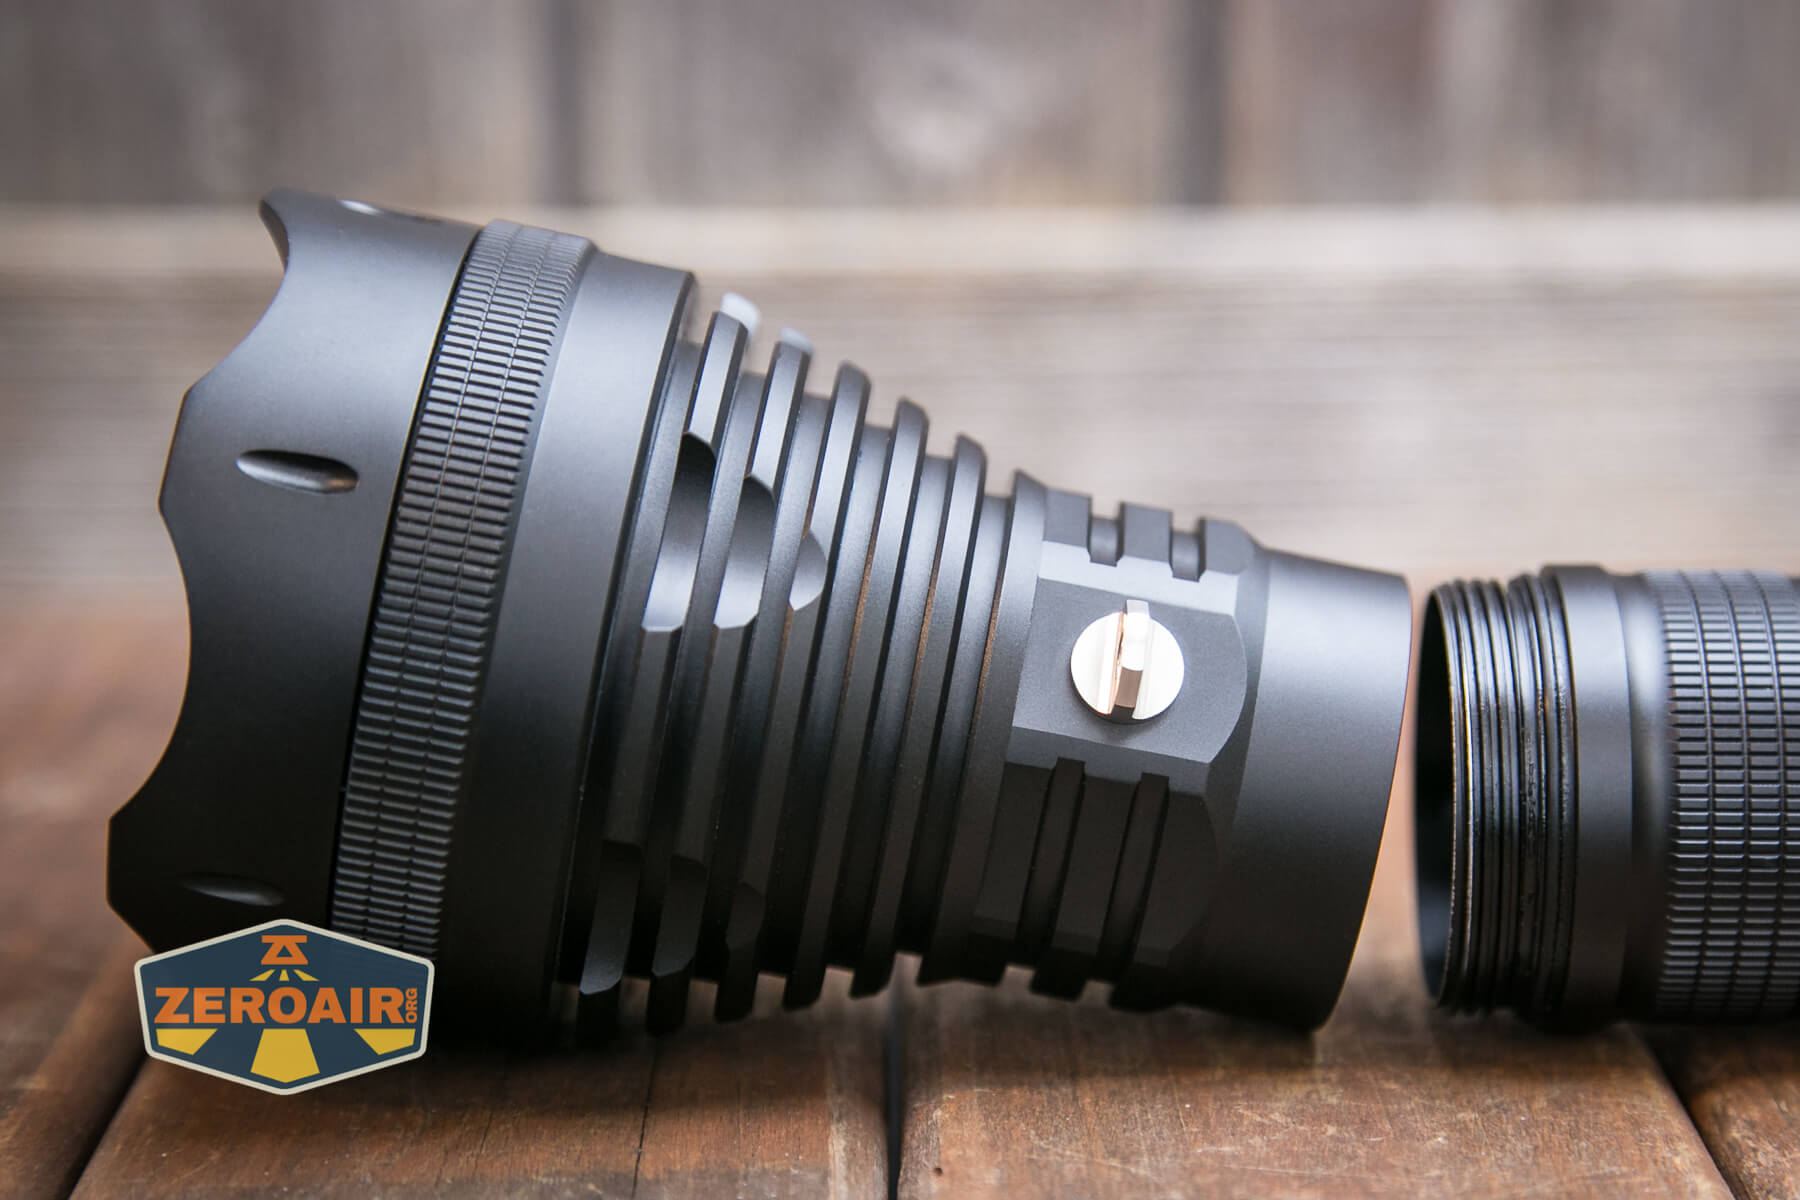
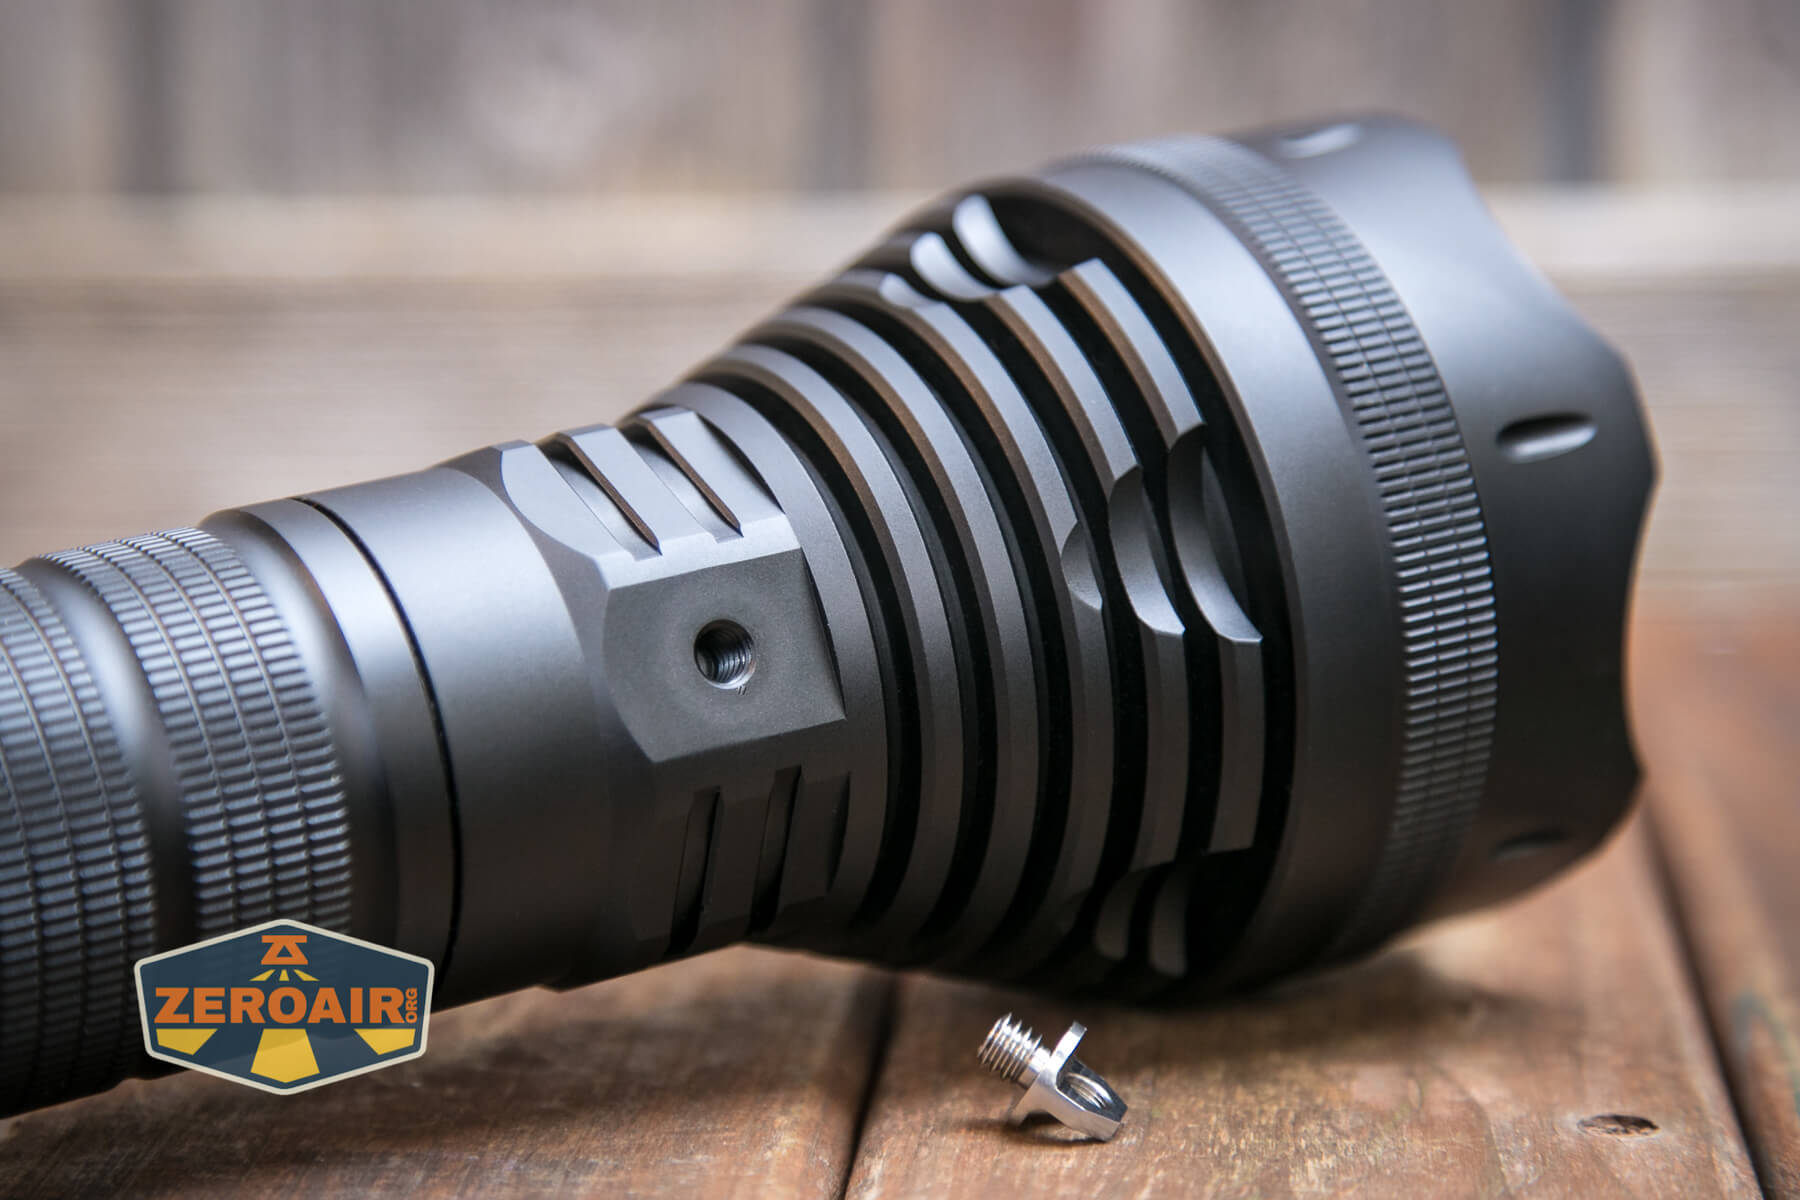
The head end has the same style threads. They’re beefy, appropriately lubed, and not too long. All just like the tailcap threads. The cell tube will technically fit in the reverse direction (threads are the same), but of course, it will not work this way.
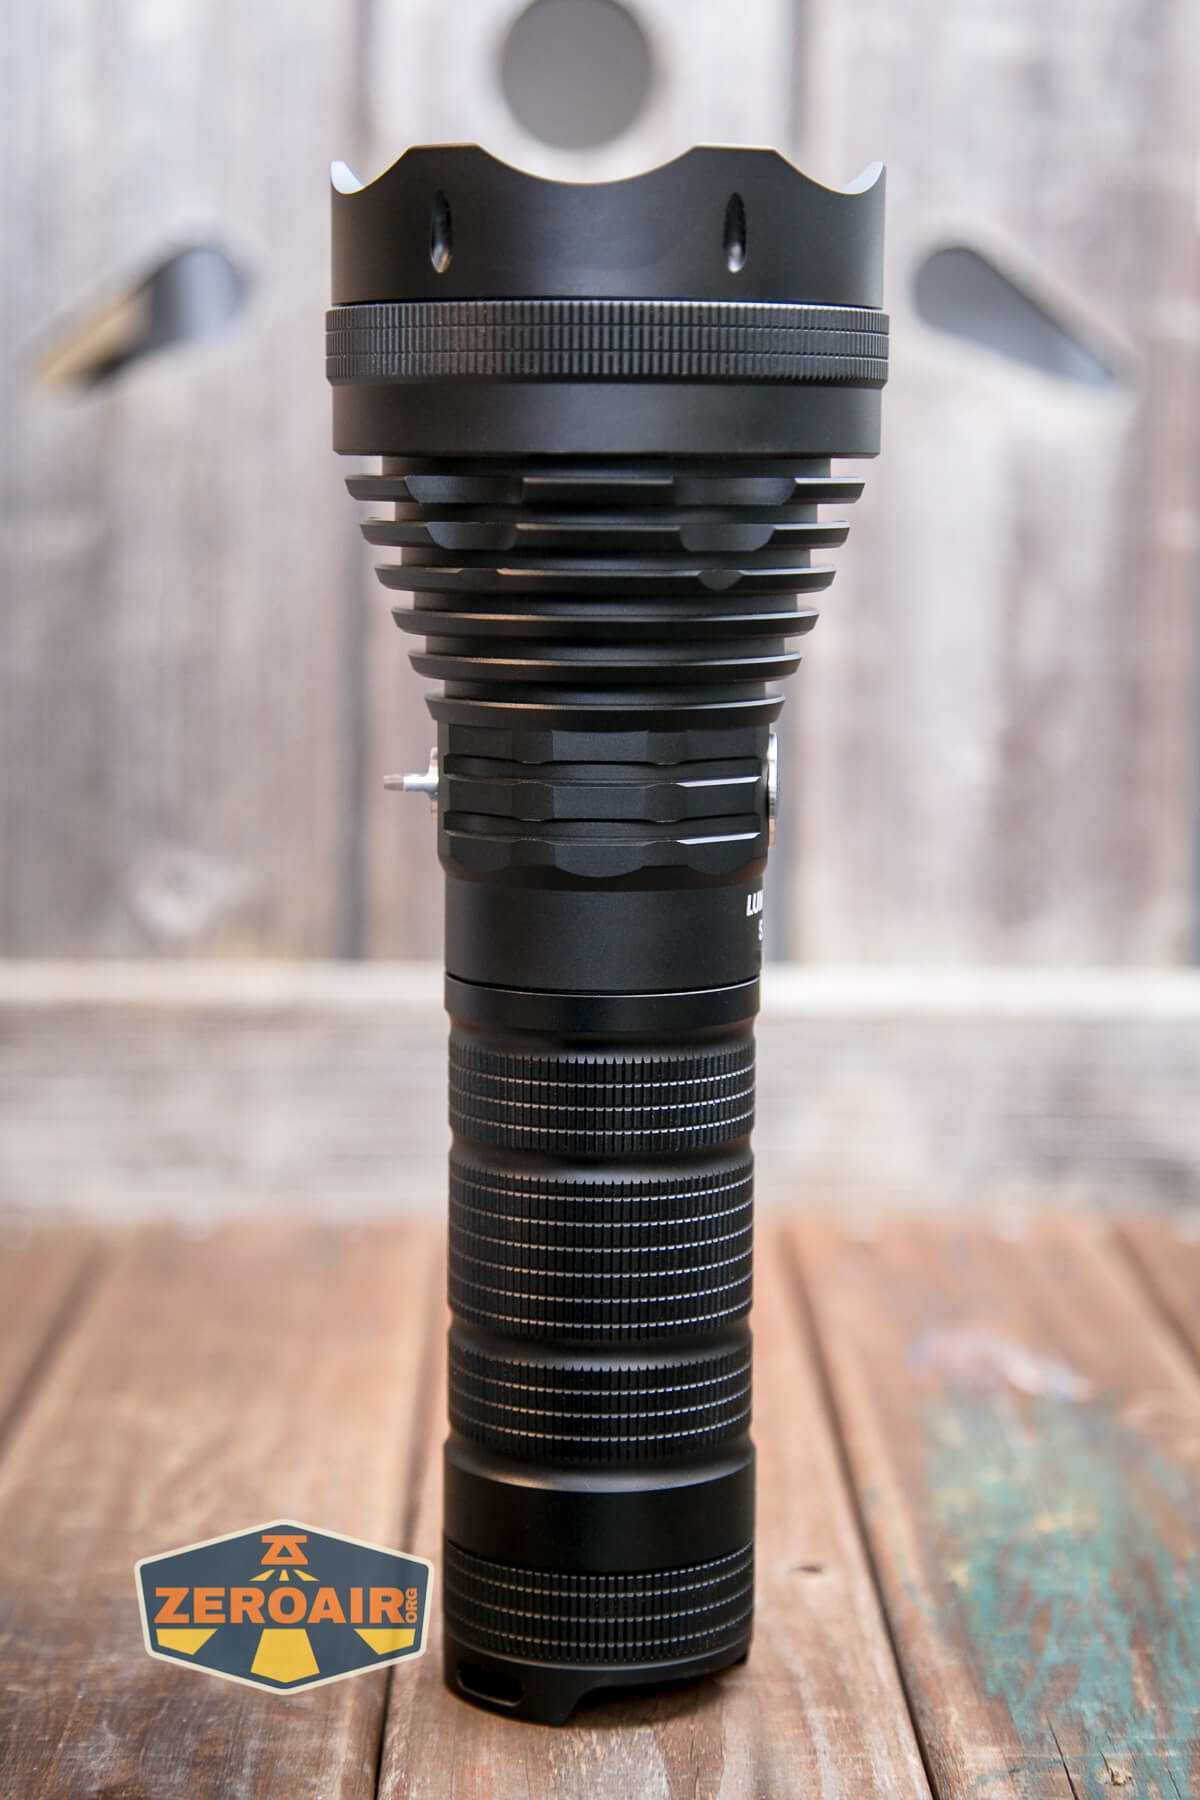
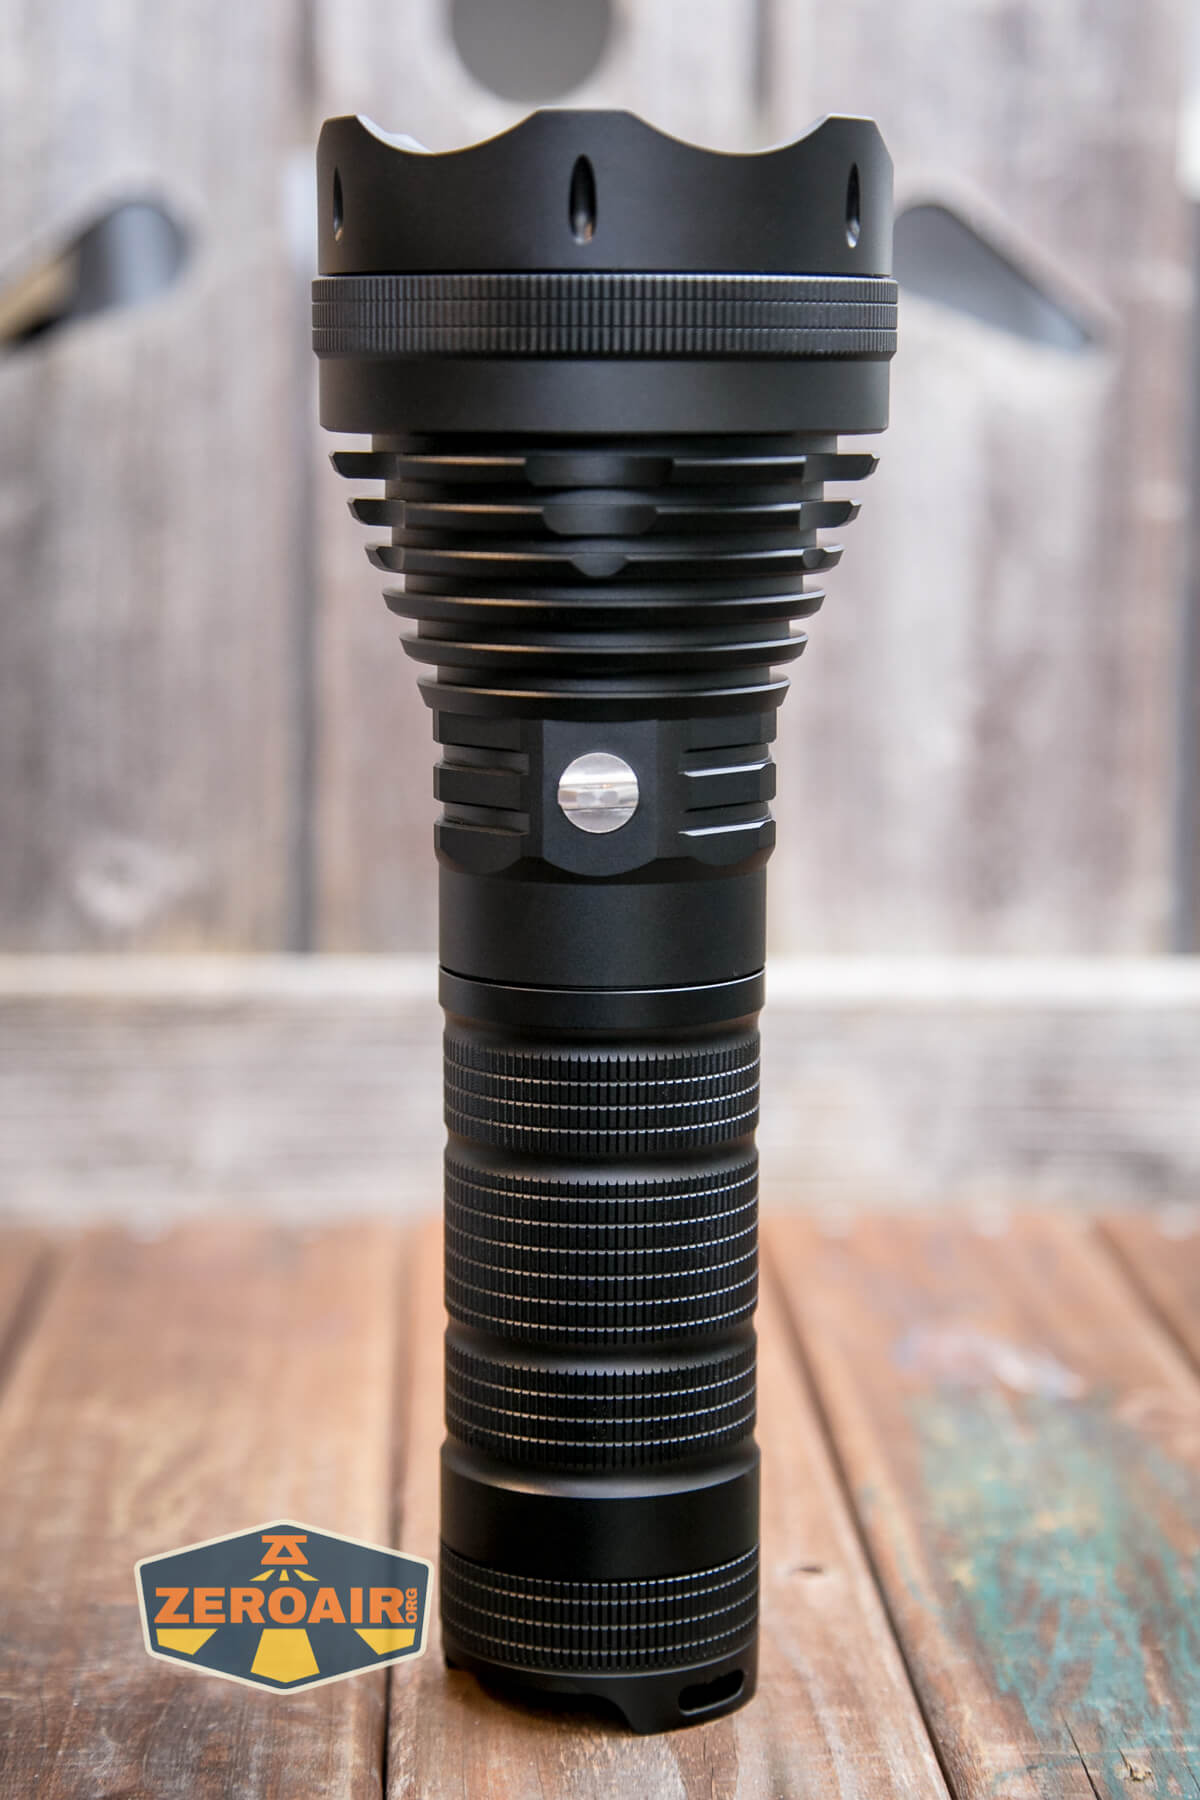
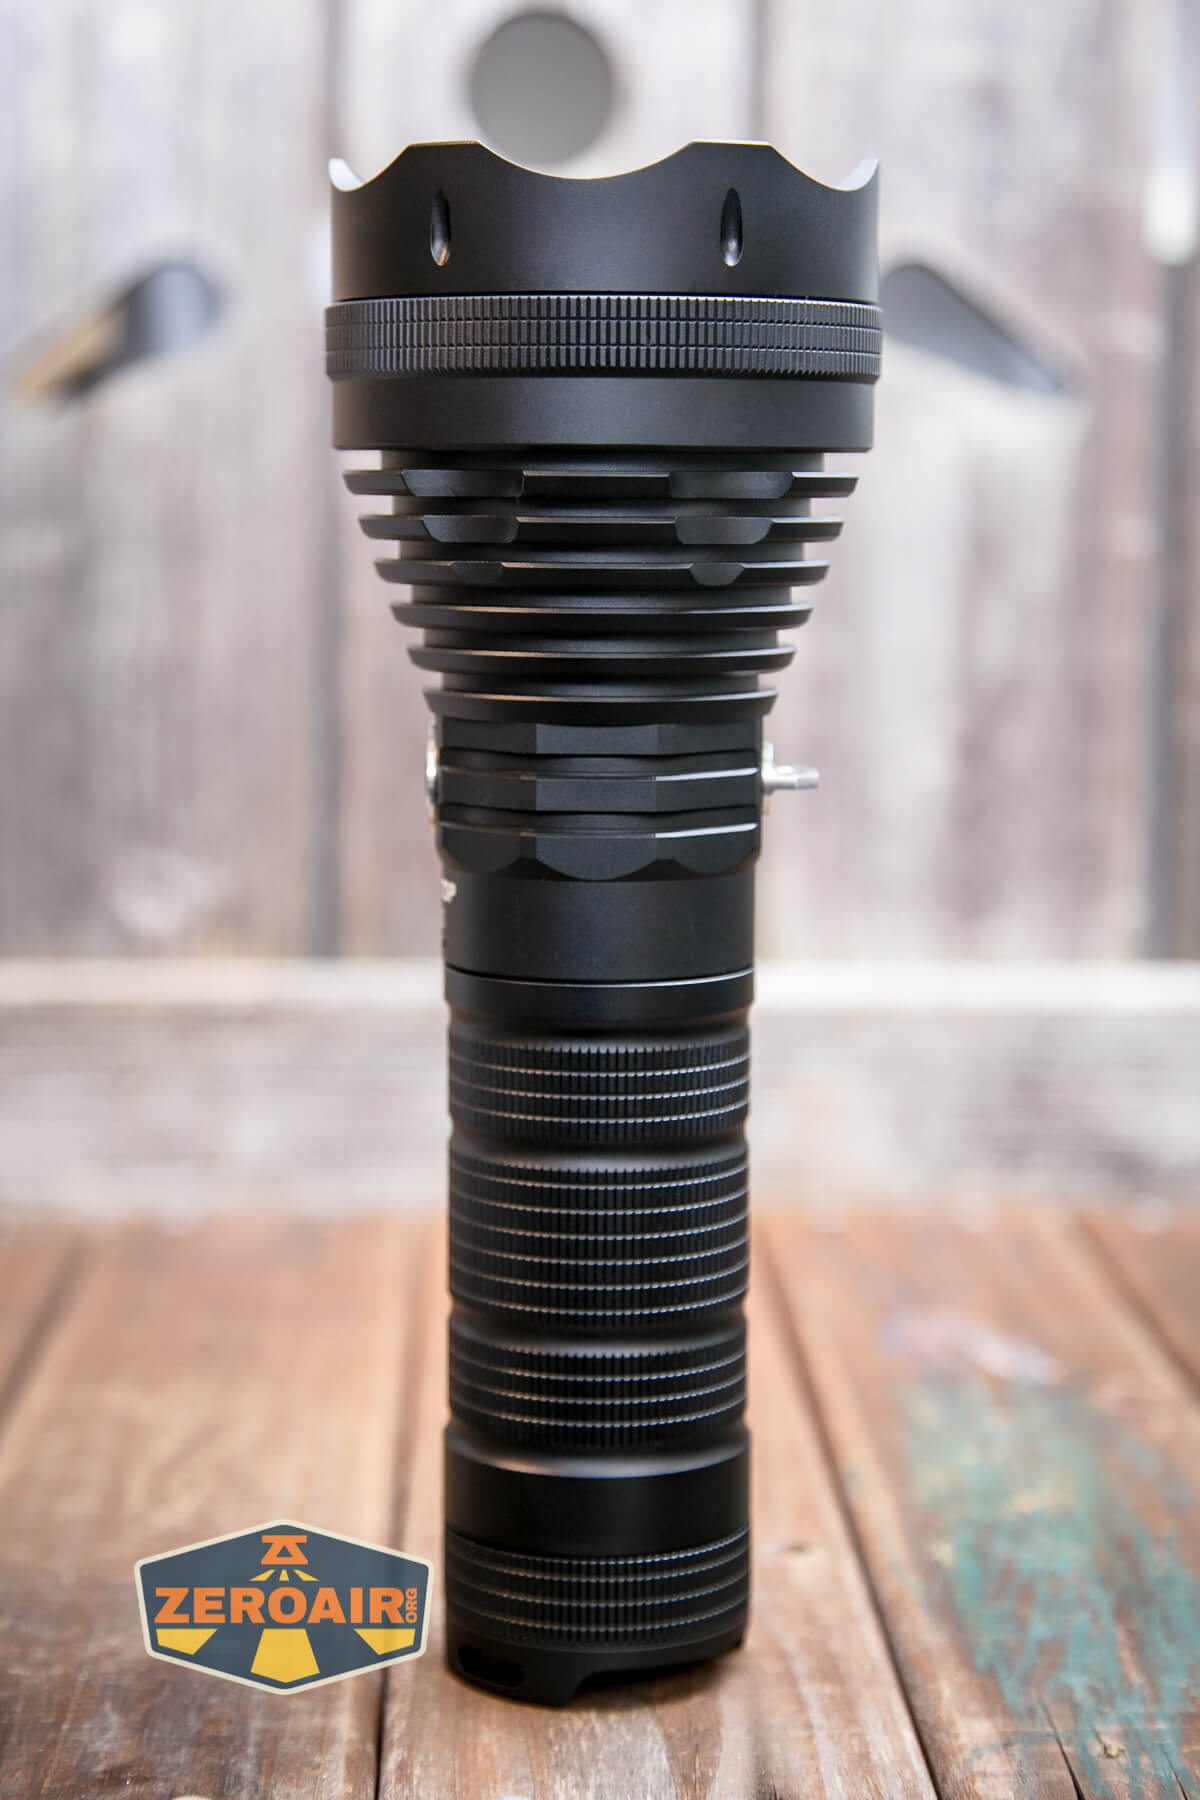
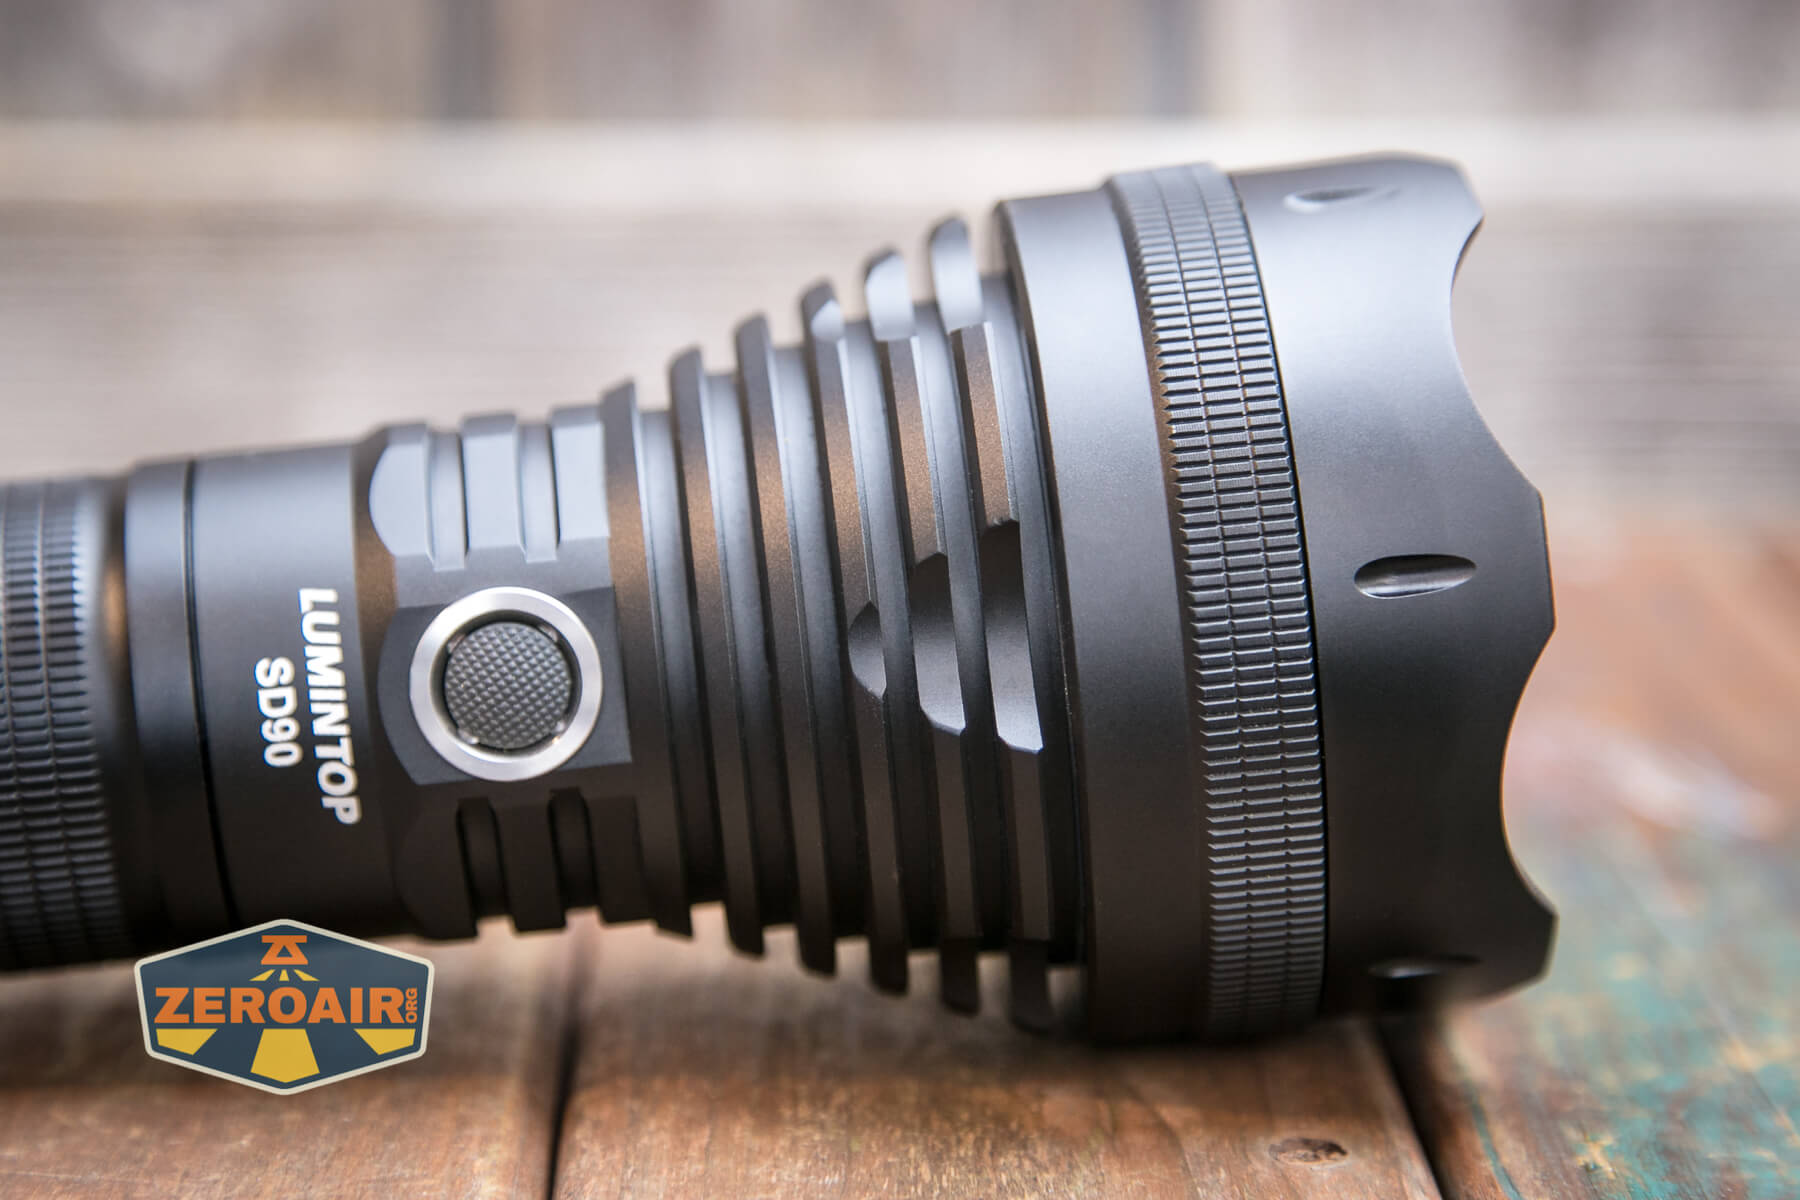
The head end sports a nice bit of deep and thick cooling fins. Around the bezel, there’s a bit of grip, too. I did find it a bit hard to remove the head from the body, but in reality, you’ll likely not have to do that very much. The cells can live in the light and be just fine, since there’s built-in charging.
Inside the head are beefy brass contact points.
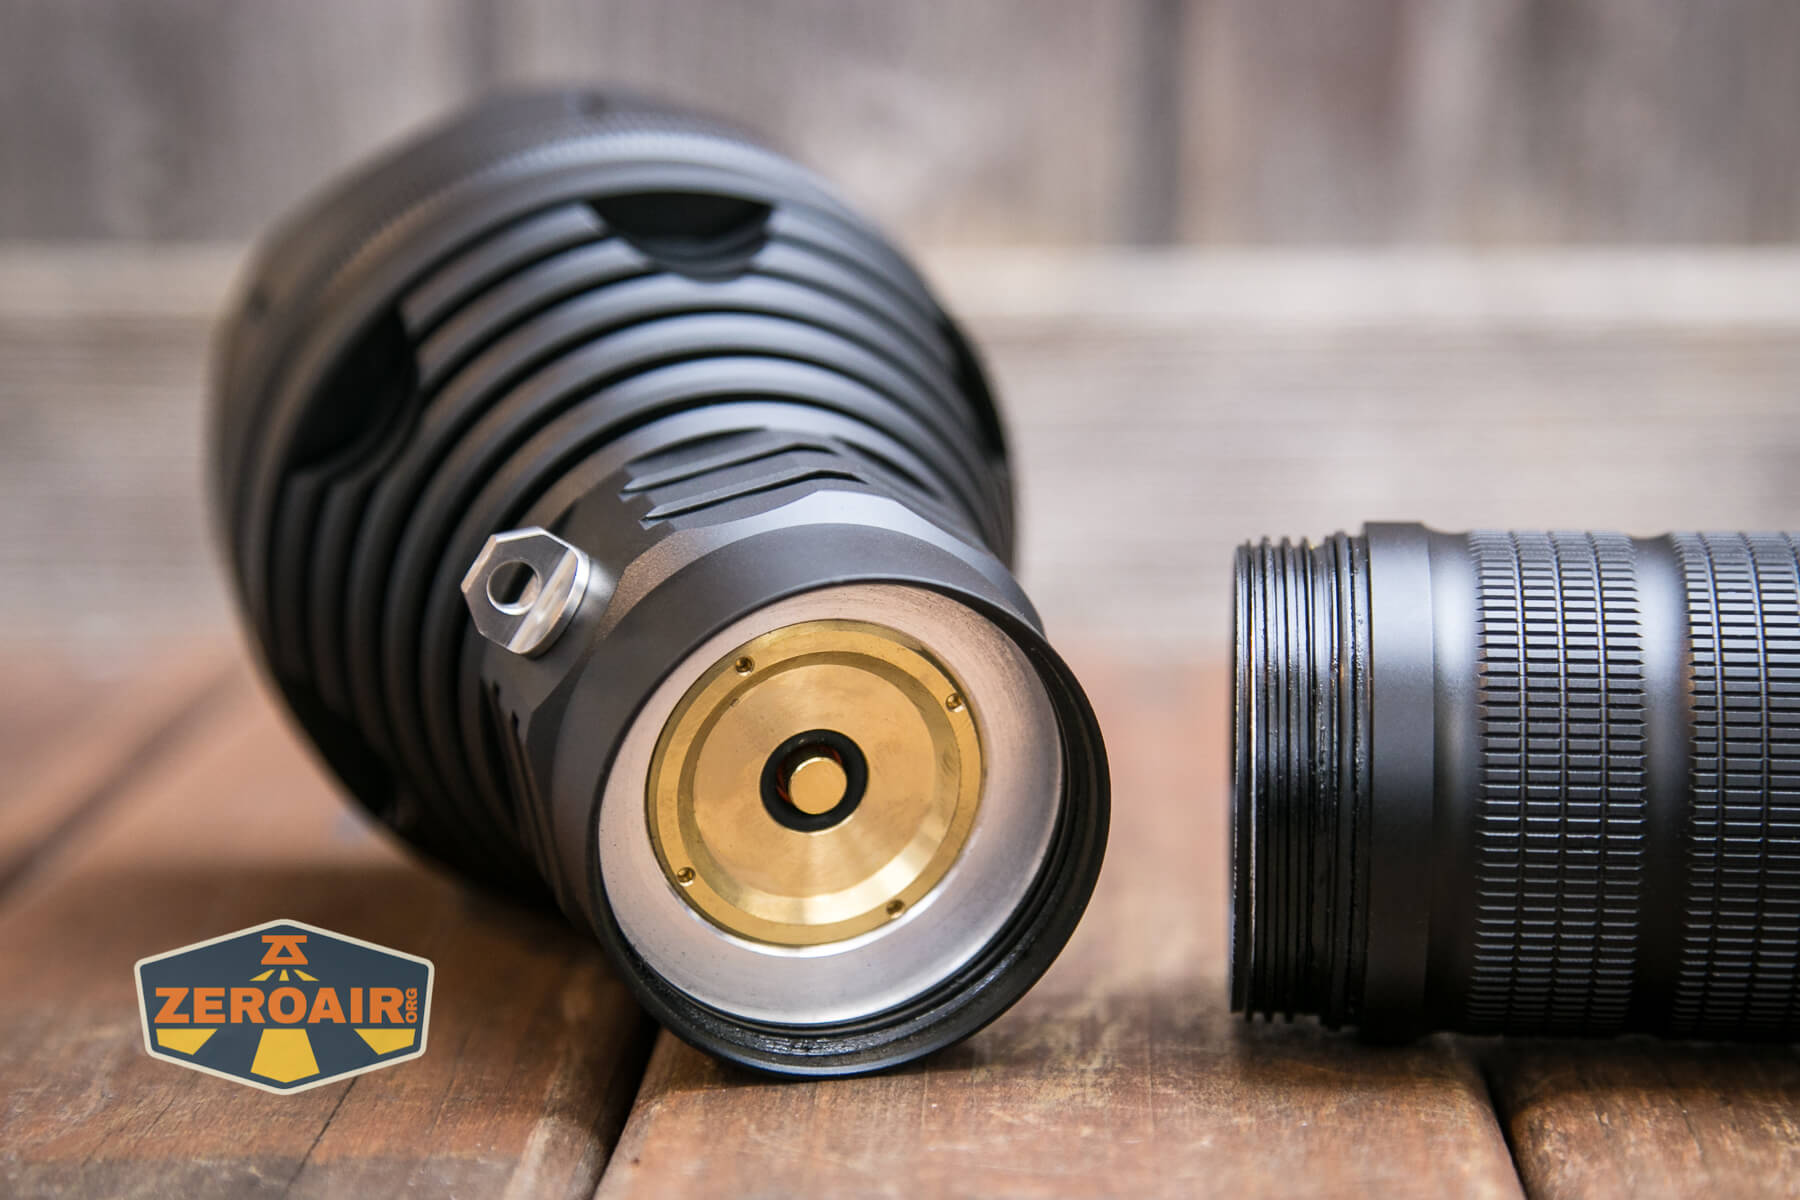
The tail has the same contacts, really, but in the center is a small spring.
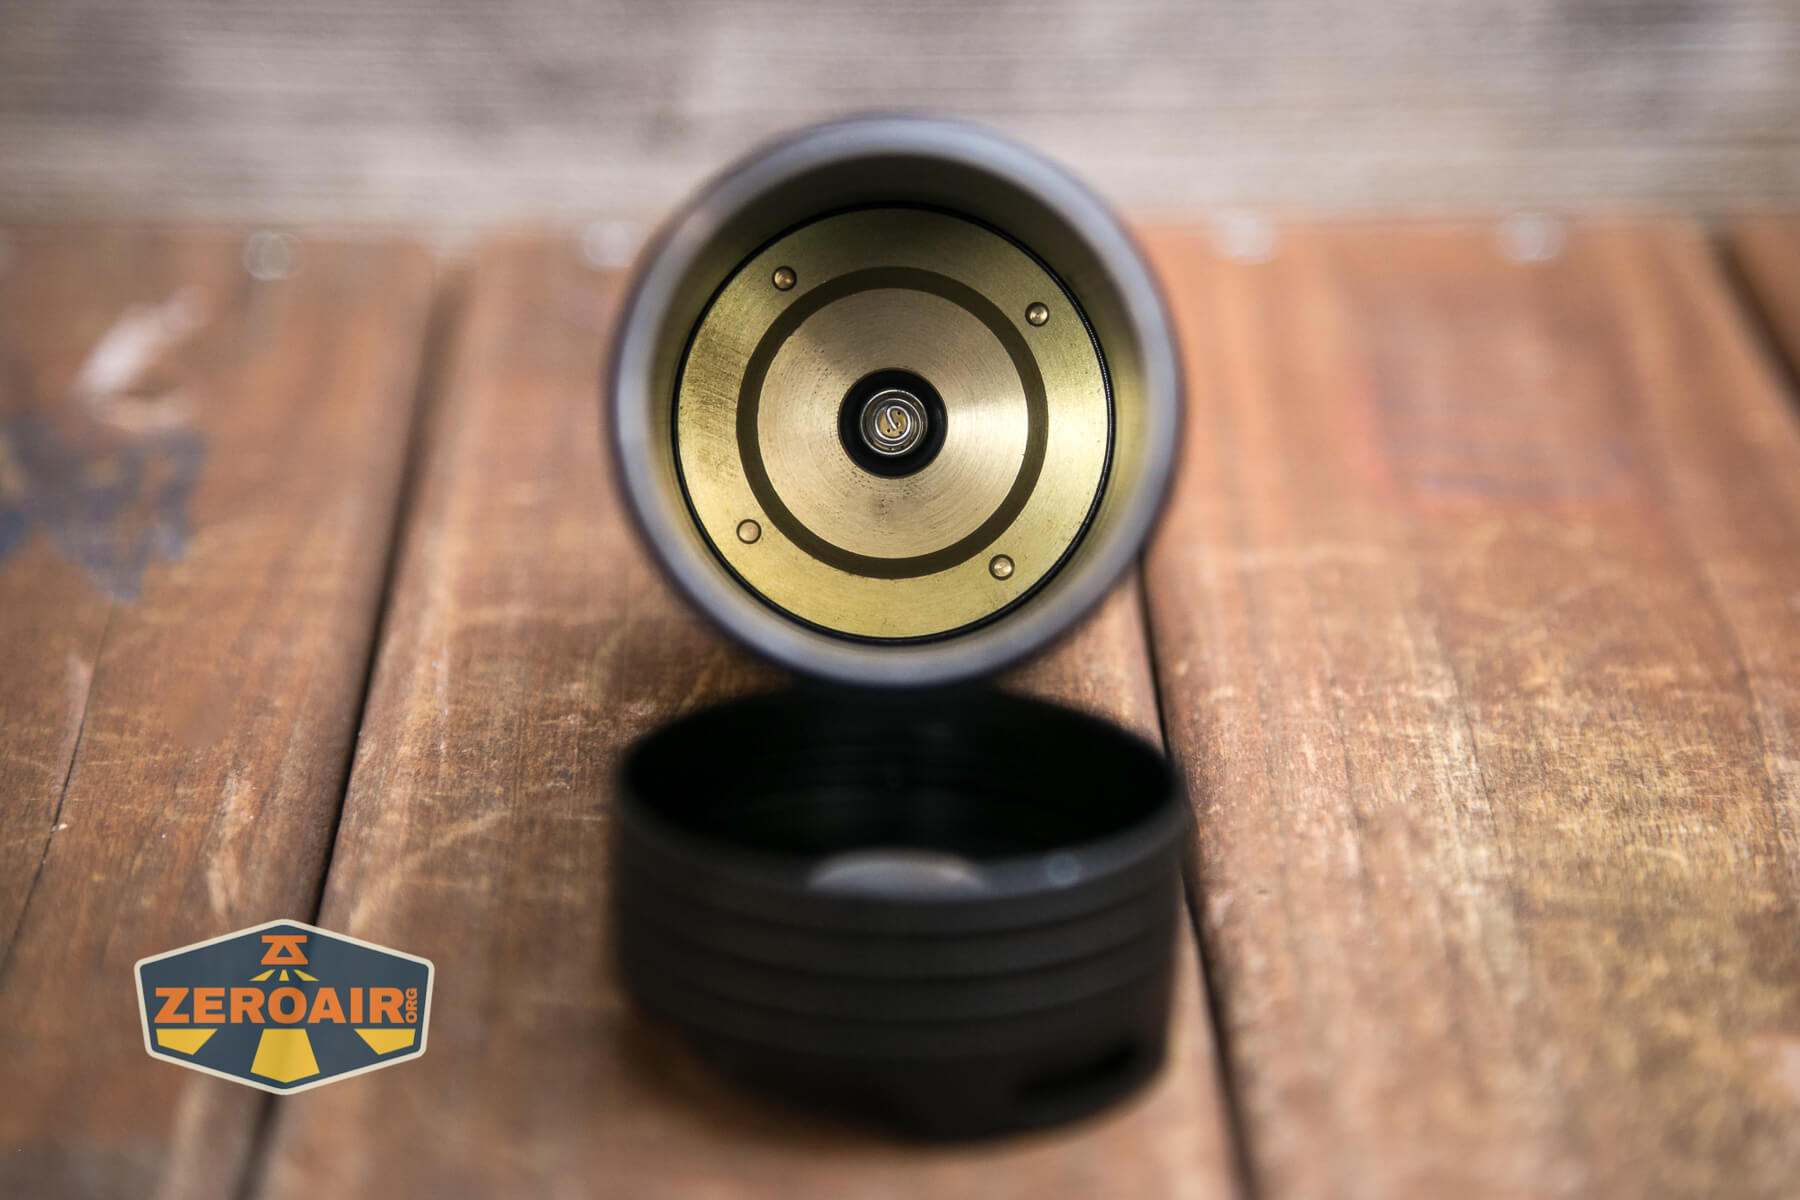
The actual tailcap part of the tailcap (the part you can remove) is not an electrical part of the light.

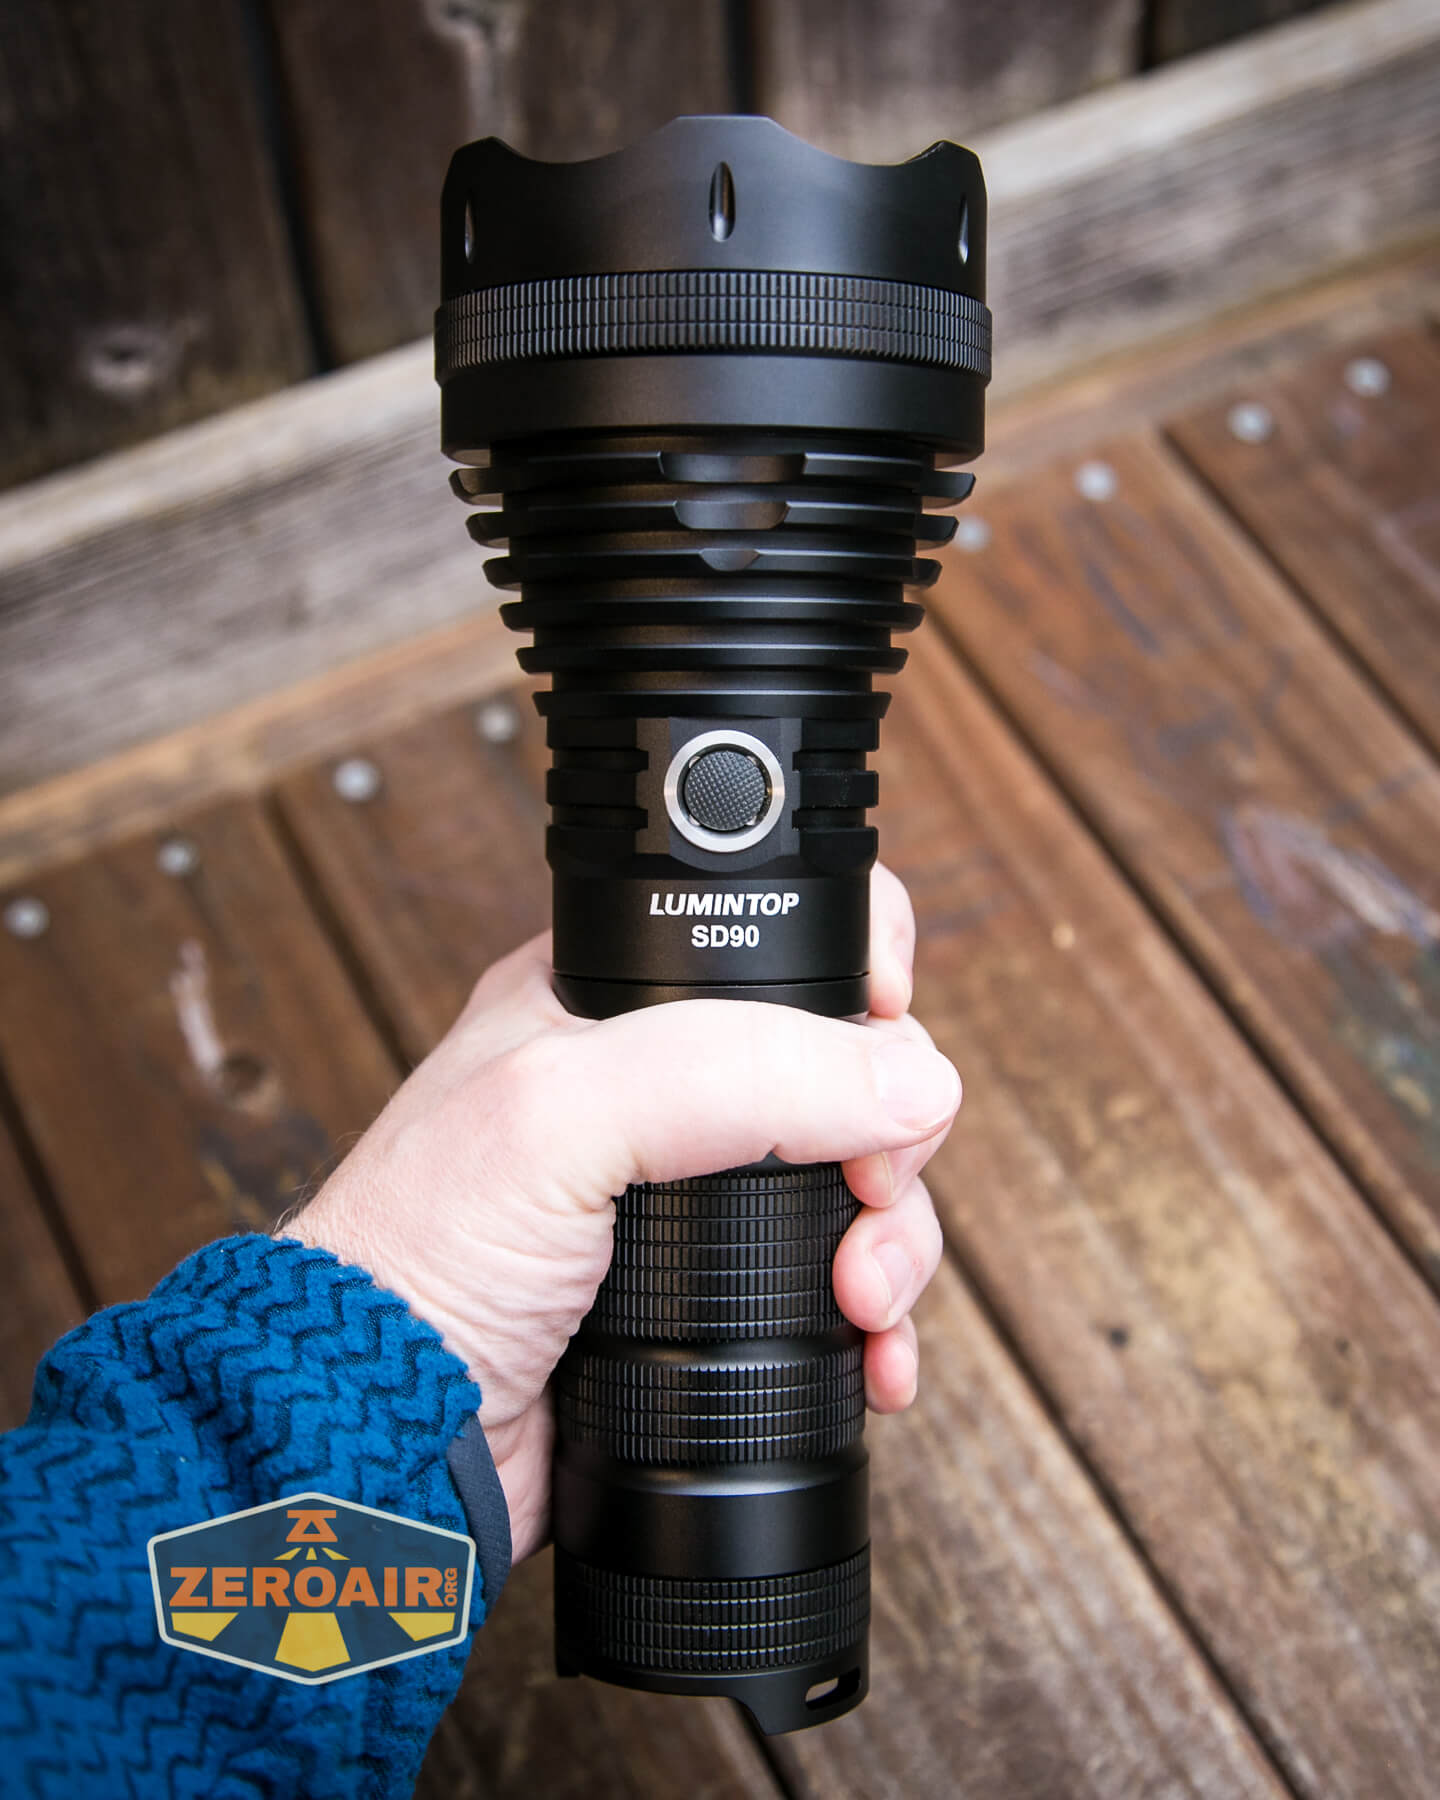
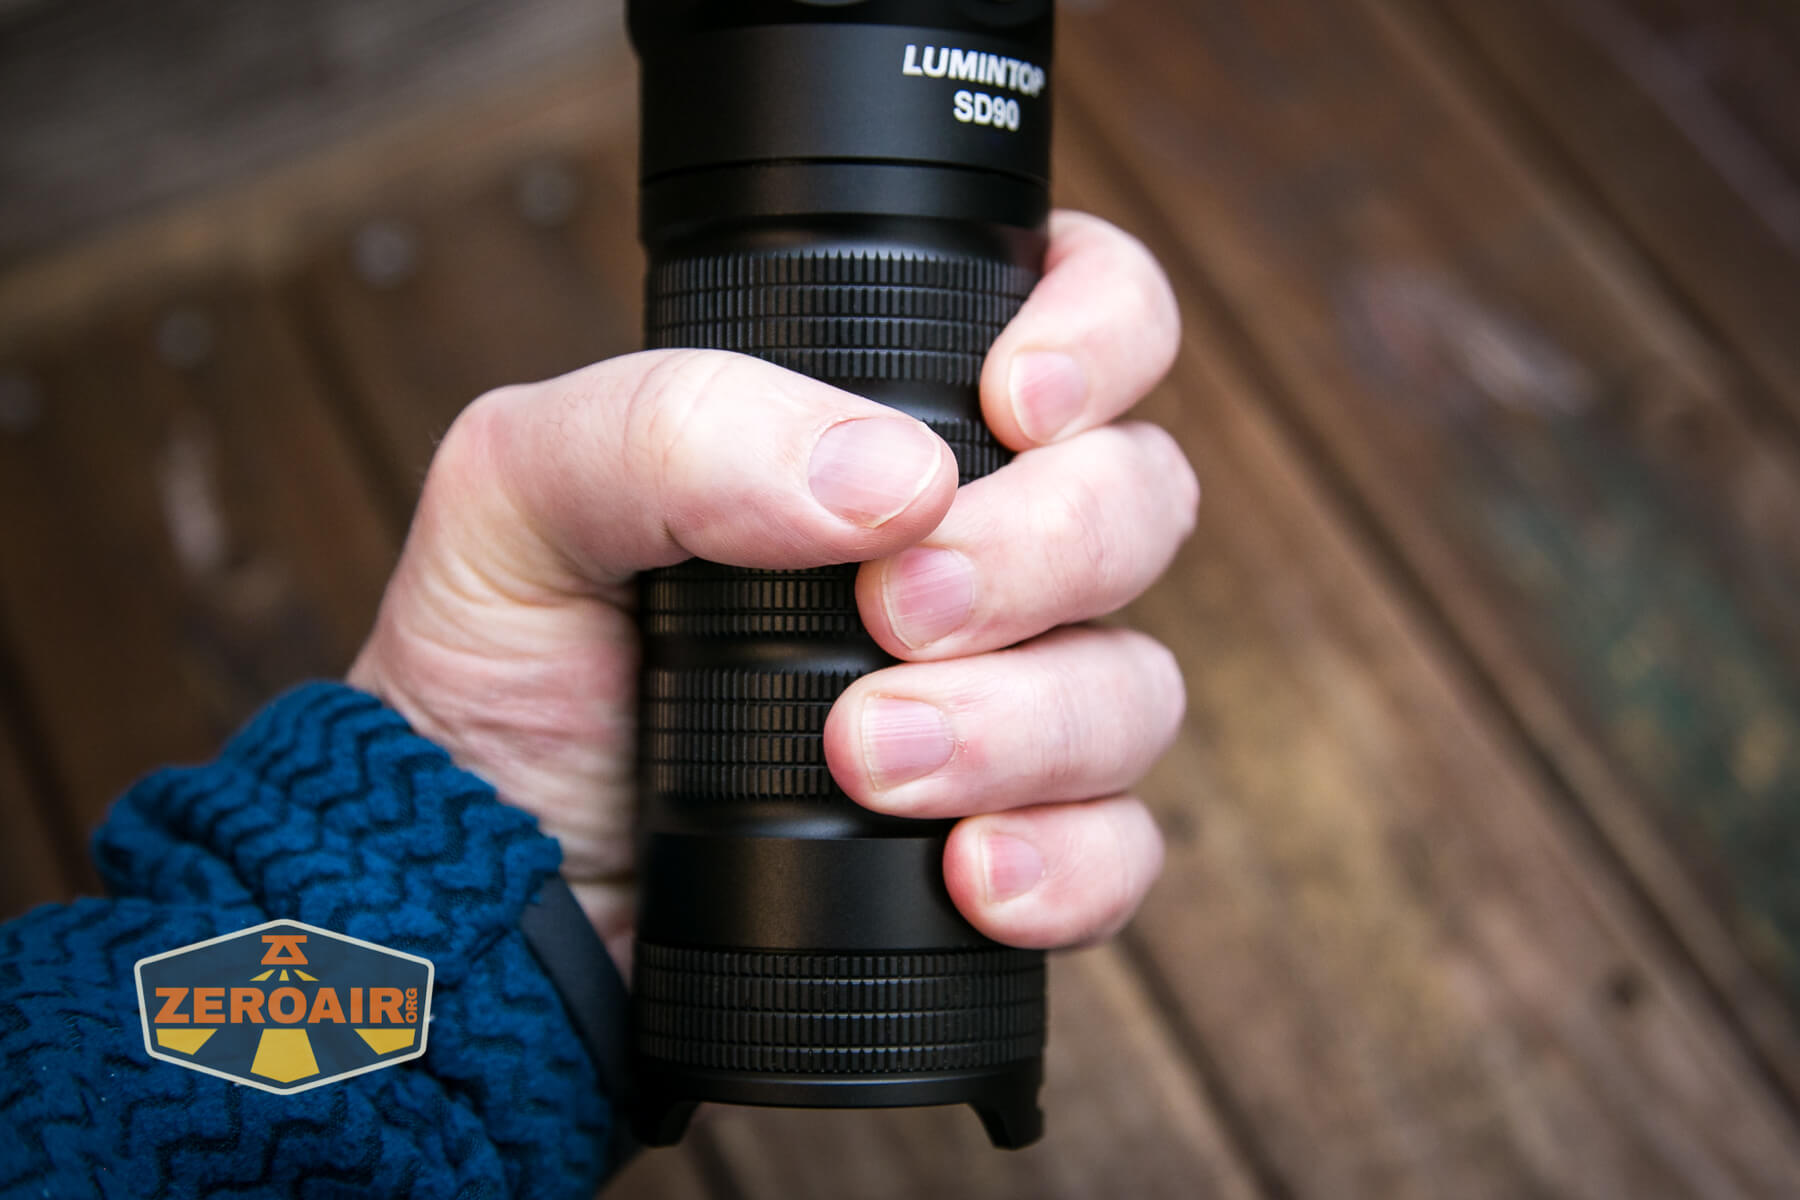
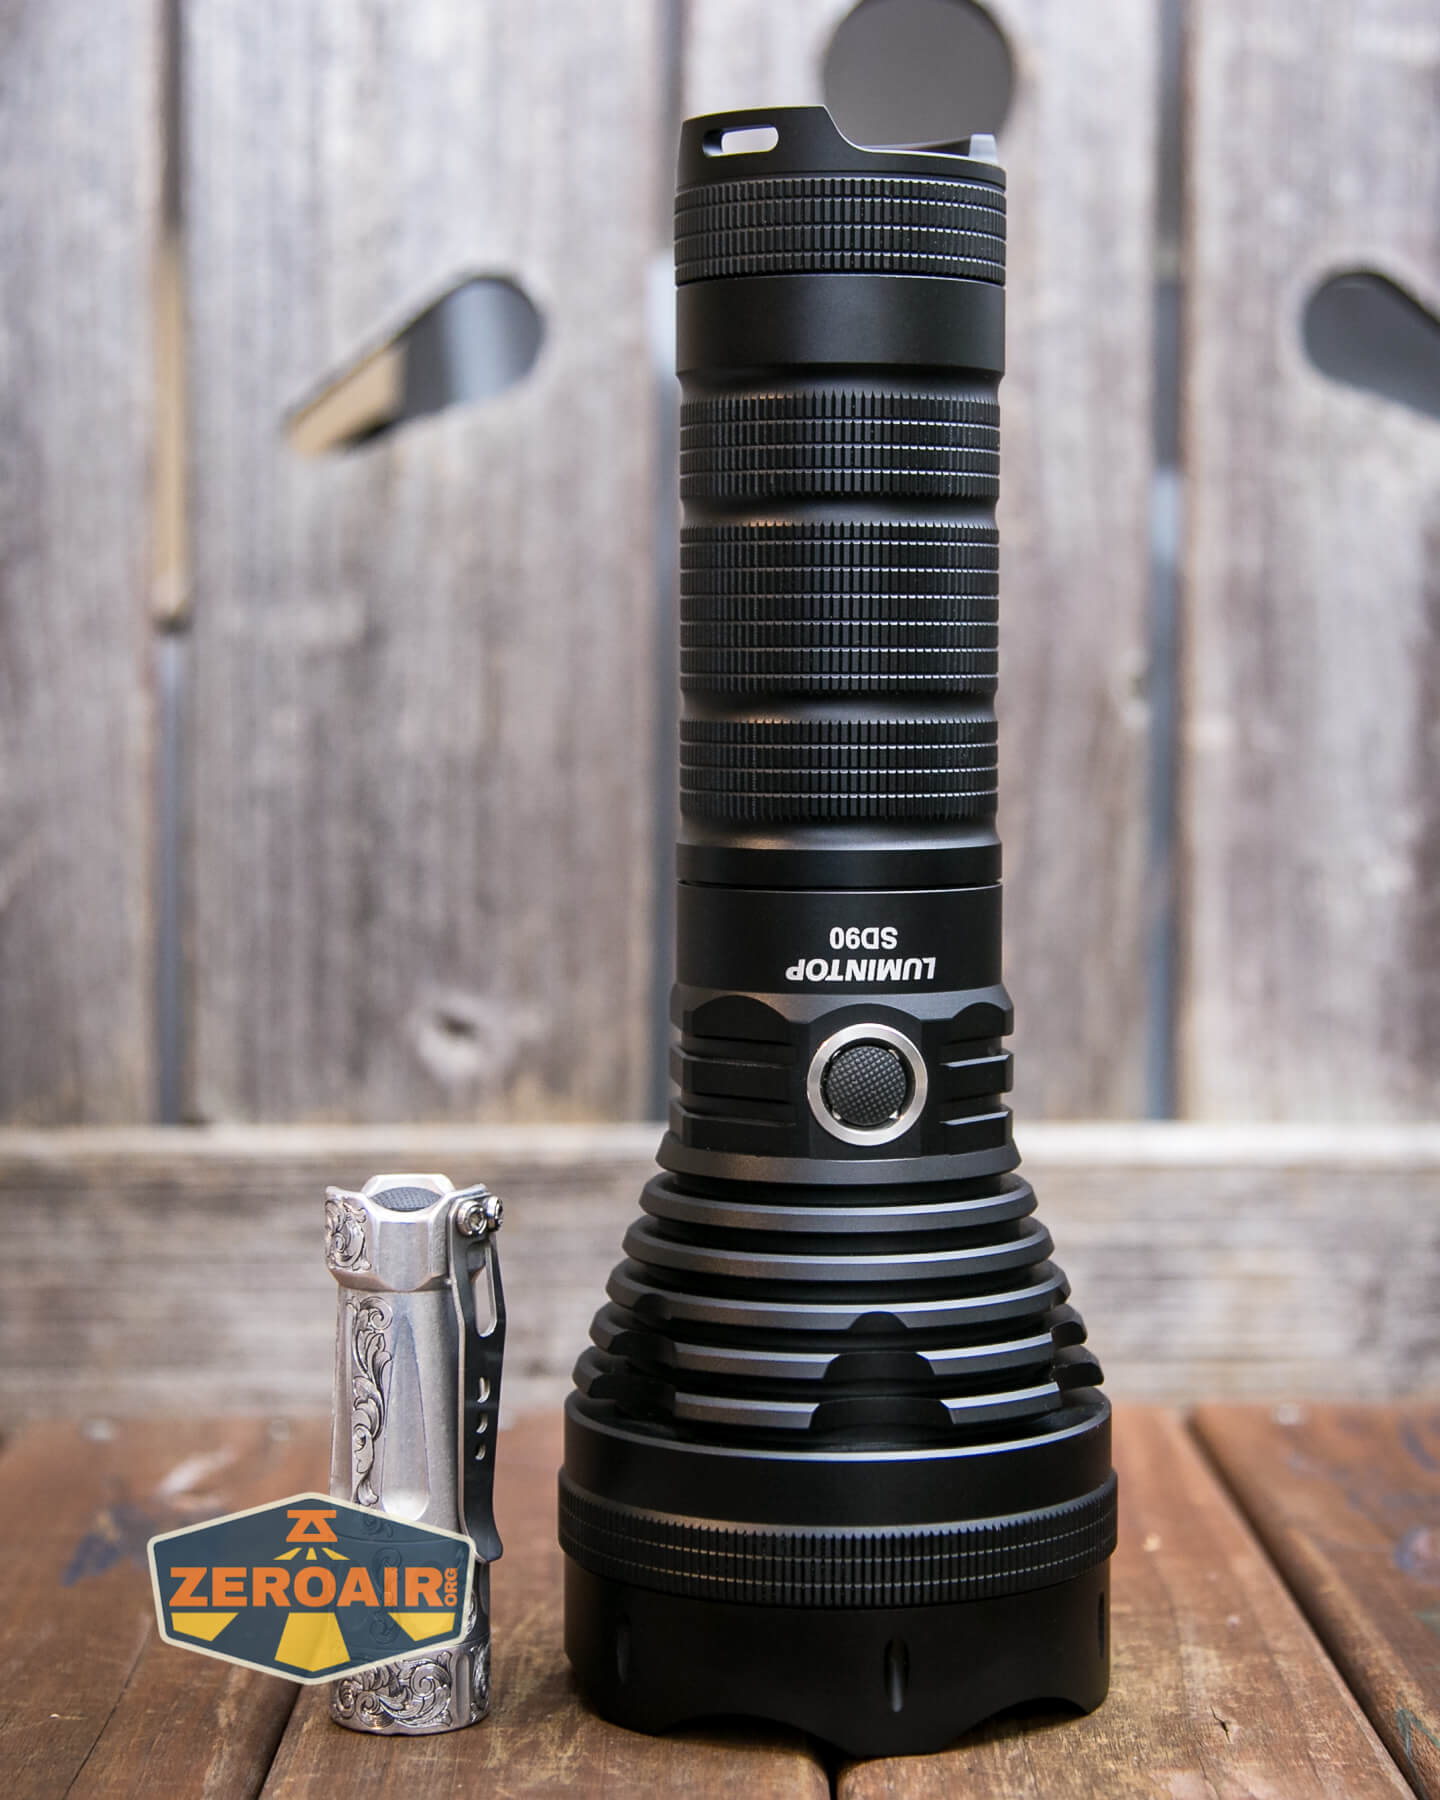
Size and Comps
Dimensions: 90 x 52 x 248.7mm
Weight: 859g without cells.

If the flashlight will headstand, I’ll show it here (usually the third photo). If the flashlight will tailstand, I’ll show that here, too (usually the fourth photo).


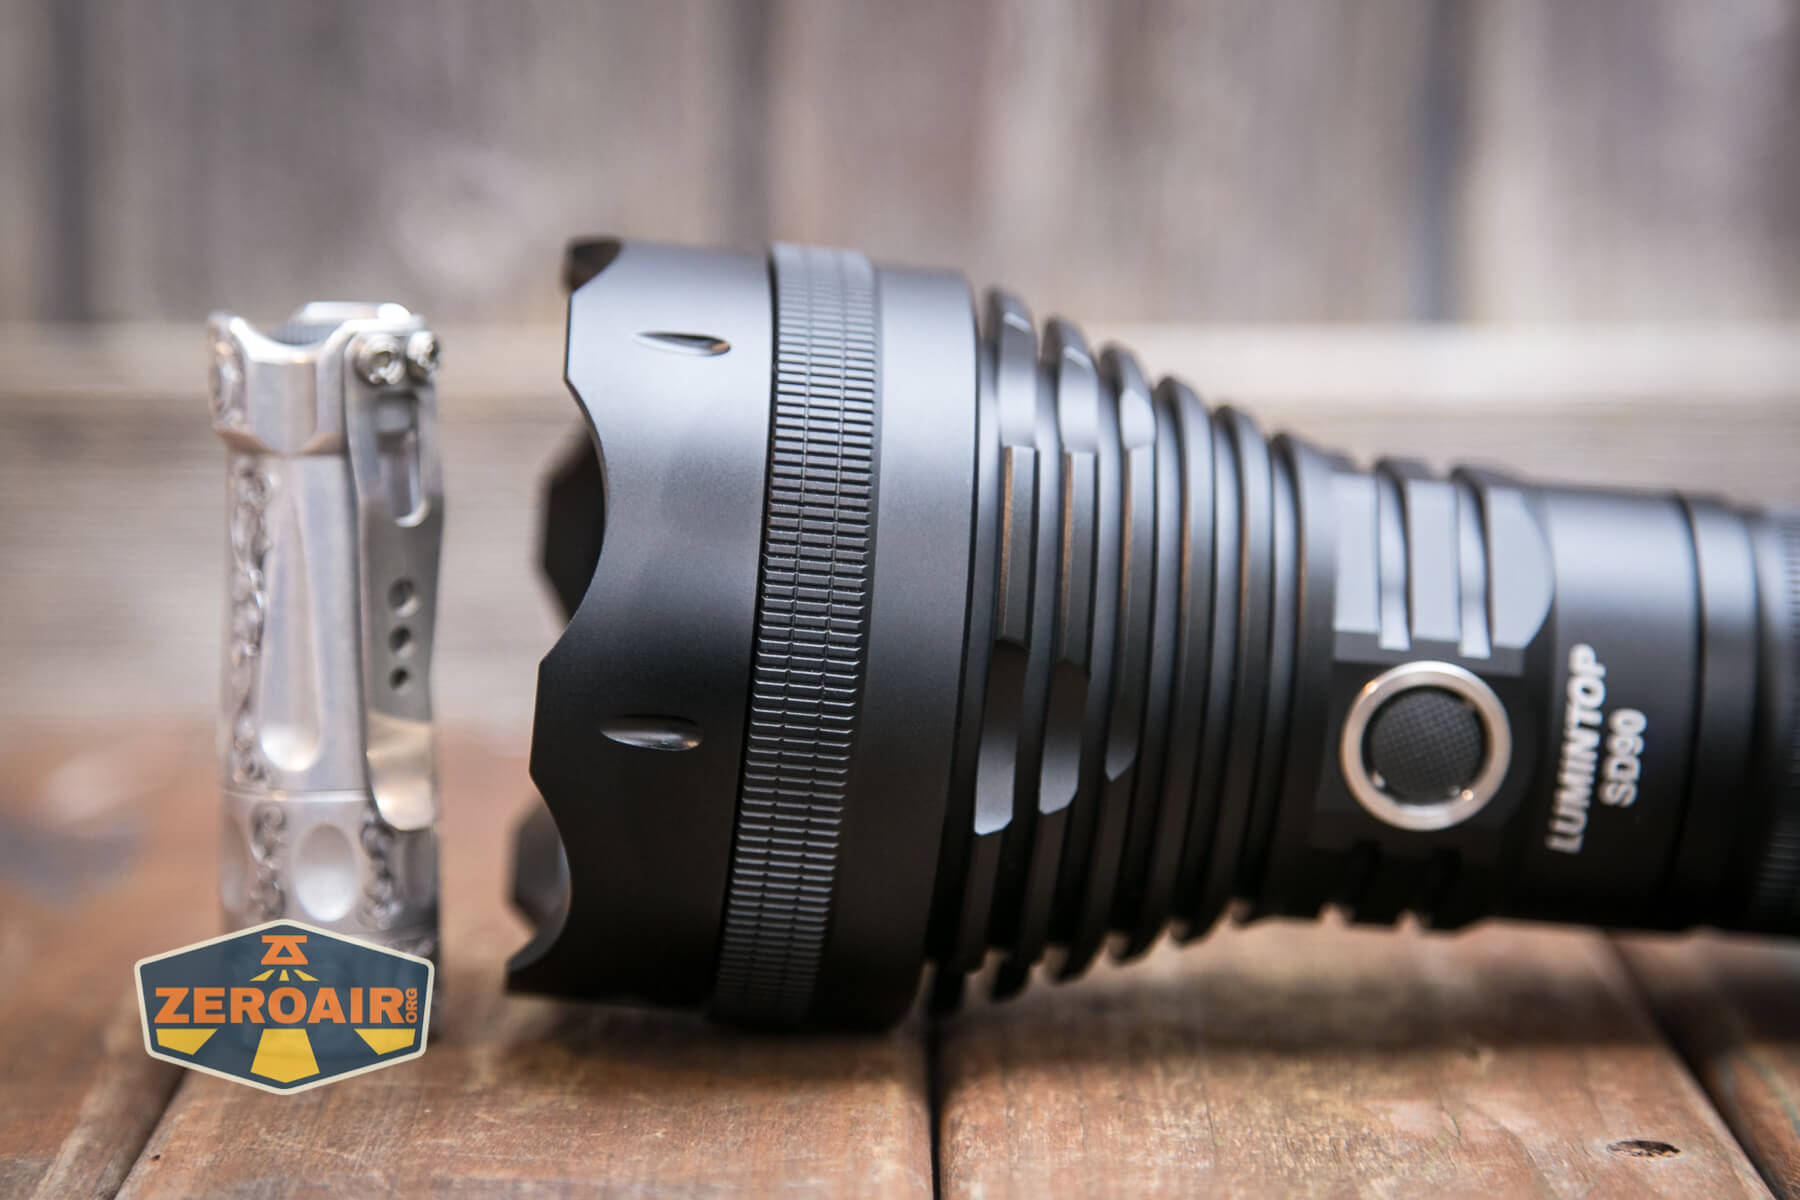
Here’s the test light with the venerable Convoy S2+. Mine is a custom “baked” edition Nichia 219b triple. A very nice 18650 light!

And here’s the light beside my custom-engraved TorchLAB BOSS 35, an 18350 light. I reviewed the aluminum version of that light in both 35 and 70 formats.
Retention and Carry
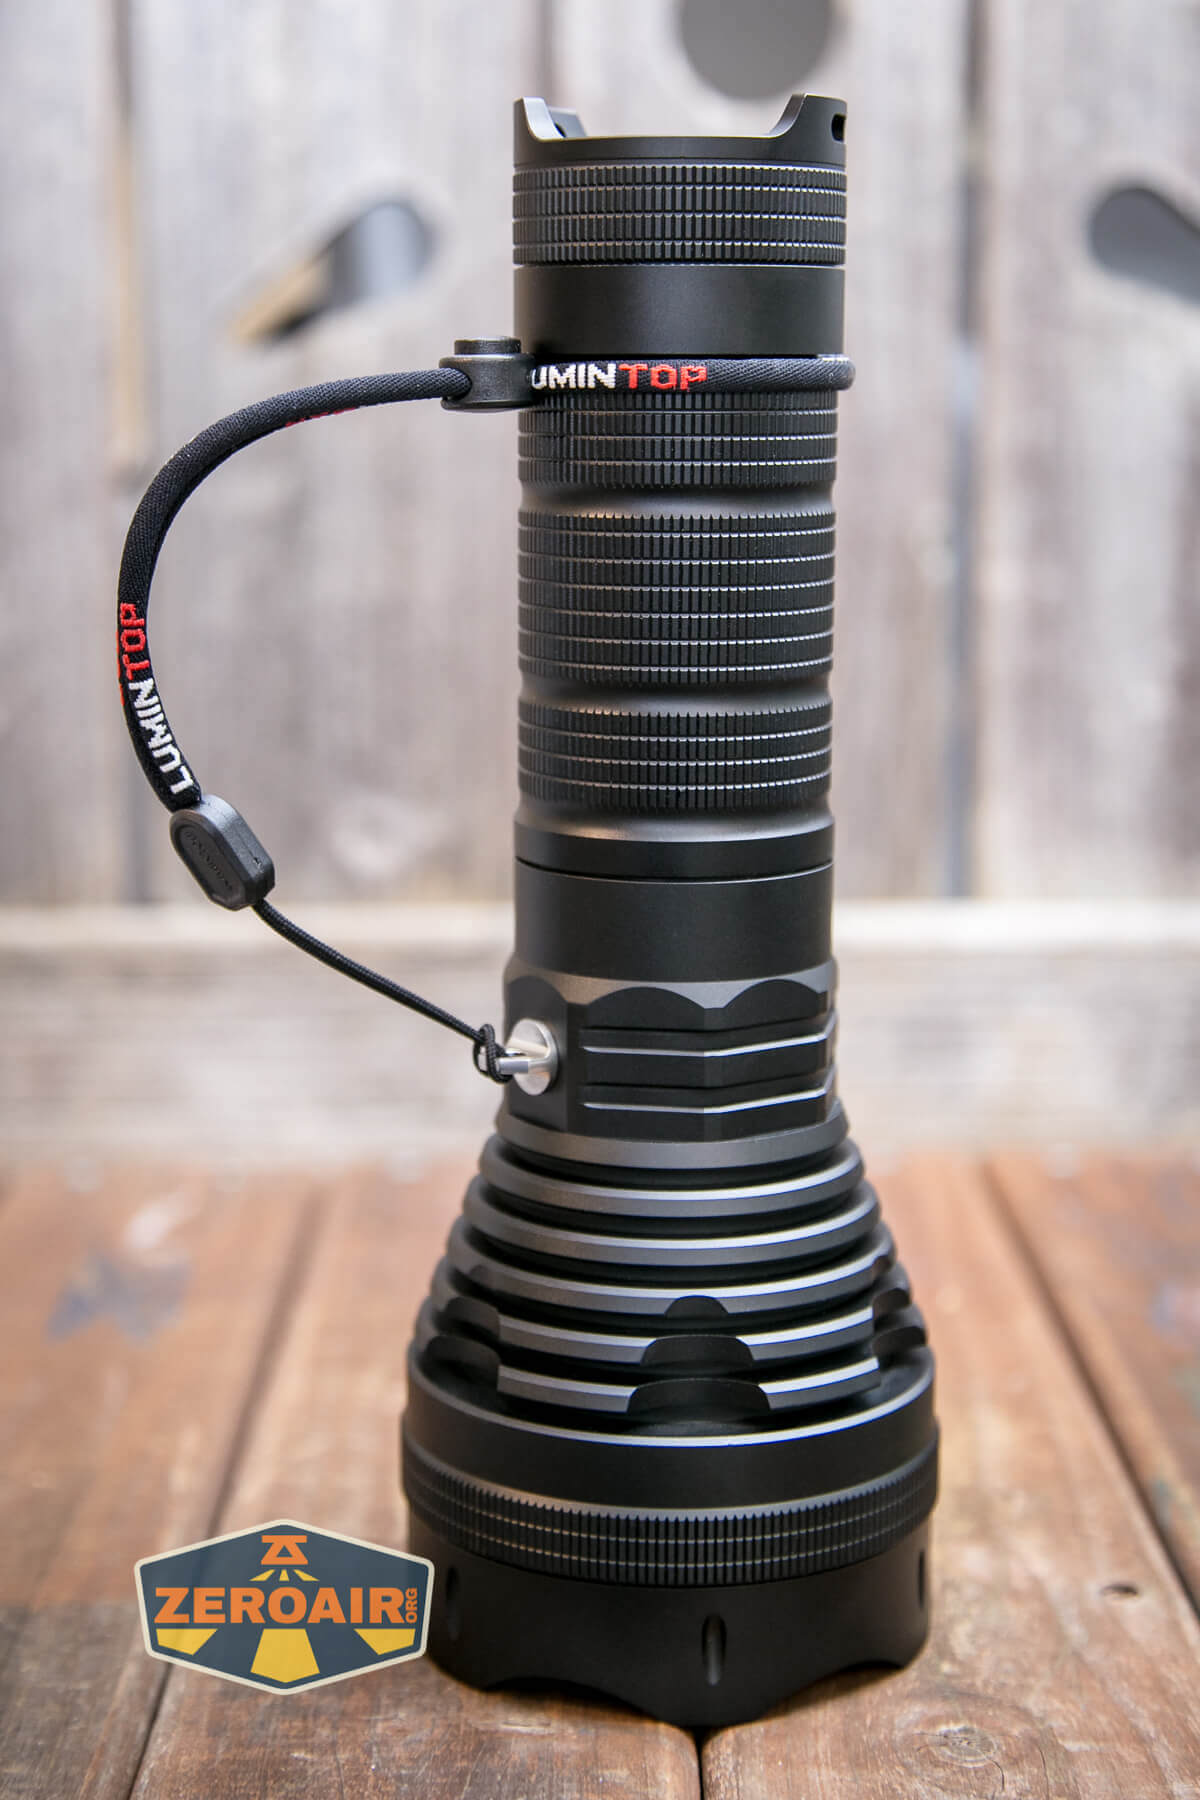
On the tailcap are two loops that accept the included lanyard.
Because of the big cutouts in the tailcap, the SD90 can still tailstand comfortably while the lanyard is installed.

You could also opt to throw the lanyard in this loop in the middle of the light. This is a tripod hole with a screwed-in ring.
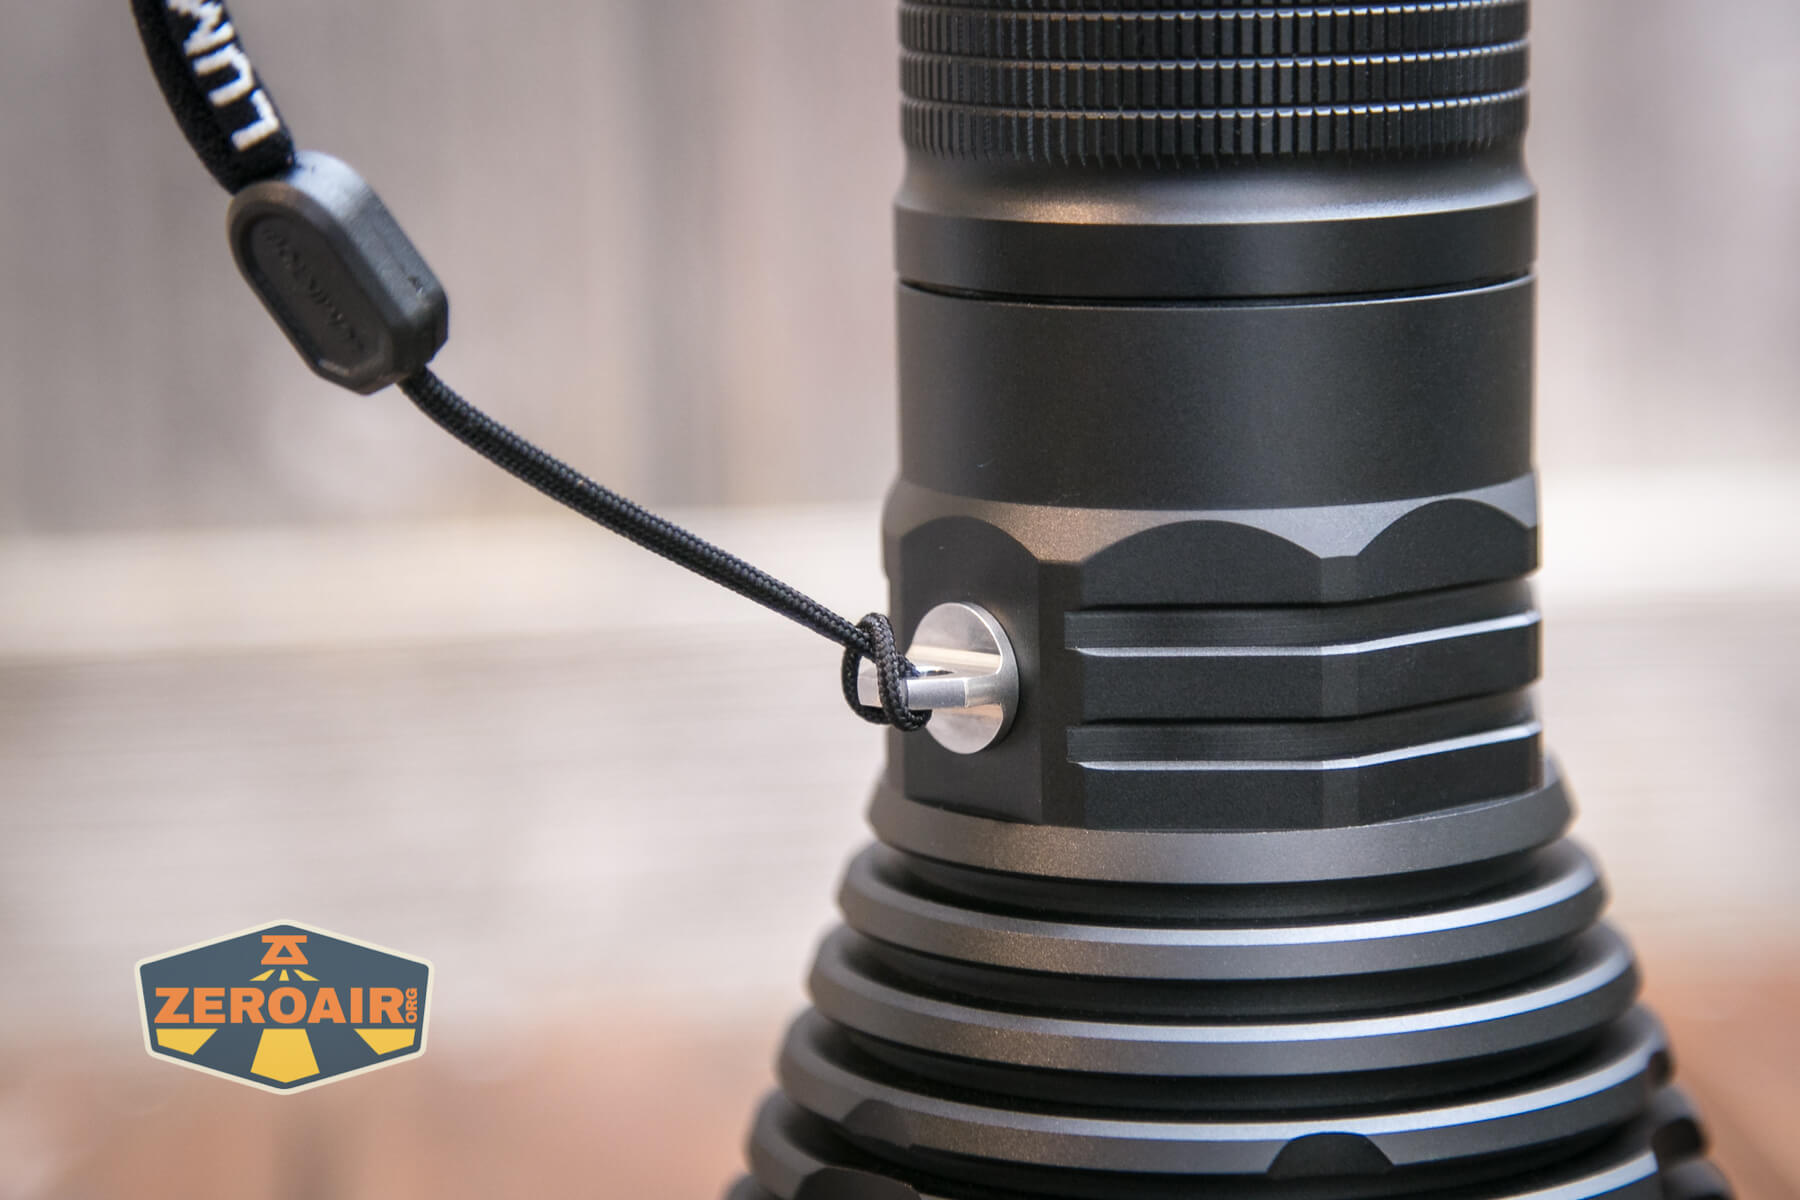
These two connections open some interesting possibilities of carrying just with the simple lanyard.
For example, here’s “handle mode.”
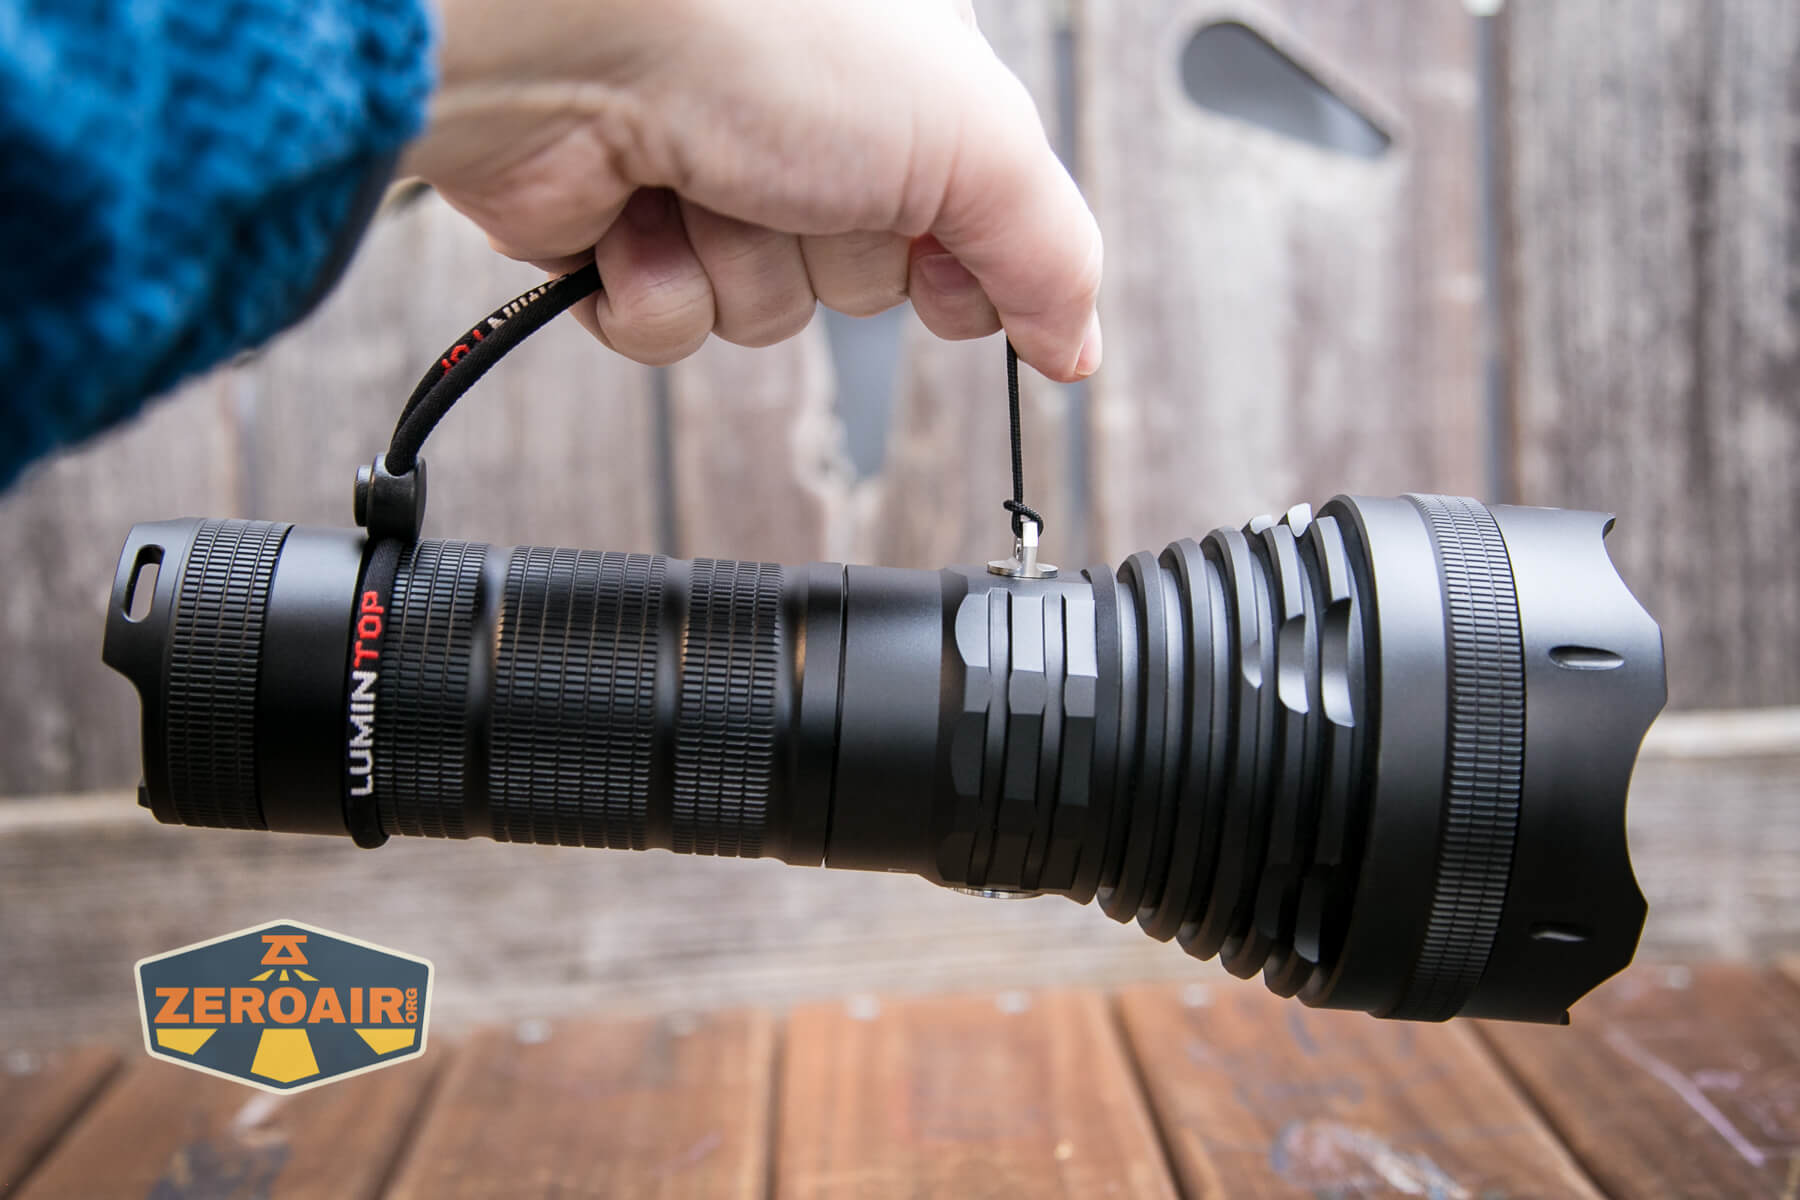
This threaded attachment is removable, too, so you can throw the Lumintop SD90 flashlight on a tripod, too. Balance at this point is pretty good, with slightly more weight in the tail of the light (when four cells are being used).
Of course, there’s the included case, too, which is great for carrying the SD90 when it’s broken down into parts. The case does not hold the light in a “ready-to-use” state.
Power and Runtime
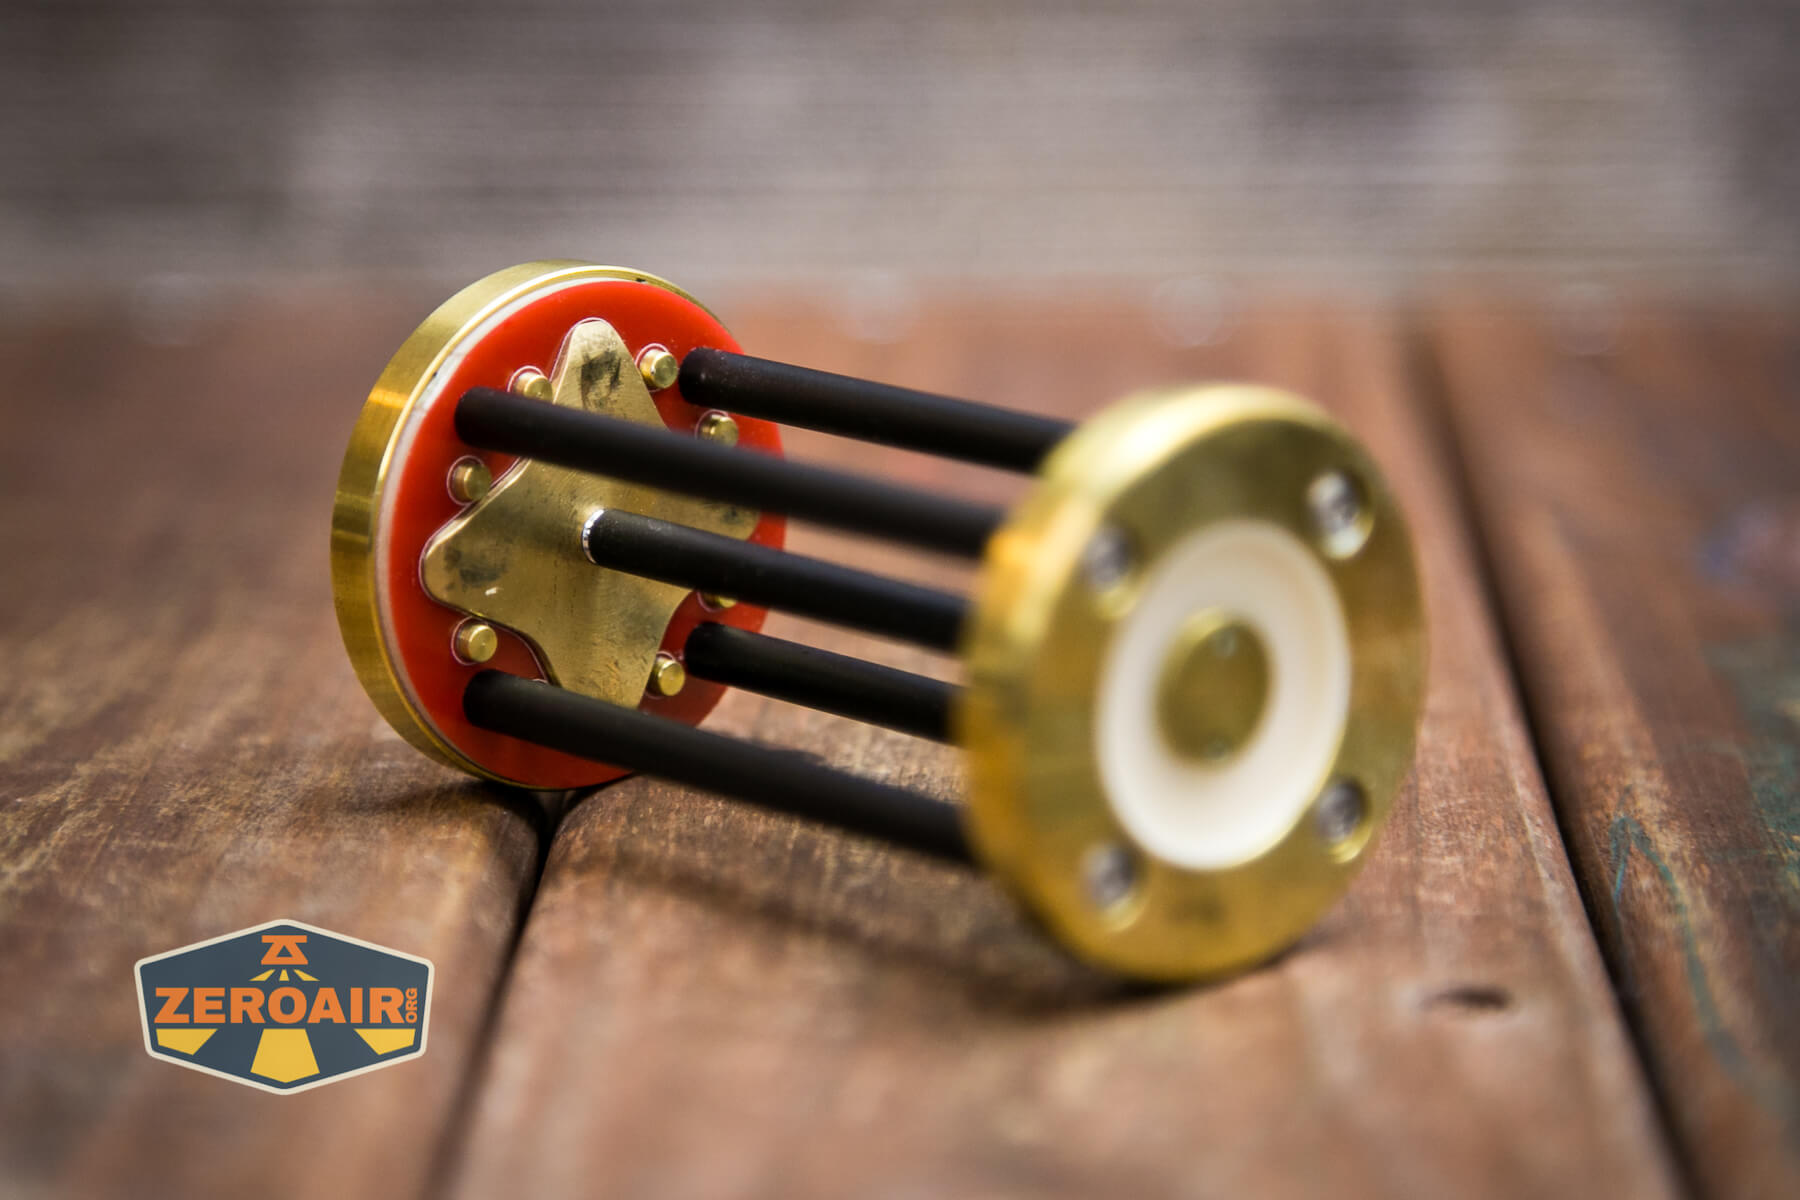
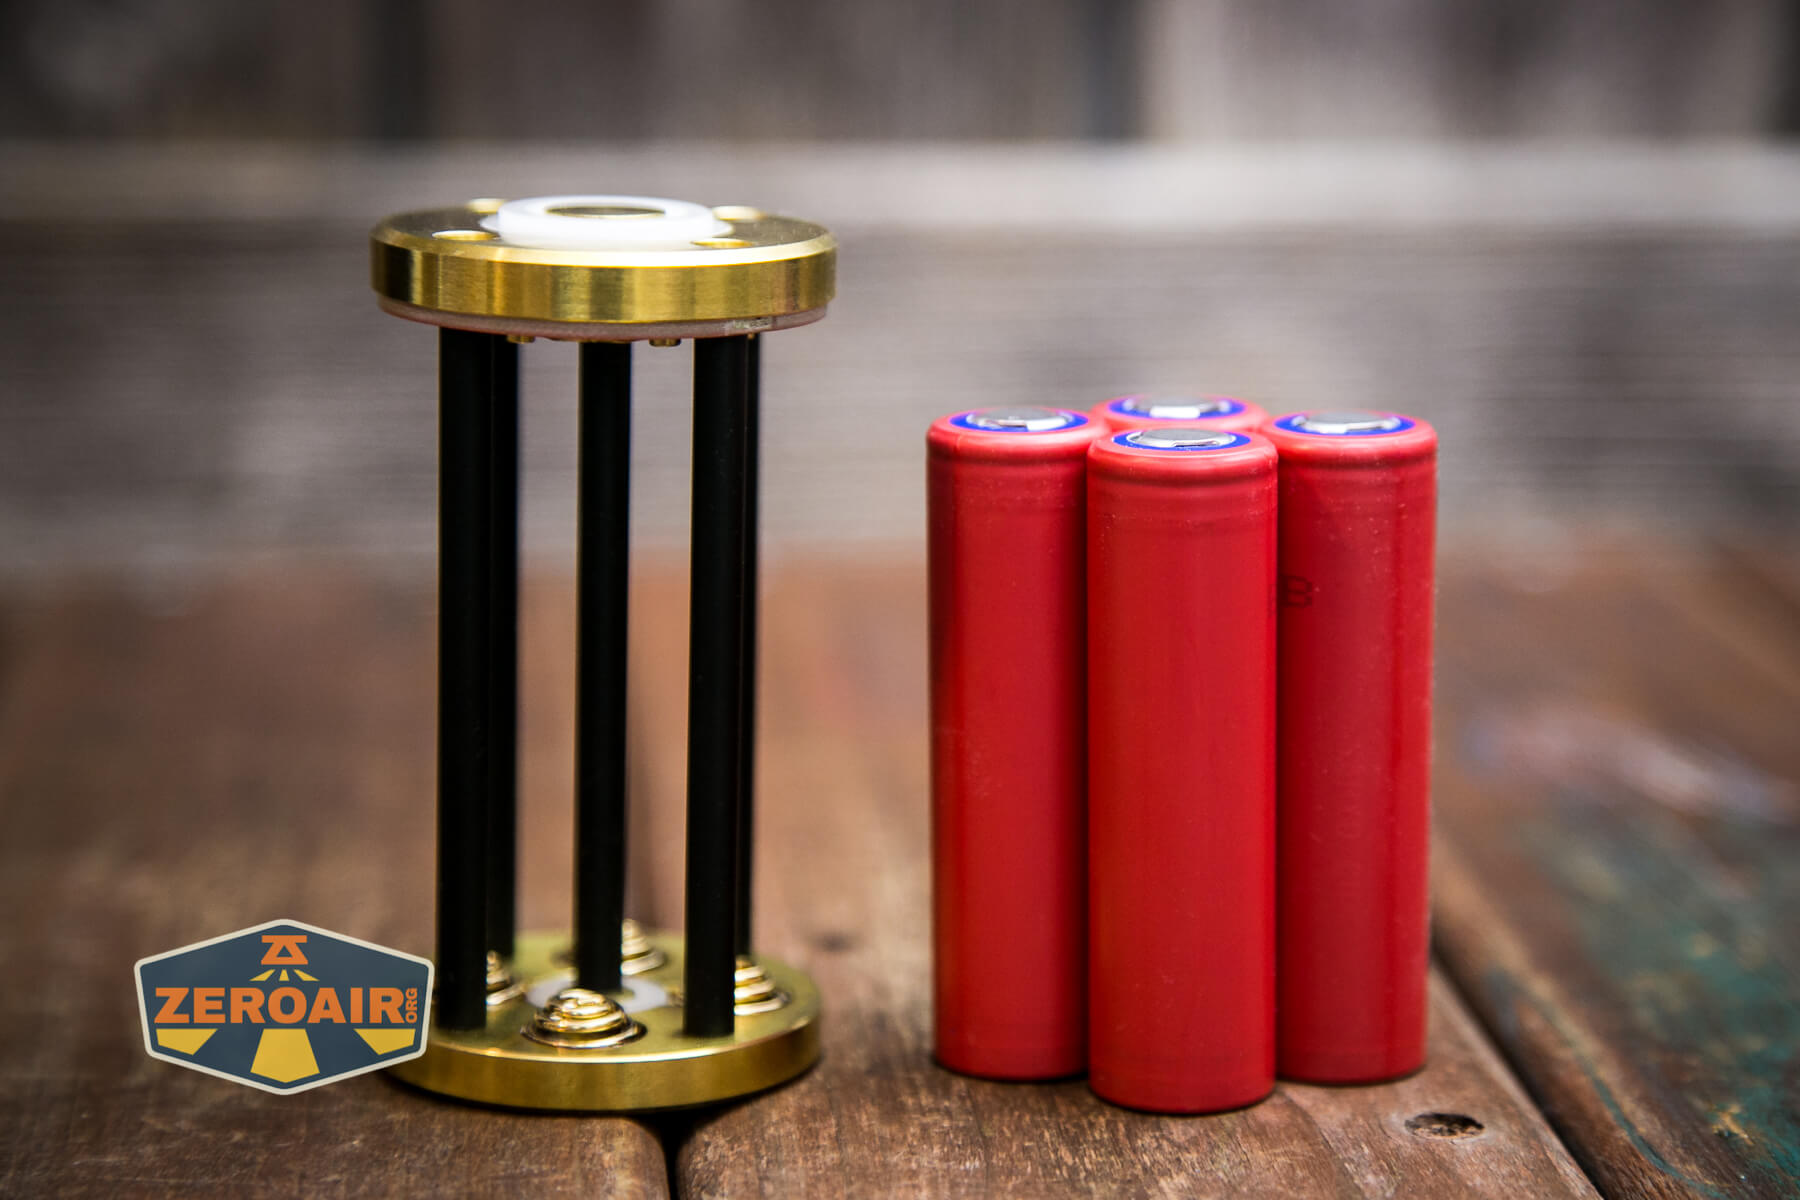
Lumintop runs the SD90 on a battery carrier with four 18650 cells. I can note a few things about the carrier that might not be immediately evident.
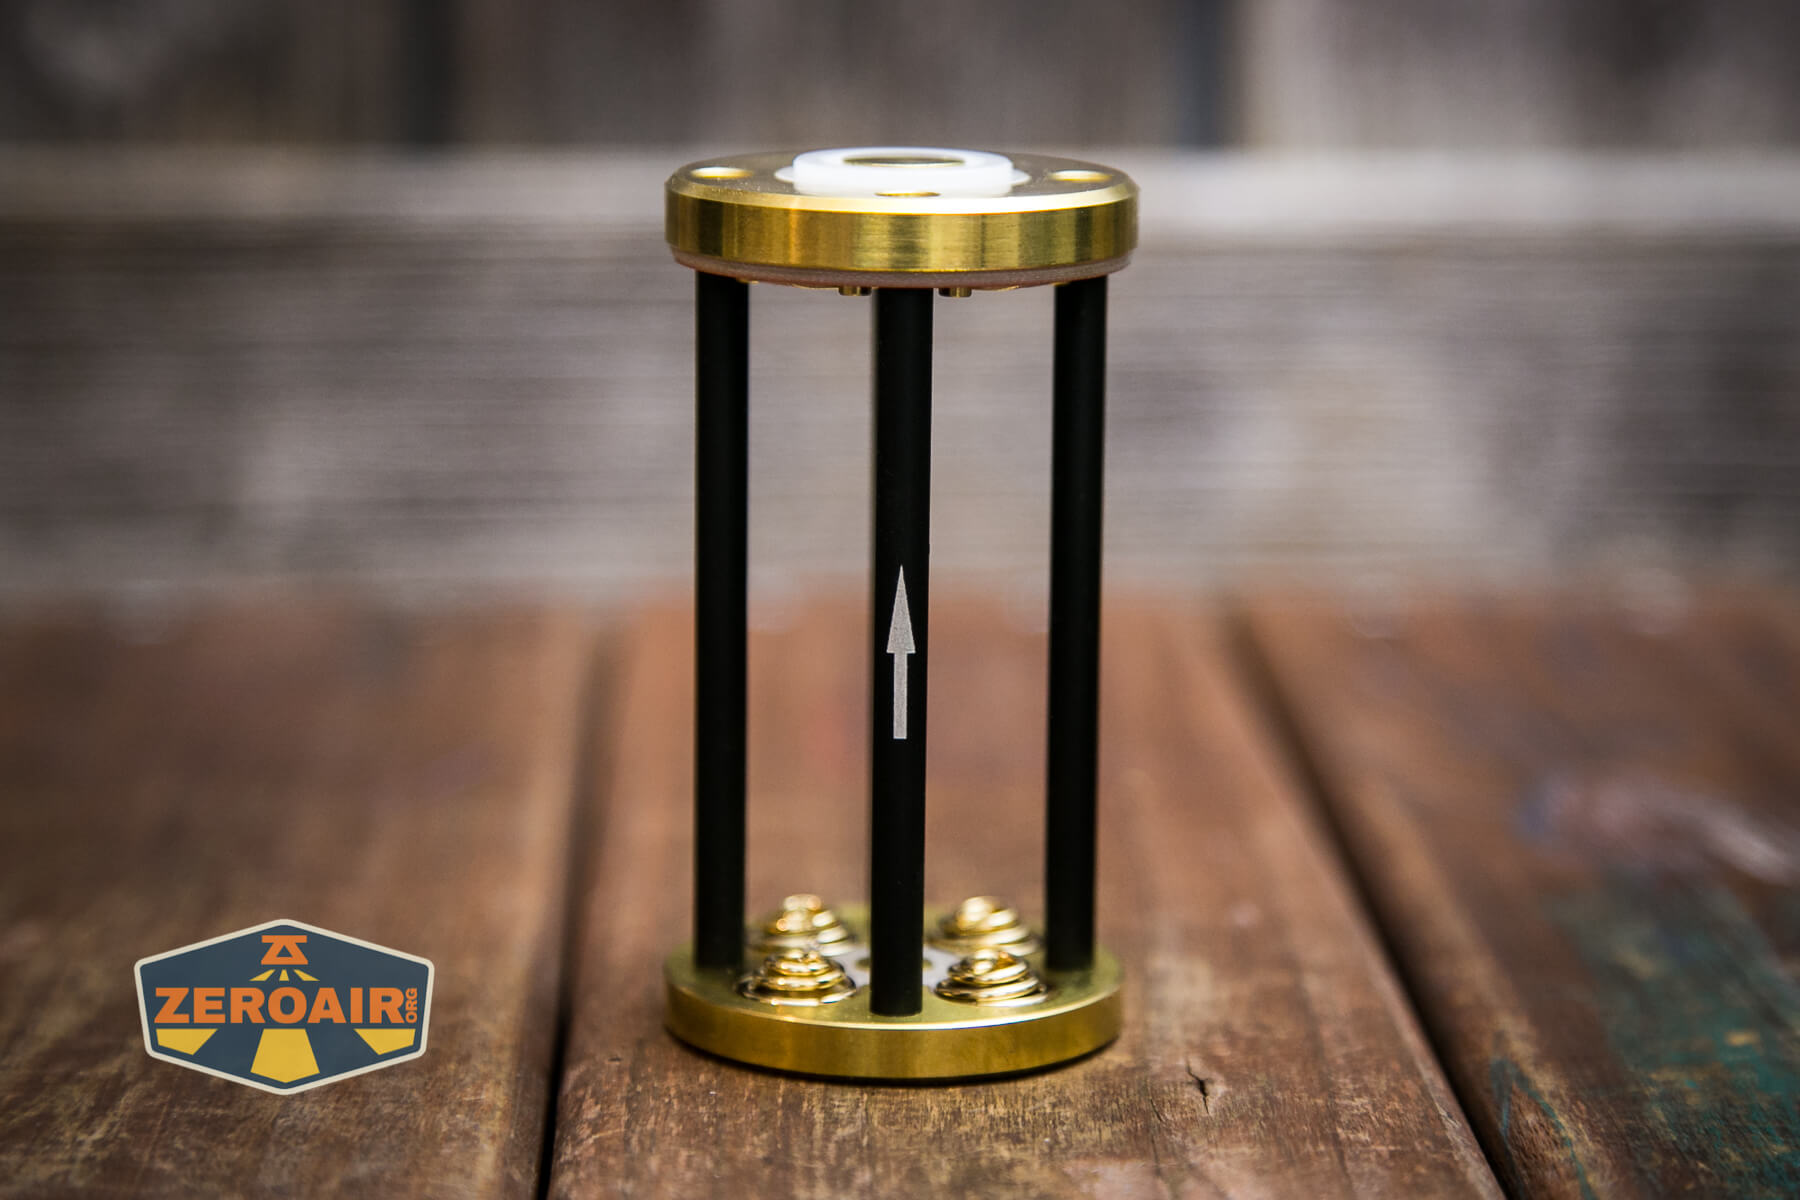
First of all, this thing is robust. Those brass plates on either end are thick!! This is easily the heaviest battery carrier I’ve had. Also, you can see the springs in the photo above – the cells are in a parallel connection configuration! This is a bit surprising because usually, you see a 2S2P configuration (or some other) so that the light can take advantage of a higher initial voltage from the cells. But the SD90 runs at 4.2V maximum. That’s fine, and no issues at all there. But since the highest output level can draw 26A (per the manufacturer specification) you’ll definitely want to use some very high-quality cells!


Check out this battery carrier! There’s an arrow on one of the connector rods, but really the manual doesn’t cover what this arrow means. I’m always 100% confused by these arrows (unless they’re explained, obviously). Does the arrow mean “point this arrow into the cell tube”? Or does it mean “this arrow should point toward the head”? Well, the manual doesn’t say, but I can tell you. The arrow should point at the head. And in fact, if you think about the cells as a single battery, then we can say this is the “usual configuration” – the springs (which contact the negative terminal of the cell) go into the tail end of the cell tube. The positive end of the cells goes to the head.

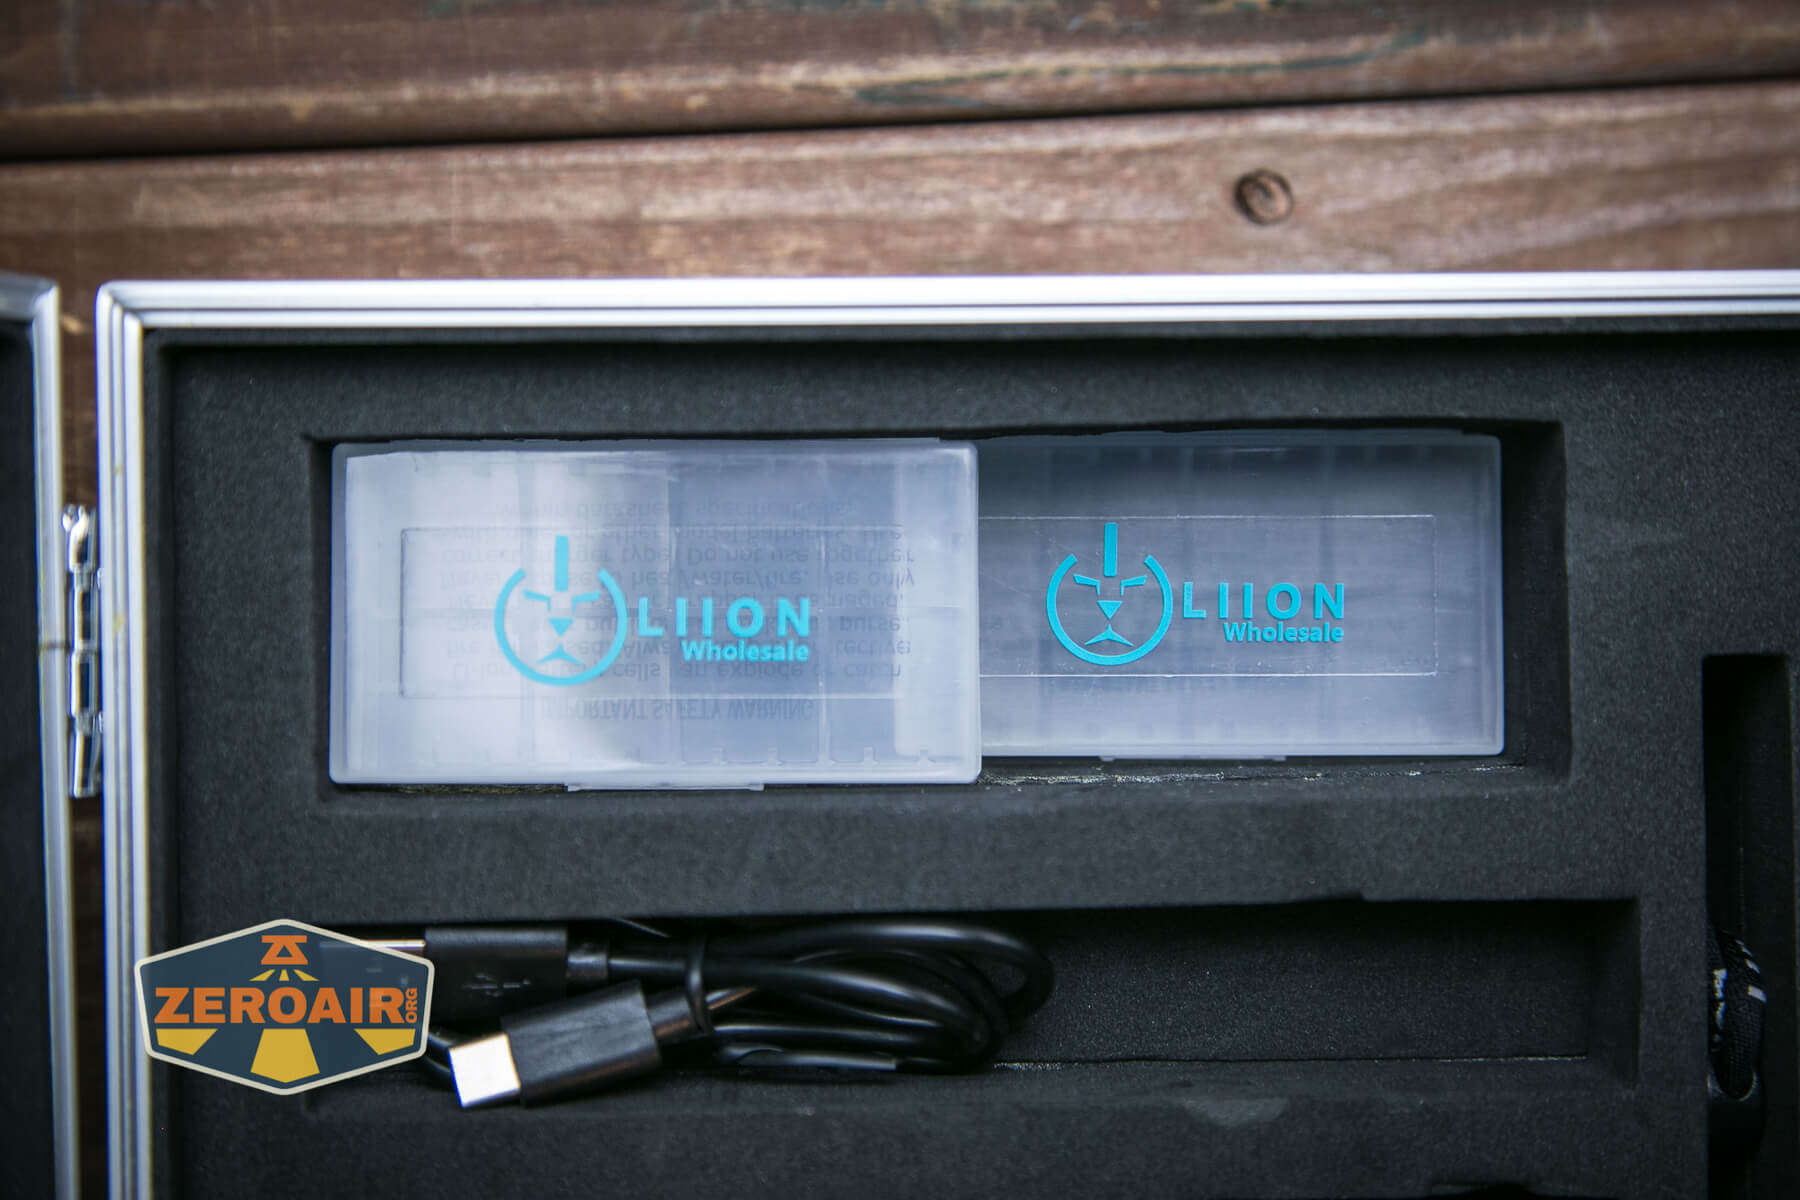
I did use high-quality cells. In fact, I used cells provided specifically for this light by LiionWholesale.com. These are Panasonic/Sanyo NCR18650GA flat top 18650 cells. You can buy those at liionwholesale.com.
One more quick note about liionwholesale.com. I think fairly new on their site (or at least not a feature I’d used before) is this selection filter:
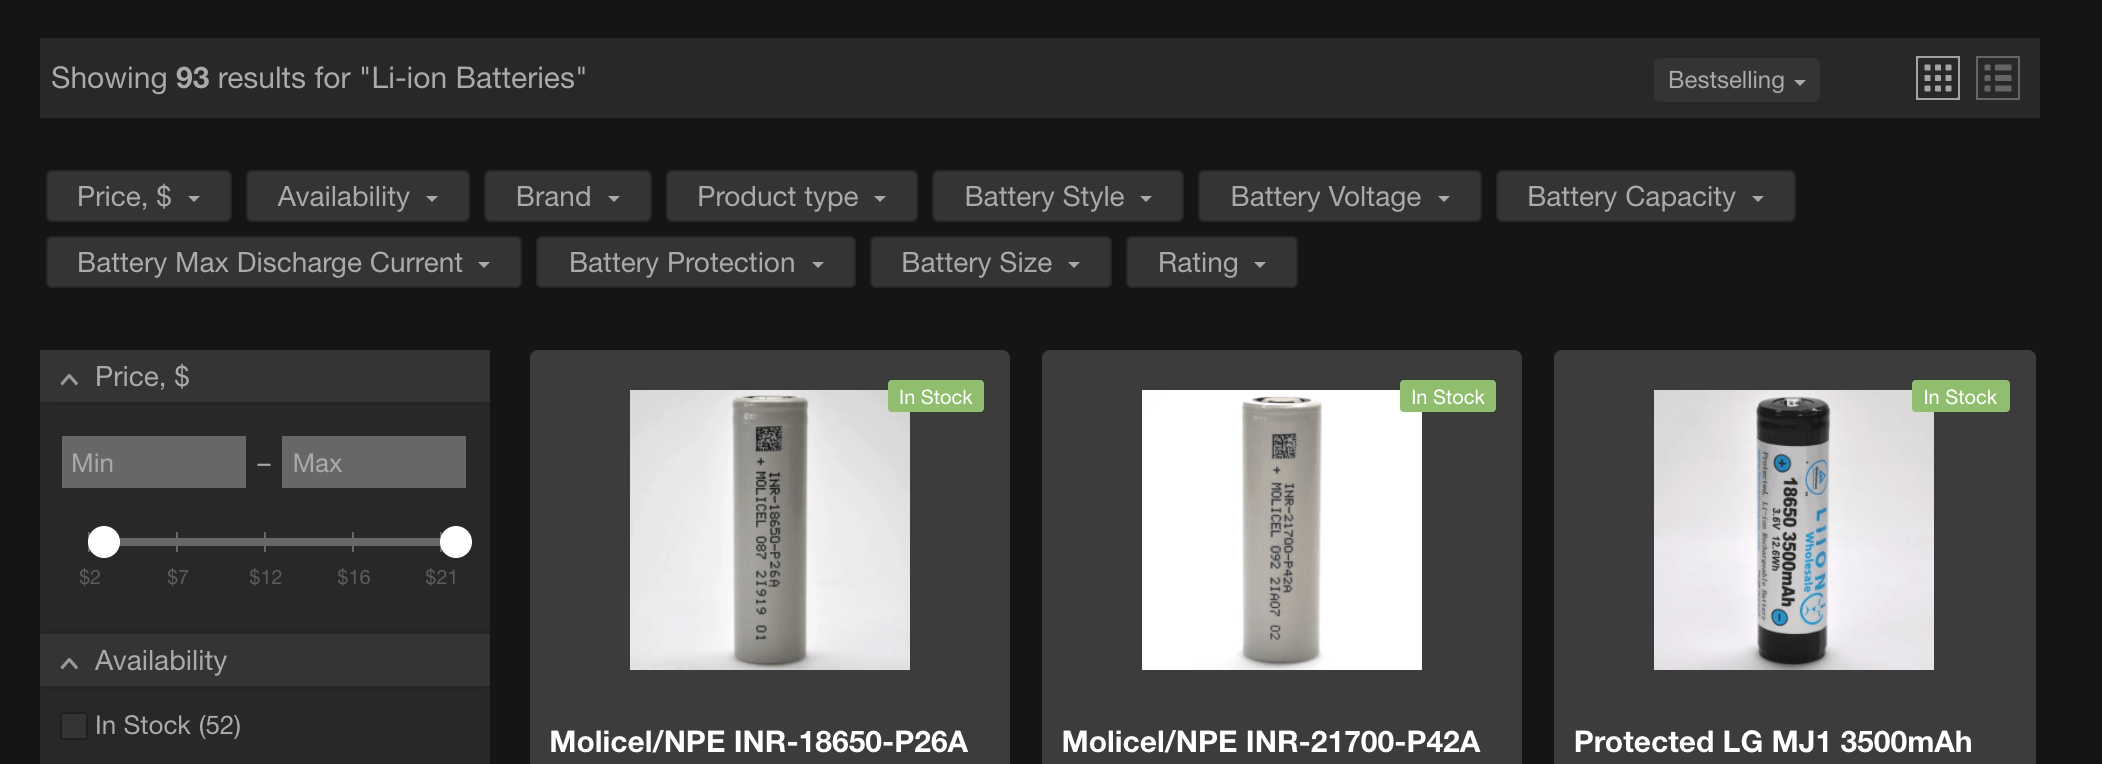
Let me just tell you that the filter is just fantastic. You can filter by all sorts of things, making finding exactly the cell you need extremely easy. (For example, if I select 30+A 18650 cells, I can see that four of the P26A cells by Molicel would likely be ideal for this light if it has the proper exposure of the positive terminal.)
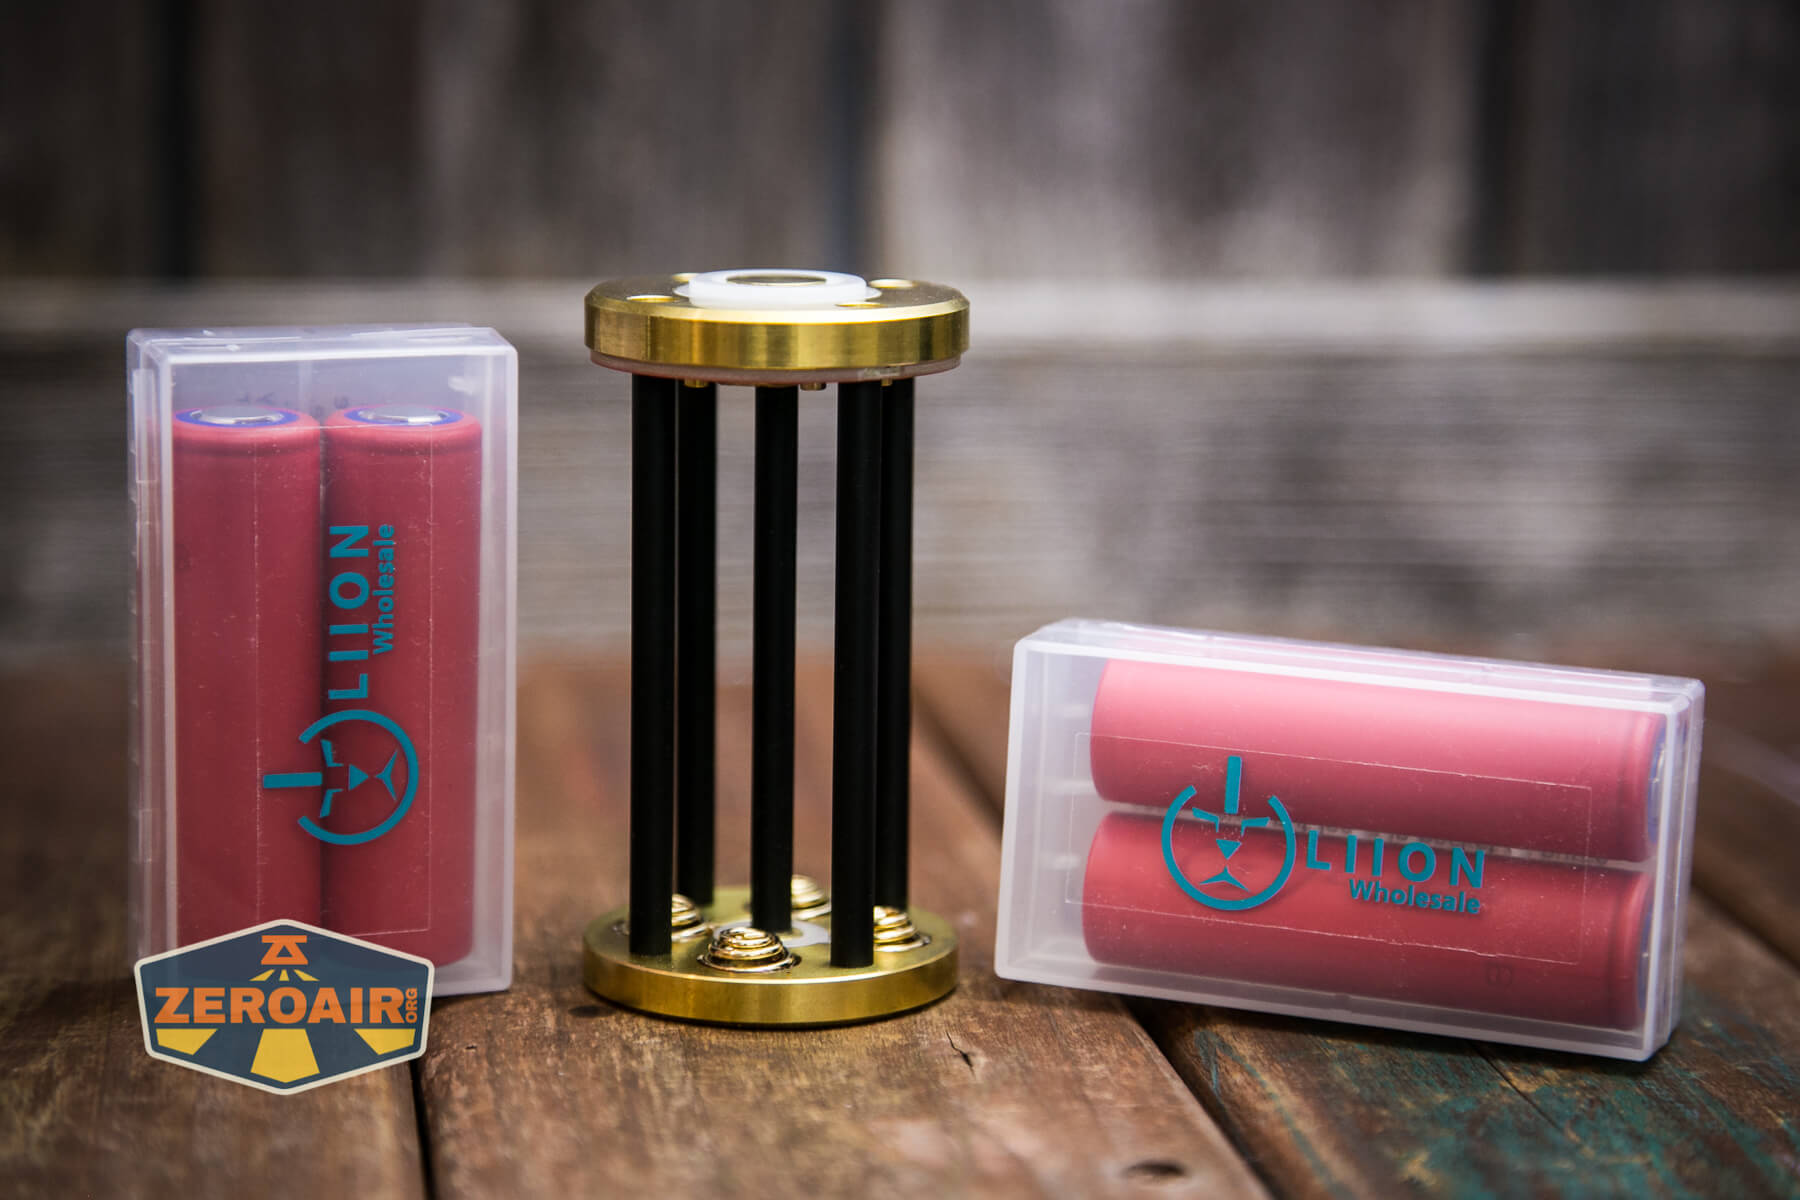
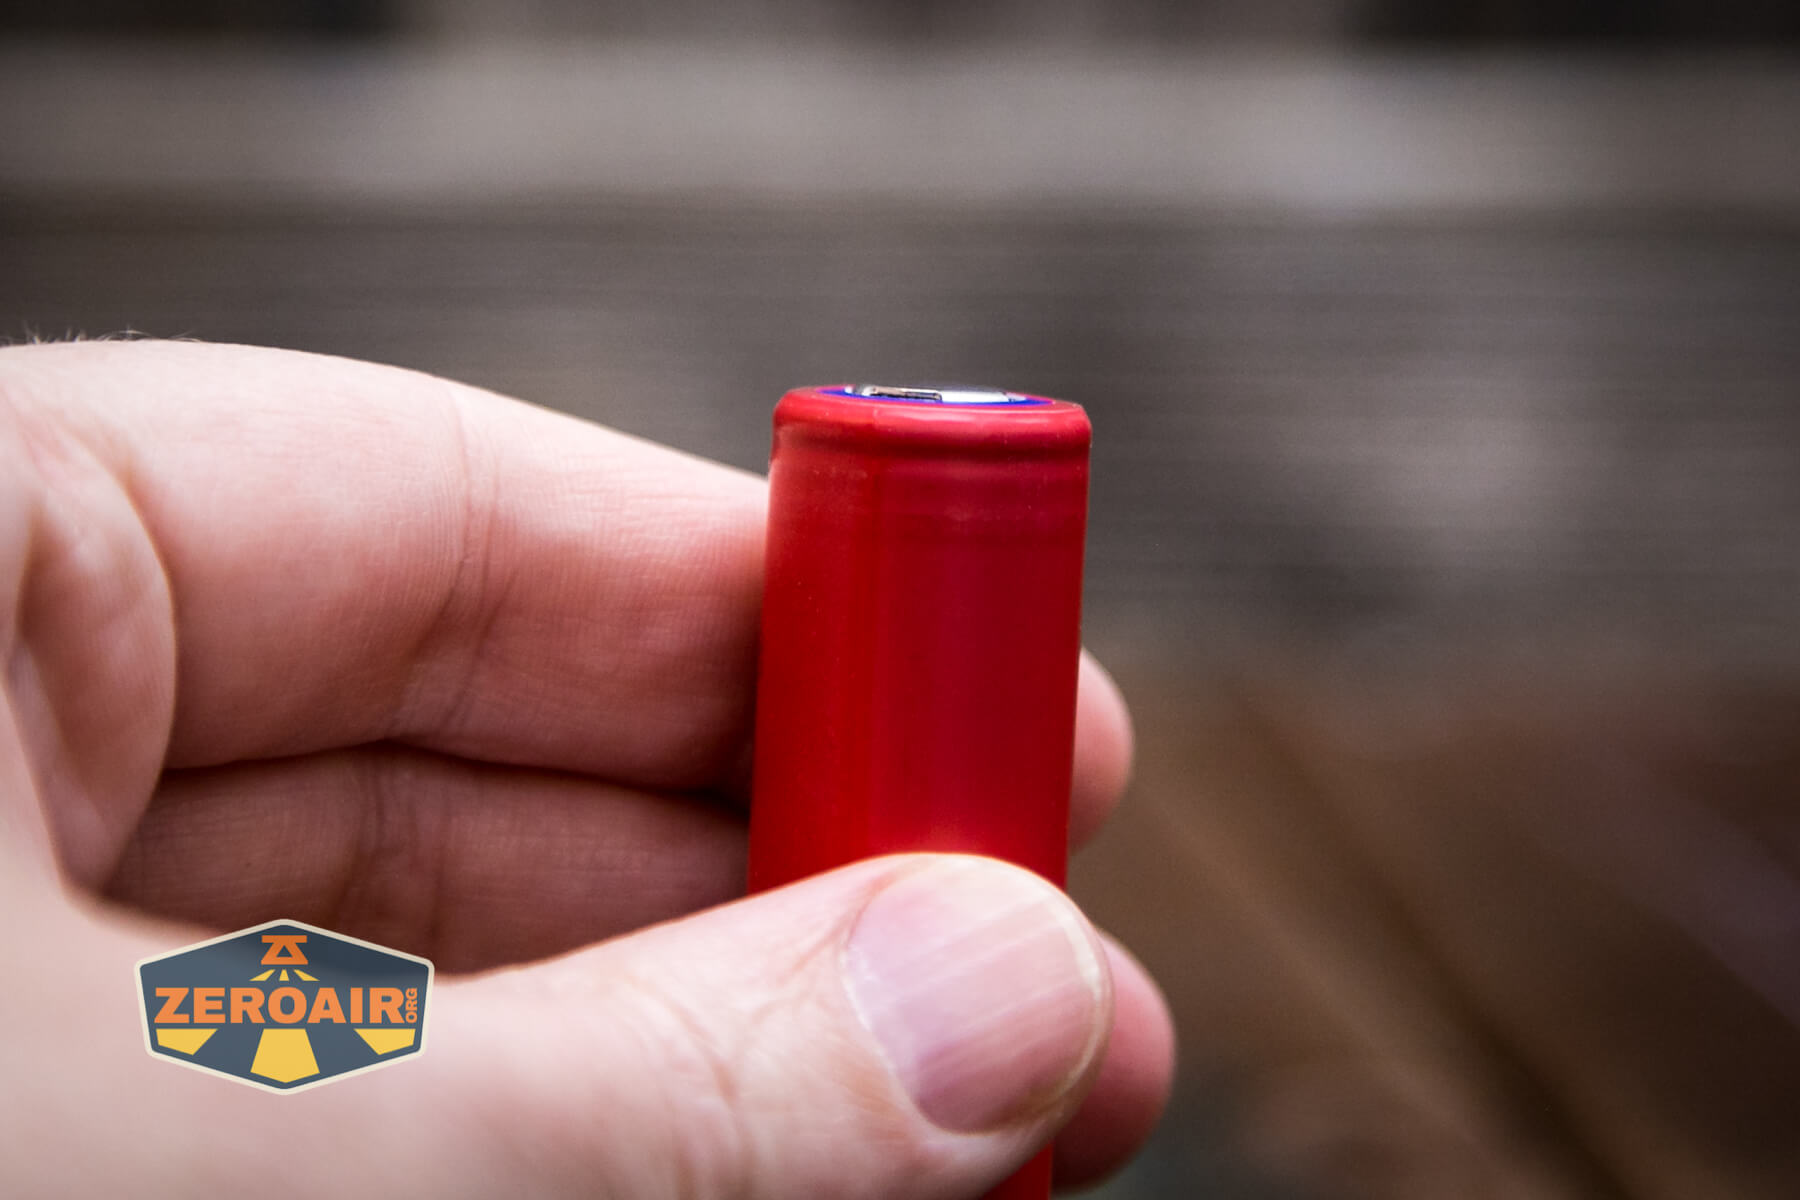
Now, just any old flat top won’t work (in my experience). The top will need to have just a very slight bump like these GA’s have. A completely flat top won’t work – it won’t make contact. And a button top won’t work – it won’t fit into the cell carrier. So I tested which cells I have and landed on these GA’s as “working” and LiionWholesale.com sent out a fresh matched set. Now, since these cells are in parallel and not in series, having them married is not that big a deal. But it’s still good for them to be close, and having them married is the easiest way to accomplish that.
One more point about these cells and the cell holder. Since this setup is at 4.2V (max, 3.7V nominal) when all the cells are in, that means that any number of cells will work! Running turbo (or even the higher 3 or so modes) on a single cell would likely be “ill-advised,” but it’ll work.

And one final point about these cells. Lumintop says the Turbo mode can pull 26A (or “will” pull 26A, I suppose). If these cells were in series, that’d be fairly easy. Four cells capable of 10A output (like these GA’s) would have no problem in series to get 26A to the driver. But in parallel, each cell individually must output this amount of current. And since these are 10A cells, we might not see the absolute max output from this light. The flip side of this is that I don’t know what better cells to recommend.
Reevaluating this thanks to users on Reddit, I have this backward. With the cells in parallel as they are in this cell holder, these four 10A-capable cells should easily be able to output the required 26A (since in parallel they’ll be able to output a whopping 40A if they’re 10A each!). Sorry for that mistake!
If you’re like me and likely to have the SD90 live in your car as an emergency light, you might want to know where you can store the cells. Since the cell carrier has its very own slot in the case, you can store four cells in it. But if you want spares, you can almost certainly find a good place within the case to store those cases. In fact, one of the slots already nearly perfectly fits four plastic cases (and could definitely be cut to fit perfectly).

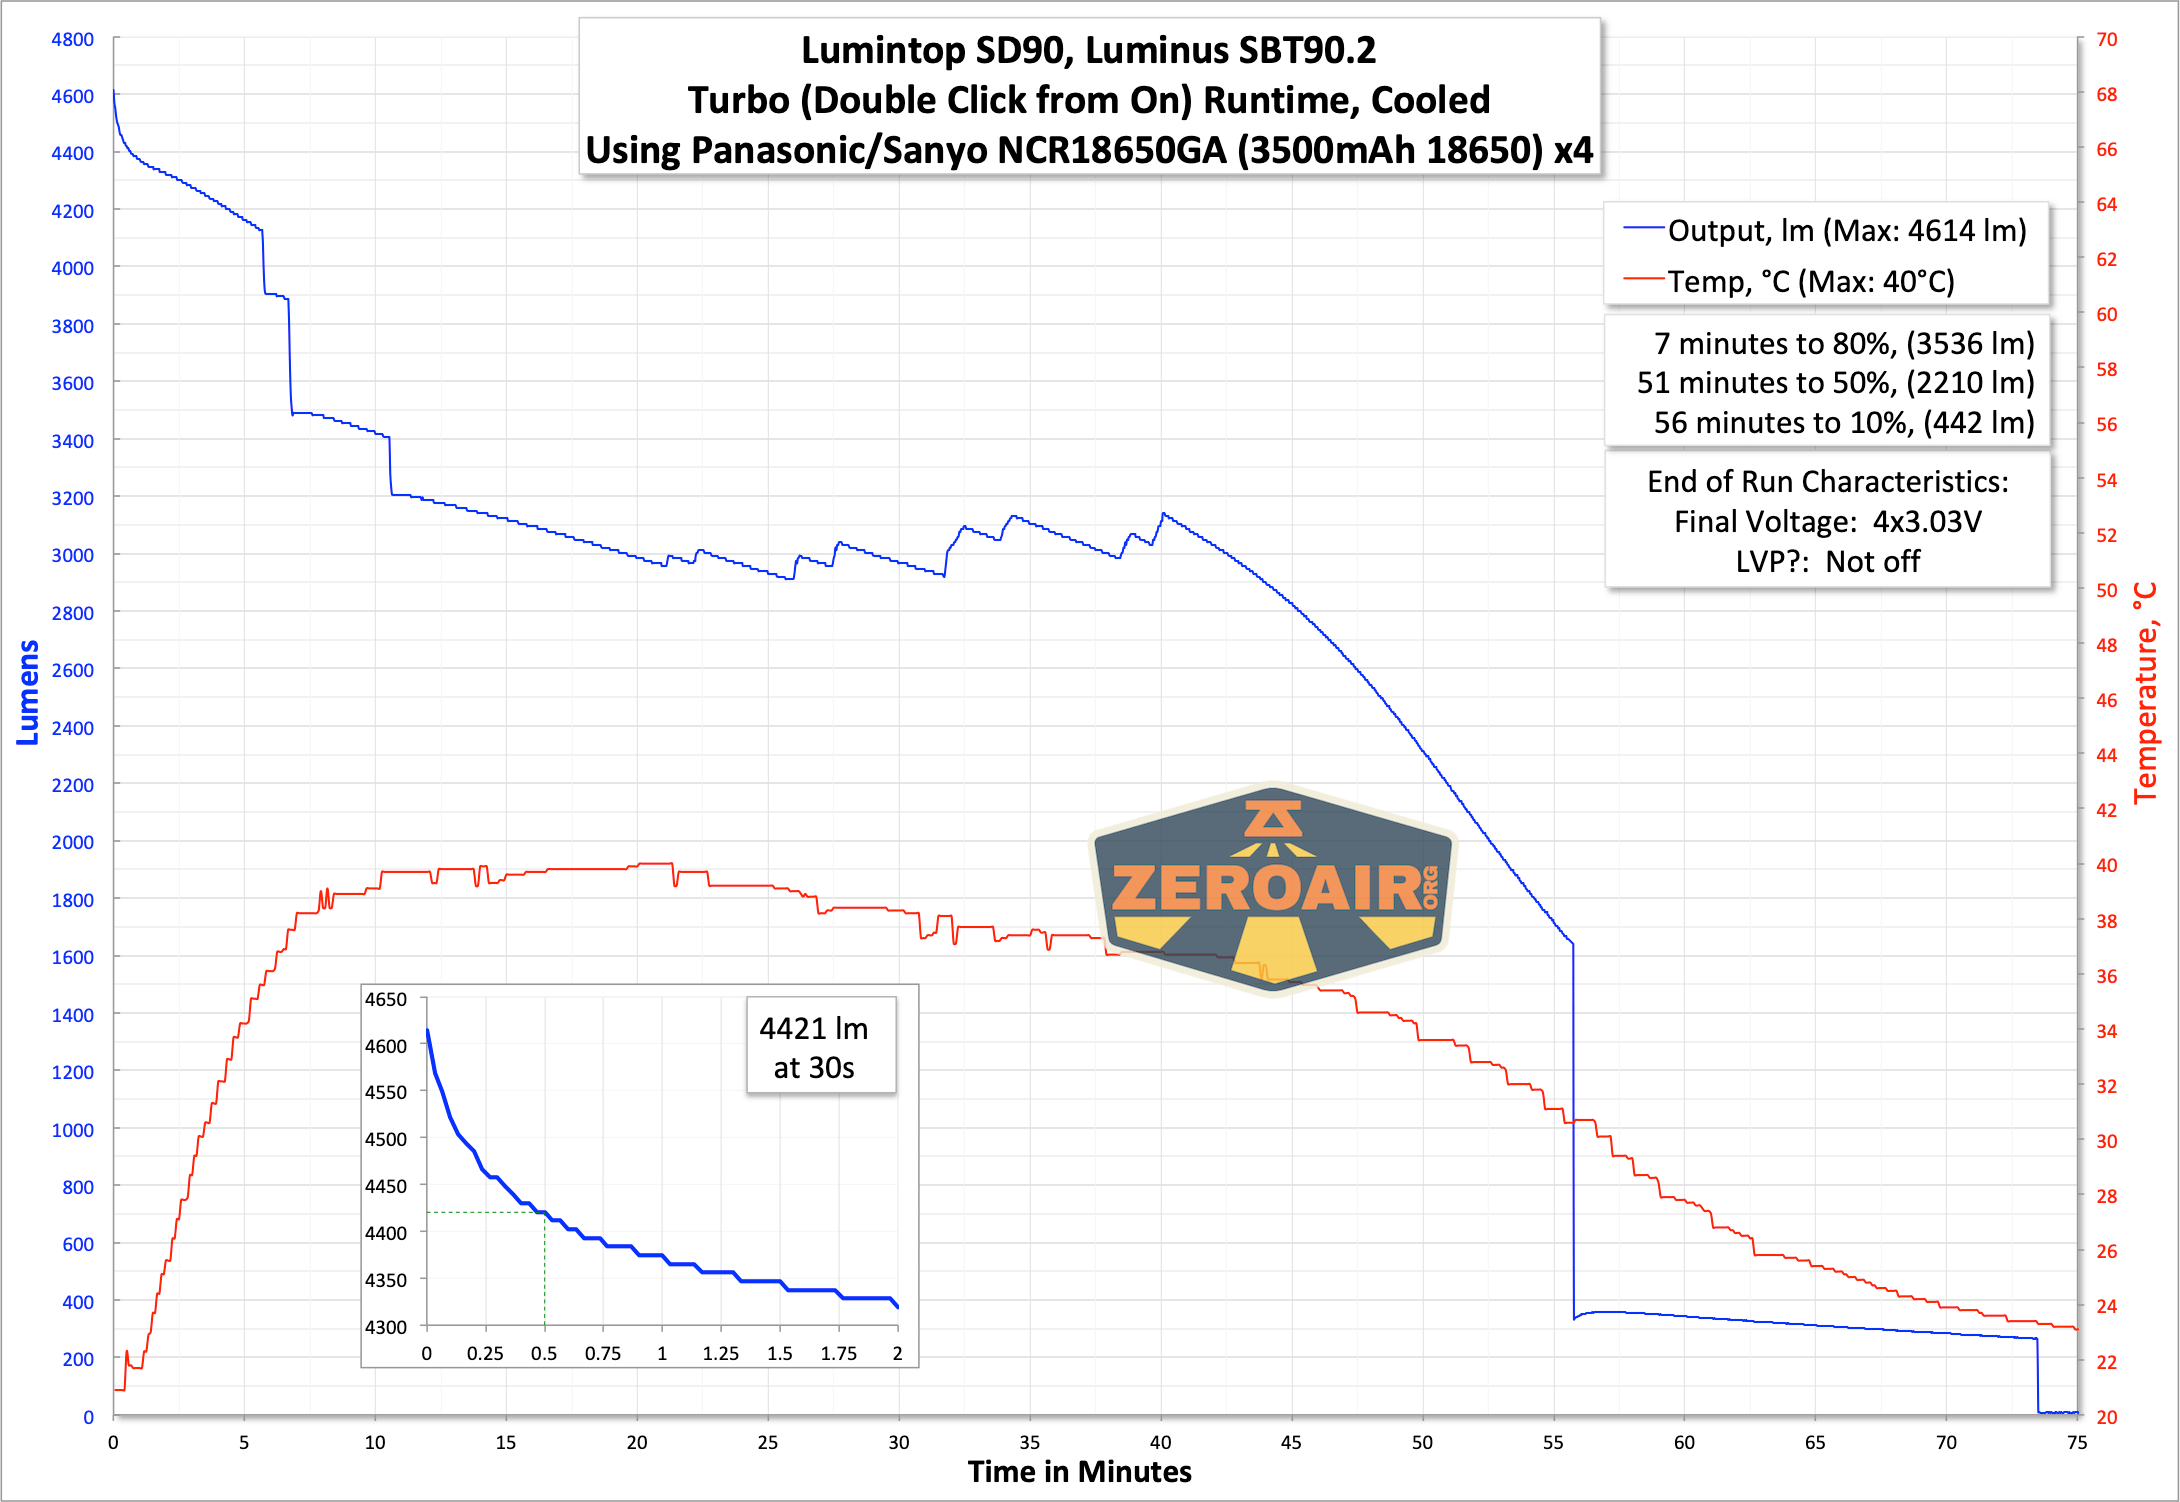
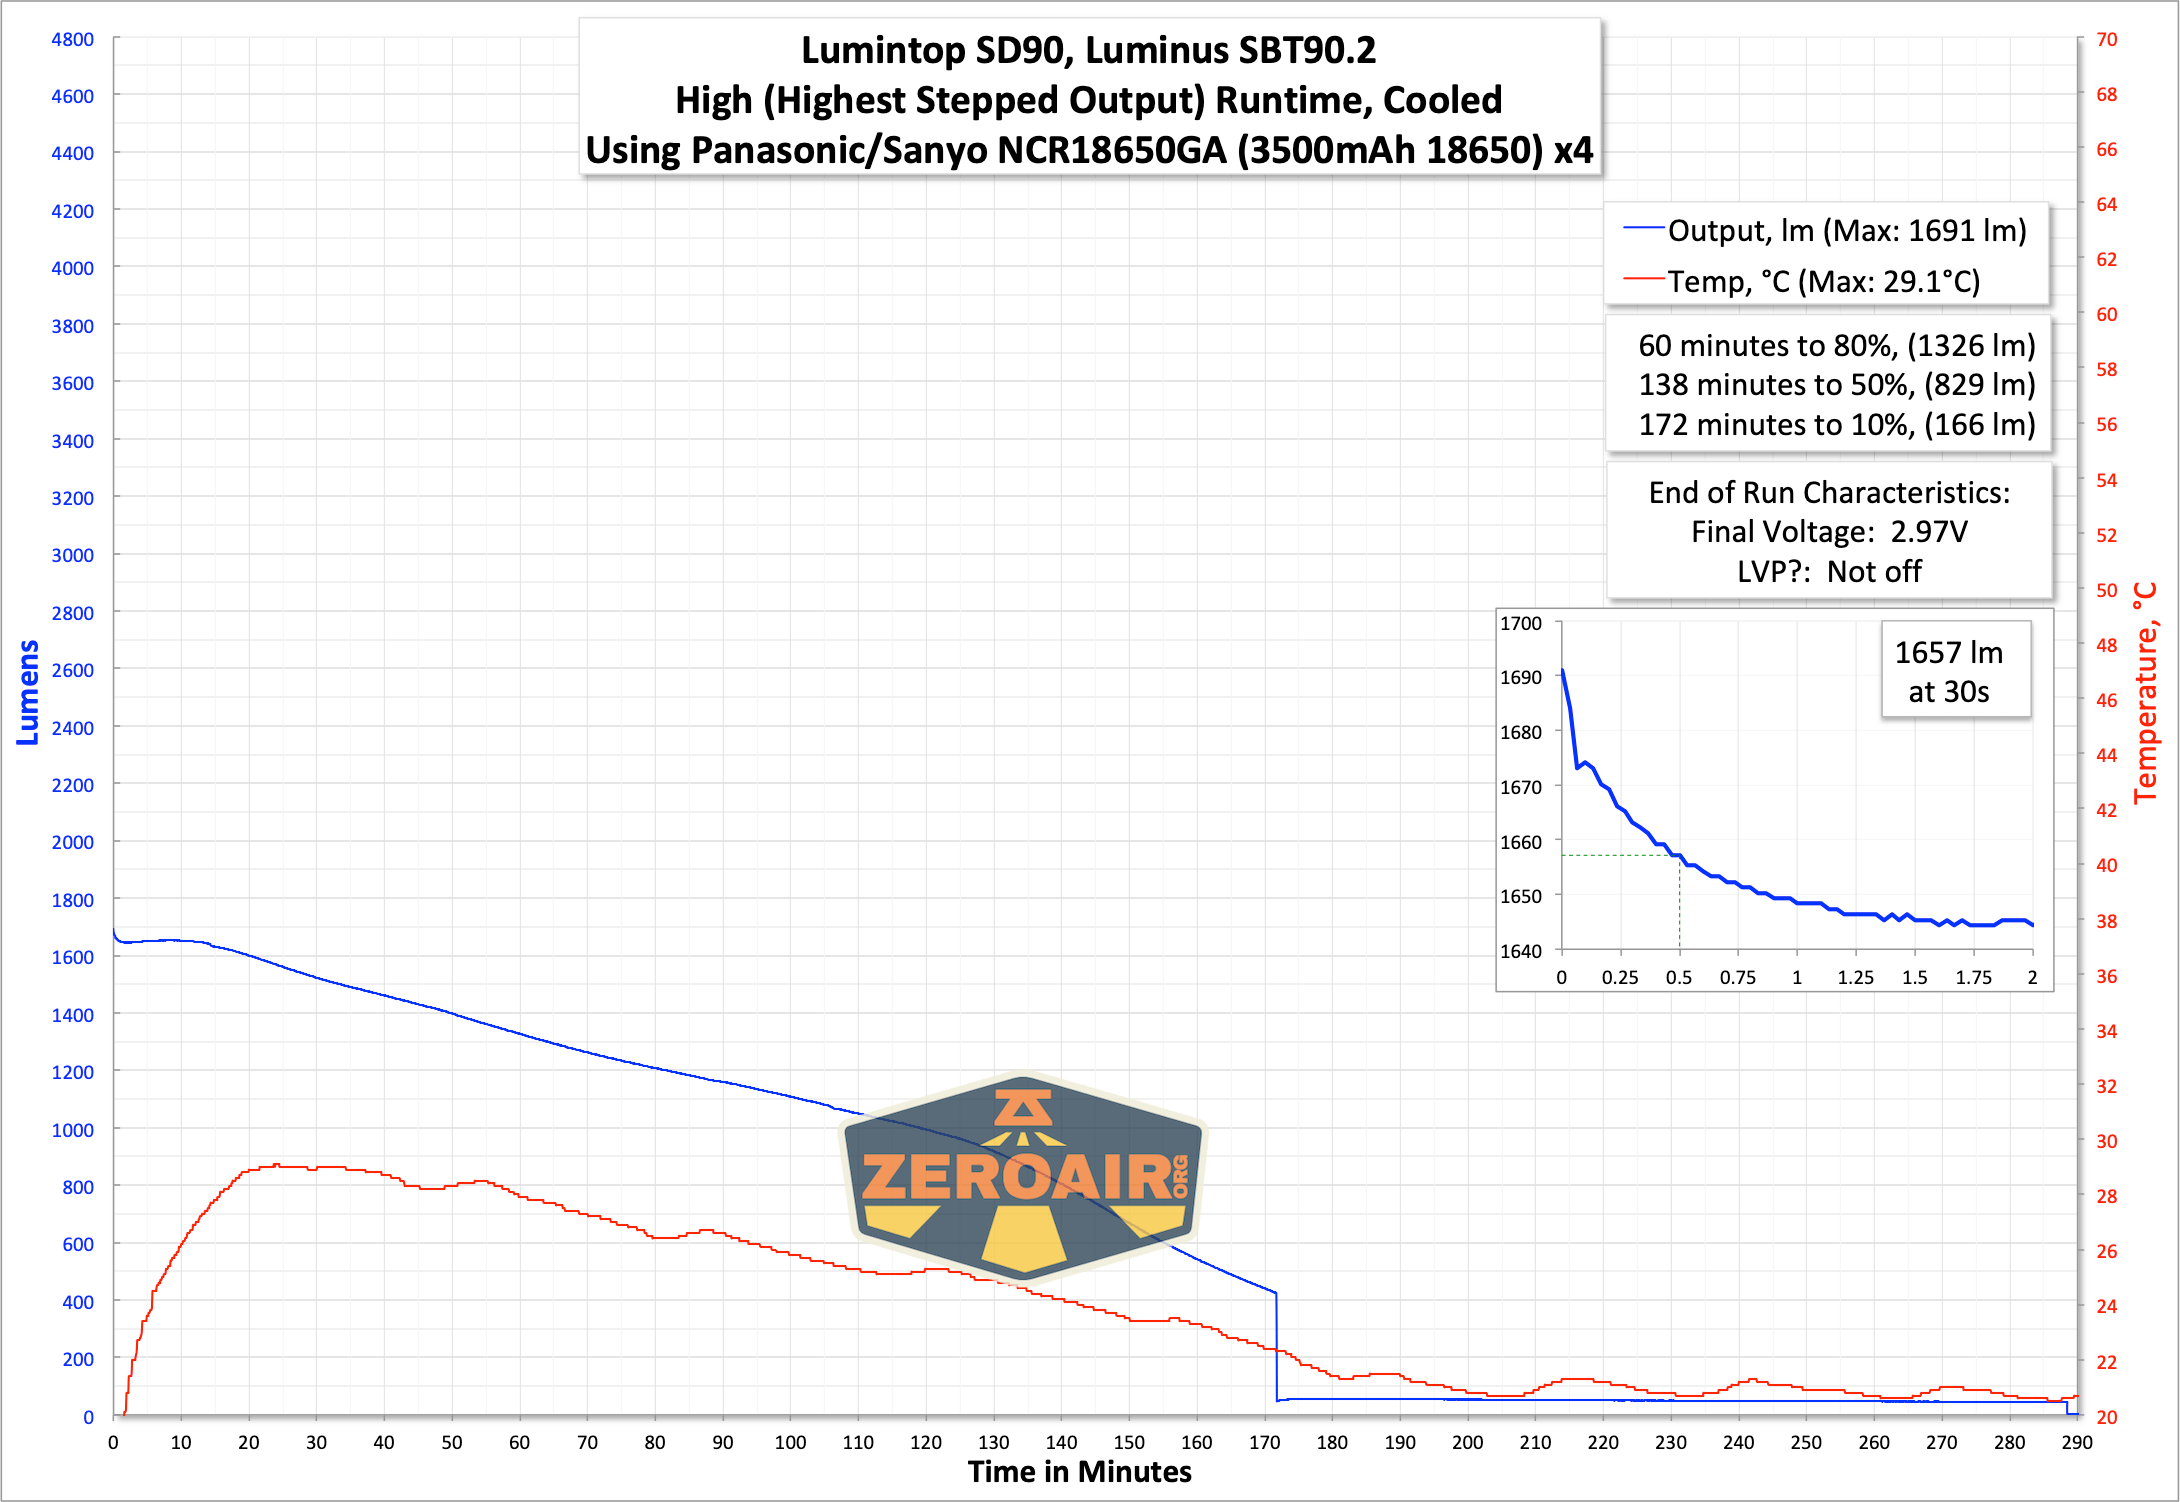
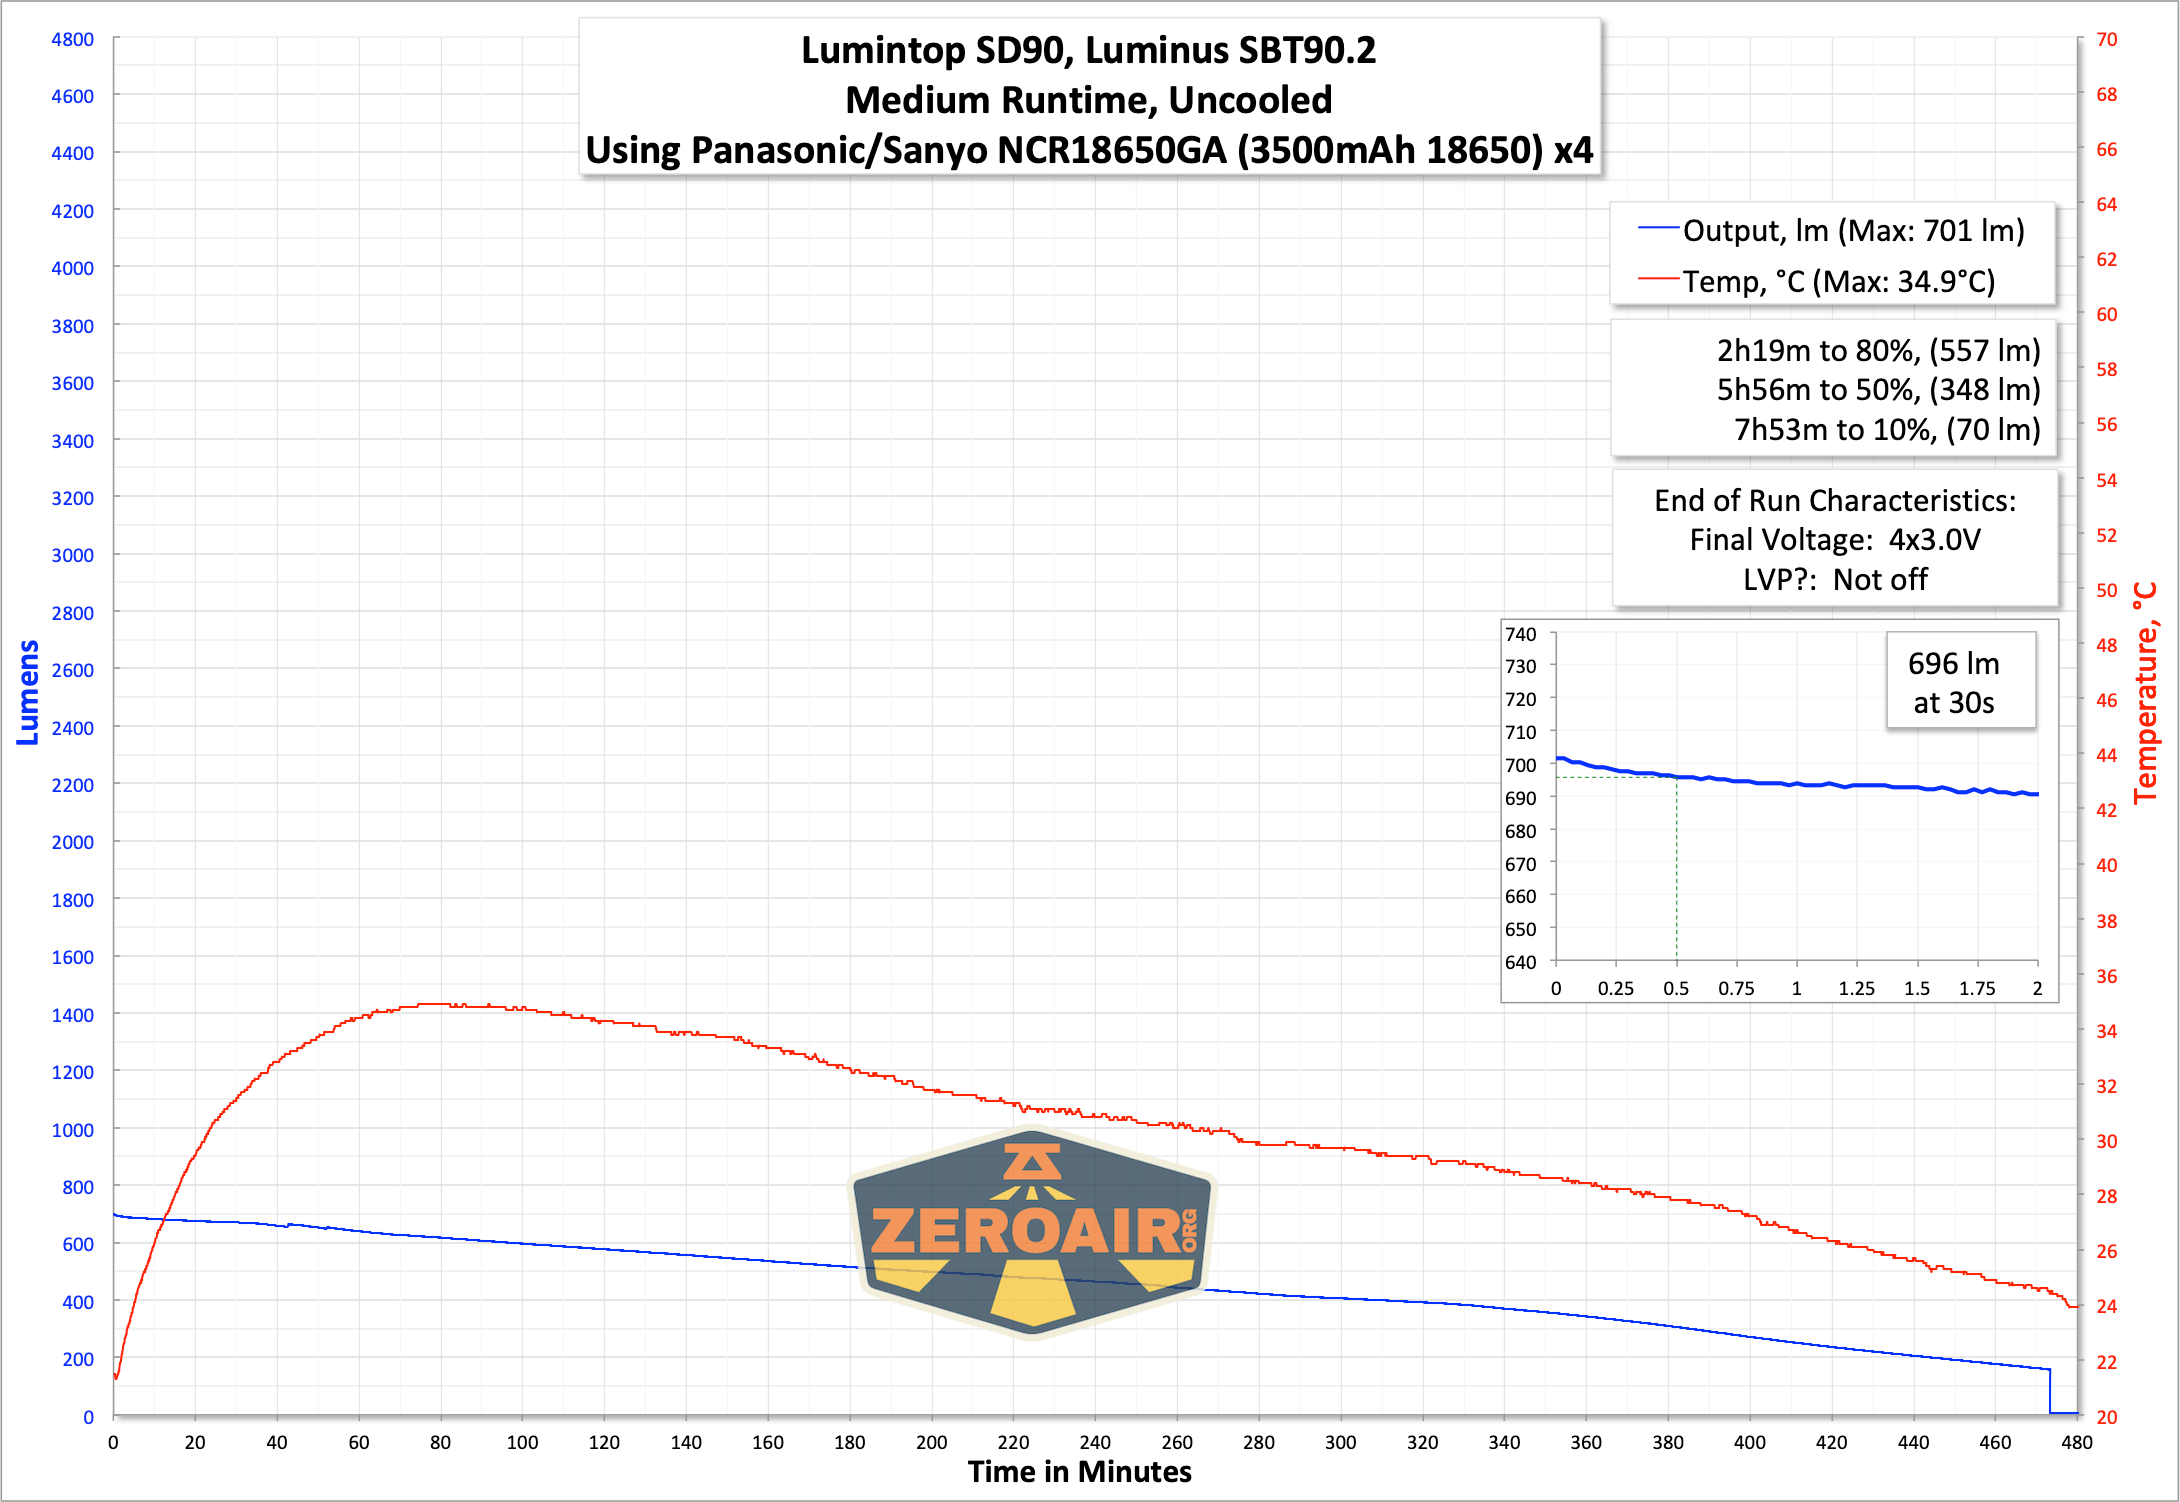
Here are three runtime tests. For all of these tests, the light was thermally calibrated to 60°C prior to testing.
Remember what I said about these Sanyo GAs peaking at 10A? Here (on Turbo specifically) is where (and probably the only “where”) you’ll notice. Even if those cells hit harder than their 10A claim (possible), they’re still likely short of the 26A possible for Turbo. The SD90 can likely perform better than this 4600 max. Actually, it seems like (since the cells in parallel add in current output), that these four cells should reach the actual max output, and the actual output is just lower than the specification. According to the testing by djozz, I’d guess that 7500 lumens is a bit of a pipe dream anyway. In fact, this testing of “around 4600 lumens” seems fairly in line with what djozz shows at a max of 20A. So I think “7500 lumens” is just marketing – and while I agree that that stinks, I’m perfectly satisfied with this light at 4500 lumens. ANYWAY, it does hit the throw specification, so that’s good enough!
I could possibly power this from a bench power supply, but I can’t even go up to 26A on that – my power supply maxes out at 20A!
Charging
Lumintop upgraded the charging on this SD90 from what the SD75 had. On the SD90, we see USB-C charging.
And really, it’s not “just” USB-C charging. This is PD3.0 charging, and in my testing, it’ll accept all the way up to 12V input. That’s great and allows much faster charging than charging at 5A (as “fake” USB-C charging would). C to C charging works right, and USB-A to C charging works fine too.

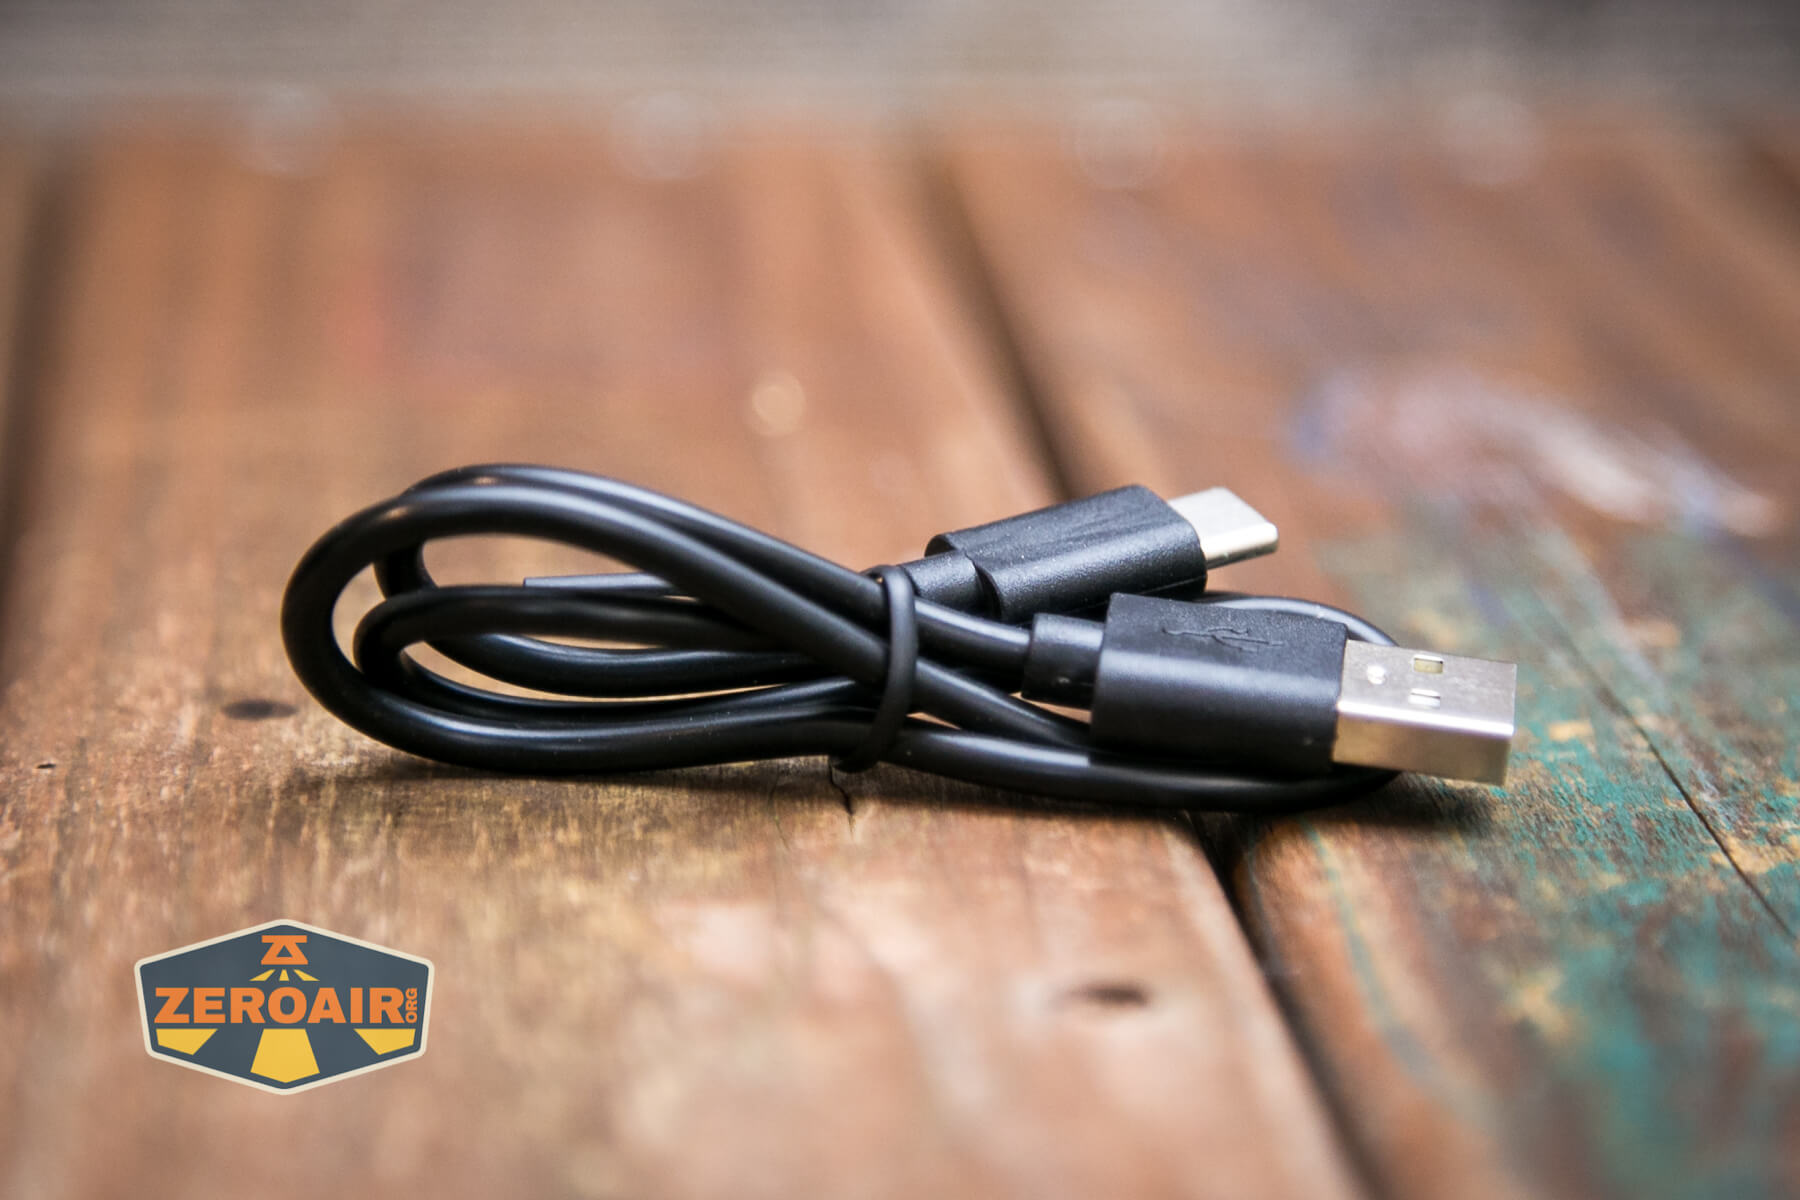
Lumintop includes this USB-A to USB-C cable.

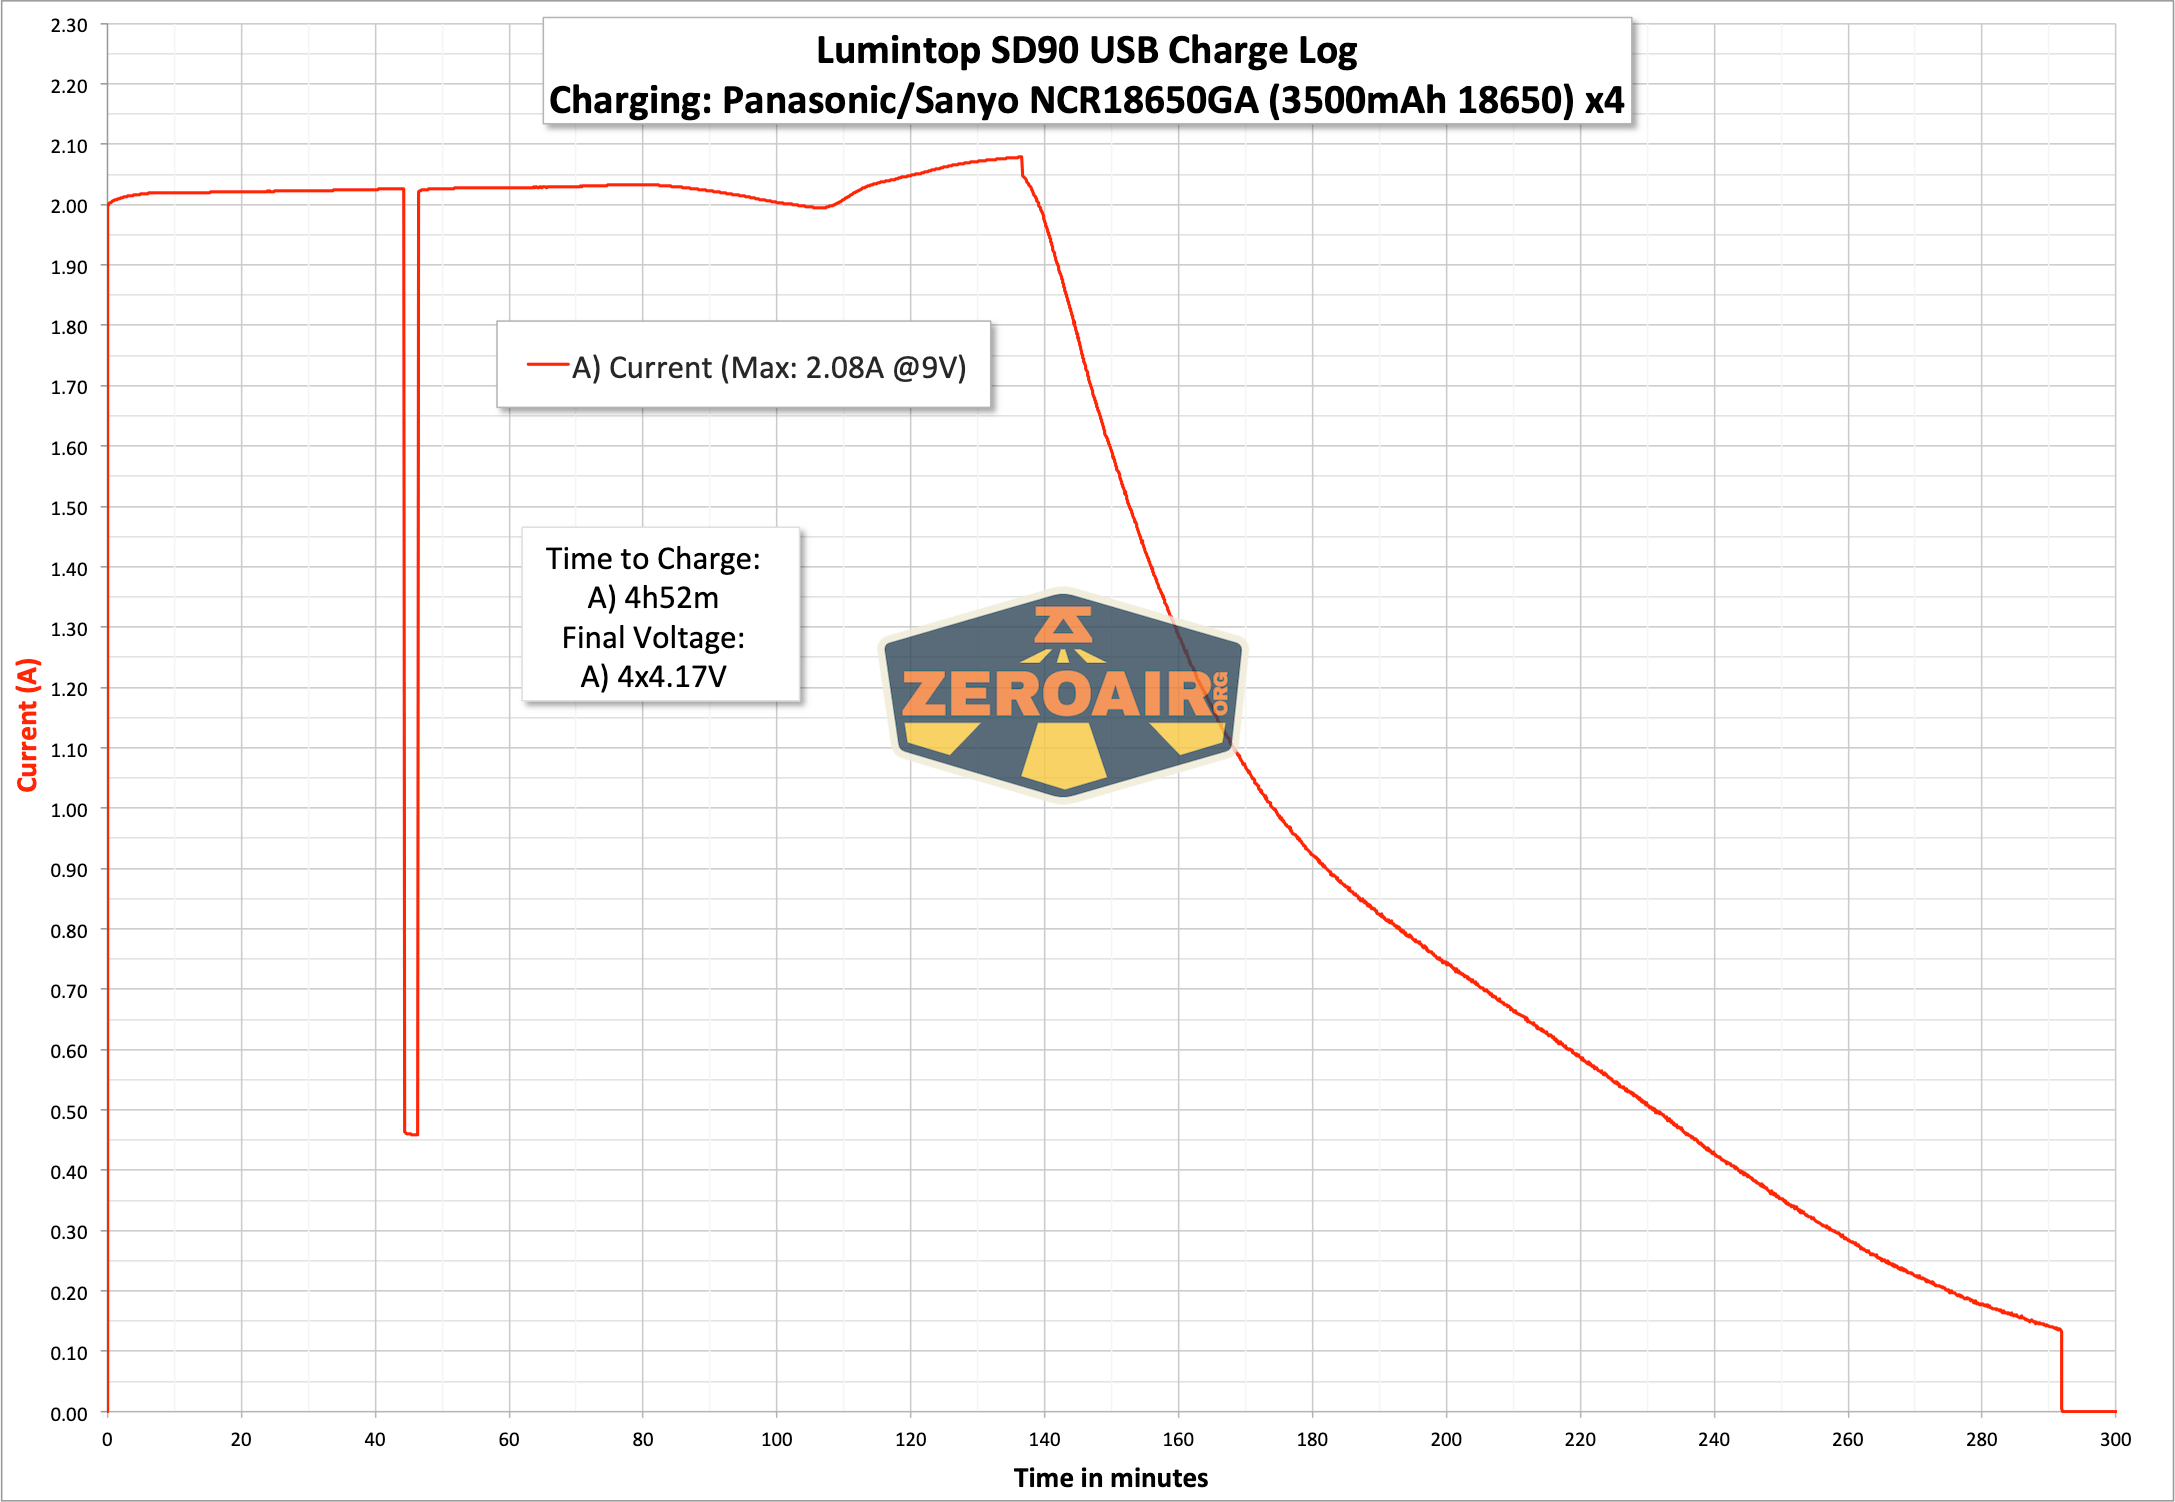
Here are a couple of charging graphs. This is actually USB-A to USB-C and C to C (second). I was surprised to see my USB-A power source negotiate 9V output. To be honest, I’d forgotten that it can do that. I’m using the XTAR EU4 for these purposes. I tested it a little bit a while back, and I still use it SO much. I didn’t put the “capacity” graph in here as I usually do, since this is at 9V (not the usual 5V) and recalculating it for something that’s only [some percentage] accurate anyway didn’t seem like a good use of time. I am not sure why the charging drops out at around 45 minutes. Interesting that it’s in both graphs! First is USB-A to USB-C.
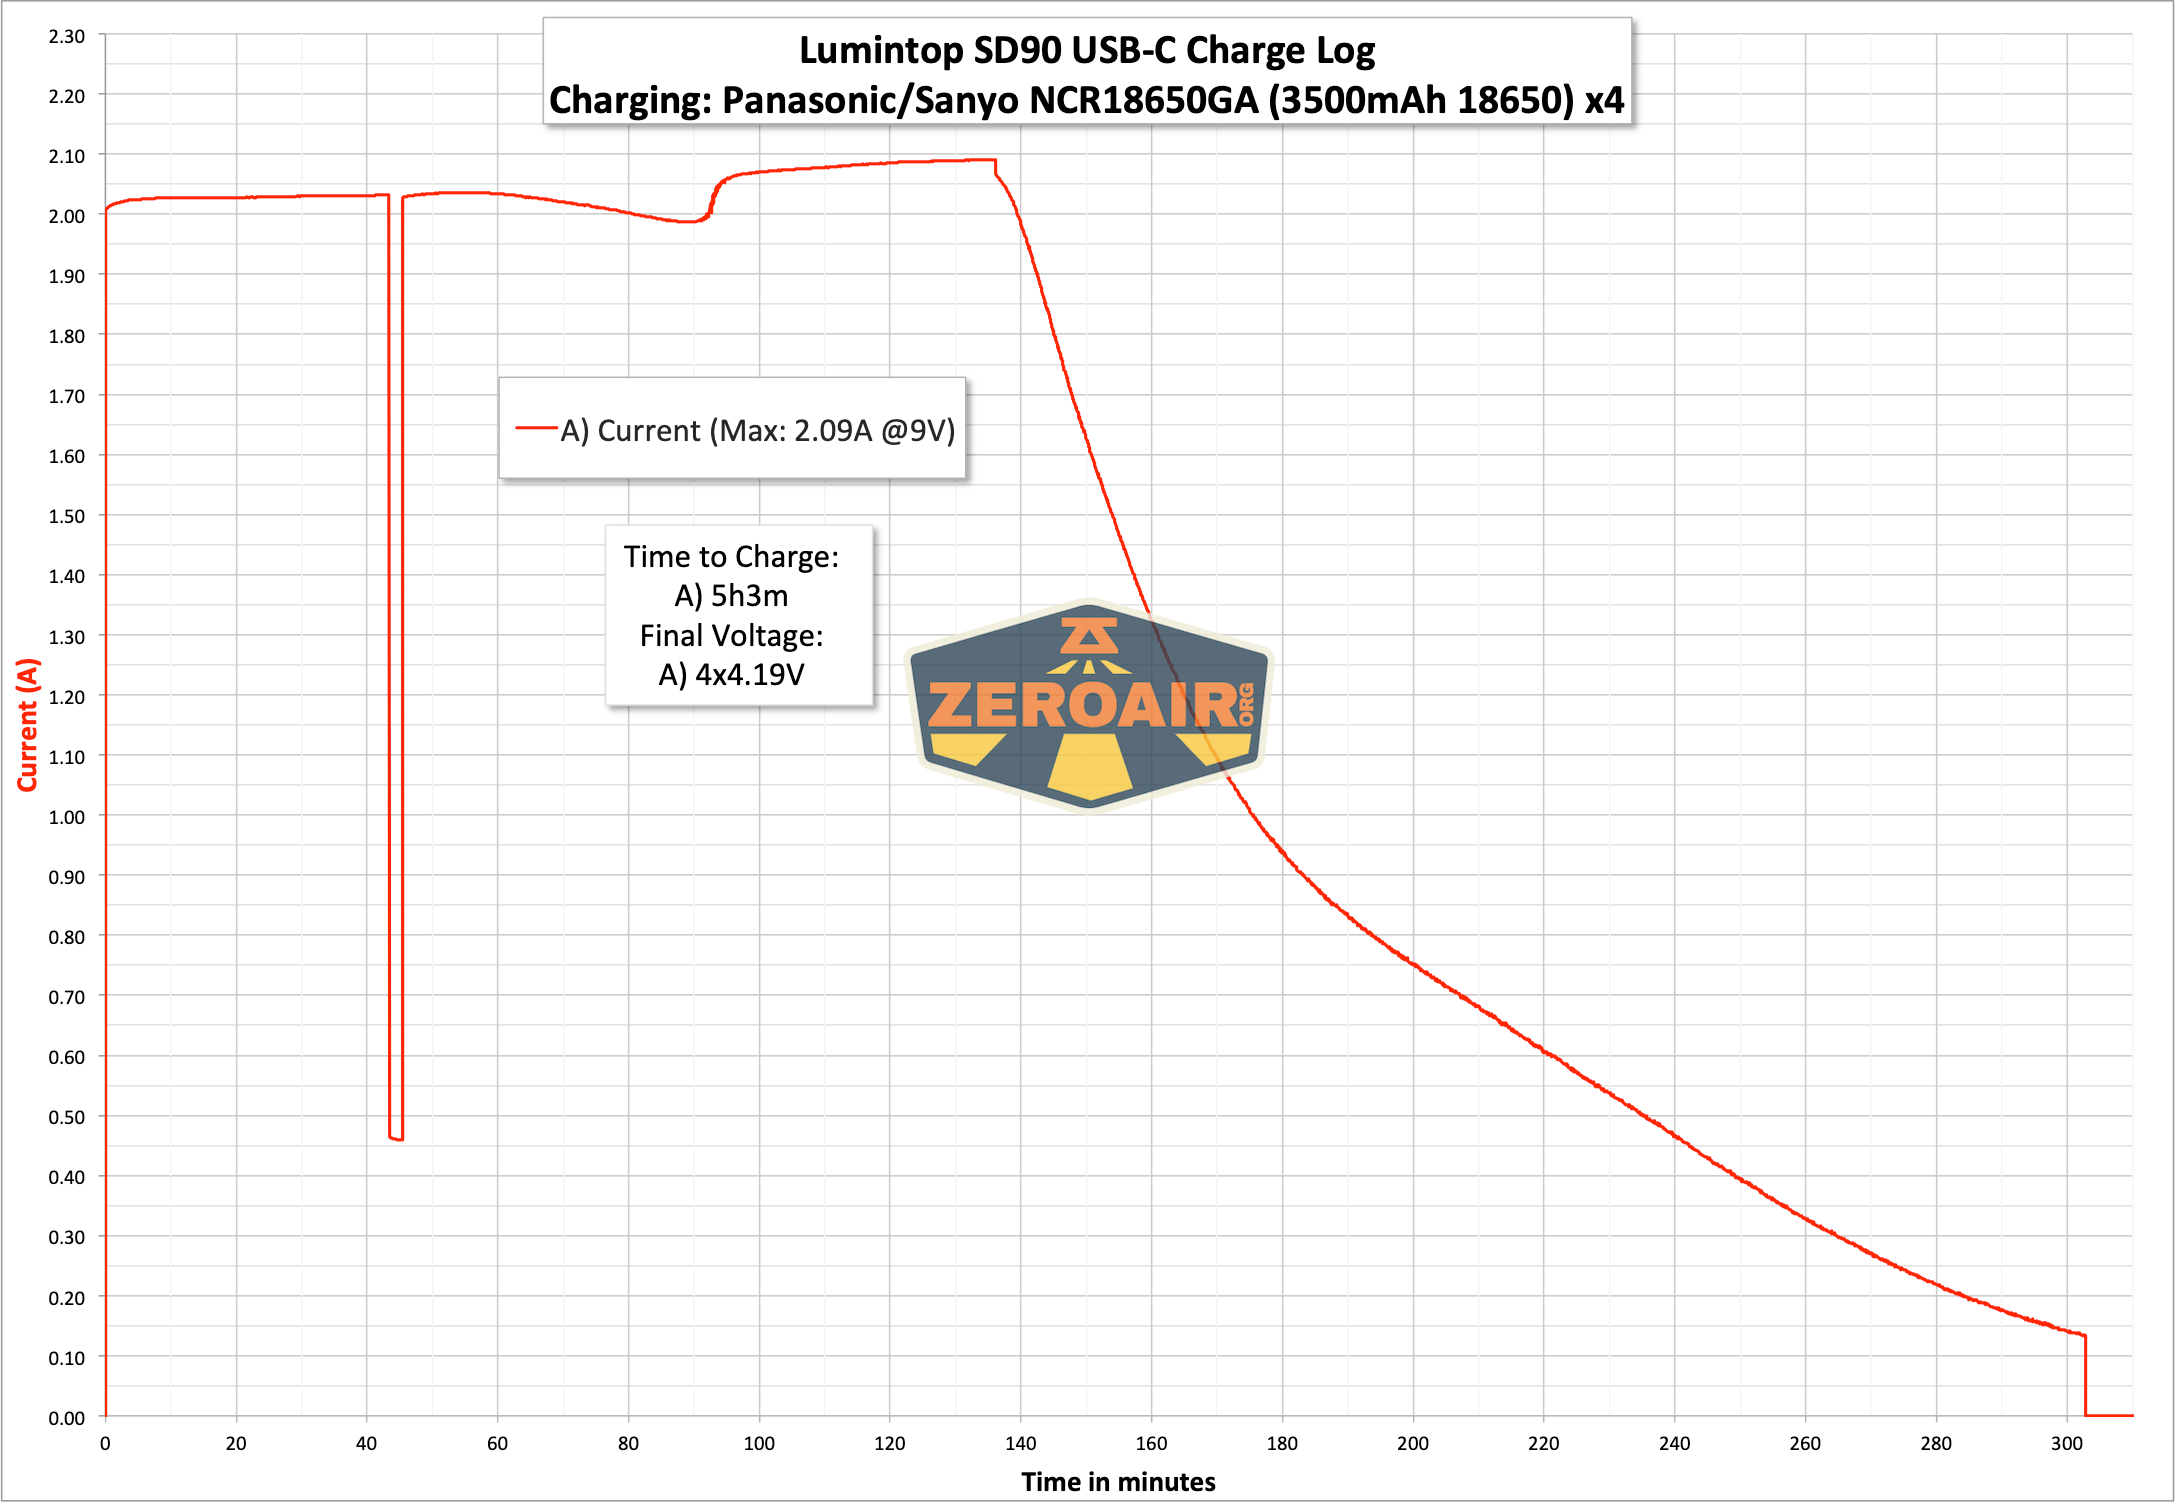
This graph is C to C (and using a cable not provided by Lumintop).
During charging, the green LEDs on the tail of the light blink. When charging is complete, these LEDs are steady green. However, if the charge is fast charging, the indicator color is blue.
The flip side of those indicators is that during discharge, the indicators are solid green and begin blinking when the power is low.
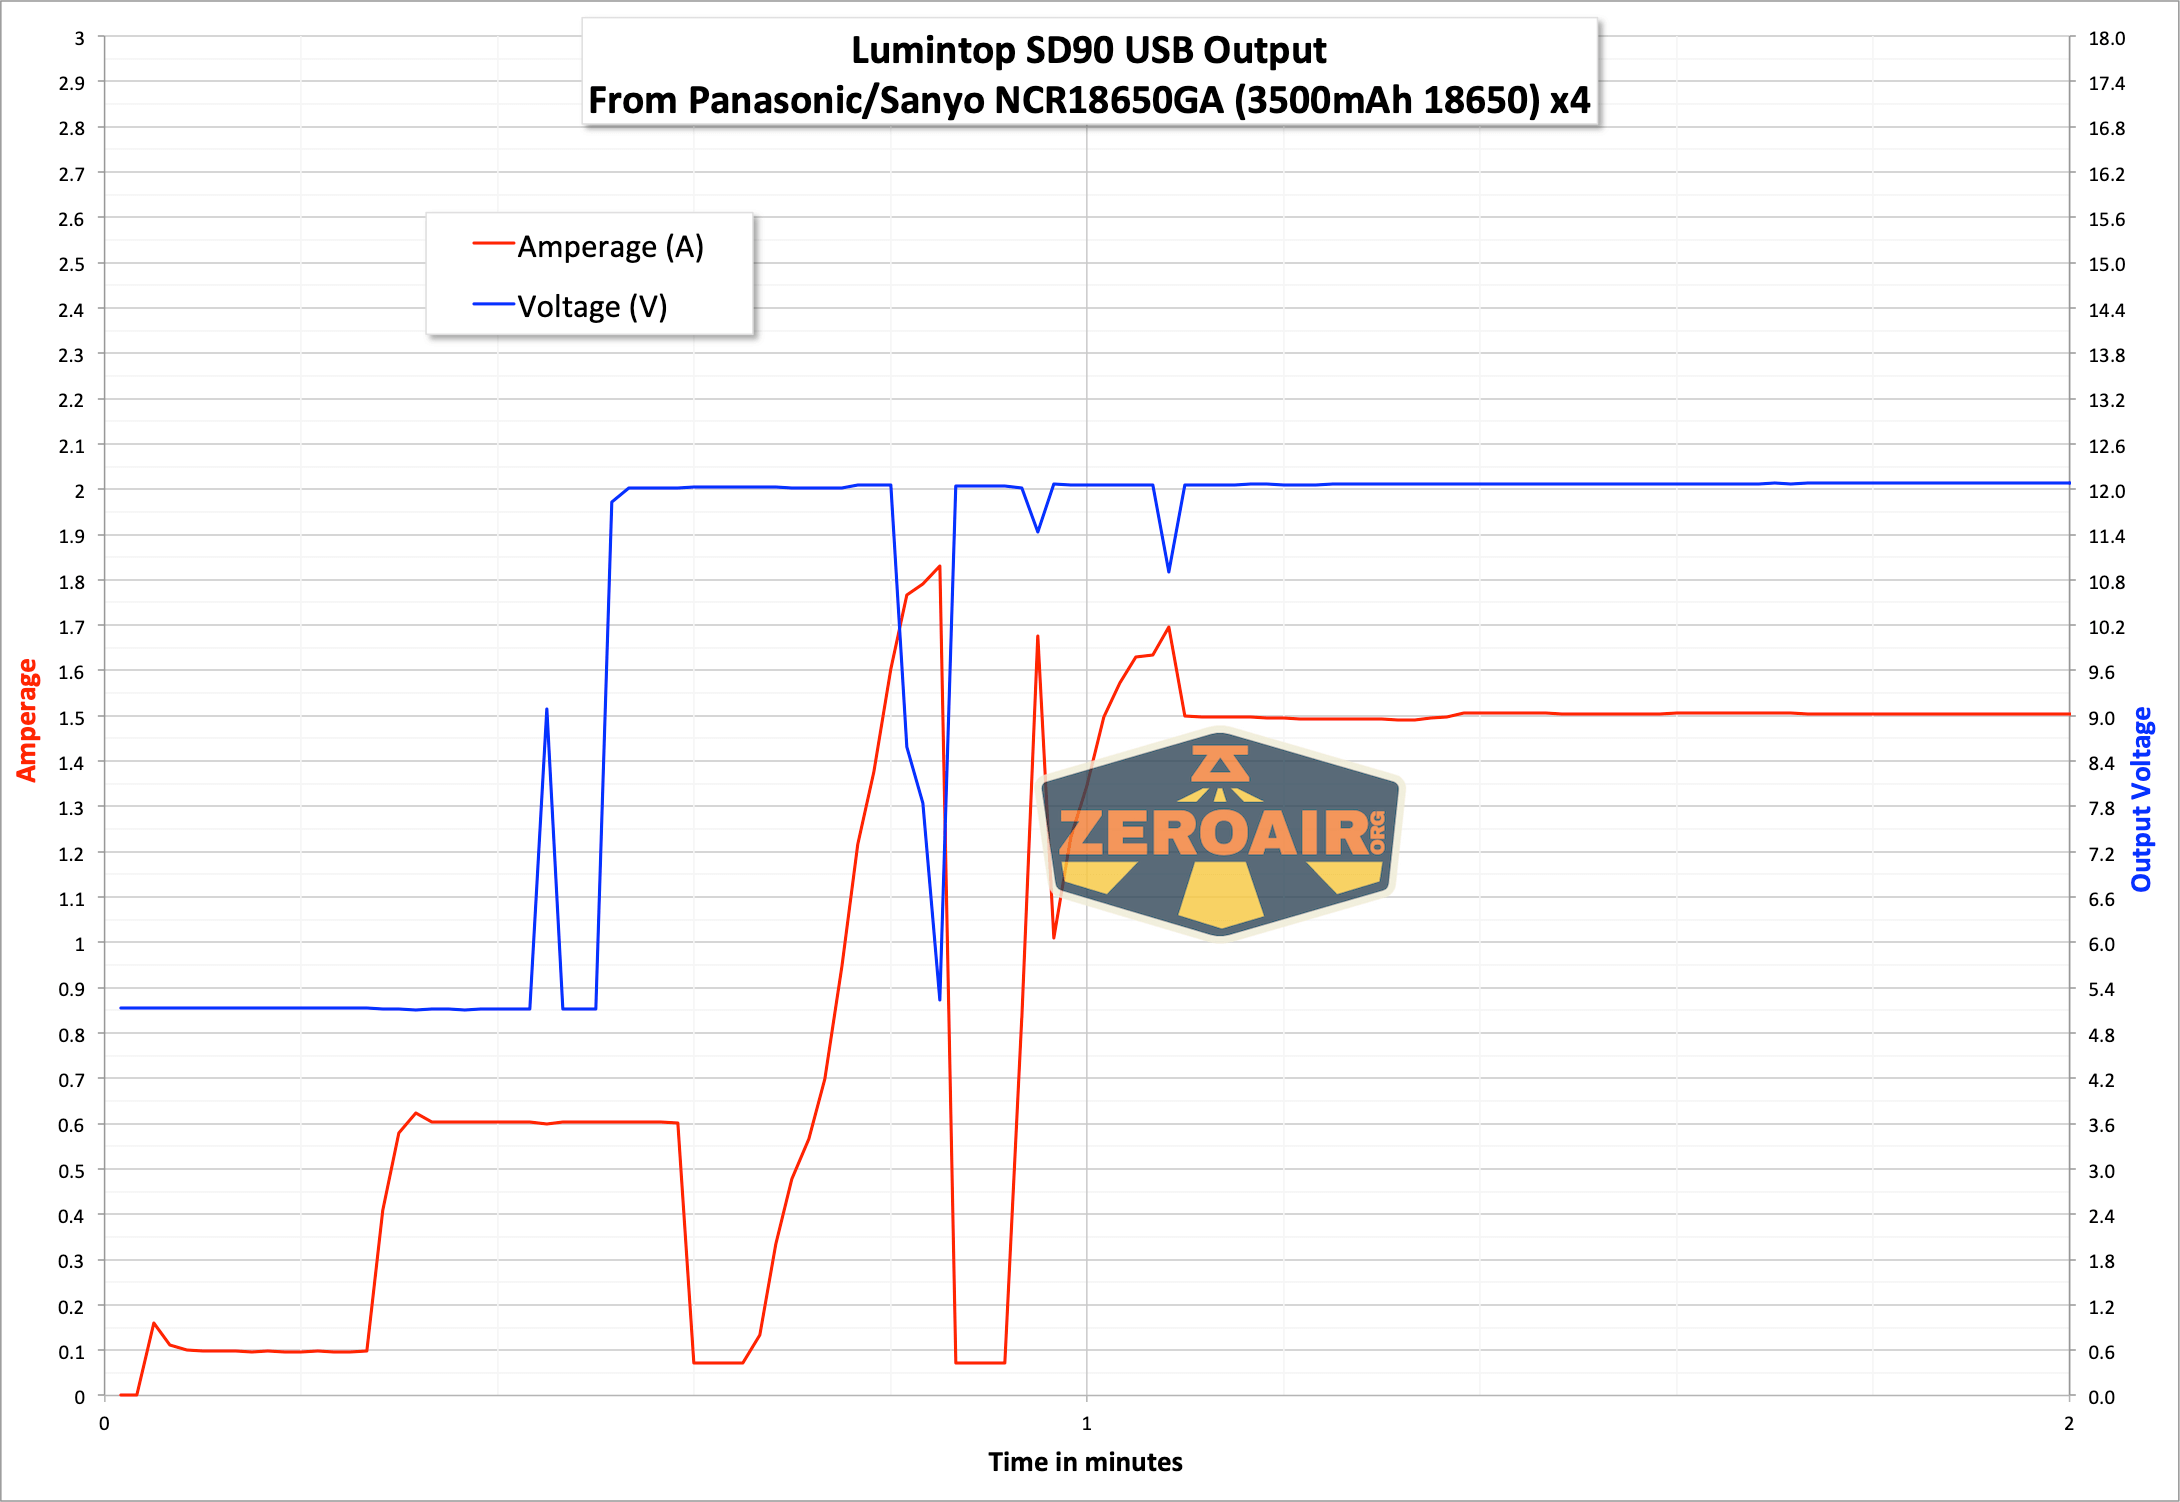
Powerbank
Not only can the SD90 be charged, but it can also discharge the internal cells.
And not just at “regular USB” levels – both these USB-A ports are QC3.0, which means they can negotiate with the device being charged up to 12V output!!
I ran one discharge test and played around with the voltages, including stepping the voltage down once the 12V output had shut off.

It’s possible to charge the light while also discharging (or “charging an external device from the light”). To do this, you’ll need to click the button on the tail. Double-clicking this small e-switch on the tail will shut off the discharge function.
Modes and Currents
| Mode | Mode Claimed Output (lm) | Claimed Runtime | Measured Lumens | Tailcap Amps |
|---|---|---|---|---|
| Turbo | 7500 | – | 4421 | ^ |
| – | – | – | 1657 | ^ |
| – | – | – | 696 | ^ |
| – | – | – | 100 | 155.3mA |
| – | – | – | 20 | 36.58mA |
| – | – | – | 13 | 19.48mA |
| – | – | – | – | 10.09mA |
| Lowest Stepped | – | – | – | 5.47mA |
| Lowest Ramped | – | – | – | 1.4mA |
^ Unfortunately, higher than these low modes, my power supply was not working properly. So I can’t state what power these are running. Soon I should have a bigger, better power supply! (Though that one still won’t go up to the claimed 26A that the SD90 uses.)
Pulse Width Modulation
Each mode except Turbo uses PWM. I think the only modes you might notice it on are the lowest two levels. The leftmost is the lowest mode from ramping. Next is the lowest stepped mode. From here all the way to the end of this post, that’s the order.
 Here you can see a “baseline” – a chart with almost no light hitting the sensor.
Then there’s the Ultrafire WF-602C flashlight, which has some of the worst PWM I’ve seen. It’s so bad that I used a post about it to explain PWM! Here are multiple timescales (10ms, 5ms, 2ms, 1ms, 0.5ms, 0.2ms) to make comparing this “worst” PWM light to the test light easier. That post also explains why I didn’t test the WF-602C at the usual 50us scale.
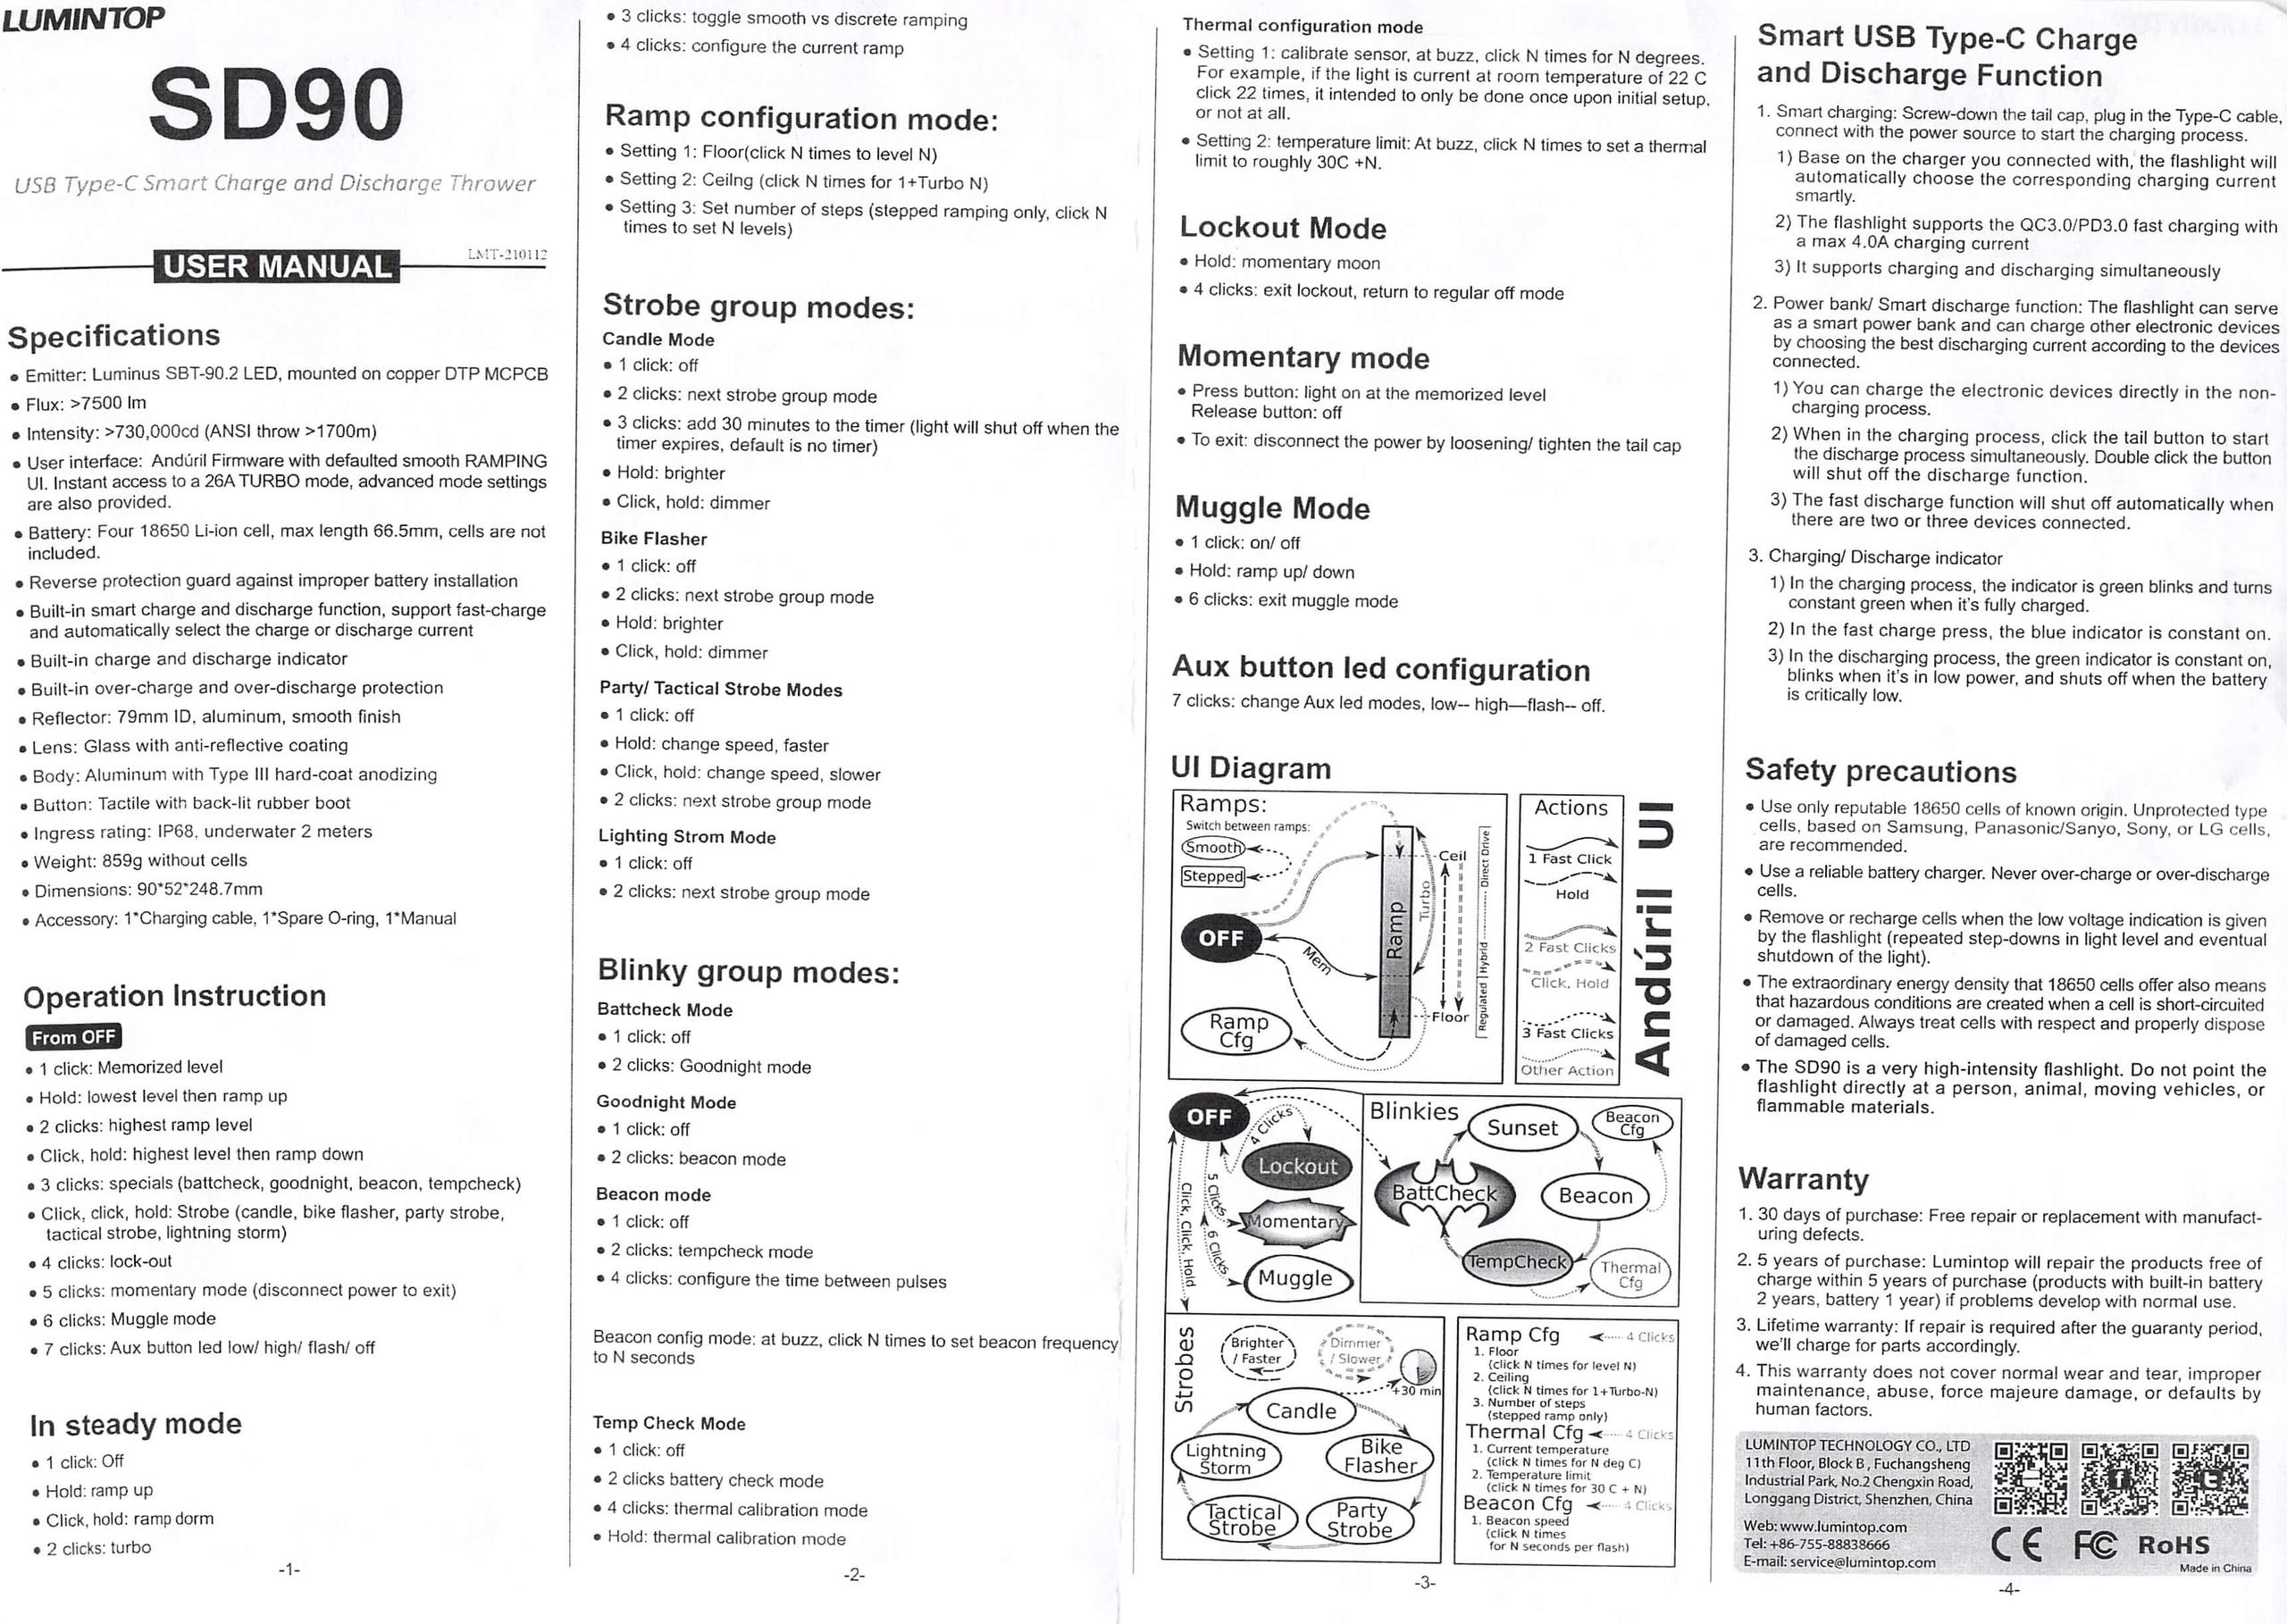
User Interface and Operation
A side e-switch is used in the Lumintop SD90 flashlight. There are two (?) green emitters behind the switch, and the switch cover has grippy knurling.
The switch is really very nice. It’s big enough for easy use, and low profile enough that you’re unlikely to press it accidentally.

The user interface here is ToyKeeper’s Anduril, which at this point is very well covered. I’ve reviewed other lights with it, too. Here’s ToyKeeper’s user interface graphic:
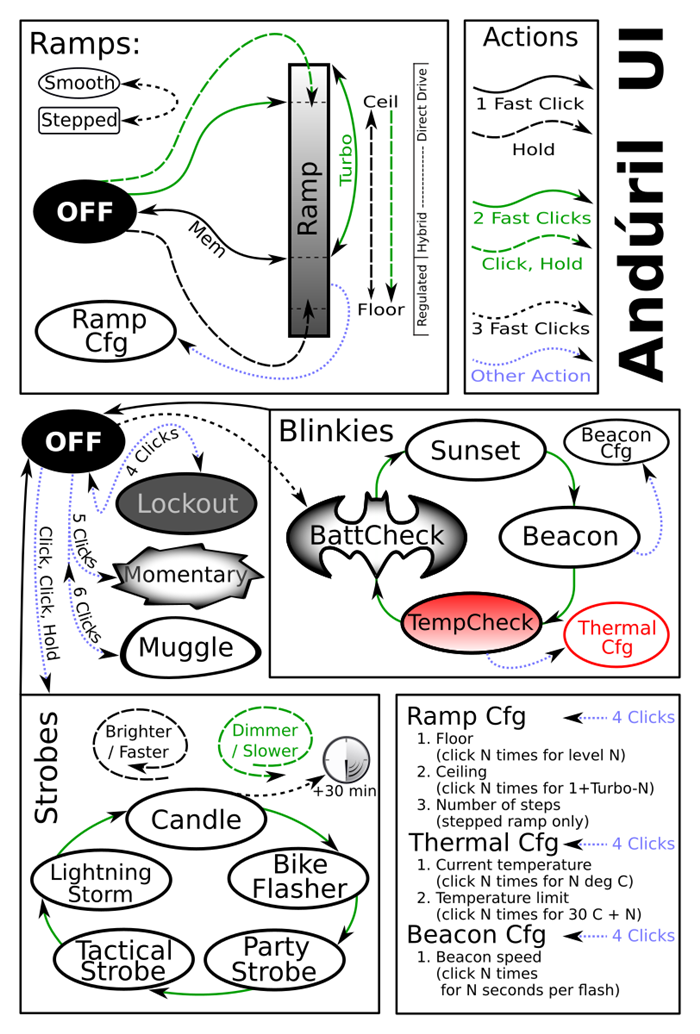
Here’s a user interface table anyway!
| State | Action | Result |
|---|---|---|
| Off | Hold | On (Low) |
| Off | Click | On (Mode Memory) |
| Off | Click 2x | Highest Hybrid Mode |
| Off | Click 3x | Blinkie Mode Group |
| Off | Click 4x | Lockout |
| Off | Click 5x | Momentary |
| Off | Click 6x | Muggle |
| Off | Click, Click, Hold | Strobe Group (Mode Memory Strobe) |
| Strobe Group | Click 2x | Strobe Cycle (Candle > Bike Flasher > Party Strobe > Tactical Strobe > Lightning Storm) |
| Blinkie Mode Group | Click 2x | Blinke Cycle (Sunset > Beacon > TempCheck > BattCheck) |
| On | Click 3x | Switch between Stepped and Smooth Ramp |
| On | Click 4x | Ramp Configuration |
| TempCheck | Click 4x | Thermal Configuration |
| Beacon | Click 4x | Beacon Configuration |
| Lockout | Click 4x | Off |
| Strobe Group | Click | Off |
| (Basically) On | Click | Off |
| Candle | Click 3x | 30-minute timer to off |
| Strobe Group | Hold | Heighten selected mode (Make faster or brighter) |
| Strobe Group | Click, Hold | Lessen selected mode (Make slower or dimmer) |
| On | Click 2x | FET Turbo |
| Ramp Configuration | [Wait for Single flash] Click N time for level N. | Selection of the “Low” you like best by clicking 1, 2, 3, etc. where 1, 2, 3, etc are different levels of low. |
| Ramp Configuration | [Wait for Second flash] Click N time for 1+Turbo-N. | Selection of the “Ceiling” you like best by clicking 1, 2, 3, etc. where 1, 2, 3, etc are different Ceiling levels. |
| Ramp Configuration | [Wait for Third flash] Click for how many steps you want in Stepped mode. | Sets Number of Steps. |
| Thermal Configuration | [Wait for First flash] Click for N times for N degrees C. | Displays Current Temperature. |
| Thermal Configuration | [Wait for Second flash] Click for N times for 30C + N. | Sets Temperature Limit. |
| Beacon Configuration | [Wait for First flash] Click for N times N seconds per flash | Sets Beacon Speed. |
If you want to see how to calibrate the thermals, see this part of the FW1A review. (I did calibrate this light; you can read more about that above.)
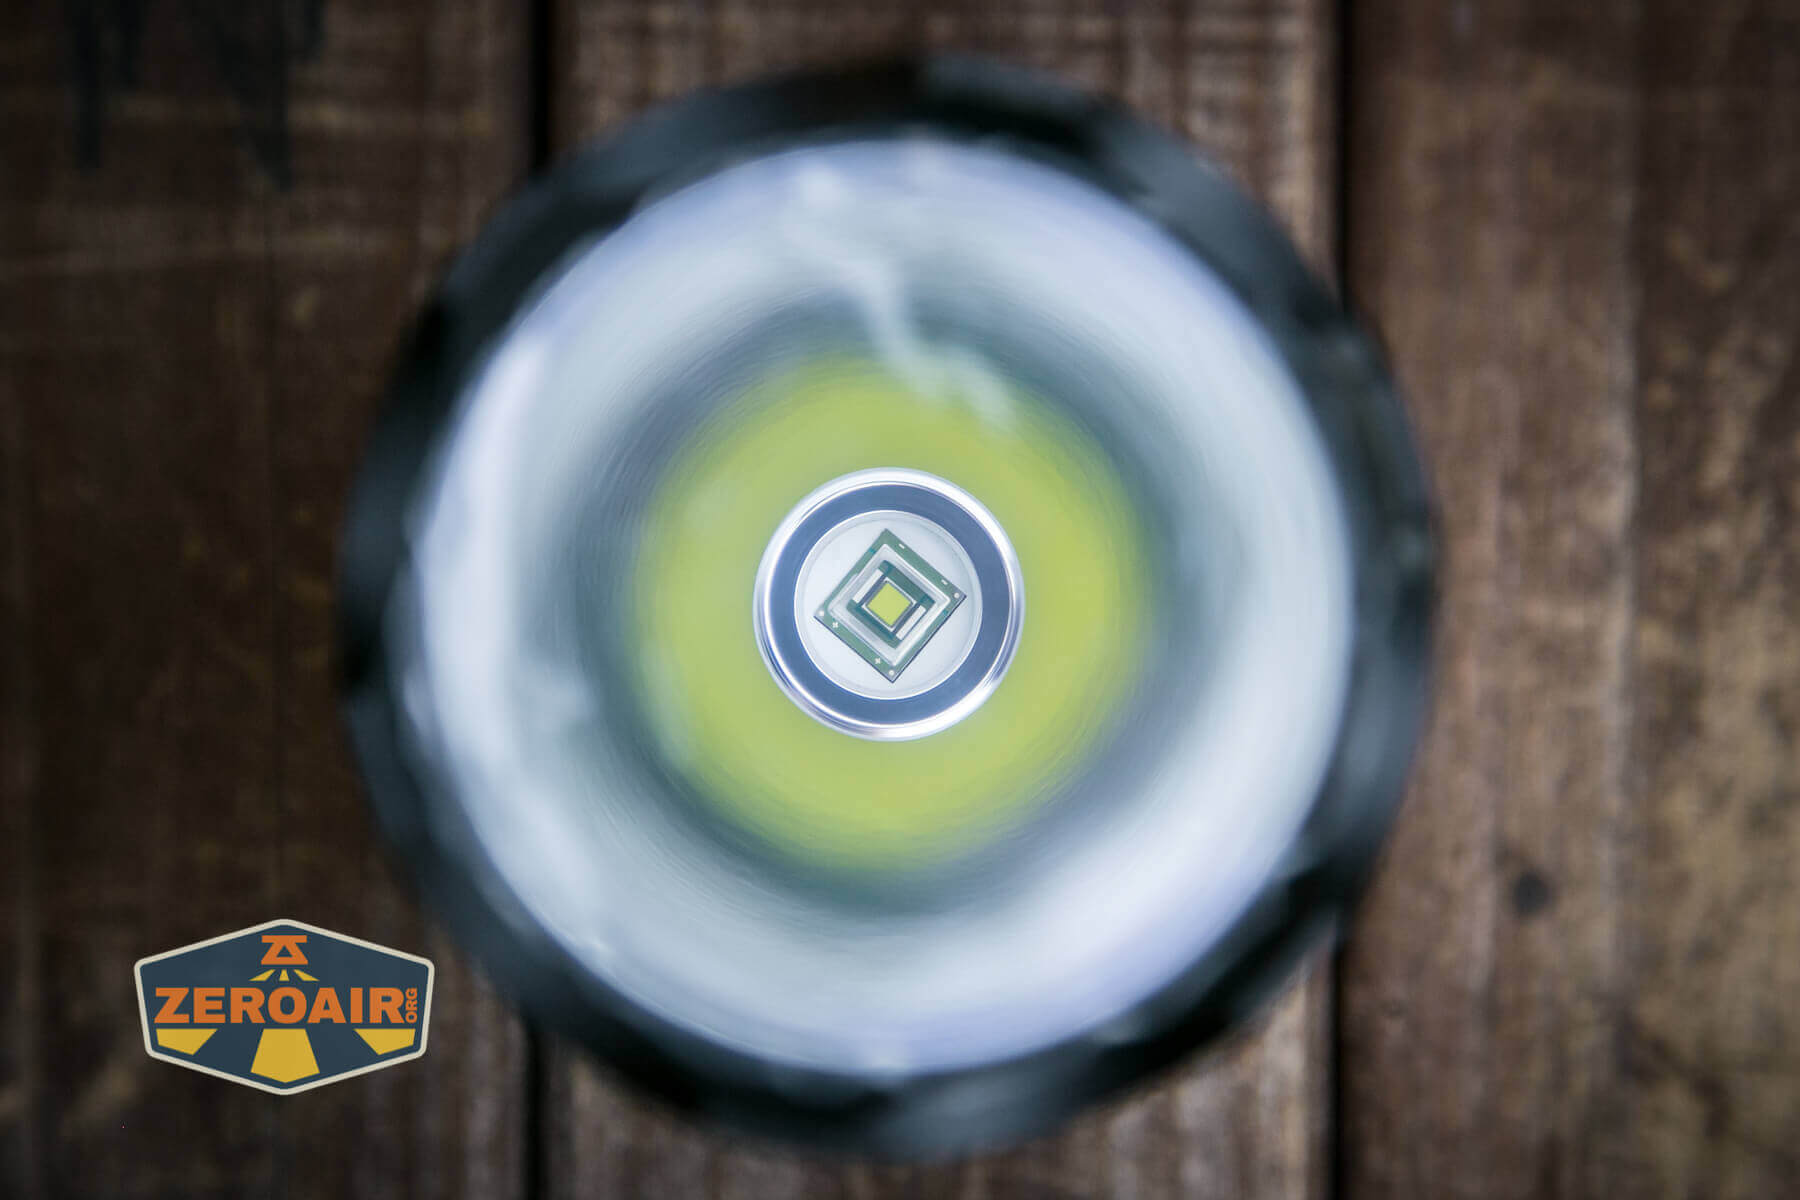
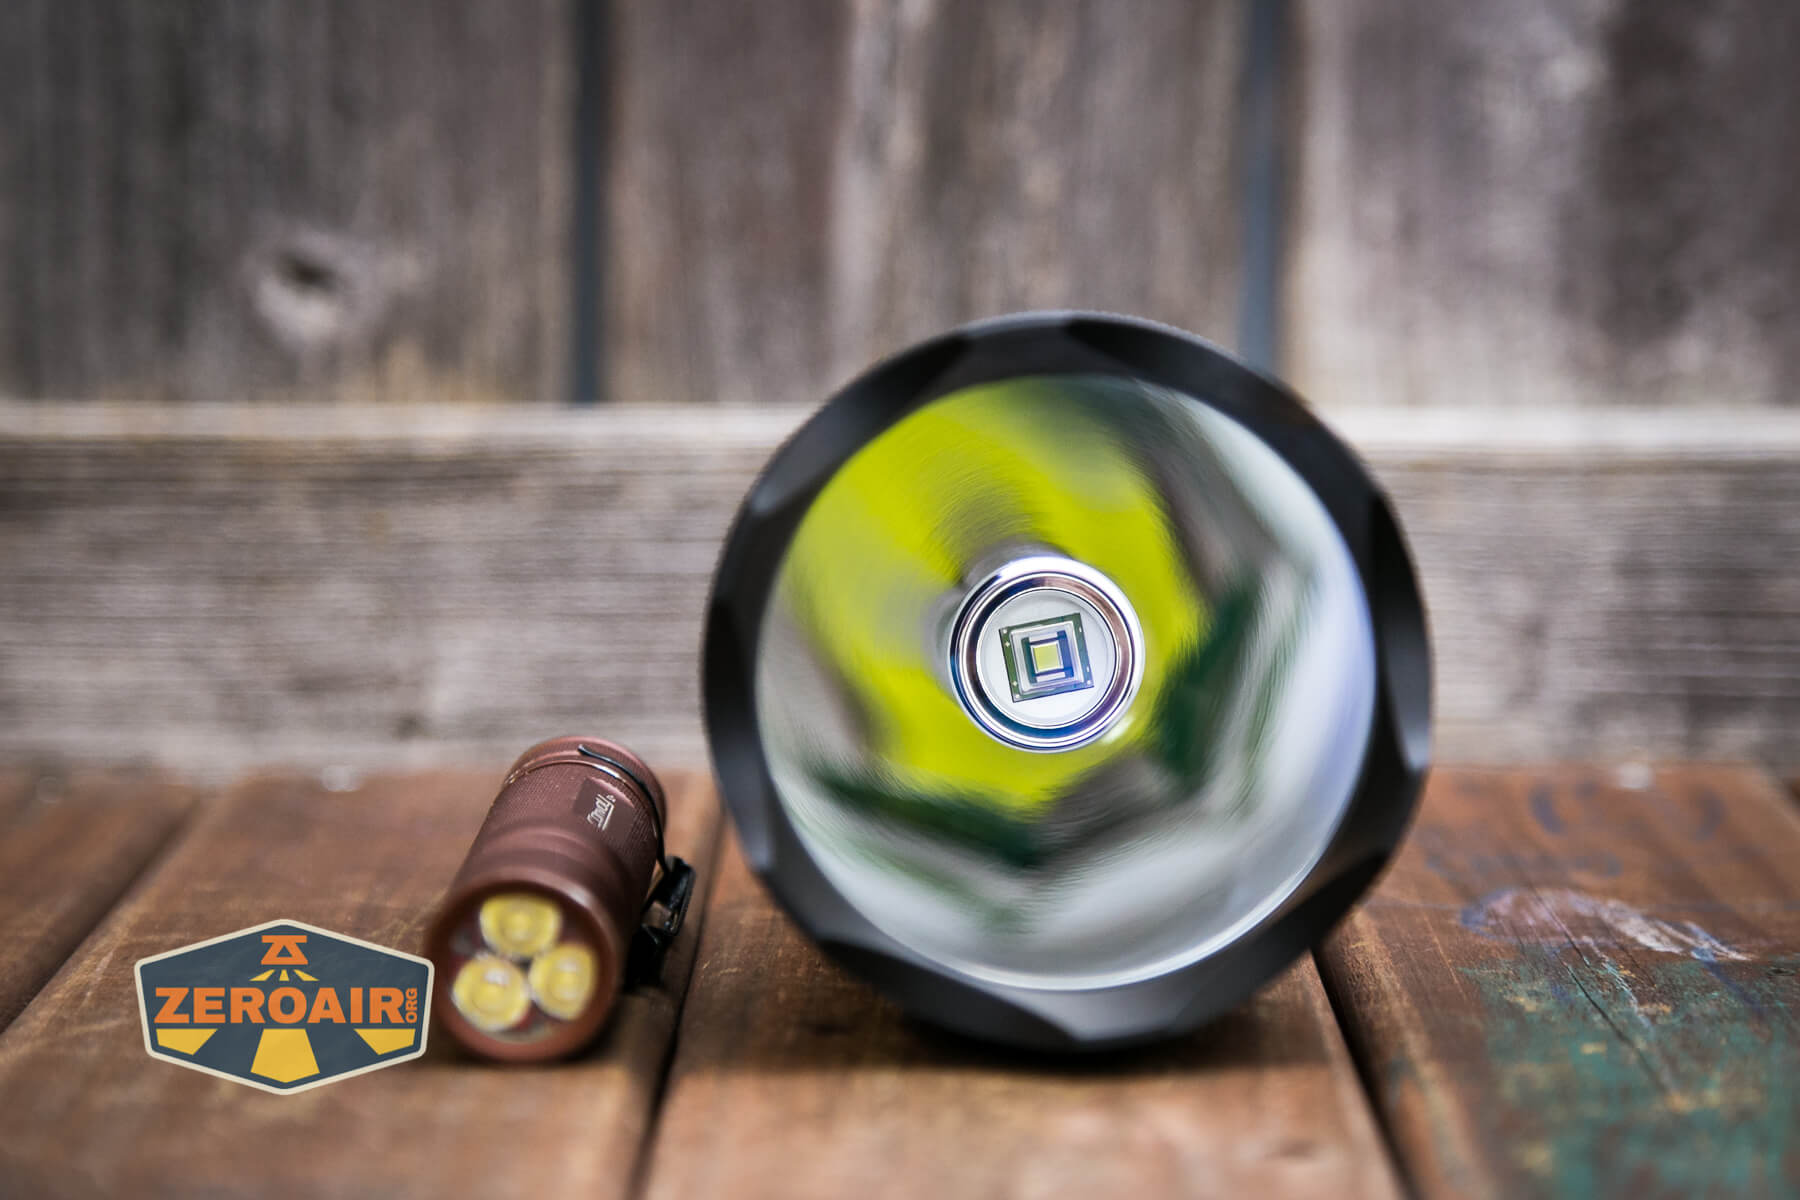
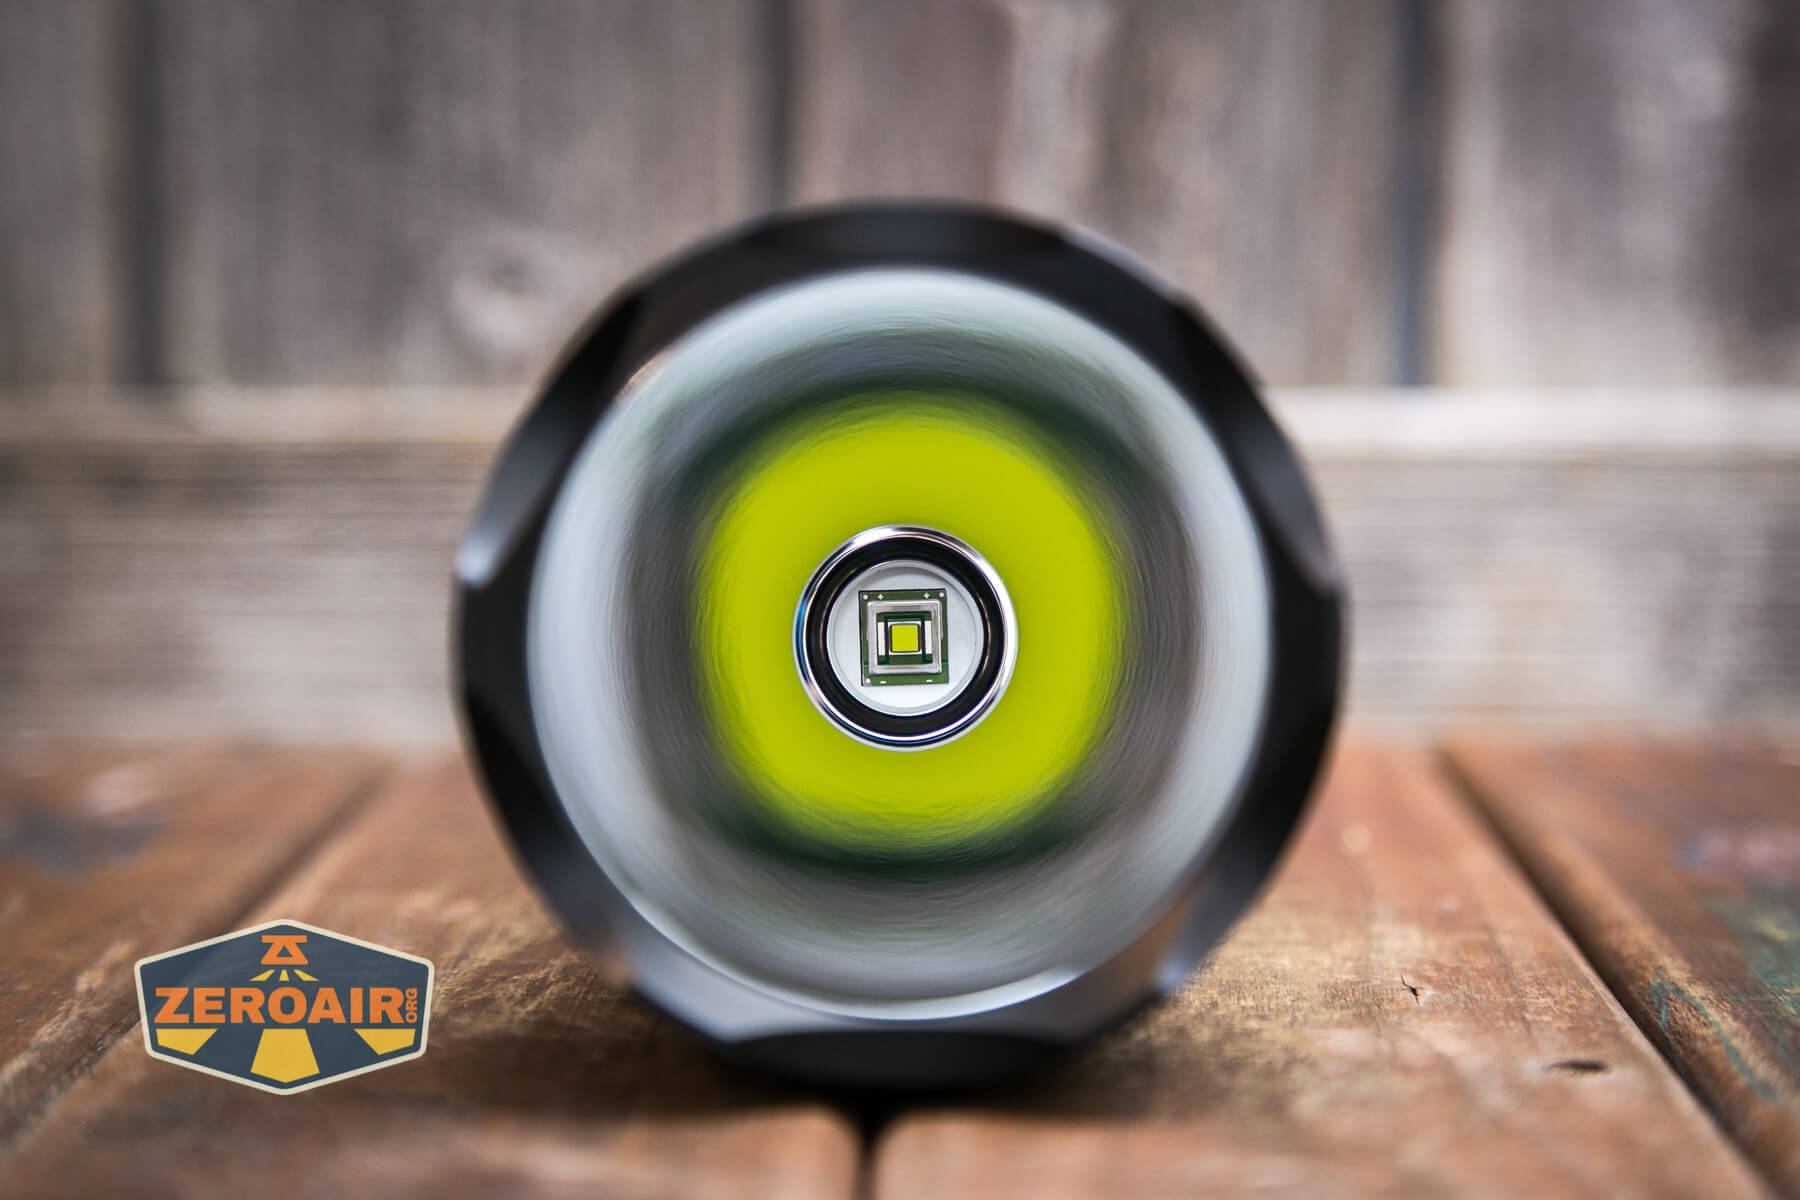
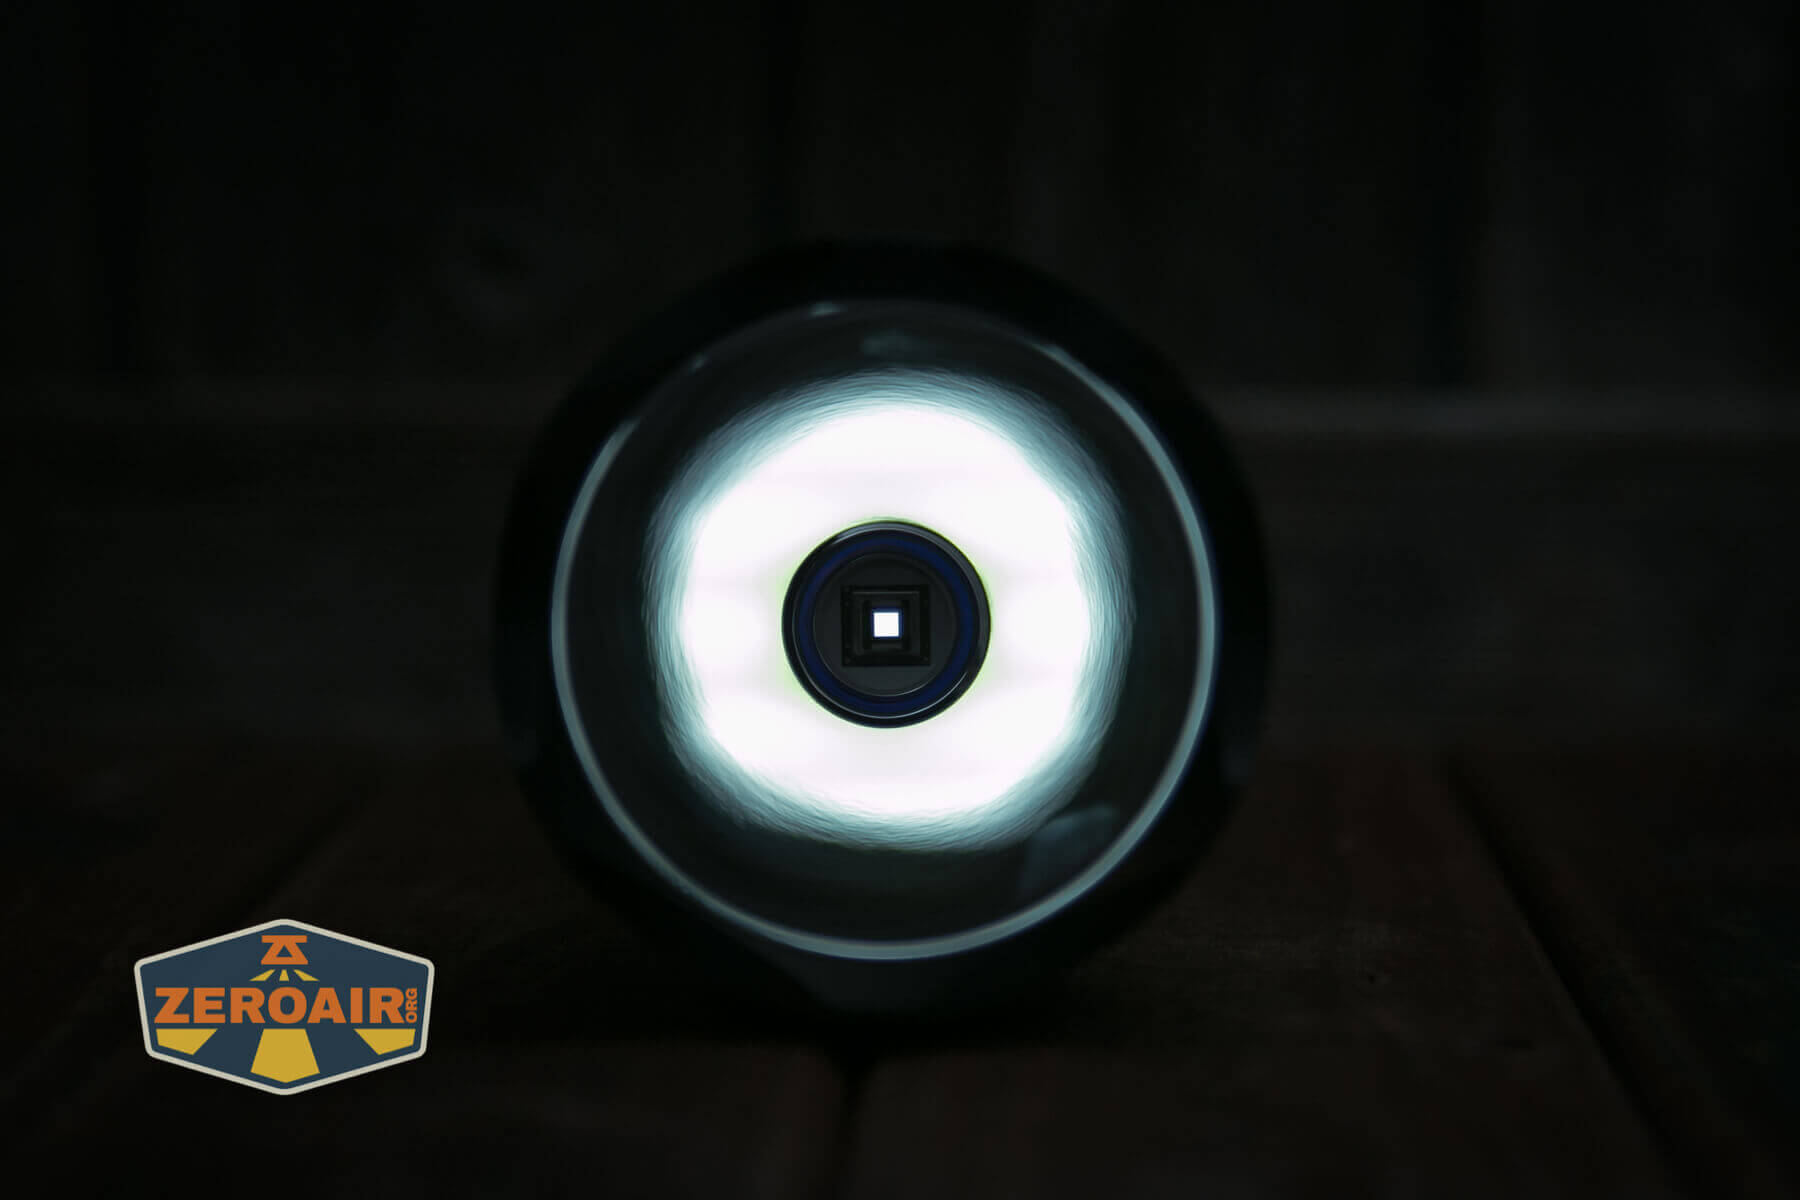
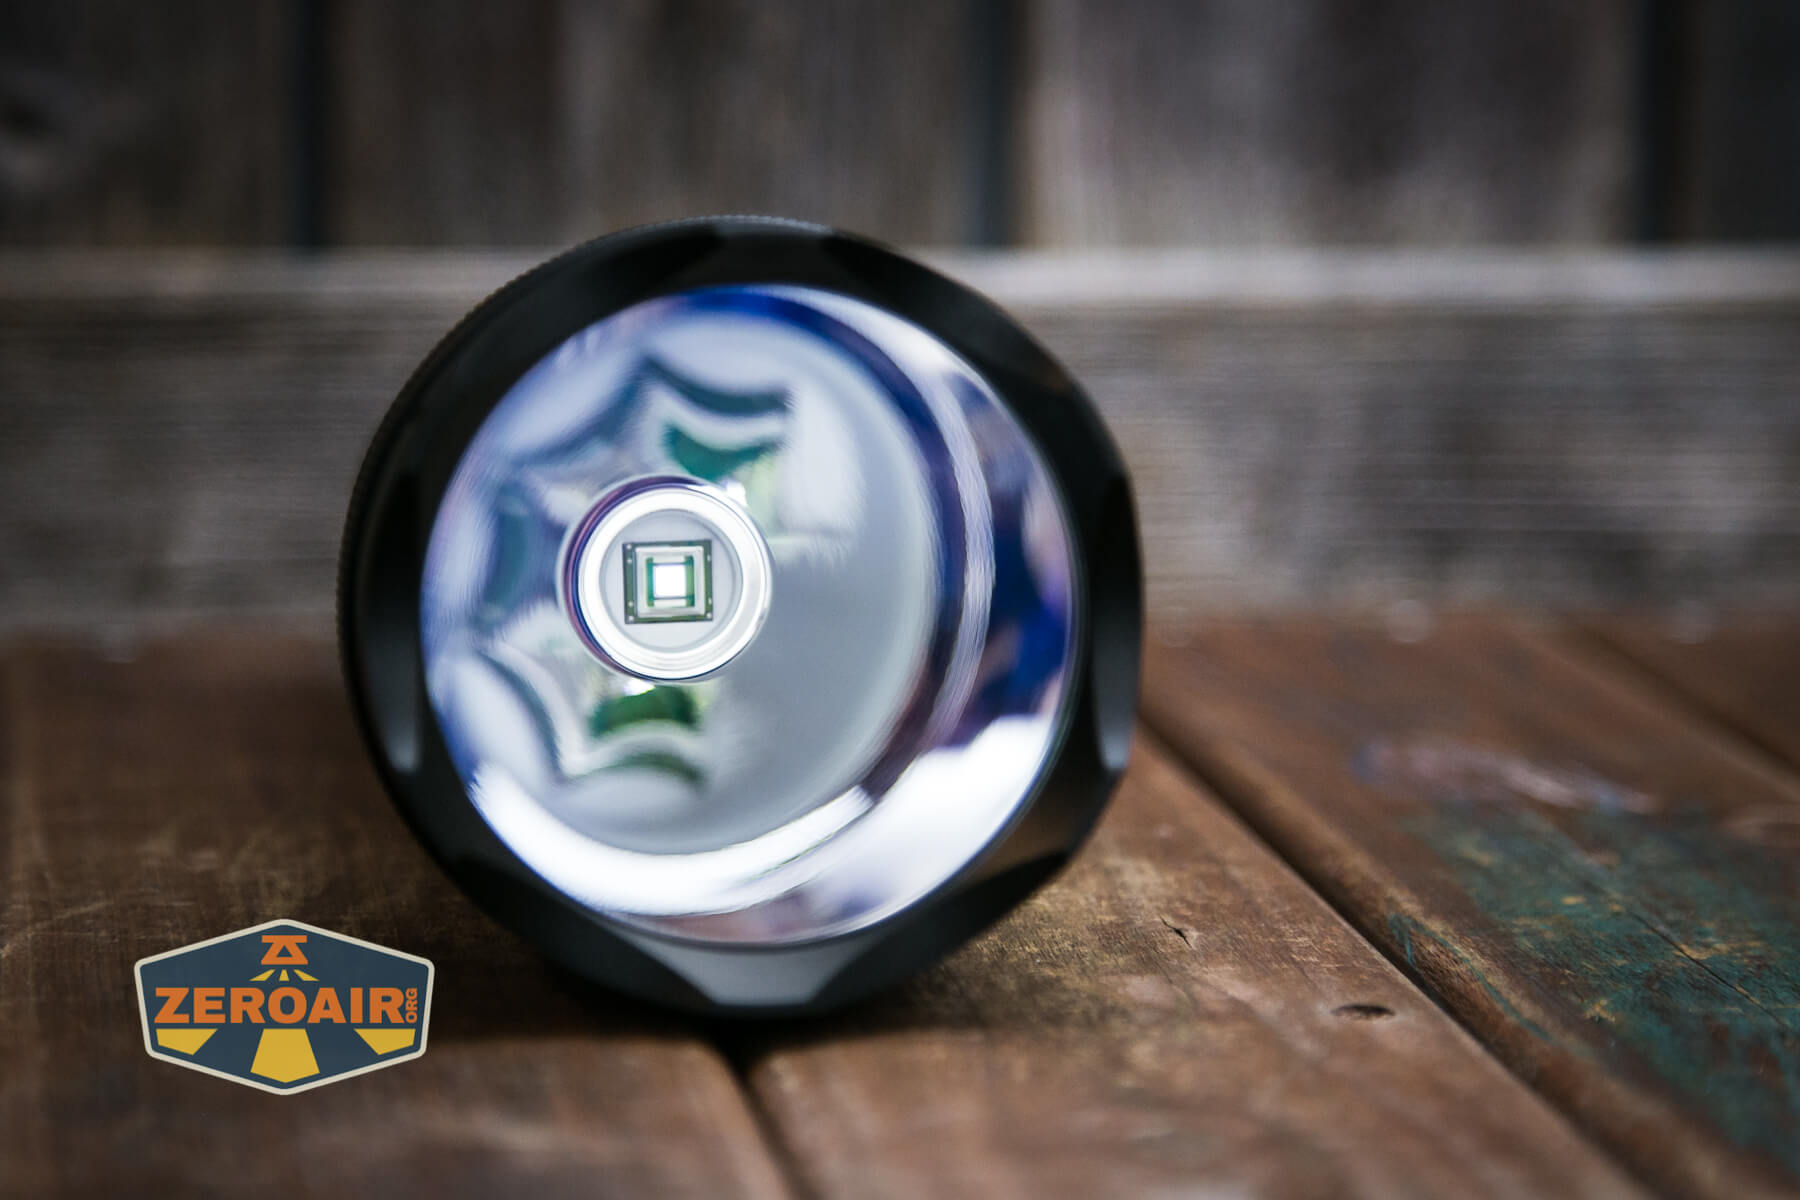
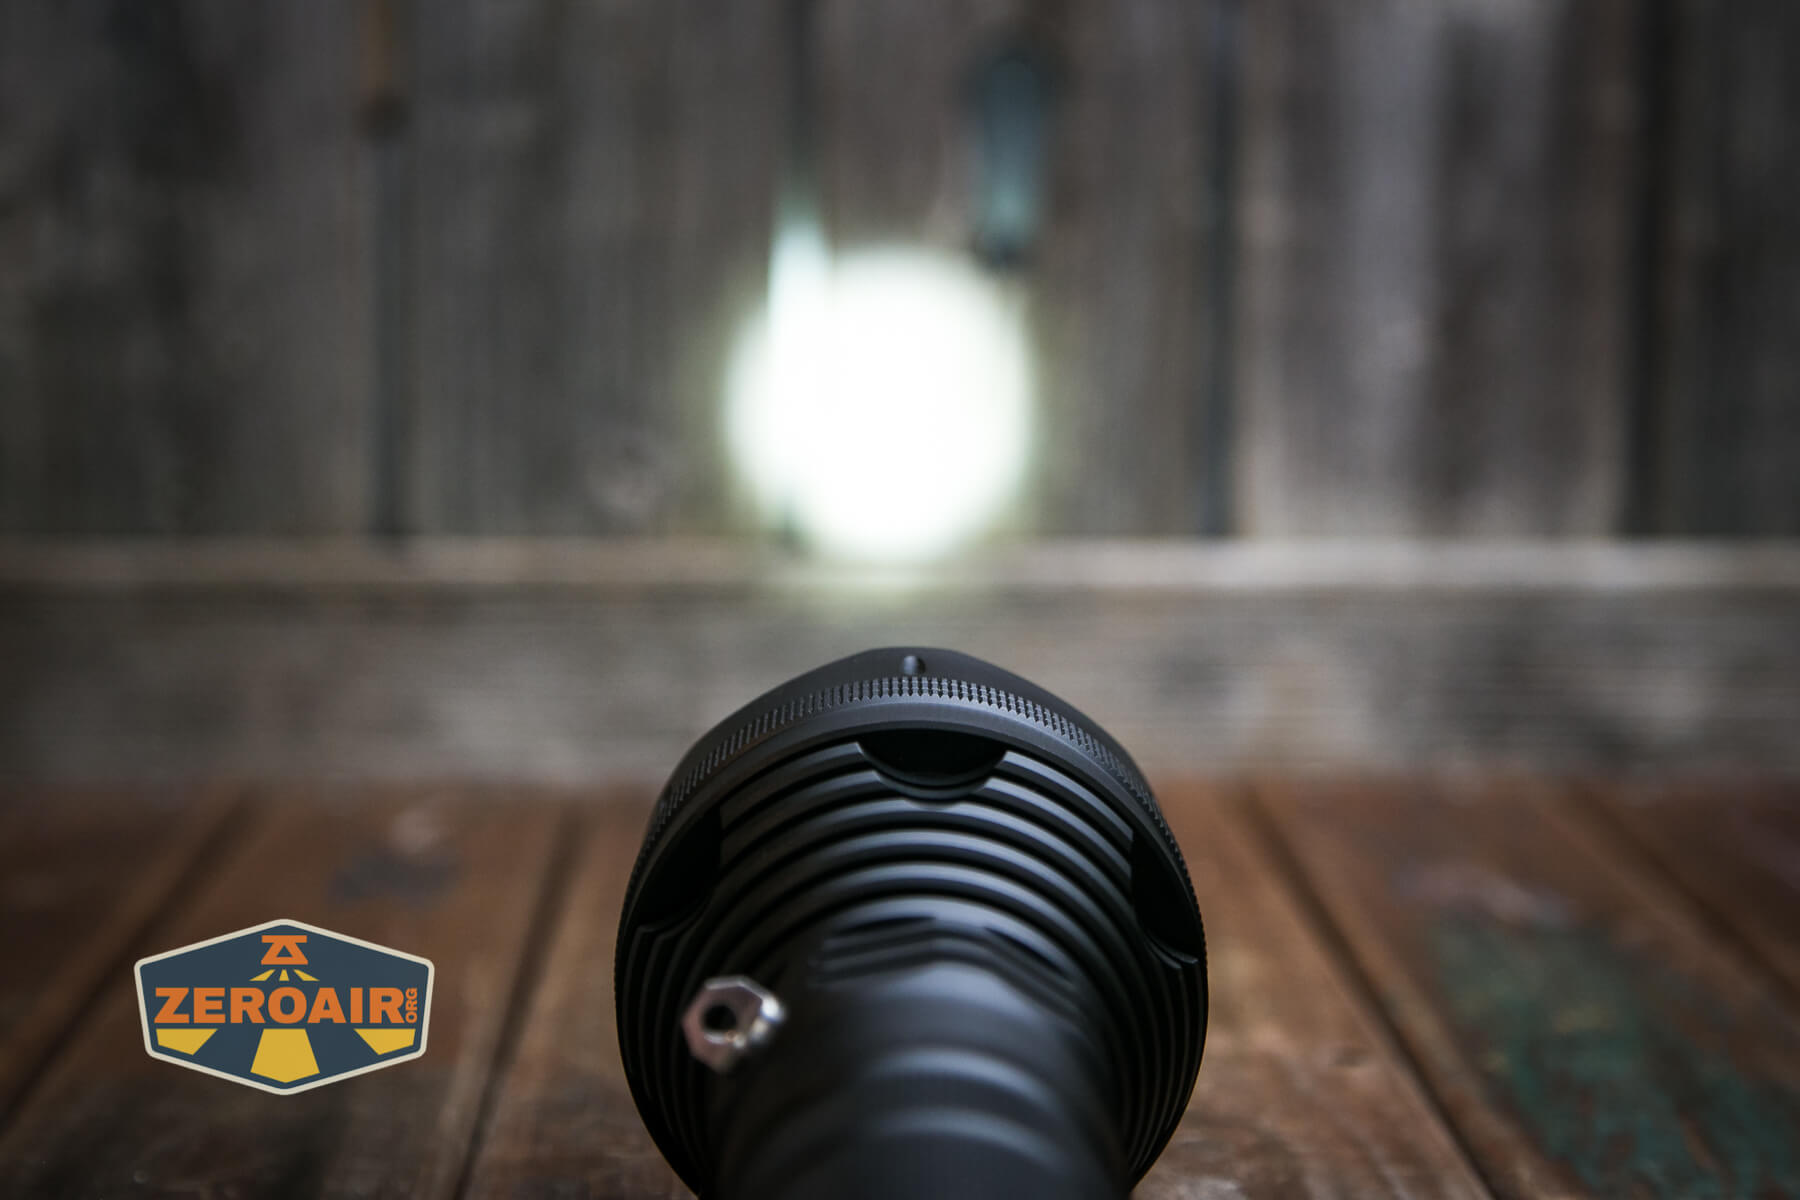
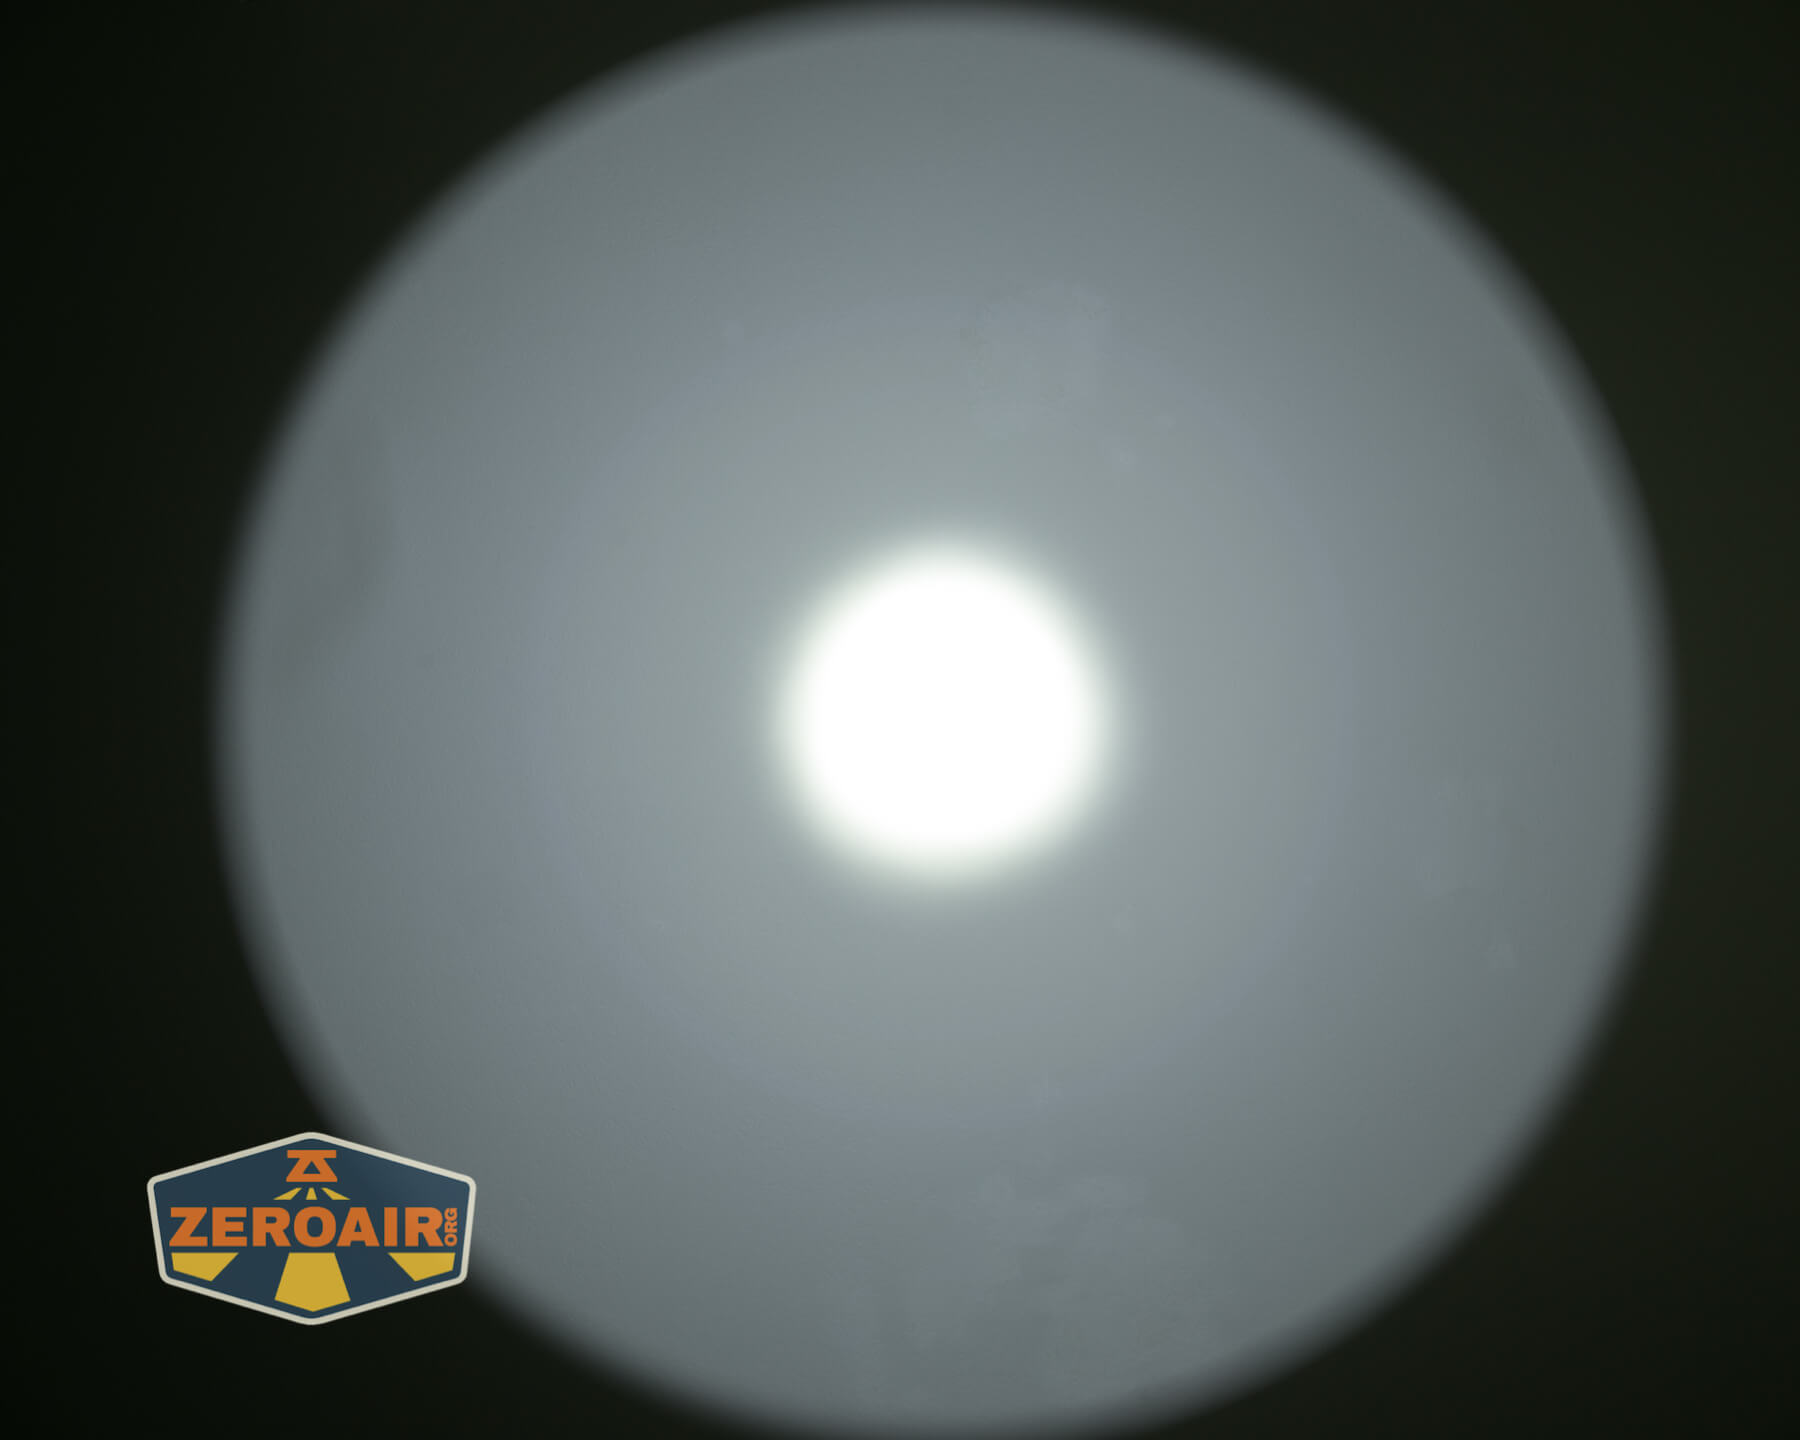
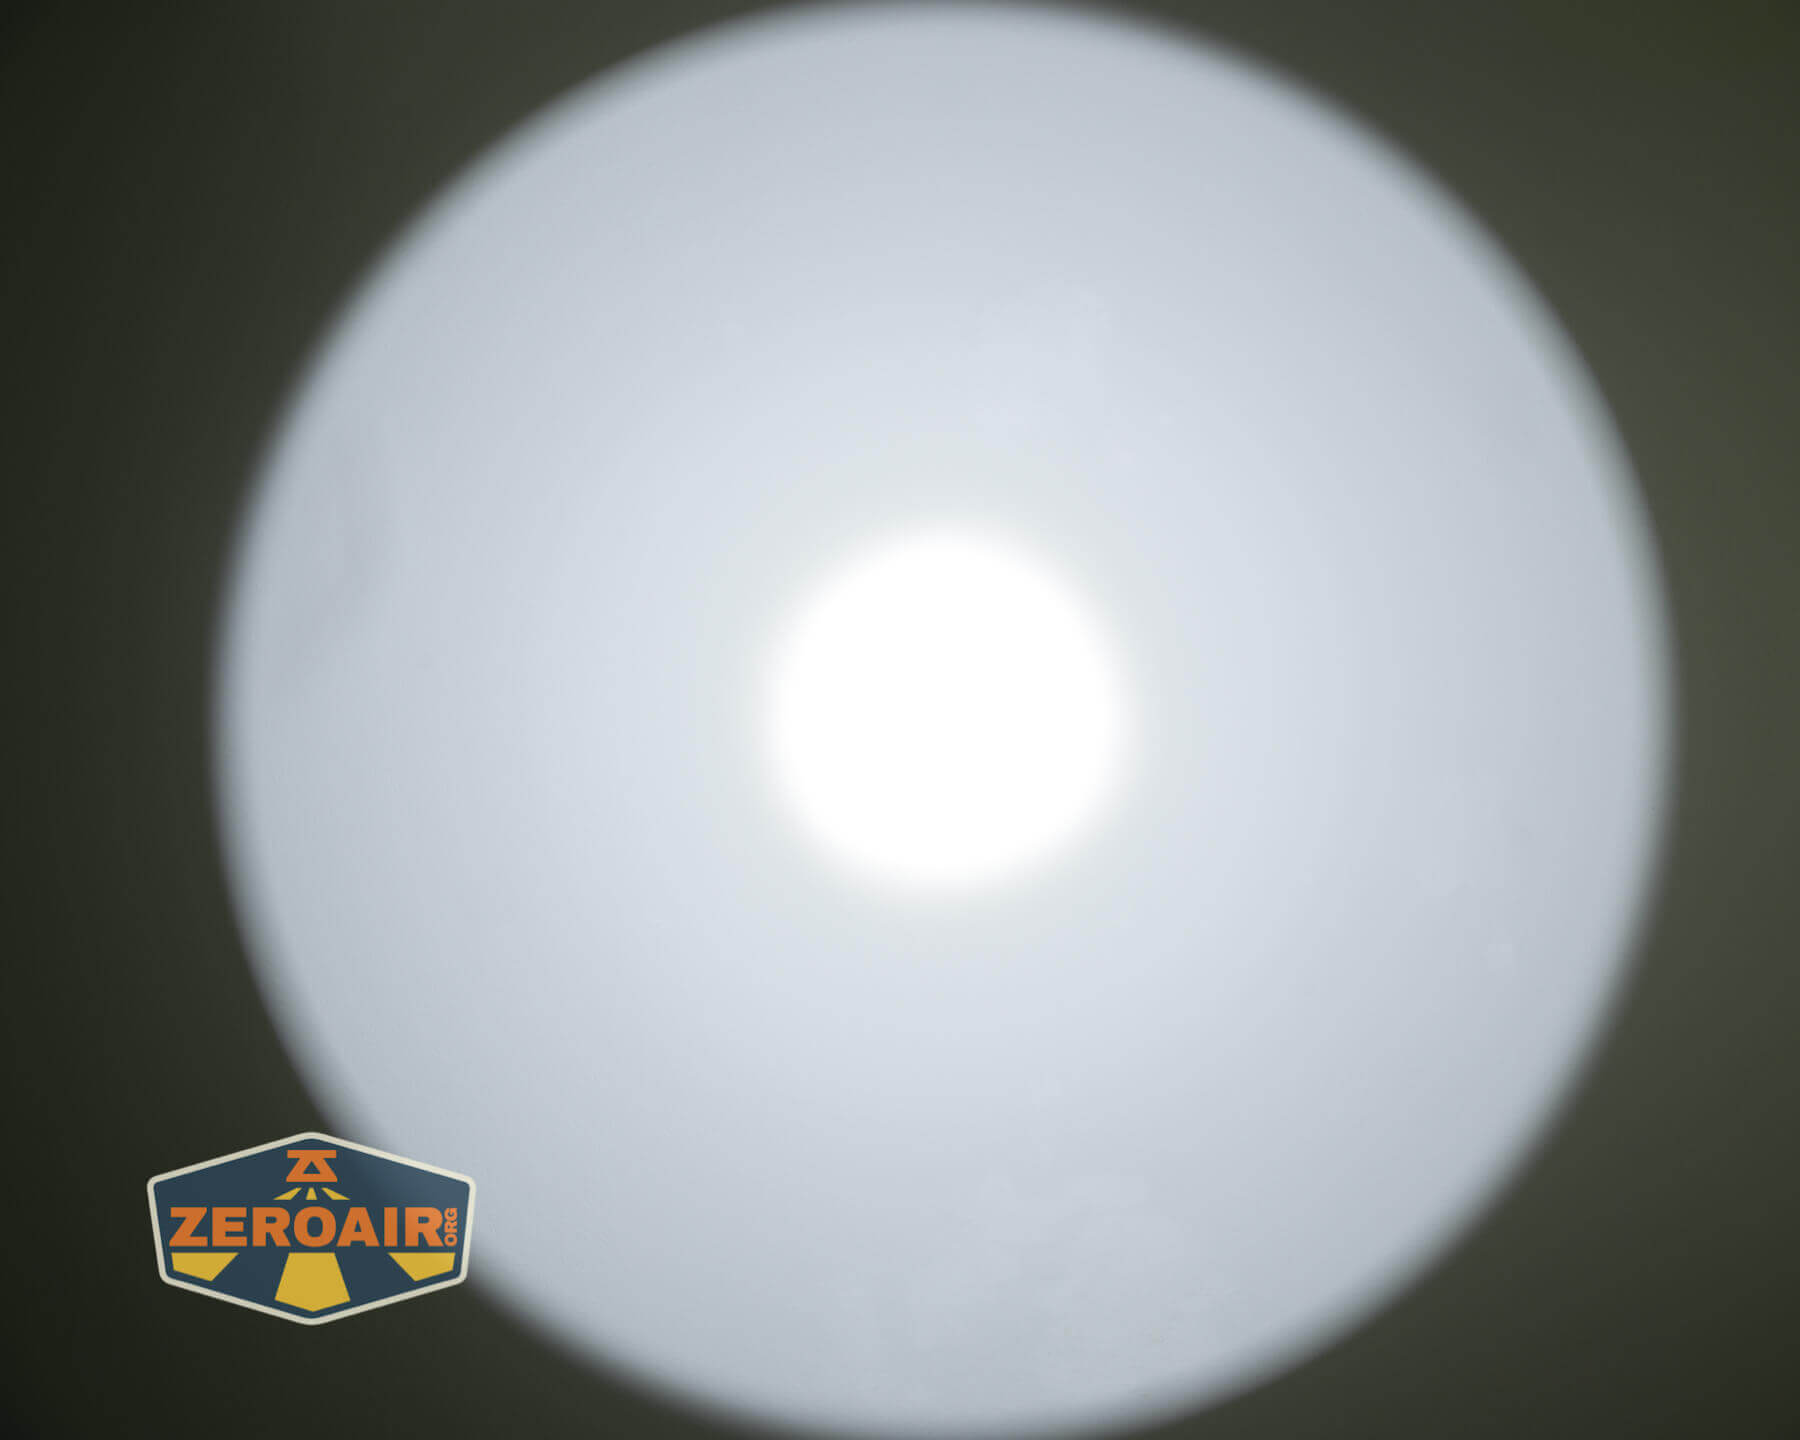
LED and Beam
In the Lumintop SD90 is a single Luminus SBT90.2 emitter. This emitter is surrounded by a smooth reflector. That reflector is deep and wide, and generally great for this SBT90.2.
With the fluted bezel, headstanding the light does allow some light to escape.
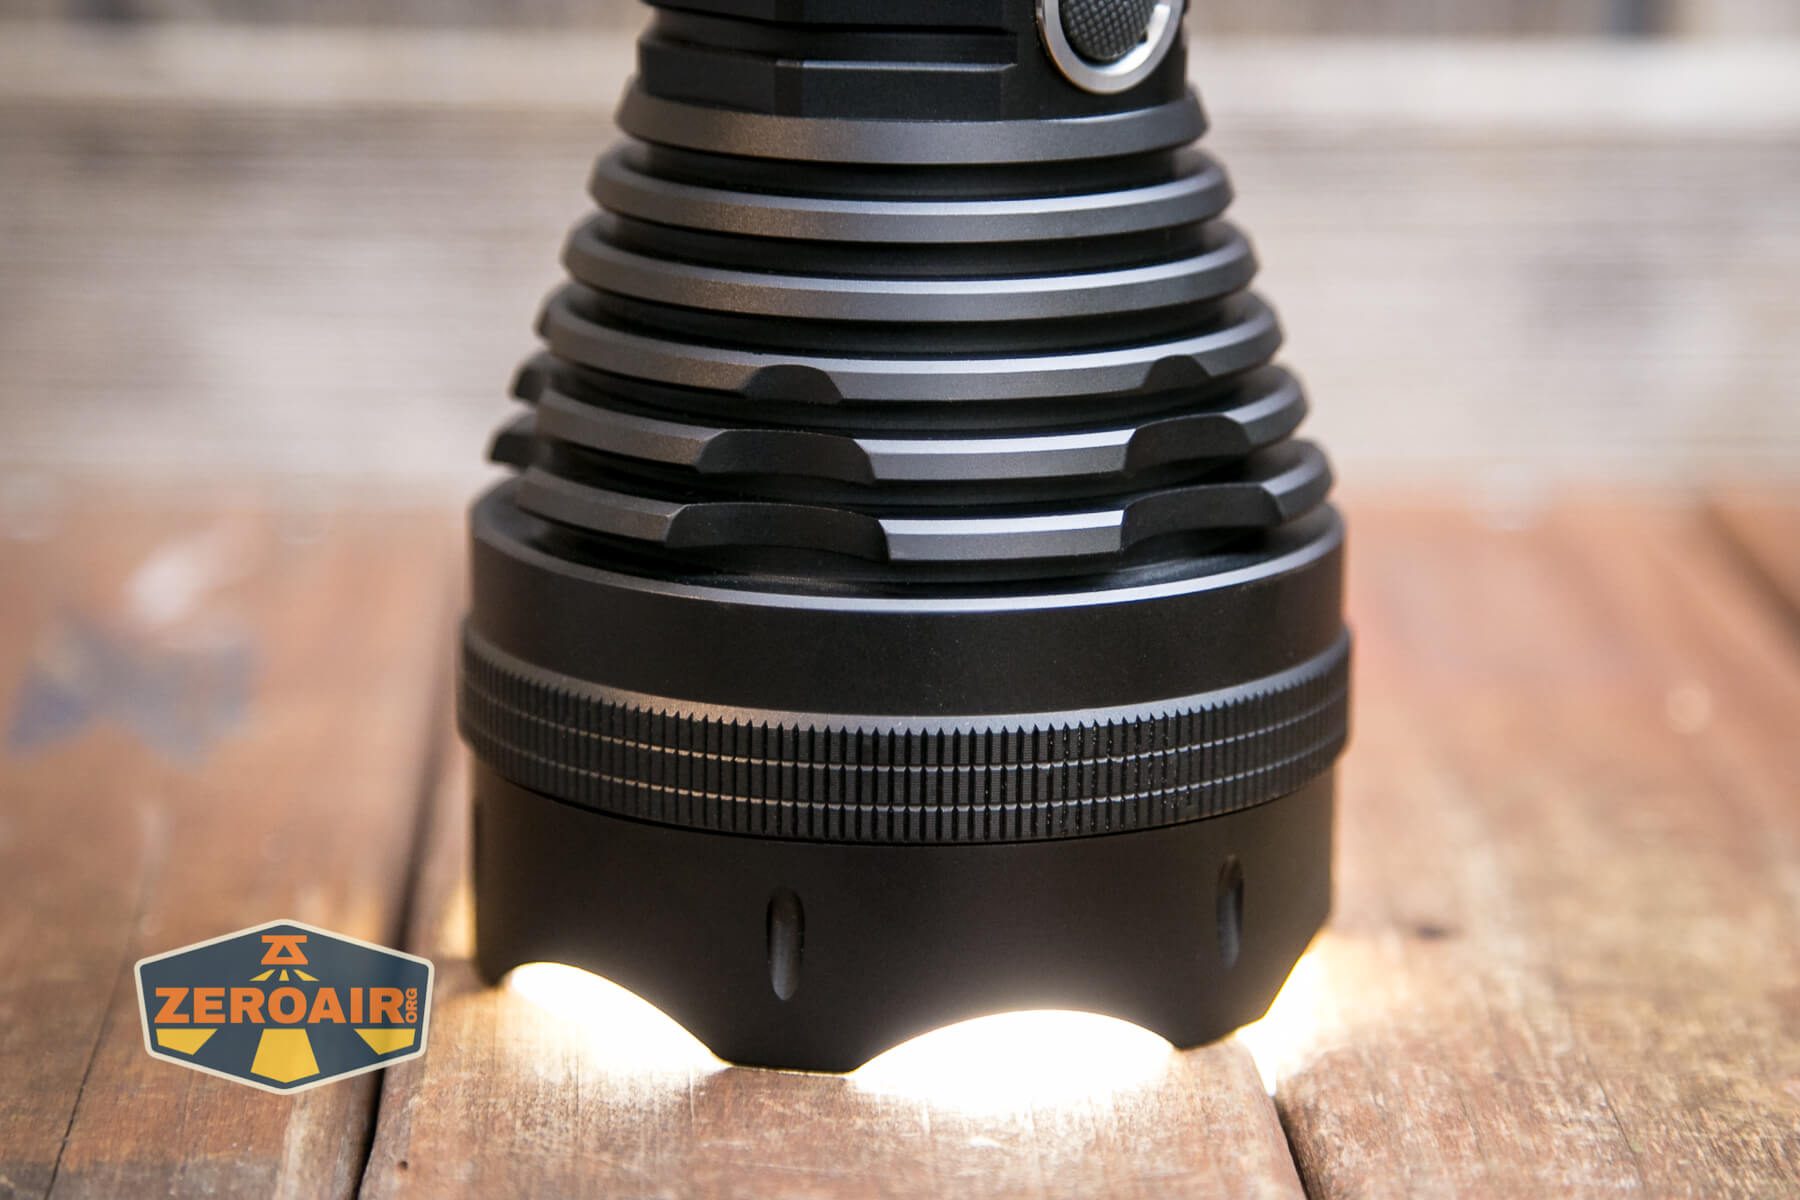
Certainly, on the lower modes, there’s little spill. On the higher modes, more spill is evident.
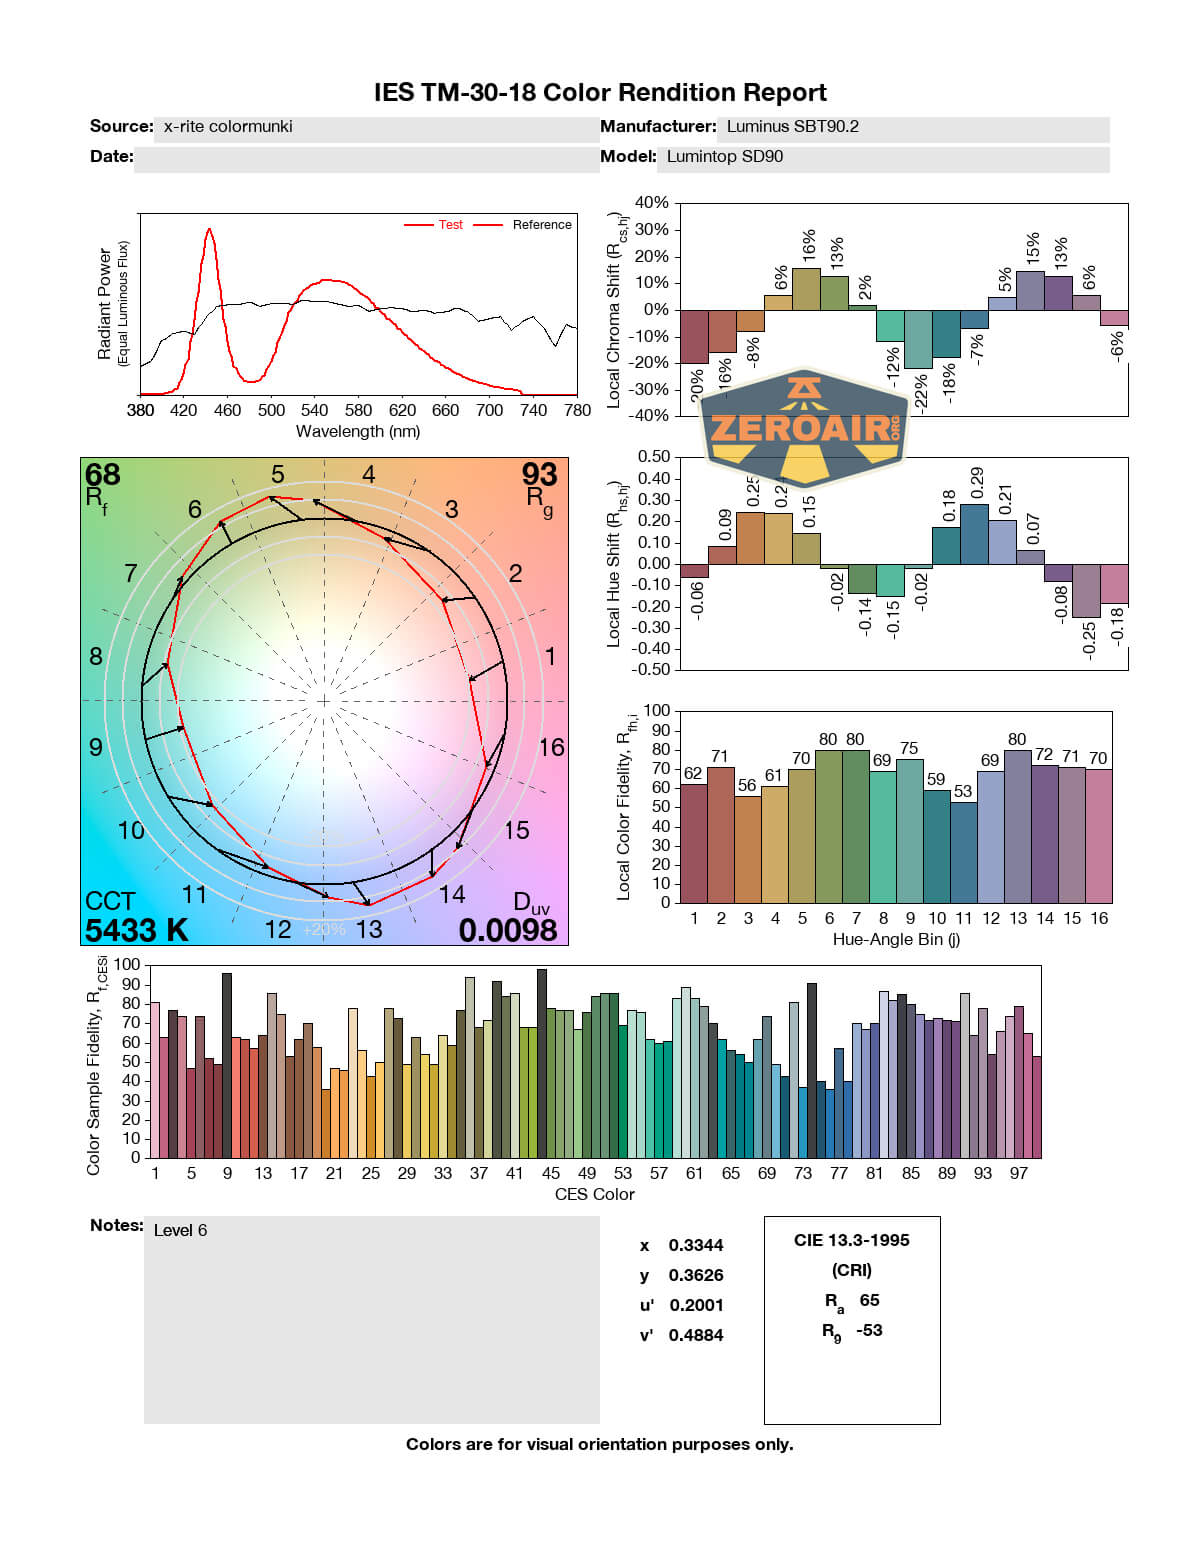
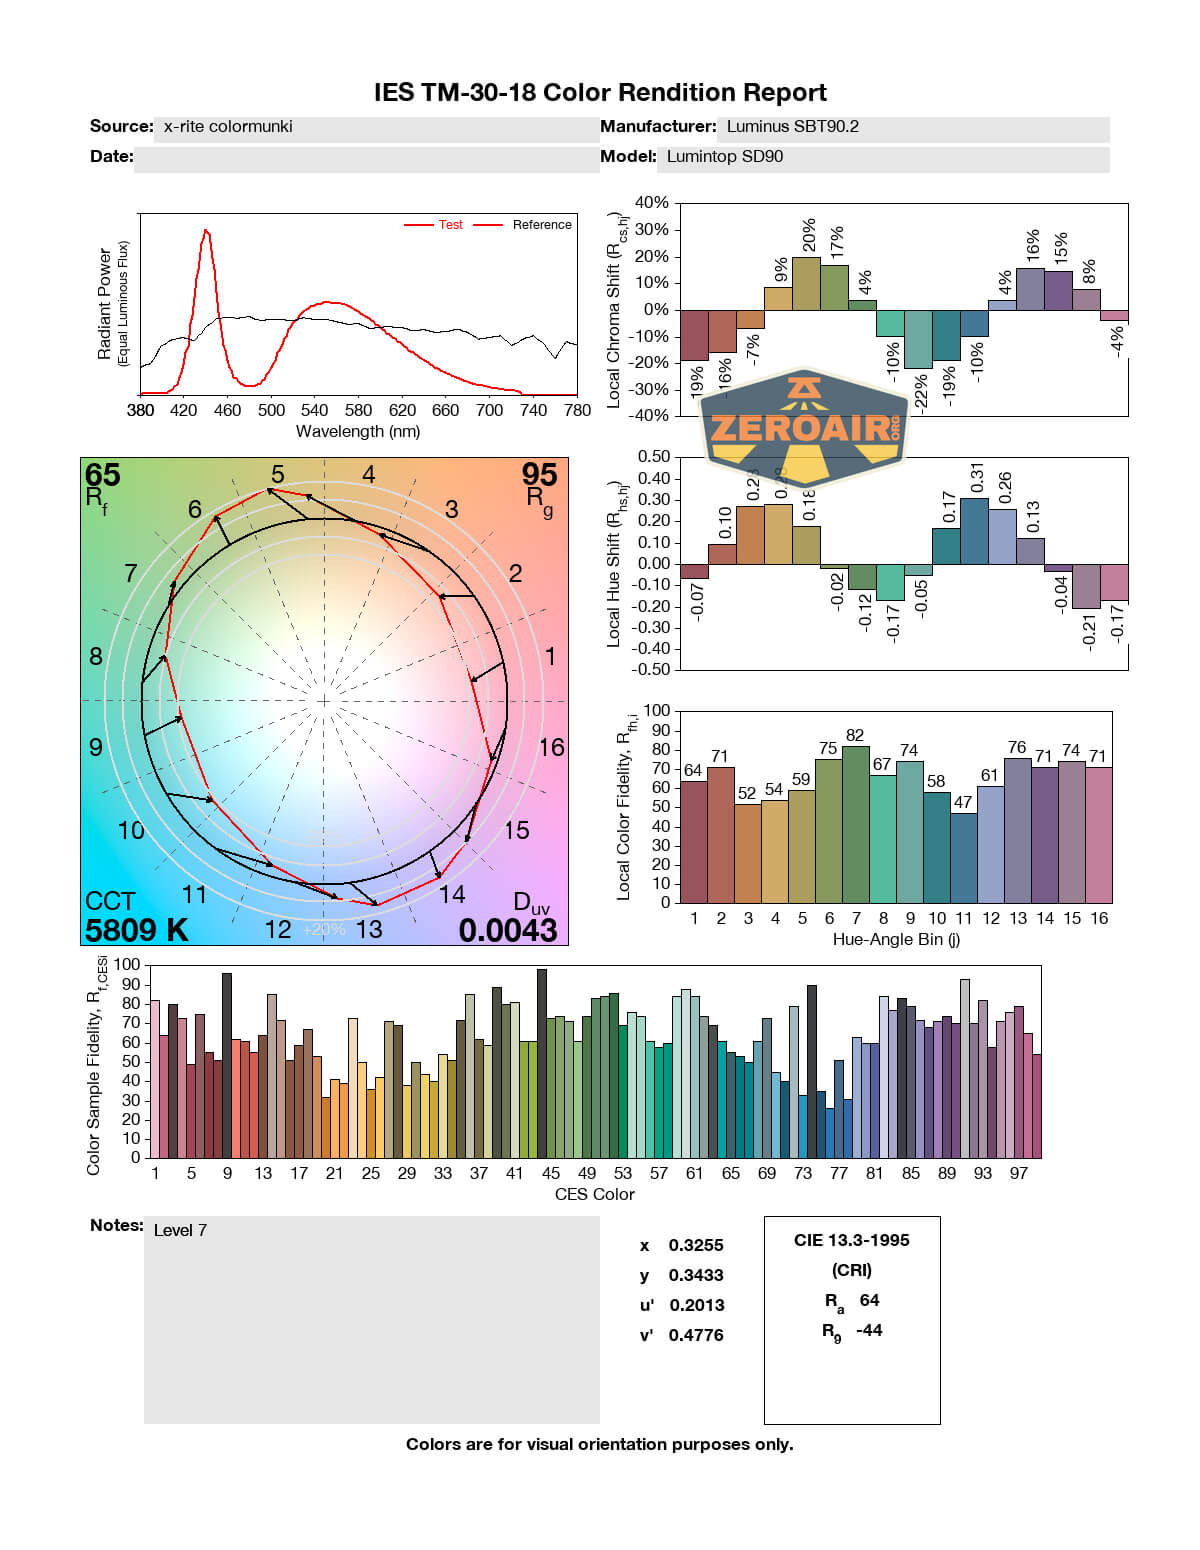
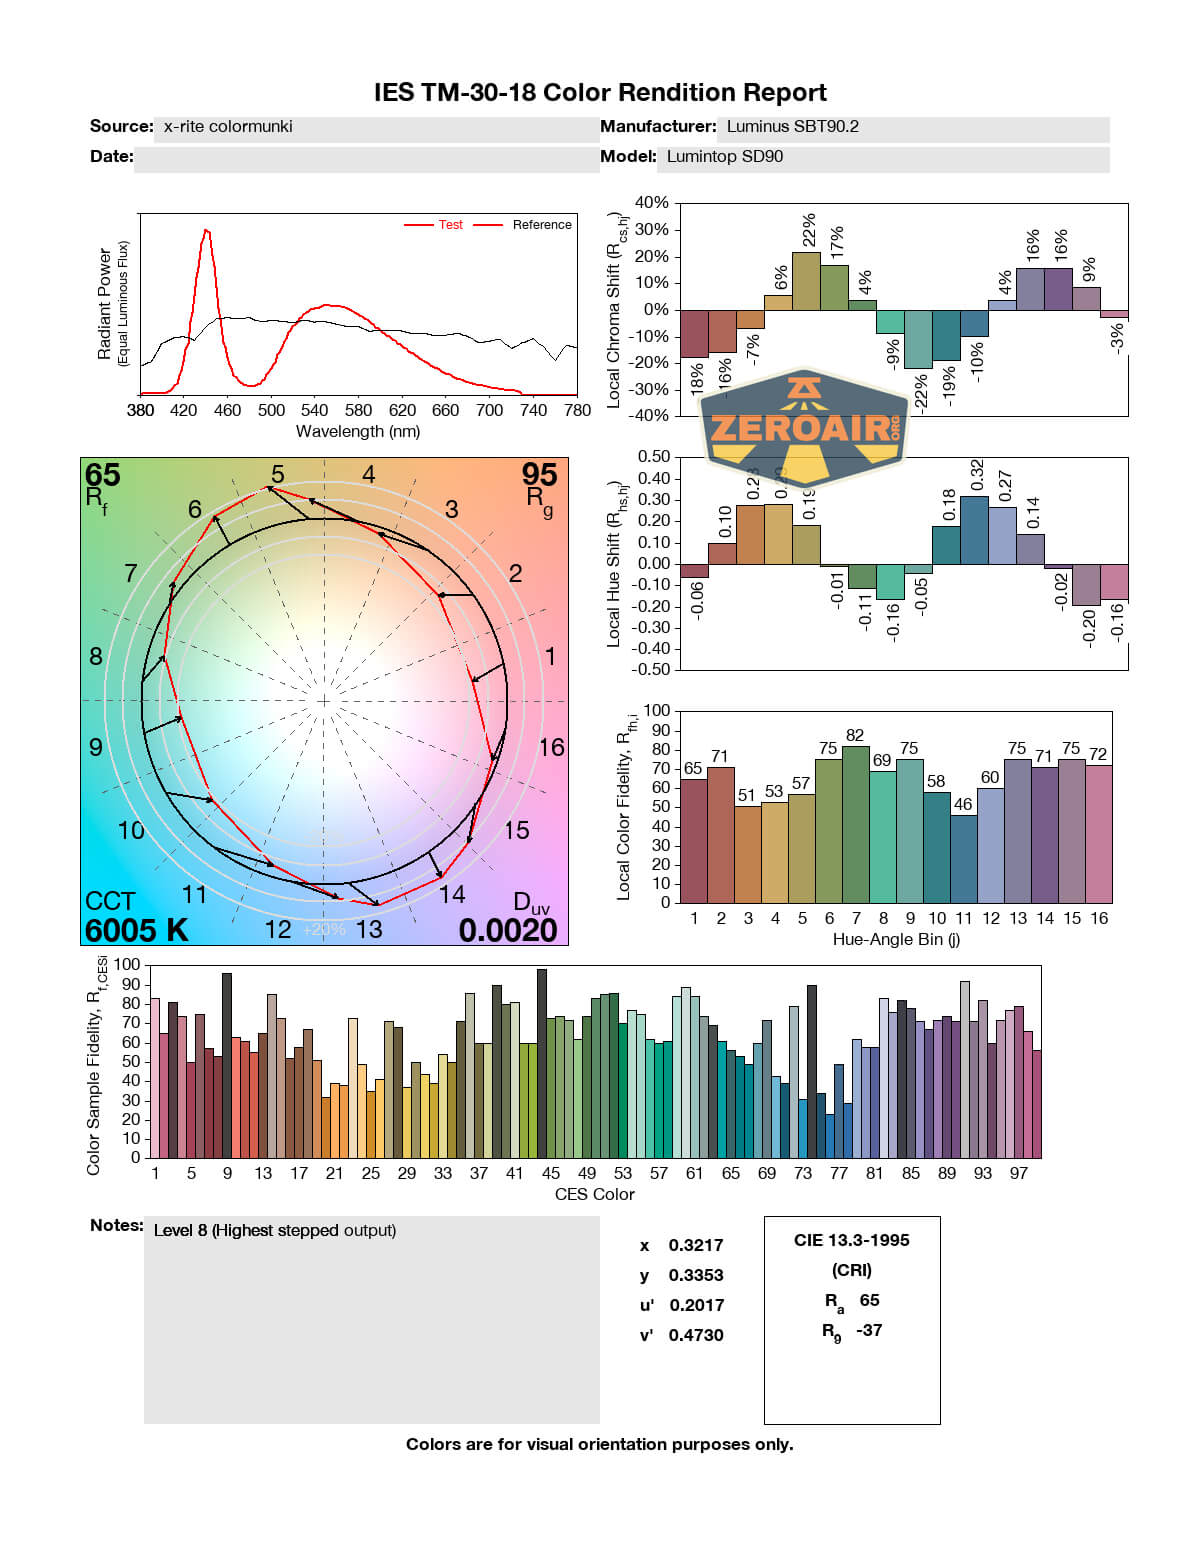
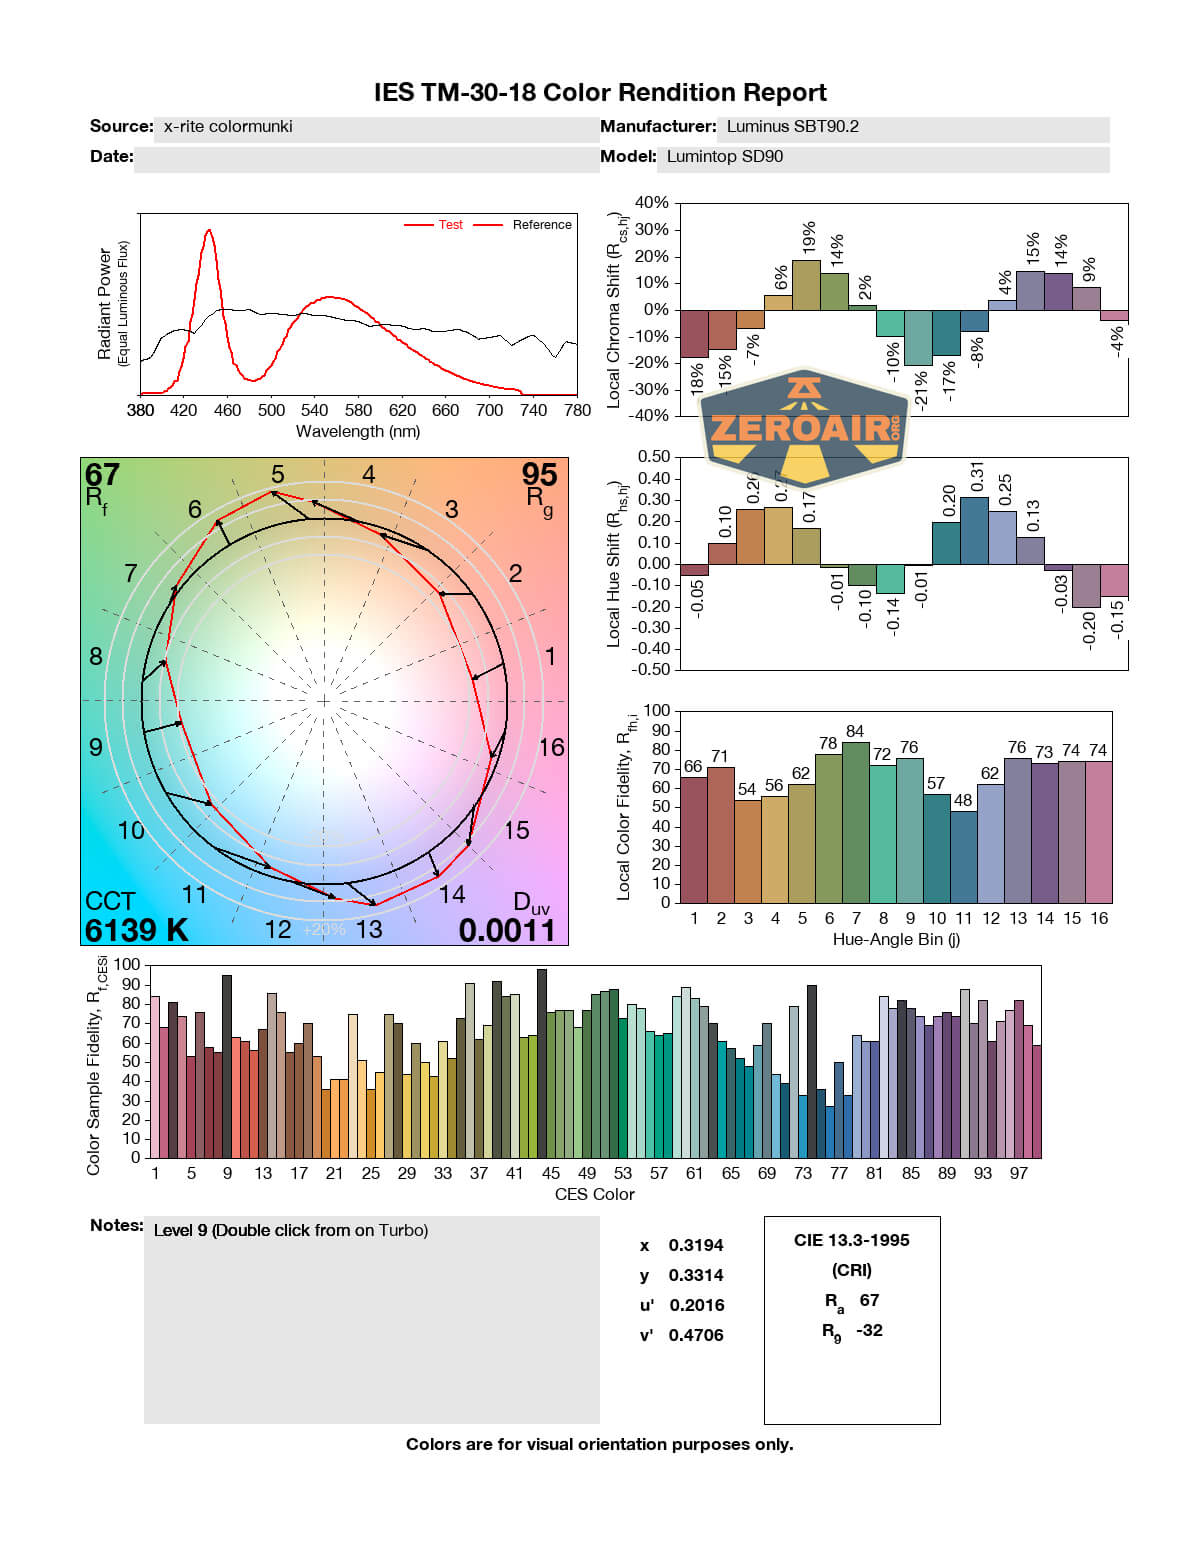
LED Color Report (CRI and CCT)
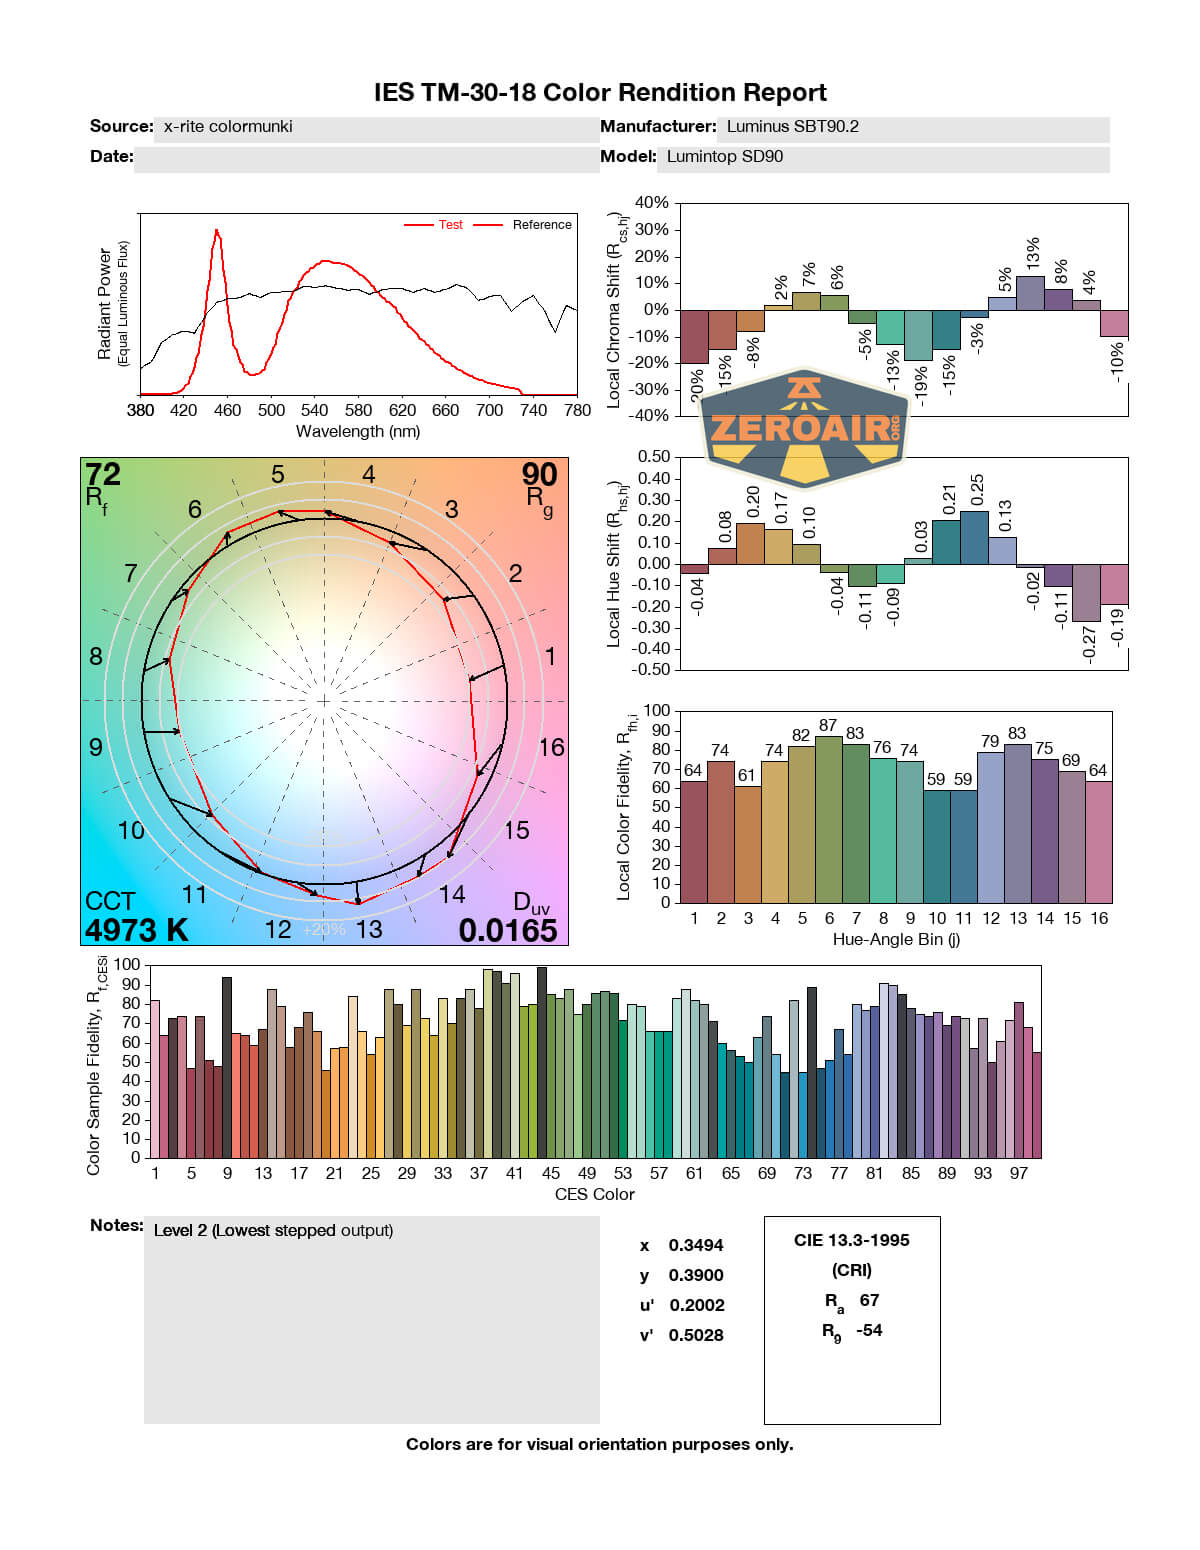
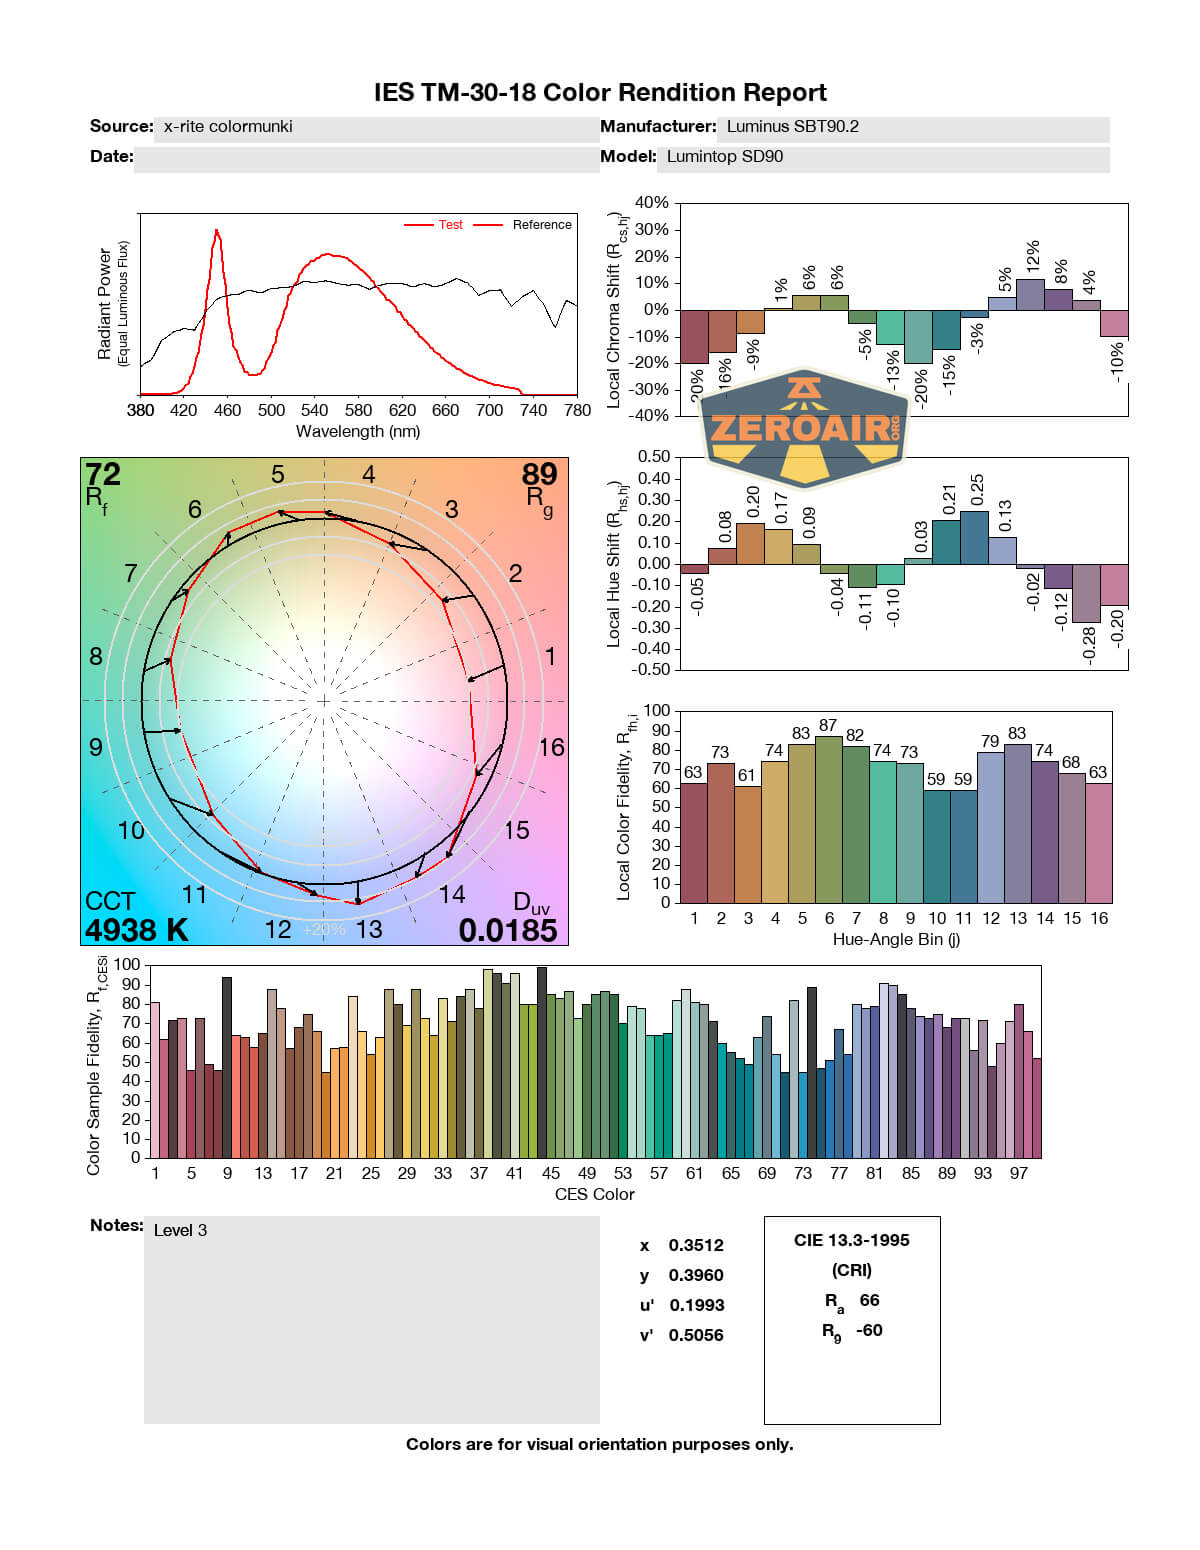
As above, the leftmost is the lowest mode from ramping. Next is the lowest stepped mode. The rightmost chart is turbo. I am exceptionally happy with the CCT on this light – the lower modes (while slightly green, aka “positive duv”), do have a CCT around 4600. As you go into the higher output levels, though, with the emitter driven a bit harder, the CCT does creep into the cooler levels. Still, around 6100K is not really all that cool, and that makes this a great thrower! CRI, not surprisingly, hovers around 70.


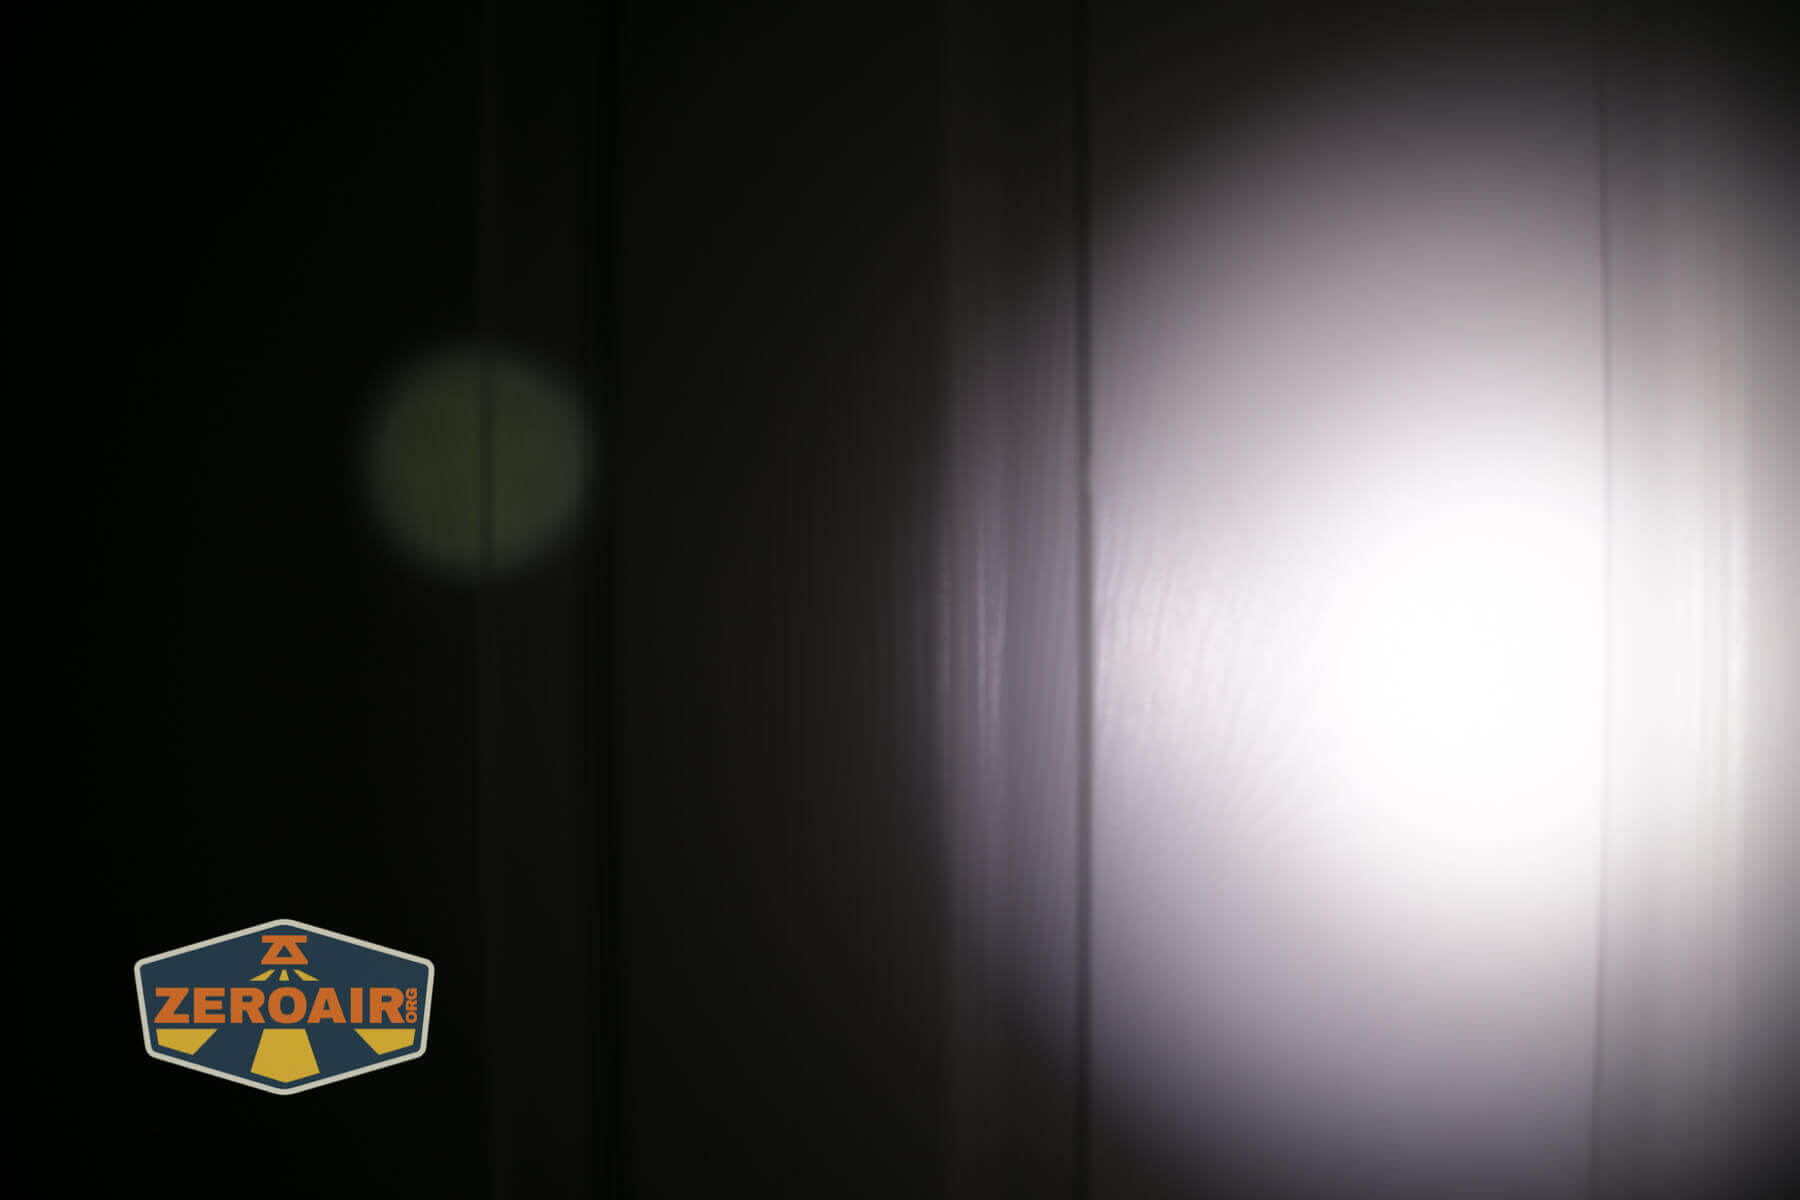
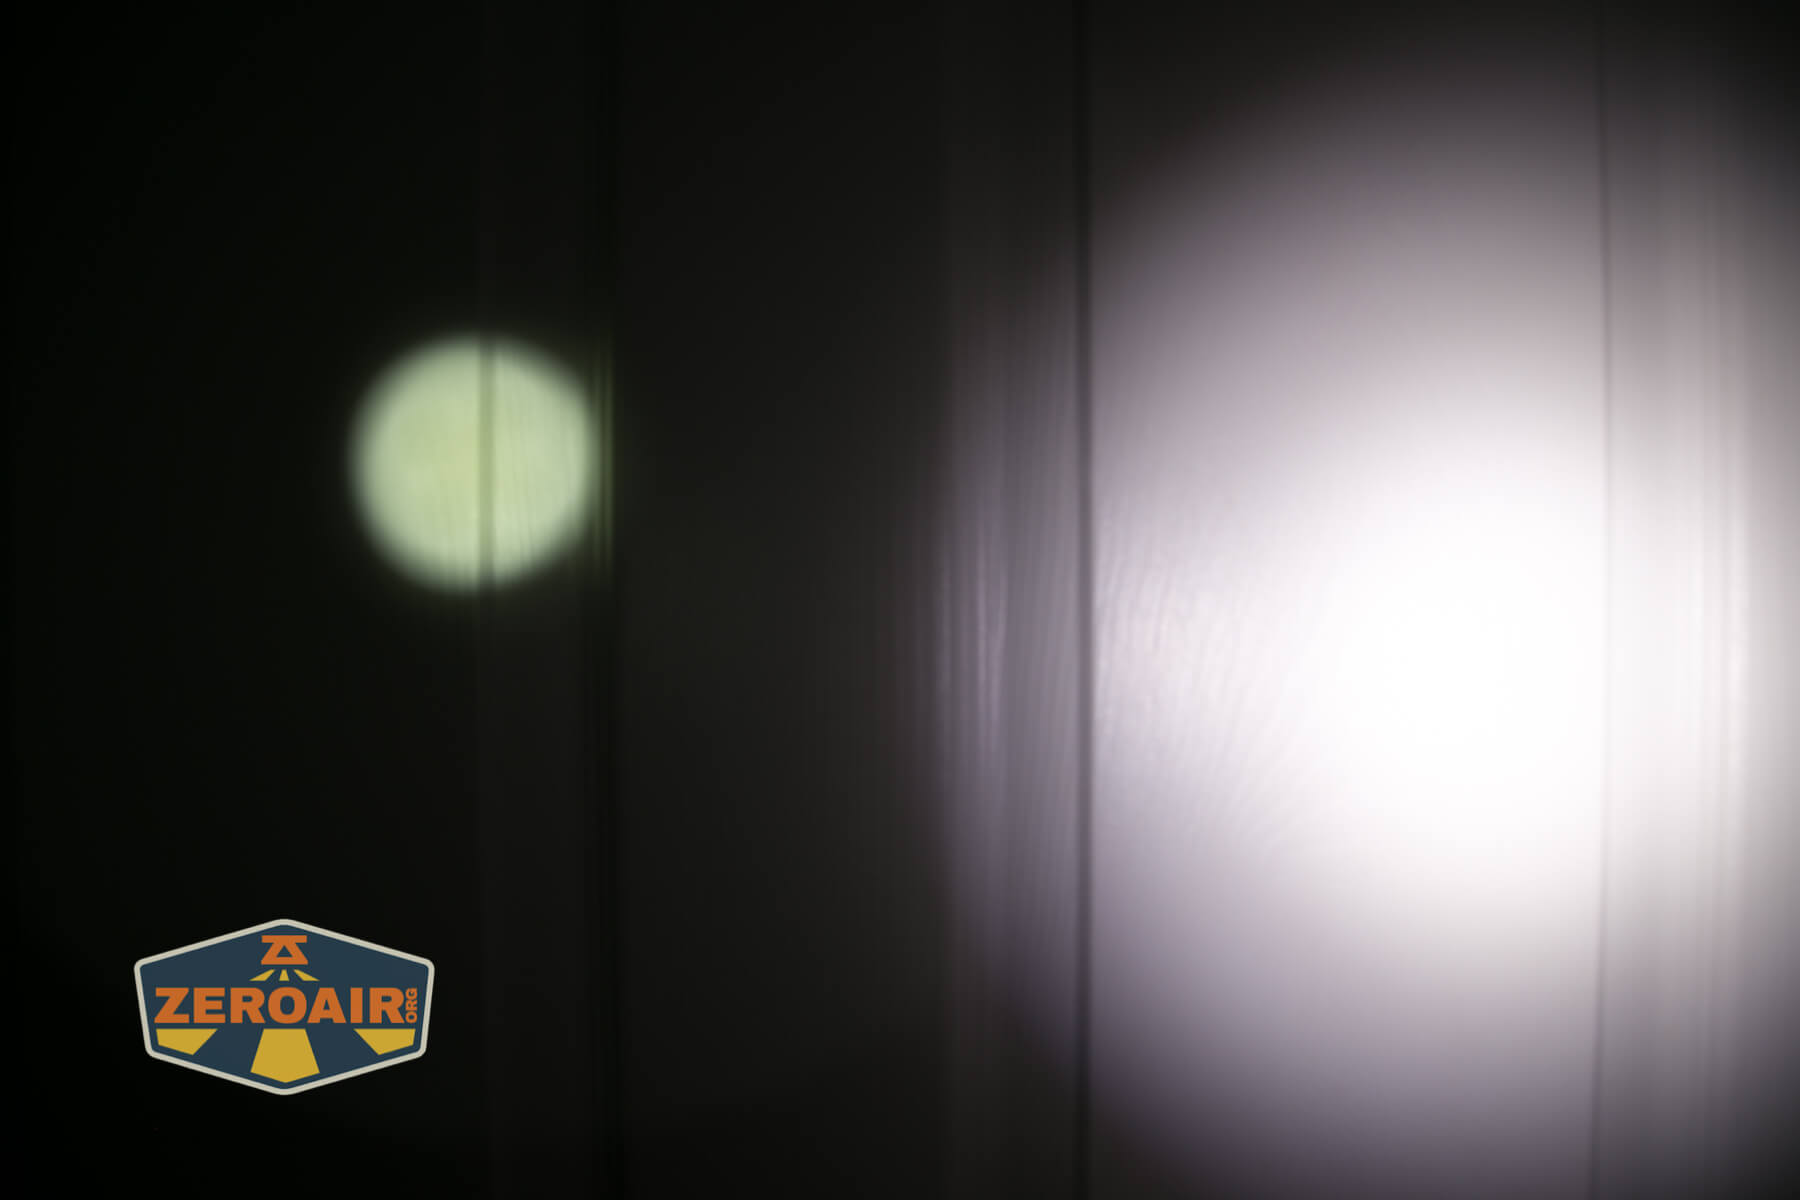
Beamshots
These beamshots always have the following settings: f8, ISO100, 0.3s shutter, and manual 5000K exposure. These photos are taken at floor level, and the beam hits the ceiling around 9 feet away. If you’re wondering about the spill starting on the 7th output level – yes, it’s exactly that noticeable. The jump between the 6th output level and the 7th output level is quite dramatic! (And remember, that’s the 5th and 6th step, since the first (lowest) photo is from the ramping group).


Tint vs BLF-348 (KillzoneFlashlights.com 219b version) (affiliate link)
I keep the test flashlight on the left and the BLF-348 reference flashlight on the right.

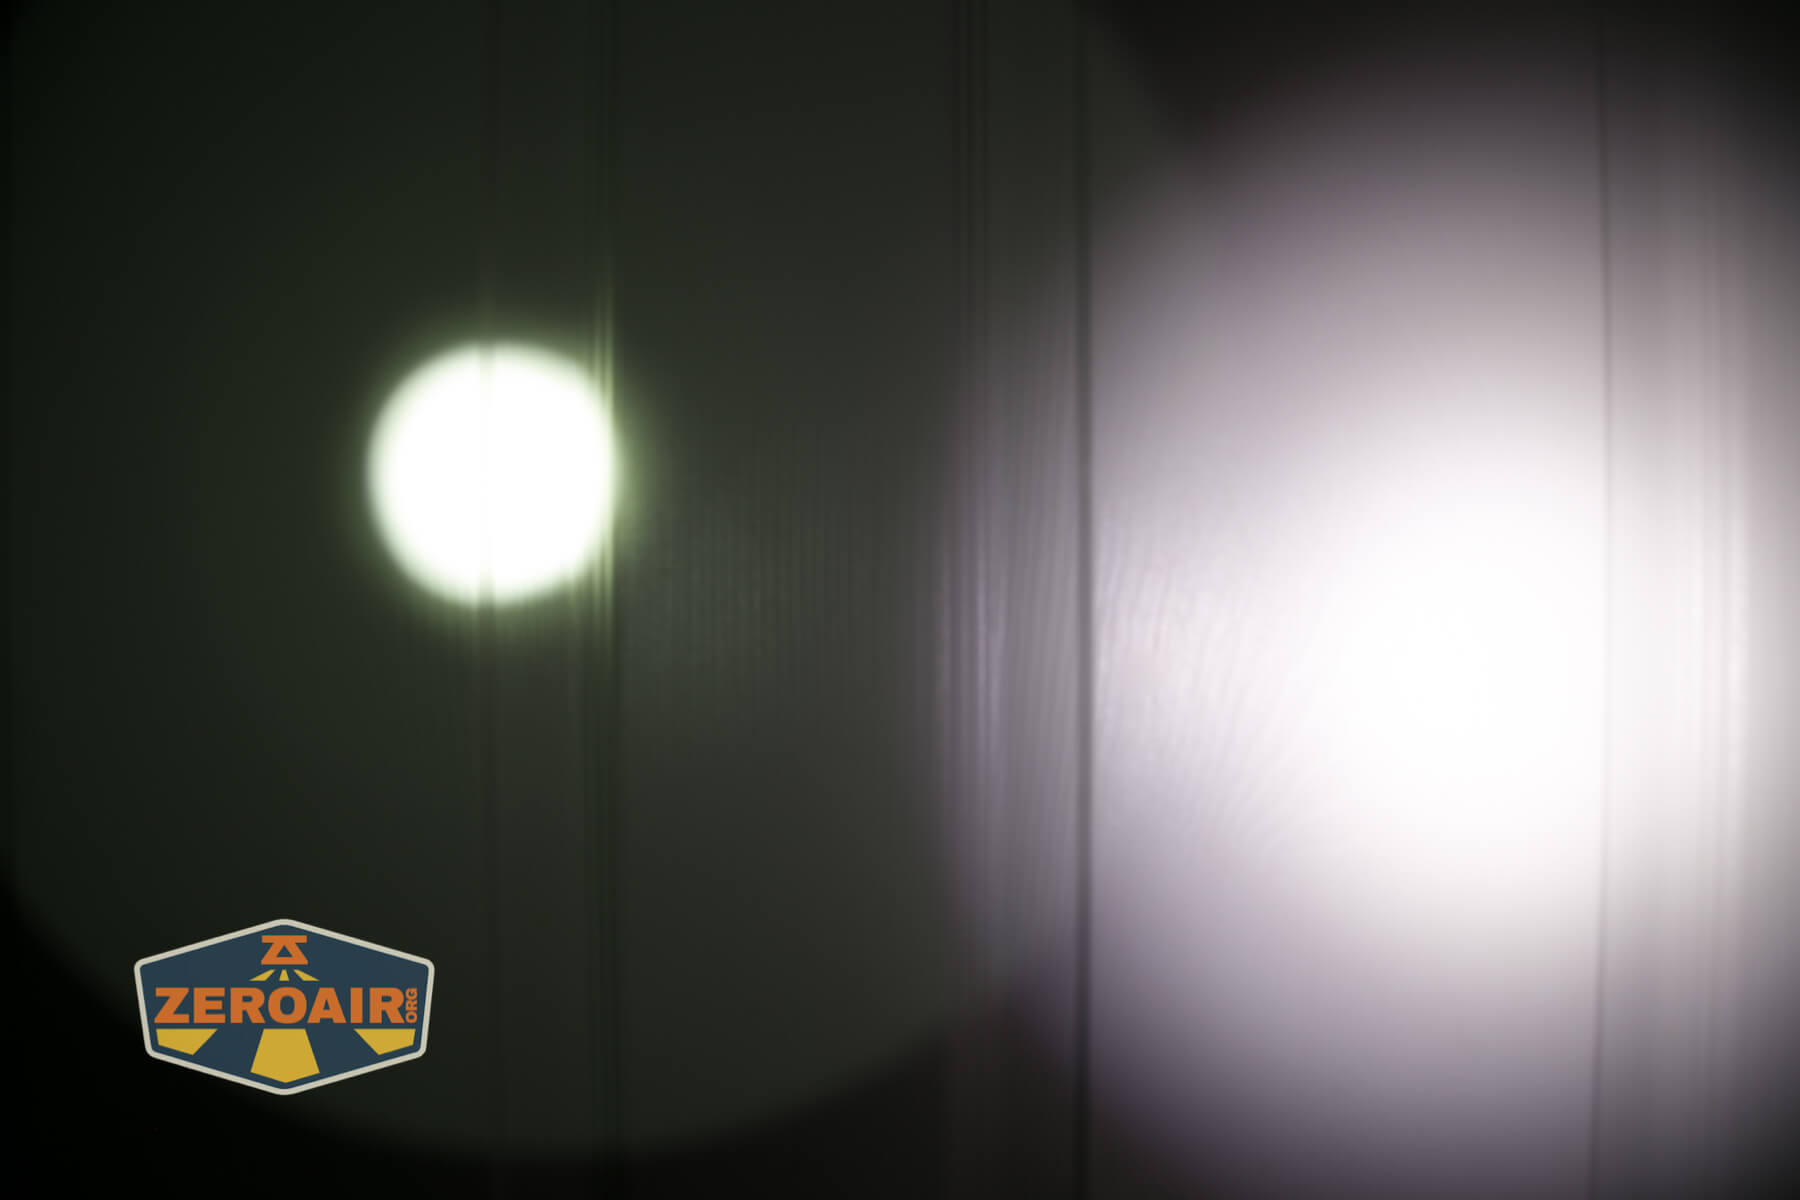
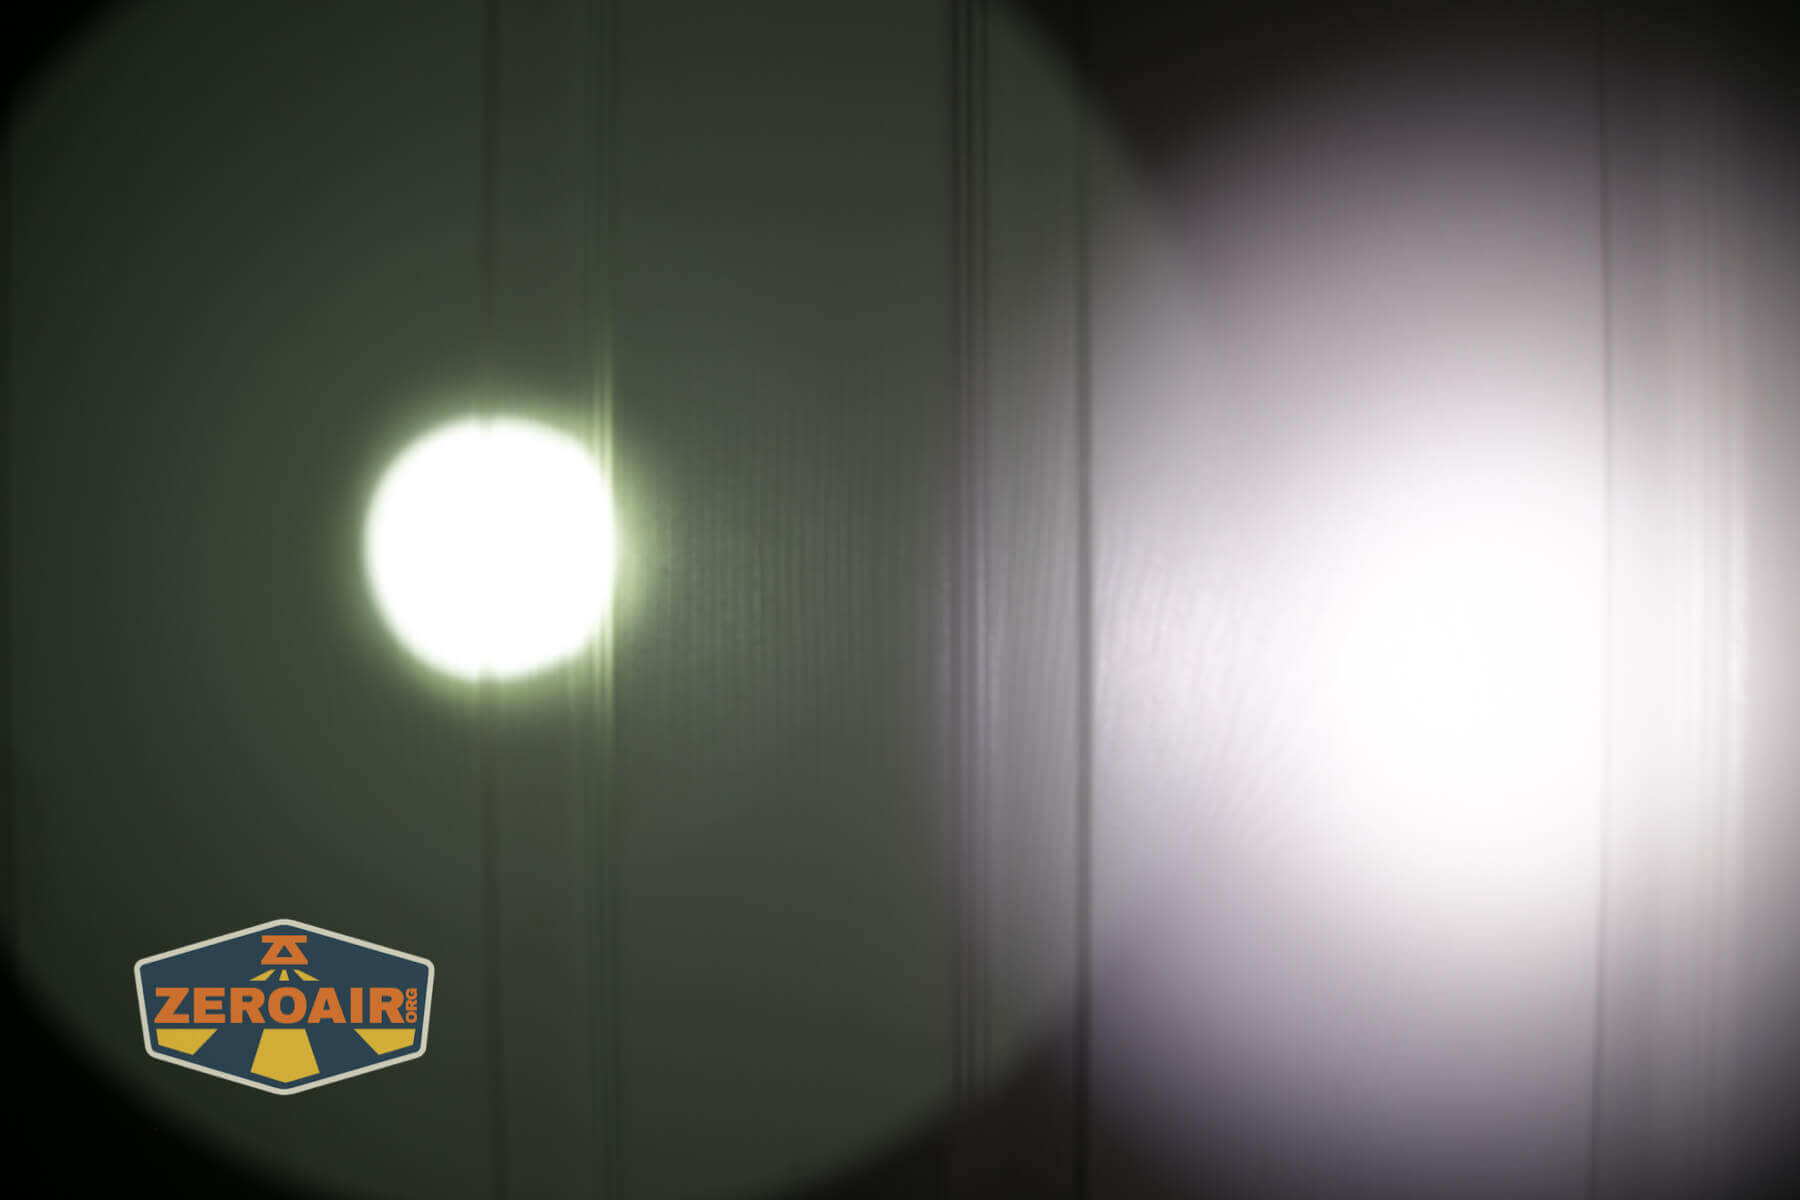
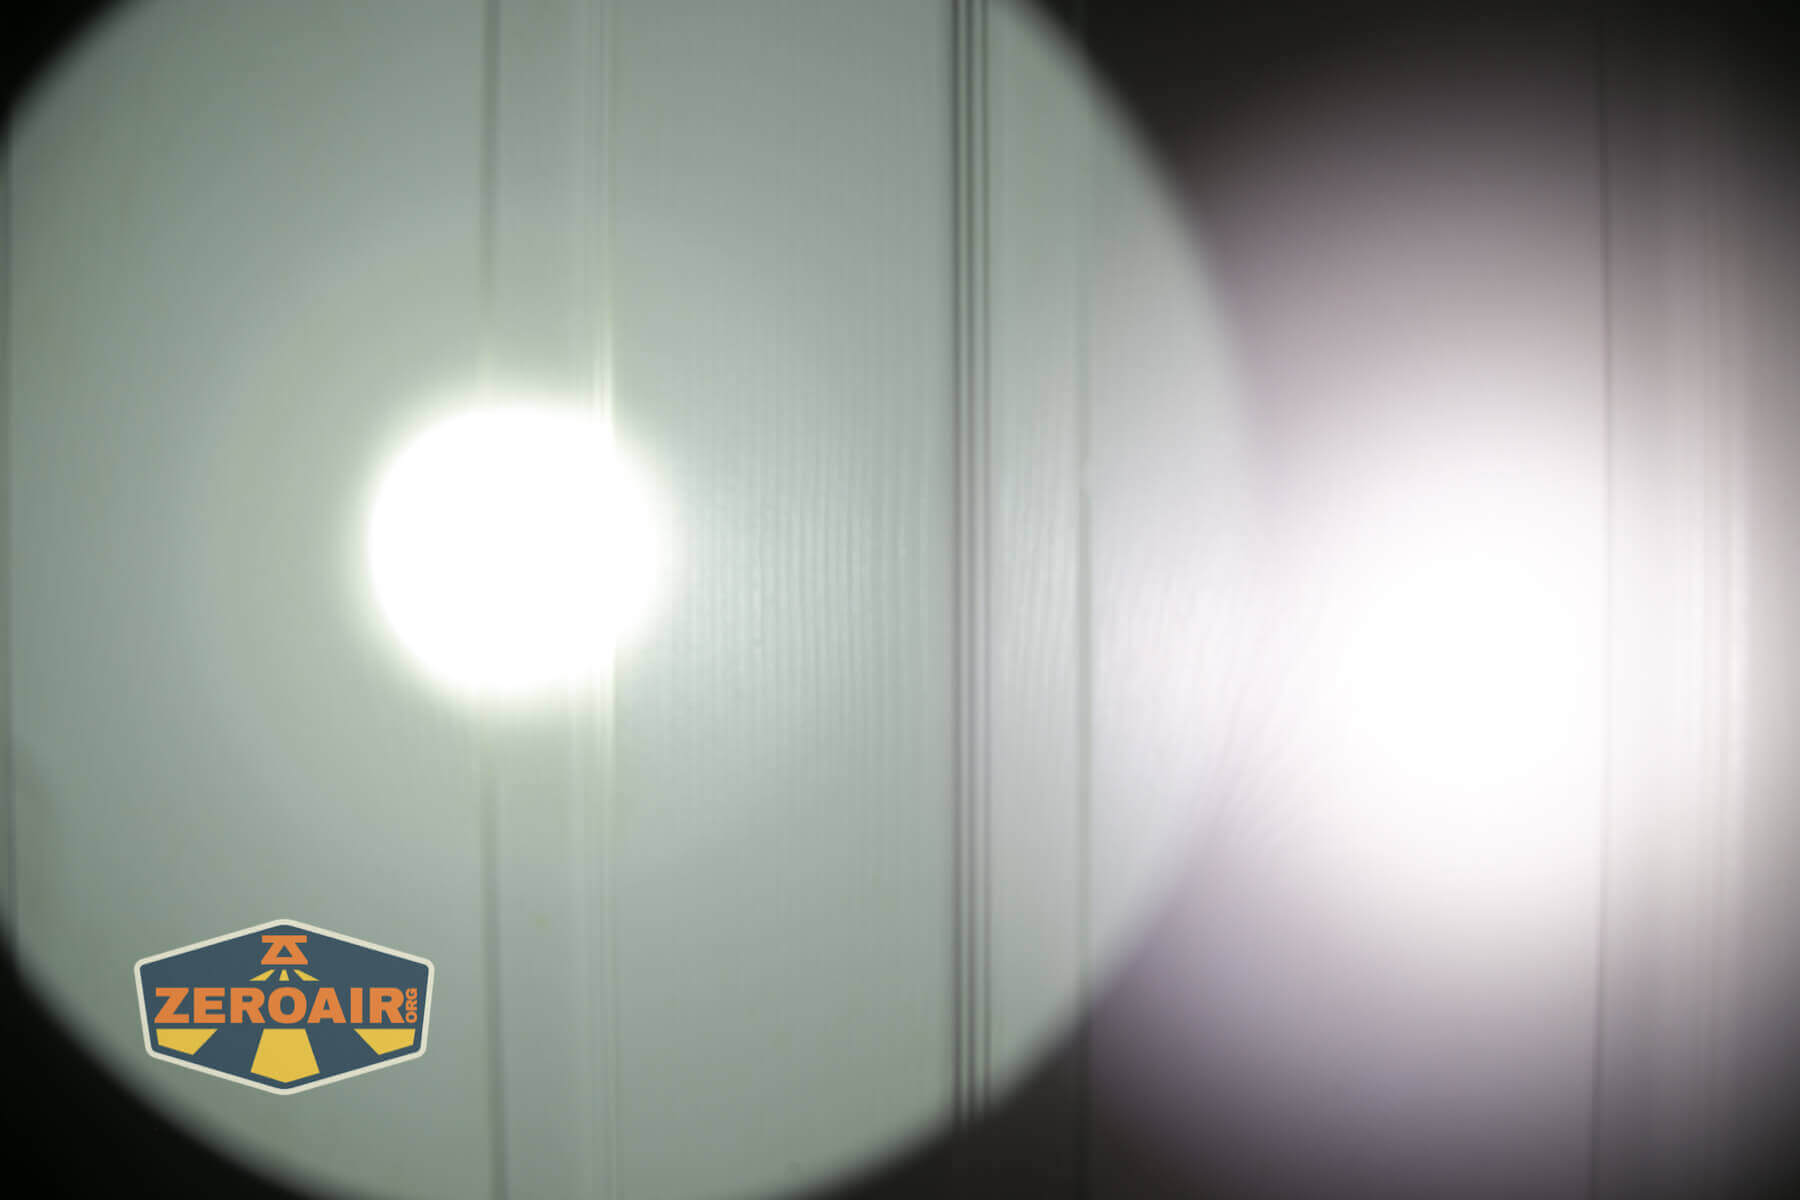
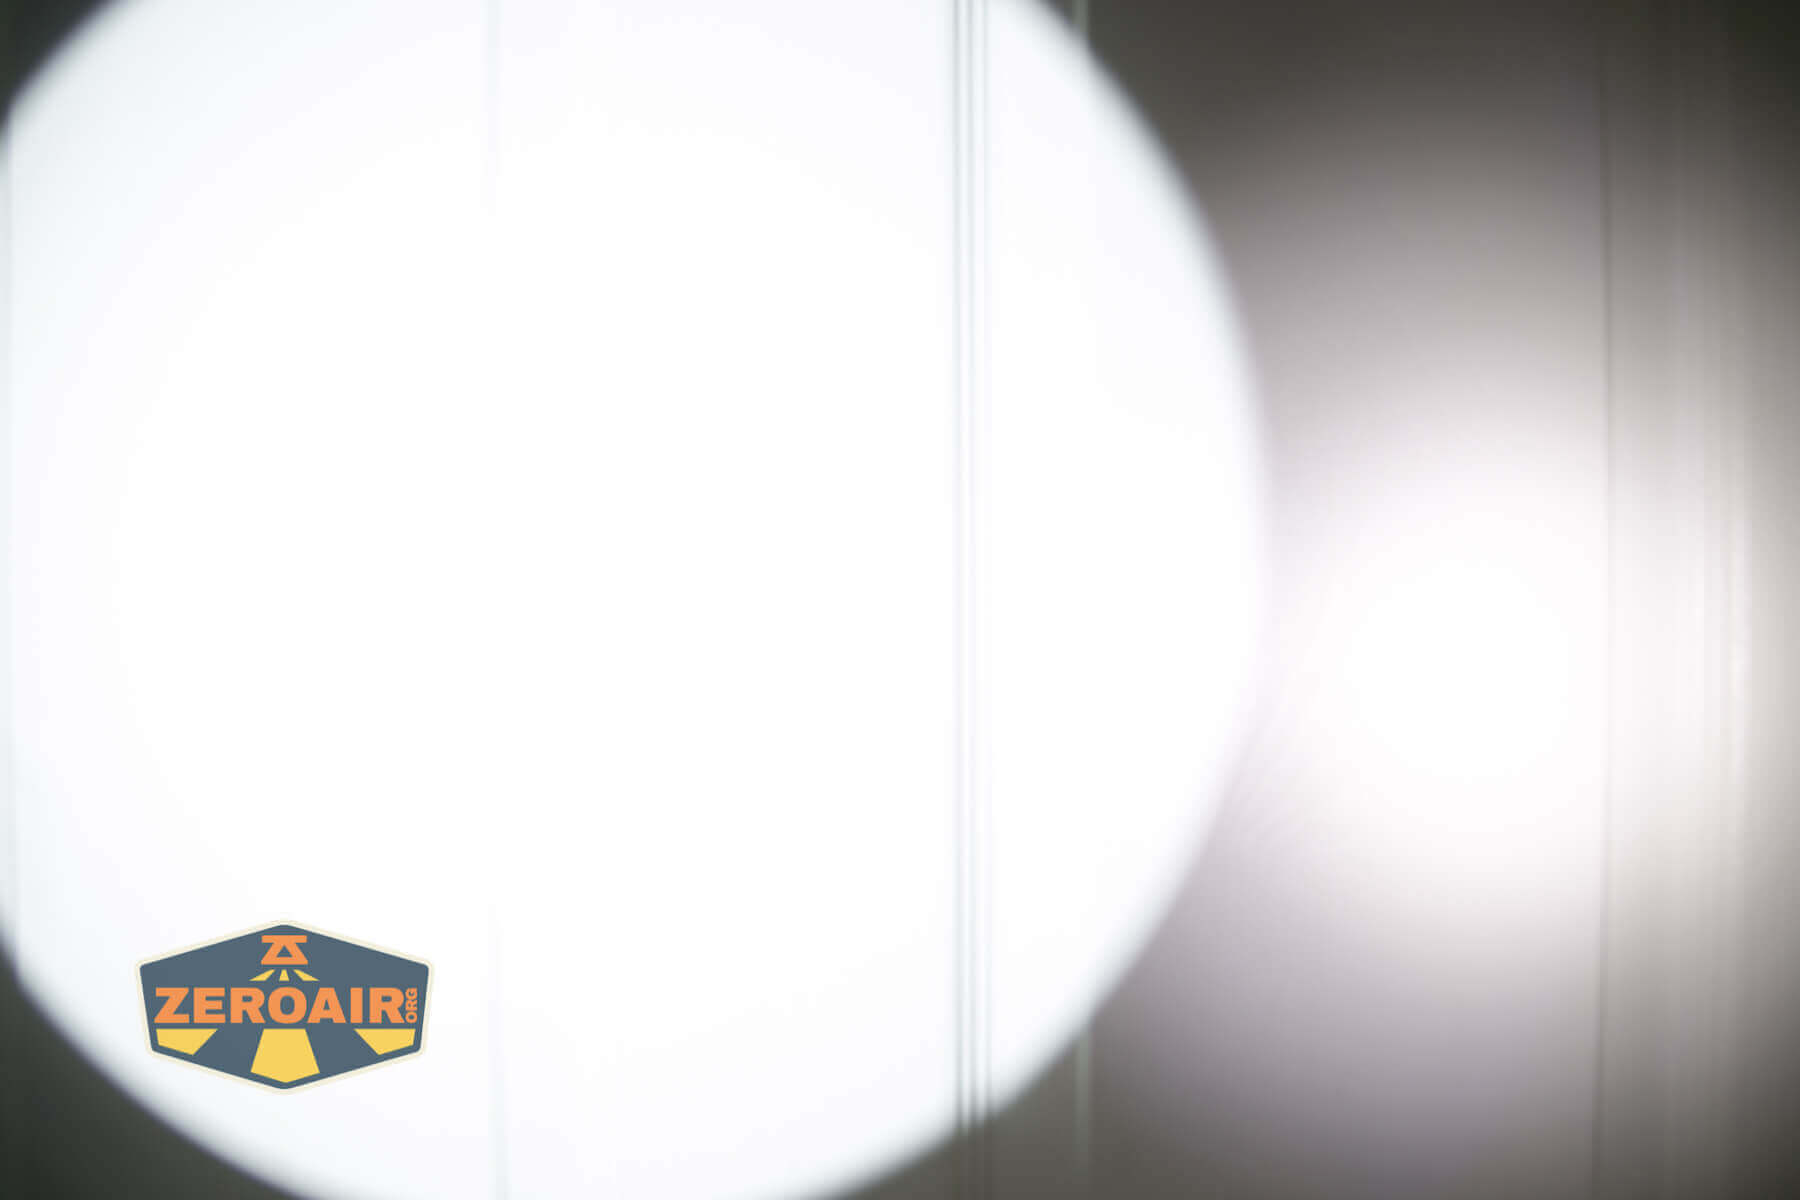


I compare everything to the KillzoneFlashlights.com 219b BLF-348 because it’s inexpensive and has the best tint!
Conclusion
What I like
- Great build quality
- Looks like a flashlight! (aka “flashlighty”)
- Lower levels have good CCT (higher levels have acceptable CCT!)
- Uses Andúril user interface
- USB-C charging (at 5V, 9V, or 12V!)
- USB output (also at 5V, 9V, or 12V!)
- The storage case is great
What I don’t like
- Battery carrier is fairly specific about what cells will fit
- Case requires light to be stored in parts (not put together)
- Cost
Notes
- This content originally appeared at zeroair.org. Please visit there for the best experience!
- Please use my Amazon.com referral link to help support zeroair.org!
- Please support me on Patreon! I deeply appreciate your support!
Discover more from ZeroAir Reviews
Subscribe to get the latest posts sent to your email.